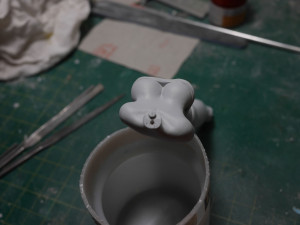
Today’s update is all about masking Kanu so that I can paint some detail areas. I use four different masking techniques. For the areas that boarder between the masked and unmasked areas, I use tamiya masking tape. Tamiya masking tape is very thin and is easily cut with a very sharp(brand new) hobby knife blade. Below is the part ready for masking, I will be masking off the skin areas to paint the body wrap and the hair.
The tamiya masking tape is placed along the edge of the skin and the body wrap, I then use a bamboo skewer tip to run along the edge creating a tight seal with the tape to the body. Taking a sharp hobby knife, I just run it along the edge with a slight amount of pressure to cut the excess tape and then remove the tape. I usually place two to three slightly overlapping layers of tamiya tape before moving on to the next masking technique.
Skipping over to the hair piece, since it is rather jagged and doesn’t have a crisp line; I use the tamiya masking tape close to the hair and neck boarder. The main masking solution here is blue sticky tack. Warming up a small ball of the stuff between my fingers to activate the tackiness, the stuff is then laid down along the hair. Using a bamboo skewer tip, I shape the sticky tack to match the edges of the hair and neck line.
Once the tamiya masking tape is in place. I use parafilm M to mask off larger areas. This stuff stretches and adheres to curves and itself. The arms and upper body torso are masked off in this manner. With the parafilm in place, the edges between the parafilm and tamiya masking tape area covered using 3M blue painter’s tape. This tape is a bit thicker than tamiya masking tape so getting detailed masking areas and cutting the tape with the hobby knife isn’t as easy as with the tamiya tape. I use the 3M tape as a large area masking solution.
And as a final sanity check, I use Mr Masking sol with is petroleum based liquid masking solution. The important note here is that since it is petroleum based, the product will eat away an acrylic paint layer, so do not use this stuff with acrylic paints. I have used the stuff with lacquer based products without any issues. For my purposes here, I use the masking solution as a final seal on all the areas where tape and different masking techniques overlap each other. There have been times when the smallest of areas was not masked properly and the entire process was in vain. This final check saves me from potential rework.
Once the four masking techniques are done, the part is ready for painting. I used an intermediate blue as the base color since I want a bluish shade to the white for the body wrap. Once the blue has been painted, I move on to the white. I over thin the white and drop my air pressure down so that I can get in close and spray highlight details. Once the highlights are in place, I open up the air pressure, increase the distance between the kit and the airbrush and spray a mist to blend everything together.


Looks good Gam. I love your shading. I am trying to replicate the technique on my own kits.
So you put the Tamiya tape down, and then you cut it with the hobby knife while it’s on the model? Doesn’t that risk gouging the resin underneath if you press slightly too hard?
Nope, the amount of pressure applied through the knife is minimal. Additionally, with a brand new blade, the knife will cut through the very thin tamiya tape effortlessly. The masking also follows the sharp edges between the masked and unmasked areas, so razor thin slice down these areas are not seen.
Am I the only one who saw the title as “Missing Kanu” and thought you lost another piece of her? Lol. Anyway, while on this subject I have seen the big box of Parafilm in your workshop, where does one find the stuff?