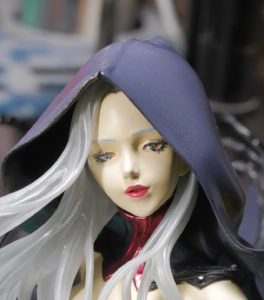
It has been more than 2 full months since I last posted any sort of progress on projects I’m currently working on. With coming back from Otakon, and seeing how inspired my friend Brian is on his fairly new interest in model building; the feelings come back and I found myself sitting down at my work bench, sanding pad in one hand, and parts of Kanu in the other. Being on Skype with Brian is certainly helping the motivation as well. Via the webcam, I just got itching with watching him sit there and build. I put up my webcam on my work bench light and started filling and sanding. The below pictures were done in early July for my presentation at Anime Expo, but I hadn’t had the chance to make an update.
Now, what I did in the above pictures is first cut open the bubbles that I found in the shoulder. Since the hole I originally uncovered in the sanding process is only the top of a bubble lying under the surface, I need to open that up so that I have more surface area for the putty to attach. Otherwise, the putty only sits at the top of the hole and any sanding will undo all the putty work. The putty I’m using is Tamiya Light Curing Putty. The stuff is very expensive, but it cures with light in minutes, and I can sand and prime without having to wait as I normally do with other putties.
Get the Flash Player to see this player.
Next up is to do some repairs that may have been a result of the earthquake we had last month. One of the four pieces of the robe came loose, so the gap is visible. So I first applied some CA glue to the gap and around the area. Once this dried, I sanded it down and then applied the Light Curing putty. A couple of minutes later, I sanded the putty down and sprayed on some primer to check for mistakes. I still have an area where I need to fix, but the main repair area that I worked on was fixed.
With the following picture, you should be able to see that there is a visible seam line that isn’t quite fixed yet. More sanding, filling, sanding and priming is necessary for this part.
Here is another example of a repair. There was some rough sanding that showed up in the primer, then I saw a small surface defect that I filled with the light curing putty. All that was sanded and then primed, and after priming, the surface defects and sanding issues are gone.
Next up was the main body. After the initial primer stage, aside from the shoulder, there were other areas that needed attention. There were rough sanding spots, areas where the mold lines were still visible, so all this needed some fine tune and spot sanding. Prior to the spot sanding, made a little video for wet sanding, this helped smooth the surface and show up all the defect areas.
Get the Flash Player to see this player.
After the spot sanding, I sprayed the second round of primer to make sure I caught all the areas. Depending on how careful you are with sanding, or how anal you are with the surface prep, this cycle can continue endlessly. Hopefully I don’t have to repeat the cycle too many times. Below are the results from last night’s sanding and priming sessions.
Well, I’m finally back on the damn wagon again. I hope to keep the steam running and actually get something finish soon. There is too big a backlog, need to get this done and finish off the Vicious Project’s Hi Nu Conversion….


Yay…. does this mean you will actually be building this gathering? I know I am going to atleast pick your brain on gap filling for my two ongoing kits tomorrow. So save any of that work till tomorrow.. lol
Heh, sure. Yeah, tomorrow’s gathering looks to be smaller than the past couple so yes, I’ll definitely be building tomorrow.
LOL congrats man!