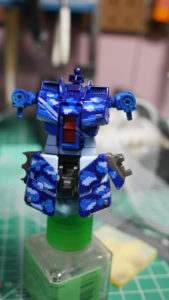
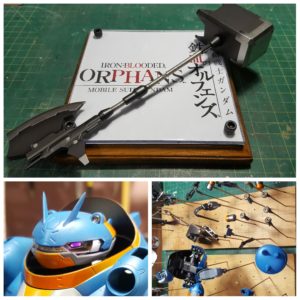
Since this is the actual body paint posting, I’m including a few pictures from the previous post so there is some better continuity. Weeks ago, I grabbed some plastic spoons to do paint tests. I used different base metallic paints and different clear reds from various brands before settling in on the three colors I have below. The process arduous, and I went through 10 different combinations before settling down. Below are the three colors to match up with the color scheme on the instructions. The lighter tone uses a mixture of clear pink, a small amount of clear orange, and clear red for tonal changes, sprayed over alclad super bright silver. The red is just Finisher’s clear red over alclad super bright silver. The deep red areas are finisher’s clear red over alclad polished brass.
Also in this post, 3D printing!
Again, I’ve found it fairly important to wash the parts before any paints are sprayed, including primer. But once dry, the parts are primed.
The parts were placed in sub assemblies then primed. The kit has so many parts, its irrational to paint all the parts separately. So simplicity and ease, the parts are primed and predominately painted in sub assemblies. The base white coat is also base coated as sub assemblies.
The paint scheme I want requires a little bit of masking using different widths of masking tape. Here I have a .7 mm, .4 mm, and 2 mm width masking tape rolls. The sub assemblies are masked off with a random line pattern then the tape is cut between each part section. The parts are then separated into atomic units to finish the masking lines and then they’re ready for paint. This is the first masking session.
After masking, the parts that will be in deep red are now base coated with black.
The rest of the parts are painted with Alclad super bright silver. Once the black pieces are cured, alclad polished brass sprayed. When the paint is dry, the masking layer is removed. Some care is needed so that paint doesn’t get lifted. If the parts were washed and clean, the removal process should be fairly clean. In cases where only the previous layer of paint comes of and the primer is still on the part, then the paint over the primer wasn’t given enough time to cure before the masking process begins. Now if the primer and paint layers come off, then the issue is that the surface wasn’t clean enough or the primer wasn’t given enough time to cure and bond to the plastic. And sometimes will bond to the paint layers sprayed over the primer instead. So proper cure times are important.
With the parts ready for paint, there are a few pieces that are dual colors. The kit comes with some stickers for these parts. So since I’m not going that route, these parts are masked off first. The the parts are painted with the appropriate clear tone. Once this cures for a full day, the masking is removed and the previously painted areas are masked off. It is a painfully laborious task, but the results are worth the effort.
All the parts are still in the atomic pieces, so once the paint cures, I went and did the decals for all the parts. About 6 hours after the decal application, the parts are sprayed with clear gloss. Waiting the minimum of 12 hours after the clear gloss application, I went and started to assemble the parts back into their sub assemblies. During the assembly, I did accidentally chip some paint and for that reason, the right shoulder part is incomplete. I have sanded down the chipped areas and repainted and clear coated. It is absolutely to allow the parts to cure at their own rate., Rushing always results in mistakes.
Here is a close up for the Saz’s head. Looking closely, you can almost see the mono eye mod.
Next up is a build process that has also been progressing along in the background. Sazabi long rifle modifications. The rifle is snapped together and a picture is taken in it’s untouched glory. First things first, the hobby saw is brought out and front end is cut.
With the front end gone, I can now use some styrene tubes of various sizes and create a new outer and new inner barrels. The inner barrel is centered using consecutively smaller styrene tubes glued together. The silencer is built in the same manner.
The outer barrel is vised up and measured. Using a drill press, holes are drilled straight through the barrel at each marked off area. The outer barrel is then glued to the rifle’s front end. Some styrene is stacked and glued together as filler between the barrel and the bottom of the rifle. Another piece of styrene is bent around the barrel and glued into place against the roughly cut front end of the rifle for use as a transition piece.
Since I had cast most of the thruster part, I had one of the foot thruster pieces in my work space. Turning it around it made for a fairly convincing scope. A circular mold from the wave option parts is cut and glued to the end of the thruster bell. Once cured, putty is applied and more areas are filled with stacked plastic. Sanded down and mounted onto the rifle, the little thruster engine piece works perfectly as a scope.
I made casts of the cylindrical piece from a resin Ore Gun set. With two copies, I applied sticky tack and connected them to the rifle for a test look. I want to use the Ore Gun’s part as an ammo drum, but felt I could use a dual ammo drum. Granted these do look like a set of balls, but I still like the styling.
The next step was to find a way to combine the two drums and attach them to the rifle. The drums are attached with a cut piece of styrene tube. The insides were filled with smaller styrene tubing as filler and then puttied. I added a resin vent piece to the bottom of the rifle as an attachment point for the drum magazine.
Taking a break from the work bench and on to my computer, I designed a rail with Blender 3D design software. In the past, I have just made the rail from styrene and cast in resin. I still had the original mold, but I figured this was an opportinuty to try printing my own design. Recently, a few of us from TGG started looking into getting a 3D printer. A few of us have been looking at one for a while now. The problem is that none of us know a damn thing about 3D design, or have used any 3D design software. I started with Blender, did some work with Solid Works, and opened up a session in Zbrush. The point here is that I’m learning. So starting off with something basic, a rail, I made the design, and then ported it to a proprietary printer software for Makerbot. My work has the MakerBot Replicator 2 3D printer.
So aside from learning to design for 3D printing, I need to learn how to actually print and use the software. The printing software is a much easier learning curve than learning the software to design things. But with my designed rail, I imported it into the makerbot printer software, oriented it, scaled it, and then printed it out
My first couple of prints were some what a failure. The rail came out, but without tops. So returning to the design software, I made some changes to my design and tried another print. A little too small. One print session, the PLA stopped feeding. Learning the quirks of the printer, I finally got a good master printed that require little clean up.
The master was cleaned up and a silicone mold was made of it; then the part was cast in resin so I had several identical copies. Now in comparison to the build it out of styrene method, the precision and scaling just kills what I did previously.
After some more sanding on the rails to lower them a but more and a few touch ups on the scope and putty here and there between new and old parts. The rifle gets its first layer of primer. Now the gun is starting to look a little more together instead of a bunch of parts slapped together.
Next, I’ll be working on painting the rest of the kit and getting the rifle completed.


looks great! how to recreate red in the middle?http://gamerabaenre.com/images/ver_ka_saz_prog%20118_JPG.jpg
I used a clear red (brand name Finishers) but you can use any clear red. And sprayed this on top of a part that was painted with alclad super bright silver.