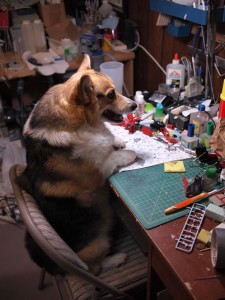
Last week was March’s build gathering, and since it was a week away from Kenken and Latte’s birthdays (March 24th), we also invited their breeder’s sister who owns Crumpet, Kenken and Latte’s sister. Oddly enough, she’s also a model builder that has been to AX and does some excellent work with resin kits. Crumpet is a bit antisocial so we were hoping that the large gathering of strangers and 5 other corgis will help break her out of her shell and shyness. She was fairly timid at first and rather unfriendly, but I think she started to get used to the dogs and started to play. And by the time they left, she was definitely more comfortable, so hopefully she’ll continue to visit during the build gatherings.
In other news, I’ve been doing a great deal of modifications to the HGUC Dreissen, which will be most of this post.
The weather was utterly crappy with a deluge of rain throughout the day. A good number of us didn’t even bother building a single thing. I made the attempt with bringing out a kit that I wanted to start sanding, but I gave my spot to another modeler. A good number of us started drinking around 4. But there was a decent amount of building that went on even though a few folks didn’t make it because of the weather.
Also happening was the little corgi birthday for Kenken, Latte, and Crumpet. Yuki went out and picked up a few doggie birthday cakes from Three Dog Bakery Arin brought his Northern Inuit puppy to the gathering too, and spent a good amount of time just keeping her in check as she was just overwhelmed with the number of corgis running around and away from her, poor Duke.
From Richard’s recommendation, we ordered from a pizza joint he likes and was fairly decent. We broke out the rockband and actually played for a decent amount of time. Angel started to lose hand eye coordination and we swapped out drummers. A great deal of alcohol was consumed. A damn good build gathering, even though I didn’t get anything built.
Earlier, a group of builders went off to Brookhurst hobbies to pick up some supplies. For which an interesting conversation was overheard. Apparently, George feels that he shouldn’t spend money on supplies and will just leech off my stuff. Seriously? I can understand when someone new comes to the gathering and needs tools and such, but when you’ve been coming to the gatherings for a few months, it’s about fucking time you bring your own shit and stop leeching off people. I’m not a fucking charity. Most folks bring their own damn tools and such. Folks that want to paint bring their own fucking paint. Granted it’s understandable when someone forgets a particular color; at least they’re making the goddamn effort when they bring other colors. Are people just too fucking cheap? Or they just like taking advantage? It just irked me that they went to a bloody hobby shop, WHERE THEY SELL TOOLS AND PAINTS, then has a fucking audacity to come back and ask to borrow my shit. Where the fuck do these douchebags come from?
The build gathering is a welcome to all modelers that are local and want to learn or get better or just have a place to build. Most folks are good about bringing their own tools and paints. I’m just sick of the folks that come and just leech. It’s such people that make me dread the build gatherings. One or two bad apples really does spoil the bunch. I’m venting, but if this fucking tool asks to use shit again, he’s going to get to meet Mr not so nice Clem.
Dreissen Progress
Ok, with that out of the way, I can focus the updates to the project since the last posting on the subject. I didn’t get any building done during the gathering, but I did a considerably amount of work in the days before and since the gathering. The work on the sliced apart waist continues. Starting with the bottom piece, the middle section of the waist unit is removed and the styrene template cut earlier is further trimmed and fitted into the waist unit. With the template in place, the template is marked up to plan out the LED layout.
Small holes are drilled and the LEDs are threaded through. On the back, the leads are trimmed and wired in parallel. Then the assembly is wired up to a battery and tested out. The same is done with the upper template.
The waist pieces are put into place for a quick mock up. The lights are turned off to get a better lit contrast.
The center torso halves were drilled out and cut to glue in small connection points. This also helps organize the internal wiring scheme; a little lesson I learned from the final assembly of the Sazabi where I ran in to all sorts of issues dealing with putting all the wiring together. The two connectors are glued to their respective pieces and when connected, the two halves are in a split view.
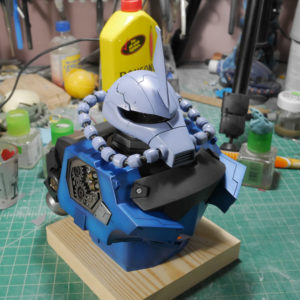
I spent several hours on the piece, the head. The internal areas of the head were gutted with a hobby knife for a clean starting point. Then small strips of styrene are cut and glued into the top and bottom parts of the head. Since the original head was just a black part that hides any idea of some internals, the styrene strips and shapes work as internals for the head.
Next, I focused on the mono eye. Like the other mono eye kits I’ve been building of late, I’ve been finding interesting ways to light the mono eyes. Instead of the armor collar that I’ve been using, I went with wave option parts for the eye piece and wave eyes for the clear lens. I also wired up a small red surface mount LED. The internal area of a 3/32″ tube was excavated, thinning the walls of the tube such that I could shove the LED and wires into the tube. With this done, the whole mono eye assembly is put together.
With most of the parts dry, at least dry enough to work with, I did a quick mock up and tested out the light. This mod took several hours to complete, but is really worth the effort to replace the rather plain original “face mask”.
A few years ago, I picked up a little .2mm scribing tool from a company called BMC. The thing rules for scribing lines and I was only able to grab the .2mm size. Doing a little search, I found that HLJ carried a couple of different sizes so I ordered a few last week. They arrived today and the .5mm was immediately put to use scribing out the “sleeves” for the Dreissen. I still need some clean up, but the scriber worked very well.
I’ll be adding some lighting to the back skirts. To extend the thrusters a little, I’m using some resin cast soup can thrusters, and behind these thrusters I’ll be adding some LEDs. On the inside of the skirt, to help hide the lighting gimmick, I cut some styrene for use as a cover. I still need some final detailing here, but this gives a general idea of what I’m trying to do.
The last bit was to finish off removing the indented areas on the front and rear skirts. Styrene is placed inside the skirts for small additional detailing.
I’ve been spending a considerable time marking off and scribing in some additional panel lines as well as adding more small modifications here and there. Starting off small since this is my actual first real foray into adding panel lines as opposed to just cleaning or deepening panel lines. I used dymo tape which is used for making labels and has a decent thickness to help with straighter lines. The first pieces are the upper arm areas. Once I got used to the technique, I moved on to the front skirts. Placing the tape in measured out areas then lightly running the scriber across the plastic until the area is scribed. I also drilled out a small hole for a metal minus detail.
Some panel lines were scribed on the rear skirt and a punch out of some styrene details are placed in the upper side skirt area. Small strips of styrene is added to the upper area of the rear skirt.
Finished with the small bits of details and panel lines, the waist and skirt are is complete.
The inner shoulder piece is modded with a little piece of detail styrene. Since the shoulders already have a decent amount of panel lines, I just added a drilled out hole and placed in some metal minus details.
The outer arm pieces are marked off and panel lines are scribed. A small 3mm hole is drilled into the outer arm parts and some metal collars are glued onto the arm.
The inner arms got a small amount of scribing. As an afterthought, I added some additional panel lines to the outer arm areas. I snapped a comparison shot between the modified and unmodified arms. A small strip of styrene is glued into place as an accent.
Next up, the legs were marked off for scribing. I scribed in a little vent detail onto the leg. The bottom of the legs are scribed with a 1.0mm blade and a small strip of styrene is glued into the spot for accent.
Moving to the upper torso, a few quick panel lines are added as well as a 3mm metal collar piece.
This should conclude the mods for the kit – that is until I decide on adding more, but I don’t want to go overboard and effectively lose the idea that this is a Dreissen. Here are pictures of the kit with the mods. The missing mods are all the lights that I have planned for the suit. That should be part of the next update.


