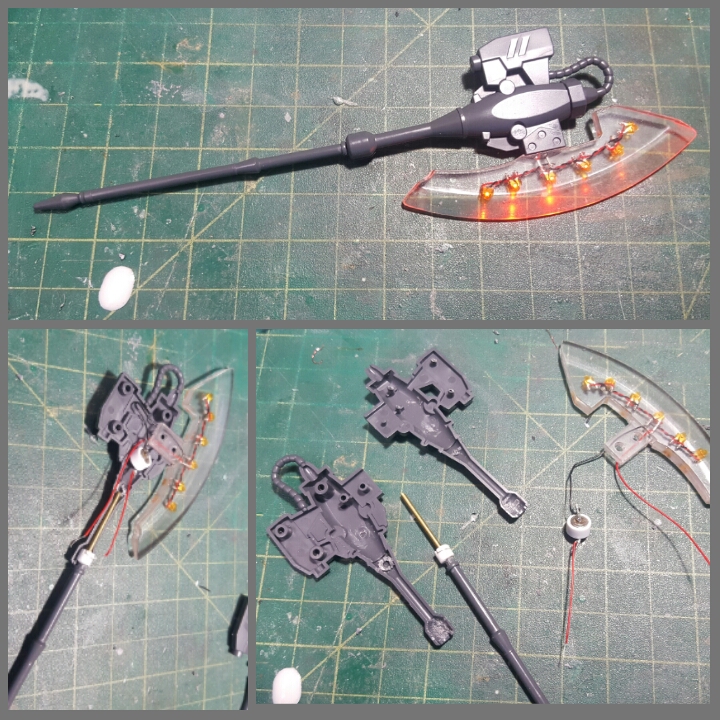
Wiring the 1/144 Heat Hawk
A few days ago, I posted about making clear resin heat hawk by making a mold of the existing heat hawk, then throwing in a string of LEDs in the mold when I poured the clear resin. The resin has had some time to cure and I’ve had some time to ponder the next great question. “How the hell am I going to power this damn thing up?” One of the TGG folks not so innocently asked the question. For which I honestly answered that I had no idea and that I would solve that problem eventually. I already had a few ideas, I could replace the upper handle of the axe and run some wires through there and then through the hands, through the body, and have the battery and switch assembly somewhere on the base of the project. That seemed a little too much work. Laziness is the mother of invention. I decided to completely self contain the power source as well as the switching assembly. Here’s a video of that through process and how it all works out:
After the jump, I go through the pictorial and more wordy version of what I did in the shot 6 minute long video.


