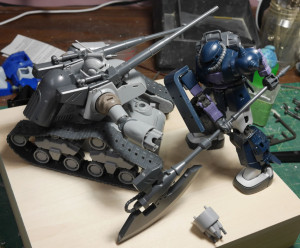
Another size comparison picture, using an hguc RGM-79D cold climate GM, this really shows off the shear massiveness that is the Nu.
Small little update to the hguc nus I’ve been working on. On one of the kits, I replaced the backpack thrusters with metal thrusters from Ako Hobby. I’m using the same thrusters for the legs as well. I start by cutting the thruster bell off the stock piece using a hasegawa tritool saw. These saws are very thin and the amount of material removed by the sawing process is minimal so they work great for such applications.
After removing the thruster bell, the area is then sanded slightly with a low grit sanding stick. This helps level the surface and give added surface area for the glue. The metal thruster is then glued into place. I used an epoxy glue for added strength.
Here are a few comparison shots, the first is the replaced leg thruster and the second is the backpack thrusters.
I think the bigger and longer thruster give a more robust look to the kit.


