A few days ago, I was reading through some threads on reddit/r/gunpla and came across a thread asking about where to buy a specific type of display base. One of the users responded with a few links on how to build your own, and from this link in particular, I was inspired to search out some local suppliers and do my own version. The basic premise to the base are a few sheets of acrylic and some metal standoffs. The plastic pieces are easy, I’ve been grabbing scrap acrylic from local shops for a while and I dropped by one near my work and they sell the scrap by the pound. I picked up about 4 pounds of scrap plastic; gloss black, clear, and white and in different thicknesses. The next item was a little harder to find, the metal standoffs. There are plenty of sources online (amazon, eBay, online retailers, etc) But I wanted to see these in person before I picked some out; so I found a local sign shop supplier that was a wholesaler. The guy there hooked me up for a small sale since I wasn’t a sign shop (they only sell to sign shops)
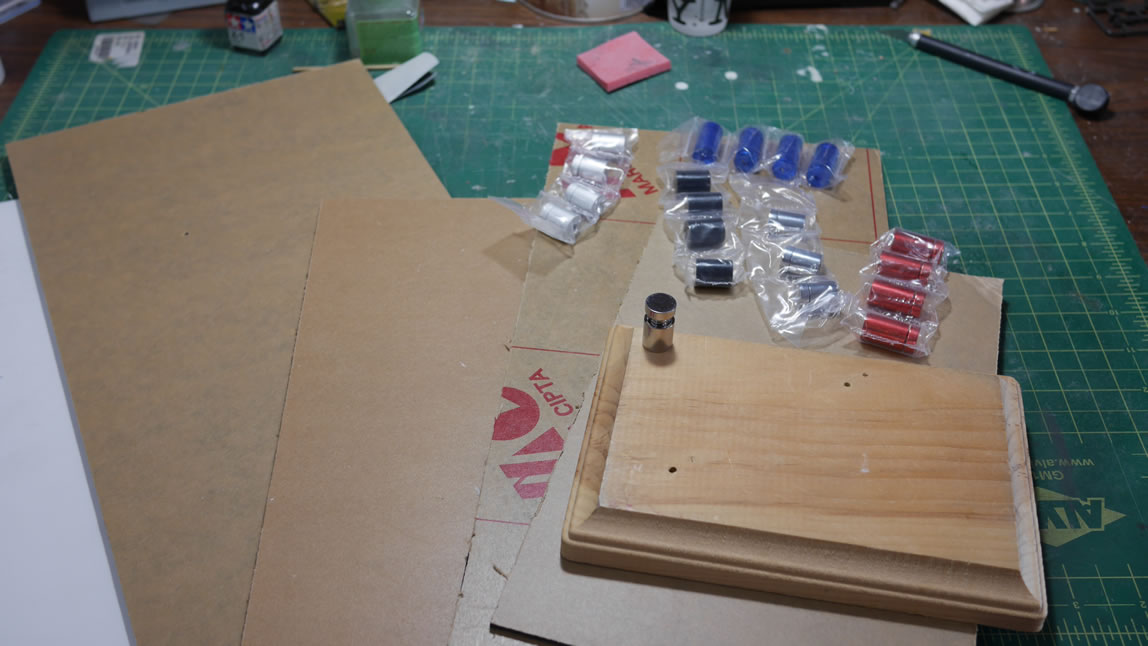
So I picked up some metal standoffs seen in the above picture. Metallic black, chrome, and satin aluminum in the 13mm x 13mm size. They didn’t have the red and blue metallic ones in that size so I ended up with 13mm x 19mm, they’re a little taller. They sell individually for about 1.50 – $2 a piece, so I ended up spending about $42 or so for the 5 sets of 4.
Getting home, the first step is to plan out the base. The original idea was to mount a black acrylic sheet on top of a wood base, then the standoffs, then a clear acrylic sheet on top.
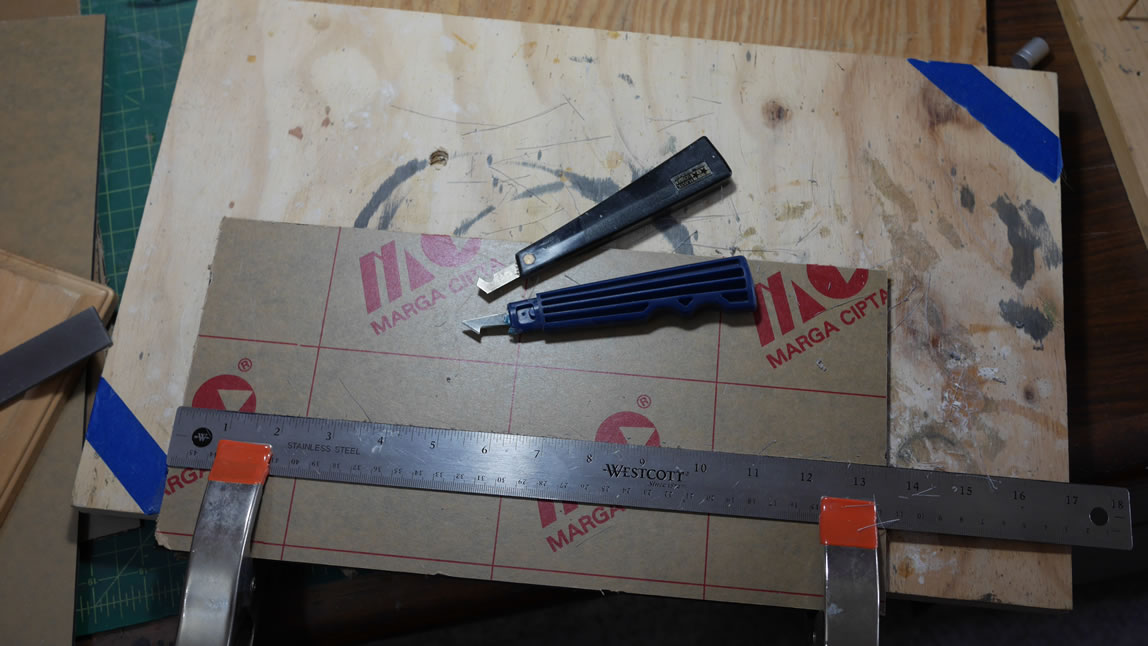
Tools needed:
- Rulers, at least 2
- T-square to help keep things aligned
- Tamiya scriber (I have a plastic cutter, but the tamiya scriber has worked well for me for years)
- Clamps – holds things together so you don’t slip up and seriously fuck yourself up
- Wood boards as a work space
- Power drill and associated drill bits
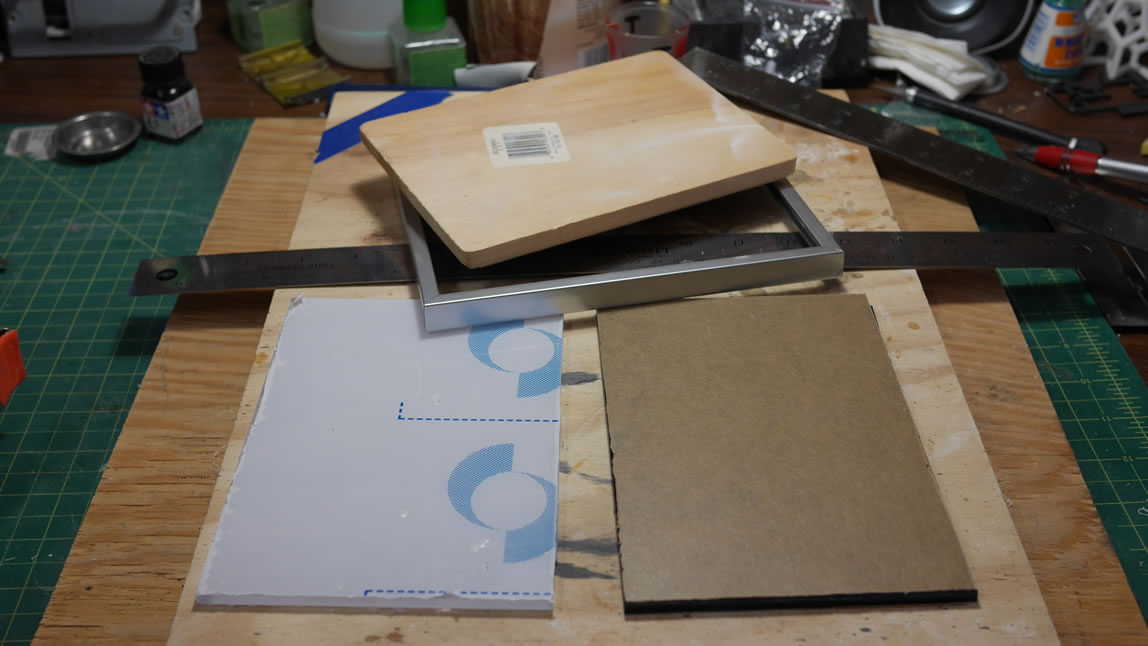
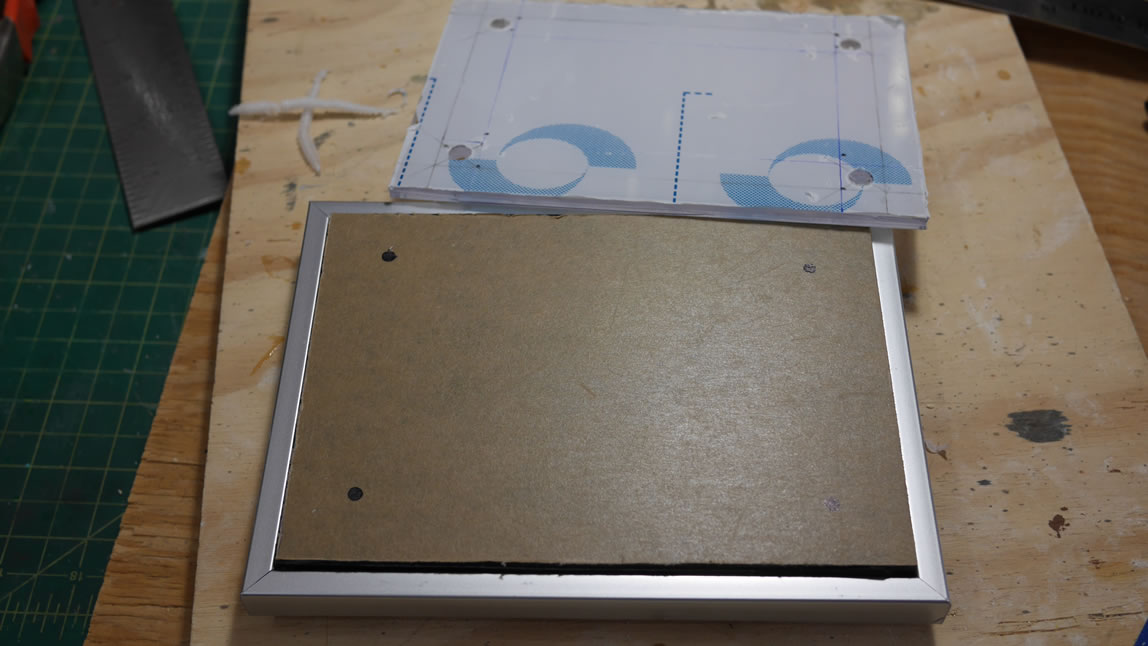
I then started working on using the scriber to cut up one of the thicker pieces of black acrylic. Keyword started. But I went back to work on the Shiki and didn’t get back to the base until Friday afternoon after work. I stopped by Michael’s’ Craft store and picked up a small metal picture frame, 5×7. I popped out the glass insert, backing, and paper insert and just focused on the frame. I had a new idea. The wood plaque I had earlier fits nicely inside the frame and on top of this wood poking through the frame will be the base black acrylic sheet. On top of the black sheet will be the standoffs and then the clear acrylic. So I then needed to remeasure everything then get to cutting. Since I had already started cutting into the black acrylic, I flipped the sheet over and started anew. The end result of the base parts are below. Frame, cut outs for the clear acrylic and black acrylic sheets, and the wood board. This will all make more sense as I continue.
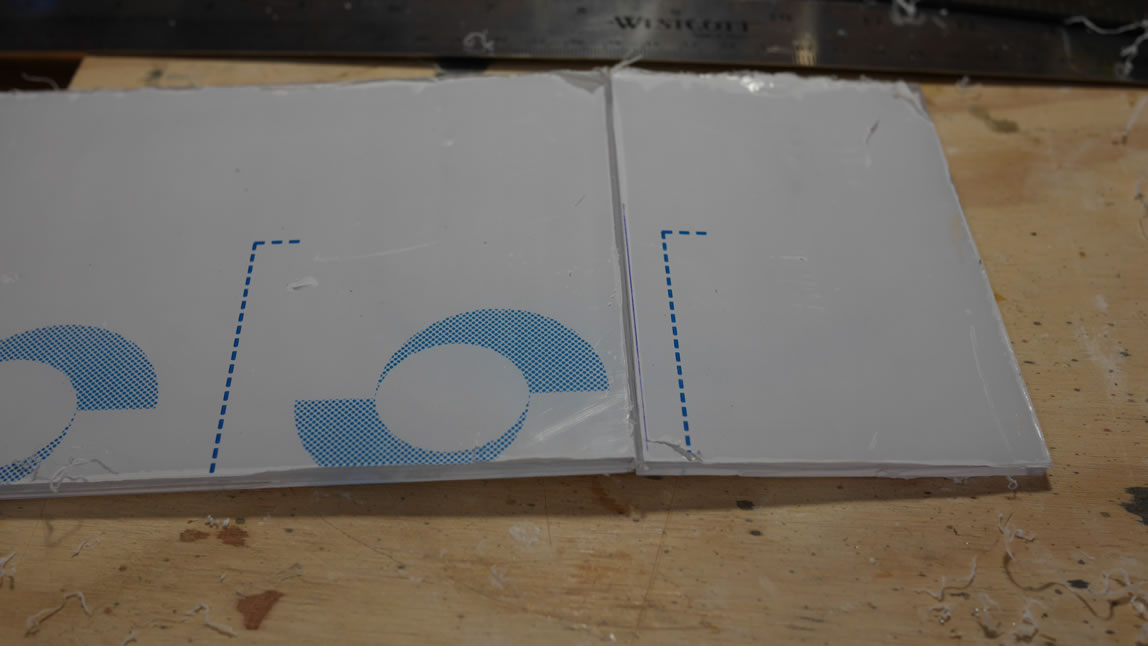
Returning to the uncut sheets. I used the glass insert as the measuring tool to size out the acrylic sheets. The acrylic sheets have protective backing that I use to draw on as I plan out the cut lines. Once measured, I place a metal ruler along the edge of one of the proposed cut lines then clamp the ruler, the acrylic sheet, and a plywood board together. Another measurement is taken here as a double-check. Then the whole assembly is placed on top of another plywood board as my working surface. With everything clamped down, I just run the scriber across the acrylic sheet using the ruler as a guide. I keep running passes scraping away a thin plastic groove and once I get about a quarter to a third of a way deep. I can unclamp the entire assembly and prepare to “break” the two pieces along the groove line. With the groove line facing up, if there is enough leverage, I can easily break the part on my leg and get a very clean cut. If I don’t have enough leverage, I use the edge of my work table – again with the groove side up, holding one side down firmly then pressing down on the other side of the groove, the sheet will snap very cleanly. The second picture shows the snapped board with the plastic backing still attached along one side. Use a hobby knife to slice through the backing then put away the excess aside. The acrylic sheets are cut to size using this method and the excess plastic is put away. At this point, you can take some sanding blocks and sand the edges smooth to remove any jagged or rough spots or even round the corners of the sheet.
The next step is to plan out the position for the standoffs. The standoffs I have are 13mm in diameter, so I measured out an inch from the edges and drew a 1 inch square box. The standoff is positioned on the inner most corner. This looks good to me, so I measure out a 13mm box within the 1 inch square. With the boxes drawn, I can draw an X and I have my center point guides for the next step, the drill. The top piece is the clear acrylic, and this will be sandwiched between the two pieces of the standoff. So I measured out the diameter of the standoff top screw piece and found the appropriate drill bit. Placing the clear acrylic sheet onto my plywood work board. I carefully drill out the holes using the X guides. Placing the acrylic flat against the wood and drilling helps keep the acrylic from splintering and flexing while drilling through it, and makes for a cleaner hole. The plywood also prevents me from drilling holes into my work table.

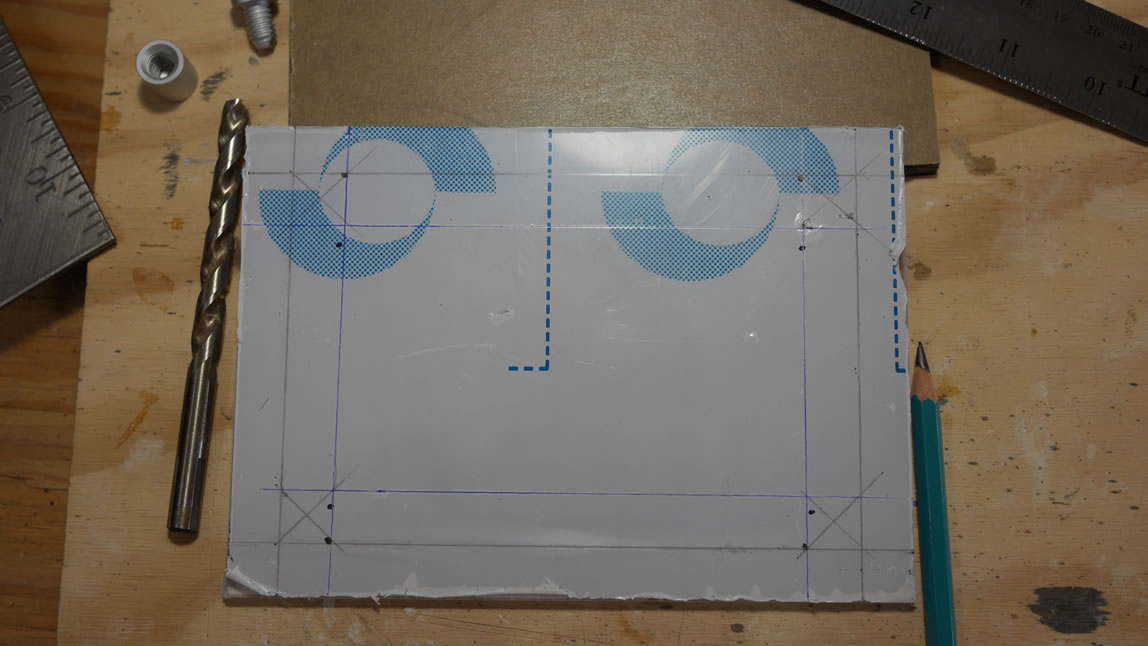
With the four holes drilled out of the clear acrylic piece. I align this piece with the bottom black acrylic part and draw in some dots. The clear acrylic sheet is the perfect template for putting in the next drill points. The standoffs will be sitting on top of the black acrylic, and the standoff bases will be attached with a screw that goes down through the black base then into the wood board. Hence the need for a base wood piece inside the frame. The standoffs came with some mounting screws, so I measured the threads for those screws, found the appropriate drill bit, and cut out the holes in the black base – again using the plywood as a backing and support piece for drilling.
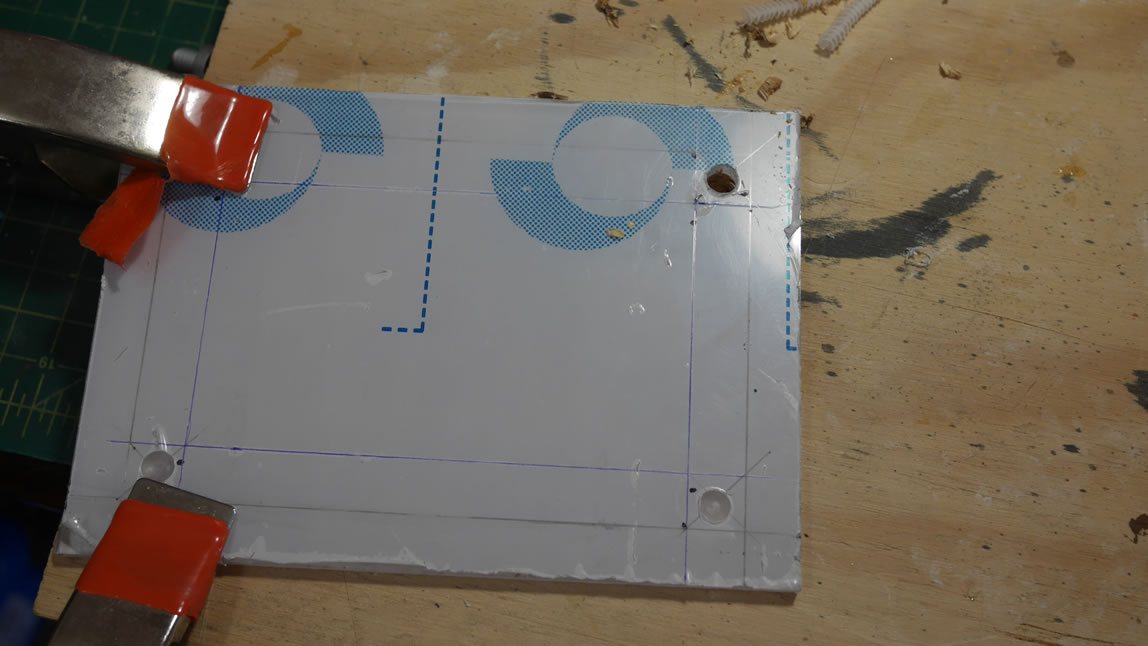
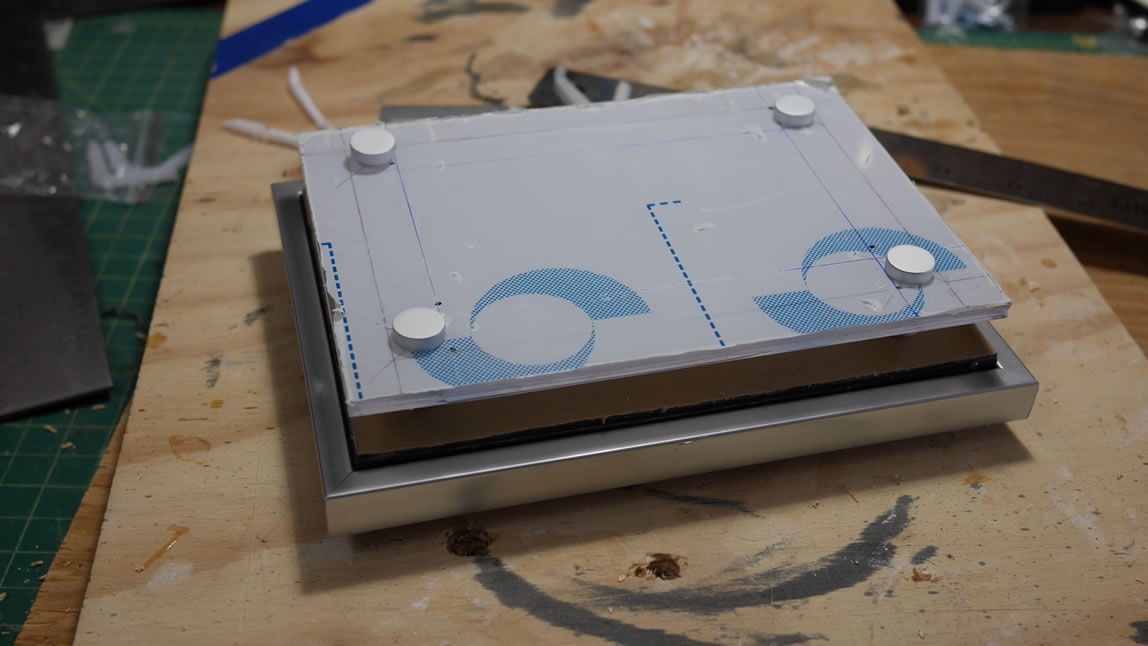
Using the black base much like I used the clear acrylic piece, as a template, I drew in some reference points for a smaller drill bit onto the wood base to create guide holes for the screws. Once those were done, I did a quick test assembly. Screws to hold the standoff bases to the black base and into the wood insert piece. Then the tops acrylic sheet is added and the standoff caps test fitted. The alignment is checked and some adjustments to the clear acrylic holes were made; and another test fit.
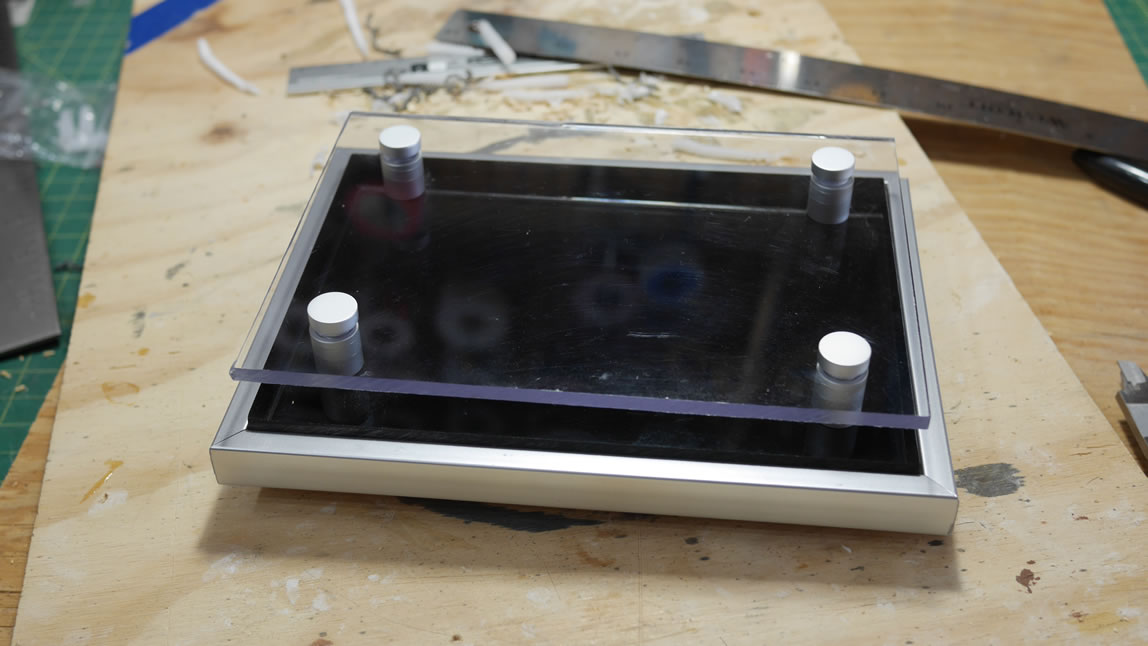
Once satisfied with the test fit, the protective backings for the acrylic sheets are removed. The surface of the acrylic sheets are cleaned and the entire base is assembled.
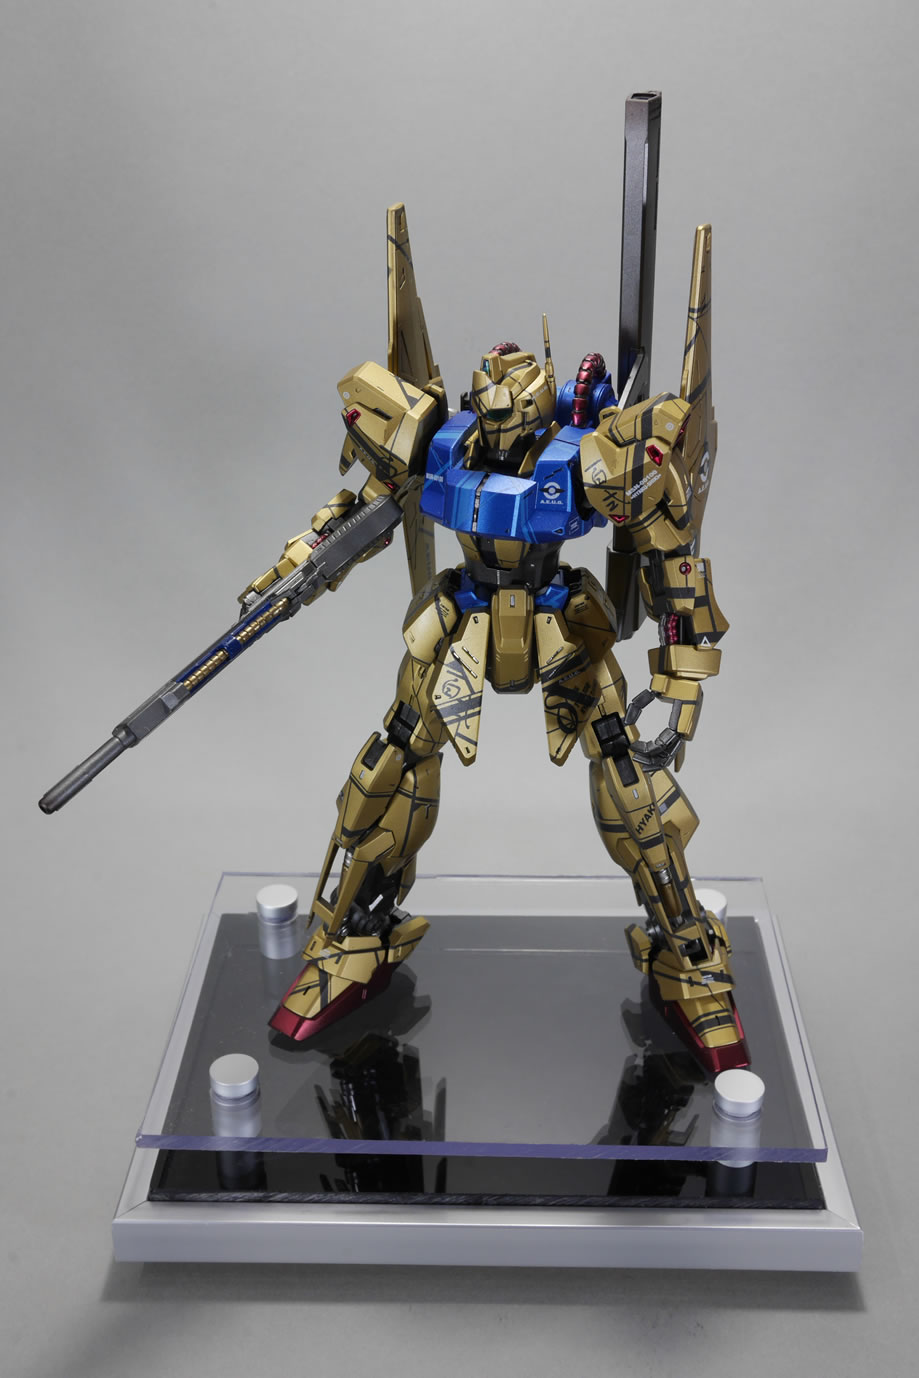
This is just a quick little base that took about an hour or two in the afternoon from start to finish. You can easily build on this idea to create a sandwiched piece of acrylic with a nice logo printout or even using mirrored acrylic as the bottom part. Or even create a 3D bottom base under the clear acrylic. The ideas are endless. Breaking down the steps, it’s very easy to build your own sorta fancy display base for your gunpla.