This weekend, I relaxed with a bit of Scuba Diving. The first attempt was made on Friday afternoon, but upon reaching the beach and pulling out the gear to get ready, I realized that I had left a very important piece of equipment at home, my stupid mask. So no diving on Friday. I was successful Saturday morning, even got some very cool pictures. I snapped a picture of a Leopard Shark about 15-20 feet away. I got a little bit of work on Velvet over the weekend as well, mostly surface fixes. Sunday, I did an evening dive at Shaw’s Cove. And for good measure, a picture of Duke passed out on his back…
Beginning with Friday, not being able to dive, I still went down to the beach to walk around and snap a few pictures. It was high tide and almost all of the normally exposed reef was underwater. This just ate at me even more as I could have been under there. But I snapped a few shots of the water and a few critters roaming the tide pools.
Returning to the spot at 6:30 in the morning, the water was amazing. About 70 degrees and clear for at least 20 feet. I got some really close pictures of lobsters, nudibranch, and Garibaldi. My dive lasted about an hour and ten minutes. It was very relaxing.
Sunday, the local reports were selling a visibility of 20-25 feet. Having slept in, I decided to go in the evening. Visibility got worse as the day wore on, and the visibility I got was about 10 feet at best. I was using the smaller tank so my dive here only lasted 45 minutes. I got a great picture of an octopus, I have two angle shots of it as it tried to conceal itself against the reef.
More pictures from the dives are here: http://gamerabaenre.com/scuba15.htm
Velvet
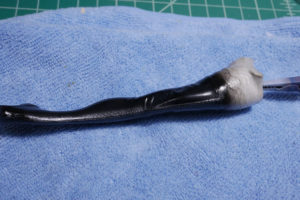
Between the dives, I got some work on Velvet done. For the legs, the surface bubbles were opened up, filled with tamiya light curing putty, and sanded.
To check the above steps for problem, the worked on areas are primed. Looking closely, some areas have been fixed successfully, while others still need a bit of work.
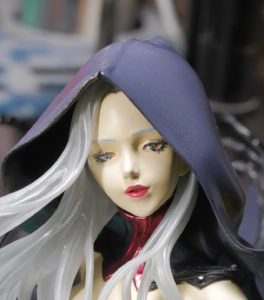
Here is another example of the above process with the head piece . The bubbles are cut open, filled, sanded, then primed to check the fix. For this part, the fix was successful, and is now ready for paint.
One of the toughest things on the kit are the hands; as the ring and middle fingers came separate from the hands. So work to glue and putty them so that they don’t look like they were separate is some fairly delicate work. After sanding the putty, the parts are primed and checked. There are still a few rough spots that still need attention.
The chain came in three parts. They were pinned and glued, and then puttied. There are quite a bit of surface defects such as deep mold lines and excess resin. The joint areas and small surface bubbles were filled with the light curing putty, sanded, and primed. The surface defects are more visible after priming and much more work on the chain is needed. I have plans for the chain so I won’t be as polished when working with the surface issuers here. A future update on the chain progression will explain it all.


