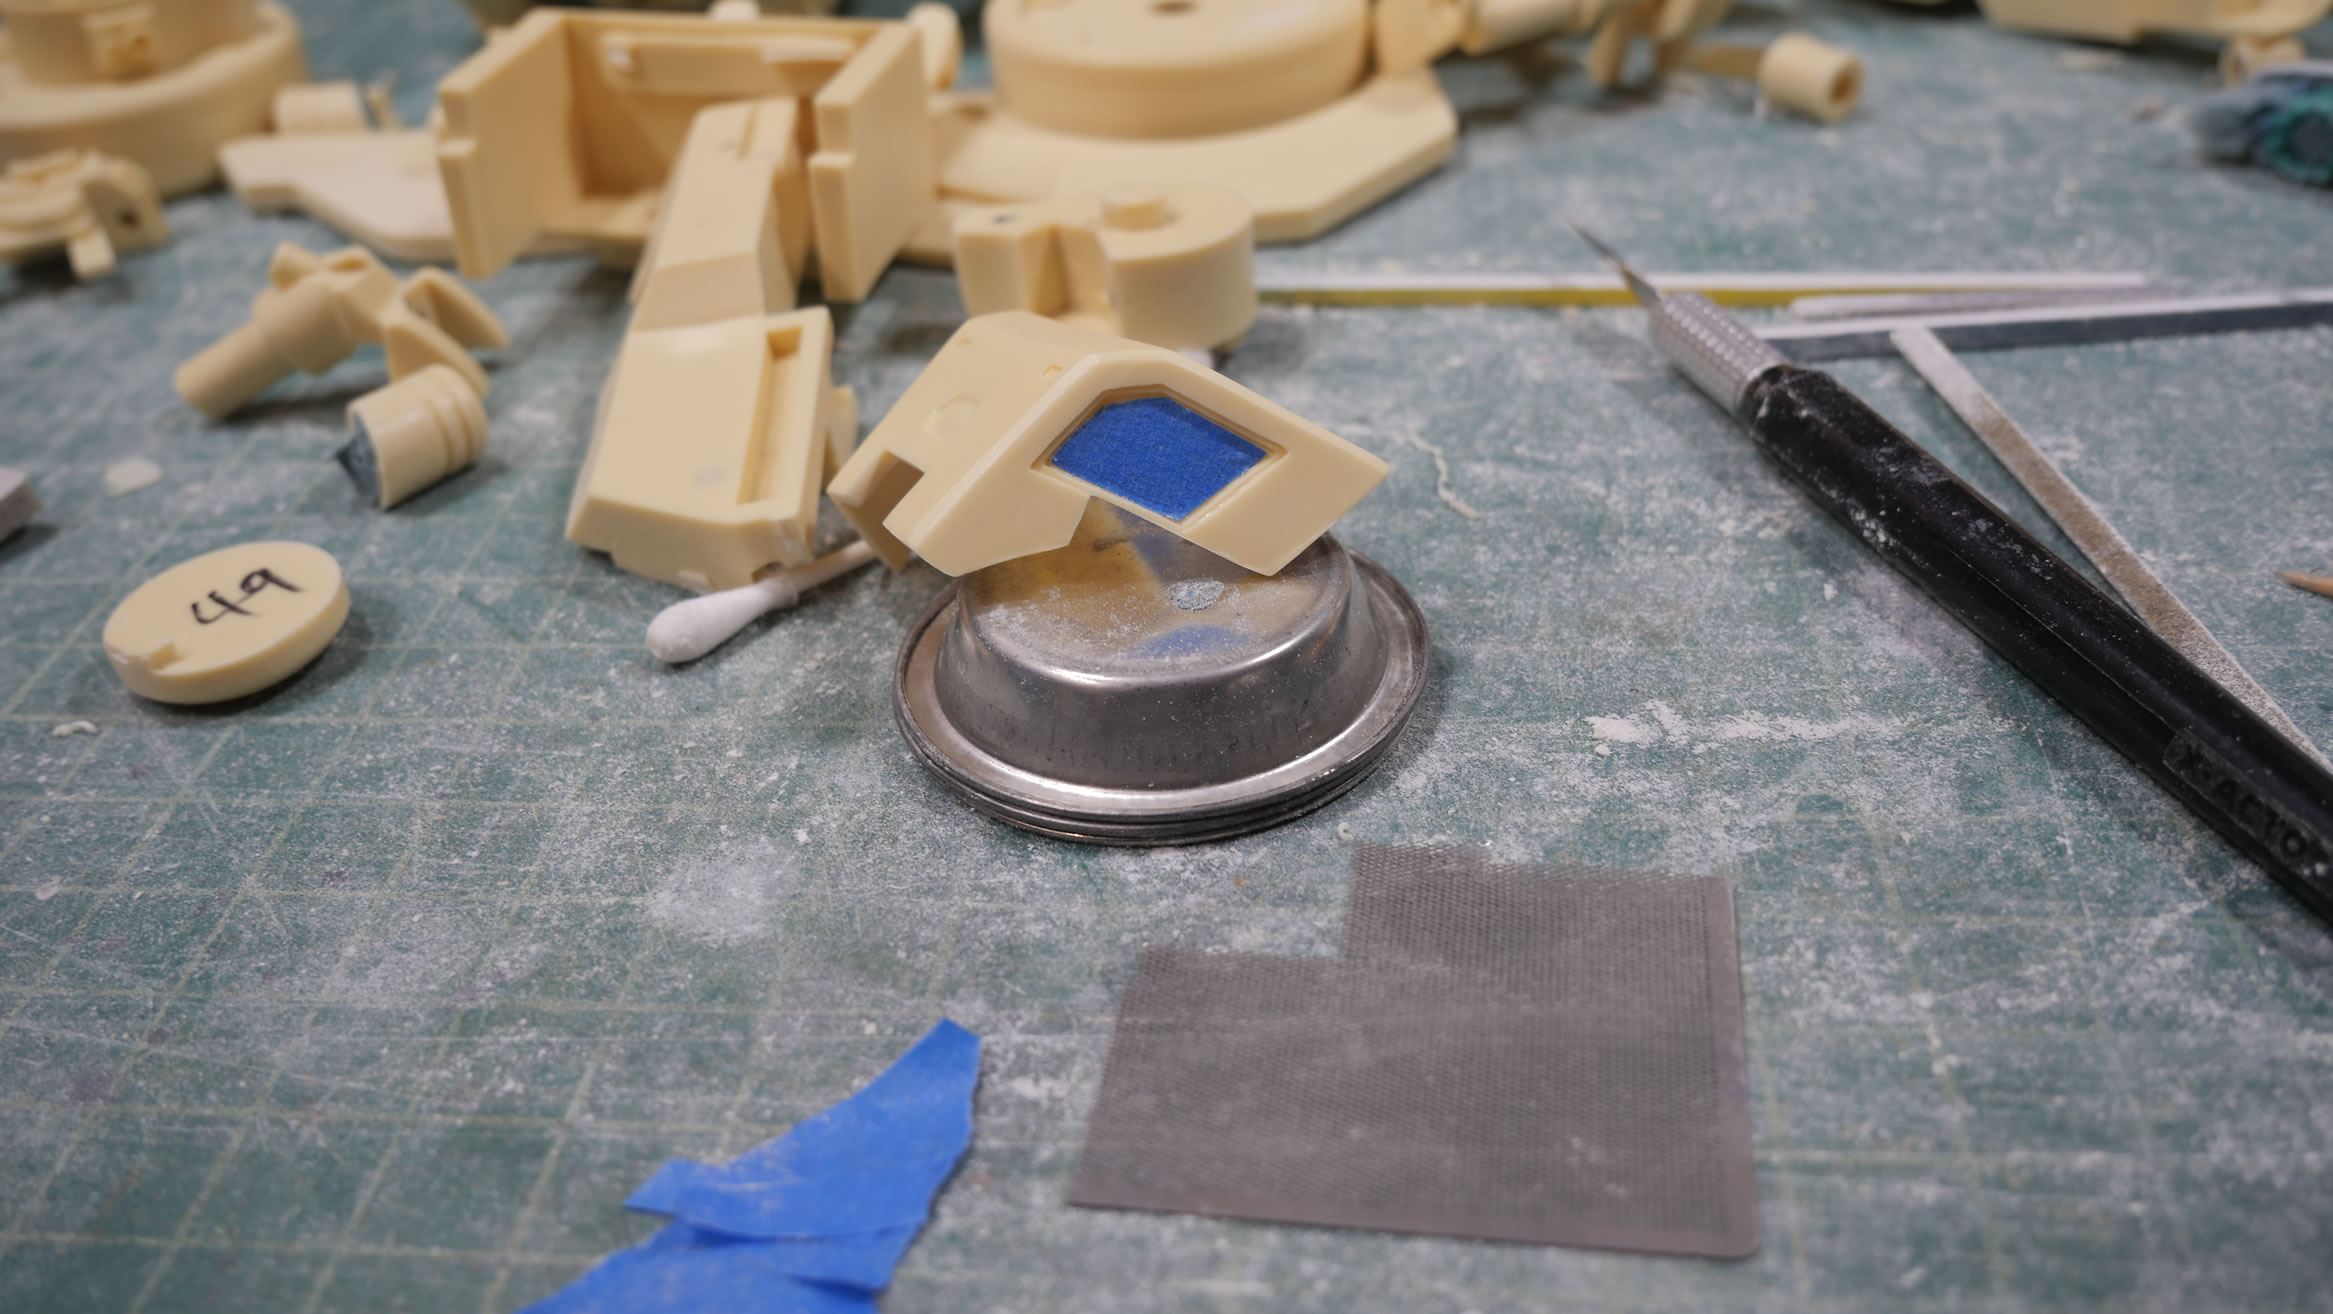
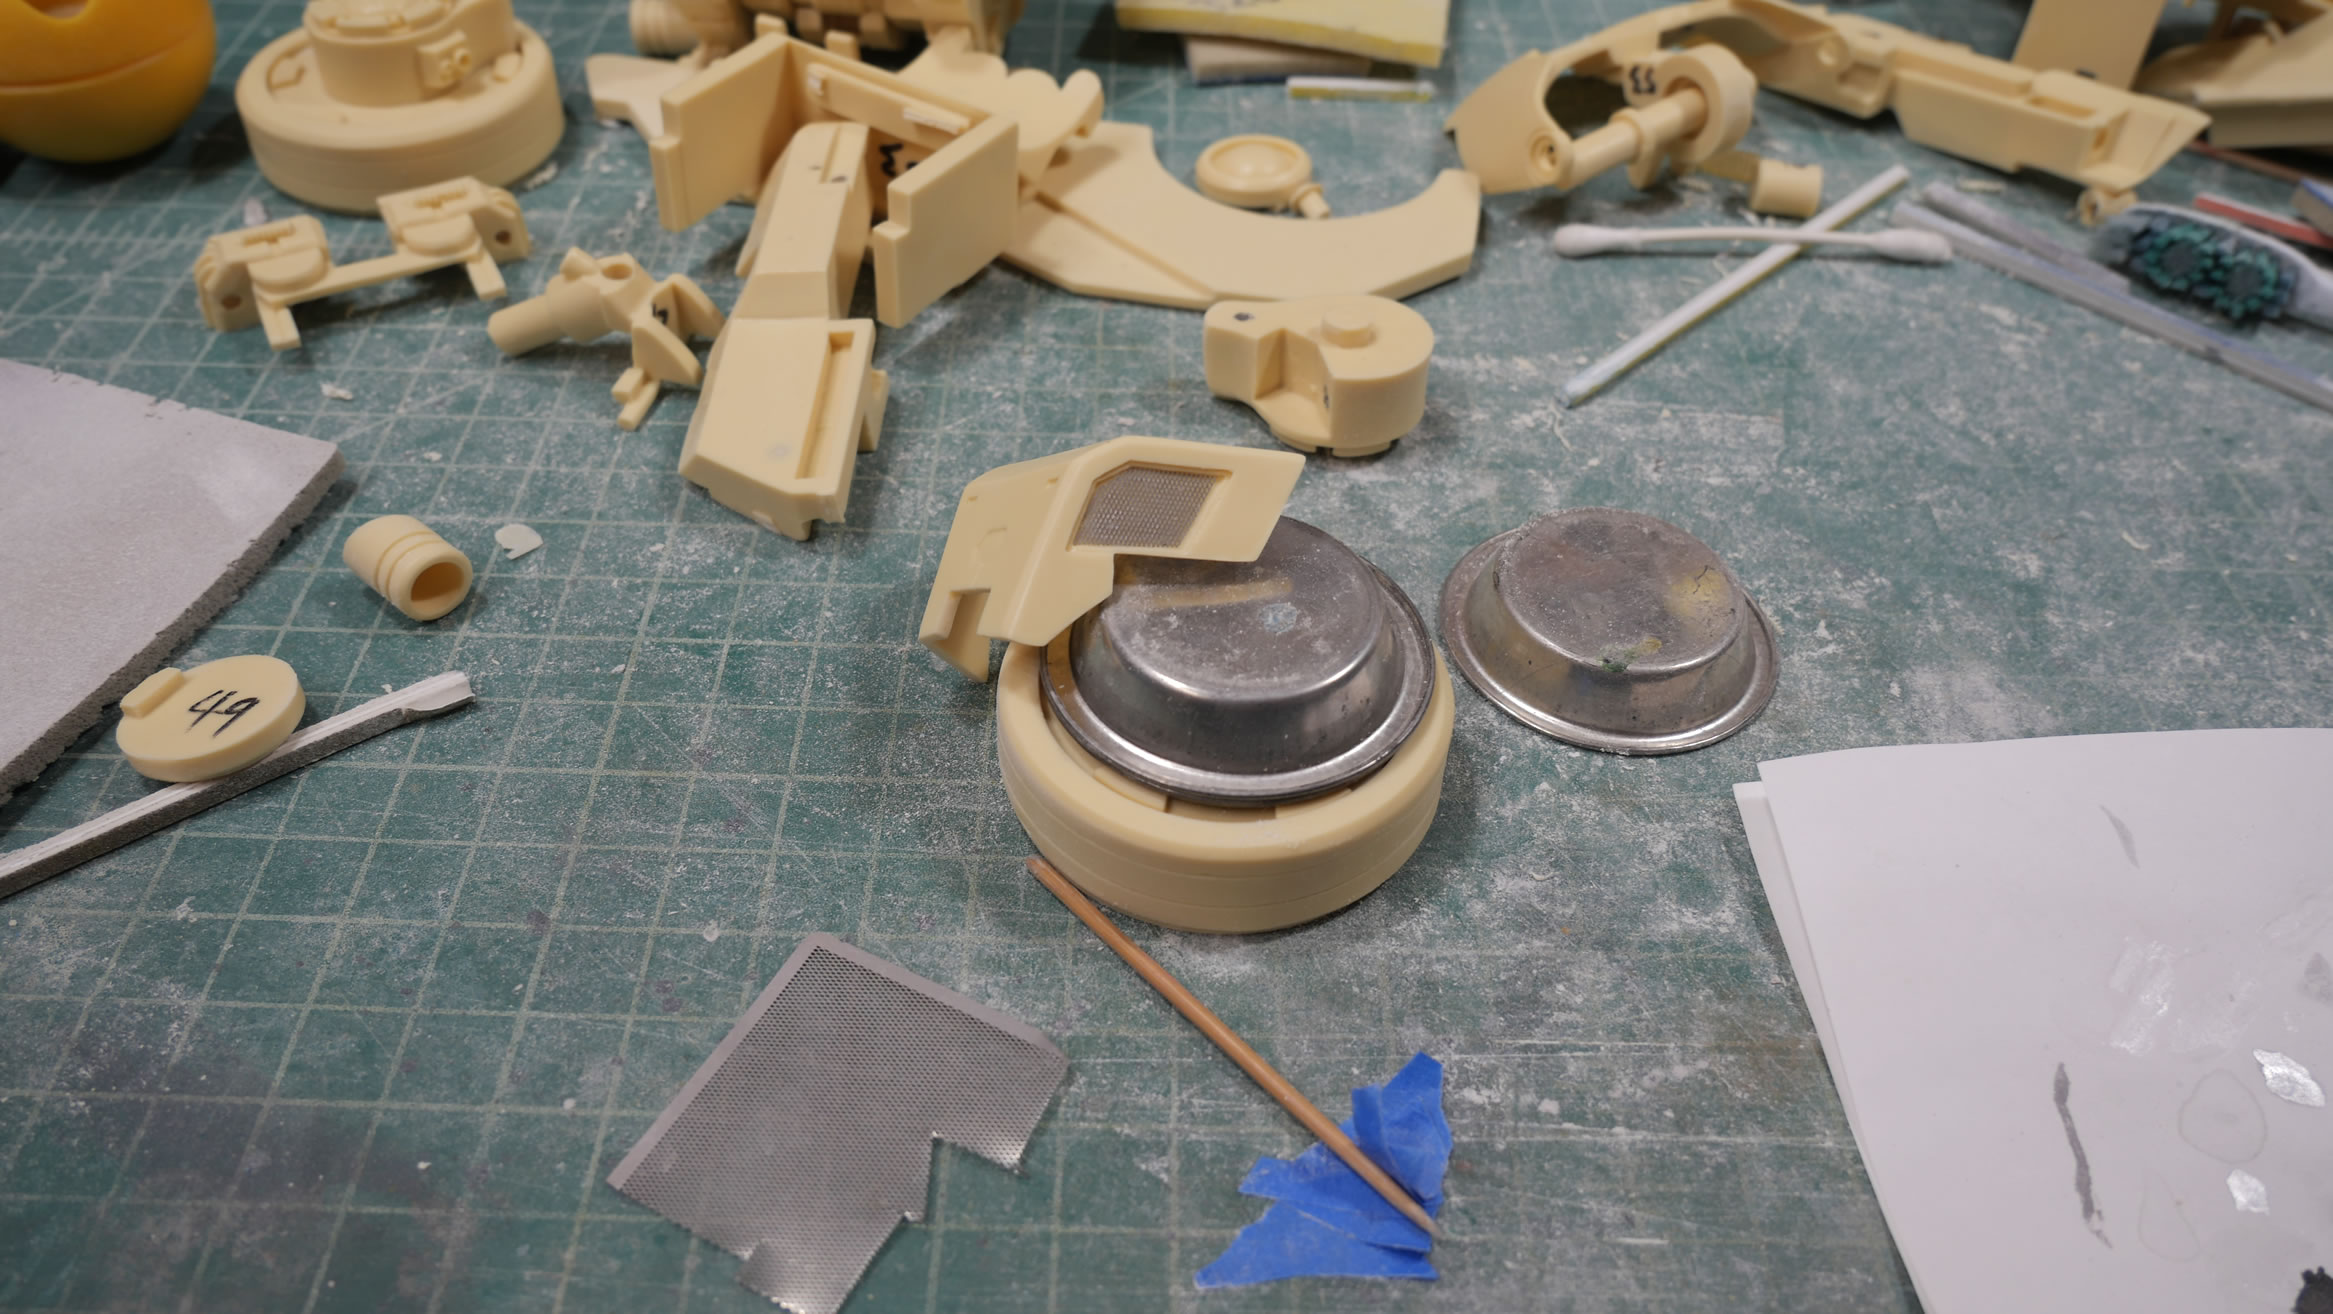
Two posts in a day because I’m playing catch up with my finished builds. I technically finished the Lancia a few weeks ago, so I really should post about that first. But really, today, I finished this sucker. I picked this kit up years and years ago at a little shop in Hong Kong. It was sitting on the floor and I thought about it for a few days then went back and grabbed it. I had to look back at the date of the original photos I took when I first took it out of the box and started test fitting, 11/15/2016 – most likely started after an SCGMC event. Being a recast kit and not sure all the parts would be there, I did a parts check and marked off each part as I went, hence the sharpie numberals.
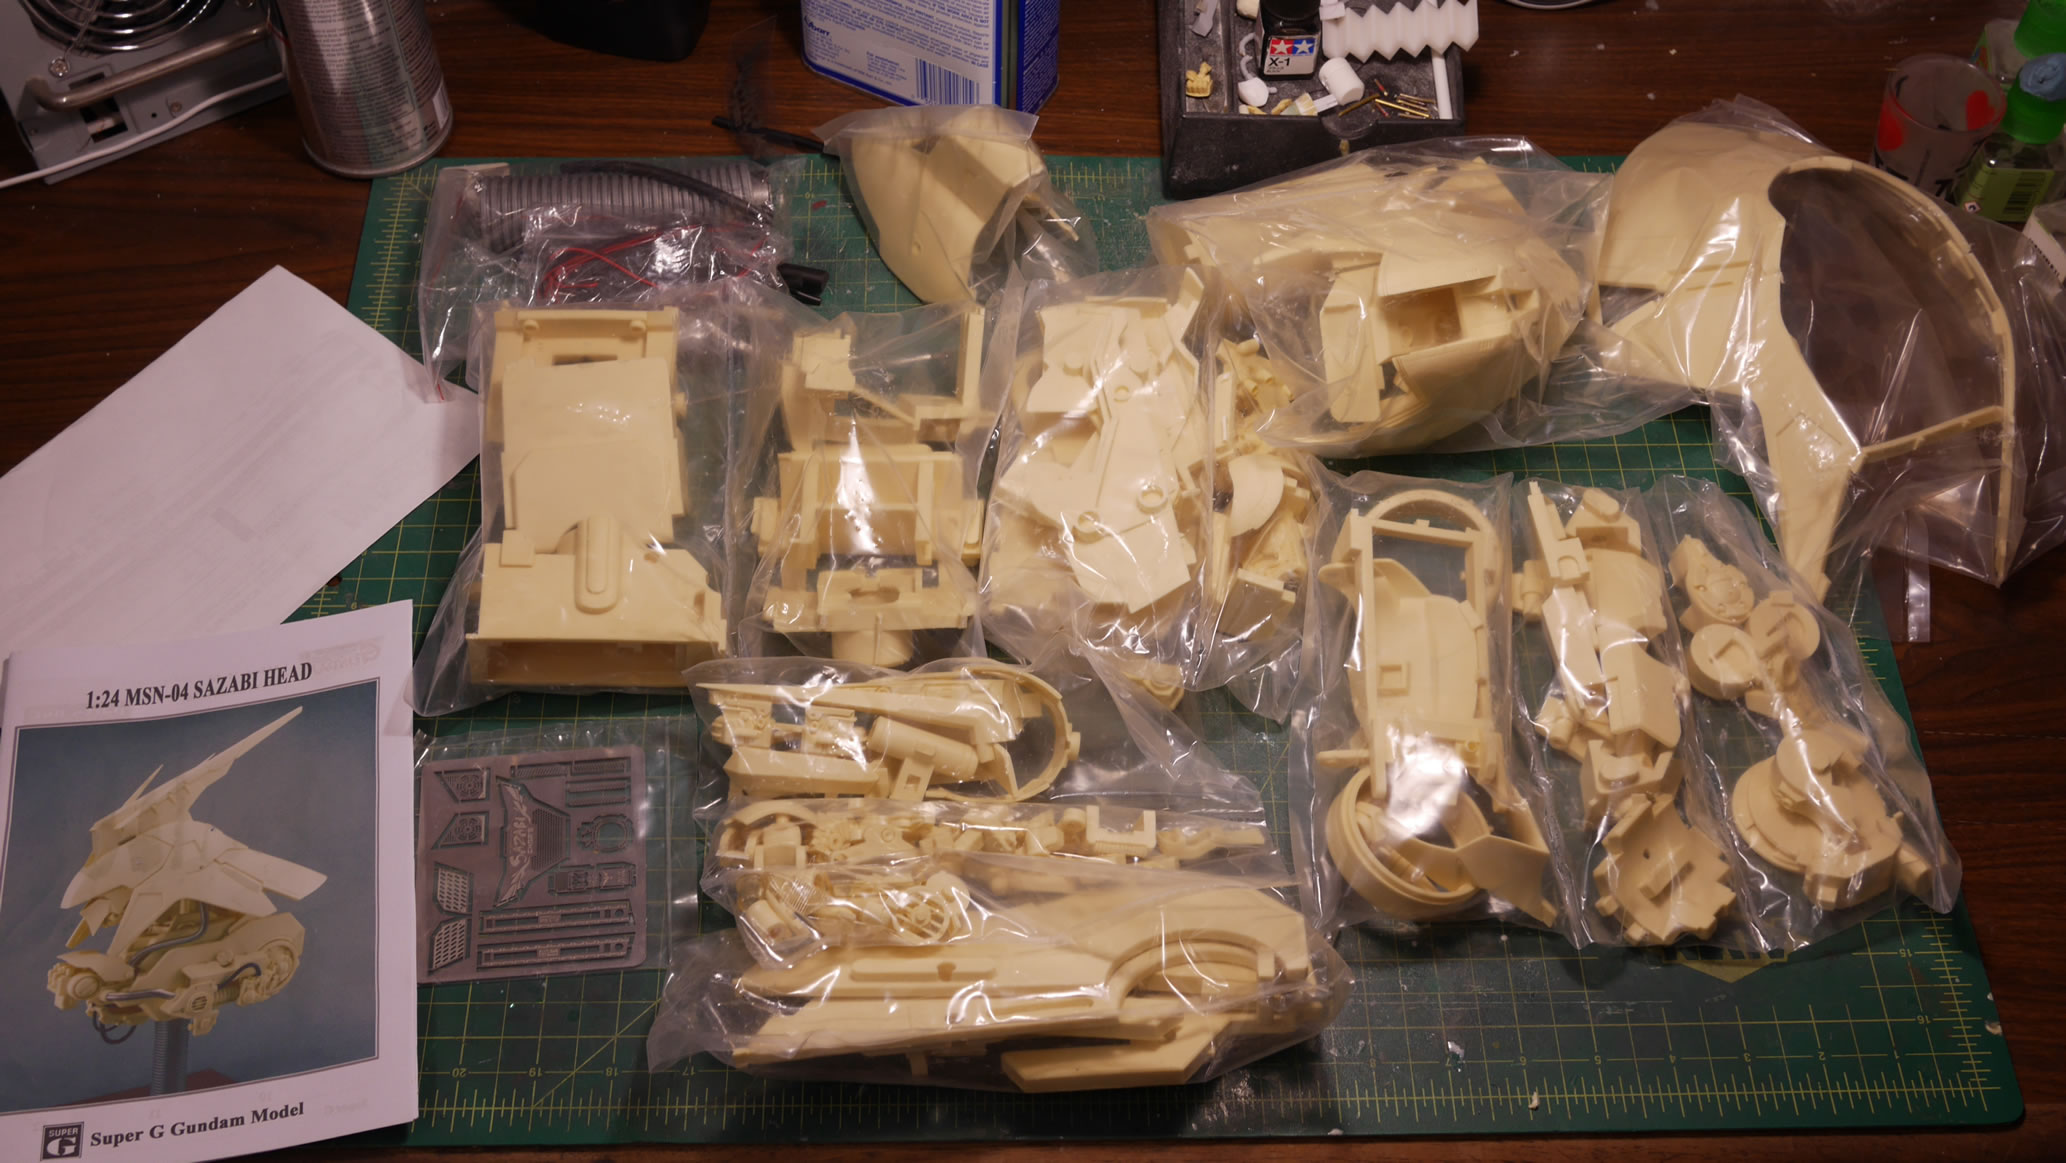
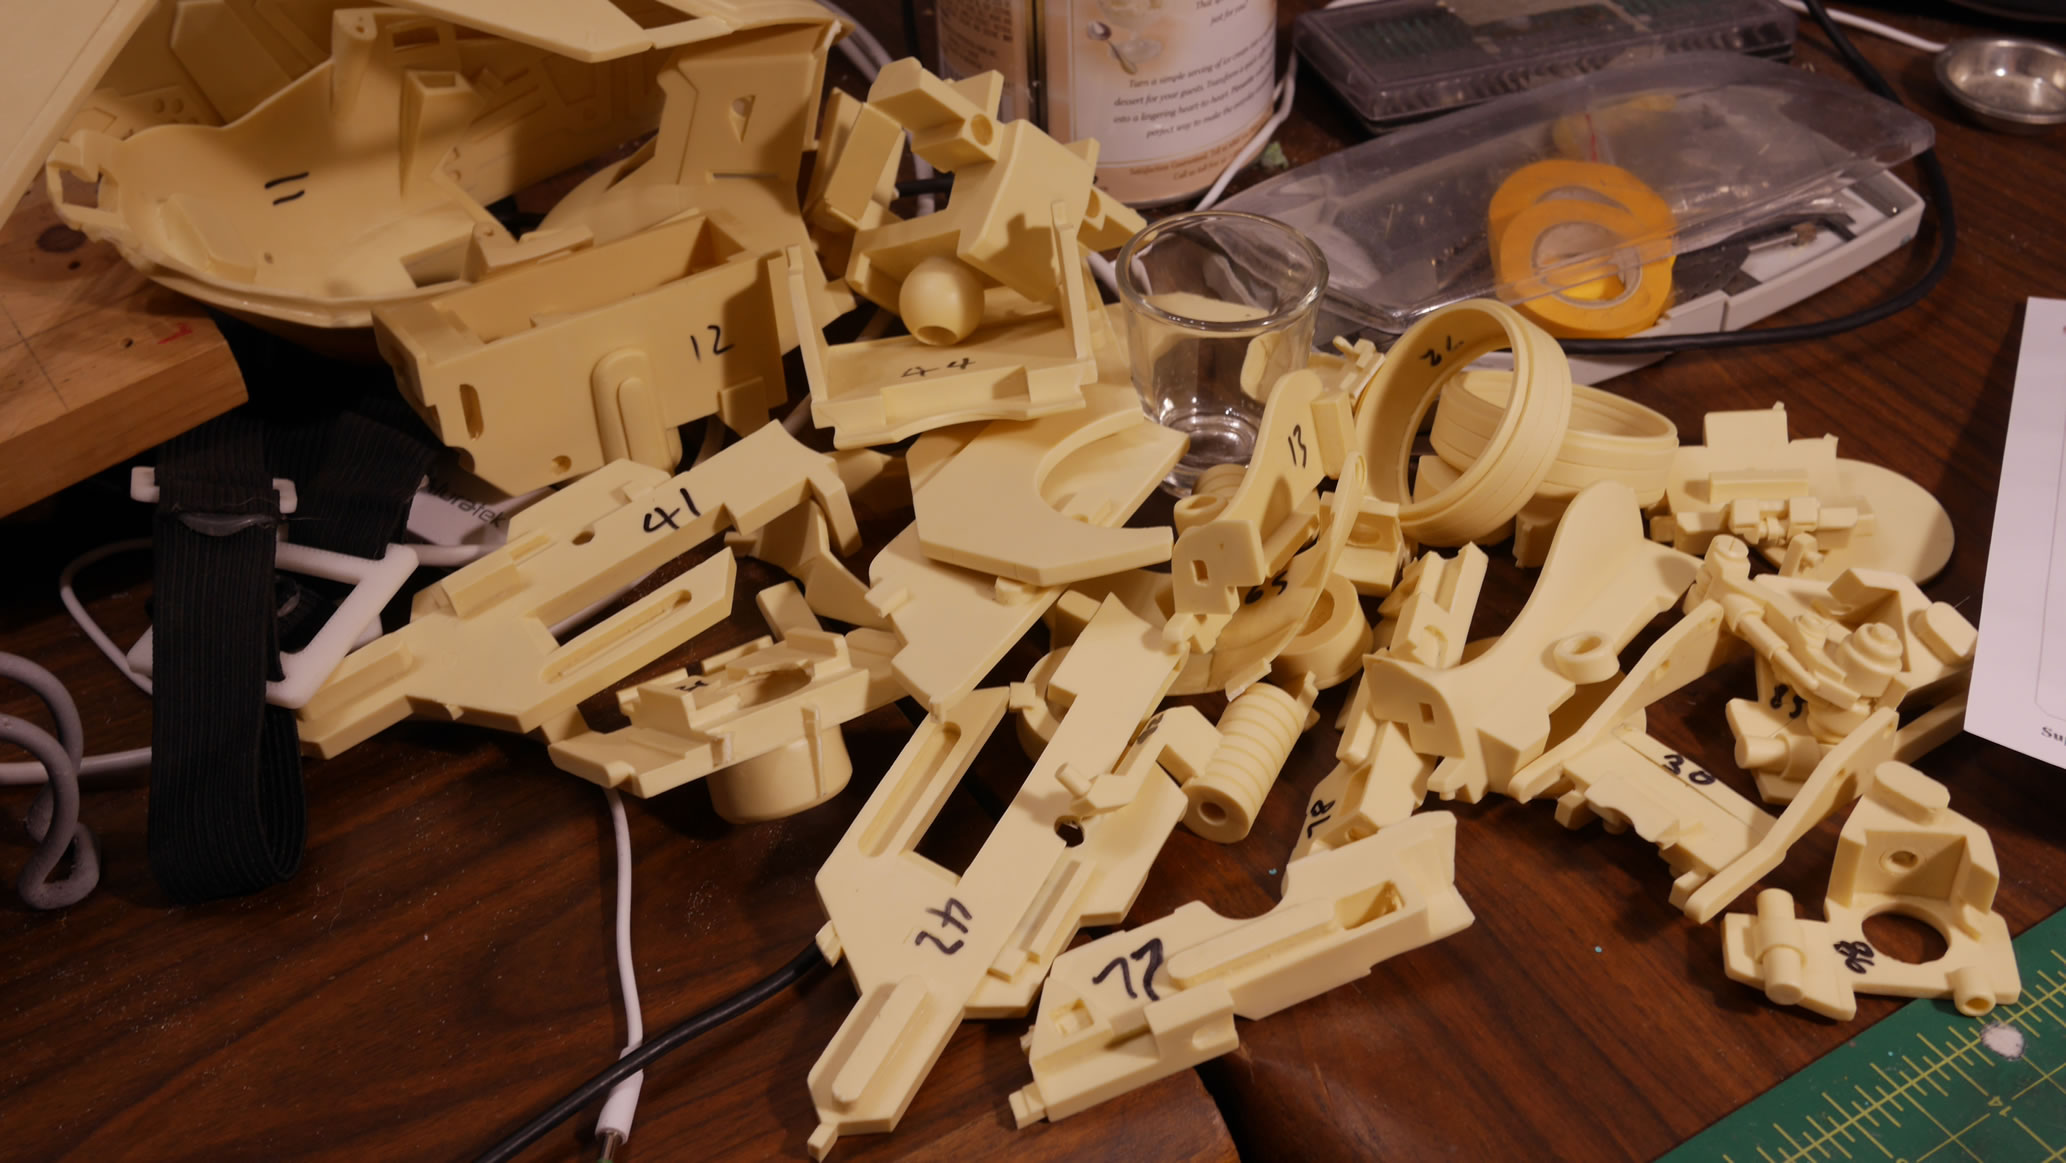
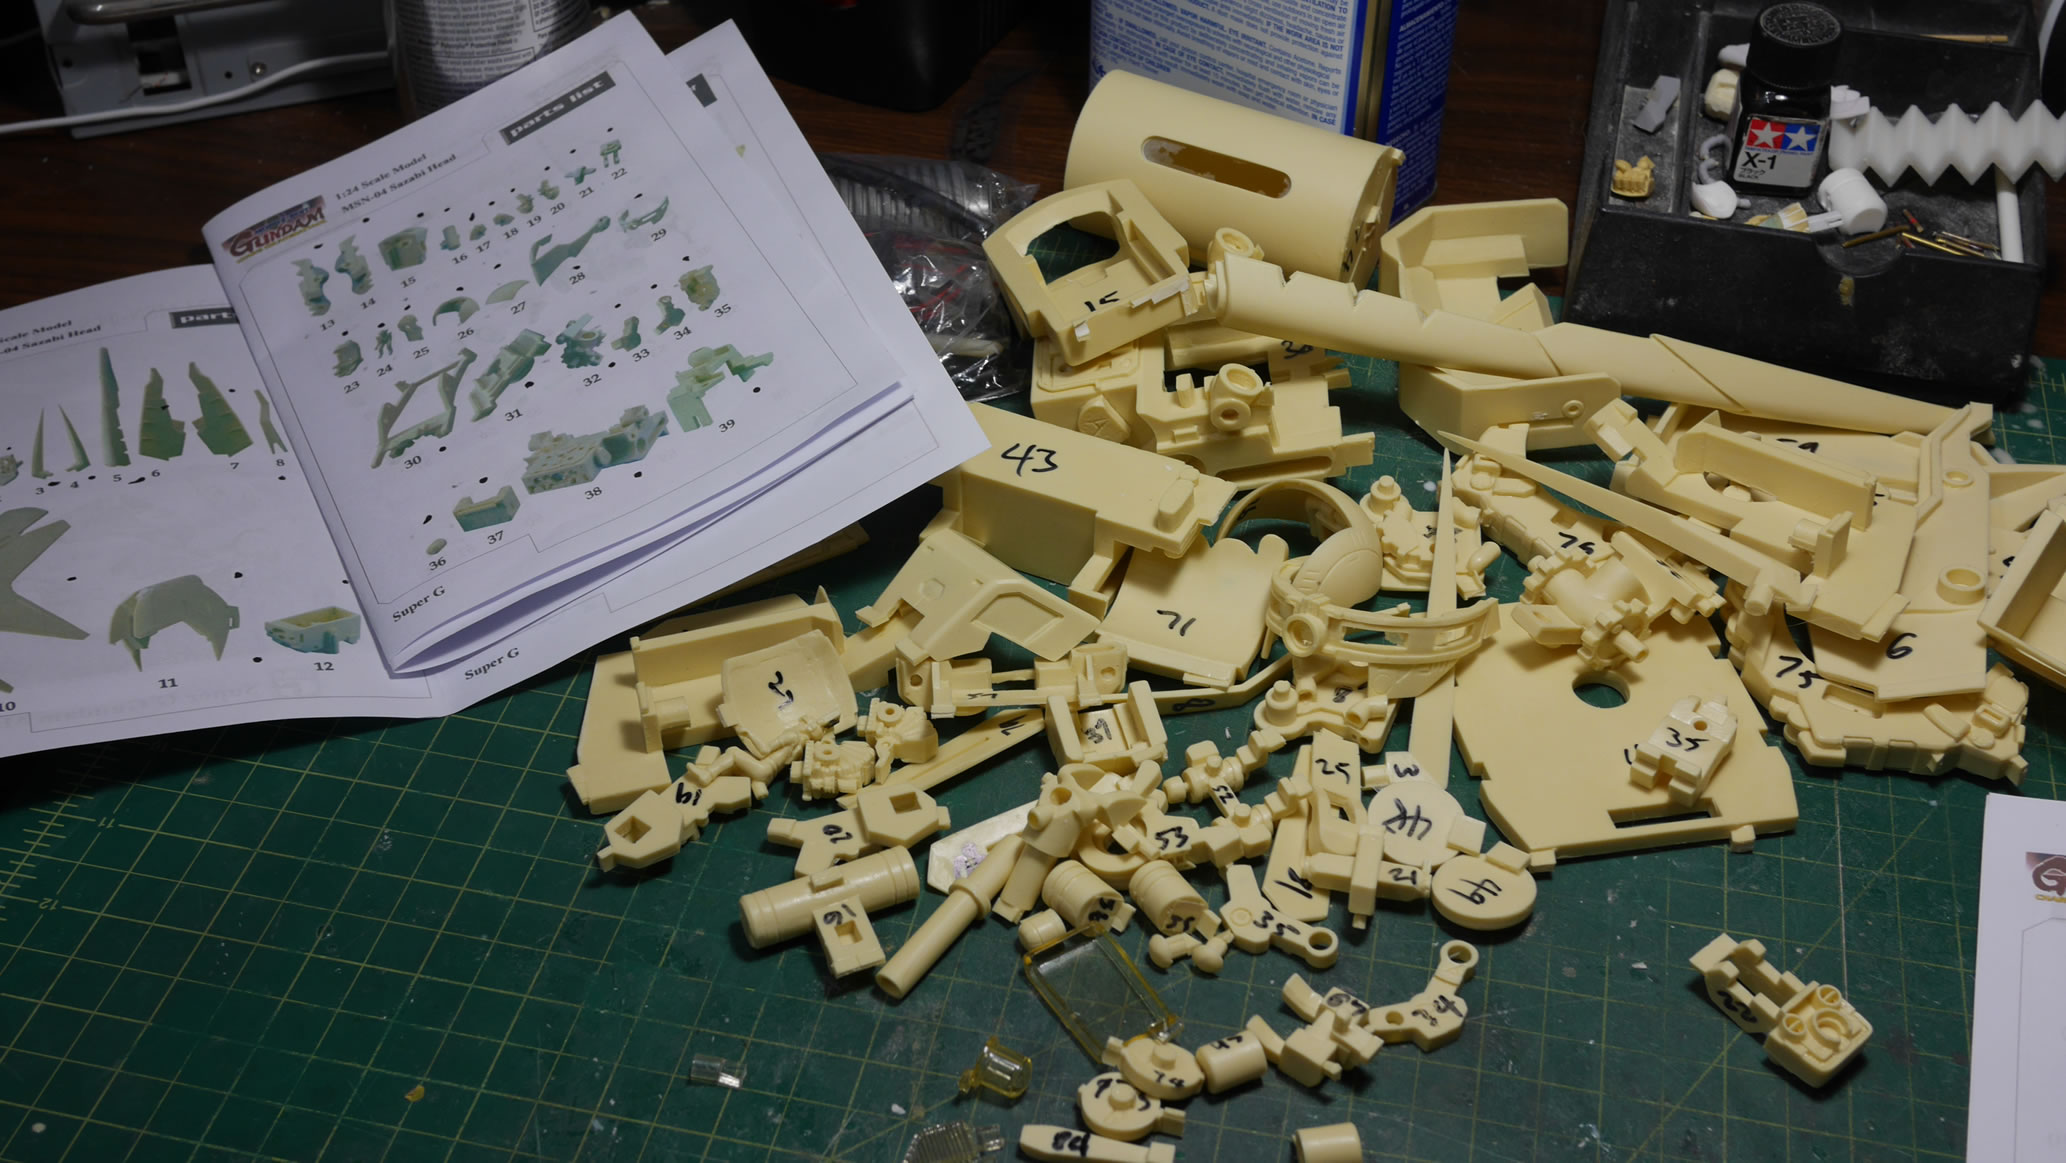
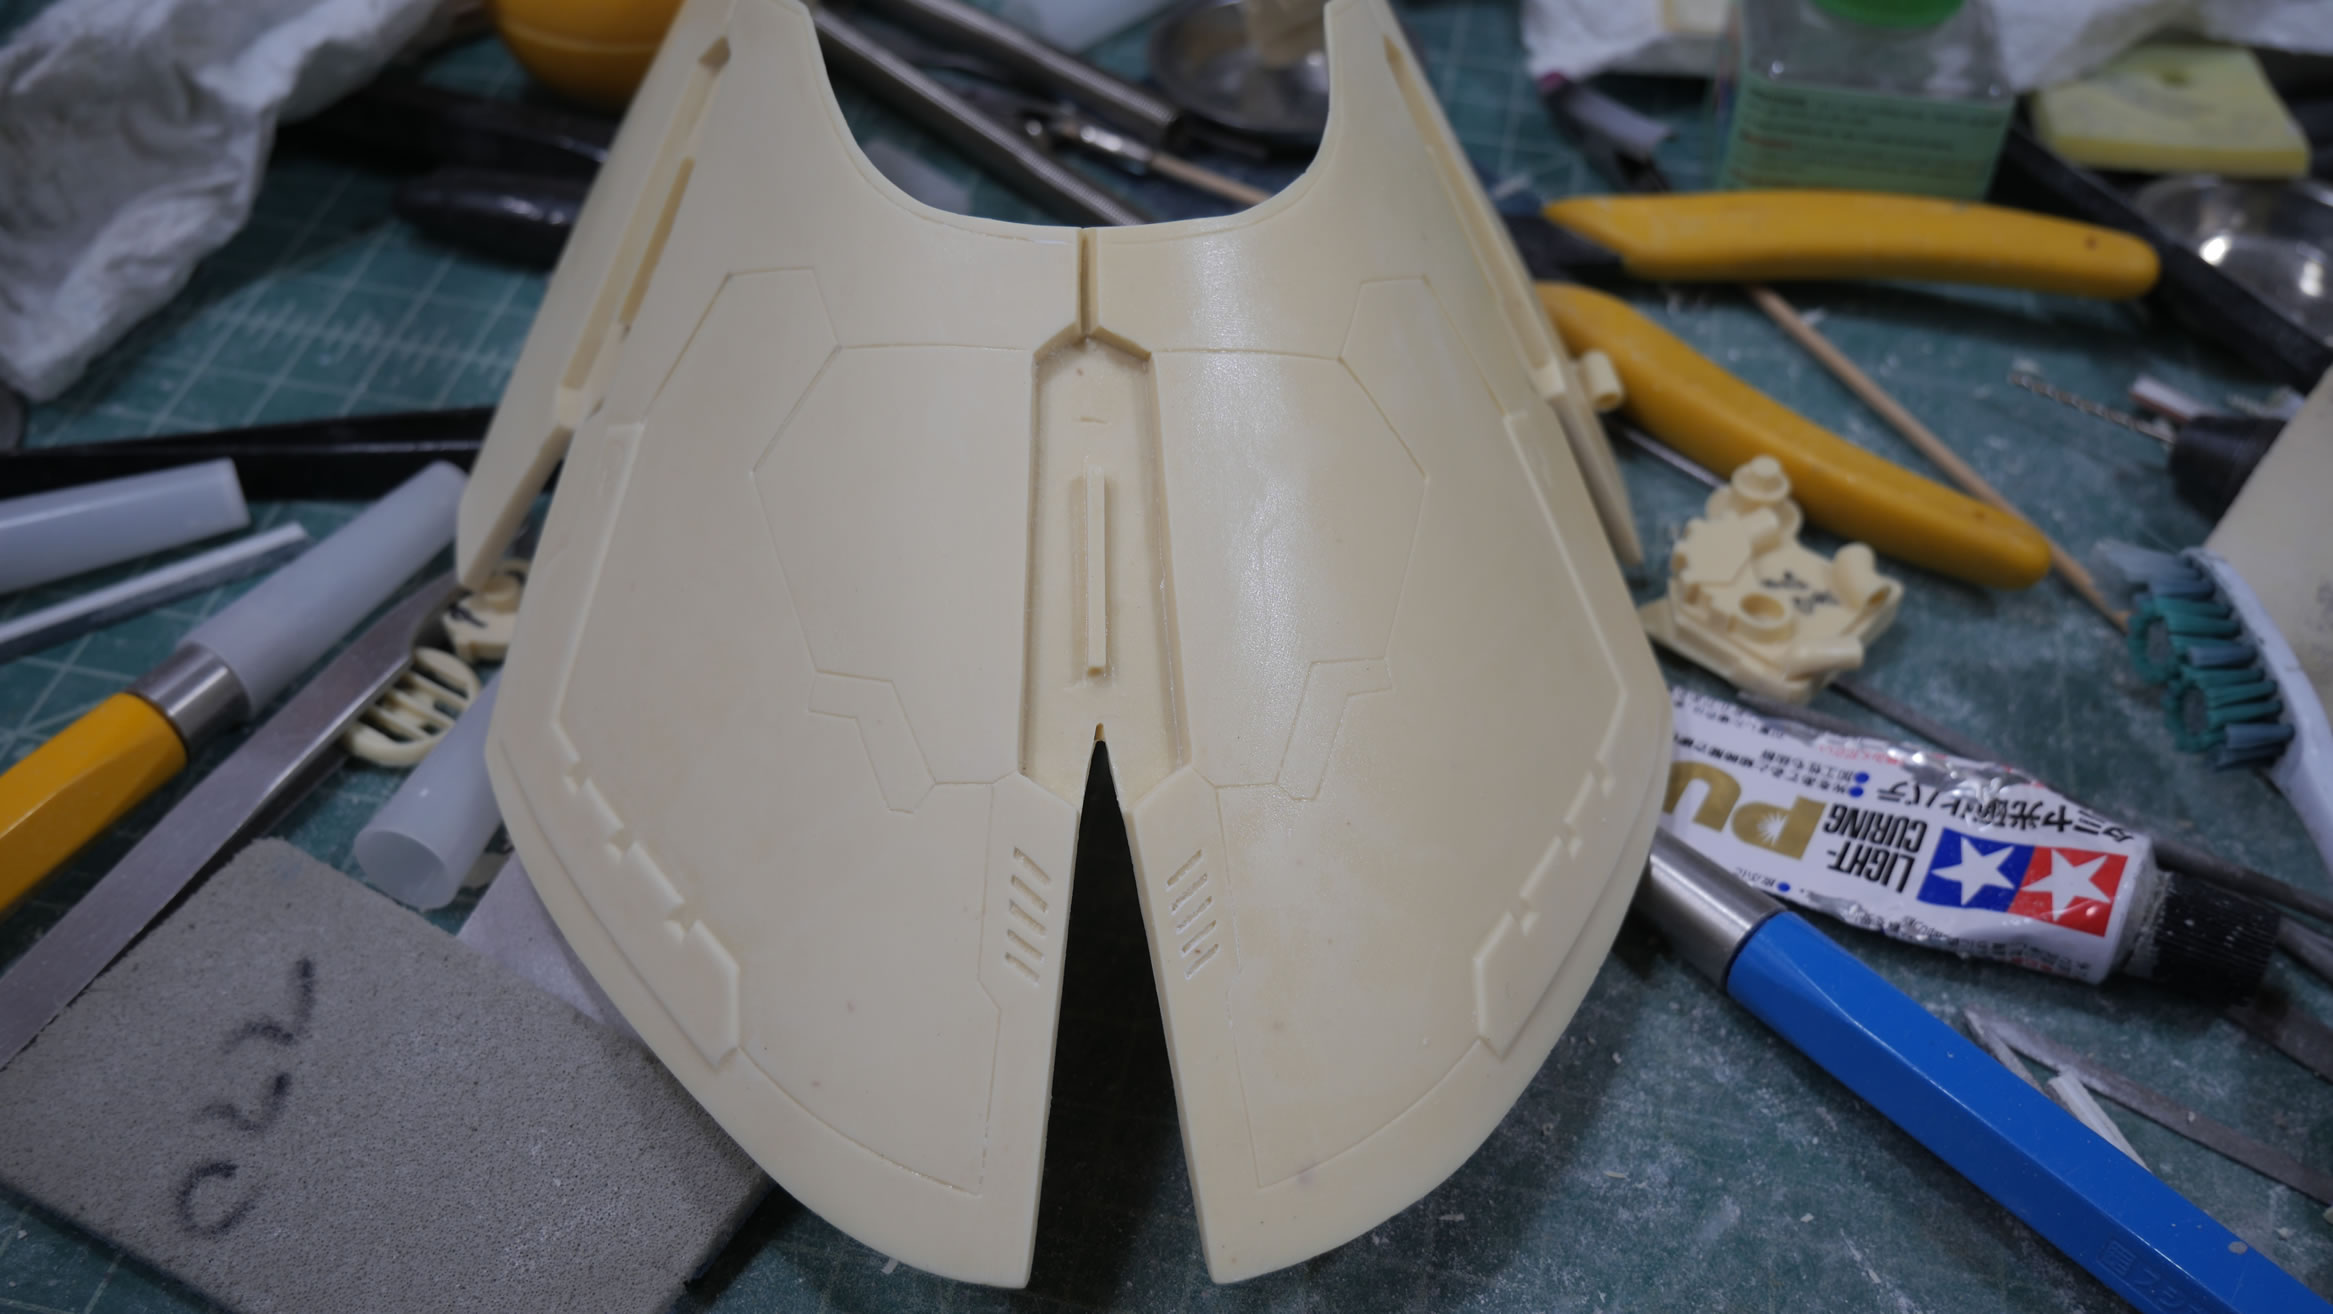
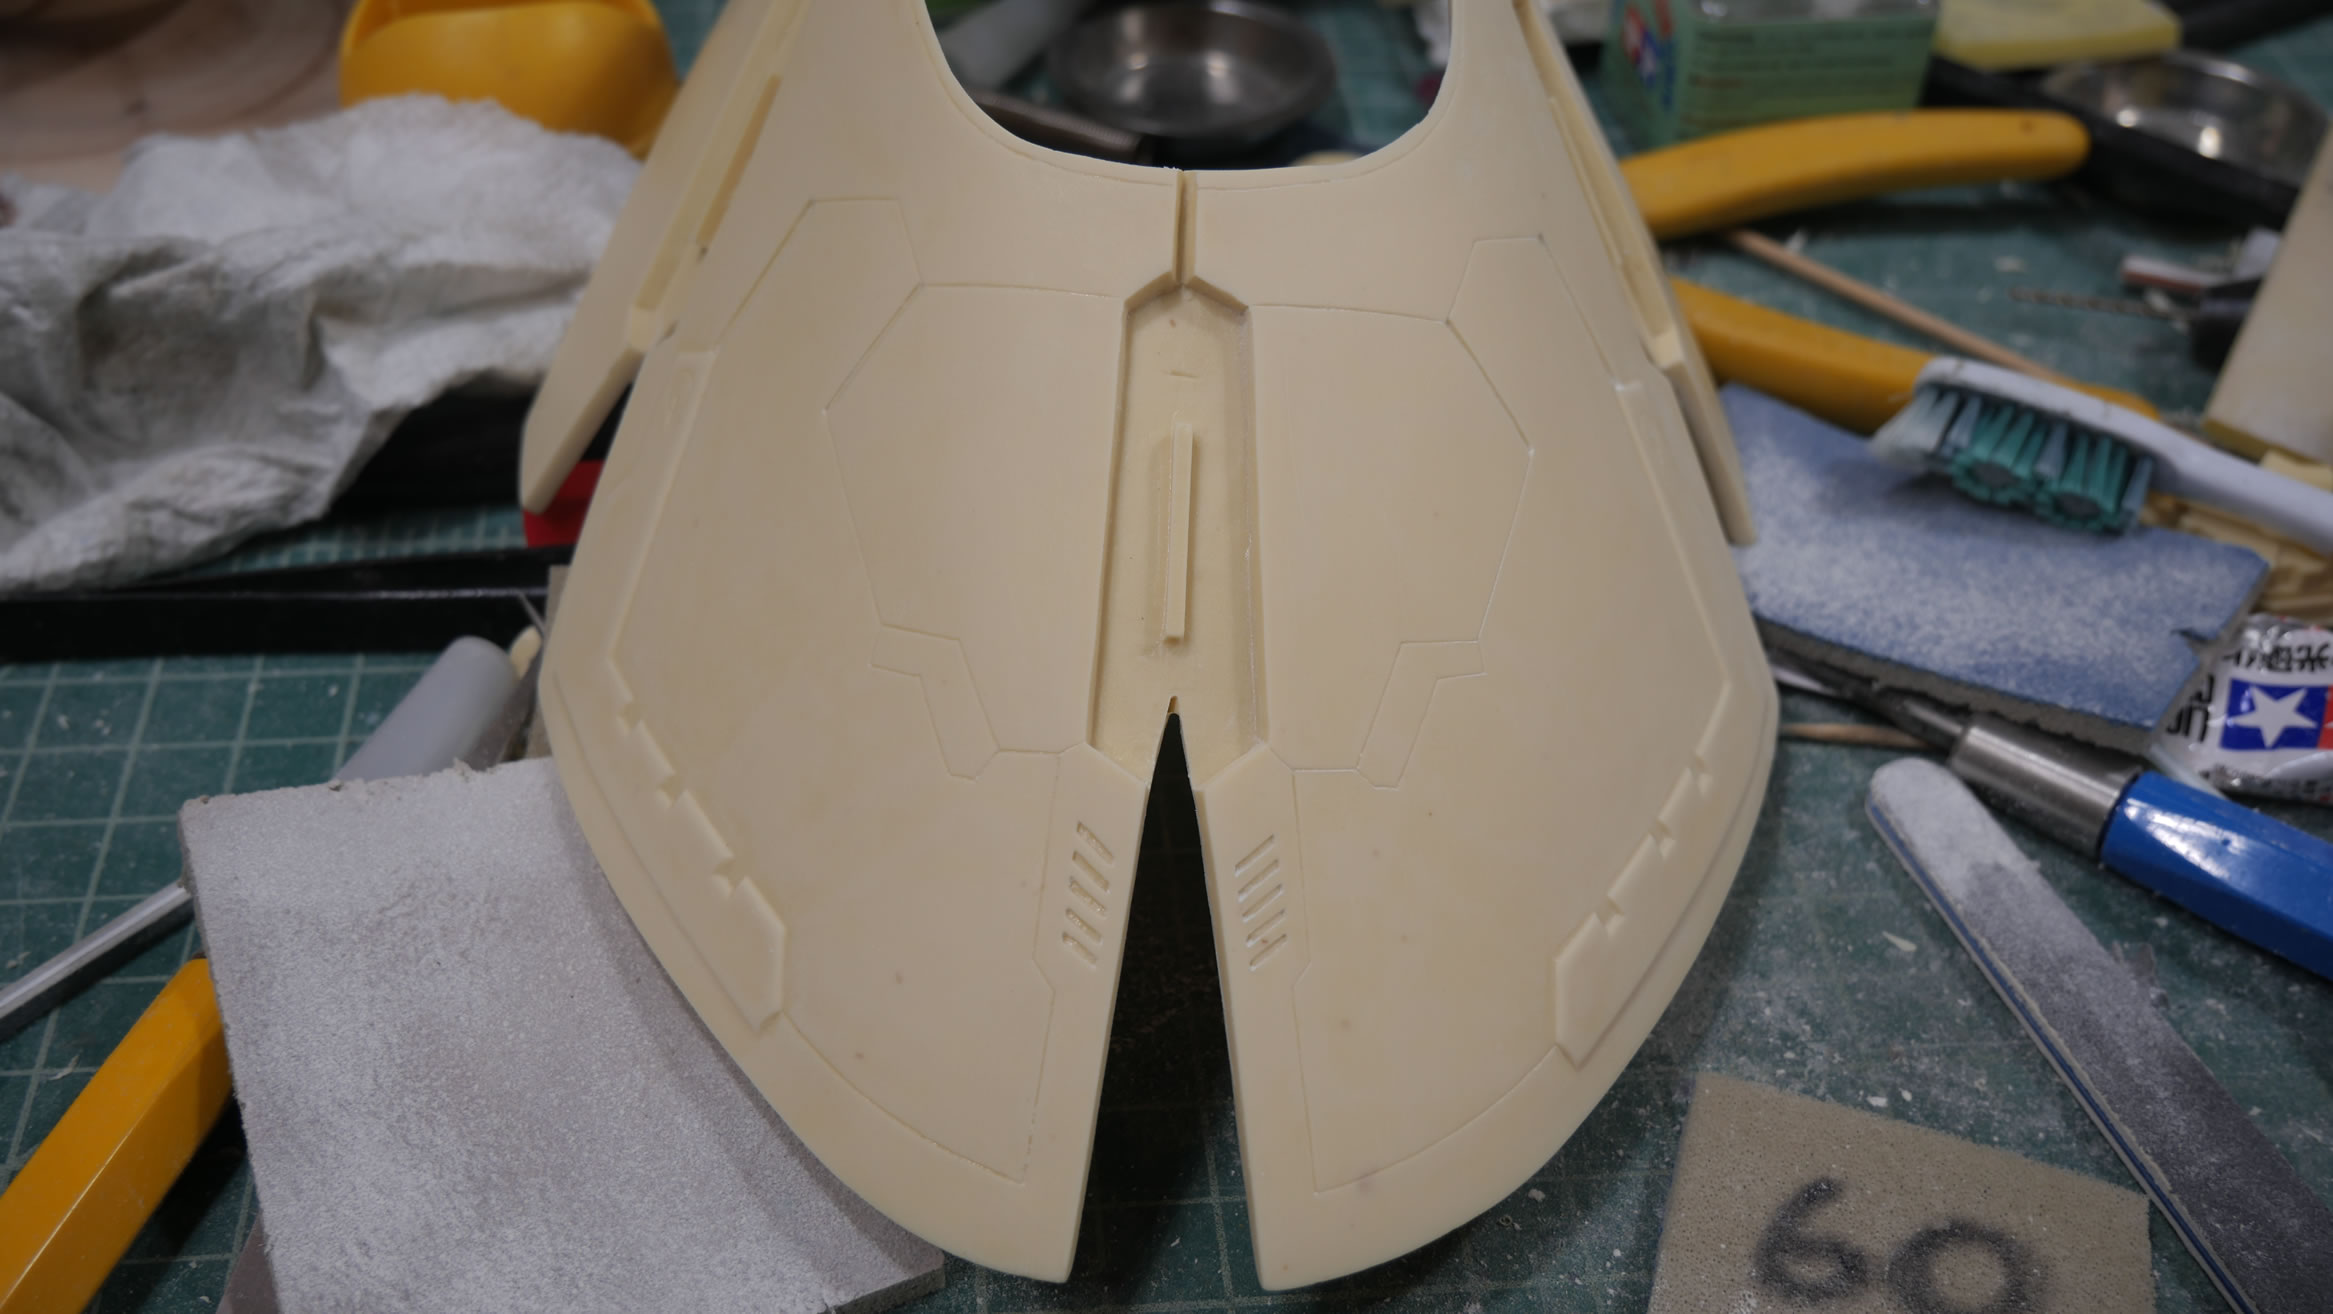
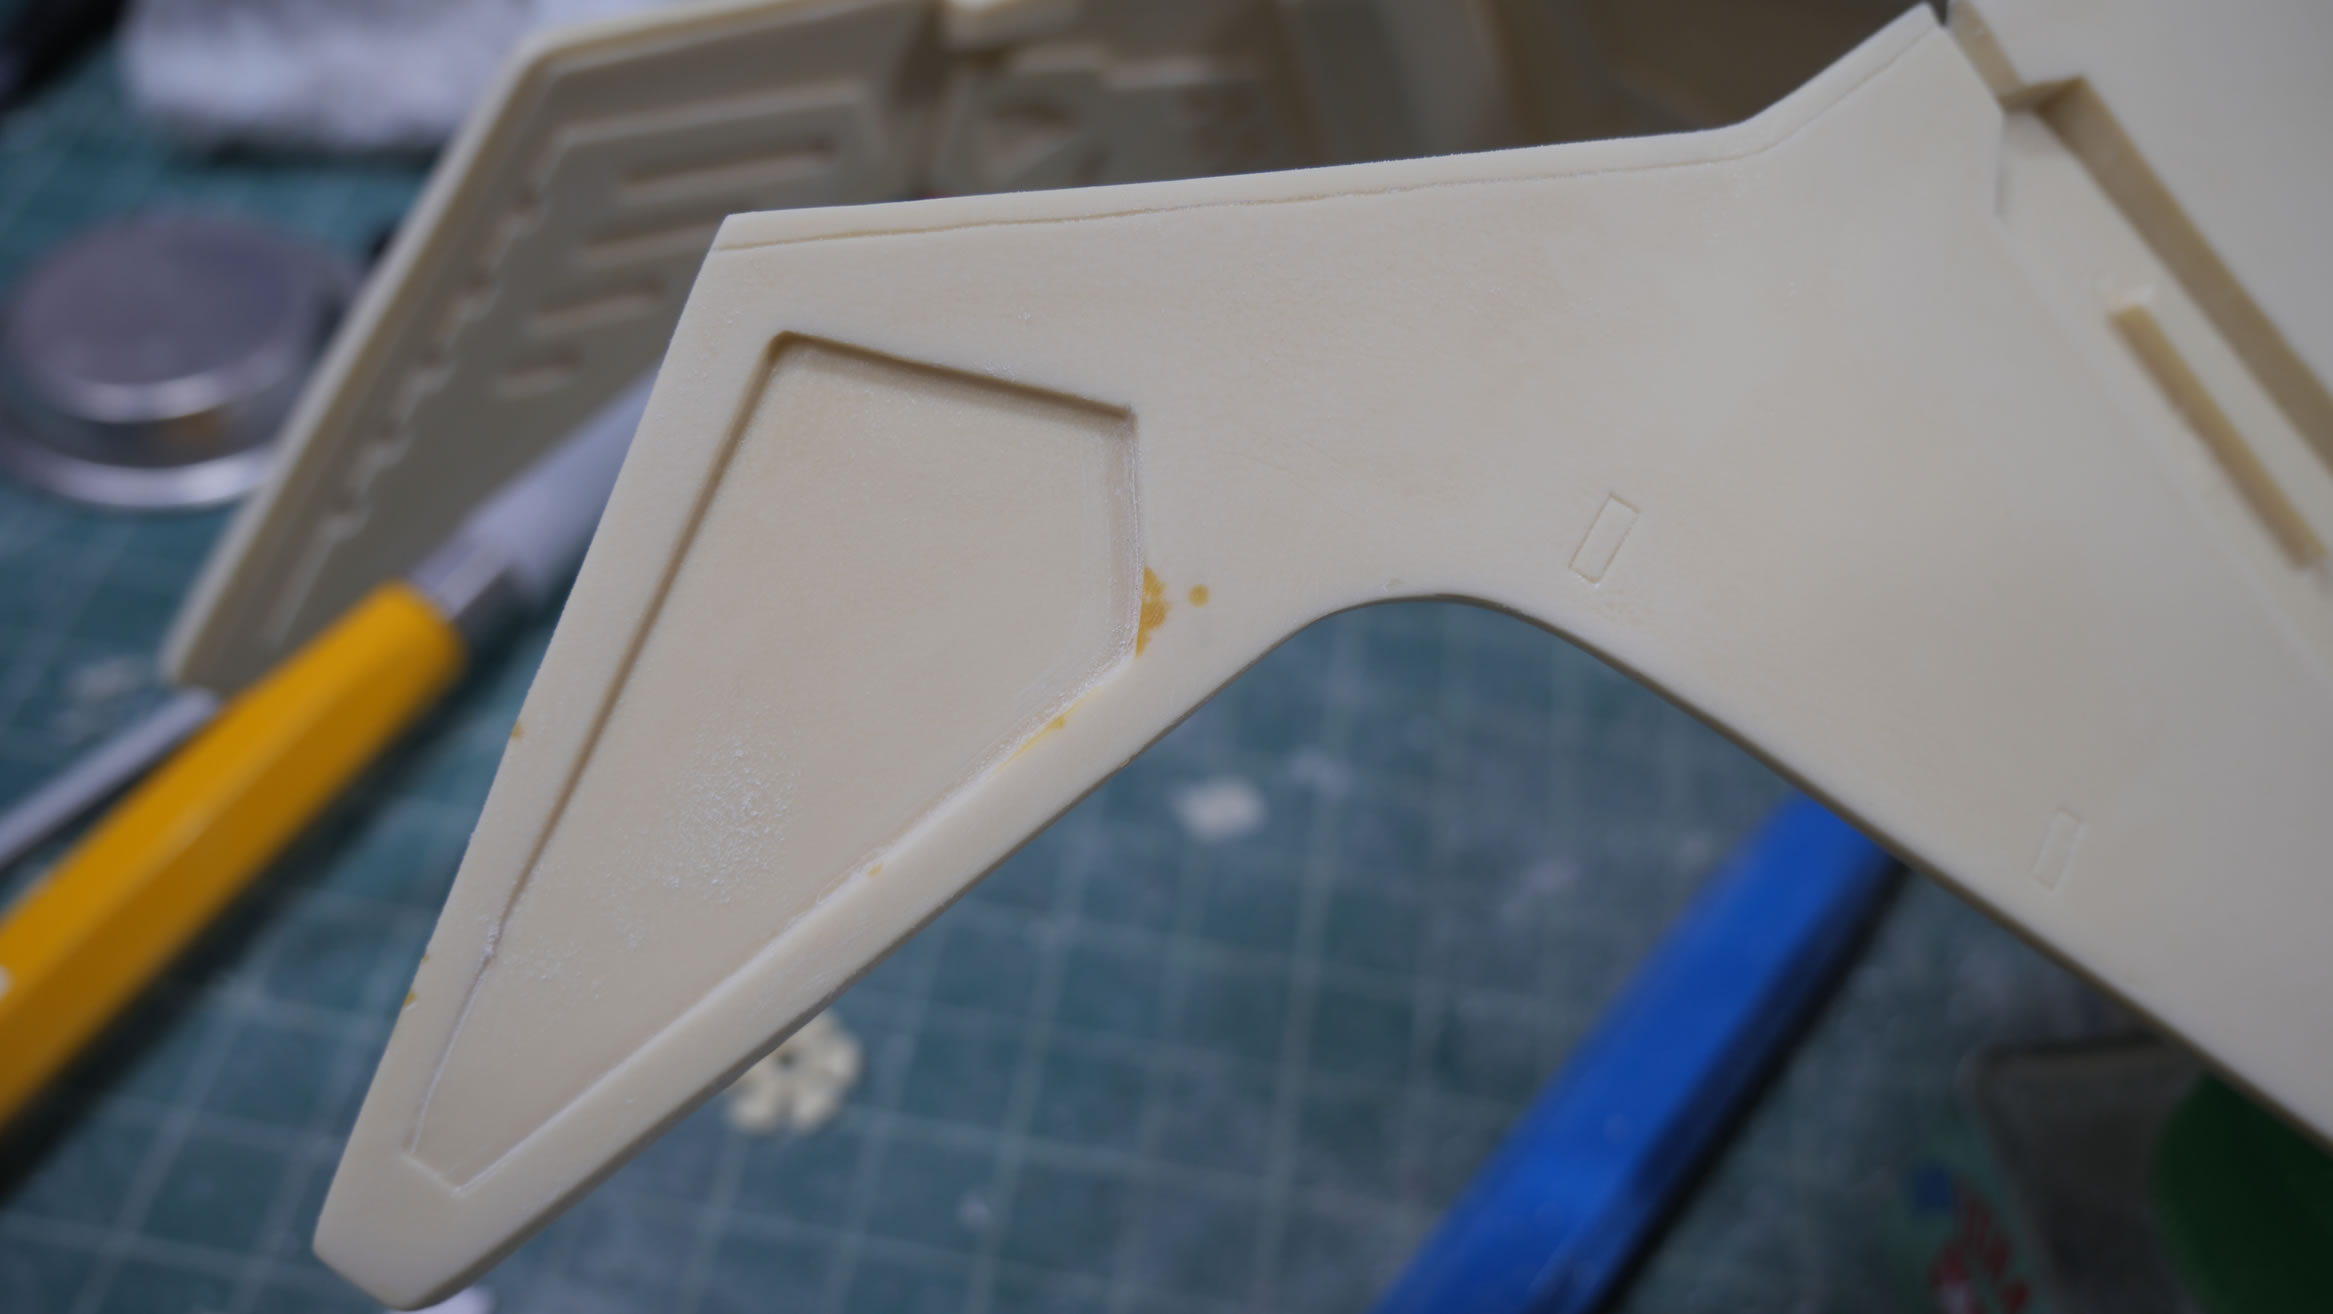
Once all the parts were accounted for, the next few days were spent rough sanding, clipping resin tabs, and pinning the sucker together.
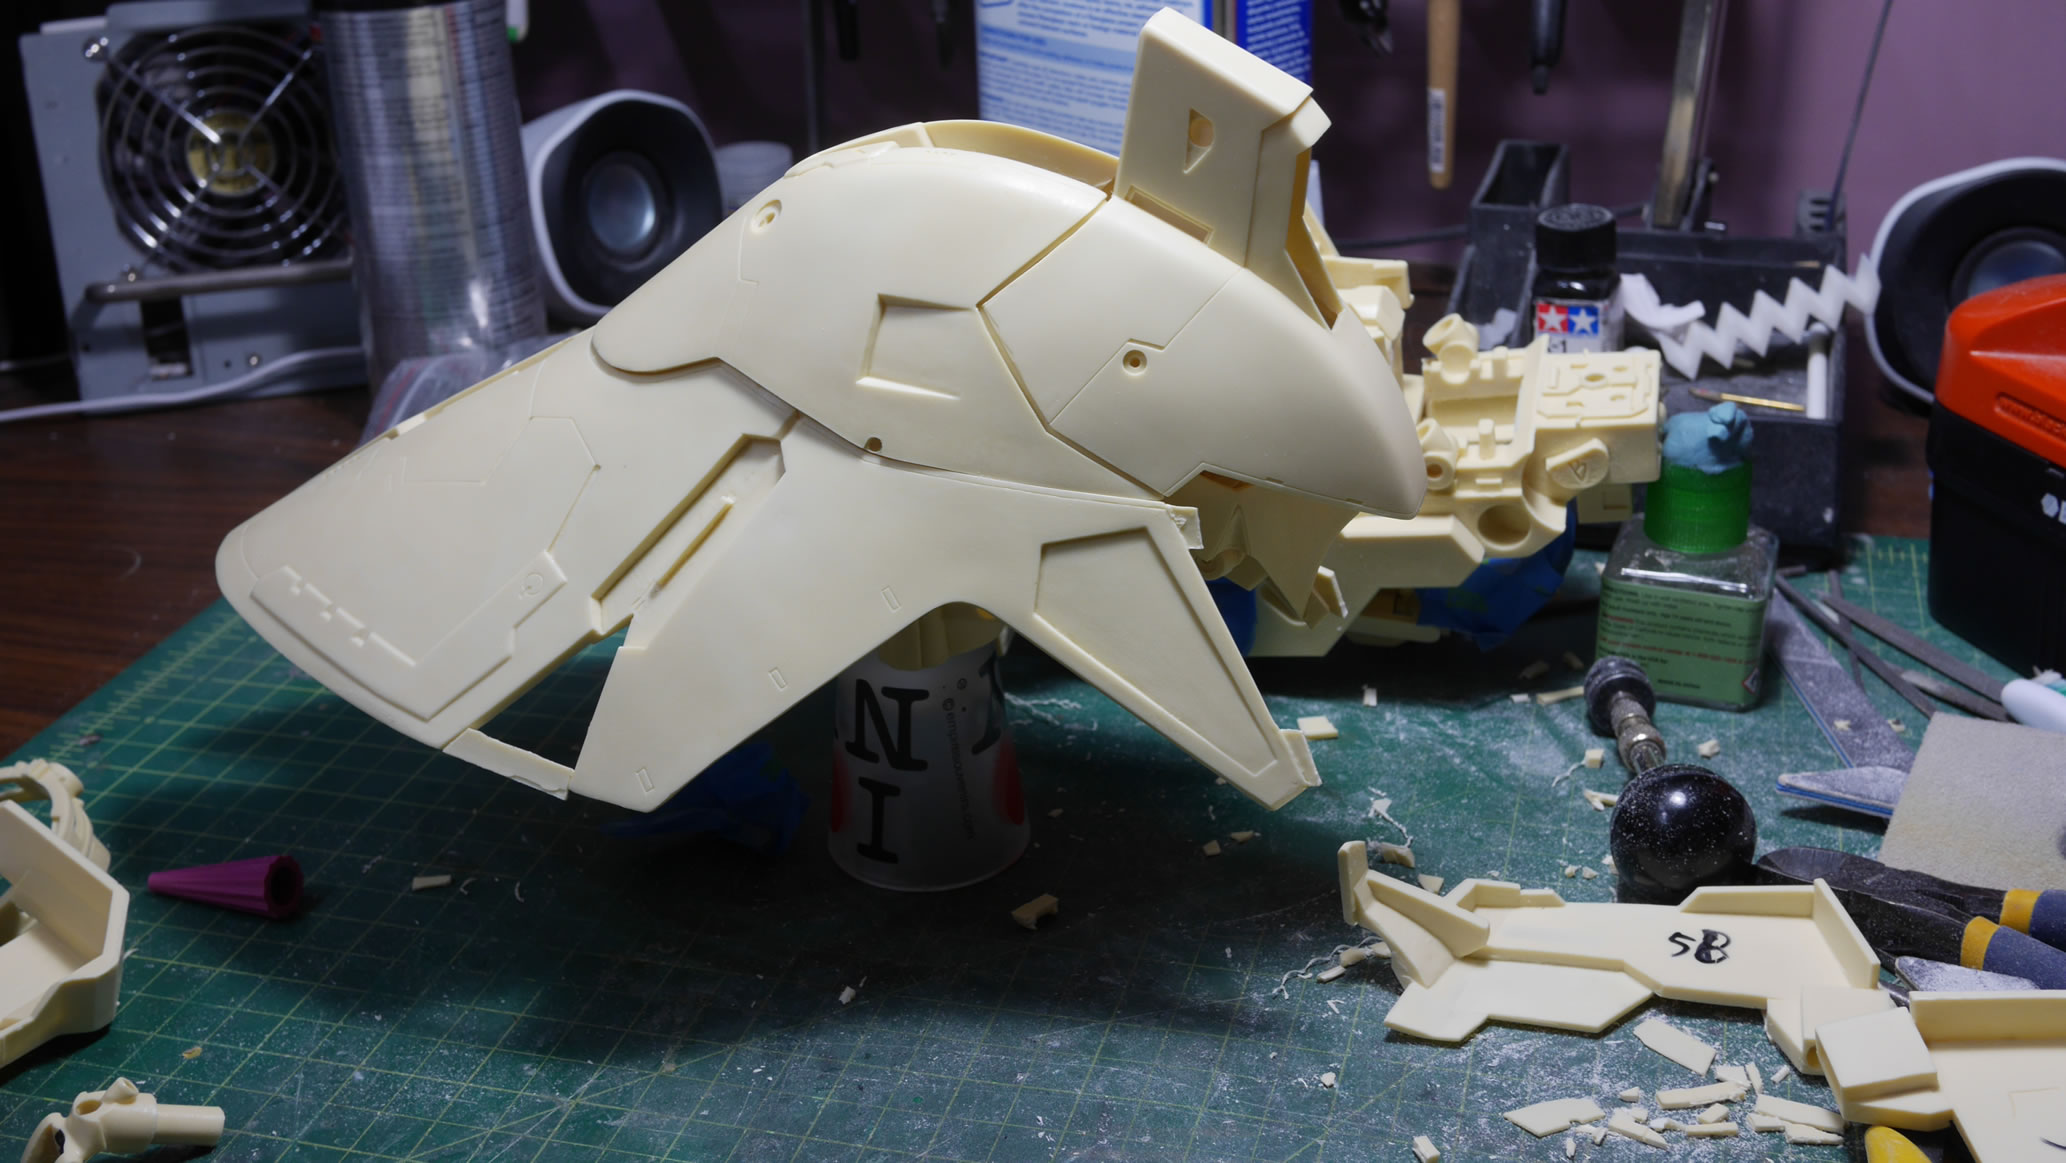
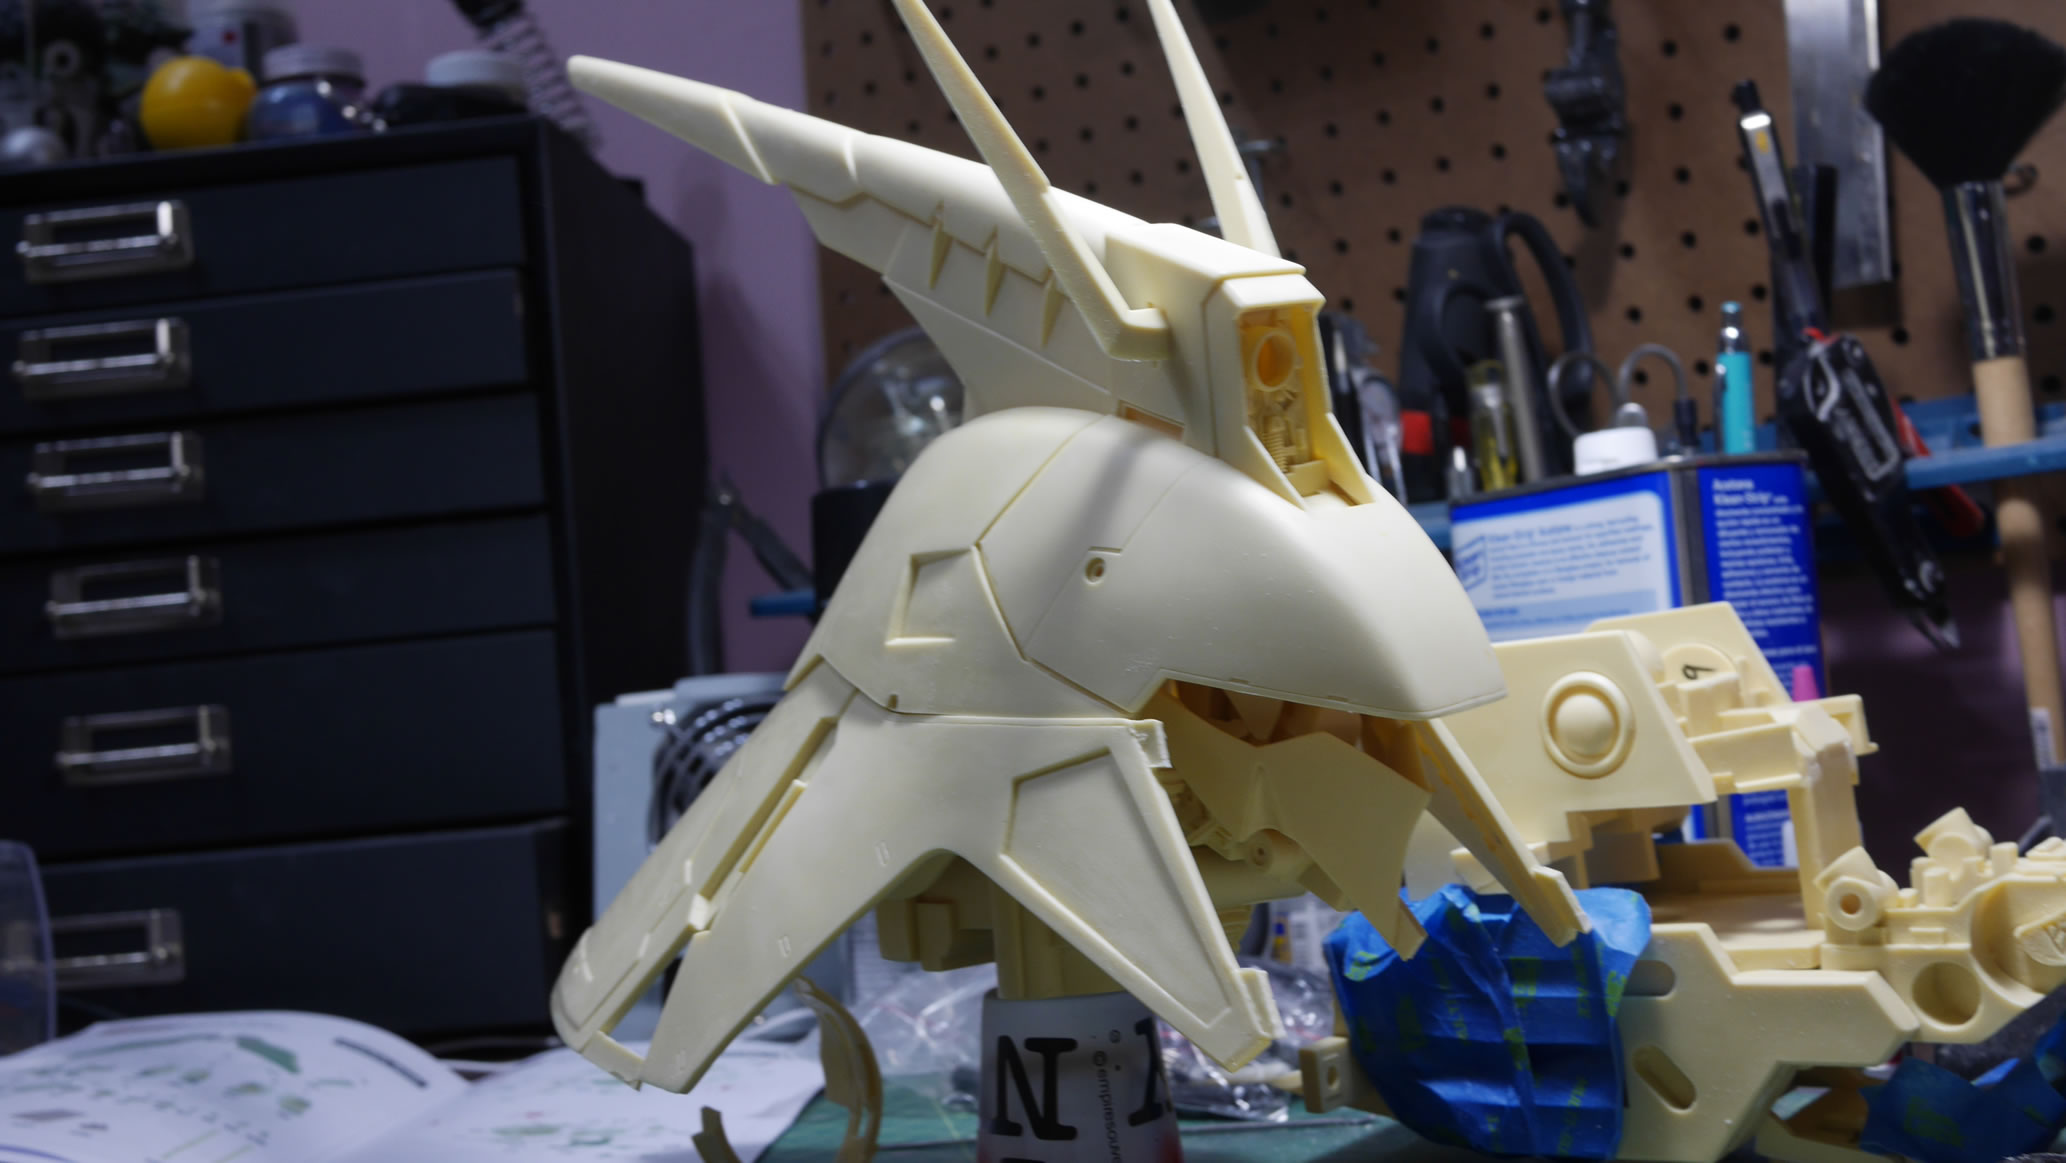
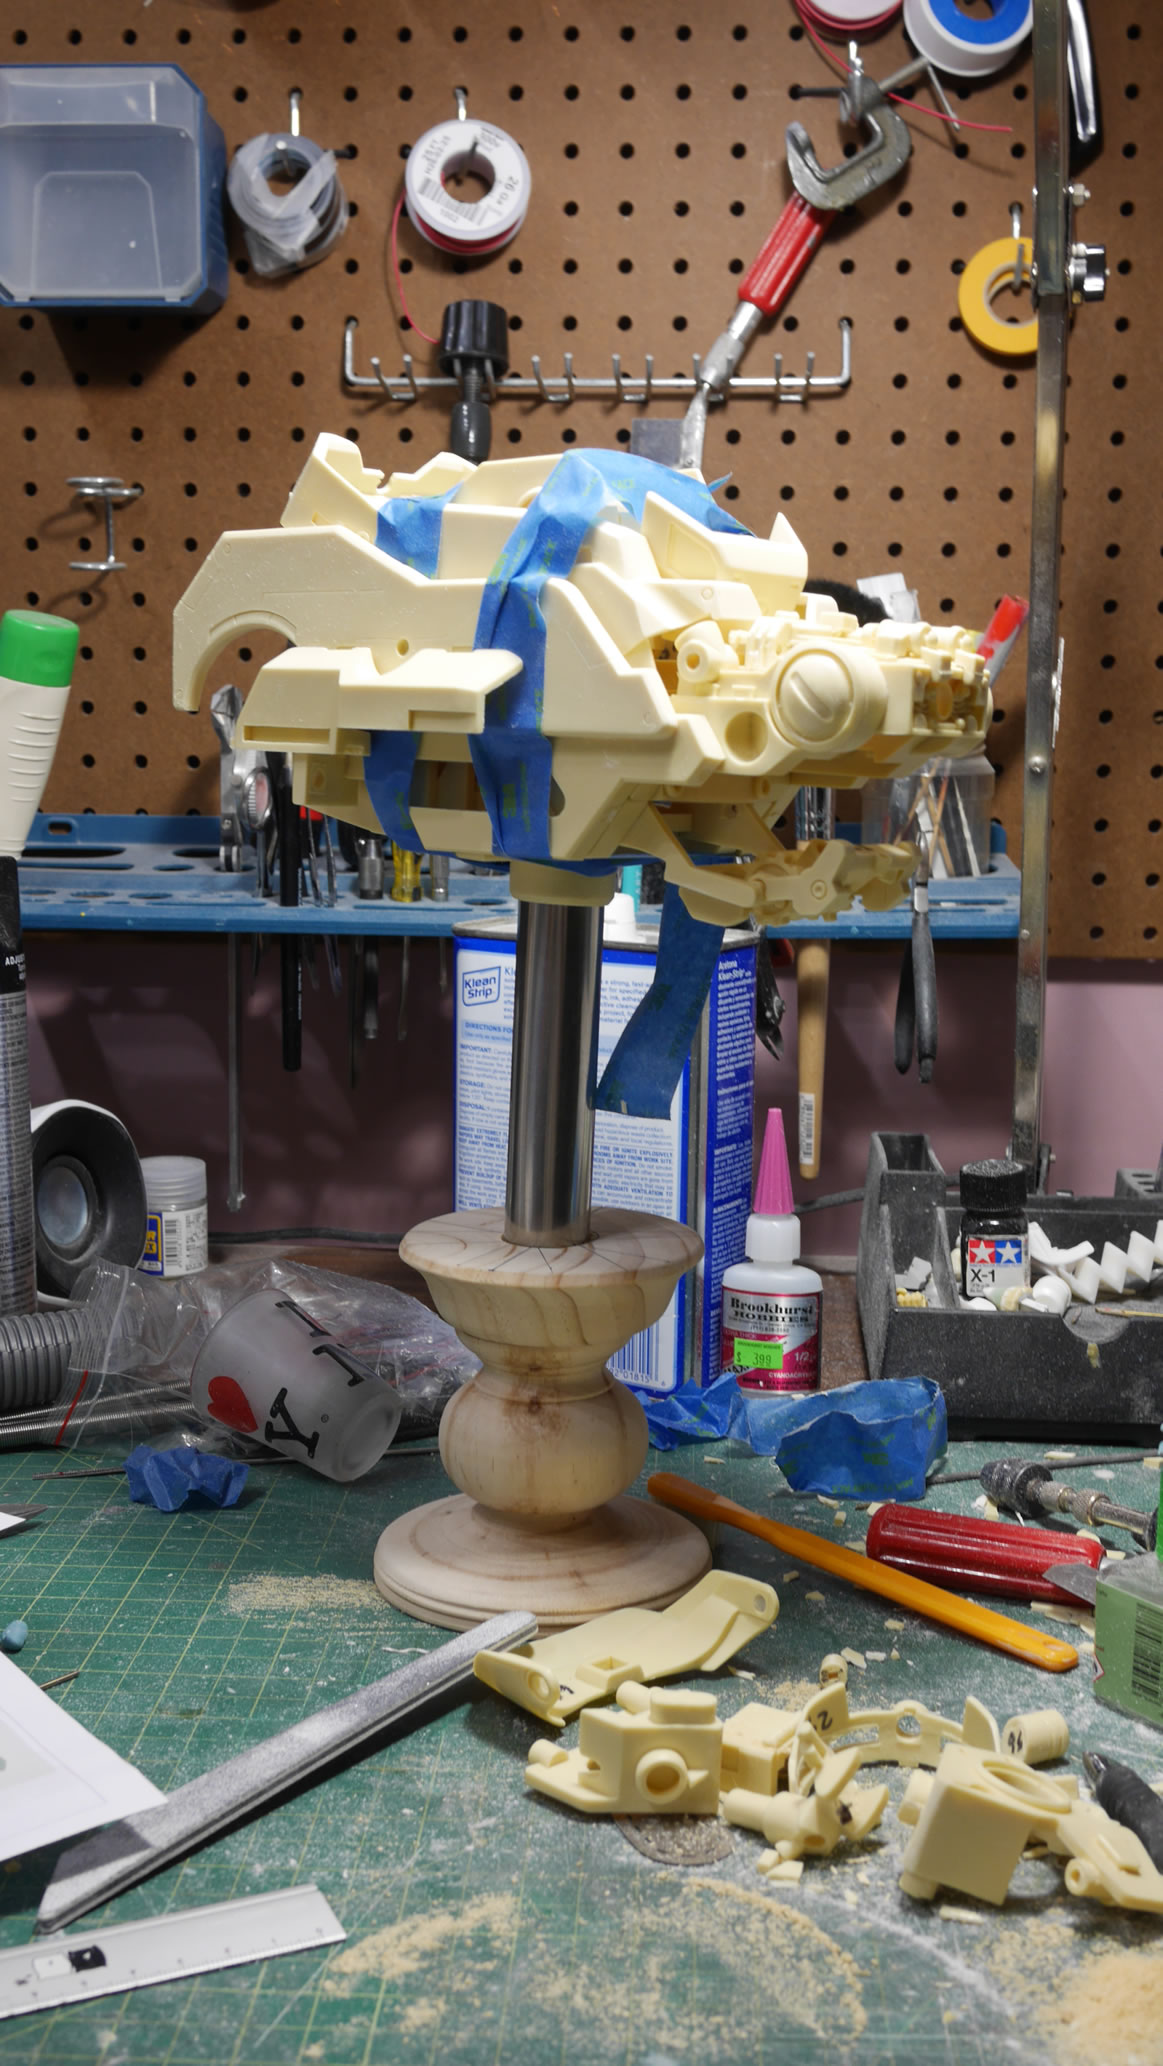
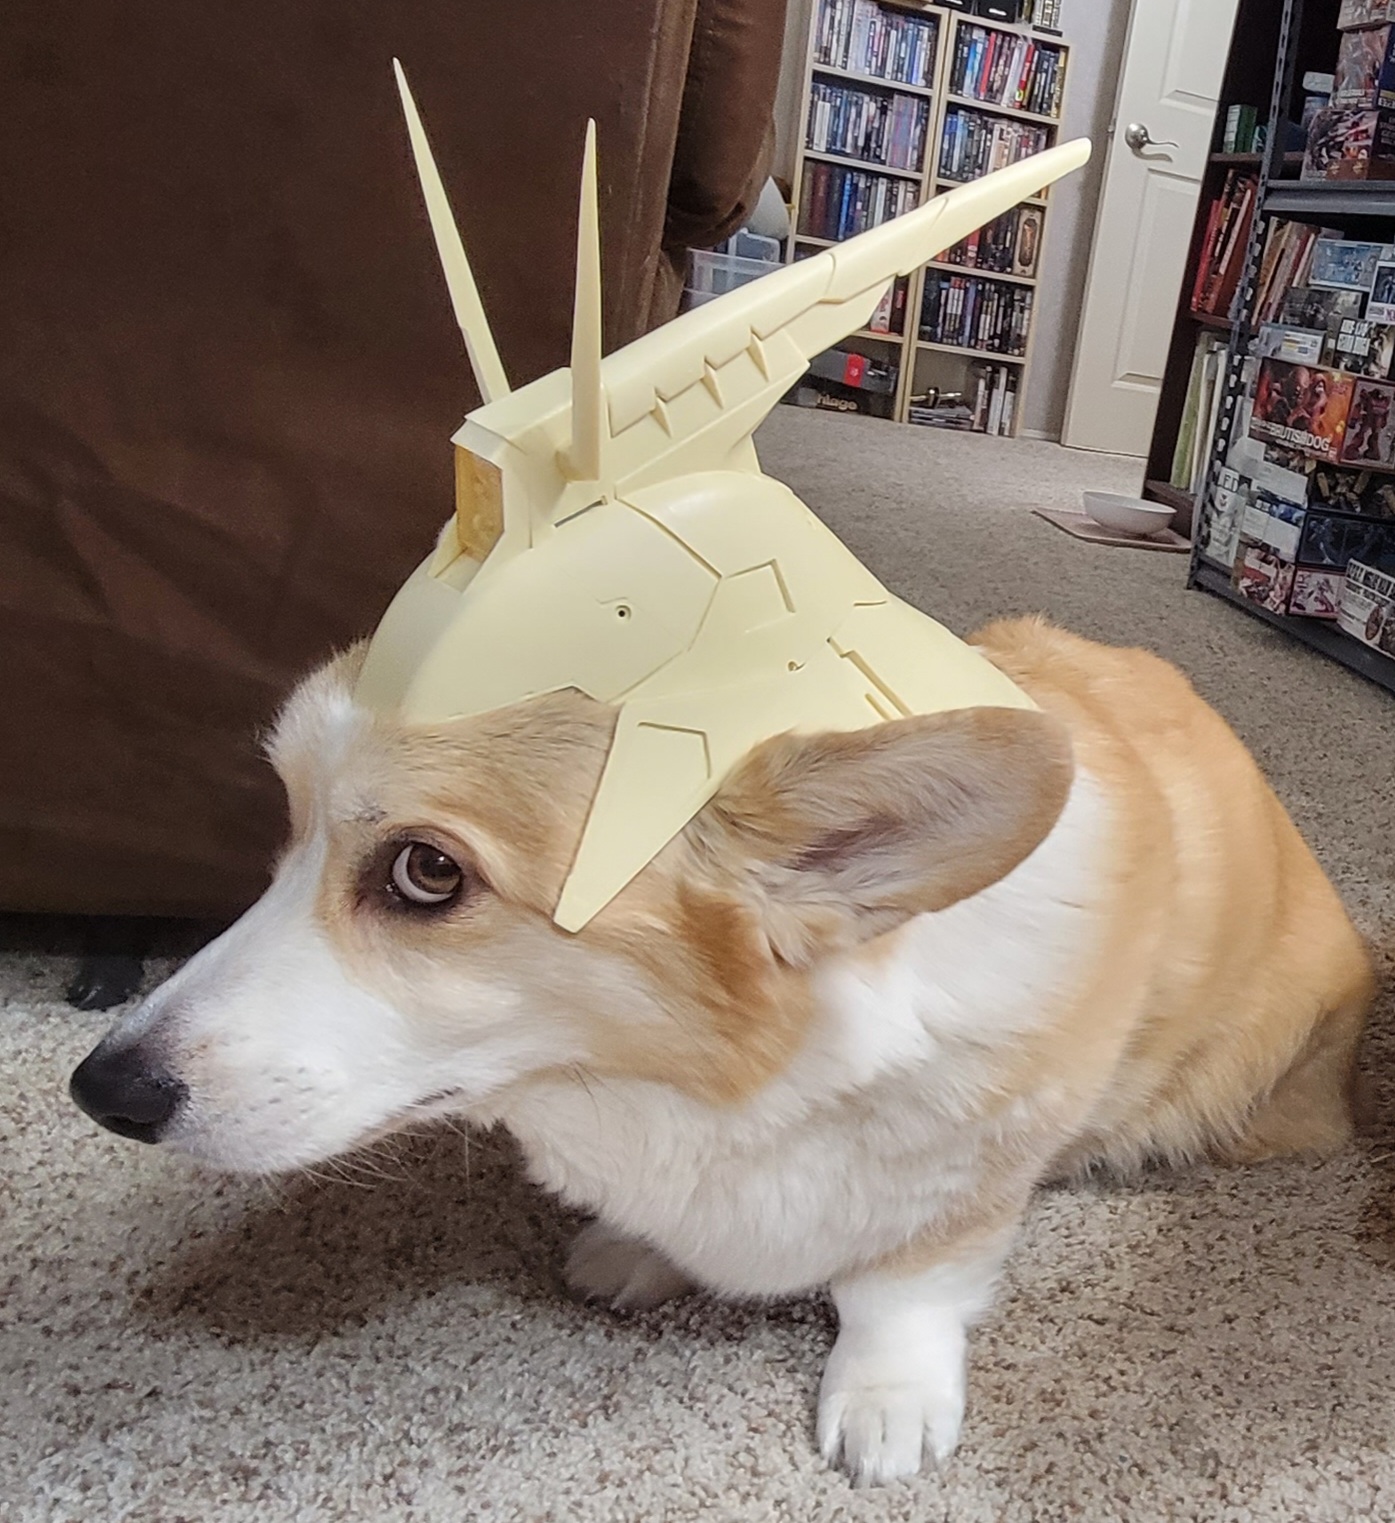
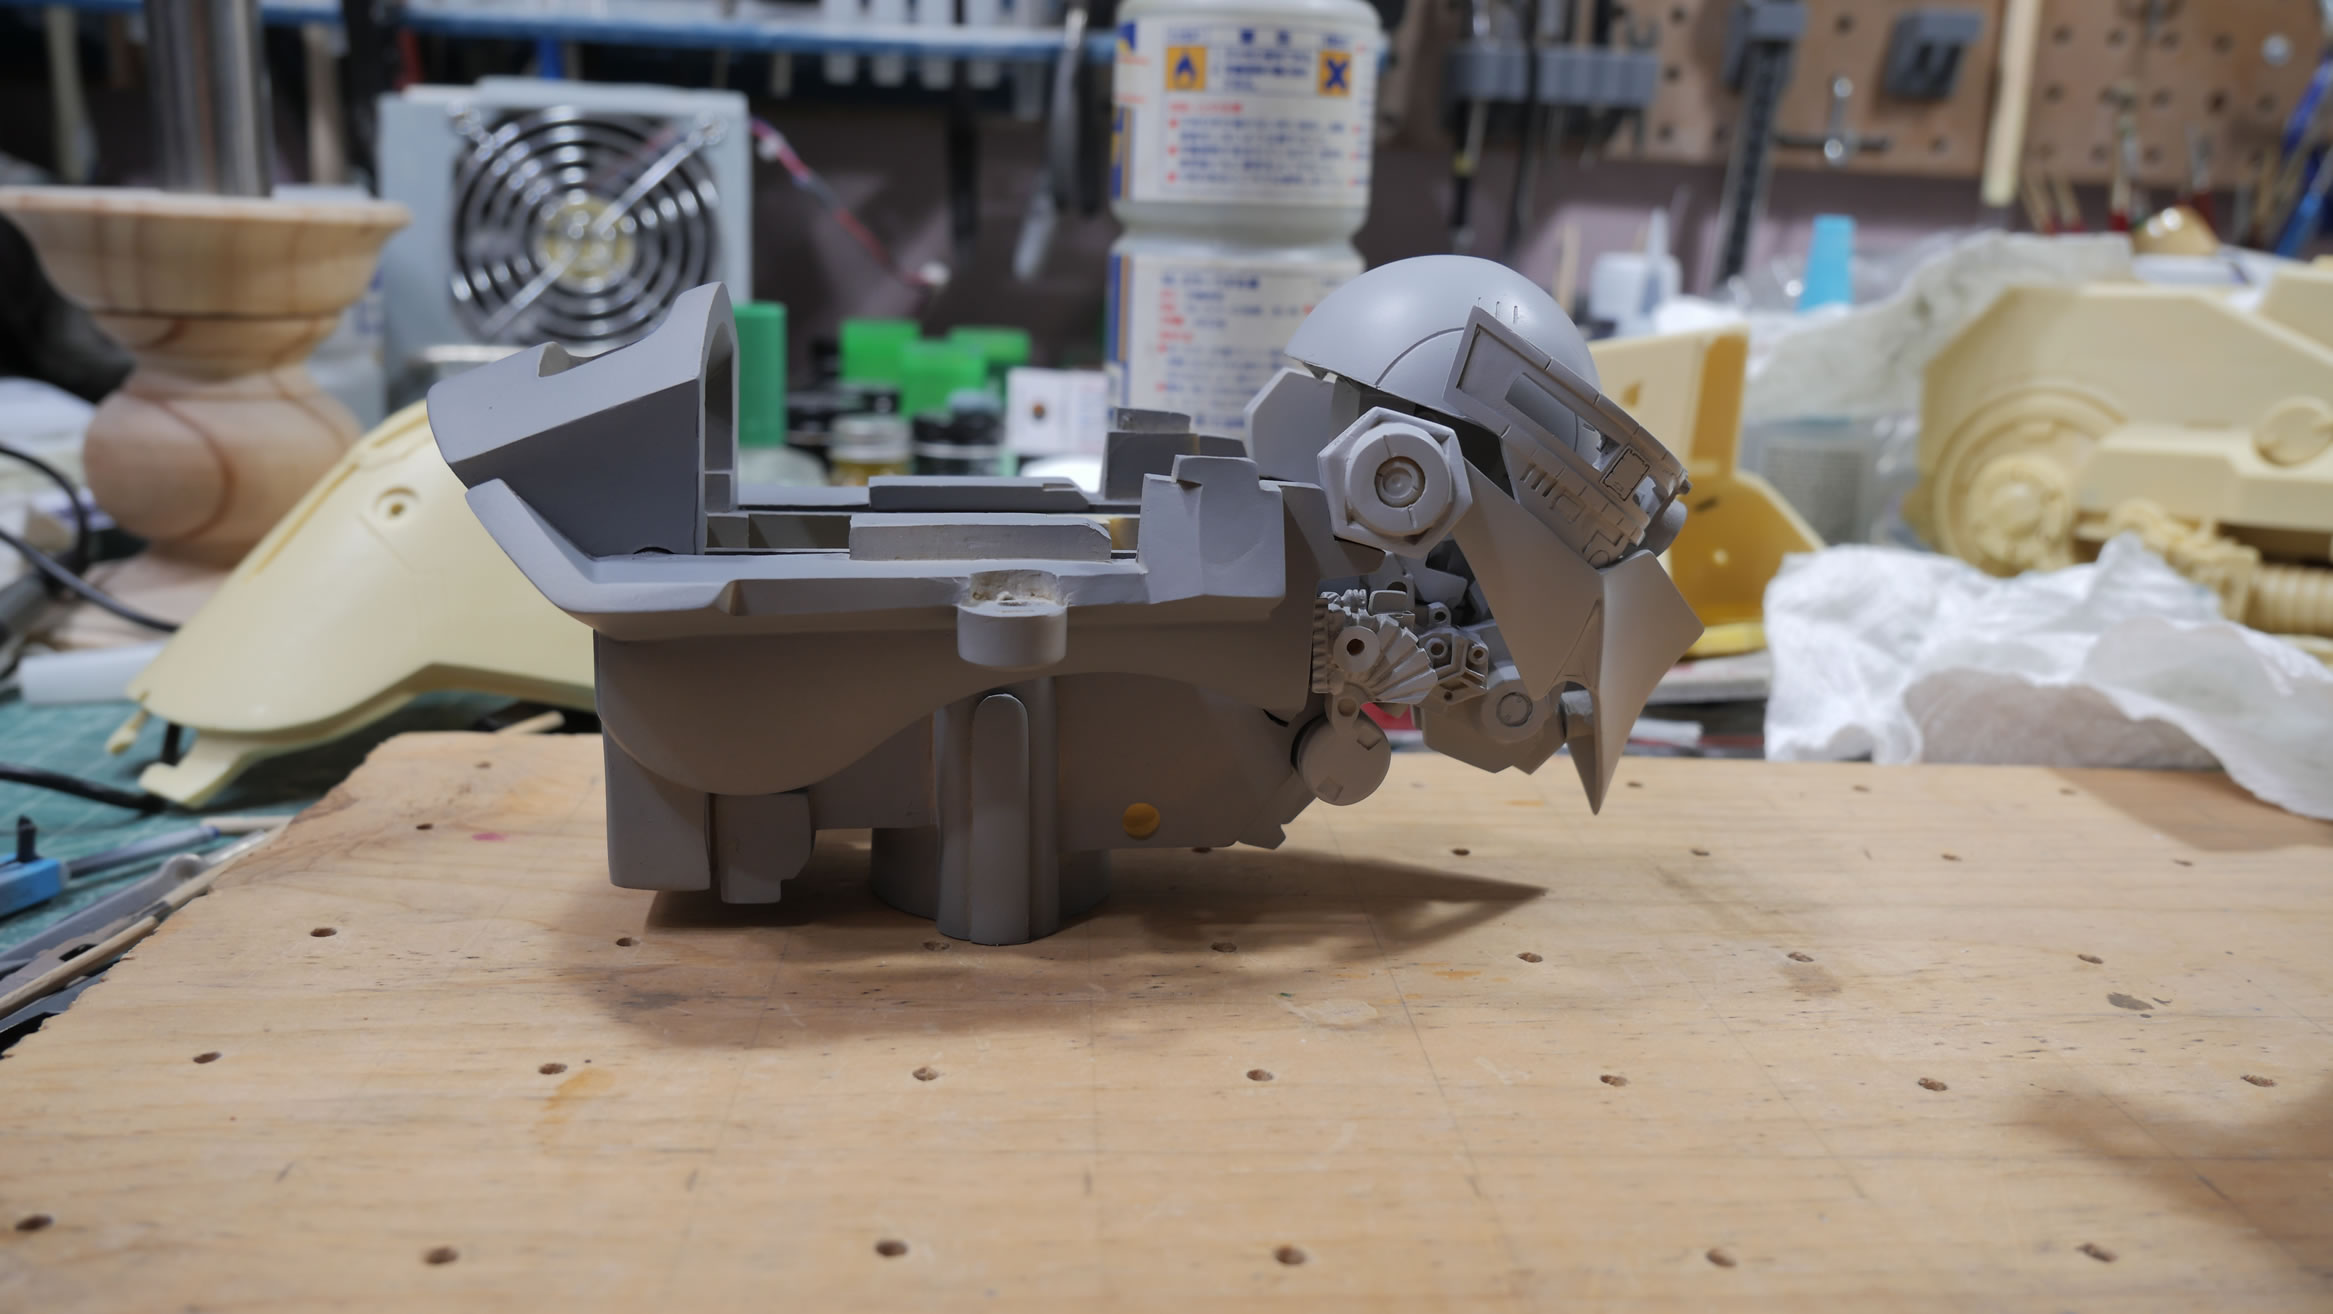
First thing was to get the helmet together. It was really only a few parts and Hugo was still around and was always willing to help me model and test fit stuff. So he sat patiently while I snapped some pictures without shaking off the Sazabi head. Bob was around, but he was still about 2 and a half months old and could have probably fit inside the head piece. He was scared and ran off every time I tried to put it near him.

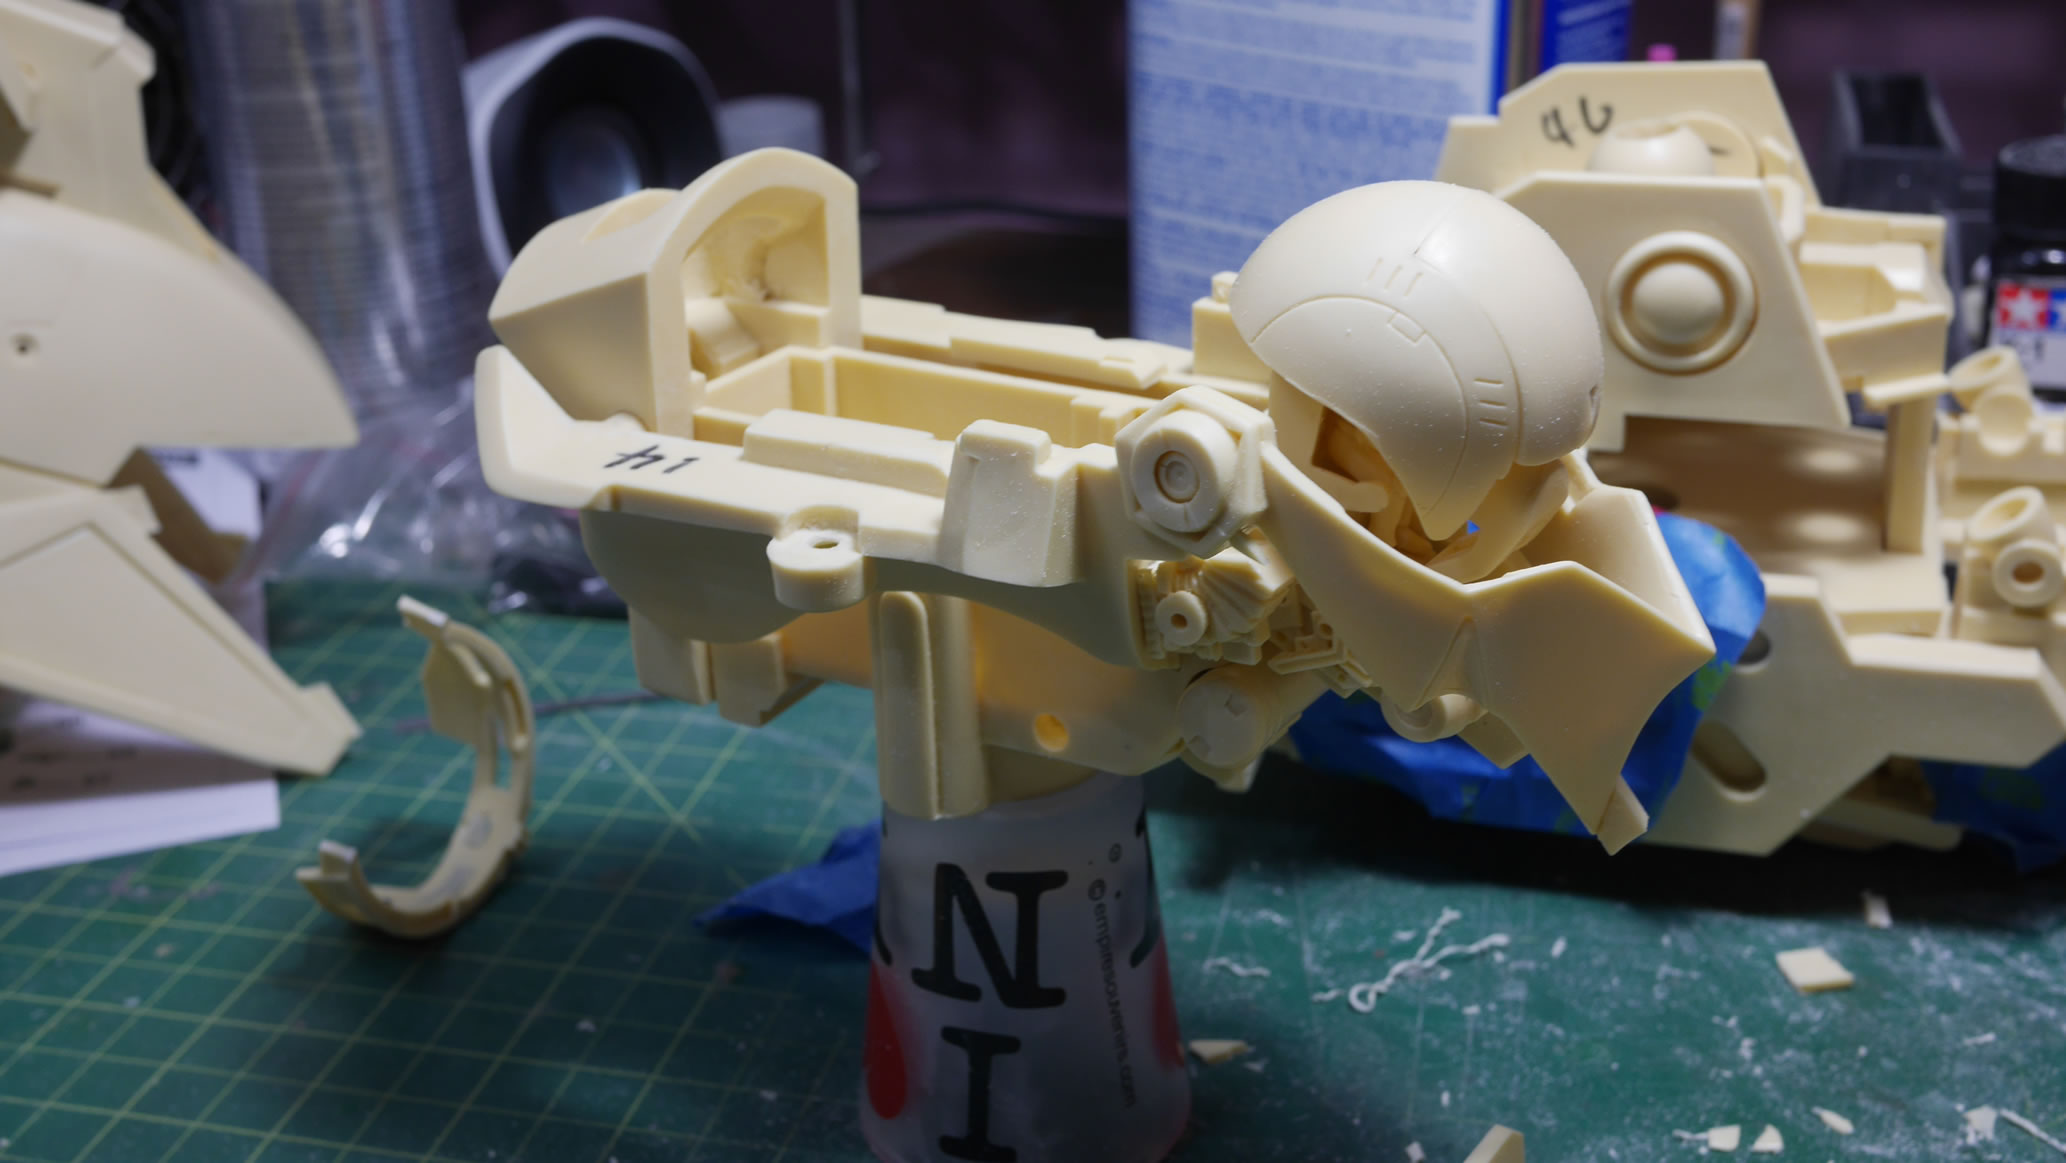
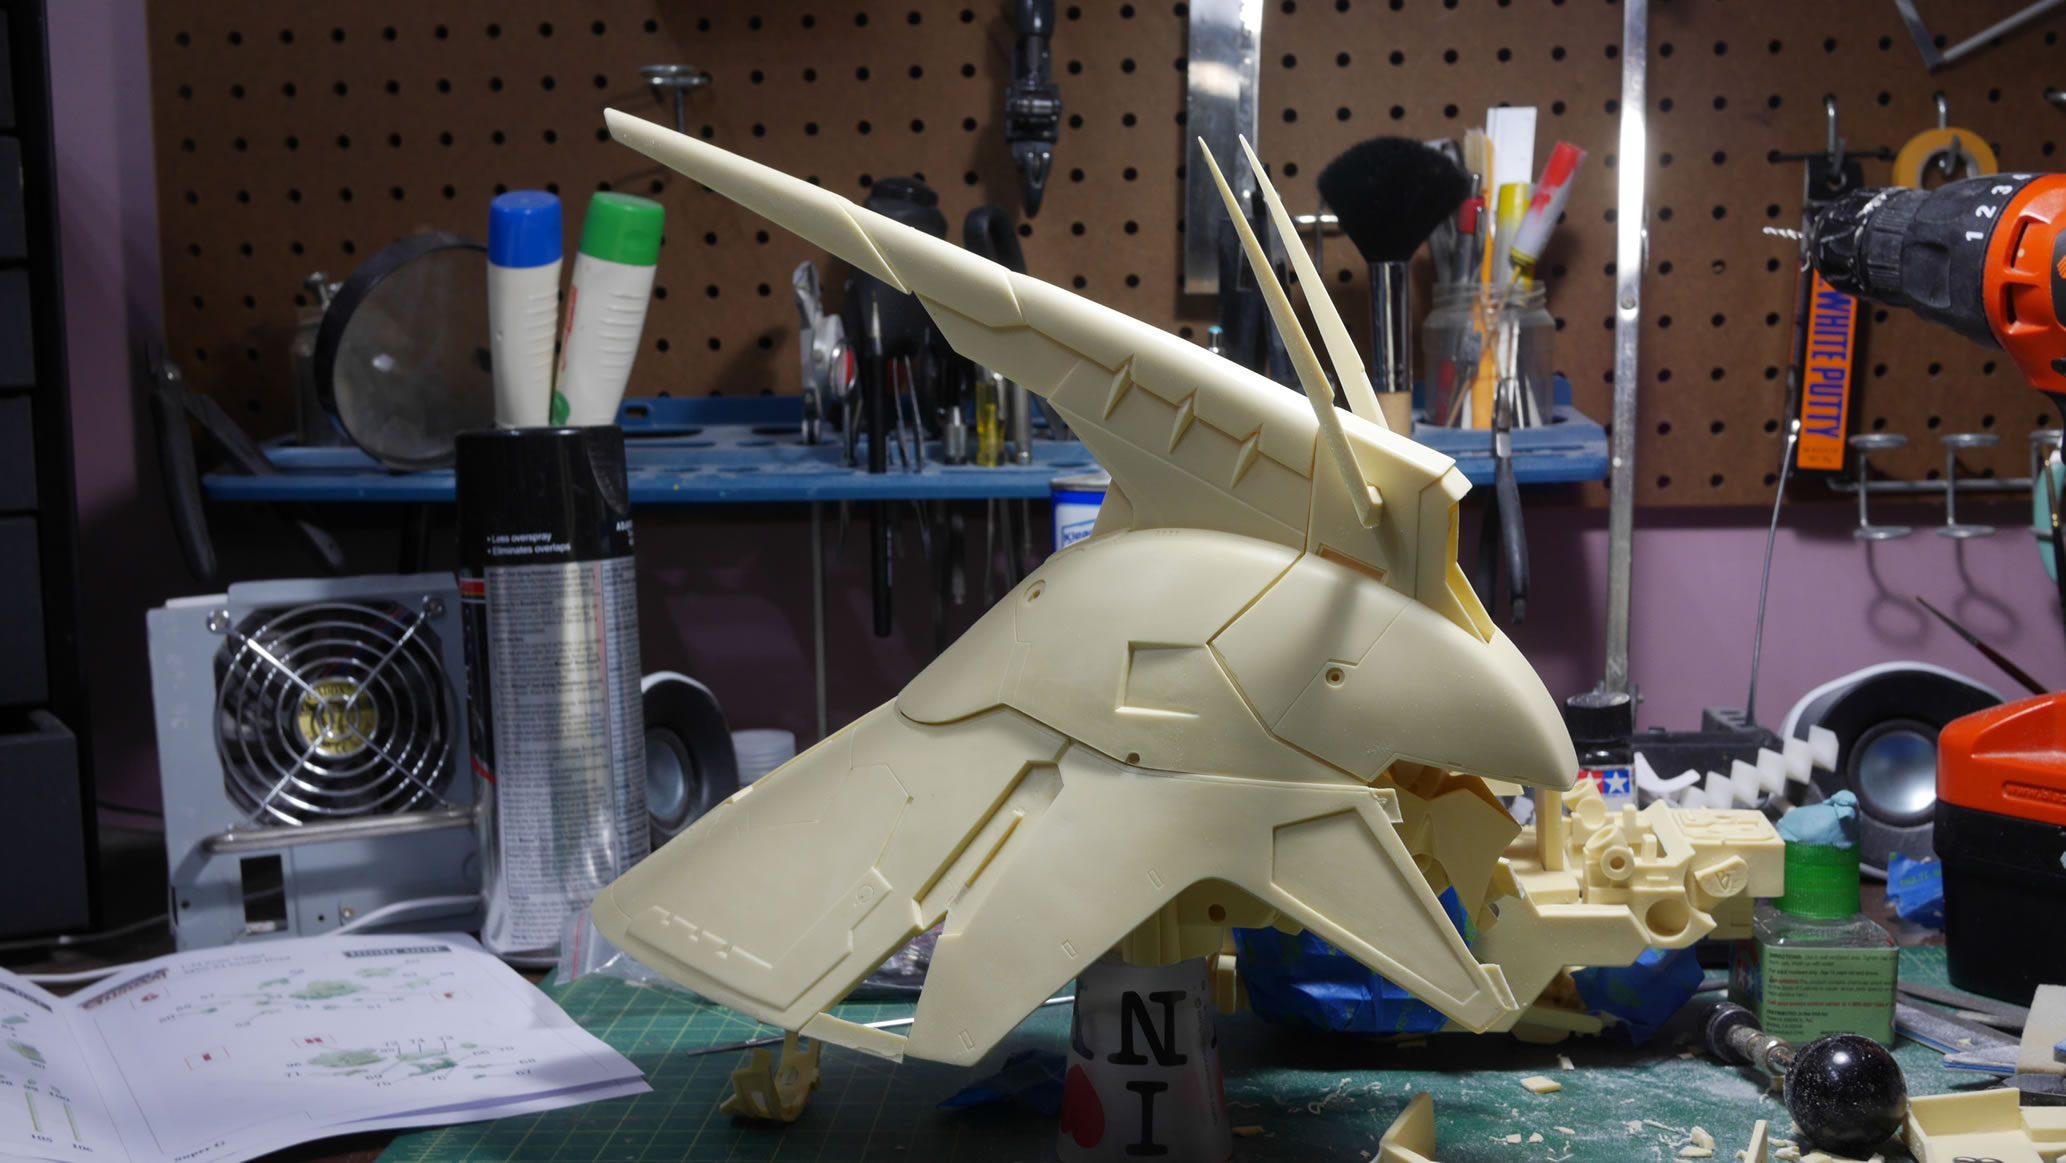
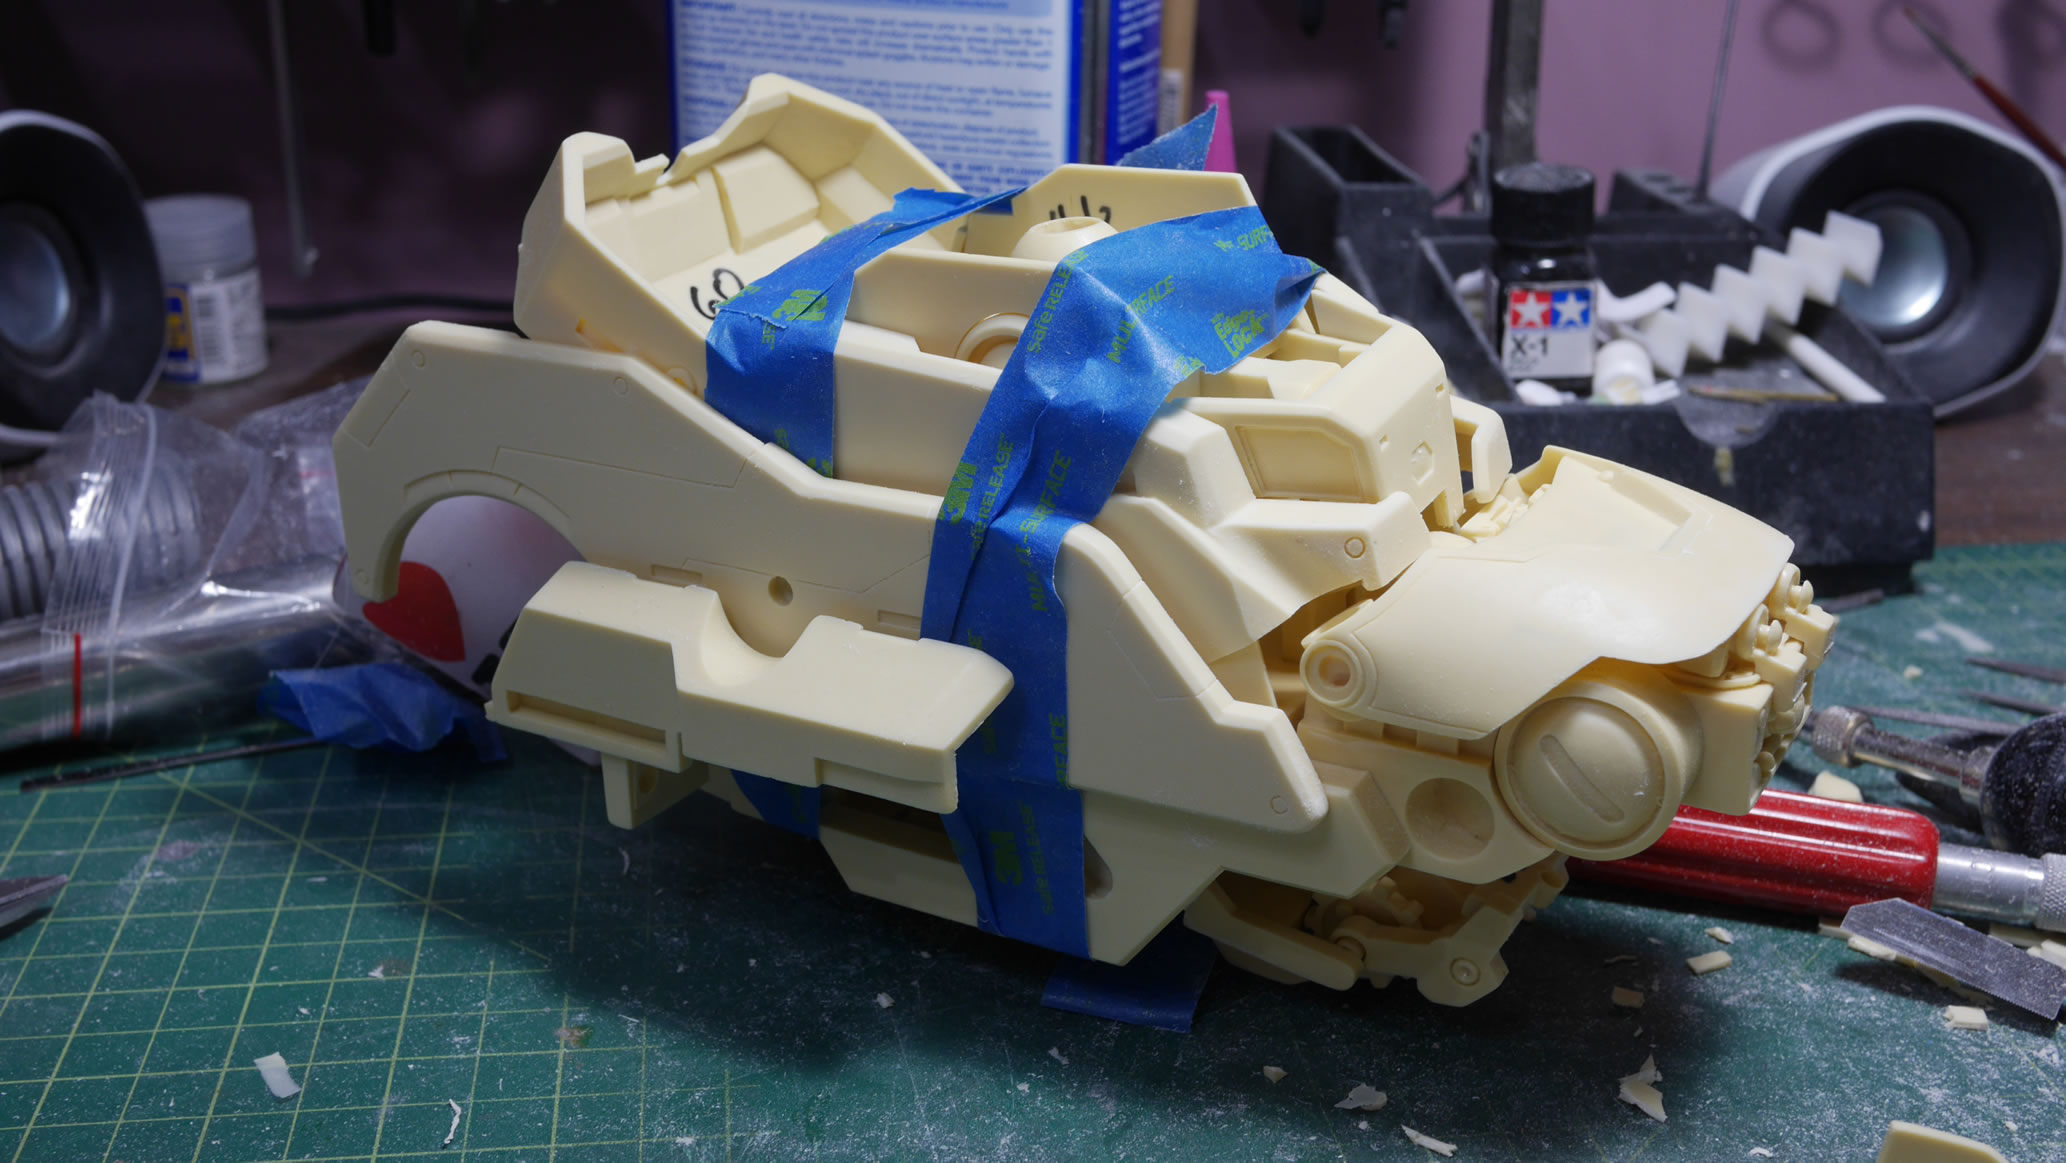
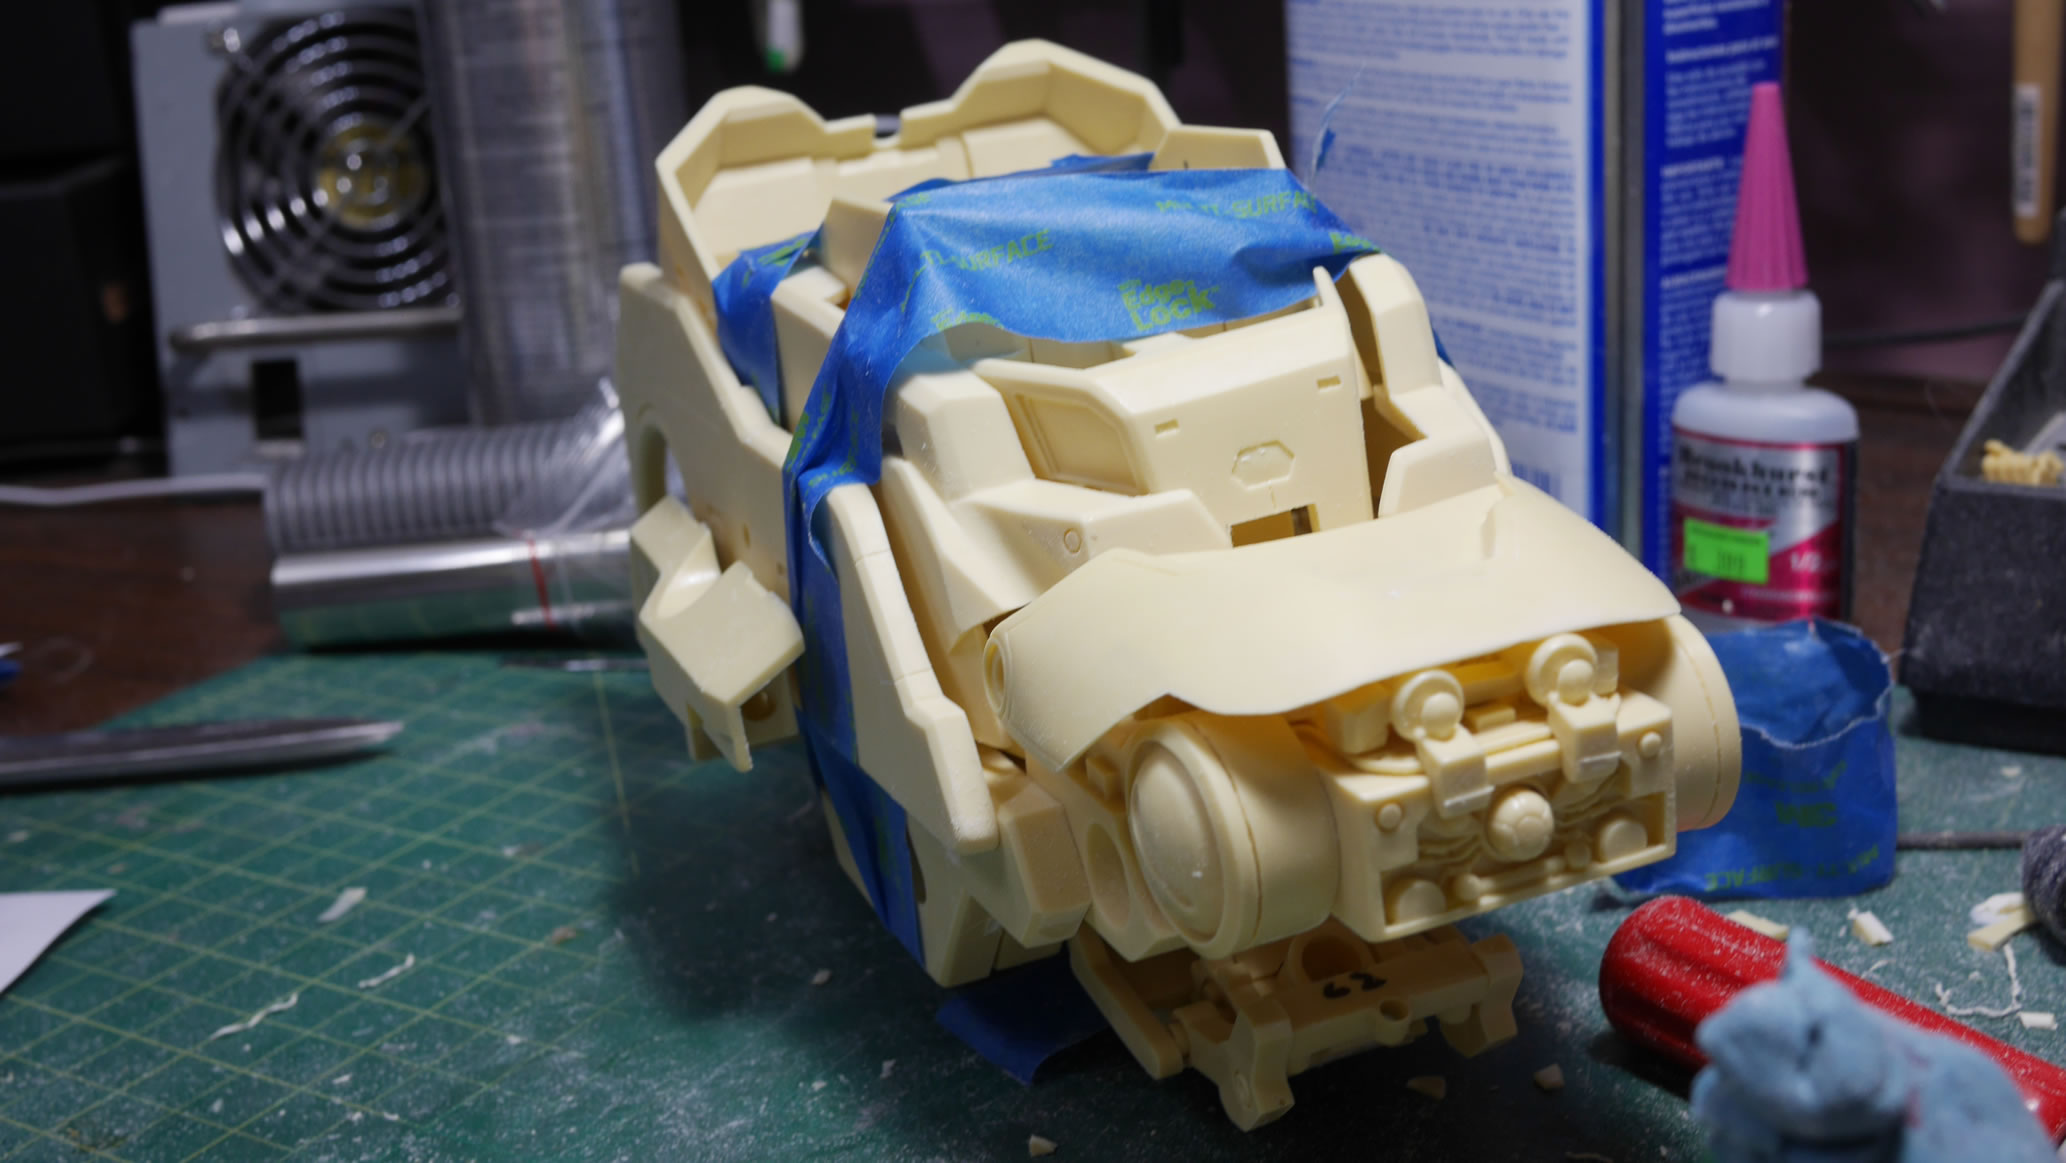
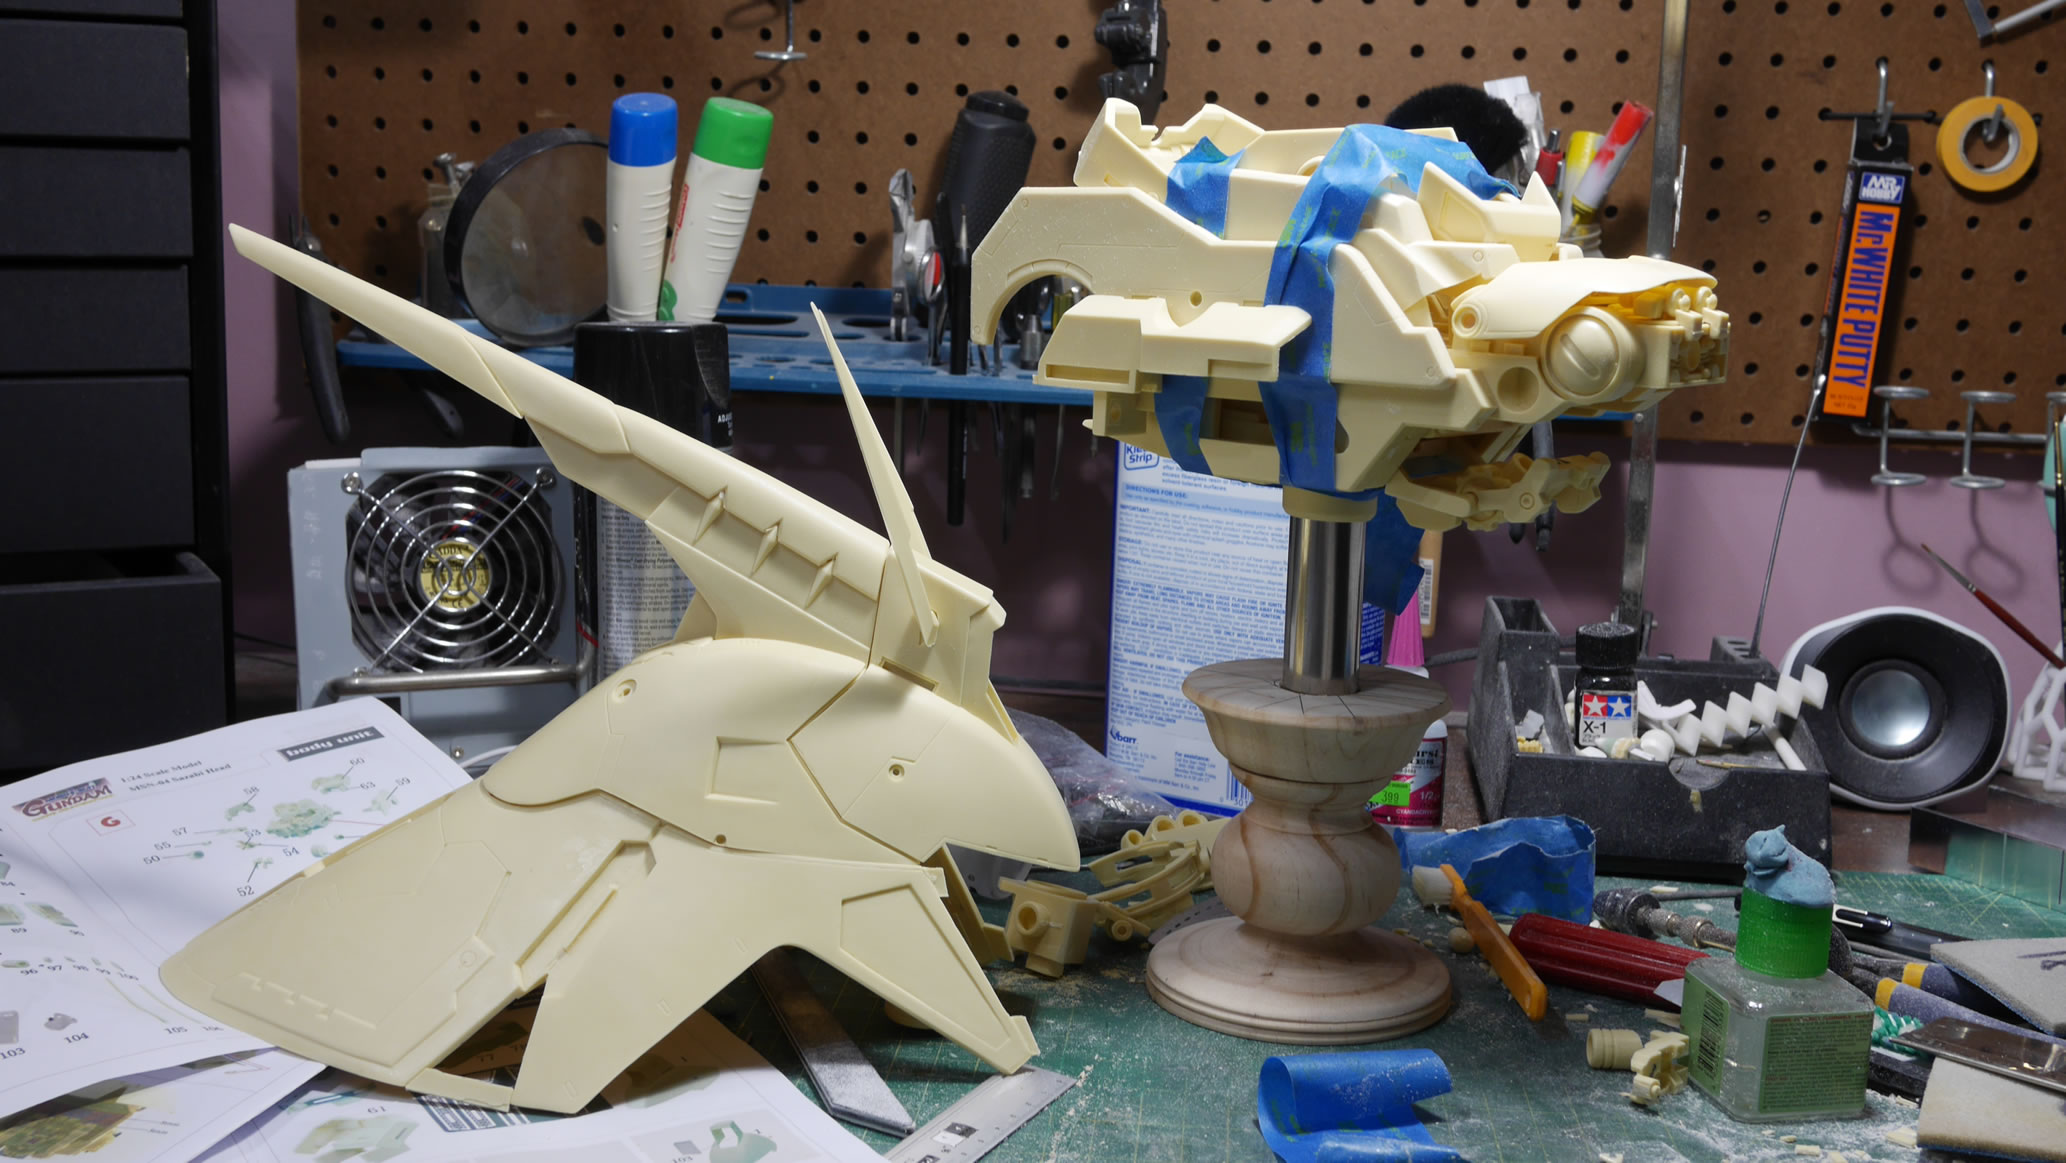
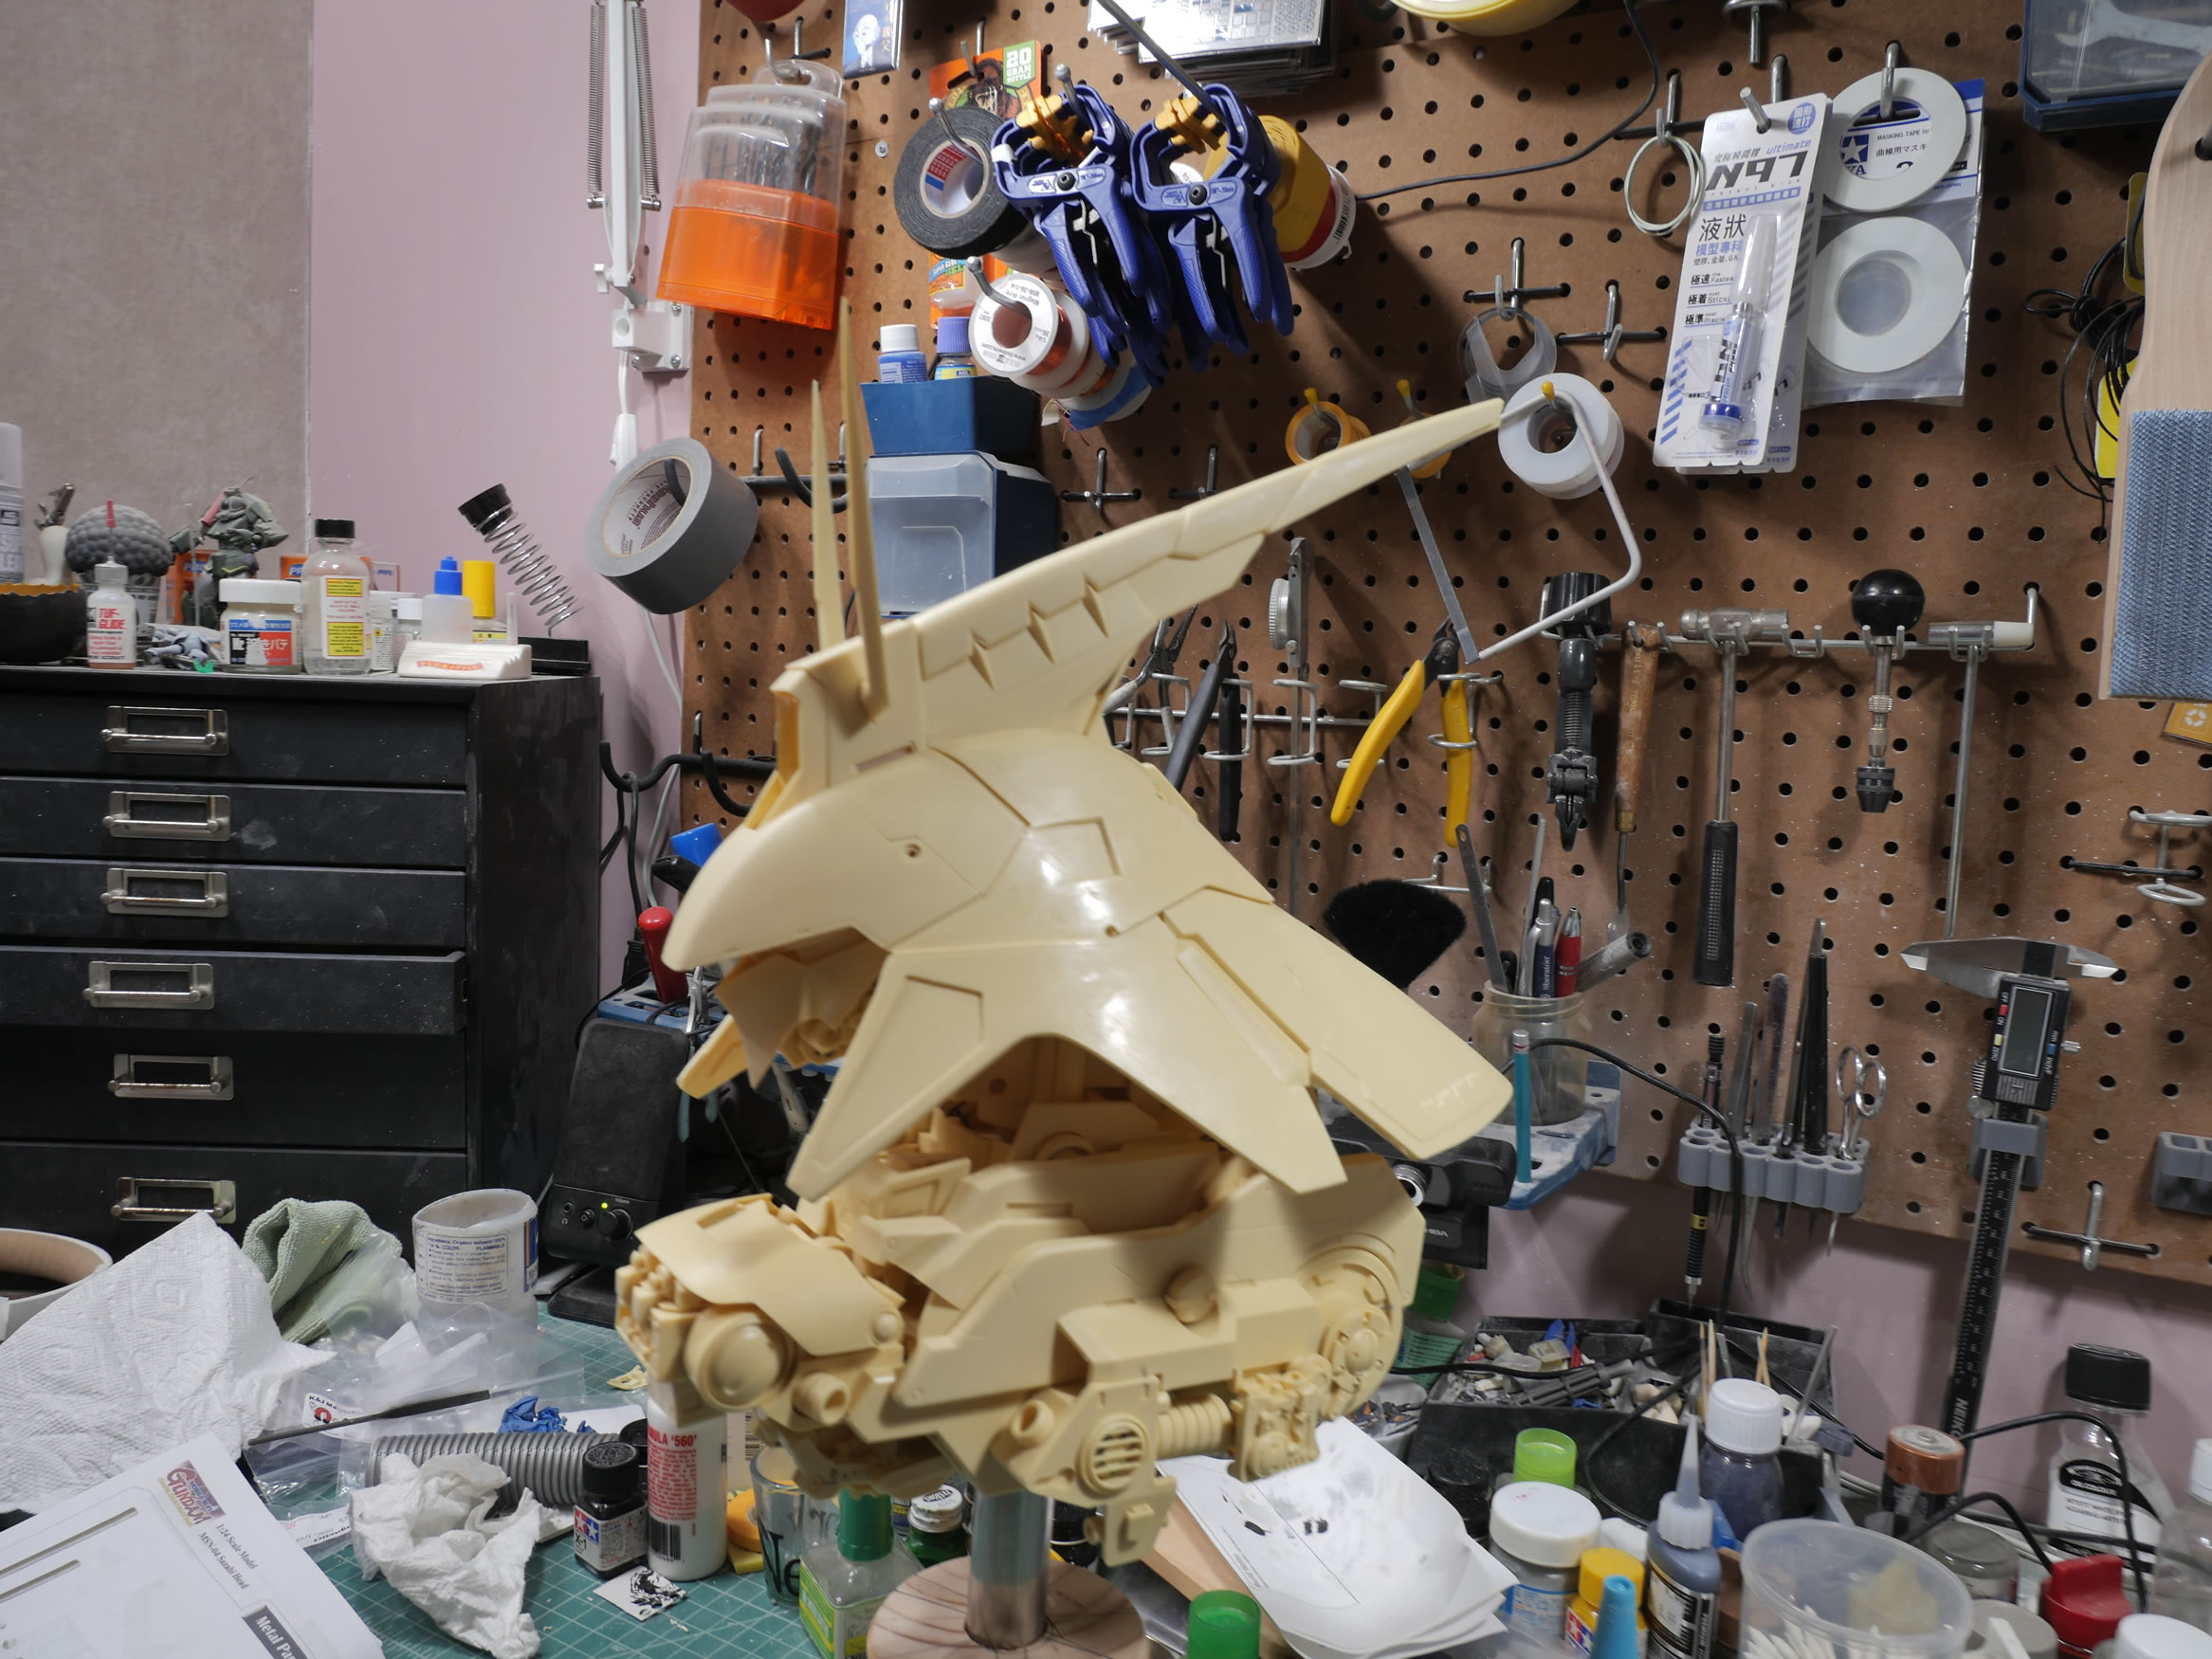
I was still figuring out how to hold everything together, but the slotting and connecting gates held pretty decently so I ended up just using blue tape to hold the major parts together as my test fit process. I had a wood base that I drilled out and used as the base.
I don’t think I ever got the two main pieces of the kit together. The test fit, bubblegum assembly was a bit on the flimsy side. I think something else took my attention and back into the box it went.
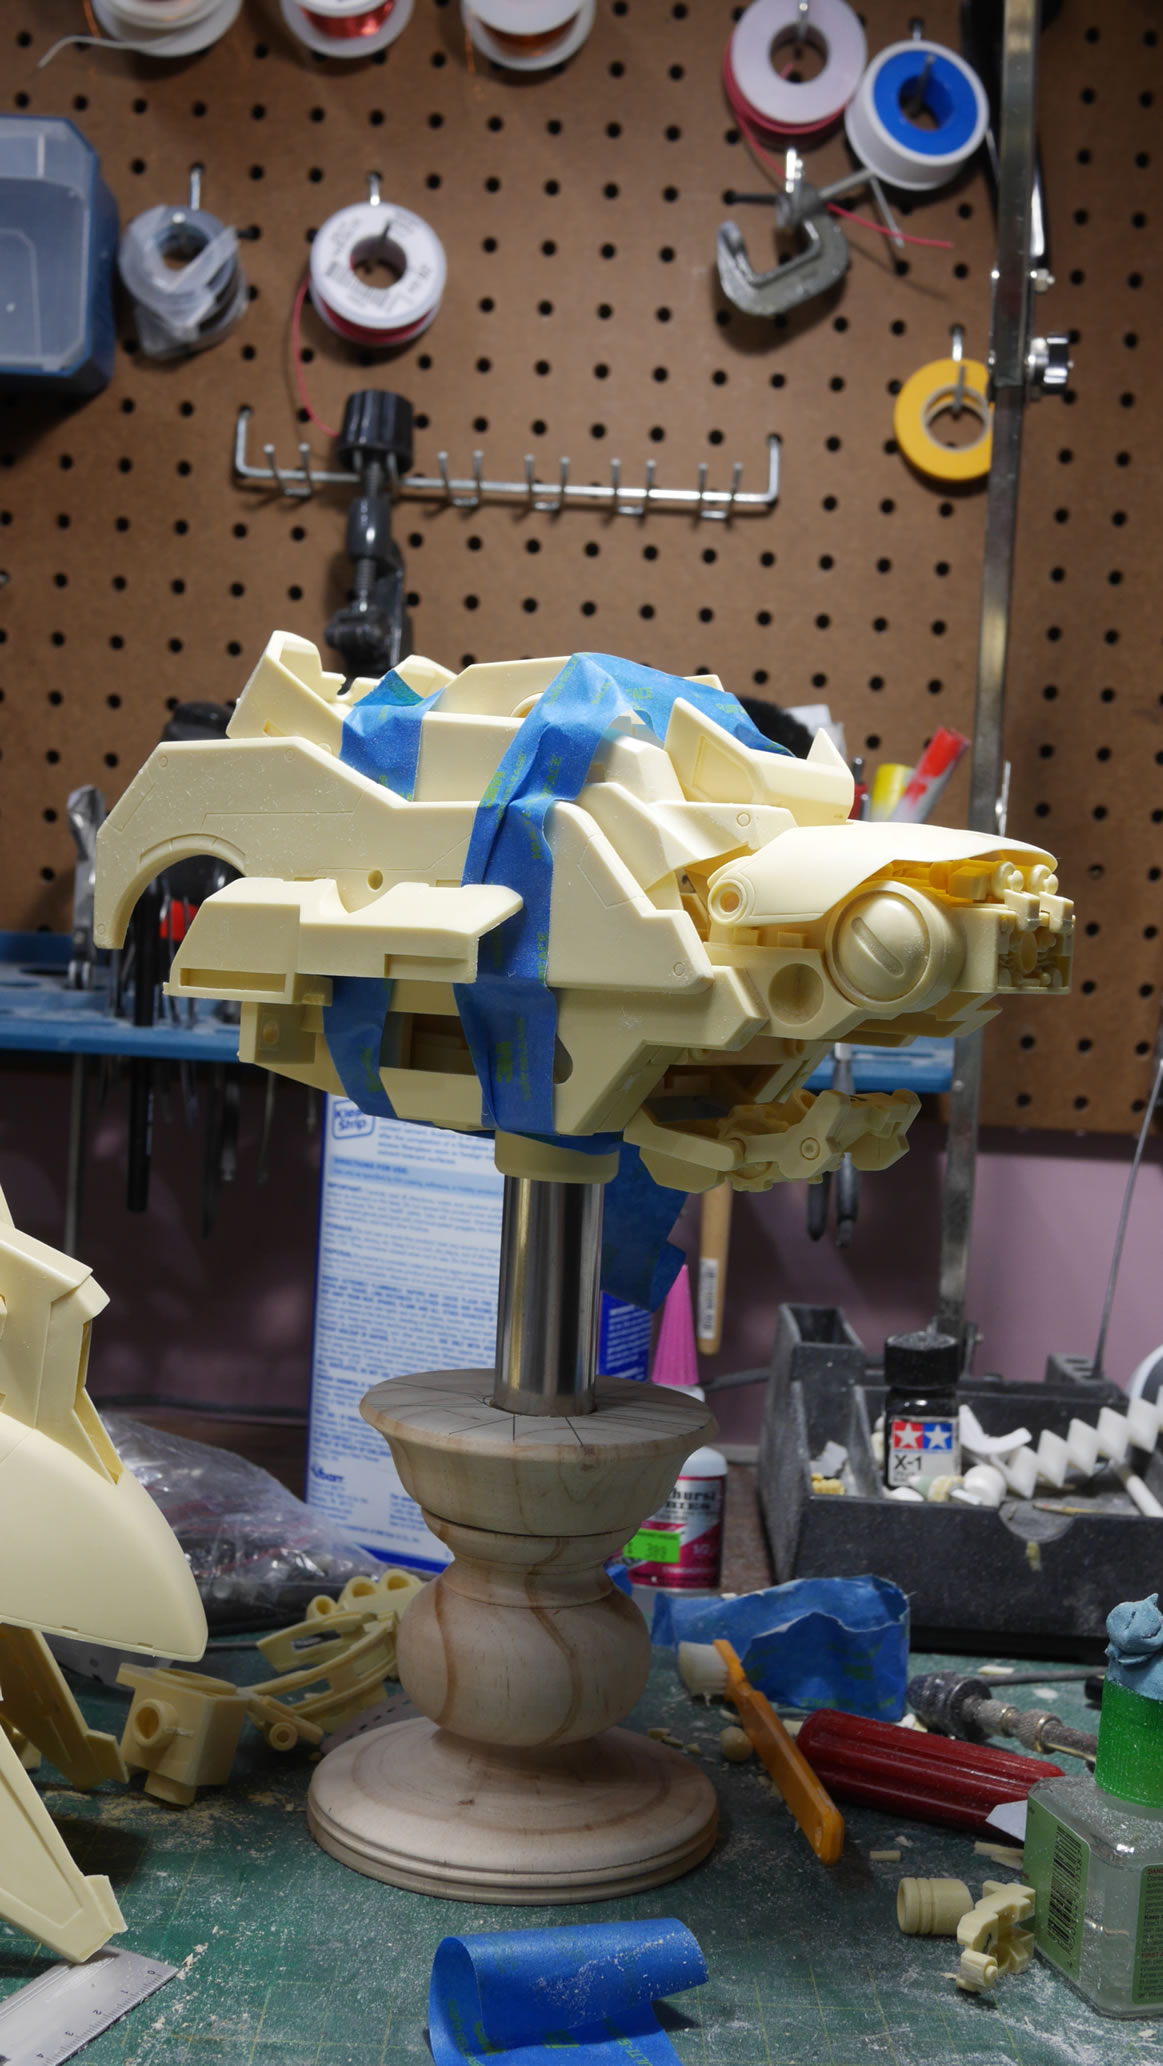
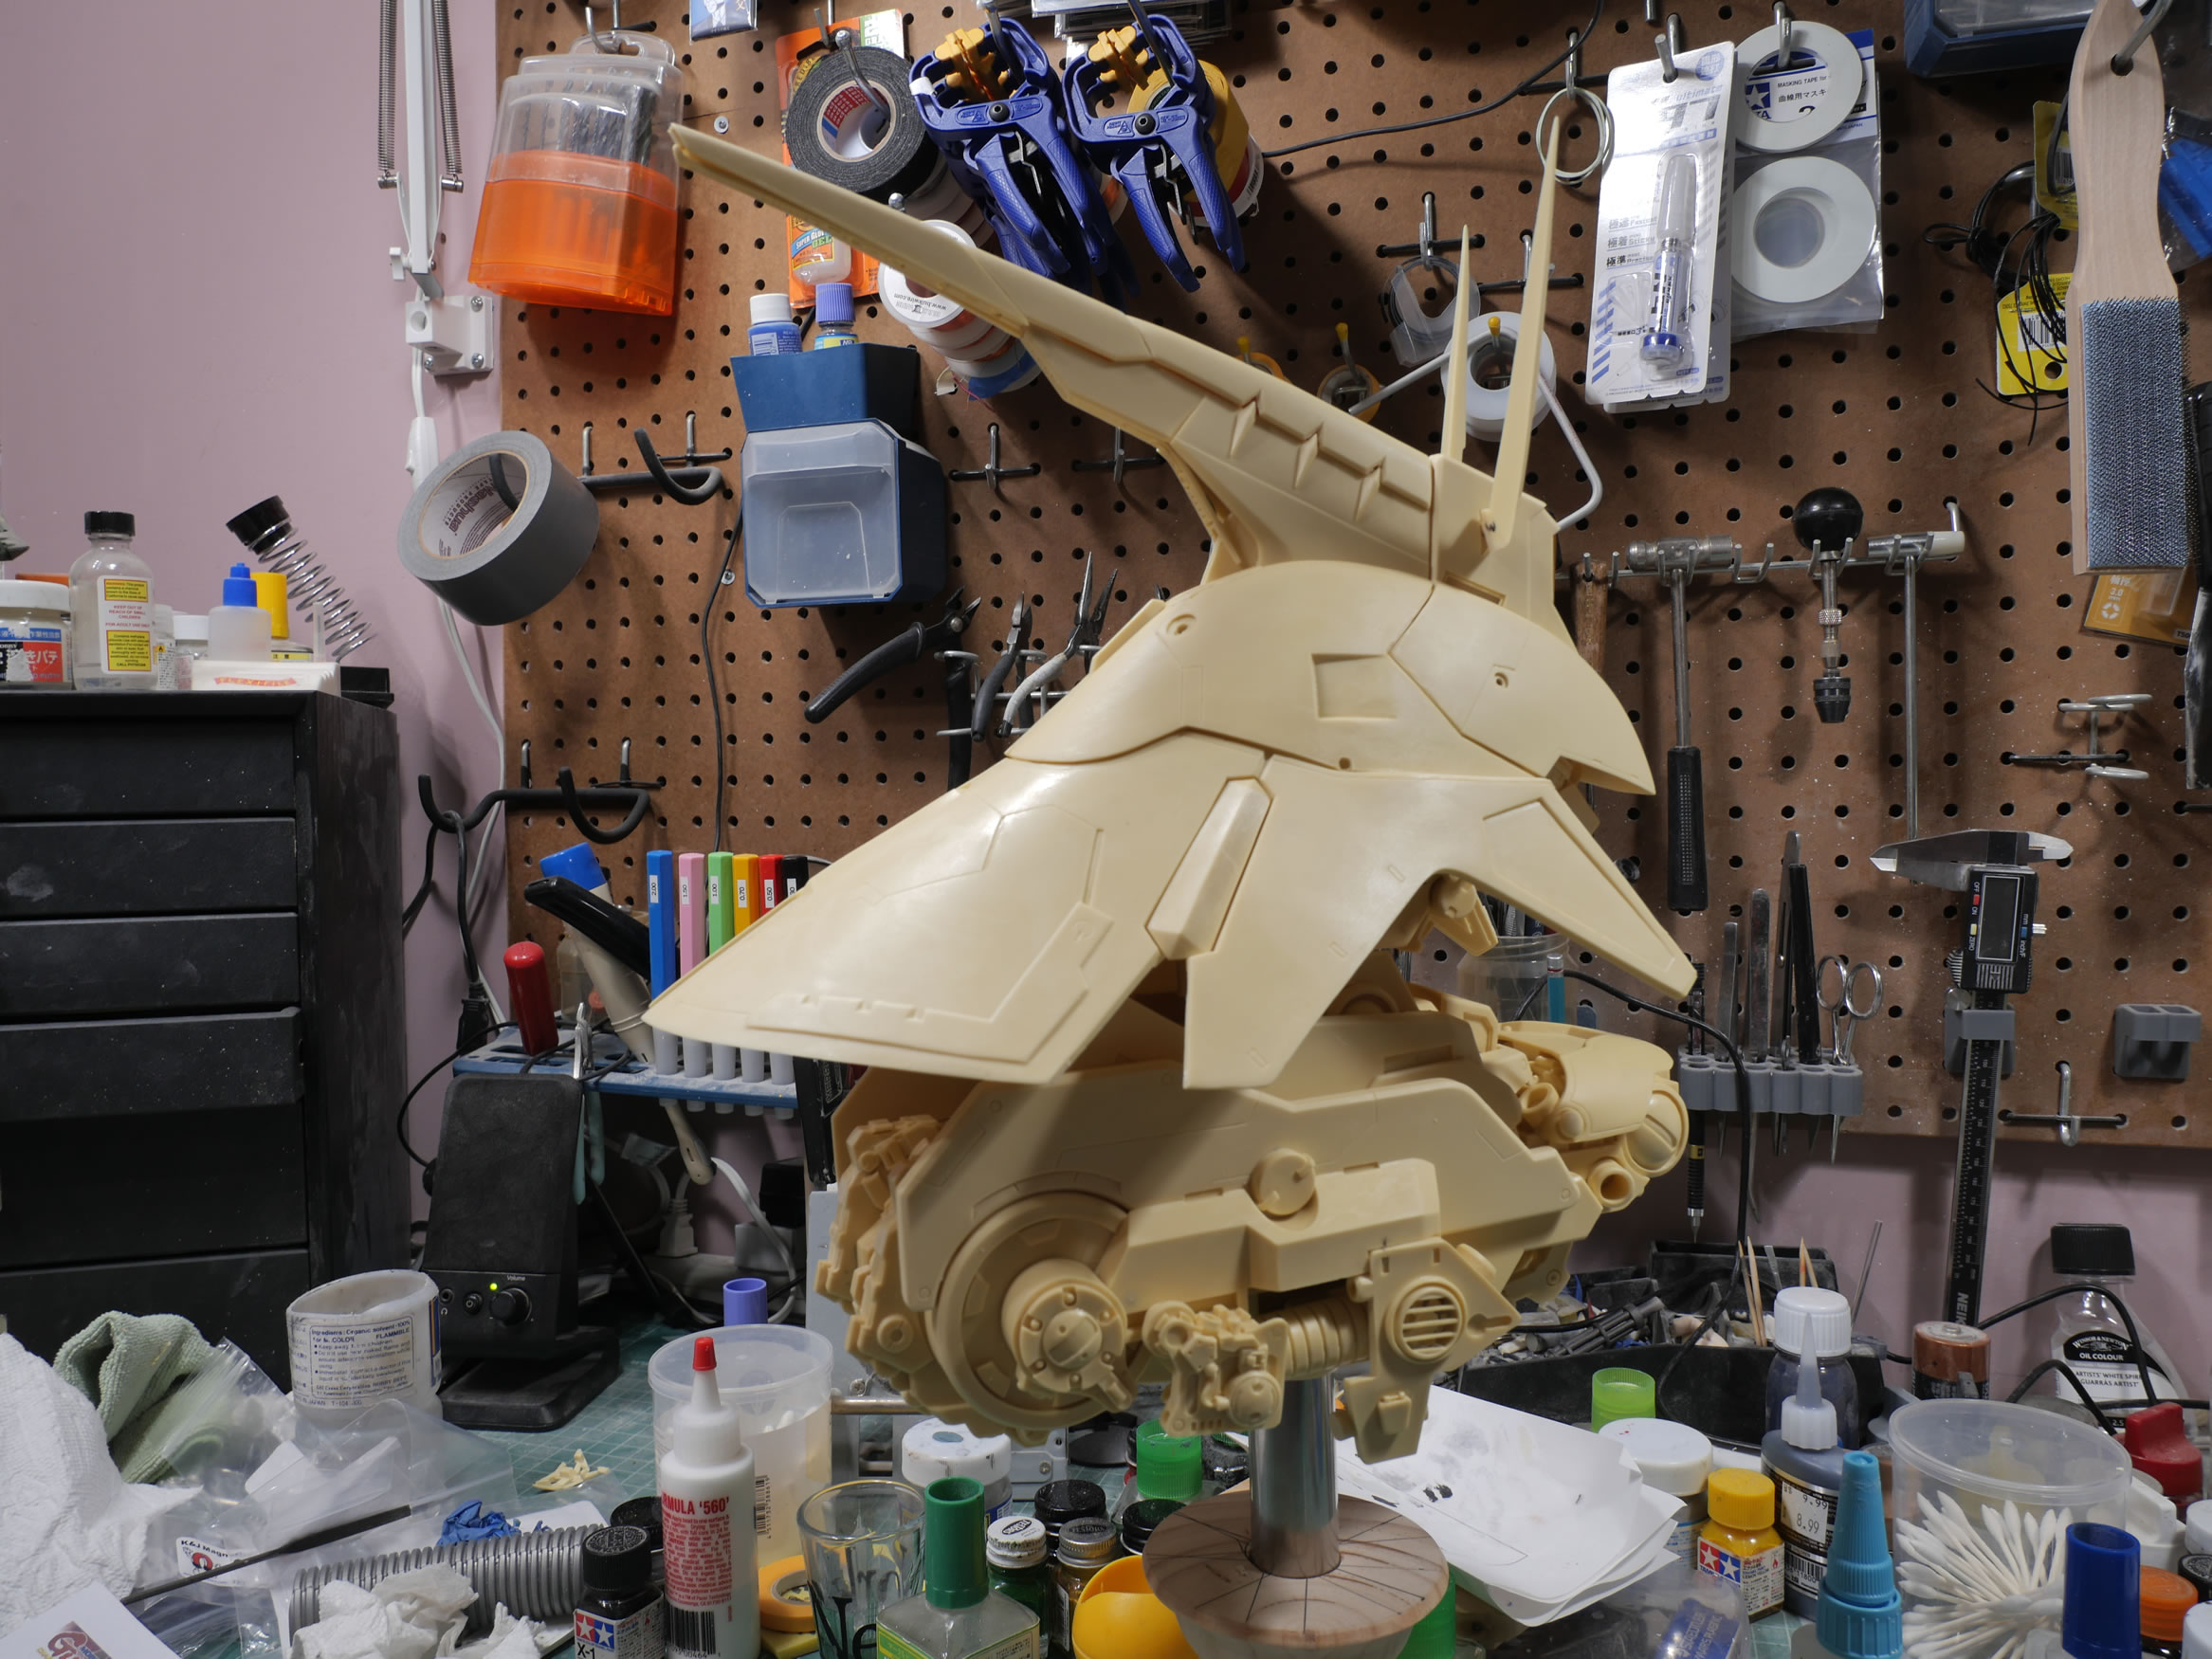
The pictures dated 11/17/2016 and that’s the last time I worked on it until 5.5 years later… and following pictures are dated 2/11/2022. I went through a few other resin “gunpla” kits; an SD LED Mirage and an NT-1 Alex resin conversion kit that I “pinned” with magnets but ended up passing on. I opened up and spilled out the parts to a 1/144 Studio Reckless Hyaku Shiki and quickly came to my senses and boxed it up right quick. Then I unboxed this sucker and started up with the magnet pinning. The magnet pinning works so much better than the tape, hopes, and dreams. So I have more solid test fit that I can combine 95% of the kit together.

Bob is much bigger 5 years on and completely used to my dress him up in anything to entertain me (he tolerates me -I guess he learned this from Hugo; Ken refuses to do any sort of silliness with me) So we have Saza-corg 2.0.
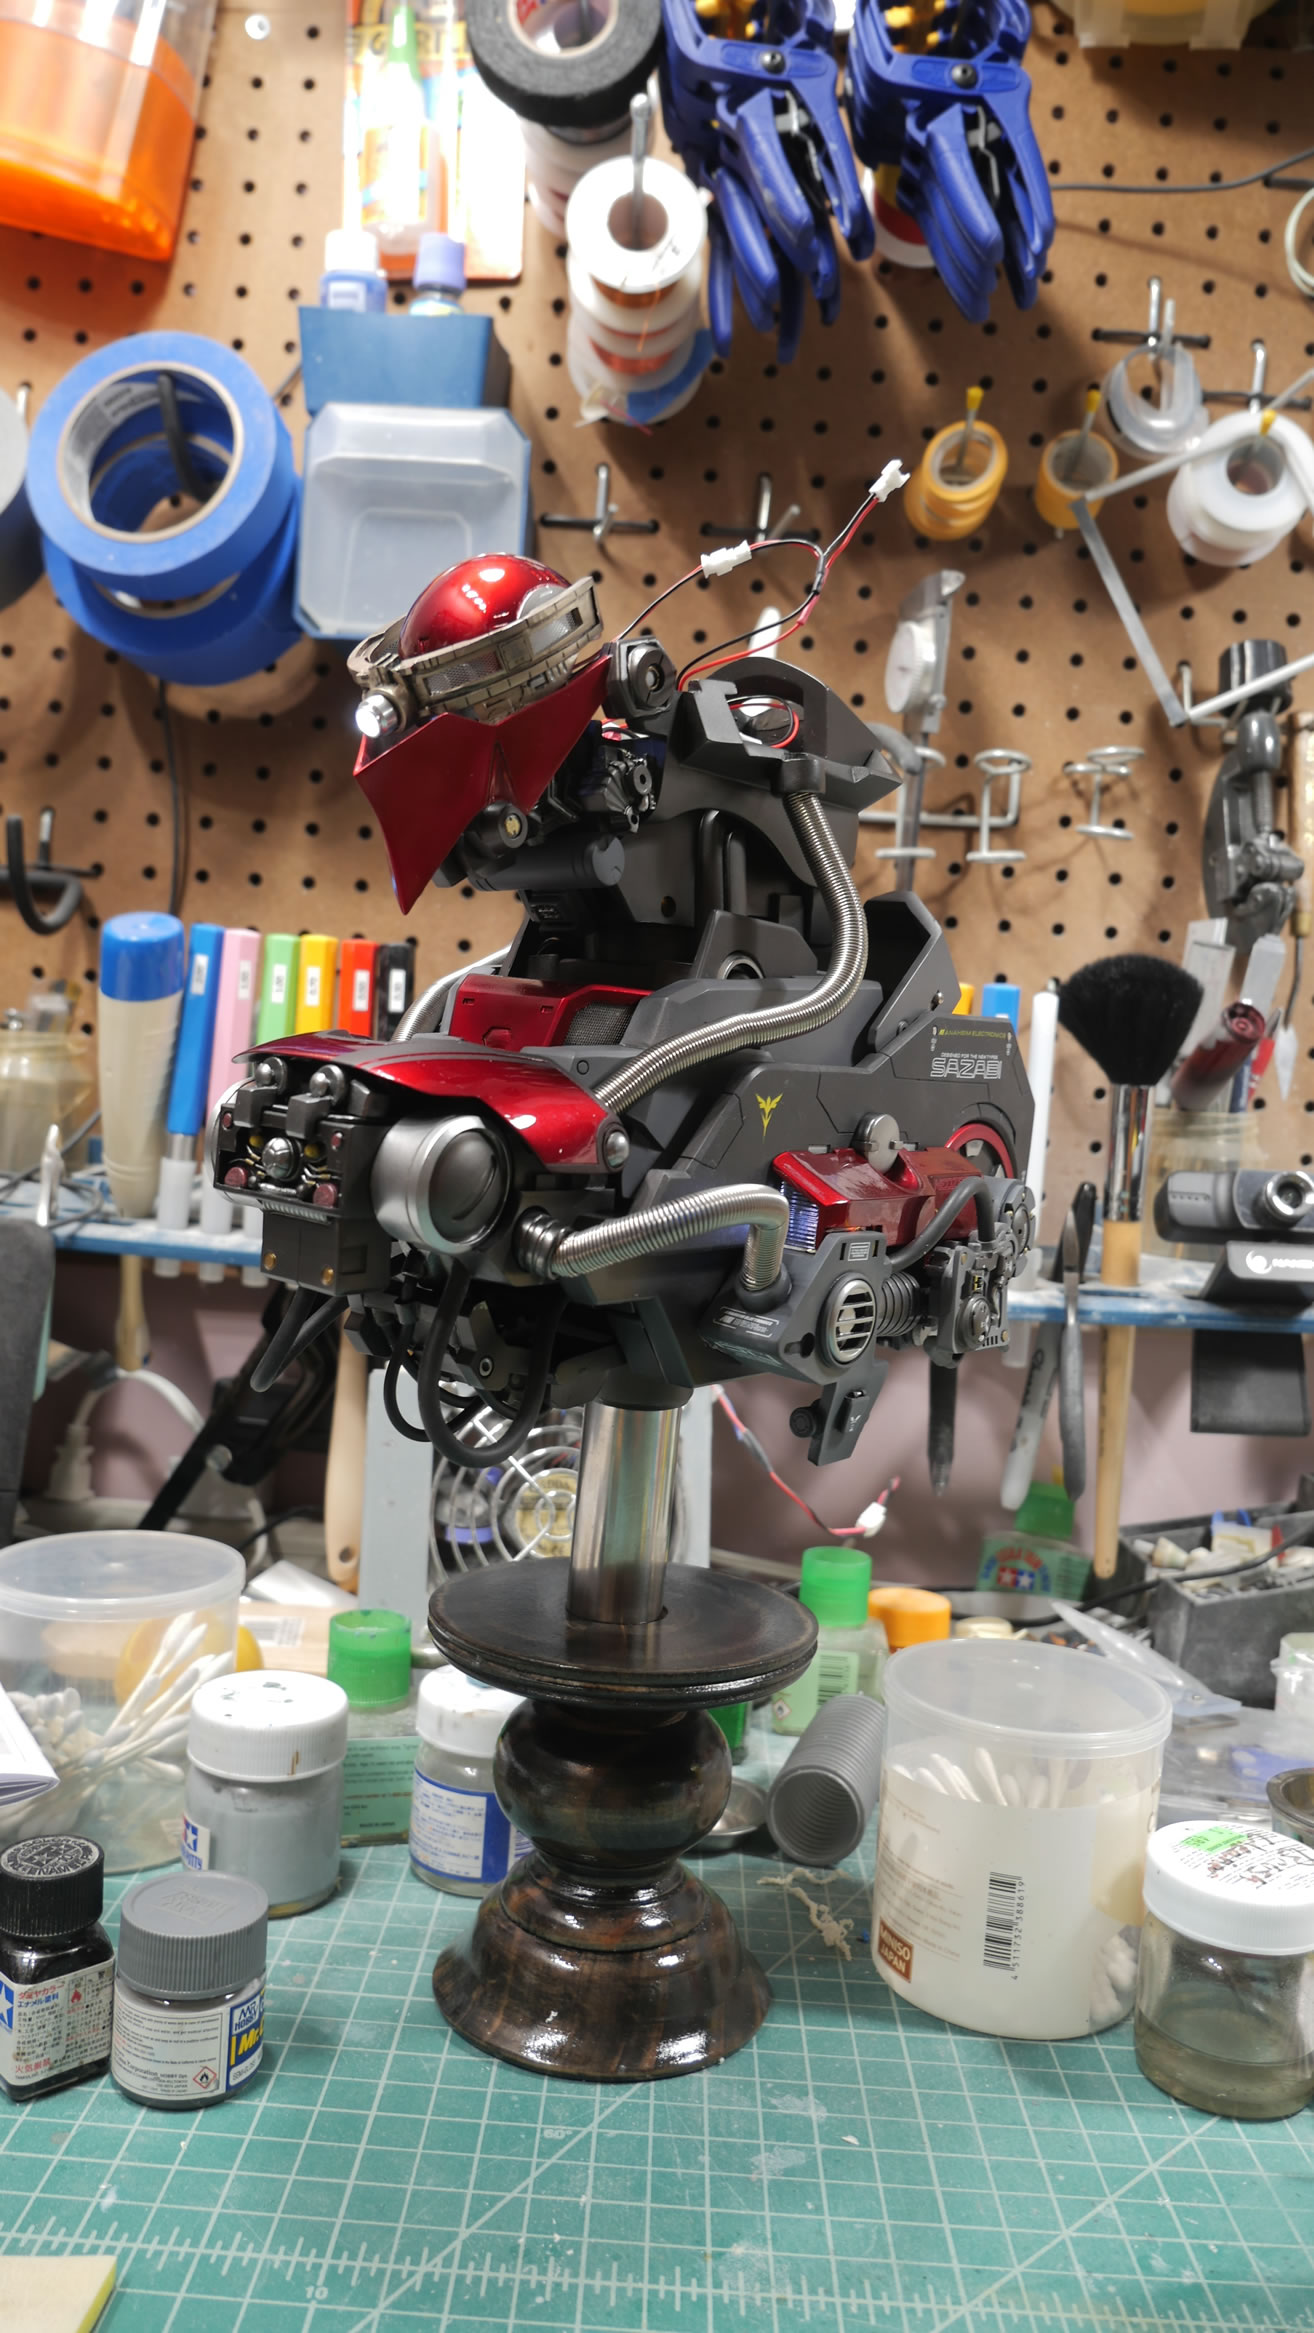
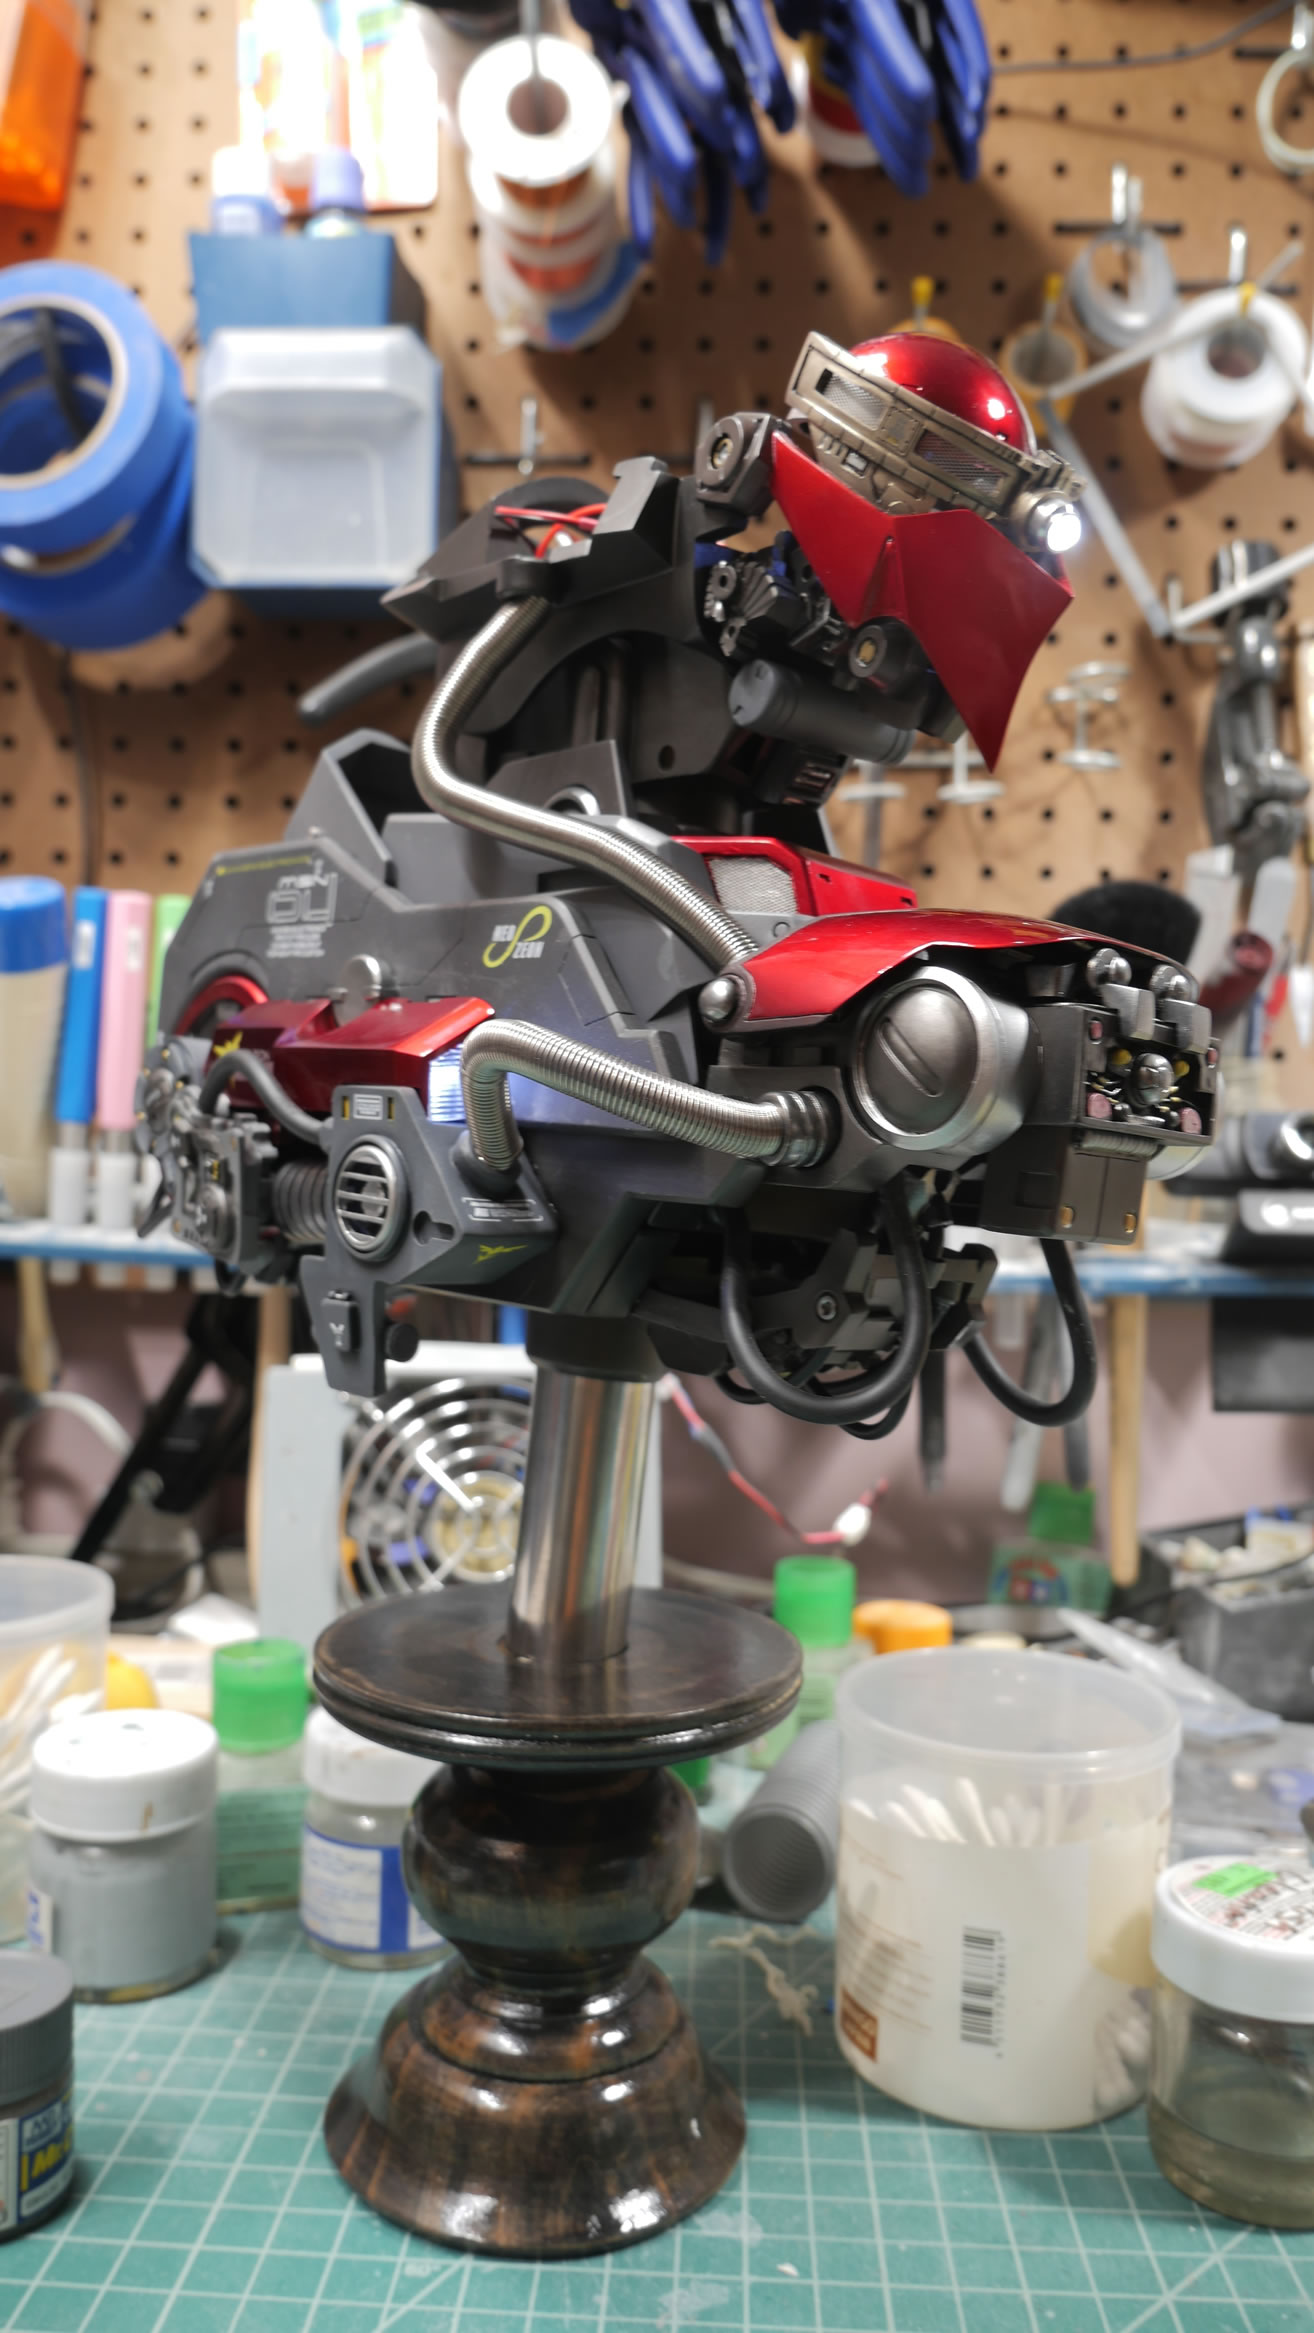
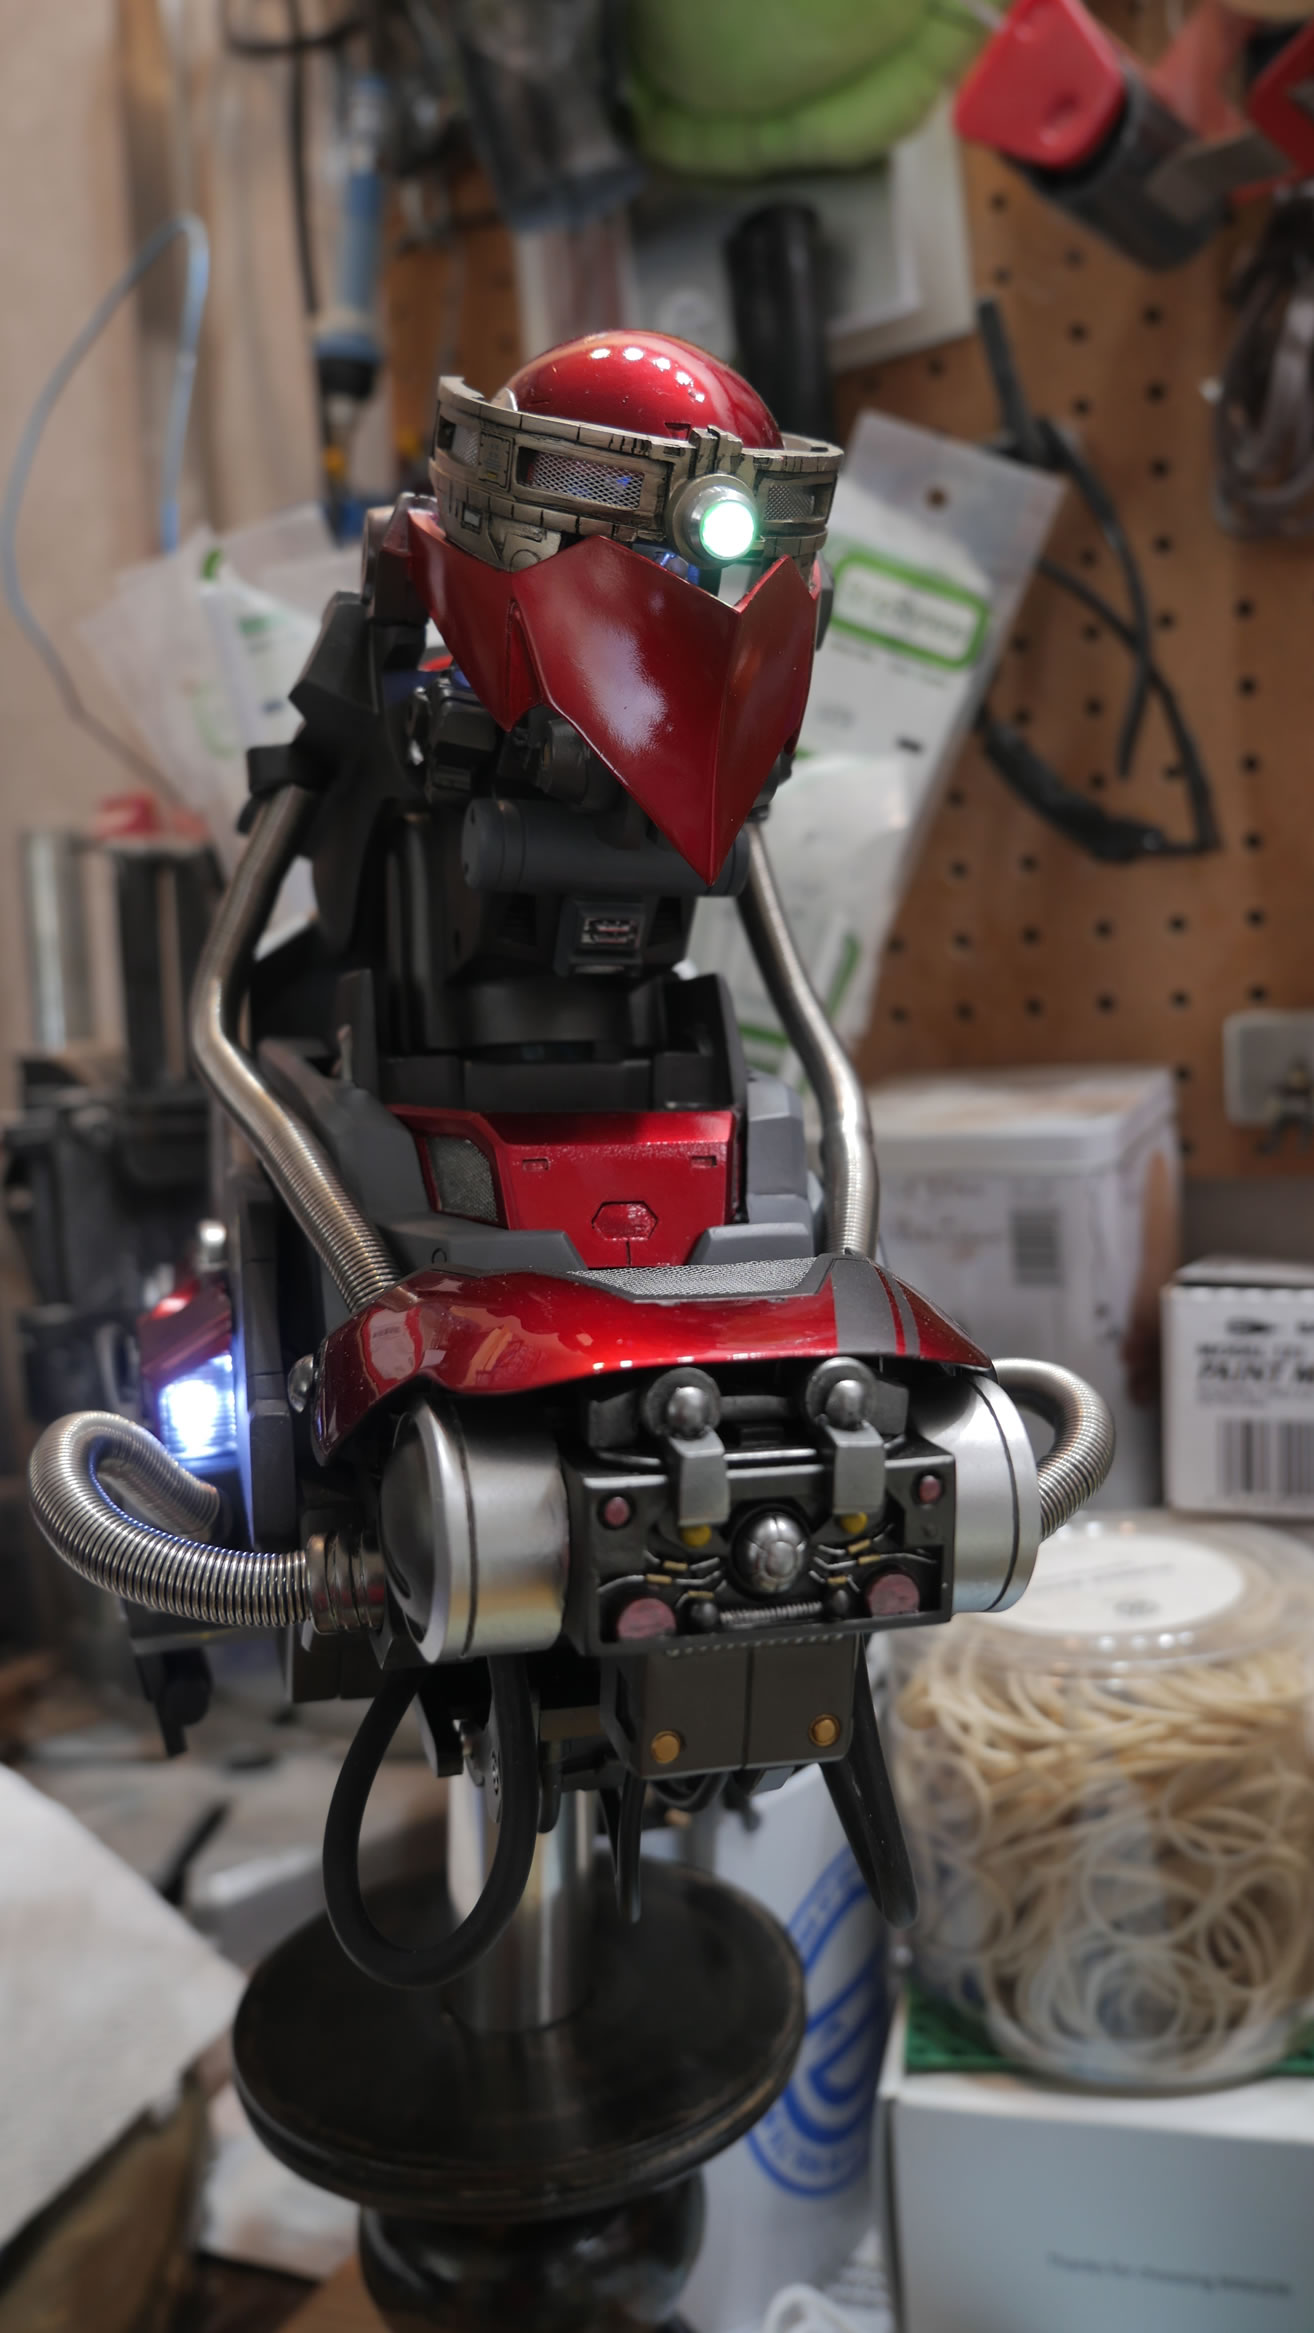
A couple of more turn around shots of the kit in it’s glorious magnetically pinned completeness.

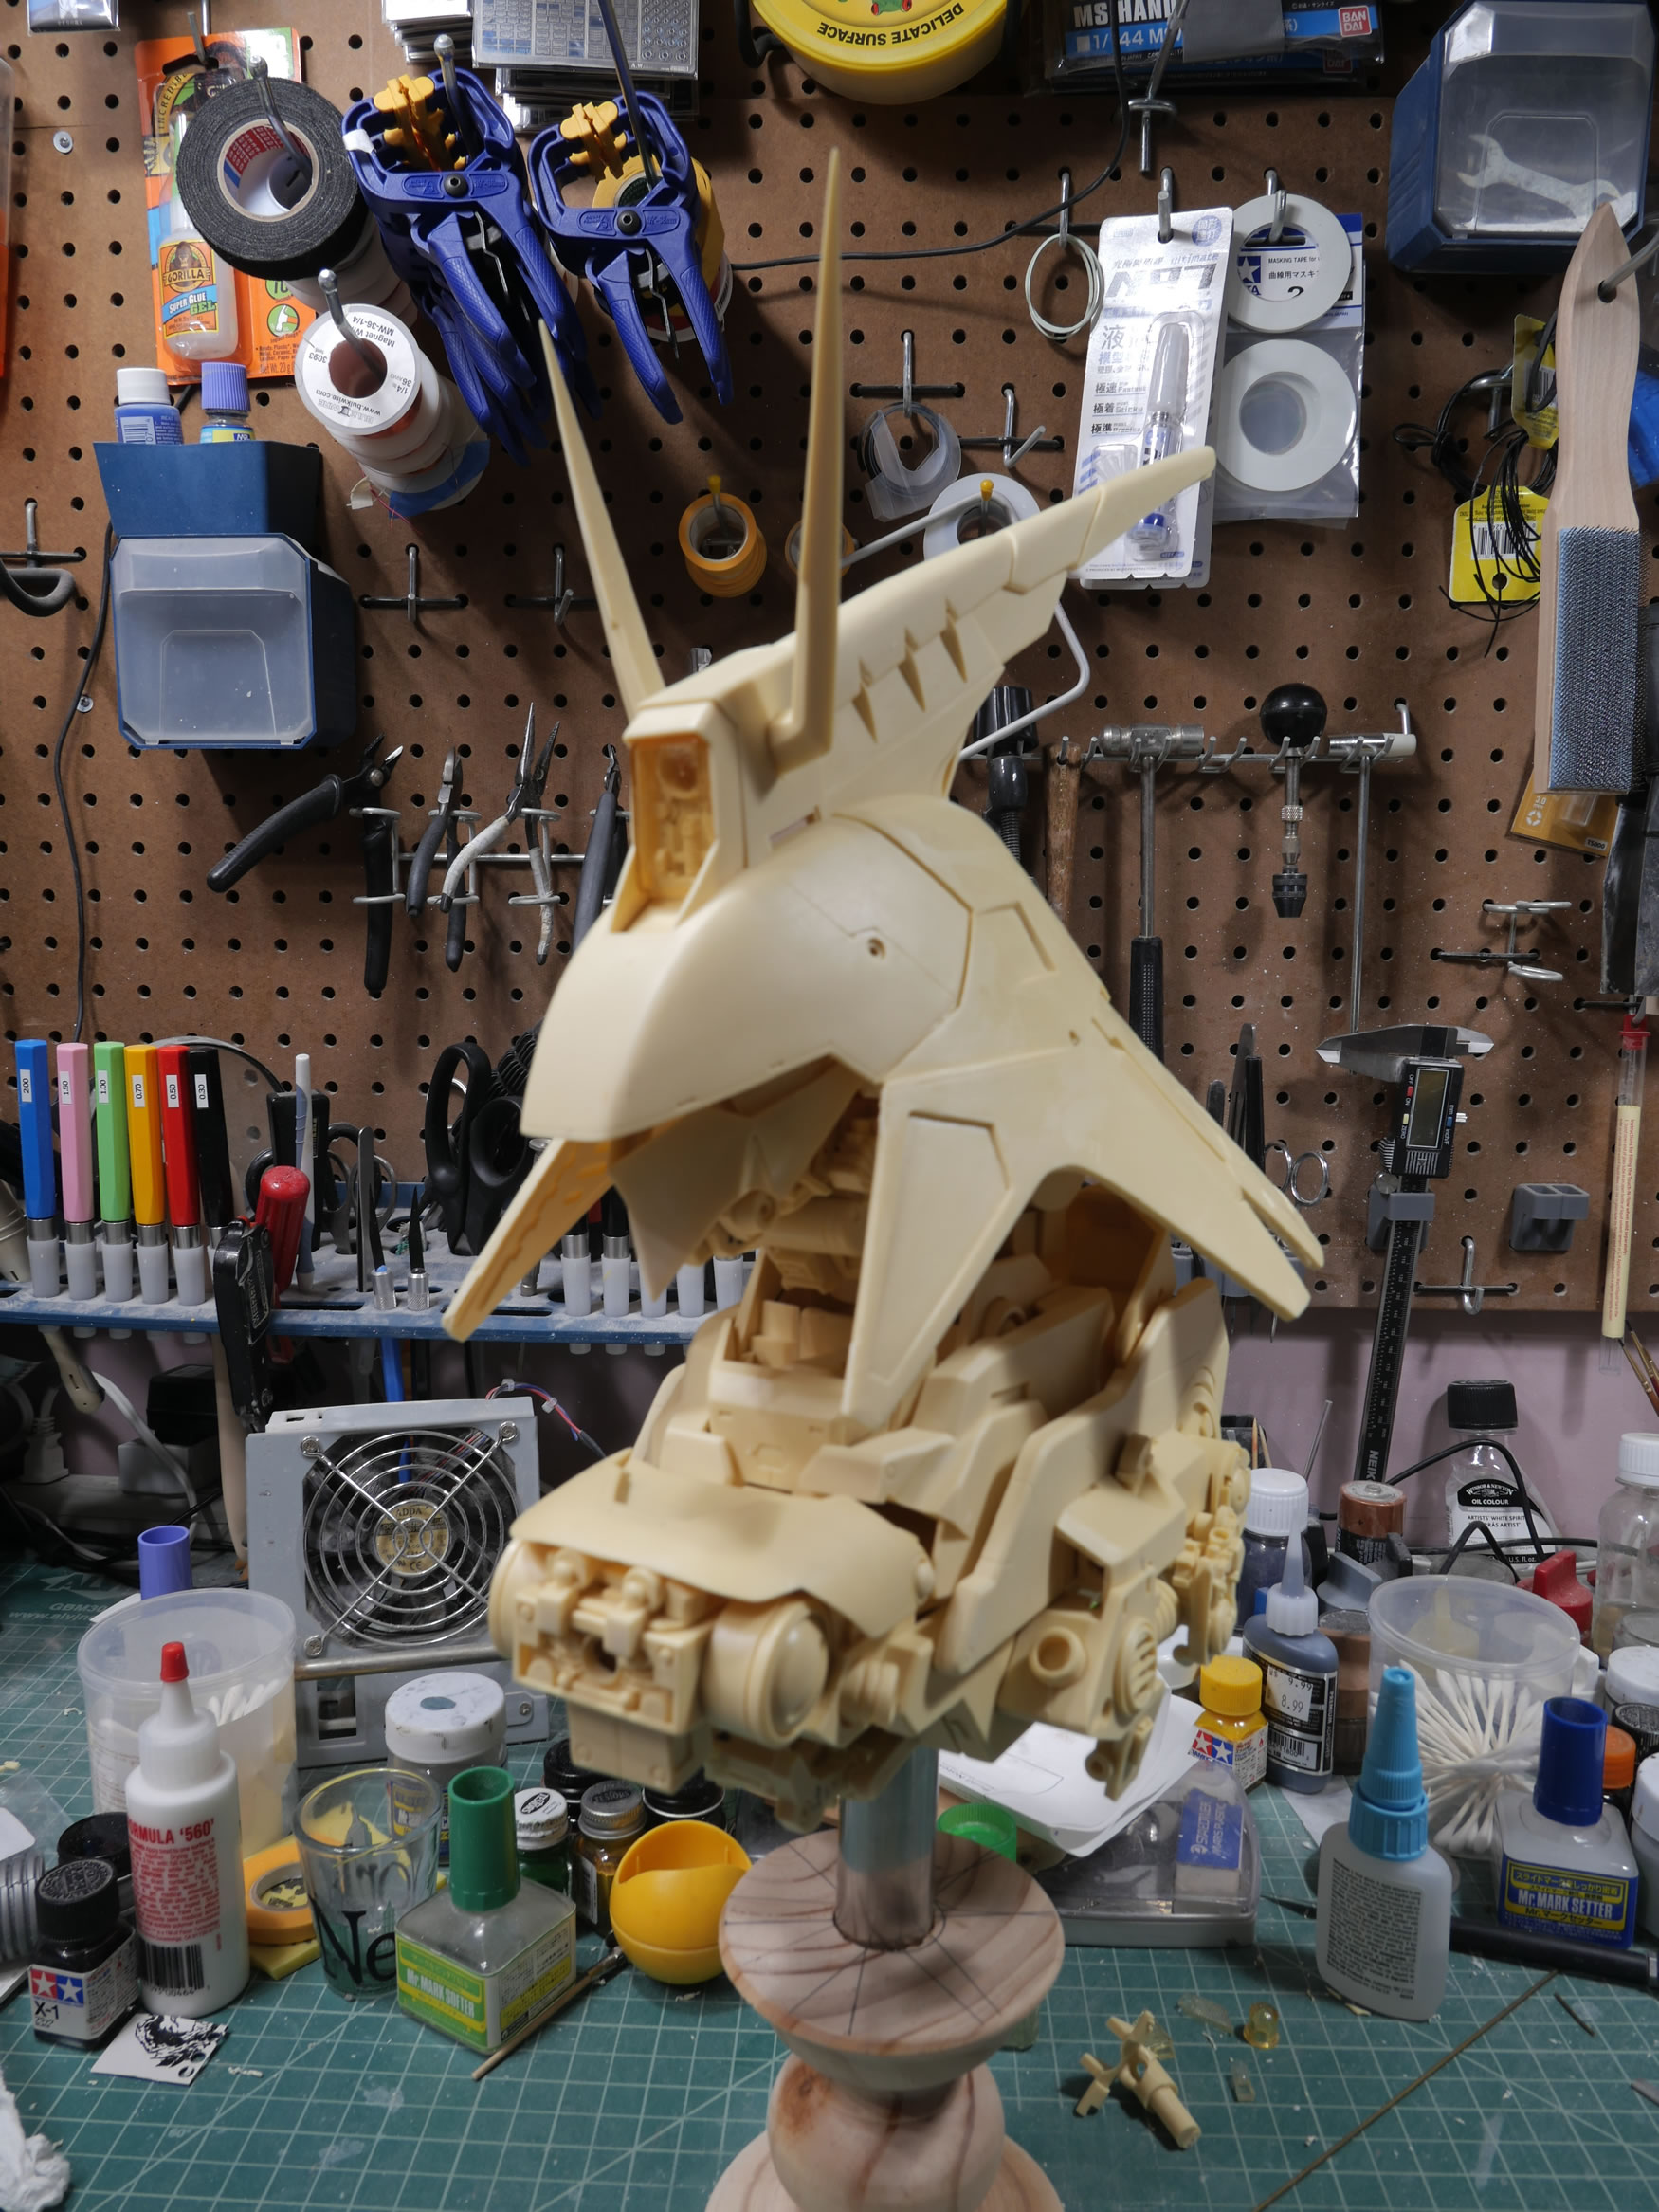
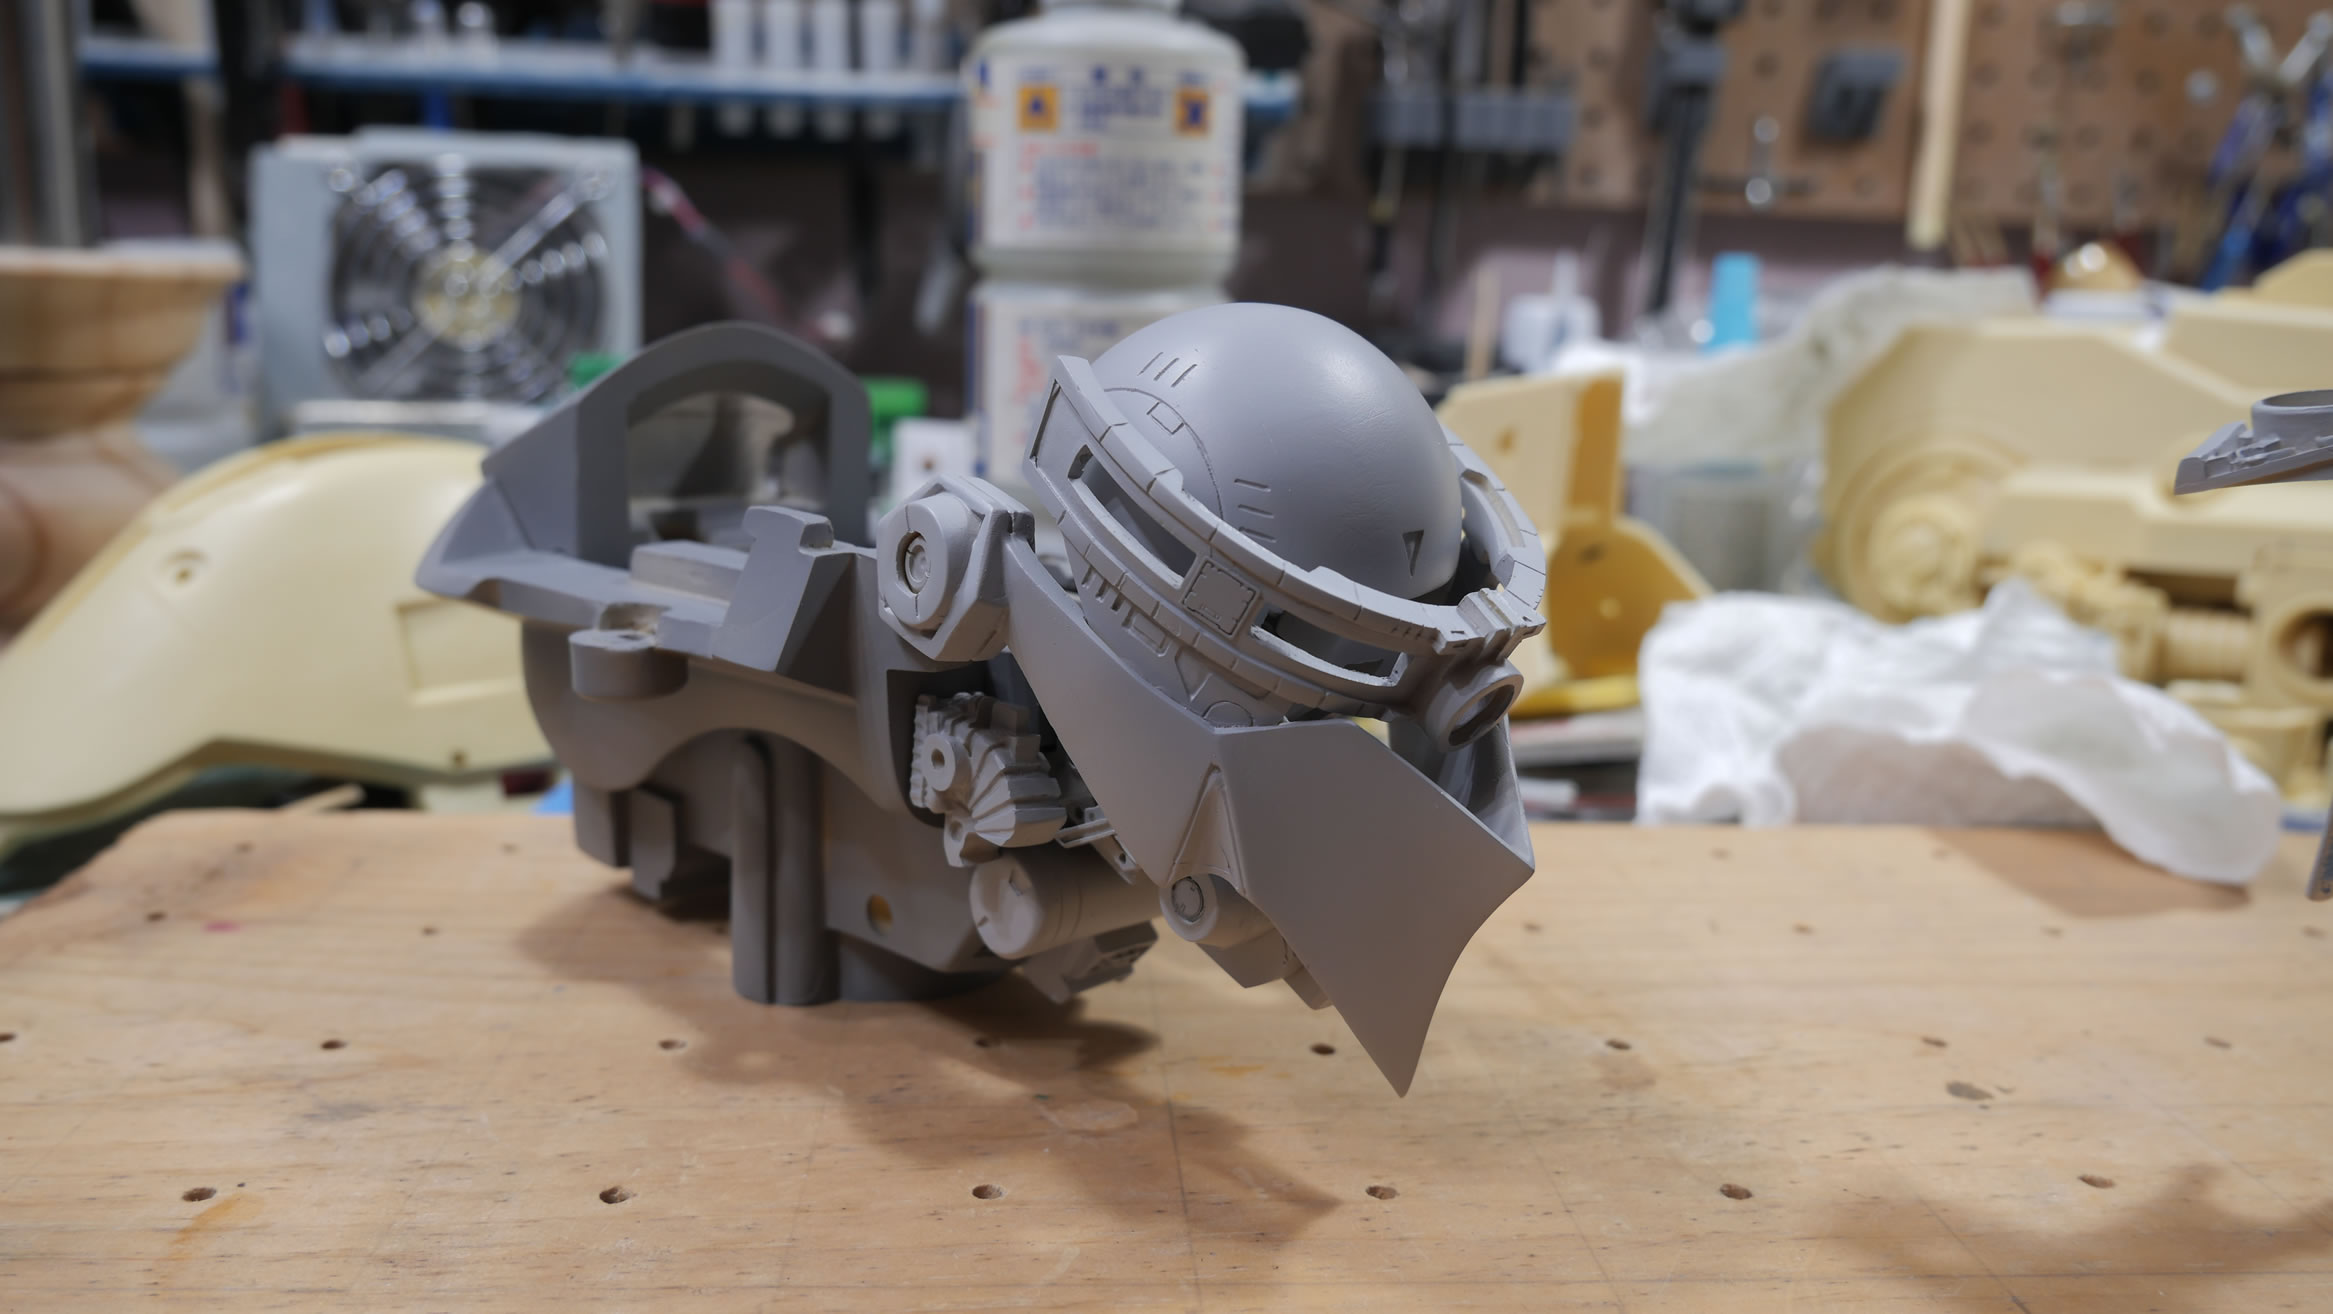
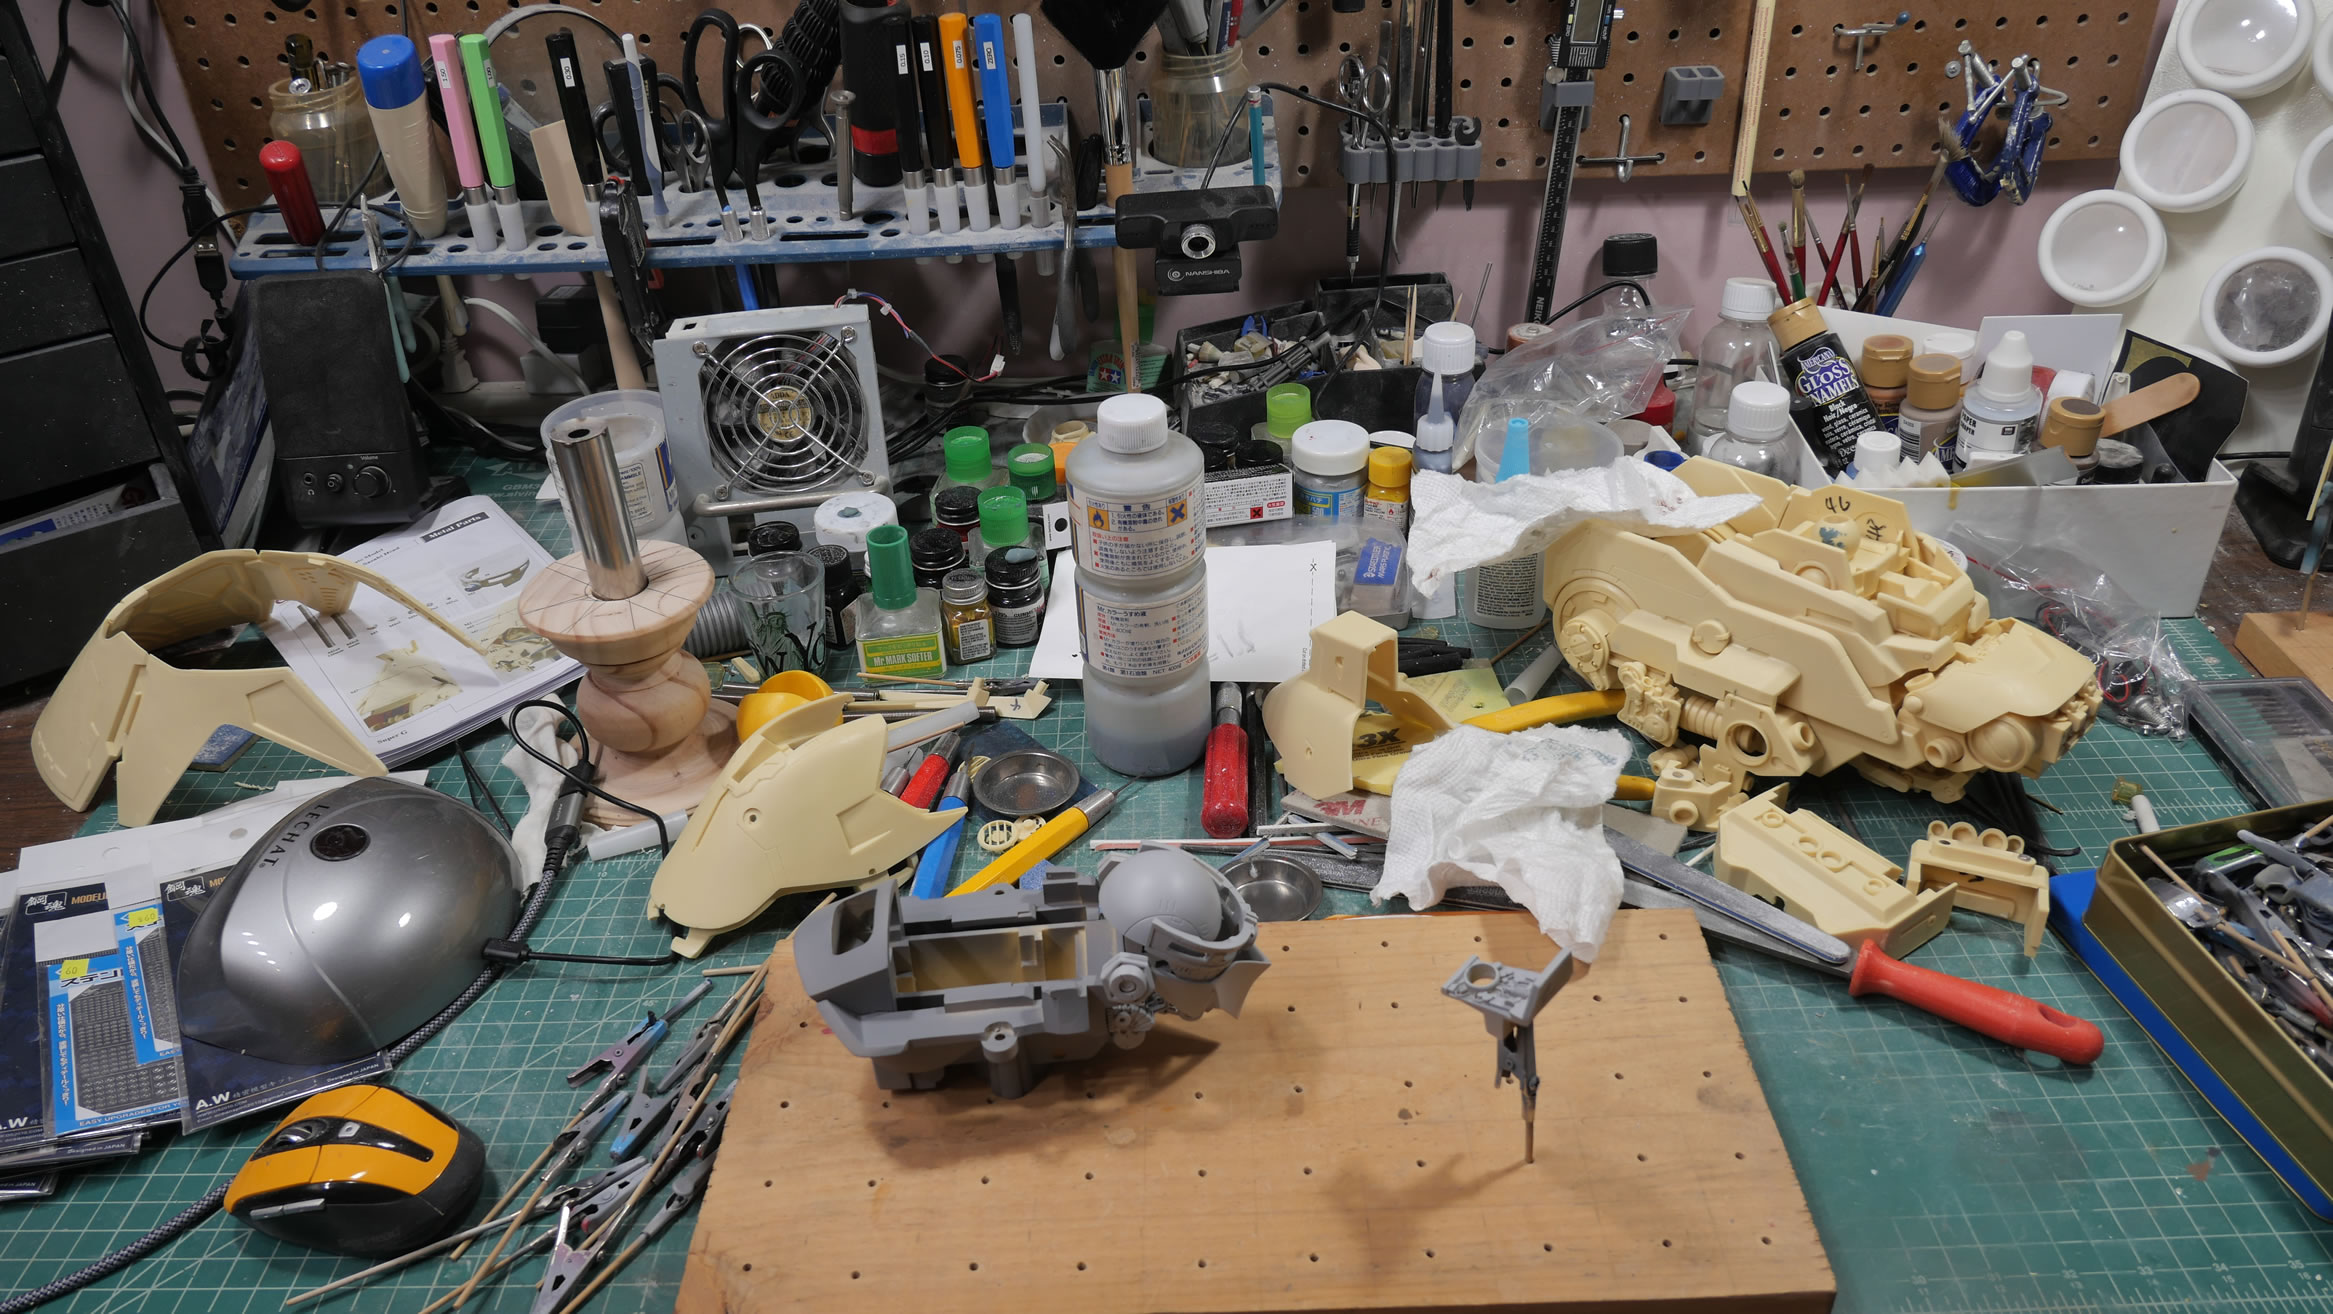
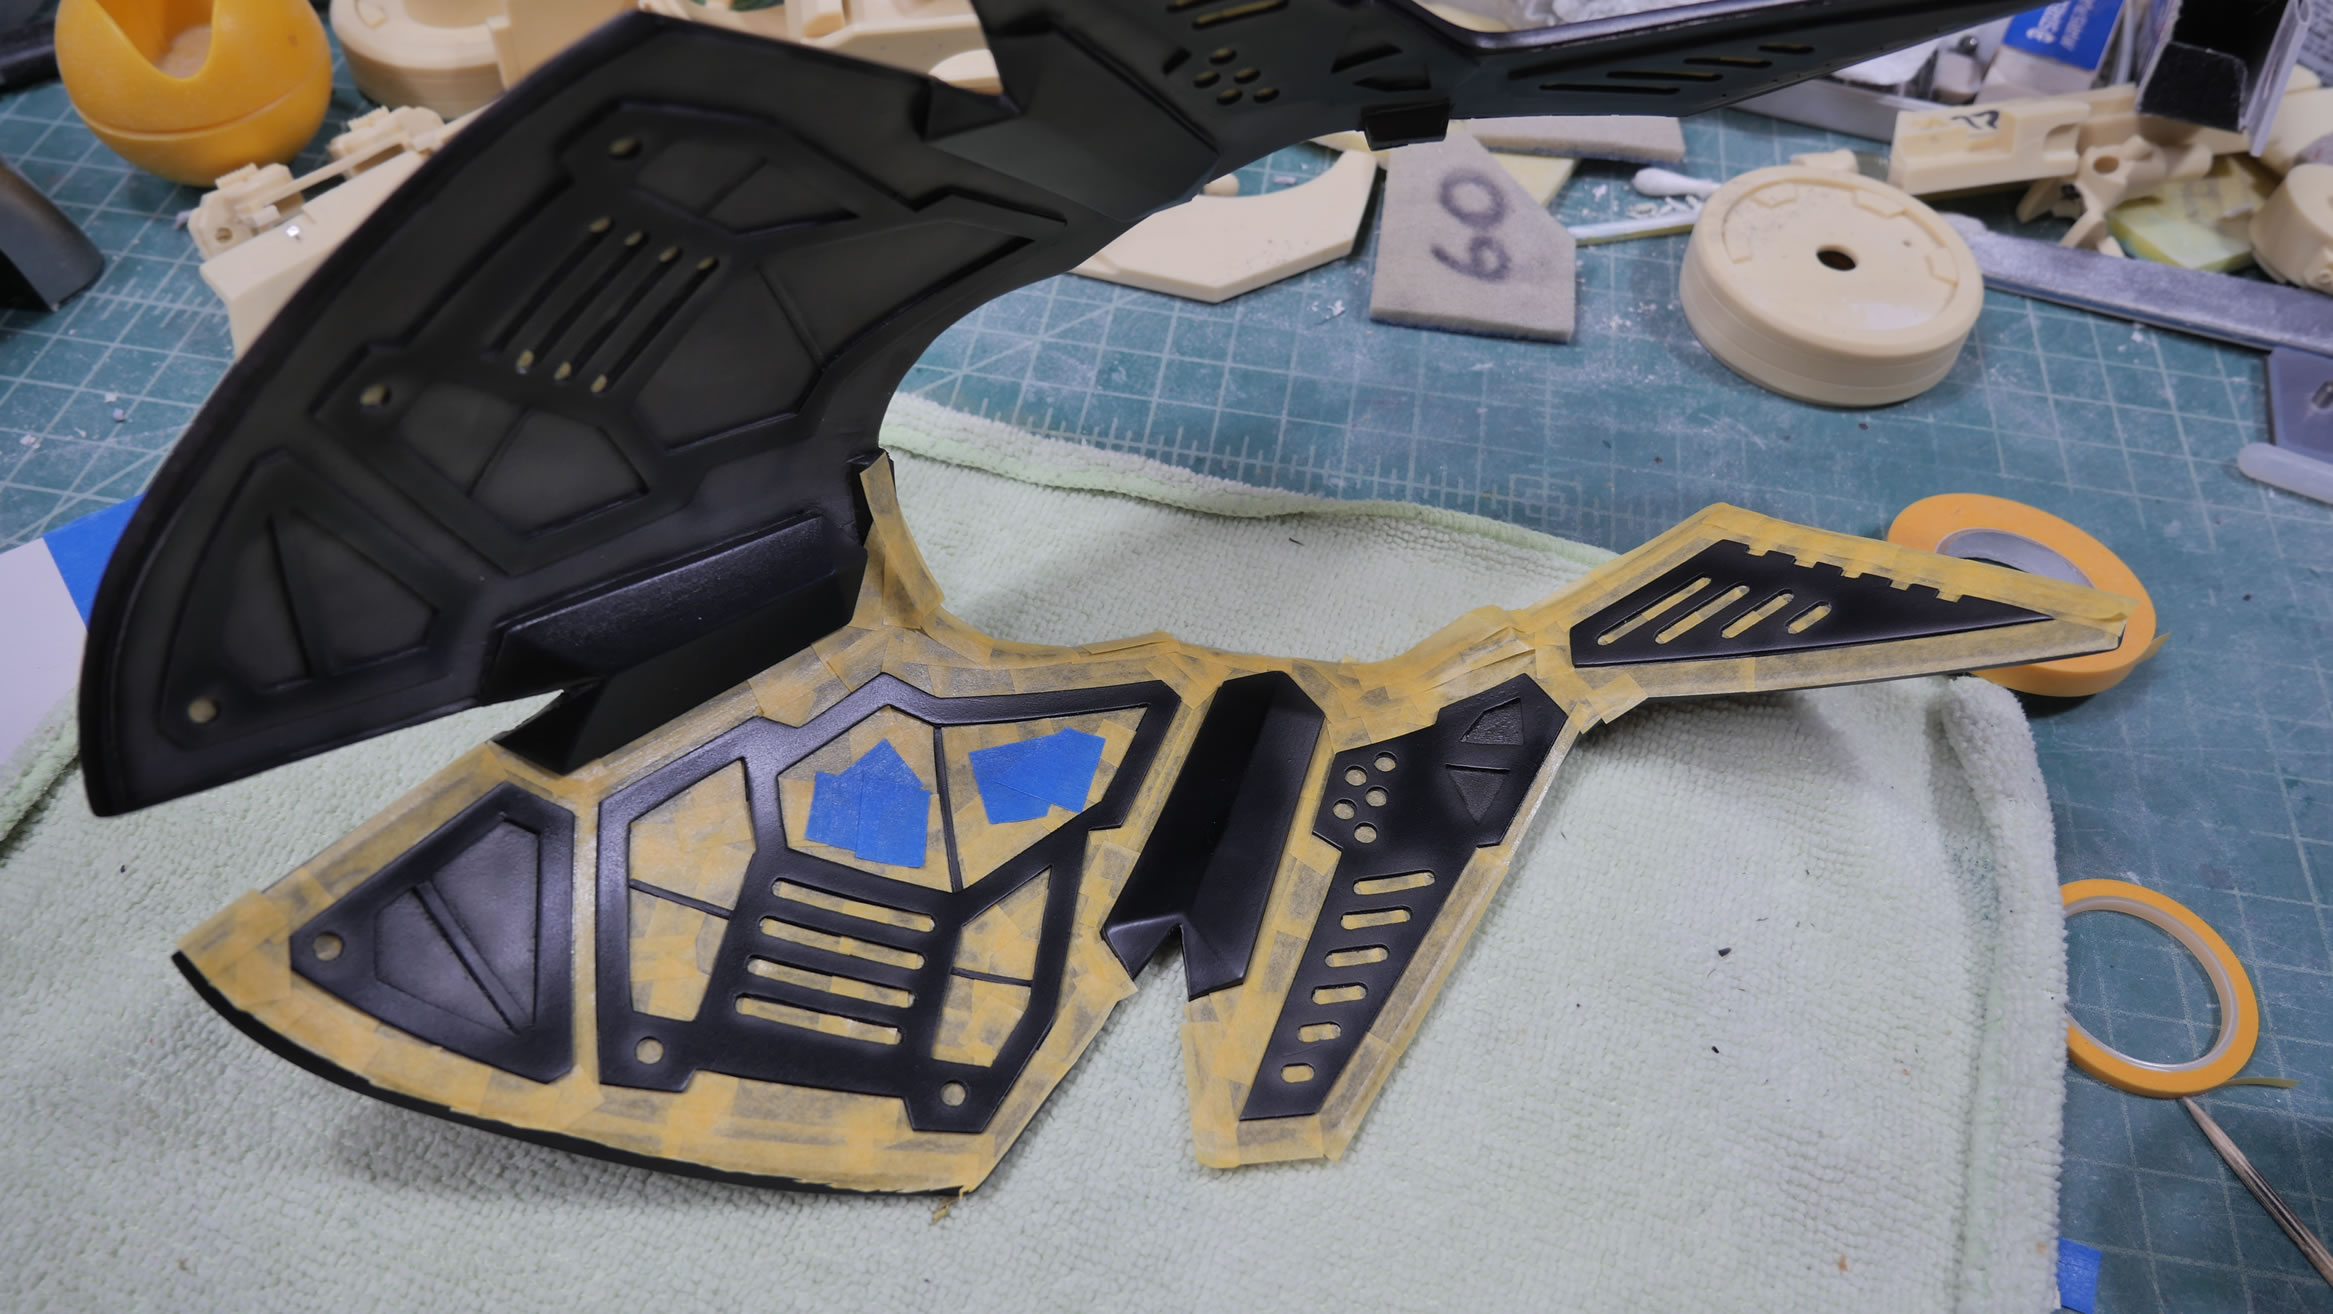
Since the project is fairly large, I broke it up into sections and just focused on specific areas to tackle it. Starting off with the head internals. I got that sanded and primed. It is here that I also realize that 5 years on, I’ve lost the photo etch sheet to the workshop. I’m sure it’s some where in a box or just hidden; but through out the build, I didn’t find it. I also didn’t look very hard. I just ended up replacing those details with mesh or other photo etch details. The work shop looks good in full swing. Project number 3 this year.
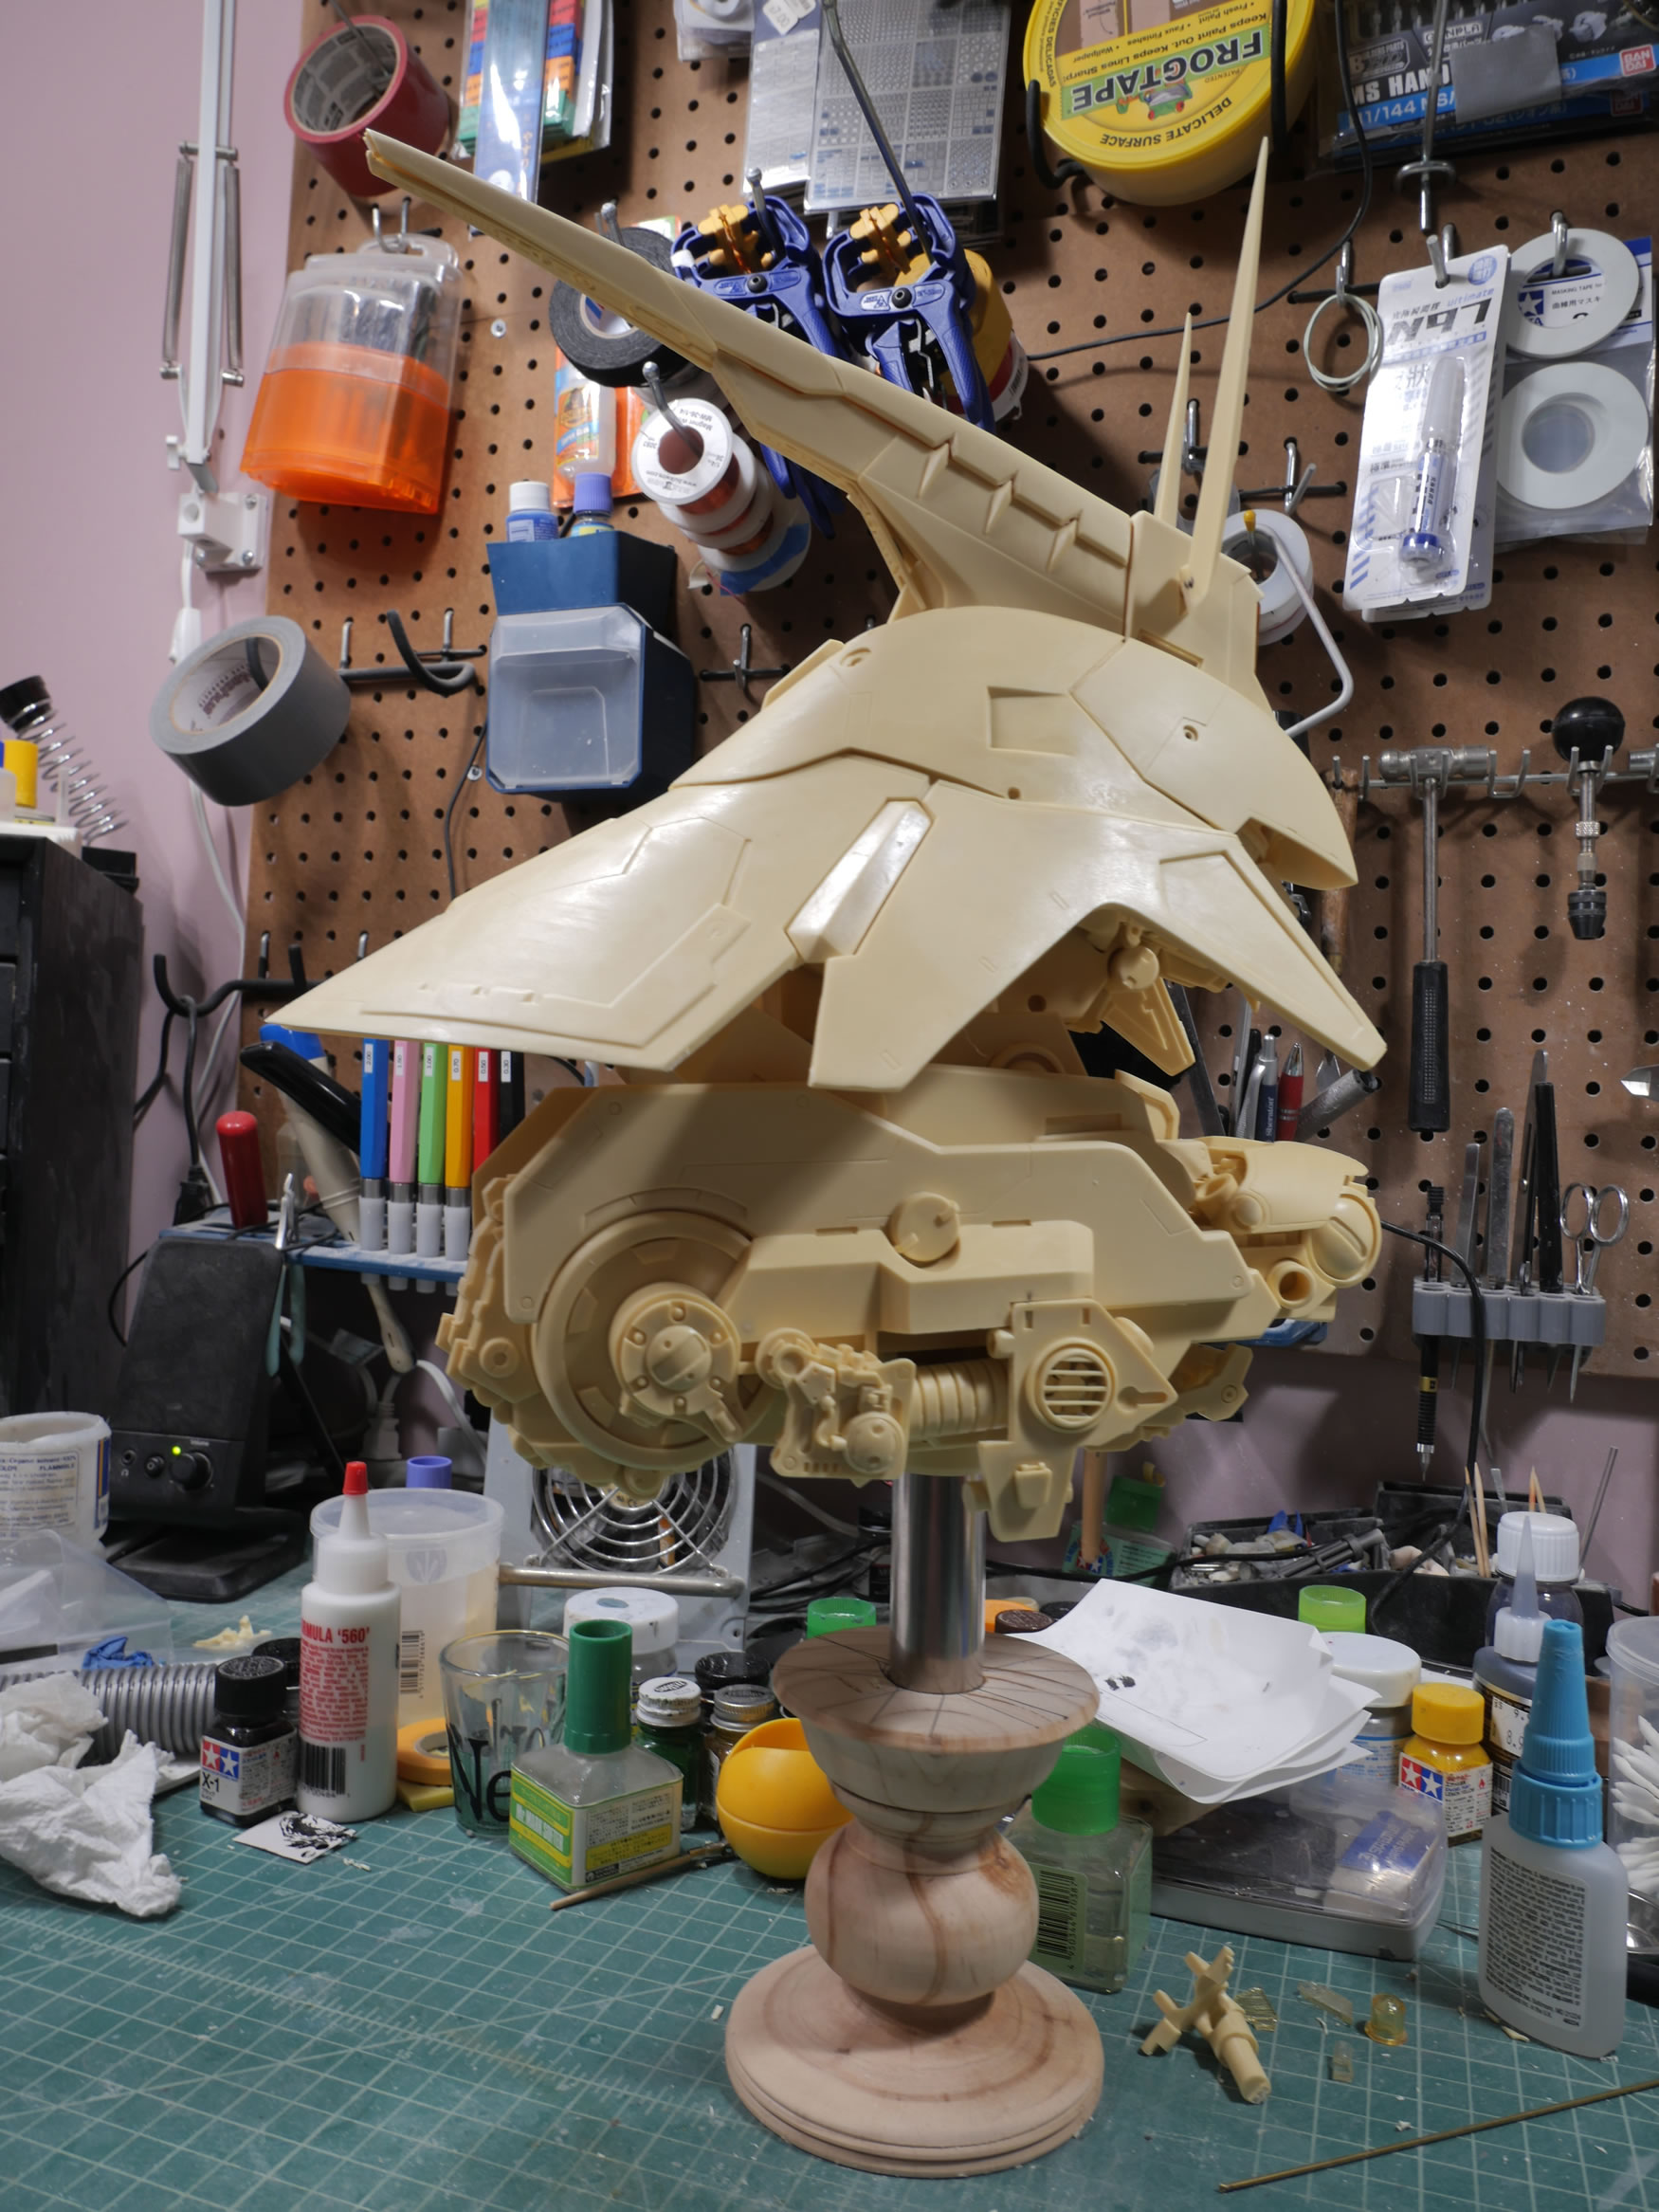
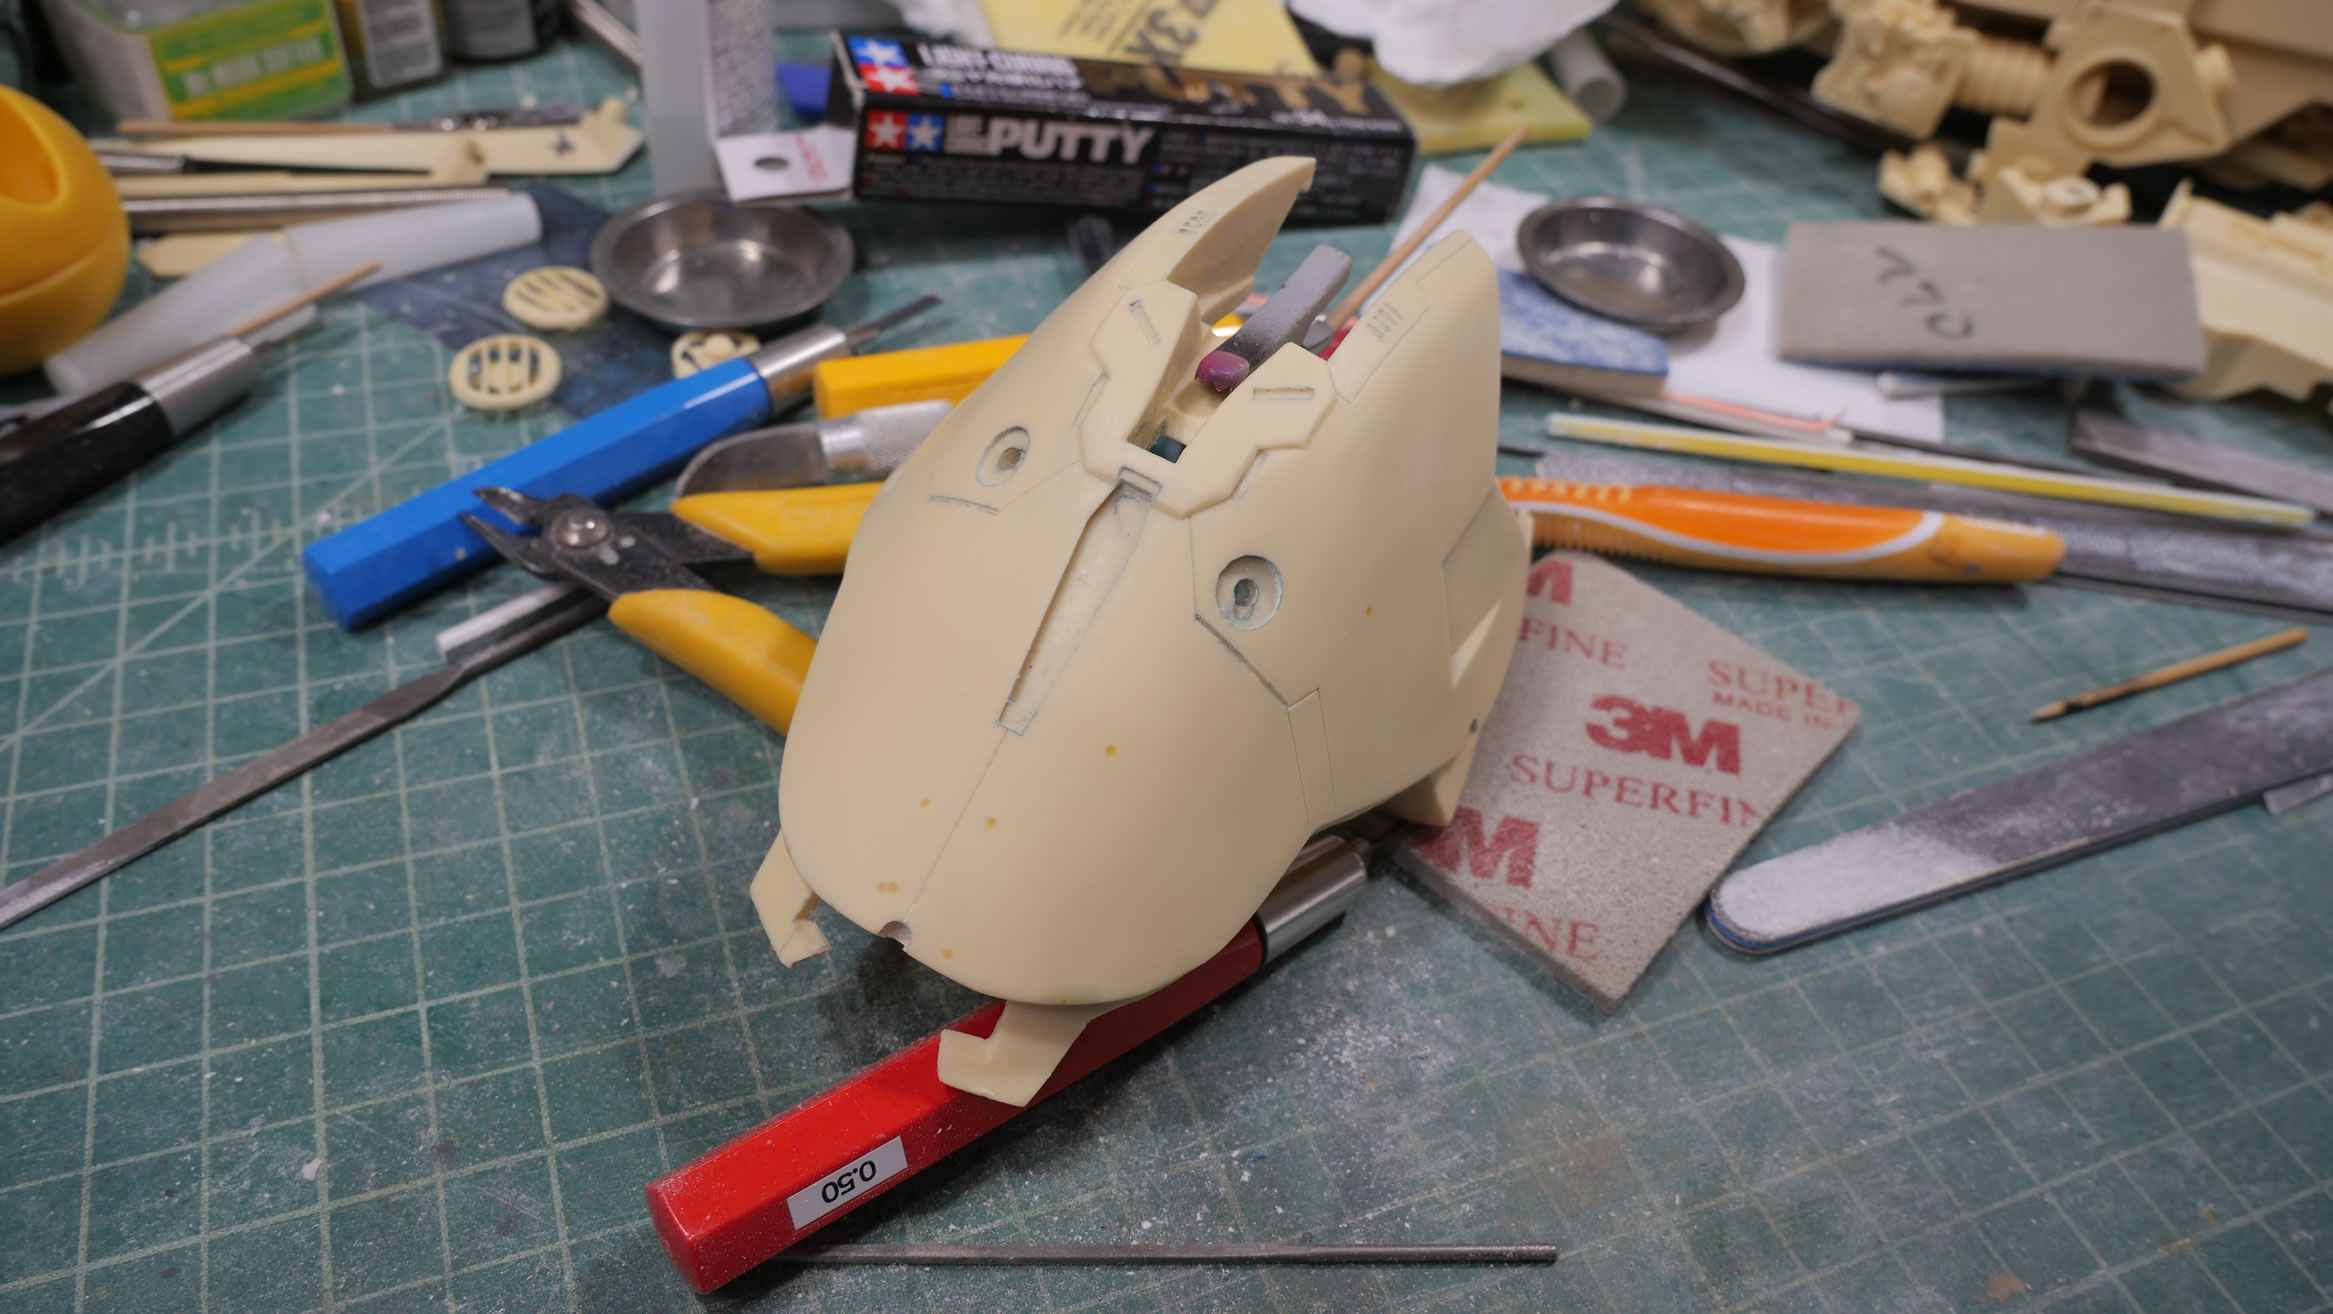
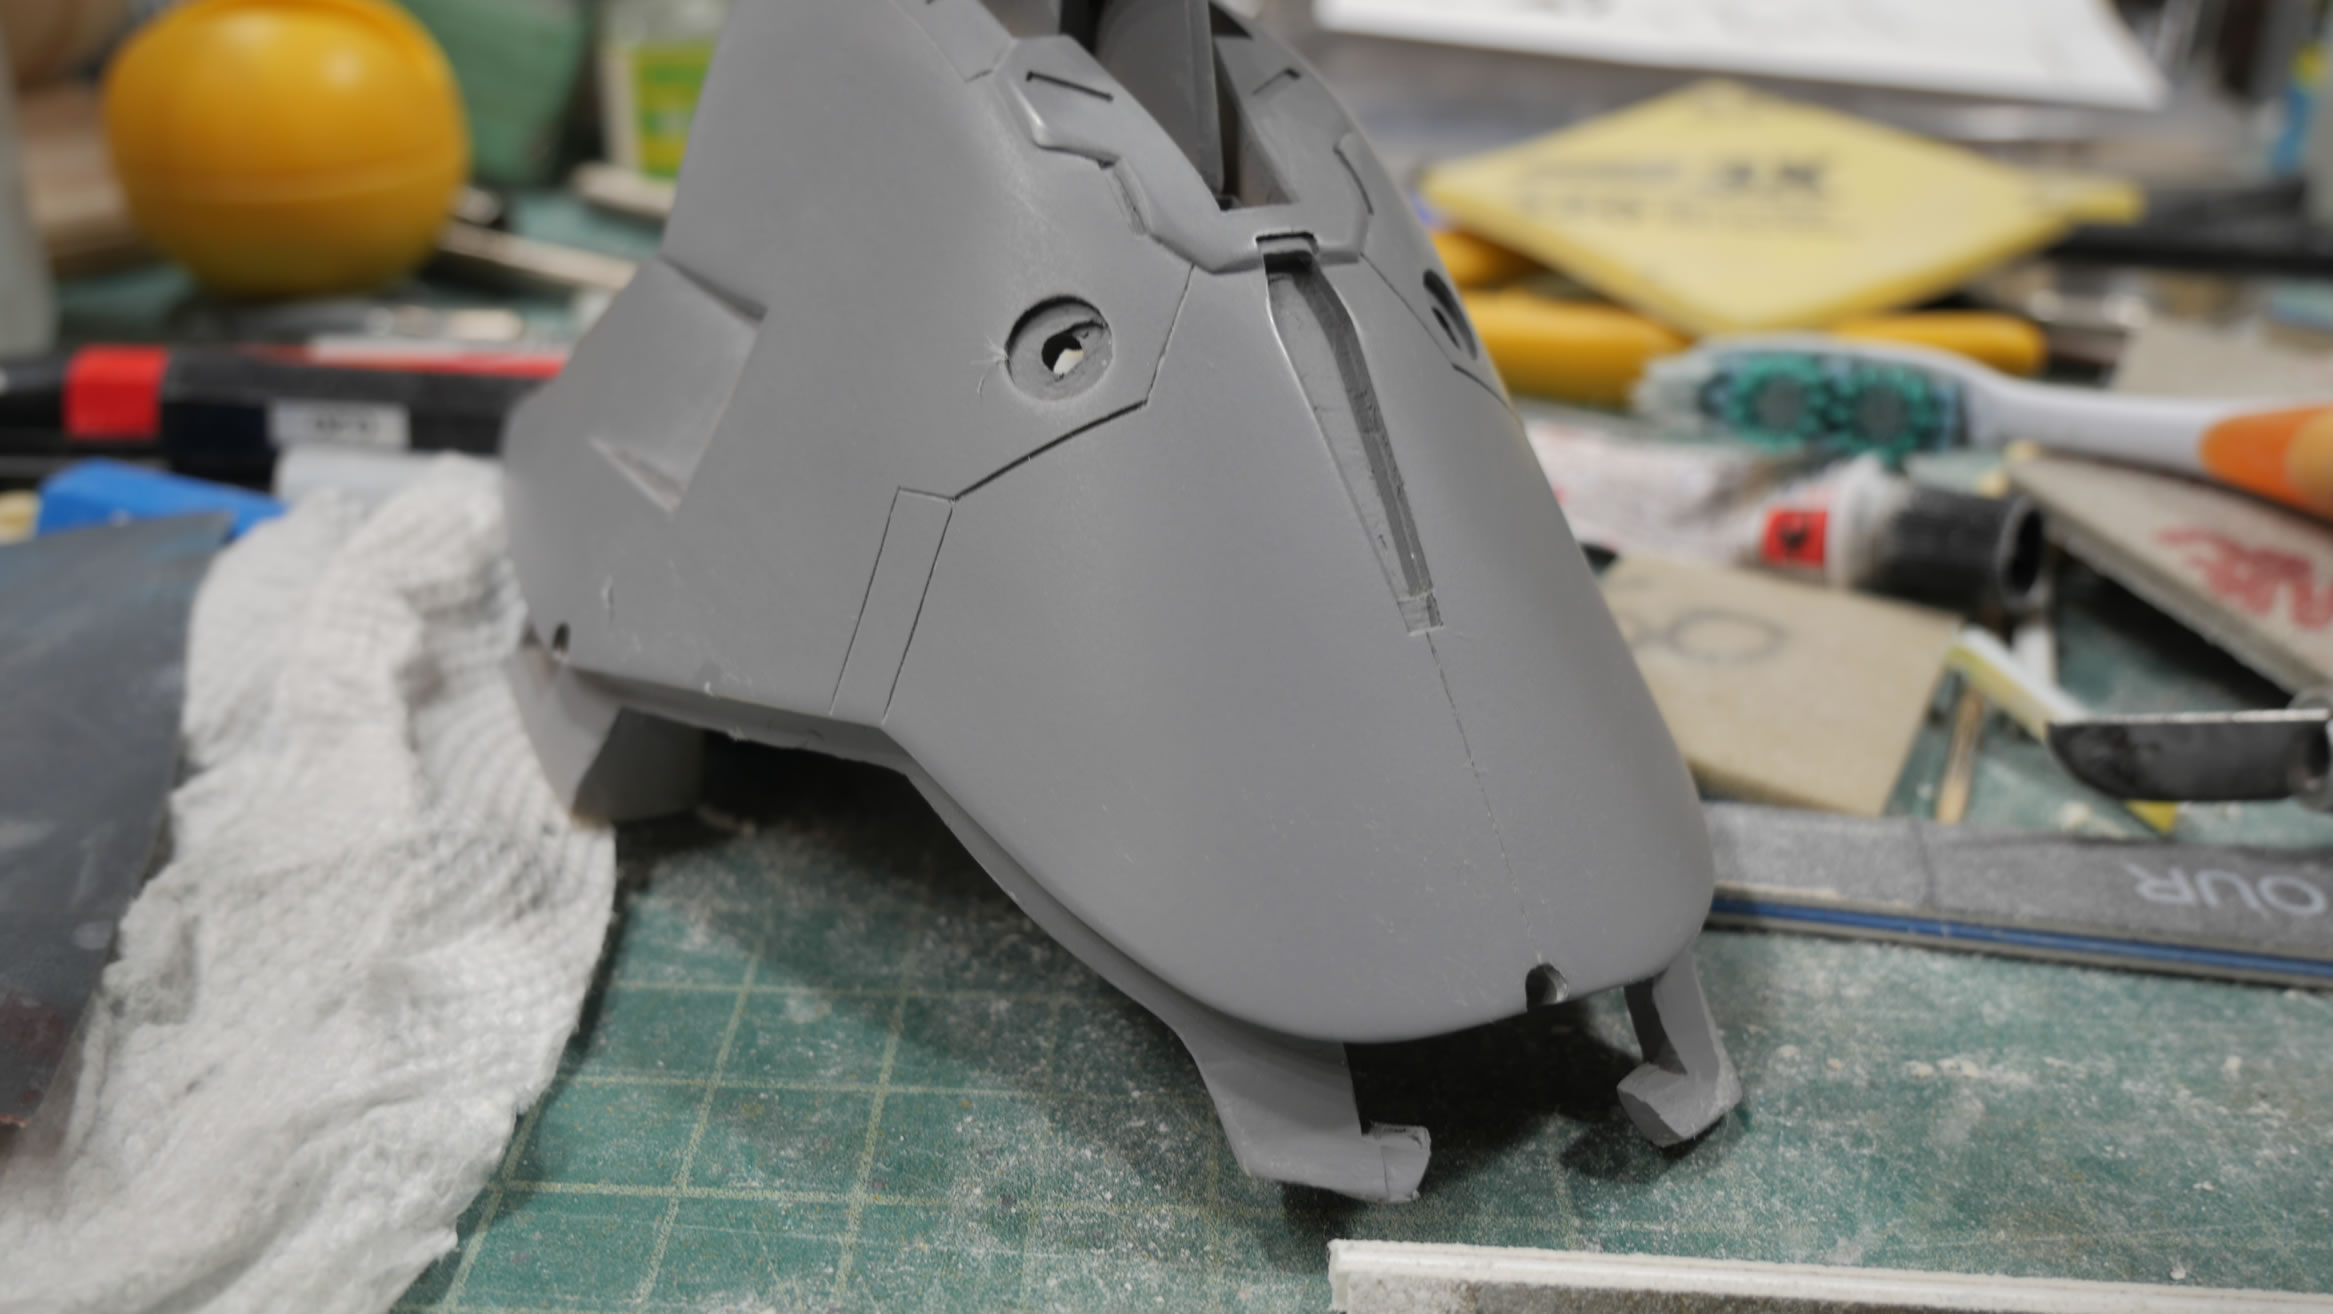
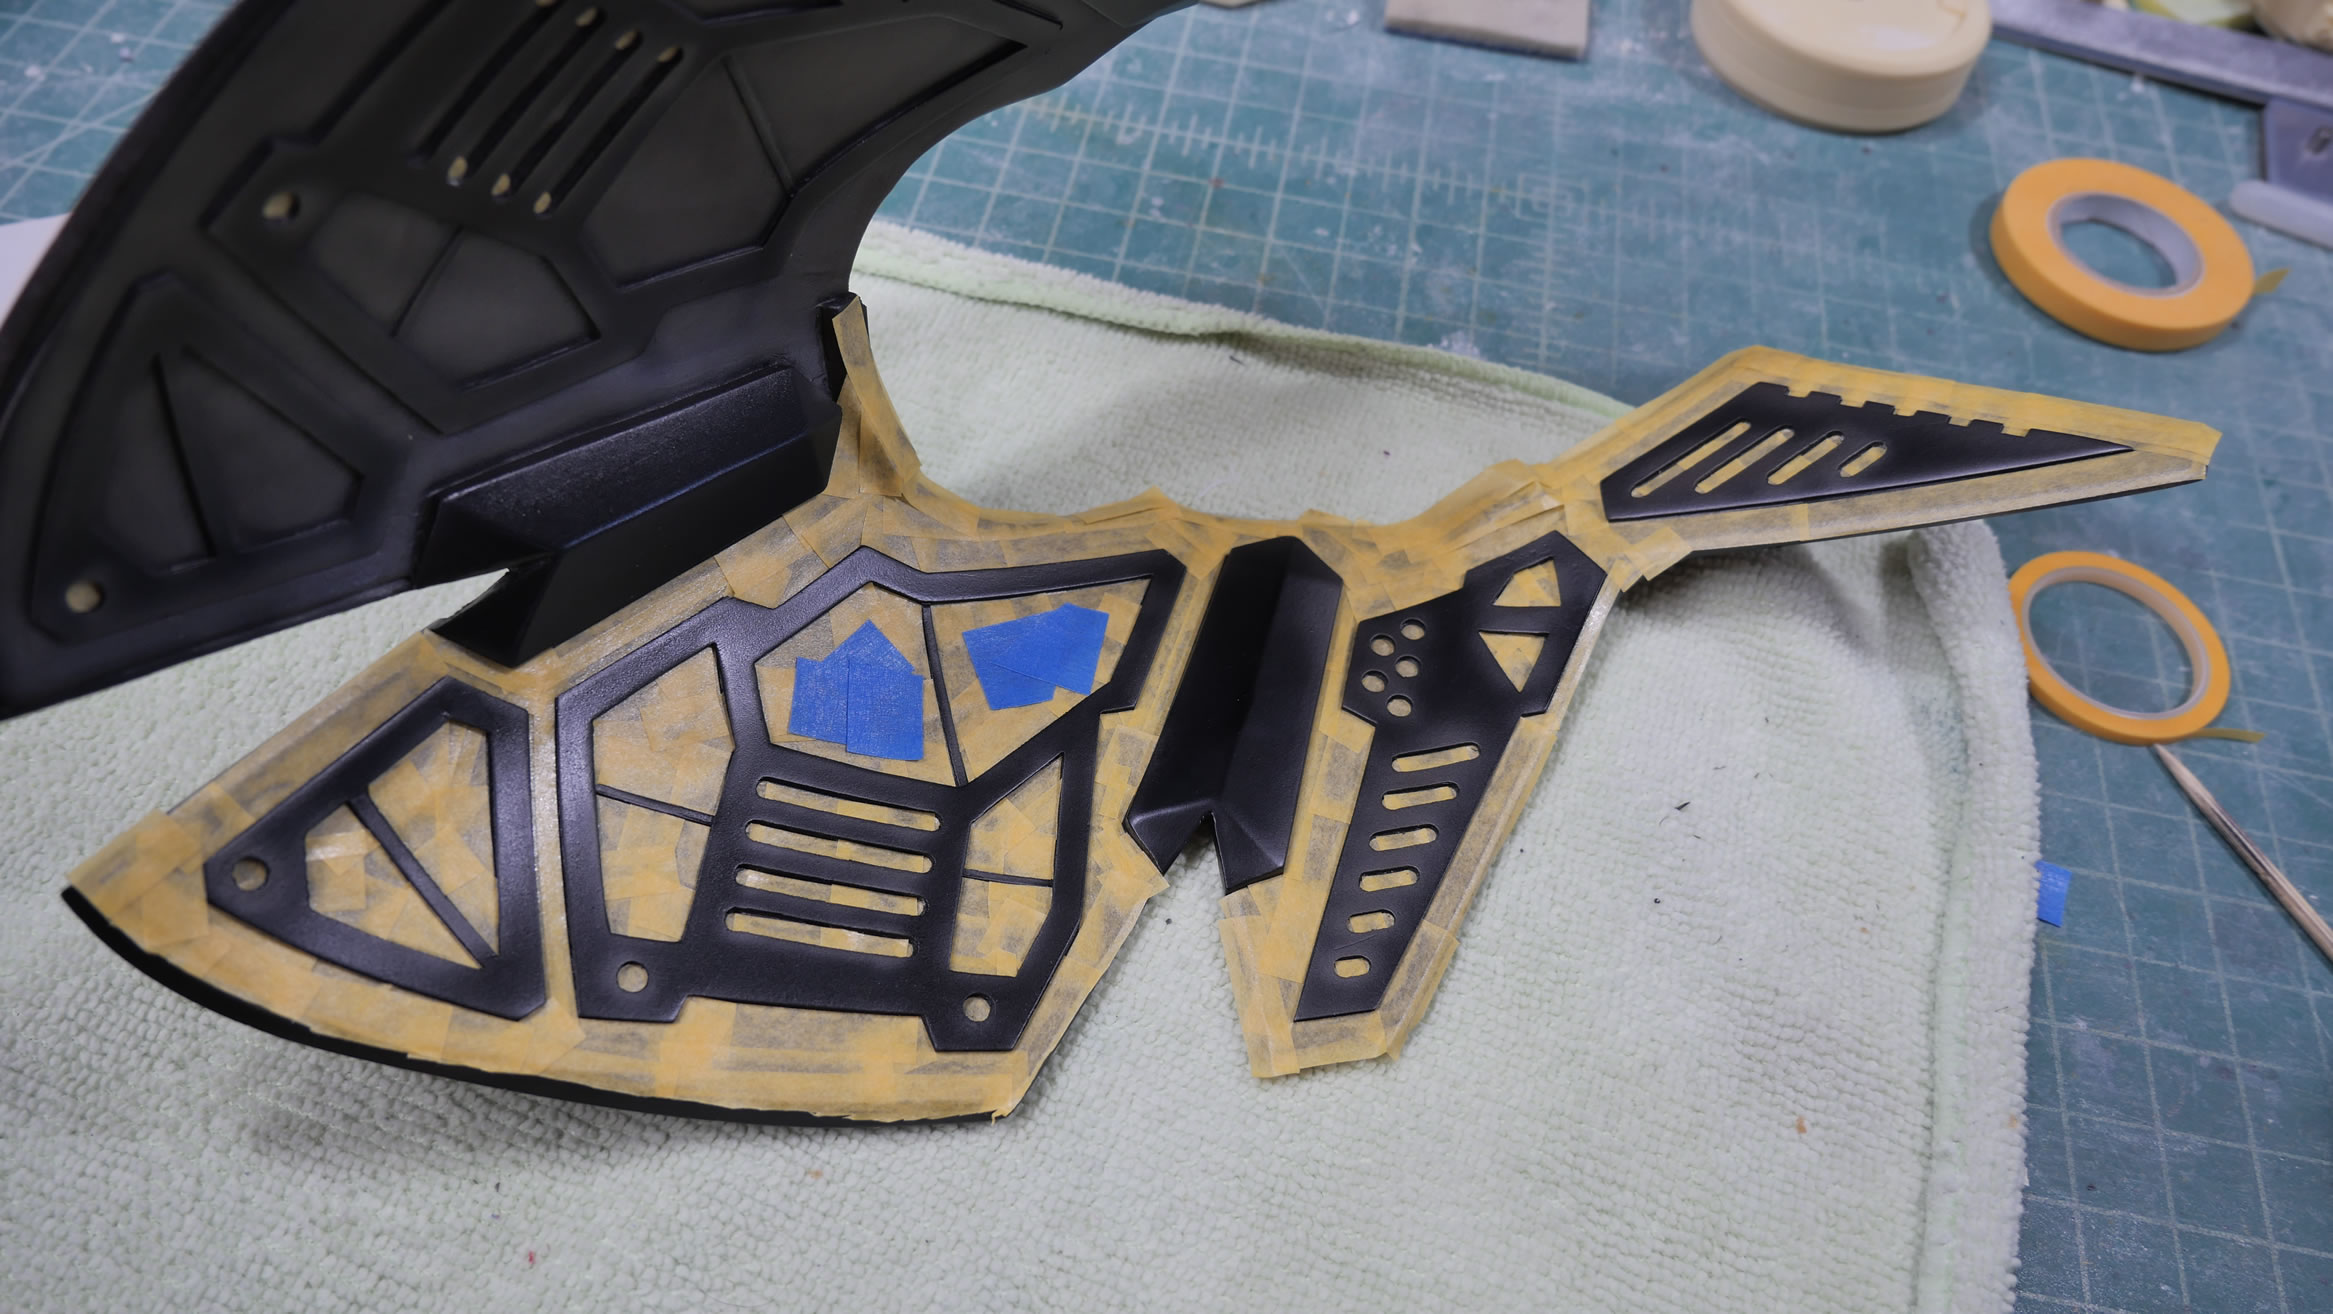
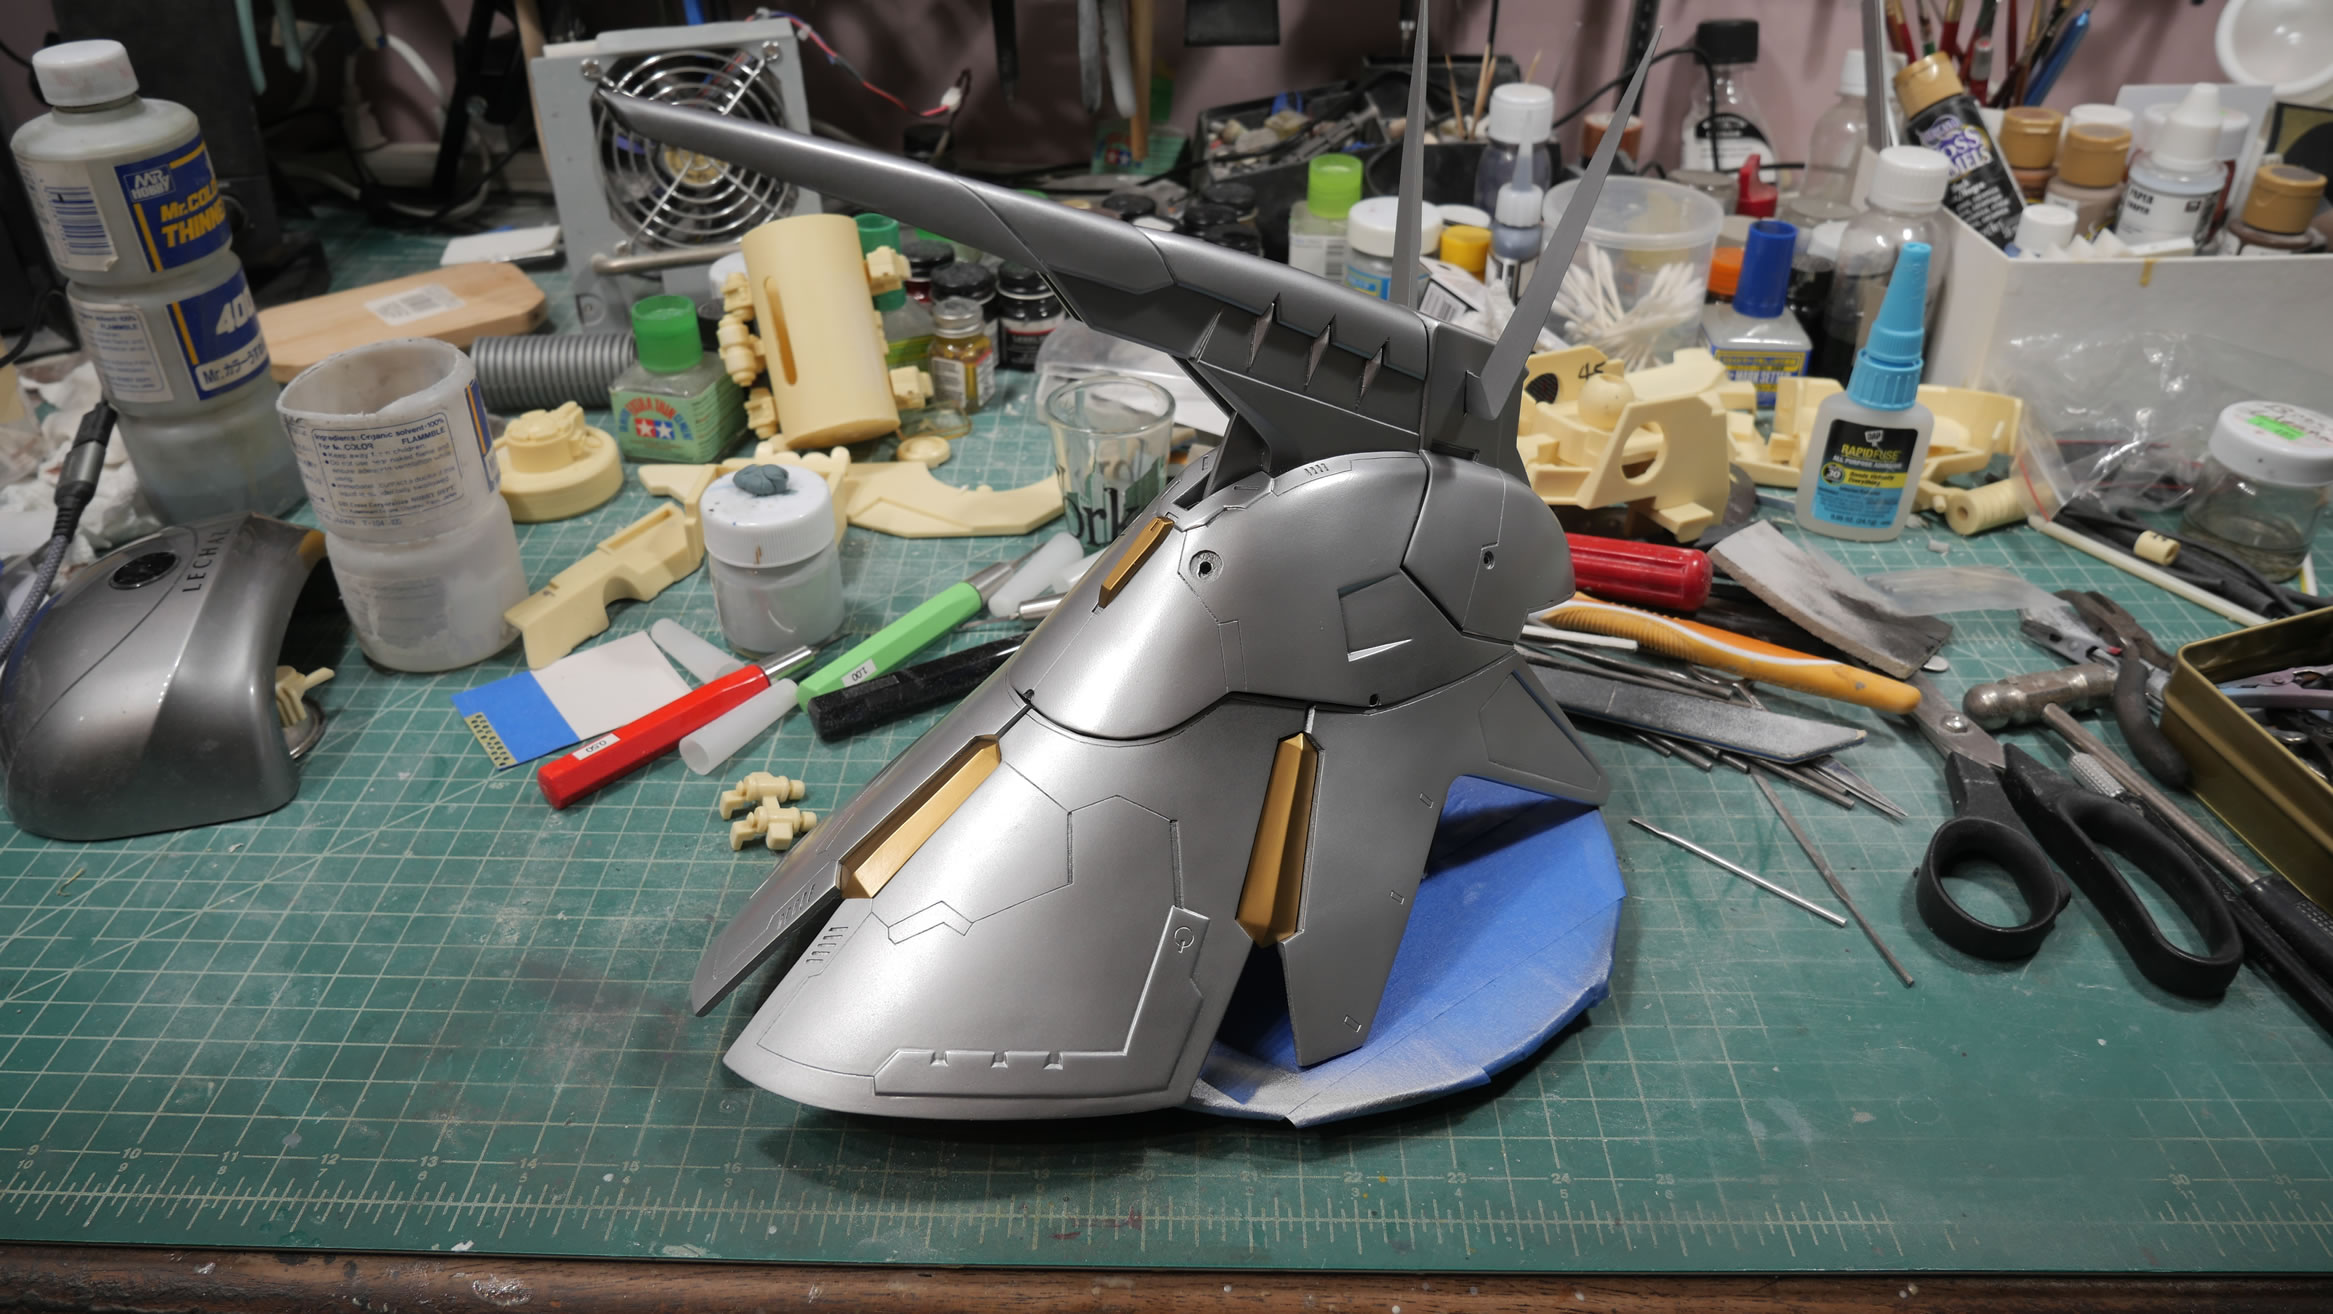
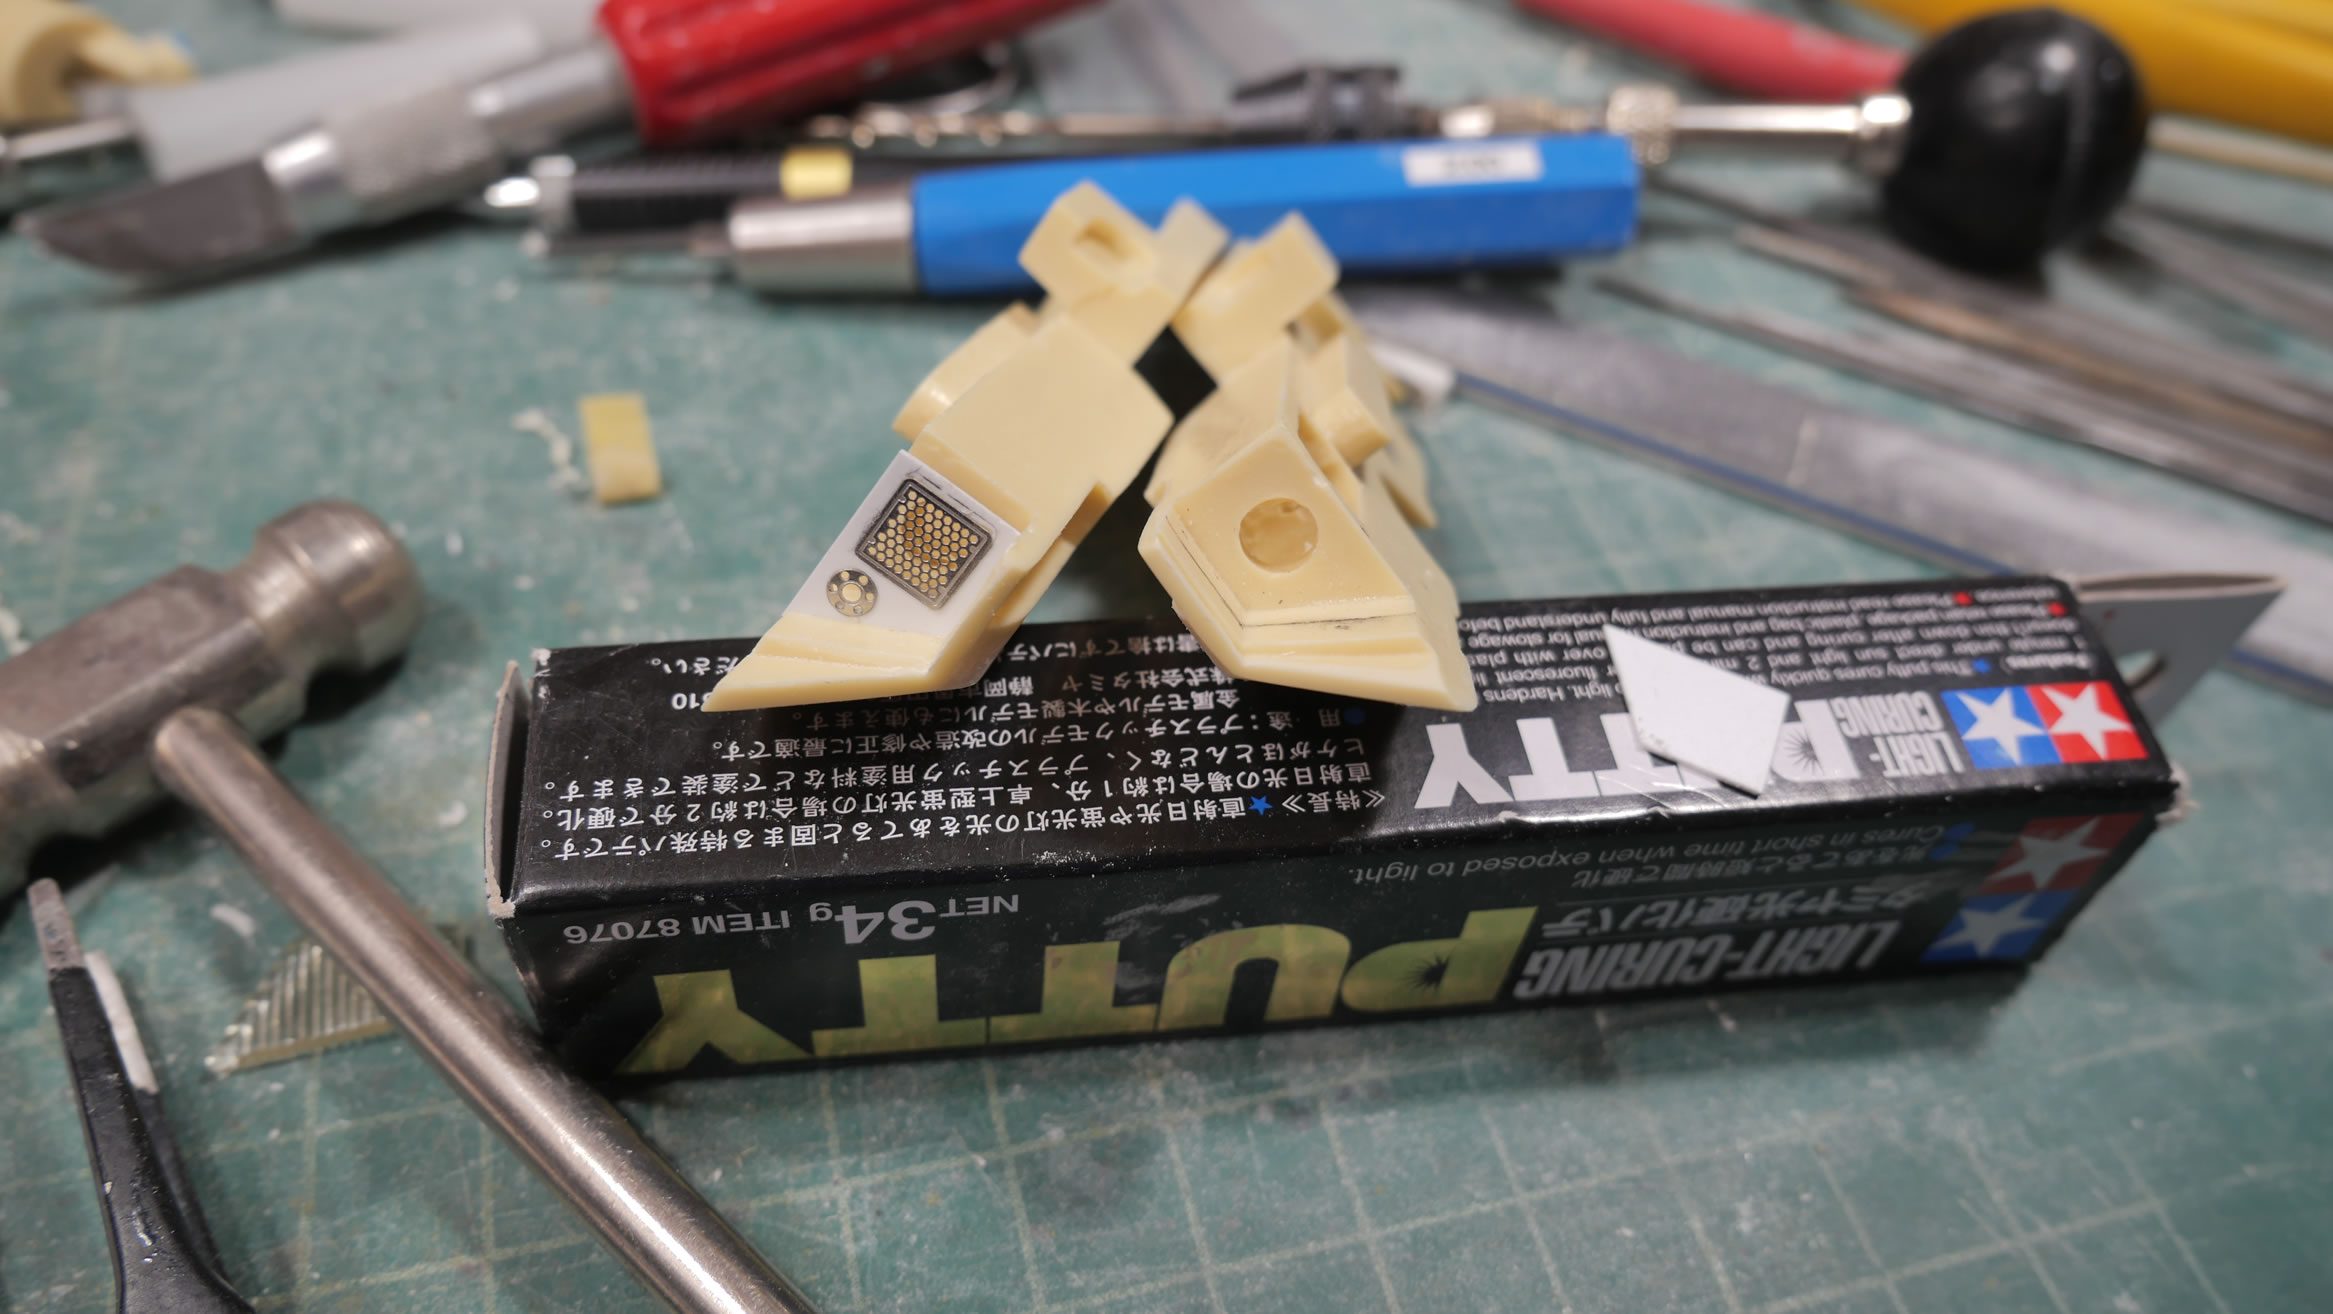
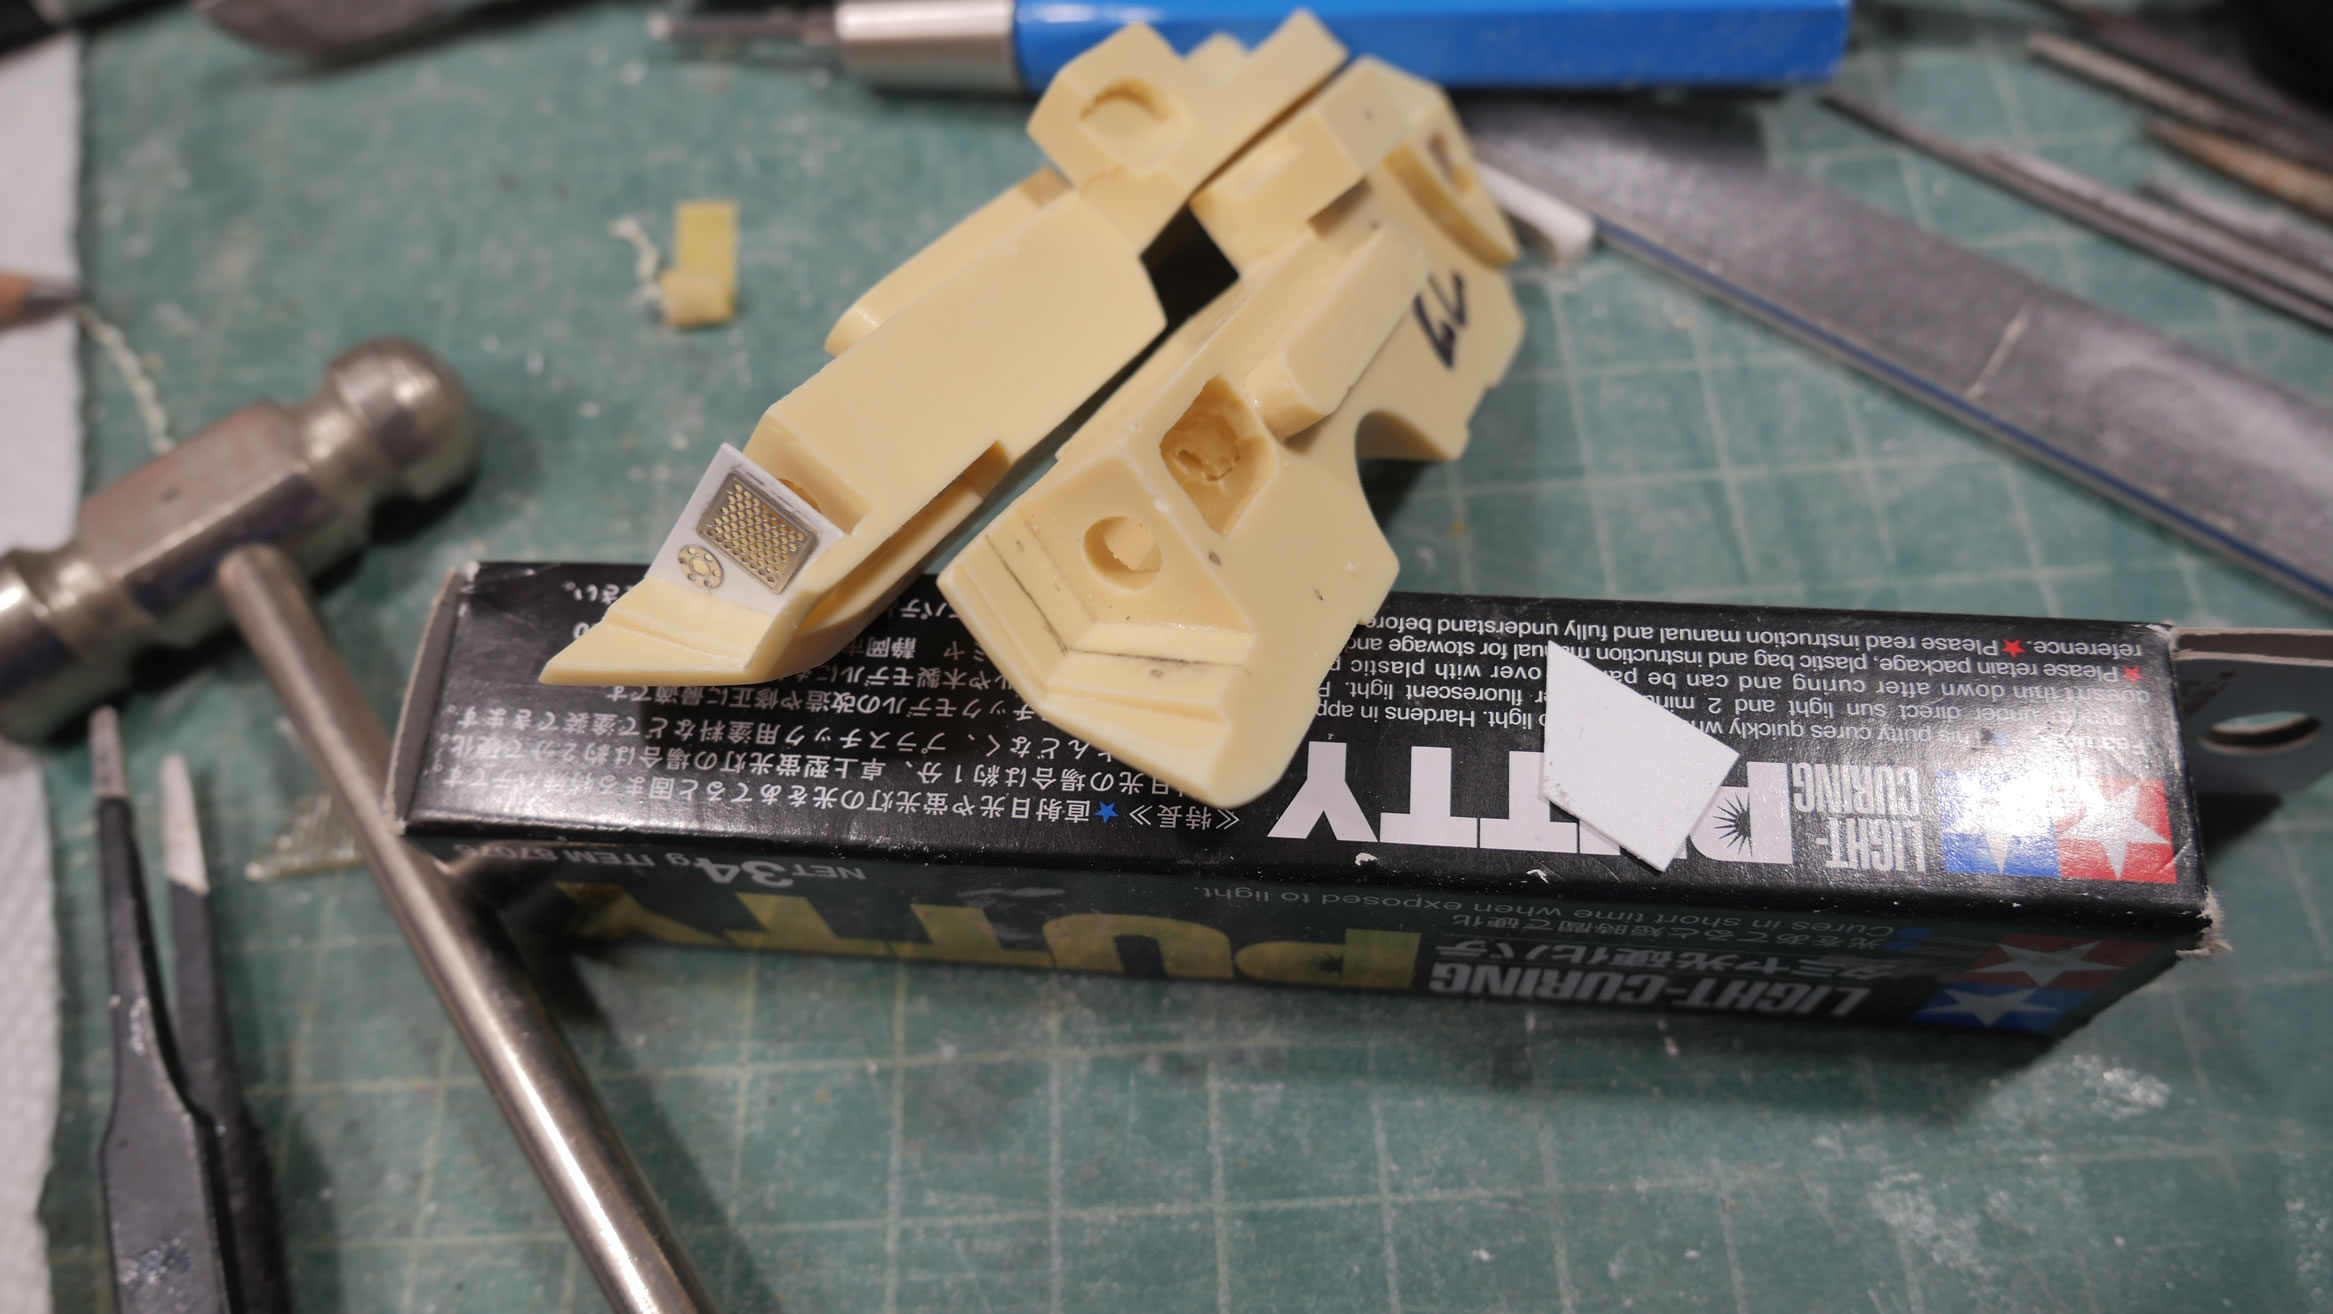
While paint dries on the head internals, I focus on the main head parts. There are a decent amount of pin holes that needed attention. So a little light curing putty here and there, some sanding, and primer to check. And in a few cases, some more putty, sanding, and priming. Light curing putty makes this process so fast.
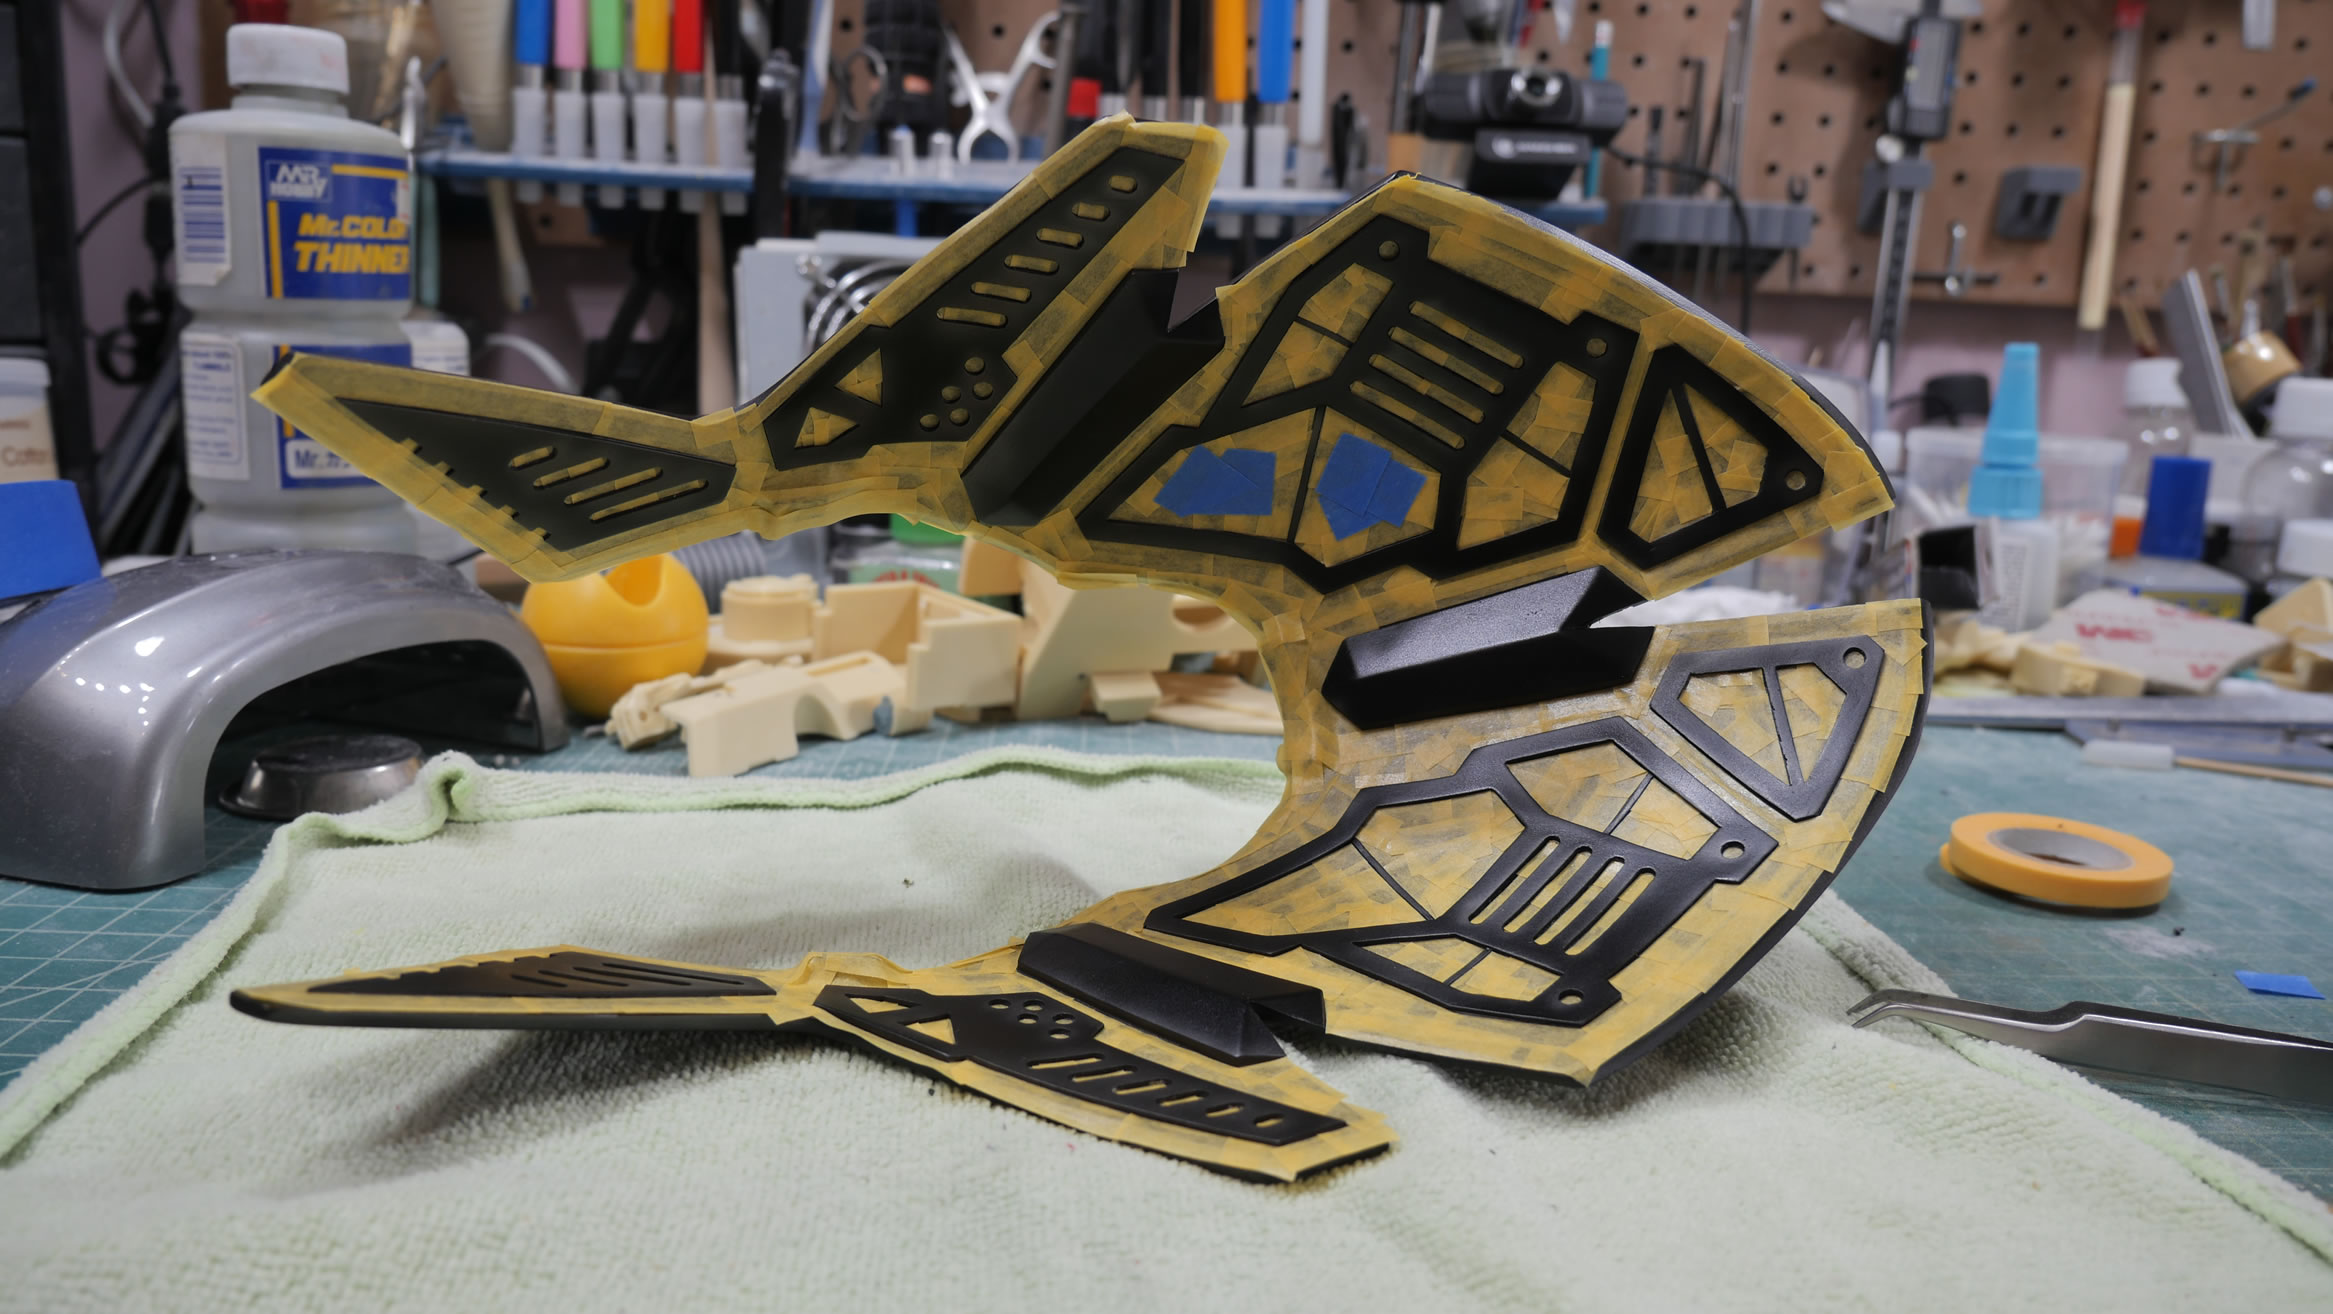
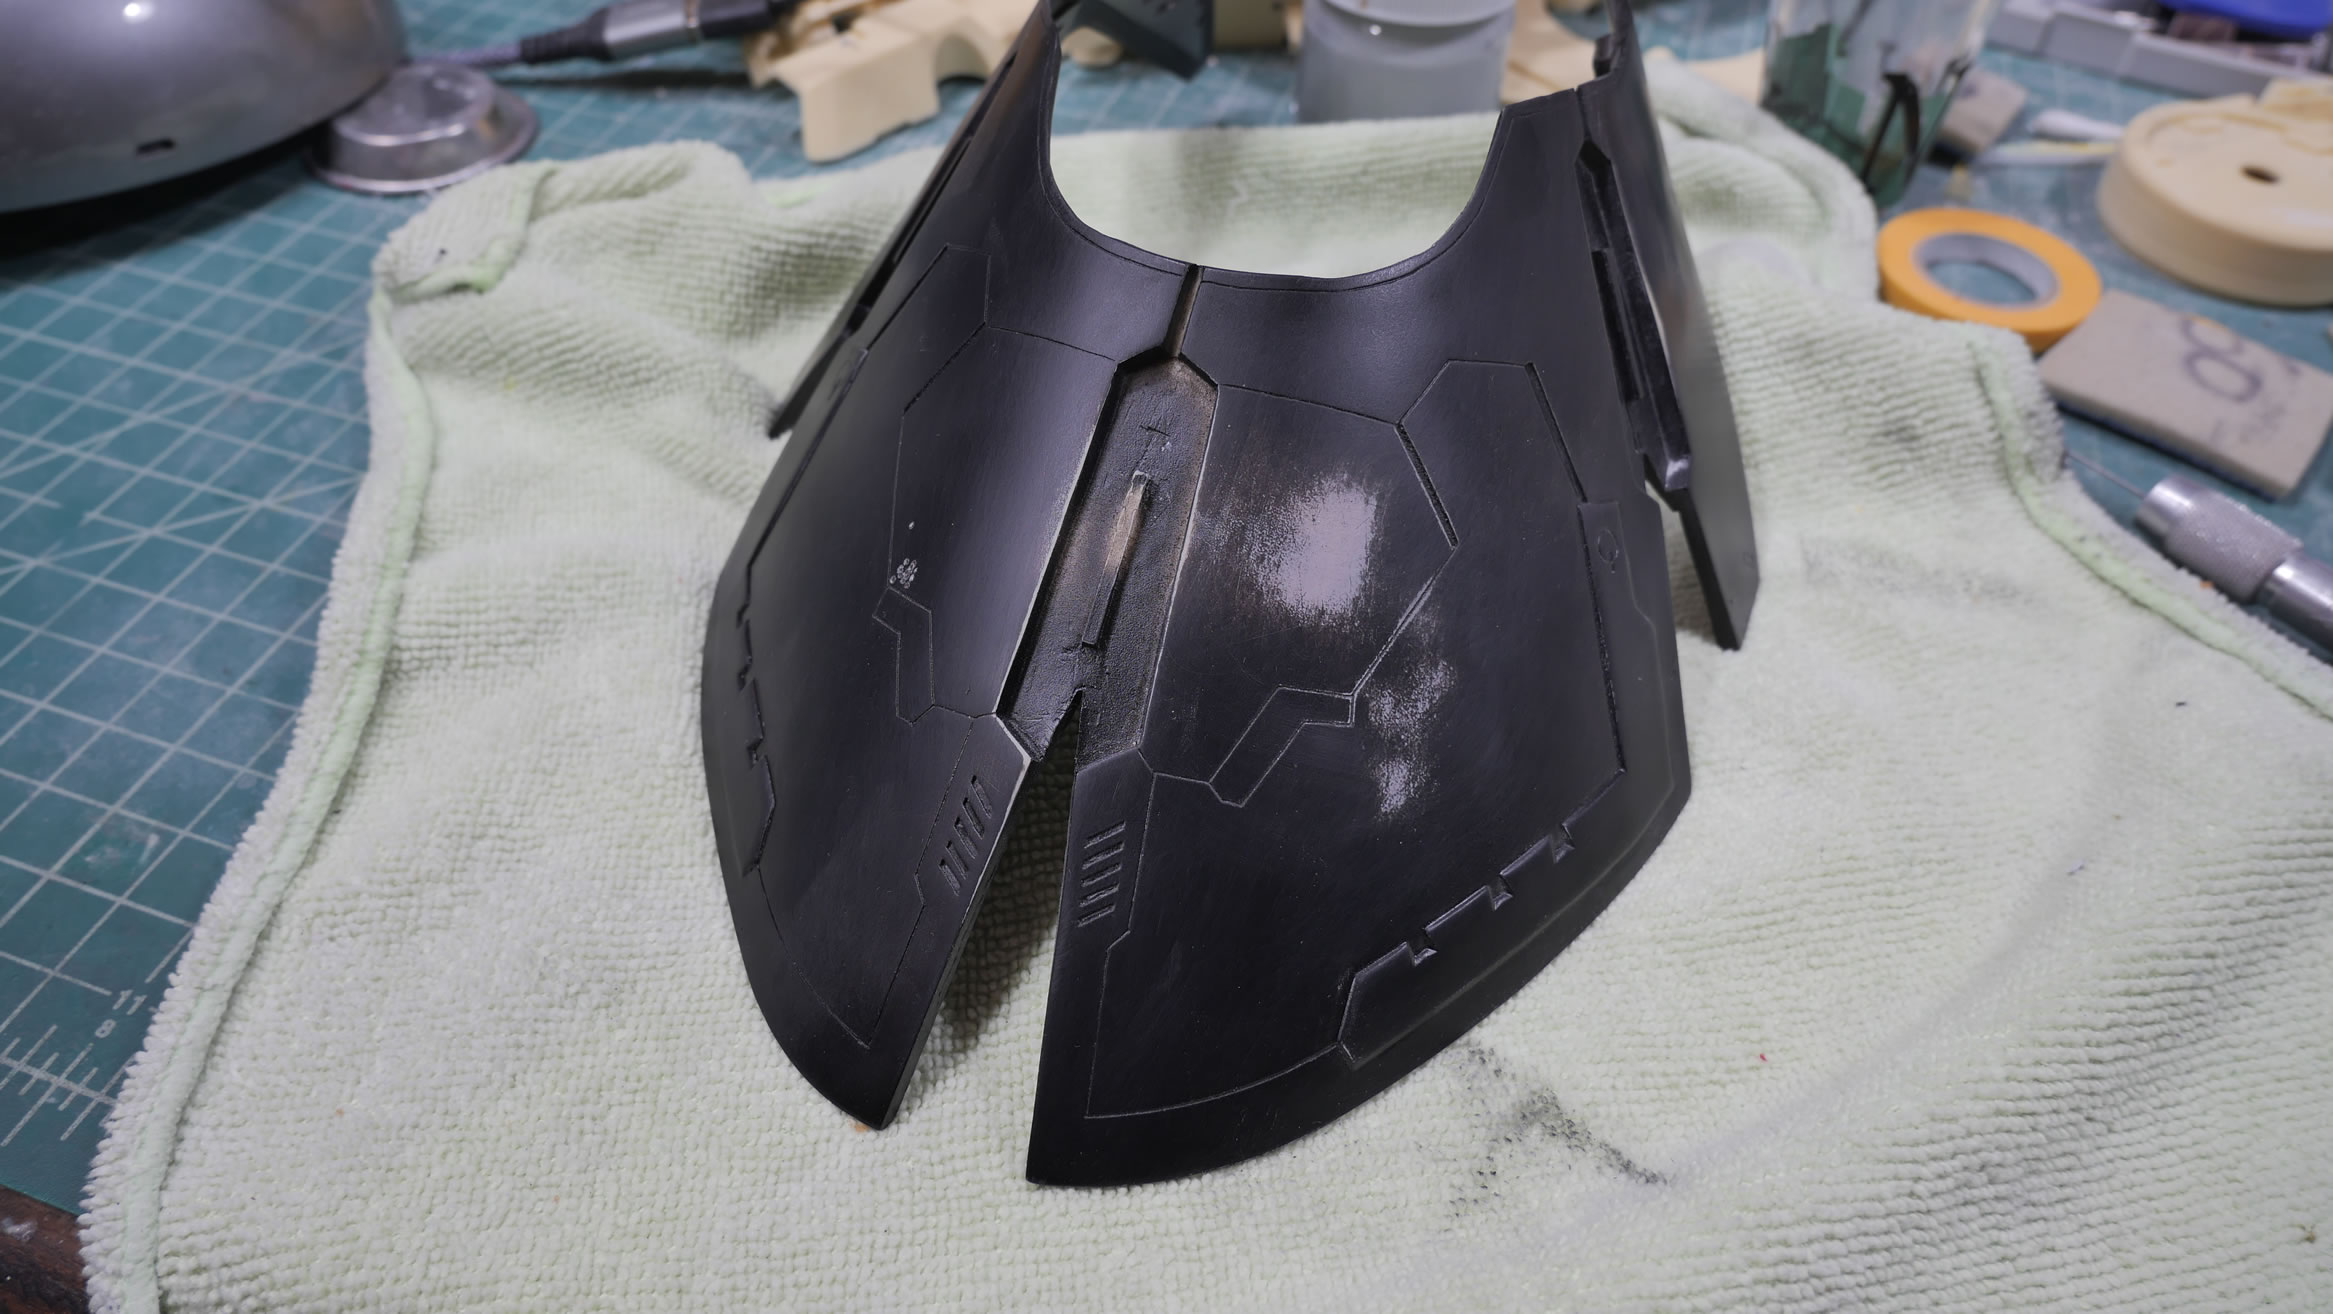
On to primer and black base coat. I switched from using the airbrush to spray cans. To just sit there and airbrush these larges pieces would put my fingers into arthritic arrest. Spray cans of Zoukei Mura GK surfacer from Volks works amazingly. They’re local so shipping takes a day or so after ordering. It sticks nicely to the surface. I did have to soak the parts and scrub vigorously as there was a decent amount of mold release on the parts. I went so far as rubbing the parts with lacquer thinner. For the most part, I didn’t get much paint chipping from removing masking tape, so this primer sticks nicely.


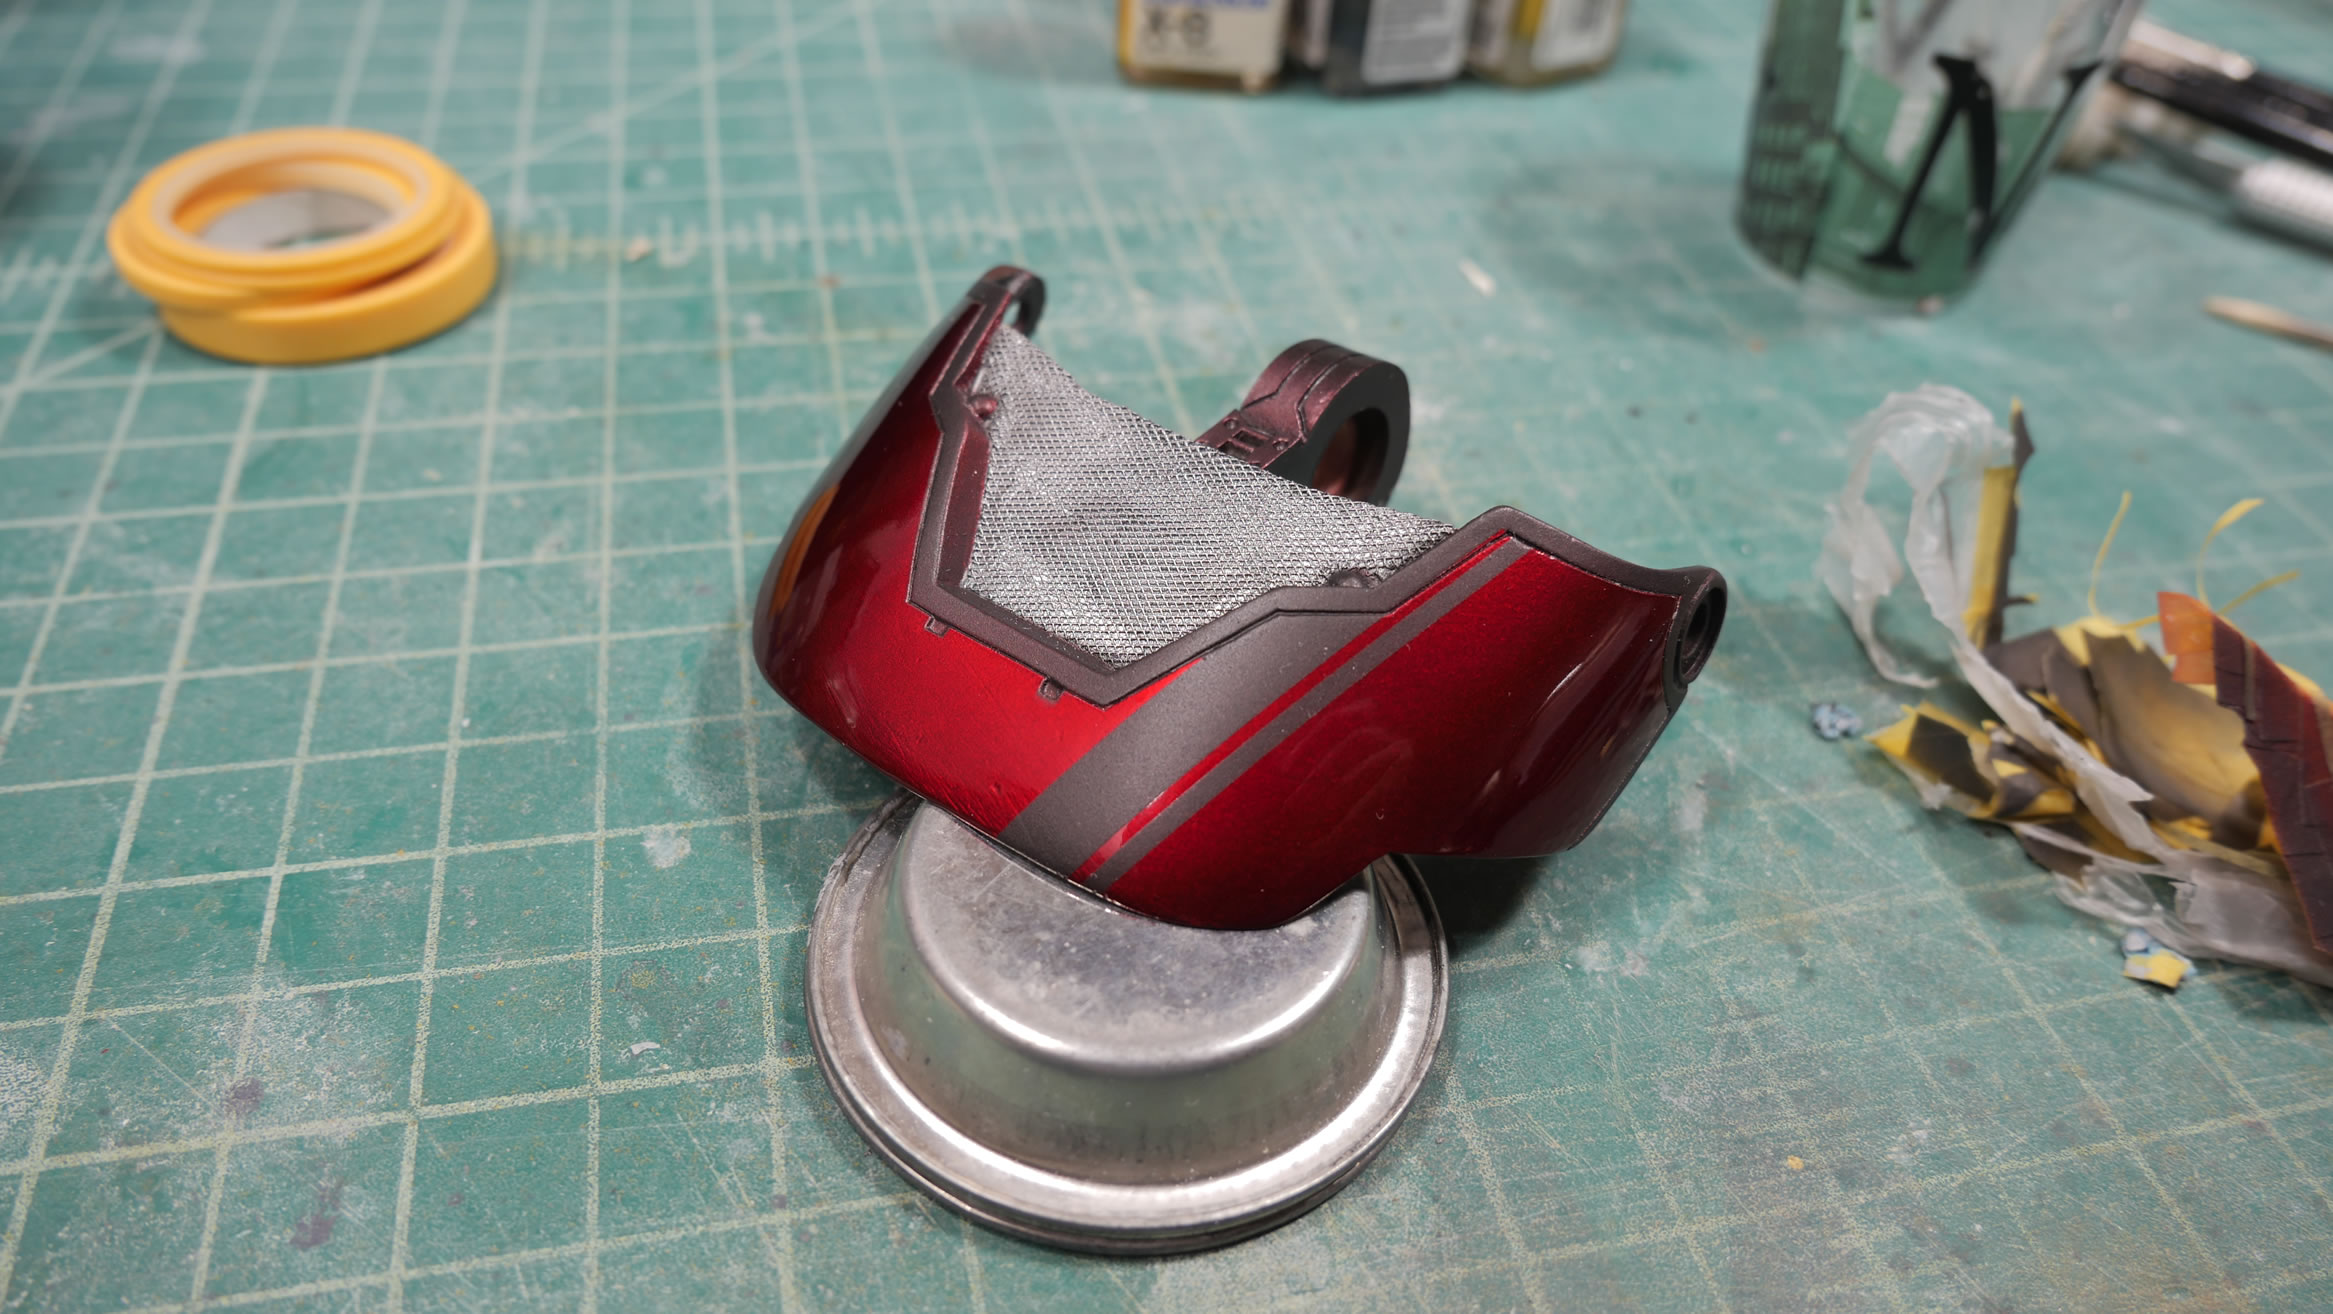
Here is one of the areas that had photoetch, so I cut out a template with masking tape and cut out some metal mesh.
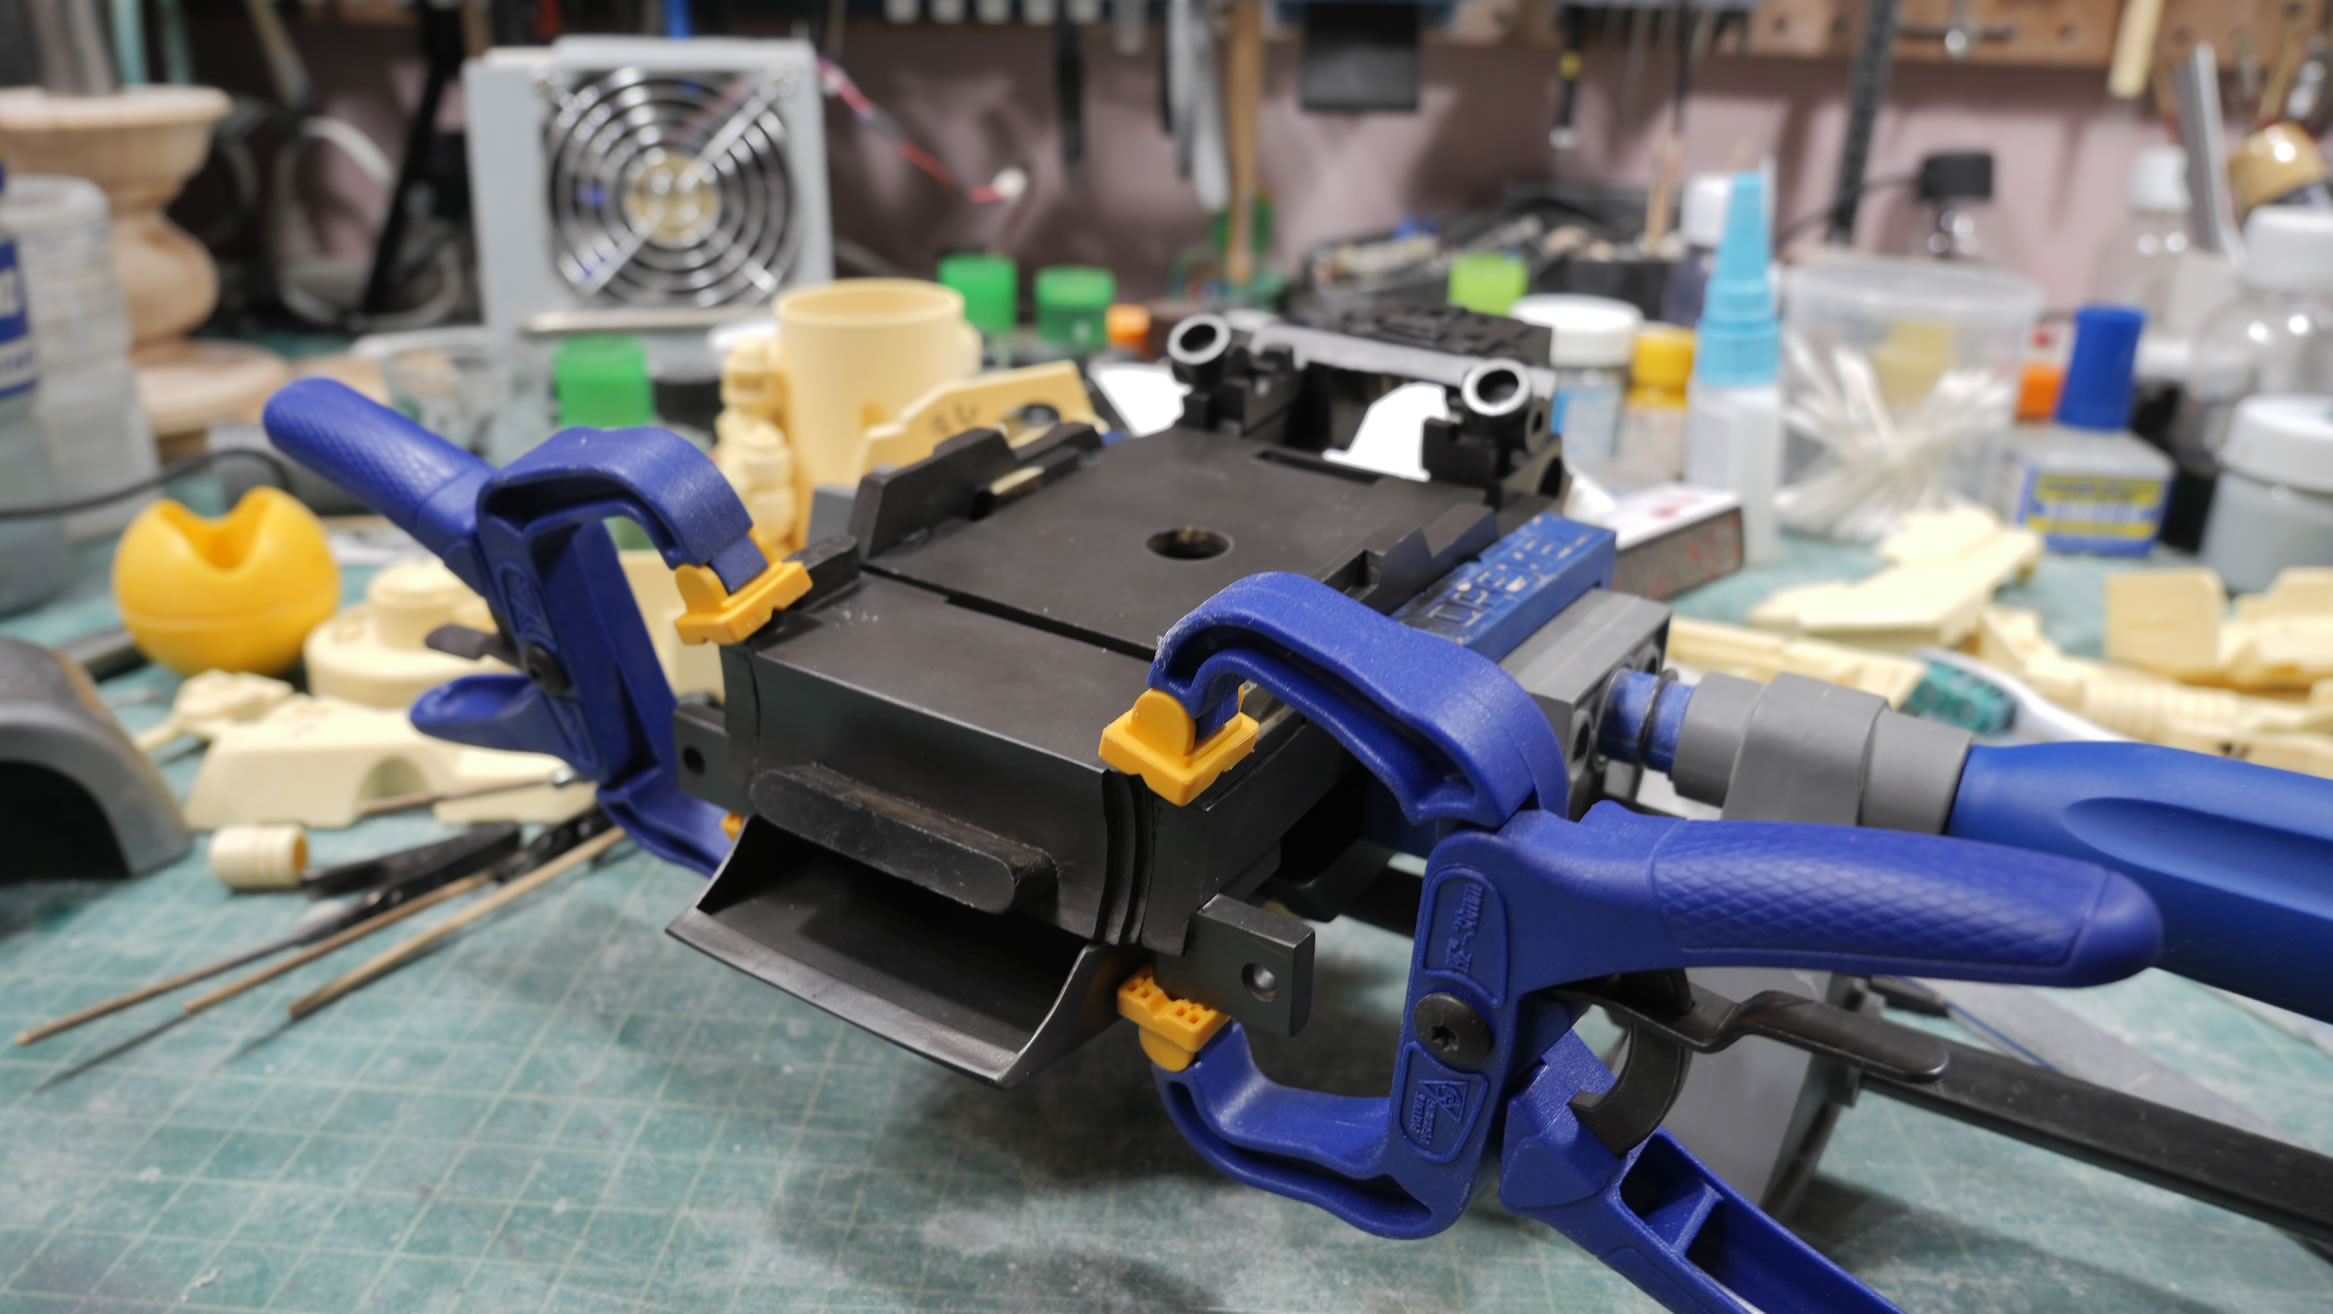
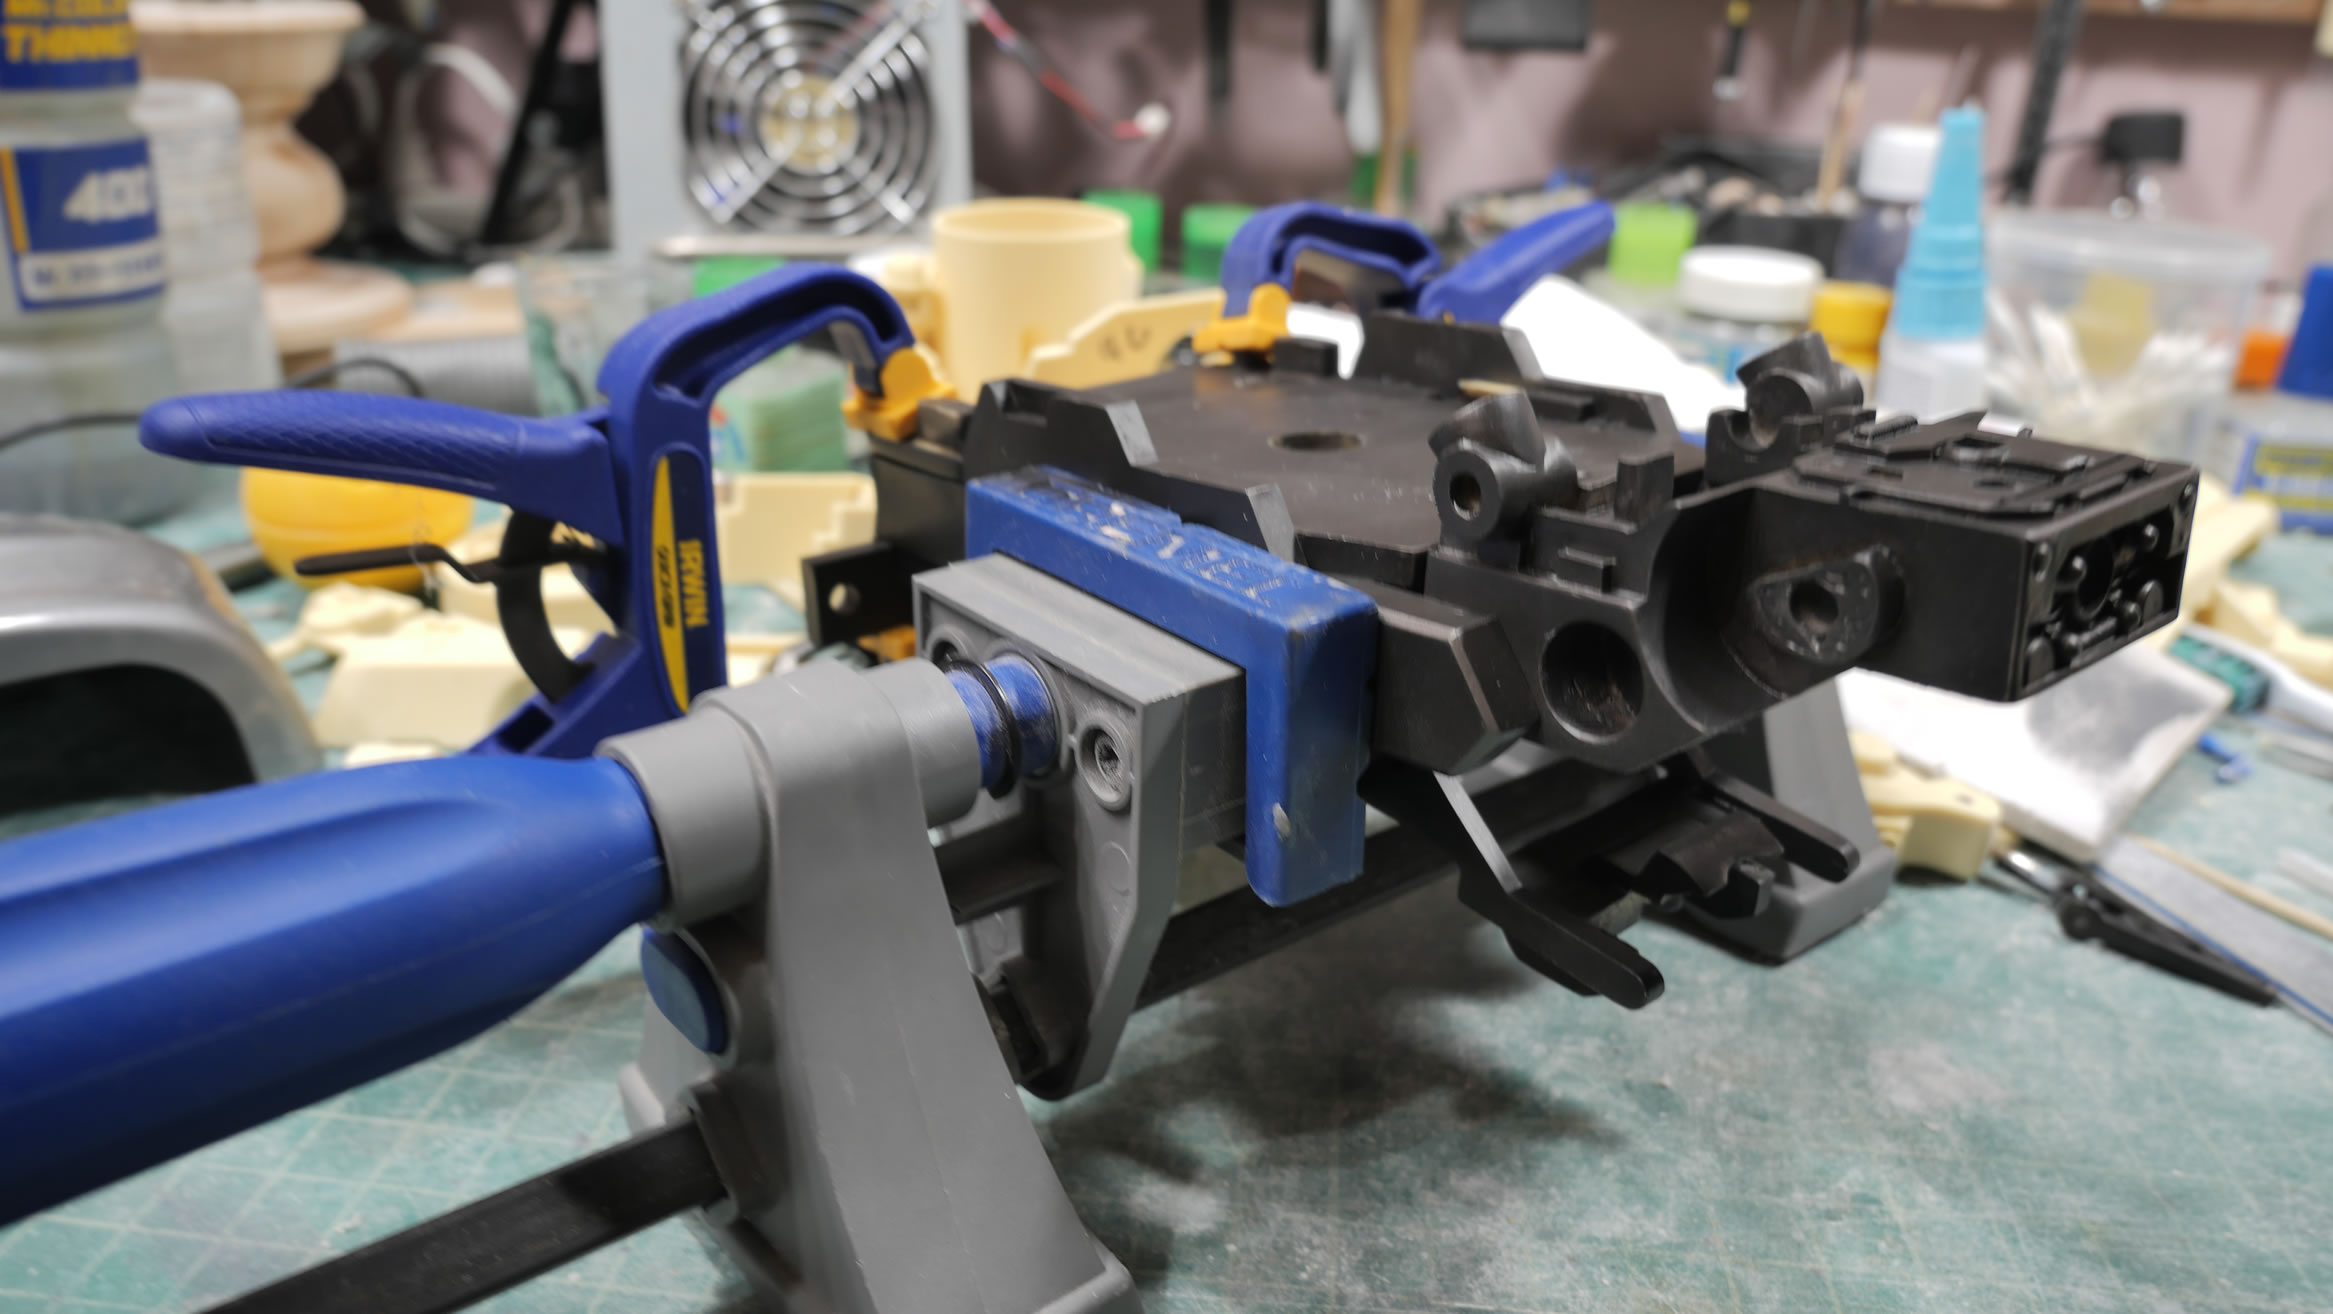
Main body of the bust is painted and glued together. Clamps and vices help keep things straight while the glue sets up.
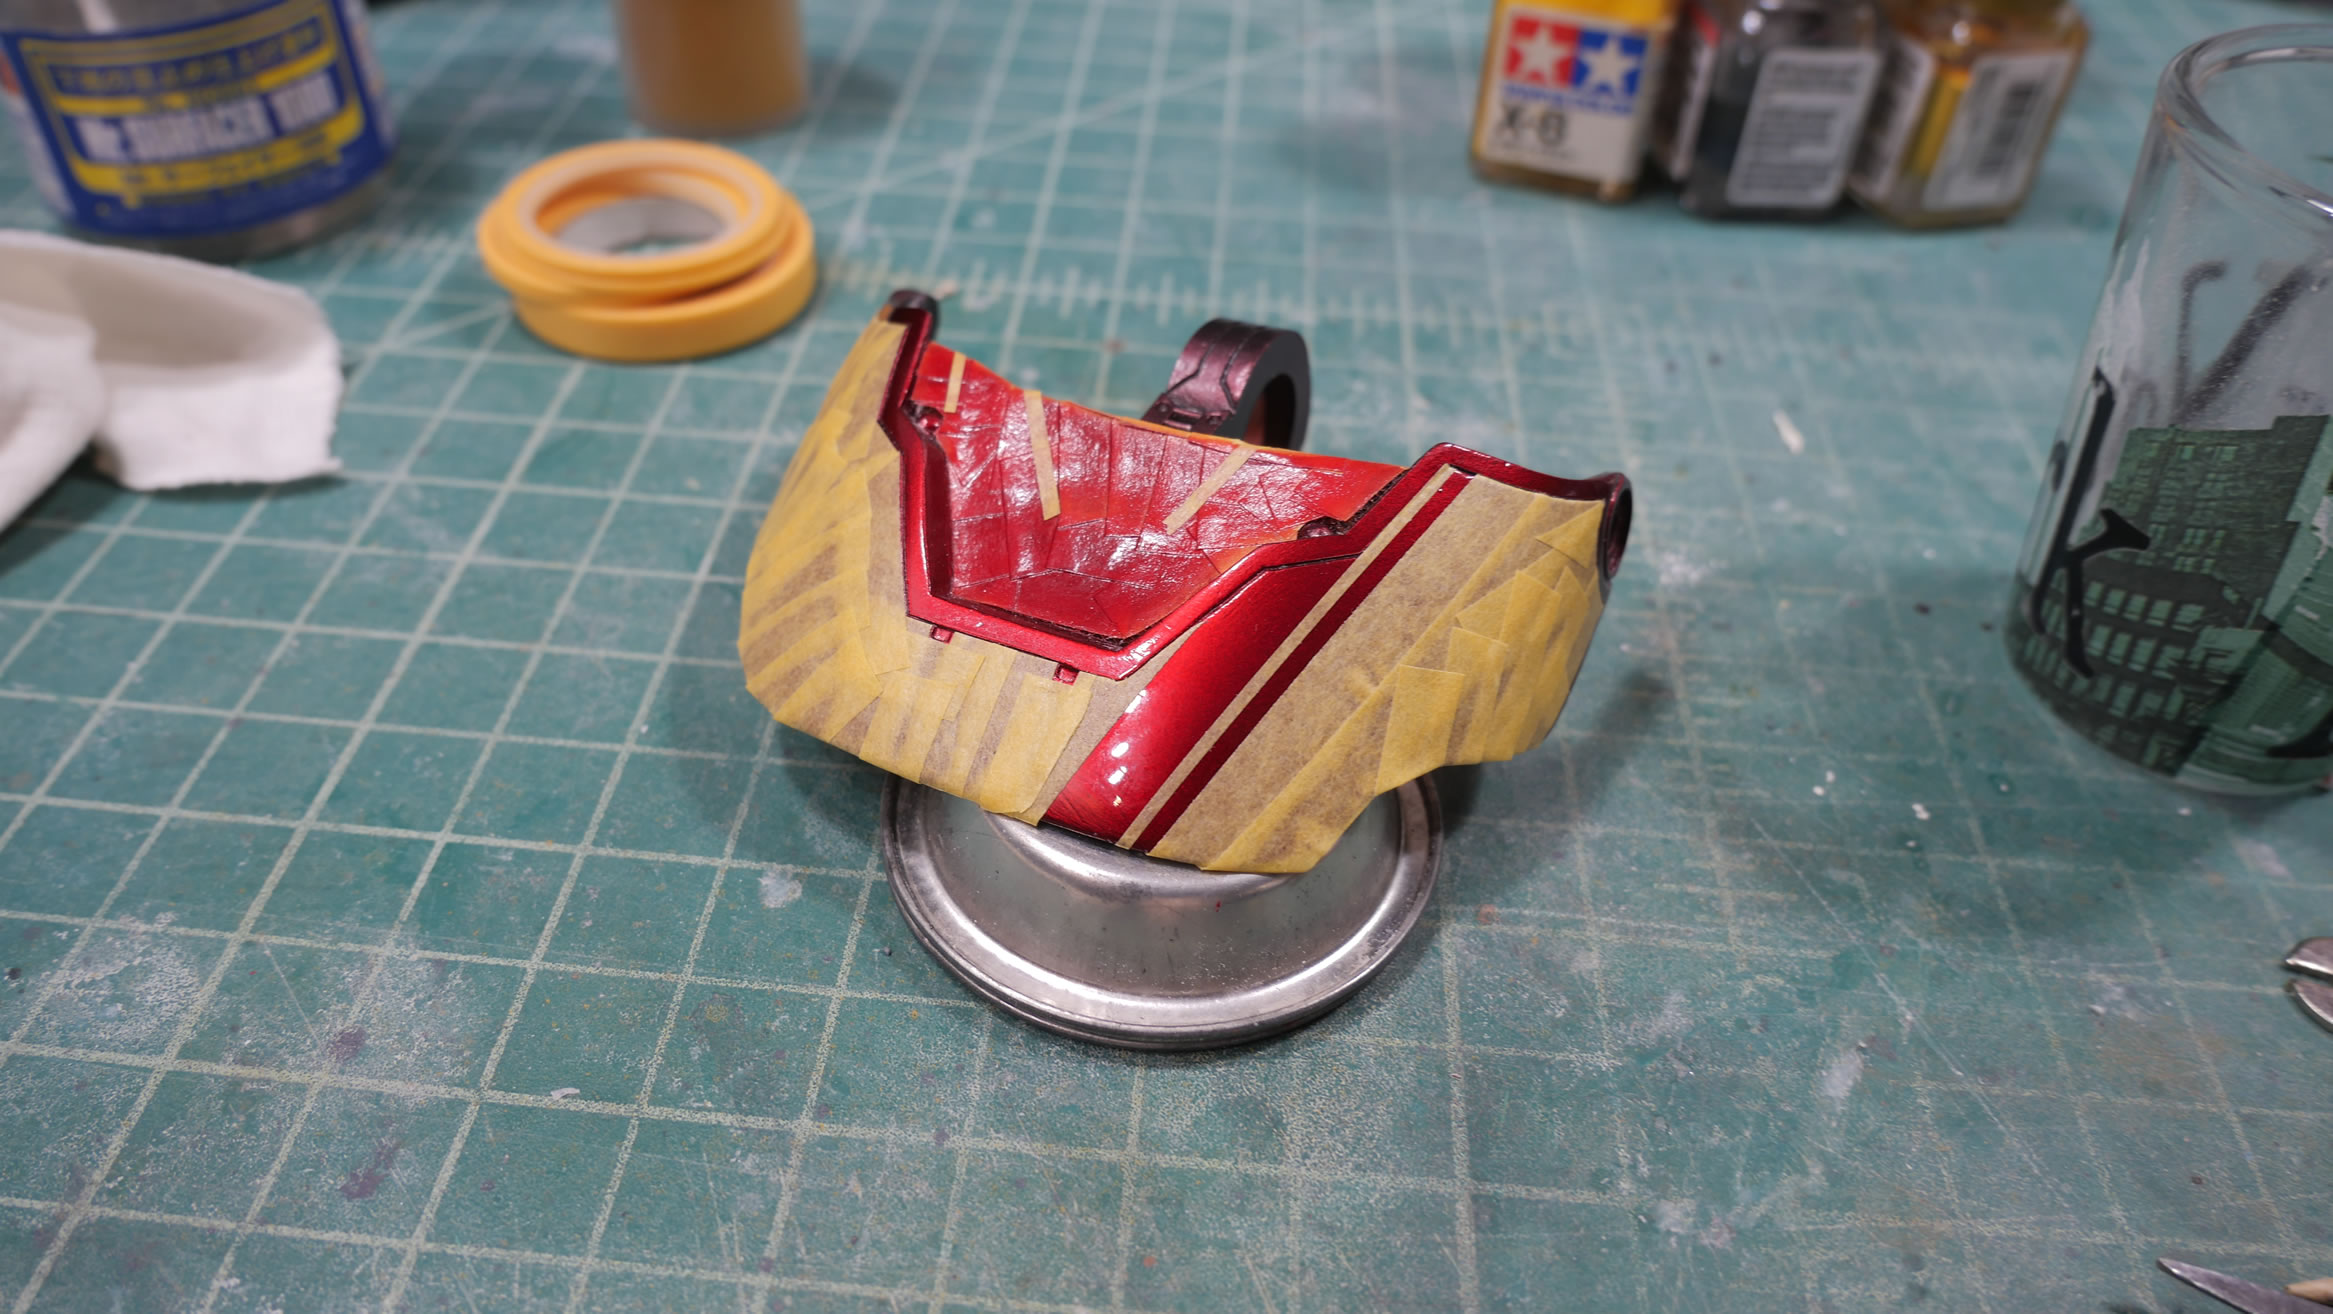
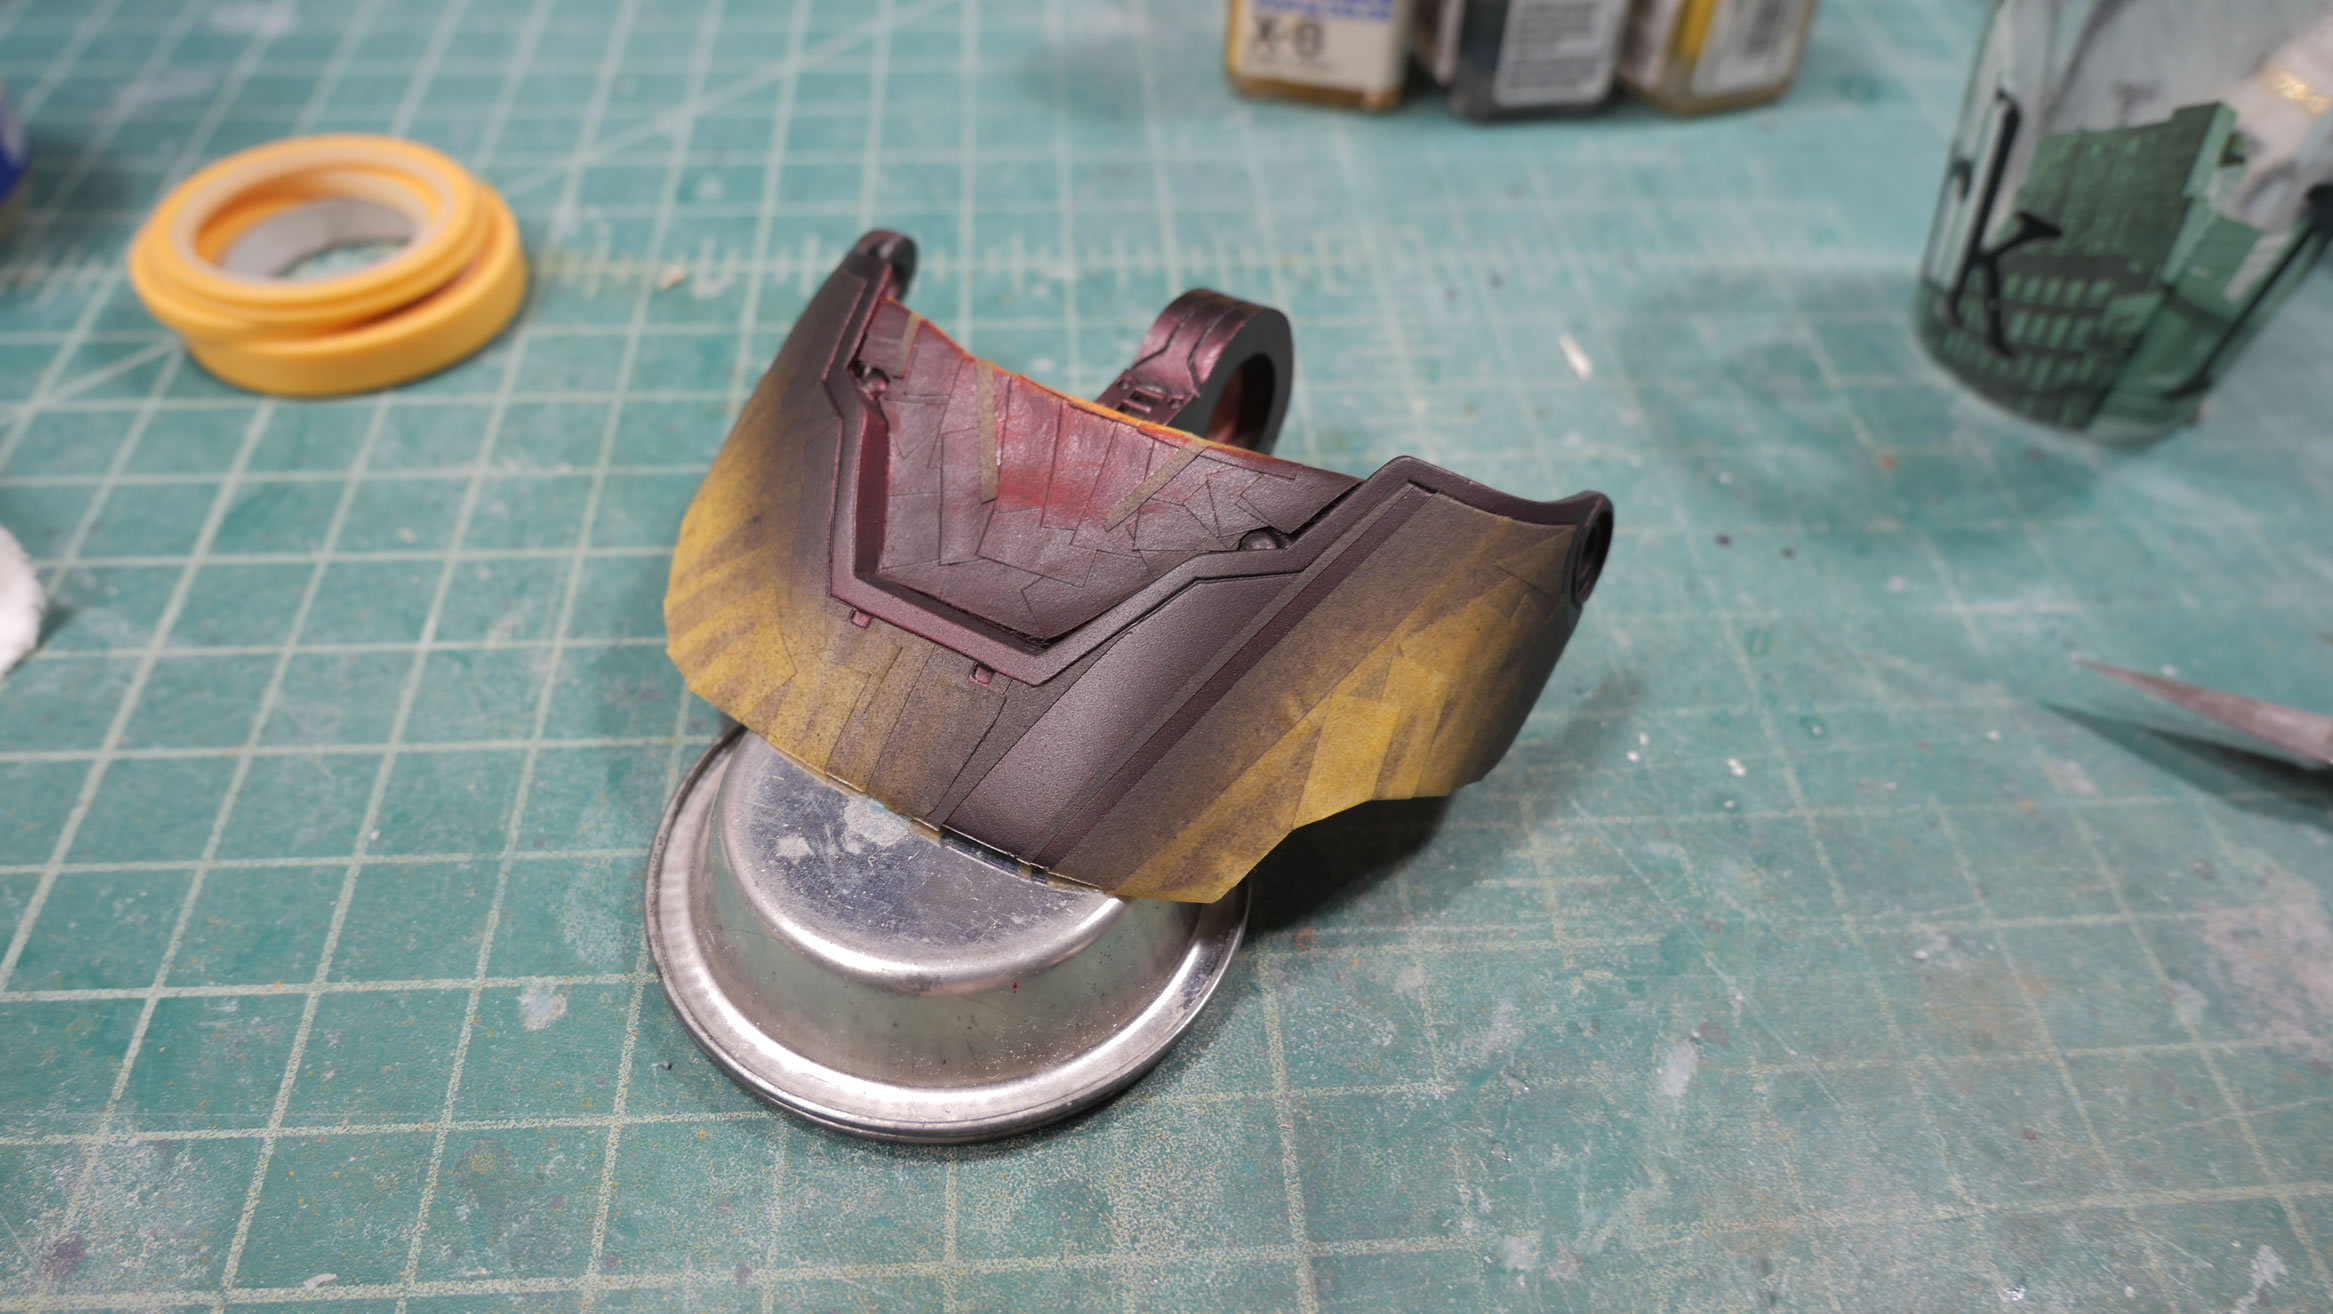
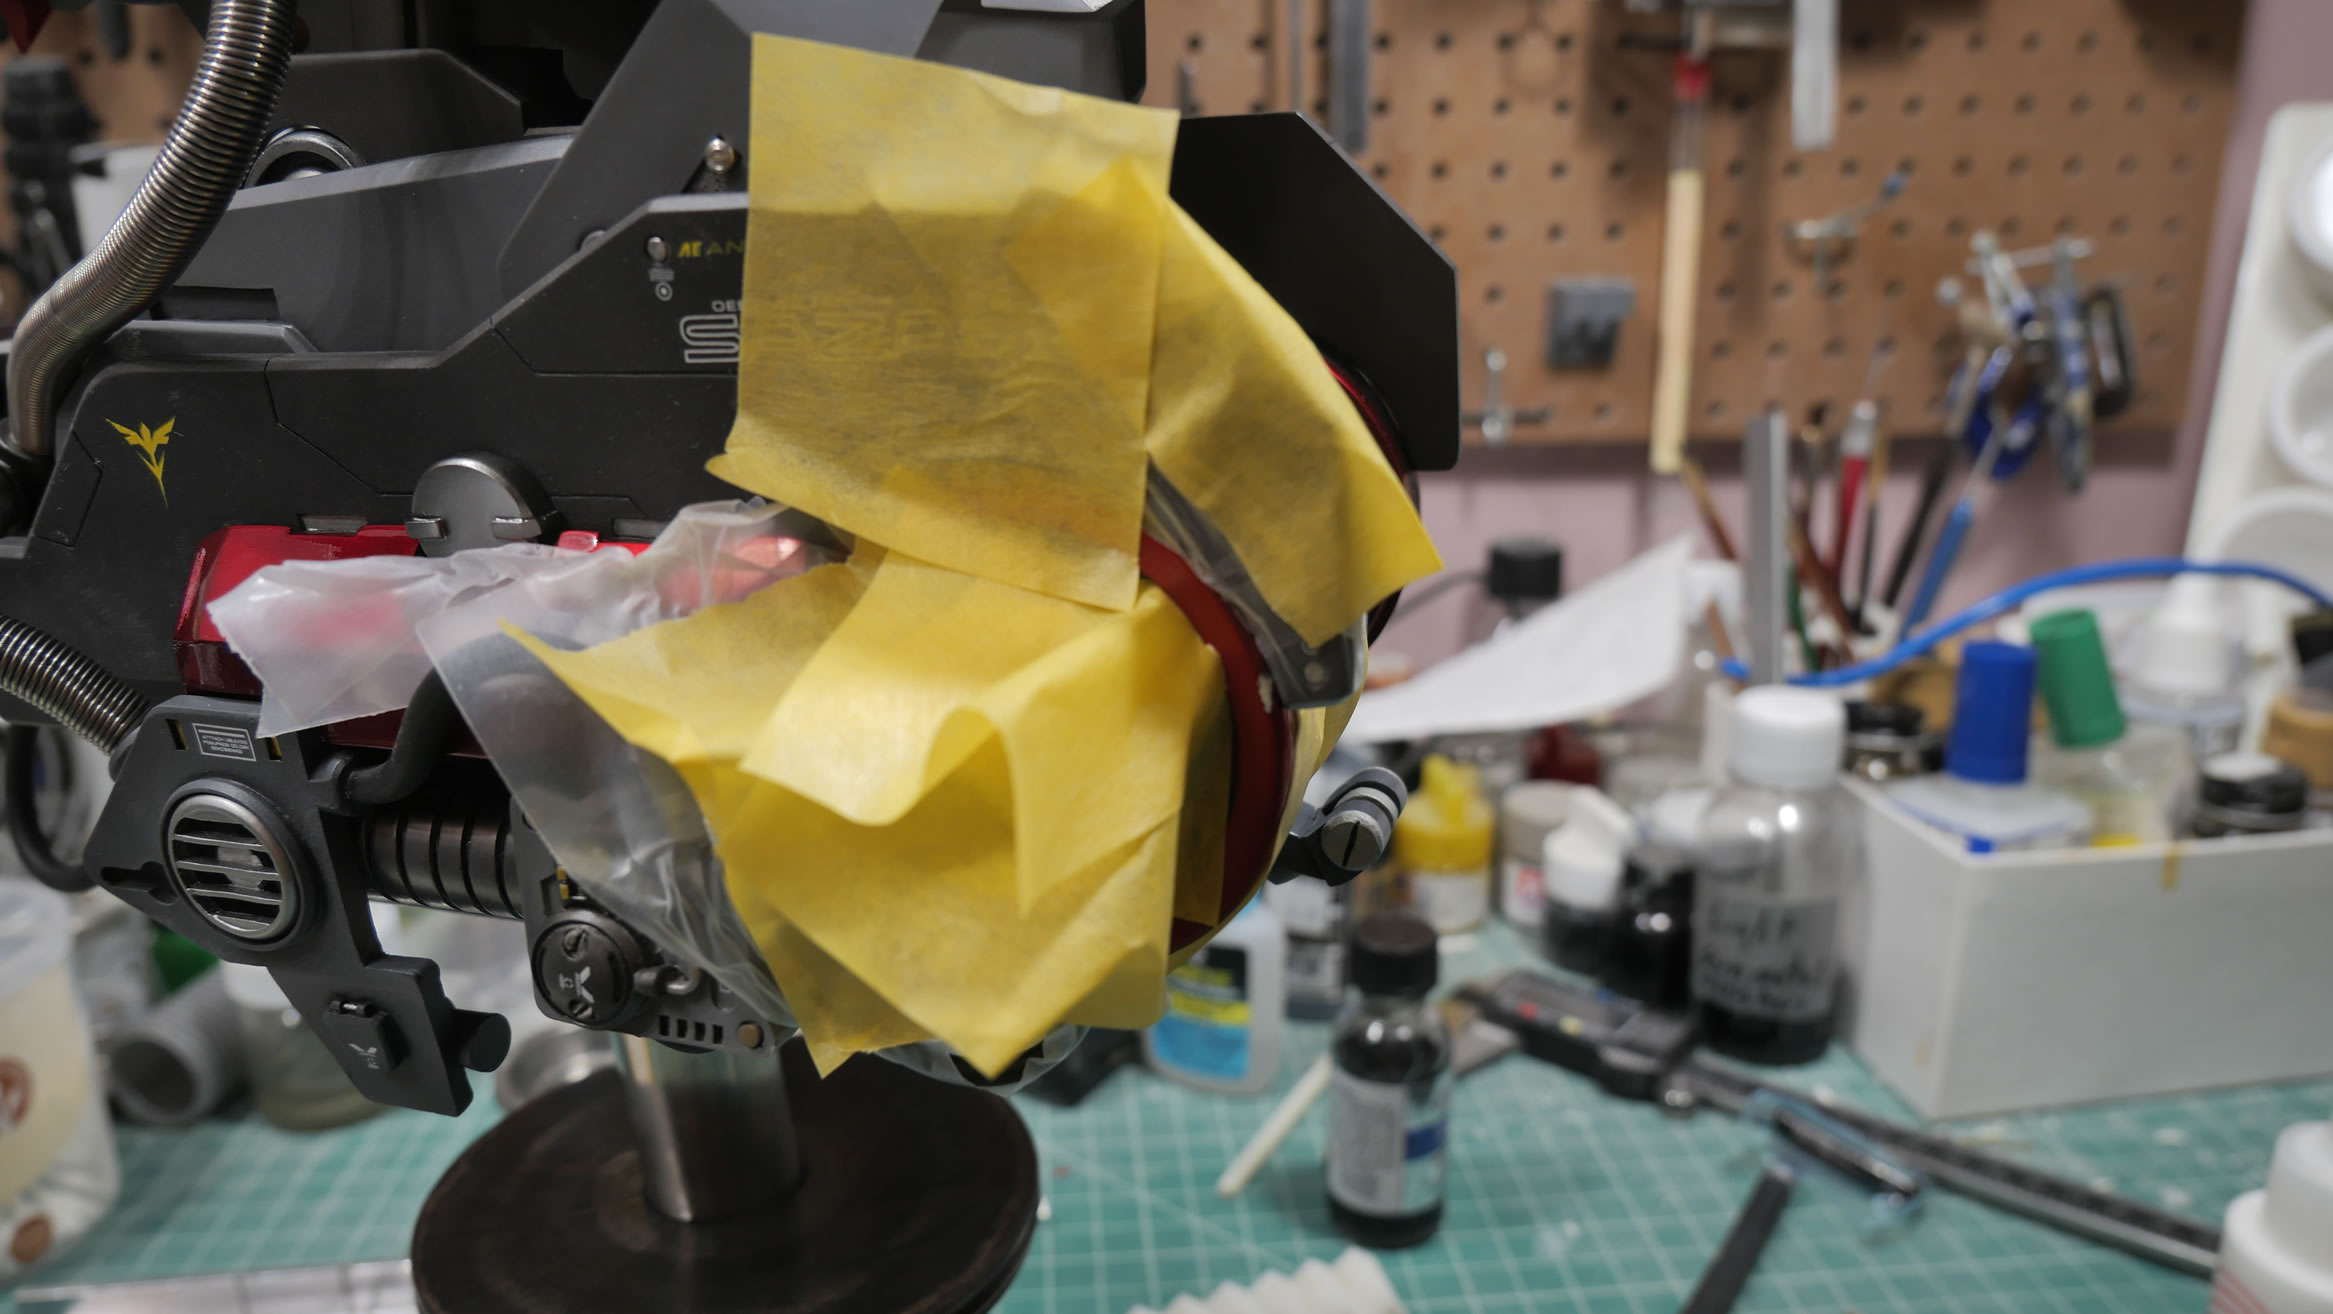
Masking the internals of the head to paint it. I got the suggestion to reverse wash it; and I really didn’t even think about it as the spaces were so large, I figured it’d be easy enough to mask. The masking process took about 6 hours in total.
Painting about 3 minutes. Unmasking about 15 to 20 minutes. I still think it was worth it. I didn’t get any paint chipping.
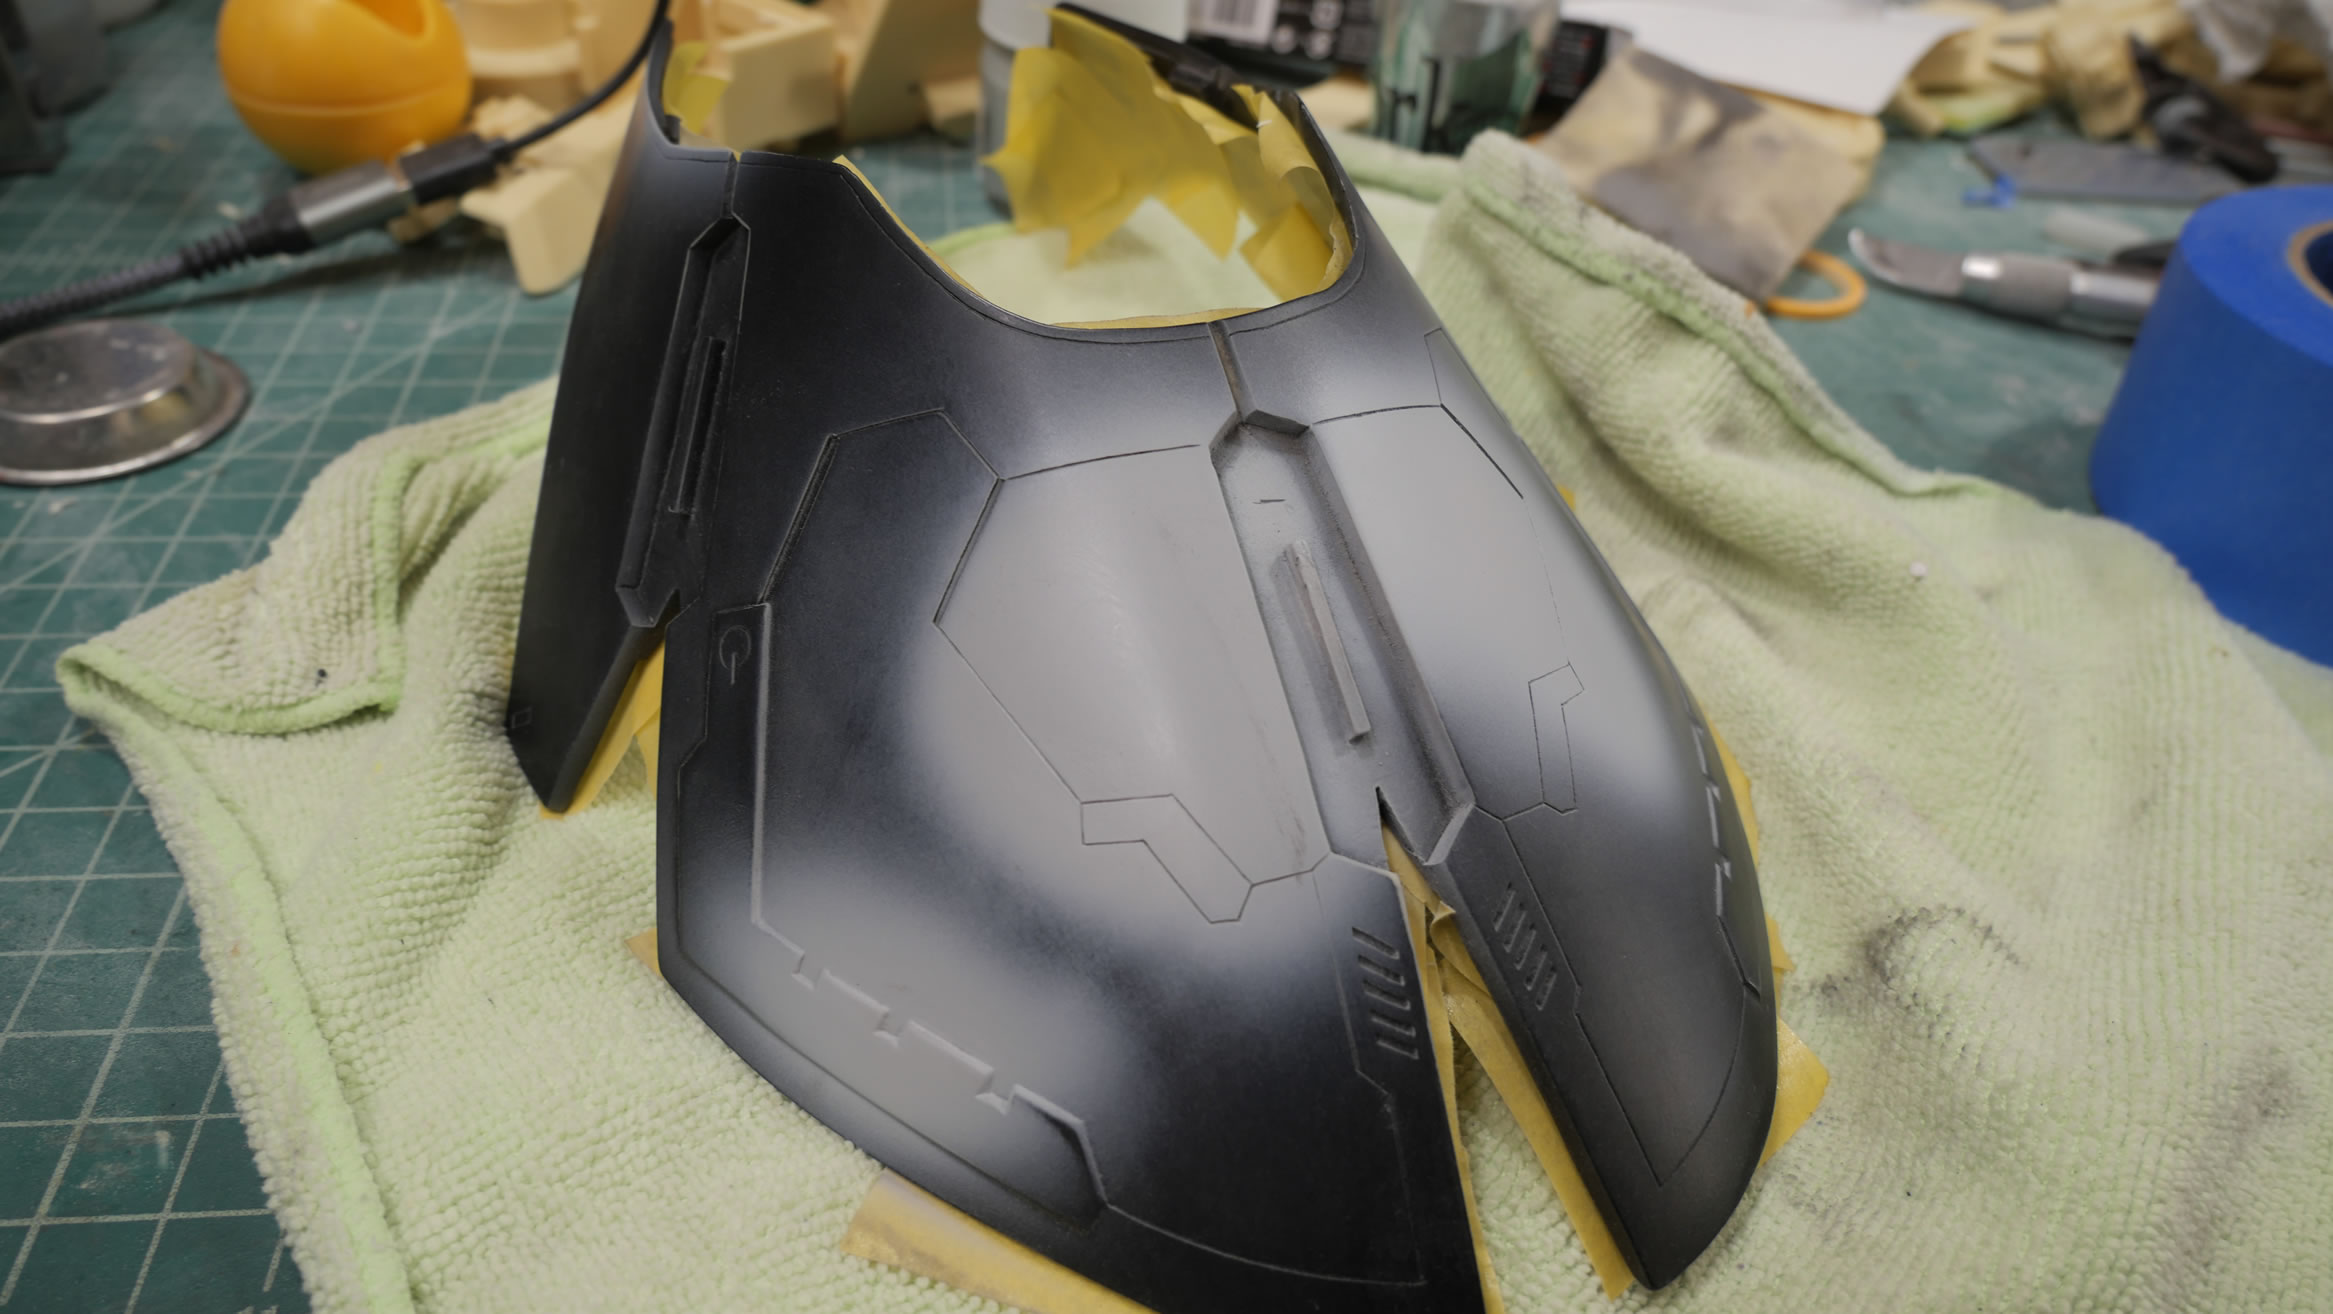
There were some surface defects that I missed, so a little sanding, light curing putty, more sanding, and more priming fixes everything, then spray the black primer.
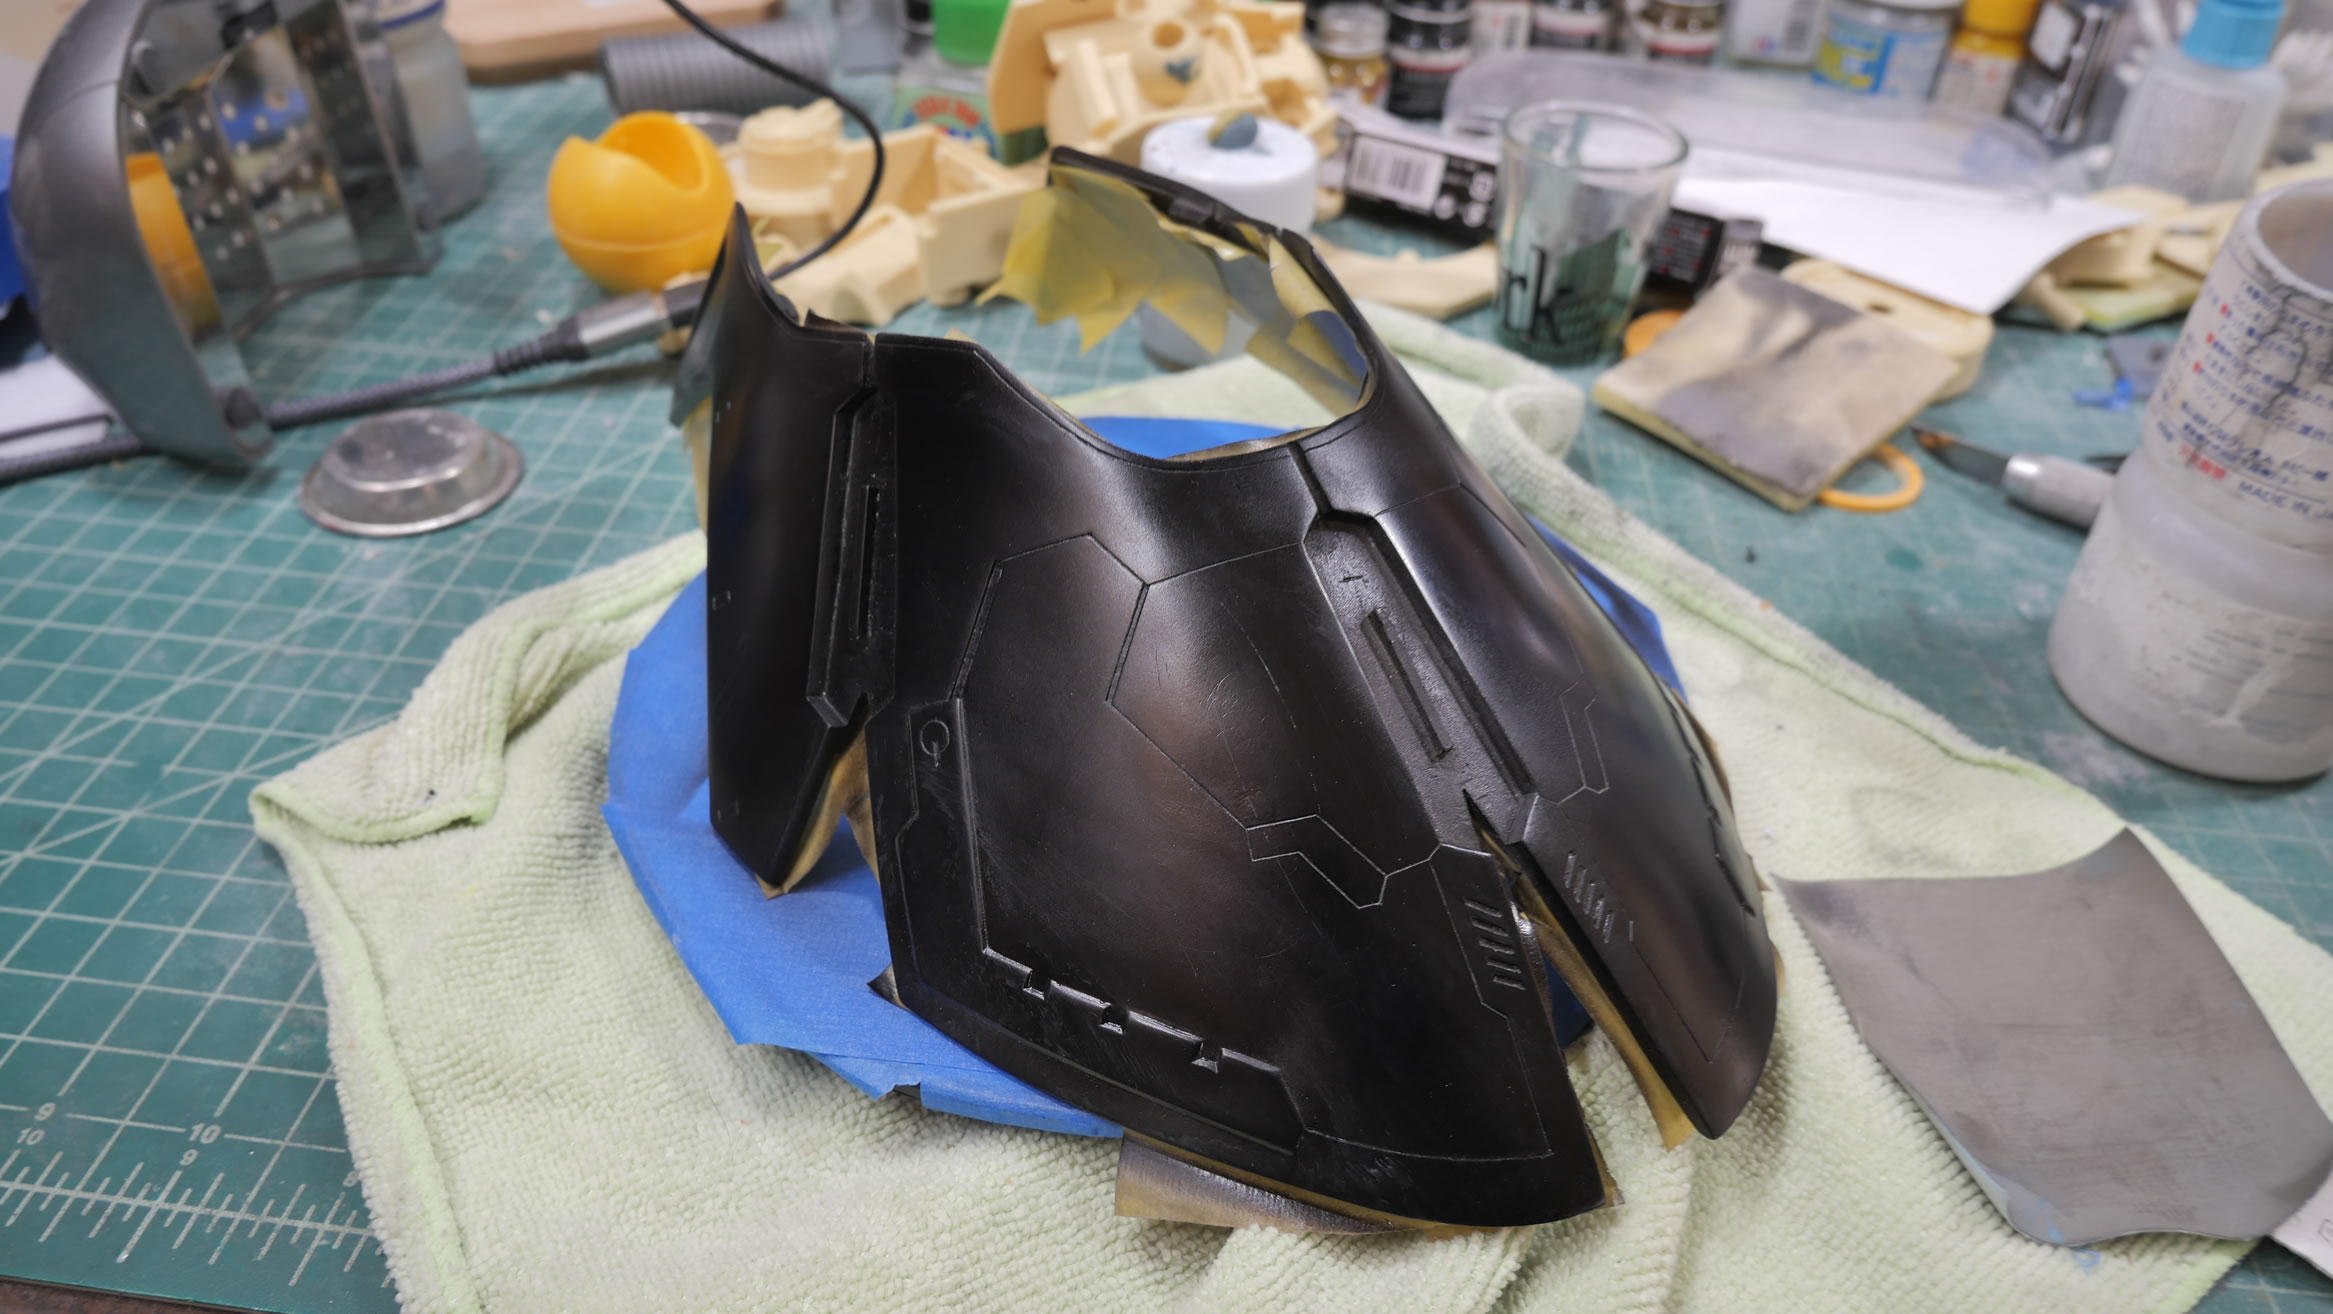
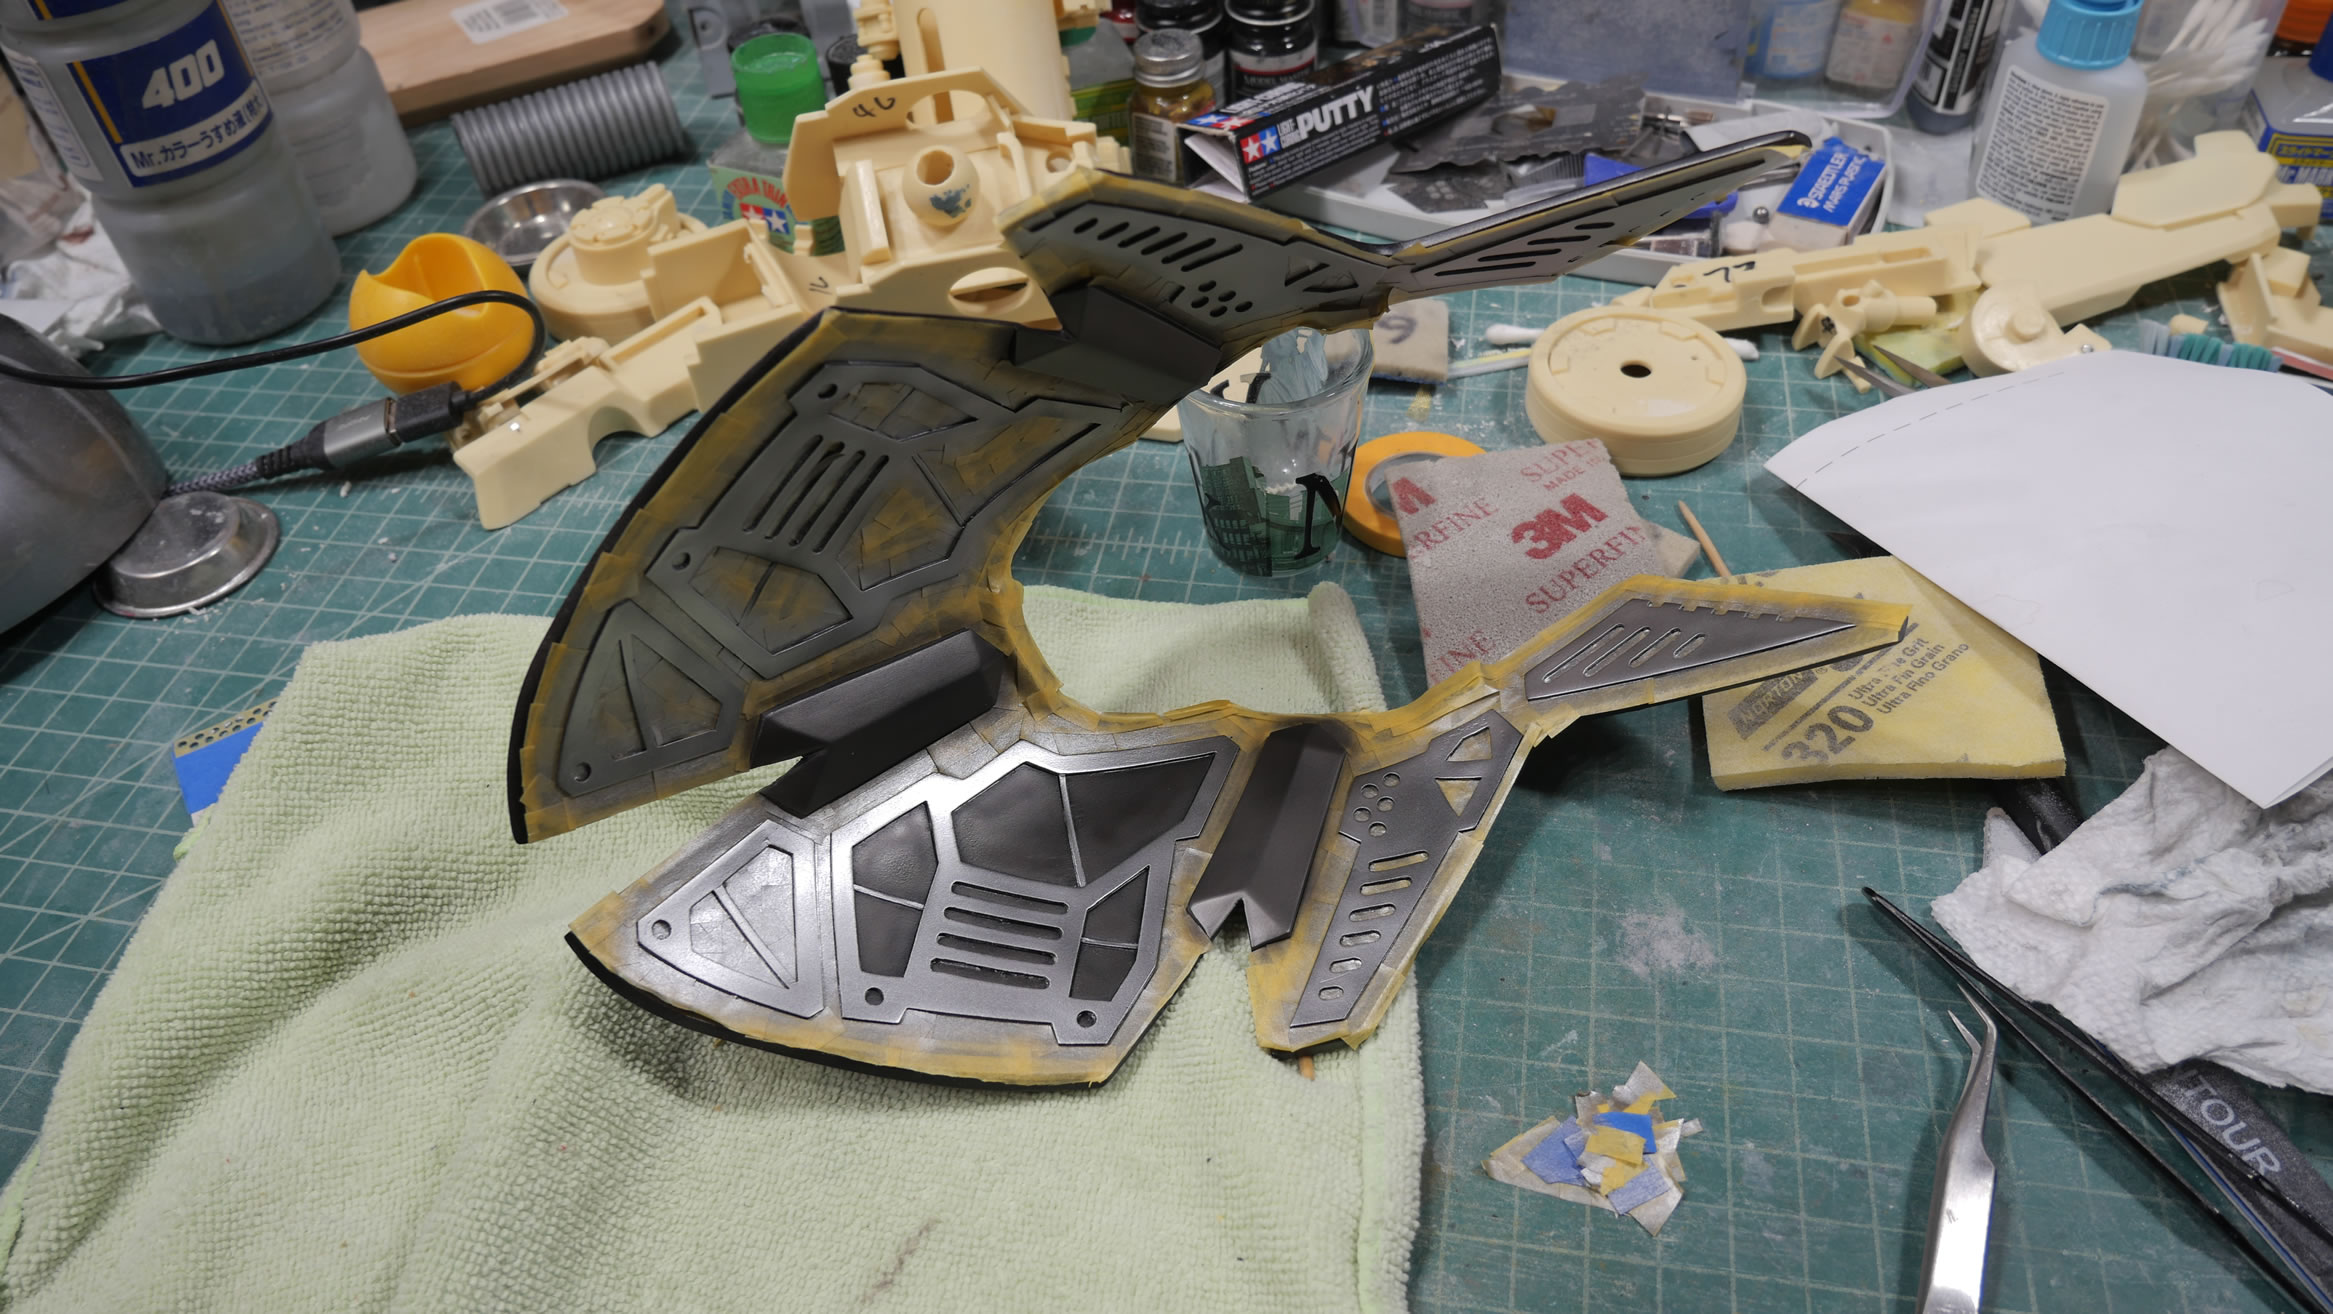
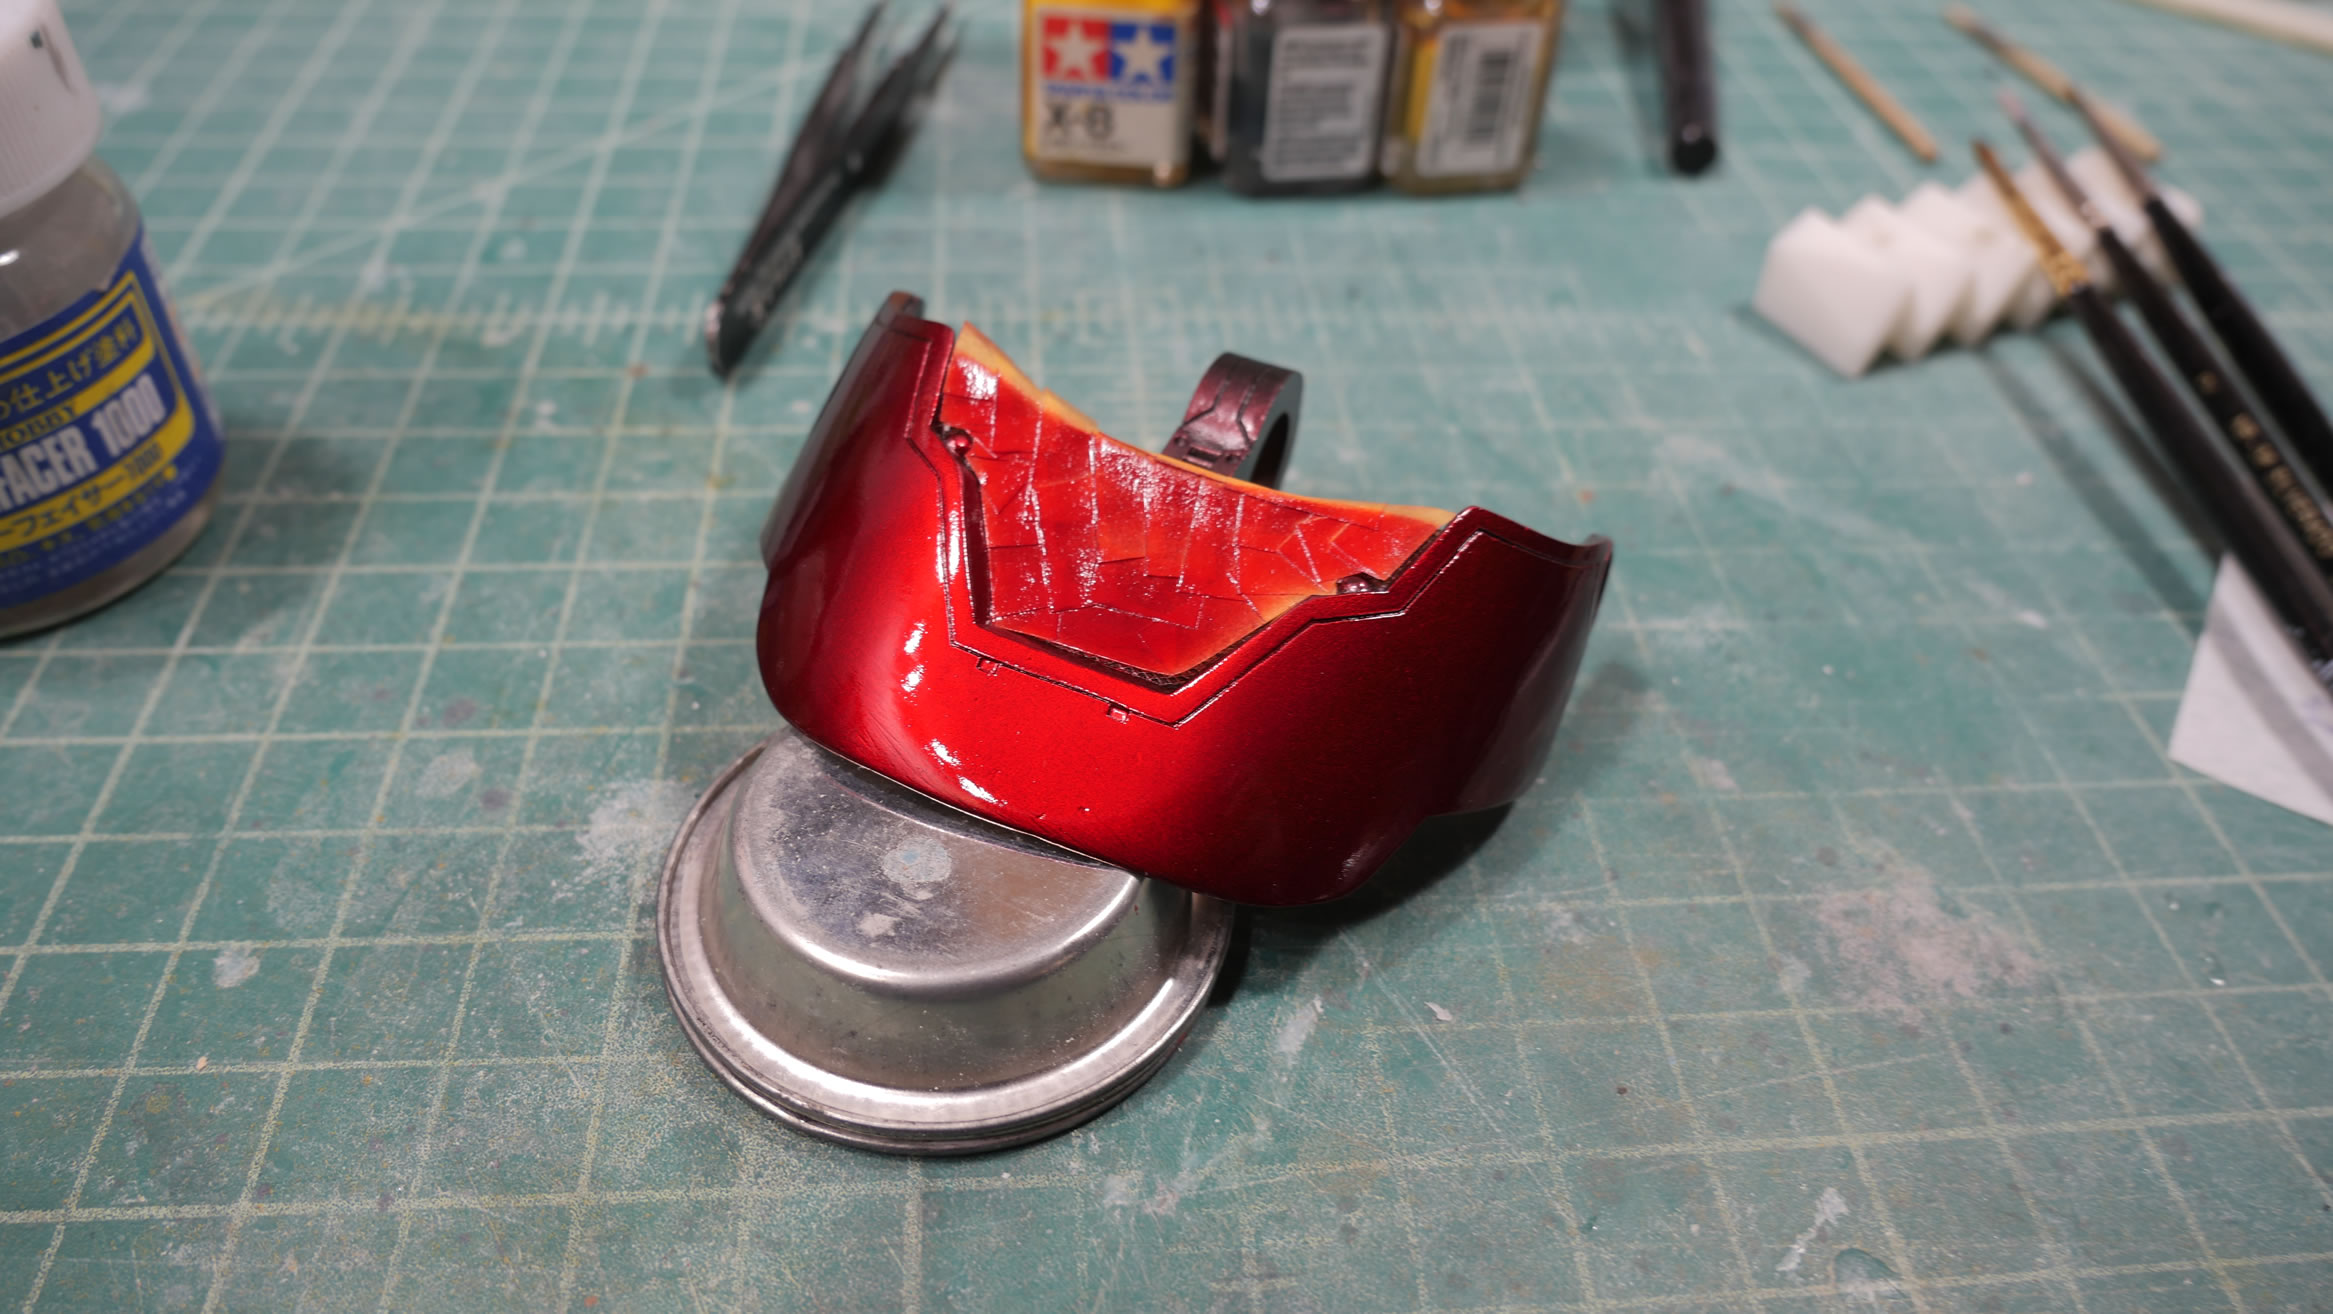
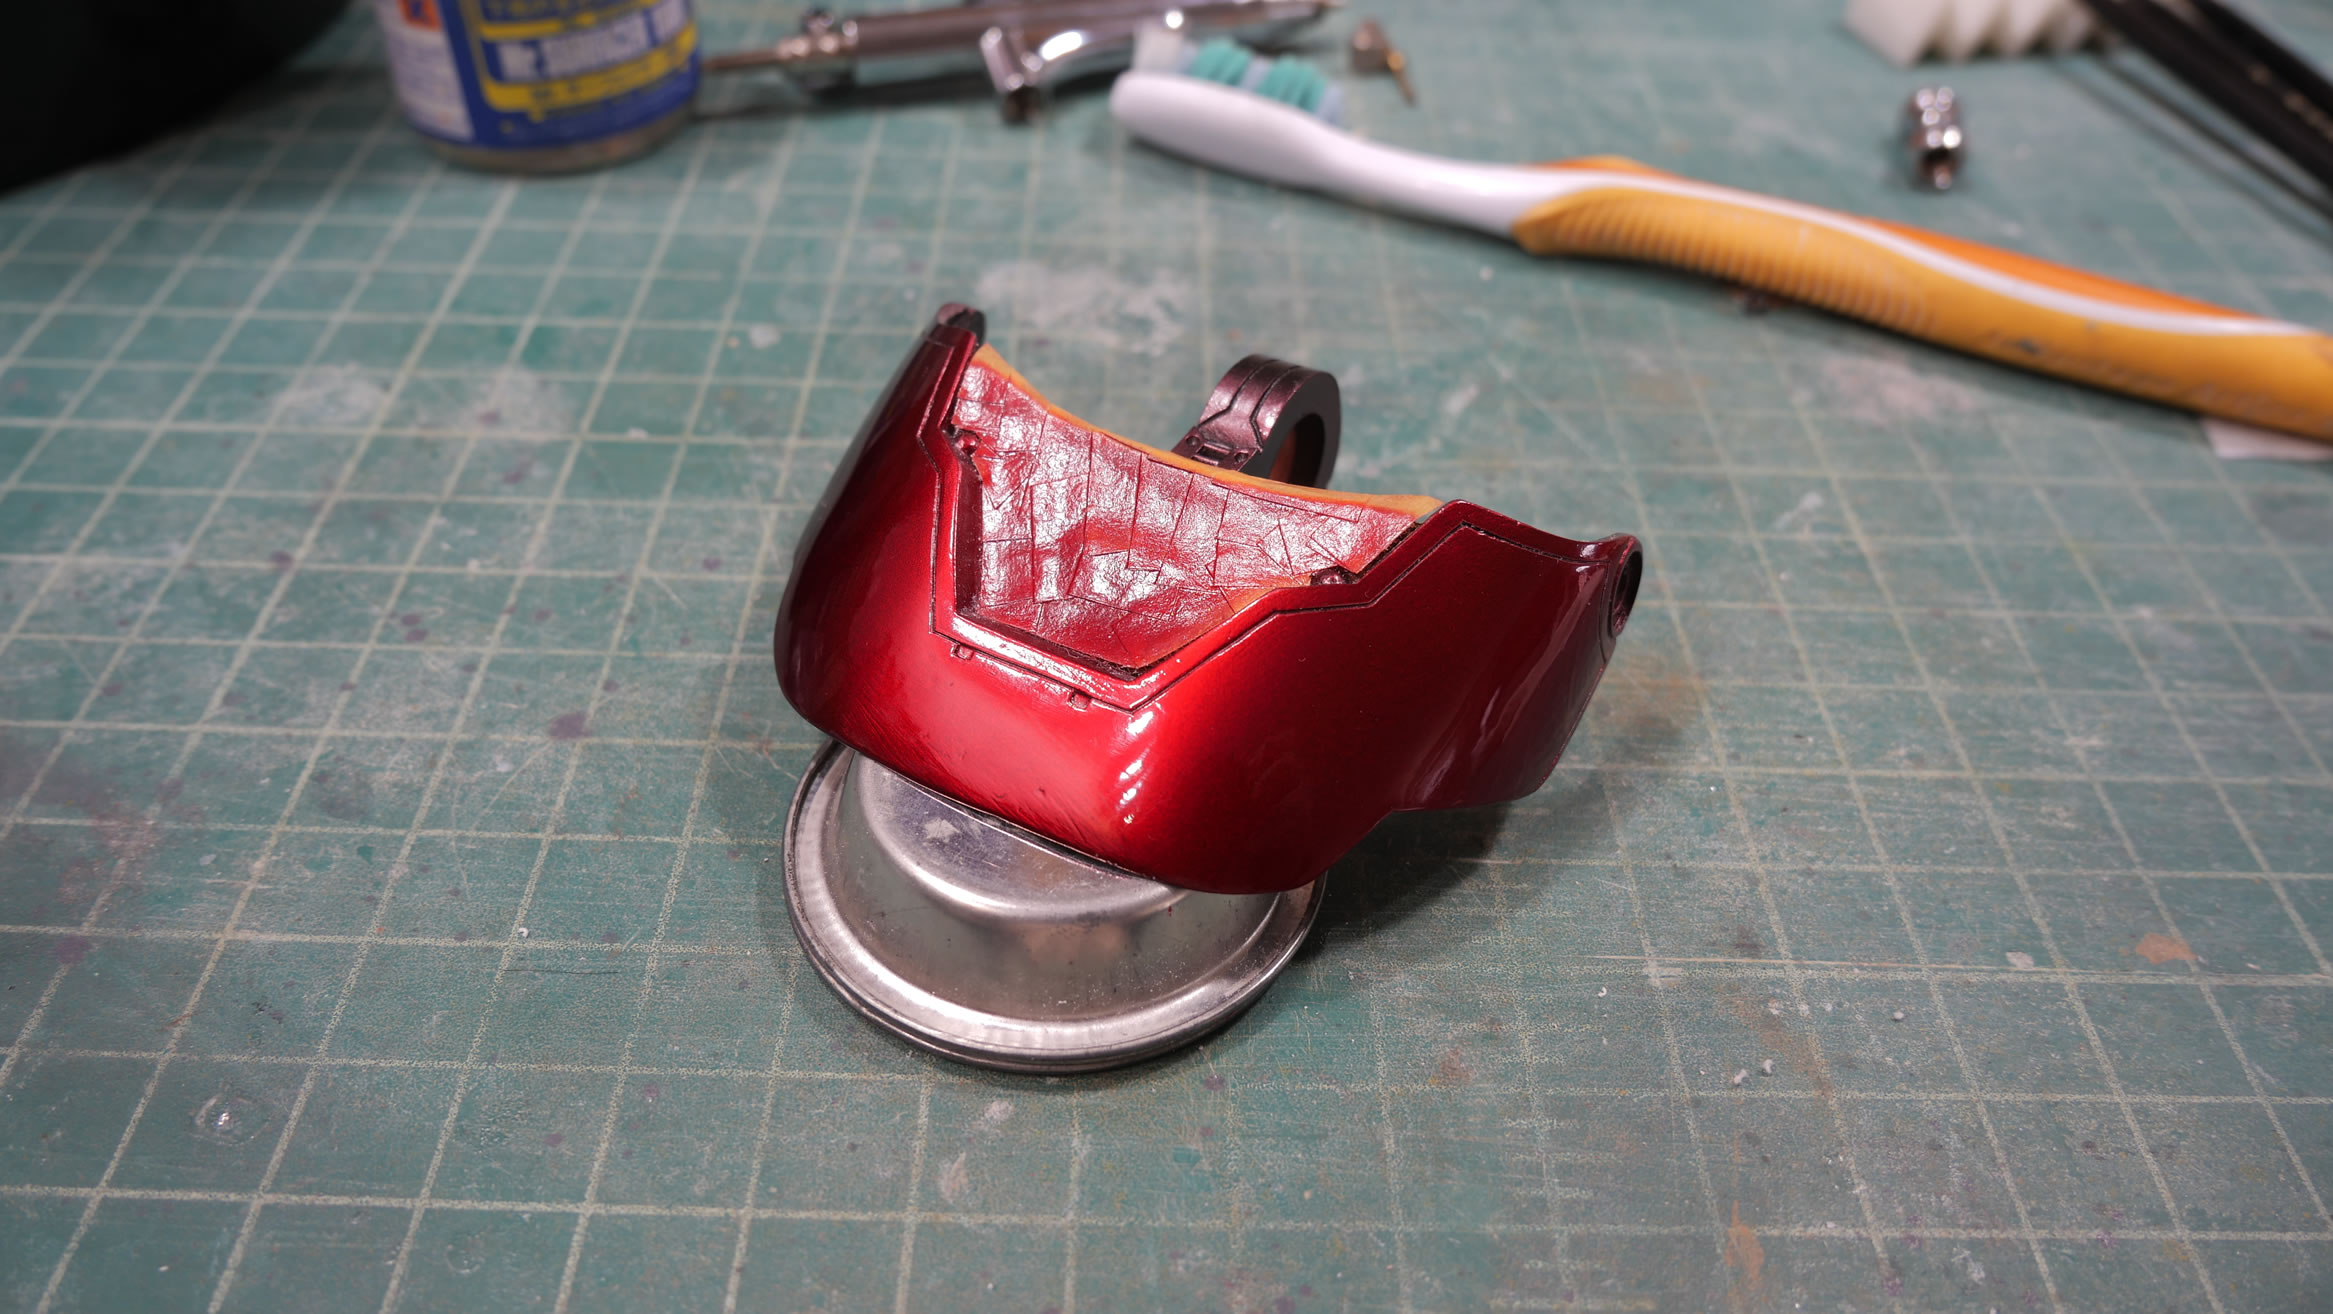
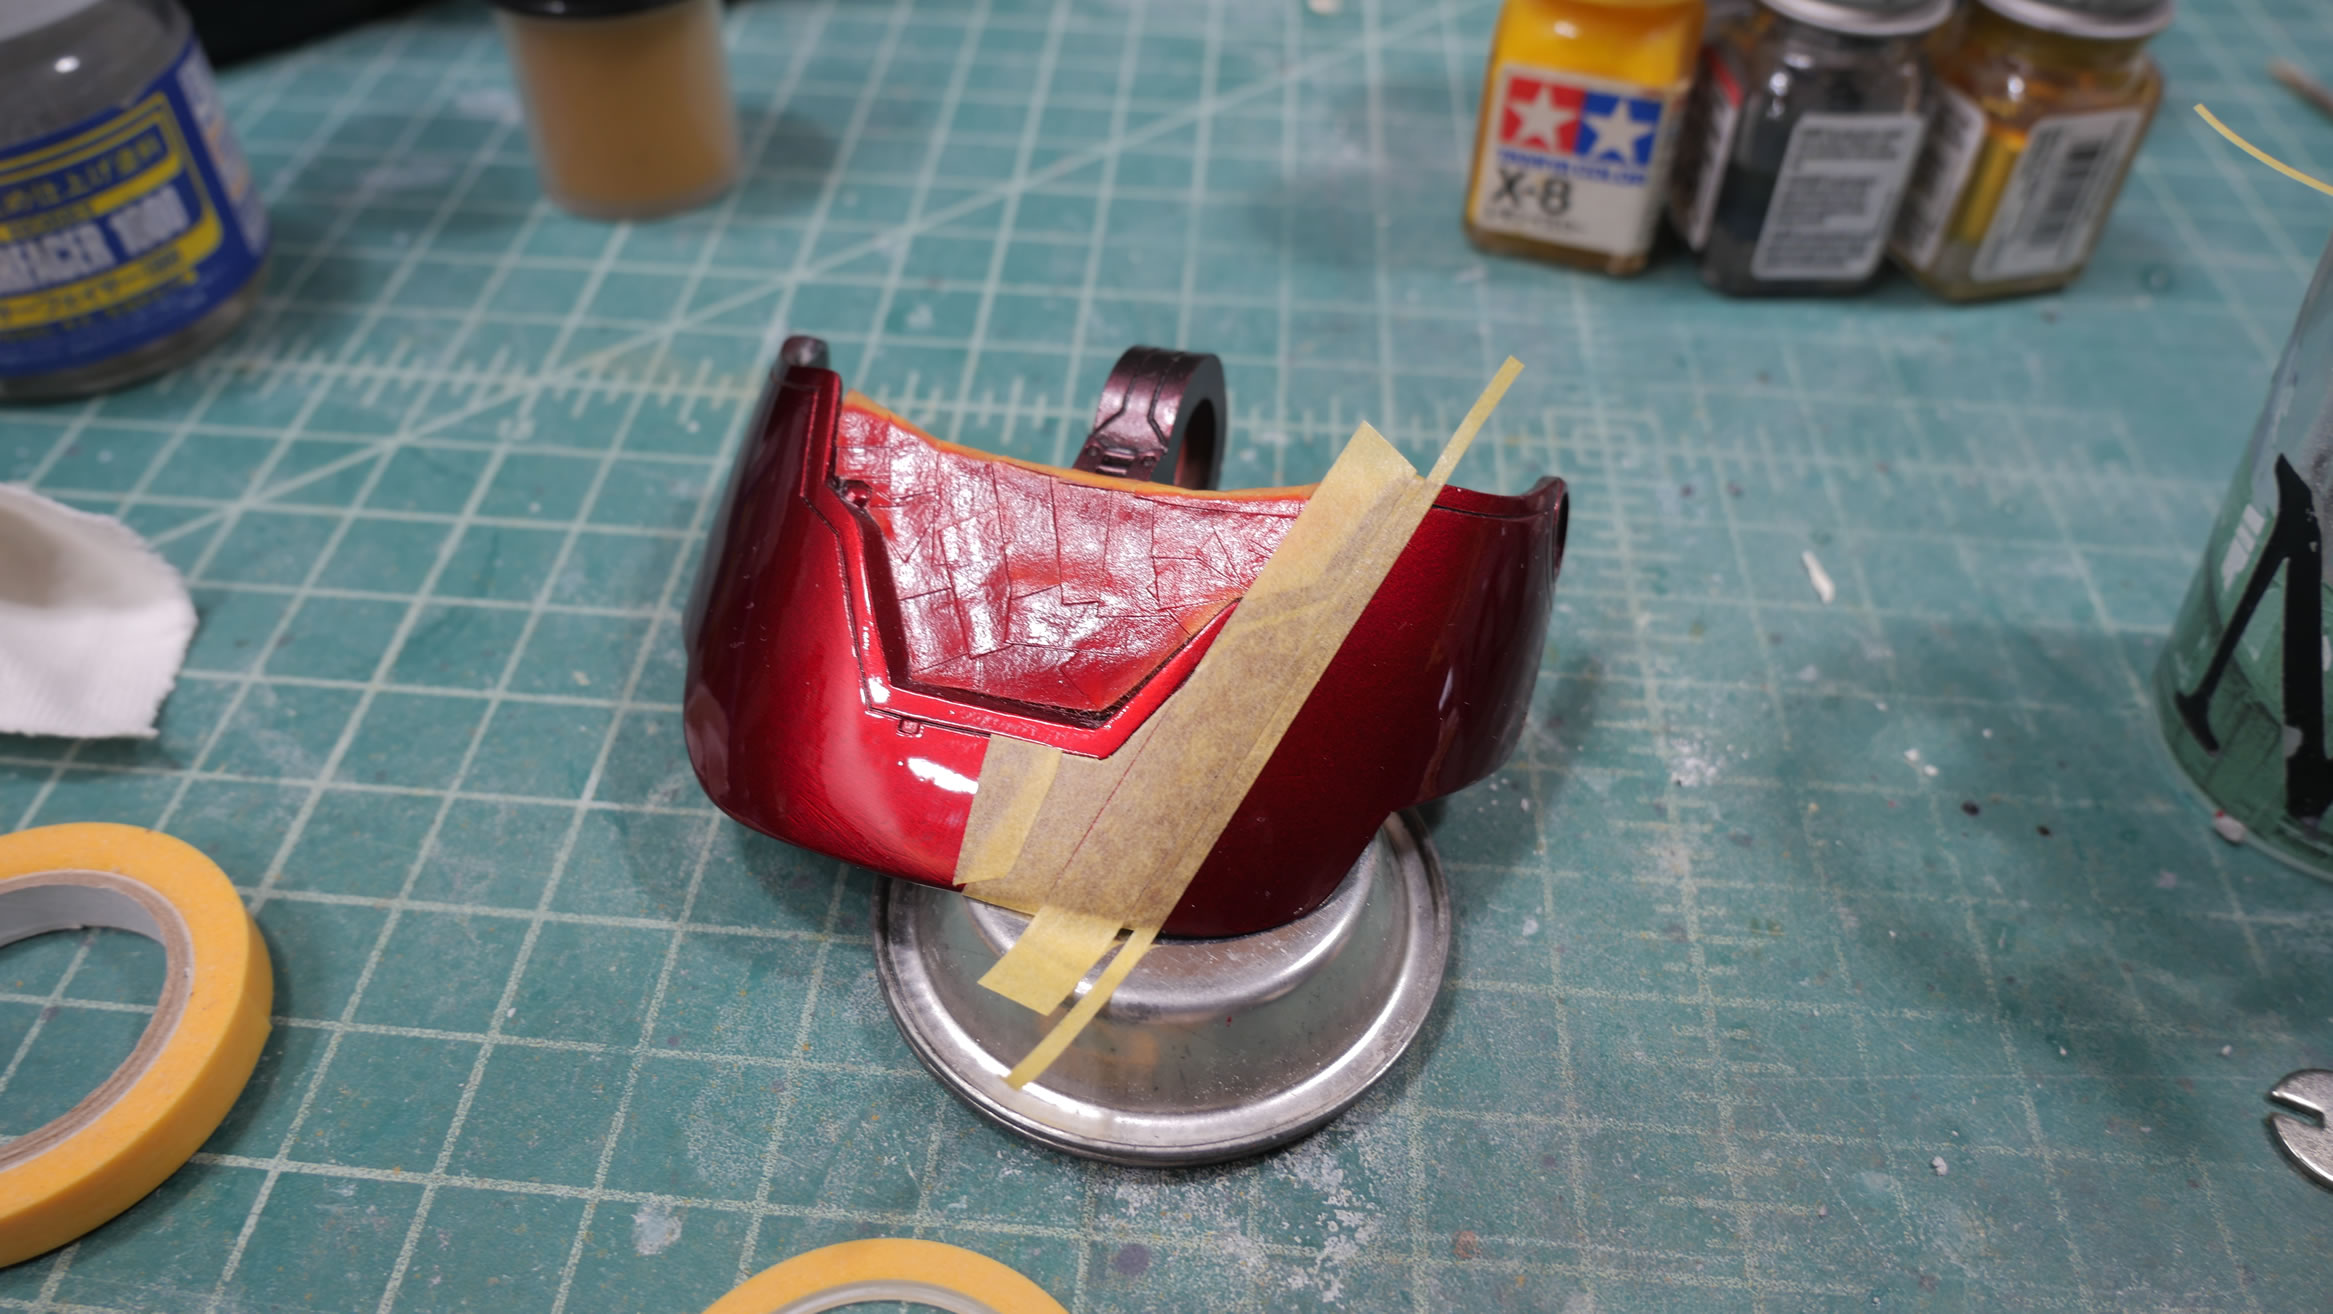
The silver I used is tamiya gloss aluminum.
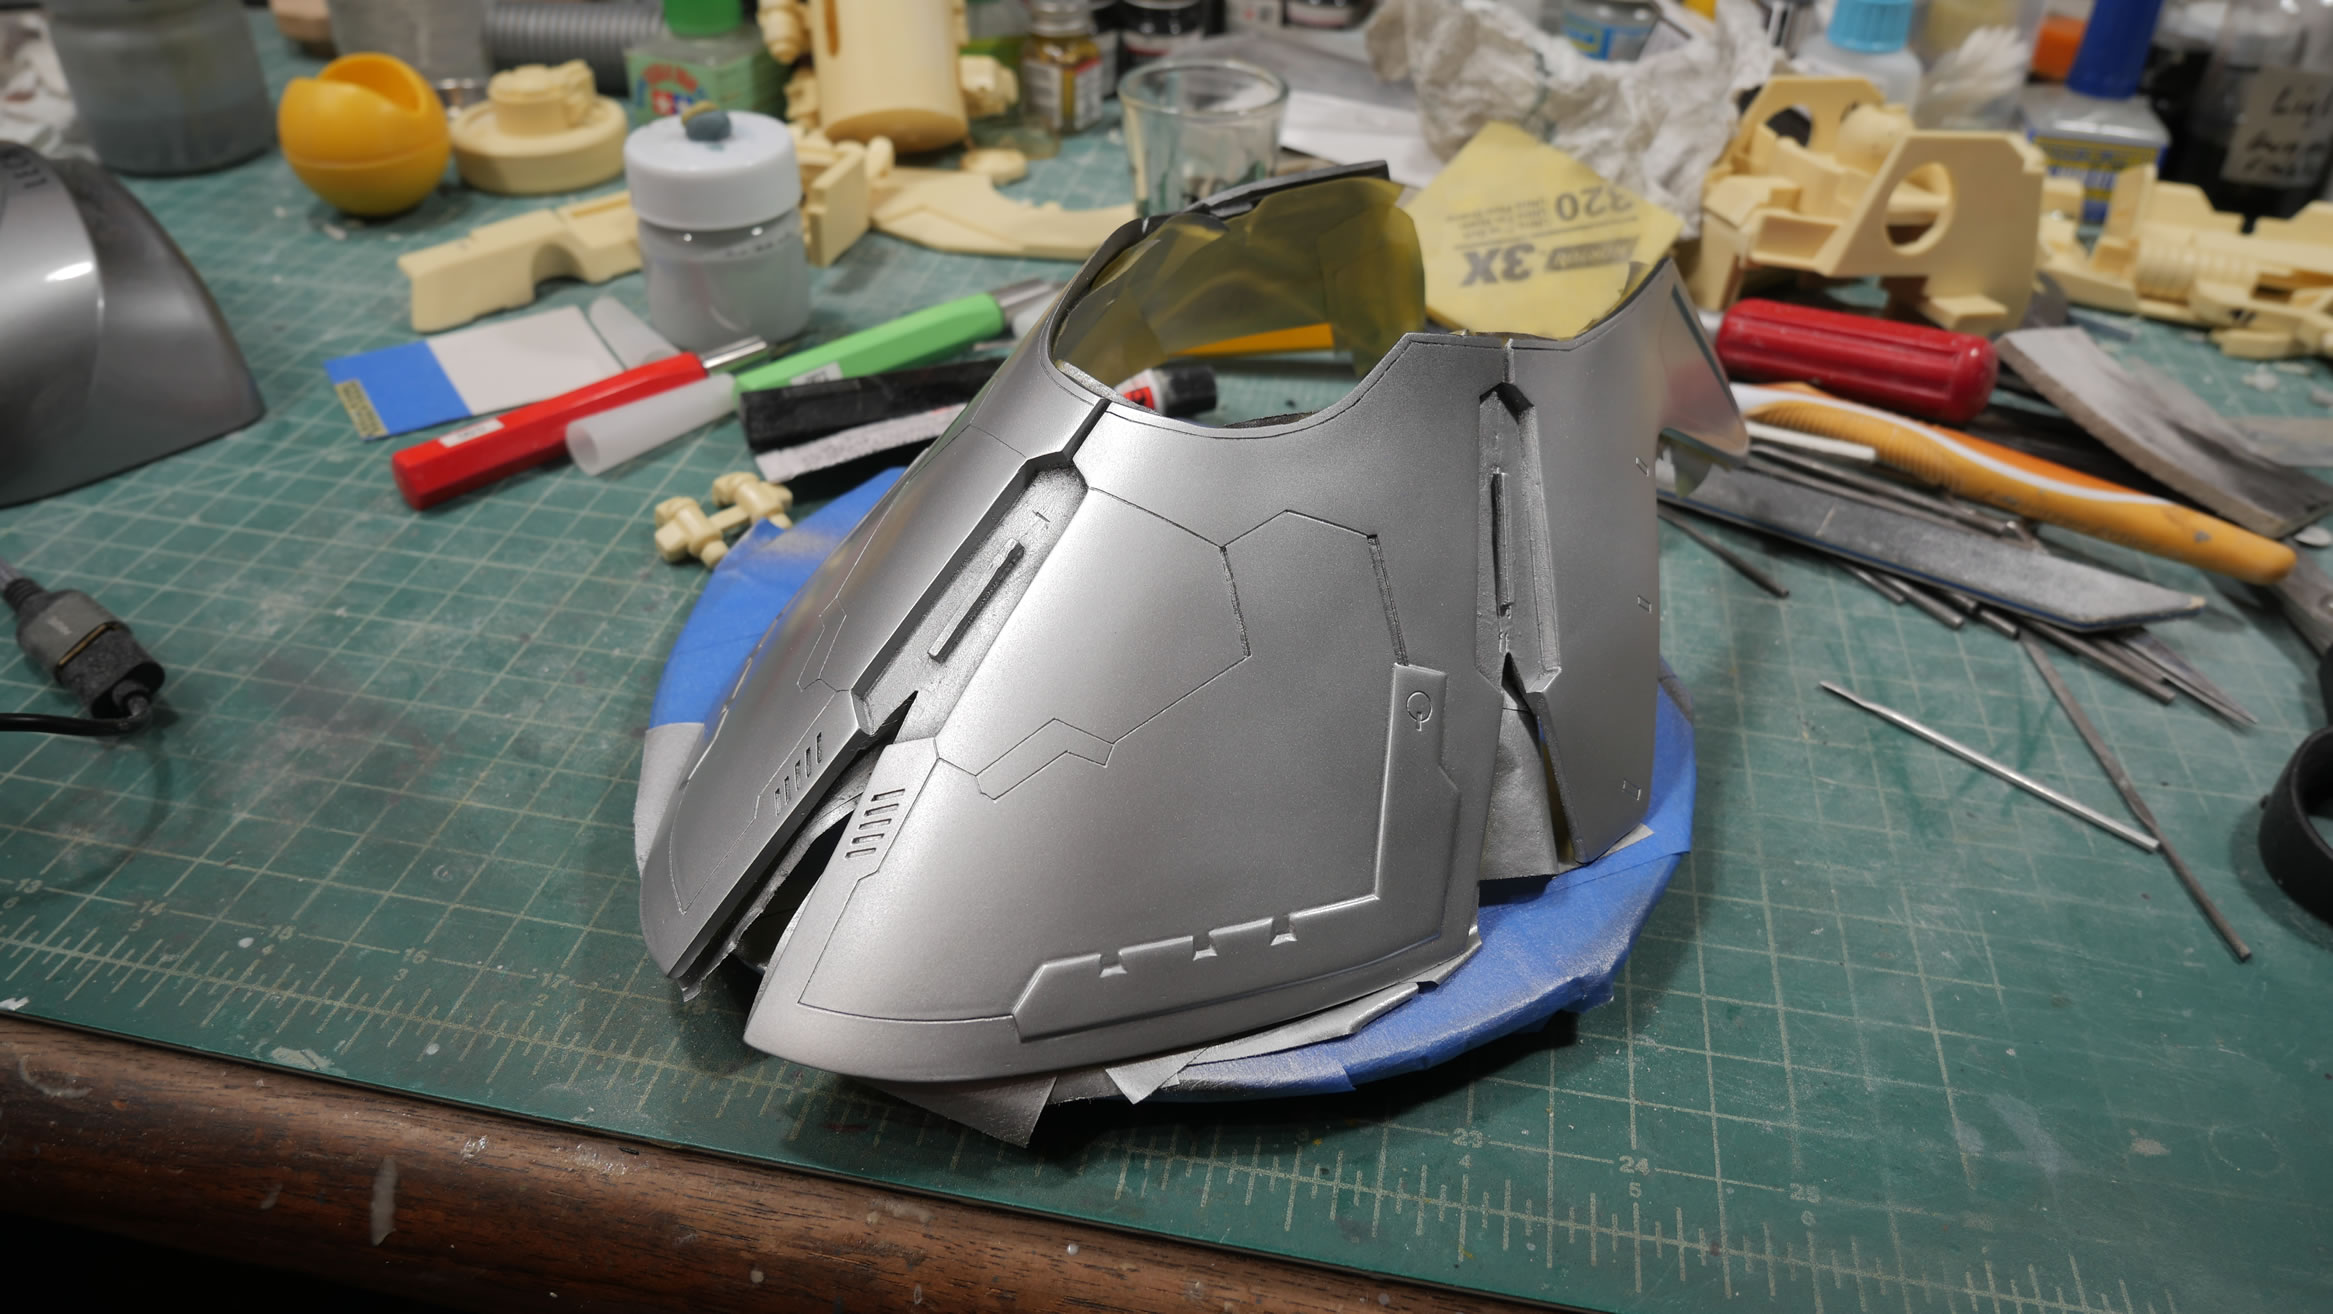
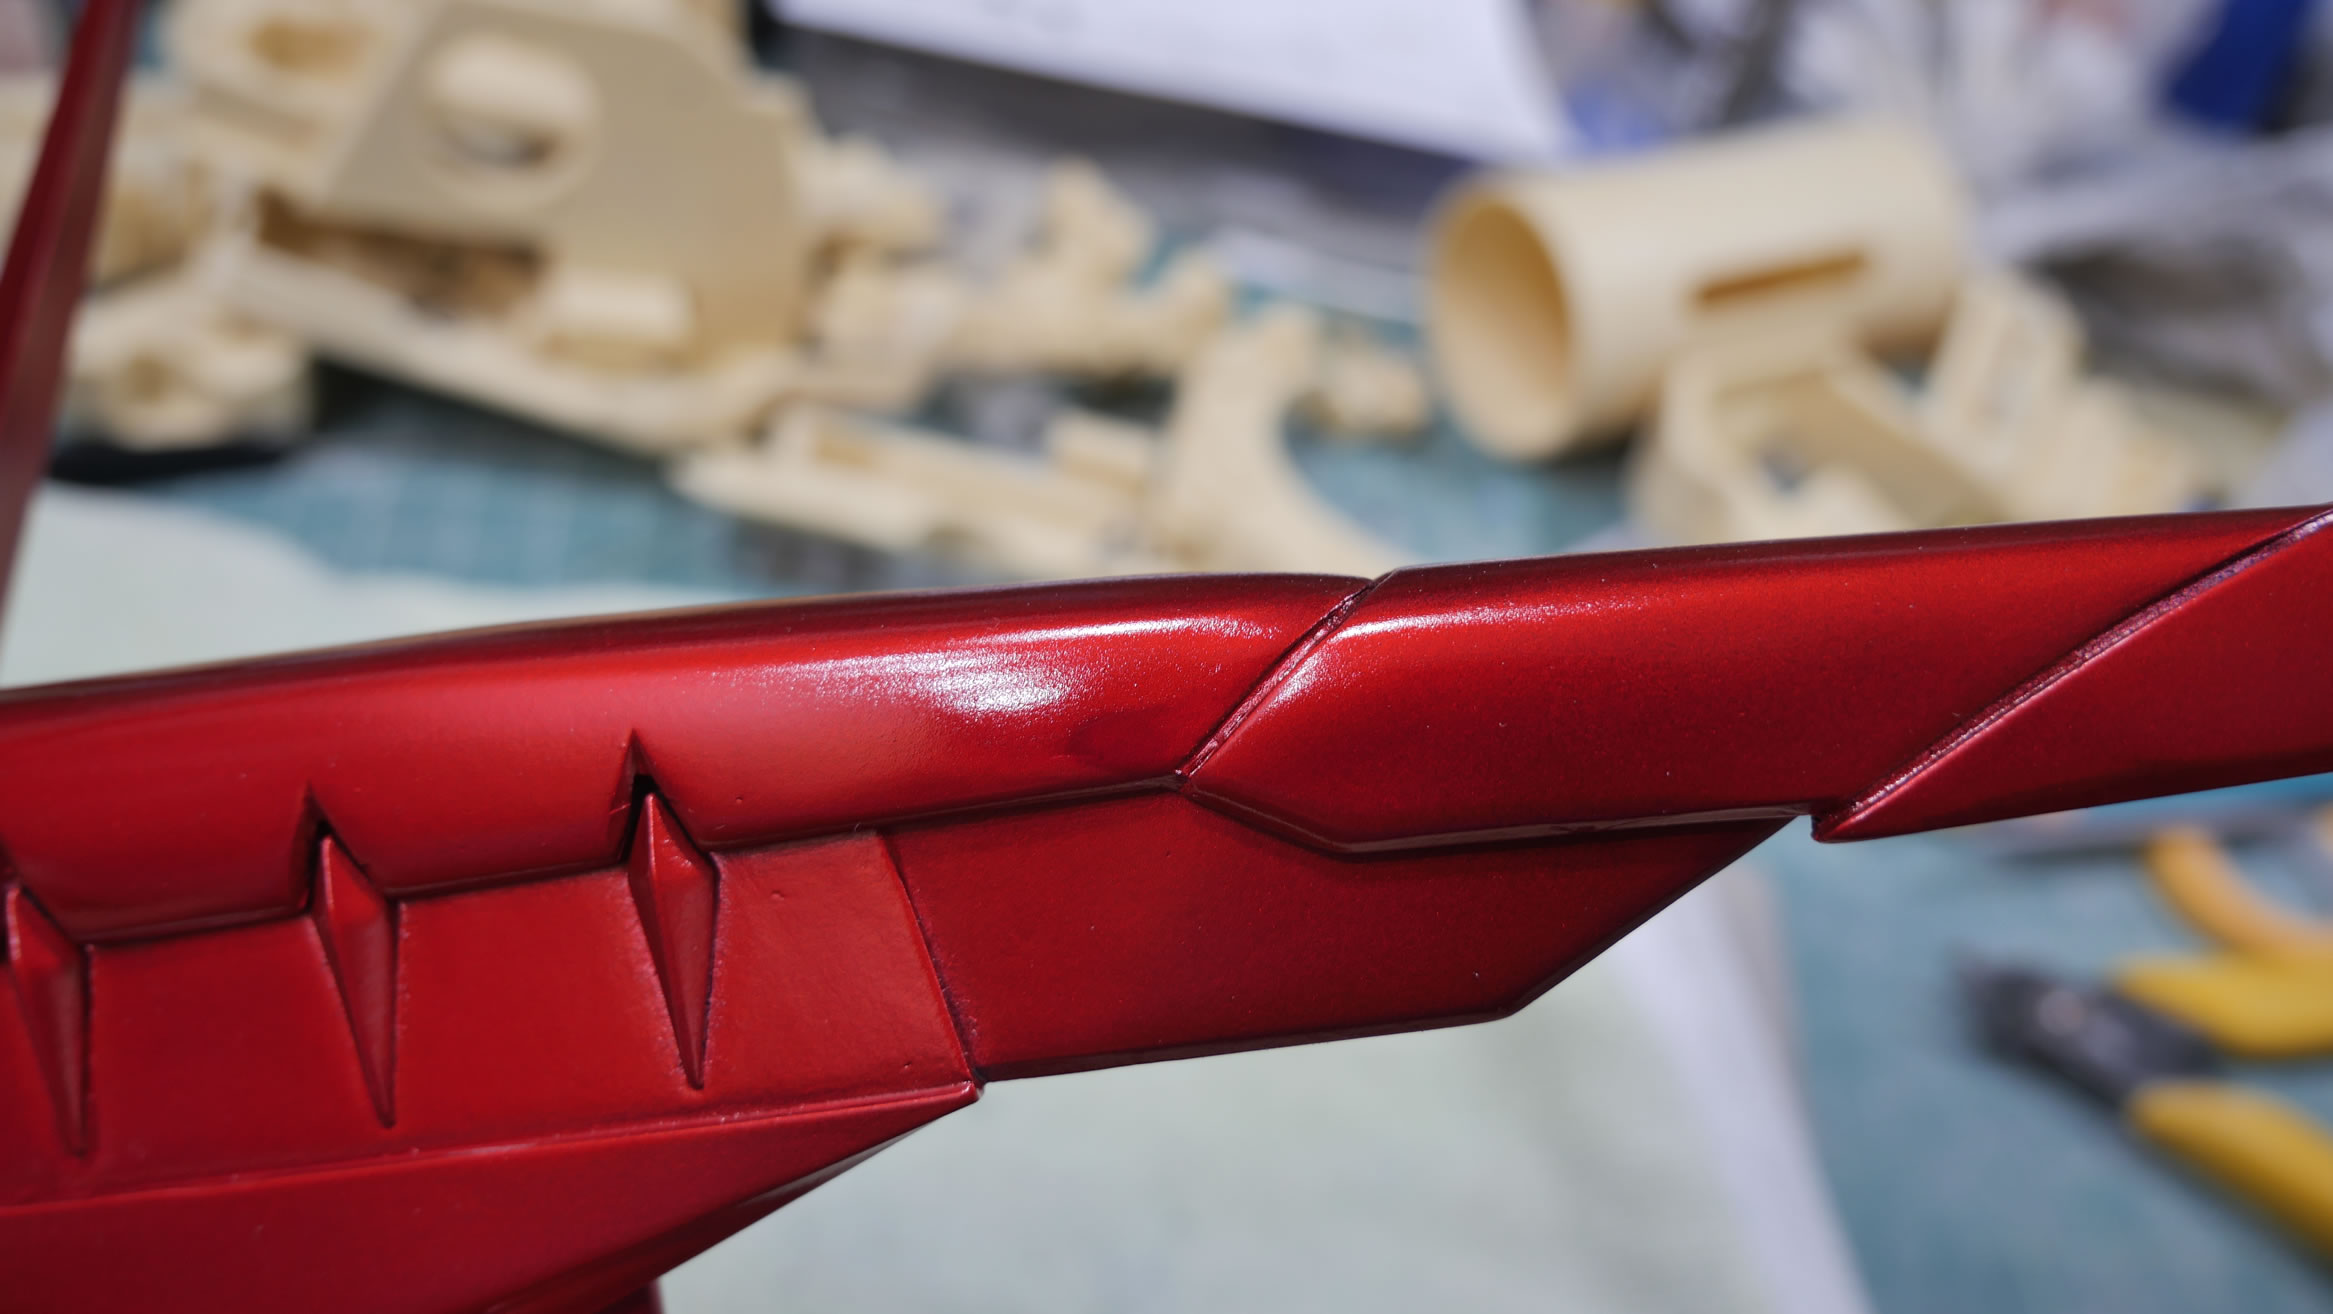
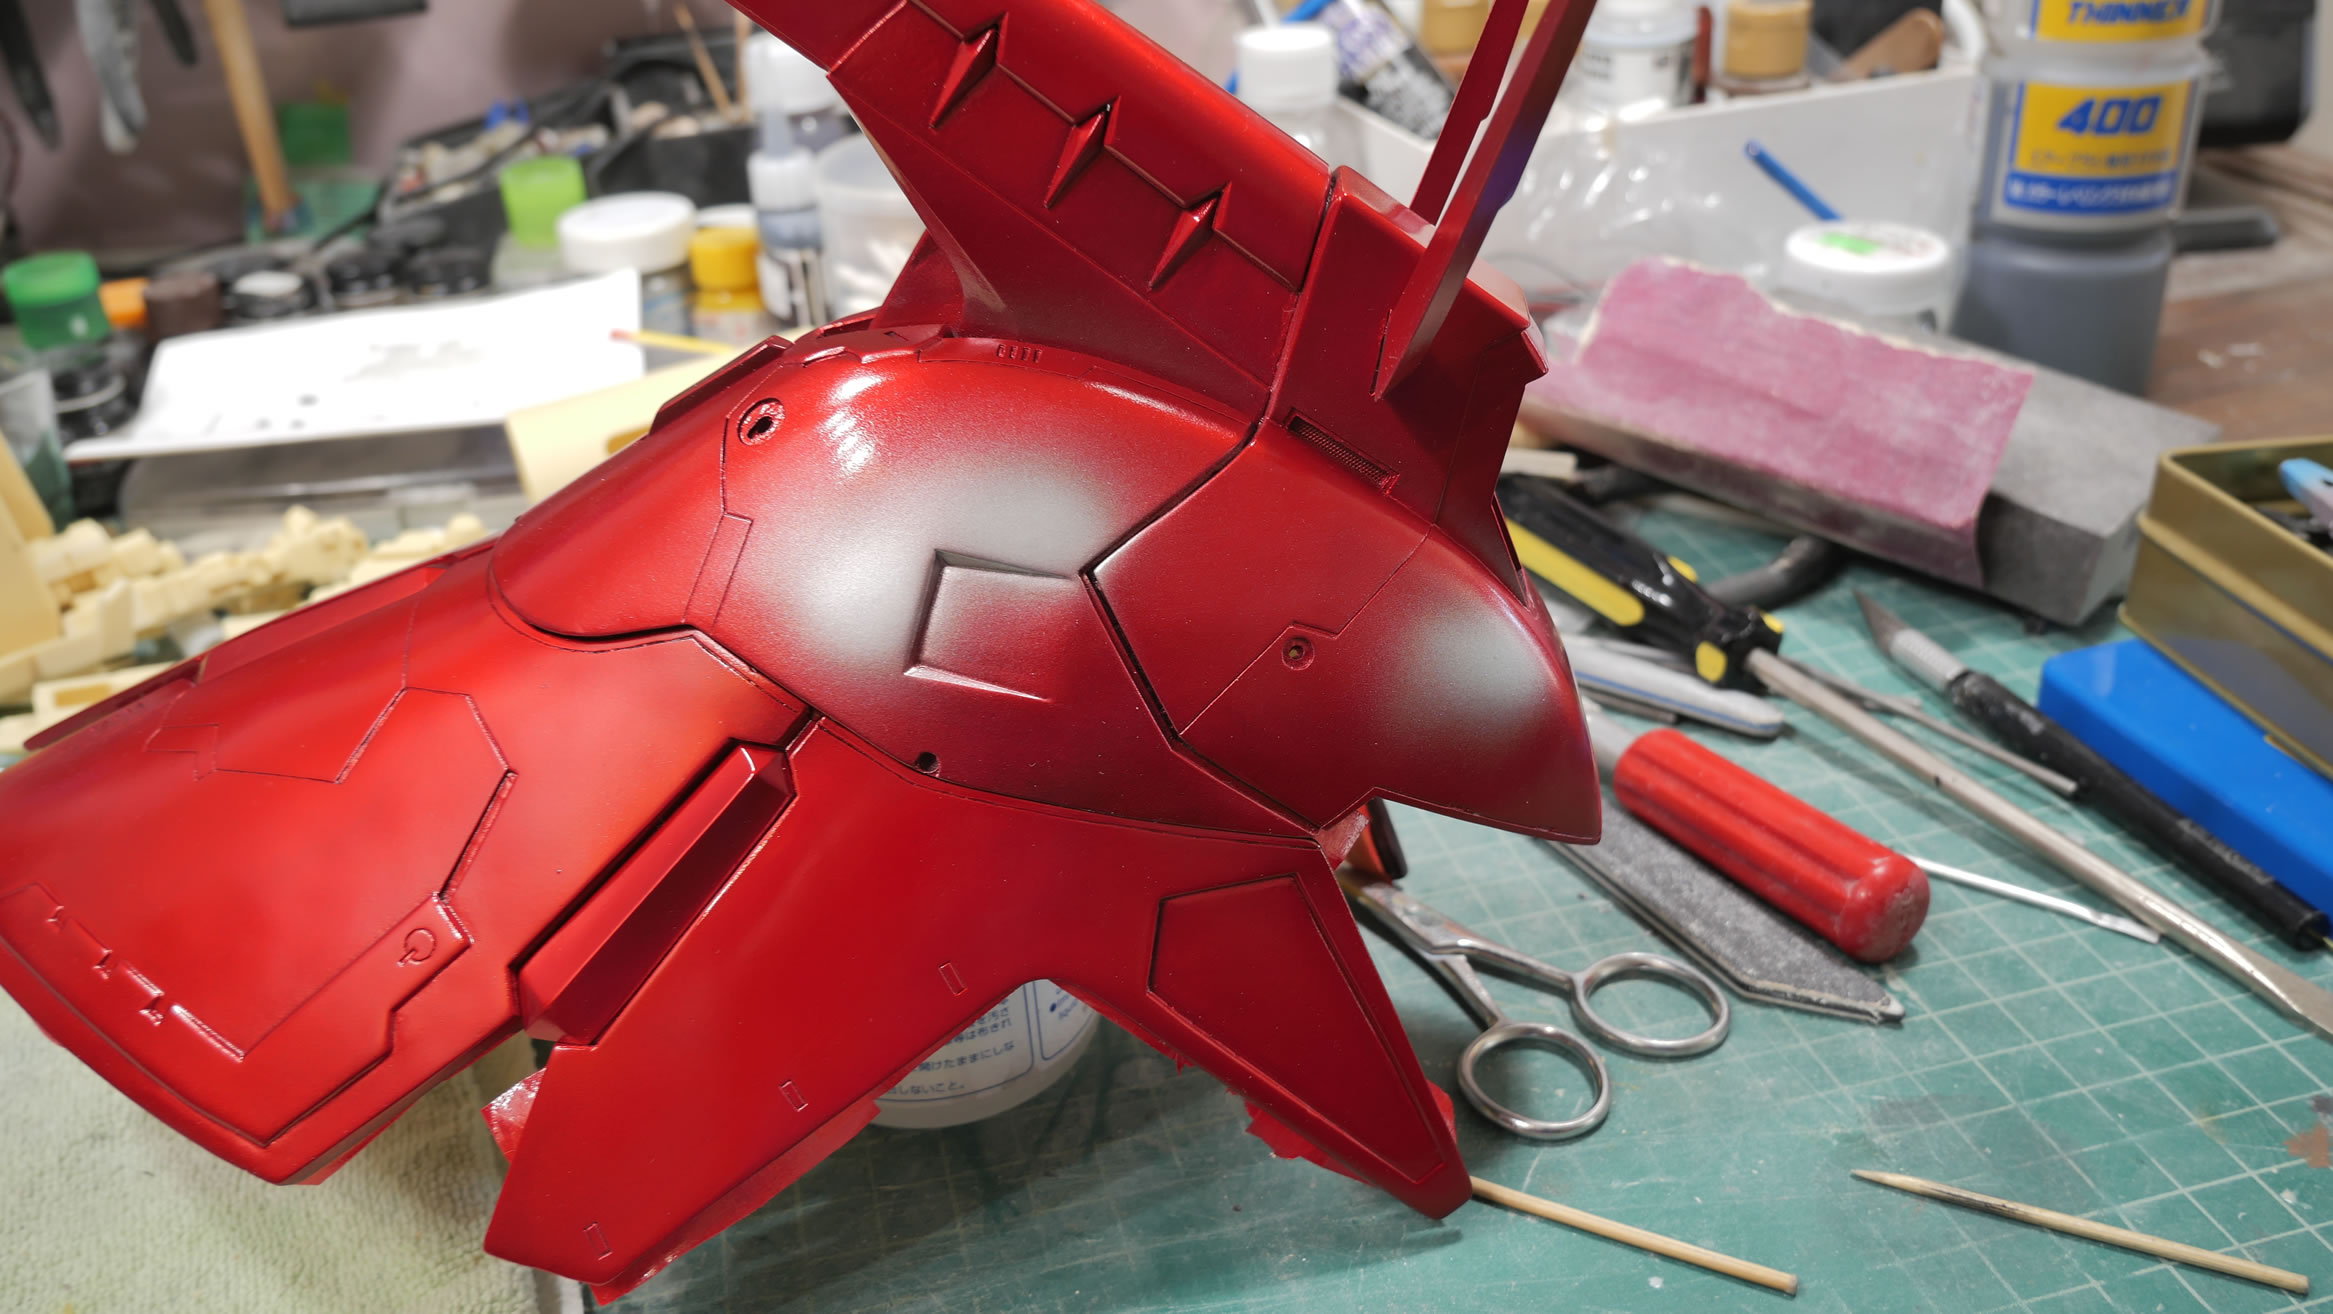
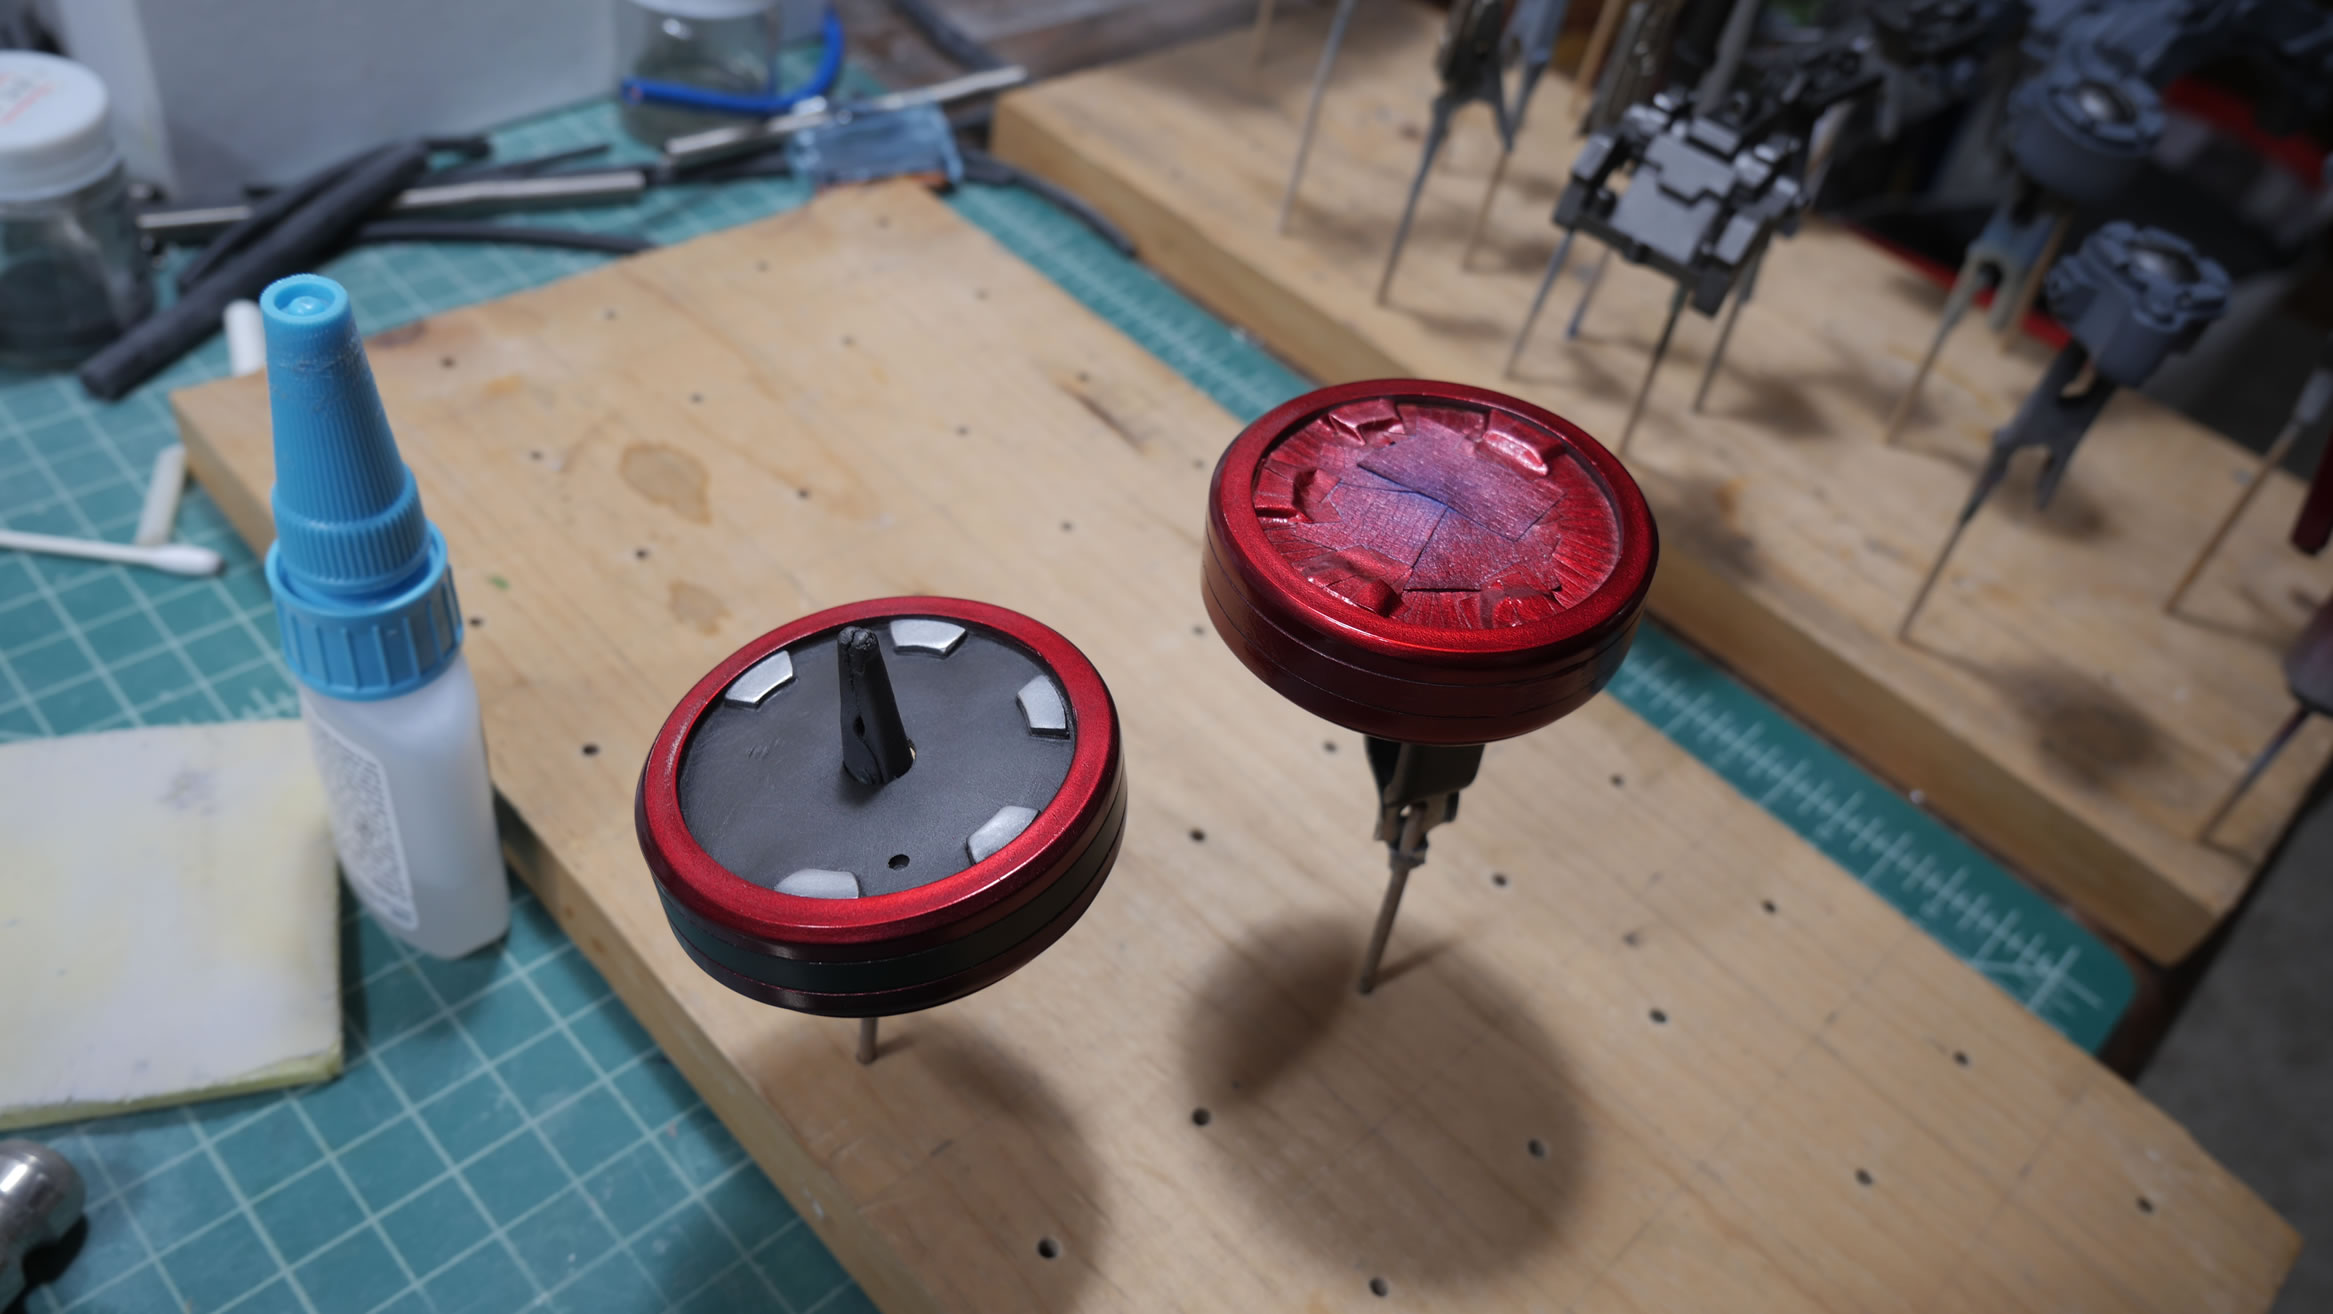
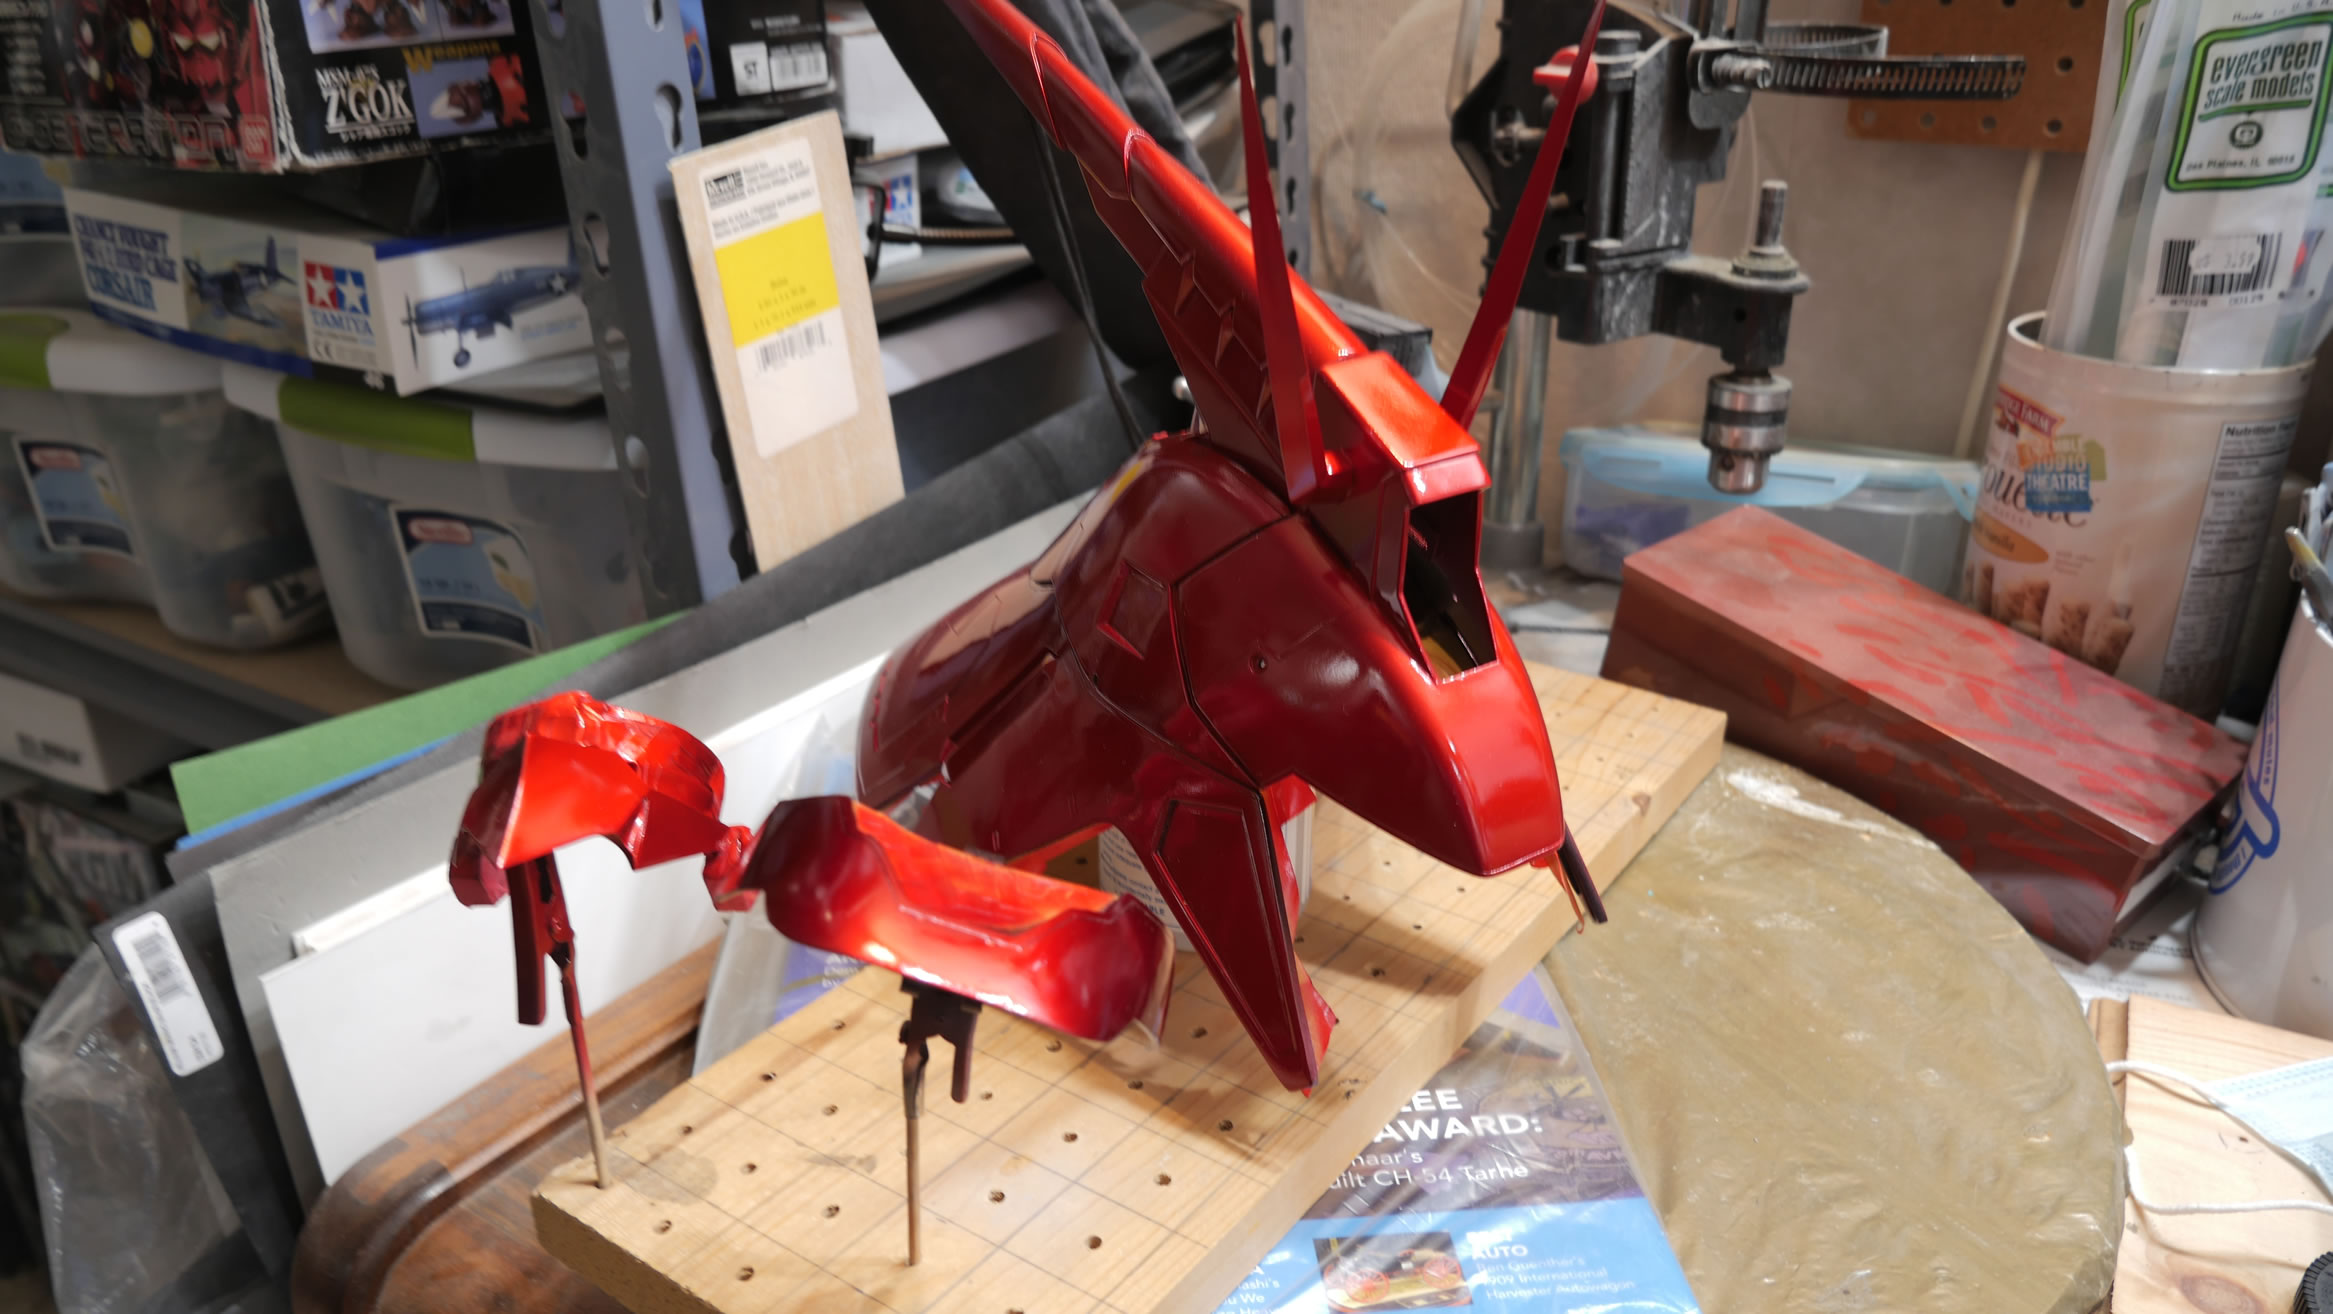
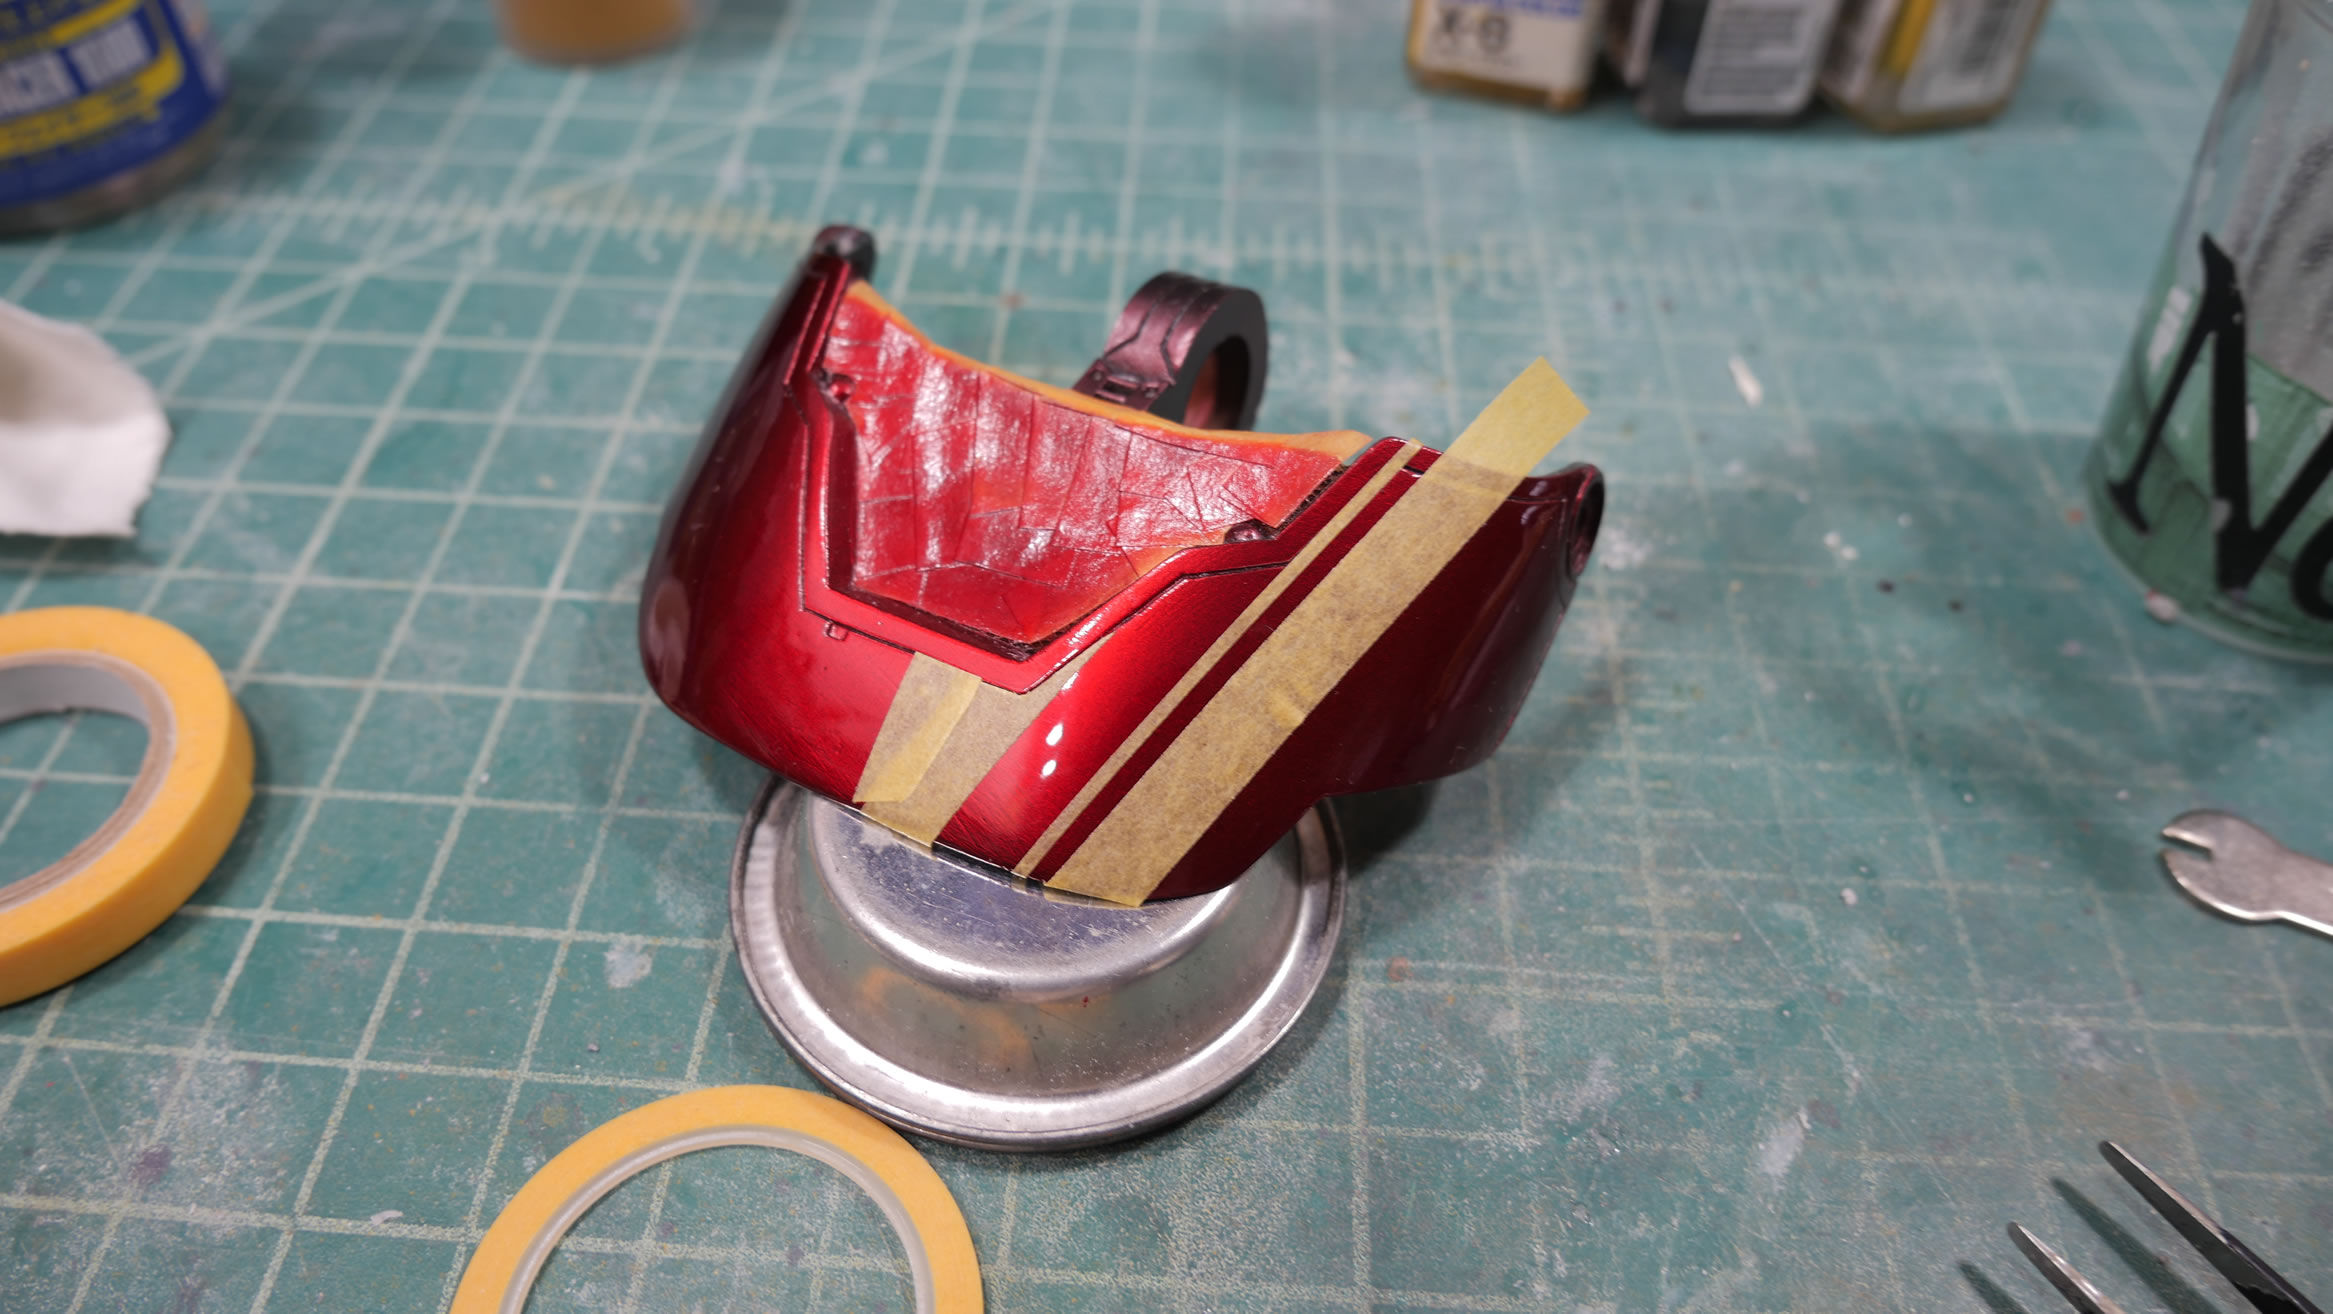
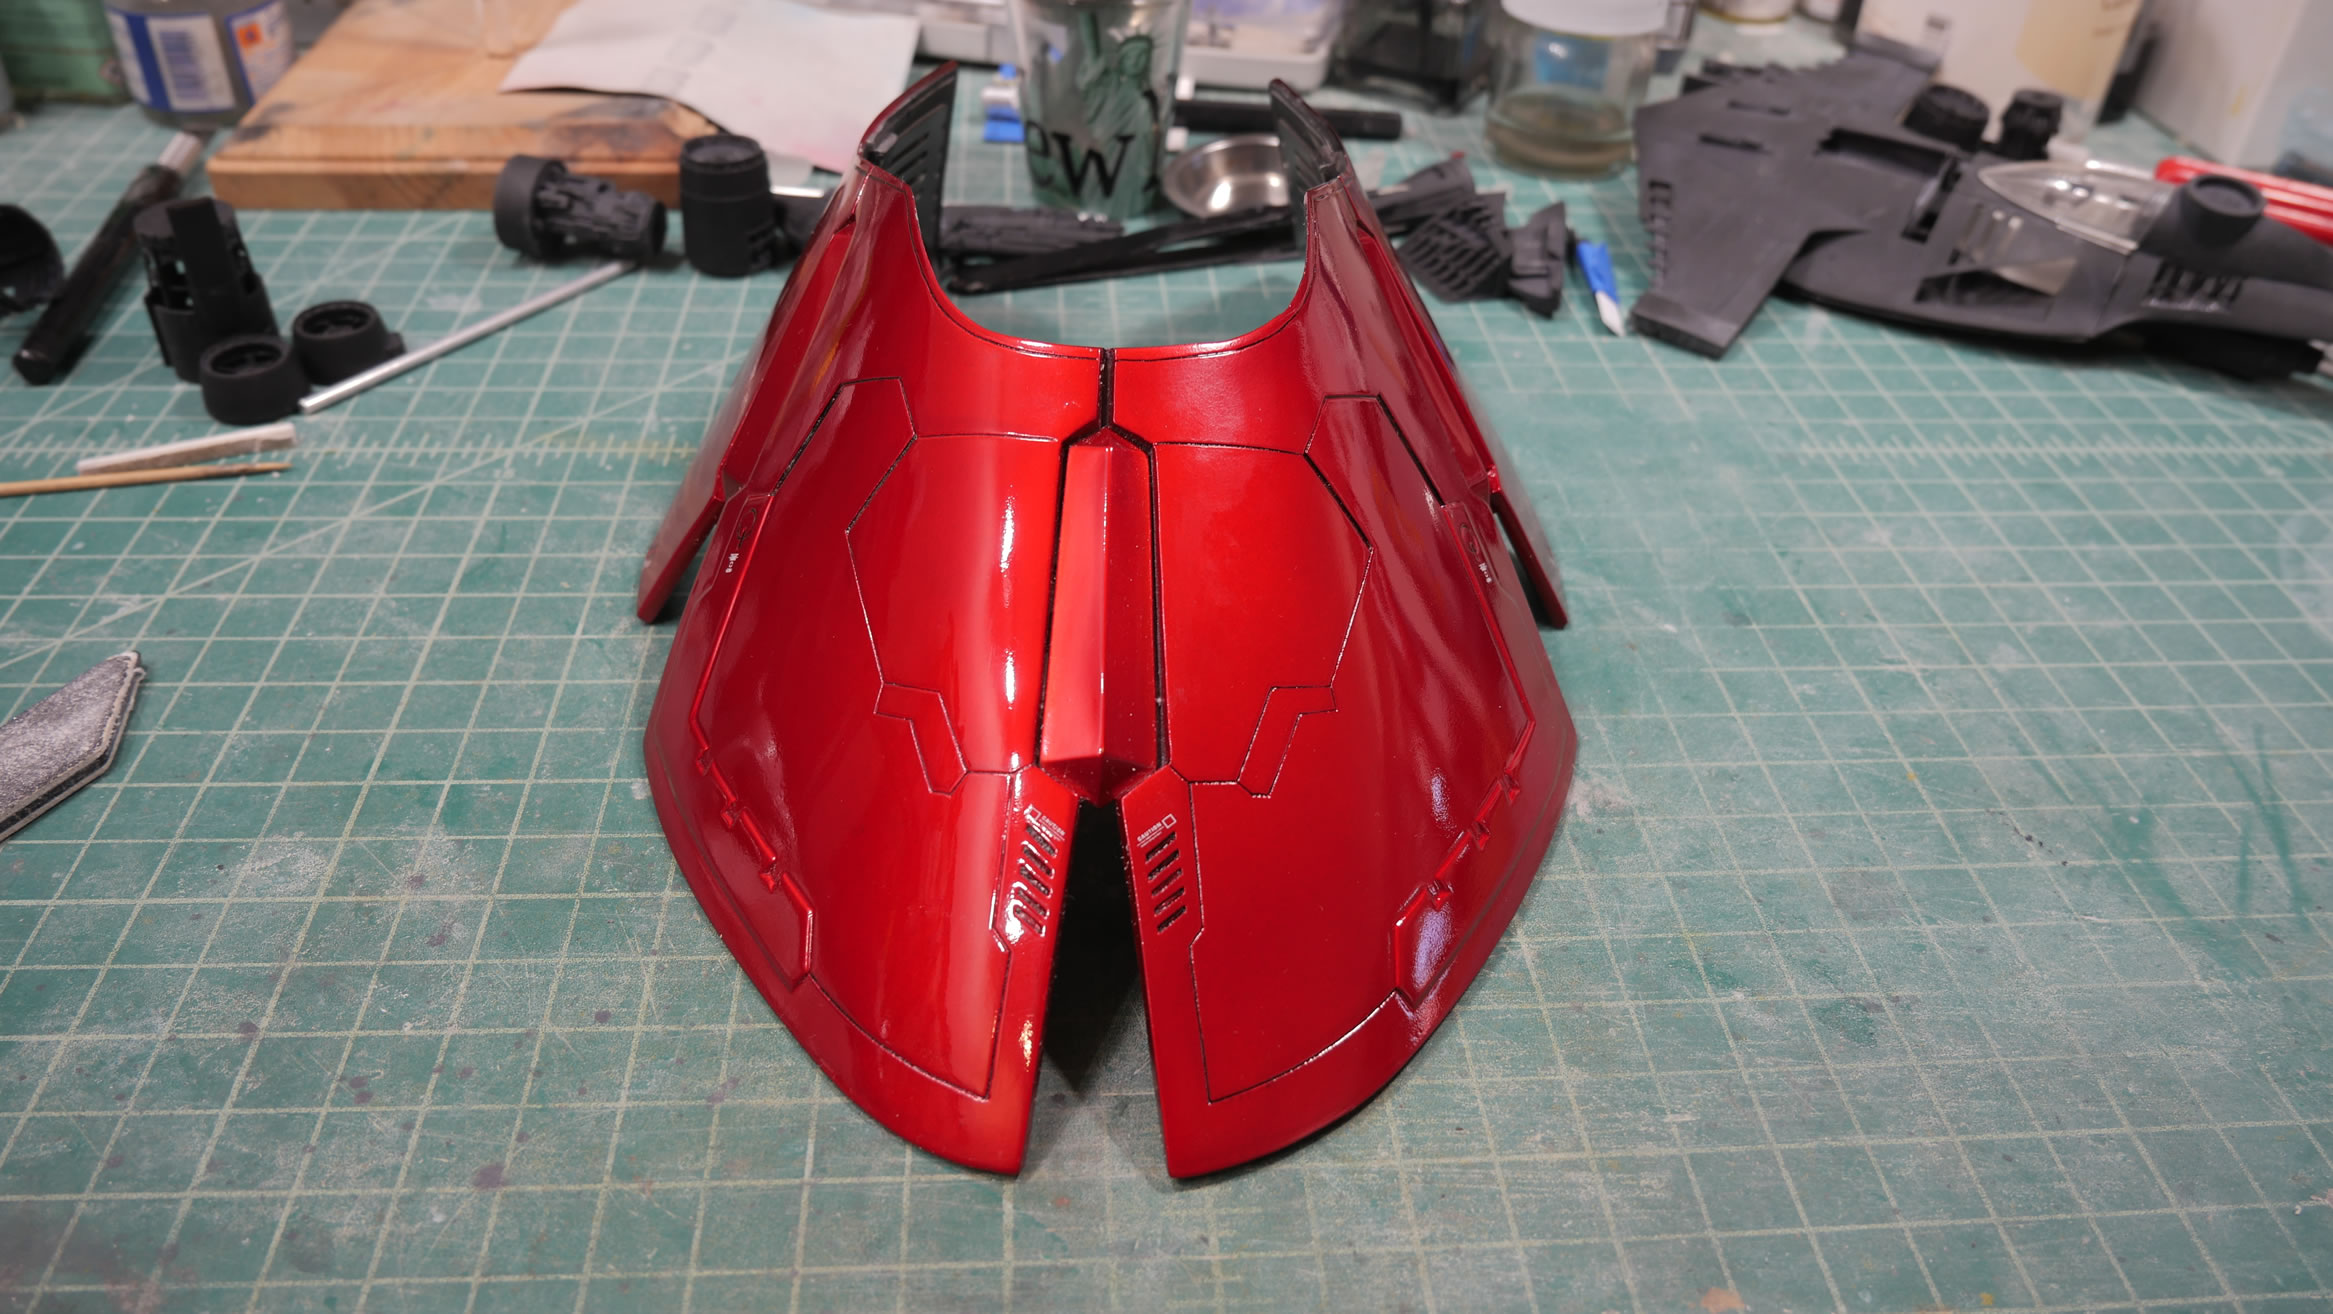
Then it was tamiya spray clear red. I got a little over zealous on some areas and the paint pooled. So I needed to let that cure up over night, sand it, then repaint. Not too bad. The kandy red came out nicely.

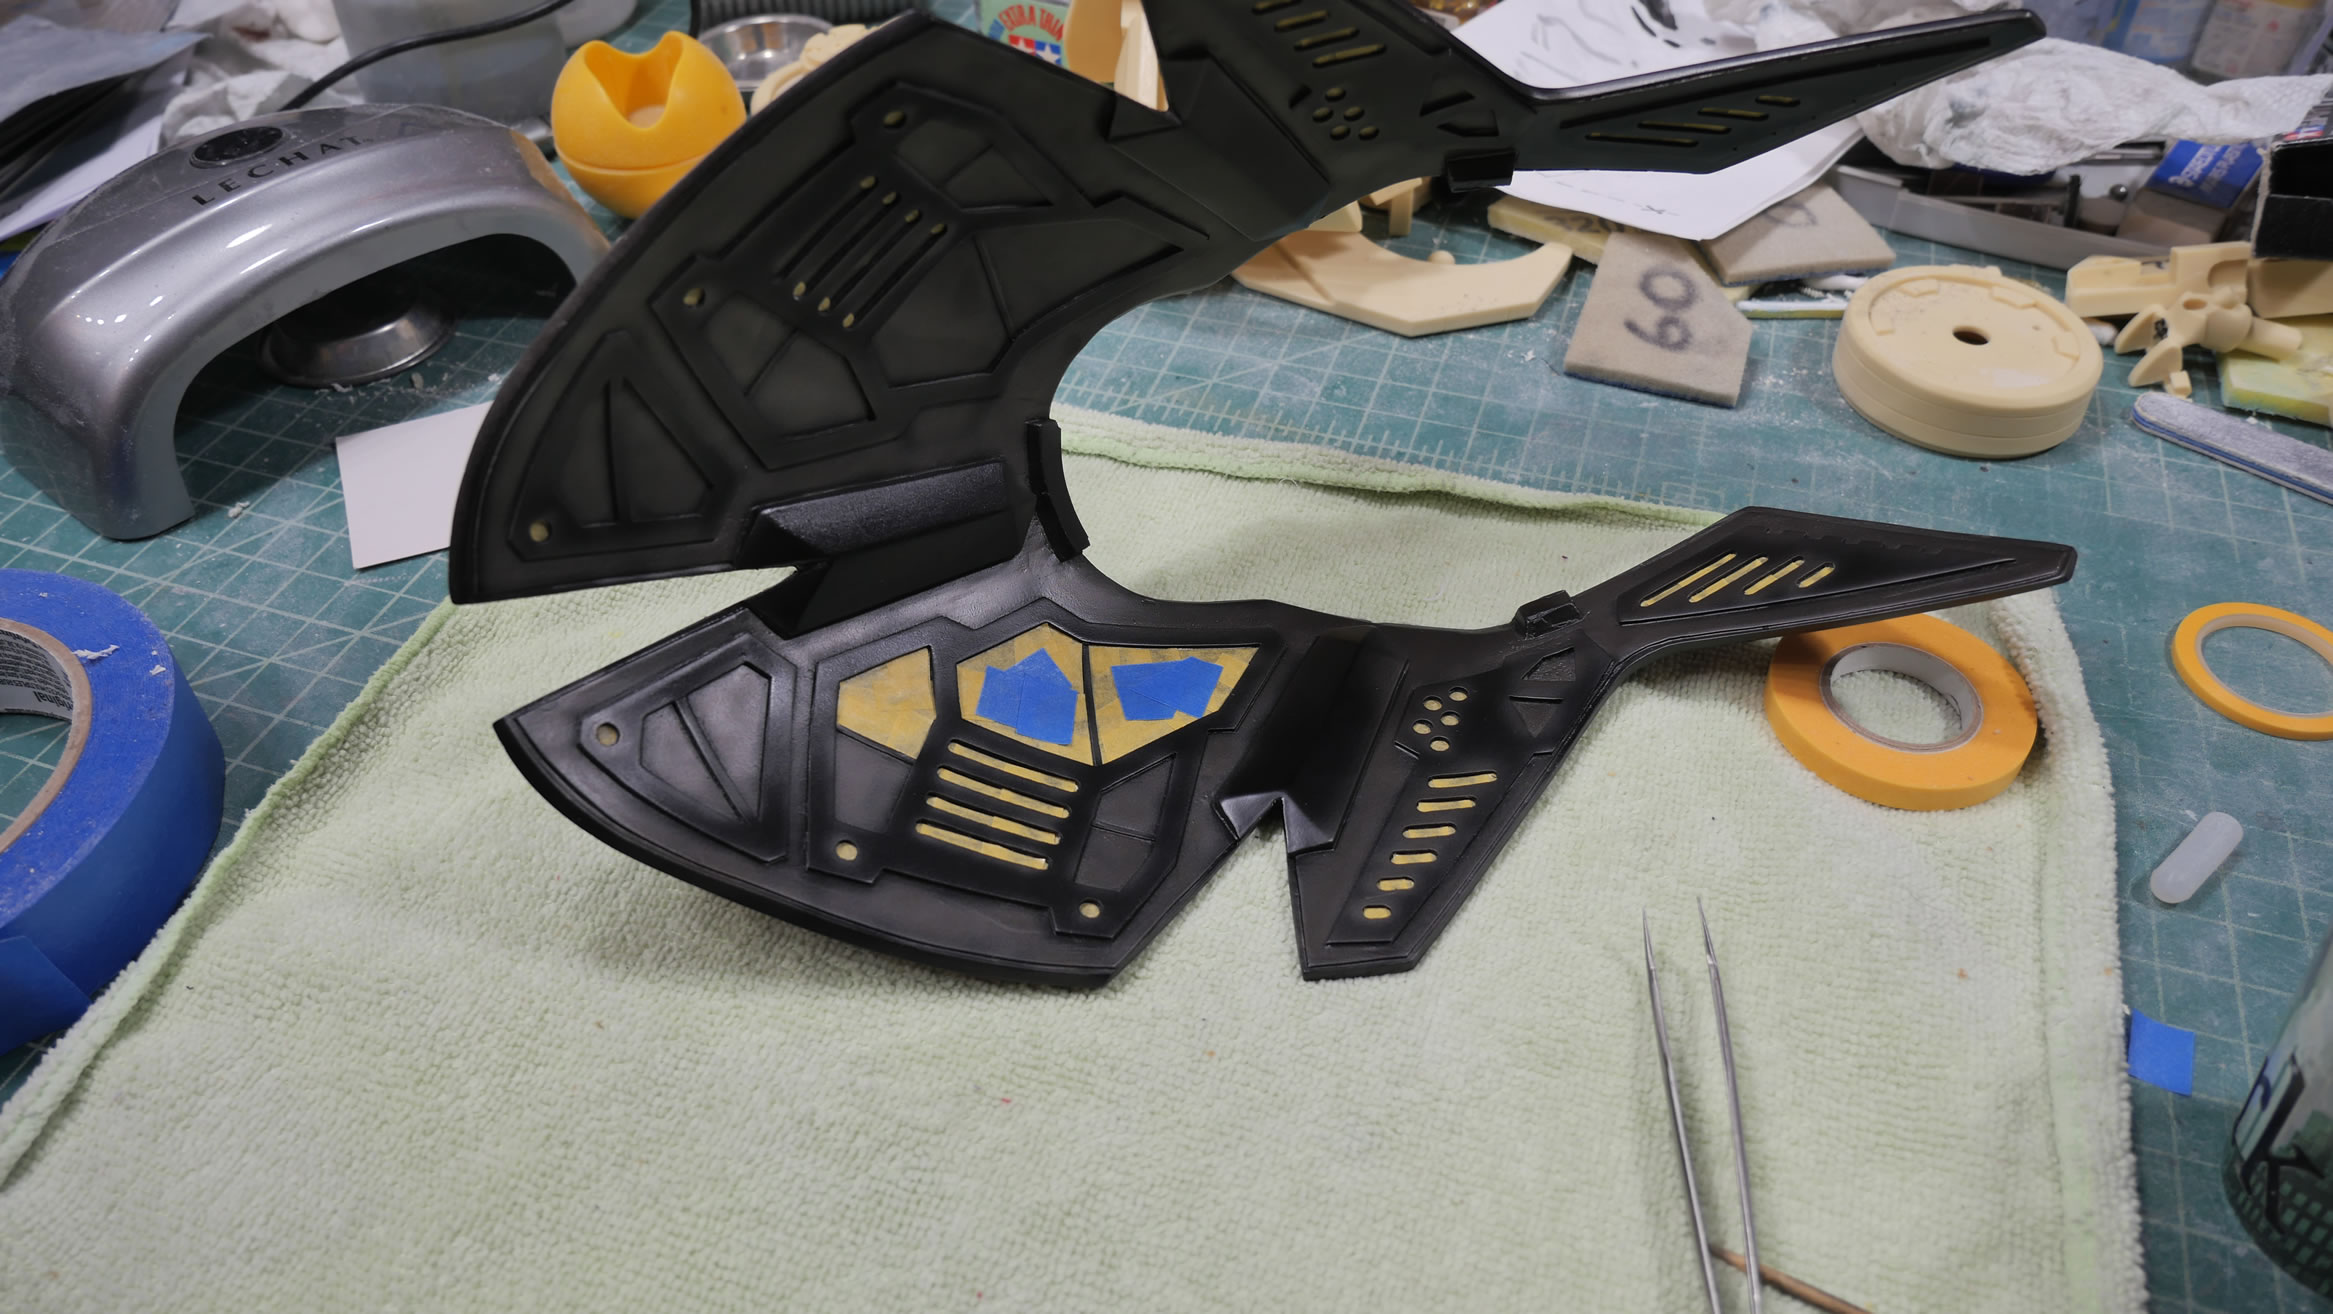
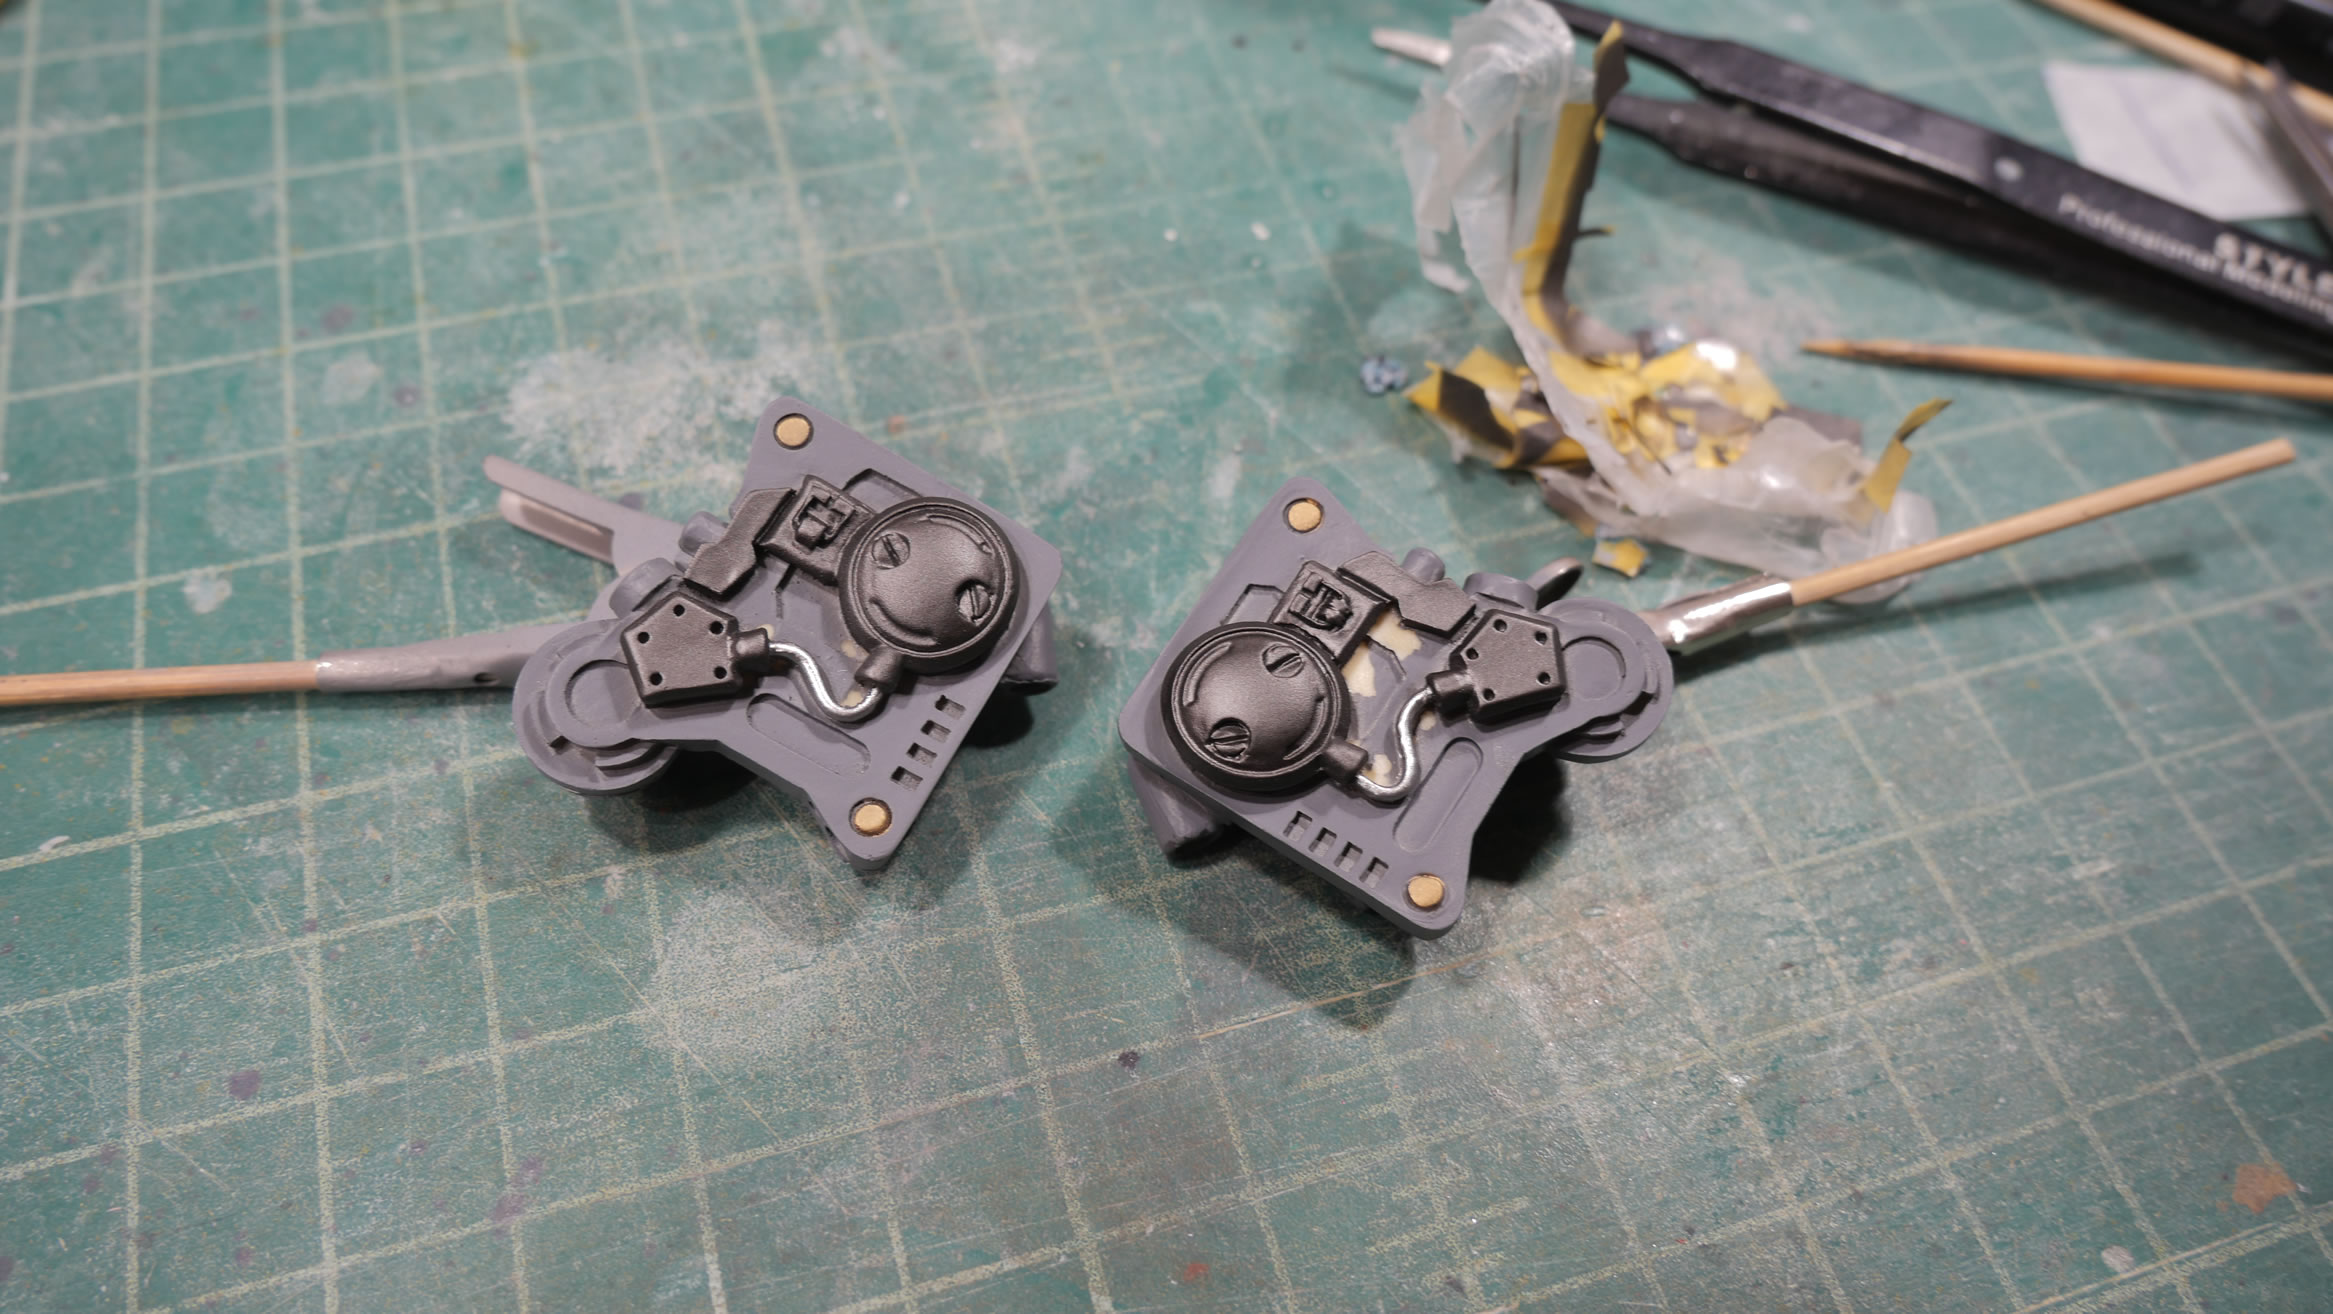
Here’s another spot where I missed the photo etch. I just scribed out a spot for the styrene strip, cut out some holes and glued in some photo etch details to sort of recreate the original photoetch details. The hold behind this piece is for some LEDs so the light will shine through here.
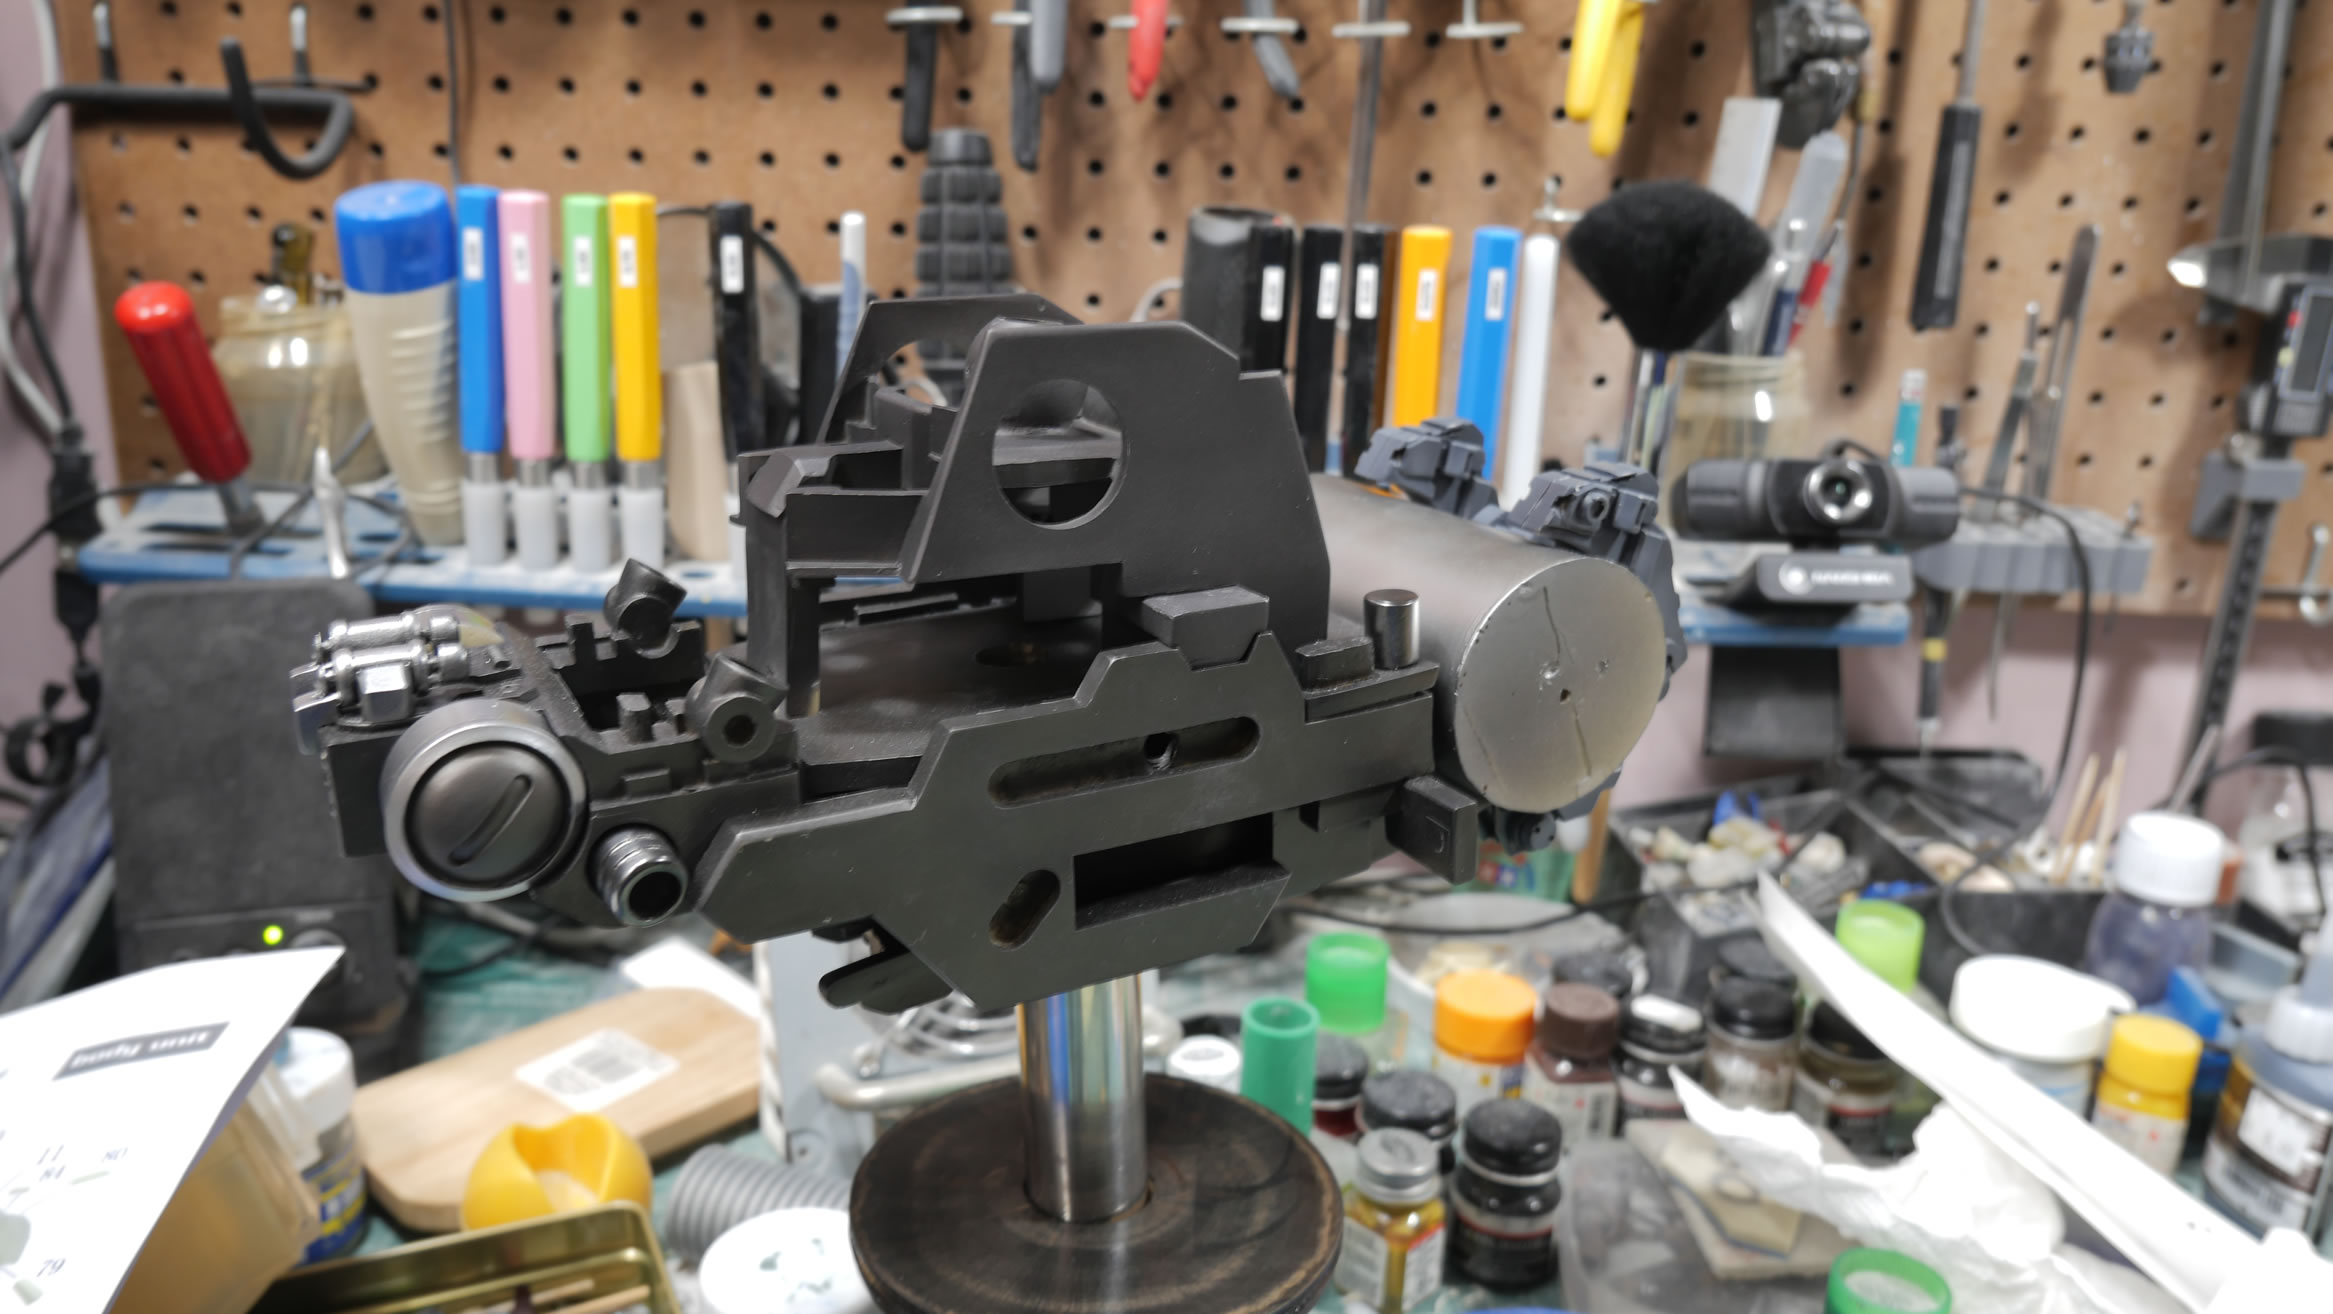
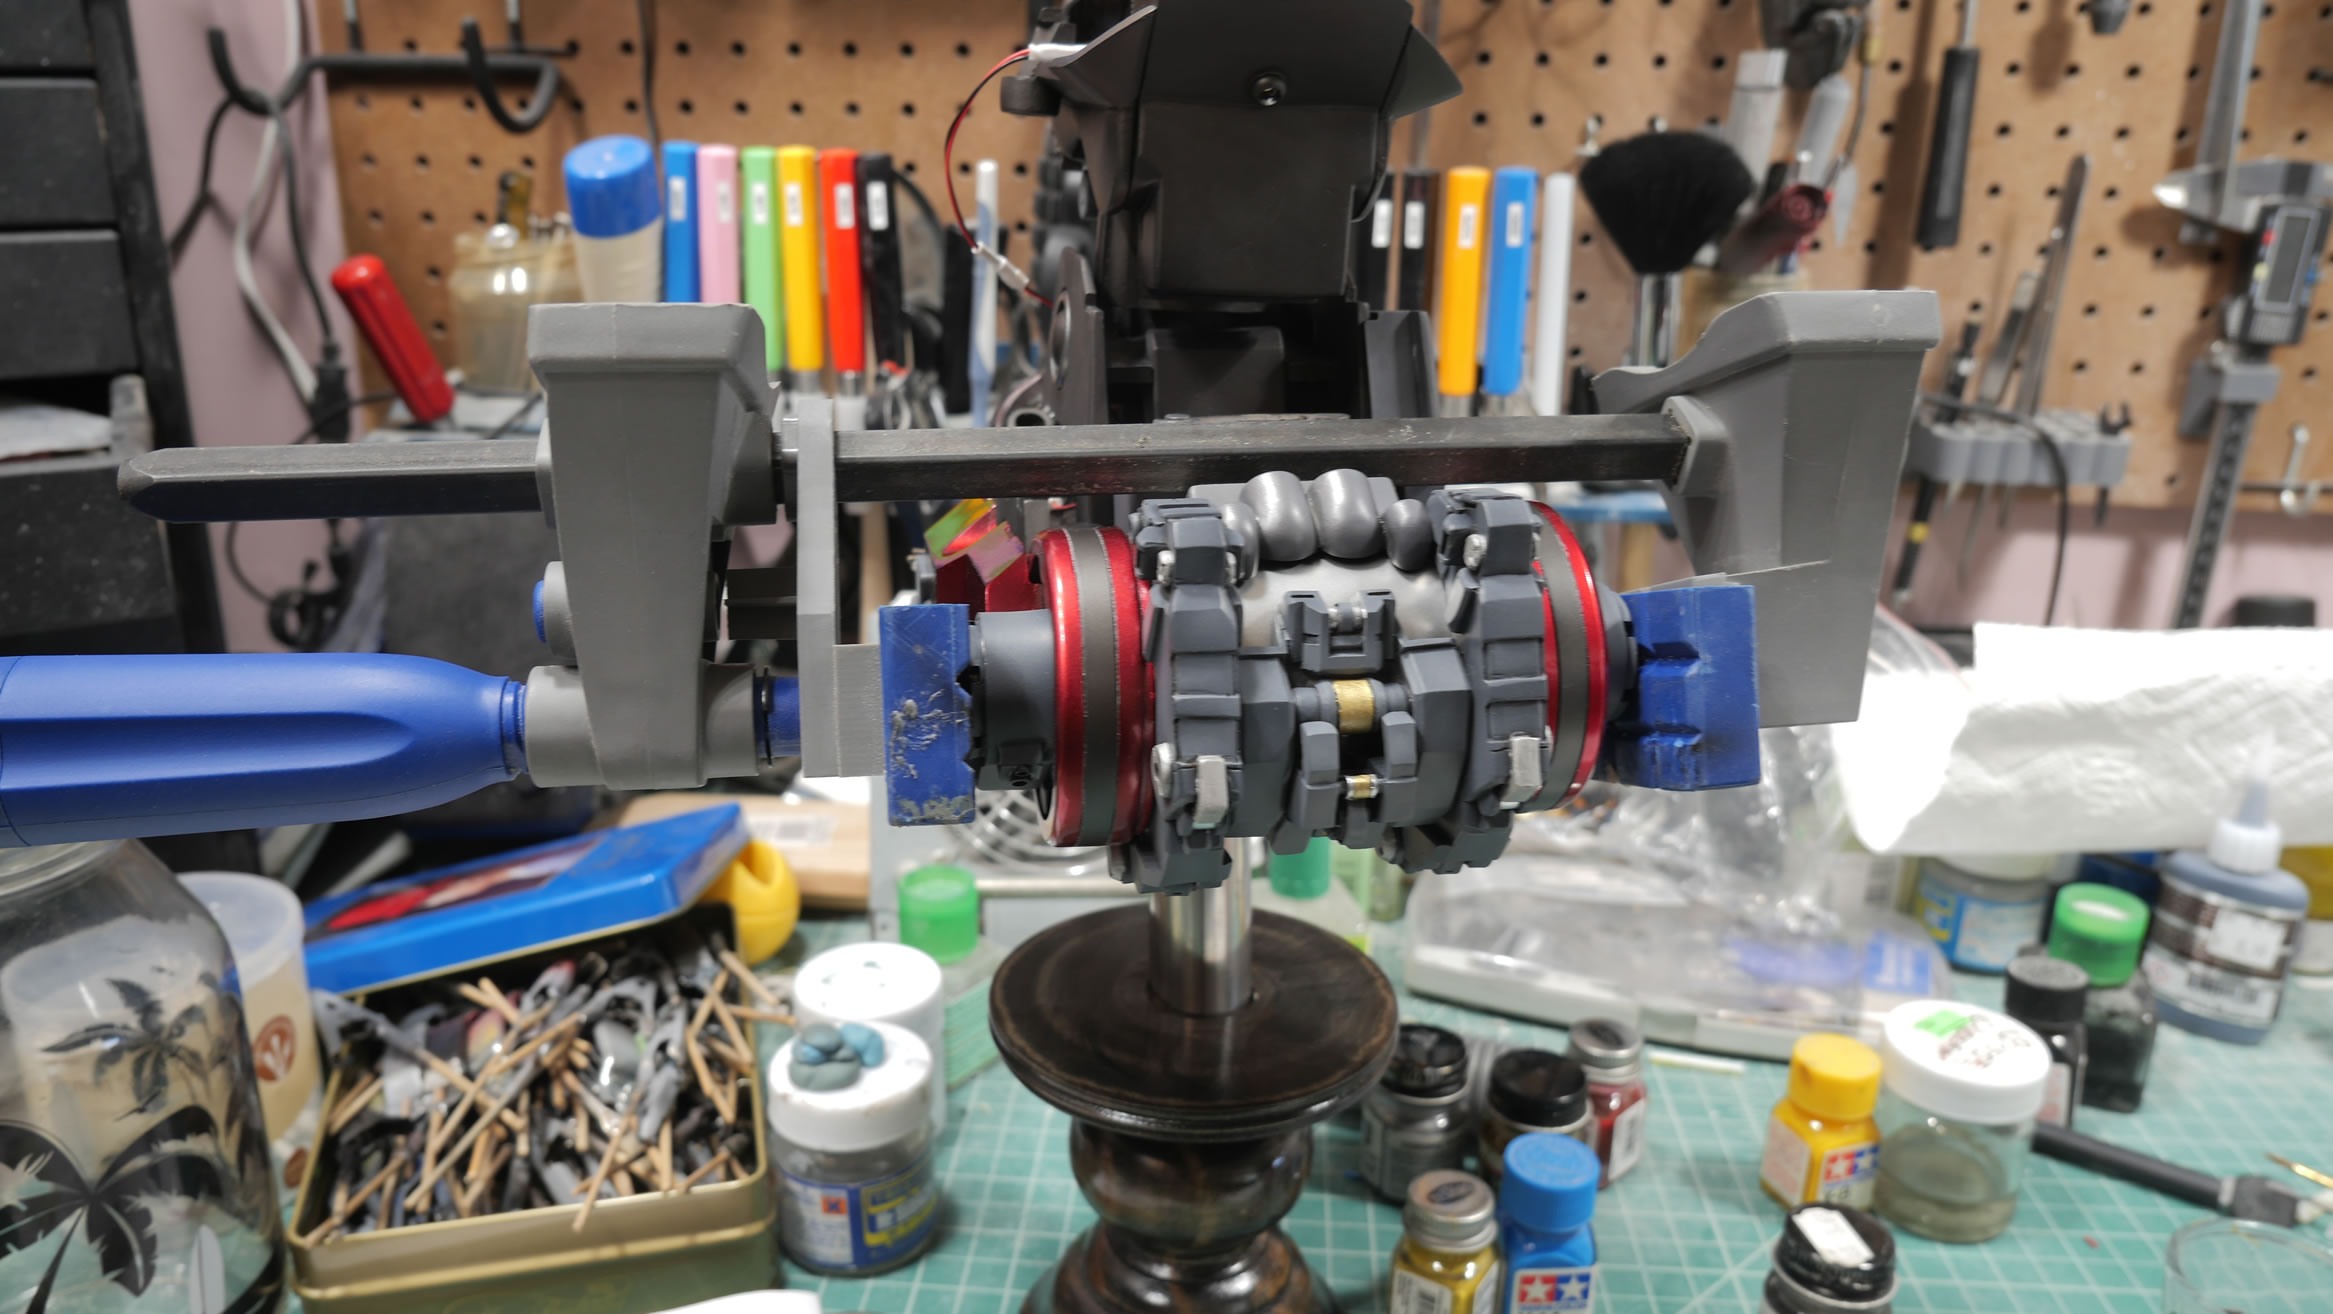
Main body is coming together. Painting up the rear cylinder piece. Mask, paint, mask, paint to get different metallic colors down.
The first layers of clear are sprayed onto kandy red pieces.
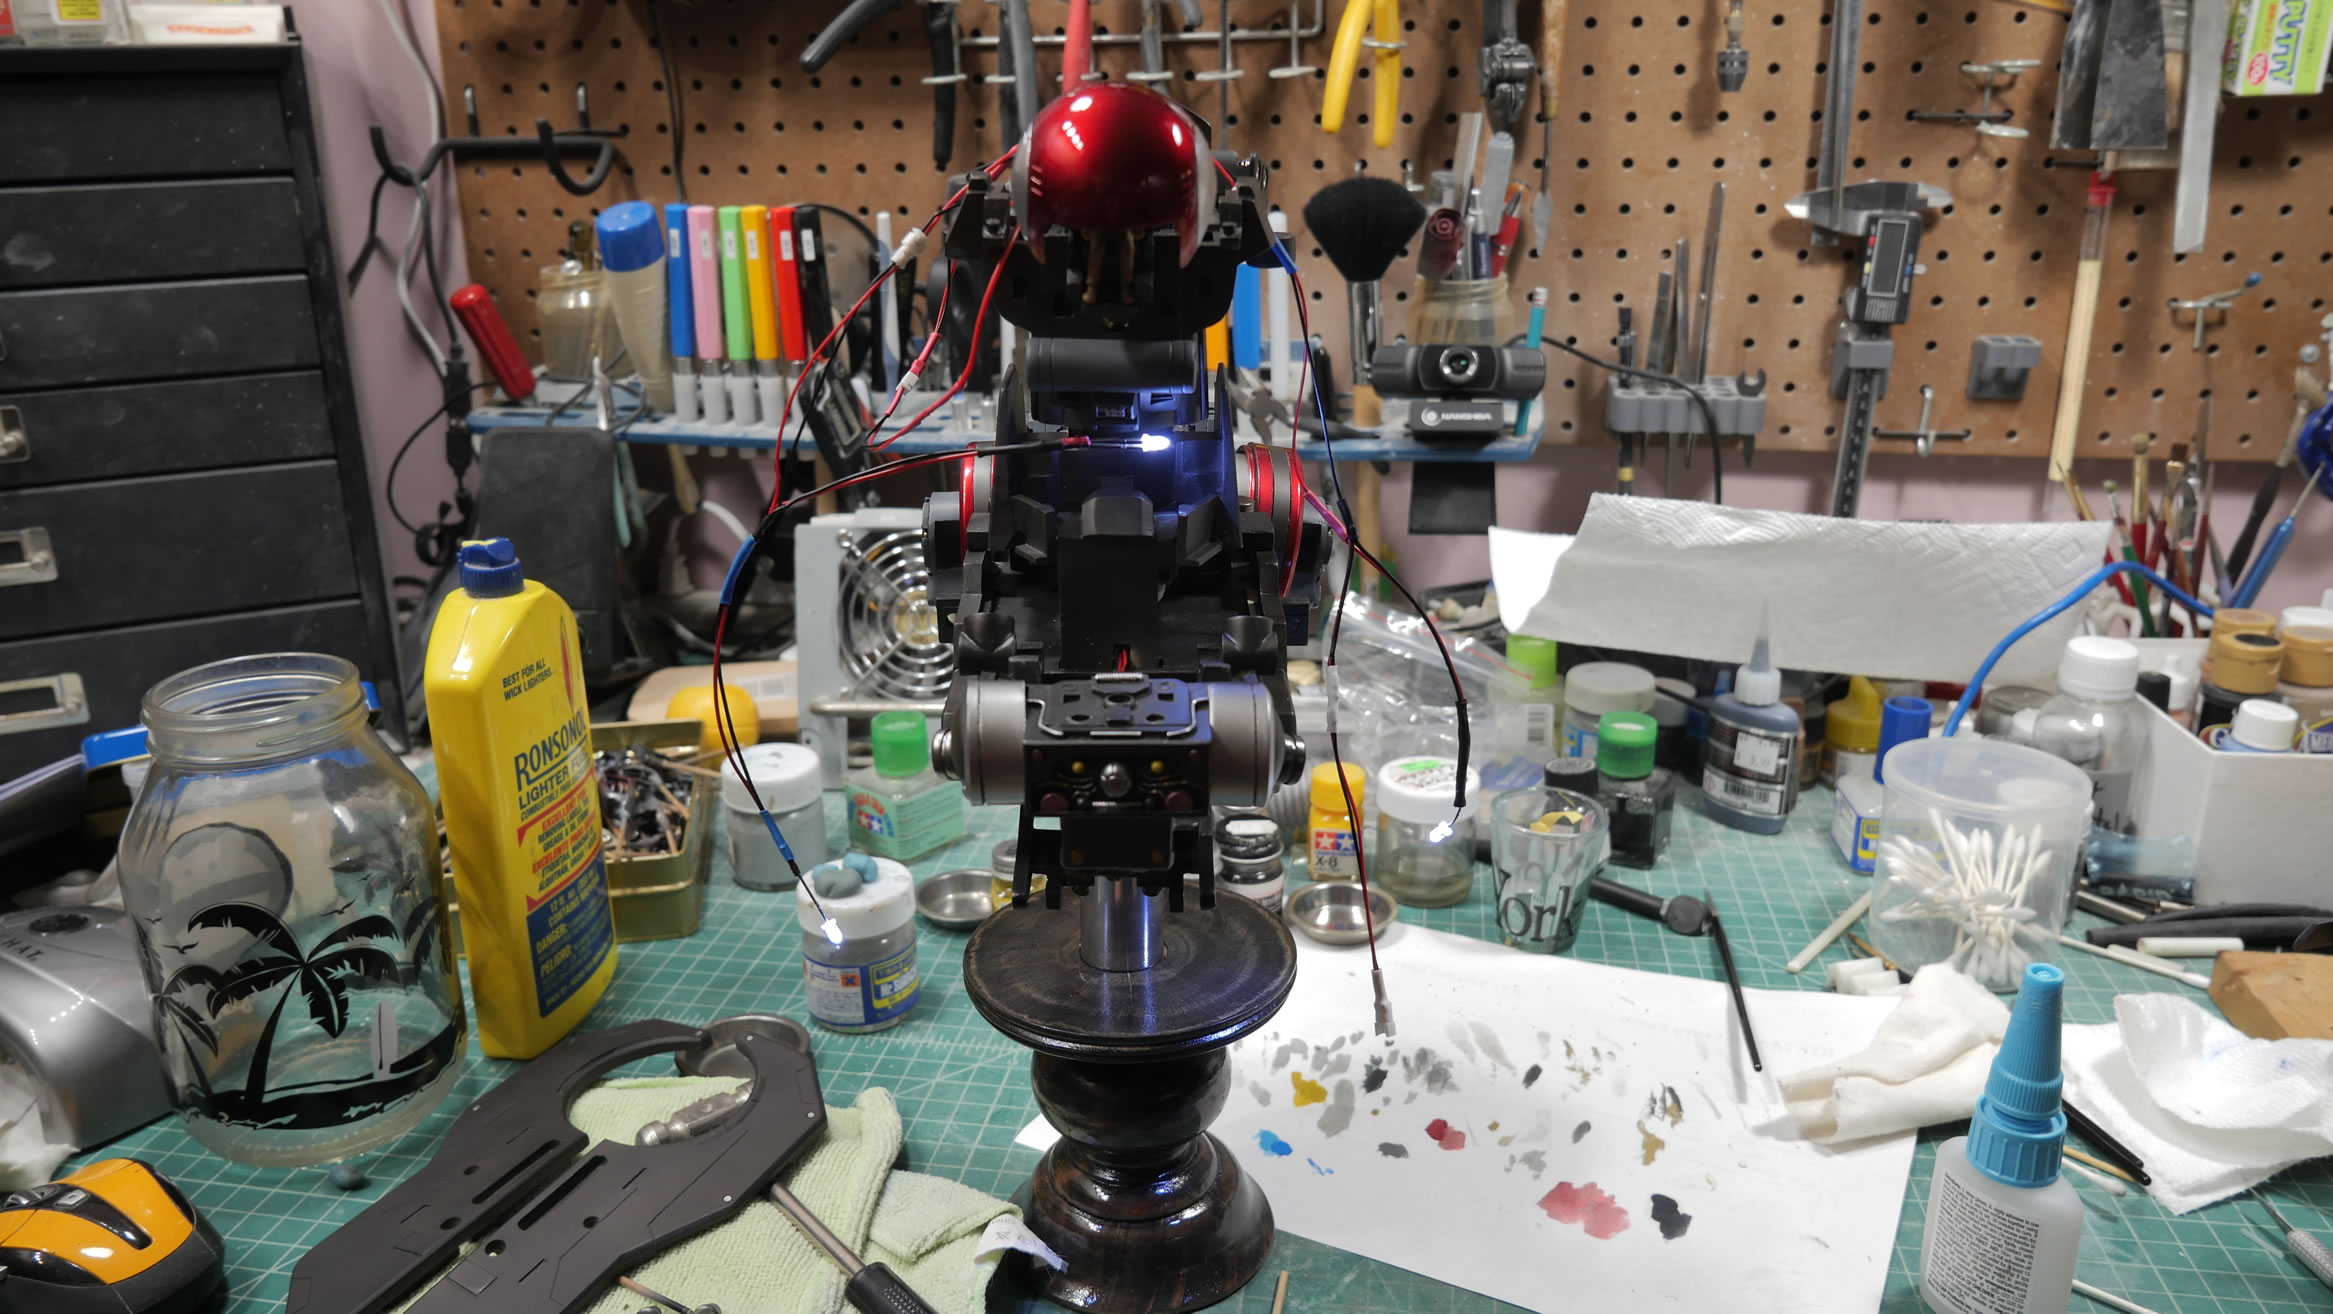
The kit comes with some LEDs wires, a switch, and a battery pack. I did a quick test to verify the switch function then went to work building wiring harnesses. I have some small j connections that used for the wiring. This will make final assembly and fishing the wires much easier.
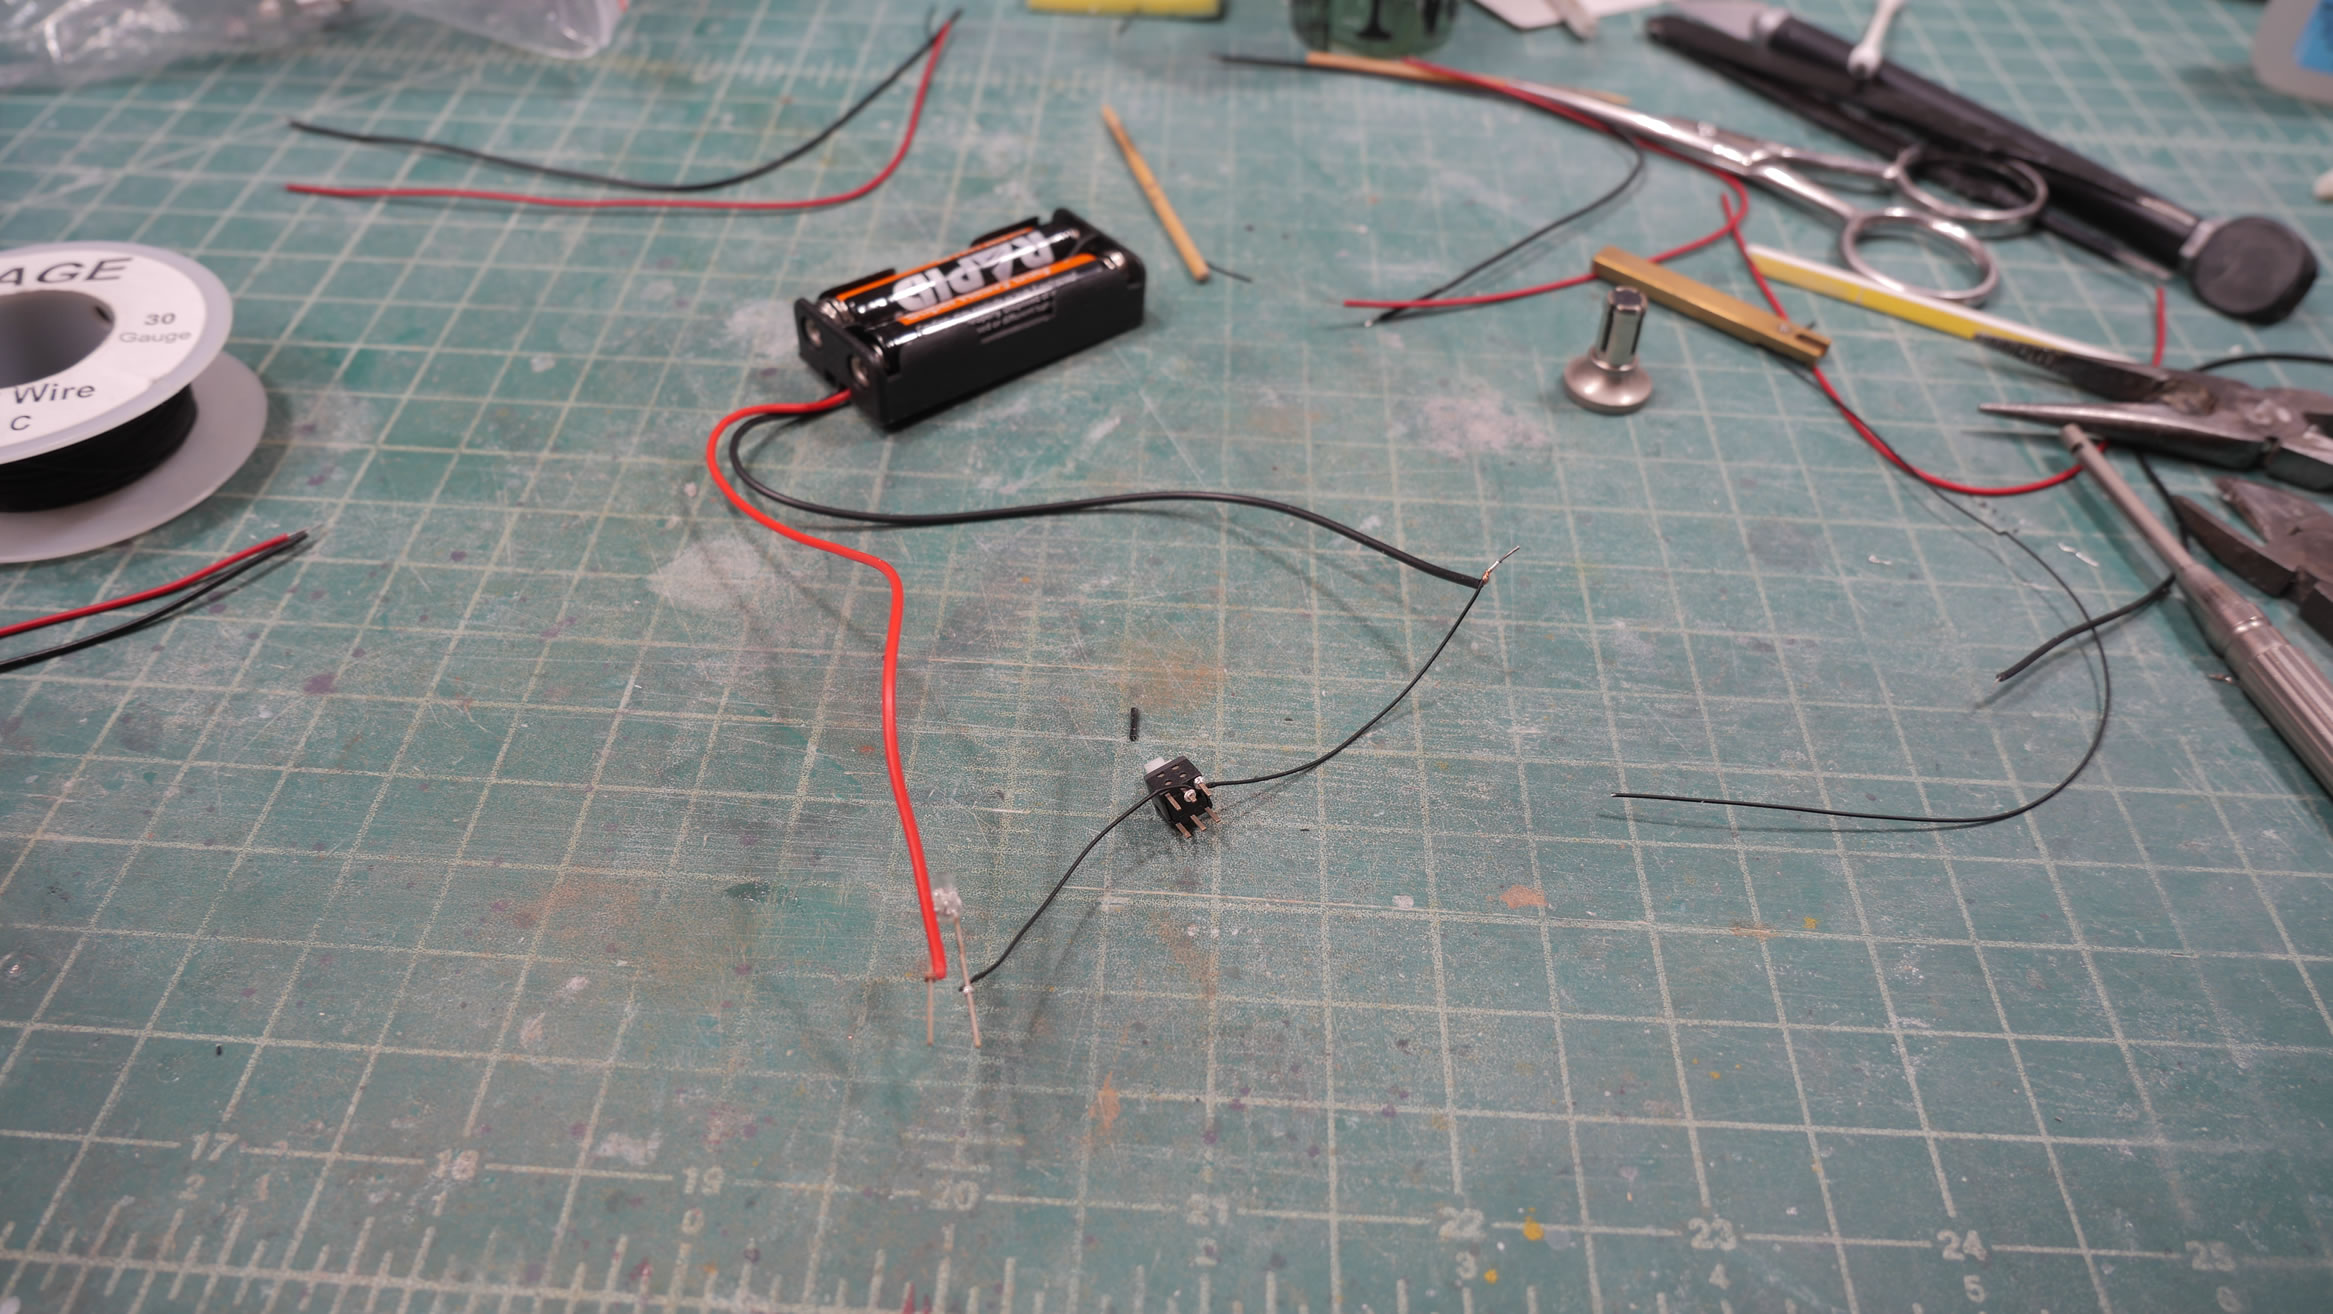

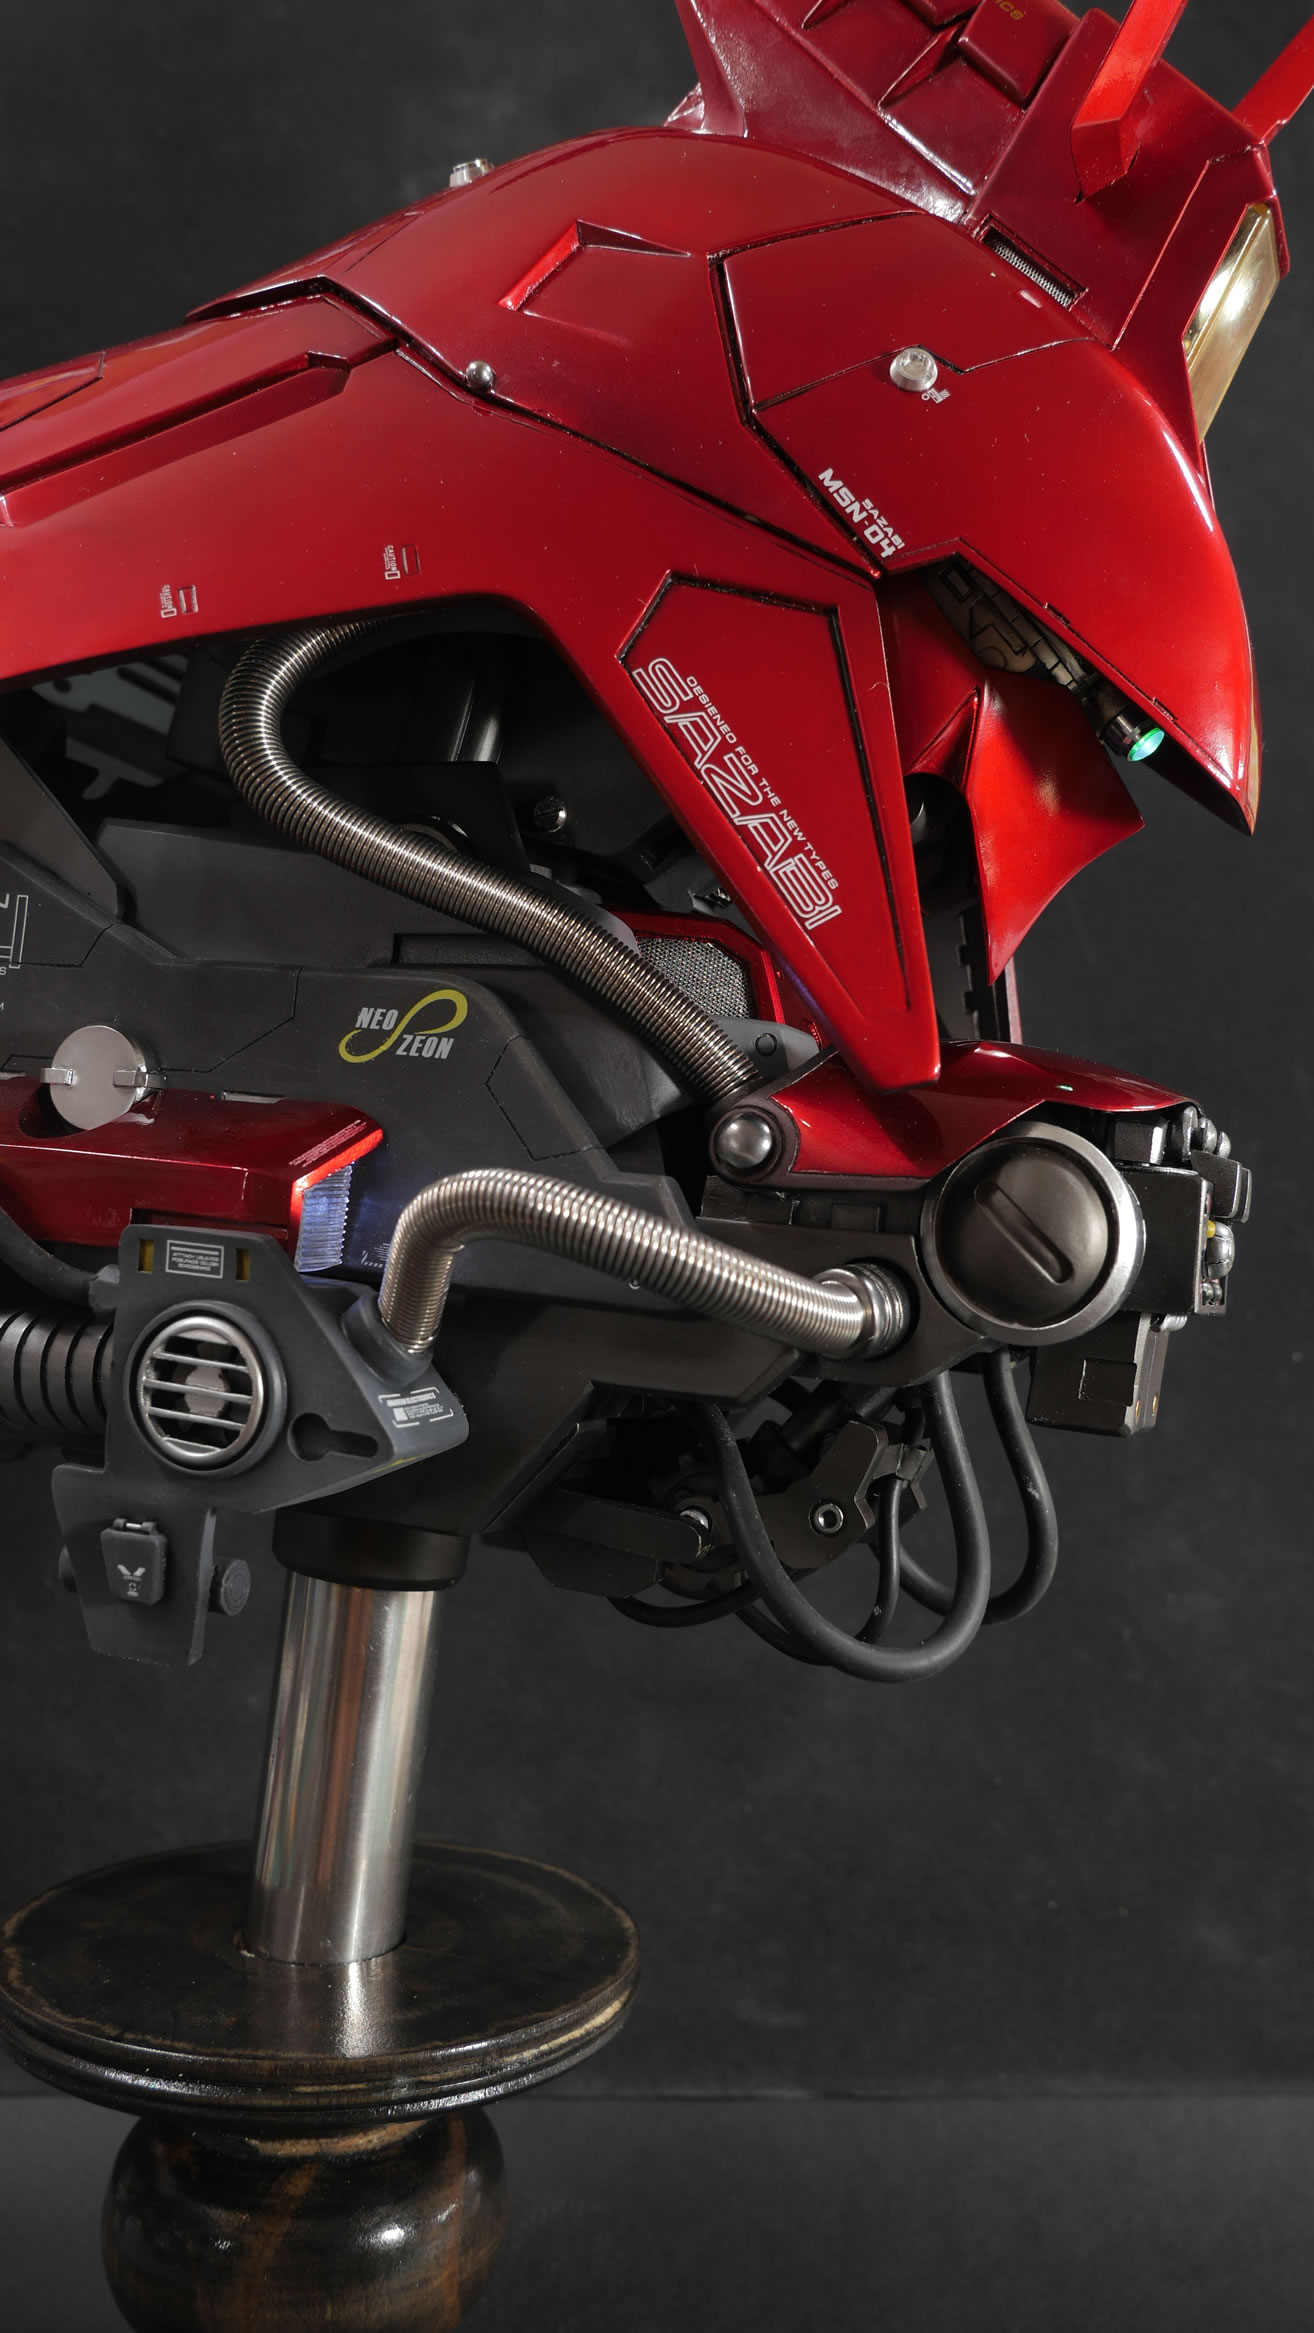
With the wiring harness and connections, fishing the switch assembly, the battery hold, and the LED sets is very easy. A quick test and all the LEDs fire up. I did have to add an additional LED as I think the kit has a spot for it, but didn’t provide LEDs for that area. There is an LED for the instrument console that is near impossible to see once assembled, one for the mono eye, and two for the sides of the kit where the photoetch parts were rebuild above.
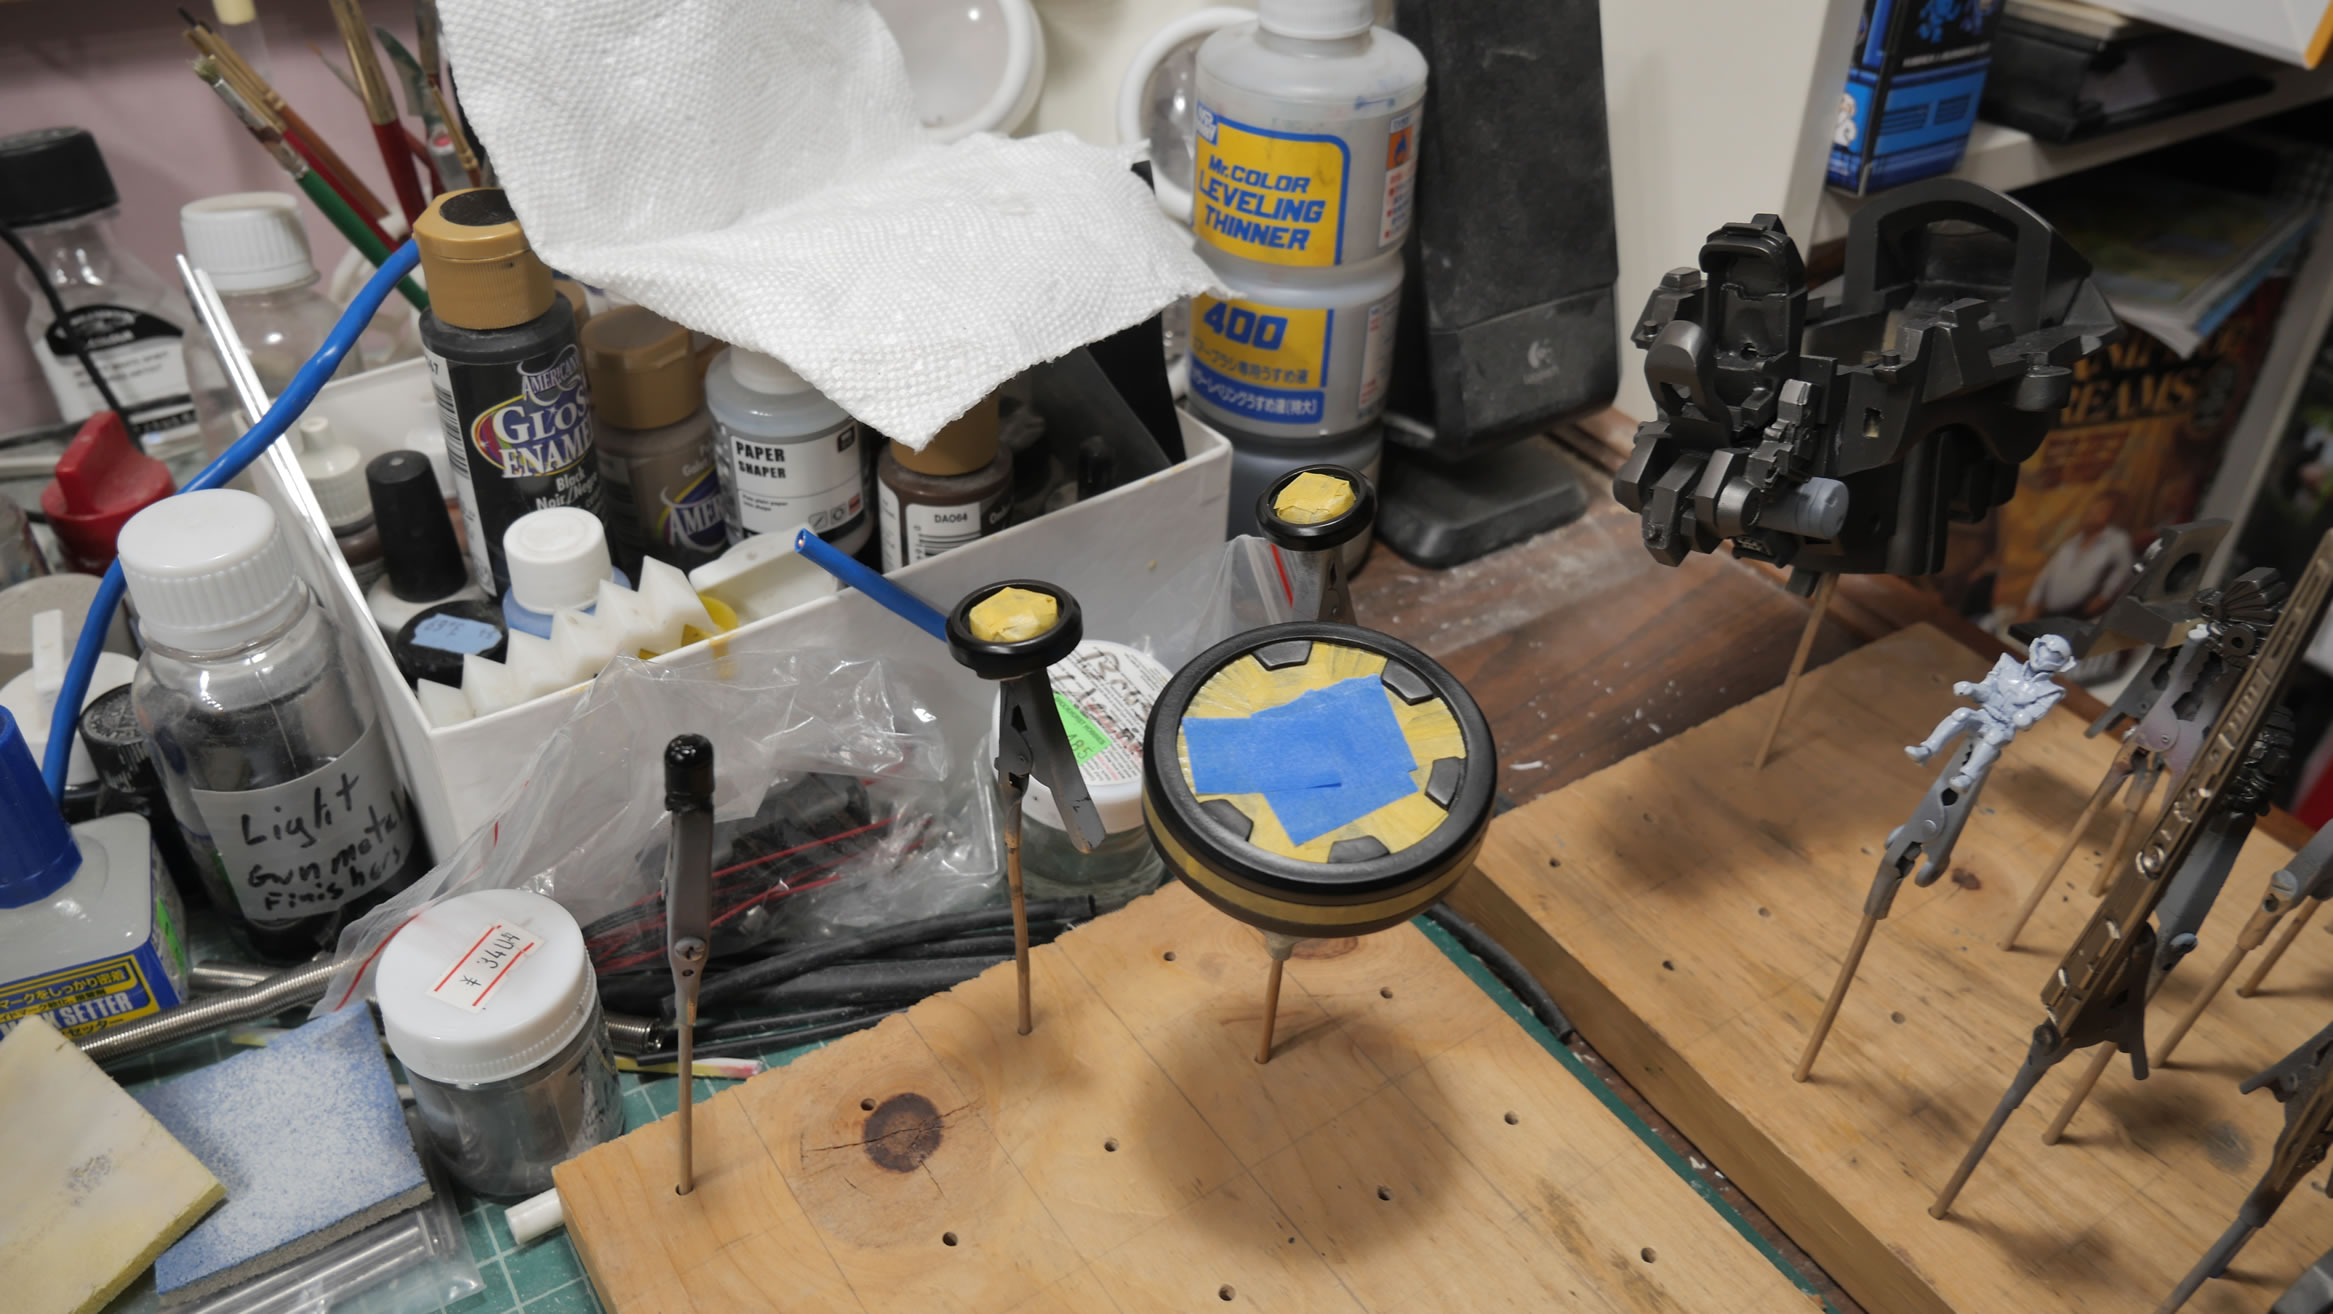
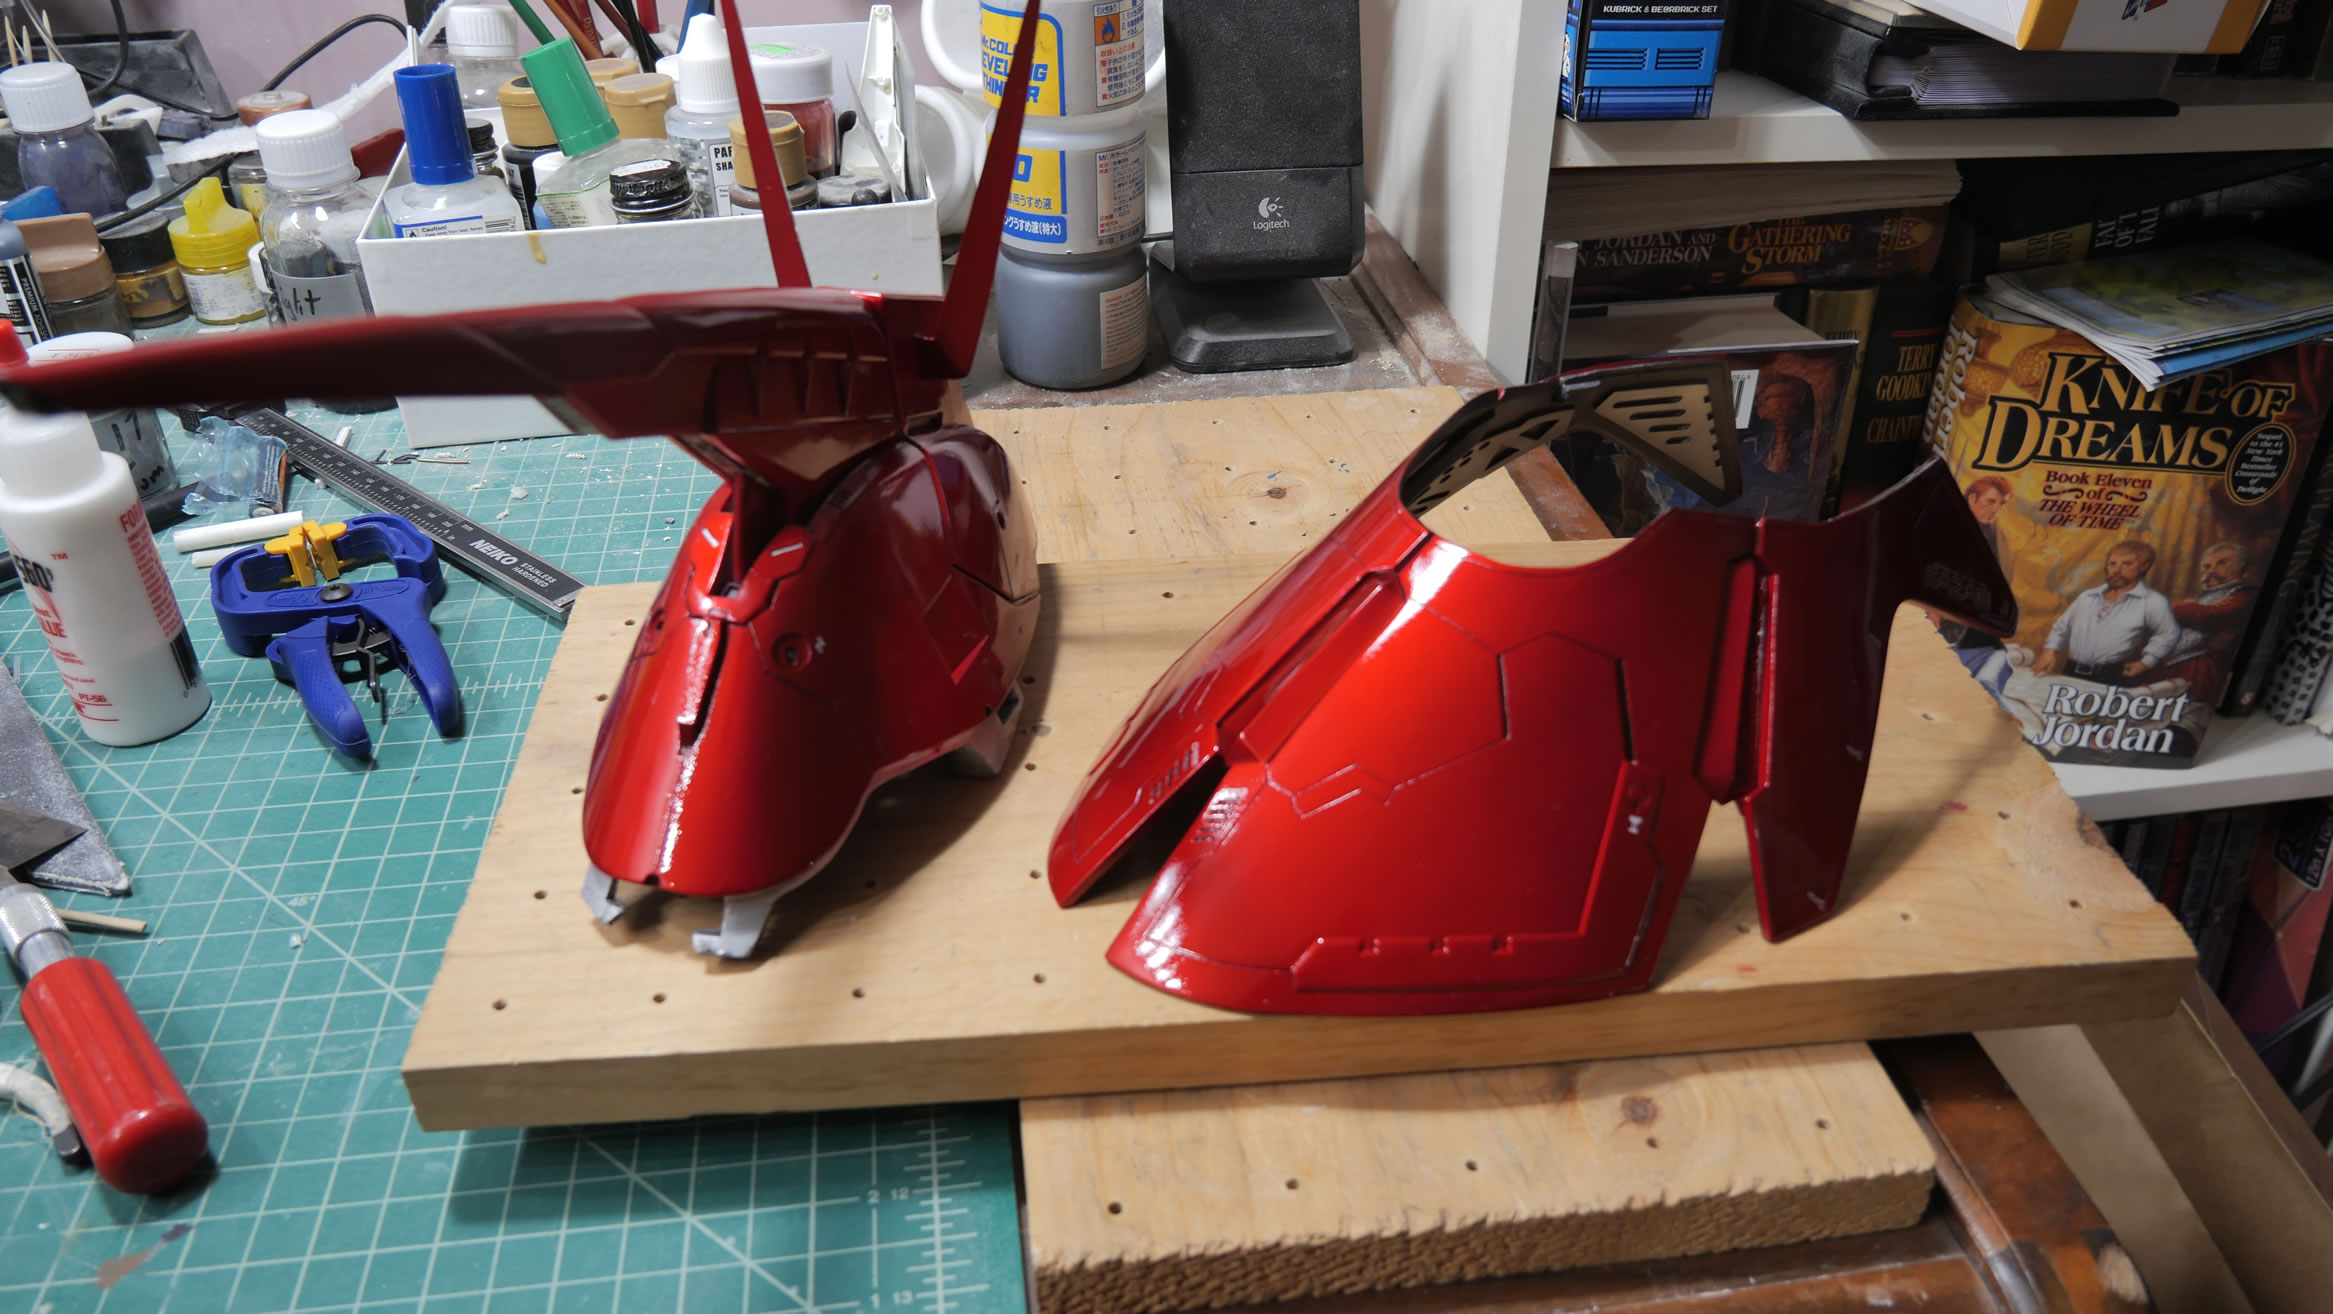
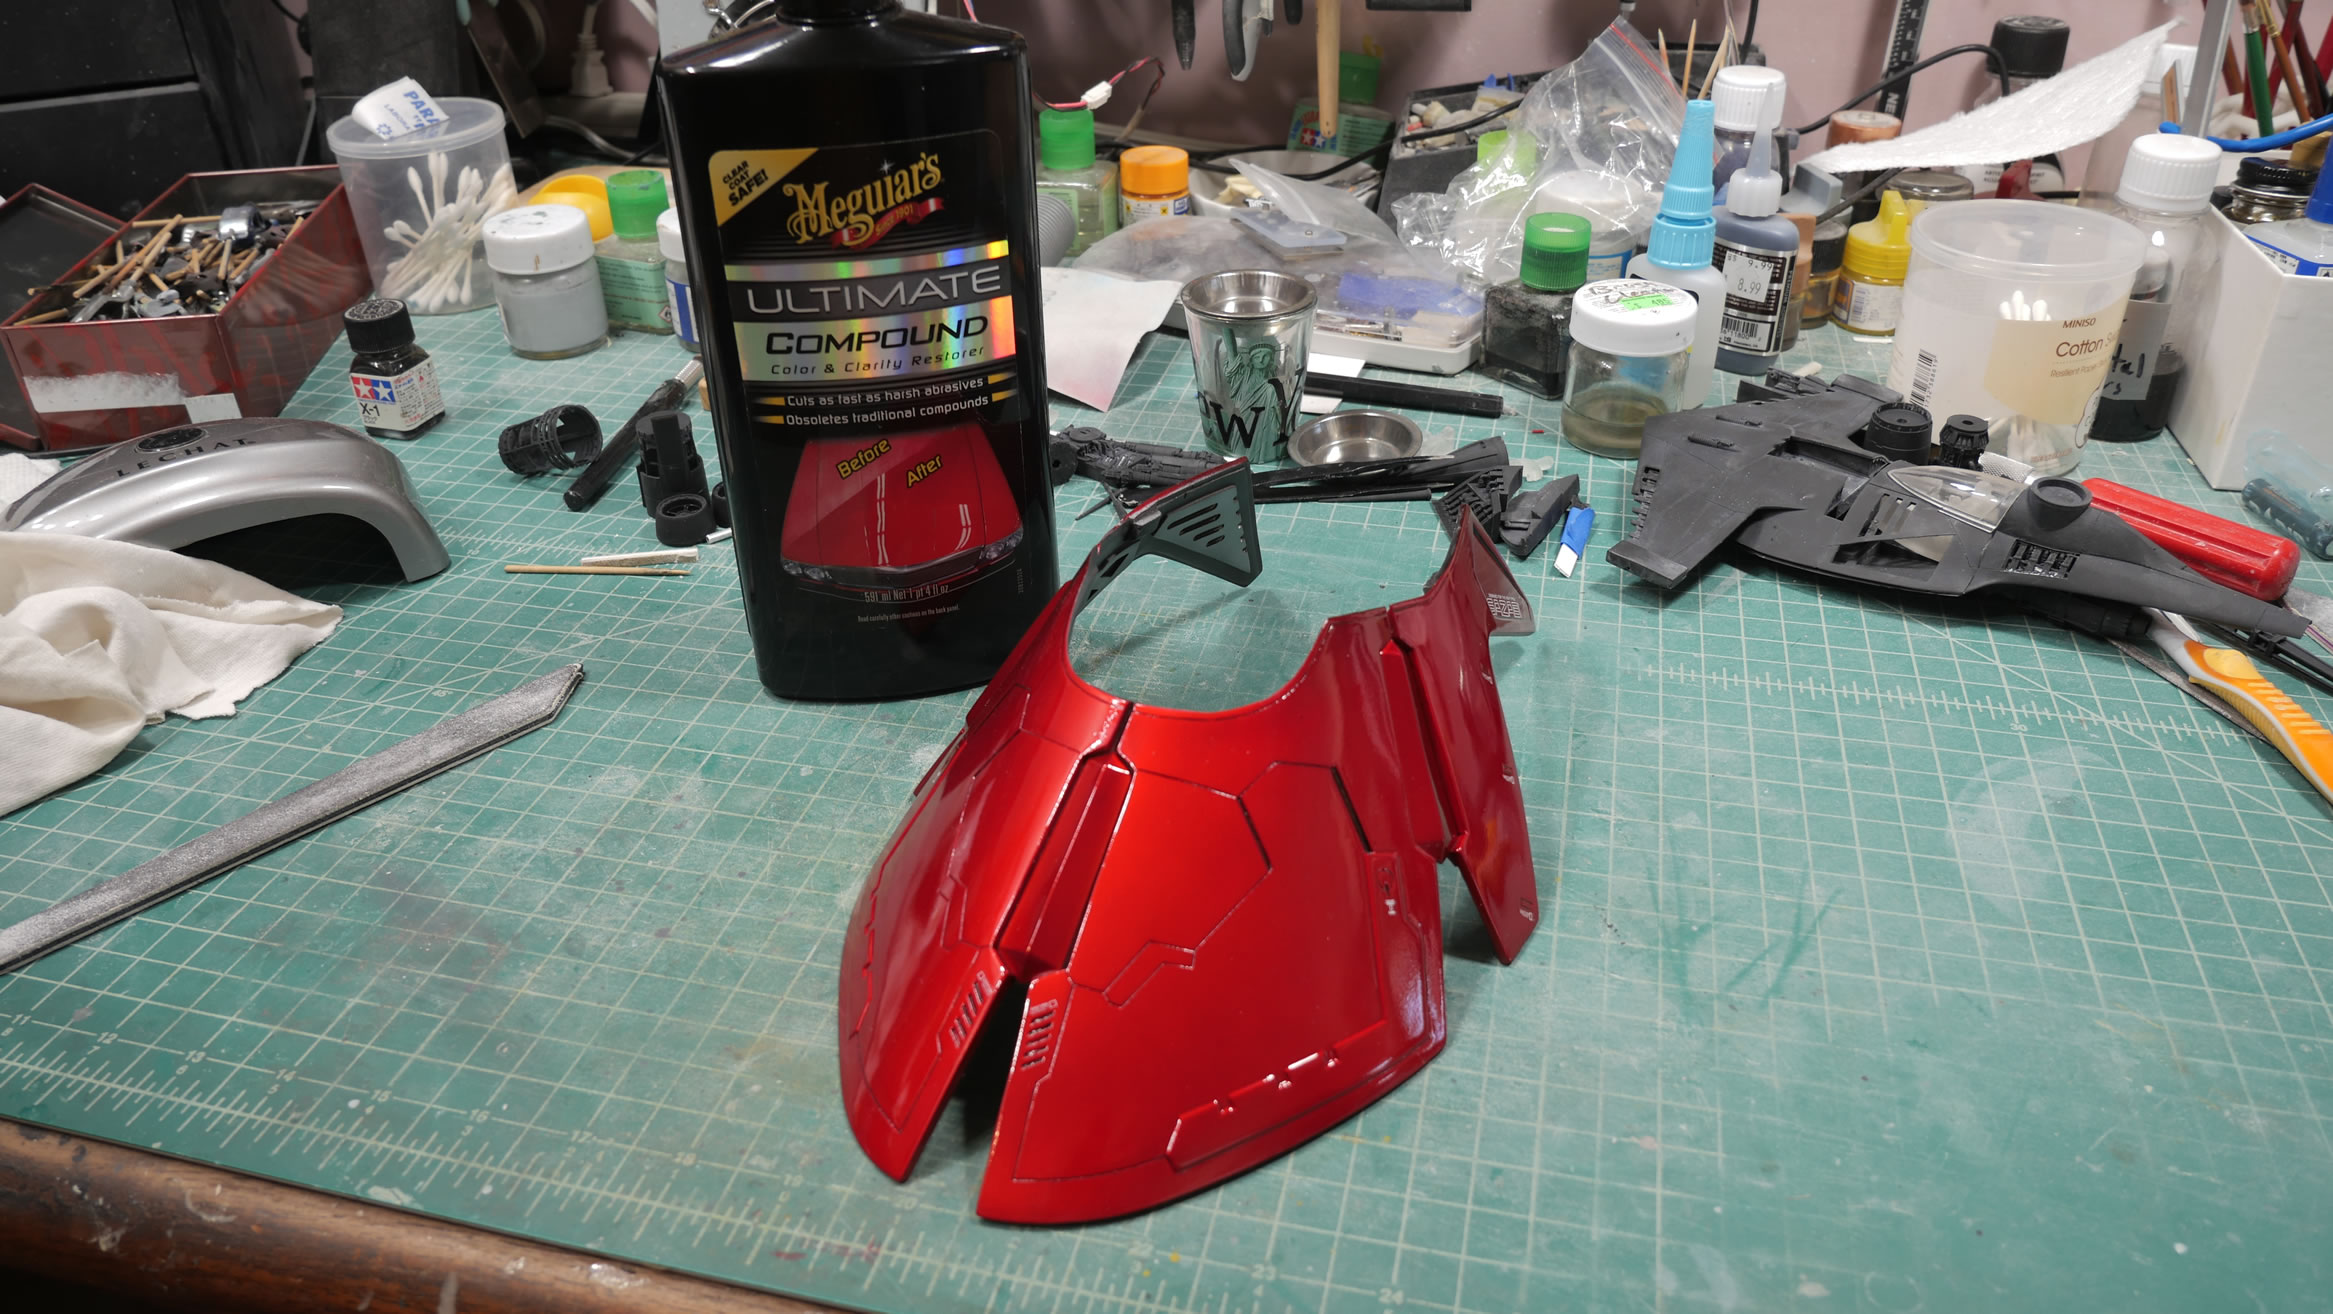
The small upper neck piece was shined up with Meguire’s compound and polish. Once that was done, the part is masked off to create a racing stripe.
Stripe design done, the rest of the part is masked off and a quick spray of Alclad Burnt Iron gives the surface a nice contrast with the ultra glossy finish and flat metallic.
First masking casualty. Paint pulled up completely down to the primer. The mold release is strong on these parts. I just hand painted the base black and greys back. A few layers of clear and it’s not too noticeable.
I mad a mistake here with the vice to hold the cylinder parts while the glue set up. I applied a little too much pressure. But this problem doesn’t rear it’s ugly head until a few days later when I’m near final assembly. Also the decal work. I didn’t lost the kit’s decal sheet, but I also had to add in a bunch of other decals from my spare decal bin.
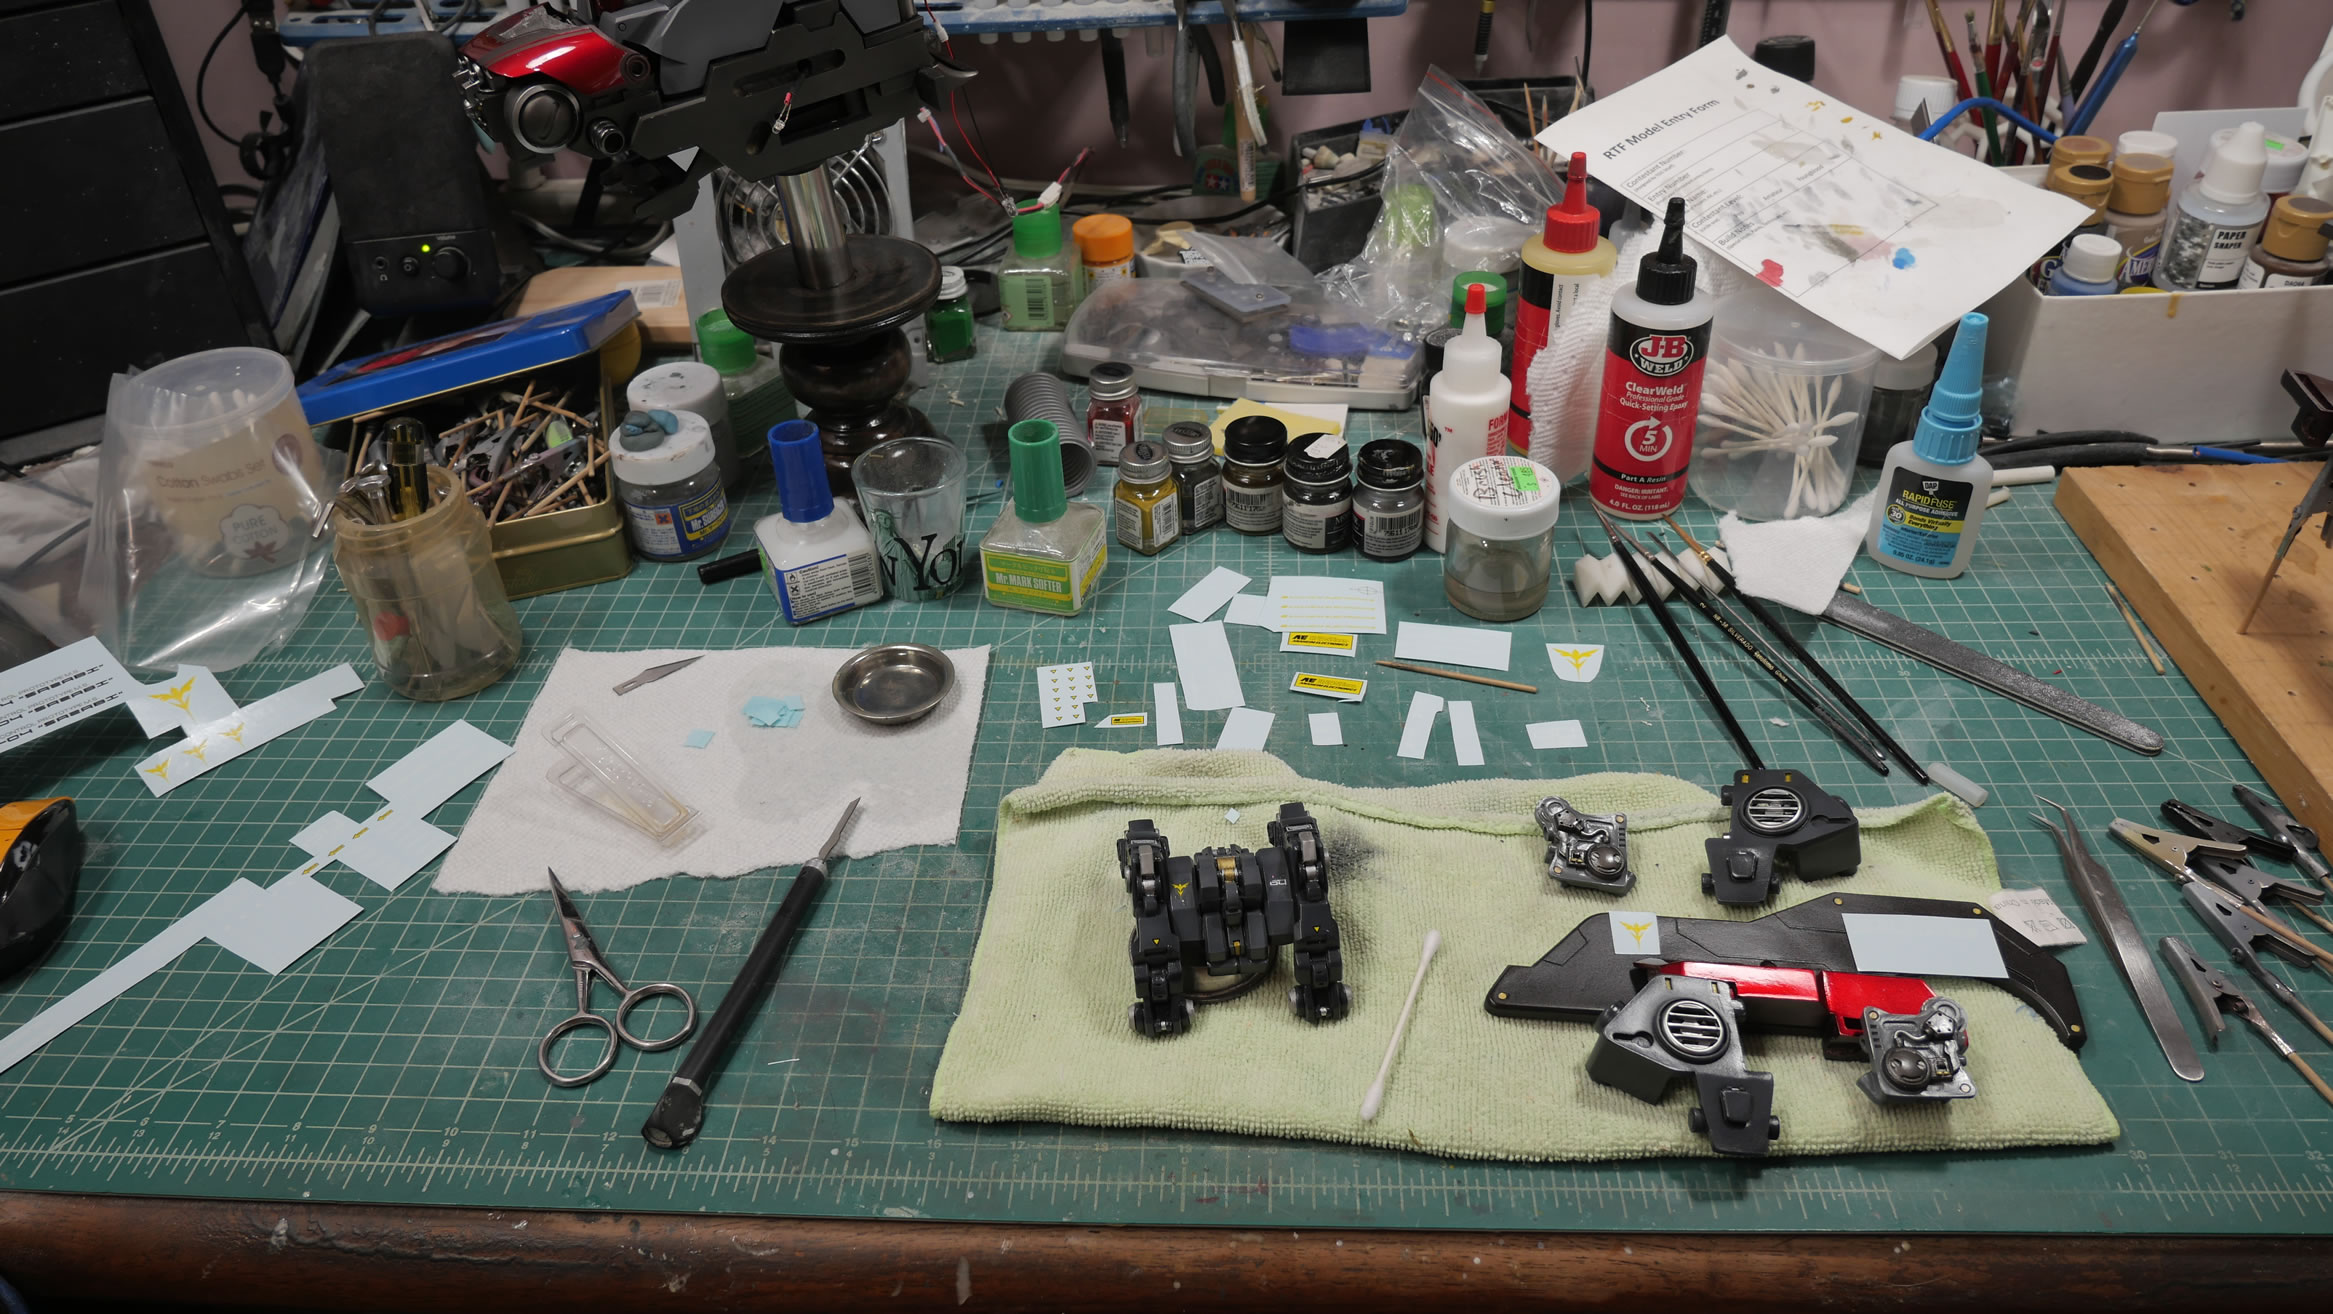
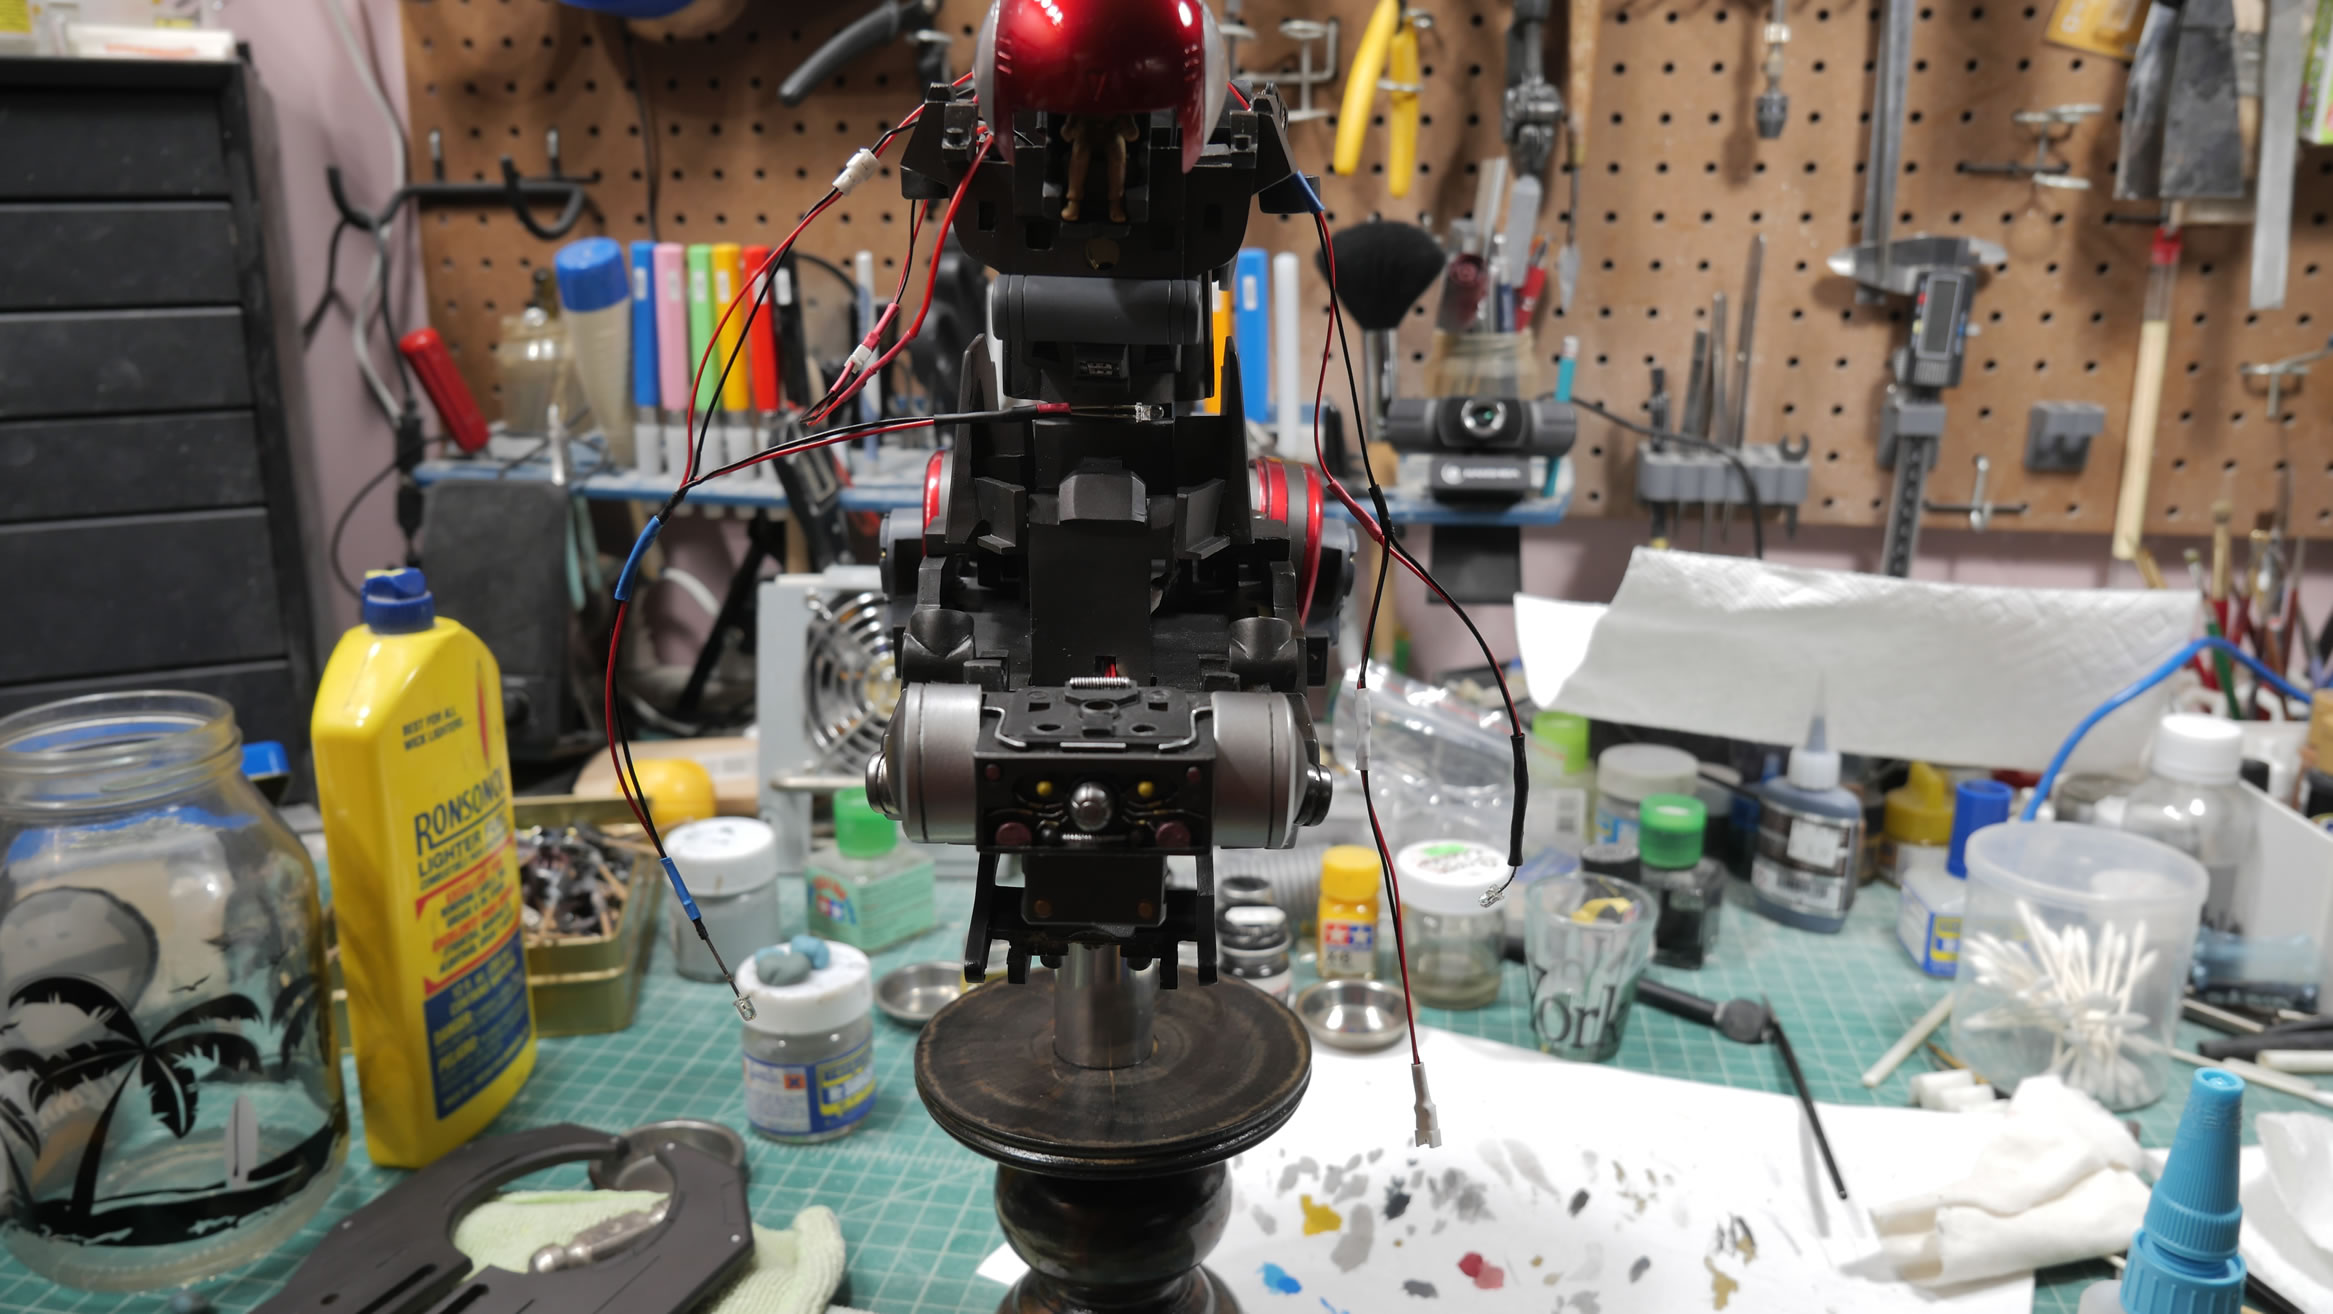
Assembly of some major pieces. The springs are glued into position. I used some excess cat6 cabling to add some structure to the springs so that bends will keep shape. LEDs are fished through the kit and the mono eye and side areas are lighted.
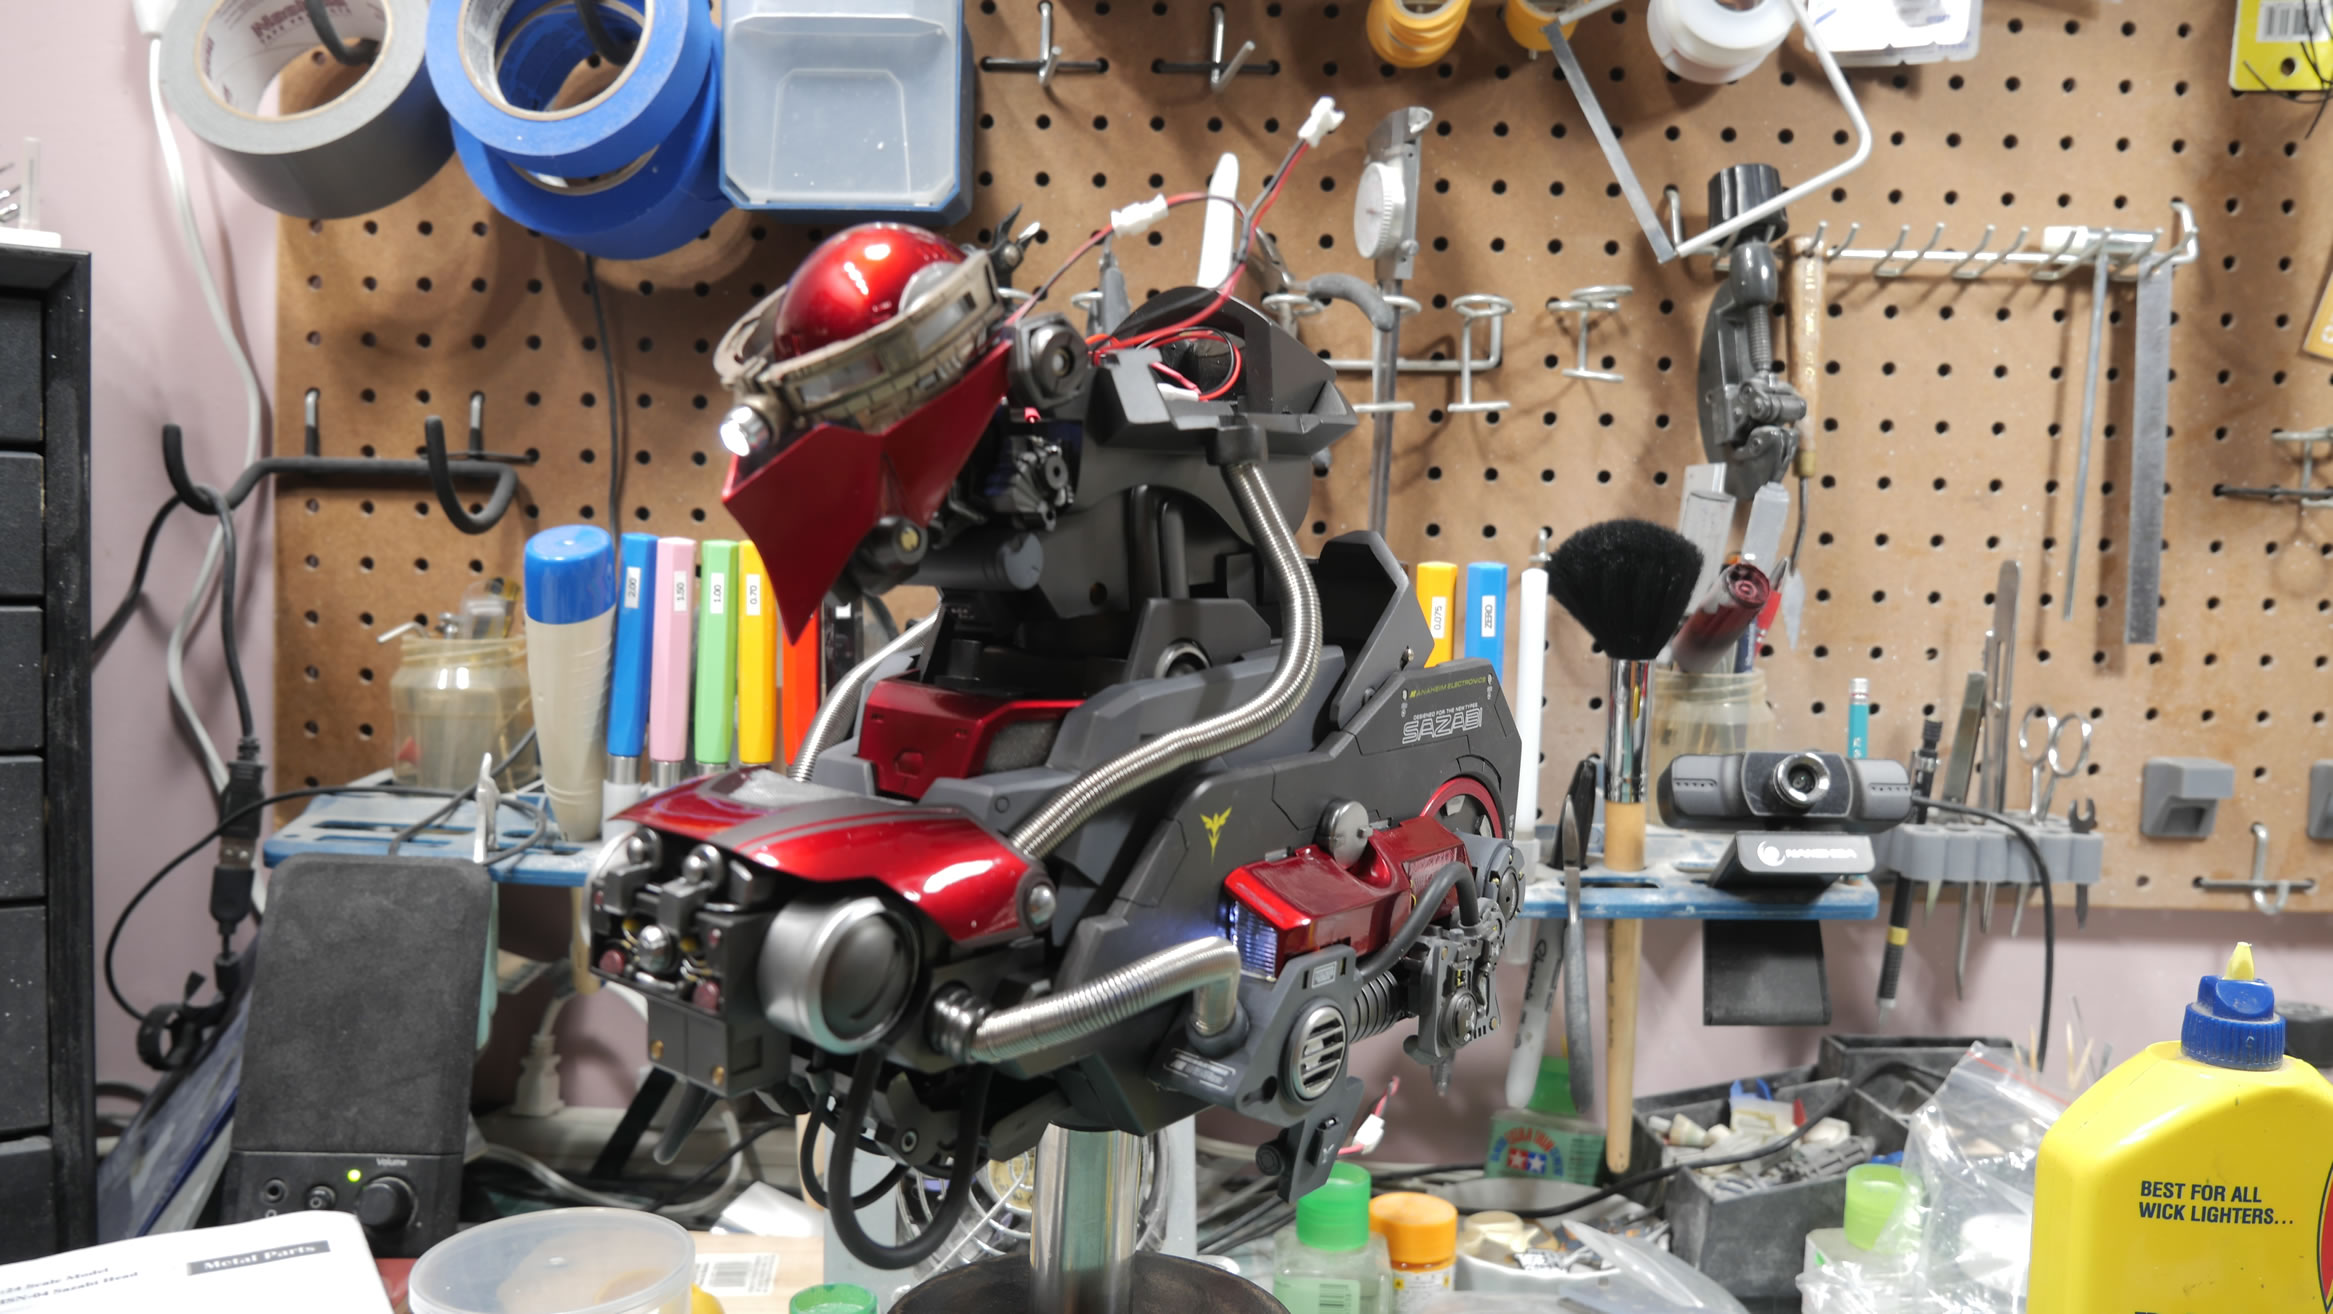
Looking pretty decent as I progress.
Decals for the head piece are done so another thick layer of clear gloss is needed to completely sandwich the decals and make the decal edges go away. Also, red is more Bob’s color.

Assembly casualty from earlier. Putting things together, I chipped some paint. So a quick mask and paint resolves this.
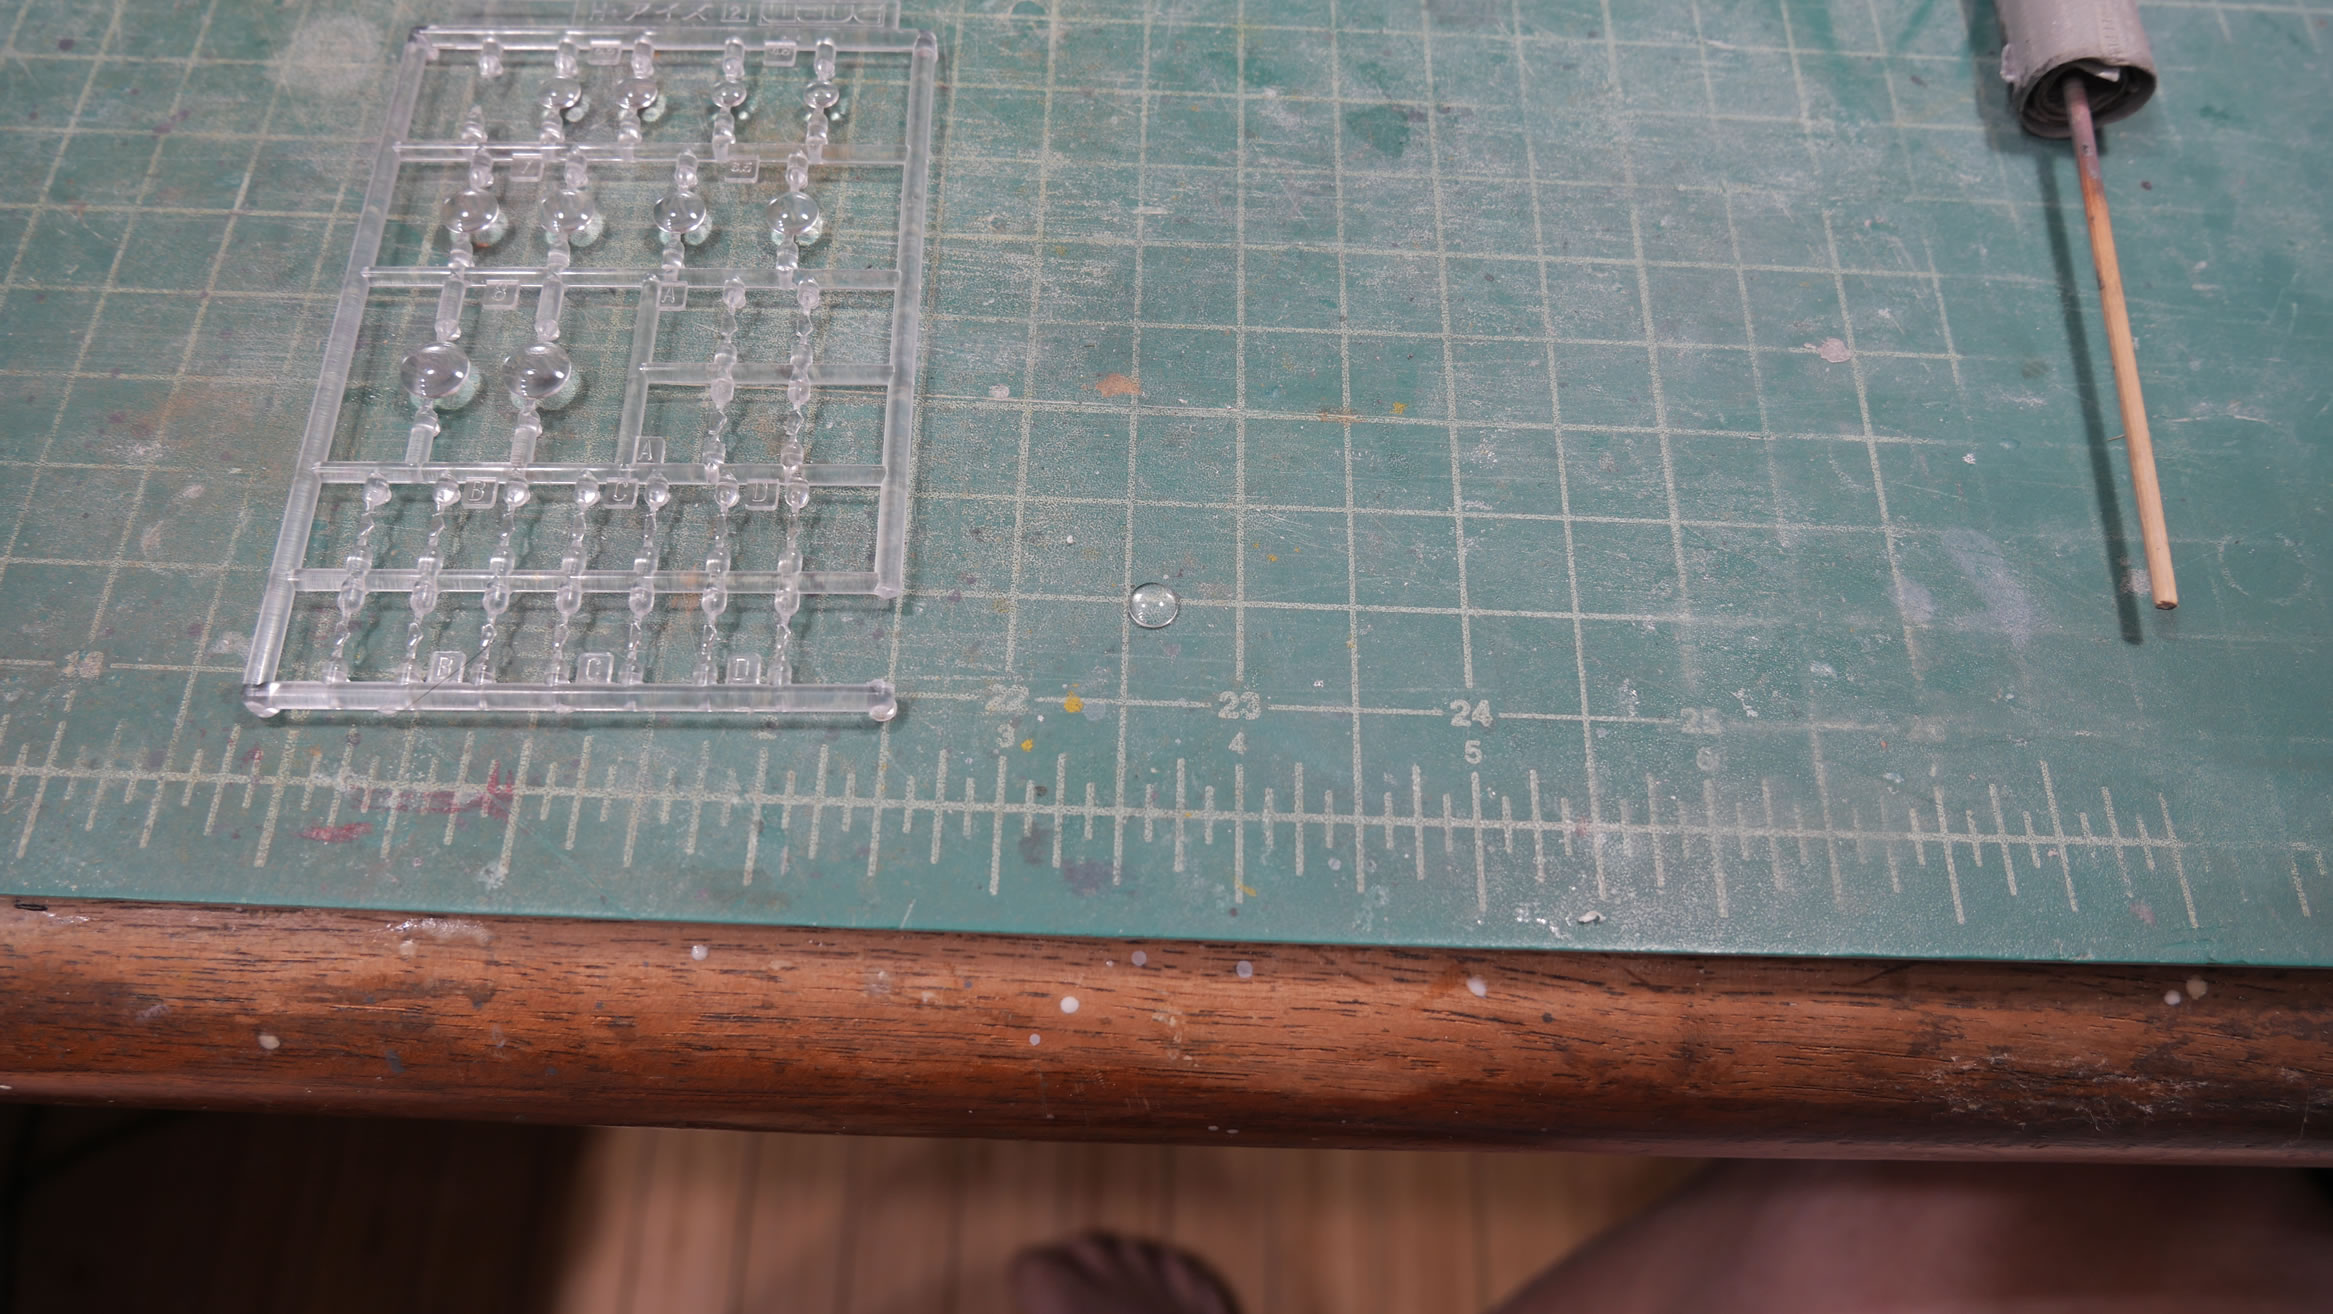
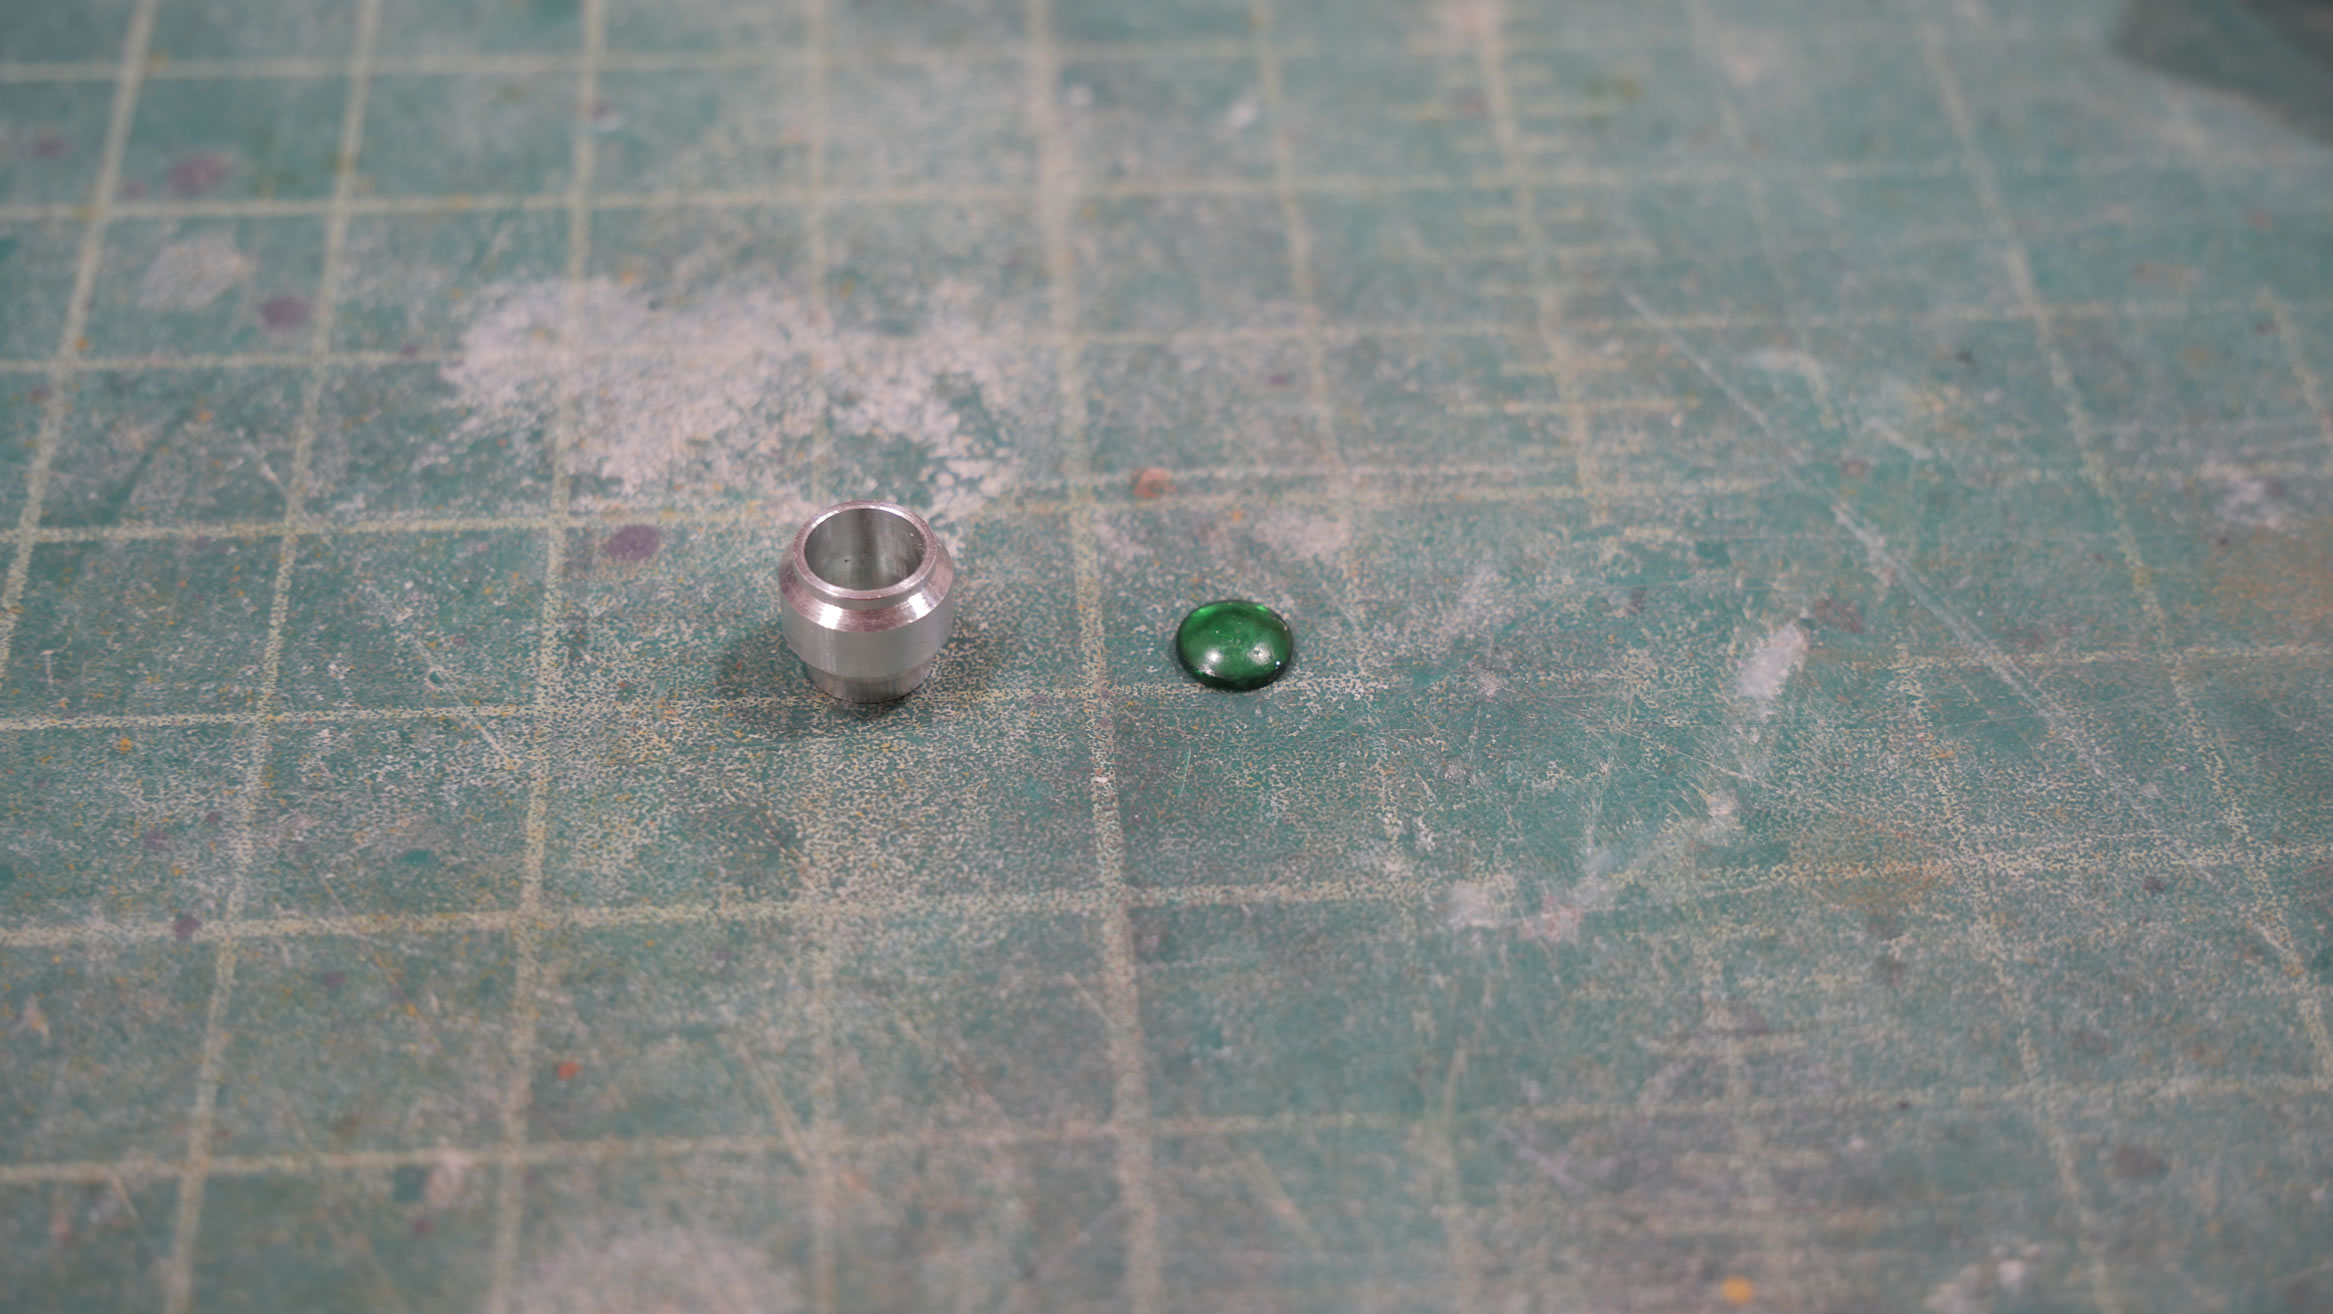
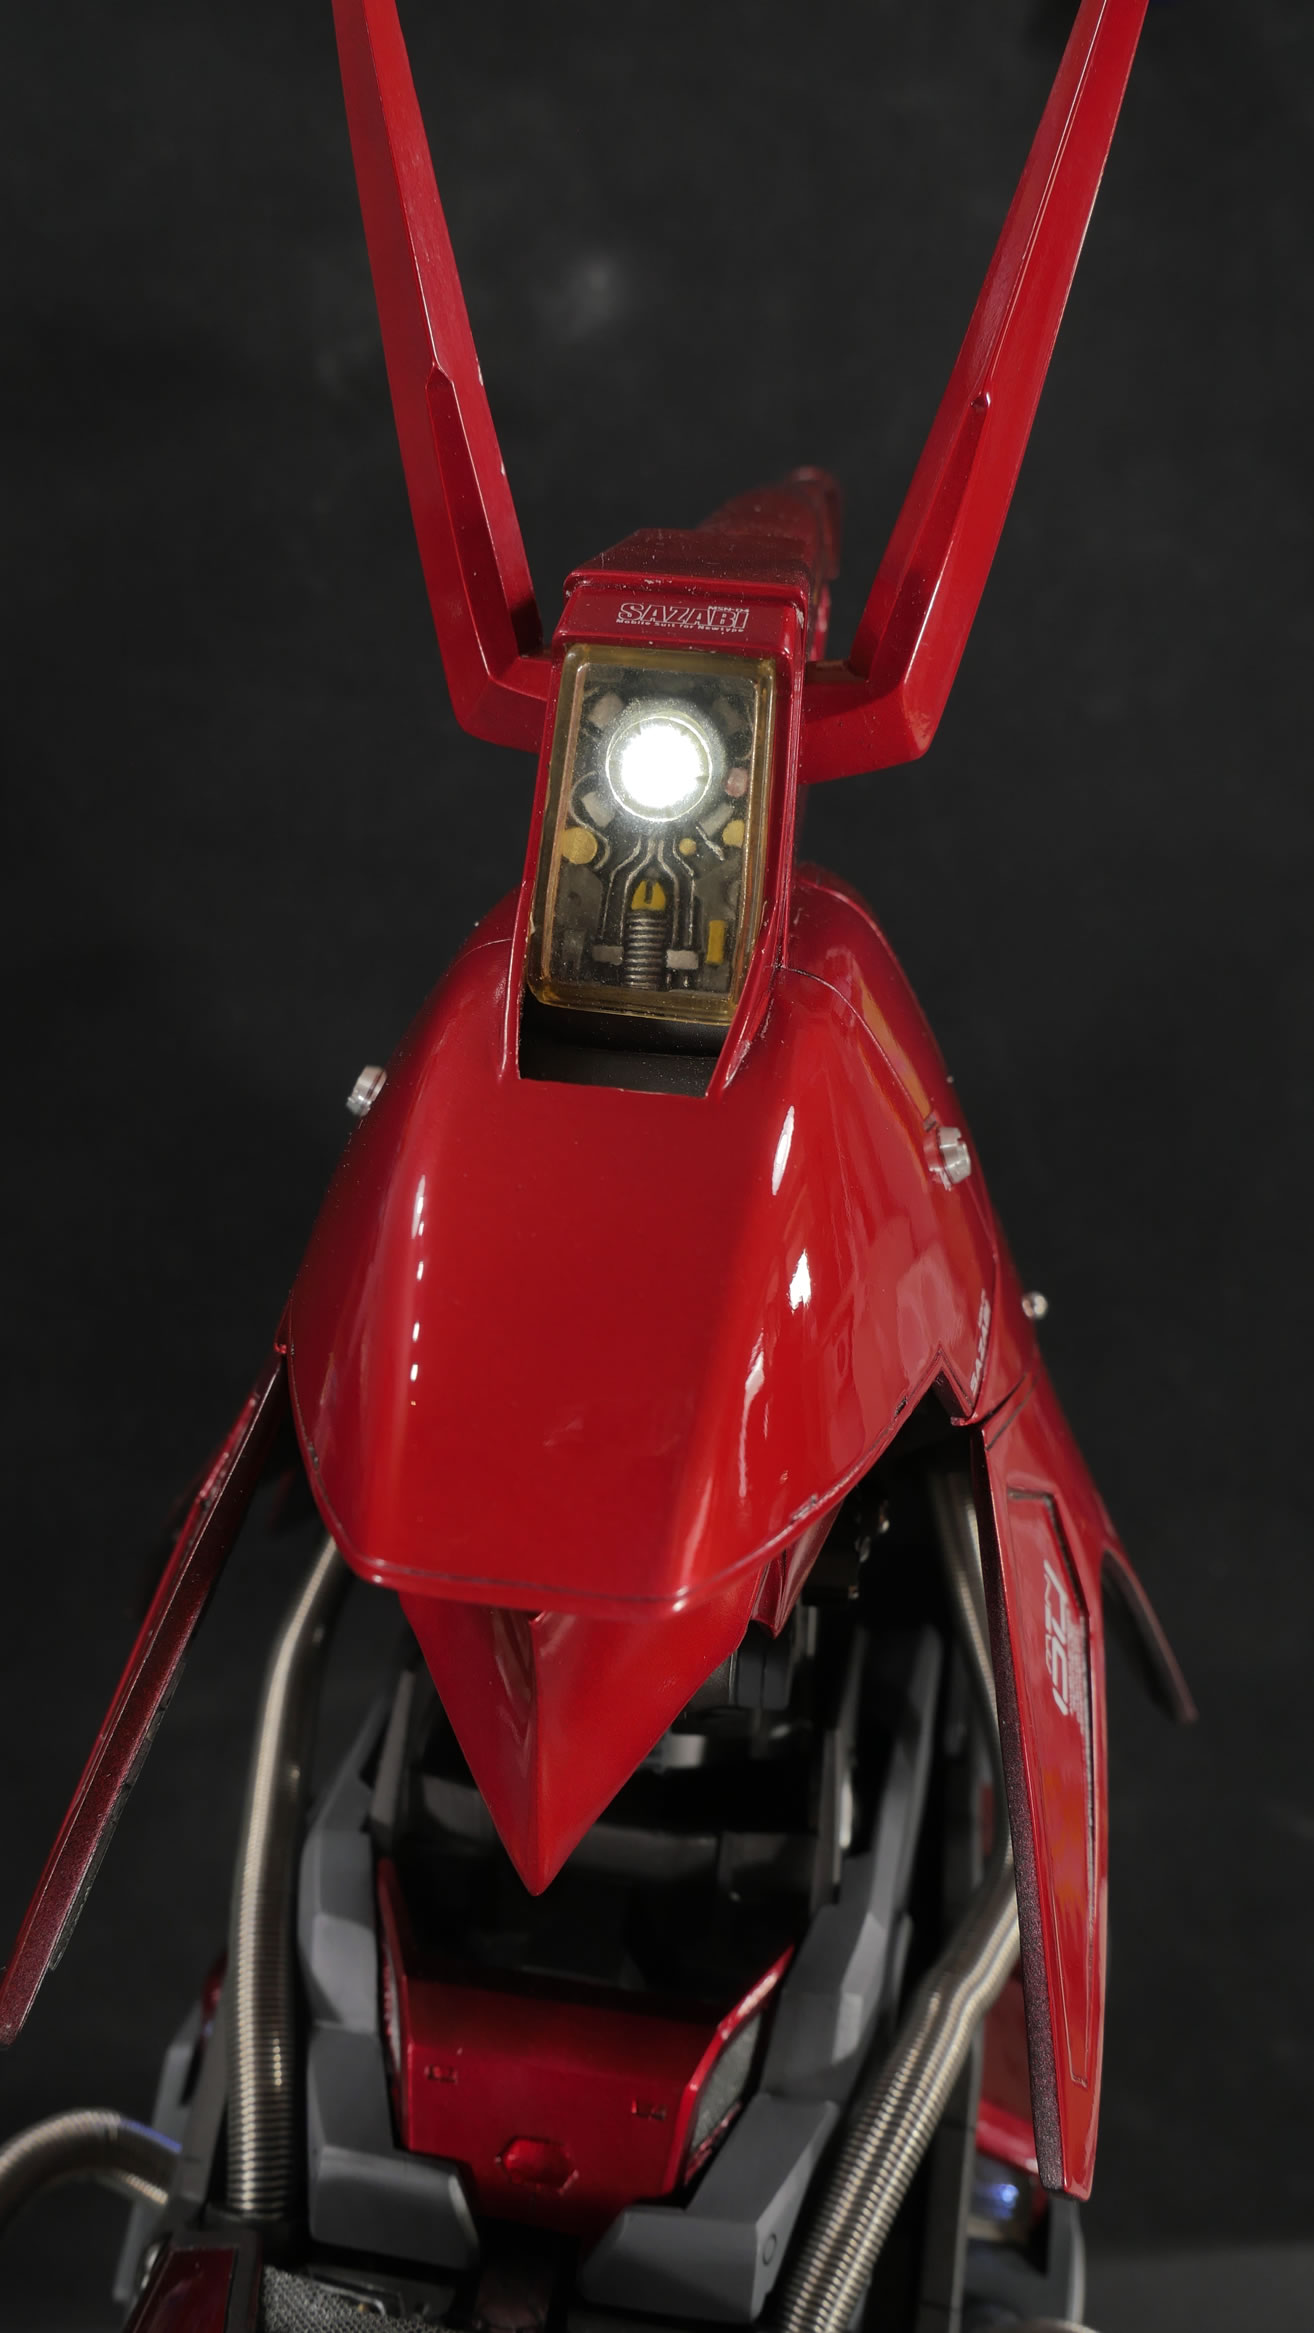
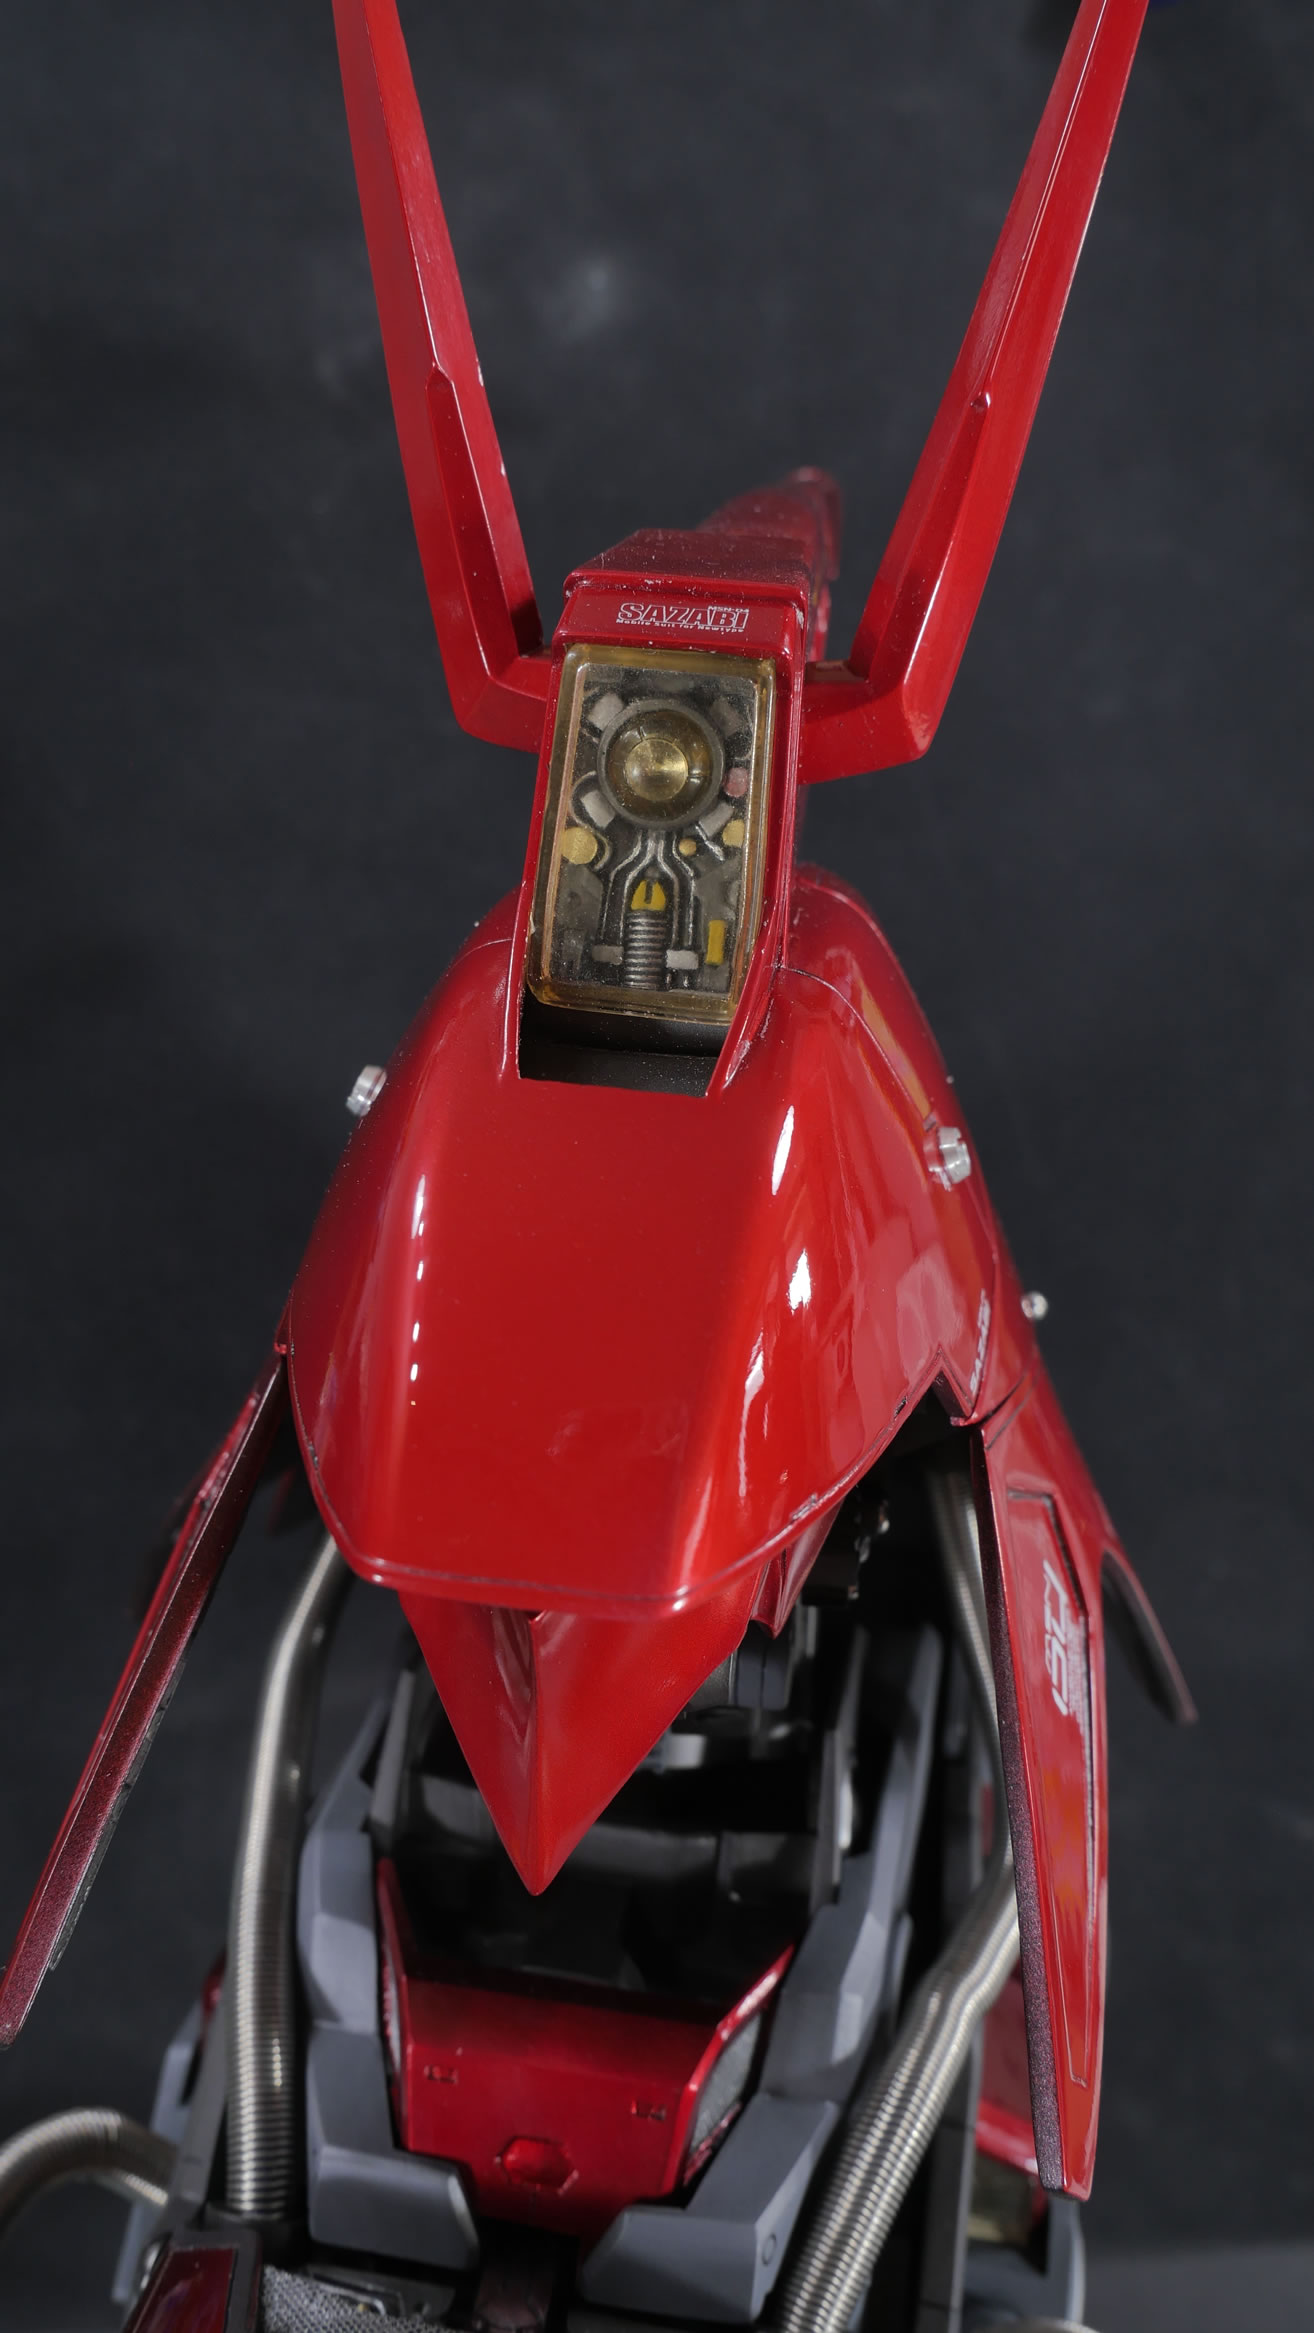
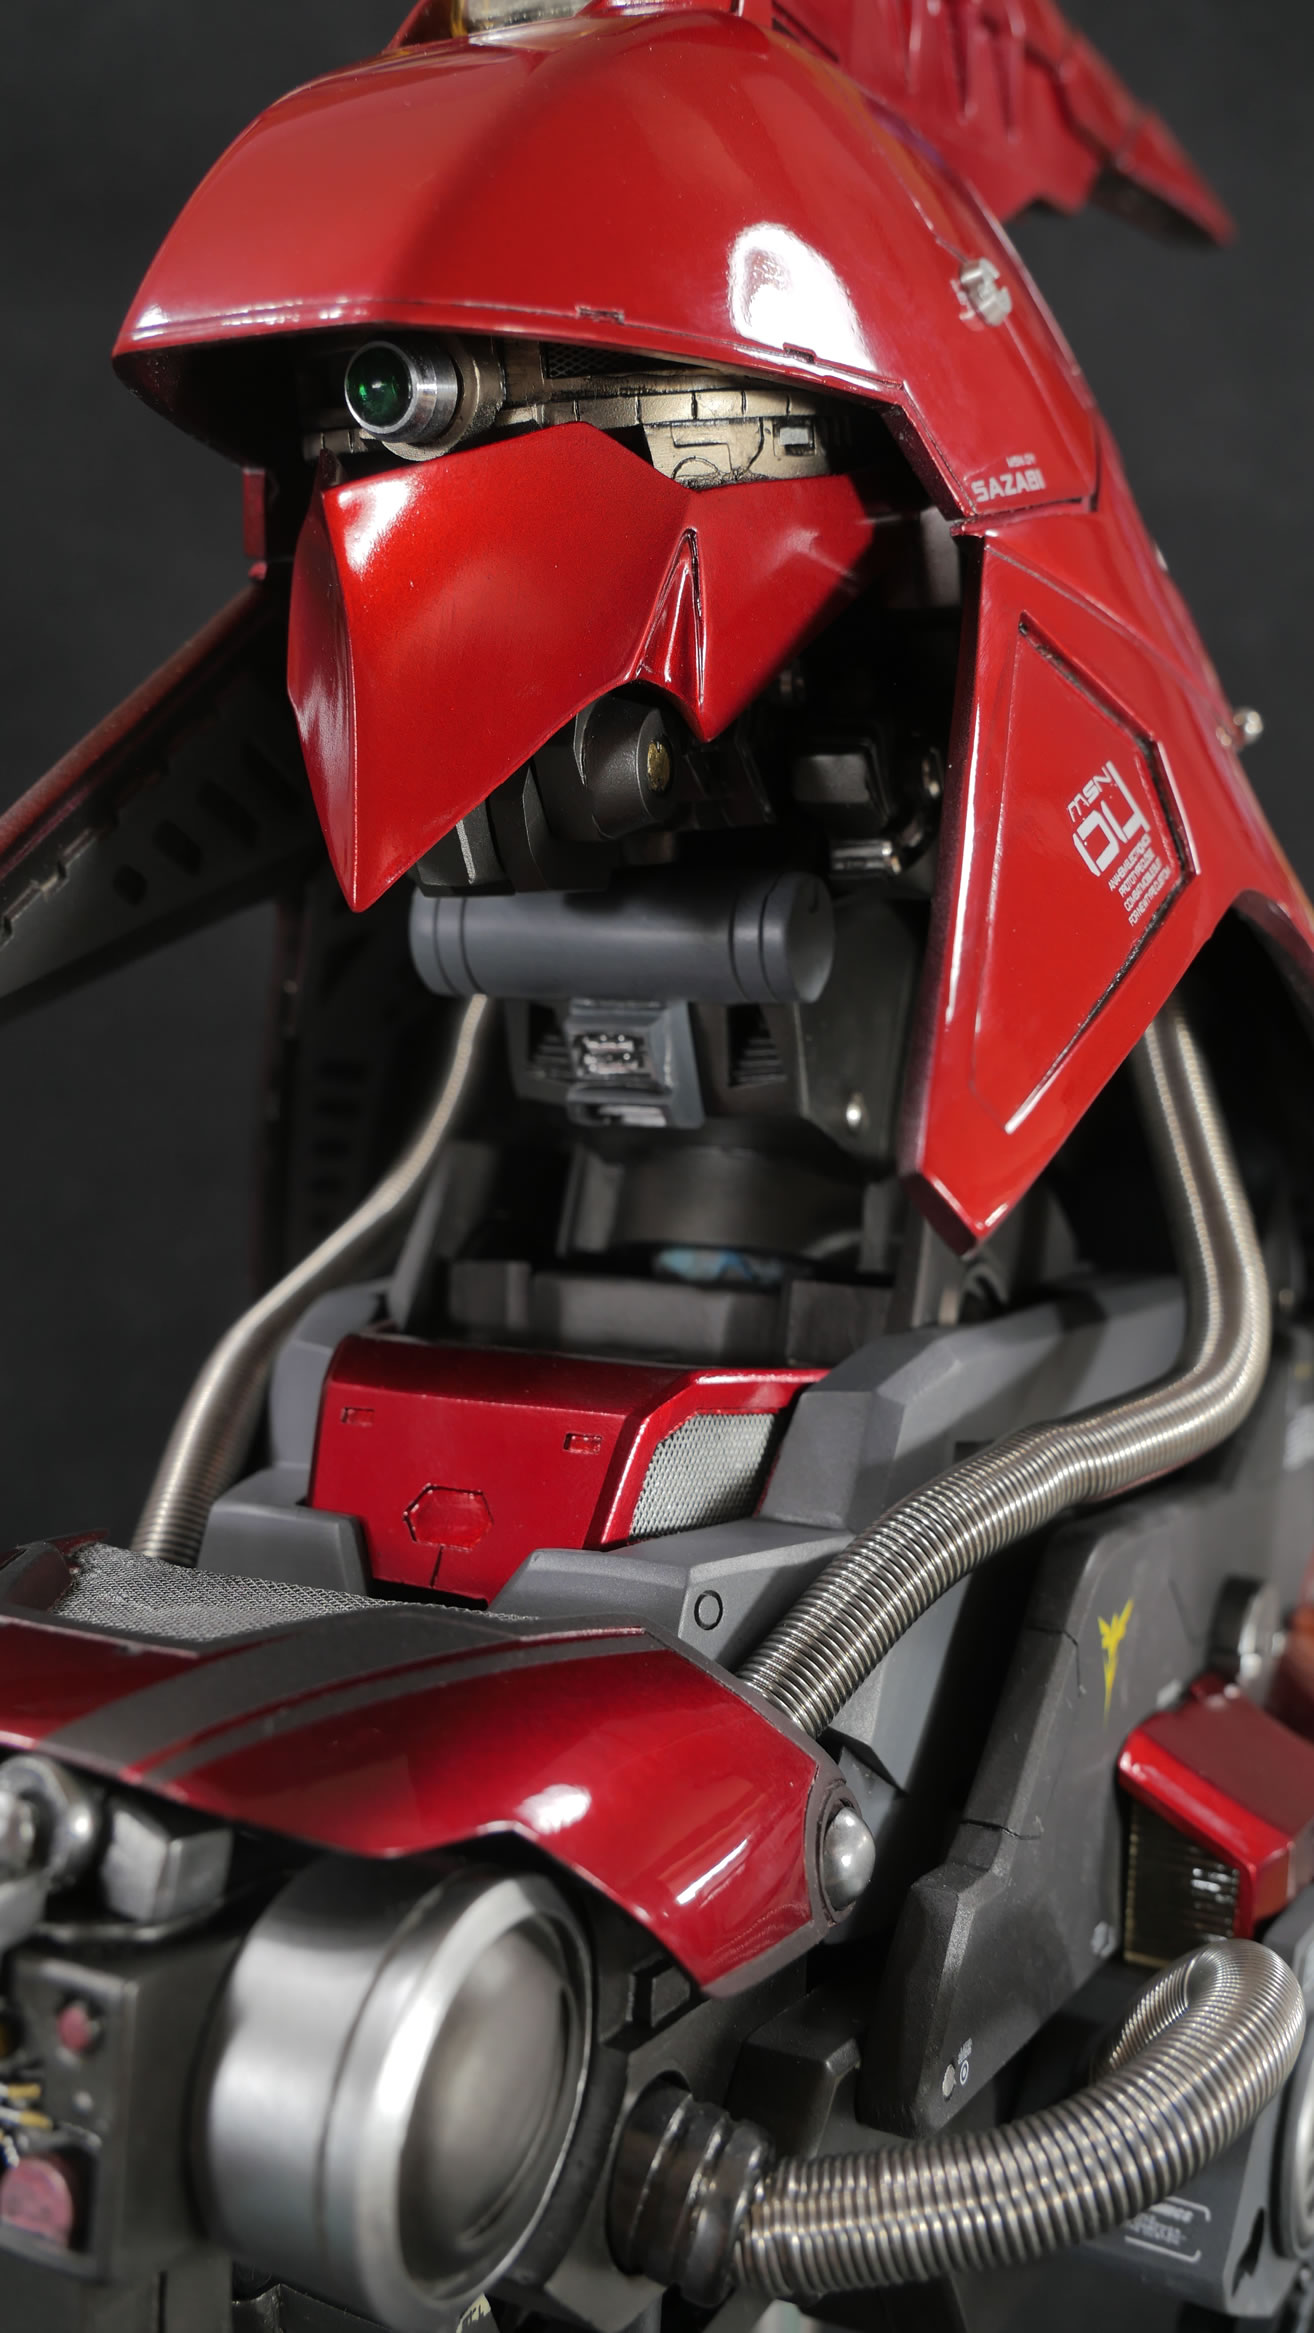
The LEDs I got were all white, and it was asked if I was going to make the mono eye green, because anime accurate…. So I grabbed a piece of clear lens, and painted the back side a clear green and inserted it into the metal collar that sits around the LED. I actually swapped out the LED the kit came with for a dome LED that was larger and fit the area better. I didn’t use a green LED because I don’t want to do the match to figure out the correct in serial wiring I would need to get everything correctly lit.
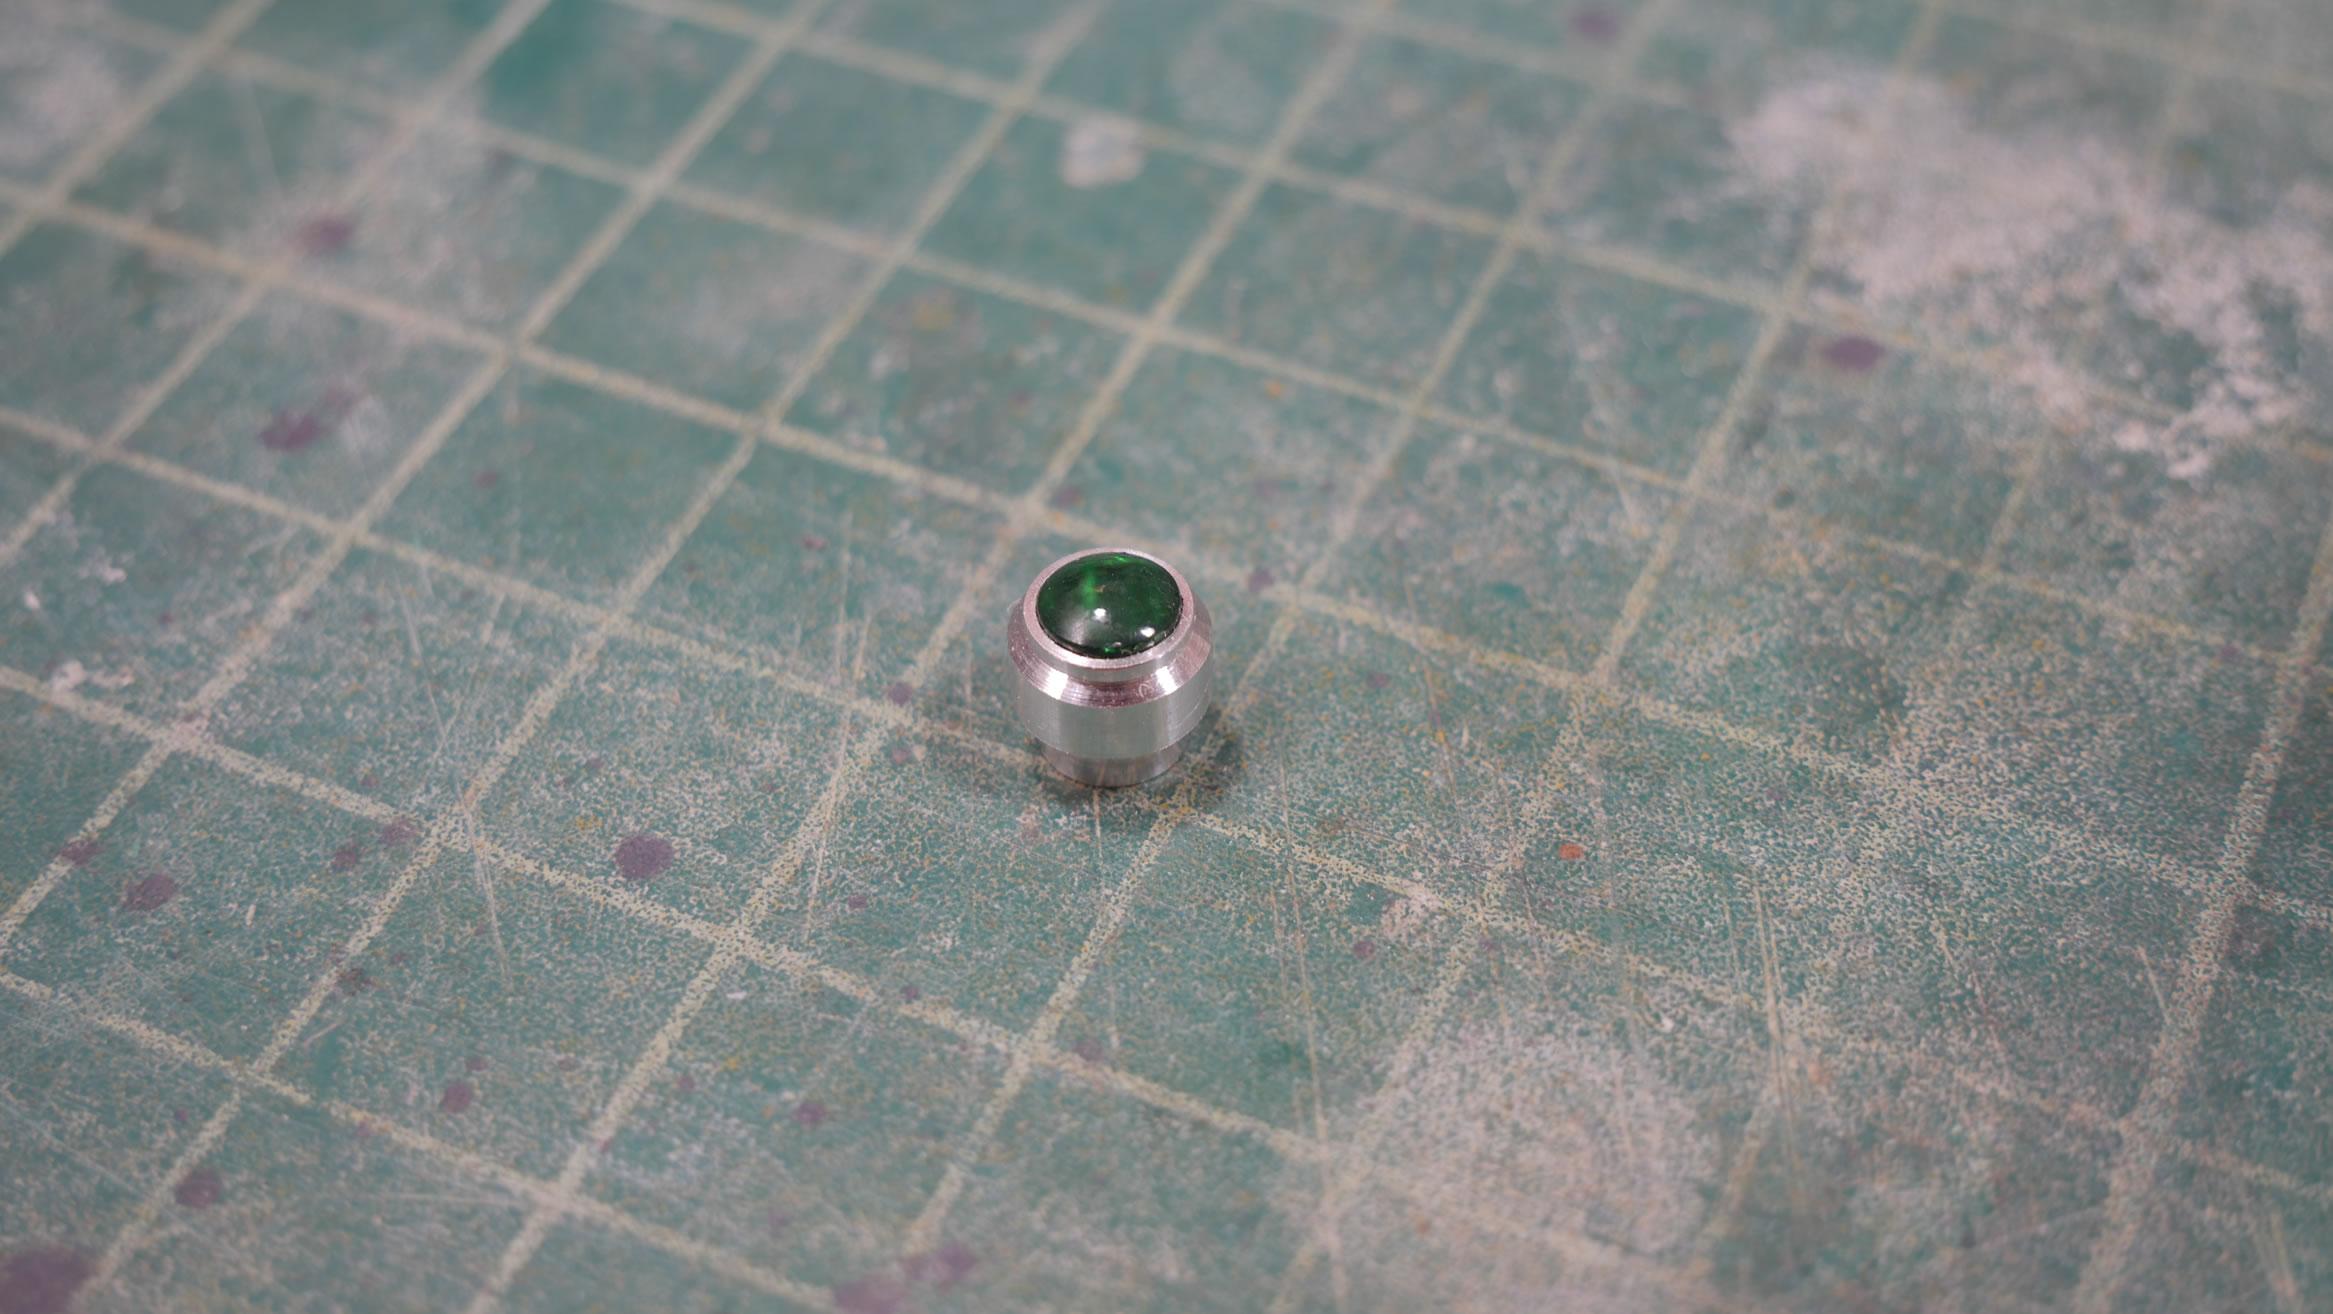
The colored lens works perfectly.
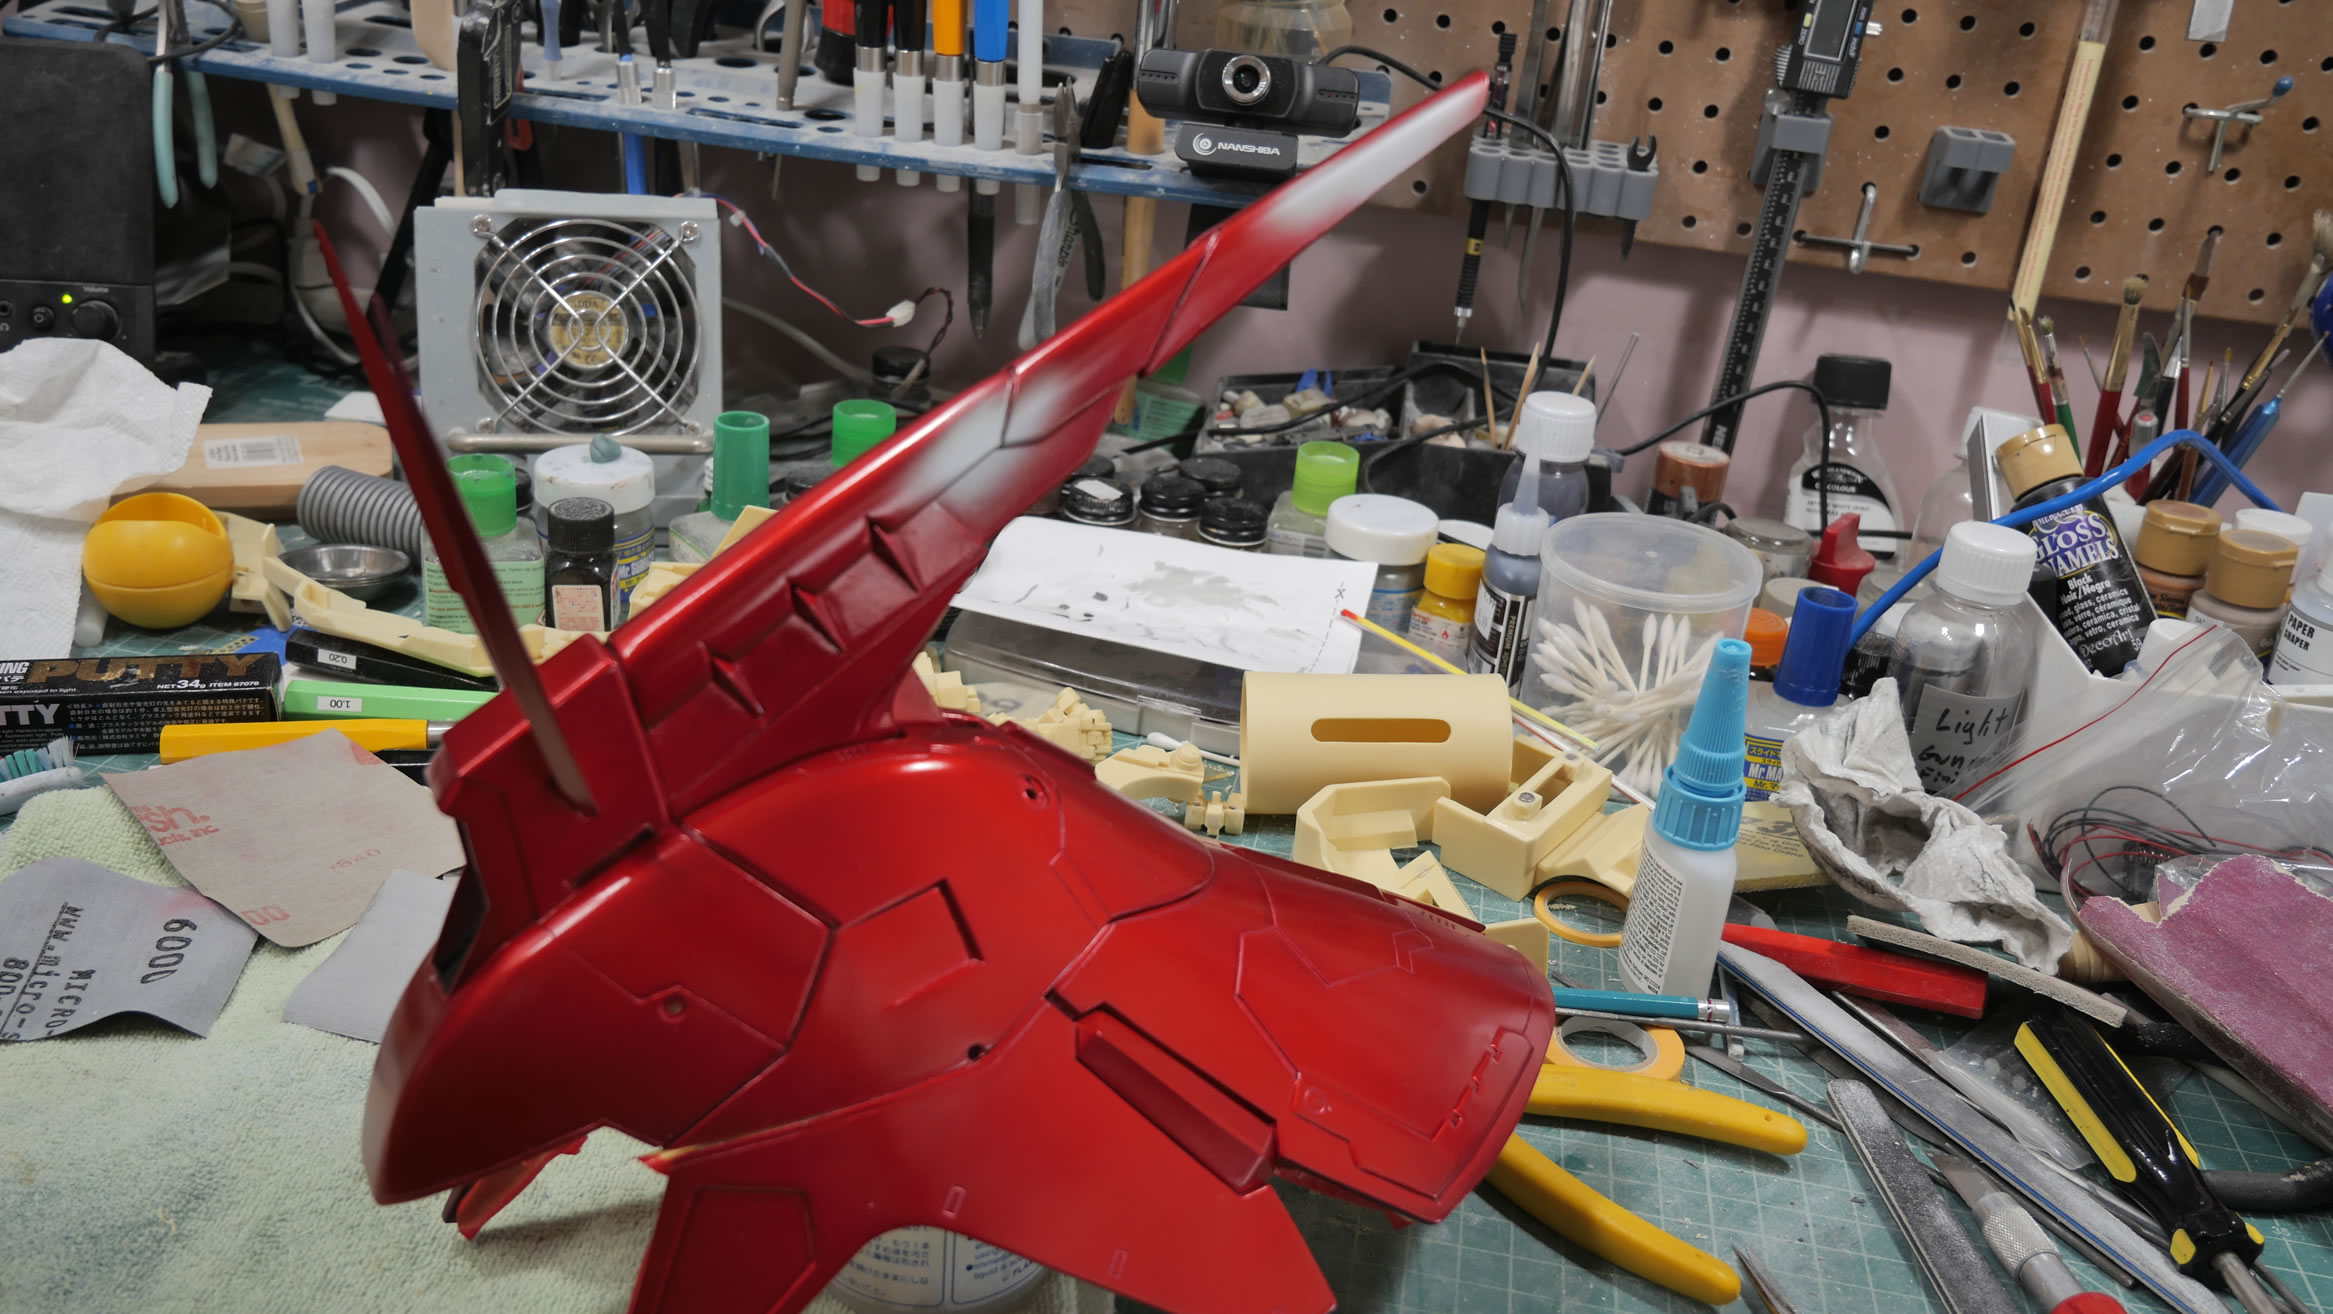
The last two days were spent with Meguire’s compound and polish to shine up that gloss
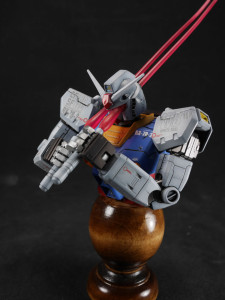
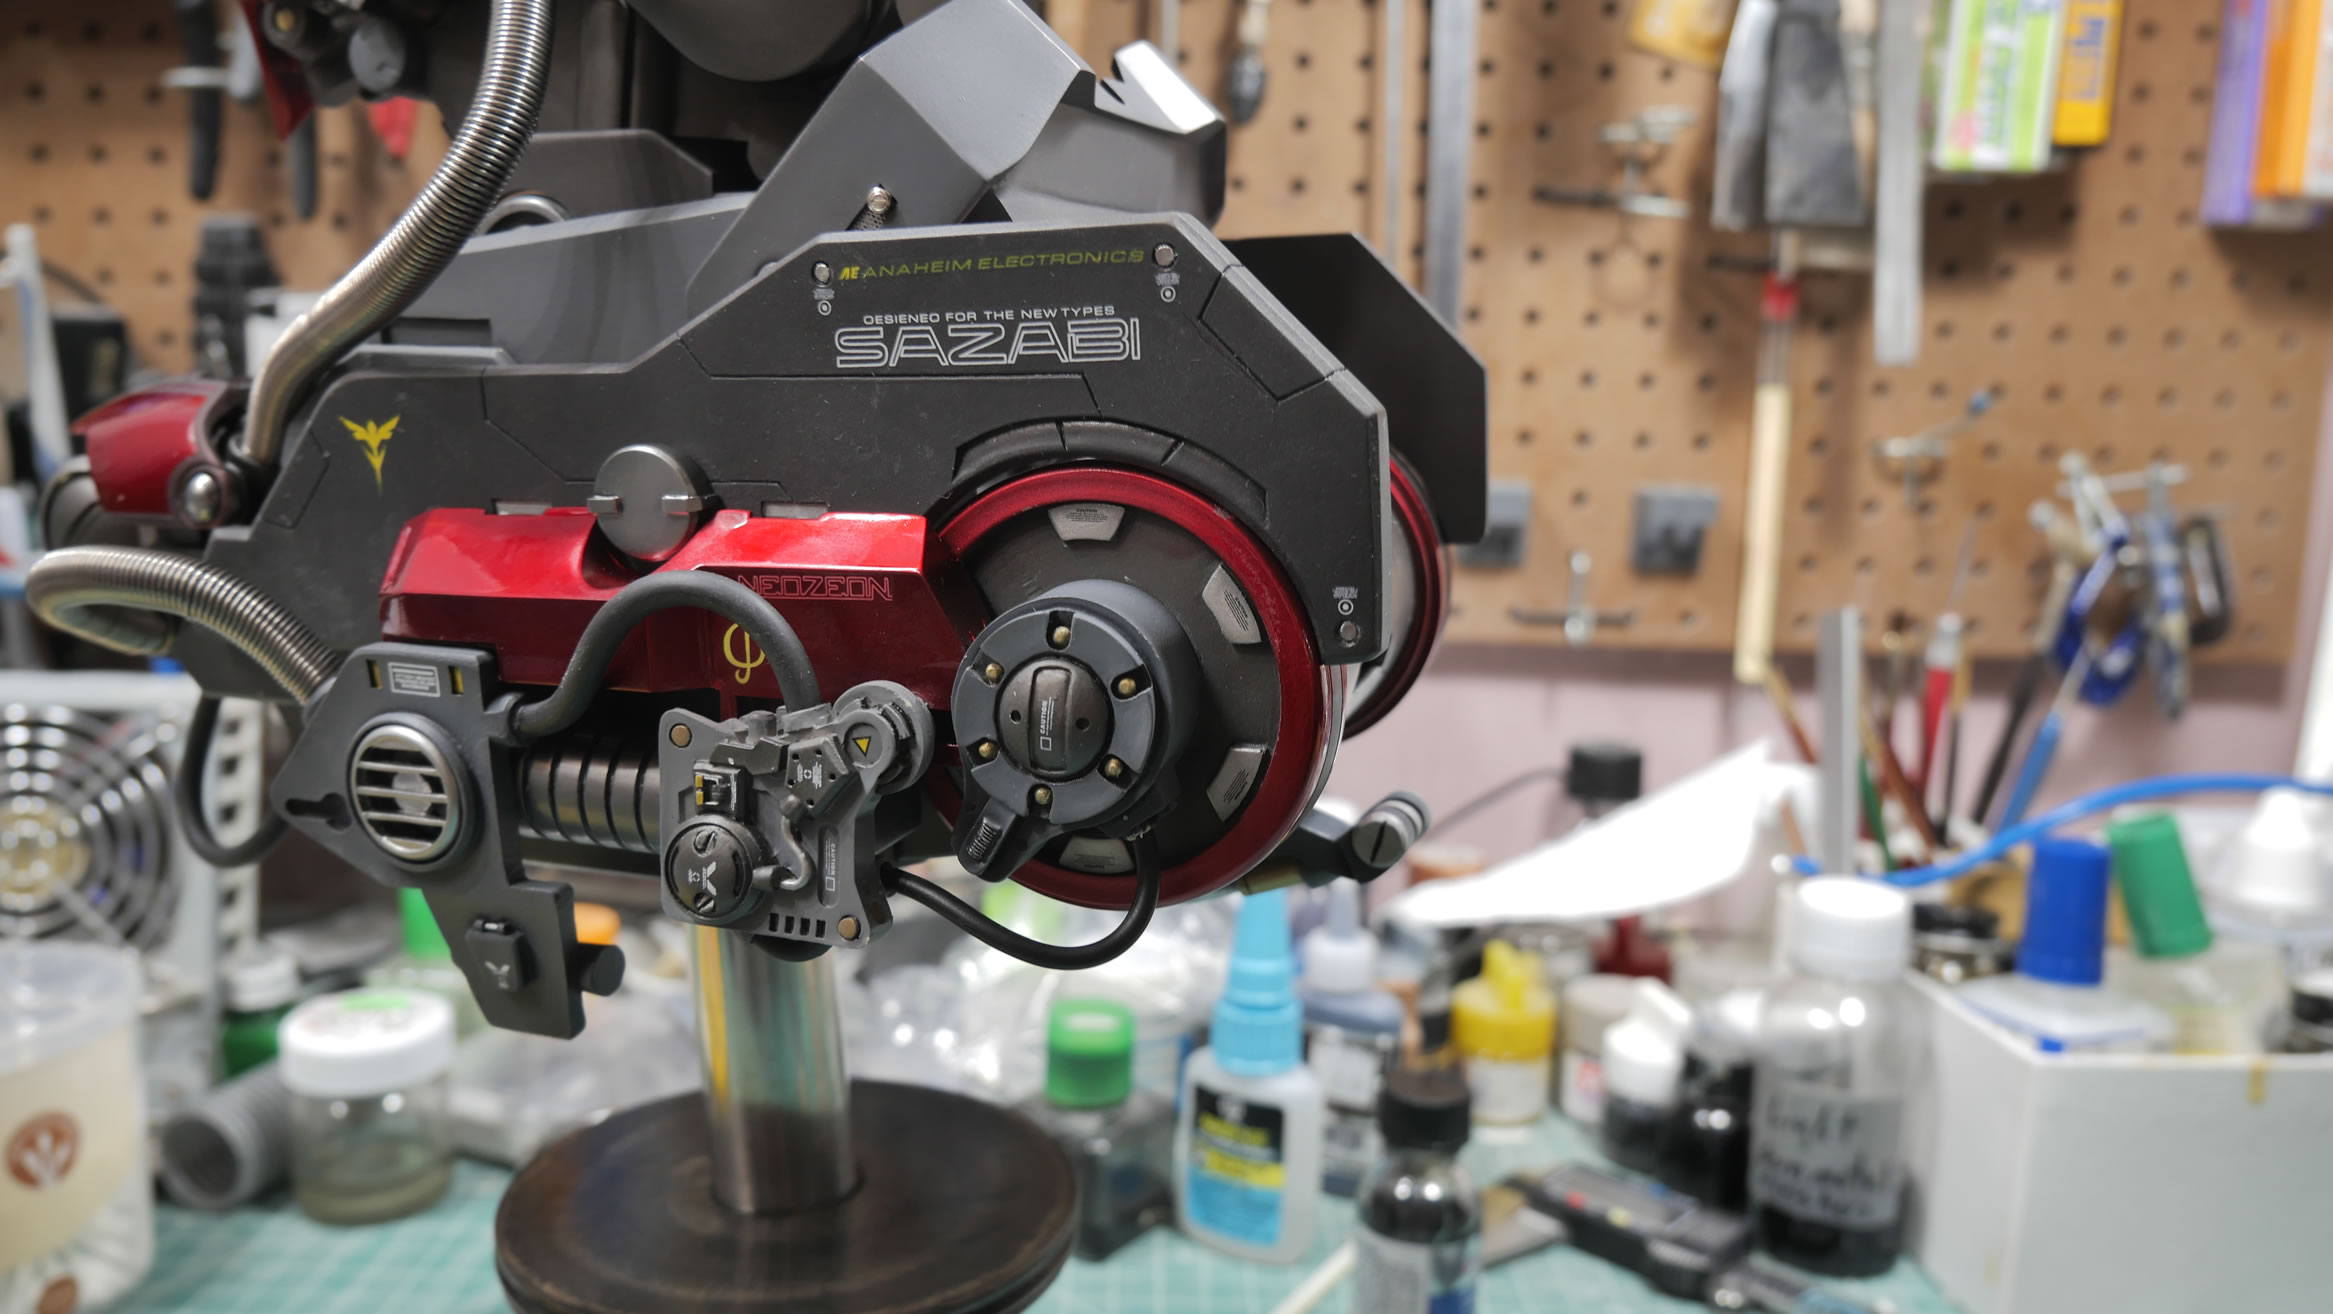
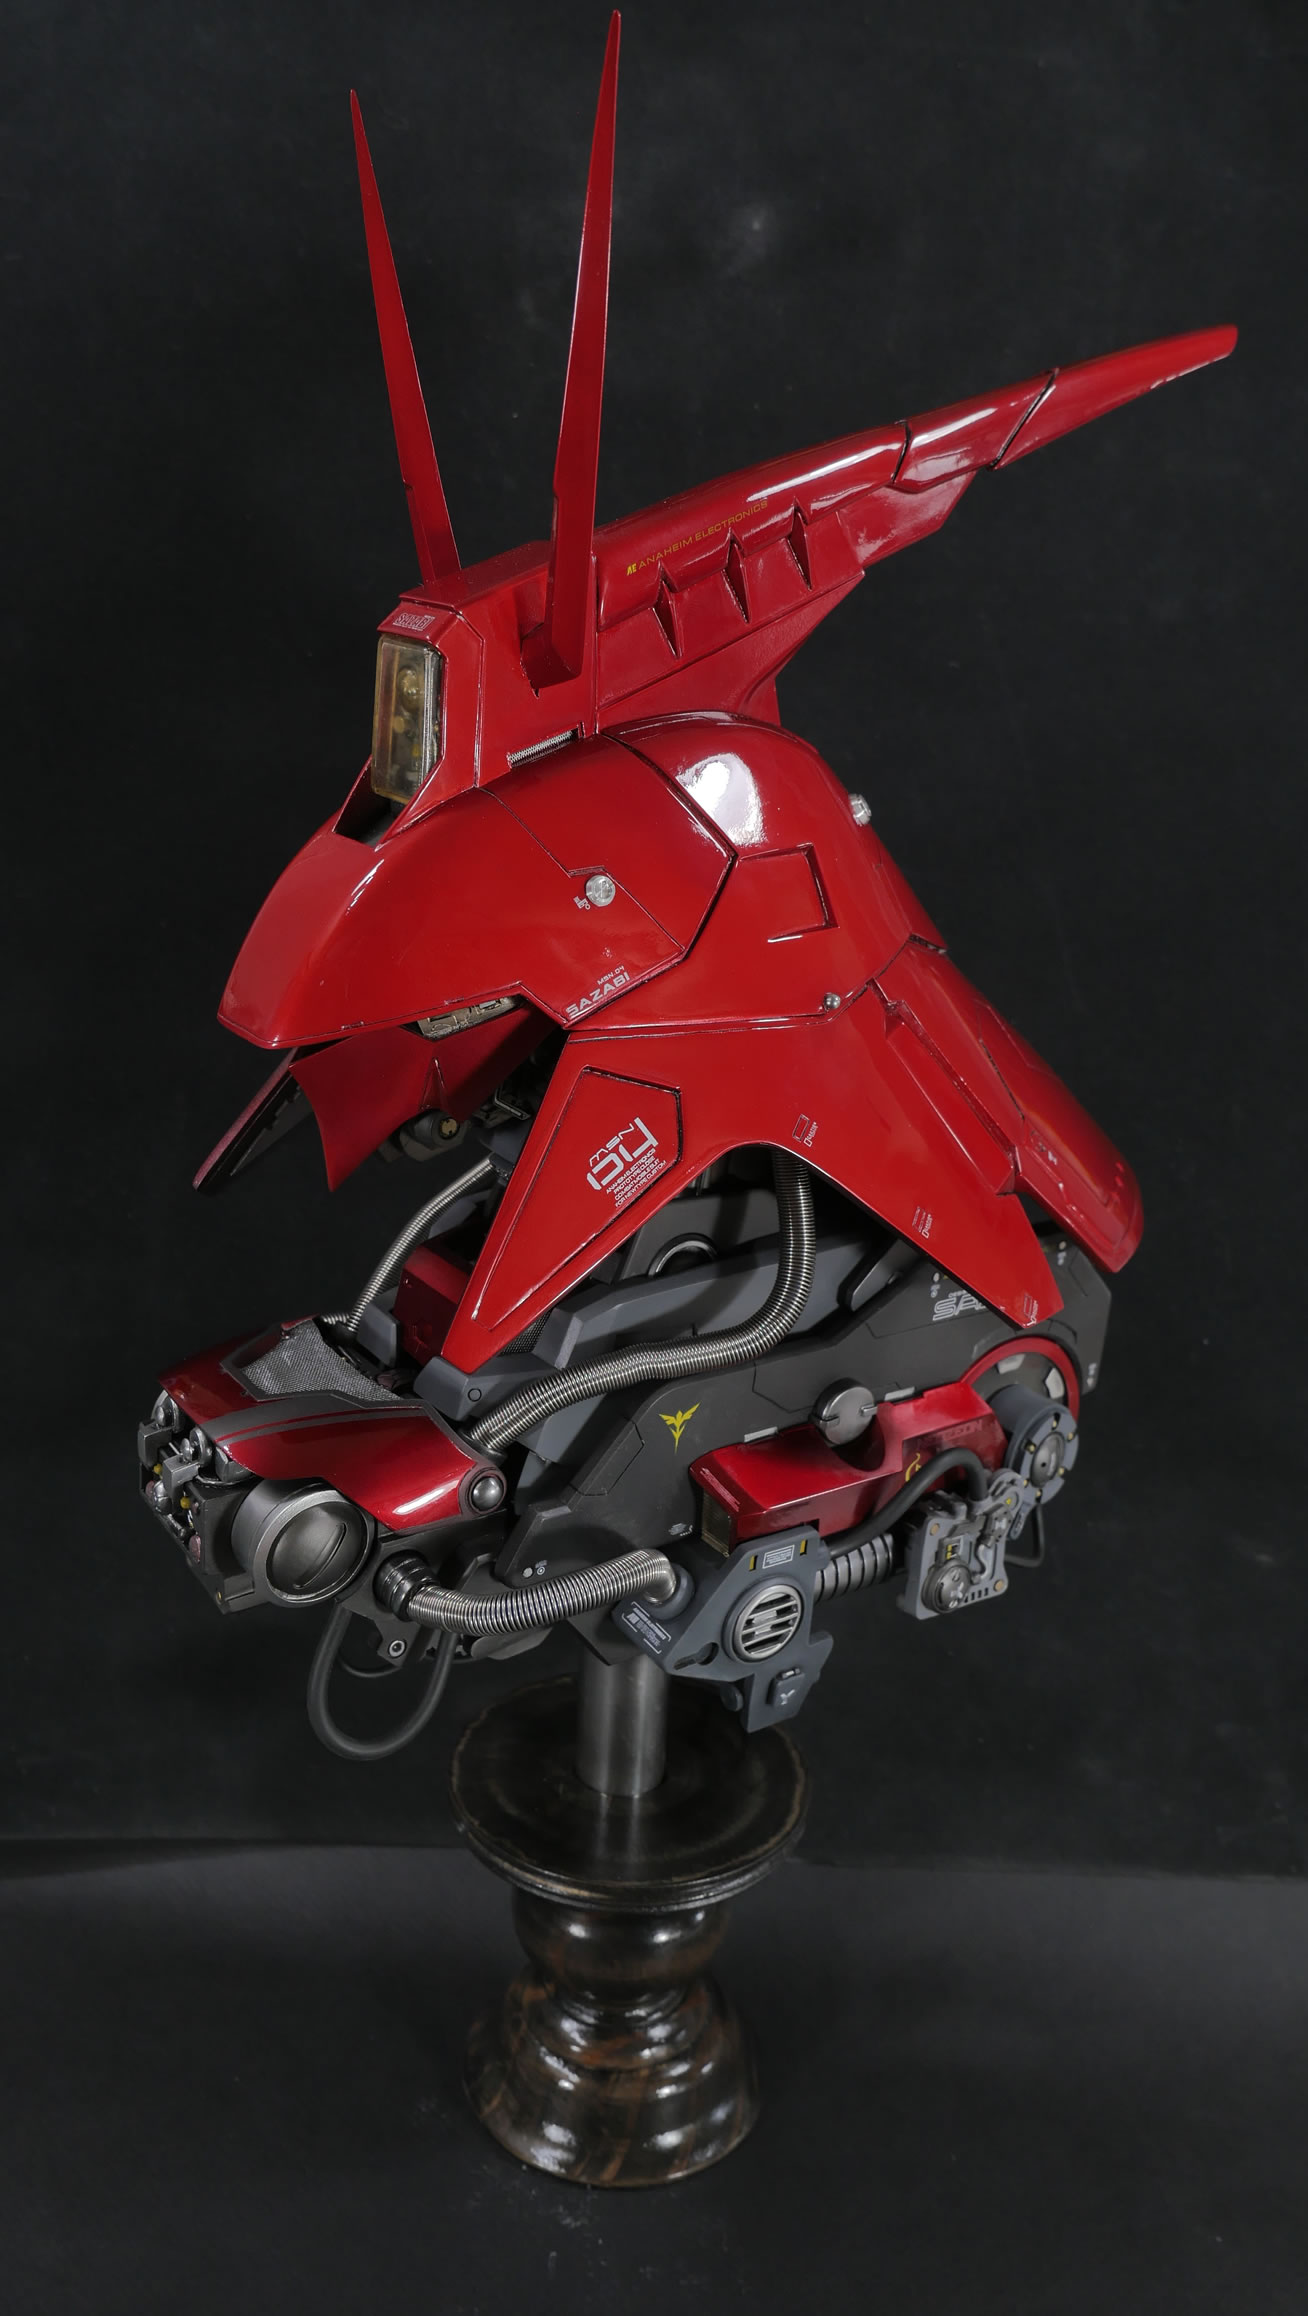
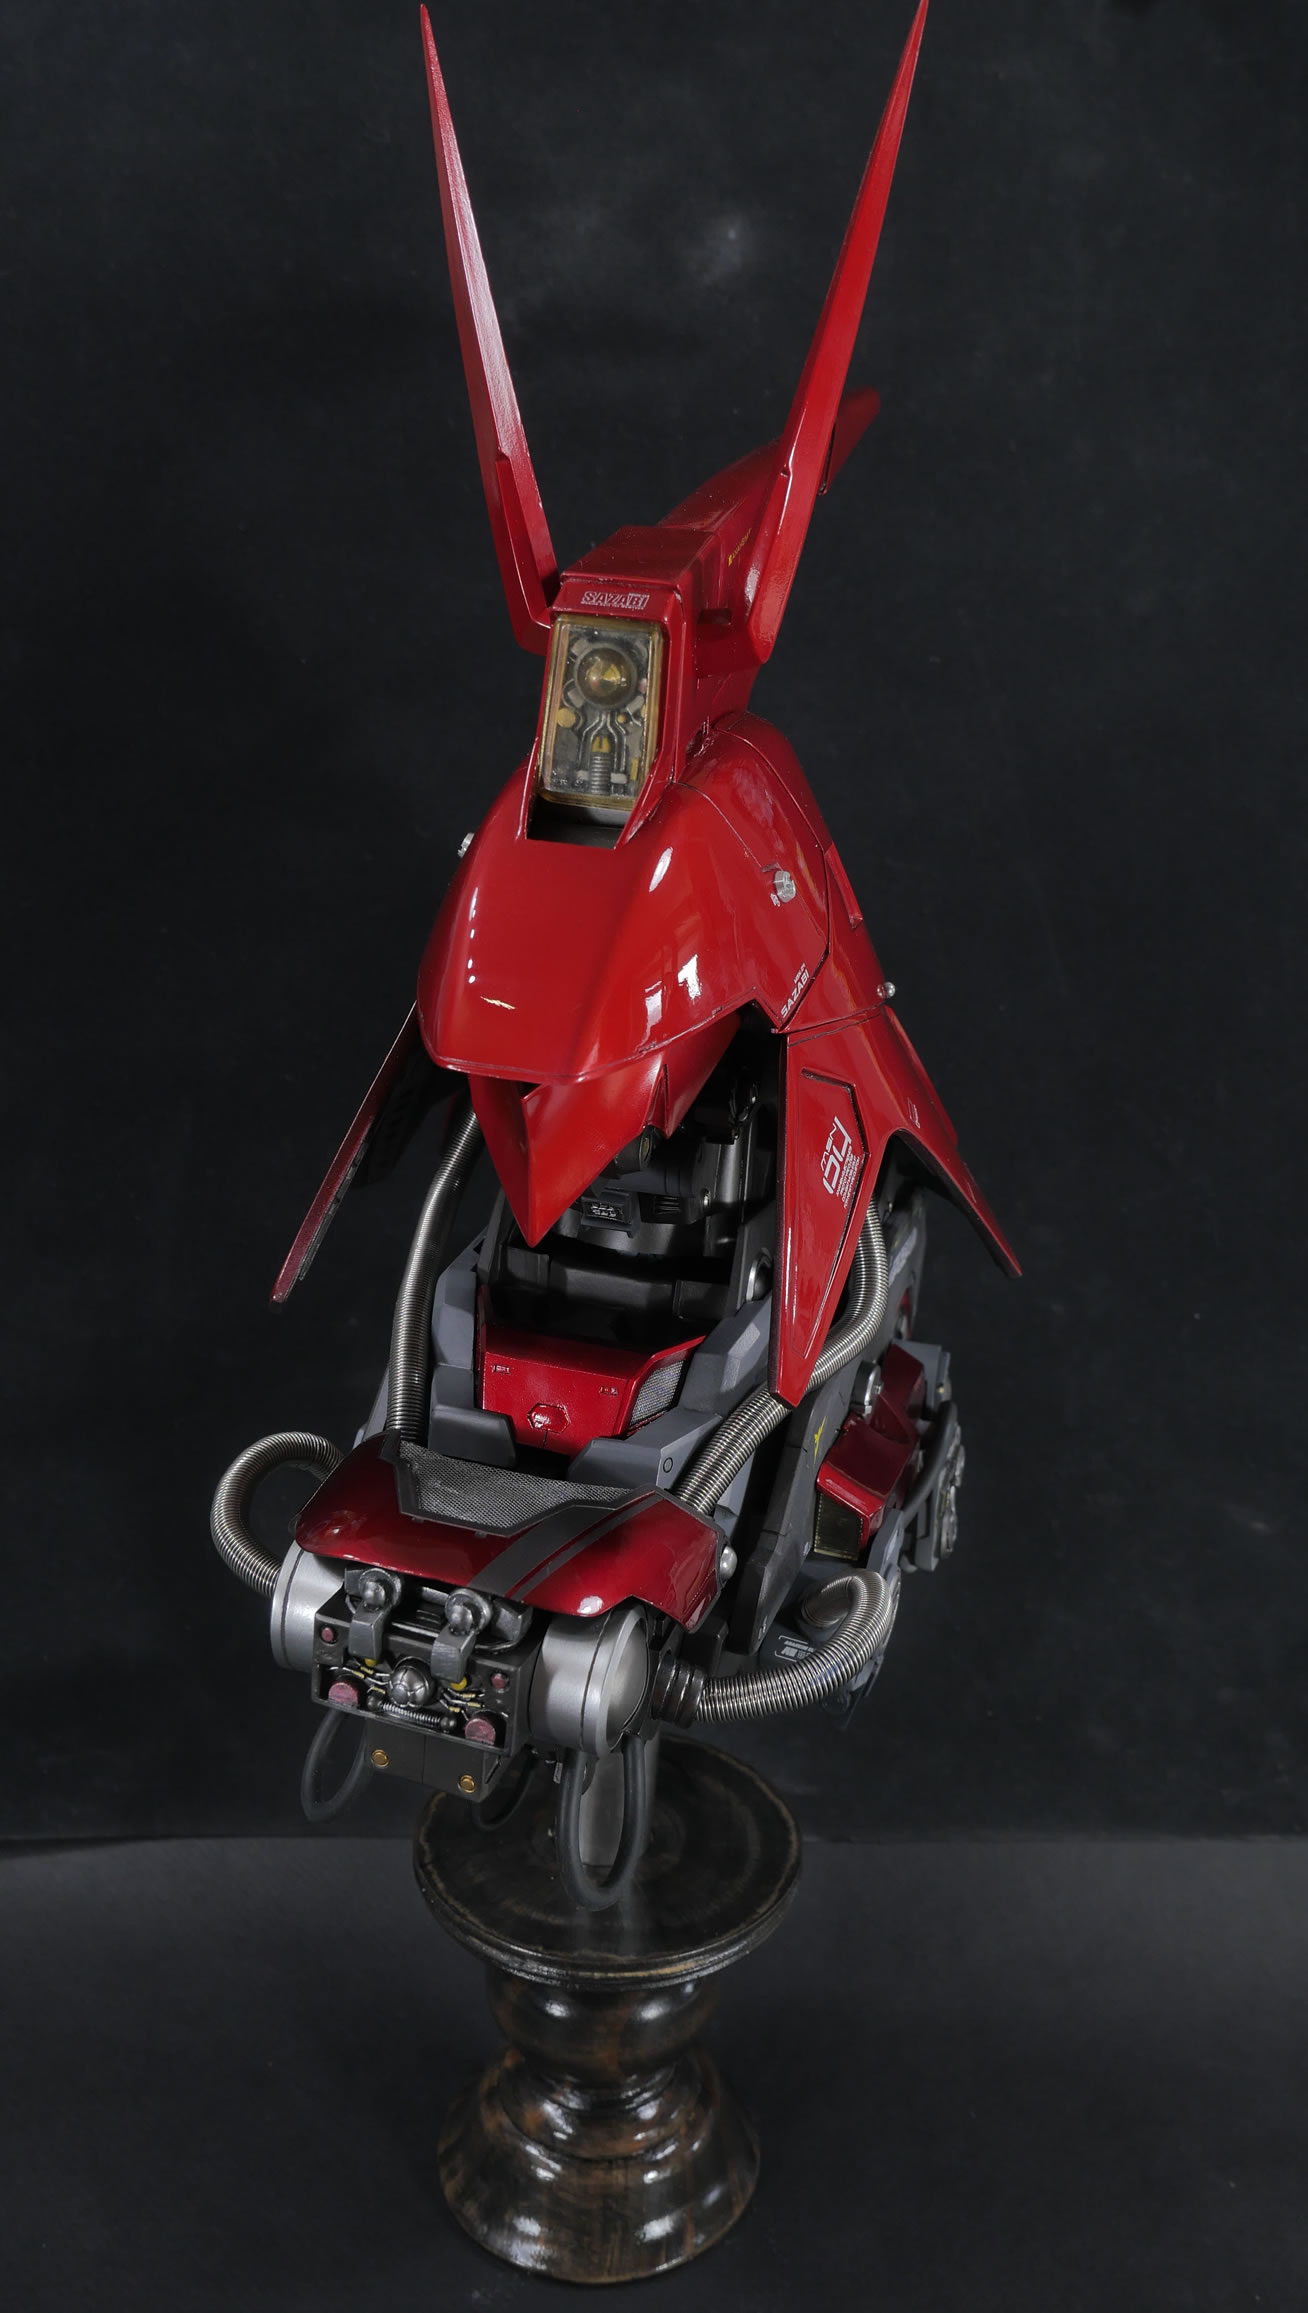
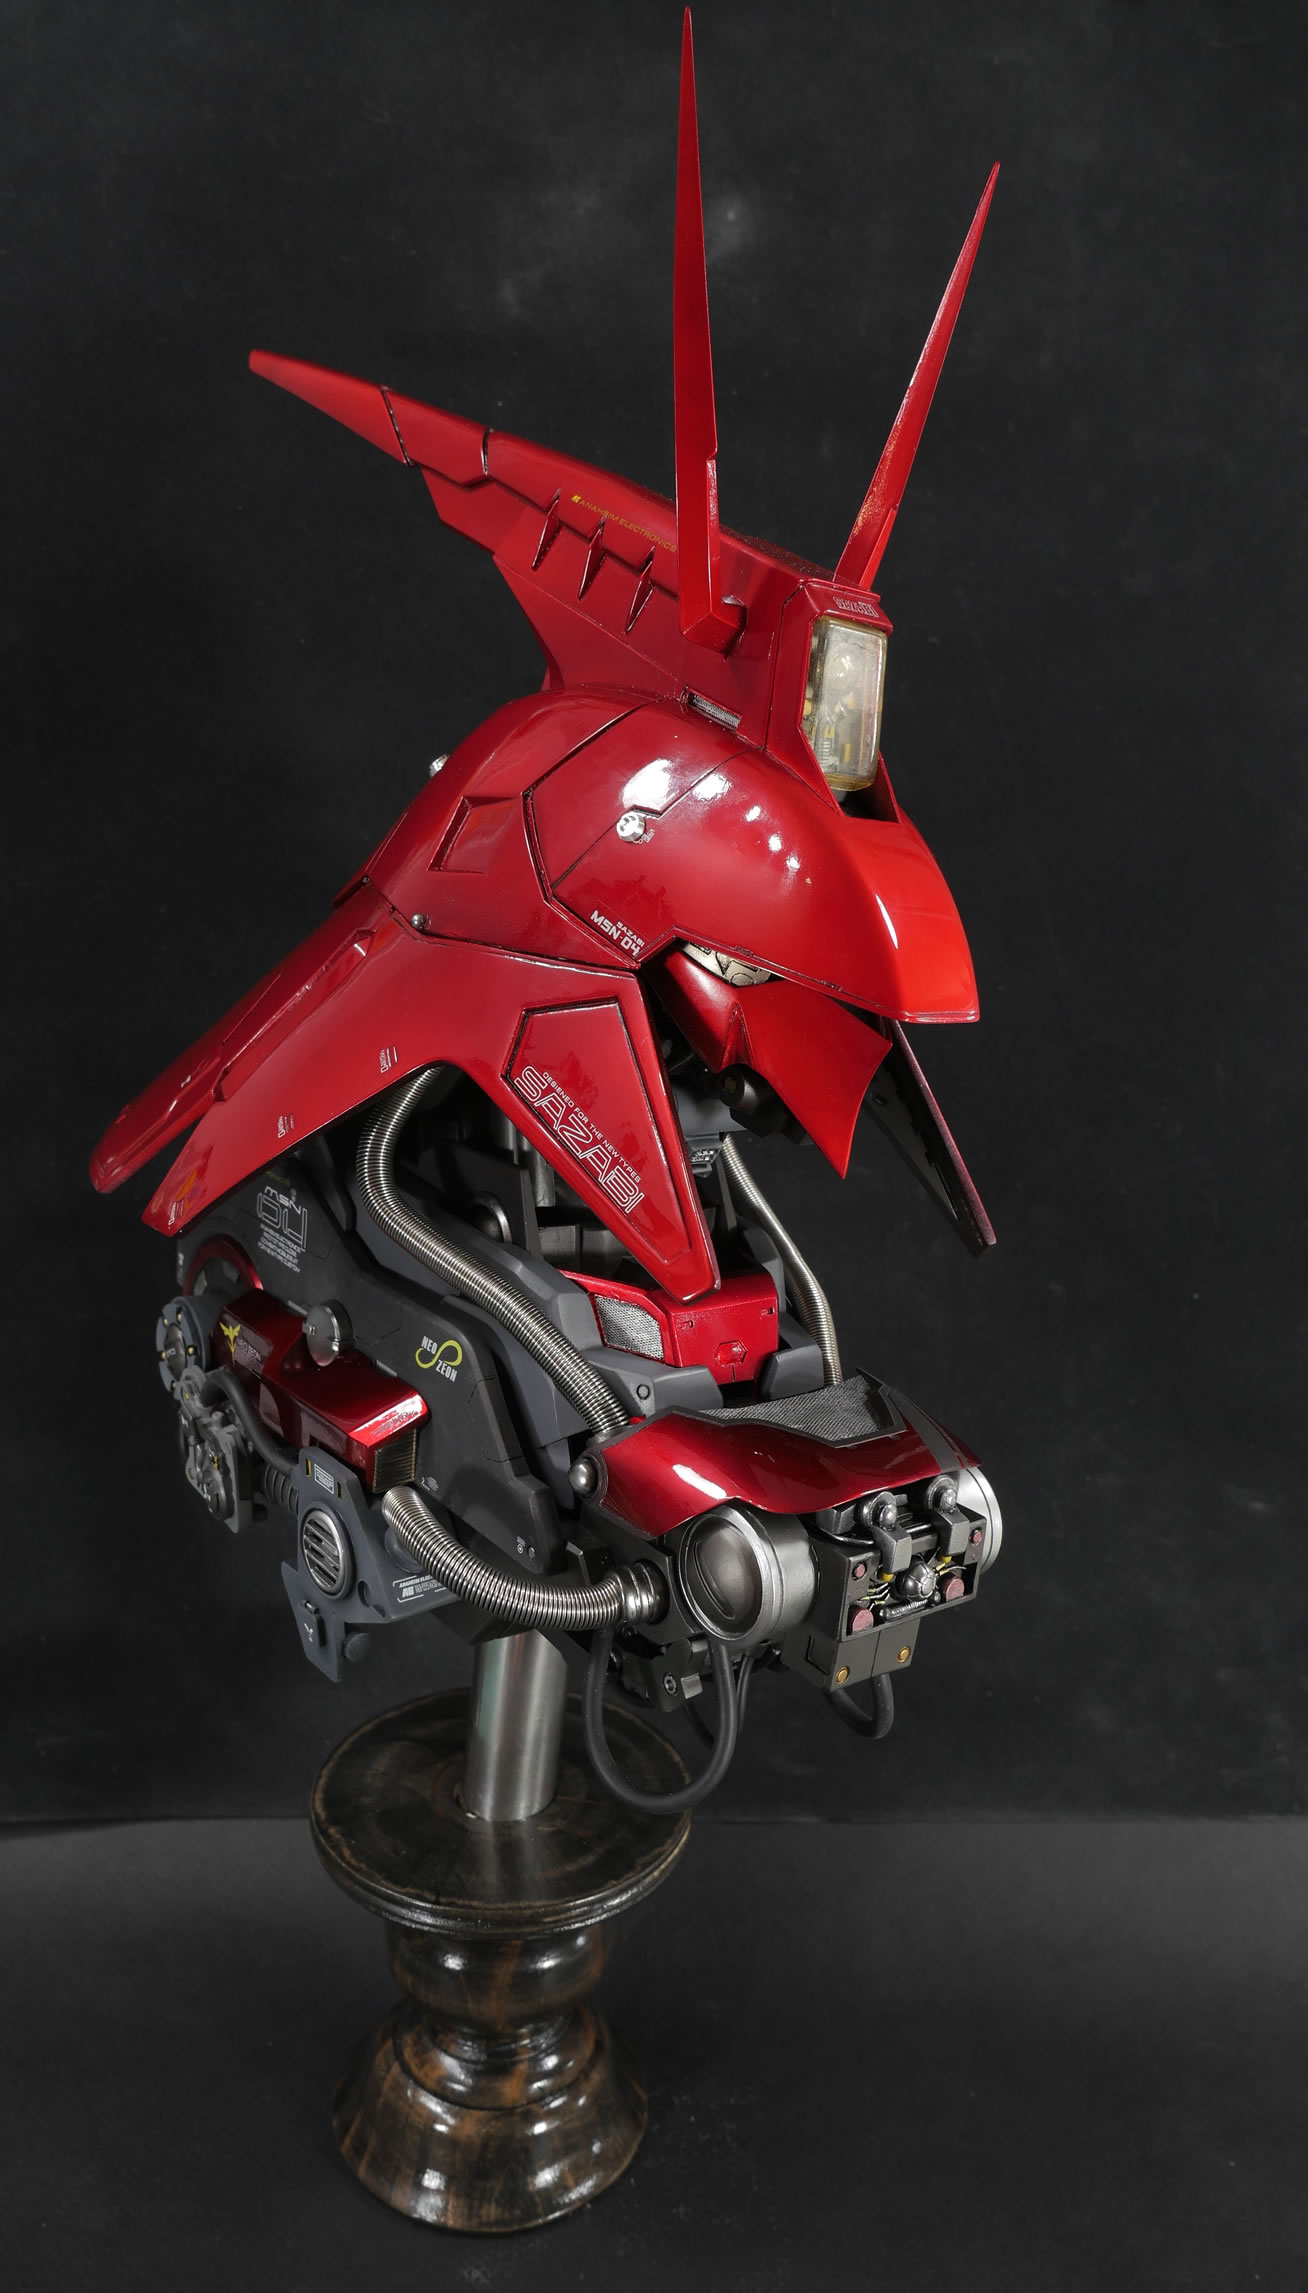
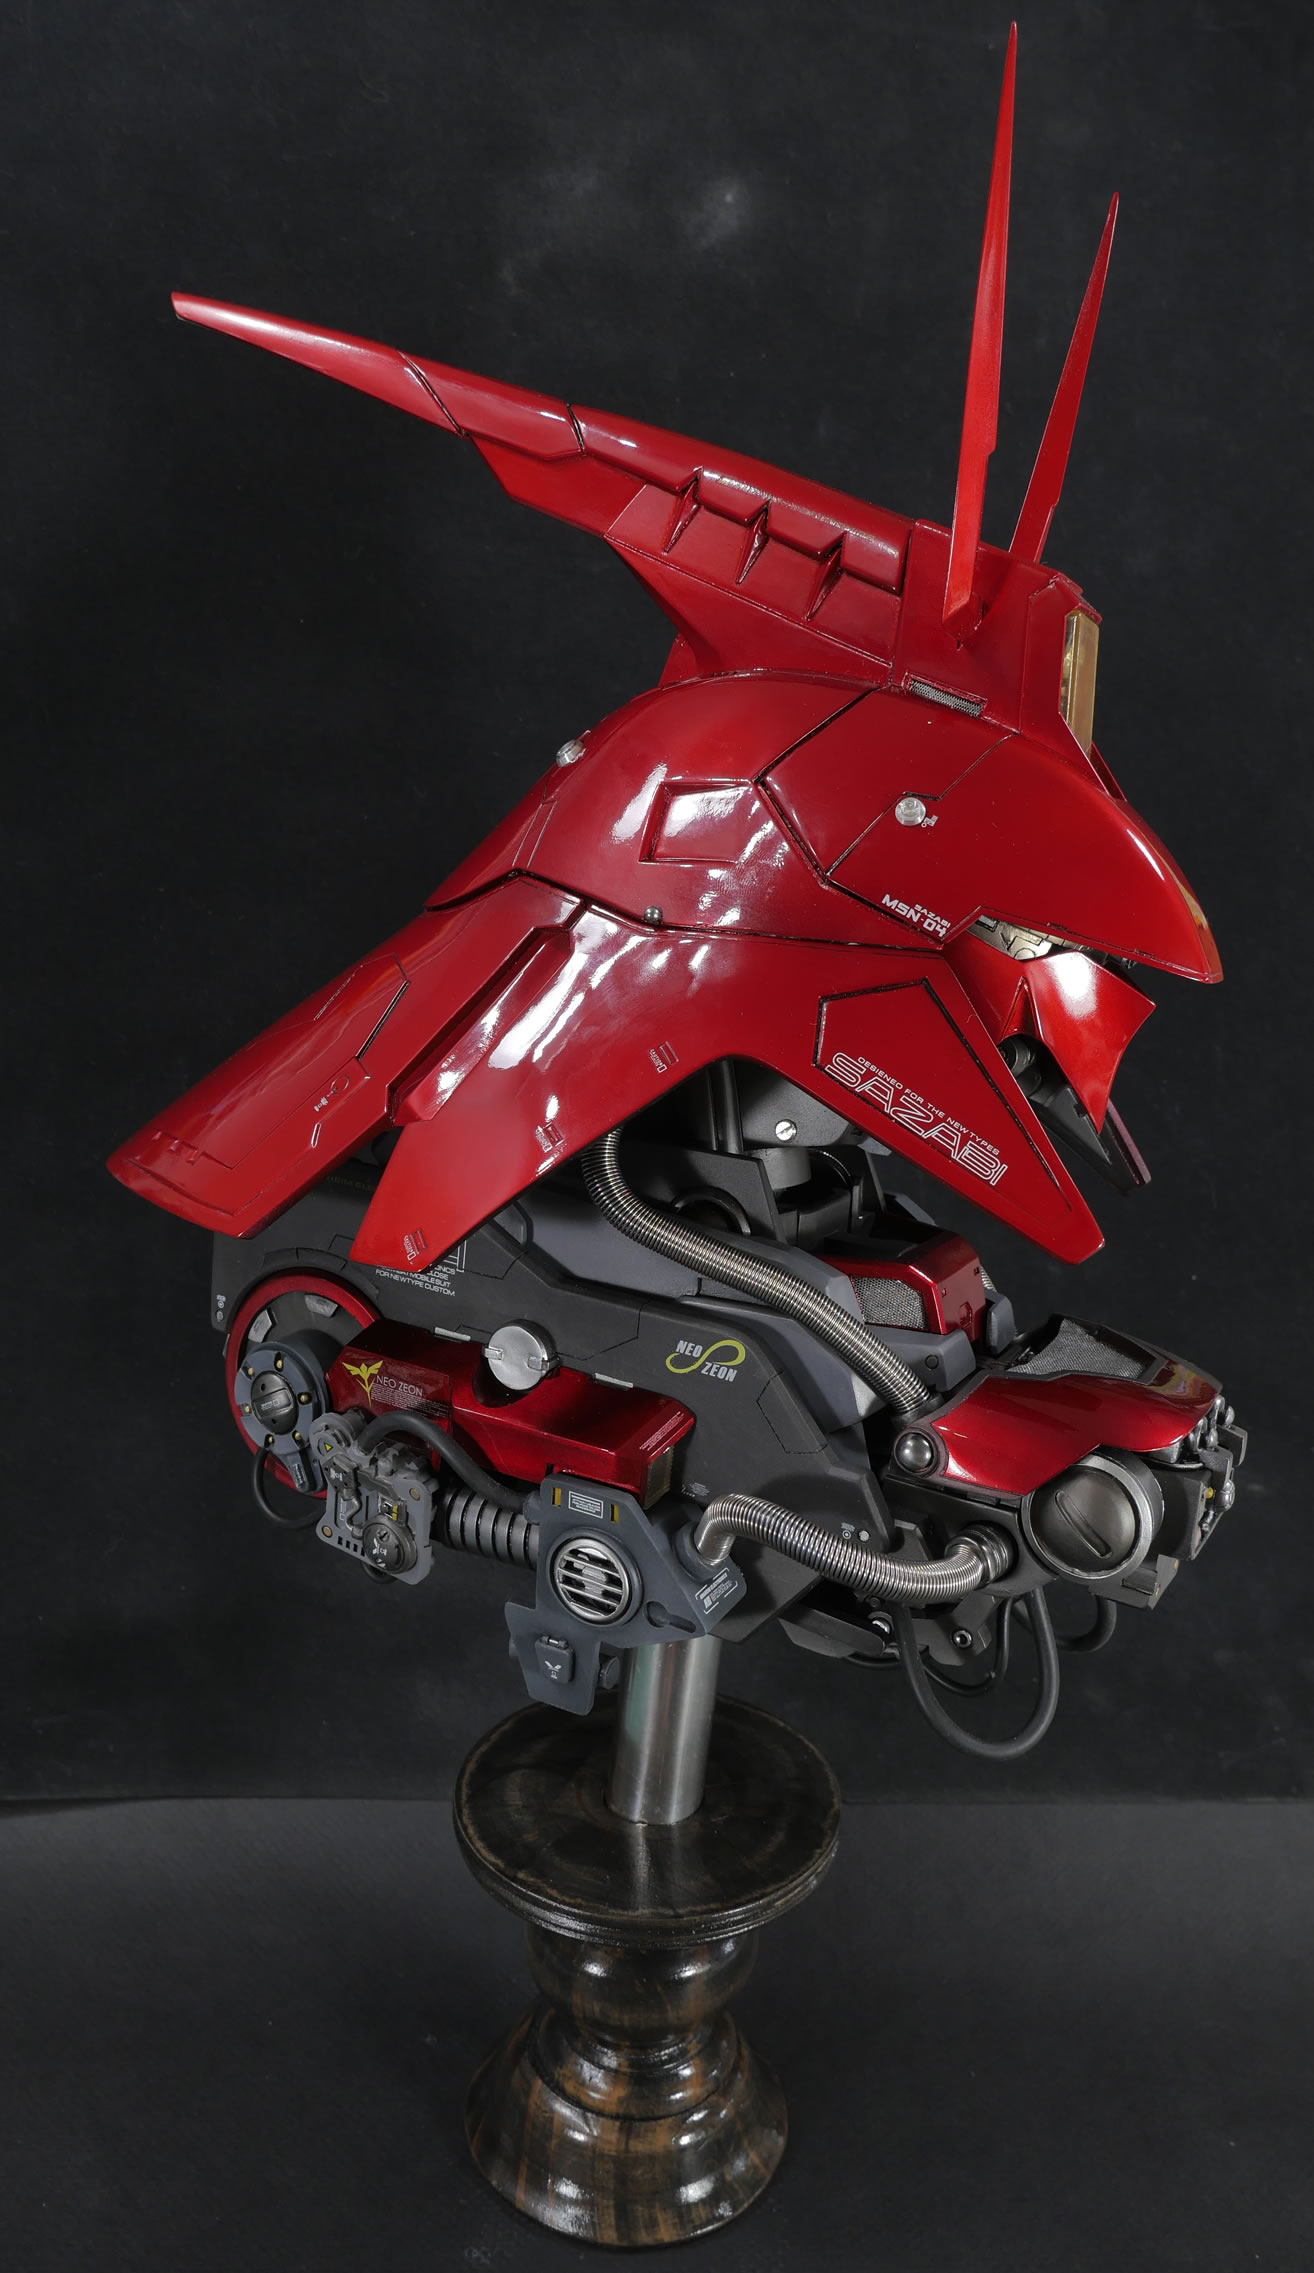
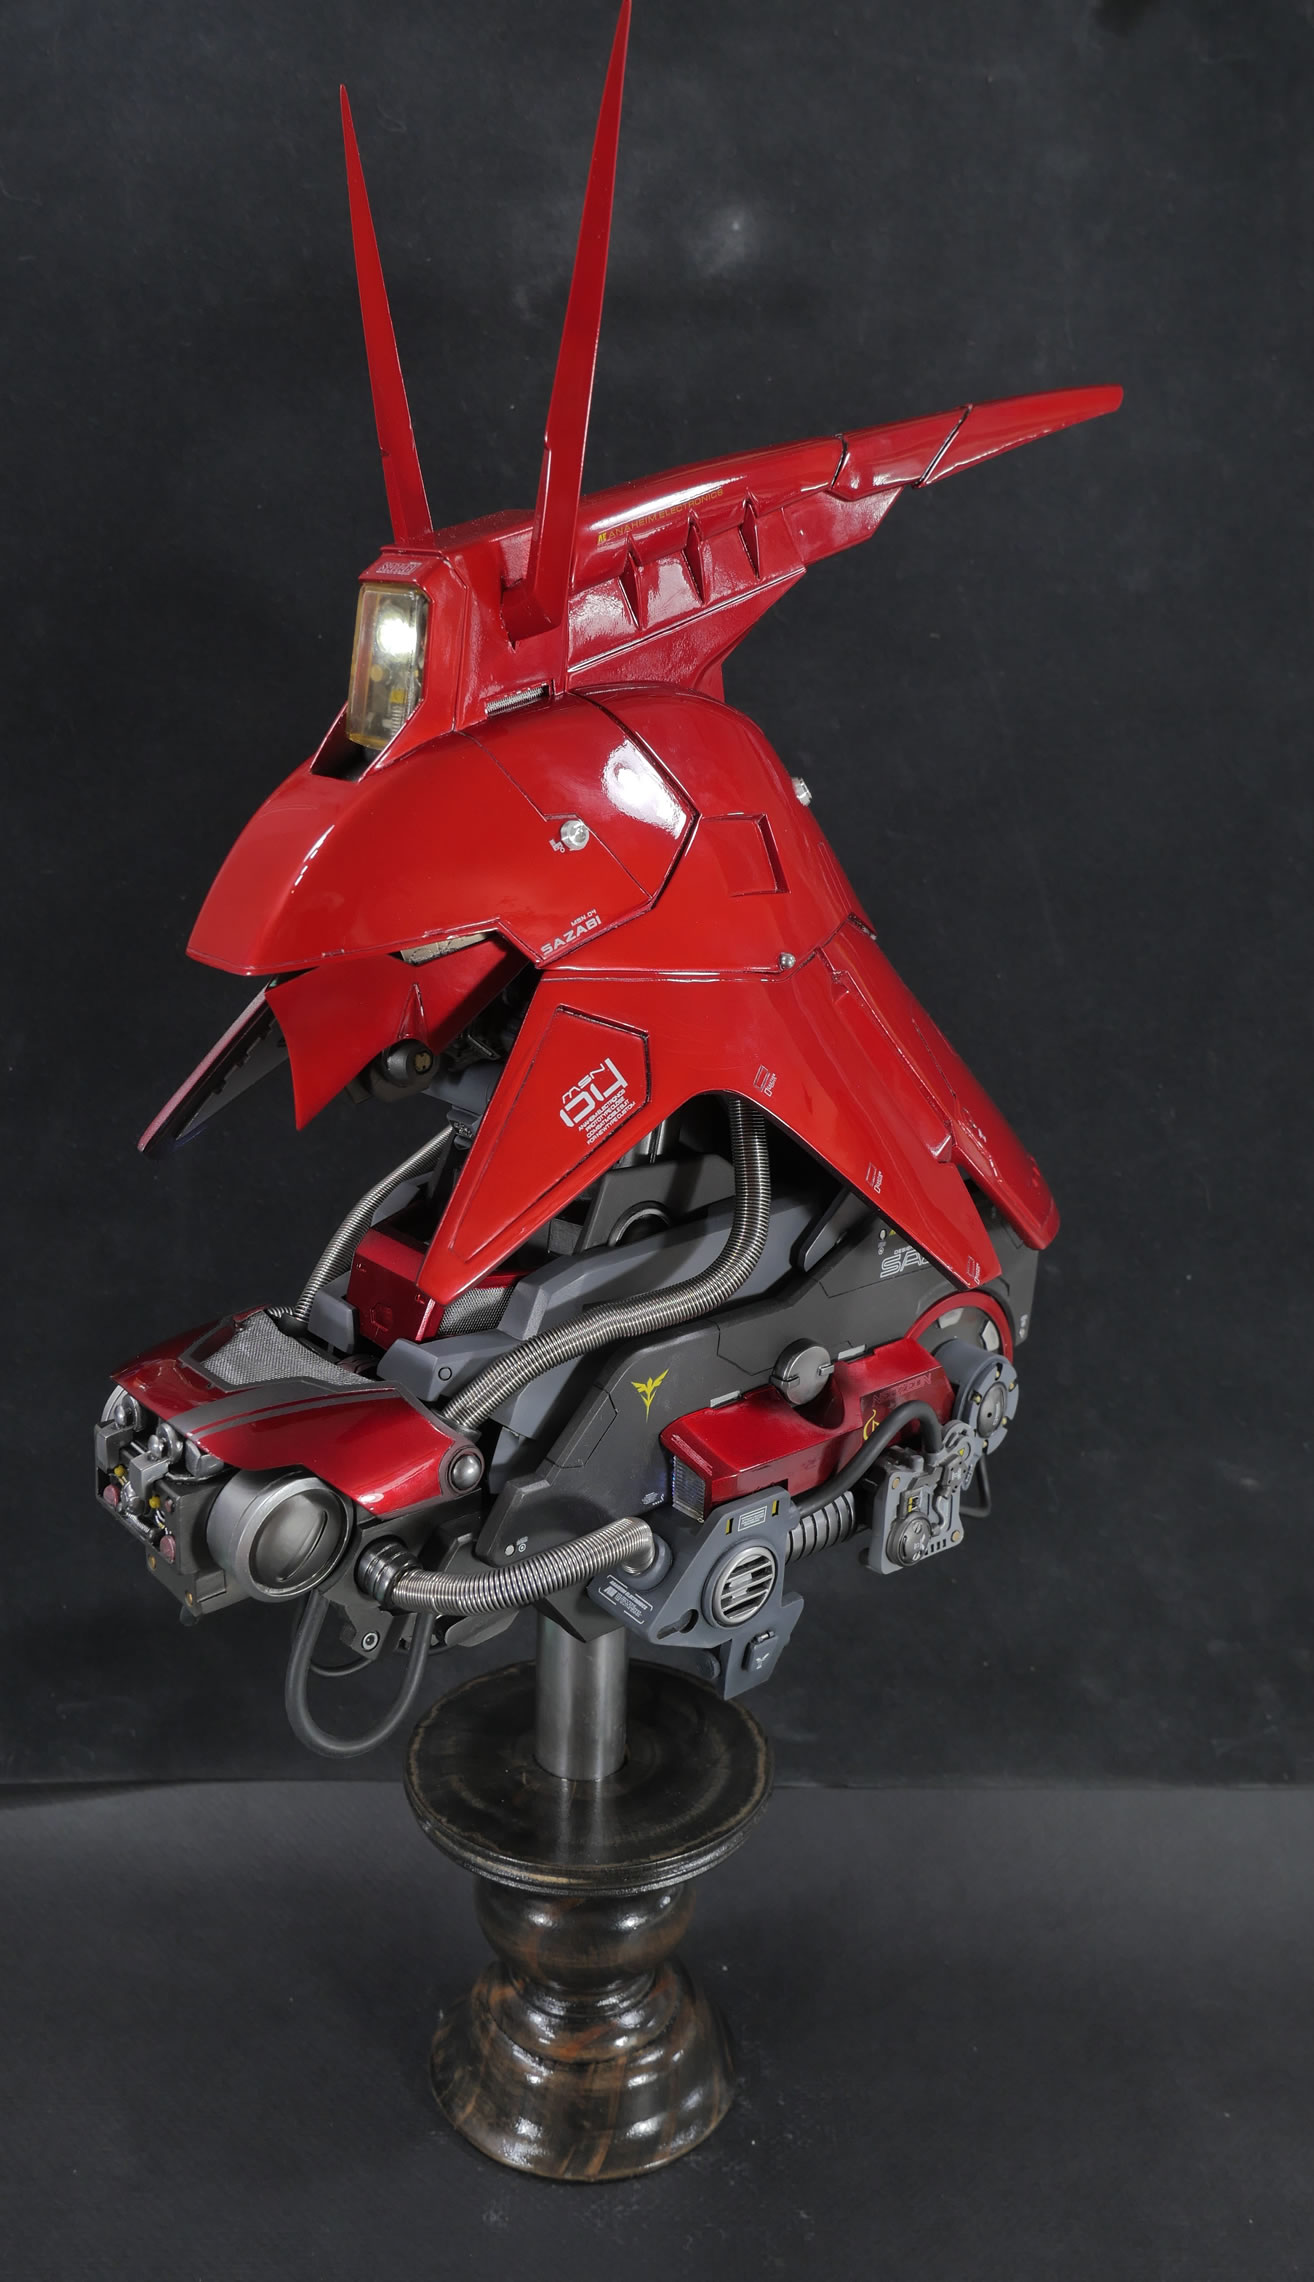
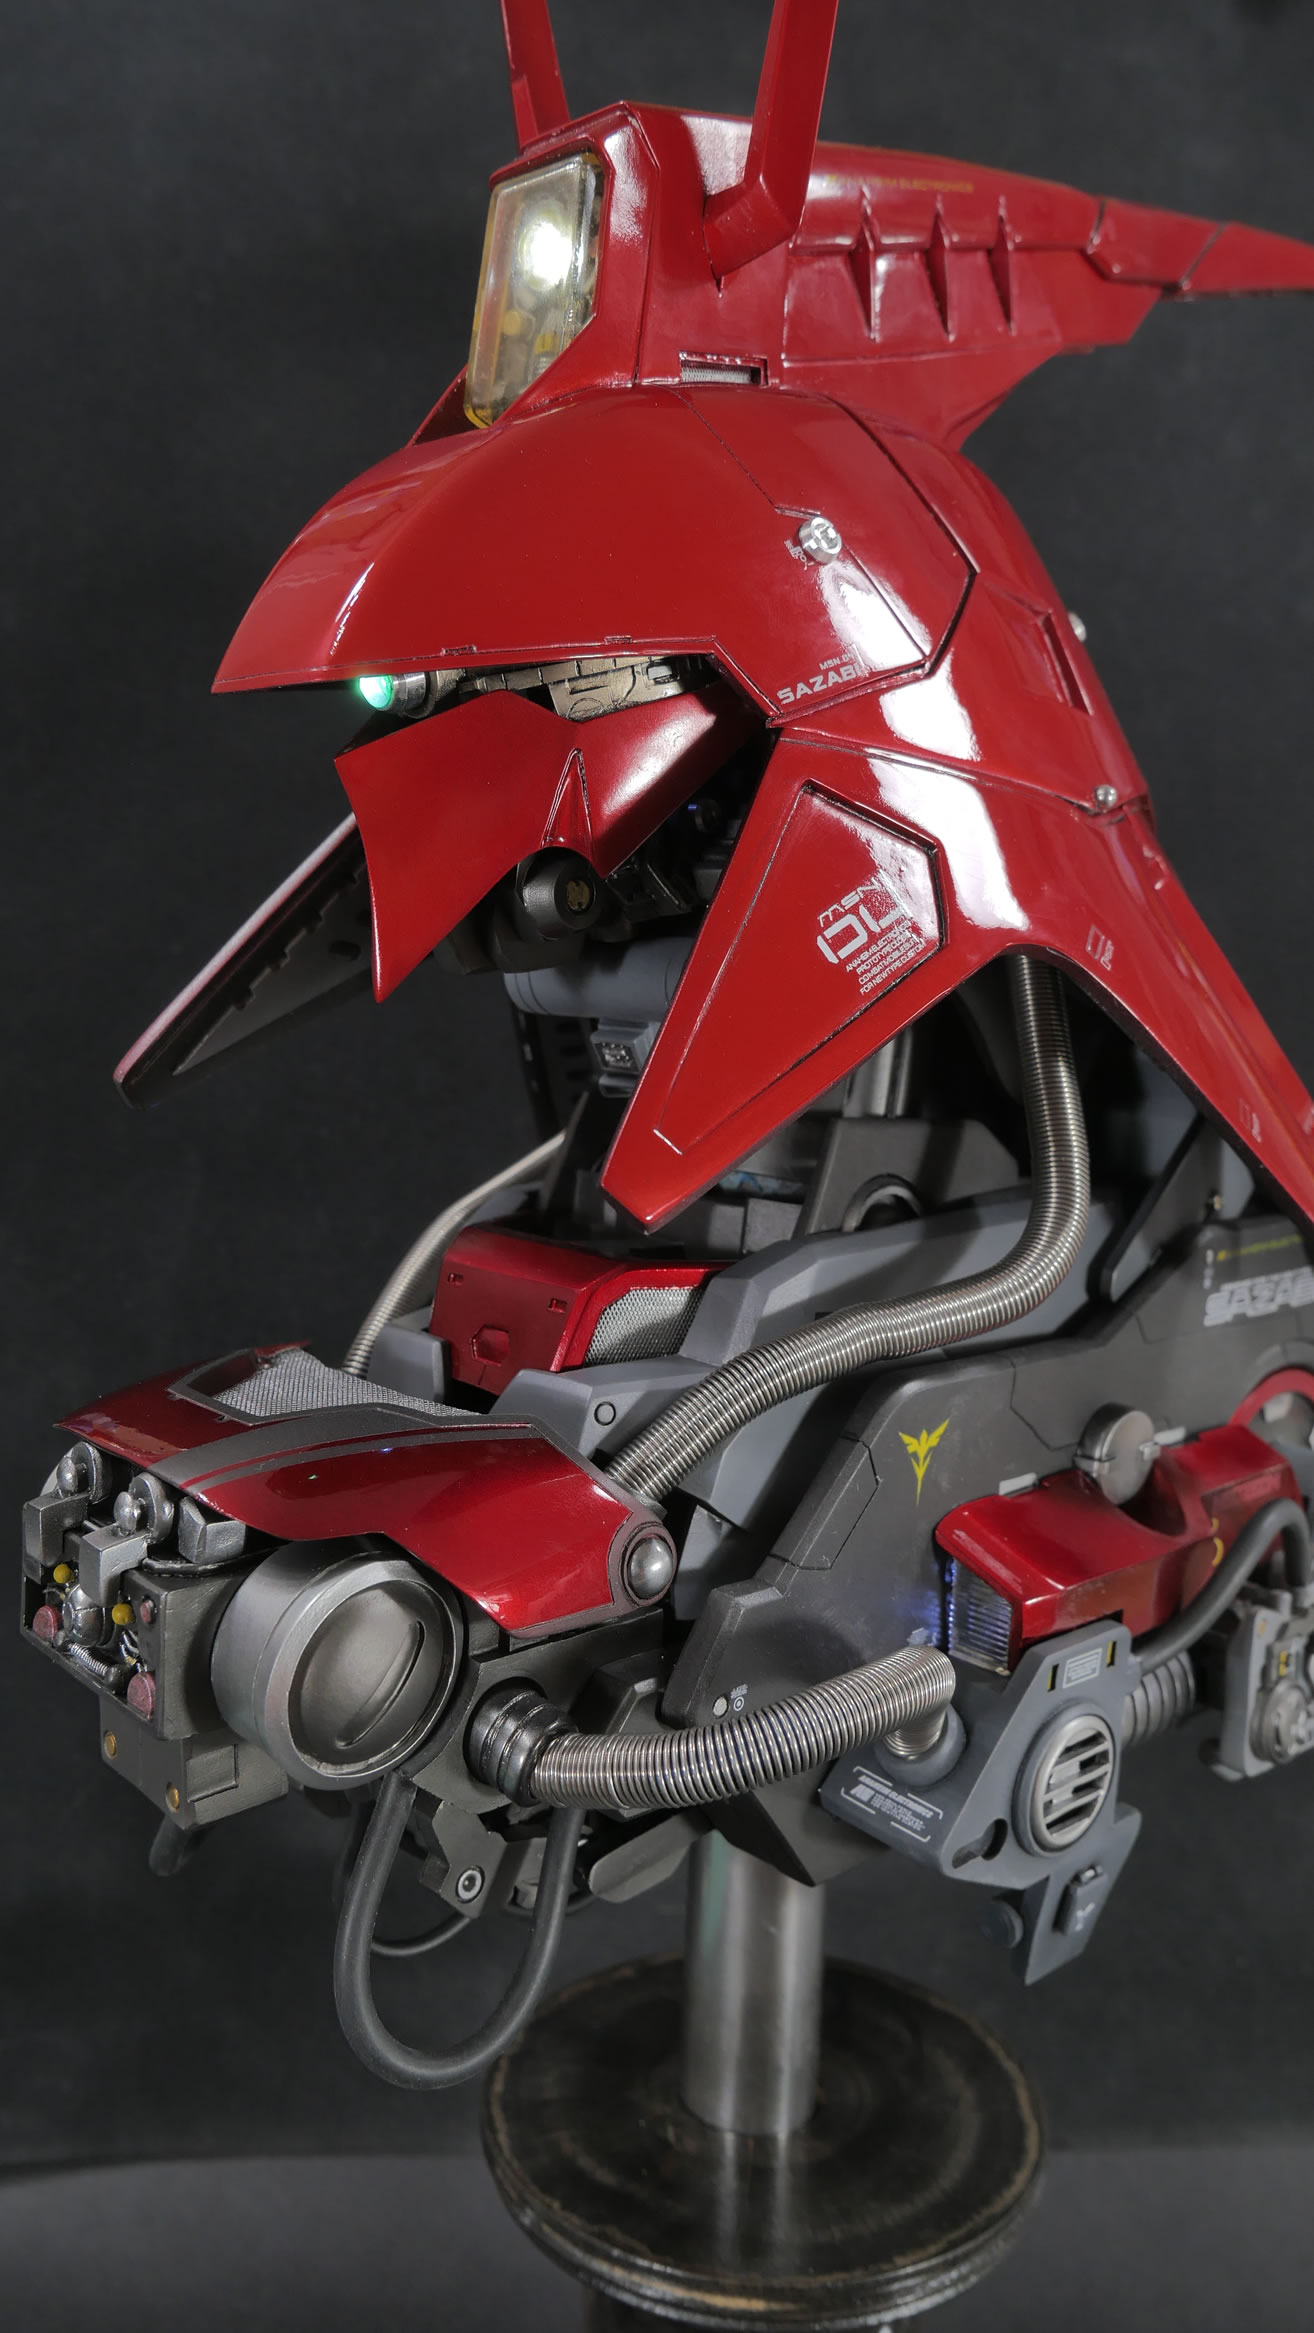
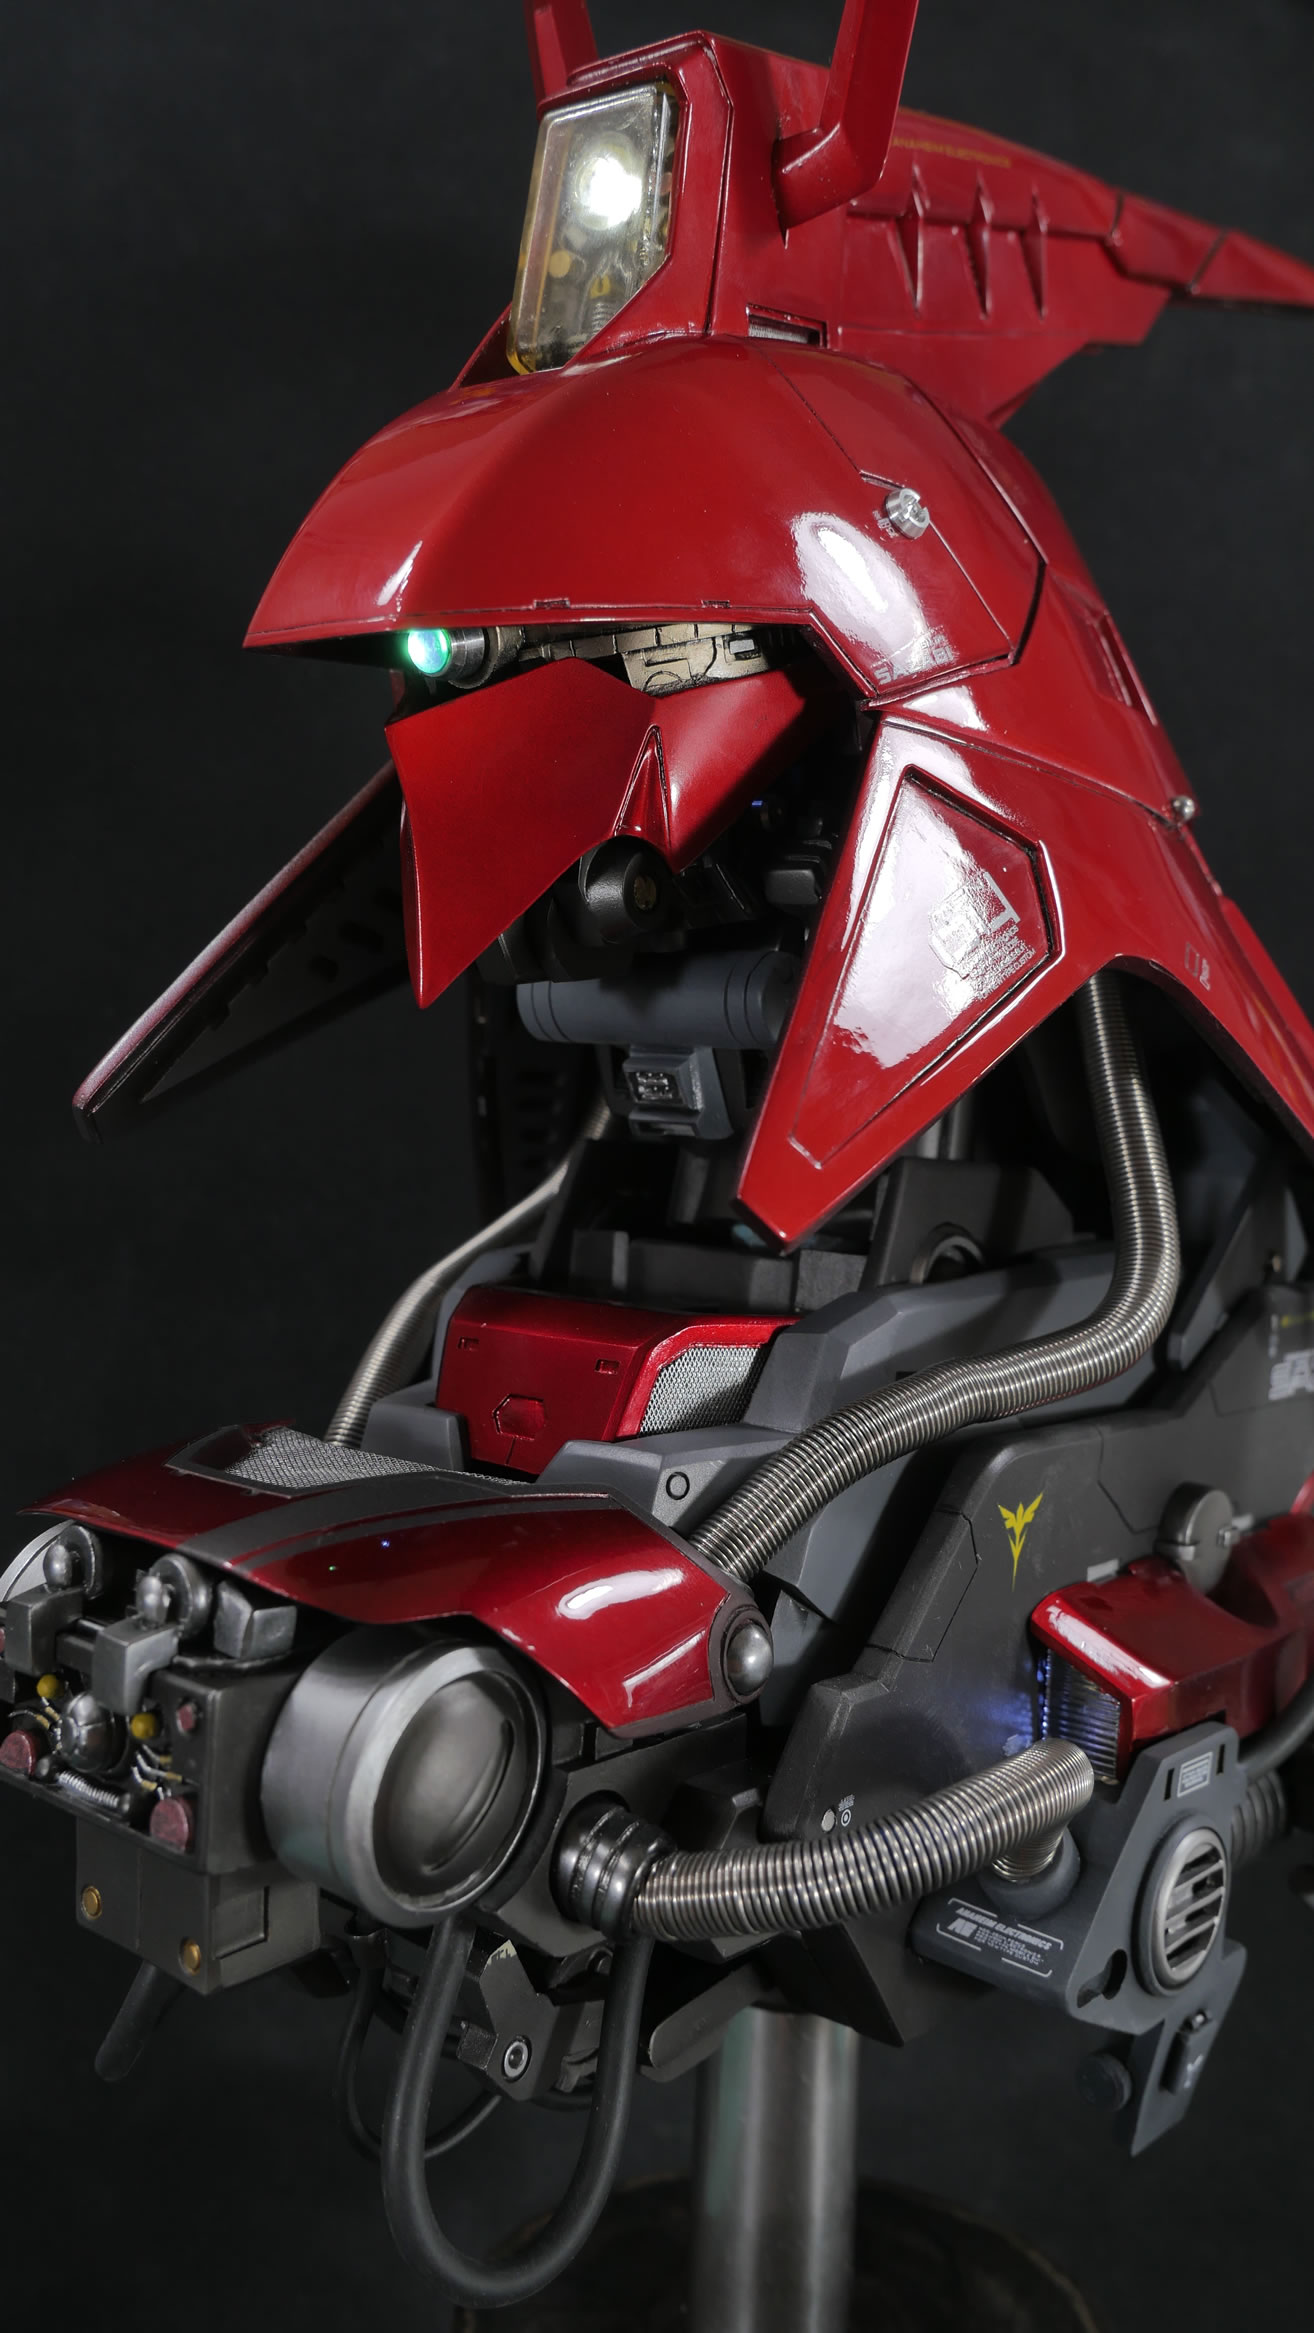
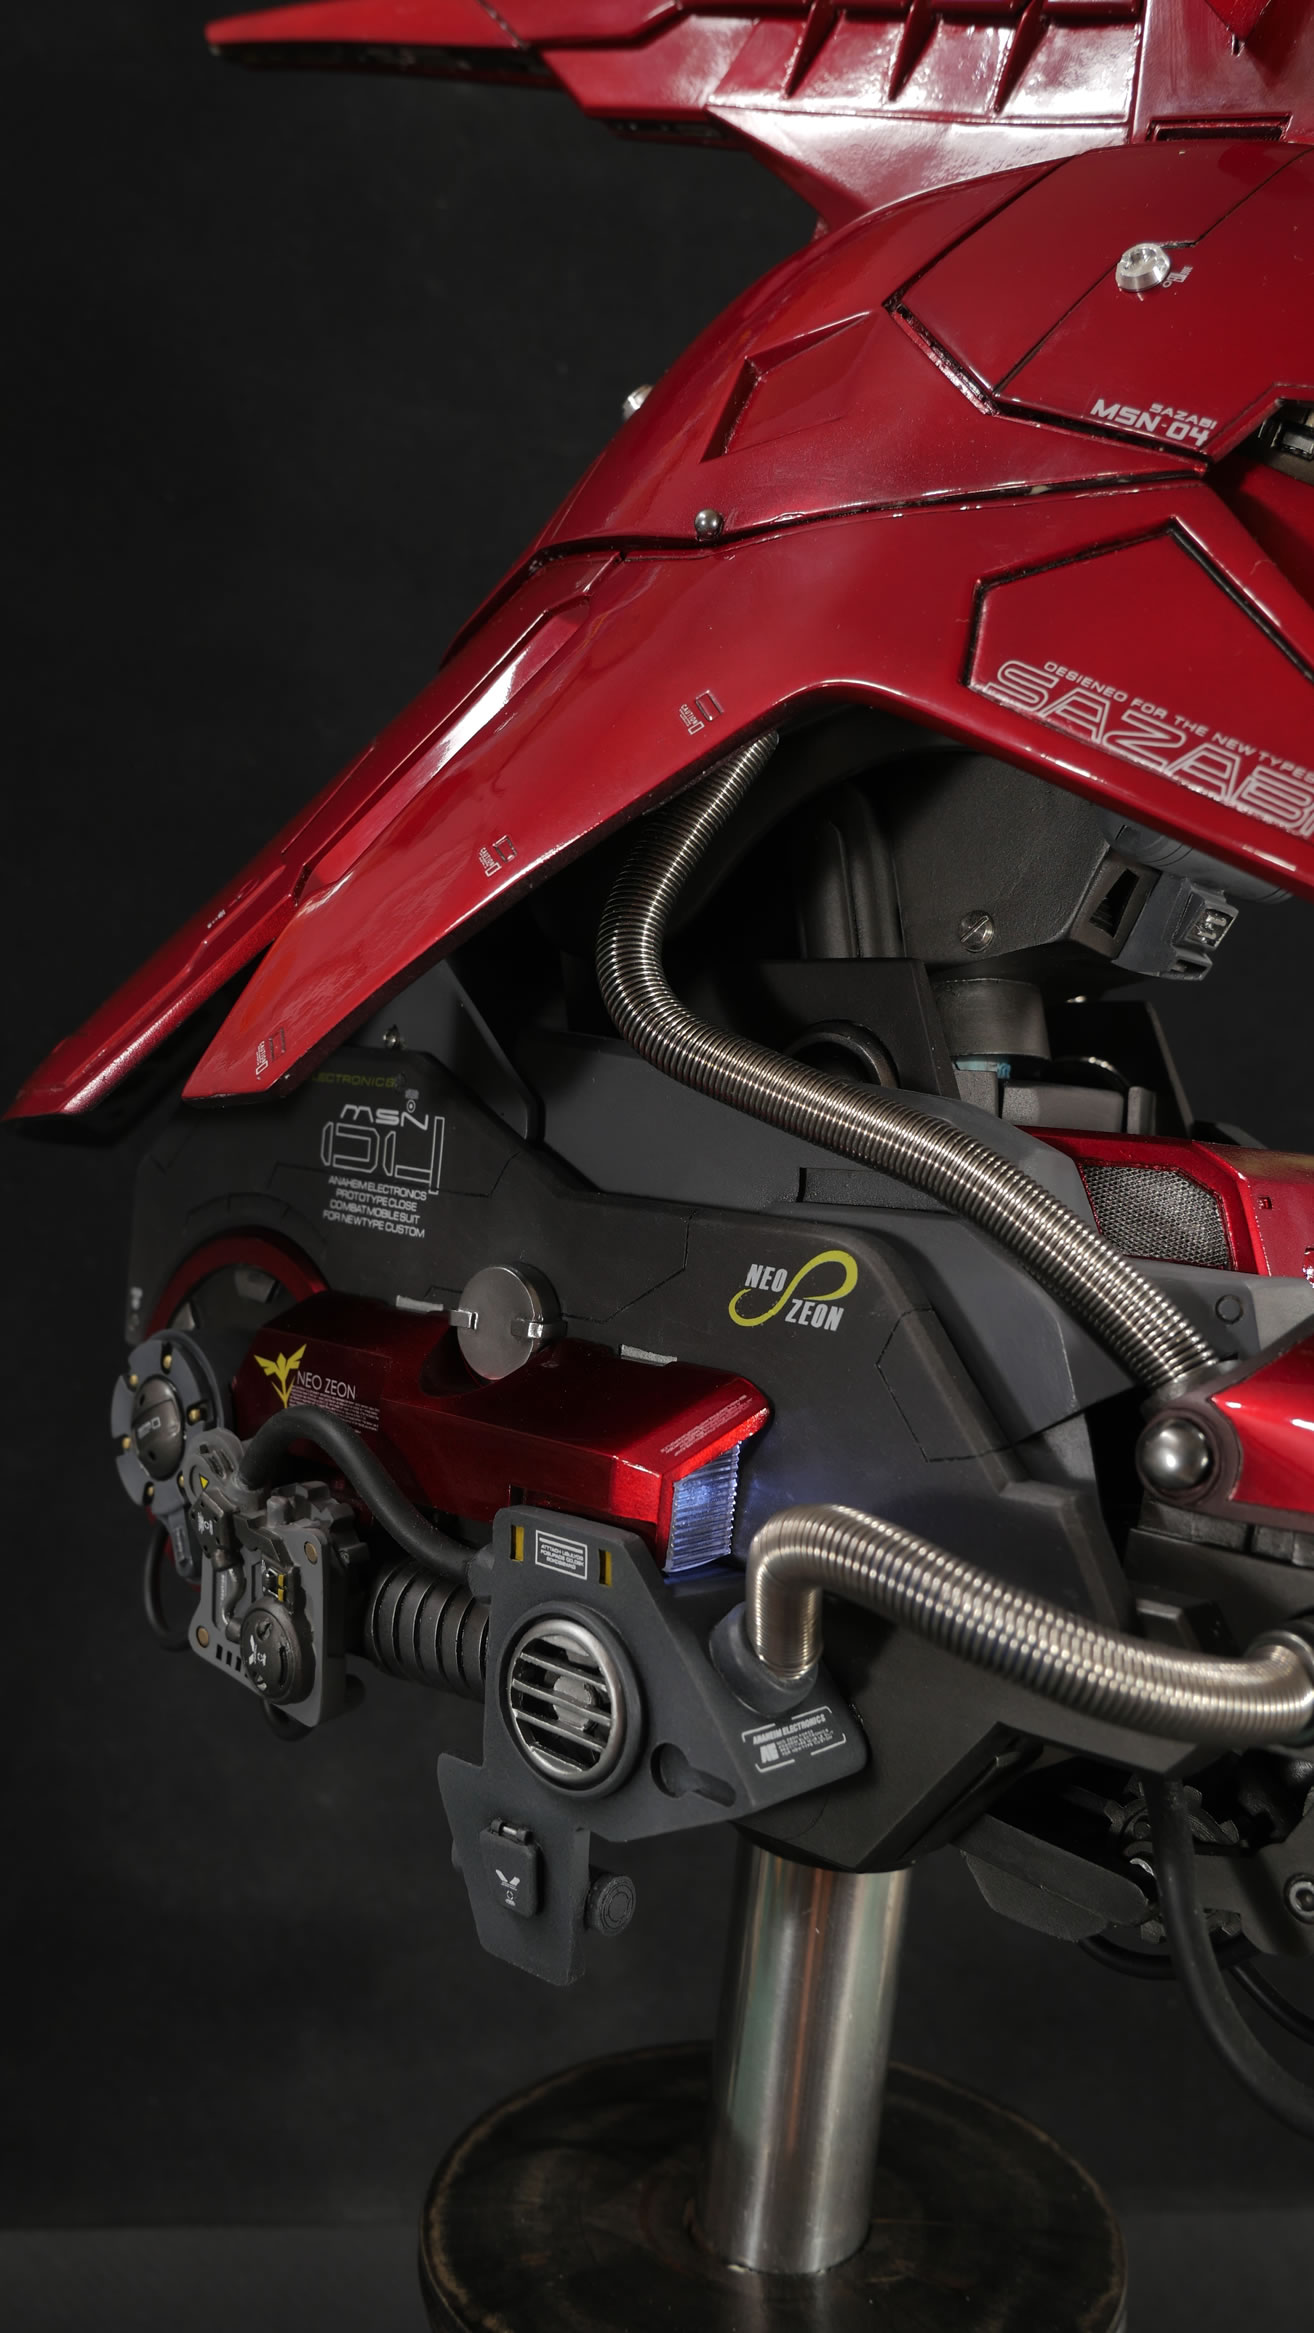
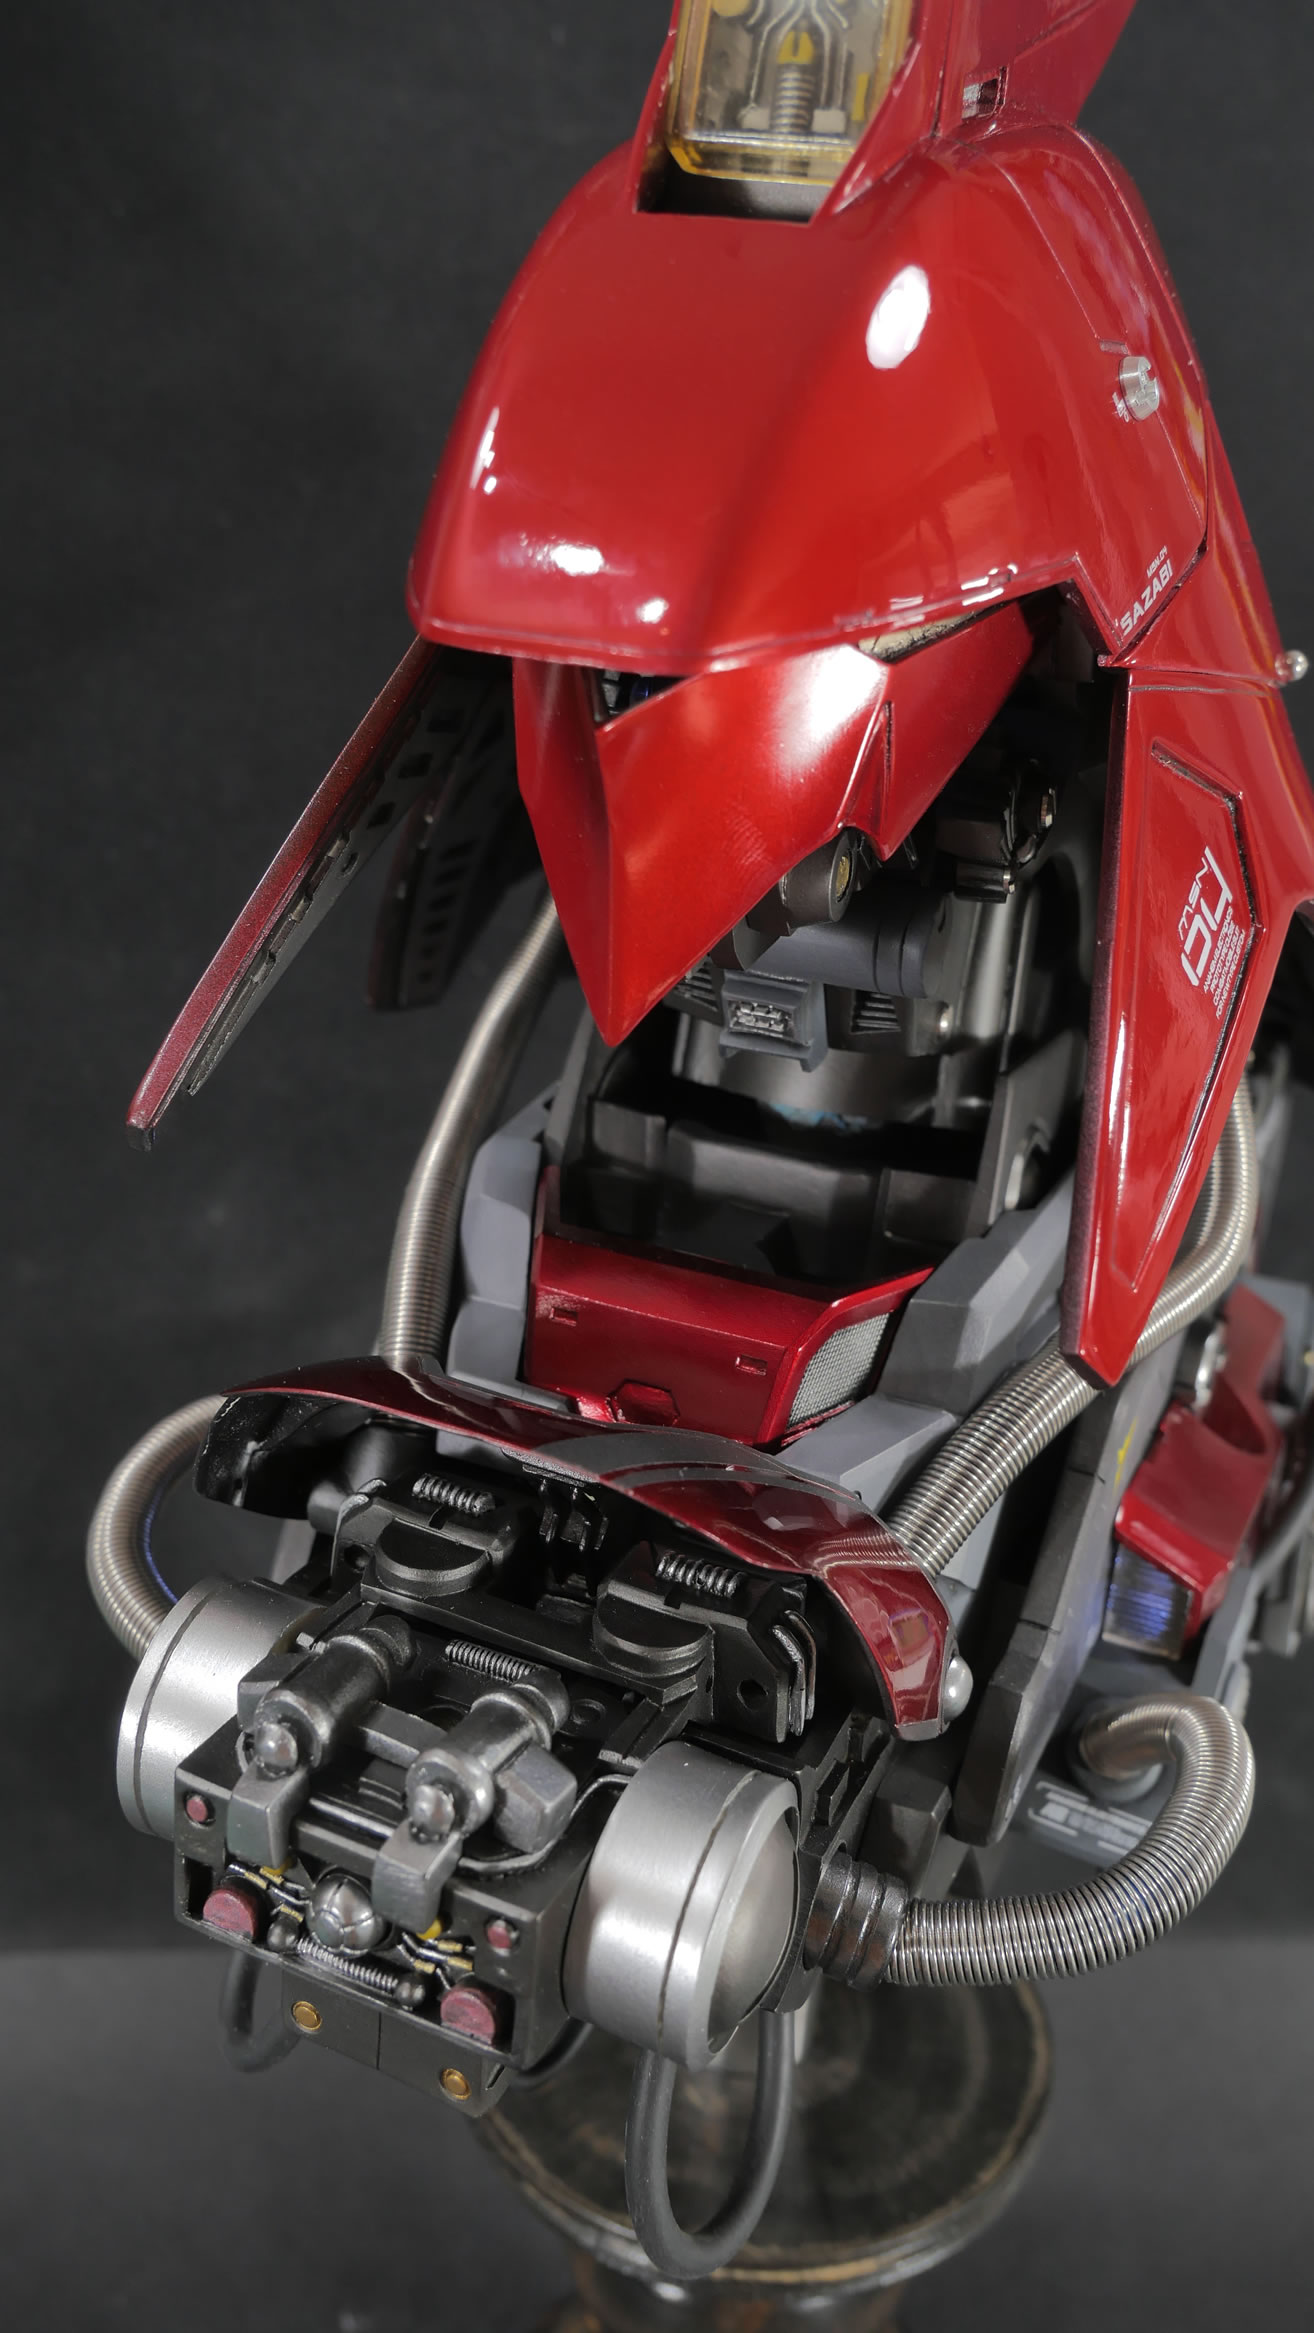
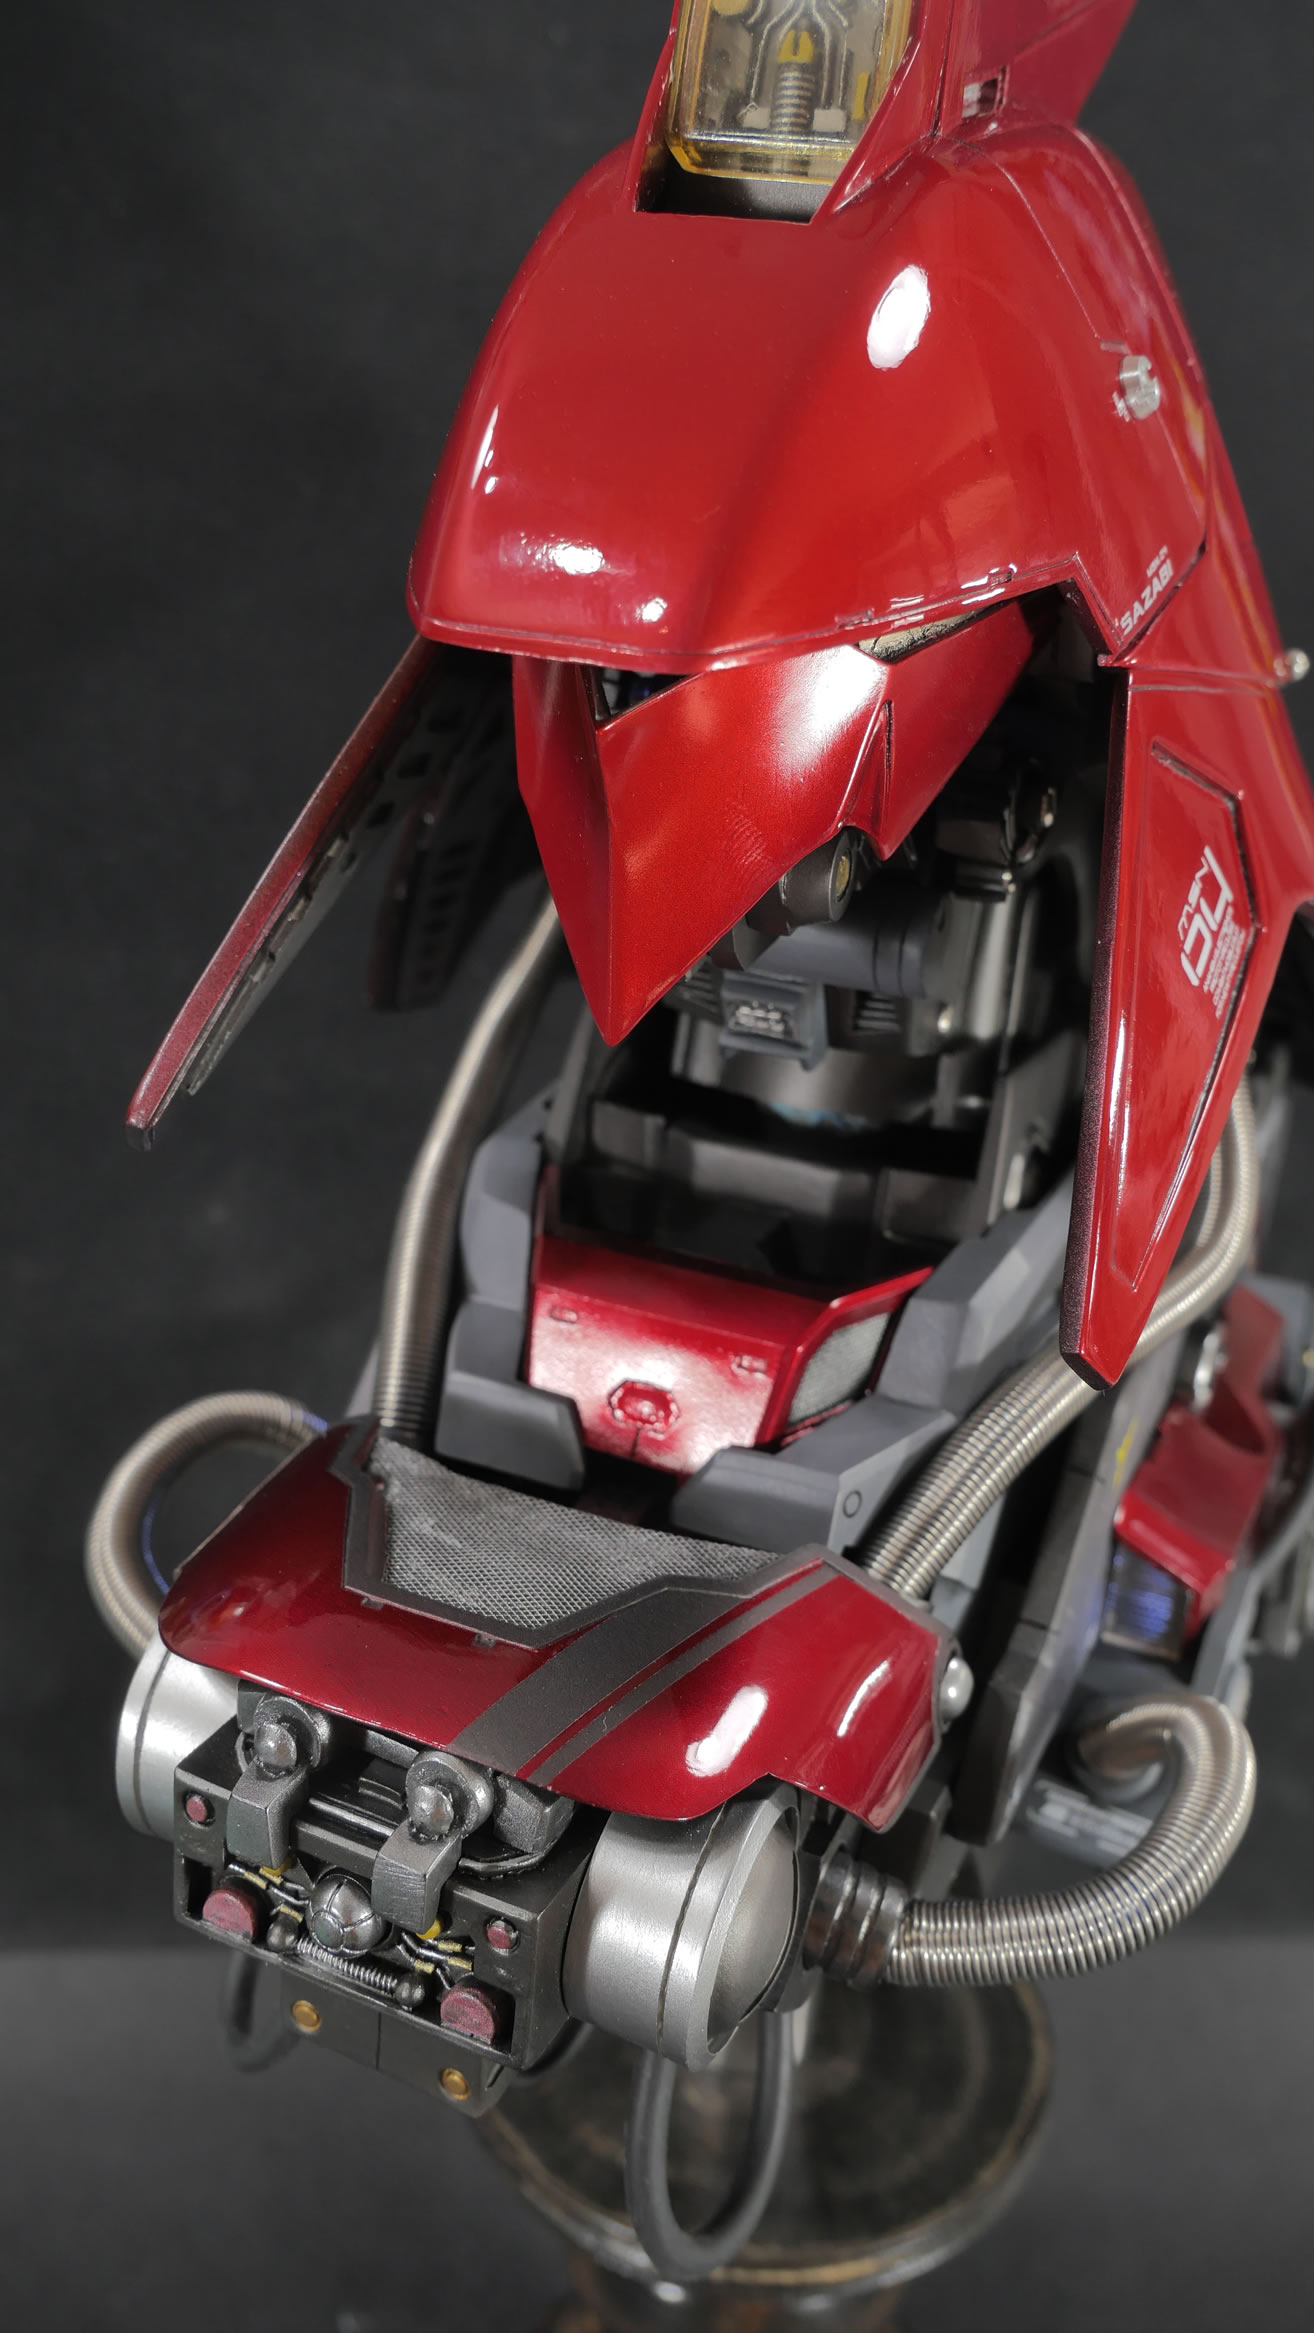
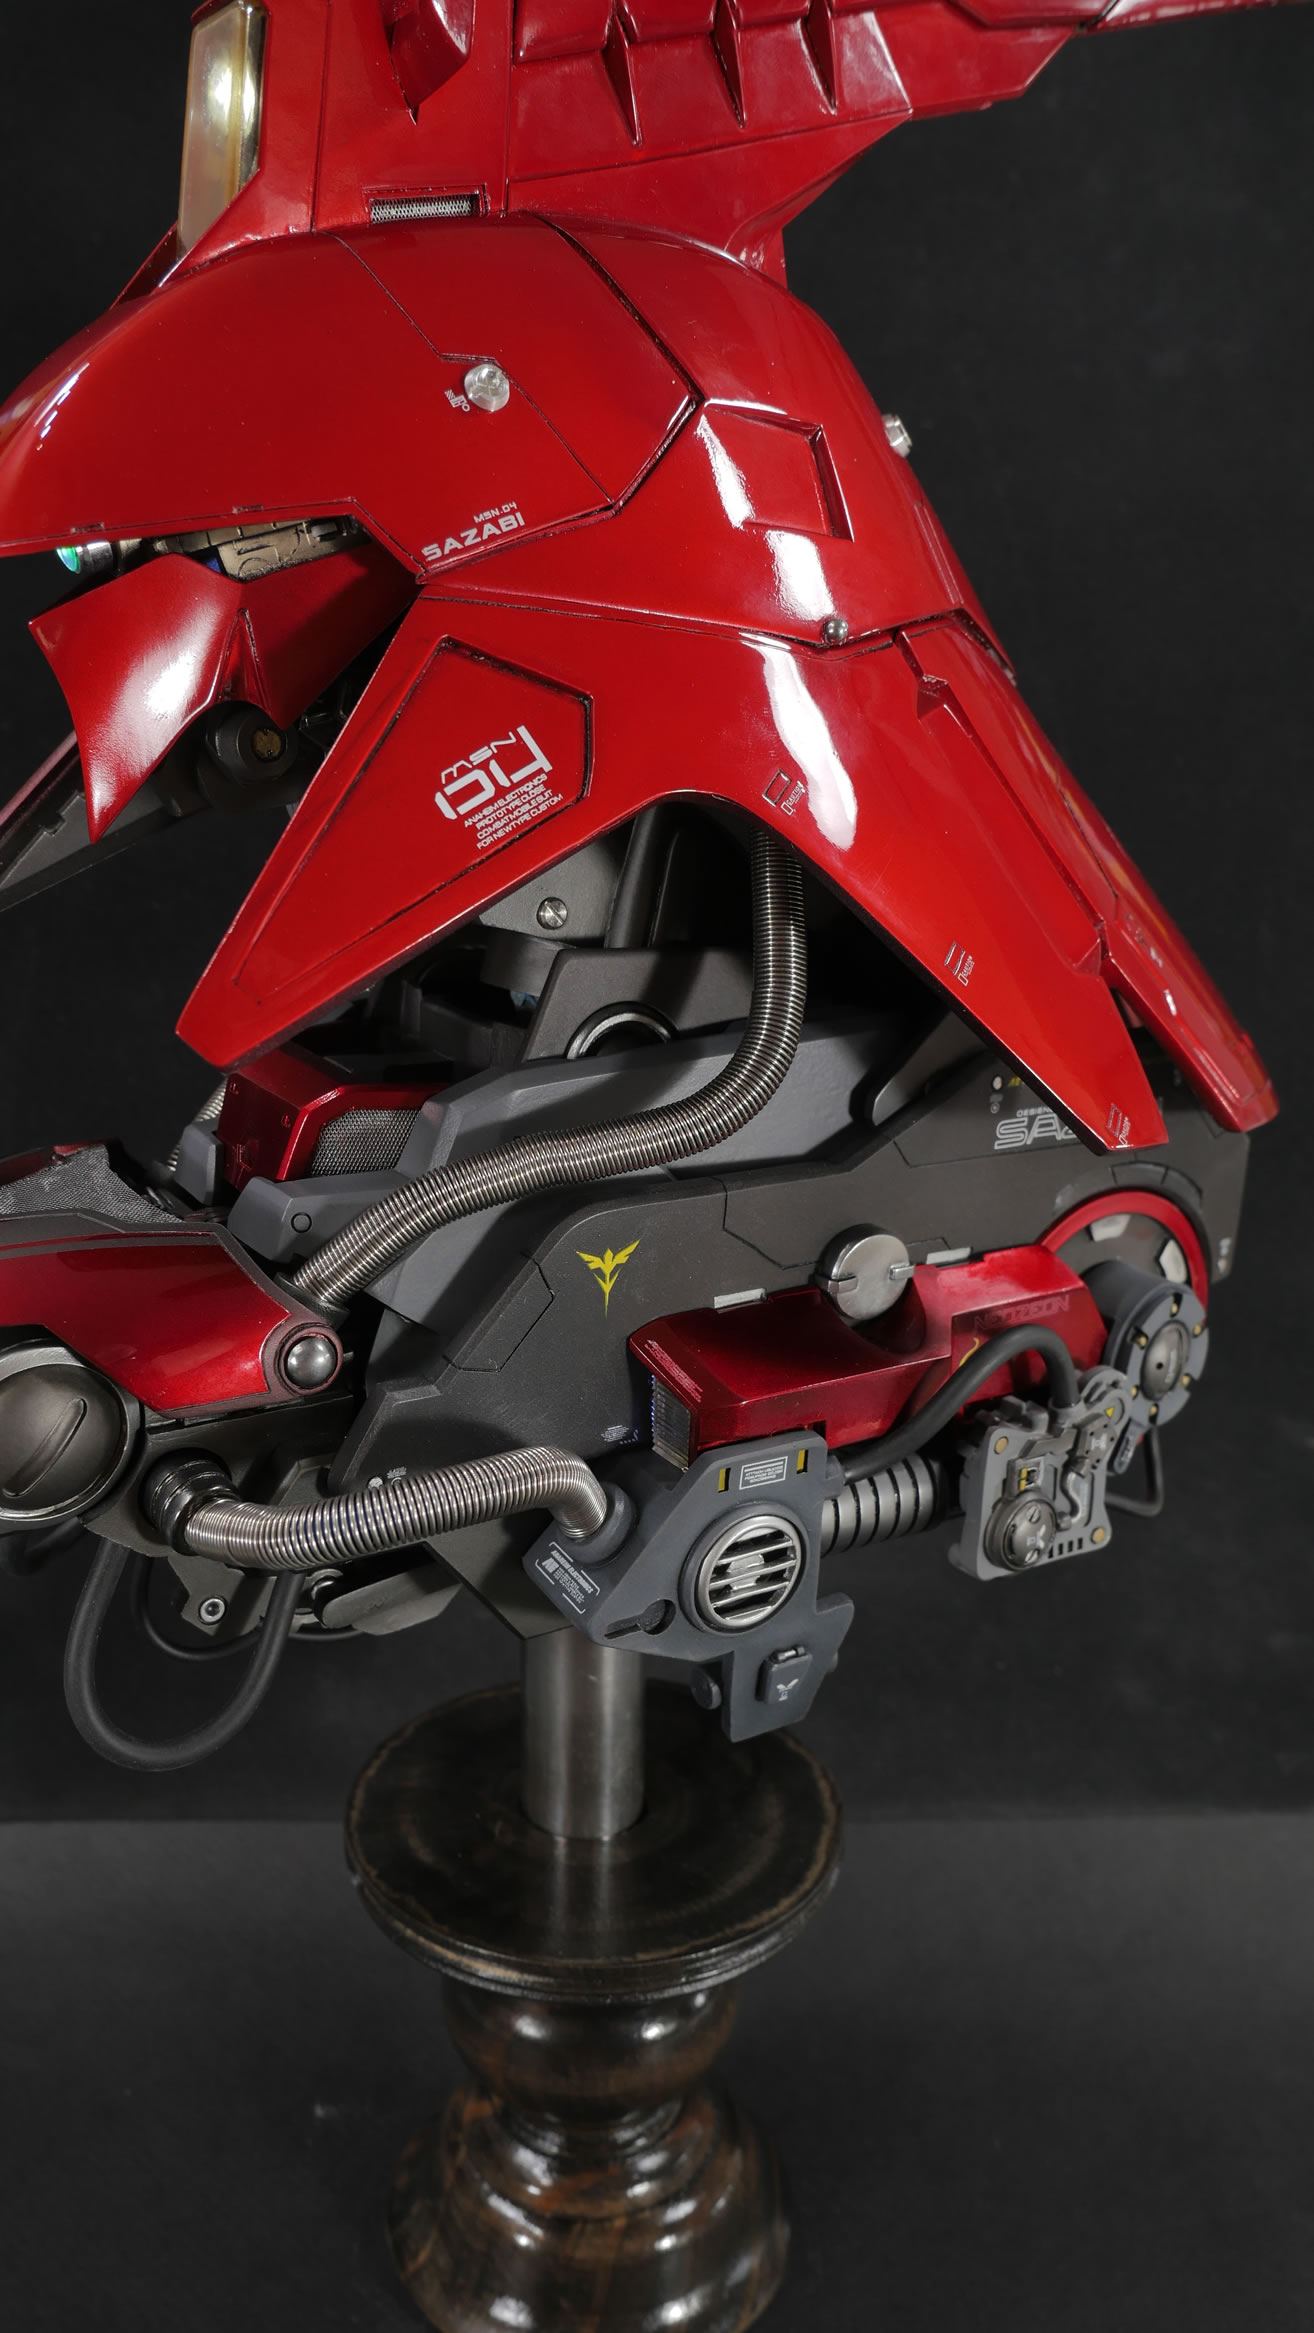
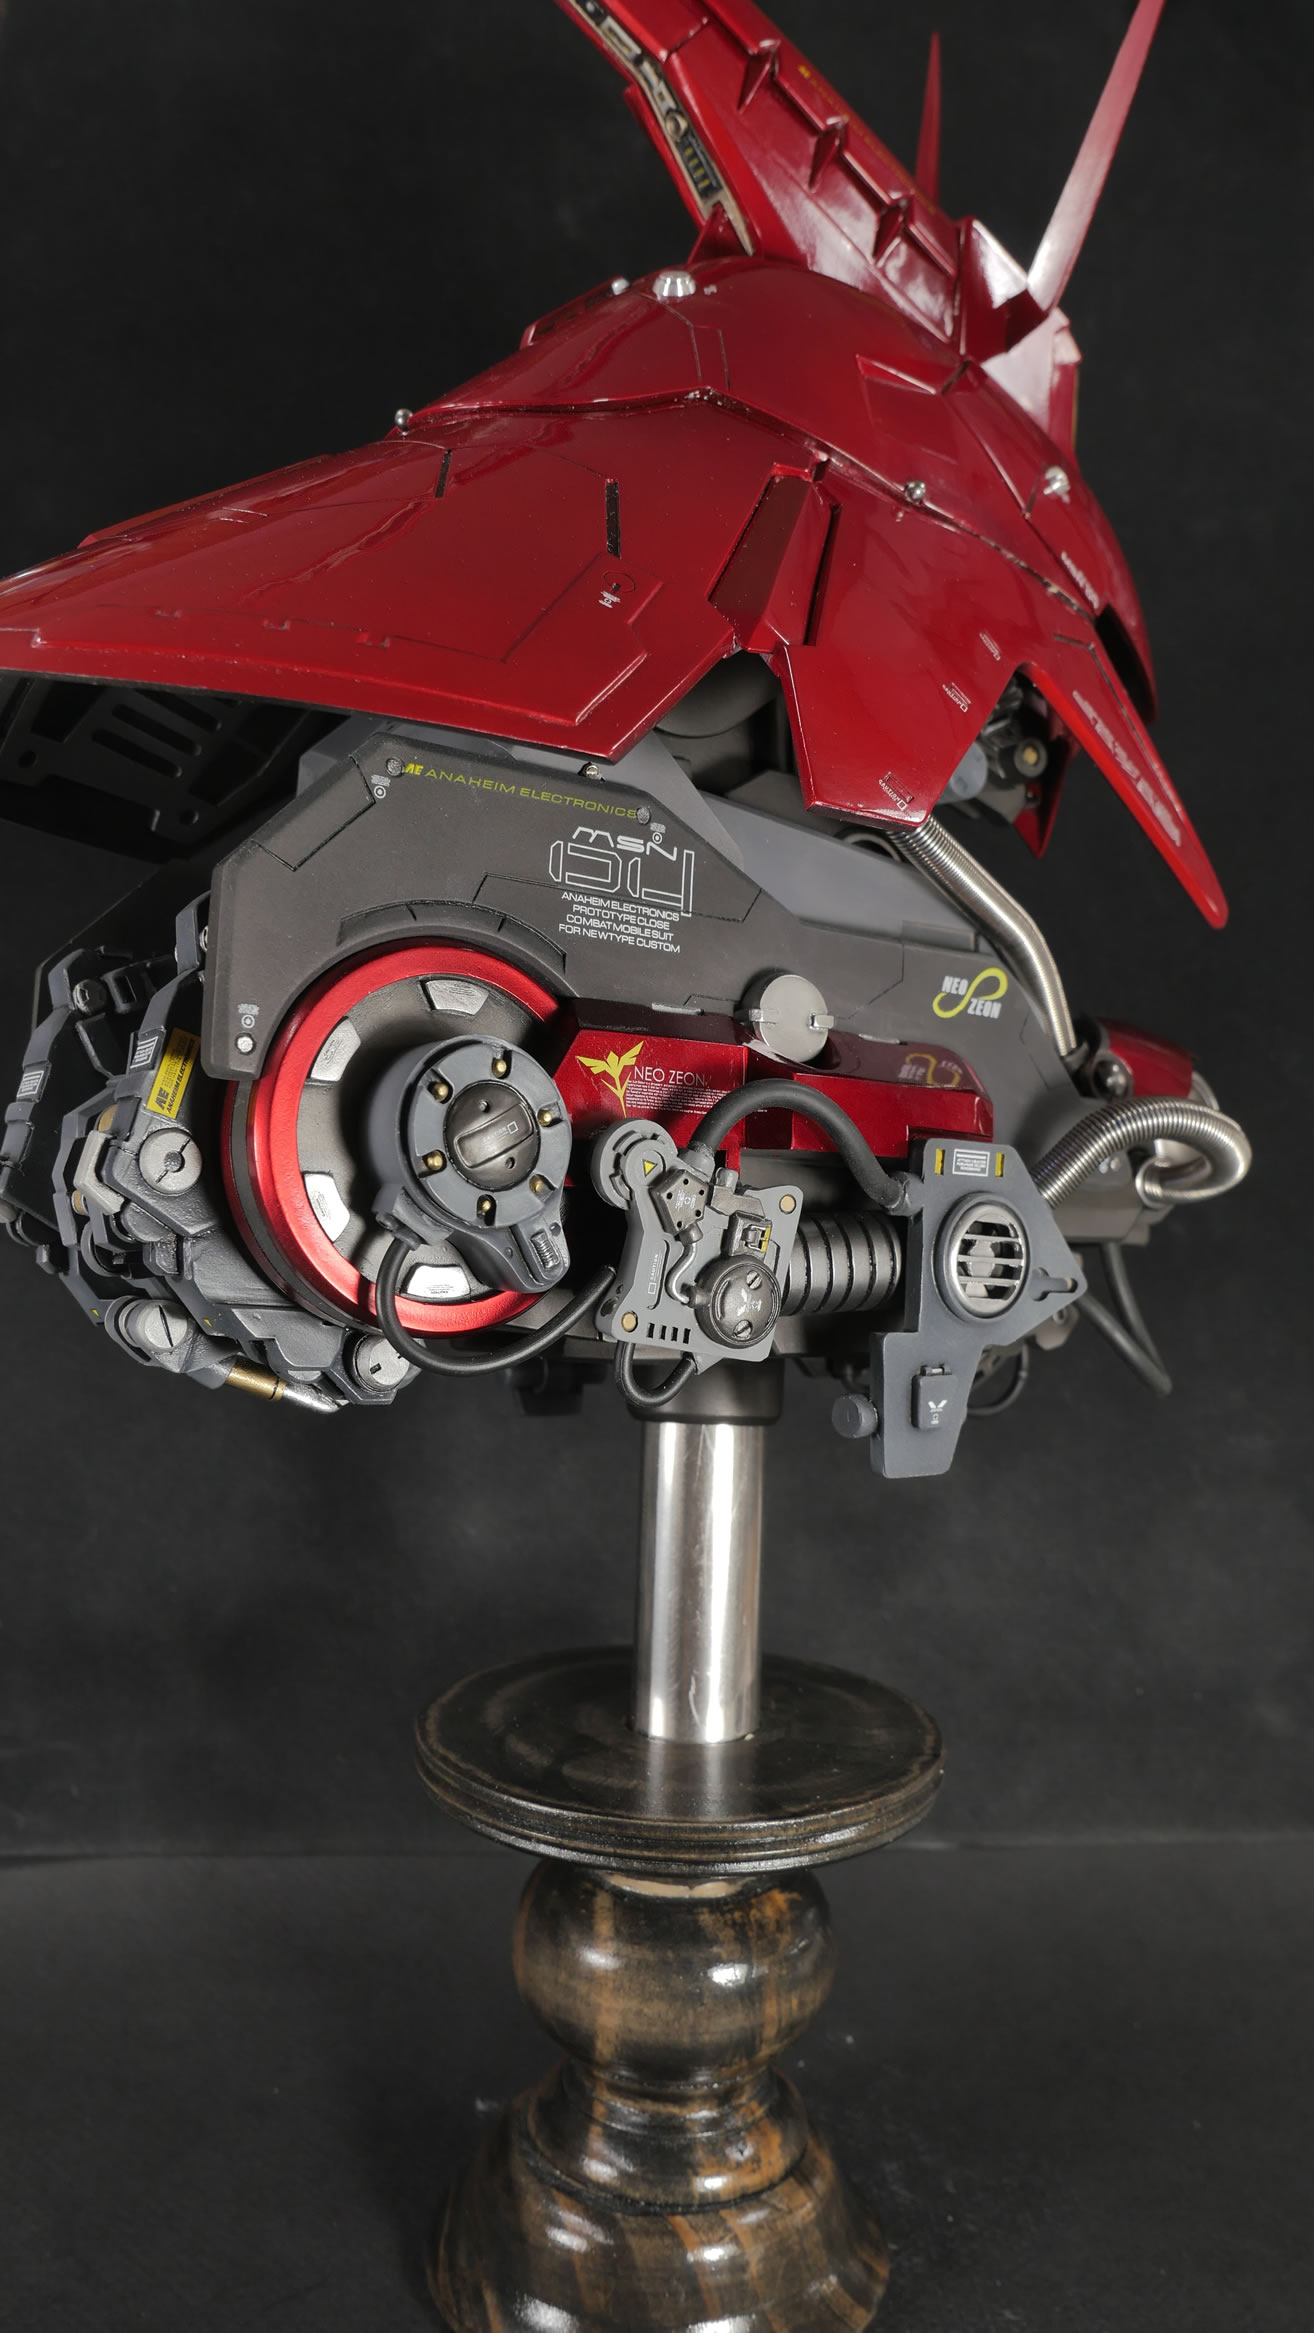
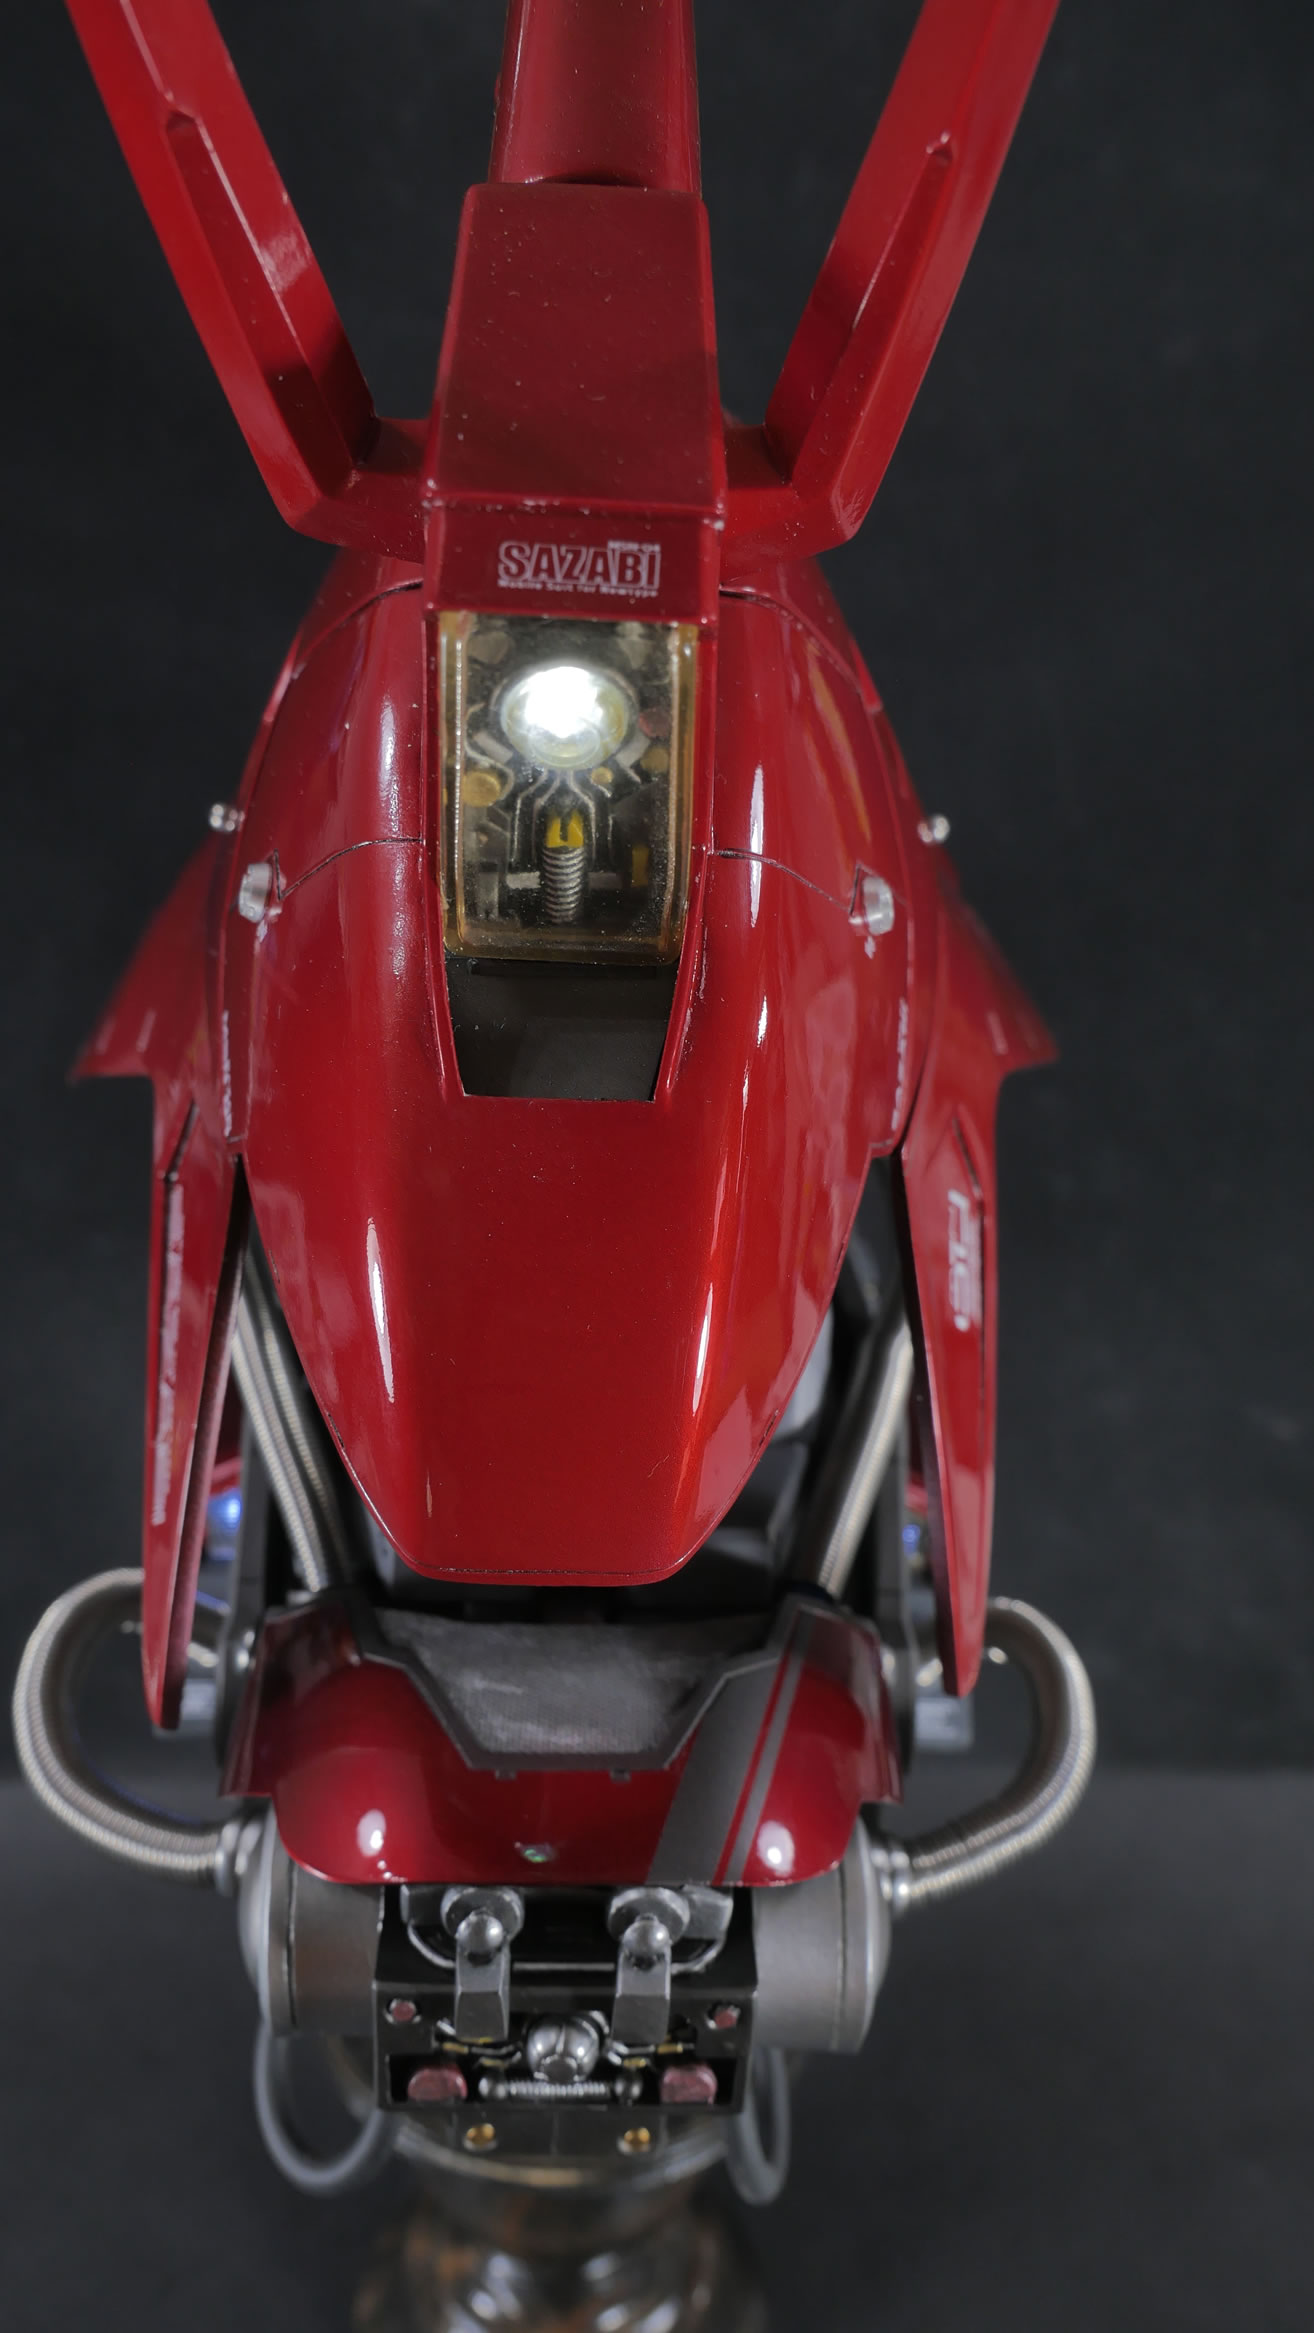
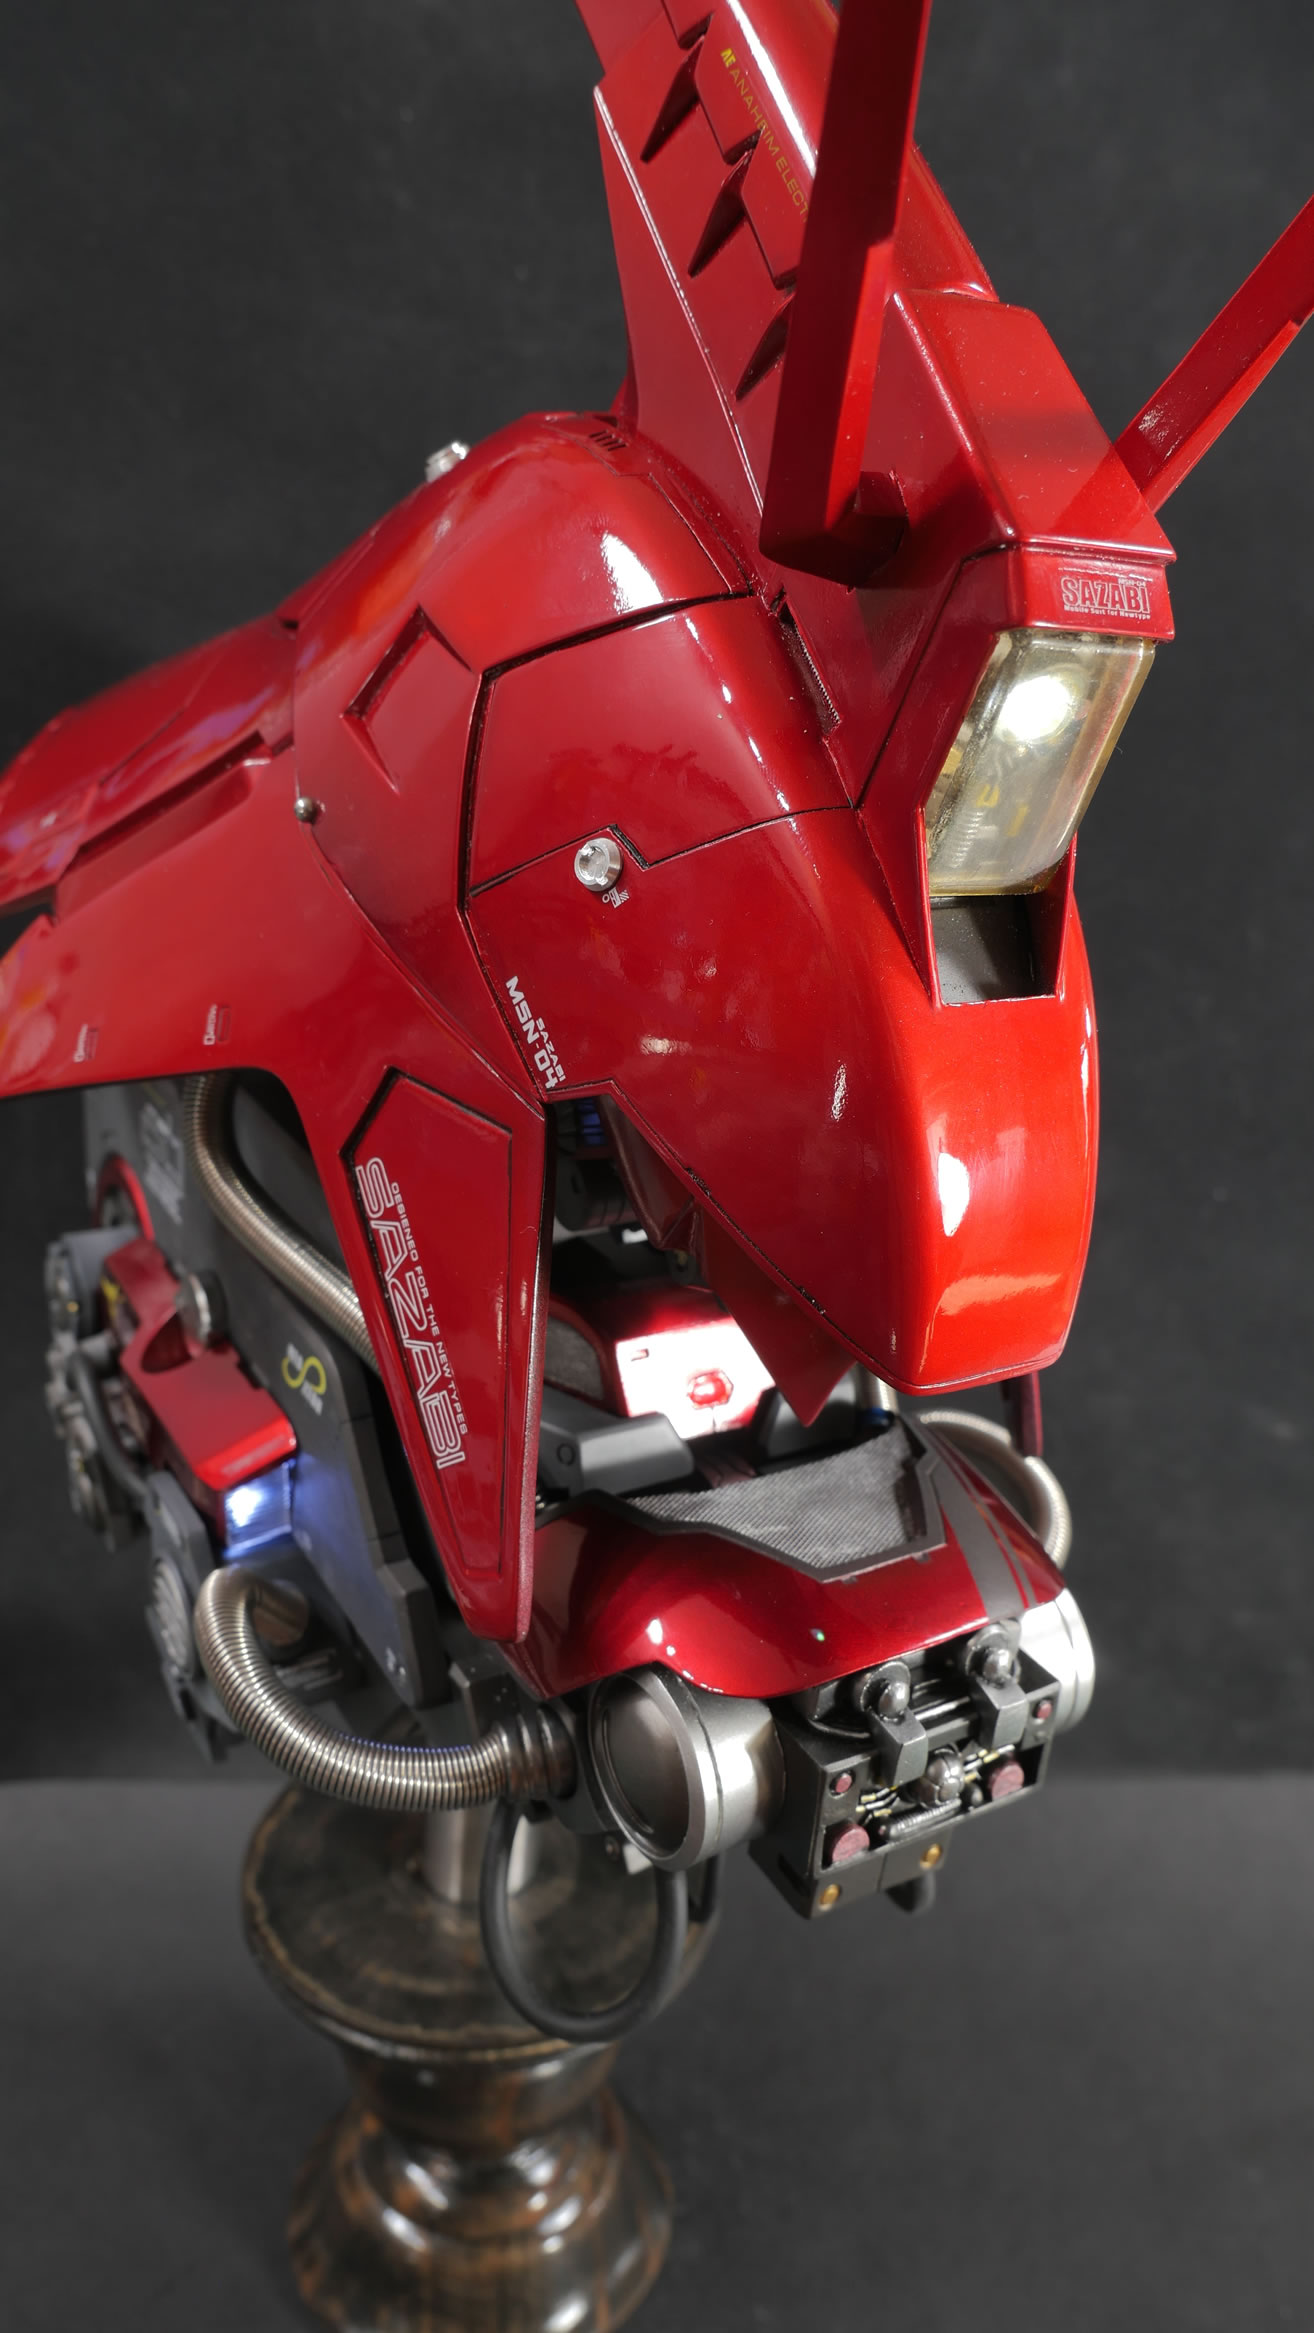
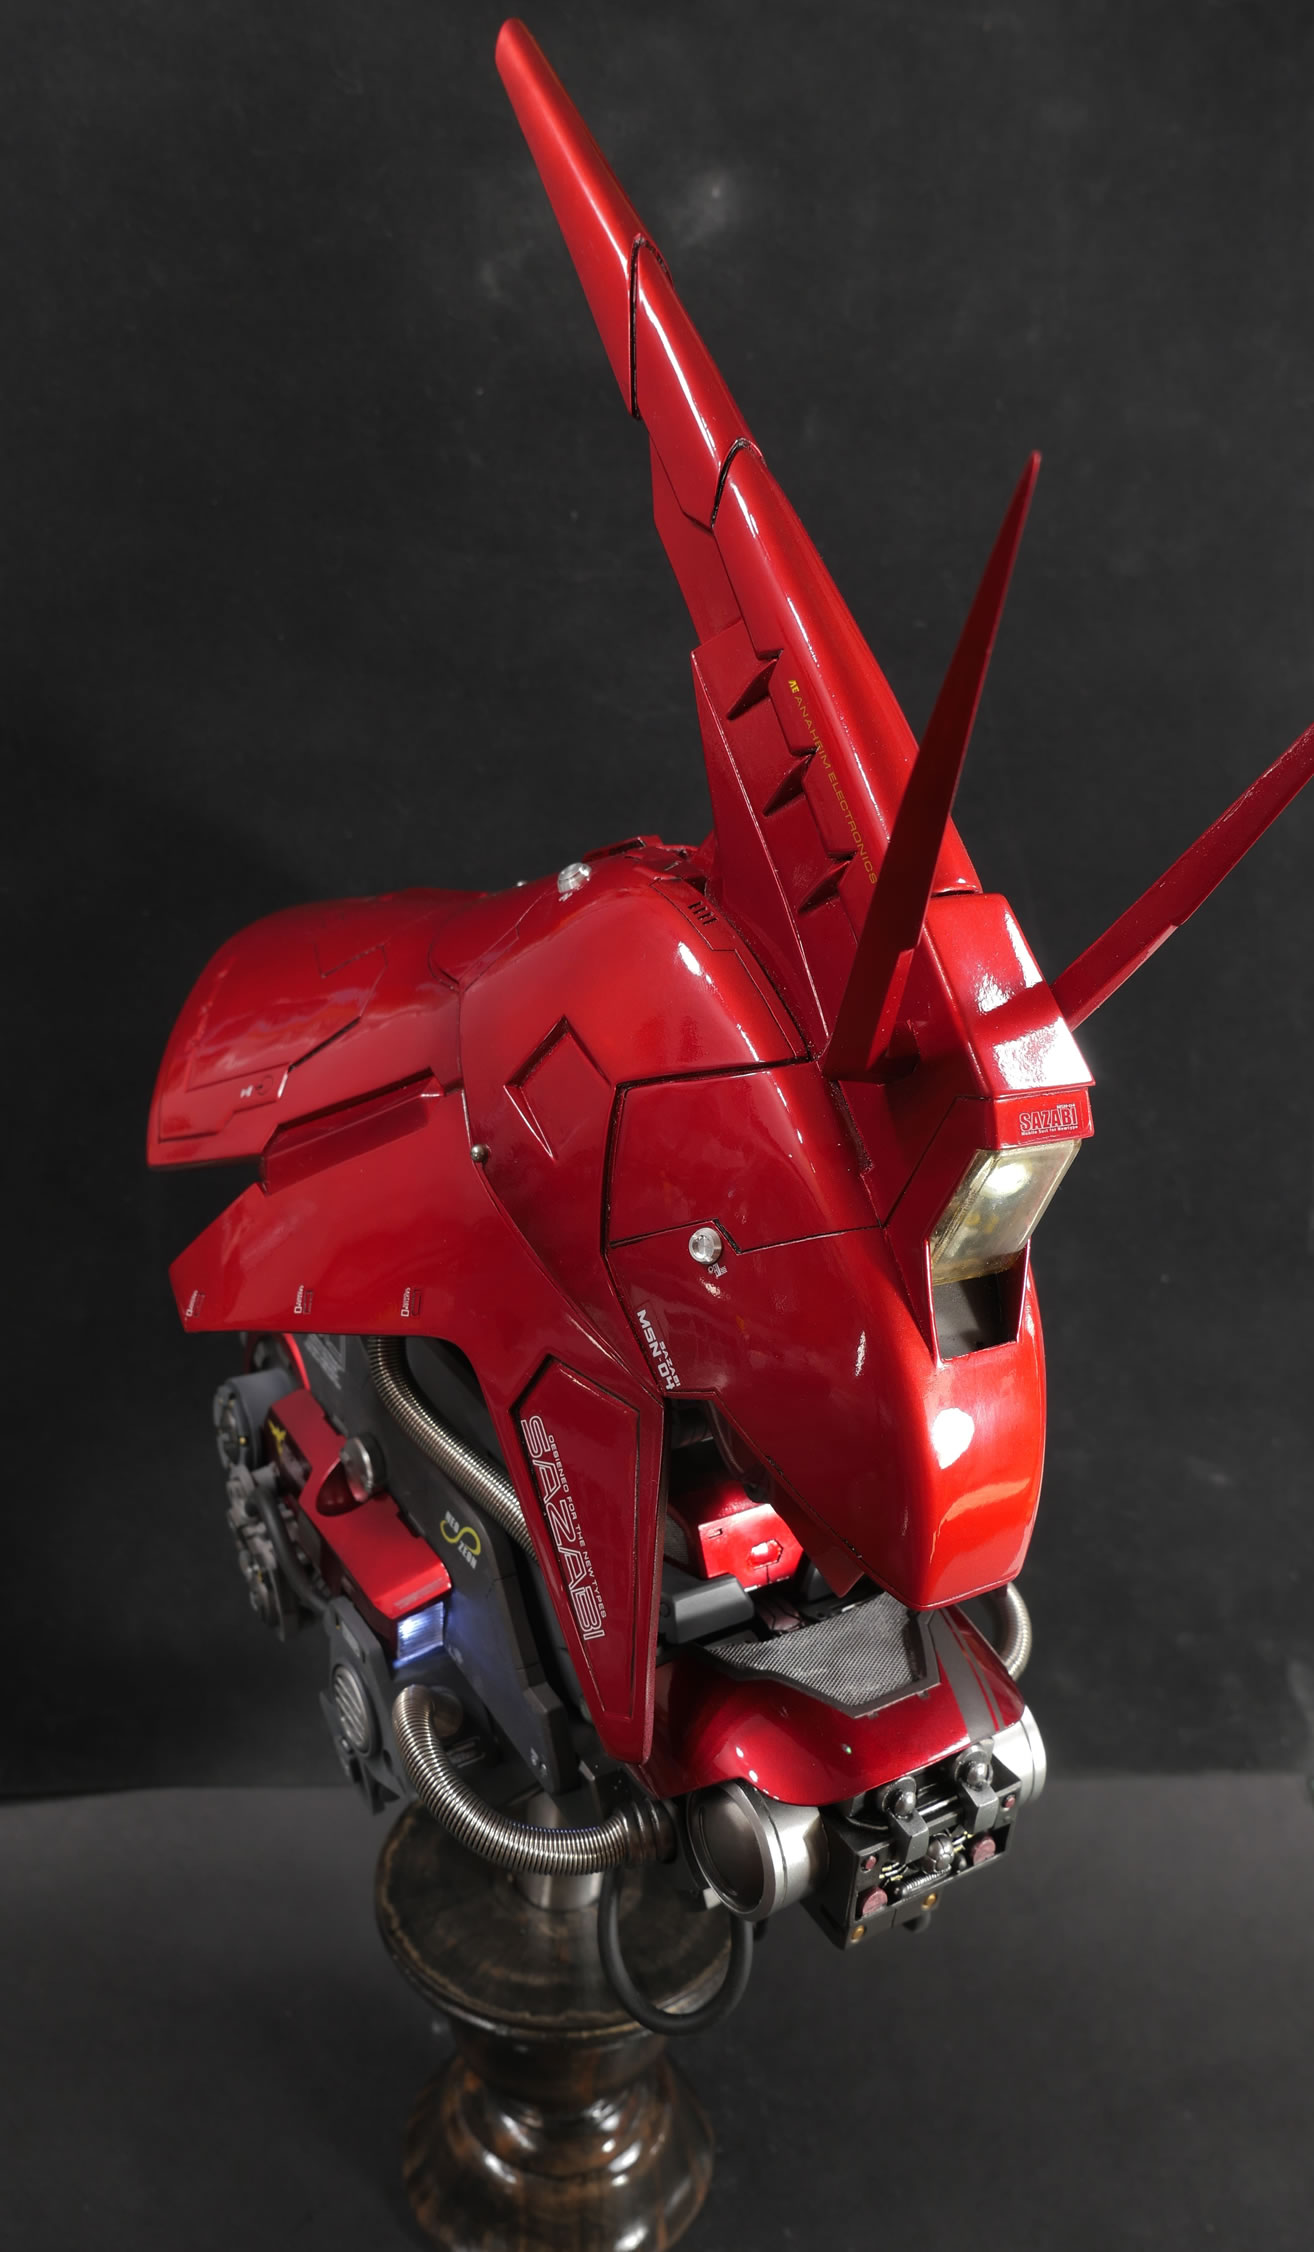
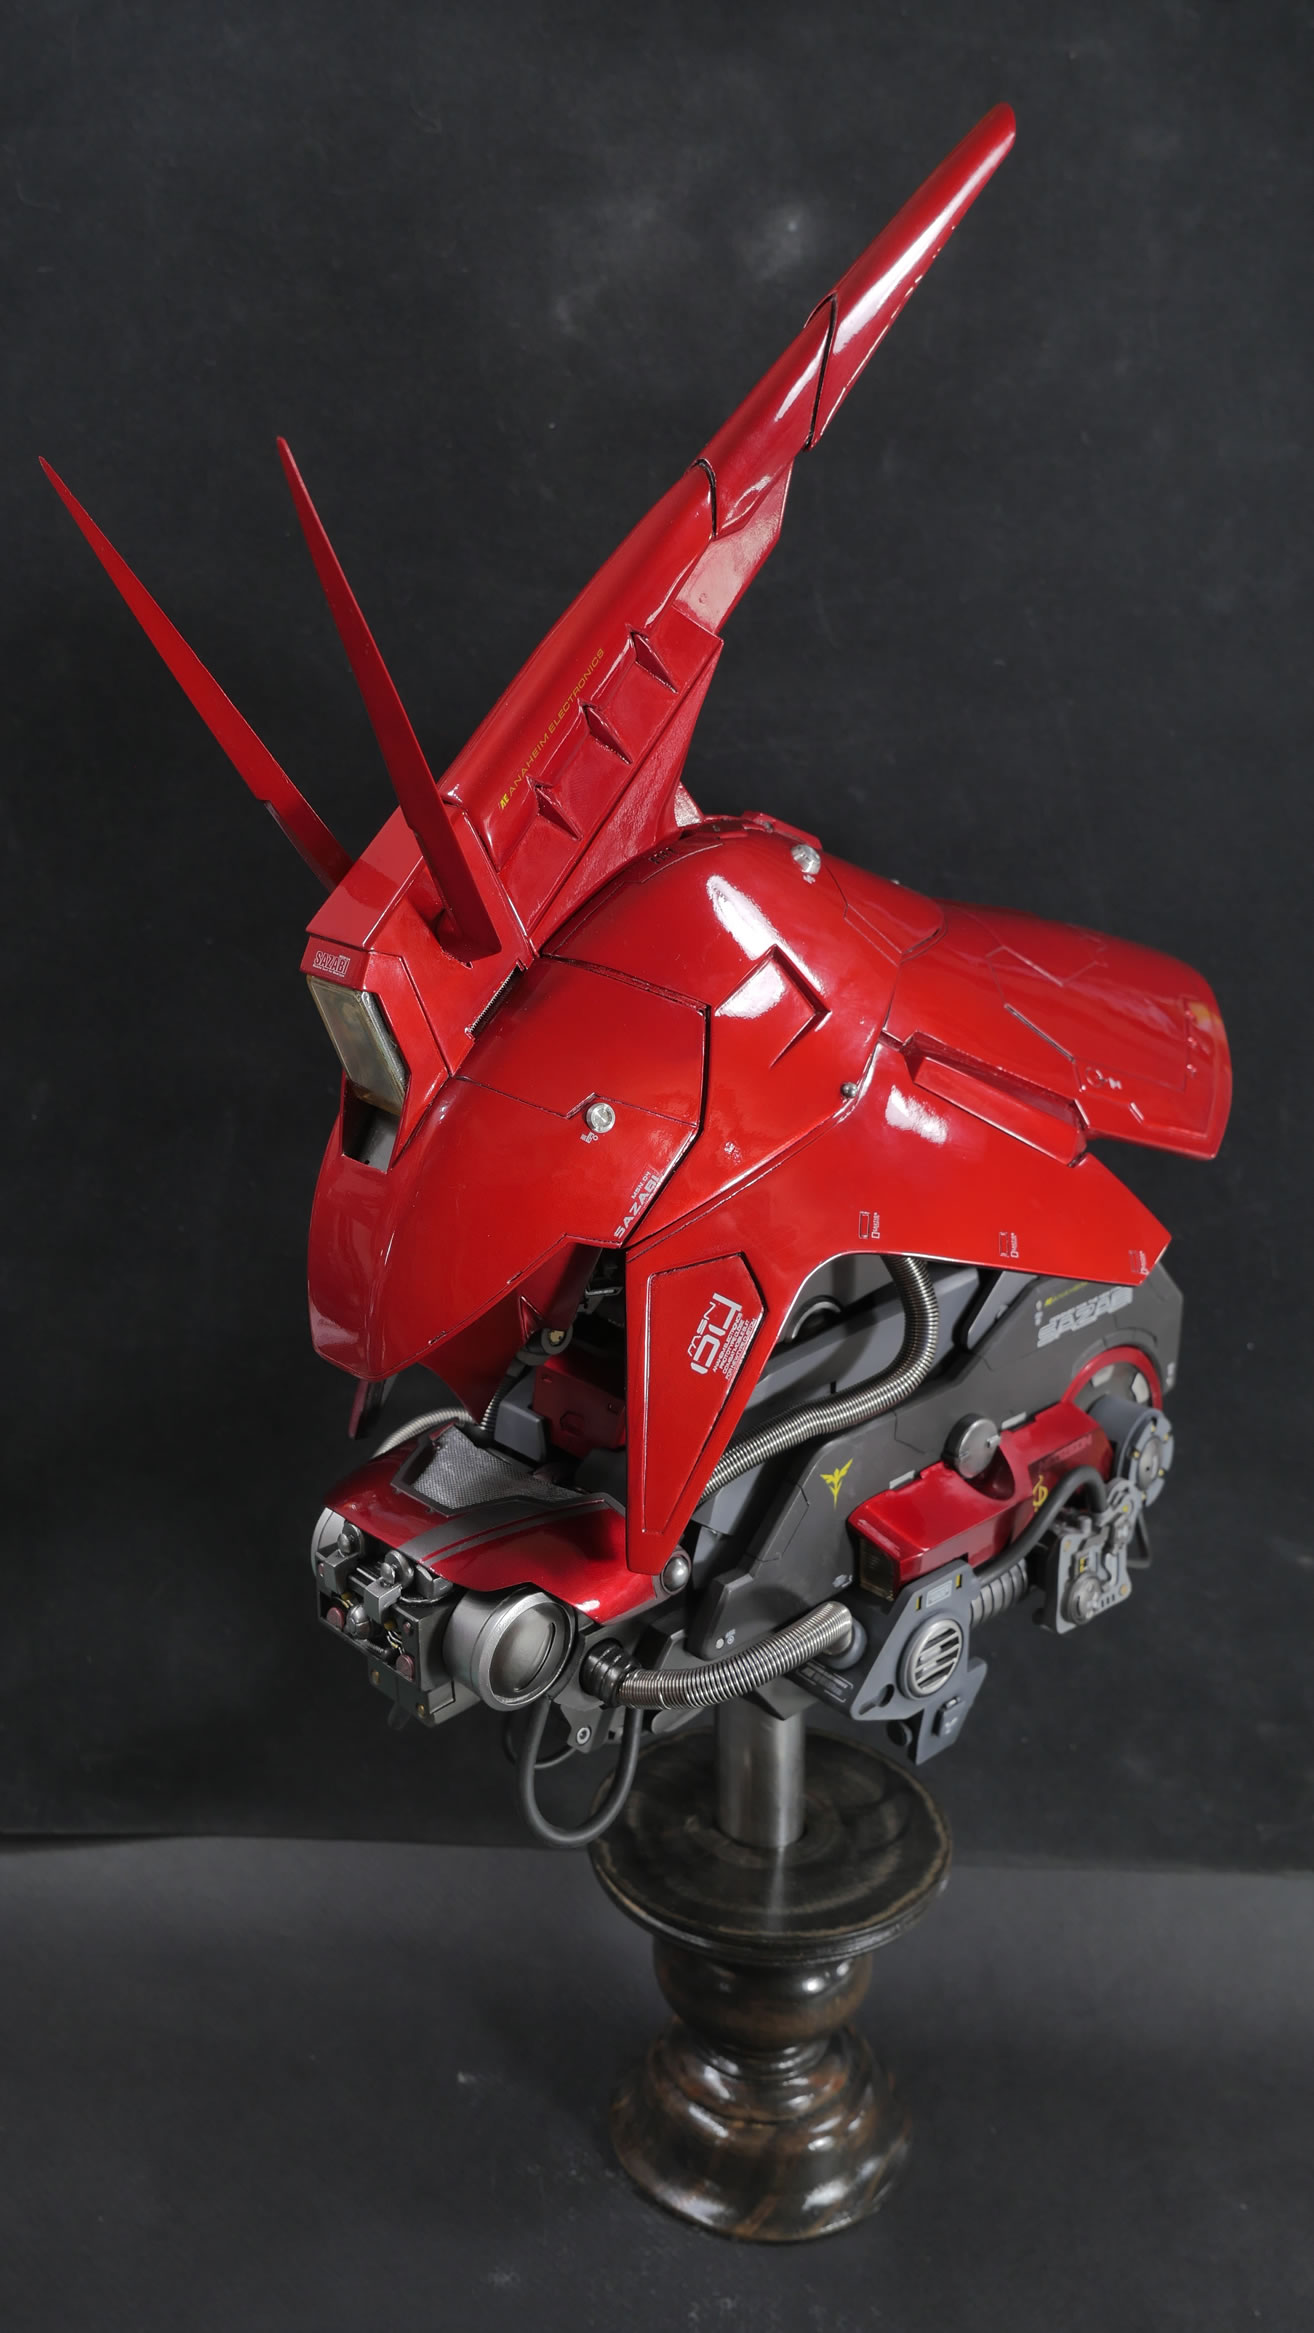
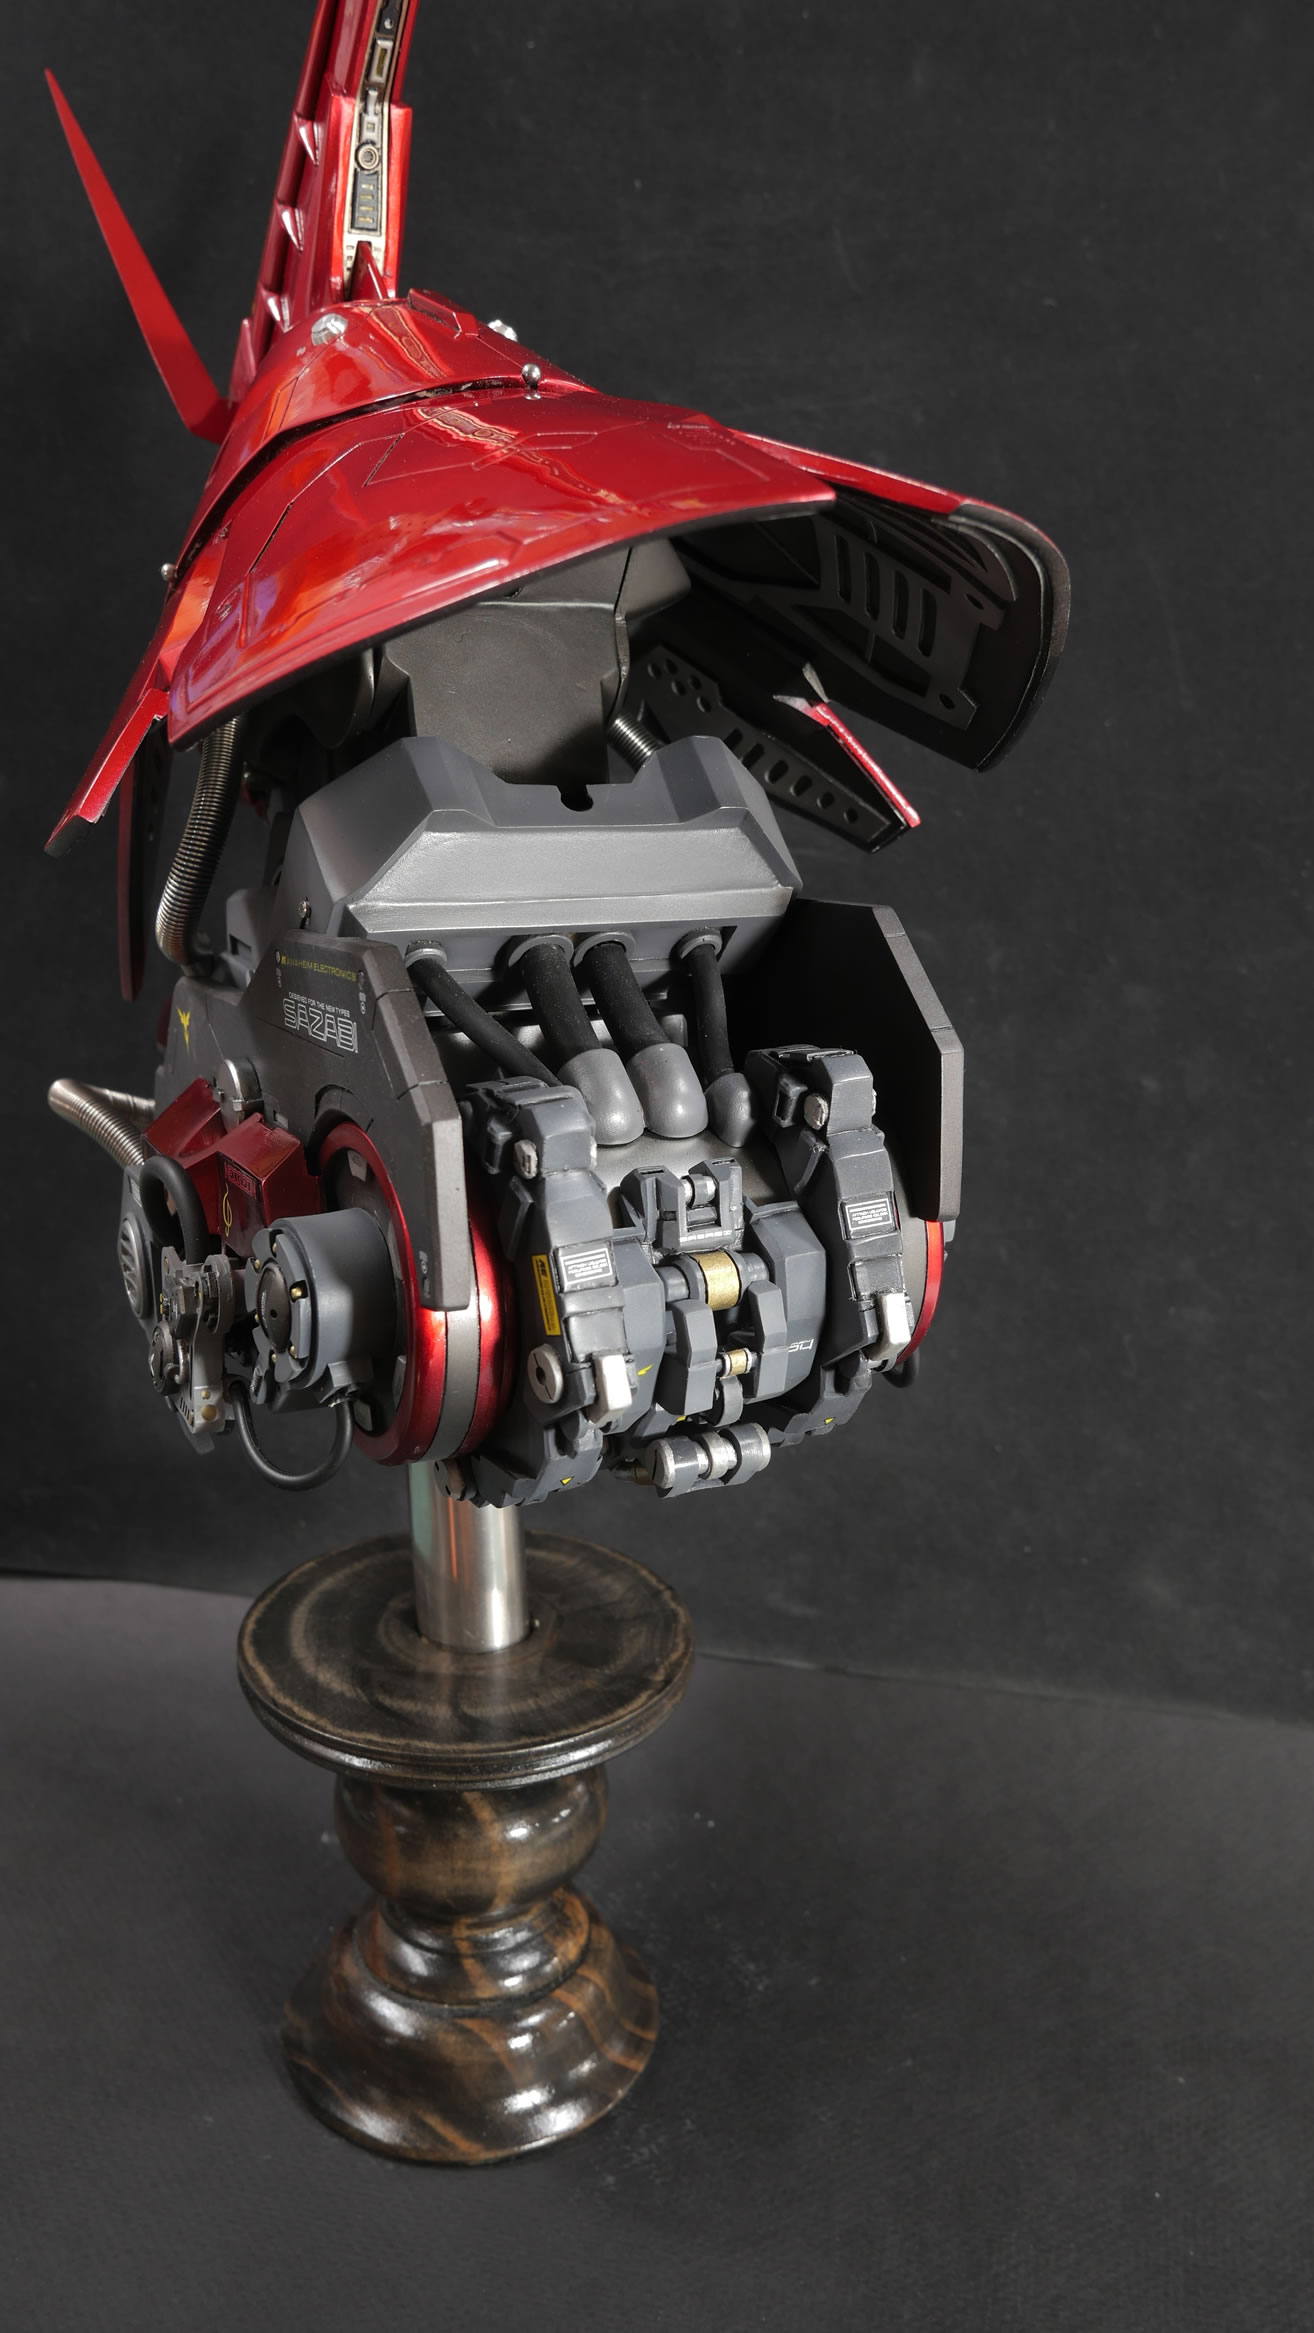
The dates between photos is about 27 days; so add in the 3 days that I spent on this 5 years ago, this works out to about a month’s worth of work for this. I think it came out fairly decently. Photos of a high gloss are difficult because everything is reflective and I didn’t bother with diffused lights. The size of the kit is also prohibitive with my usual photo setup. Here are the completed pictures:
|
|
|
|

|

|

|

|
|
|
|

|
|
|
|
|
|
|
|

|
|
|
|
|
|

|
|
|