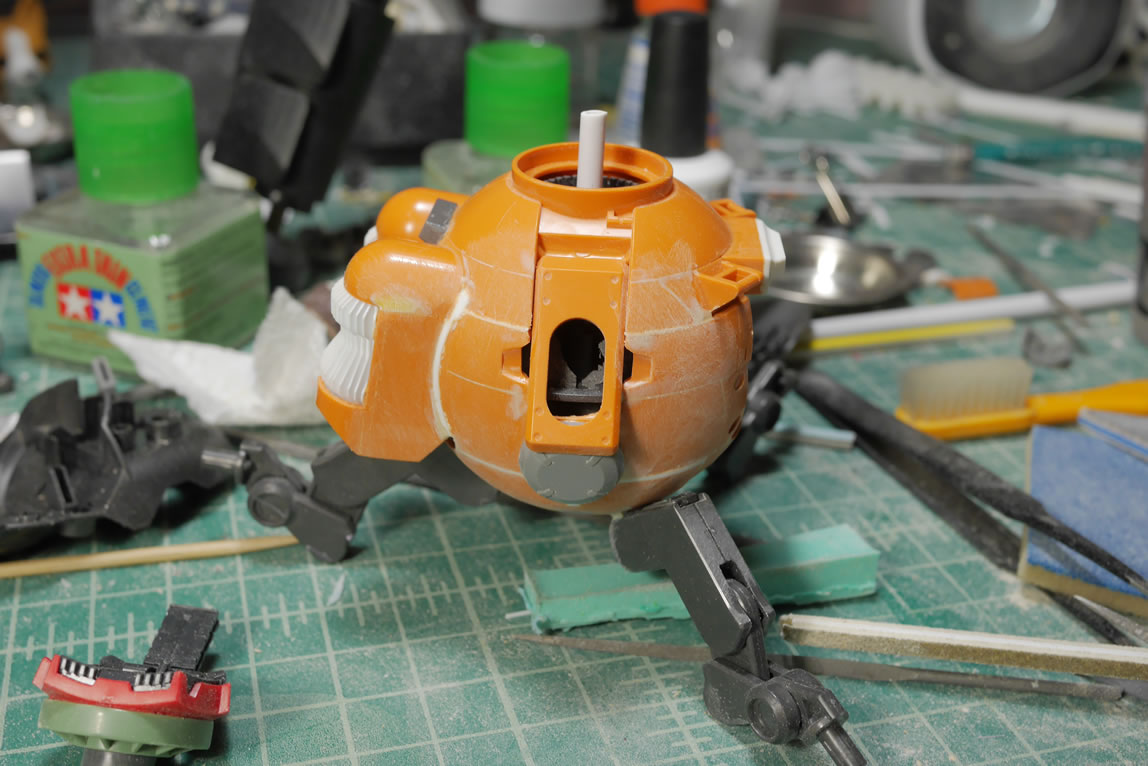
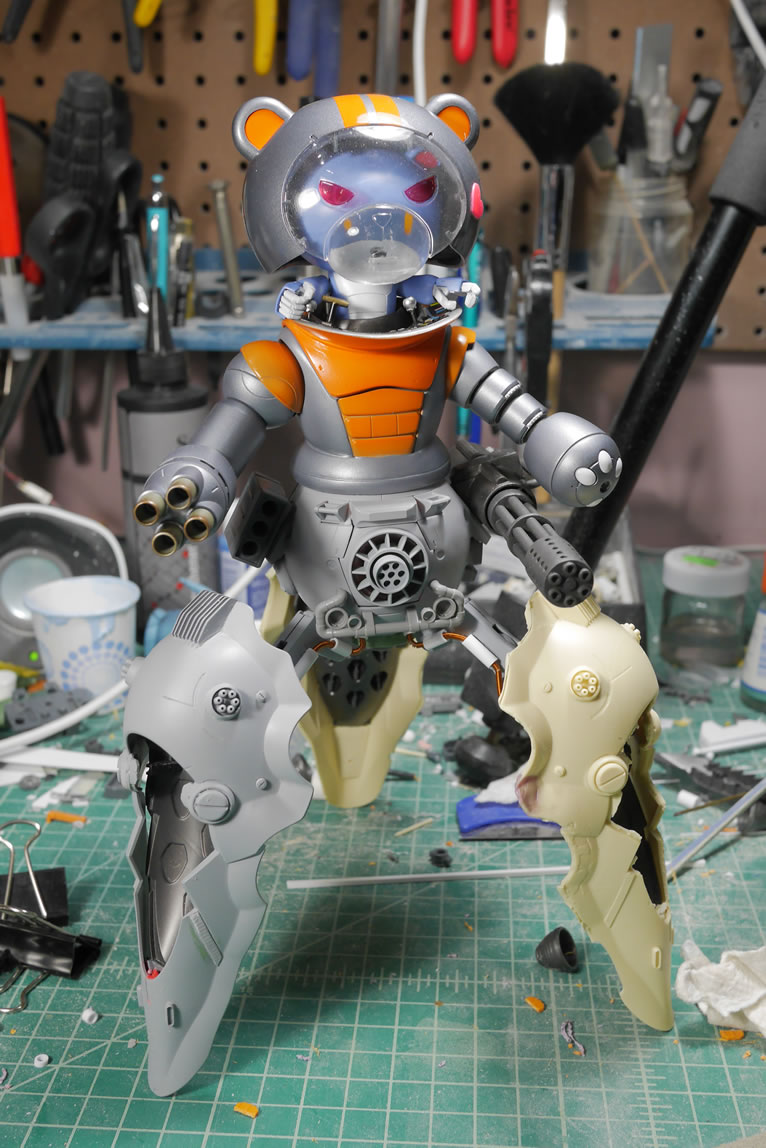
June update for this project. As of this posting, the main kit for the project is done. I’m just playing catchup with the progress for what happened between the last update and last week’s final assembly and photo session. I took all these pictures during the build so why not post up the progress. Last we left off, I had just applied a ton of putty all over the lower body. The gaps and some panel lines are getting filled. Once the putty is dry, its off to sanding the whole section. In addition of the putty, I used some of the UV gel product to quickly fill small areas. Not pictured in the first set is the initial primed kit after all the sanding. Pictured is the part after sanding the initial layer of primer.
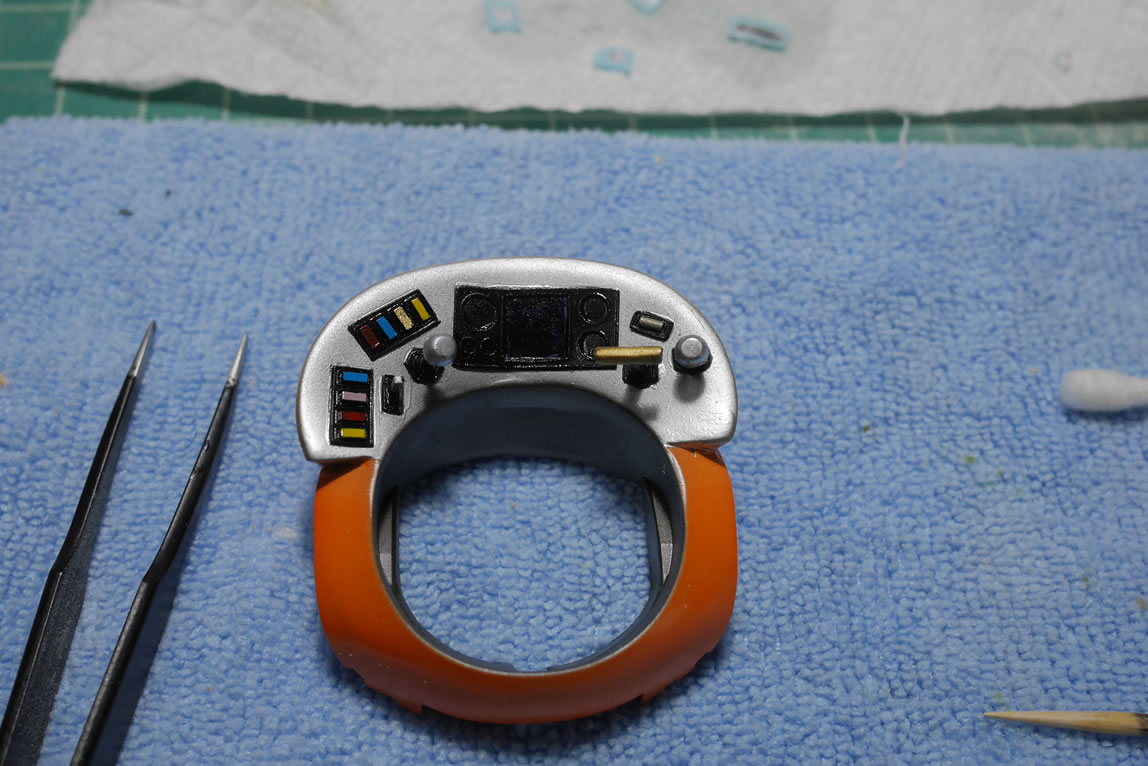
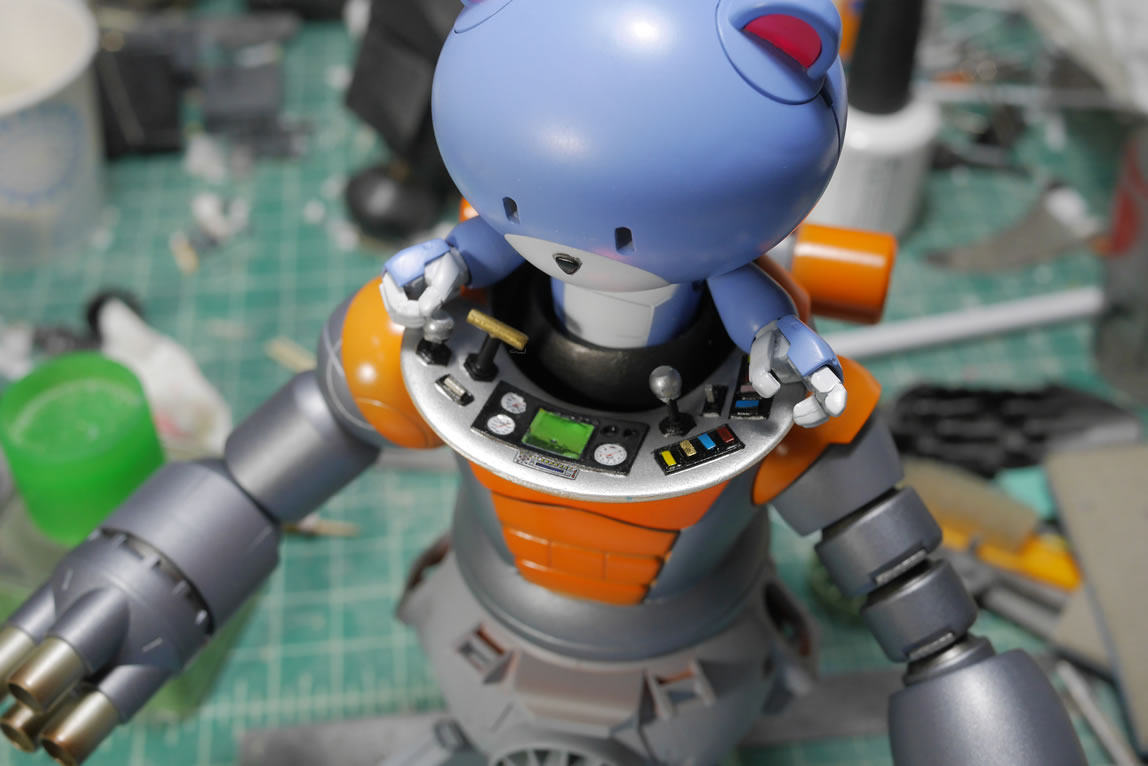
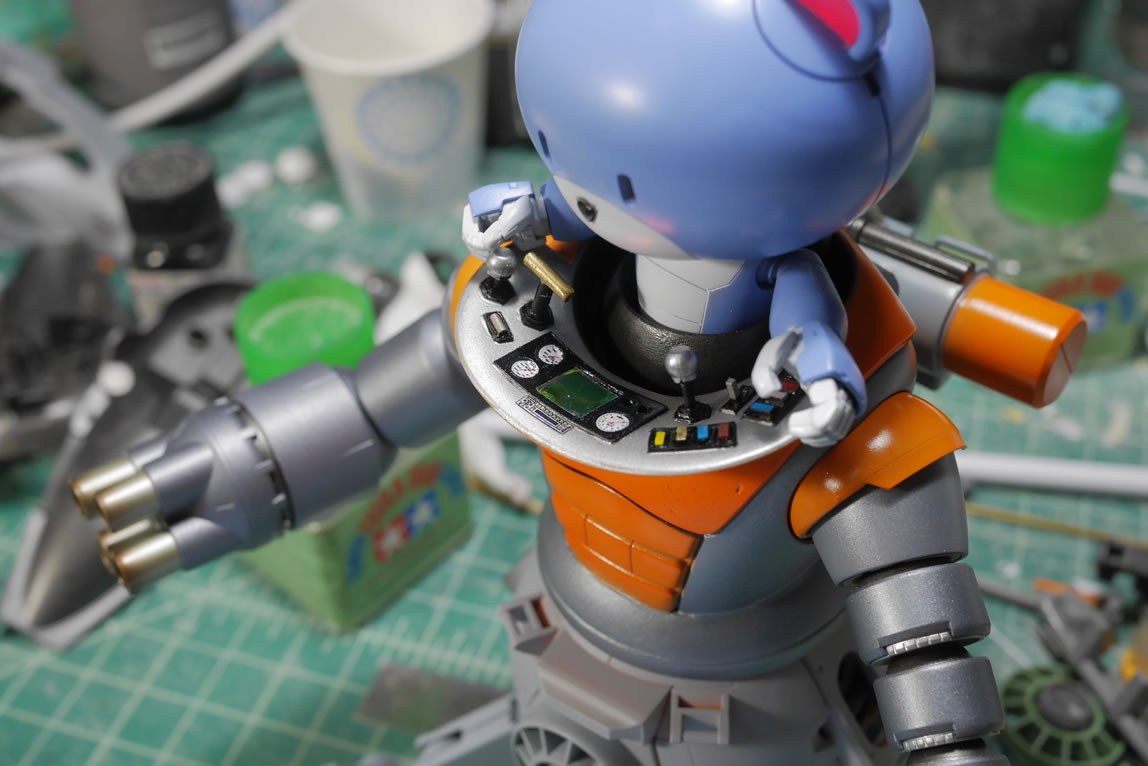
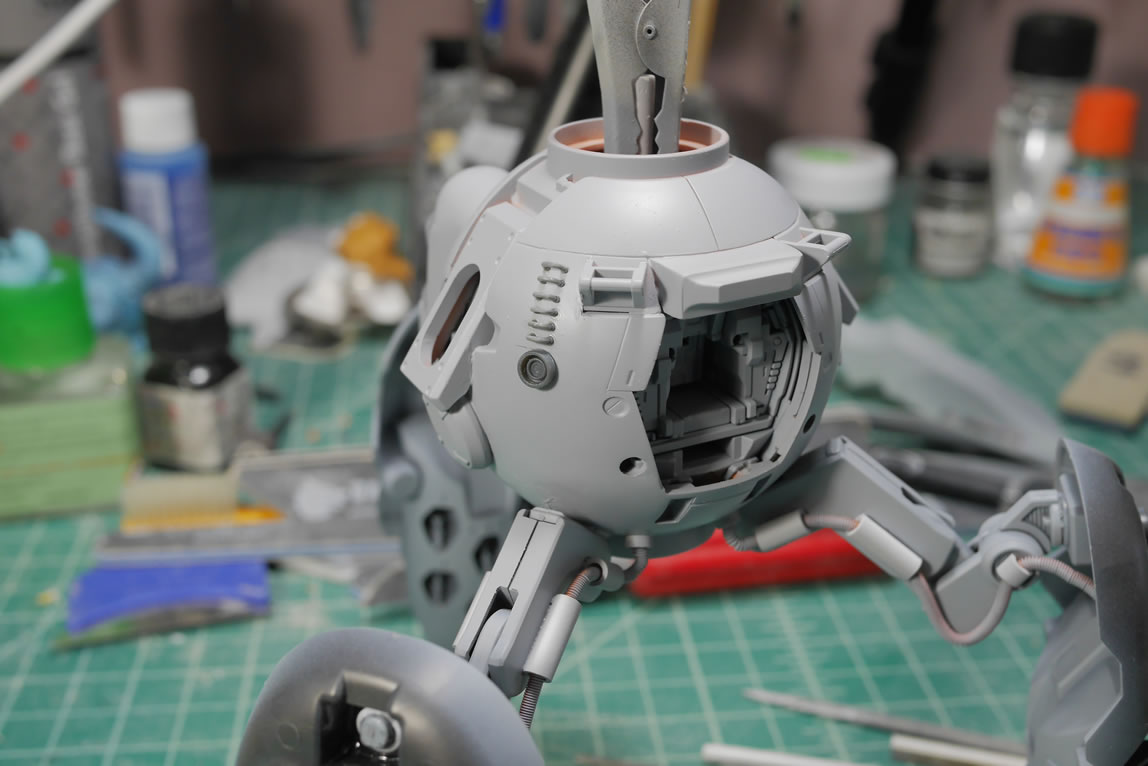
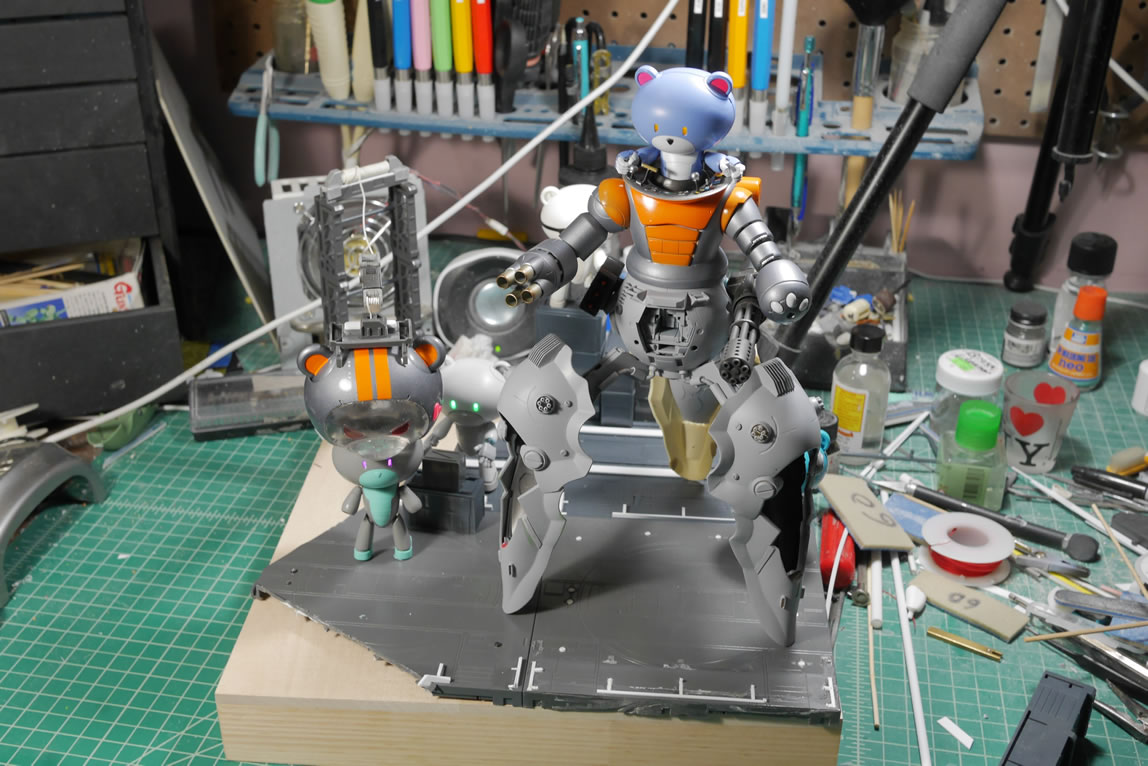
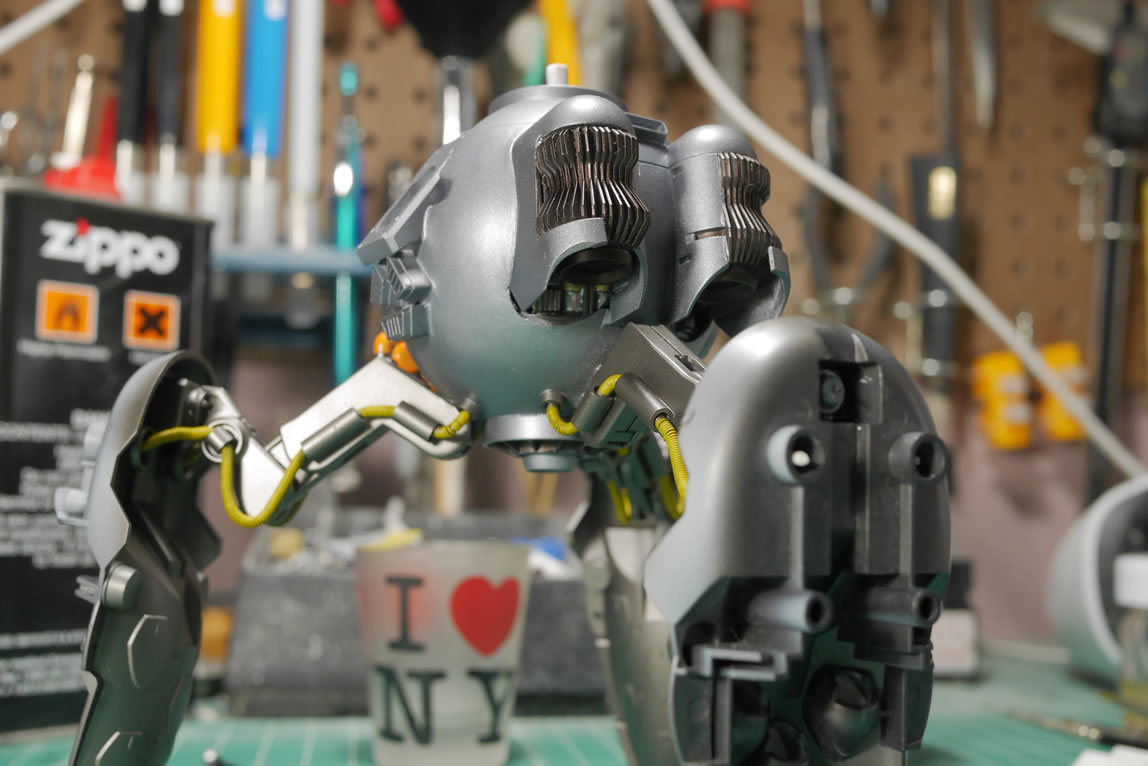
Returning to the upper torso, I now have the control panel getting painted. The last updated had the beginnings of painting this area. I hand painted in the button colors. Once the paint is dried, I sprayed a clear gloss because I wanted to add some water slide decals for the dials. The center screen is color shifting iridescent stickers from HiQ, so different angles will give a different color reflection. It works well enough as a screen for the control panel. I also did a quick mock up with the upper torso and the primed lower torso.
More about the final steps of this build after the jumpp
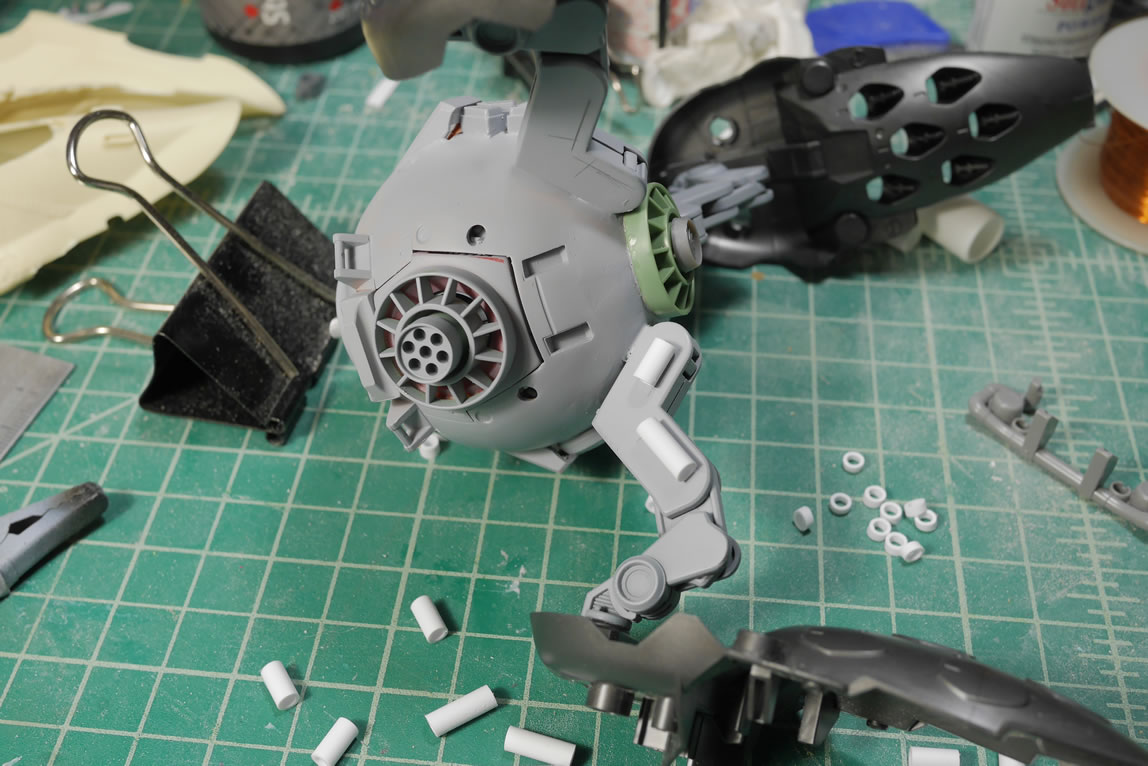
I had glued the leg joints a month ago, so now that I got the lower torso surfaced prepped and ready for paint, I can glue in the leg frames – which are the inner frames from the kshatriya binders. The kit came with 2 different sets of frames, one for the newer design of the opening binder and the original design for the non opening binder. Since I decided against having the binders open, I’m just going to use the original design for the rear leg. I will need to make some fixes to balance this part with the two front leg frames. Once glued, there is some mobility with the joints.
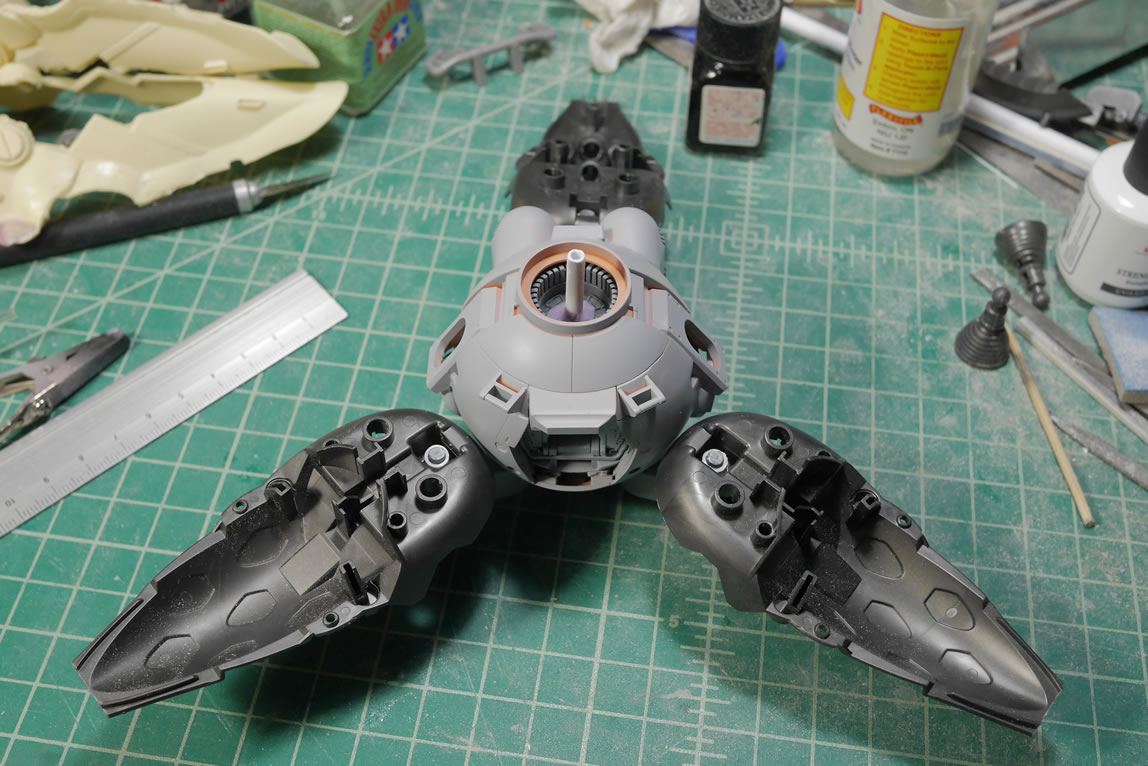
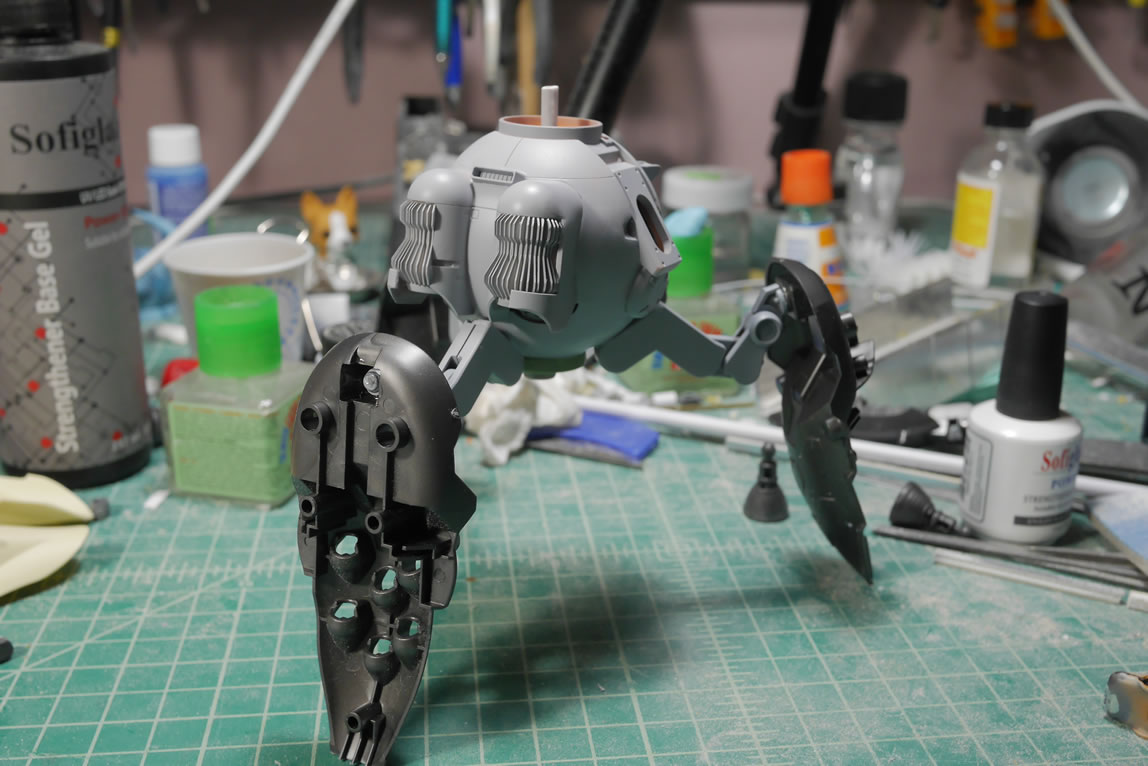
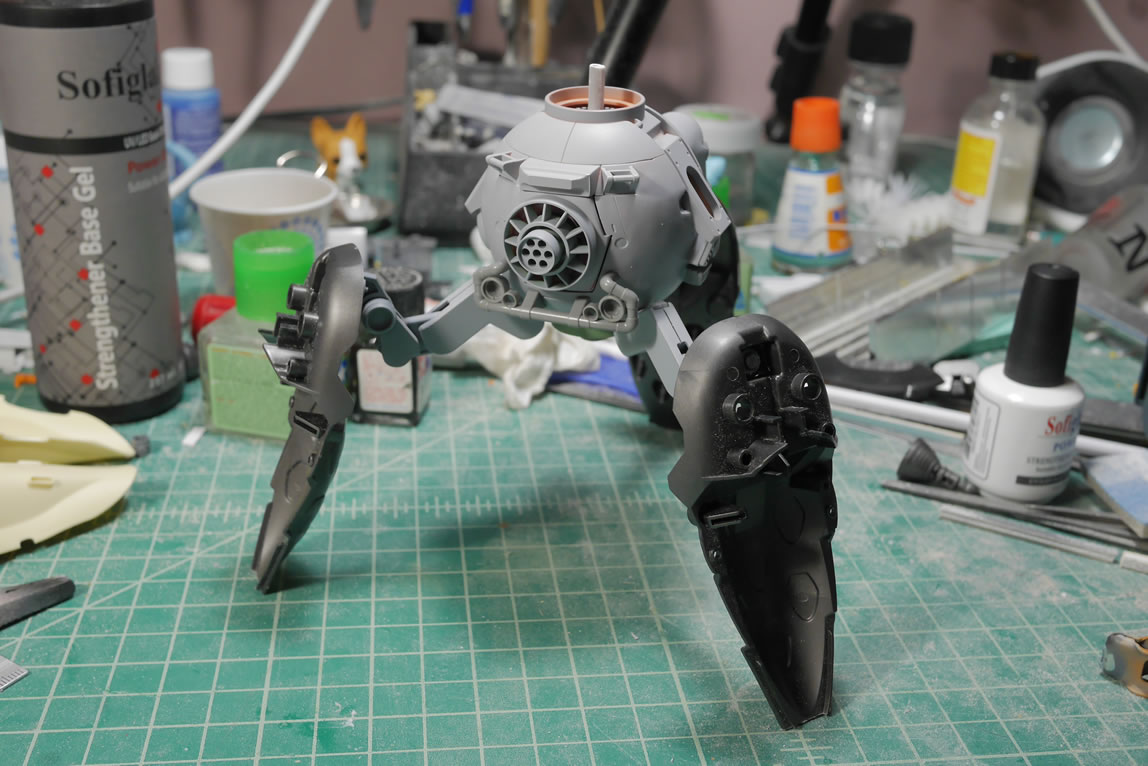
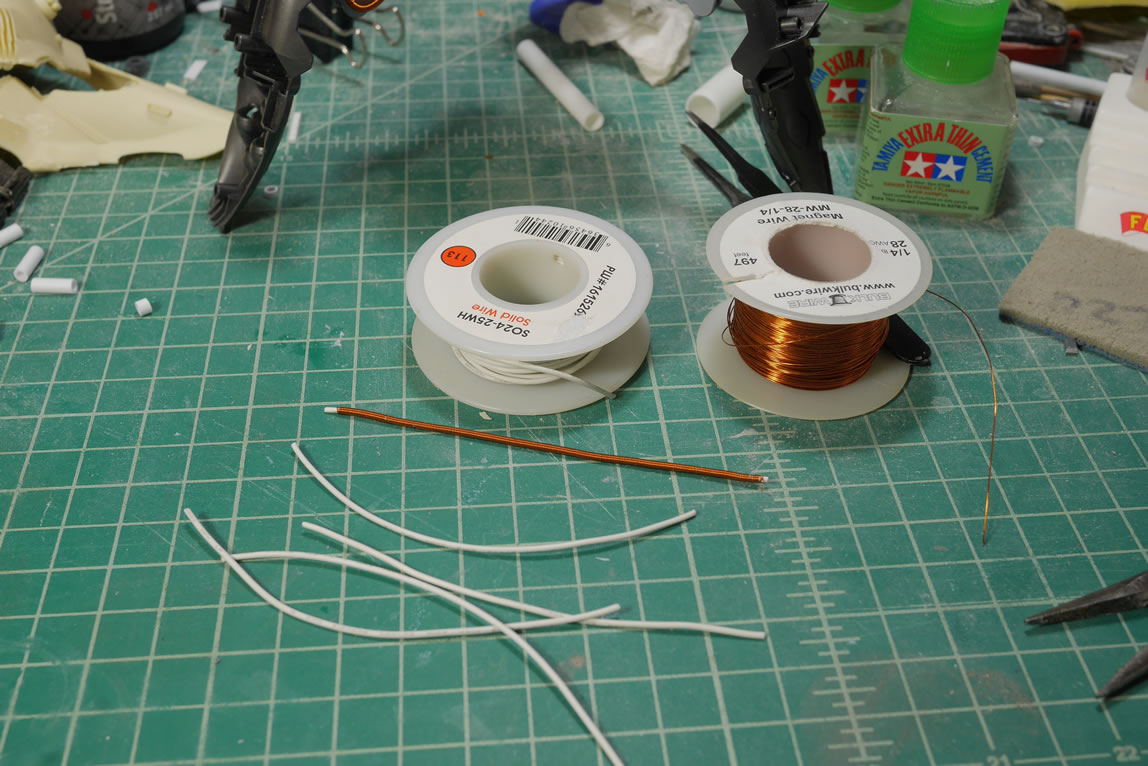
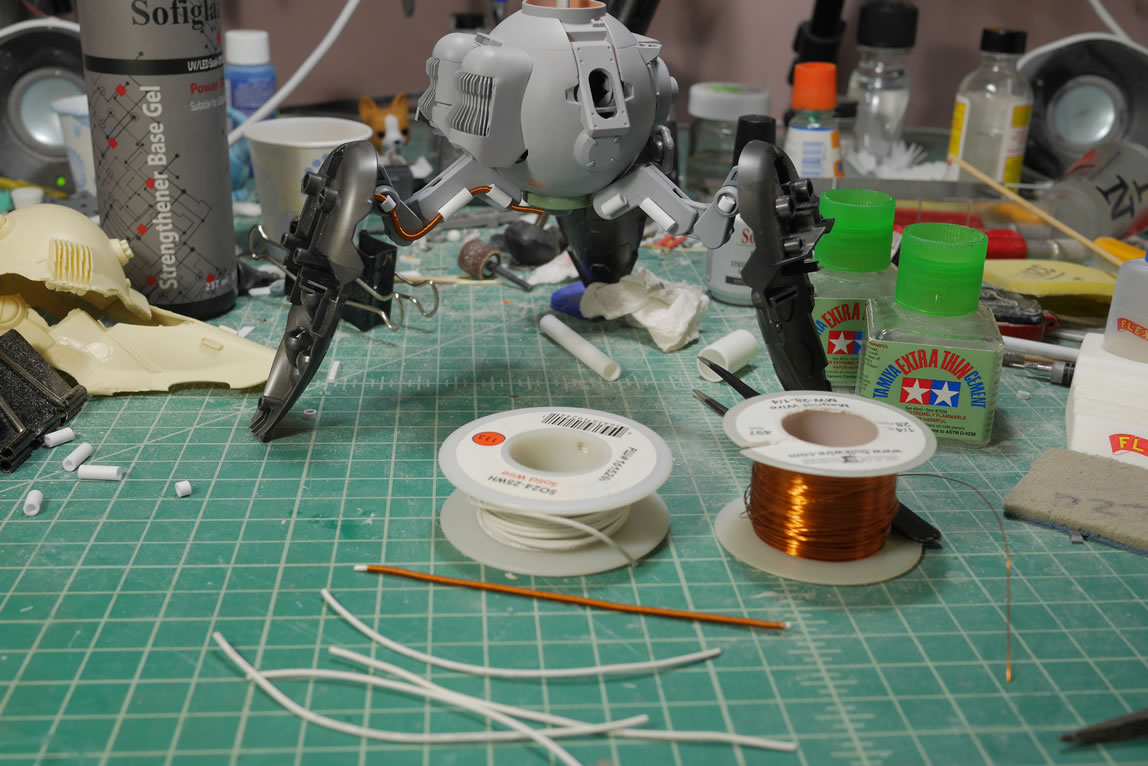
Now that I have the leg frames glued, I need to add some details, so I grabbed some 24 awg solid wrapped wire and the 28 awg magnet wire and made some coils to run from the leg frame to the lower body along the leg joints parts. Making the coils is simple, just wrap the magnet wire around the solid wire and done. There’s a quick test fit for length and the rough look and feel before moving on to the next step. Styrene tubes are cut and glued to the leg joints. The coil is then threaded through these tubes to connect up the leg frame and the lower body.
The plan is solid, so time for execution. Measurements on the leg joints are marked off with pencil as this will guide the tube gluing locations. The tubes are glued and another quick mock up with the binders connected to see how everything fits. It is always important to keep testing fitting as you build because the smallest of changes will seriously mess with the proportions and how well things fit together.

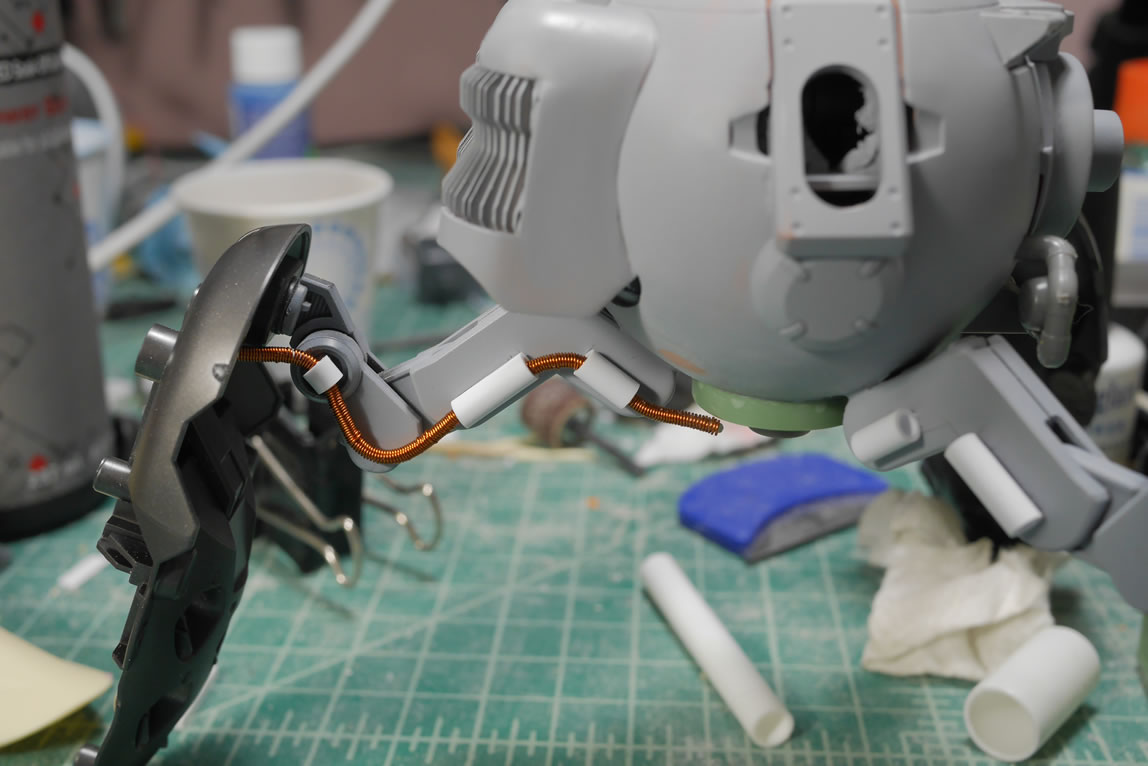
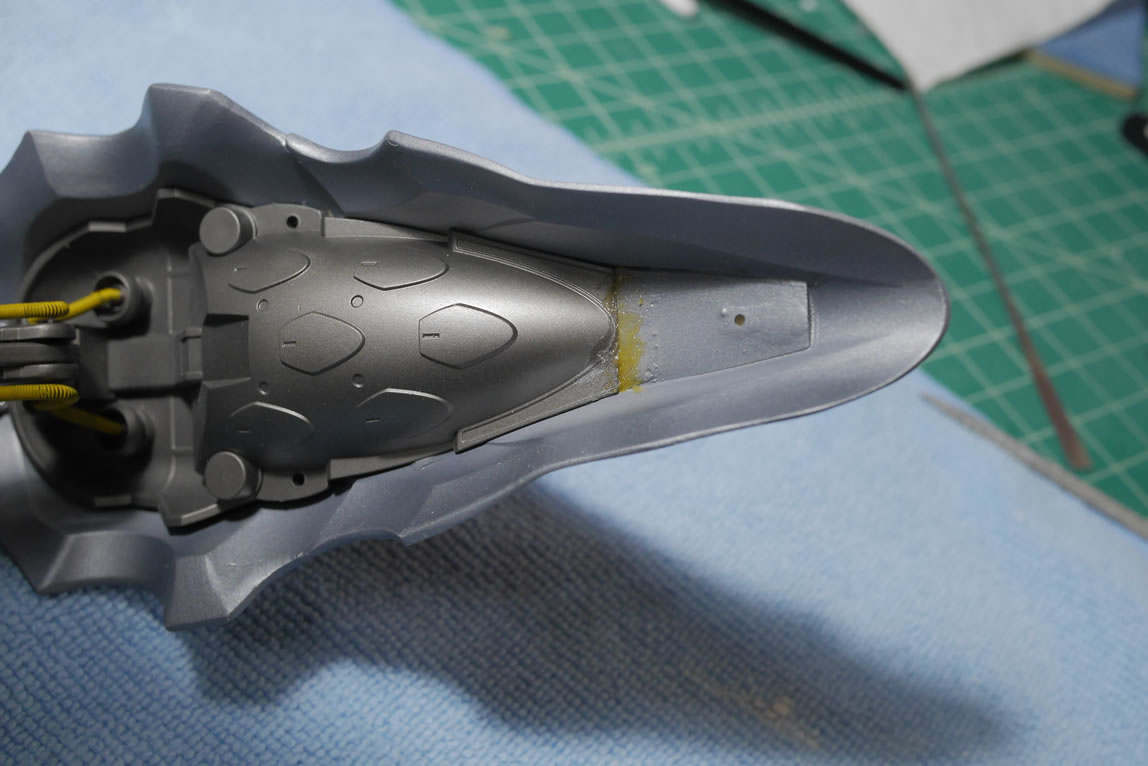
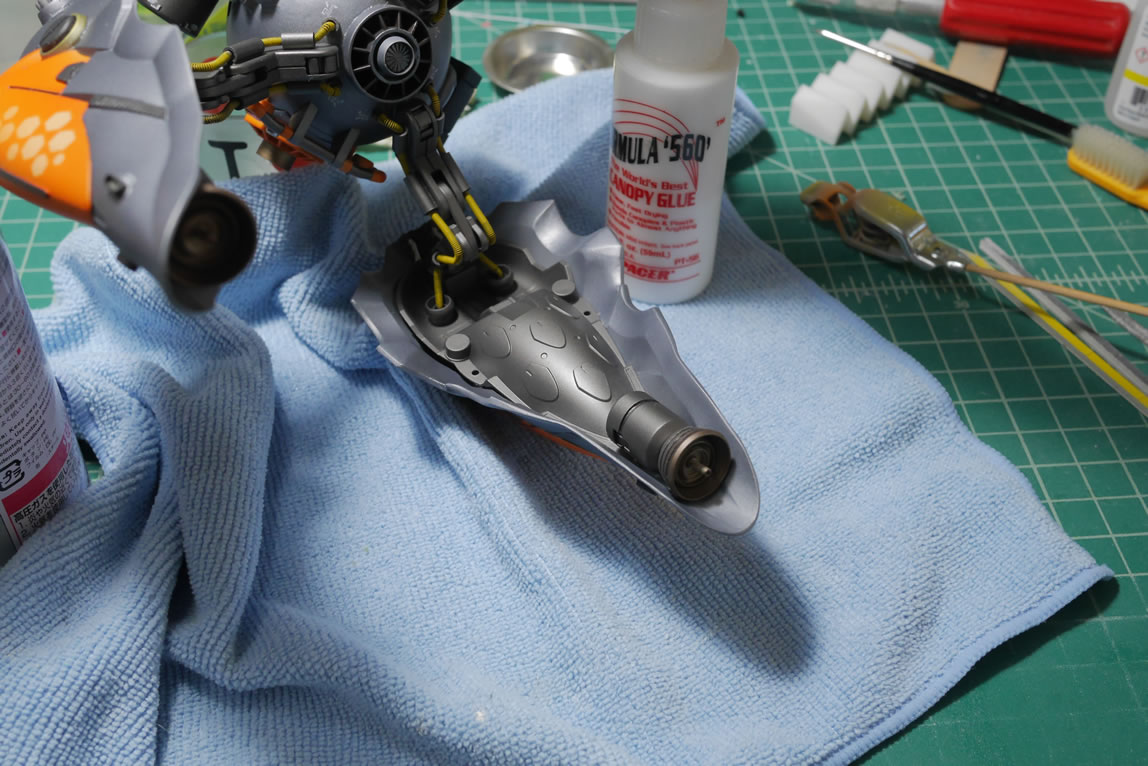
The coils are then threaded once the glue has cured overnight. I need a transition piece for the lower body so some more styrene tubes are cut and glued to the body and then the coils can have a termination end. Another transition piece is made from the Kshatriya’s thrusters.

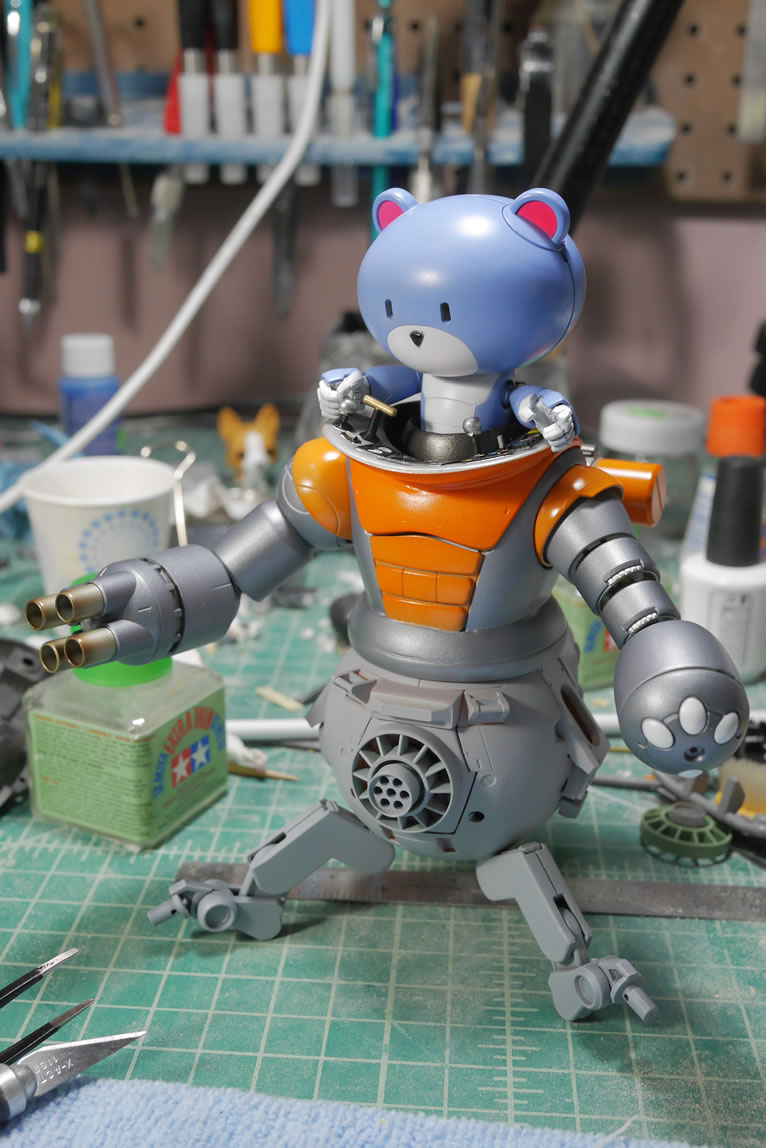
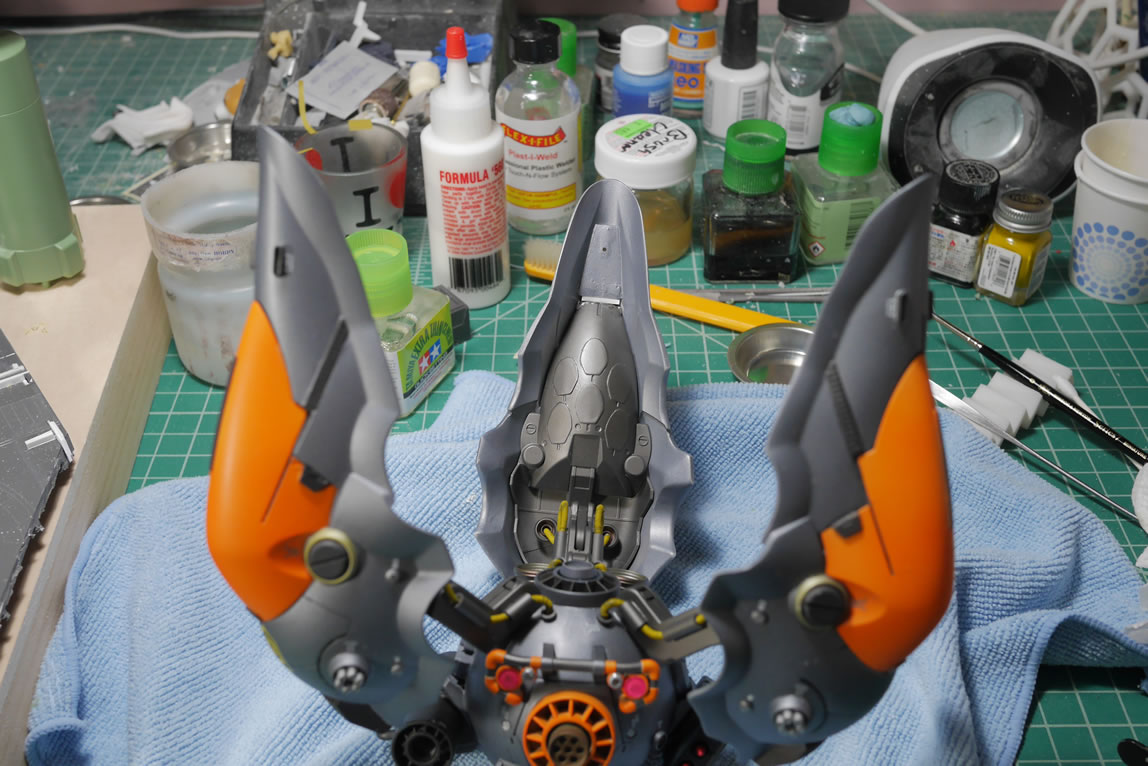
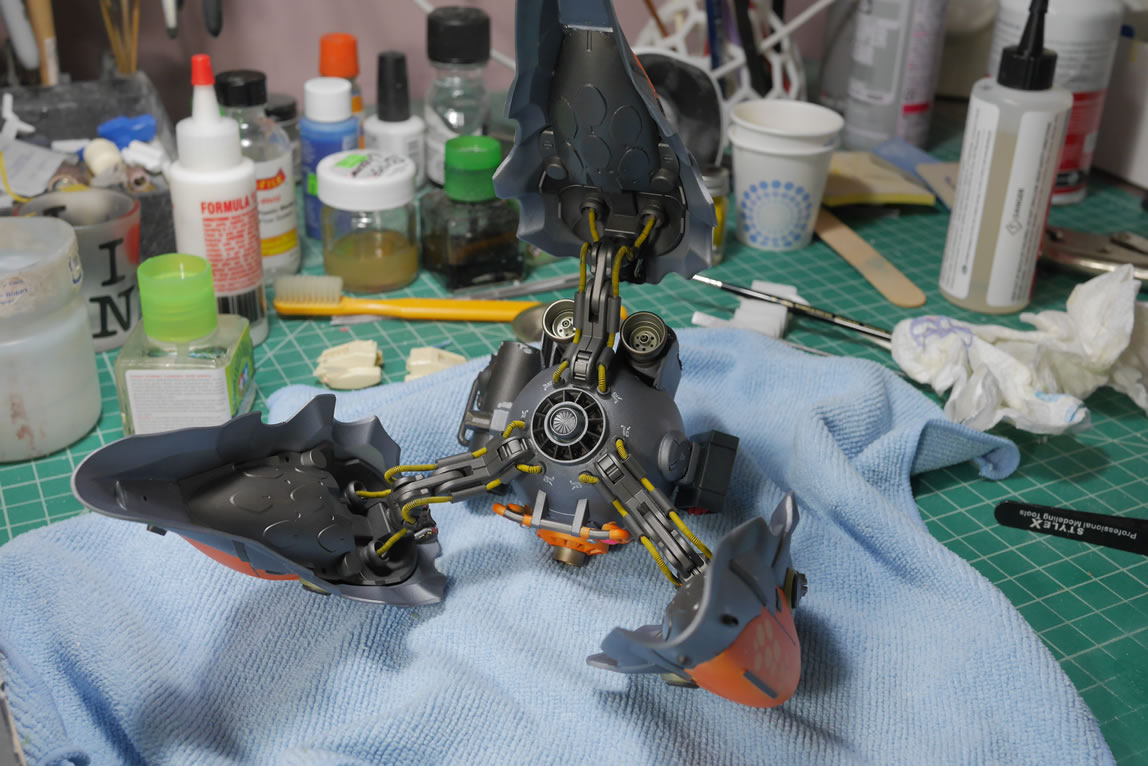
Time for some more test fits with the binders. The upper torso is pretty much done at this point. I’ve been procrastinating the binder work because there is a considerable amount of work to clean up the two resin casts.

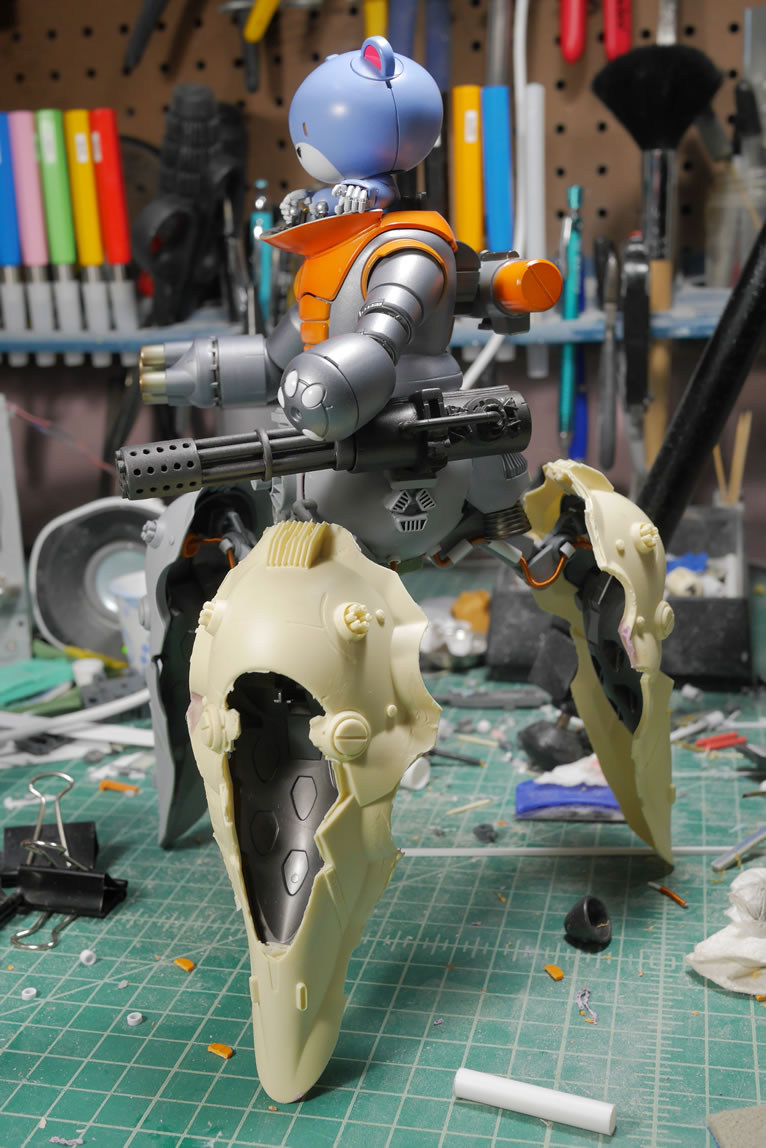
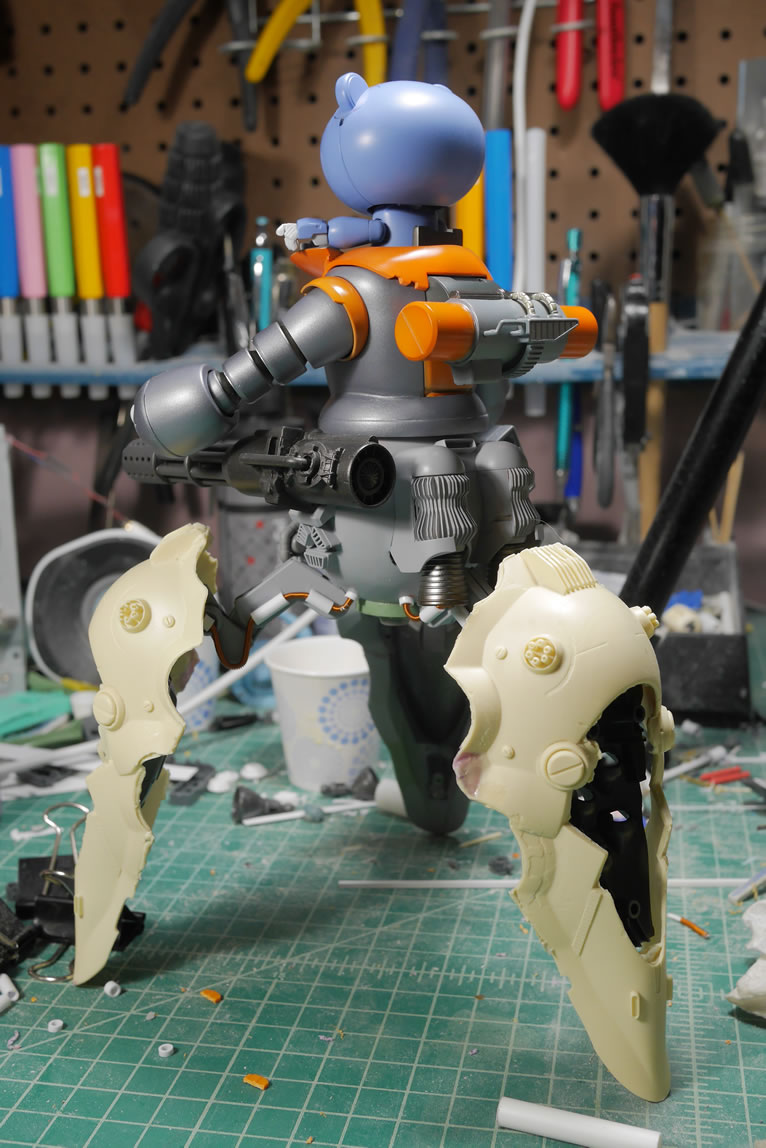
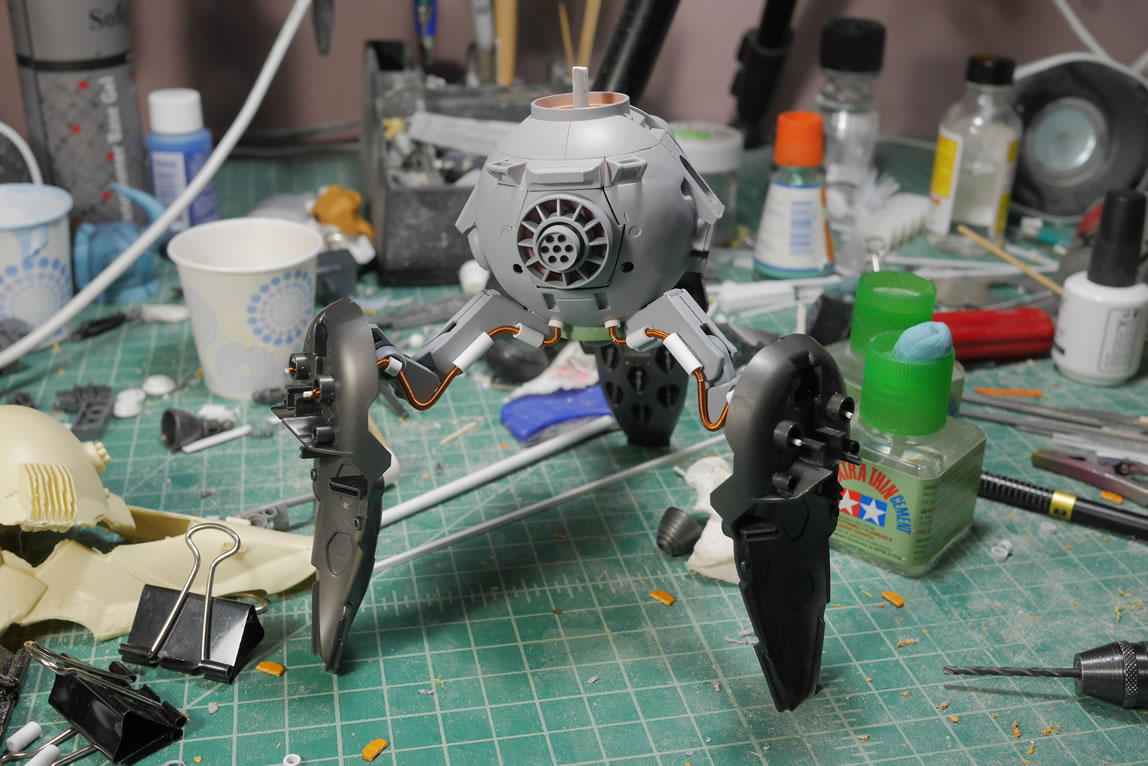
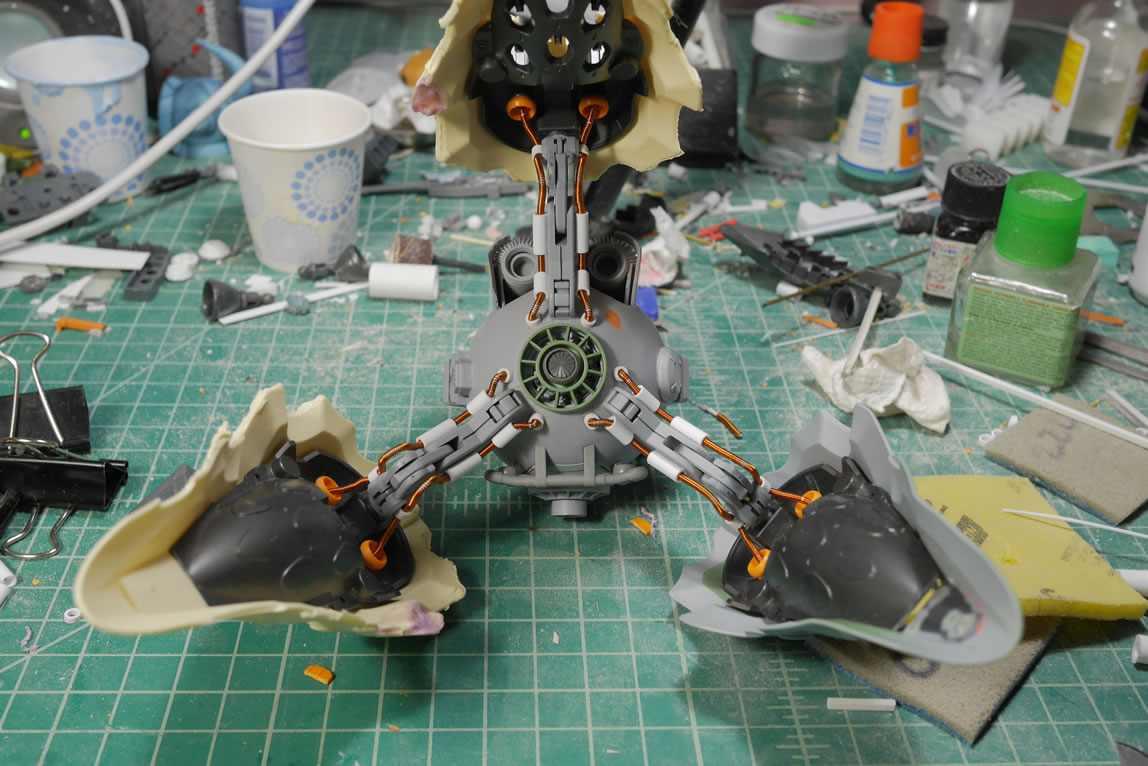
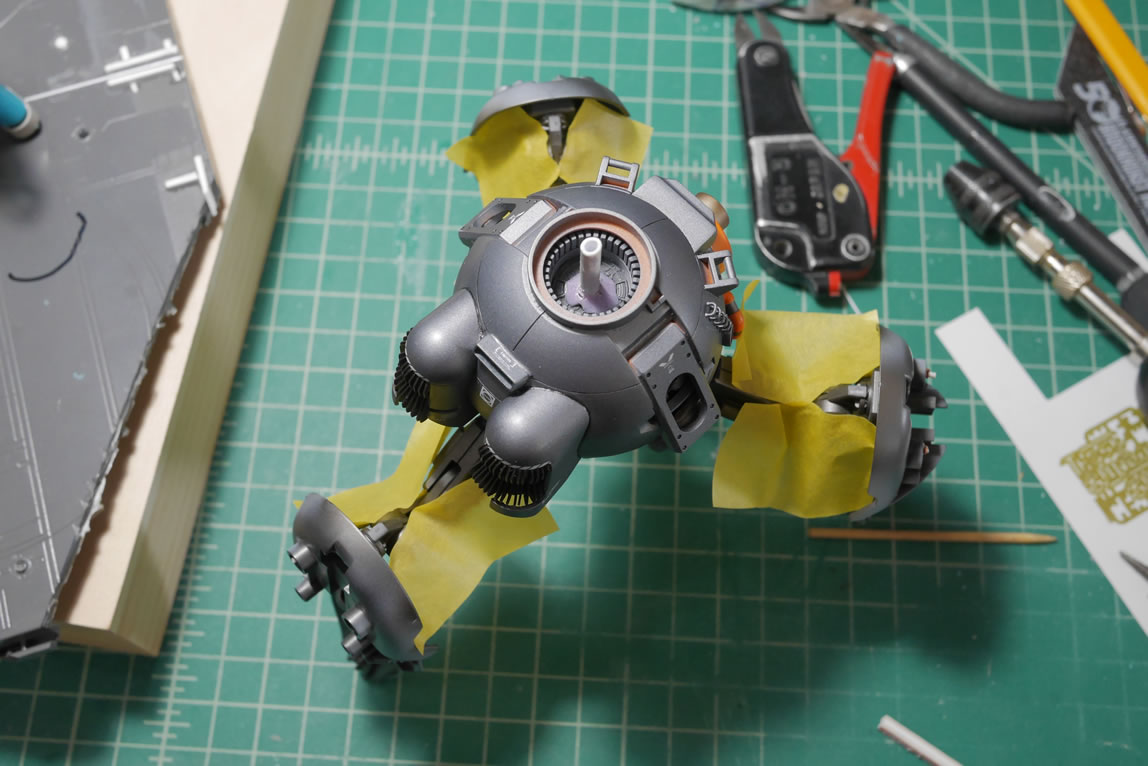
Here’s what the bottom of the kit looks like with the cables and transition partes all glued together.
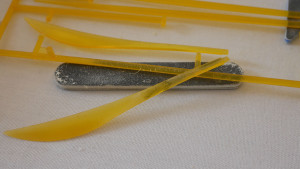
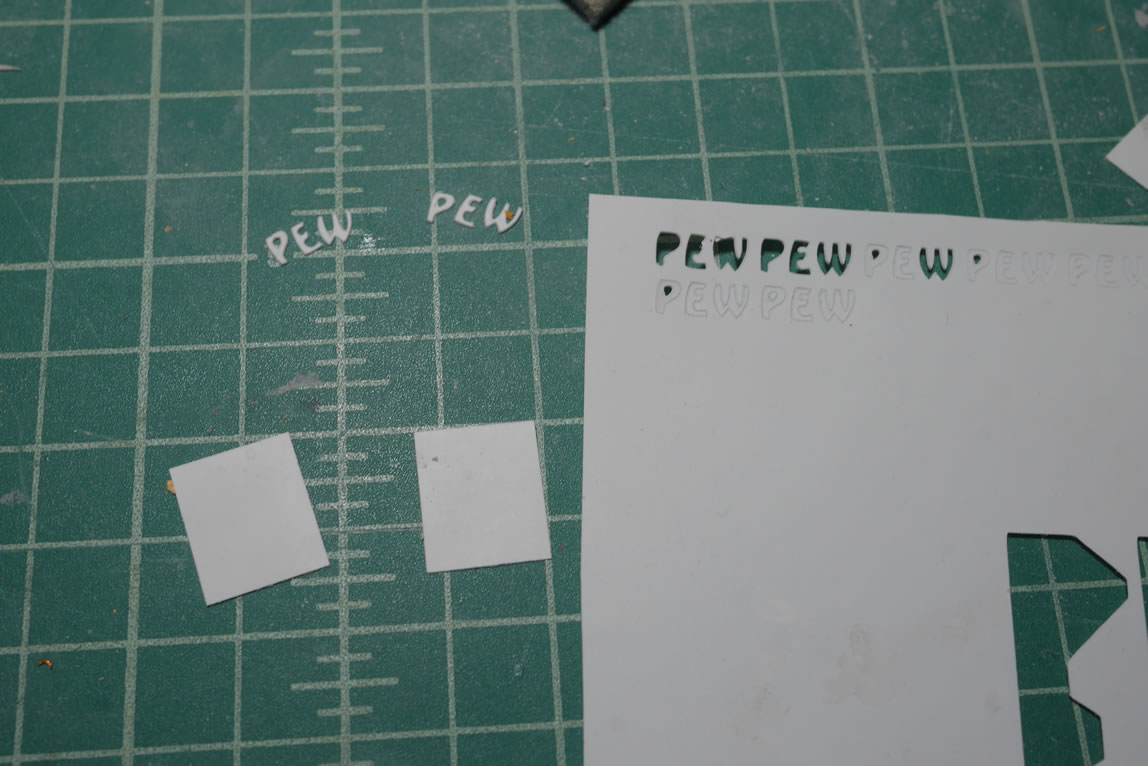
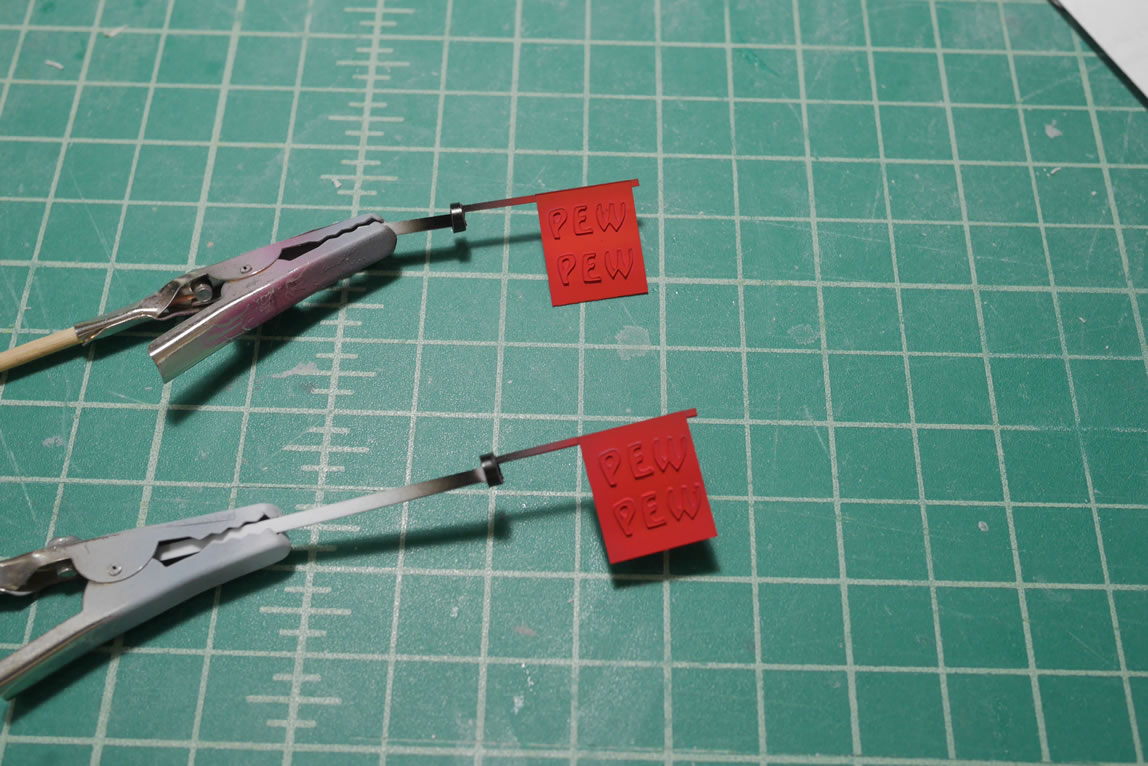
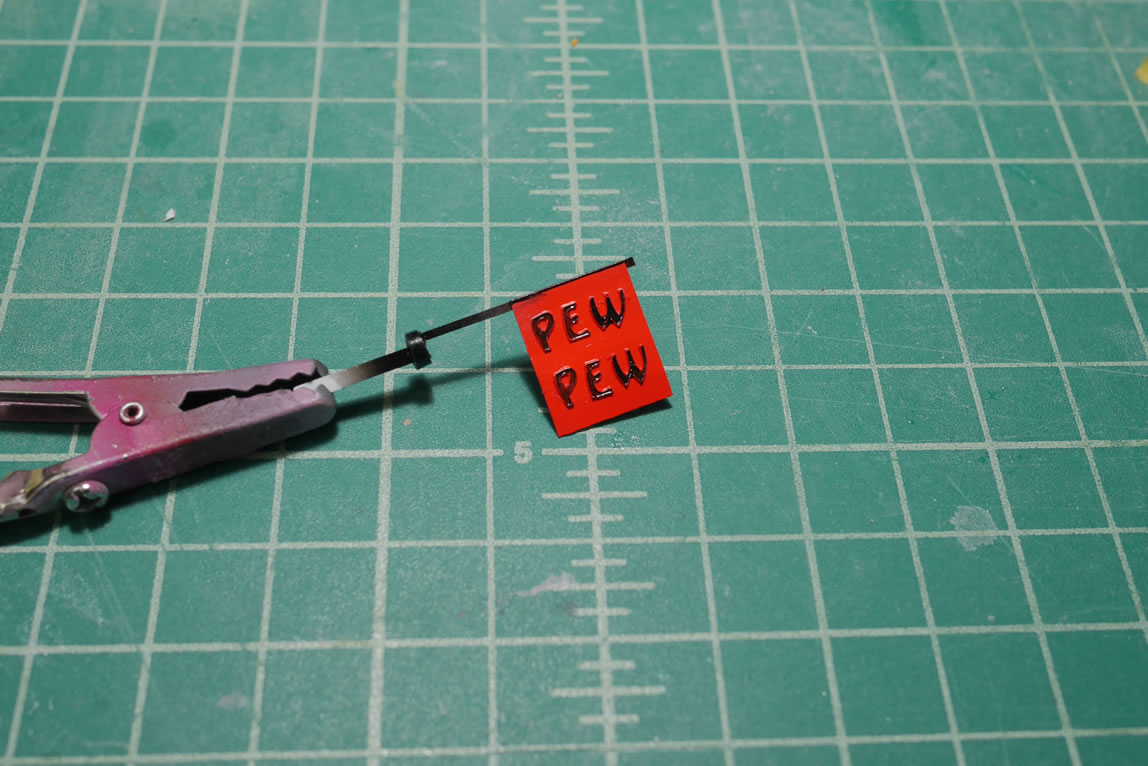
Since I’m going for the cute yet deadly angle, I figured I could up it a level with a “pew pew” sign. I picked out a font I liked and used the cricut to cut some letters out. These letters were then glued to a thin sheet of styrene that will be the pew pew flag. I bent the plastic a little to create a slight wave. Then did a test fit with the guntank barrel. I printed a few of the pew pews as I was going to use multiple flags, but I figured that one flag got the point across.
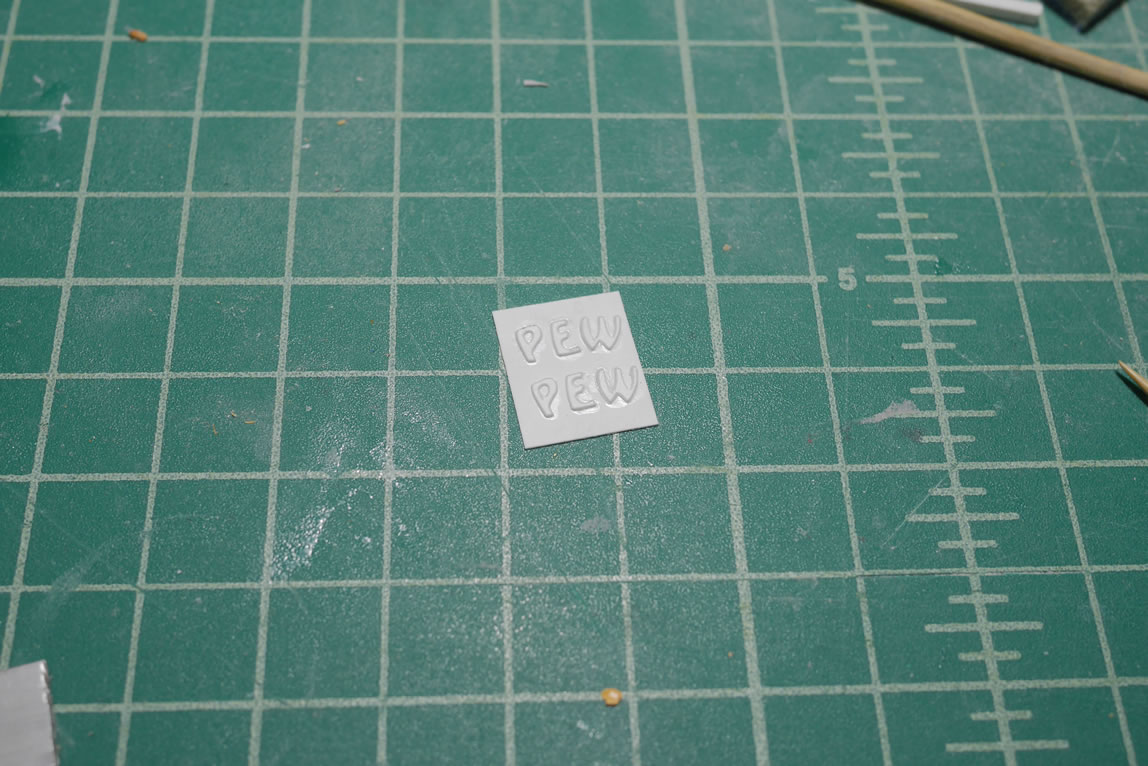
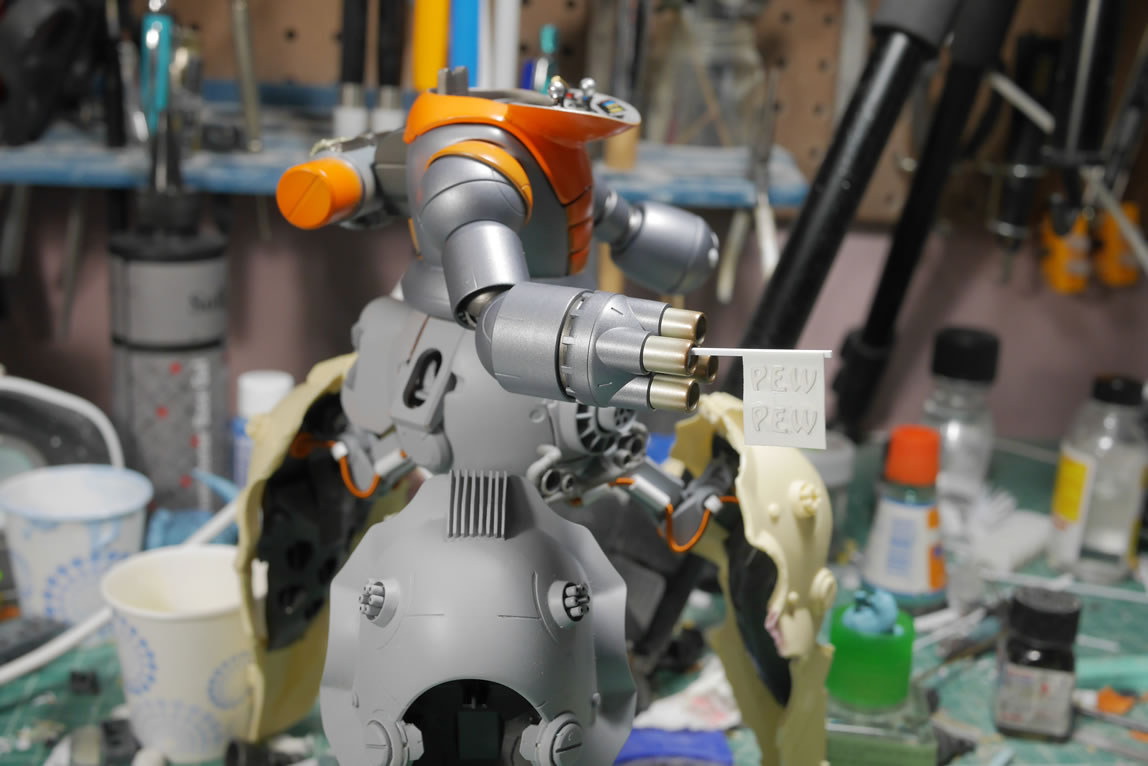
The flag get painted and the lettering is painted by hand with enamels. The letters are raised so this is easy to do. As one of my fellow TGG guys pointed out, the raised letters on a flag make no sense… but then again, what part of this whole kit makes sense? So it all goes to the nonsense of it all.
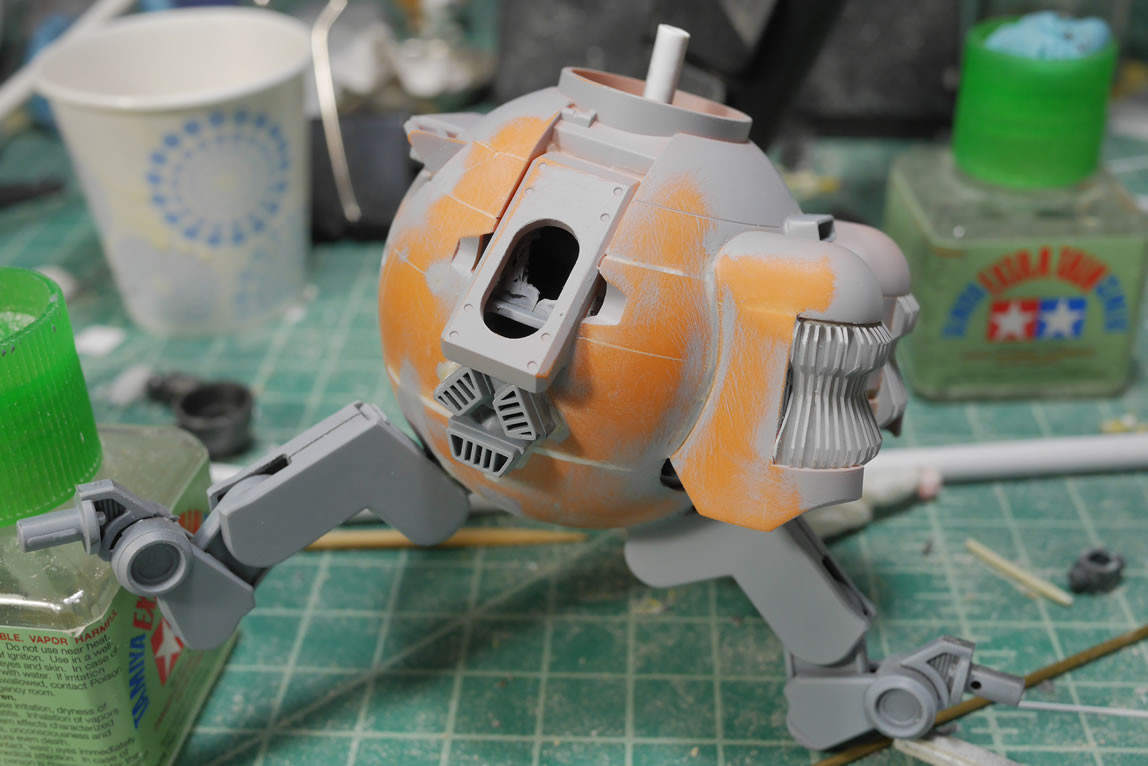
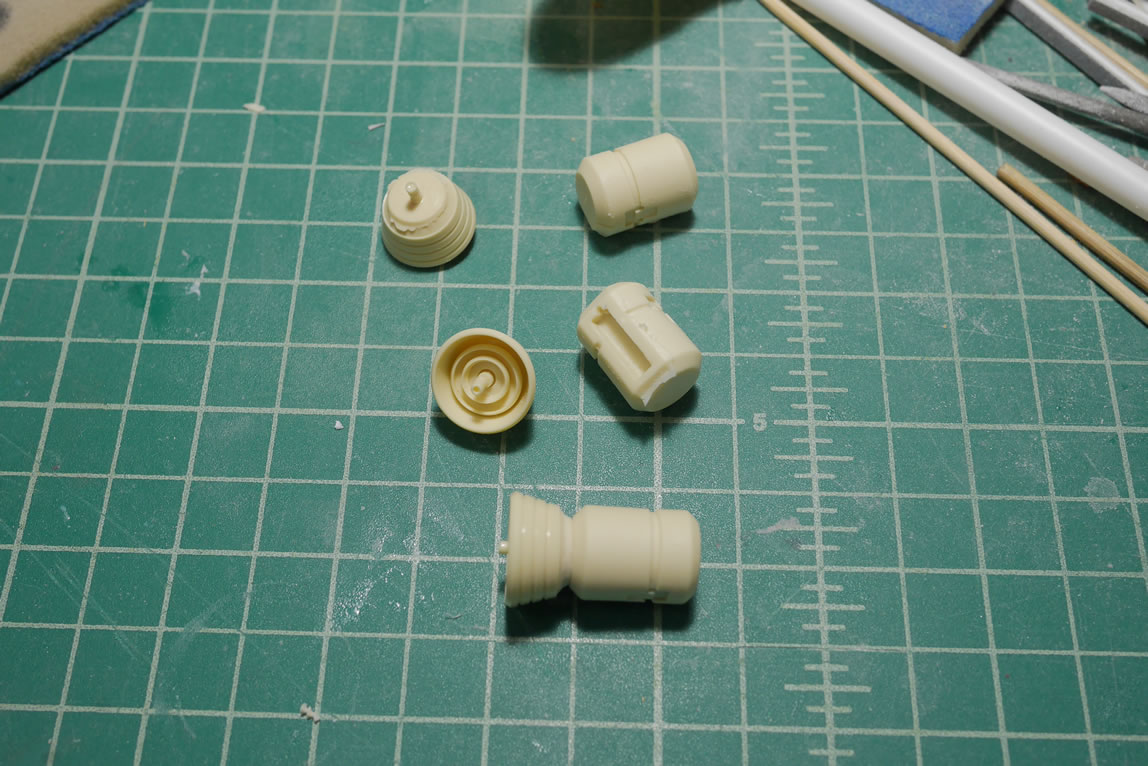
I casted some thruster bells from a previous project. Reusing molds is a great money saver. I also casted a part from the ore gun. These parts will eventually be the thruster and engine attached at the bottom of the binders. The side of the lower body got some detail work. I created a little ladder with those heavy user parts that came with the first MGs (Zaku/Gundam) Back when the MGs first came out, these kits also came with added details that were labeled “heavy user parts”. These were rarely used since they required glue. So I think Bandai abandoned this pretty damn quickly. It’s a shame because us more hardcore model builders loves these little details. It’s one less thing we would need to scratch. Another round mold was added at the bottom completed this detail.
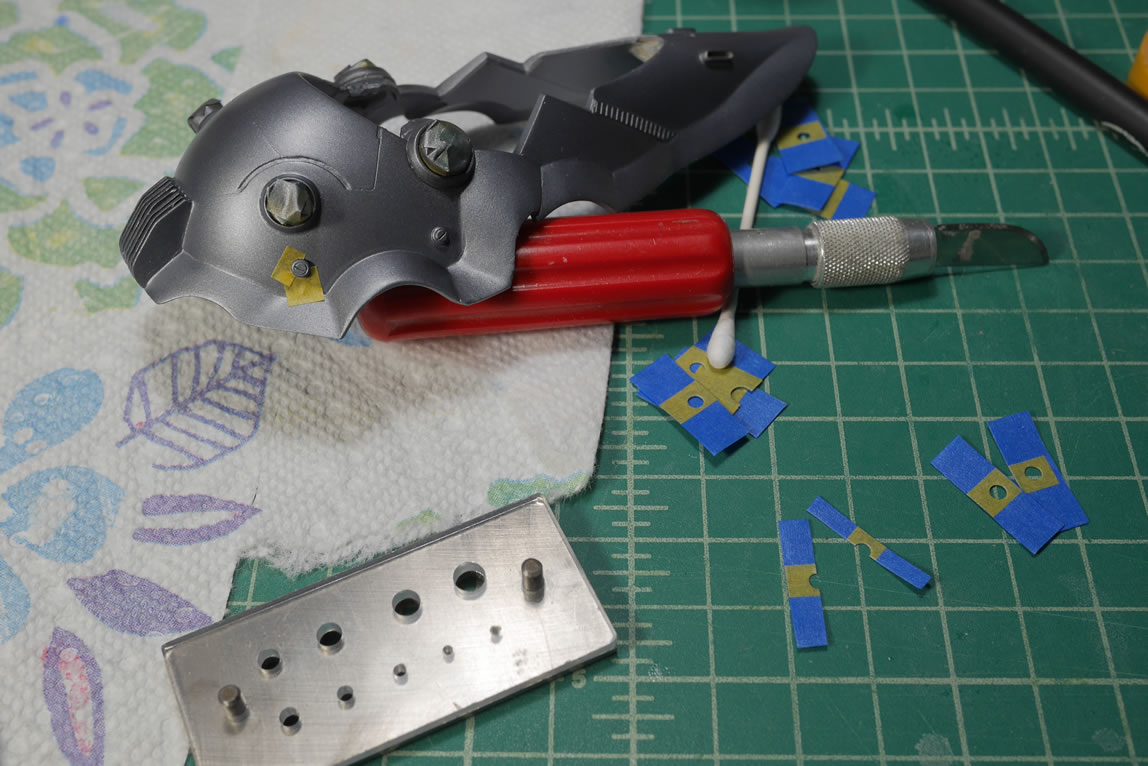
Next up, the rear binder leg’s frame gets some styrene plates glued into place where the funnels attach. The new design has these closed up and to sorta keep everything looking similar; the styrene covers are glued into place. The last photo is the paint-mask-paint process for the kit’s bar detail.
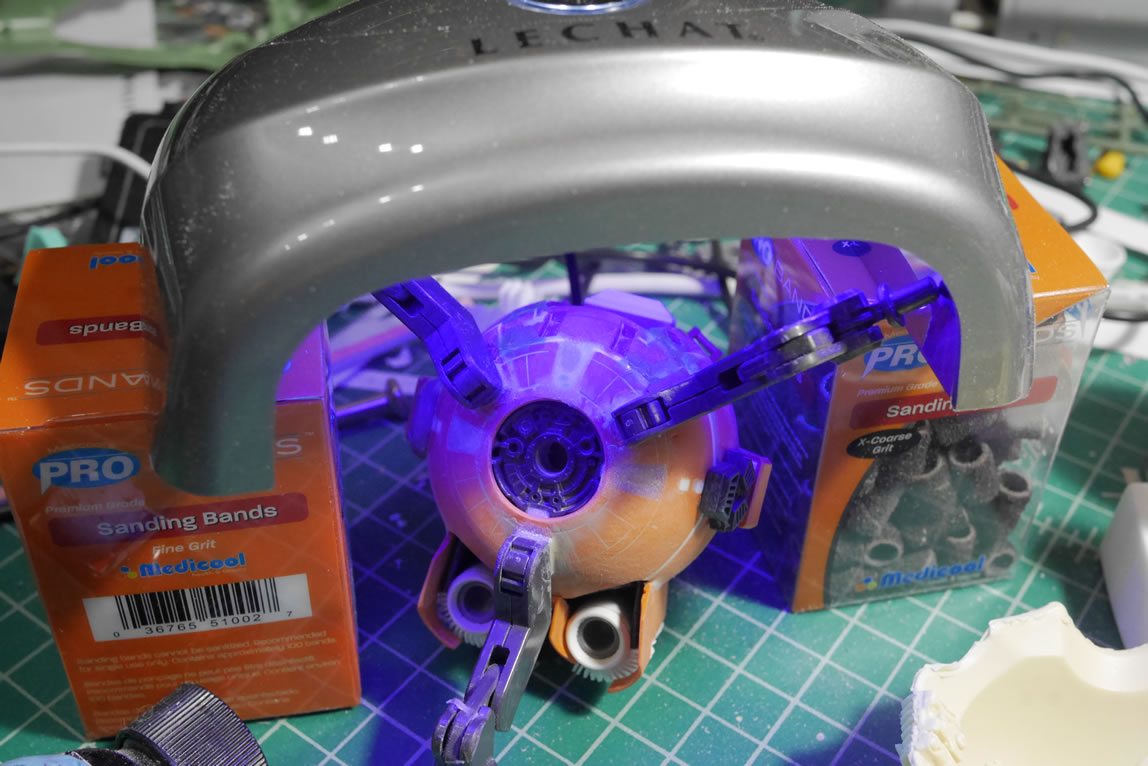
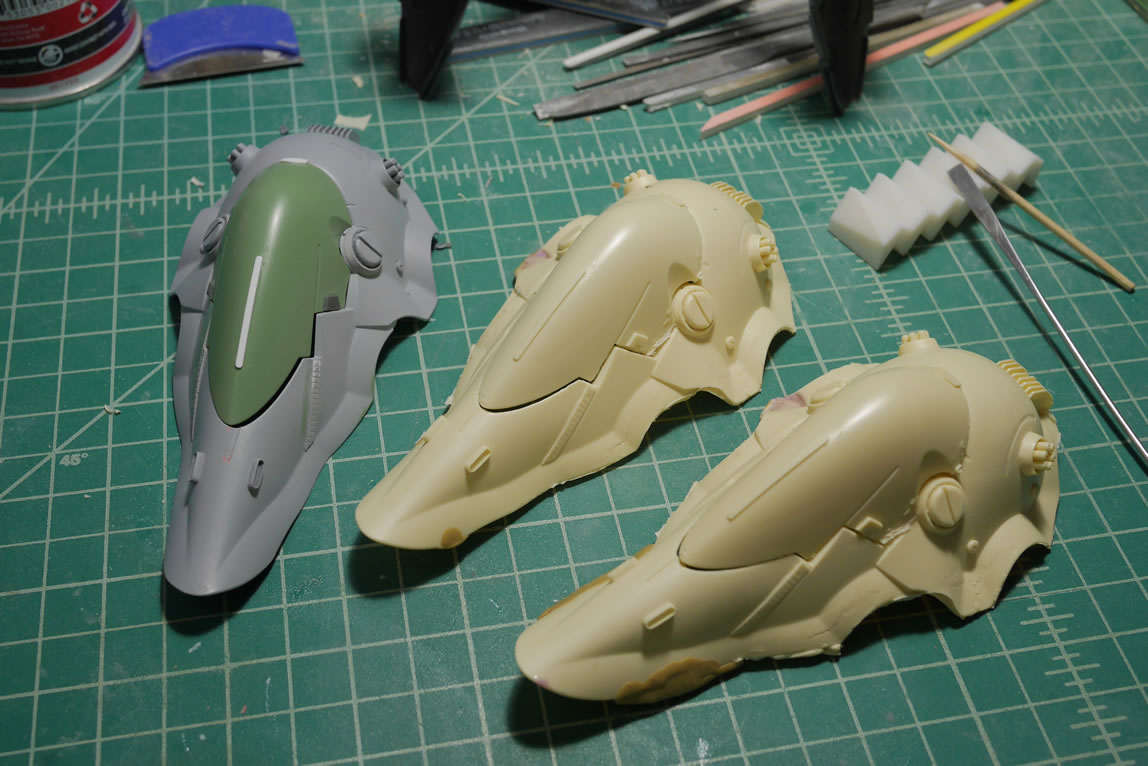
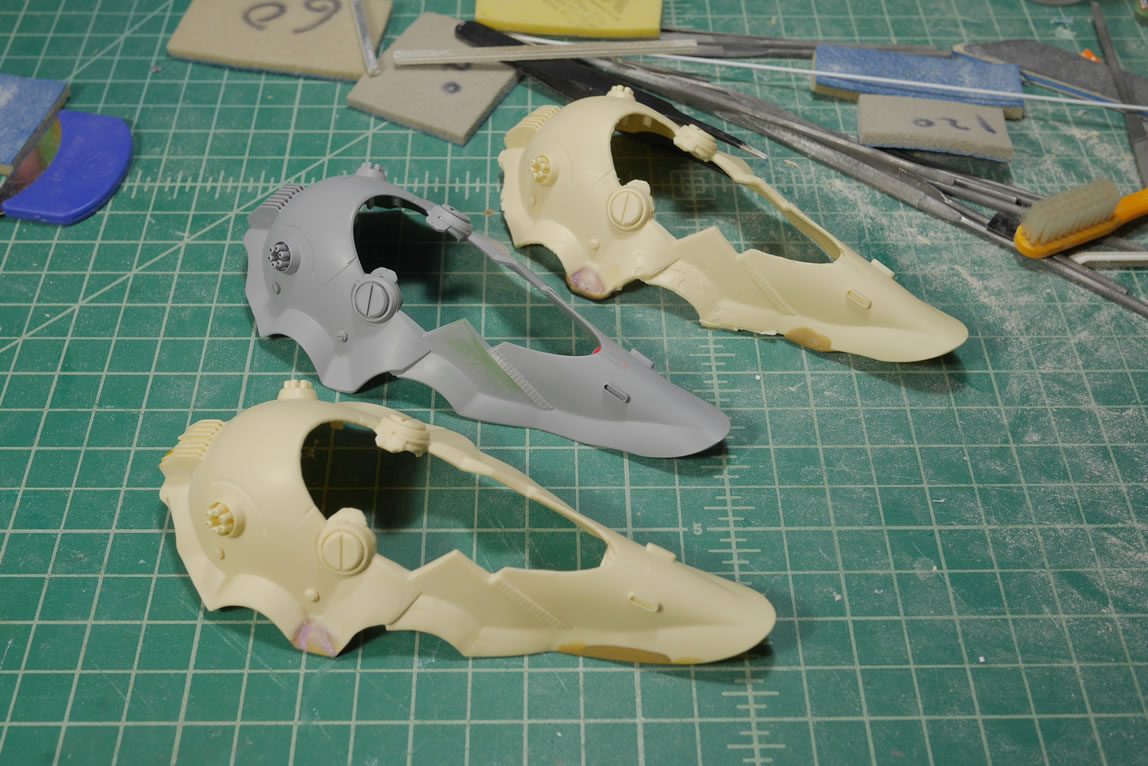
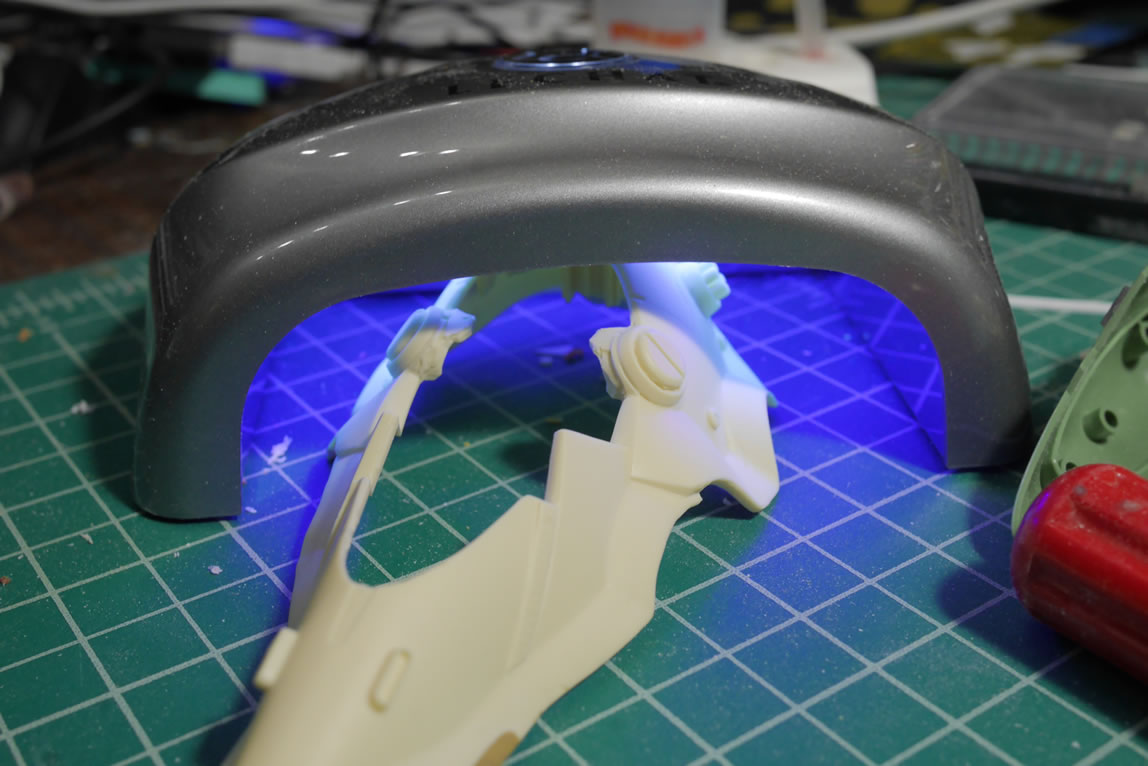
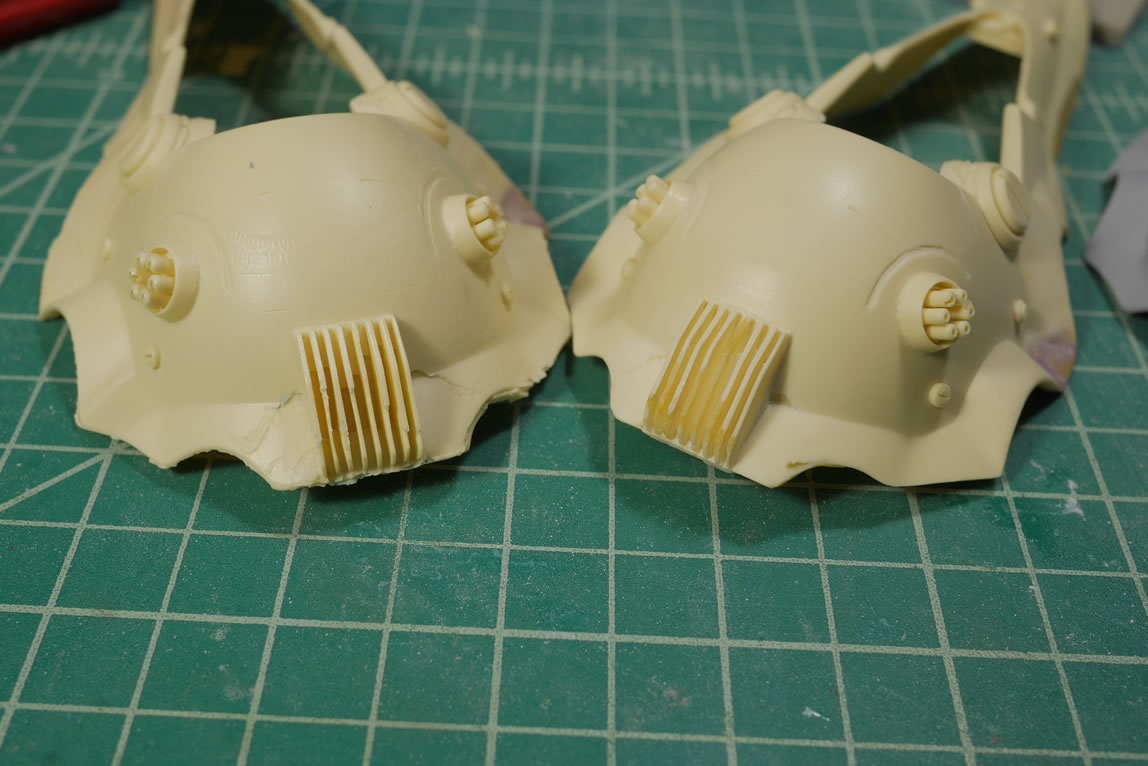
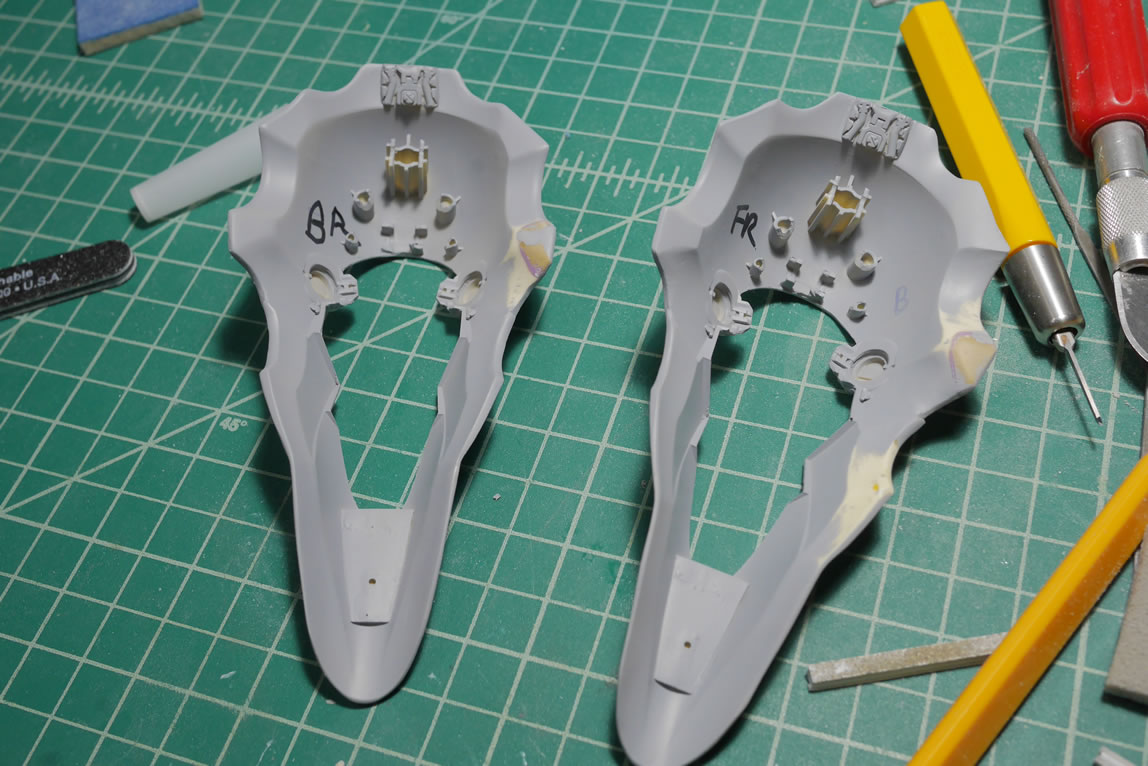
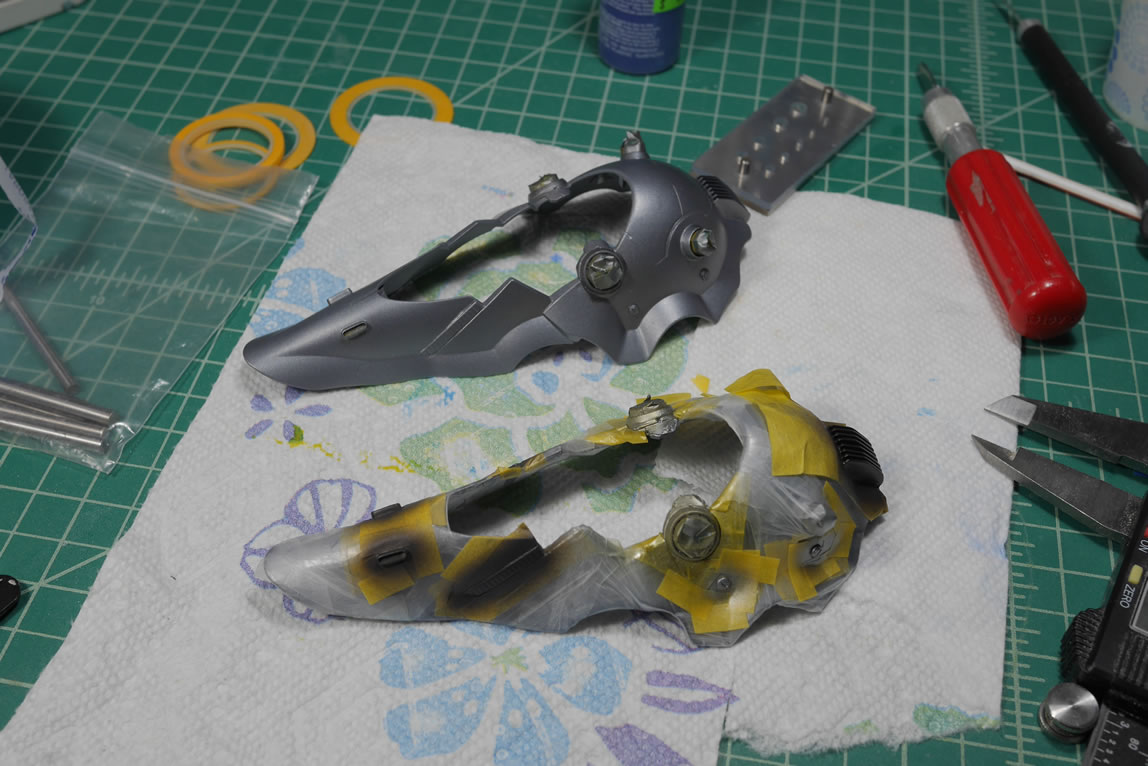
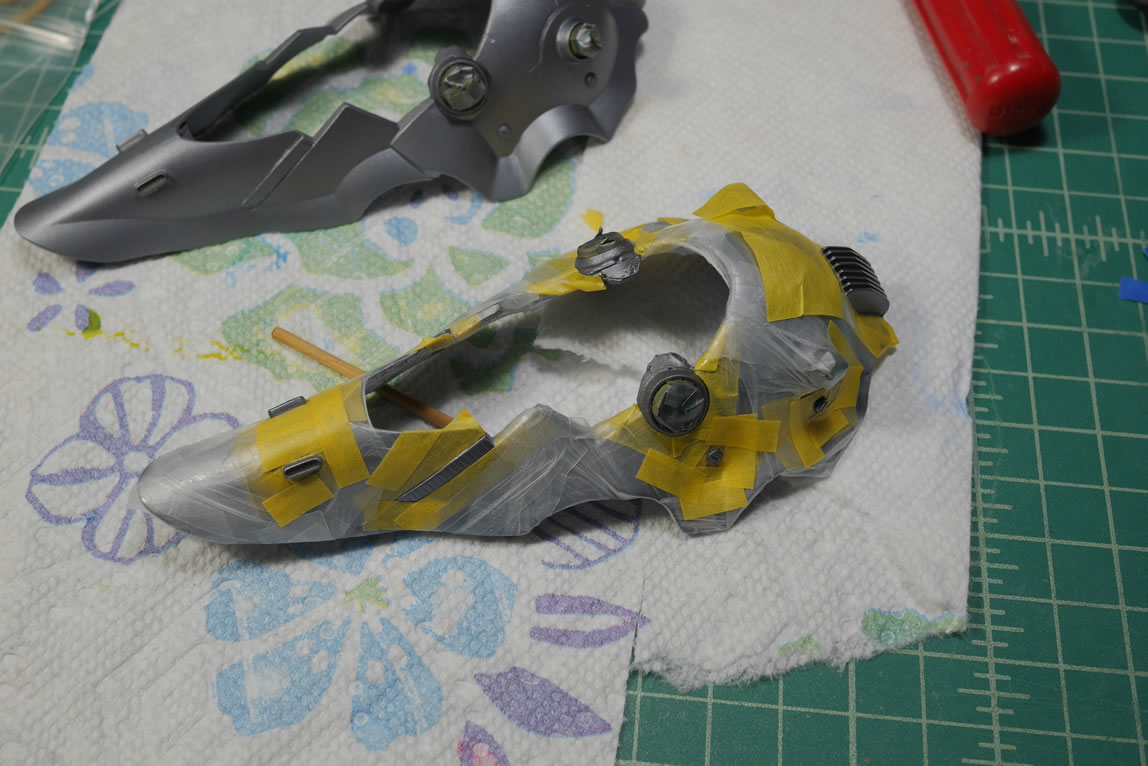
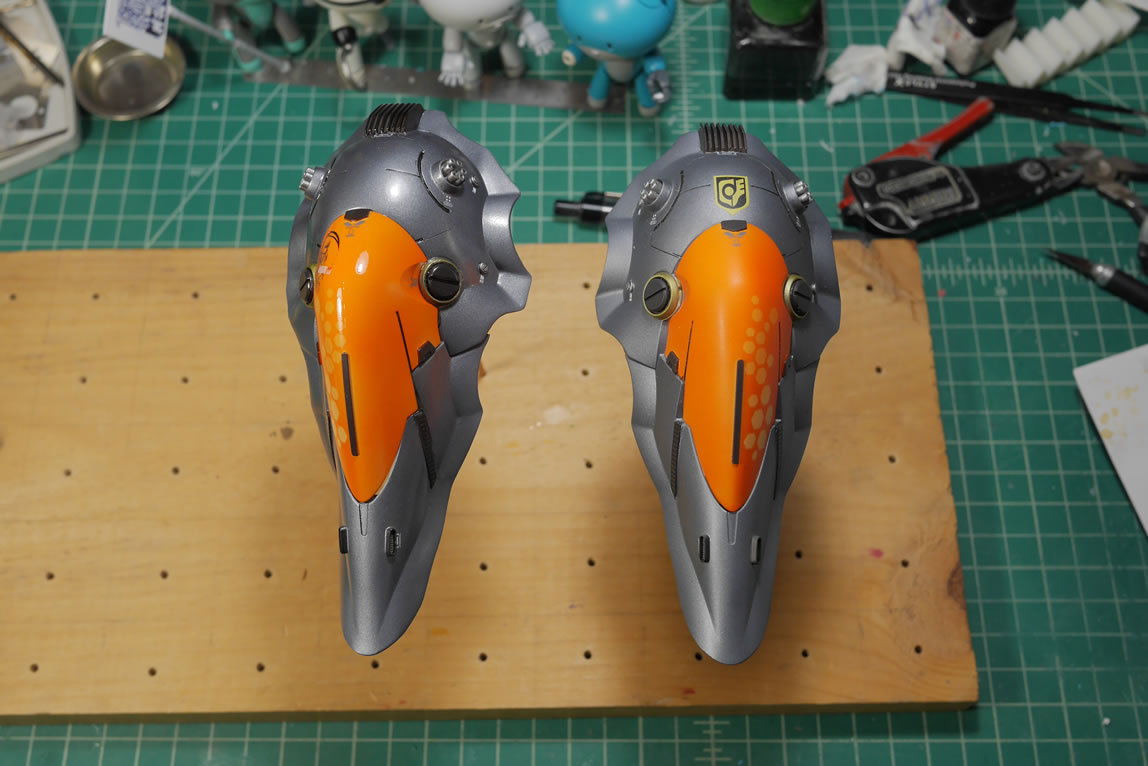
Now for the dreaded resin binder clean up work. Each of these binders took about 6 hours of work to clean up and fill. The process would have been much longer if I used traditional epoxy or styrene putties. I used light curing putty which significantly sped up the process. I can add the putty, throw it under the UV lamp, sand, and continue. The heat sinks for the resin binders needed considerable rebuilding, so that was carefully done with light curing putty as well. The last picture shows a comparison with the repaired binder and yet to repair binder.

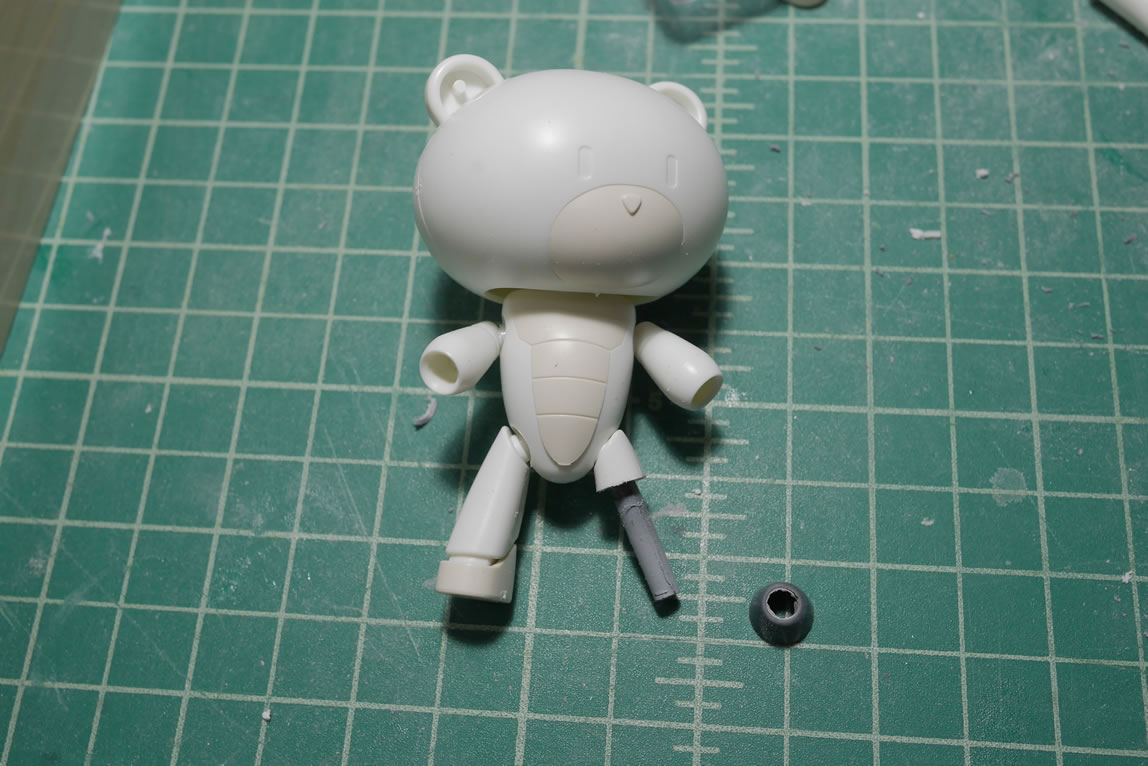
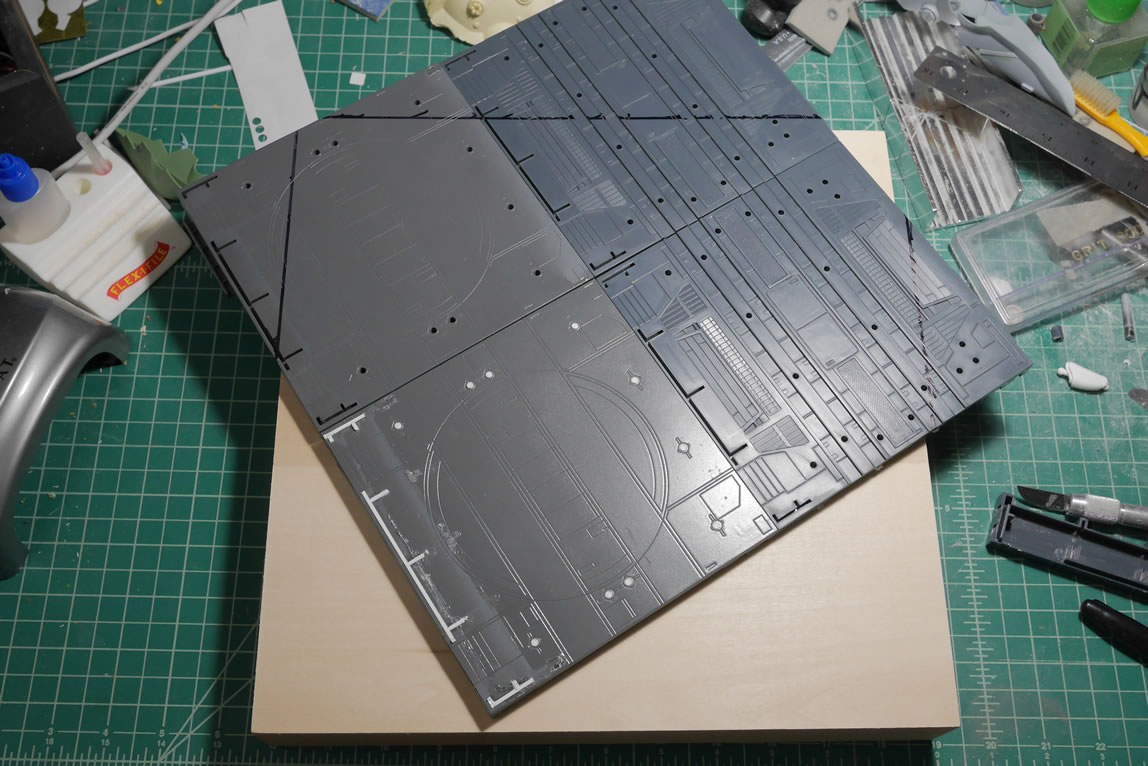
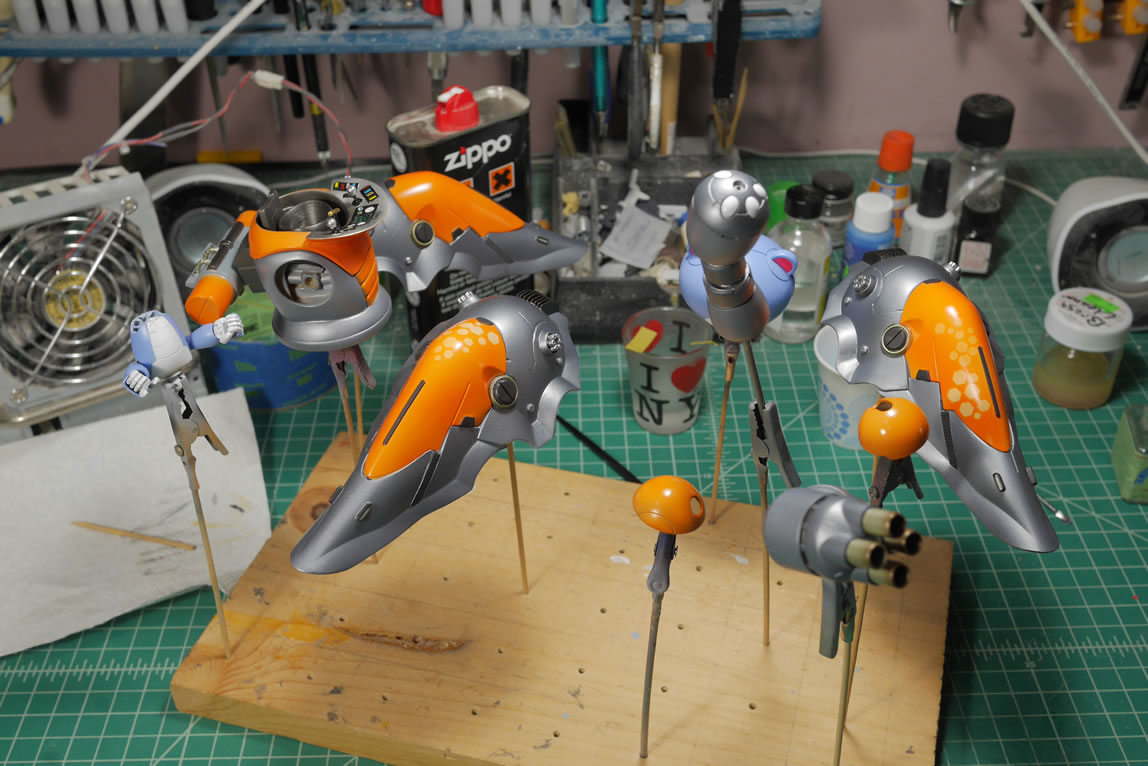
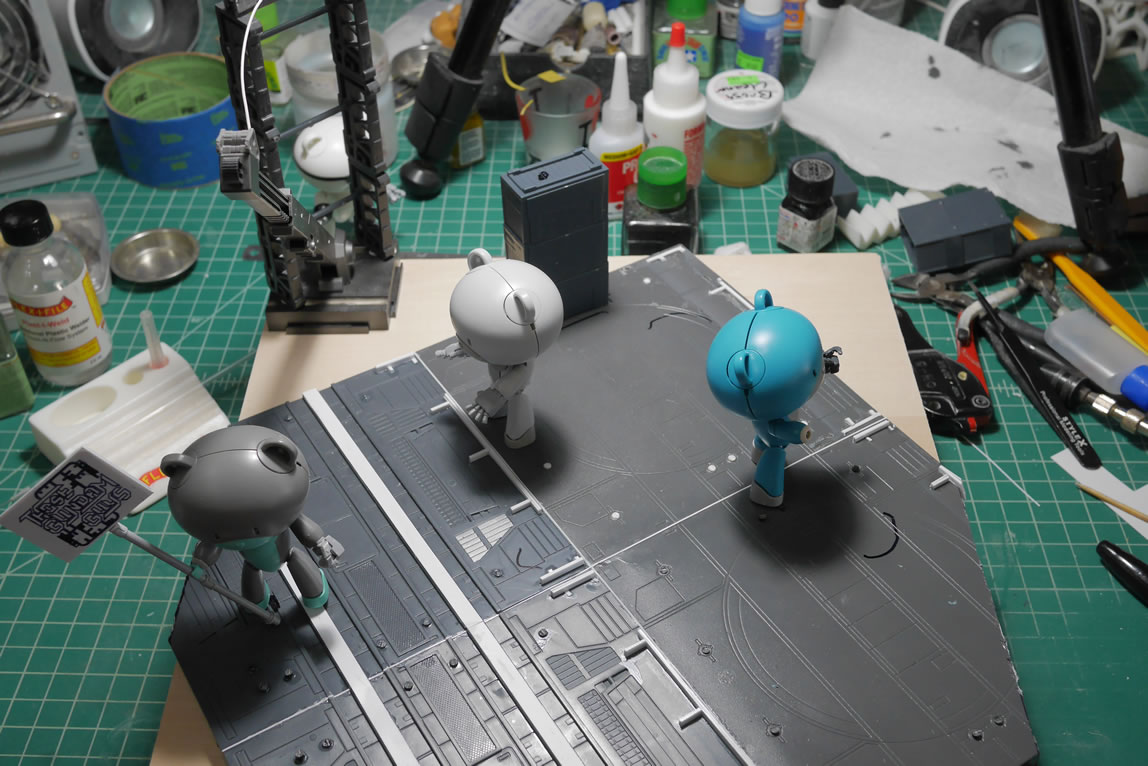
Having spent 6 hours working on one binder, I got a little burnt out so time for some fun work. I decided to create a little display base for the kit. First up was to use the pirate parts I jokingly made to create just a pirate petit guy. Using some left over sprue and a small thruster bell, I created a peg leg. I scribbed some lines into the leg to get some wood texture that should look decent after it’s painted and washed appropriately. I also lay out the basics of the base on the wood board. I will be cutting up the plastic so this is just the design phase. I have 4 petit guys for this, so each head gets it’s own LED system and ear switch.
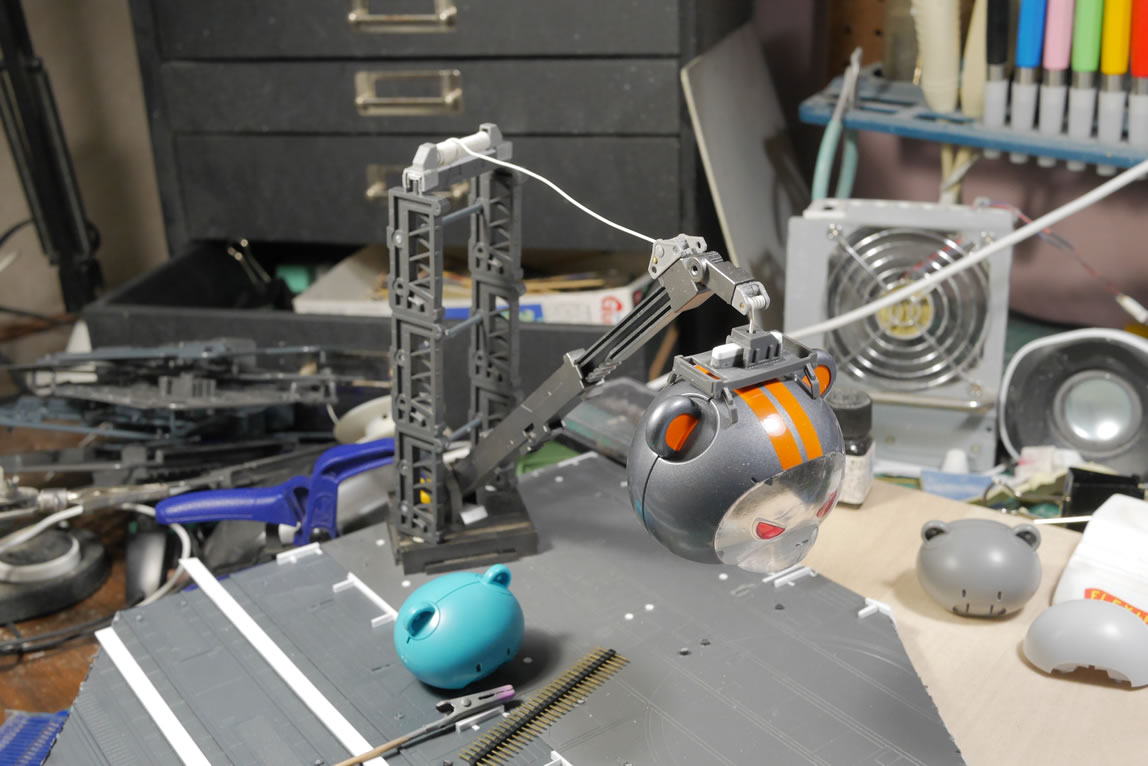
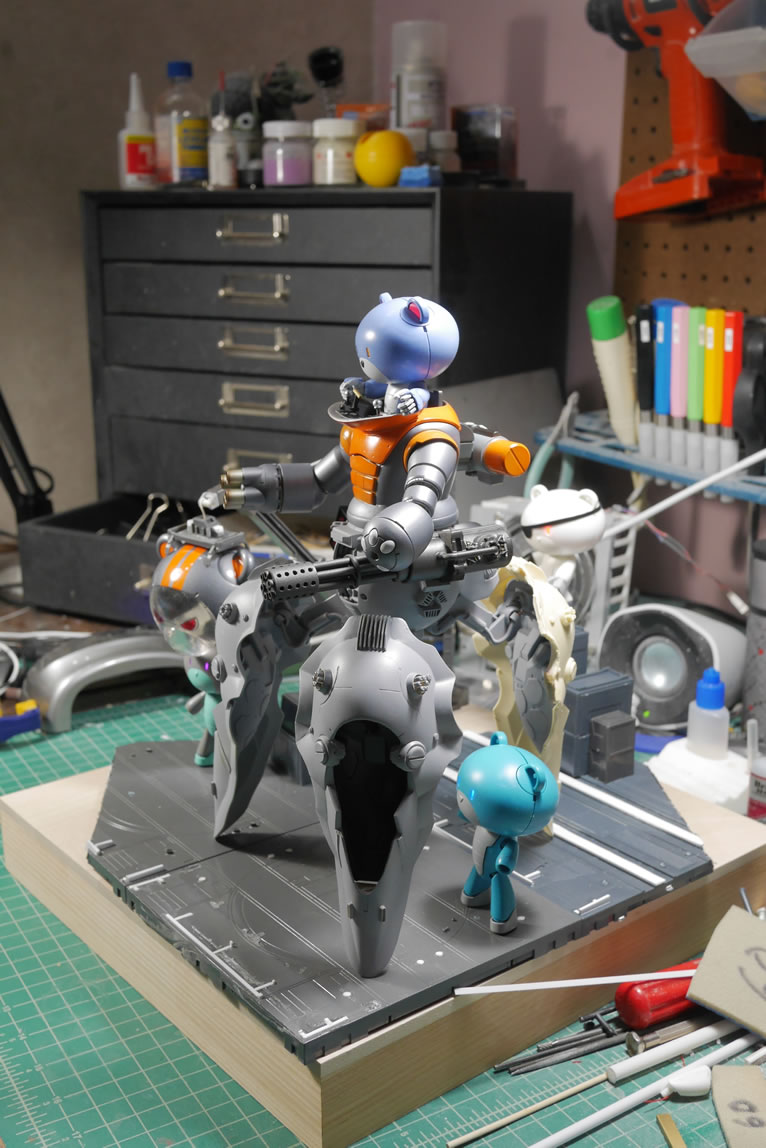
Since I had made the helmet, I wanted a way to display both the petit in the driver seat as well as the helmet. My brainstorming brought me to the idea of a petit guy hanger. Pirate guy would be directing things as the old salty veteran that’s already lost appendages in previous battles. The narrative now puts the pilot I built as just a testing guy. The real pilot will be painted in the same scheme as the main kit and be standing aside while the helmet is getting lowered. This allows the display of the helmet. For this, I slapped together some parts and created a crane to hold the helmet. The helmet is connected to the crane via magnets so it can be removed and actually used on the blue pilot. Then comes a very rough mock up of how everything will look. With a crane in the scene, I need a crane operator and a control panel. The other kit will just be under the kit doing inspection work. This is how the scene plays out in my head; I just need to execute it… later. Break time is over and I need to finish the other binder.

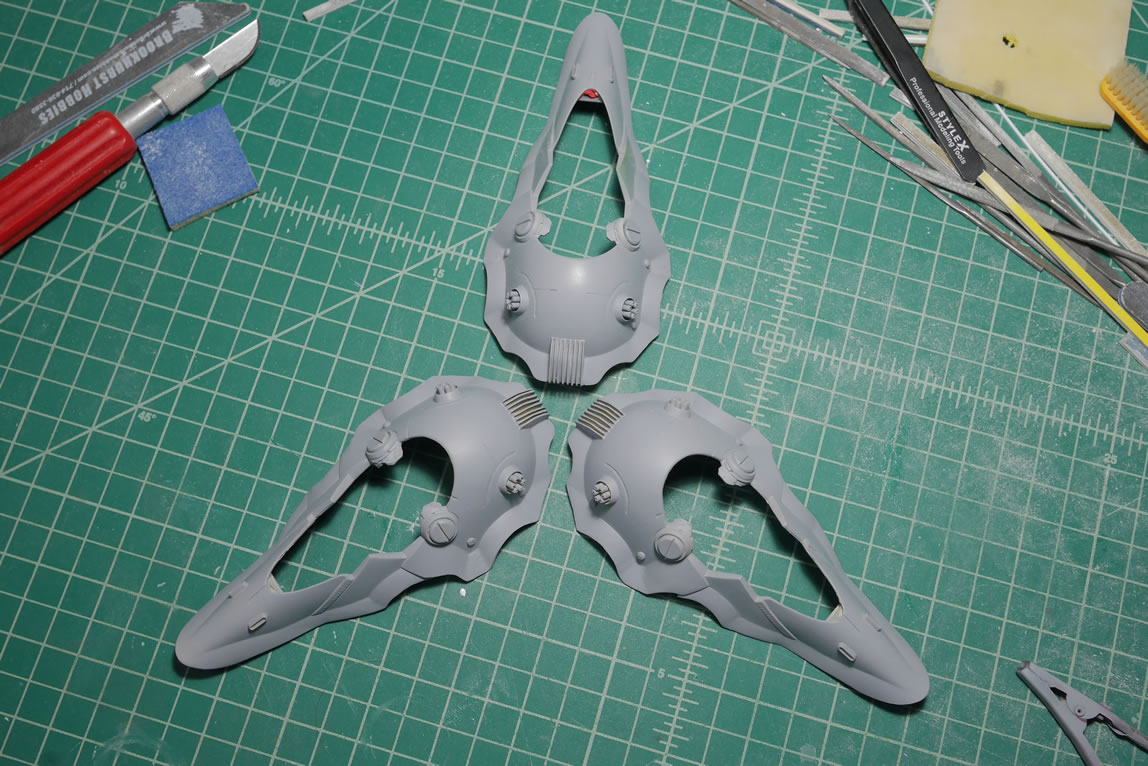
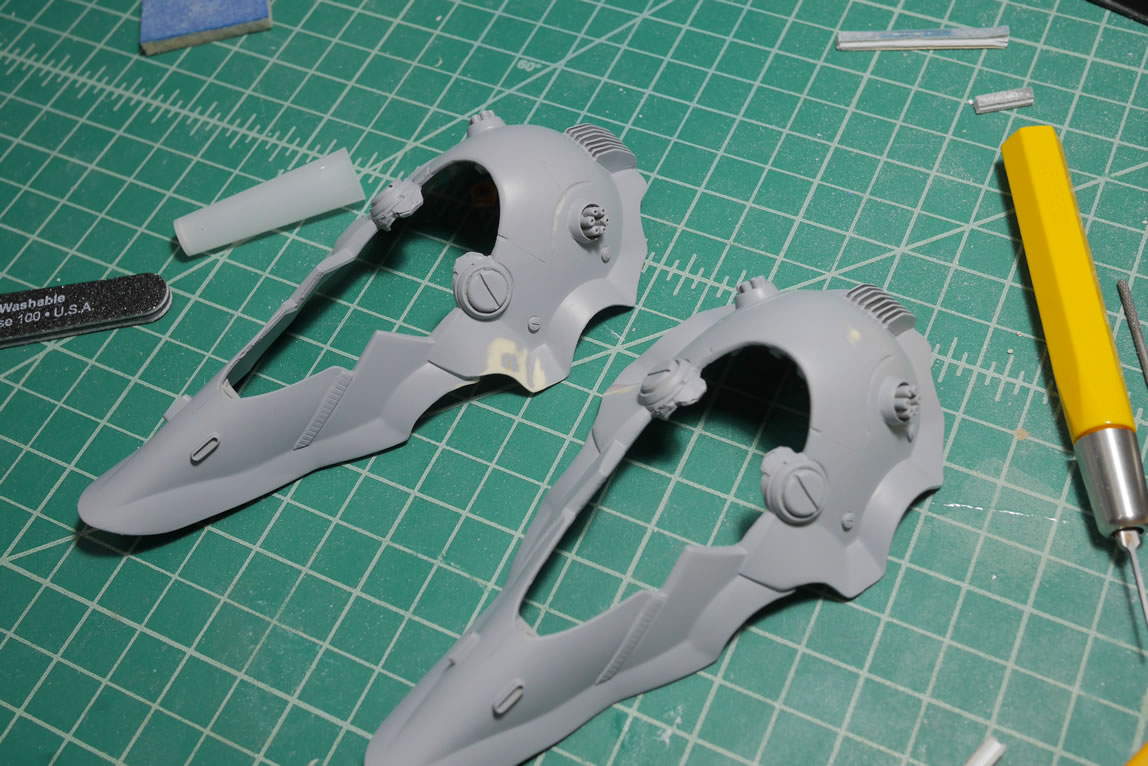
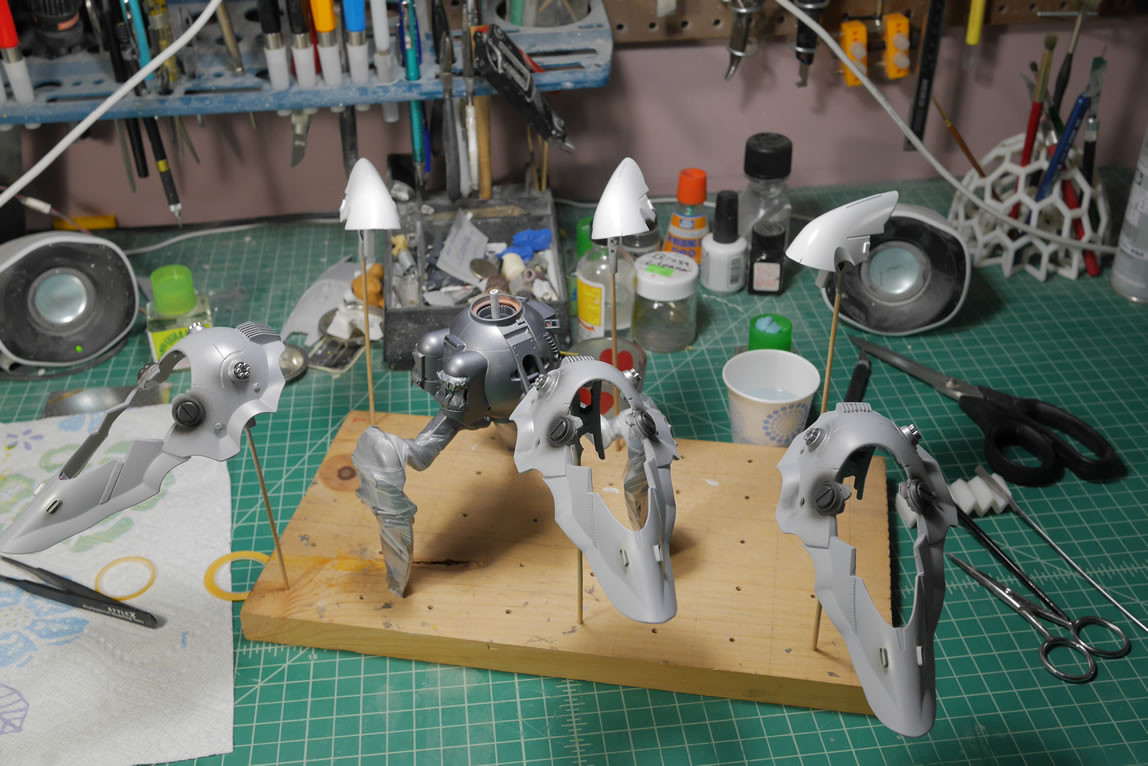
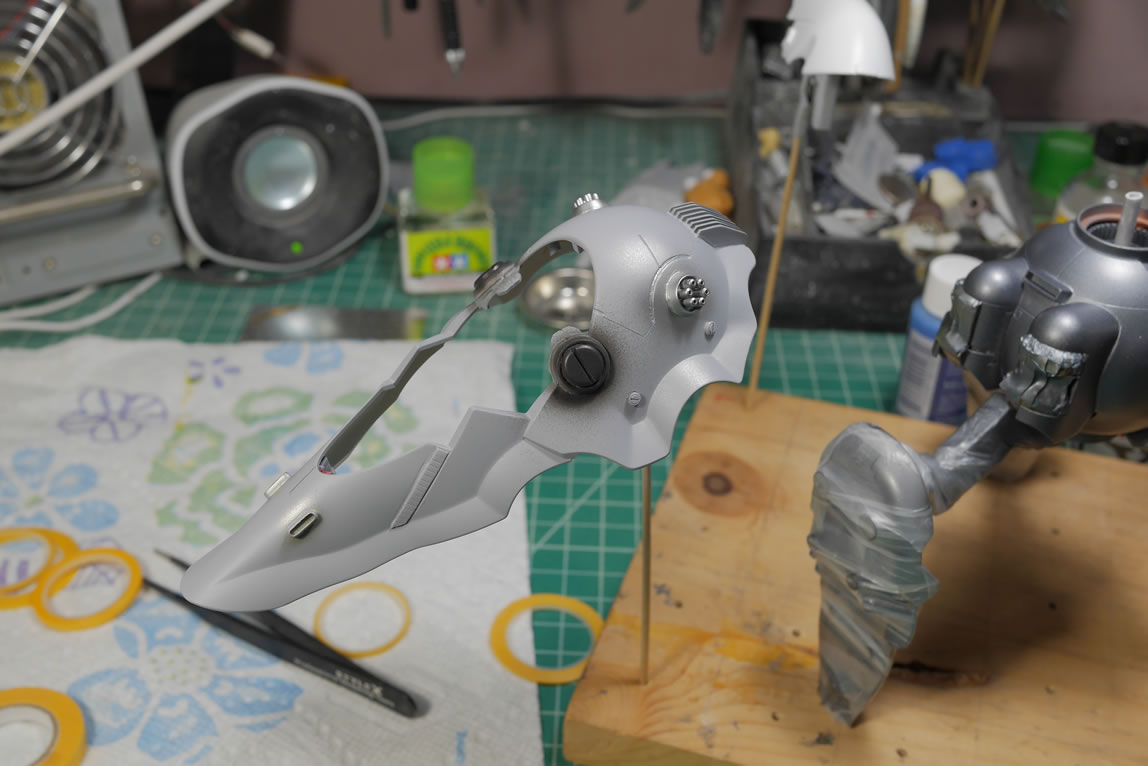
And we jump right into primed and ready to paint binders. The desk is cleaned from all the construction work.
There are some minor fixes for the binders after the priming. And those are fixed relatively easily; so only a few sessions of prime-sand-putty-sand-prime.
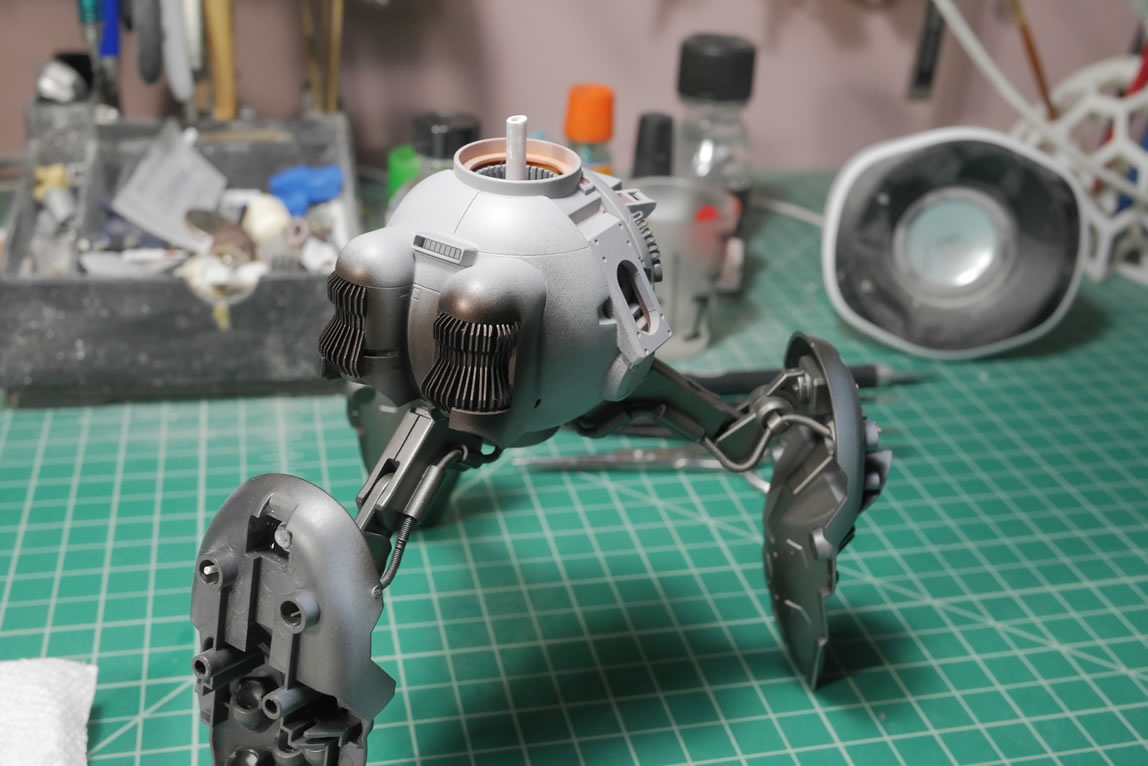
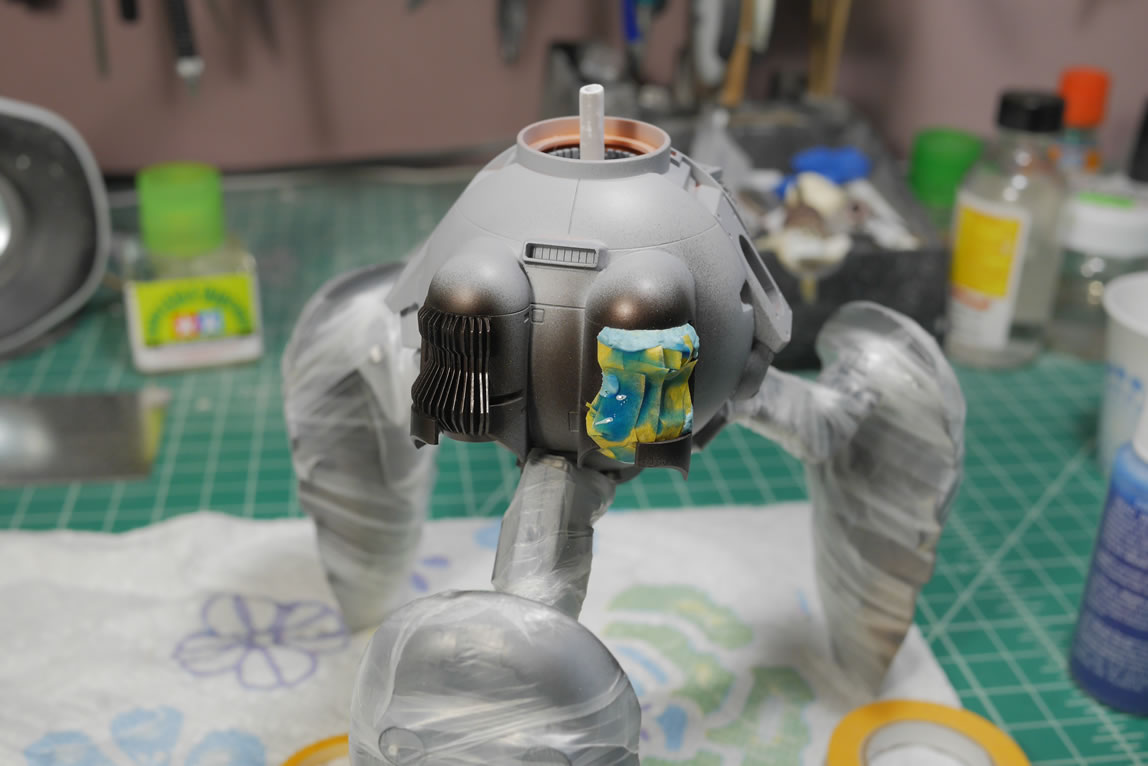
The lower body gets some paint. I painted alclad exhaust manifold for the heat sinks for the body’s thrusters. This is then masked so the rest of the lower body can be painted. Details for the binders are painted and masked off.
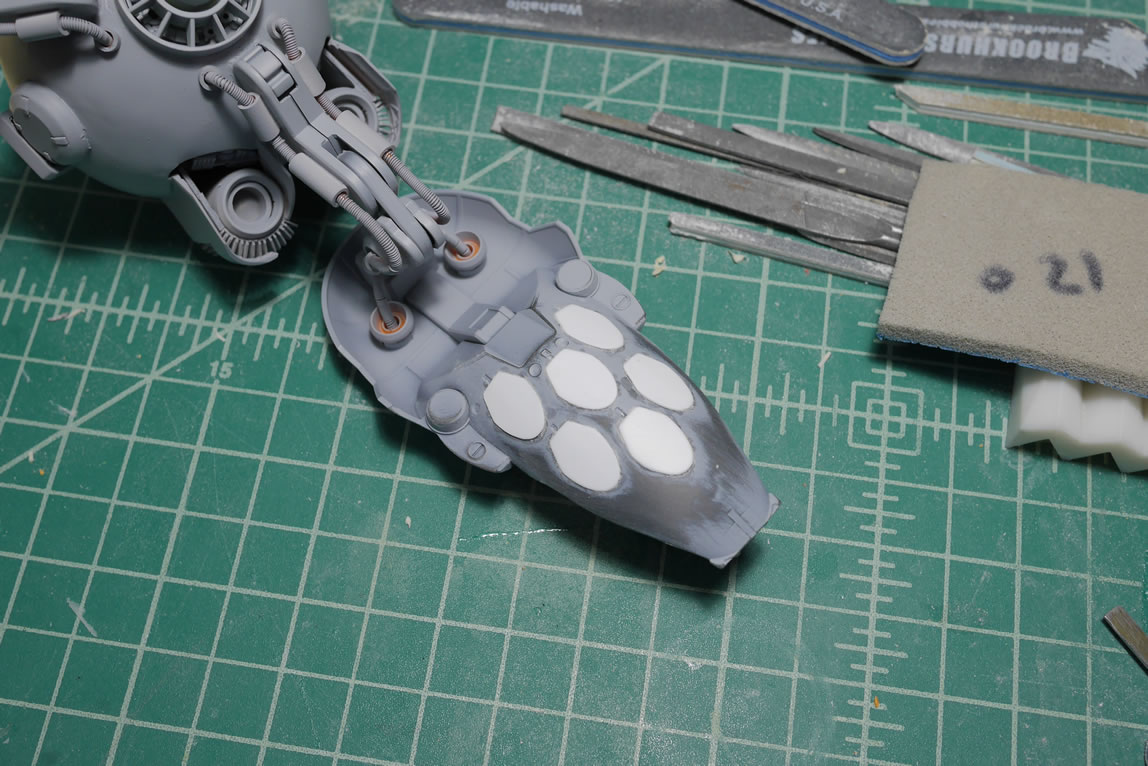
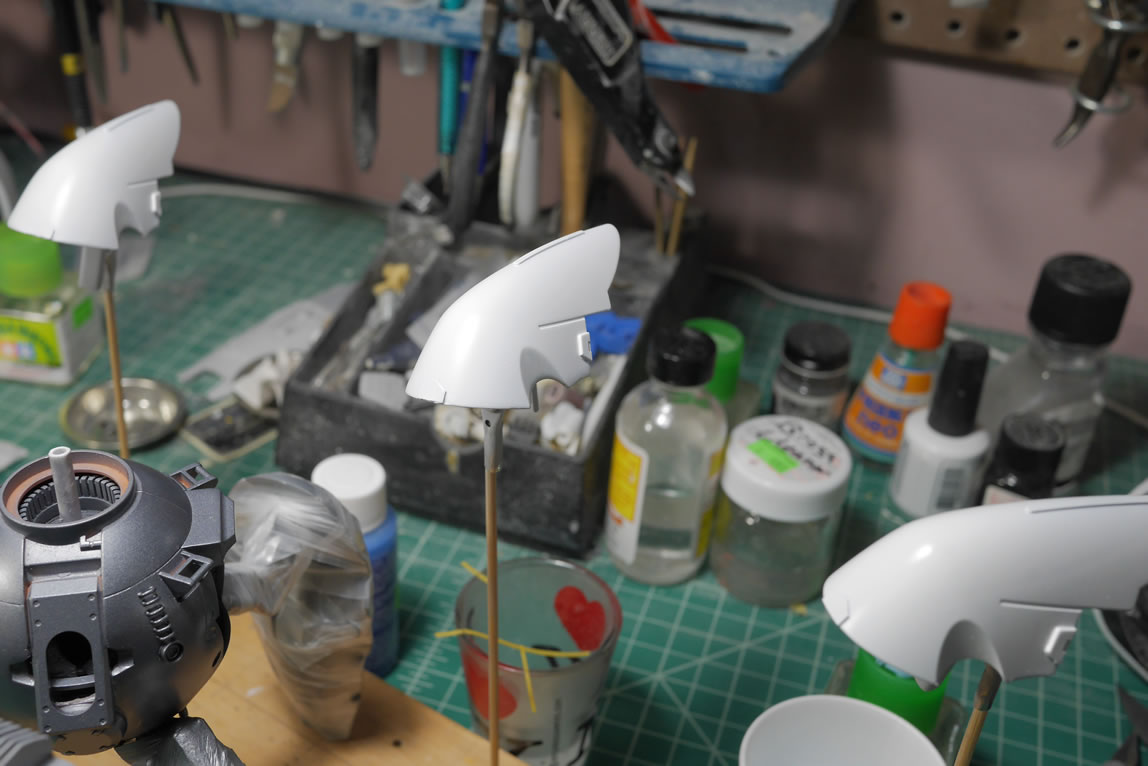
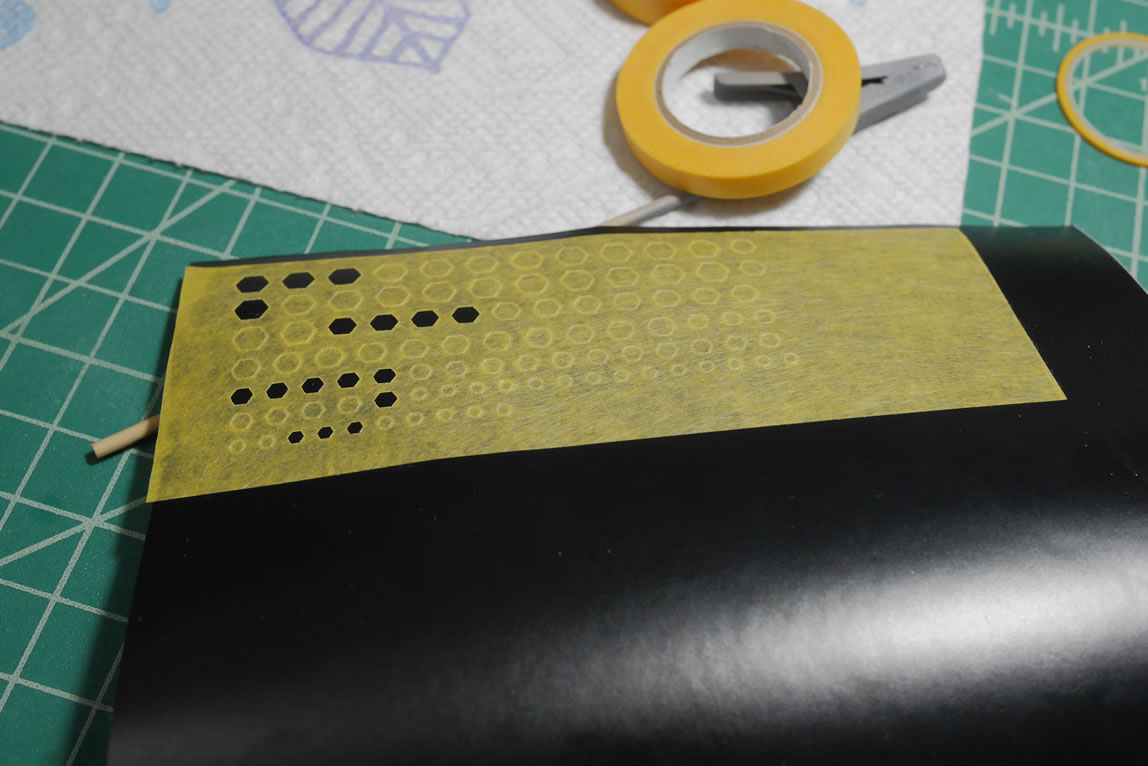
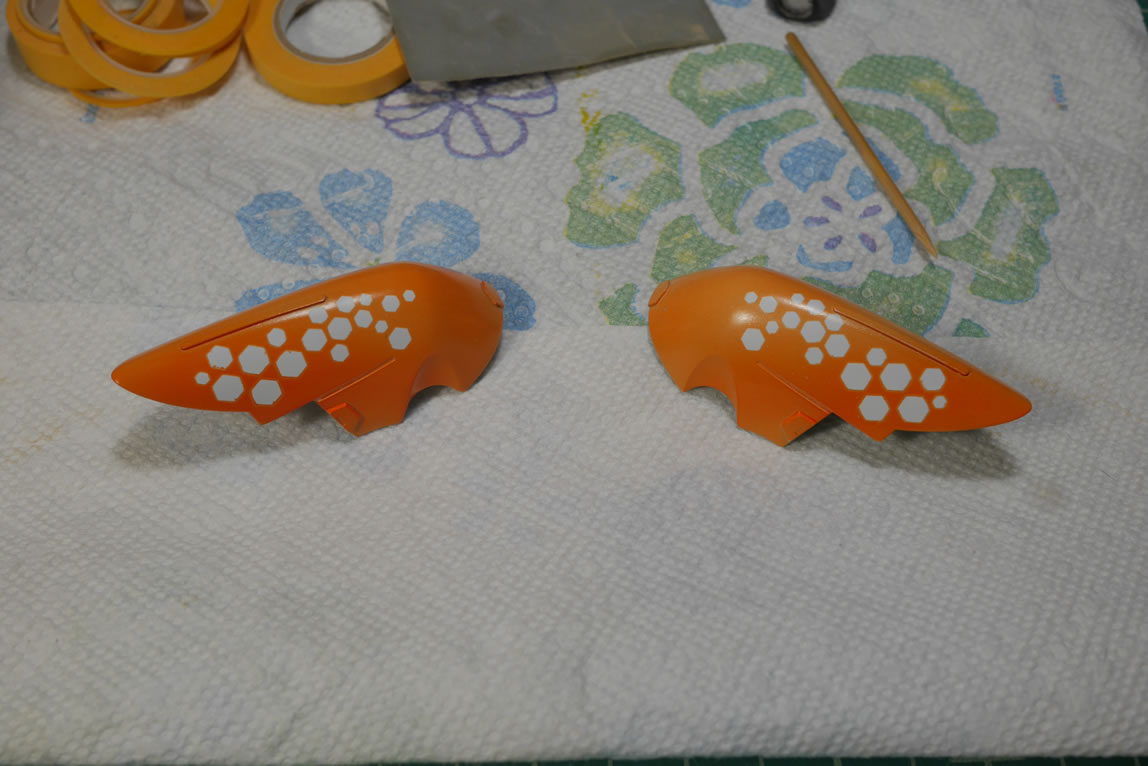
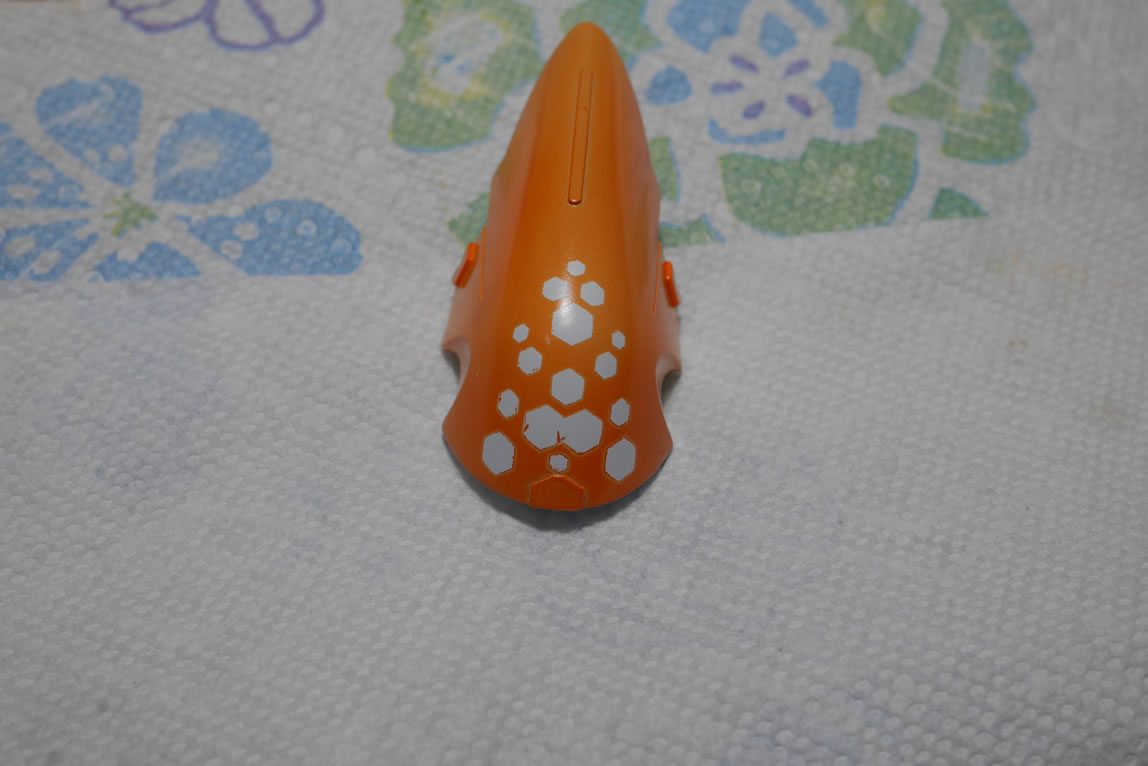
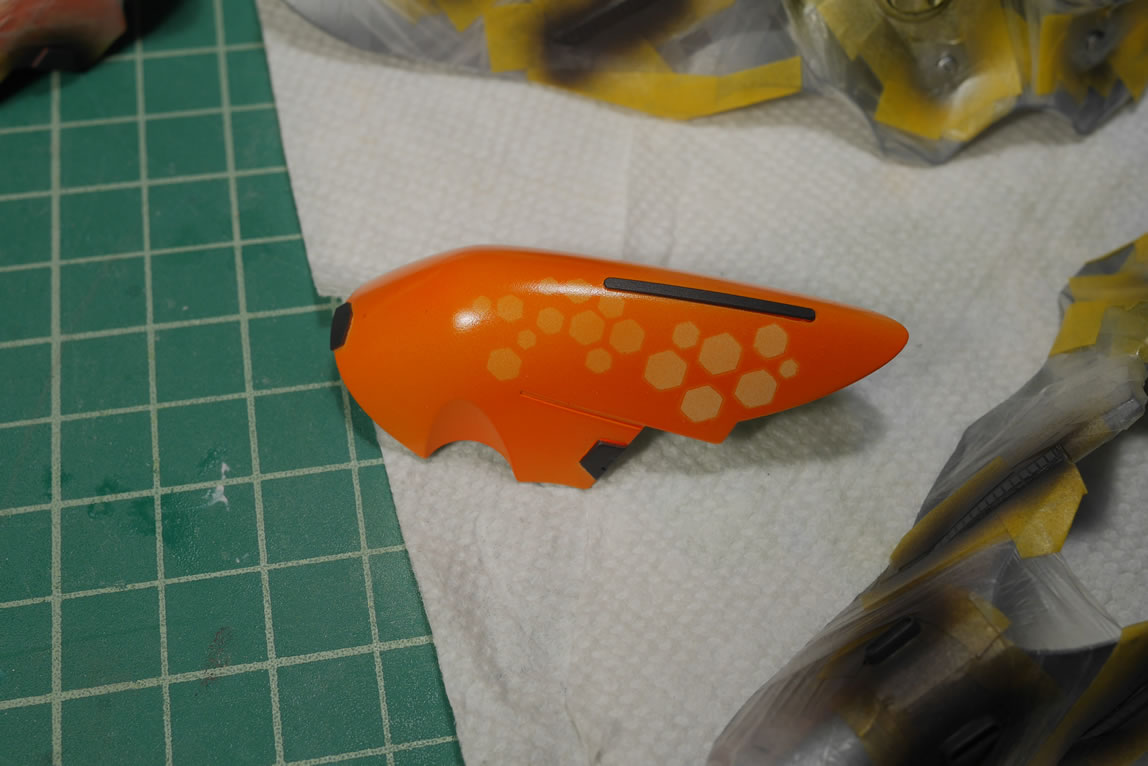
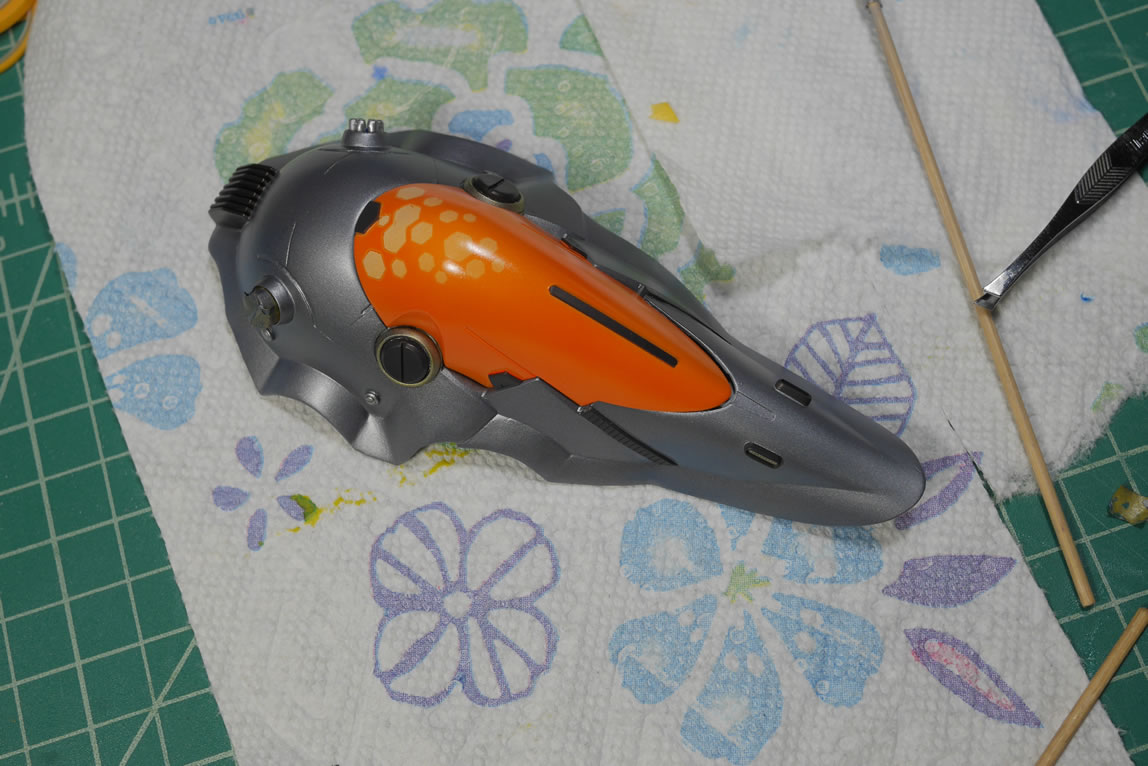
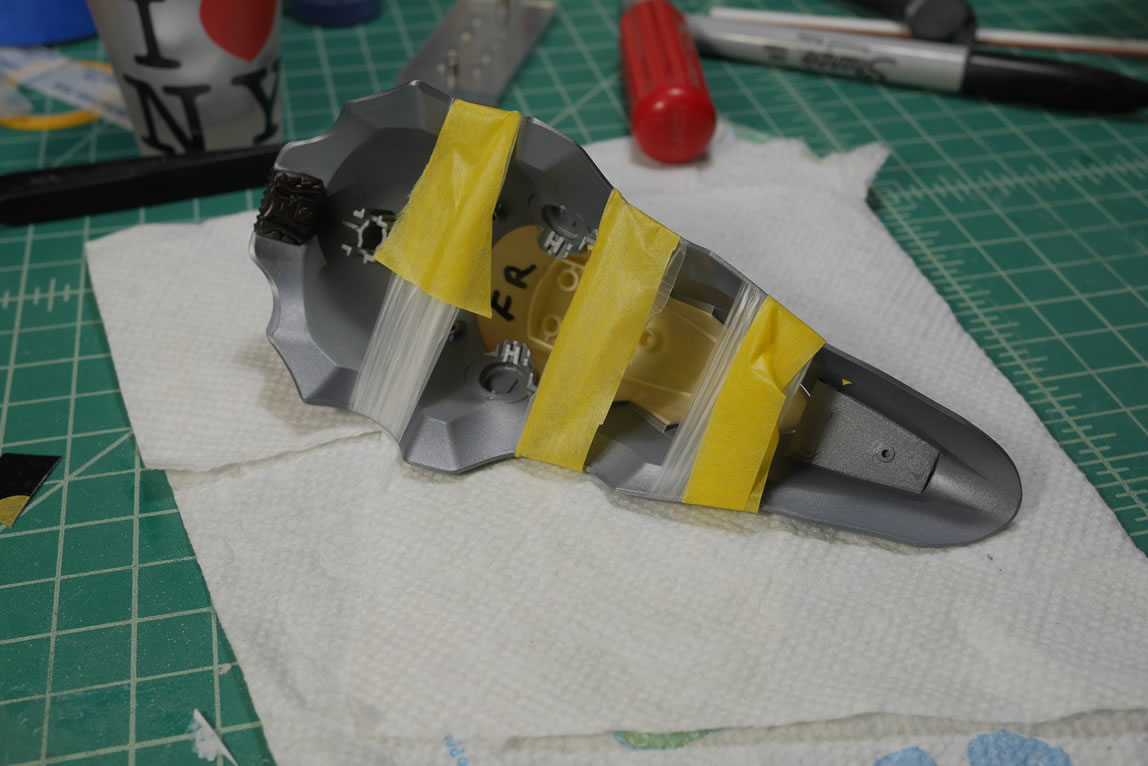
While all the above are at various stages of drying/curing, time to move onto the top of the binders. I start with painting them white, as I will be painting these with clear orange as I have with the other orange parts. Prior to the clear orange, I want to do some hex masking. I did a quick video broadcast about this step and it can be seen here:
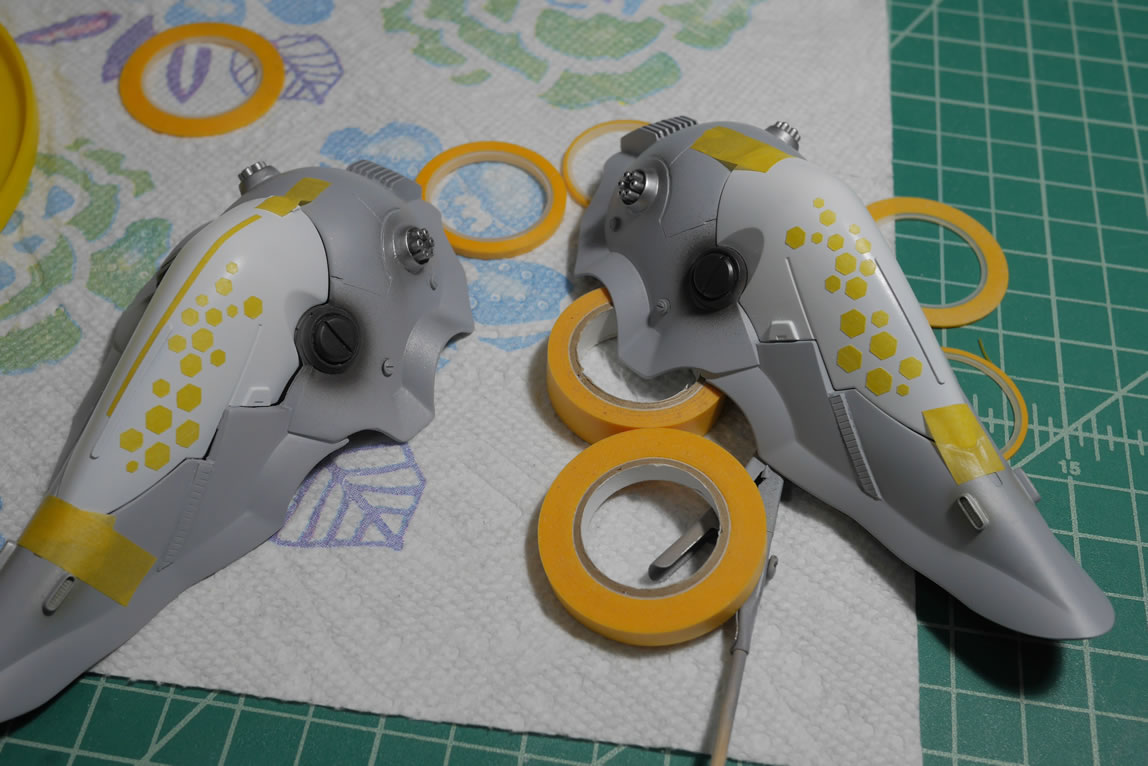
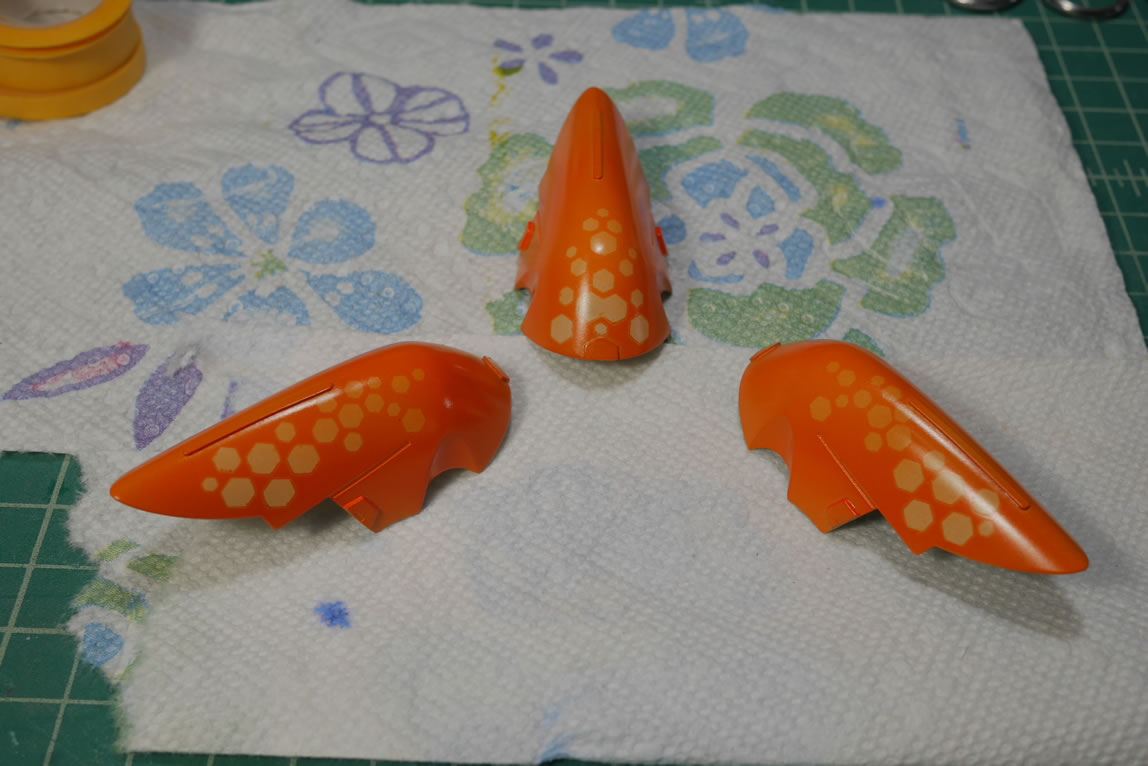
The hexes are cut with the cricut and the parts are masked. I use some other tape as guides since I will need to reproduce the masking scheme on the other parts.
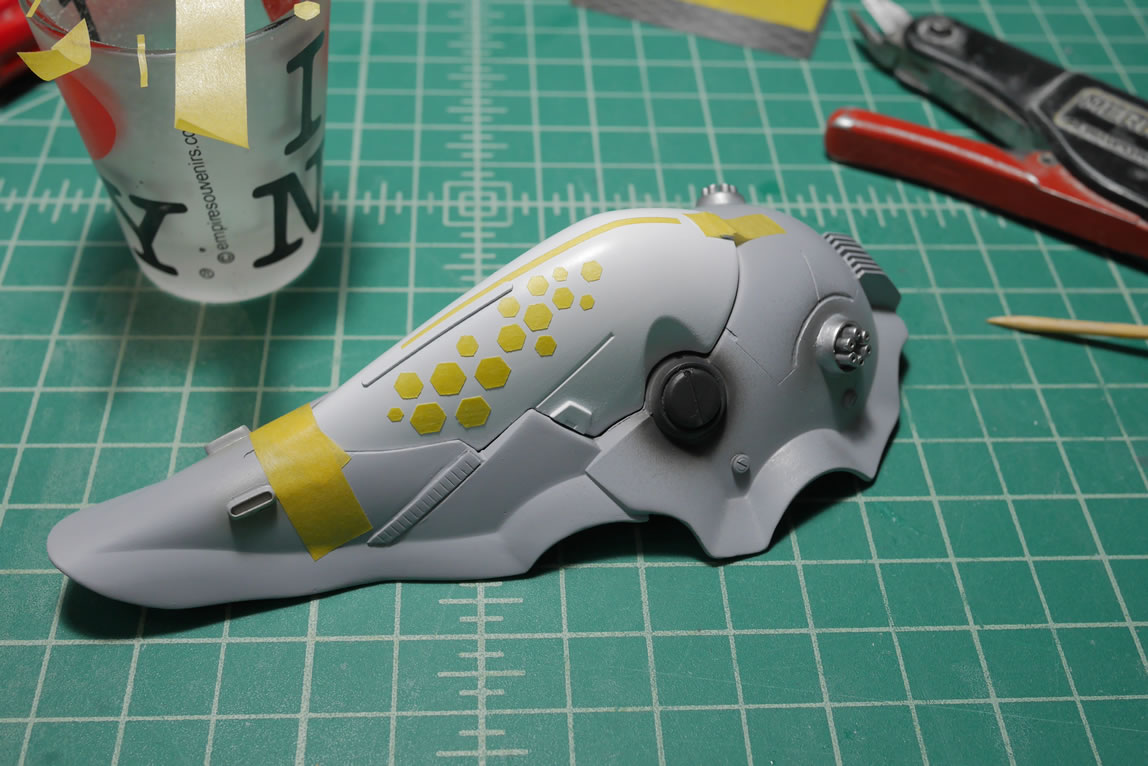
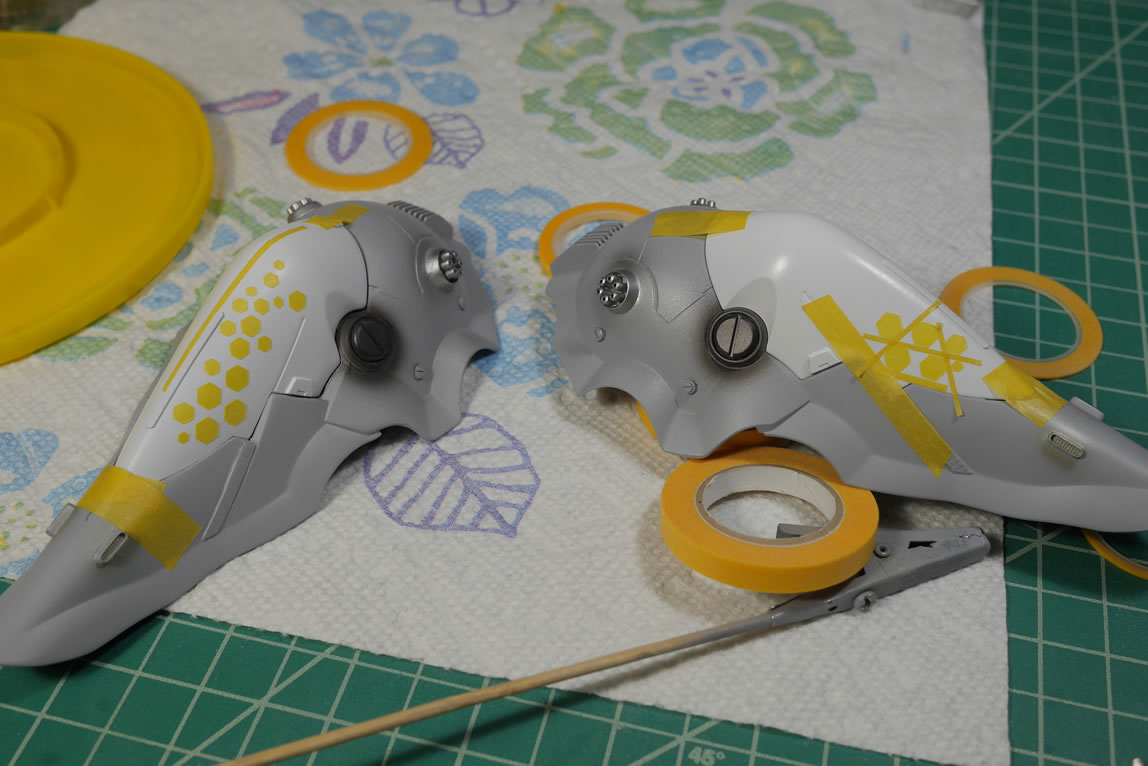
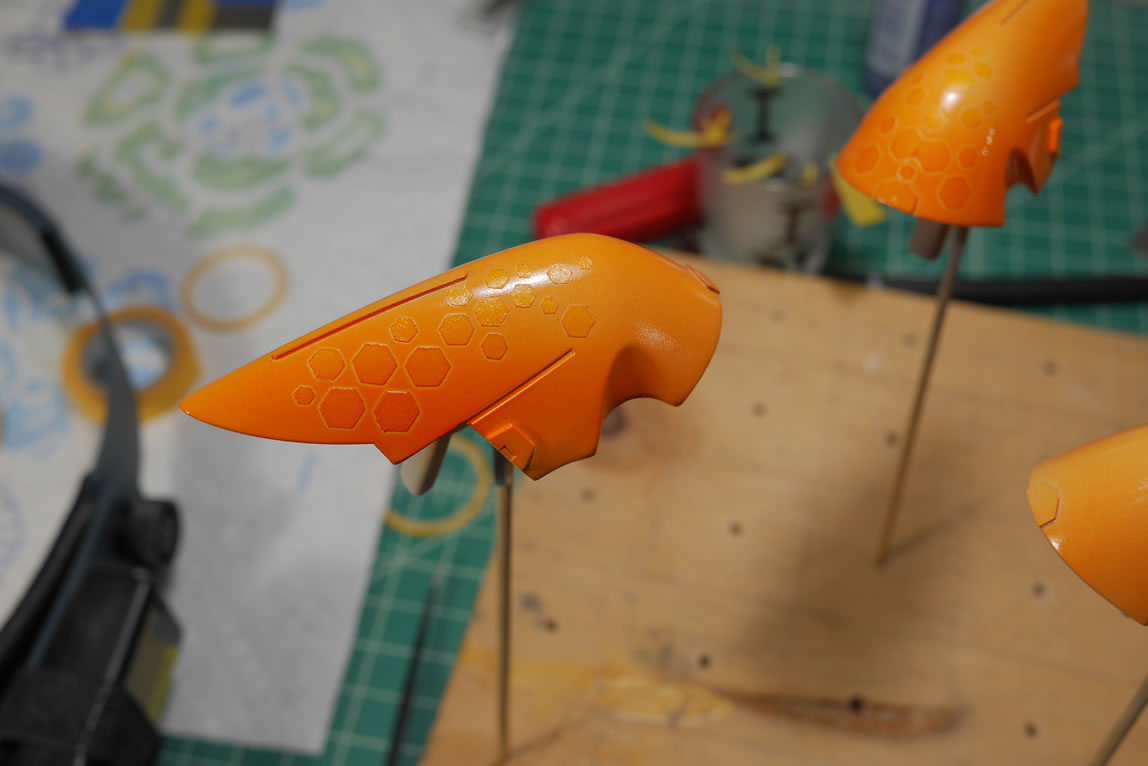
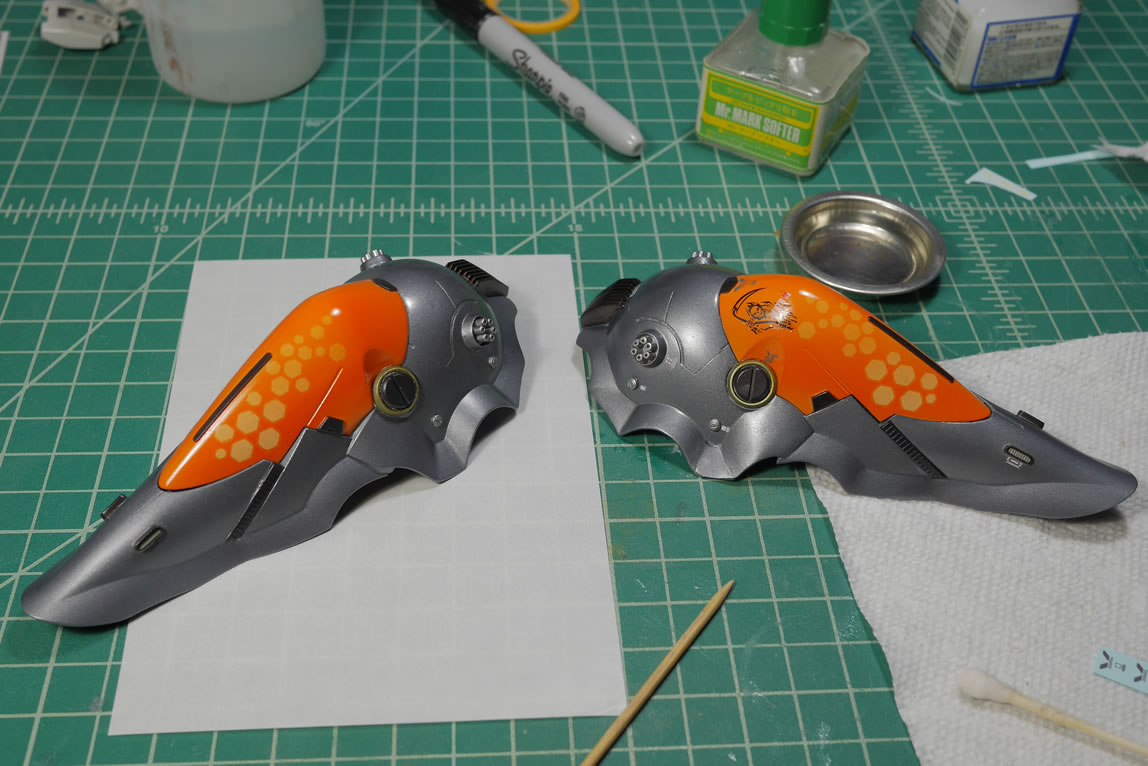
Once the masking is done; clear orange is painted. The application of the clear orange is controlled so that the lower areas of the parts get a heaver coat than the top area. This is planned because I want to do a fade technique on the masked areas. This will make a little more sense as I progress. Looking at the pictures there is a tonal difference from the top area to the lower areas where the masking is placed.
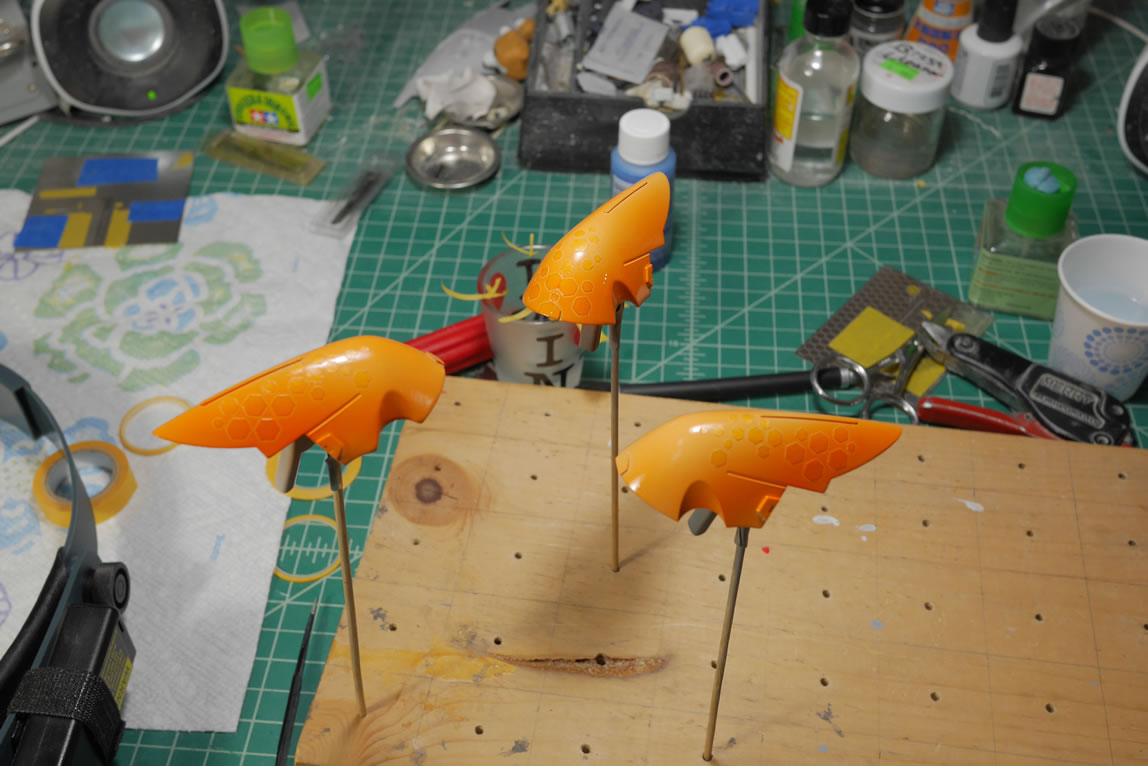
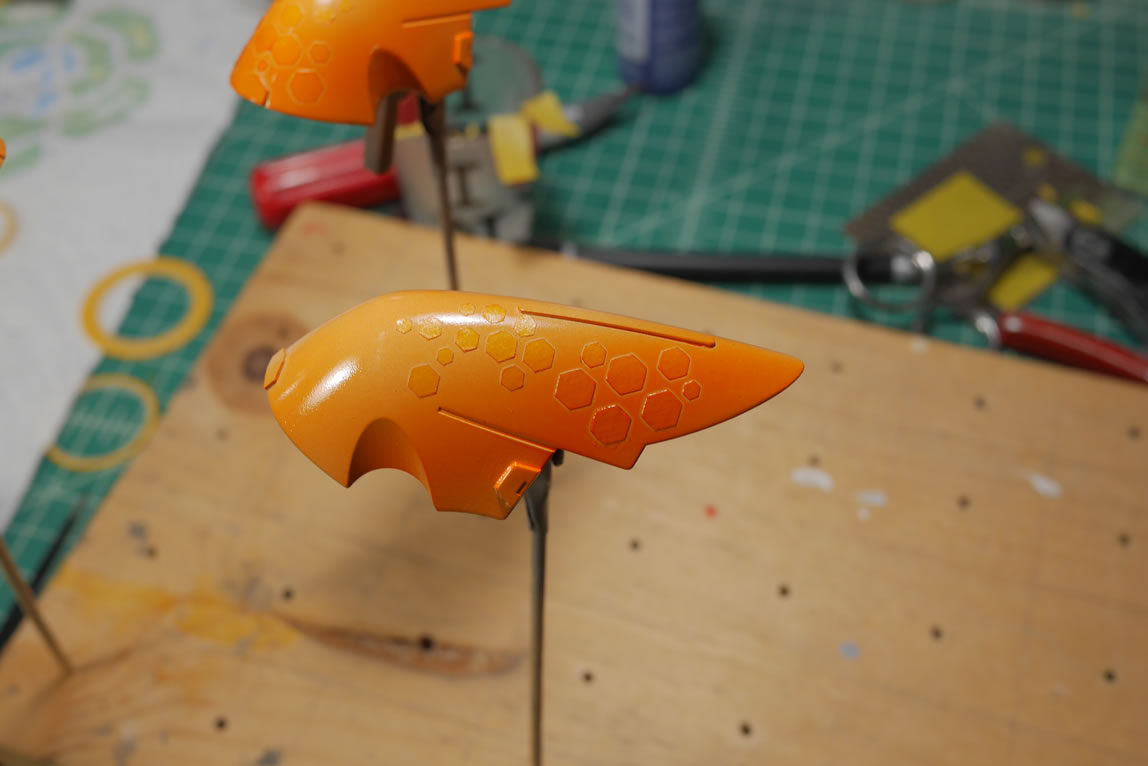
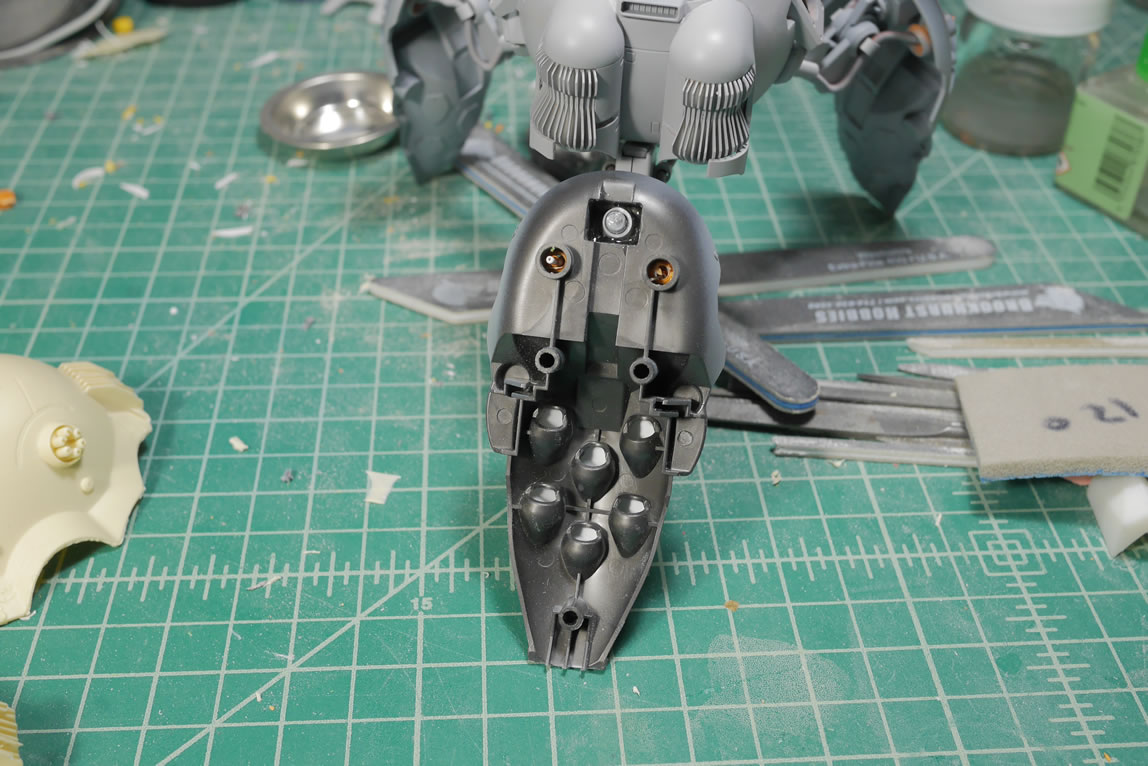
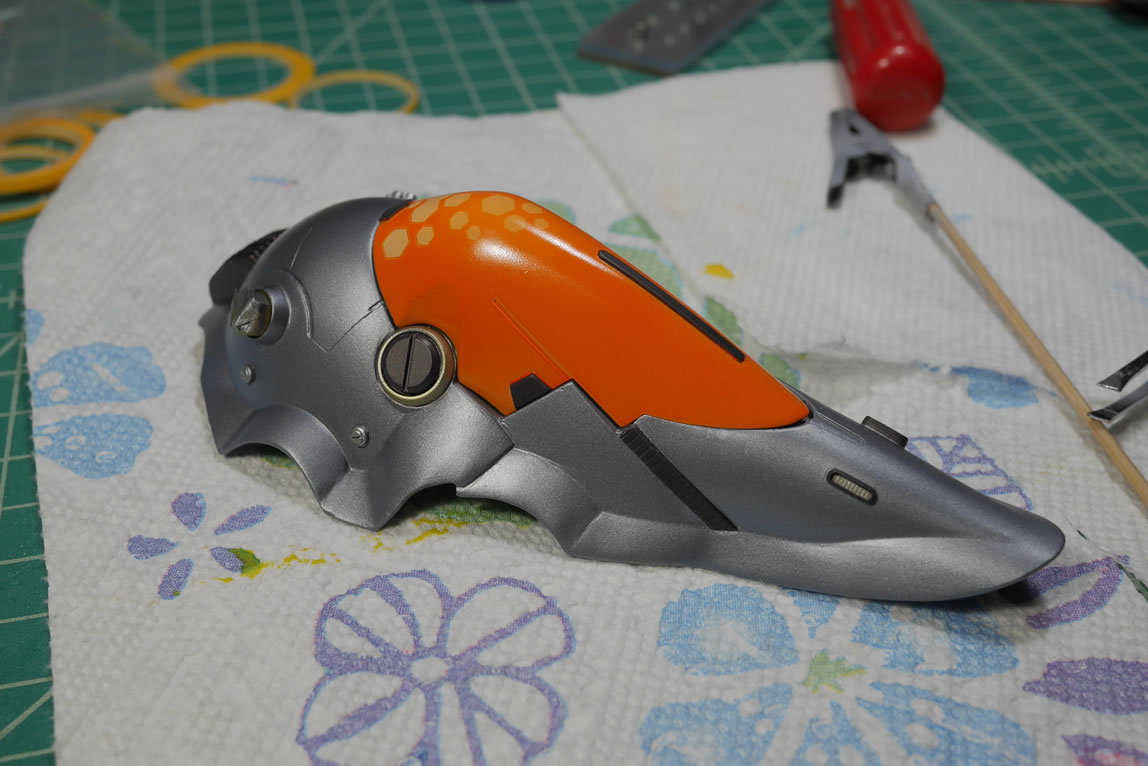
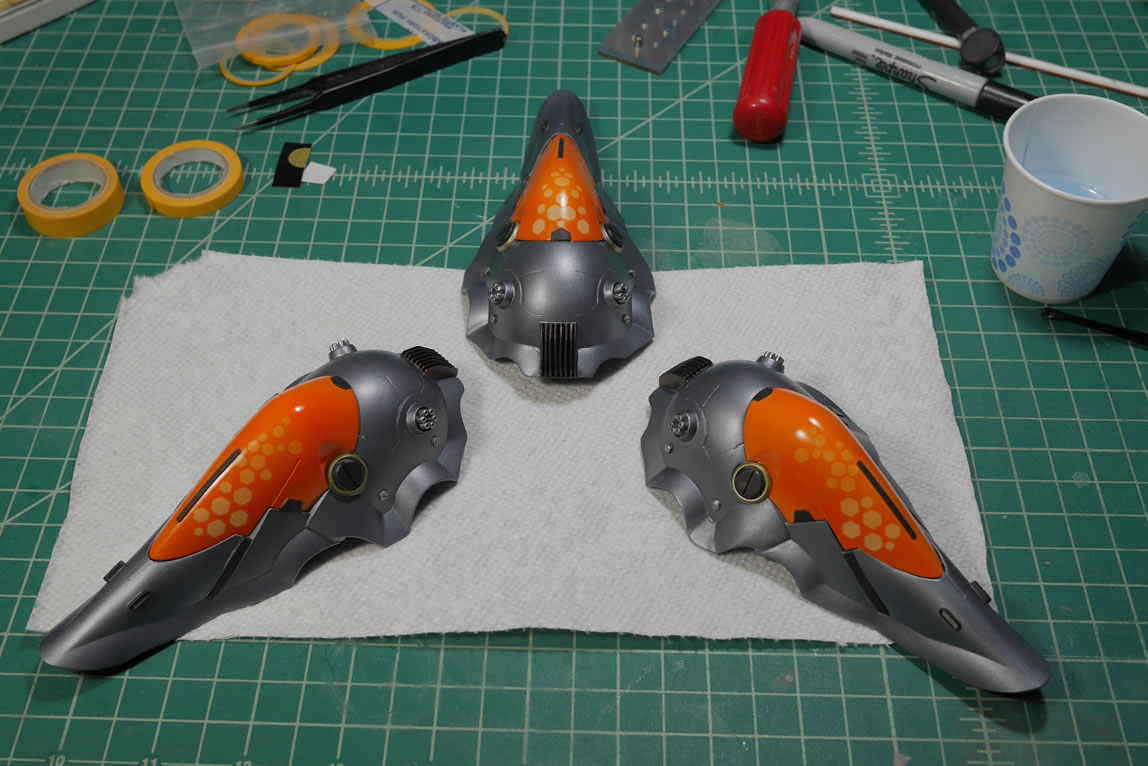
Masking hexes are removed after a full day’s cure. There are some rough spots where paint leaked, these were cleaned up slightly with some very high grit sanding pads/meshes. 4000 and 3600 grit pads/meshes were used.

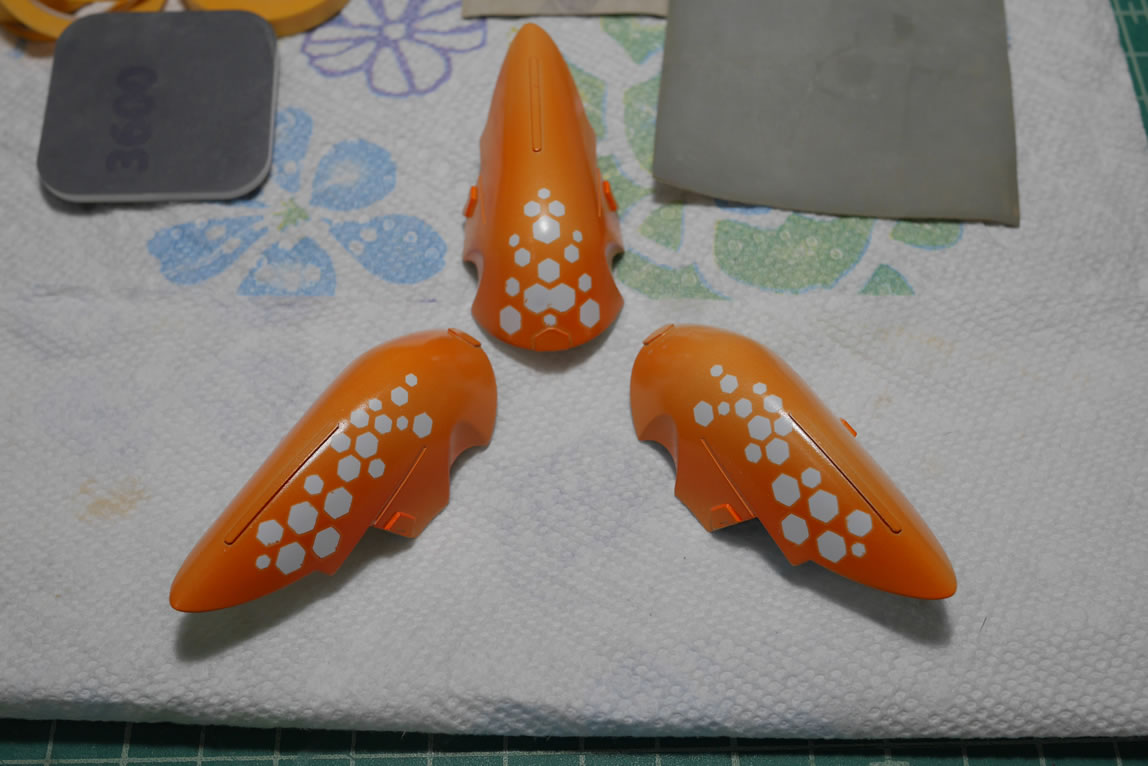
The kit is unmasked and cleaned up a little. Another layer of clear orange is sprayed concentrating on evening the tone of the top area with the bottom area and just leveling out the tone for the entire part. This effectively creates a fade for the masked off white parts being brighter at the top and fading with orange at the top.
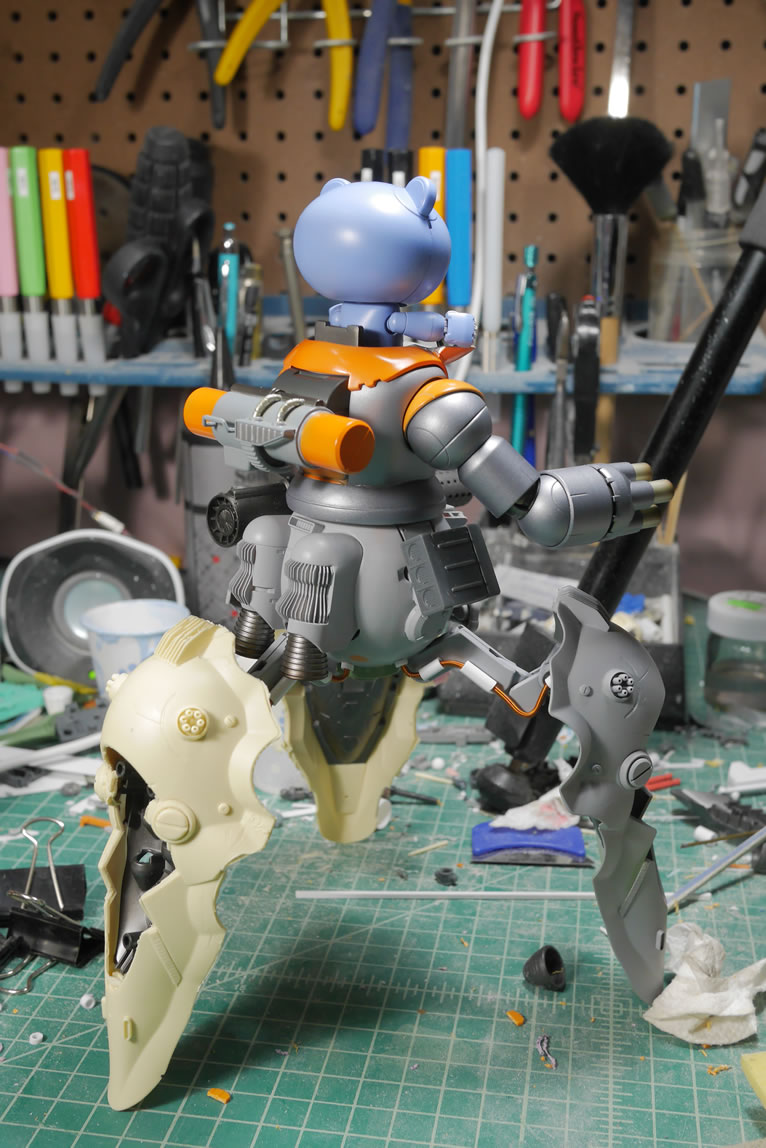
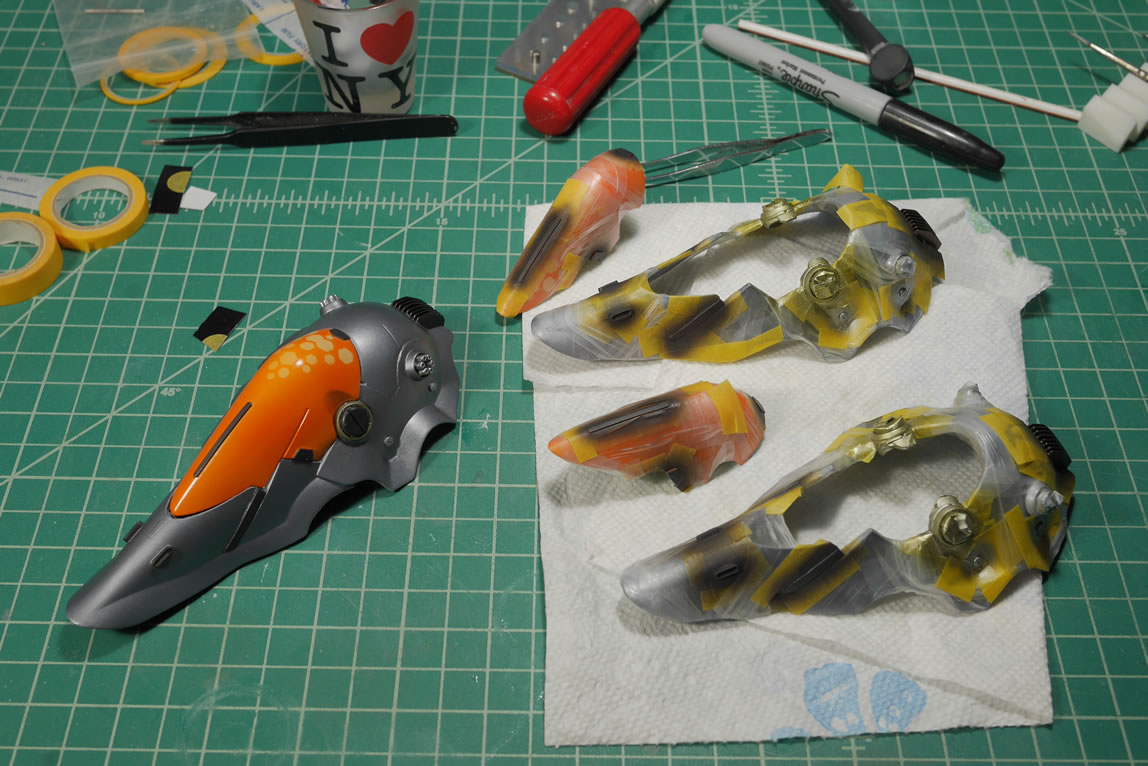
Back to the main binder parts. Earlier I painted the first layer of details. Those are masked off to paint in the main color for the binders. The same semi gloss bright gunmetal used earlier.
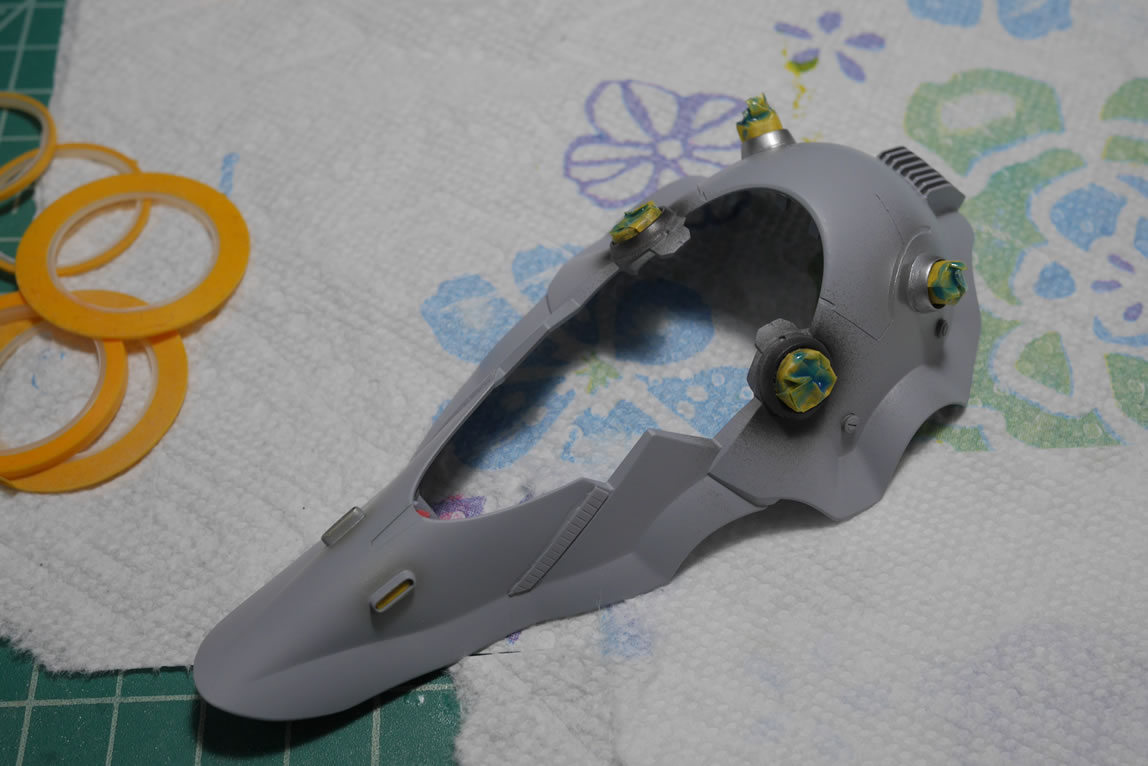

Once painted and cured for a day, I can get to masking off the main color to paint in the details. I use a punch to create masking templates for some of the circle details.
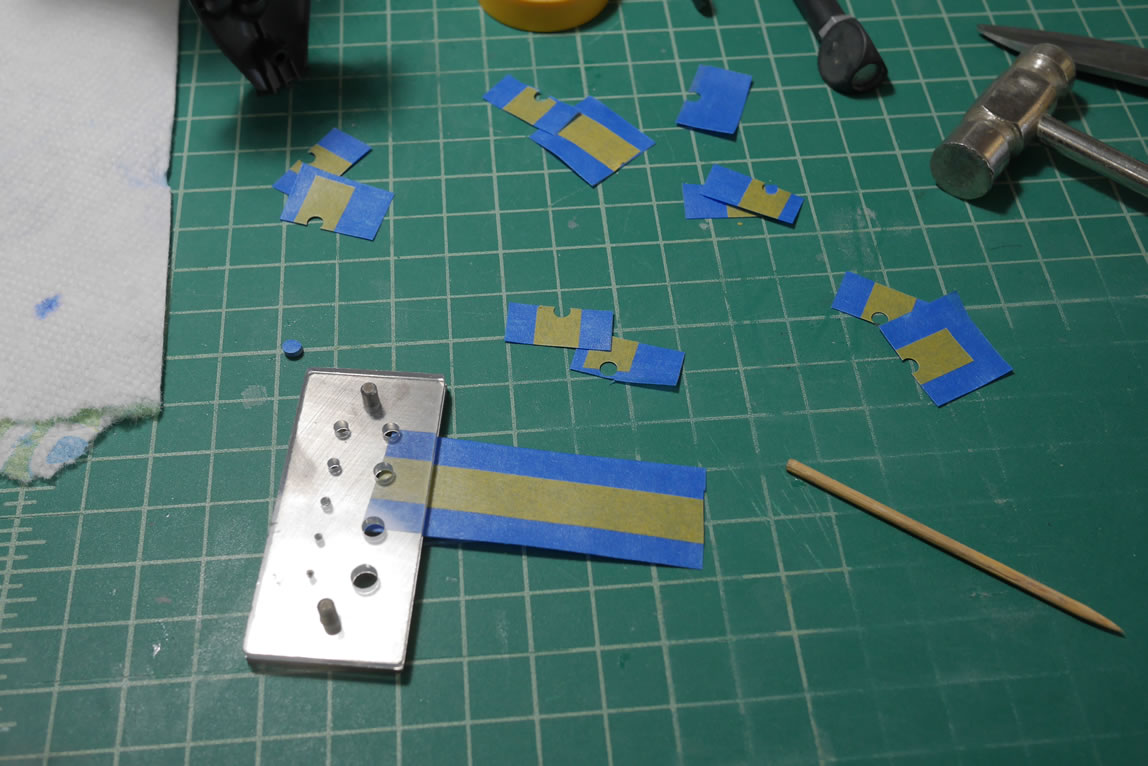

Hours later… one part is masked. Once I get one binder masked, I paint the detailed immediately. This is to avoid the low tack paint from lifting while I spend another couple of hours masking off the other binders.
The top part is also masked and details painted. Unmasking everything, I can put one of the binders together.

Now on to masking and painting the details on the other binders.
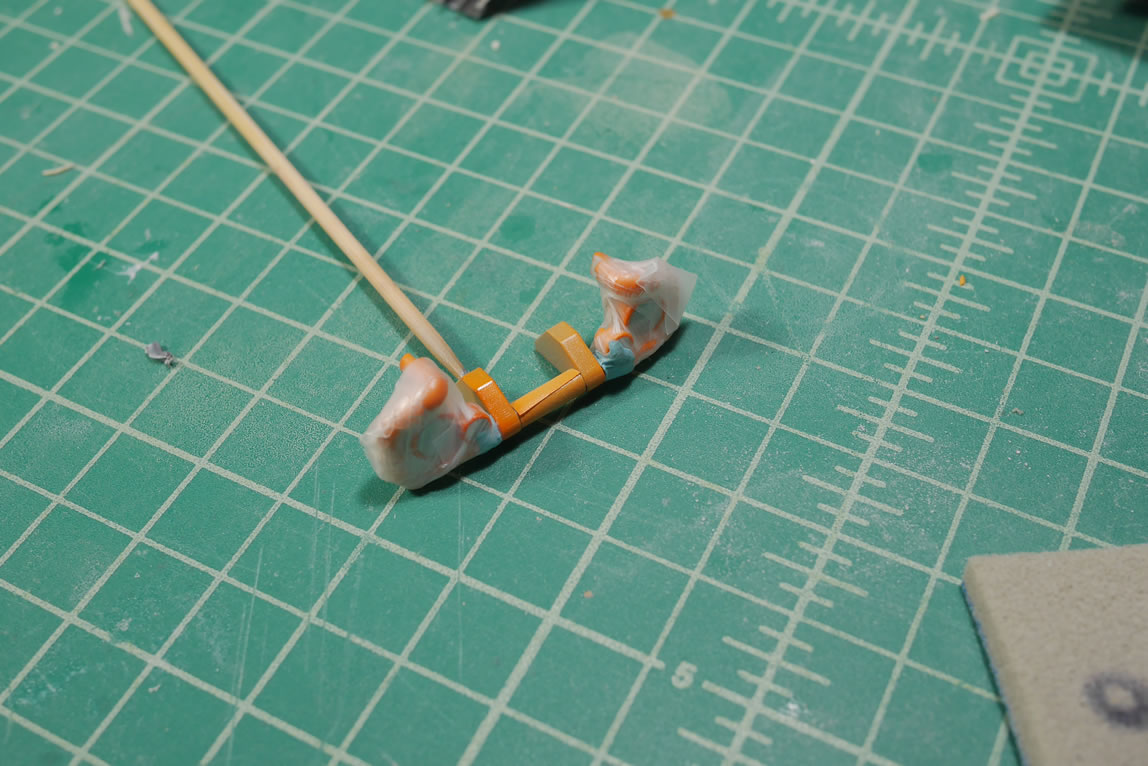
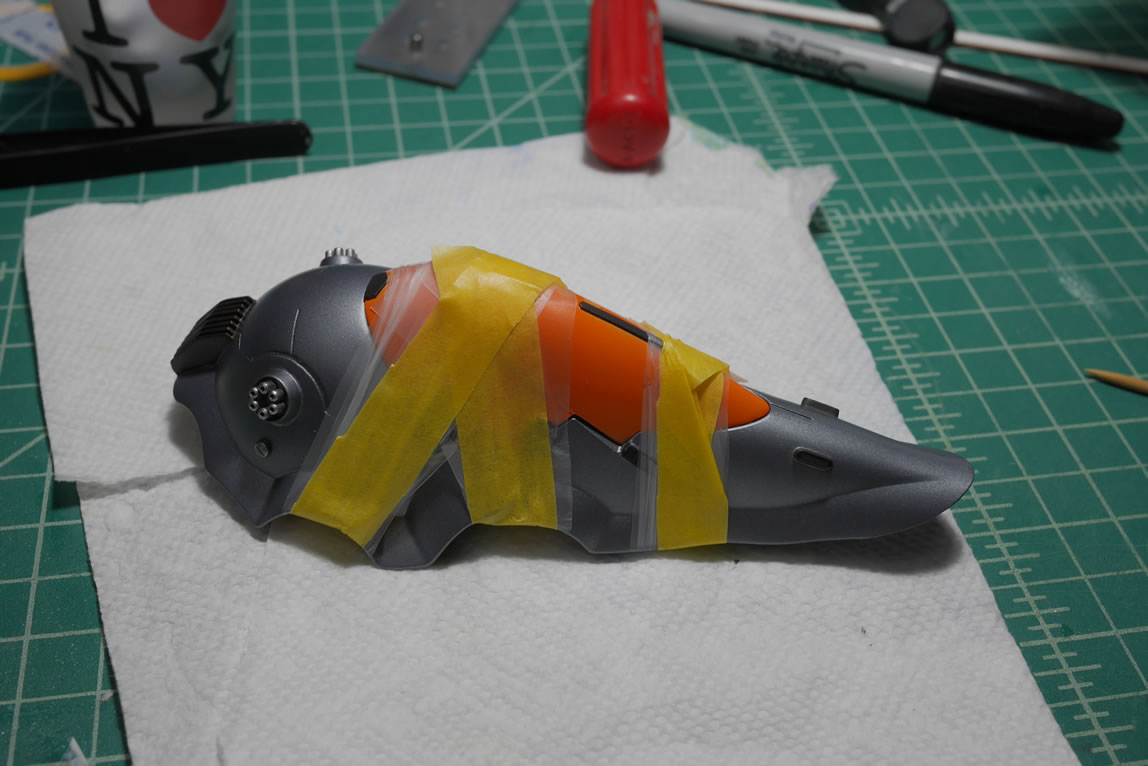
With resin pieces, you will get some interesting fit problems because they may warp slightly. For gluing the binder pieces together, I used some parafilm to give me a light hold then used masking tape over the parafilm to get a strong hold for the two parts that also ensures I don’t damage the paint. Once the parts are aligned, a little bit of epoxy glue is applied and the part is left to sit and cure. The same process is done to the other binders.
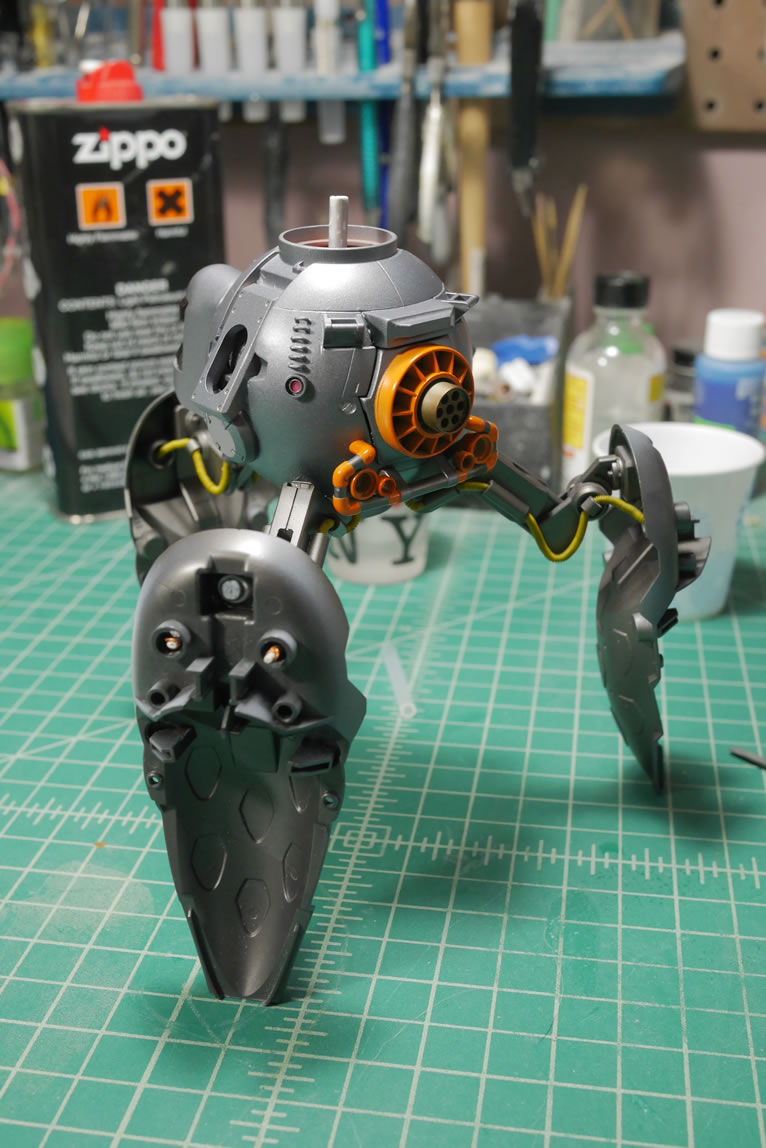
Returning to the lower body, all the painting is done and the cables were hand painted with an enamel zinc color to create a little contrast.
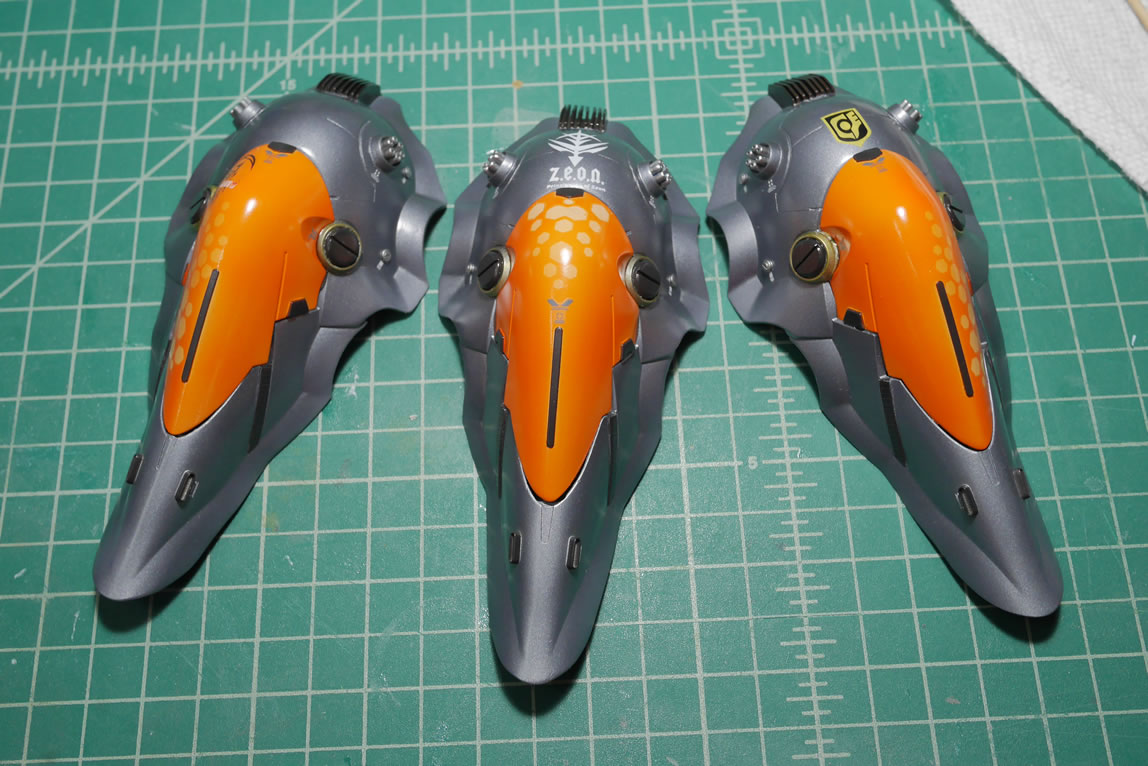
Everything is unmasked and cured for a day. A clear gloss is sprayed over everything to prepare the parts for the next step, deckals. Once decaled, the parts are left to cure for another day and another layer of clear gloss is sprayed to sandwich and protect the decals. This layer of clear also works to hide the decal edges.
The flat coat, well technically, the semi matte, is sprayed. I’m using alclad’s clear coats. They have 4 levels of clear. Gloss, semi gloss, semi matte, and matte that go from ultra shiny to not so shiny, to not so flat, to flat. At least, that’s how it’s supposed to look. I didn’t want a totally flat finish, as the metallic colors work with some bit of sheen so I went with a semi matte. Here are some comparisons between the glossy finish and the semi matte finish.

As I sprayed the semi matte on the lower body, I noticed that there were nubs that I missed. Better to discover them now than later when it’s on display somewhere… So time for a quick fix. The nubs were carefully sanded away and the parts are carefully re-painted. Pretty easy fix, but a fix that could have been avoided if I paid attention when I was building, sanding, priming, and all the other stages before this.
The parts are left to cure for another day. I will need to handle the parts to start glueing and assembling, so to avoid the potential finger print in uncured paint; I just let it sit.
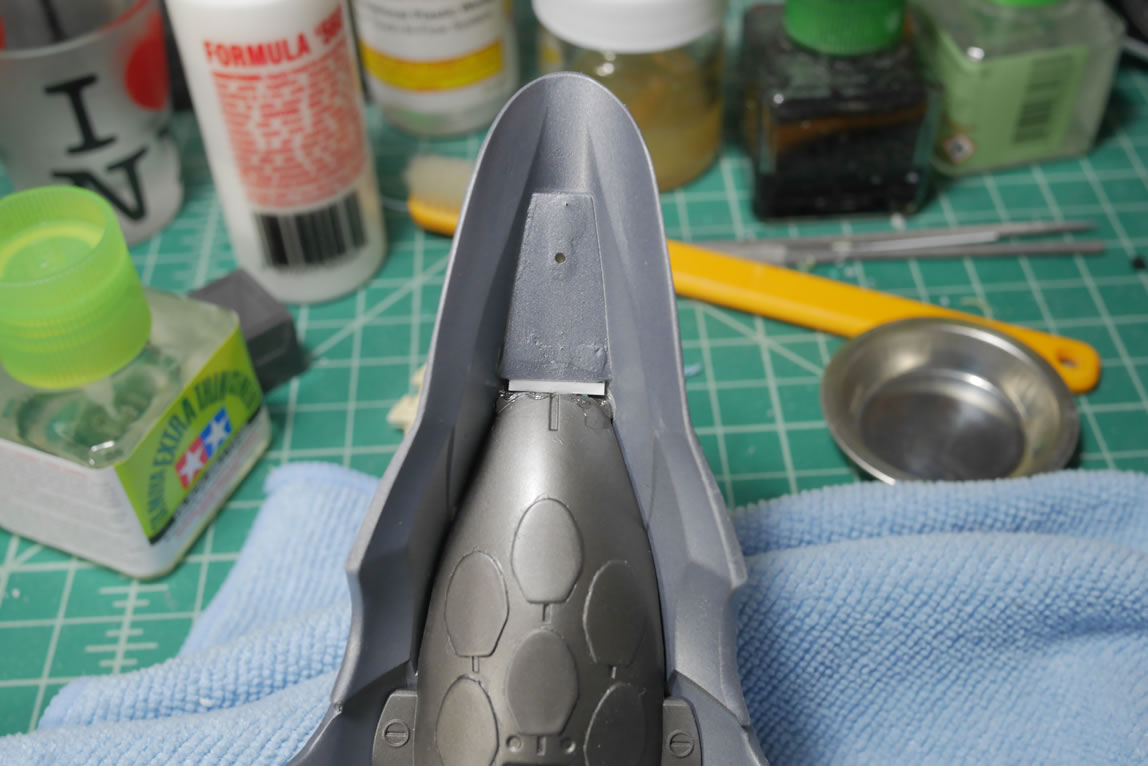
Assembling the binders require some glue and a little light curing putty to fill some gaps. One of the parts have a bigger gap that needed to be filled with styrene.
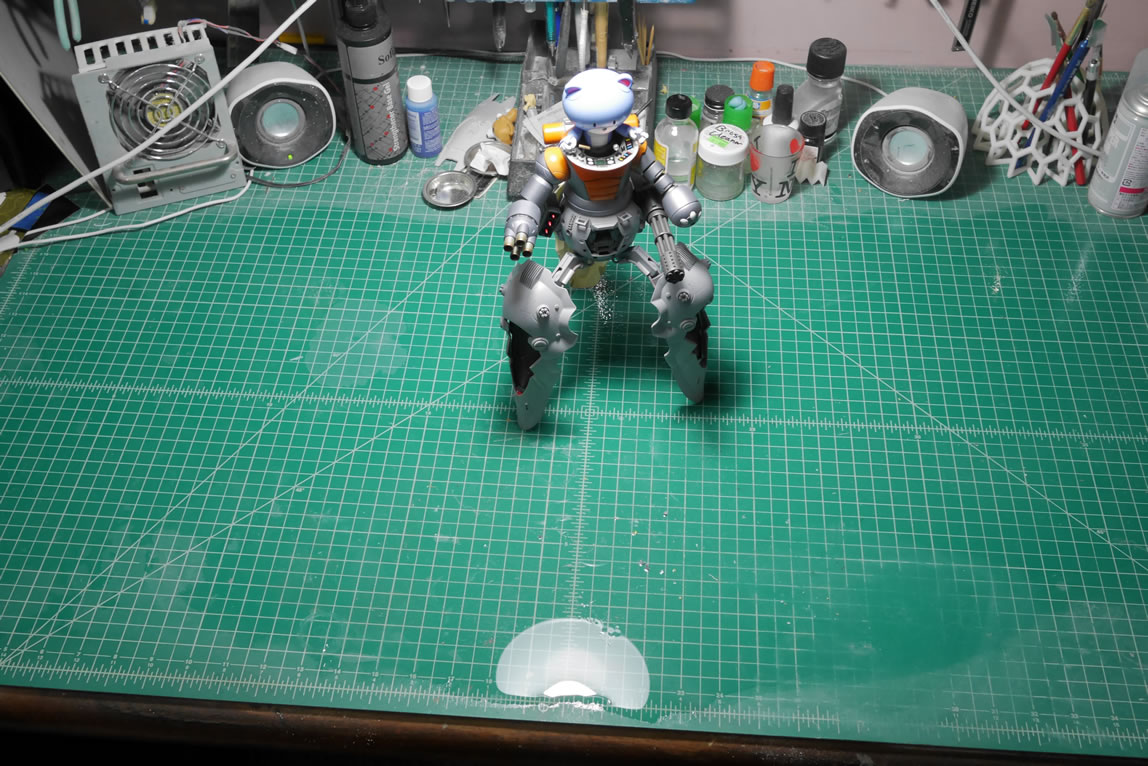
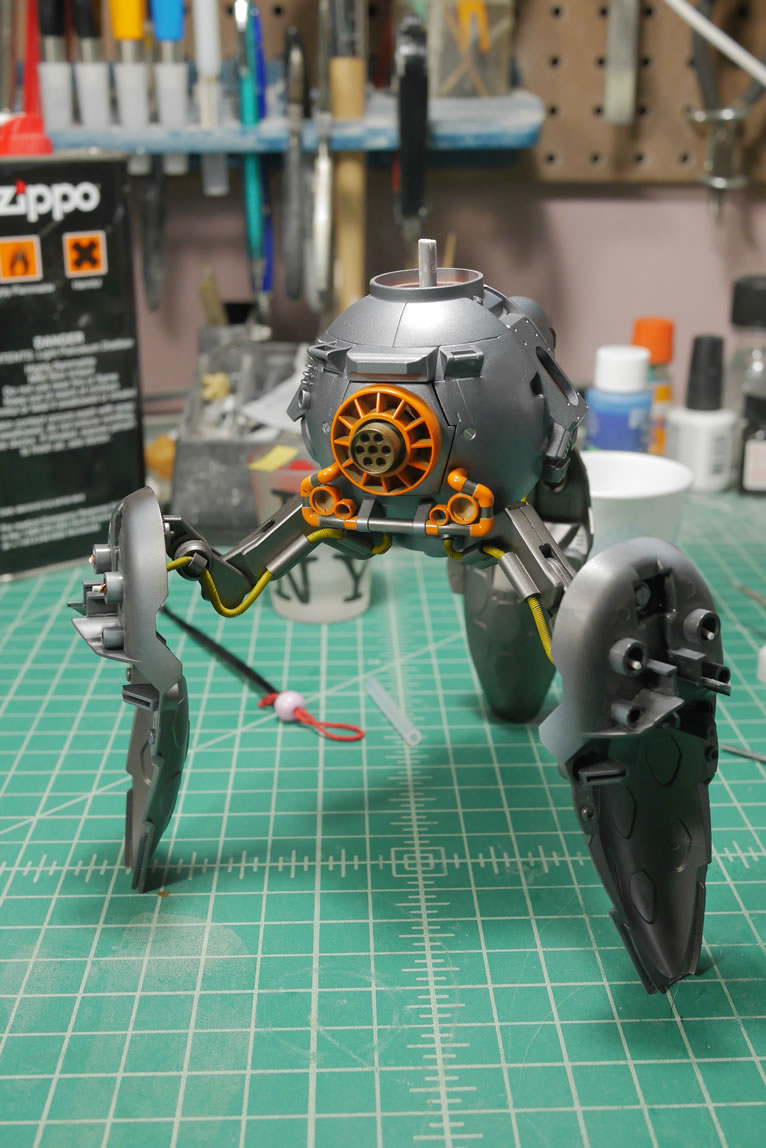
Slowly and carefully, the kit is glued together and small areas fixed. The final thrusters and engines are glued to the tops of the binders to complete the kit. Now I just need to let the glue cure up, so the kit is moved to a safe space away from me.
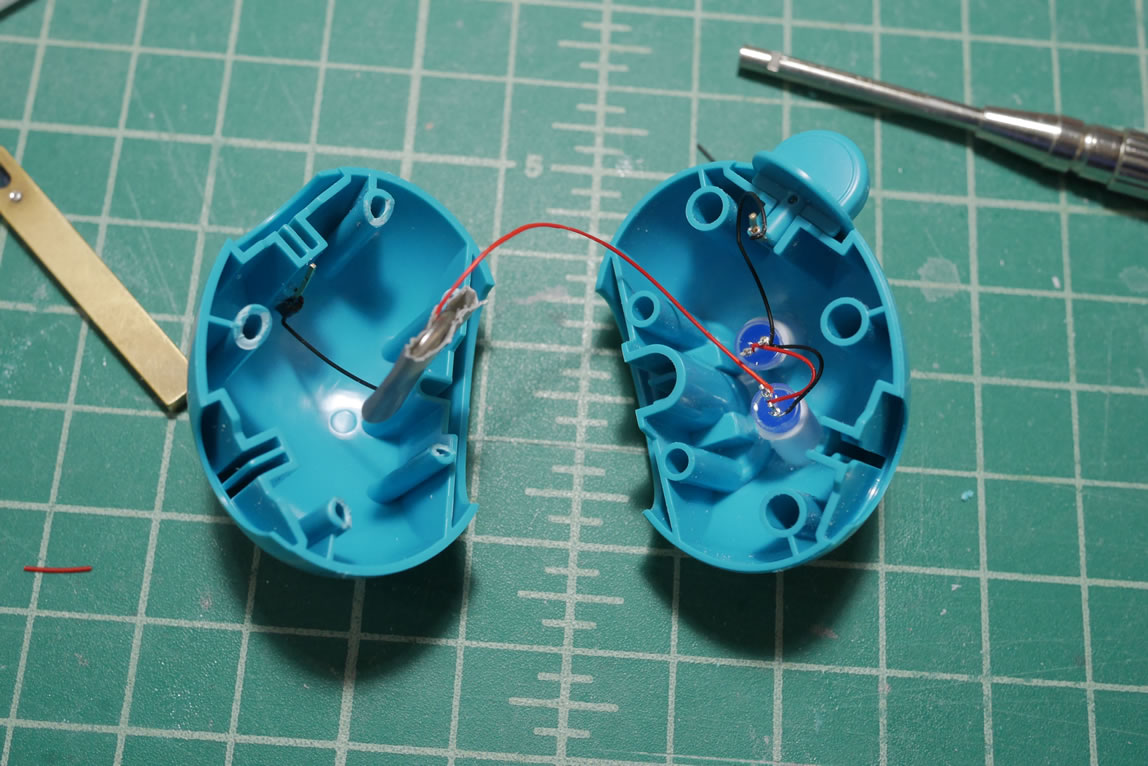
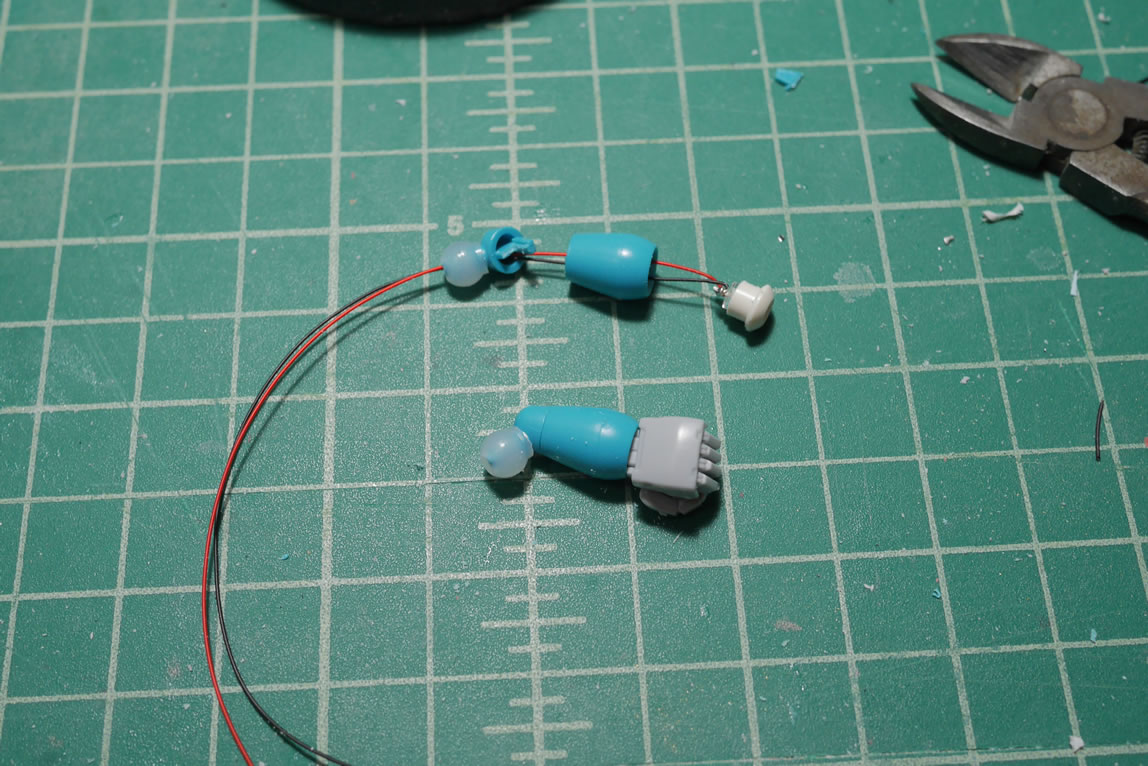
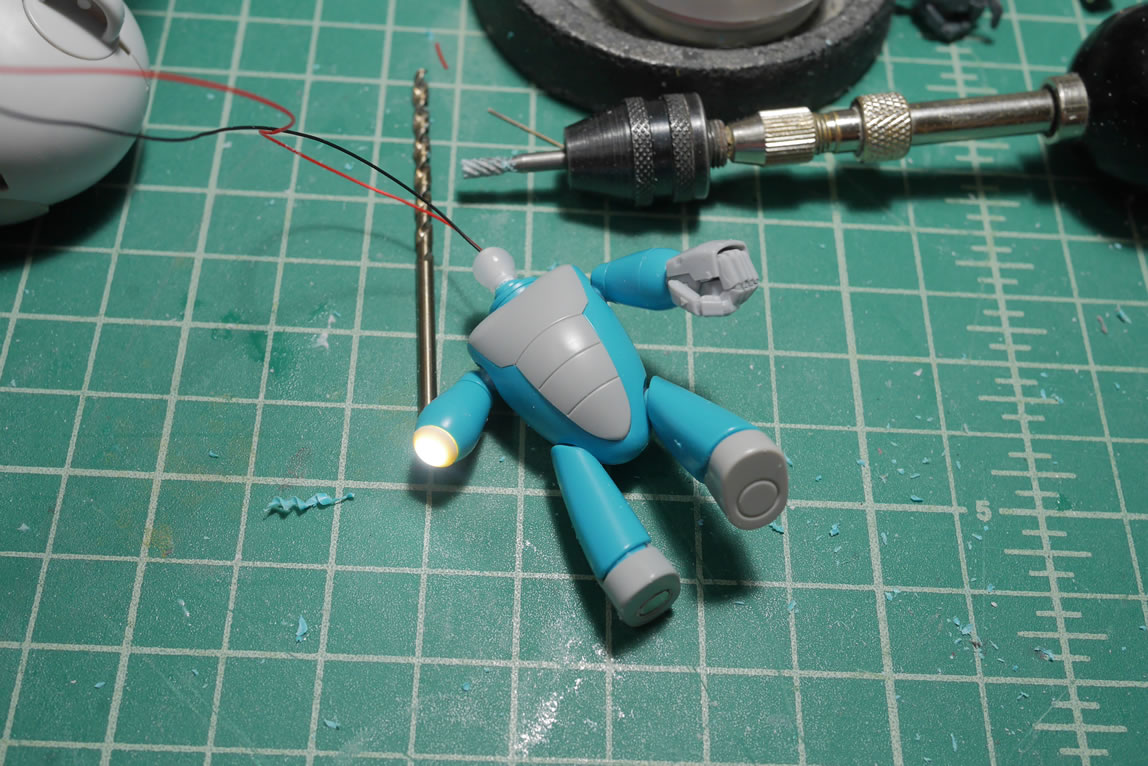
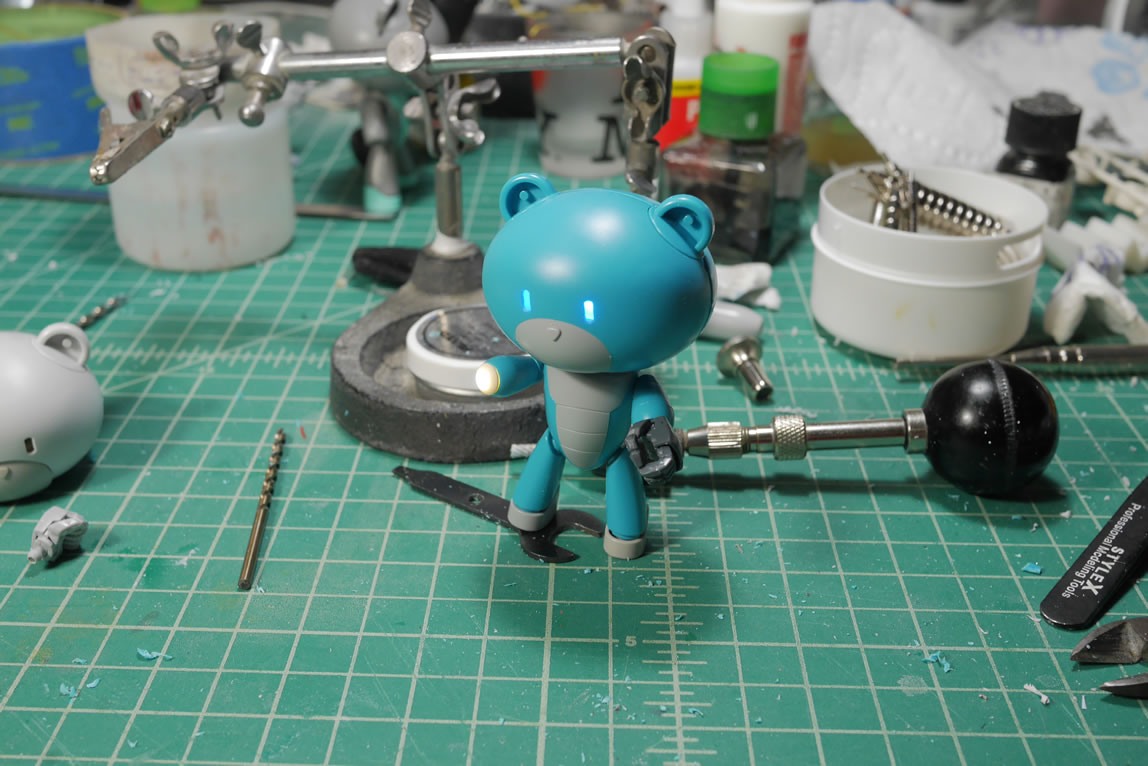
To occupy my mind, I return to the display base work. The petitguy that will be under the main kit will need an inspection light. So I added an LED inside the arm and wired this through the connecting peg. From here, this is wired through to the head where I added another switch in the other ear and another battery pack. Since the LEDs in the eyes and the LED in the arm are different colors they run at different voltages which would draw differently from a single source battery. I would need to wire things up in parallel for such a system to work. So it was just easier for me to add in another battery inside the head. There’s plenty of room for it. Now I have two switches controlling two lights in this guy.
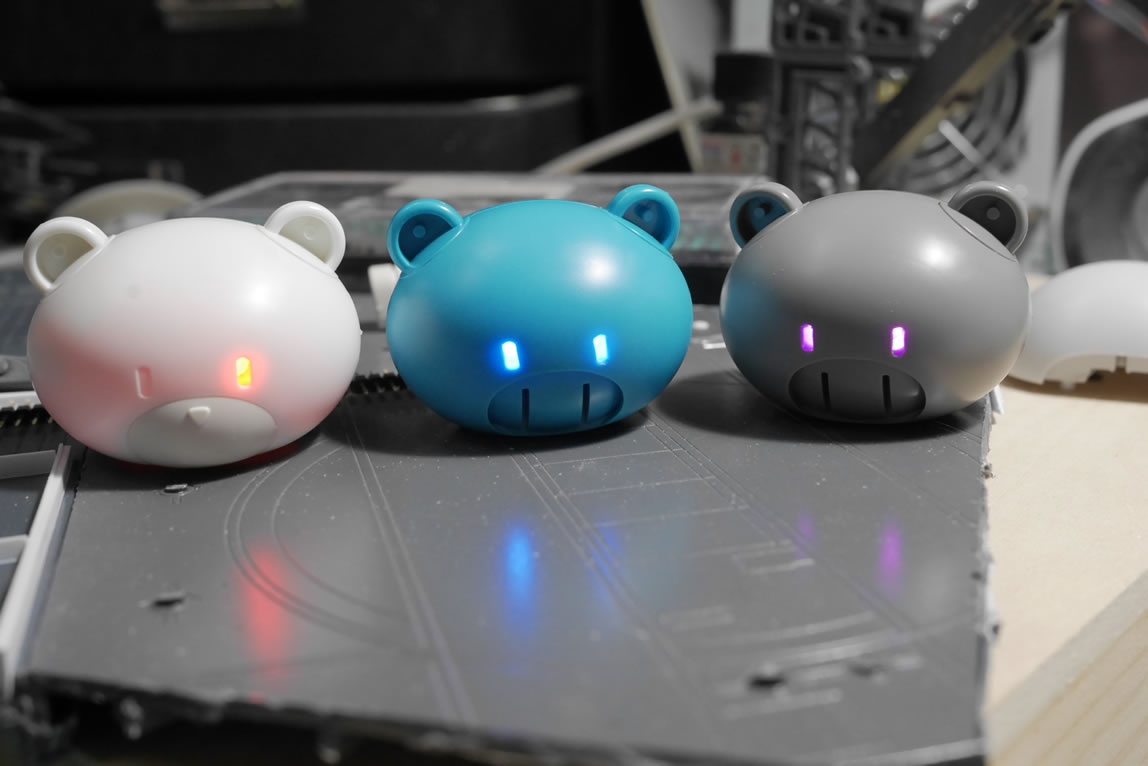
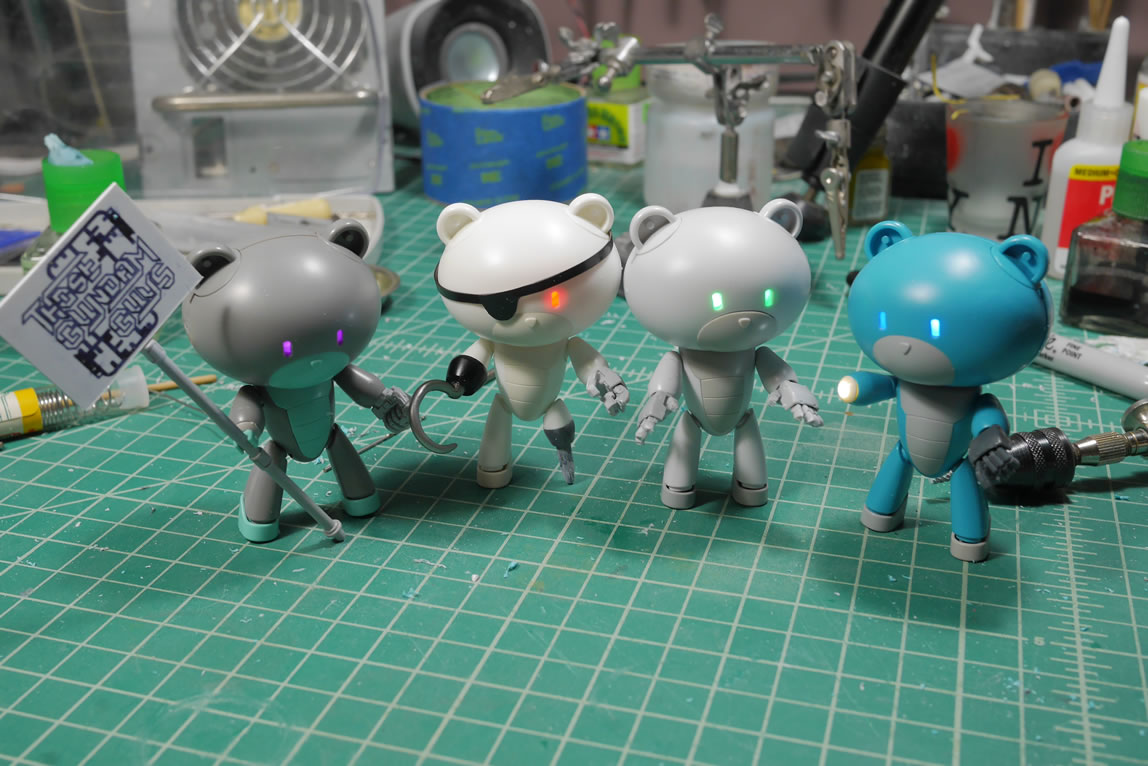
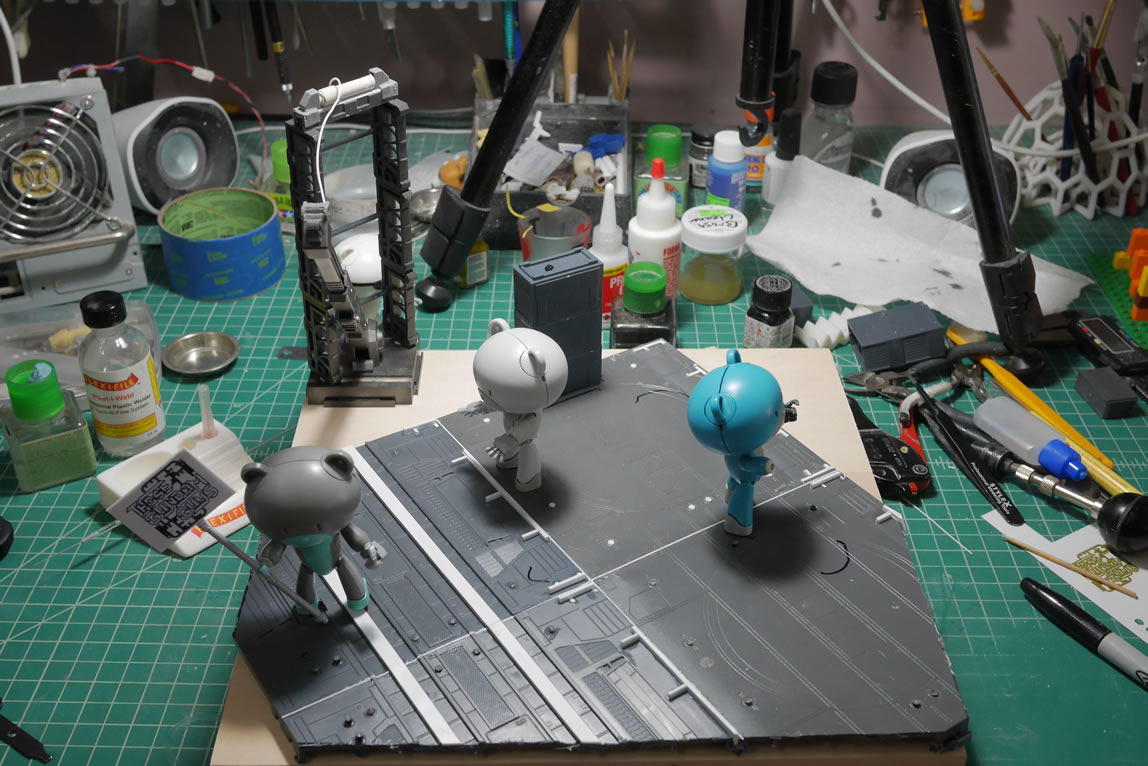
My squad of petits are ready for work. I added some magnets to the bottom of the feet so that I can just snap them into place and not have to worry about things falling over. Another quick test fit on the board finalizes the location of the squad.
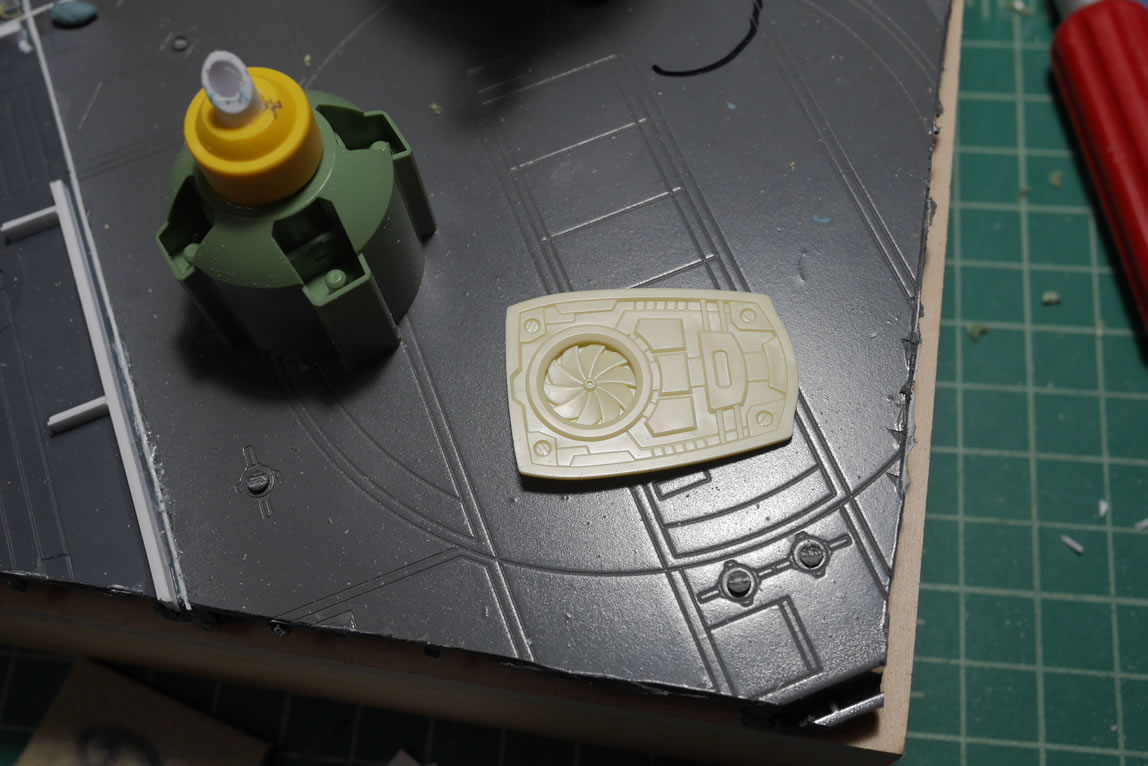
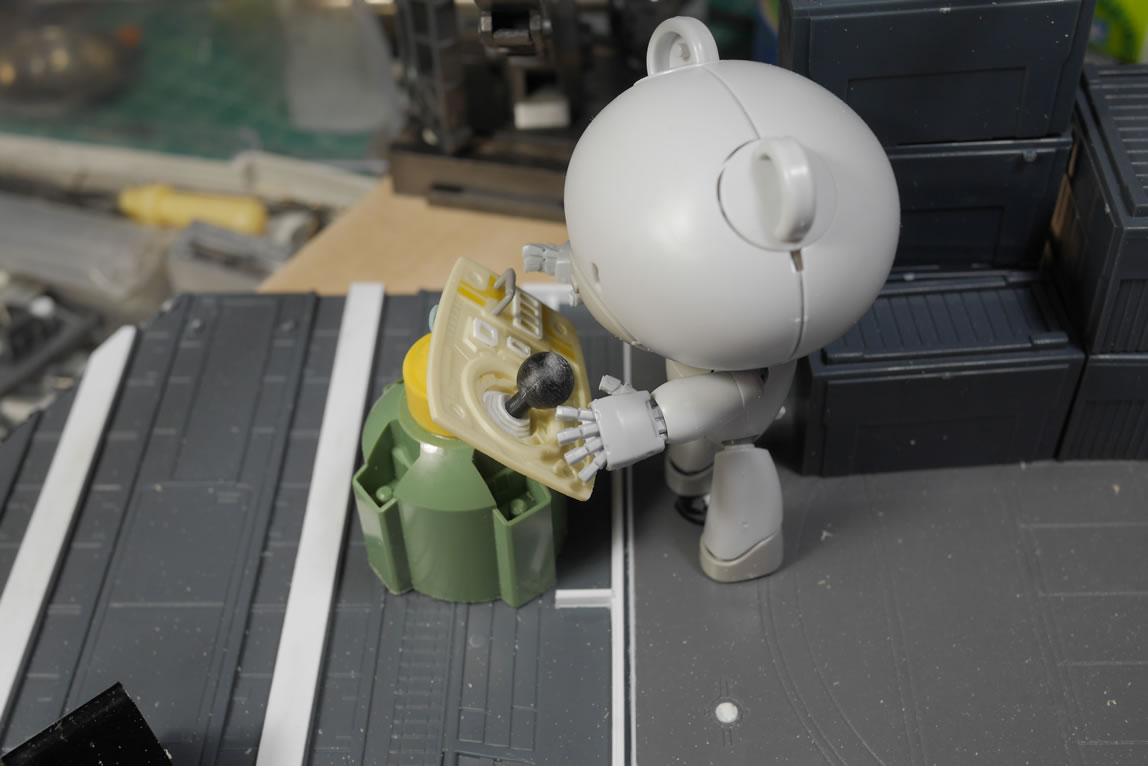
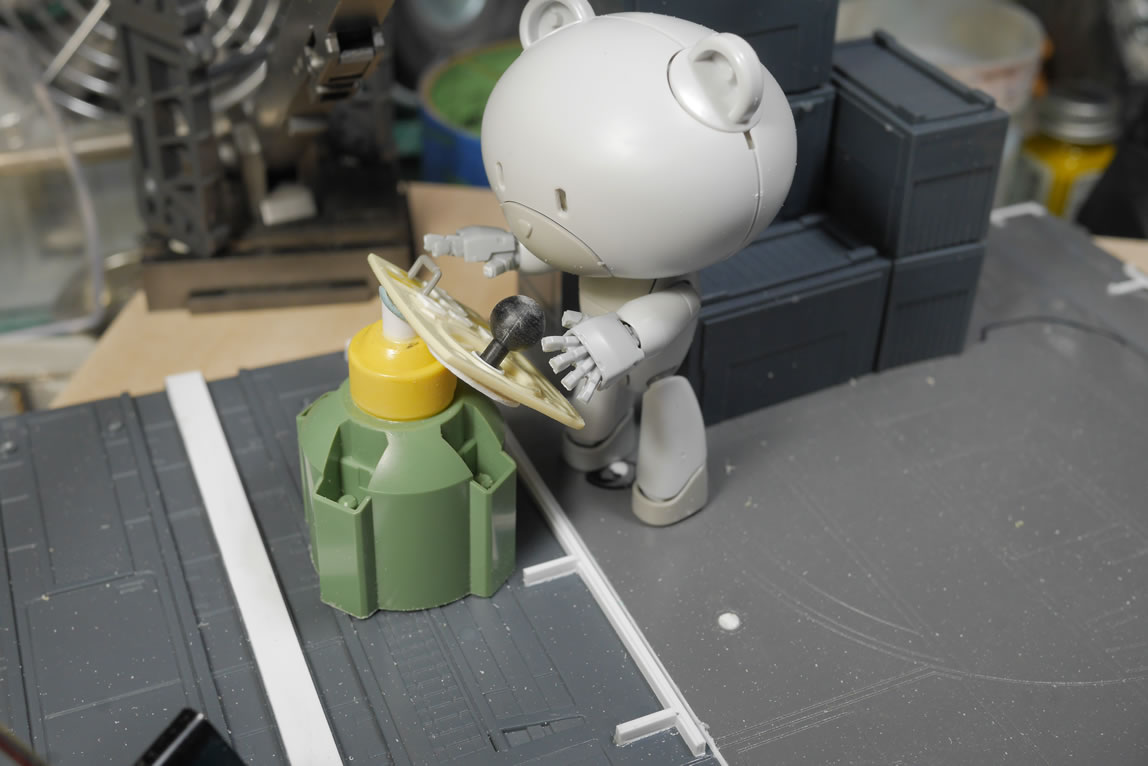
The crane operator needs a control panel. Time to rummage through parts to find something fitting. I found the following, arm piece to the bear guy, the foot of the bear guy, and a part from the kshatriya repair’s fuel tanks I believe. Mashed together, I get a basic control panel feel.
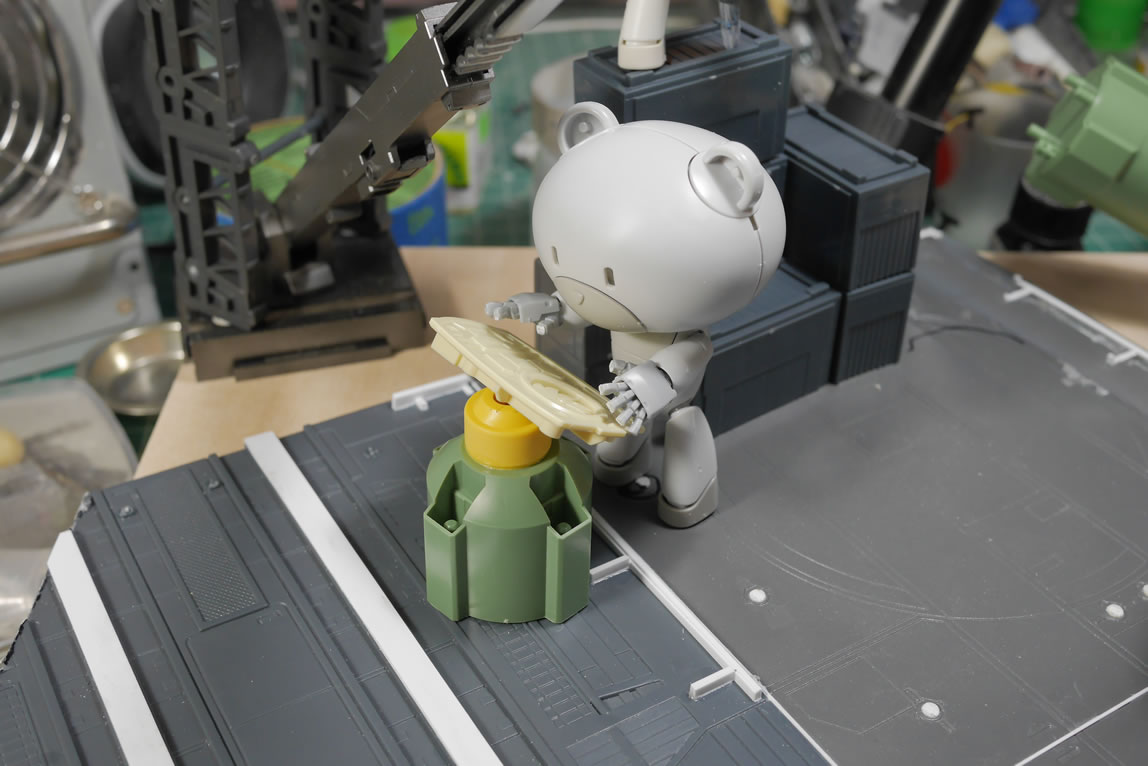
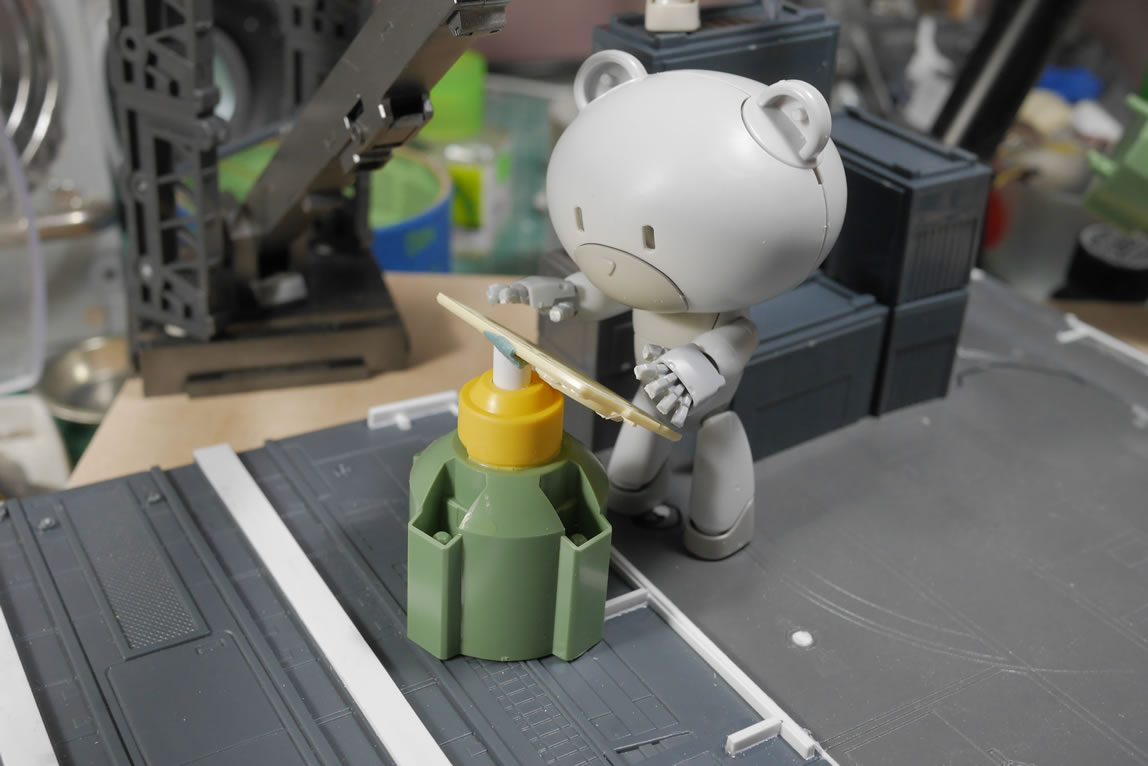
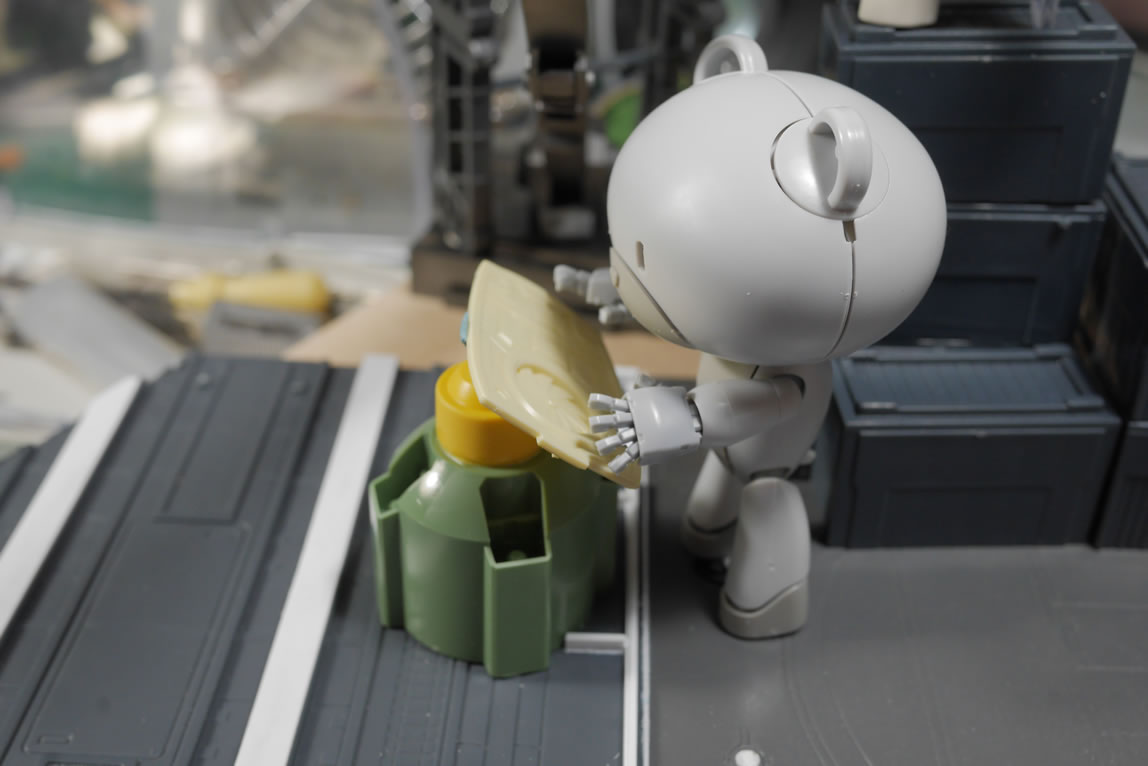
A little sanding here, a little putty there, some drilling in the vent, some cricut cut instrumental panel details and some styrene and other plastic bits glued together form the basic control panel.
The main kit is done and completed pictures are here
And as usual…
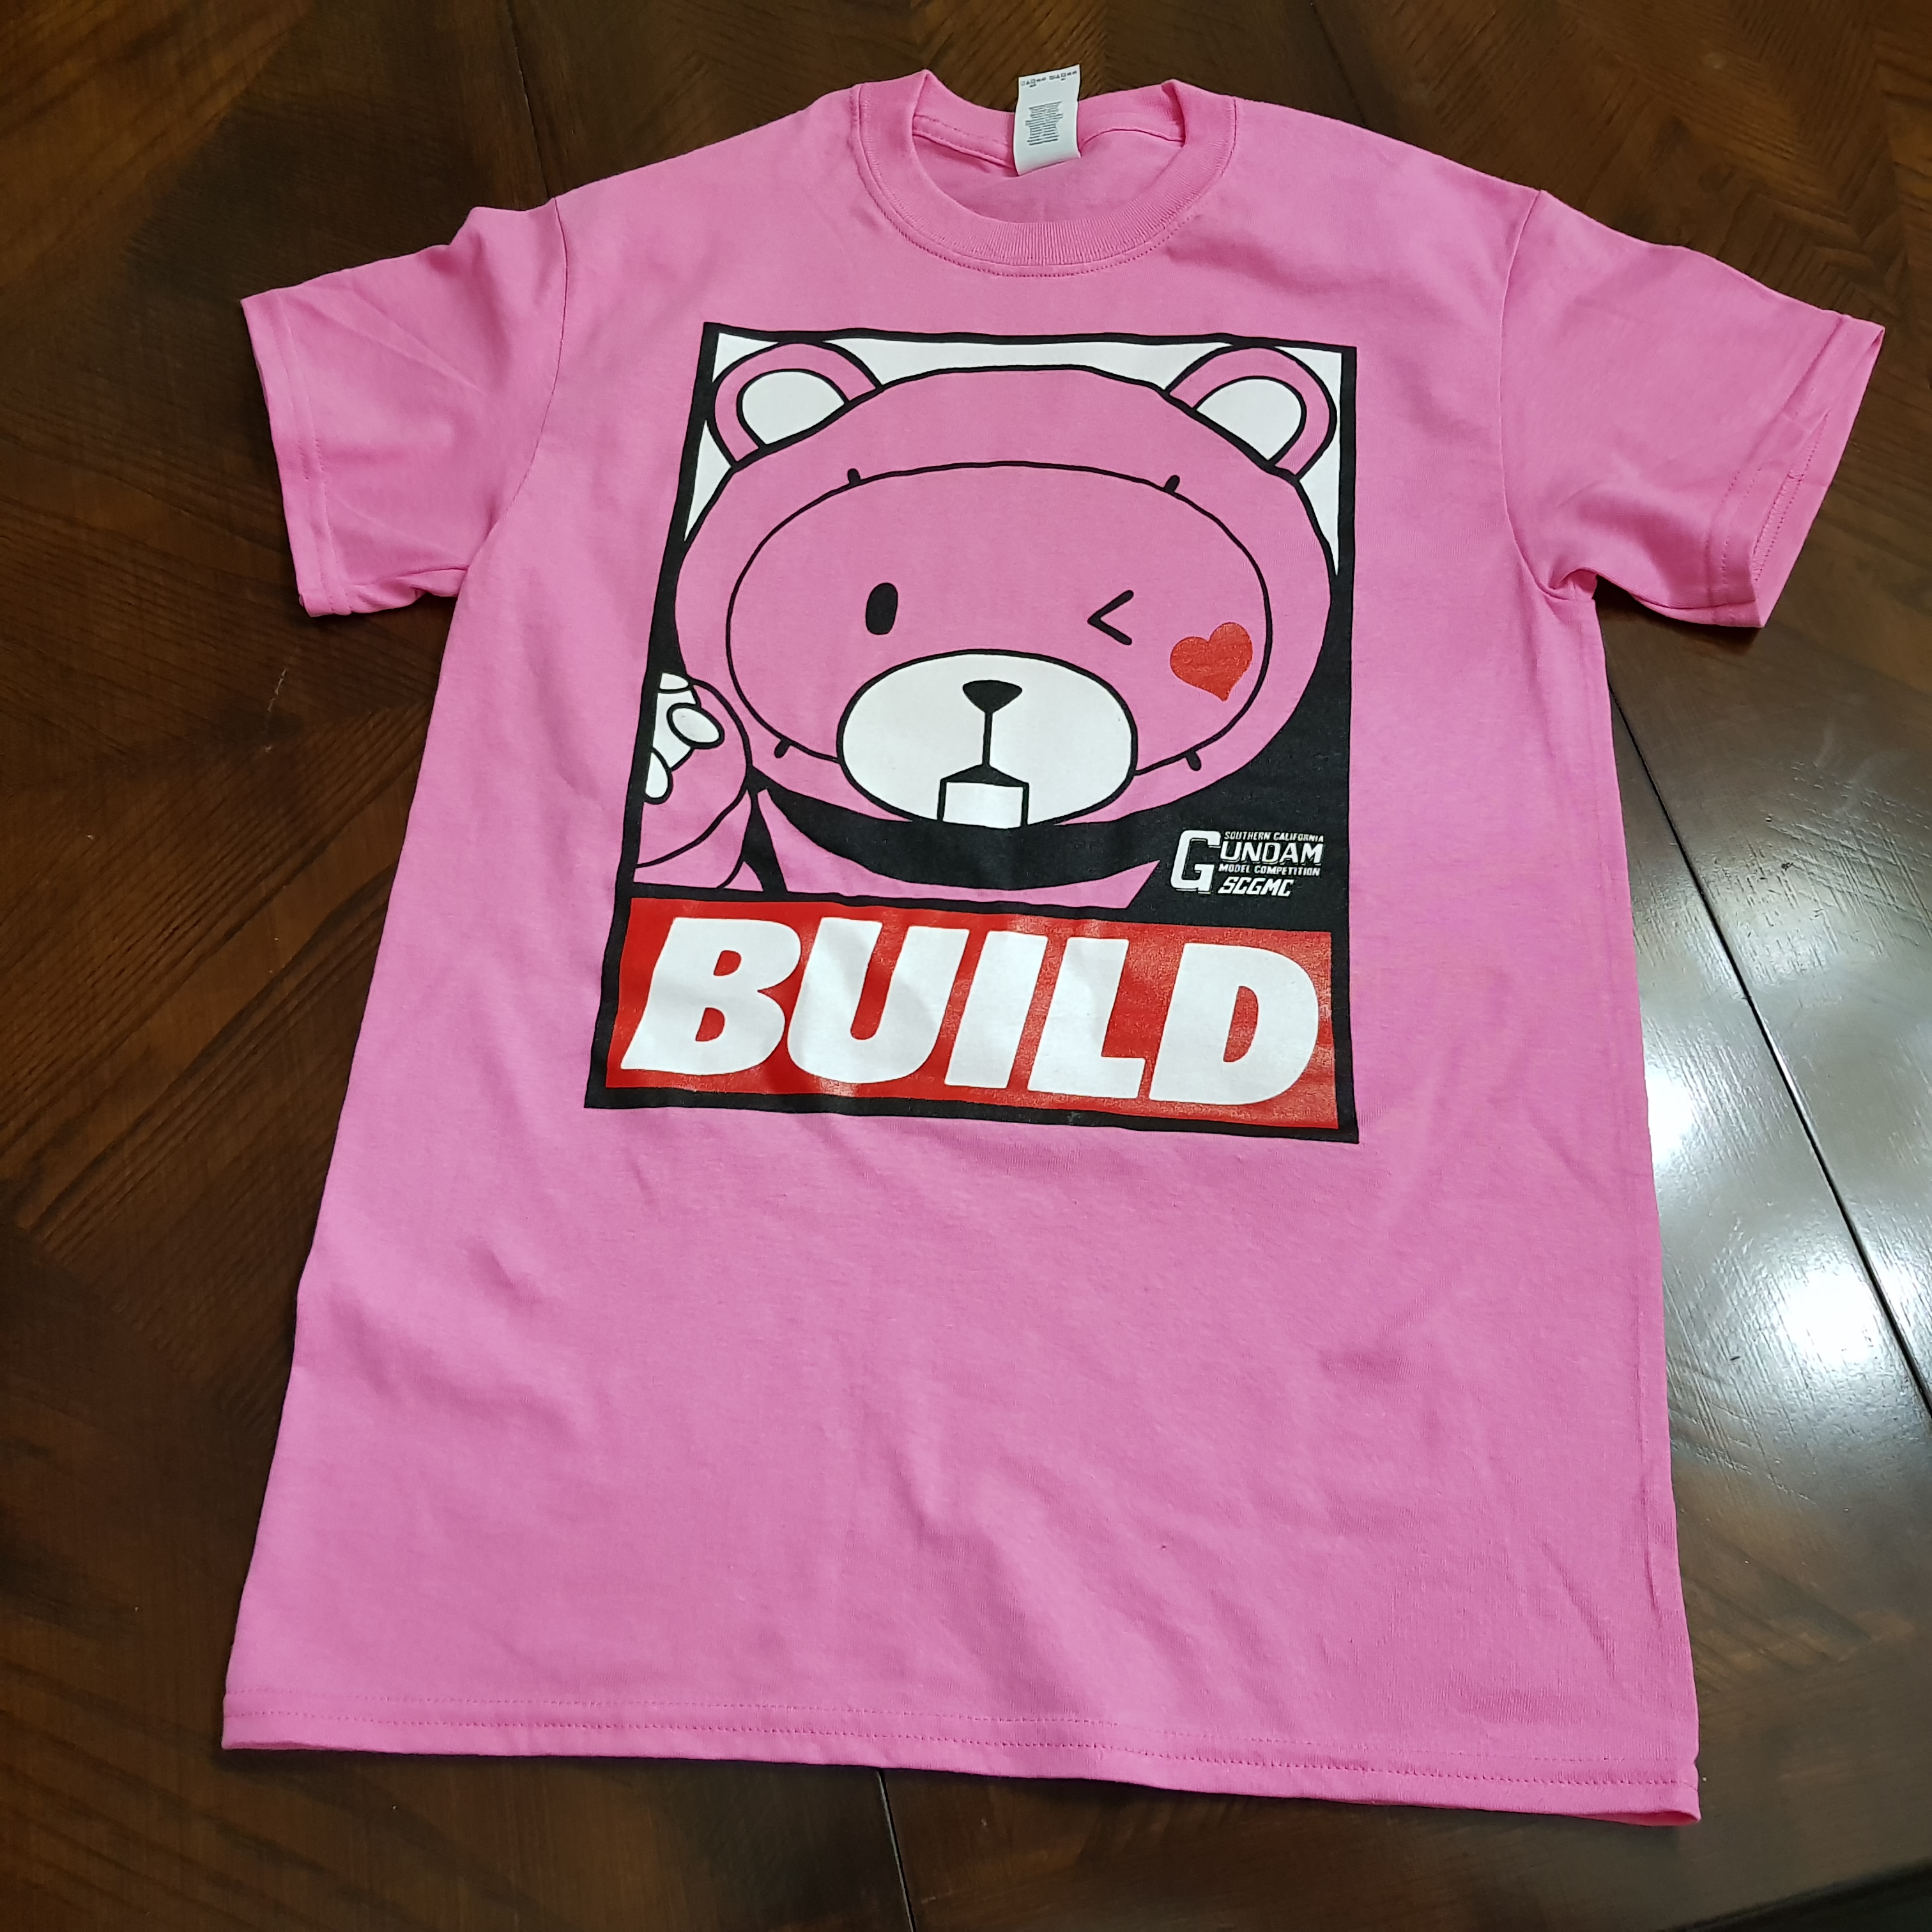
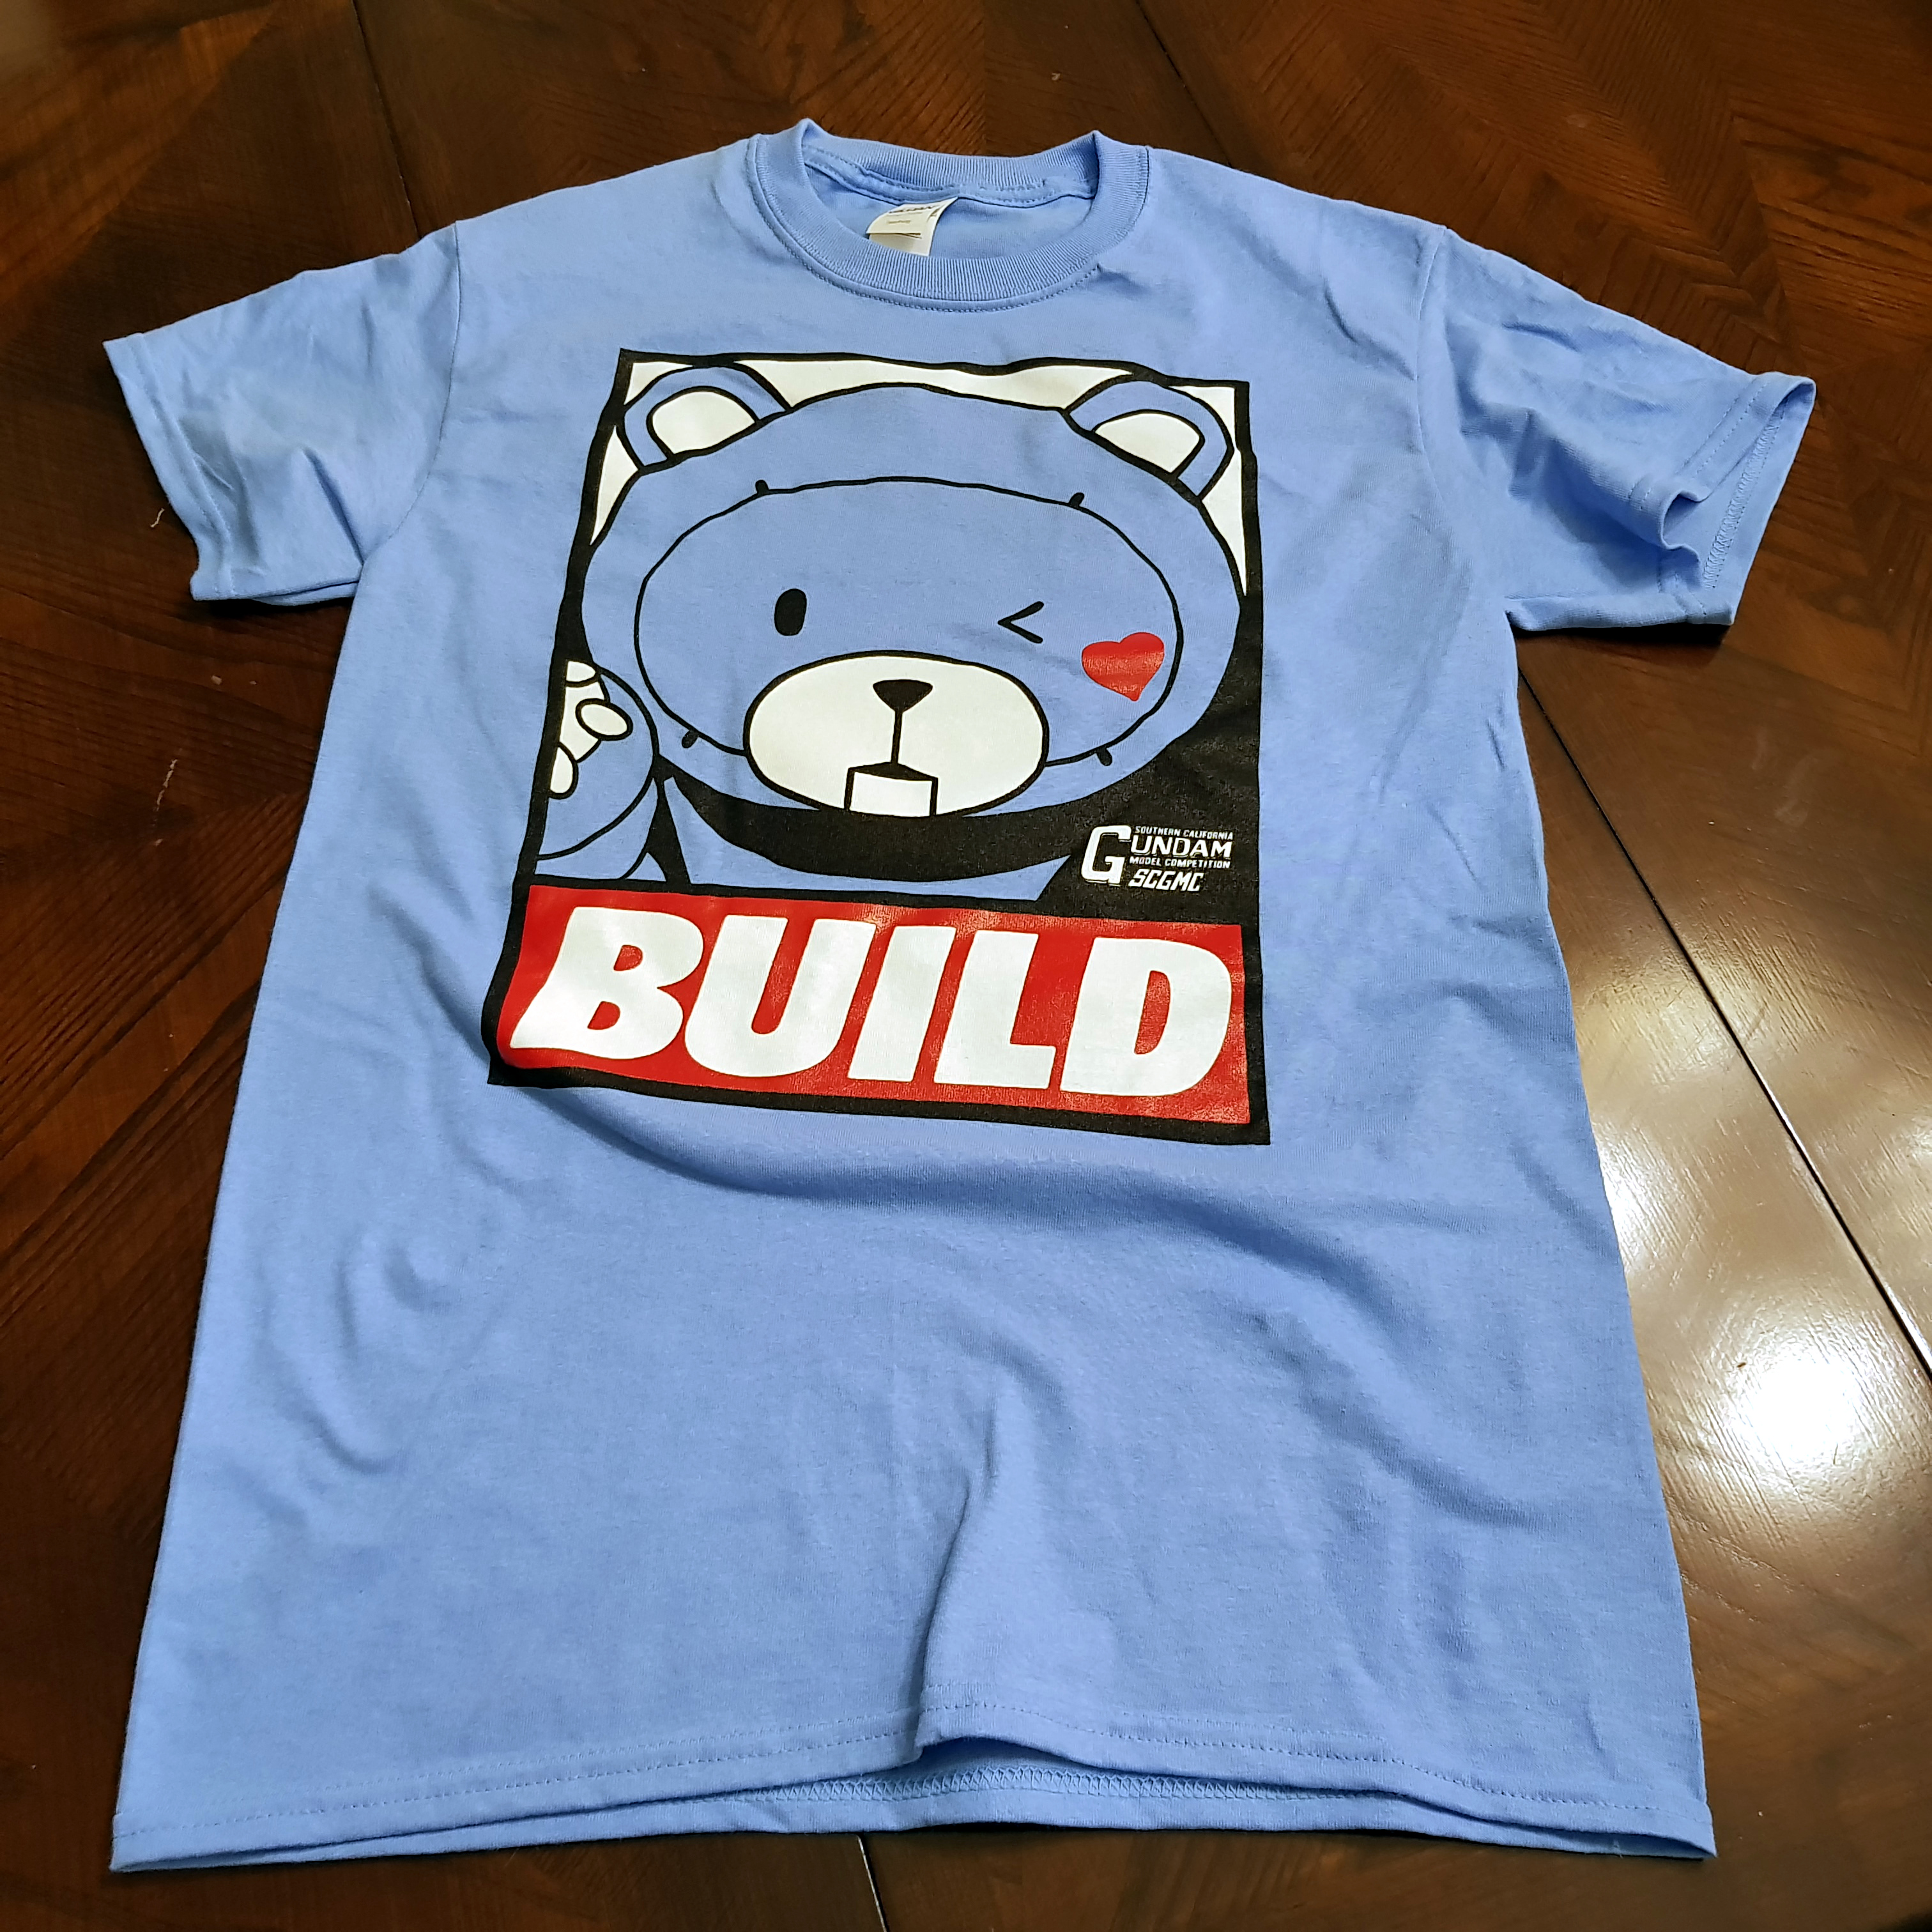
Shameless plug!!! Again, this is a Bear Guy build and as our theme this year for SCGMC is the Bear Guy. It’s not about how elaborate a Bear Guy kit you build, but how many Bear Guy shirts you buy!!! Get your shirts while we still have some in stock! We have one in Pink and one in Blue. Wear them proudly!
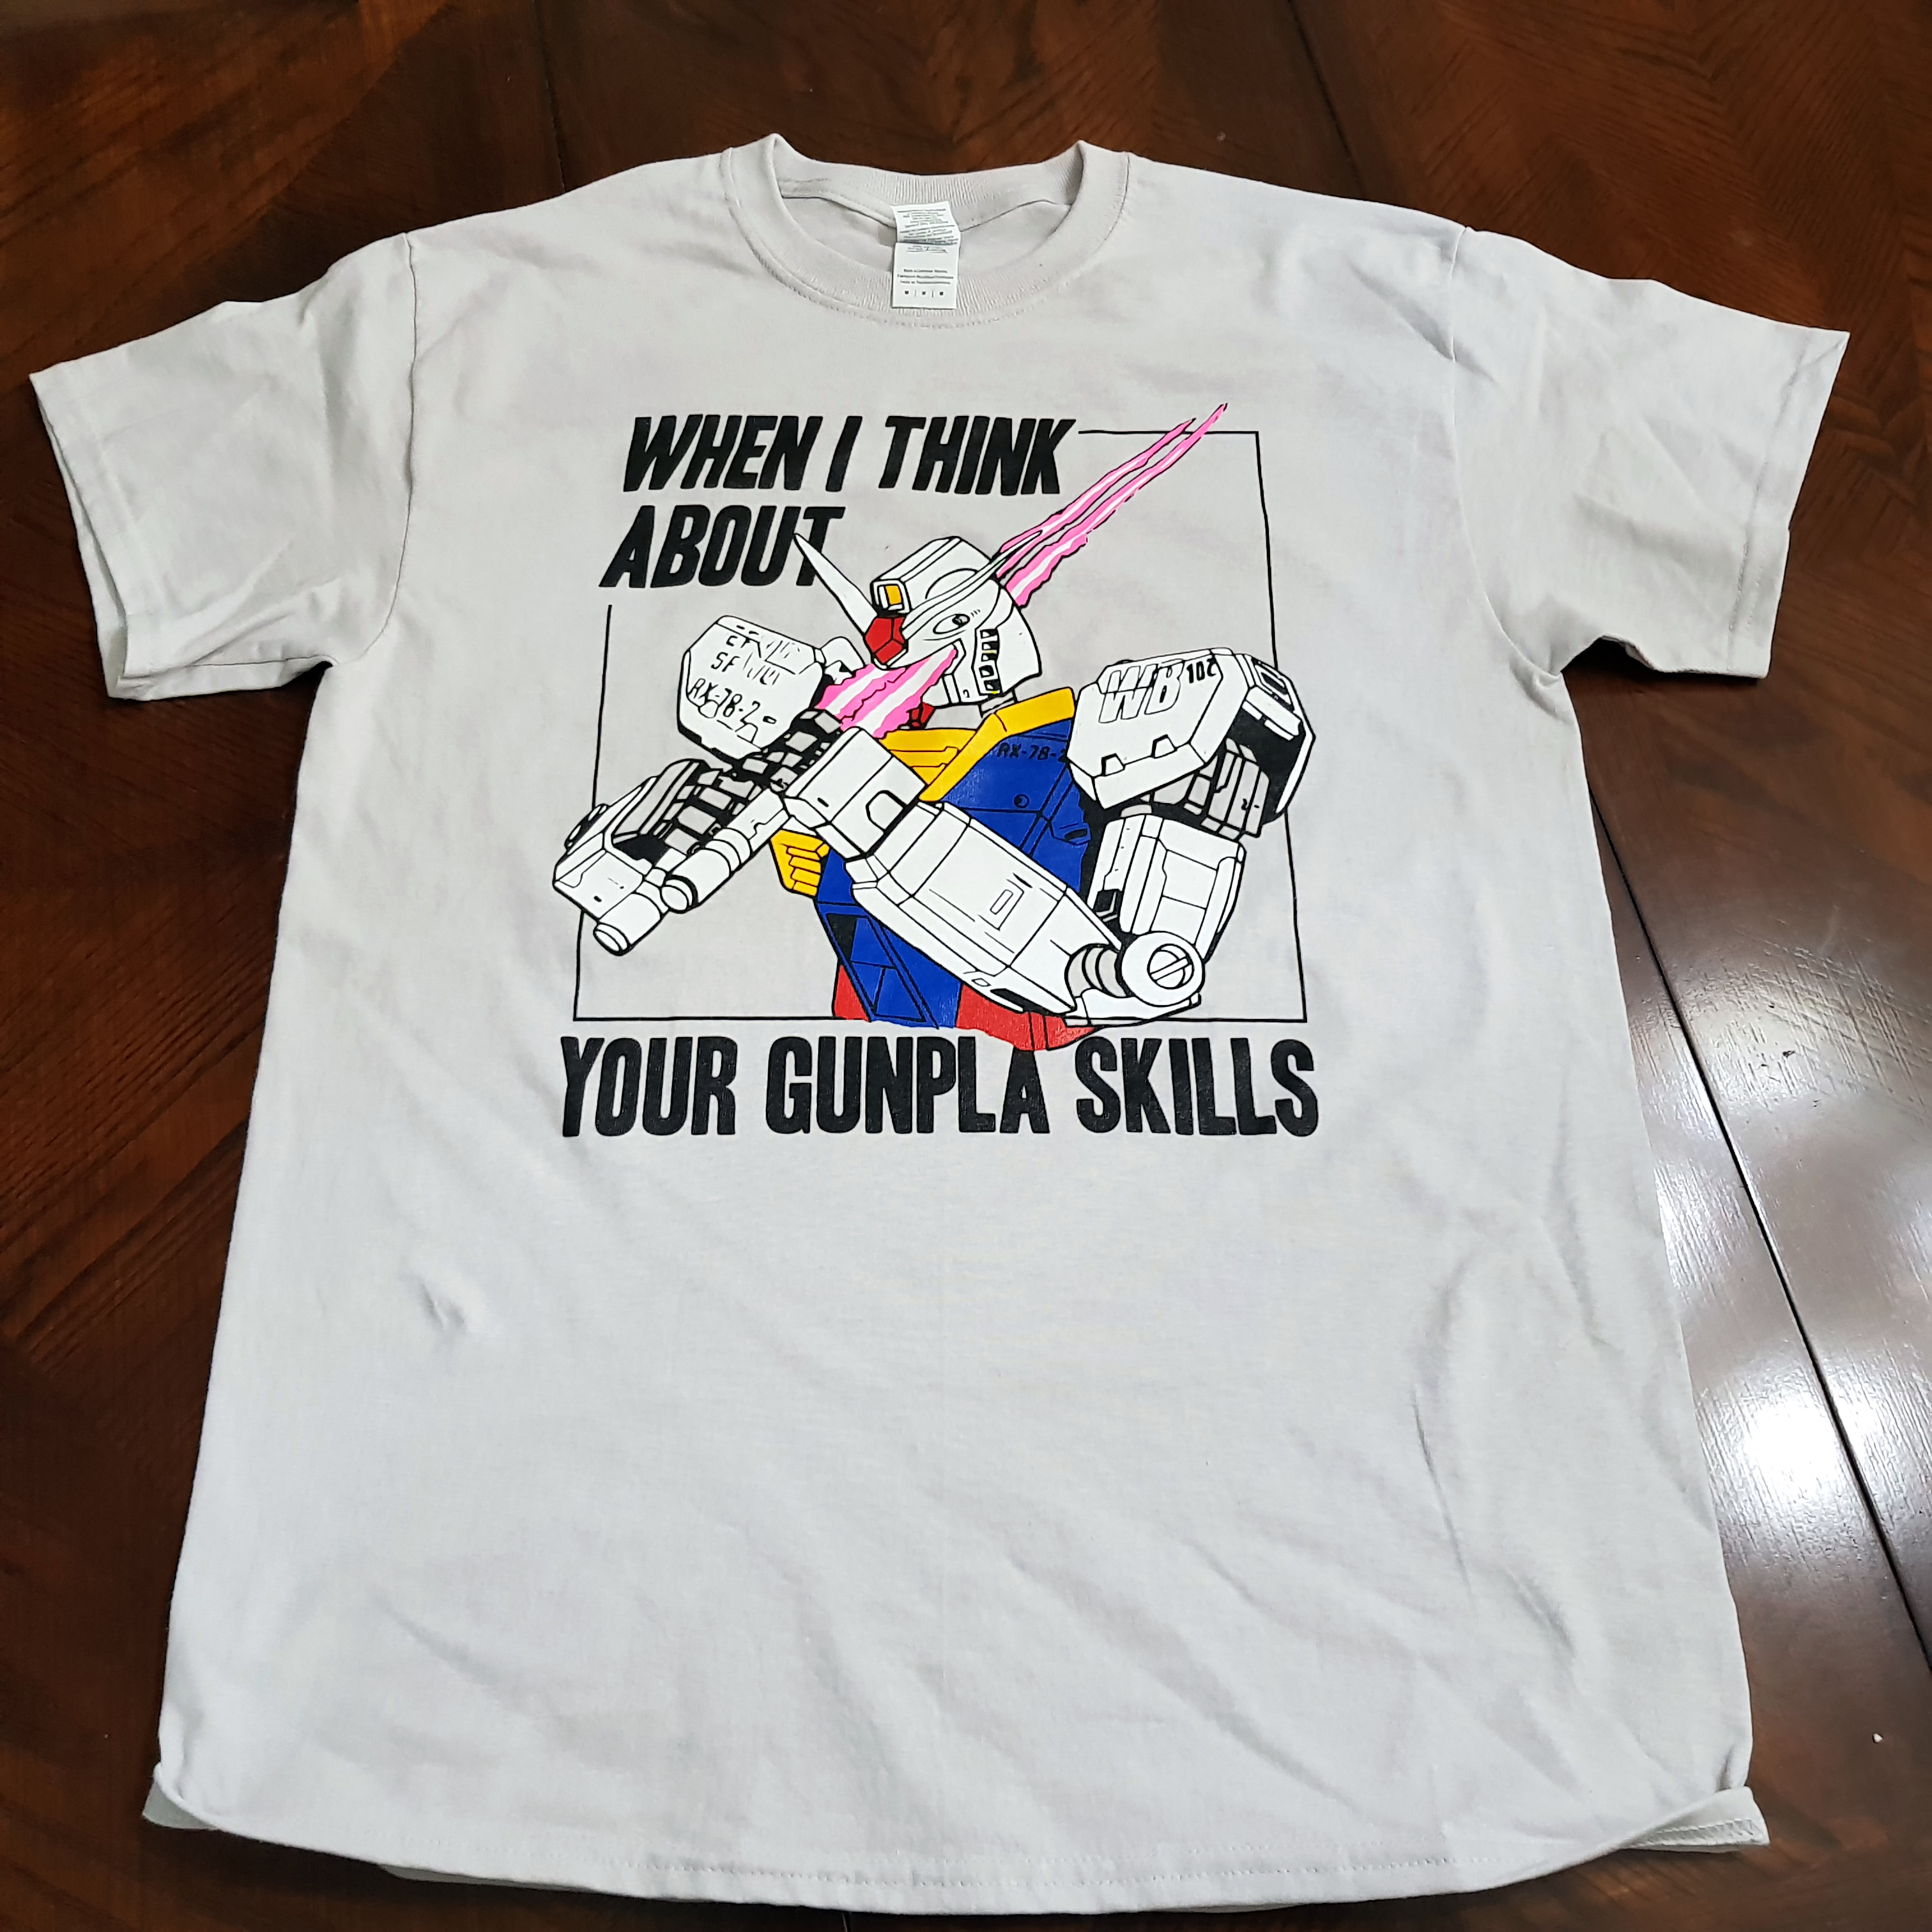
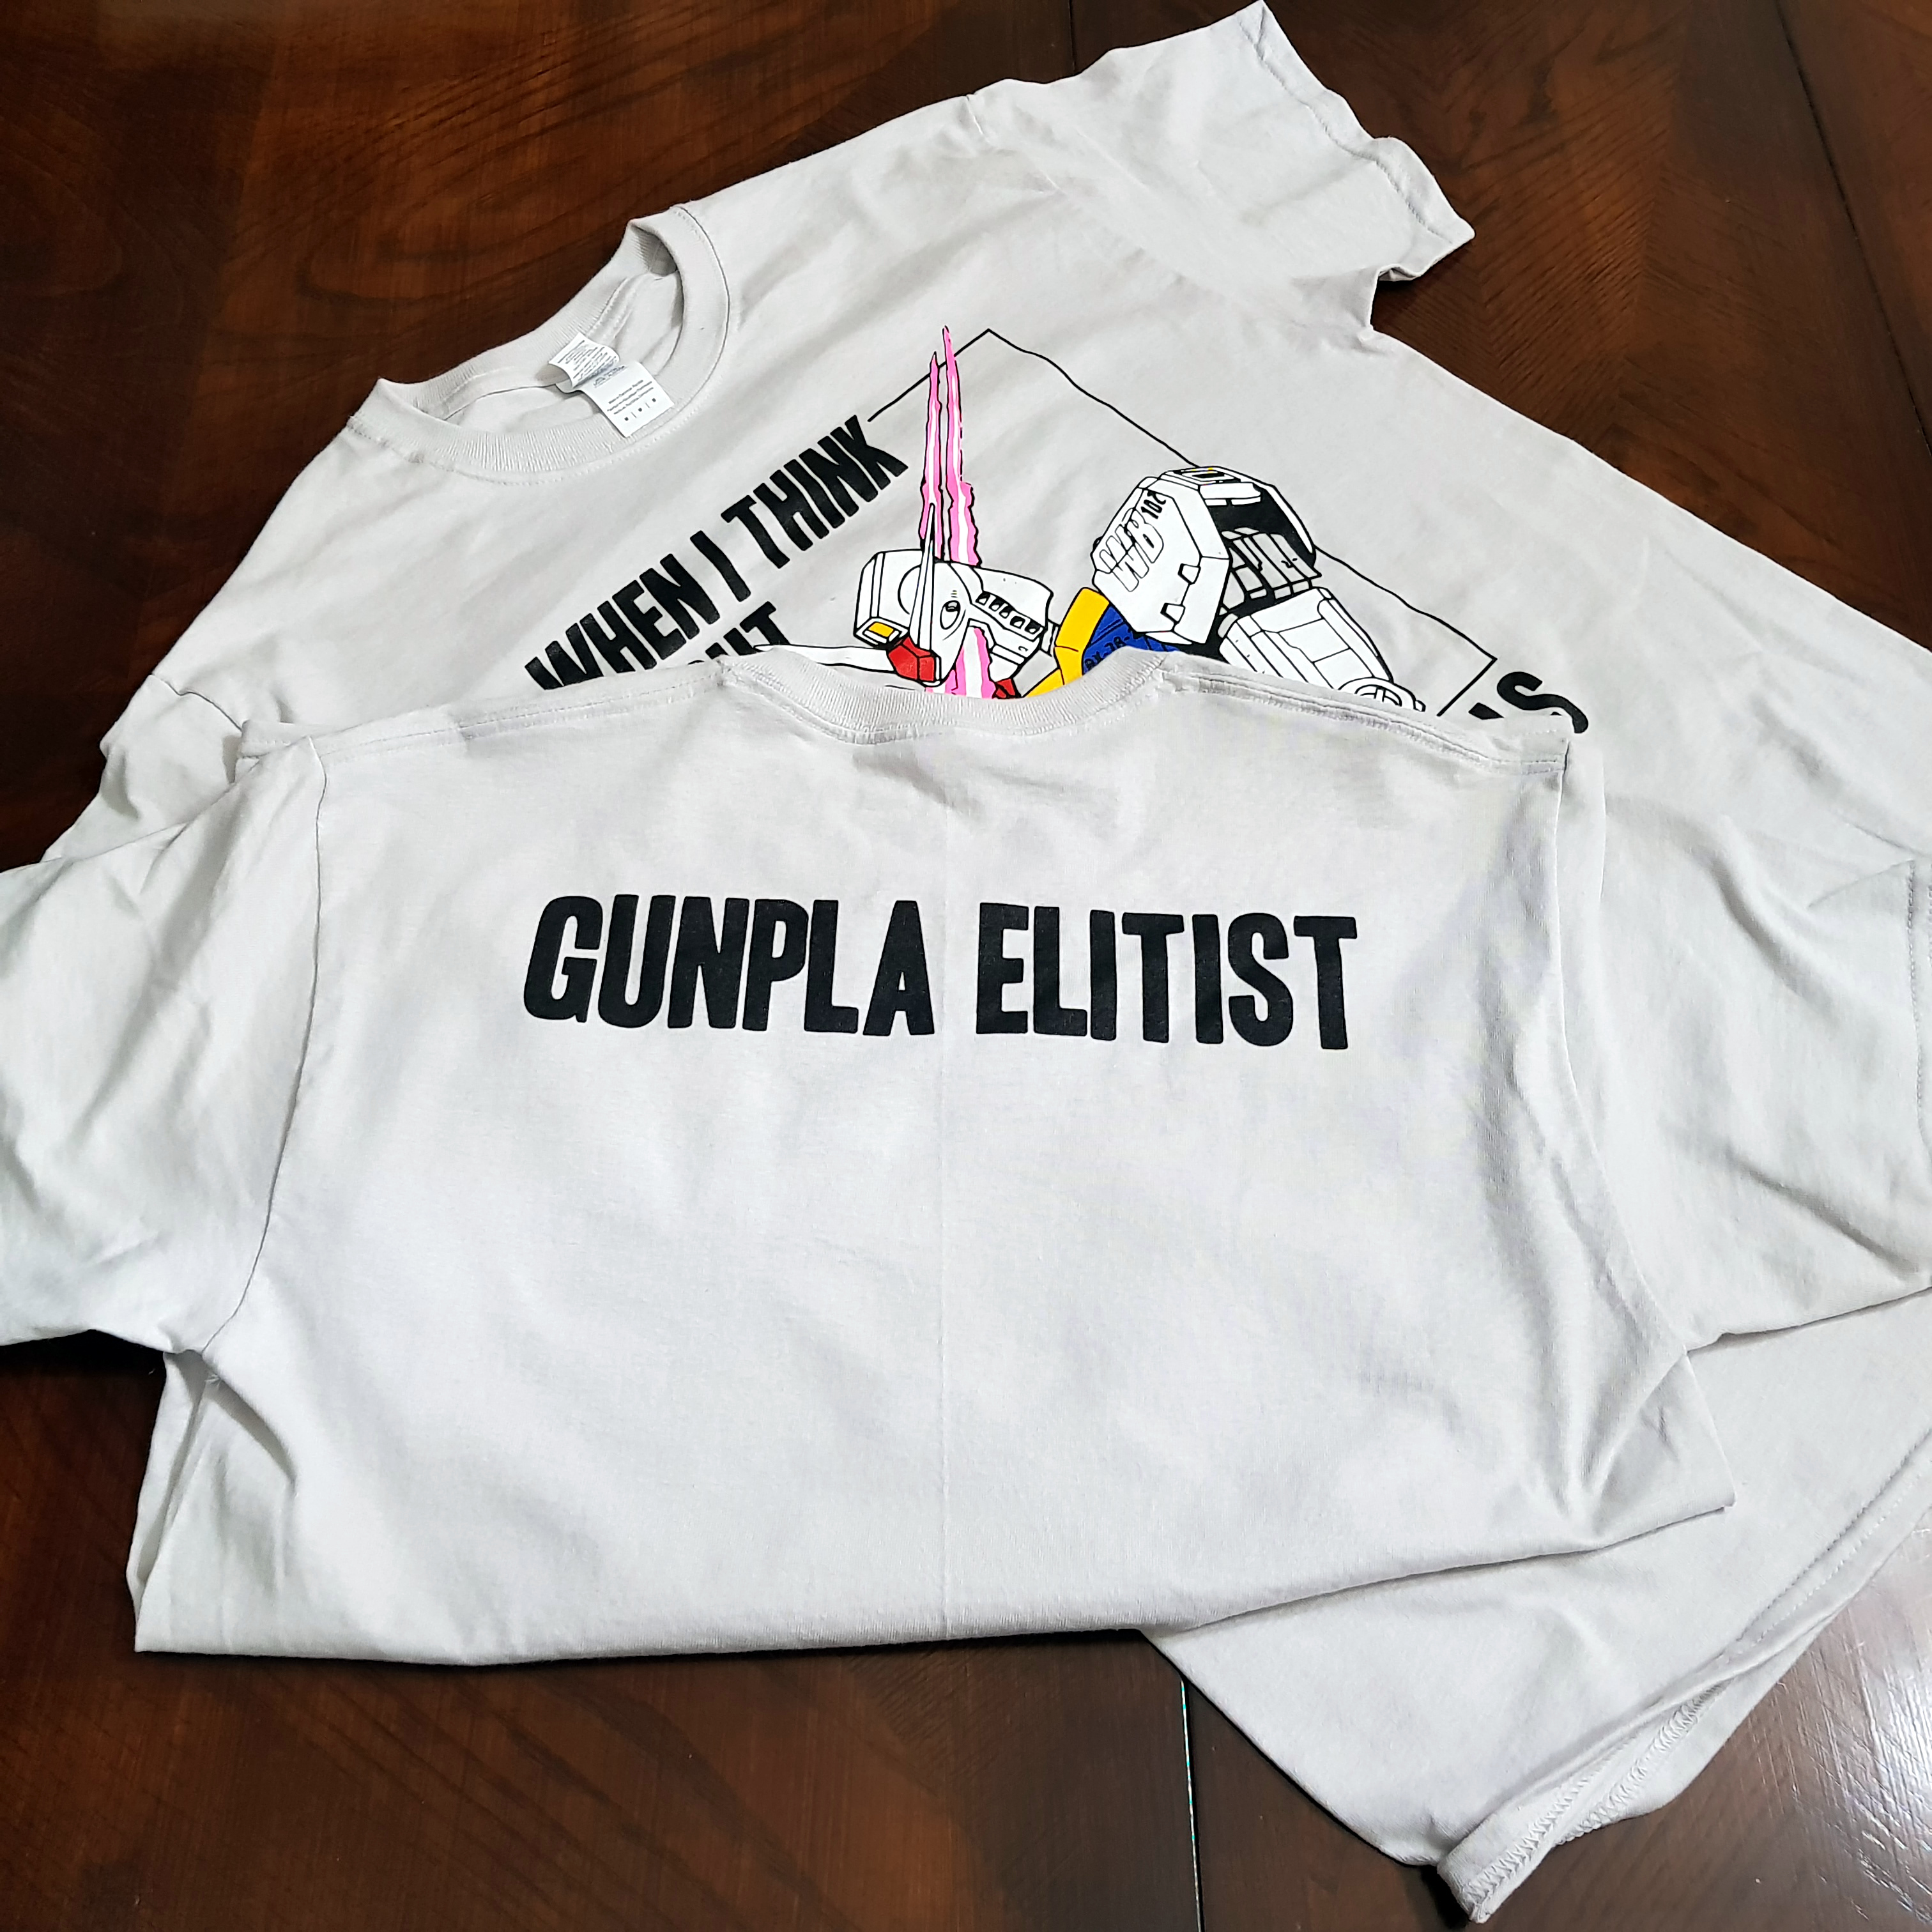
We also have another new shirt we have up for sale now is based off the chess piece designed by our own Bhop: the Gunpla Elitist T-Shirt. Get your elitist shirt while supplies last and wear them proudly at any gunpla event you attend!
This also helps us bring you guys SCGMC every year, so every dollar spent goes right back into making the competition bigger and better! [/end plug]