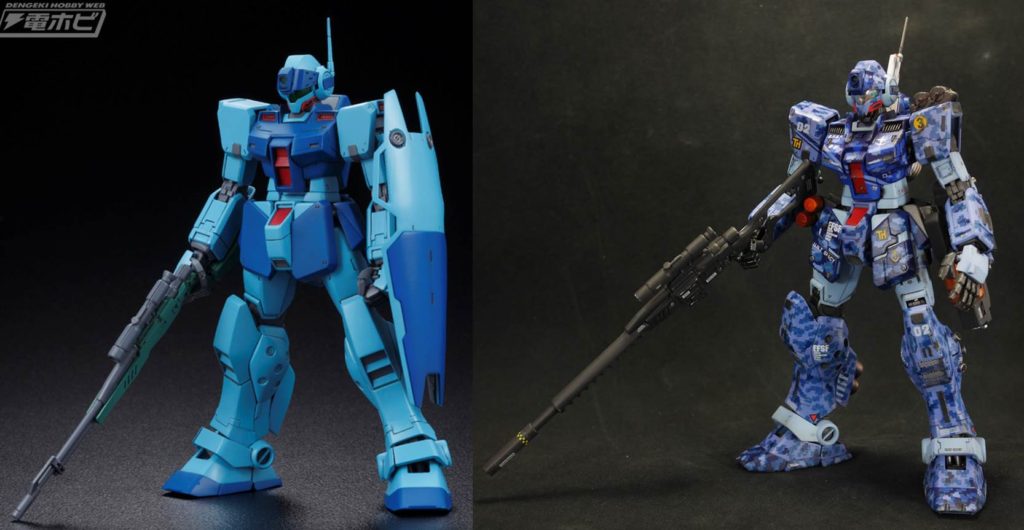
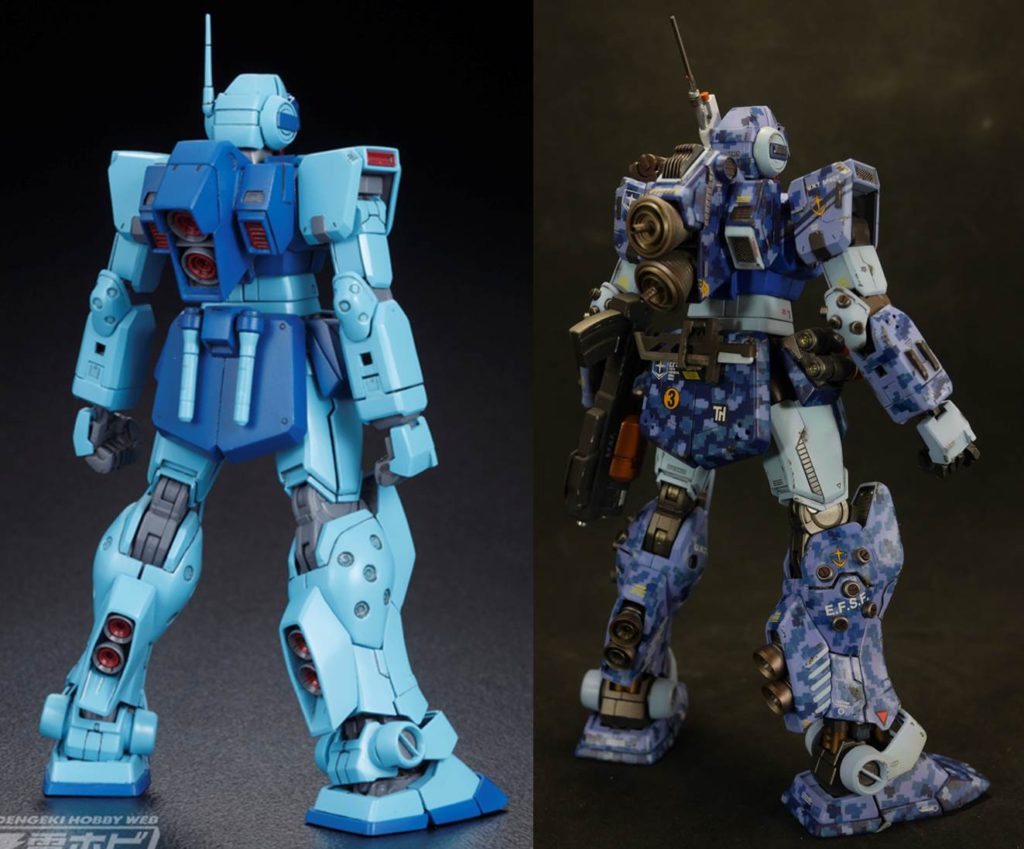
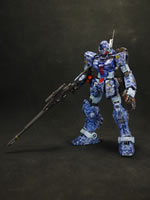
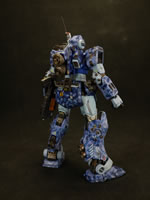
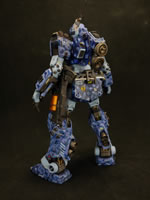
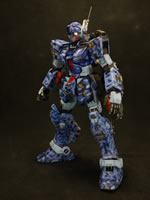
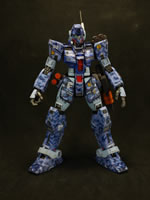
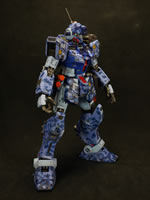
I got to thinking about the kit and the mods I made for the thing and never really got around to listing them out. It is not only for the competitions that I plan on attending; but a visual reference to how much really changed on the kit from the stock photos Bandai and others have put out to the dizzying camoed painted completed version I have now. I also realized that when I snapped “final” pictures the other day, I left some sticky tack on the lower area of the GM’s slide down visor. So I took some new pictures with some slightly altered lighting to fix the rather harsh looking light against the kit.
Using stock photos, here’s the direct comparisons:
The list of mods after the jump:
GM Sniper 2 Mods:
- Head:
- Scratch built antenna
- Clear resin cast facepiece and semi-transparent aurora film to get aurora film effect and allow view of internal details
- Added a small plastic tube and metal mesh as an anti-glare device to the slide down scope piece
- Torso:
- Extended collar
- Raised lower neck/upper chest area and added plastic details
- Replaced upper torso vents with plastic plating radiators
- Scribed rectangular piece on the chest to add small rectangular plastic strip
- Backpack:
- Cut out a hole at the top of the backpack to add in a plastic plate radiator detail piece
- Lined the top hole with thin plastic strip to add details around the new radiator piece
- Added plastic plate to the small side pieces of the backpack
- Added a thin strip of corrugated plastic detail to the sides of the inner backpack piece
- Added a circular eye piece and a circular punched corrugated plastic detail to the upper sides of the backpack
- Scribed new panel lines for the backpack
- Added thin plastic strip detail to the lower sides of the inner backpack
- Replaced thrusters with larger resin thrusters that protrude from the backpack
- Added metal mesh to the vents on the small side pieces of the backpack
- Arms:
- Plastic plate details to the shoulders
- Scribed new panel lines to shoulders
- Added smoke grenade canisters to the right shoulder and chain detail for grenade caps
- Added metal mesh to the shoulder vents
- Plastic plate details added to the inner part of the upper arm piece
- Scribed new panel lines for the upper arm pieces
- Plastic plate details added to the forearm pieces
- 3 small beveled detail holes added to the back of the forearm pieces
- Drilled out, beveled, and added resin minus mold detail to the outer part of the lower forearm pieces
- Added a beam saber mount and beams saber to the left forearm
- Modified beam saber hilt for added details and magnetic connection to beam saber mount
- Added corrugated plastic to the inner elbow areas
- Added resin cast collars with minus mold detail inserts to the elbow armor indent detail areas
- Waist:
- Modified right side skirt for a scratch built dual beam saber mount
- Scratch built two beam sabers with magnet attachment to side skirt beam saber mount
- Modified left side skirt for scratch built resin ore gun mount point.
- Added resin ore gun with magnet to attach side arm to the left side skirt
- Modified rear skirt to remove dual beam saber mount
- Scratch built new mount point for combat knife on the rear skirt
- Scratch built combat knife from plastic strips and added magnet to mount knife
- Scribed new panel lines for the back skirt
- Added 3 small beveled detail holes on each side of the rear skirt
- Drilled out, beveled, and added resin minus mold detail to each side of the rear skirt
- Cut apart and added plastic plate to the front skirts
- Drilled out and added raised minus mold detail to the front skirts
- Scribed new panel lines to the front skirts
- Scribed new detail mark for the red front skirt insert
- Added metal mesh to the front skirt vent
- Legs:
- Added plastic plate detail to the front of the upper thighs
- Added new panel line details to the front and back of the thigh pieces
- Added corrugated detail to the outer sides of the thigh pieces
- Added plastic plate details to the knee armor and lower shin armor
- Modified outer calf armor pieces to add resin cast collars with minus mold detail inserts
- Drilled out the circular details for the inner calf to add in metallic mesh details
- Cut apart outer calf armor to create a detail “hole” along the horizontal plane of the parts
- Added plastic plate details the sides of the leg armor parts
- Added resin cast thruster bells to the back legs to extend the thrusters out from the back housings
- Added plastic plating details to the thruster housing
- Added metal mesh to the under knee vents
- Extended and modified the front toe pieces to get a “Katoki” style lengthened foot
- Added plastic plate detail to the front piece of the ankle armor
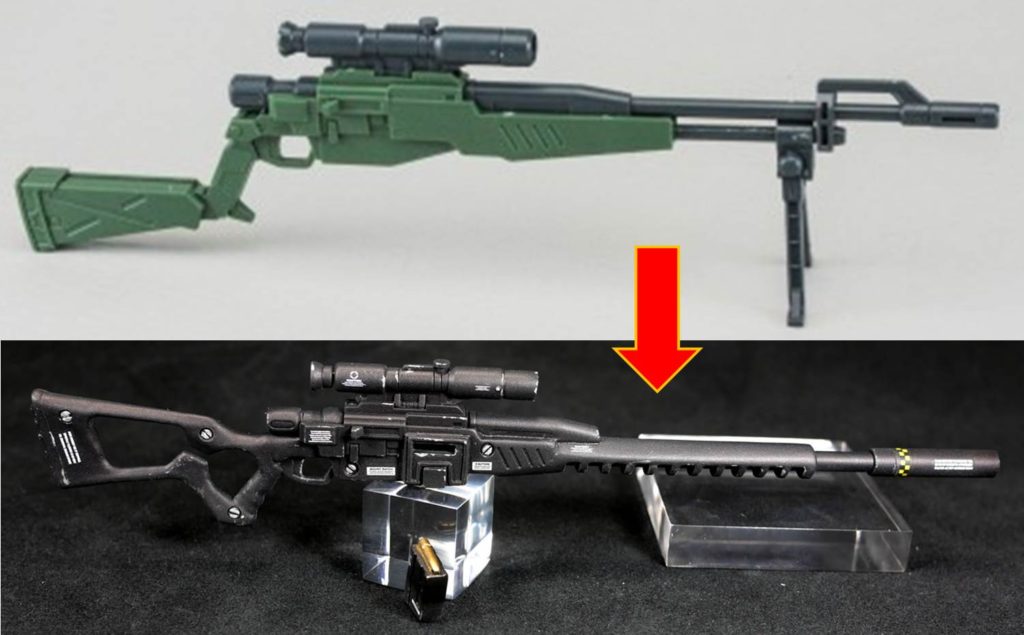
- Sniper Rifle:
- Designed and printed new front barrel as well as a new stock on blender referencing the sniper rifle from the game Fall Out New Vegas
- Printed the front barrel and stock on a 3D printer
- Cut out an exhaust port for the rifle on the right side
- Cut apart main rifle body to accept the new front barrel and stock
- Added plastic stripe details to the sides of the rifle
- Drilled out, beveled, and added minus mold details along both sides of the rifle
- Scratch built a silencer for the rifle using plastic tubing
- Added plastic tube and metal mesh as an anti-glare device to the sniper rifle’s scope
- Scratch built new ammo magazine and added a top bullet detail that can be seen through the exhaust port
- Added plastic stripes to the back of the new stock for added details
- Painting and Finishing
- Camo pattern with a hex pattern sandwiched in between the different camo pattern layers
- Slight weathering on areas that were purposely stippled with Mr surface 500 to create a rough raised paint areas for paint chipping
- Decals from bandai and other sources to add warning labels and markings from 0080 War in the Pocket anime
And the new pictures I took today:
|
|
|
|
|
|
