This was a very productive weekend. When inspiration is there, never shy away from it, and just let it flow. I’ve gotten to the point where I cannot force myself to build something or it will just lose interest. Or if I come to a roadblock that gets me stumped, I may give up for something more powerful. The fun of this build is really keeping me focused and I got a great deal done this weekend. Here’s where the kit is standing now that it’s Sunday night and I’m recapping all I’ve done for the past few days, actually, since the last update really, which was only a few days ago too.
A little discussion about kit bashing and scratch building. I personally believe that there’s a distinction. For me, scratch building is taking raw materials such as styrene strips, plates, tubes, metal, glue, putty, etc and creating something out of nothing. There’s a gray area between scratchbuilding and kit bashing – somewhere between the two, there’s a line. What I do most of the time is kitbashing. I take leftover parts from kits, add in a little styrene, add in some putty, and an ass load of styrene glue, and create something.
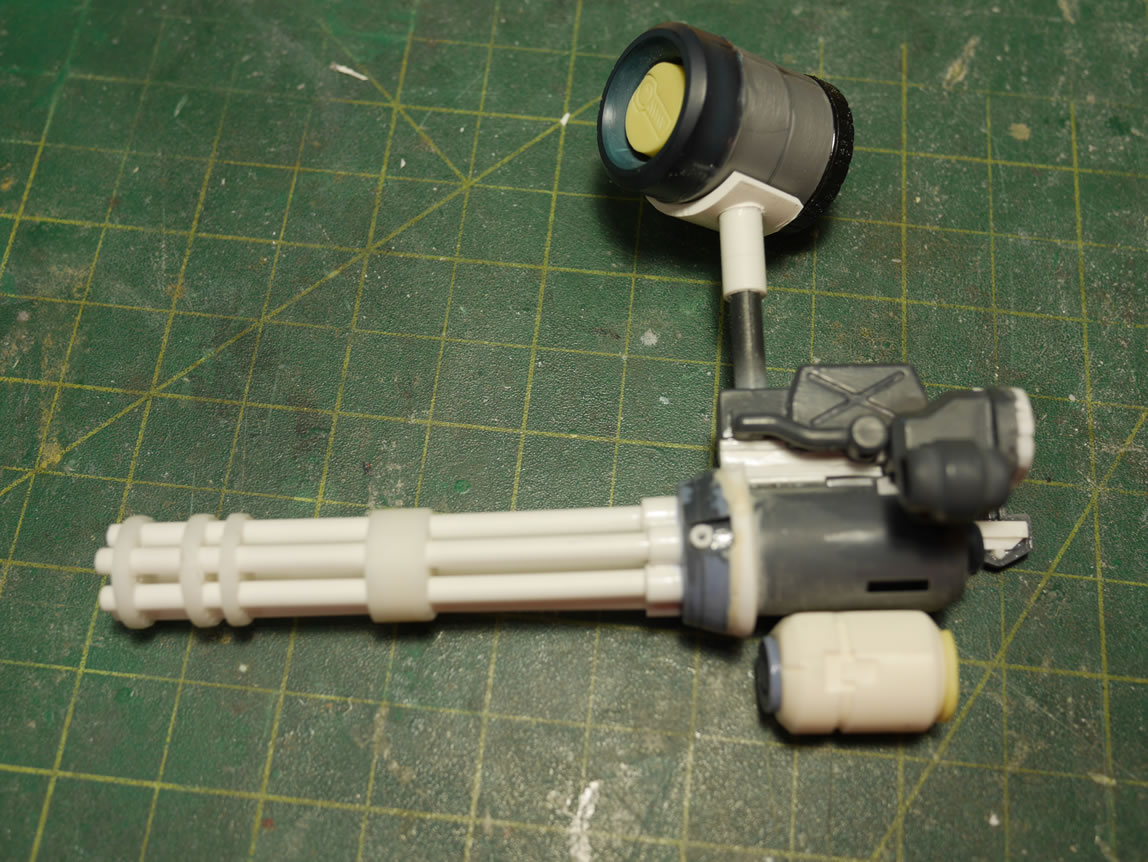
For example, take the gatling gun I slapped together for this project; I designed some frame pieces and printed them out on a 3D printer. Then I took parts from an MG Z’Gok, MG Dom, MG Gouf Custom, SD Resin Kampfer, MG Kampfer, a part from a resin ore gun kit, and an MG Zaku II. Mix in some styrene tubes, styrene strips, and glue, I’m starting to get a basic weapon together. So am I really scratchbuilding? I don’t believe I am, at least for this instance. Have I built something completely out of raw materials, maybe? I think there’s a mix of scratchbuilding and kitbashing, but definitely more kitbashing going on in some of my builds. I’m sort of a software engineer (CS degree) so I tend to take the approach of “if it’s already built out there, repurpose it” I’m not much of the reinvent the wheel type guy. So I spend a great deal of time looking through my spare parts bins (I have 4 of them so far) and looking at things that could have the potential. I ended up cutting things apart all the time; because hell, it beats building it from scratch. I understand that a great deal of modelers need to have a very specific end product, and just building upon something that already exists just isn’t for them. Me, I’m f-ing lazy, I want to do the least amount of work possible.
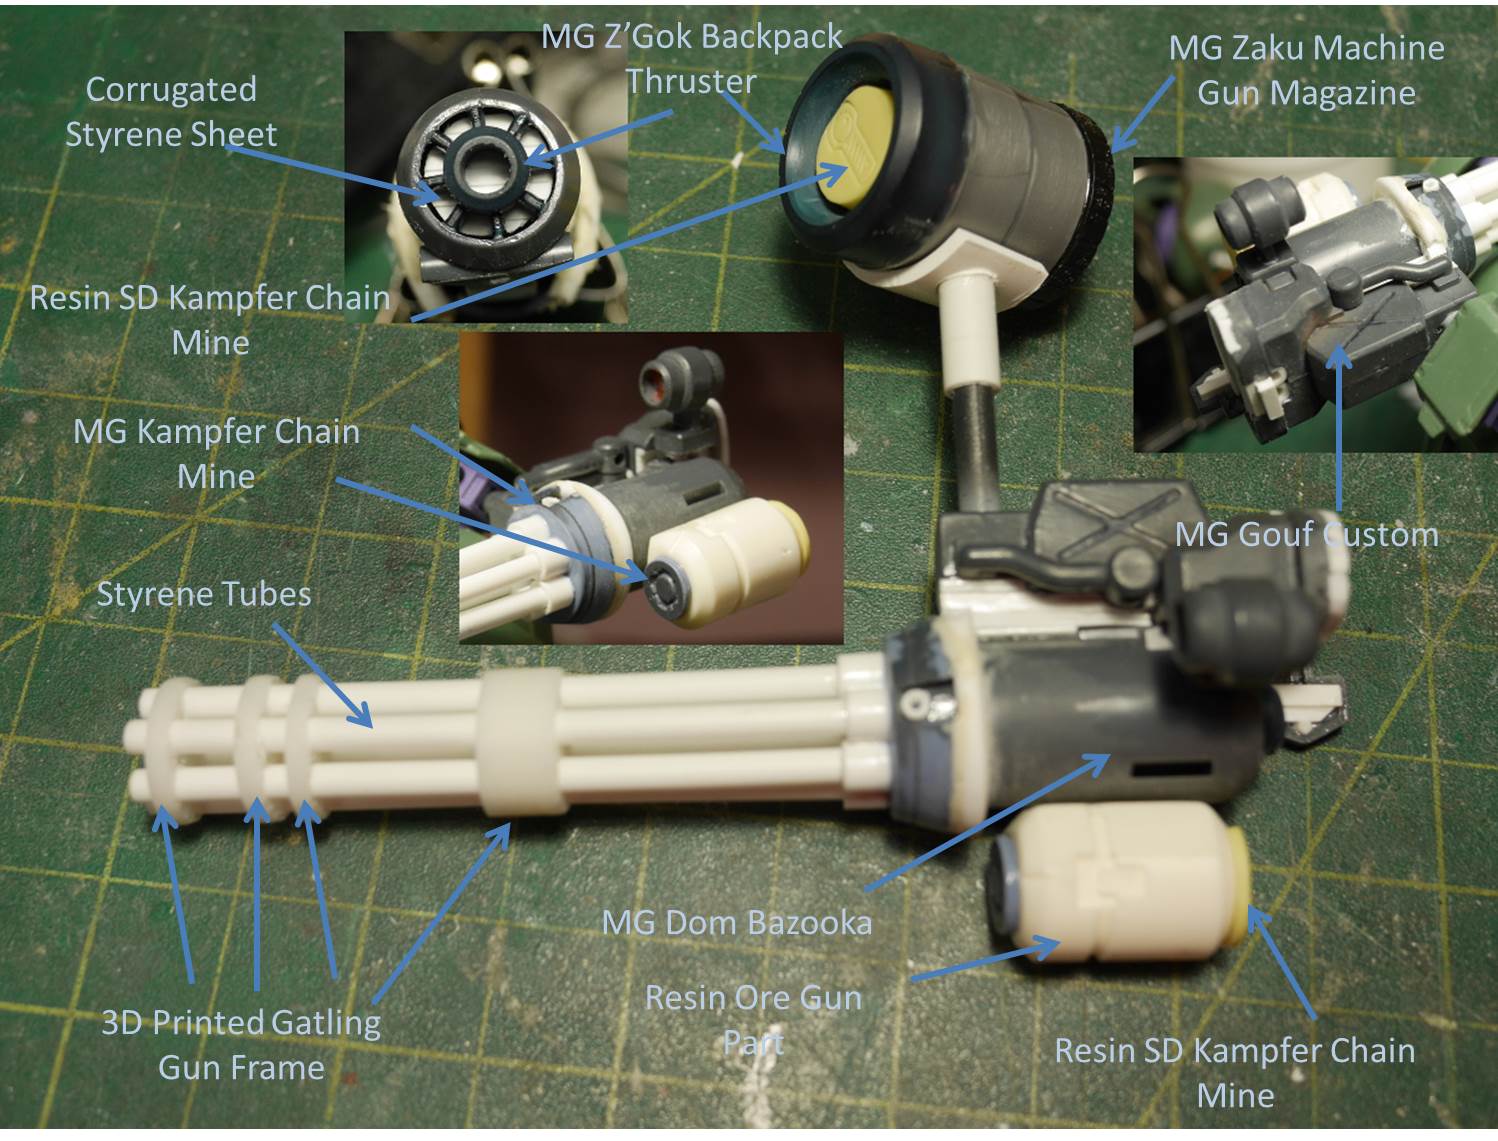
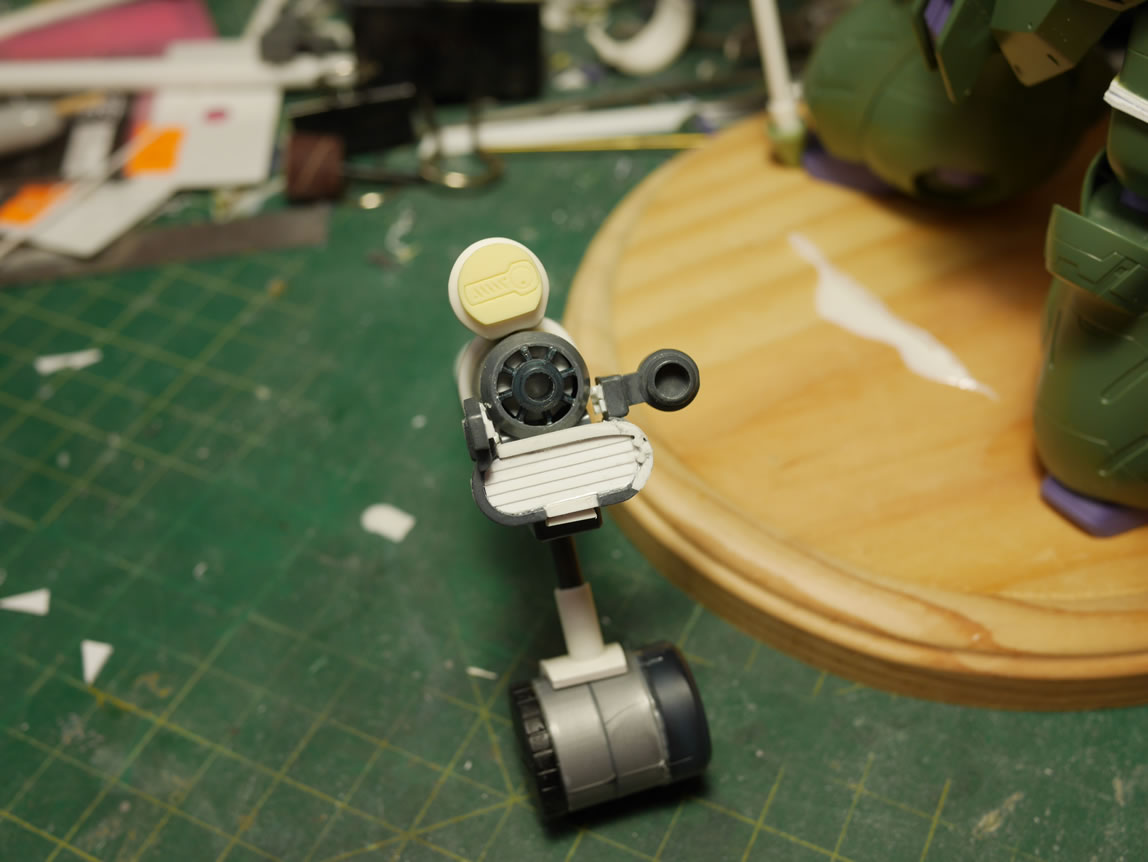
A complete break down of the gun work so far:
- 3D printed frame pieces
- Styrene tubes for the barrels
- Kampfer’s chain mine for the attachment point for the gatling gun barrels (I sanded down the detail on the top side)
- Kamfper’s chain mine underside cut away as a detail piece on the resin ore gun part
- Resin ore gun on the side of the gun’s main body
- Styrene tube heated and bent around the body as a transition piece for the kampfer mine top part to the main body of the gun
- The front barrel of a Dom’s giant bazooka as the main body for the gun
- Some resin SD Kampfer top mine pieces as details for the back of the ore gun detail and for the top of the ammo canister
- Z’Gok’s backpack thruster cover. I cut out the center detail and glued it to a sheet of corrugated styrene then glued this to the back of the gun’s main body
- Z’Gok’s backpack thruster cover, the cowl was used as the top of the ammo canister
- Zaku II’s machine gun ammo clip as the bottom detail for the ammo canister
- Cut away PVC pipe and styrene tubing to start the structure for the ammo canister holder
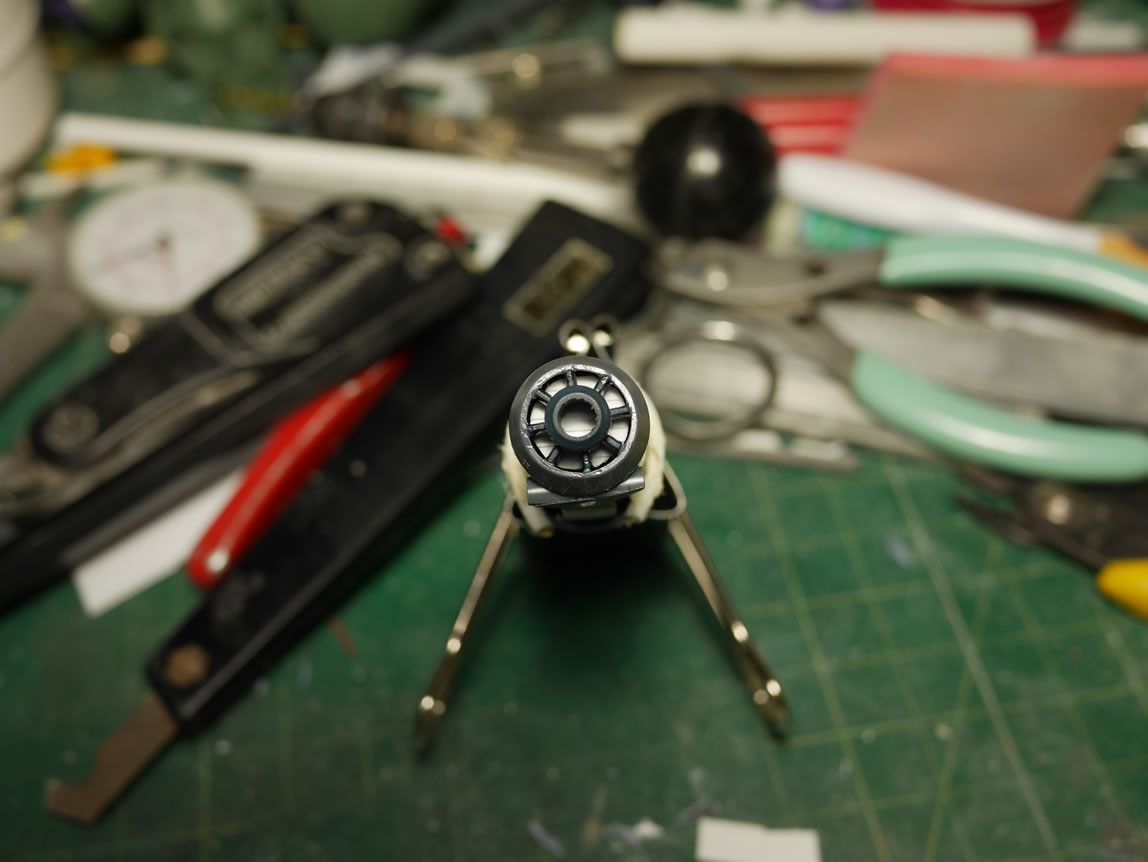
- Gouf Custom’s gatling gun detail as a perfect detail peice and attachment area from the main body of the gun
- Styrene strips stacked to fill in gaps and create transition areas between major parts.
I still have a great deal of work on the gun, but it’s starting to take shape. not much scratchbuilding going on there, just a whole lot of kitbashing things together. I think I would have been great friends with Dr. Frankenschteen…
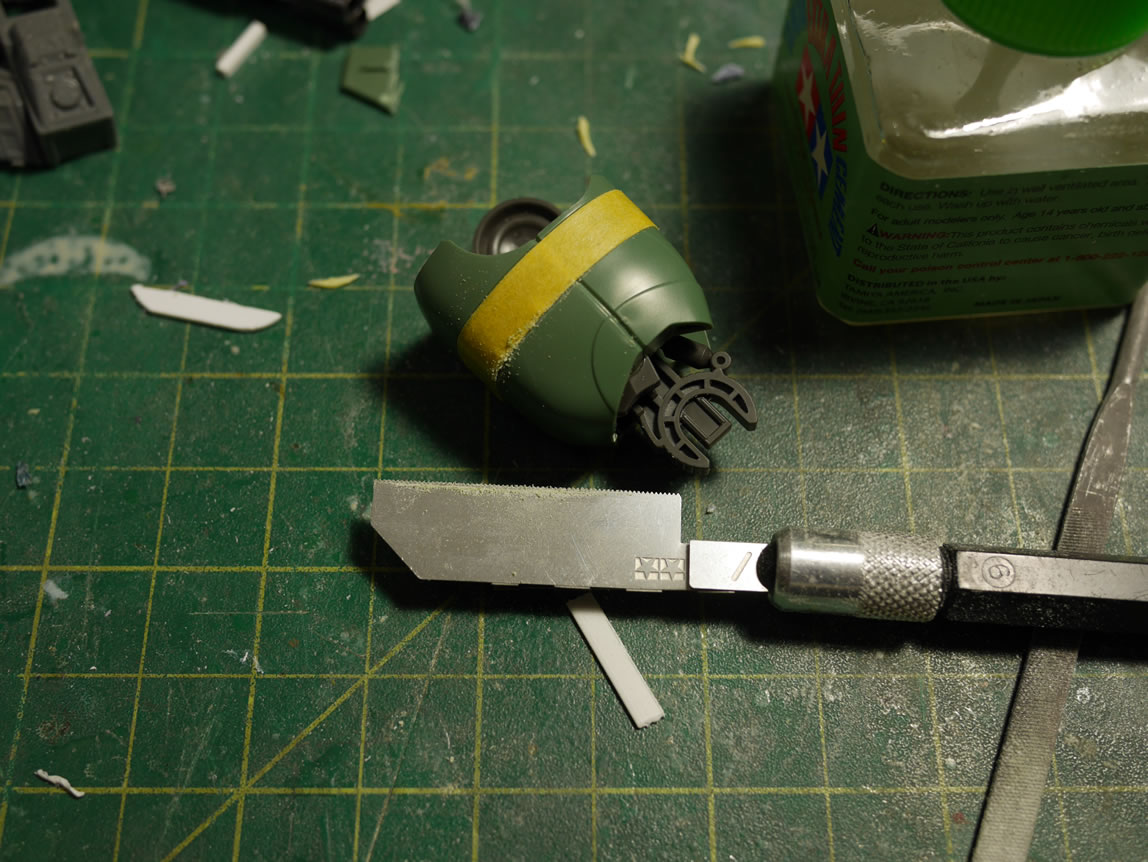
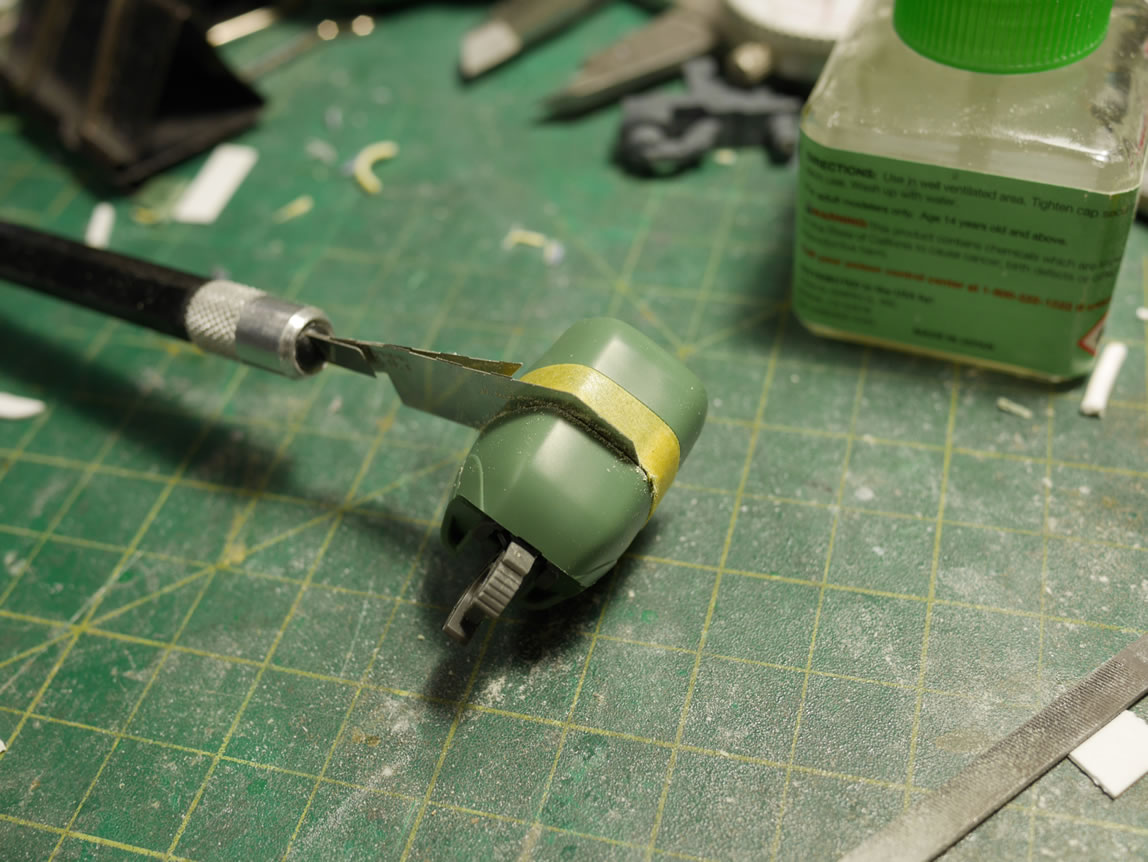
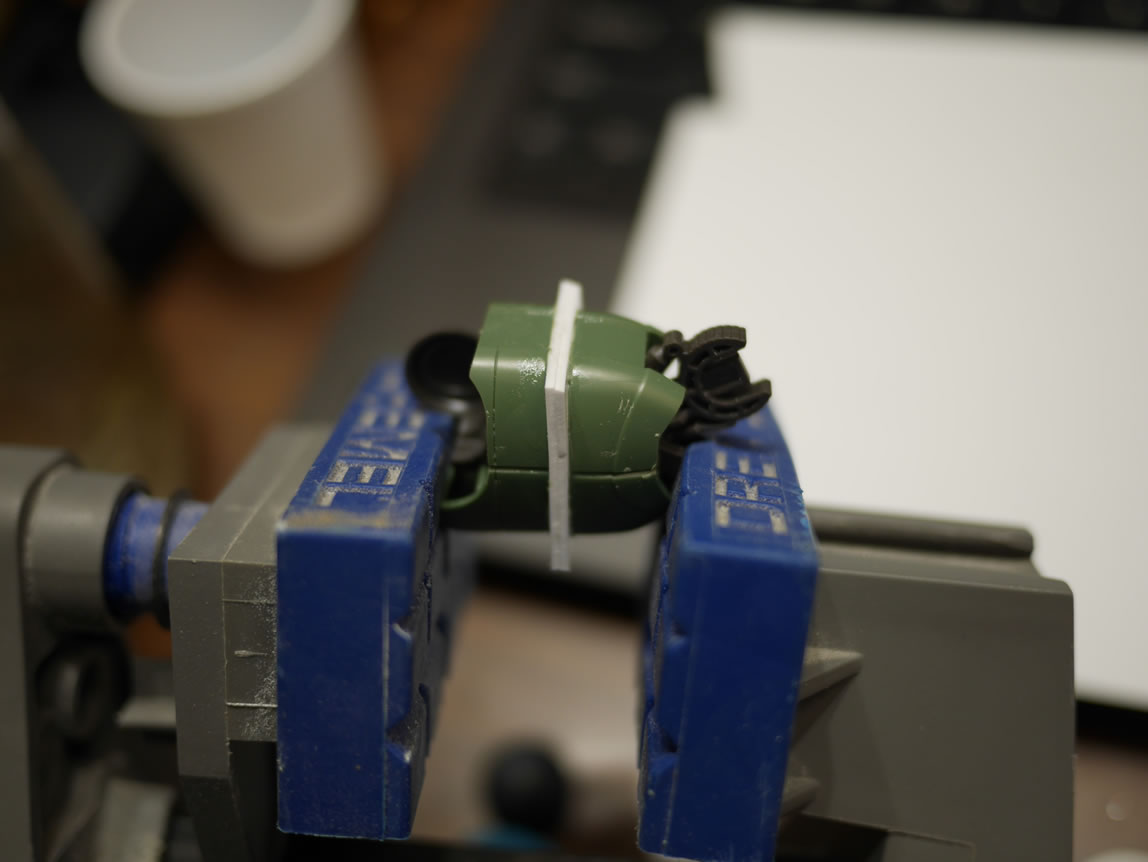
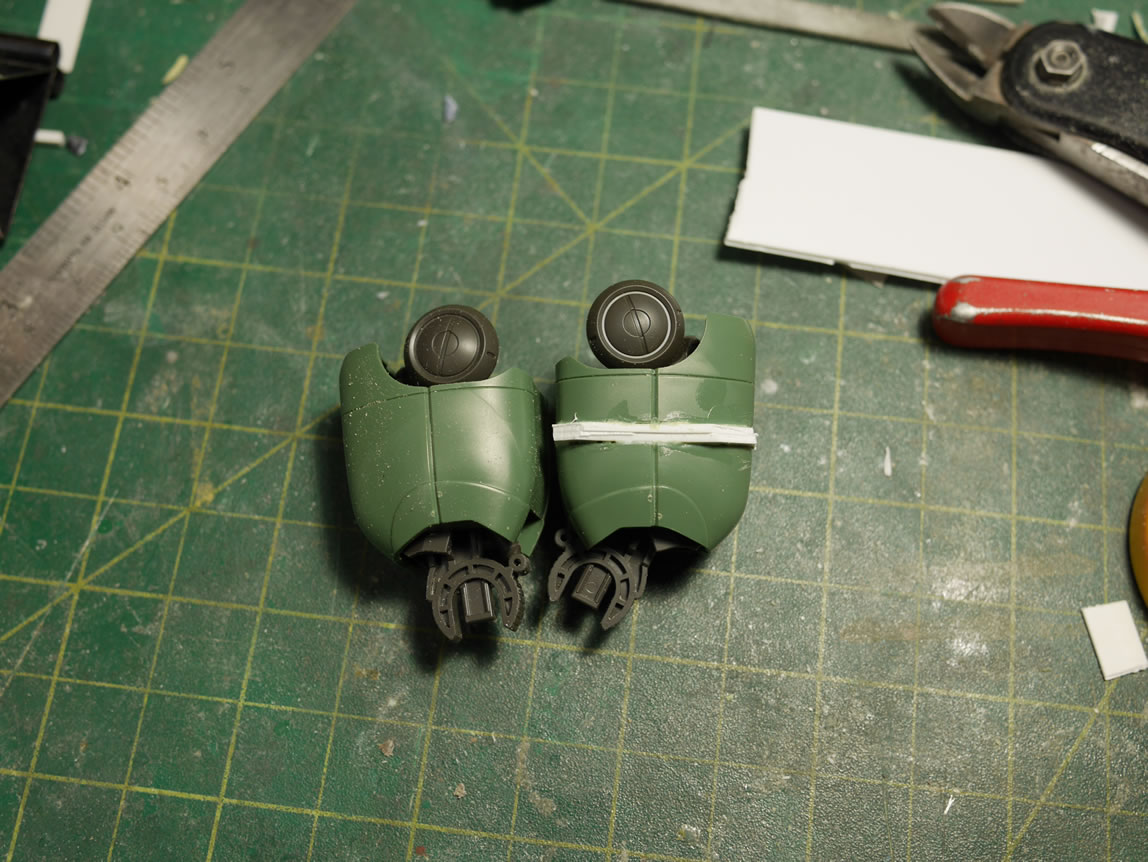
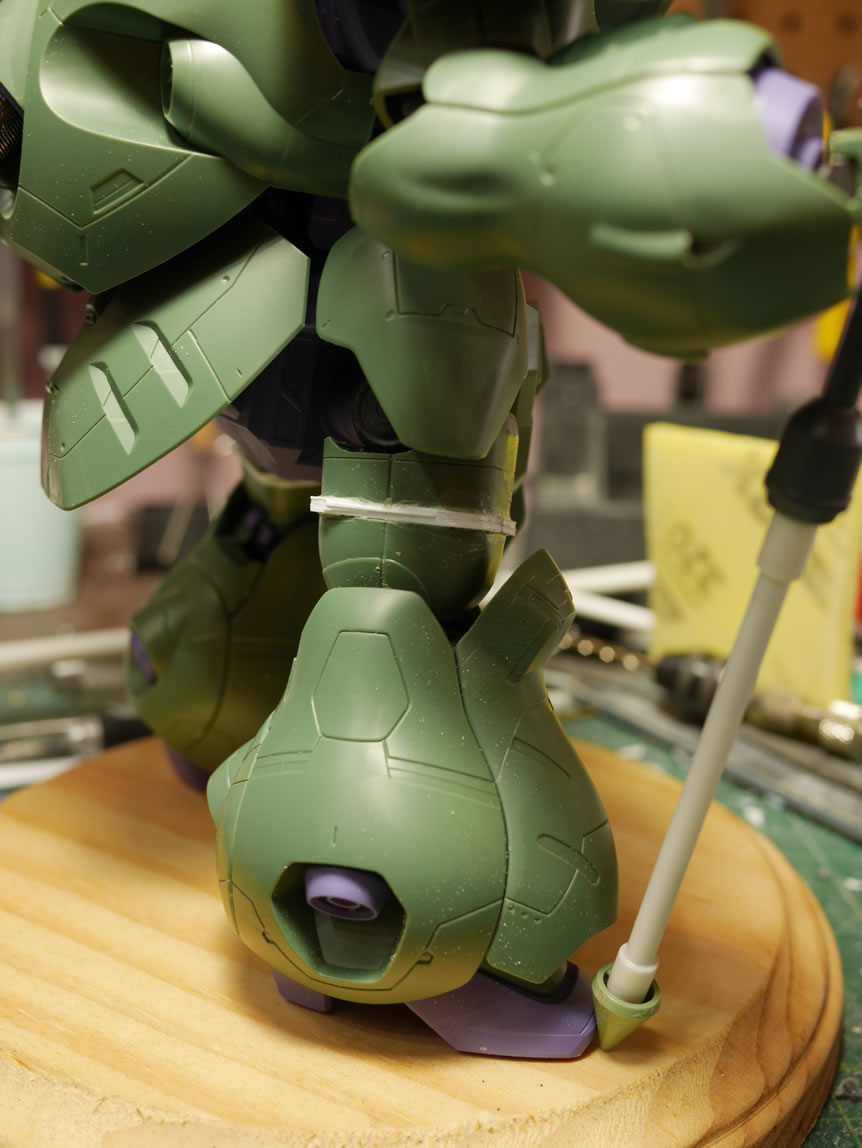
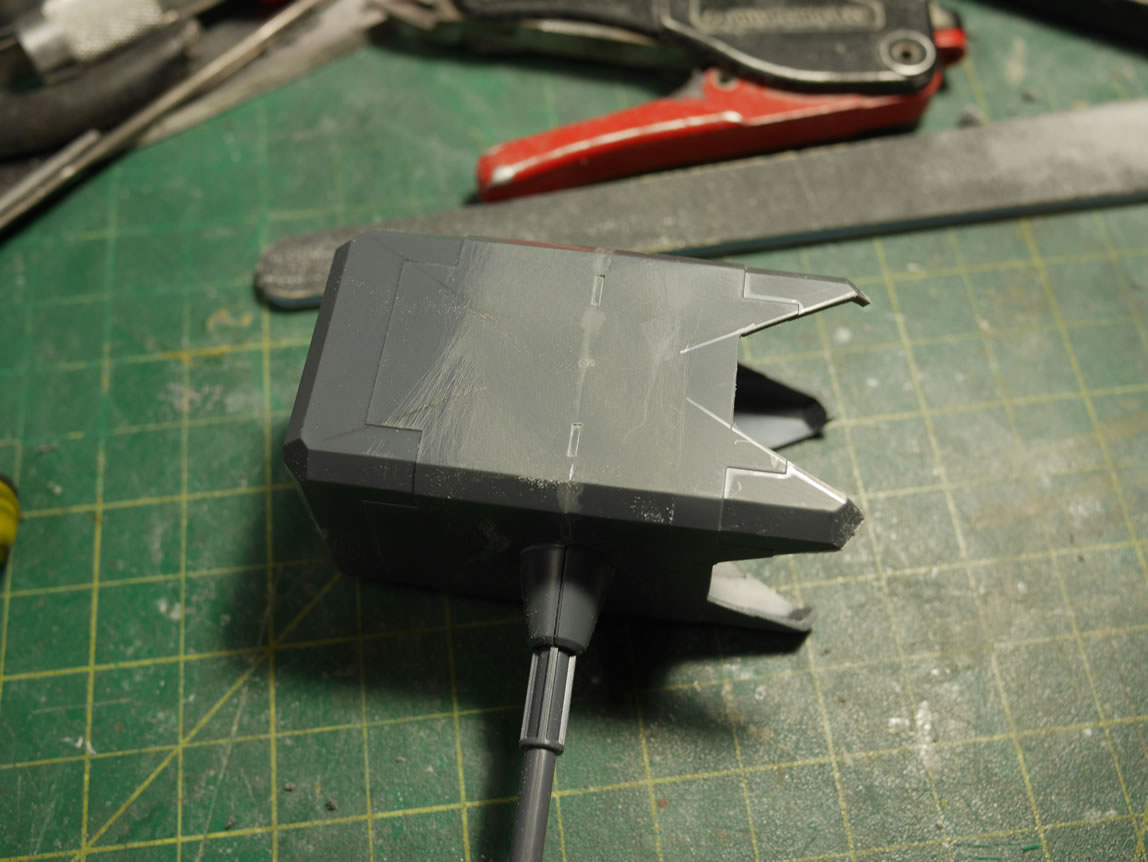
Next up, I taped up the upper thigh, ran a scriber across the surface along the edge of the tape to give me a starting groove, then used a tamiya saw to cut the parts into two pieces. I had earlier glued the part together so that when I cut, it didn’t fall apart on me. Funny to have to do this kind of prep work; glue it together to only cut it apart in a completely different plane. The tape helps me keep a level cut.
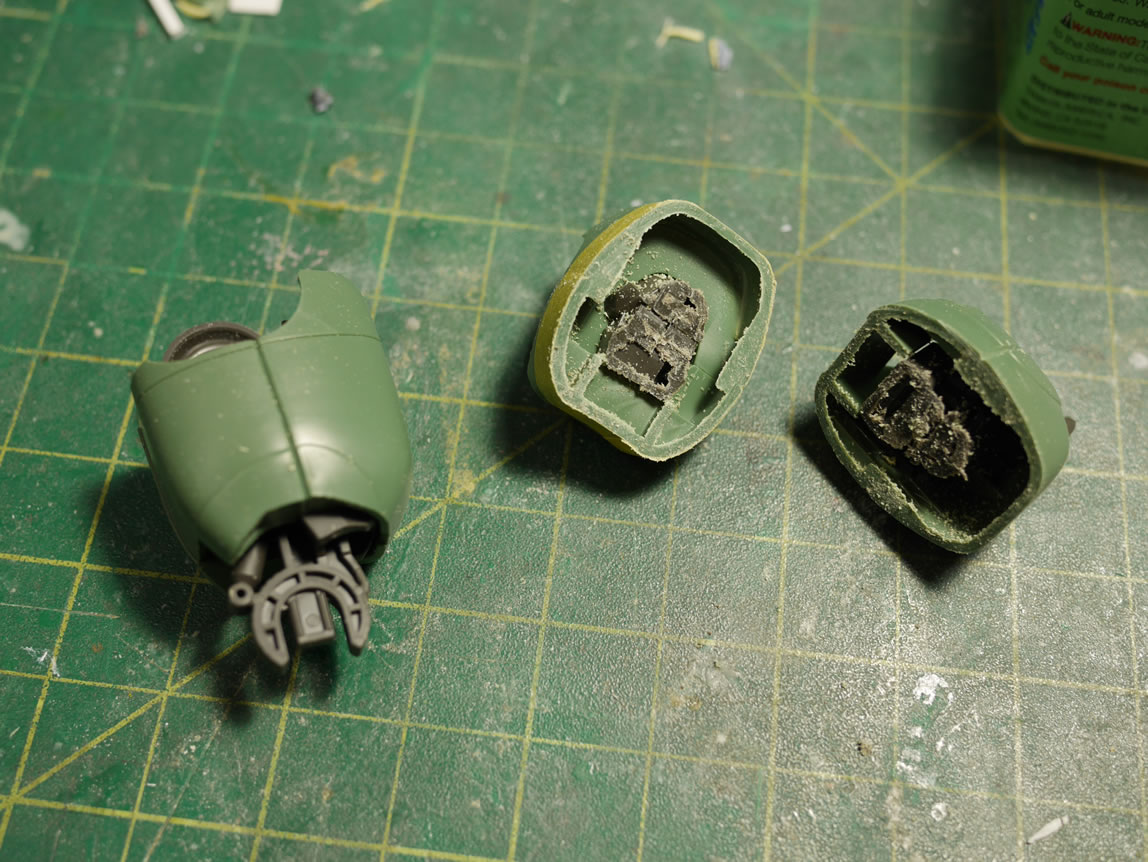
I used two strips of 4mm thick styrene plate to give an added 8mm height to the kit. I used a vice to put constant pressure on the part as the glue set up. This helps with a solid bond and less filling when I get to sanding down everything. Once this has set up, I have a comparison with the other leg yet to be messed with. The difference isn’t too great, but once done, as seen in the first set of picture, it is noticeable.
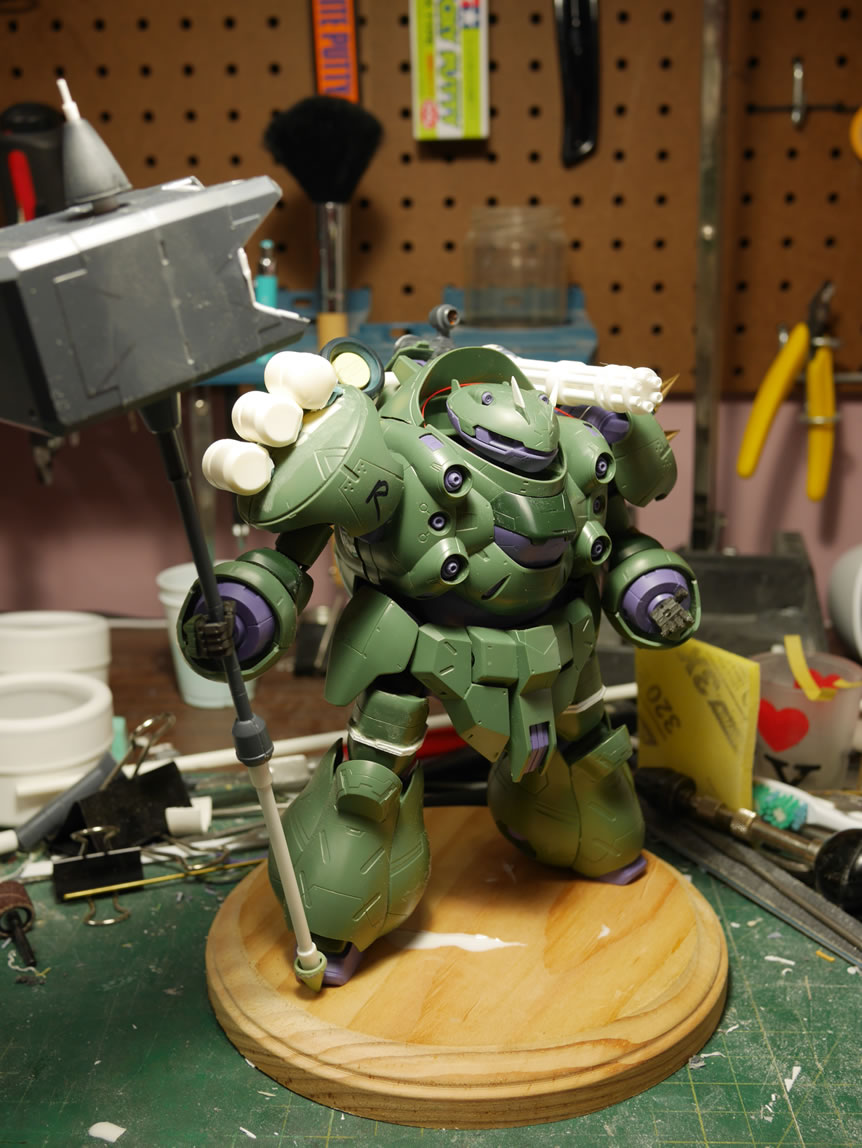
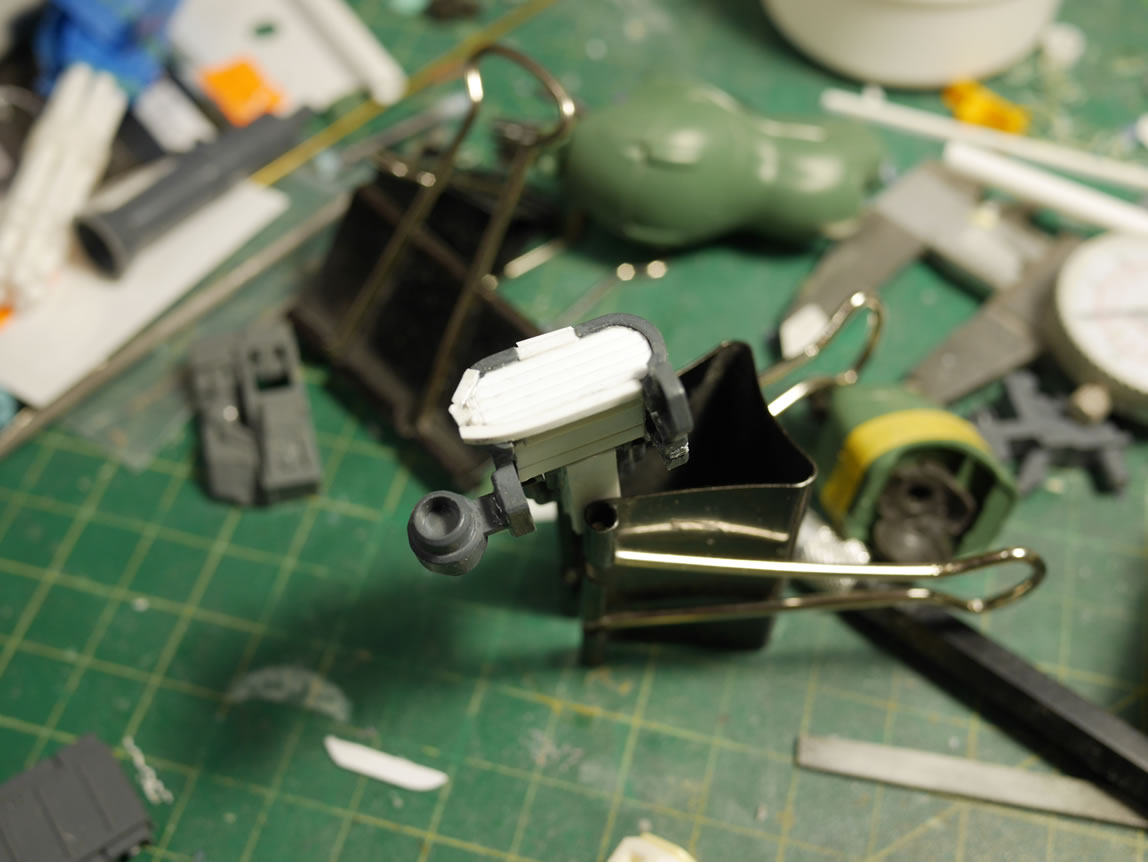
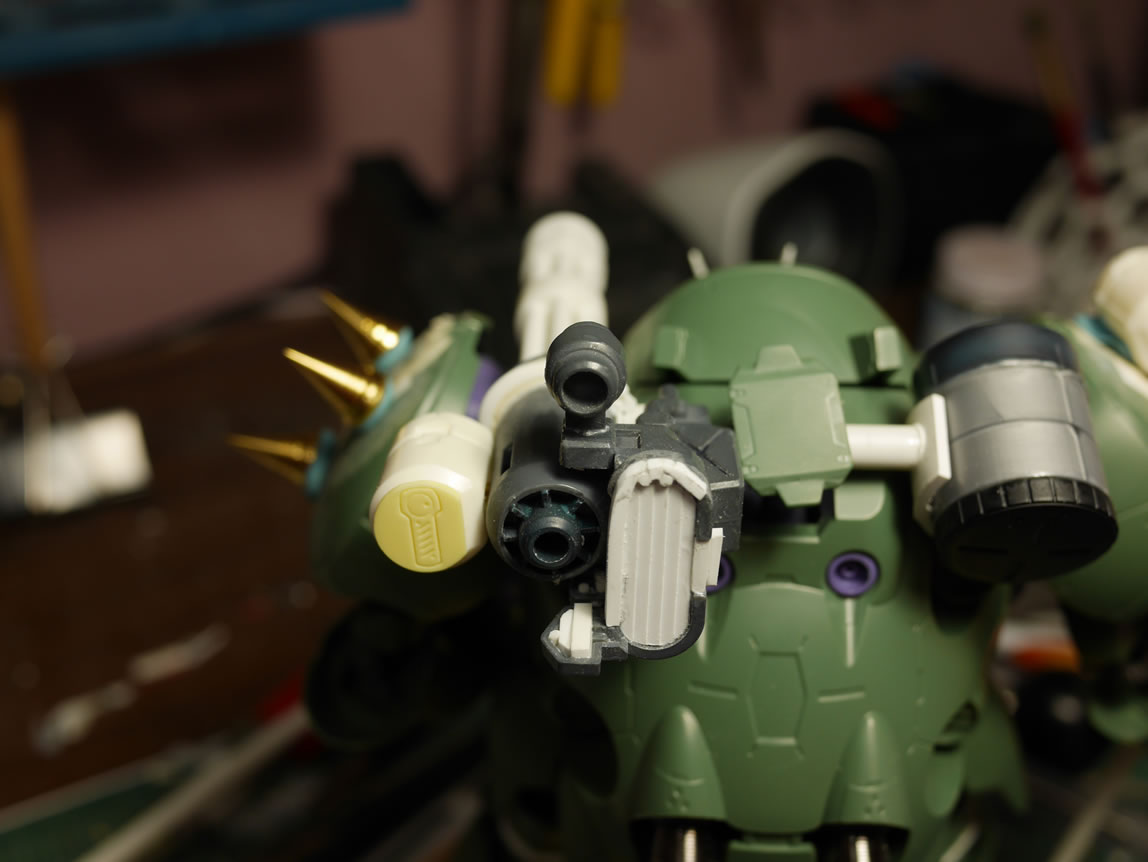
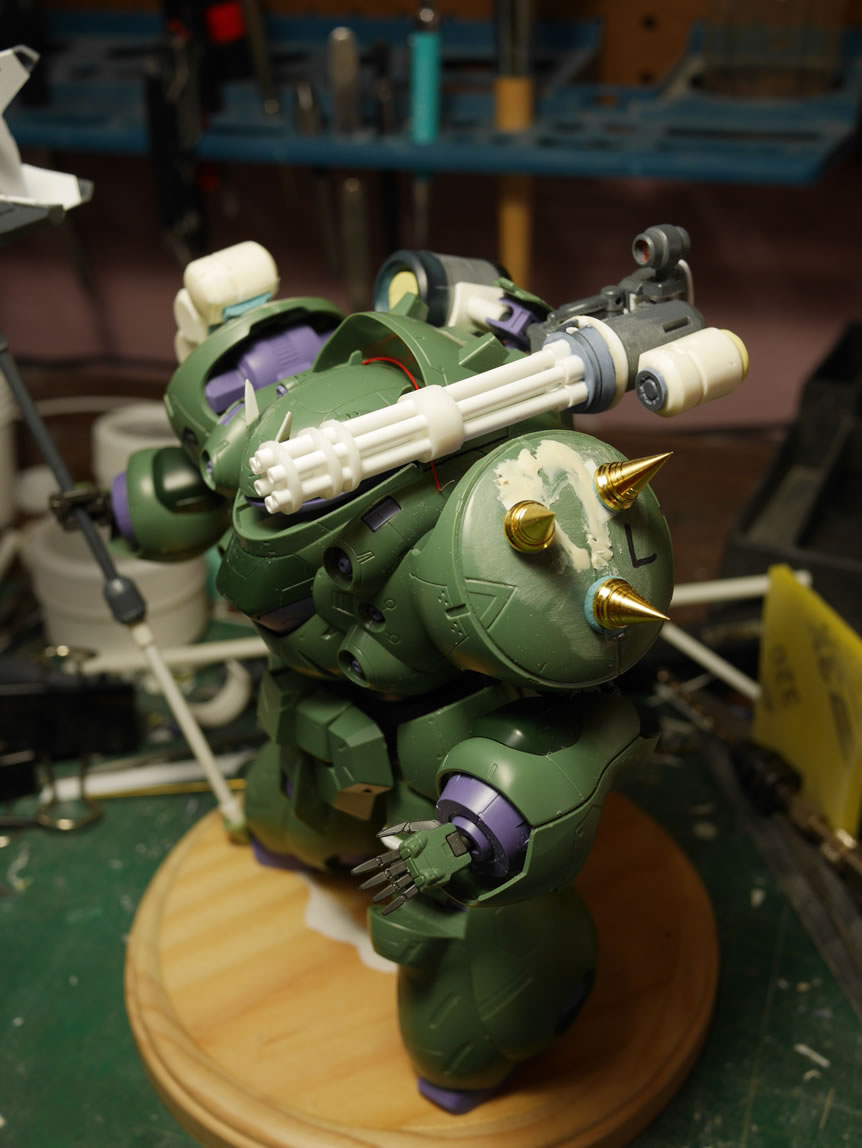
Here are some shots of the gatling gun as I continue to work and add on details. The back of the gun is actually the front end of the Dom’s giant bazooka, so this big gaping hole needed to be filled. I cut out the Z’Gok’s backpack thruster cover, glued some detail styrene, and I have an instant detailed vent piece.
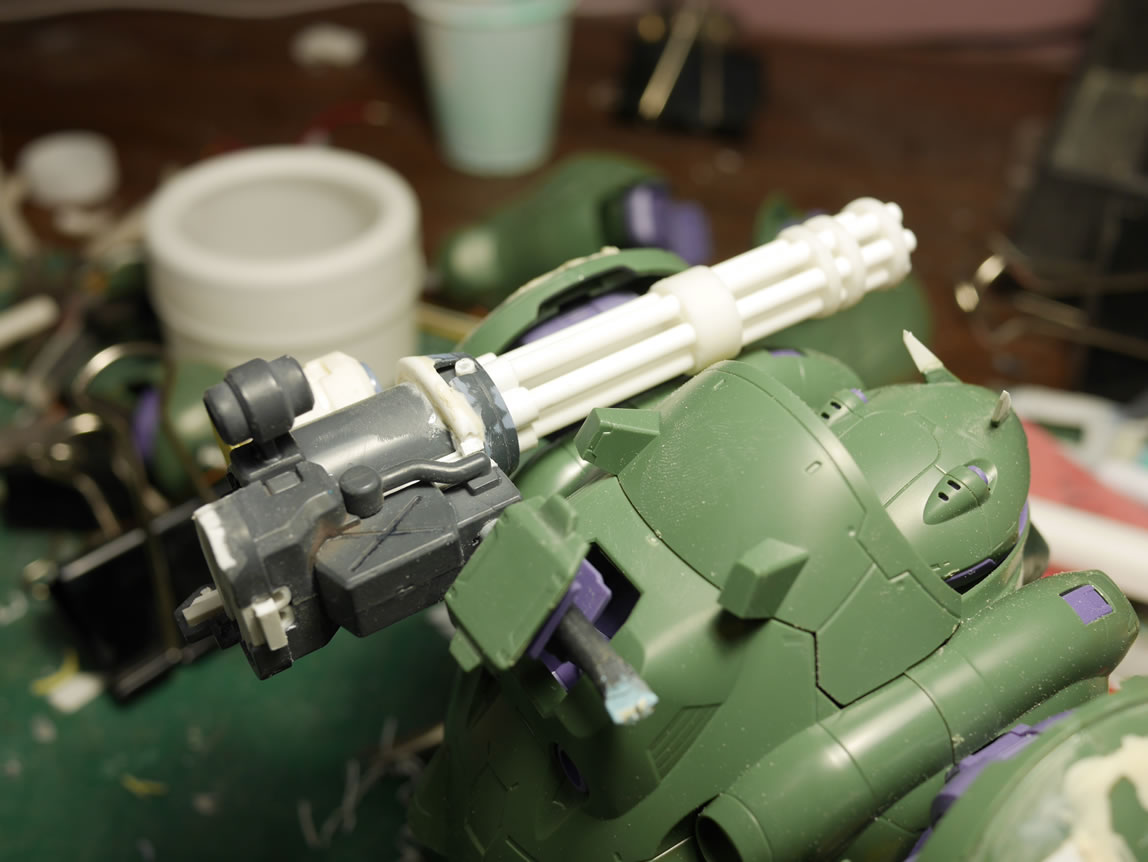
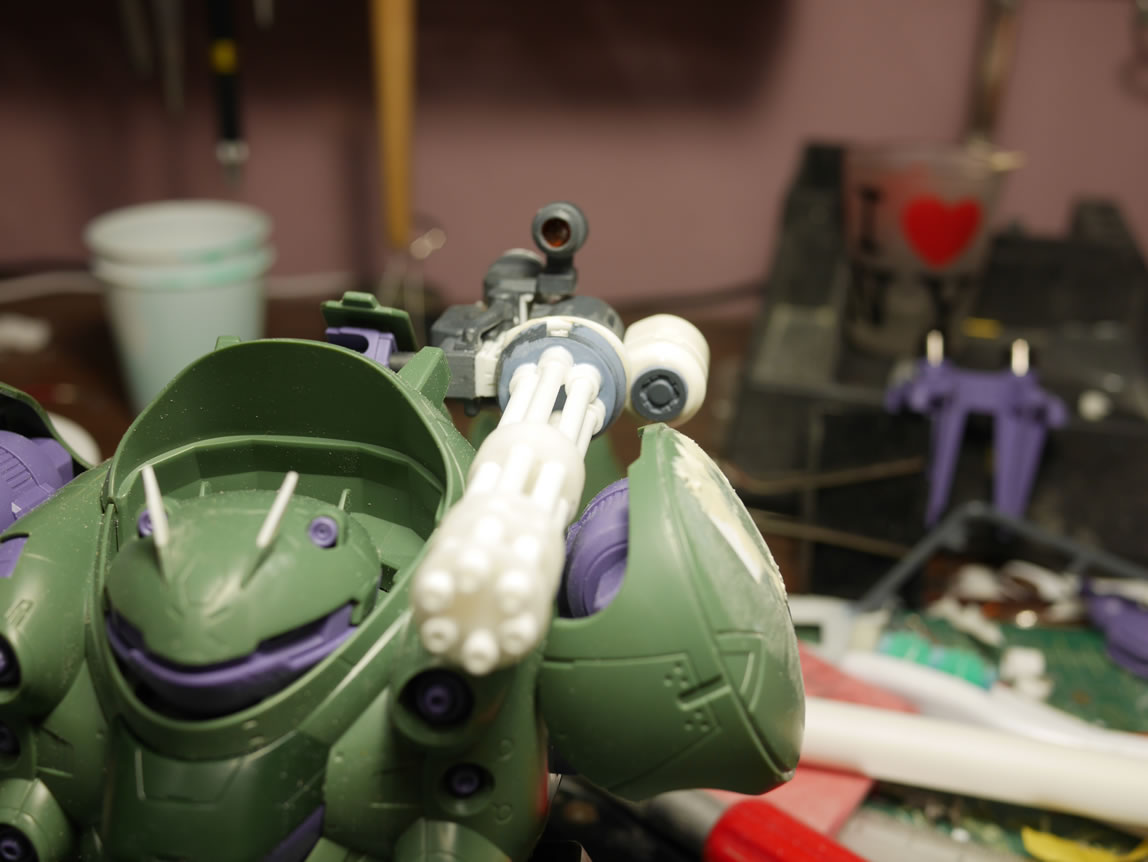
Test fitting the weapon, I originally had the orientation of the Gouf Custom’s gun part reversed. But since I’m using the Gusion’s hammer holder part as the attachment point, it just worked out better to reposition the Gouf’s part differently. I then added some of the detail styrene plating to the back of this part and started rebuilding a frame around the detail plating. Some styrene strips are glued together to the bottom of this part to help work as a transition area from this piece to the main gun’s body.
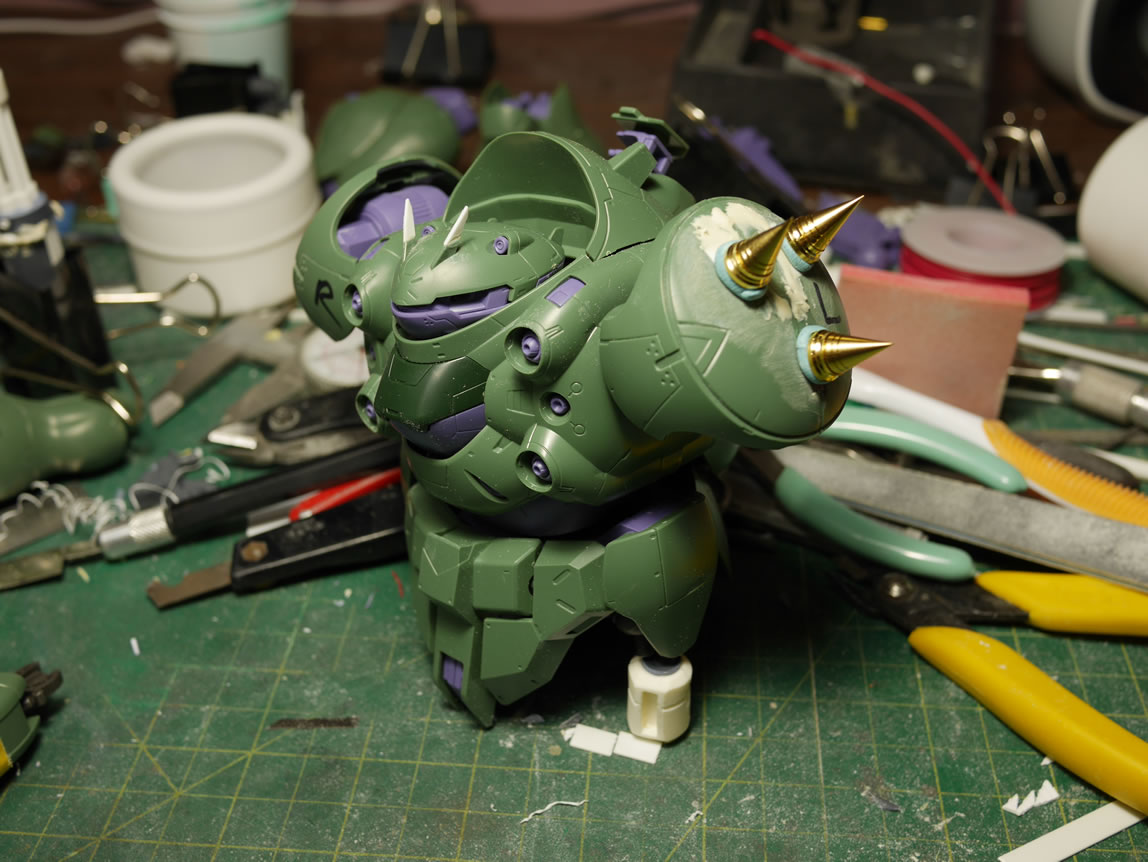
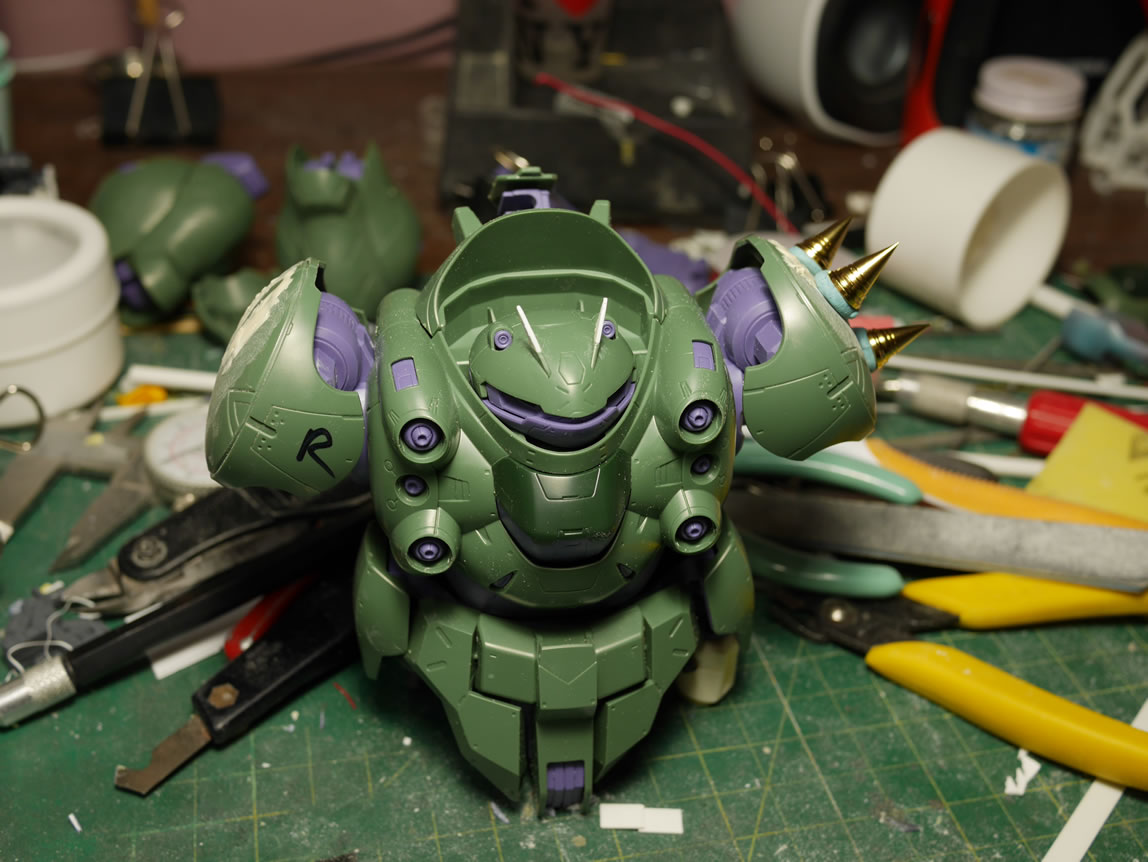
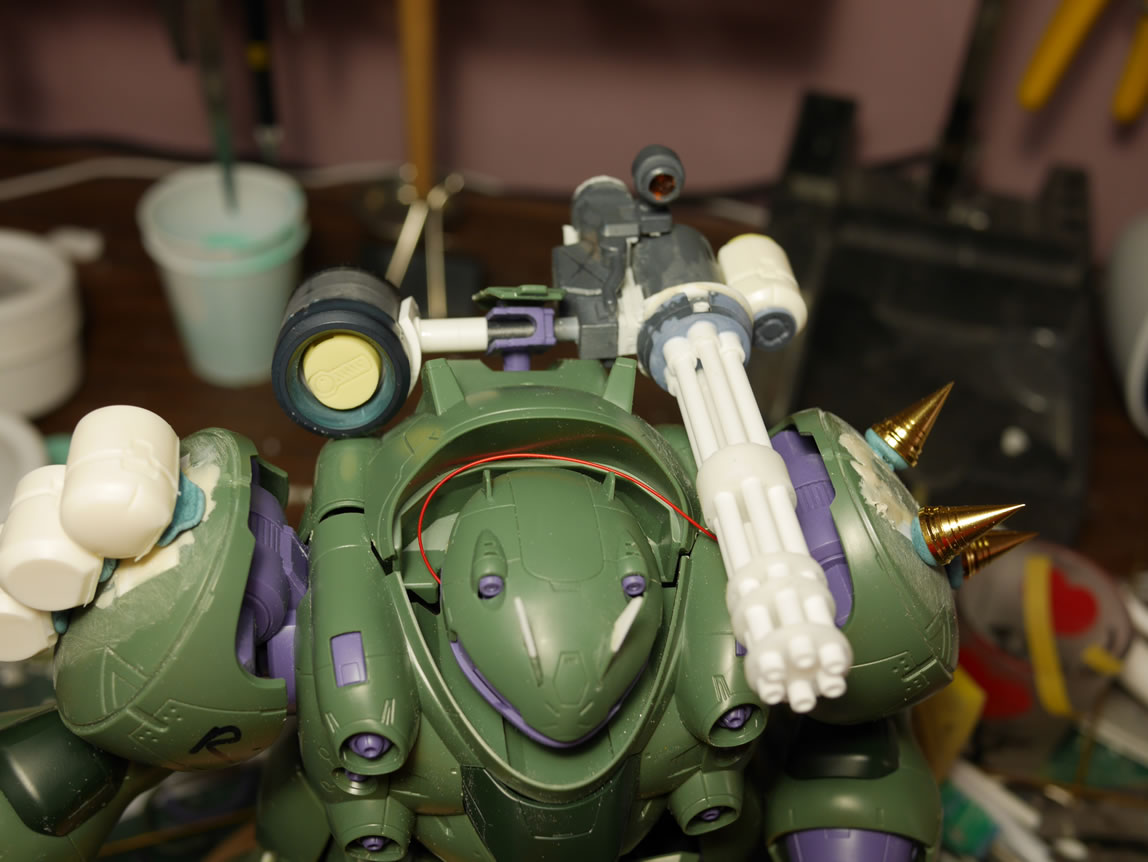
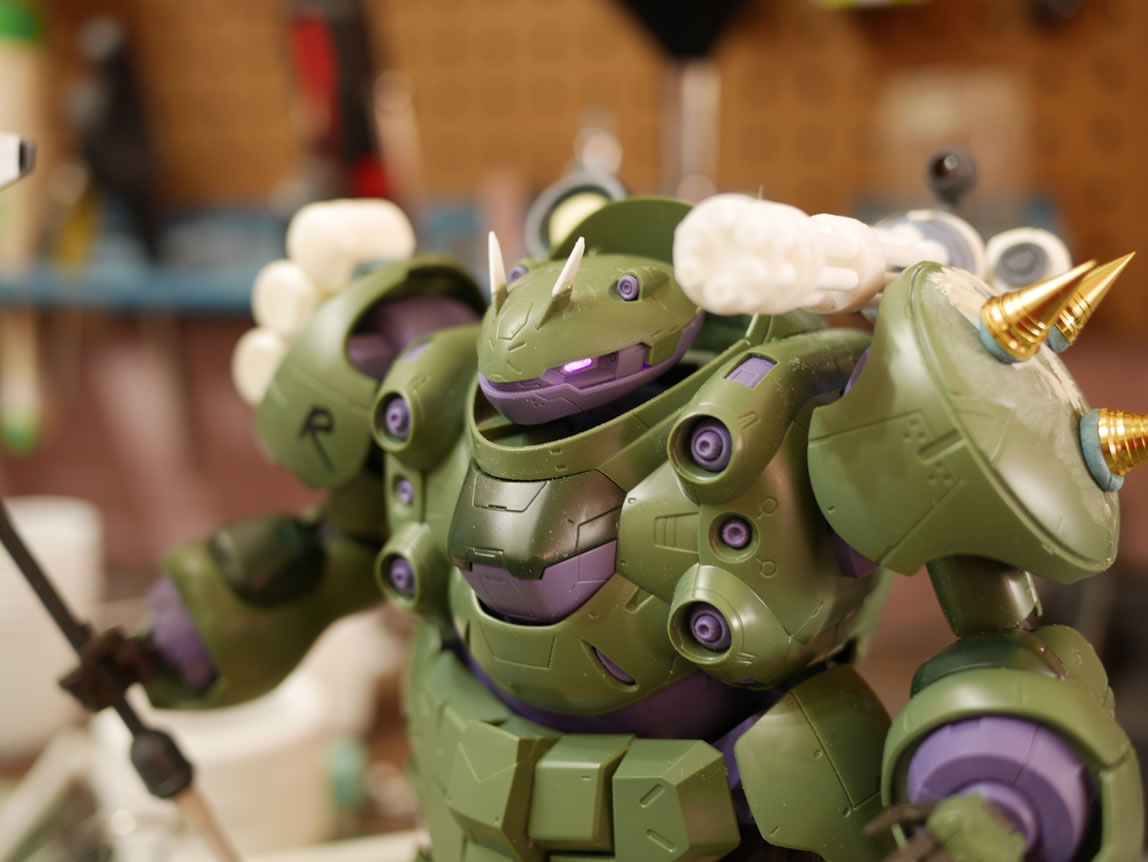
In my previous post, I had cut off the details on the shoulder pieces and started to fill the area with styrene strips and putty. Sanding those areas down, I glued the two halves of the shoulders together and added more putty to fill in any left over gaps. I’m adding some aftermarket metal spikes to the left shoulder; using the same position as the square spikes. The spikes are just attached with sticky tack for now as I’m still working on preparing the shoulders.
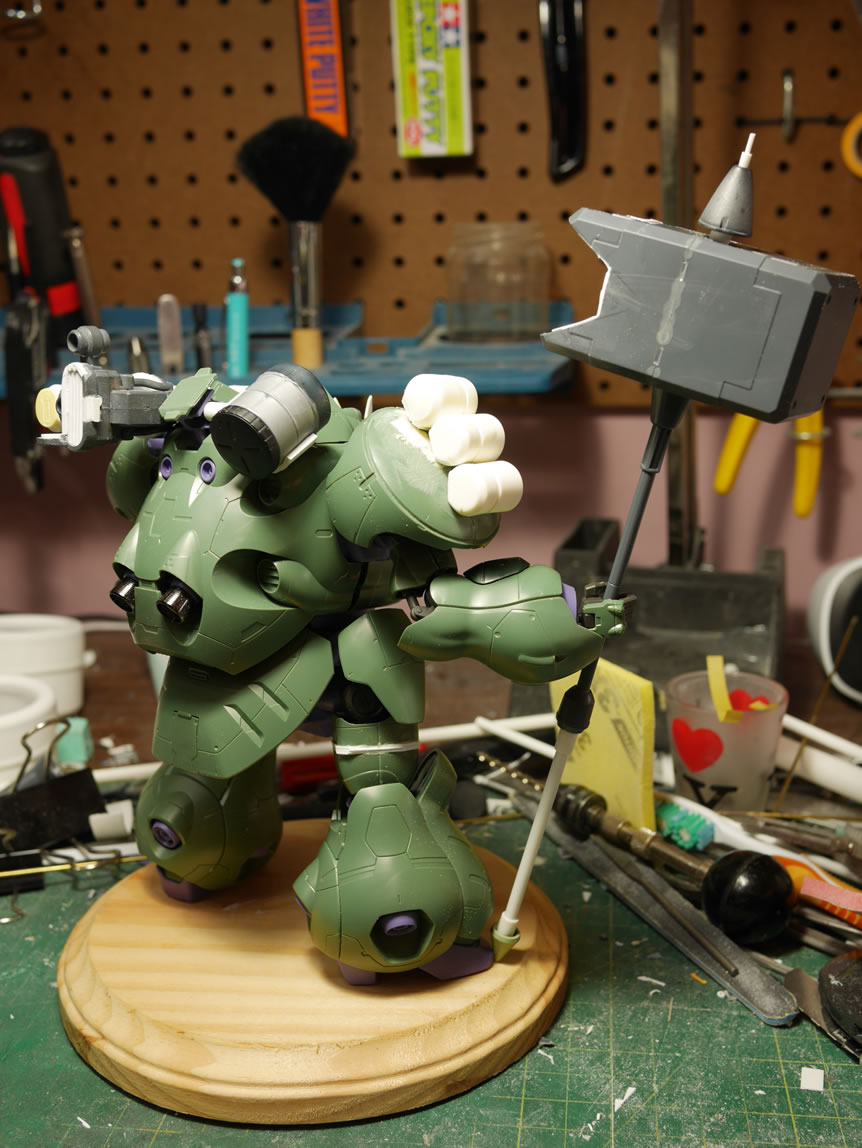
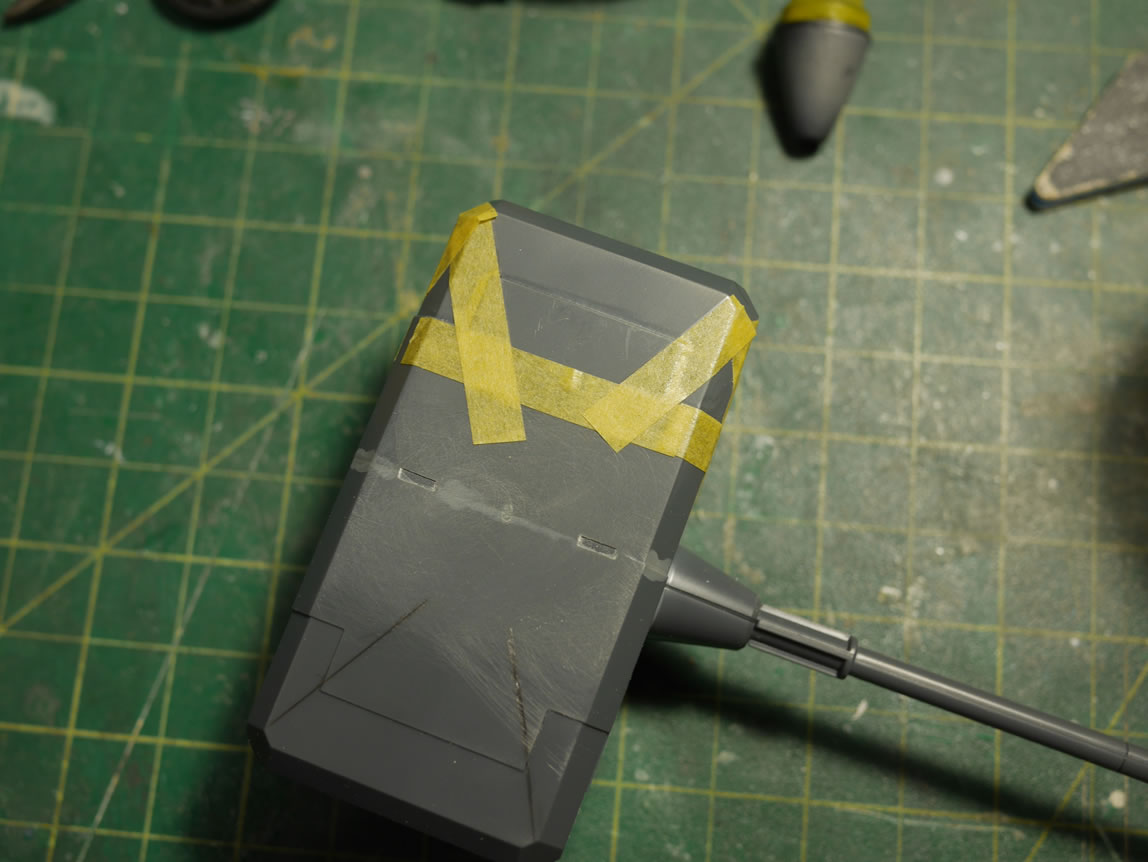
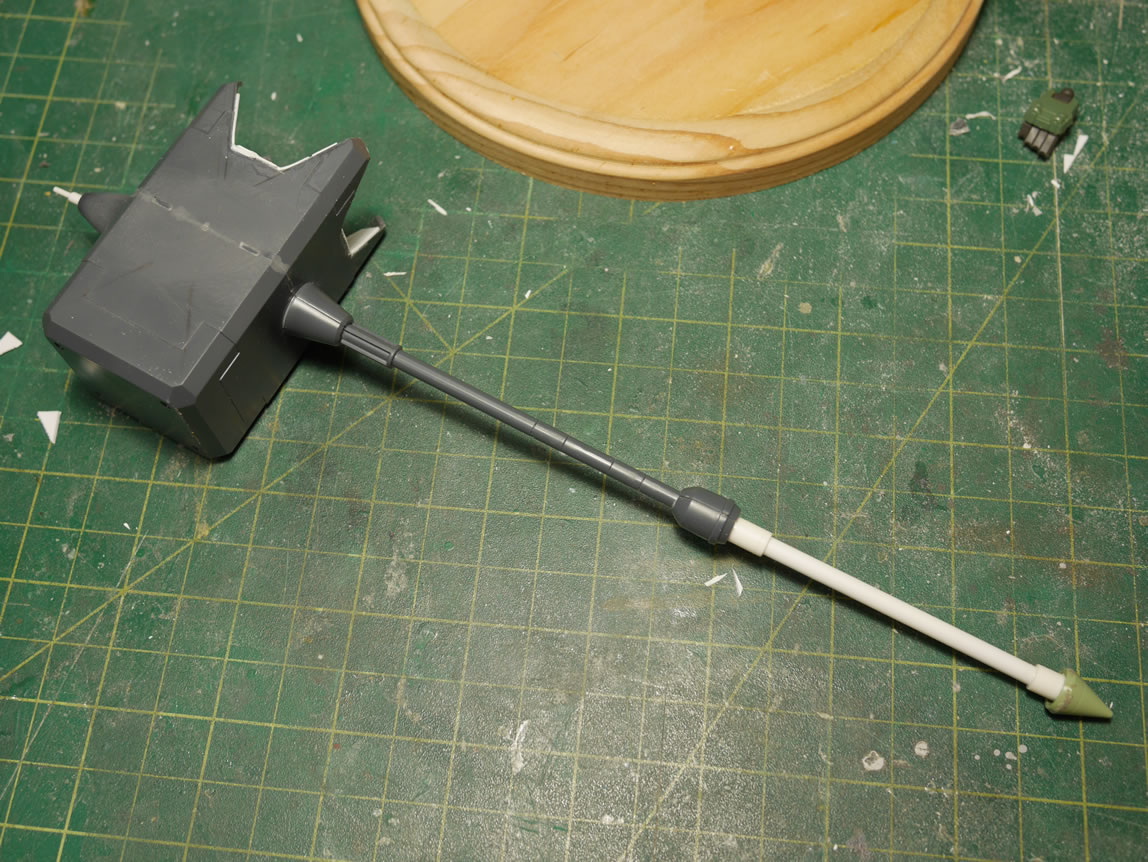
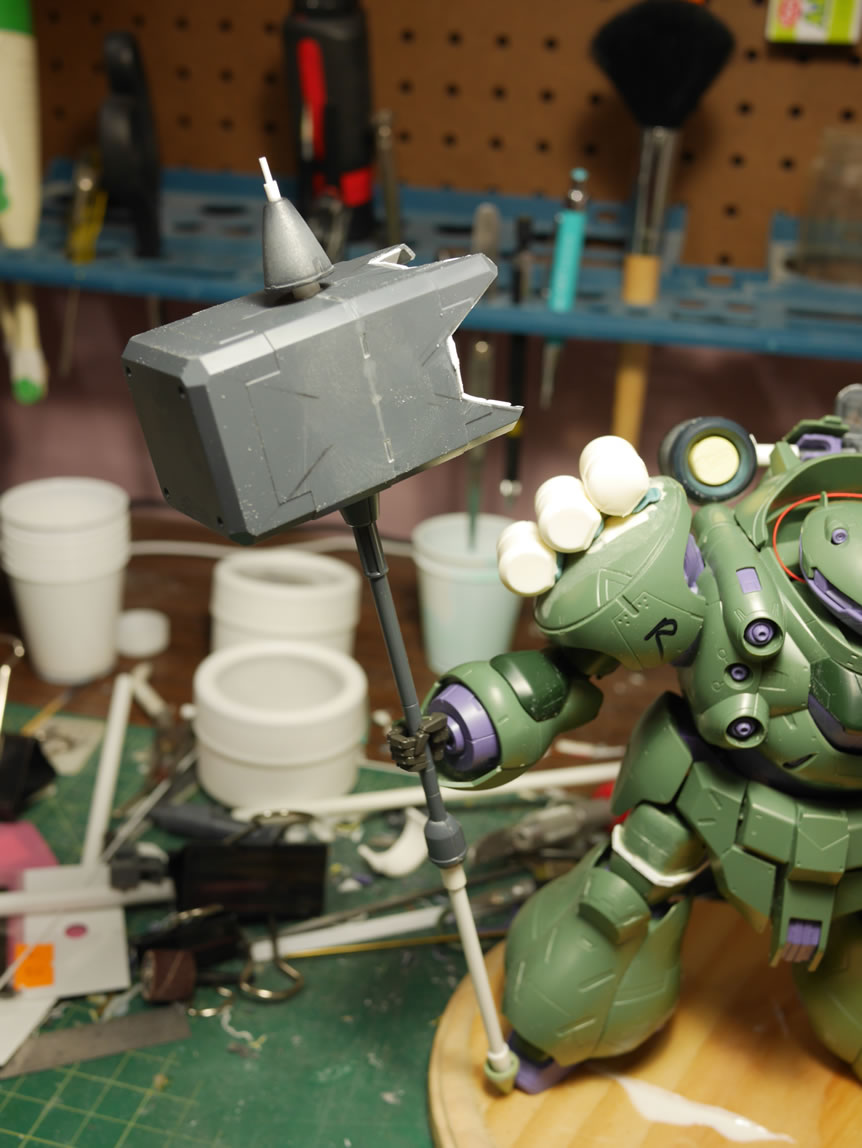
Next up, I drew out a pattern on the “back” of the hammer, and I put that in quotes as the hammer really doesn’t have a front or back. Time to fix that. I drew out some lines in pencil, then laid down some tamiya tape. The dremel and a cutting disc was used to quickly remove a bulk of the plastic materials. The a sanding bit to help speed the process. And finally, some files and sanding sticks to do the fine detail removal work. Once that was done, strips of styrene are used to cover up the now opened up back of the hammer.


Some styrene tubes, a metal rods attach a handle extension turning this into a dual wield weapon of blunt force trauma. A lone Zaku II should spike is added to cap the bottom of the lengthened handle. I used the bottom half of a Kampfer’s sturm faust and some styrene tubes to create the beginning structure of a top spike. The hammer’s starting to look more unique now.
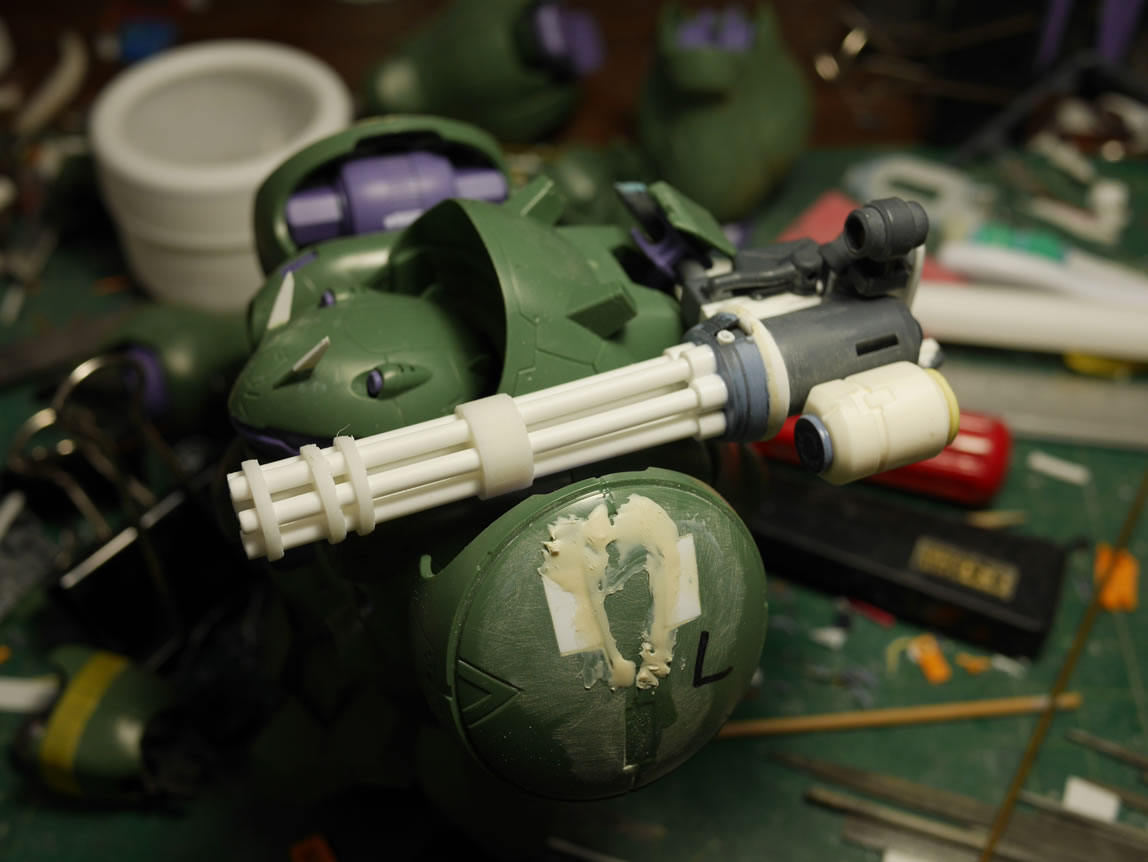
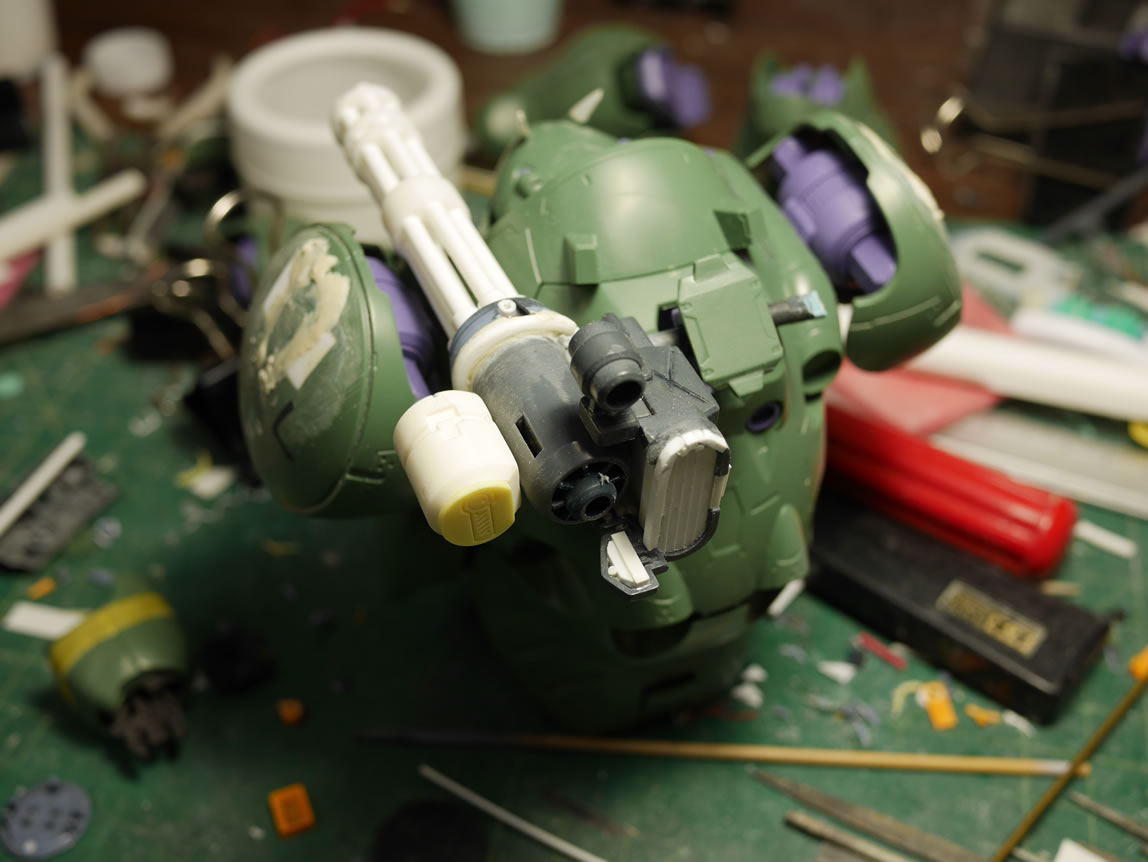
The gatling gun needs an ammo canister. So I created one using the leftover cowl from the Z’Gok’s thruster cover (where I gutted the internal detail). Glued on a Kampfer mine piece as a detail part, some cylindrical tower parts and capped off at the end with a Zaku machine gun magazine clip cover. Some PVC is cut and onto this a piece of styrene tube is glued. A magnet is embedded into the pvc so that I can make quick attachment and removal of the ammo canister. I did some sanding work on the gatling gun, but I still have a bunch of detail to add; so more on this for a future post.
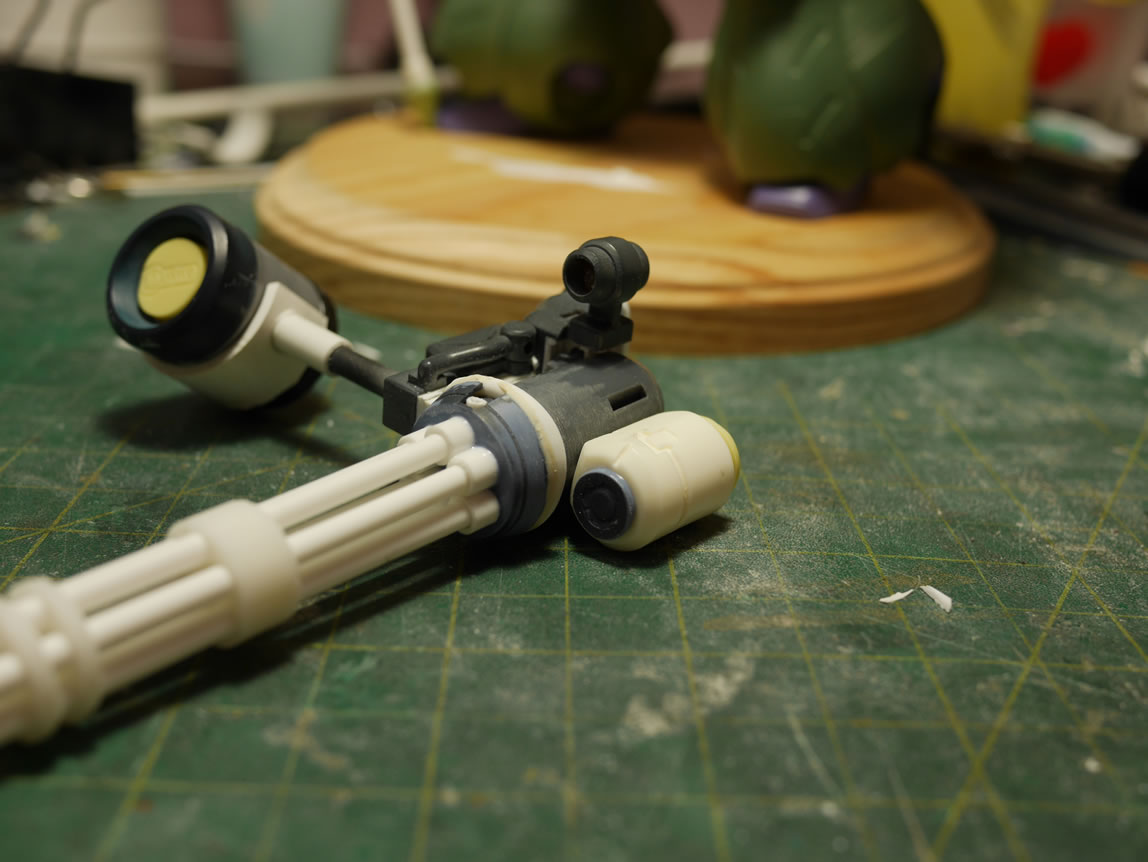
Here are some quick mockups with the gatling gun and ammo canister attached. Also note that the right shoulder has some ore gun parts attached temporarily with sticky tack. I still need to build a holding assembly for these canisters. But this is what I’m headed towards in terms of the shoulder work.

Here’s what the sucker looks like so far; it is a decent amount of work, but still very rough work that needs quite a bit of refinement. The last picture shows the pink eyes lit. I think that color should go nicely with my envisioned paint scheme. Hopefully I get another good week of work in and there will be another post later this week.

This is quite exciting, the first season of IBO has ended, and I’ve not watched a single episode…. maybe it’s time to marathon it… and possibly get more ideas for the damn thing.