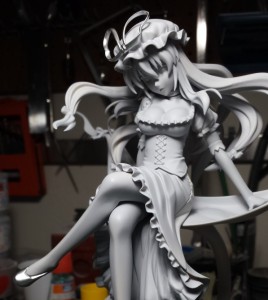
Sena progresses with the eye painting. I’m still pretty scared of this process and I’m still learning, but here are some things I found that have helped me. I start off with the face getting a coat of white base then painting the main skin tones before going on to working the eyes.
Below is the video of the whole eye drawing and painting process:
The written details about the process comes after the jump.
First step is the base white, since the skin tones needs to be painted this first before the actual skin tones so that the figure doesn’t have a grey tone in the skin color. Before painting the skin colors, the eyes are masked off. The eyes are masked off using blue sticky tack applied with a skewer to follow the curves.
The face is base coated, highlights are sprayed, then the middle tone is used to blend everything together. Once this all cured, the eyes are unmasked.
The eyes are first drawn using a .3mnm mechanical pencil. This makes it easy to make corrections with an eraser if I am not satisfied with how the eyes look. Once I have the eyes drawn in for a rough look; a rapidograph pen is filled with ink and the eye lines are inked. If I make a mistake here, I can use tamiya enamel thinner/lighter fluid, and clean up the ink without hurting the lacquer based paint layer below. It is important that the lacquer based skin paints are cured which truly helps when trying to clean up the ink with enamel thinner.
Once the inking is satisfactory, the first light color is mixed using green, light blue, and white to create a light turquoise color. This is painted in and allowed to dry over night. Enamel paints take a long time to cure, and may dry in a few hours, but to keep the paints from blending too quickly; the eyes are left to sit before applying the next layer. The darker tone is mixed from green and light blue and painted into the eyes. This is also left to sit over night. The final step is to paint in the white dots for the eye’s reflections.
The eyes are done and the eyebrows are drawn in with a pencil first since any mistakes can be fixed with the eraser. Once the penciled in eyebrows look good; brown, yellow, and white is mixed and the eyebrows are lined with the brush carefully. Again, if the brush slips, the mistakes are easily cleaned up with enamel thinner and lighter fluid.
The eyebrows are left to cure overnight then the entire head is sprayed with clear gloss. The clear gloss is left to cure overnight, then the eyes are masked off to be painted with clear flat to fix the skin while keeping the eyes “wet”.
The last bit for this update is spraying a semigloss to the hammer to take the glossy shine off the metal. I did not want to use a flat coat as it would dull the finish too much, but I wanted a balance between the shiny kandy red and the alclad metallics, so a clear semi-gloss is sprayed to balance out things.


This should spend a lot of work.