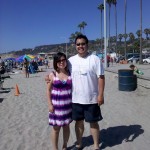
A little bit of a weekend update. This like pretty much every other weekend was fairly busy; time this it was the birthday bashes for Nicky and Yuki. Nicky’s birthday was earlier in the week and Yuki’s was this past weekend. So they decided to combine both birthdays and have a little gathering down in La Jolla Shores. Interspersed within all the birthday activities I have a little bit of time to mask and paint the Asuka bust kit.
Friday was my day off and Yuki got a day off from work as well. We ended up spending the day doing errands. Got Kenken’s rabies shots, lunch with Angel, grabbed some office chairs he was offloading, went to pick up some food for the beach day, went to get the custom cakes, returned to the cake shop because they had messed up the order, then had a nice dinner at a Mediterranean place in Anaheim Hills. Yeah, Friday was fairly busy, but I still got a little bit of work on Asuka done here and there.
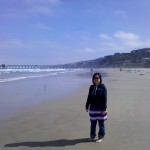
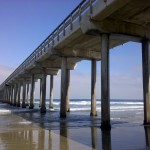
The plan for Saturday was to get to the La Jolla around 6:30, so we were set to meet up at 5:30 in the morning at my place. We didn’t actually meet up until just before 6, then went to grab breakfast and ended up leaving the area around 7:10. We got to La Jolla in pretty good time, about 8. And the parking lot was already full. Divers, surfers, etc. But since most surfers enjoy the morning when the beach isn’t crowded, a good number were leaving so parking wasn’t that difficult. We set up our little area and all the fire pits were already taken. We would have had to have gotten here around 6 or so to get one of the coveted pits. The sky was overcast, and Yuki and I walked down the beach, about a mile or so. The water was fairly cold. Seeing all the folks with scuba gear just got me itching as well. But I had opted against bringing my gear. I had also forgotten to bring my camera so pictures I took are from my phone.
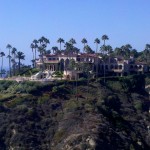
The beach just got more and more crowded as the day wore on. We stayed from 8 until about 4. On our way out, I took Yuki out to an ecological reserve that I used to visit when I attended UCSD. I snapped a picture of a house that, back when I was at that school all of 17 years ago, was just being built. Fantastic view of La Jolla and the ocean. After the short little detour, we headed home.
Over the last week I had spent a decent amount of time working on the Asuka kit. The eyes were masked off and I painted in the skin tones. Starting with a darker tone and then a lighter highlighting tone.
The same was done to the main body.
The hair was next. I first sprayed a dark reddish brown as the base color then went over with a lighter reddish brown. However it looked a little too dark for my liking, so I used some thinned Finisher’s deep yellow and sprayed a light misting coat over the hair, lightening everything up and creating the orangish red hair that is Asuka’s character.
With the skin tone cured, the skin areas are masked off as the first layer of masking. I’m using mostly tamiya masking tape in conjunction with sticky tack and liquid masking solution. And the little detail circles are painted with alclad prismatic colors over a gloss black base.
The chest detail is painted white then masked off. The circular details are masked off and this is the second layer of masking so that the red can be painted.
With the red areas painted, a third level of masking is done so that the detail lines on the kit can be painted. I used alclad polished aluminum over gloss black.
The fourth layer of masking was done mostly with parafilm and masking tape to cover the brass painted areas. The outer circular areas are then painted with the red.
Once the paint is allowed enough time to cure, all the masking layers are carefully removed leaving a stack of masking tape and balled up sticky tack.
After removing the masking, there are several areas that will need some touch ups. I’m happy that I didn’t get any paint lifting, so the surface prep was done properly. There will always be touch ups, after the tedious masking and painting sessions. It’s part of the build process. Nothing ever comes out perfect. So those areas were fixed and I used some pastels to shade the skin tones a little. Next up will be the clear gloss coat for the entire body.
The middle of last week, an idea for the base came to mind. Originally, I had pins drilled into the bottom of the leg areas to be attached to a wood base. But when I was working with the wood base, the idea to spice up the base came about. Taking a sheet of clear acrylic, I cut out a circular pattern that matched the size of the top circle of the base. With that cut, I drilled three holes into the base and acrylic sheet to make room for some detail screws that work as a nice detail piece as well as holding the base and acrylic sheet together. I found a decent Nerv logo online and printed it out on photo paper then cut the logo out to fit the circular pattern of the acrylic sheet. The base was sanded, stained, and clear glossed for a few days so that the wood can fully absorb the gloss and get a nice glossy finish. I also chiseled out two holes in the wood base and glued in some rare earth magnets. Corresponding magnets will be in Asuka’s legs, and this will be the means of attaching her to the base. With the base cured, the components of the base are assembled.


