So, this past week I’ve been working quite a bit on this project. Granted if I had spent this amount of energy earlier on the damn thing it would have been long completed by now. The same could be said for many a projects sitting on the workbench, below the workbench, to the side of the workbench, etc. Well, it’s crunch time and I didn’t really expect to get the sucker finished by AX. I was positive that I would have it done by Otakon. Well, at the time of this posting, all I have left are the decals, panel lines and little bits of detail painting. So, effectively, I could possibly get the little bastard done tomorrow and show it at AX.
So starting from where I last left off, I got the rest of the kit sanded and did a quick mock up. It’s definitely not Bandai engineering, but it’s not too bad. I’ve worked with much worse. This wasn’t any bed of roses, but not too bad. Good practice on the good old basic model building skills of glue, sanding, putty, and rescribing detail lines lost from the first couple of basic build steps.
With that done, I went on to focus on some putty work. Again, since I wasn’t in a big rush to finish the sucker, I used tamiya basic putty cut with tamiya extra thin cement. The putty would go on, then I would apply some of the extra thin cement to help dissolve and soften the putty. This helped with shaping it and getting it thin enough to fill in the holes and dimples in the plastic. With everything sanded, the kit was taken apart and thrown into the ultrasonic cleaner for a cleansing session. Once dried, the parts were placed on skewers and were ready for paint.
With most of the parts cleaned and sitting on skewers, I was able to prime the entire kit Monday night. There were a few mistakes still in the surface like some rough sanding spots and some surface defects that needed some additional attention.
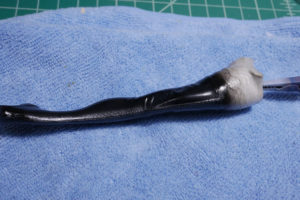
Monday night also saw the paint work for the thrusters. They were base coated with gloss black, completely skipping out on the primer. An hour of drying and a layer of stainless steel went to the thruster bells and for the thruster internals, polished brass.
The next day, I put the binder thruster assemblies together and snapped a few quick shots.
The other thrusters were completed as well and all the painted parts were removed form the skewers and set aside.
Last night, I finished fixing the last bits of surface defects, reprimed, and based coated the kit with gloss black. During my lunch break, I sprayed on a layer of alclad magnesium over all the exterior armor pieces. And early this evening, I used a full bottle of alclad hot metal violet over all the exterior armor pieces. I used the entire bottle. Lets hope I don’t run into any paint issues down the road.
After dinner, I sprayed the clear gloss over the exterior armor pieces, and in the picture below, you can see a big difference between the paint surfaces.
I finished painting the other major parts and hopefully tomorrow, I can finish up the small little bits and pieces of work left on the sucker.


