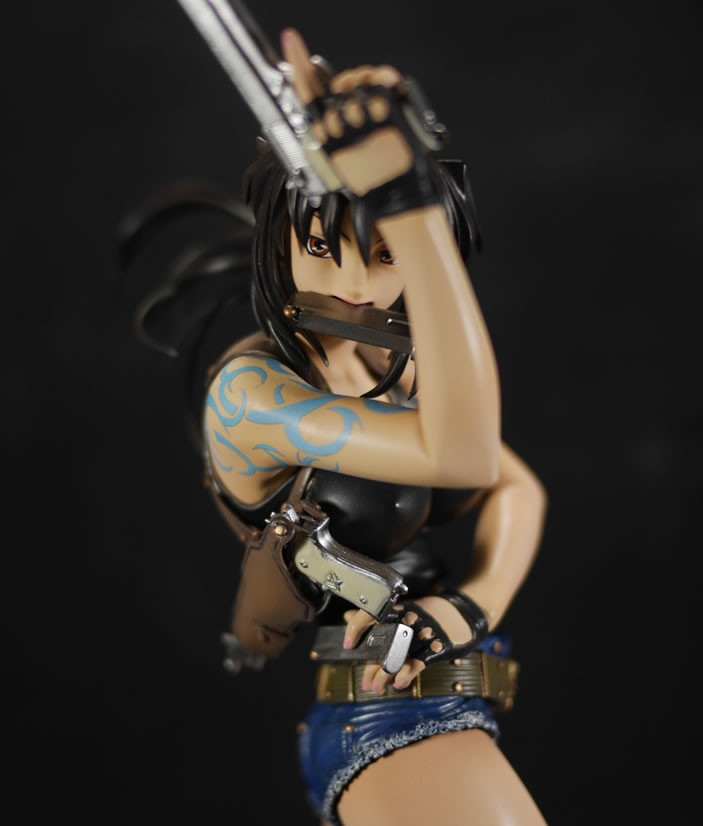
New Figure Build: 1/7 Revy by Volks

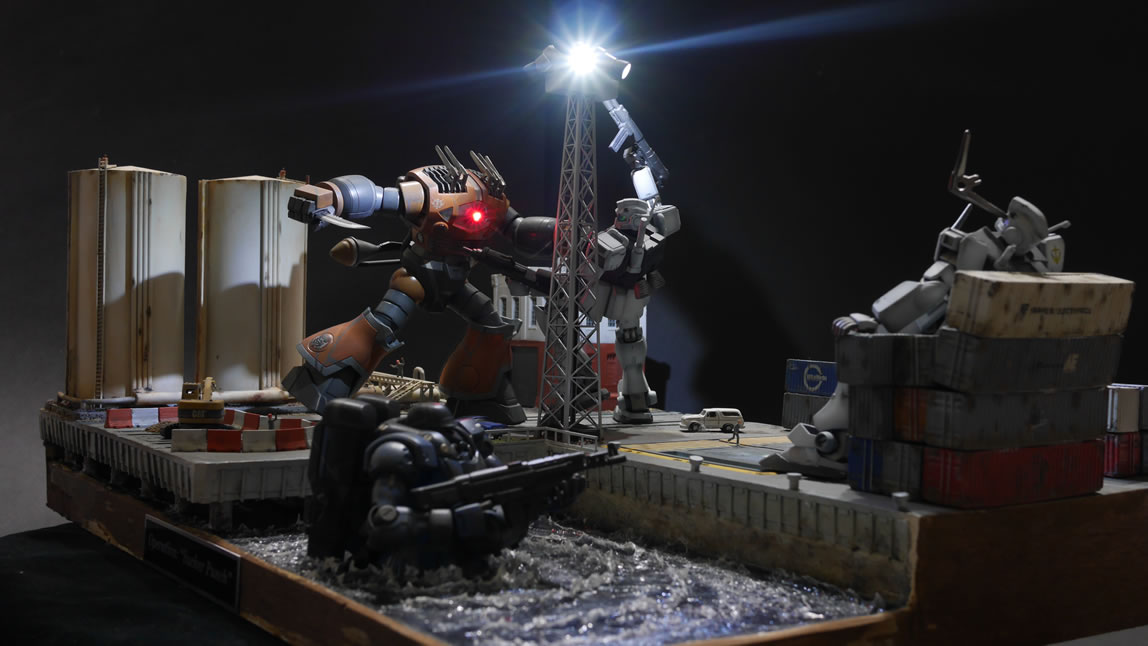
A few days of rest after AX is always healthy; but I’m still fairly gunplaed out after pushing pretty hard to finish the sucker punch diorama. I’ve still not taken a quick video showing the kit with all it’s lights and morse conversation between the two zeonic suits; but I’ll get around to it soon.

From AX, Volks was in the exhibit hall and while I didn’t really put much faith in seeing resin kits. The booth was fairly simple with some display pieces; and historically, most booths with these figures were not selling kits. I did notice some FSS kits they were selling, all plastic and no resin. But I asked about resin figures and they pointed to a sign right in front of me with their whole line of charagumi kits. Picking up my jaw off the floor, I immediately asked if they had the Revy kit. I’ve been interested in this kit for a while as well as the Saber kit; but I was immediately suckered into picking up the Revy kit. I am usually pretty good at walking away from AX without picking up a single kit; but damn, I could not pass up getting at least one kit from Volks. I hope they did well enough that they come back next year.

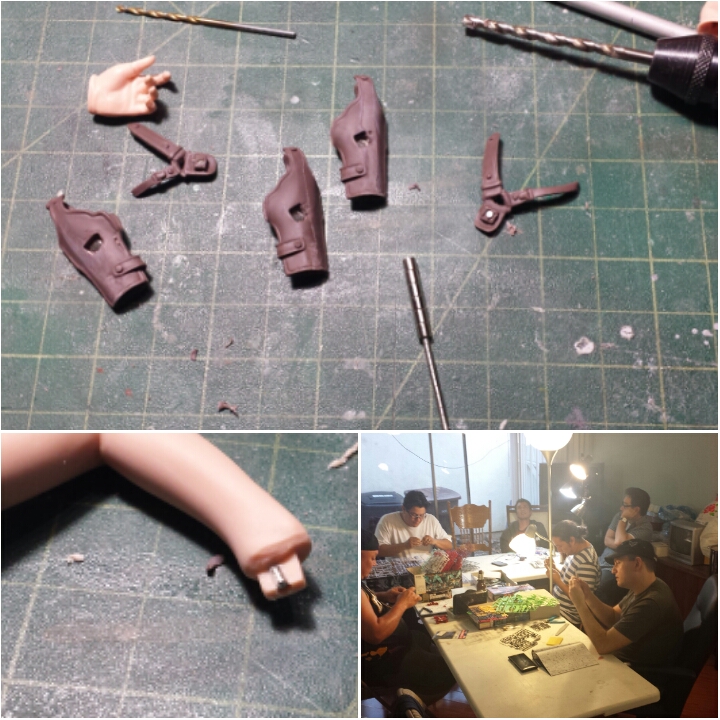
Cracking open the kit, the parts separation is amazing. They are using colored resin. There are still gates that need to be removed and mold lines that need sanding. But baring any pinholes, it would be as simple as just clear coating the thing, gluing everything together, and adding the decals. But like the colored bandai kits, I will be priming and painting this kit. It will definitely be an easier resin figure kit; but the same work for any resin kit is needed.

Another note about this kit is the extra parts. The kit comes with two heads, one with her mouth open biting down on a gun mag; then another with her mouth closed. There are also options on her left hand, either holding another gun mag, or holding the second gun. This leads to options for the holsters; an extra empty holster and one that has a gun holstered. Pretty damn cool to include all these extra parts; and effectively, all the parts can be painted and then interchanged.

(more…)

Continue ReadingNew Figure Build: 1/7 Revy by Volks

Anime Expo 2015

A group of us representing Those Gundam Guys went to Anime Expo, as we have been doing for the past several years to participate in the Gunpla Builders World Cup preliminary competition held by Bluefin. Dan, Angel, Mike, and I brought up our kits and put them into the display case on Thursday. We chatted with some folks spending most of our time trying to promote our show, the Southern California Gundam Model Competition since the audience at AX is just huge. There are thousands of people buying gunpla over this holiday weekend; the perfect opportunity for advertisement.

Done chatting a bit, we start to wander the hall. We hit up the Hobbylink Japan booth, and I chatted with Jim, whom I’ve known over the years as we talked about figure models. He’s a very talented resin figure modeler, so we usually exchanged pictures of our recent builds and such. A few days later, I told him that Volks was in the hall, and he was surprised. He’s a big fan of Volk’s figure kits and was unaware of their presence this year. I also got to meet Syd from the Hobbylink.tv web shows. I invited him to the gunpla panels we host, and left him my card with my website/contact info. I got a nice chuckle when he looked at my card and said he had heard about my site. He told me he’d email me if he could make on of the panels.

The group decided to start at one end of the hall and try to get all the booths. That didn’t work out very well. By about 3PM, we were beat the hell up, and only got half of the exhibit hall. They’ve added hall G to the convention and massively expanded things. We visited the Volks booth and I immediately grabbed a Revy kit I had been eyeing for a while at the Volks booth. I was pretty surprised they brought so many resin figure kits. Actually, this is prolly the first time in well over 10 years that I have found resin kits at AX. The other guys in the group eyed the products at the Volks booth, and eventually, over the next few days, Angel and Mike ended up buying Bang Dolls and Dan picked up a Mari resin figure kit from Evangelion. HAHAHA, slowly I’ll get all these guys building a resin figure.

The original plan was to get through the entire hall, then leave; we got through half and gave up. We had 3 more days, well, for a few of us, we had 2 more days.

(more…)

Continue ReadingAnime Expo 2015

Operation Sucker Punch!

Taking some time off work really paid off; as if I didn’t, I wouldn’t have been able to finish the project within the confines of the AX deadline. Well, I think I could have, but it would have really been pushing things. From the last update, I started attaching the completed pieces of the project to the base. The silos and pipe works were glued onto the base. The tower light was attached and glued into position. The one building was also glued onto the base. Once these pieces were in place, I taped off some border areas and using some elmer’s white glue thinned down slightly with water; painted the watered down glue and then carefully sprinkled some colored ballasts (model train store scenics stuff) The stuff is great for replicating gravel and comes in a variety of colors. The damaged base area was painted with the diluted white glue and more gravel was applied. Once the glue completely dries; a few hours as the stuff dries pretty quickly (I let it sit for at least 8 hours as I’m paranoid). I did an enamel wash with a few colors to give a some dimension to the gravel. I also dropped in some more diluted white glue and added some yellow turf as a weedy undergrowth.

(more…)

Continue ReadingOperation Sucker Punch!

Water Front Diorama: Clear resin poured for the water area

It’s getting down to crunch time. A little less than a week to go and things are slowing way down because things just need time to cure/setup. On Friday, I mixed and poured clear resin with some blue and yellow dye; but much more blue so the clear resin came out a deep blue. I should have mixed more yellow to get a greener tint, but I may just do some clear green tinting to get that effect. Or I may just leave it as it’s more “anime” effect if I keep it the current blue. I may just run out of time so that it may need to stay blue.

The first step was to apply a silicone sealant around the bottom, I did this last Thursday. I really did not want the resin leaking. The way the thing was put together, there is great potential for leaking; so I’m doing everything I can in precaution. Once the sealant was applied, it was left to set up over night. Friday afternoon, I mixed the clear resin and added the dyes, then poured. There was a little bit of a leveling issue, so I got some spillage from the front; but nothing too bad. I lined an empty MG Sazabi box with parchment paper too. The whole base was placed on top of two rolls of blue painters tape. Again, another precaution that if it does leak, I don’t have the entire base sitting in a pool of clear resin. Excess resin was poured into another mold that I keep around for making moon bases.

The resin I used is an enamel based resin that takes several days to cure. Since the base is too big to fit into my pressure pot, I needed a slow curing resin that will allow for bubbles to escape. The whole thing was then covered with the top of the Saz box to keep dust out while the resin cured.

(more…)

Continue ReadingWater Front Diorama: Clear resin poured for the water area