It’s been a minute since my last post. Quite a lot has happened this past year, so model building got back burnered. Back in April, the plan to remodel our kitchen got green lit, so I started with building it around a new cook top. Go big or go home, so I went with a 48″ Wolf gas cooktop with a griddle option, model SRT466; and of course, I also need the proper ventilation system to go along with this cooktop so I went with a wall mount vent: PW482418. Additionally, I went and picked out a new sink, a copper sink from Home Depot because I get a 10% military discount there. These were purchased back in April, and while the copper sink was shipped to my house, the Wolf products were just put on hold until I actually have a kitchen. Now to design the kitchen around these two things. The double oven is only a few years old as one of the first things we did to the kitchen when we moved in; and our dishwasher is less than a year old. So those two things will be recycled. Also planned for recycle was the faucet as it still worked beautifully and our garbage disposal and fridge which are also fairly new.
The design:
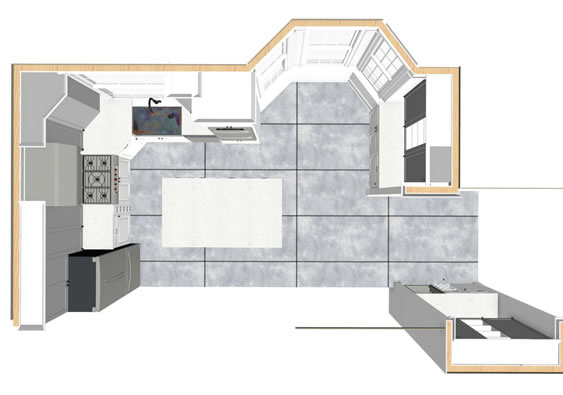
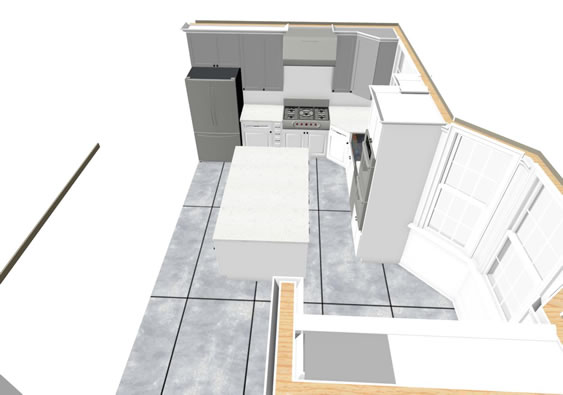
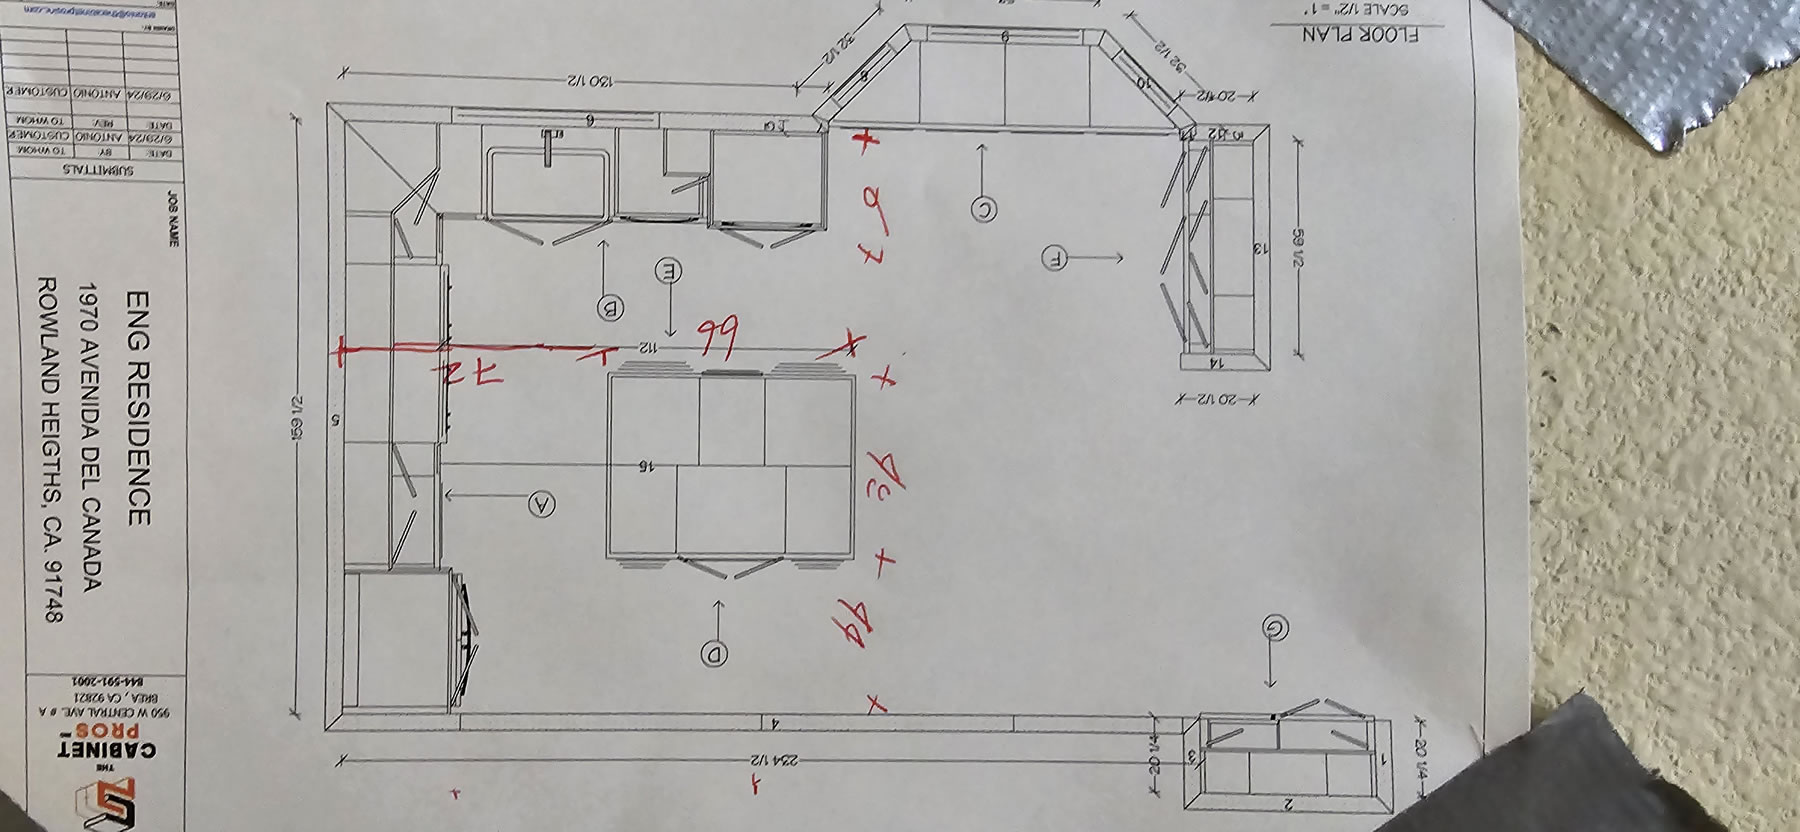
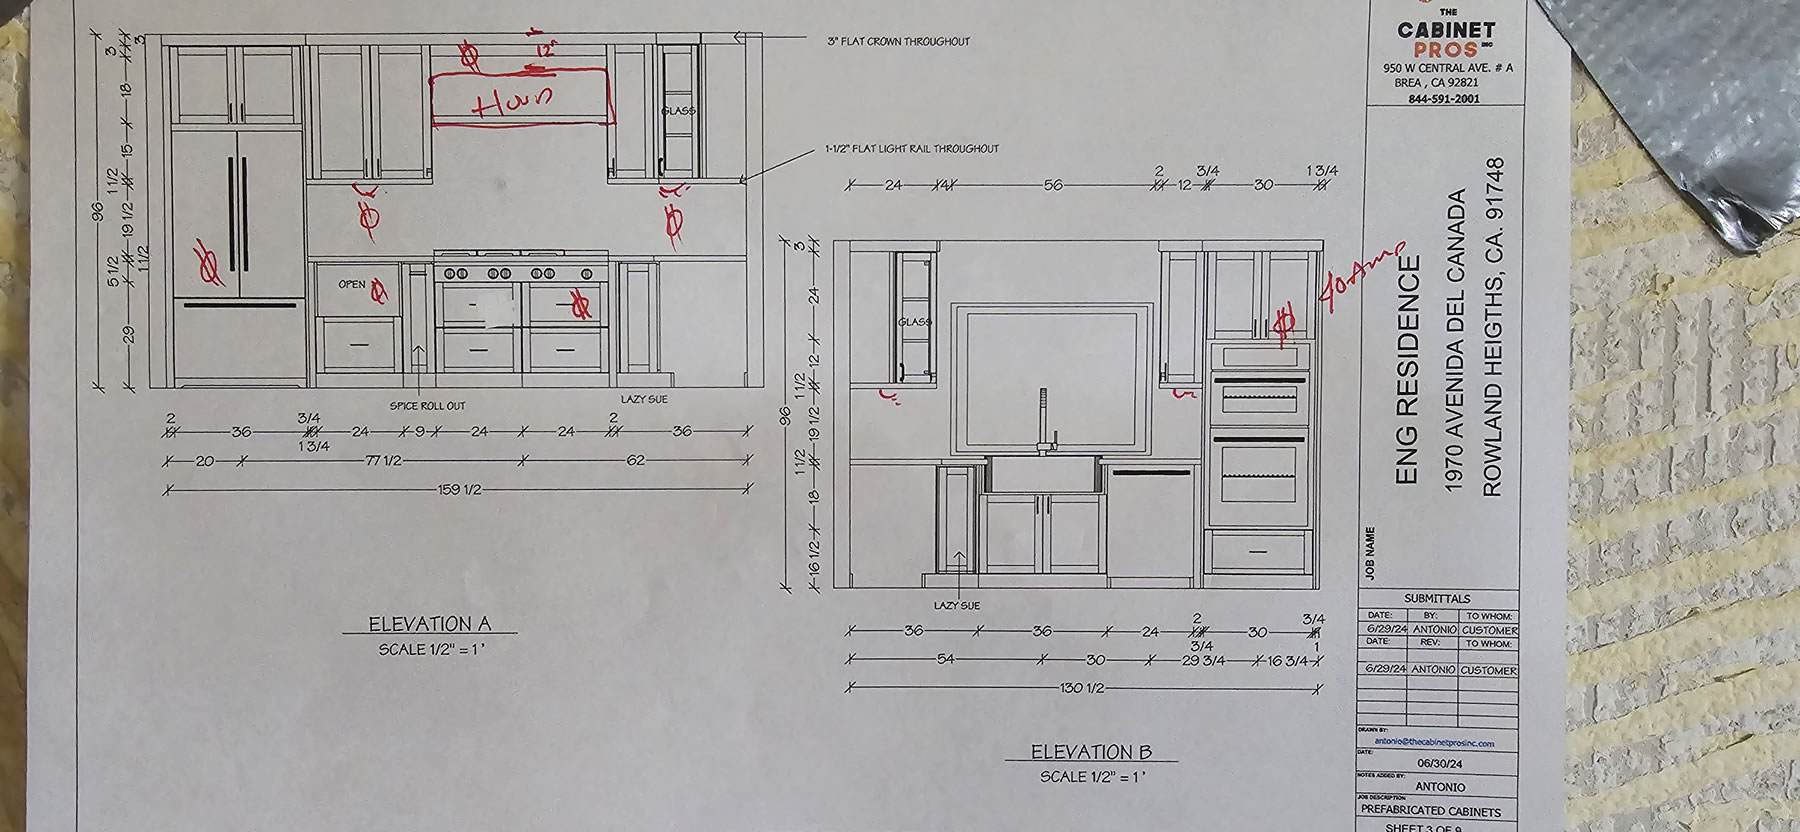
I picked up some home design CAD software and started playing around with basic ideas and drew out what I wanted with input from the wife. She would have had everything white, the tile, the countertops, the cabinets. So a little convincing and having to draw these things out so she can better visualize helped win her over; albeit still very skeptical. In November, we’ll hit our 9 year mark of living at this place; so we’ve waited a fair amount of time before kicking the piggy bank(inheritance funds) in the teeth and just doing it. So in April, I had this rough idea that’s been swimming around in my head for YEARS, finally drawn and we have a visual. The parents were getting into town about that time, and so we wouldn’t be able to break ground until they went back to HK at the end of June. So plenty of time to refine the design and shop for contractors. Also plenty of time to warm the parents up to the idea of completely gutting and destroying their beloved kitchen. It wasn’t too hard to convince them, especially with visuals in hand.
We went through a few unlicensed GCs (one that’s done work on a few houses in my neighborhood) and a few licensed GCs and after a few weeks of meetings and quotes; we settled on The Cabinet Pros as I got the best warm and fuzzies from them vs all the others. They were definitely not the cheapest, as several of the other contractors quoted less – but experience has taught me that you get what you pay for. They seemed fairly serious and very on time when doing meetings. So the decision was finalized early June and a 20K deposit was donated to the cause.
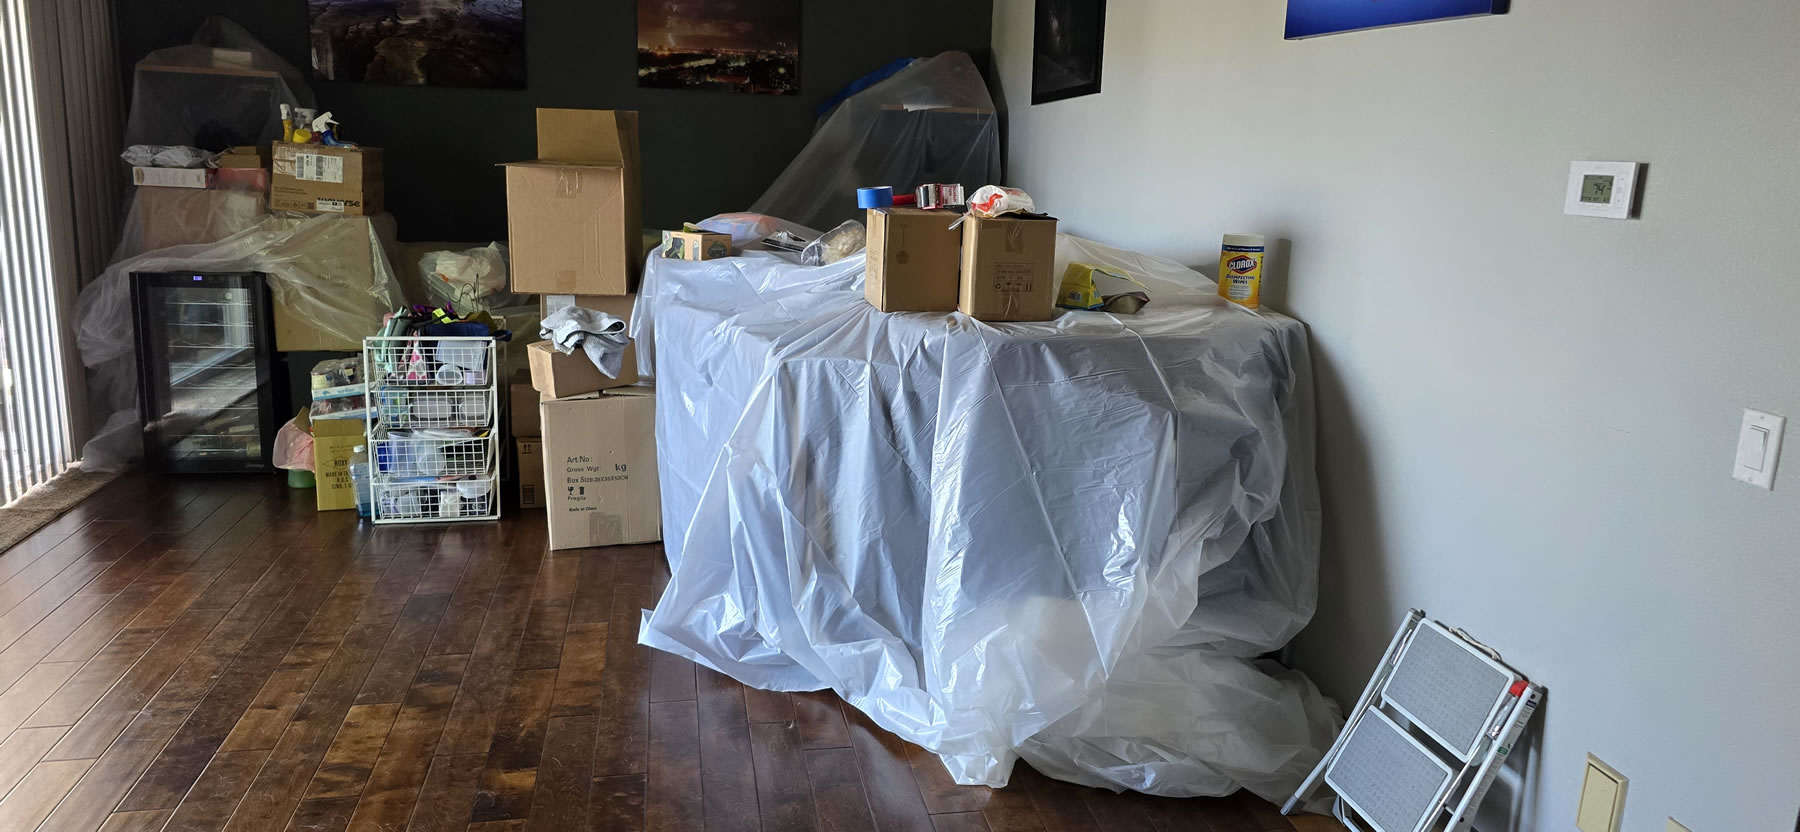
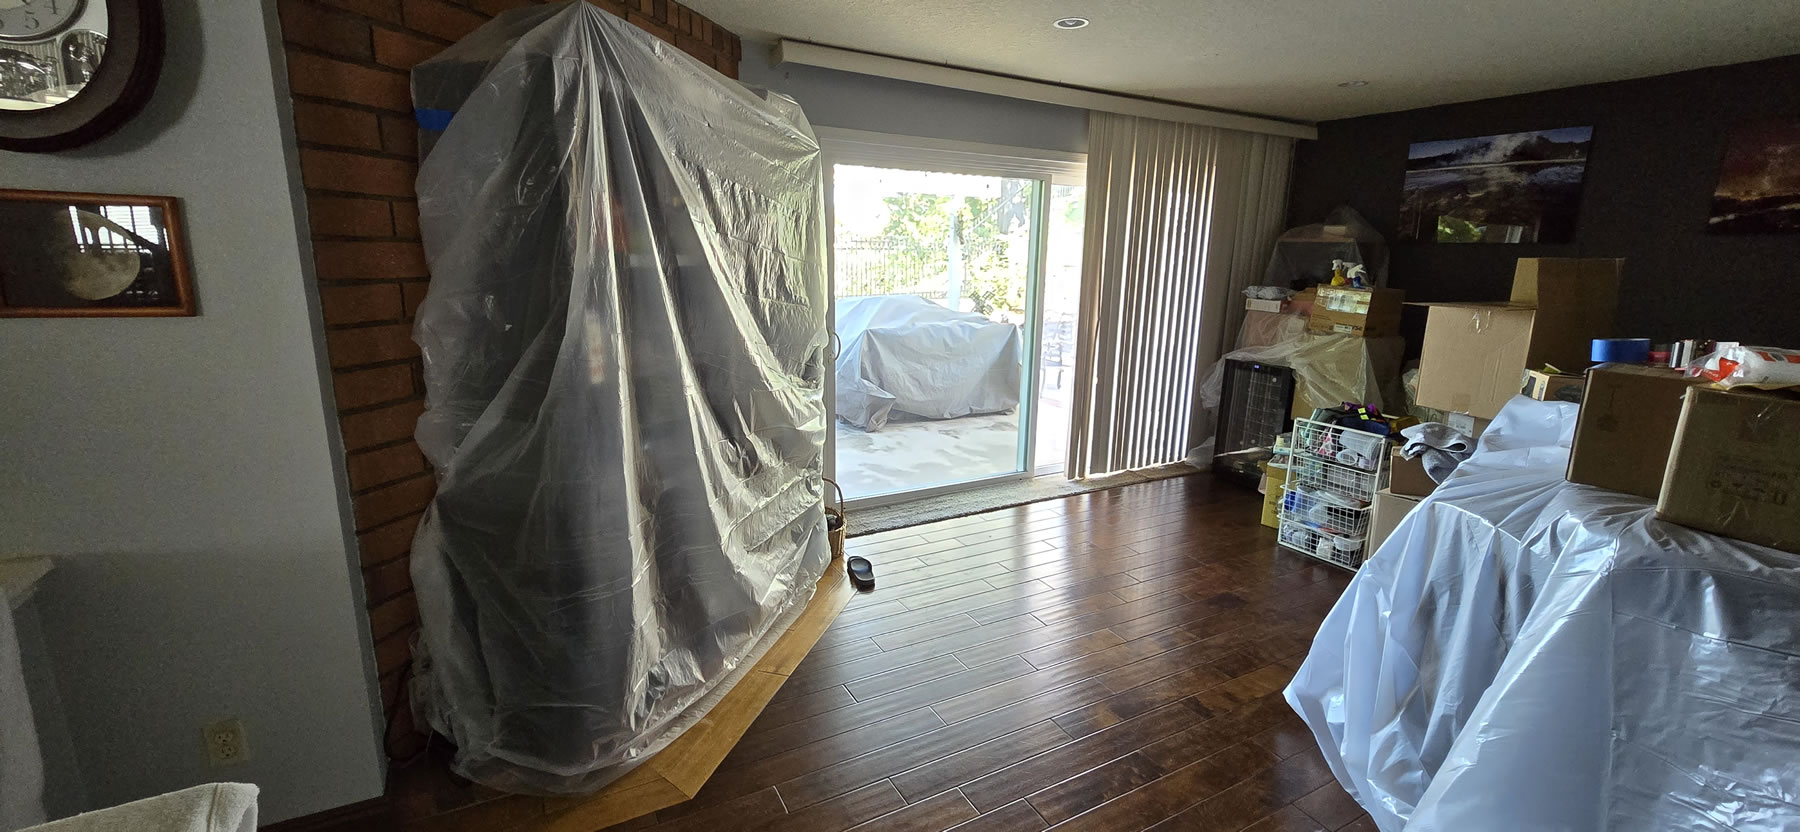
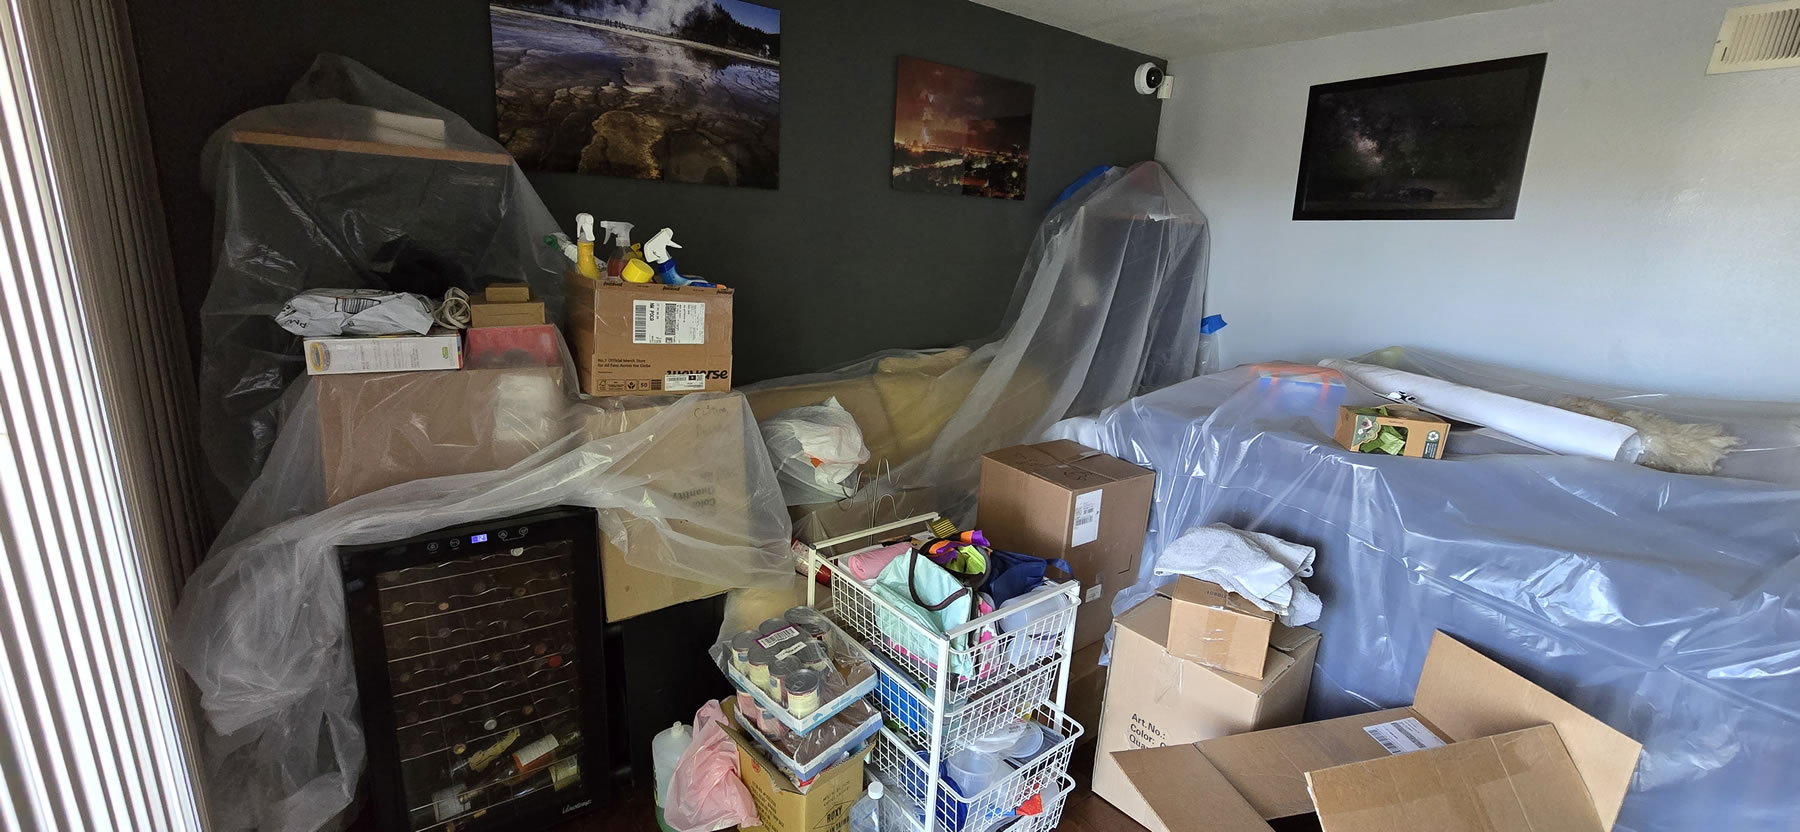
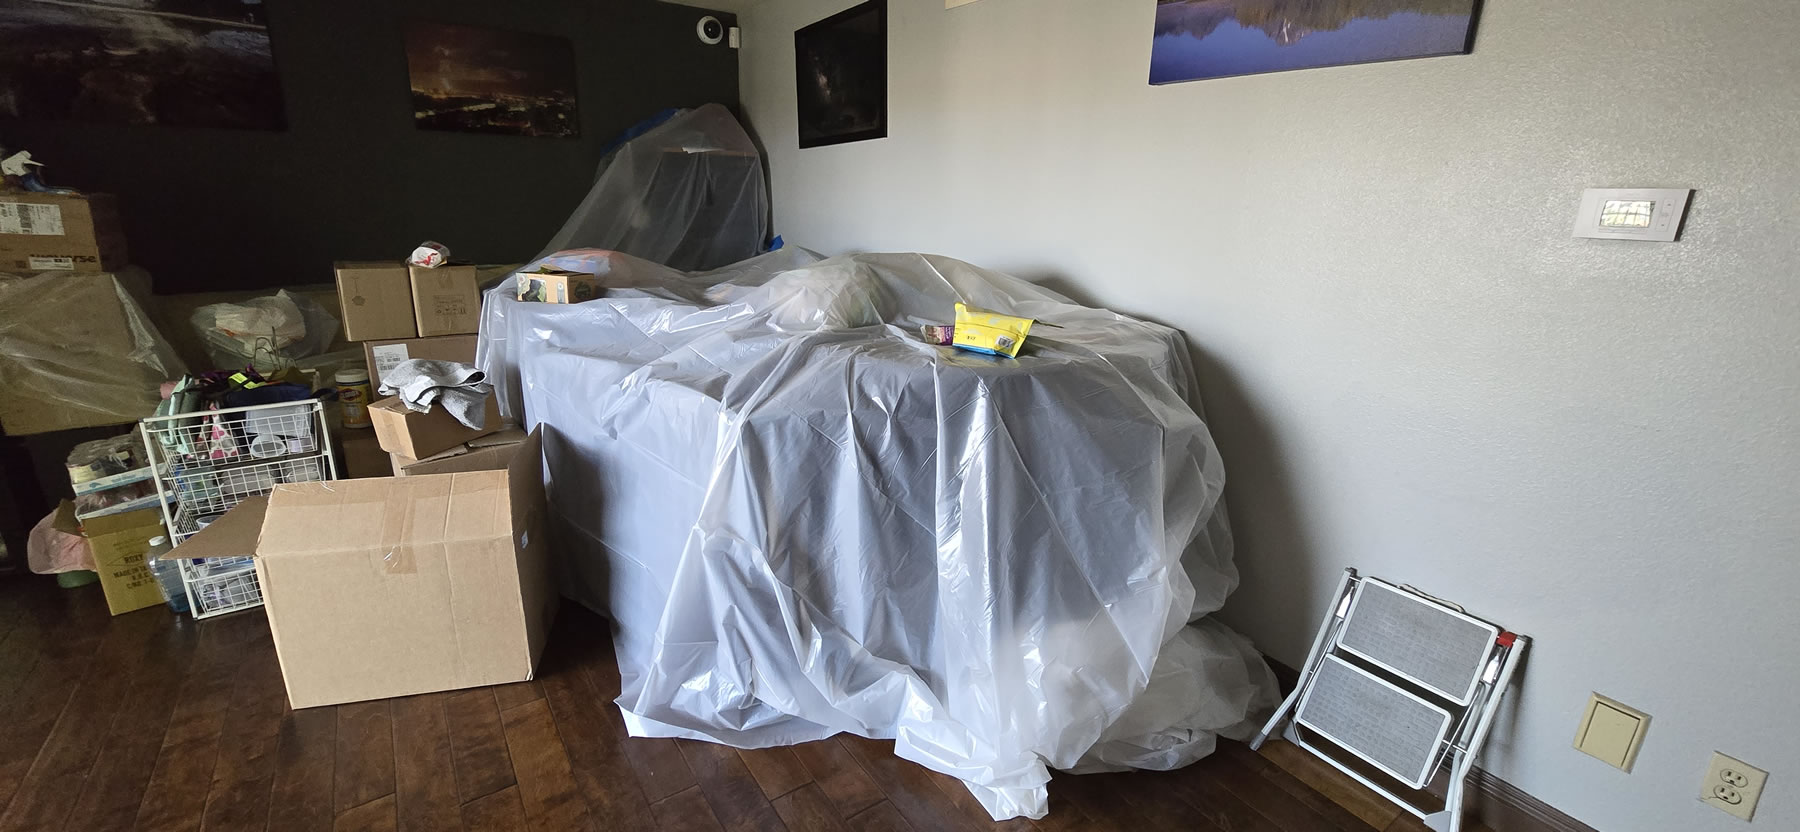
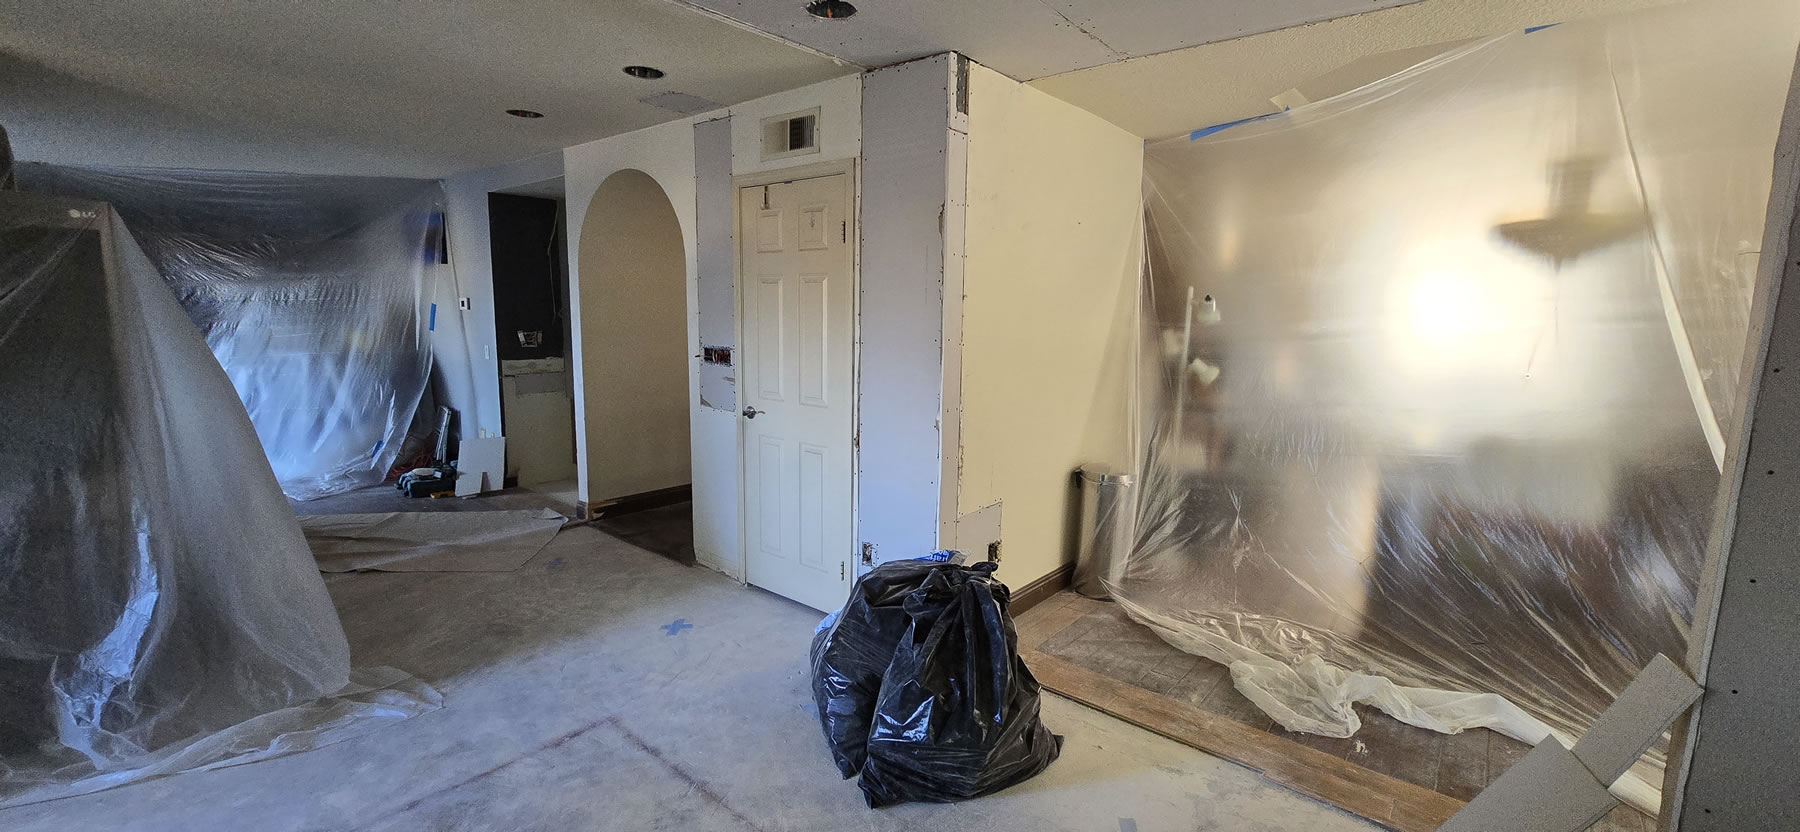
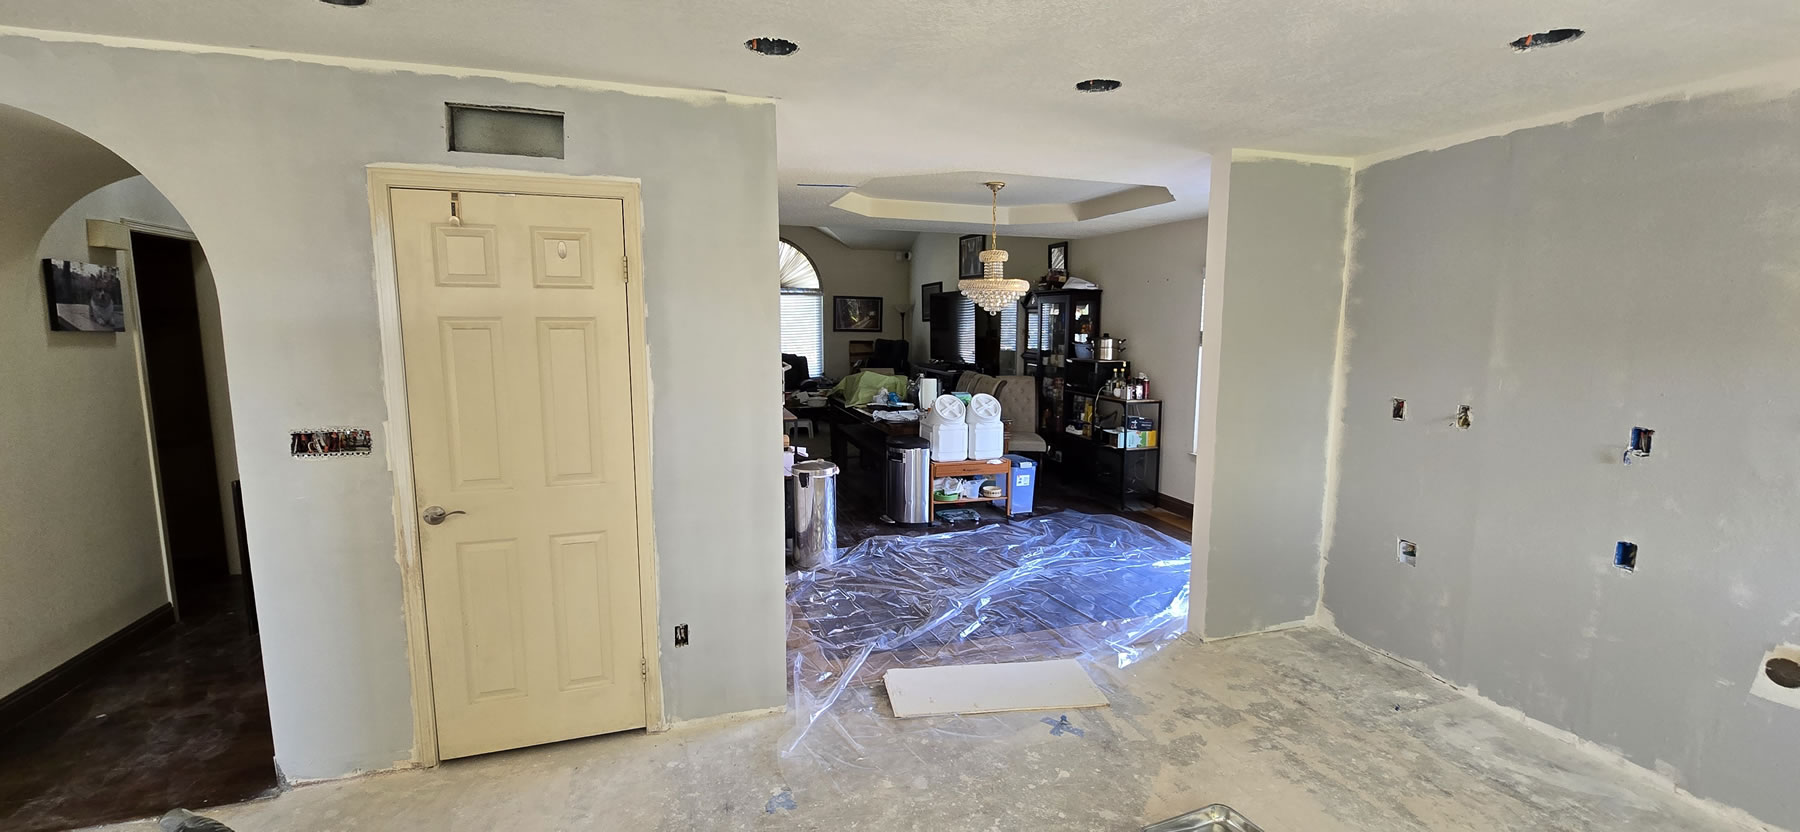
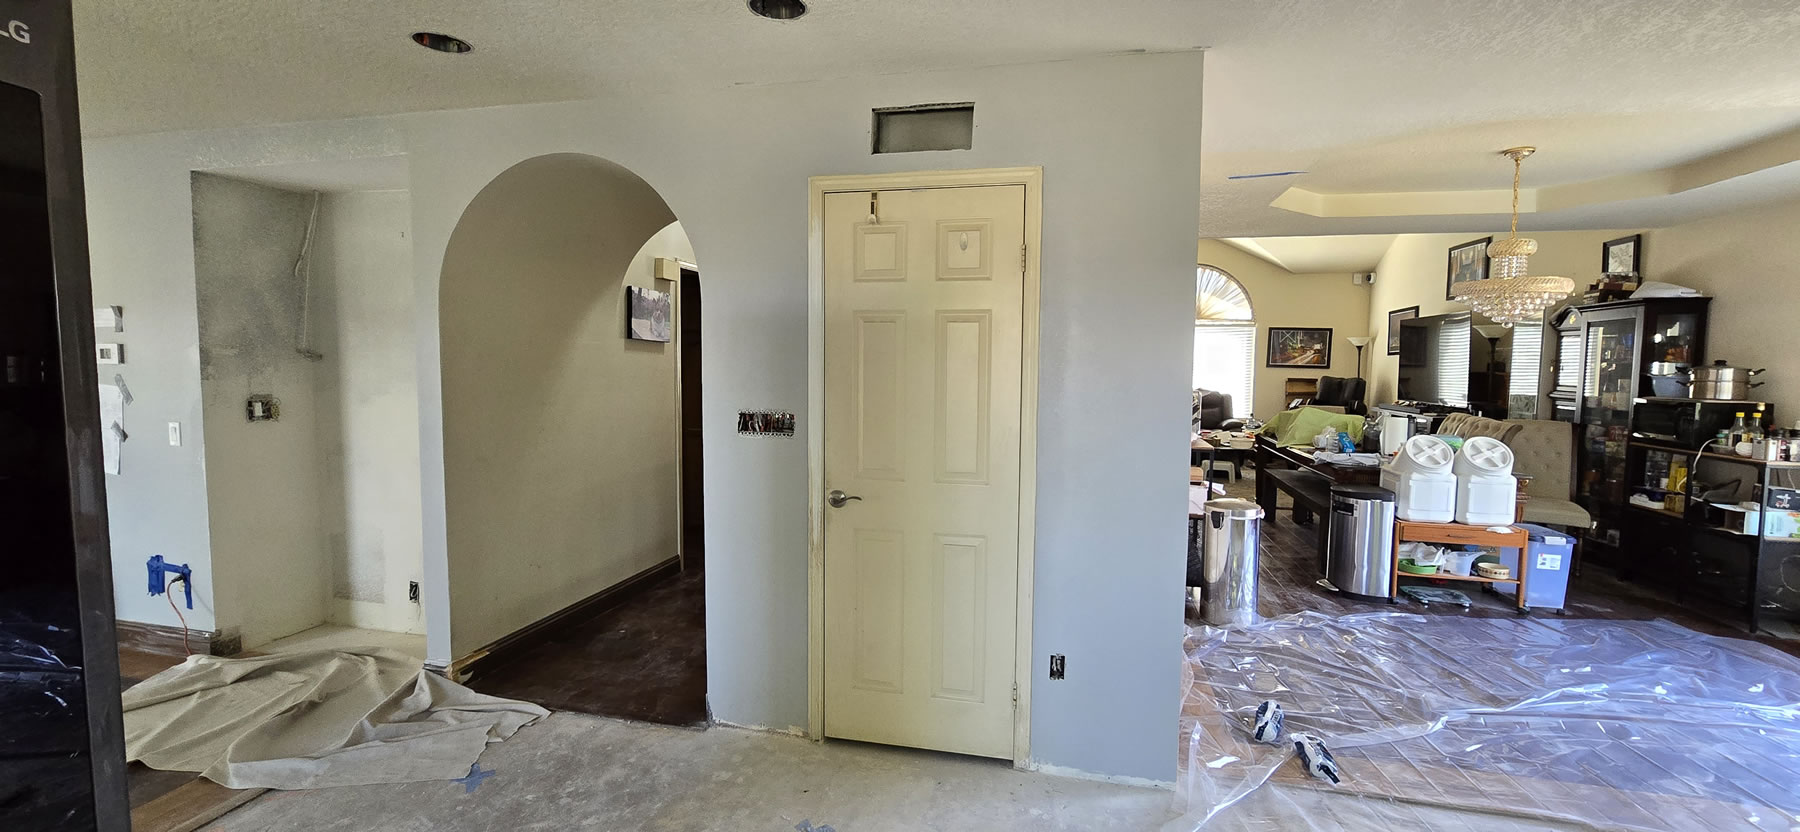
Parents fly back to HK, we contact contractor and start scheduling the start date for the week after the 4th of July weekend. It gave us time to do one last BBQ with friends and get the kitchen emptied and everything into temp storage. The adjacent living room becomes storage and everything is plastic wrapped.
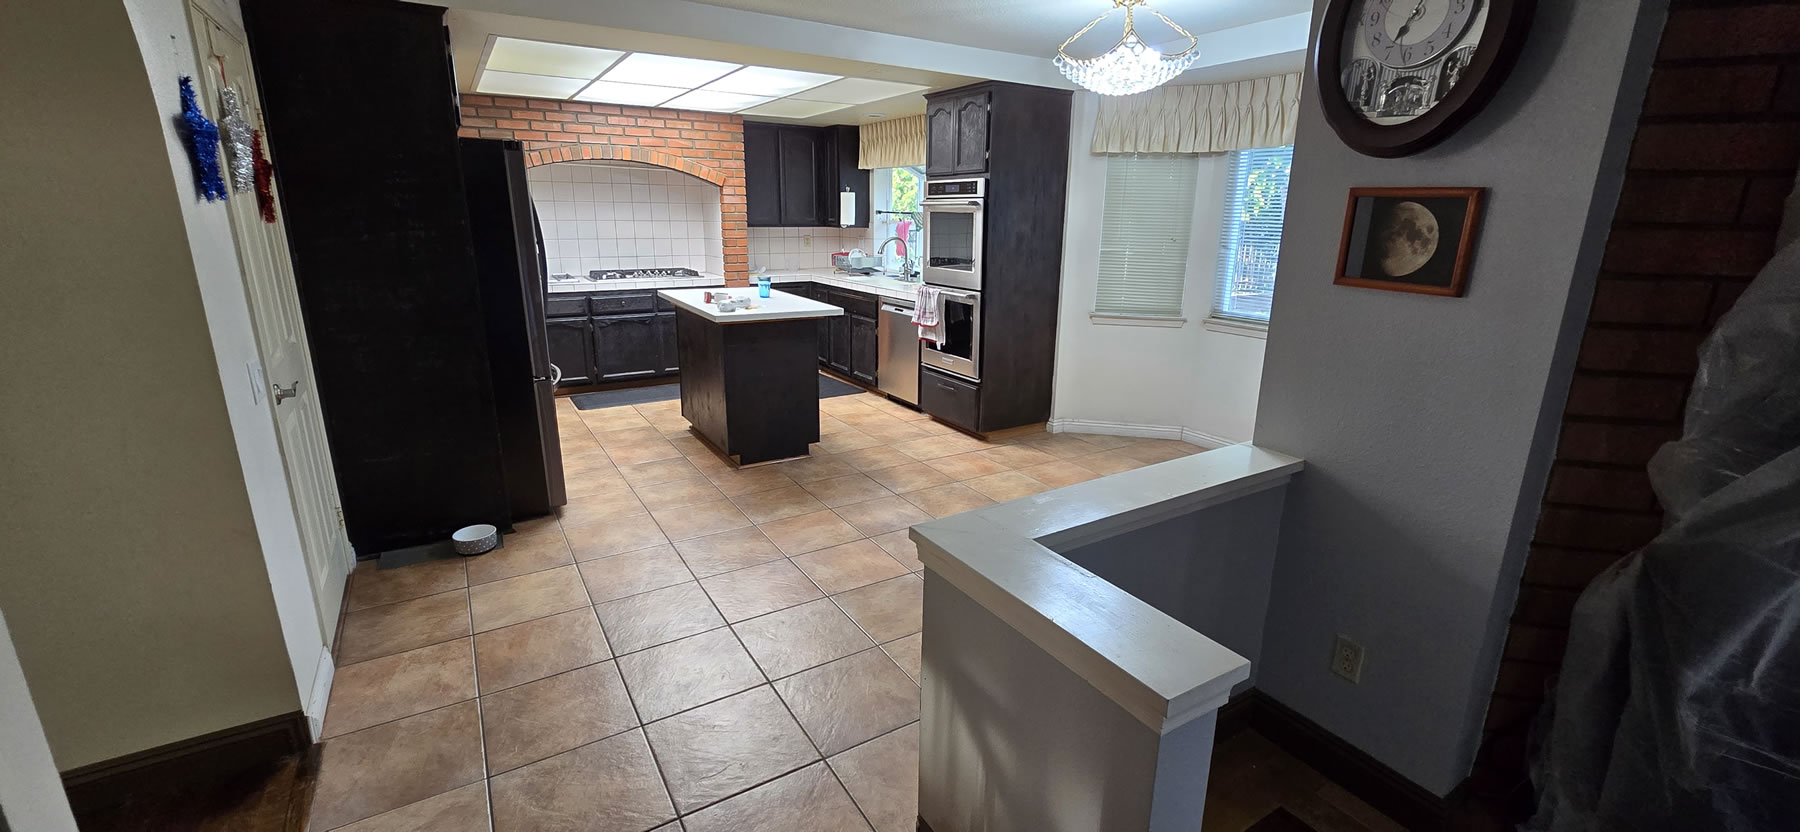
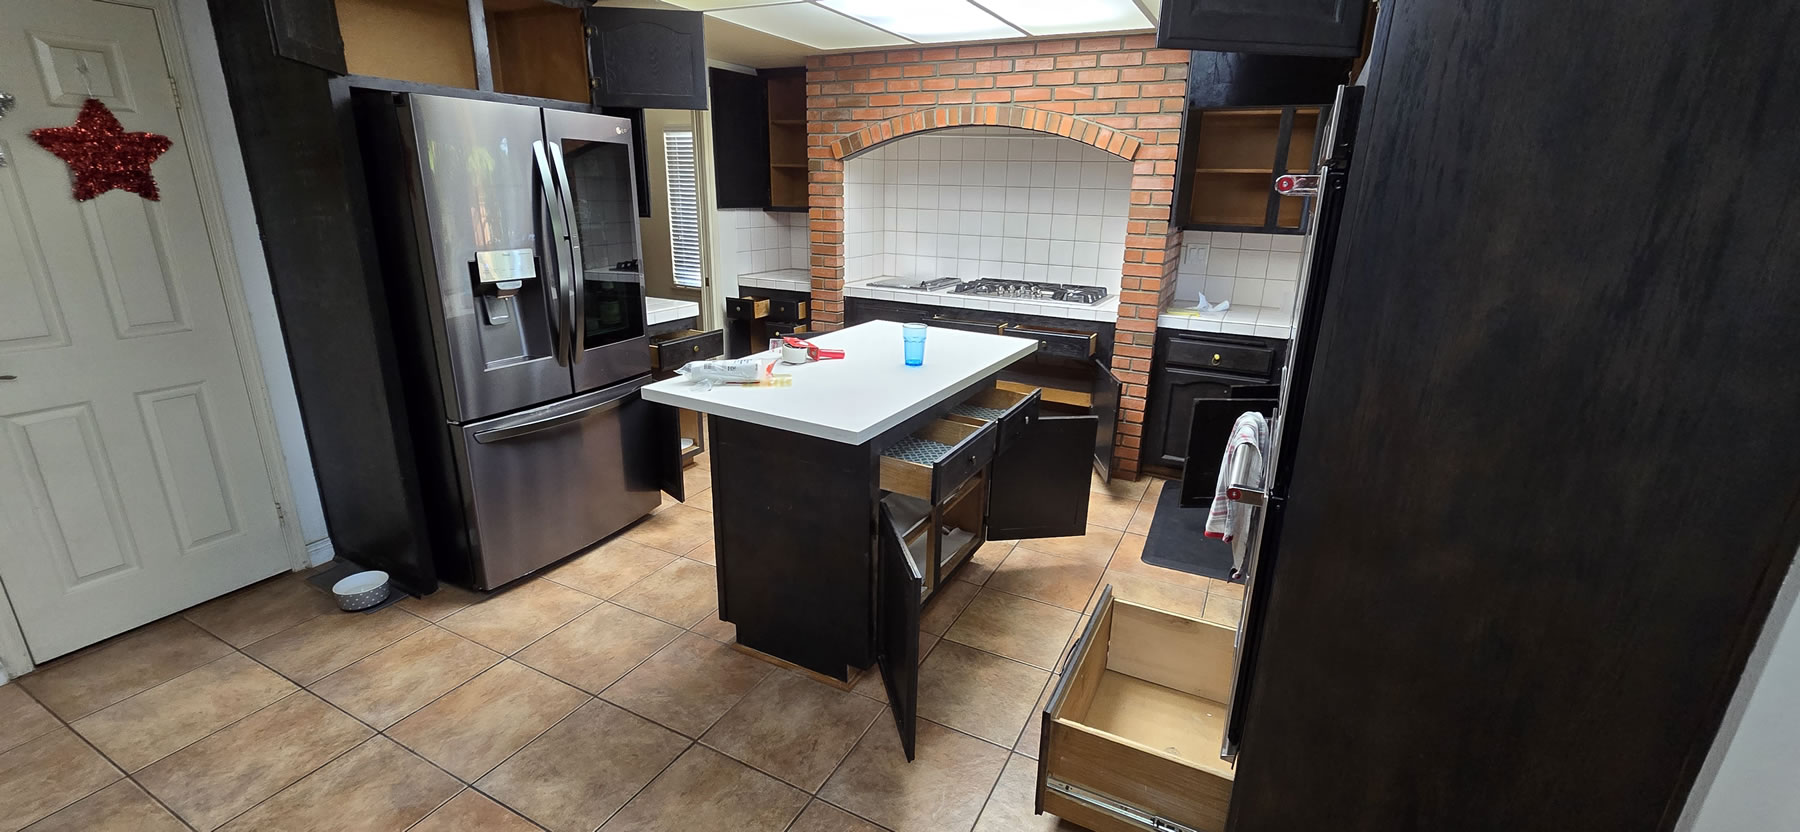
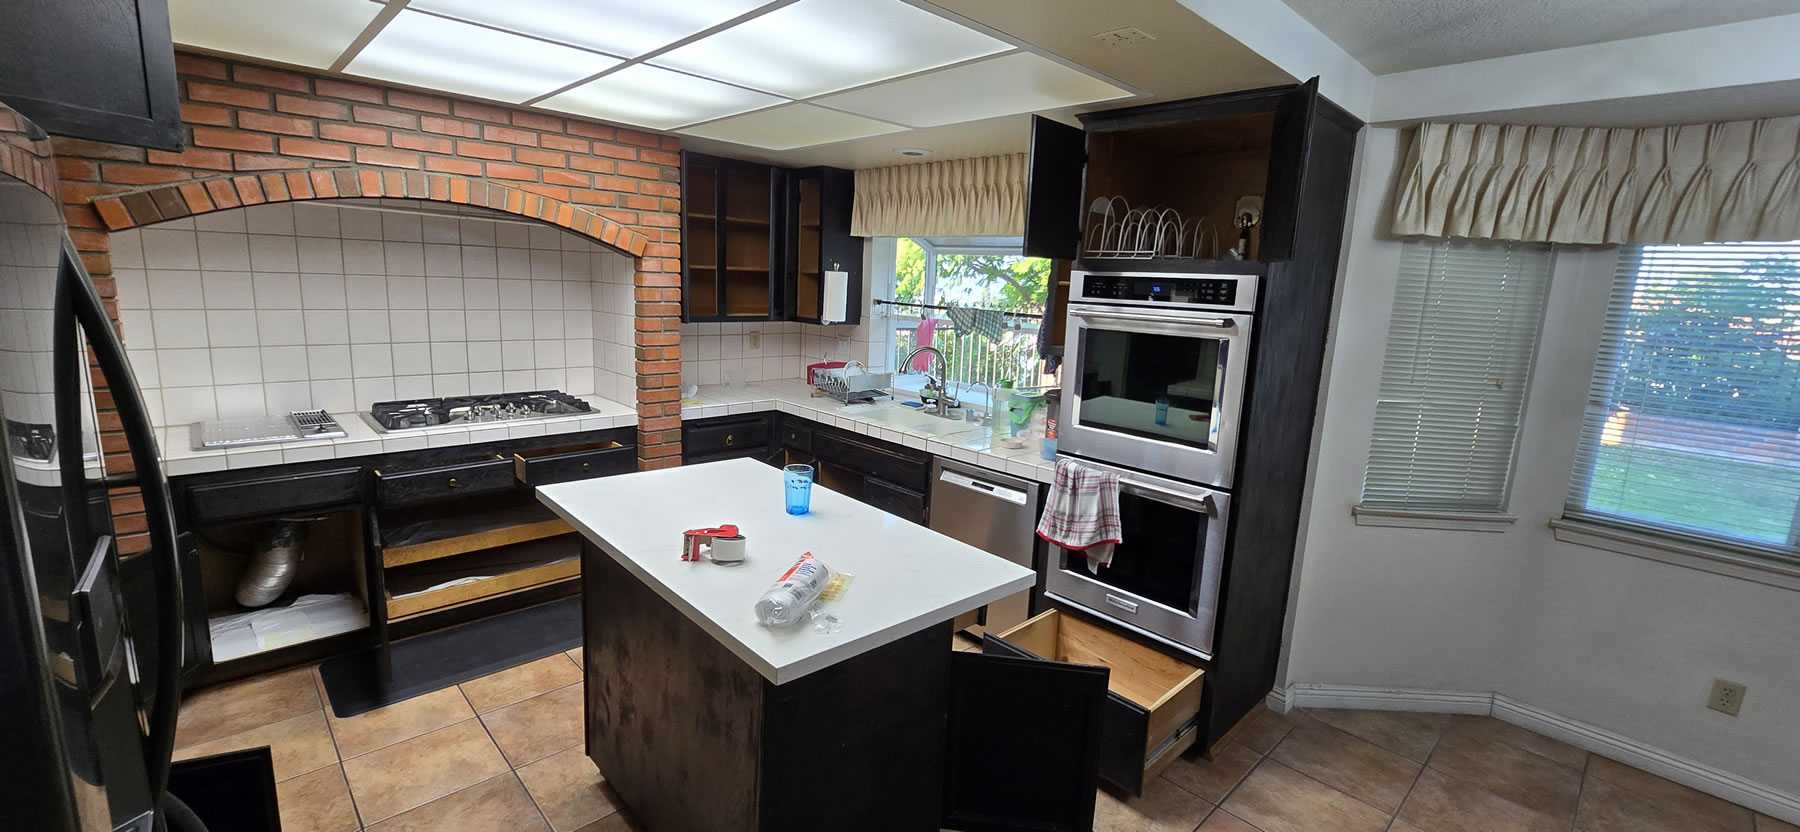
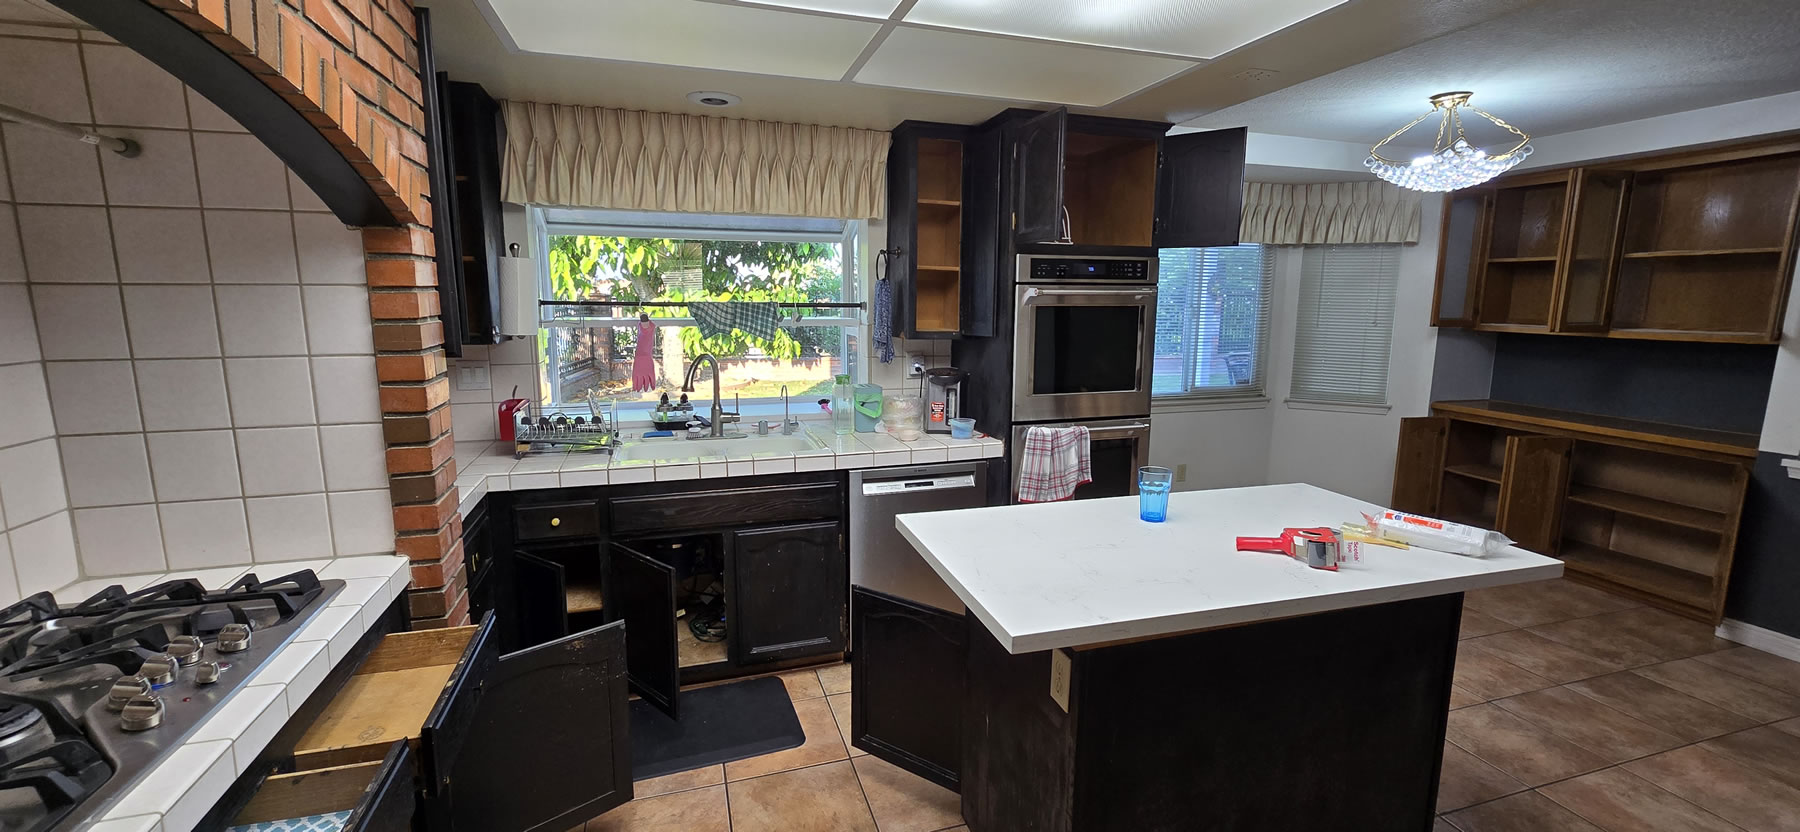
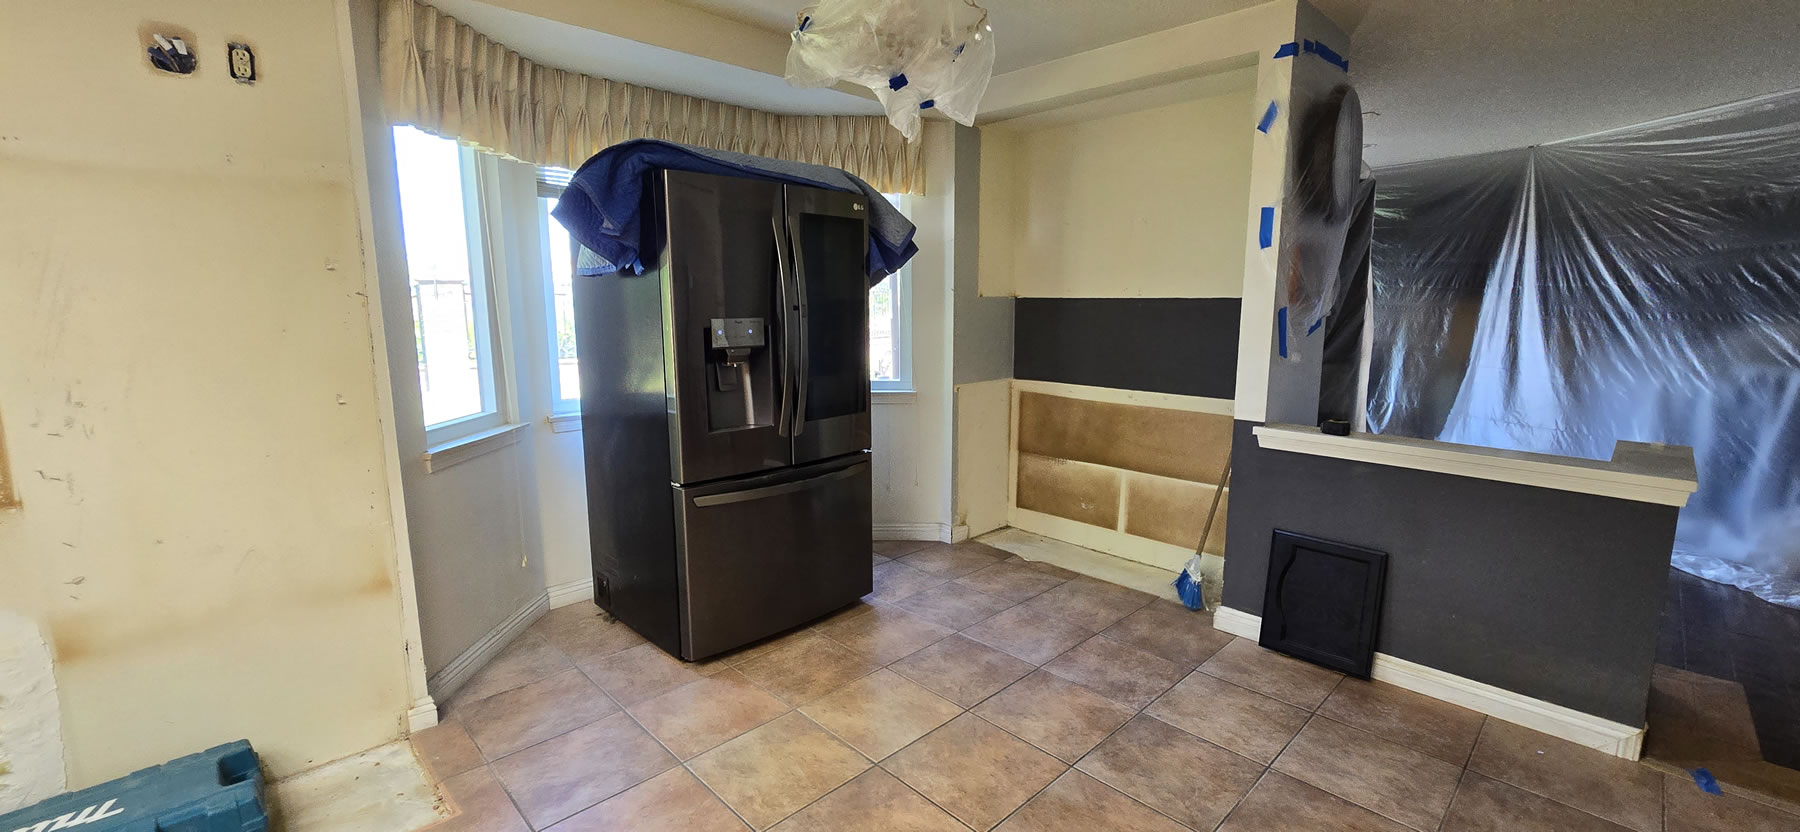
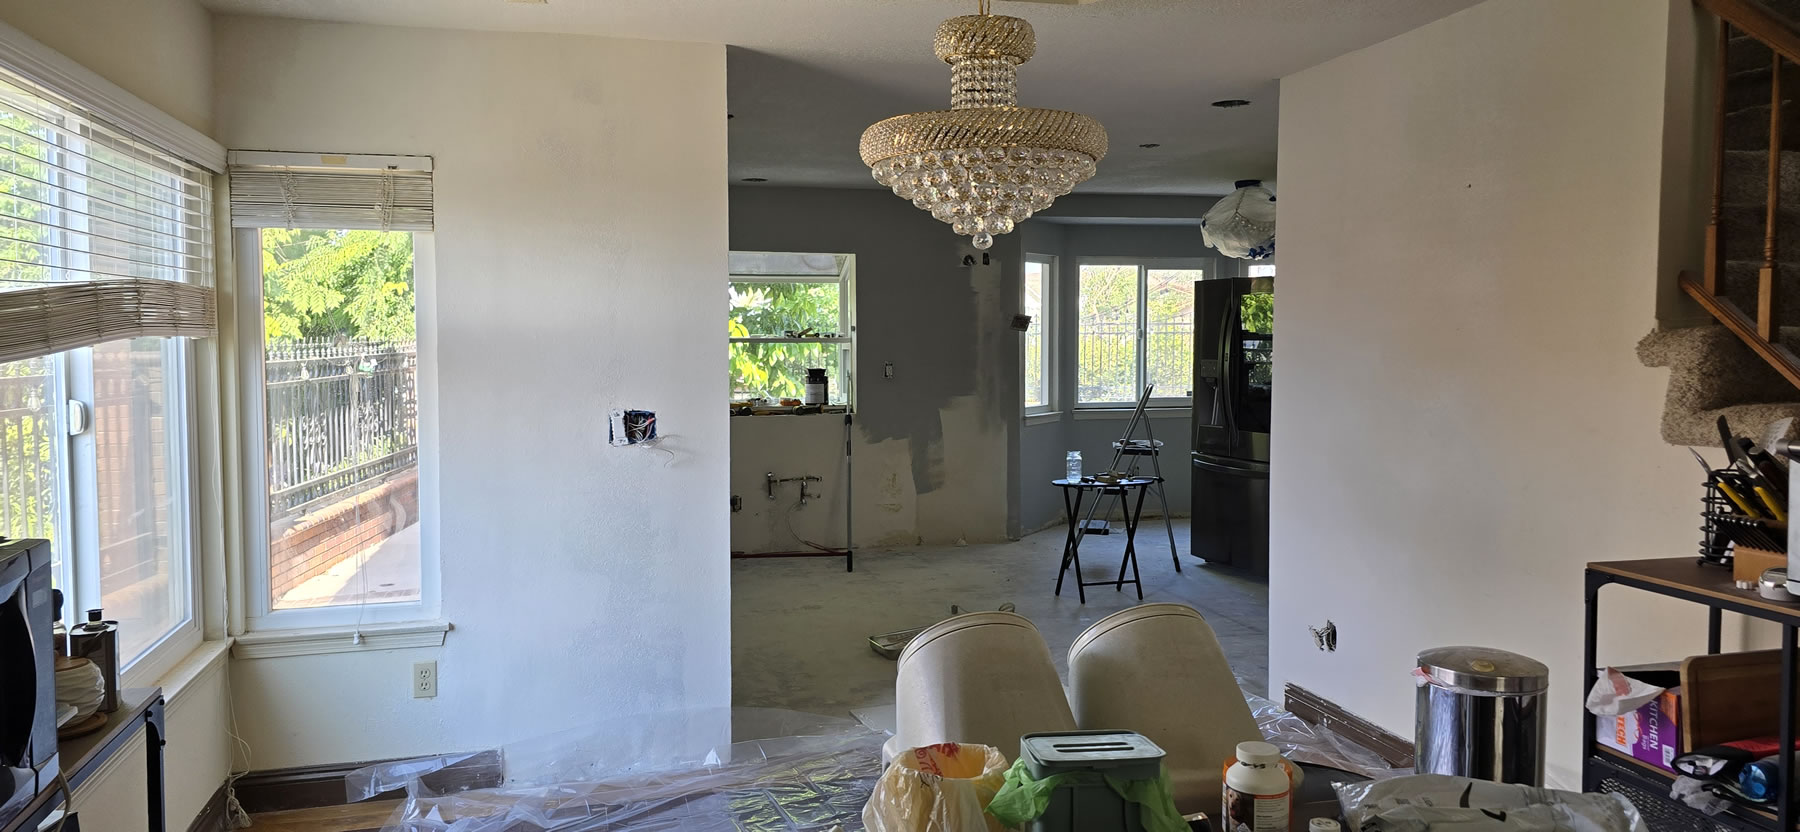
Time to say good by to this 1988 kitchen with slight appliance upgrades and resurface cabinet doors – something the wife and I did the first Christmas week we spent at the house.
We finalize the plans with the contractor and it’s pretty damn close to what I want. So the wife and I are happy. There are a few unknowns, such as the need for a support beam and the what if of stuff hiding under the kitchen soffit.
Click to continue this long ass post that took 2 months to do
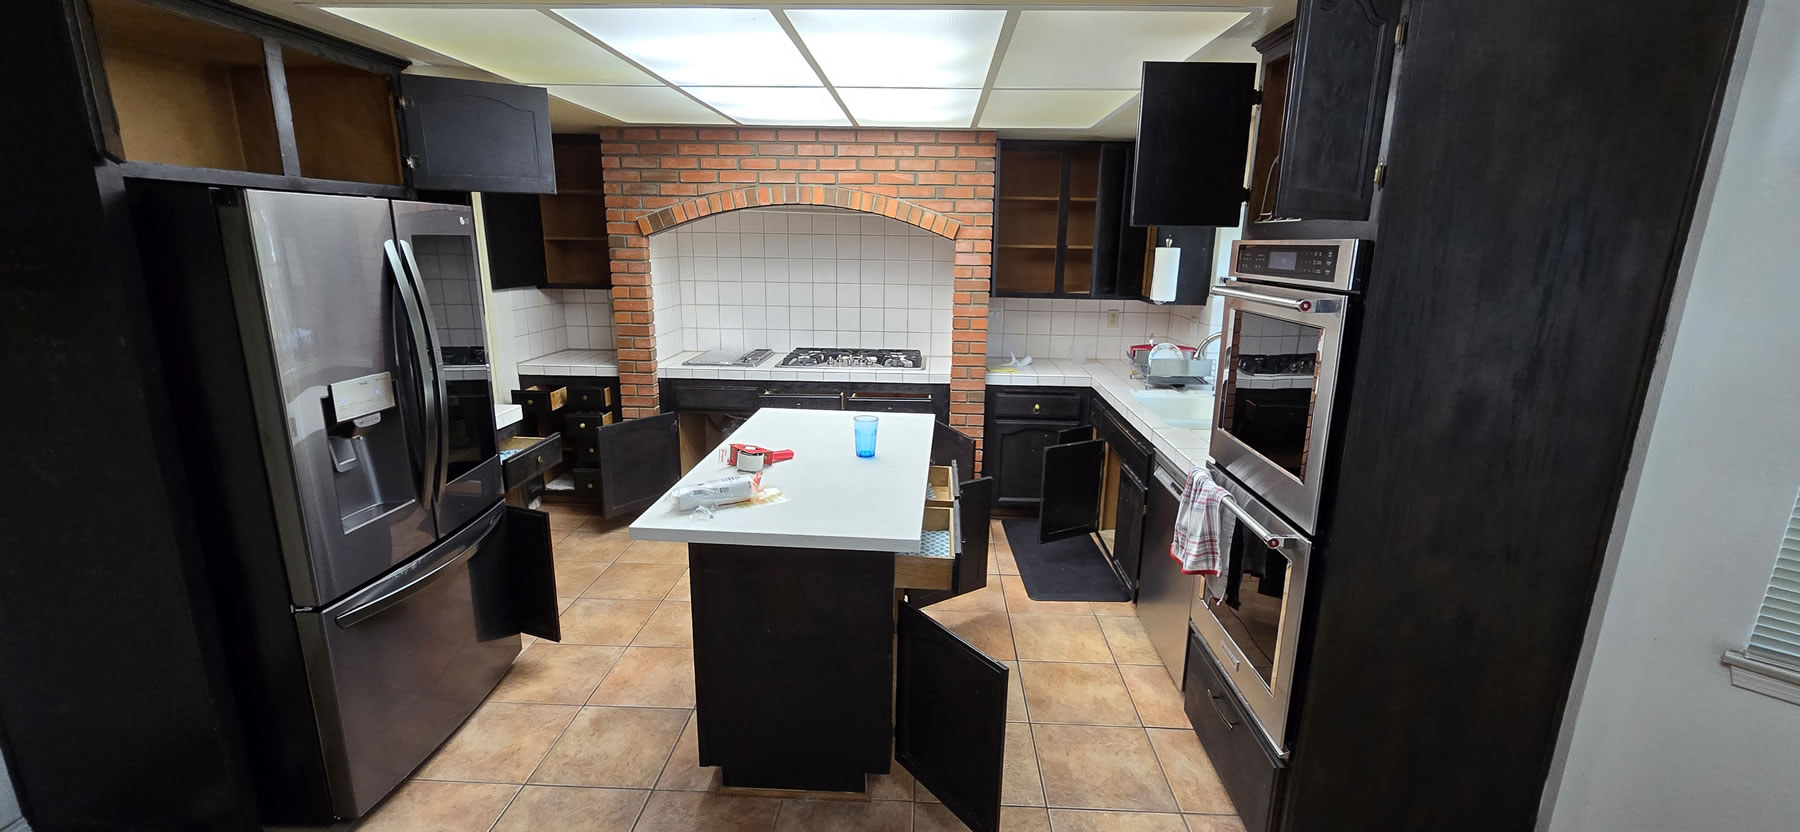
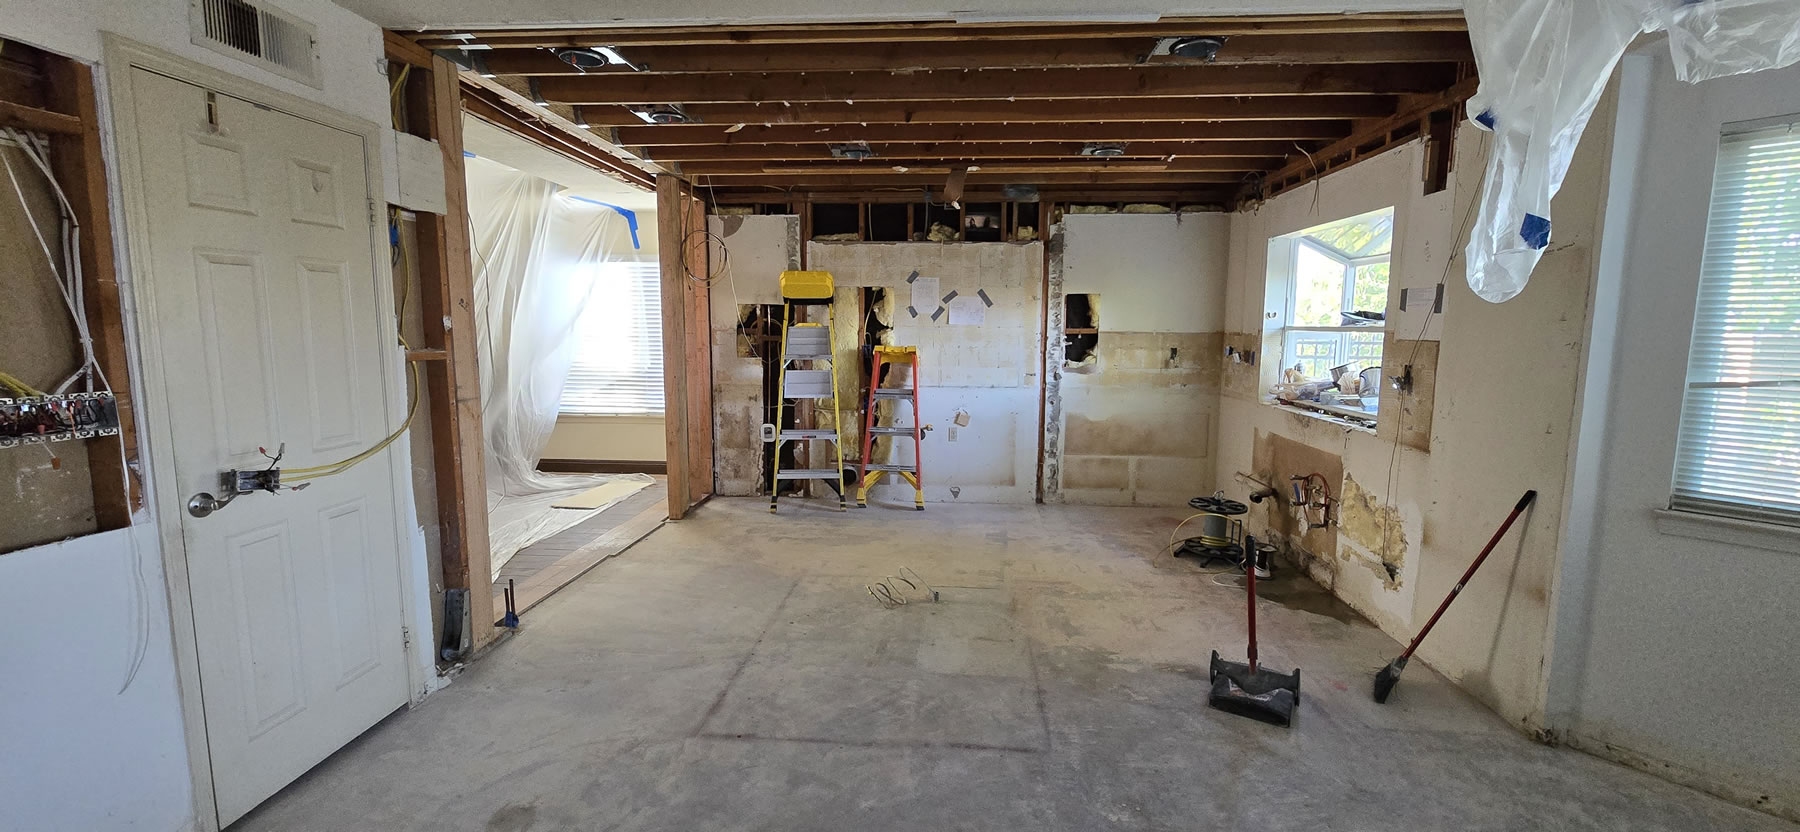
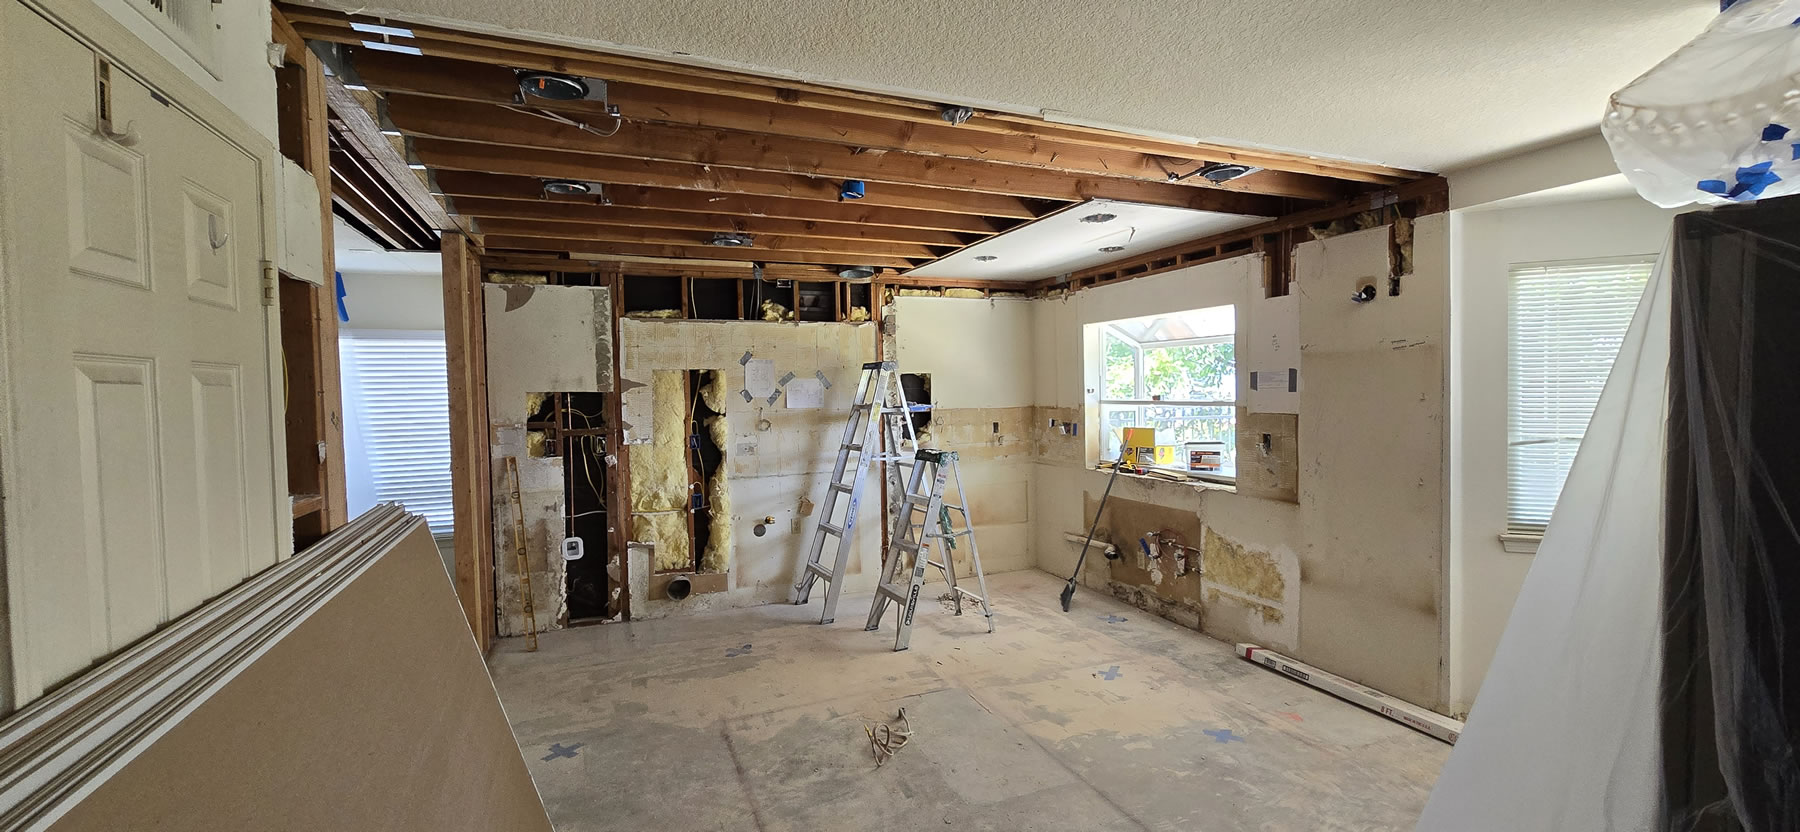
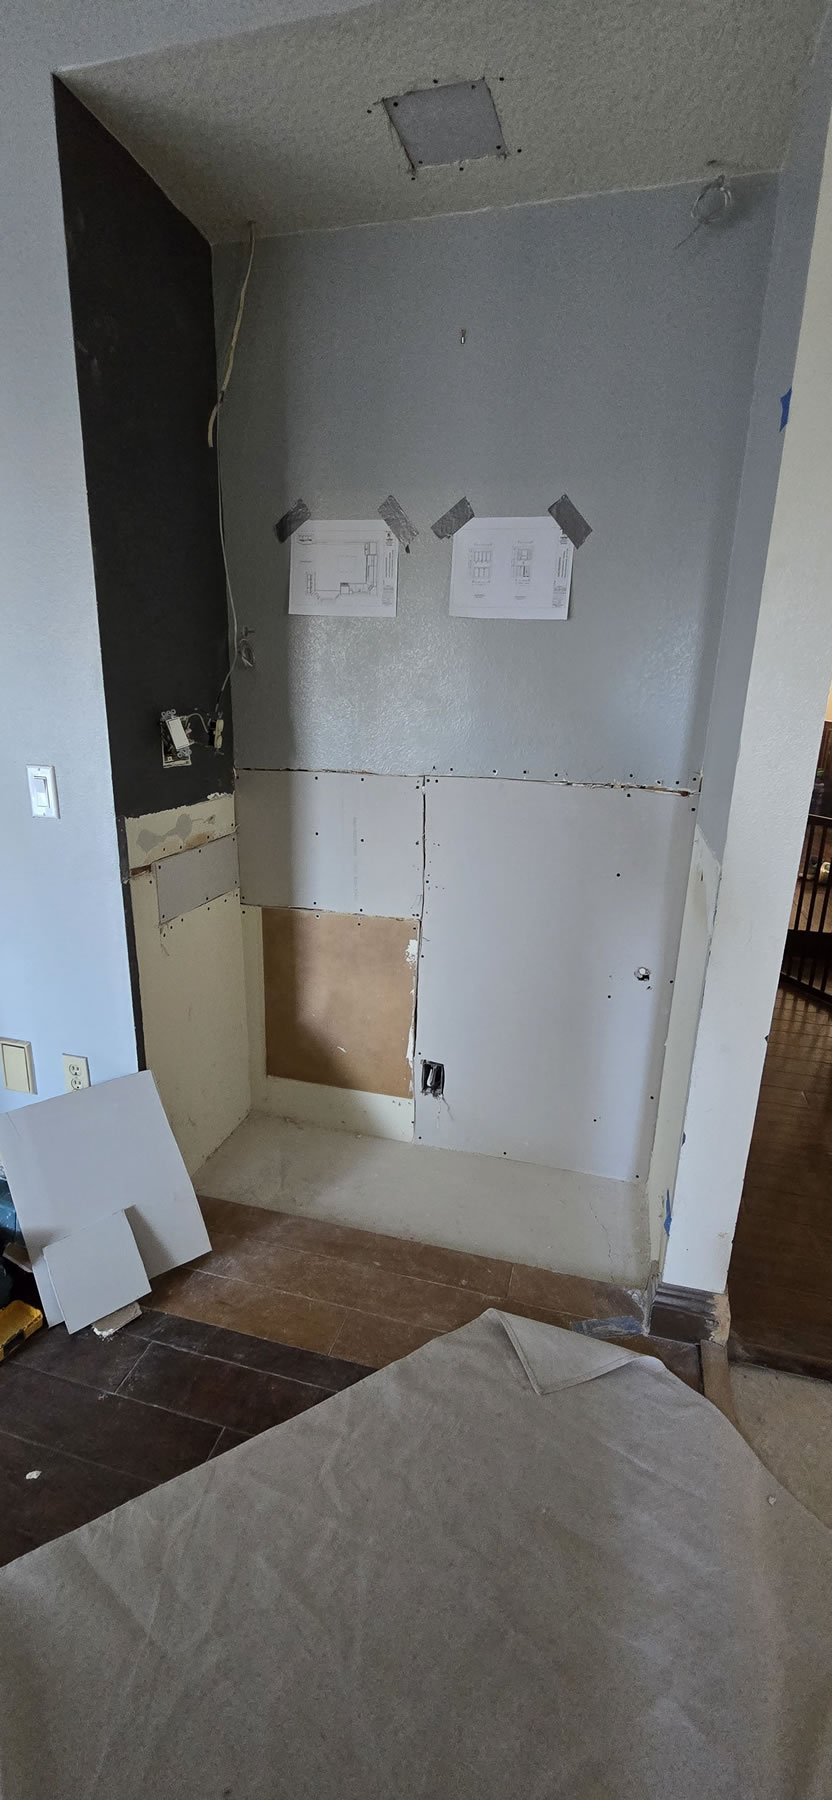
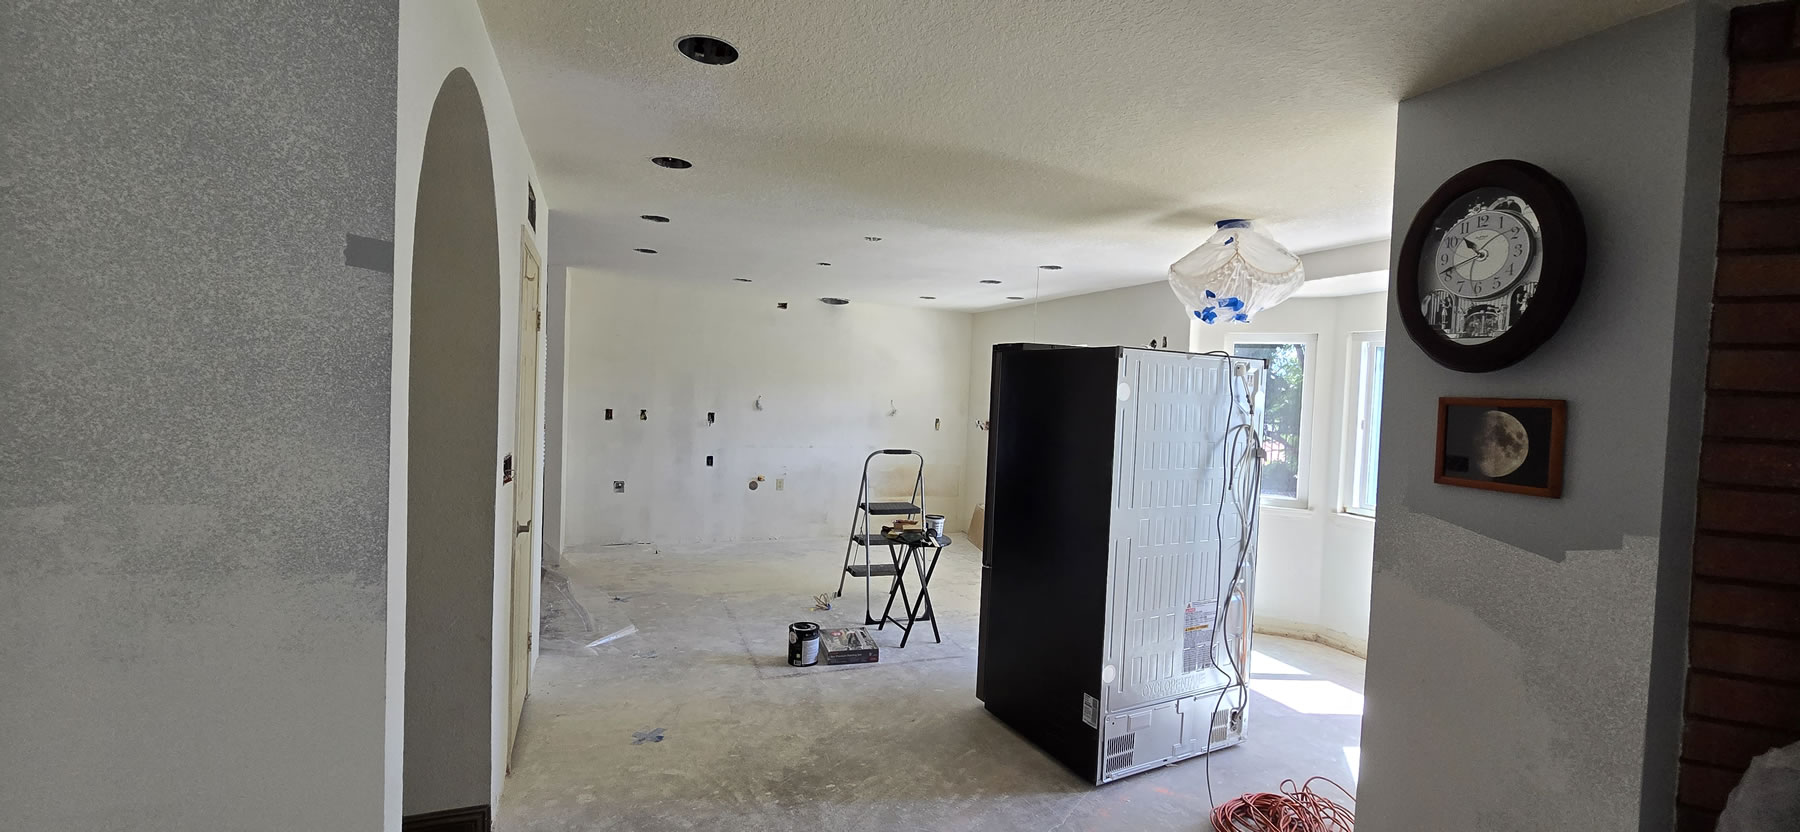
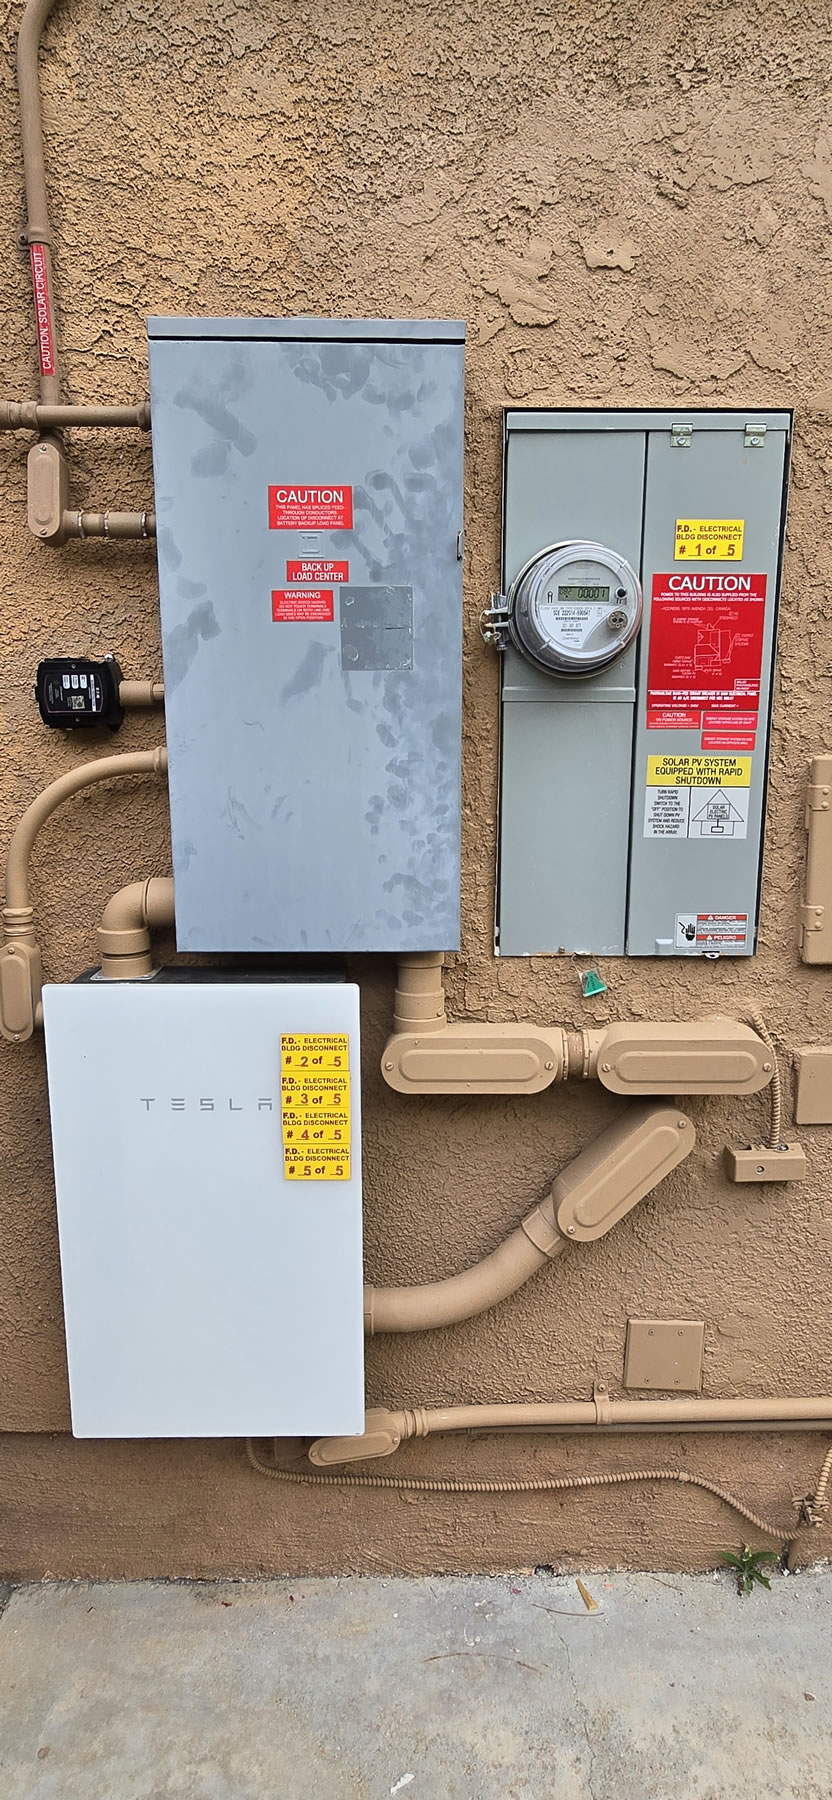
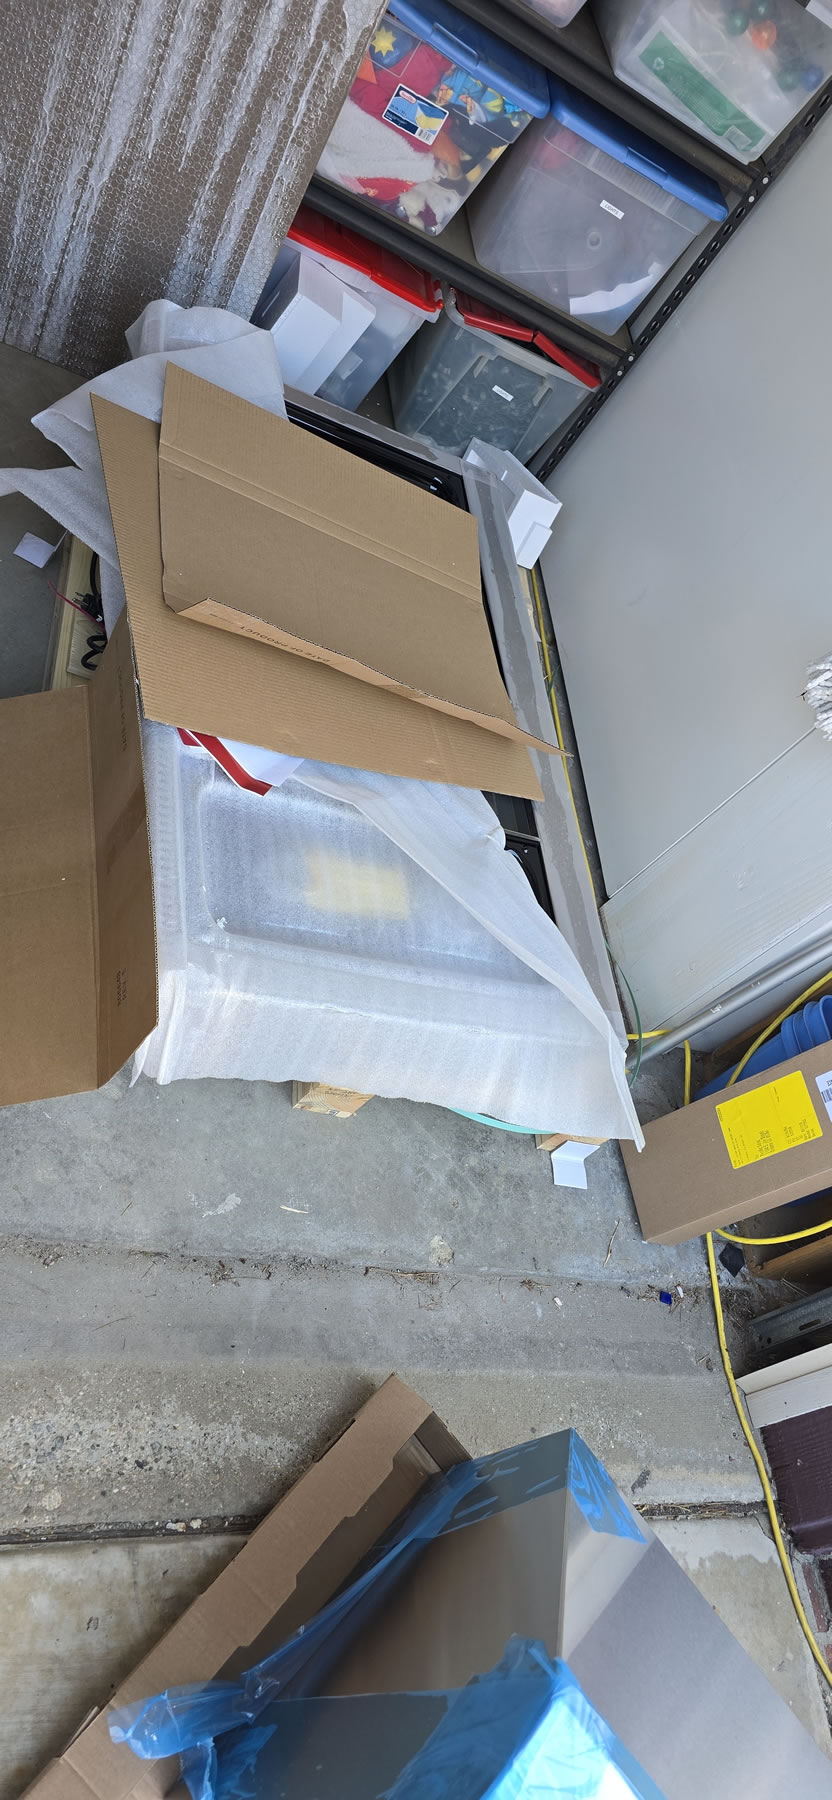
The whole project begins with some good old fashion demolition. The keeper appliances are removed and stored into the shed that I had emptied and moved so that Tesla can install some additional batteries I ordered for the house. At this time, I had no idea when they would actually do the install, but this worked so that I can temp store the kitchen stuff. Working with Tesla is a whole other ball of fun disguised as a happy trip to Idiocracy – like I said, you get what you pay for. Shed stuff has been relegated to the garage. The old cabinets and old tile countertop are ripped out and the island is gone. Fridge is moved out of the way. Old cook top is thrown out.
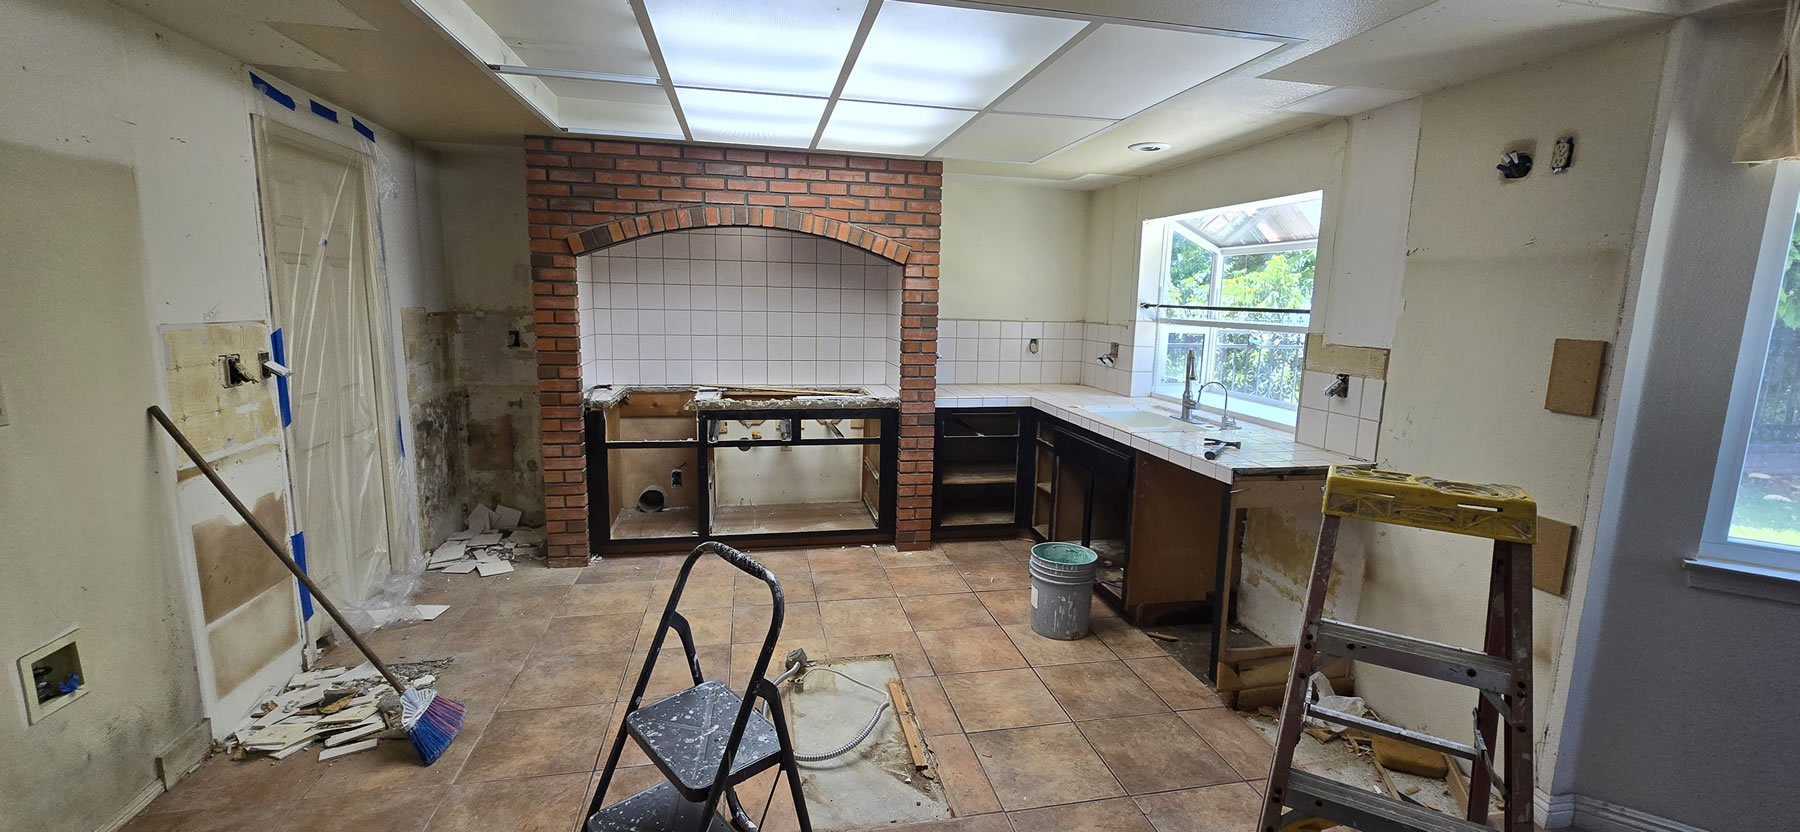
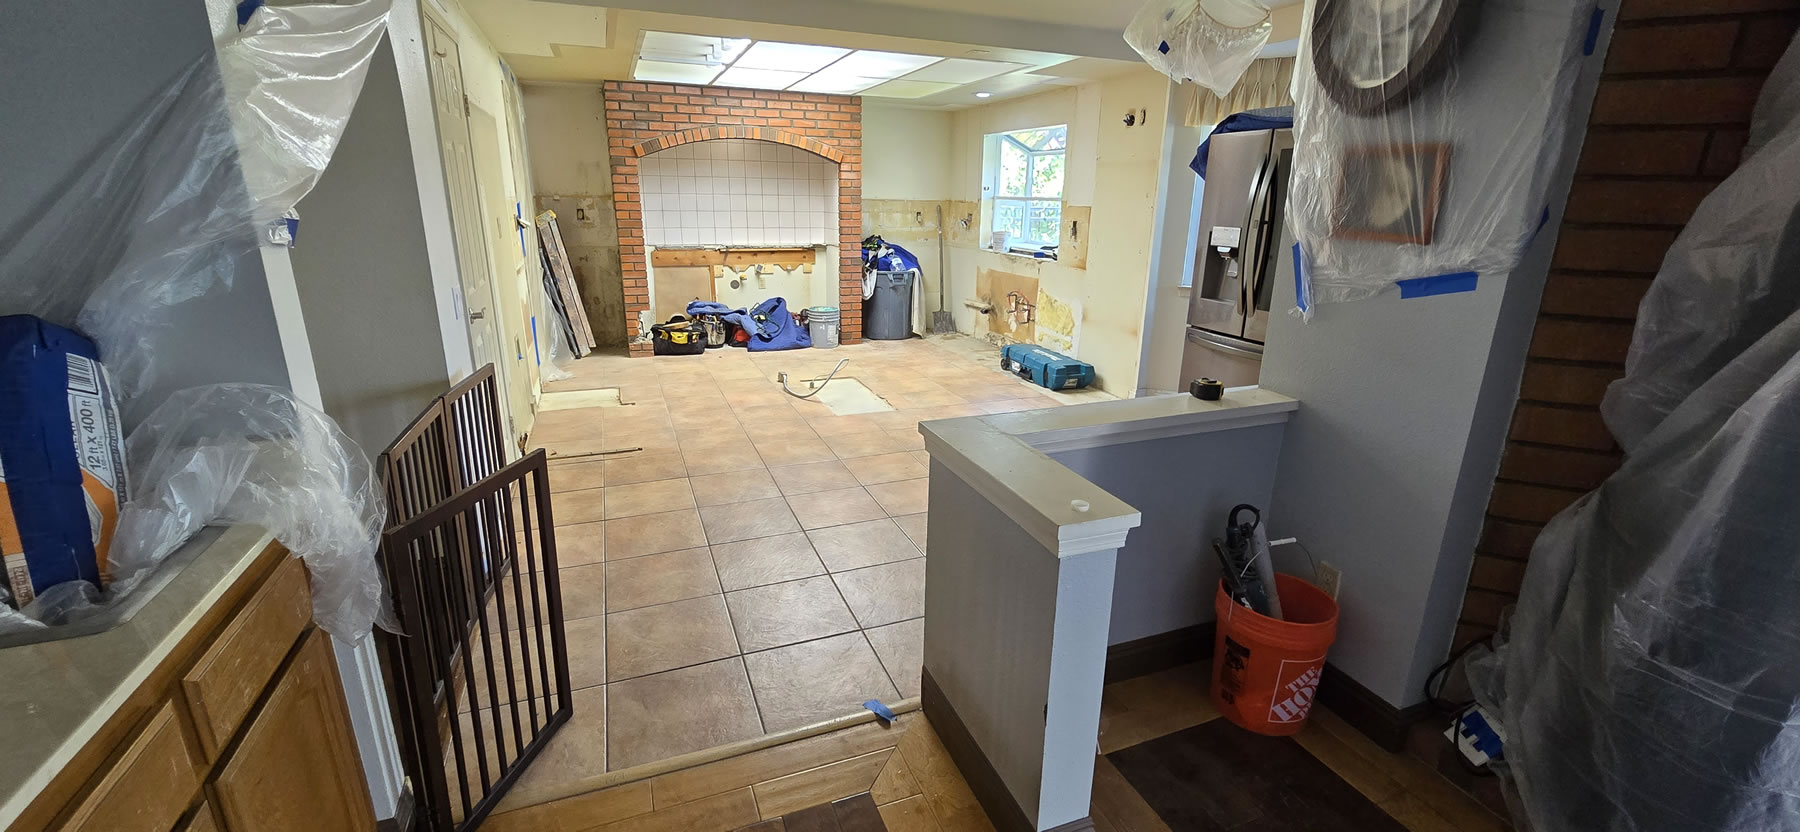

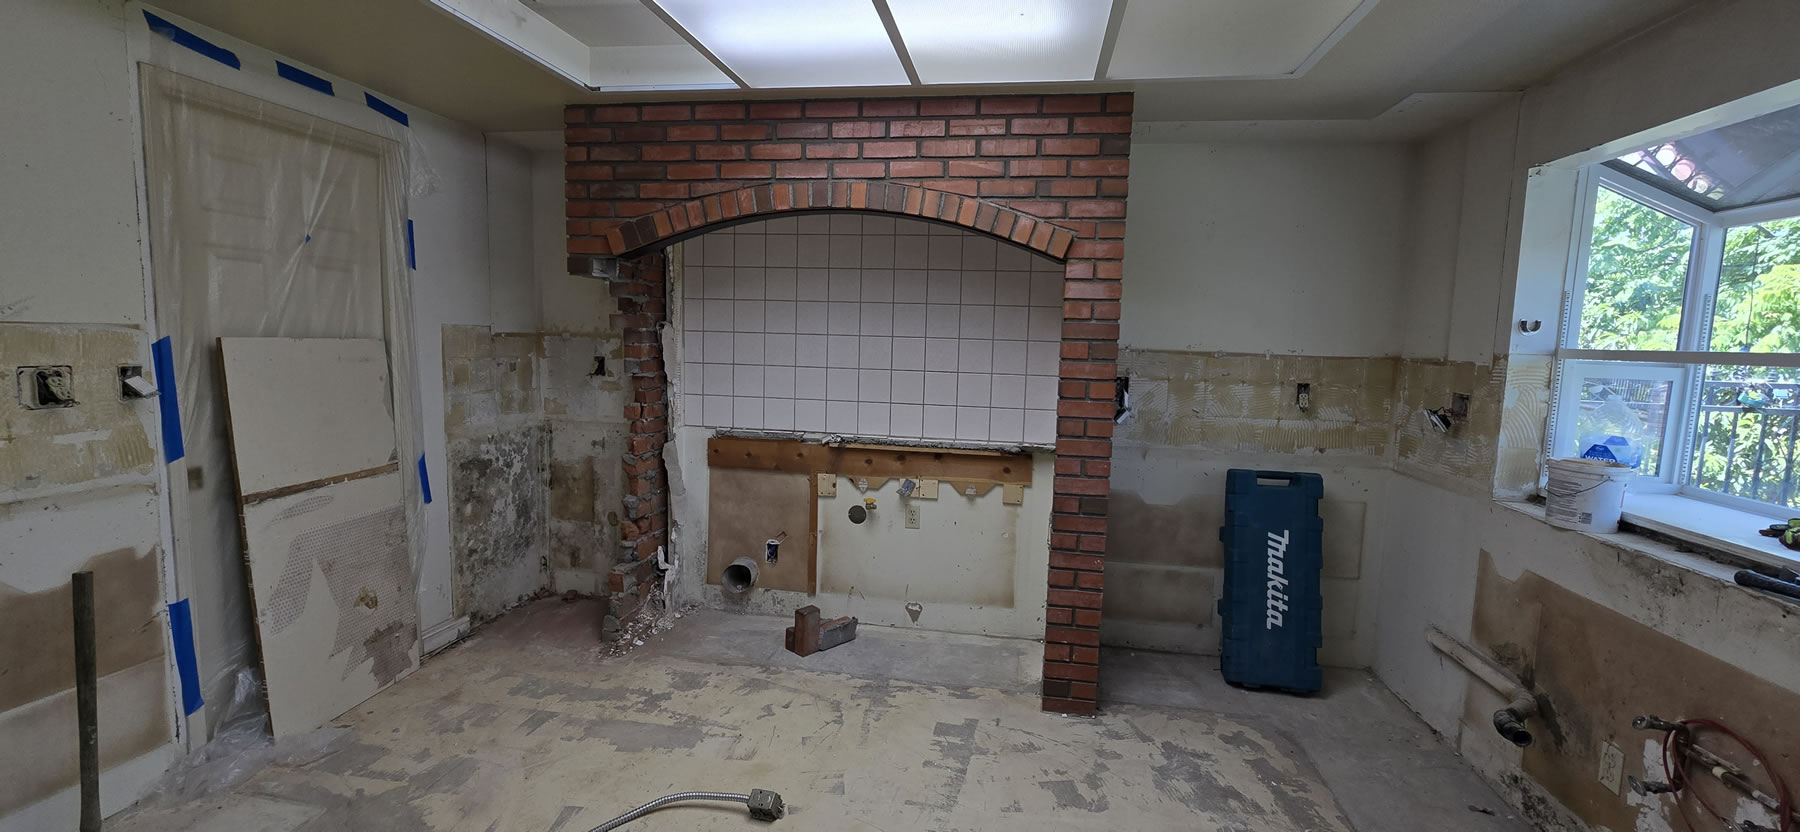
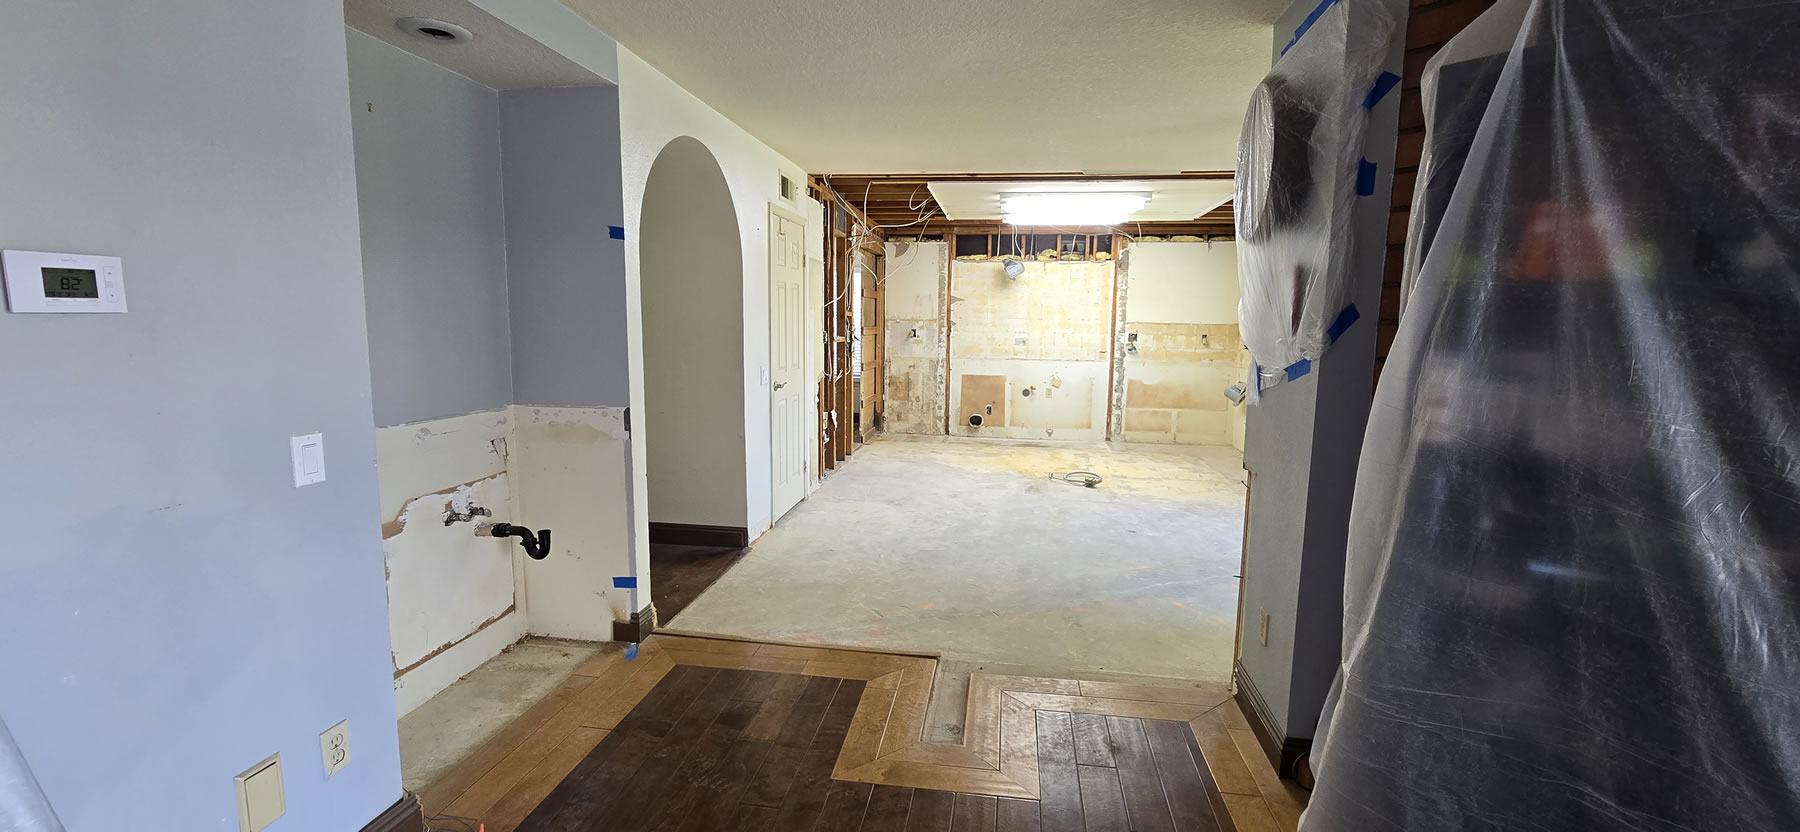
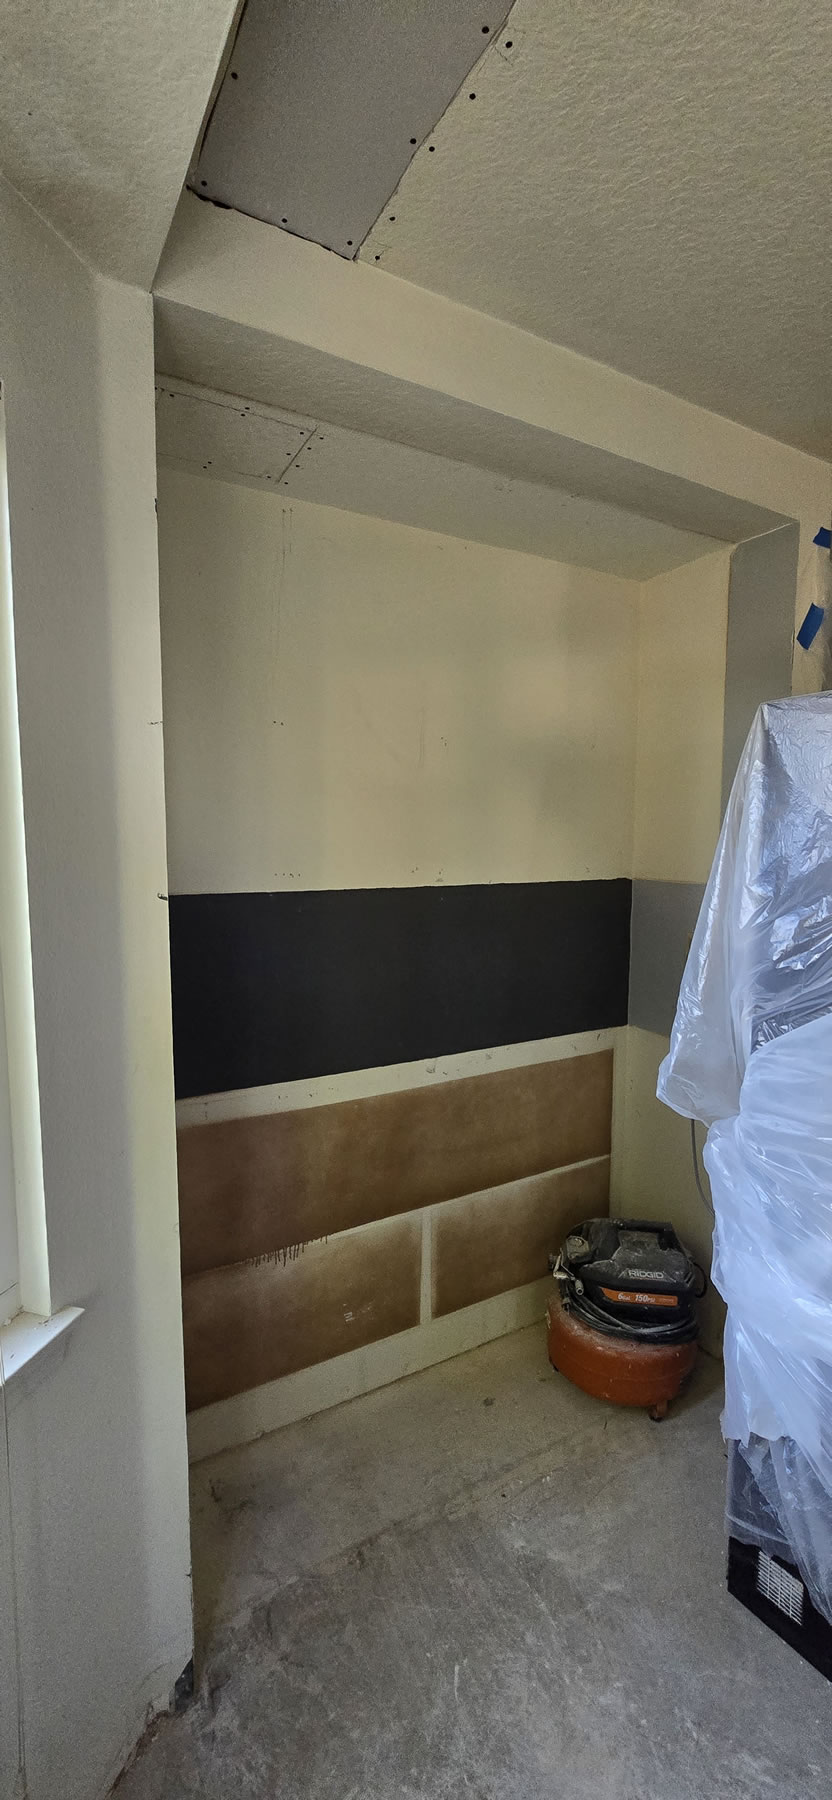
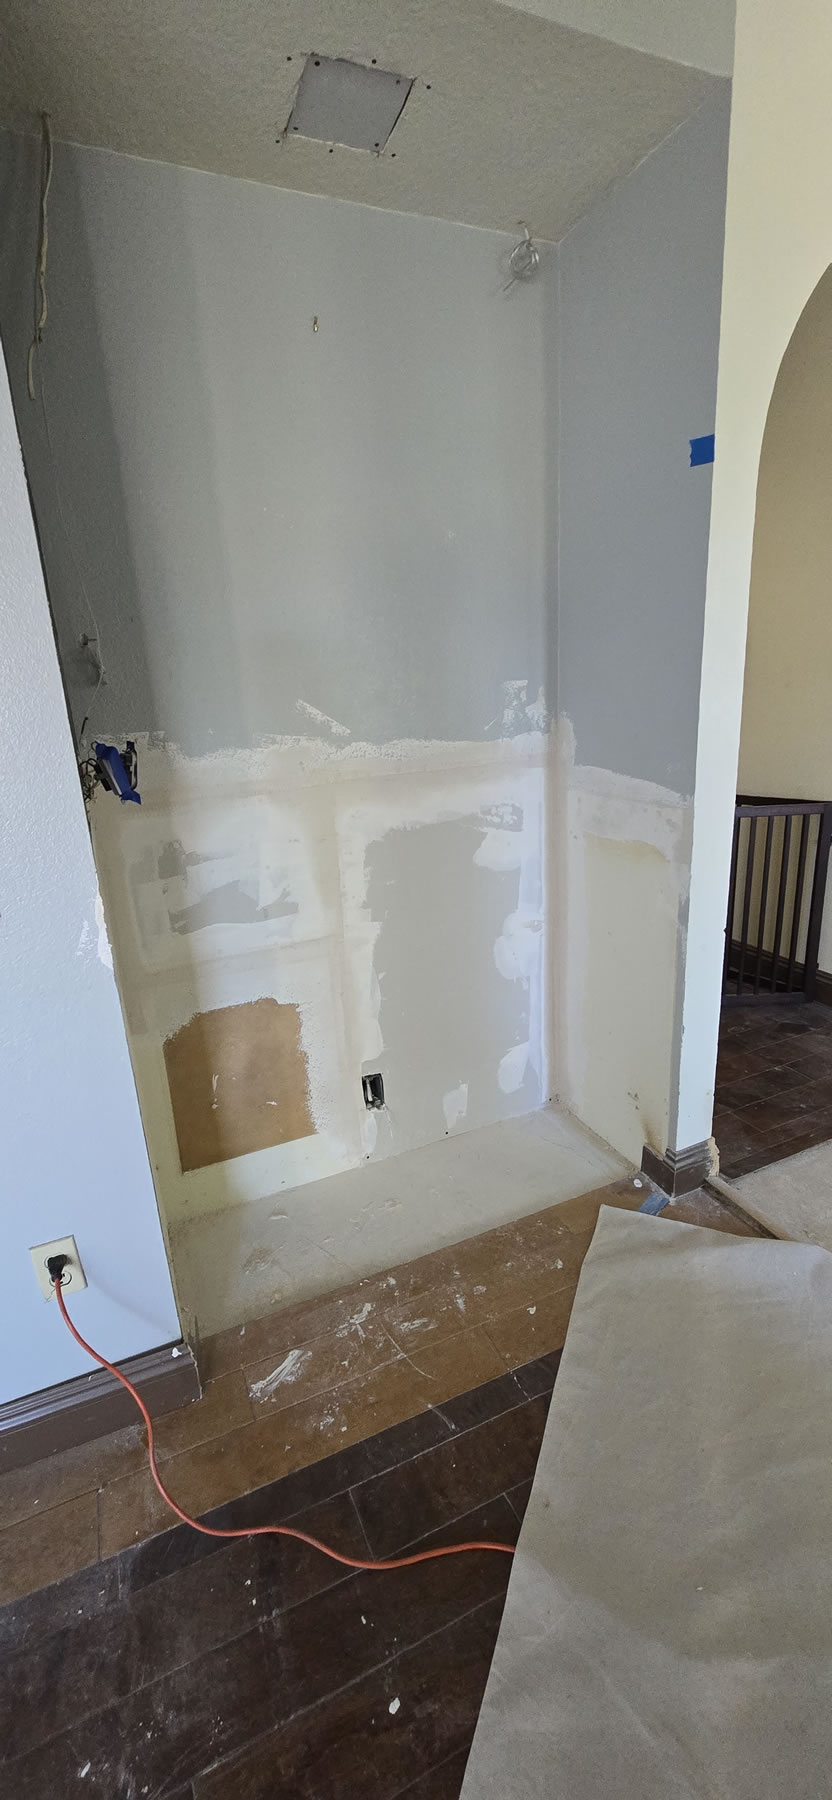
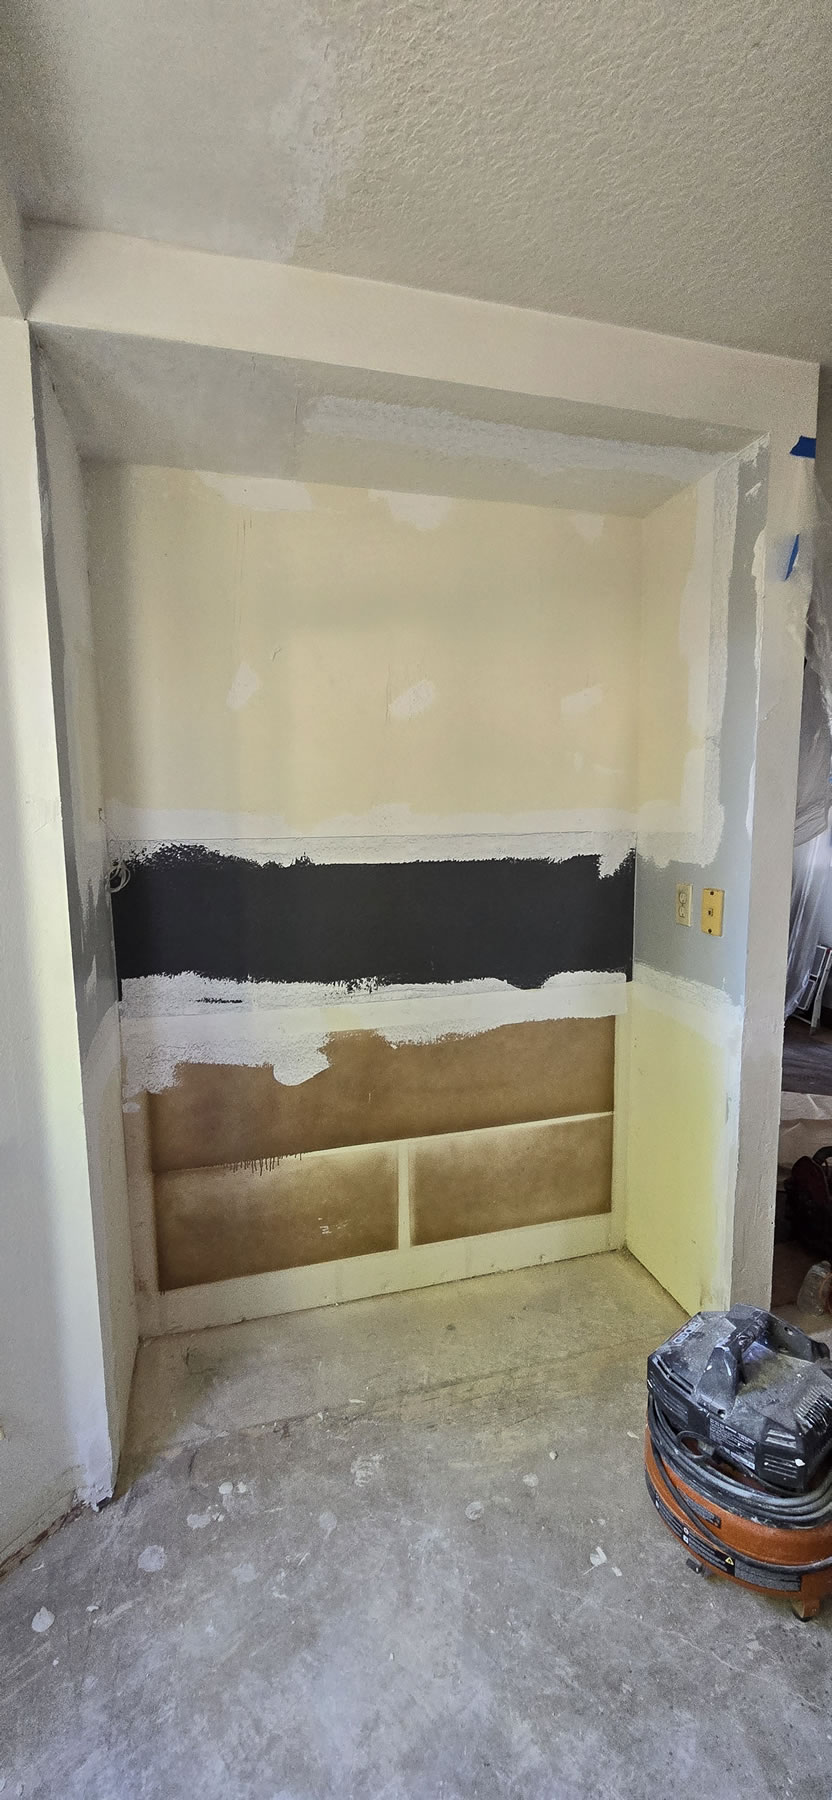
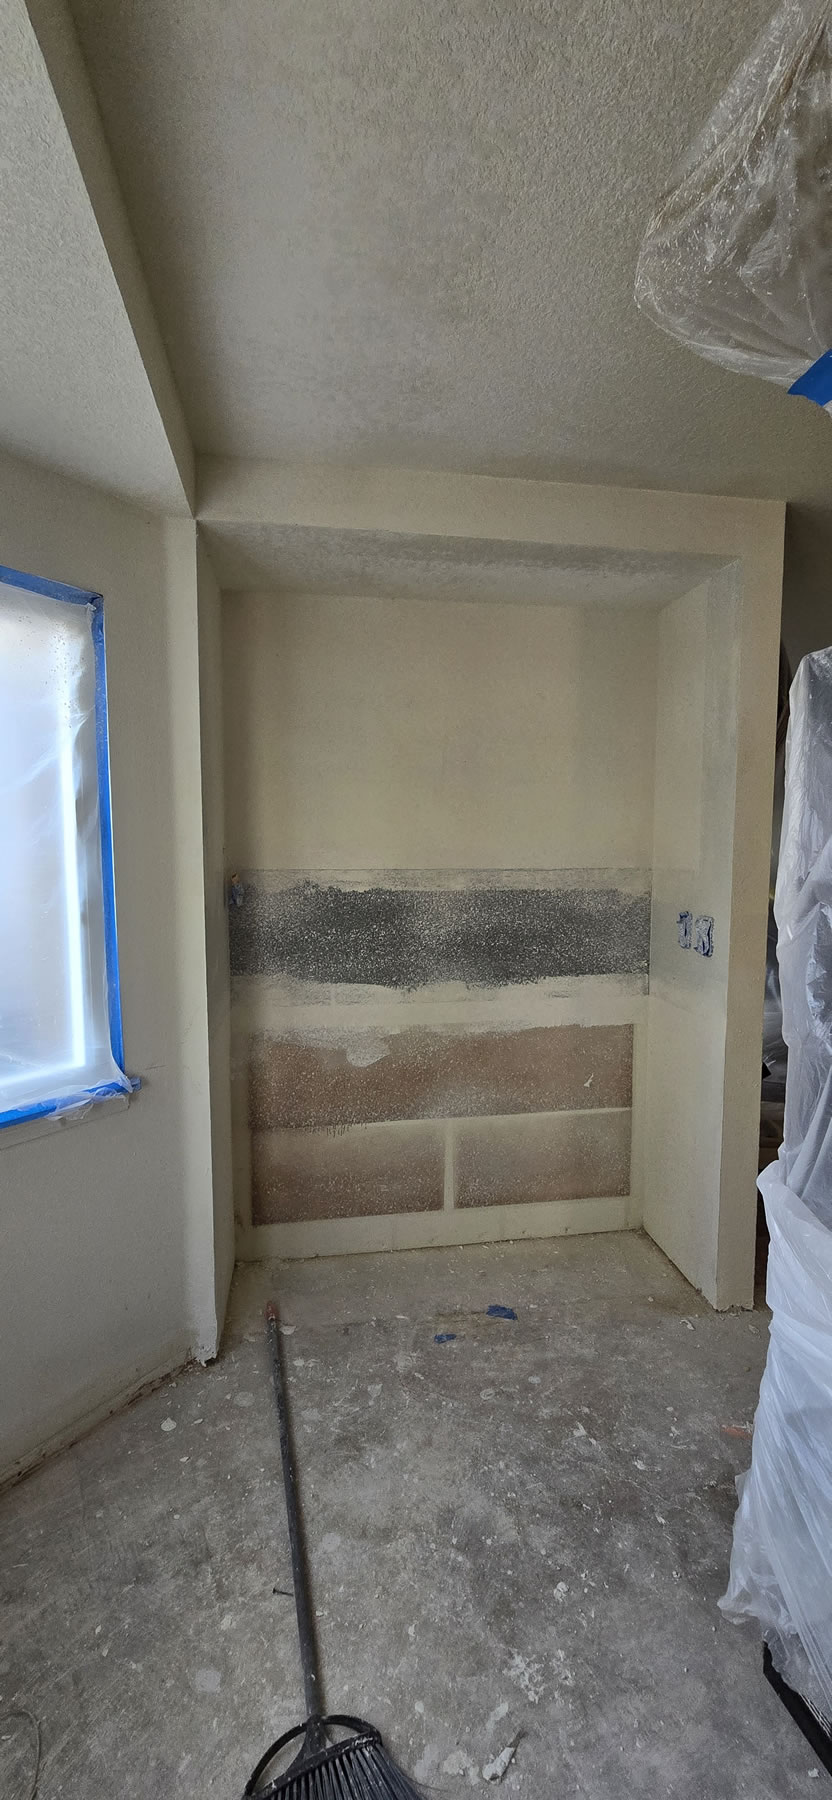
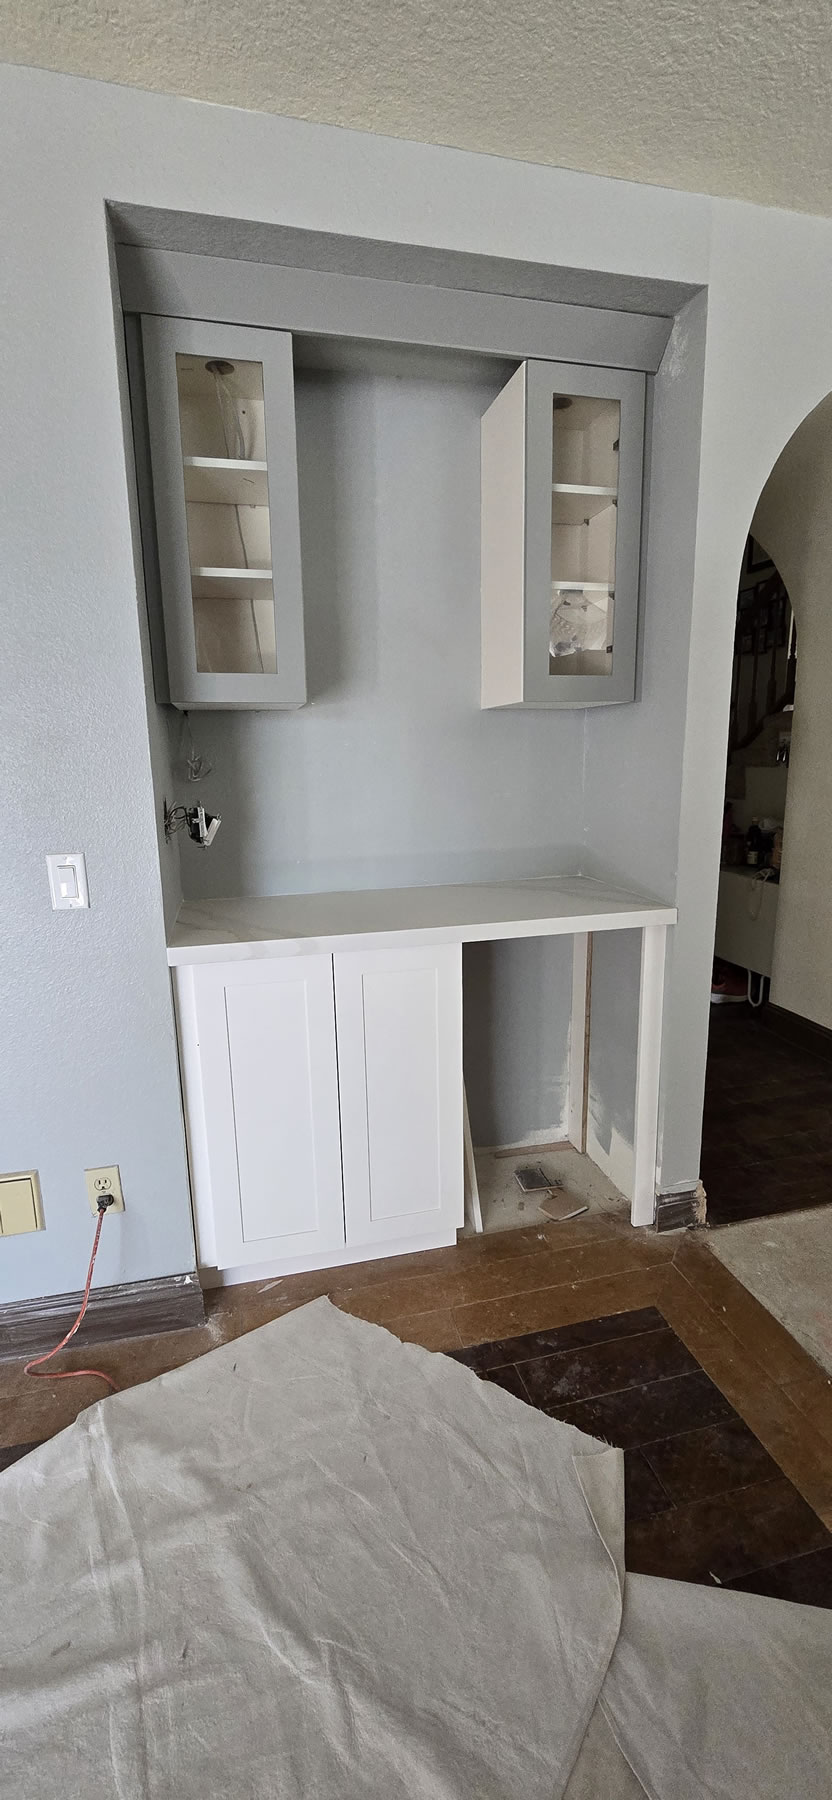
Day two of demo removes the floor tile and the little half wall that really served no purpose but blocks off half the room transition from the kitchen area to the back living room. The humble beginnings to remove the old brick accent wall also kick off today. Last bit is the removal of the wet bar cabinets and sink.
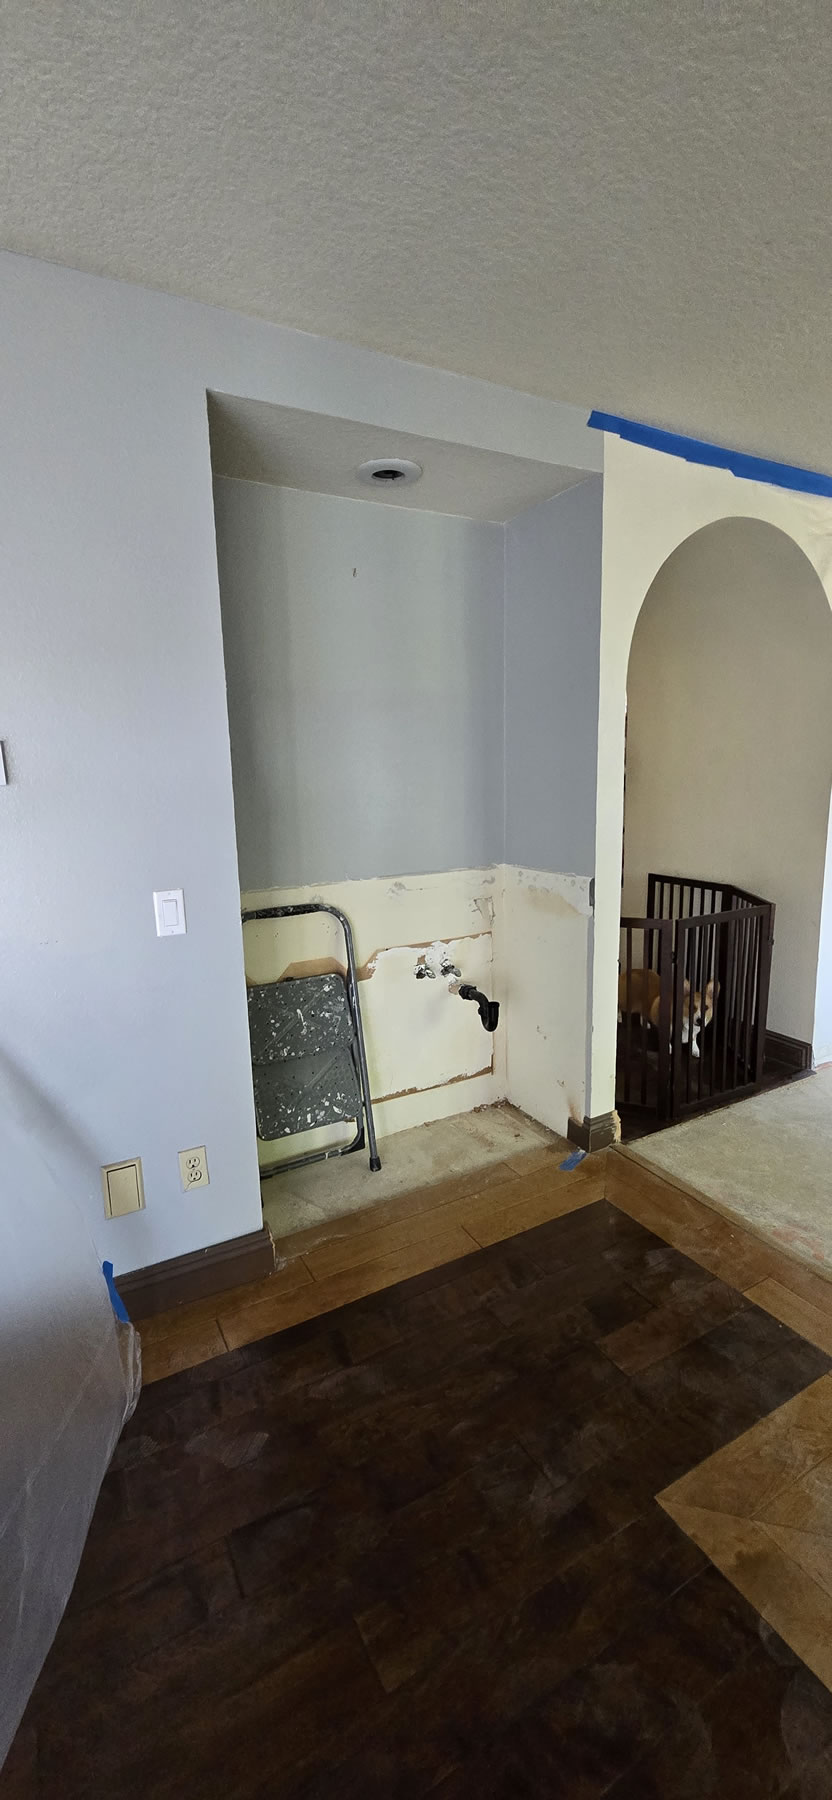
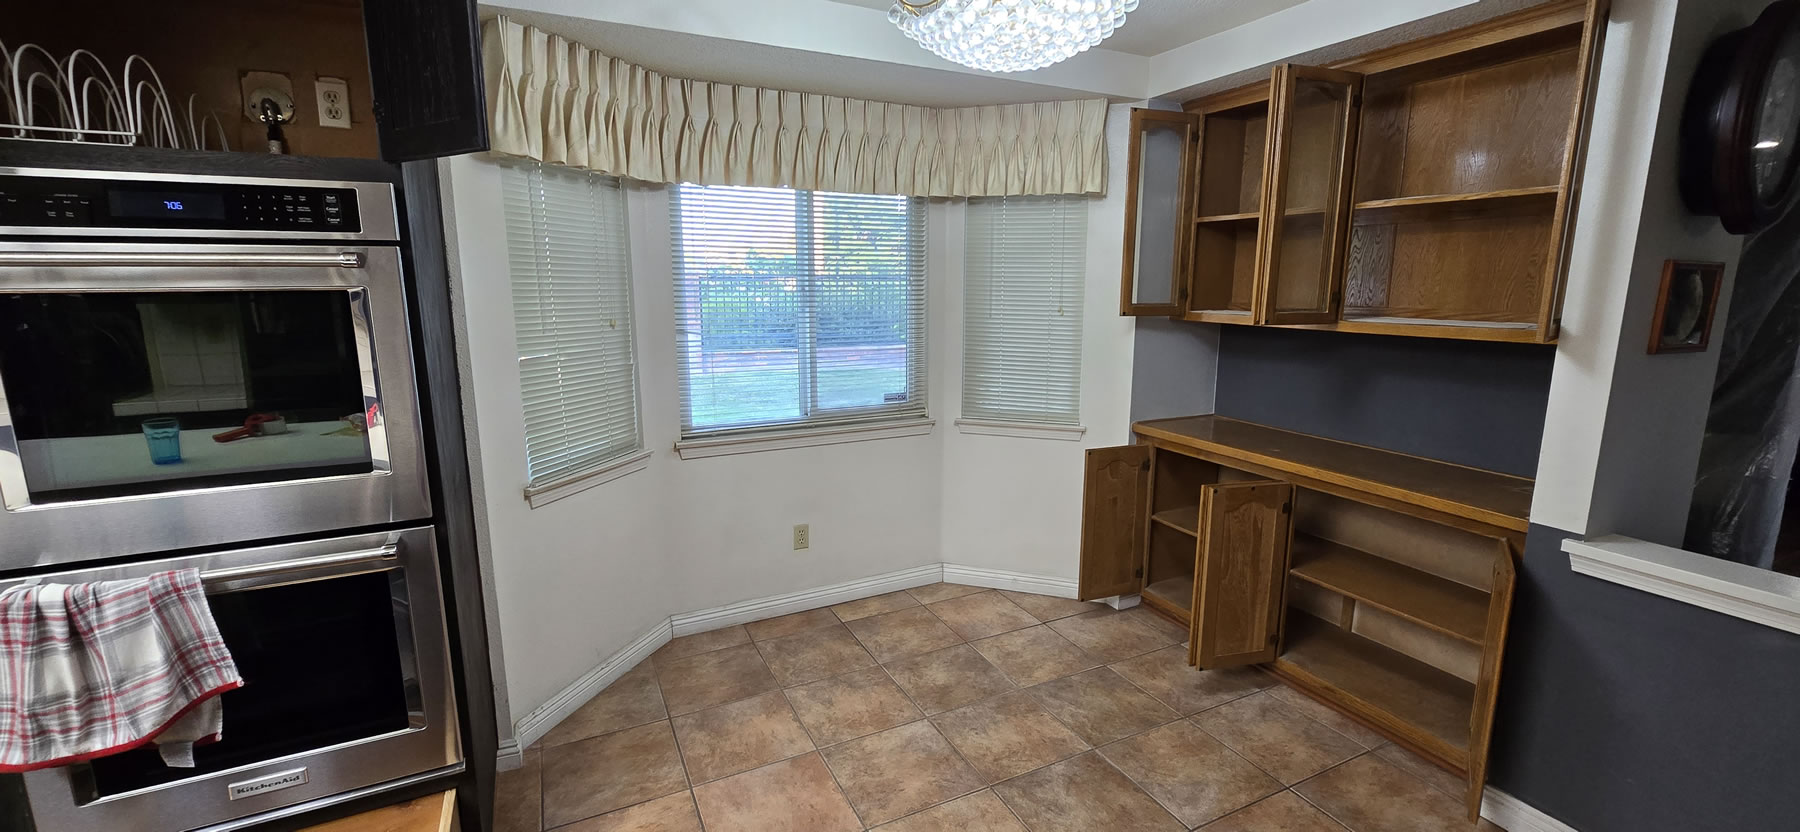
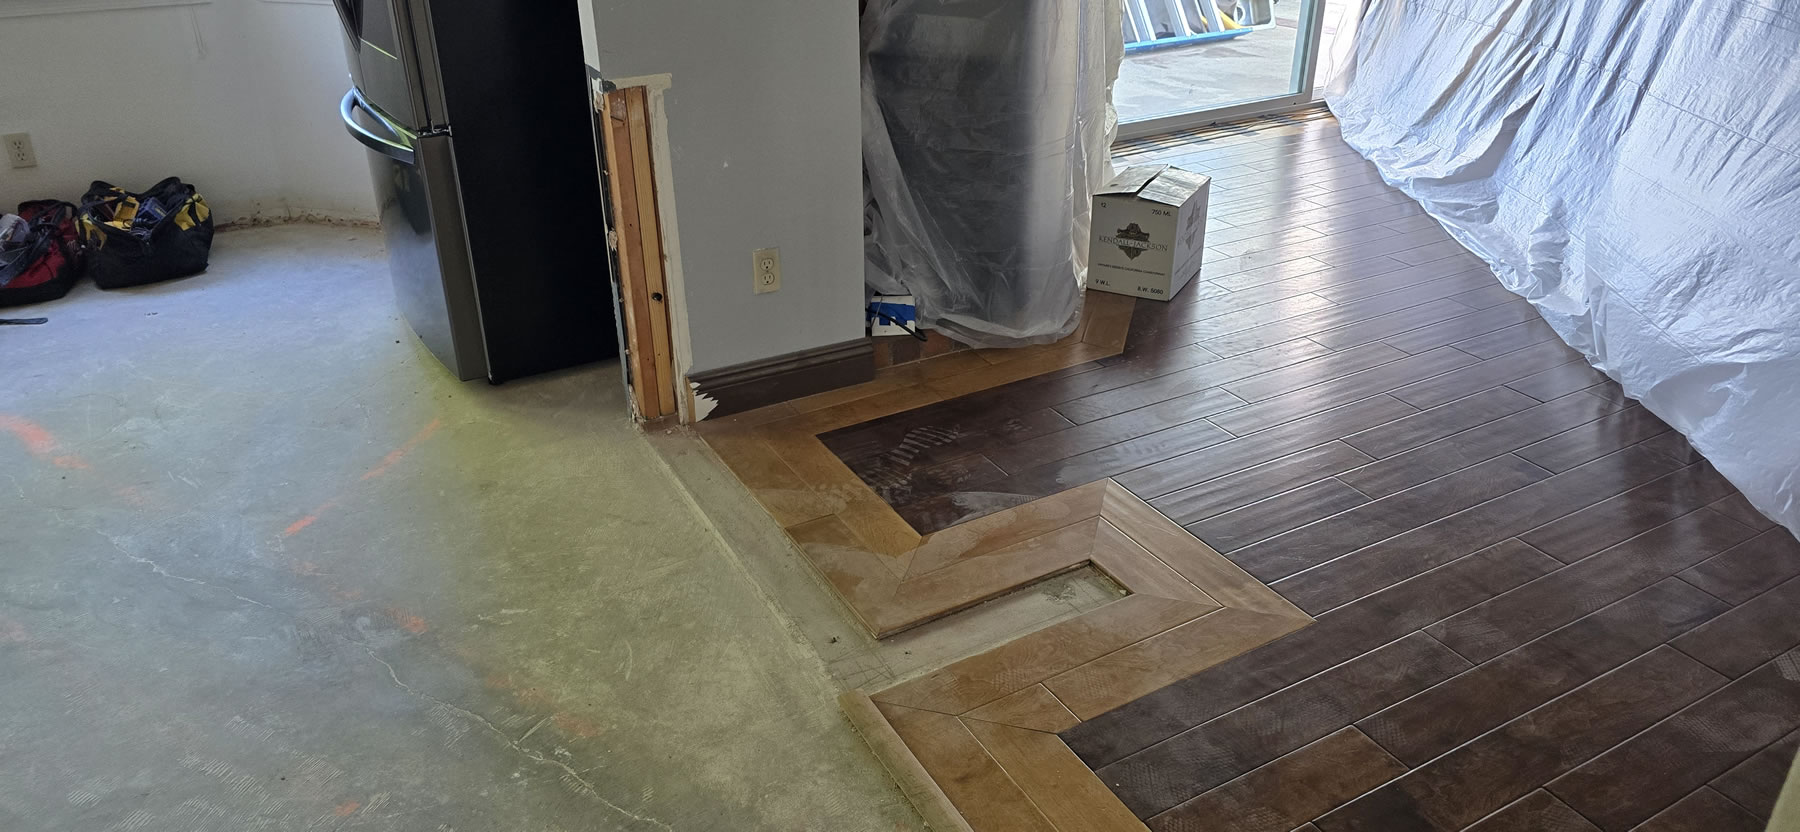
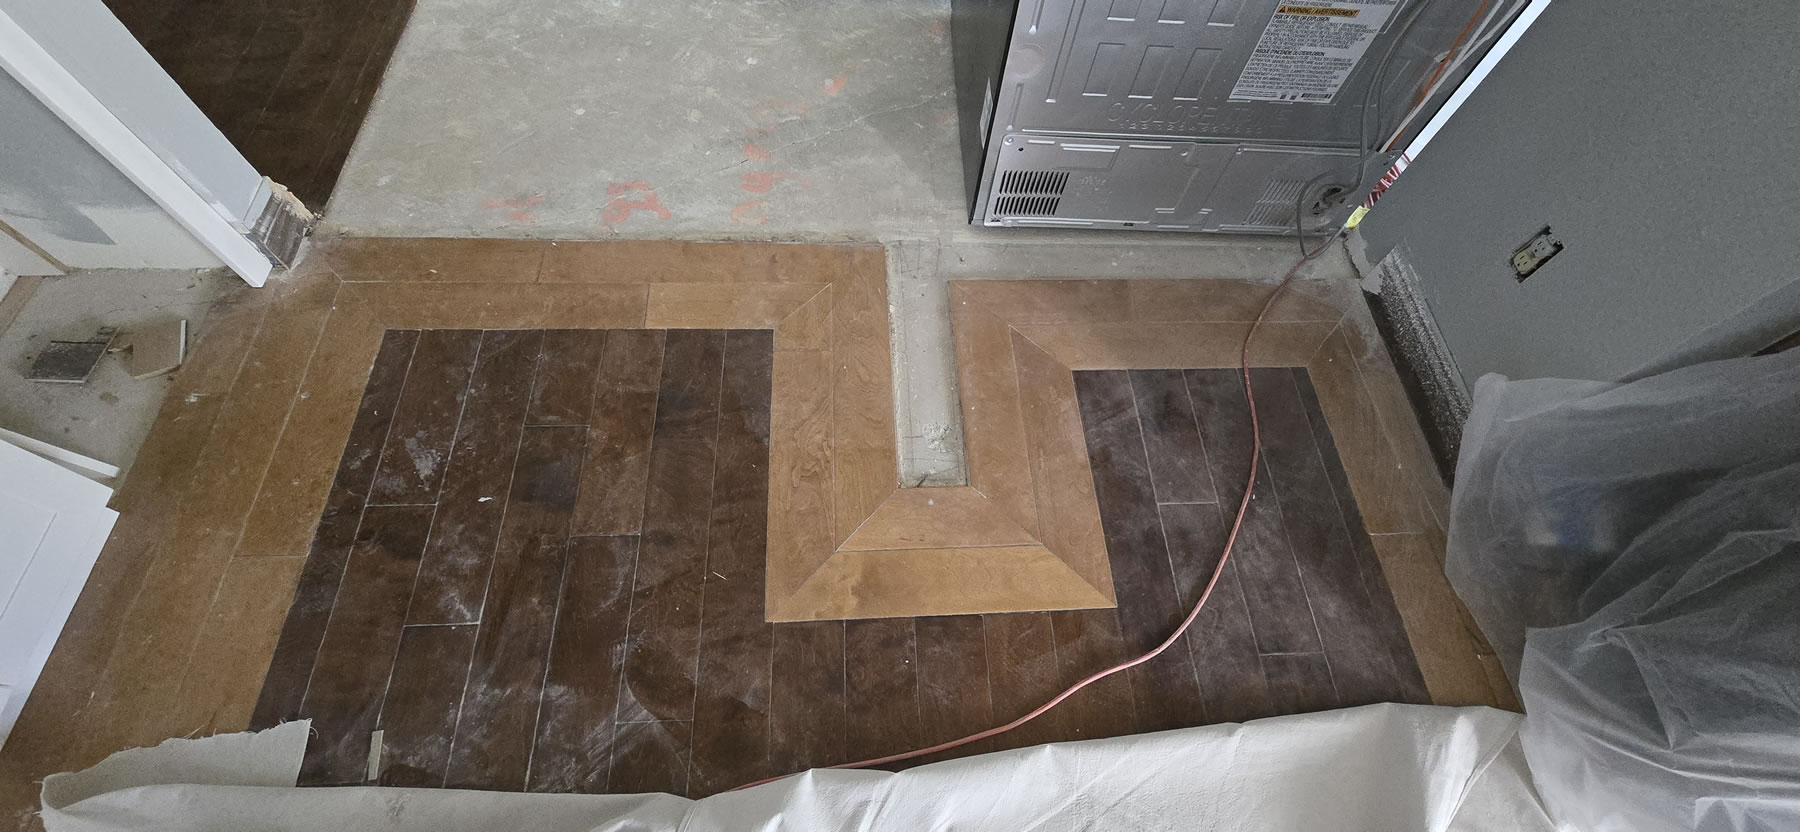
We also have this fun little dual tone wood design that my mom did when they last redid the floors. I’ll worry about this little “U” design later.
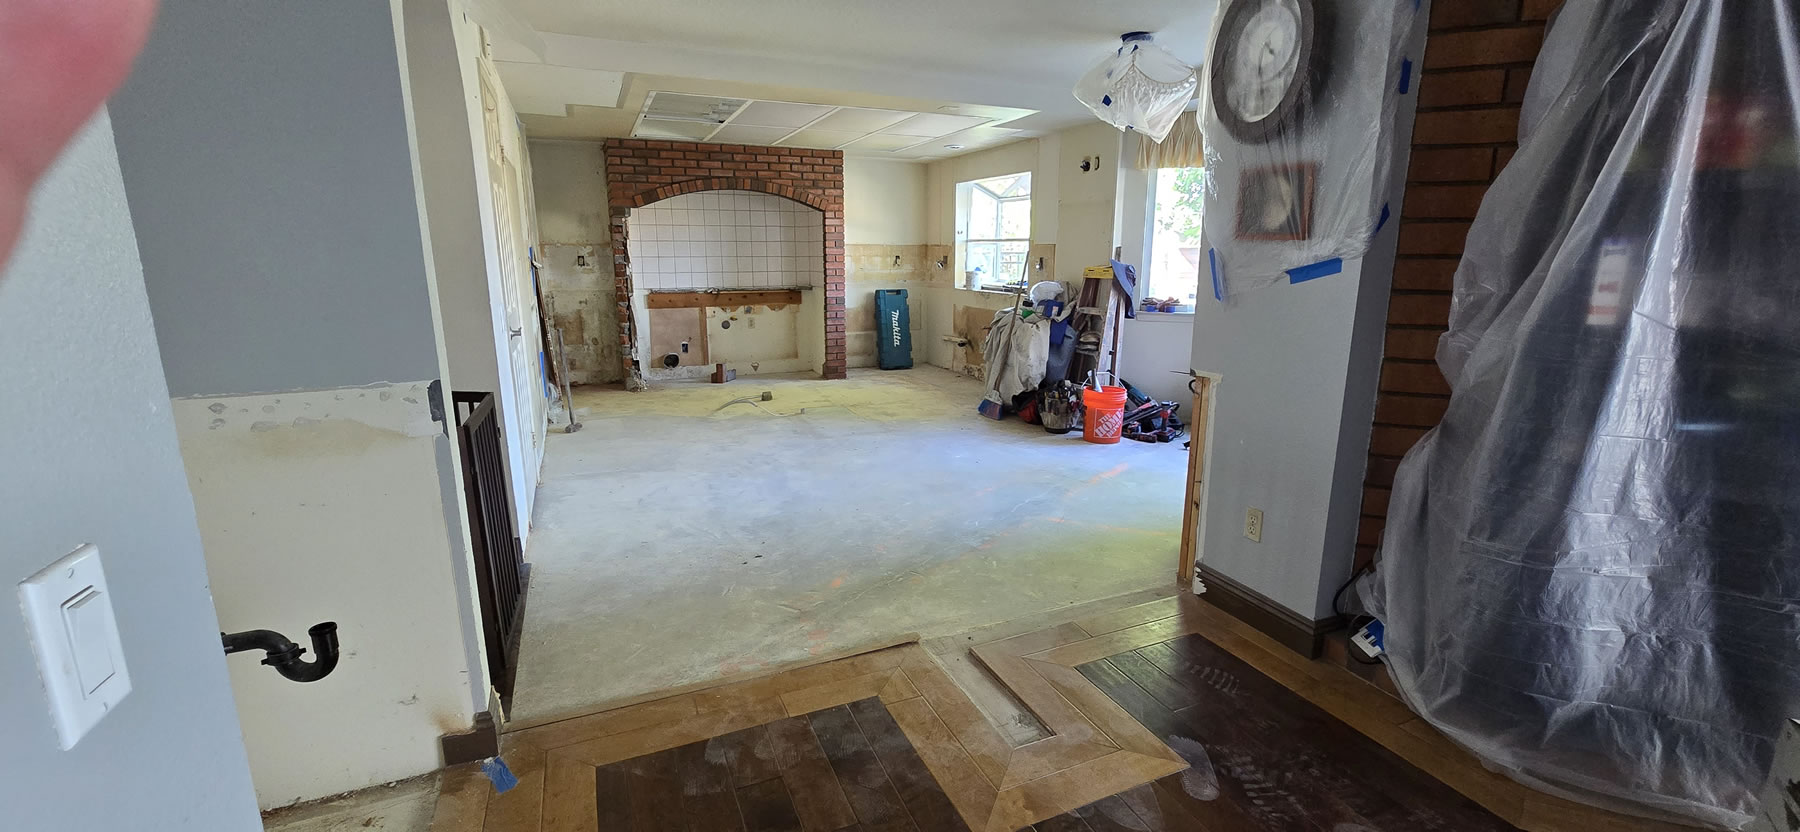
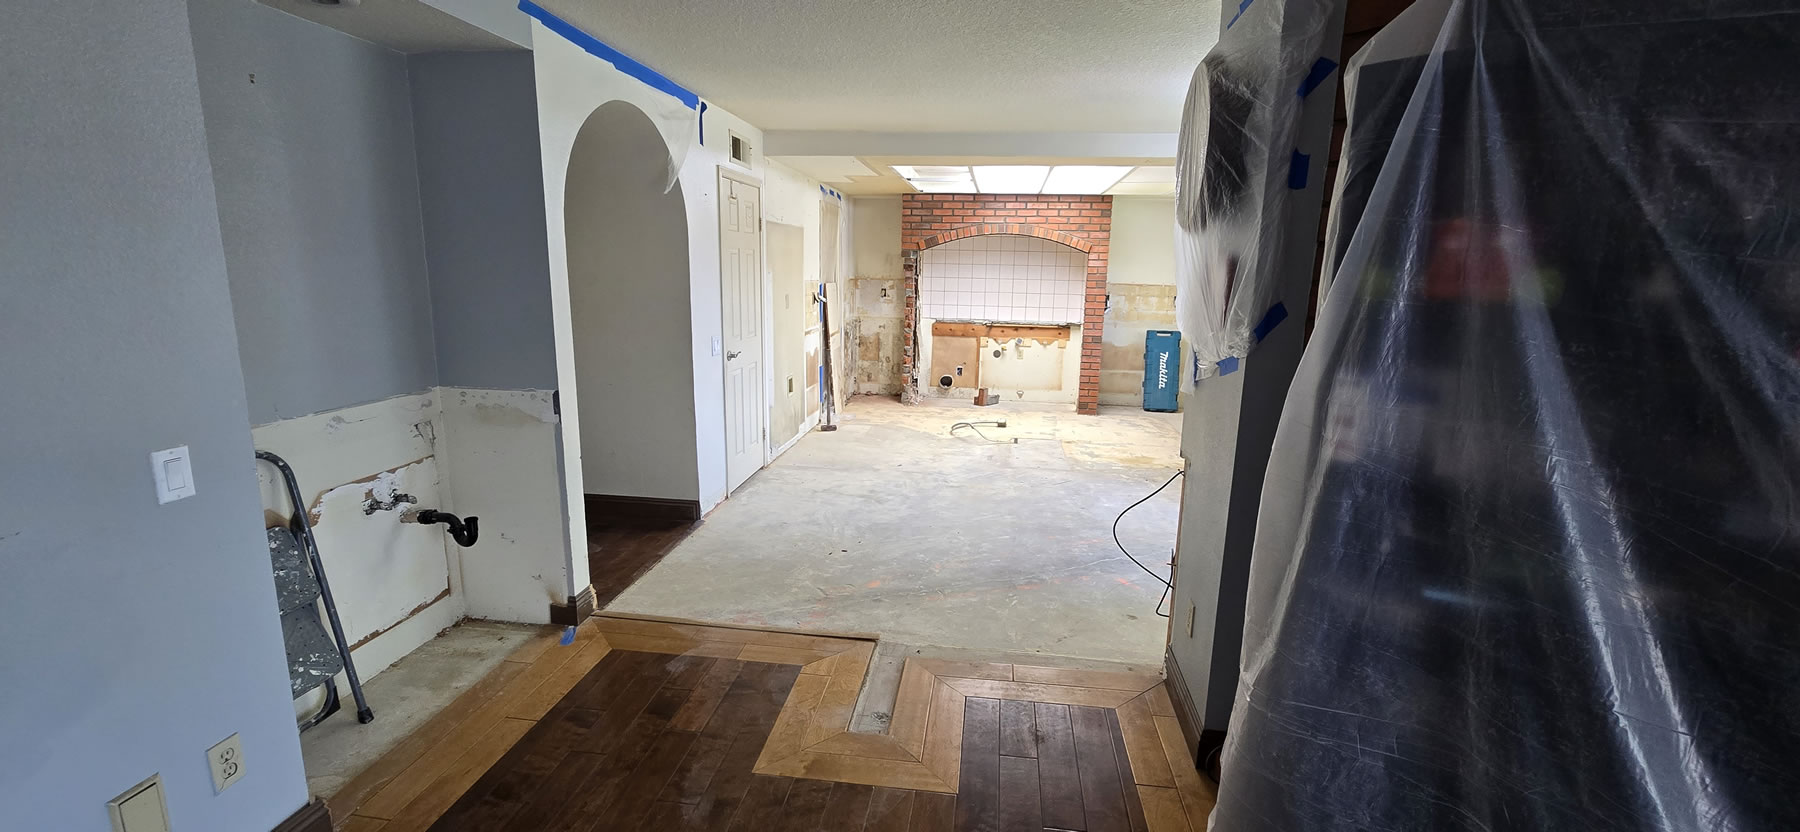
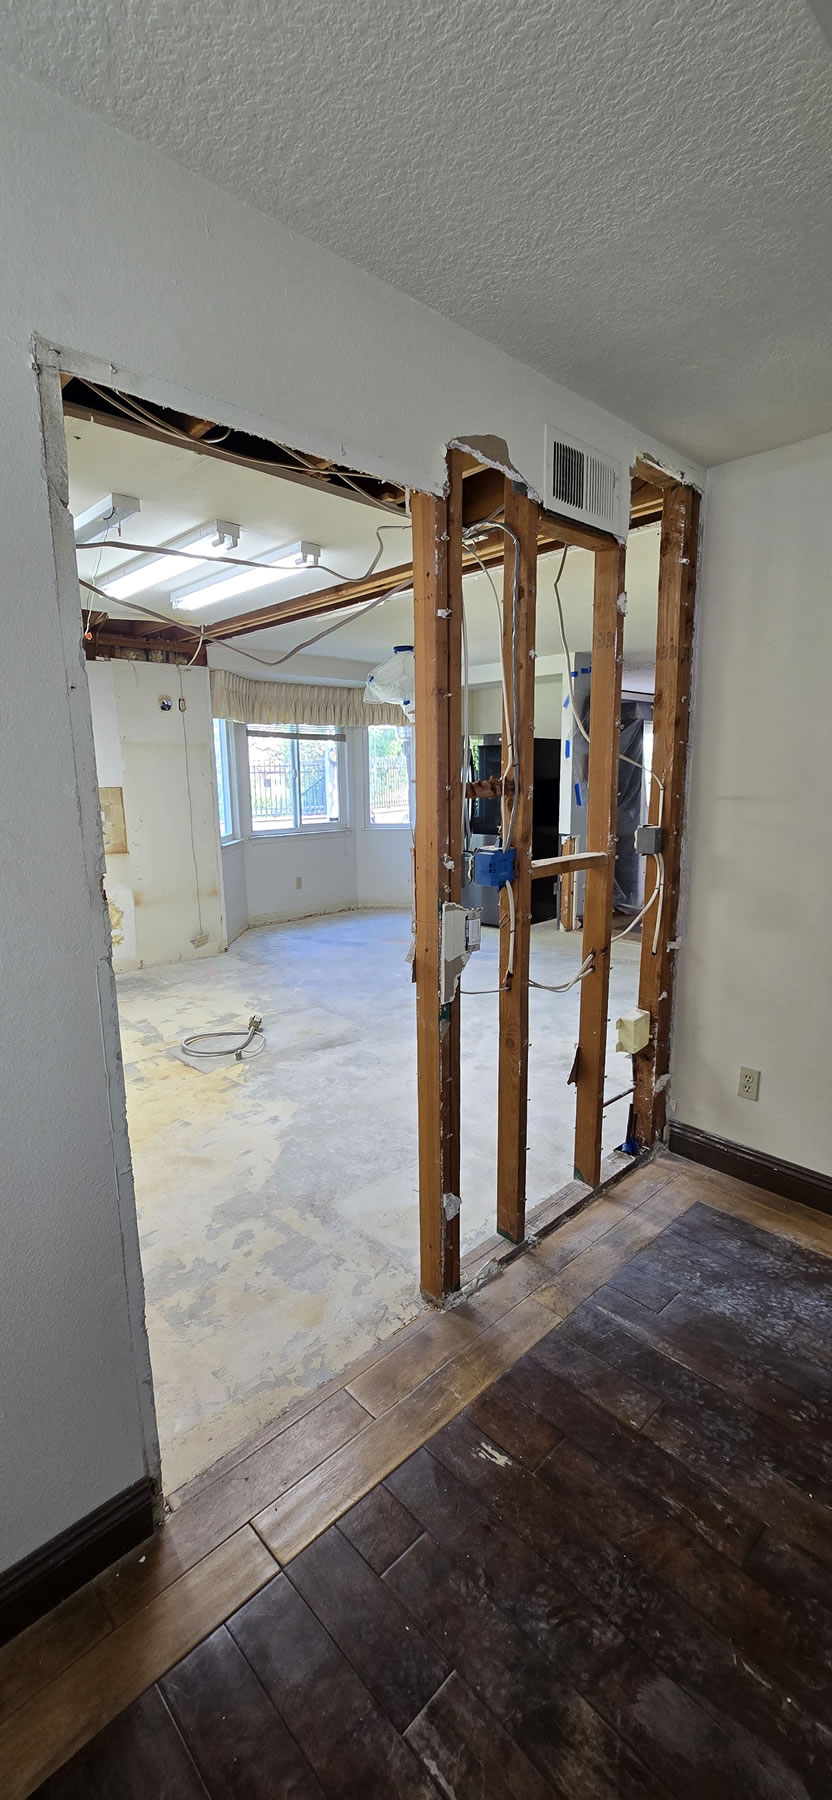
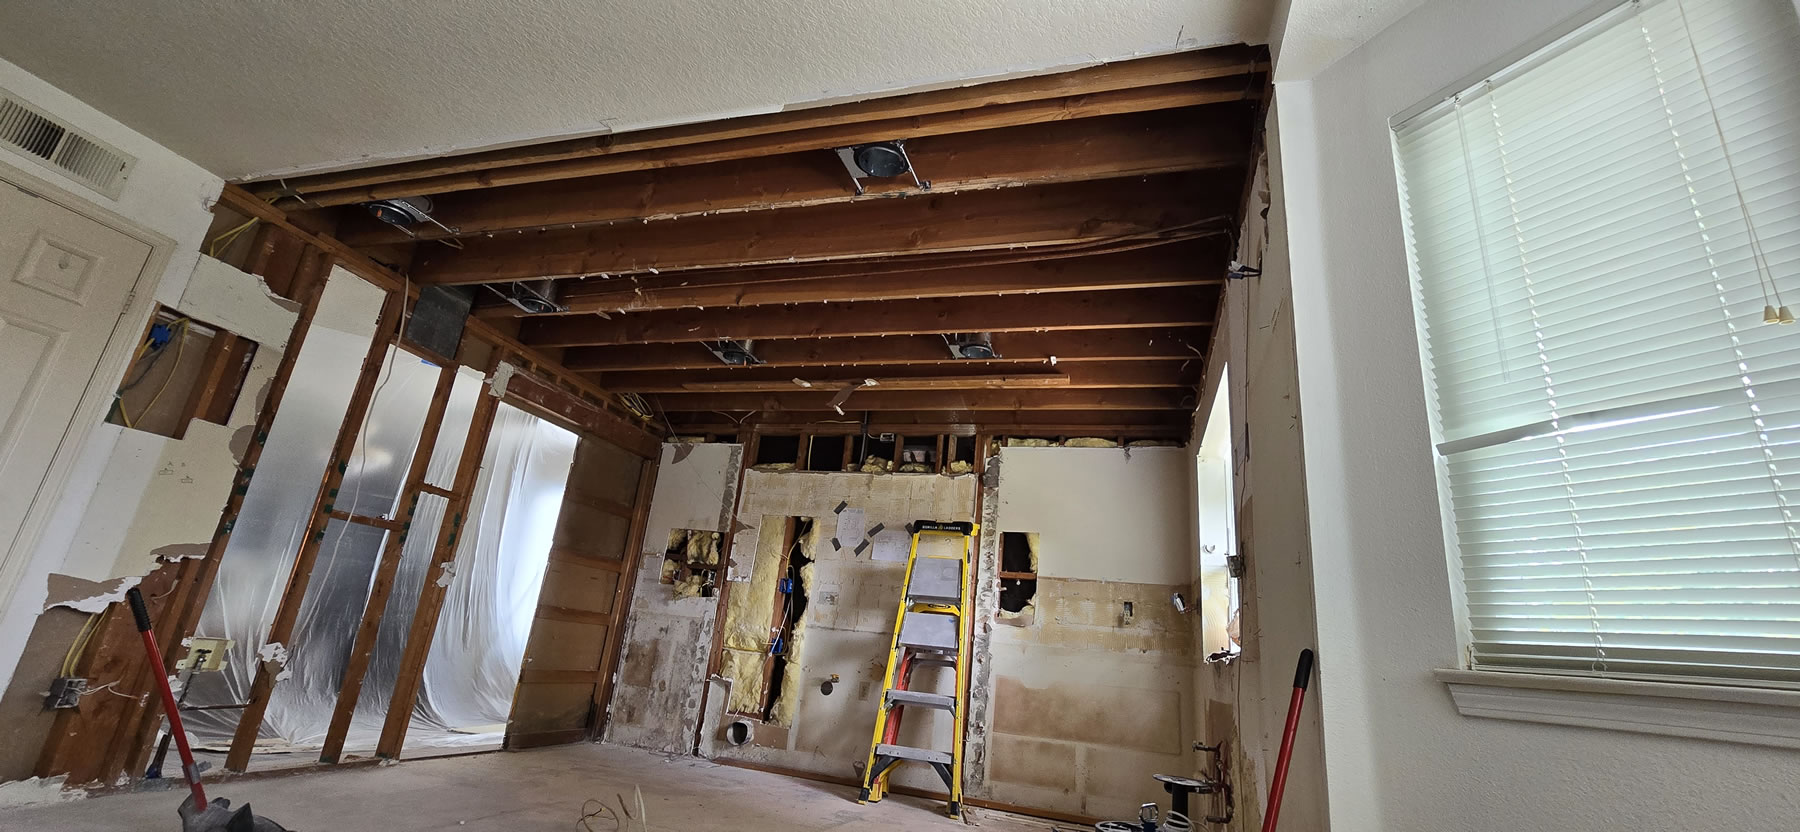
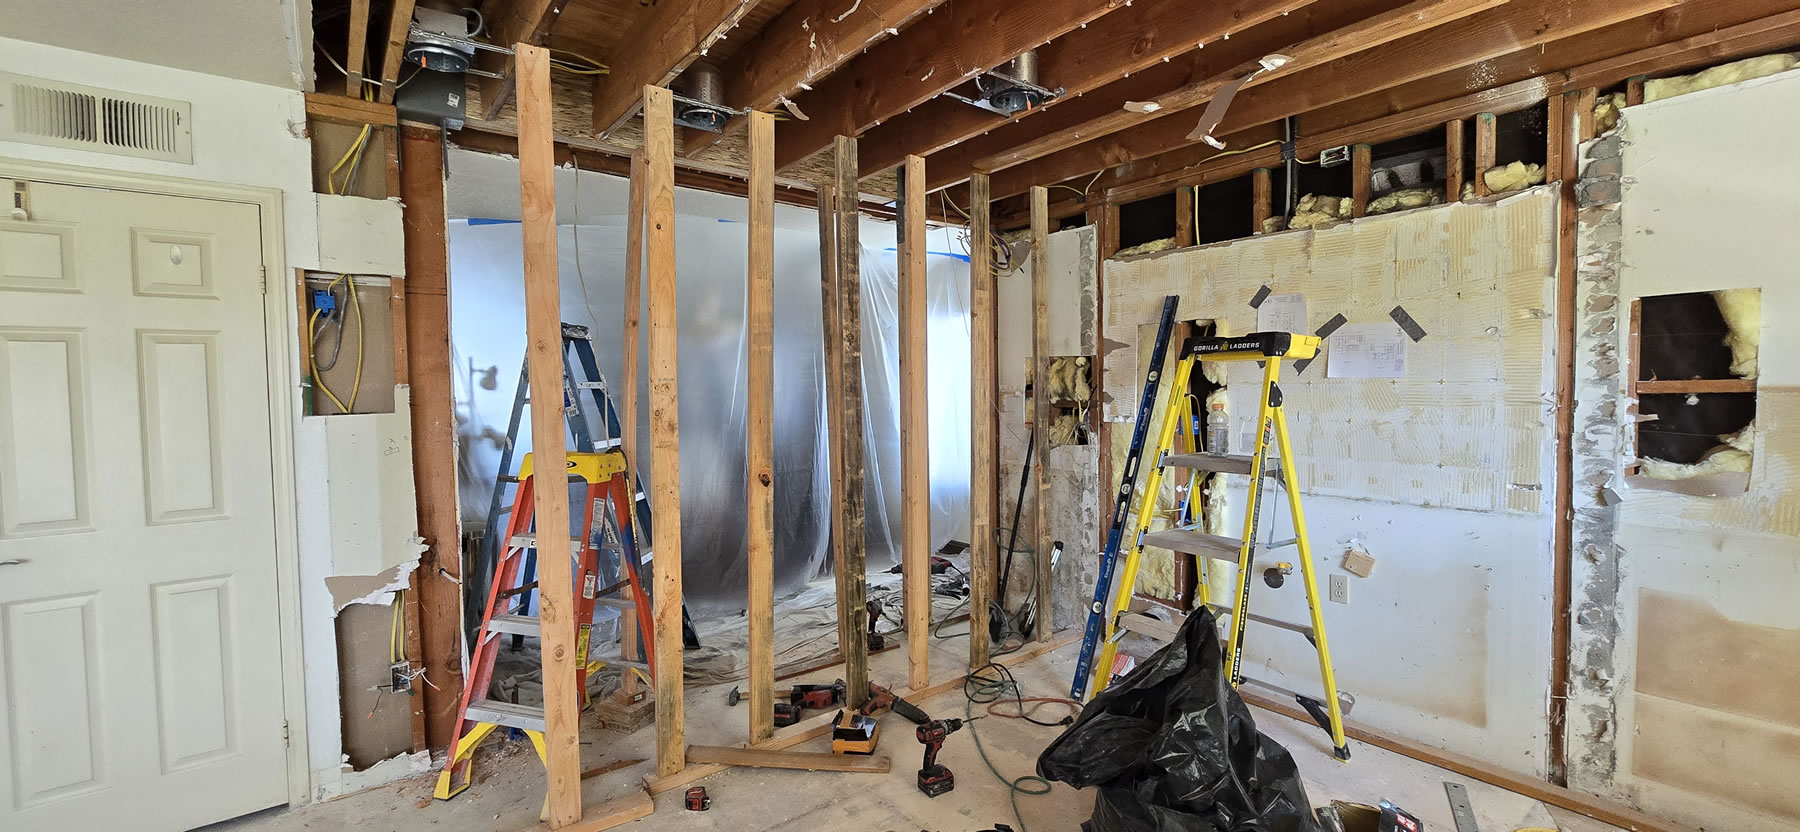
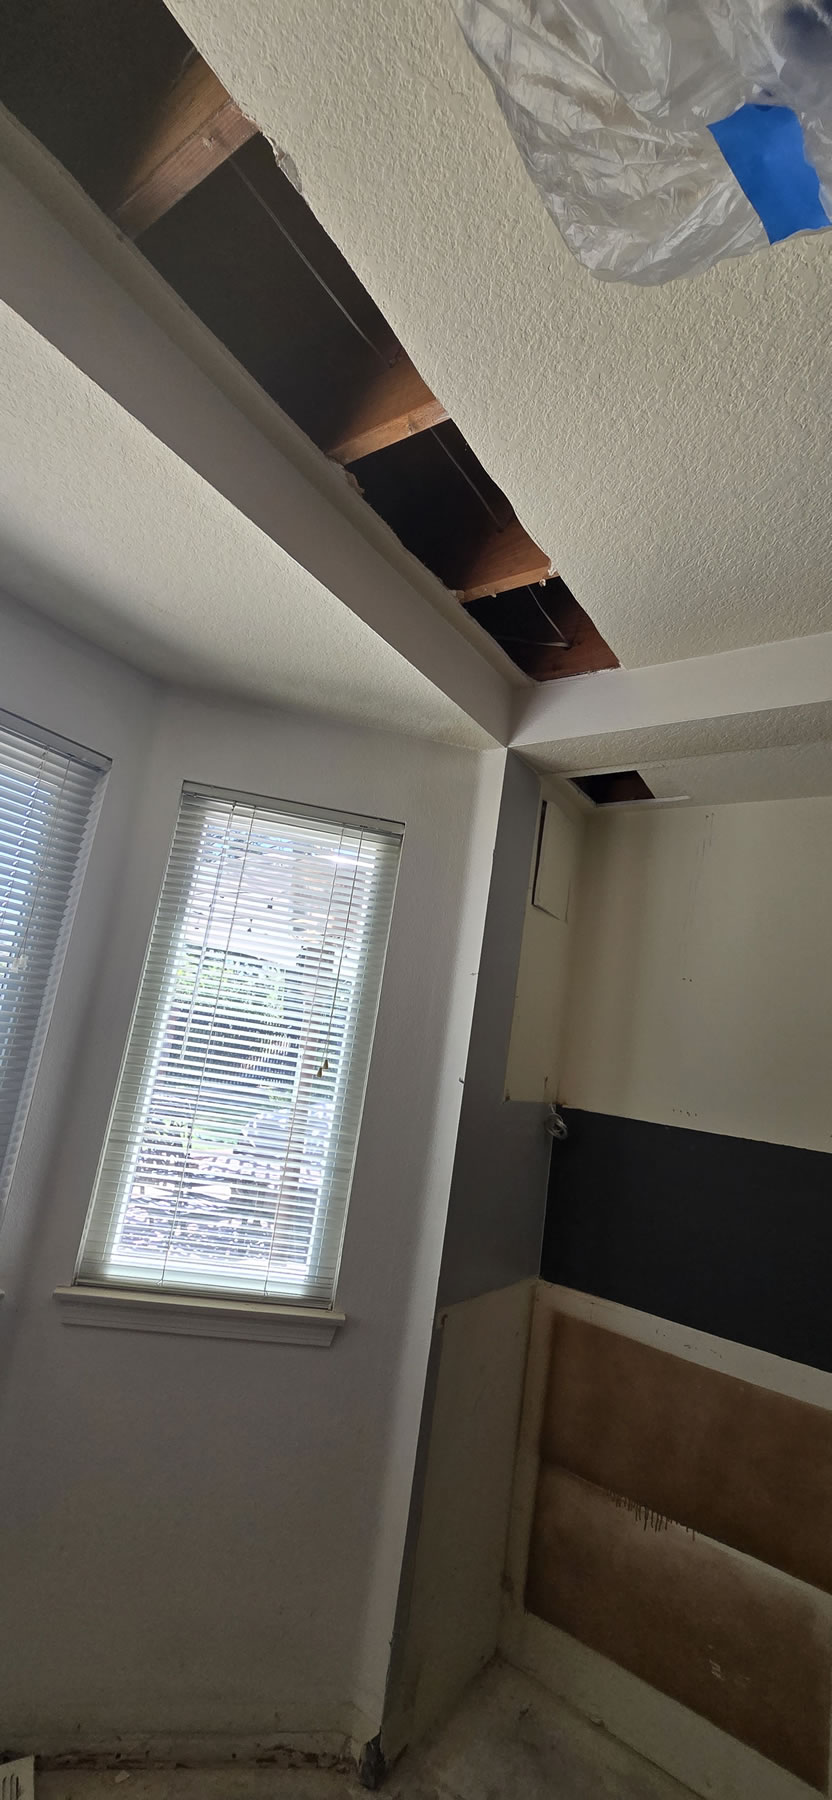
Day 3 is the last day of demo and the brick wall is gone. One of my neighbors absolutely loves his brick wall and says it’s character. It just a waste of space served no purpose for us. Also gone is the soffit (the 6 inch drop in the ceiling where the fluorescent – now changed to LED light tubes are housed). Pocket door, door frame, and drywall between the kitchen and dining room are now gone.
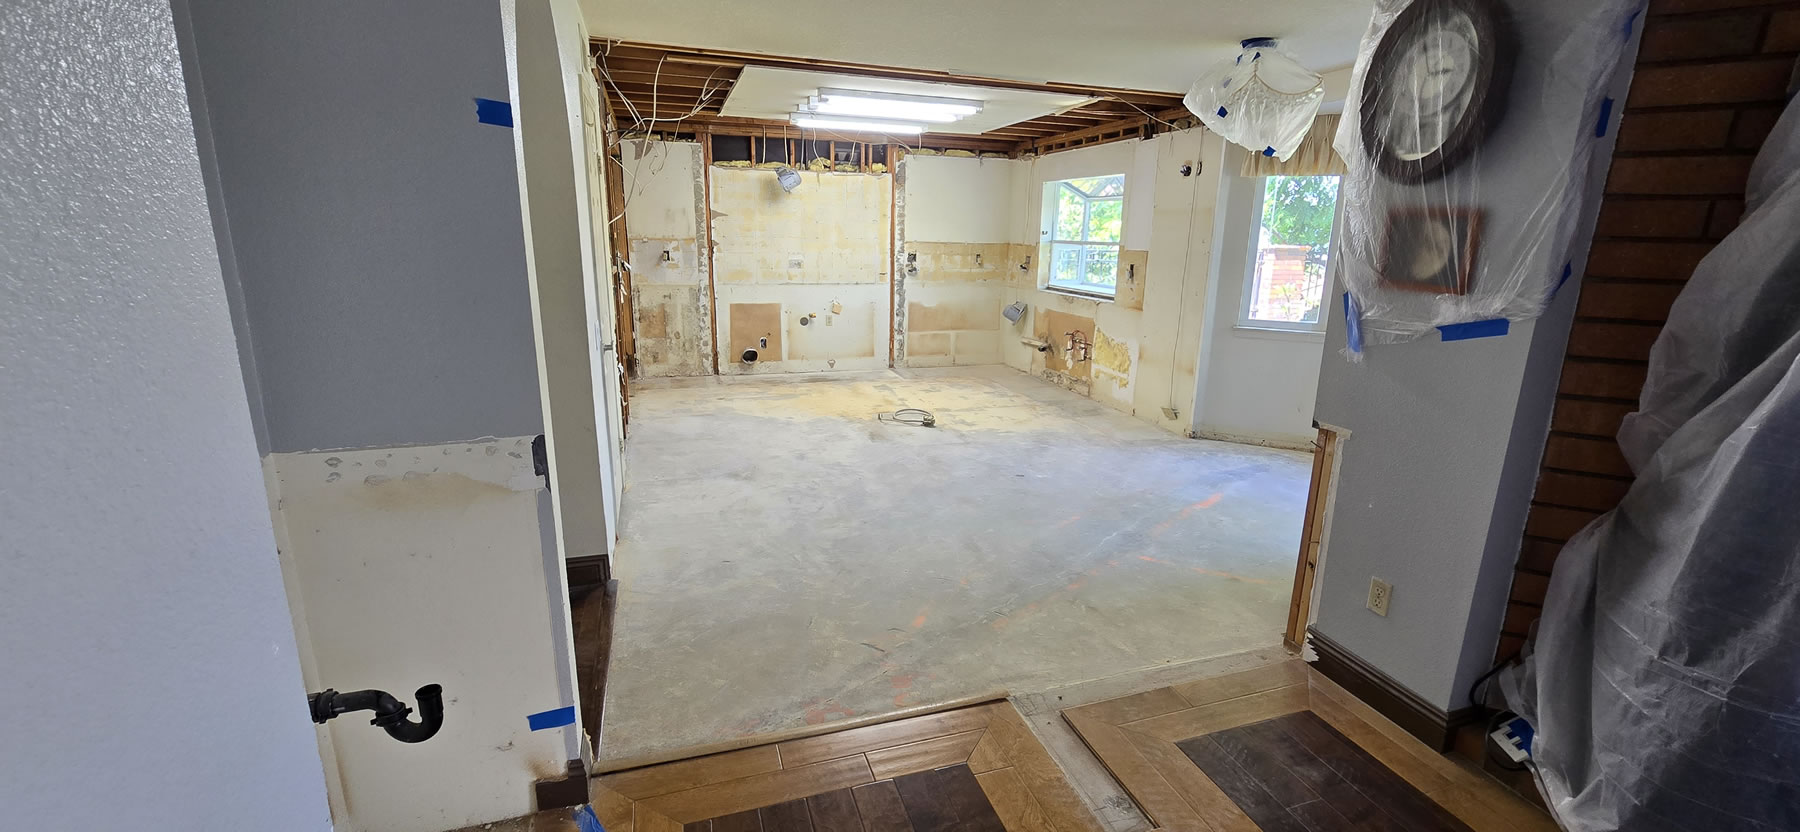
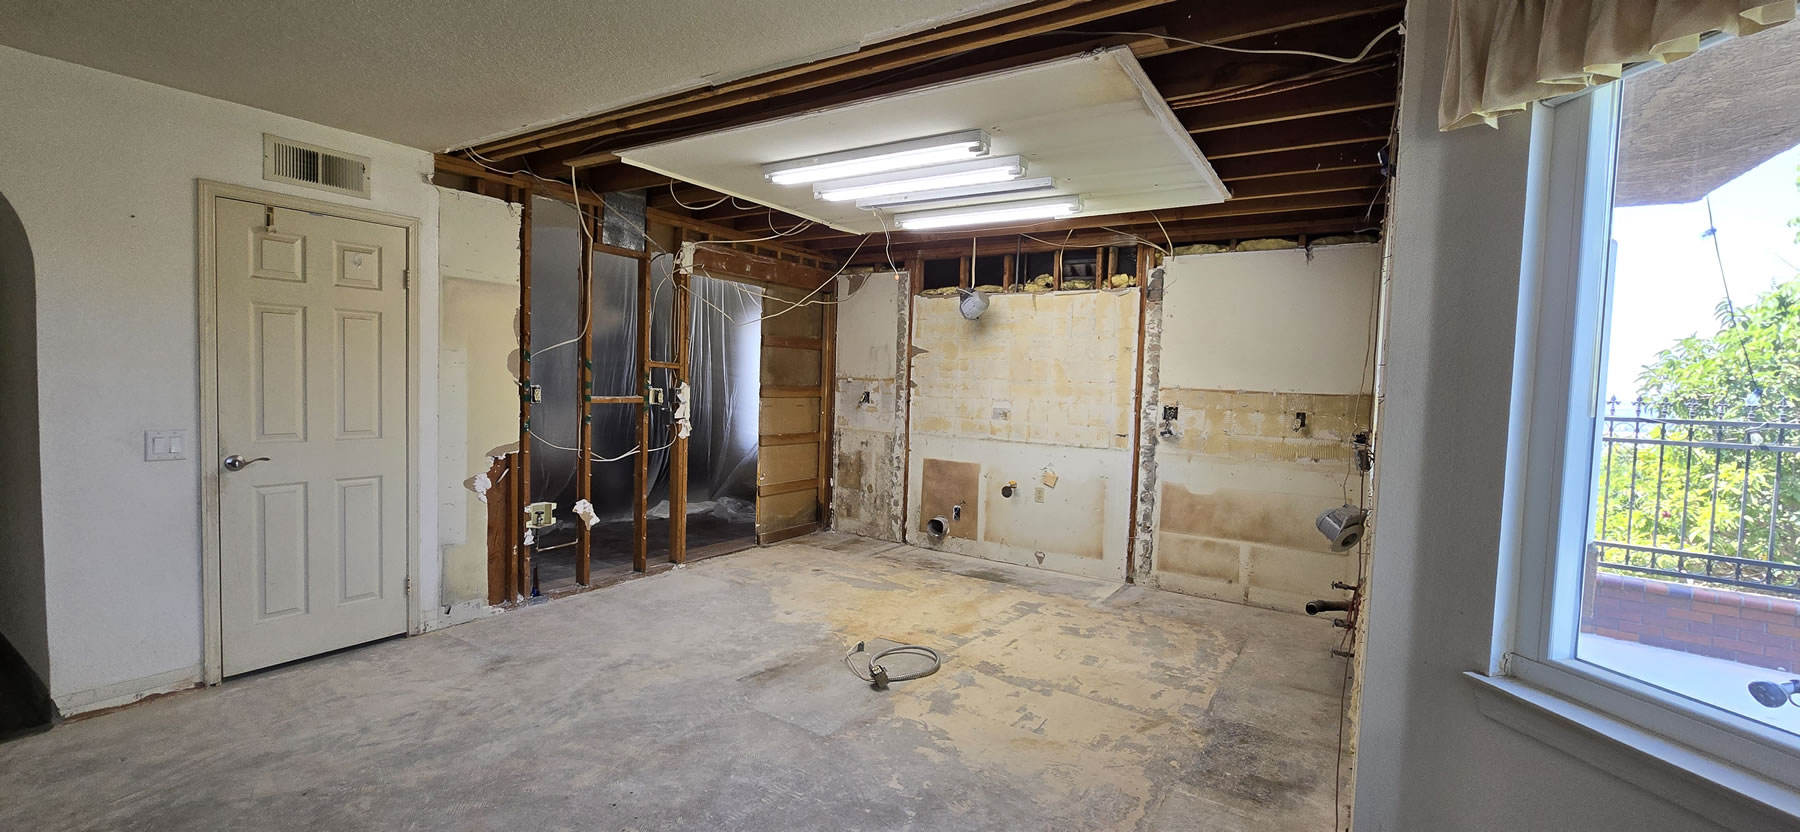
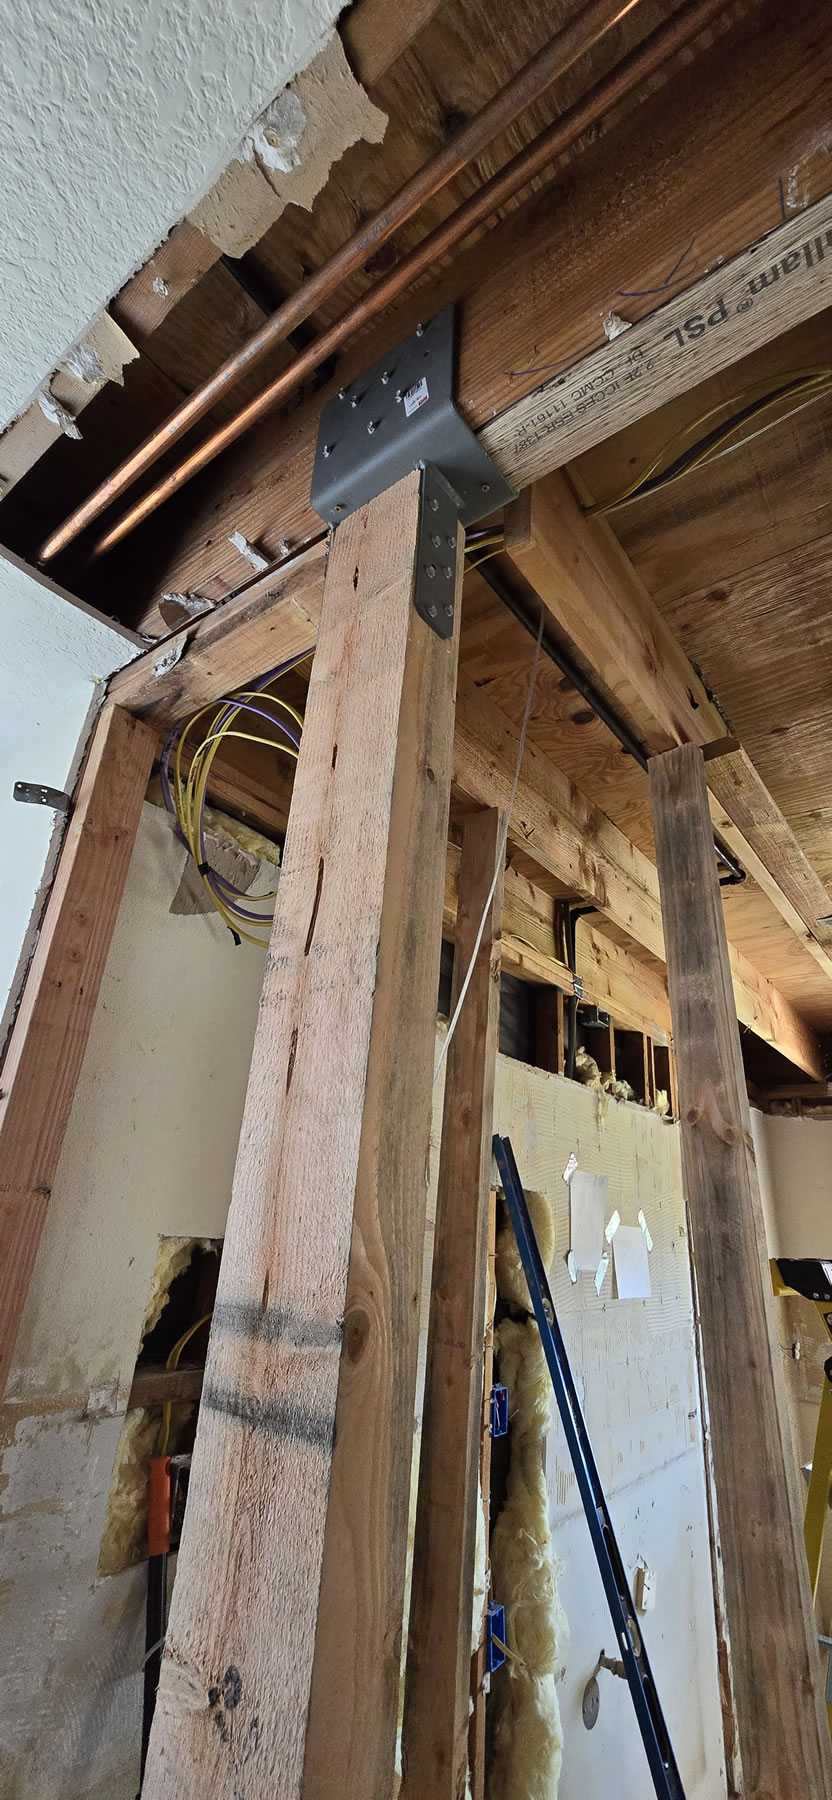
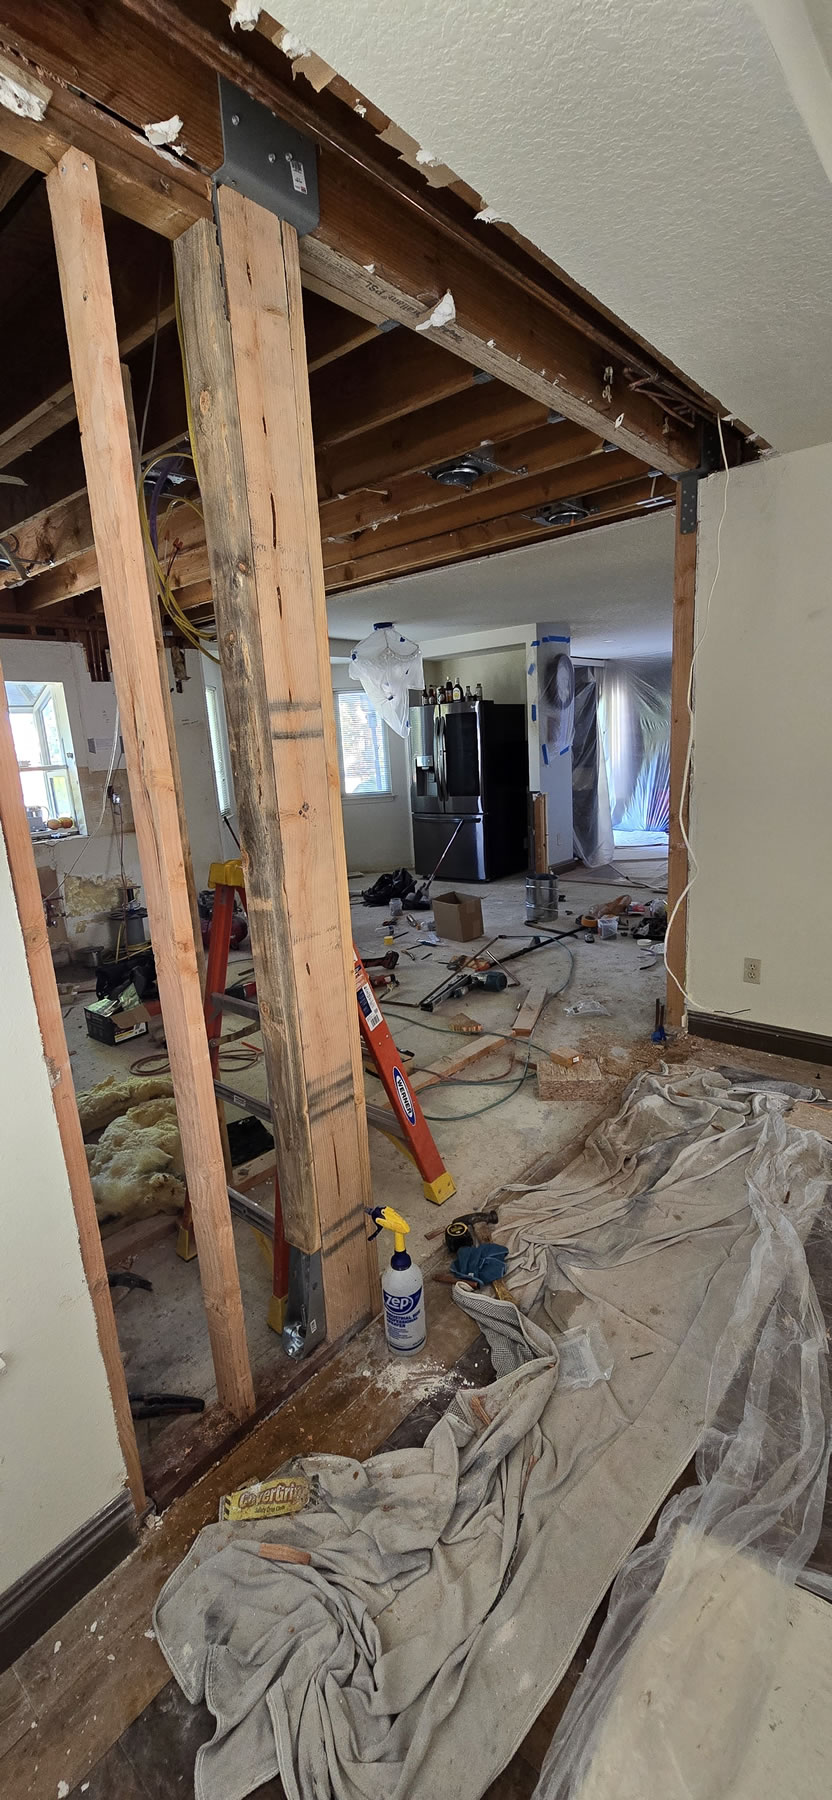
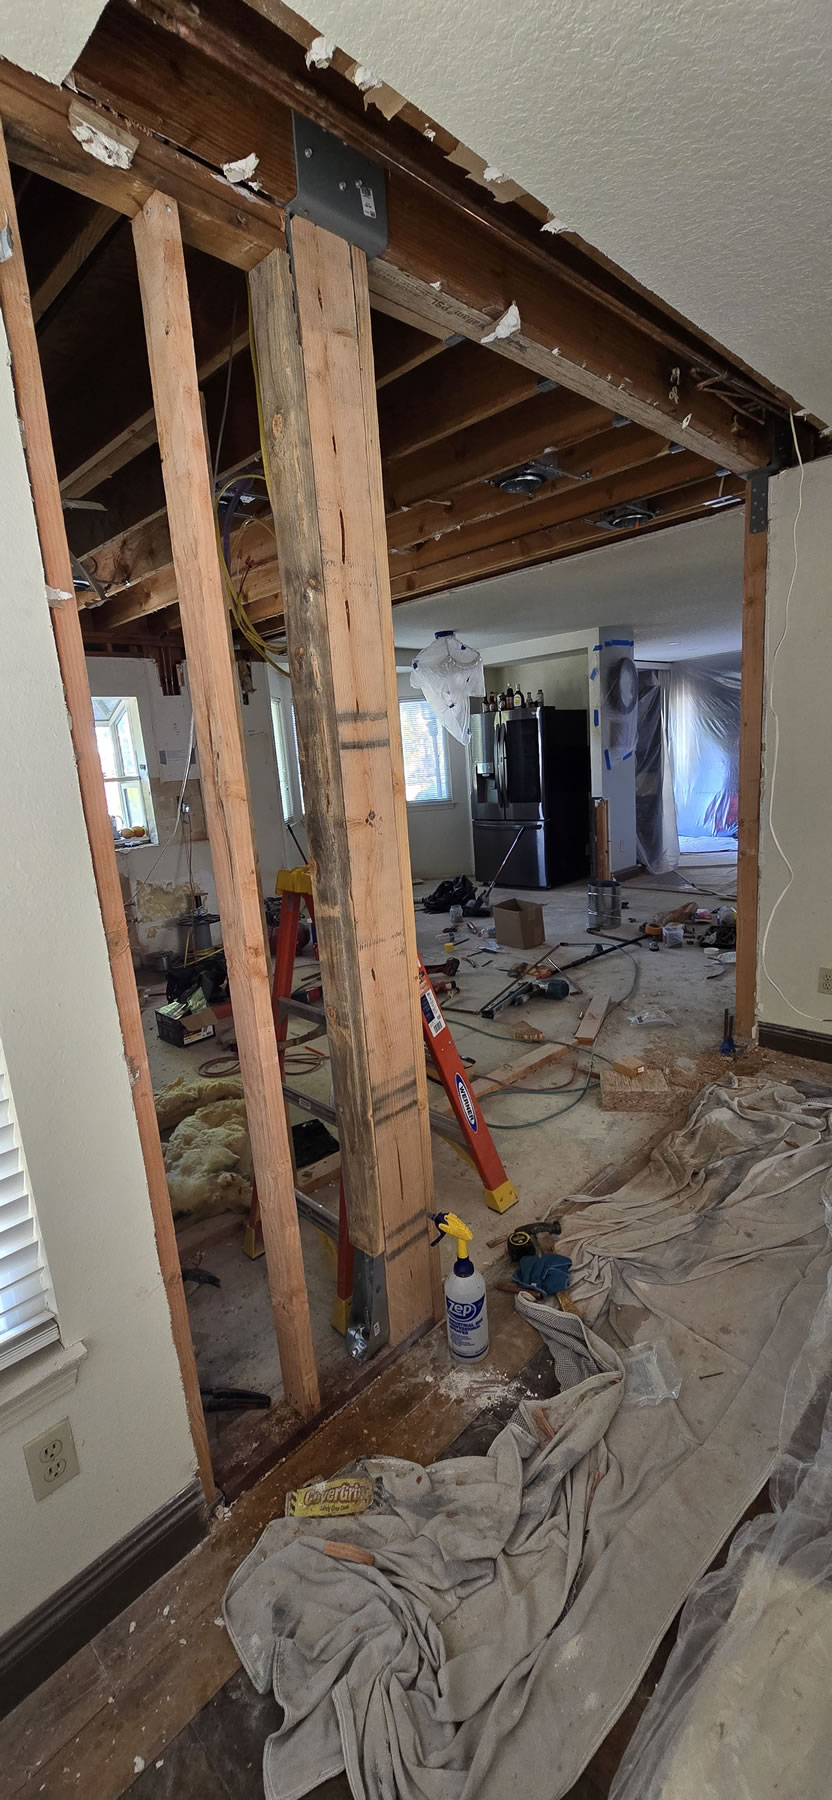
Notice the short beam above where the old pocket door? Yes, this means this area and the framing across from the door is load bearing. So no more demo here because, well, load bearing is a thing. Contractor needs to check this out before deciding on what to do, and giving me some options.
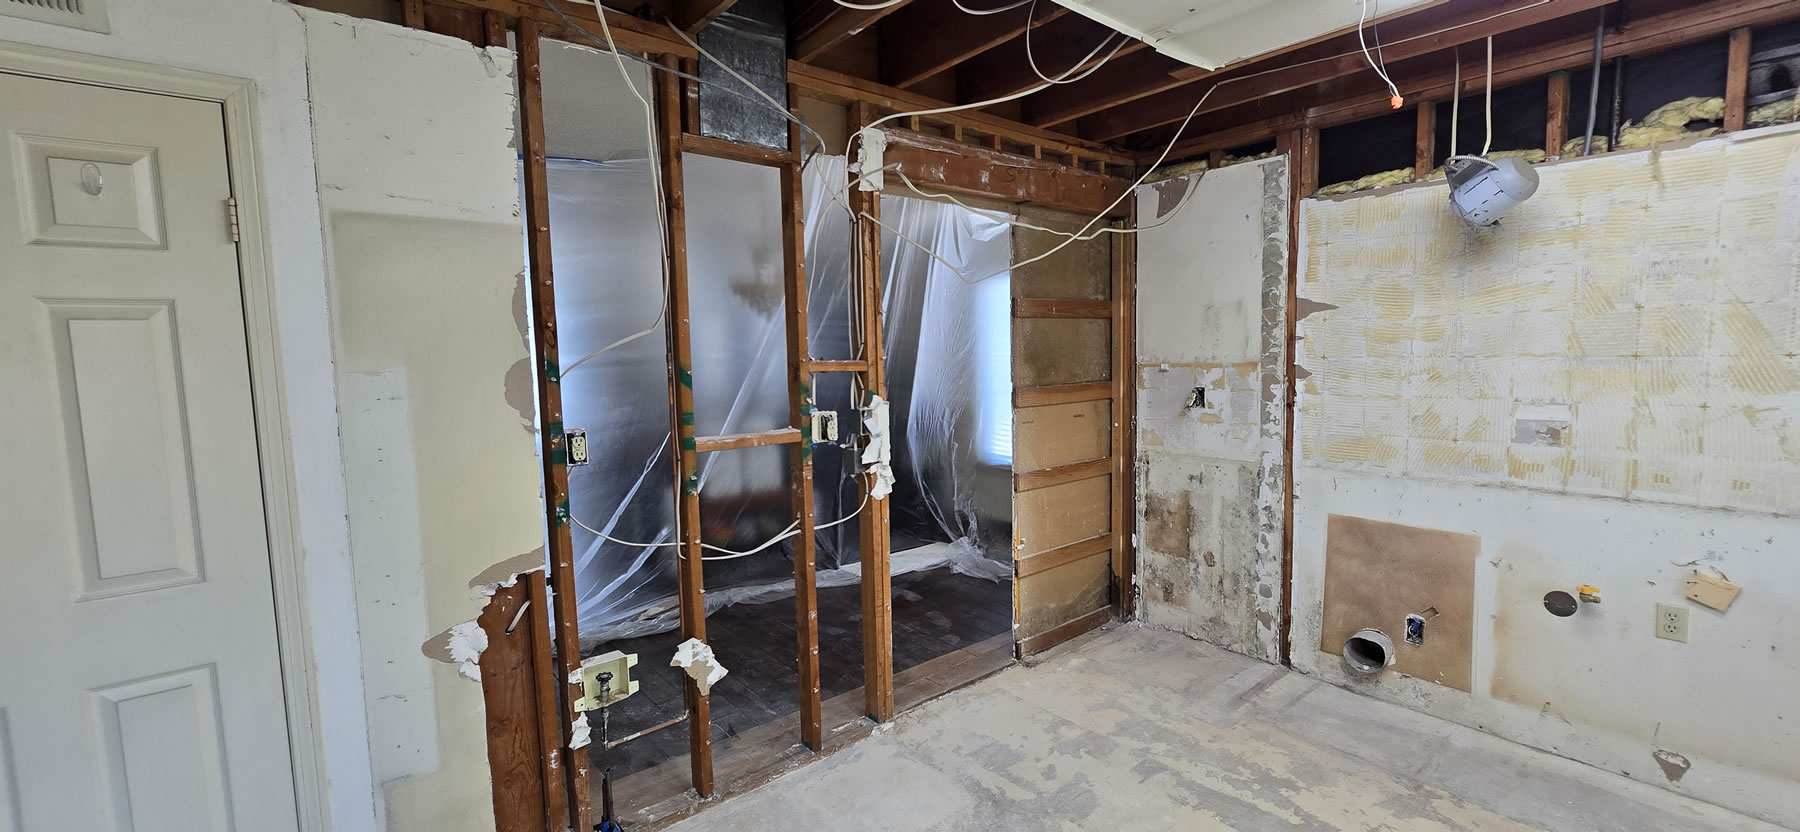
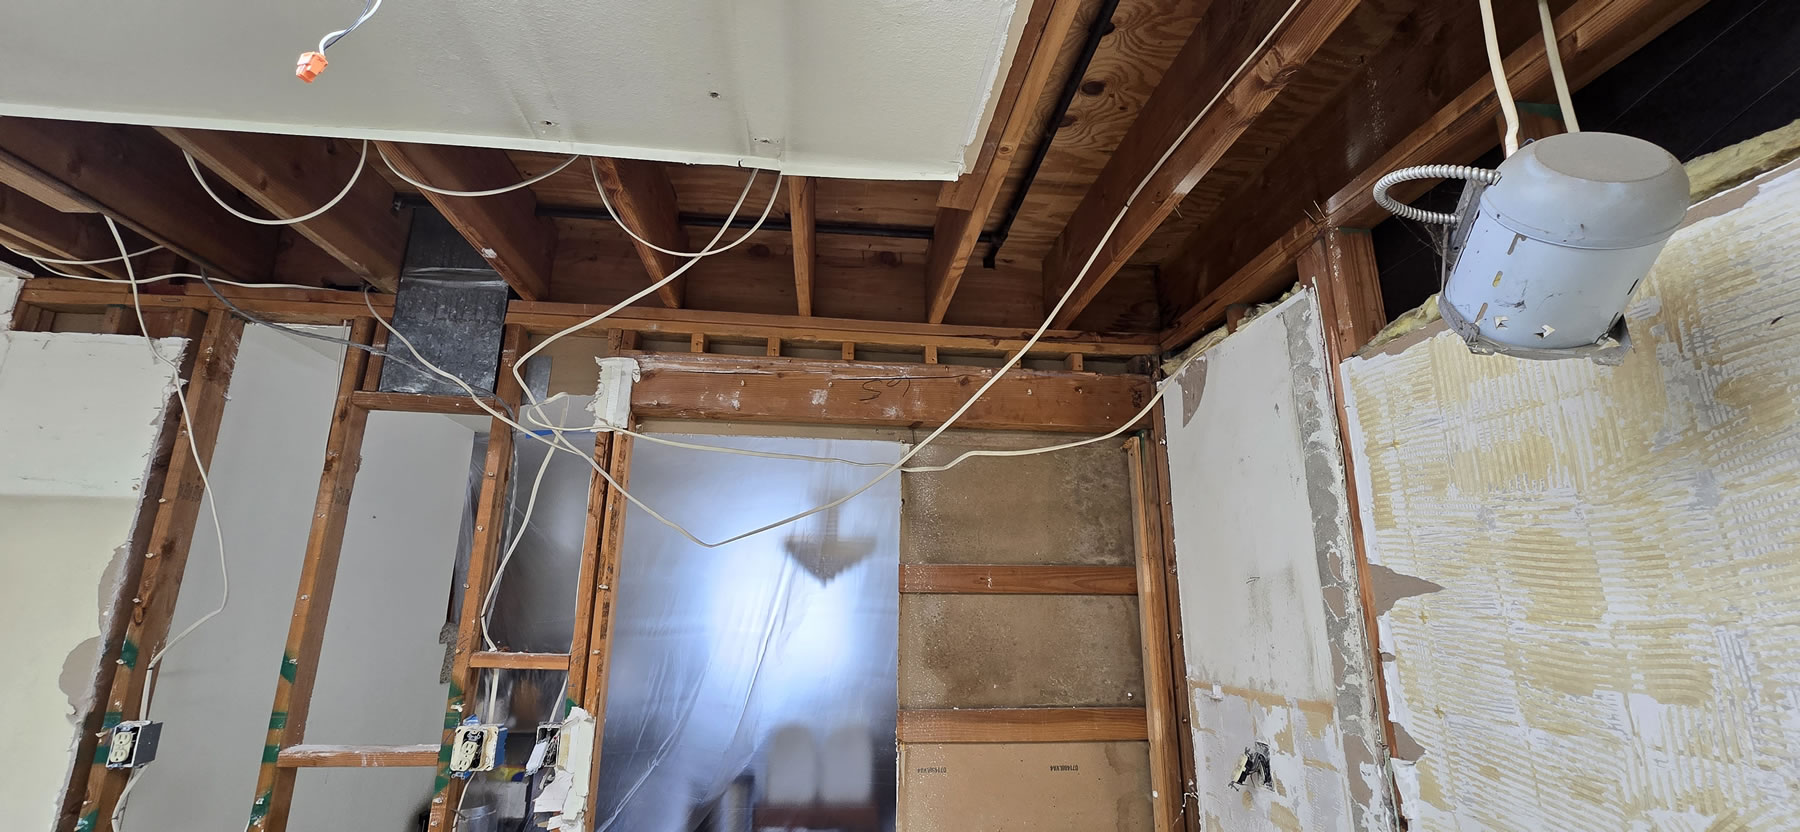
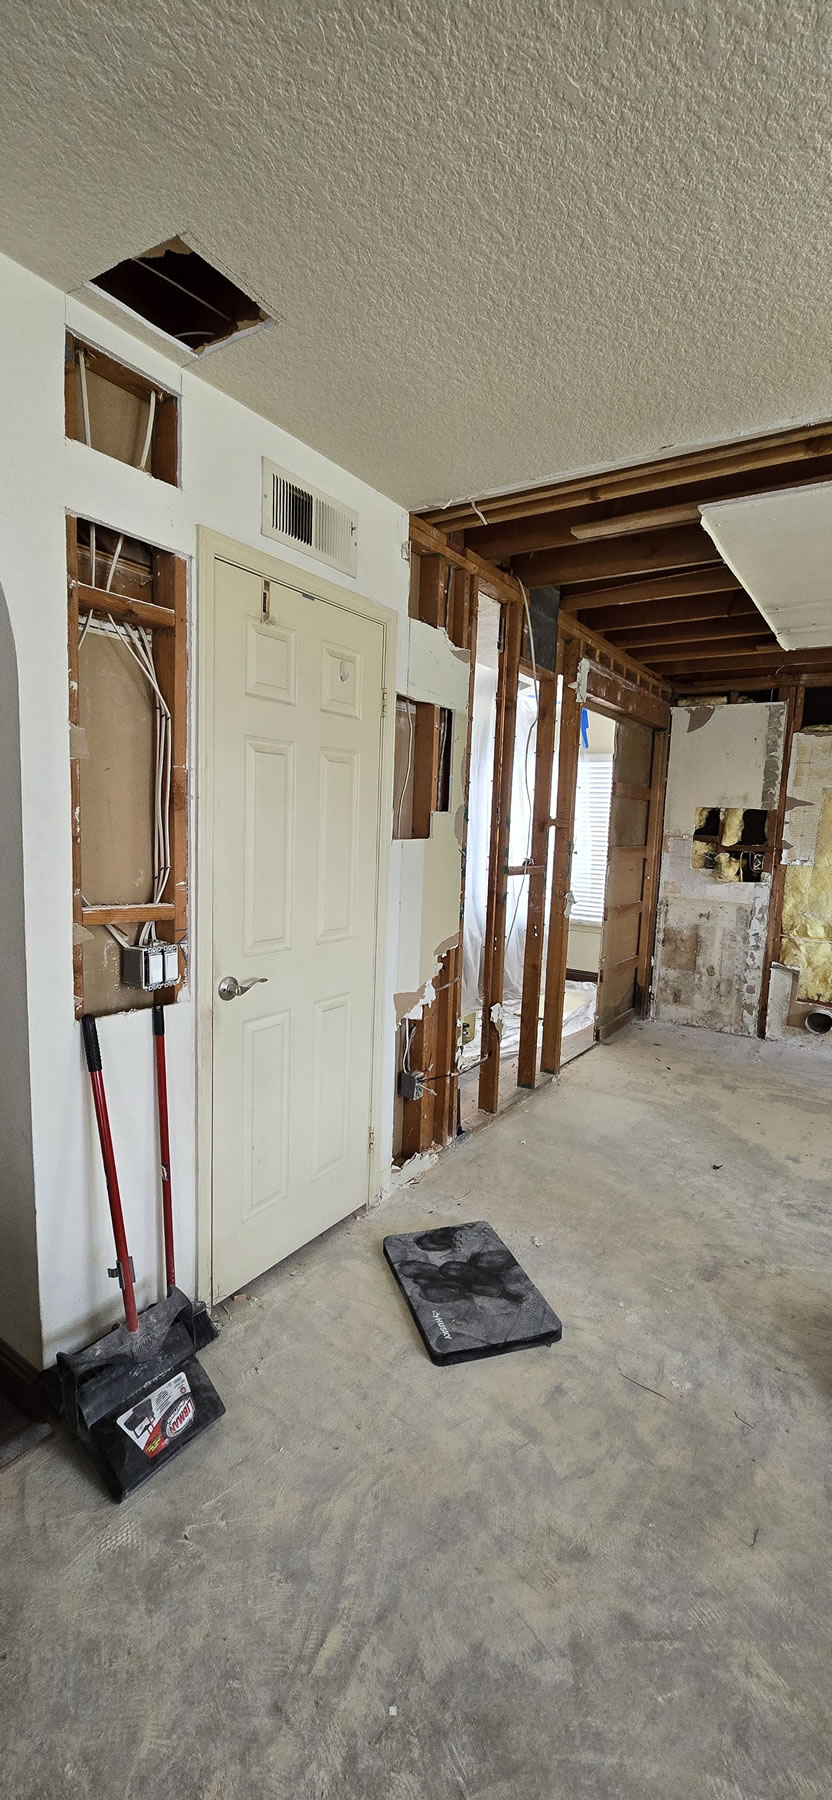
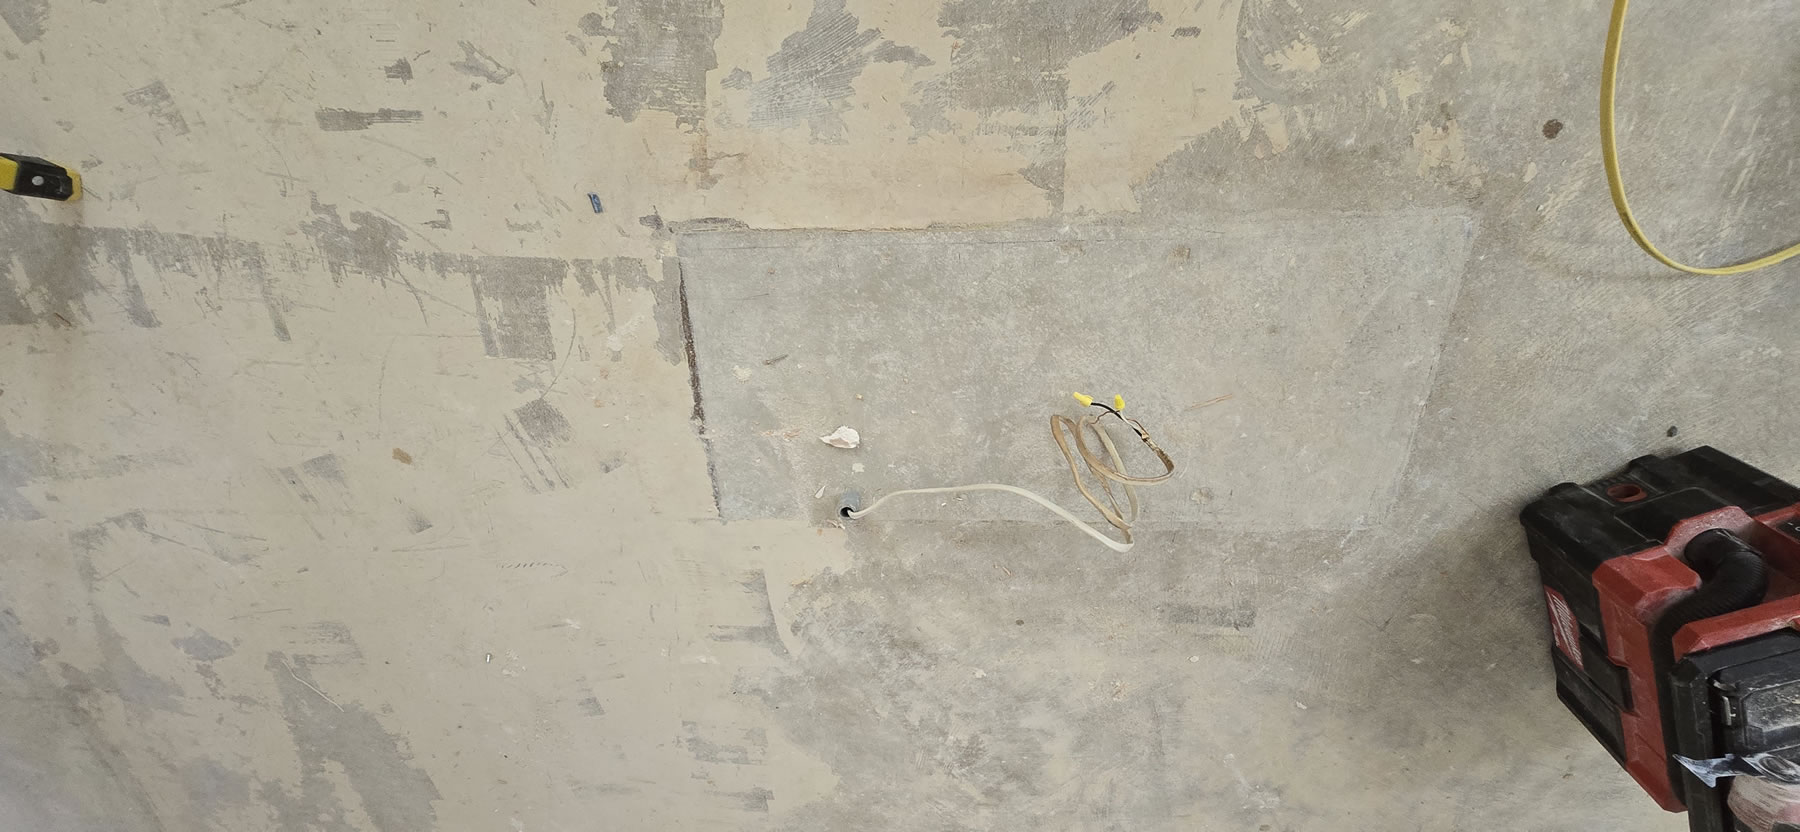
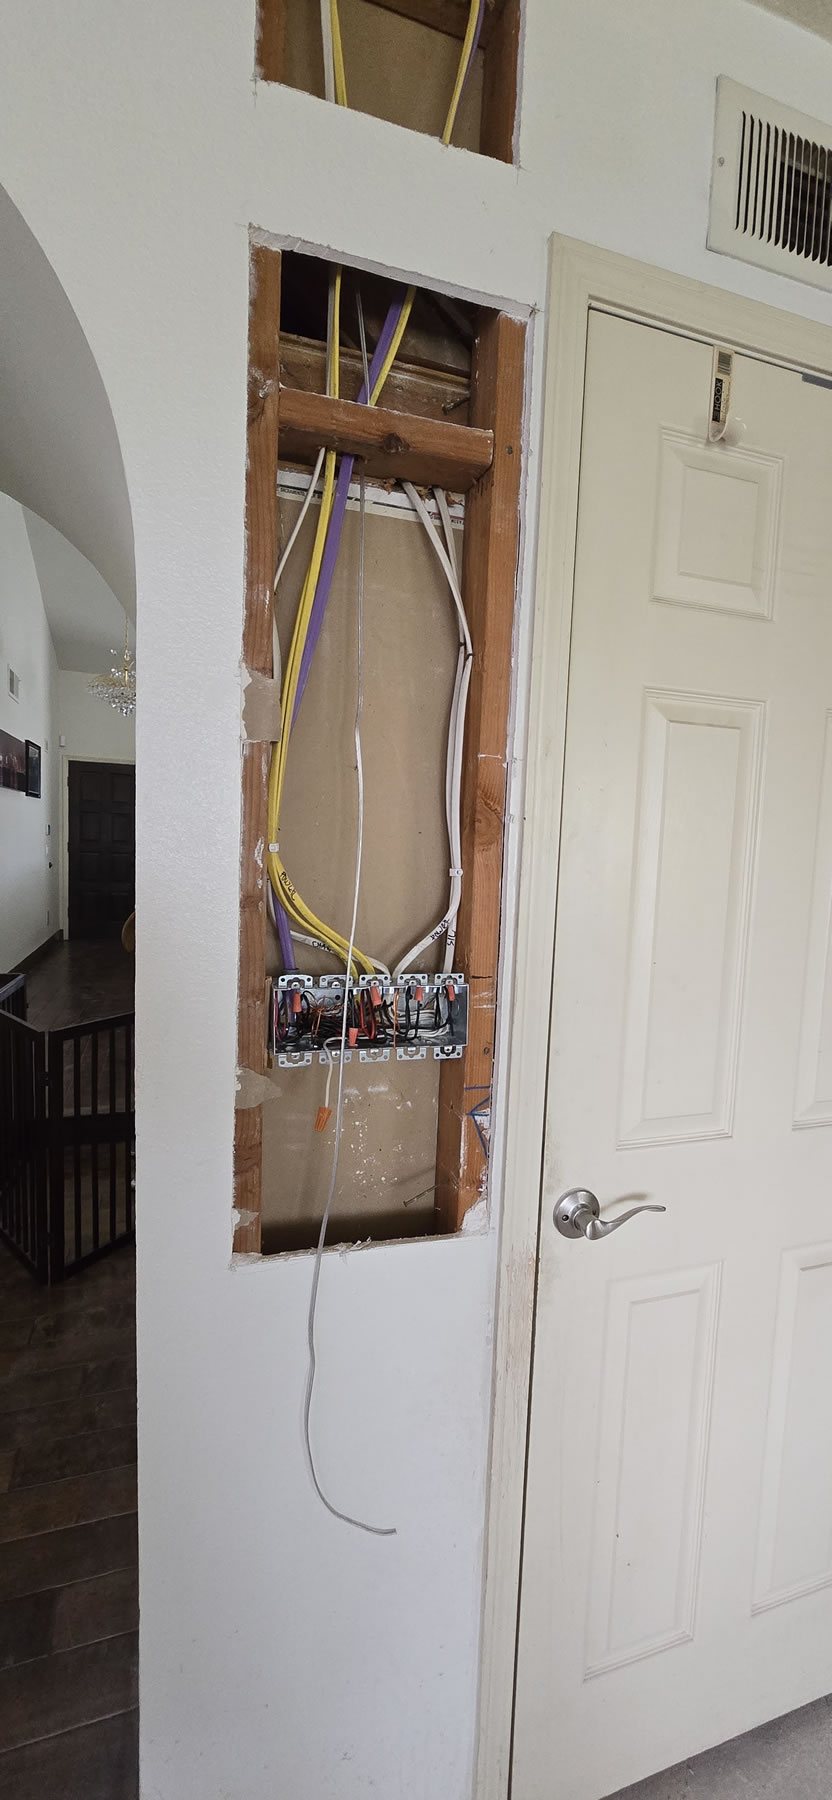
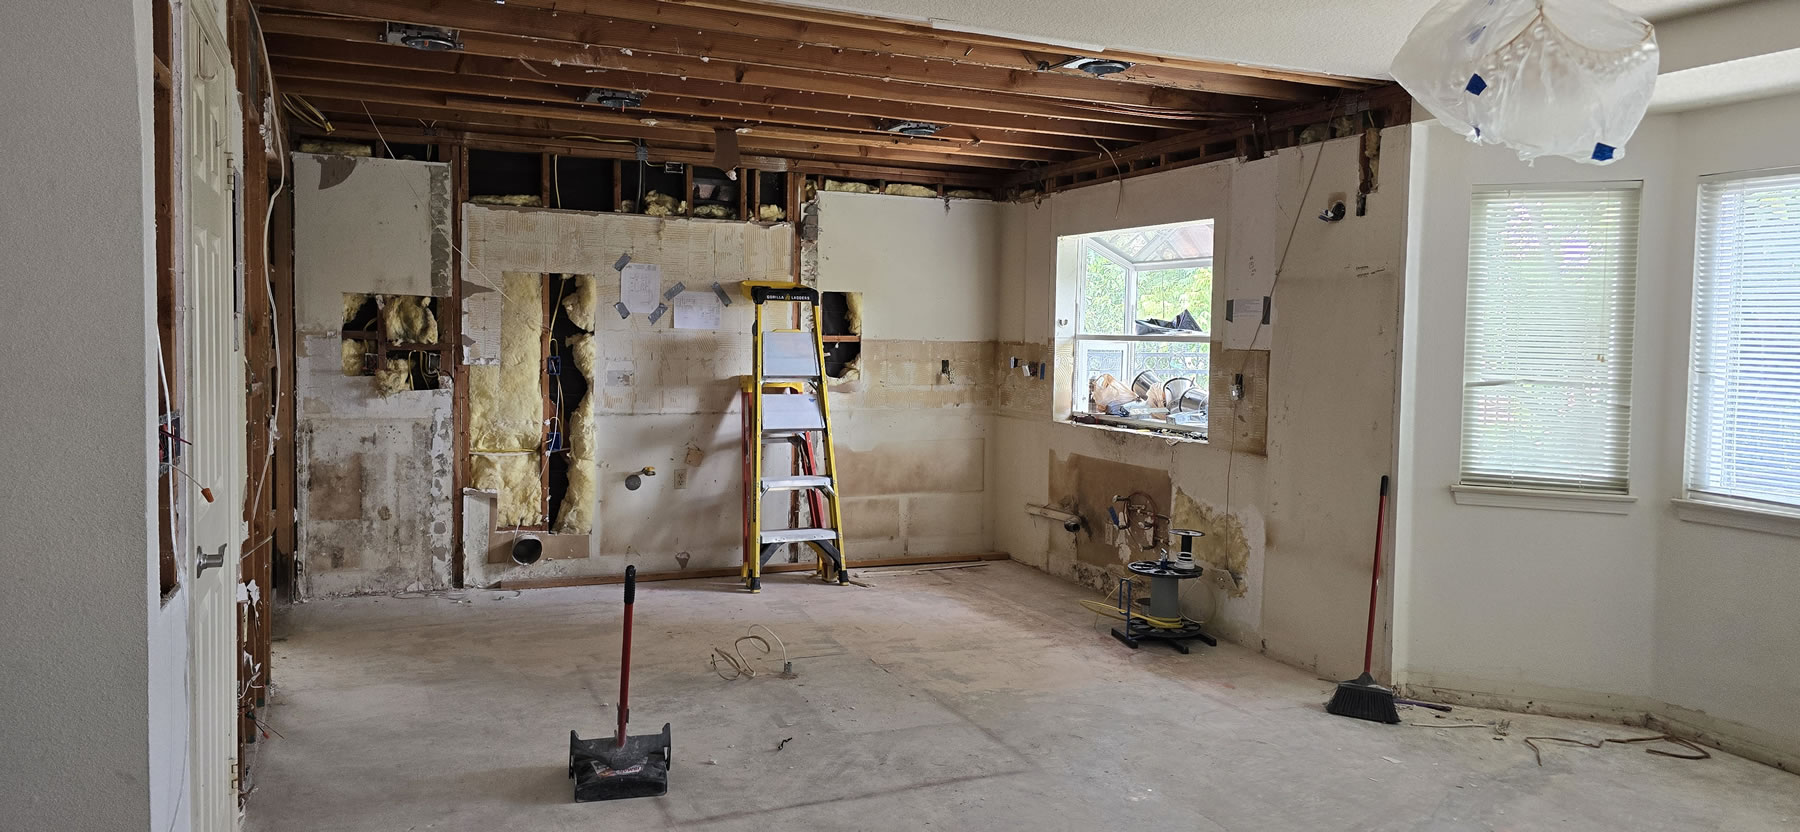
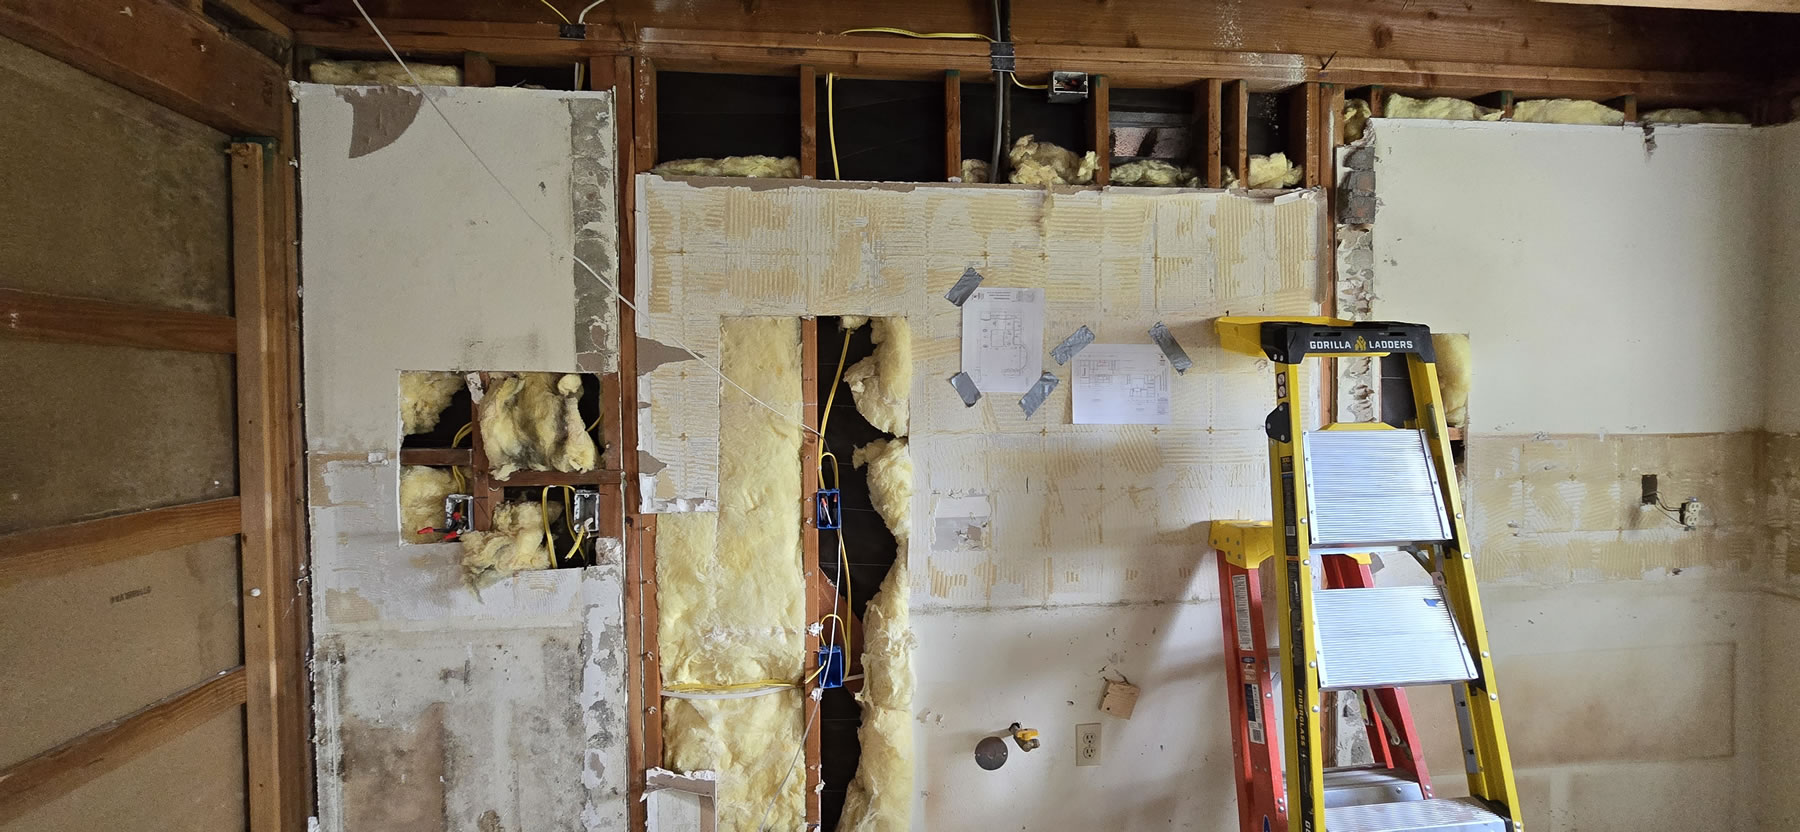
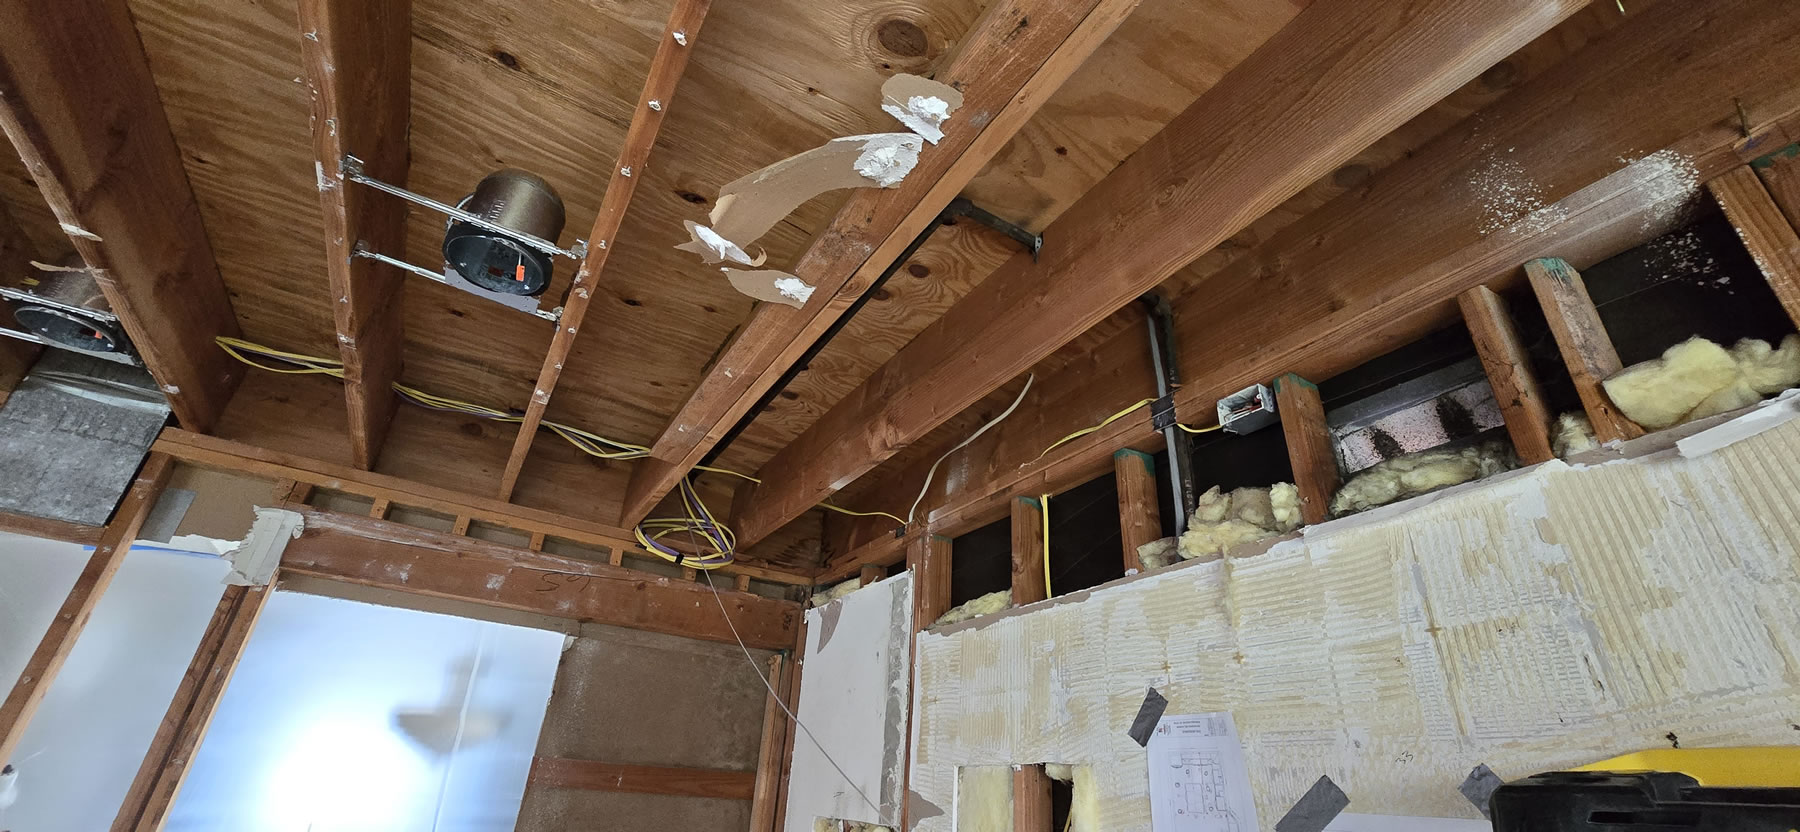
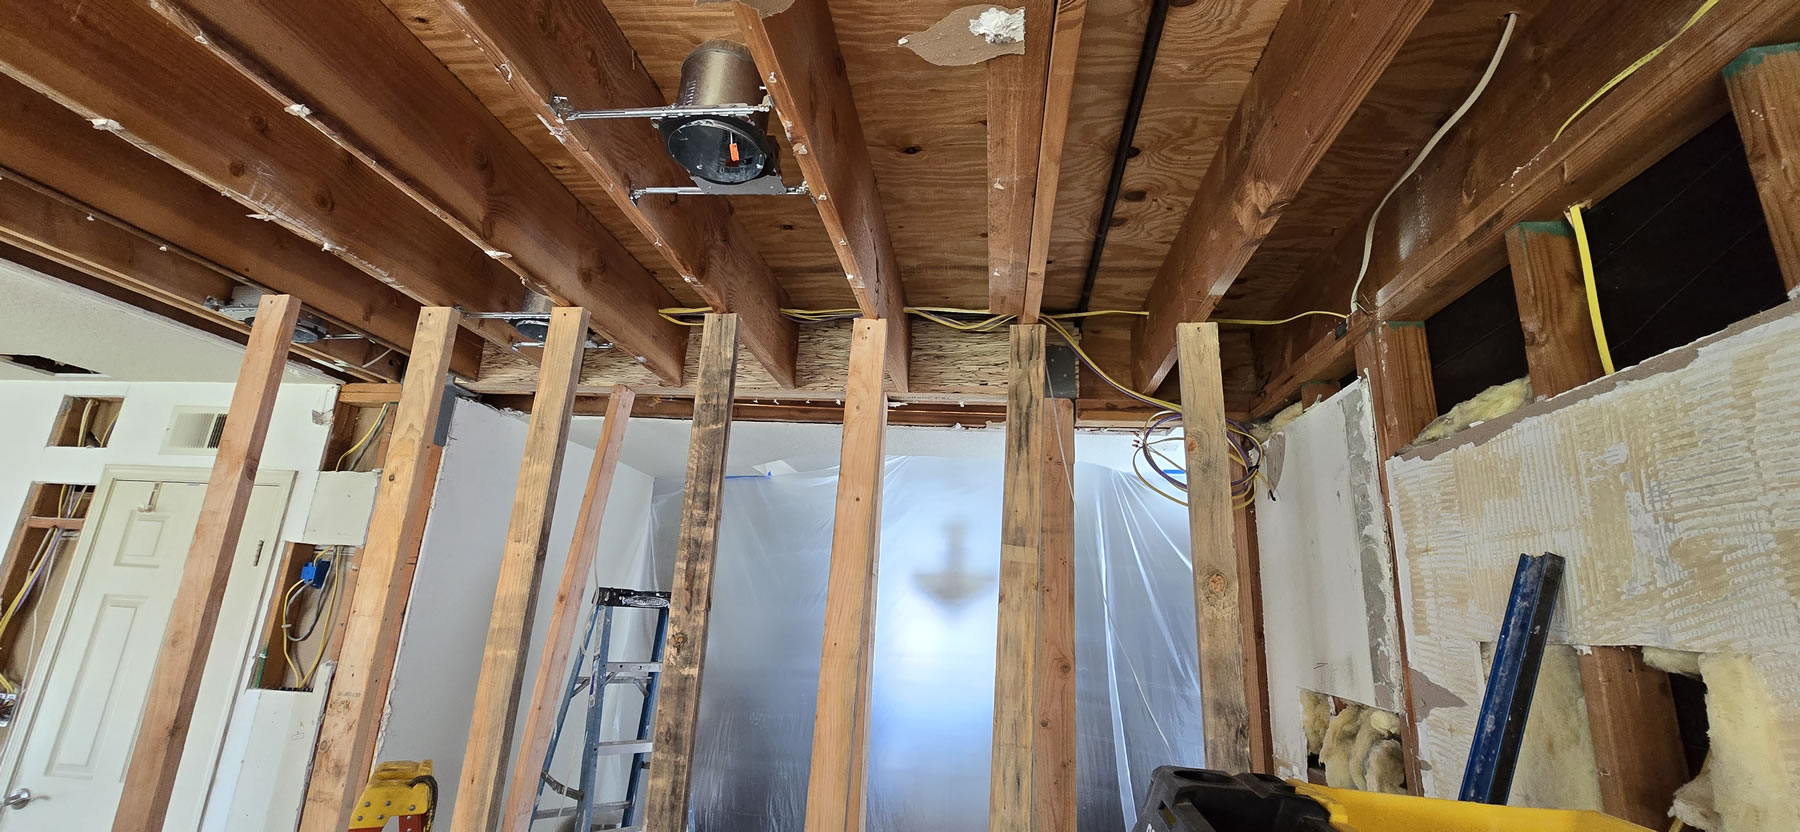
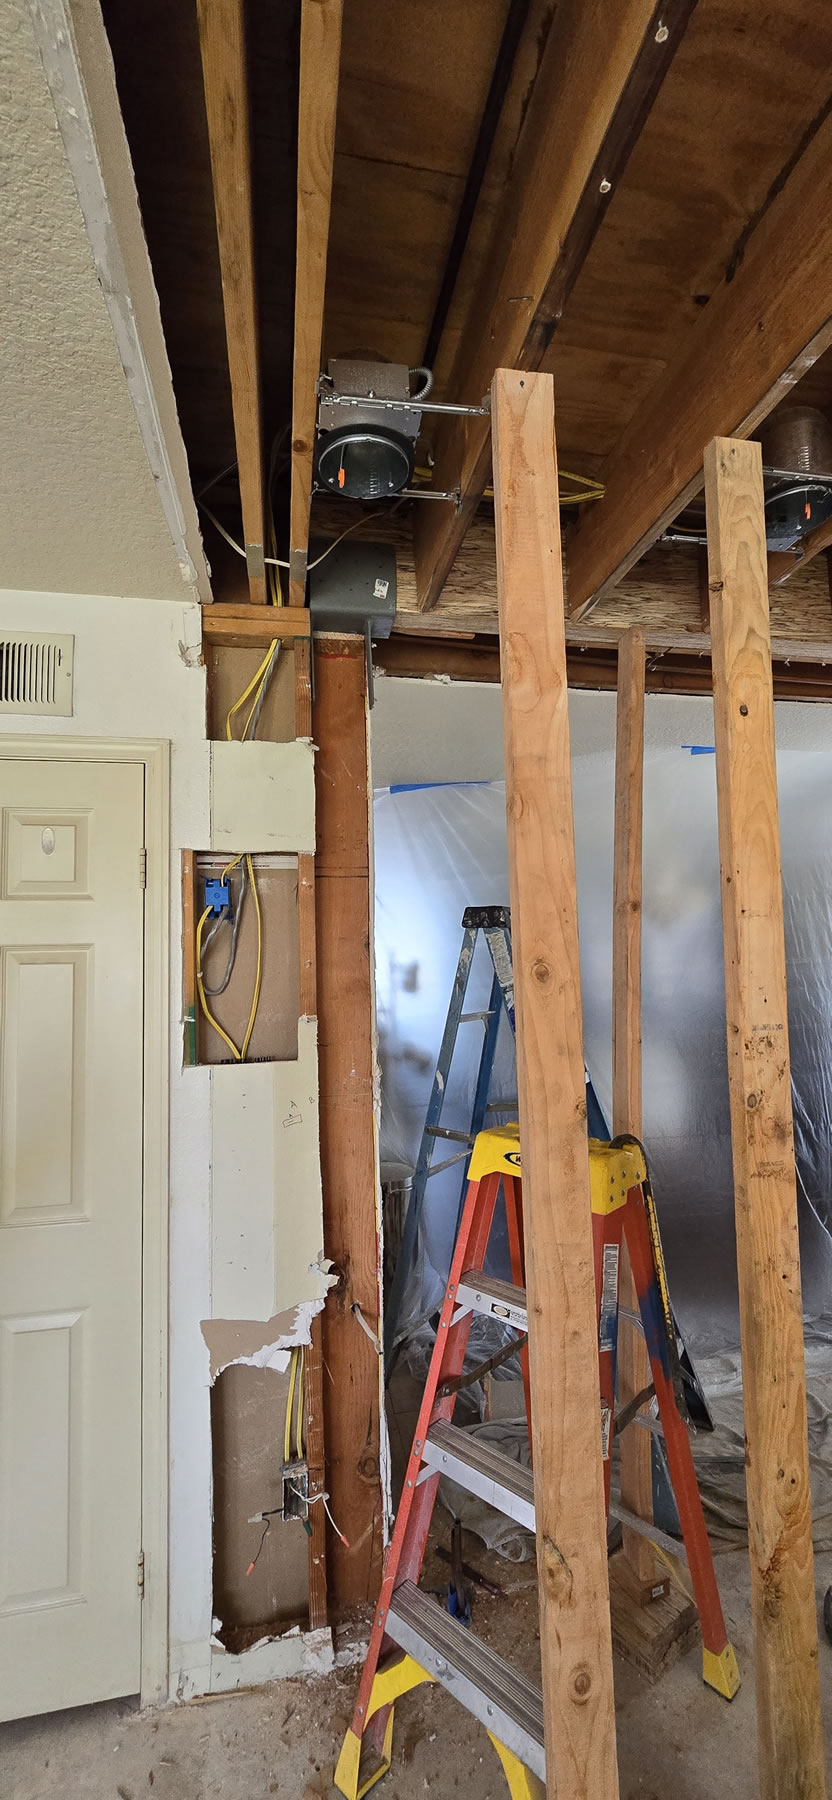
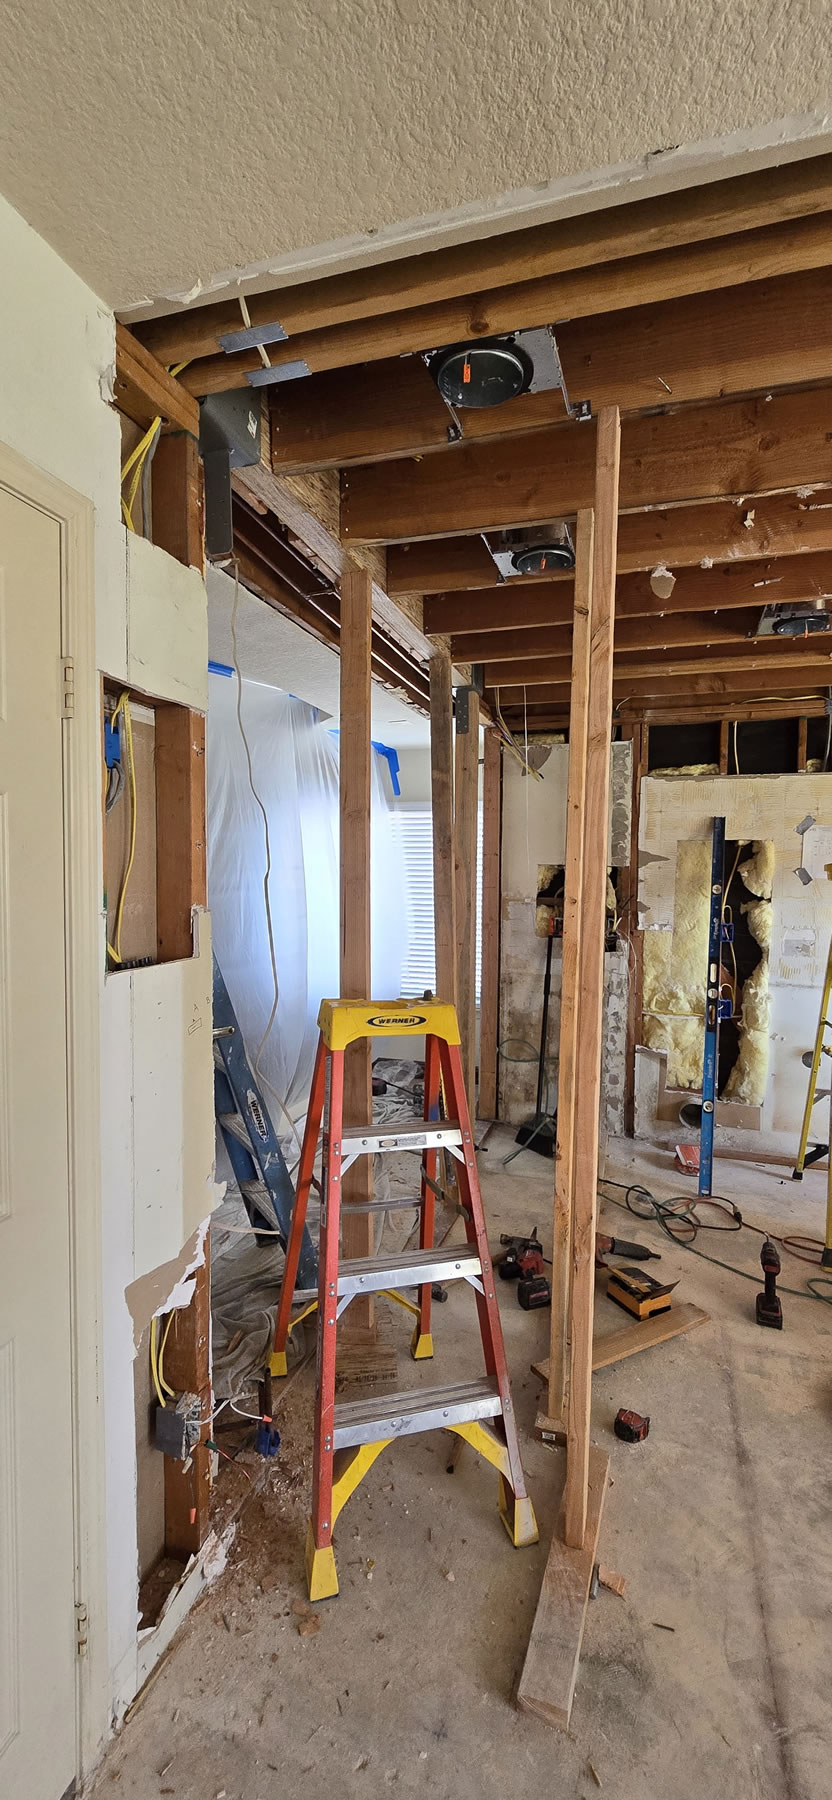
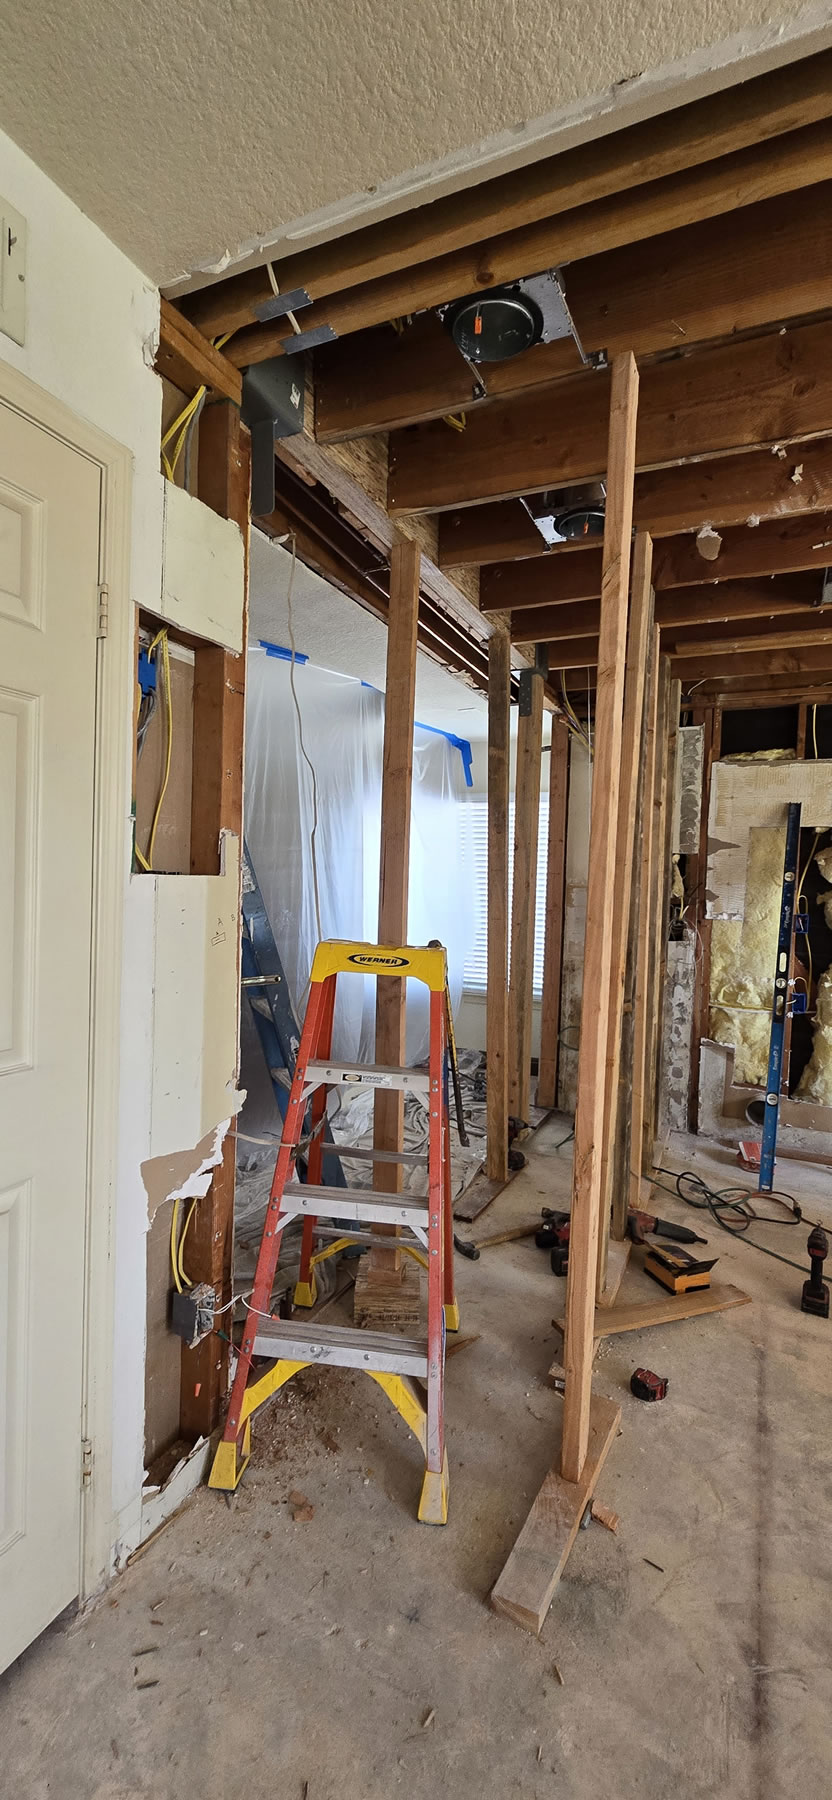
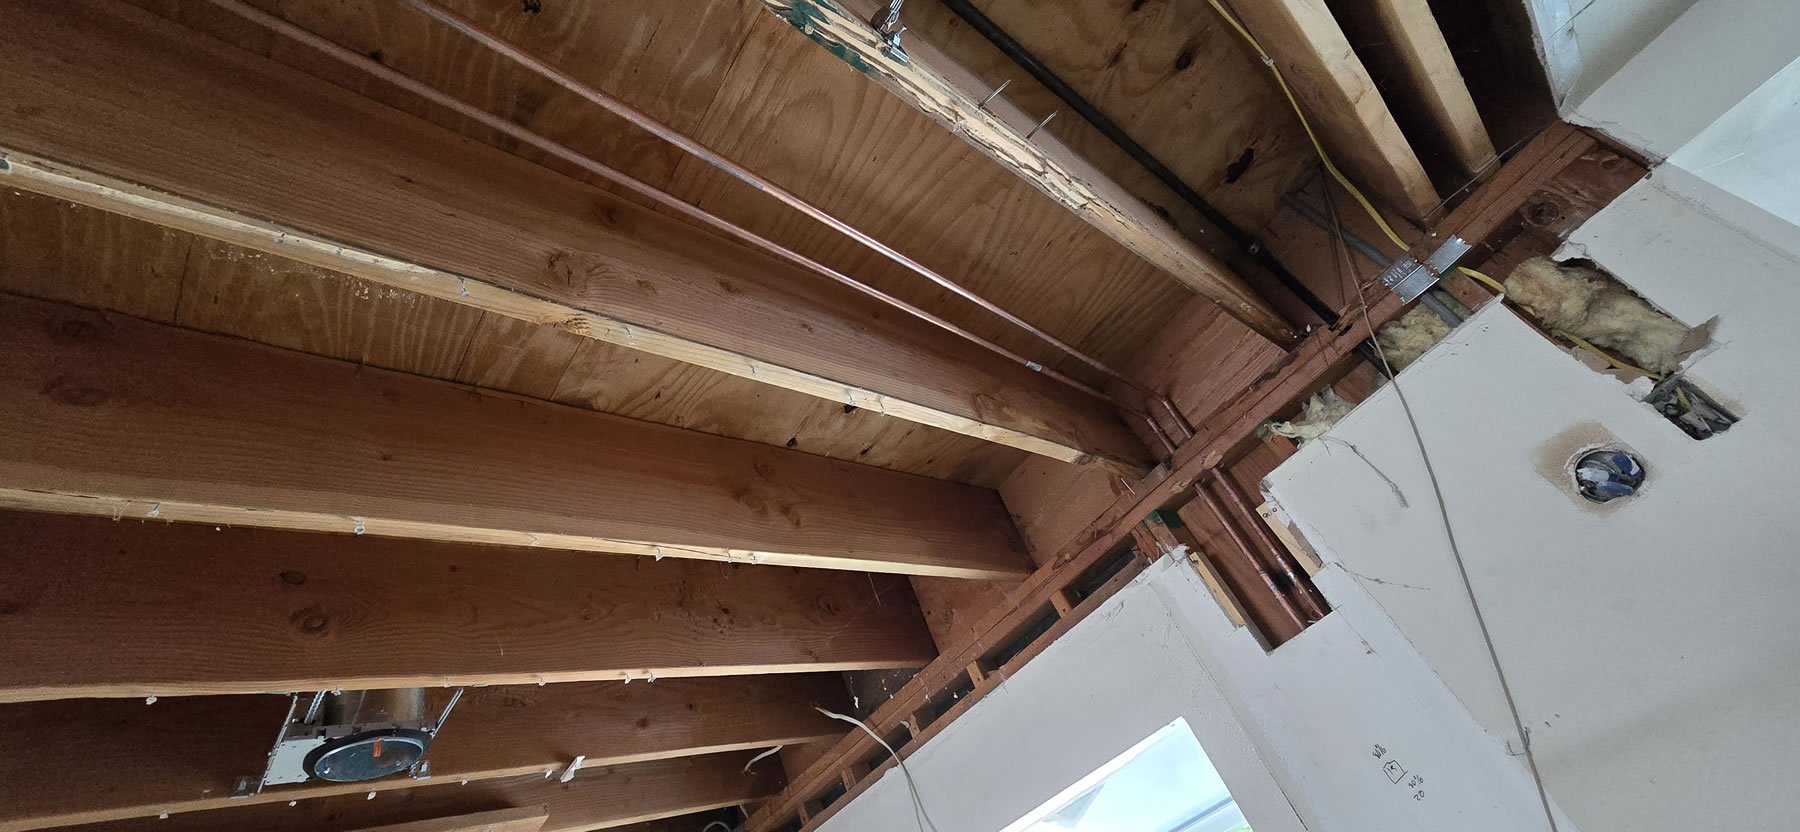
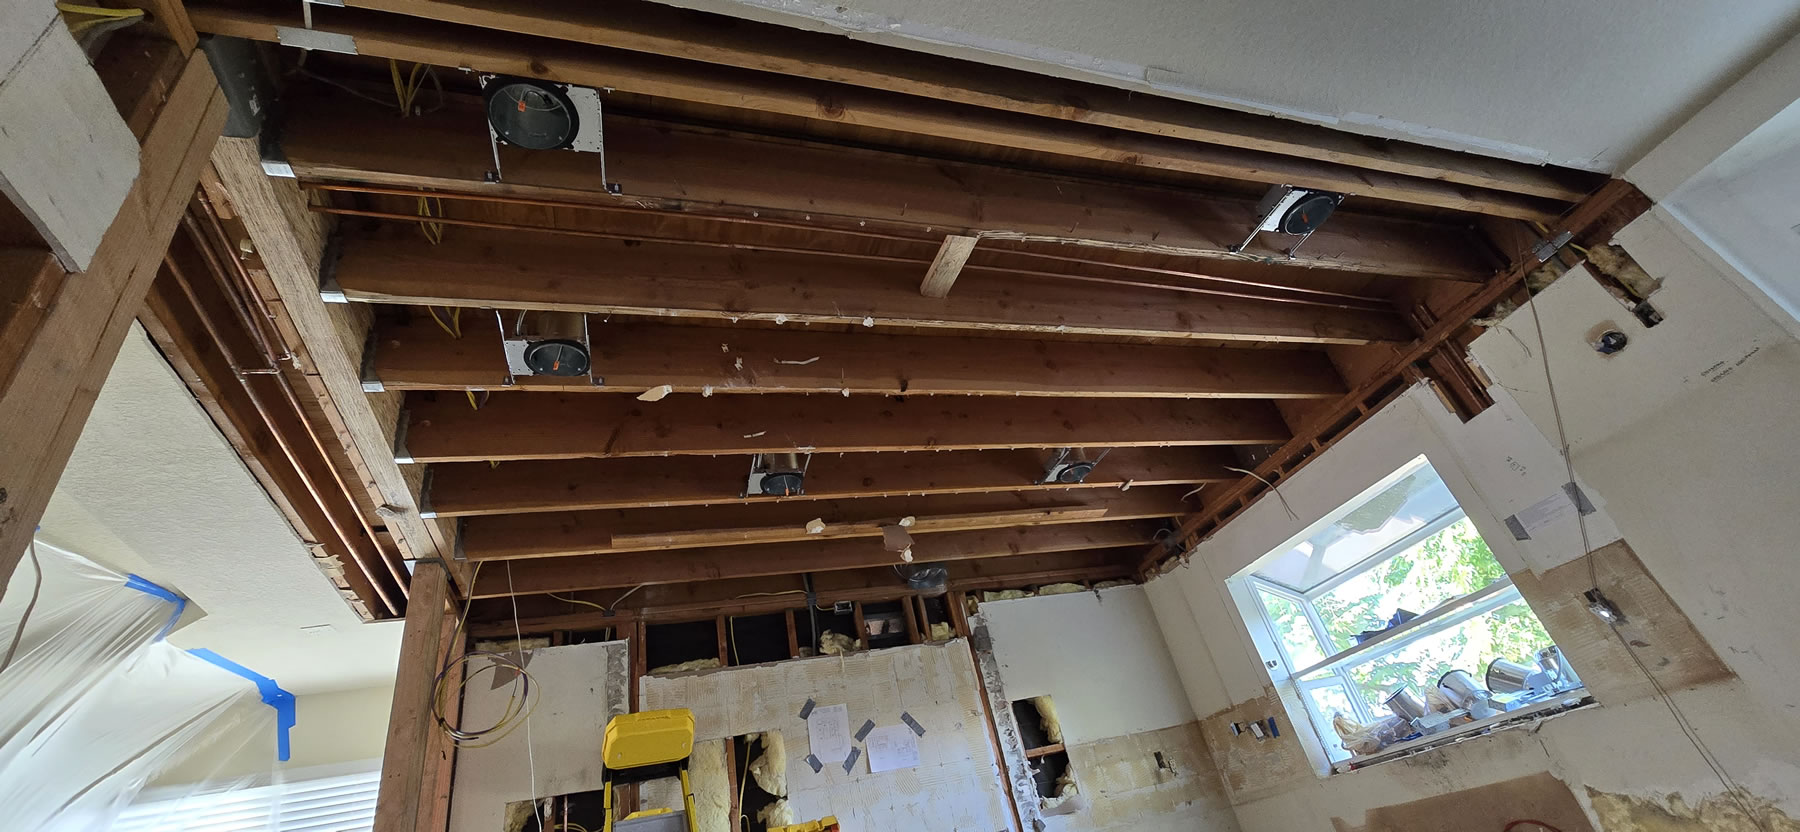
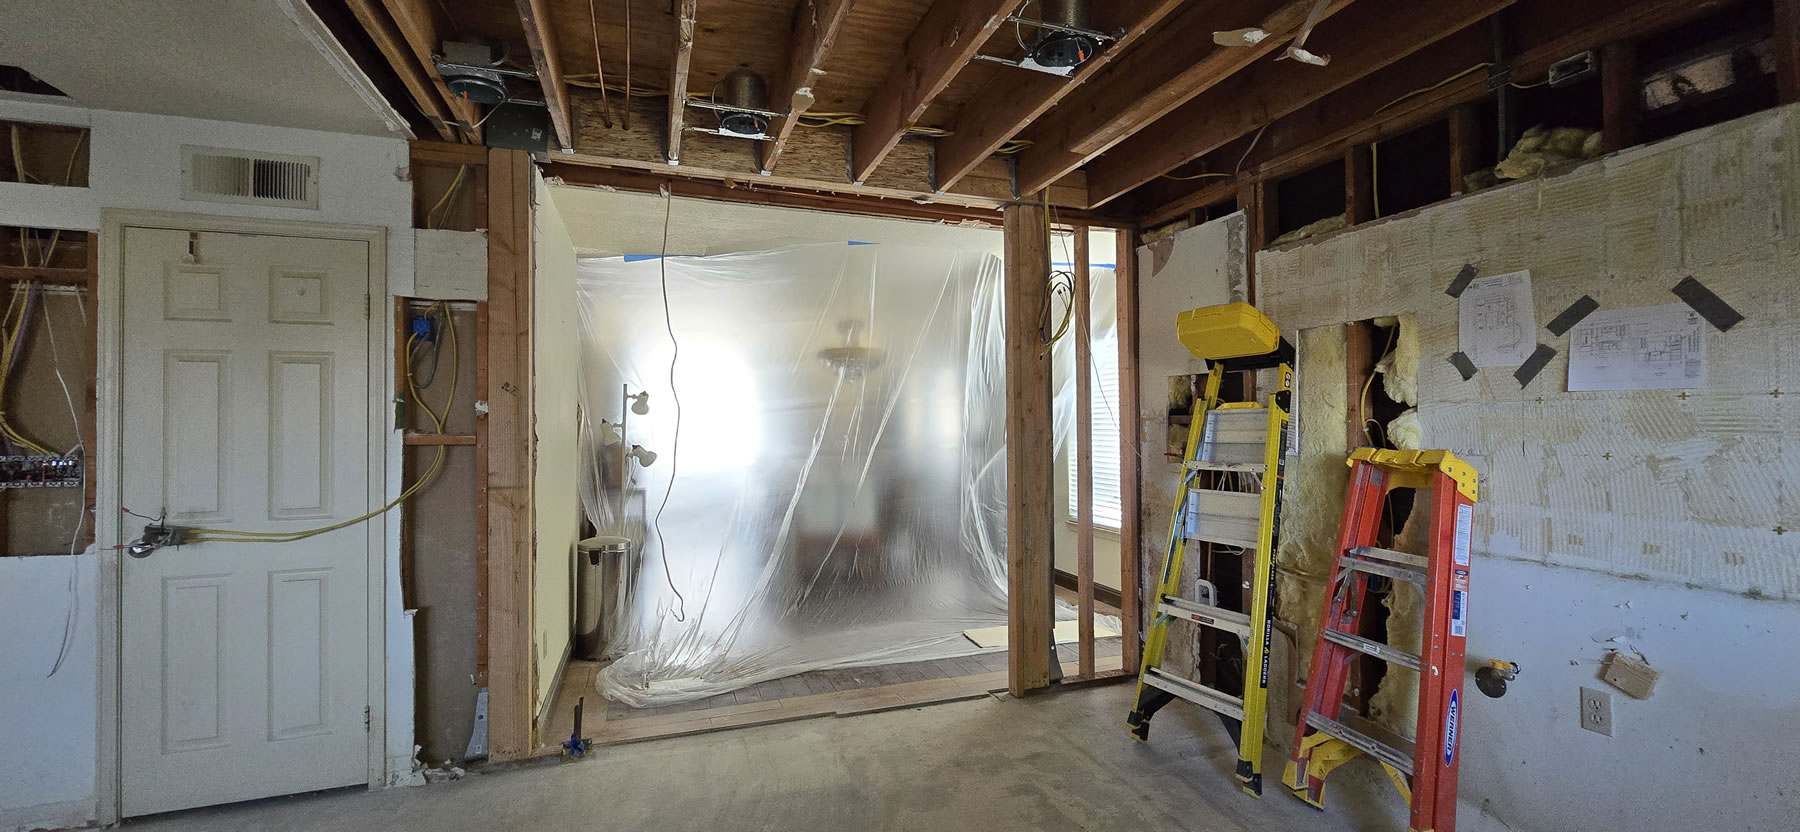
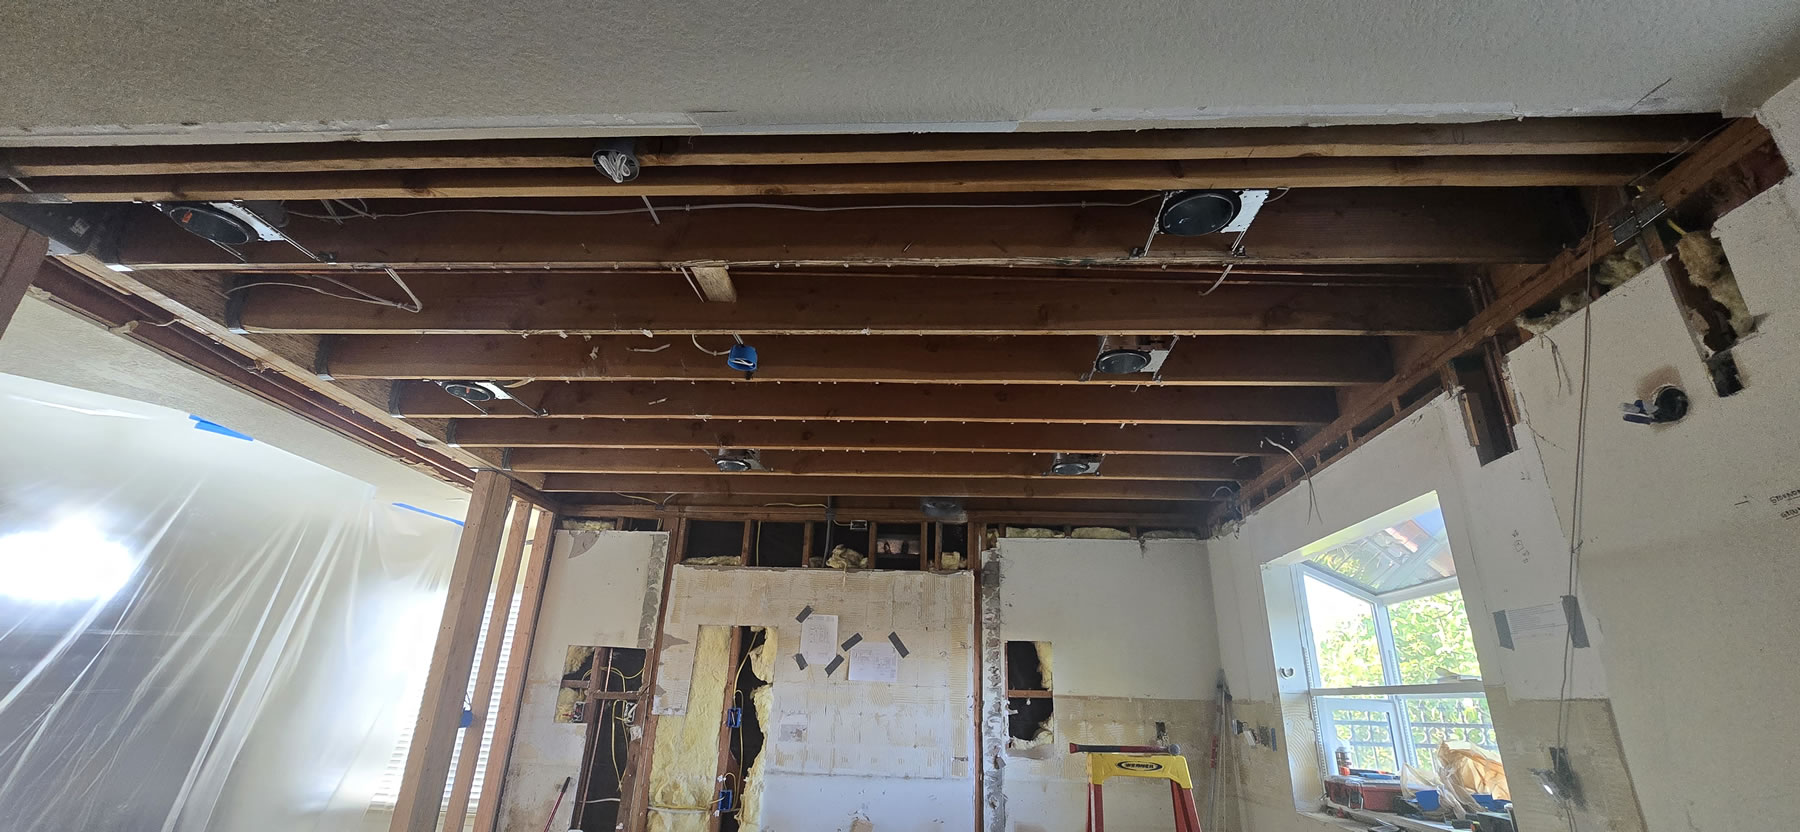
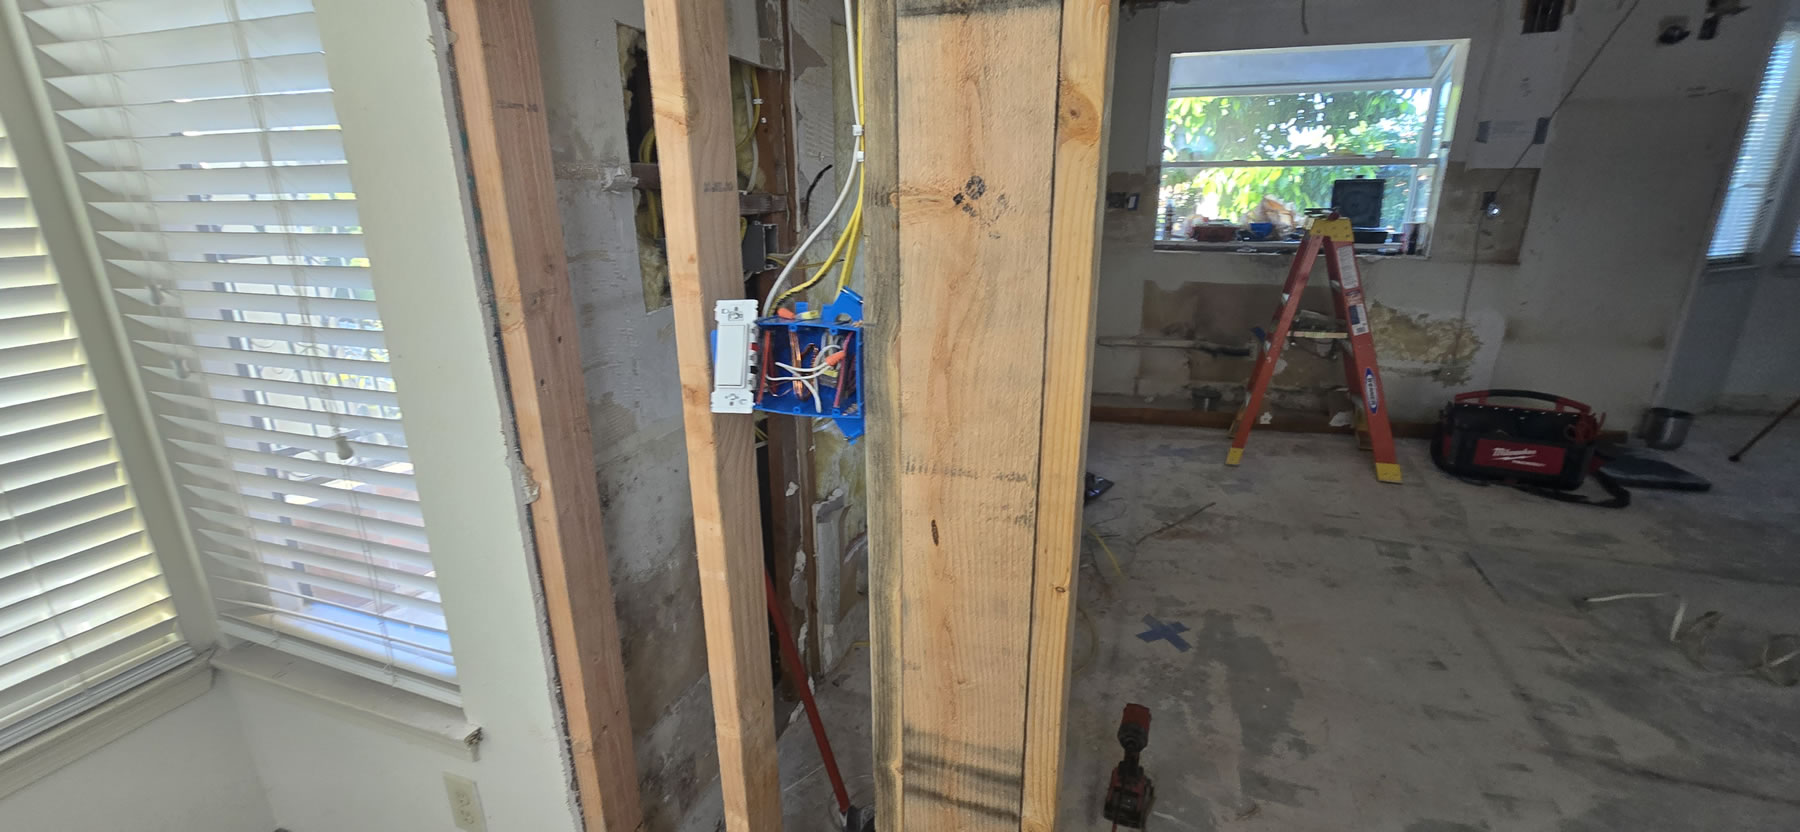
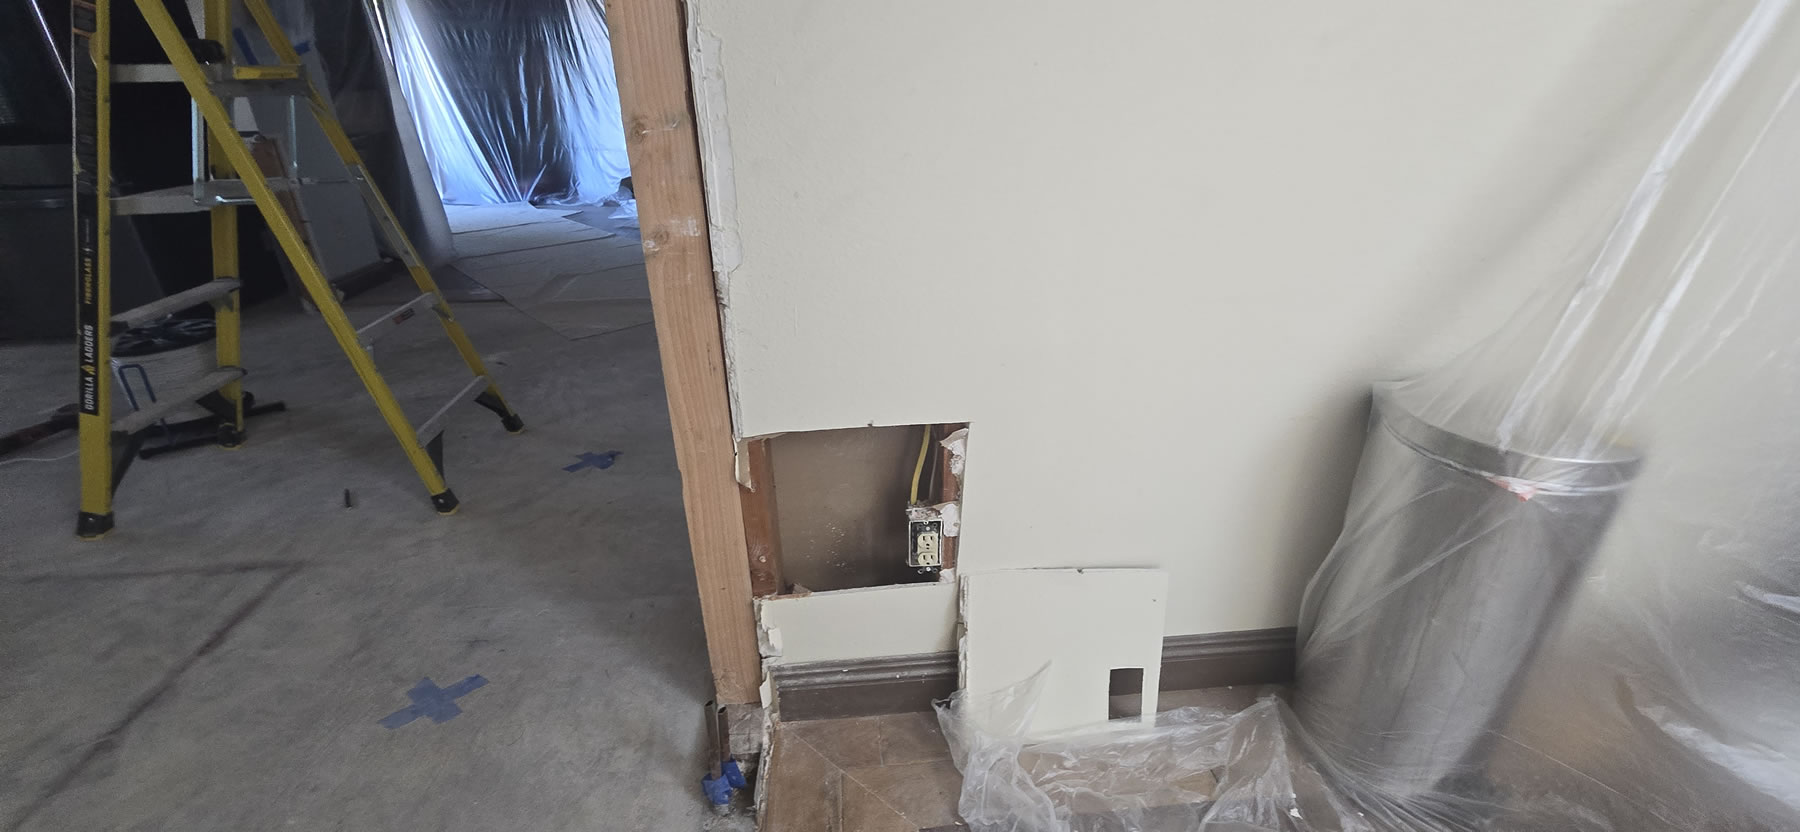
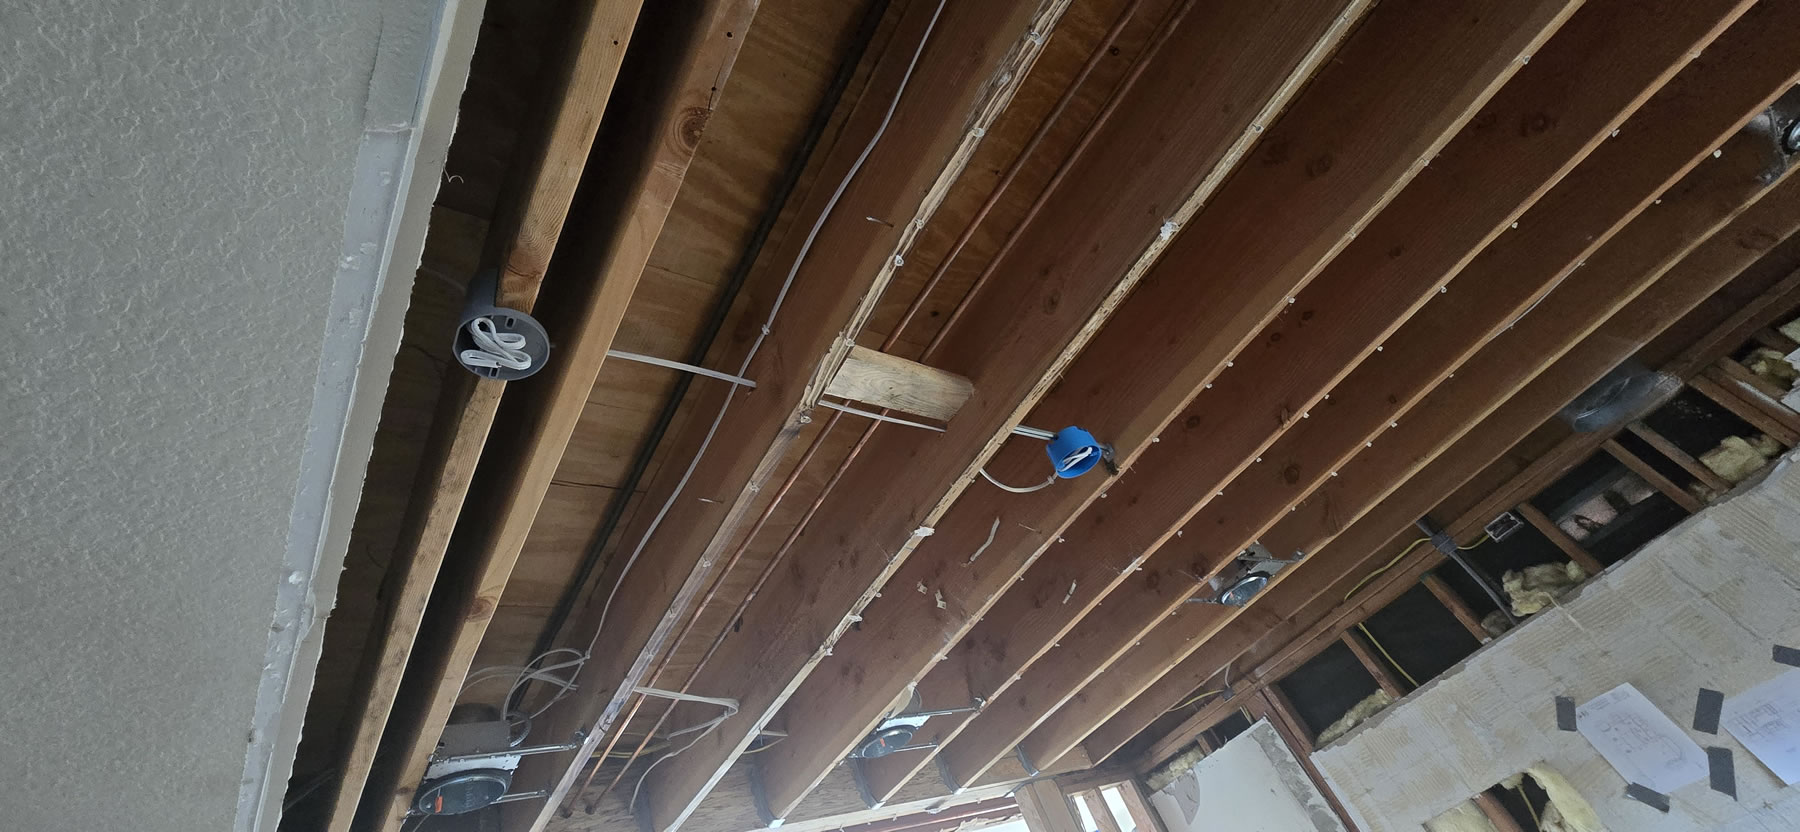
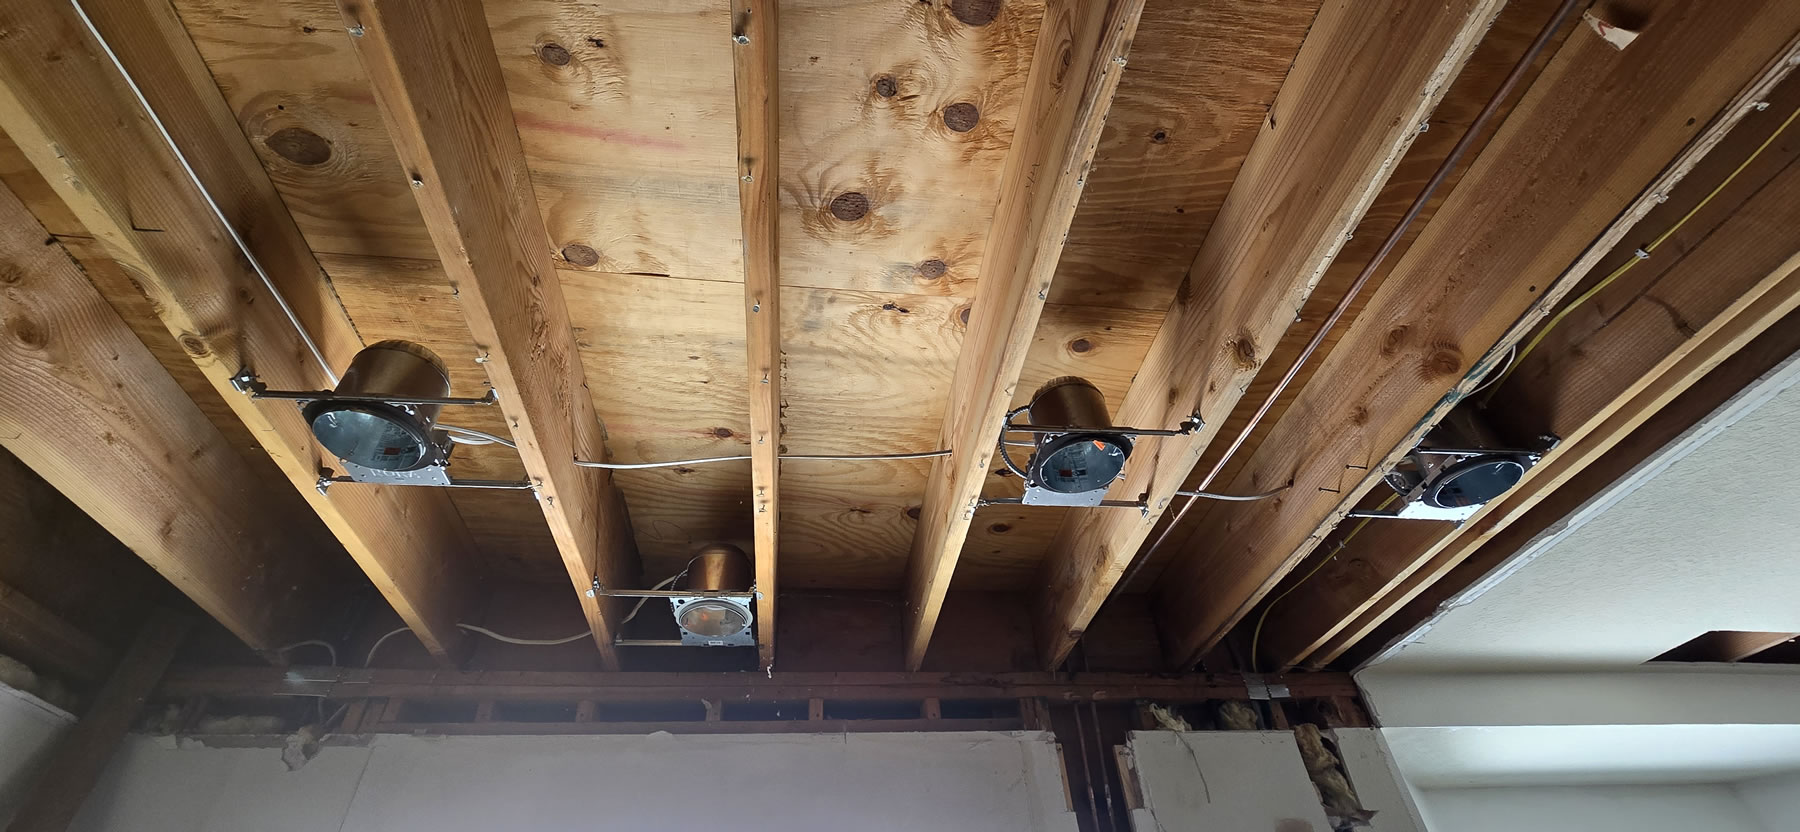
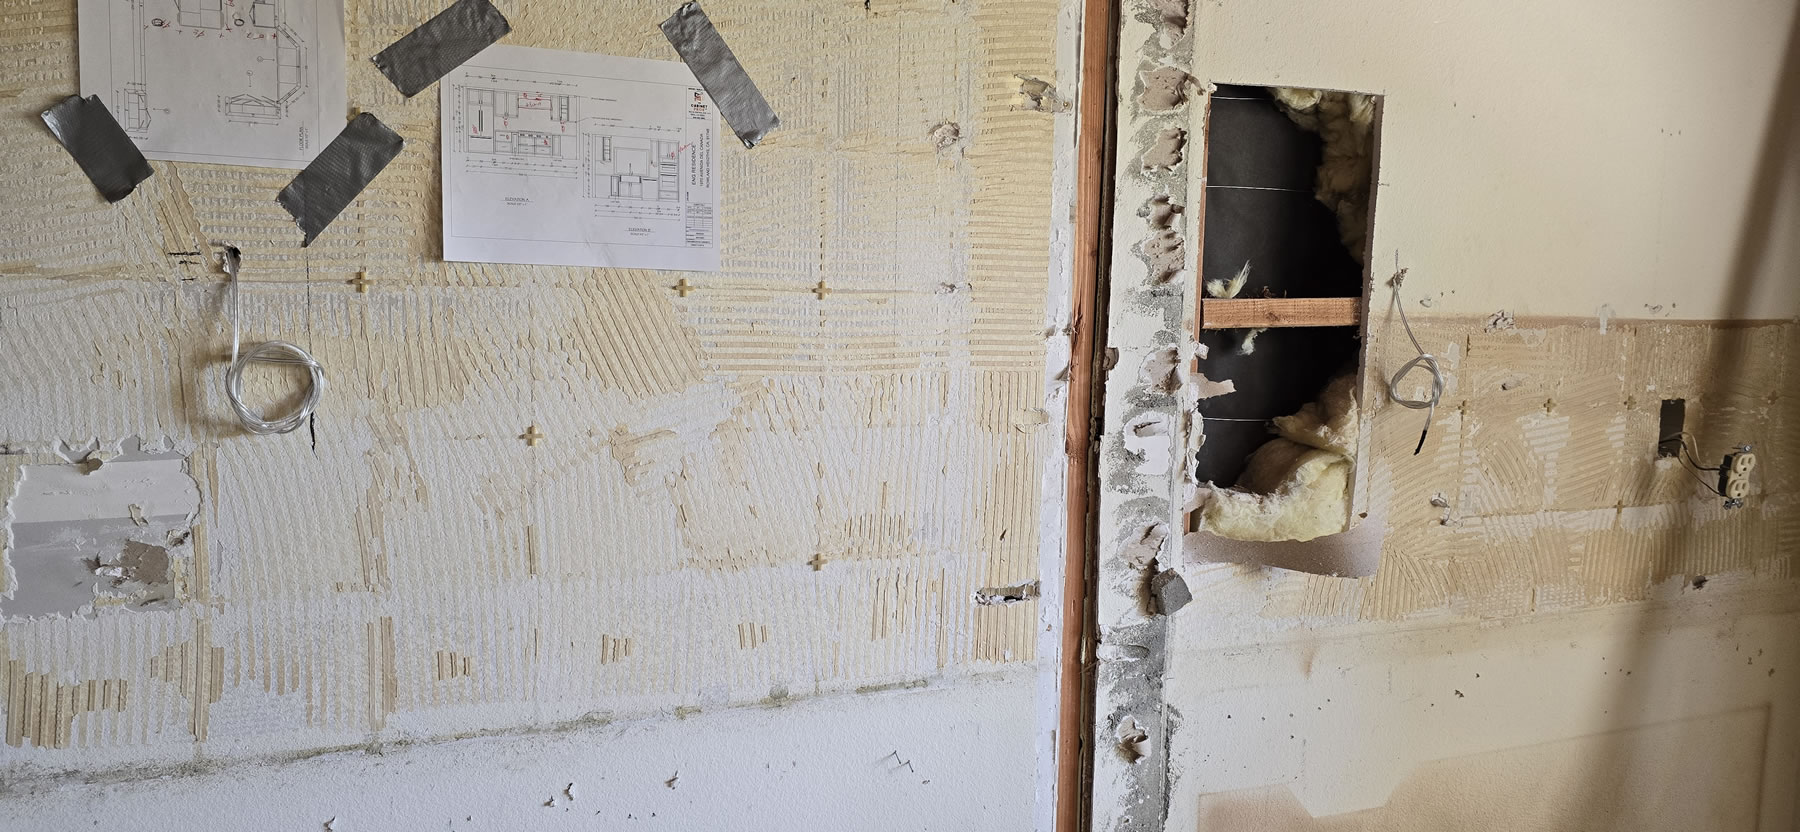
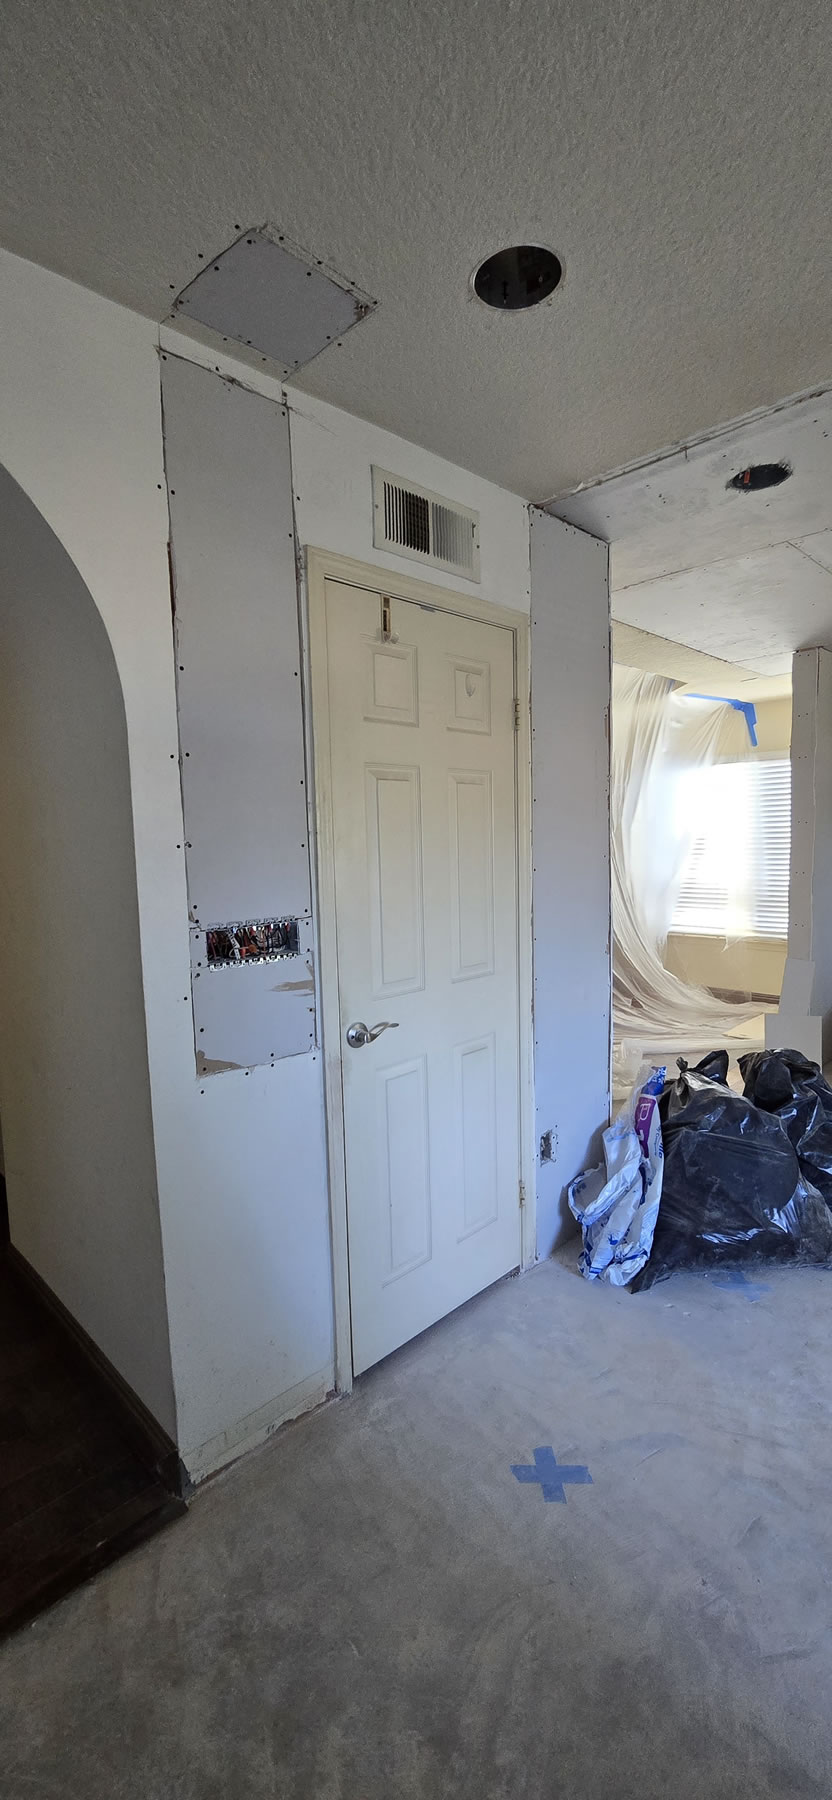
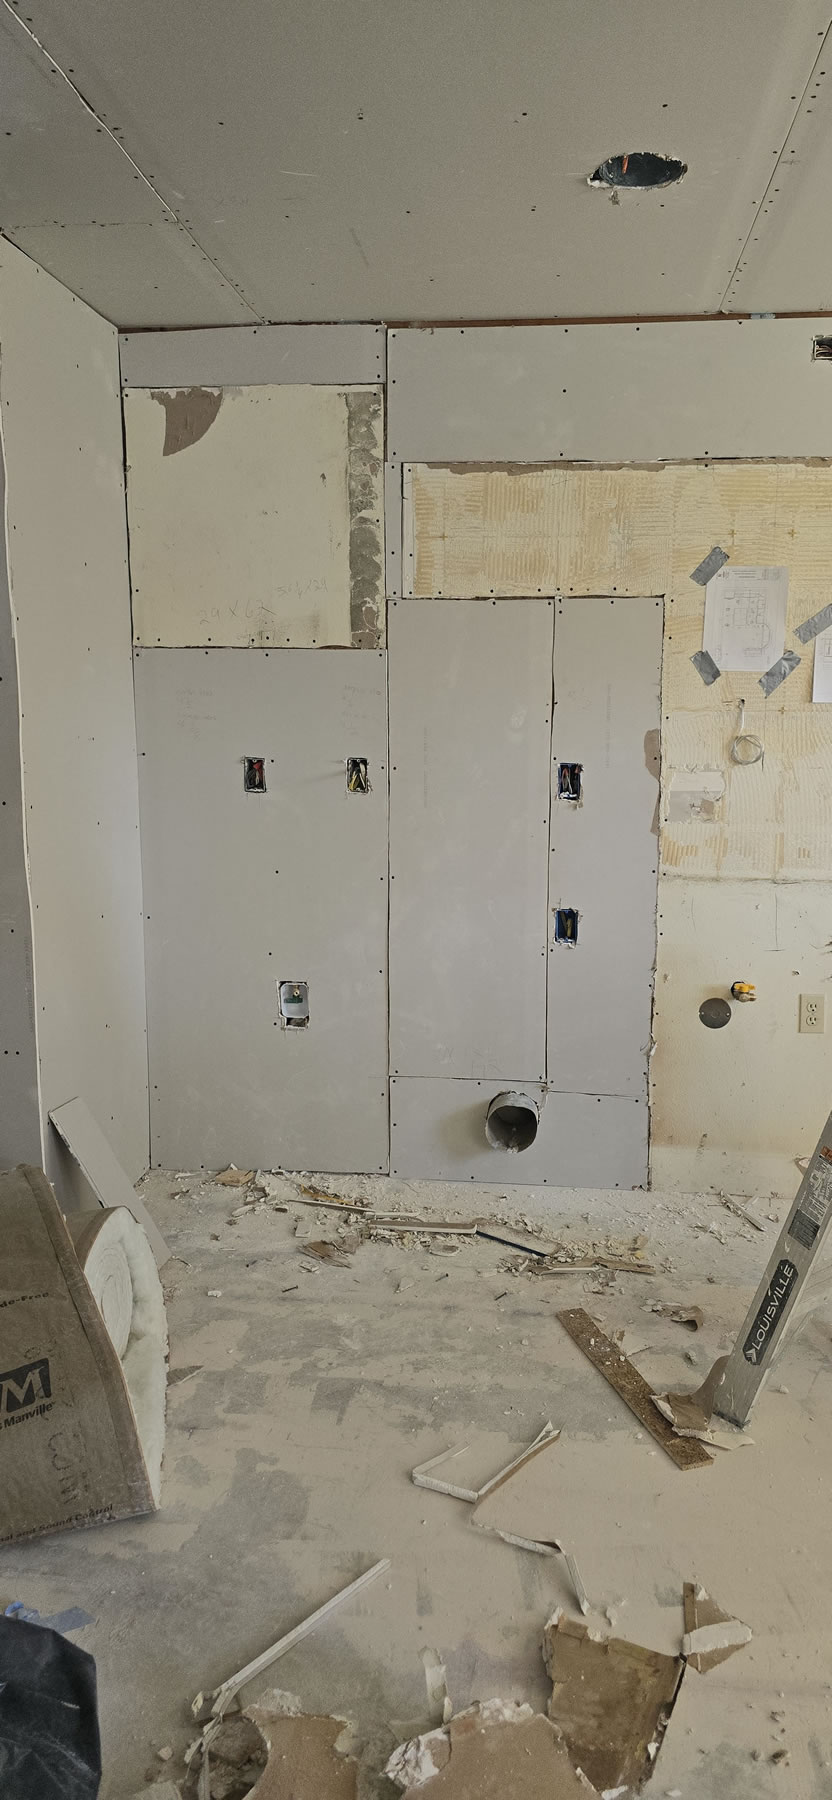
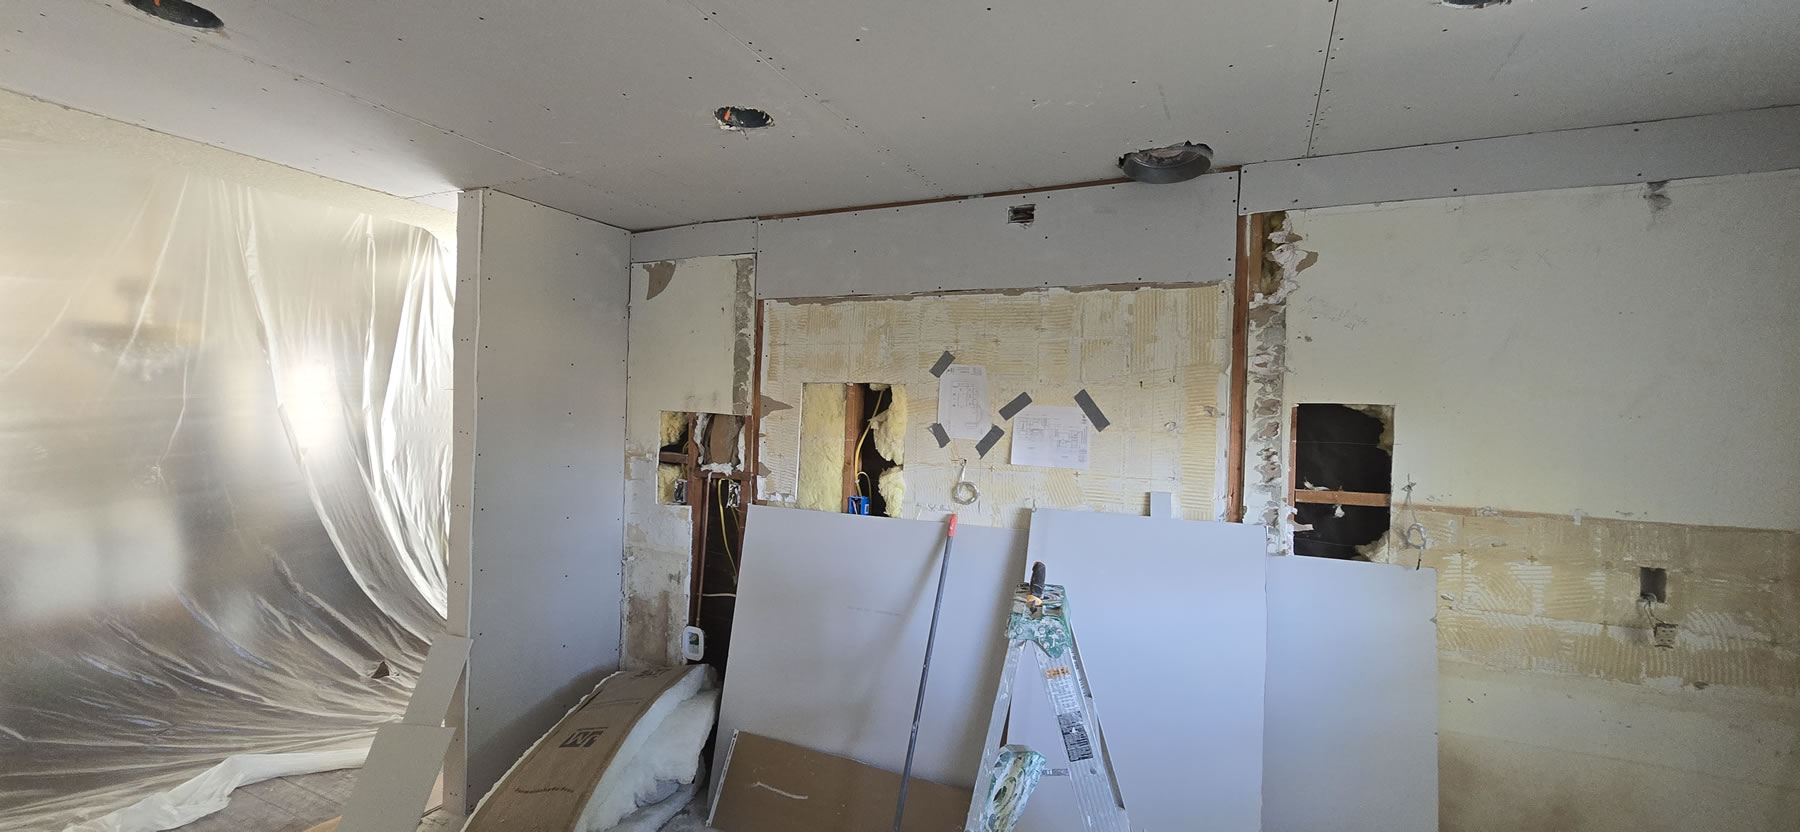
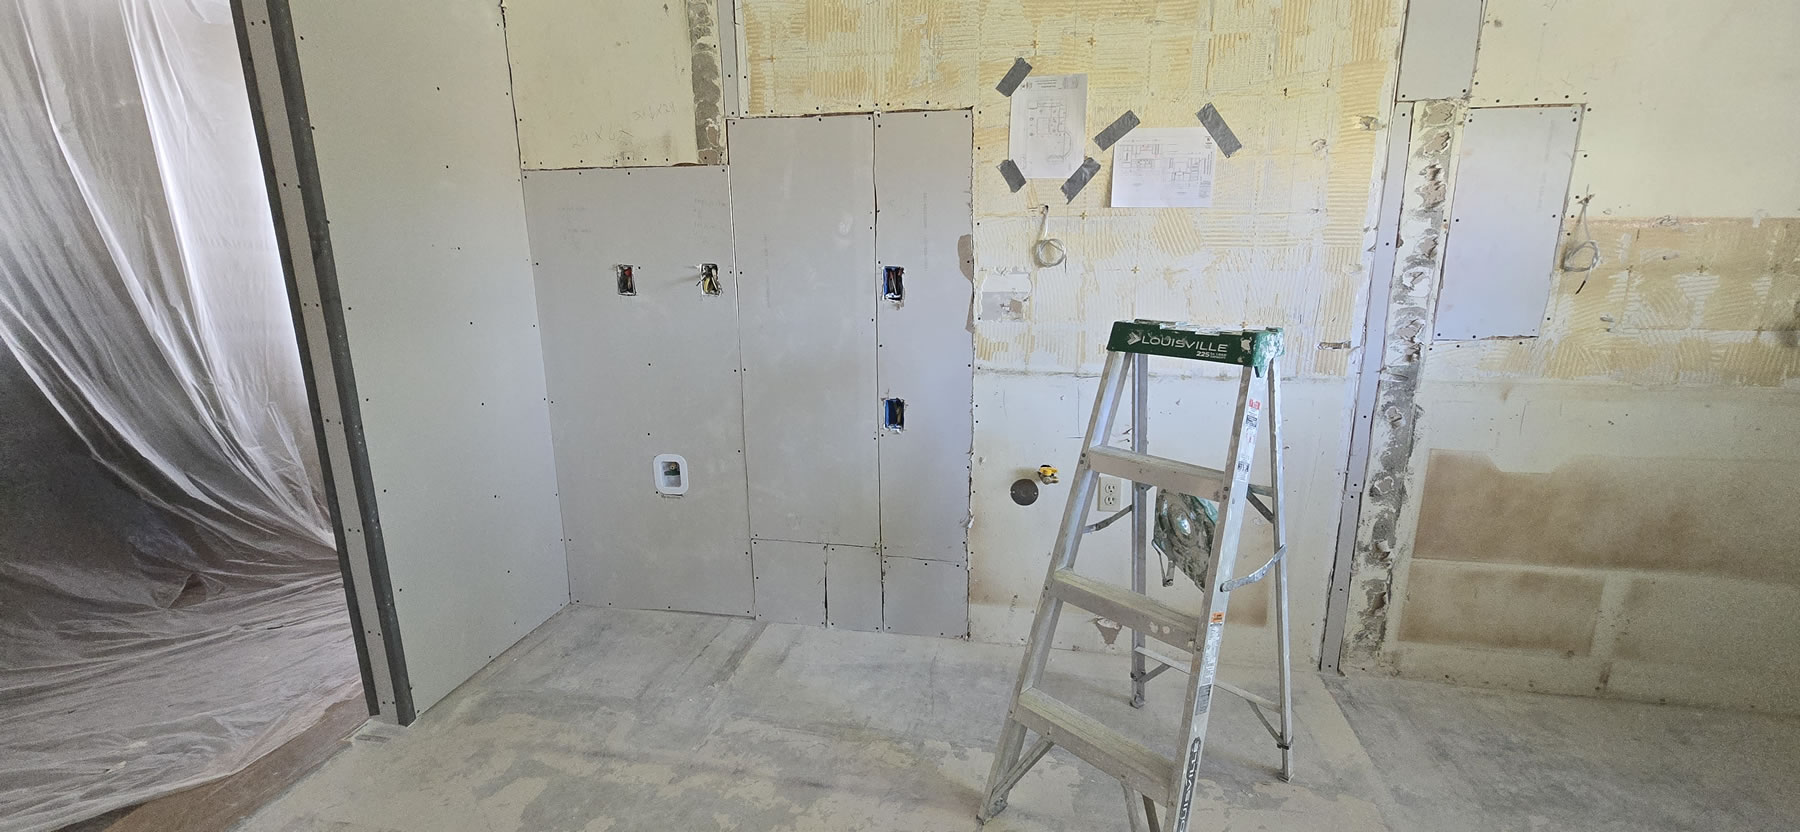
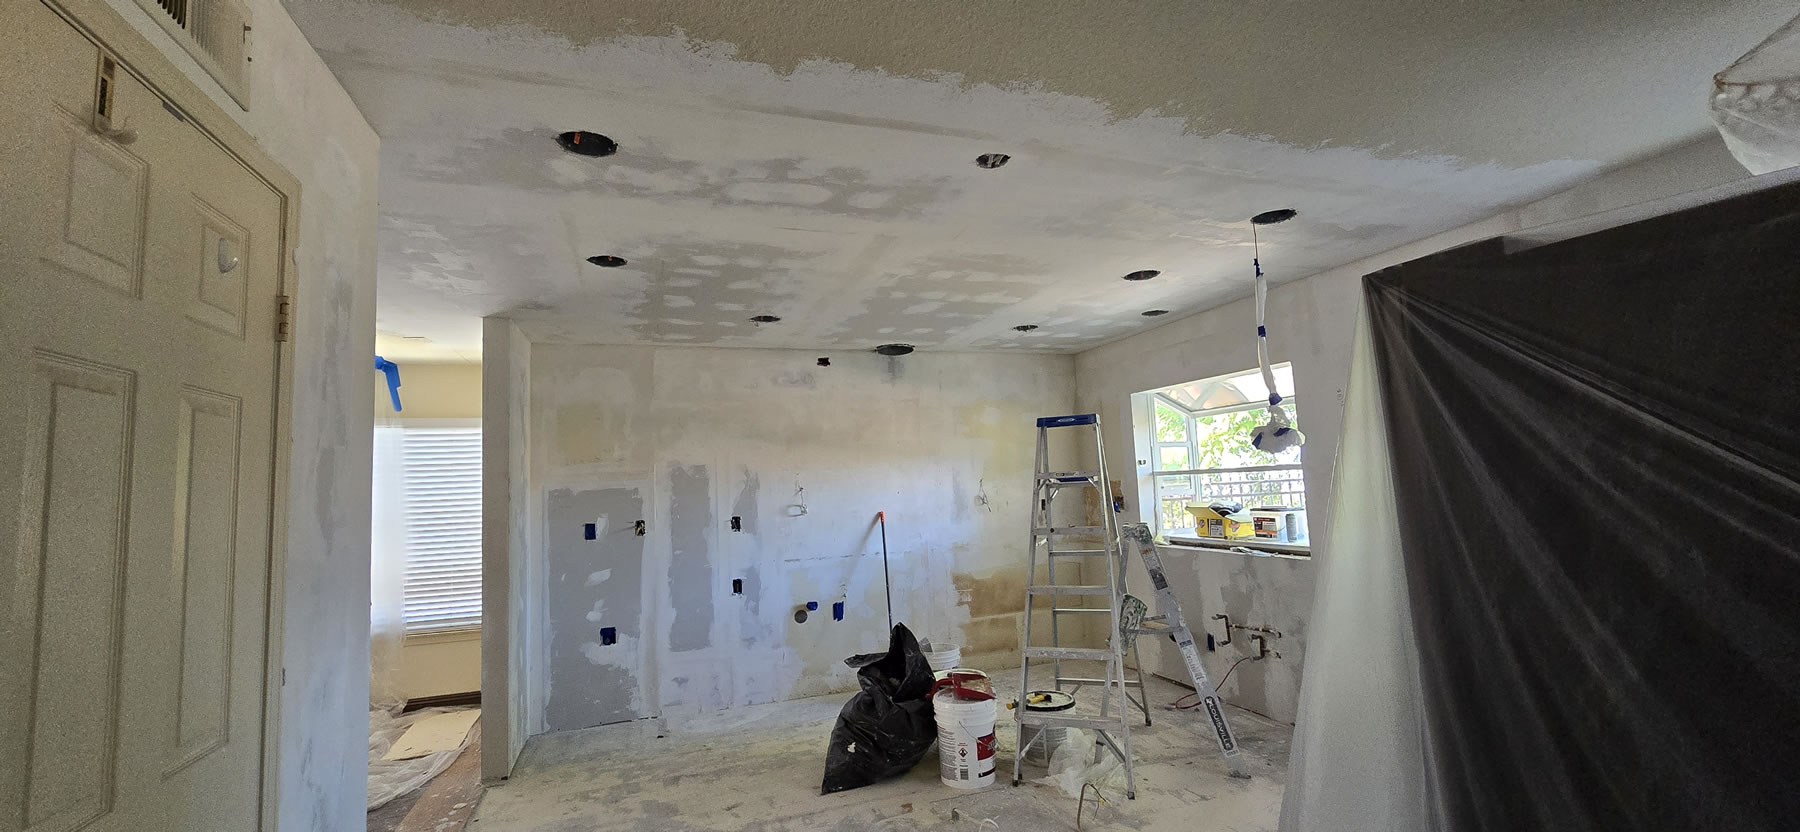
Rough electrical work begins. More walls are opened up to plan out the new switching layout. I want 3 way dimmers all over the damn place. The light tubes and fixtures are now gone. And more walls are cut to add in new junction boxes for relocated appliances. The island wire is capped off.
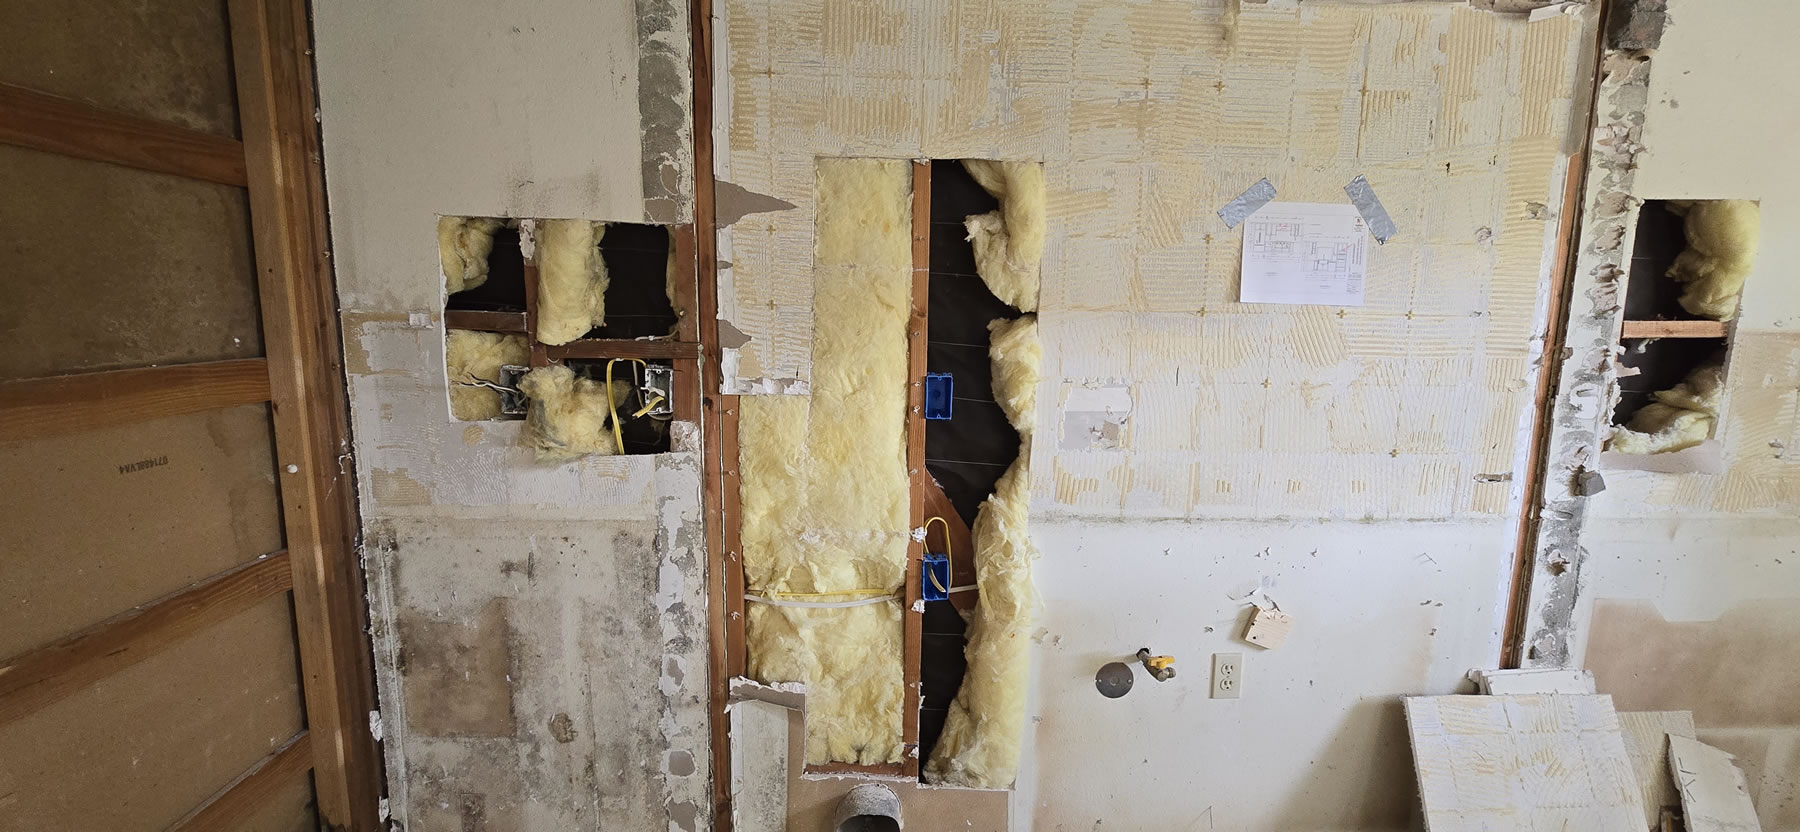
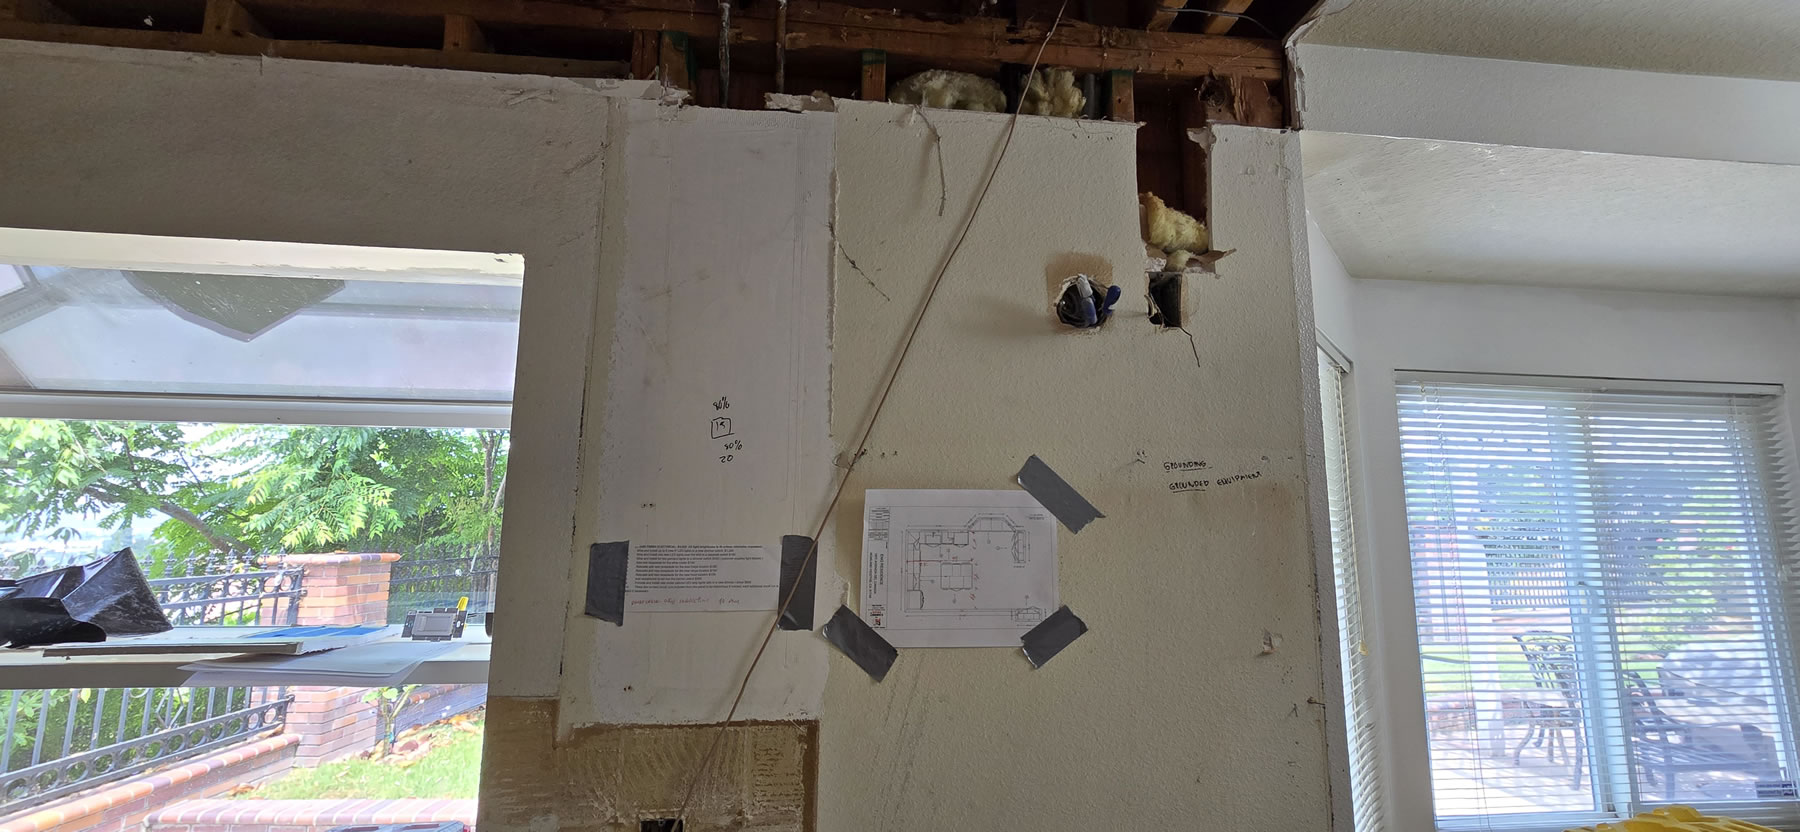
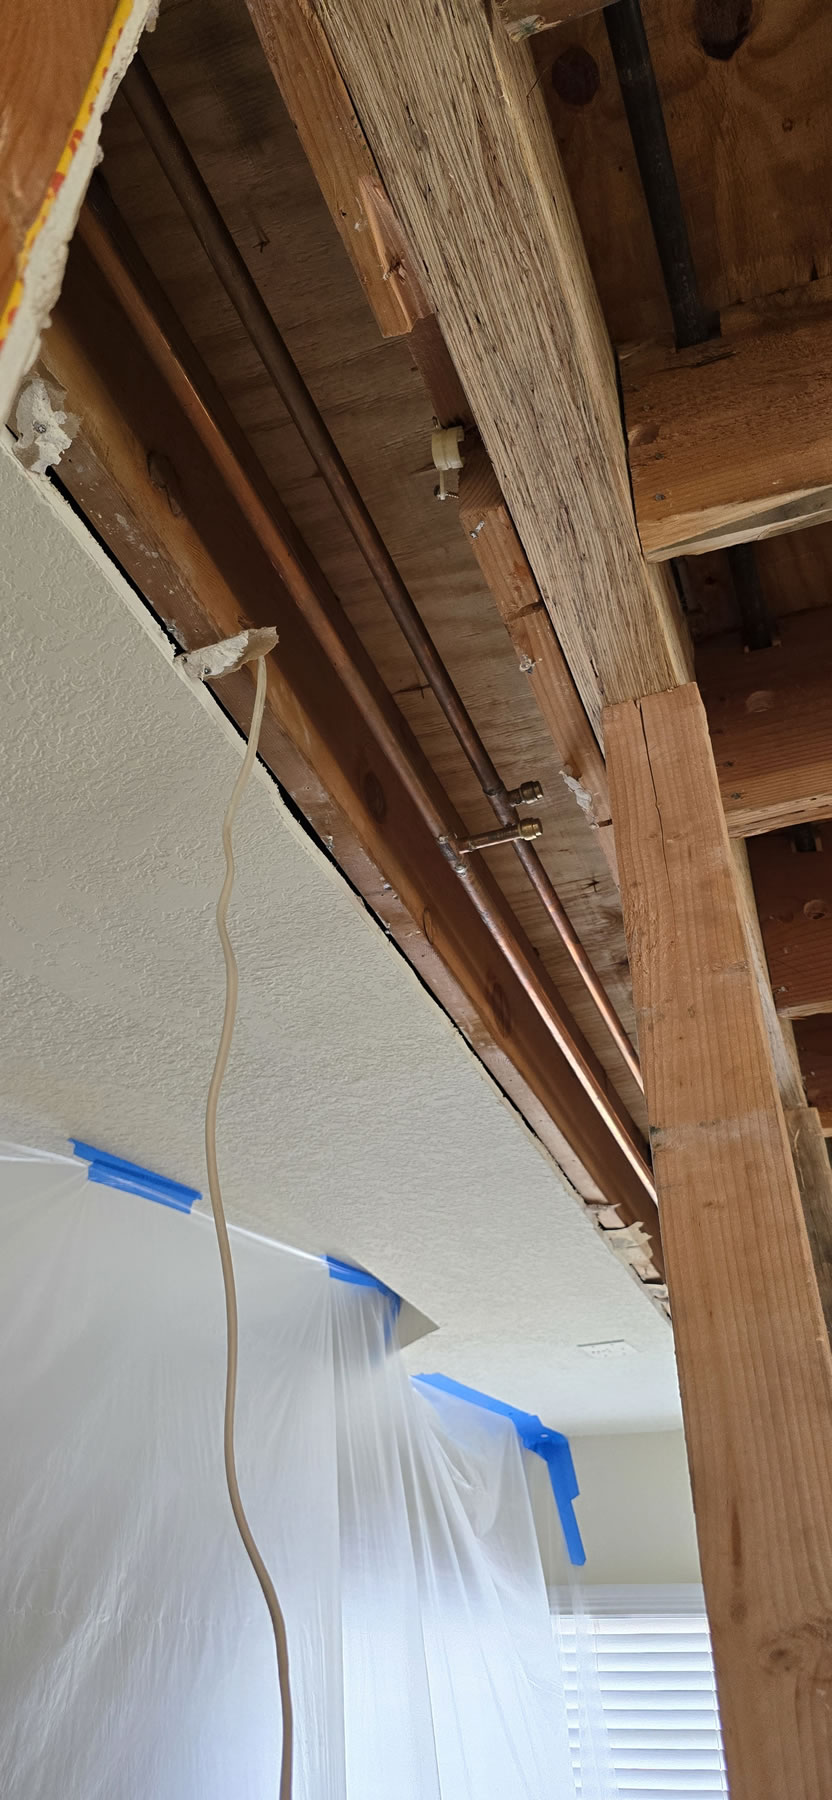
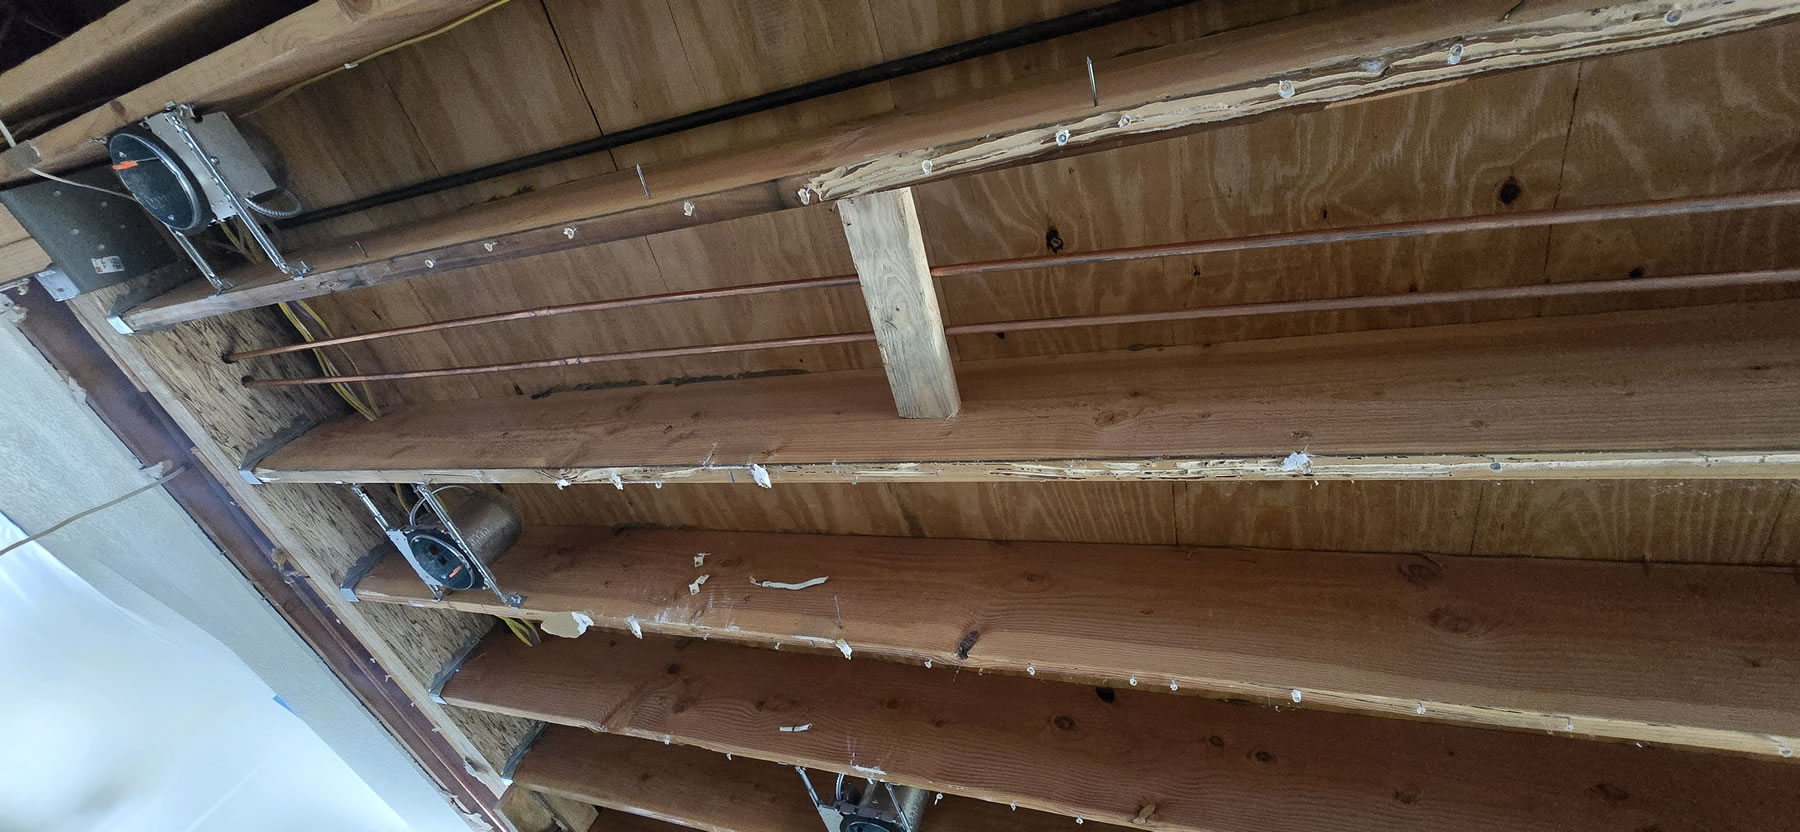
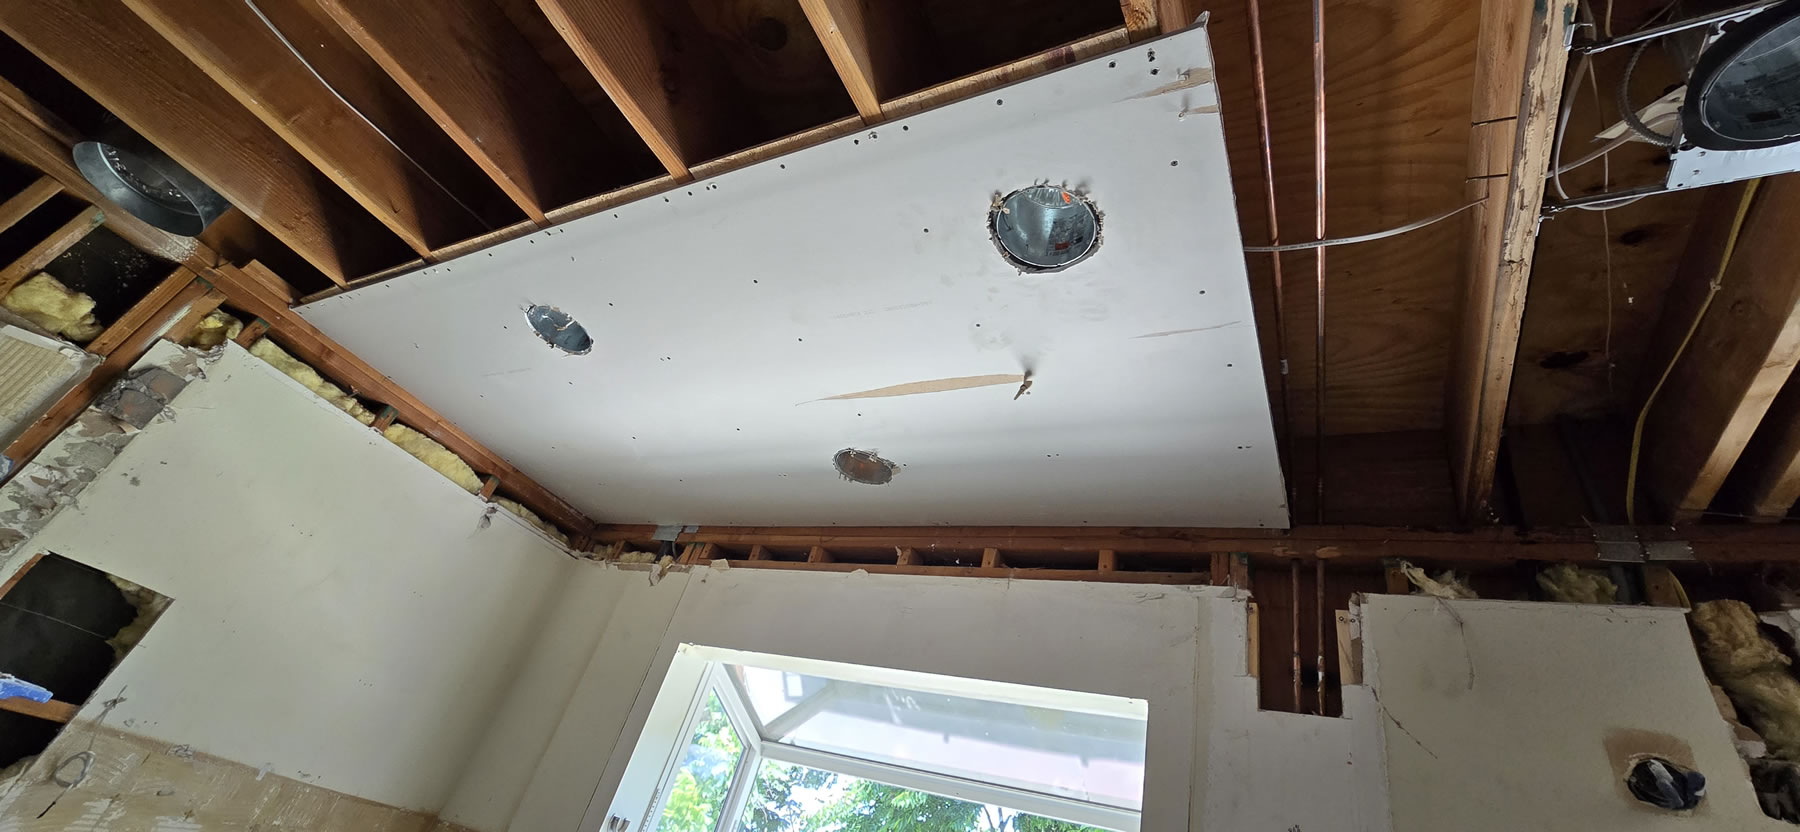
Pot lights go up at the contractors digression. New 5 gang junction box is installed next to the pantry door. Romex to all the new junction boxes are pulled. And all the wire runs are professionally hidden and bundled together so it’s not a spider web mess of wires. A side note for one of the pictures, if you zoom in to the celling, you’ll notice that there are pipes and they cross under one of the house beams. This was done as part of the re-pipe for the house back in 2015 and the guys that did the job didn’t properly plan it out. With the soffit gone, this is now an issue – as they can’t put up sheetrock with those pipes in the way. So not the worst thing that could have been hidden within the soffit. No wait, when they dropped the soffit, the ground was littered with the dead carcass of thousands of termites. Before we tented last year, the termite inspection didn’t even find this little infestation, and they were happily munching away the soffit sheetrock. Gross.
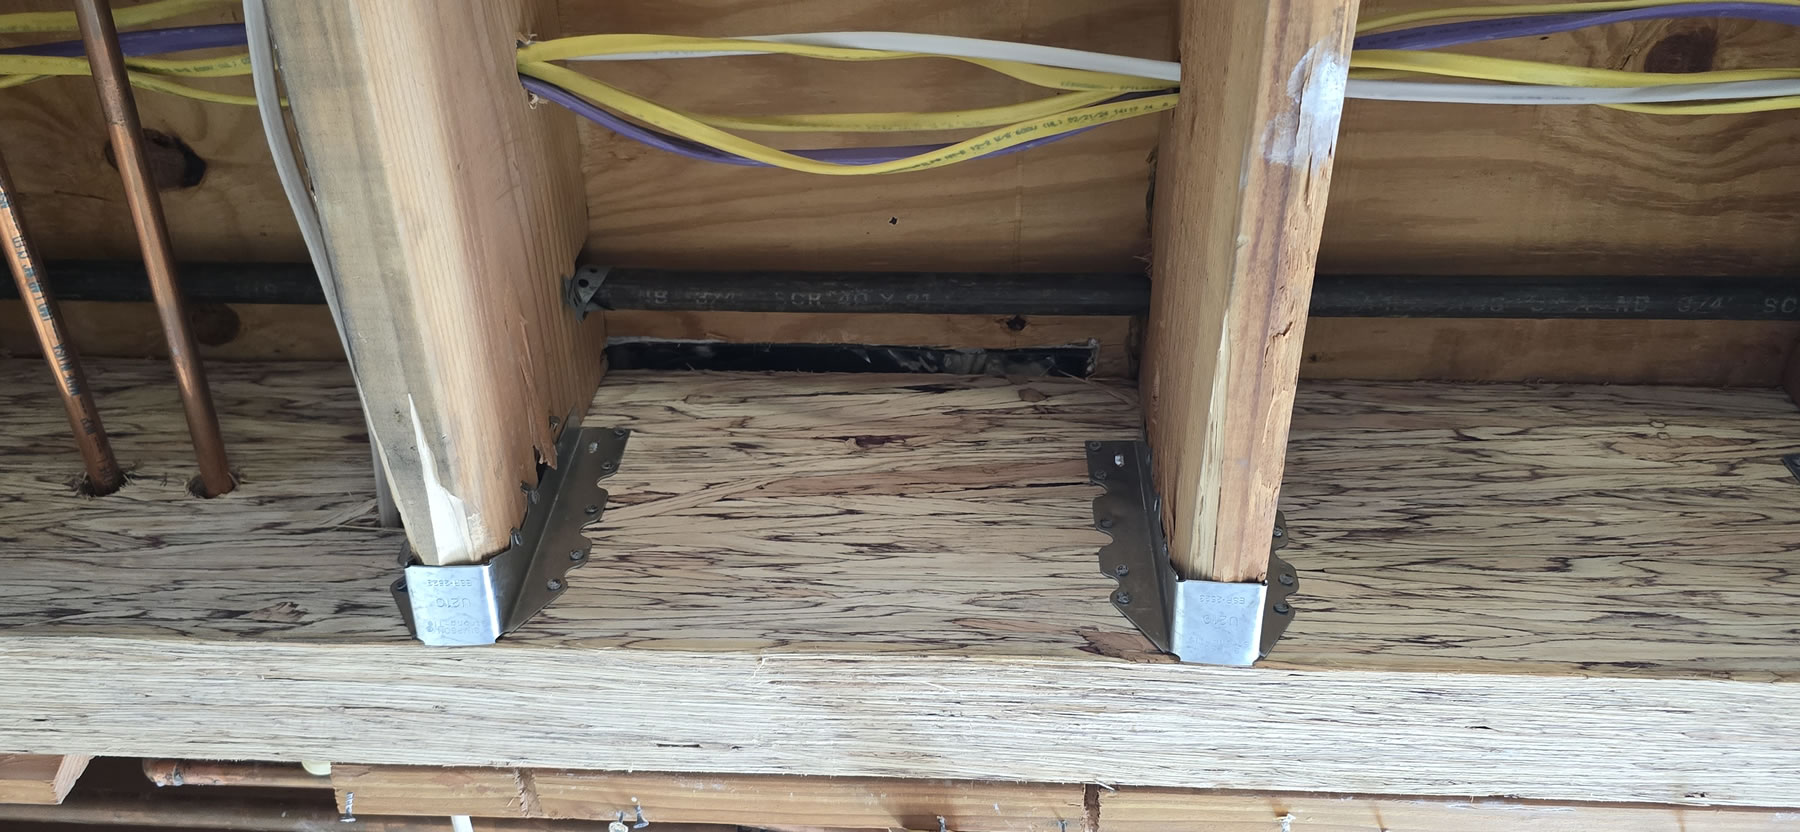
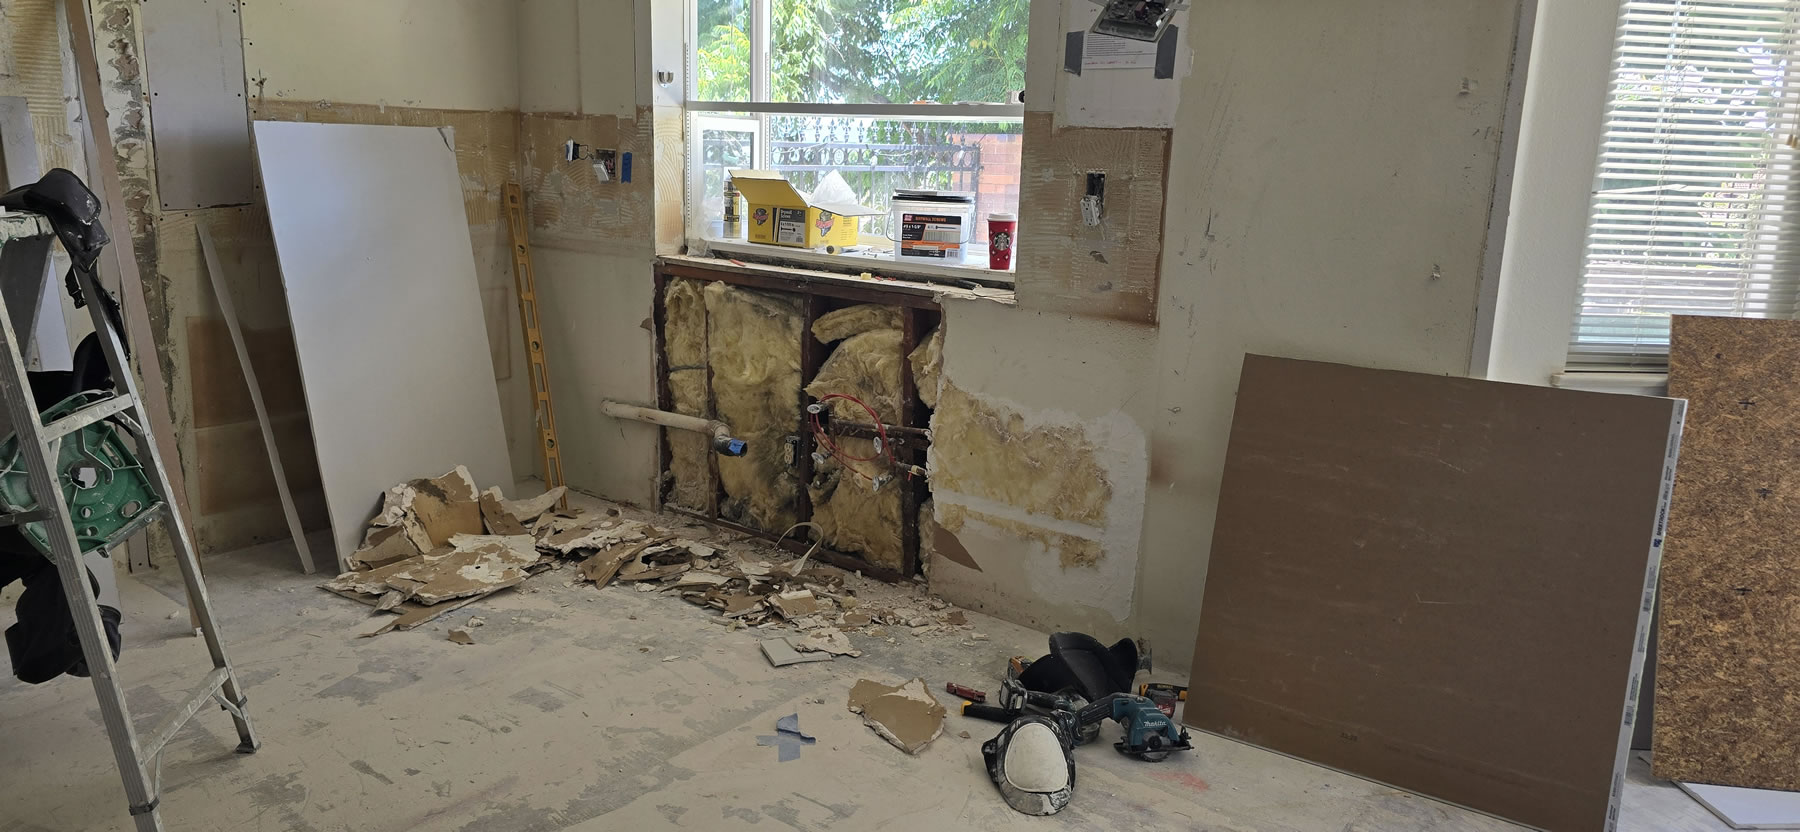
We get the call that framing and plumbing will happen on Saturday. Plumbing is needed to move the water line from where the fridge was to the new fridge location. Also the issue with the pipes crossing below the frame beams needed to be addressed.


Temp frame support is put into place while the old pocket door beam is removed as well as the frame between the dining room and kitchen. New support beam is propped up and with some heavy duty joist and solid support post. This and the plumbing work added another 14k to the project costs. I was given two options, hide the beam or have the beam running across the ceiling between the kitchen and dining room. Had I went with the option to not completely hide the support beam, the price would have been 4k less. What’s the point in opening up the rooms when I have a block of wood sticking out between the two rooms. Option to hide the beam = a shit ton of more labor.

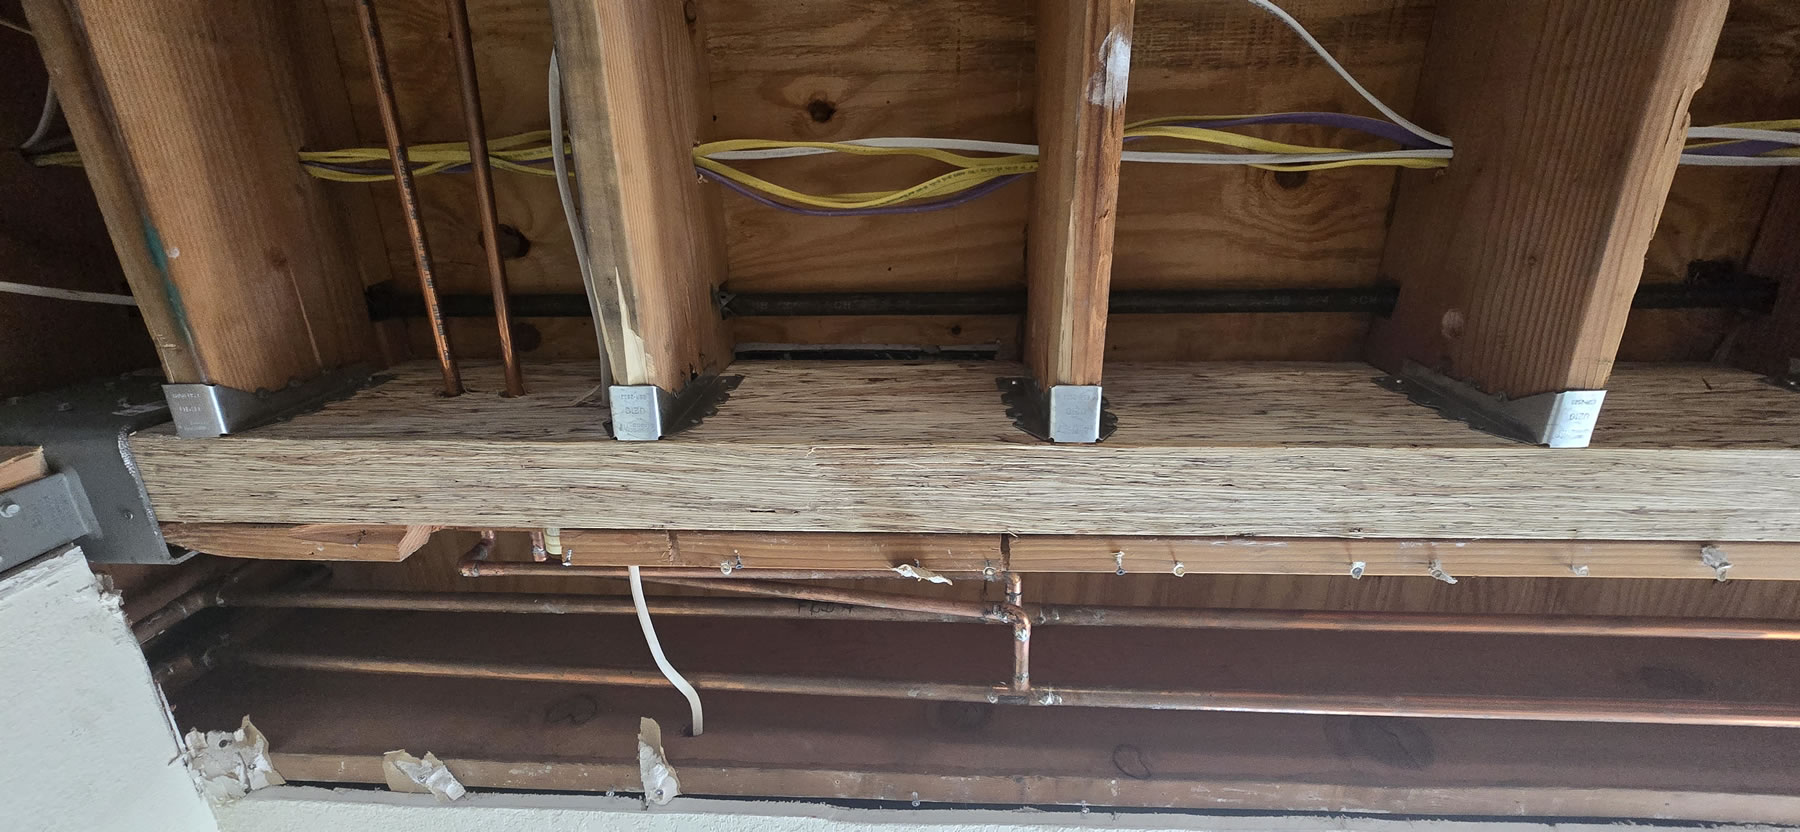
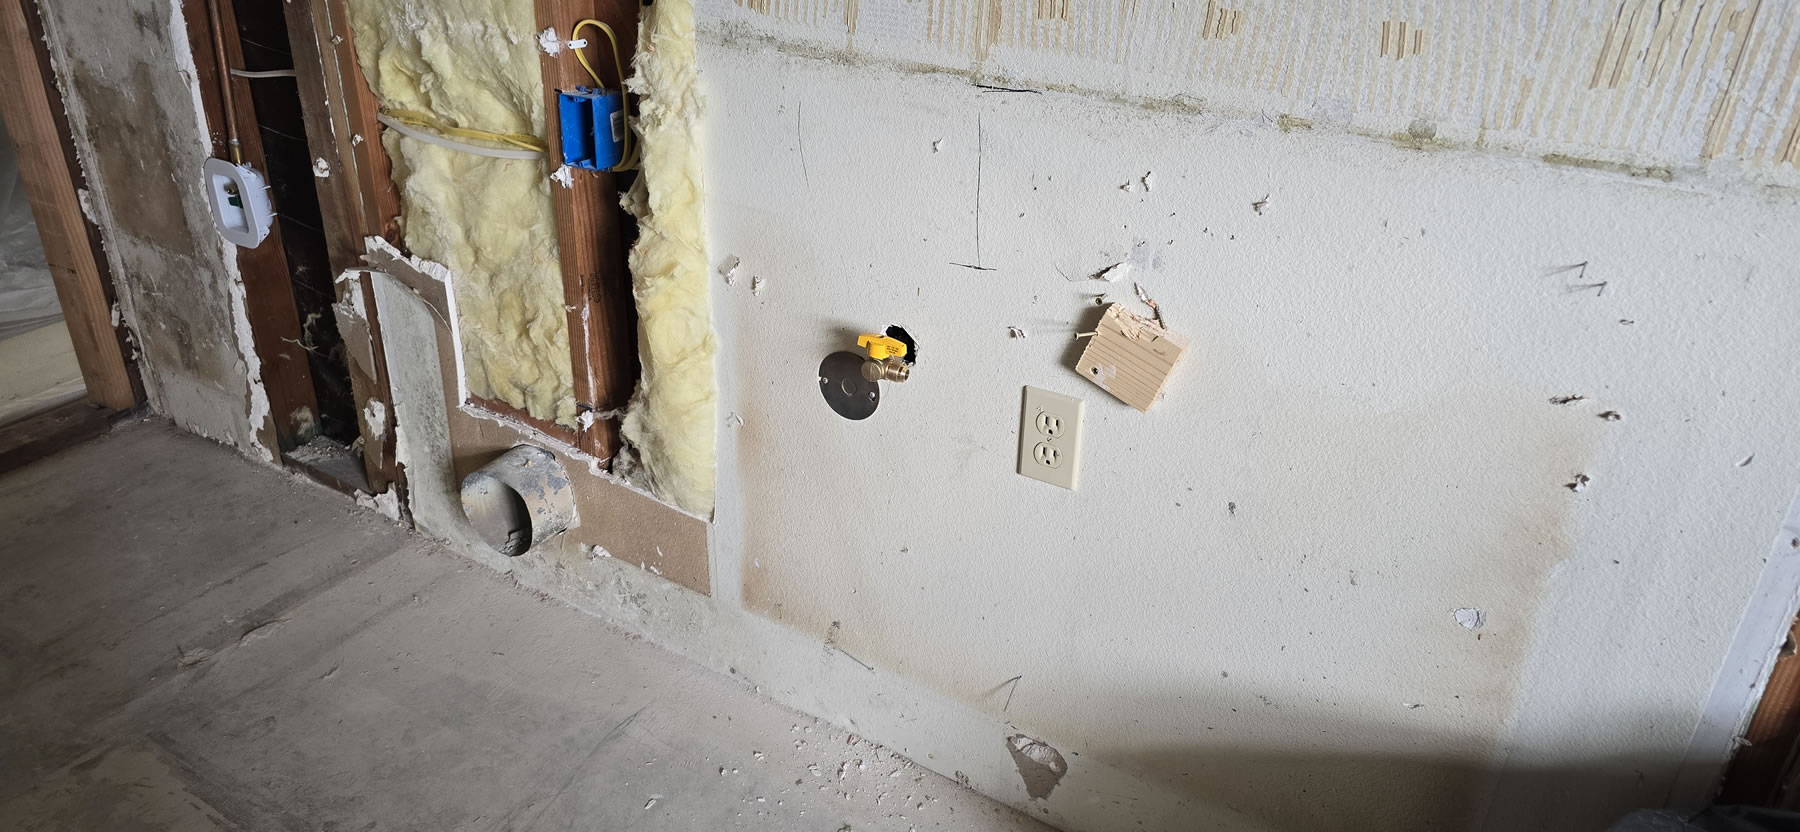
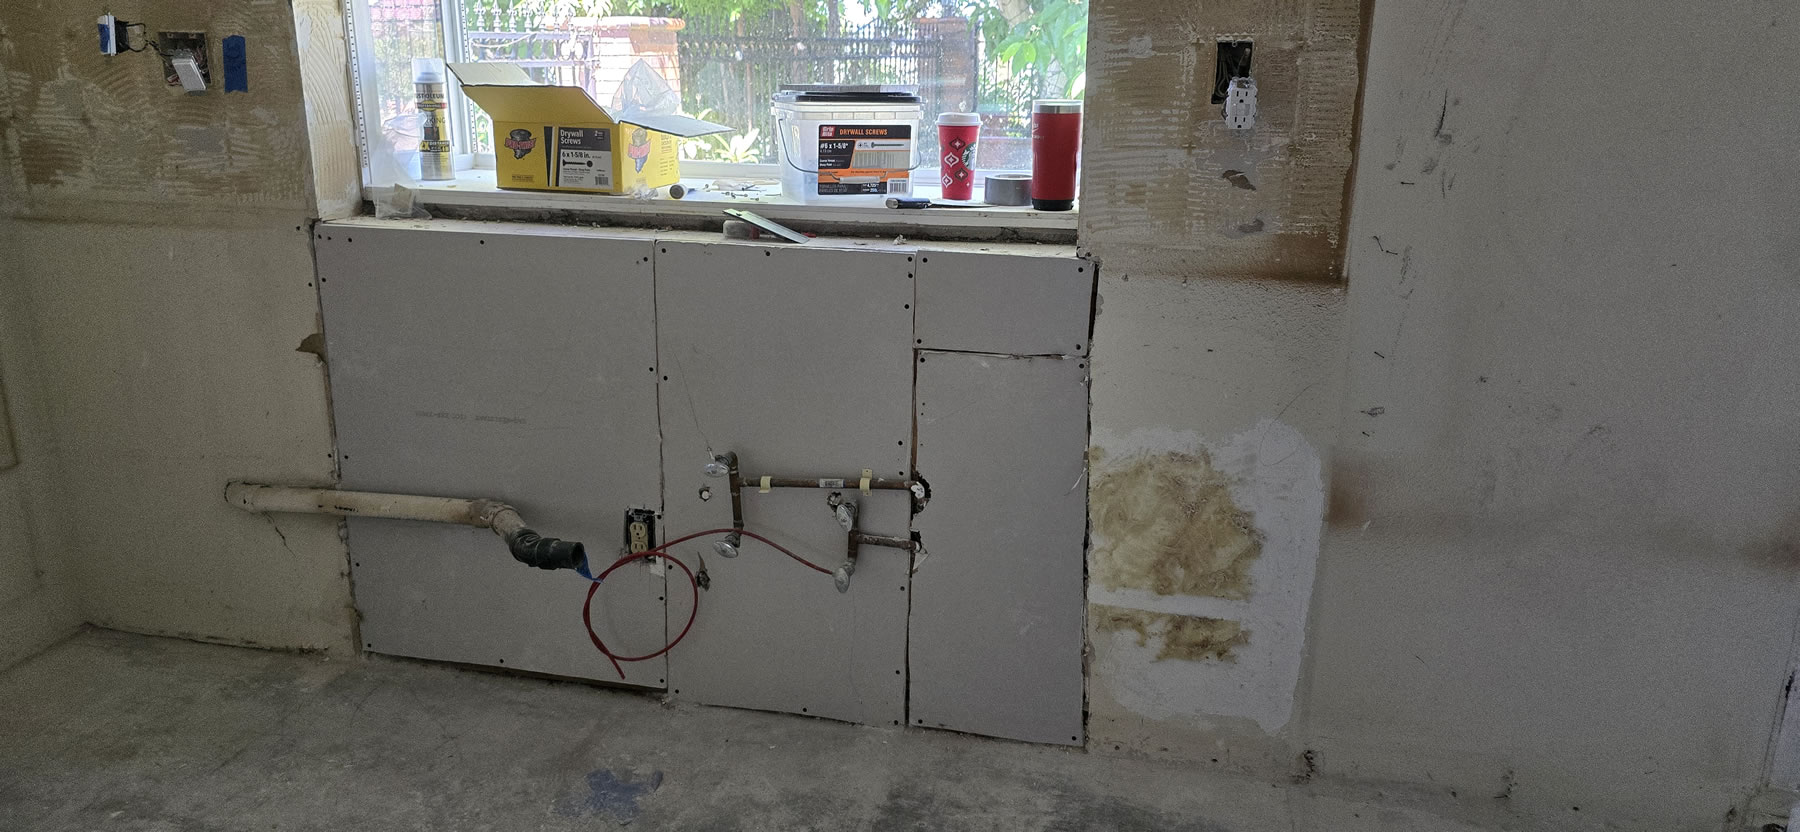
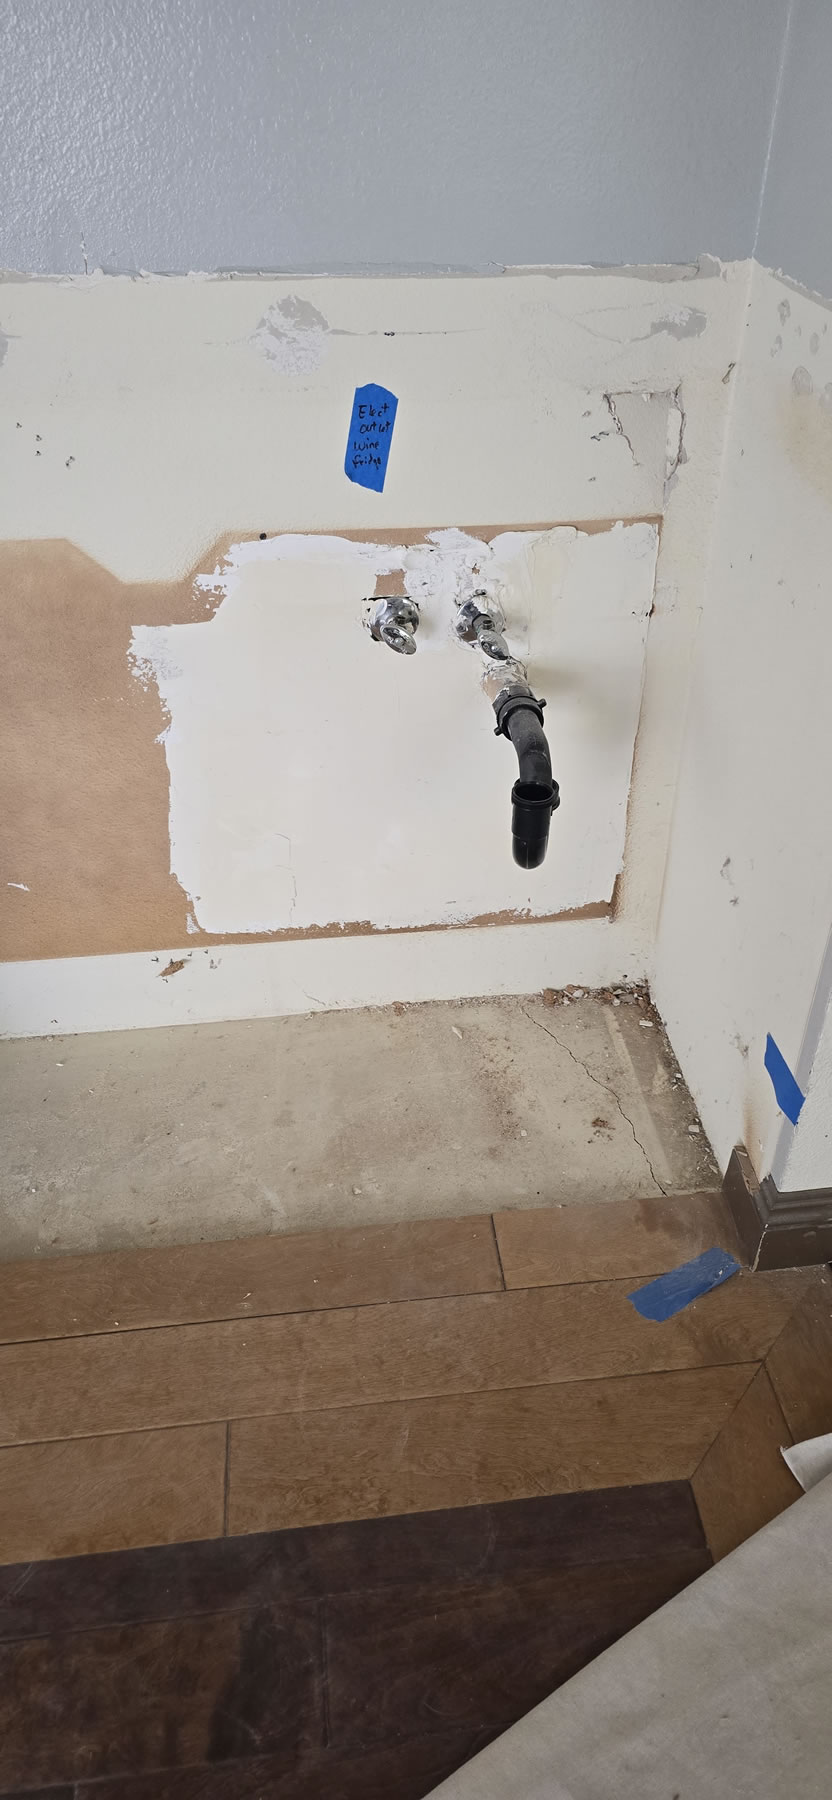
Old crossing water lines were cut and capped off. New water lines are run correctly and aligned to run completely between the frame beams.
The new location for the behind the fridge water line is set up. Temporary support posts are removed and we get a view from the dining room. This will look good once done.

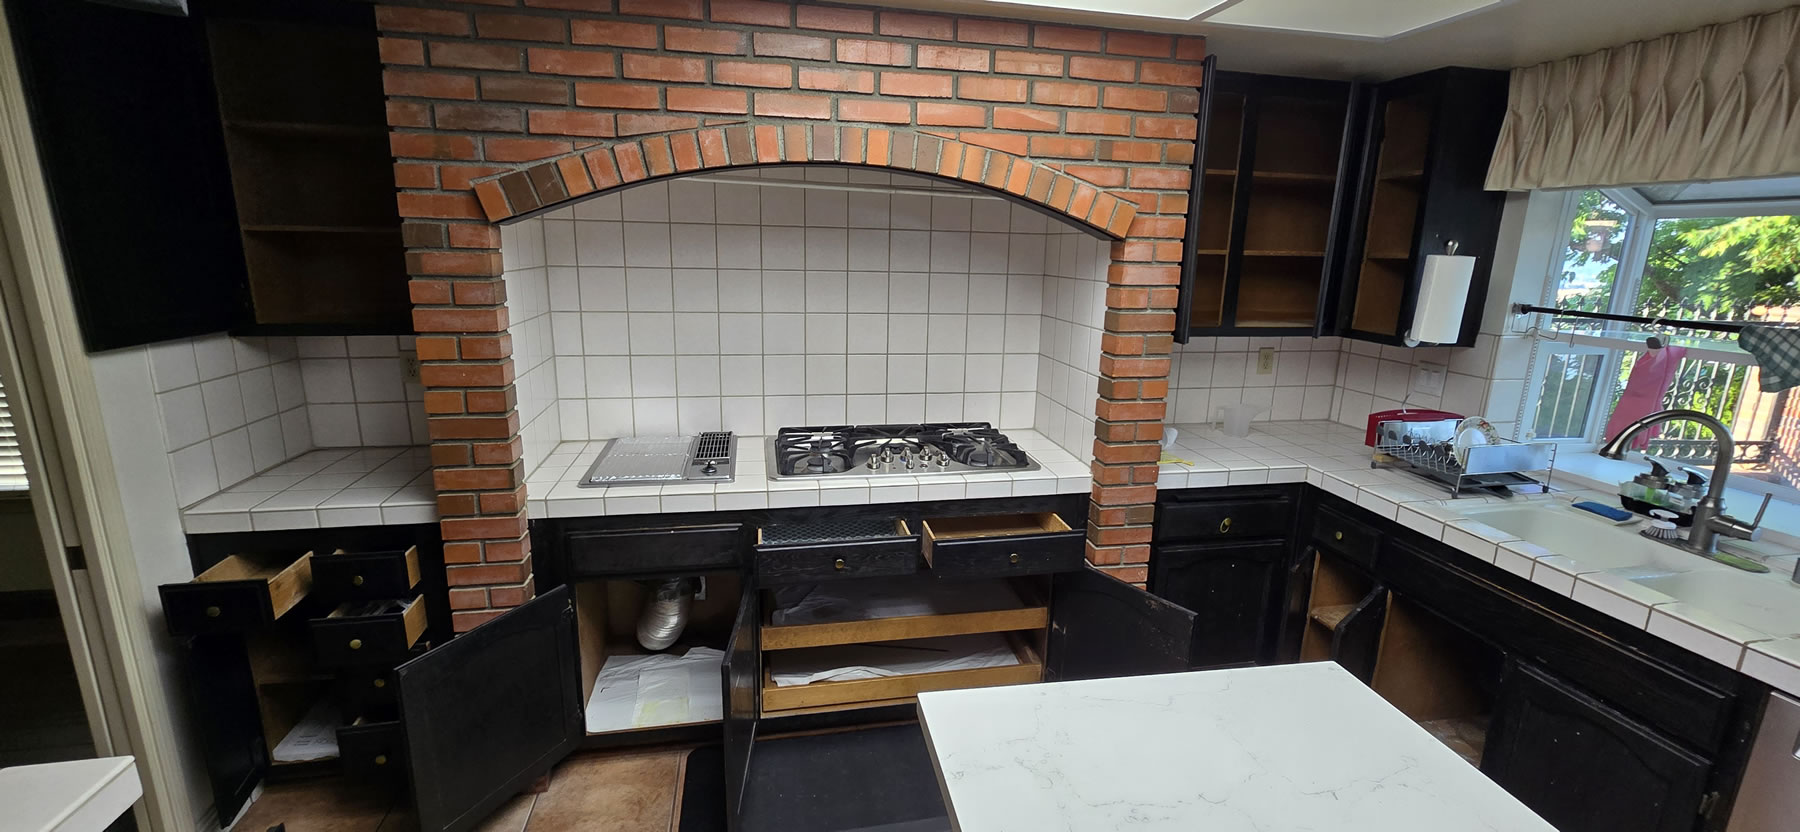
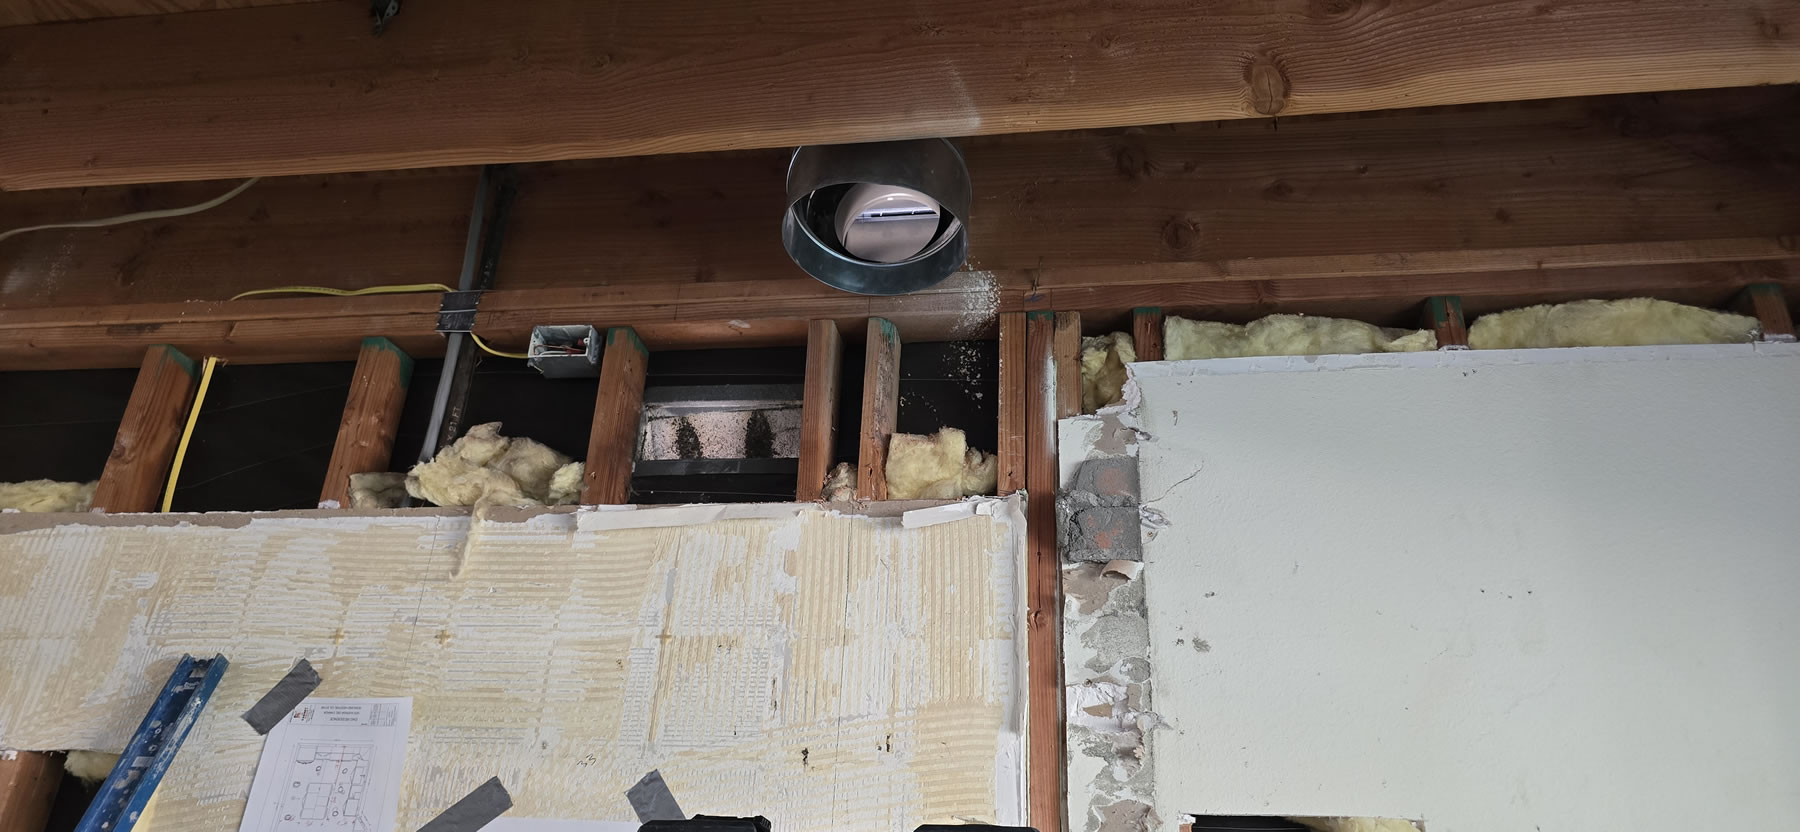
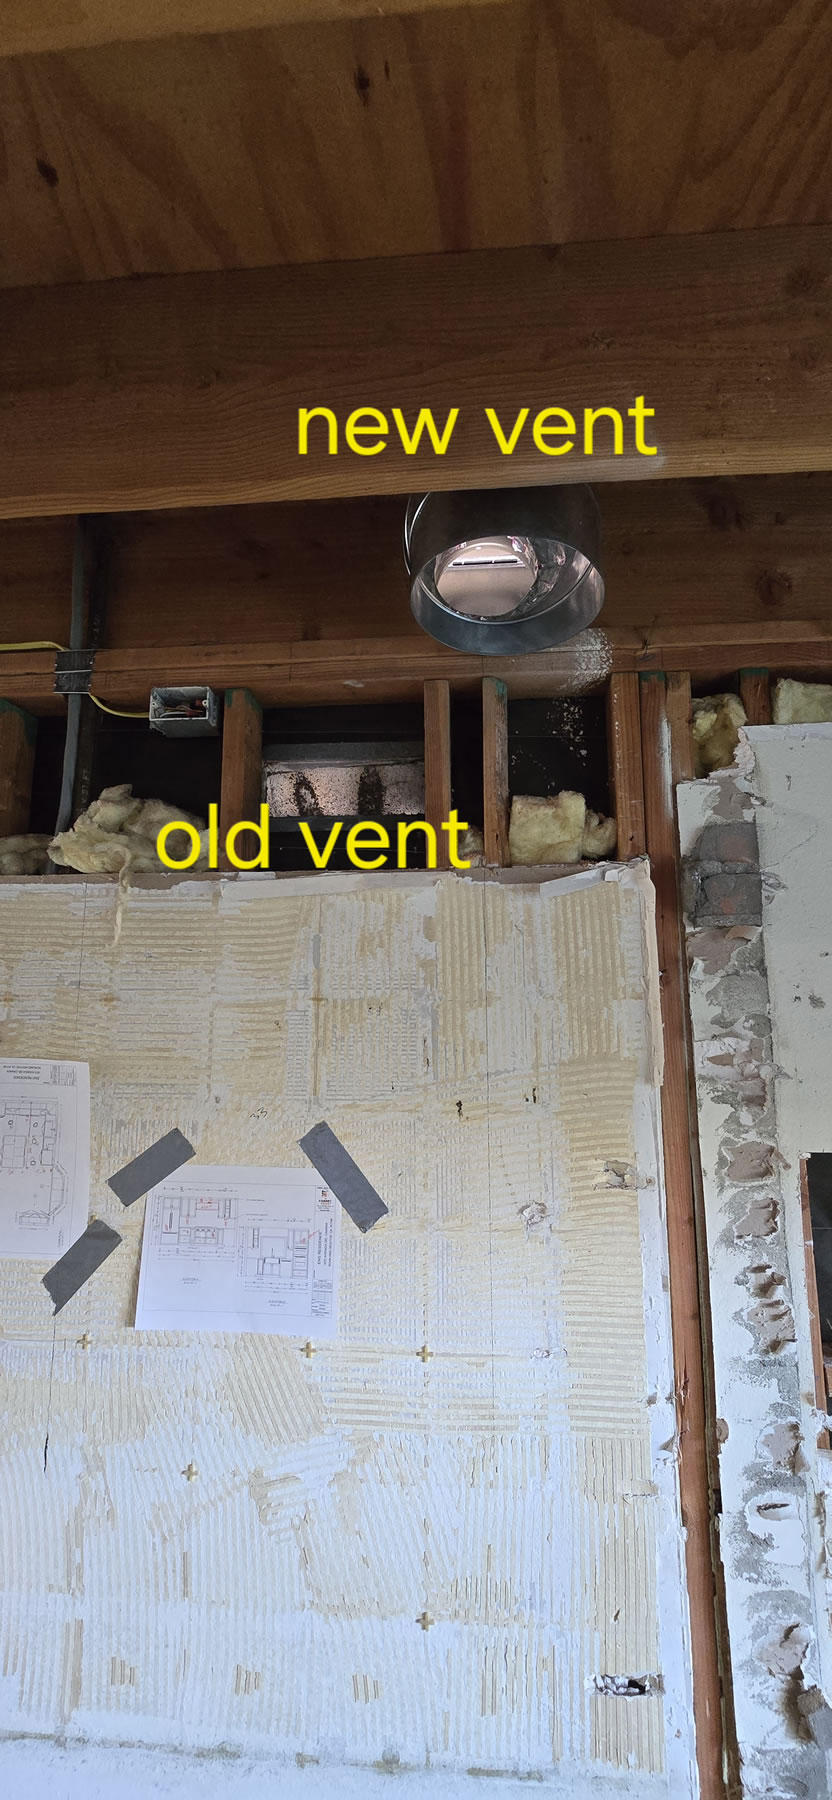
A new vent is drilled out for the Wolf wall vent. This is much bigger than the existing exhaust fan which did nothing to clear cooking fumes. Here are some comparison shots of the old vent vs the new vent.

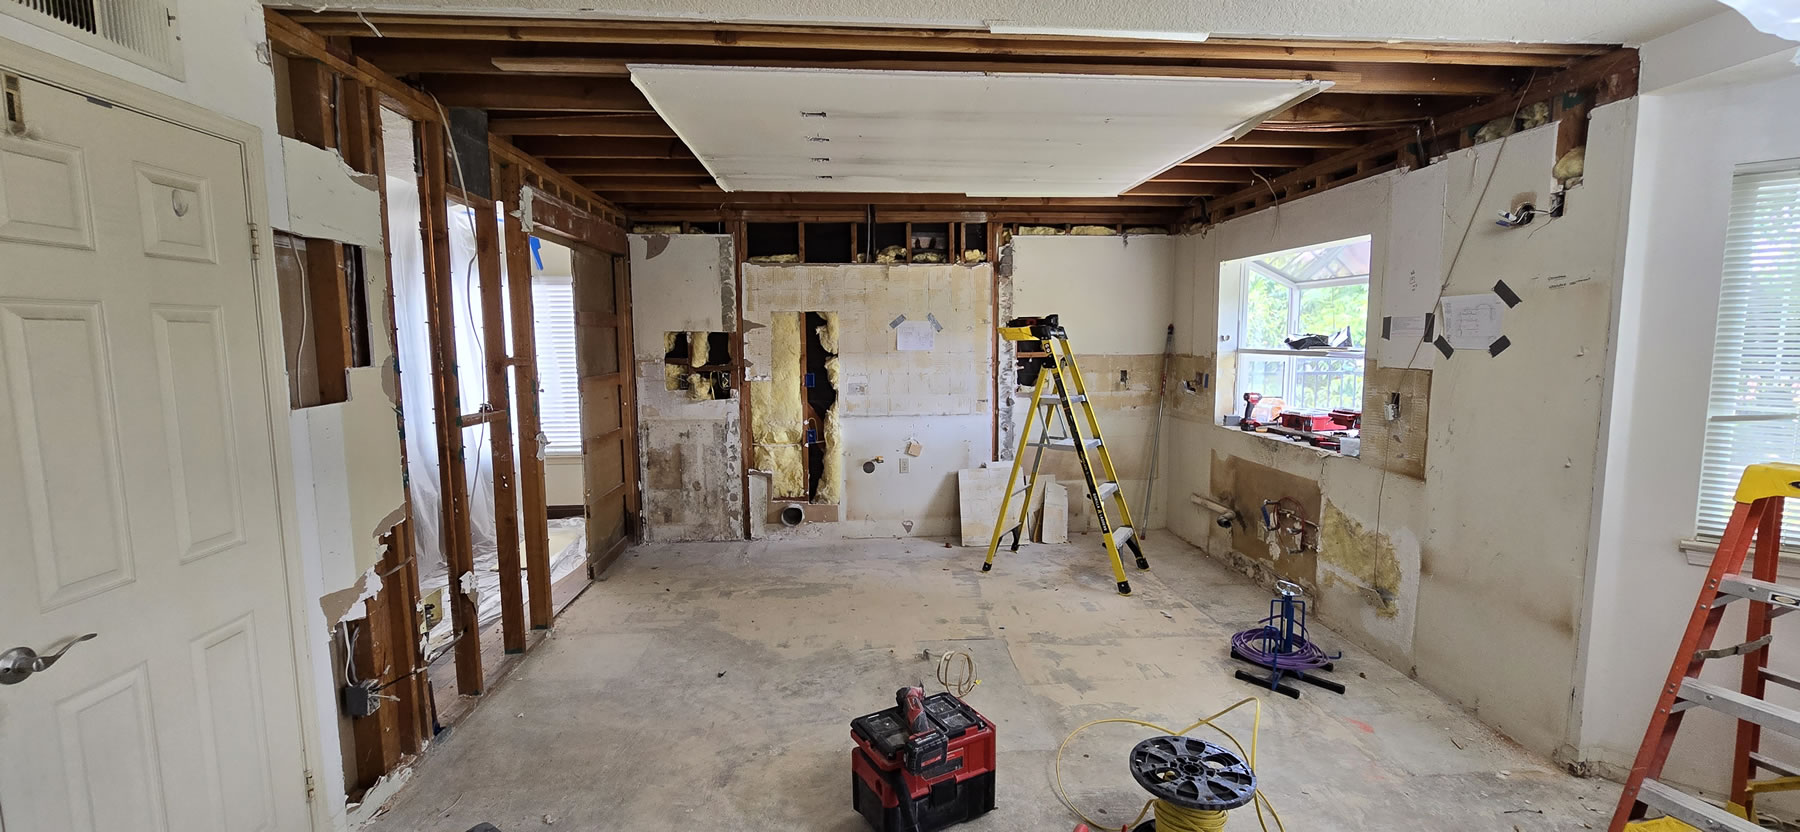
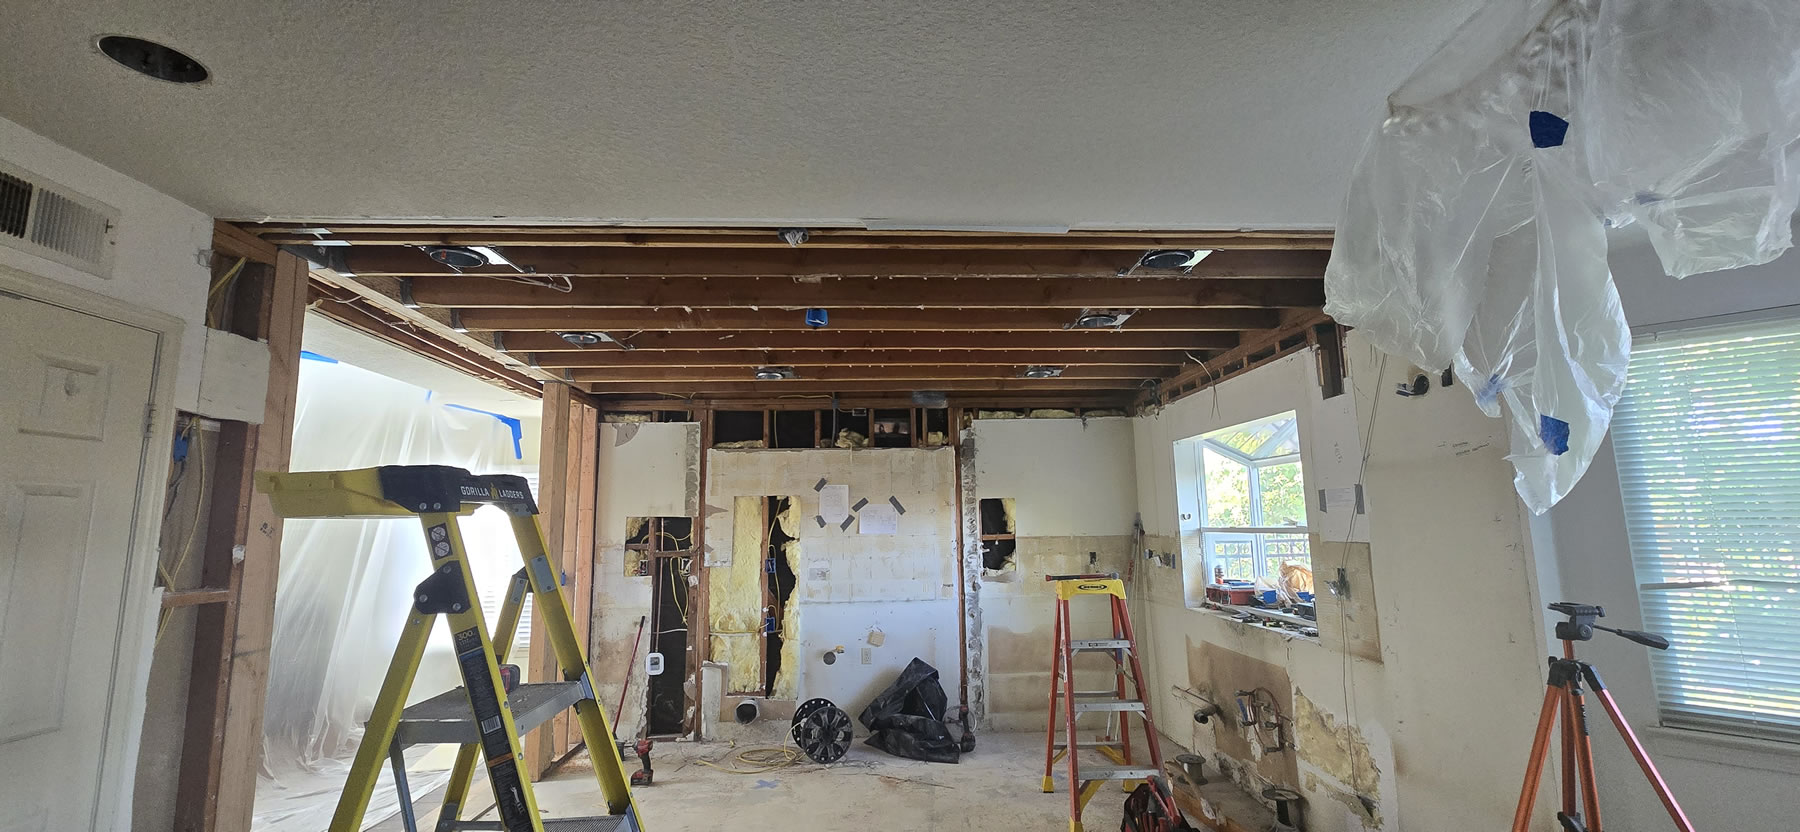
The other view from the kitchen side with the new support beam and opened up wall. New piping is clean. And we’re done for week 1. A decent amount of work happened in just the first week. I’m impressed.
Week two continues with the electrical work. The pendant drops are put in (grey and blue cylindrical boxes) and a few more pot lights are added. I also had the contractor adjust the locations of the pot lights to better fit the function I want for the kitchen. Junction boxes are added now that the framing is complete. Adding a few more pots to the are just outside the pantry and an entry into the kitchen light.

Closer look at the pendant drops. With the support beam in place, we actually lose an AC vent to the dining room. The vent is capped off at the top and we’ll just need to rely on the main living room vent and kitchen vent for AC. Small sacrifice. Now that I think about this, I wonder if we could have salvaged the AC vent if the beam was not hidden. Oh well, too late for that now.
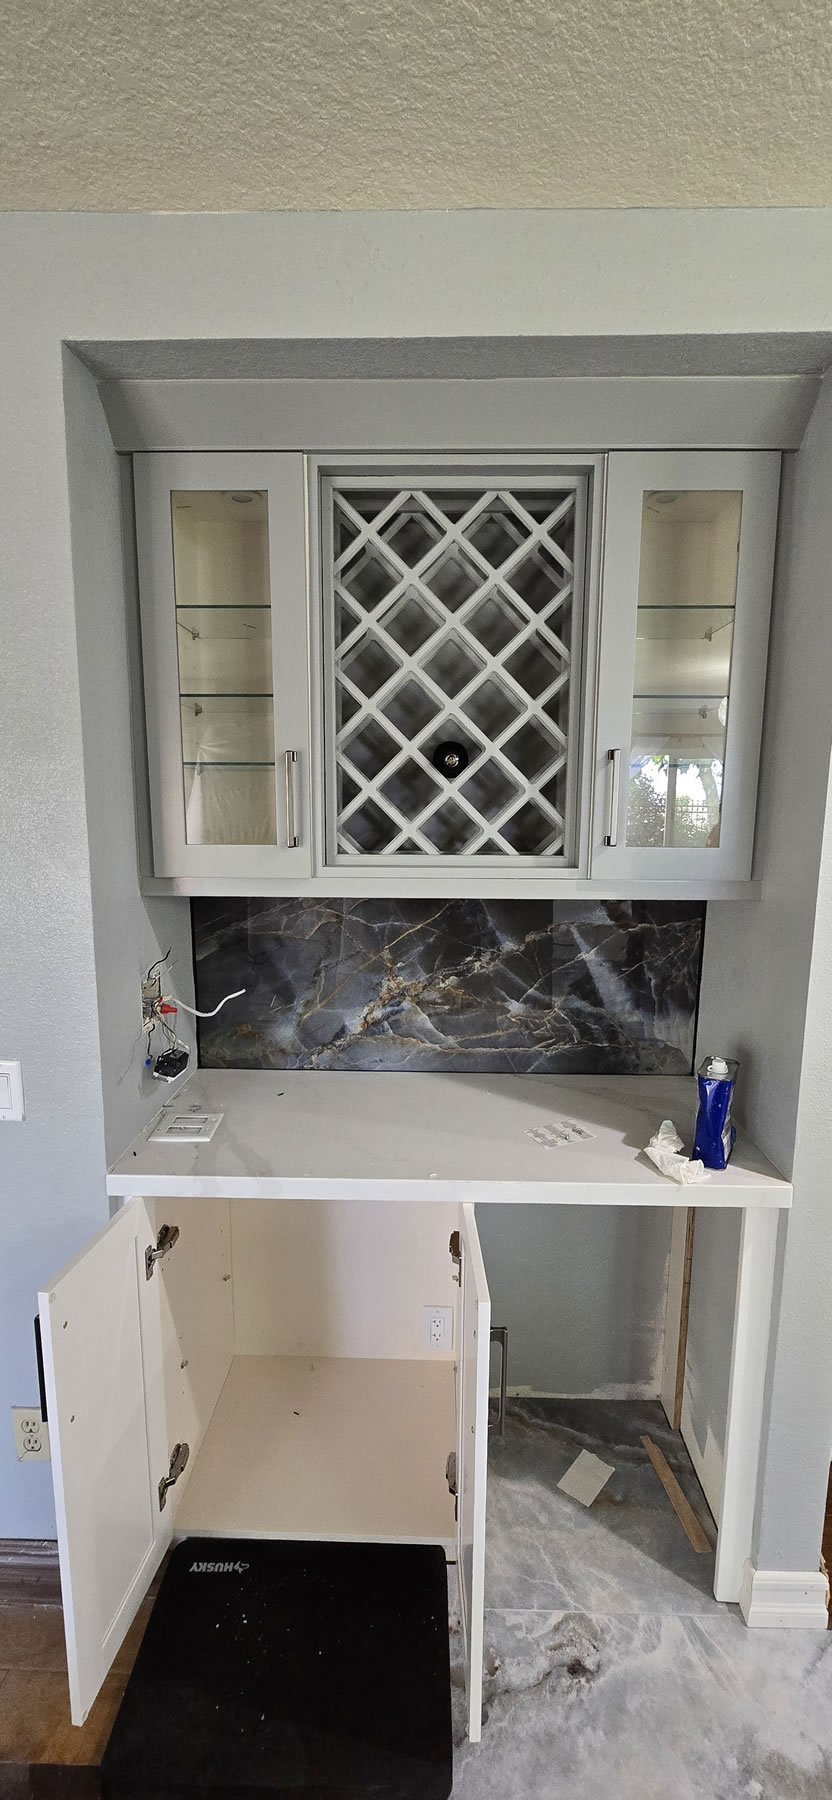
Electrical work runs to the wet bar area to include this area for under cabinet lighting as well as add light to the glass wall cabinets. Wiring is also run to the cabinet area next to the kitchenette for the under cabinets lighting there.
Wire is run to the cooktop side for undercabinet lights too.
Wet bar plumbing is removed and the gas connection is modified to fit the cabinets better.

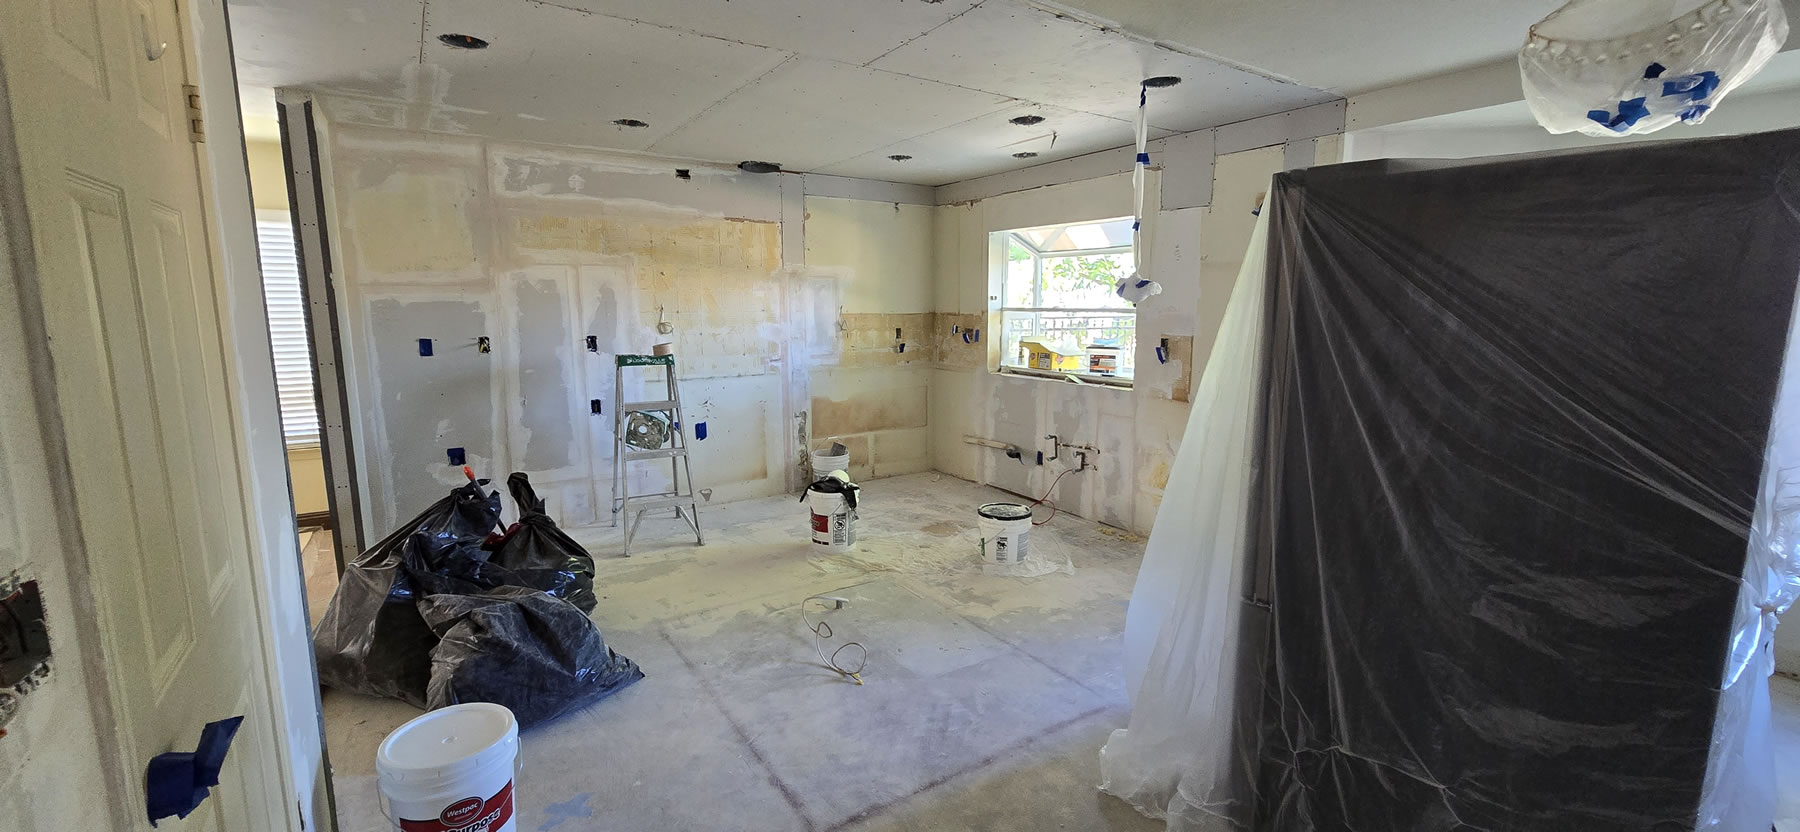
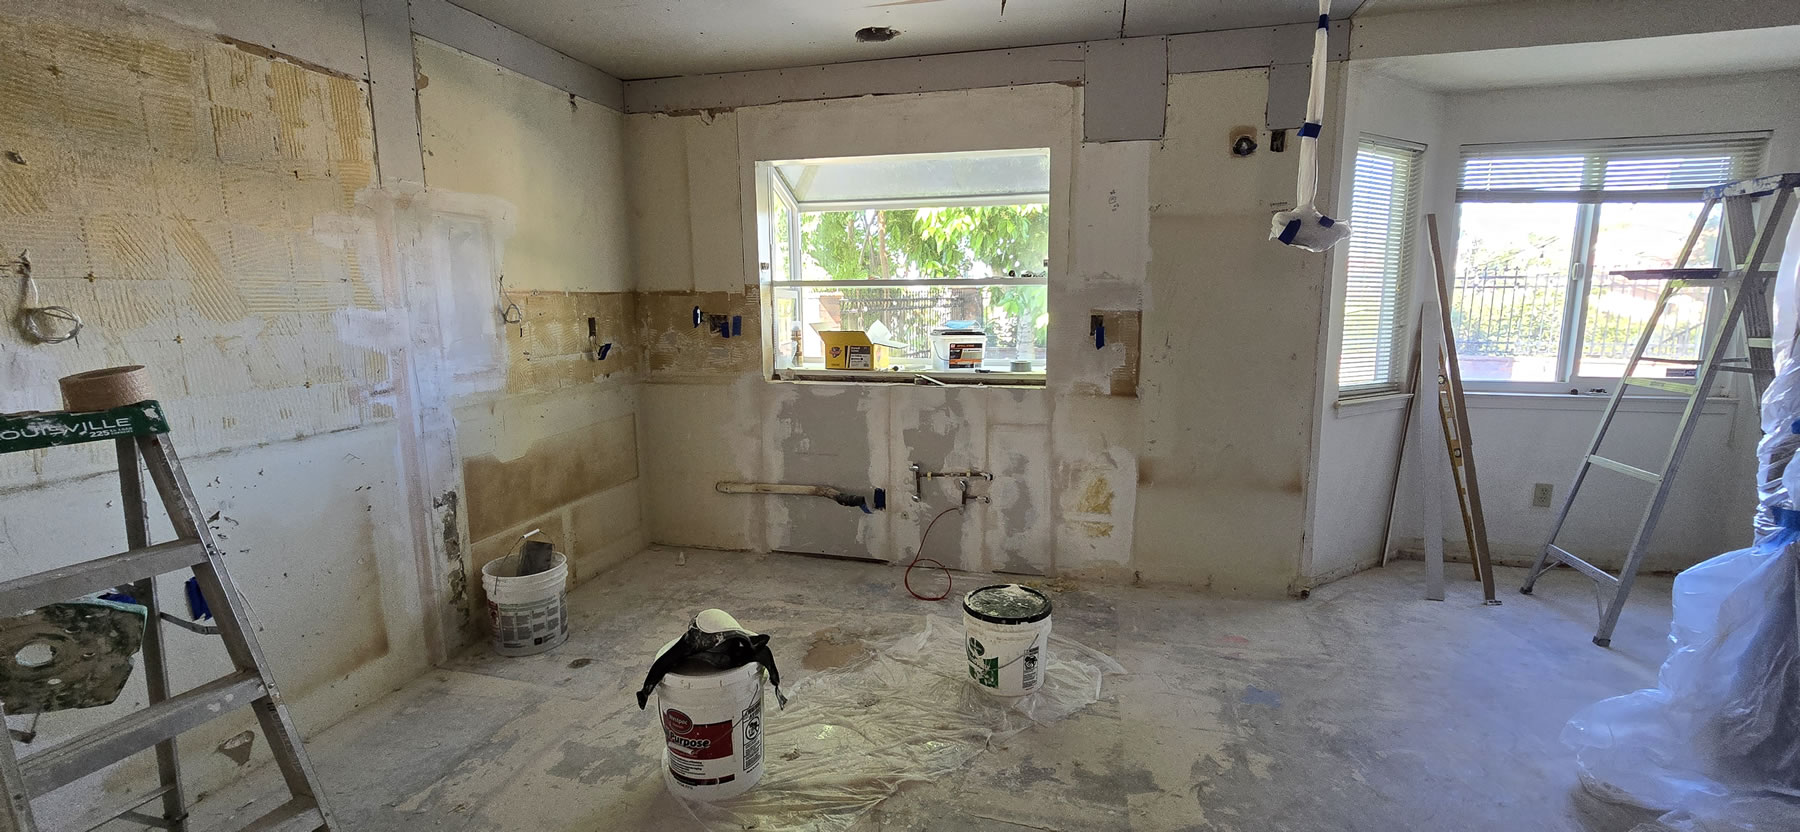
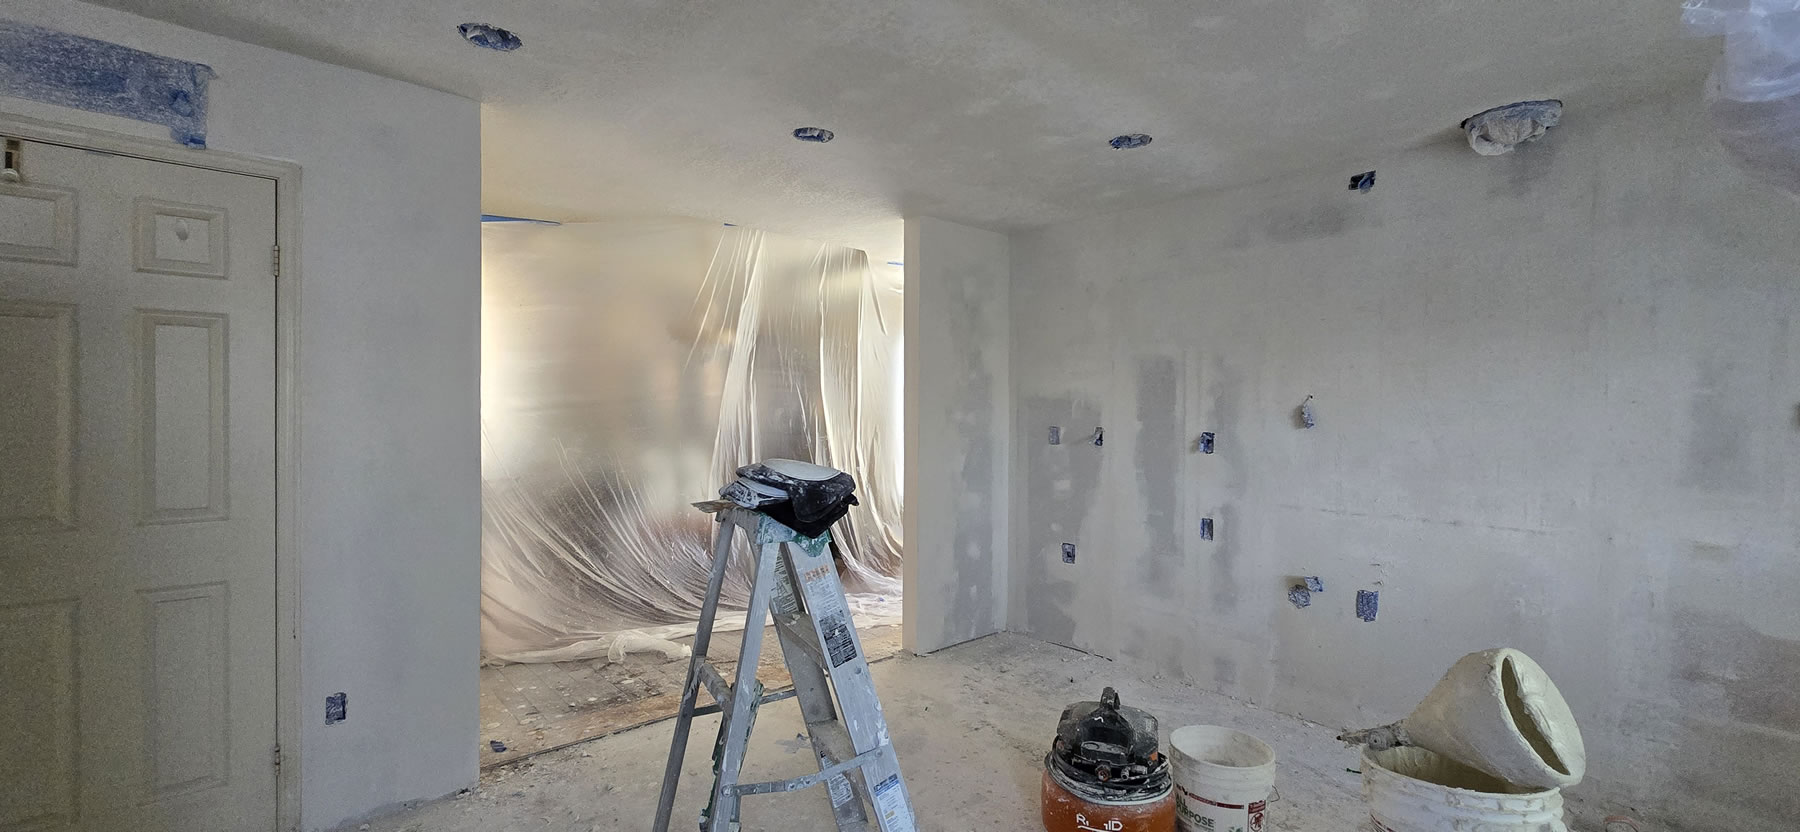
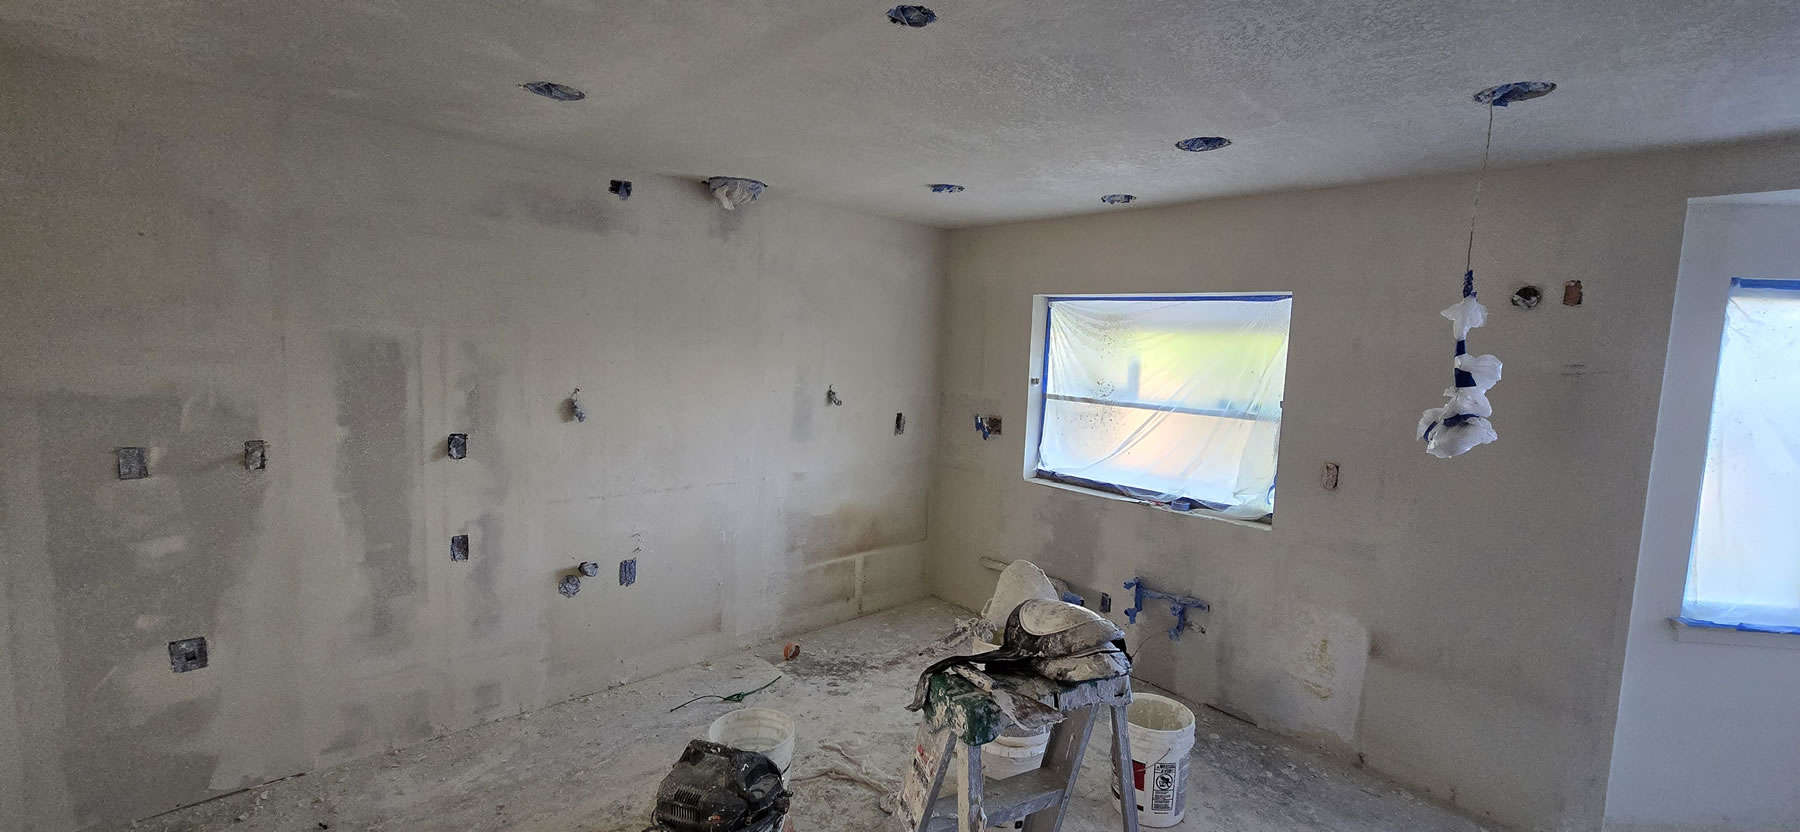
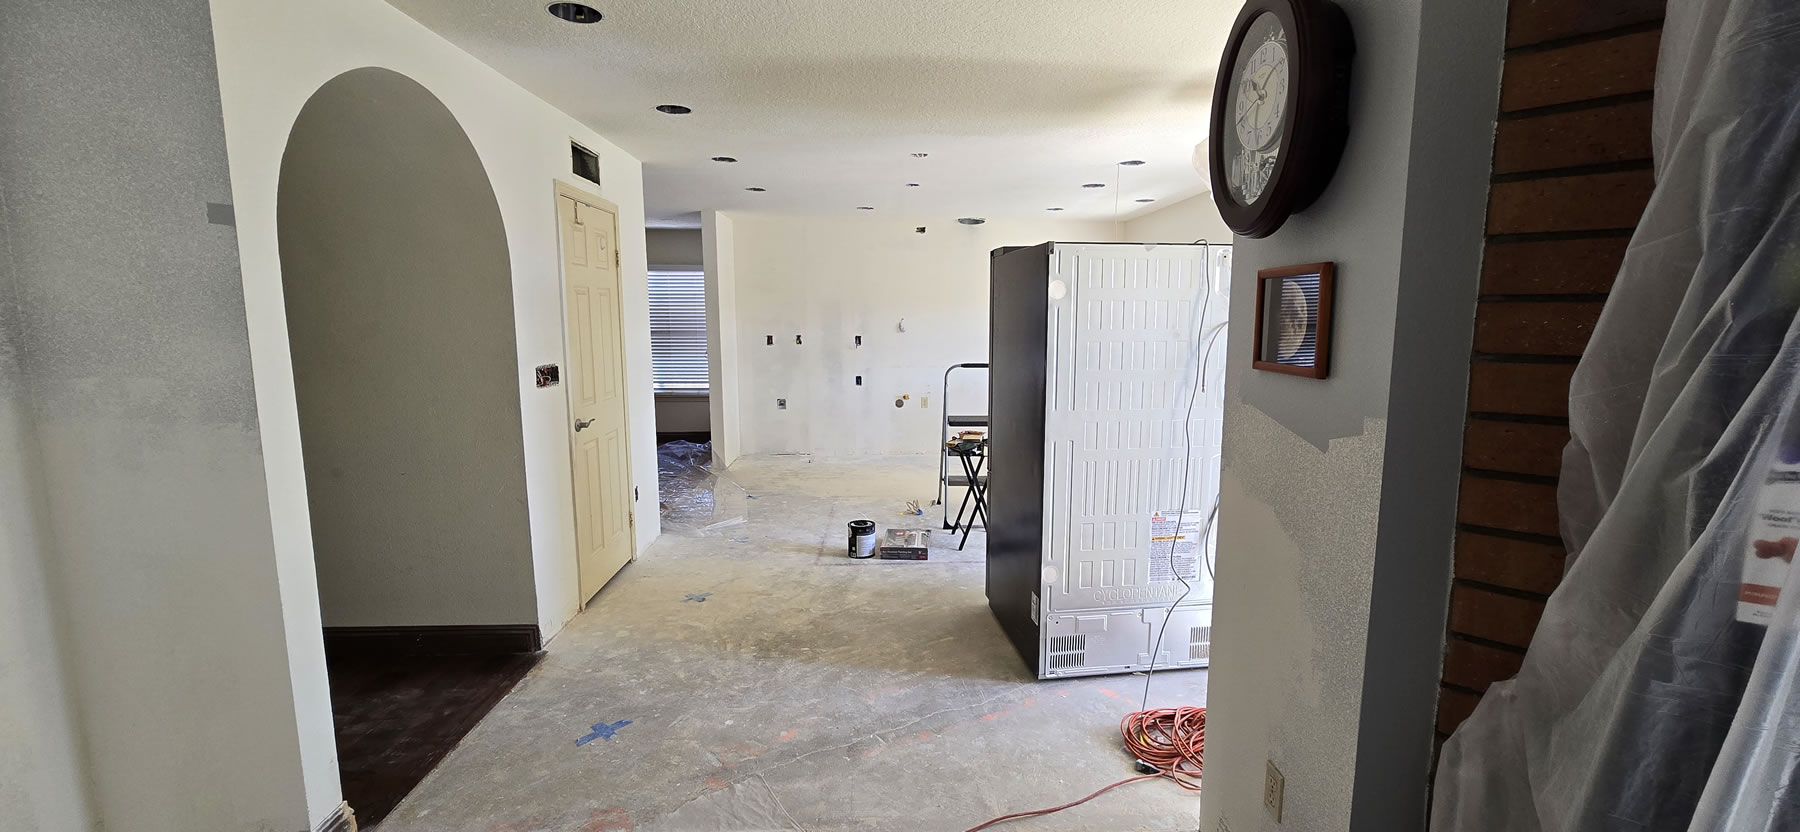
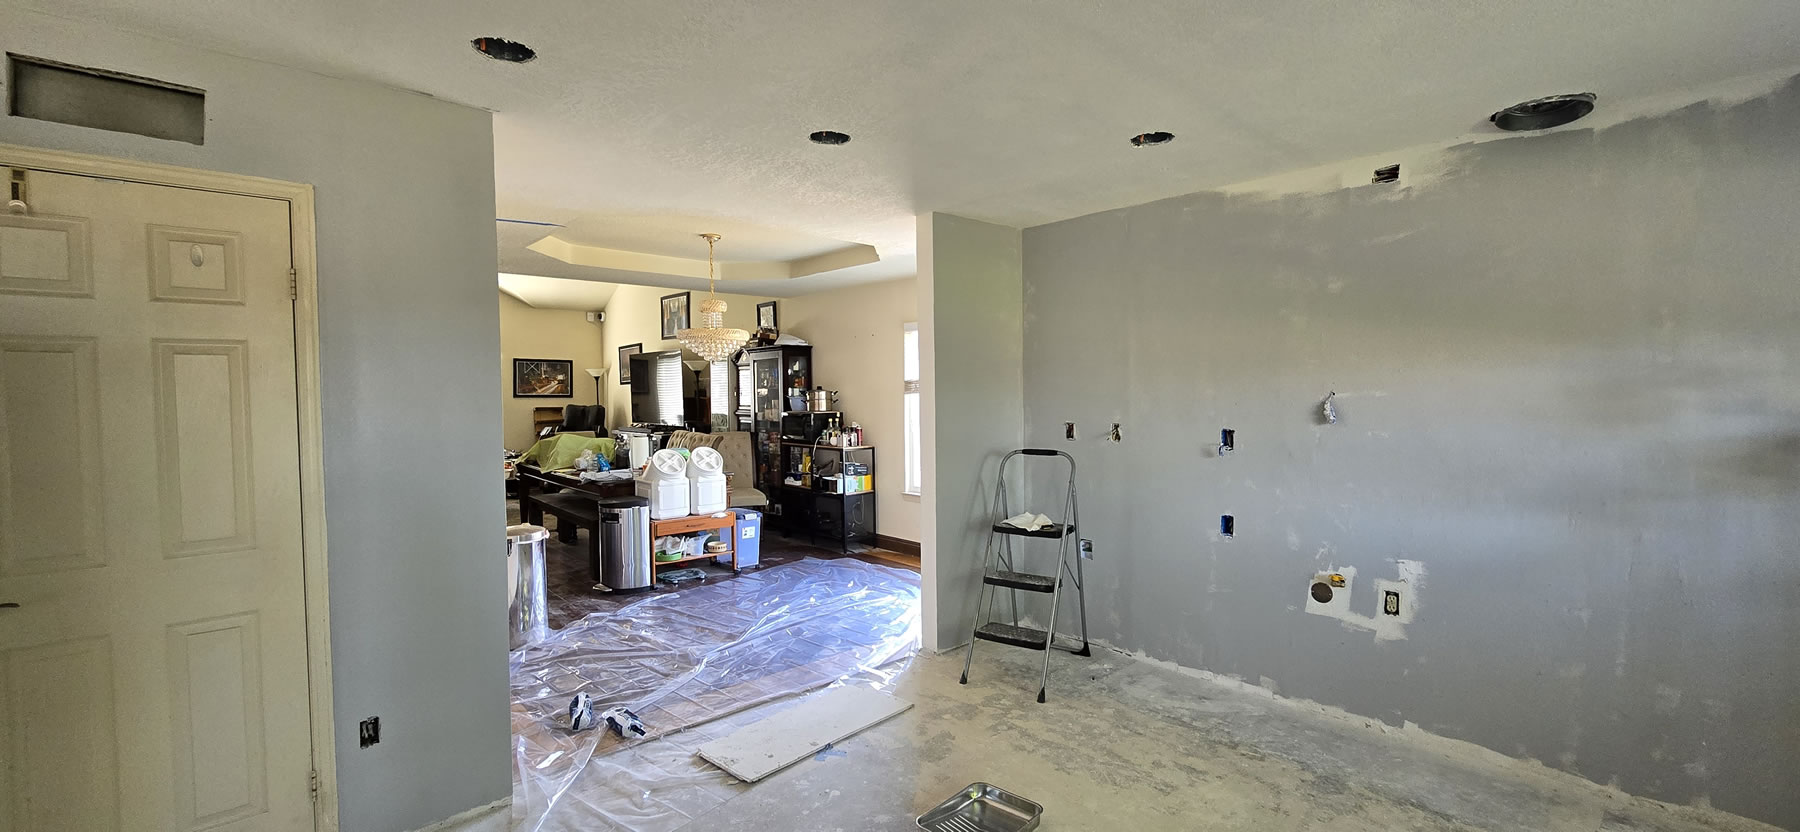
With the rough electrical done, plumbing done, and framing completed; it’s time to patch and hide all this with sheet rock. It’s time to dry wall. Also, first payment of 8K to contractor for the electrical/plumbing rough and demo.
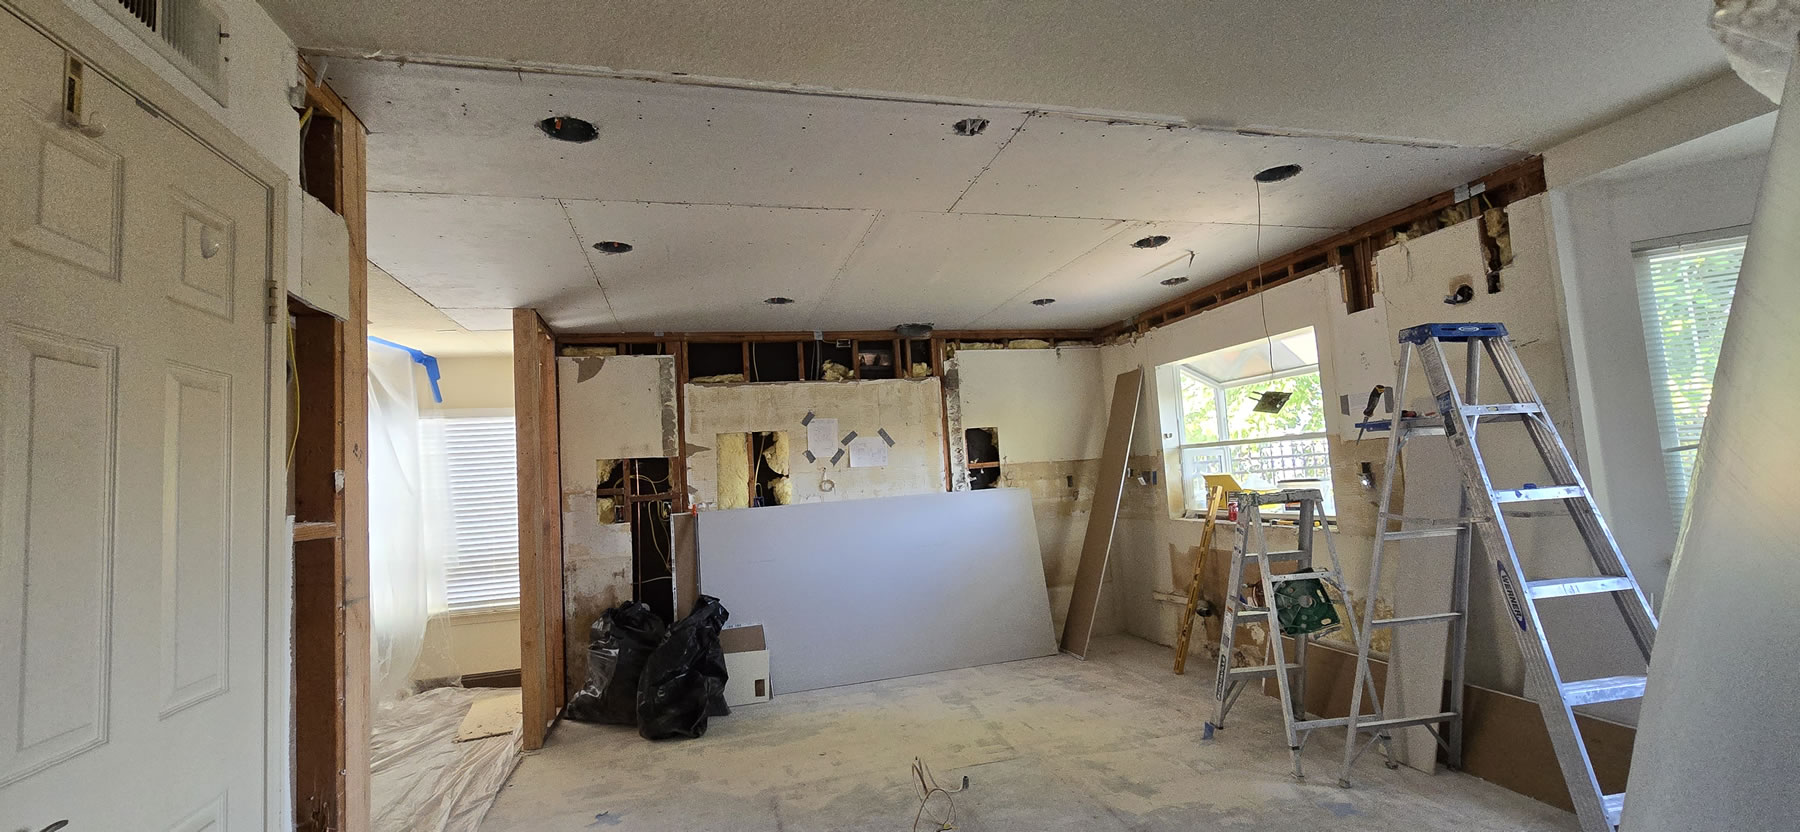
The dry wall team works fairly quick to get all the dry wall cut and placed. I did have to point out that they had dry walled over one of the pendent lights and had to show the guy where the box was. The box was a bit more recessed than the other, so it’s an easy mistake. Better to catch it now than try to figure out where the damn thing is after complete mudding.
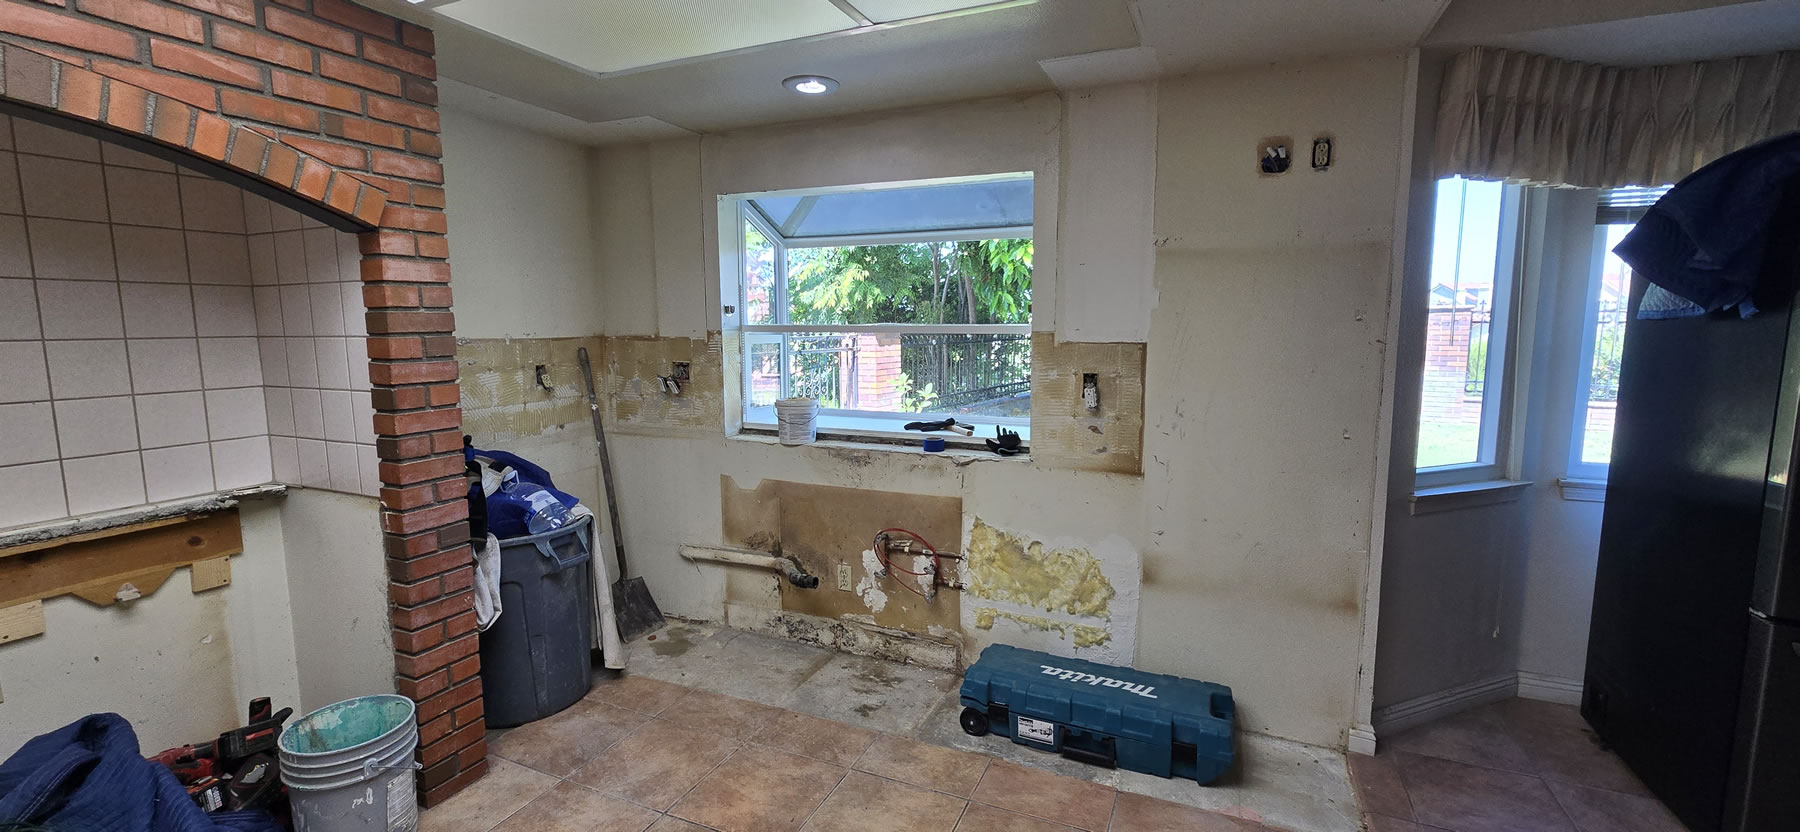
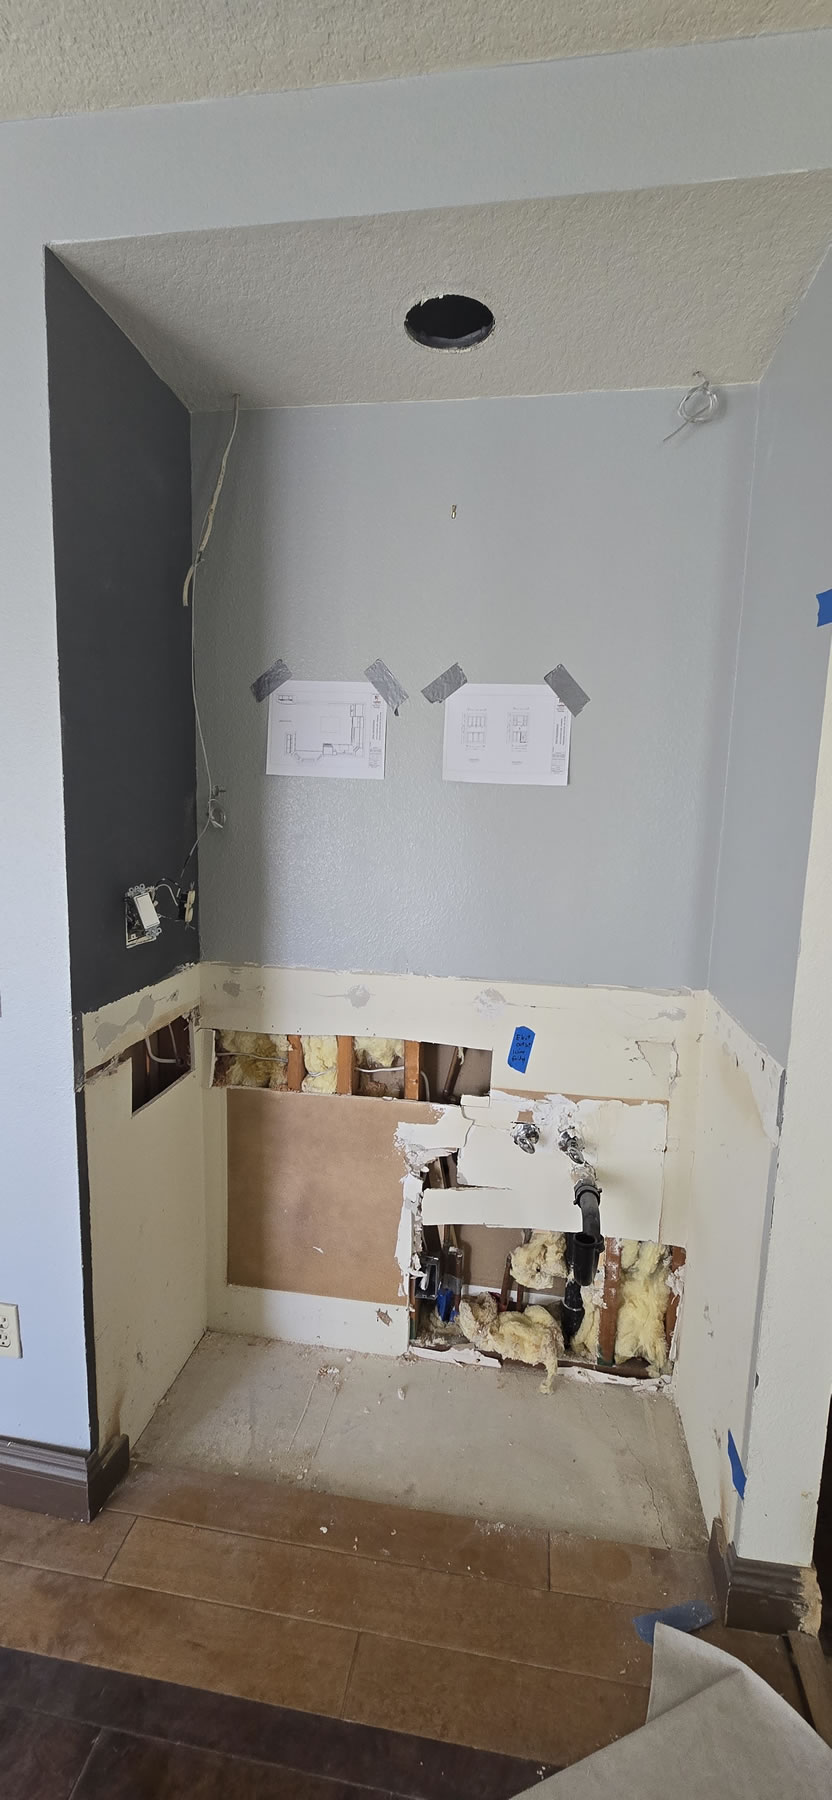
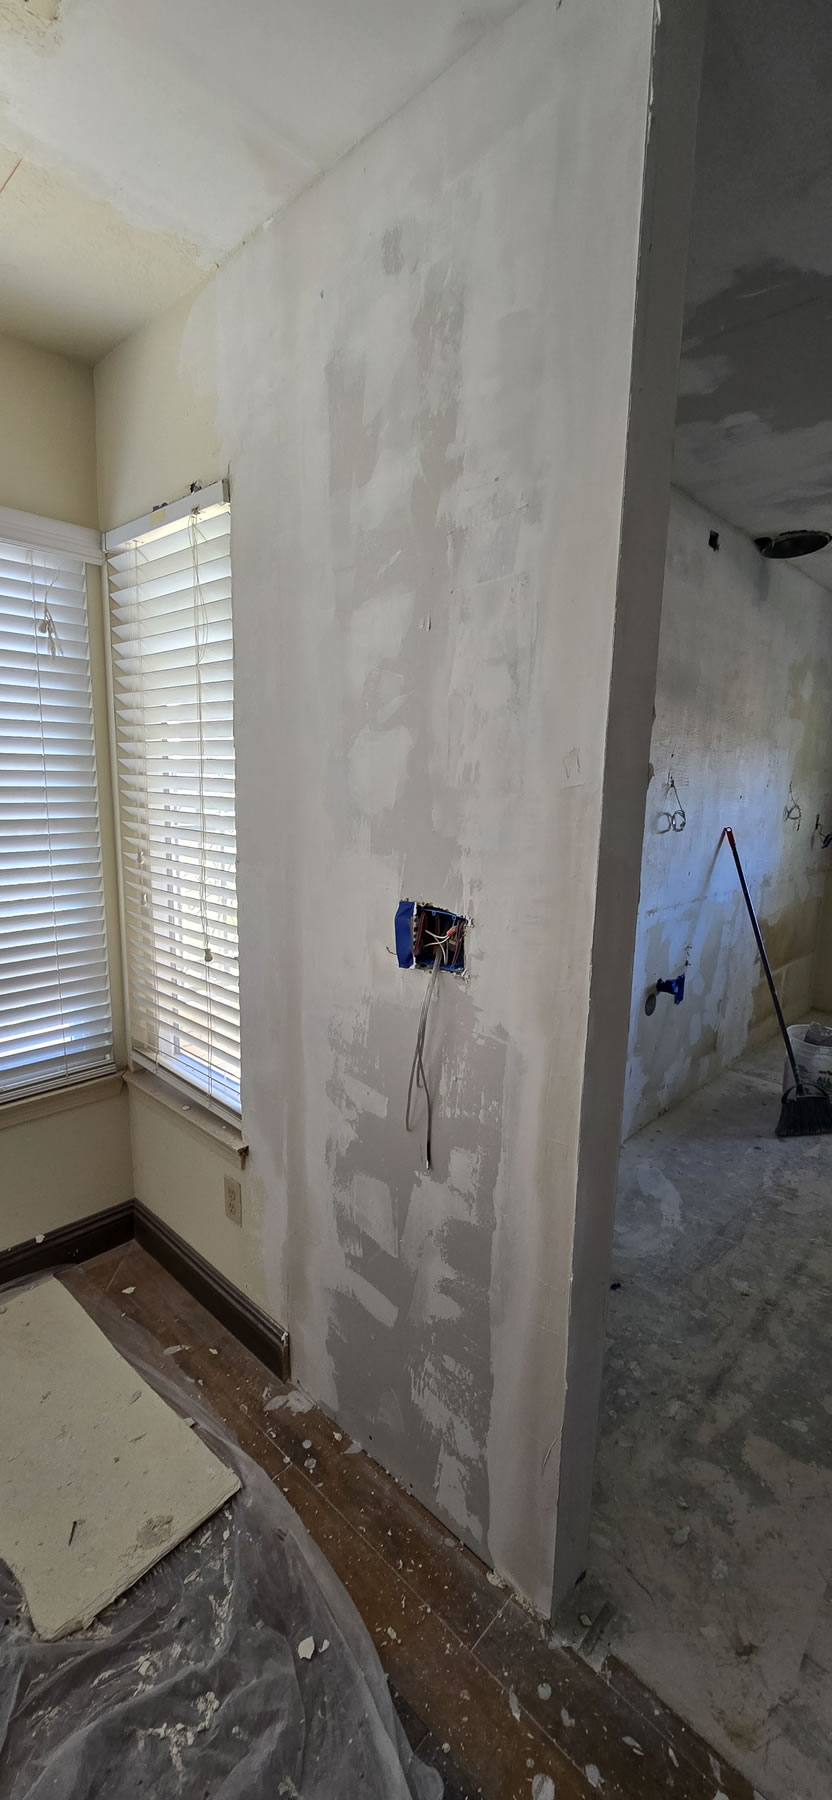
We had to also remove most of the old drywall in the area around the sink where the window is because there was mold there. One of the main reason for remodeling the kitchen was to get rid of the moldy cabinets in the kitchen sink area. No more opening the cabinets to get a nice whiff of rotting moldy wood.
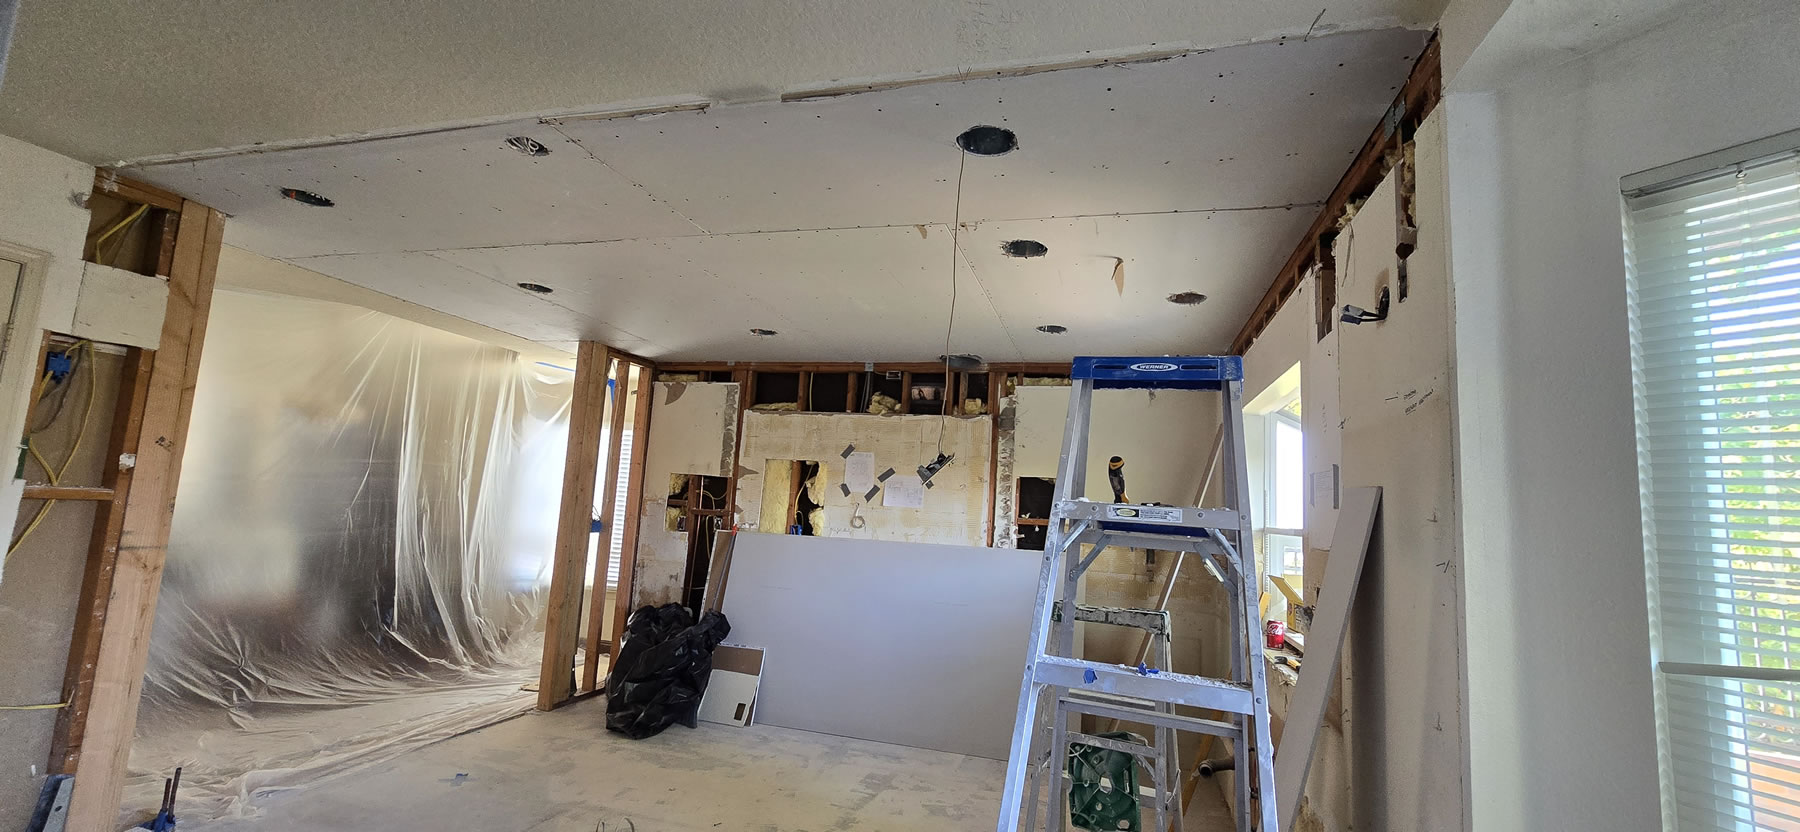
Sheet rock is up, time to mud.

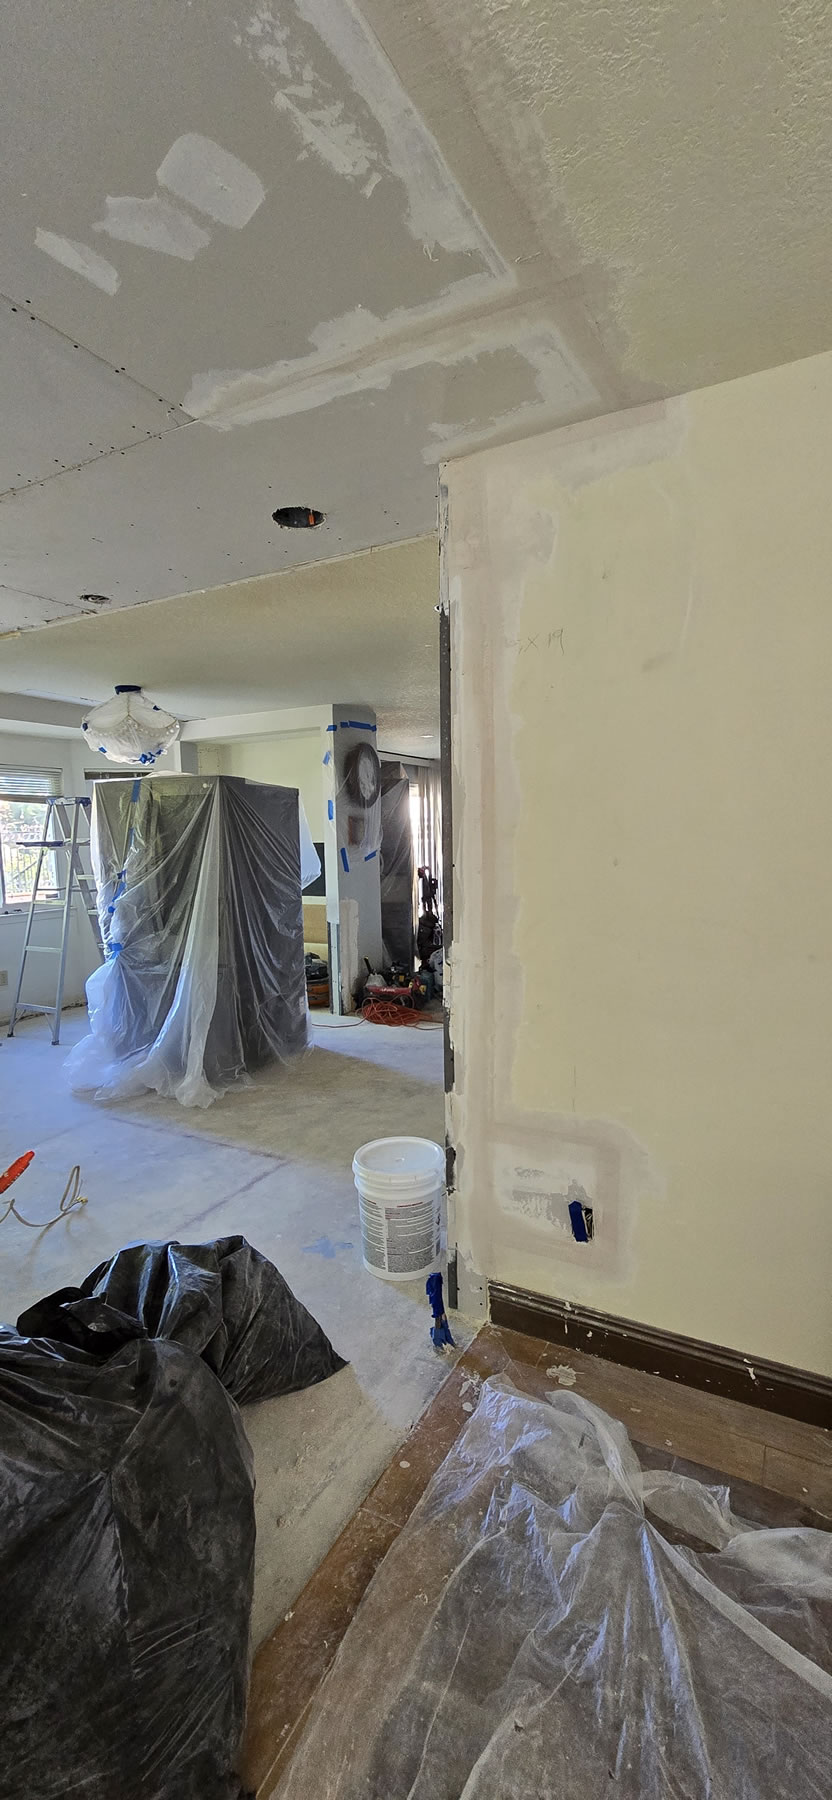
All the framing is covered up and things are starting to look cleaner. Second week is done.
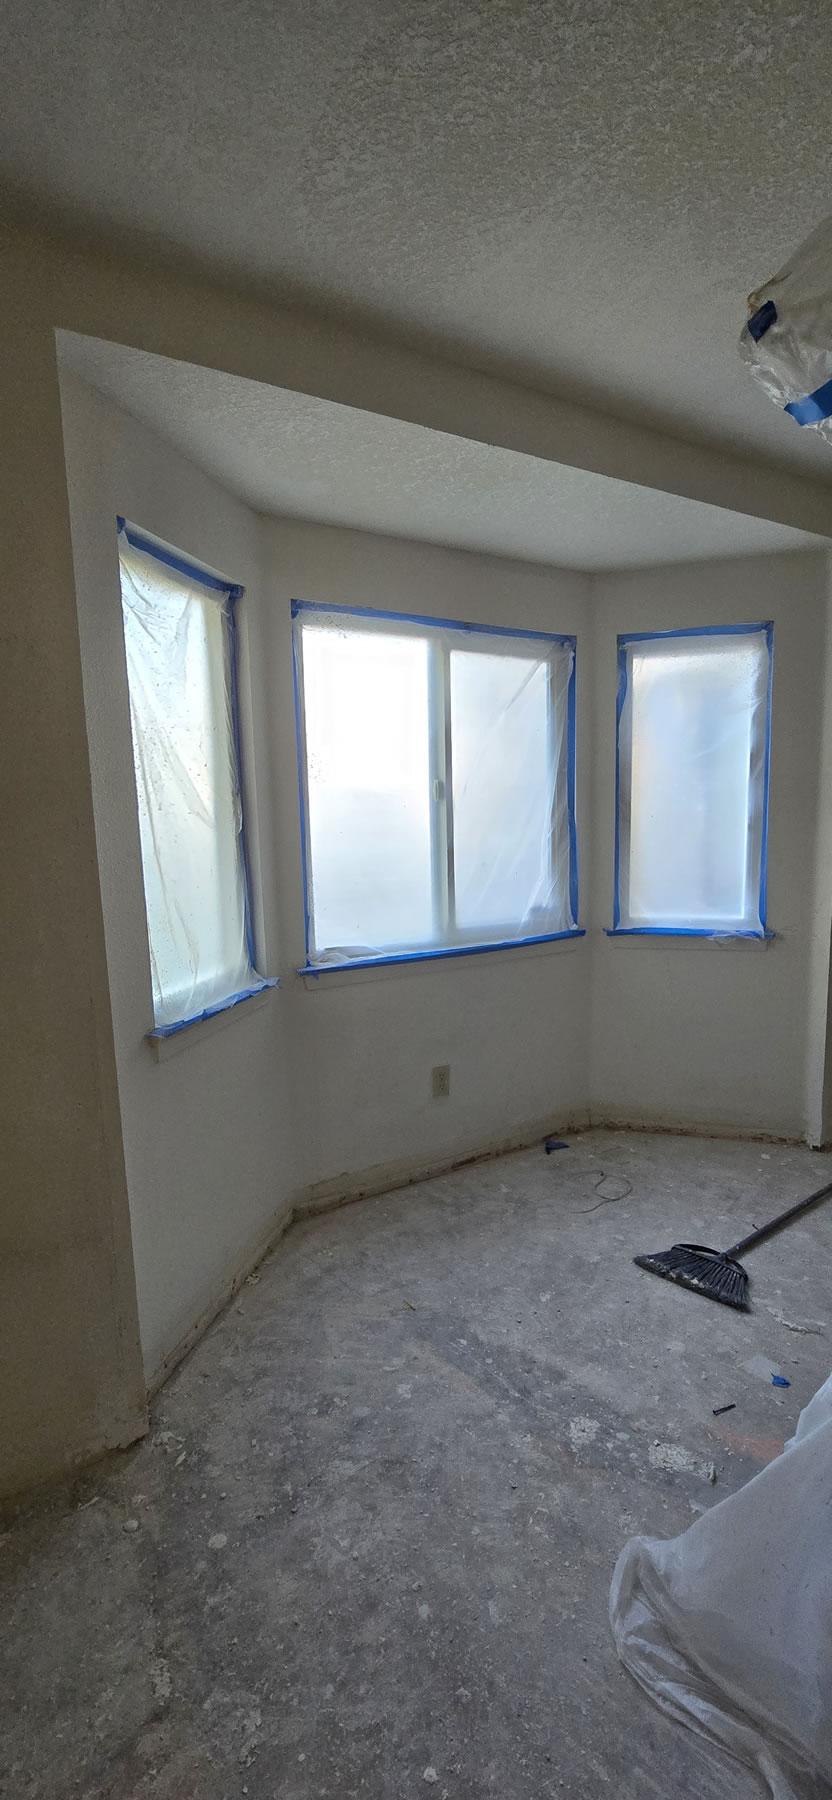
Week three begins with the end of the dry wall team’s work. Mudding was completed last week, time to mask off everything and spray texture like a mad man.
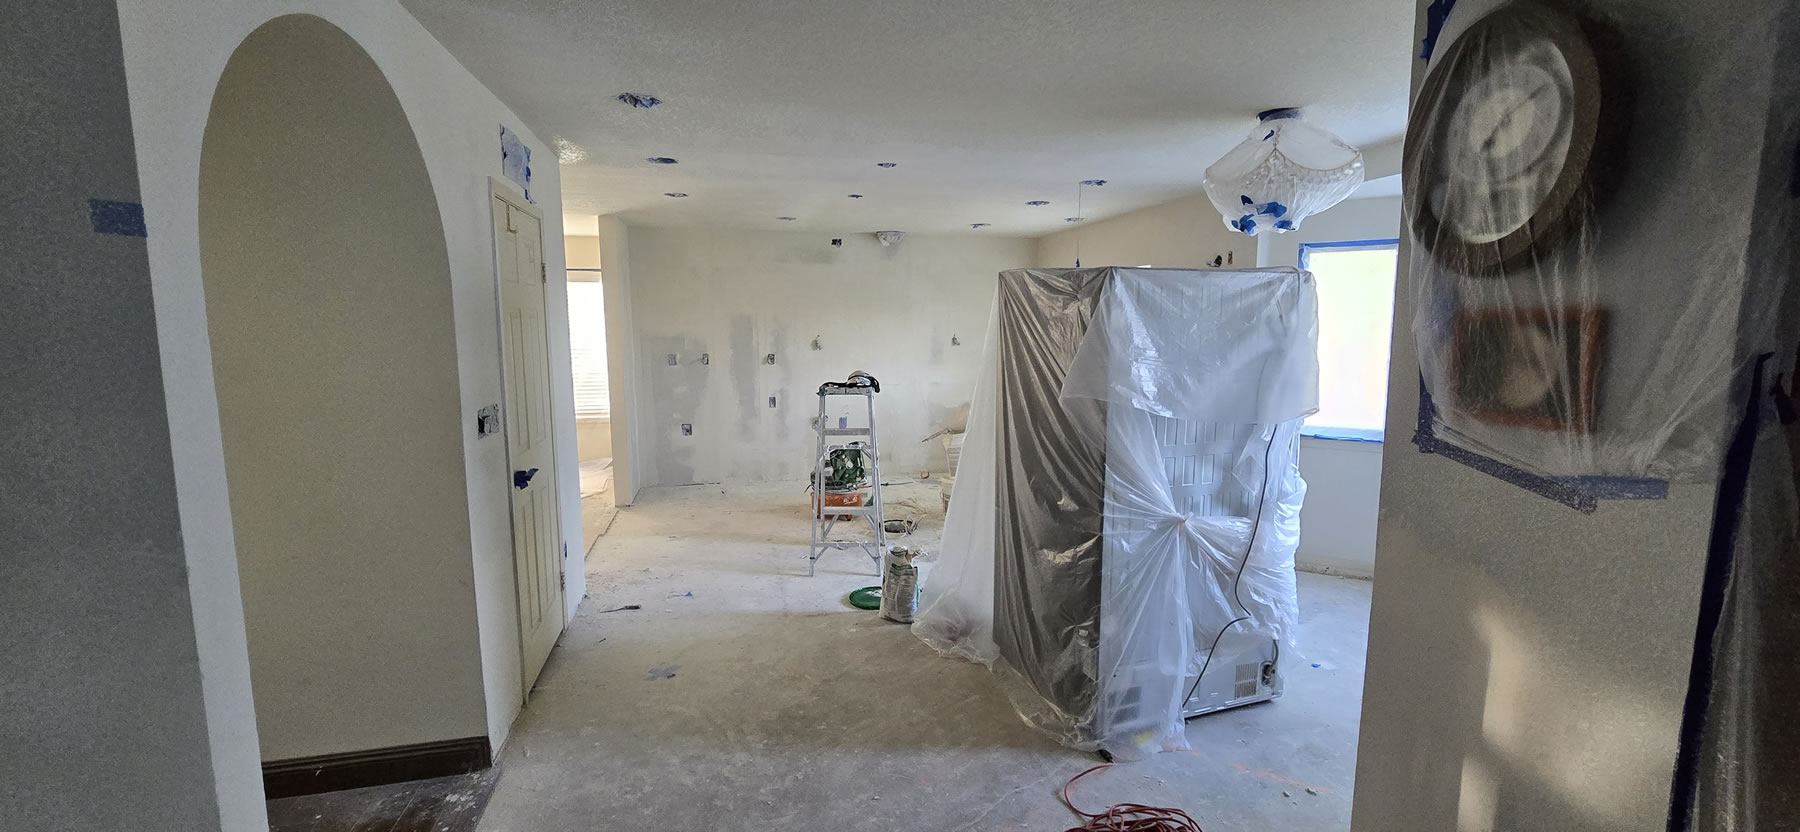
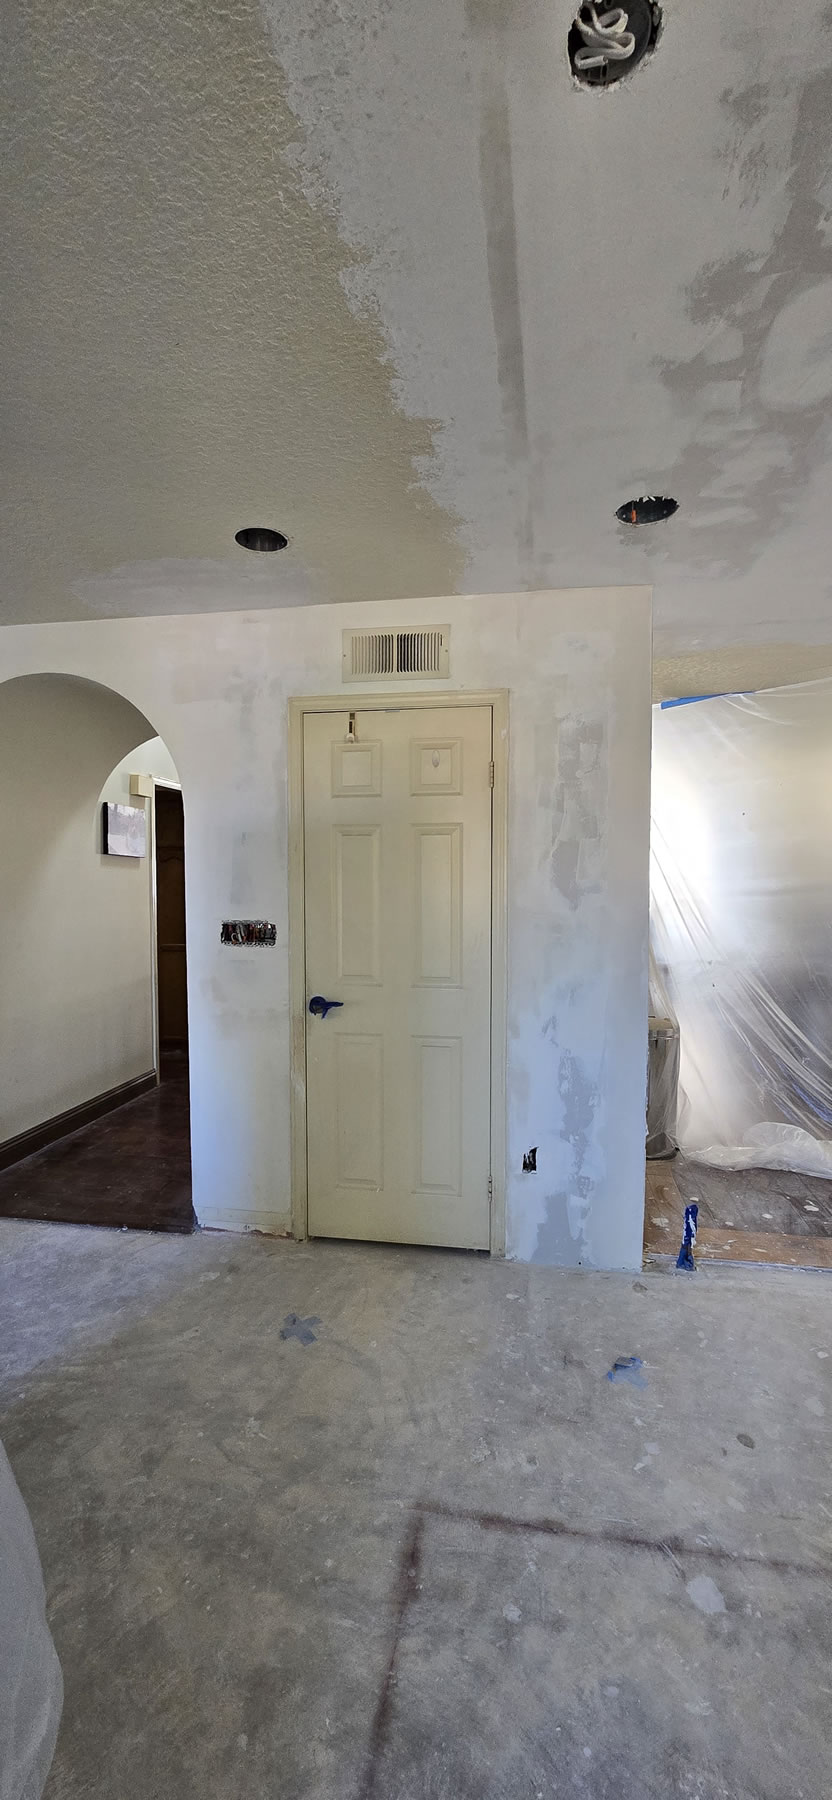
My contract did not include painting. There is some down time to wait for the cabinet delivery, the walls and ceiling are done, and there’s no flooring or cabinets. So this blank slate is perfect for painting. The wife and I hit up homedepot and pick out a nice kitchen wall color. I grab a sample of the ceiling color and make a batch of that. The next two days were spent painting up the walls and ceiling. Not too bad a job. No speed of a spray gun, but a roller and some brushes works just fine. In the wide shot from the kitchen to dining room, the pipes sticking out of the ground in all previous pictures are now gone. None of the work crews were told to cut them, so I just grabbed my sawzall and flush cut them off. These were a byproduct of the house re-pipe job. Blue taped tripping hazard is gone.

Wasted a decent amount of paint on areas that would be completely covered up. The wife pointed this out so I stopped and just focused on visible areas. Should have known better. But I also fully paint gunpla frames and areas that will never see the light of day… so at least I’m consistent.

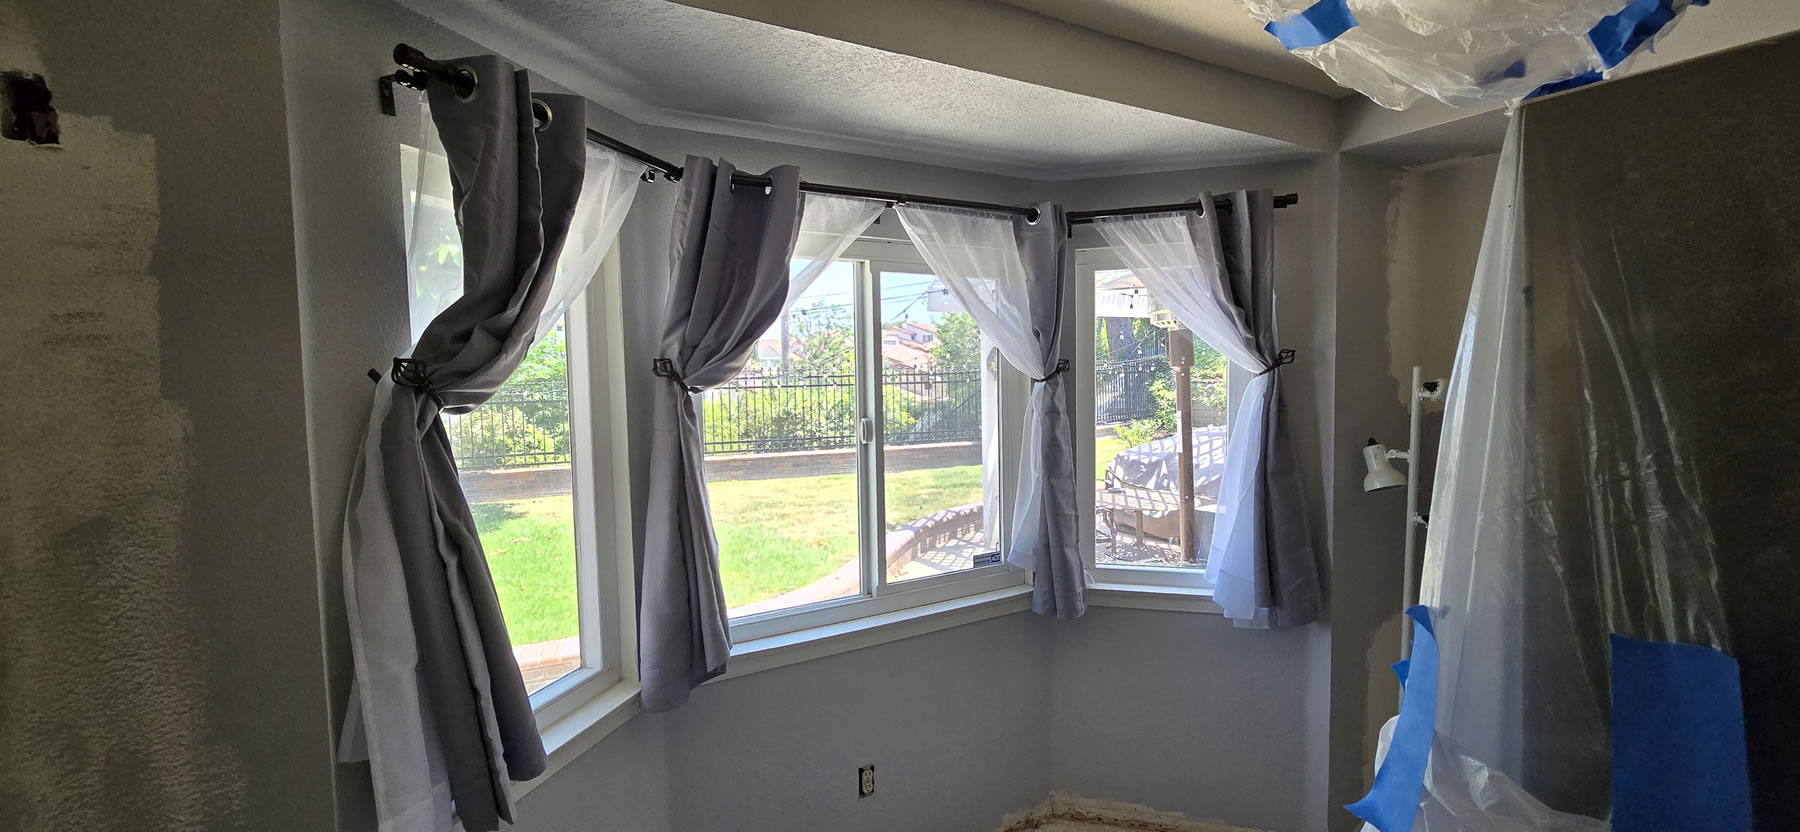
The old pink blinds were removed and thrown as far away as possible. At my old place, we used a dual curtain rod with a sheer outer curtain and black out inner curtains. I liked this design so I found something similar and applied this to the kitchenette bay windows. Reference the earlier set of pictures to fondly remember those pink blinds.
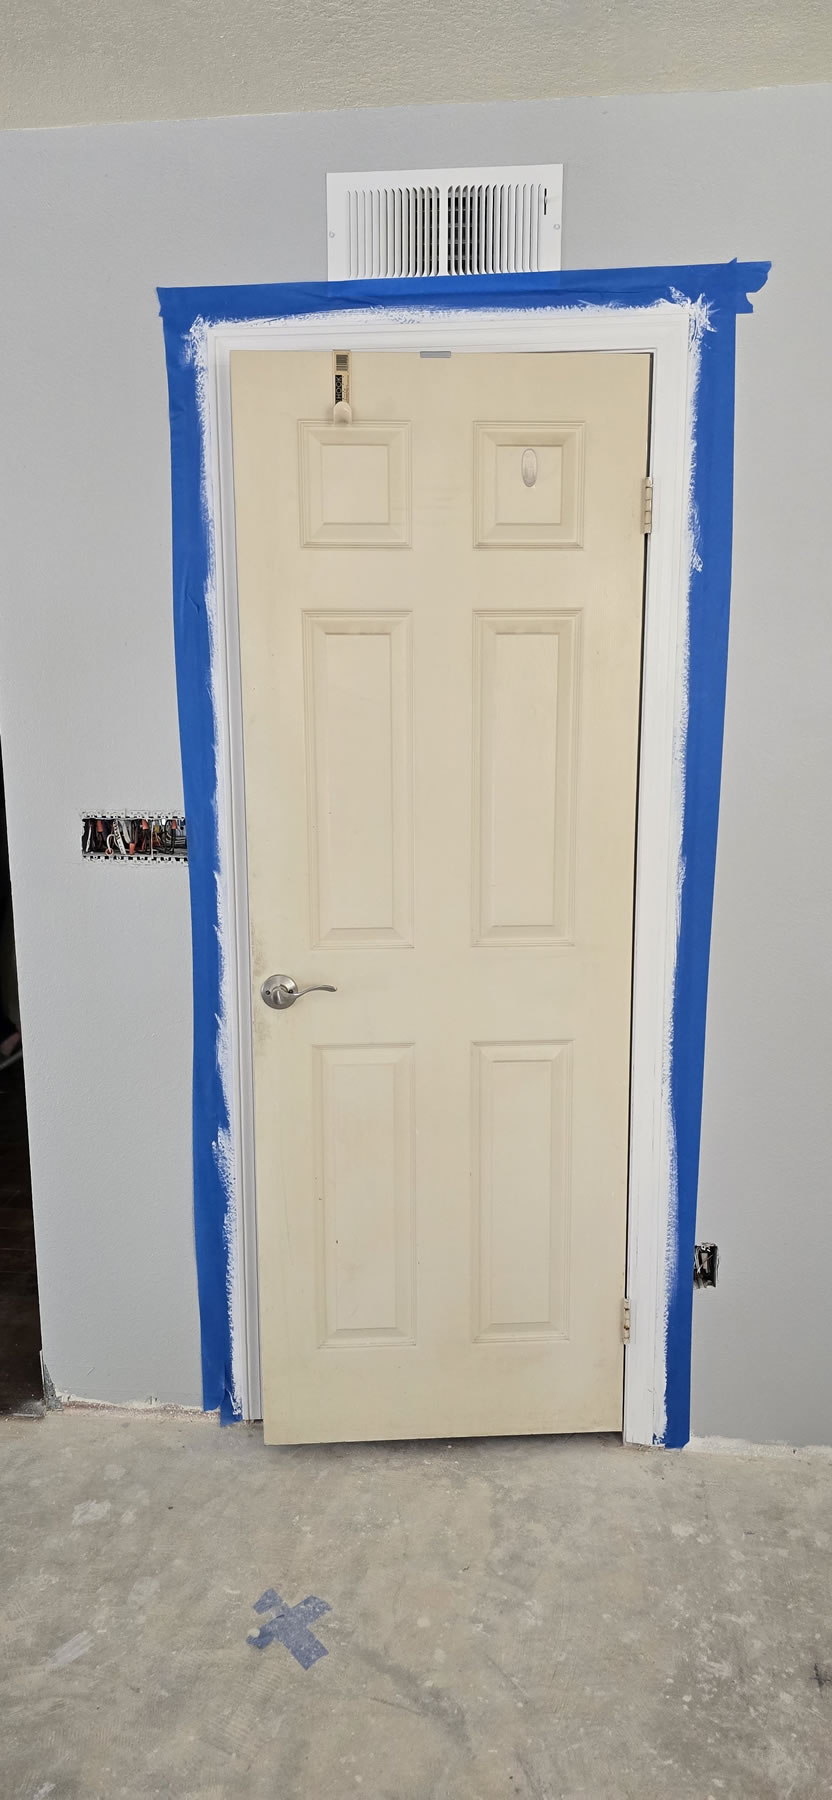
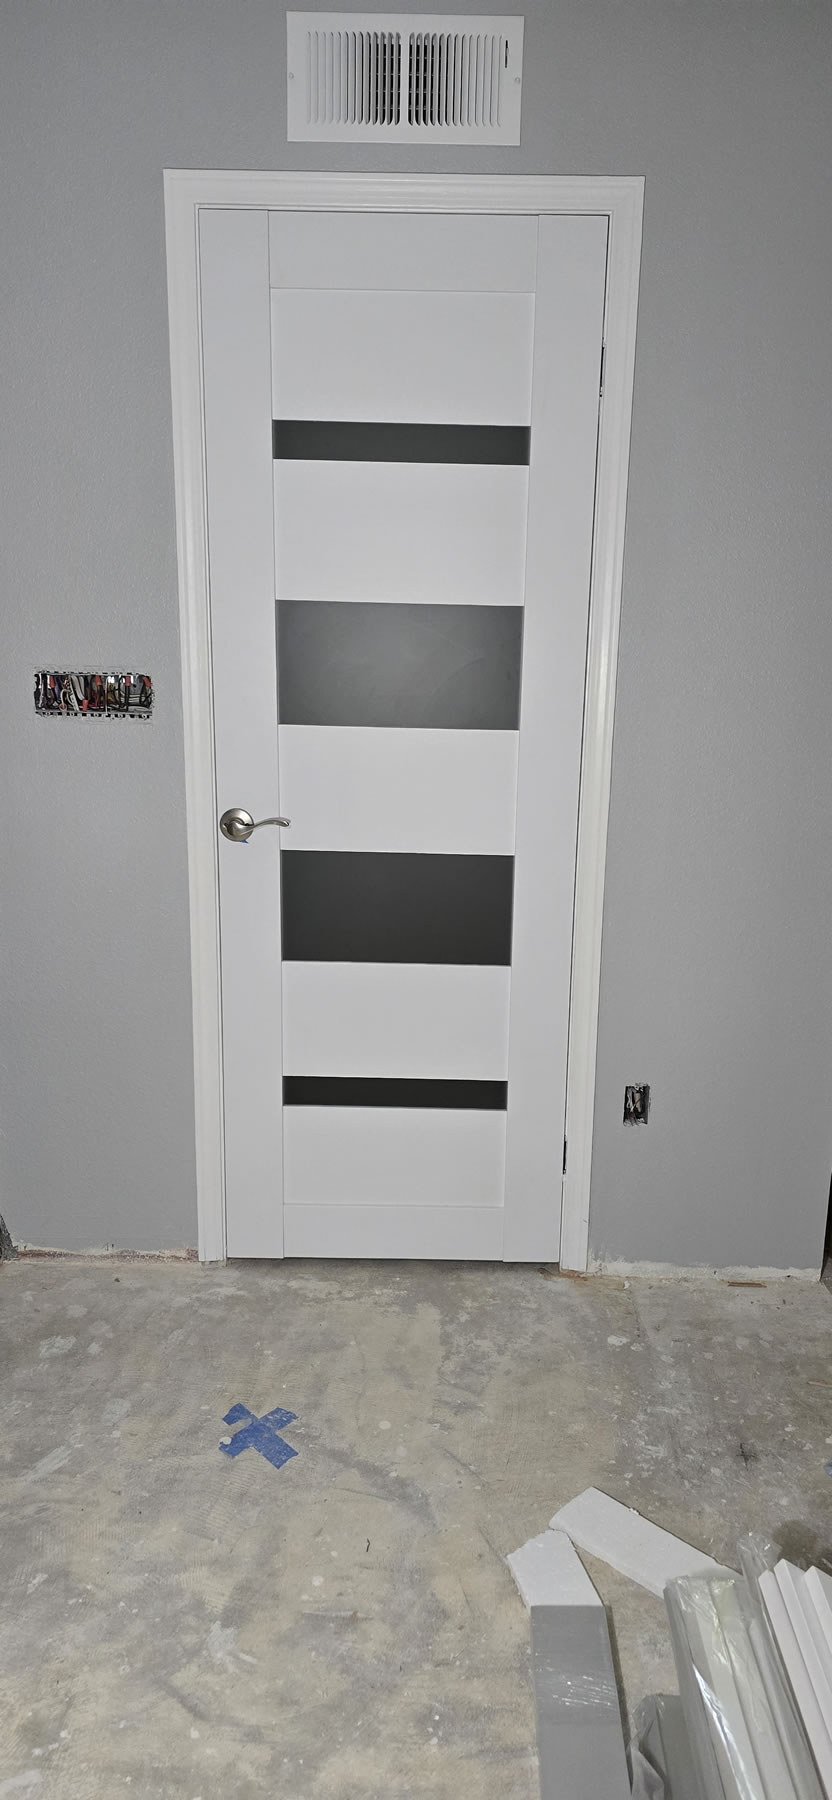
Painting the pantry door frame brought up a very glaring issue. We will have this nice new kitchen and still use the dingy old pantry door? Ok, lets order a new door. End week 3. Very little happened, but the down time worked so that the walls and ceiling could be painted.
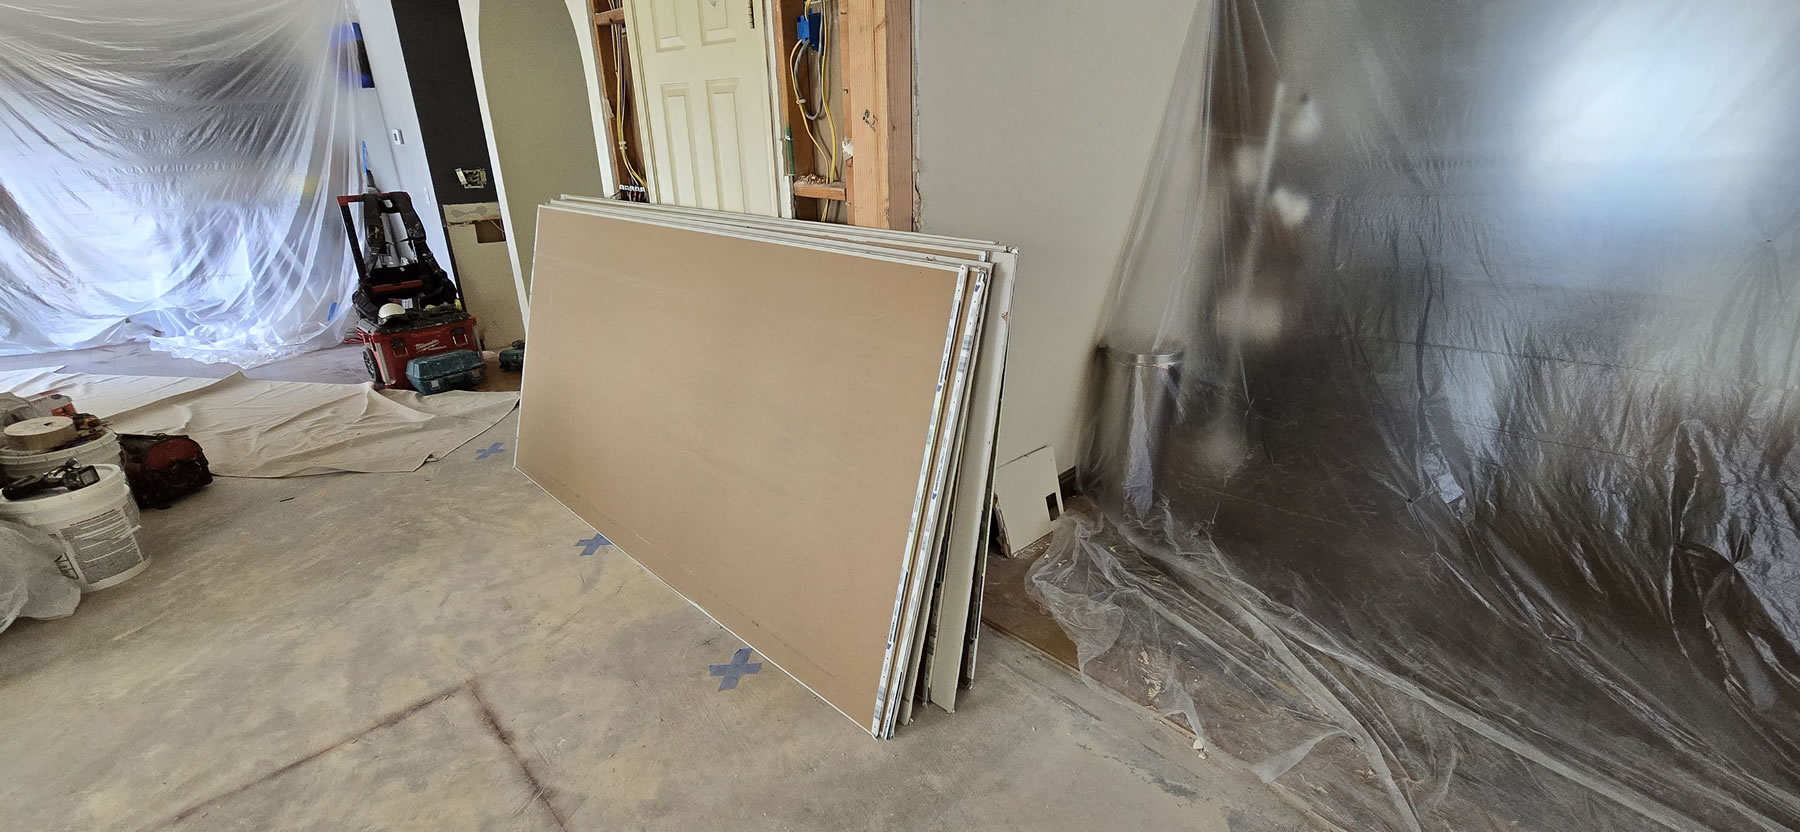
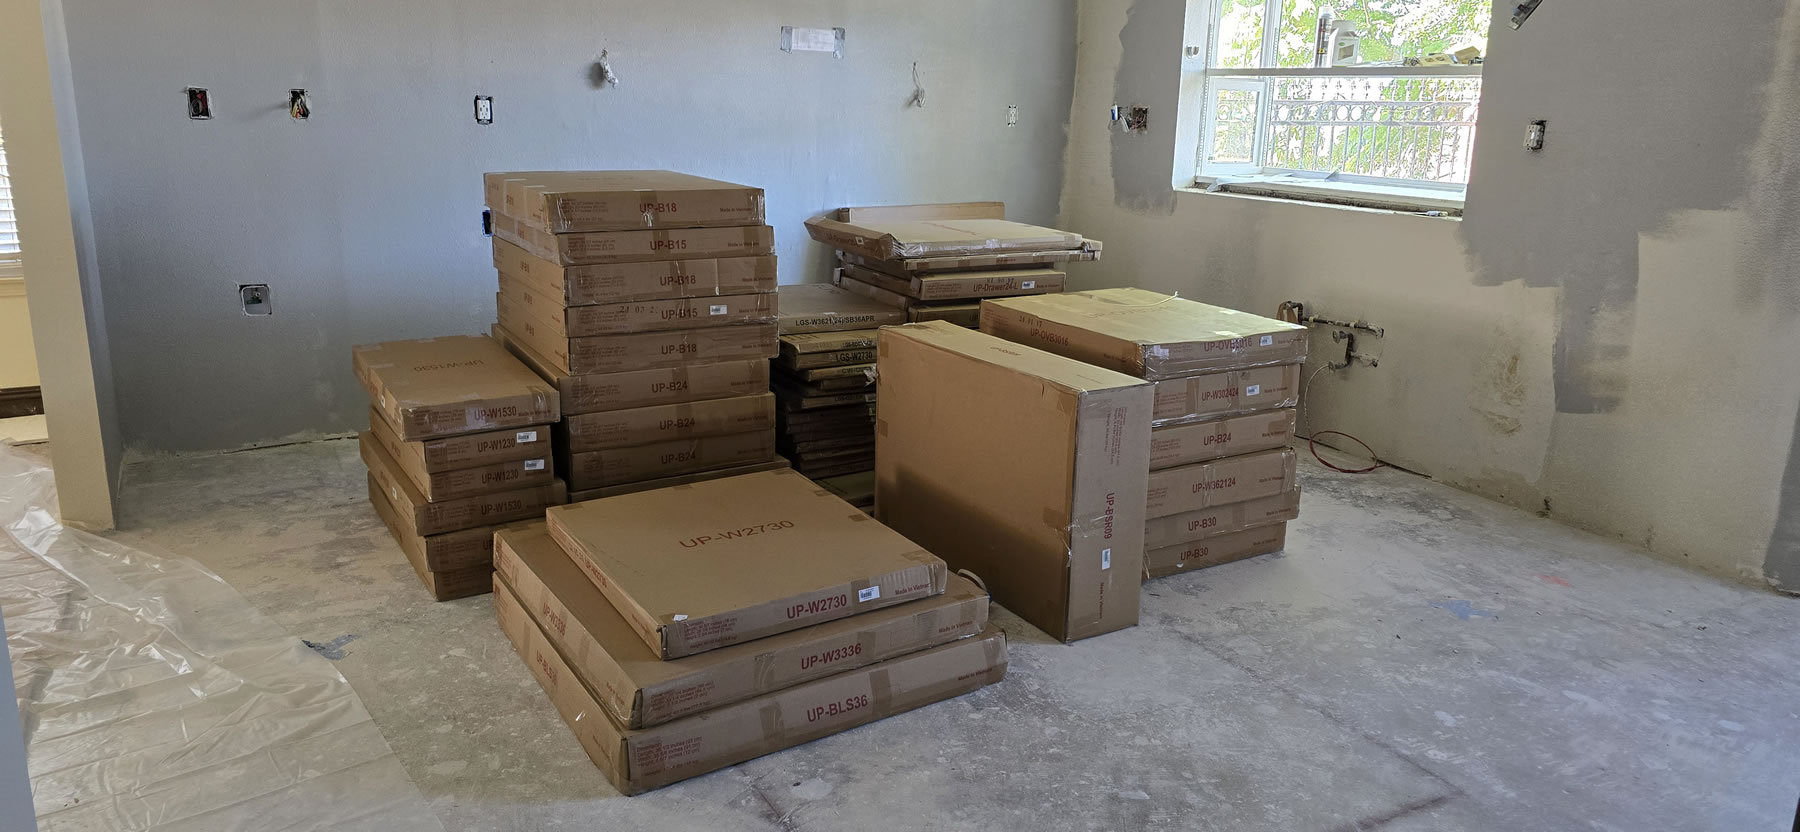
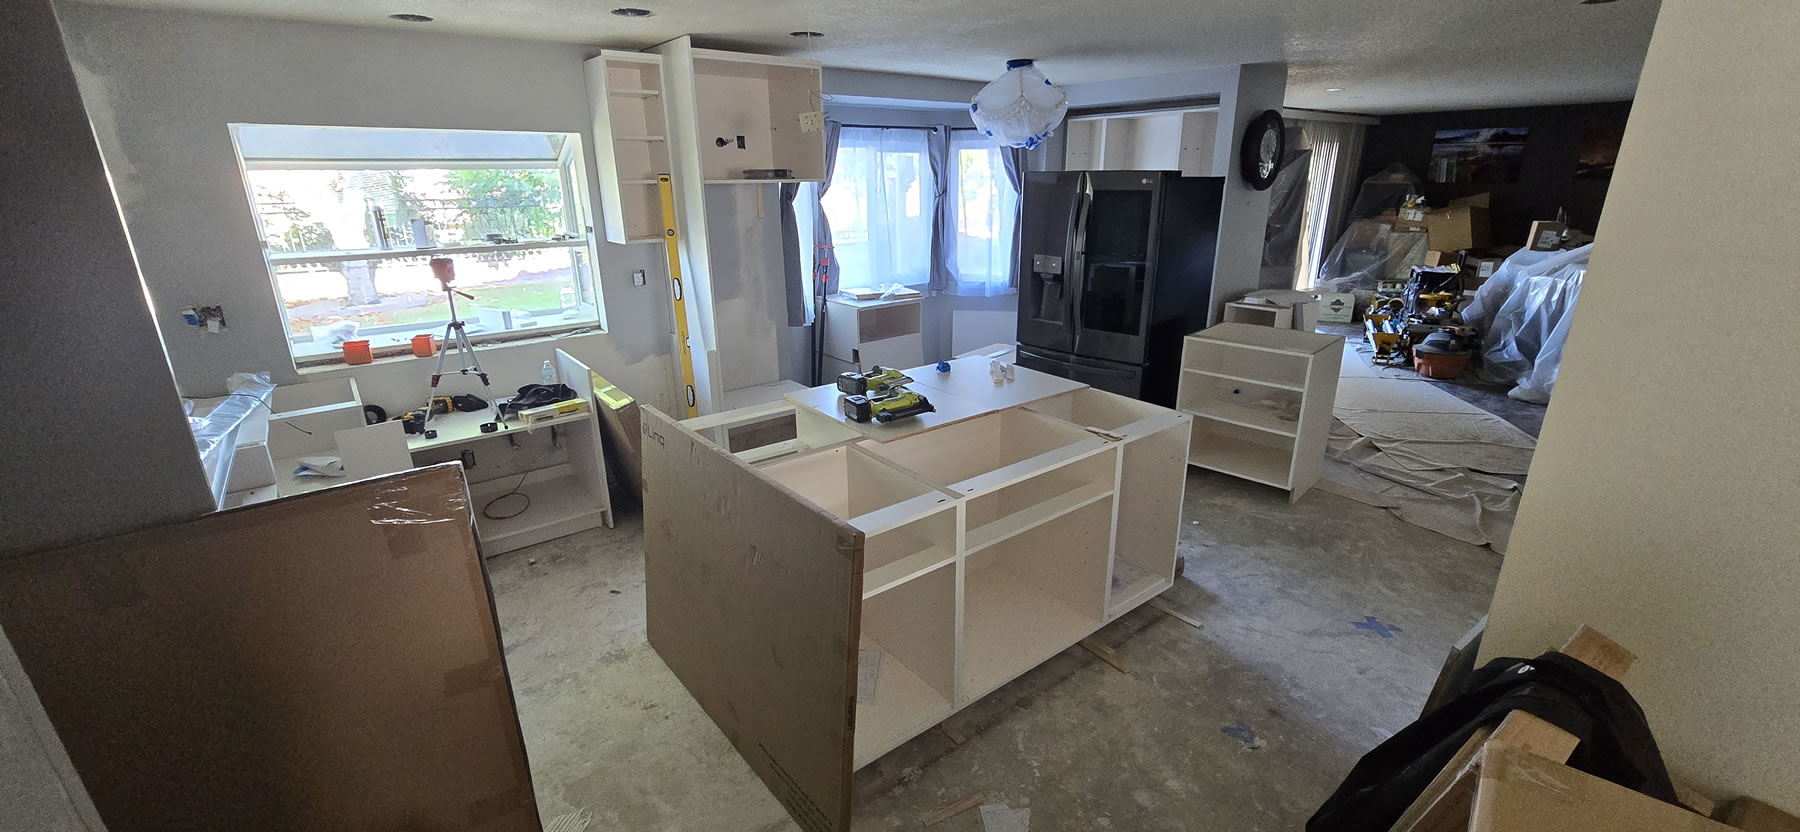
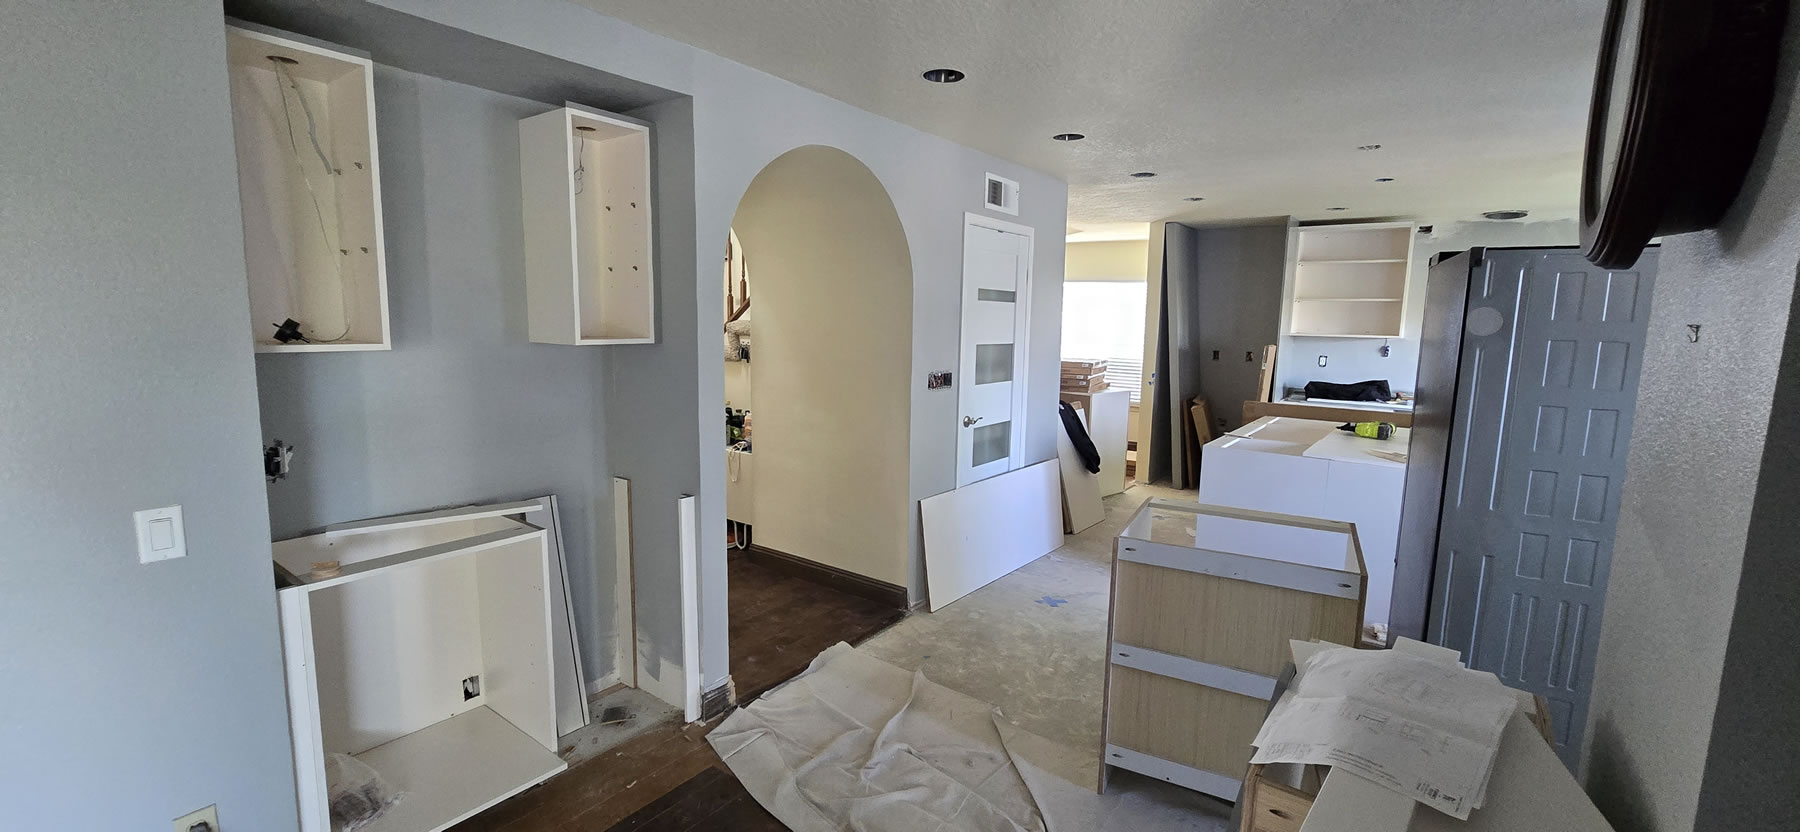
Week four begins with a slow start, but midweek, we get the cabinet delivery. Lots of heavy boxes of MDF and plywood. We went prefab because it was about 10k cheaper than going full custom cabinets – which is what our contractor’s company actually specializes. That saved 10k pretty much went to the beam and still wasn’t enough to cover that and the additional plumbing work.
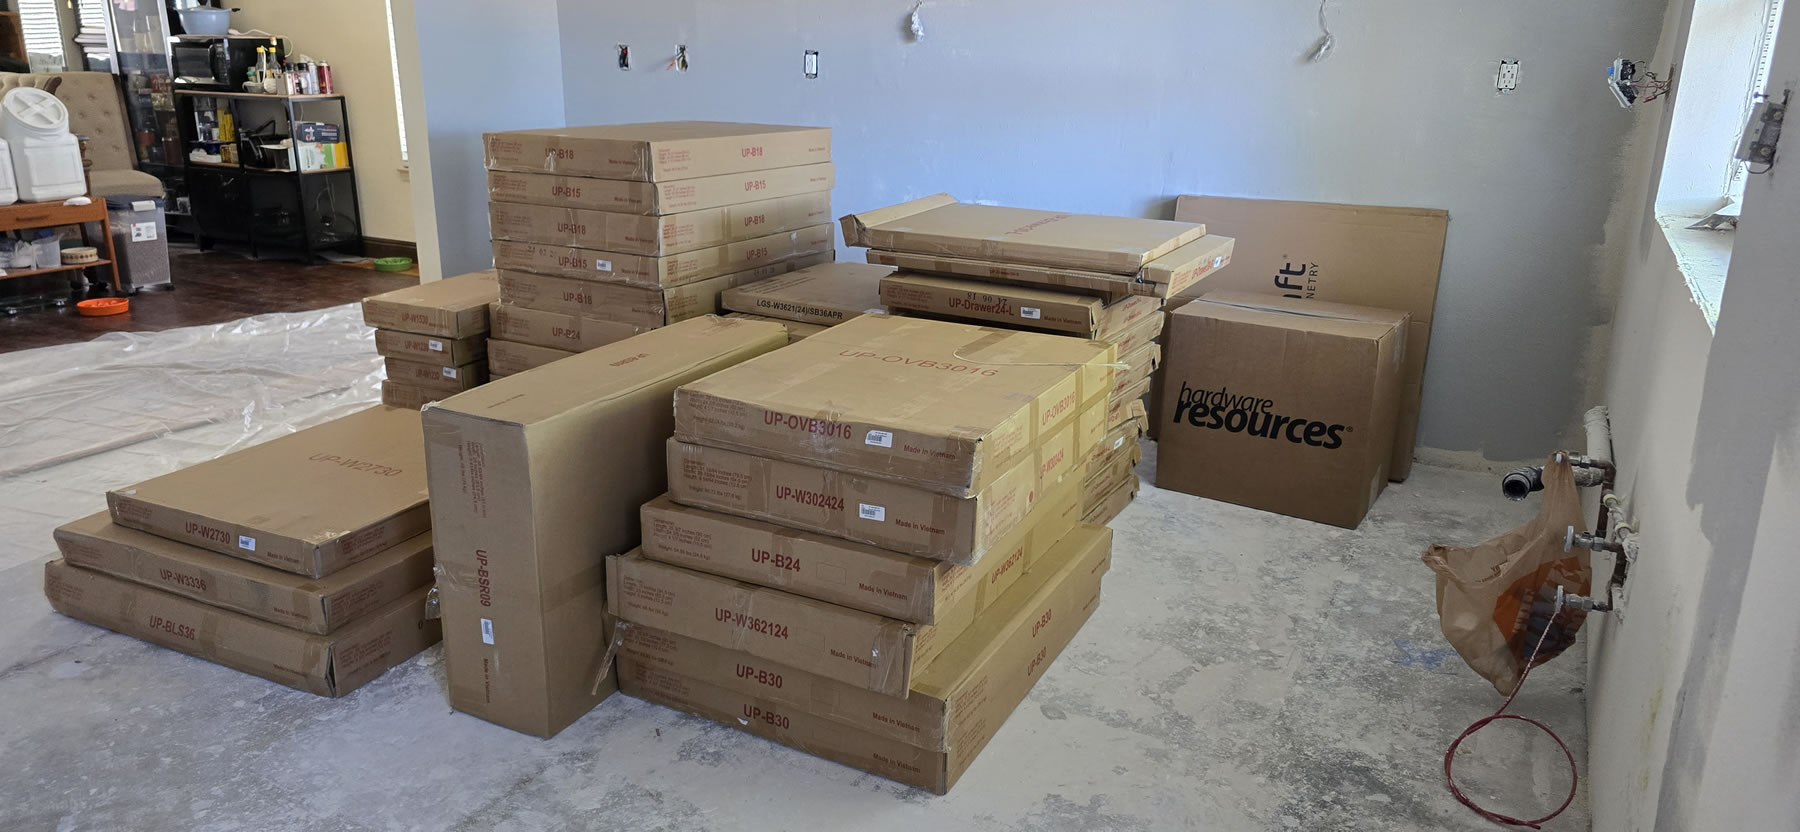
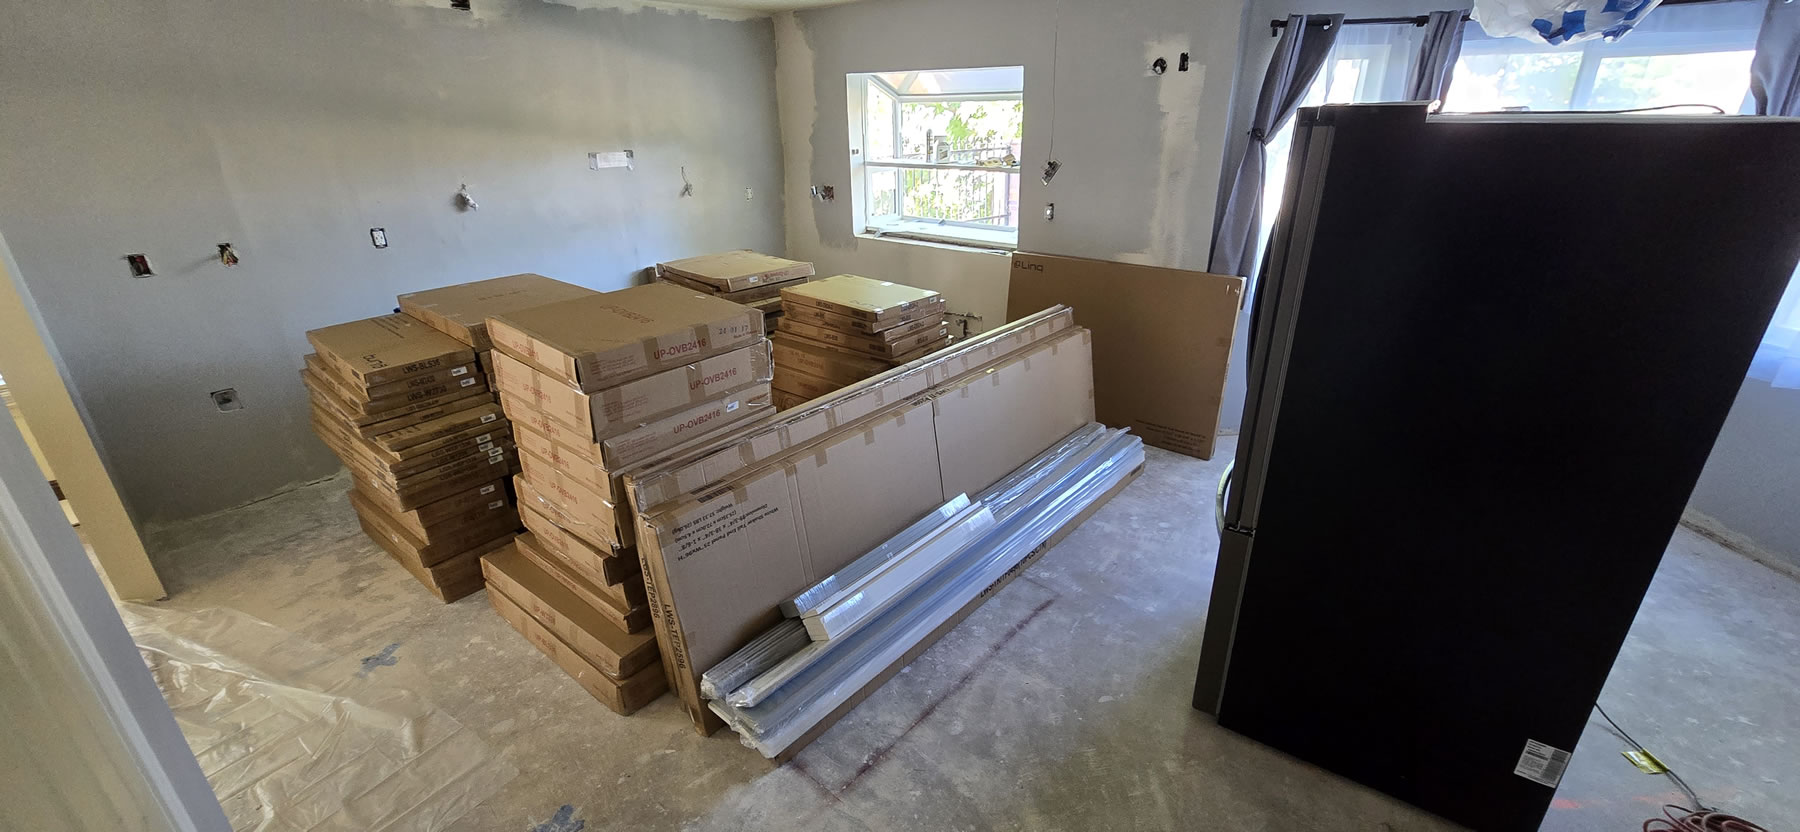
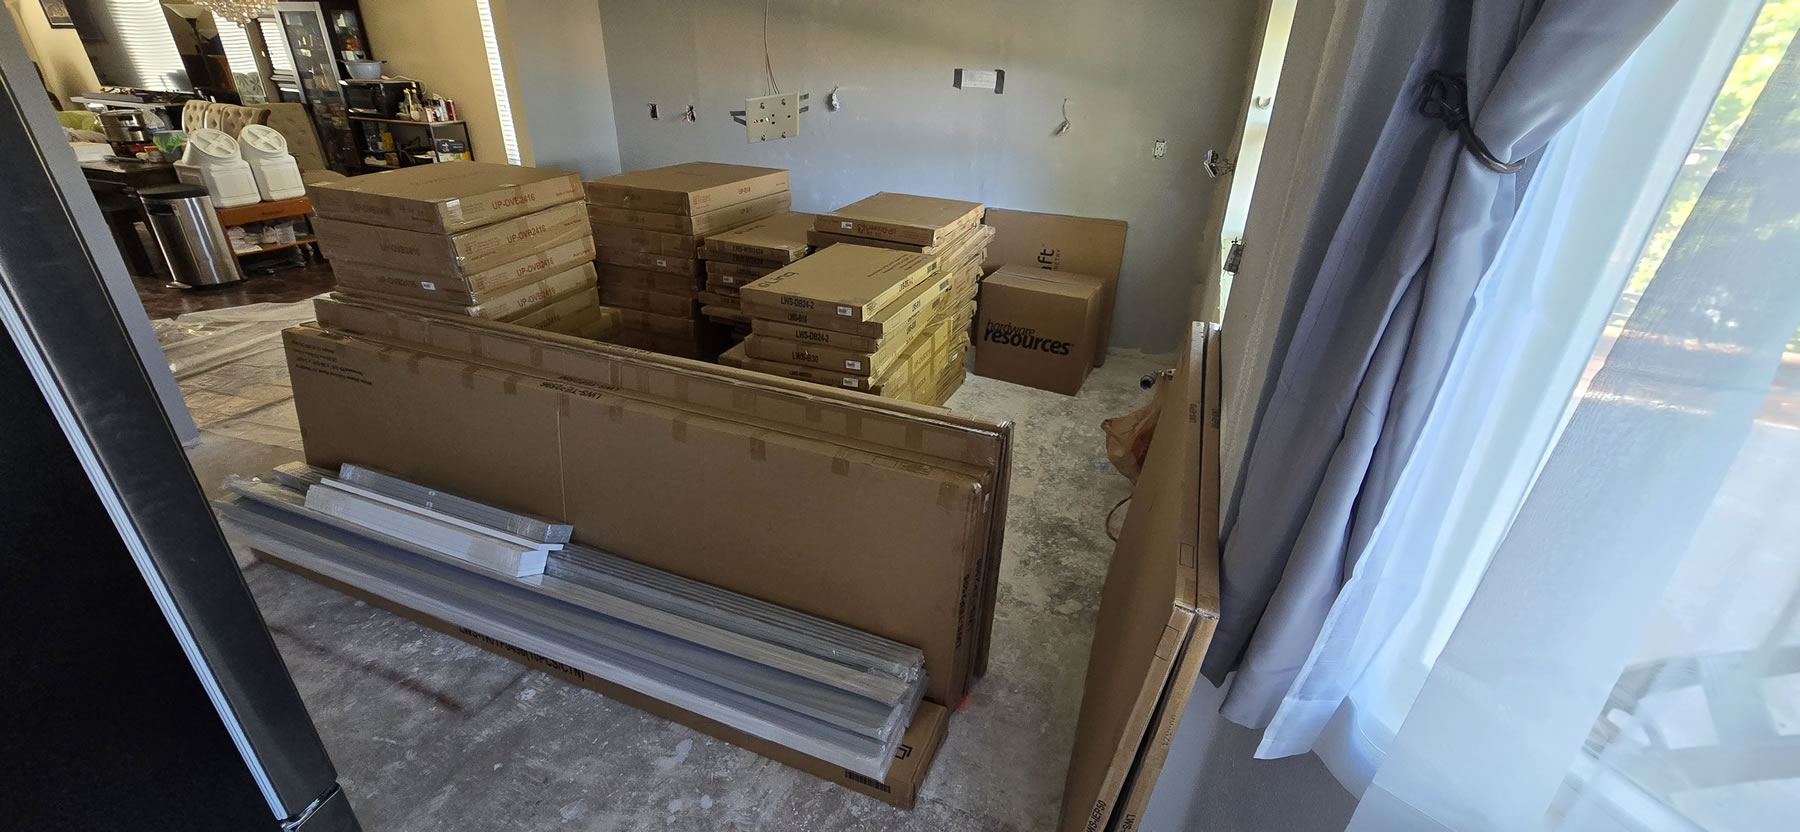
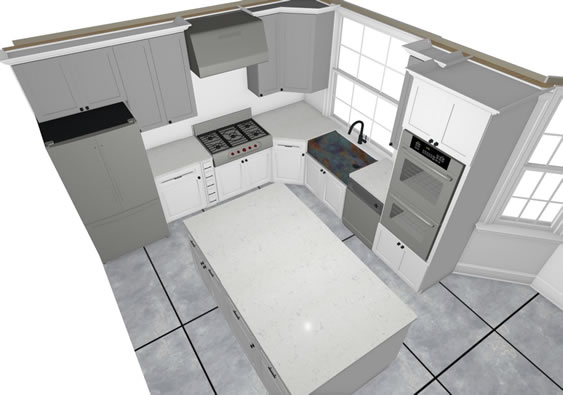
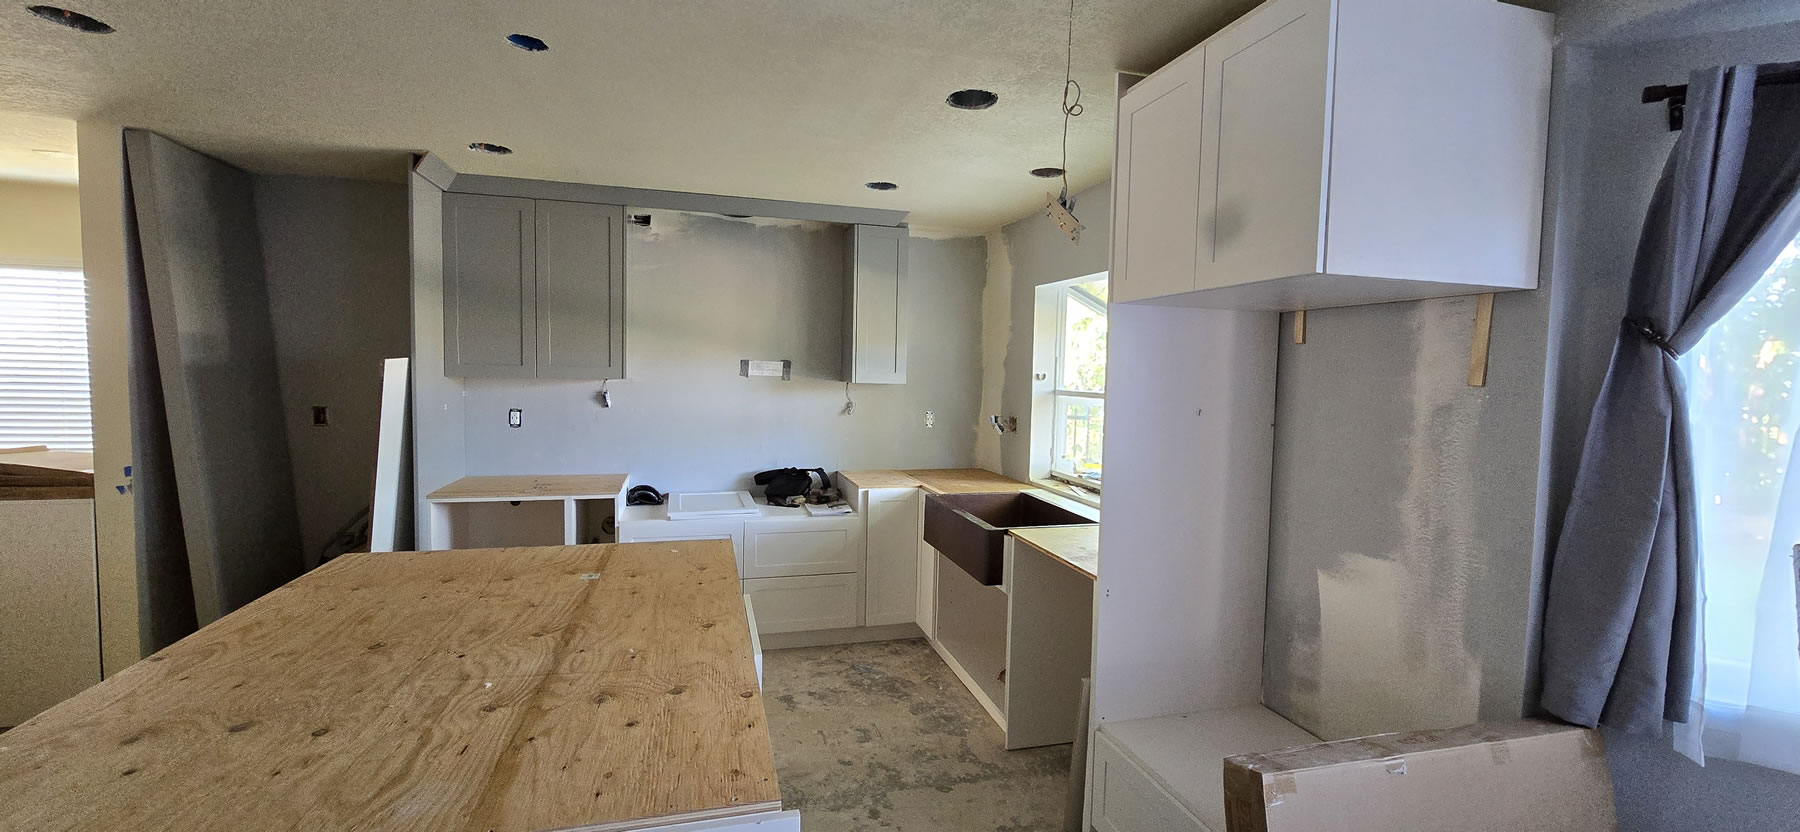
A day and a half of cabinet delivery and the cabinet assembly begins. A few things are assembled then installed to the appropriate location. The cooktop area is the first to see some cabinetry.
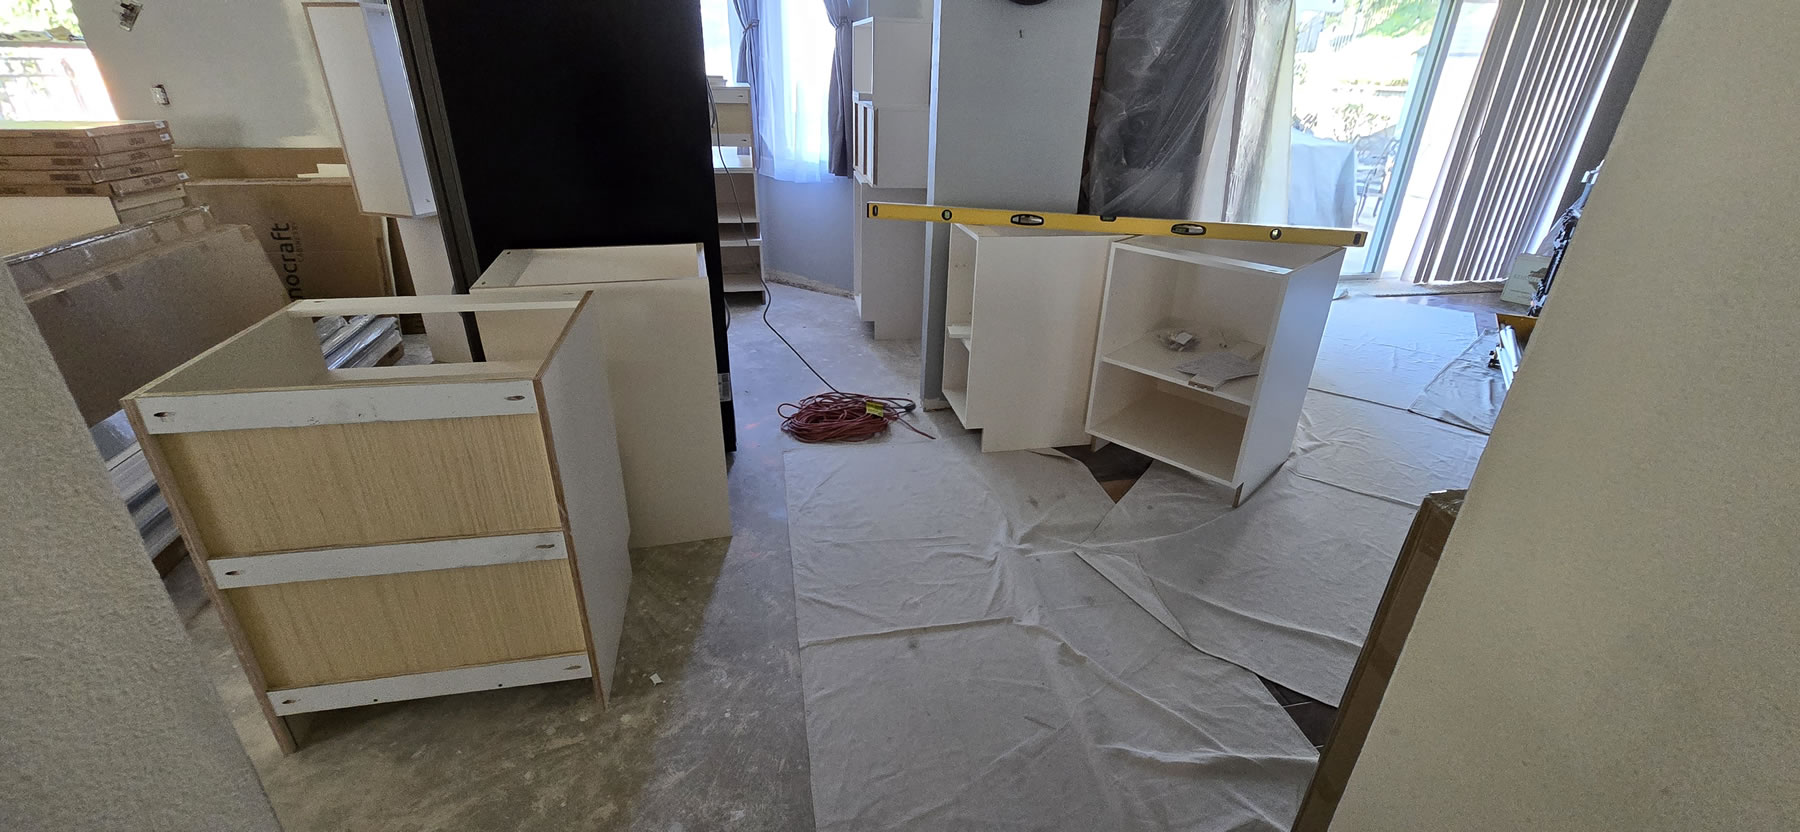
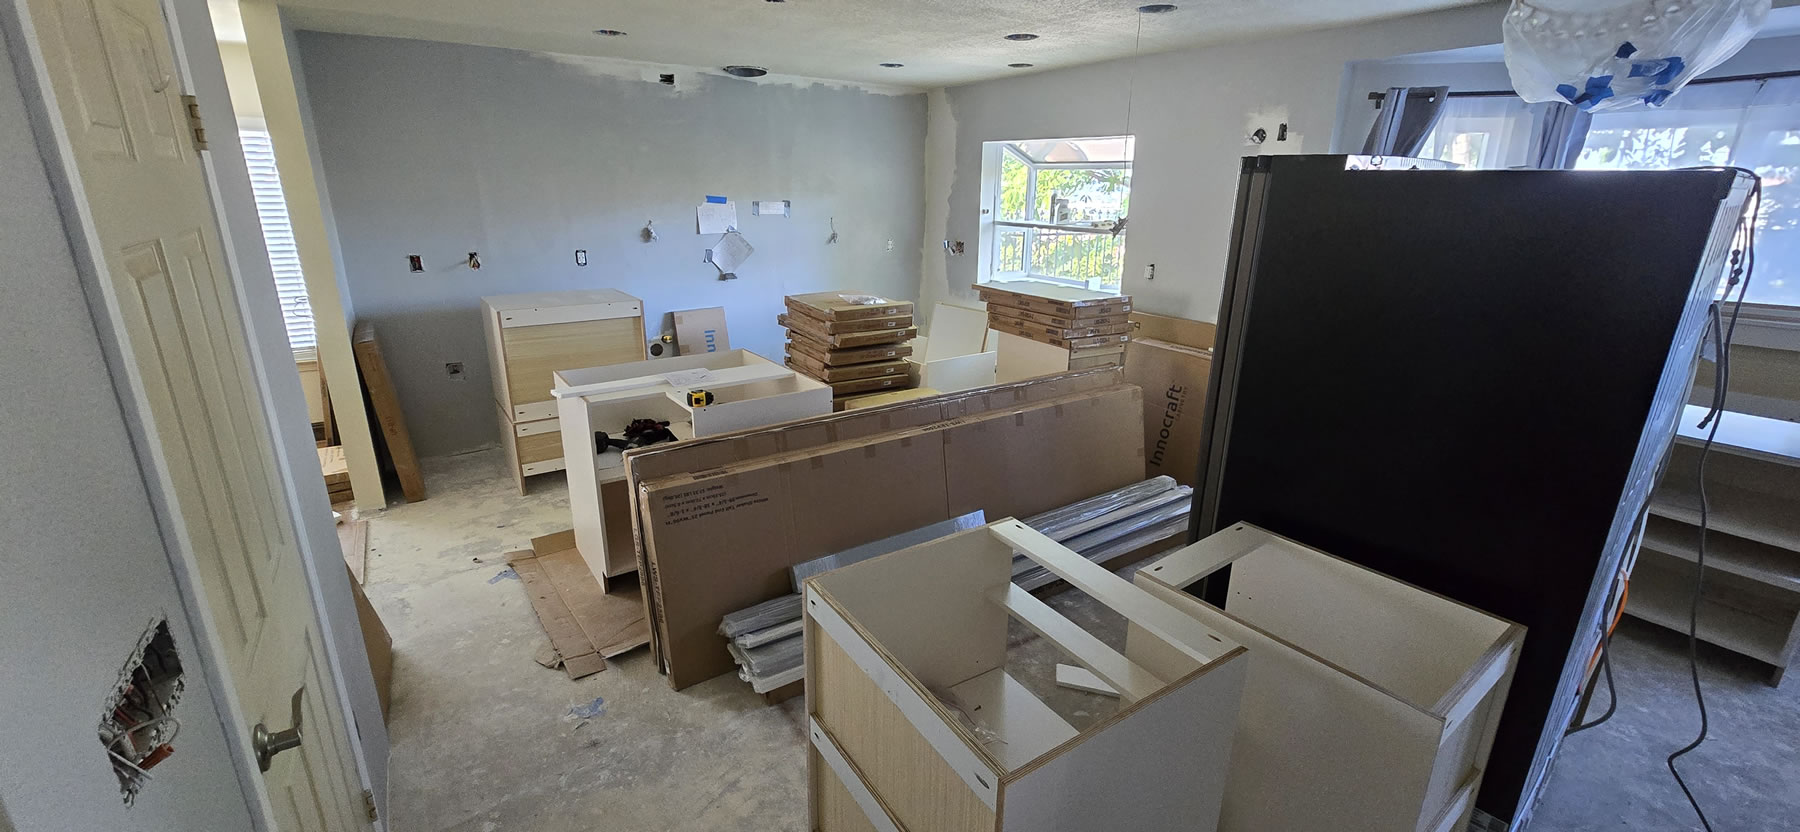
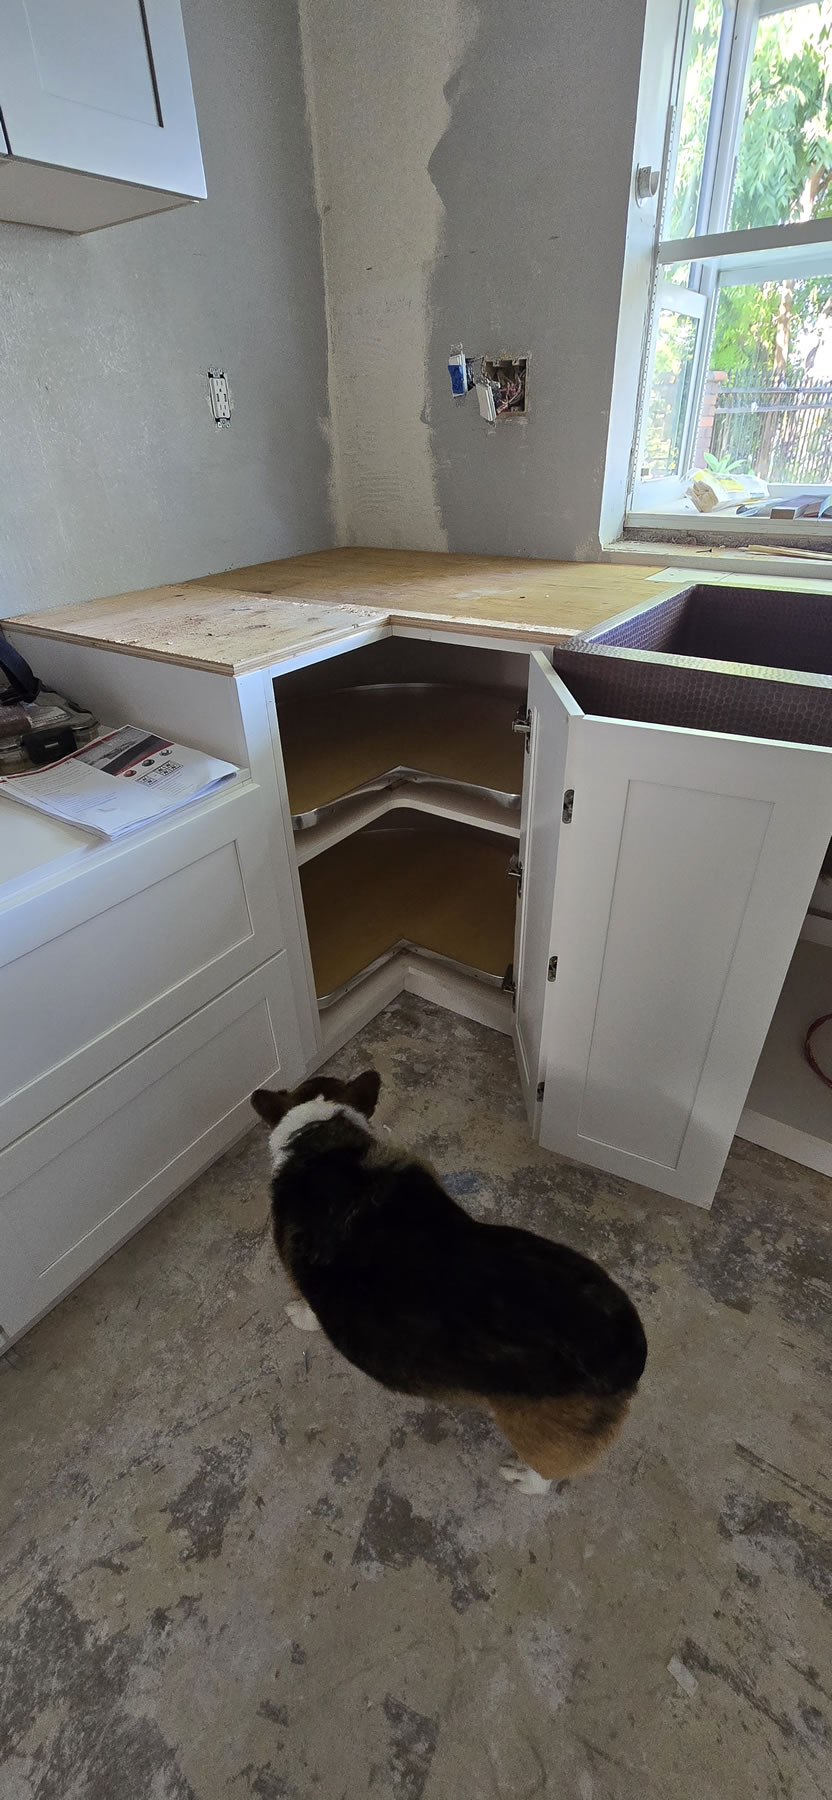
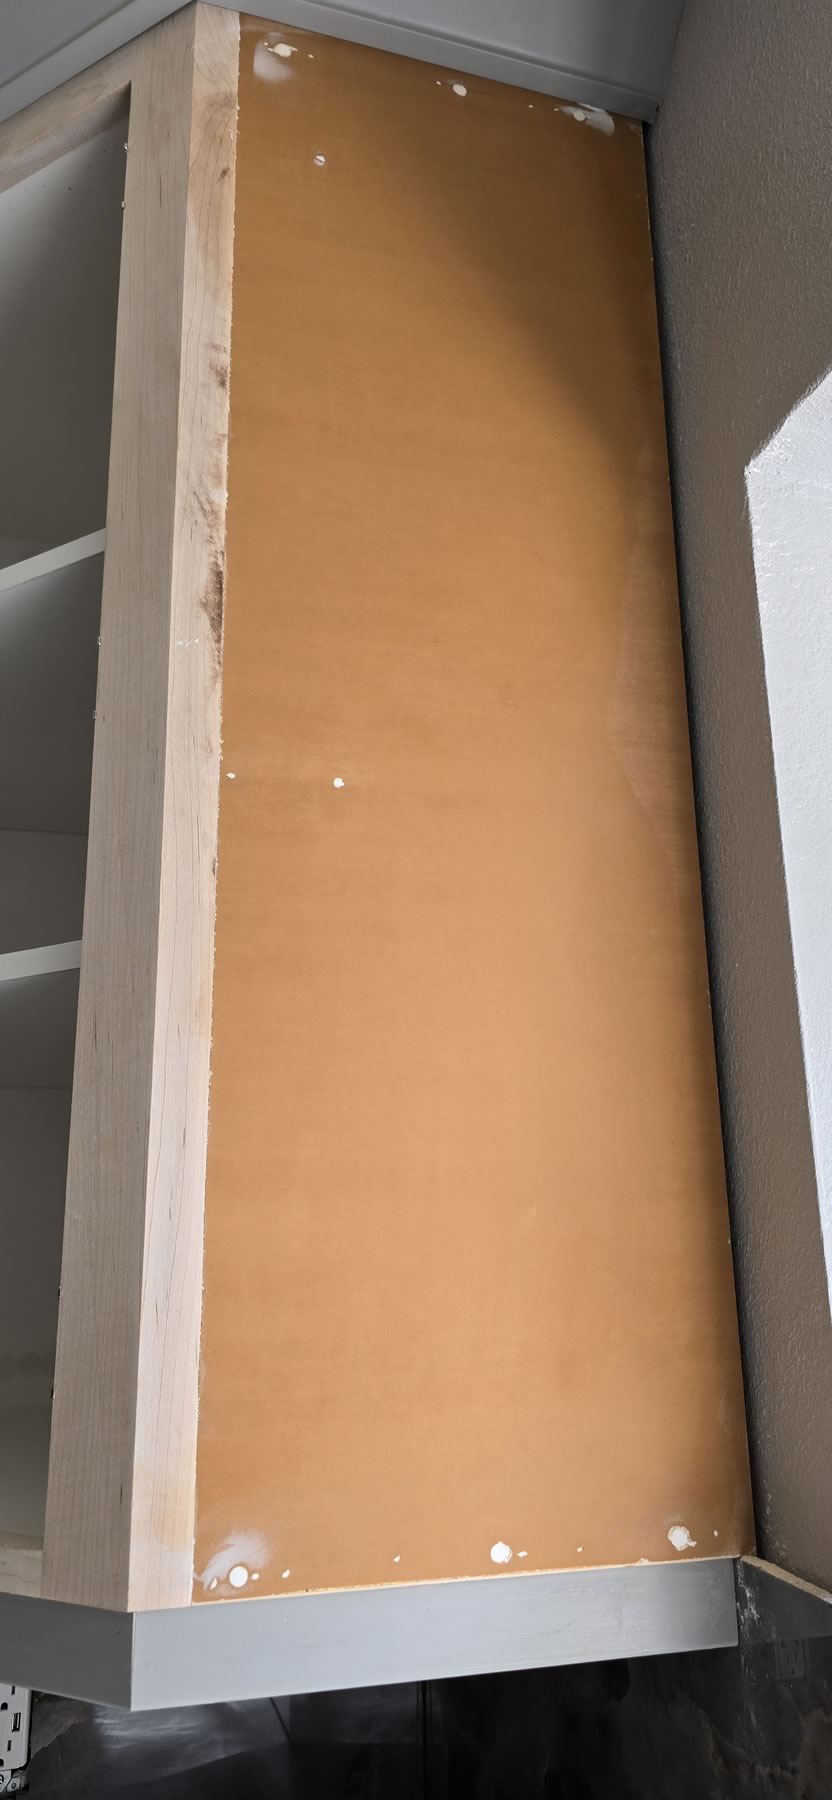
Corner cabinet is built and put into position. Even though these are prefab, the contractors cannot just slap them together and just nail them into position. There is a decent amount of cutting and fitting to meet the design requirements.


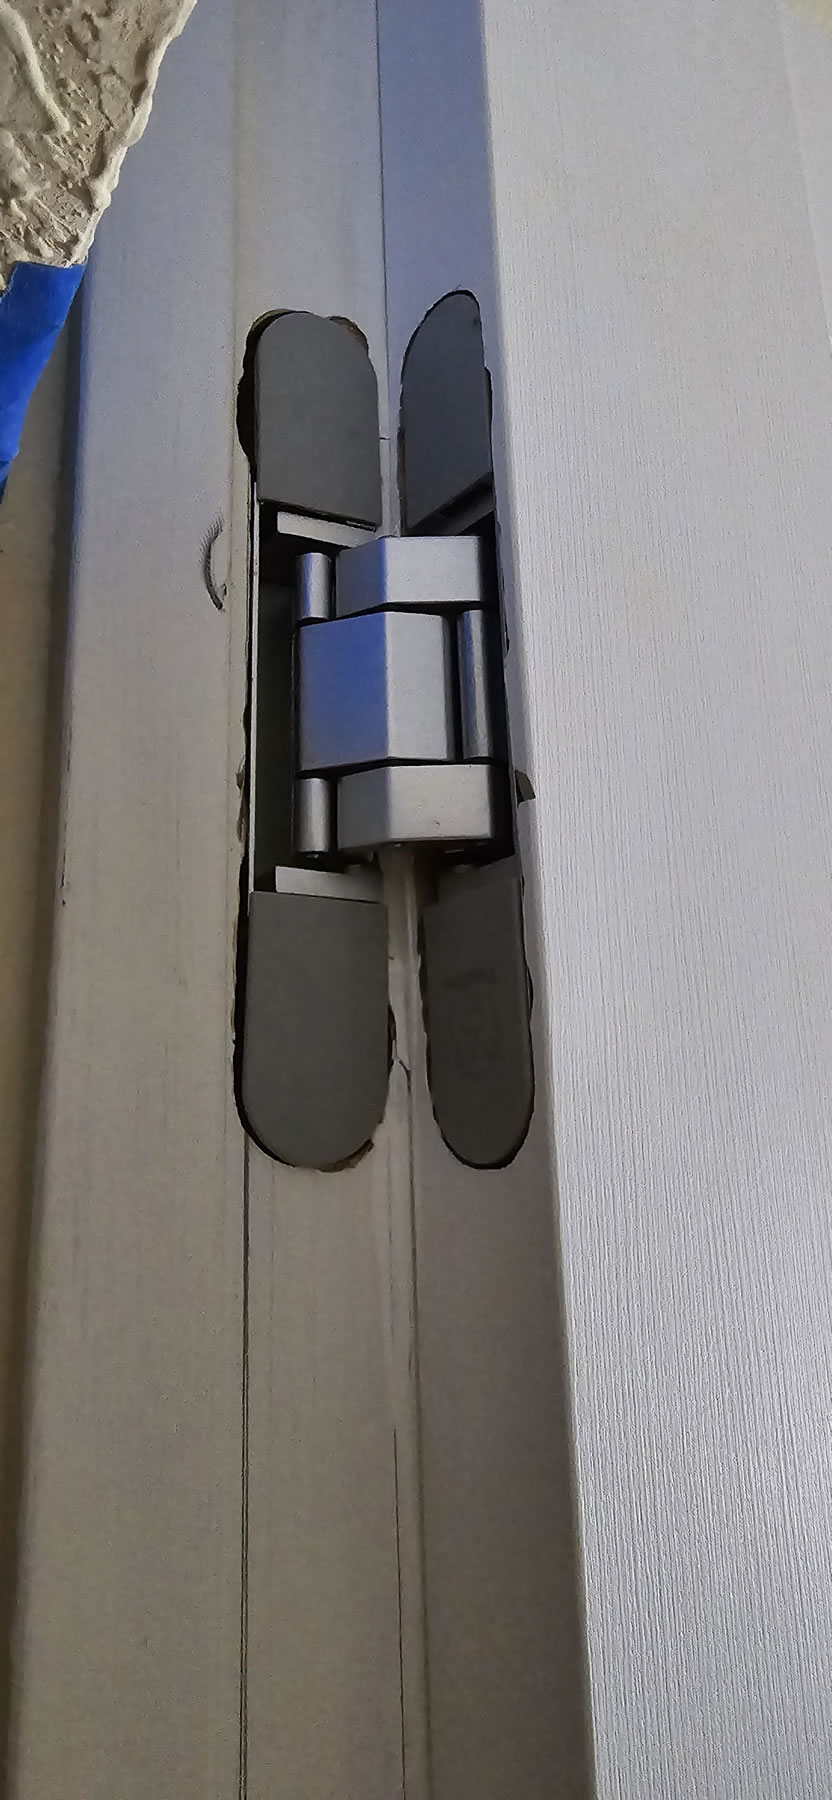
The new pantry door arrived. The shop is located in Torrance, and wasn’t too expensive. I measured out my car’s trunk space and knew the door couldn’t fit. What I COMPLETELY forgot is that I have a fucking RV that would EASILY fit the door and its box. This lesson in stupidity only cost us $200 in delivery charges, and we could have gotten it a whole week sooner than we did. Install happened that weekend and I had to use a router to cut out the door frame as well as the corresponding locations on door slab to fit in some new hinges. I went with hidden hinges and it helped with the visual for the new door. And I get to learn something new with that install. We had asked the contractor for a quote on installing the door. So I saved about $400 doing it myself. Yay me.
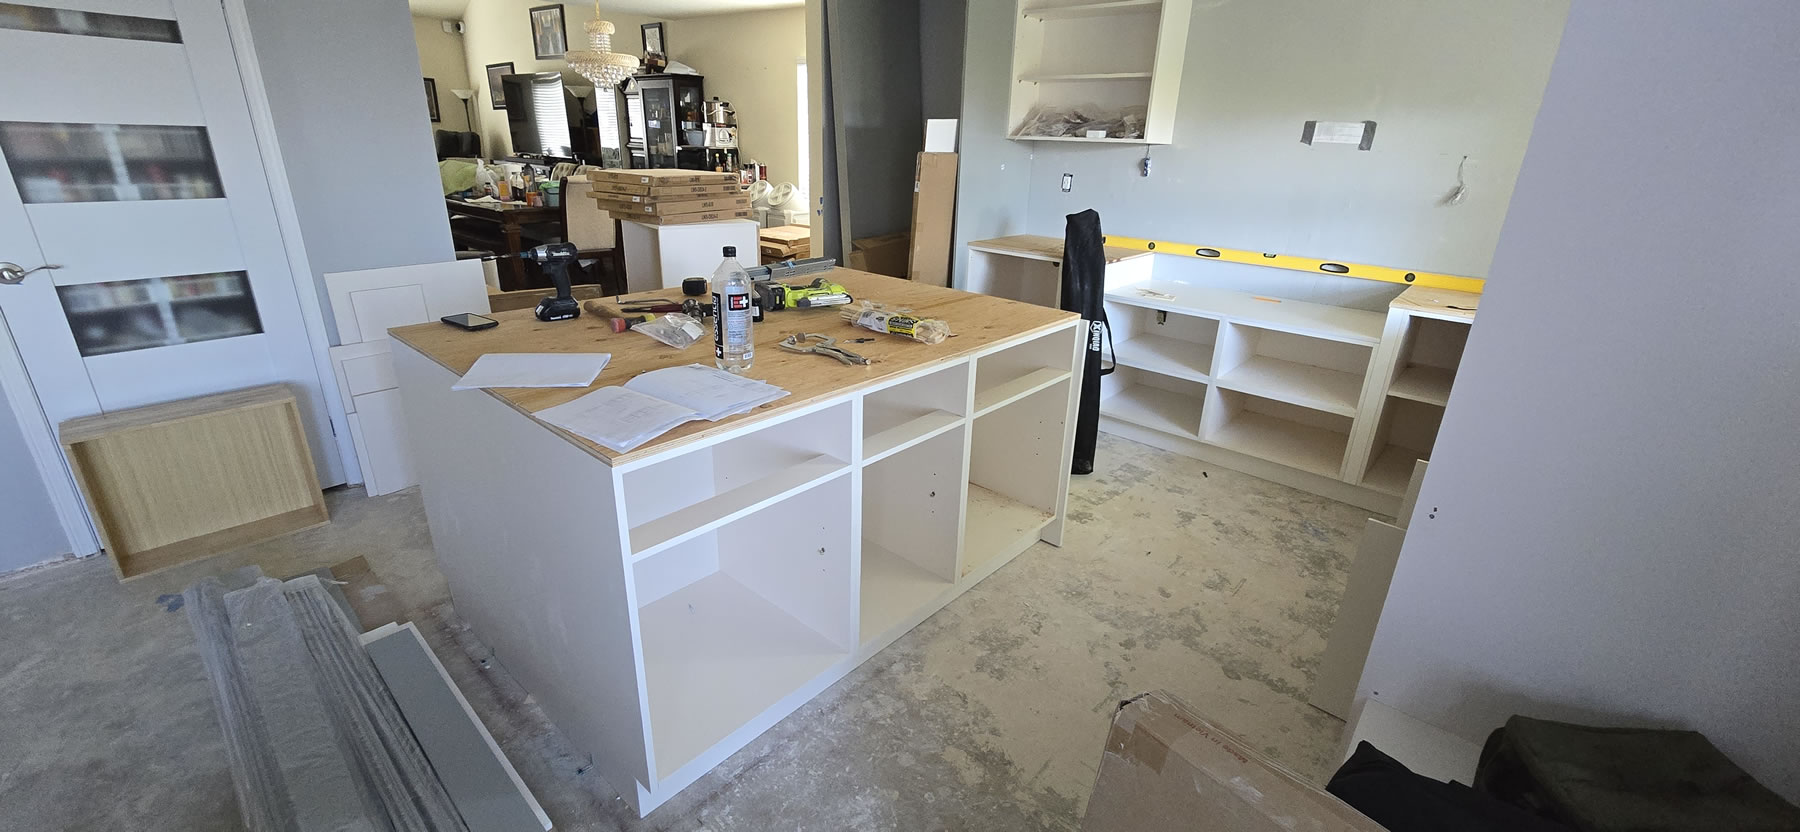
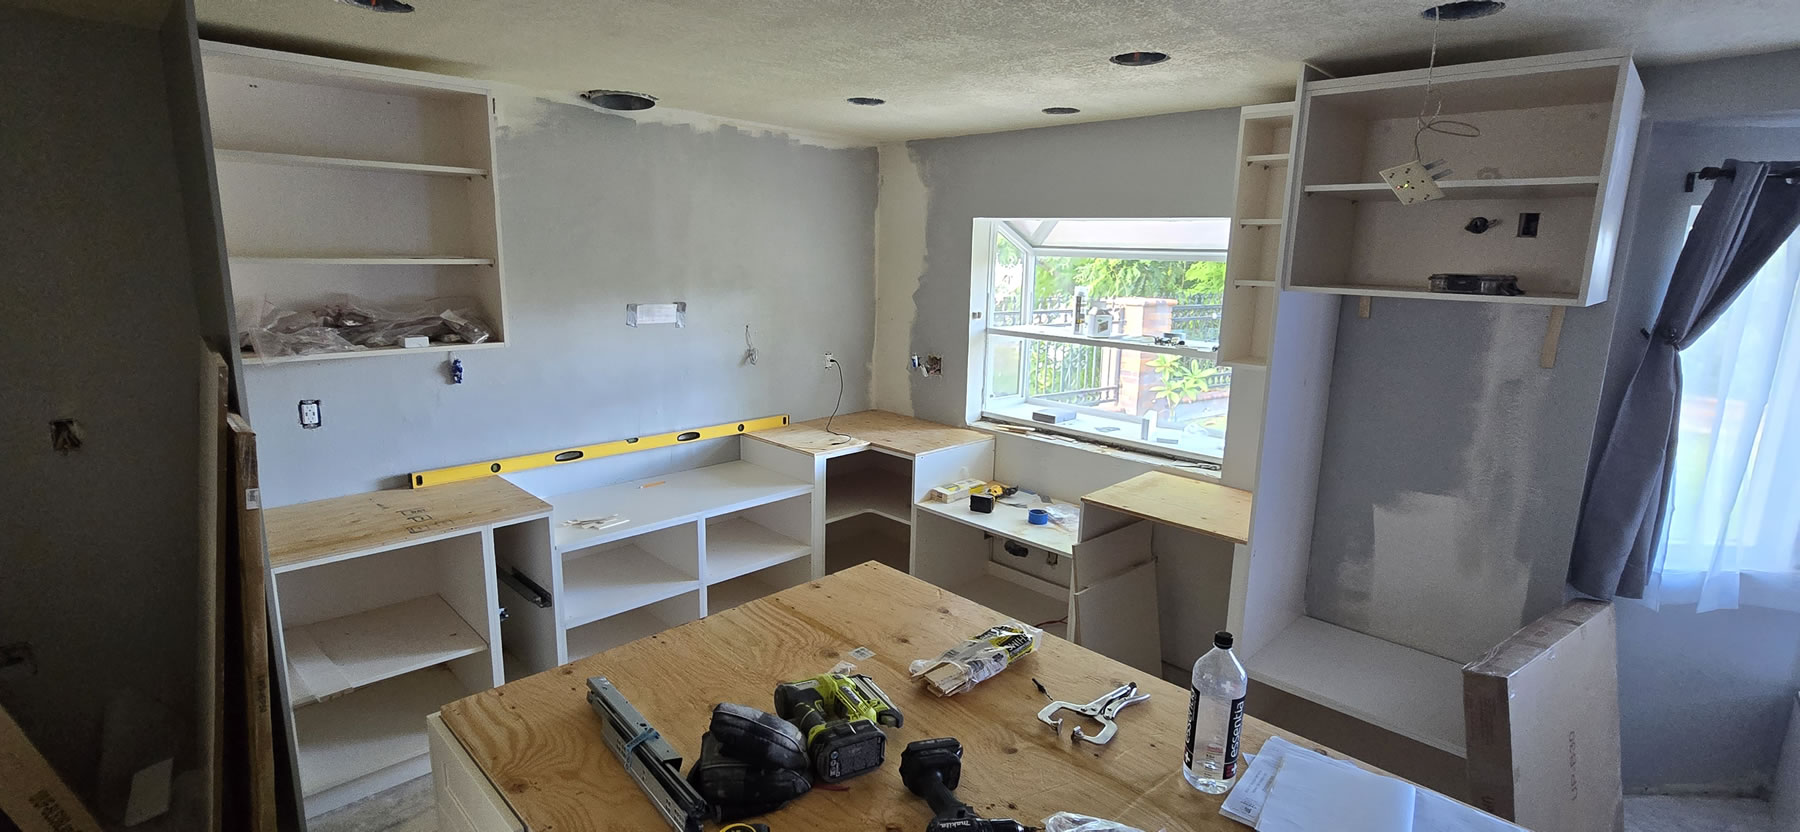
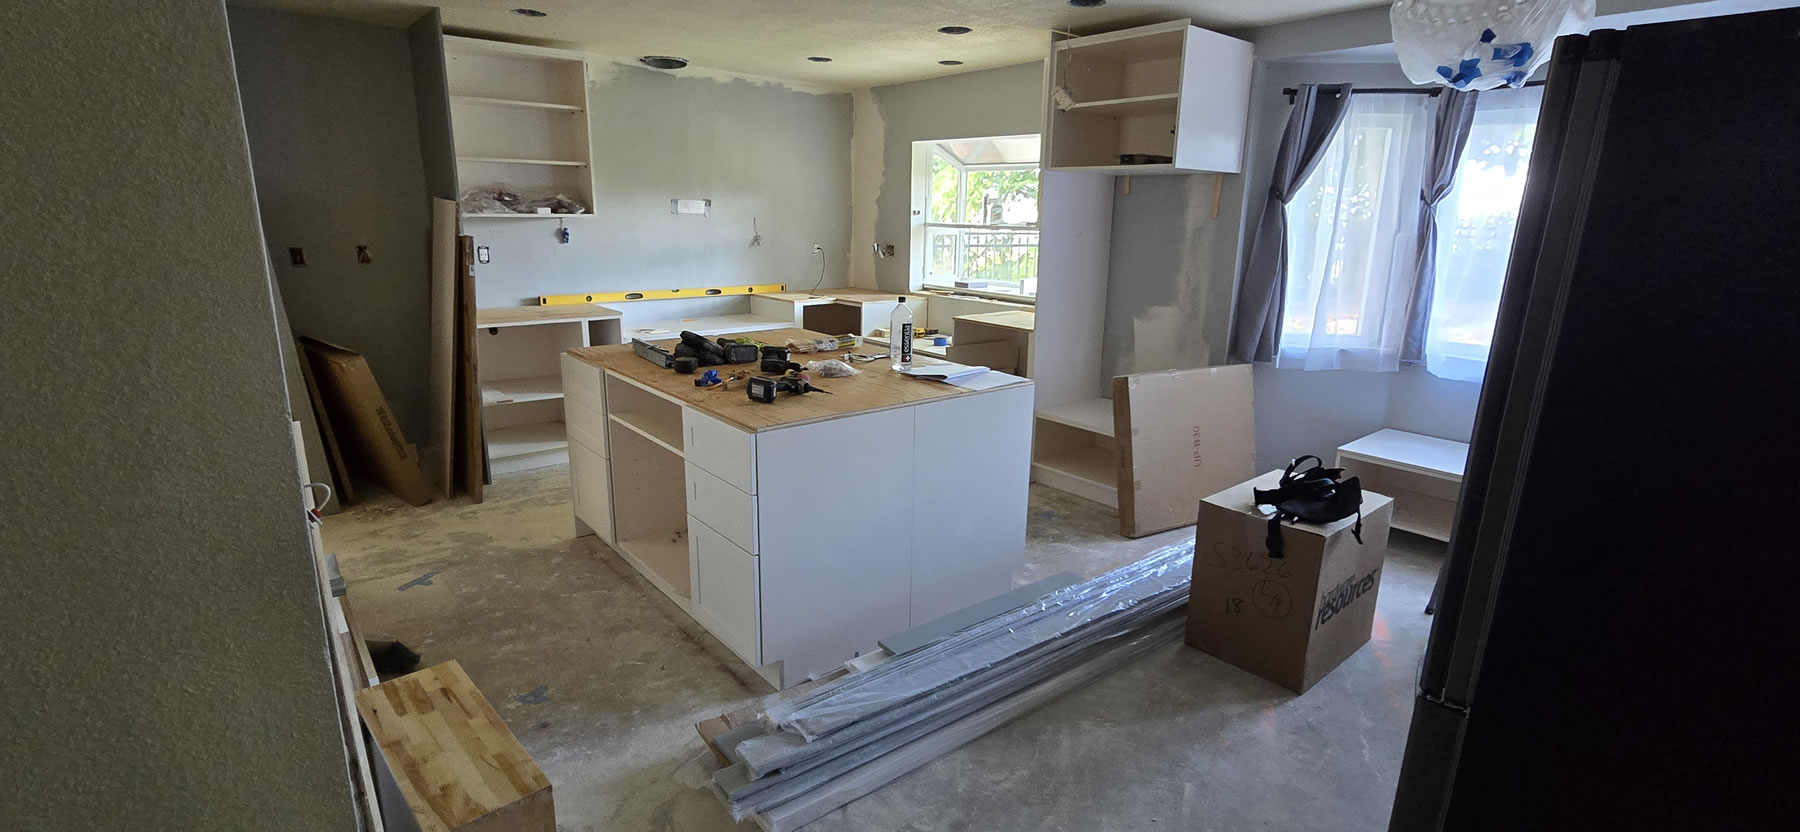
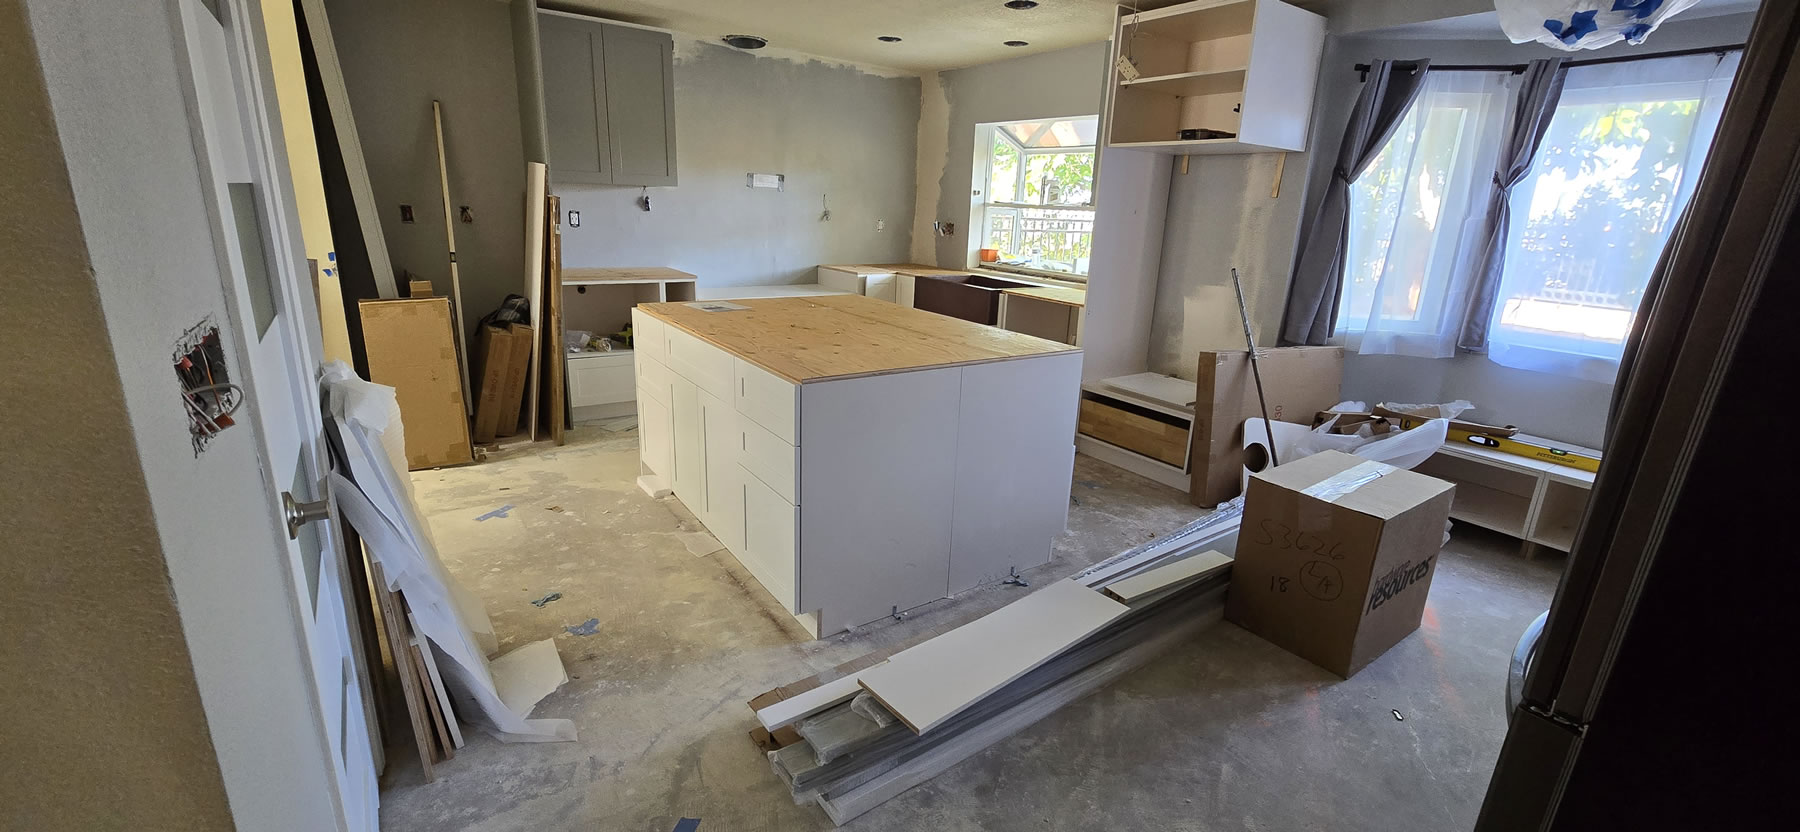
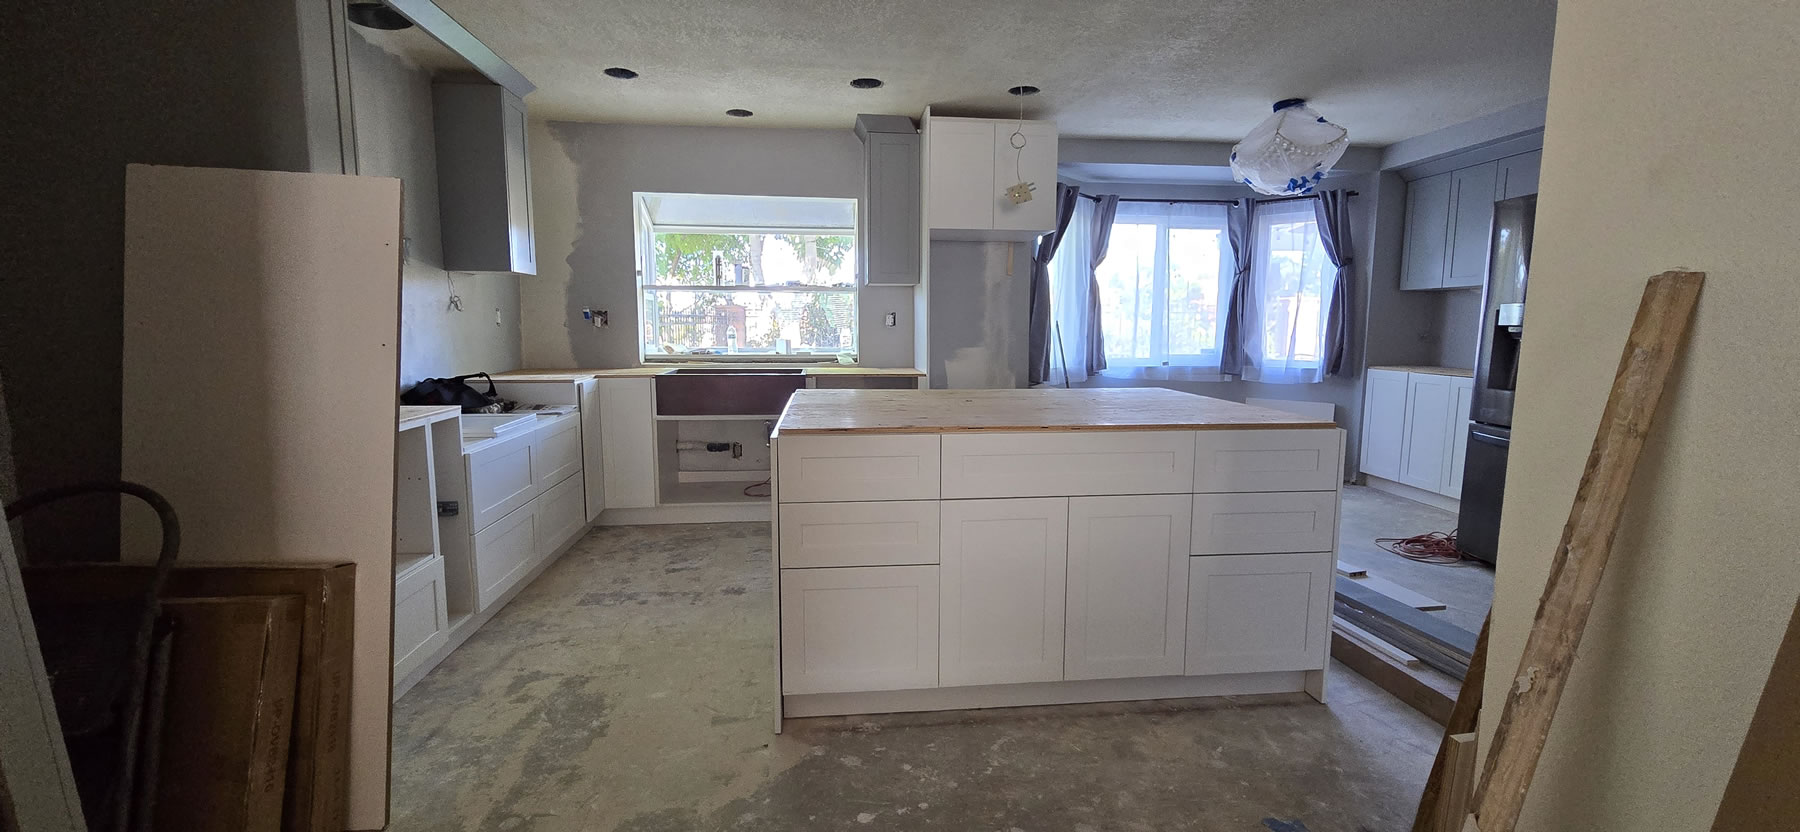
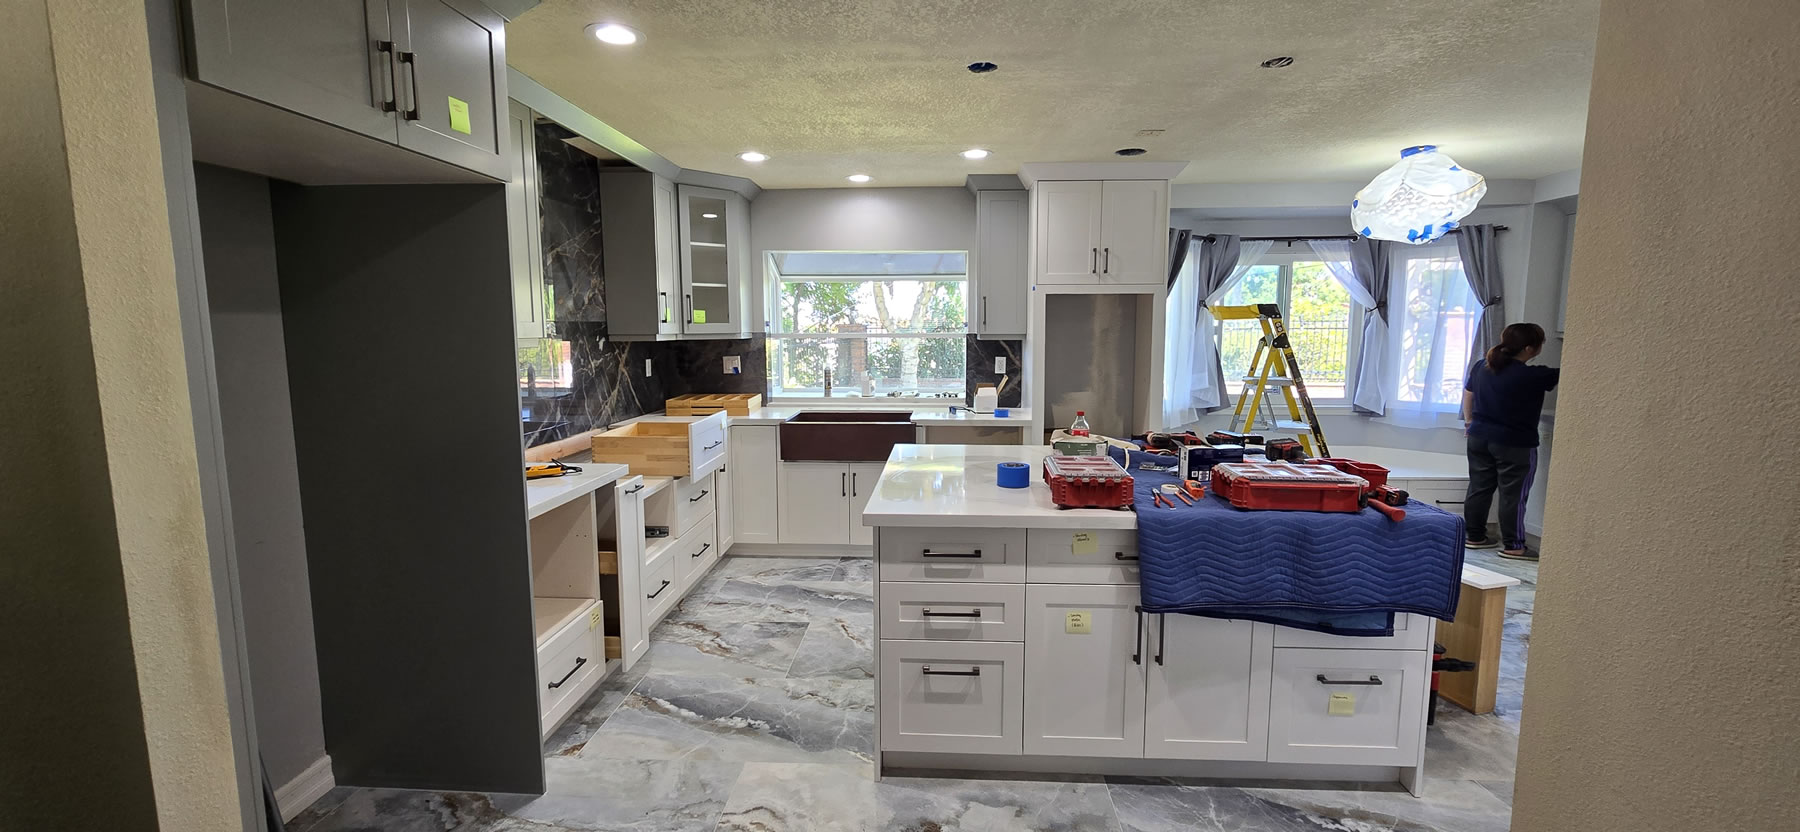
Week five is all about cabinet install work. Every day saw more cabinets installed. The island coming together. The wall cabinets are getting placed. The contractor took a good amount of time and did things very carefully.

Here and there, there were some scuffs to the painted walls. A poke to the ceiling, a chip of drywall off one of the corners. I started placing blue tape around those areas so I could remind the contractor to fix; then remembered that I had the damn skill, tools, and materials to do it my damn self.
Patch here, sand there, spray some texture, then paint and repeat if necessary. The model builder’s mantra.
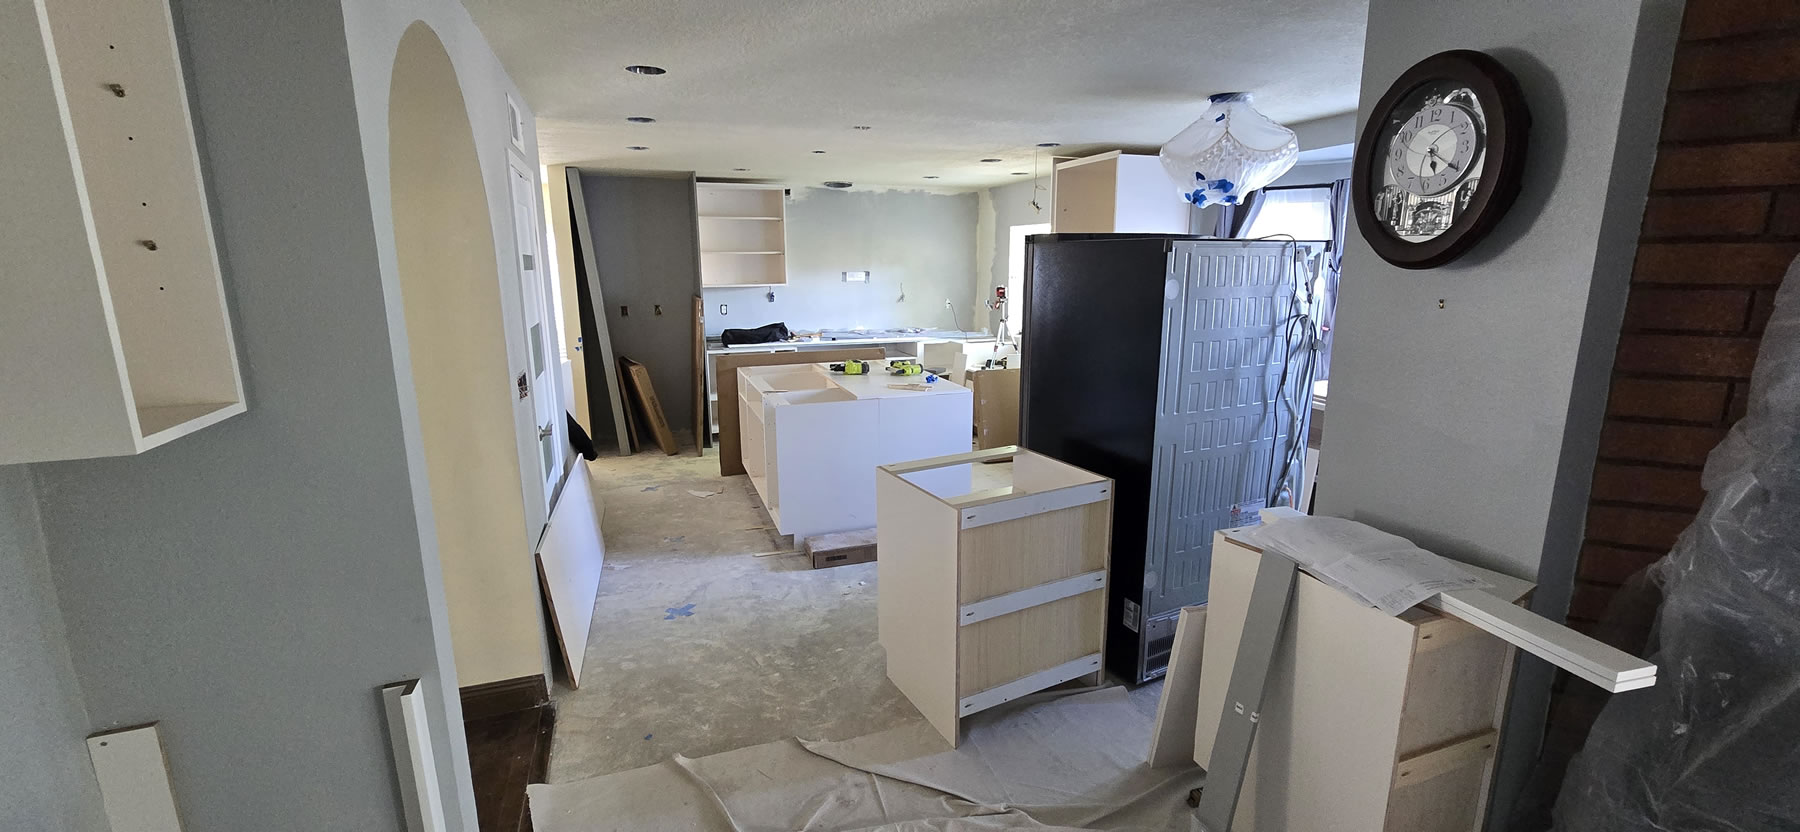
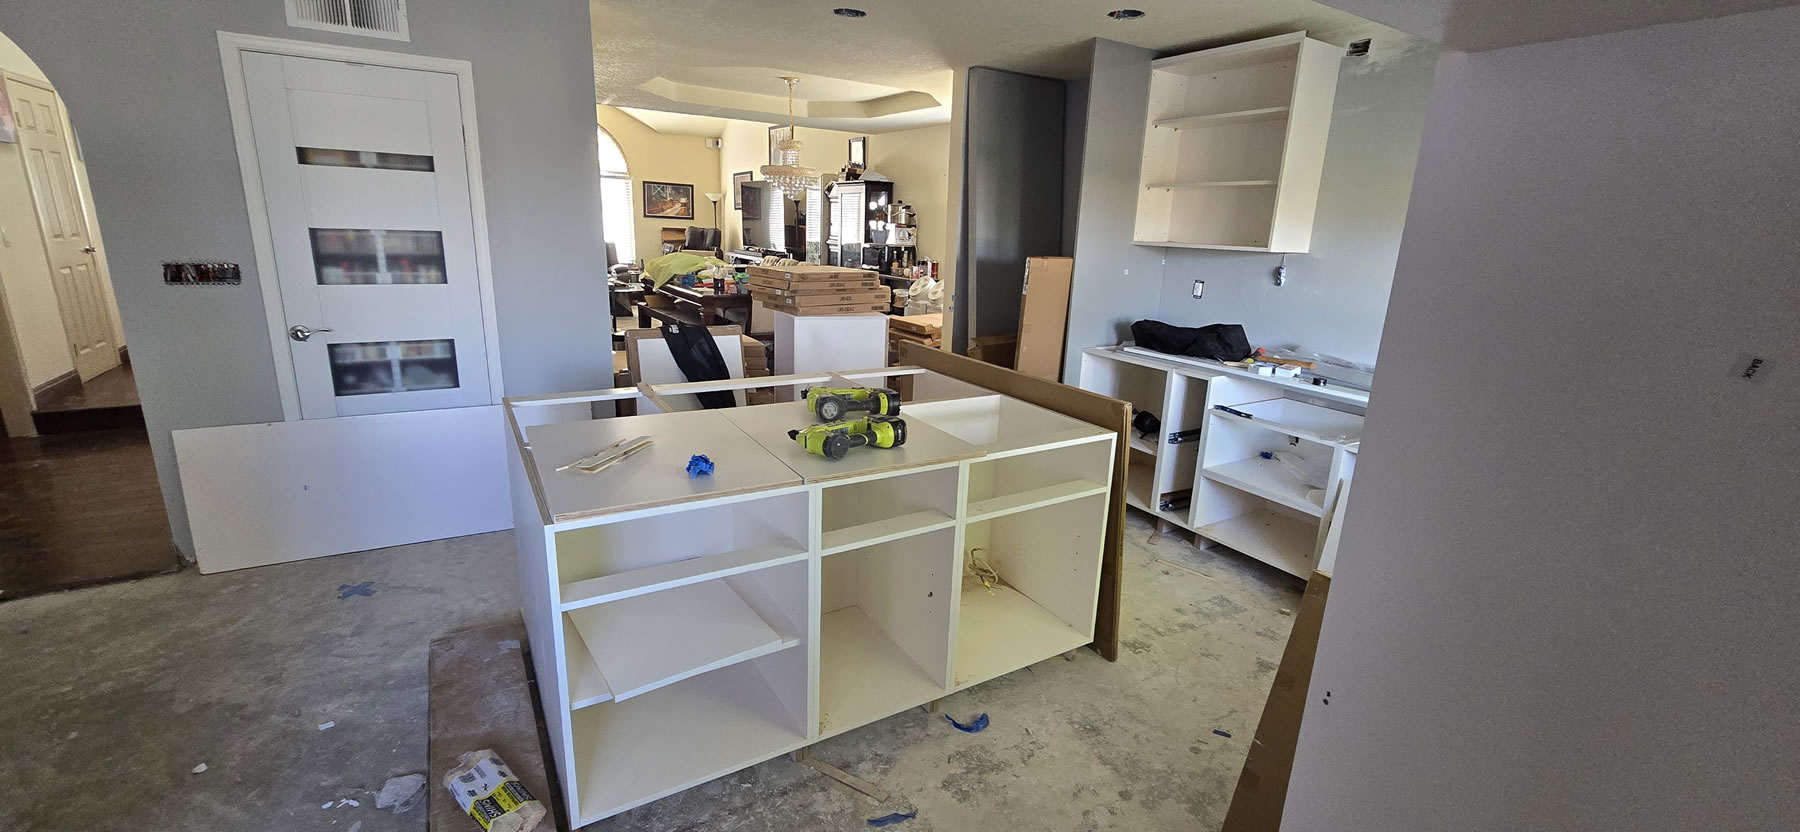
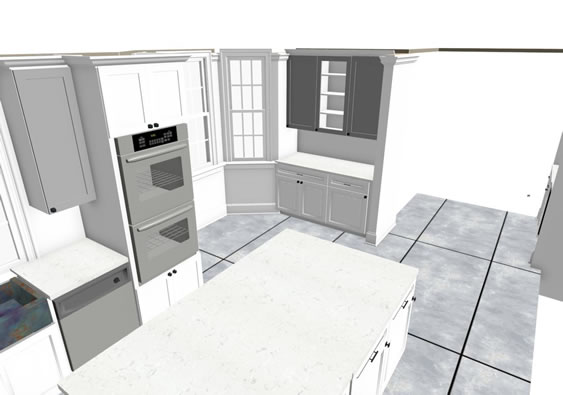
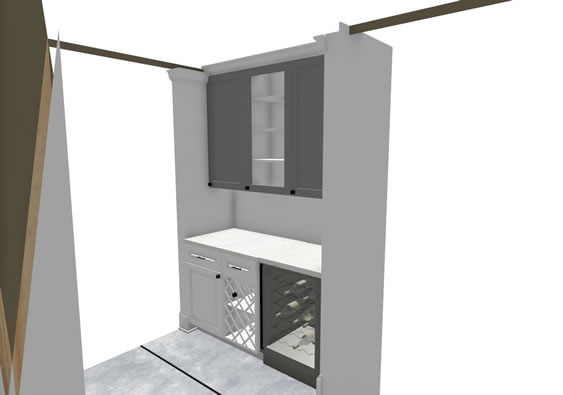
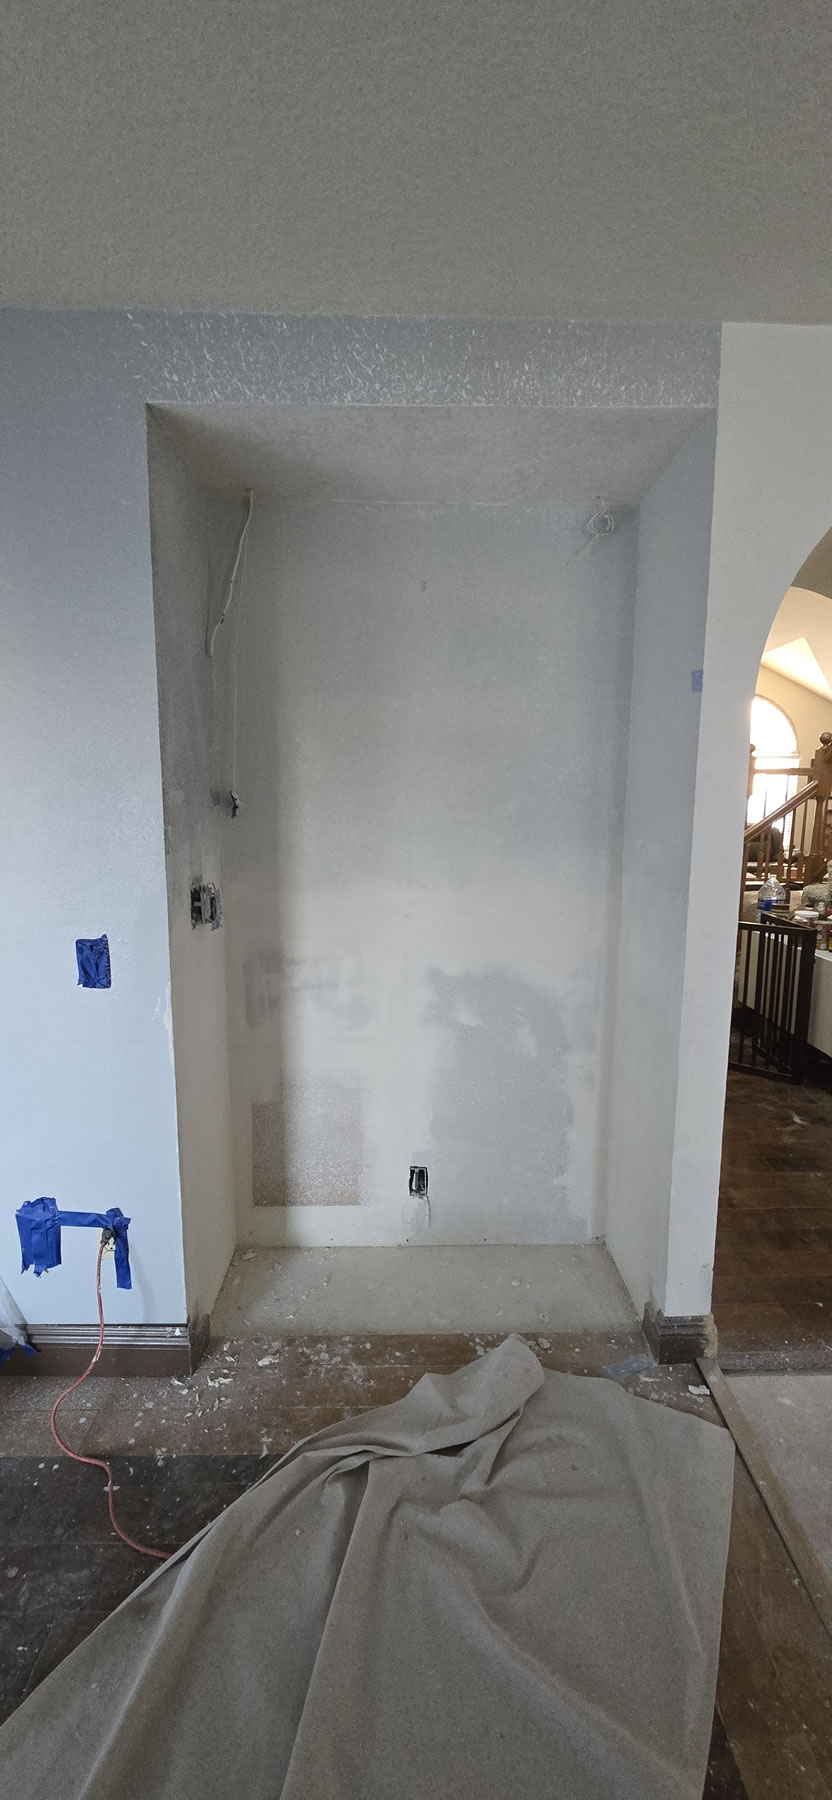
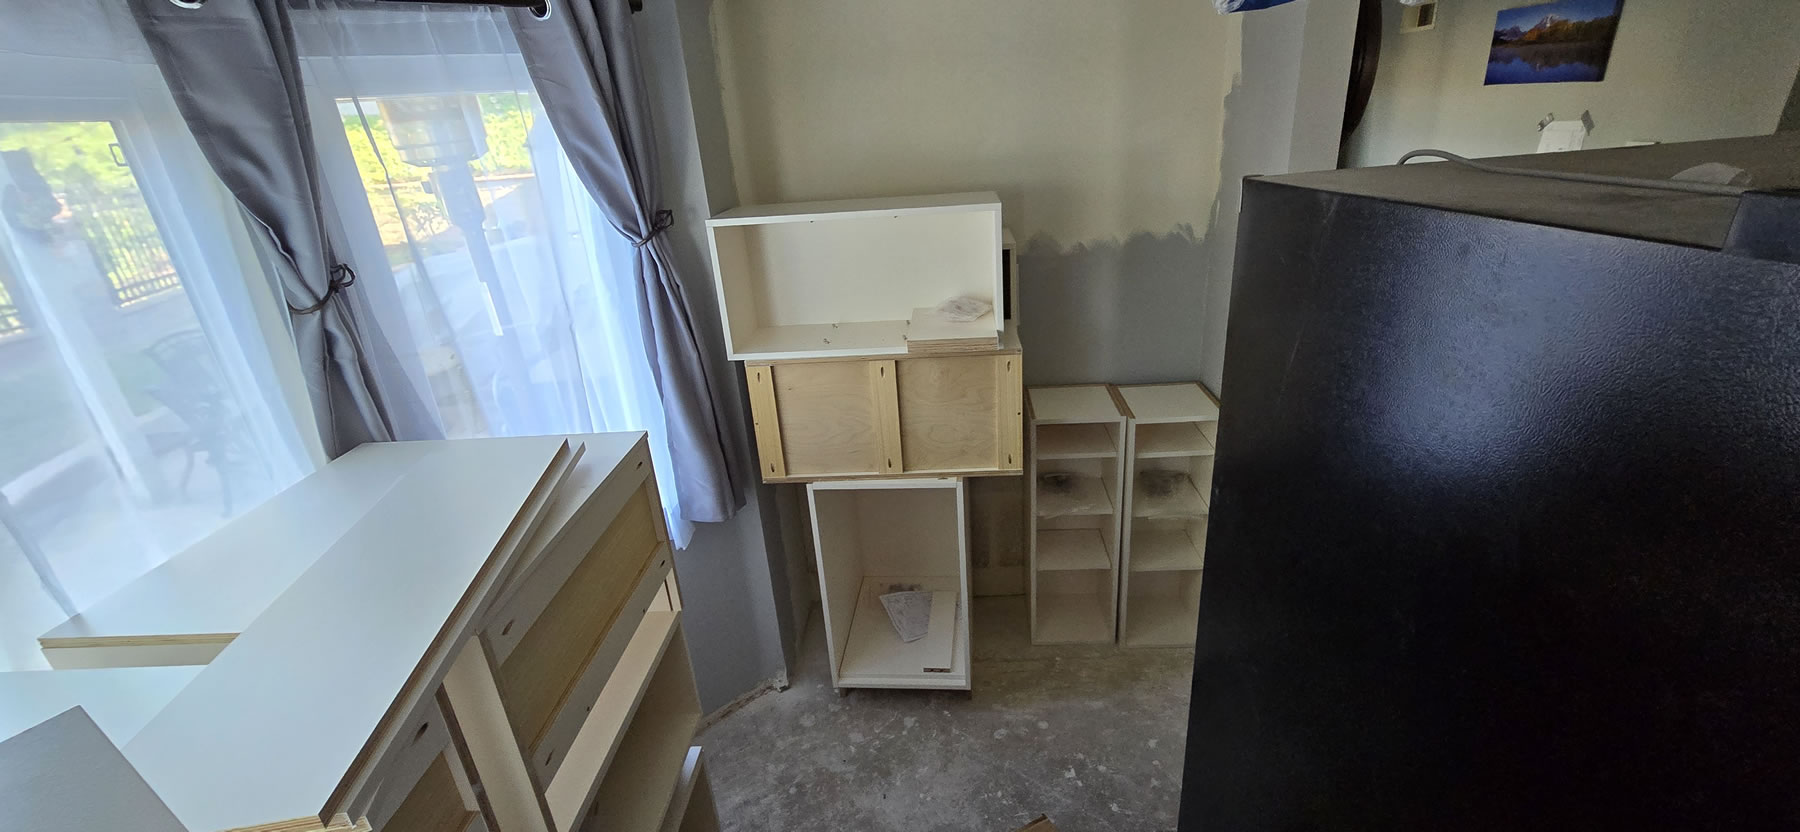
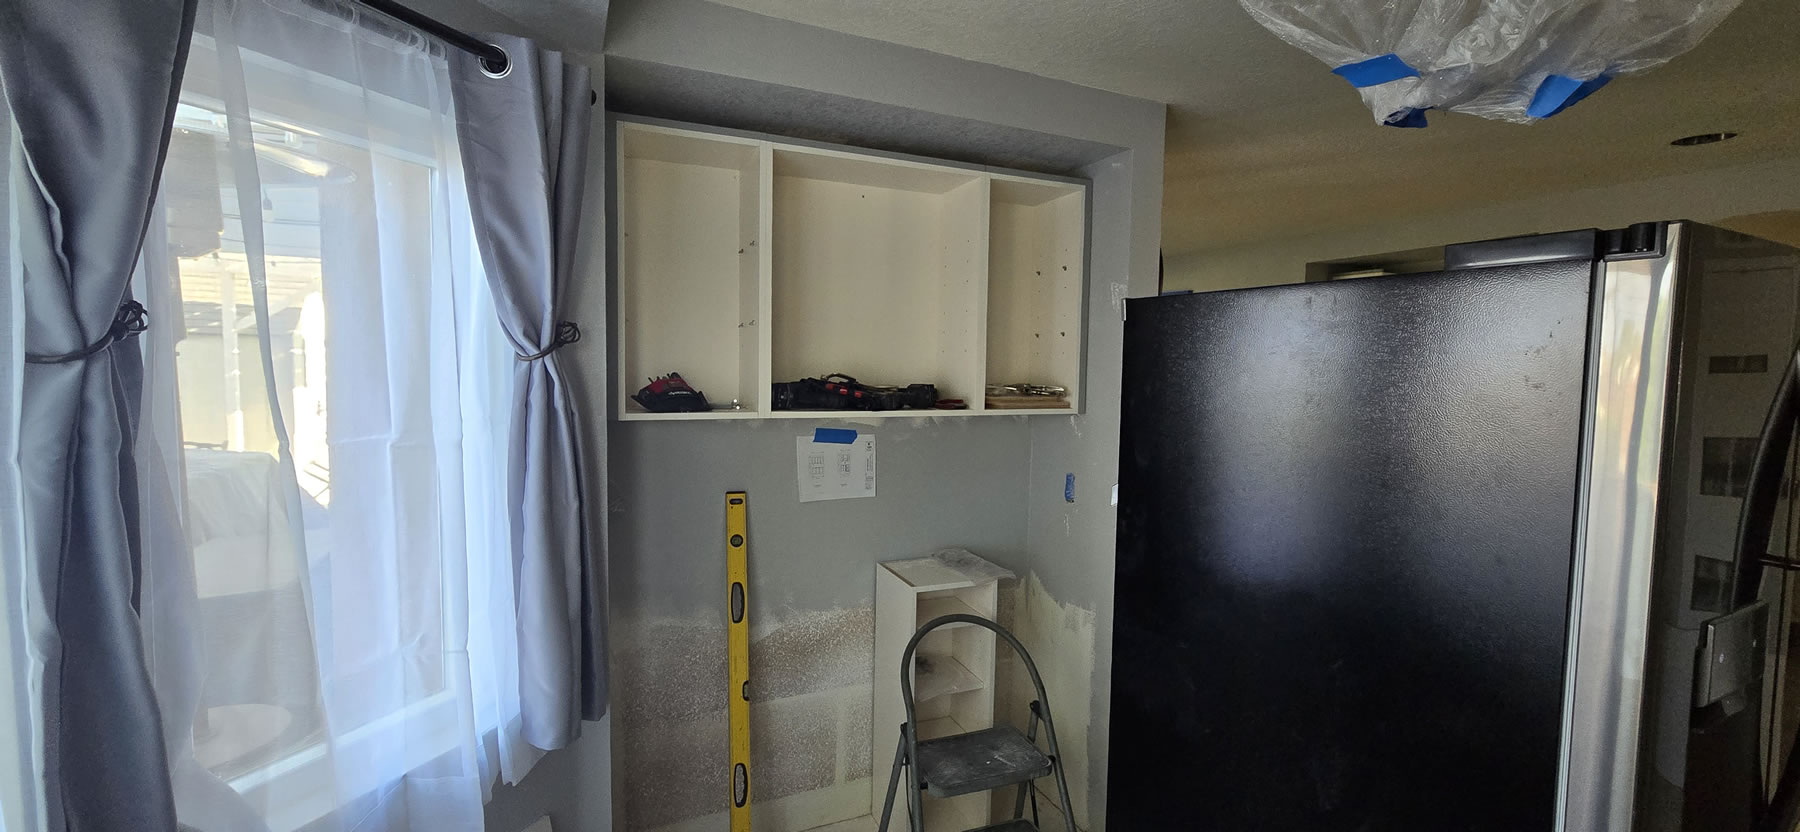
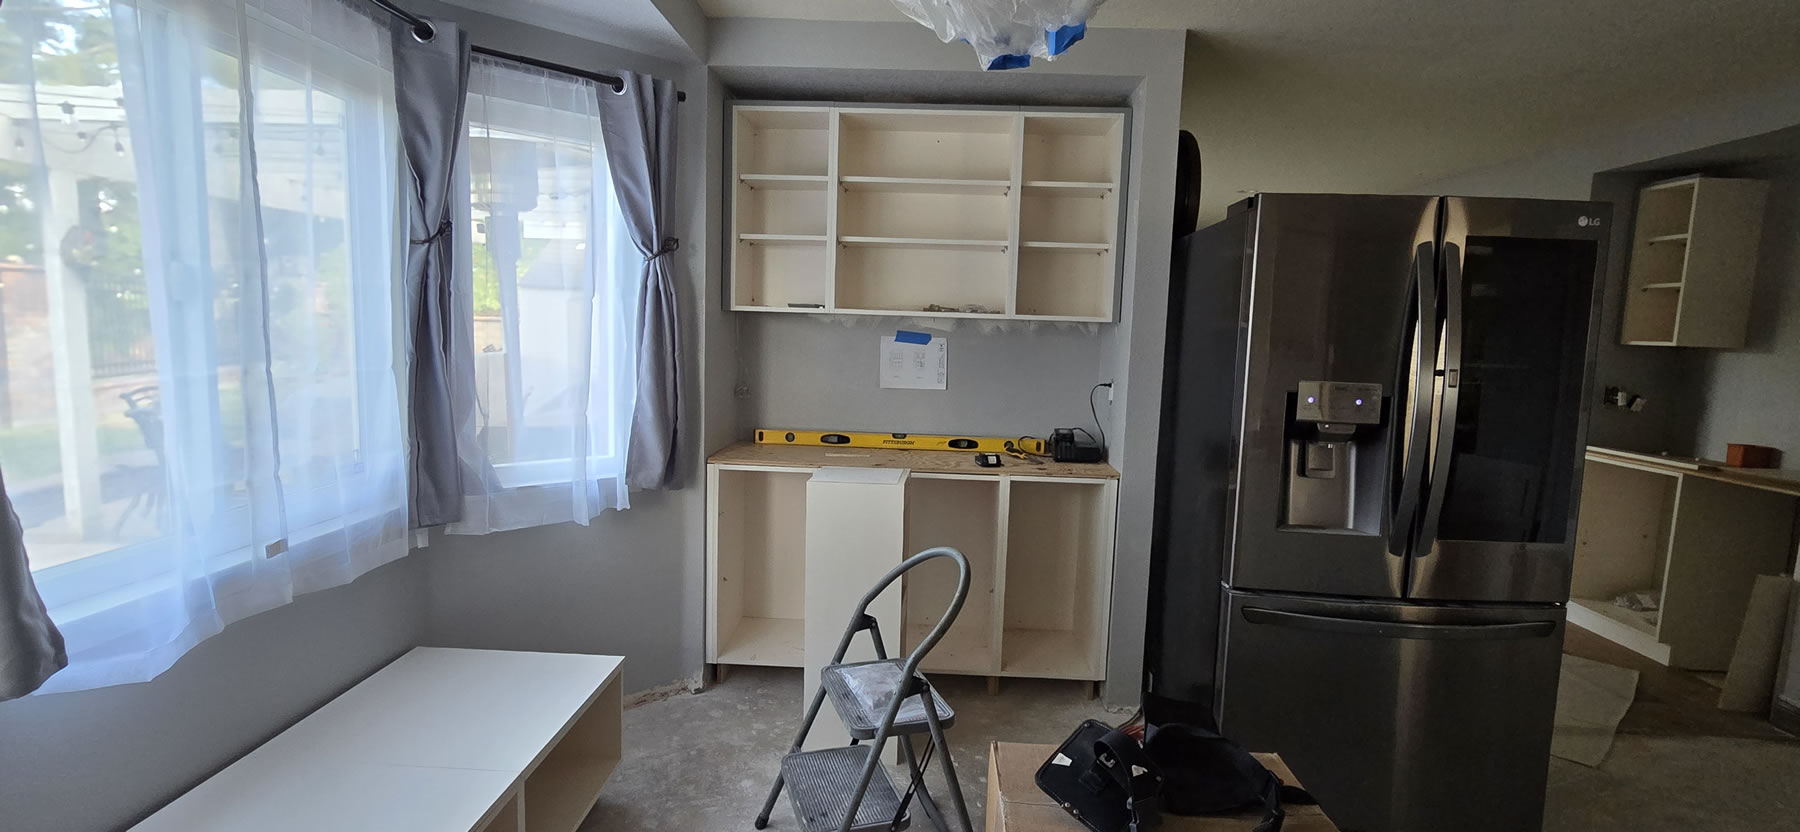
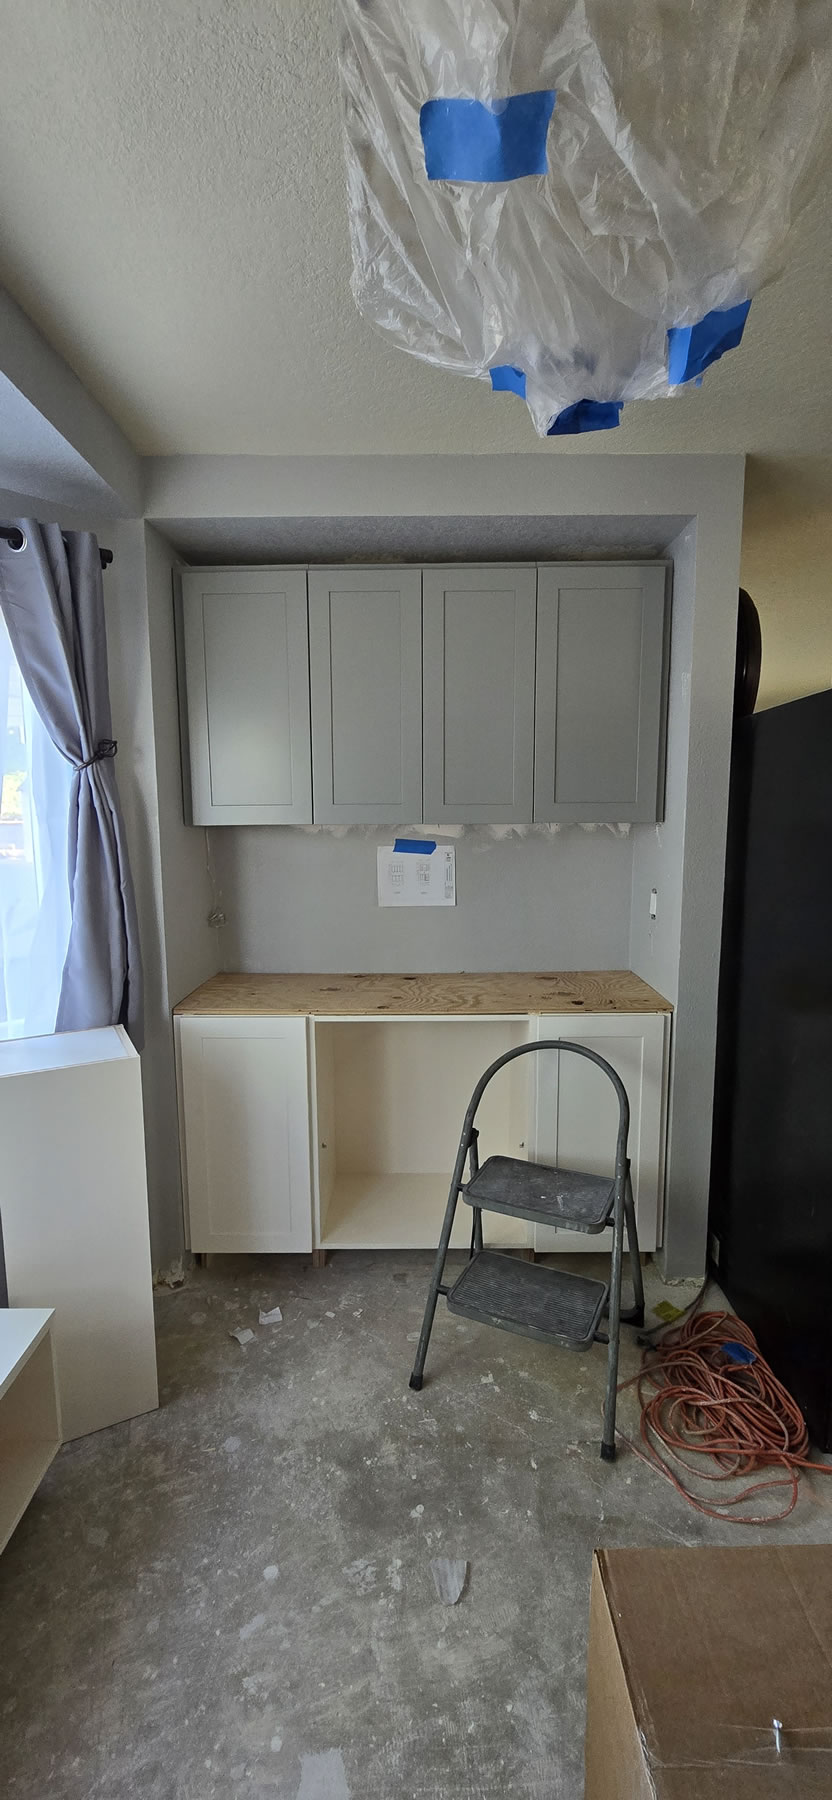
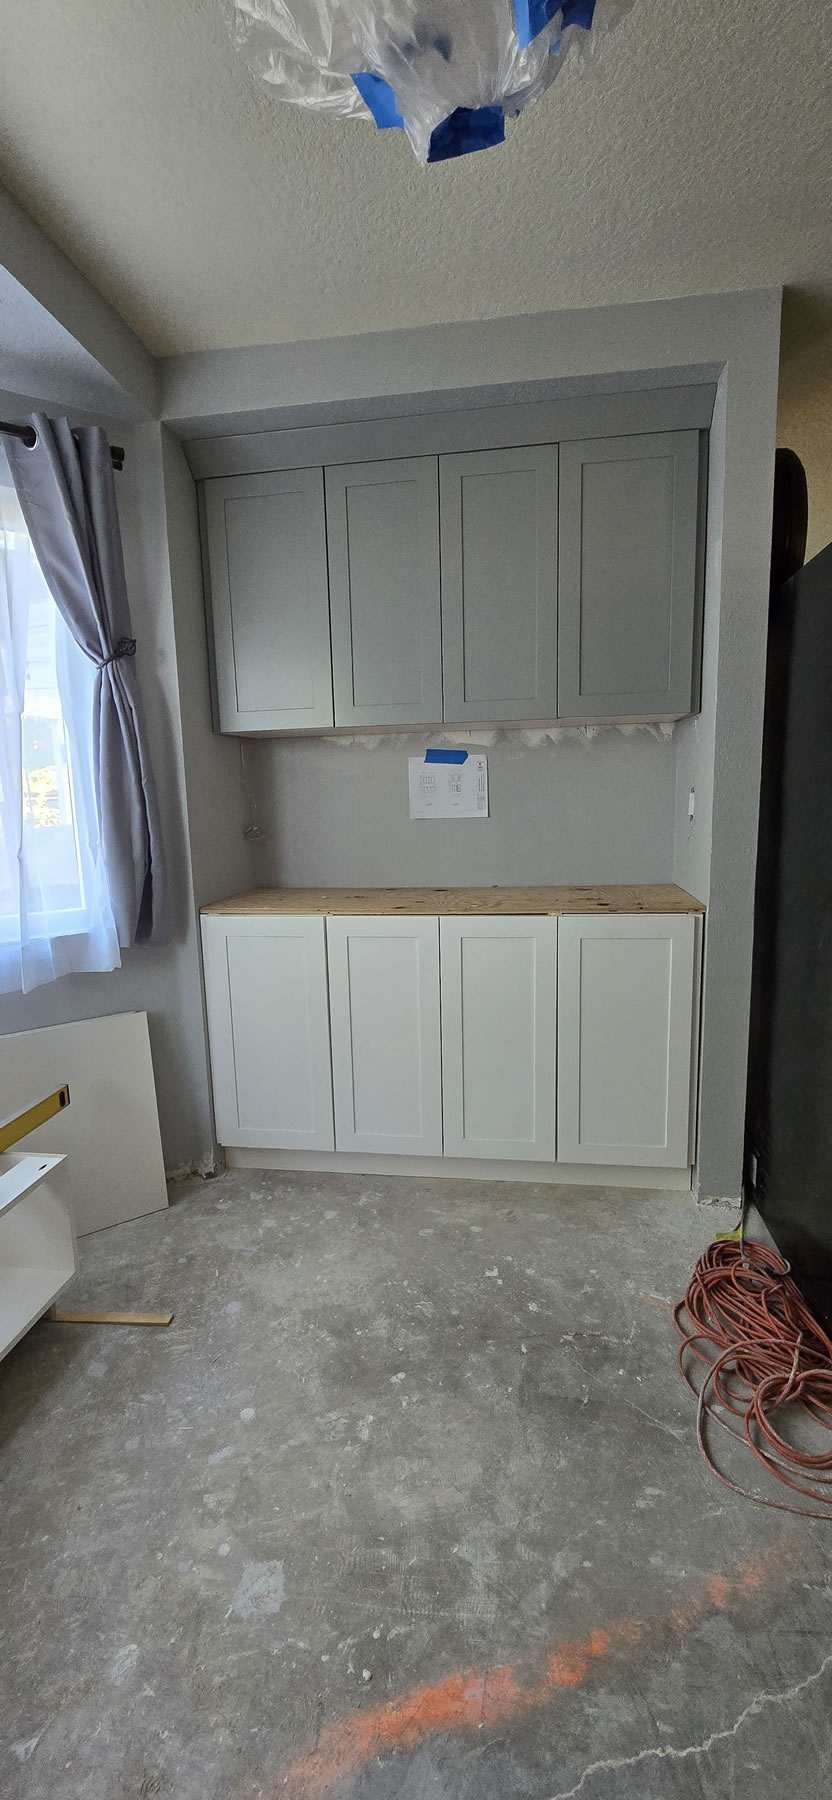
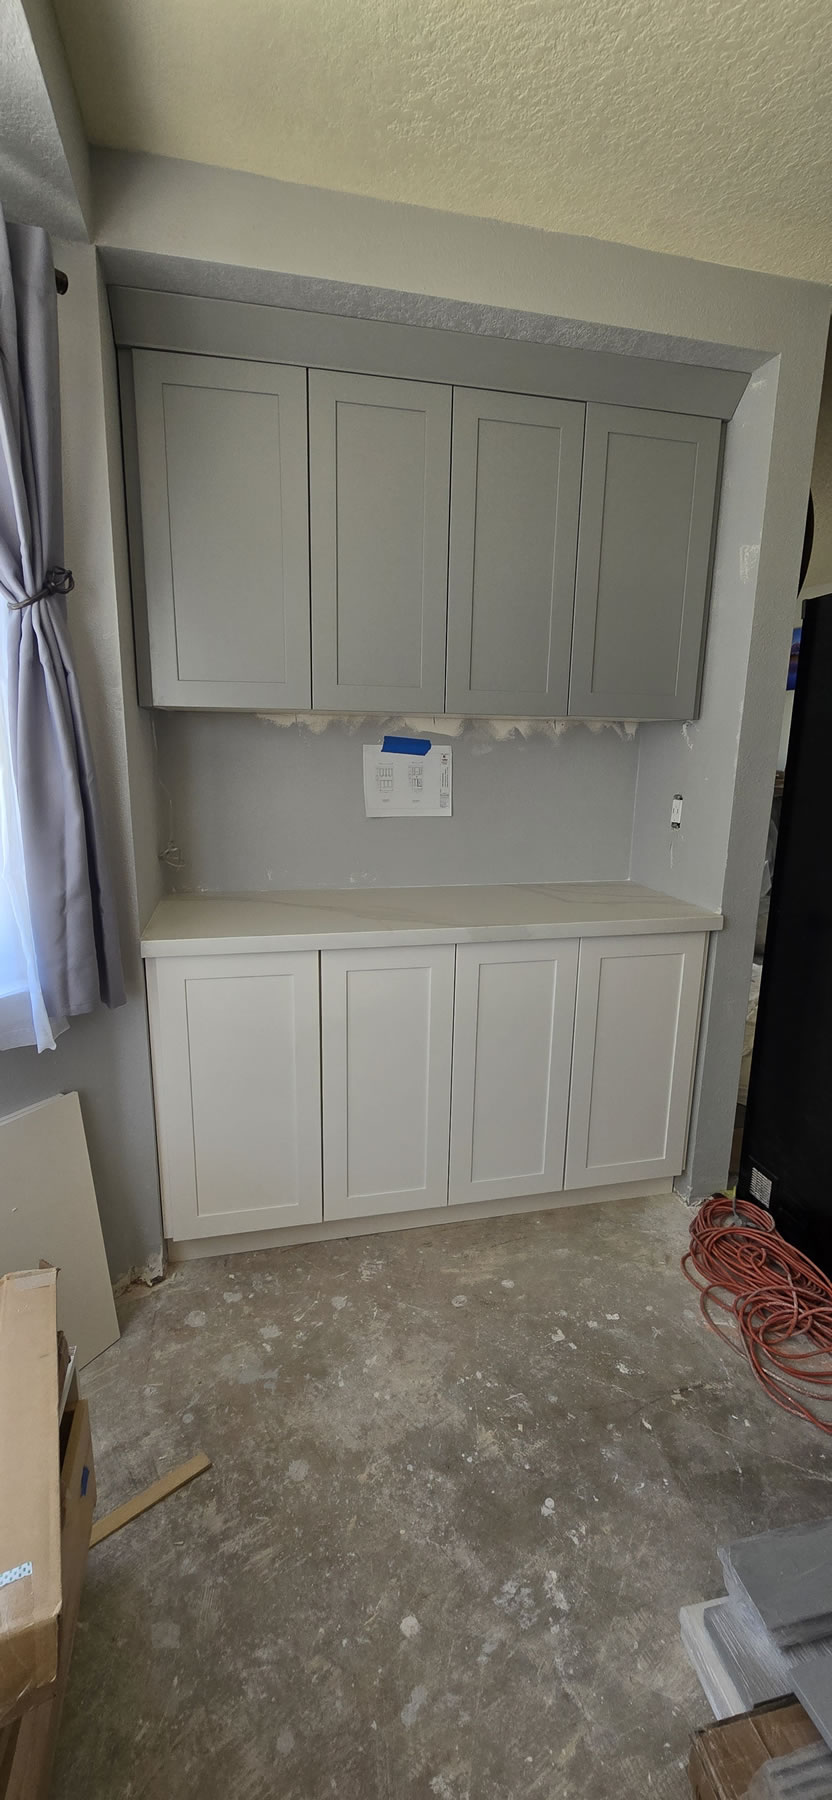
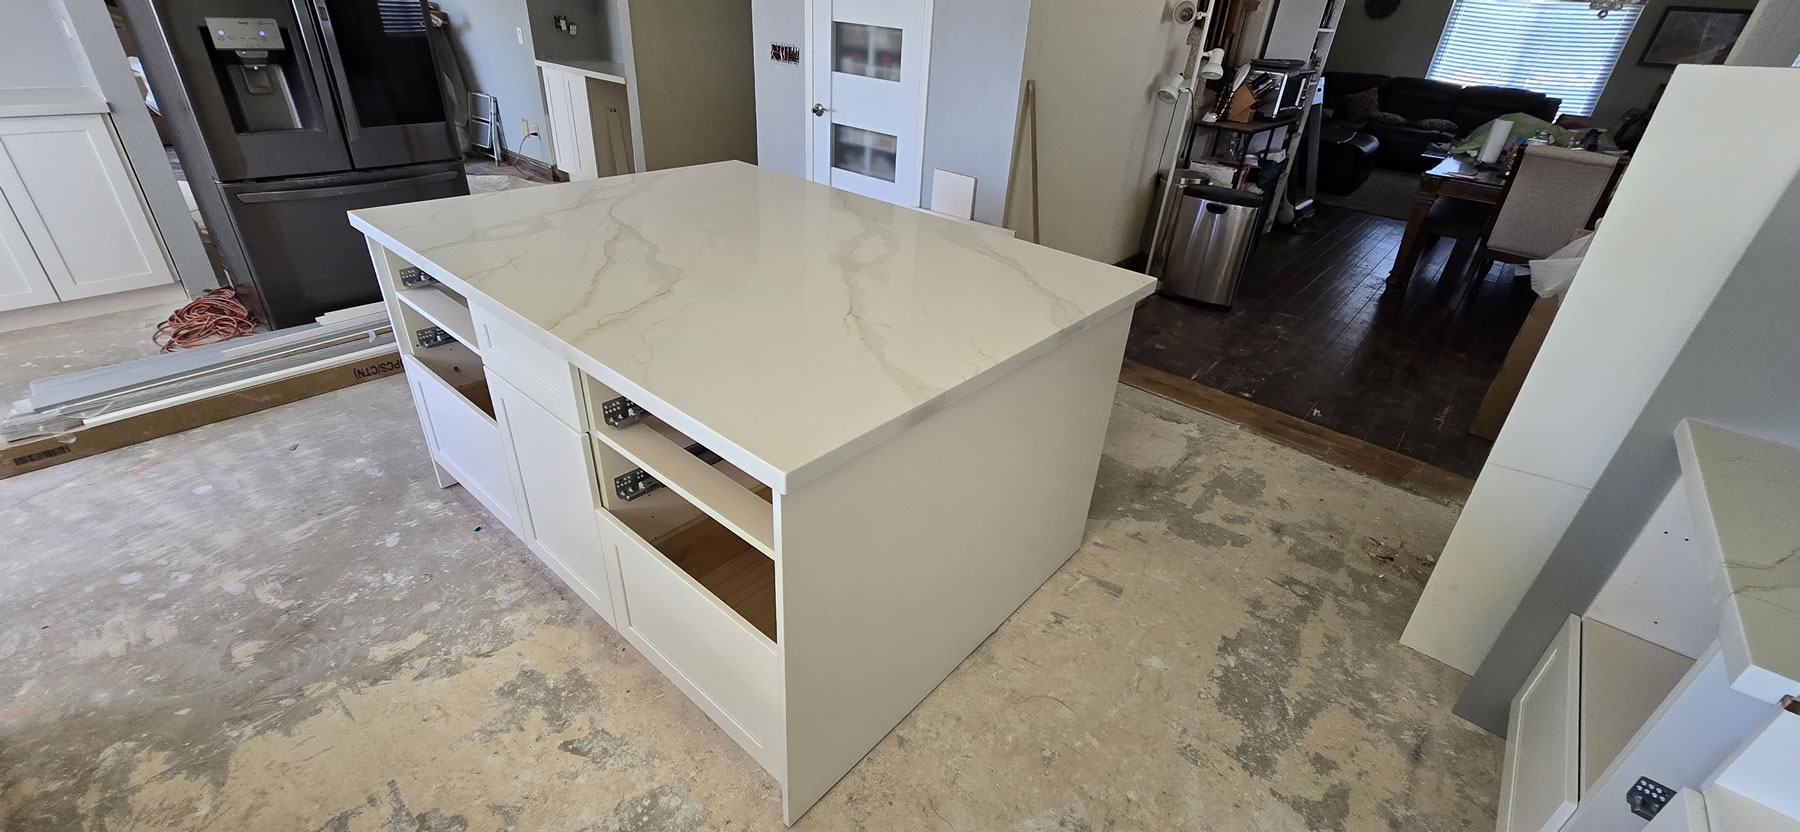
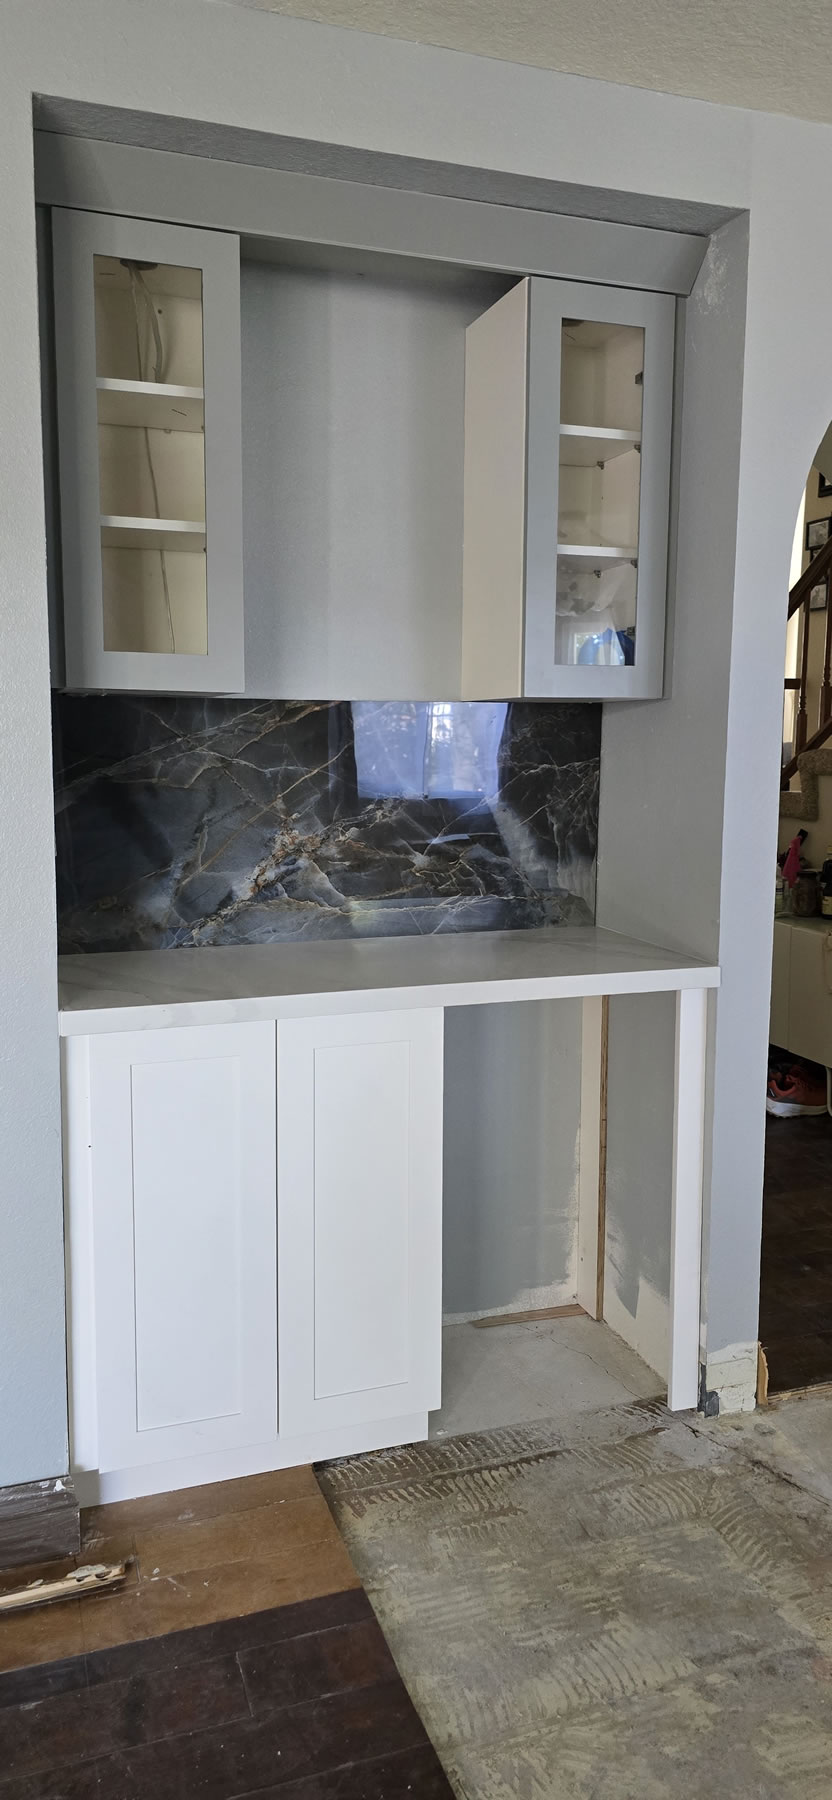
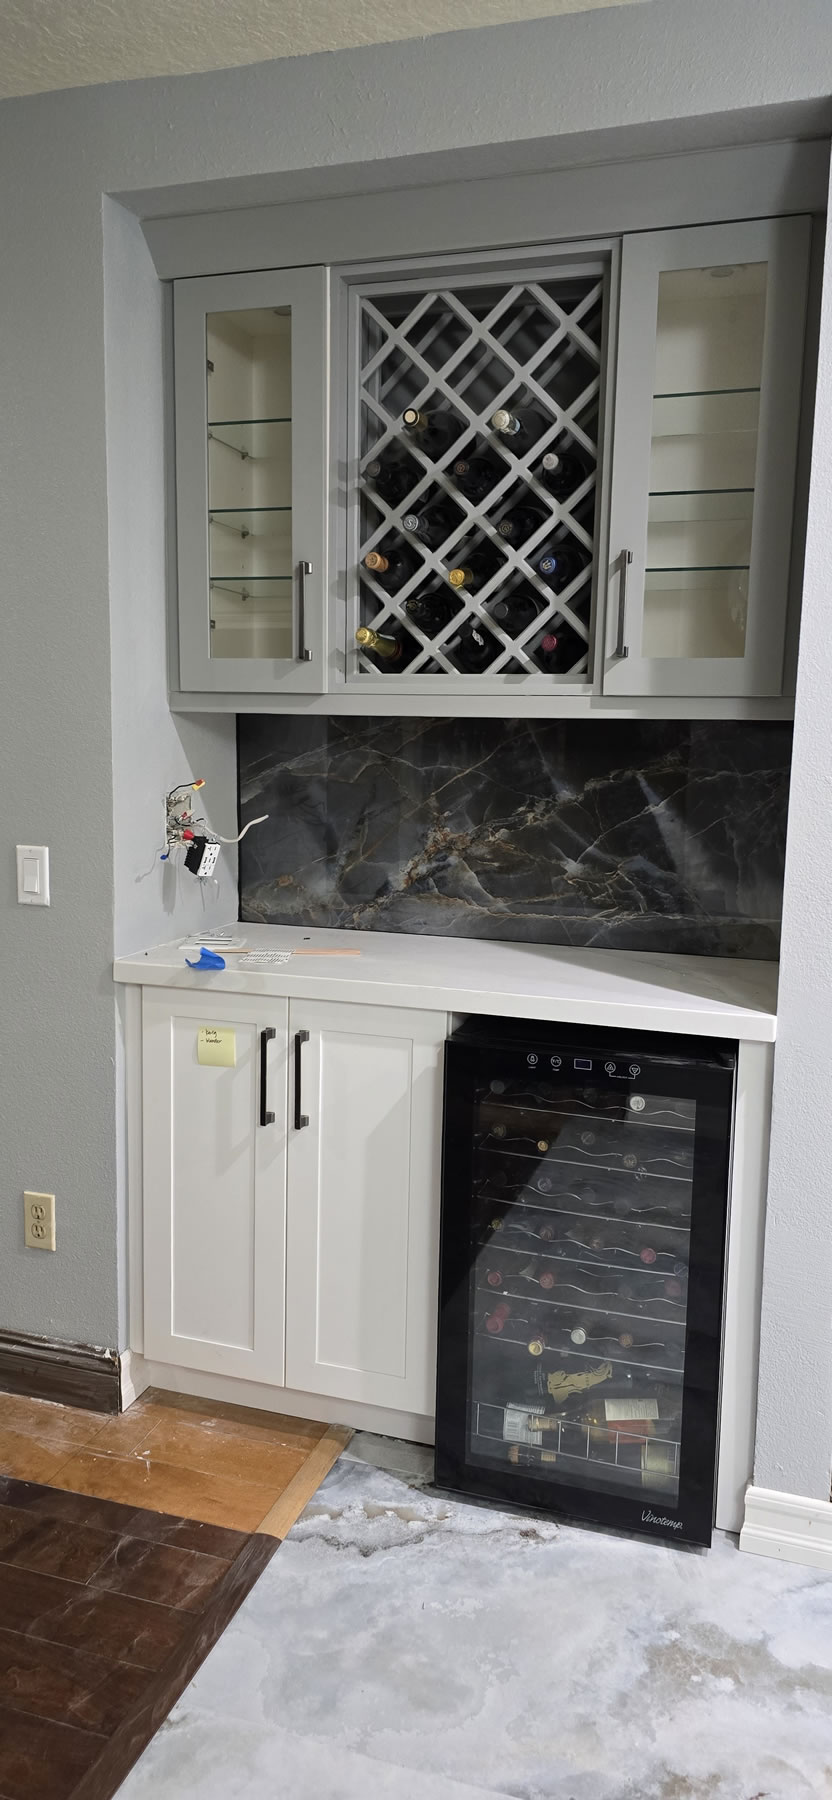
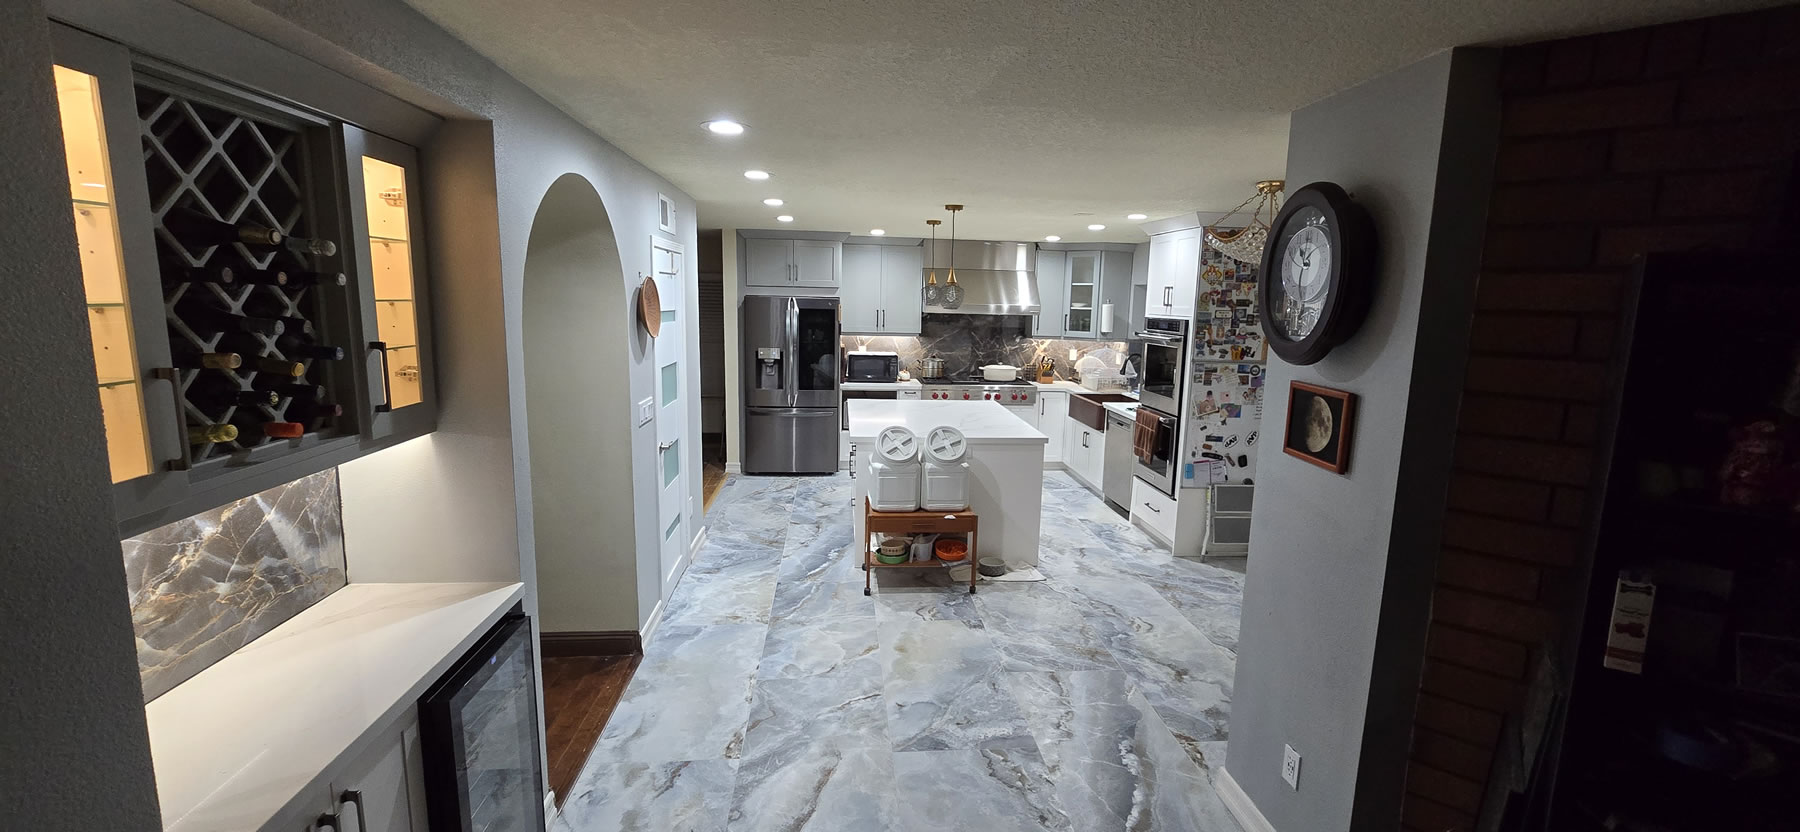
Ply wood over the island cabinets really show how big the new island is going to be. Wall cabinets and holes for the lighting drilled out in the wet bar area. I should stop calling it a wet bar as the wet part is gone and capped off. Lets go with new wine area. The wine fridge’s new home will be here as well as a new wine rack between the two wall cabinets. This area did not have any wall cabinets before so time to fill up that unused space. The above oven wall cabinets are in place.
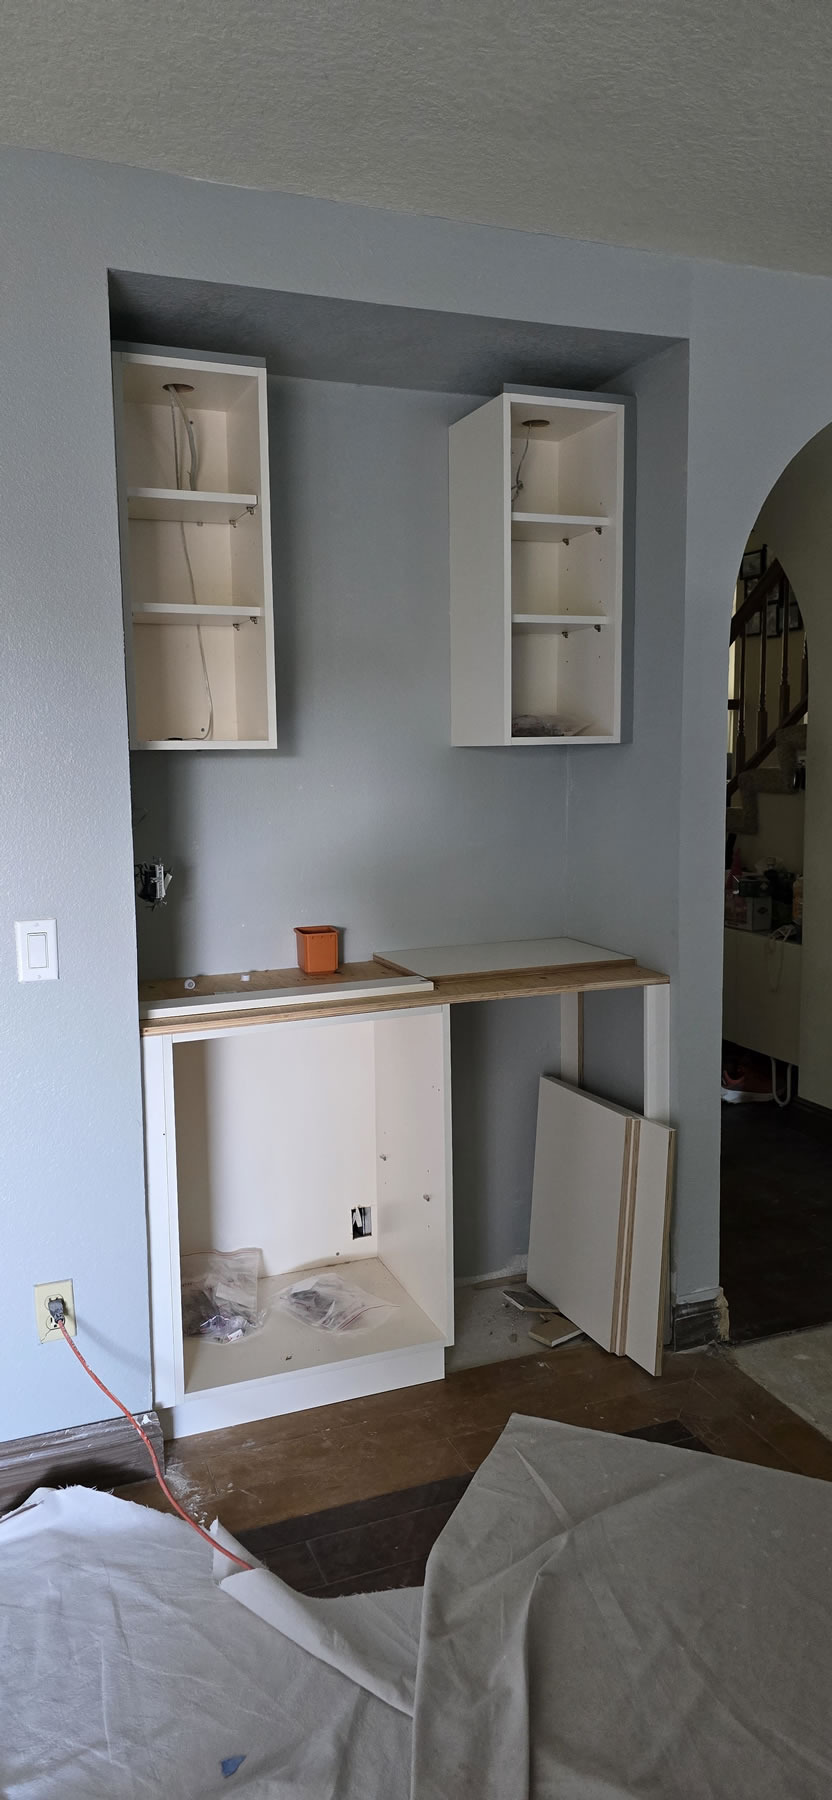
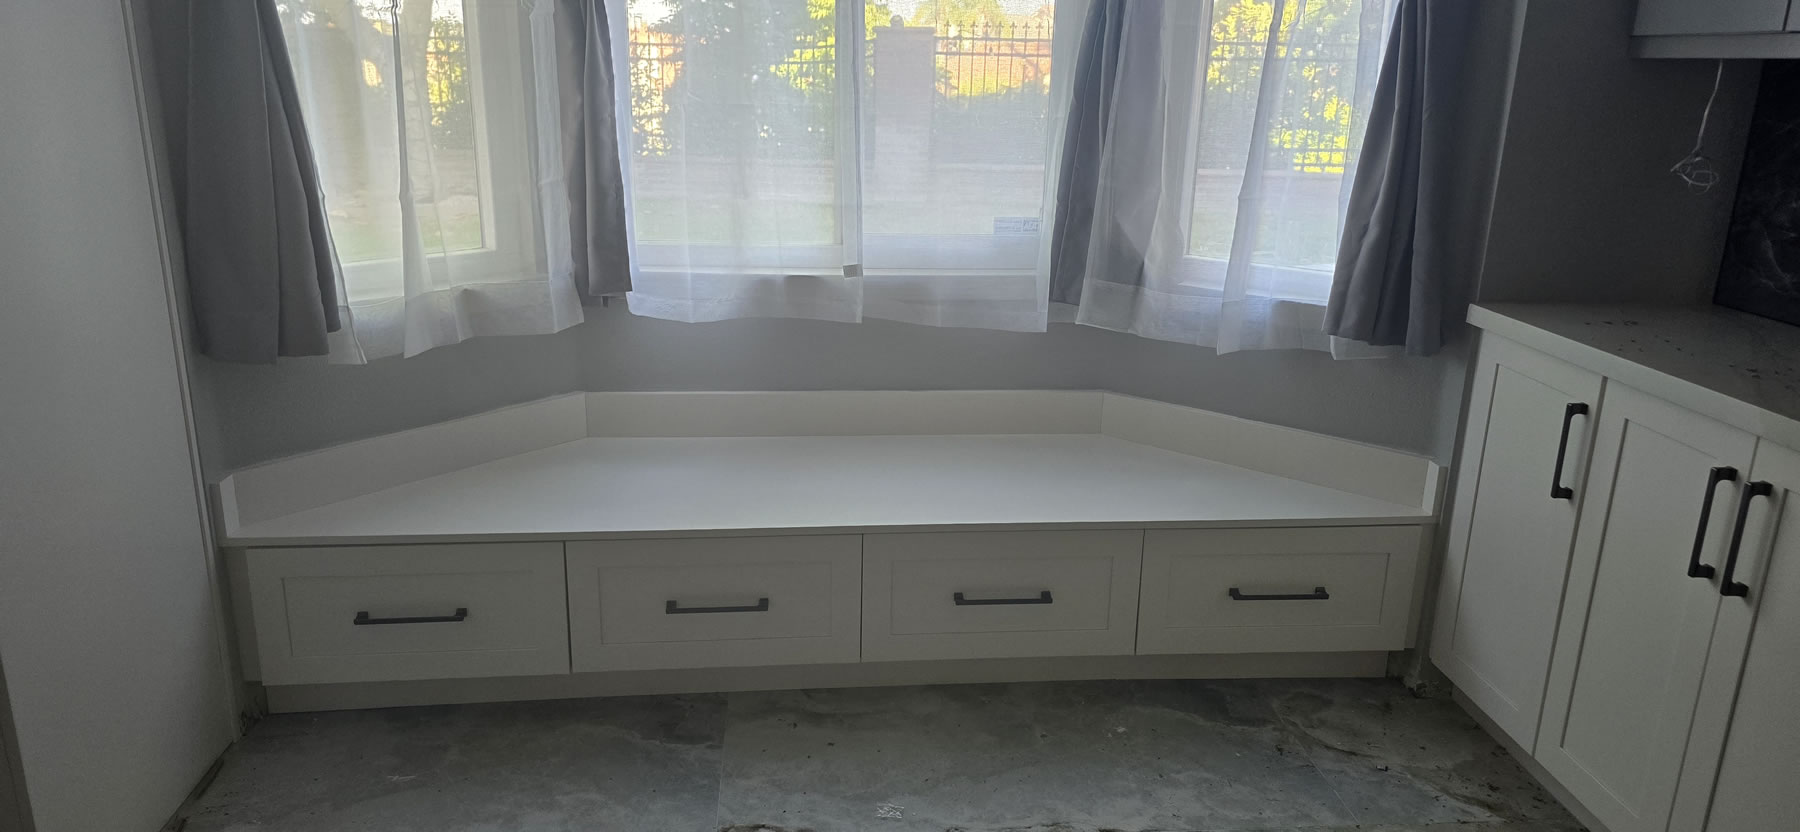
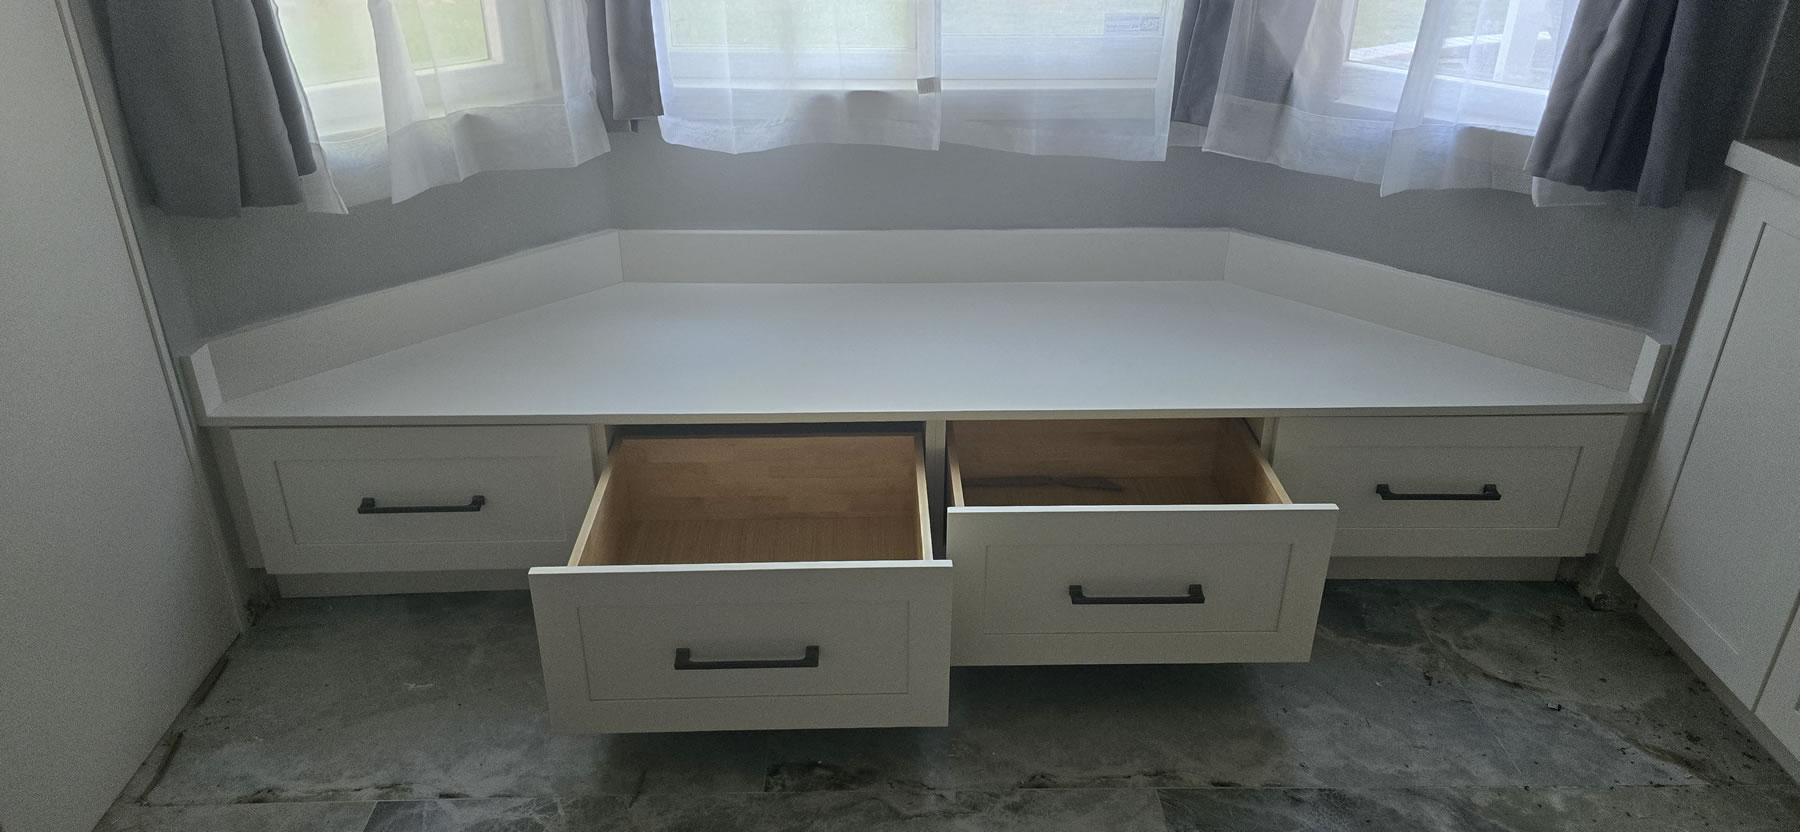
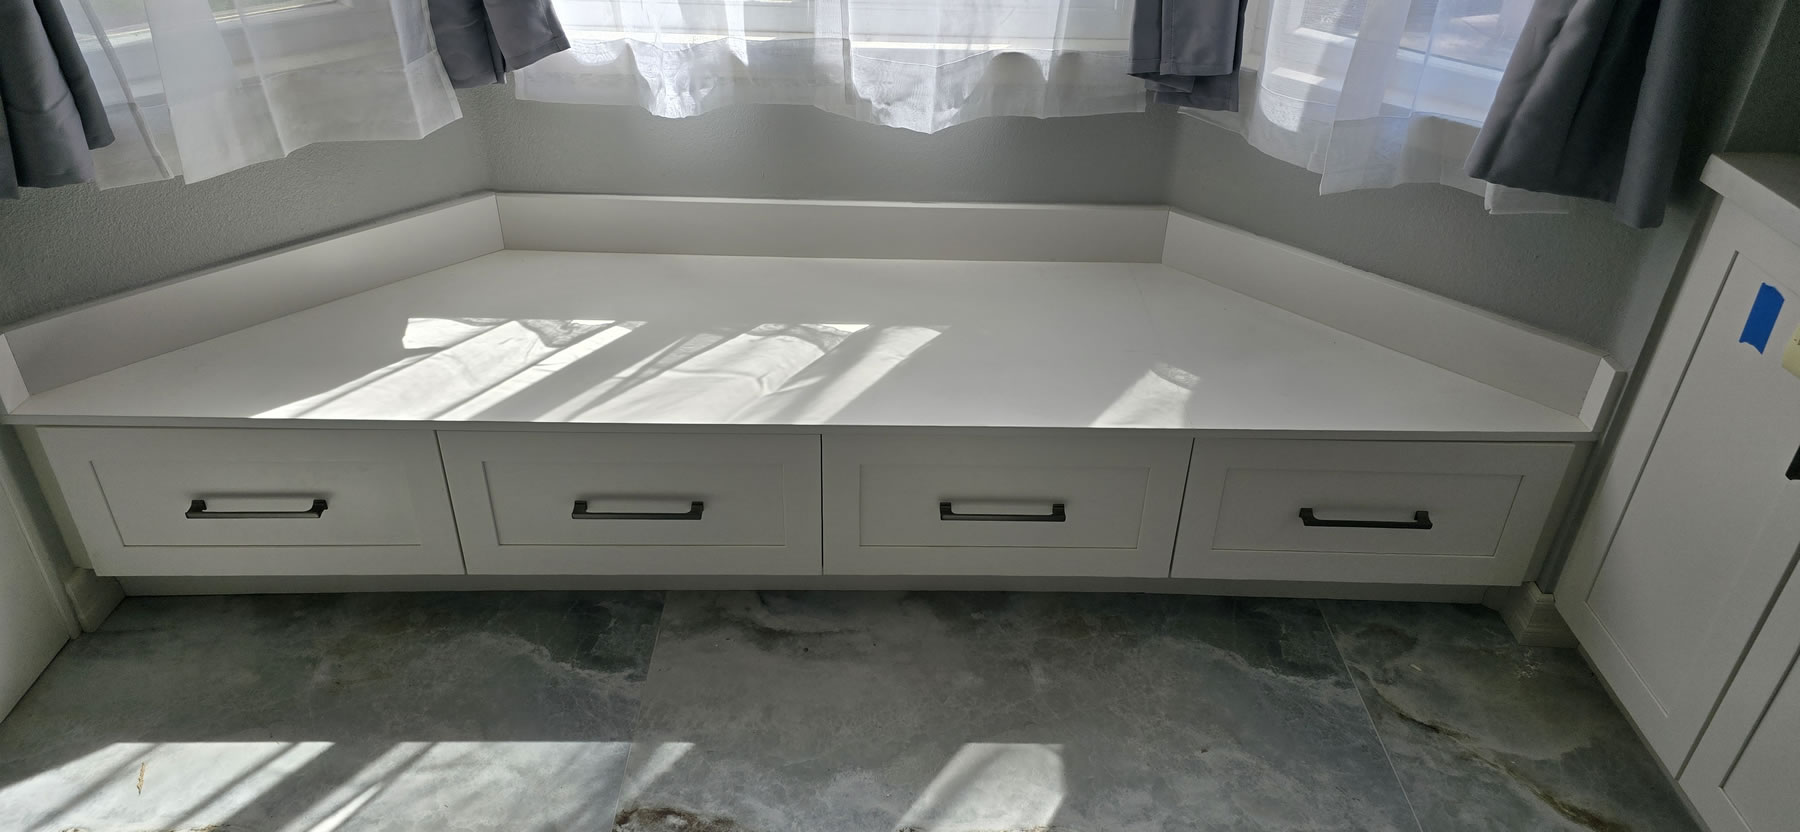
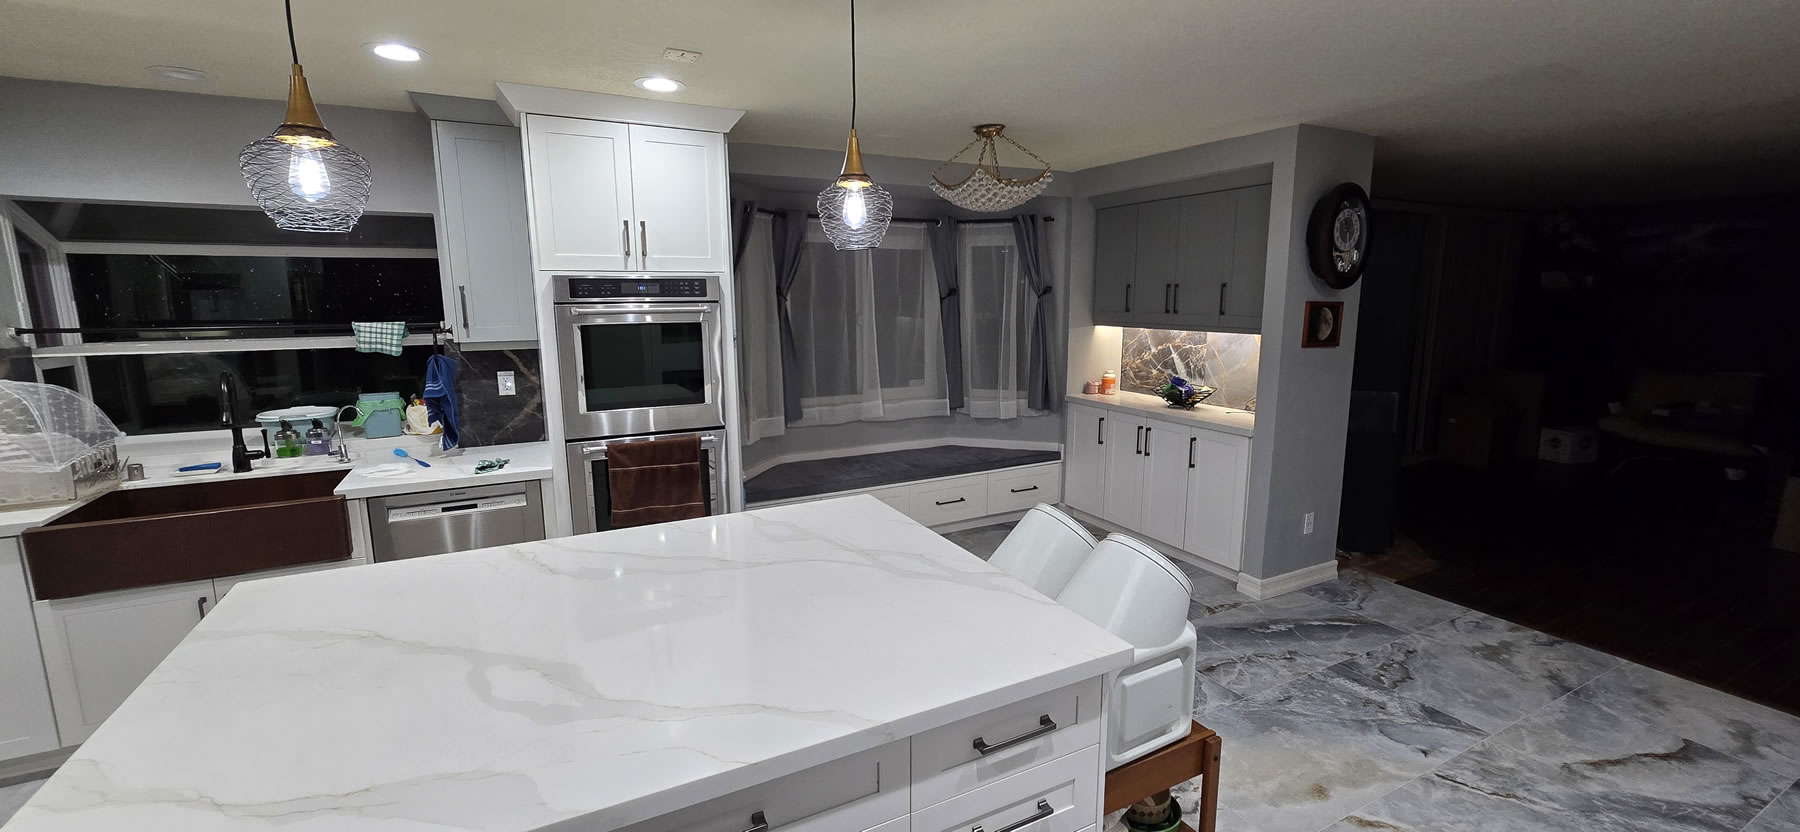
The bench seating cabinets are in position. And the kitchenette cabinets are installed.
_jpg.jpg)
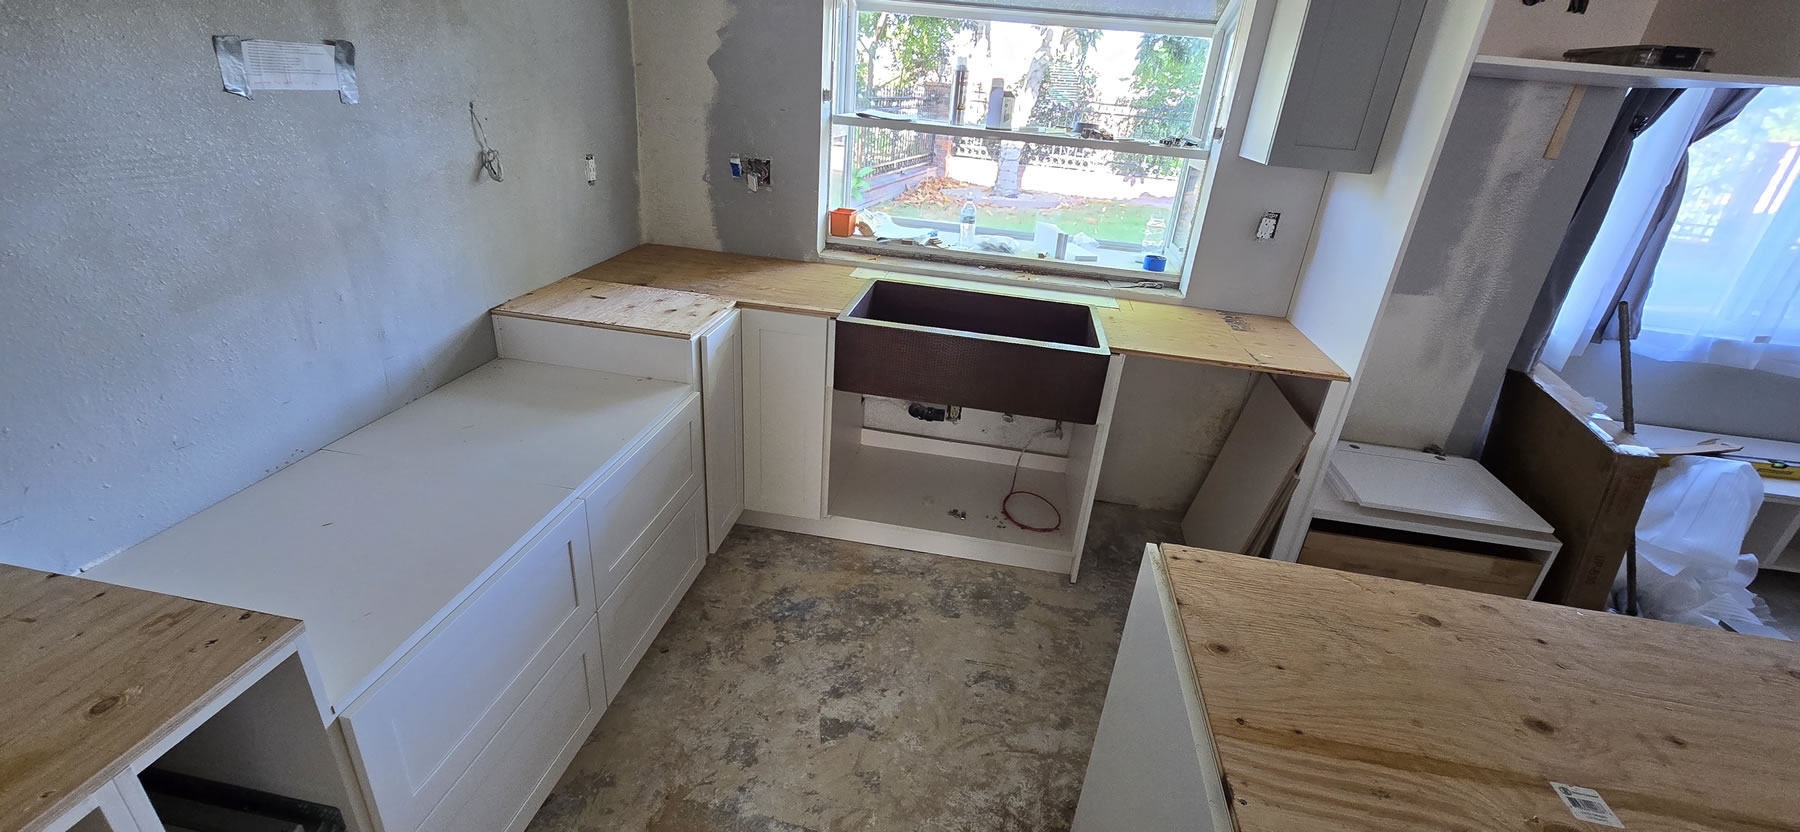
The countertop fabricators came by to do templating, but left because the sink wasn’t installed. Apparently, they need it to properly do the templates. So the copper sink that had been sitting in the garage since April and eventually moved to the shed is finally unboxed and I get to feel and touch it for the very first time… cue some Madonna…
Cabinet doors get installed and things look even more complete.
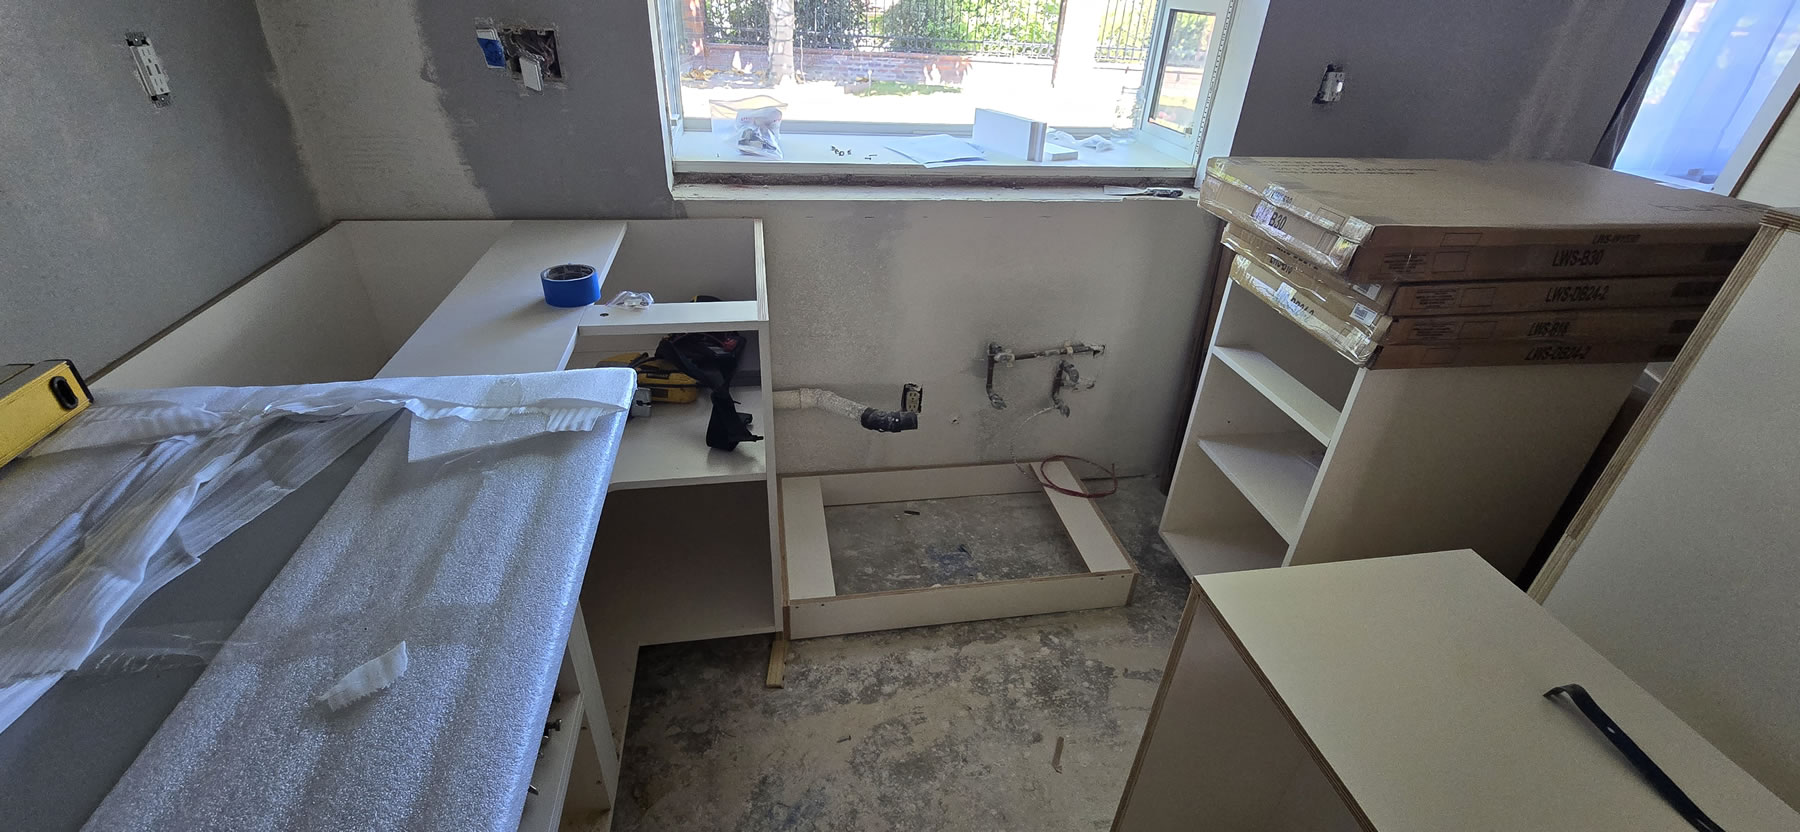
Cooktop side cabinets are just about done. The contractor is missing the corner wall cabinet and needs to custom build that, so we’re waiting on that. There is also the side panel for the oven that needs to be done and we’re also missing a few drawers. The original design had a different cabinet layout and the order kind of got screwed up. But the resulting island layout was what I originally wanted; so things kind of worked out, but we were still missing some drawers. The other thing I did was add some sound deadening material to the sink. Since it wasn’t completely installed, I pulled it and wrapped it with sound deadening material. You know, that same crap we tape to cheap cars to reduce road noise? Yeah, that stuff. Knocking on it before had the fun hollow metal sound. Adding the material helps diminish it significantly.
Rolling in the end of the week and the countertop fabricators show up having just picked up the countertop material I bought late last week. They’re here to template. It’s also 5:30PM on a Friday. But about an hour later, they get all the countertop spaces templated up. With most of the cabinets installed and the countertop templating; another 8K payment goes to the contractor.
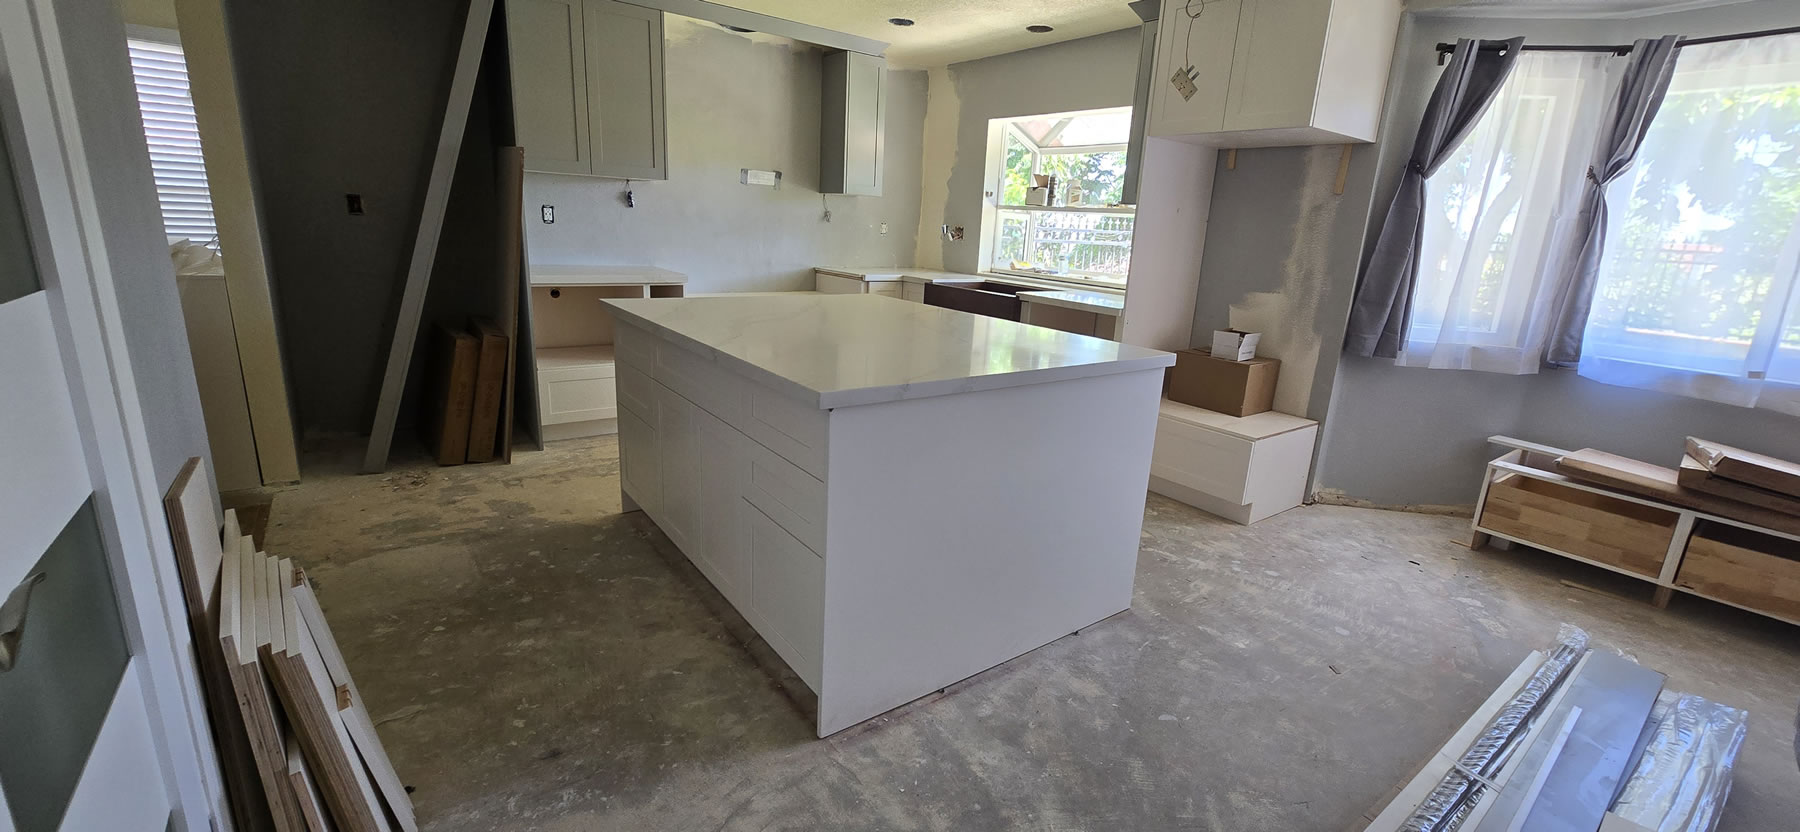
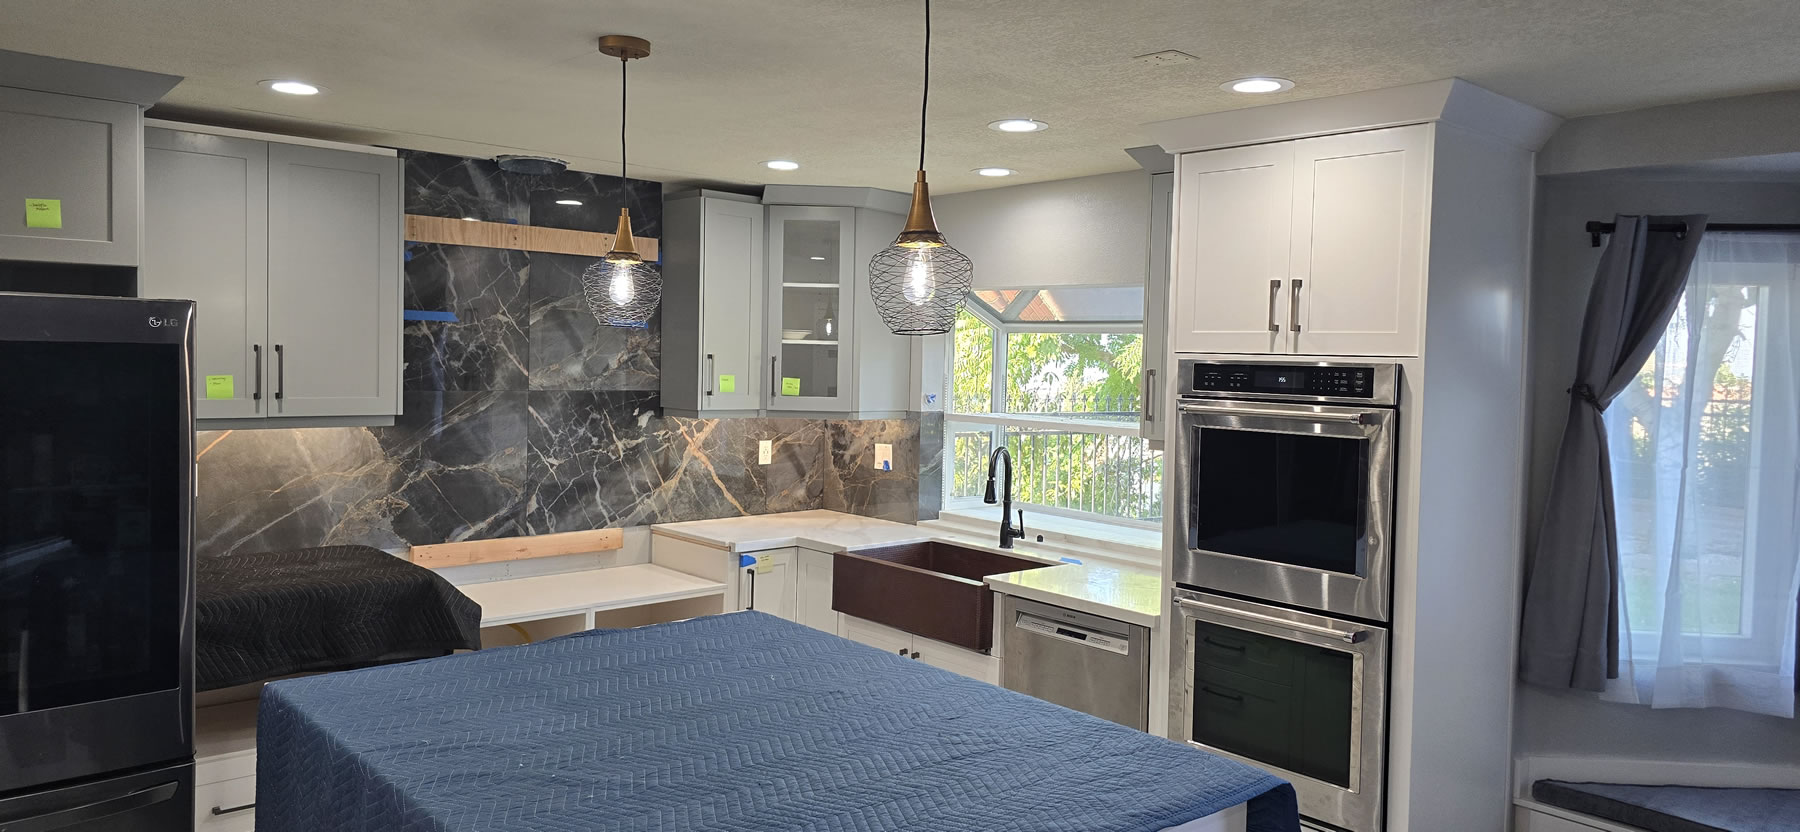
We have a strong start to week six as the countertop guys show up bright and early Wednesday morning and get the countertops installed. I now have countertops! Now for the bad news, while installing the island countertop, they managed to do unrepairable damage to both side panels to the island. These will need to be replaced and gets added to the order of missing cabinetry. The wine racks are also on that list. Other than the island, the other areas look great.
Wait, what happened to Monday and Tuesday? Well; since the missing cabinets were still in a holding pattern, the cabinet guy came and grabbed his tools for another job and took off. Tuesday was actually a scheduled Tesla install day for upgrading my main panel to prepare for the additional power walls and full house backup system. No electricity all day means no work in the kitchen. And I got regulated to working out of the RV because it was hot as F that week. Tesla originally scheduled to install the same week I did the painting with the down time between drywallers and cabinet delivery. However, they forgot that they needed to coordinate things with the power company to shut off power and work with inspections and all that, so the install was pushed two weeks. Power wall install is schedule for the next week.
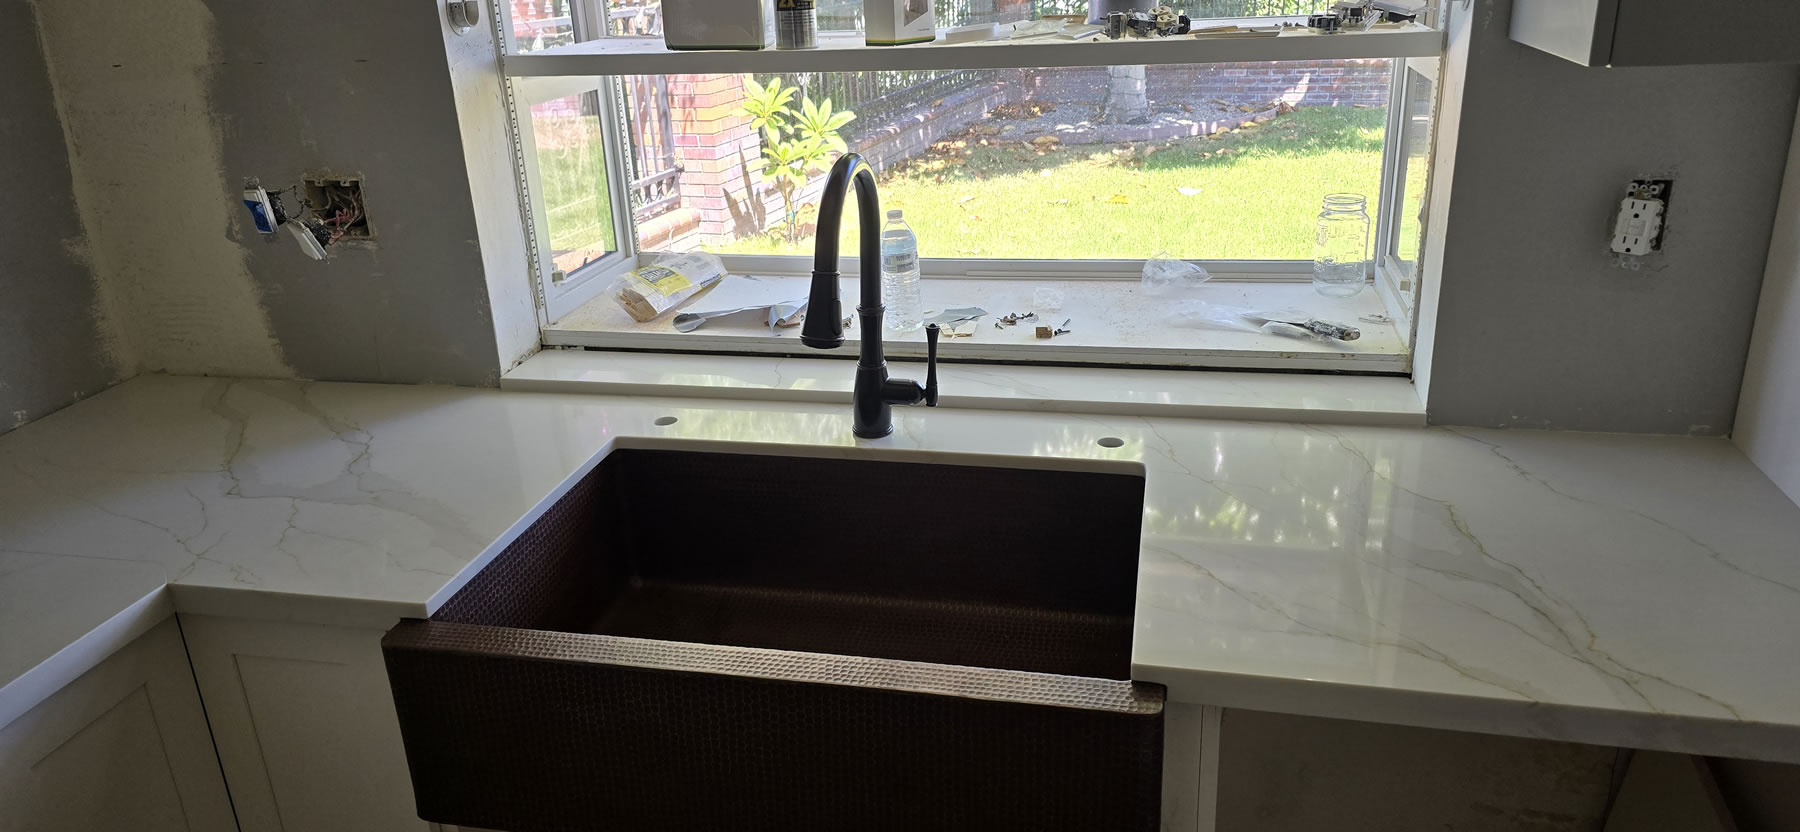
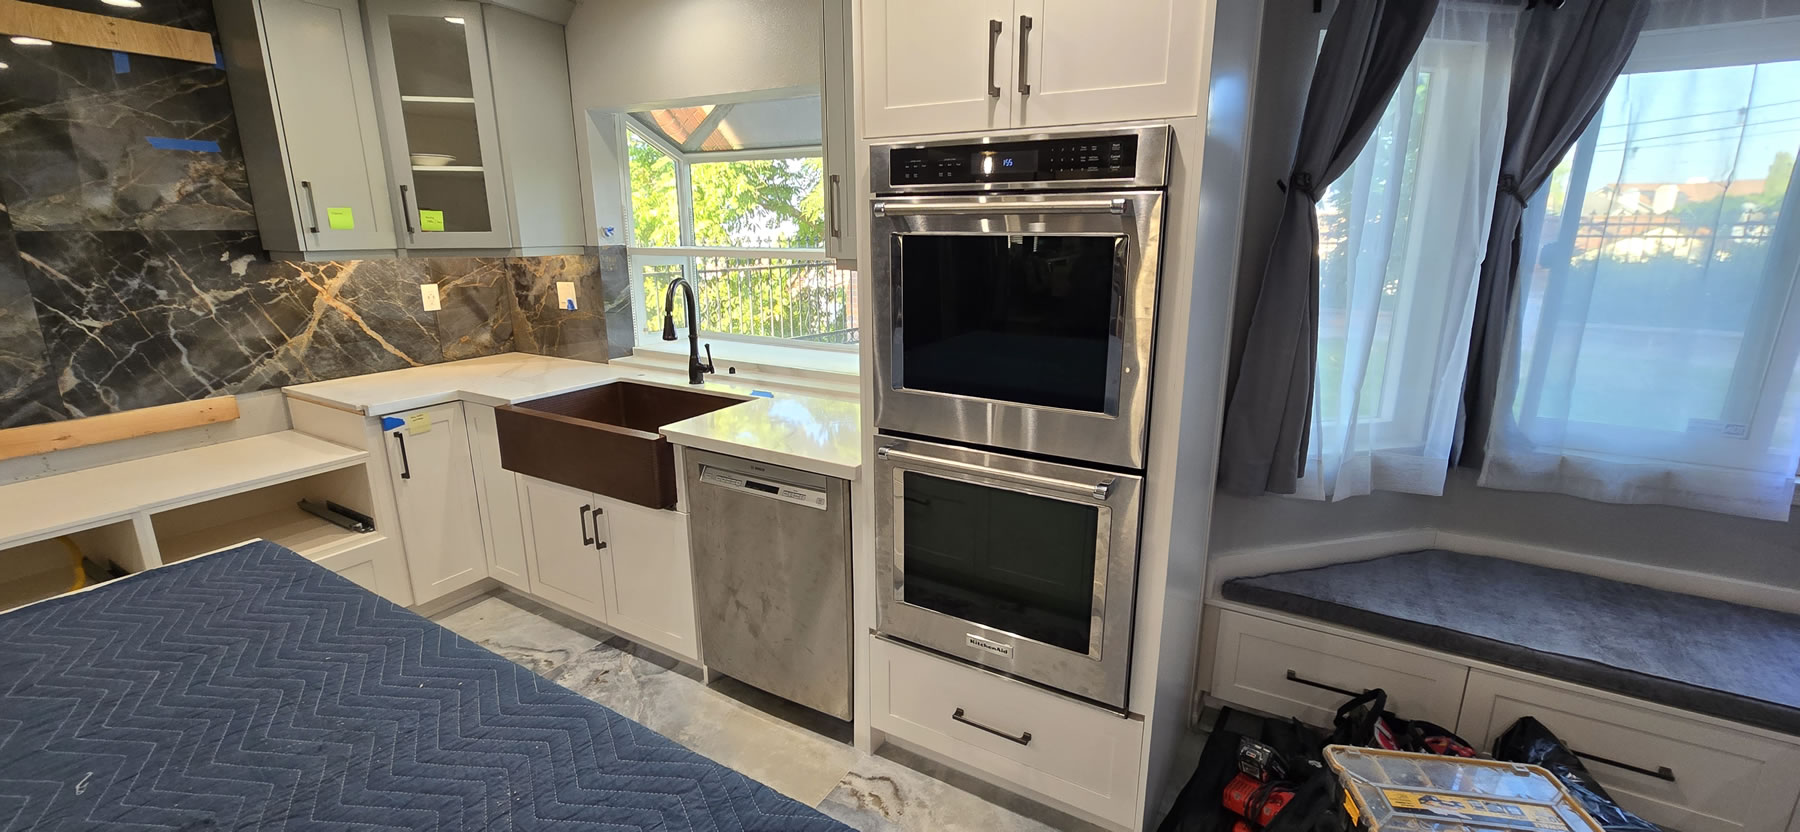
With the sink and countertops in place, the visuals for the wife are much clearer, so she mentioned that we should also change out the faucet. Our original, still working piece of German engineering; is matte silver – so we’ll be needing a burnt bronze or matte black faucet. Order placed and arrived in a few days and now a quick test fit. Yes, she’s right, it matches better. My mom was worried about the working piece of German water works and was put at ease as we replaced the laundry room faucet with Herr Wasserhahn. Again, another one of those, we should have done this day one week one. The laundry room sink is our current kitchen sink during the remodel and that old faucet is a horrific pain in the ass to use. Good riddance.
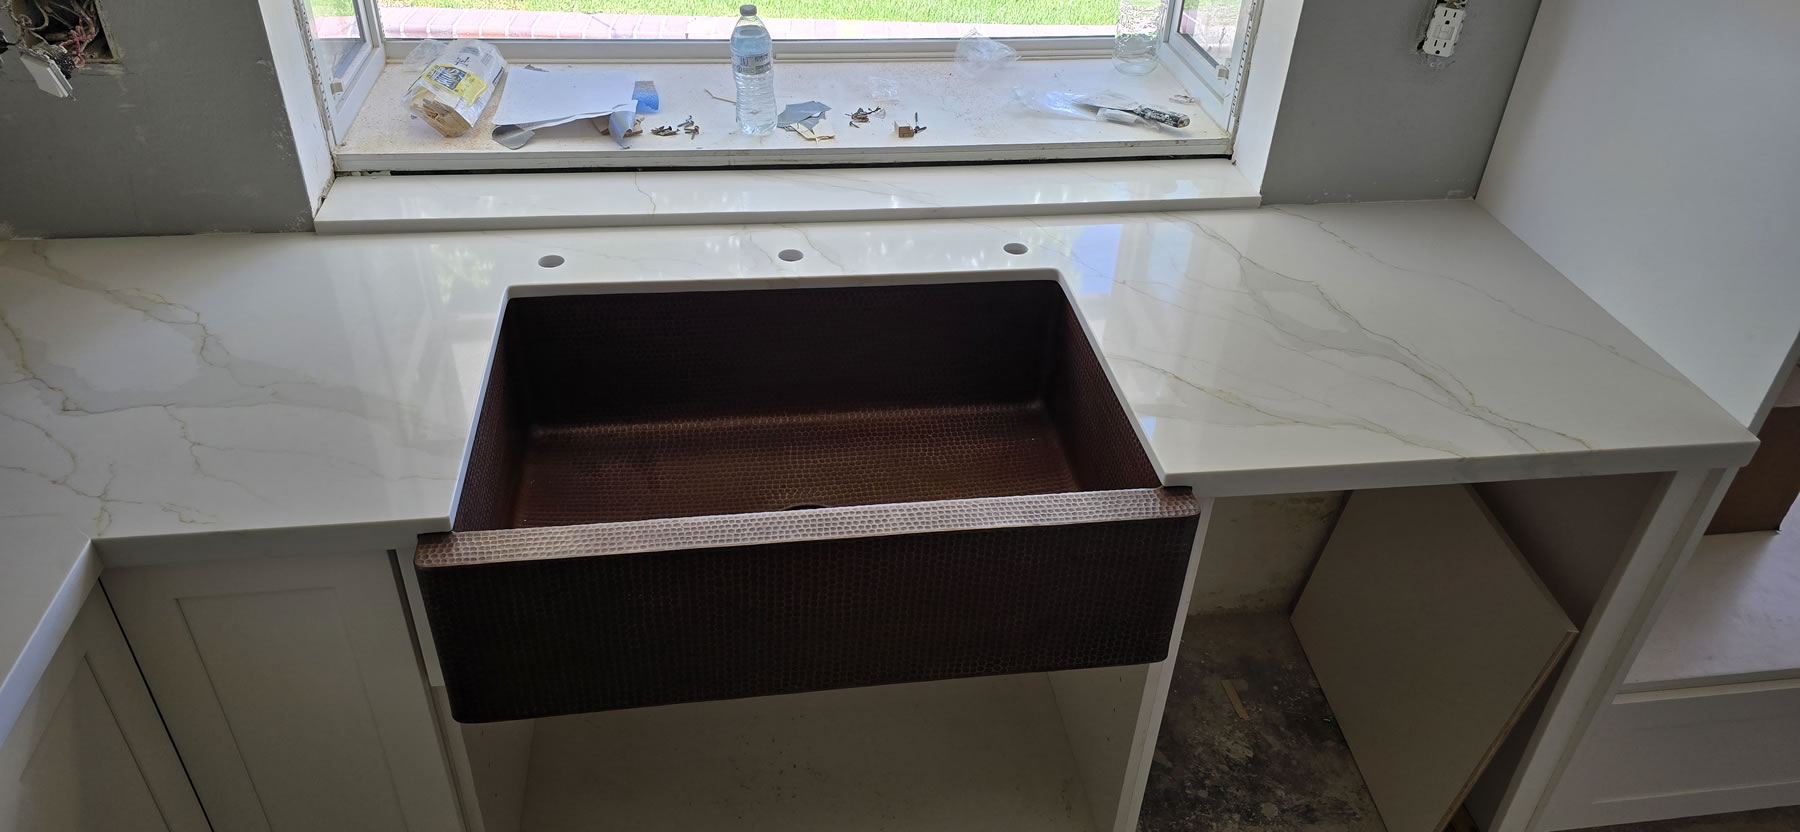
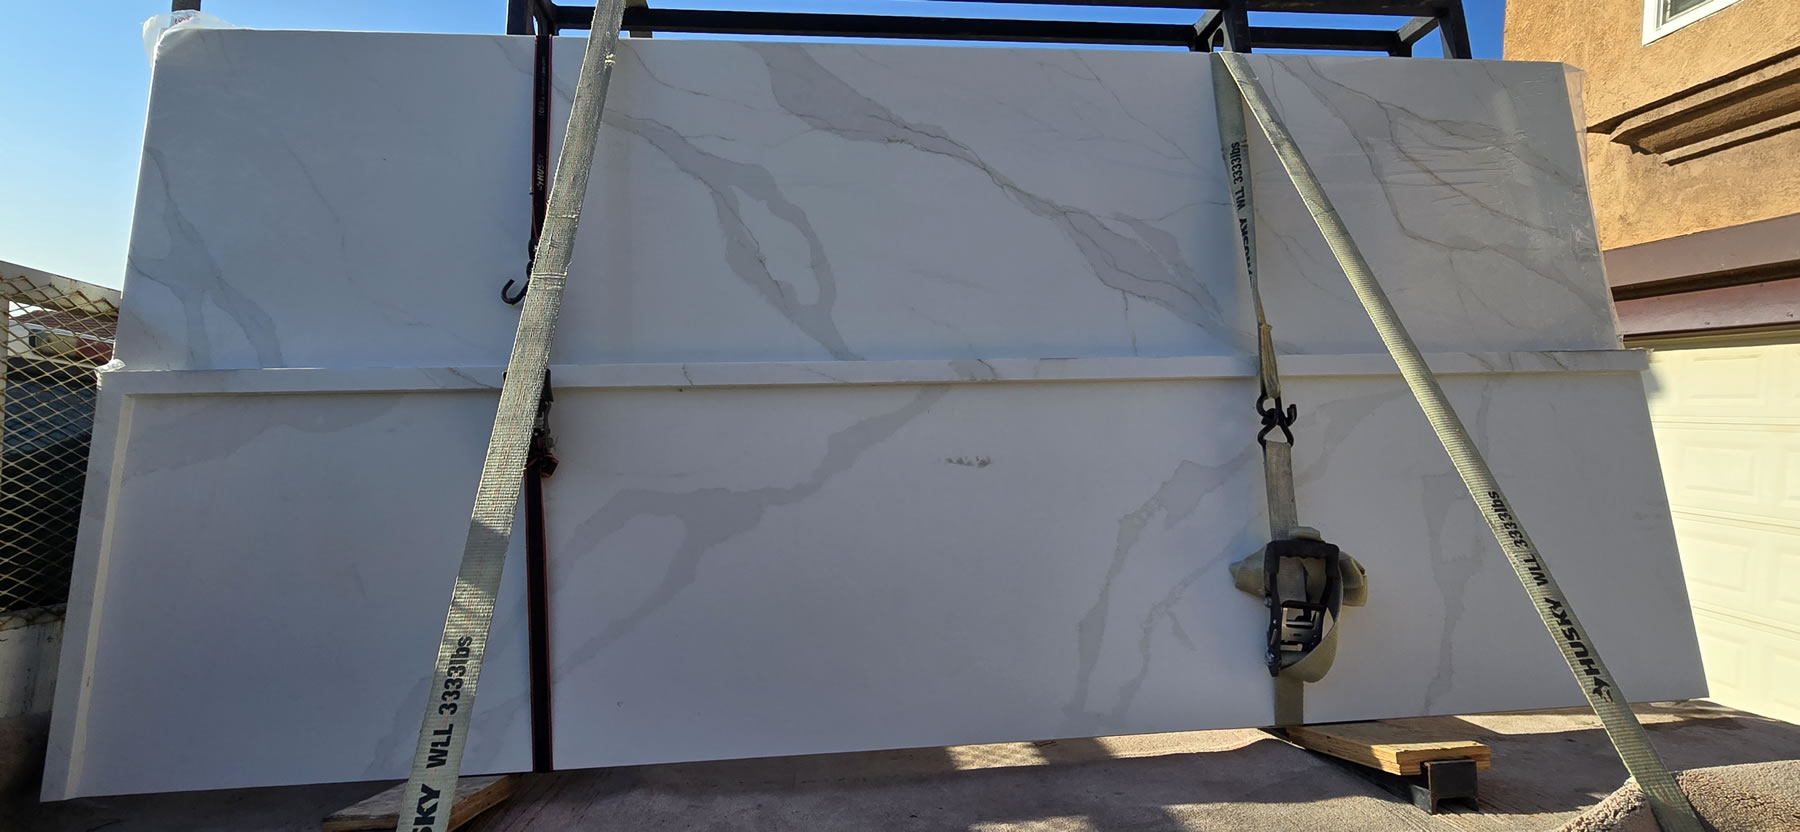
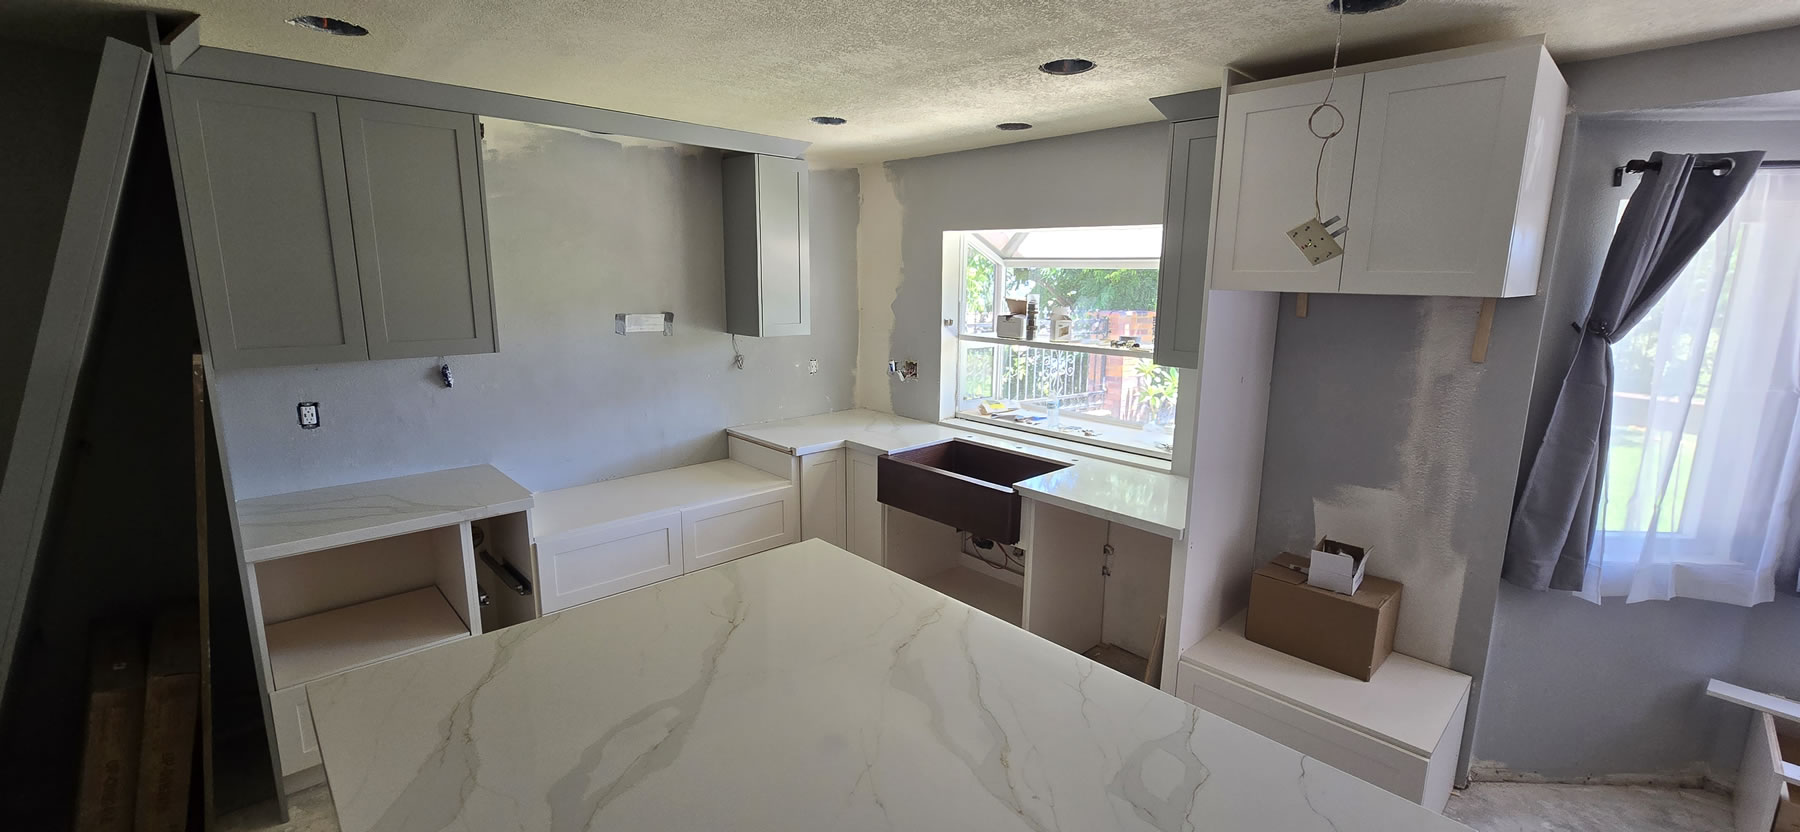
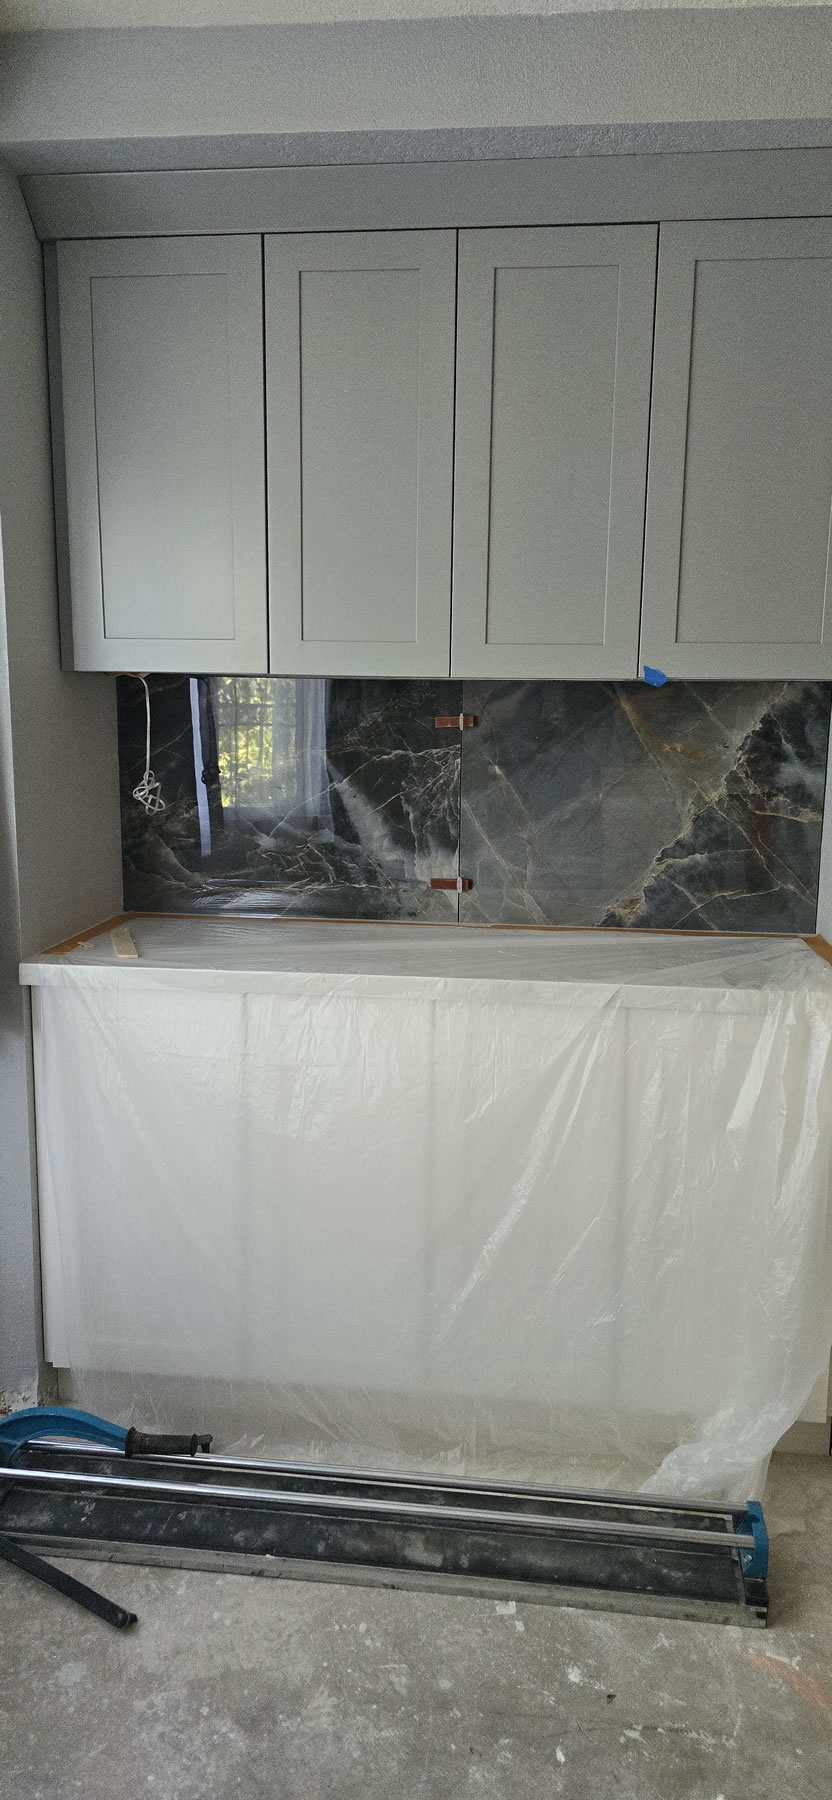
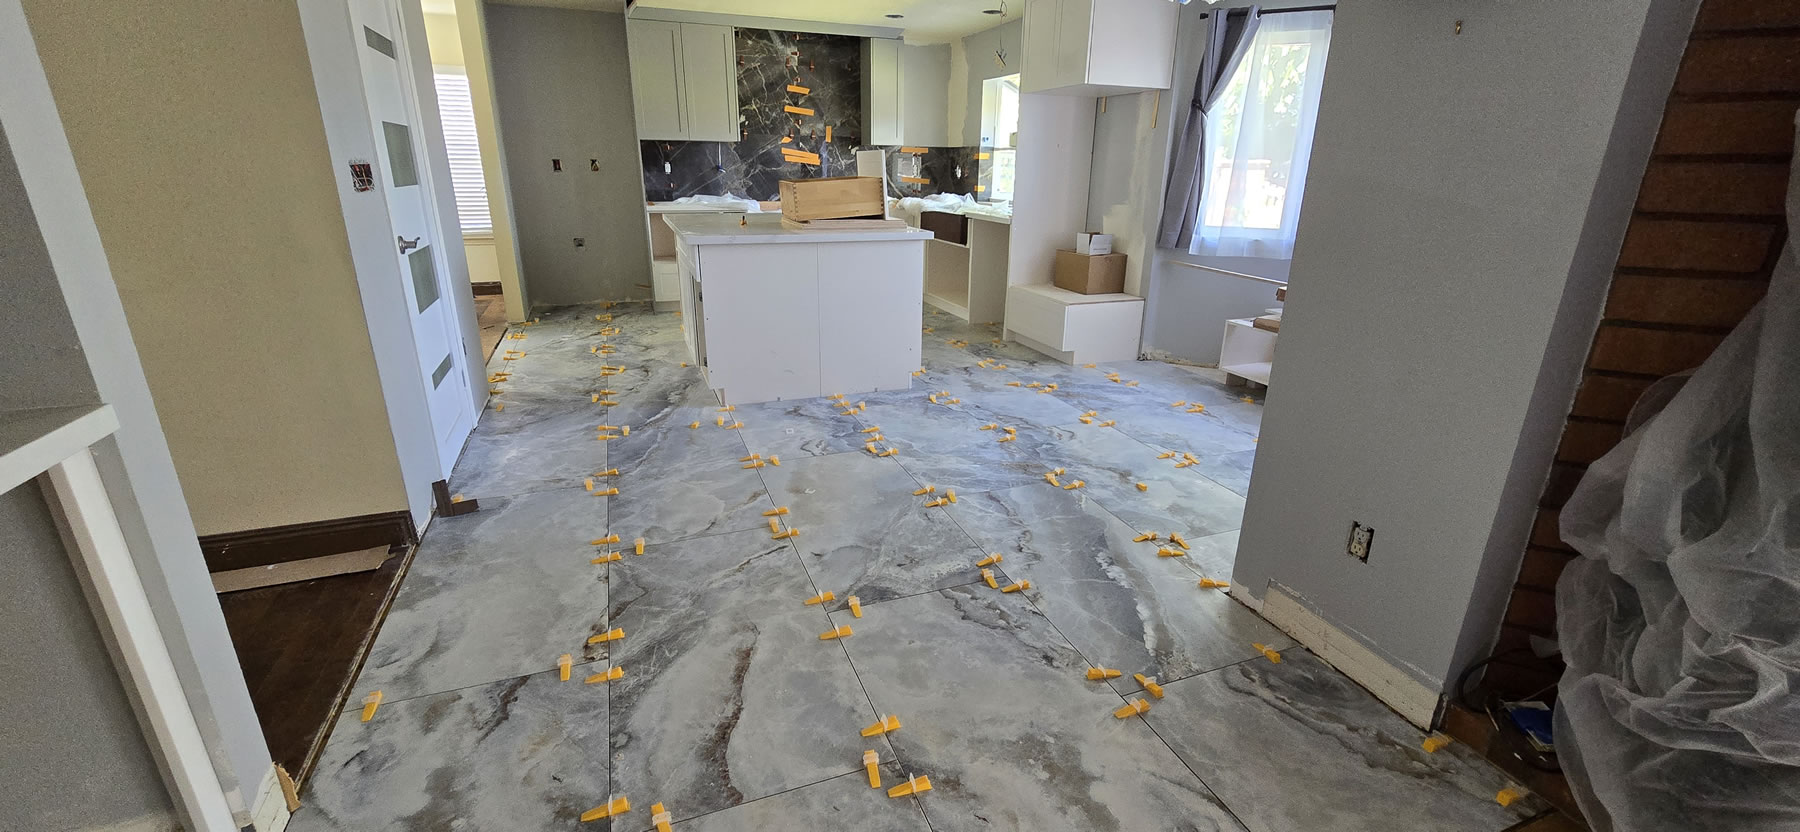
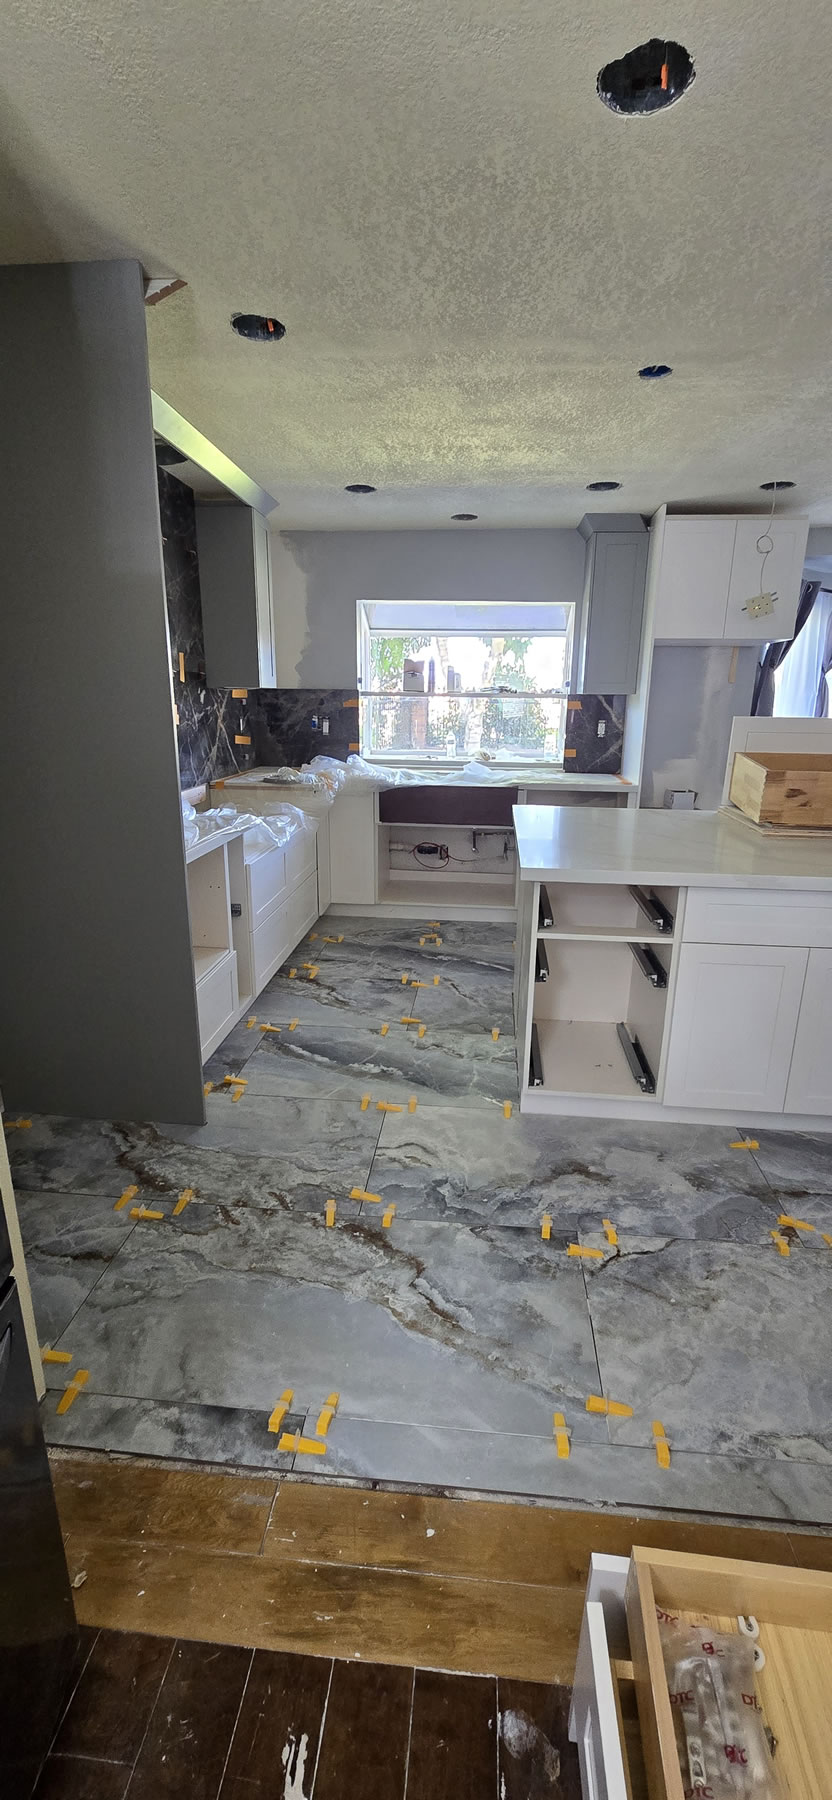
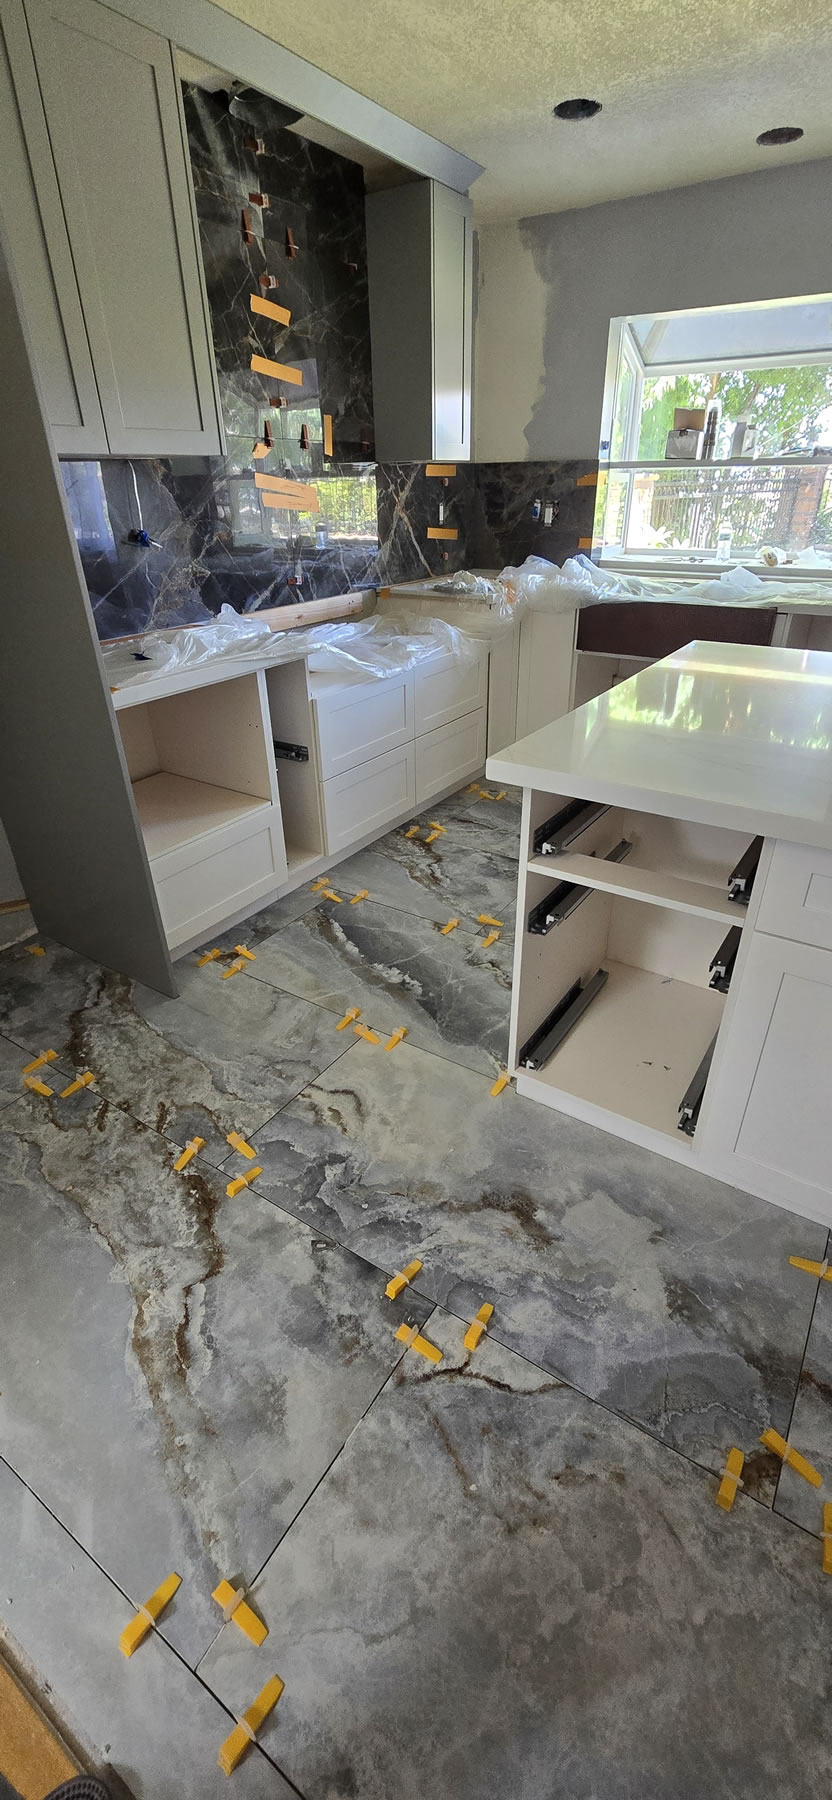
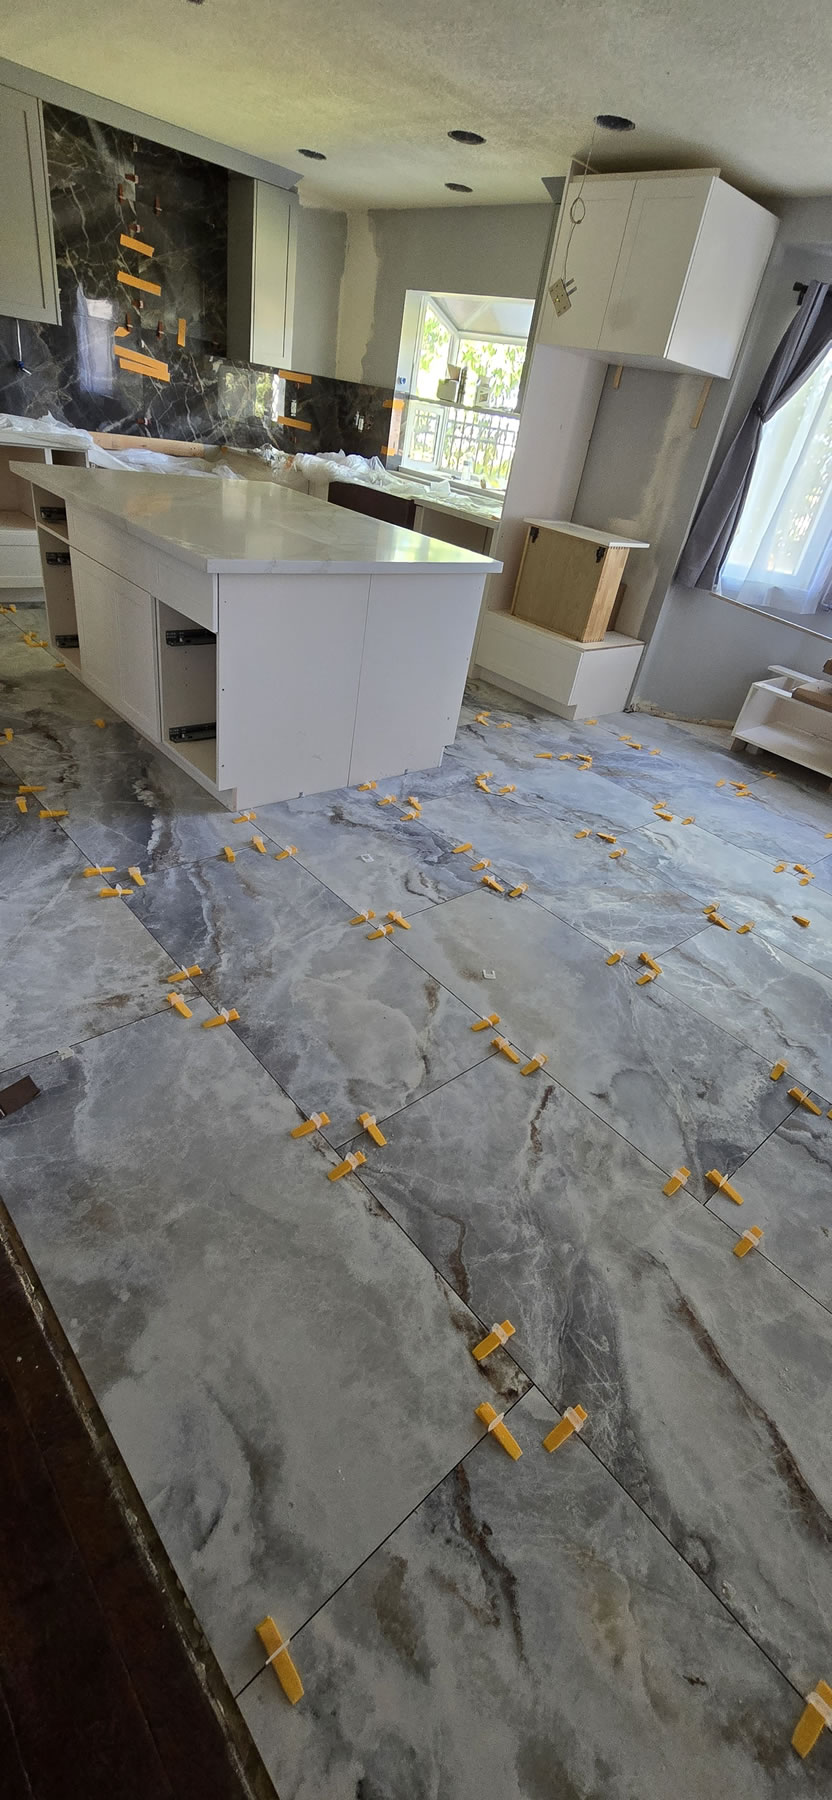
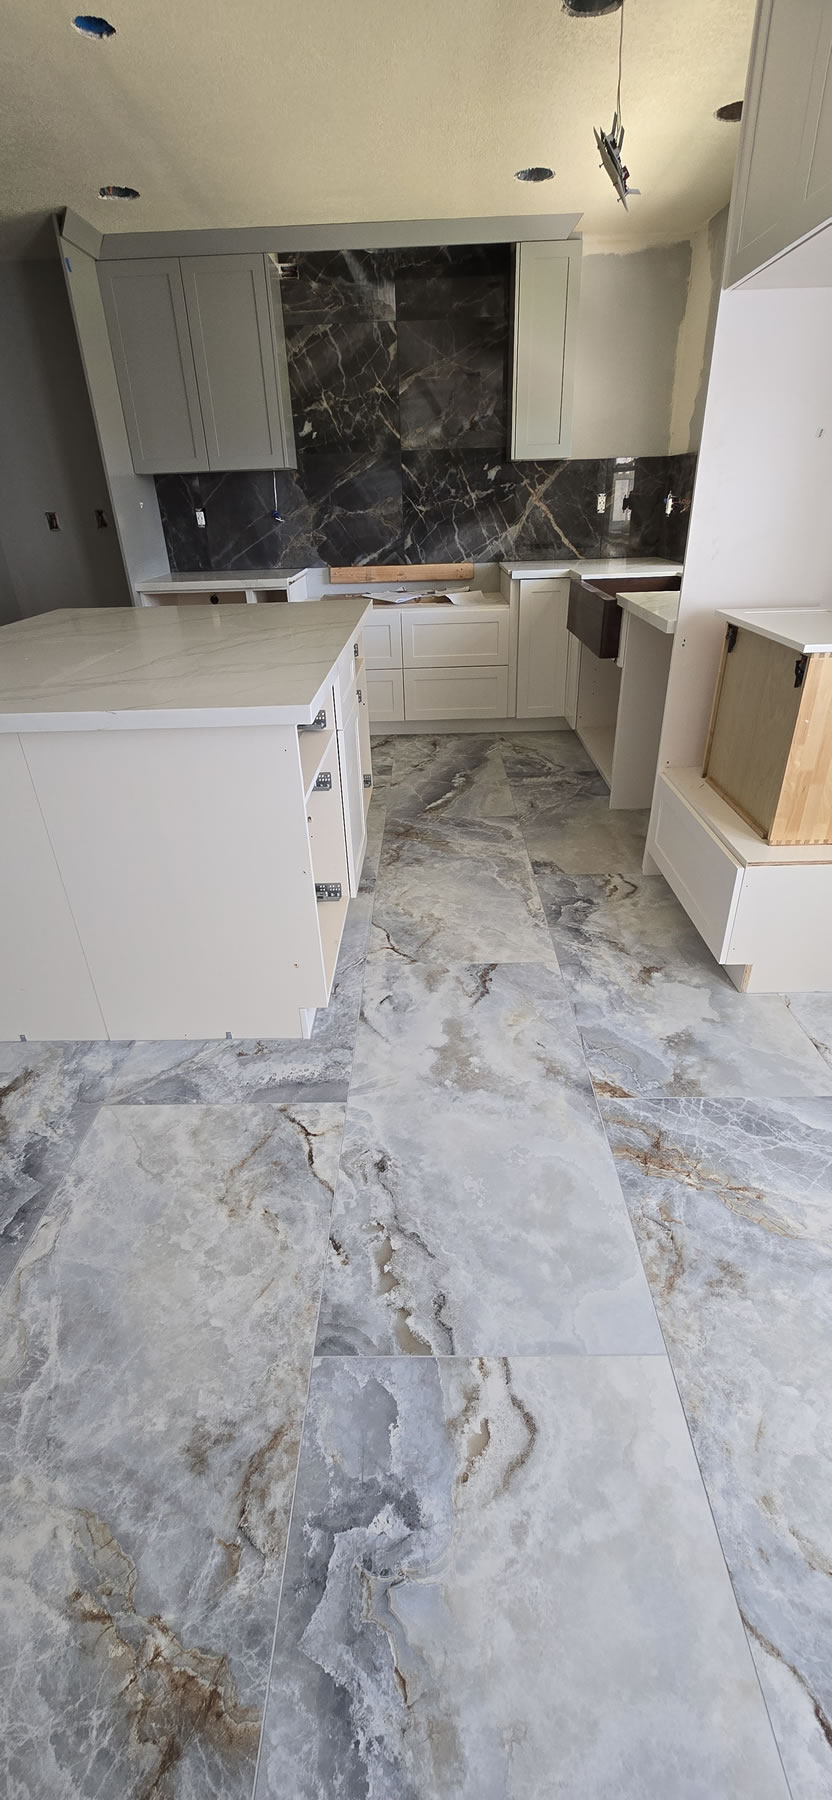
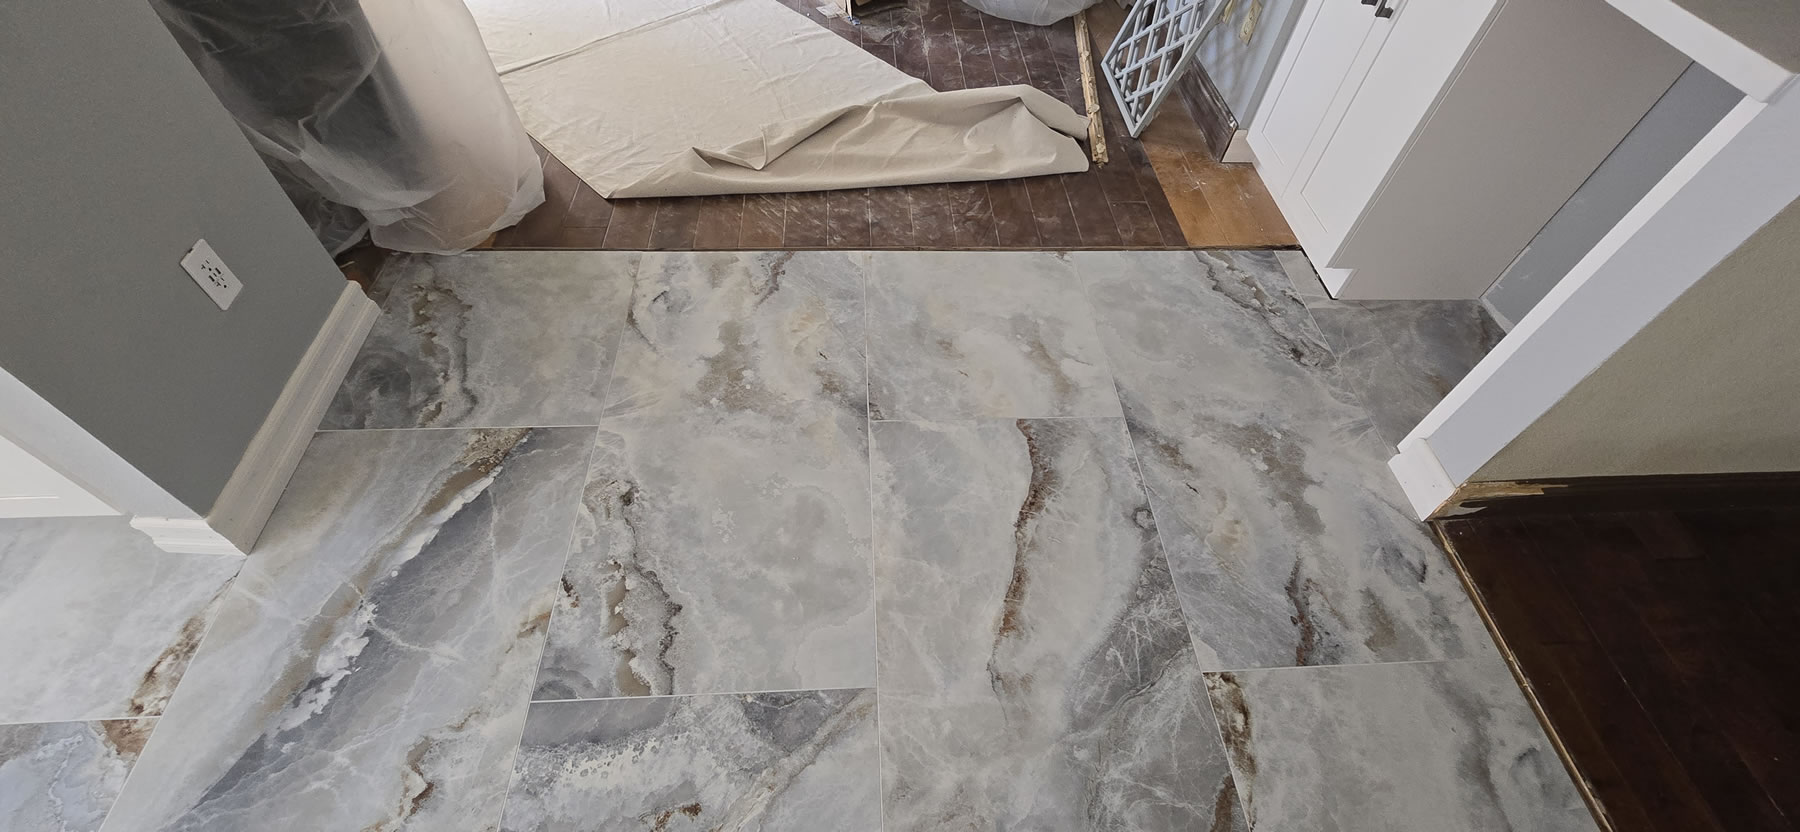
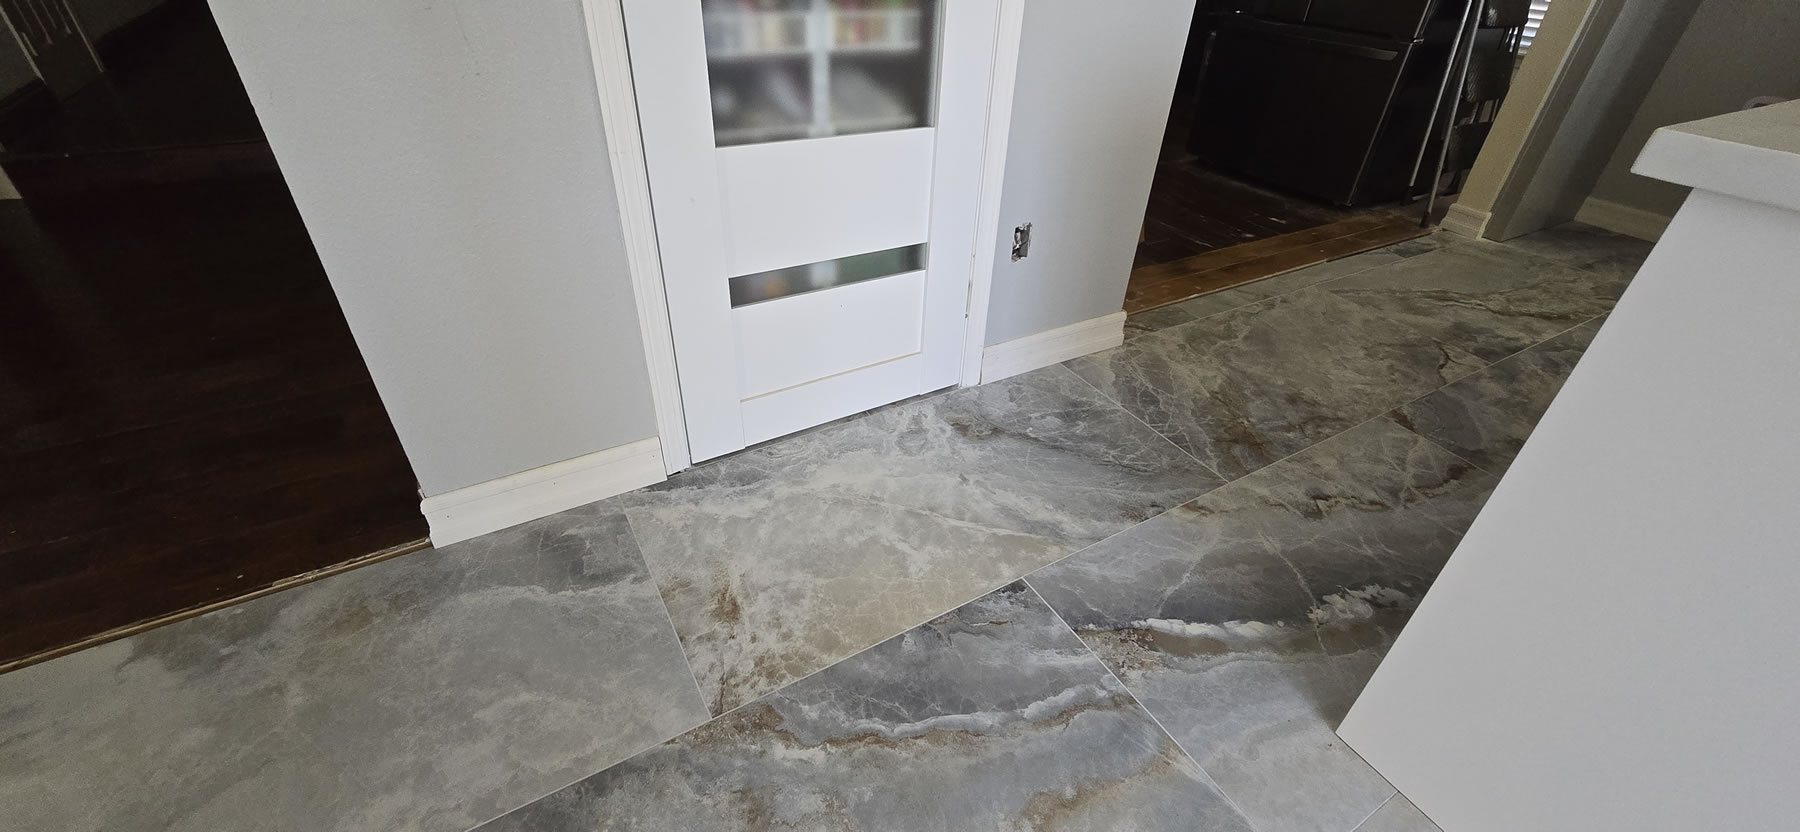
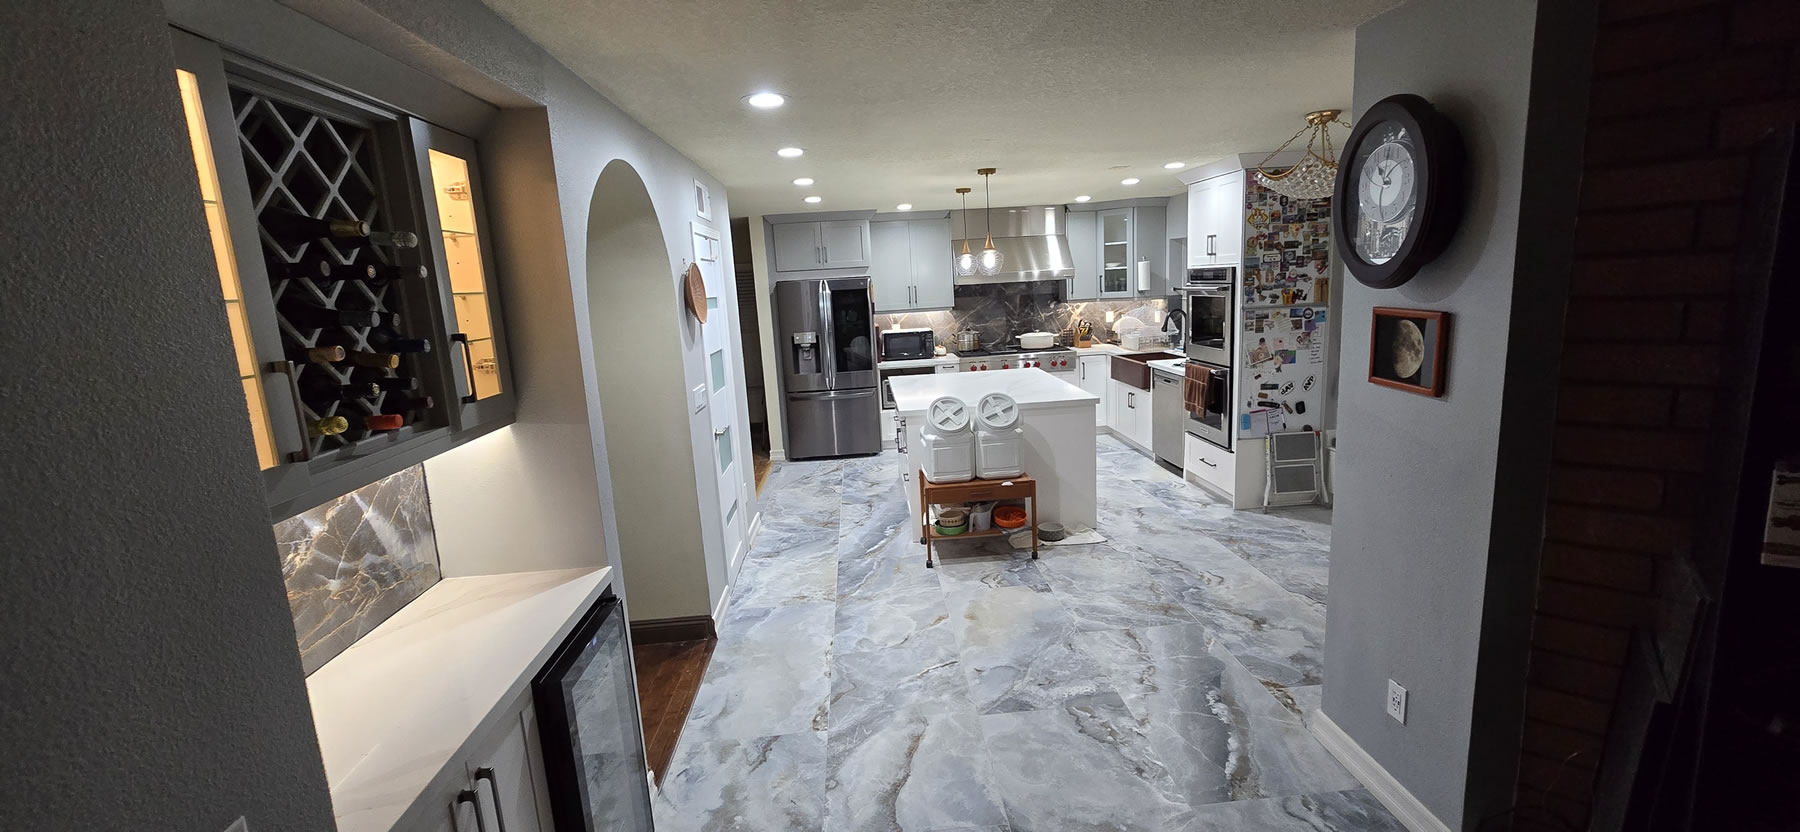
The week ends strong with the flooring guys coming to install the backsplash and floor tile. At this point, I need to backtrack to last week when I got the ok to order the floor tile and backsplash. I had already ordered the floor tile on week three because I was worried it’d take too long to arrive. And it arrived sometime during week 4. Week 4 was also when I got the ok to order the countertops, which went fine. Just ordered at the shop and let my contractor know so the fabricators can come pick it up when they’re ready. We went with Calcatta Luxe, quartz with total cost: $2,450.
I also got the ok and square footage for the backsplash, so when I went to look up originally picked out backsplash; I discovered that all the local shops were out of stock. I would have to wait a few weeks, so F that, plan B: pick a new tile design. Originally we were shopping those fancy small shiny stone tiles but one of the contractors suggested we use a big slab of tile like what we did for the floors. Less grout to clean and it would have a different look than what we initially imagined. So with the help of a visualization tool from the tile shop, I quickly mocked up a few designs with what they had in stock for 24X48 inch tiles. Way back in May when we first shopped the floor and backsplash design, I immediately gravitated to a dark marble style design. It was quickly vetoed as being too dark. But that one design I liked was in stock, so I added that to the pile of mock up designs. And so it would just happen, the design was blessed by the wife. Originally there was a bit of worry that it would be too dark. But I think the contrast works very well with the floor, countertop, lower cabinets and upper cabinet colors. Oh yeah, if you haven’t already noticed, we went dual tones for the cabinets, white on the bottom and grey on top. Bonus, I also mocked up our original backsplash choice and it was immediately shot down in comparison to the other choices.
Another bit of detail decision. What to do with that dual tone U shaped wood design that went around the half wall. I did find matching wood if I wanted to rip up the lighter tone and replace it – however, I only needed a few pieces and I would need to buy an entire box. A big bag of nope. Another option was to fill in the middle piece and just leave the odd U design and just mess with my friends’ OCD. As tempting option B was, we took option C; just cut the wood out from where the wrap design hits and go straight across from the middle of the wine cabinets to the fireplace.
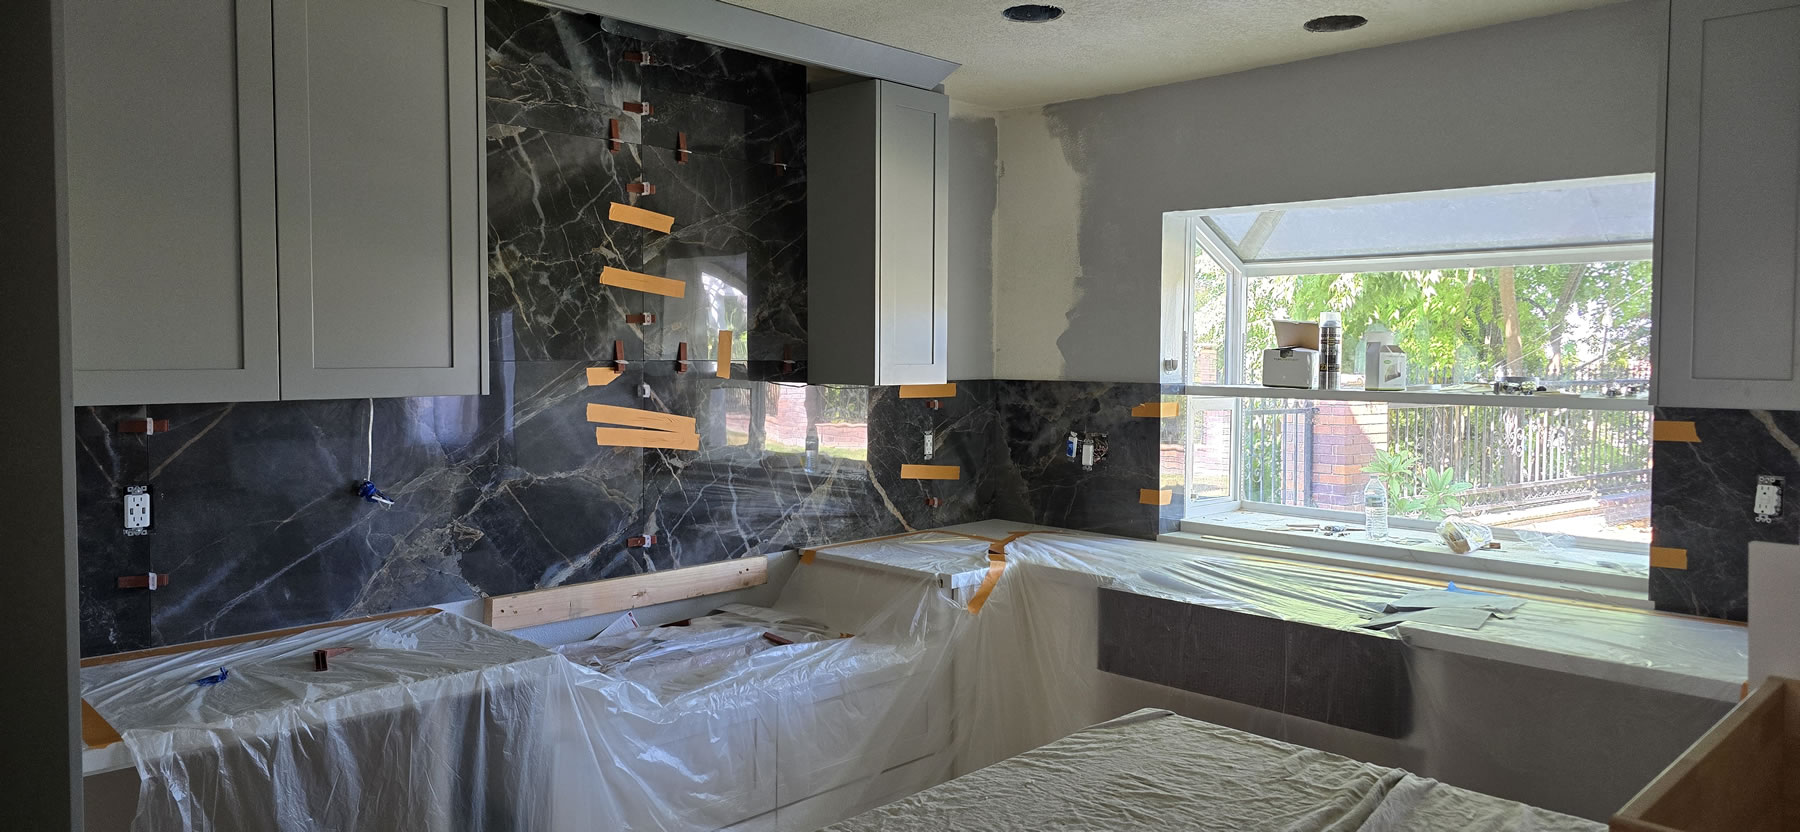
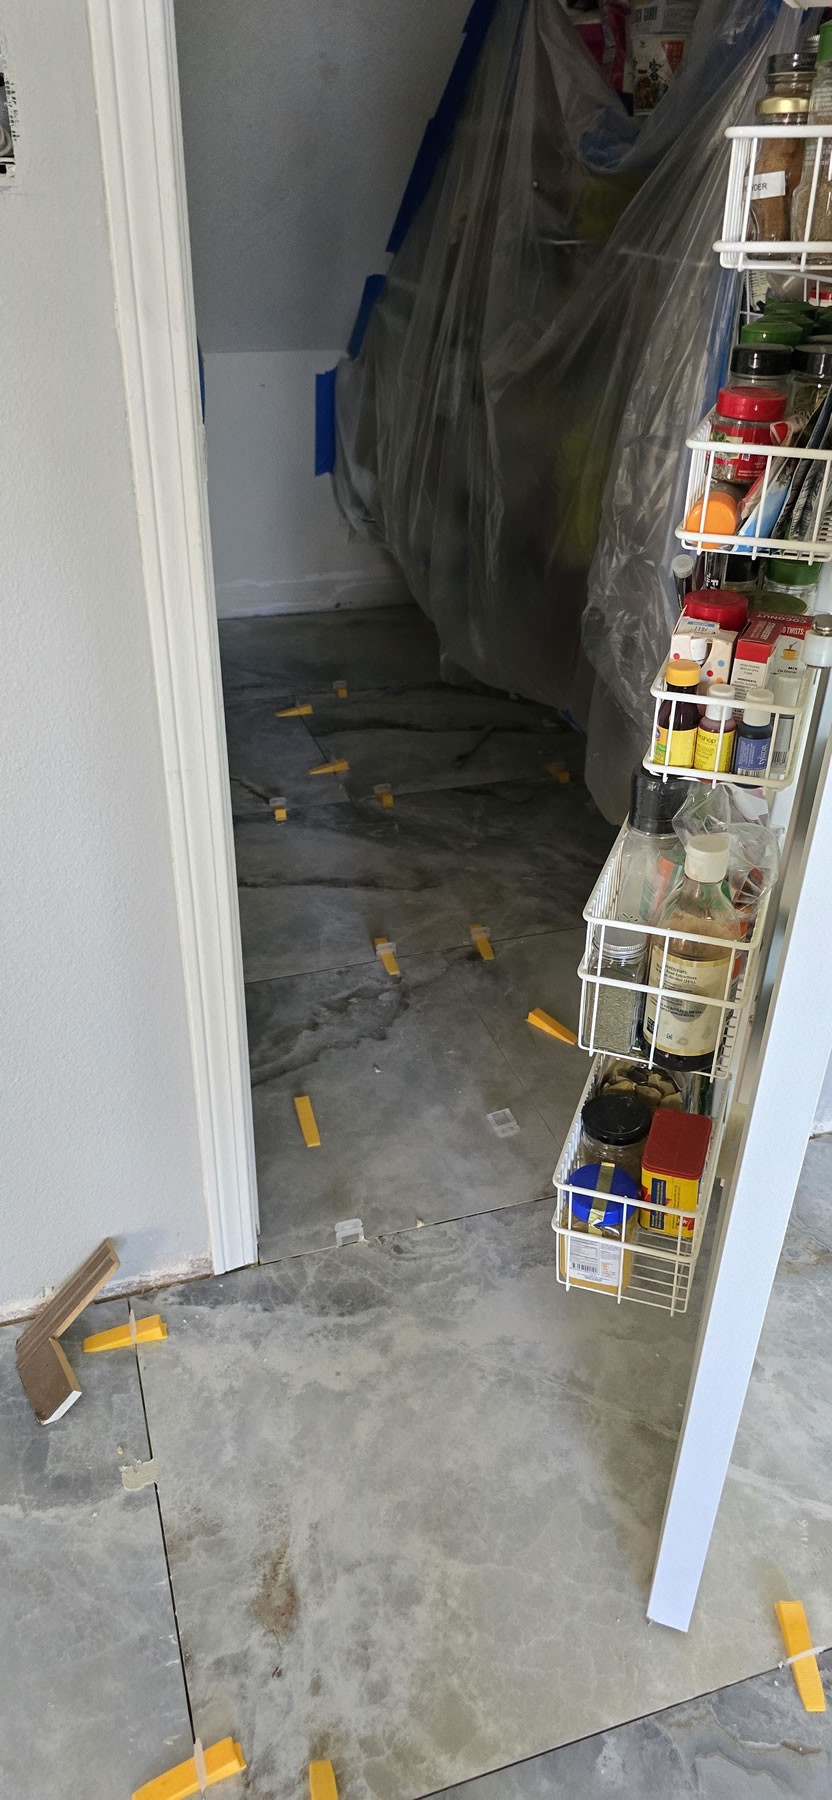
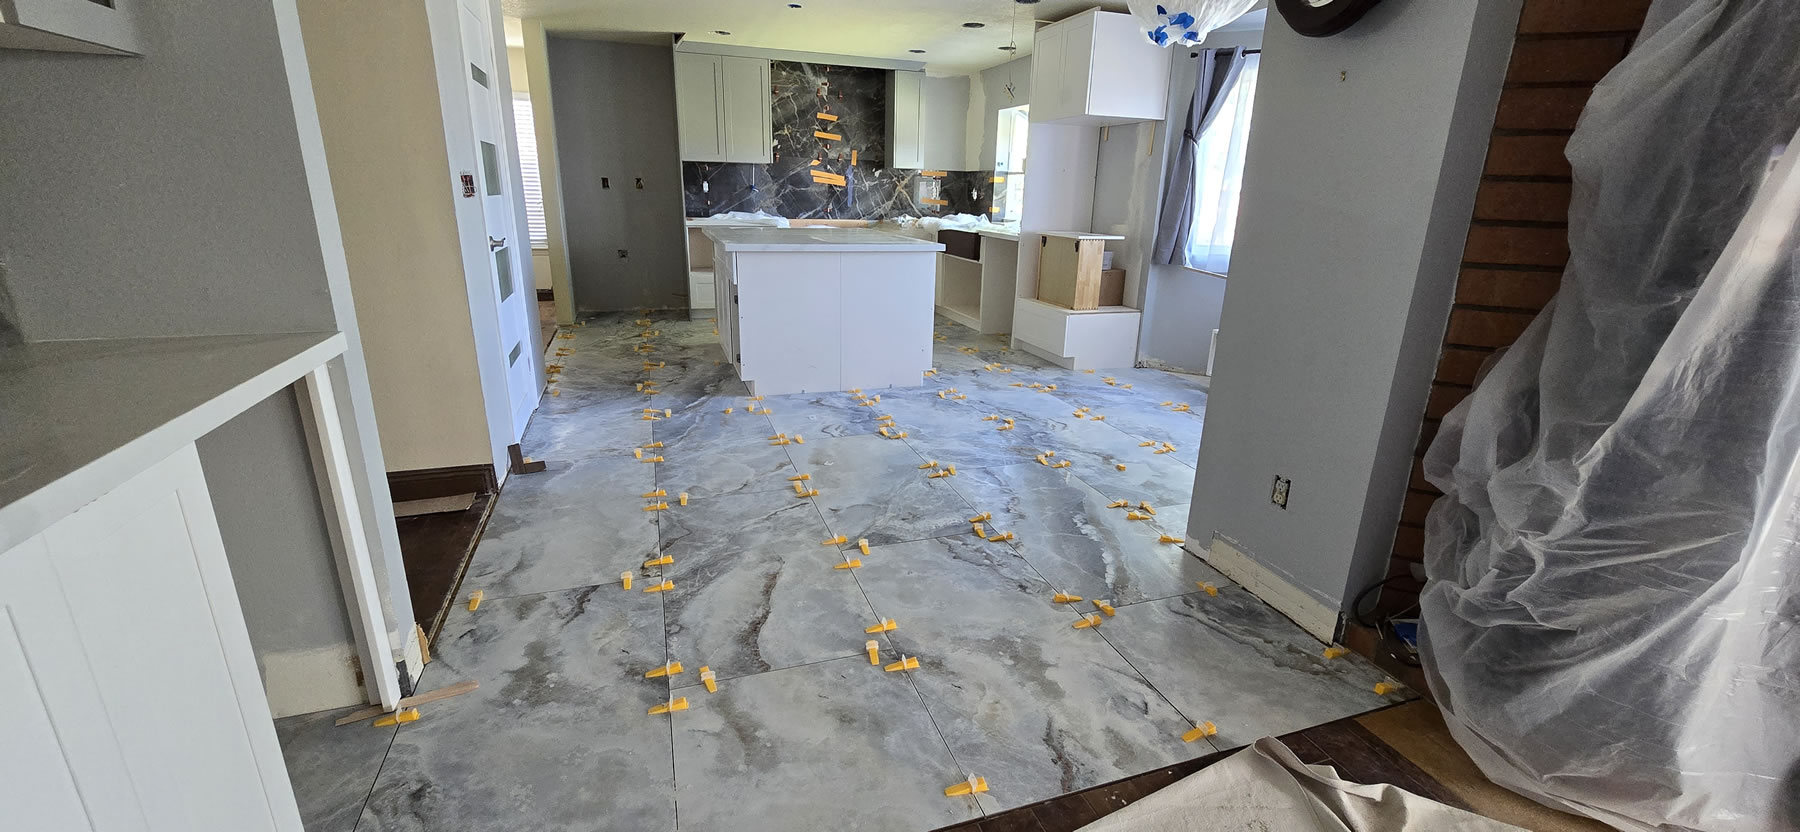
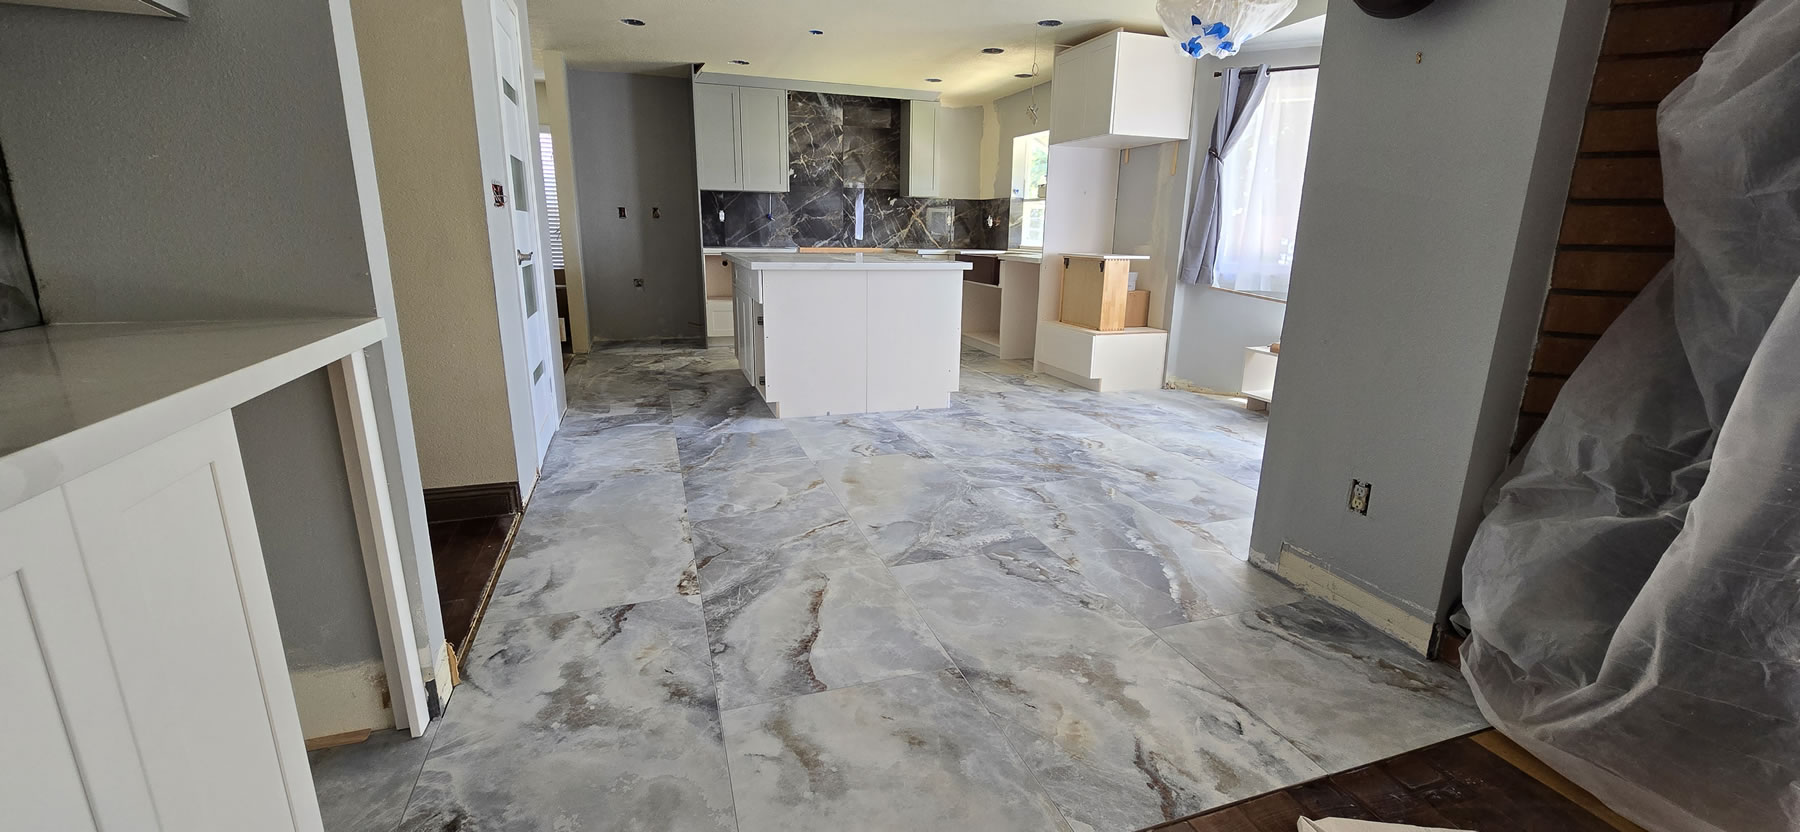
Backsplash goes in and I’m pretty much right on the money for the amount of material. Contractor said I may need another box, so I went and grabbed one more – that didn’t get used. Flooring went in that Friday and during install, I got word that they needed more flooring. The contractor and me completely forgot about the square footage for the pantry area. This will also bite us again later. Anyways, they needed 3 more boxes (2 slabs per box) so I needed to make a return for the extra backsplash box anyways, so two birds.. and off I went. Return goes as planned, but the purchase of more floor tile failed since the shop had already allocated it’s remaining boxes to another shop. I needed to go to the shop next door to my office and pick up three boxes -25 miles away. I get back in time for them to finish installing, and they only used 3 of 6 slabs. Time to return 3 slabs to my local tile shop. Total cost for floor tile: $1,503, and backsplash: $420 (which incidentally, almost twice what the original tiles cost) Fun times. But that bit is done now and it’s starting to look like a real kitchen.
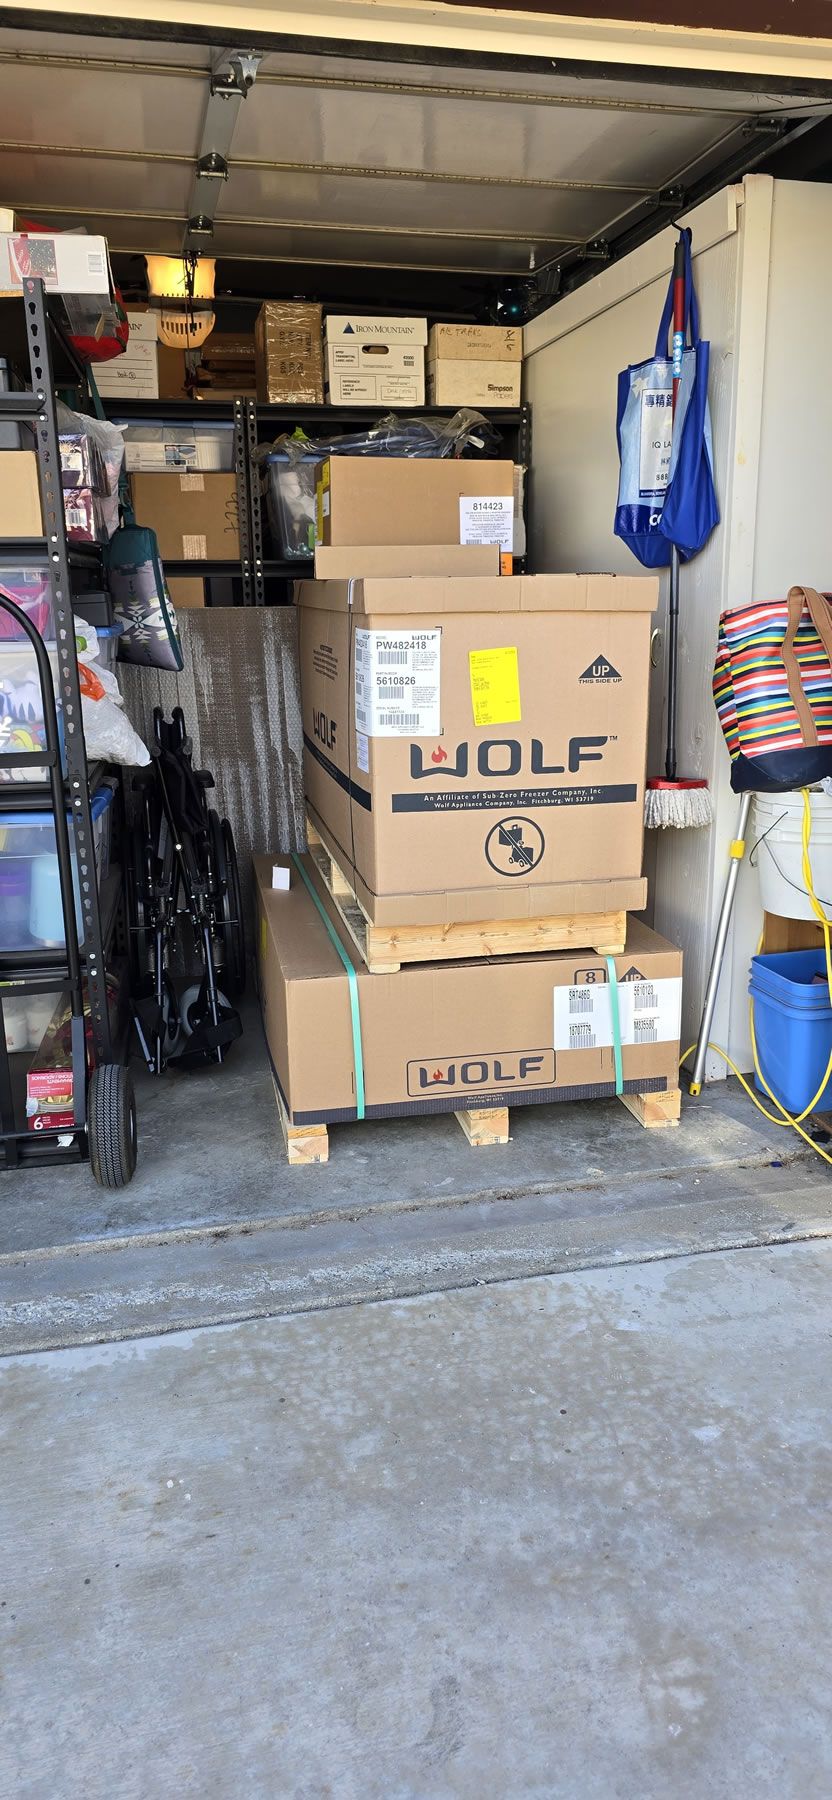
I emailed up my sales rep for the Wolf Subzero products earlier in the week and requested shipment for the cooktop and vent I paid for back in April. The cooktop arrives Saturday morning. Two pallets just fits into the garage space.
Flooring guys also return Saturday morning and get the grout work done for the backsplash and the flooring. Wow, things are starting to look really good. Just missing the cabinets bits. Week 6 ends here. Flooring and backsplash done, time for another 8K to the contractor. Anyone keeping the tally yet?
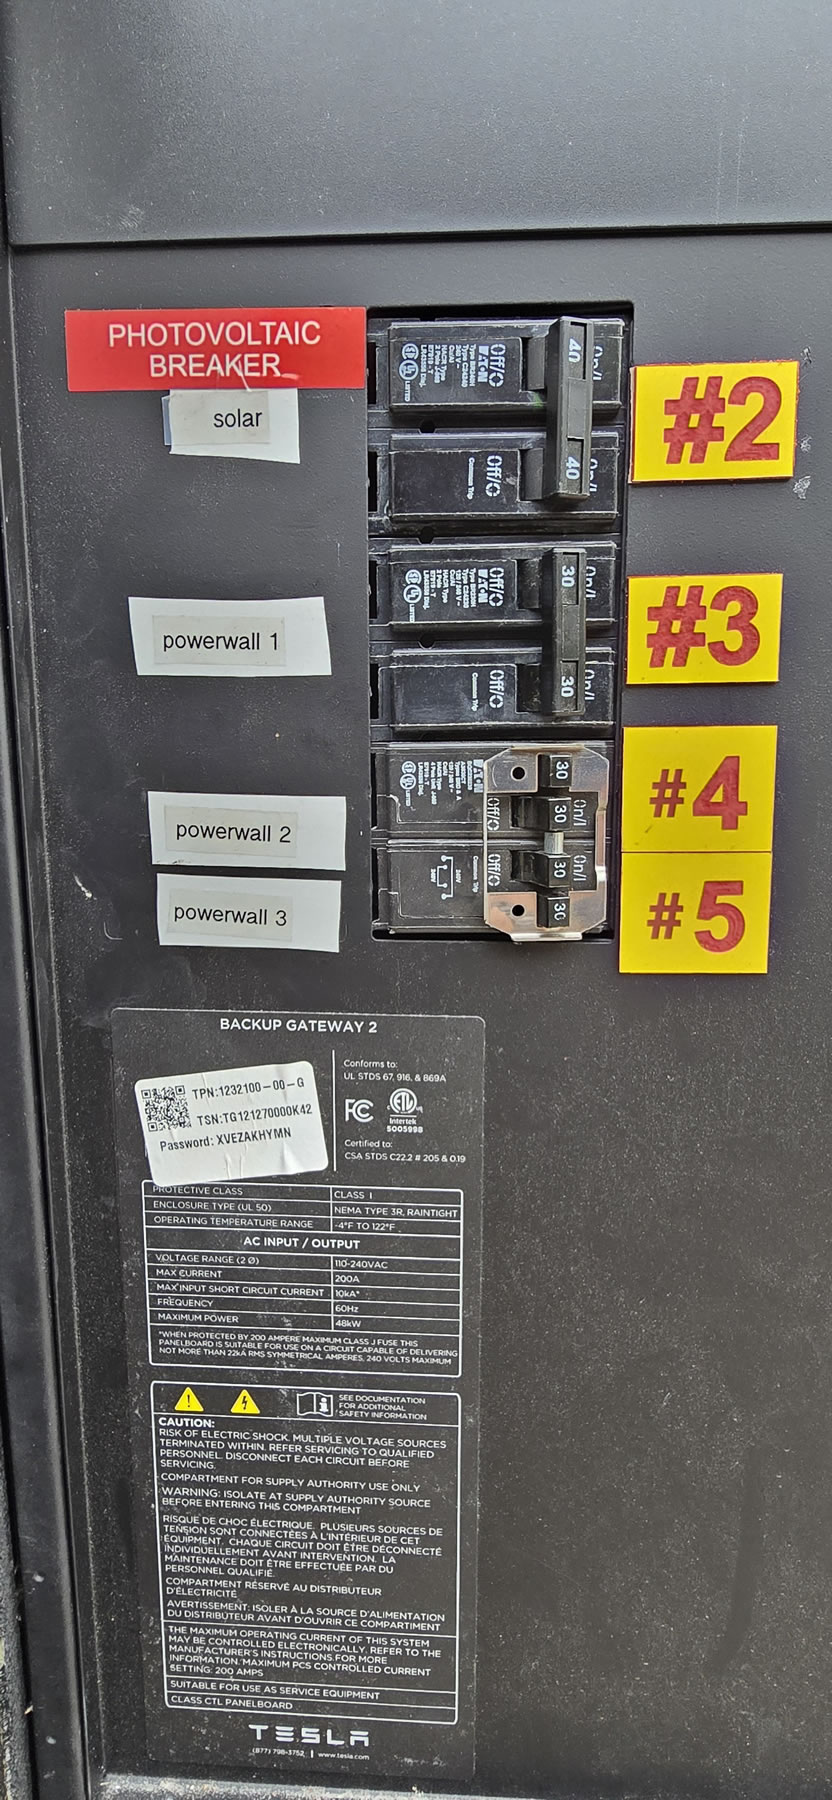
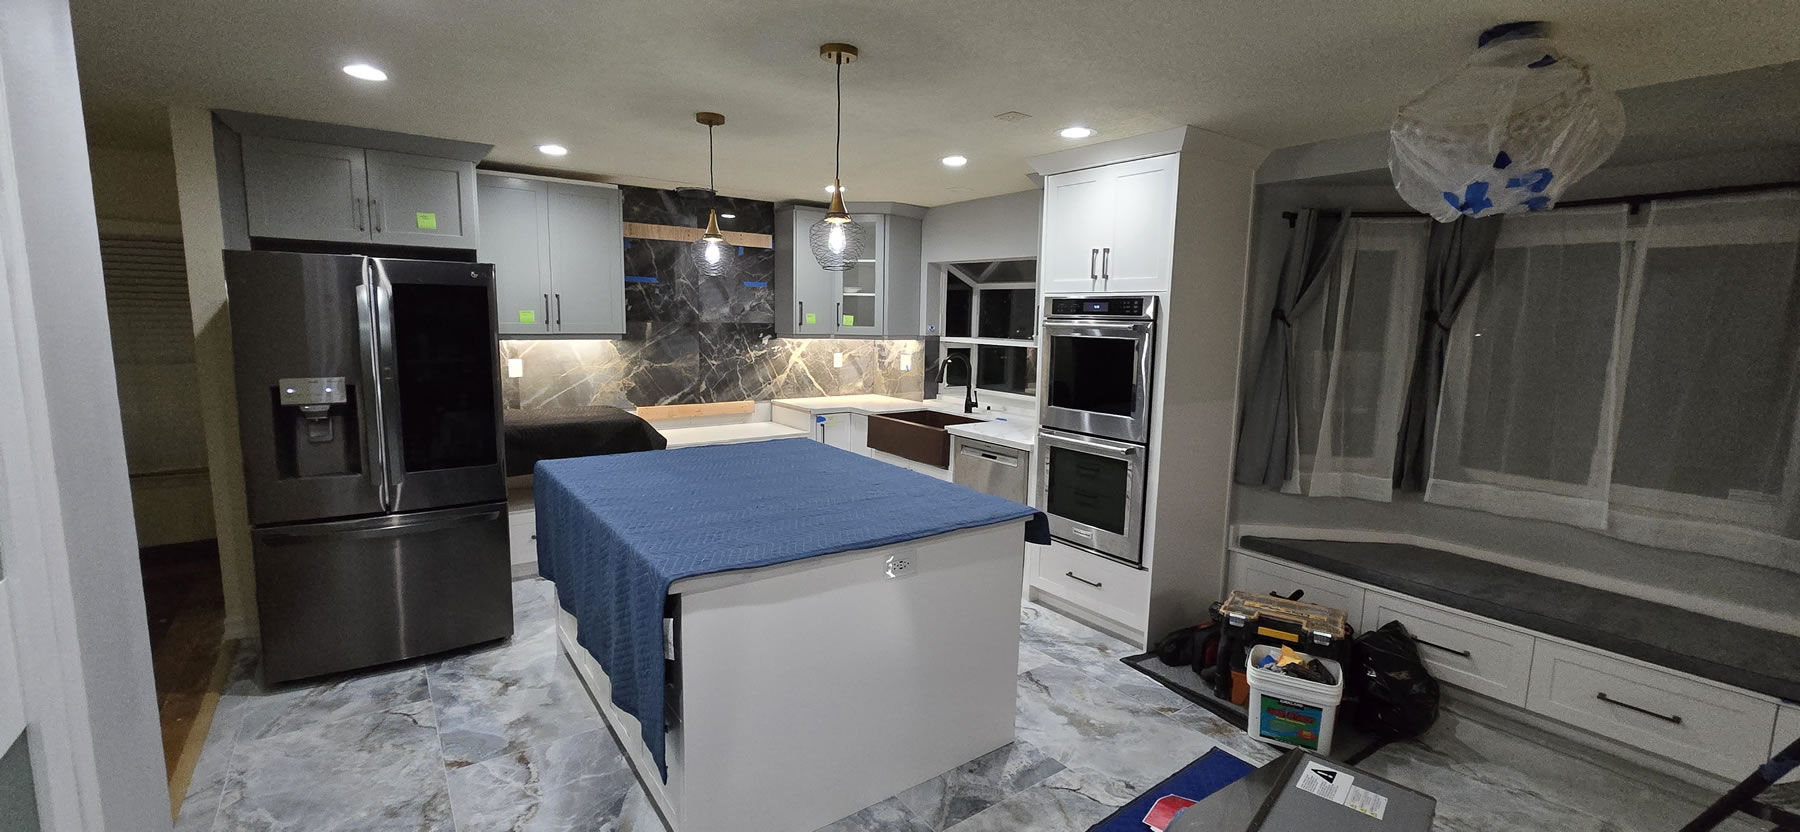
Week seven also starts off with no work Monday as we’re still waiting on the missing cabinet items. Tuesday Tesla comes and installs the power walls. No loss of power so no need to work out of the RV. The missing cabinetry items are delivered and the cabinet install resumes too. Contractors galore around the house doing all sorts of work. Cabinet work continues for Wednesday and Thursday to install the missing pieces. There are still a few missing bits, but work continues through late Thursday. We now have the kitchenette bench for the bay windows. Here are the new additional powerwalls. I can now run completely off grid.

Cabinet pulls finally get put in as well. We can finally open the drawers and cab doors like normal people. The pulls were planned out by the contractor so I looked up the cost off Amazon and Build.com and got identical pricing of about $730 or something along that line. The contractor gives me them for $533 – cool, contractor pricing. So those got delivered back in week 5.
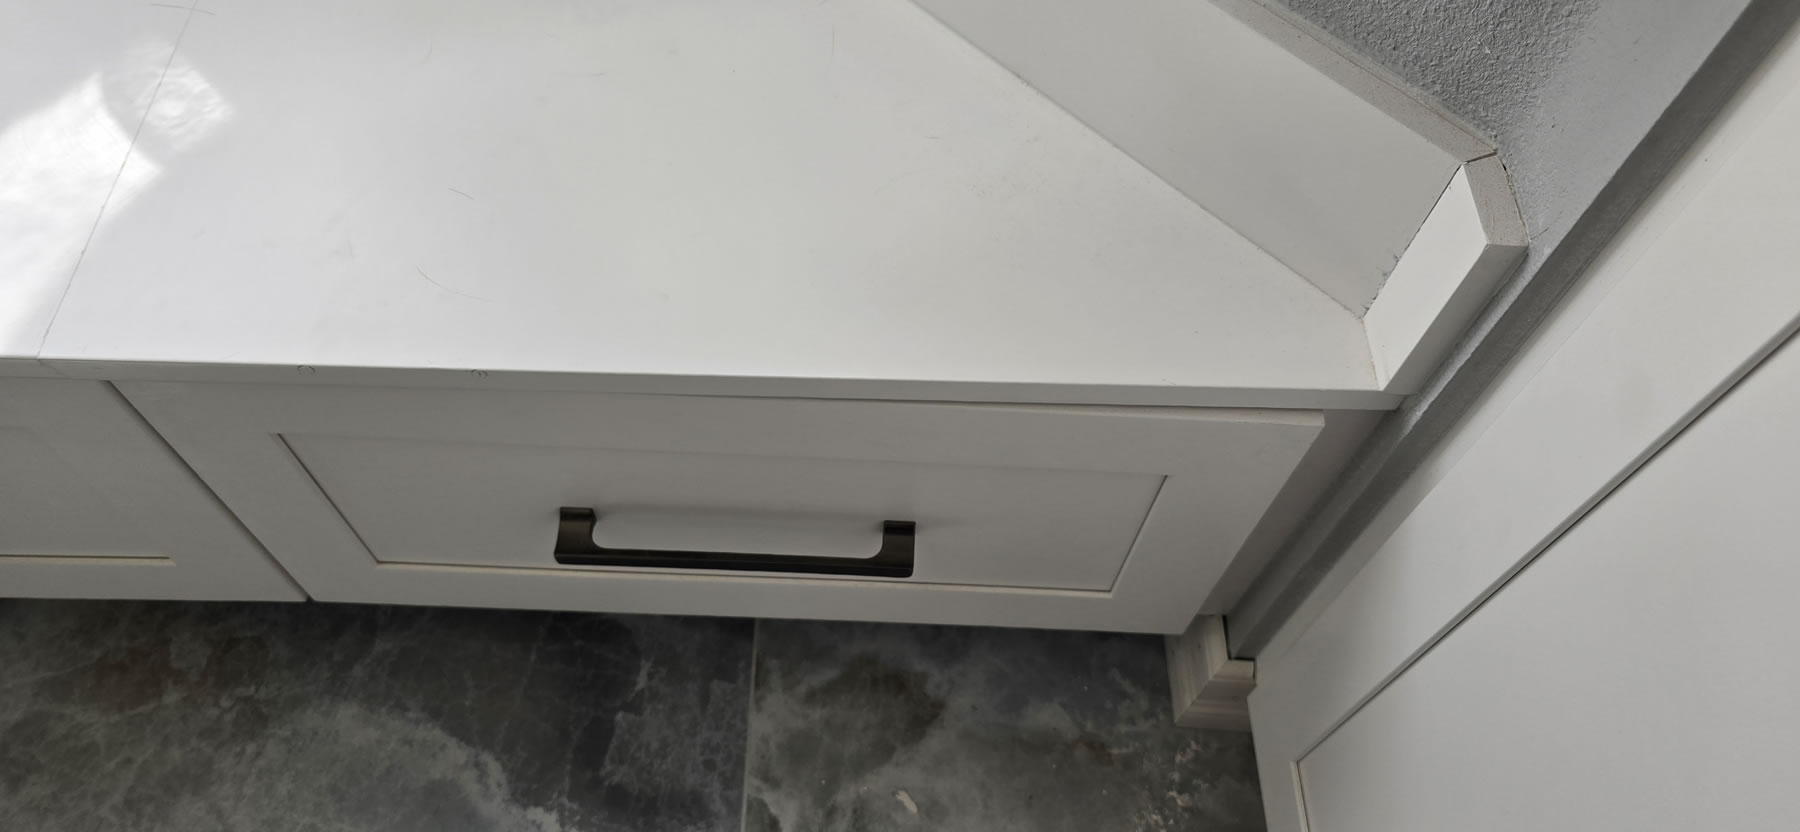
The contractor was rushing to finish Thursday so there is a bit of an issue with fit and finish on the bench. We’ve marked that off to remind ourselves to bring this up to the contractor. Not a glaring issue, but once you see it, you’re not going to unsee it, and for those with OCD, it’s an issue. A mistake in the upper trim cut also needs a replacement part so that will have to wait too.
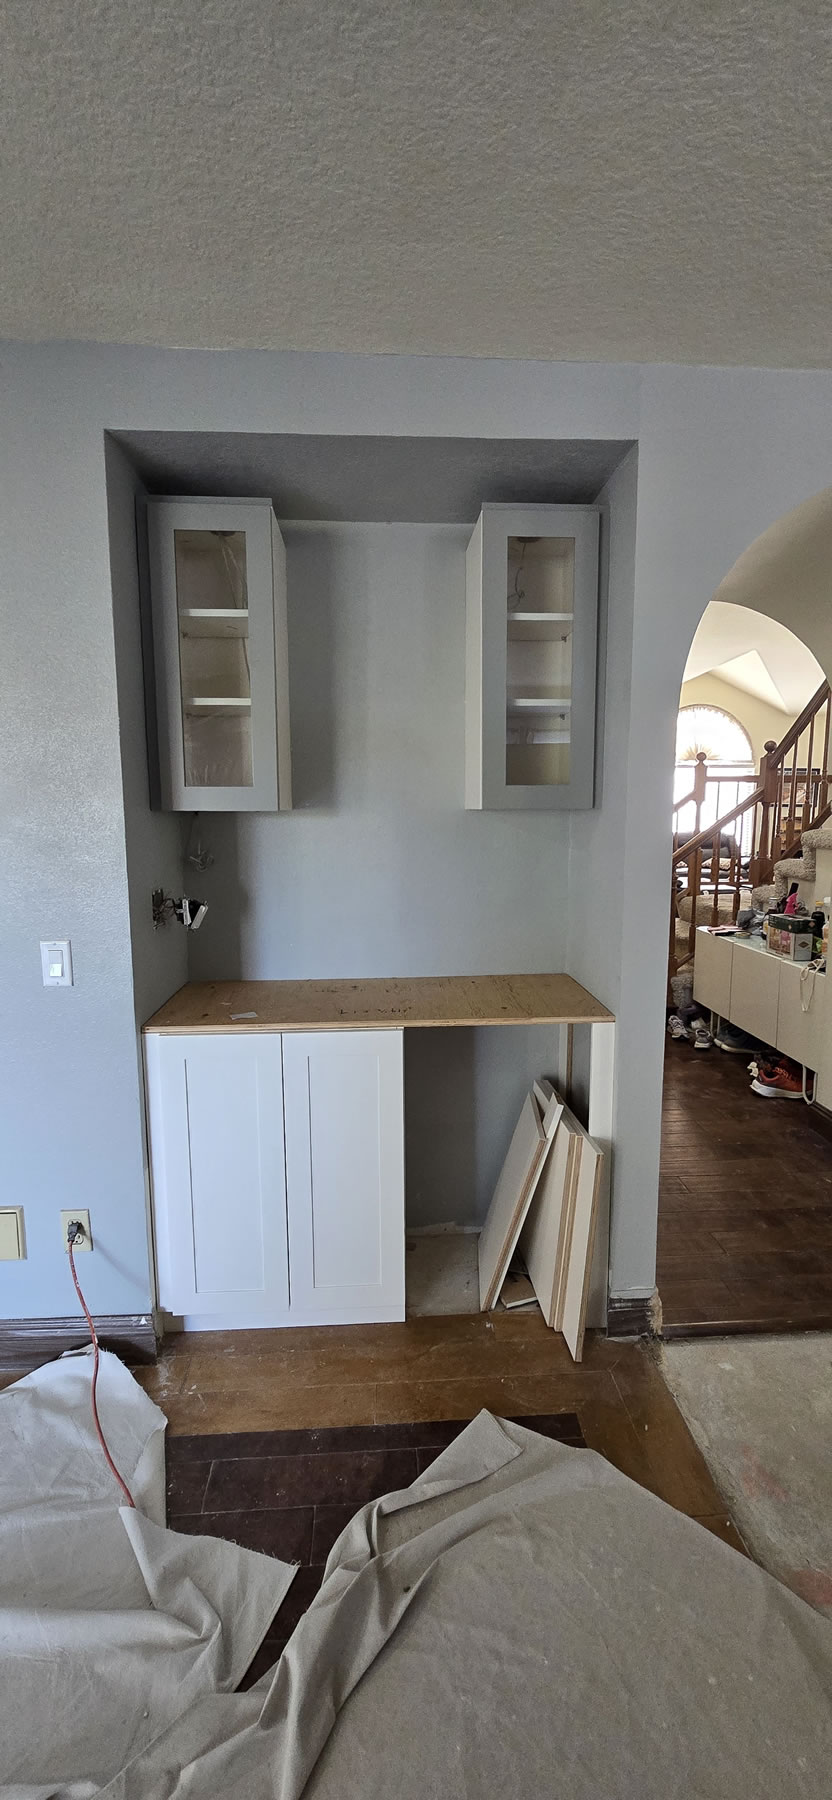
The wine rack cabinet is installed as well as the corner cabinet. Since both these cabinets were custom made, there’s no prefab grey panels, these will need to be painted. Contractor told me that no work was schedule for Friday or Sat on Thursday. However, Friday morning, I get a message saying the base boards will be delivered Friday afternoon and Saturday morning will have a guy come to install the baseboards. So the baseboards get installed and we discovered that the scheduler also forgot about the pantry square footage and he’s short baseboard material. That damn pantry floor space bit us again. But it’s only a small amount so that will need a return trip to finish.
The baseboard install also revealed that there were some issues with where the half wall used to be – look at one of the pictures of this area two sets up for a comparison. So I spent some time to get it patched, texturized, and painted. Not too bad a job, and it looks fairly decent.
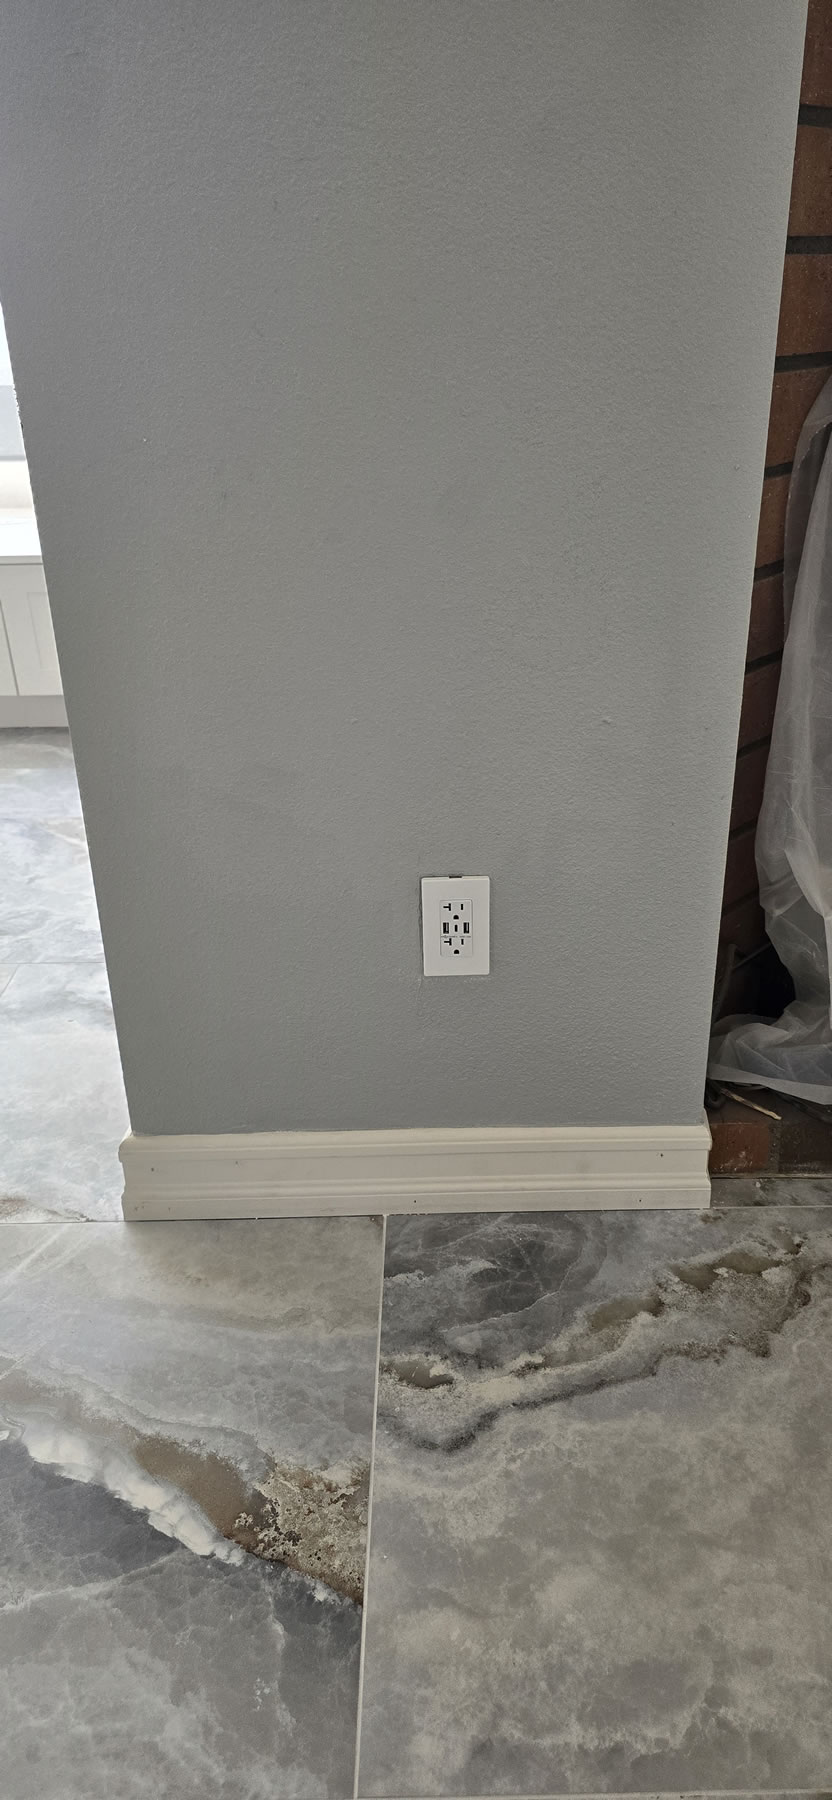
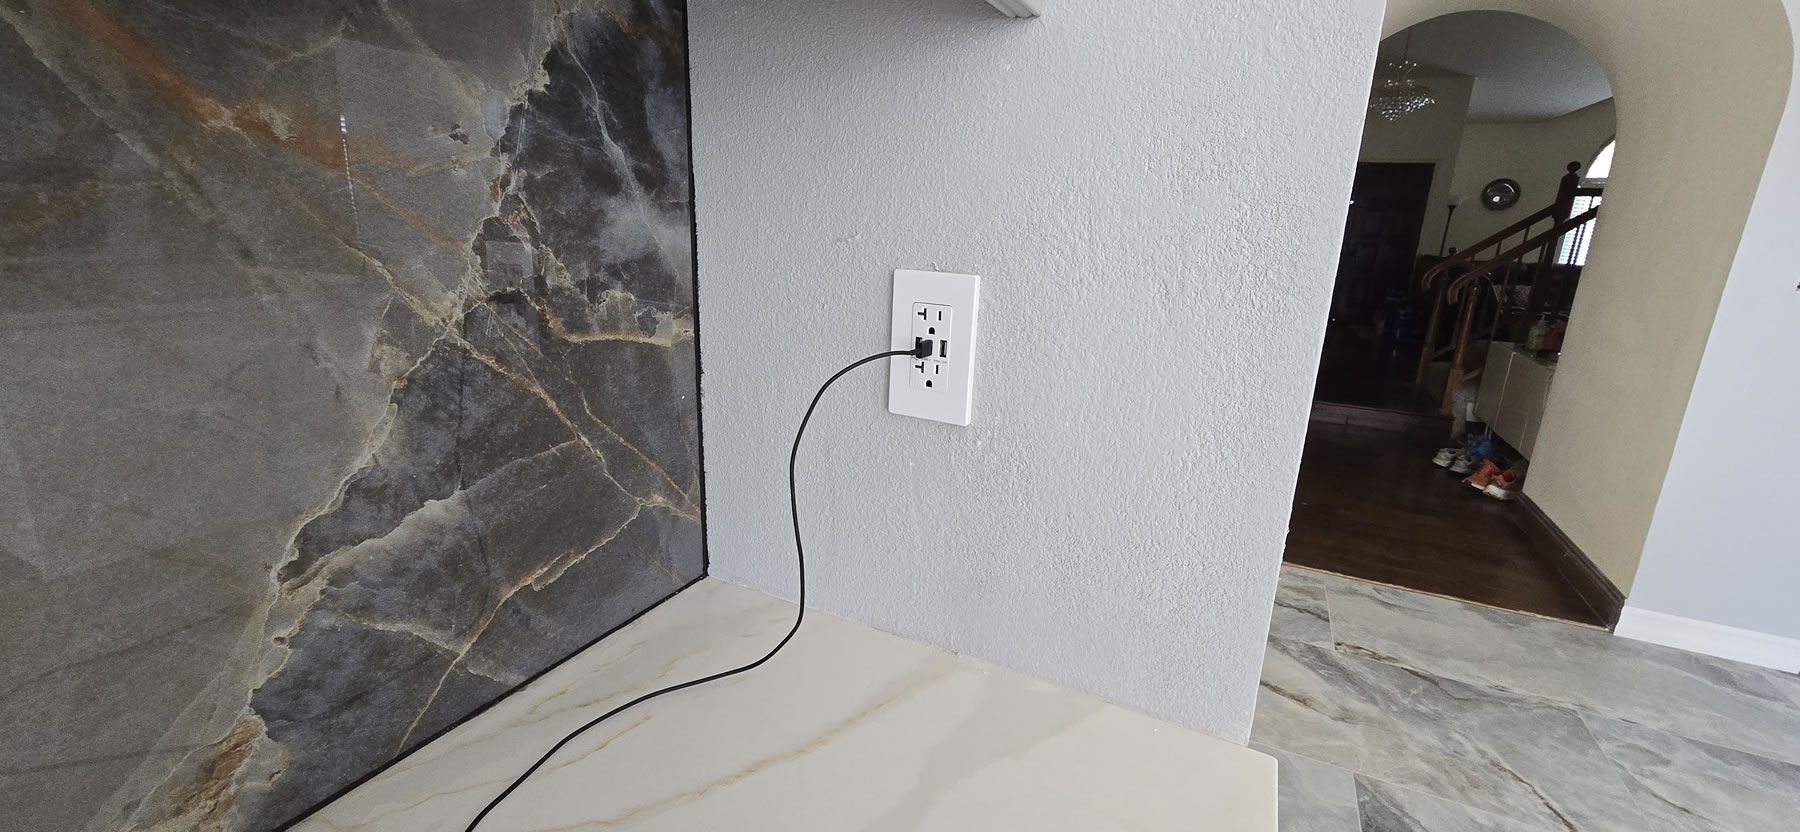
The other thing I did was install a few new outlet drops that also had USB and USB-C connections. The charging station will be much less cluttered with this new outlet.
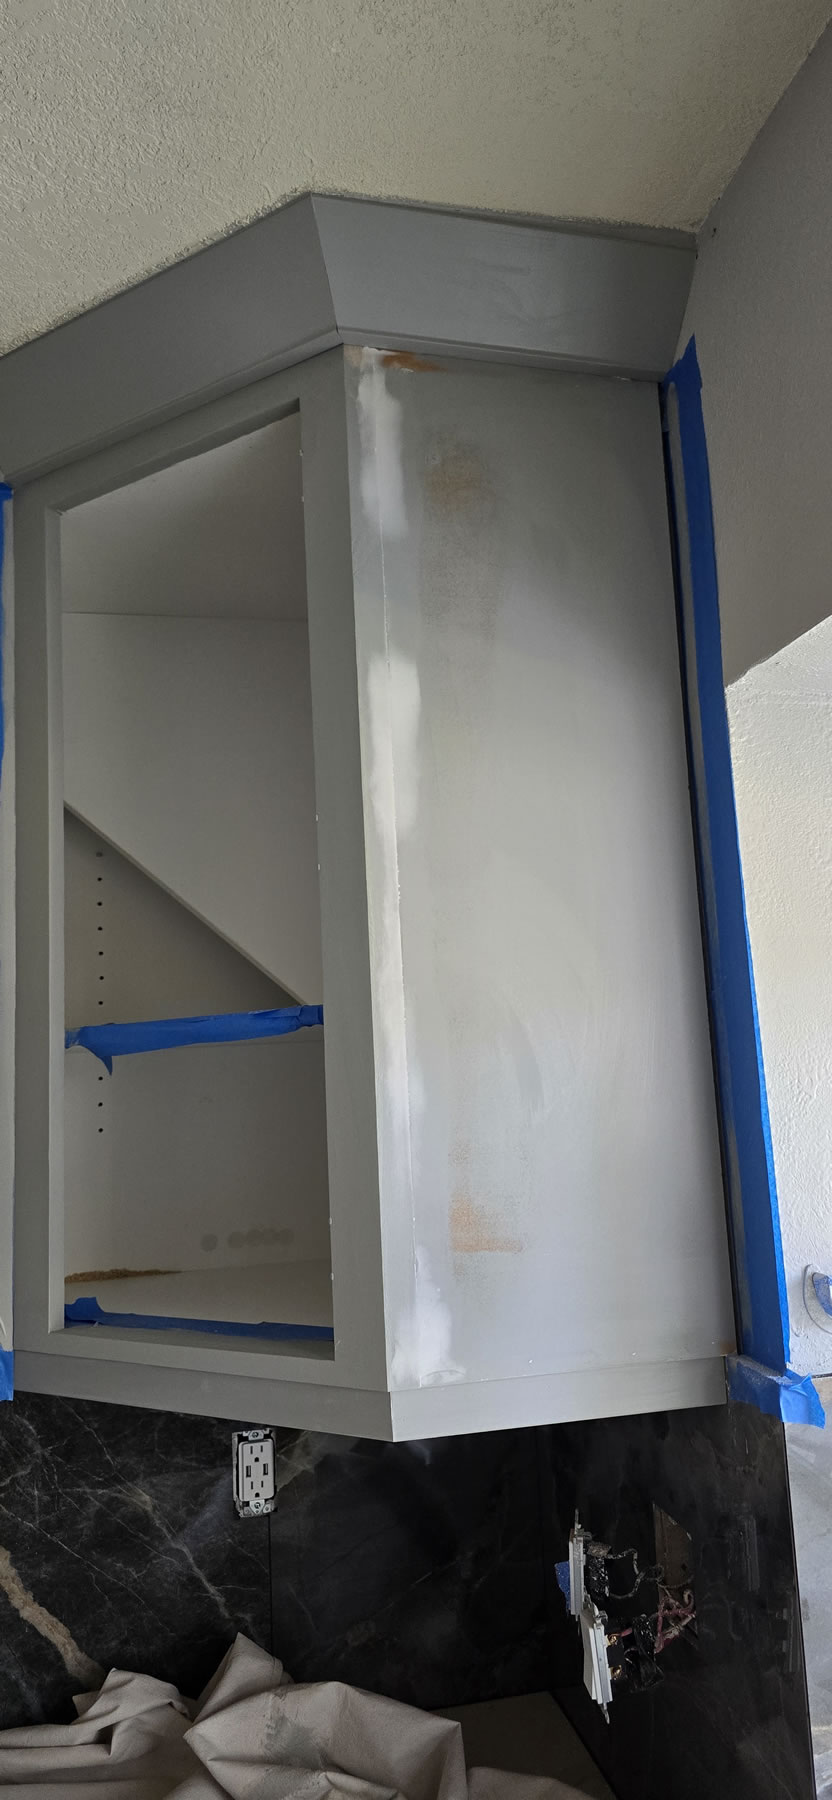
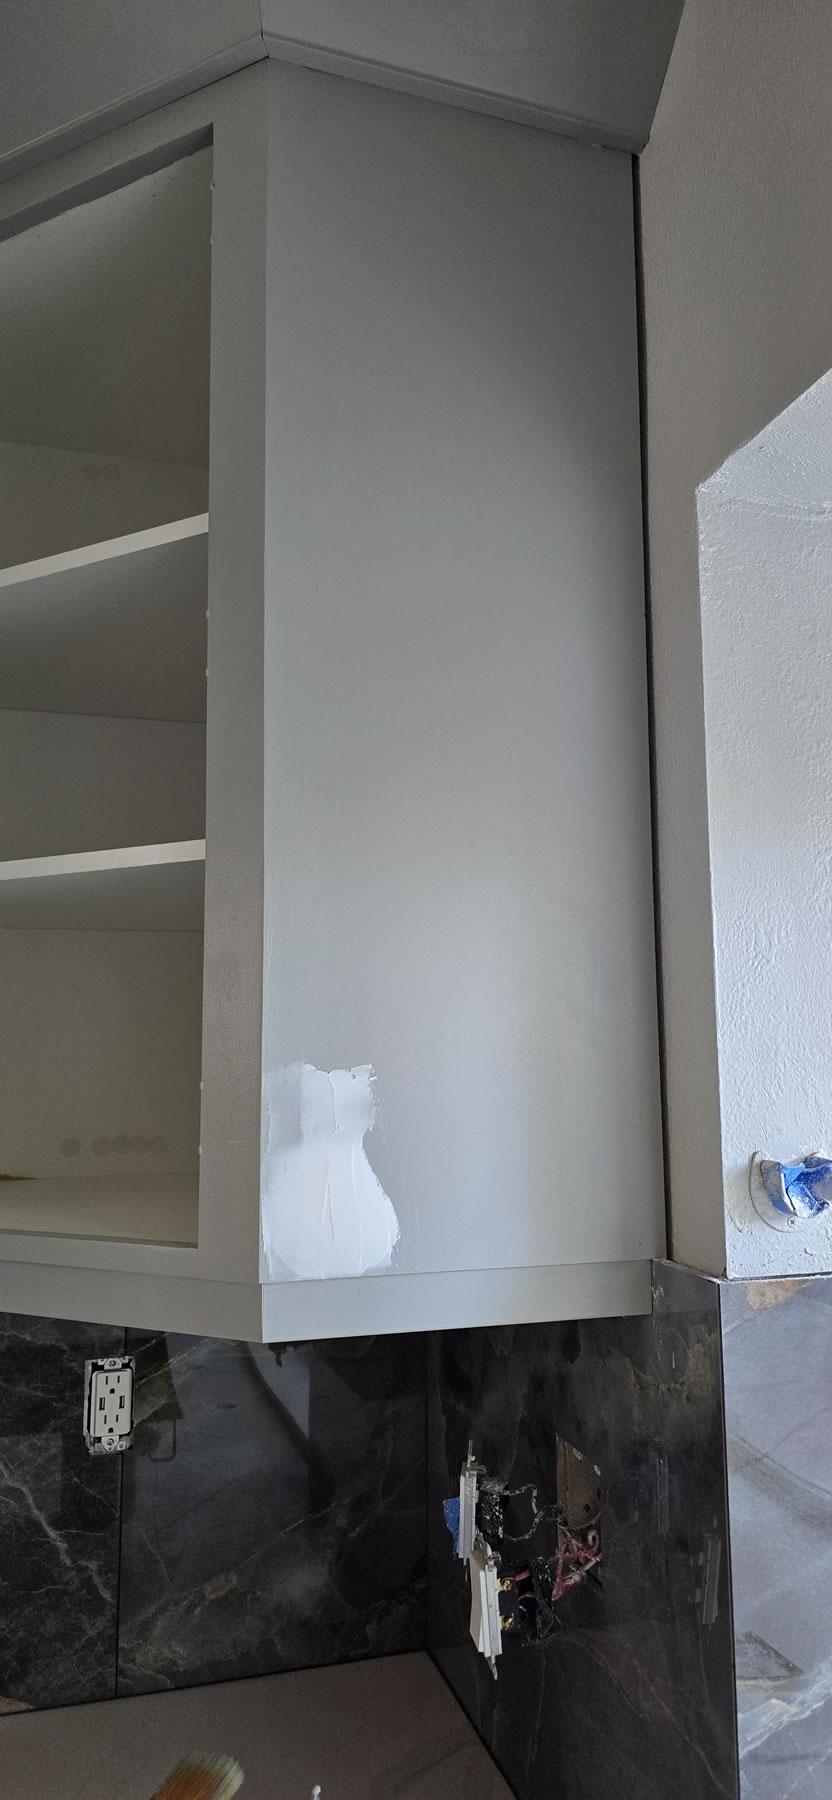
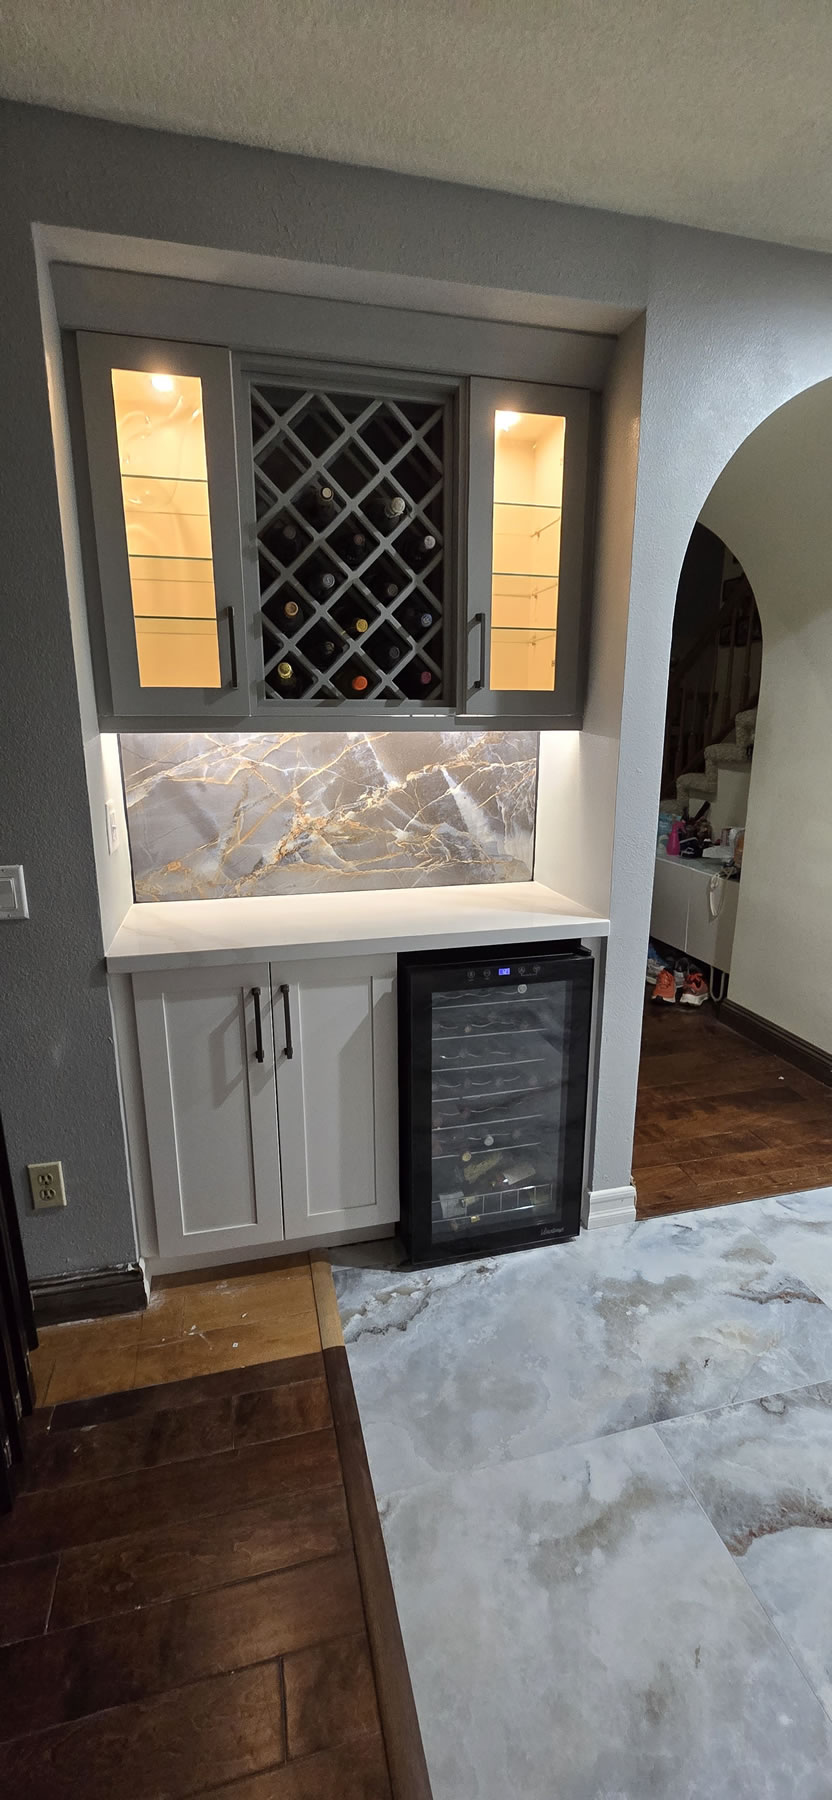
I get to work on patching and painting the corner cabinets. I’m a model builder, if anything, I know how to putty, sand, paint, and repeat until it looks good enough to give up. While this is happening, I get a message from the contractor saying the painting for the cabinets is scheduled for Monday of week 8, which will take two days, followed by electrical day 2 and 3. I let him know that I’m already patching and painting the cabinets and sent him a picture; so he cancels the paint appt. Also installed are some custom cut 1/4in thick glass shelves for the wine area wall cabinets. Since there will be lighting inside, wood shelves do nothing to help light pass through to the rest of the cabinet. Why light the first shelf when I can light the whole damn cabinet? The glass shelves look better in general too. Another message from the contractor asks if all the appliances are at the house. The positive answer from me gets a week 8, Thursday install for the appliances. Wow, the light at the end of this 2 month long tunnel is growing ever brighter.
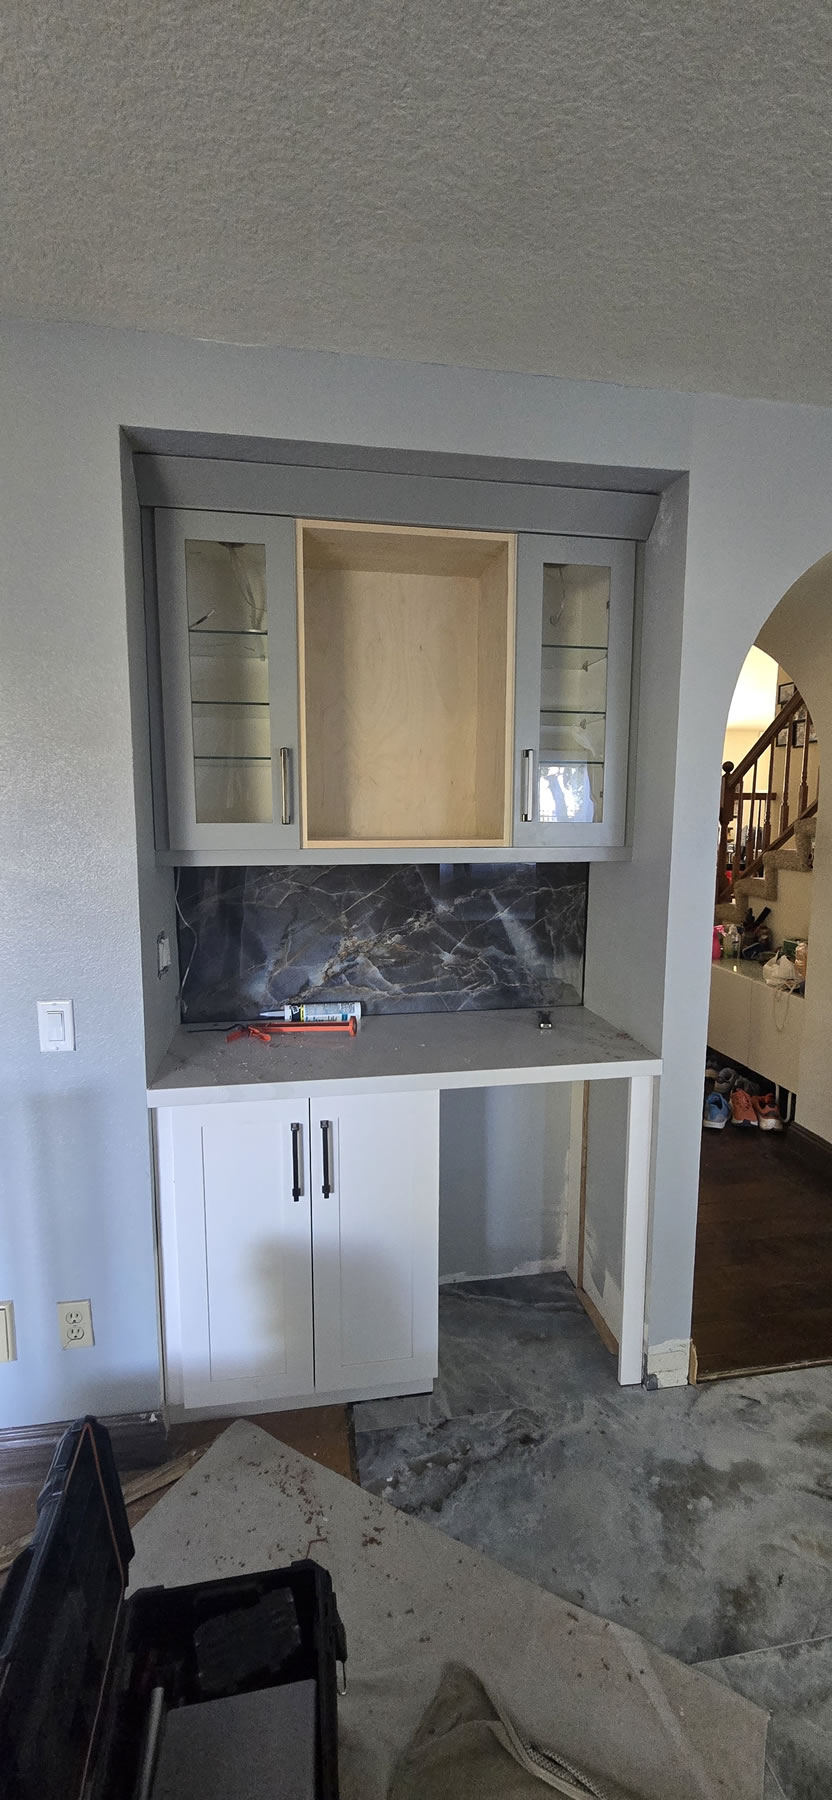
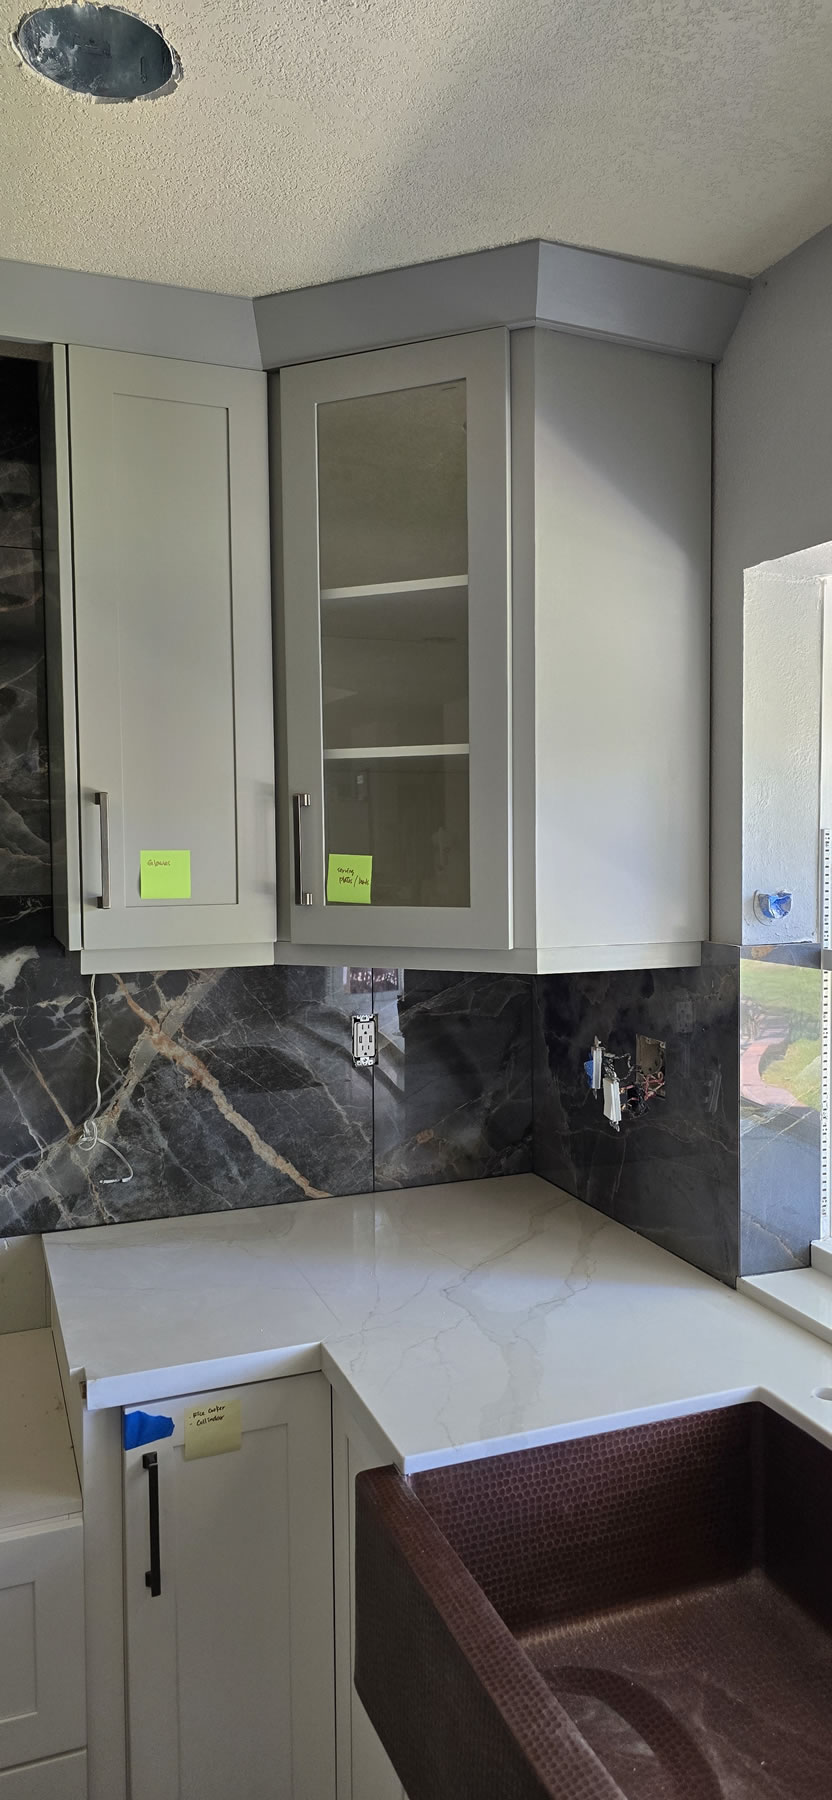
I also get the wine racks painted up and did a quick test fit for the pictures. These should get installed next week – or whenever the cabinet guy comes back to finish the last bits of work.


No work planned for Monday as it was originally paint day. Tuesday’s electrical fell through since the electrical guy is a day behind for other jobs. So nothing happening until Wednesday. Its either feast or famine. Wednesday the electrical guy comes out first thing in the morning and gets to work. Tesla also comes out because there’s a final city/county inspection for the work done as well as an inspection from the fire department. LA county is pretty strict, but despite that, everything passes. (My first Tesla Solar install’s inspection didn’t go quite as well…)
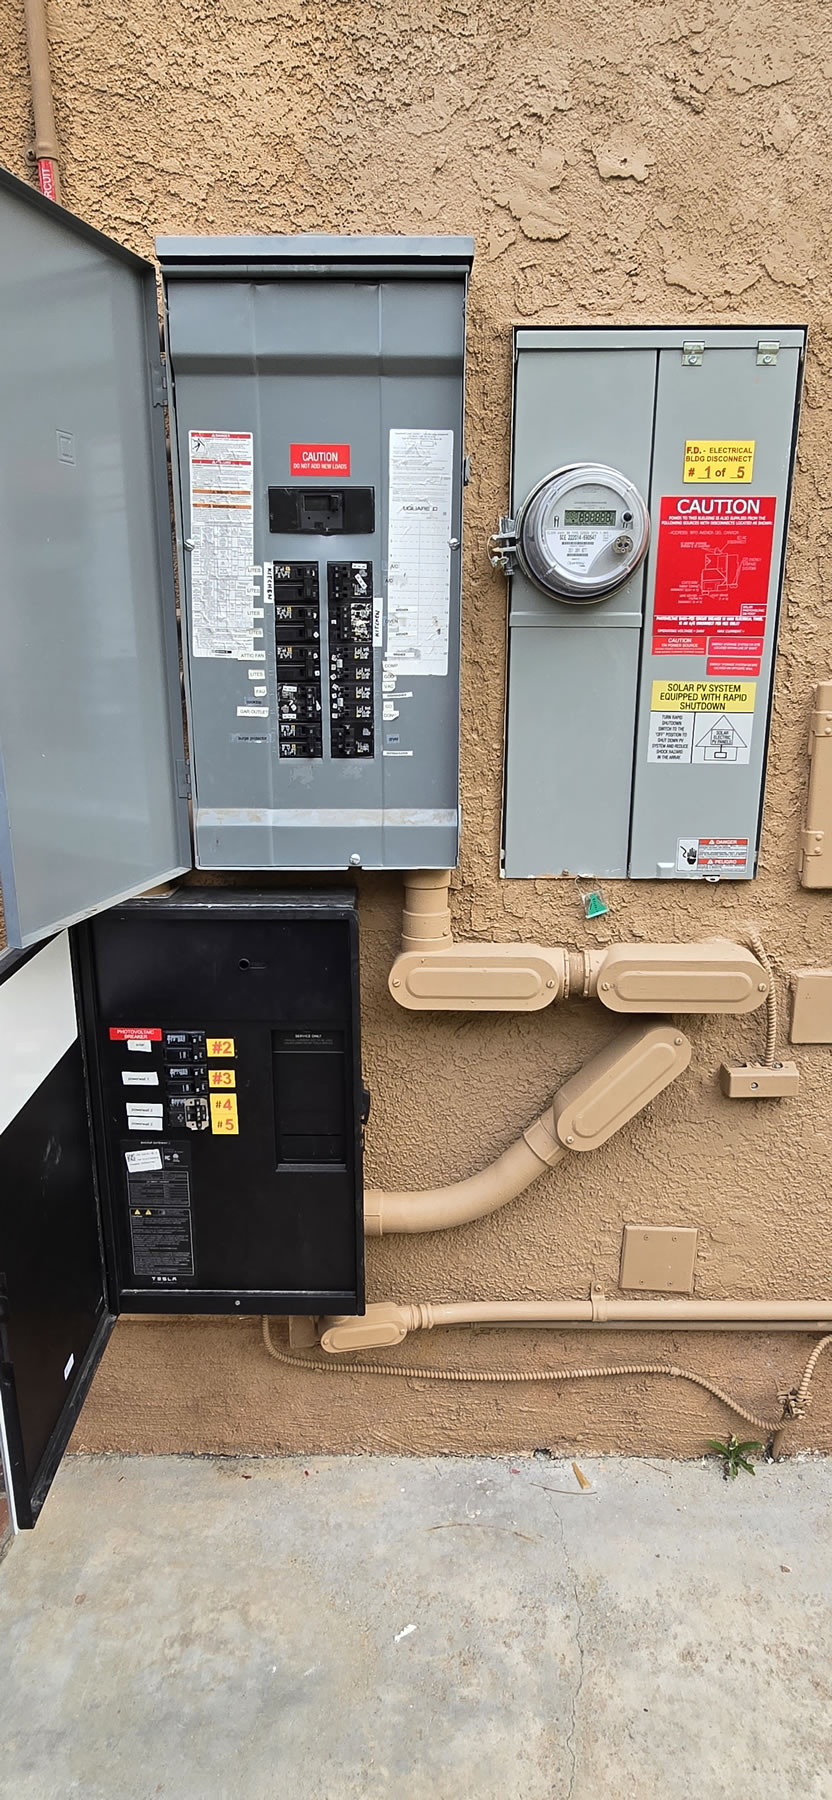
I have a new main panel that is only the main shut off. Then in the Tesla panel (white box) is all the shutoffs to the powerwalls and solar system. Prior to this, my oven and AC were connected here since the system wasn’t robust enough for a full house backup; and it was only a partial backup. Basically, if the grid goes down, I don’t have AC or the use of my oven. With this change, those two items were moved up to my main panel above the Tesla box, and everything is now on backup and if the grid goes down, I still have enough juice for oven and AC usage.
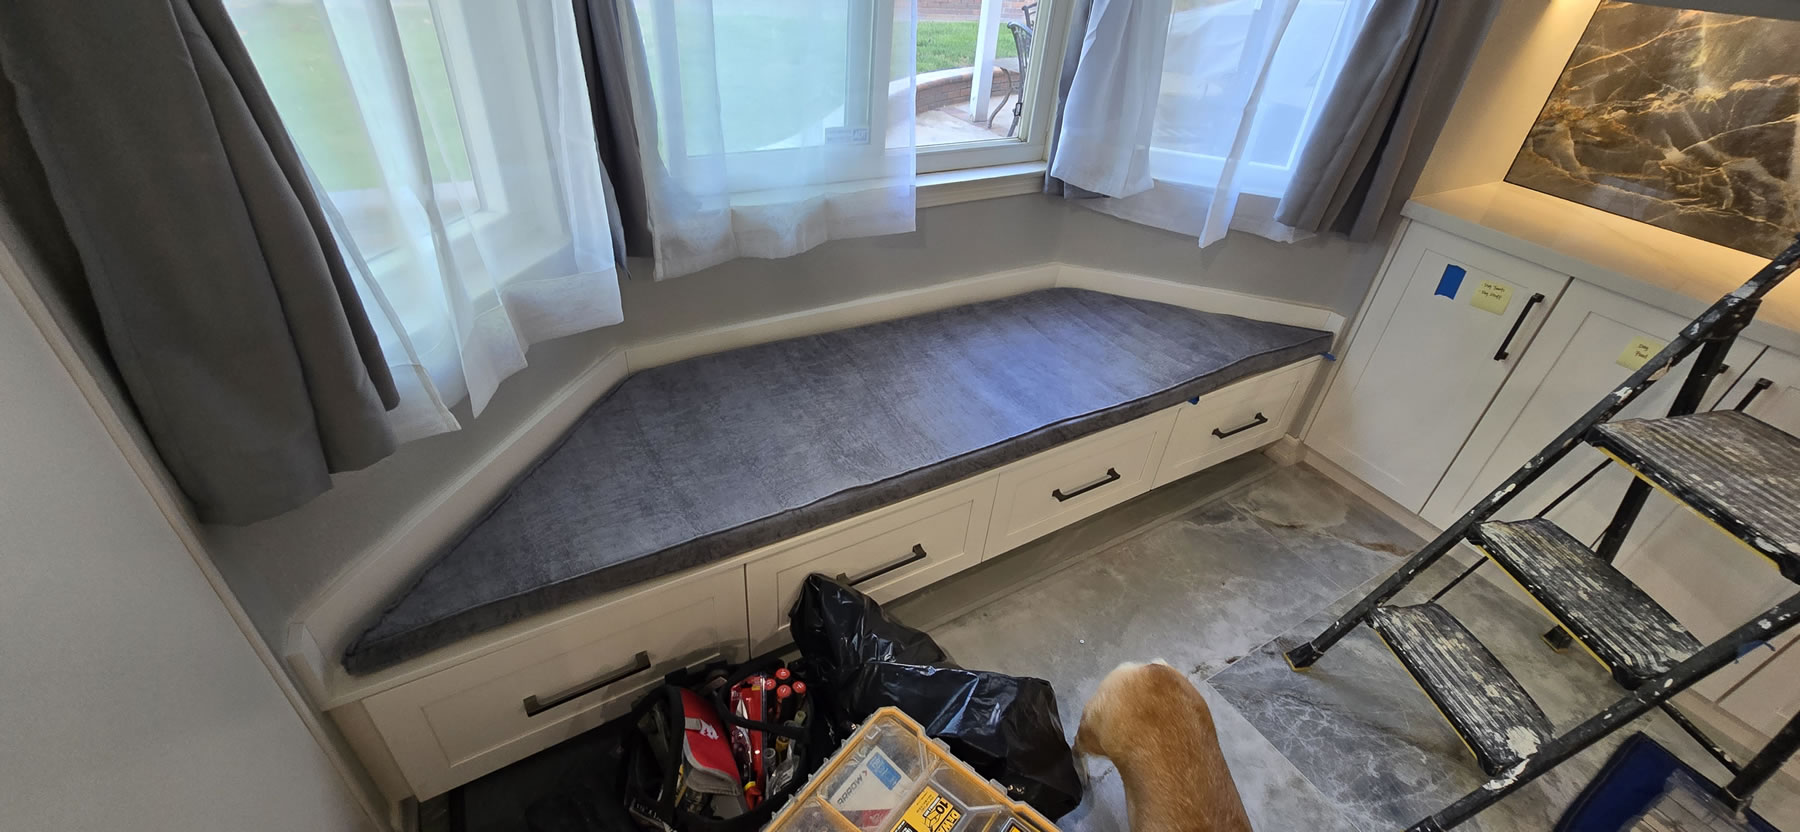
Also on Wednesday, the main contractor sent out a guy to finish the missing base boards. He was then suckered into installing the wine rack and fixing the bench. He 90% fixed the bench. I had ordered a custom bench cushion off Amazon which was a company in China last week. After some messages back and forth to get the measurements and shape correct, the item was shipped and I got it on Wednesday. Damn impressive.
The new wine bar is done. I drilled out a hole between the cabinet wall and opening and shimmied the wine fridge over and plugged it in. The electrical work above was not done yet, so no power to the fridge. I moved all my loose wine bottles to the rack. We’re getting close. Thursday, everything is finished and a dimmer switch installed to control the top lights as well as undercabinet lighting. I had made the decision not to run the undercabinet lights with the rest of the undercabinet lighting just to save on having to pull that wire. The wine bar is effectively it’s own entity, and outside the kitchen, hence the decision to keep it that way.
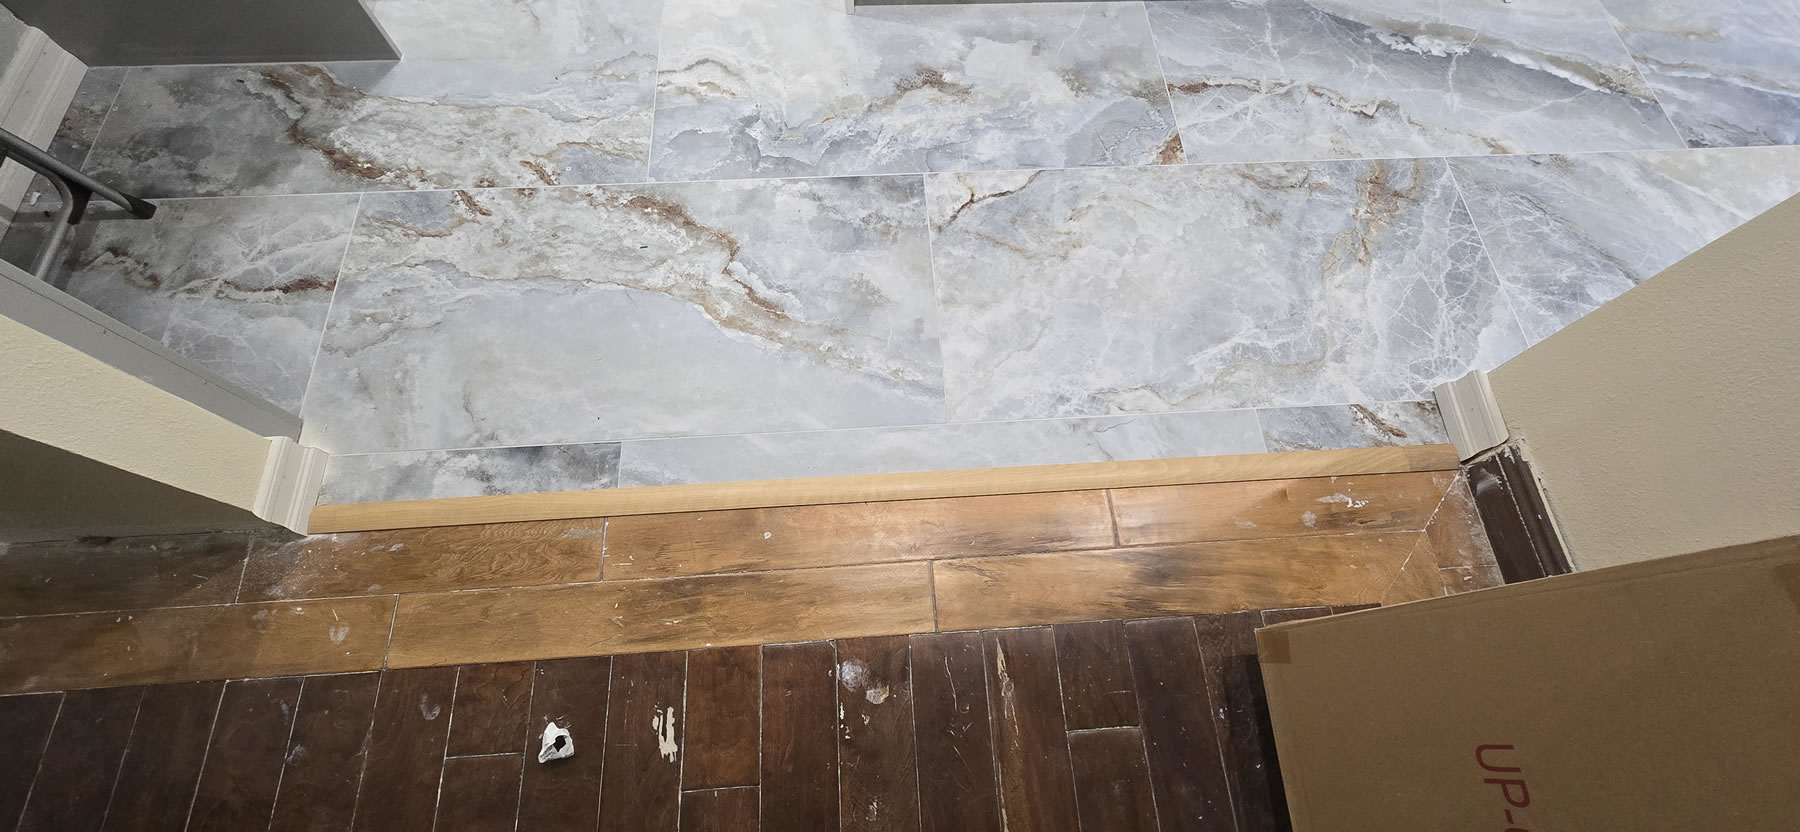
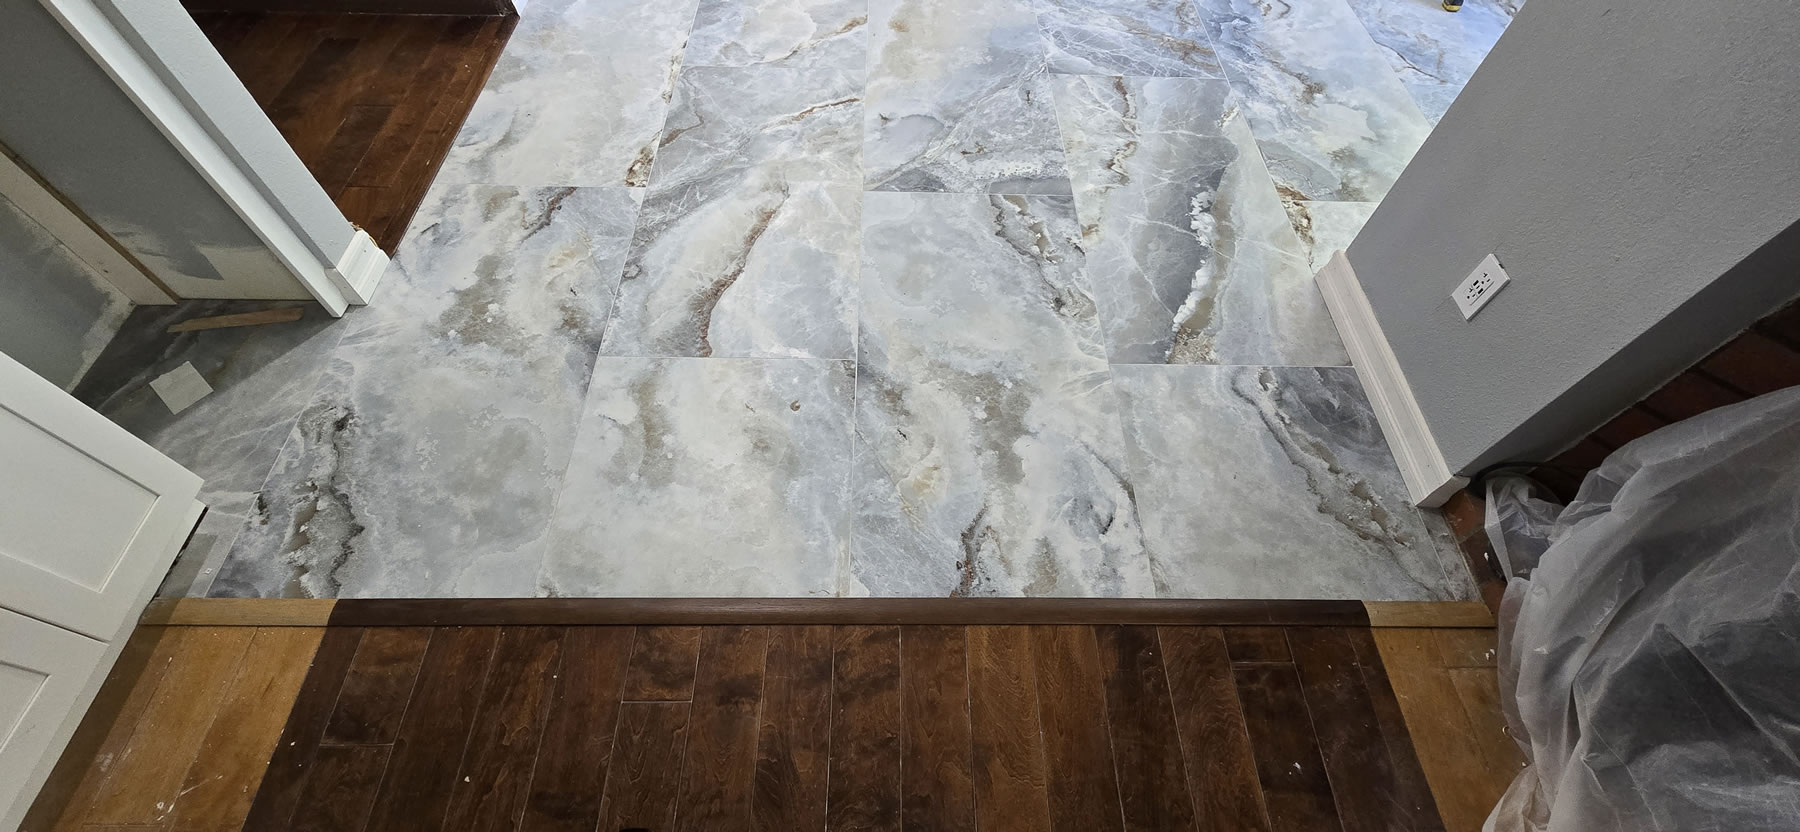
There was some back and forth on how to deal with the transitions between the rooms. The contractor wasn’t very clear, so I figured it was something that I needed to fix. I had some left over transition material from existing area, but it was not enough to cover all the new opened up areas. I took the two sample pieces and hit up my local tile shop and grabbed two T molds. The hallway transition into the kitchen was just reused from before and I didn’t even bother gluing it down because we’re going to eventually rip out the wood floors there. But the piano room needed a permanent solution. Since I still had to deal with my mom’s dual tone design. I followed it with the same dual tones for the transitions. I started to cut the two lighter tones and ran into an issue with fit. The flooring guys did not cut the wood floors straight enough, so the tail part of the T molds did not fit at the fireplace heading towards the middle of the room. The wine bar side fit perfectly. So I figured I need to route out the wood floor to make things fit. At this moment, the call came from the contractor that they’ll take care of the transitions. Well, I got the materials, I’ll leave the labor to them. The guy that finished the baseboards also finished installing the transitions according to my designs. And fixing my hand cut strips of mold. It looks pretty damn good now.
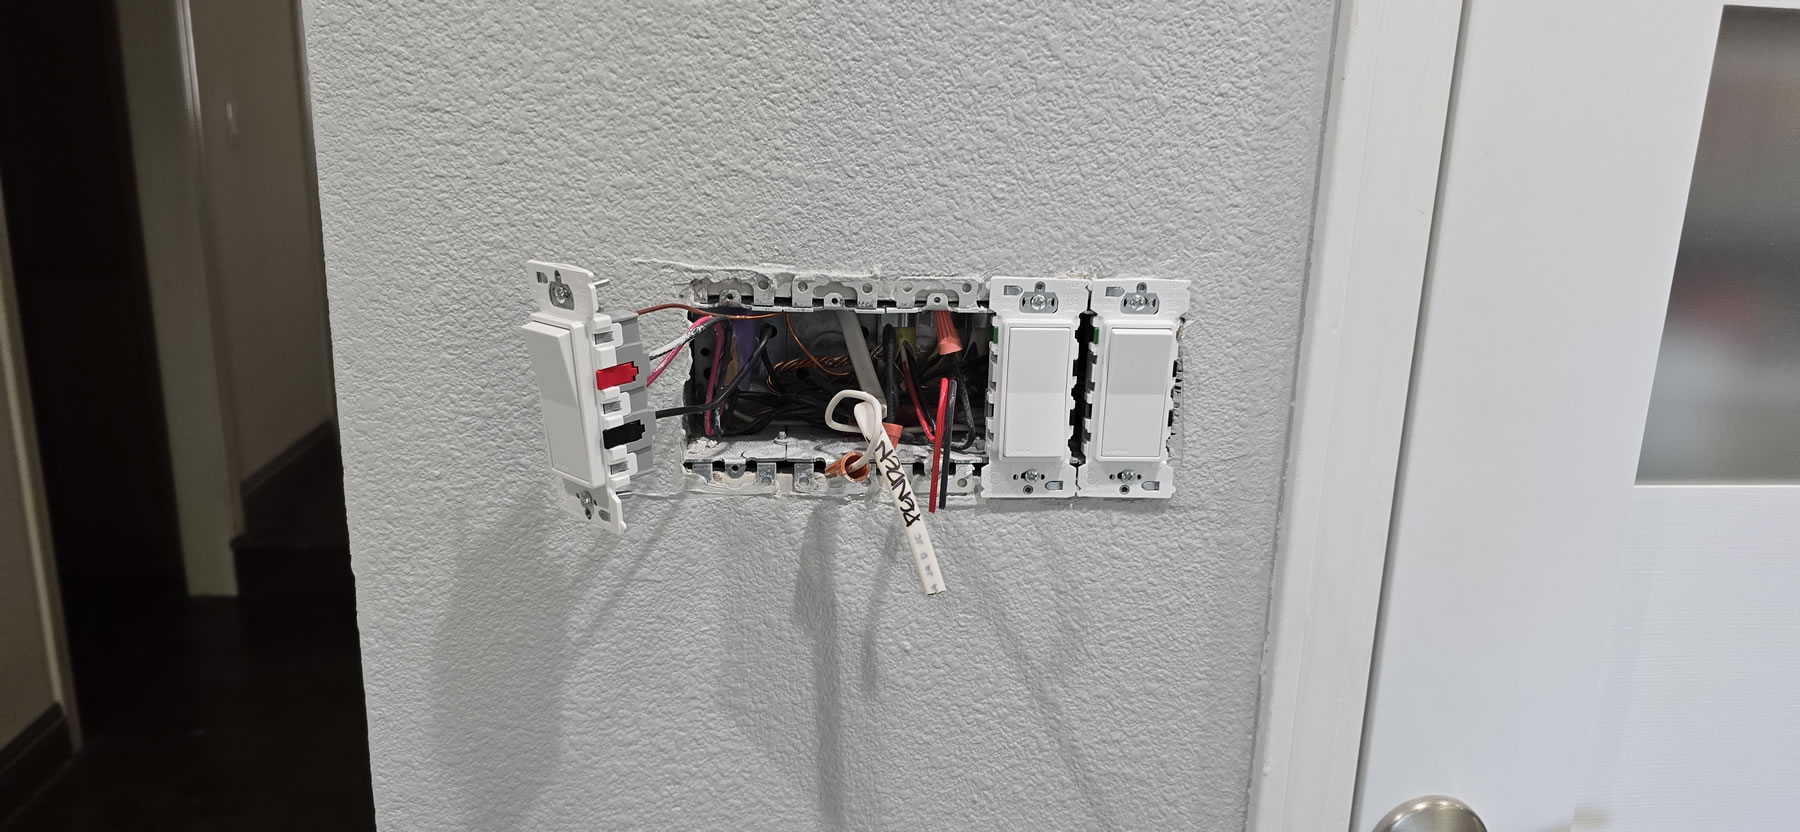
The electrical work is 85% done on Wednesday We finally have lights in the kitchen after 2 months. I need to order some 3 way dimmer switches, so a quick amazon shop got the switches to my house that early evening. Ready for install the next day.

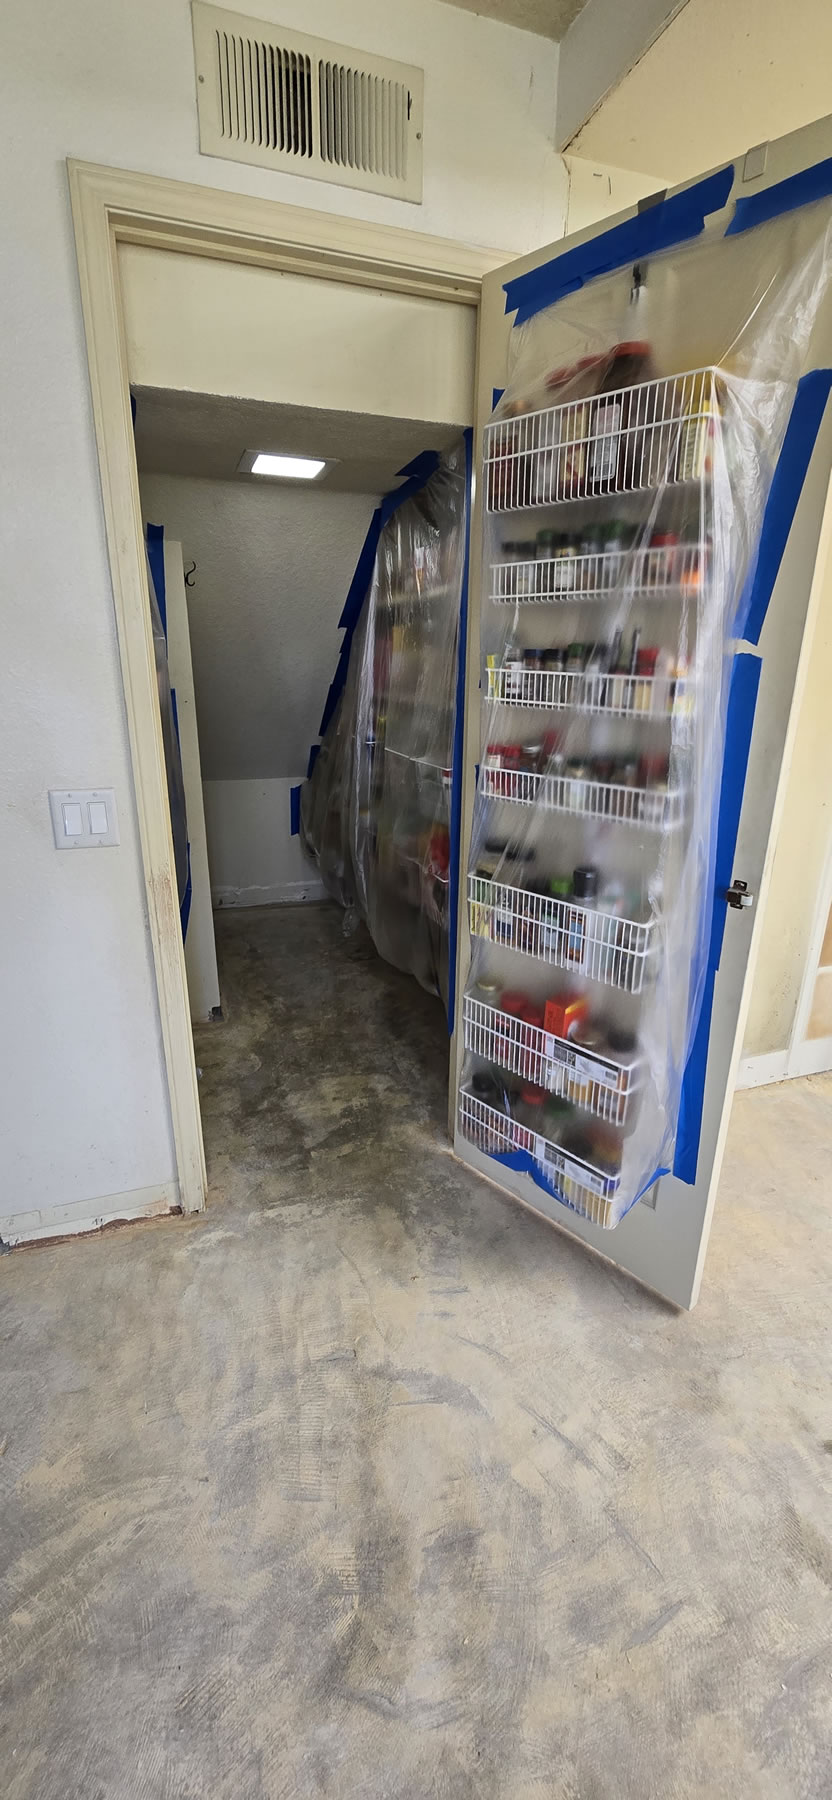
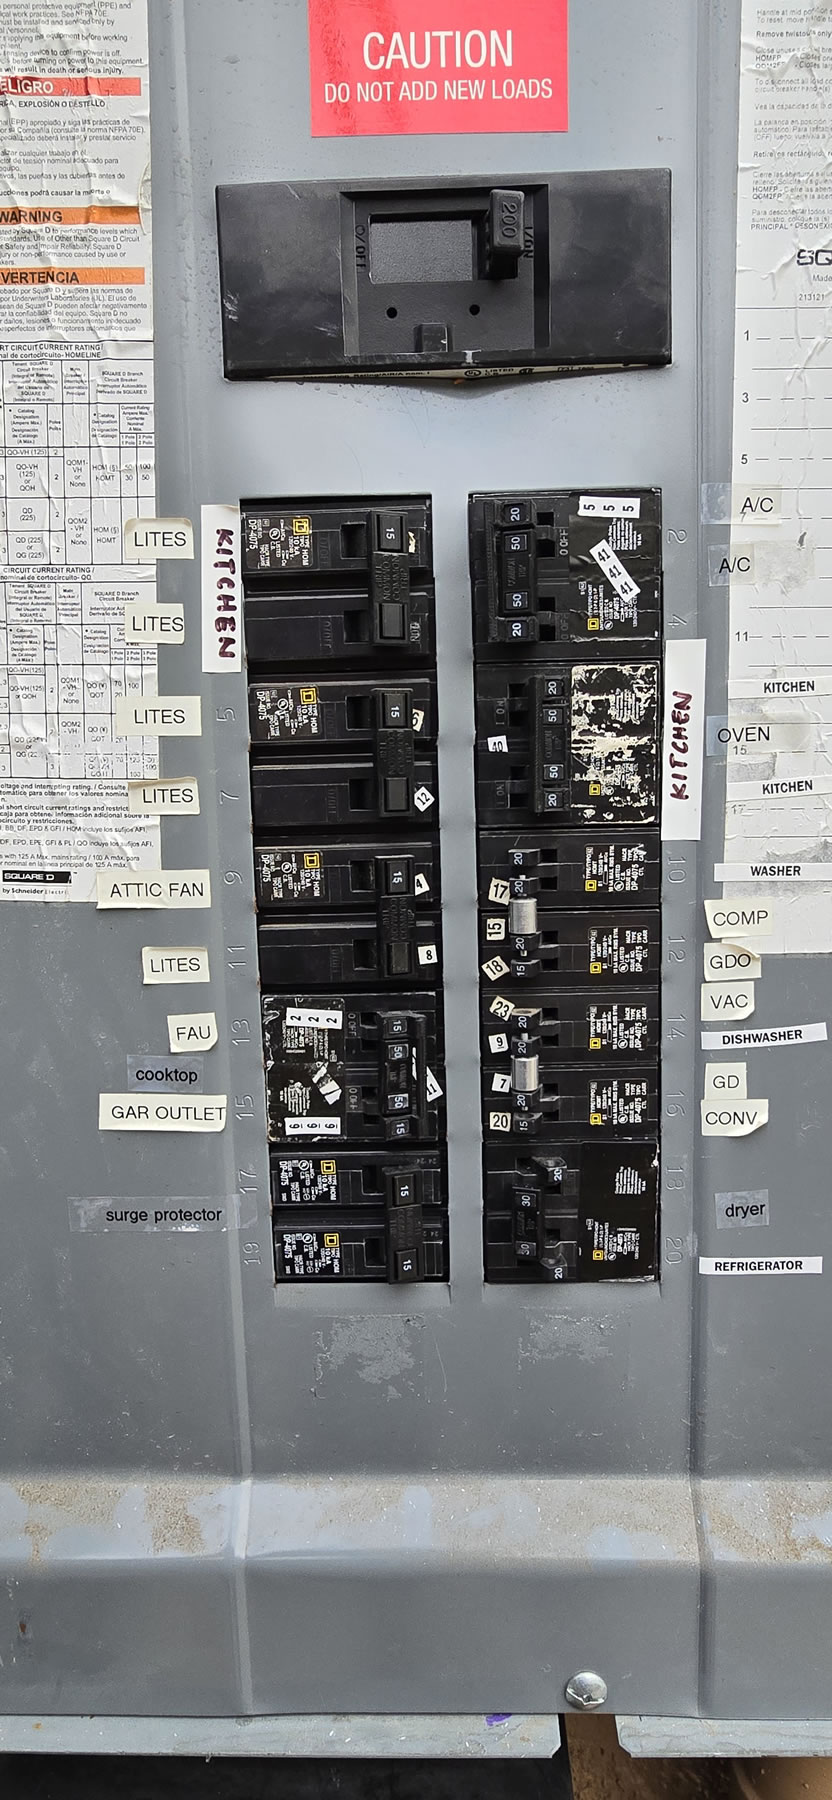
What used to be a 2 gang switch, is now a 5 gang switch. Left to right, Kitchen lights, pendants over island, under cabinet lights, kitchenette chandelier, and last is the pantry light. I can now see inside my pantry.
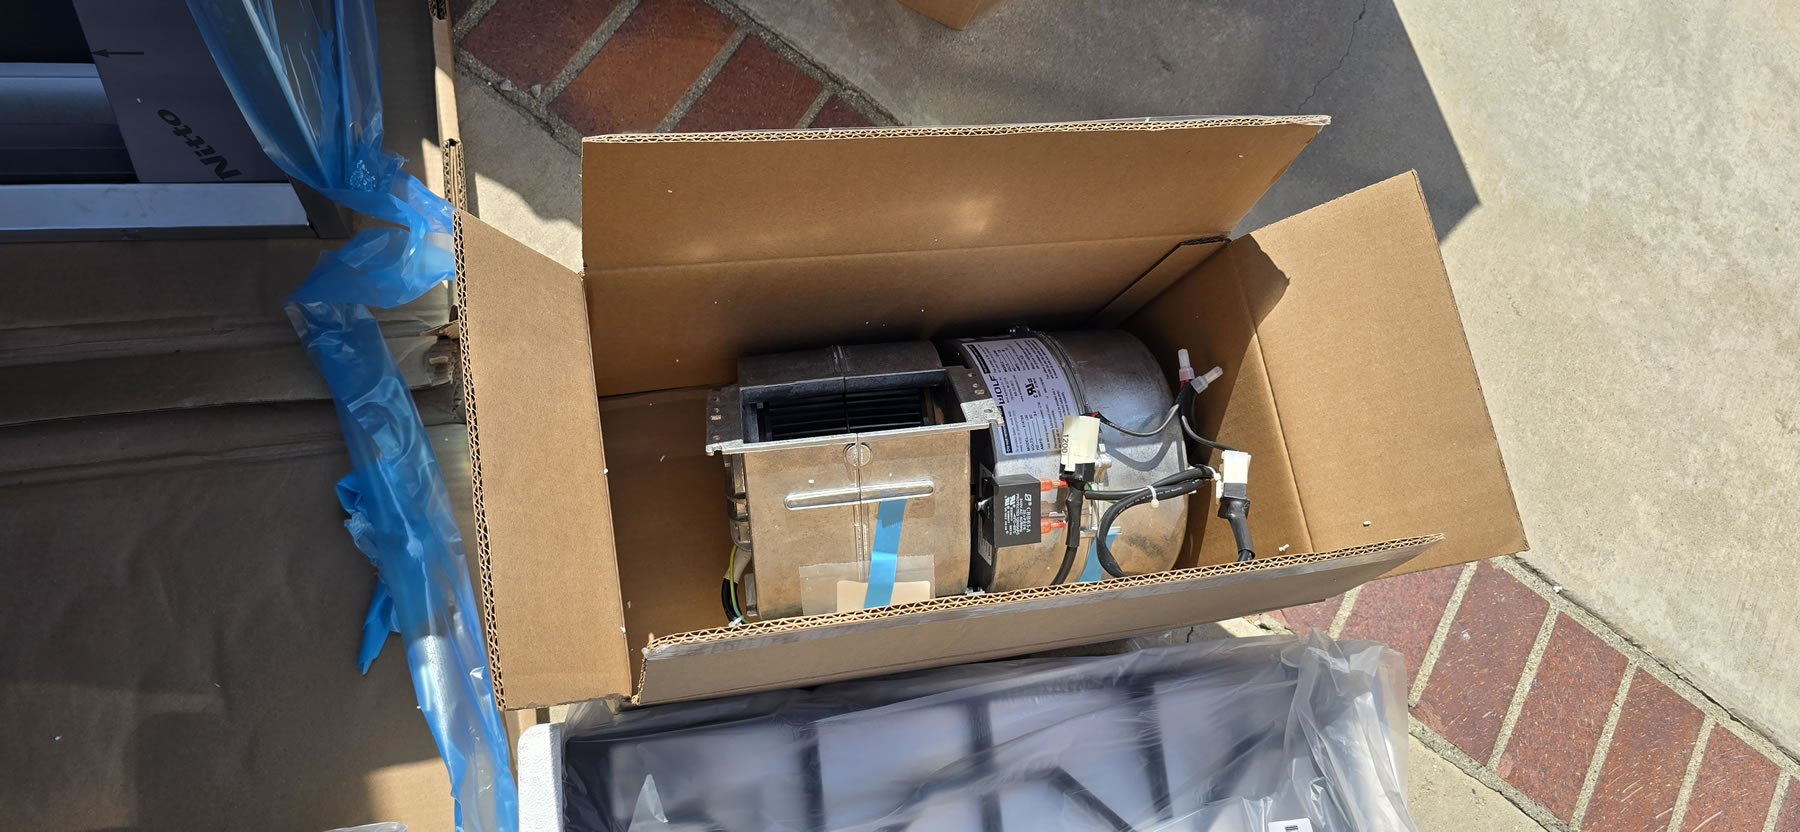
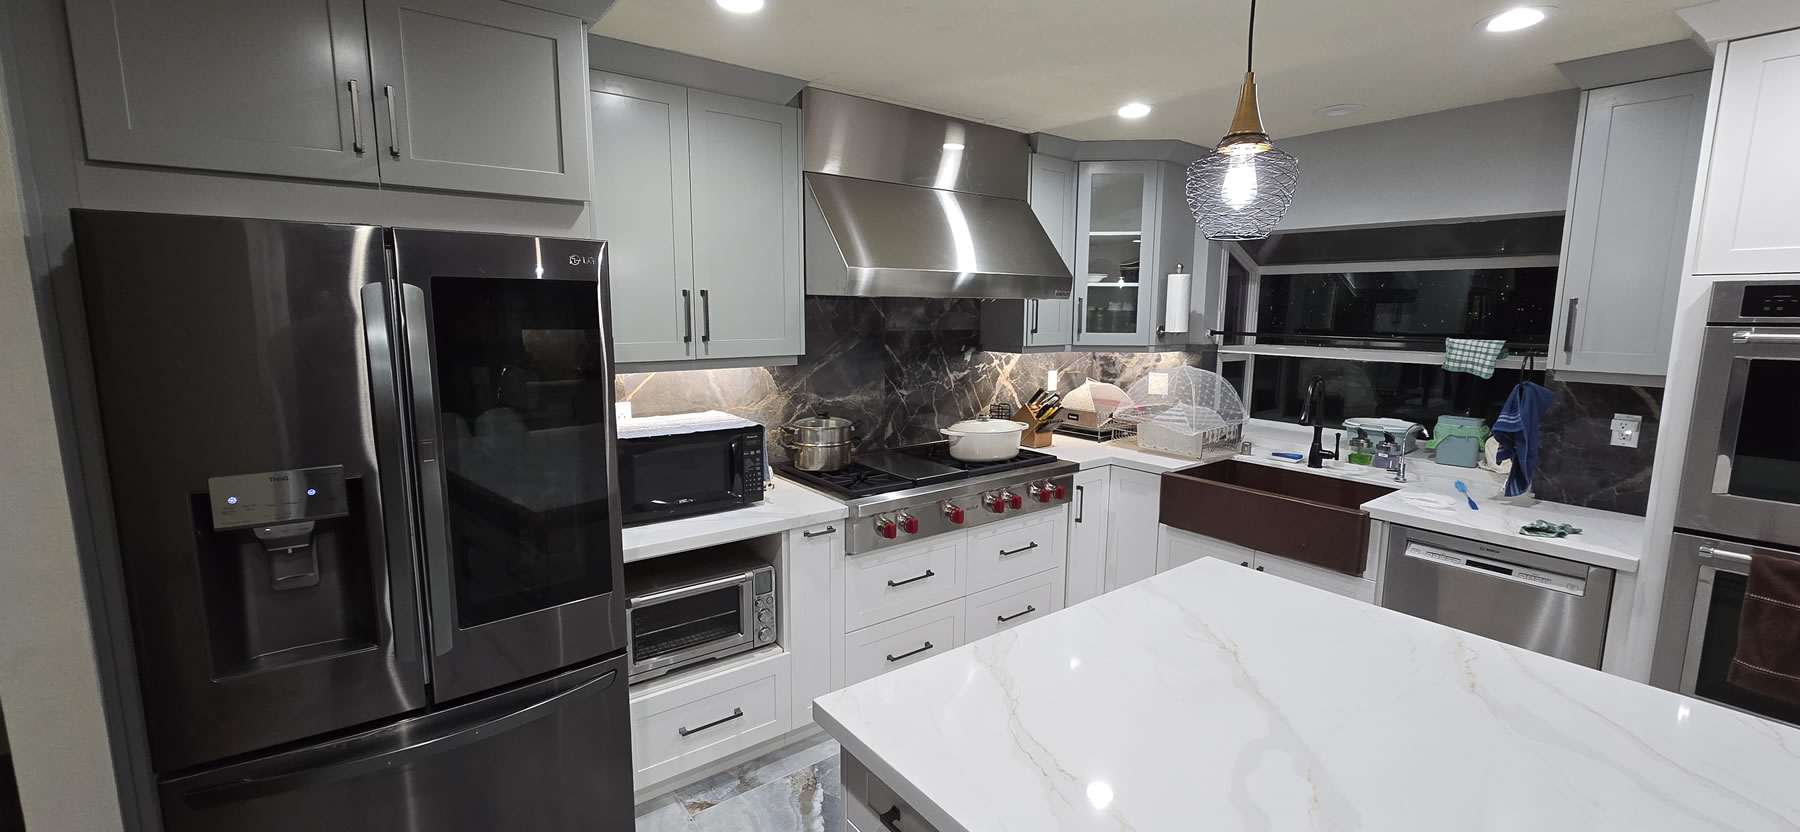
Thursday, the appliance installation day. The Wolves are unboxed. The damn vent is huge. I also have two blowers that will net me 1200 CFM. A slight improvement on the original 300 CFM vent blower. And the first time seeing the range top.
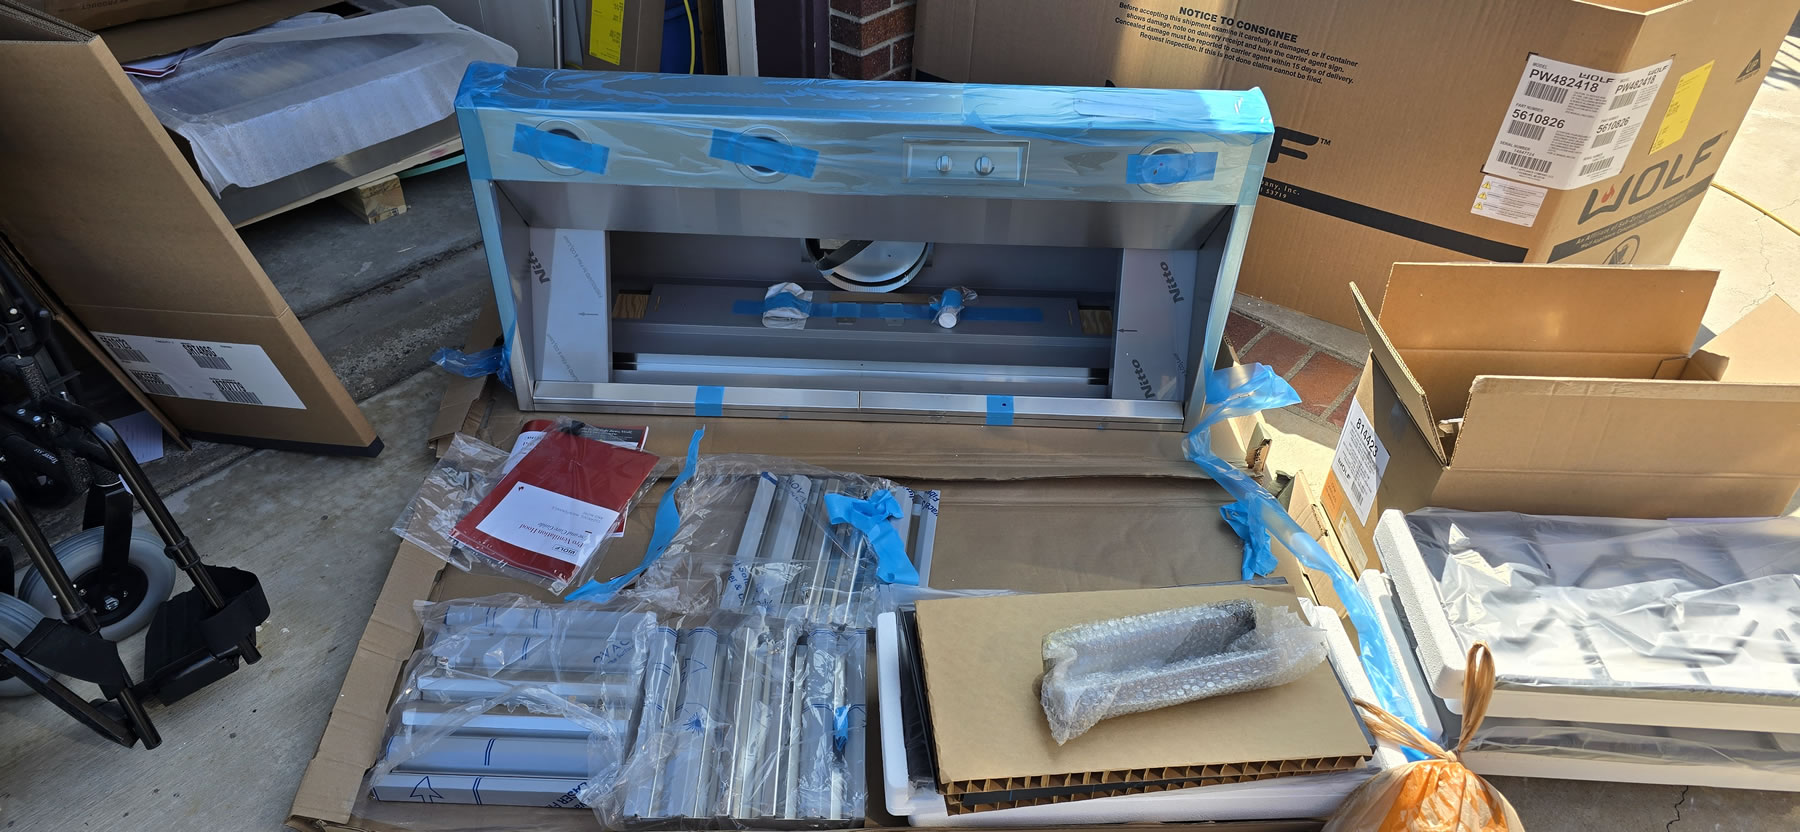
We hit a bit of a snag with the vent install. The installer cannot see where the studs are and I grabbed a stack of magnets and got a general idea of where the studs are located. The problem is that the backsplash is 9mm thick, so getting the magnets to read through that was difficult, but at the bottom we found bare wall that I got a general location. He’s still not sure because he doesn’t know how thick those studs are.. heh heh.. so he holds off. He’s had experience with a heavy vent crashing down because the anchor points were not strong enough. The other issue is the alignment of the new vent location to the range hood’s vent. The Wolf called for a ridged/straight pipe for optimum air flow. The vent location is about 4-5 inches off center. The range also needs to be installed between 30-36 inches above the range. So that left a gap above that needs a 6in duct cover. Something the appliance sales told me back in April that I may need; but I neglected to order.
I call up two local companies to find the 6in duct cover and both say they’ll call me back when they know for sure they have it in stock. Pacific sales (the folks I got the cooktop and vent) gets in first and tells me that I can pay, then hit up their warehouse in Ontario to grab the duct cover. Bringing that back, we’re still faced with the problem of how to align the vents. They consider doing a flex pipe as it’s only a 6 inch run; but need to find the vent.
So with nothing going on for the cooktop side, they moved to install the faucet, plumbing, garbage disposal, oven, and dishwasher. We were missing the original air gap for the dishwasher so nothing could be done there.
The installer’s company is called 4 Dots Remodeling. It was guy and one of his daughters doing the install. And chatting with him, he has 4 daughters, hence the company name, and he had 2 of his daughters working with him. Horrifically cute. They also tried to install the fridge into its final location but could not. The cabinet guy had made the opening exactly 36ins the same as the fridge, but didn’t account for expansion as fridges do after use. So that will need to be addressed. But we’re getting close. The appliance installer tells me he’ll be back at 7am Friday.
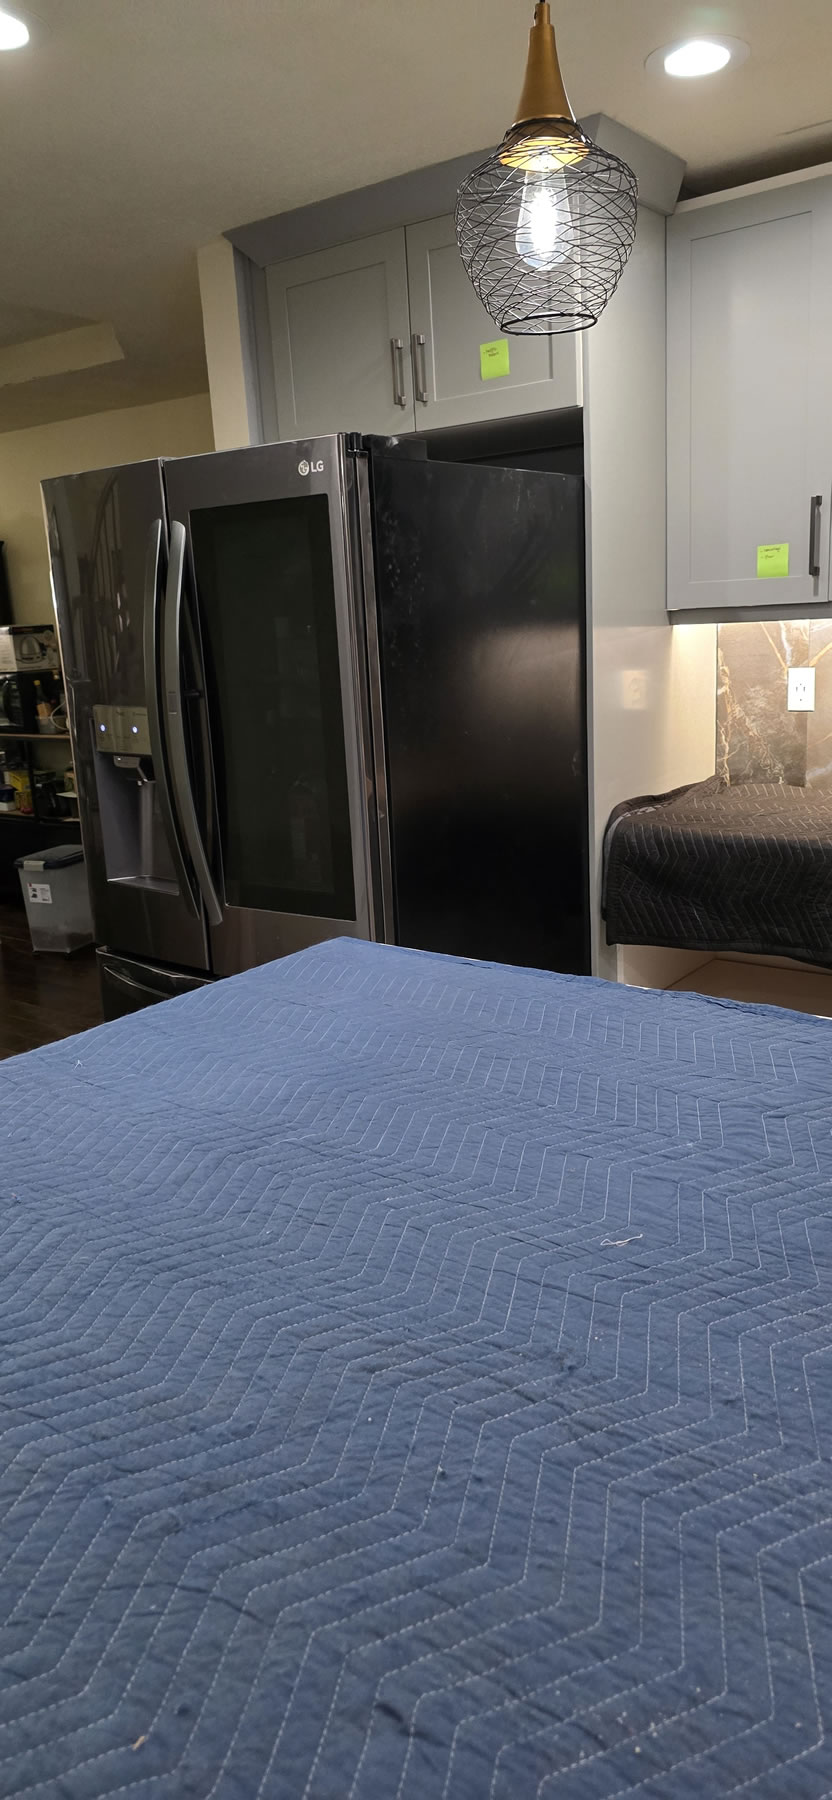
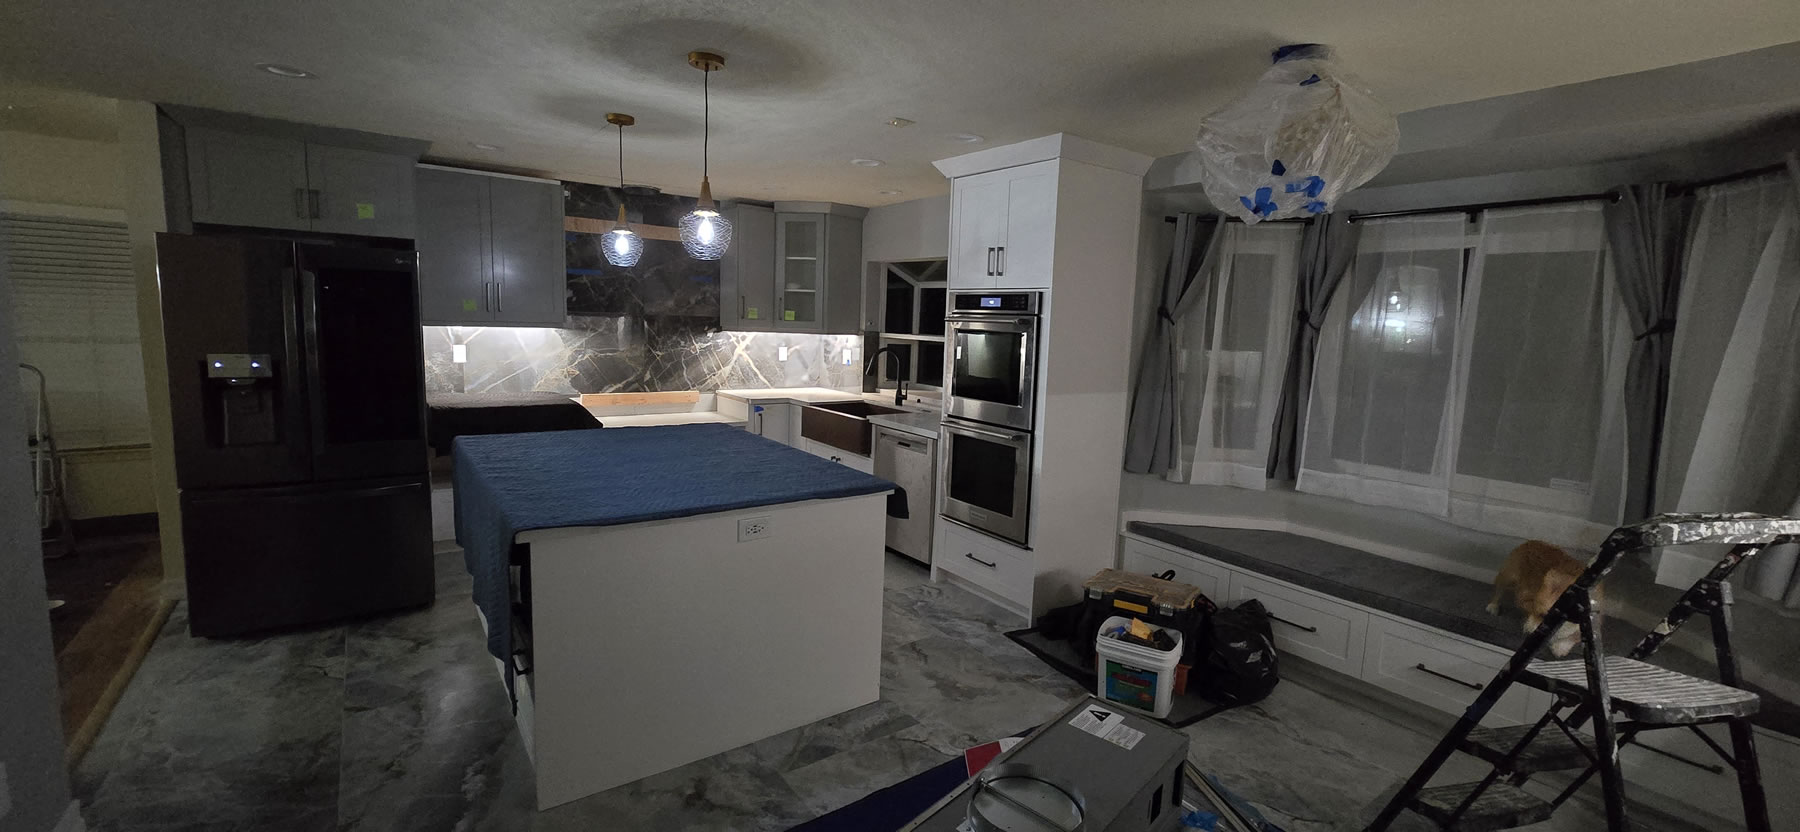
Electrical gets done with all the switches installed and the wife and I play with the dimmers. Bonus, the switches I got are from the same company that I got some smart plugin outlets. So that means I can tie them into our phone’s apps and run the lights and dim functions from there. The pendants are installed and they look damn good. The undercabinet lights are a very nice touch to everything. We’re pretty damn happy with the lighting. And the folks that know me, know my fetish for lights, so this tracks.
Friday is contractor overload day. 4 Dots show up bright and early, 6:45 or so and get to work with finishing the sink install with the air gap connections to the dishwasher and garbage disposal. Tests are run to check for leaks. We move to the vent and it’s a no go with the flexible pipe and he couldn’t source it. Last we left off, the idea was to move the vent and possibly cut the stucco from the back of the house to add support for the vent. It would be a cost and pain in the ass to the contractor, but what could we do. Gut punch #2 is that the counter tops have an overhang in the stovetop area and the open space between for the cooktop there is 46 and 3/4 inches. The cabinet spacing is 48. The stove top is 48. The install manual for the stove top is 48. The countertop guys did complain that they did not have the stove top to use when they templated, but the cabinets were already installed and the stovetop manual WAS GIVEN TO THE COUNTERTOP guys. So why they felt they needed to leave a lip, I have no idea. Regardless, 4 Dots calls my main contractor to let him know this issue.
The night before, I scrolled through my pictorial documentation and found a picture of the studs, back wall, and vent and all the alignment. I showed the contractor and he had me send it to his phone. Ok, no need to cut out stucco for back supports. The pictures clearly show the stud size and he can mount the vent against them. Next issue was the vent location. The solution to that was to drop the vent another 6 inches, so now instead of the 6 inch duct cover, I need 12. It’s 8am, and none of the local shops are open. But we have a plan. Once 9am hits, I call the first shop that got back to me about an hour later than the first shop. They claim they have 1 in stock at their warehouse in Anaheim, but will need to confirm and let me know later. Ok, I make a few other calls to other shops and a few say no go on stock.
9am, the original cabinet installer shows up and I point out all the fixes that are needed. He was originally there to fix the crown that he had over zealously cut last Thursday in his rush. I point out the fridge issue and he trims out the excess panel which gives the fridge the extra 3/4 inch of fat gain girth. And gets to work on completing the bench fix. Showing up around 9:30 is the countertop guys with instructions to cut the countertops to fit the original specs.
10AM, I call up the Pacific Sales shop that I got the 6in cover says they have it, but they’ll need to confirm and they can help me set up an exchange, pay the difference, then pick up the new 12in cover at their Ontario warehouse. Again, I get to wait for who gets to me first. Also showing up is our water filter guy to install some new reverse osmosis filters as the one we had sat for 2 months has now gone bad without proper water going through the system. The gardeners show up… There are 5 teams of workers at the house now. I’m done with work, but Kenken has a vet appt for his busted ccl (acl for us humans) So I take off and take him to the vet. While at the vet, I get the call from the Anaheim appliance shop saying they’re good to go for the 12in duct cover. I confirm, and they tell me they’ll send payment request soon.
I get home around 11:30 and in a few minutes get the payment request, so they win today. I pay and just wait for confirmation that I can go grab the duct cover. I’m also smoking some beef ribs to later braise. So since I’m kind in limbo, I start work on the braise liquid. The countertop guys are done and the water filter guy is done and they take off. I get the email that the 12in duct cover is ready for pick up and I tell the installers that I’m heading out to grab it, they tell me that they have an appt at 2 and that they’ll be leaving at 1. I’m completely oblivious to time and I think it’s still 11 so I casually say shop is close by and I’d be right back and take off.
I get in my car and start driving and looked at my instrument panel and noticed it said 12:30. Yeah, no way in hell am I gonna make it back by 1. Even worse, it’s Friday afternoon preceding Labor Day weekend holiday. Traffic going to Anaheim blows, what normally take 15 to 20 minutes took me 45 or so. I get to the shop around 1:15 and grab the duct cover and take off back home at around 1:30. Checking in on my cameras I see that they’re still working on installing the hood and stove. I get back to the house around 1:55; traffic the other way was fairly light. And they’re still putting the finishing touches. They tell me that they can’t get to the duct cover today as they have the appt they’re already late. I tell them that I could probably install it. They finish up things and give me a few pointers for the duct cover; and take off after cleaning up and getting everything tested and showing that it all works.
They take off and the cabinet guy is also done and he takes off. The house is now quiet and I start to work on the duct cover. It’s a tight squeeze, so a mallet and folded up hand towel work like magic to push the duct cover into position. I just need to do some touch up ceiling paint. But for all intents and purposes; ITS DONE!
There are a few bits and pieces that need attention; and I haven’t submitted the final payment of 2K plus what ever odds and ends I added to the project. But the kitchen is 98% done. We start getting the essentials unboxed and into their new cabinet homes. Moving things around here and there for optimal functionality. The spice rack serves to hide all the stuff we originally had out on the counters.
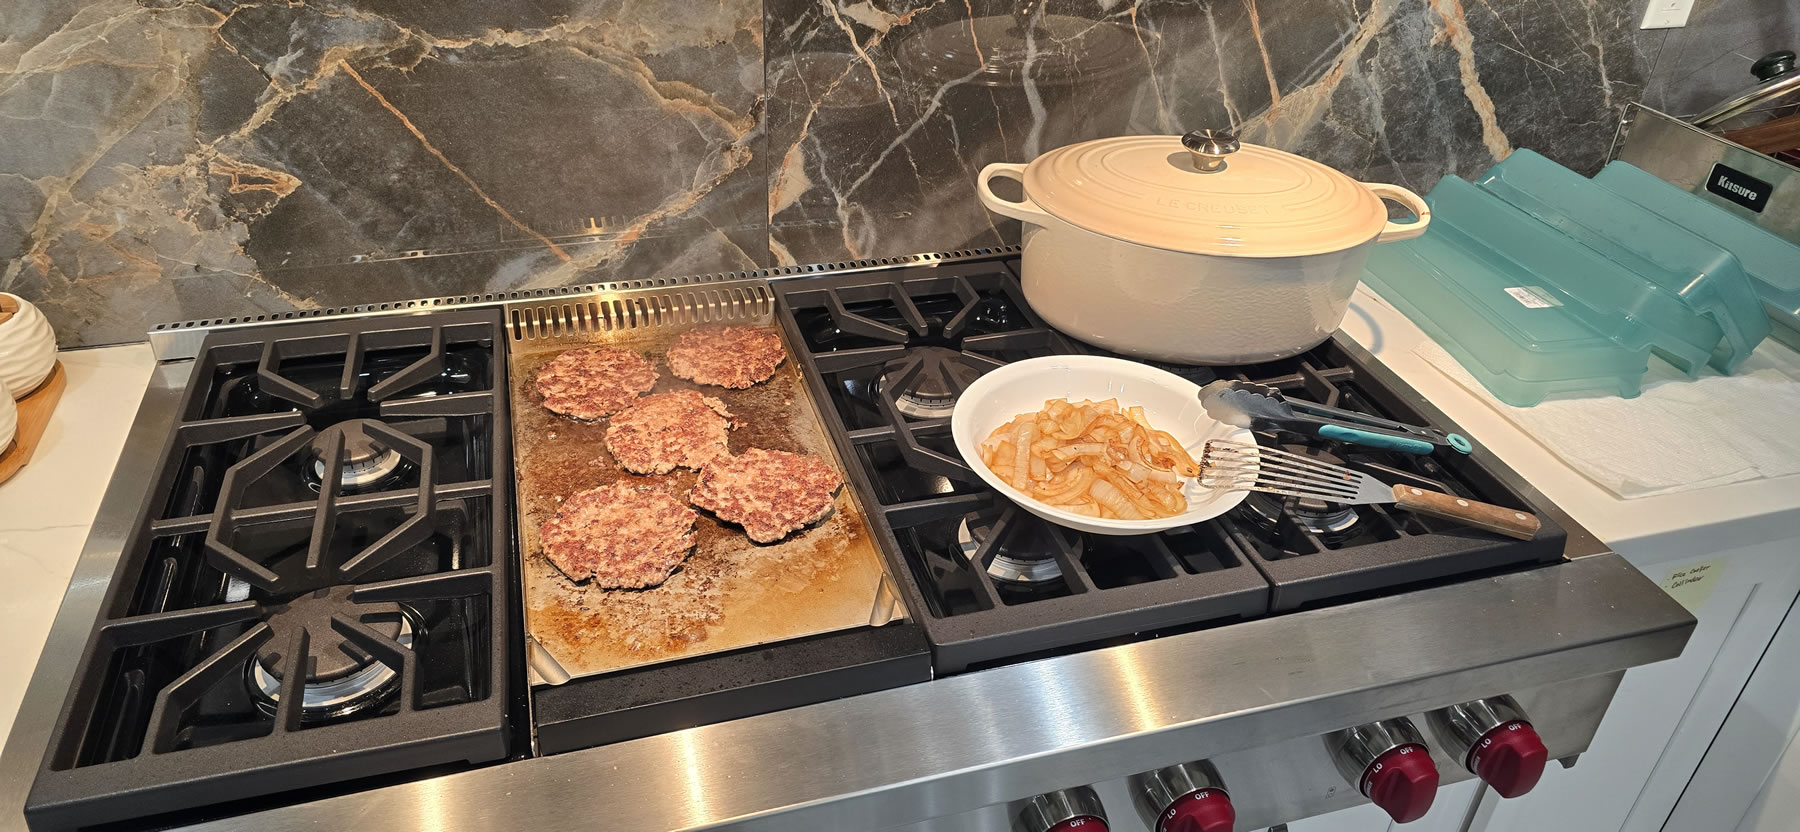
We fired up the stove and made our first meal, burgers that I had patties made back for the July 4th BBQ. A fitting book end to this project, started with the burgers and ended with the same burgers. Some grilled onions and fried eggs to fully test out the griddle. The vent hood is LOUD, 1200 cfm is no f-ing joke. We need to make sure we have a window open so that the air flow would actually work and not create a vacuum.


For now, the kitchen is done. Only a few bits left, and we can move on to the next projects that we have lined up for the rest of the month. I’m pretty happy with the design and most folks that have seen it have said they liked it. Most likely to be nice to me, but F it, I like it, the wife likes it; we’re good.
