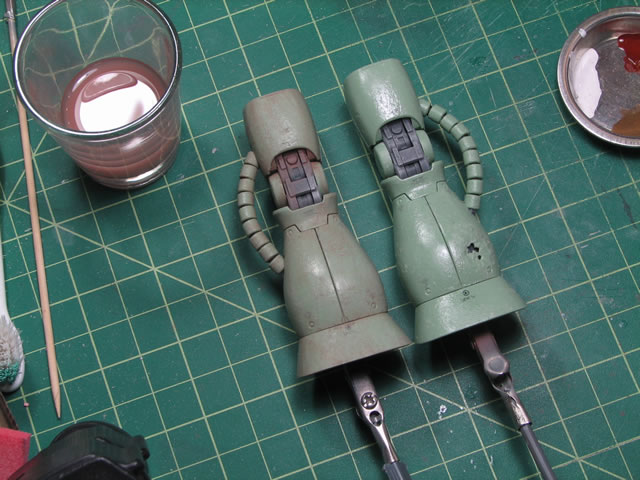
This tutorial covers the application of a fade or filter. There are important steps that need to be followed for this technique to work. The set up for this technique is identical to the set up for applying a panel line wash. The ideal paint for this technique is enamel paints as they are oil based and dry very slowly. These are two properties that are key to the success of this technique. The surface of the kit must be clear coated with a gloss lacquer or acrylic; and the clear coat must be fully cured before applying this technique.
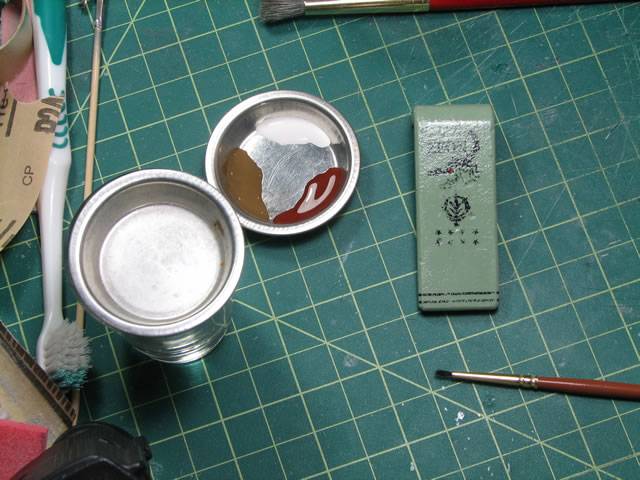
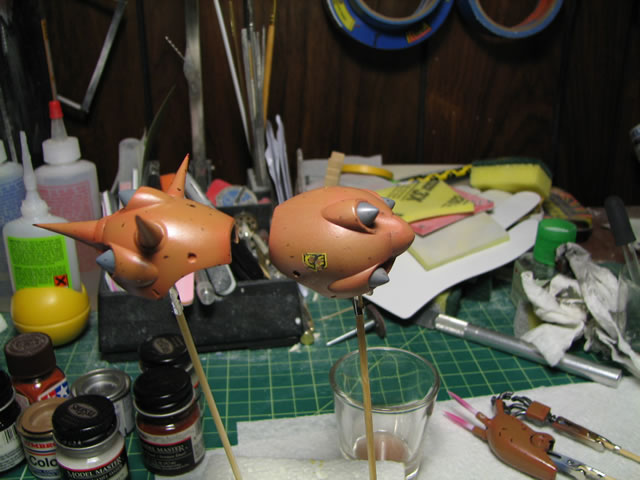
I begin by selecting three enamel colors that I want to use. The color choice can be arbitrary; but I chose colors that emulate the environment. For instance, rust, a dark earth, and white. There is a whole array of color to use that will create different fade and filter effects. Always keep a mind of the current color of your kit when choosing the filter colors – to decide which direction you want to pull towards. Aside from the paint, you will need a small brush to apply the paints, a stiff brush (one you would use for dry brushing), and enamel thinner. A special note on the enamel thinner is to use the same thinner manufactured by same brand as your paints as the thinner is designed for model use. Other enamel thinners may severely weaken the plastic and turn it brittle to the point where the parts will crumble.

The enamel paint does not necessarily need to be thinned, only thinned enough to keep them from drying out.
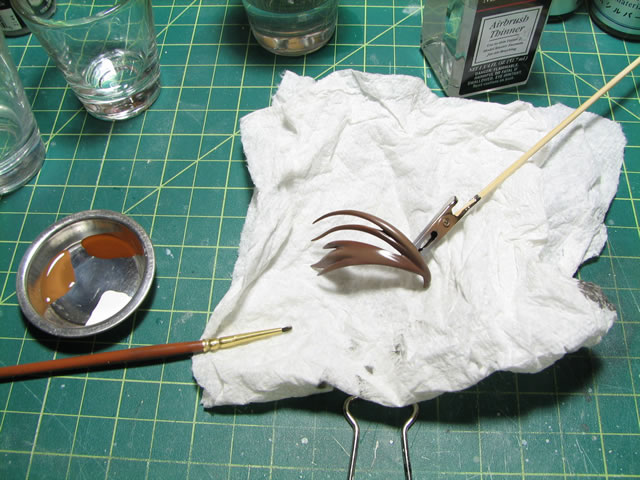
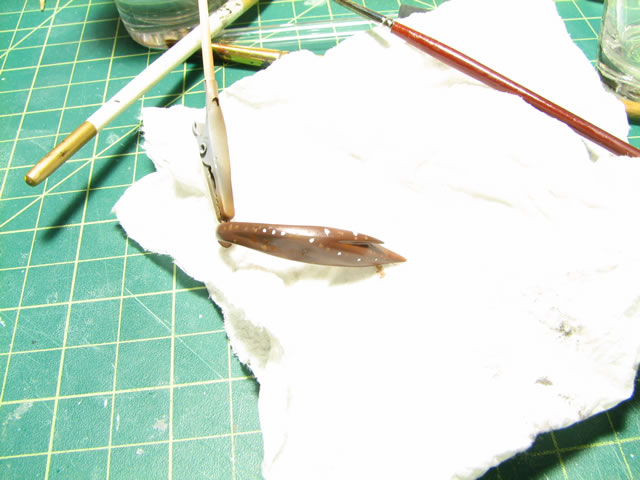
Using a small brush apply dots to the part. I usually dot the parts up haphazardly, and if there was a certain color I wanted represented more, or a color I wanted to pull towards, I would then use more of that particular color. In the following examples, I am just applying the dots at random.
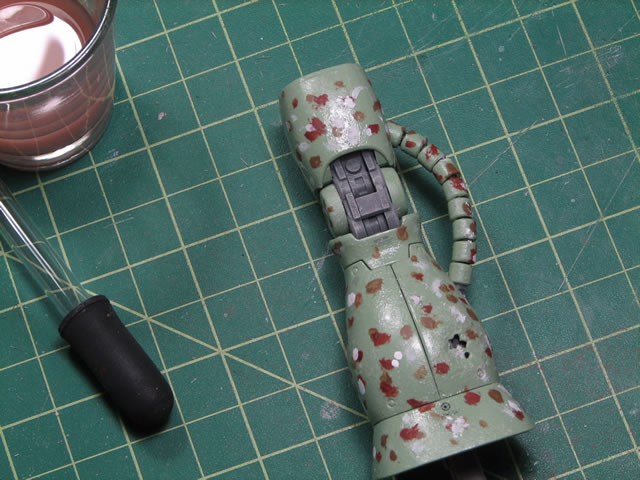

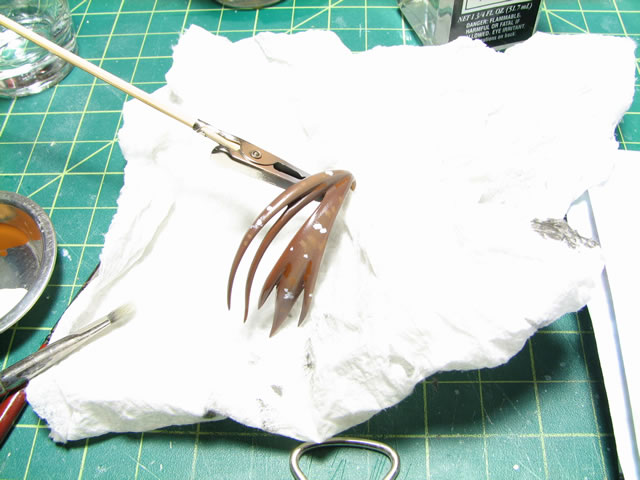
Once the paint has had a small amount of time to dry (about 10 minutes or so); using a bigger stiff brush, moisten the brush with a small amount of enamel thinner and then wipe the dots away in a direction that would emulate weather, or wind, or natural movement of the part as it exists in real space. The fade and filter are easy ways to create rain streaks, or to show sun damage in faded paint. The goal in this step is to remove the dots.
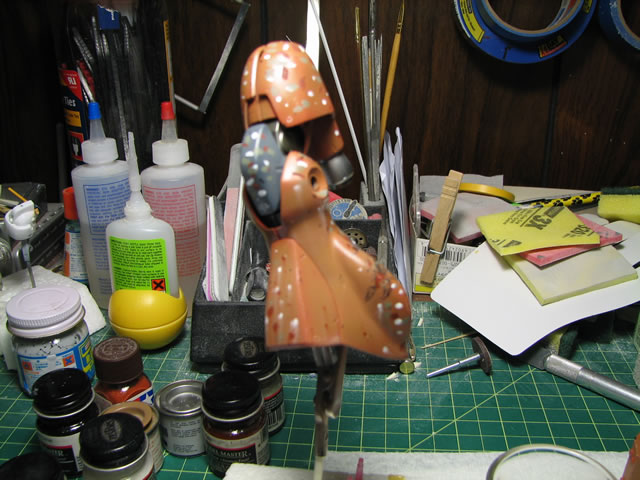
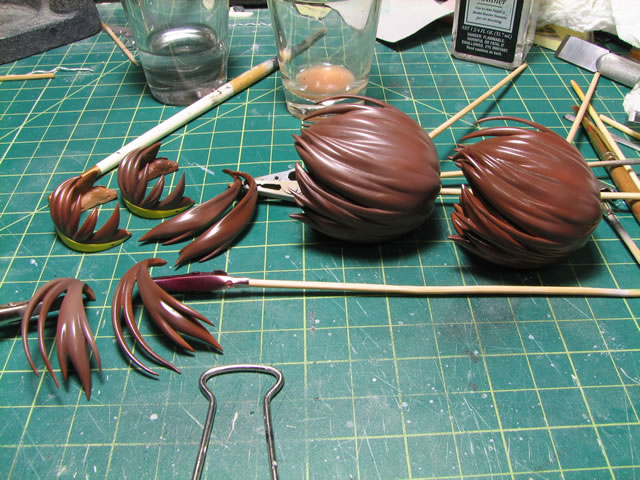
Once the dots have been remove, allow the part to dry. Additional weathering steps cam be taken from this point. Here are some comparison pictures between faded and non faded parts.
This technique can also be applied to figure kits. Most notably, the hair to add a bit of dynamics to a singularly colored head of hair. The same steps and prerequisites are required for resin figures as for gunpla kits. There needs to be an initial gloss clear coat of either lacquer or acrylic and the clear coat must be cured prior to execution of this technique.
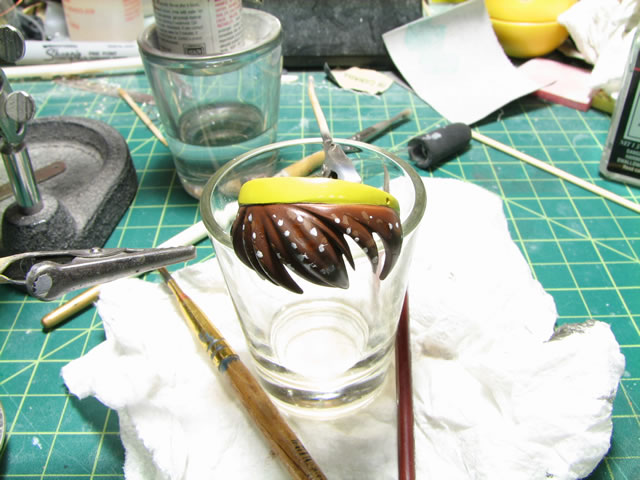
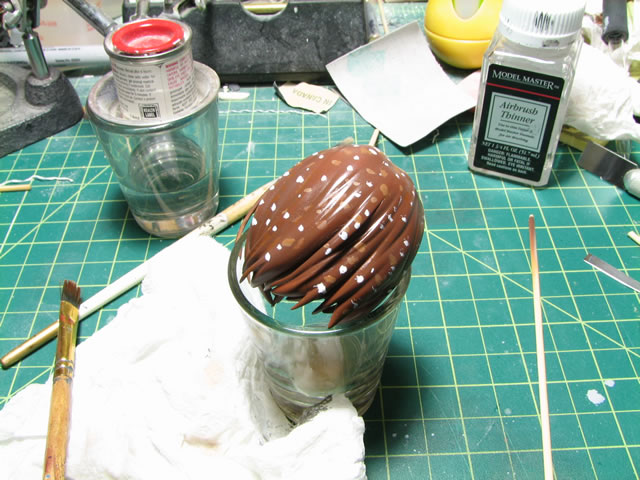
For this example, I used a light tan and white. Yellows and oranges can be use in a highlighting fashion. Additionally, notice that the lighter colors were used on the bigger flat surfaces; this serves as a means to shade and highlight those areas, keeping the folds and darker parts of the hair dark. Using the brush with a small amount of enamel thinner, the dots are removed and you can see in the next set of pictures for comparison.

- Recap of the steps:
- Gloss clear coat the parts using acrylic or lacquer and allow the clear coat to fully cure
- Choose the appropriate colors to create the fade/filter, the number of colors does not matter
- Apply the colors to the parts using a small brush
- Using a big stiff brush and some enamel thinner, wipe the dots away
December 17, 2007: Added some video compliments for the technique. The shield:
Get the Flash Player to see this player.
The leg:
Get the Flash Player to see this player.