This is a tutorial for applying a wash to paint in the panel lines. This method is very inexpensive, as you will notice that very little paint is used. Additionally, different paint colors can be selected for applying the wash, such as dark grays, black, dark blues, etc. I also like this method over the pen method since the lines tend to be much thinner, and the application and clean up is much easier. Granted there are certain prerequisites that must be met for this method to work.
The first step is to ensure that you have sprayed on a gloss clear coat. This is an imperative step, and depending on the wash solution’s paint type, the type of gloss coat is very important. Since I use and enamel (oil based) paint for the wash solution, I can use either an acrylic clear coat (Future Floor Polish) or a lacquer based clear coat (Mr Super Clear Gloss). The reasons why will become clear after a few steps. Having clear coated the parts and allowed for the clear coat to cure, I can move on to the actual wash. As stated earlier, I am using enamel paint and enamel thinner (note that the thinner is the same brand as the paint) Some enamel thinners may be too strong for model applications.
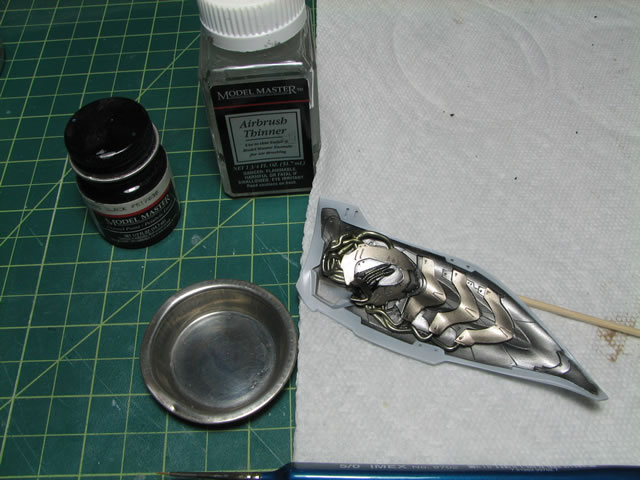
Using an empty paint tin, I placed a drop of black enamel paint onto the tin.
Next I add a dropper of enamel thinner to the tin.
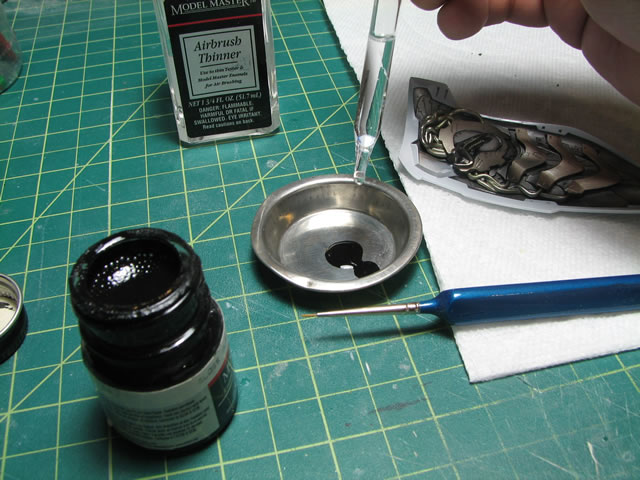
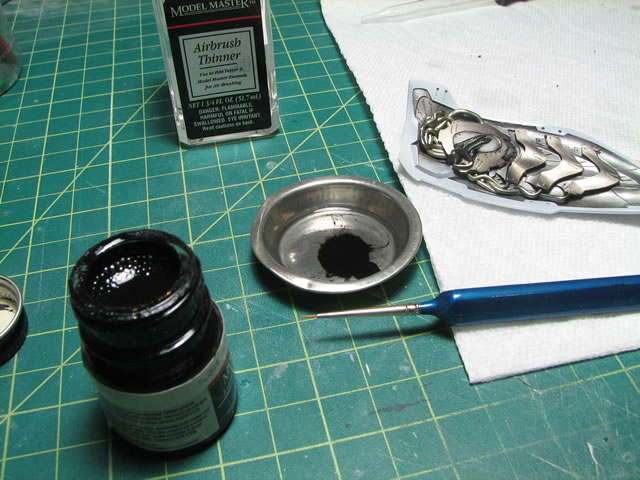
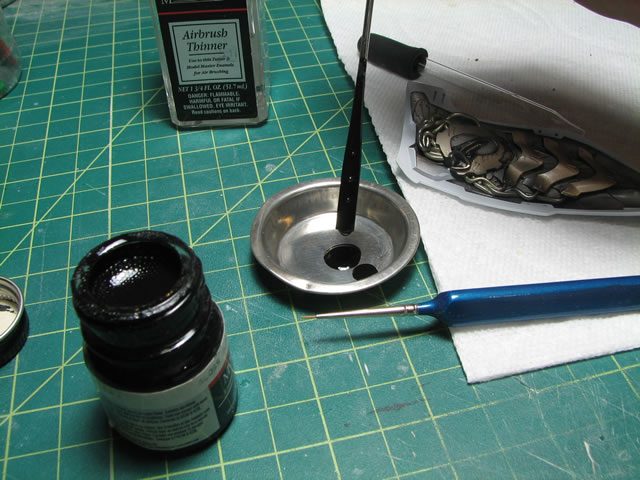
Mix the solution up; and the solution should be a fairly watery consistency.

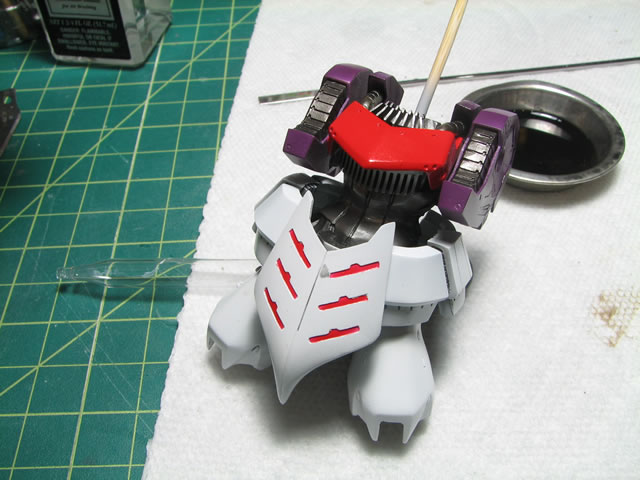
Taking a small brush, simply dip the brush into the solution.
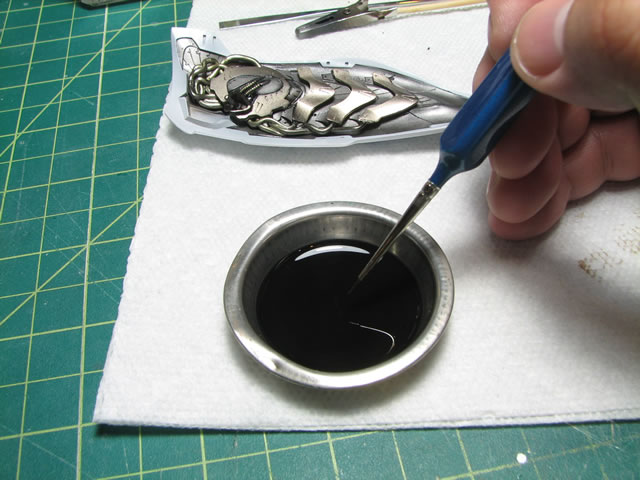
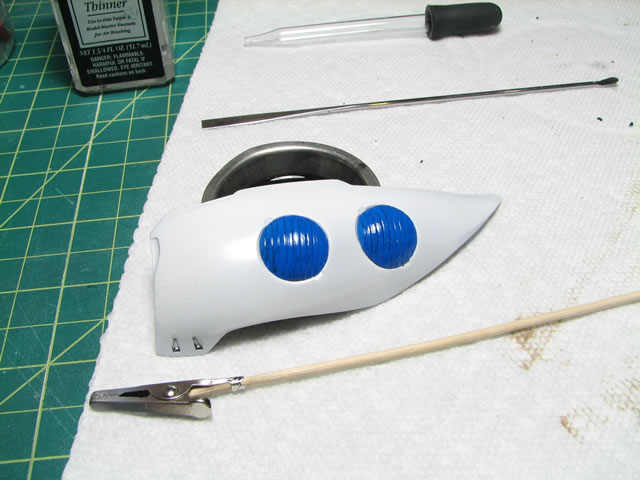
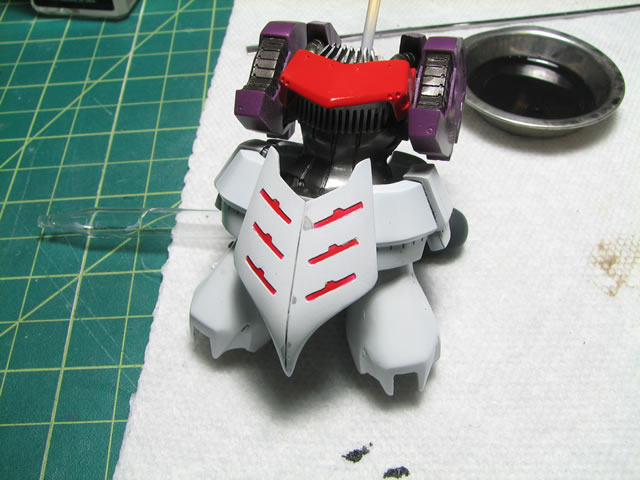
Then touch the tip of the brush onto the panel lines. Now here is where the previous gloss coat and the different type of paints do all the work.

The clear coat keeps the wash solution from flowing all over the place and stays in the line. If the surface was a flat finish or even a matte finish, the surface of the kit will start to absorb the wash solution like a sponge and the solution will not be contained to just the lines. The reason for this is that flat paints and clears create tiny microscopic bumps on the surface which refract light which when looked at, looks dull and non reflective. These tiny little bumps creates a sponge like surface that will absorb the wash solution; essentially the wash solution will flow all over the part. With the gloss, the surface is ultra slick and the wash solution will freely flow in the panel lines. It is also important to use different paint types. Since acrylic paints are water soluble, the enamel paints which are oil based, will not mix with each other. The same goes for a lacquer clear coat and using an enamel based wash solution. It is also important to know which paints will eat other paint types. As a rule of thumb, it is always better to layer paints from strongest to weakest, the weakest at the top. Lacquers are the strongest paint types, enamels next, and then followed by acrylics.
I like using enamel paints since they are oil based and have a relatively slow dry time, this allows the paint to flow easily and gives me time for easy clean up since the paint has yet to dry on the surface.

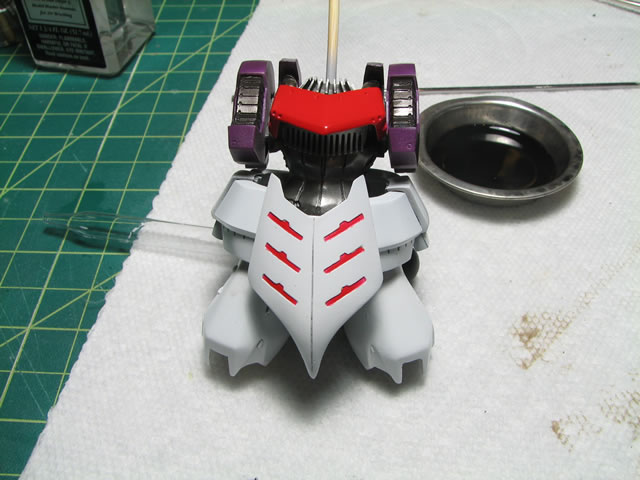
Any excess can be clean up with a cloth, or a cloth with a small amount of enamel thinner.
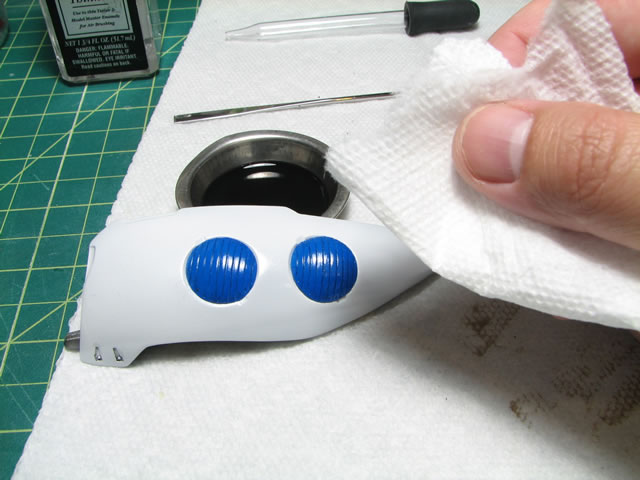
Again, since the clear coat is a different paint type, the enamel thinner will not remove the clear coat or paint. And this is all there is to applying a wash for panel lines. Here is a comparison picture of the same part, with and without the wash applied:

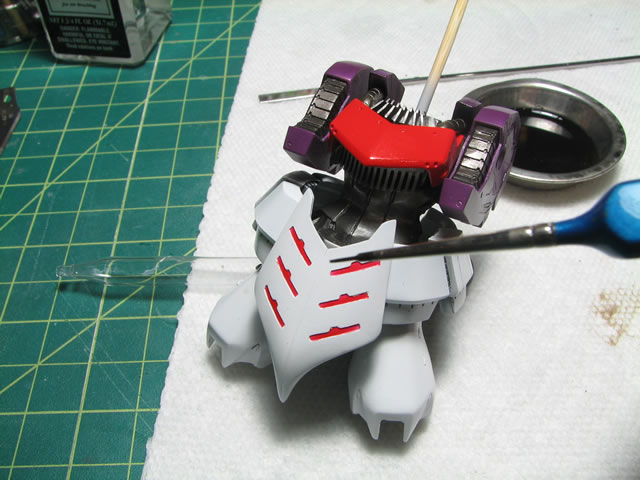
Here are some additional examples; going from the gloss coated part –> applying the wash solution with brush –> continuing wash application –> wipe away the excess
- Recap of the steps:
- Gloss clear coat in paint type different from wash solution
- Drop of paint
- Thinner to create a watery solution
- Dip small brush into solution and touch the panel lines
- Clean up excess
Updating this tutorial with a video for panel lining. For this example, I used naphtha based lighter fluid as the thinning agent. I find that the lighter fluid flowed smoother, dried quicker, and cleaned up easier than the enamel thinner. The surface of the clear coat was still smooth after rubbing a paper towel moistened with lighter fluid against the surface to remove excess paint. The below video shows the process to making the panel line solution.
Get the Flash Player to see this player.
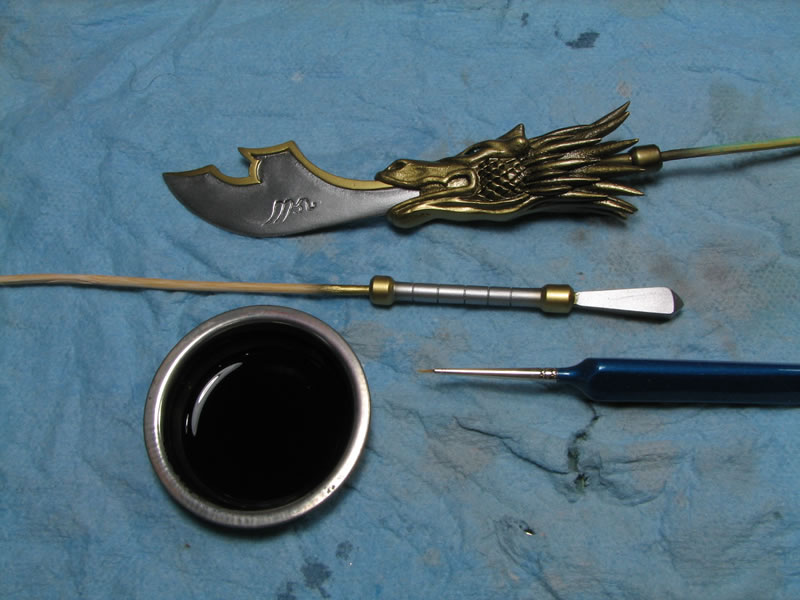
The following image is a still of the ingredients used to create the panel line wash solution.

Below is a video of the panel lining process. This process follows the steps detailed in the above section.
Get the Flash Player to see this player.
And finally, below is a video showing the process for cleaning up excess paint. On a side note, the excess paint was removed after the panel line wash was applied a full day prior. You can see that the excess removal process did not damage the painted surface around the panel line. Again, this is due to proper surface preparation using a clear gloss that is a different paint type and a paint type that does not mix with the wash solution.
Get the Flash Player to see this player.
Below are some before and after pictures of the panel lining process.


Wash for Figures
While working on Kanu, I decided to do a wash for the dragon lance to help highlight some of the details. As with the above examples, I used enamel paint and lighter fluid as the thinning agent.

Video of the process:
Get the Flash Player to see this player.
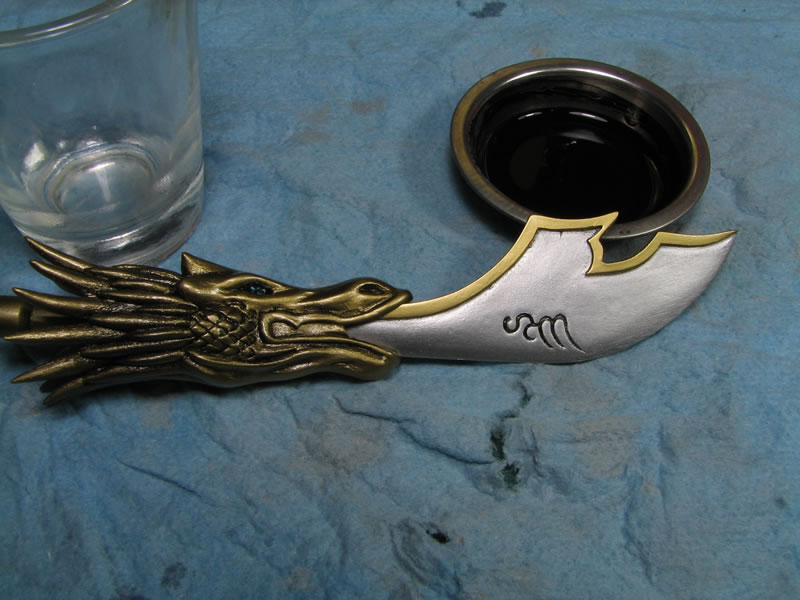
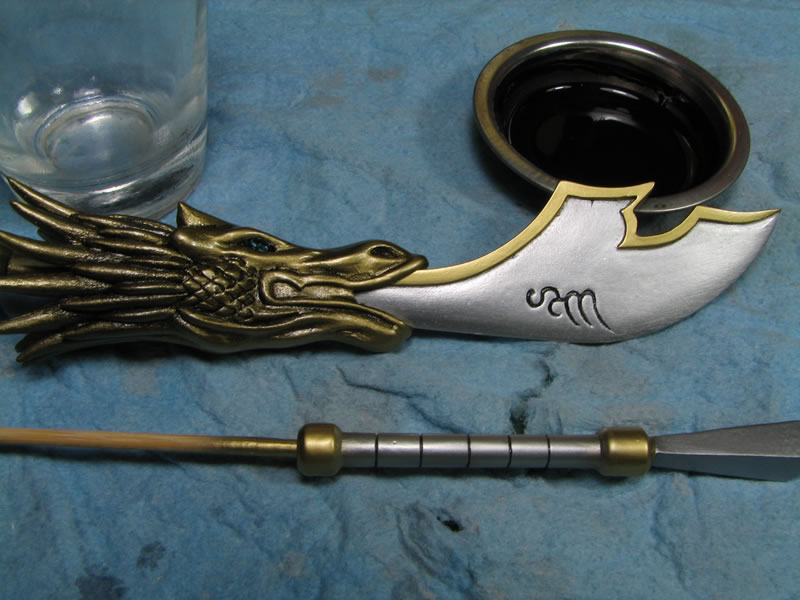
After allowing the enamel to dry for a bit, I can go in with a lighter fluid dampened cloth and wipe the excess away.
Get the Flash Player to see this player.
And below are the finished pictures.
December 2, 2008: Adding another video of the panel line wash from the Tekkaman Blade Project. The video camera is at a different angle and the entire technique should be visible.
Get the Flash Player to see this player.
Hello,
First of all I really like reading up on your blog. I dont have as much time as I used to to make kits or read blogs, but occasionally I stumble upon them and I always seem to learn new things or get new ideas from your page >_<
I've recently tried painting using an acrylic base (tamiya) thinned with a mixture of 70%/90% ethanol, and attempting to panel line using enamel (trying both thinner and lighter fluid). At first, I tried painting acrylics and then followed by panel lining using the enamel, as they are soluble in different solvents, but I ended up removing the acrylics. After further reading, I attempted the same acrylic/enamel using lighter fluid and the base color also came off. Then I attempted to coat the piece with a Acrylic Floor Polish derivative using ethanol to thin out, and again, once I weathered using enamel thinner or lighter fluid, the base colors came off…
Some of the base colors have been drying for some time (a few weeks) so its hard to believe they have not cured. Is it better just to avoid acrylics as base colors and attempt with lacquer base? Is there anyway to ensure that acrylics would not get wiped away one excessive enamel panel lining is removed?
Thanks,
Yoda
If you really need to thin the future, try using 91% isopropyl alcohol instead of ethanol.
But when I use future, I don’t think it at all, I just use the stuff straight out of the bottle. I’ve had success with acrylic base paints in the past, but I’ve gone almost exclusively with lacquer paints now.
hi there,
i’ve recently tried using this panel line wash technique using testors enamel black, and what i always get is instead of a solid black line, it’s more of a grainy or powdery look if you know what i mean. almost like the thinner separated the particles of paint.
are all enamel paints like that or am i just doing something wrong?
thanks!!
Hi, I got confused on the different type of paints parts, will it be ok if I use Mr.Hobby gloss and tamiya enamel black + lighter fluid, and scrubbing the excess w/ Mr.Color thinner 250?
For what I do, I spray Mr Color Clear (this is lacquer/solvent based clear)
Let that cure overnight.
Once the lacquer clear is cured, THEN I use enamel based paint (tamiya, model masters, humbrol, etc) These are all enamel/oil based paints mixed with lighter fluid to do the panel lines.
I let this sit for a few minutes and clean up using lighter fluid.
This is how I do my panel lines.
ohh, alright I get it, thanks for the reply, btw just to make sure, will a lacquer paint eat away an acrylic top coat?
Yes, do not use lacquer products over an acrylic product. The other way around will be fine, an acrylic product over a lacquer product.
Sorry to bother, I’ve looked around the net and Tamiya and Mr. Color paints are really confusing me. I can’t seem to find a clear answer on what they are. I thought they were both of the same property: “Solvent based acrylic”, and interchangeable when painting. I’ve been painting my current kit using Tamiya thinned with Mr. Thinner but it sounds like I can’t use lacquer gloss over it but I could over Mr. Color? I was going to use some Mr. Color shading over a Tamiya base, but should I not do that? Thanks in advance.
Tamiya’s acrylic line is water based (actually alcohol based) Mr Color is solvent based. They’re both “acrylic” in terms of the pigment base – but the solution that the pigments are dissolved in for Tamiya is water/alcohol based and for Mr Color, solvent (lacquer) based.
Lacquer is MUCH stronger than water/alcohol. So, if you are not careful, there is a possibility of the lacquer layer eating away at an acrylic layer. If you are VERY careful, you can do this. But it’s generally recommended not to because there’s too much risk involved. This is why it is highly suggested to use the same type of paint when doing color layers and shading, etc.
I recommend testing this on a plastic spoon – your acrylic layer, then shading with Mr color. If you are successful, go for it since you already have the paint. If you don’t have the paint yet, then I would recommend sticking with one paint type.
The panel line technique in this article uses different paint properties to work.