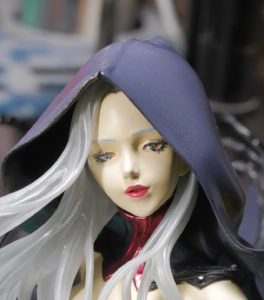
At the last build gathering, I finally got some time to start working on this kit. I spent most of the time at the build gathering doing the initial sanding, clean up work, and minor repairs to surface issues that are visible. After the initial cleanup work, the parts are soaked in purple power over night, rinsed in water, run through the ultra sonic cleaner, dried, then skewered and ready for priming.
All parts have mold lines, some more visible than others, but these areas need to be sanded. An easy method to facilitate the removal of the mold line is to take a sharpie or marker and mark along the mold line. This helps me focus on where the line is and helps keep me from overlooking random edges during long sanding sessions.
While sanding the mold lines, every so often I’ll uncover a bubble on the surface. For these areas, the bubbles are opened up with a hobby knife, then filled with Tamiya Light Curing putty. A desk lamp is used to cure the putty, and 3-5 minutes later, the part is sanded and the bubbles are effectively filled.
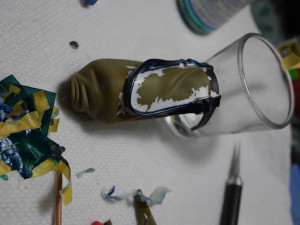
One of the hair pieces has broke and there is a missing chunk of resin. The area is a little too small for effective pinning, so light curing putty is layered in to replace the missing area. The process needed a few layers to get the proper shape and cure. The light curing putty needs light to penetrate the putty to fully cure it, so it is necessary to layer the putty on in relatively thin layers to get proper curing. Once the part is properly built up, it is sanded and reshaped to reform the piece.
Looking at the dress, there seems to be a casting mistake, as some of the fabric folds are horribly mismatched. This is a fairly simple repair with some sanding and some light curing putty to resculpt the misaligned areas.
After the initial clean up sanding and repairs, the parts are soaked in purple power to sit overnight. After the soak, they are pulled from the purple power (the purple power is then stored for future use) and the parts are placed into a tub of water to quickly rinse off most of the purple power. From the tub of water, the parts are thrown into the ultrasonic cleaner for a thorough cleaning session. Then removed and allowed to dry on sheets of paper towels.
Velvet’s chain weapon is separated into three pieces. The pieces need to be glued together, but to add some strength to the bonding, the parts need to be pinned together. My normal pins are too large for the process so I’m using thin stem wires to pin the chains. The chains are glued together along with the pins using a 5 minute epoxy glue.
Next update should have the initial priming session and additional clean up work for any surface defects that appear from the priming session.


