June 22, 2015
I had a one day business trip up to Palo Alto. Finished with work, I stopped by the good folks at Tatsu Hobby and picked up the new Hyaku Shiki 2.0. And the nice folks there lent me some new nippers and I started clipping the kit and got most of the torso frame together before they closed and I had to catch my flight home. Damn flight was delayed, so I should have hung out a little longer.
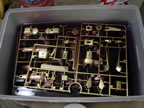
Once I got home, it was too late to work on the diorama, so I cut open the rest of the Shiki’s parts bag and grabbed the gold plated runners. Clipping two runners to make them fit into a smaller box with Zep Purple Industrial Cleaner; the parts are thrown and left overnight. In the morning, to my surprise, just about all the plating is gone and I’m left with clean translucent white runners.
Posting this up on several social media outlets, I’ve been asked why the hell would I ruin such nice plating? Well, I’ve done it before; at least 13 years ago with the first Hyaku Shiki MG kit. For which I recolored and painted in a “Char’s” color scheme. This kit is still in my display case at the bottom still collecting dust.
Which brings us to the present, with this newer kit. I’m stipping it because I will be painting it my own tone of gold. There are still nubs that need sanding, granted there’s a great deal undergated, but there are some seams here and there; so the purple industrial cleaner really did the trick. Looking back at my old progress, the 409 I used worked, but didn’t work as well as the industrial strength stuff. I’m guessing that a concentrated version of the 409 would have worked just as well as the Zep.
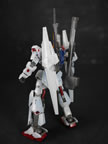
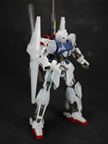
This weekend was our monthly build gathering, and the possibility of drinking heavily is very real. So no work on the diorama, as impaired building may negatively affect the progress. Being impaired however, is perfectly good for clipping and snapping a kit. Just goes to show how easy these damn things are; I can build it drunk off my ass. And it did take all day to get that done. I didn’t do much sanding as I just wanted to get the thing snapped for some pictures with the translucent white plastic. It feels very similar to some Wave FSS LED Mirage plastic kit; almost the same translucent white plastic. An in all honesty, I think this color looks pretty damn cool. But I gotta do a gold version. Maybe I’ll do one in this color in the future.
June 13, 2016
I picked up this kit immediately when it came out last year and started working on it. Back then I was finishing up the waterfront diorama and only soaked the kit’s runners in some purple power to strip it and just built it at one of the monthly build gatherings. To be honest, it looked pretty damn good in all it’s translucent nakedness. It would be really cool to completely do up the internal frame and clear coat the translucent parts and be done with it. Maybe a later project, I really liked the kit. For this one, I really wanted to paint some gold. I have a ton of gold paint. Finisher’s blue gold, finisher’s red gold, alclad pale gold, alclad titanium gold, alclad polished brass (very close to a gold), Mr color super metallic gold, testor’s enamel gold, gaia color bright gold, and an endless combination of chrome/polished aluminum/
I decided on Finisher’s red gold since I wanted a warmer gold in comparison to the others but I also did not want a very yellow gold or bright gold for that matter.
Last I left the project, the kit was hastily built. Meaning, it was not sanded. So the very first thing returning to the project was taking it apart and getting it all sanded. The translucent properties of the kit make this process a little difficult. But once the sanding was done I can get to painting. I had just gotten done with the Grimgerde commission and I figured I’d use the same painting technique, or rather, process. I painted the frame parts first. Painted all the metallic bits as well as the red parts. Getting to the eyes, I decided to use some aurora decals. It’s a multi spectrum film that when placed on top of a glossy black painted surface, shows off some cool rainbow effects. The decal film is self adhesive, and is a pain in the ass to remove from it’s backing since the film is razor thin. It will wrinkle very easily as well. But the adhesive backing is very strong.
It’s difficult to really show off the effect in pictures, but here is an attempt. I tried shooting a few different angles and you can see the effect.
I painted the frame in alclad steel. The red is painted first with alclad super bright silver, then alclad candy ruby. Little bits and pieces were done with other alclad metallics such as stainless steel, polished brass, polished aluminum, and mr color super titanium. The frame parts are masked off with a parafilm wrapping then the exterior armor pieces are added and we start painting.
I didn’t want to just paint solid colors, and I recently saw a kit that one of our build gathering folks completed and displayed at Robotoyfest; so I was inspired to do some stripes.
So the first step was to paint on the stripe color. I used alclad burnt iron. I really like this color and almost finished off my bottle of the stuff basically priming my kit. Note, I did not prime the damn kit. I only washed it with some diluted purple power and ran the parts through the ultrasonic cleaner. This comes back to bite me in the ass later. But I digress. I paint with major subsections. This is just a build preference. Some folks like to paint all the individual parts, some like to paint on runners. It’s your kit, build it how you want to build it. You’re the one having fun right? So, for me, it’s just easier to paint as a whole part. Again, this also comes back to bite me in the ass; but I’m expecting it, so it’s not a big deal.
I find it quicker and easier to shade when the parts are all together in subjections. BUT, for this project, I am not doing any shading. So that point is moot. But it is still easier for me to paint subsection then all the individual parts; all the subsections are painted and left to cure for a full day.
Next up is the masking process. This time around, I did something that I hadn’t done before. I worked on one subsection at a time. For example, I started with one shoulder and one arm. I masked off these parts, with Aizu masking tape to create some stripes, then immediately painted those masked off parts. Then after the paint dries for about an hour, the masking tape is removed. Previous projects, the masking was a complete stage in the process. ALL the parts for a particular color was masked, and only then, would I progress to the painting stage. I found that I screw up less with this process. The masking tape is fairly low tack, so there isn’t a long span of time that passes from when the first part was masked to when that first part actually gets paint. In the past, the masking tape may lift and all that hard work needed to be redone in sporadic areas. The other bonus is that there is actual visual progress. I can break up the rather boring masking process. My work has adopted the agile approach to software engineering, so the idea to break up everything into small chunks that are easily completed has apparently crossed over to my hobby world.
I want the striping effect for the chest block and backpack as well, so those dark blue parts were base coated with the same blue I used for the 1/100 Gusion project. I still have enough of that mix left over; so waste not, want not. And the next picture is a quick snap together of some different subsections in the various stages of the painting process.
The chest subsection and the head are masked off then painted. I used the same WRX World Rally Blue paint that I had picked up years ago as touchup for my ’11 Rex. The blue has a little bit of a pearl effect so I think it’ll match nicely with the gold. Once painted, and then unmasked, we have another round of quick assembly for visual progression. I am really enjoying the mask and paint progression as it’s not tasking at all. And I have visual progress to keep me going.
The process continues for the legs and rear foils.
Once I finished the primary painting stage; I can now clear gloss the parts and get ready for the final stages. It is at this point that I discover a missed nub. Since I did not prime the part as a check for sanding mistakes; I completely missed sanding down the nub on one of the upper arm pieces. I pull the part from the arm subassembly and get it sanded and polished. Bite on ass part 1.
The part is then masked with parafilm and painted. I was lucky that the nub area was all gold, so I did not have to match up the masking scheme and go through the several layers of paint. I was also lucky that the part wasn’t shaded, so I only needed to paint the gold and unmask the part and it was ready to return to the other parts for clear coating.
I sprayed a clear gloss over all the parts. The clear gloss darkens the tone so the gold and the blue get a slight shade darker. This is also why I make sure I clear gloss all the parts and not just the areas I want to apply decals. I do not want different tones of the same color for my final complete kit. The gloss coat is an important step in decal application.
I had picked up a Hyaku Shiki decal sheet from Samuel Decals a long long time ago. And I’m happy that I finally get to use them. In light of my recent screwups with decaling the Gusion, I made sure I was fully focused. The decal process took about 4 hours from start to finish. Decals are placed. Then the part is left to dry for a while, then Mr mark softer is applied over the decal to soften the edges, then the parts are left to sit over night.
The following day, only the decal areas are hit with the clear gloss. This is to help hide the decal edges. As well as protect the decal ink from the panel line wash. Since the rest of the parts are already clear glossed, it is unnecessary to spray more clear gloss on top of the existing clear gloss. Only the decal areas need it. There is always the question about which to do first. Panel lines or decals. I’ve just always done decals first, then panel lines. Personal preference. It’s my model, I’ll build it how I want!
Clear gloss has had a day to cure, and tamiya gloss black enamel is mixed with some lighter fluid and the parts are panel lined. I leave the parts to sit over night so that the panel line wash can dry. The following morning, I take a paper towel soaked slightly with lighter fluid and clean up any excess panel line ink, then let the part sit for a few hours.
We are getting into the home stretch! I can finally apply the final clear coat. I recently picked up some alclad clear coats. For this, I’m using alclad light sheen. Since gold has a fairly metallic look, I didn’t want an ultra glossy finish, but I didn’t want a complete flat finish either. I’ve used semi gloss a few times, but I really wanted to try out the alclad stuff. So here’s a comparison picture. For the first picture, the glossy is on the left and light sheen on the right. The next picture, for whatever idiotic reason I did this, the glossy is on the right and the light sheen is on the left. Can you see the difference? It’s not too easy to see in pictures, but in person, it is a pretty visual difference. I like it.
The rest of the parts were sprayed and left to sit while I ran off to this month’s build gathering at Funaka’s house. Coming into the home stretch, it gets more and more difficult to fight the urge to just bum rush through and finish the project. It’s a huge task on your patience. At least for me. But I waited. Then hung out with friends all night that further helped keep me away from the project. I finally got back around to the kit this afternoon.
I start pulling the armor pieces and undoing the parafilm mask. For the most part, this is very successful. The frame parts are well protected and I just have to reassemble the armor over the unmasked frame. Then I got to one of the legs. The masking had either ripped or I missed some masking and the inner frame got some gold splashed. I told you that the method of painting the internal frame and parafilm masking had some risks. This was it. A missed masking, or ripped parafilm. It’s part of the process. And you just have to work through it. The leg was masked off then carefully painted. One of the red parts on the other leg got gold on it too. In hindsight, I could just just left this piece off when I masked the entire leg, so I’m not sure what I was thinking when I decided to attach it and then mask it. I’m surprised that the other red thruster part didn’t get a splash of gold. I ended up having to respray the whole part with bright silver, wait, then spray the alclad candy ruby. If I just tried to touch it up, it would just make things worse. Bite in the ass part 2.
With the end of the tunnel in sight, and the finish line only feet away; you really have to stop running if there are sudden obstacles that pop up. EVERY modelers runs into these issues. We tend to see finished kits and ooo and awww at them, but rarely do we see the screw ups and how many times a part was reworked. This shit happens. It’s supposed to be part of the fun. So up until this evening, my work bench looked like this. Parts on skewers to the right still getting touch ups and various stages of completion, and skewered parts on the left completed and waiting for final assembly. And the parts in the middle in complete limbo until the stuff on the right gets finished.
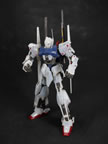
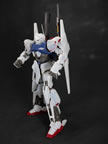
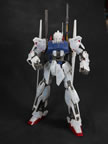
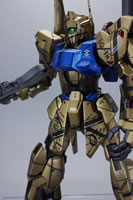
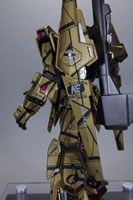
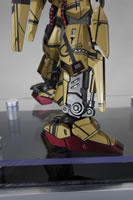
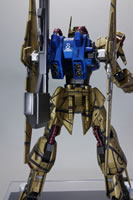
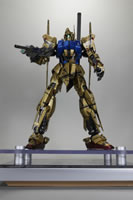
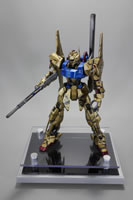
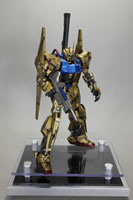
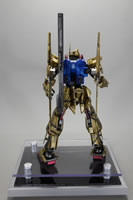
But finish I do, and here are some completed pictures.
On a side note, I also built the little display base this past week and click here for a little write up of that.
Click here for the more pictures from the completed gallery!

