This tutorial will discuss the basics of fixing seam lines, this is done as part of the sanding and surface prep of the kit and is part of the bare plastic step in the build layers chart.
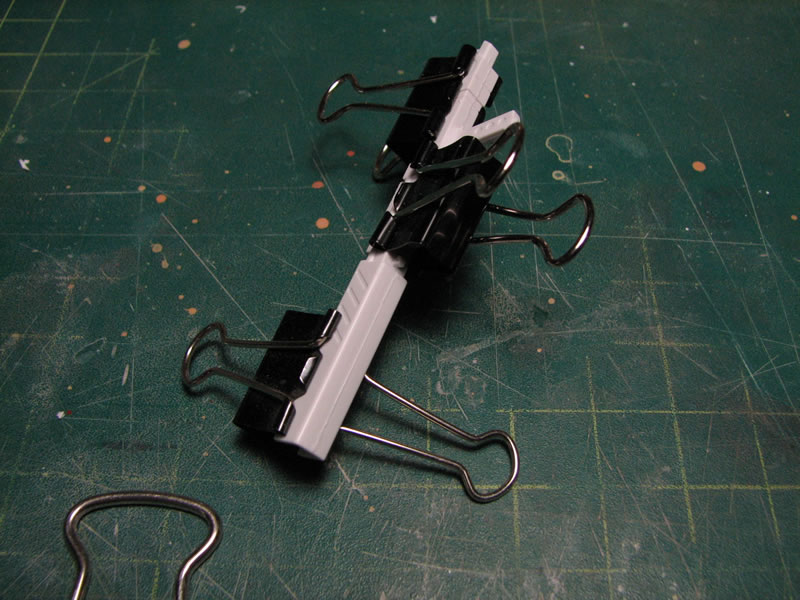
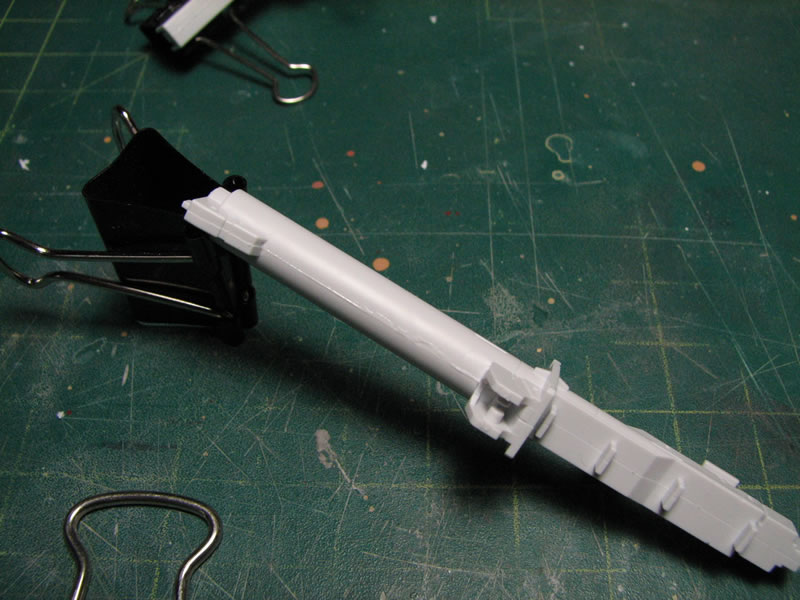
The basic tools I use for this technique is a solvent glue (tamiya extra thin cement) and clamp stylepaper clips.
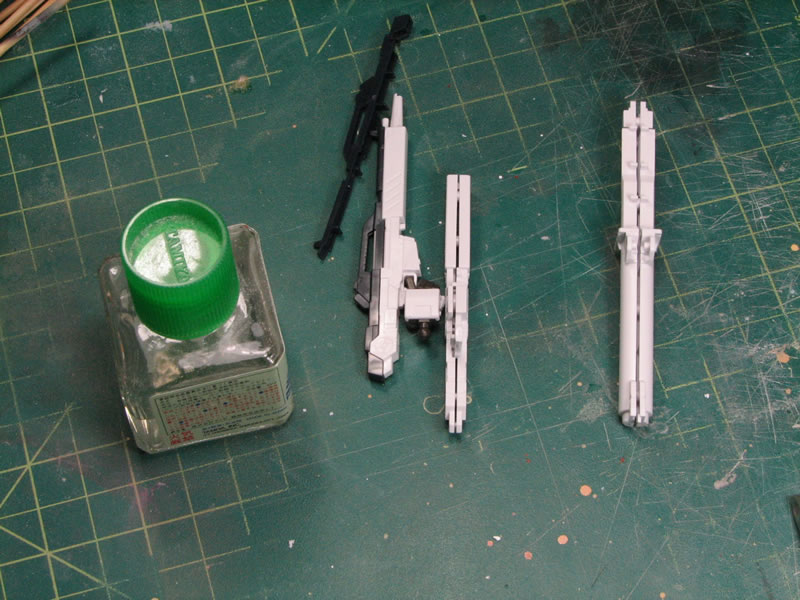
I start by having the part, partially assembled, leaving a small gap between the parts. The glue is applied to the two sides that will meet up when the part is completely pressed together. The solvent glue works to melt the plastic and when the parts are pressed together, they are effectively welded together and become one whole piece. As the parts are pressed together, a bead of plastic ooze will seep out along the seam line and applying constant pressure to the seam while the glue cures ensures that a full weld forms. This is where the paper clips come into play. Rubber bands are also a good tool for holding parts together while the glue cures.
Get the Flash Player to see this player.
The following is a picture of the part demonstrated in the video above:
The following is another example with a different part.
Get the Flash Player to see this player.
The following is a picture of the part demonstrated in the video above:
Sanding Seams
After allowing the the glue to cure over night, I can now go and sand away the excess plastic ooze that seeped out of the part while cementing the part together. The sanding technique is the same as the previous tutorial on sanding.
Get the Flash Player to see this player.
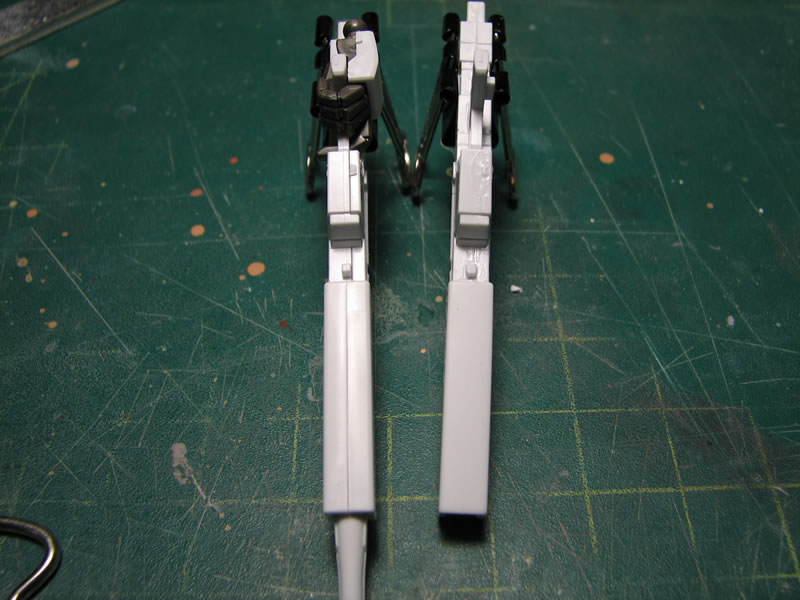
Here is a comparison picture of the sanded part next to the identical part that is only snapped. Andit should be fairly clear that the seam is completely gone.
Next up, we spray primer onto the parts. This is a double check as any mistakes in sanding or gaps left over will clearly show up with a primed part. And the following picture is a comparison with the snapped part.

Other glues such as CA (super) glue can be used, but I find that once cured, the stuff is very difficult to sand. It is a great gap filler, in the case that the two parts to not completely match up next to each other, that is more standard on old kits or kits engineered to lesser tolerances. But with a majority of bandai kits, they are engineered very tightly, and fixing these seams is a very simple process. There are several brands of solvent glues out there for modelers, and each has their own unique properties like work times and strength. I’ve just grown accustomed to working with tamiya extra thin cement.
hi i’m a newbie in this gunpla thingy. :D i wanna ask about how to do the seamline removal while you have another part that is put between the parts that will be glued (i.e. the beam rifle of HGUC rx-78-2, the scope and the clip is between the rifle)? did you put that part first and then you glued the other parts? thx.
Can the scope piece be placed into the rifle after the rifle is glued? In that case, I tend to put the scope piece in and then glue. The major problem I’ve run into here is that glue gets onto the scope piece and it becomes glued to the rifle, so you need to take care when gluing the rifle. The other method I would recommend is to cut the scope part that connects in such a way that you can glue the rifle piece, then just glue the scope piece into position after you’re done gluing/sanding the rifle. The issue with this is that the scope piece becomes immobile. Tough decision. Every kit has certain quirks with it and build planning is a major part of the kit.