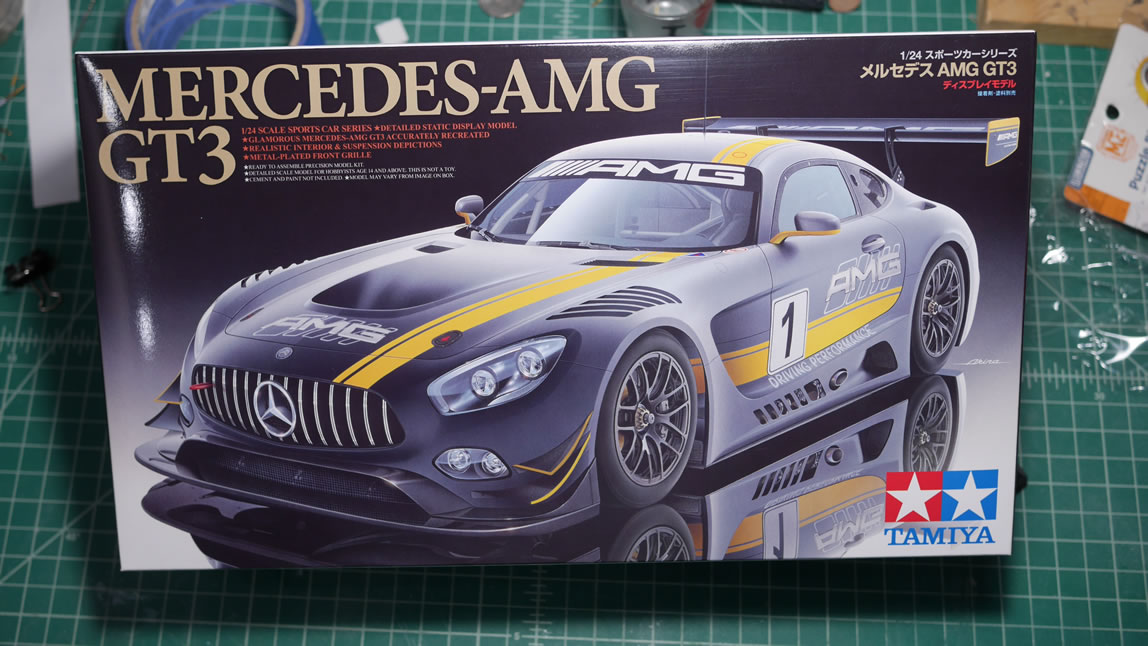
Jan 29, 2018: Last week at SprueFest, one of the things for sale was a Tamiya Mercedes GT3 AMG kit. It looks pretty good and the price wasn’t bad because of the sale so I picked one up. I also gently nudged fellow TGG Jeremy into getting one. I suggested that we should do a build off and set the deadline for August 1, 2018. This sets us up with plenty of time to get the damn thing finished and as a bonus, we could take it with us to IPMS Nationals in Arizona that so happens to start on August 1, 2018. That was last Saturday and the kit was getting ready to join the rest of my backlog and partially built kits on my shelf when I left it on my table because I was in Ecuador all week for business. Returning home a few days ago, I was ready to shelve the box but decided to open it and take a look. The last time I build a car kit was a Ford GT40 back in July 2007, so just 11 years ago. Before that, I think it was before I was even in high school. So time to learn some new tricks.
Since I started working on the sucker, I made a facebook post to remind Jeremy and then thought why not open this up for anyone else. So the challenge is to build a GT race car. Other than the deadline, and car type, the challenge is open ended. So if you’ve only build gunpla or other scifi, time to see if those skill translate to cars!
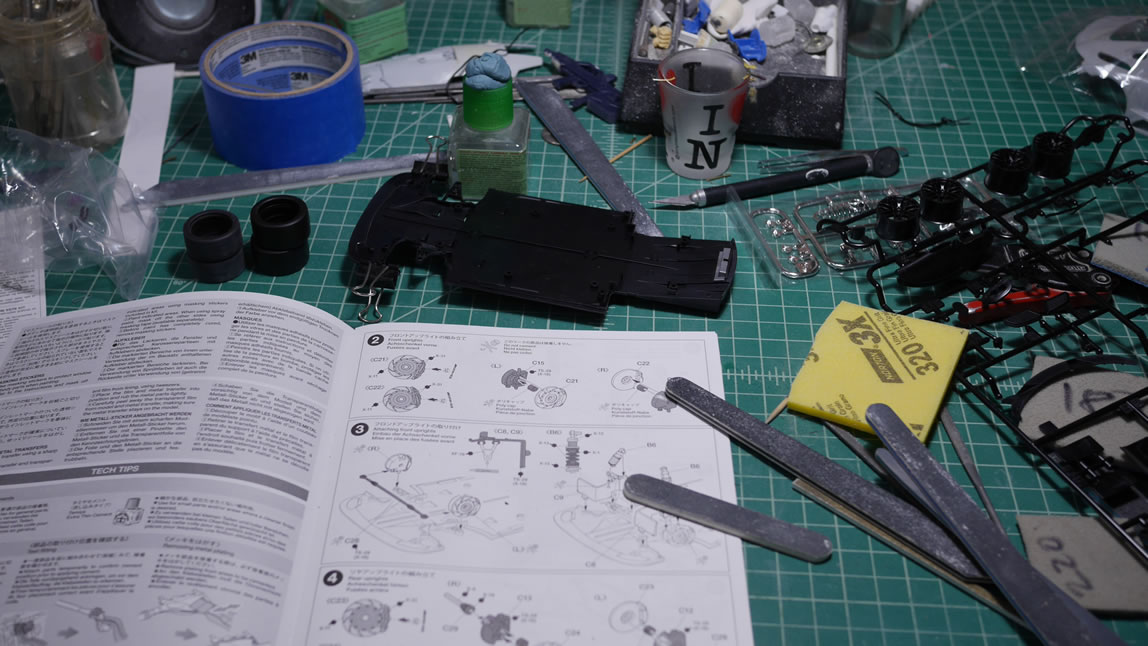
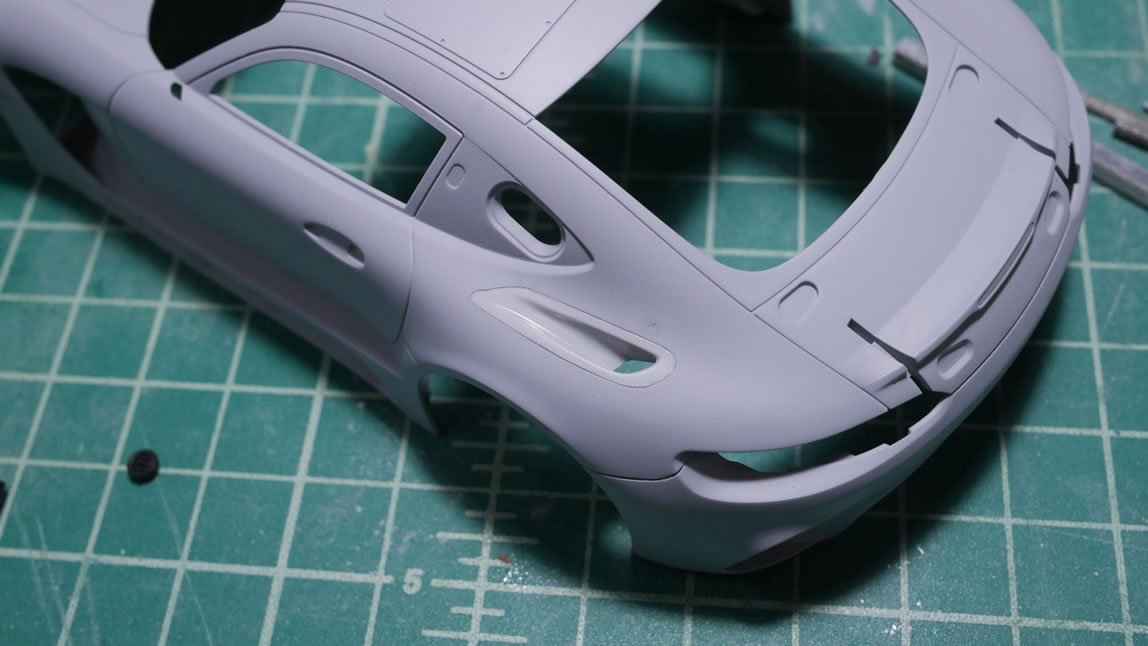
Bandai spoils us. Seriously, aside from just sanding nubs/gates/clip points/etc; every part has mold lines and machine markings. The marking are sometimes indented and other times just excess plastic. These need to be removed. The process is pretty tedious, but it isn’t anything that is impossible. I have found my fine and small metal files especially useful in tackling some of the rather difficult and small to reach places on these parts.
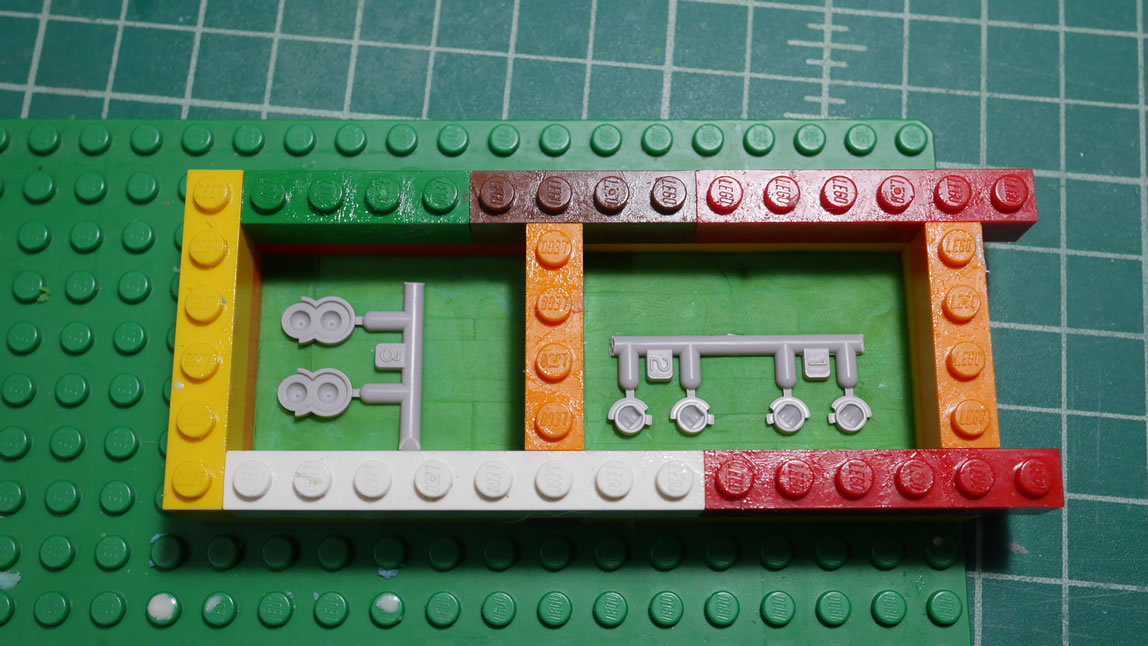
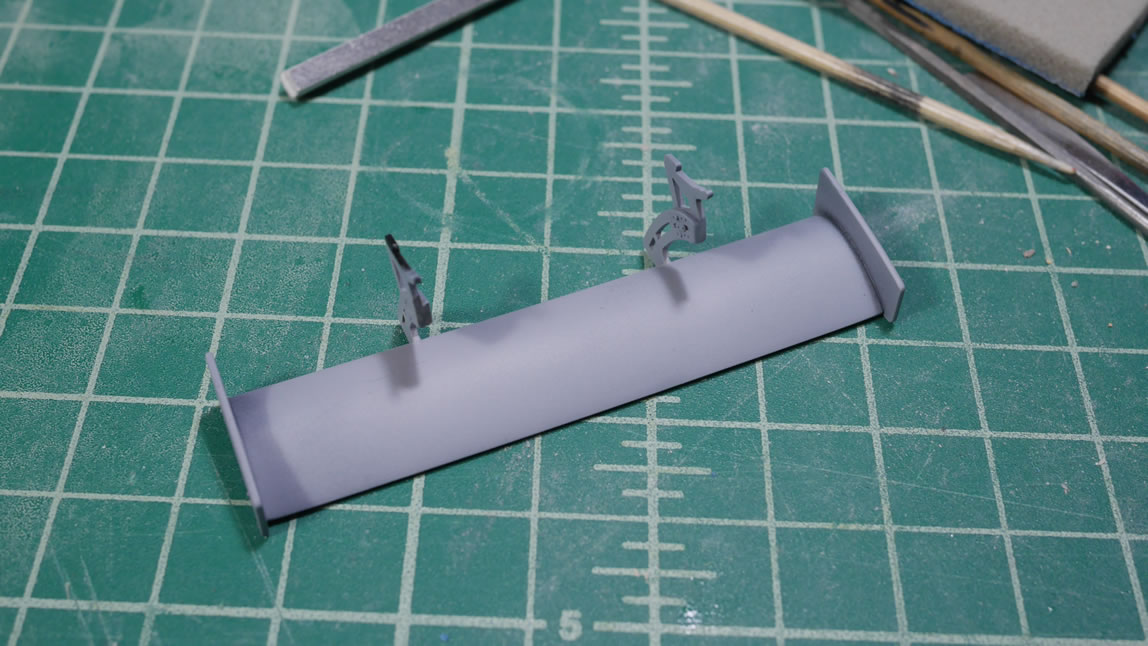
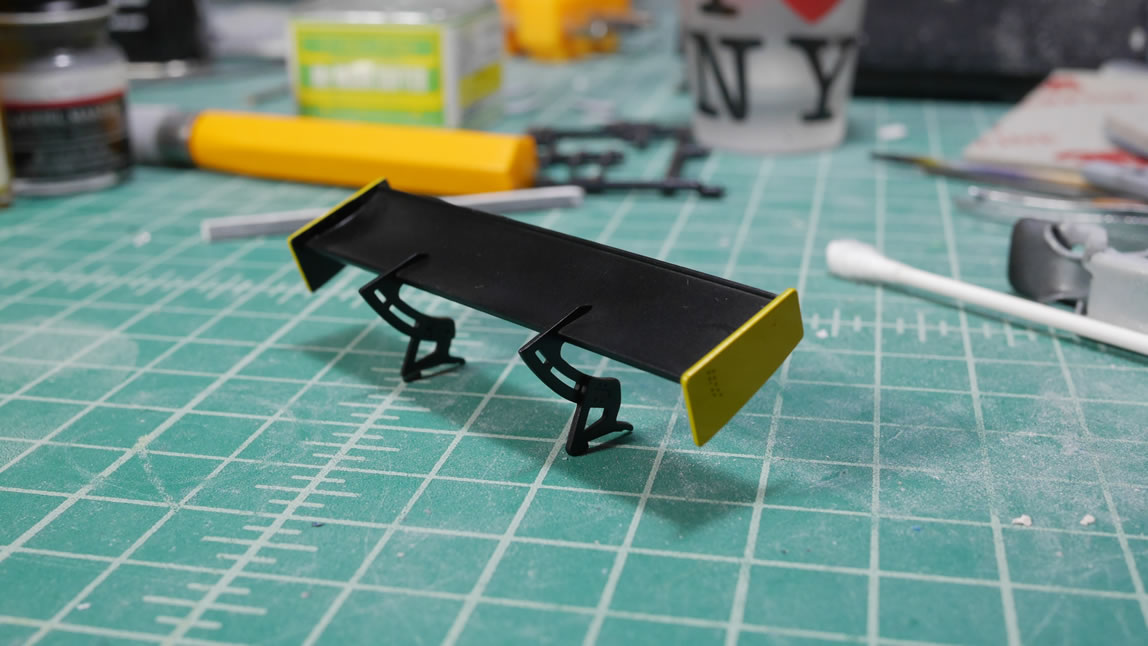
I finally got to use the small vice I picked up last year from my trip to Hong Kong. Not quite a full year, but it is coming in very handy when gluing parts that need to be at a straight angle. I can use my angle templates to check my work as well as hold them there while the glue dries. Shopping cart wing is assembled.
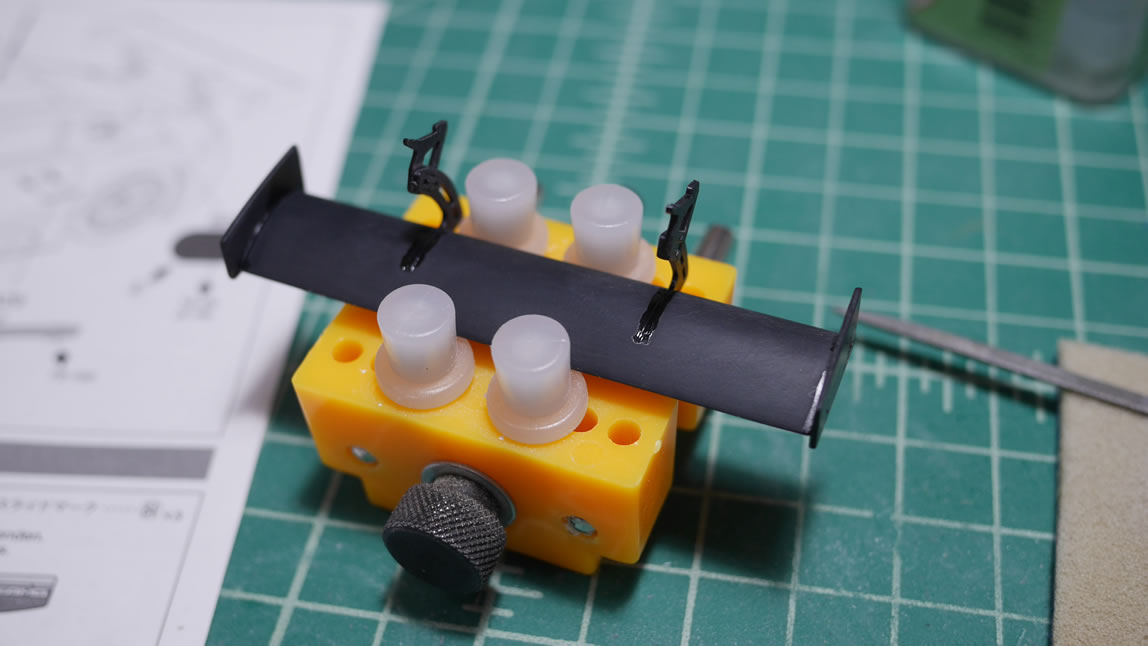
Next up is to assemble and glue the major pieces of the body together. There will be some sanding and once all these pieces are set, I can wash the body and get to priming. But that is a long ways off. I placed the wing onto the body to check for balance and fit. Things can be easily fixed now, not so much after paint and decals are applied.

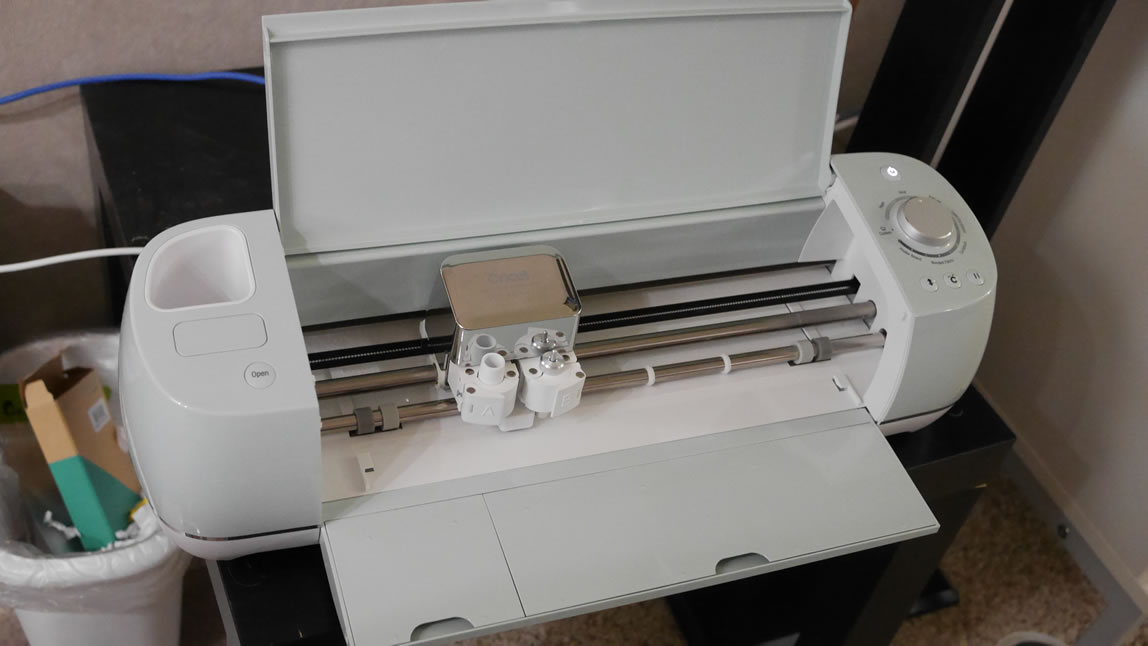
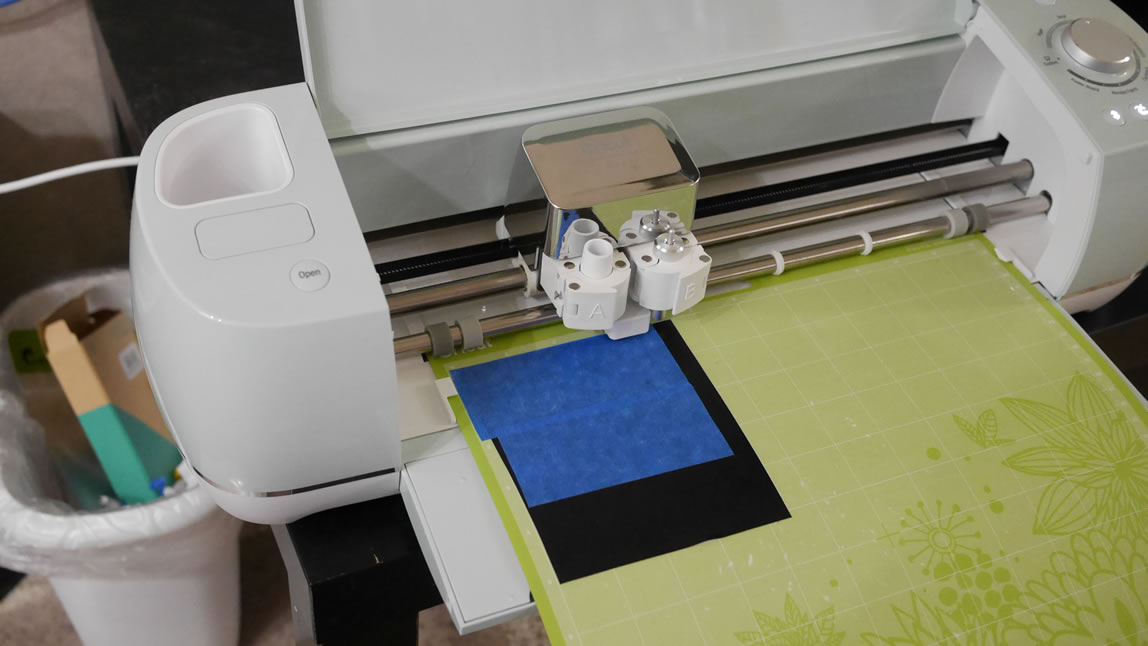
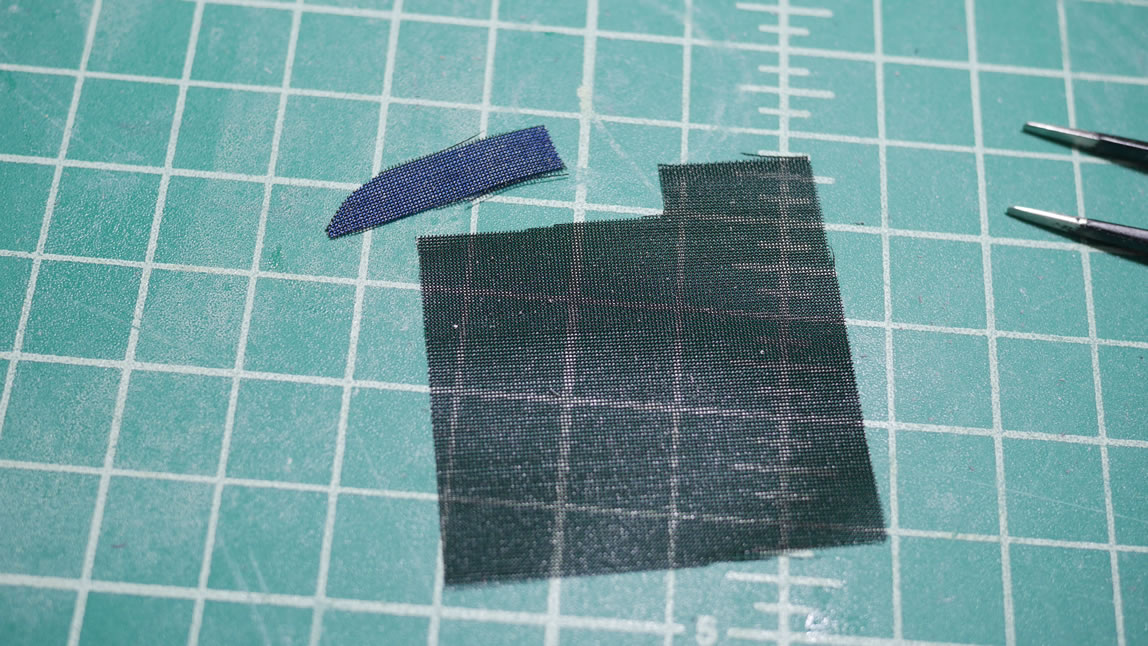
The next piece of business is just an excuse to use my cricut machine. The kit comes with a square piece of mesh and on the instructions, it shows how to cut the mesh for fitting into areas of the car. For this, I’m going to use the image and have the cricut cut out masks. I’m pretty sure I can use the cricut to actually cut the mesh, but since I only have one, I didn’t want to leap that far in my experimentation. I’ve only used the machine a handful of times and I just need to get used to using it more.
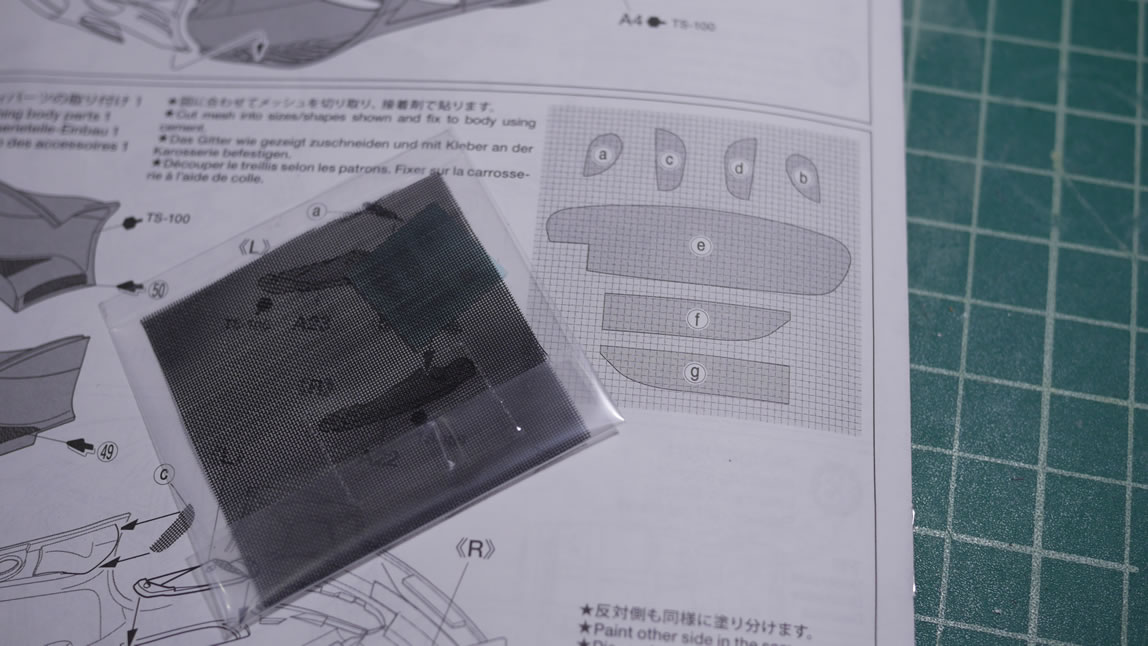
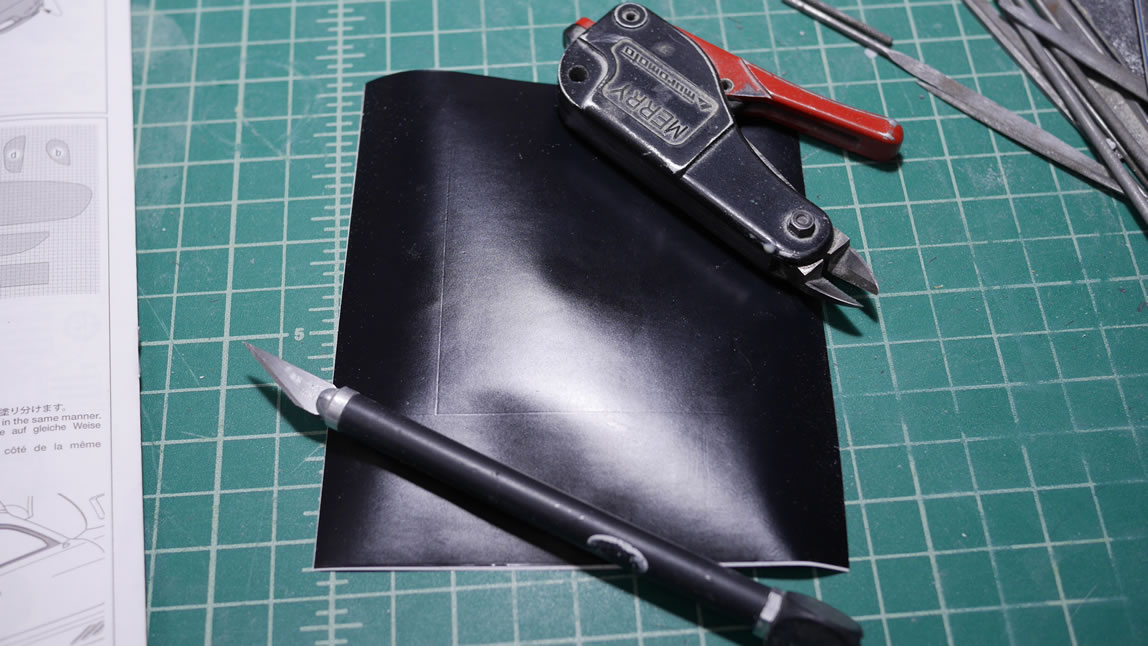
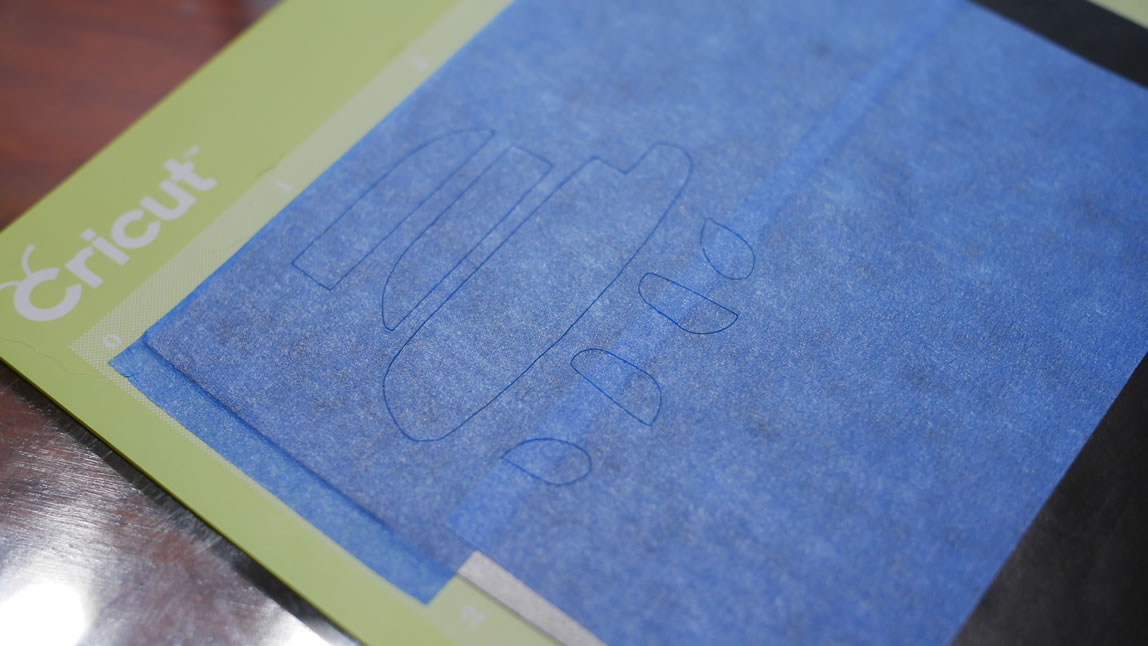
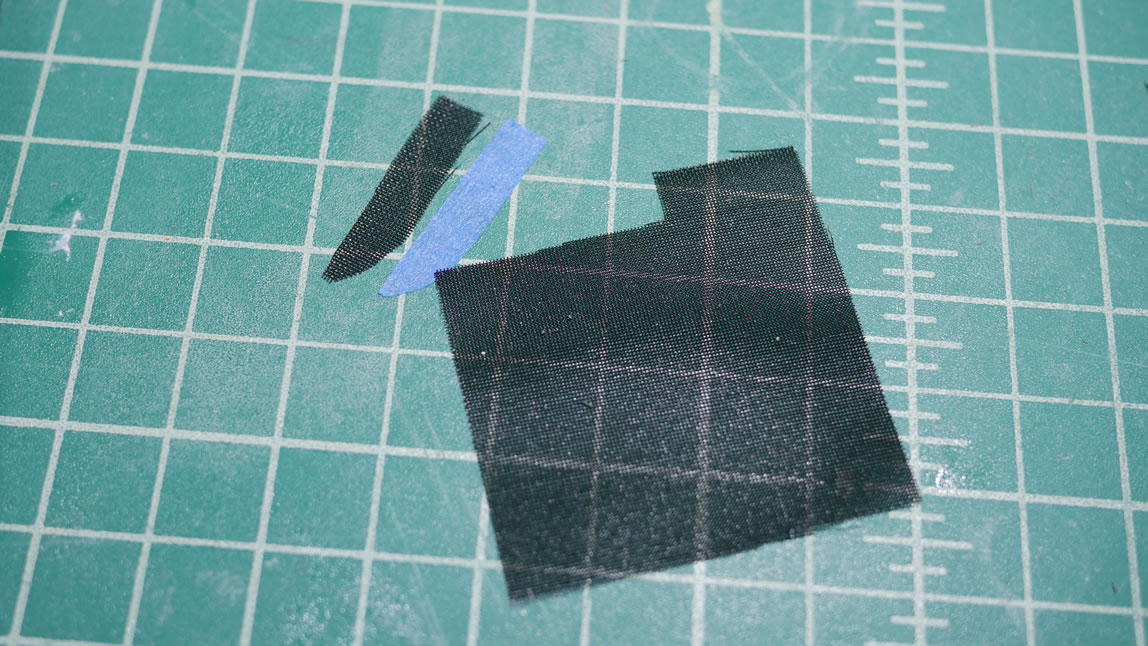
I start with a base piece of vinyl sticker. Over this I lay down some masking tape. The masking tape lifts up easily from the vinyl. The image from the instructions is cleaned up and loaded into the cricut software and we’re off to the races.
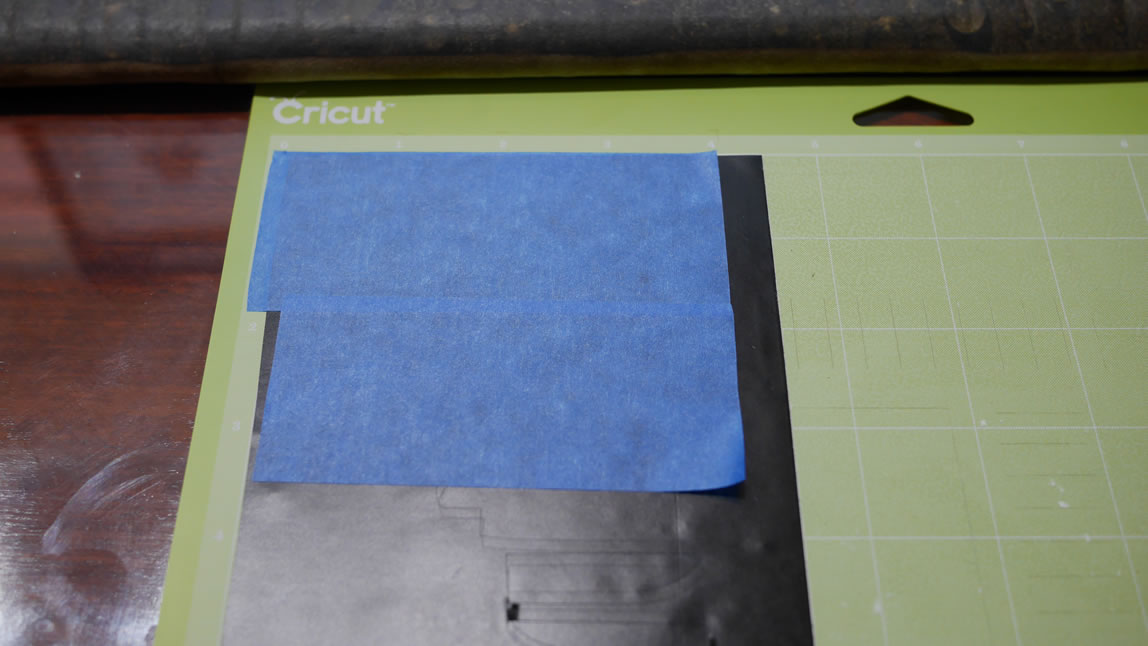
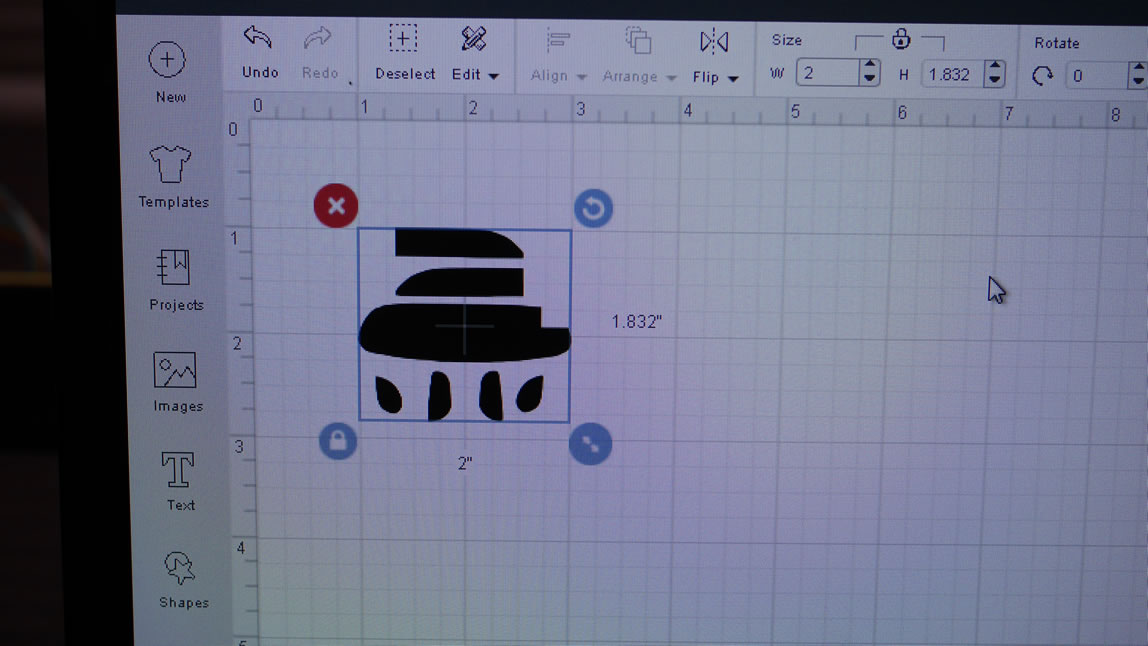
The cricut cuts the masking tape quickly with great precision. Once I unload the vinyl from the machine, I just remove the excess masking tape. This is perfect for drawing your own masking designs and having the machine cut them out for you. I will definitely be using this in the future.
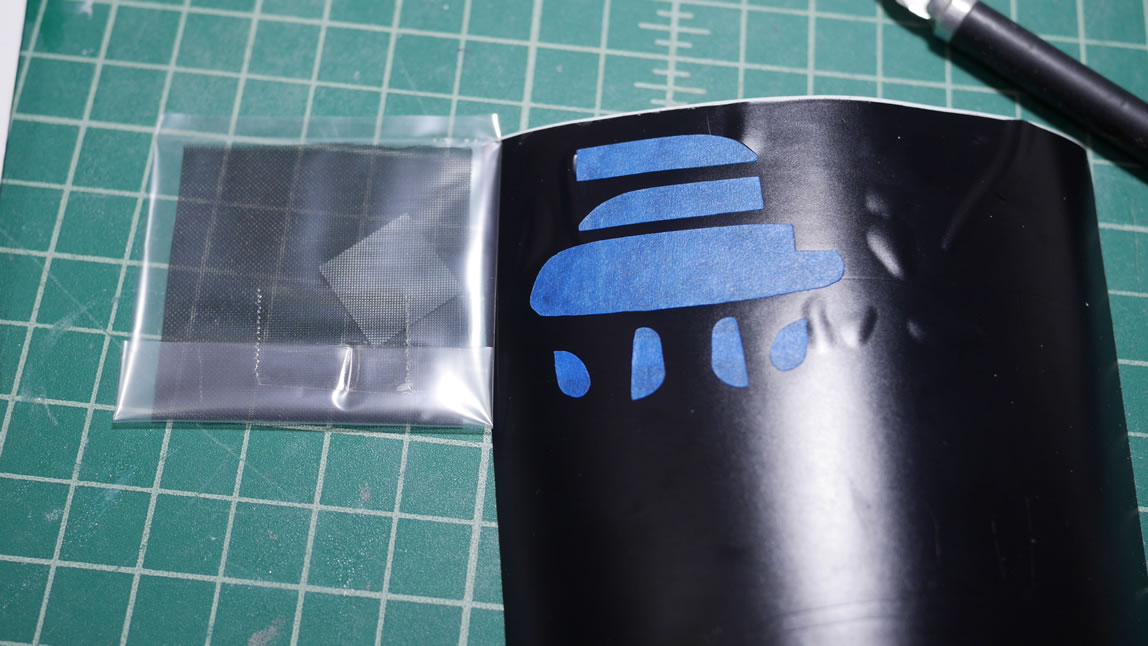
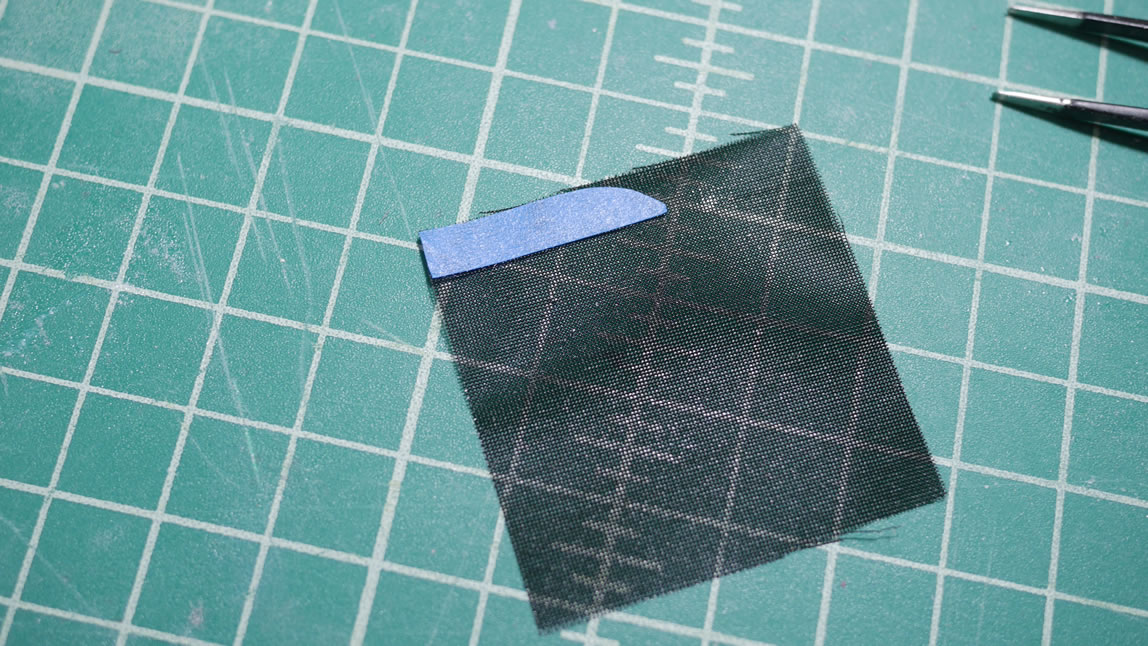
The tape masks are place on the mesh and I have a very easy time cutting the mesh without guesswork. And I save on the mesh in case I screw up somewhere and I need an extra piece.
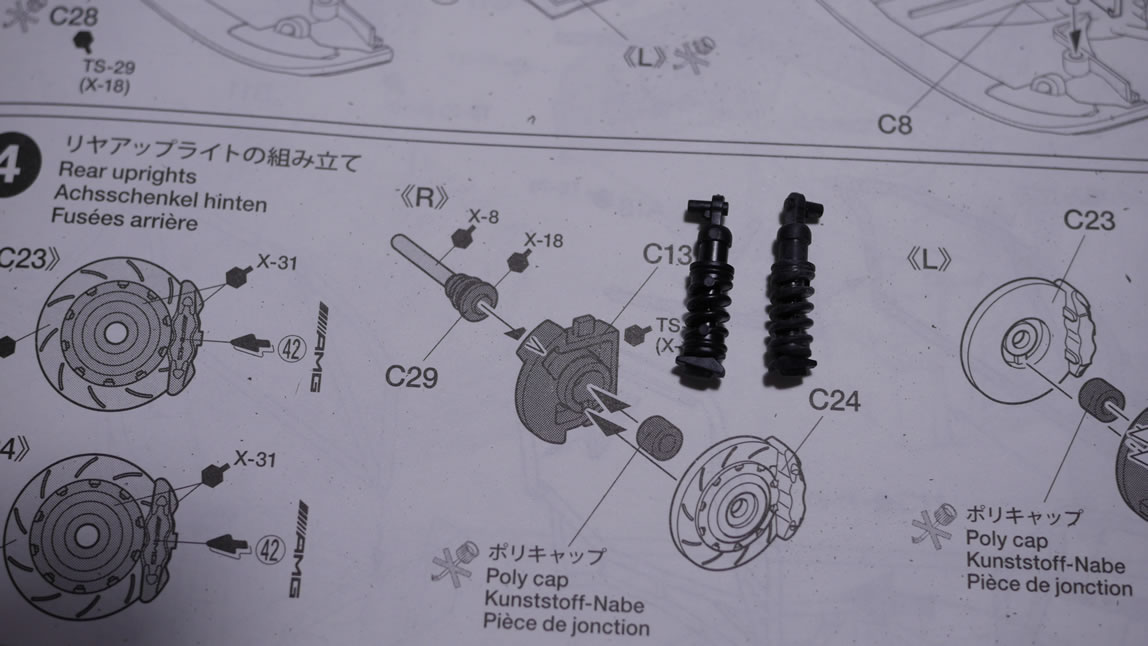
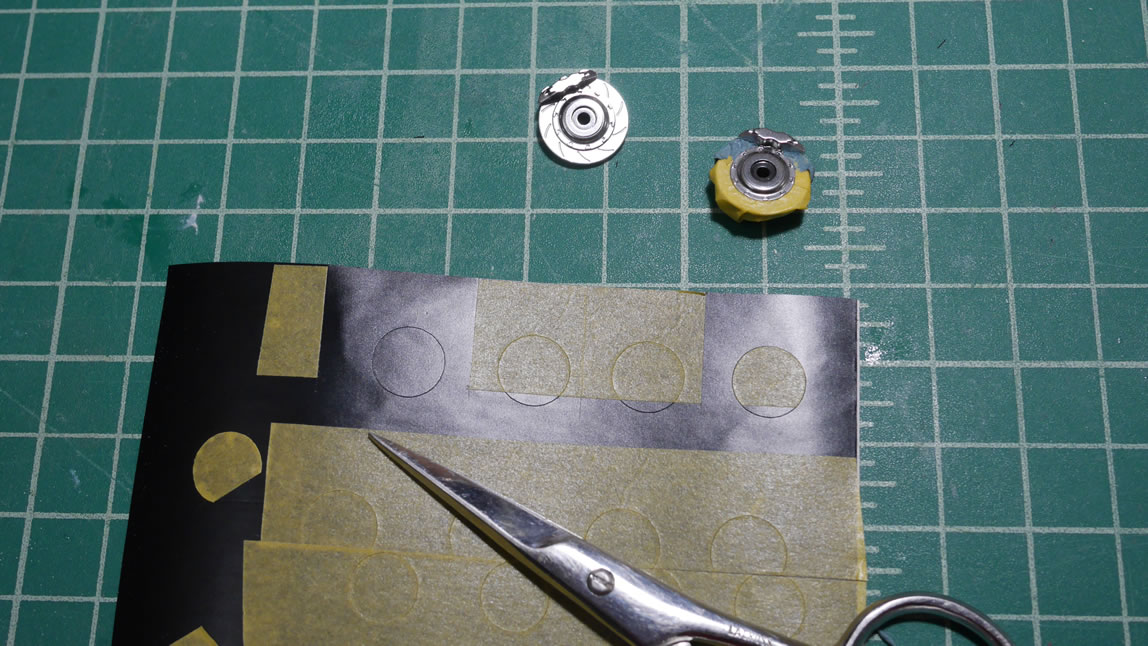
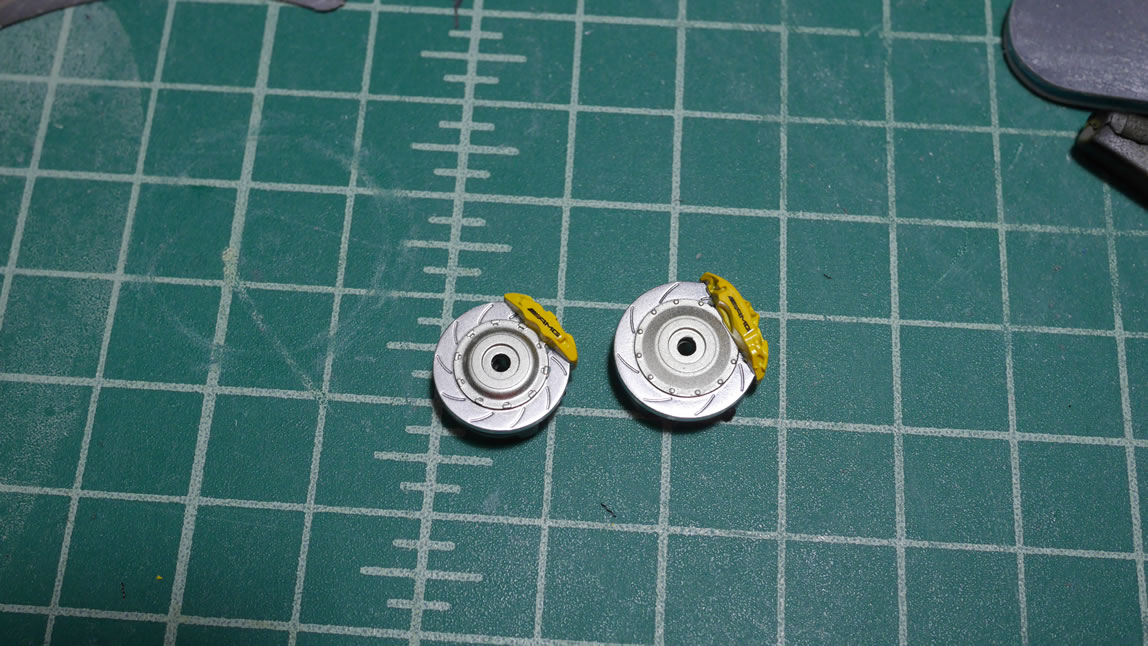
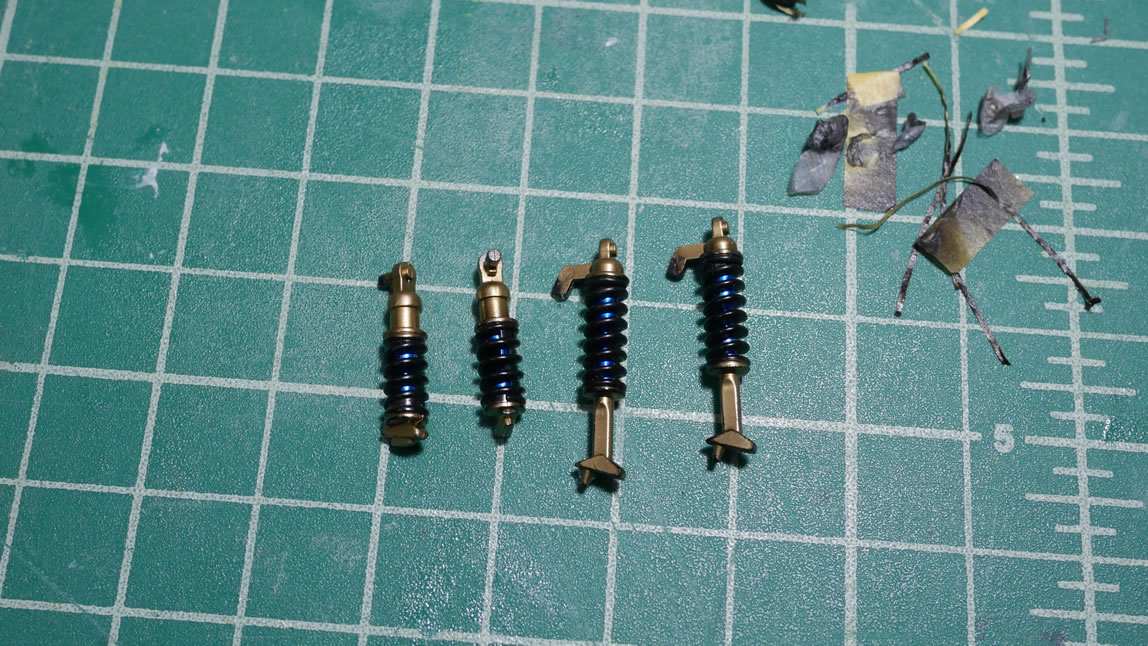
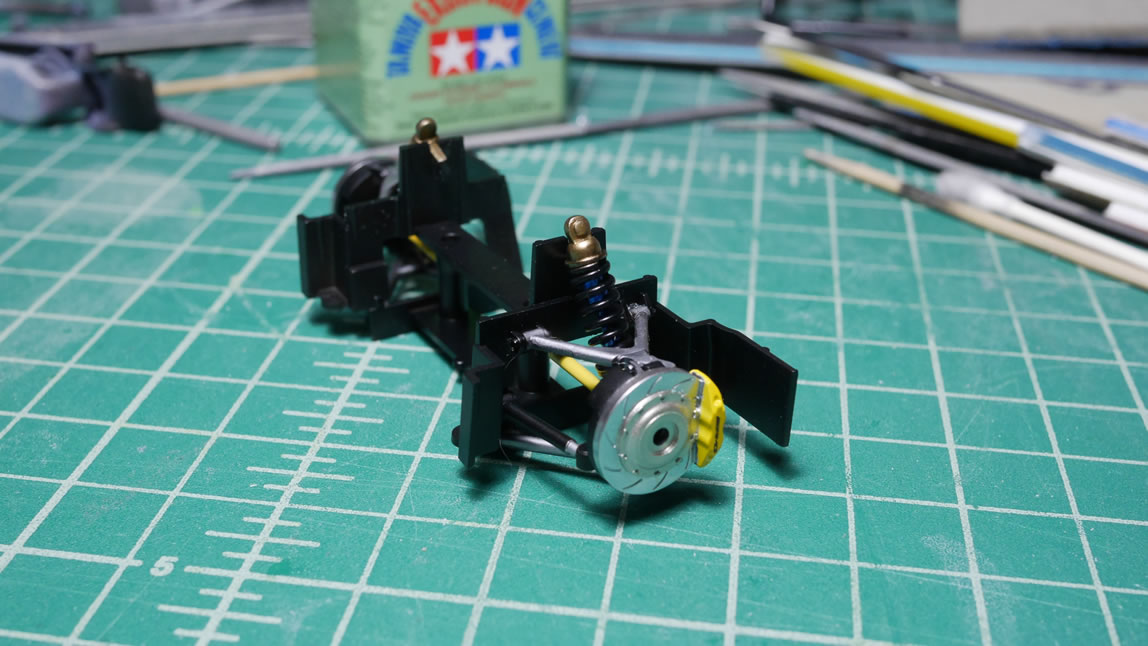
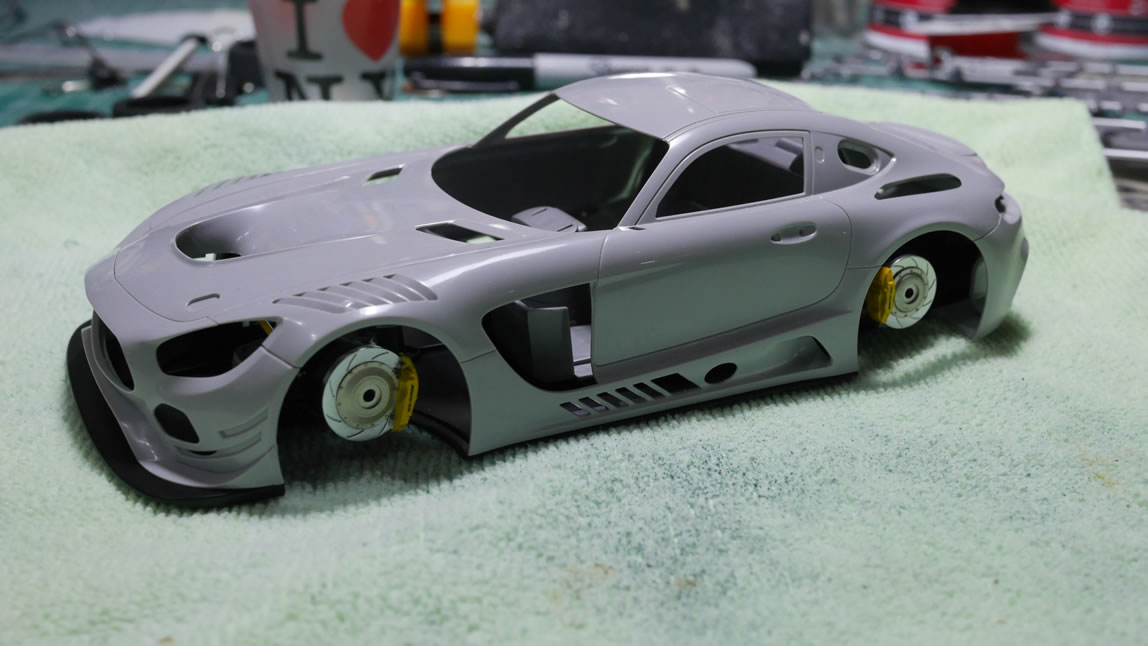
Next up are the beginnings of some paint. I’m painting as I build so for now, I have the brakes painted, struts, and suspension. There will be lots of masking.
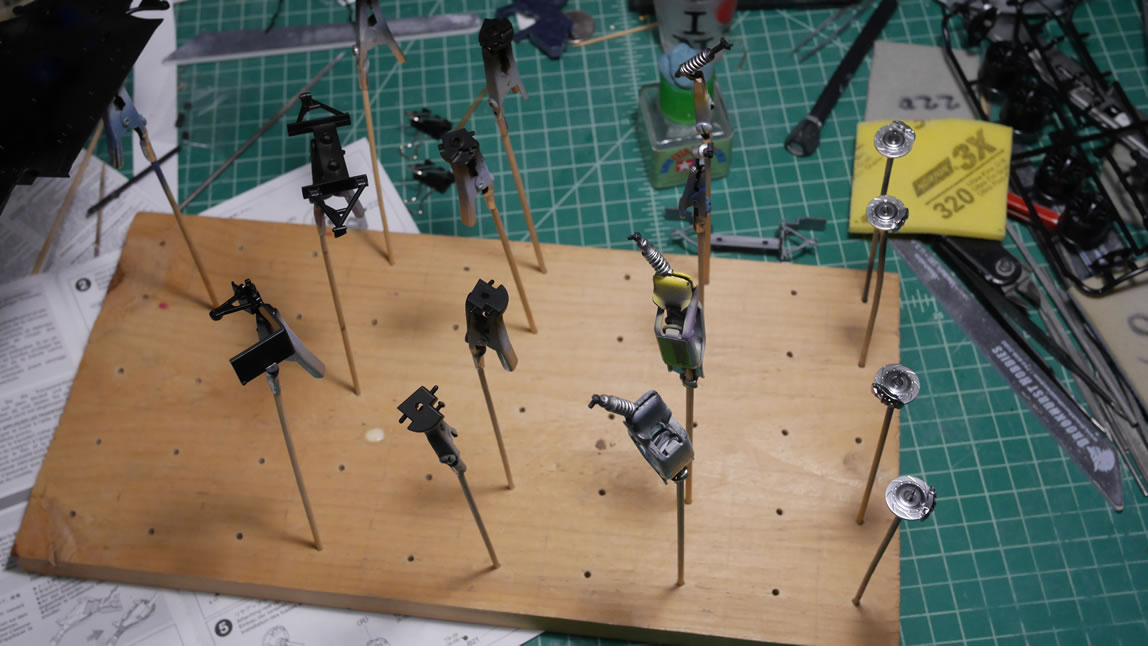
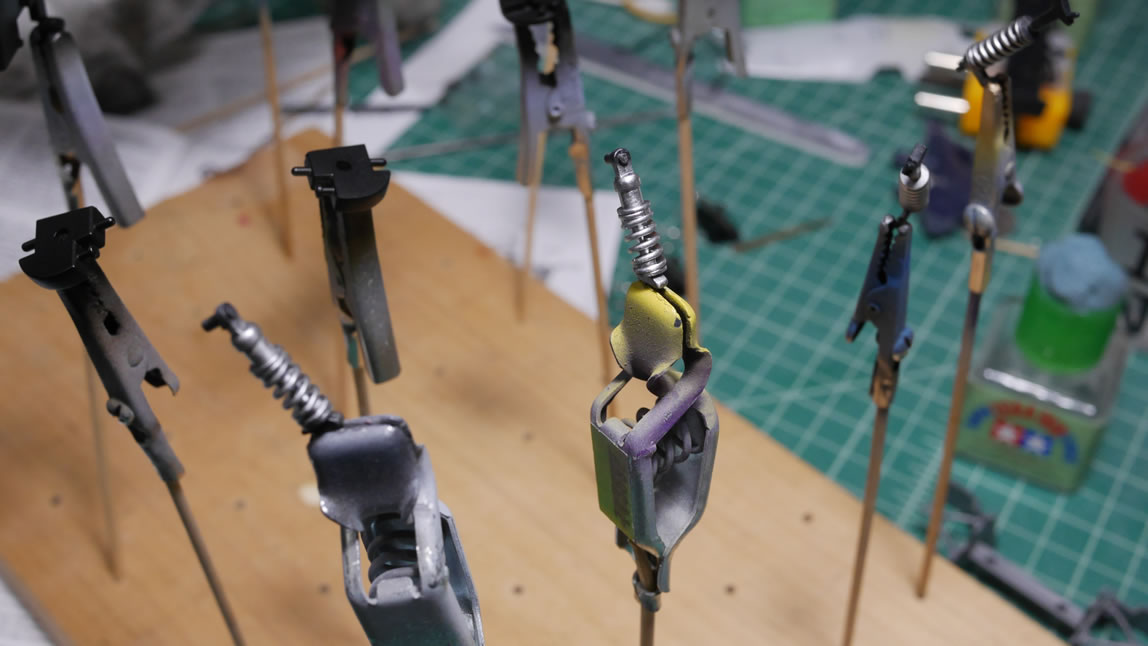
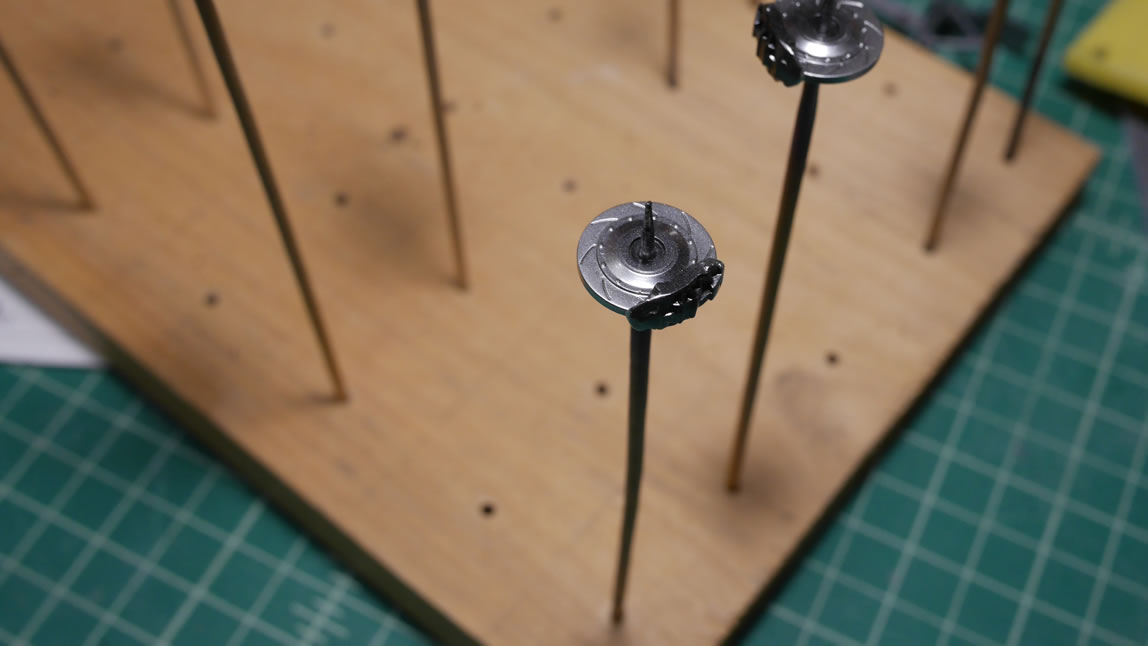

Speaking of masking, after the first level of the brakes have cured, I painted them in polished aluminum. I used the cricut to cut some masking templates and masked off the painted rotors to paint the center of the brakes a titanium gold. That was then masked off and the calipers were painted first with white followed by yellow. And the last bit was the AMG decal over the calipers.
Not sure when the next update will be as I’m off to Canada this week for work. At least some of the paint I applied will have plenty of time to cure before I come back and do more masking.
Feb 7, 2018
So a quick little update. I was out of town for the past two weeks so work on the thing slowed to almost a complete stop. But I was able to get some paint on here and there, then after a week of curing, getting some masking, and more paint and the suspension is still being worked on, but at least I have the struts done. There were two levels of masking to get the three paint colors on without having to hand paint the tiny things that will most likely be completely hidden once the Mercedes is assembled. But, maybe we can see this with the wheels turned and some flashlights.
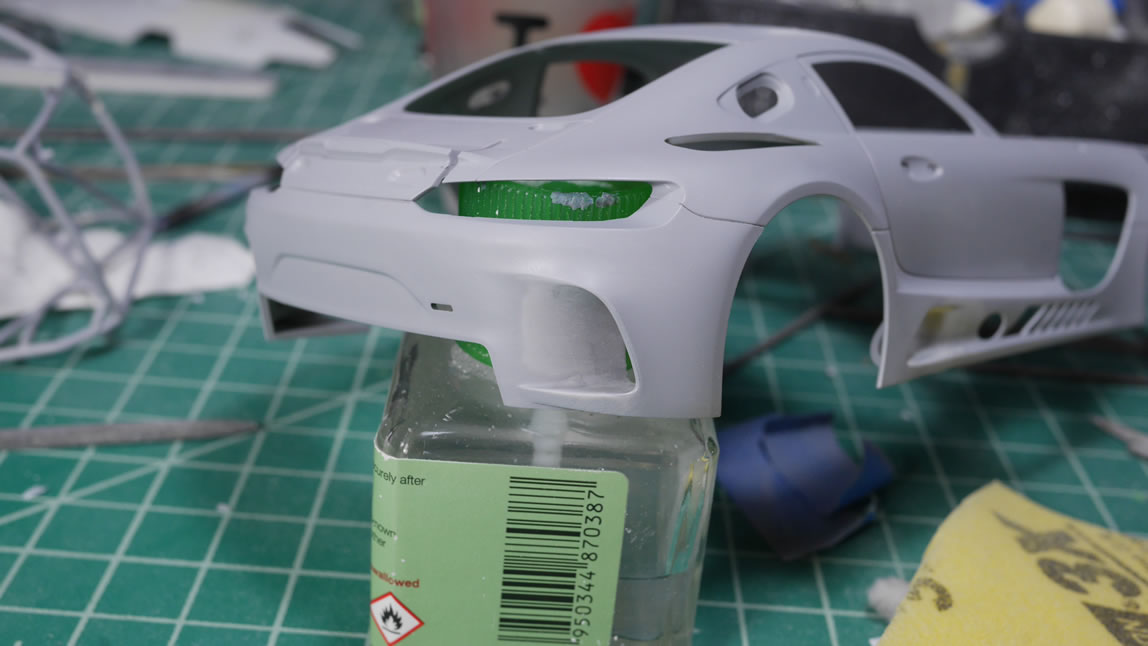
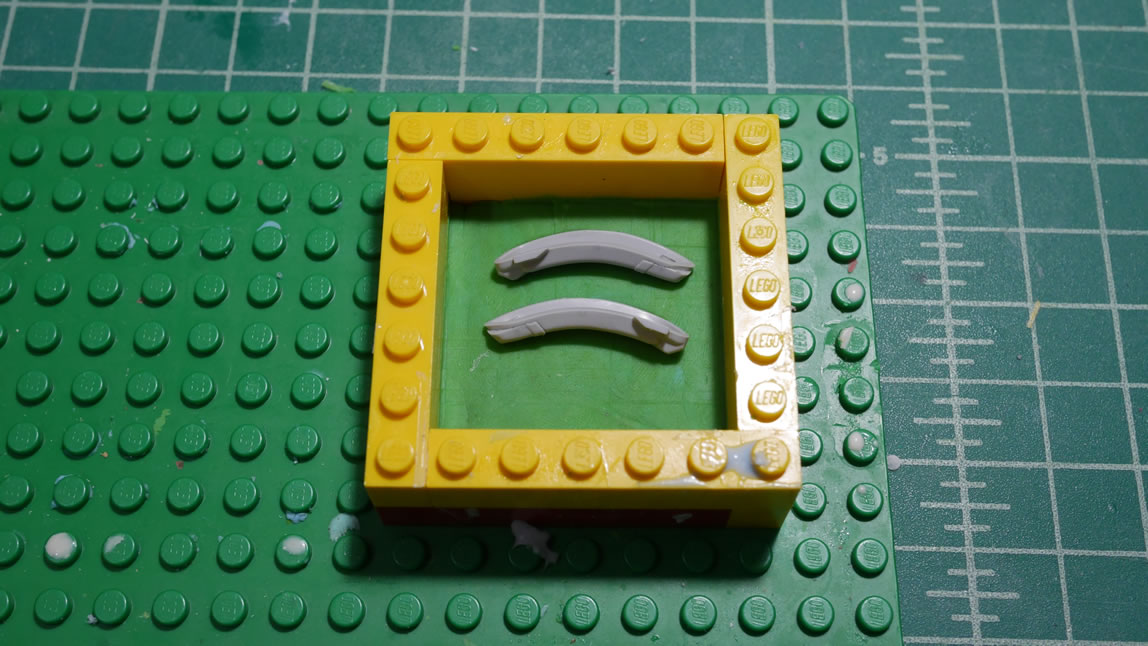
The real meat of today’s story started about a week ago on my break between two trips. Sure, I’m working on a model type that I haven’t done in over ten years. So why not make things more difficult by doing a simple mod. Go with what I know. Lights. I thought about it for a while and figured I’d make copies of the headlights and foglights. They were originally chromed so that was removed with a bath in some industrial strength cleaning agent. Then into a lego enclosure padded with playdough and the first layer of silicone is poured. Curing for a day, the mold is removed, cleaned off, flipped over, and replaced in the lego enclosure with a brushing of vaseline to keep the next layer of silicone from completely sticking to the bottom half.
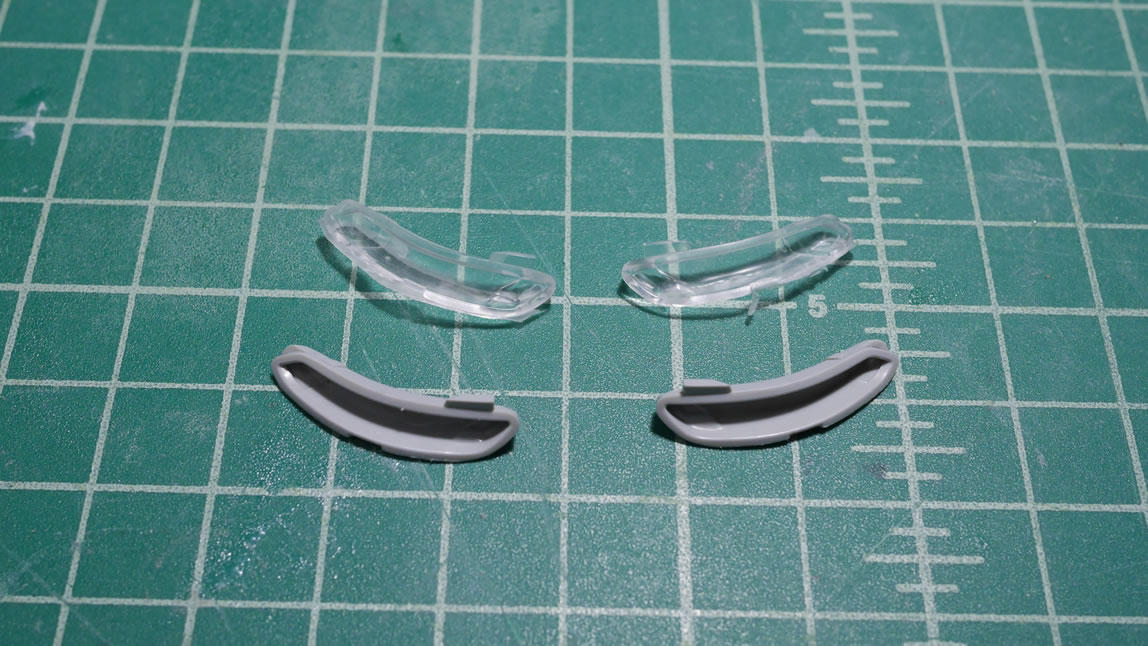
Resin is poured and I now have working copies that I can mess with while keeping the originals safe. Incase this completely blows up in my face, I still have the originals to use. The resin copies are drilled out and some small LEDs are wired up in parallel and inserted into the drilled out space. I’m test fitting everything with blue sticky tack to hold things together temporarily. It looks fairly decent so far.
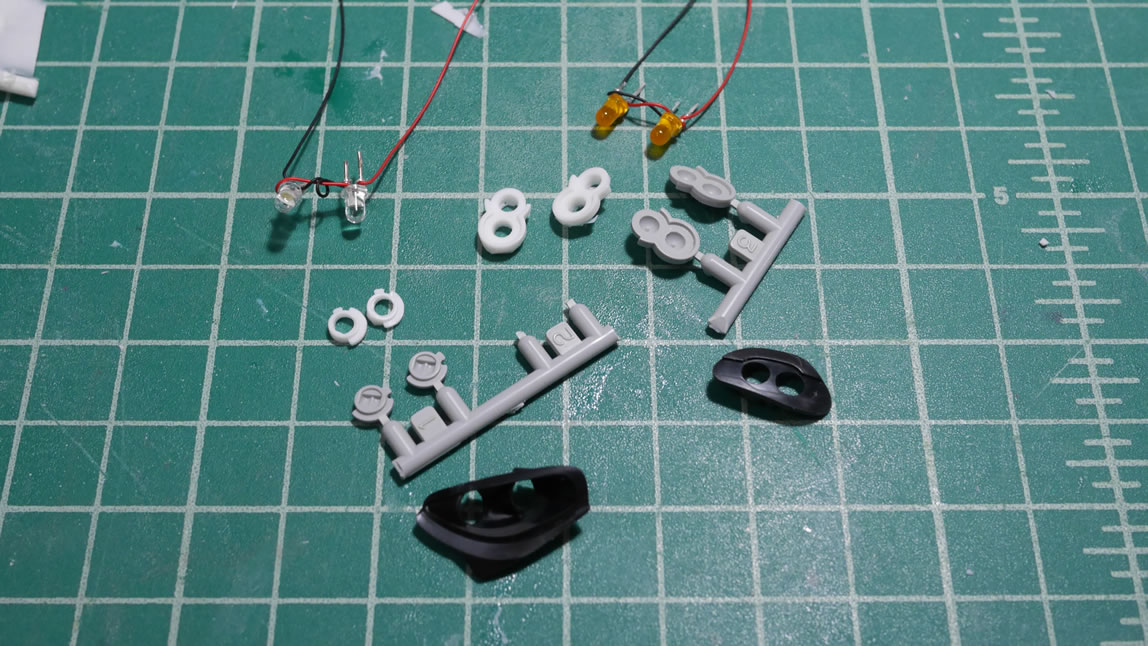
The LED systems are wired and tested out. I’m using yellow/orange LEDs for the foglights and using white for the headlights. The original car has a slight yellow tint to the fogs, so I’m taking some creative license. Plus, I don’t have soft white LEDs. The LEDs in their new resin lenses are placed into the original housings. The fit is perfect. Some more sticky take is used to hold everything together. All these things will need to be glued together after it is painted. But this works for testing fitting in the immediate.
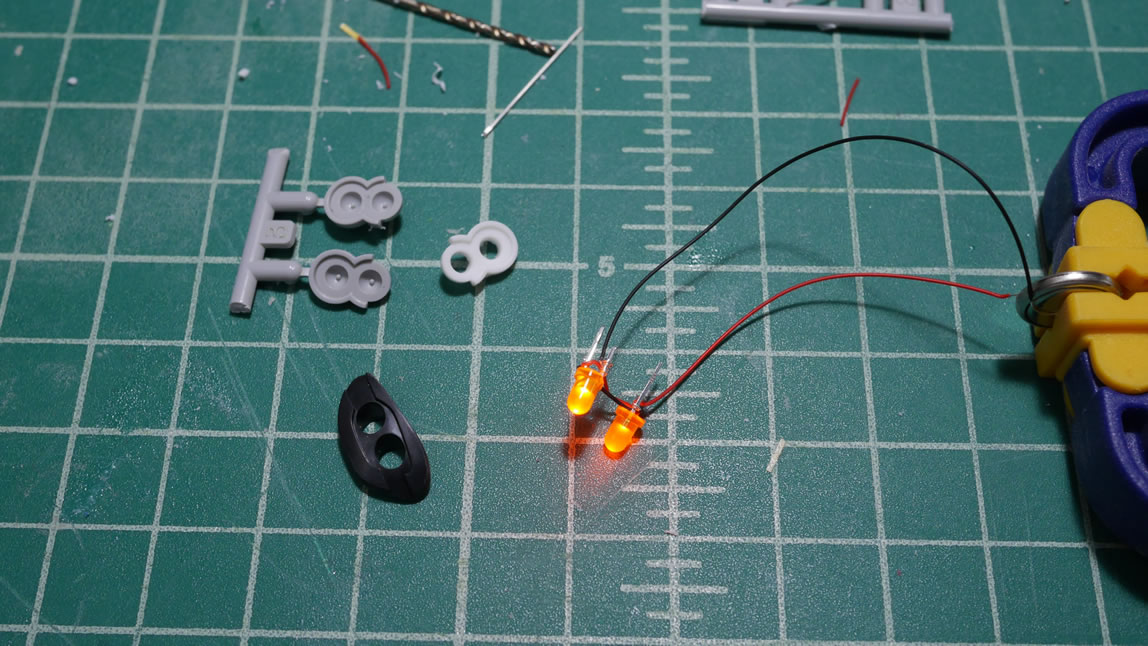
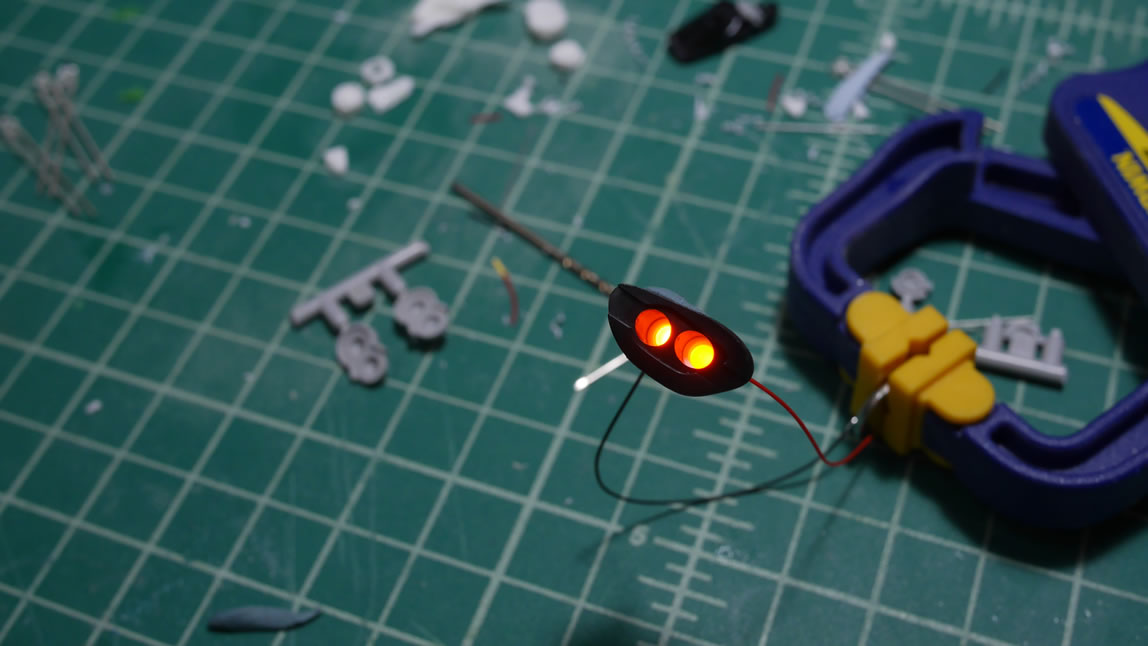
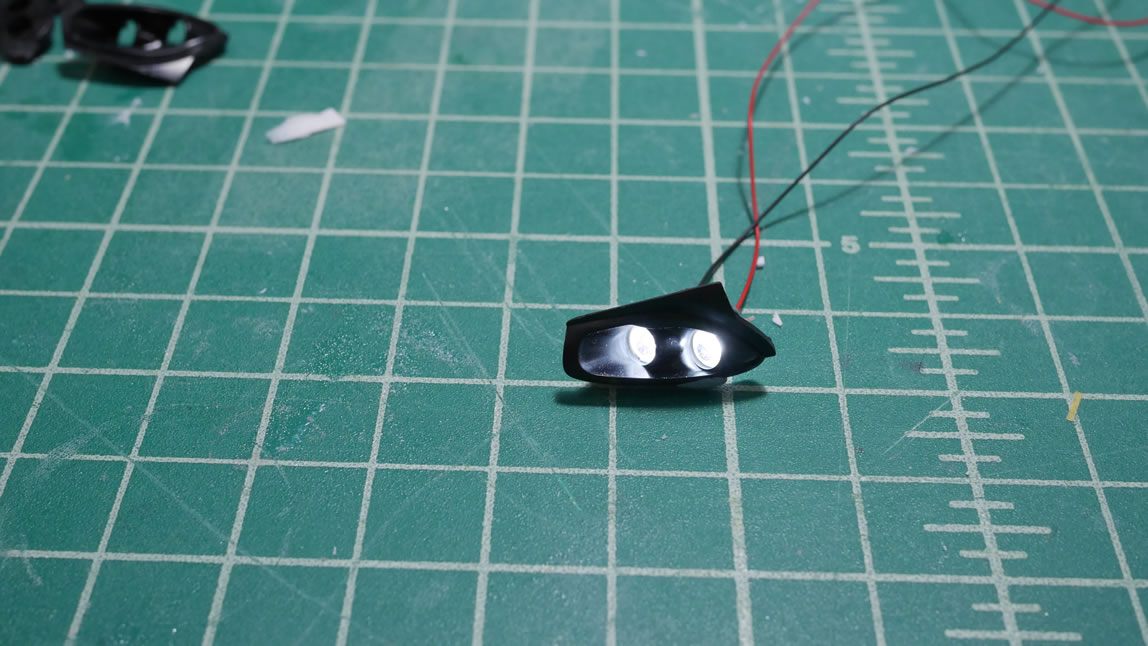
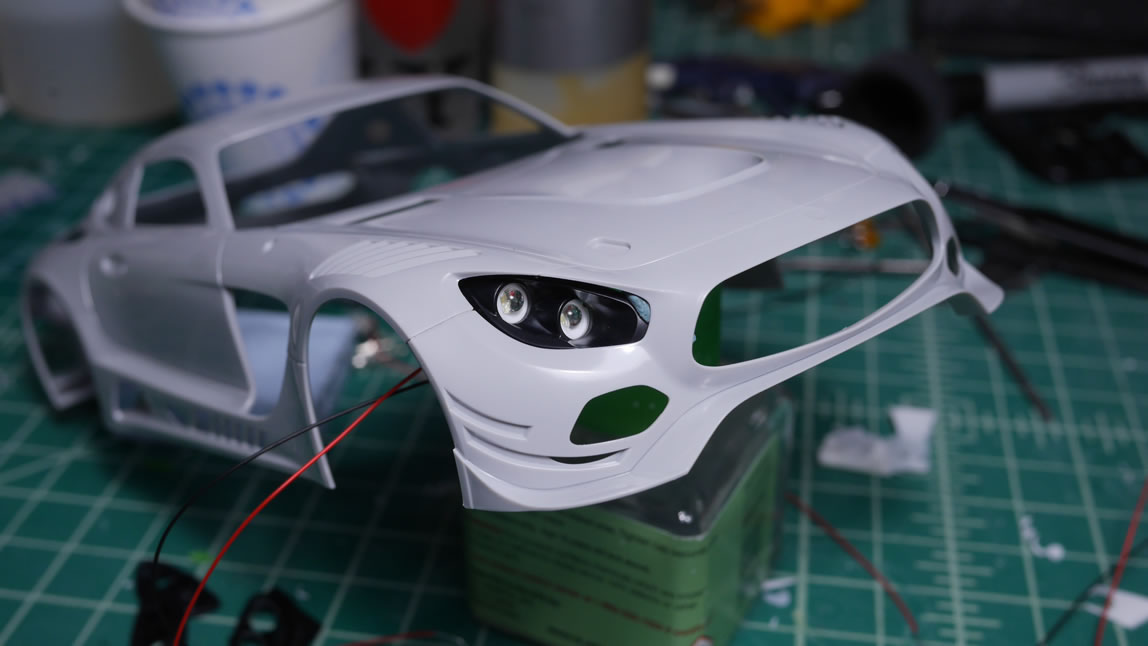
The housings are test fitted to the car body with more sticky tack and it’s starting to look pretty good. I didn’t like the detailing on the original headlight lense and I think the LED lens looks pretty close to the original projectors. So this could work. The foglight housing is test fitted and powered up. Followed by the headlight housing. I think it looks pretty cool for a quick little mod. Going with what I know about LEDs makes this easier than say, cutting the hood and scratch building an entire engine.

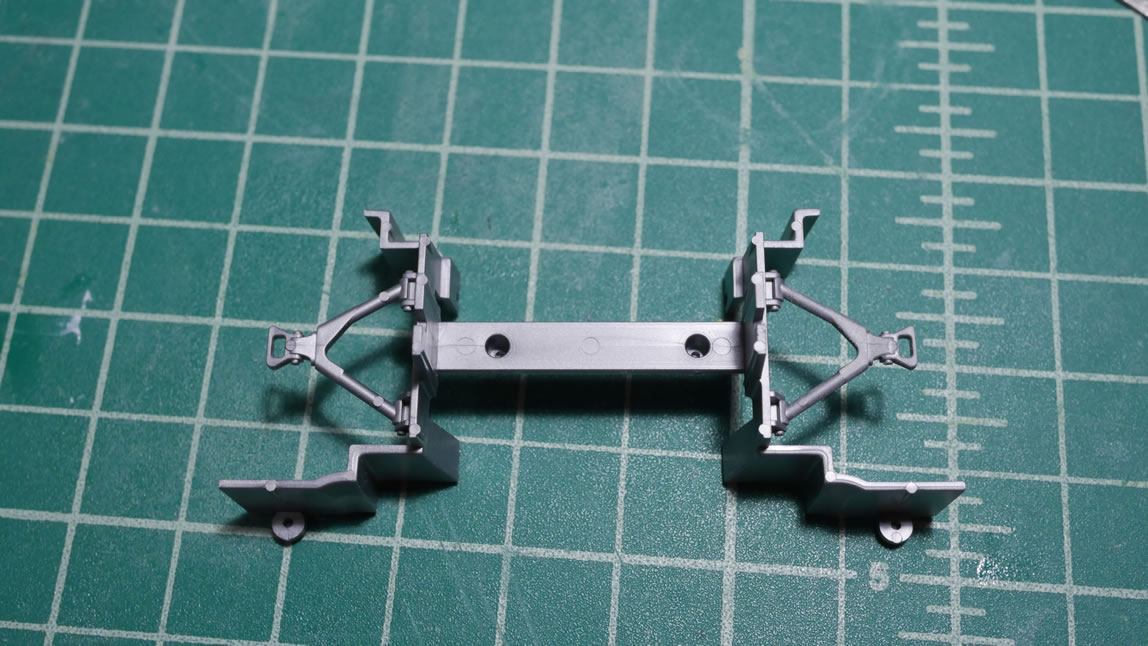
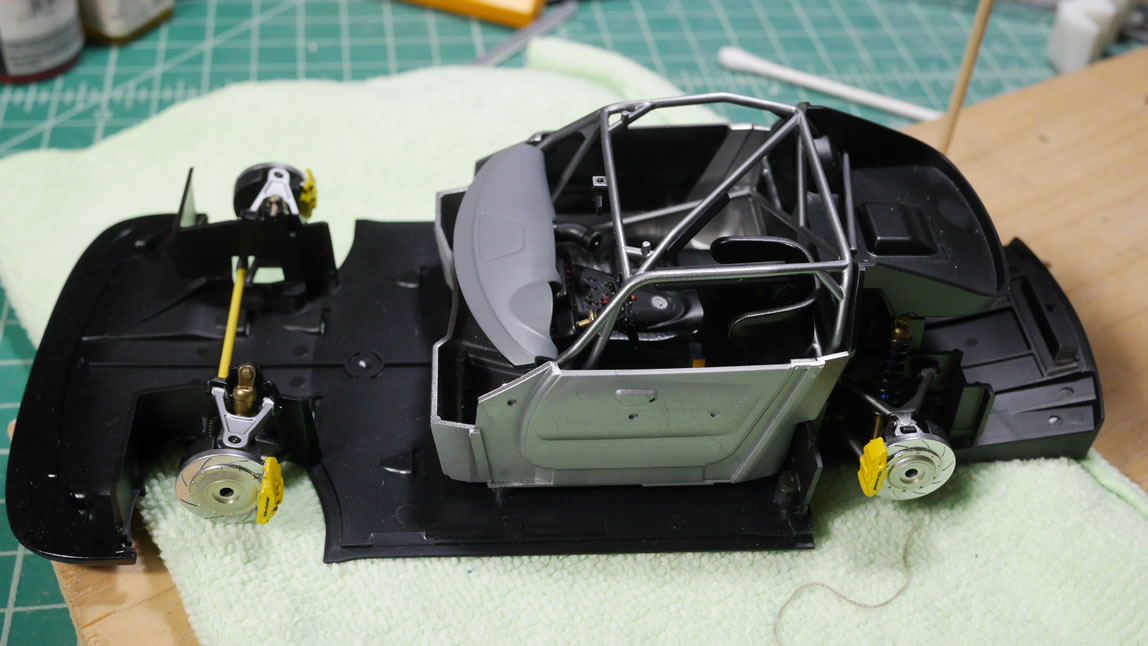
Feb 19, 2018: I’ve been traveling quite a bit for work in the past month. Hell, 3 out of the last 4 weeks were spent in Eastern Standard Time zone. So work has been pretty slow on the project. Since the last update, I’ve gotten some decent work done when back at home base. Starting off with the suspension. The masking for all the small bits is done and the parts get assembled. A quick test of the untouched car body over the suspension gives me a rough idea of what will be visible once everything is together. So I probably spent too much time painting things that will never be scene. Well, I haven’t built a car in a while, so I’m stumbling through a good number of things.
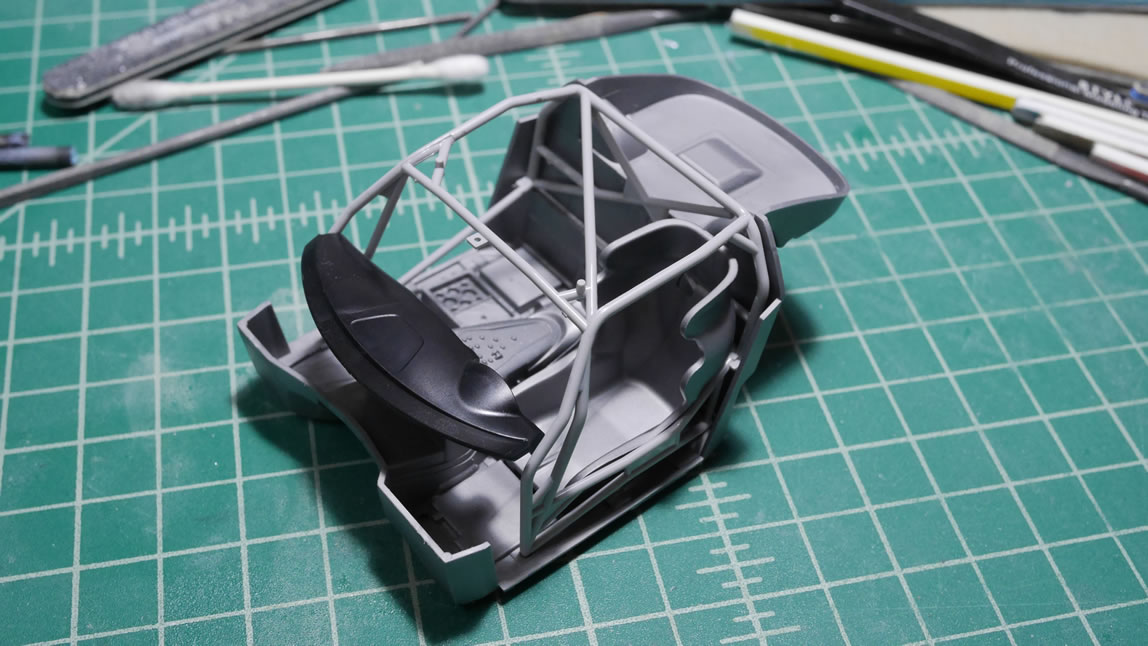
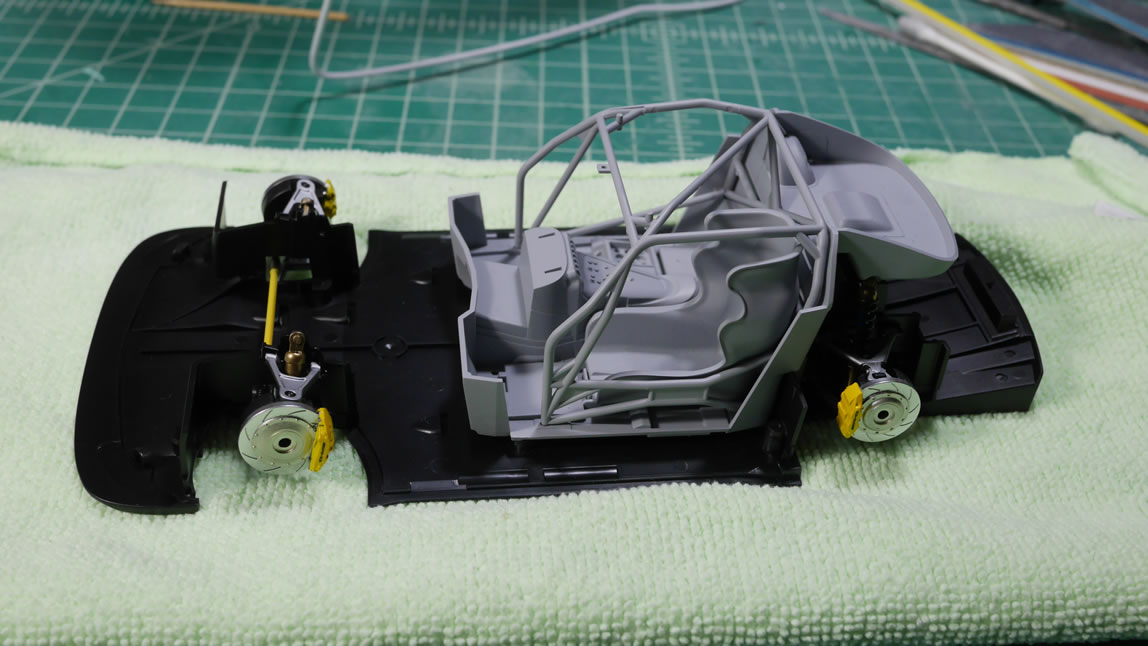
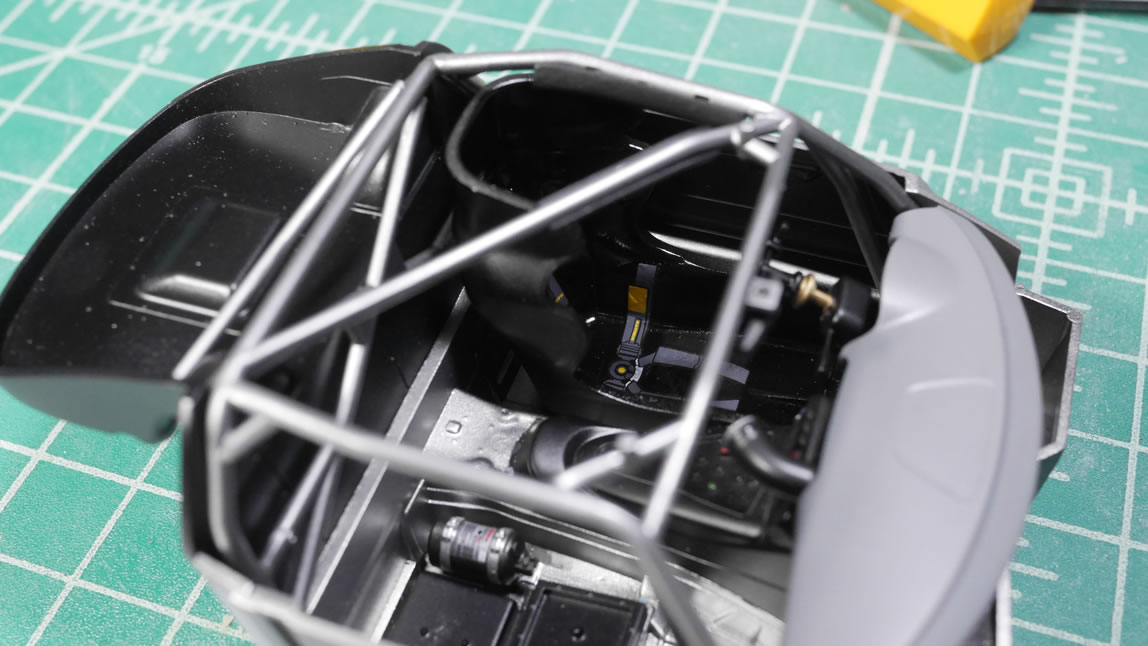
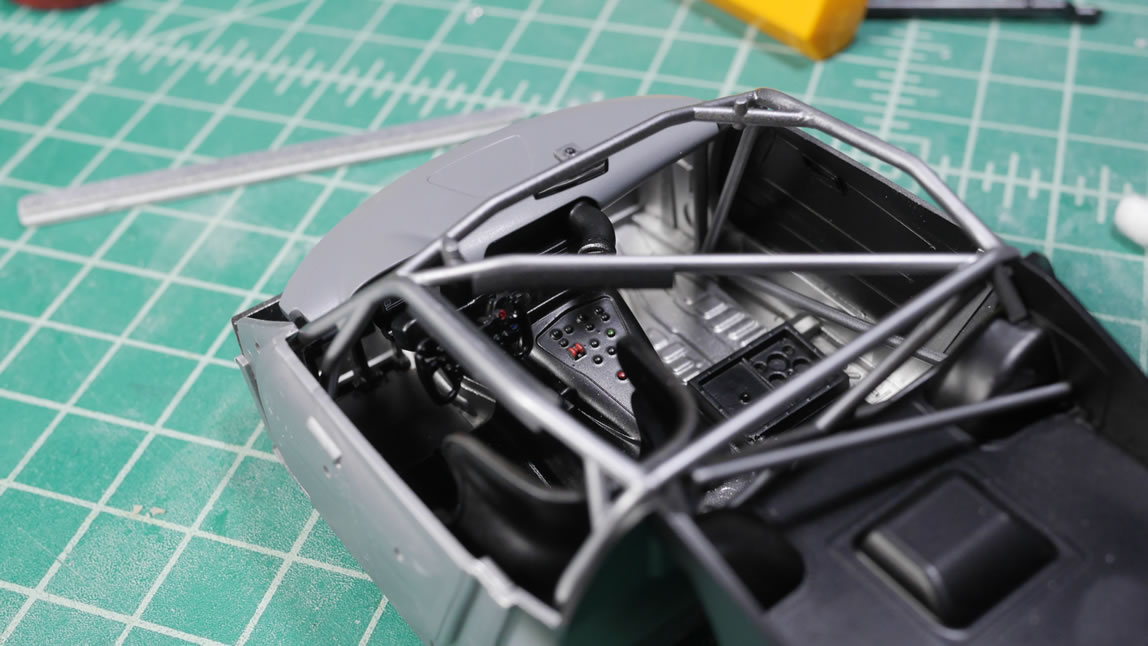
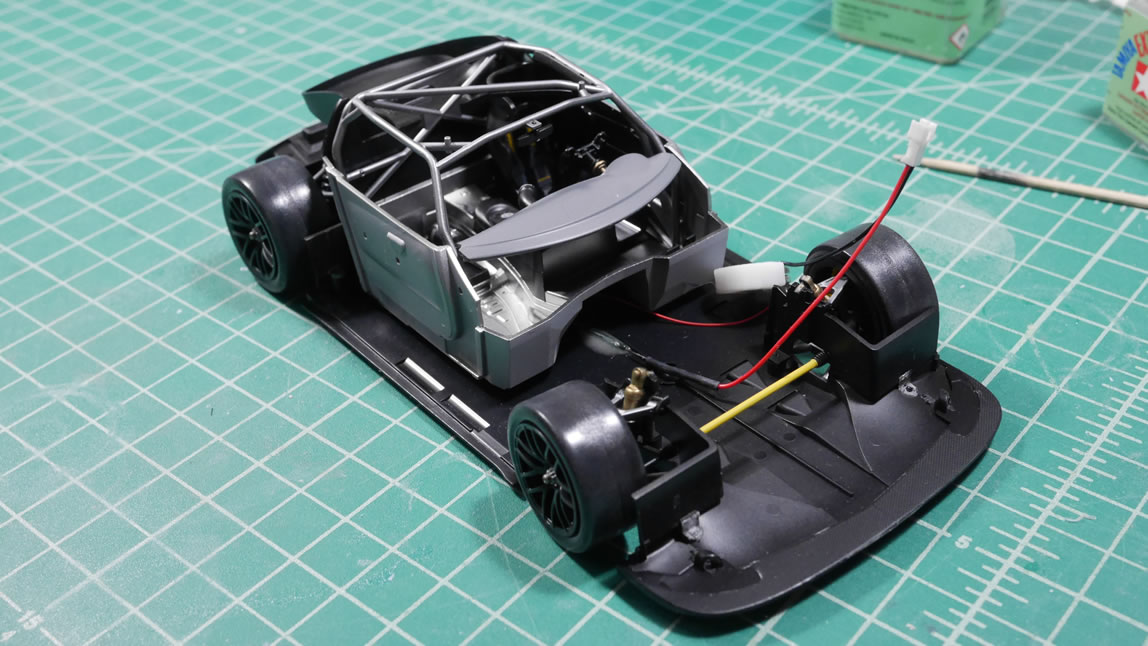
Next up is the cockpit so to speak. I glued the roll cage together since I needed to putty up some of the attachment points. Again, things that will most likely NOT be seeable once the whole thing is put together. After the test fit, gluing, putty, and sanding, the cage as well as the cockpit tub is primed. Then placed on the recently finished chassis for a quick snap.
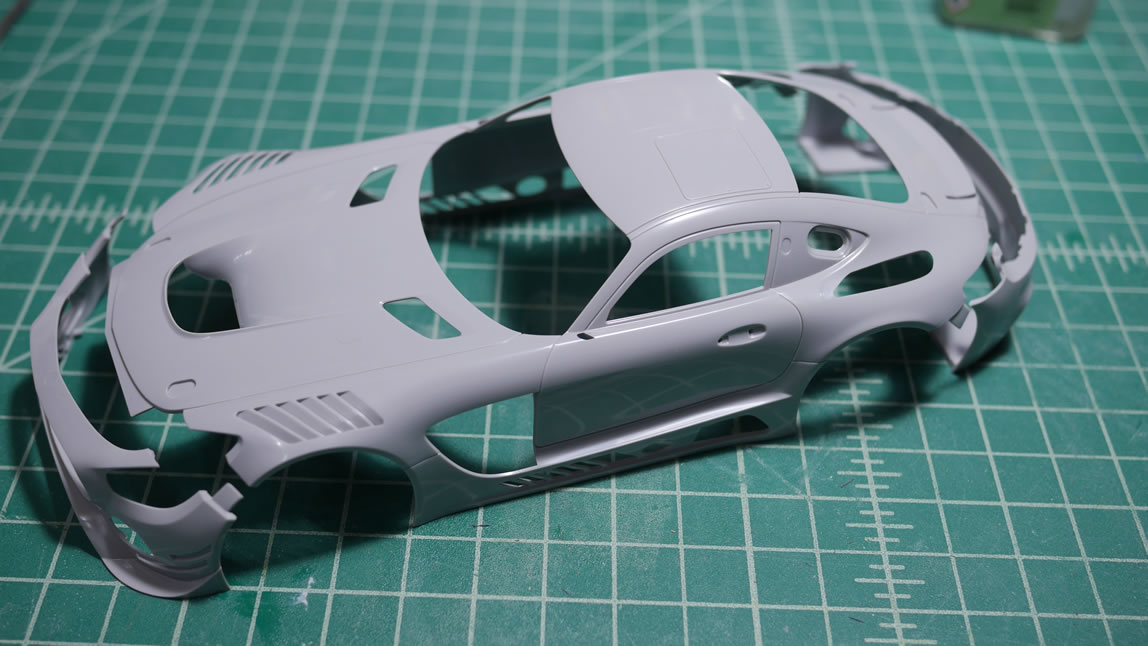
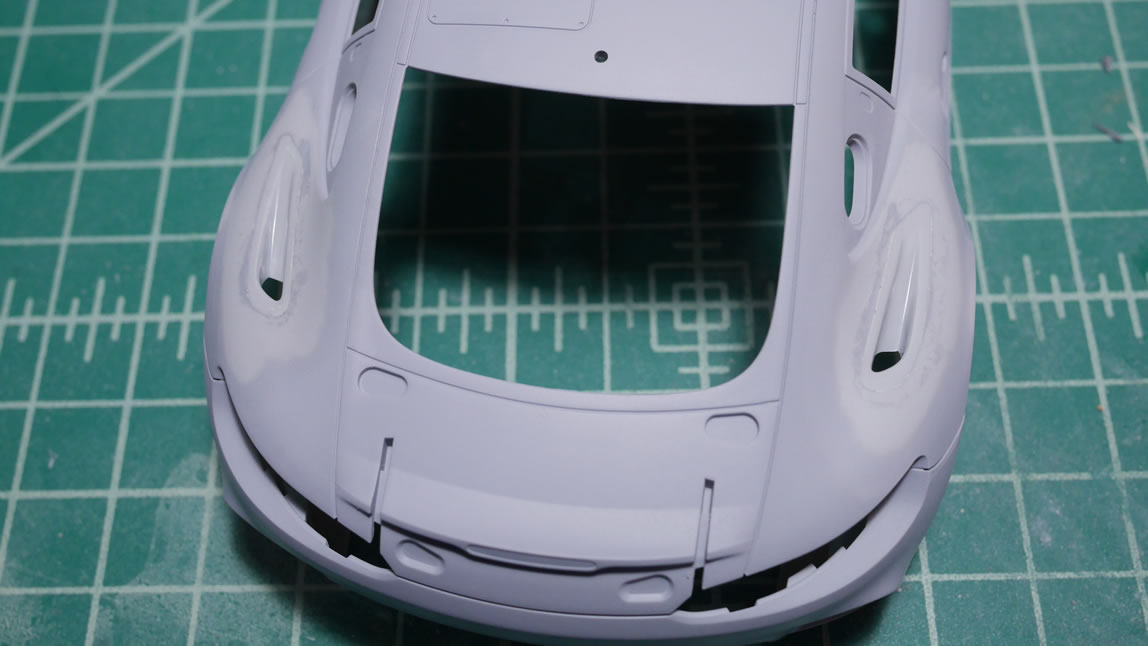
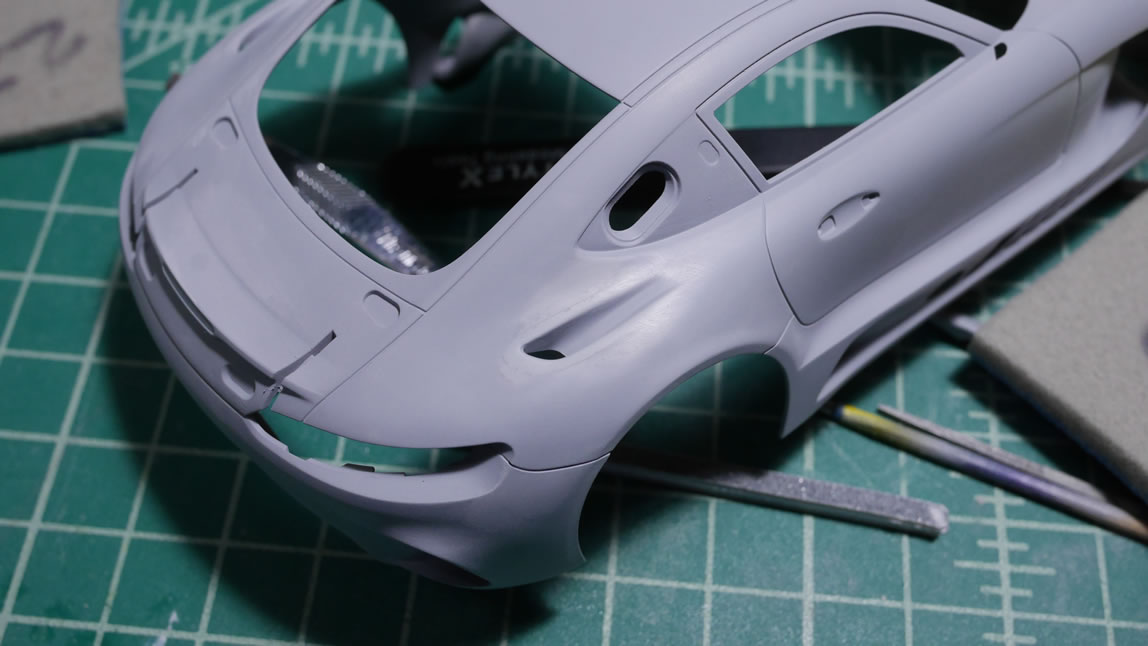
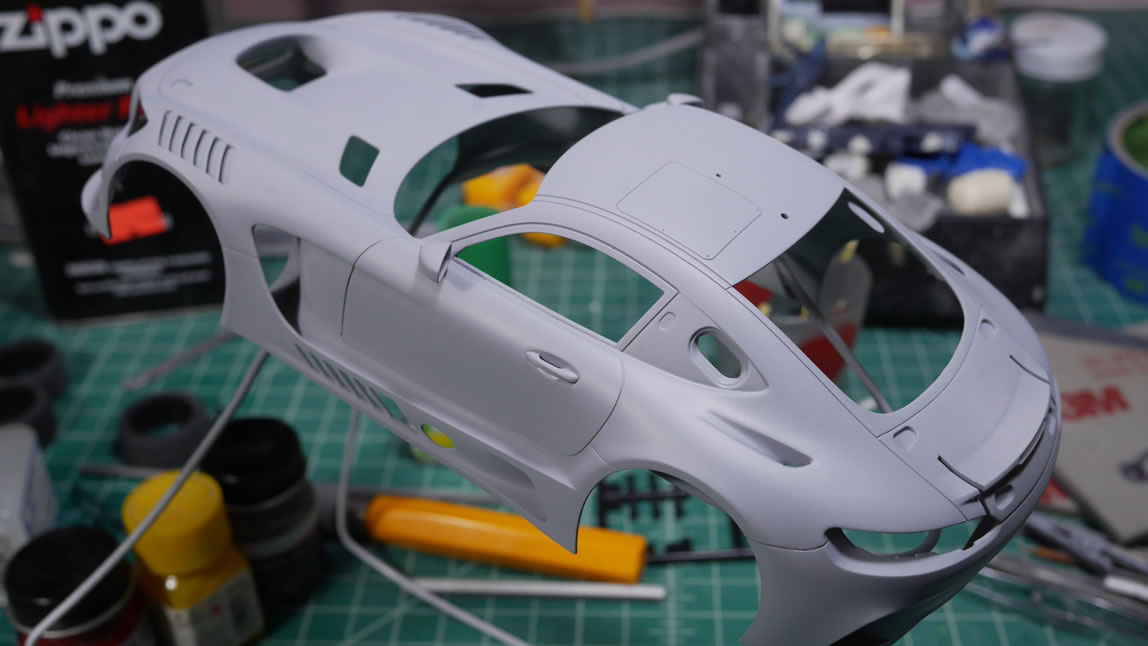
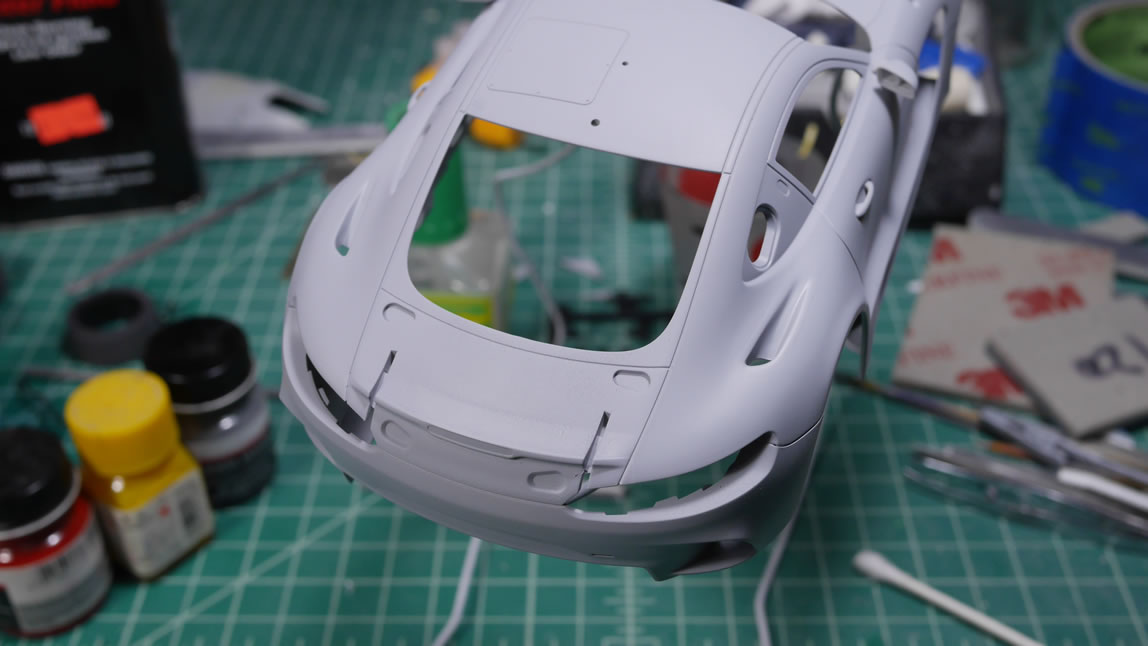
This is what I had been avoiding. The body work. To make things a little more digestible. I decided to work on the body in sections. Gluing lower rear and underside panels first. Then sanding, puttying, and priming to get them seamless. Then I added the underhood body panel.
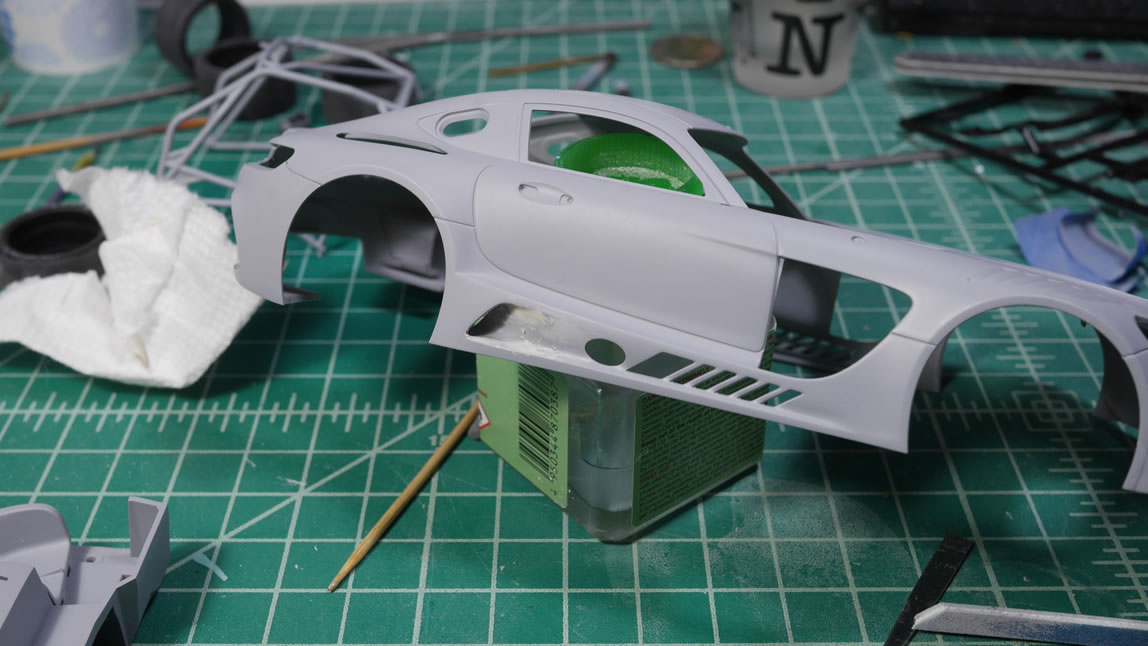
Work on the lower body panel continues. I’m using Mr White Putty since I’m not working in a hurry. Traveling during the week slows down progress so I stick with the slow curing putties.
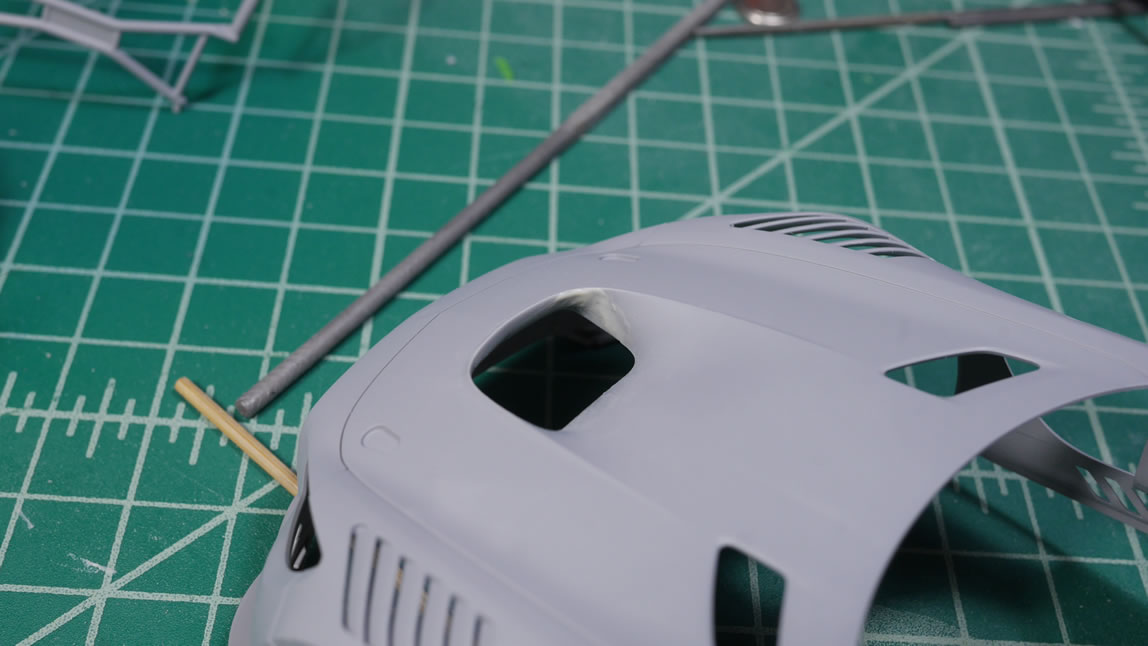
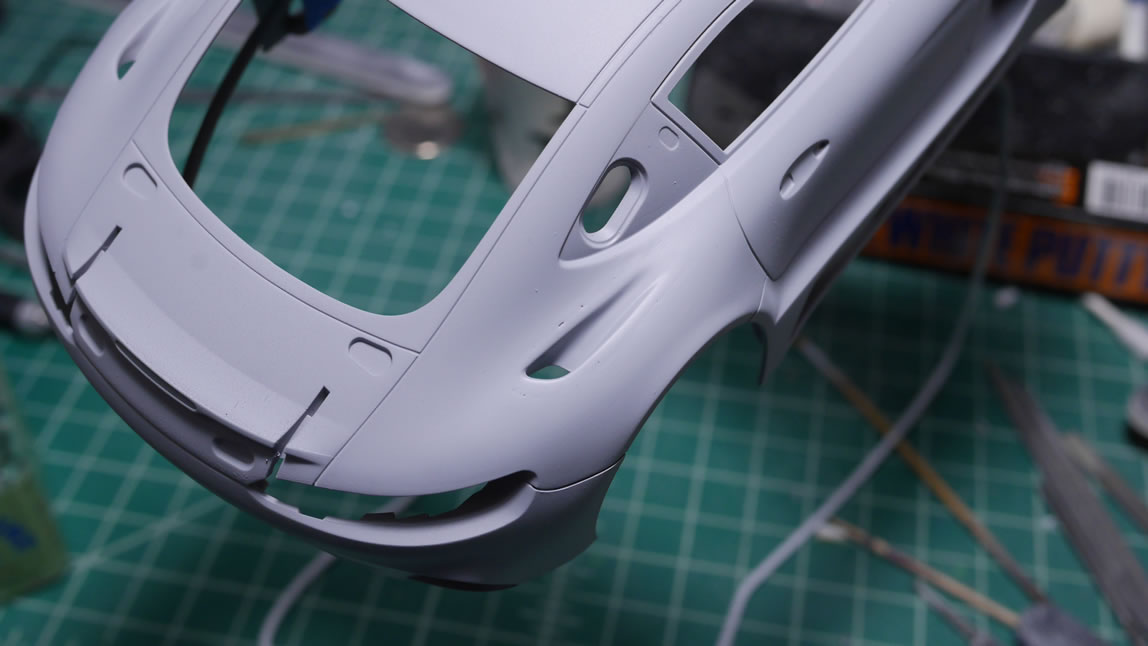
Once those body panels are done. I get to gluing the front side panels and work on putty and sanding everything.
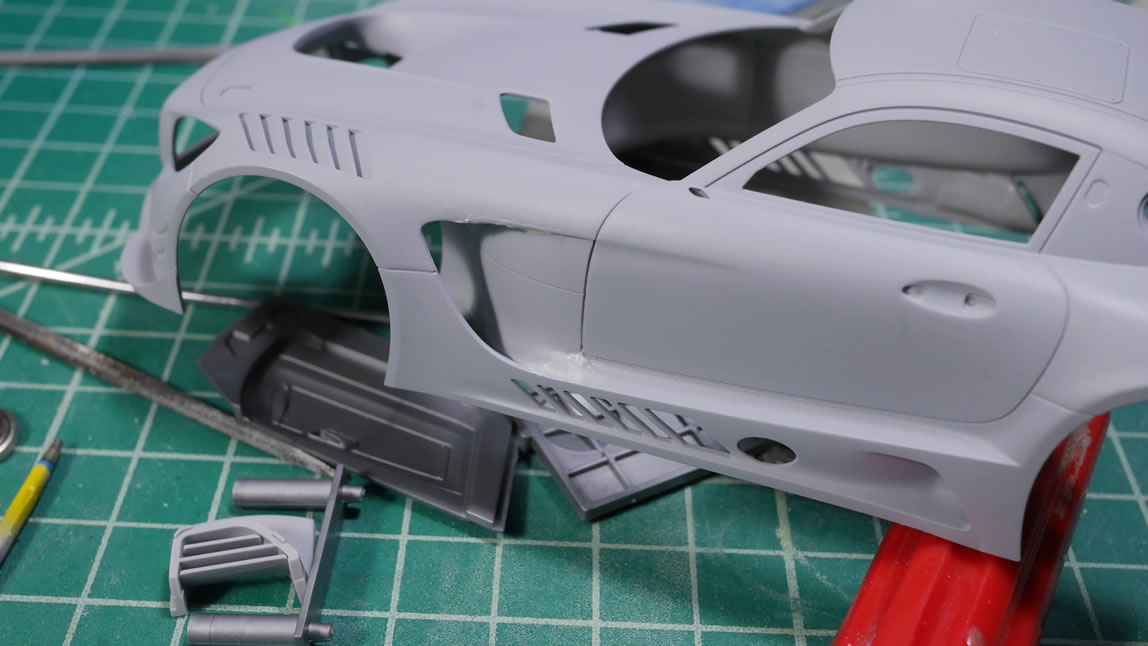
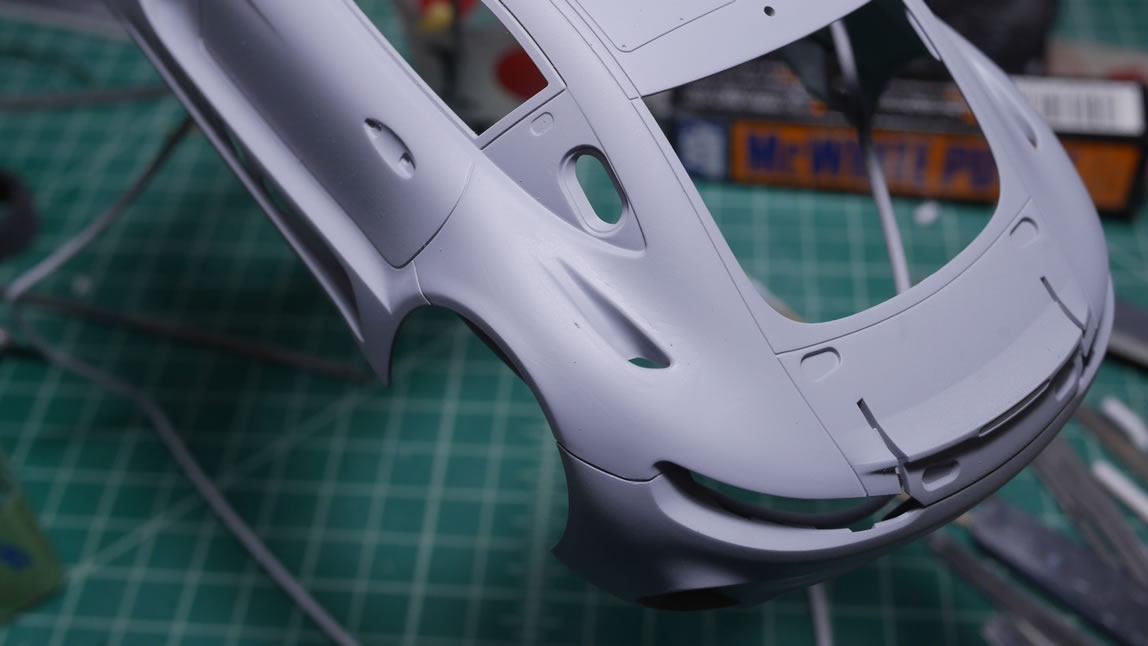
That front area done, I go back to the rear and get the final panels glued into position. Again, Mr White Putty is employed. When the putty is applied, it dries very quickly and is a little stiff to work with and get to sink into the gaps. A little bit of styrene glue brushed over the putty works to melt it and give a little more work time to push the putty and melt it into the gaps.
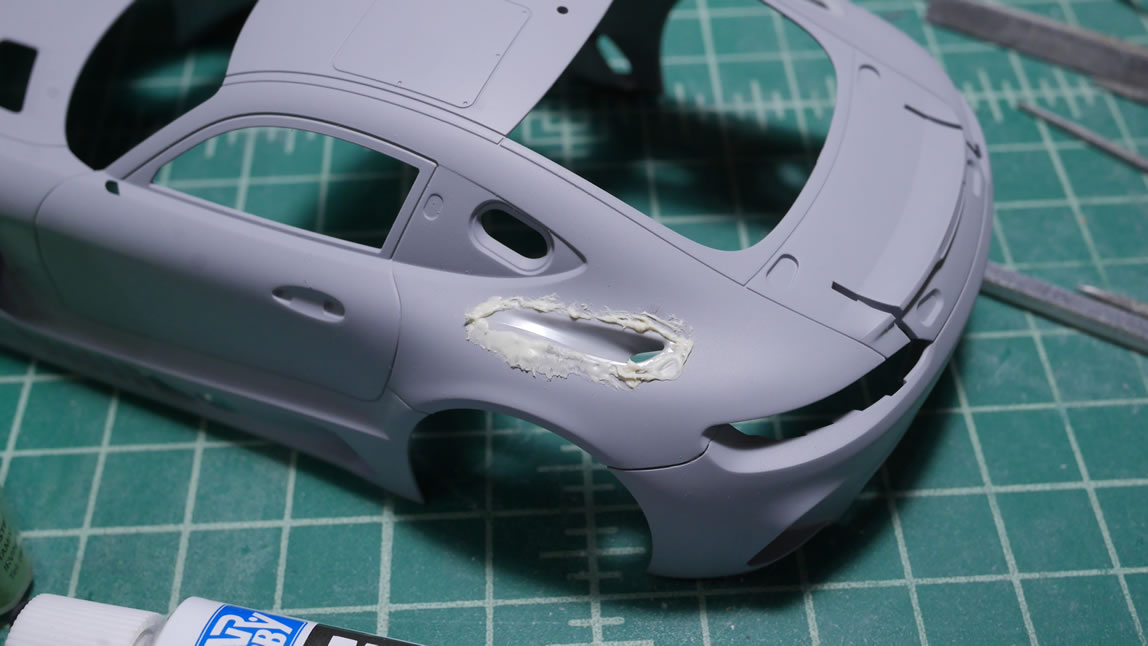

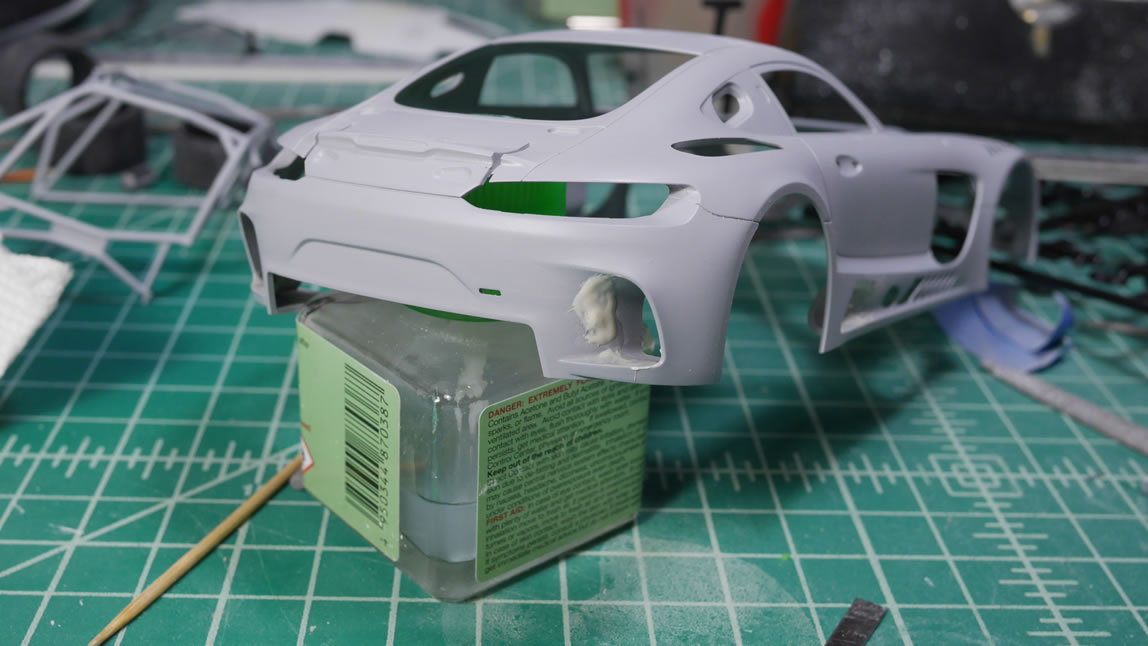
Once cured, the puttied areas are sanded and the surface is prepared for another spot priming session.
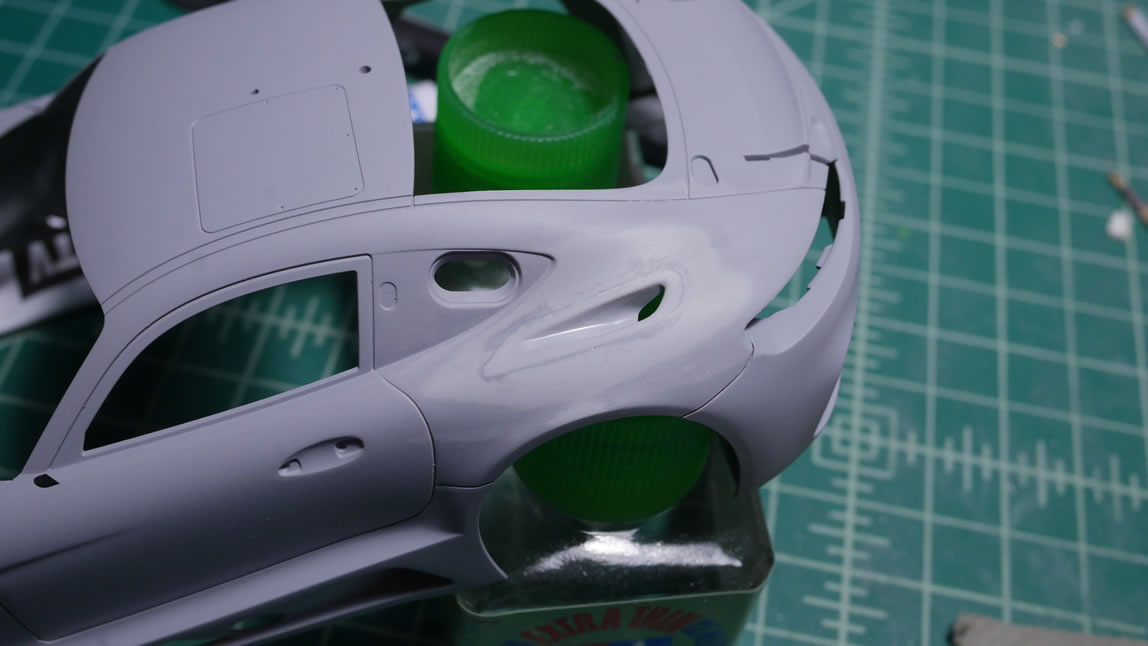
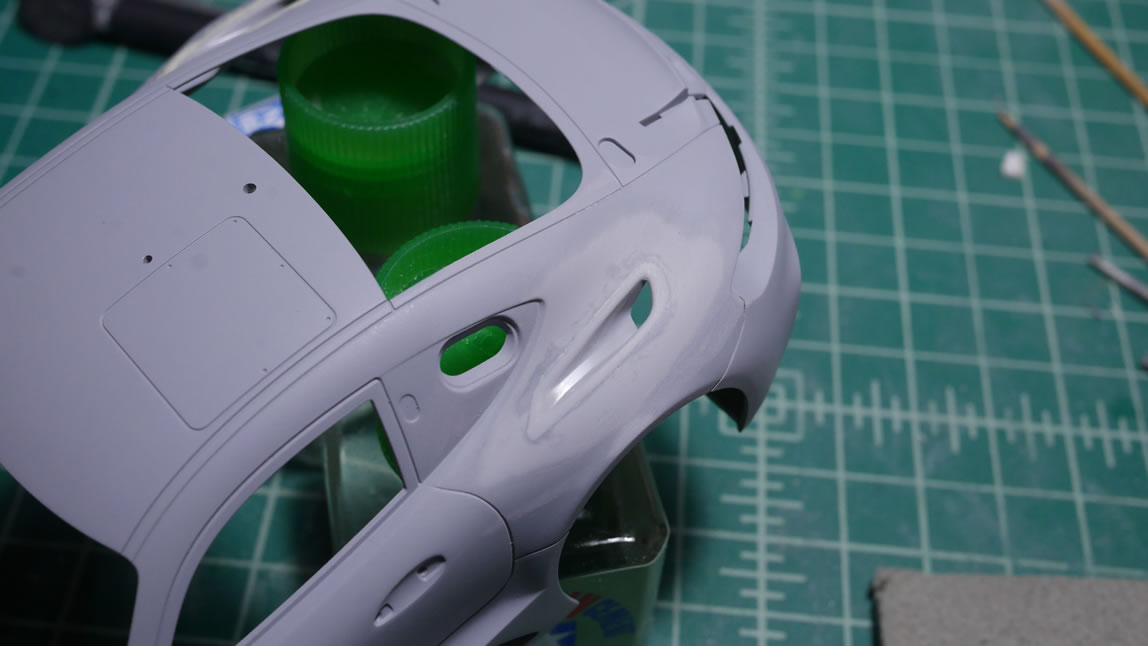
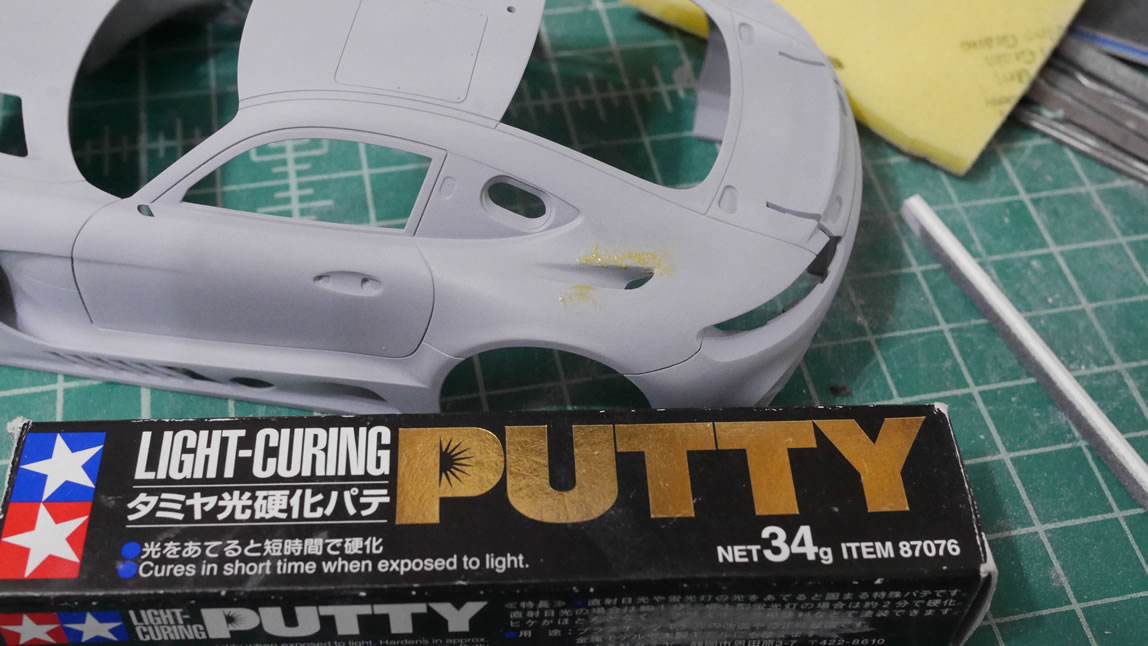
The spot priming revealed a few missed gaps. And at this point, I’ve returned home from a trip so I can ramp up work. For more speedy work, I turn to light curing putty. The putty cures under the lights in less then 2 minutes, so I can get it sanded and primed very quickly. And I only have to wait for the primer to dry to check for the mistake and continue to fix surface issues.
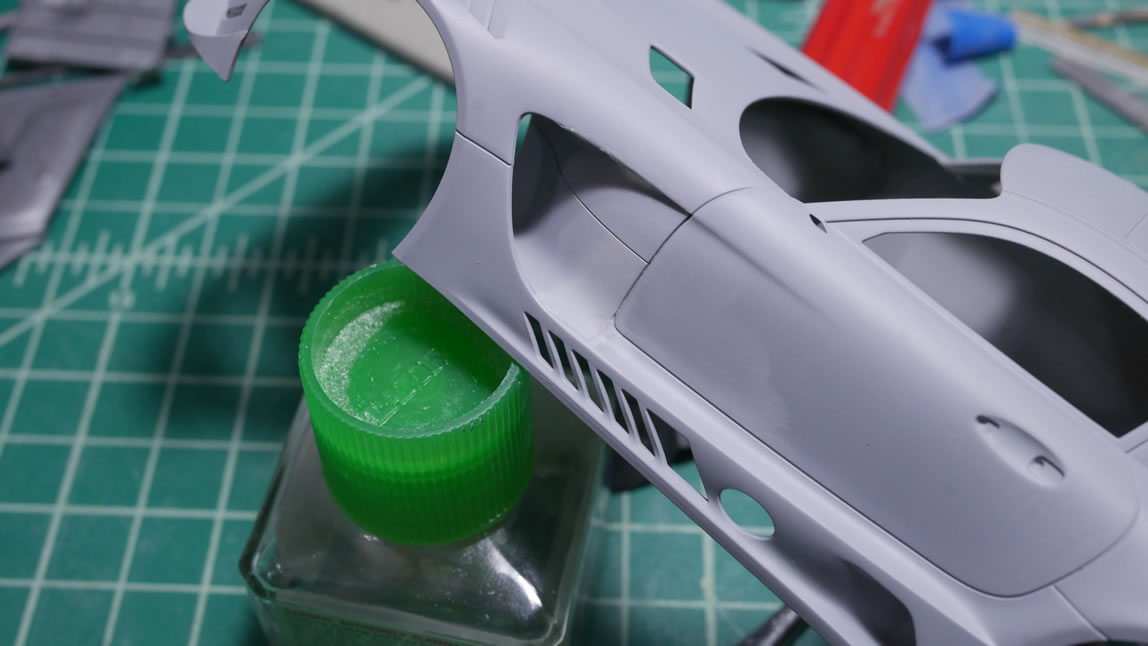
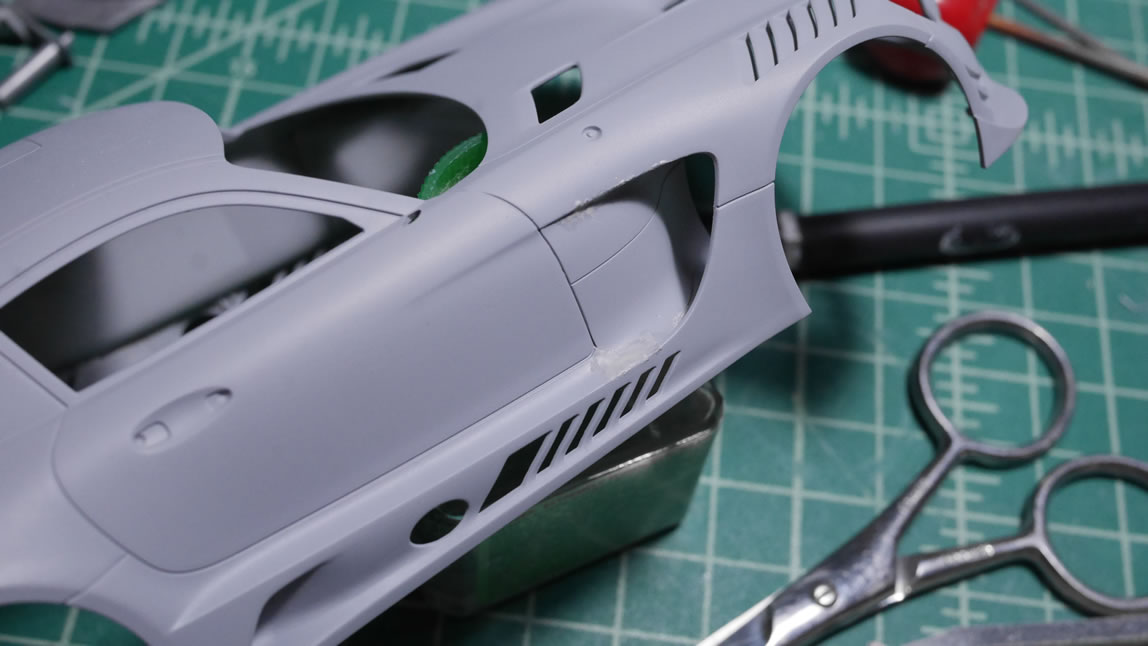
In the meantime, I get back to work on my lighting mod. For the tail lights to work, I needed to make a mold of the rear light housing unit and make a clear resin copy. This way, I can shine an LED from behind and effectively light the taillights. The bottom of the wing’s attachment points were sanded smooth and primed to check for gaps then painted and masked and painted to get the semi gloss black and yellow finish.
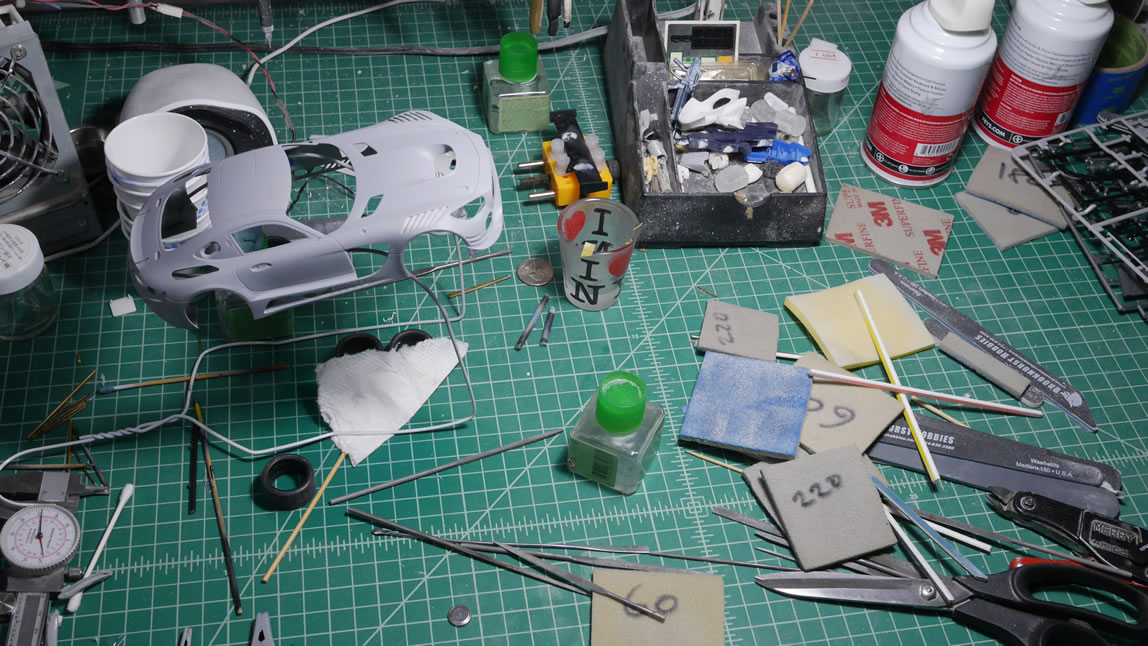
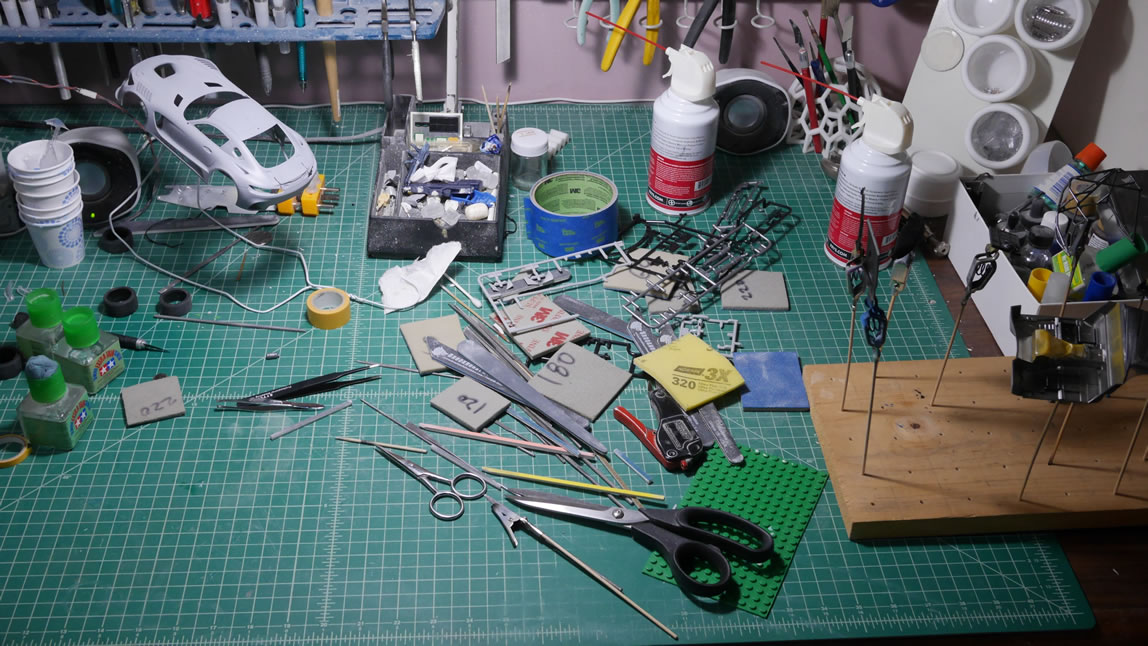
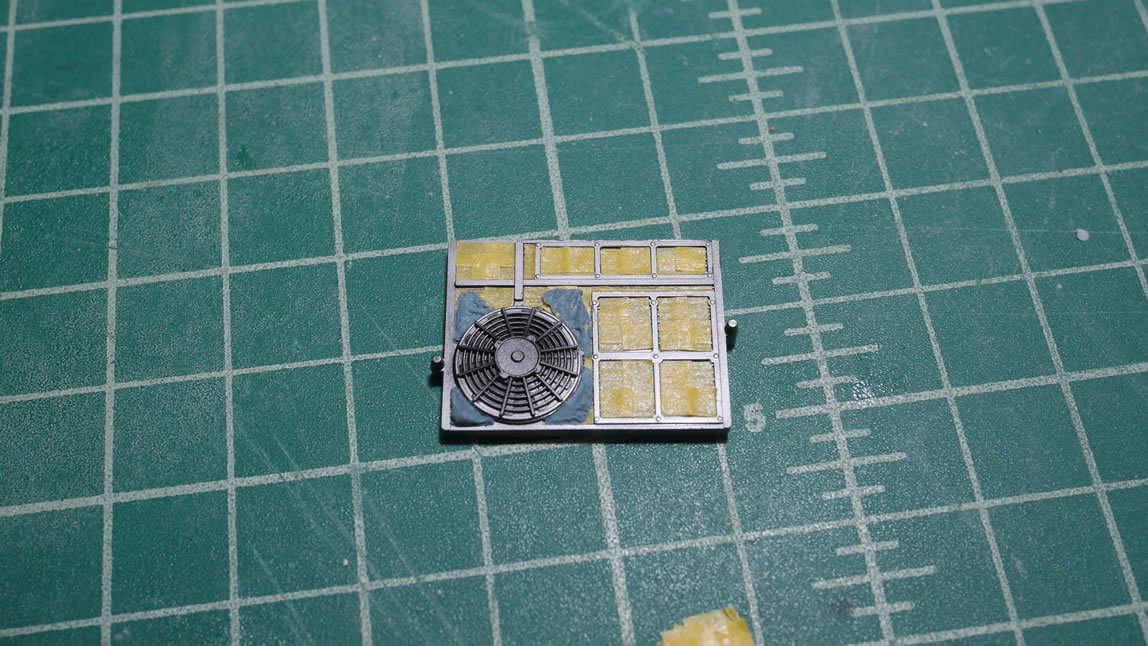
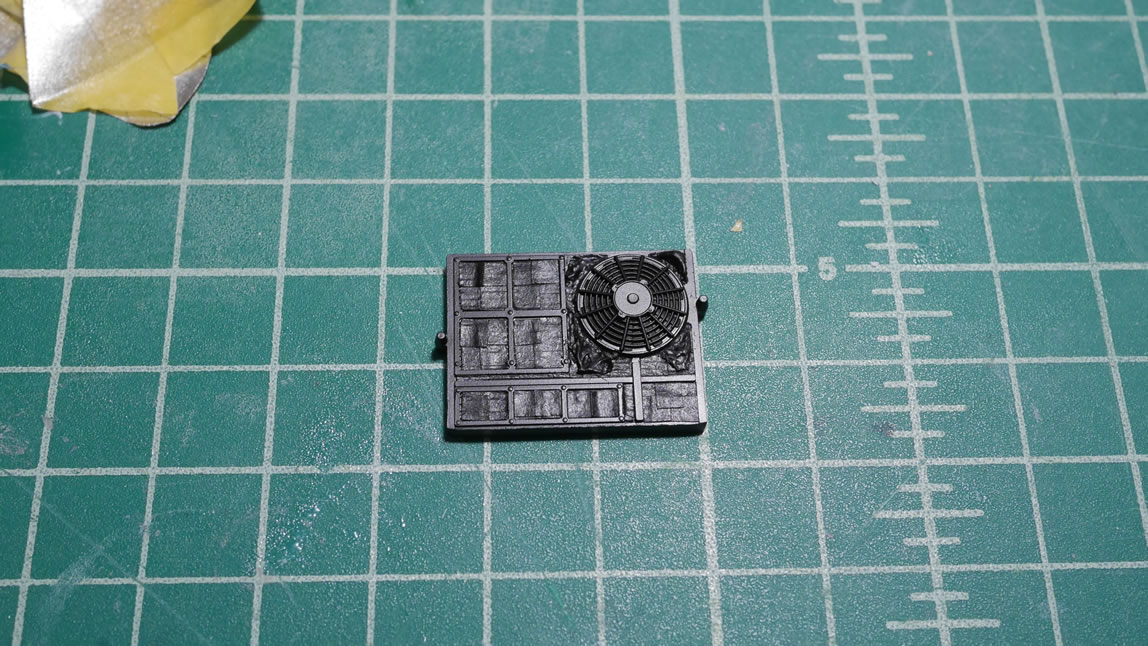
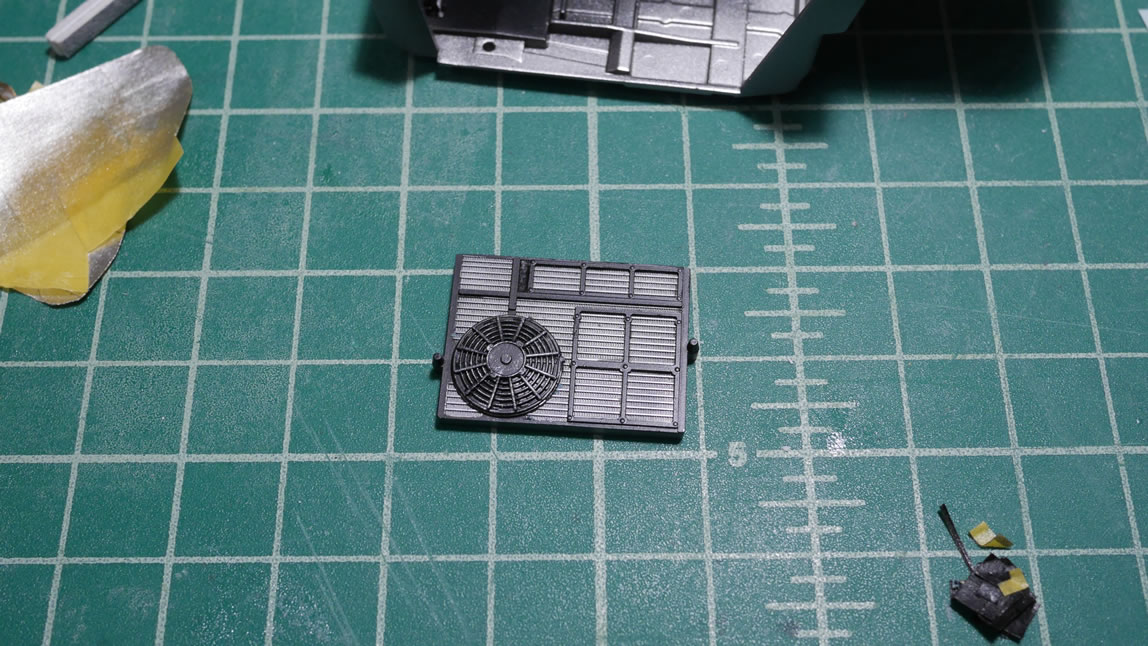
The workshop pretty much stays in the same state as parts are in various stages of work from freshly cut off the trees, to sanded, to primed, to masked and painted. The little engine detail from looking down the open inverted hood scoop piece is painted in aluminum, masked, then painted in semi gloss black. A little dry brushing finishes off the fan piece.
Returning back to the cockpit, everything is painted so time to start gluing things together to complete the cockpit. Some of the decals for this kit are pretty nice. Again, I haven’t built a car kit in a long while, so I’m pretty impressed by the mirror decals and other things that came with the kit.

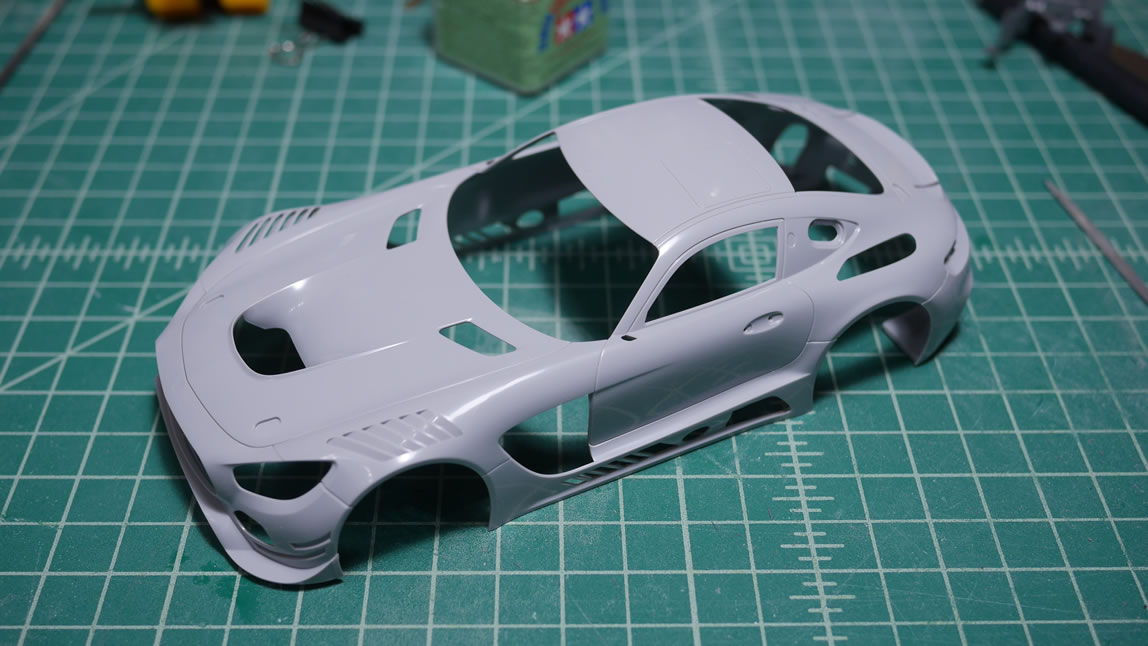
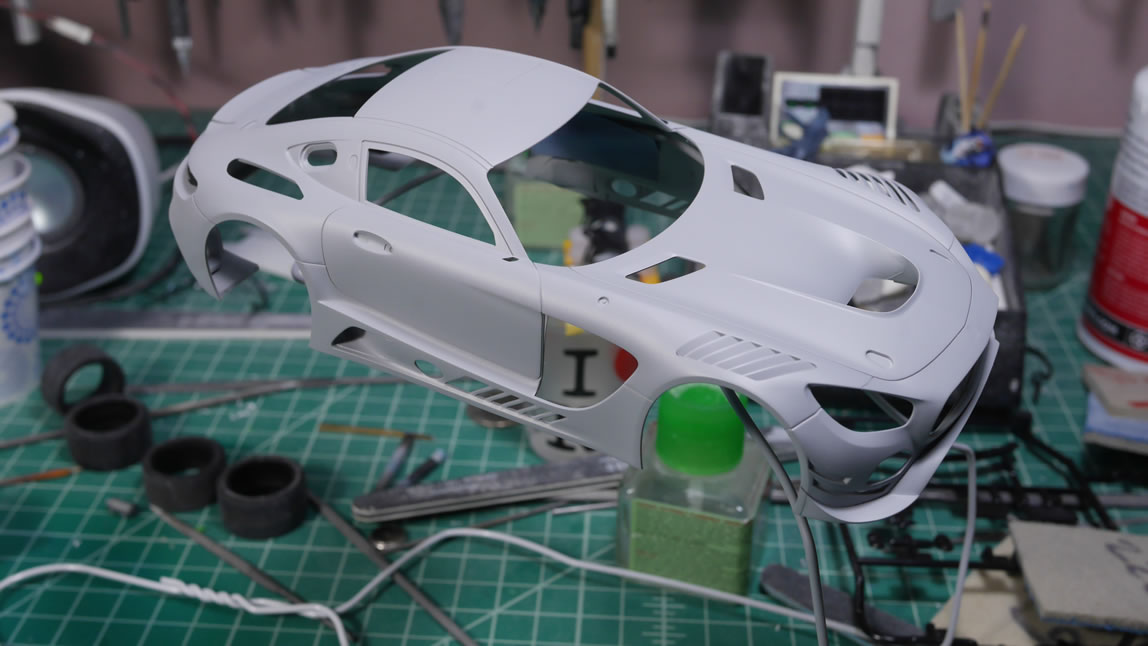
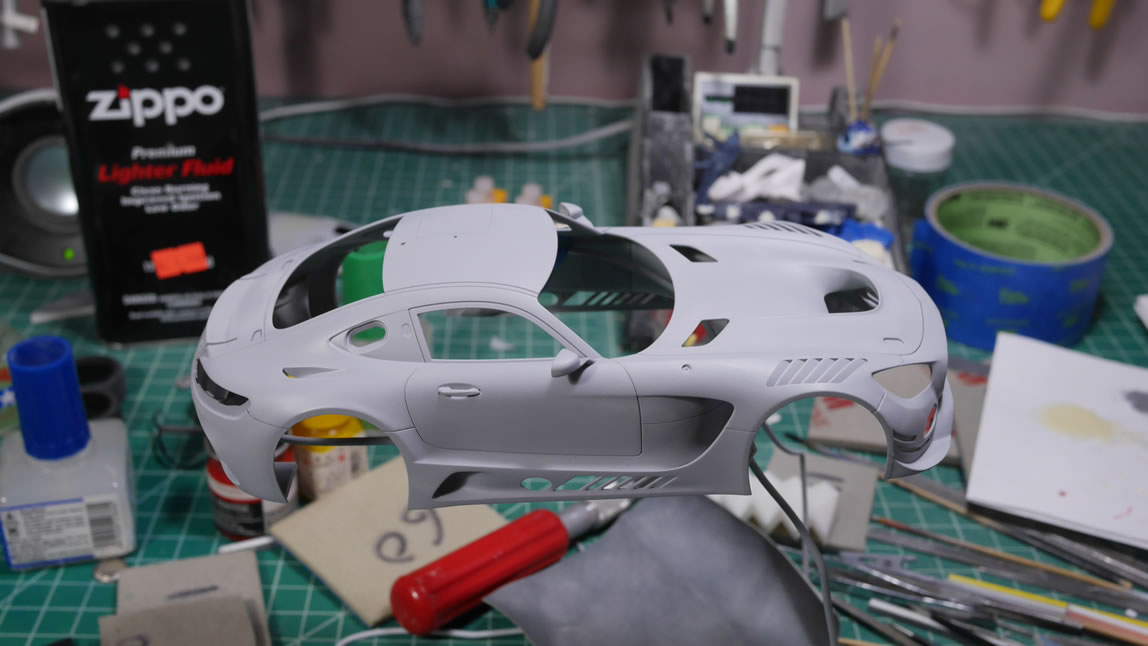
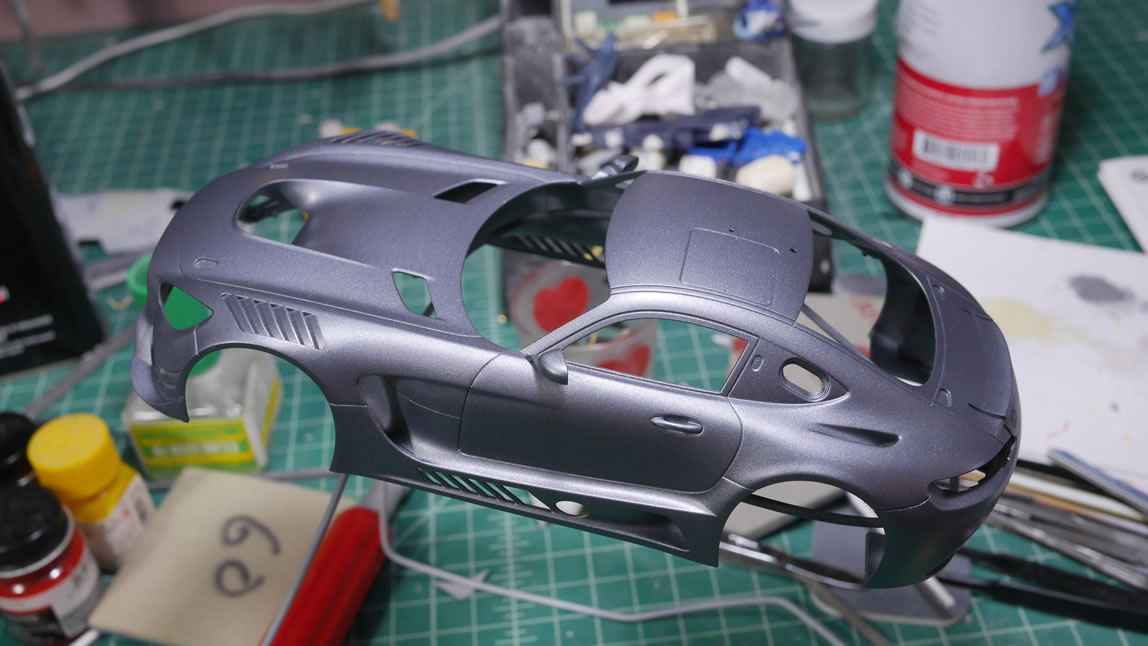
The surface prep for the body is completed. I glued in the door handles and side mirrors as the last bits of the body parts. After the last priming session, a very high grit sanding session was done over the entire body and we are ready for paint.
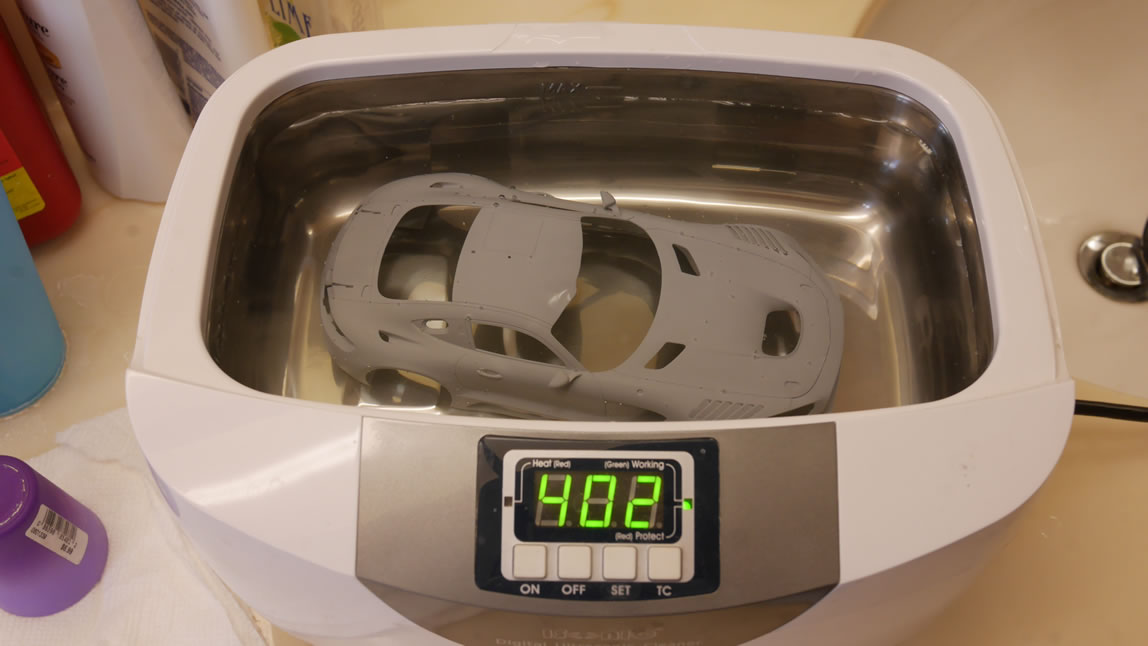
The very last step before the paint is the run the body in some water in the ultrasonic cleaner to really clean the body up of all primer dust or any other things that may have been missed and stick sticking to the body.
Once dry, the body is painted with a heated up can of tamiya spray TS-100 semi-gloss bright gun metal per the instructions. There are two pictures below. The first is taken after spraying the main body color. The second is after spraying Mr Super Clear Gloss over the entire body. The final finish for the kit will be semi-gloss, but since I still need to decal the crap out of the body, I need as glossy a surface as possible. This is the first layer of gloss. I may spray another layer of gloss after I’ve let this layer completely cure.
Progress is finally moving on the kit. There are still a few bits on the runners, but I’ll get to those soon enough.
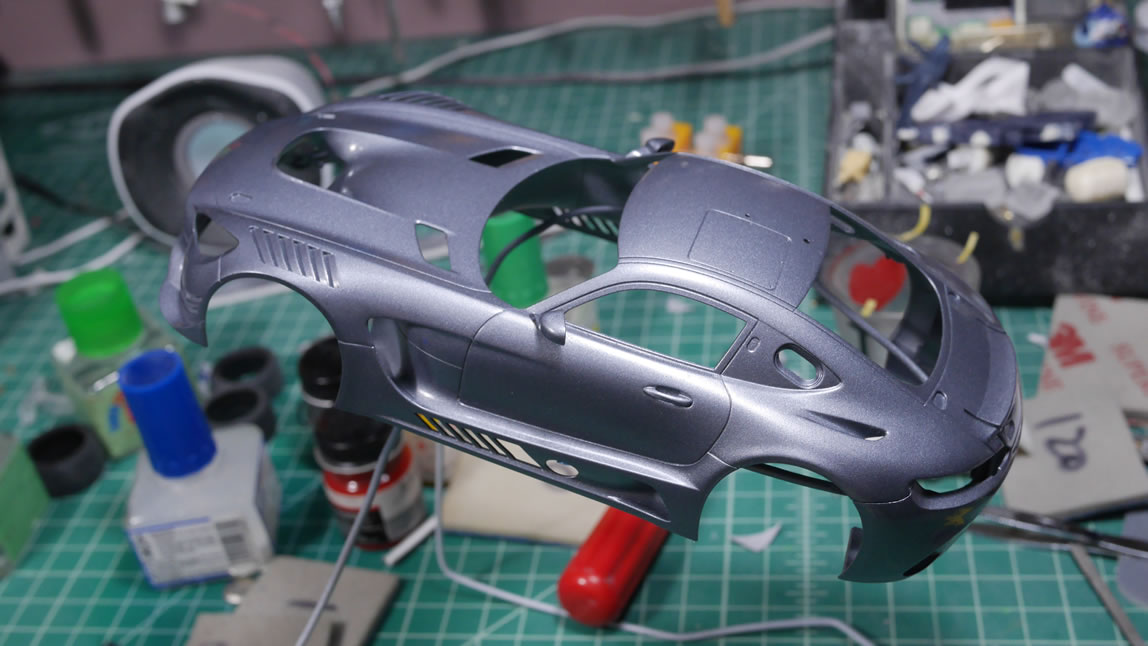
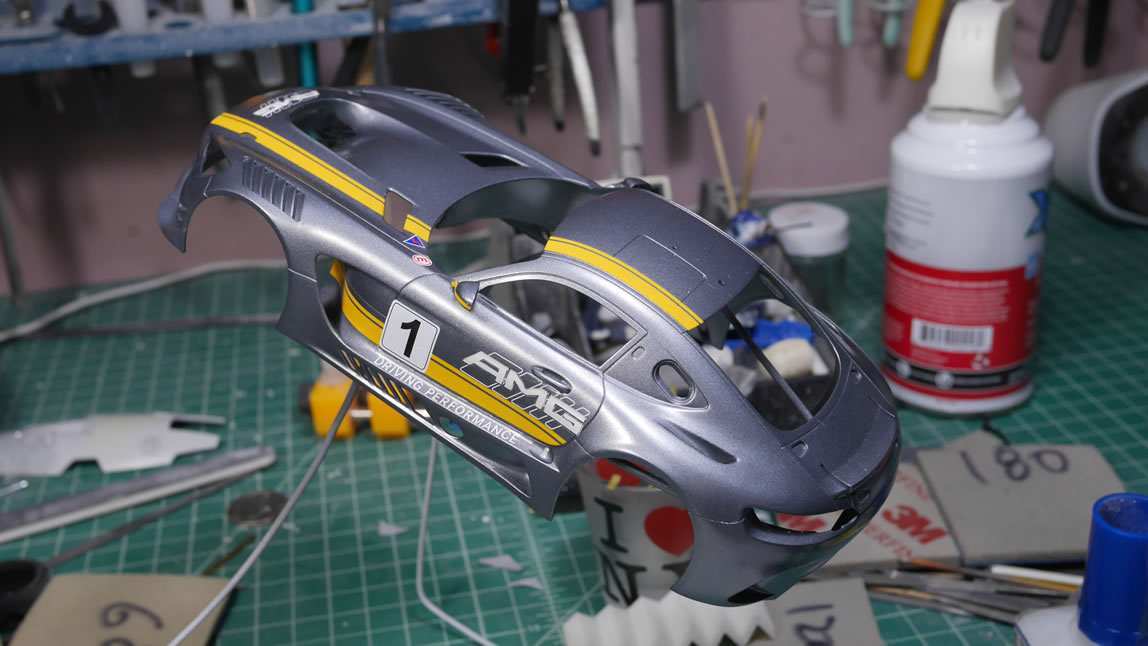
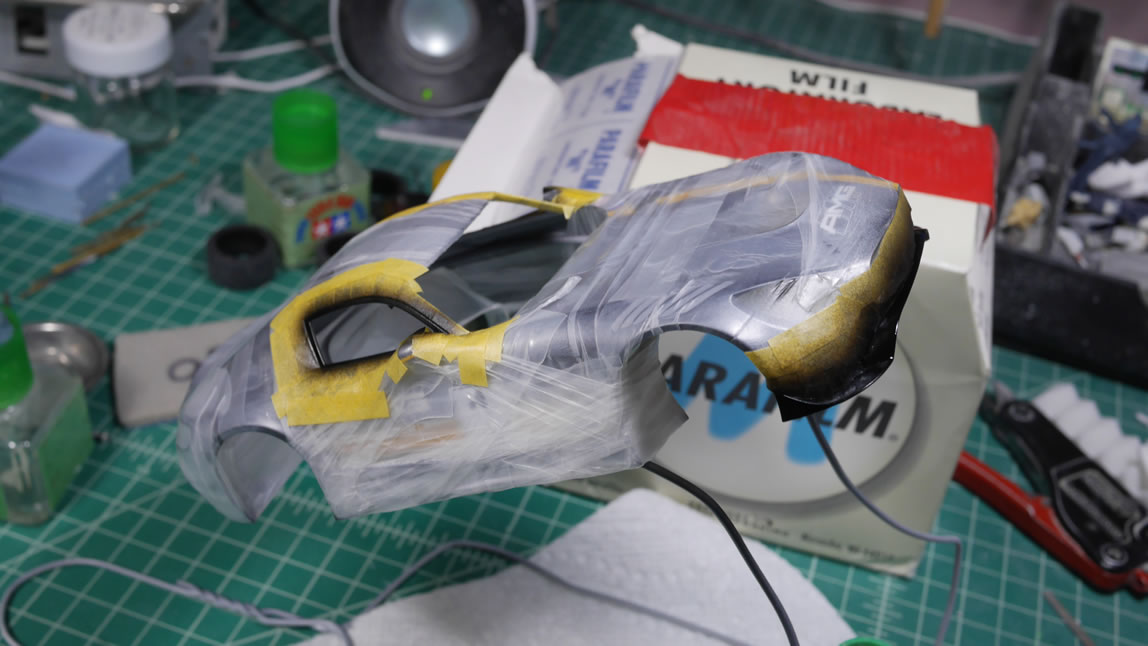
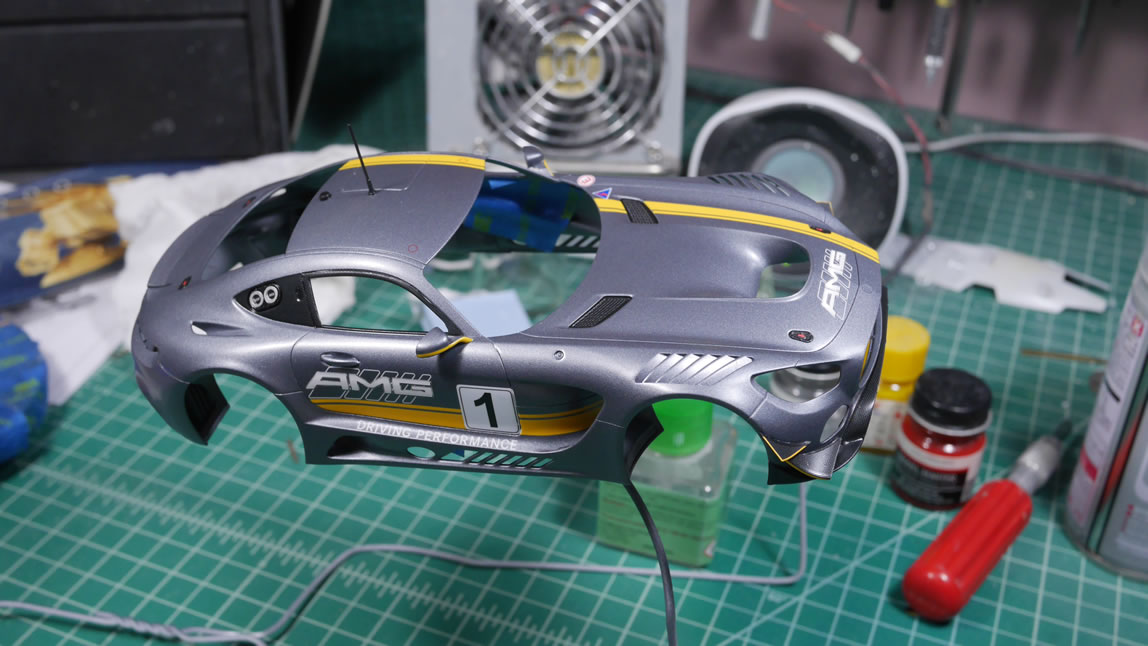
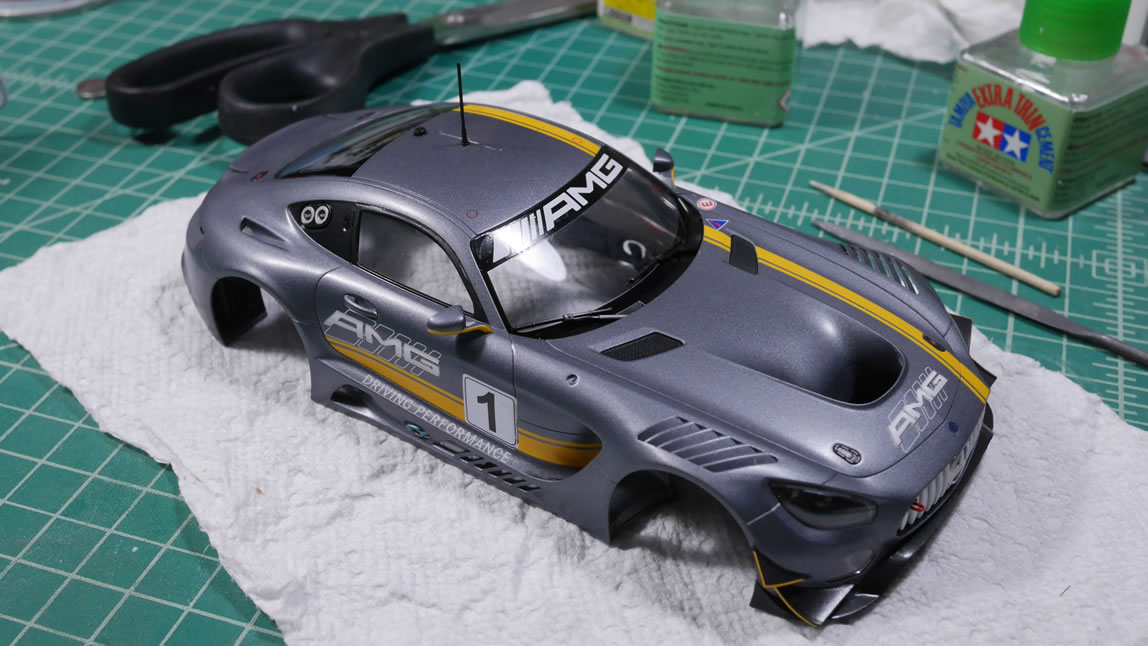
Mar 3, 2018: The body paint is done, or so I had thought.. so on to the fun decal work. The paint for the body is tamiya bright gun metal which is a semi gloss finish. That means I need to clear coat the crap out of the body before getting to the decal stage. I did the gloss coat in the last update so on to decals. This car isn’t too bad for decals, it’s not one of those itasha style cars, but it is a GT car. Luckily, it still isn’t as decal intensive as most race cars. The process is slow, and with how I worked, it should have been even slower.
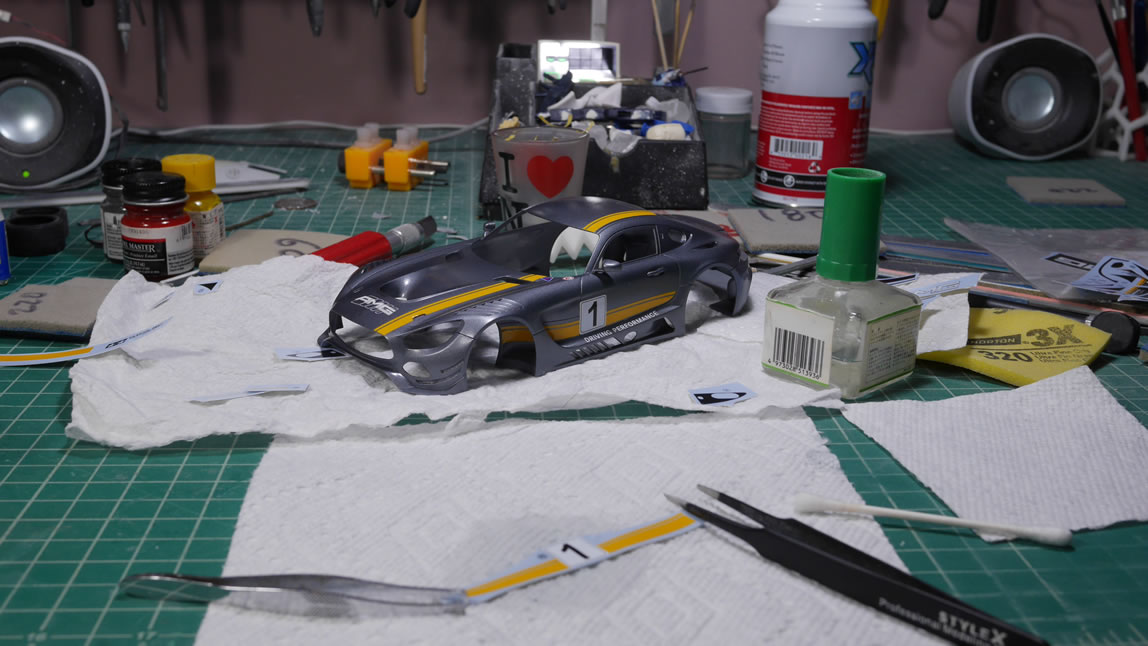
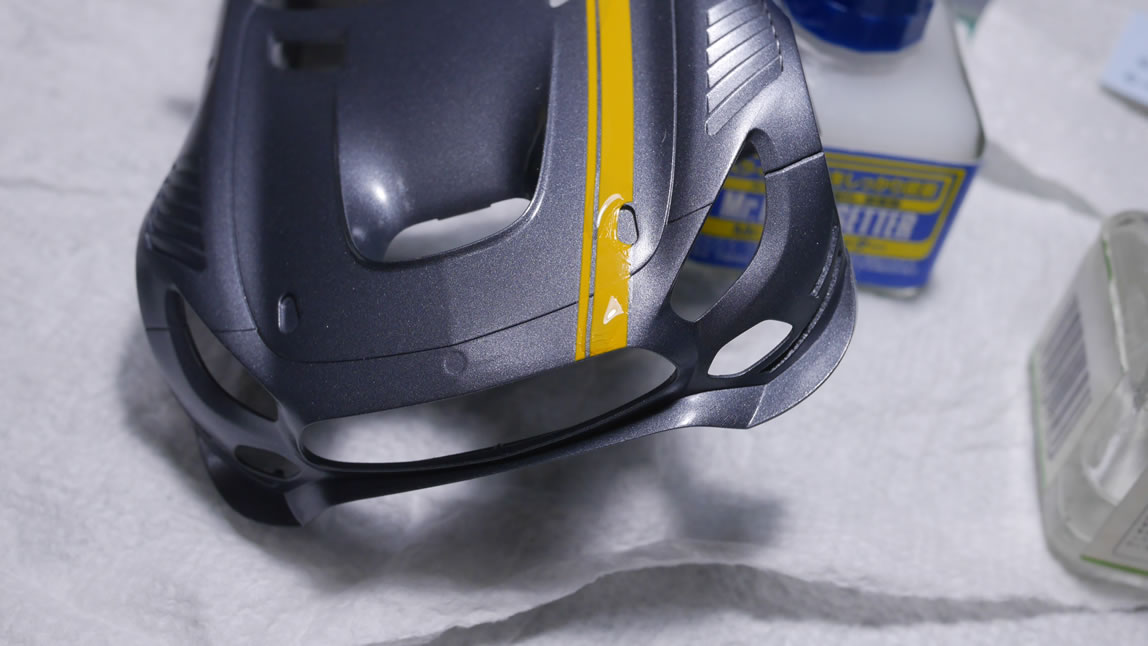
Once the decals are on the surface, I need to let them dry out completely. Then on goes the decal softening solution. This stuff will help melt the decals into the panel lines and get the decals to curve along the surface as if they were painted. The decal softening solution will wrinkle the decal in the process. It is very important to acknowledge this and leave it the hell alone to dry on its own. It will flatten out. Caveat, it will flatten out if the surface is flat and upright so that the decal and the softening solution don’t pool in any specific direction but flat onto the surface. The spoiler has 3 decals on three sides, and doing the softening solution process really should have taken 3 days – one for each side. But in my haste, I rushed it and did it at the same time. This pooled and shifted the decal so when it wrinkled, it stayed wrinkled. Huge lesson learned here. Paint and surface prep you can mess up on all day long. Those are easy fixes; decals unless you have a bunch of spare copies, is a one shot deal.
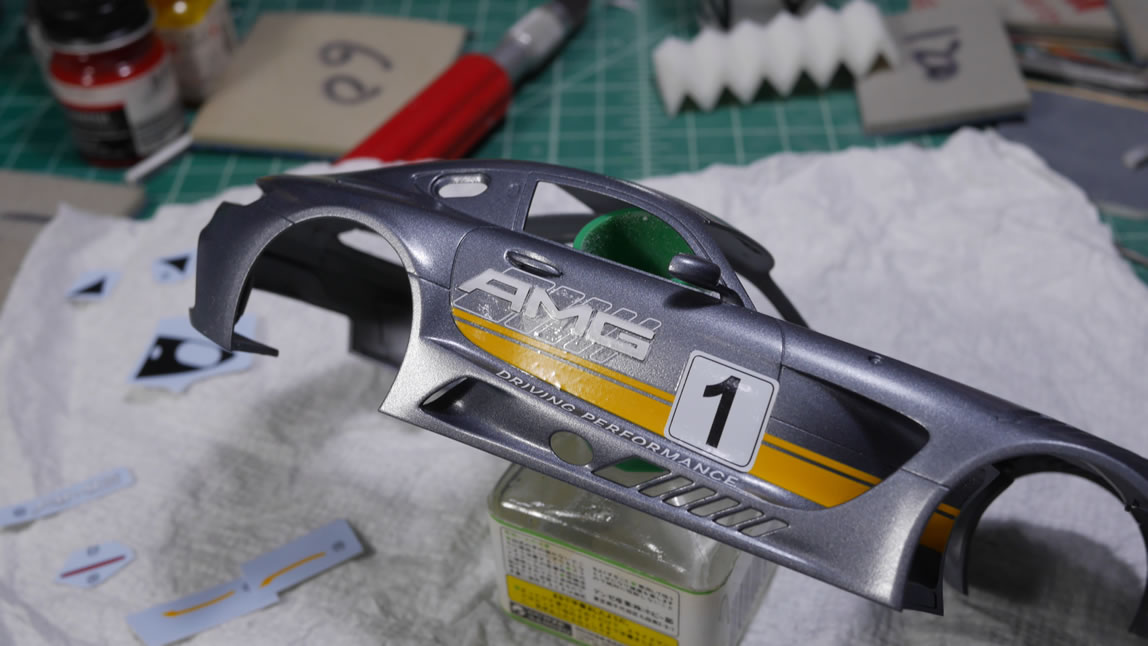
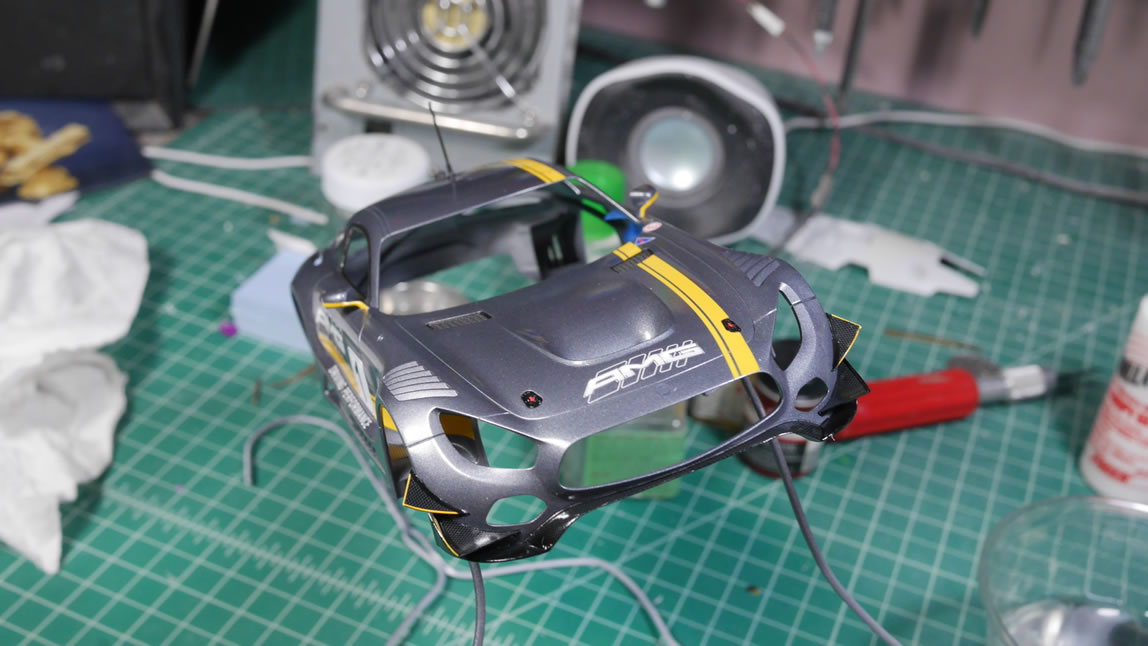
Most of the decals are done and the softening solution has cured for a full day. Another layer of clear gloss to seal in the decals as well as help hide any residual decal edges that didn’t get fixed with the softening solution. So the decals are done? Not nearly.
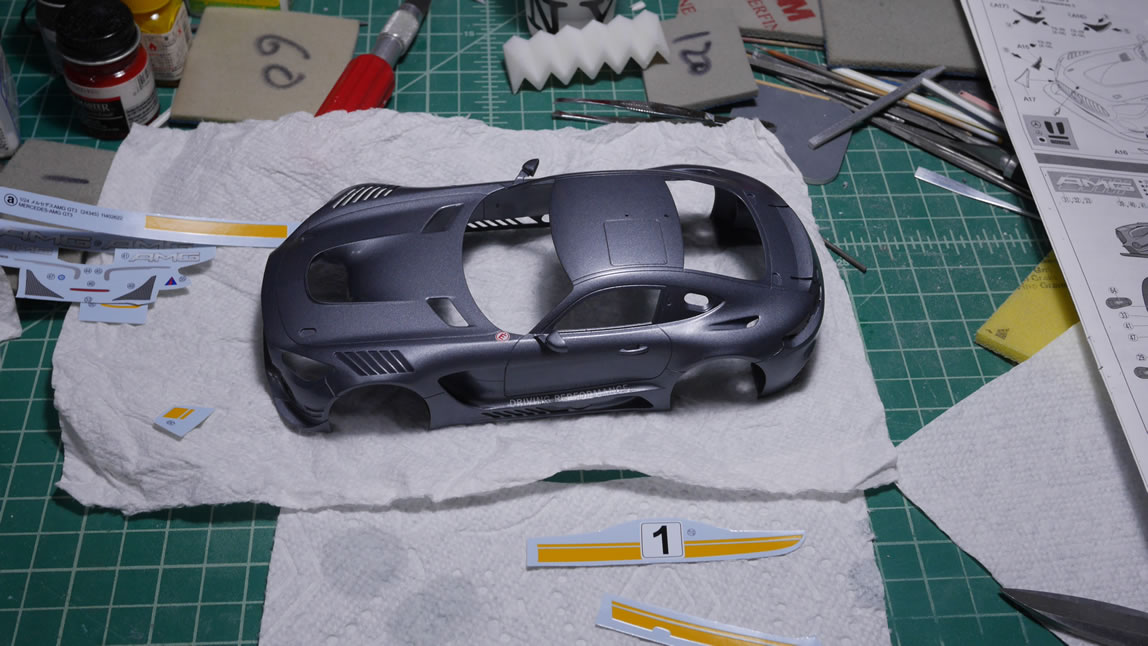
I finish most of the decals for the body and run into the carbon fiber decals. Applying these on the bright gun metal color surface wasn’t going to work. I had missed the step that told me to paint these areas the semi gloss black. Oops. The whole body is masked off and the semi gloss is painted onto the window frames.
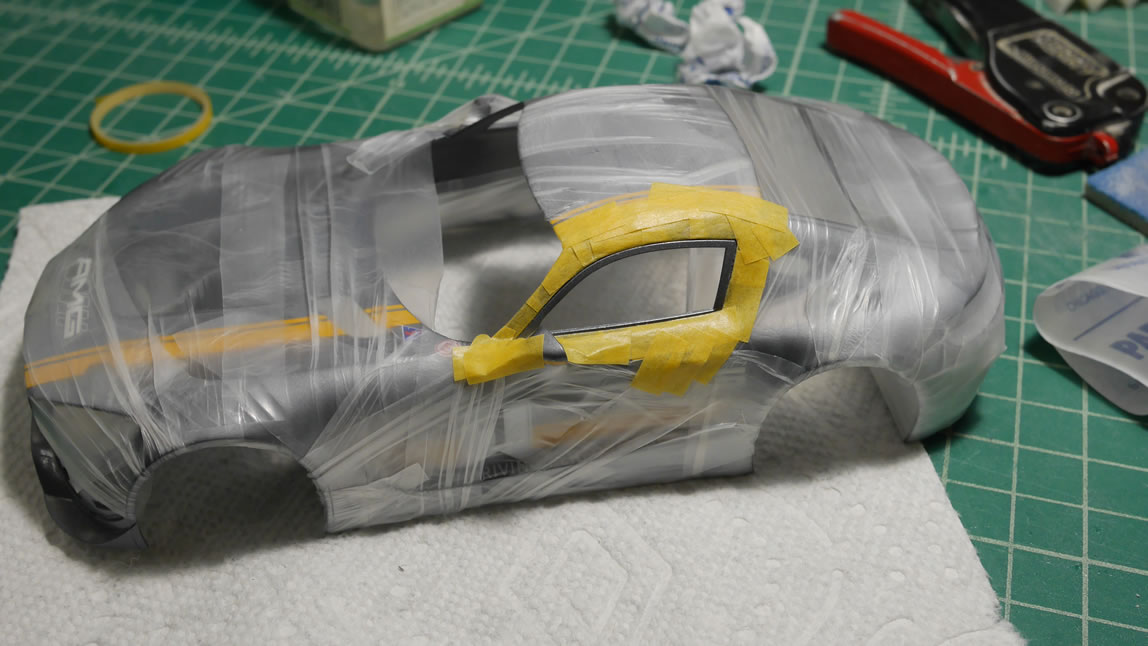
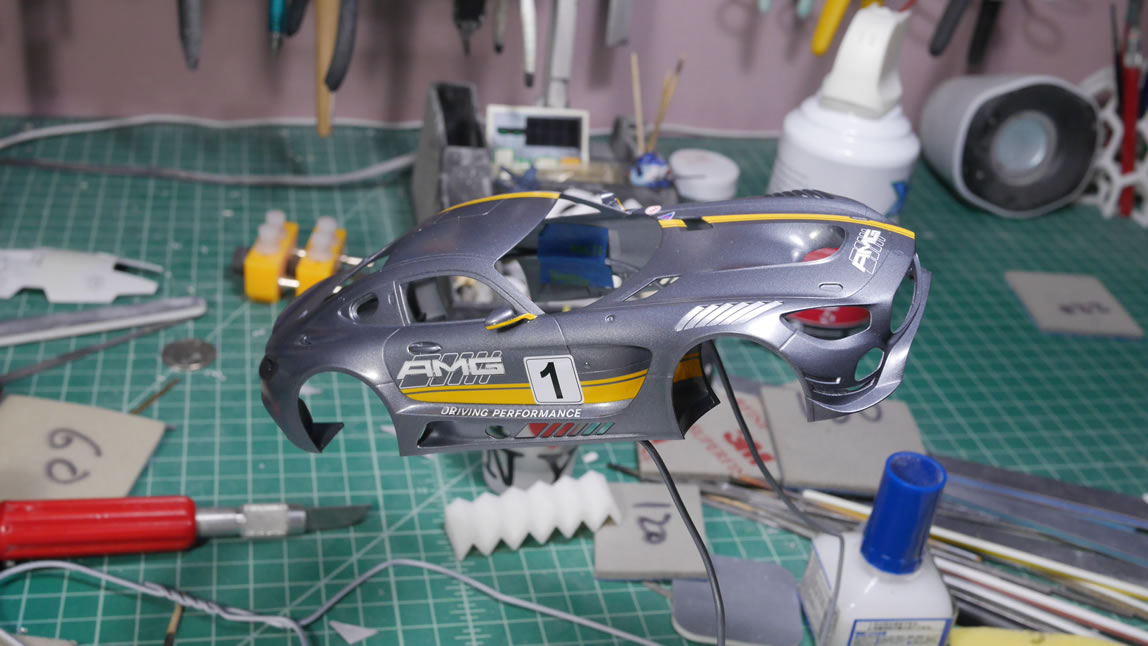
Painted and unmasked. Note that I also missed painting the back area behind the windows. I needed to remask and paint this section later too. The small body pieces are getting glued onto the car now.

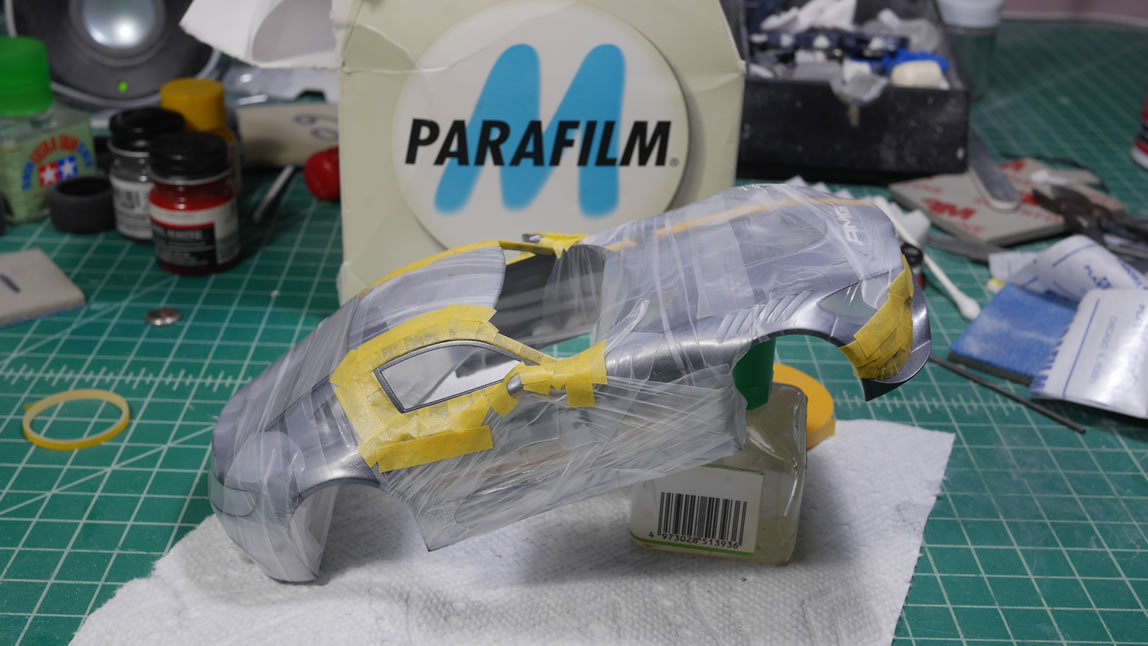
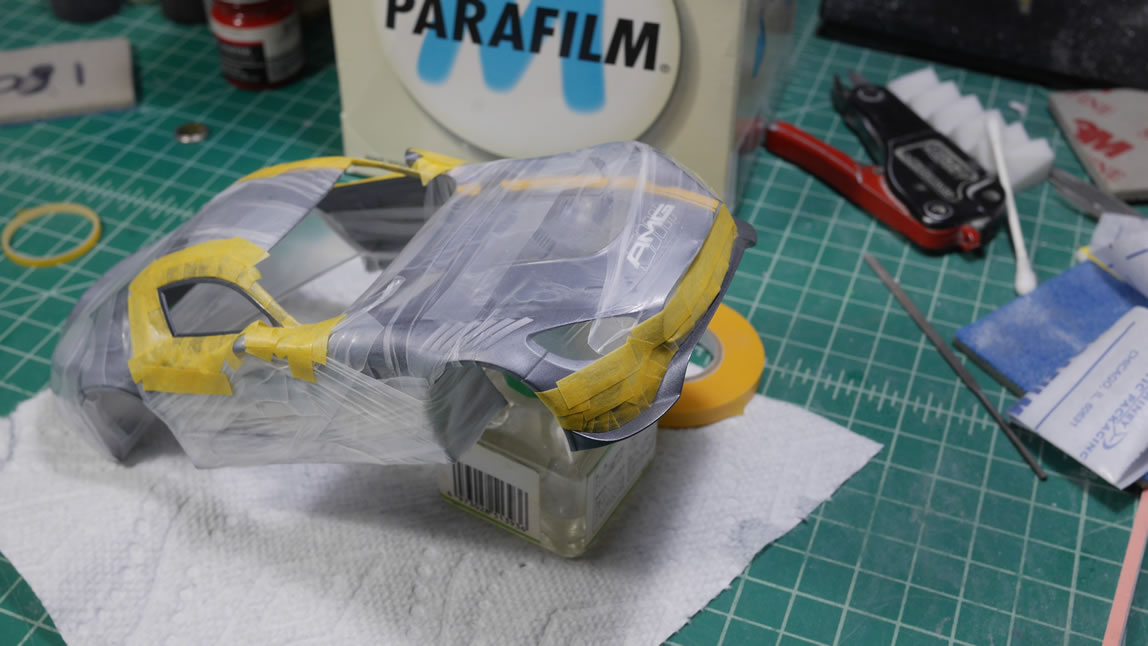
The back of the side windows area are masked and painted and decaled. Everything gets another layer of gloss.
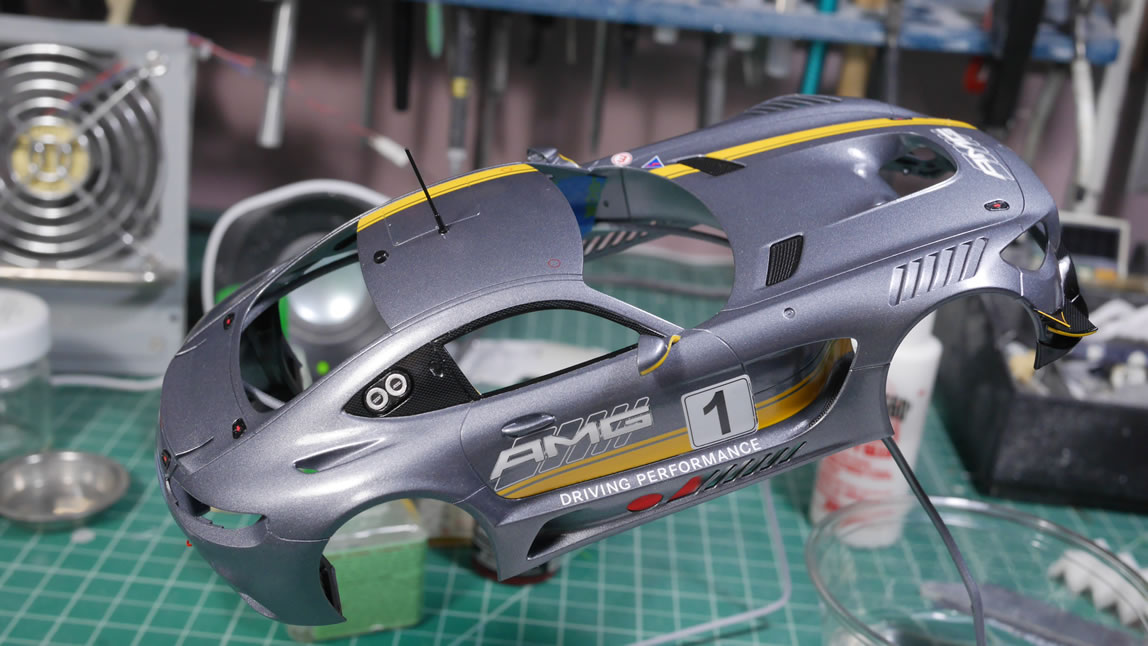
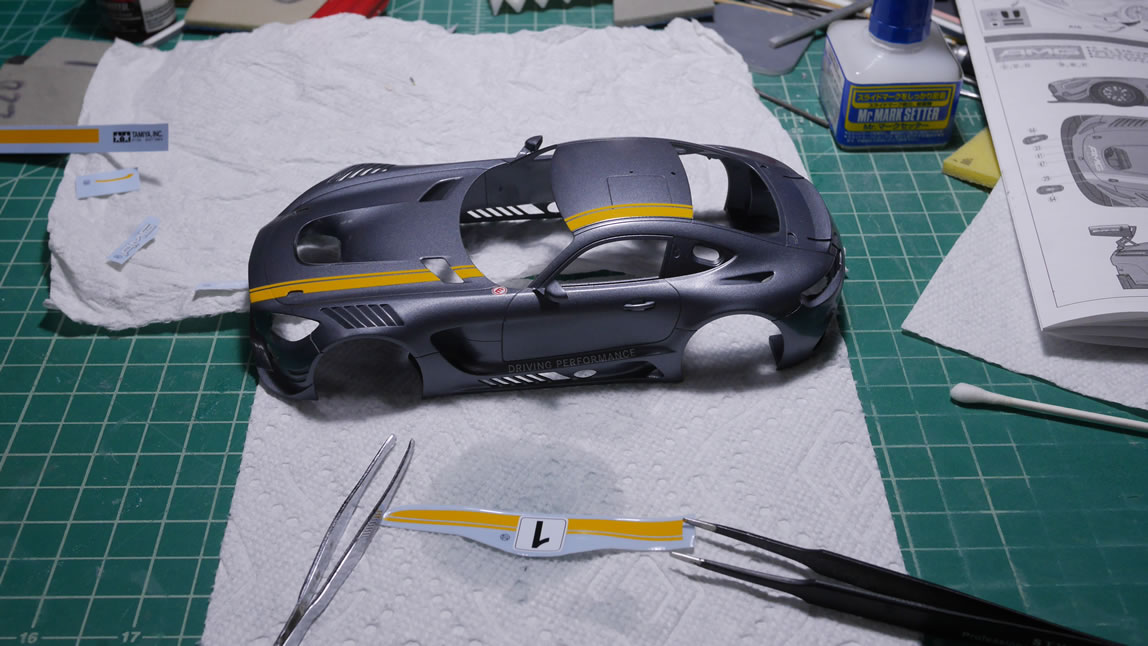
Front grill and under grill bits are glued. It’s starting to come together. I really need to slow down, not speed up. Impatience is going to ruin everything.

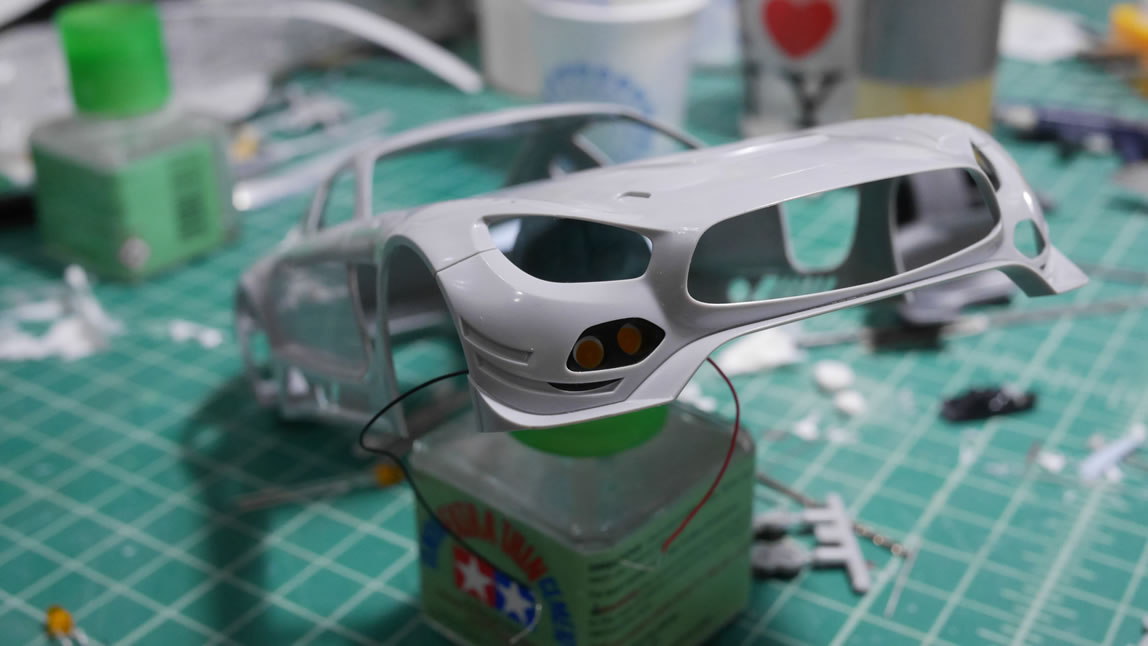
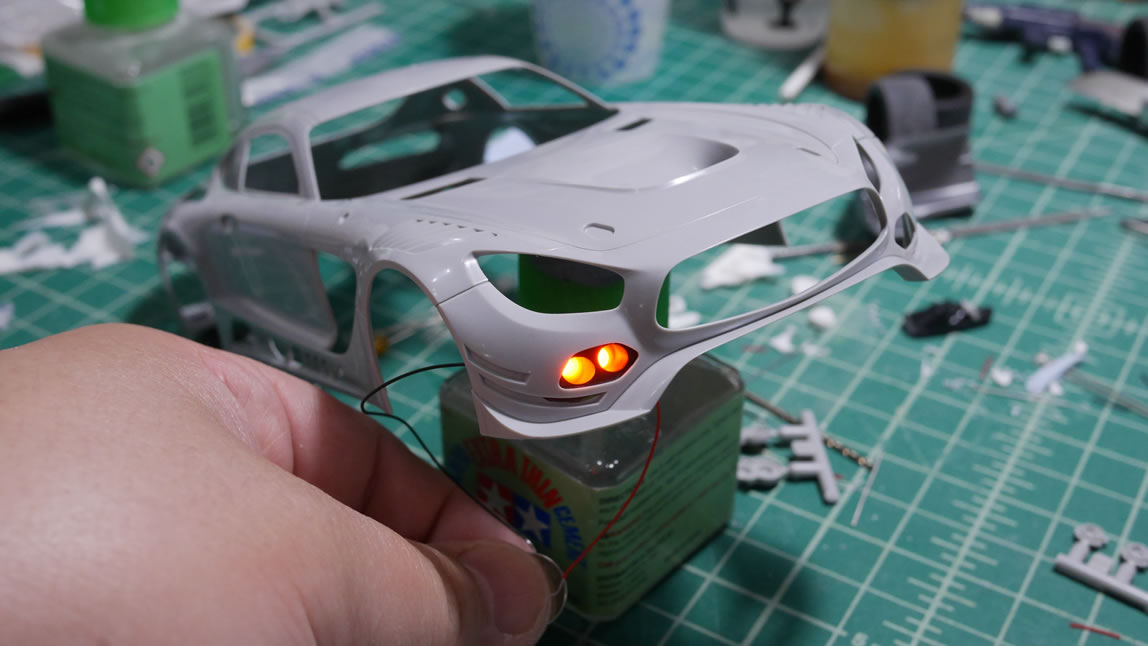
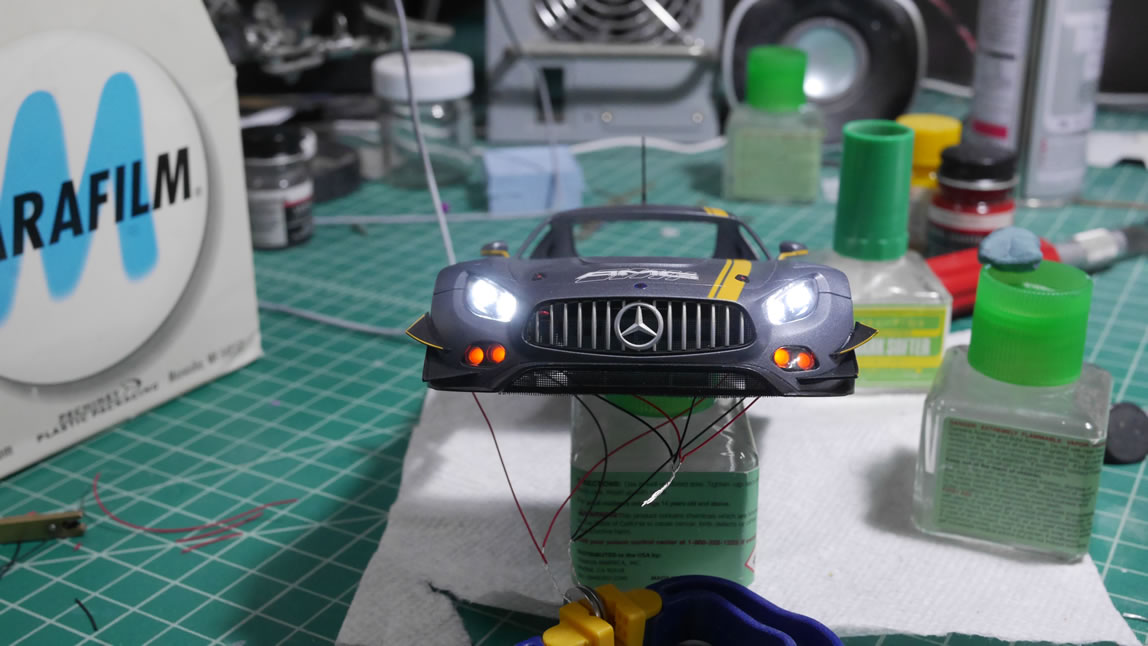
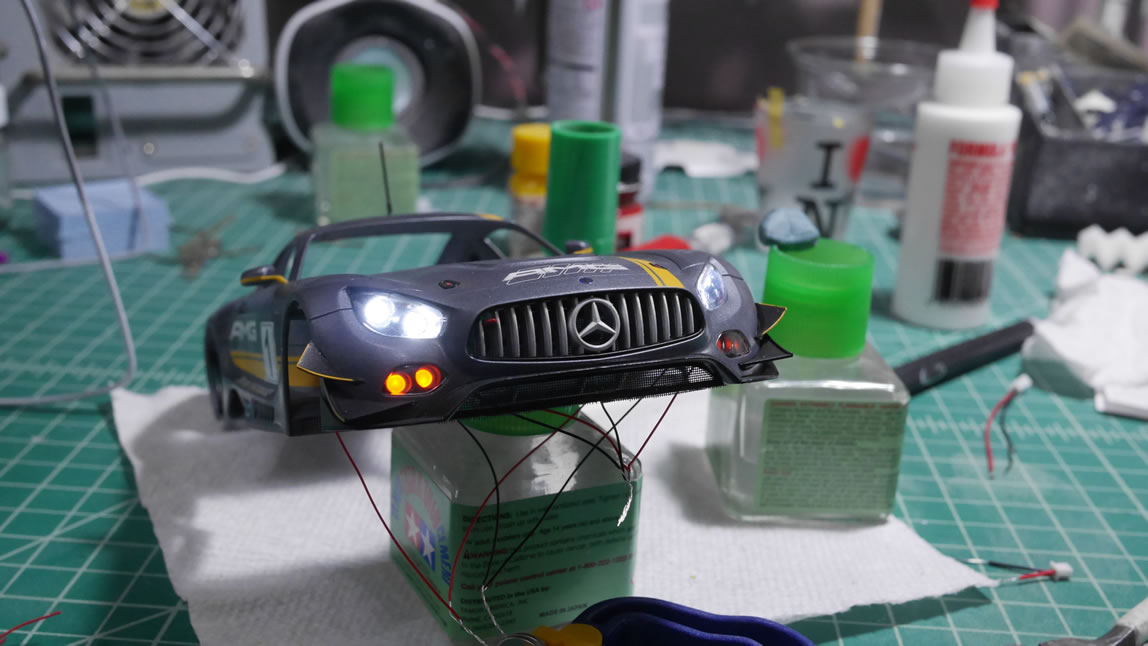
I get over zealous and start gluing the headlights and fogs into place. In my haste, I forgot to clean up the back of the headlight lenses before gluing in the main headlight housing. I wanted to get the lights tested. There are 4 assemblies with 2 LEDs in each assembly. These two LED arrays are already wired in parallel to one another so each of these 4 assemblies has 2 wires coming from it, a positive and negative. Each assembly is glued and tested. Everything is working, so the body is left for the glue to set up over night before continuing.
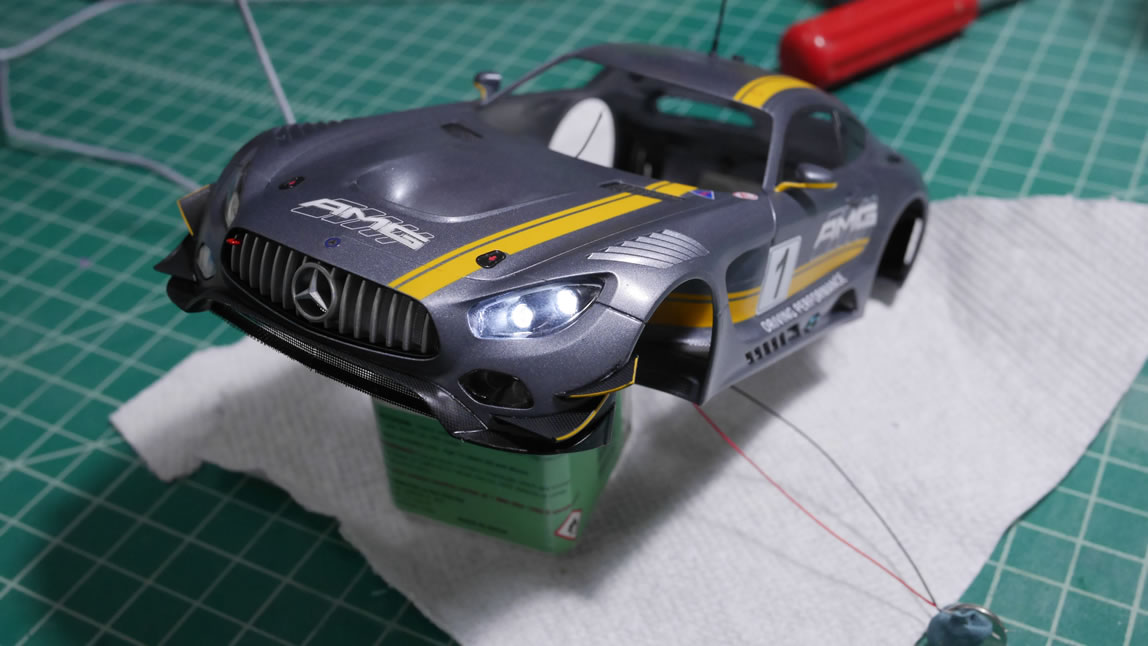
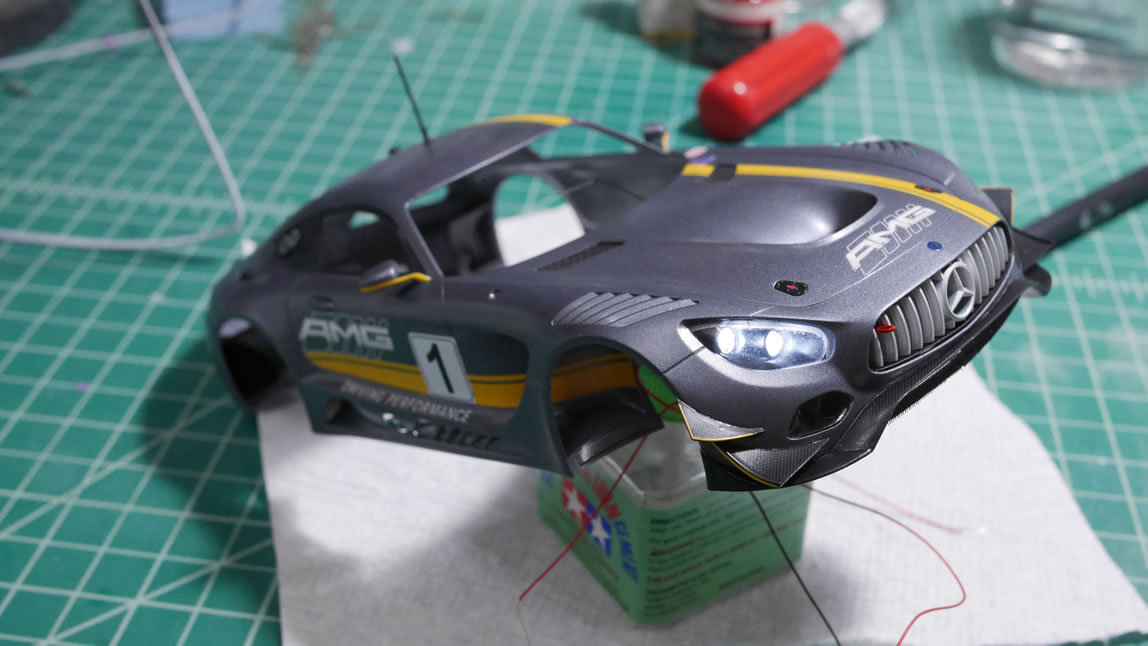
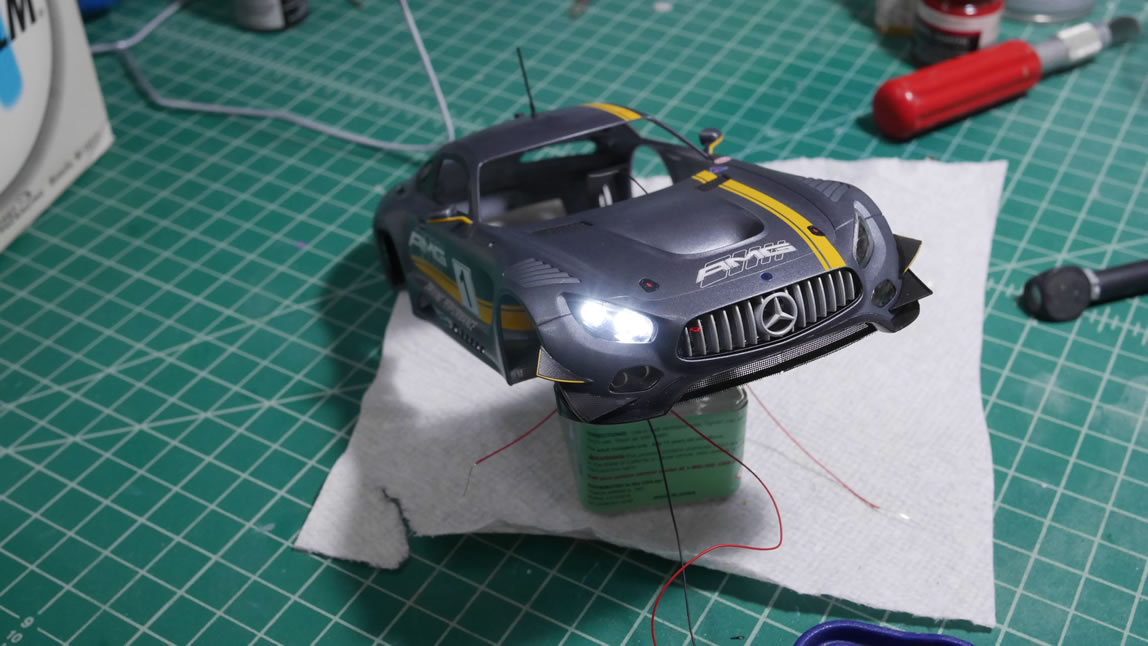
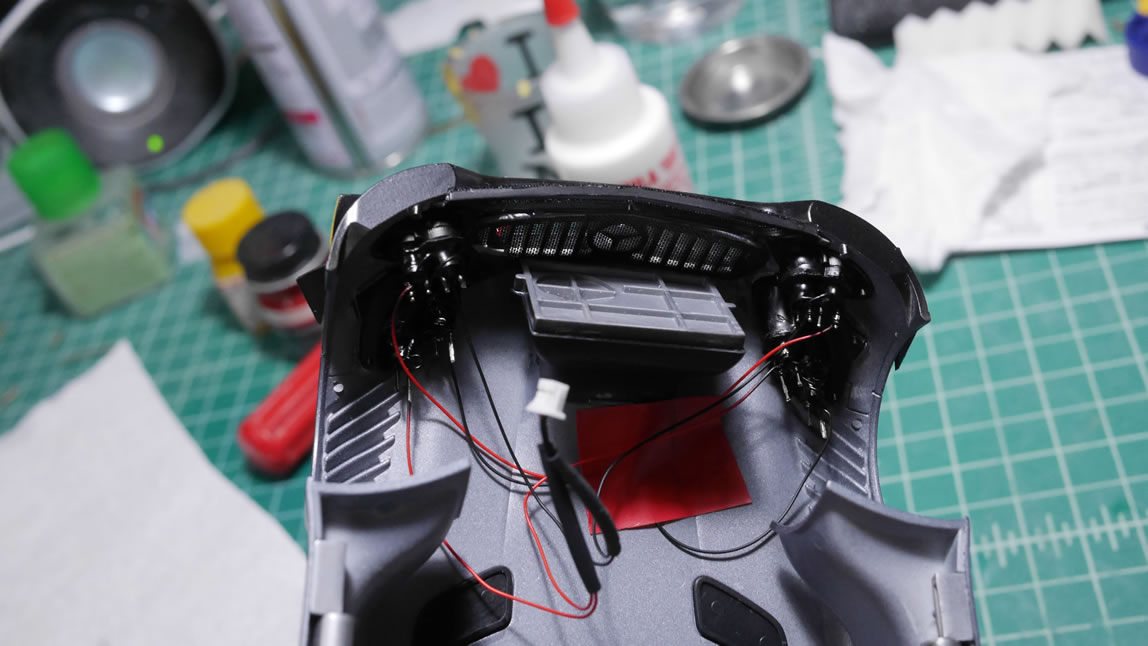
The glue has set and I can continue to work the wires. Since I’m using different colored LEDs, I cannot just wire everything in parallel and have it all work. The lower drawing LEDs will get power over the higher – yellows will be on while the white is off if wired in parallel. This means I need to wire this in series. This also means that my power source has to be greater than a single 3V lithium button battery. I needed to draw this out on paper to fully visualize and get everything to work correctly. Since the lights are in pairs, I can wire the like colors in parallel then wire them together in series. I start with the positive end for the white LEDs. Those are wired together and are my positive wire. The negative wires for the whites are bundled with the positive leads for the yellow LEDs. This continues the series connection from the negative white to positive yellow. The negative yellow leads are wired together and will be the outbound negative wire. When all is said and done, I have the positive end to the positive end of the white, connecting the negative of the white to the positive of the yellow, then the negative of the yellow out. I end up with two wires and I connect that to a small 2 lead JST connector. A quick test with two CR1220 batteries stacked together to get 6 volts lights up everything. The wiring for the main body is done and taped to the underside of hood to hide the wires.
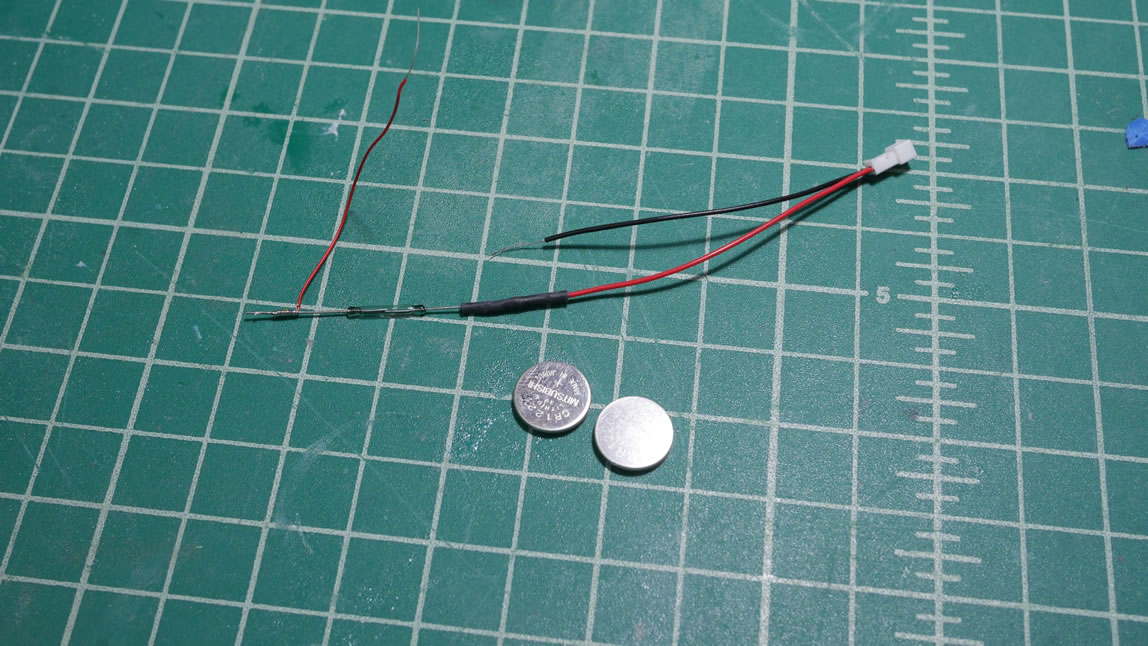
On to the chassis side. I created another wiring harness that comprises the switch, battery, and connector. The switch is a small reed switch that will allow the whole system to activate with a magnet. The battery holder is a simple 3D design and printed to clamp two CR1220 3V batteries and the positive and negative ends out to the switch and then on to the female JST connector.
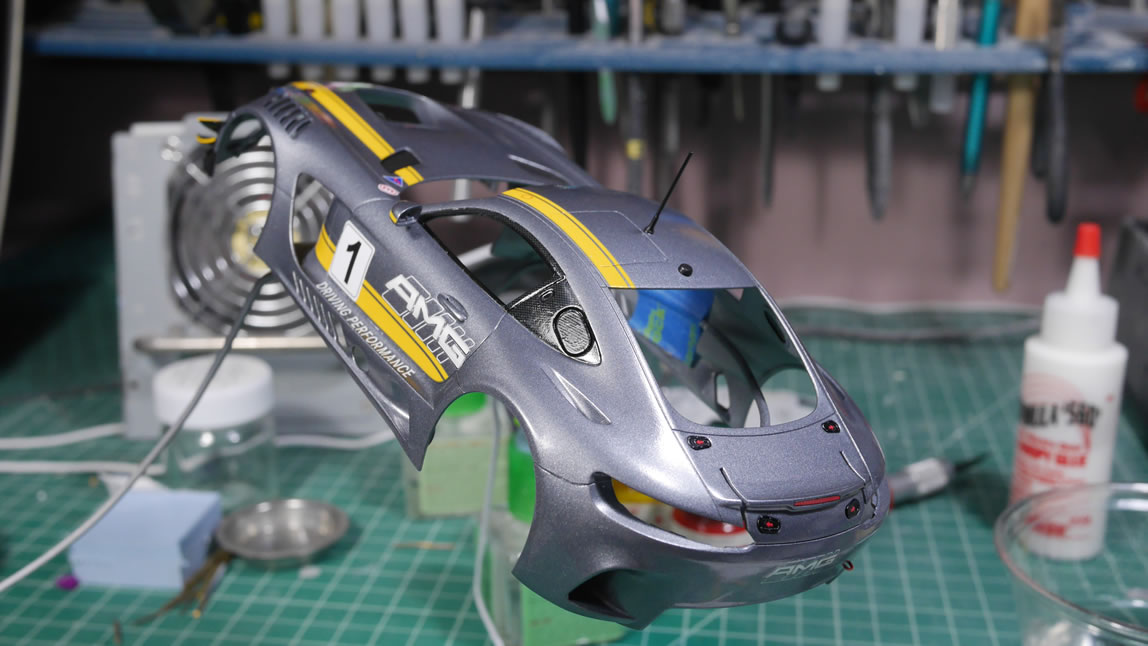
Windows are glued into place and also the final part, the shopping cart handle, is glued to the car. The body is now ready. Sort of.
The wiring harness with the switch is glued to the chassis. In test fitings, the added LEDs created some fit problems. I had trimmed the LED leads down as much as possible, but there was still a few millimeters of spacing that was preventing the body to chassis alignment. This also throws off the wheels. So the the front ends of the front wheel wells were grinded down a bit to thin that wall and create the necessary space for the lighting mod. Once that was resolved, the JST connectors are mated and the body and chassis are combined and that’s all she wrote.

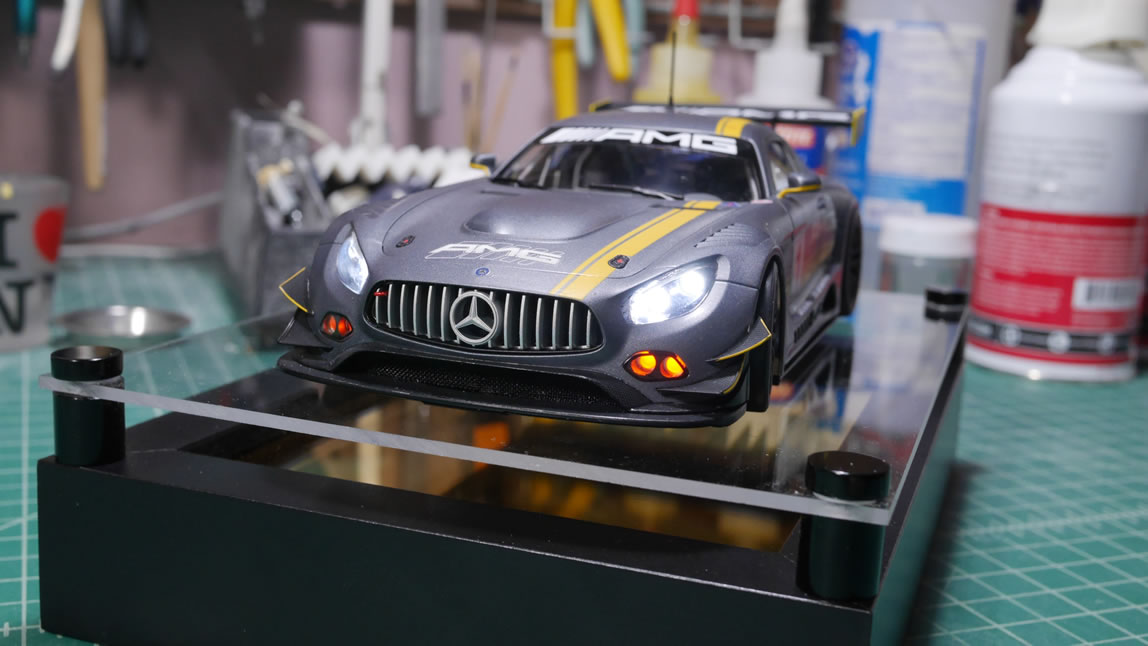
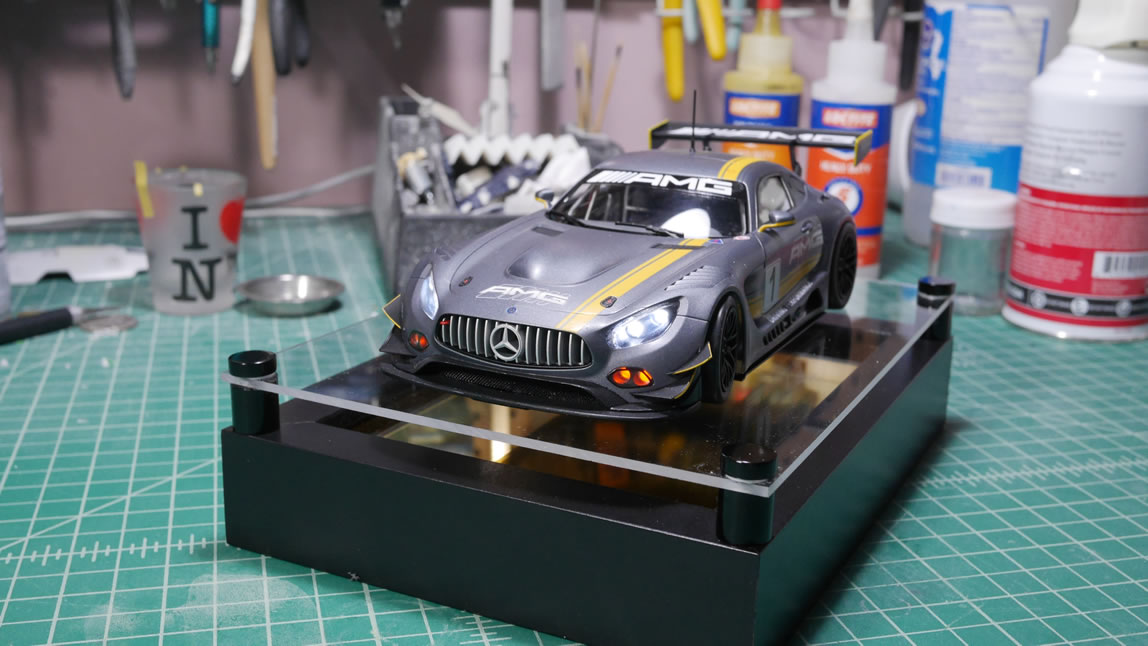
Here’s a quick video showing the completed car and how the lights work.