January 11, 2011: I picked up a few of these HGUC Sazabi kits when they first came out. I think I ended up selling off one, and I may still have another in my stockpile, but I’ve been meaning to get around to working on this kit and the recent quickness at which I was able to finish off the Bearguy Panda got me pumped up to do more 1/144 scale kits. They’re much less partsy than MGs and have some great potentials for mods. I will definitely be making several cosmetic mods, nothing major, just enough to enhance the look. I will be keeping the ideal “Sazabi” look as I want to test out a few reds before I finalize the exact red I want to use on the kit. And I will be attempting to go with the ultra gloss finish for the guy.
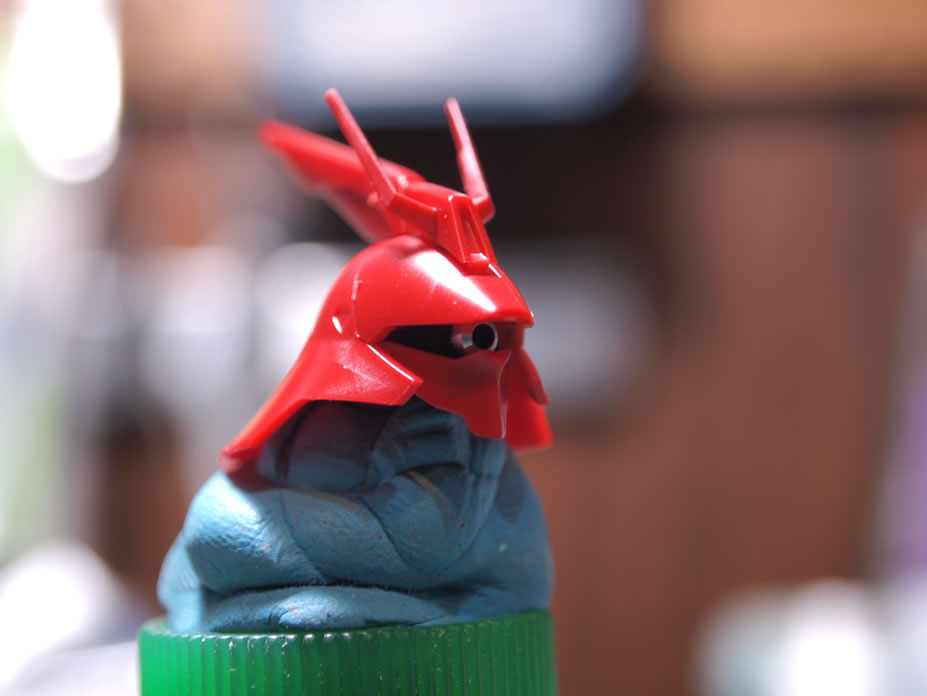
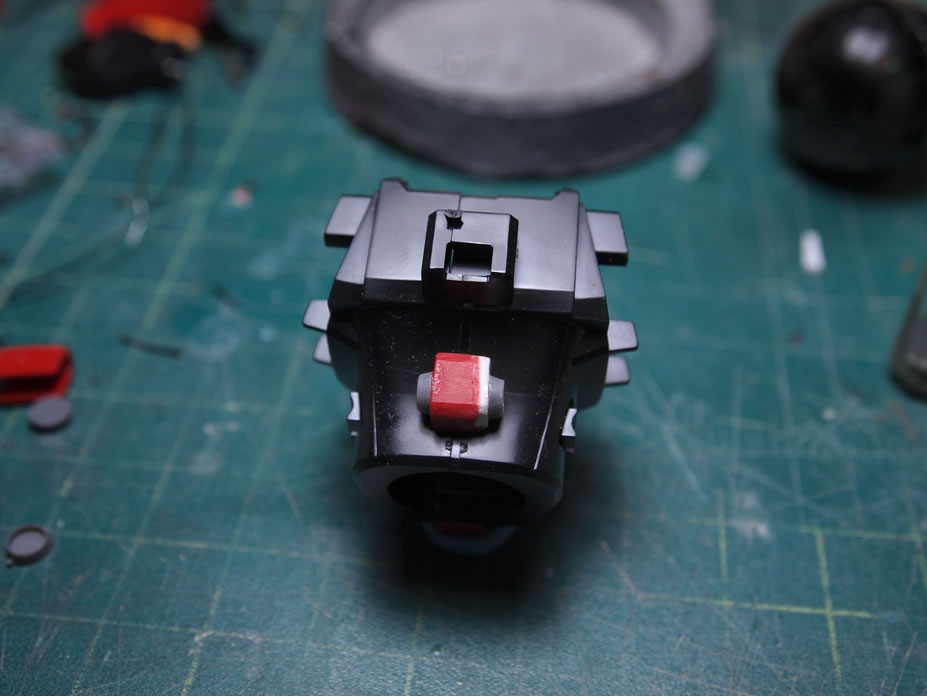
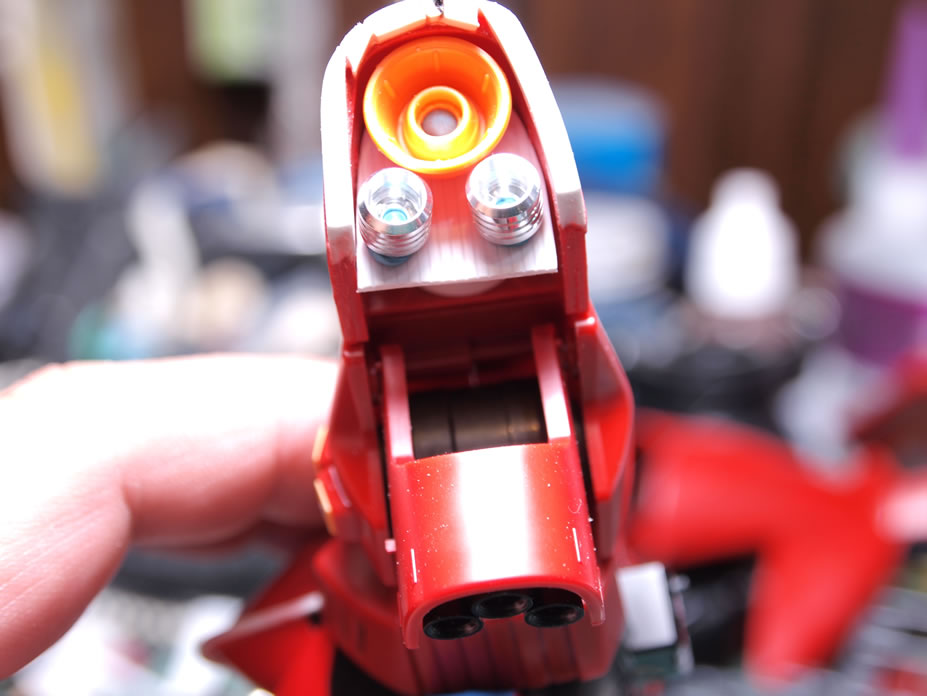
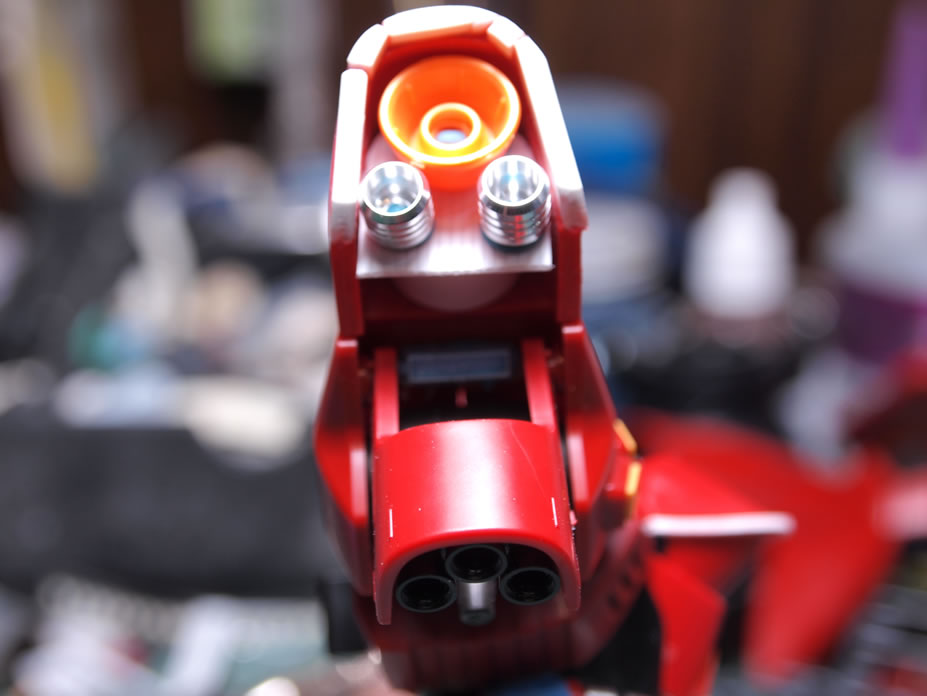
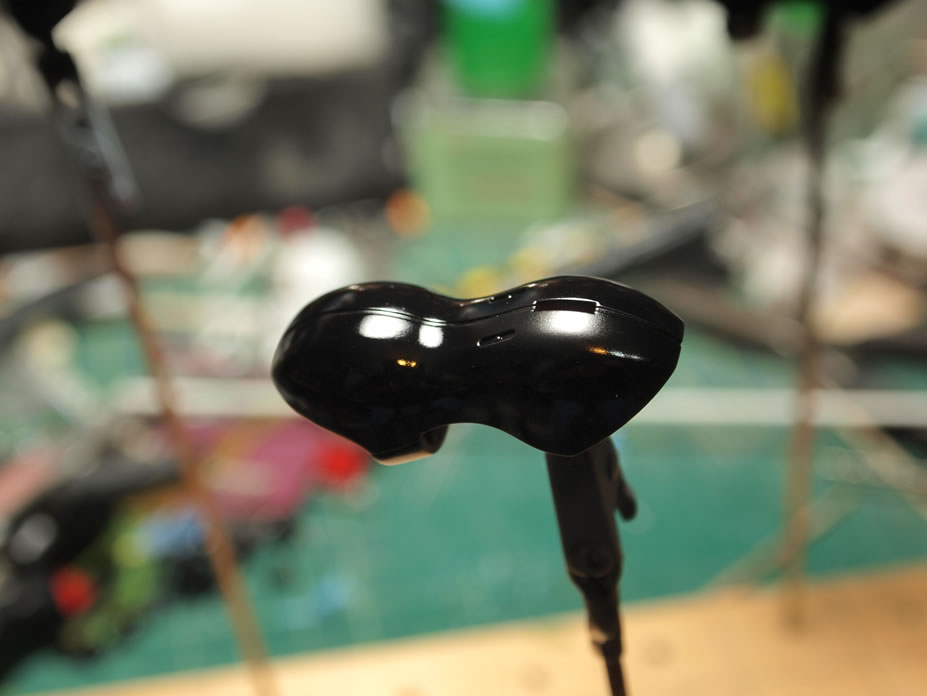
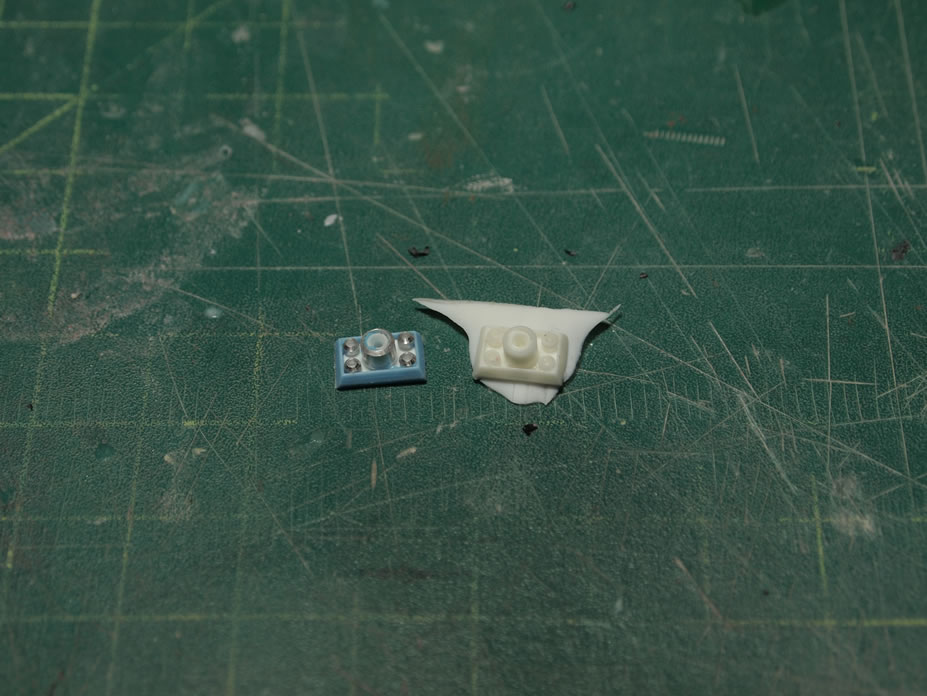
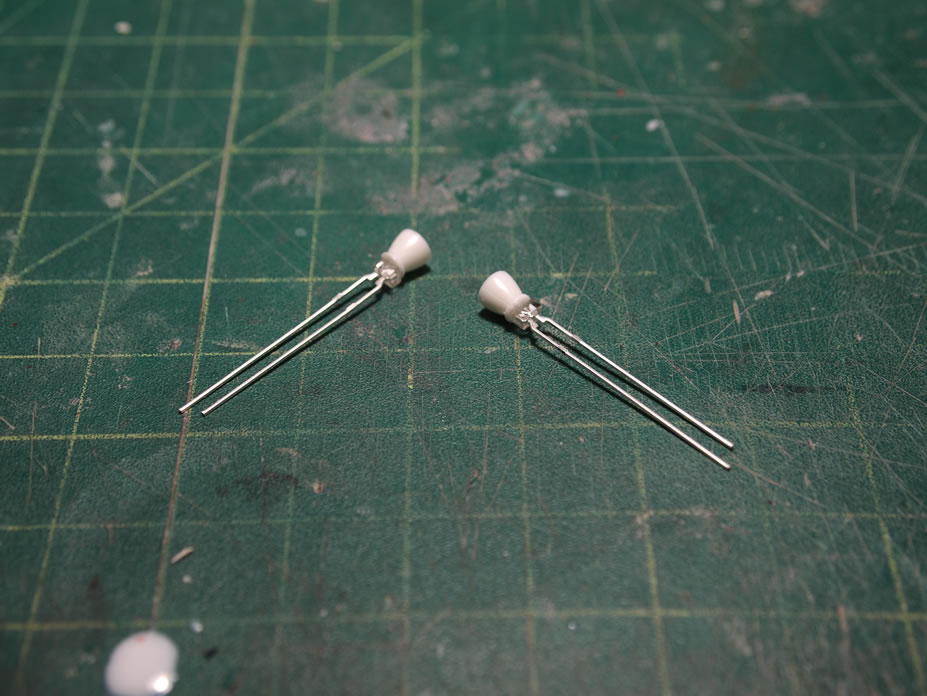
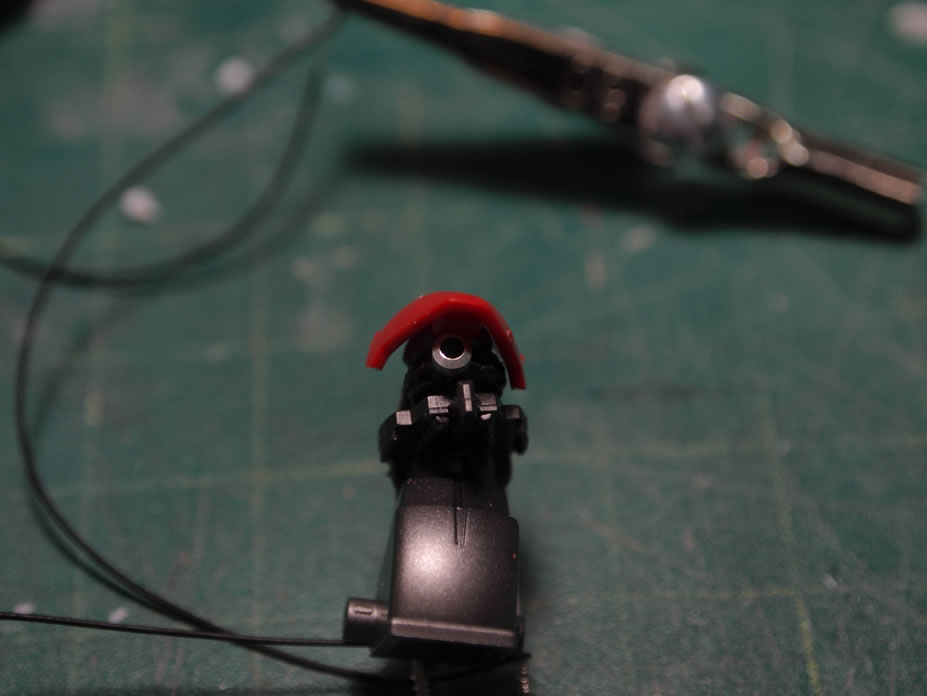
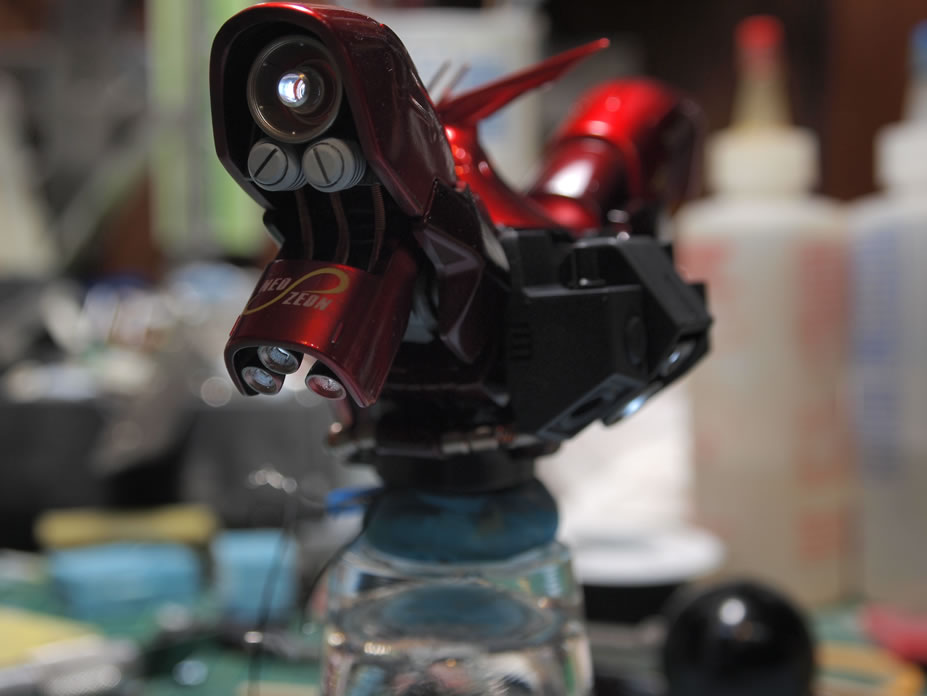
First up tonight was a small mod to the mono eye. The original mono eye plastic stub was cut and a metal collar is added as a replacement. I also drilled through this piece and will be adding LED lighting to this kit.
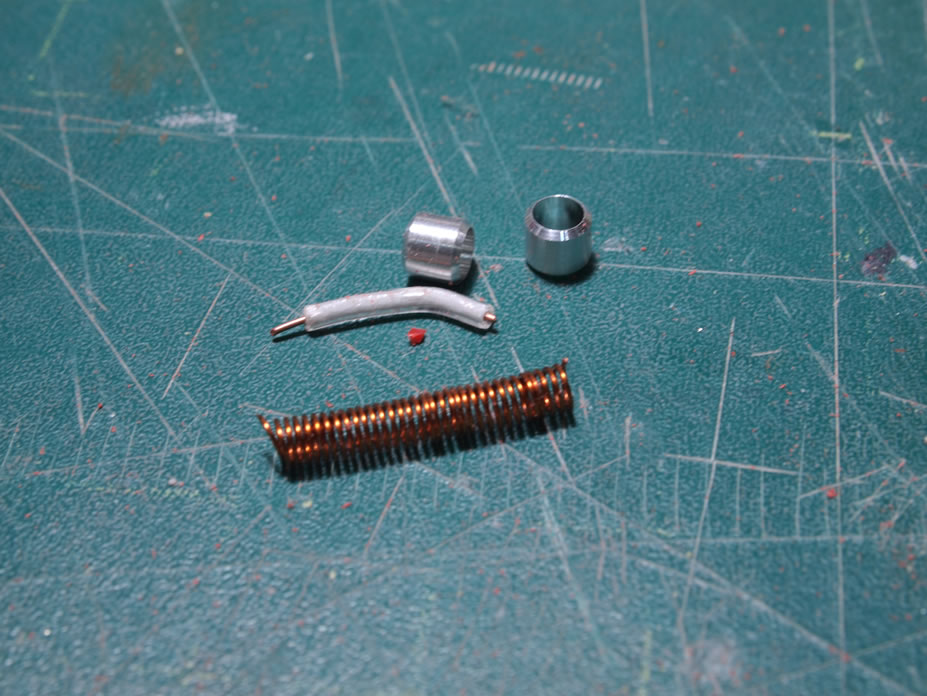
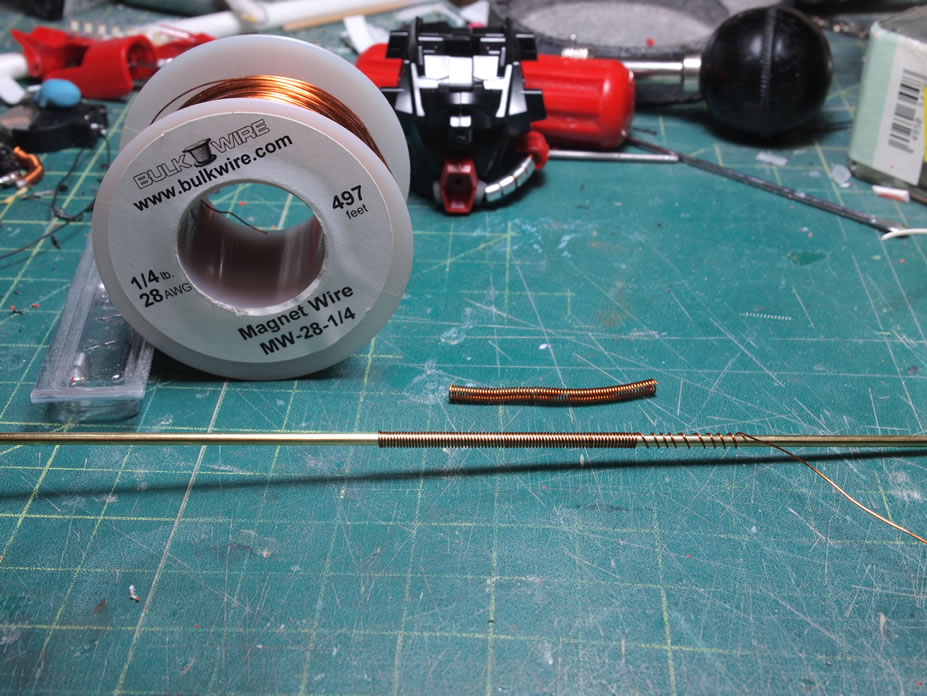
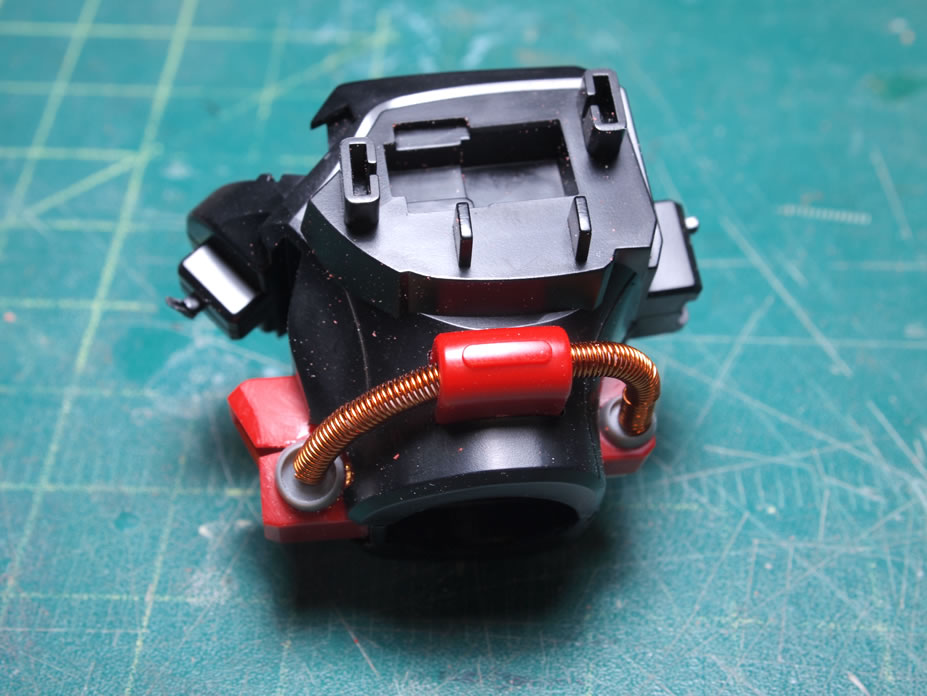
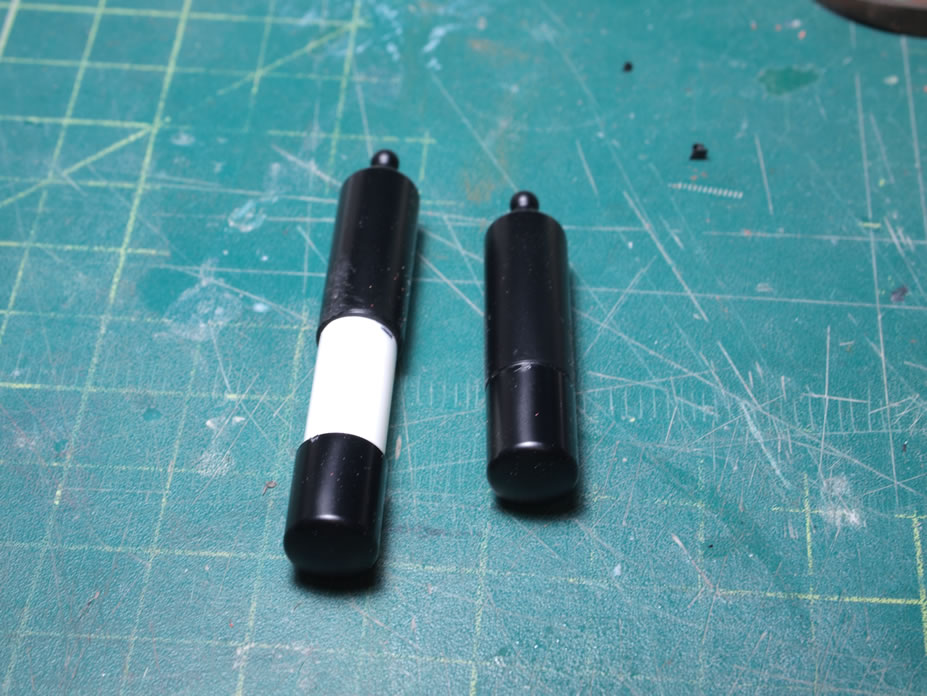
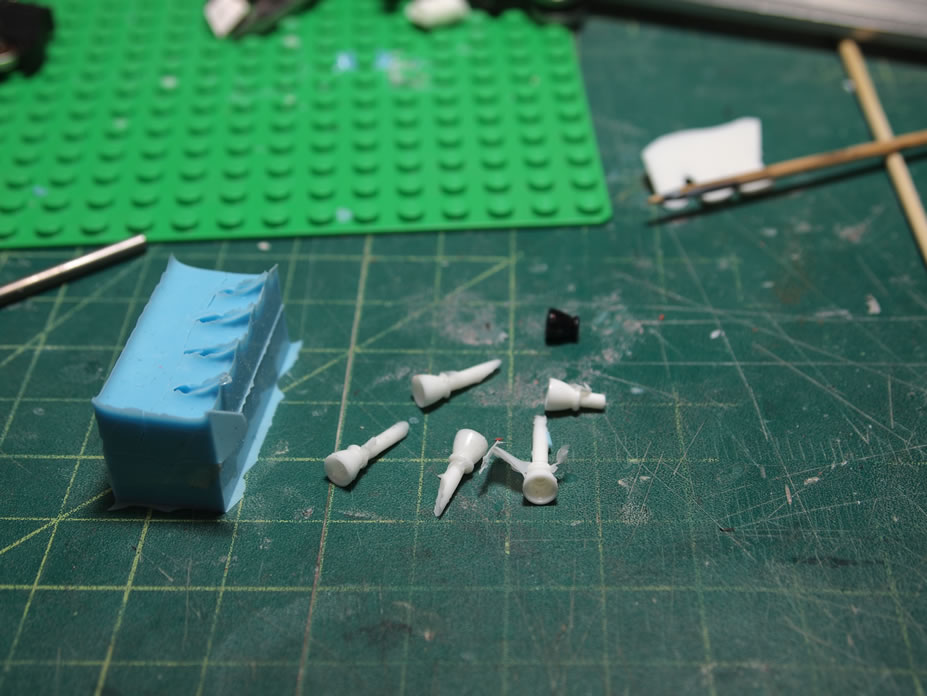
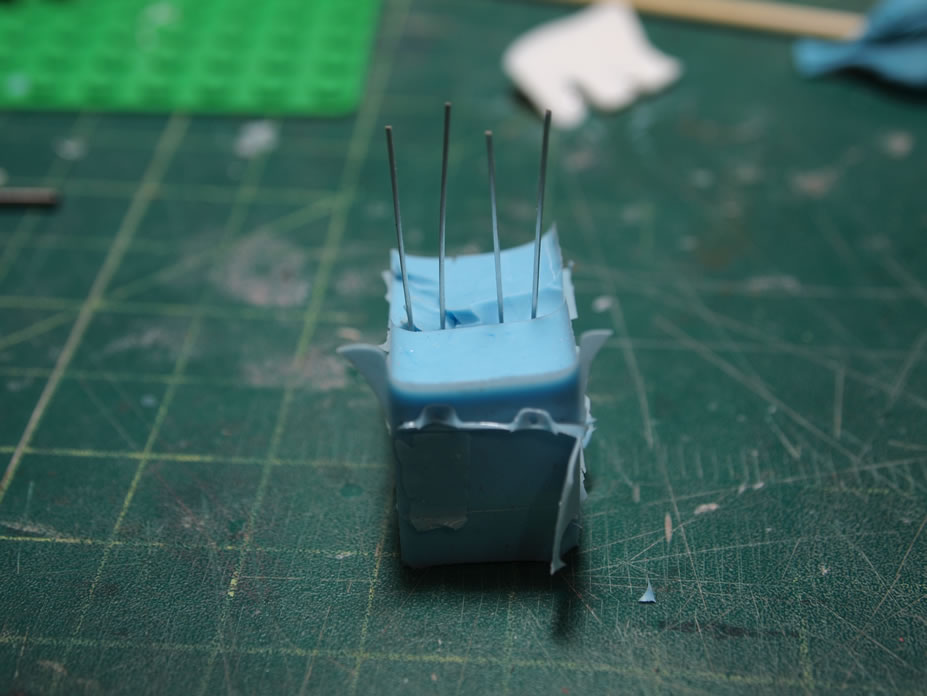
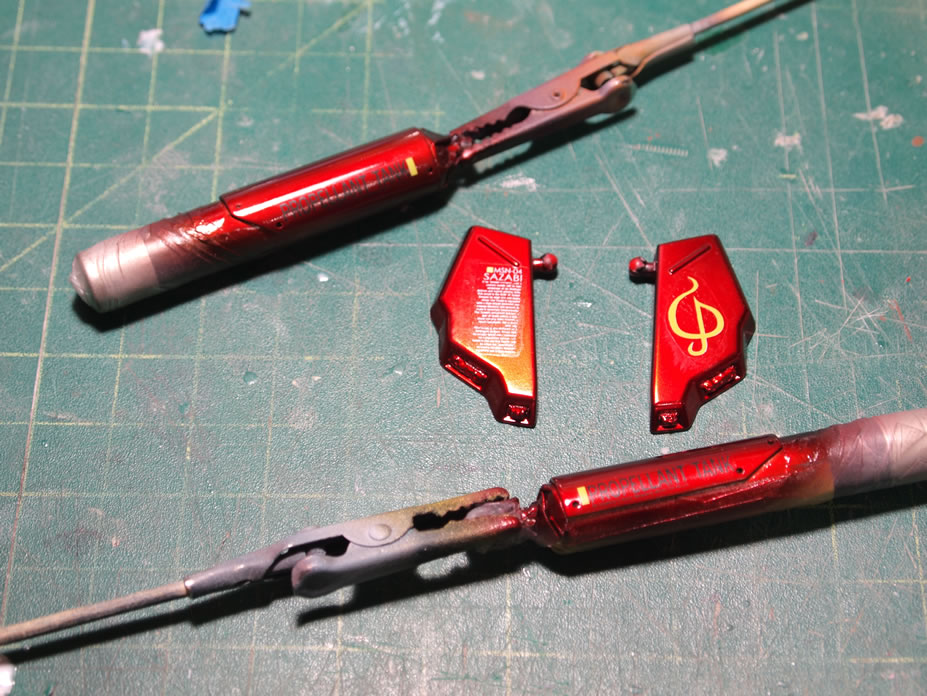
Next up, since I had my collection of metal collars out, I went about planning the replacement for the Sazabi’s yellow belt thingy. Metal collars, some wire, and a coiled up length of magnet wire to create a spring sleeve.
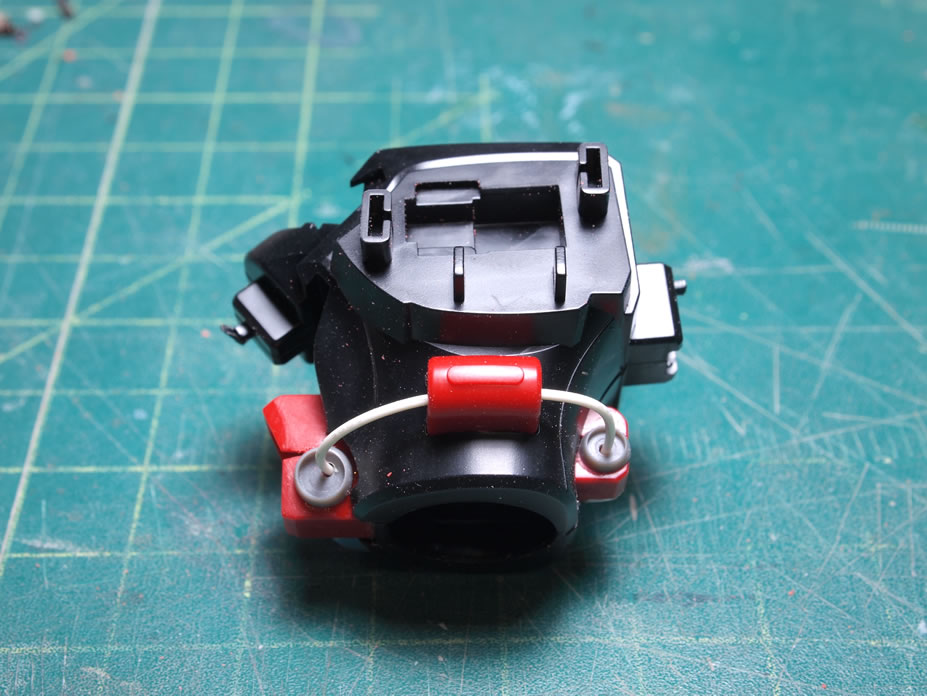
Assemble the parts and we have a comparison shot with the original belt and the new belt. I think it’s a slight bit of improvement. Small start but this should ramp up as I continue.

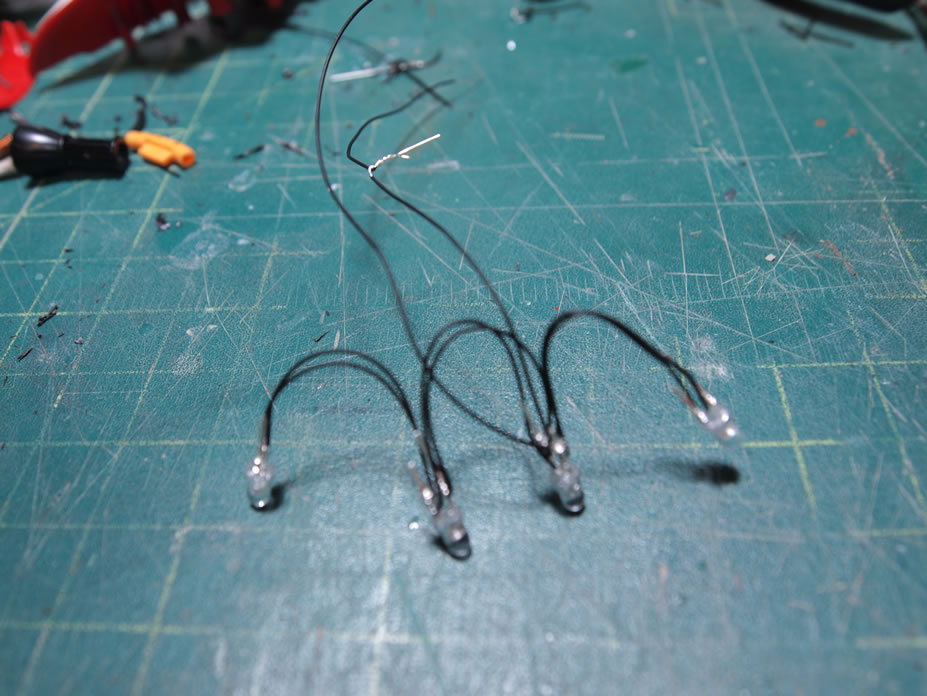
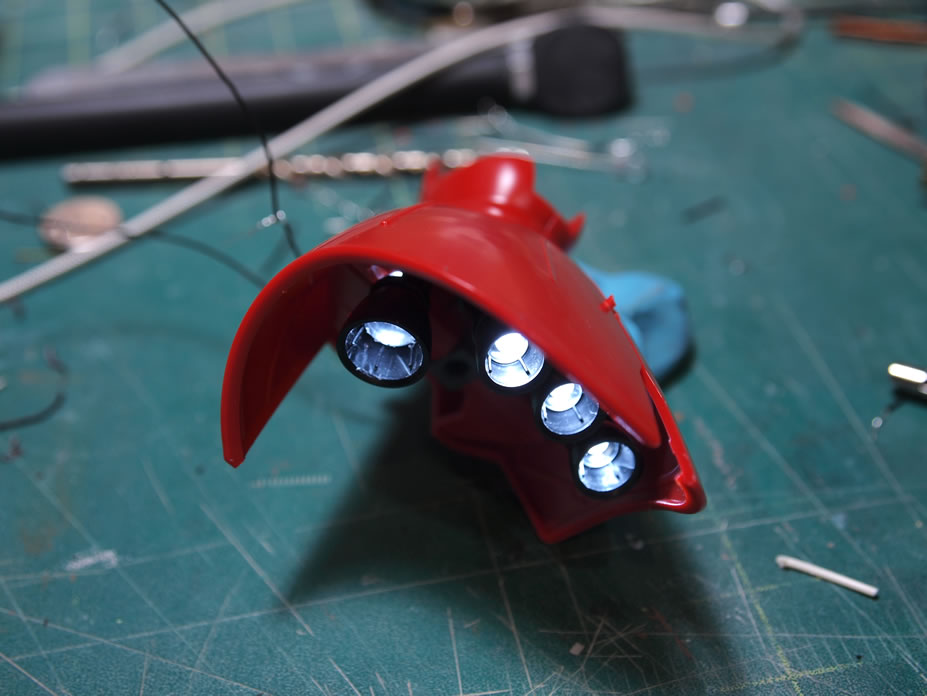
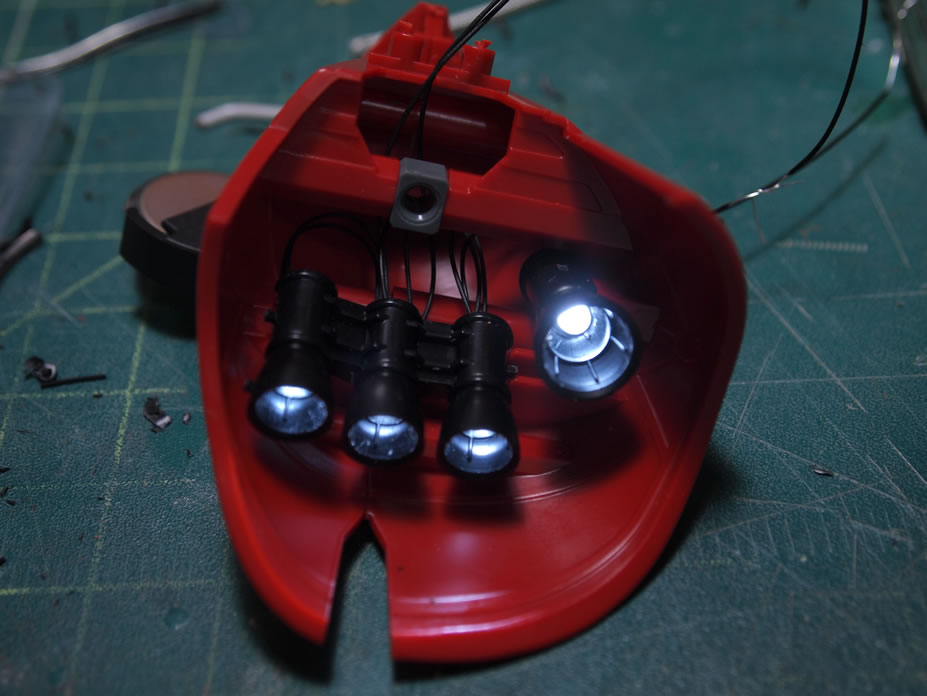
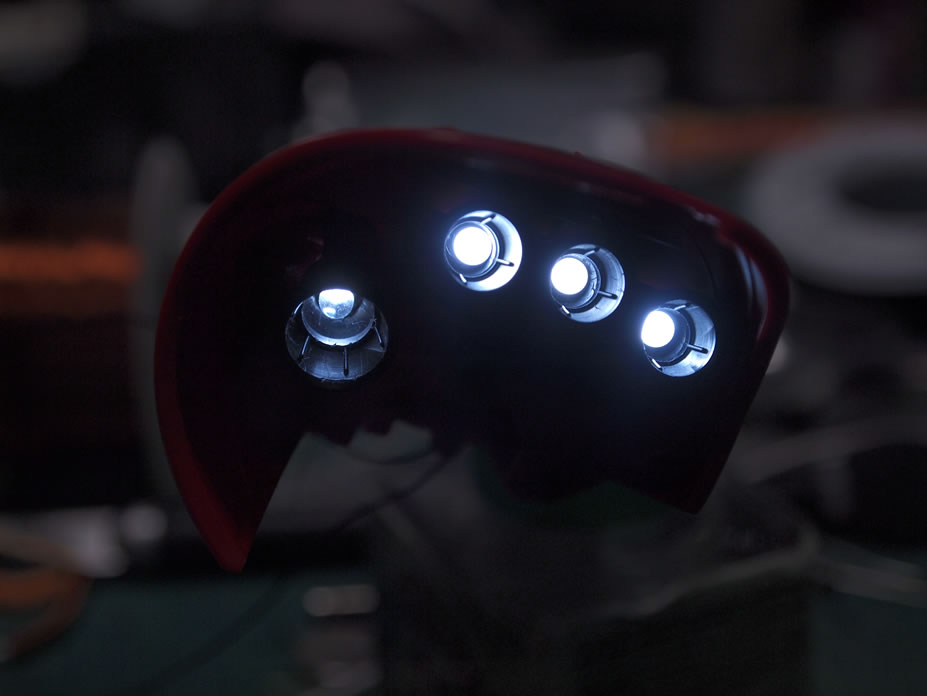
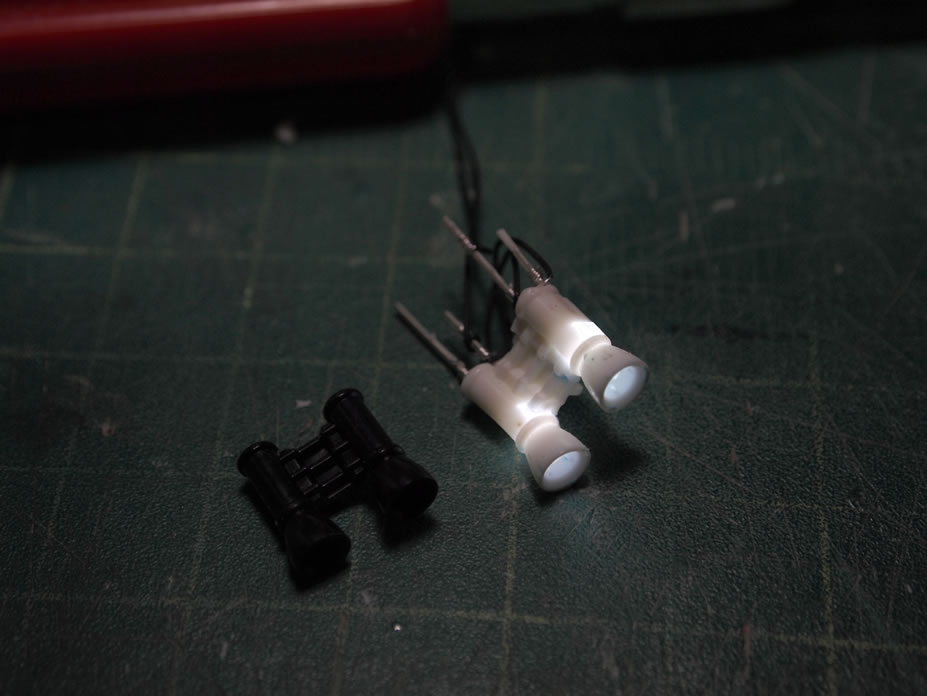
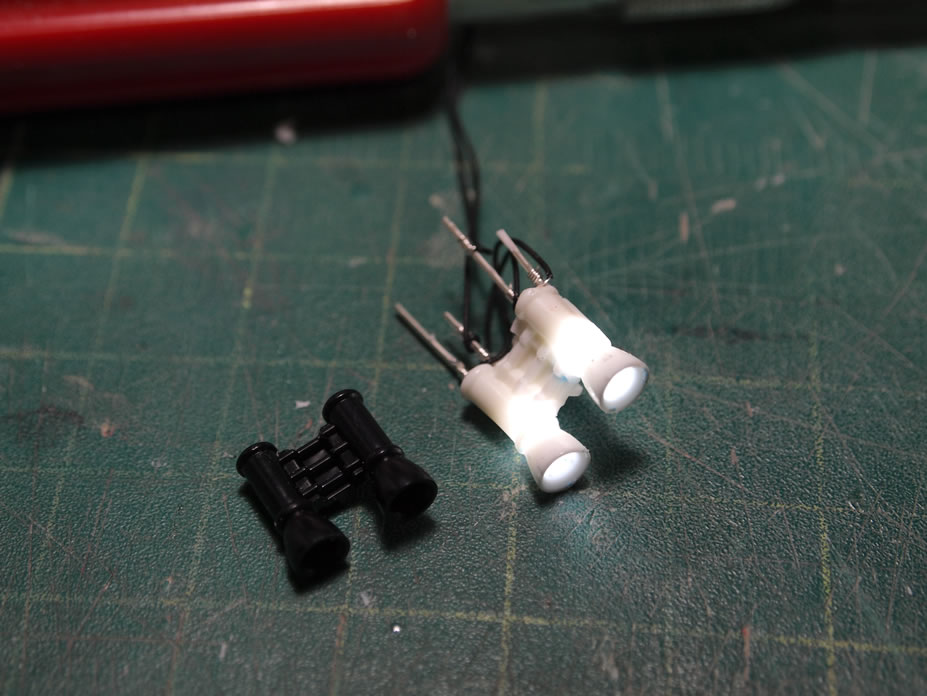
January 12, 2011: During my lunch break, I went to the local electronic shop and cleaned out their stock of 3mm white LEDs. I picked up a few other items as well. And tonight, I spent most of the time drill, test fitting, and more drilling. I’m still working on the waist unit cables but parts are being glued and need to dry before I can continue, so on to the fun lighting adventure.
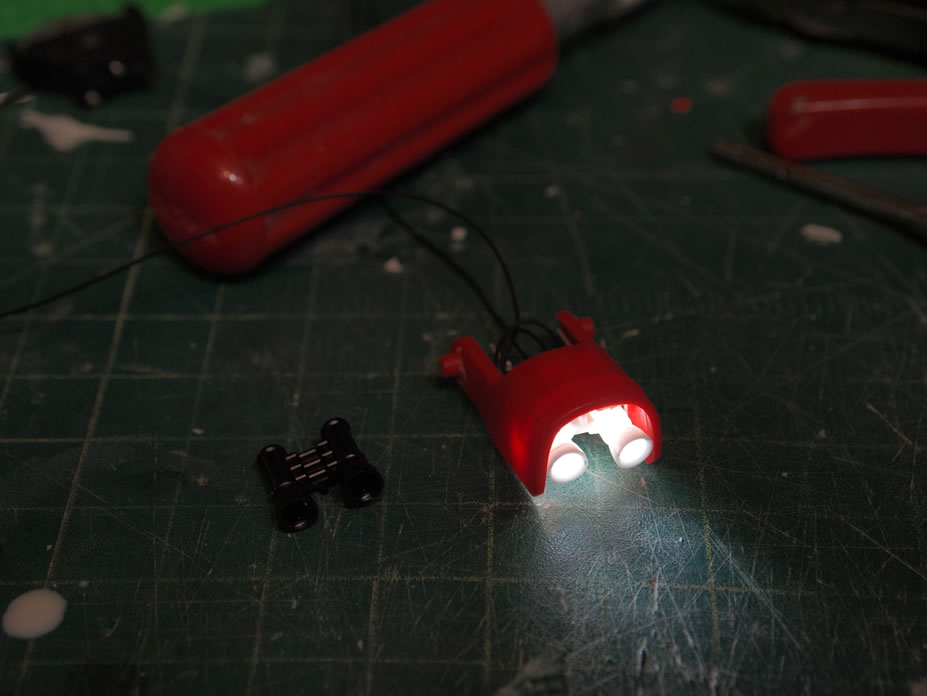
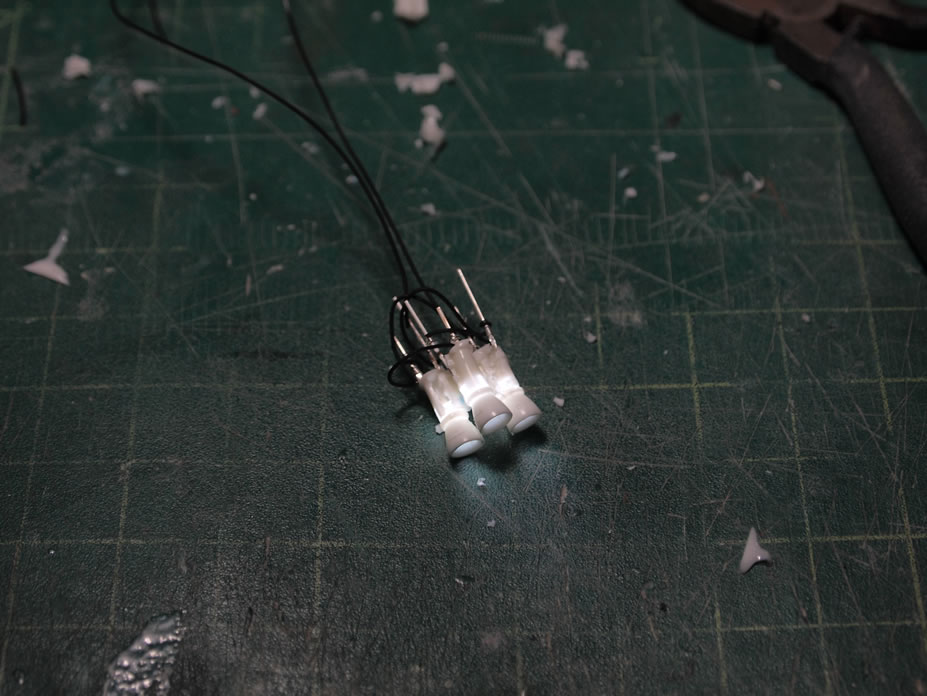
I wire wrapped four of the 3,, white LEDs together in parallel, then after successful test fitting, I assembled everything together.
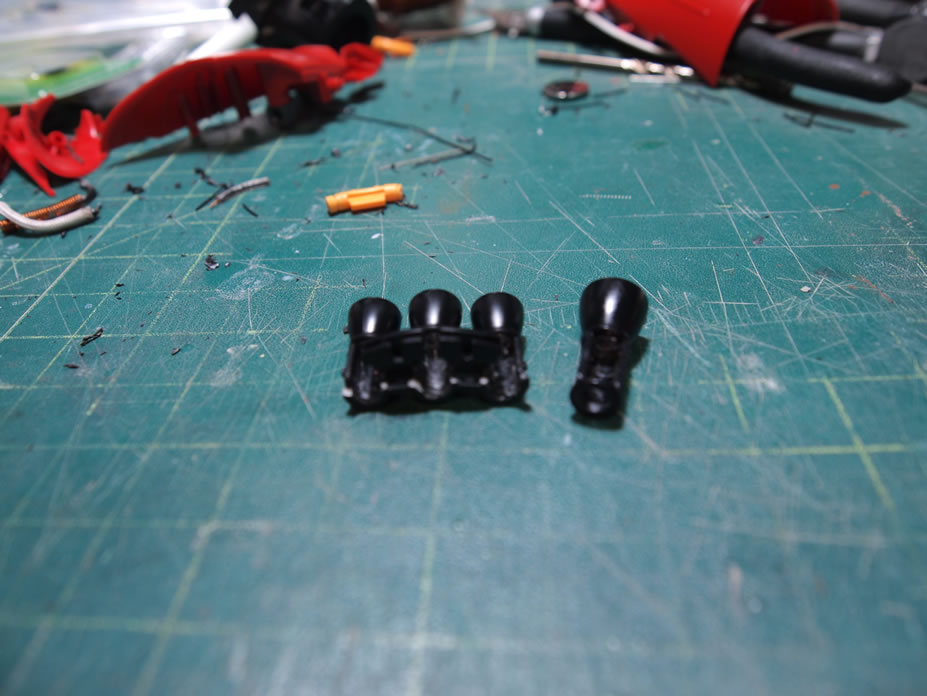
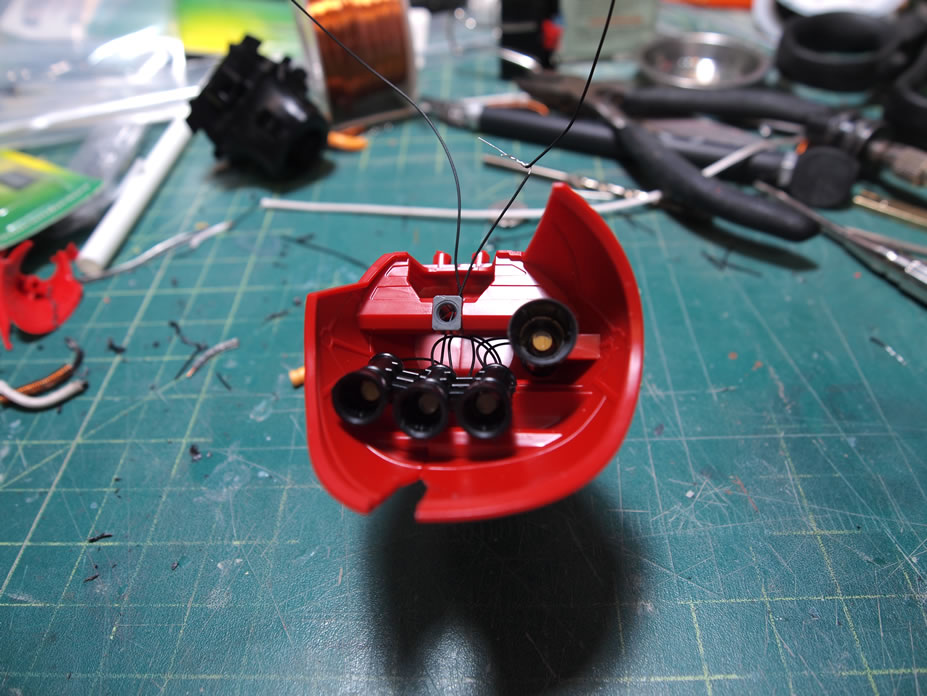
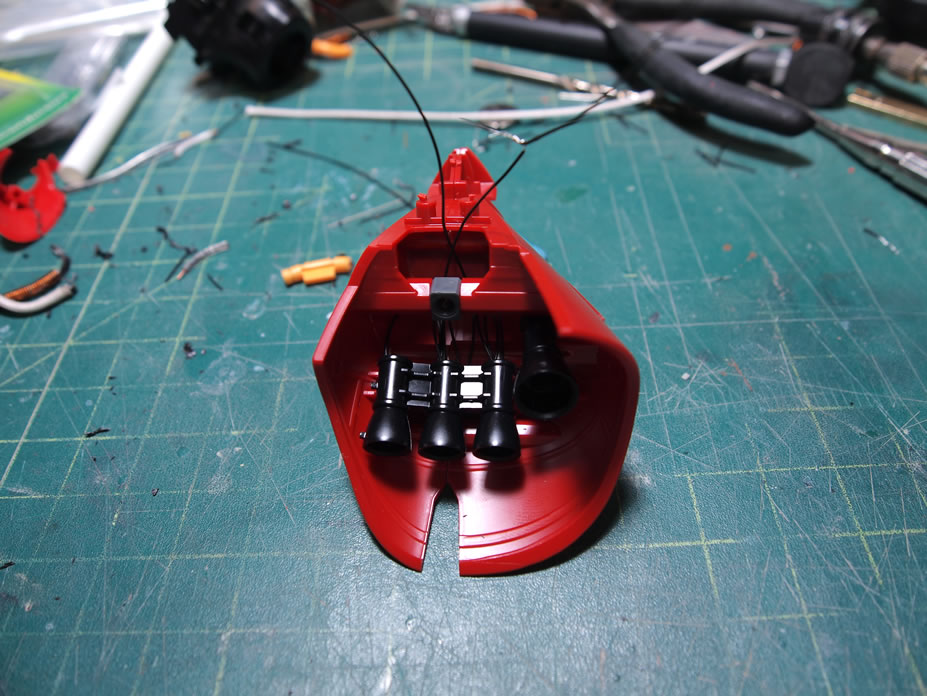
Not too bad of a lighting job. Good thing that the Sazabi is a fairly sizable suit or this would be a really difficult job. Progress is slow, but moving along steadily.
January 13, 2011: So when I first started working with replacing the waist cables, I got a little over zealous with cutting and sanding down some of the end points. So, after rebuilding the back end piece with some styrene strips; I added some circular end points to each side. The same is done with the front end point.
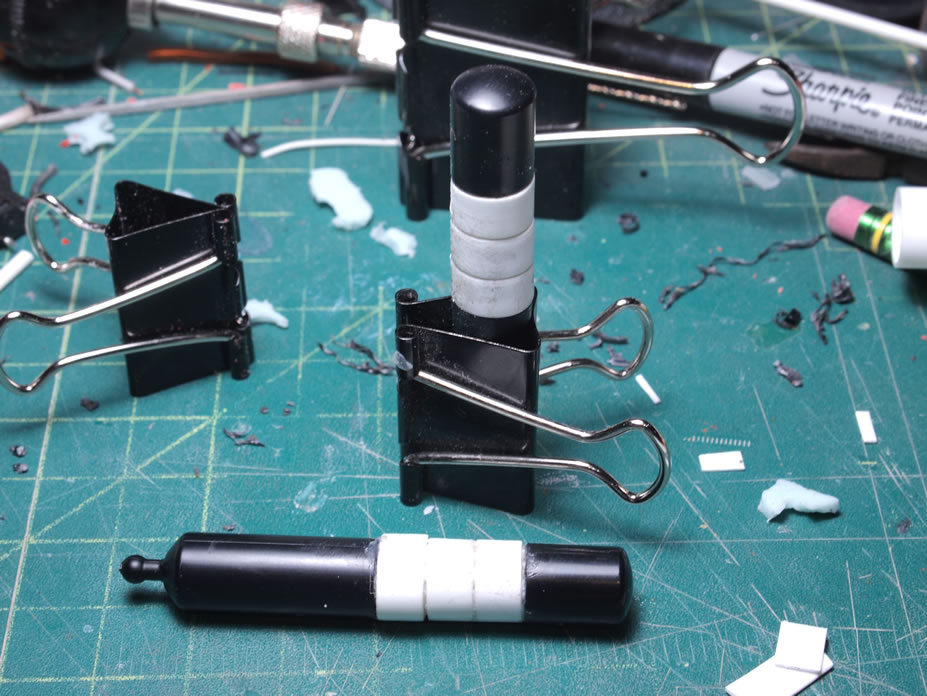
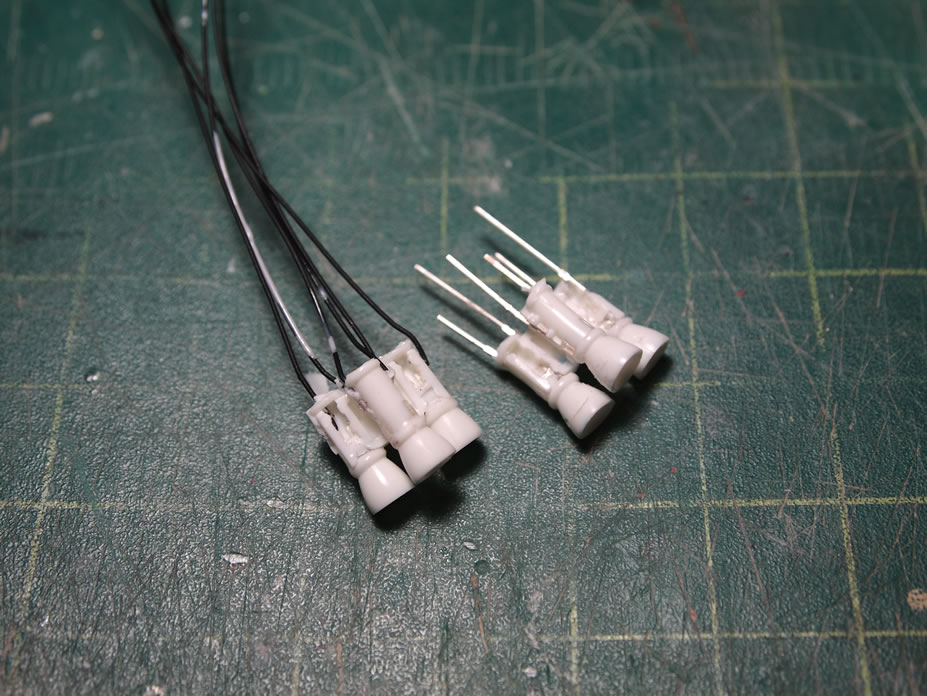
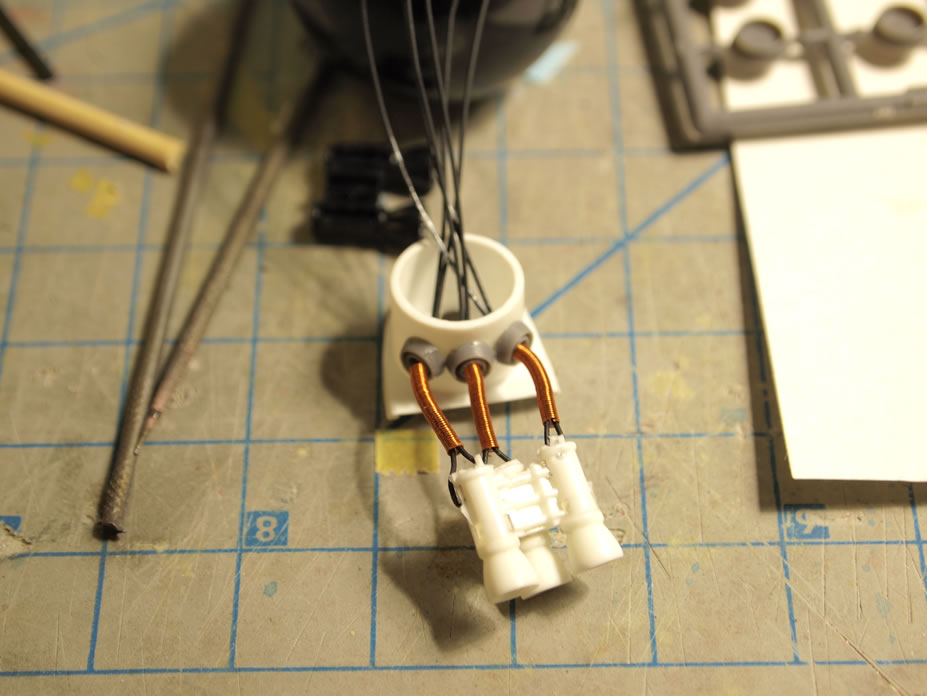
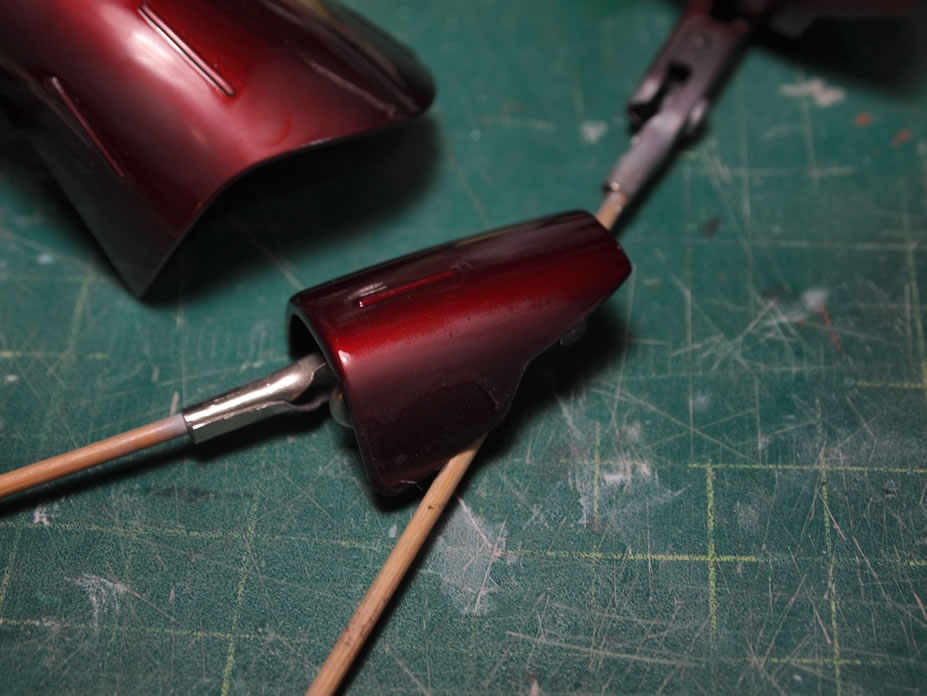
Using 28 AWG magnet wire and a 3/32 inch diameter brass rod, the magnet wire is wrapped around the rod to create a spring. An internal wire, the spring, and metal collars the replacement cables are the components for the new waist cable.
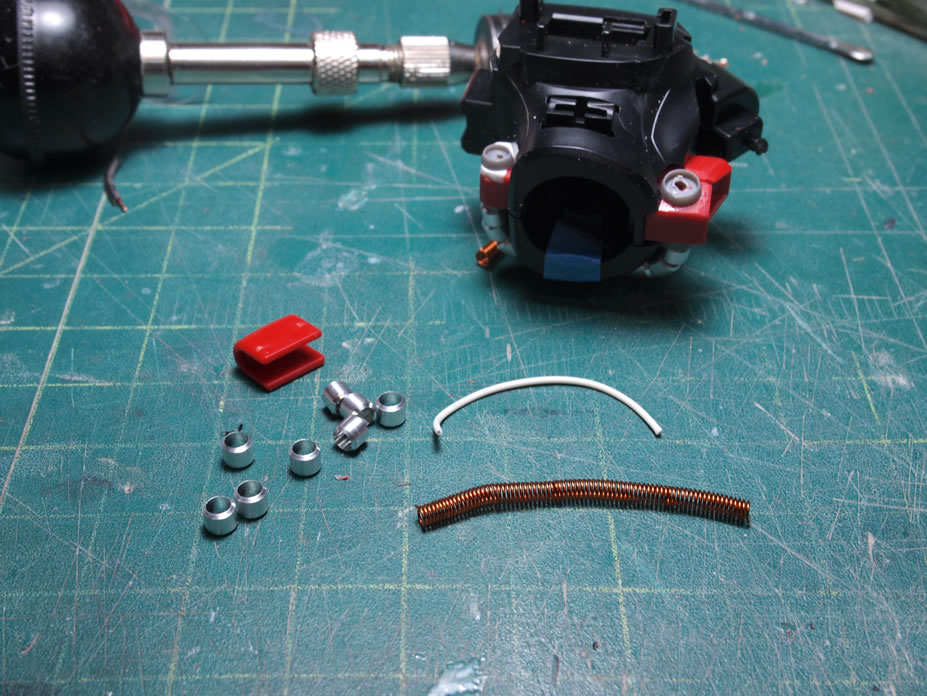
The wire is threaded, coiled, then metal collars are added and the waist cables are done.
These metal collars are slightly smaller than the metal collars I started off with so the fit looks better and more to scale with the kit.
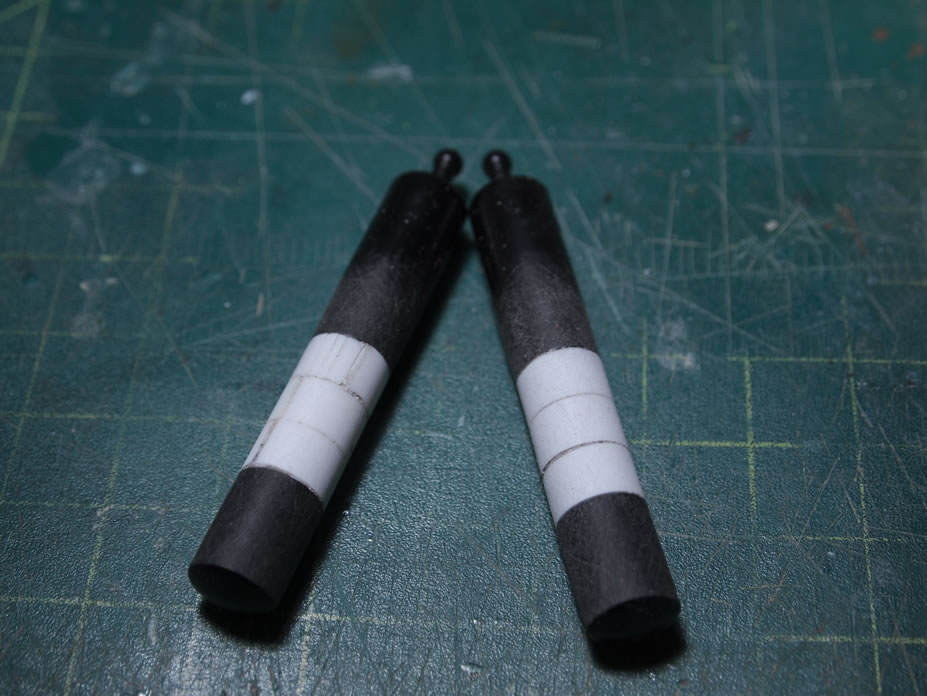
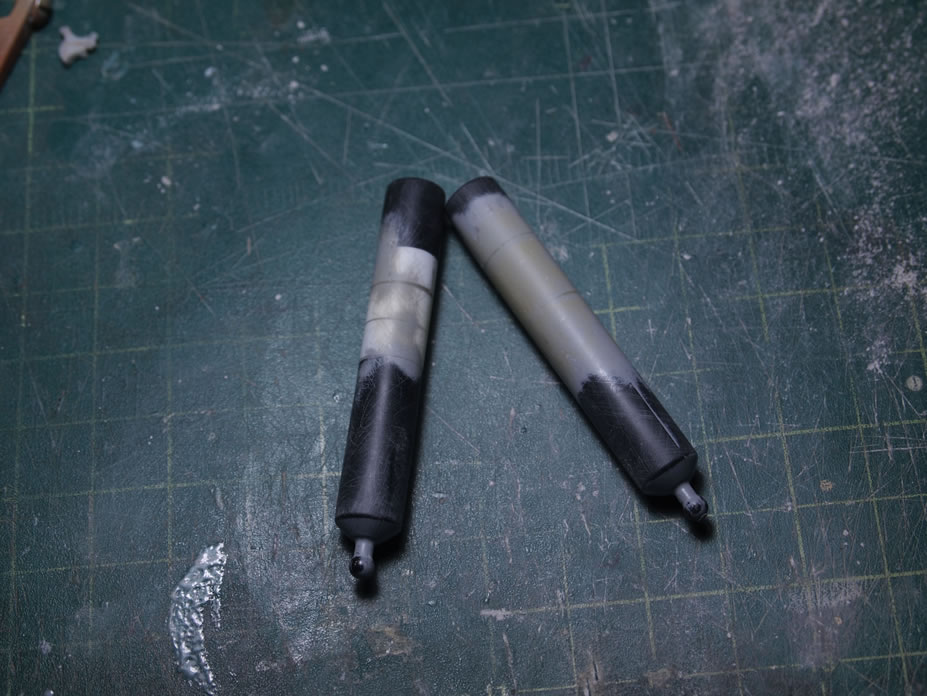
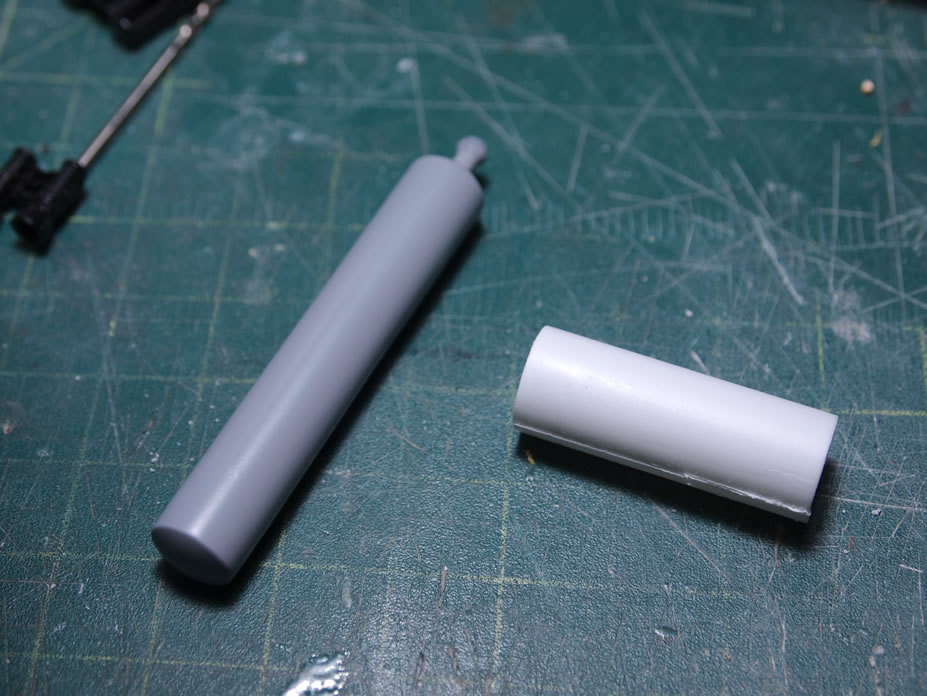
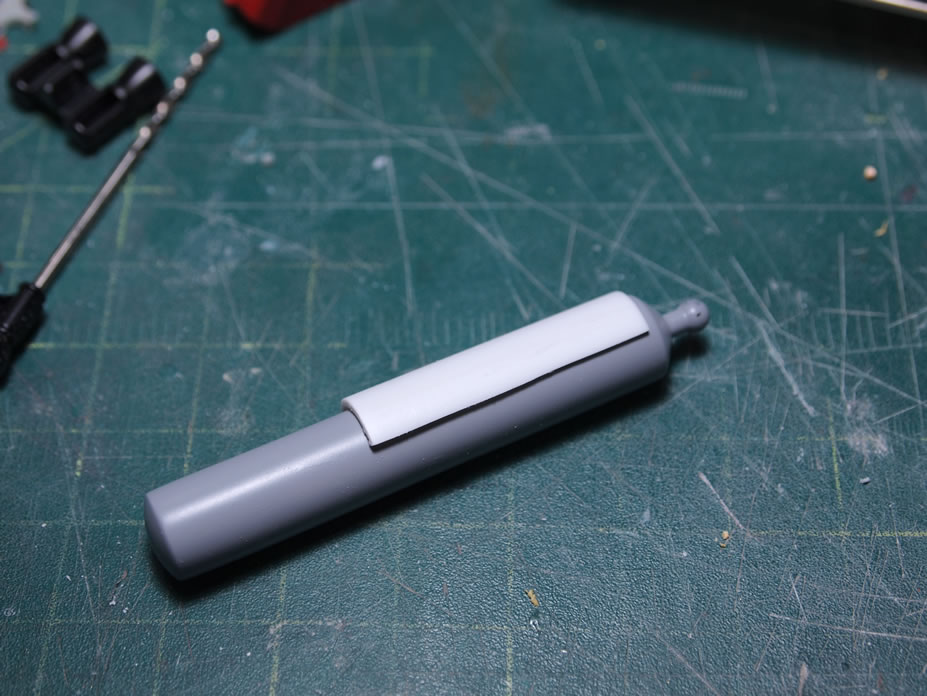
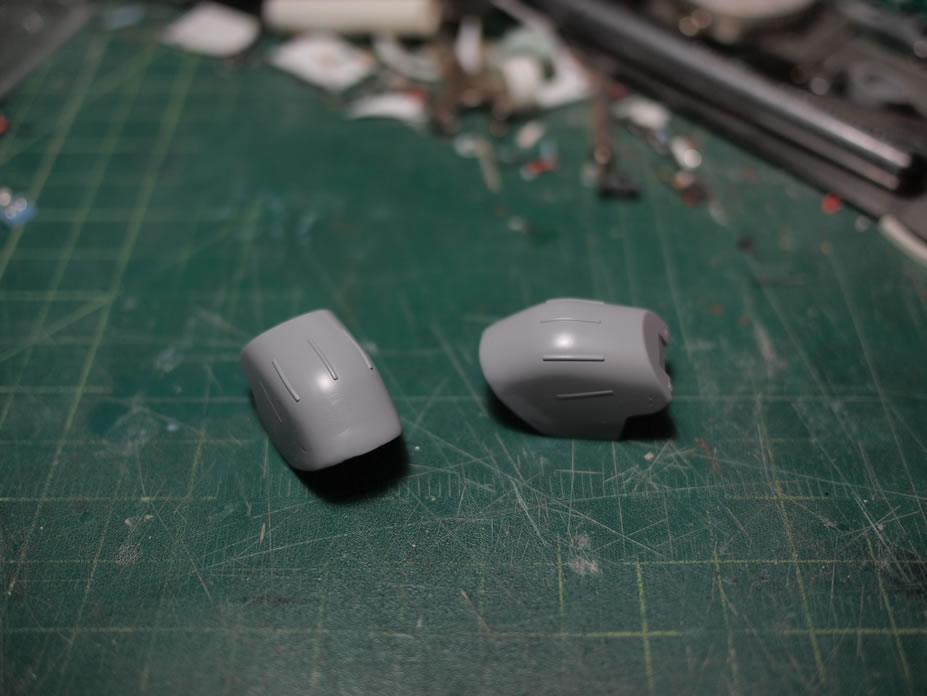
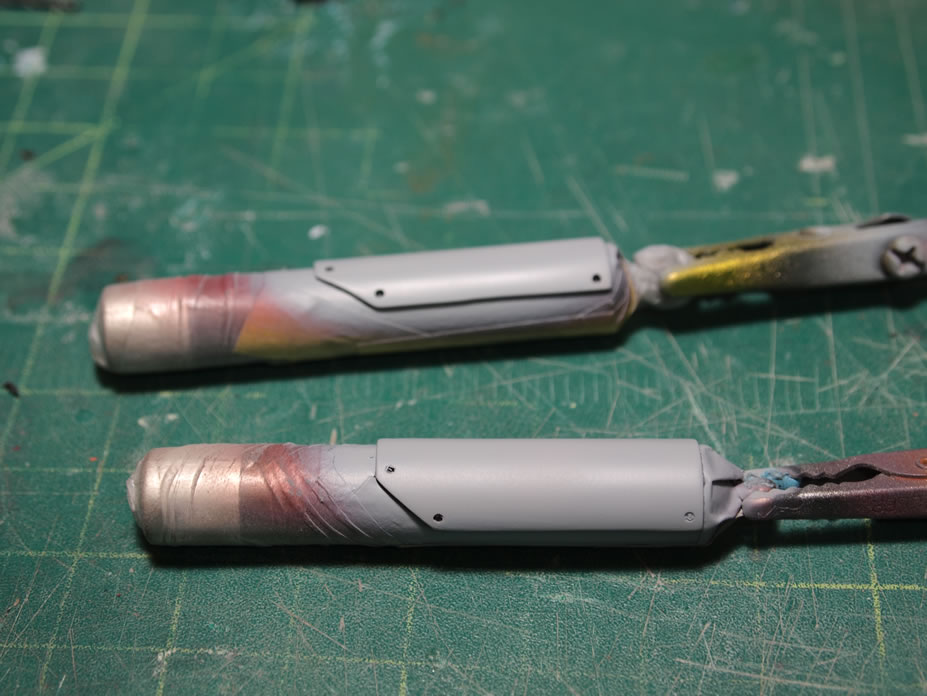
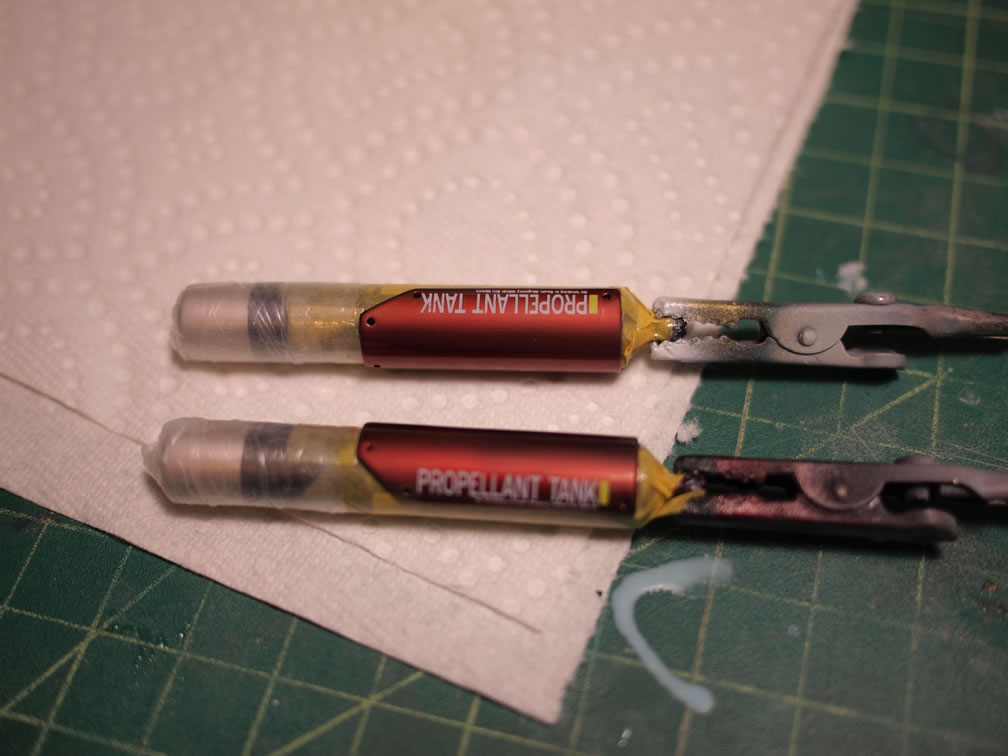
Work on extending the fuel tanks. An extra 3/4 inch is added to the length of the tanks. Strips of styrene are wrapped around the extension cylinder to level it up with the original cylinder.
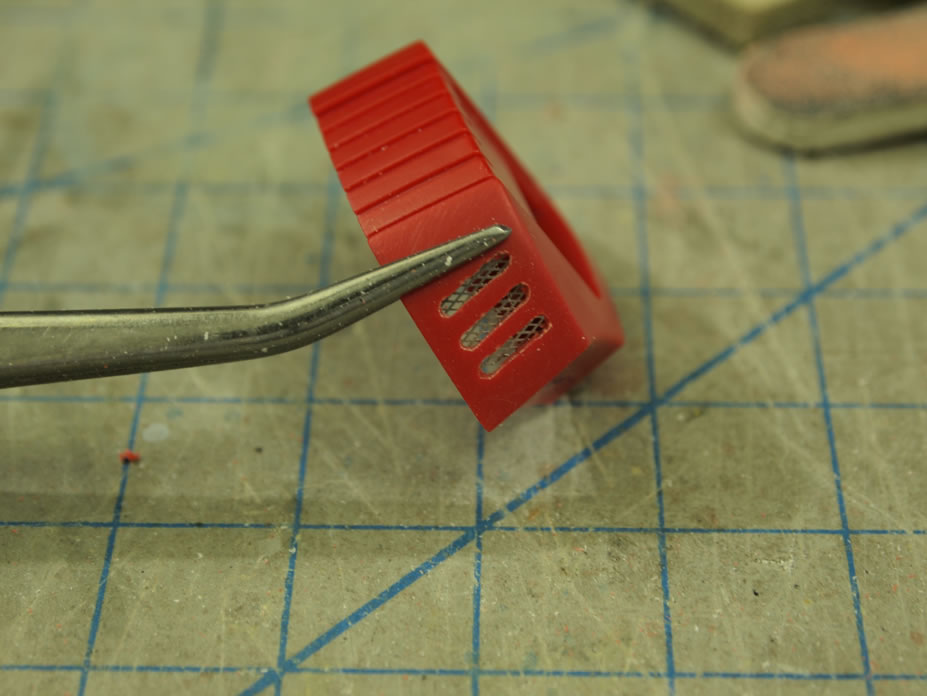
January 16, 2011: Build gathering update. I did some tedious work during the build gathering. The chest vents for the Saz were drilled and cut open, then sanded the openings down.
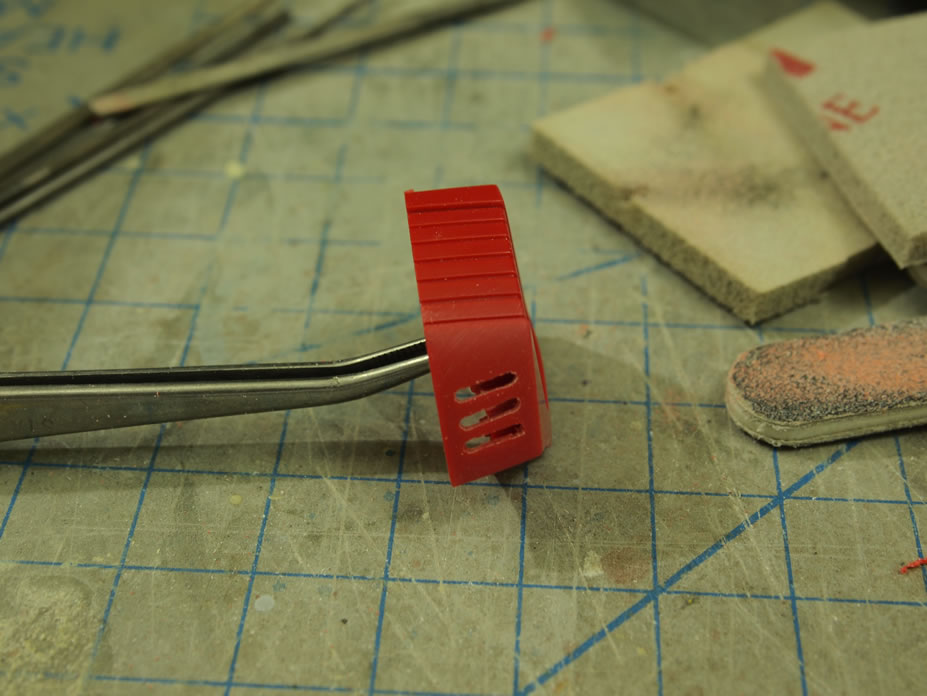
With the vents exposed, I added a small metal mesh detail inside and put it together with the torso for a quick picture.
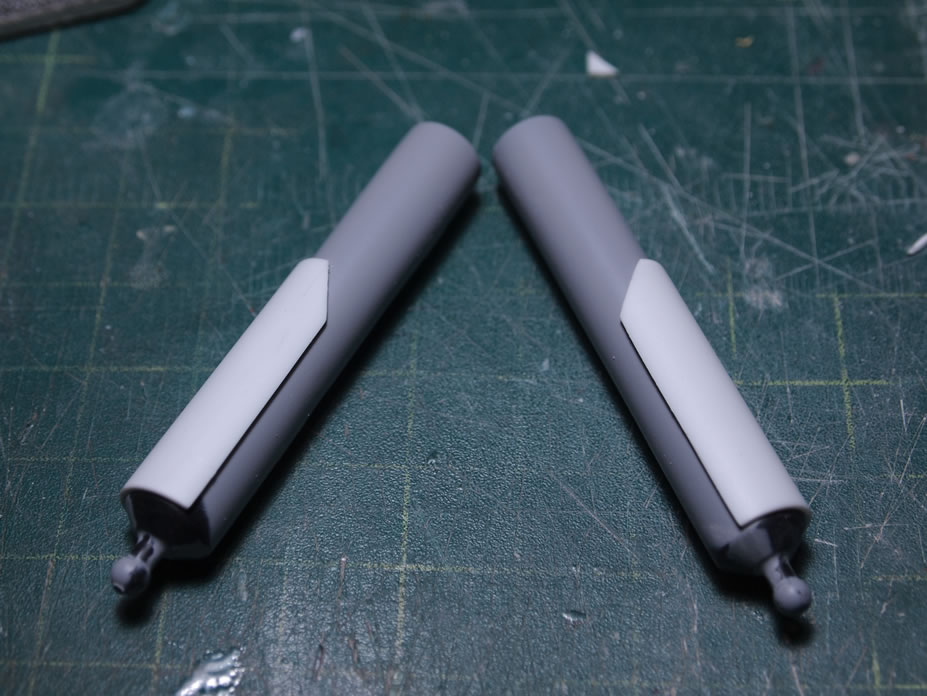
January 18, 2011: Work on the fuel tanks continues. After sanding the excess plastic with low grit sand paper, the parts are sprayed with an initial priming session. The rough surface from the sanding is clear in the primer as are the areas that need filling.
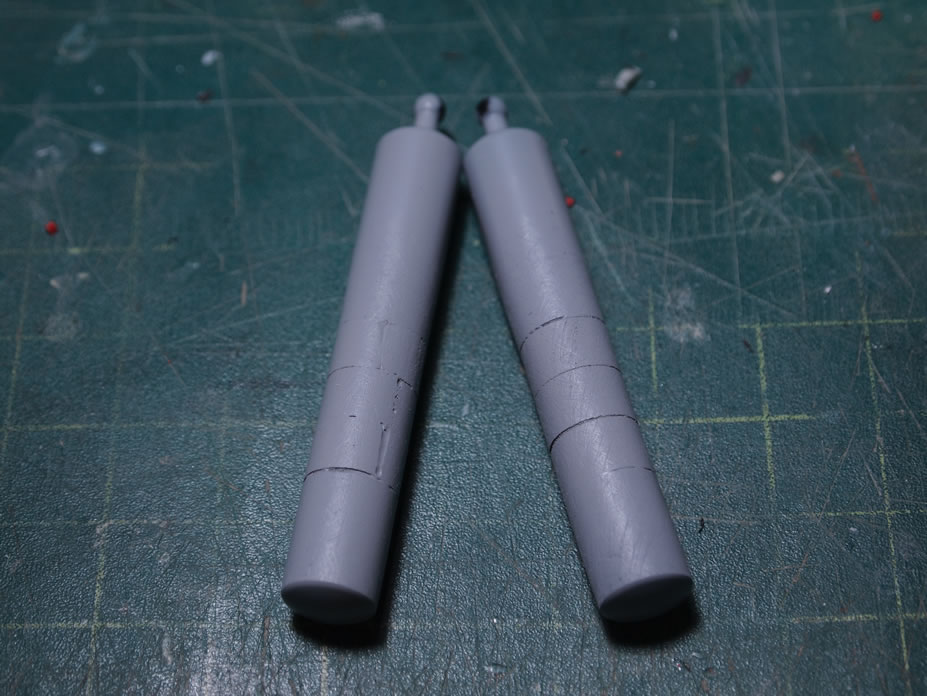
Light curing putty is used to fill in the open spots found after the initial priming session.
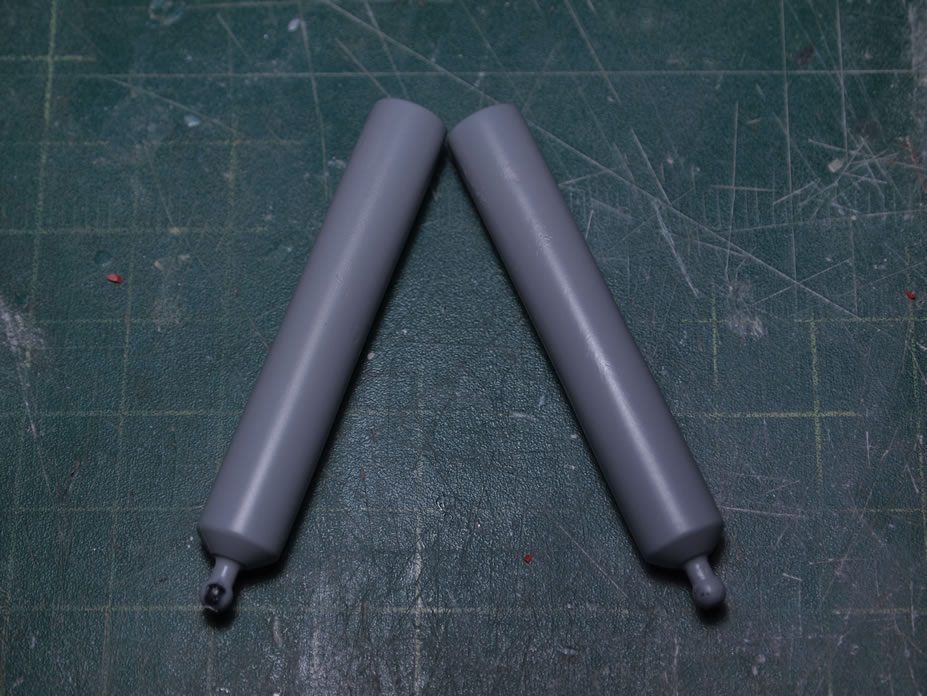
The light curing putty is cured and sanded down then another priming session. There are still some small areas that need attention so one more putty/sanding/priming session should finalize the work needed on the fuel tank extentions.
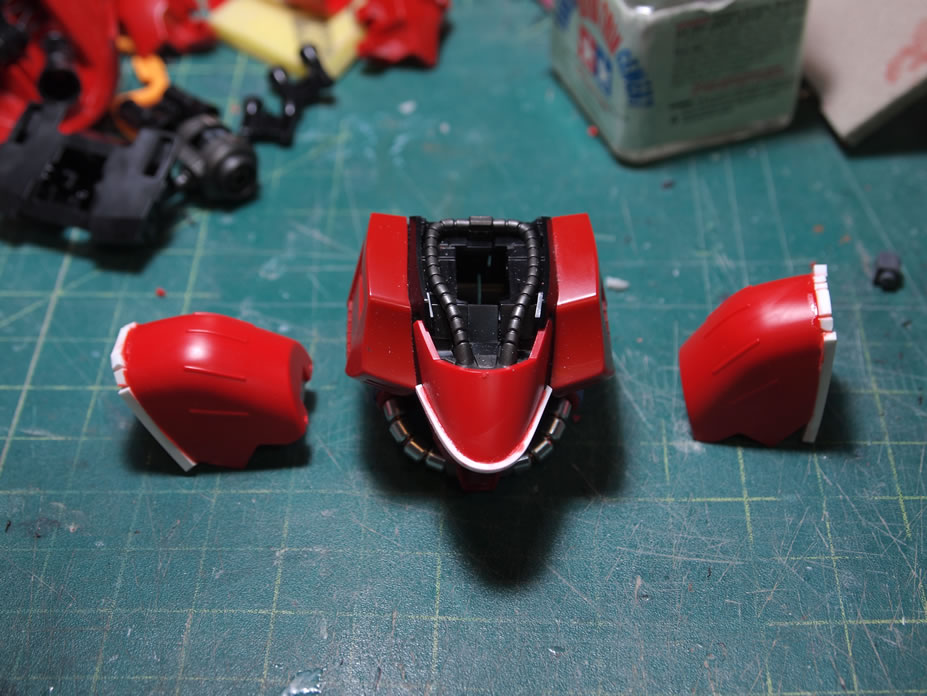
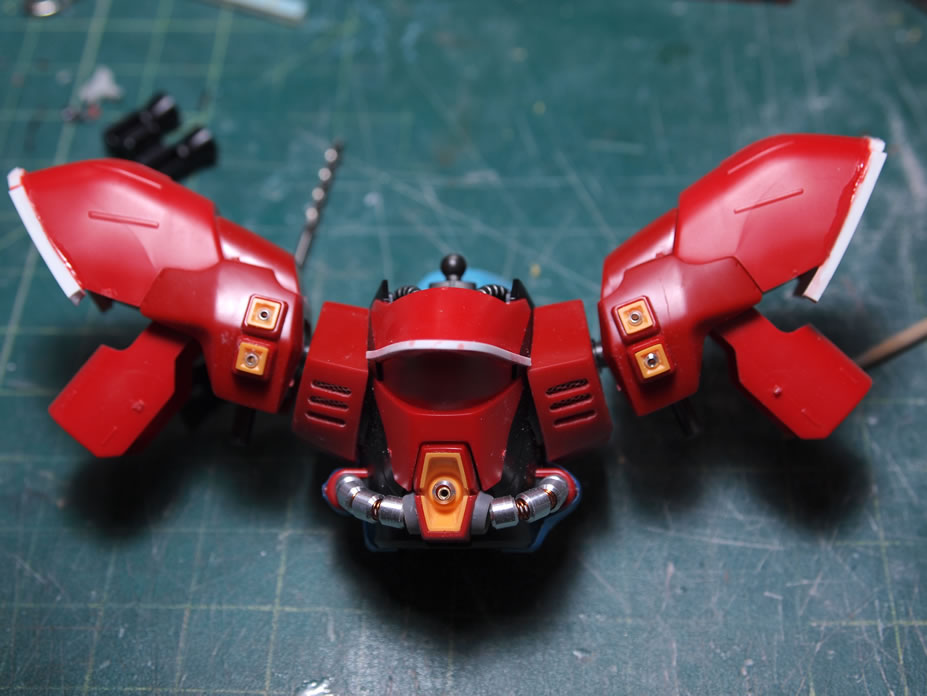
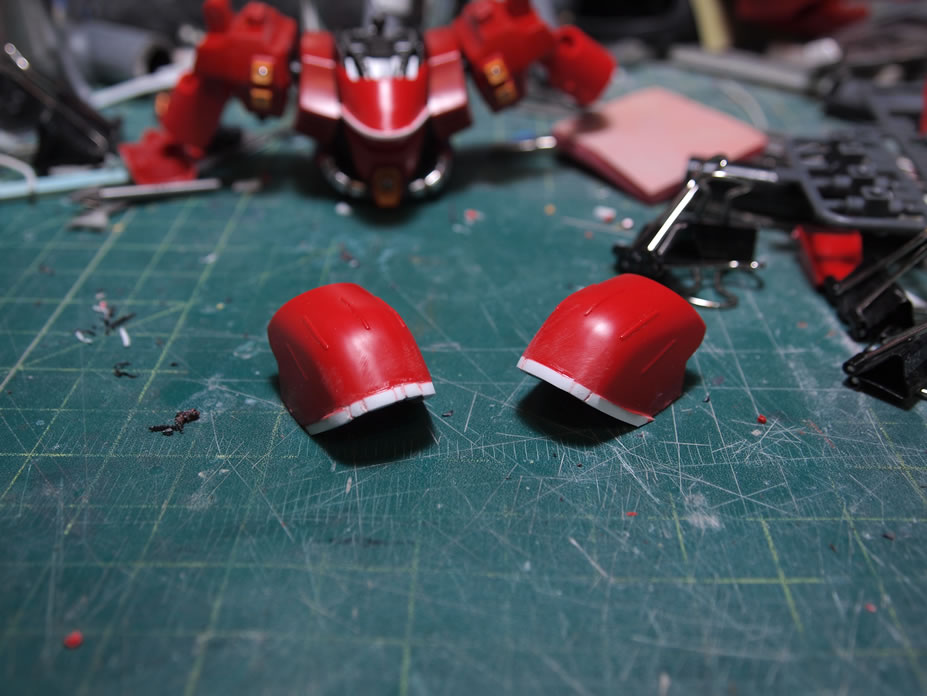
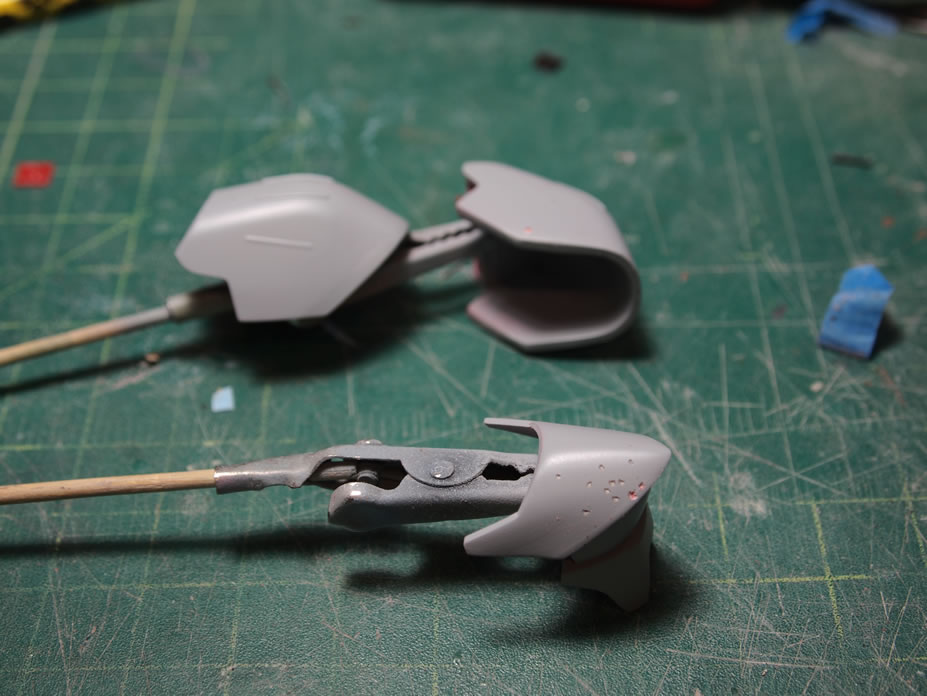
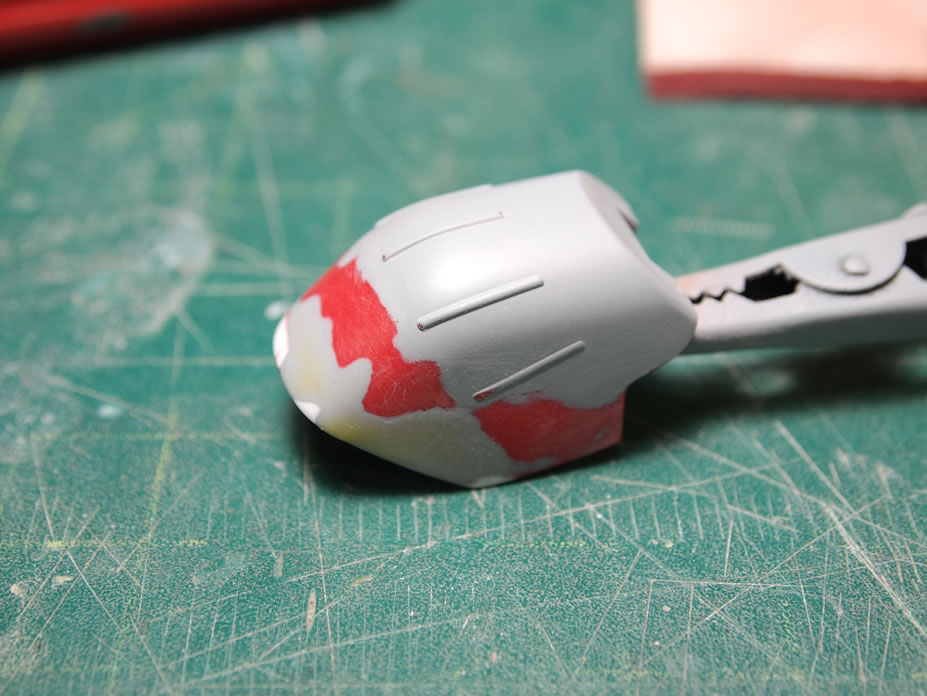
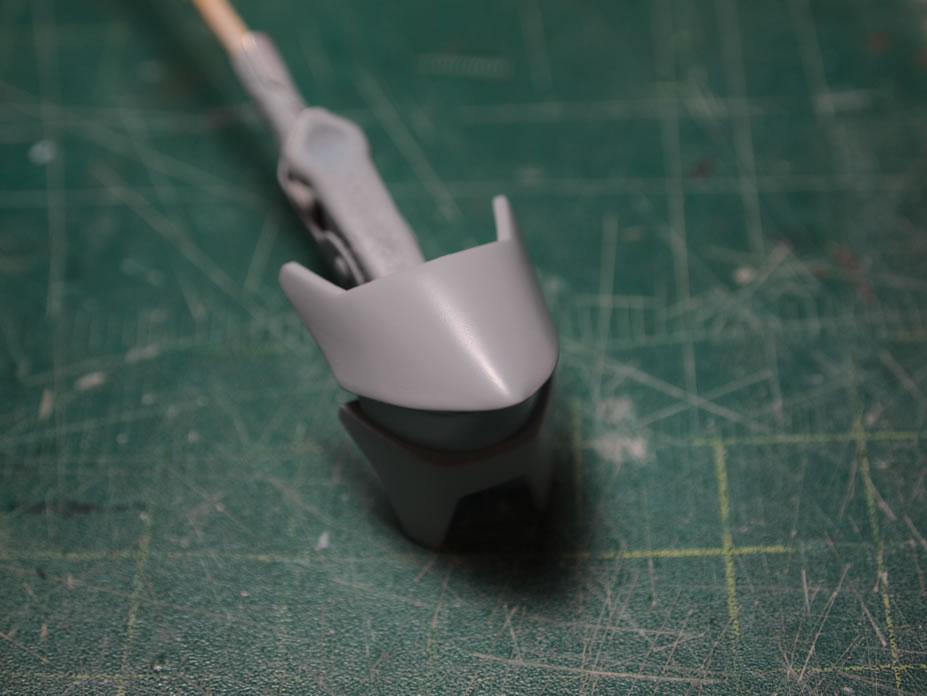
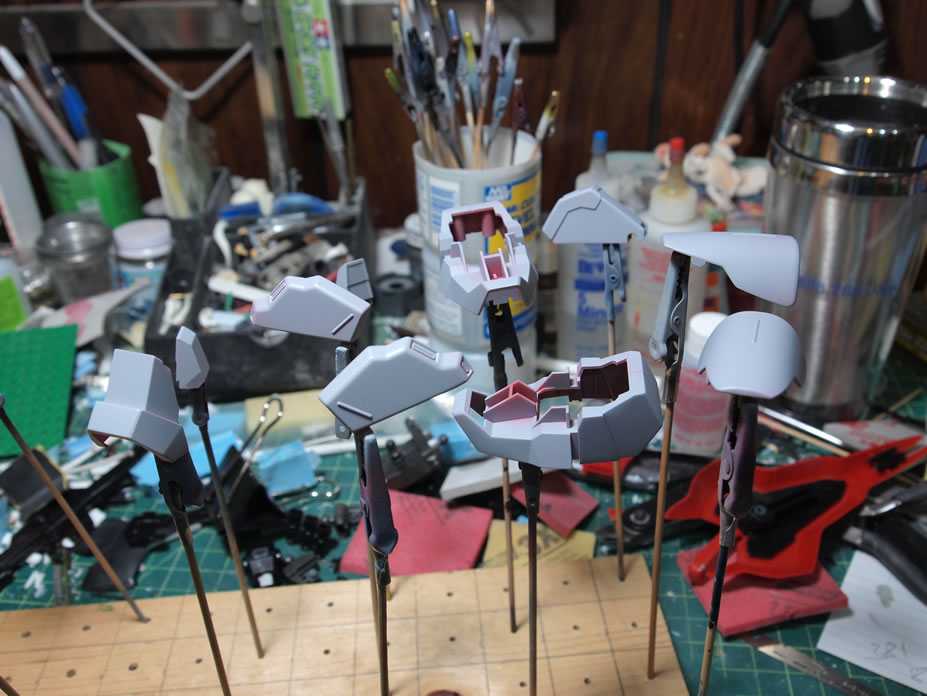
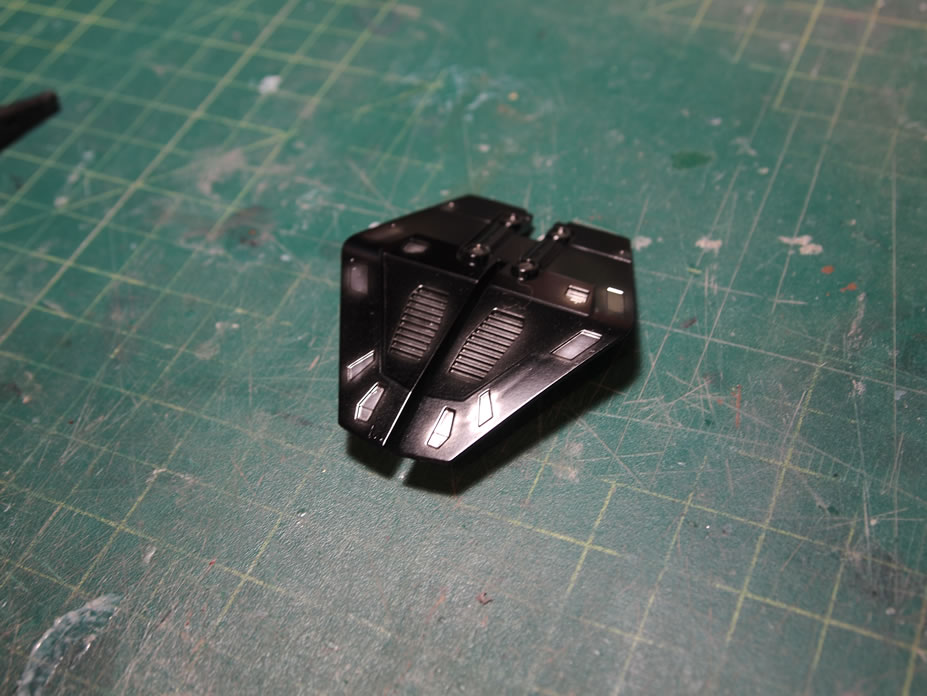
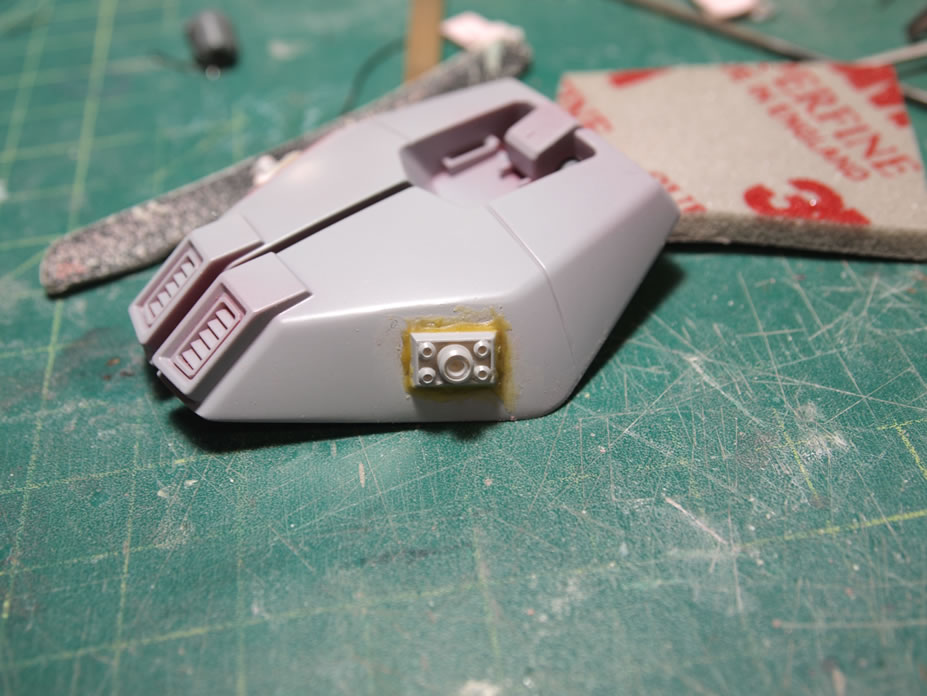
I added some styrene to the shoulders and chest piece to extend the shoulders and get a starting framework for reshaping and extending the chest piece.
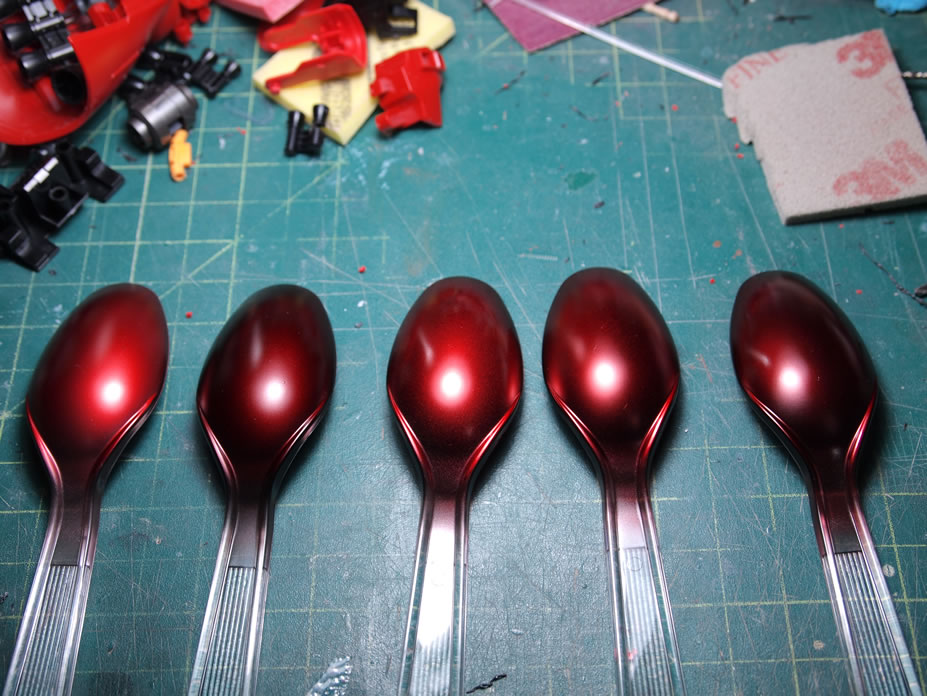
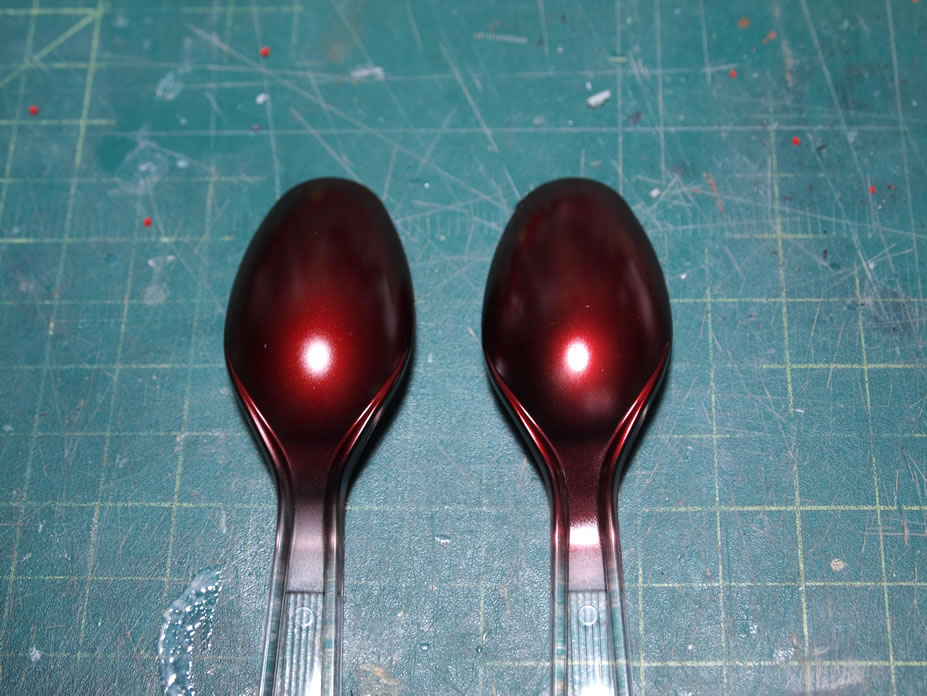
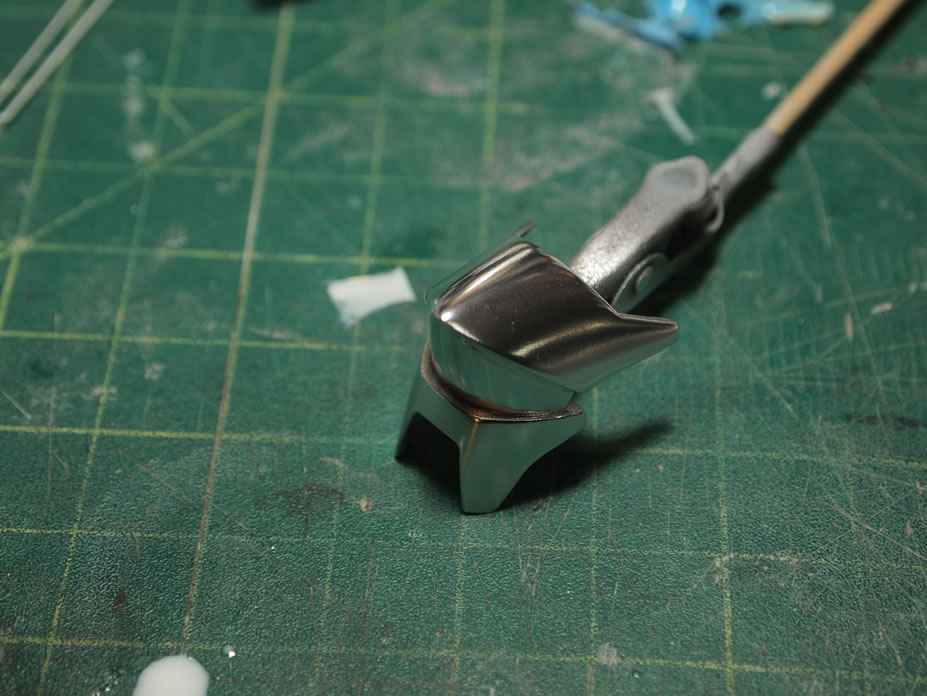
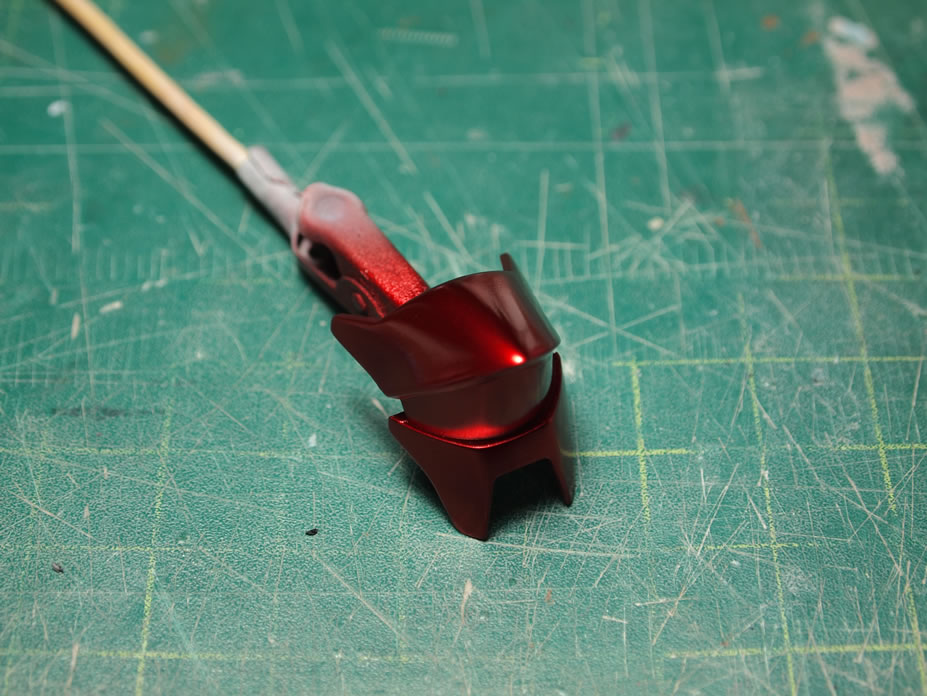
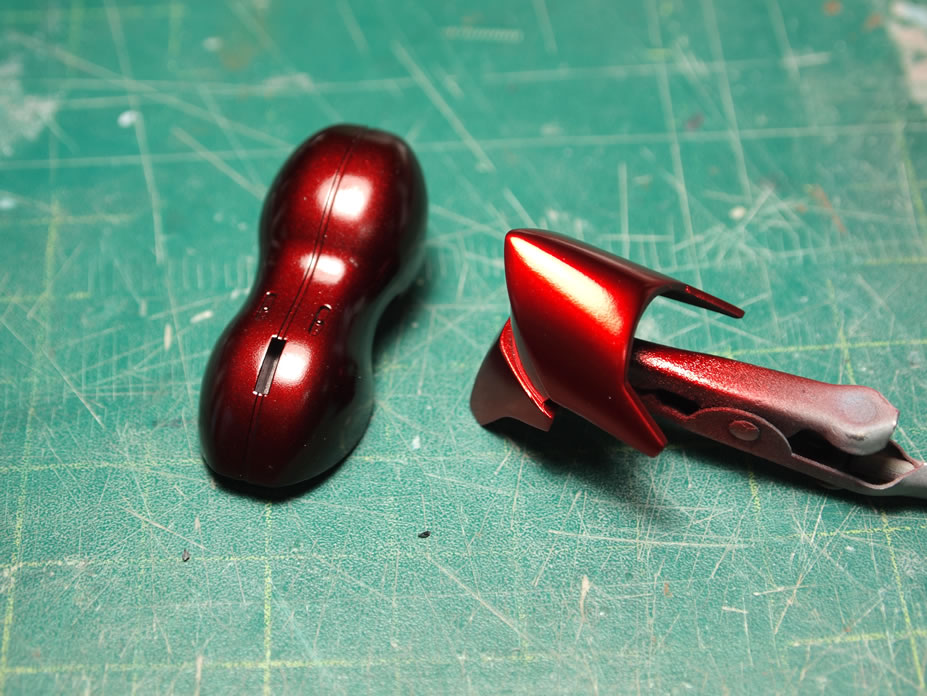
Here are a few color swatches that I made using alclad paints. I base coated some plastic spoons with a gloss black, then sprayed from left to right: dark aluminum, steel, chrome, polished aluminum, and stainless steel. After spraying these metallics, I sprayed alclad’s Hot Metal Red over everything to different tones of a metallic red. I want a really dark red similar to a red that I saw at last year’s auto show, so the decision will be between the steel or stainless steel.
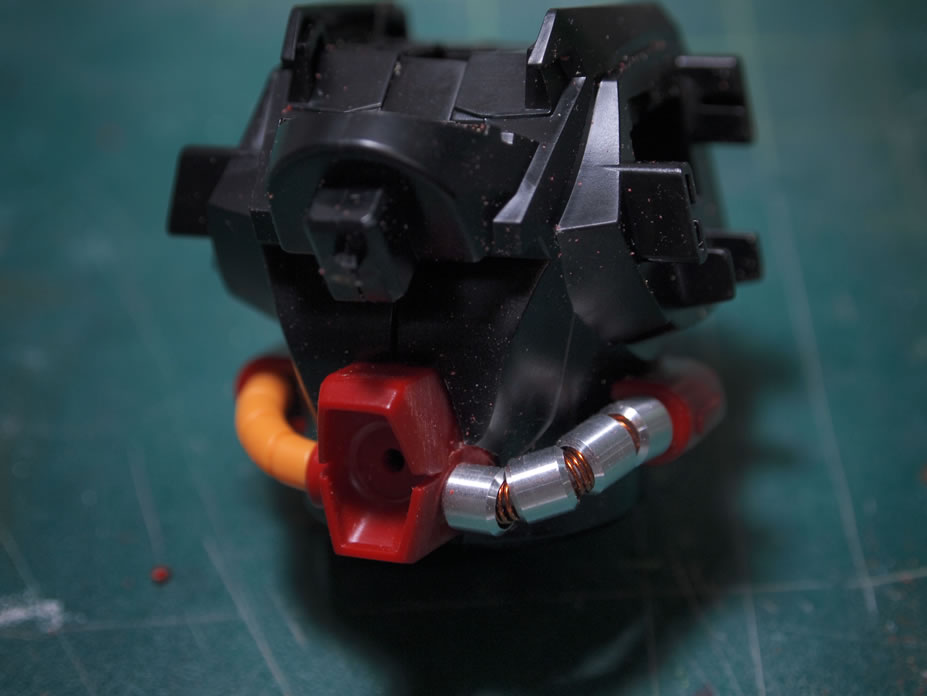
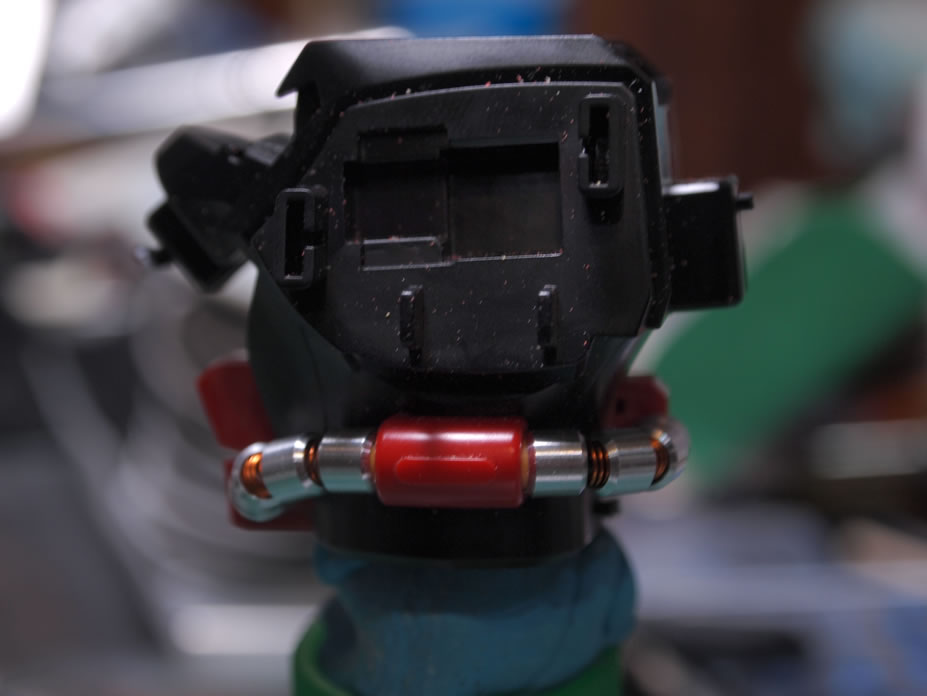
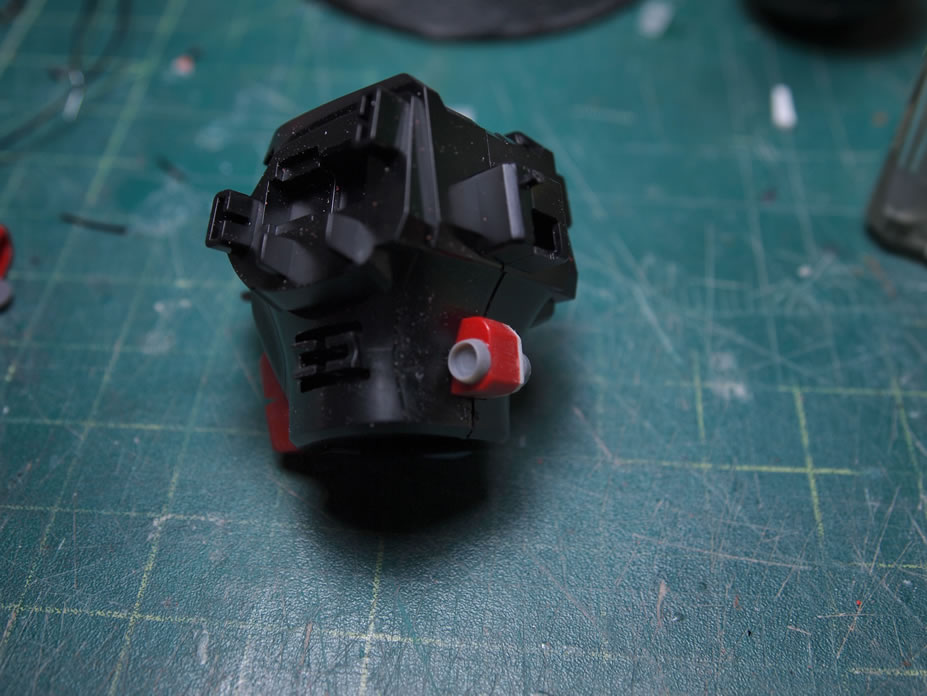
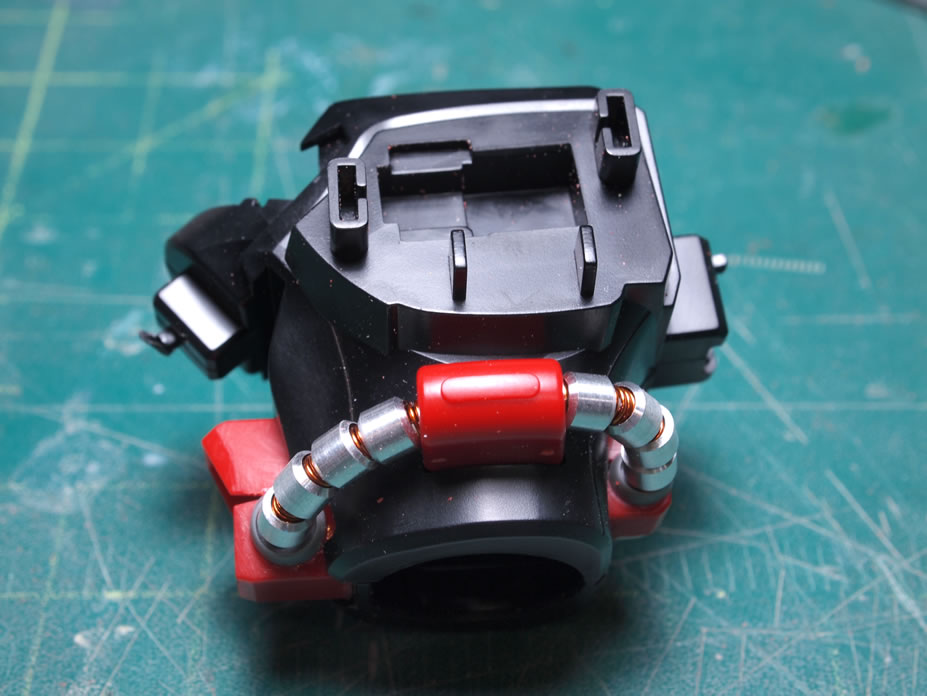
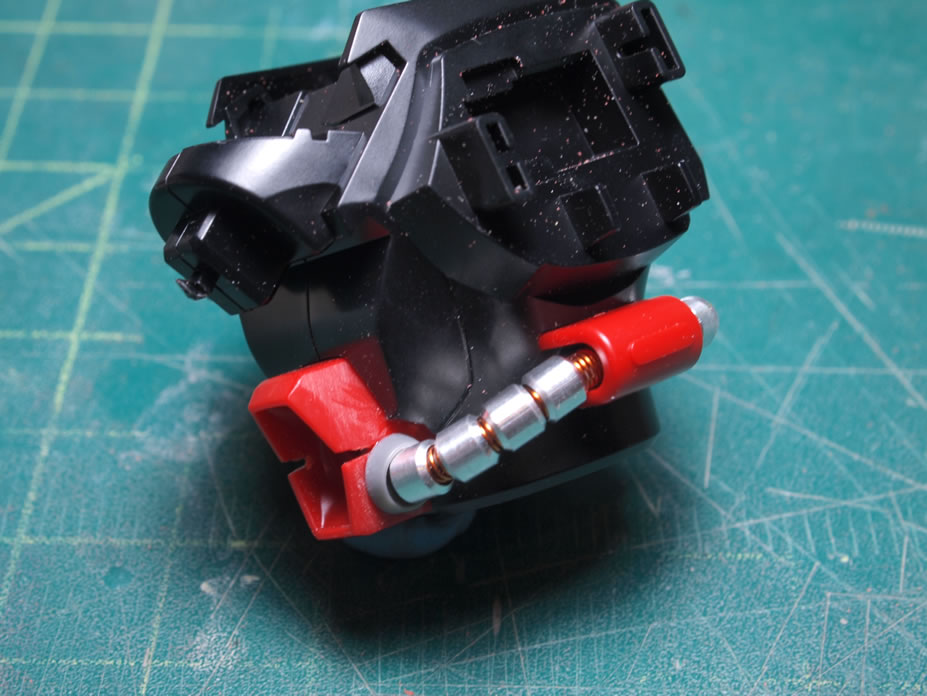
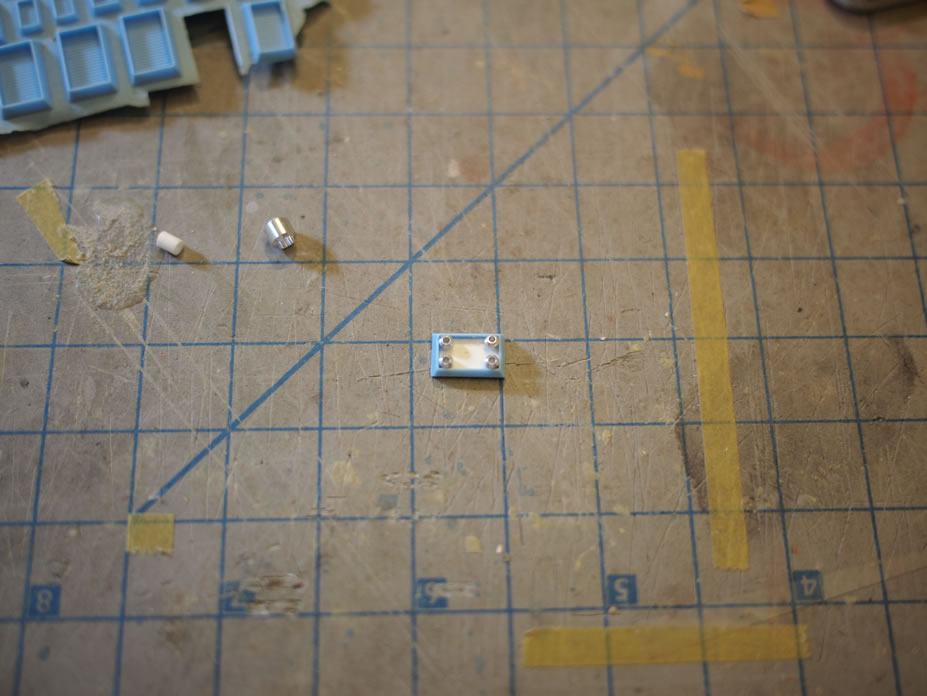
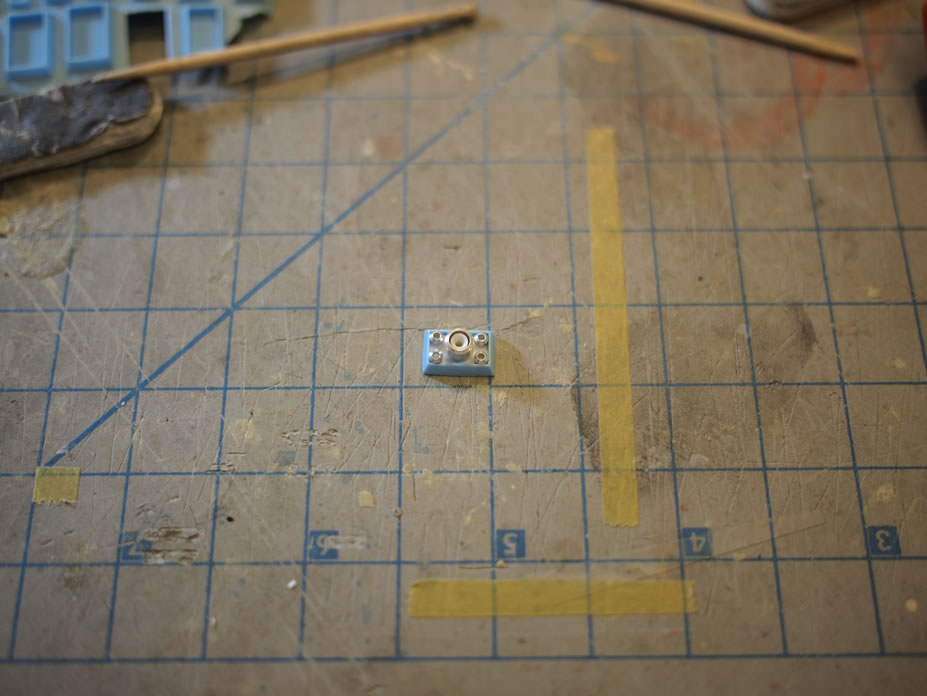
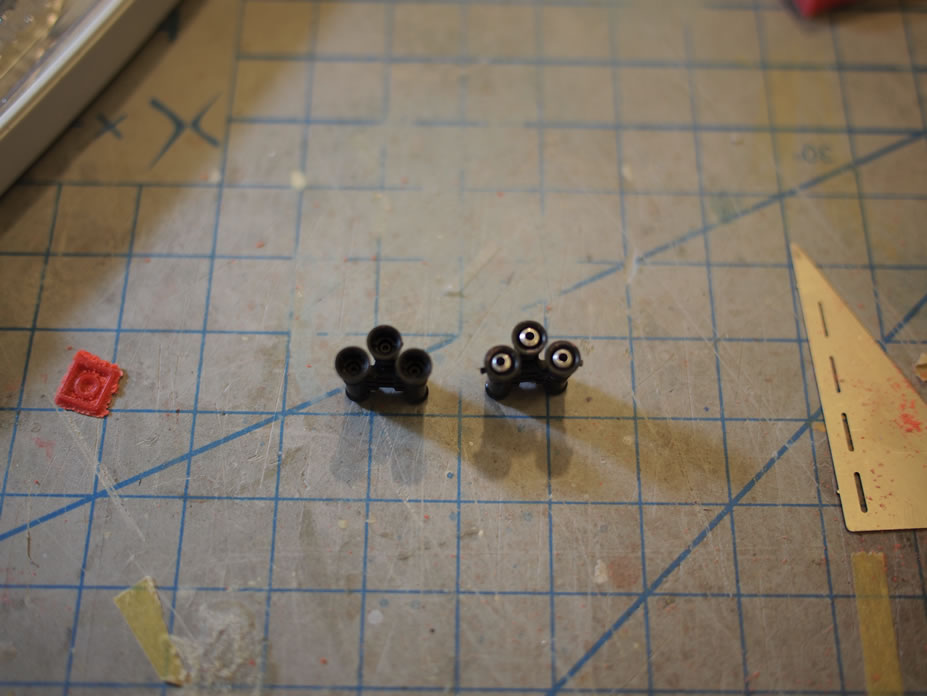
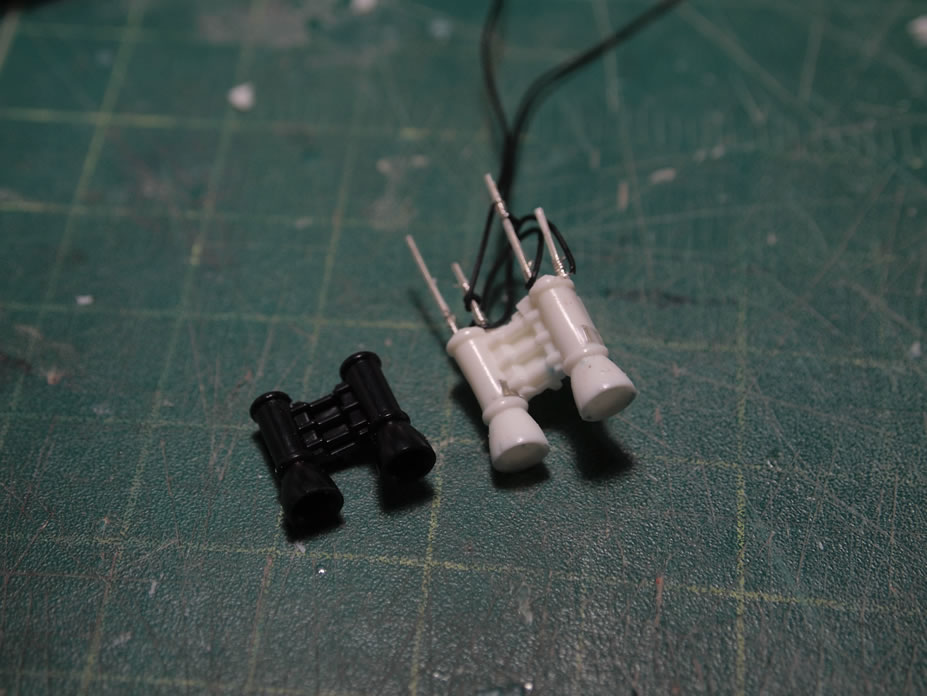
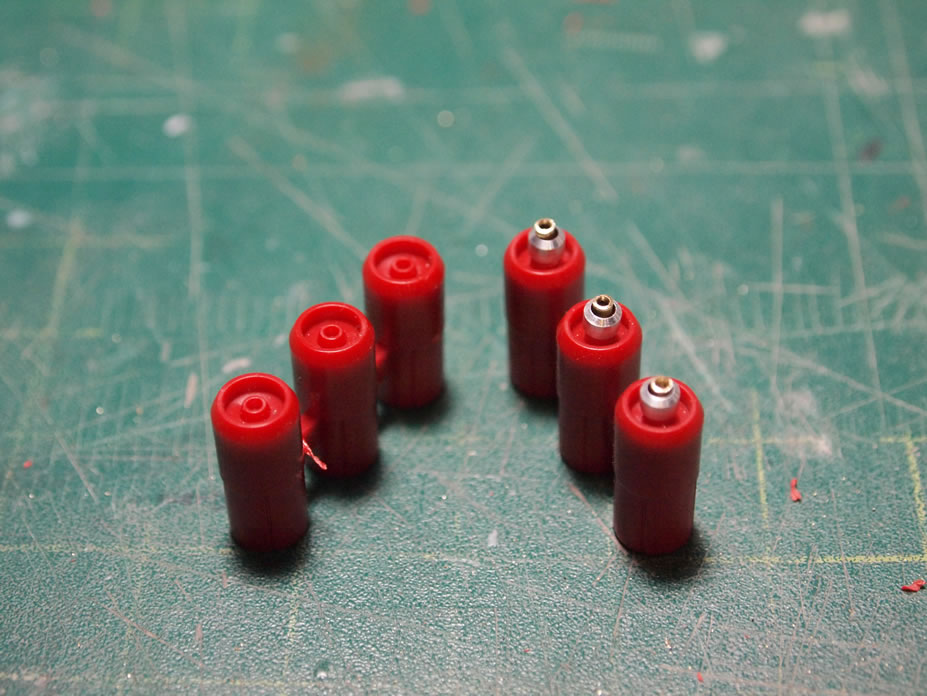
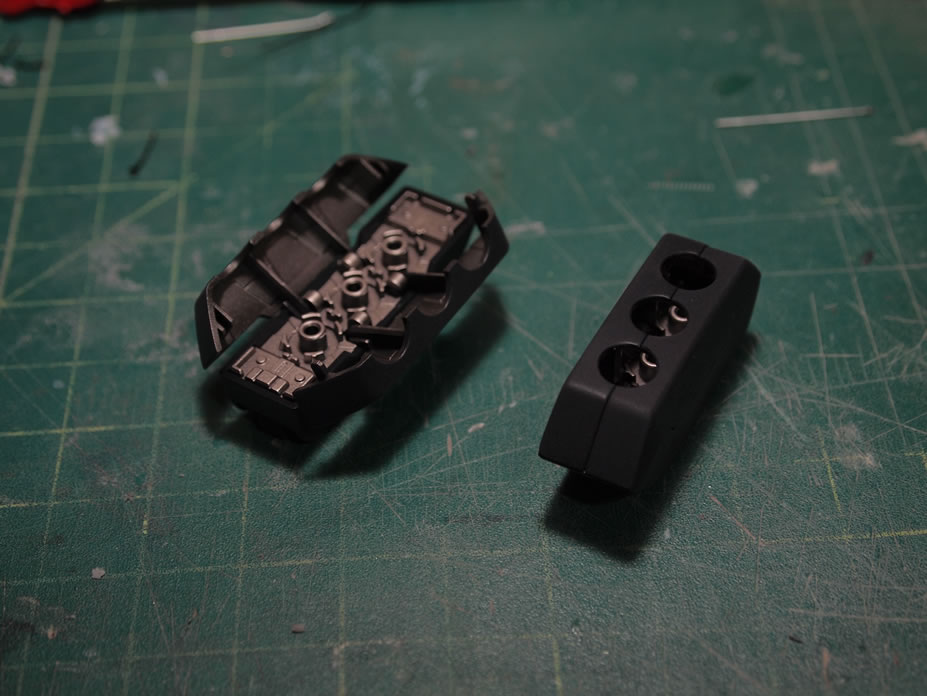
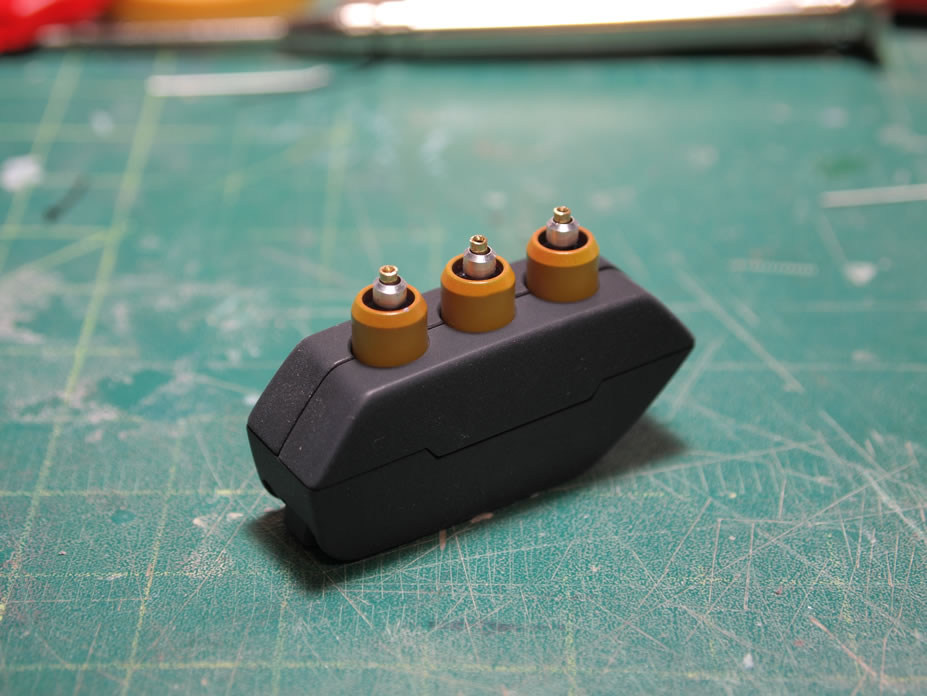
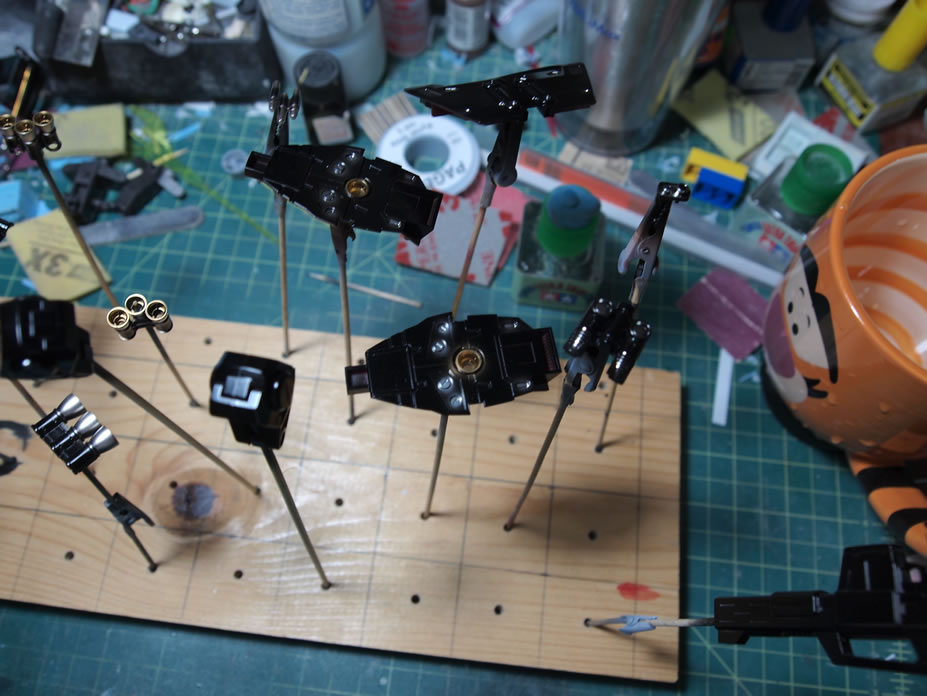
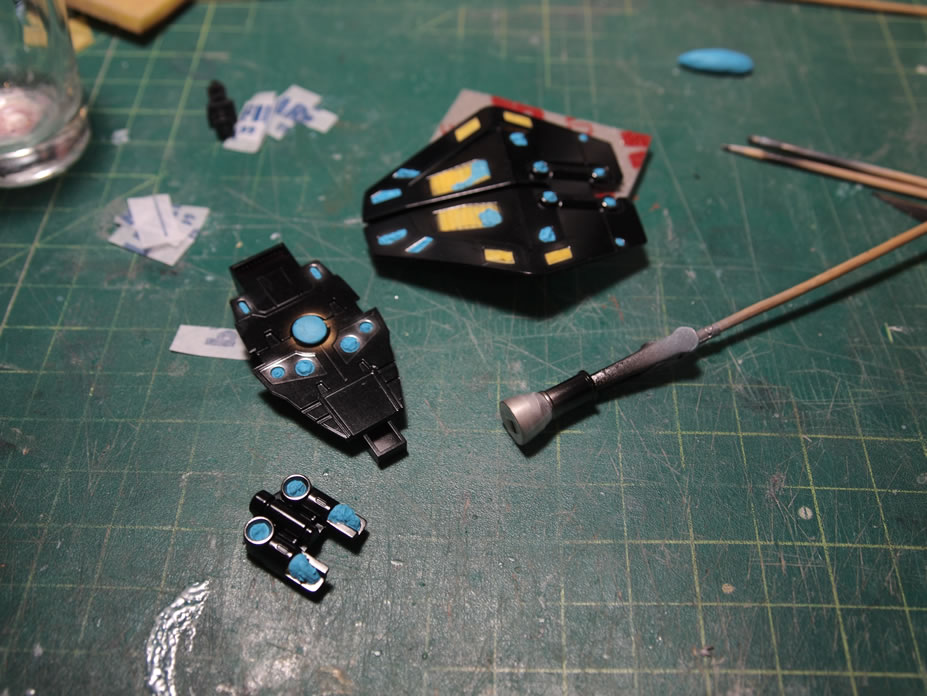
January 19, 2011: Daily update. I added small metal collars to the little thrusters. The original thruster ports were drilled out and the metal collars were used in place. The Saz’s “belt” got a metal collar treatment as well as an additional small brass insert to add a little bit of detailing to that area.
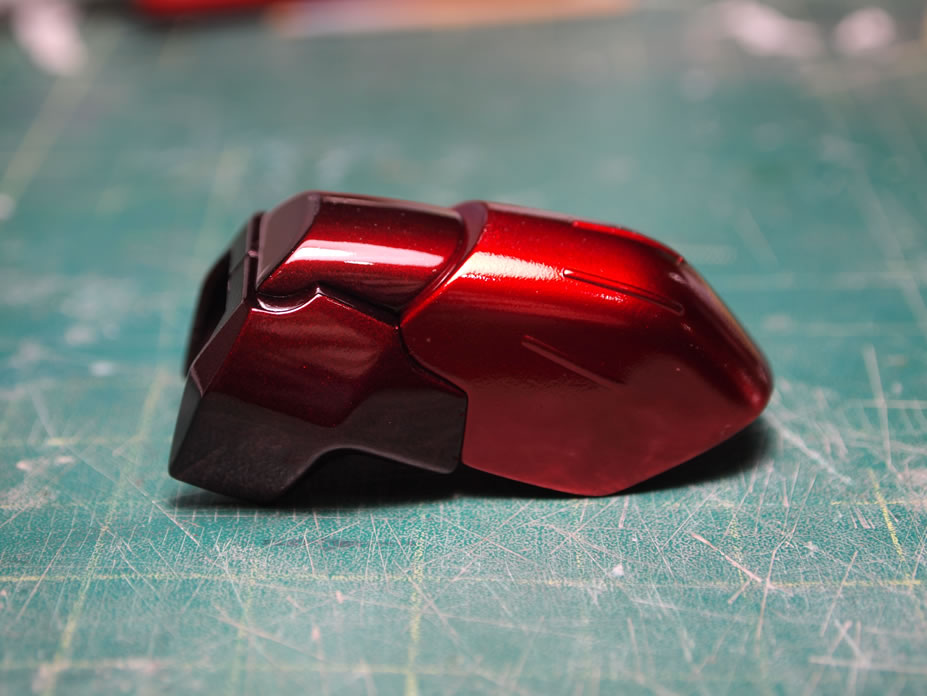
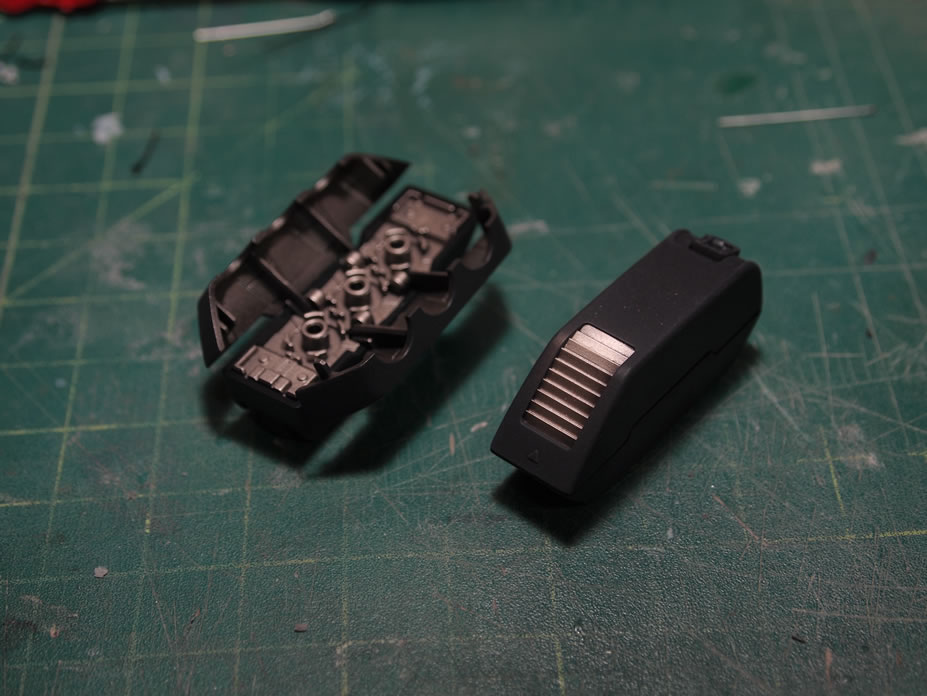
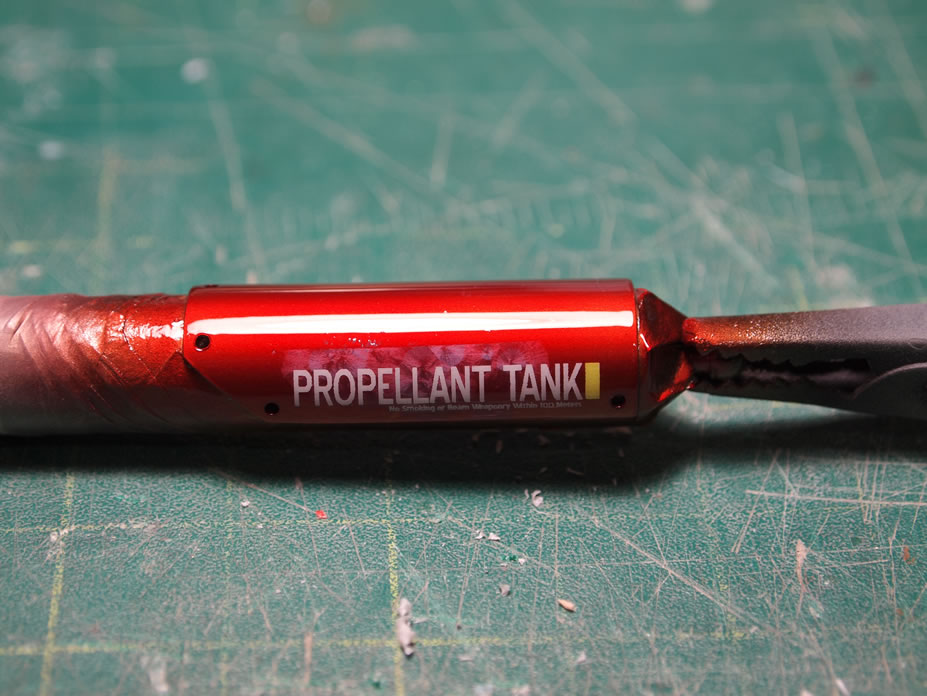
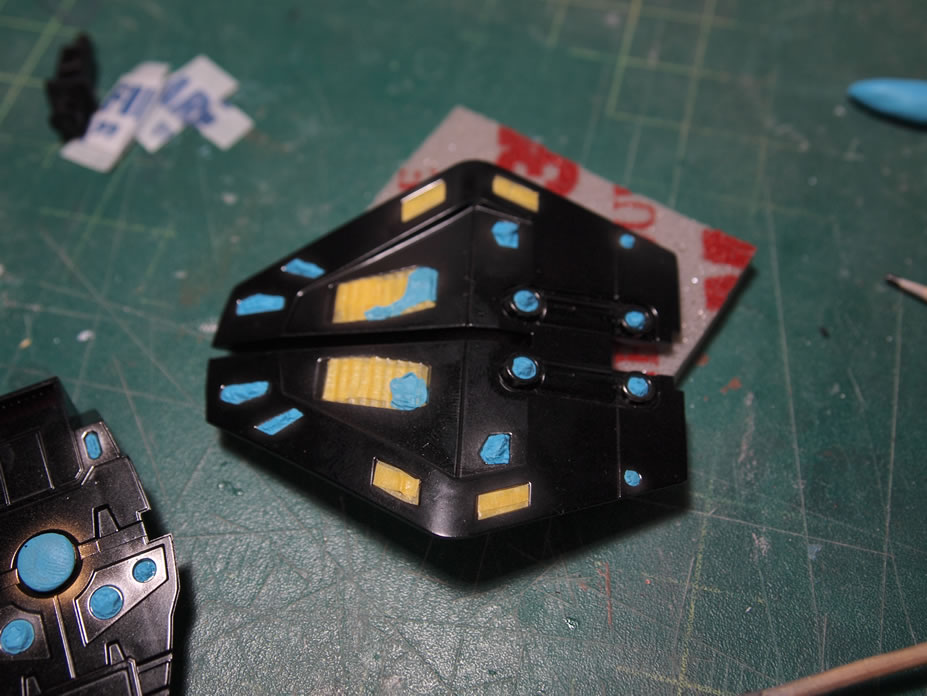
The fuel tanks were a little on the bland side, so I cut up a styrene tube to use as additional details. The styrene tube was then cut in half lengthwise then the corners of one end were snipped off and finally some small detail holes were drilled.
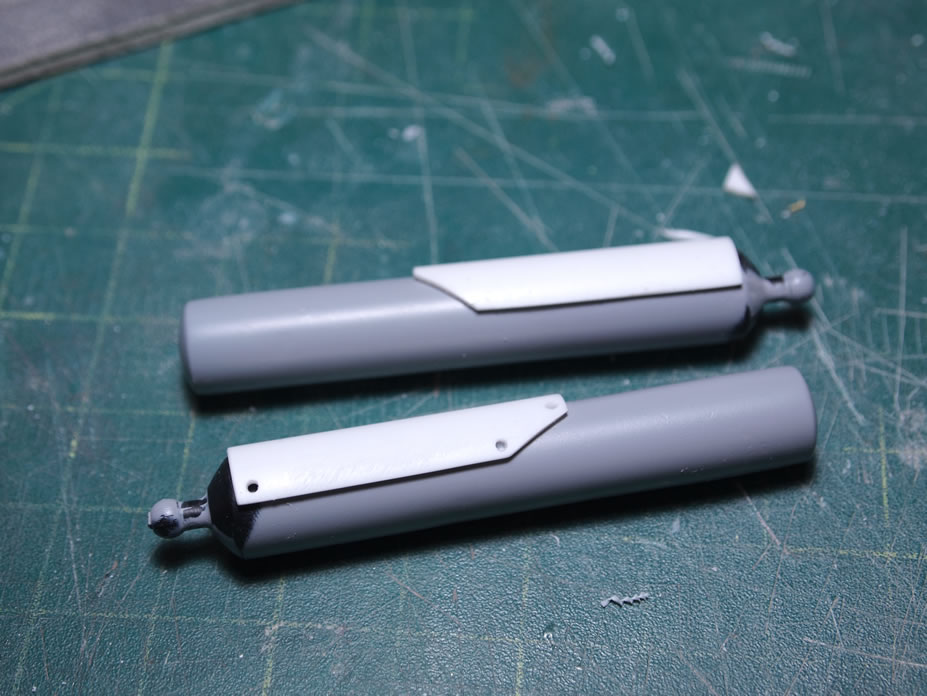
I think it’s an improvement on the original fuel tanks. I may add some more details, but for now I think it looks decent.
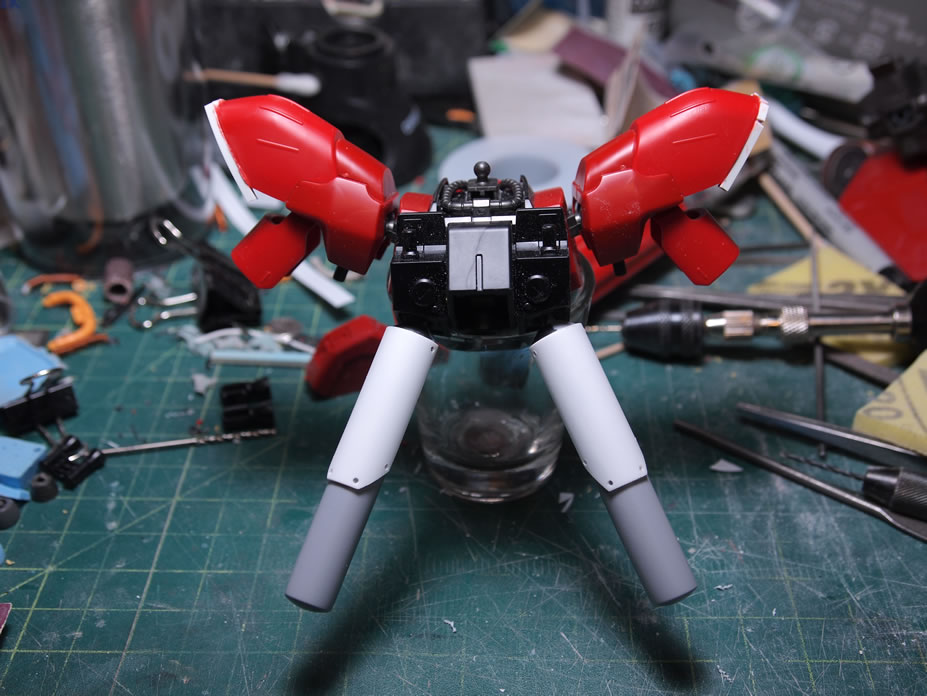
Next up, I wired up one of the legs. I set the wires so that they’re hidden in the joint pieces and with enough slack that the joints still move without any reduction in posibility. I only had time to wire up one leg, I’ll get to the other leg tomorrow night.
Here’s what the leg looks like attached to the waist and torso. Not too bad, this will definitely look better with the other lit up leg in place.
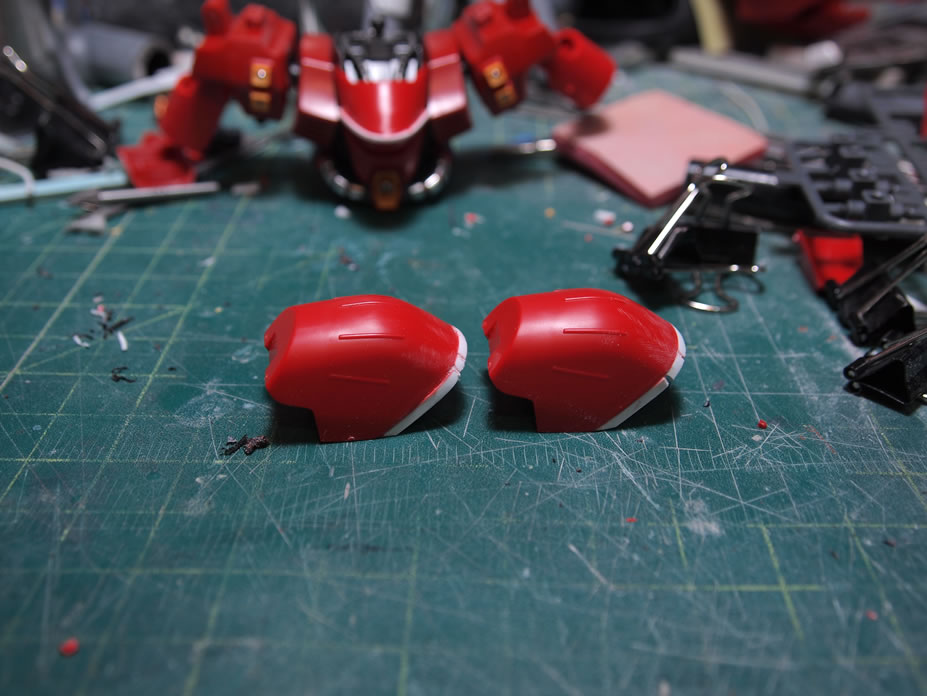
I also did a little work on the shoulders removing the excess styrene that I glued into place the previous night. I glued another area of the part so I didn’t get too much work on these parts. I have additional plans for these parts.
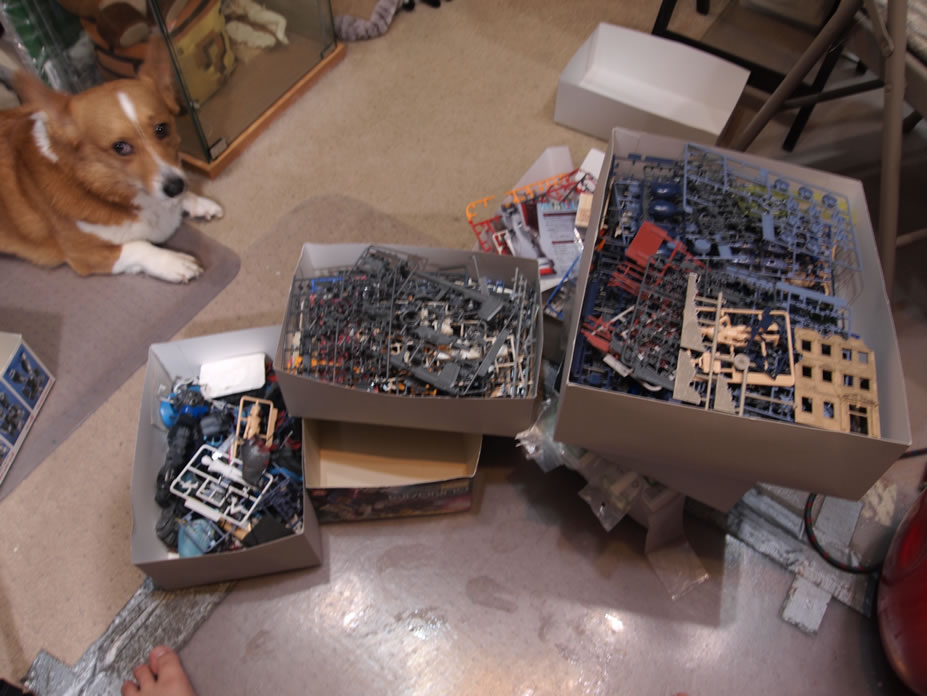
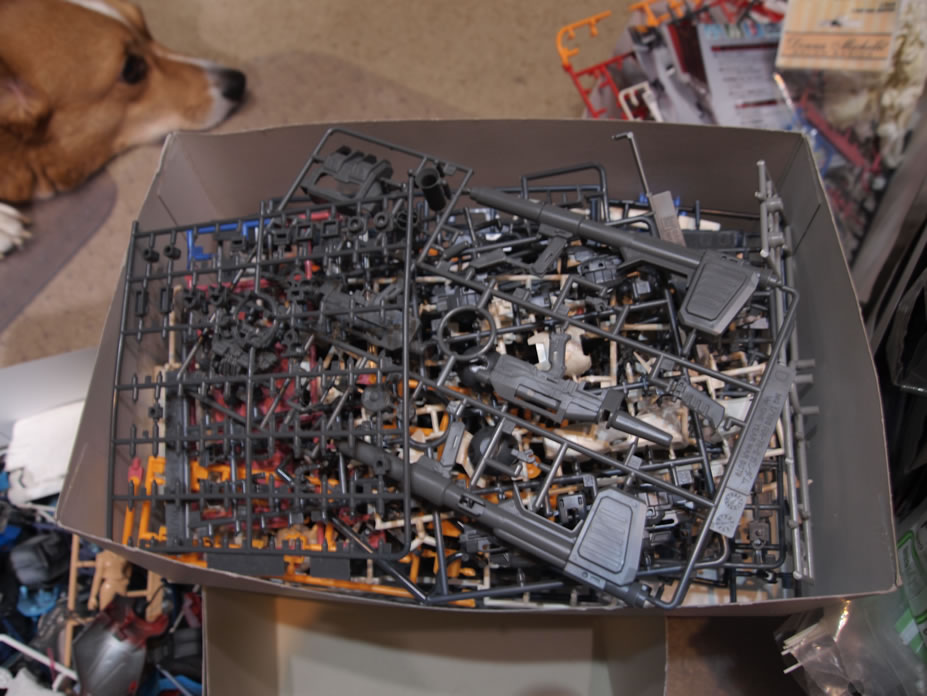
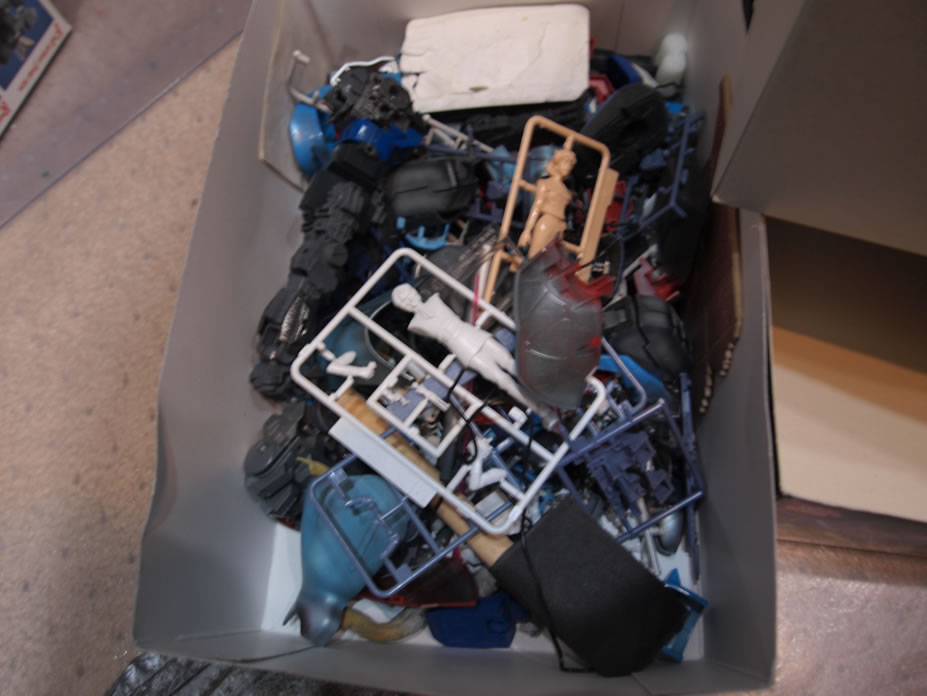
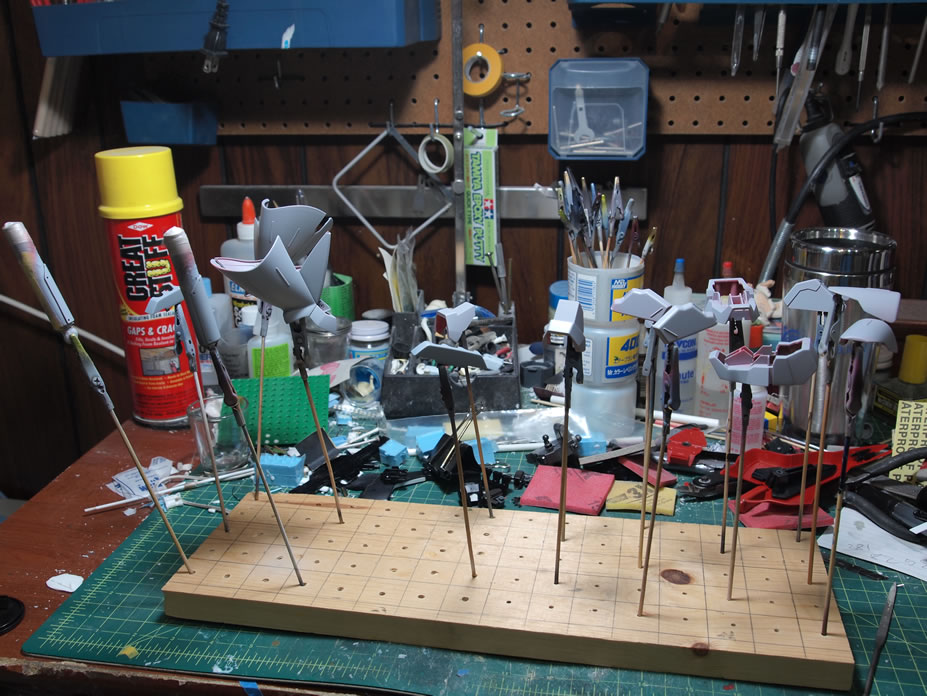
January 20, 2011: Well technically, this update is being done at about 4:50AM on the 21st, but hell, I haven’t slept yet. First off, I started looking through some of my spare parts boxes to find little things to use as detail mods. I have quite a bit of spare parts apparently.

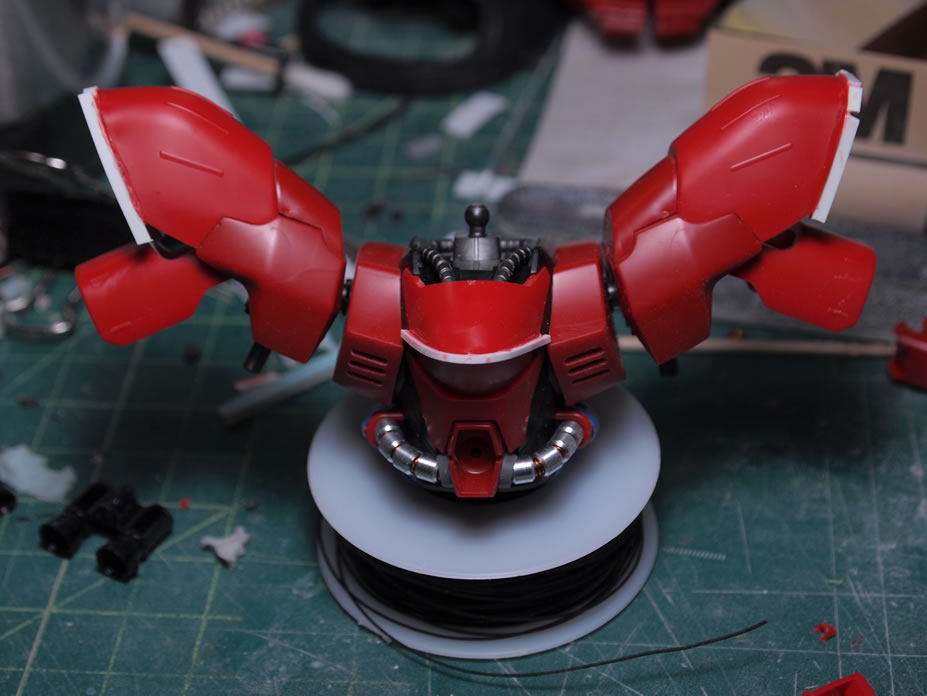
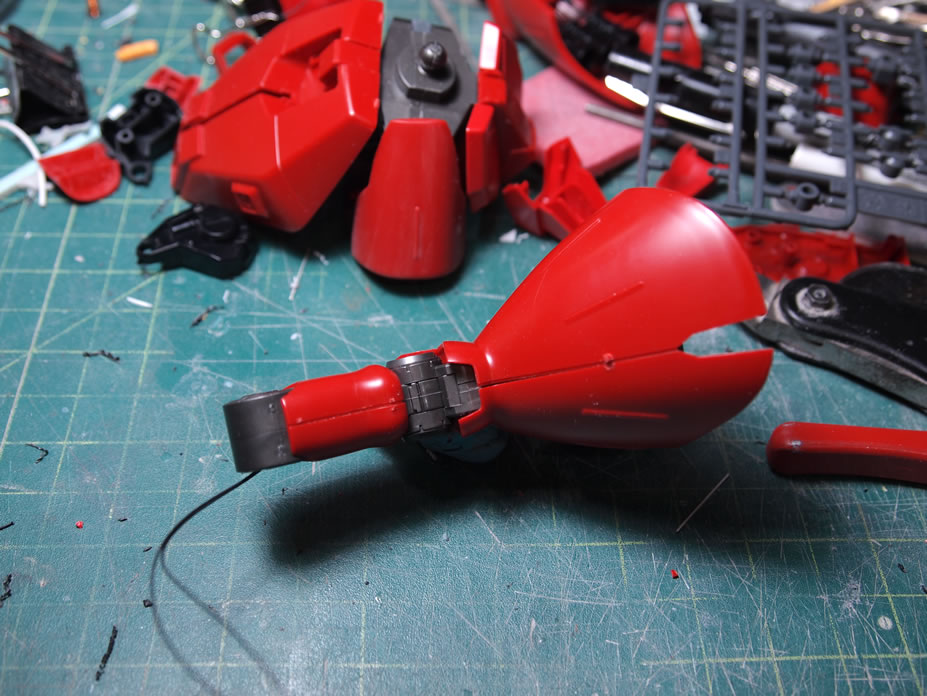
Getting back to the kit, first up are some shoulder mods. The interior of the shoulders were lacking in detail, so I added a few thrusters.
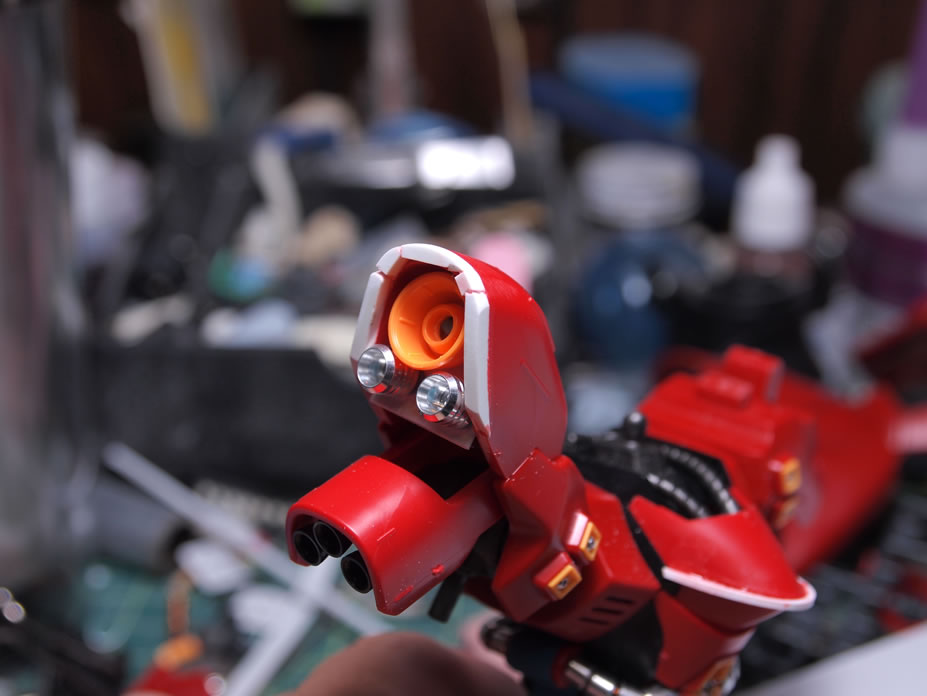
There are some pegs that can be seen, so I added a small rectangular vernier to cover it and add some more detailing to the shoulder pieces.
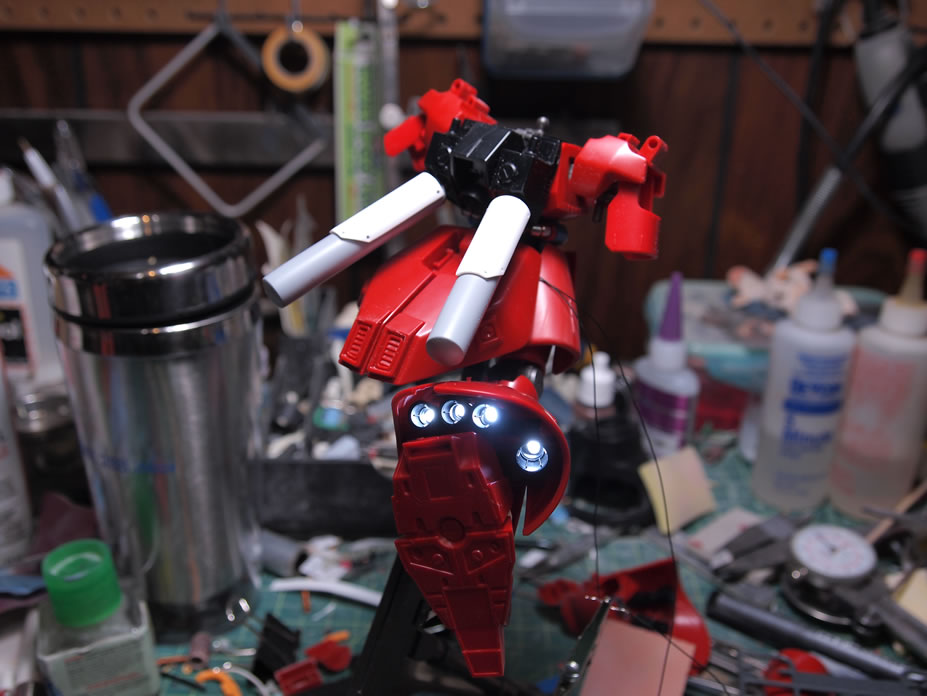
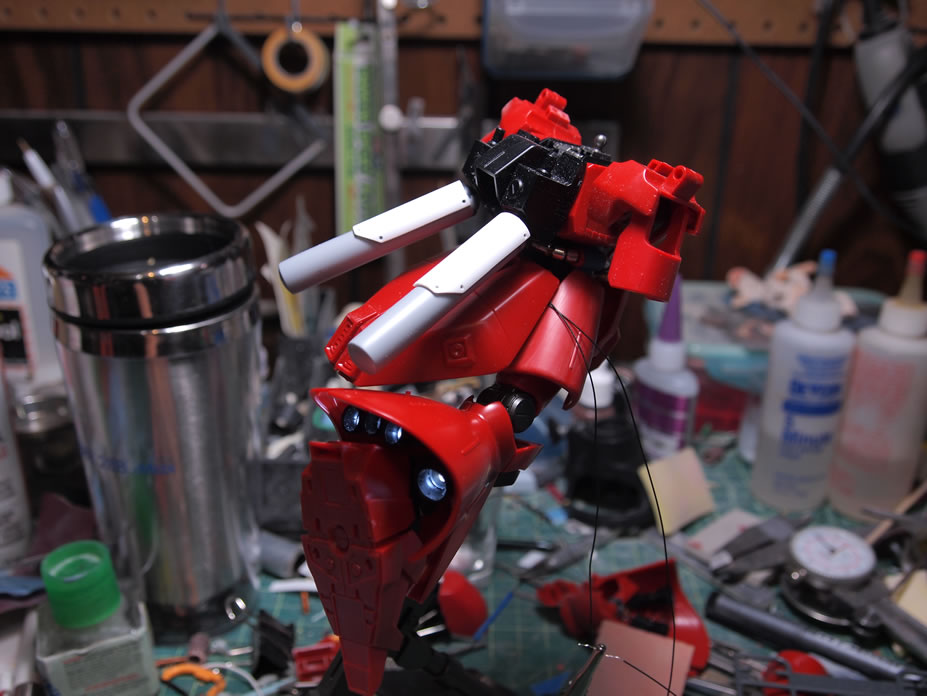
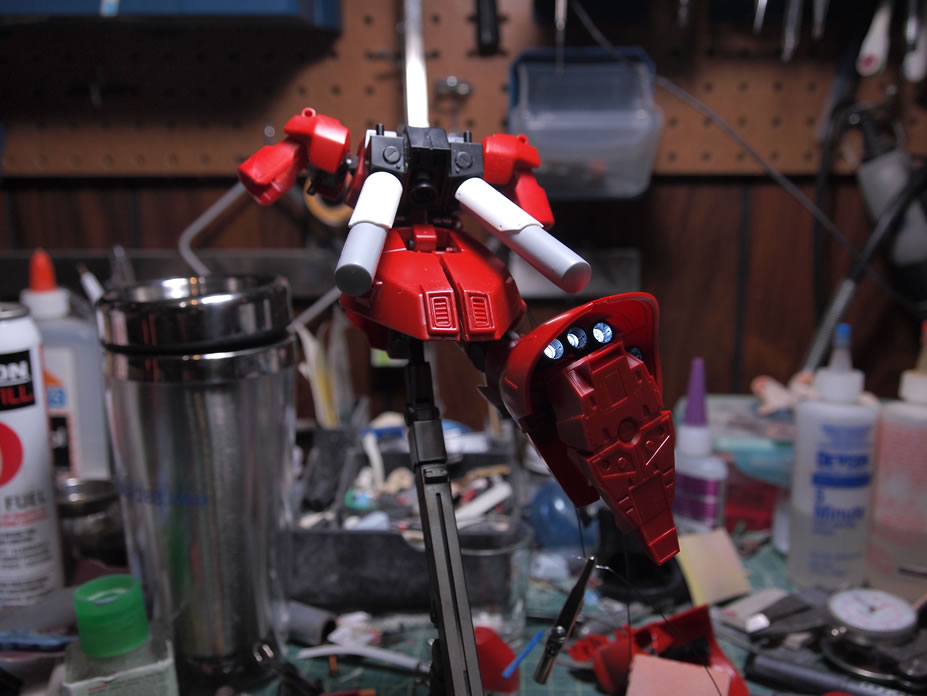
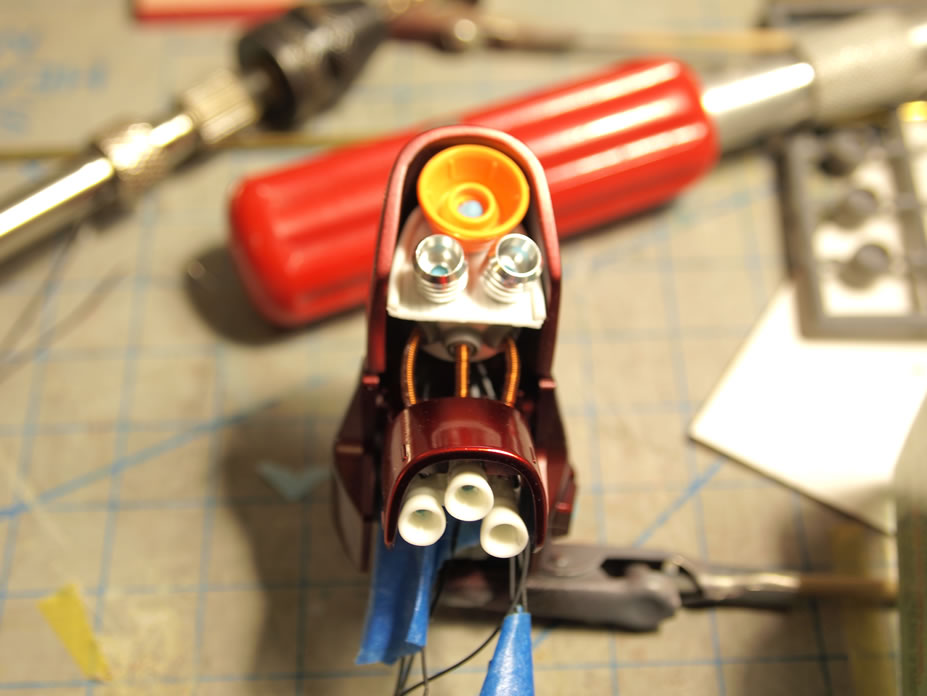
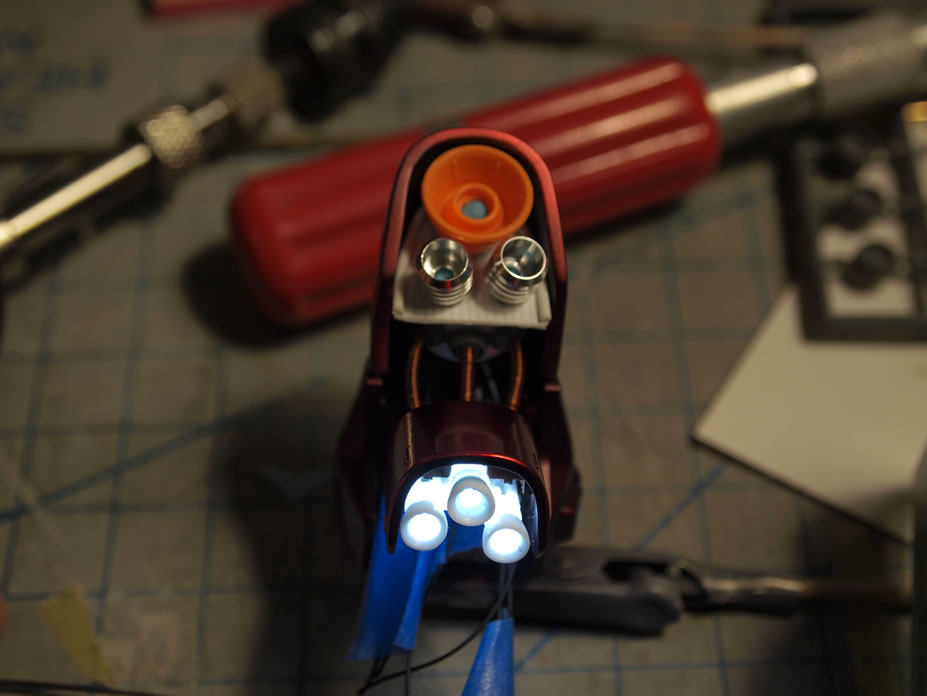
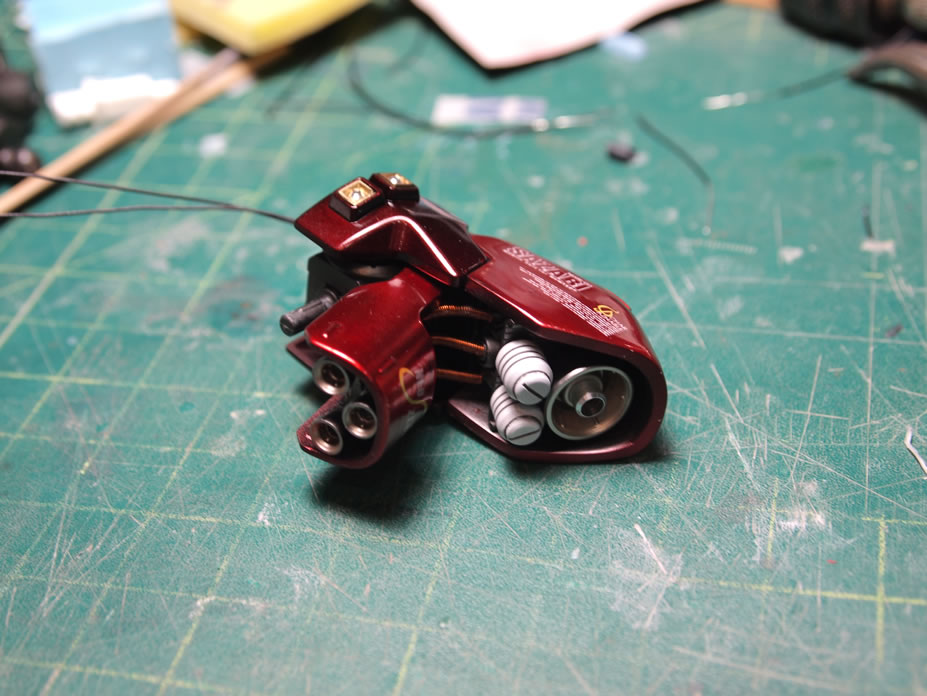
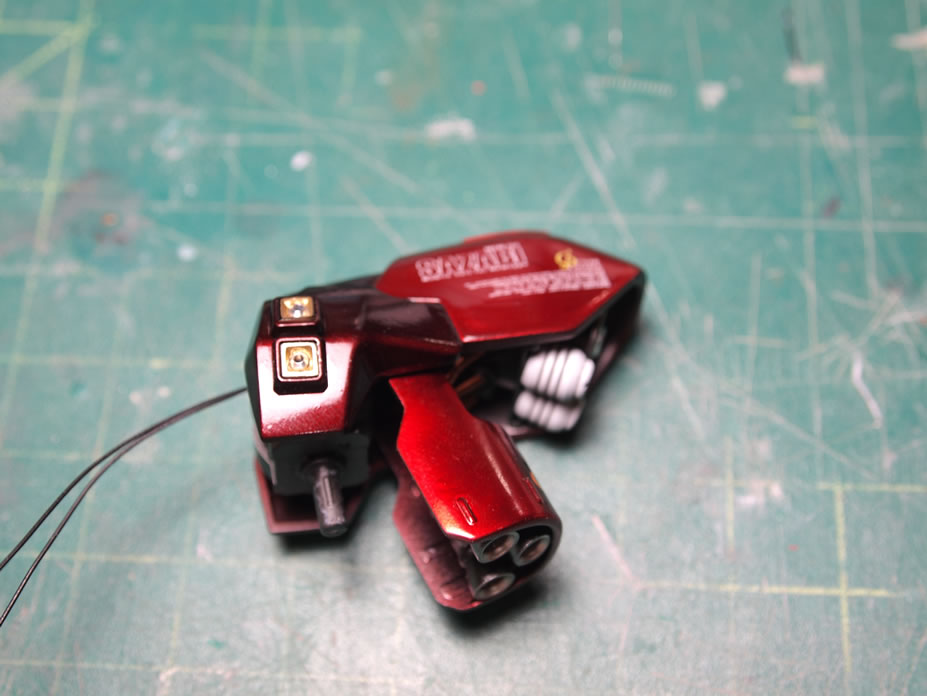
The other leg’s wiring was threaded and we have lights. Additionally, I did some mods to the bottom of the foot and added a thruster bell as well as LEDs there too.
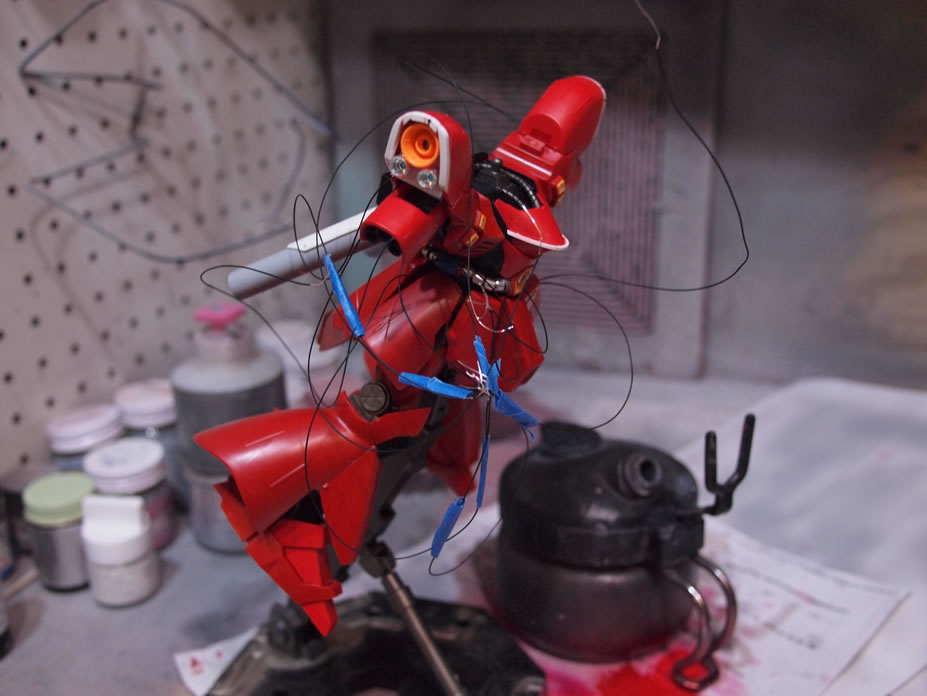
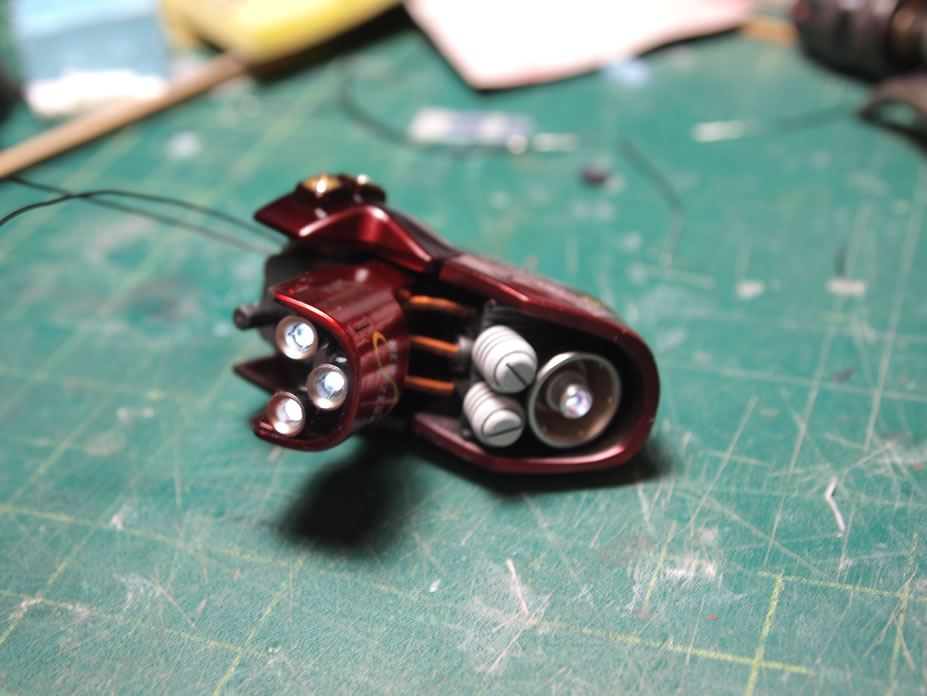
So I’m up to 11 LED, 5 for each leg, and the backpack thruster. The smaller backpack thrusters are too small to effectively achieve this for now. If I find decent surface mounts I may attempt to light up those thrusters as well. The side skirts were also lit up, so that’s three on each side bringing the total to 17 LEDs. And the last thing I did was add lights to the main thruster detail I added earlier, one on each side brings the total to 19 LEDs. I still have the mono eye to figure out.
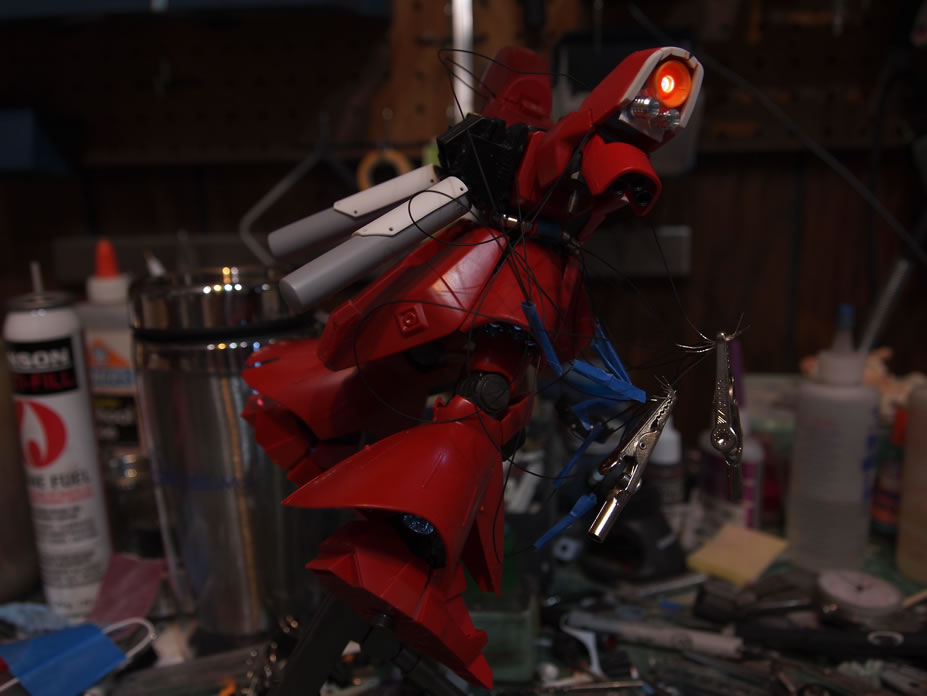
The jumble of wiring I have for the kit so far. Fun times.

January 23, 2011: Not much work on the sucker this weekend. But I did get the shoulders puttied and primed. I will need to go back and sand/putty, and reprime to fix the current surface issues.
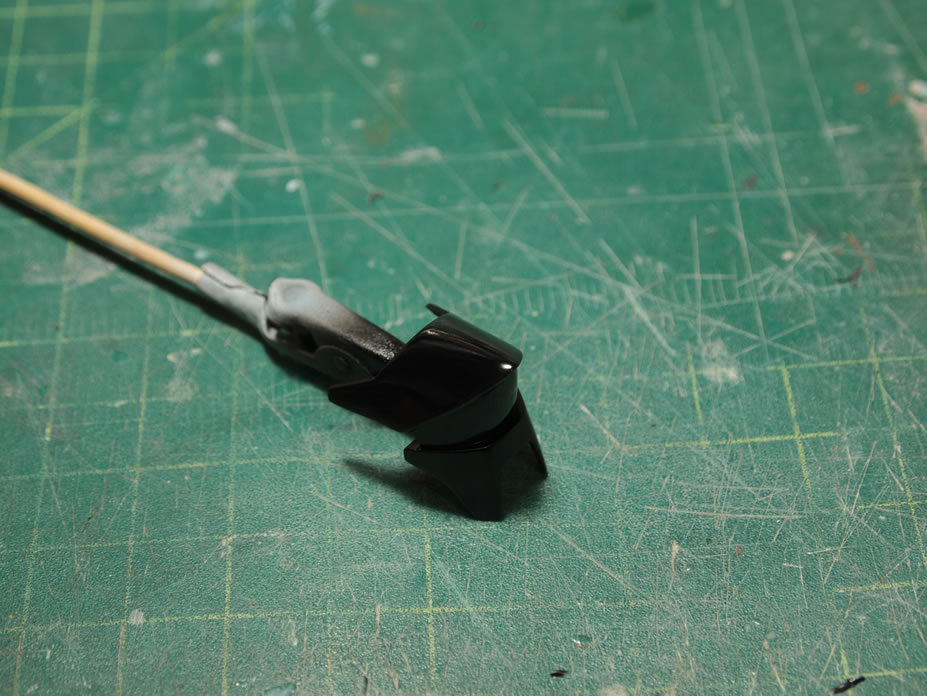
Built a little thruster pack to replace the one on the back skirts sides. Nothing to fancy.
Here’s I’m thinking about adding the metal collars to the shoulder thrusters. Still gotta think if I like the look or if I like the look of the regular thrusters.
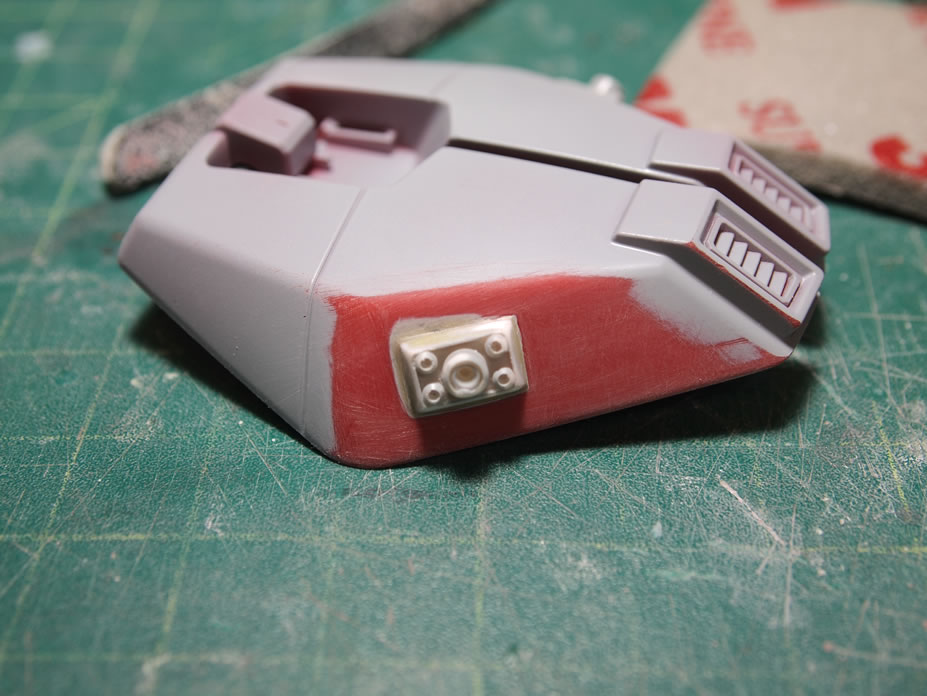
January 24, 2011: Work continues on the shoulders. They were cleaned up, putties, and sanded. The chest piece gets the first layer of putty.
The chest is sanded down, more putty is applied, which is futhrer sanded down and prepared for the primer.
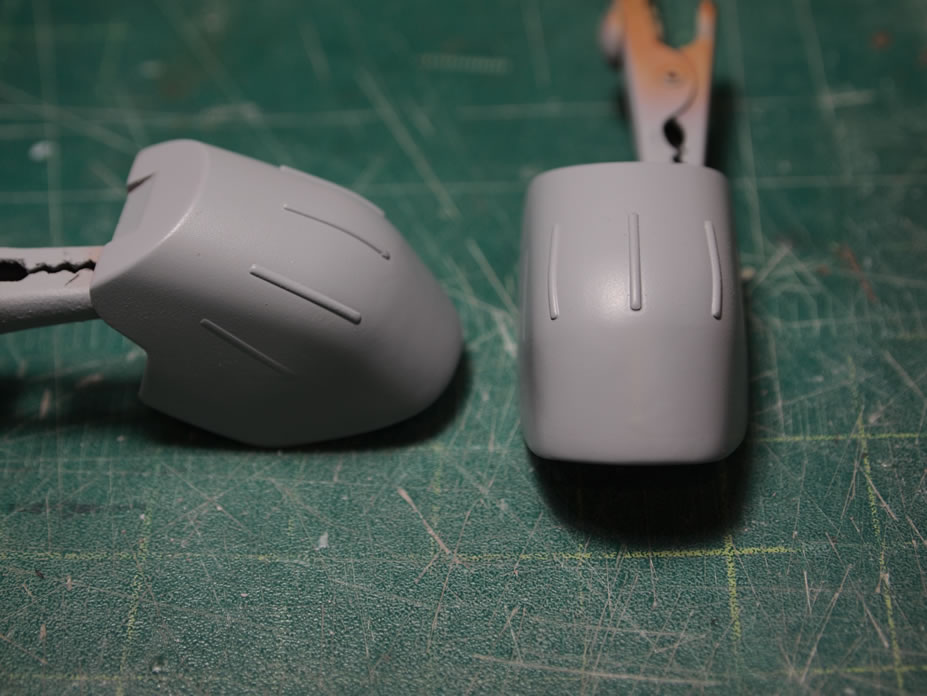
And here are what the shoulders and chest look like after priming. I’ve added some bulk to the chest piece as well as sharpened the front edge. It’s a minor cosmetic change. In the primer, there are still a few slightly rough areas on the shoulders that will need attention and the chest has a few surface defects that will need attention.
January 25, 2011: back to the shoulders and chest piece with another sand/putty/sand/prime session. First the little bubbles in the surface of the chest are cracked opend with a hobby knife.
The filled with light curing putty and sanded smooth. After sanding, the parts were primed, and then a few areas were lightly sanded to fix some unevenness in the puttied parts then primed one last time.
And the third priming session does the trick, these parts are ready for paint.
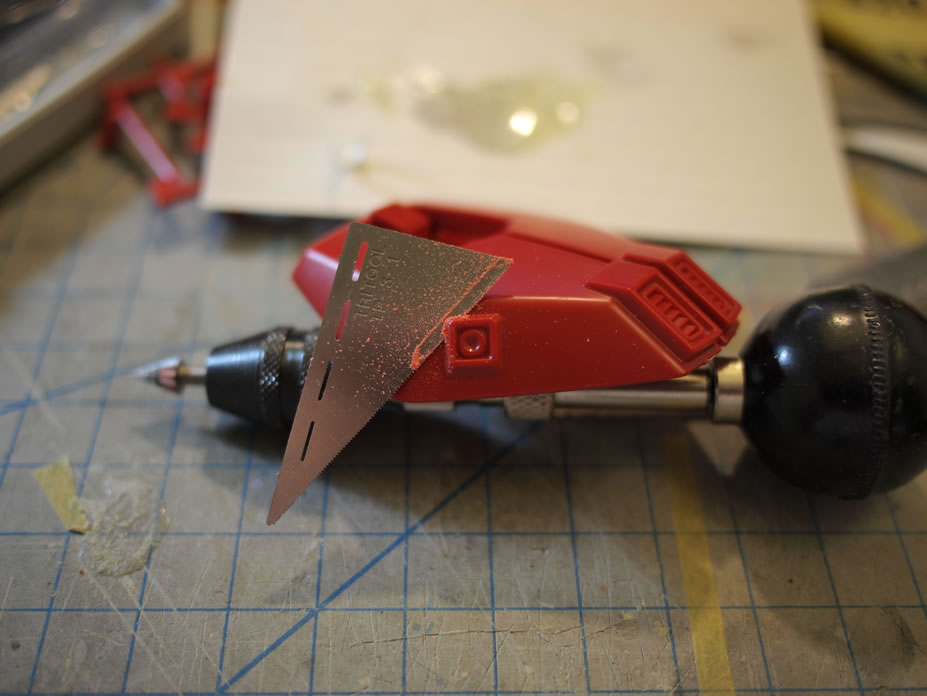
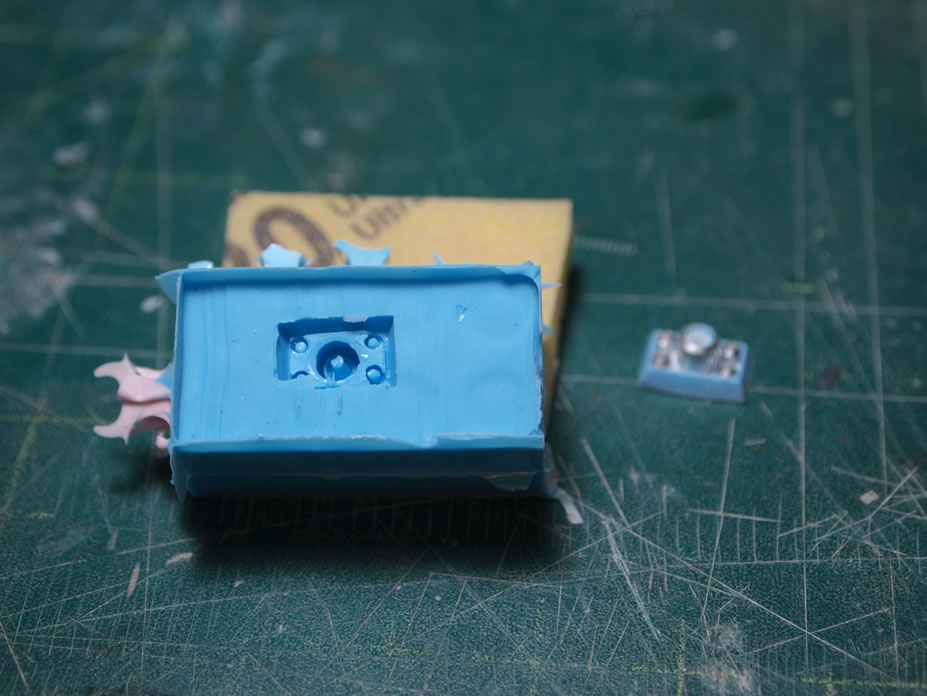
The little back thruster piece is molded with silicon and tomorrow I’ll make resin casts of this part.
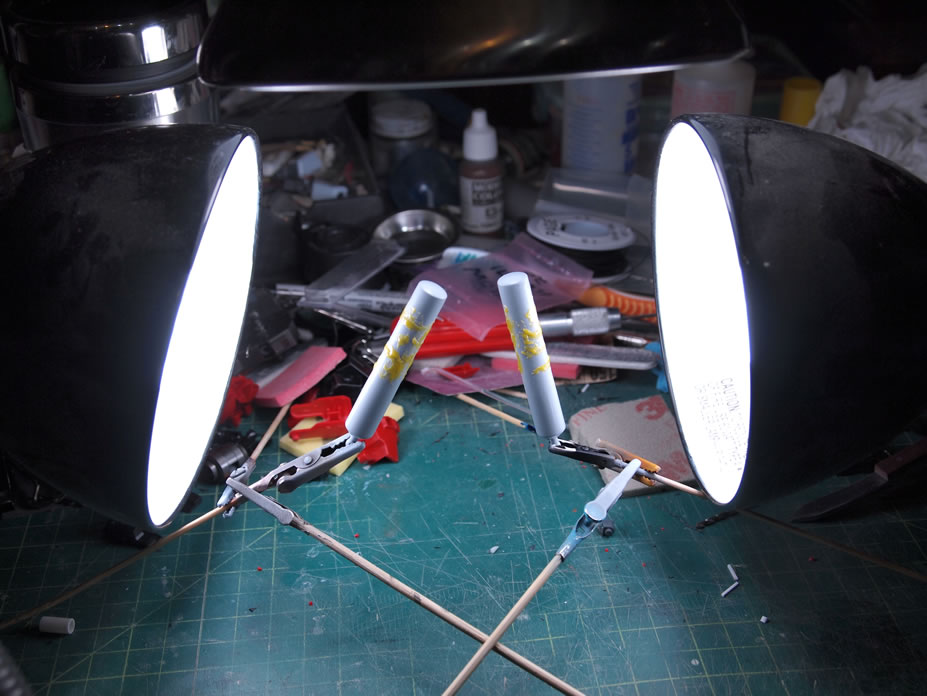
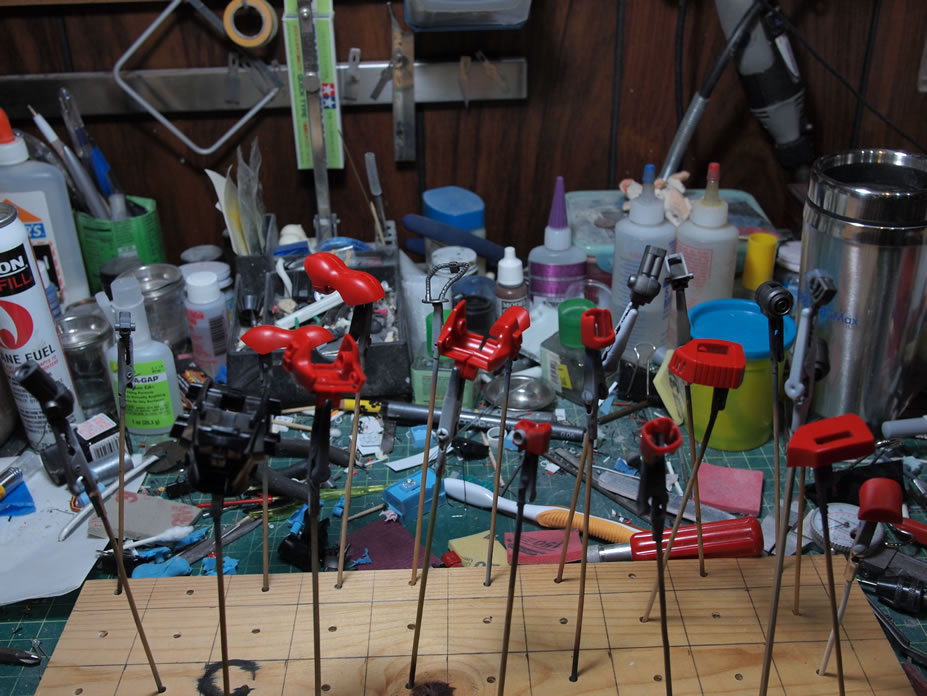
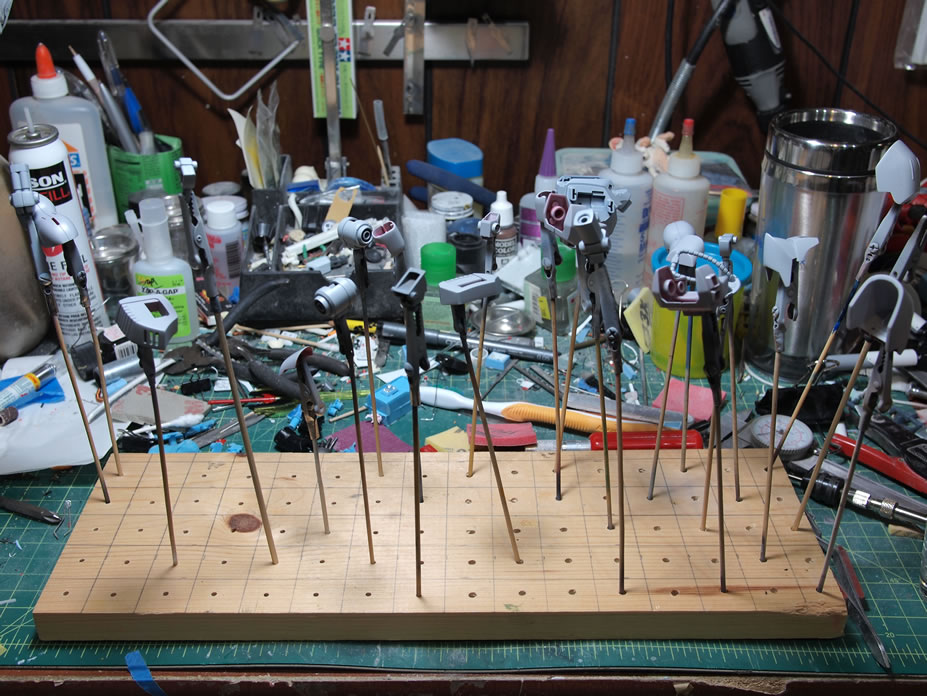
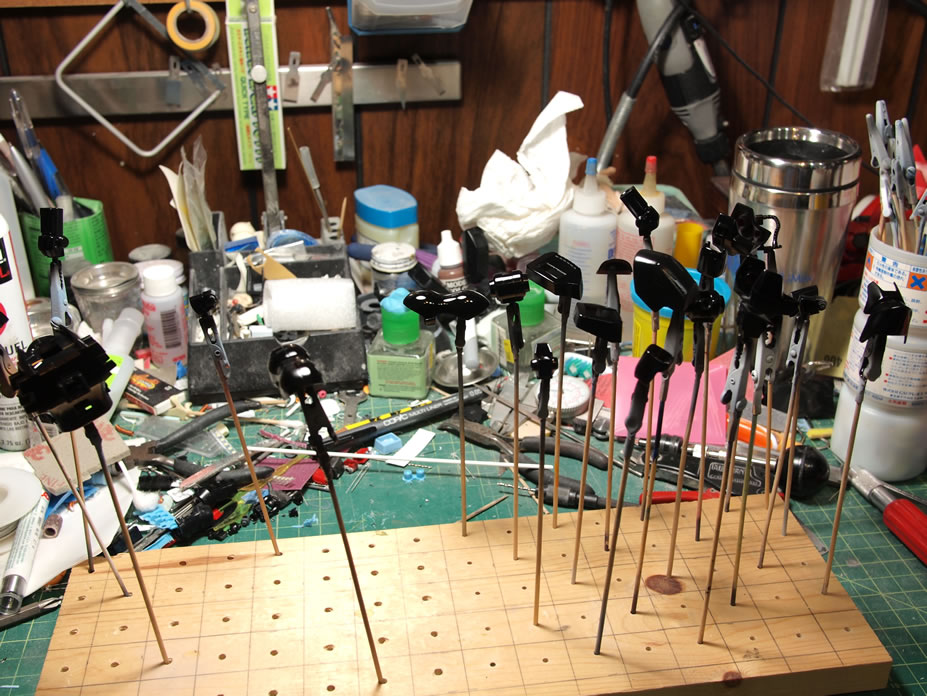
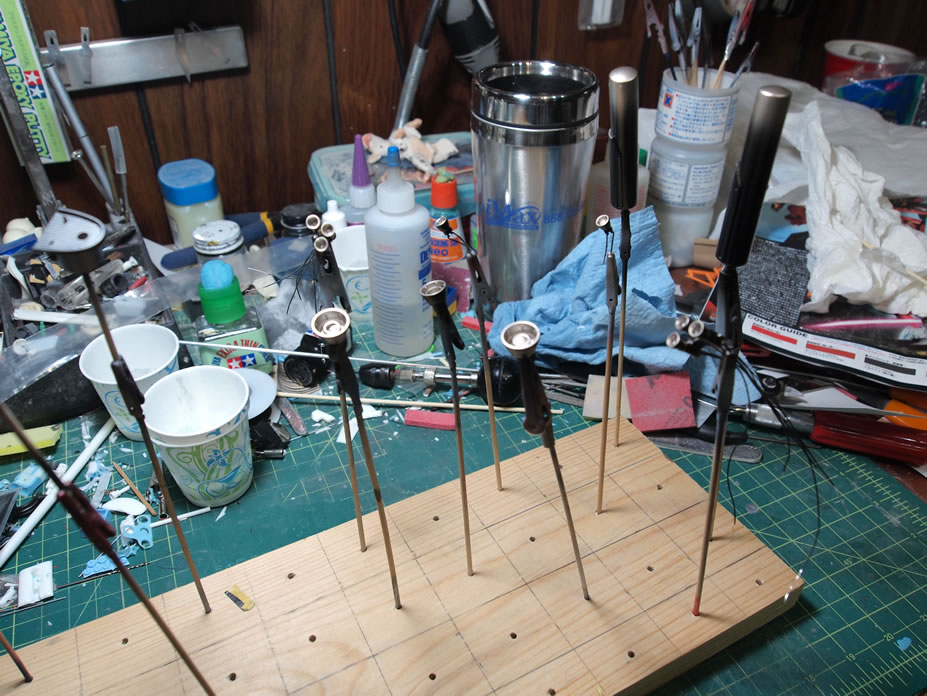
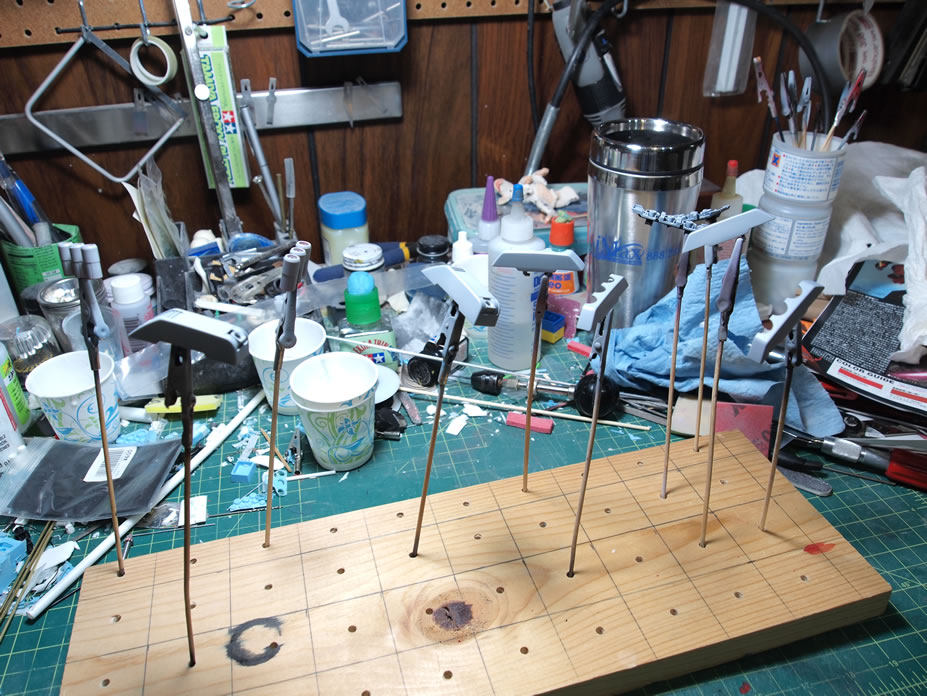
January 27, 2011: I’m finally getting some painting on the kit. I’m taking a different approach, I’m painting the kit in sections. So I have most of the arms and upper torso ready for paint. The parts are cleaned and placed on skewers. Primed. The primed parts sit over night to fully cure up. Today, I wet sanded the parts with a 4000 grit micro mesh sanding sheet. Then the gloss black was painted.
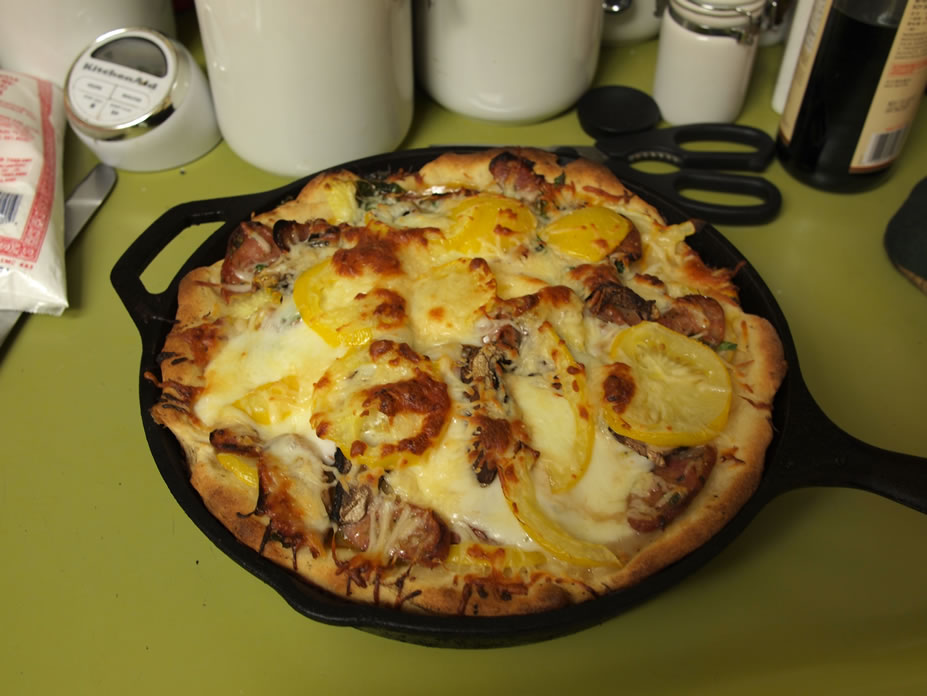
I made a Chicago style pan pizza for dinner, hence the picture in the middle of the Sazabi update.
Here are some close up shots of the black base coated parts. Nice and shiny, and fully dry.
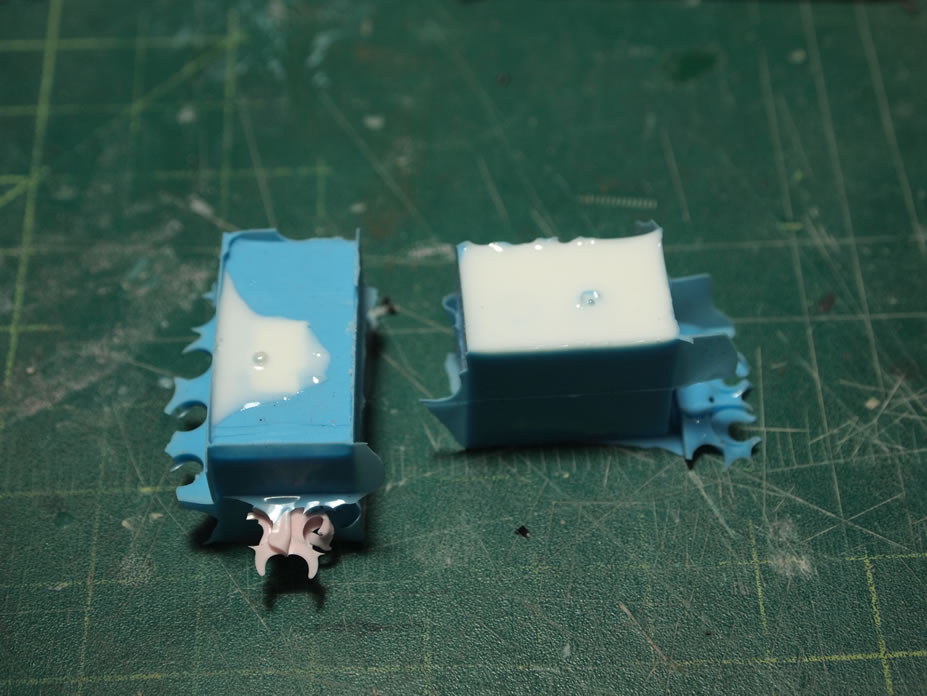
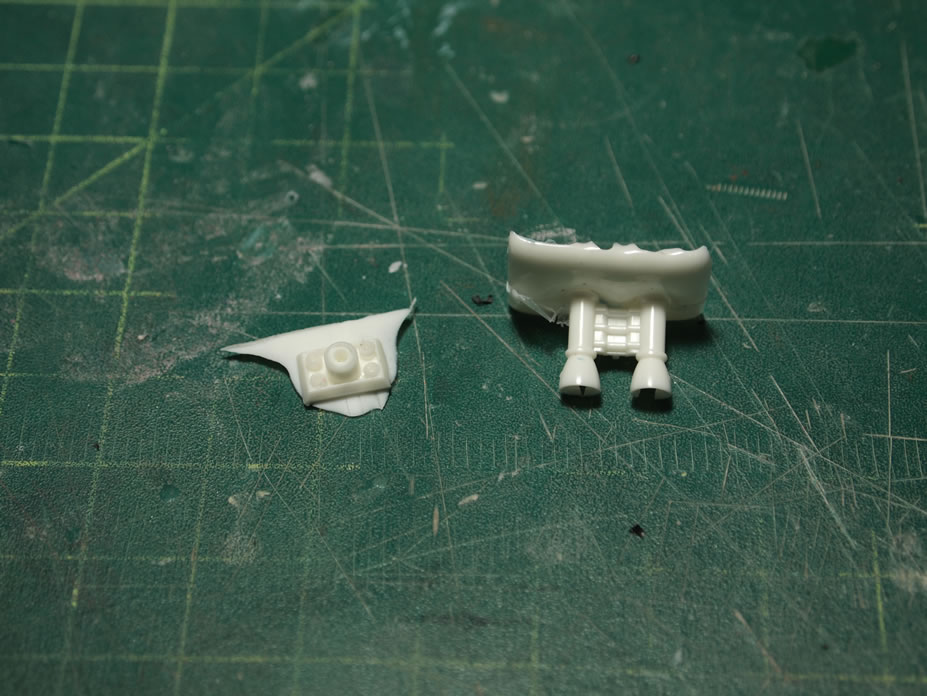
Back to the resin casting. The molds were filled with resin, then placed into the pressure pot, then after curing, the resin duplicates are removed. This is the first run. I can run several of these to make my necessary copies.
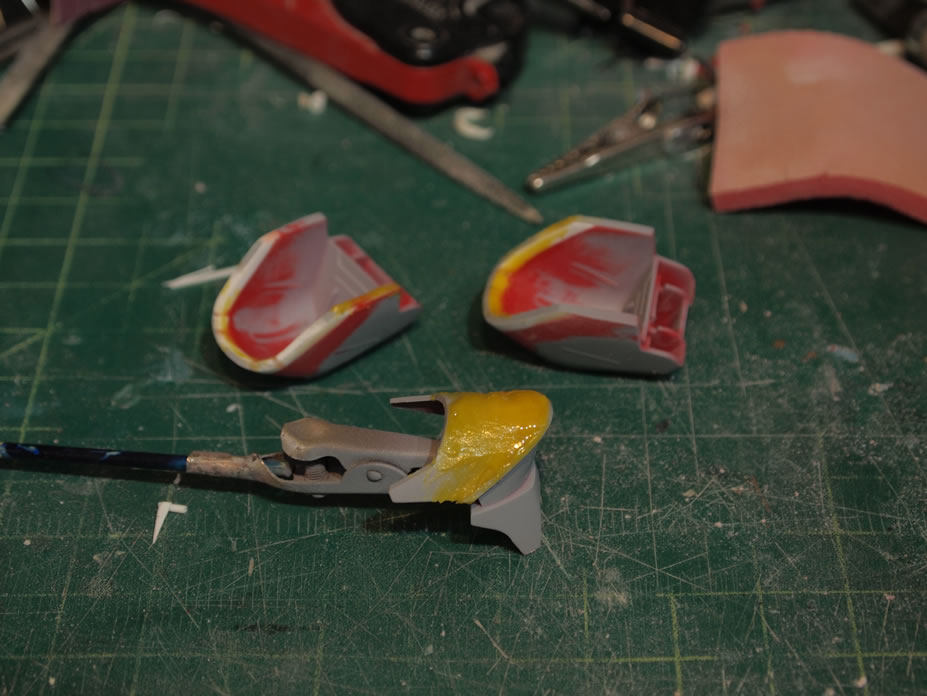
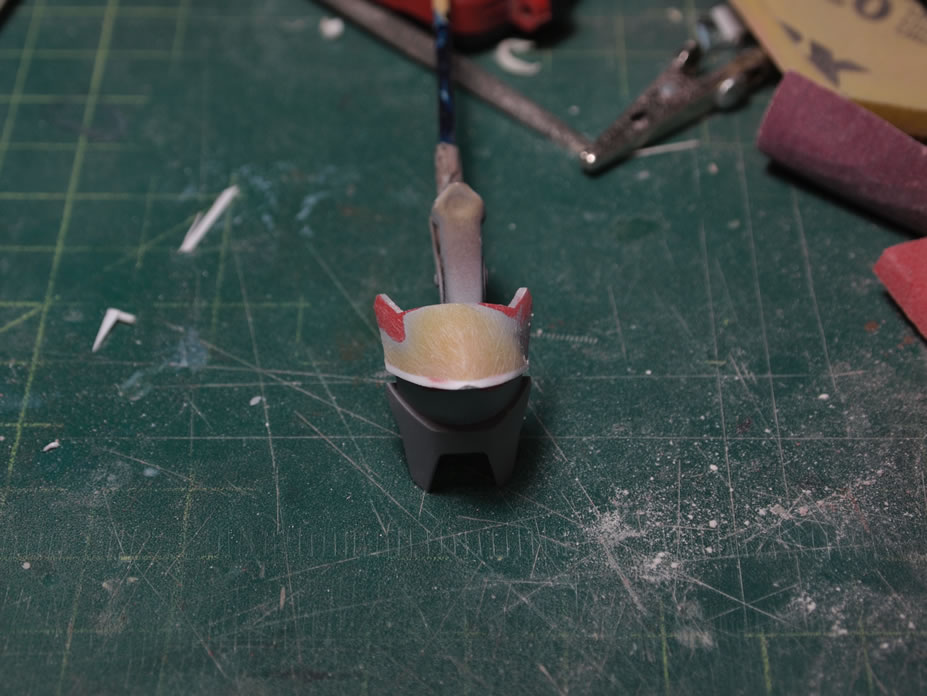
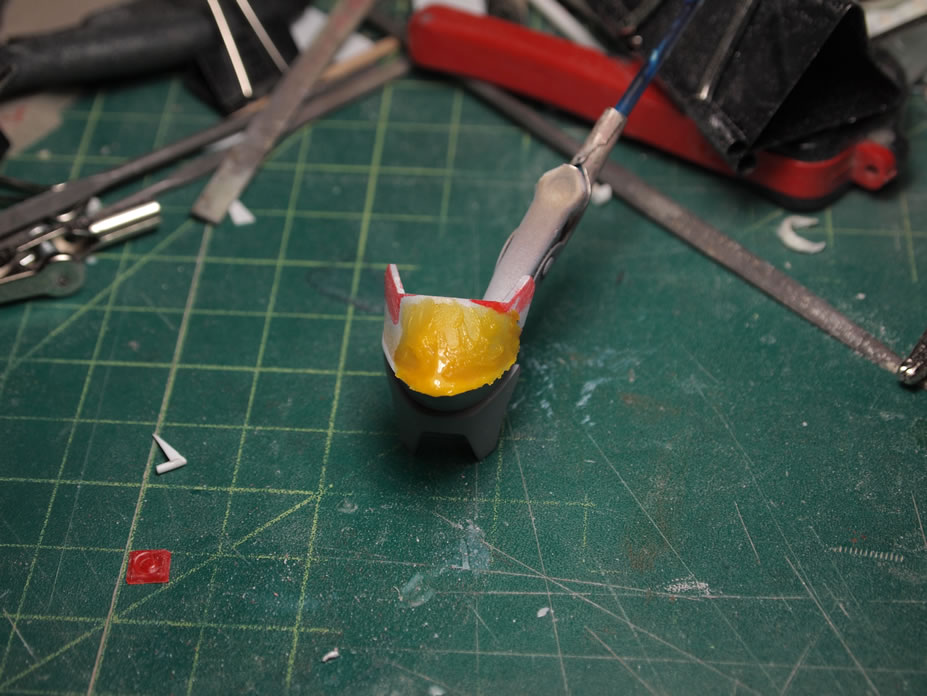
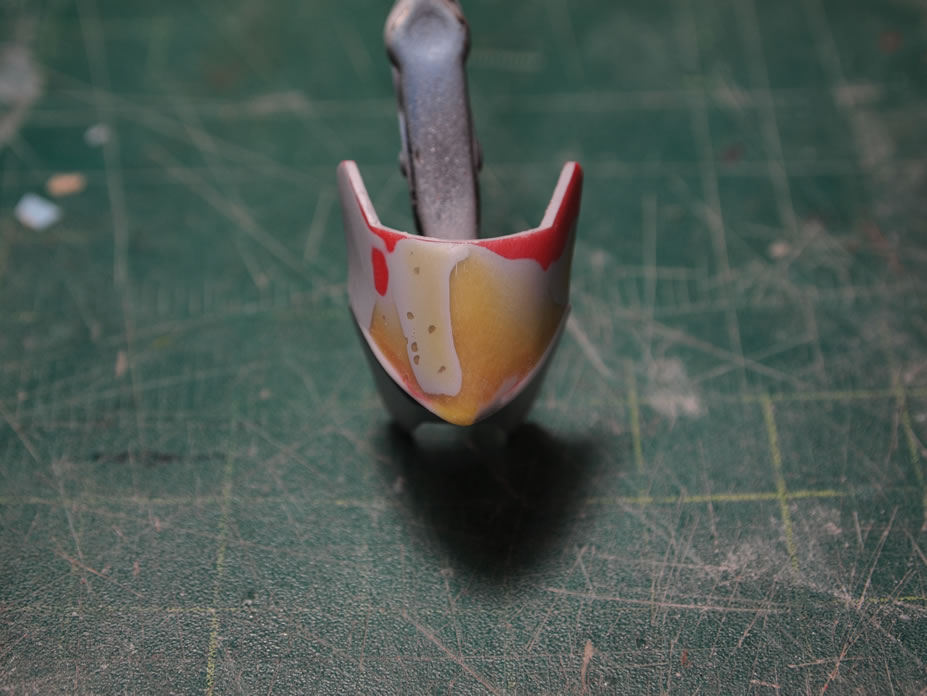
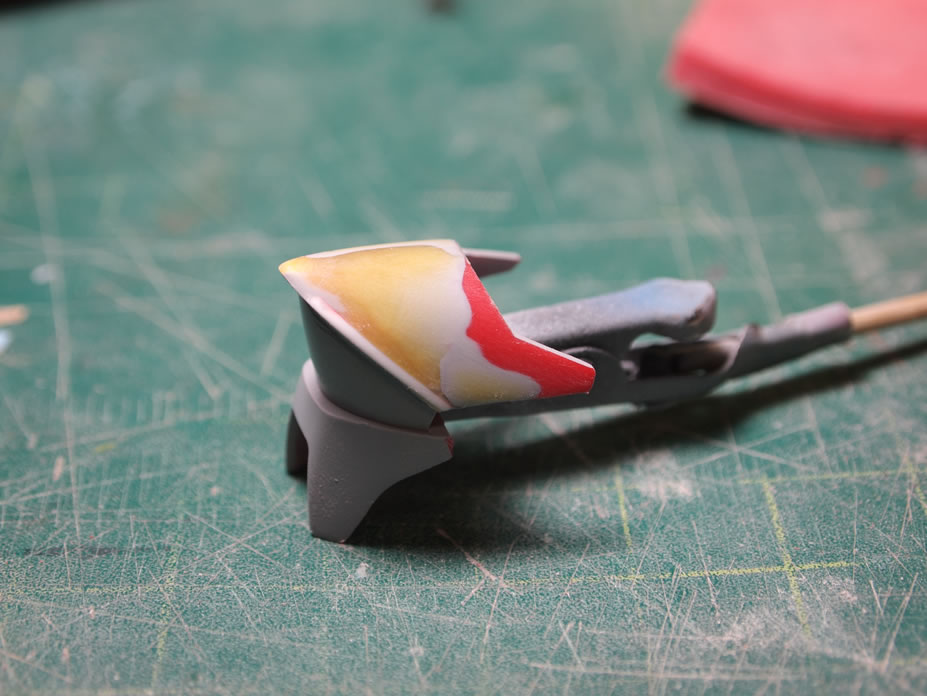
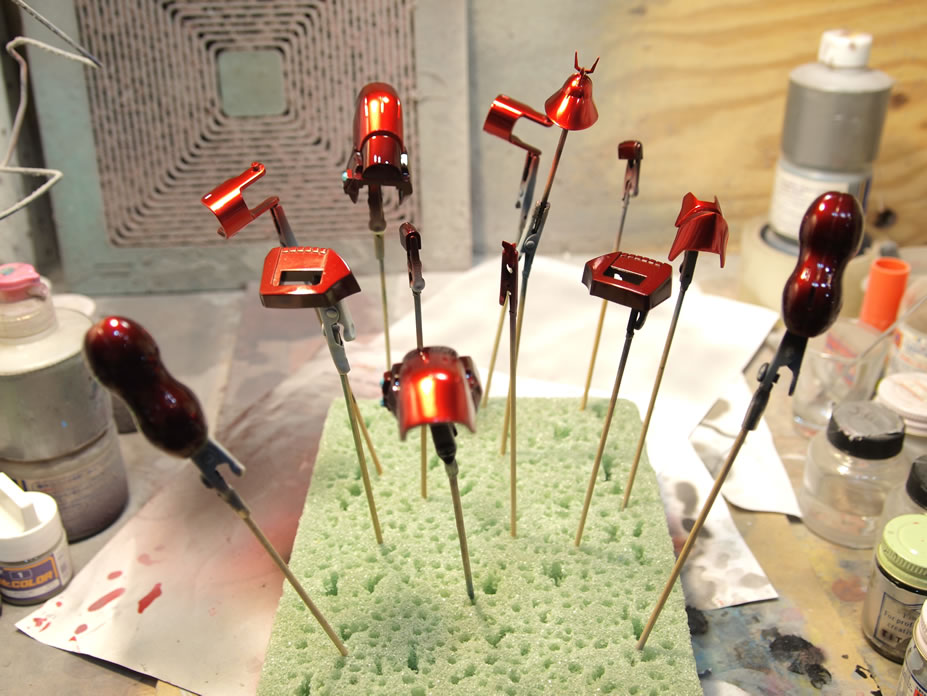
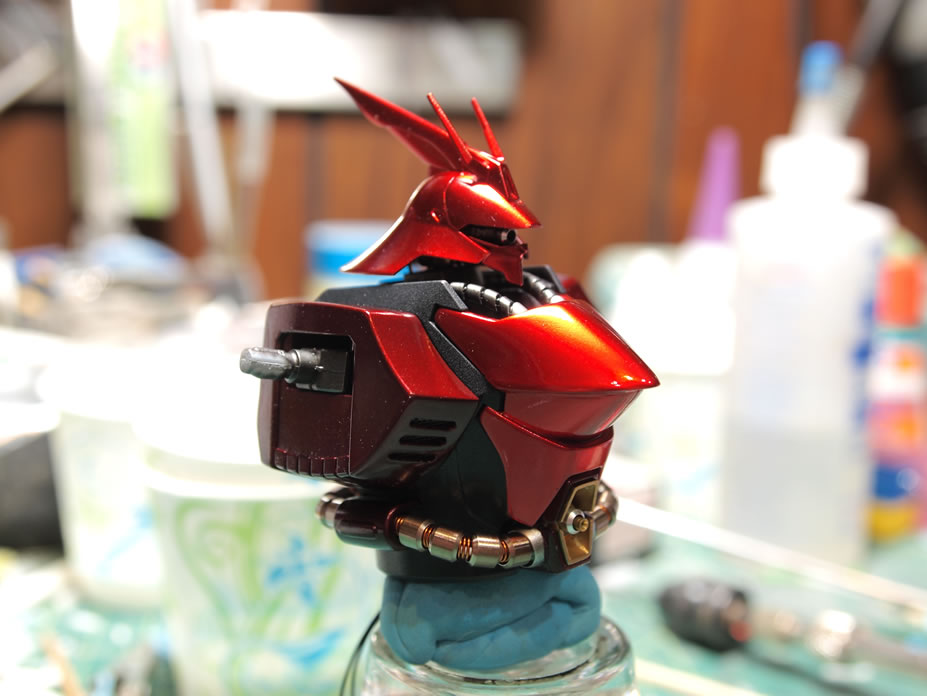
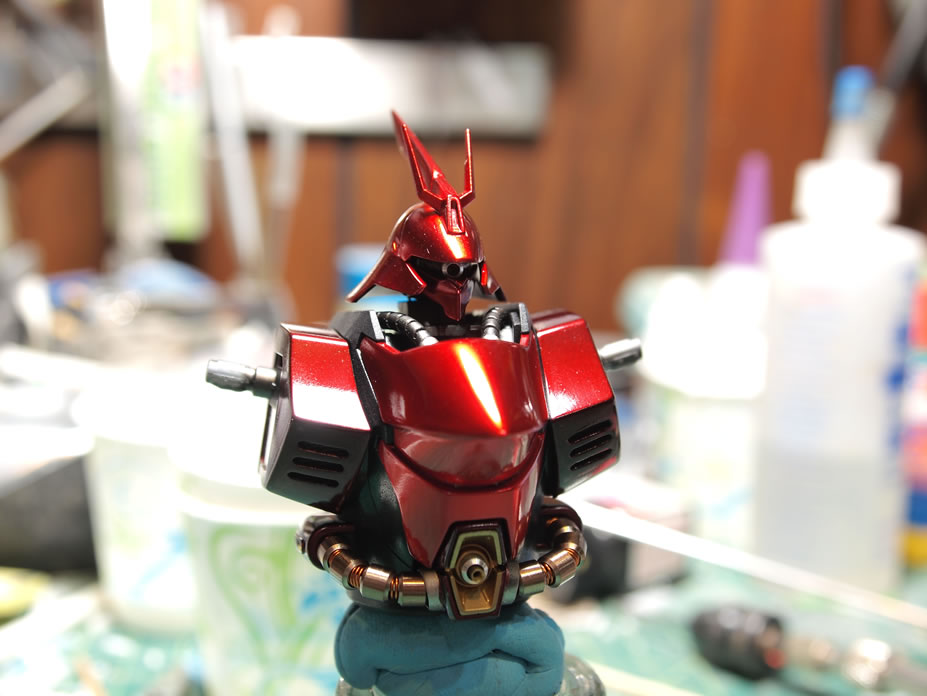
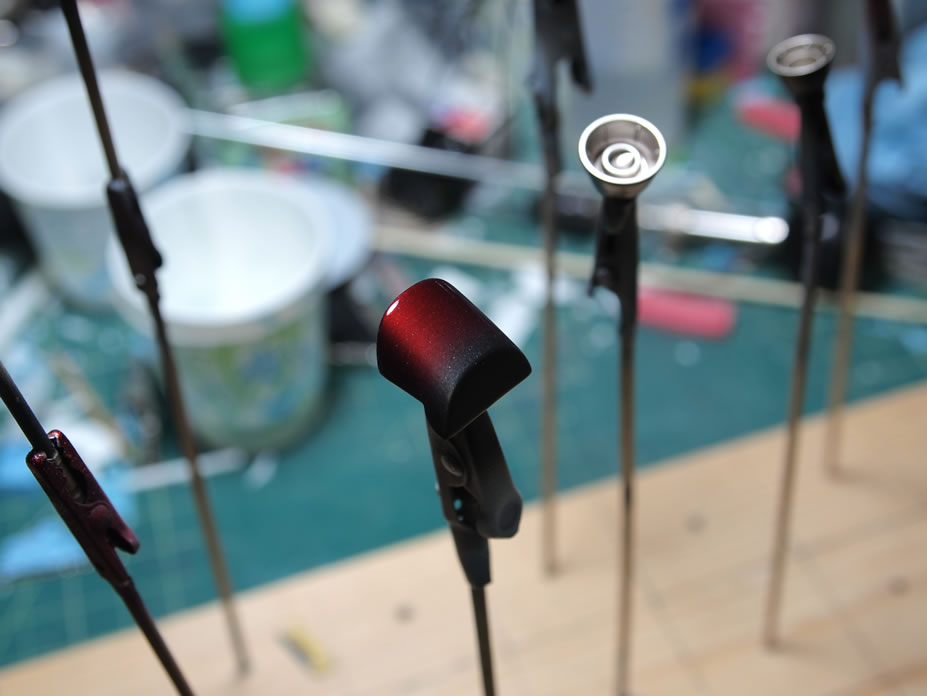
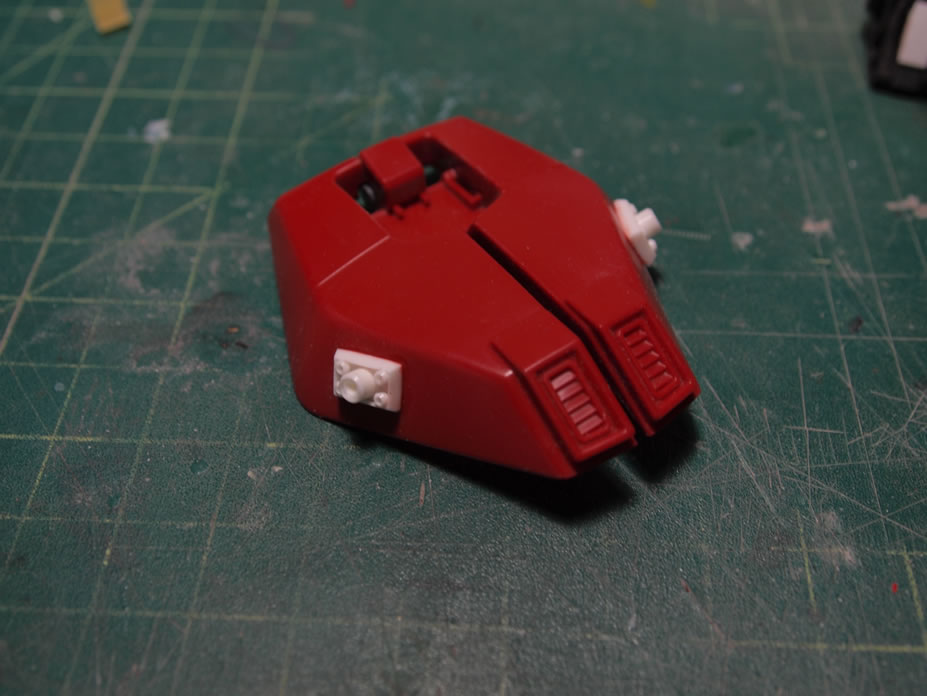
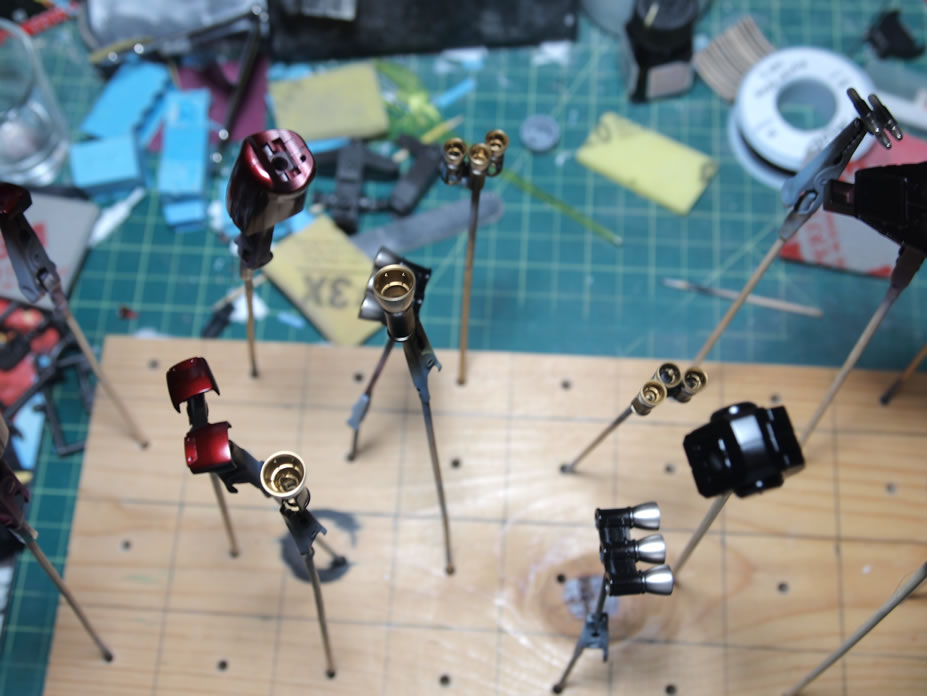
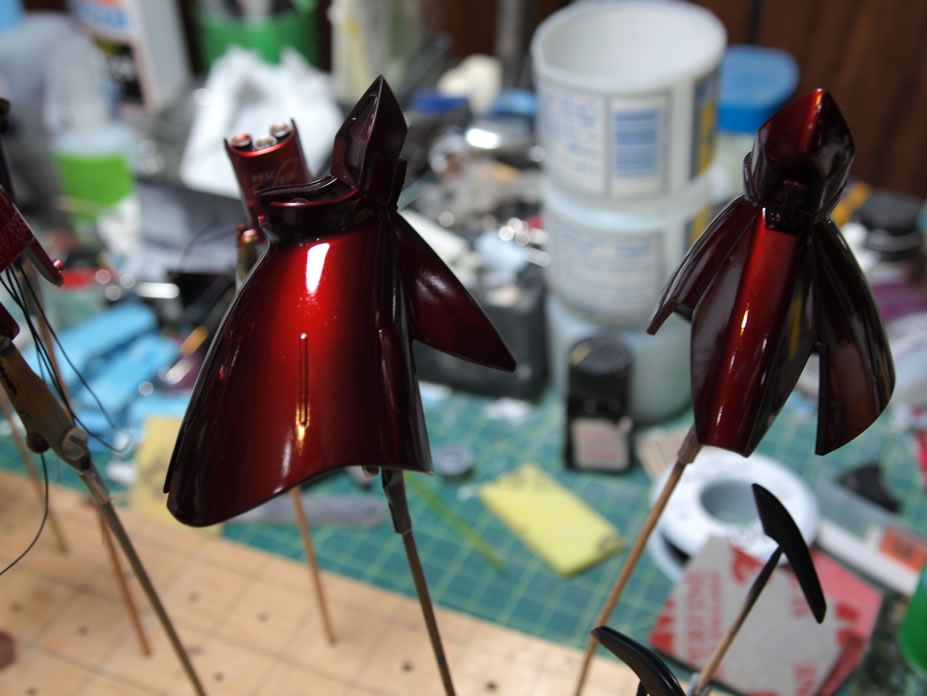
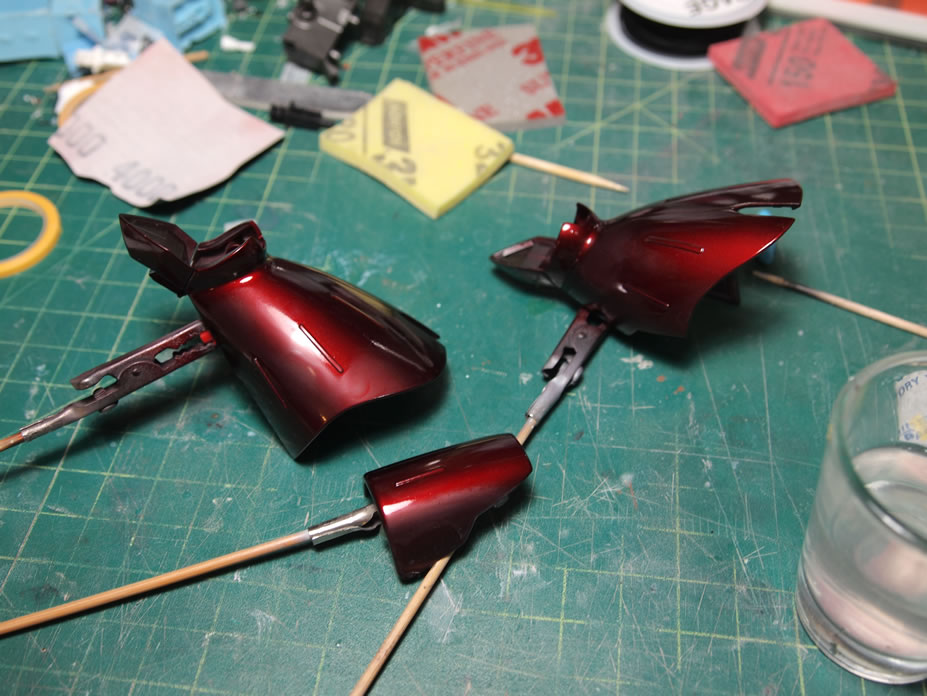
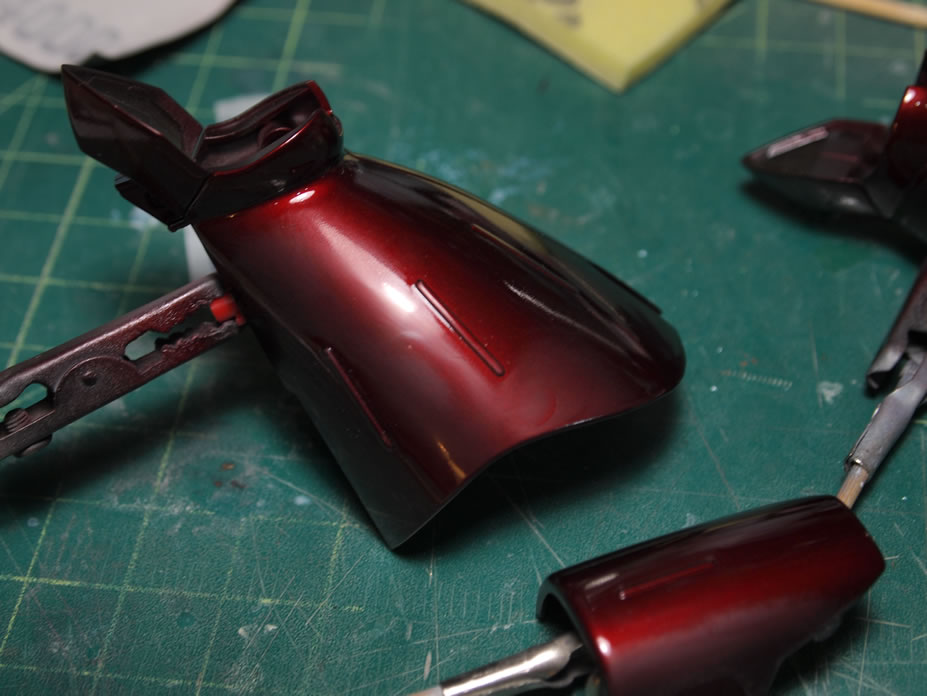
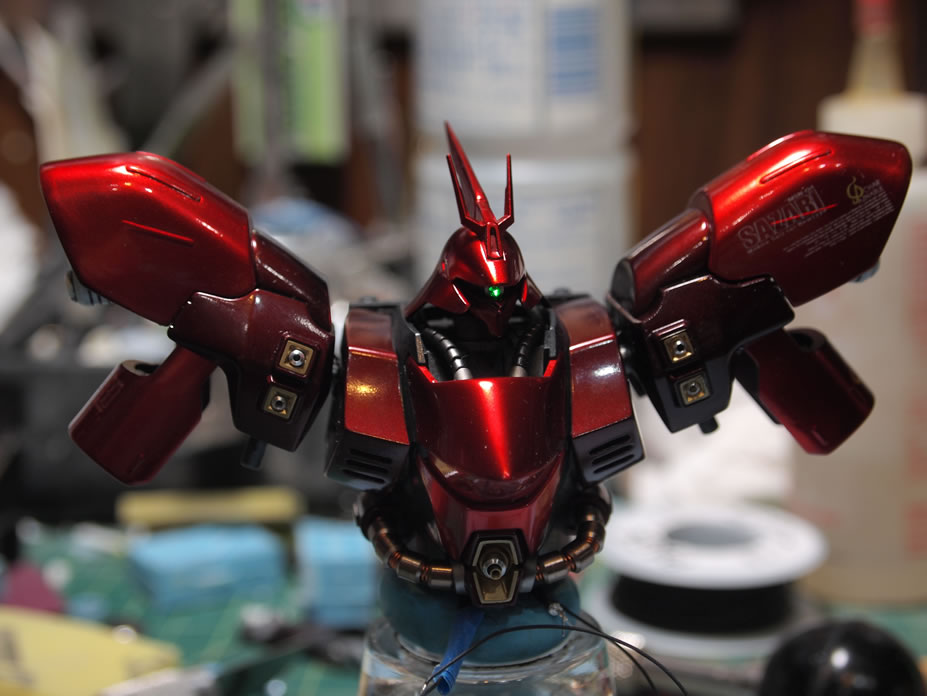
January 29, 2011: Updates from the past couple of days. I’m working on painting the upper parts of the Sazabi. So after the parts painted with the gloss black cured over night, the parts were shot with metallics. Since the Saz has a slight dual tone to the red, I’m keeping with that and going with the suggested dual tones. So for the sholders and chest pieces, and eventually the other lighter red parts, I painted alclad chrome. The other red tone parts were painted with alclad steel.

Against my better judgement, I sprayed alclad hot metal red over the above parts after they cured for about an hour or so. I really wanted to see how the red comes out on these parts. Here are the parts after being sprayed with the hot metal red. This is almost like a deep clear red.
Here’s a comparison shot of the chest which is the lighter tone, next to the arm piece which is the darker tone. The difference is a little more subtle in person. I like it.
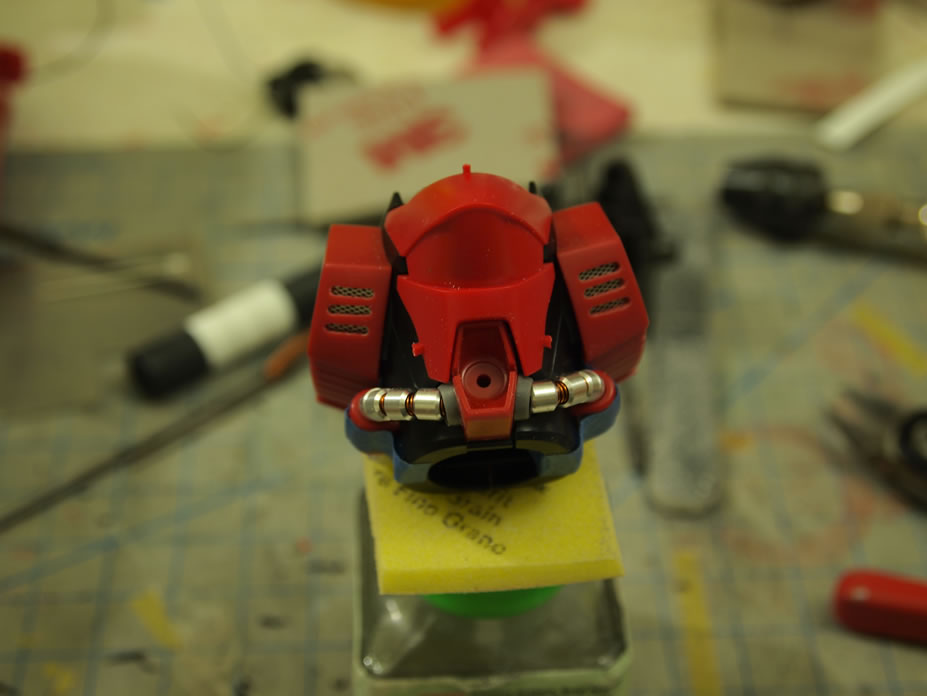
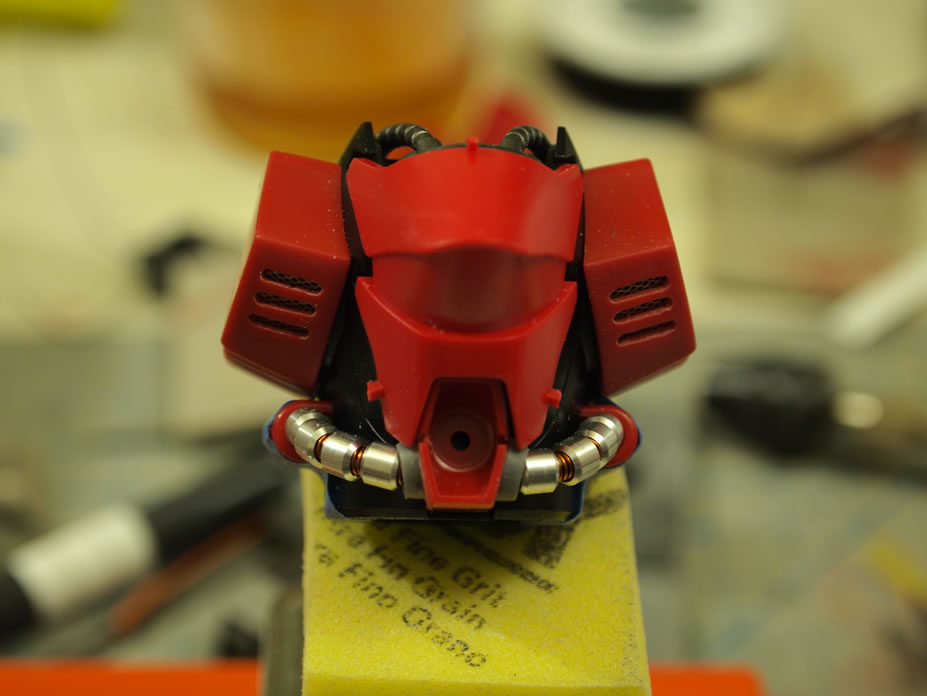
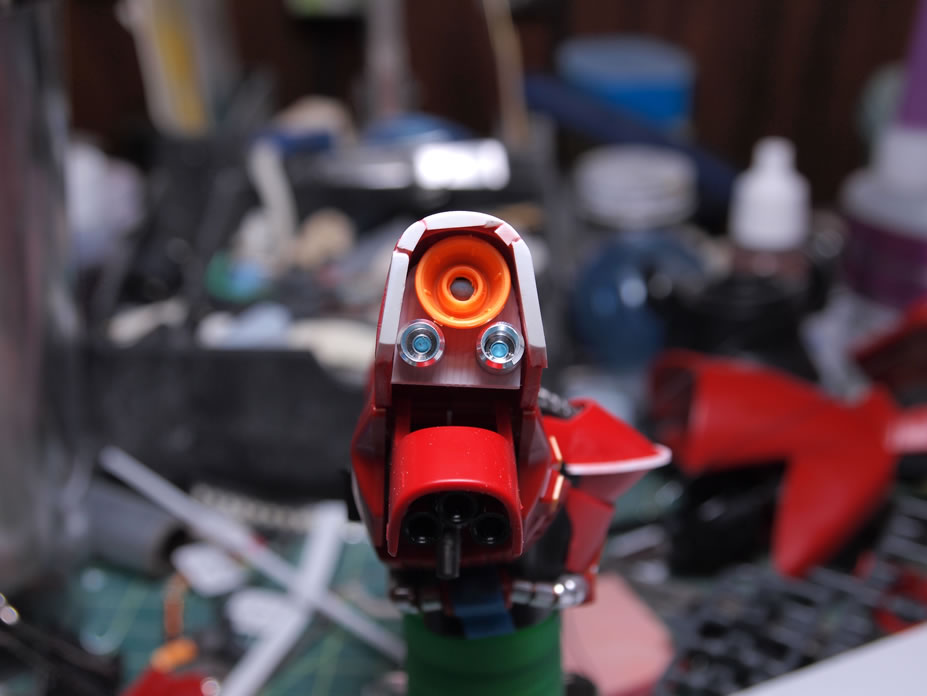
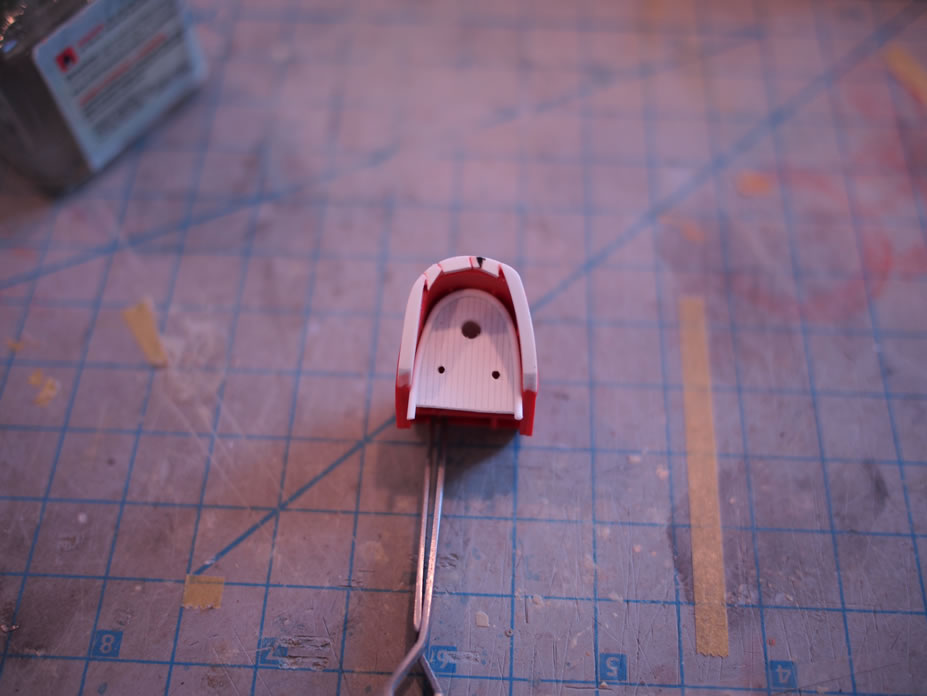
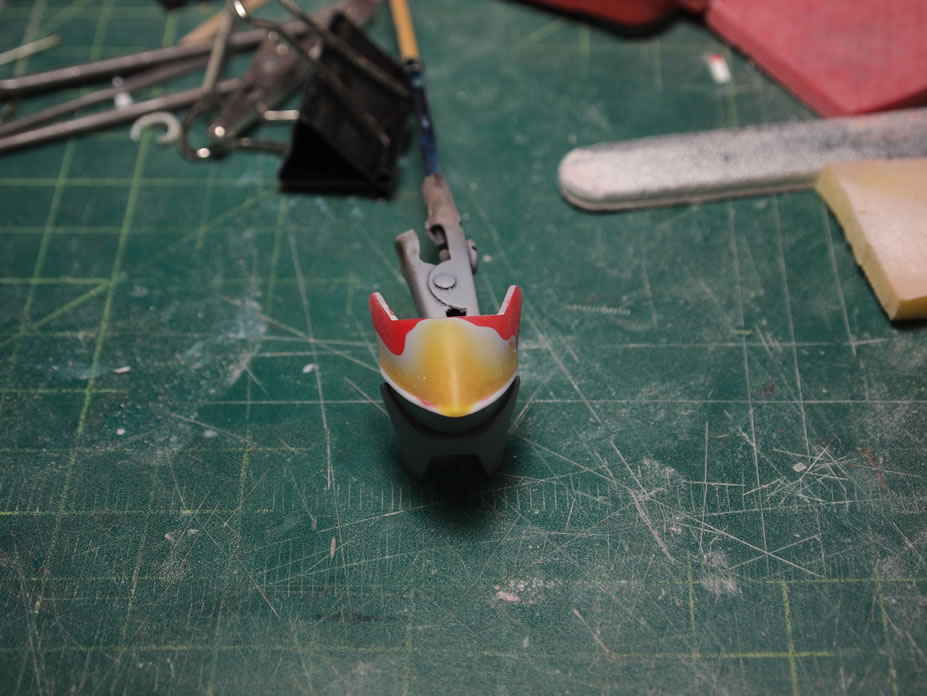
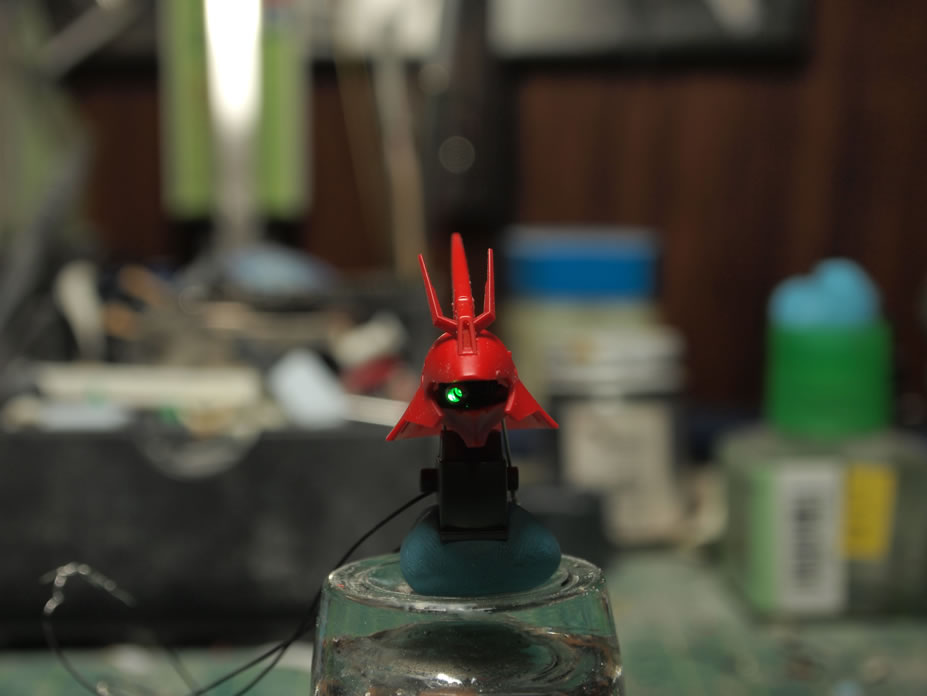
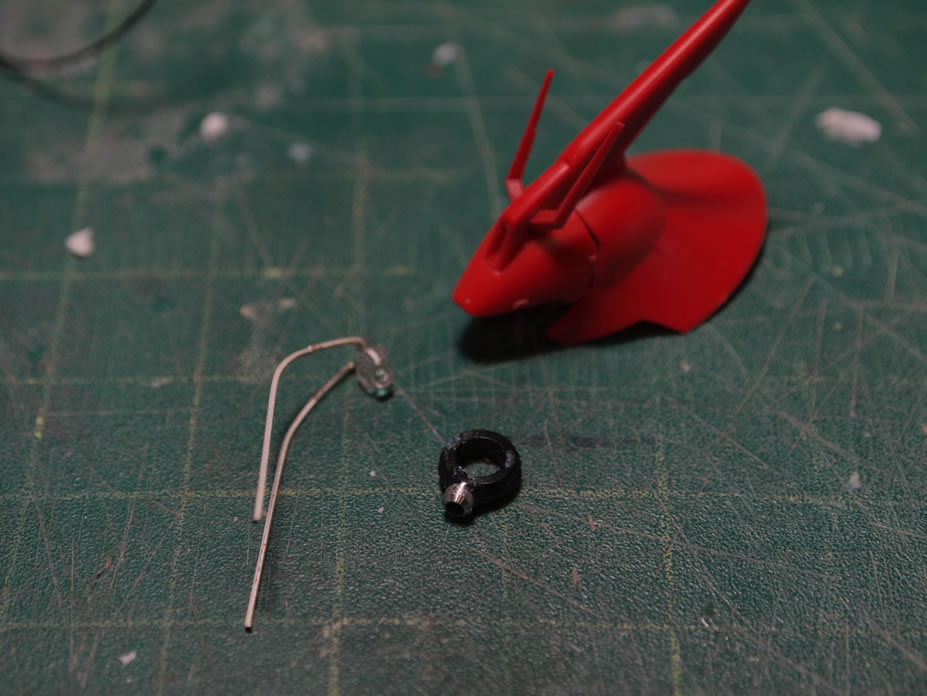
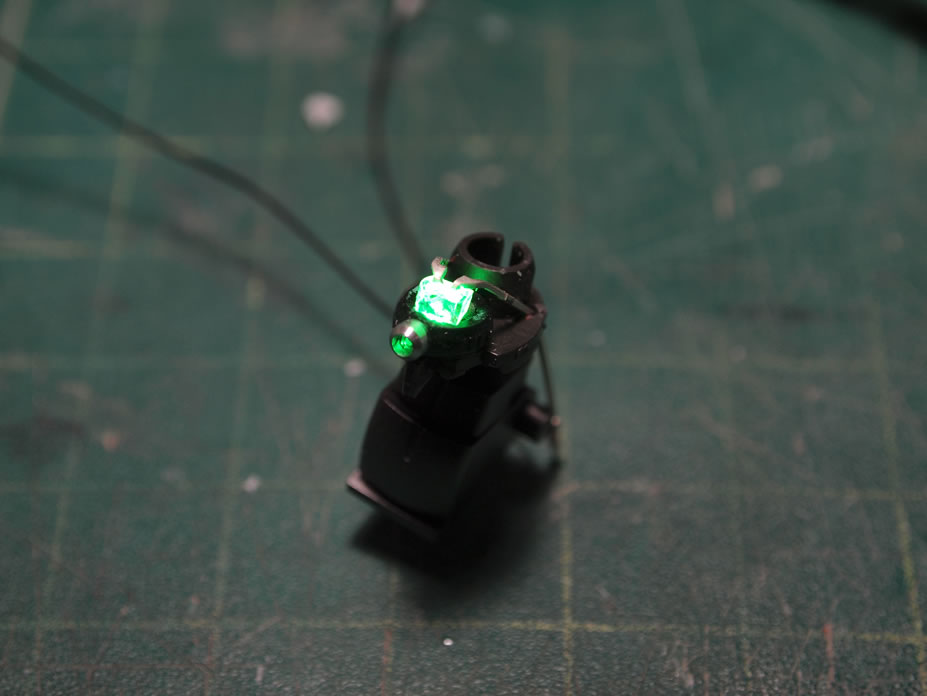
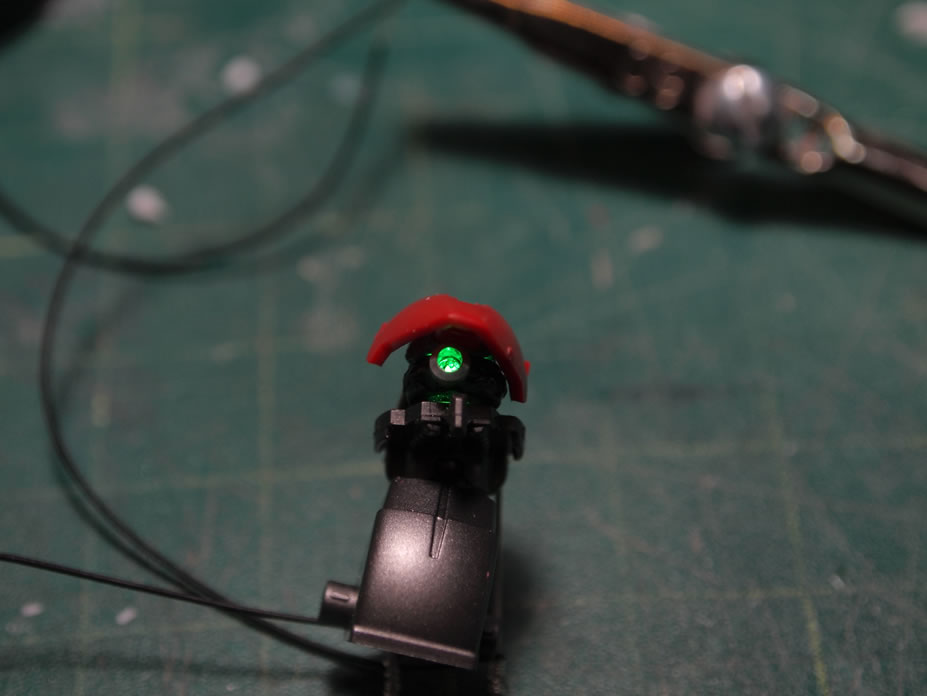
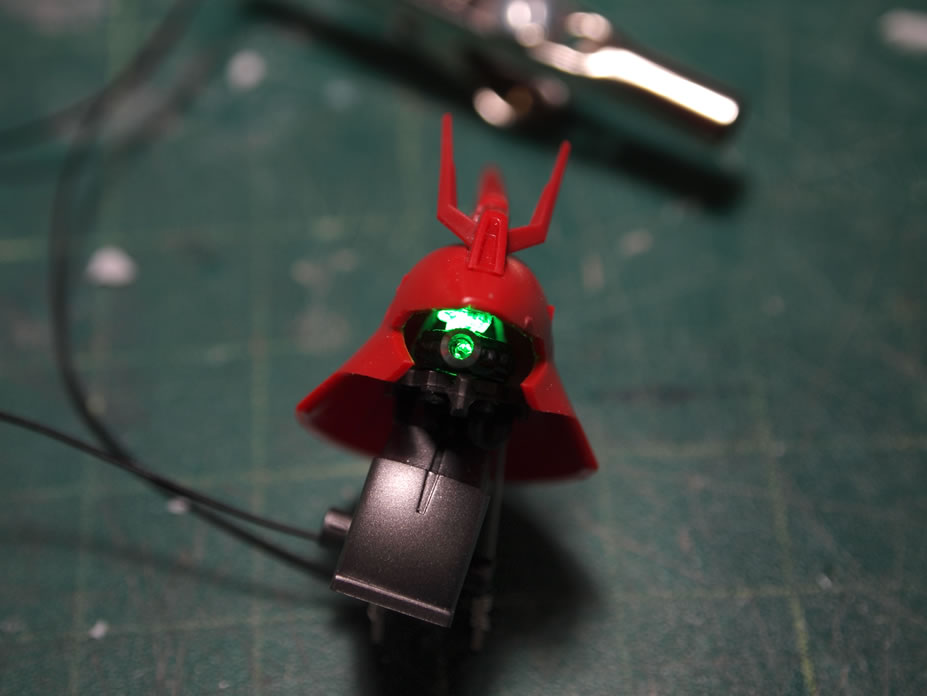
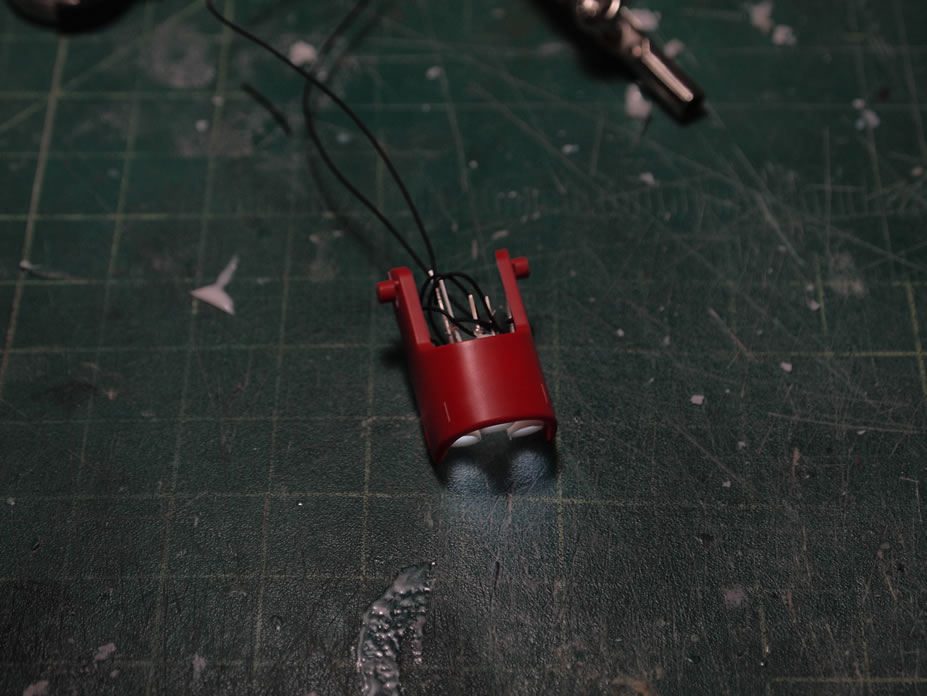
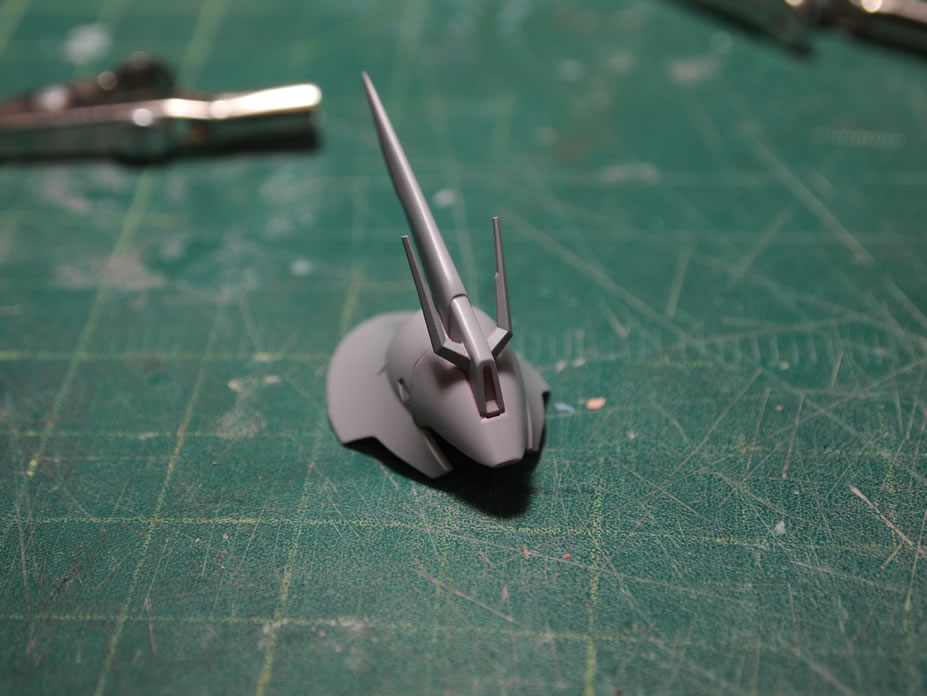
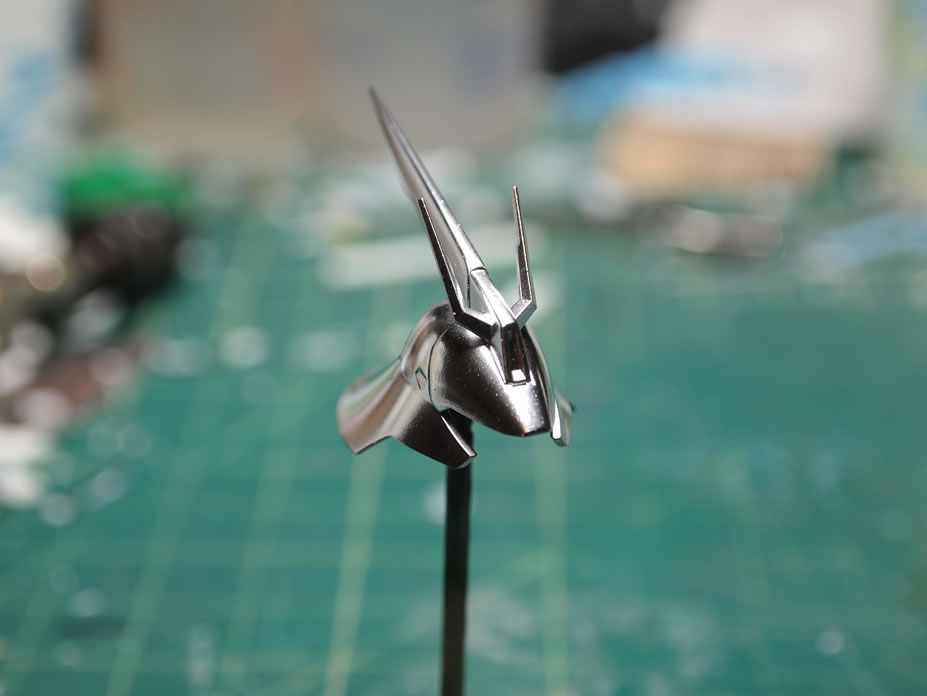
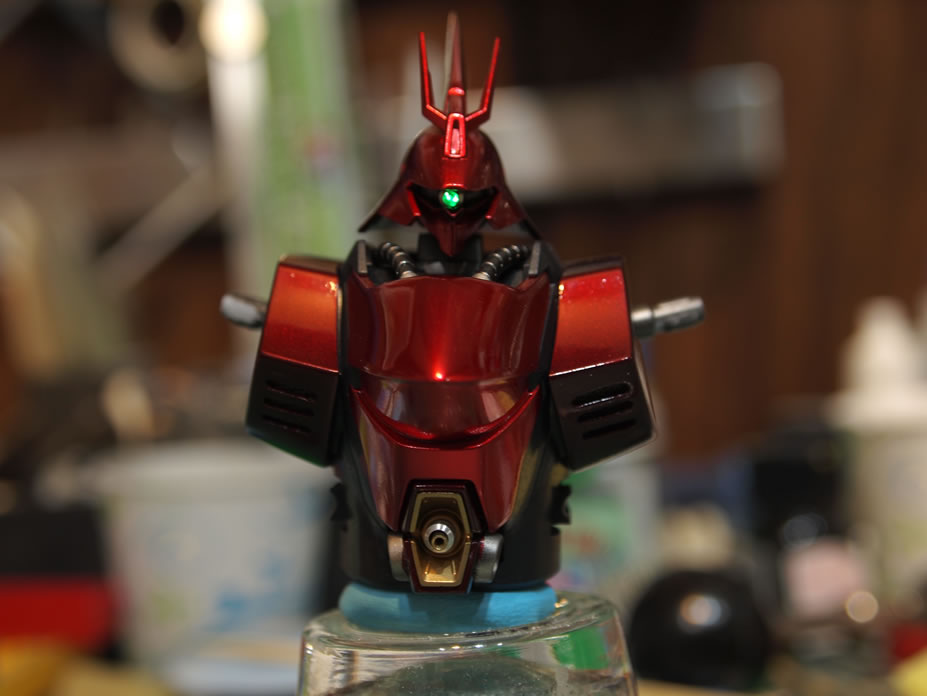
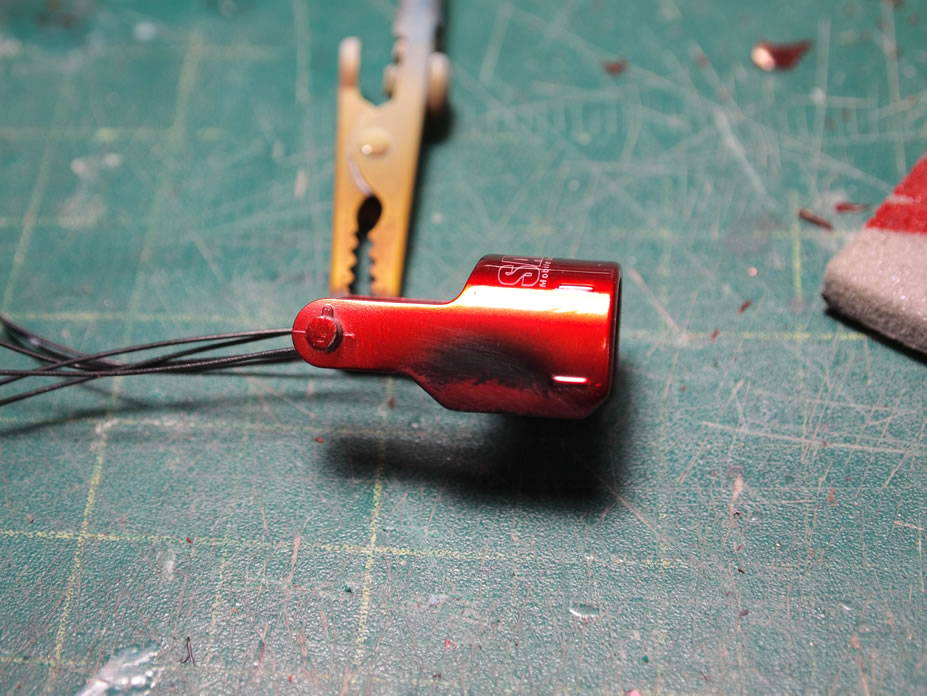
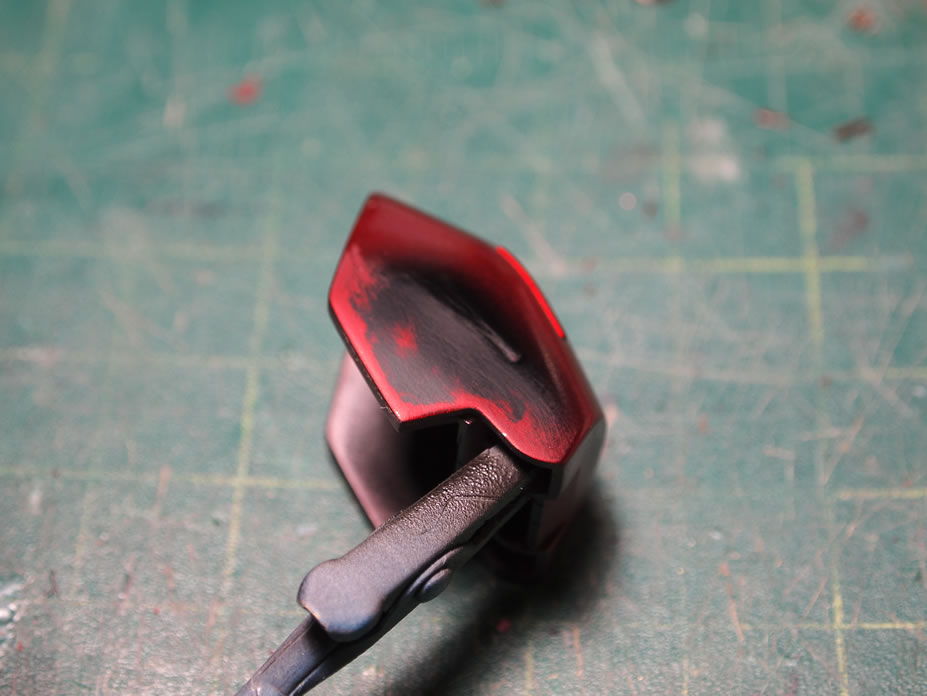
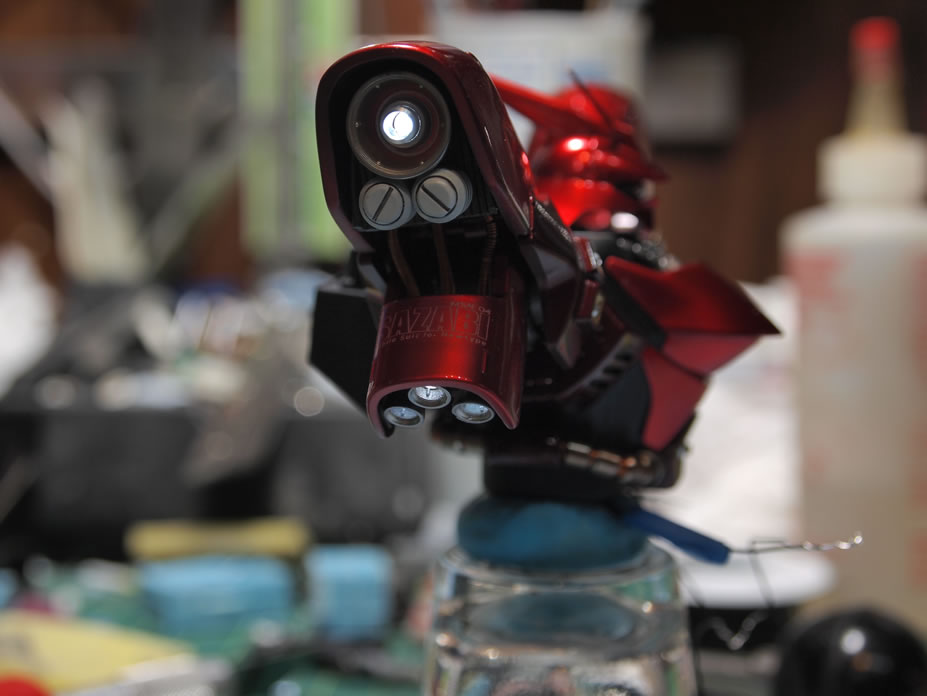
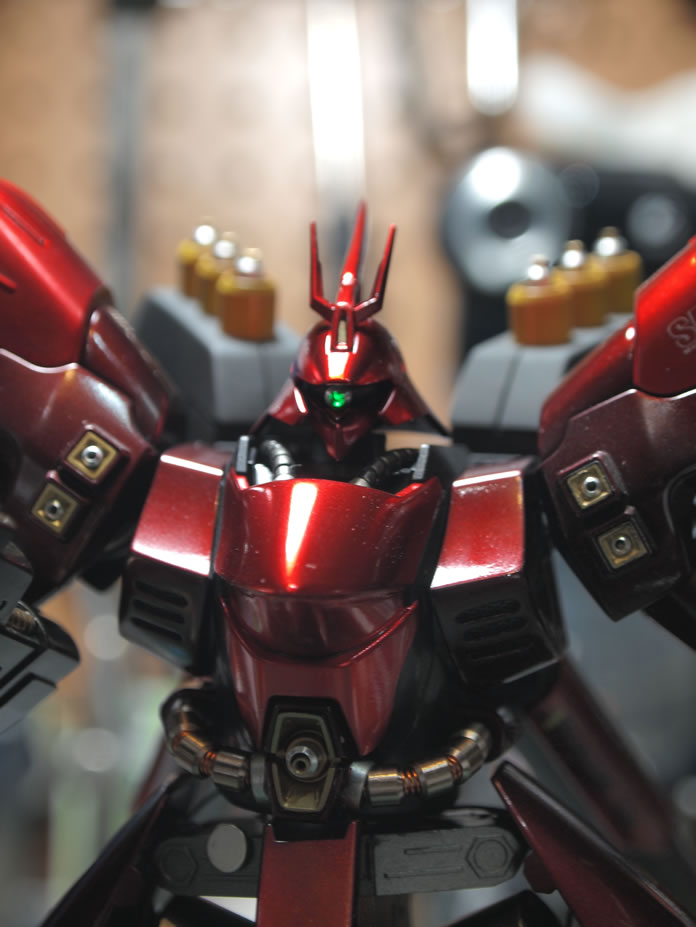
Tonight, I spent my time working on the mono eye piece for the kit. Since I was lighting every damn thing on it, not lighting the eye would be a waste. So after some cutting, clearing, and fitting the mono eye. I got the head assembled with the mono eye working.

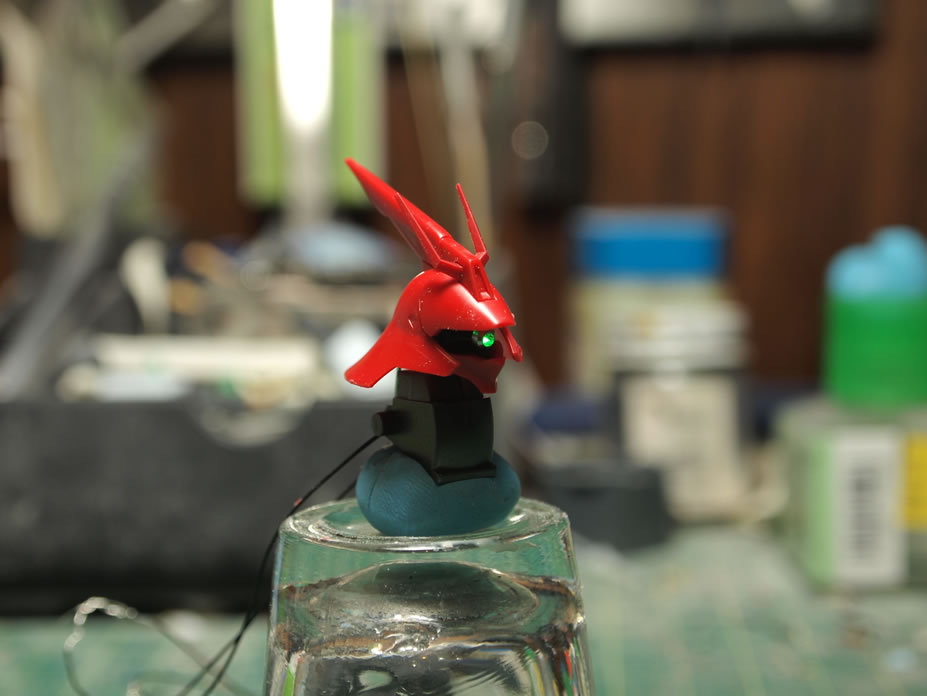
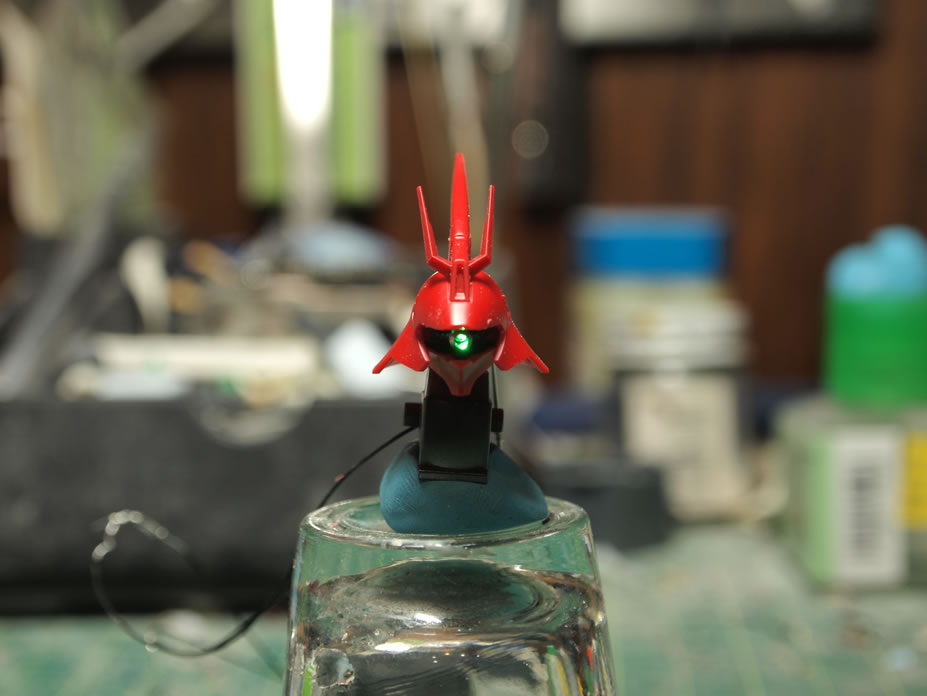
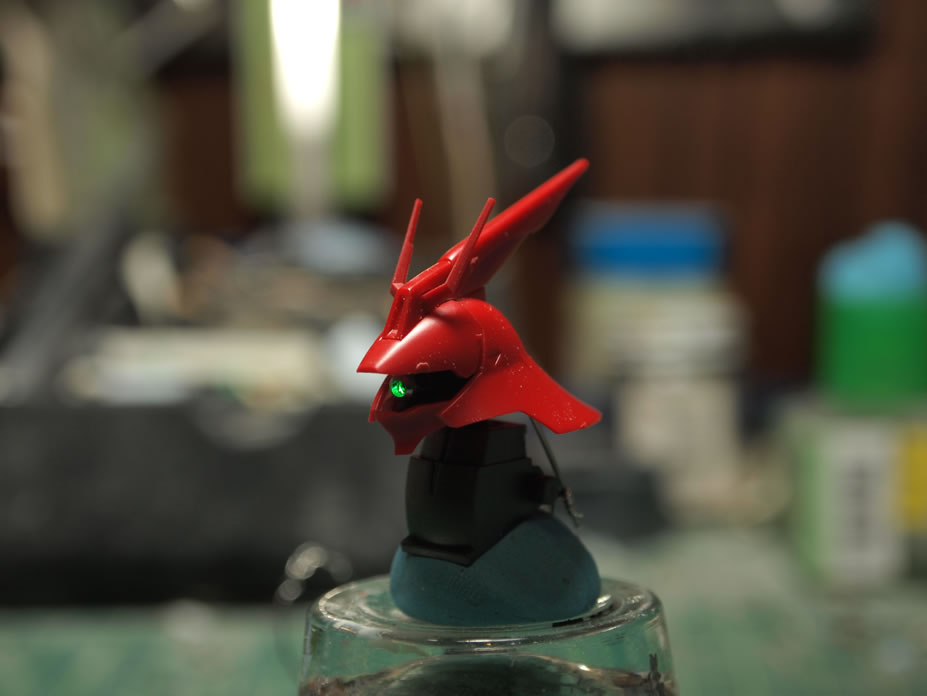
And I’ve even managed to keep the functionality of the moving mono eye. Not that I’ll move it, but the novelty that it could move is there.

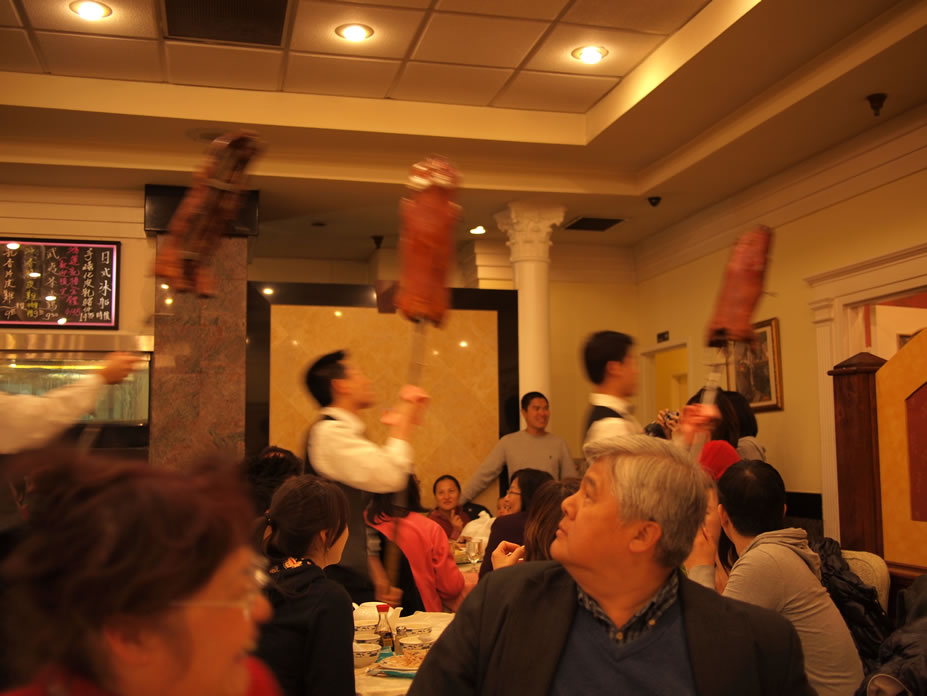
February 2, 2011: Been slow to update as I’ve run into a few problems here and there. The first problem is that my resin casting was yeilding uncured resin, the resulting resin was basically a soft rubbery form. Not good. And little life things are getting in the way as well. It’s getting close to Chinese New Year’s, actually the 3rd is Chinese New Year’s Eve. So the local restaurants have been packed, and on the night we went this past Sunday, they had a “parade of roast pigs” where they brought out skwered roast pigs and paraded them around the restaurant before returning them to the kitchen to be served for the various tables that had ordered their roast pig. It was bloody good. Wish I could have had more.

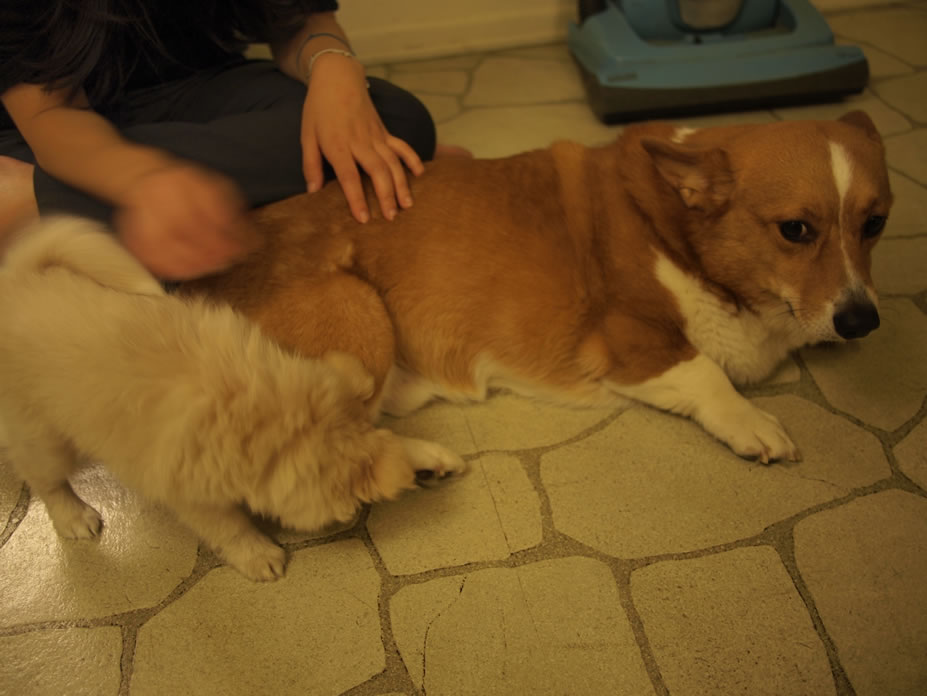
Tonight, my roommmate brought back a little maltipoo puppy. She’s so damn cute and Hugo is terrified, Beanie not so, but getting jealous of all the attention and a little annoyed with the new puppy invading his personal space. She’s playful as all hell, and is cute. Not sure if she’ll be a permenant addition to the family, but she’s more than welcome. The little bastards will just need a little bit of time to get used to her. It’s like this with any new addition we bring over to the house. I’m mean, they like Duke now.
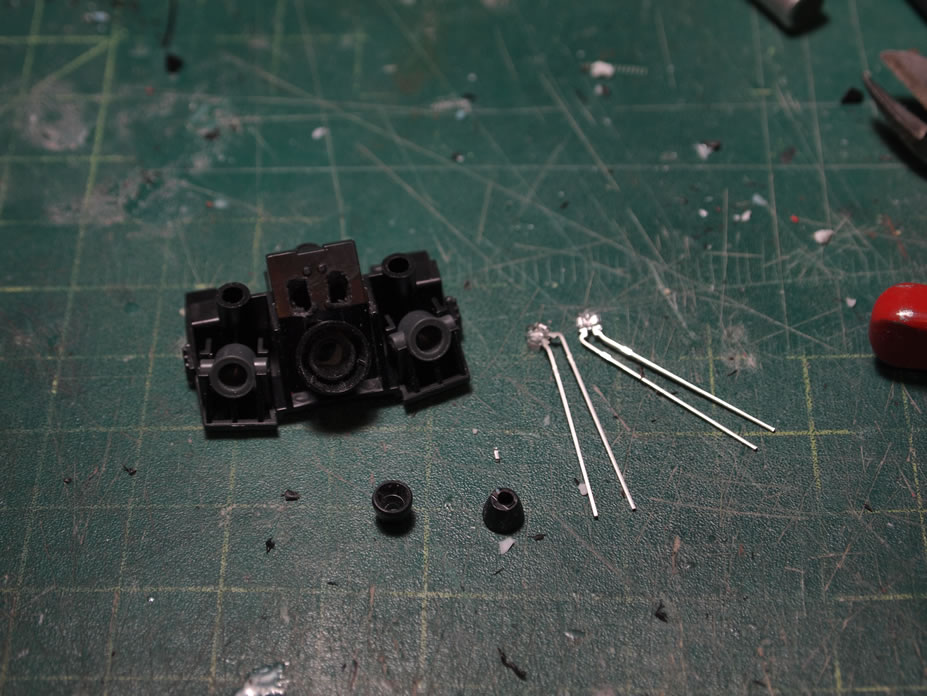
Back to the kit, I figured that there was a real possibility he resin I have is out of date and has gone bad. However, looking up the resin I have, I learned that the stuff should be stored at temperatures of 75 – 80 degrees F. It’s been cold the last few days. The last batch I mixed up the previous night actually cured up decently. I think keeping it in the pressure pot overnight kinda worked. Tonight, I decided to try something new. I got some hot water and dropped the bottles of liquid resin into the bath to heat them up before going to casting. So I have some thruster bells that I casted the previous night. The 1.8mm LEDs are glued to the casted bells with CA glue. Then the entire assembly is placed into the mold I made of the Saz’s shoulder thruster part.
The heated up resin worked like a charm, it cured damn fast and solid. So now I have a casted part of the Saz’s internal thruster component, with LEDs embedded. And a quick test has the lit up thrusters. Now to do two more castings so that I have a complete set of thrusters for both arms.
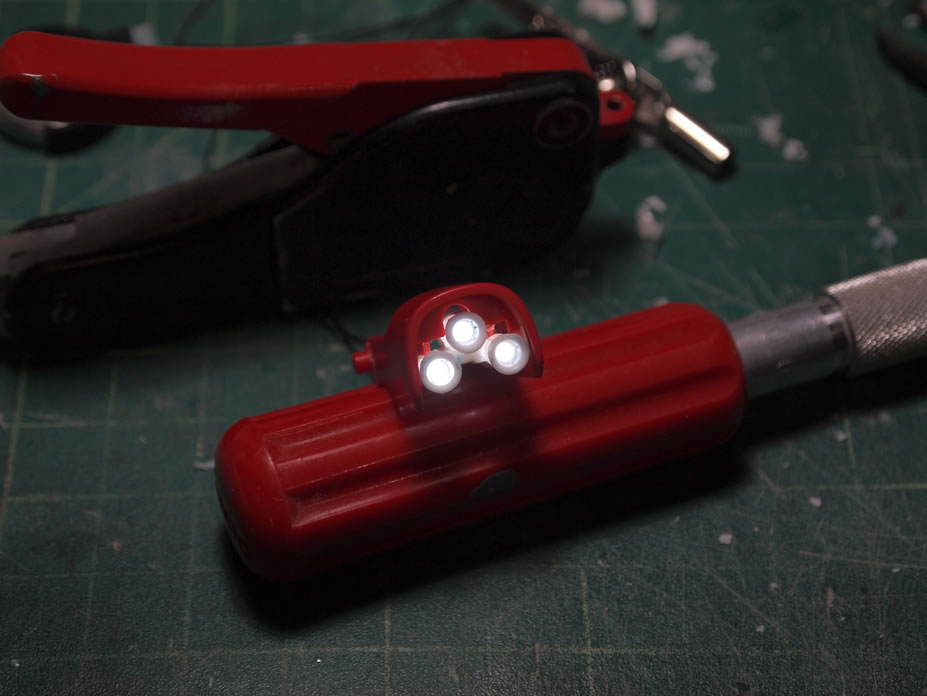
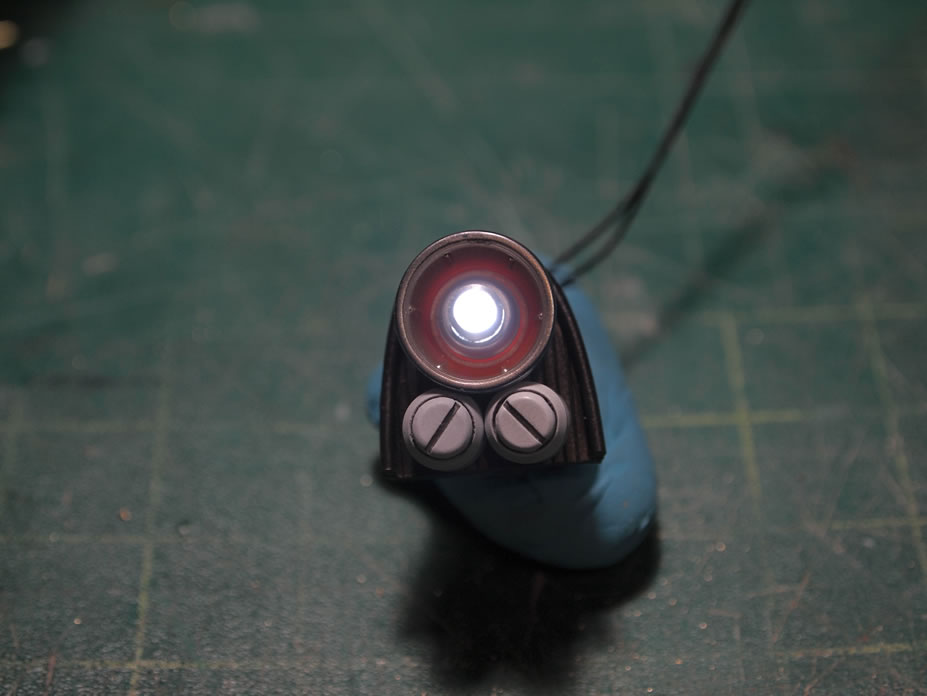
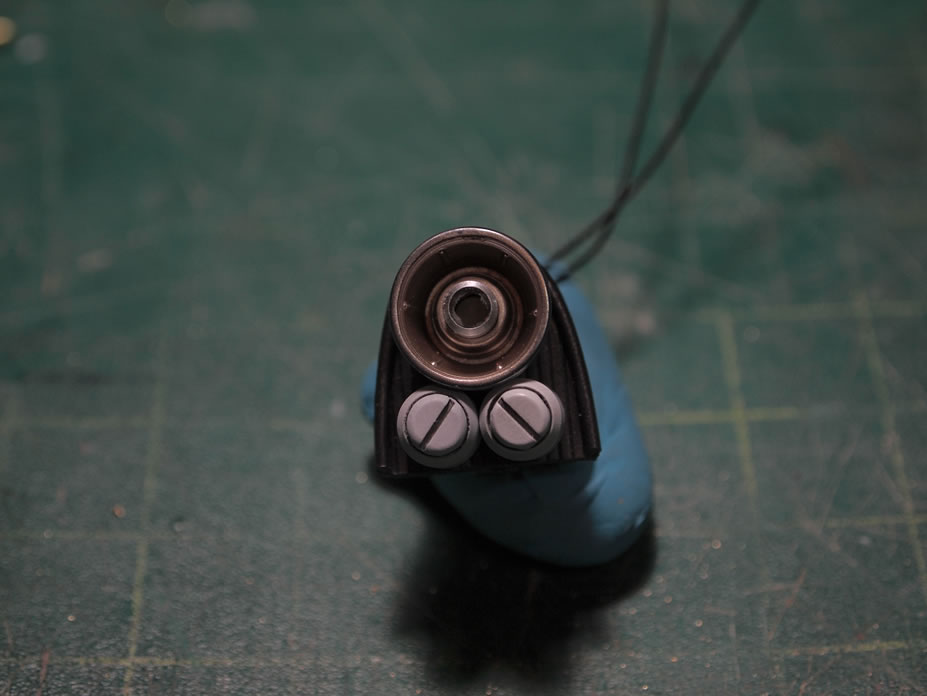
Time to expand a little on the mono eye lighting. Taking all the components apart. We have the LED already bent to fit into the area, the mono eye piece with the metal collar replacing the original plastic nub. The ring is drilled through from the metal collar so that when the light is placed inside, the ring will move and still get light, keeping the functionality of the original kit’s design. A bit of the male section that connects to the mono eye ring is cleared. And the light is installed.
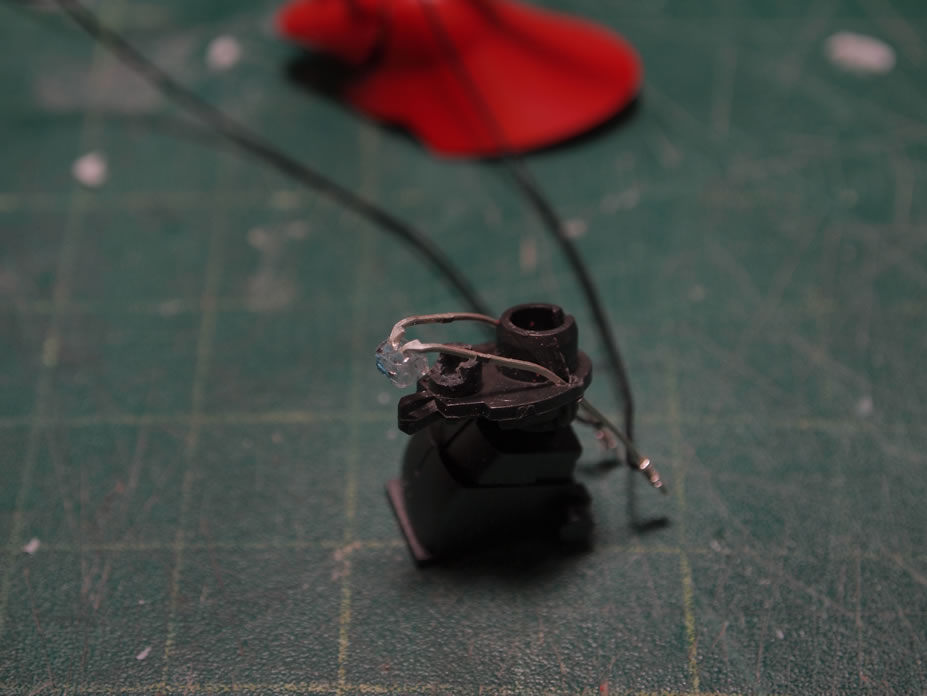
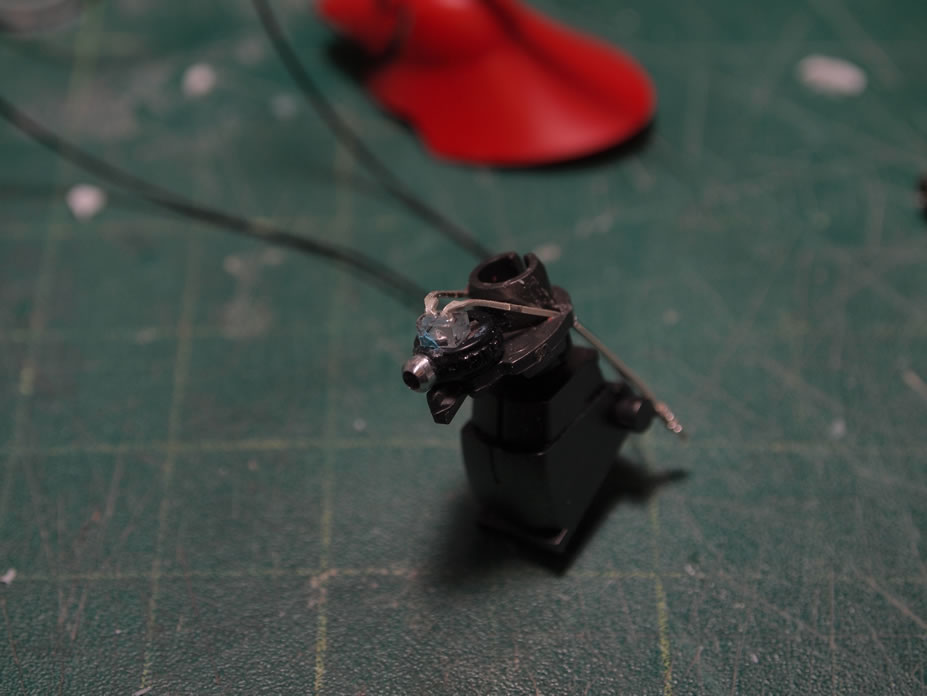
Temporarily, I used some sticky tack to cover the back part of the LED that I don’t want shining through when lit. The top piece of the head is cut internally to accomodate the LED. And with everything trimmed down, it all fits together fairly nicely.

A fairly simple modification, but took a little bit of time figuring it out and excuting the mod.
February 2, 2011: Chinese New Year’s Eve update. Small update. I finished casting the other thruster parts. Some rough clean up and the parts are put together, wired, and powered on. Then a quick test fit on the original shoulder piece.
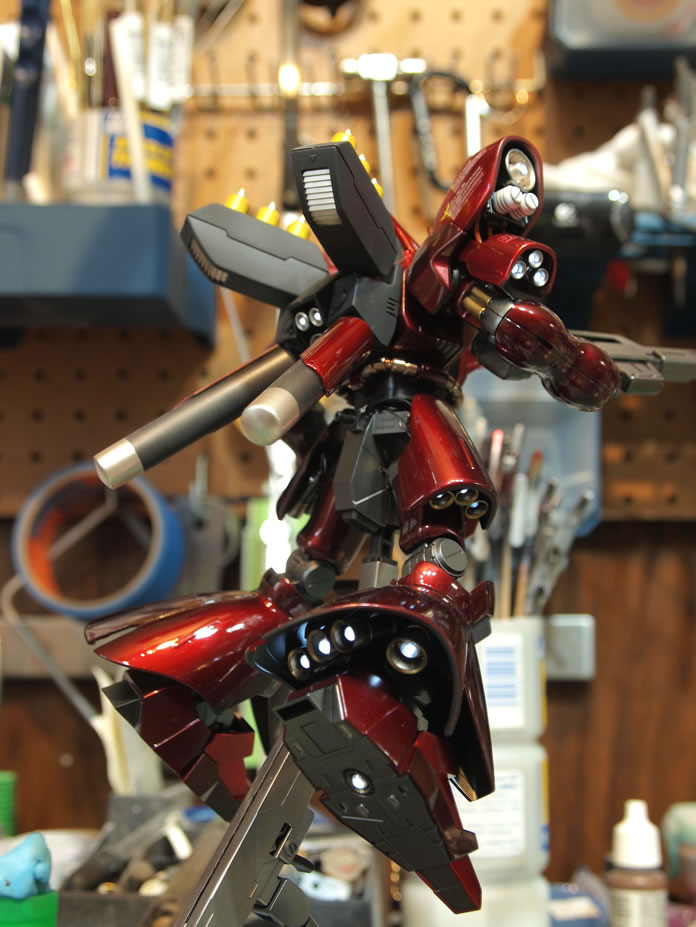
Next up are the last two major thrusters for the kit. The two small backpack thrusters. I used the 1.8mm LEDs and cut the contact point open so that the back of the LED can be inserted into the backpack. The thruster bells are just temporarily tacked into place. The back area will need some fine tuning to make everything flush and hide the extra lighting bits. And this completes the lighting, I have a total of 28 LEDs laid out through this kit. Not too bad.
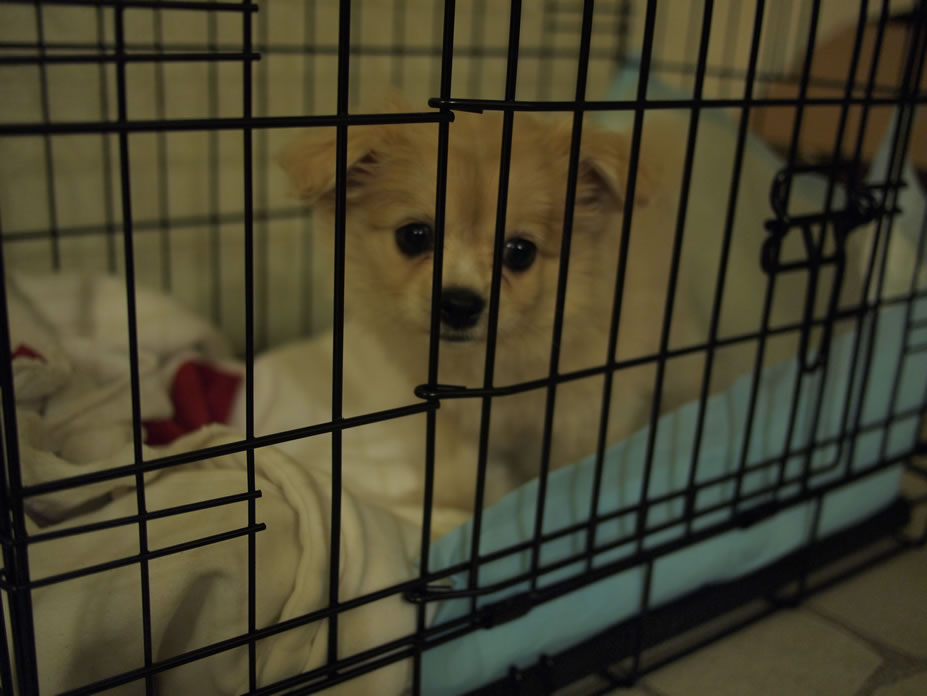
Yuki is playing with the newest addition to my household, Izzy, a half Maltese, part Pom, and part poodle mix. She’s damn cute and very playful. Yeah, gonna be hard to focus on work with her running around or whining to be played with while locked in her crate.


February 6, 2011: Weekend update. I got the some more painting done for the kit, pretty much the entire upper torso is painted. Here’sthe metal collar cables and MarkW really insisted that I tint, so I sprayed the alclad Hot Metal Sephia over the parts to tint them.
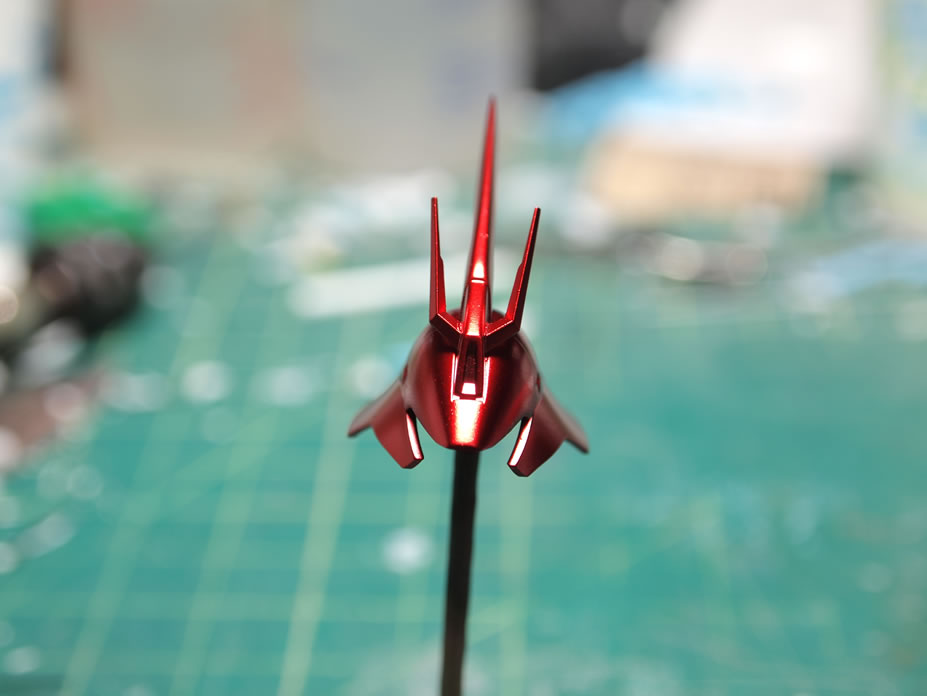
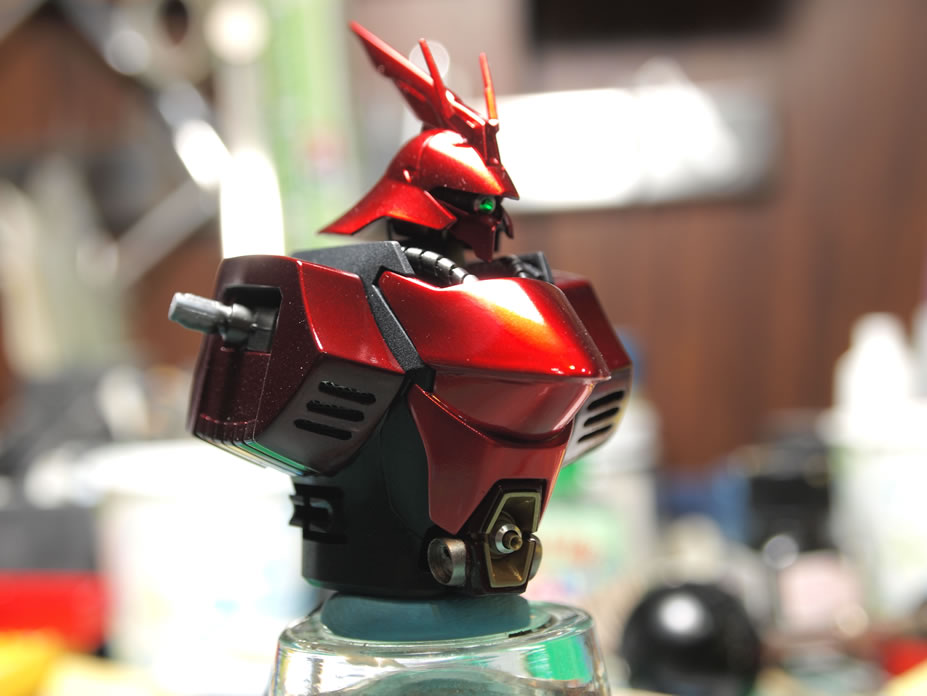
Here’s the head, primed, chromed, then the hot metal red sprayed.
I sprayed future floor polish over all the parts painted so far, at least those that will be glossy. The main torso and the inner forearmswere painted a carbon black then flat coated.
Still not completely satisfied with the shoulder thrusters. I made a new cast using things I learned form the previous casting, and made new, much cleaner casts of the shoulder thrusters. Now I can fully get on with integrating them.
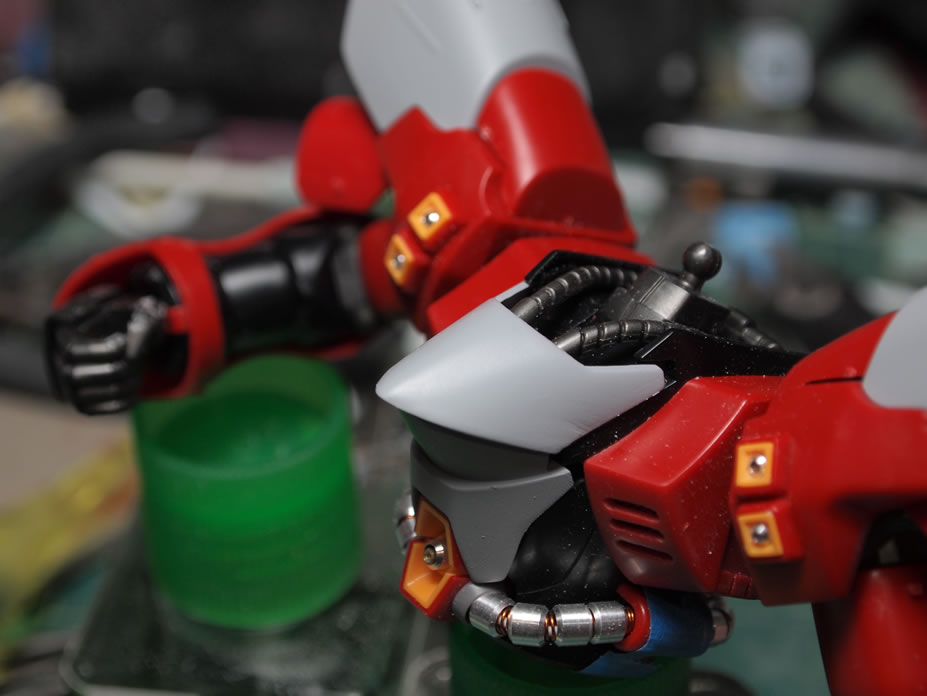
The intergration involves hiding the wiring as best I can. The shoulder insert piece that I made a few weeks ago also needs some detail sotime to kill two birds with one stone. Using some wave parts, I created some ports. These ports were then glued onto the created shoulder parts.I coiled up some springs and sleeved them over the wires and then threaded the wires through the ports and into the shoulder area.
Here’s a test fit and test lighting.
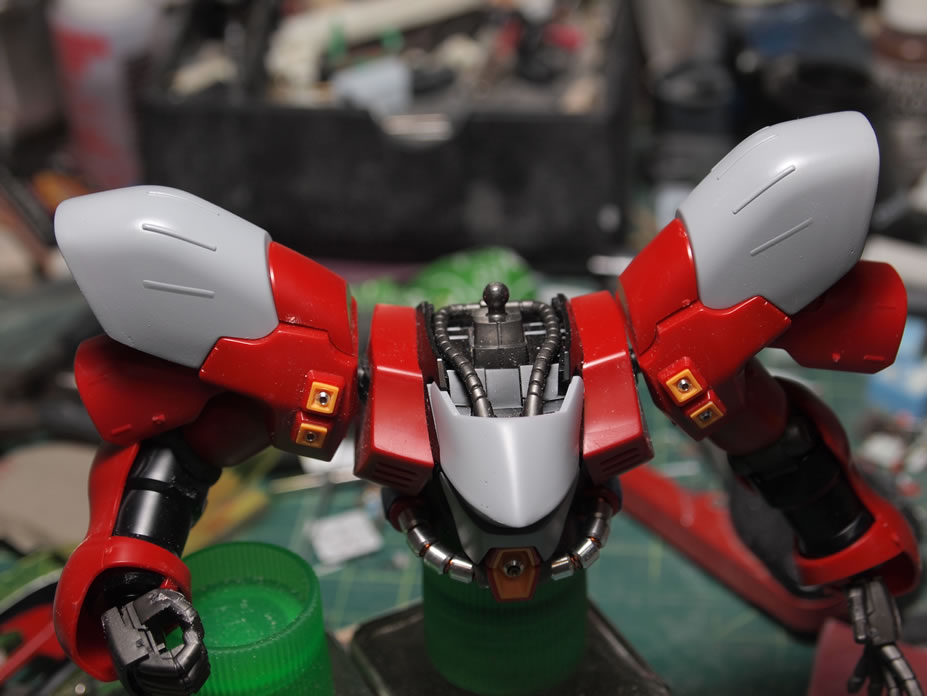
Most of the Saz’s upper torso is compled, so time to put things together.
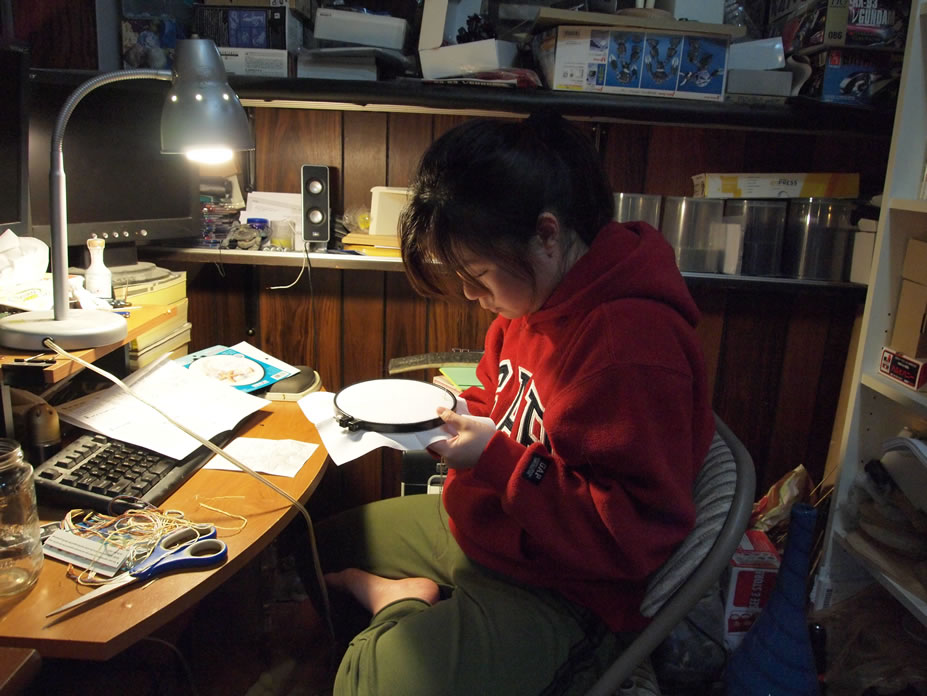
February 8, 2011: Little update while Yuki sits and works on her own hobby. I’ll try not to poision her with lacquer paint fumes.
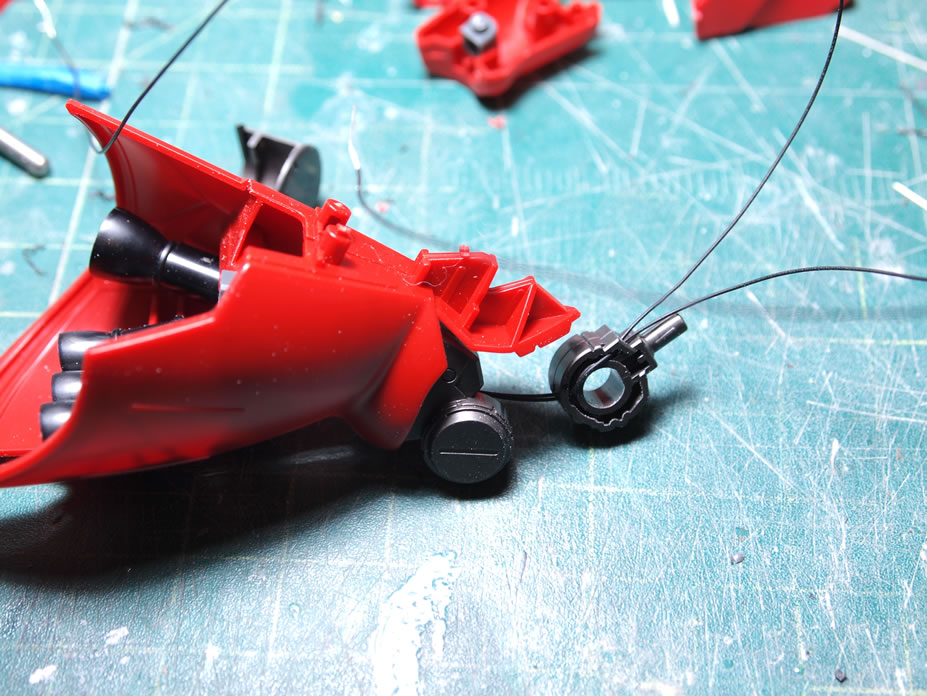
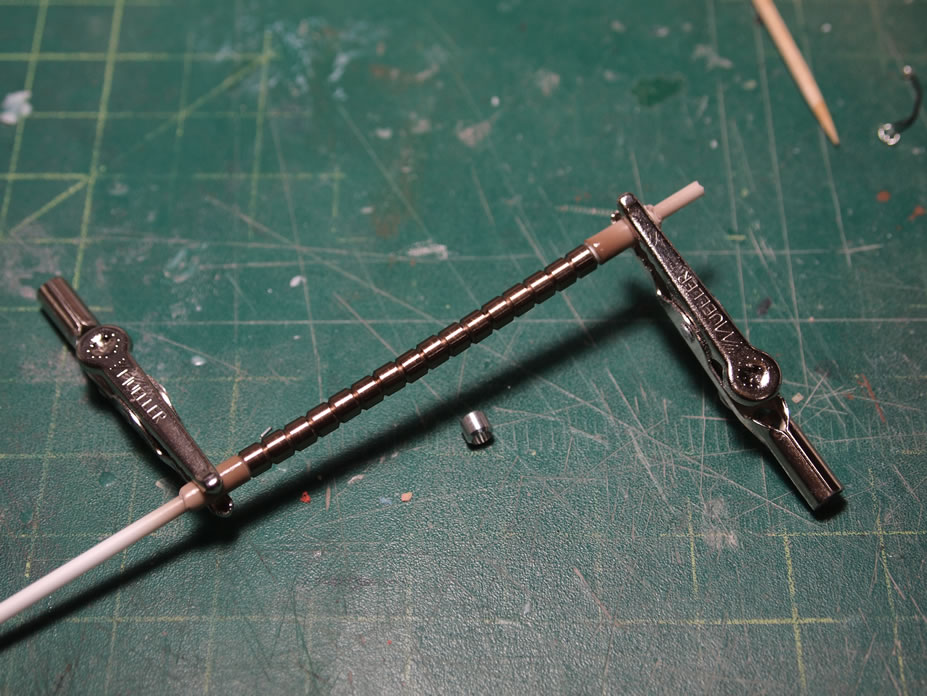
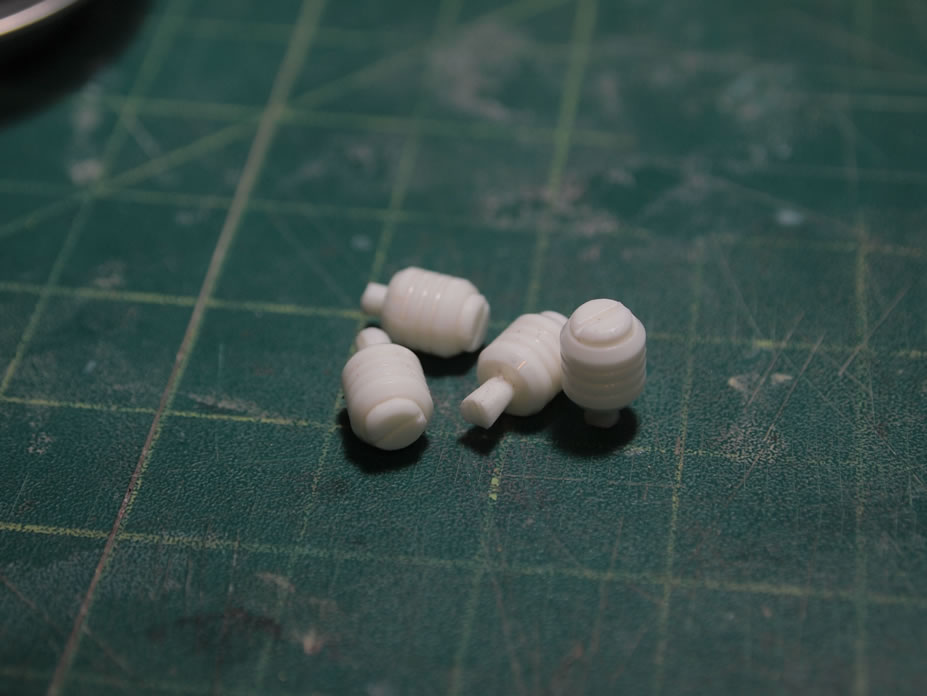
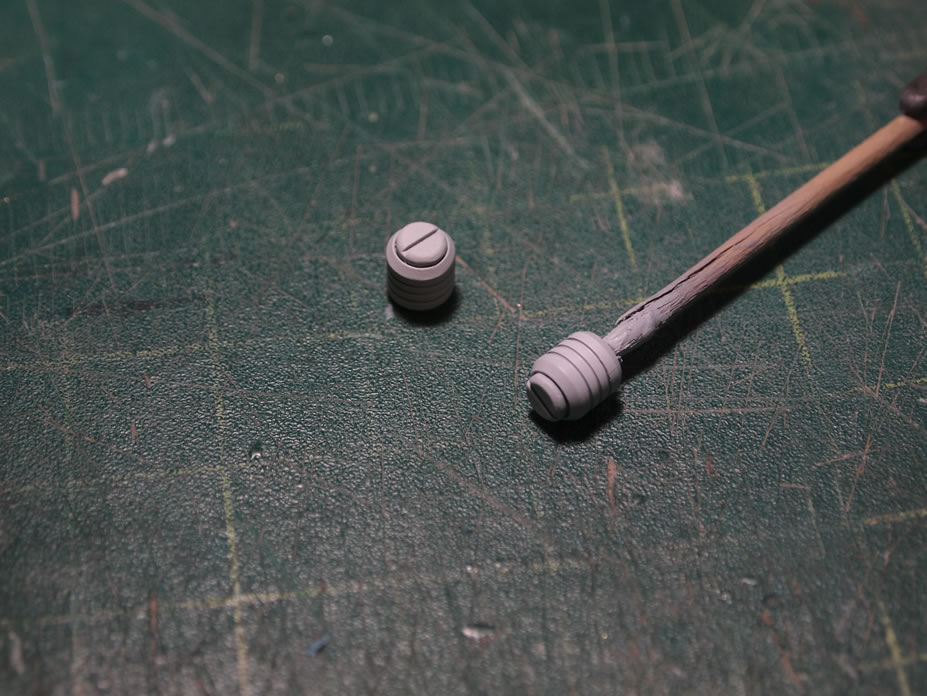
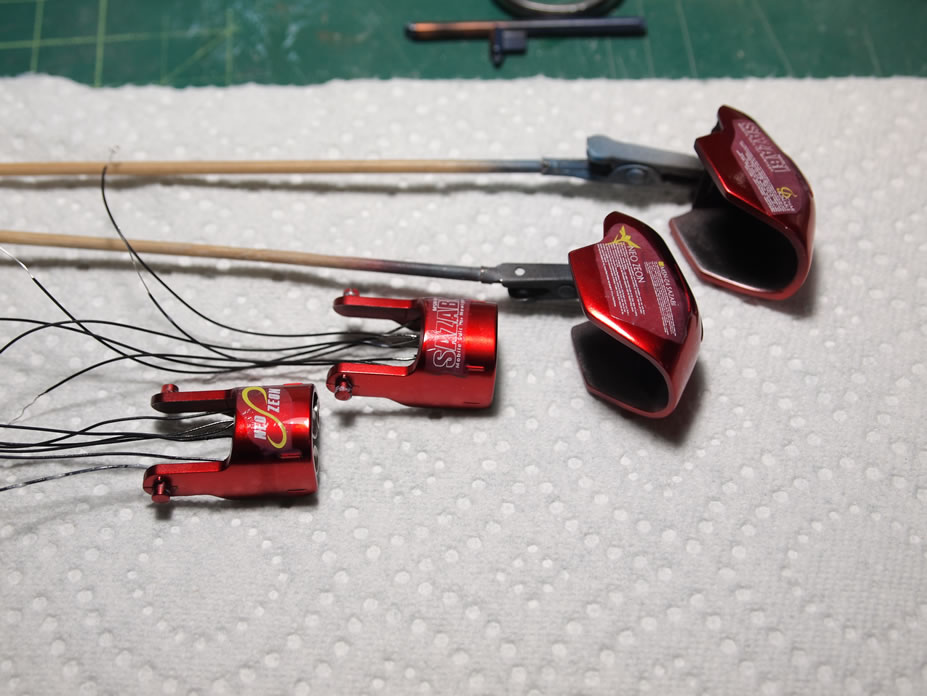
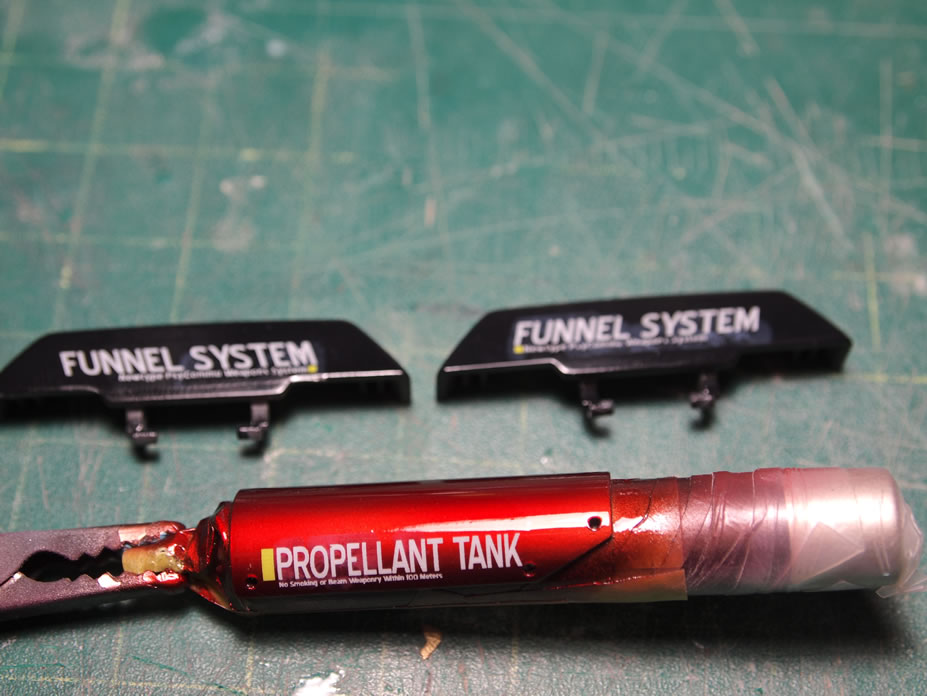
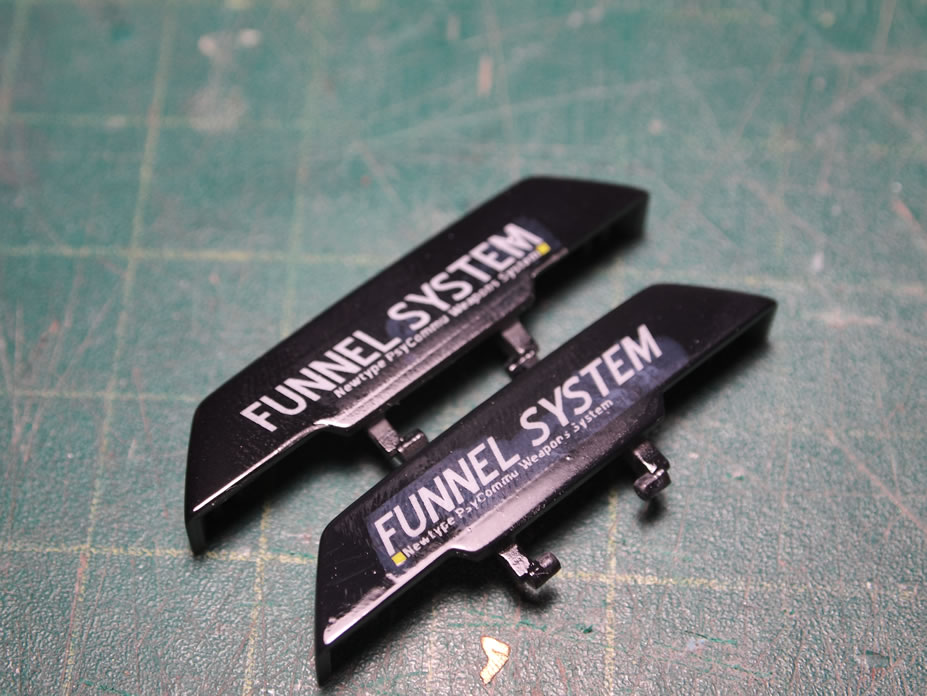
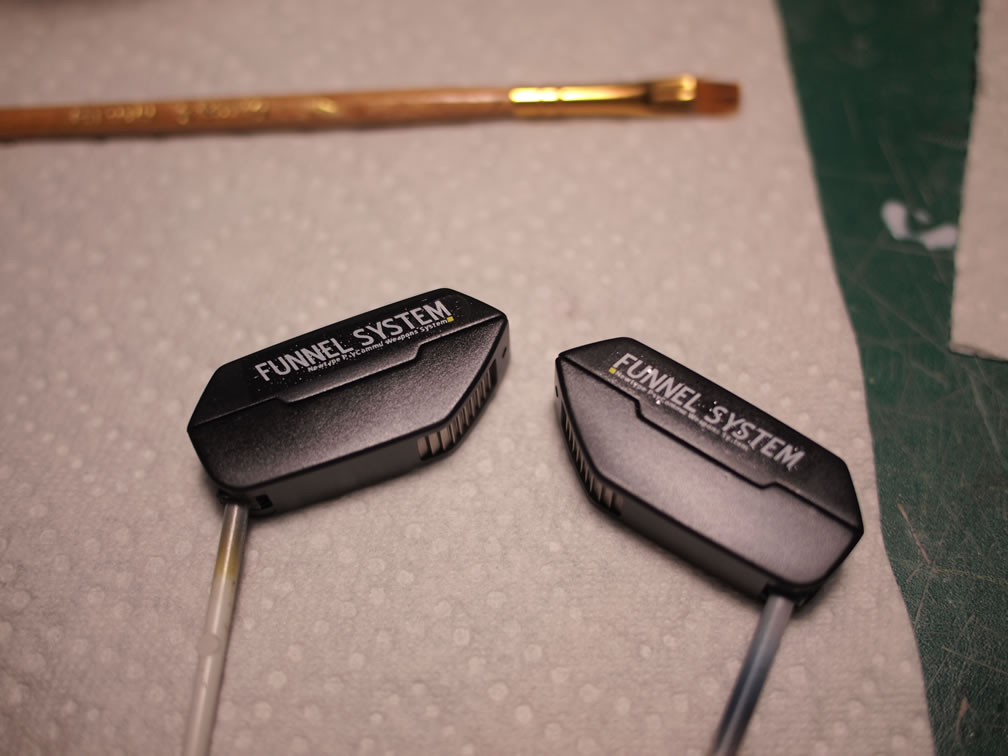
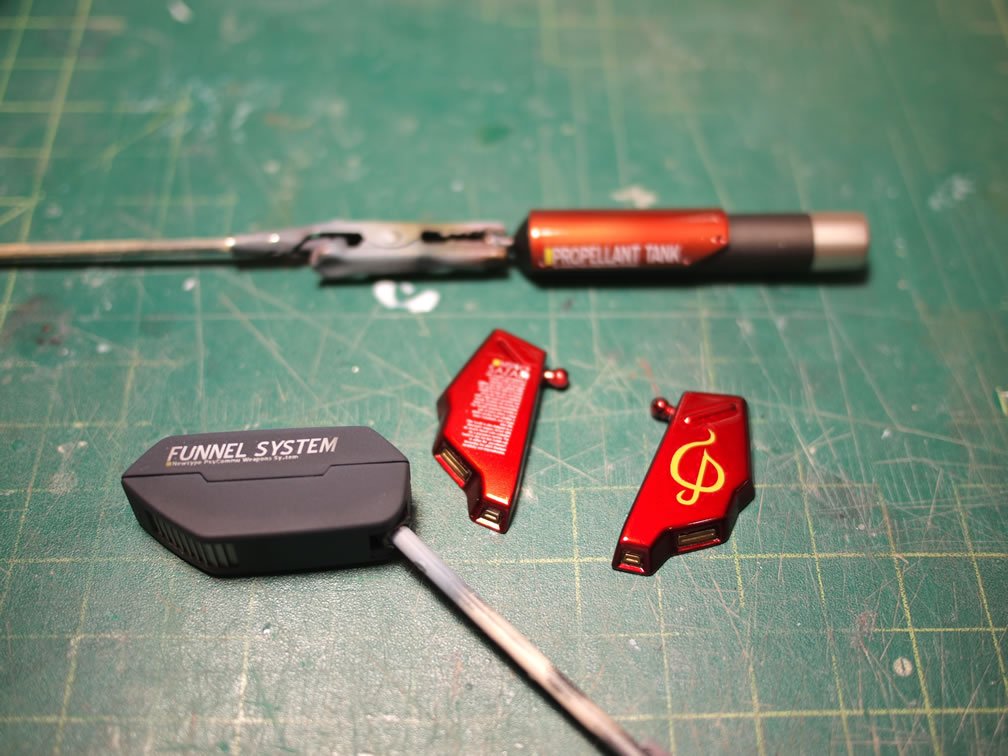
First off, I spent some time adding some details to the funnels, just some metal collars and a brass rod. Here’s a comparison shot with the unmodified funnel.
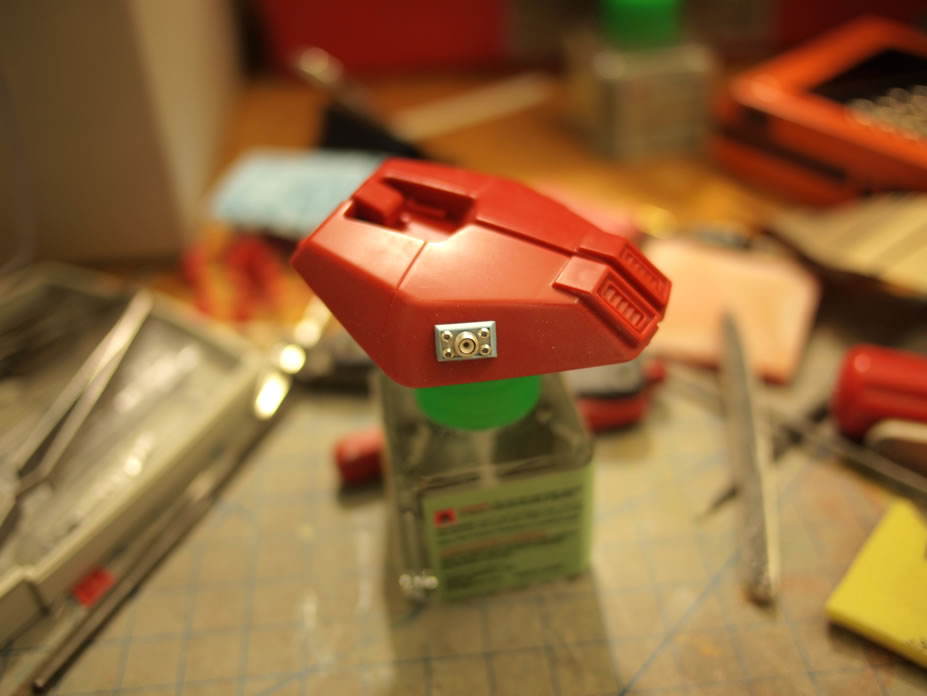
Next up, starting with what I had originally planned to use as additional shoulder thrusters for the added shoulder detail – the metal thrusters, I decided not to make them “thrusters”, but more of little tanks on inside of the shoulders. So rather than just wasting the metal thrusters, I made a mold of them and cast resin copies. Now I can freely modify the resin copies for use in the shoulders without wasting the rather expensive metal parts. Additionally, I now have an unlimited supply of this thruster design.
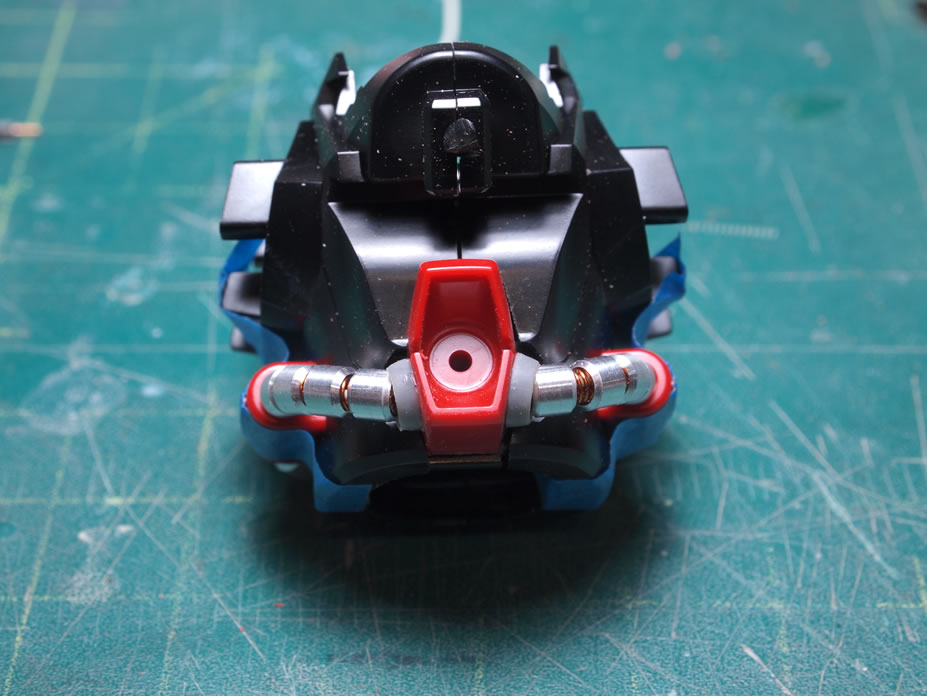
Yesterday, I glued together the waist cables onto the main torso. So here are some pictures as the Saz’s torso gets a little more towards the compete look.
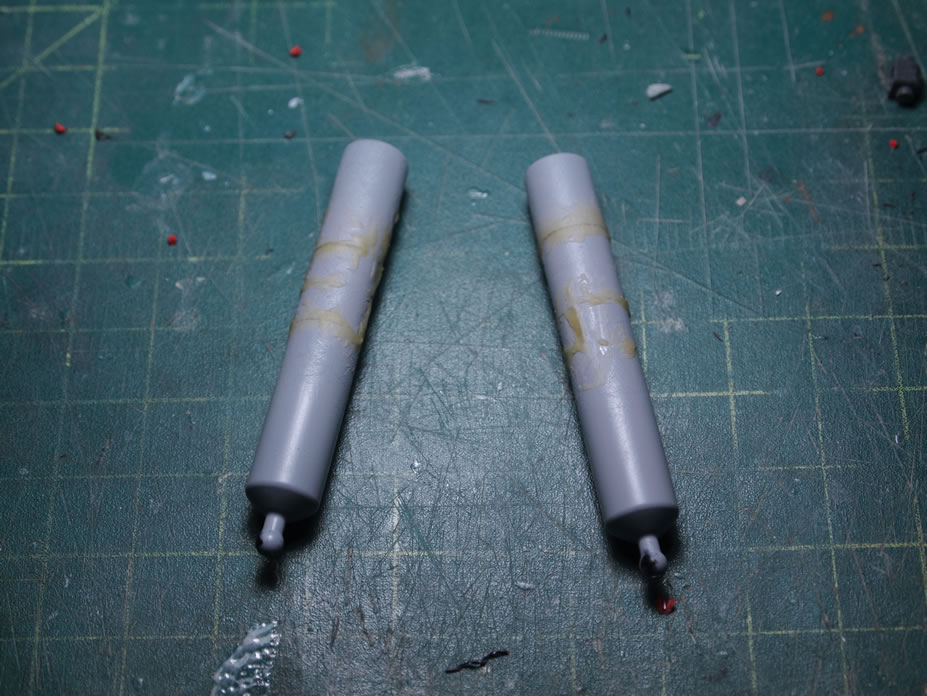
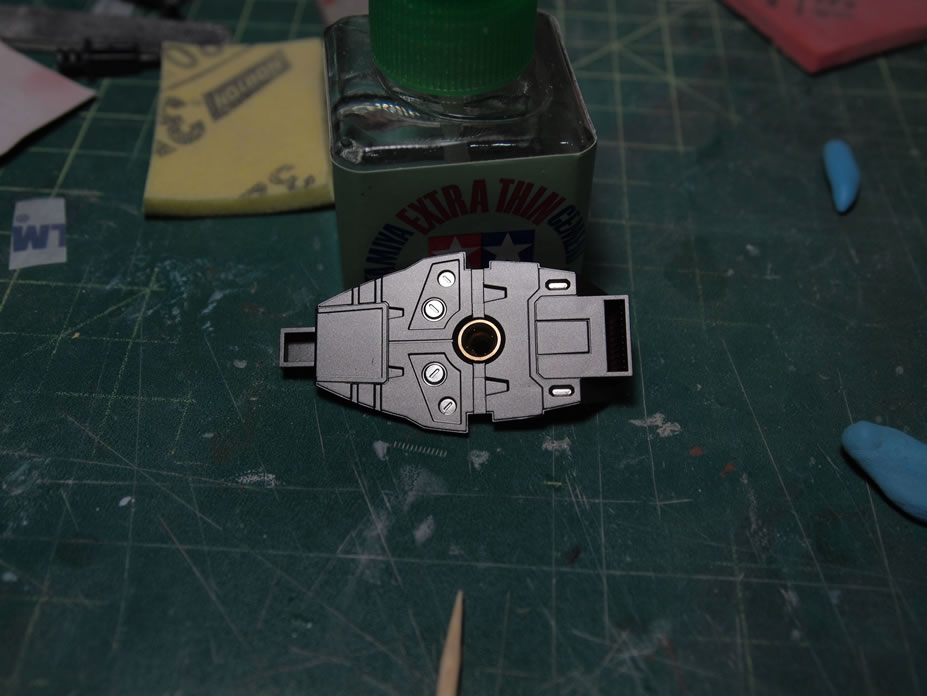
These parts were primed Sunday evening. Yesterday, I sprayed on the gloss black base. And today, I painted the internals of the thruster bells with finisher’s titanium. I also painted the bottom tips of the fuel tanks the titanium.

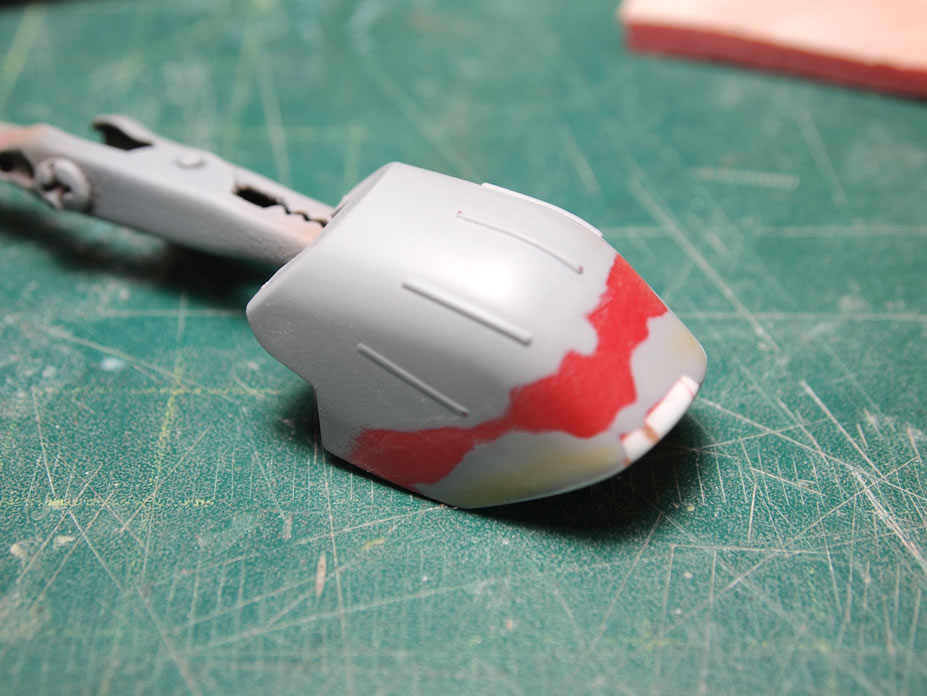
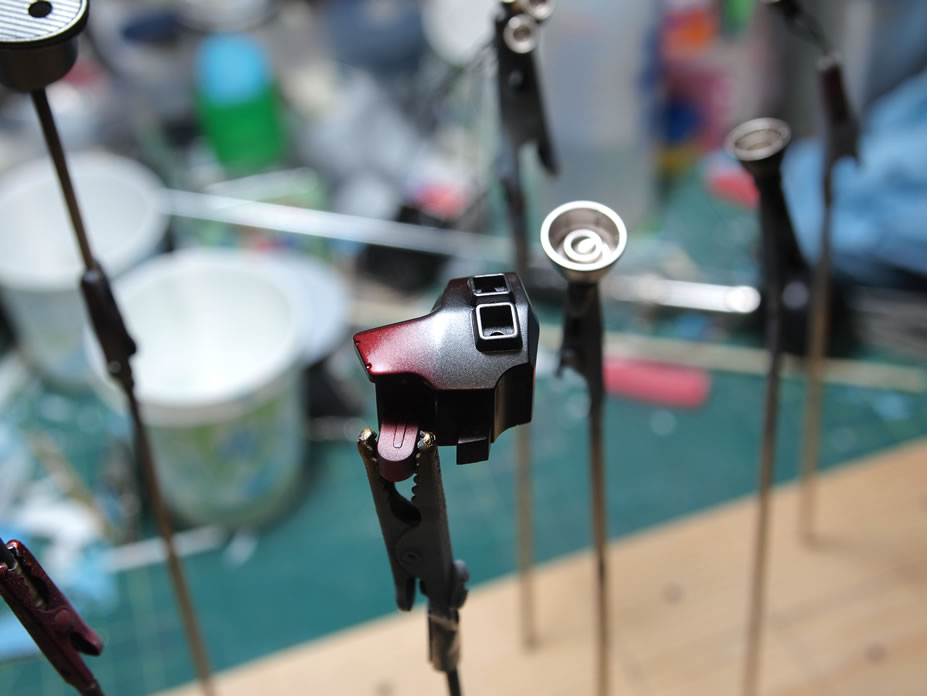
Invariably, with any kit I work on, I screw up somewhere. So these next two pieces are touch up jobs. I sanded the damaged area to blend it in with the rest of the part, primed, black gloss coated, now the metallic paint was sprayed.
And the parts I worked on sanding tonight were primed. Now that all the upper half of the Saz are in painting cycles, I’ll start work on the lower half, got some mods and stuff for that section. I think I like the split paint plan for the kit, it kind of breaks up the time spent sanding and building with painting fun.

February 10, 2011: Small update. The thrusters I molded were cast and little fuel tanks are made. They’re washed, primed, and painted.

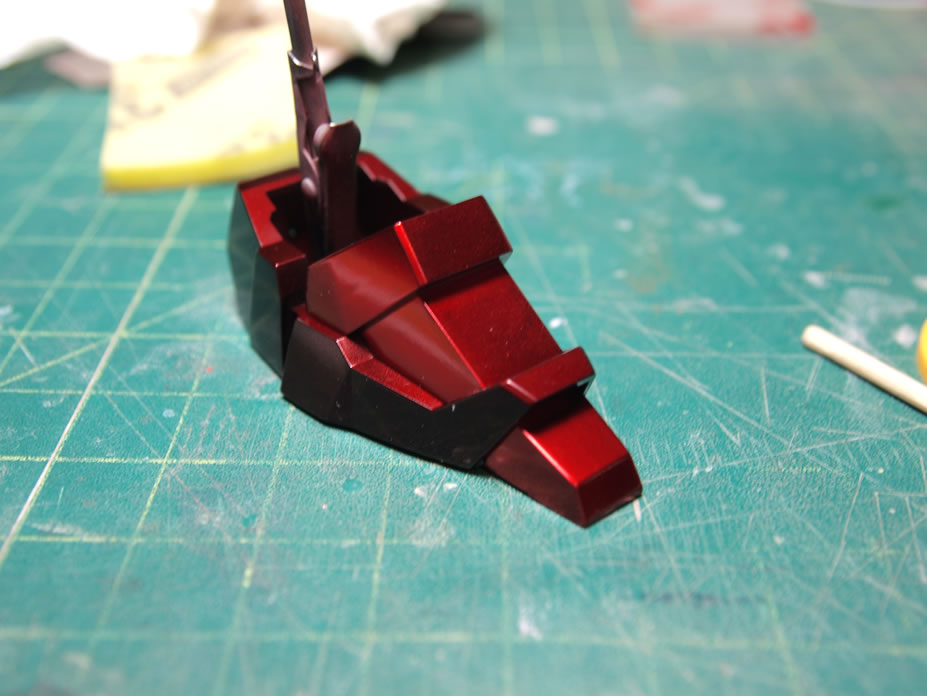
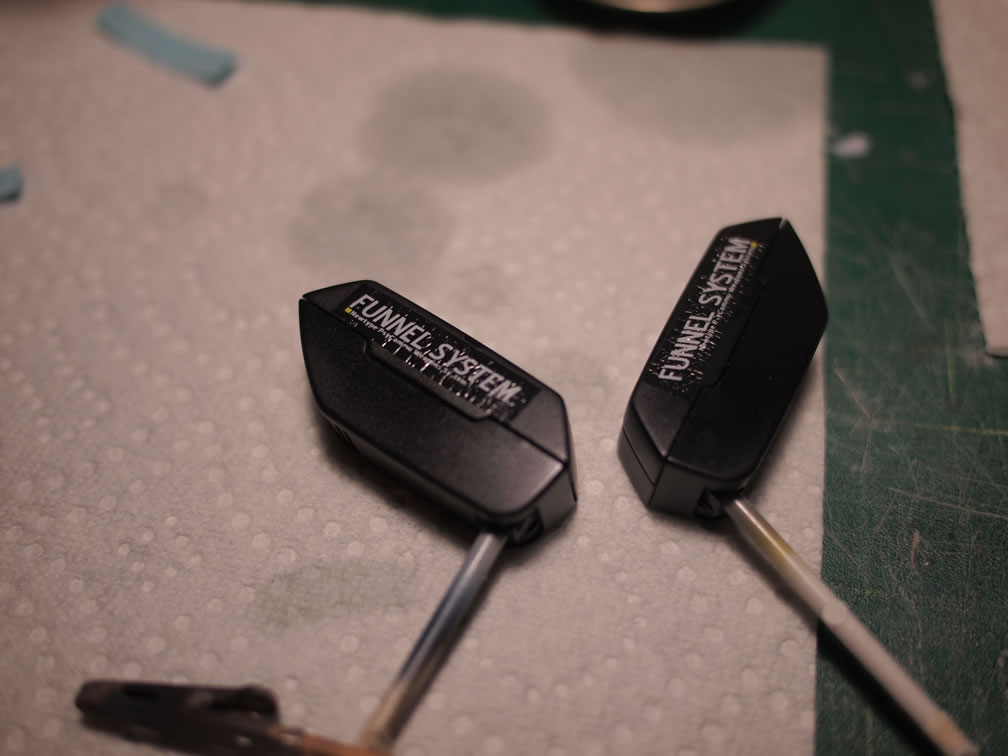
The funnel system is painted. The internals were painted with finisher’s titanium and the exterior is carbon black followed with a flat coat. The funnels were painted first with a red then yellow using the red as a shading tone. The brass rod and metal collars are glued into place.
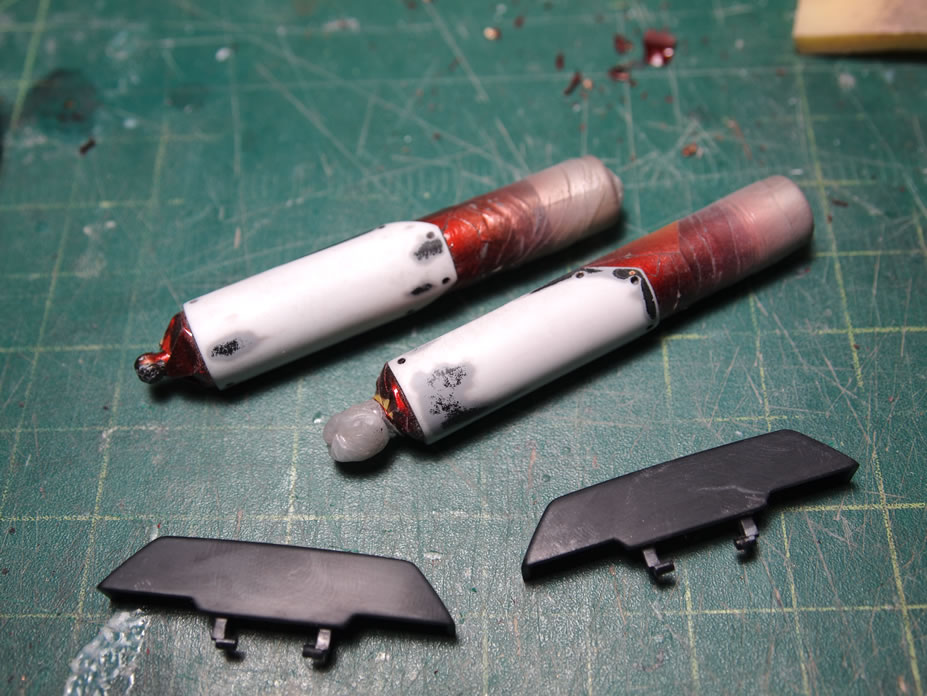
The backpack fuel tanks are masked and painted. I sprayed alclad polished brass followed by the hot metal red over the detail area for the fuel tanks.

And after a little rework and fiddling around with the backpack thrusters, I finally got them working and in place. Saz torso moves yet another step towards completion.

February 14, 2011: Small update with work done over the weekend. The start of the weekend saw some decal work. For these pieces, I added the decals and used micro sol decal setting solution to help the decal conform to the surface. Apparently, I used a little too much as the pooled decal setting solution damaged a few areas. No biggie, the area was sanded and a touch up repaint is in the works. Lesson learned, don’t put TOO much microsol on the surface. The future has been sitting for about 3 days.
Next up are the shoulder insert details. The little metal thrusters were painted, panel lined, flat coated then glued into place. Here’s what the part looks like lit and not lit.
Sometimes, it’s difficult to not get discouraged while working on the kit. For these decals, I sprayed on mr super clear so I figured a day of curing was good enough to apply the decals. The decals were applied and then I used Mr Decal Setter as my decal setting solution. Over time, the setting solution seems to be eating away at the paint. The most likely of reasons that this is happeneing is that I didn’t let the decal setting solution fully cure, I only let the stuff sit on the parts for a couple of hours before I sprayed on another clear coat. The second possibility is that I didn’t let the clear cure long enough before applying decals. The third possibility is that I used too much decal setting solution. And there’s also a possibility that my bottle of mr mark setter has gone bad. Regardless, the eating away of the paint under the decal did not happen with the micro sol, so I will be sticking with that stuff. It’s a shame that I ruined 4 decals because of my haste. Lesson learned here is to let everything cure properly. Patience always pays off in the long run.
So the decals and paint are sanded off and then the parts primed.
During the build gathering, I spent the time cleaning up the rest of the Saz, so now about 80% of the lower half is primed. Now if I can just keep form screwing up again, I may get some decent progress on the kit this week before I have to leave for my annual ski trip in Tahoe.
February 27, 2011: A bit of a lag from the last update as I went on my annual ski trip vacation. But continuing from the last update. I’m down to the last 30 or so parts that needed sanding and priming. The little scratch built thrusters were added to the rear skirt. I still need to do some filling, but to see what I need to do, I’ll have to prime the piece first.
After sanding and cleaning the parts, they’re primed. The skirt parts are painted.
After priming, the parts are base coated with a gloss black. The thruster bell internals are painted with polished brass with the exterior bells painted with finisher’s titanium. The details on the inner skirt and the bottom of the feet were painted with alclad stainless steel.

The legs were painted using the same formula and paint layers as the other darker red parts. The last bit of work on the legs is a layer of future floor polish.
March 2, 2011: Slow progress but progressing as I continue to get work done on the kit. Continuing from the last update, the little detail areas were masked off with tape and/or blue sticky tack.
I had found some pooling in the future, so those areas were lightly sanded to remove the little pool bumps. These areas where then sprayed with clear which fixes everything.
The foot is done.
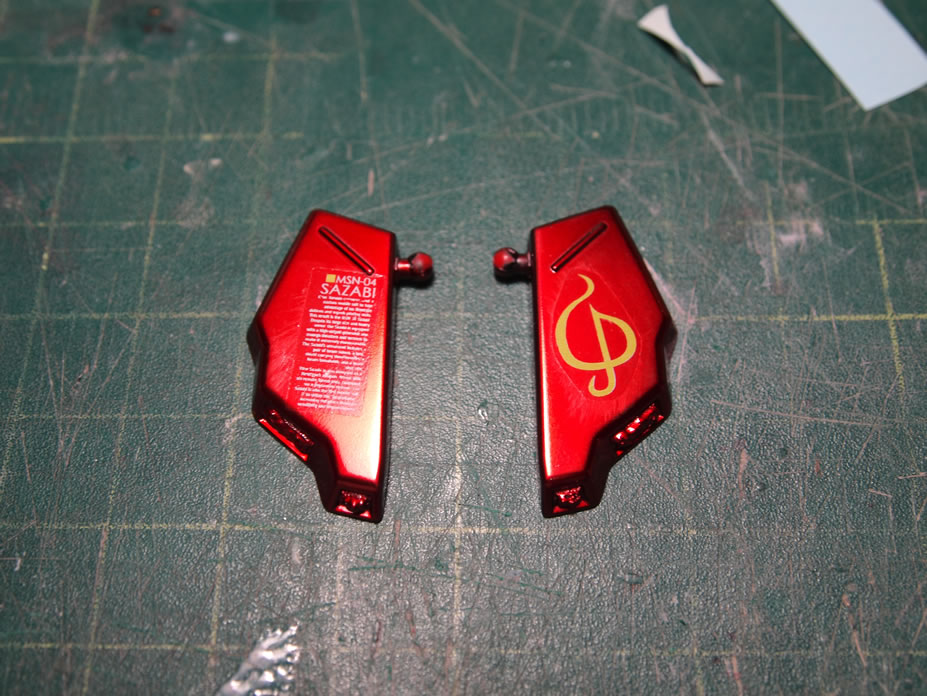
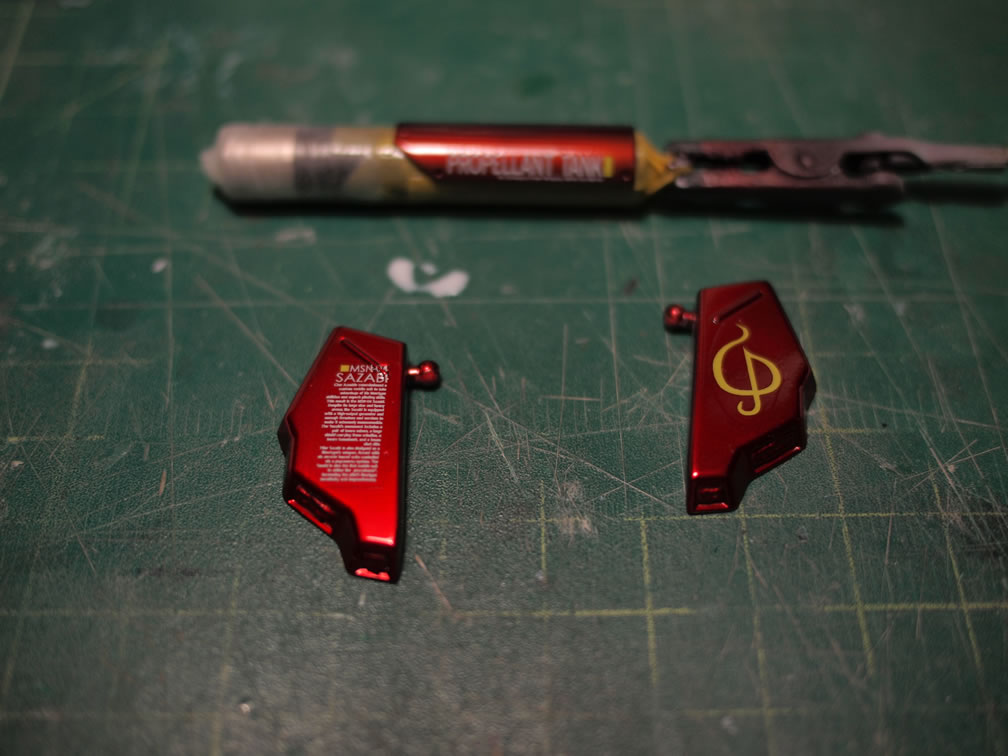
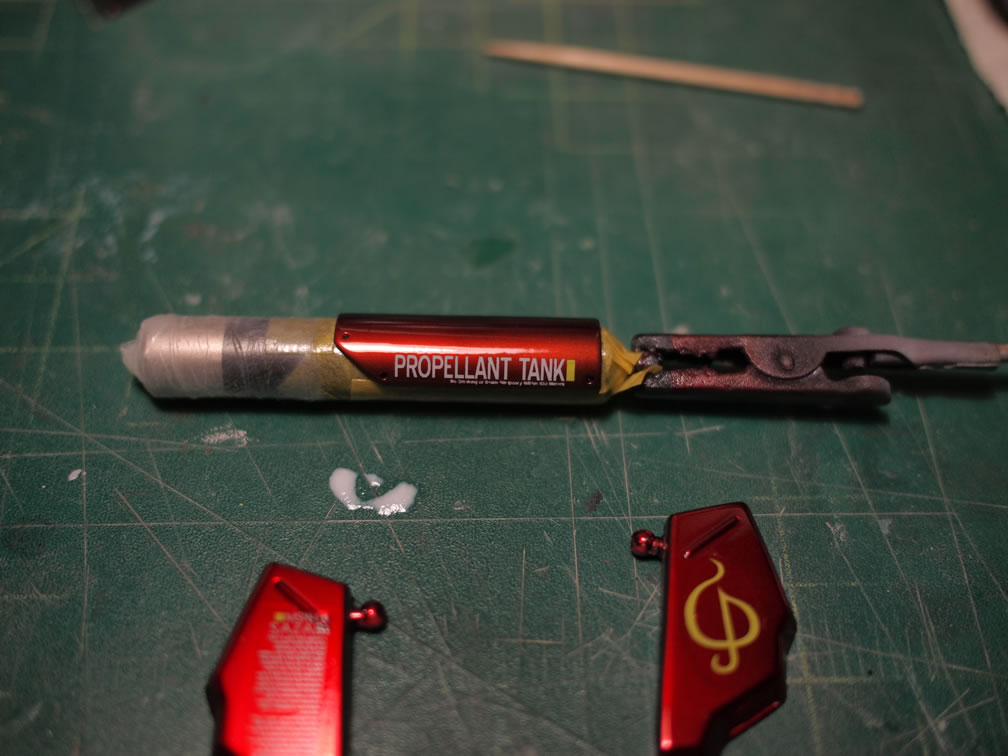
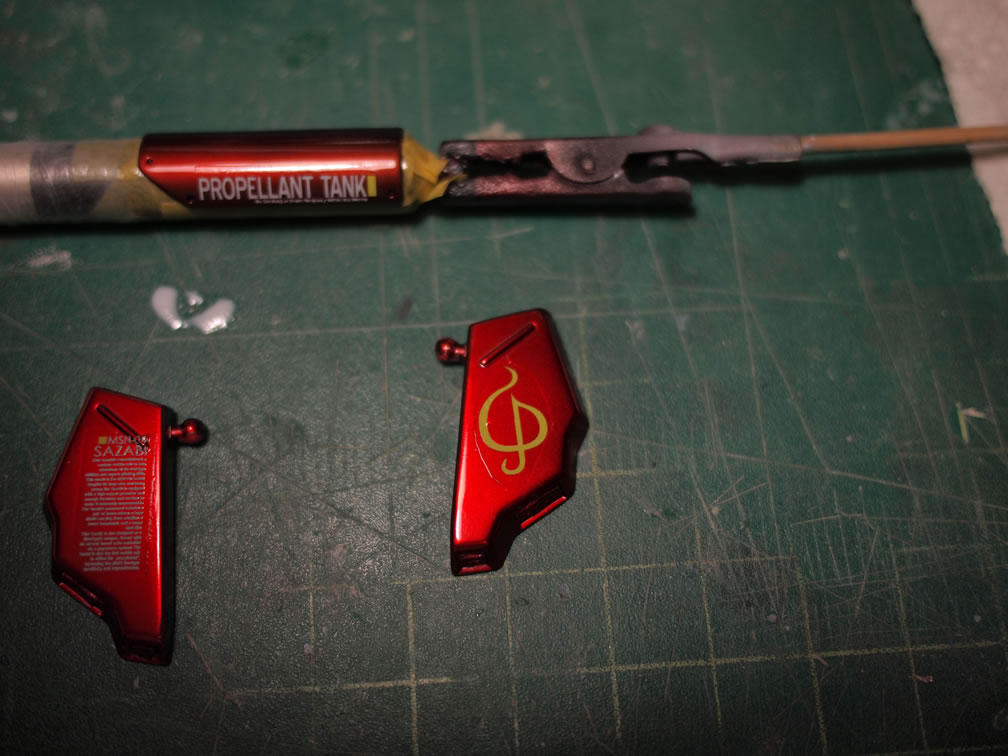
Decals are applied to the skirt and fuel tanks. Then setting solution is applied. They still need clear coats to level out the decal film edges.

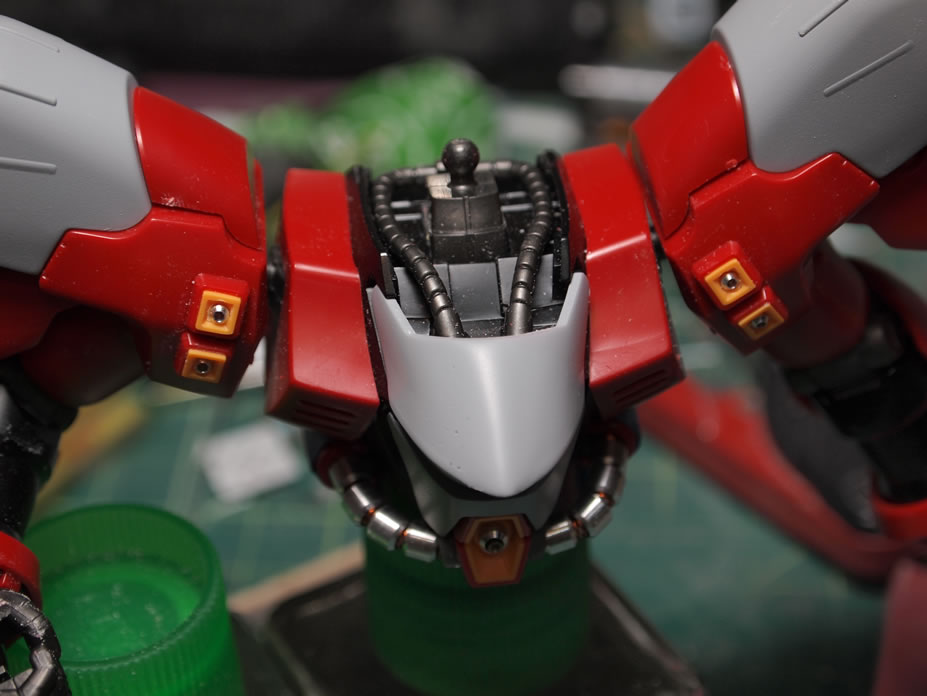
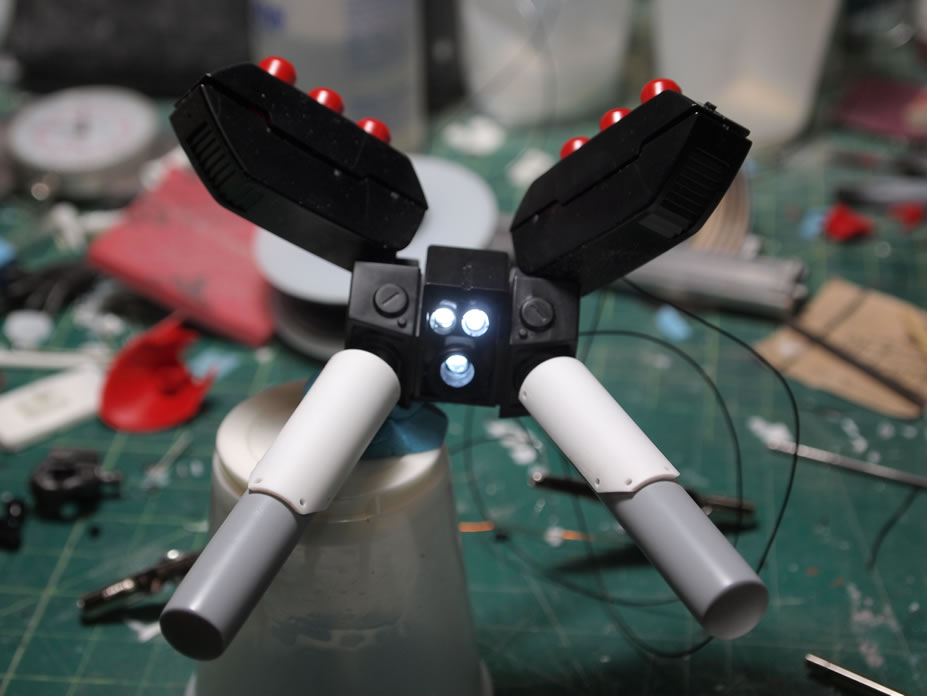
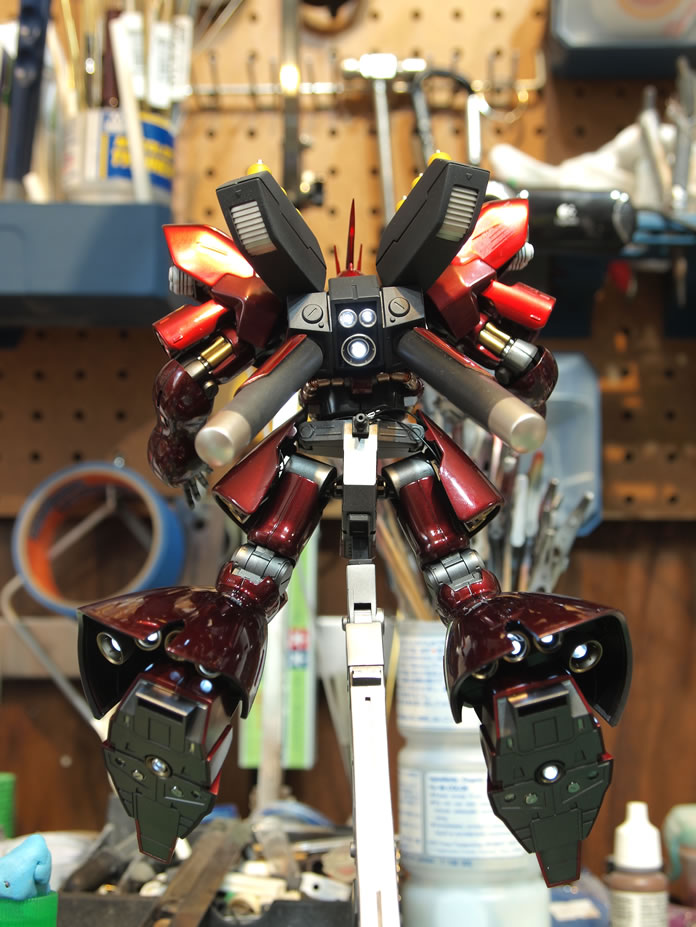
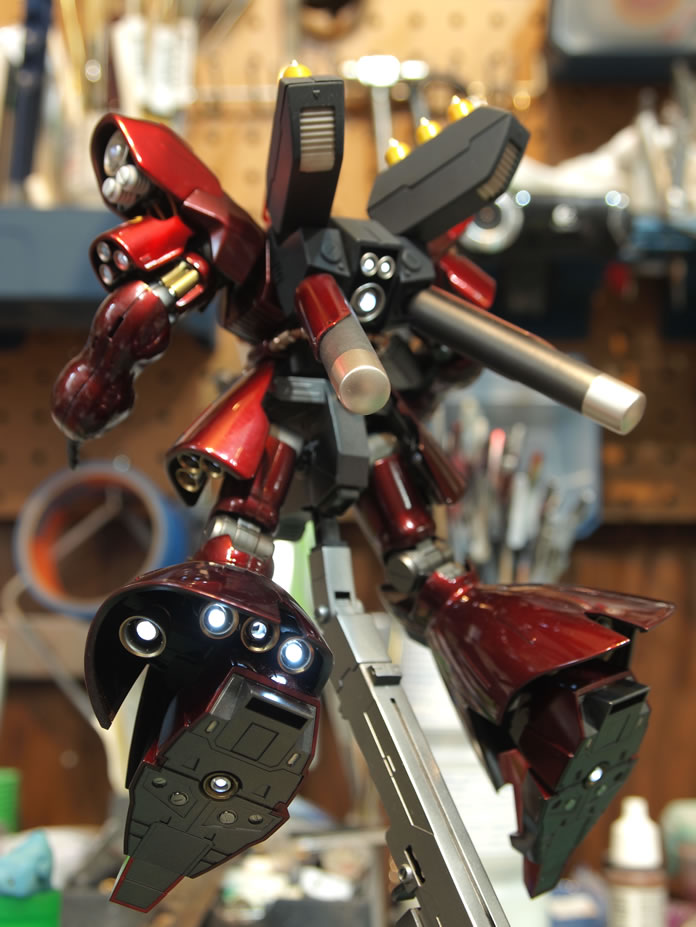
The wiring for the shoulder pieces. A little complicated, but all the negative leads for each shoulder was connected together and a single negative and positive wire was threaded from each shoulder assembly. Then the entire assembly is tested to make sure all four lights were functioning.
The shoulders were then mounted onto the main torso and the wires threaded through the body. The torso’s wires from the mono eye and backpack are combined with the shoulders to create single postive and negative contacts.

And the completed torso wiring is tested; everything works. So far so good I guess.

March, 6, 2011: Progress after the March model build gathering. But rewinding back before the gathering, the rear skirt was worked on with the added thruster detail that was modified slightly. Hindsight says I should have added some lights here too, but hell, I think there are enough lights in the damn thing already. But some light curing putty is applied and sanded to smooth out the transition from plastic to resin.
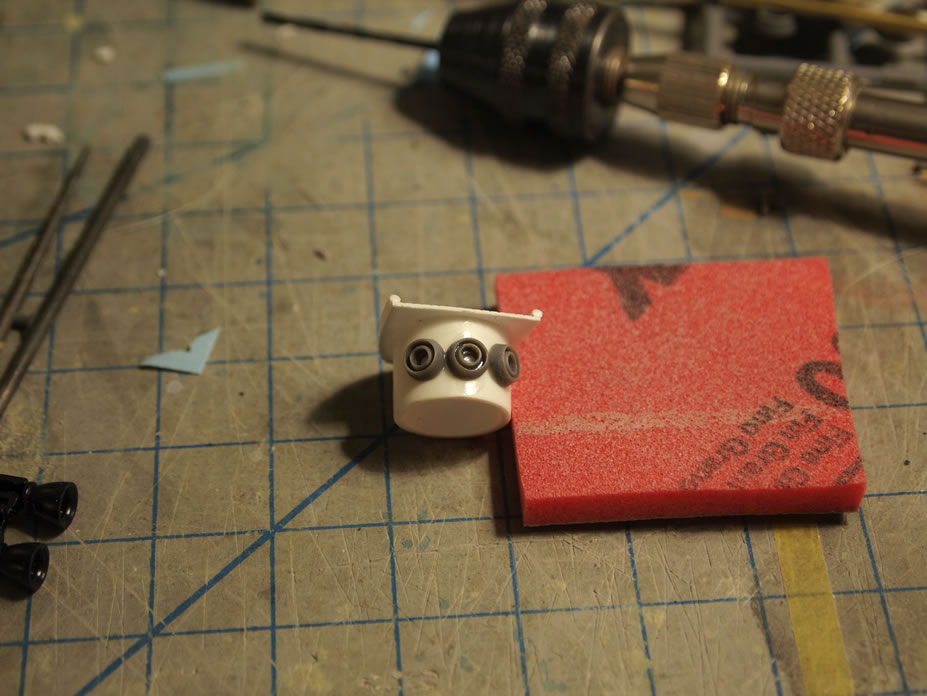
Metal collars are added to the thruster bell interior. This works to add some detail to the interior, hide the ugly drilled out area, dim the LEDs and actually have the thrusters look decent without the lights on, the metal collars sort of hide the LED bulb a bit.

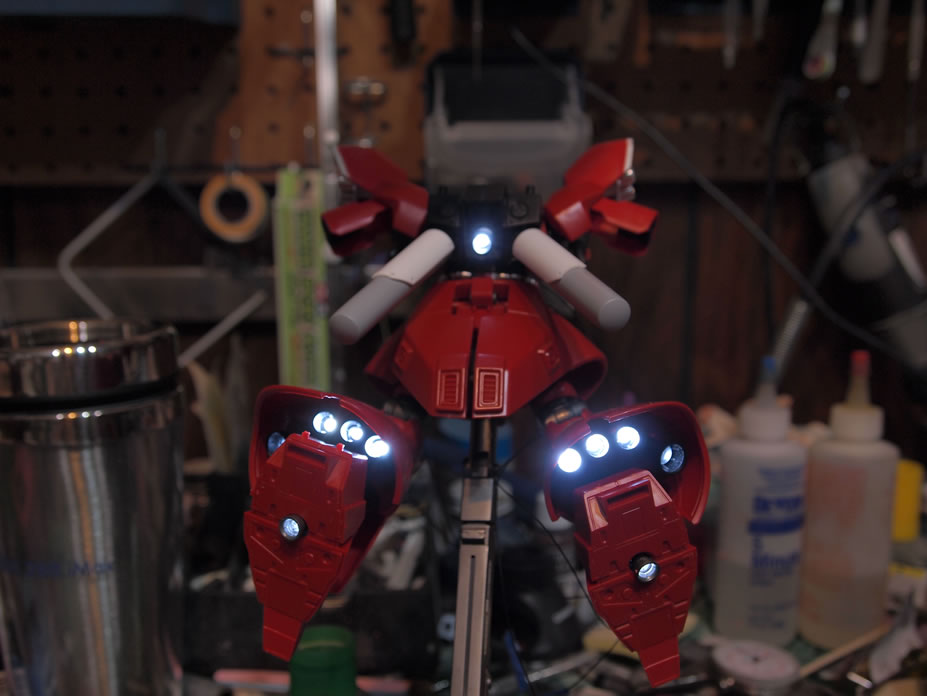
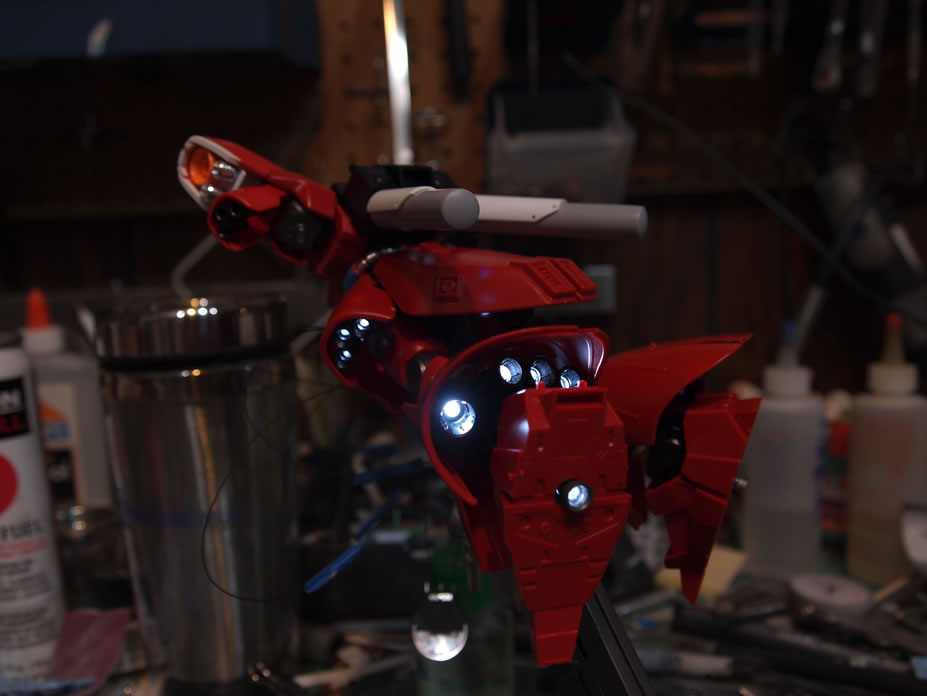
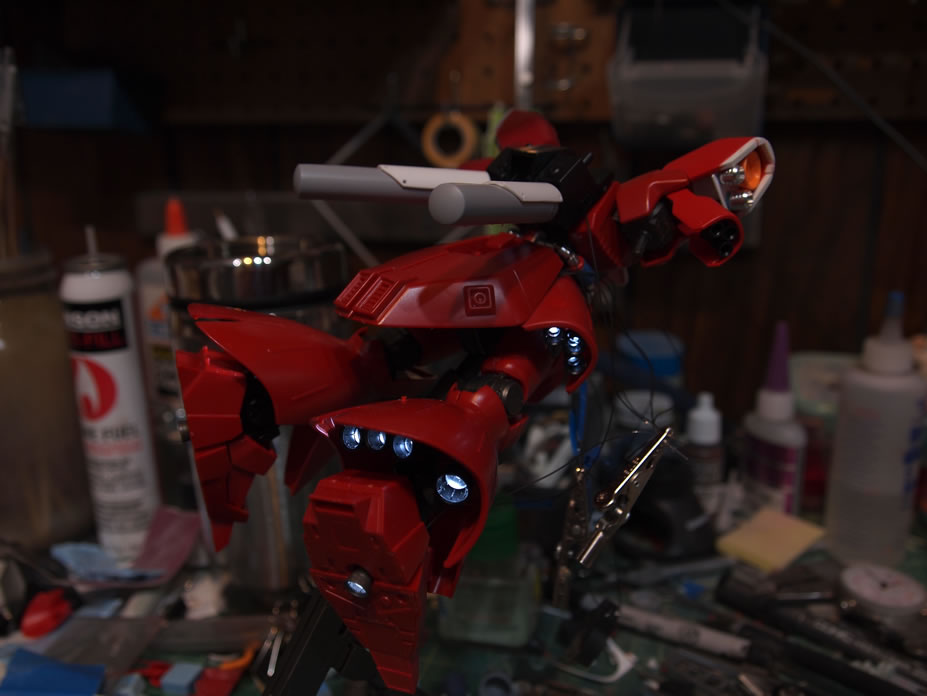
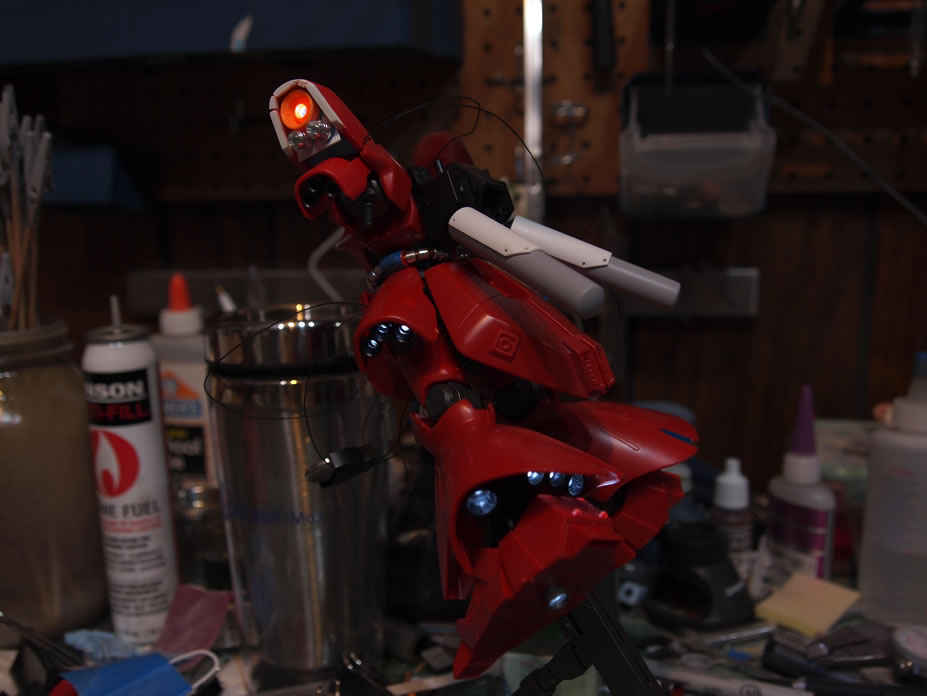
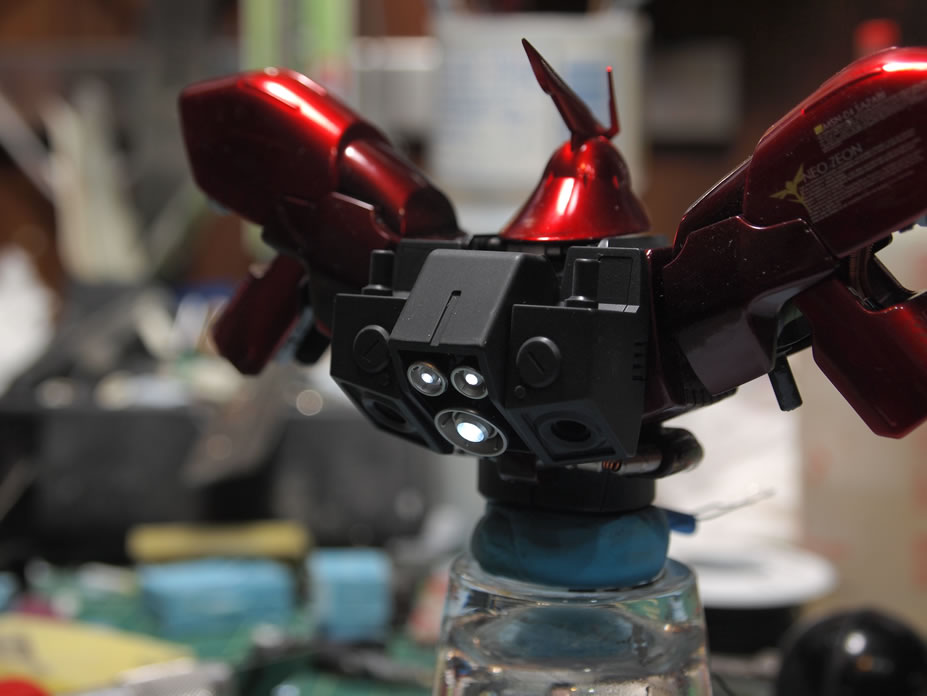
I spent the time at the build gathering wiring up the kit. Then today was spent applying a panel line wash and putting the arms together. I still have to finish the front and rear skirts. But for now, here’s the kit without lights turned on.
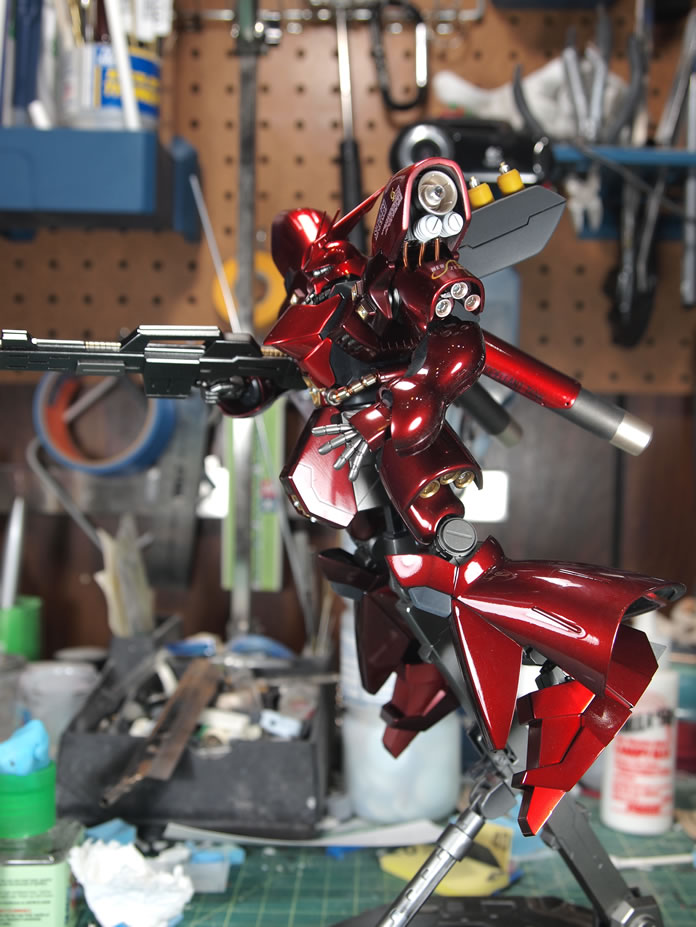
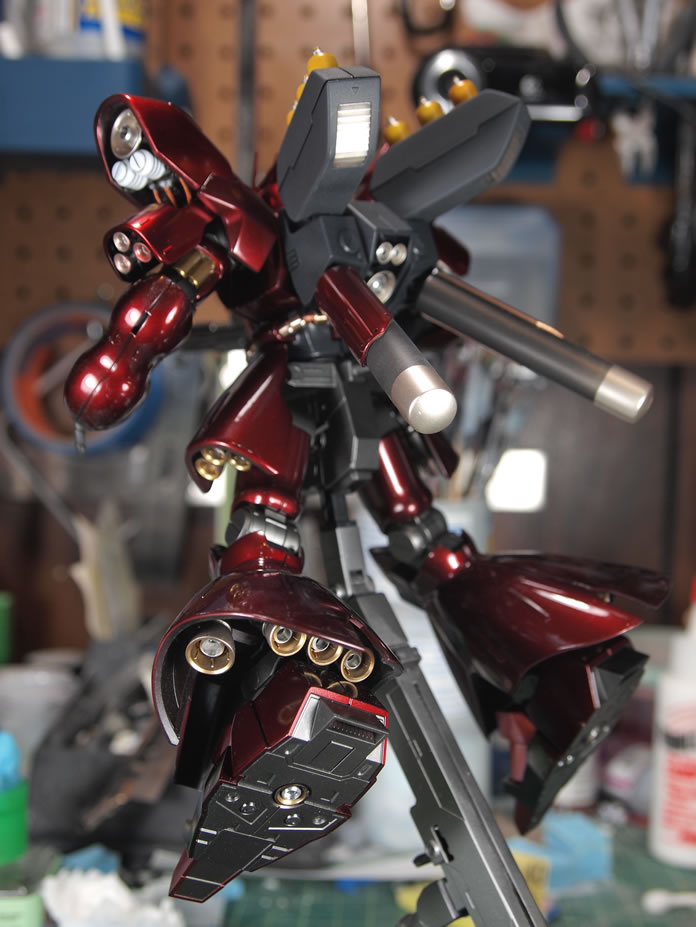
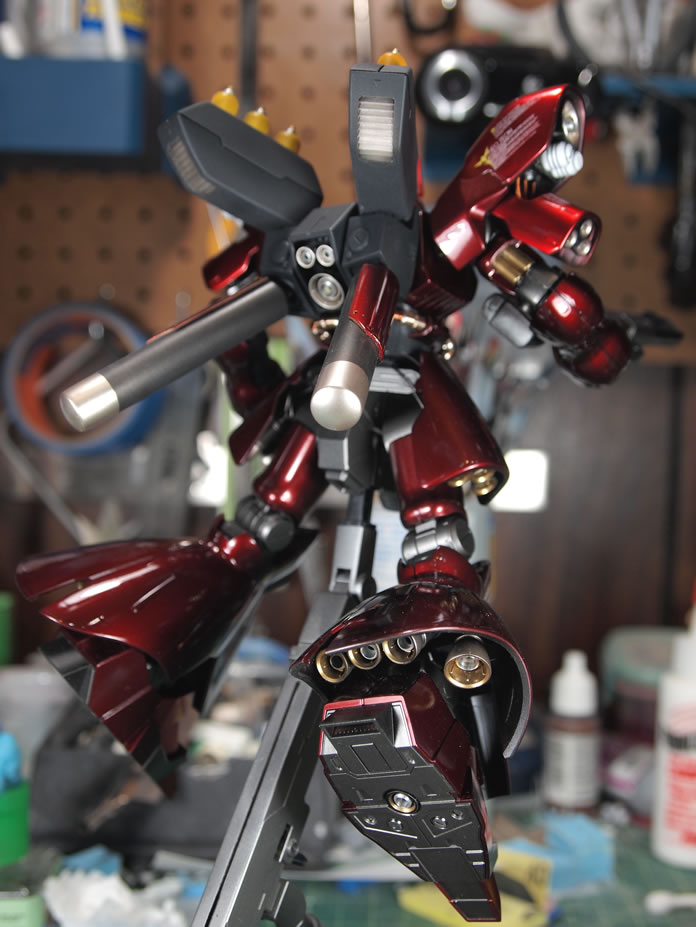
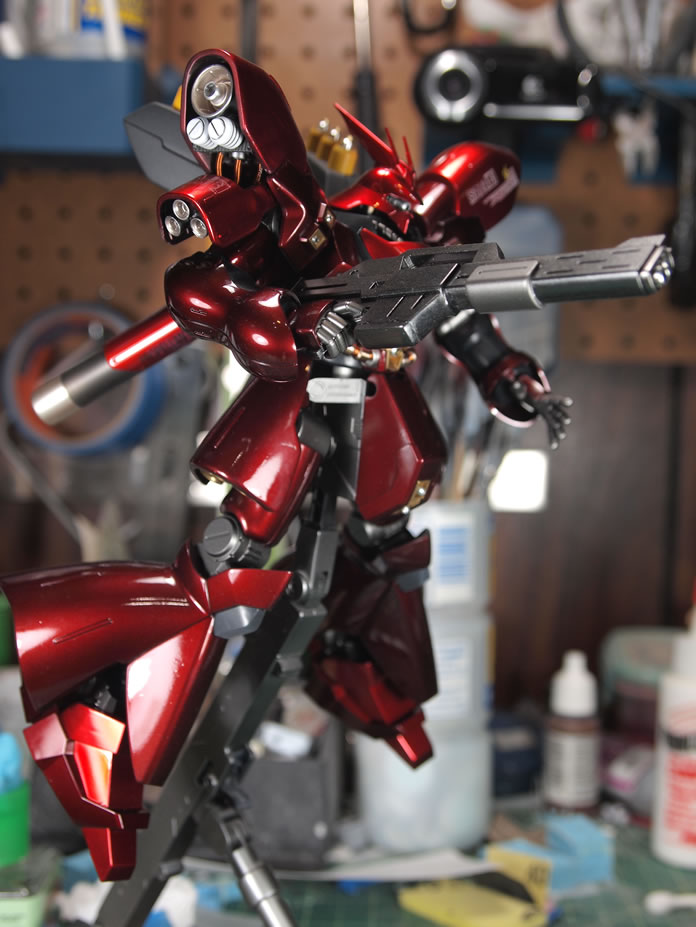
Here’s the kit with the lights on.
May 16, 2011: Finally got back to working on the decals for the little sucker. And when getting around to the skirt armor, I realized that I had left the masking tape on the skirt armor thrusters. This isn’t too big a deal, but I had entered the kit into two previous model competitions. *sigh* Well, regardless, I finally got the decals into place. And only had one hiccup. The decals will wrinkle a little with the decal setter, but once dry, the decal lays out flat.
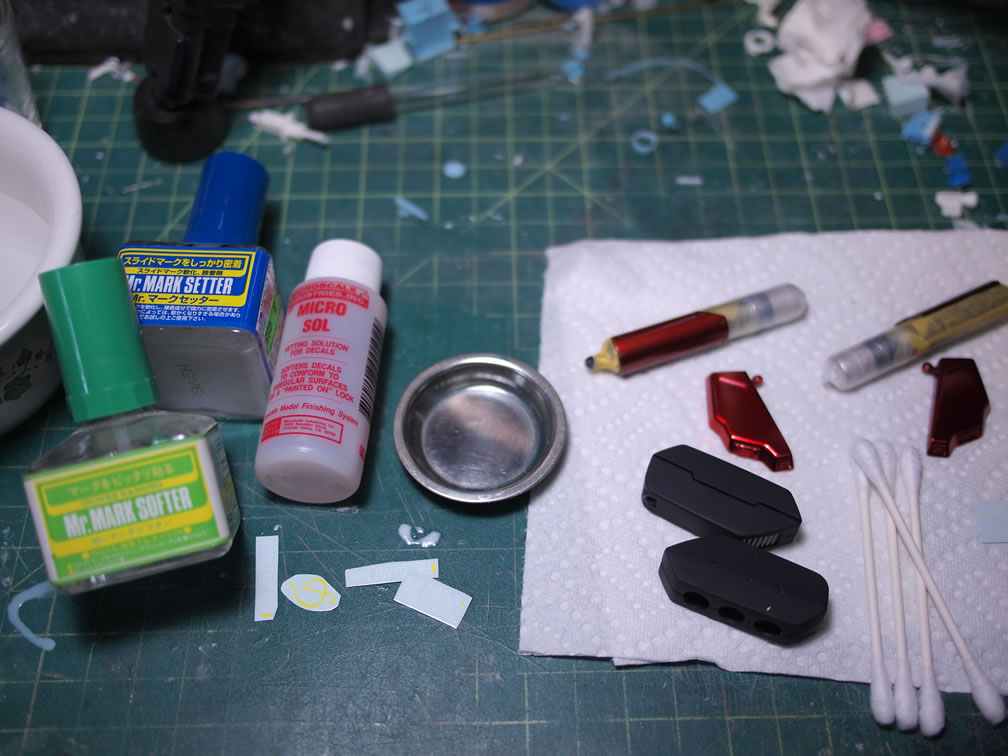
Decals placed, clear coated, then lightly sanded to remove the small decal edges that are easier seen in glossy finishes than flat finishes.

After sanding the the edges and clear, the parts are clear coated again for a final clear gloss. The funnel system is flat coated. No need to sand the decals on the funnel racks as the flat coat easily diminishes the decal edges.
I’m working on the base, so sometime next week, I’ll have a finished product… finally.
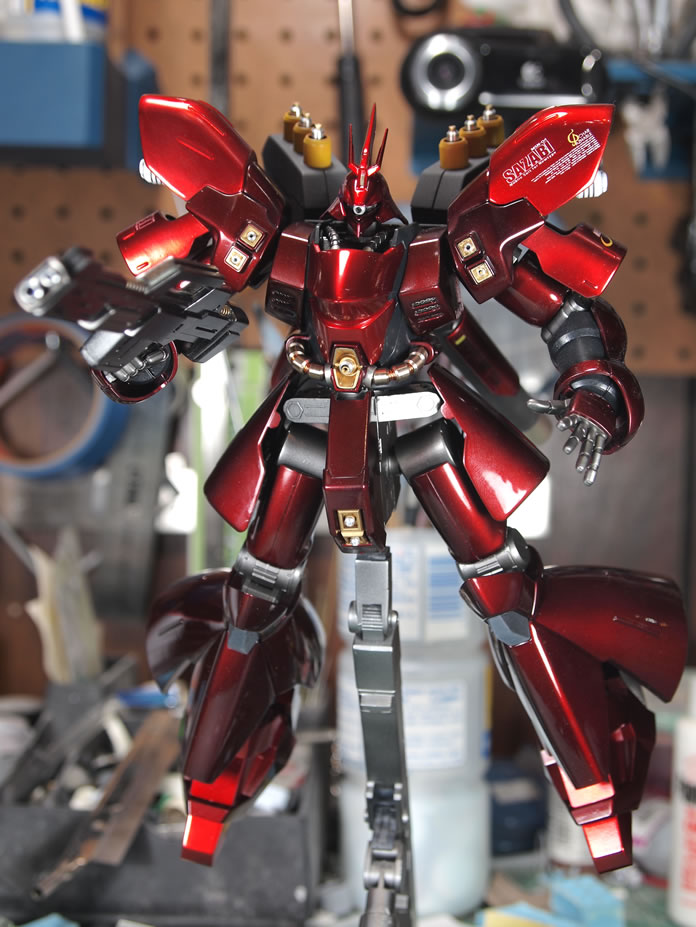
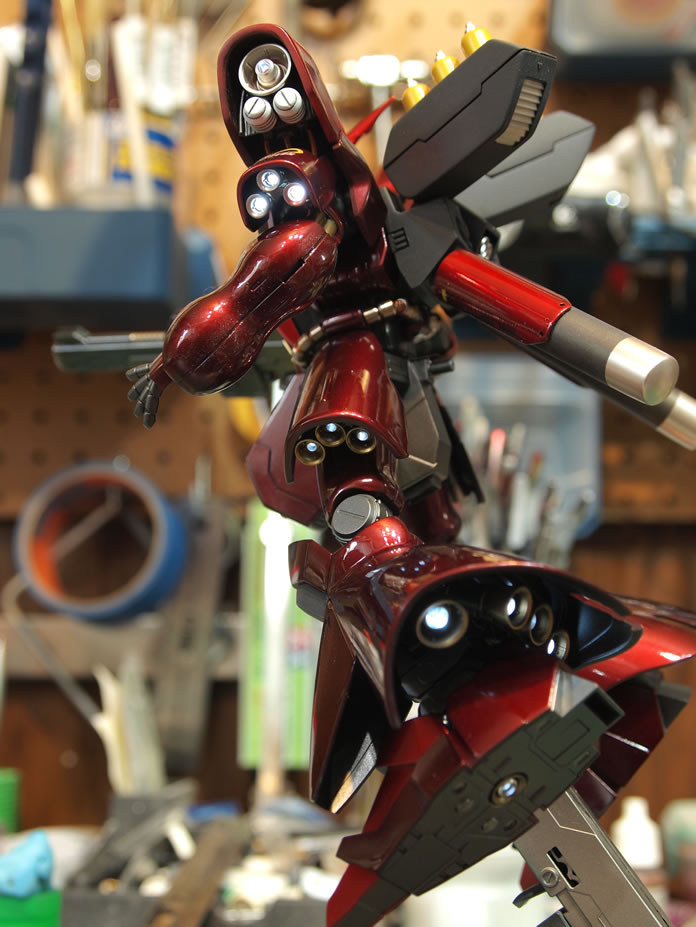
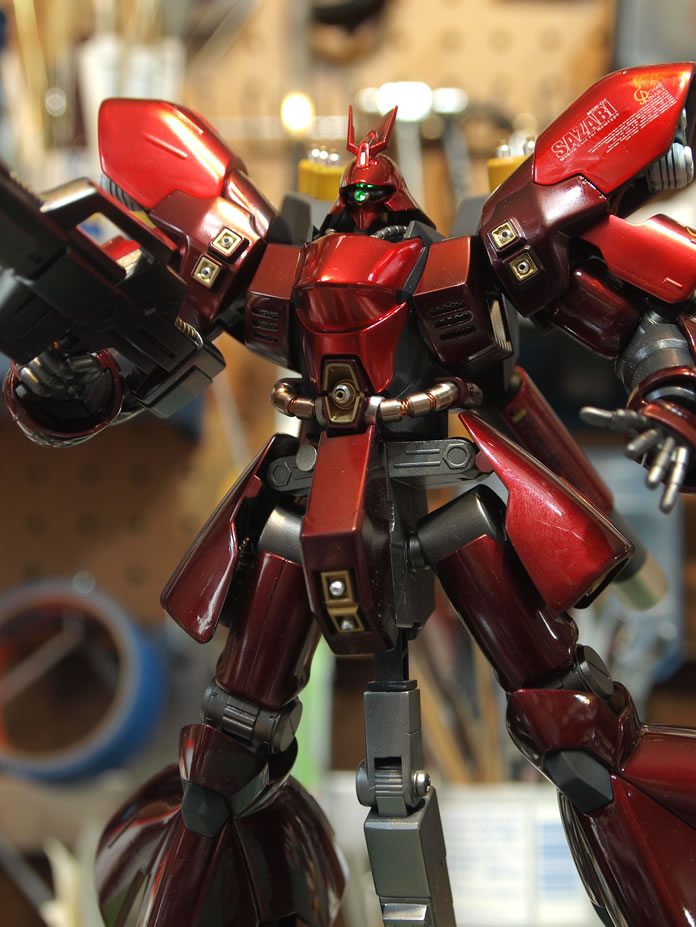
Project is done, click here for completed images.
Hi,
About two and a half years ago I got into building and painting models. So far I have only painted Bandai Gundams but I got some Macross and misc stuff in the back log. Right when I started getting into this hobby I was desperately looking for some guidance on how to paint and I stumbled across your tutorials (which seriously rock btw). The fun factor in this hobby got boosted once I followed your advice and I was able to make some pretty decent paint jobs. So anyhow I just wanted to say thanks for putting so much time and effort into the tutorials and the rest of the site in general. I can tell you really love what you are doing and I really thank you for doing so much for the hobby. There is a very slim chance I would actually have carried on with this if it was not for some good tutorials. I could not imagine trying to figure all that out on my own. I would have just ended up with seriously messed up pain jobs and ditched it all after too much frustration.
Also, I think you have an amazing model making/painting talent and your ingenuity shows (resin casting LEDs into the Sazabi boosters). On top of that you have a very nice and structured presentation in your tutorials. If you ever thought about releasing your own DVDs or whatever I would say go for it!
Thanks again buddy! Looking forward to whatever comes next on this awesome site!
Wow this is an awesome WIP post!