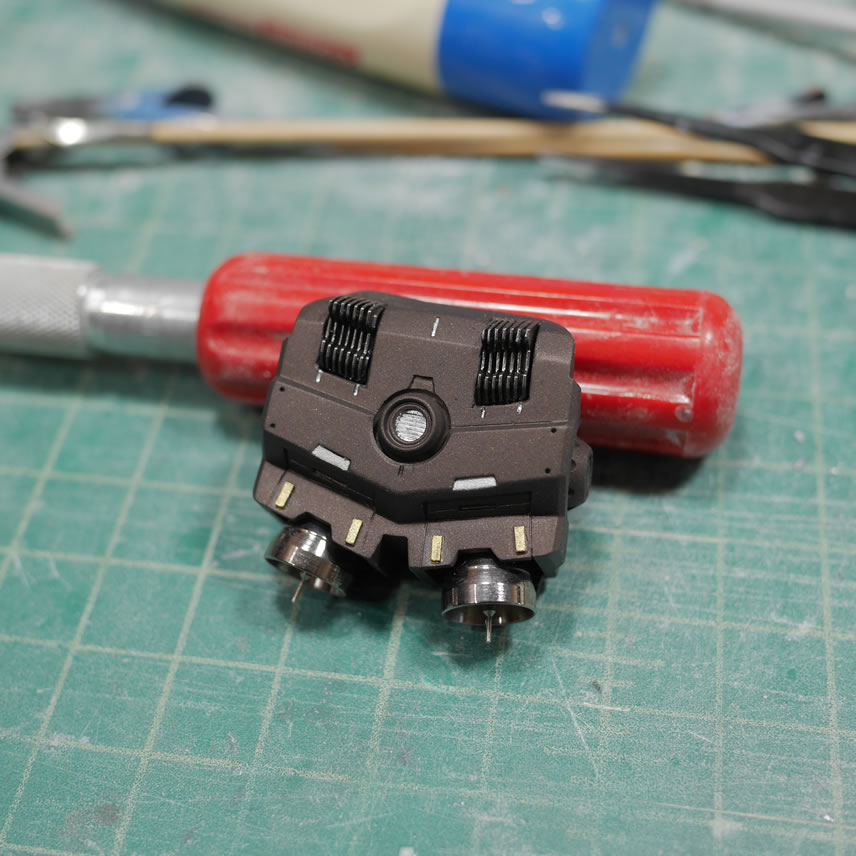
June 22, 2020: I love build gathering for the simple fact that a ton of my goofy ideas result from build interactions with my friends. I’ve been struggling to work on projects for the past two virtual build gatherings. The Ford Mustang GT4 stagnated from frustration. And then I started on an RG Sazabi that I have an idea for, but the motivation for that kit just wasn’t there. I’ve managed to snap the legs and part of the waist in May and started back on it to finish off the waist and upper torso this past build gathering before just boxing the damn thing up and moving on to a more interesting project.
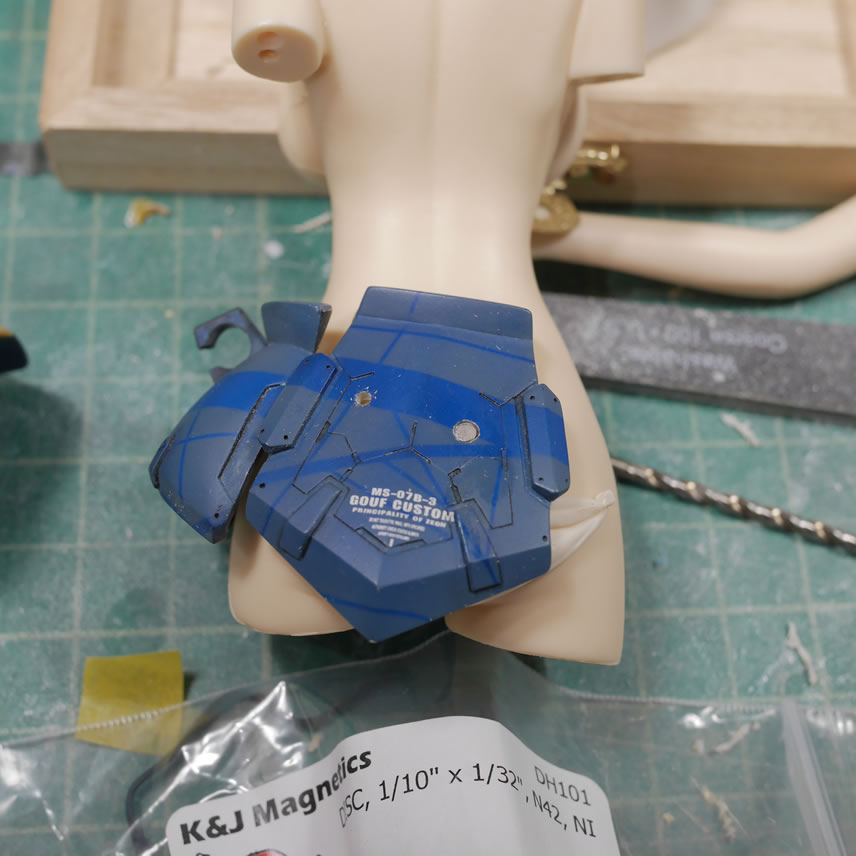
There is a little history for this project. And I have been known to take previously finished projects and just rebuild them. The Neograde Gouf Custom conversion for the MG gouf 2.0 kit was finished almost 10 years ago: Neo Grade Gouf Custom Build. This one is a little different, it was displayed at a local hobby shop and was damaged from a customer handling it. (I have no idea why a hobby shop would allow a customer to handle kits in their display case). But it happened several years ago, almost 5 years ago: Broken Neograde Gouf Custom. And since then, it has sat in a box. Well, not really, it was taken out and used as a reference for the Gouf Custom Zaku Exceed Head conversion and Bust kit I made; that is still available for purchase here: Gouf Custom Zaku Exceed Conversion kit and bust for sale!. But back out of the box and this time, really ripped apart.
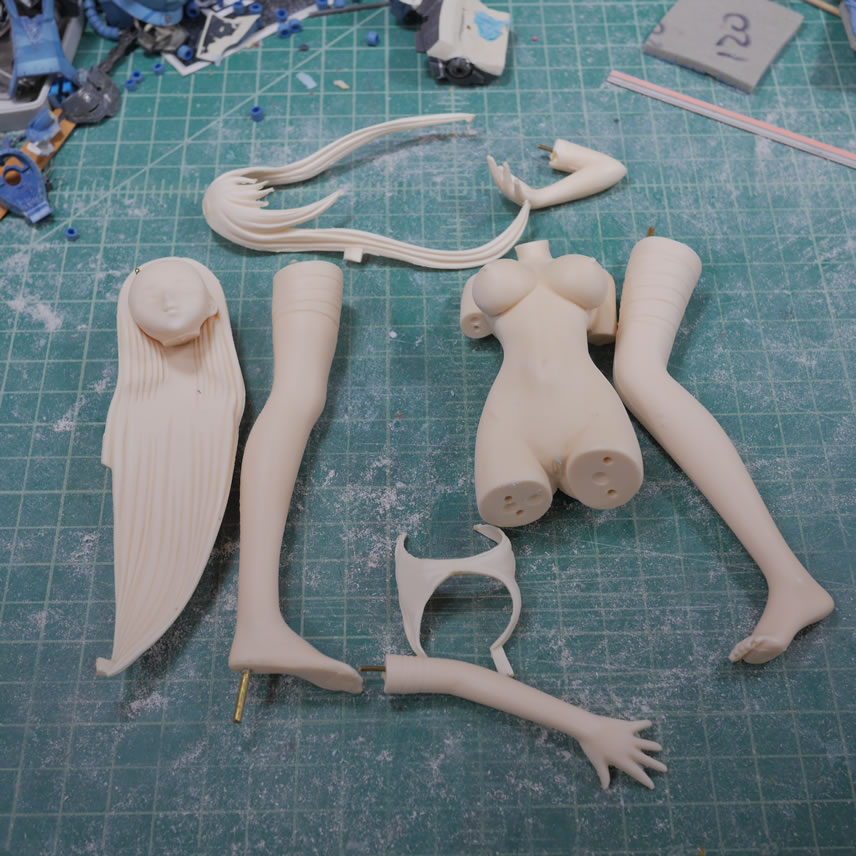
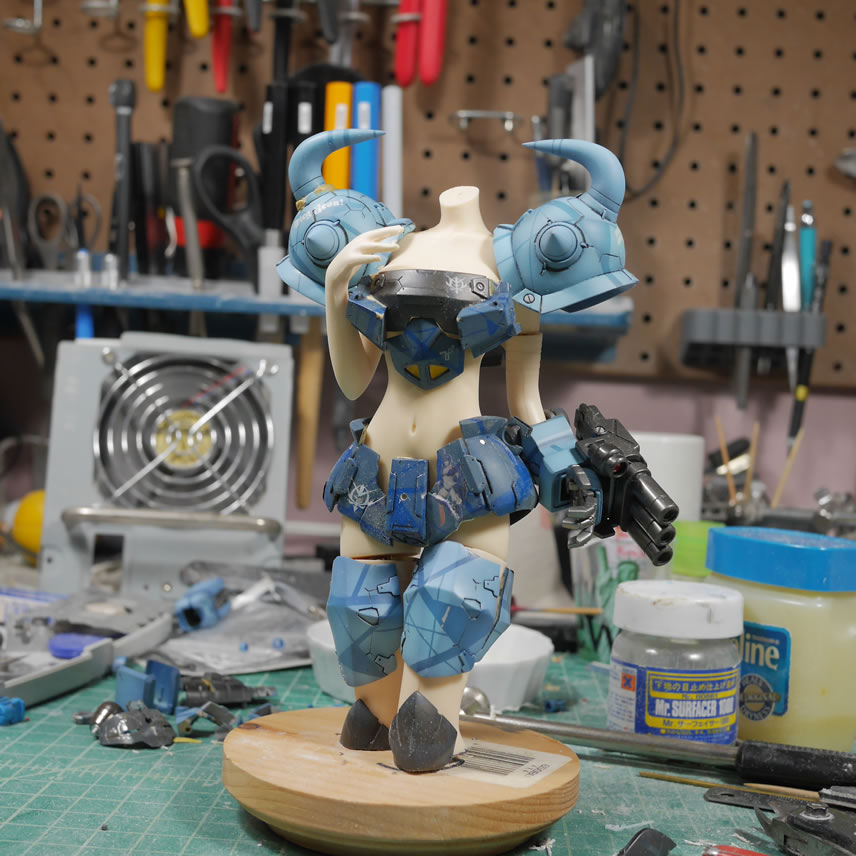
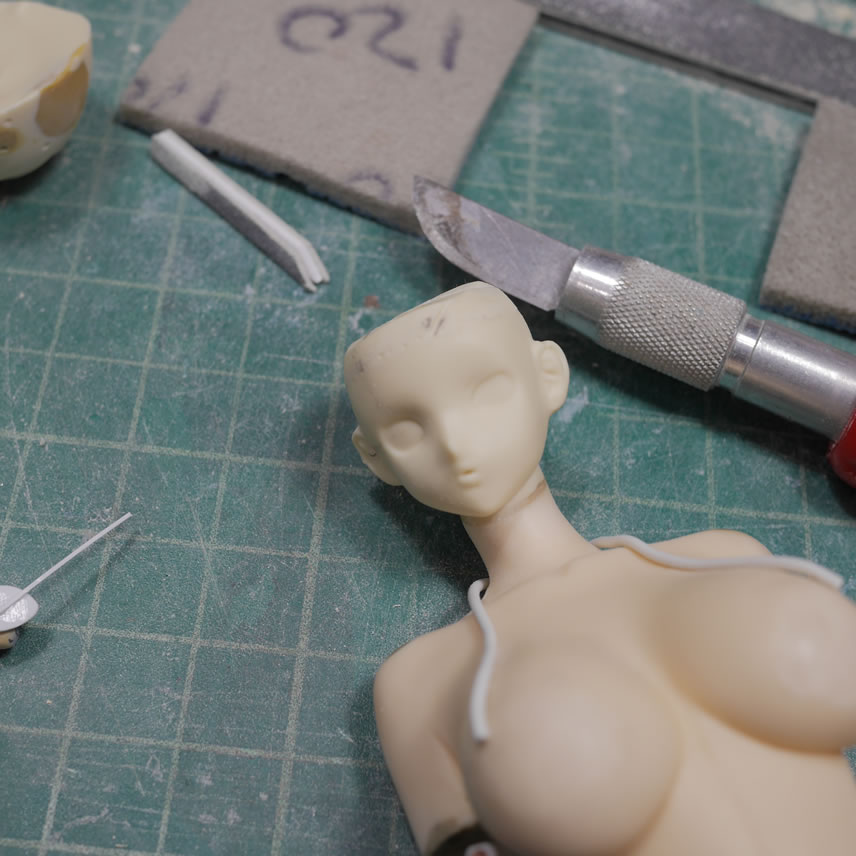
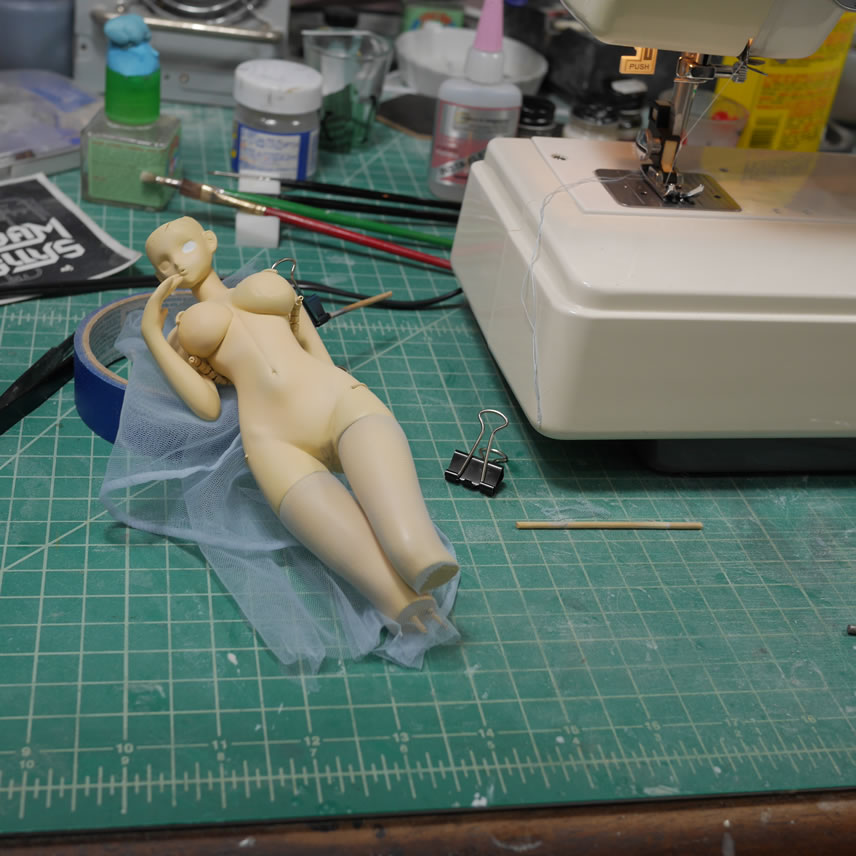
Some time during the last half of June’s virtual build gathering, the idea to make an MS Gouf Custom Girl popped up. I went digging for a suitable figure kit to butcher and unboxed the damaged Gouf Custom. After looking at my collection of recasts and some originals, I picked 2 kits. Two original kits. An older Volks kit Hibachi from Rance that I’m taking the head and hair from to make a mold and cast a copy as I only need these three pieces. And a kit I got from Yahoo!Japan auctions back in 2008 from AB=Flug sculpting circle for their 1/6 scale *NSFW* Villetta Nu from Code Geass. The sizing and pose for these two kits look good enough for the Gouf Custom. So on to just cutting and resin removal. A very rough fit to see if we could even do this was done with some blue tack.
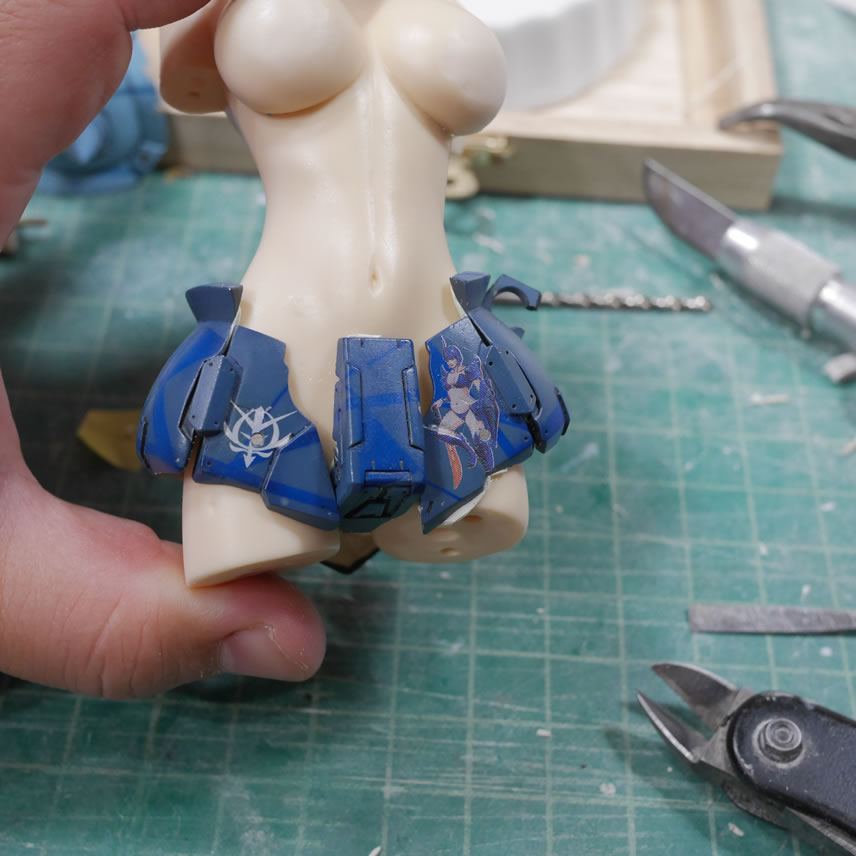
Most of the armor is just resin, so it is easy to remove the excess material to get a better fit against the curves of her body. I’ve got a semblance of a skirt from the Gouf and not too much material is removed for the fit; so this kit was perfect. A nude kit is almost the best choice in these kinds of bashes as there is much less material that needs to be removed from the original figure kit. But it’s all resin anyways, so a dremel with a sanding bit will cut though this in no time.
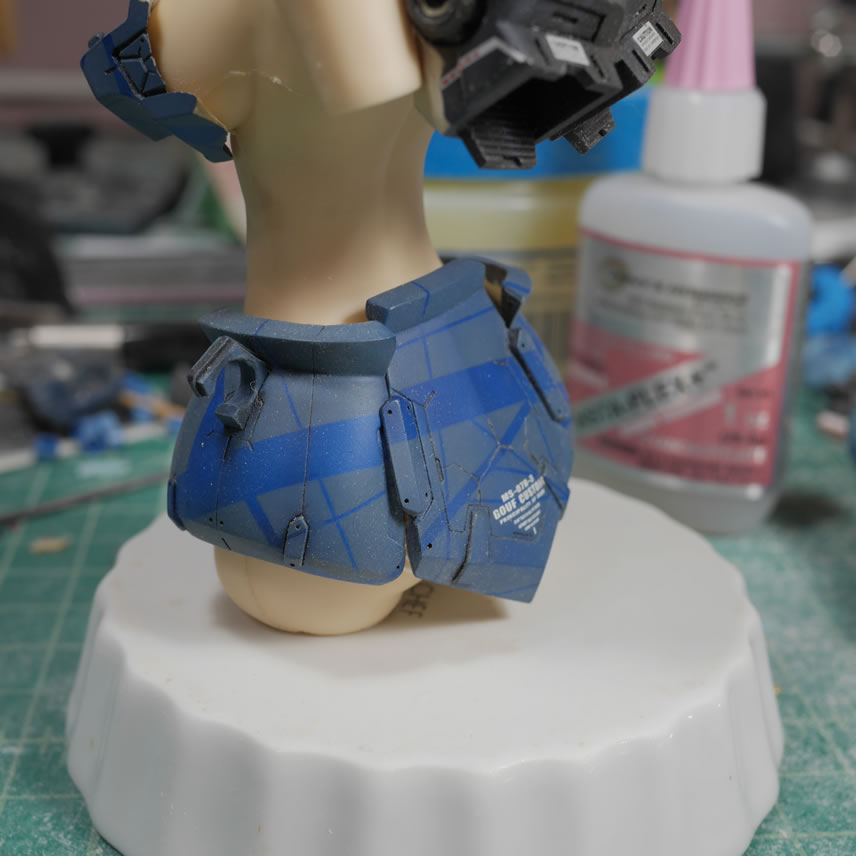
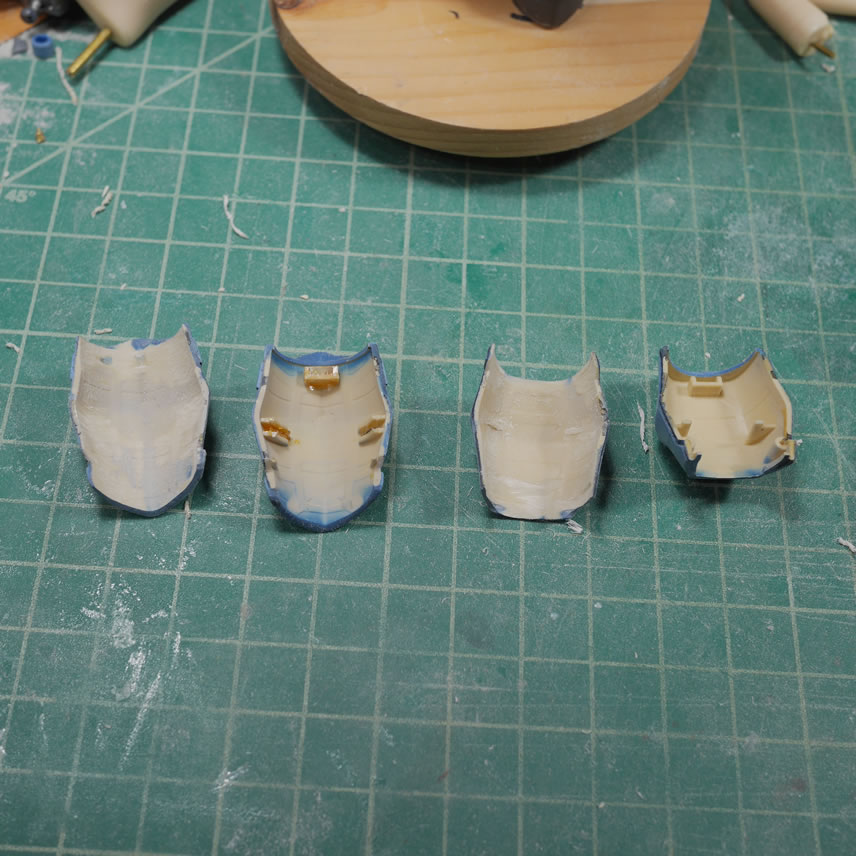
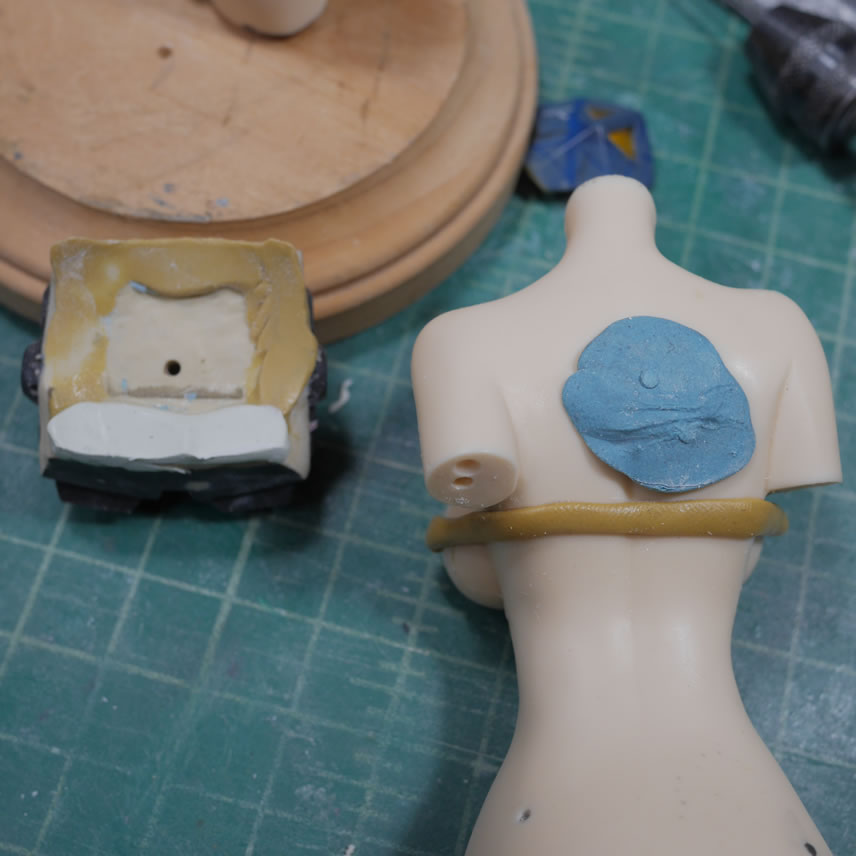
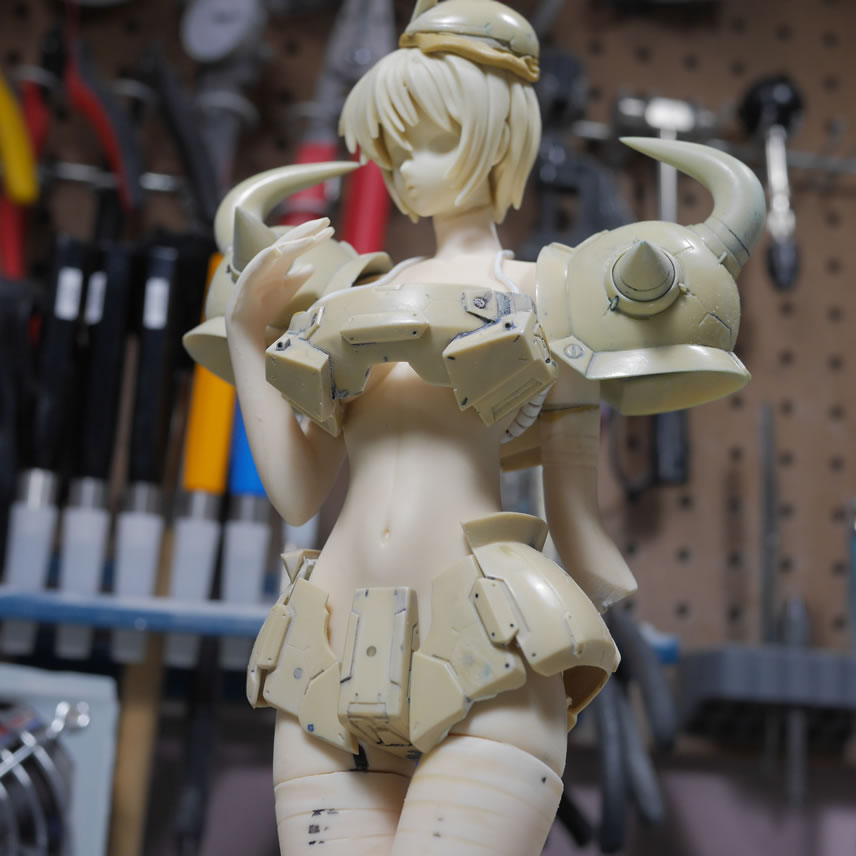
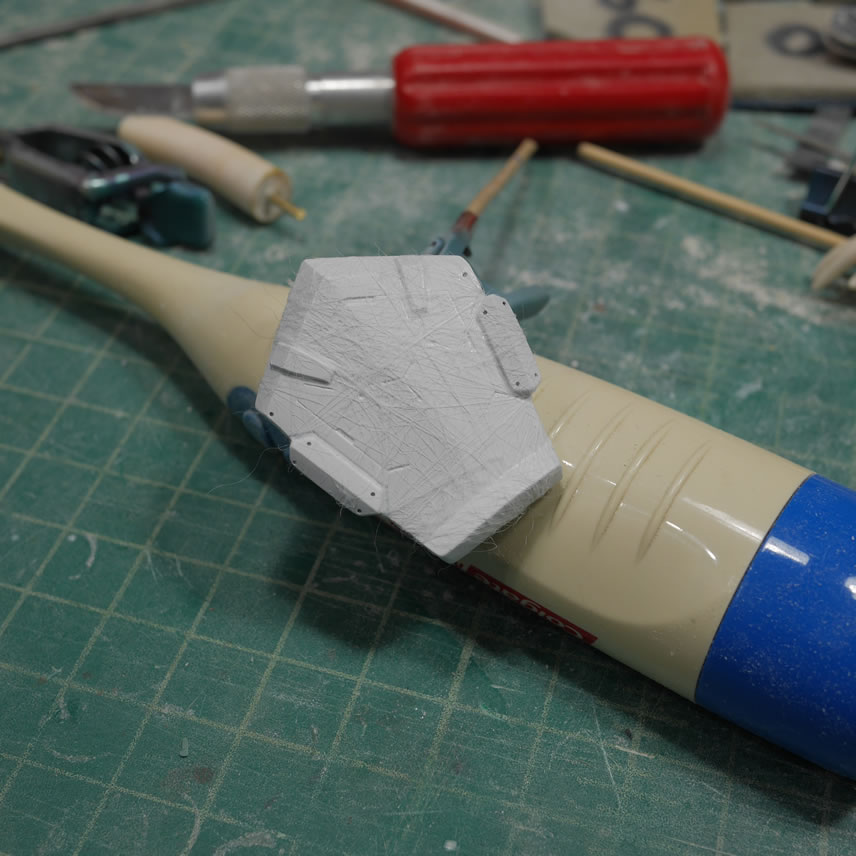
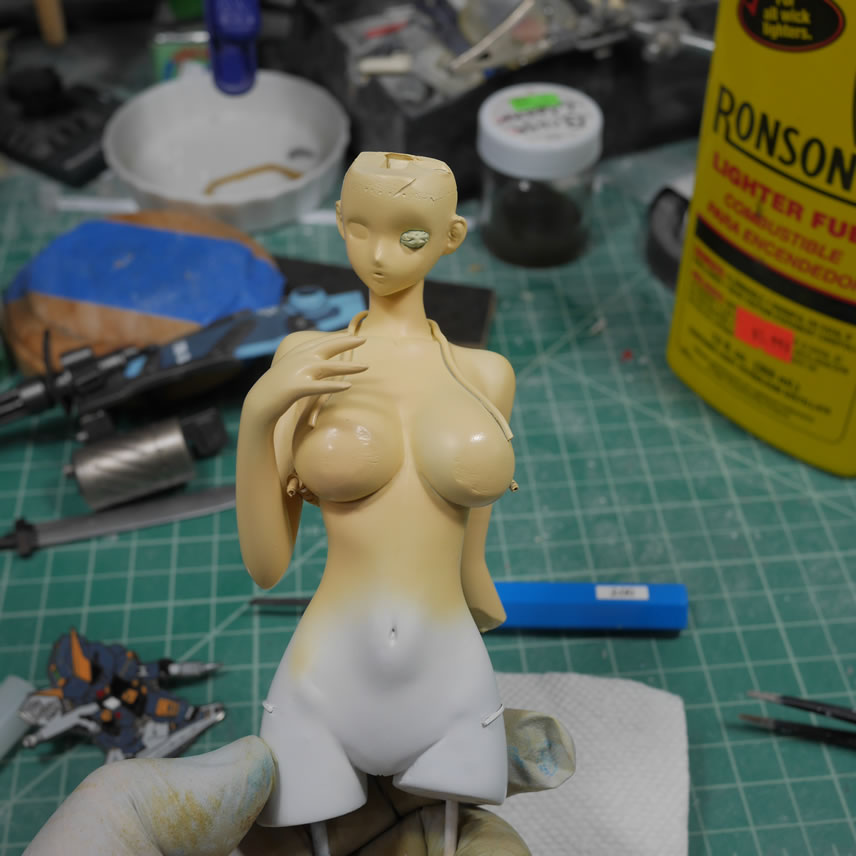
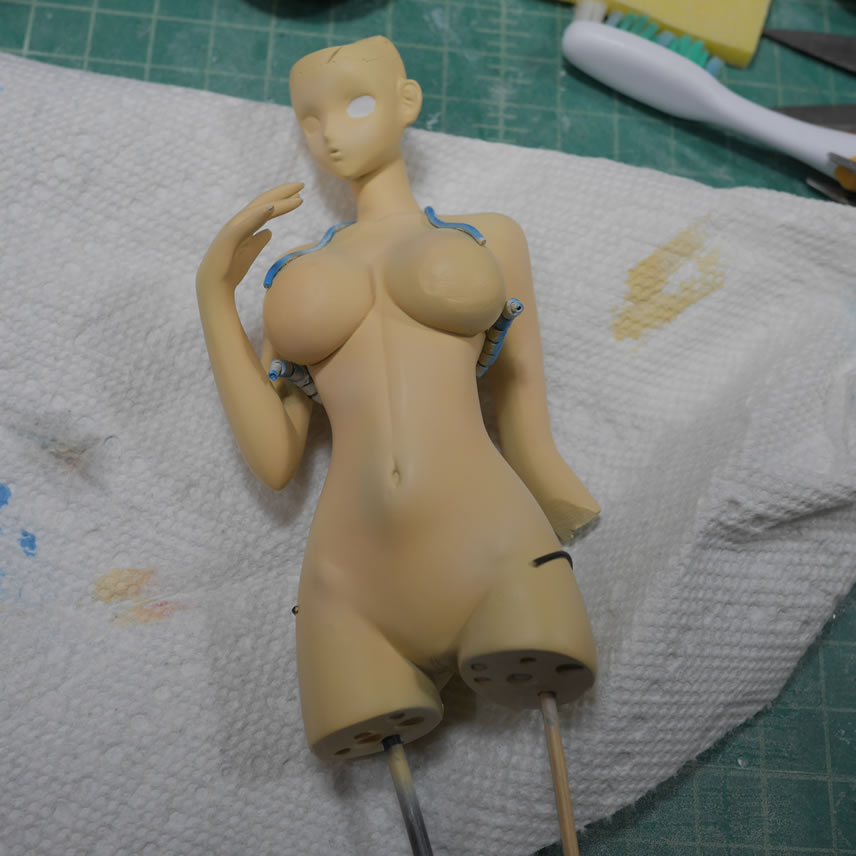
The Gouf’s chest piece was three pieces when I pulled it apart. I glued the three pieces together as it is much easier to work with as a whole piece. Lots of cutting and hollowing out to fit the new goufy bikini top. I also needed to do some reduction surgery, completely removing the nipples and changing the profile of the boobs to better fit the new bikini. Since I’m not planning on making the top removeable and I only have so much room on the Gouf side of things for material removal; this is a good compromise. Some areas on the Gouf chest were thinned down too much and I ended up making holes that will need to be filled.
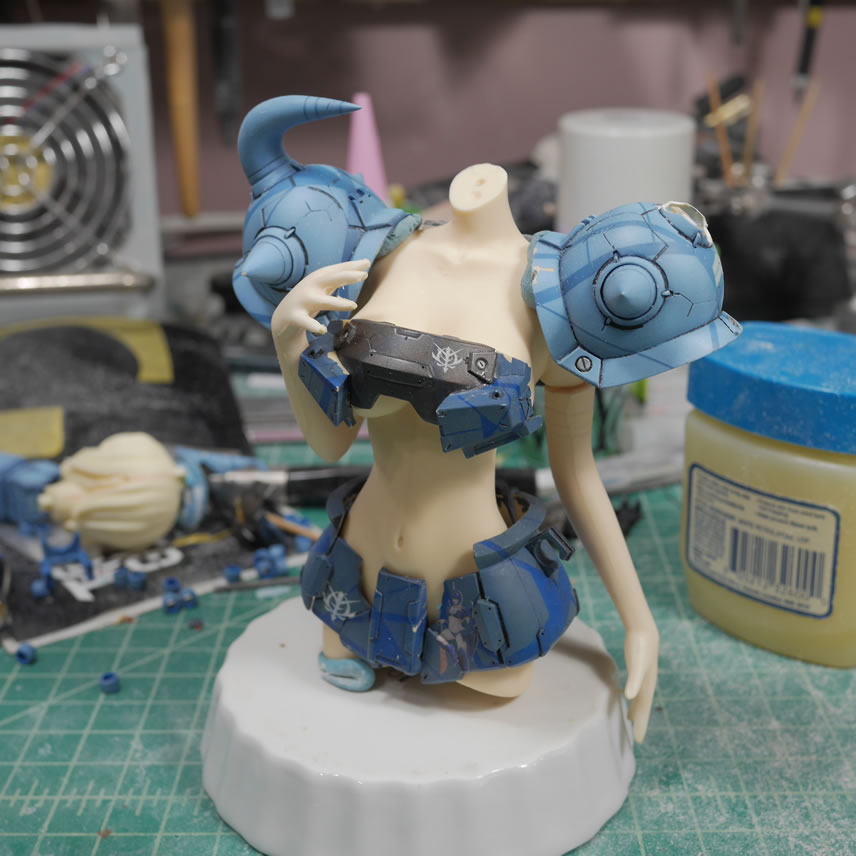
Here’s a quick test fit with the new proportions and it is starting to take shape. I’m still holding things together with blue sticky tack; so those clearances will need to be checked later once I have the fit locations and such figured out.
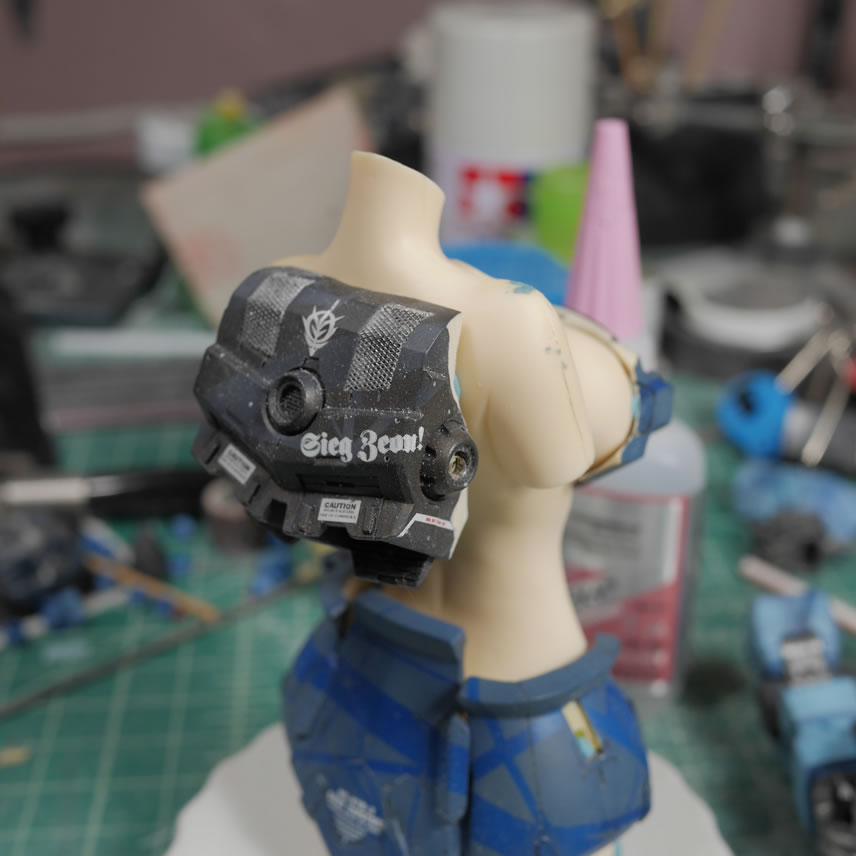
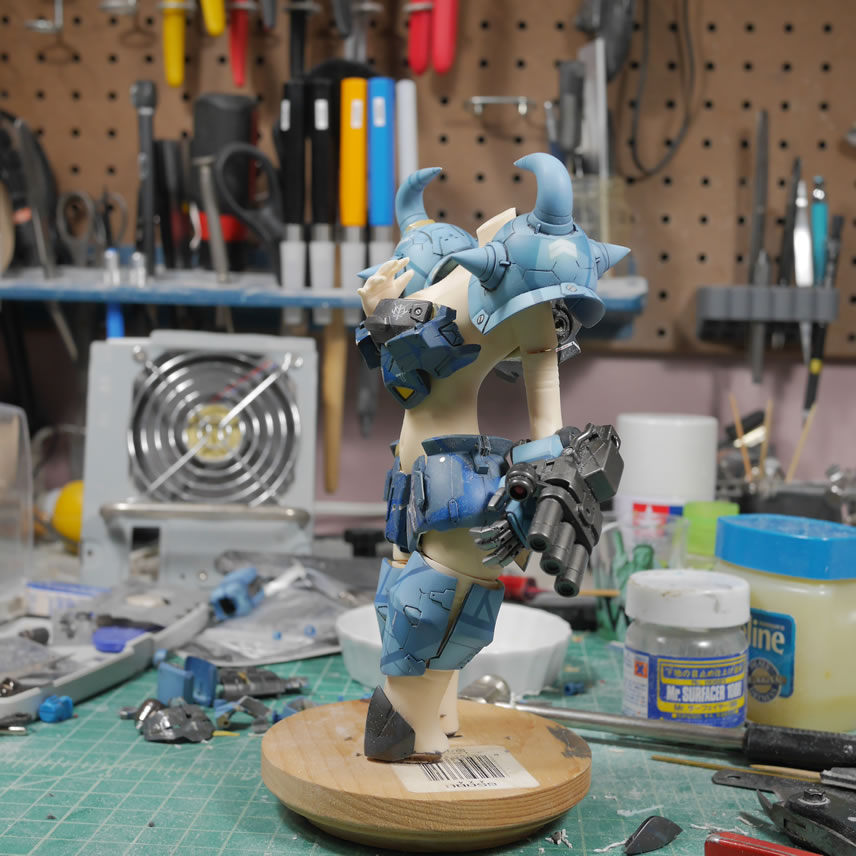
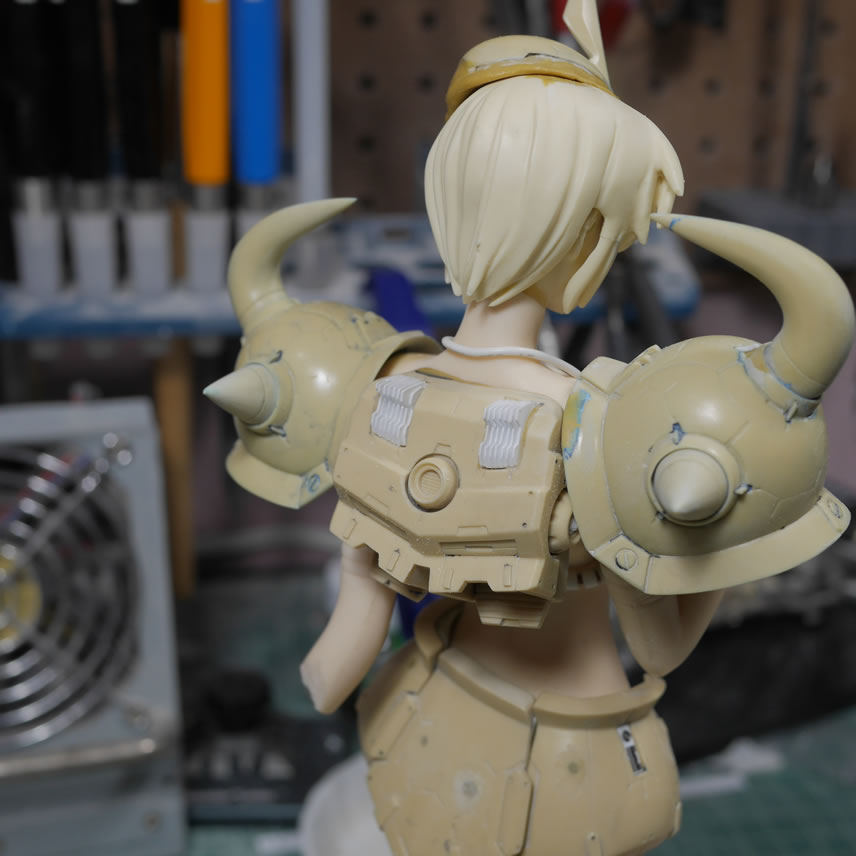
The backpack will be just that. A backpack. I’ll add in straps and create an actual backpack for her. The fit wasn’t perfect here so the sanding bit did some work in slimming areas here and there for a better and more centered fit.
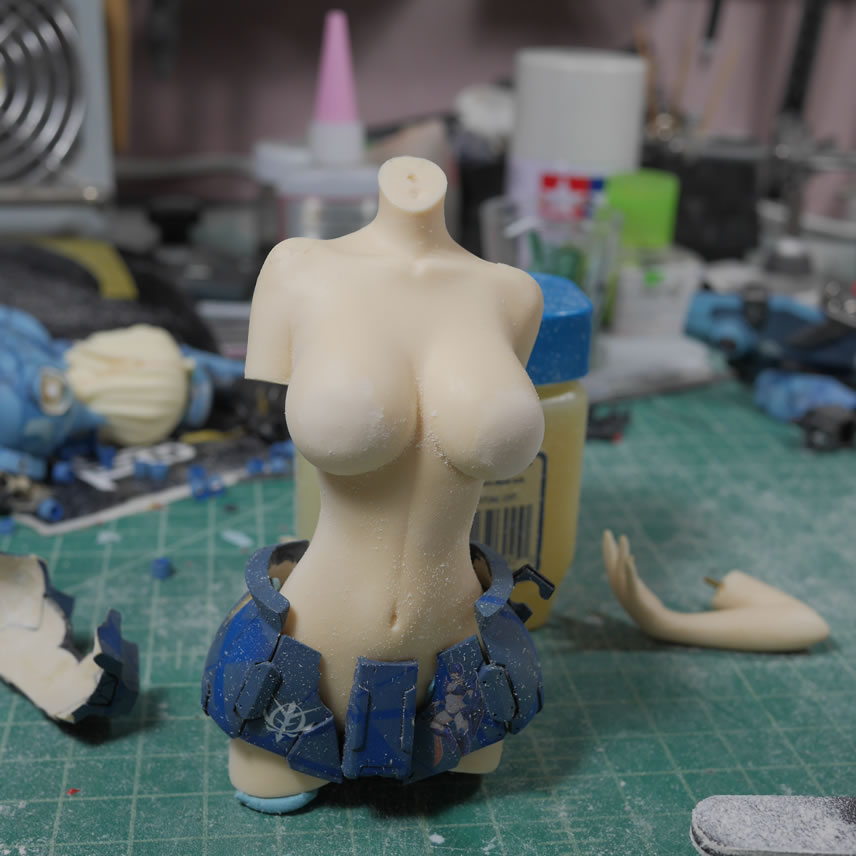
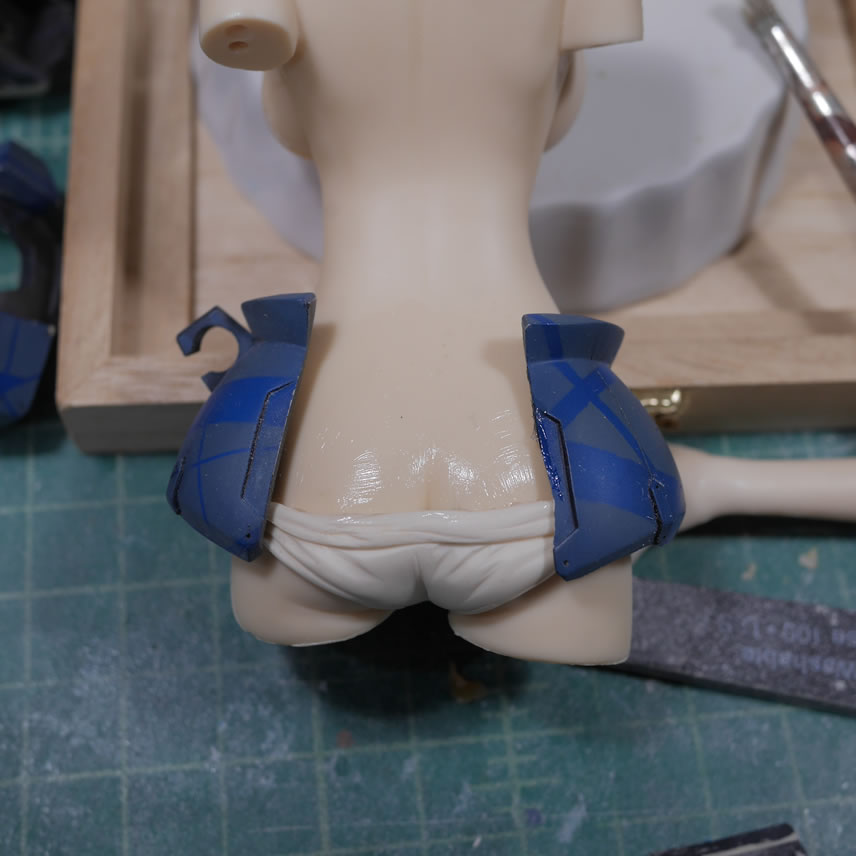
The original kit came with panties, and if you clicked on the link earlier in reference to the Villetta kit, you’ll have more insight into that naughty little bit. Cutting the panties in half, they fit well with the cut up crotch piece from the Gouf. Some glue and putty here will help the transition. This is still all very rough for the time being.
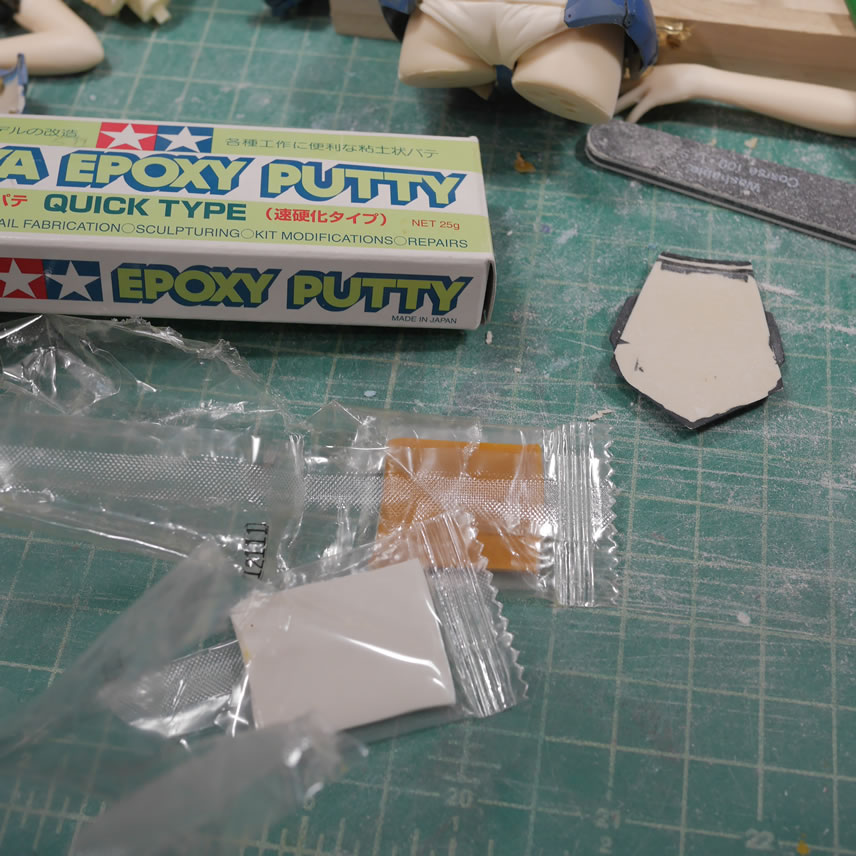
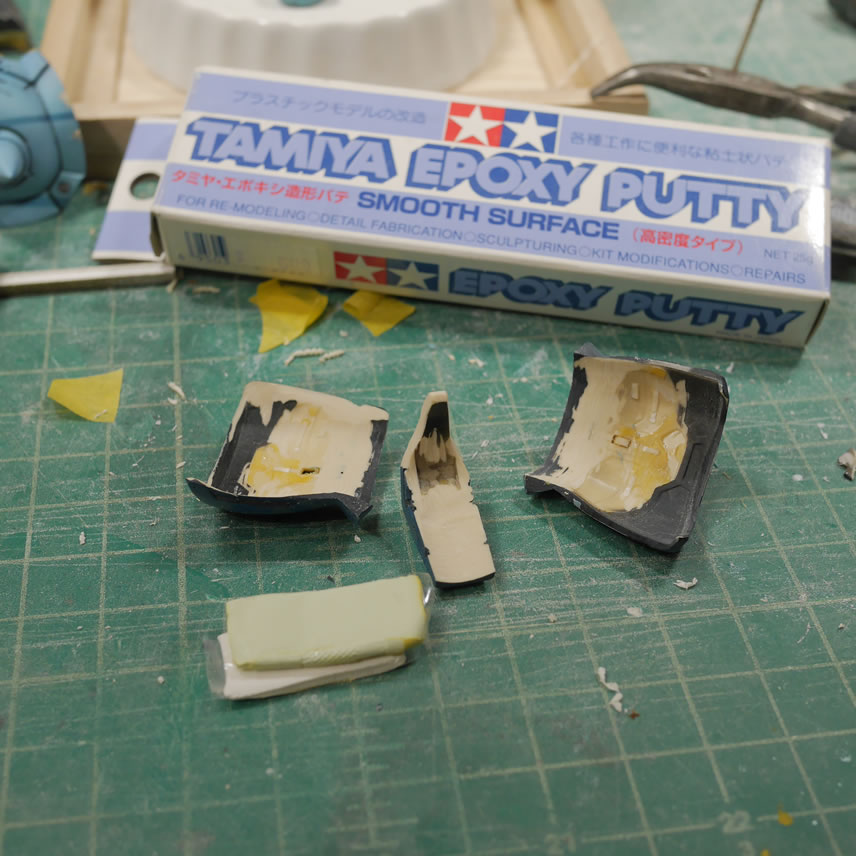
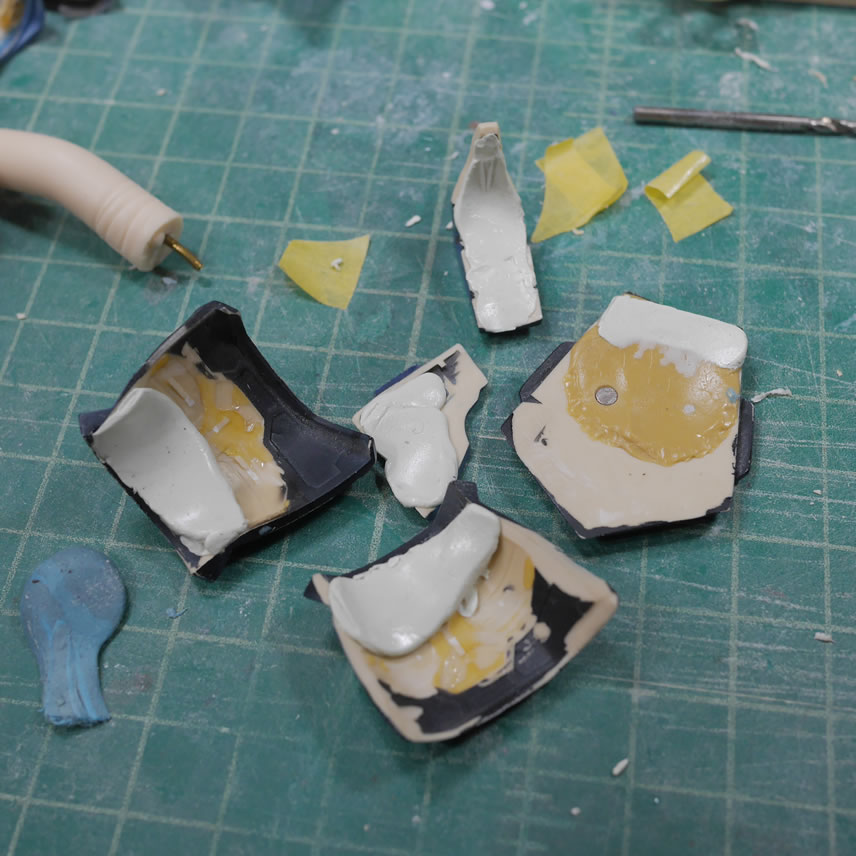
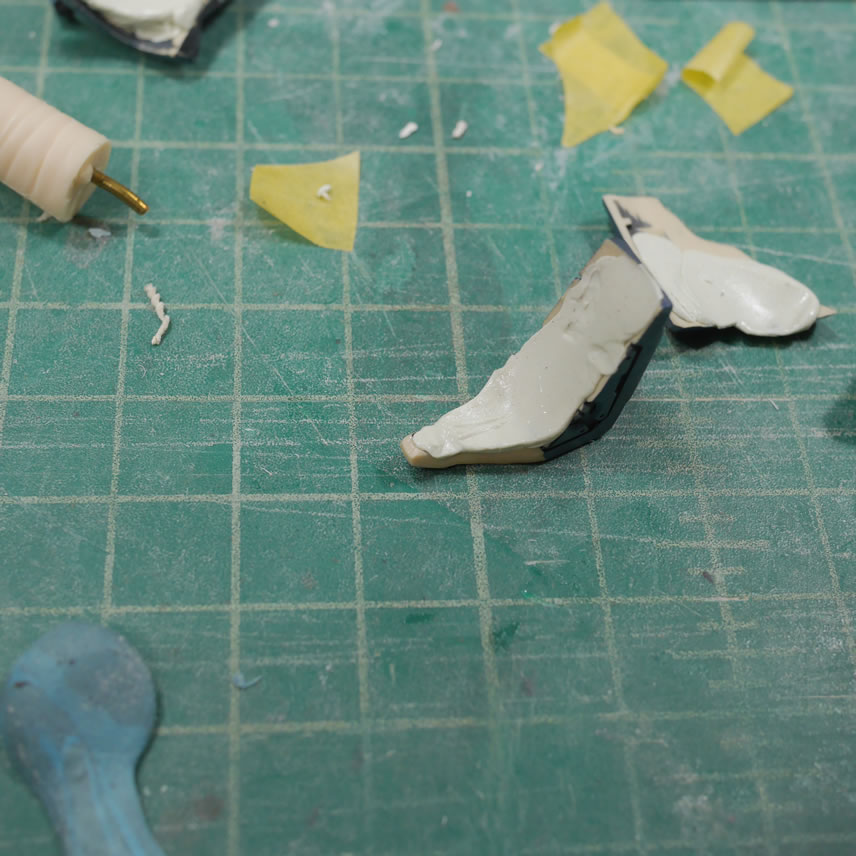
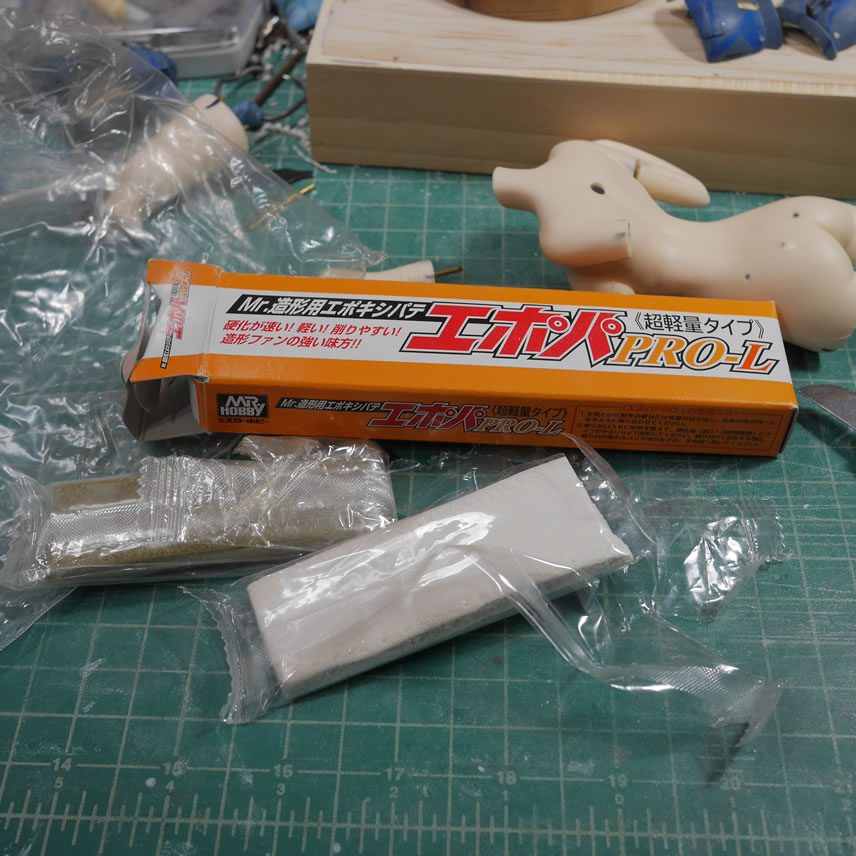
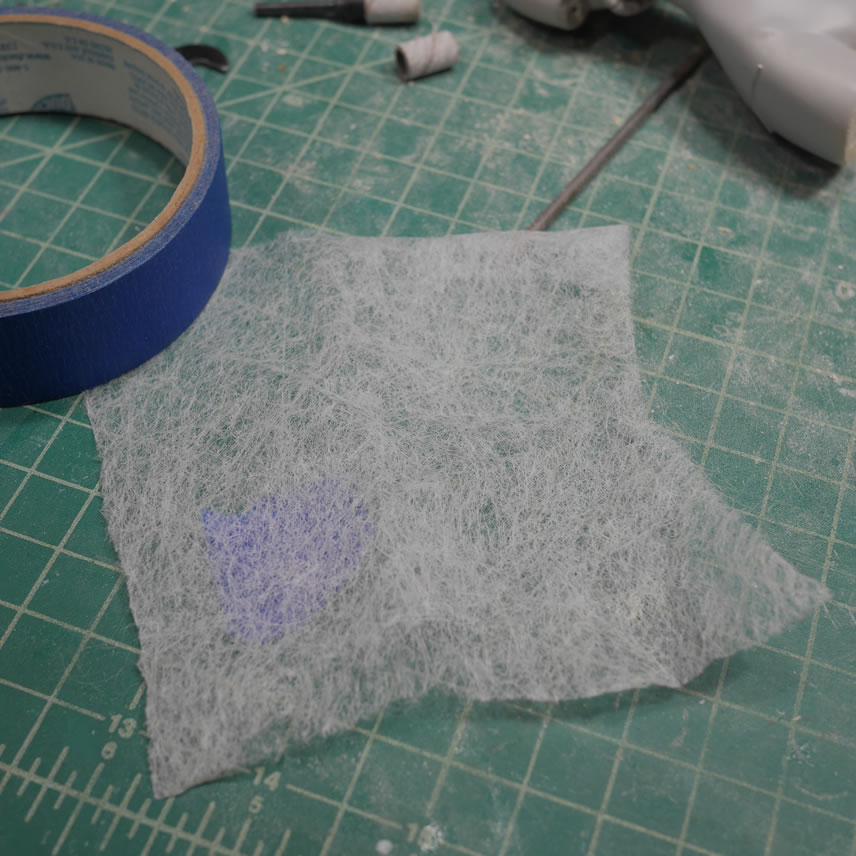
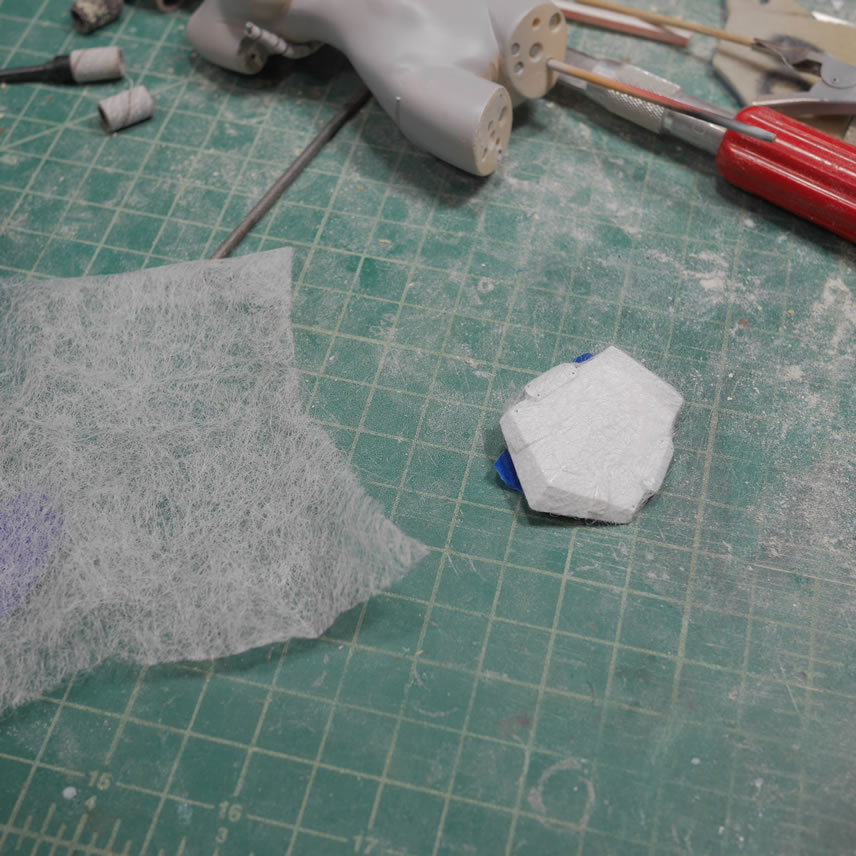
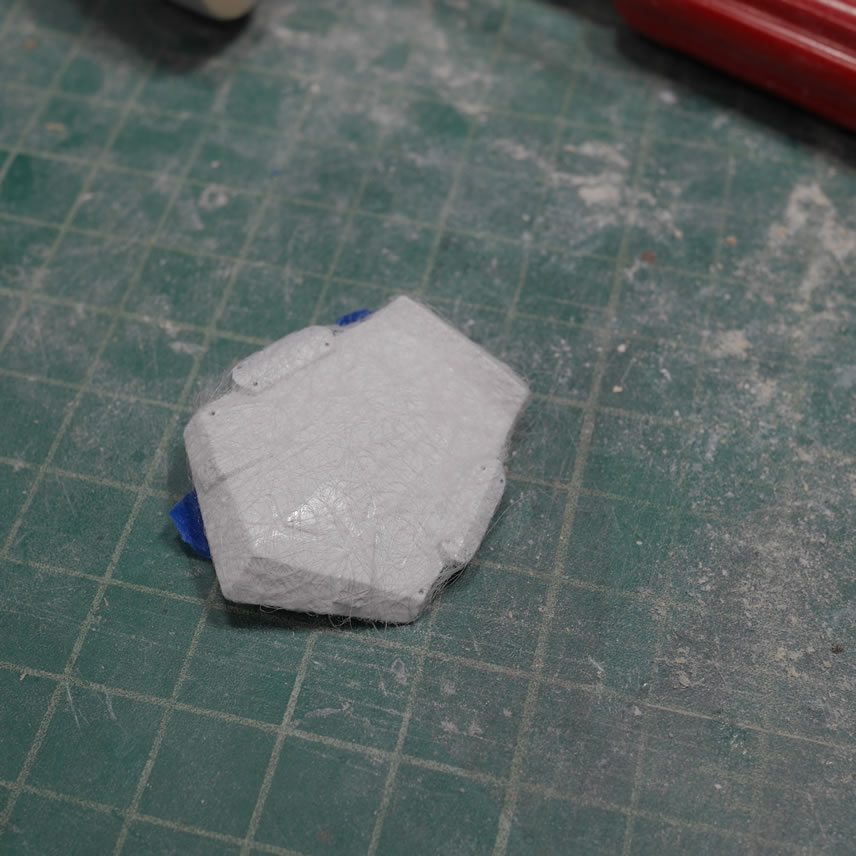
The other thing I started is to apply epoxy putty to the areas that I sanded down on the Gouf’s armor. Some vaseline applied to the body keeps the putty from sticking and pressing the parts together, I get a better transition from the armor to the main body. I will be doing this with all the armor pieces.

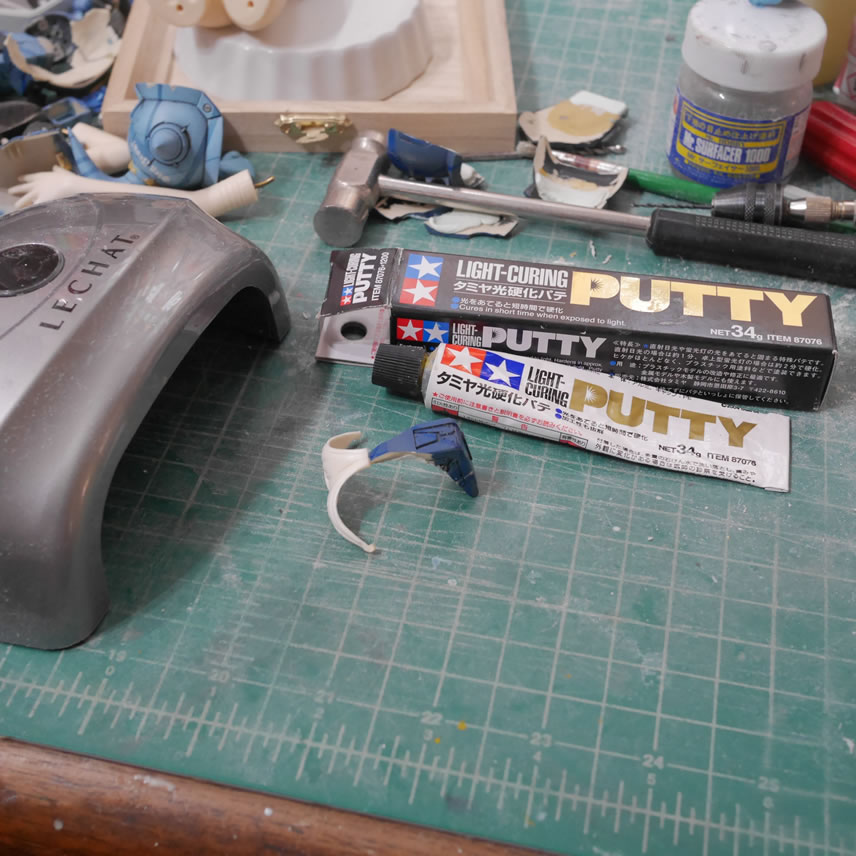
The putty used is tamiya’s 2 part quick type. I guess if I wanted a longer working time, I could use the smooth type which is softer and takes a lot longer to cure, but I have that much more time to work. The next pieces I will probably try out the smooth type and see how I like it. The putty is mixed together and pressed into place for the backpack and the rear skirt.
Excess putty is used to repair the over zealously sanded chest piece.
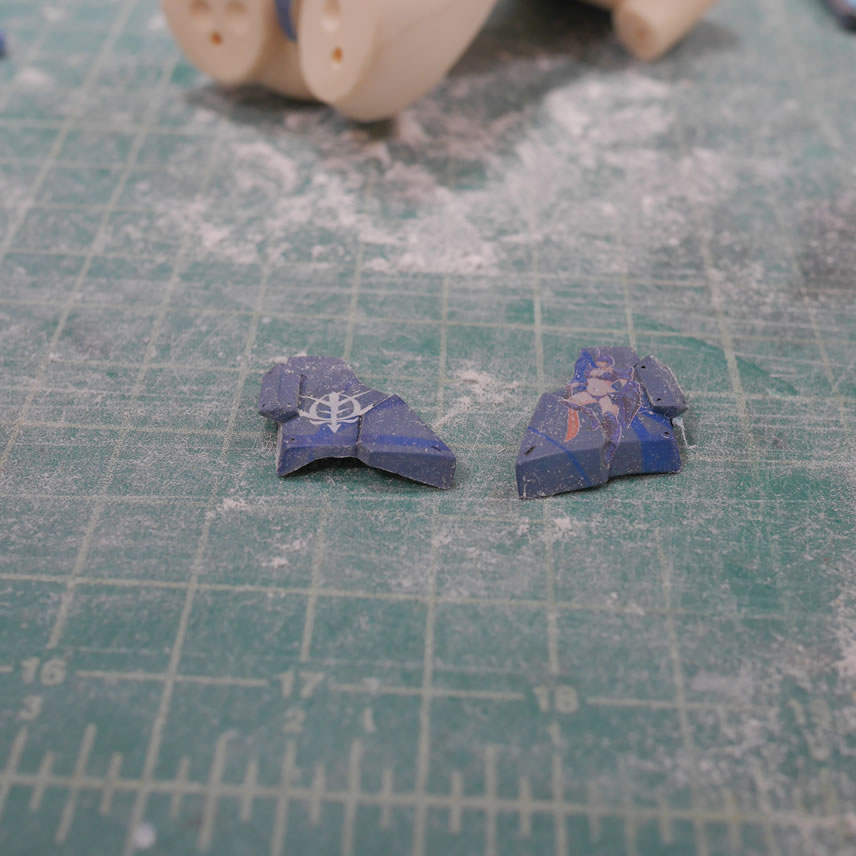
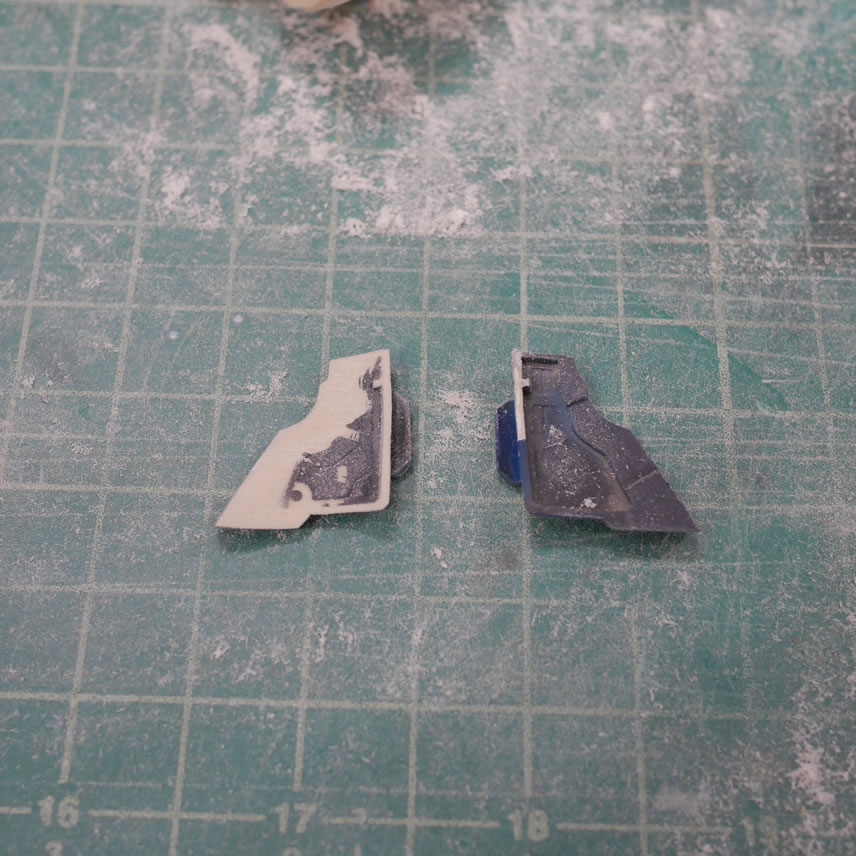
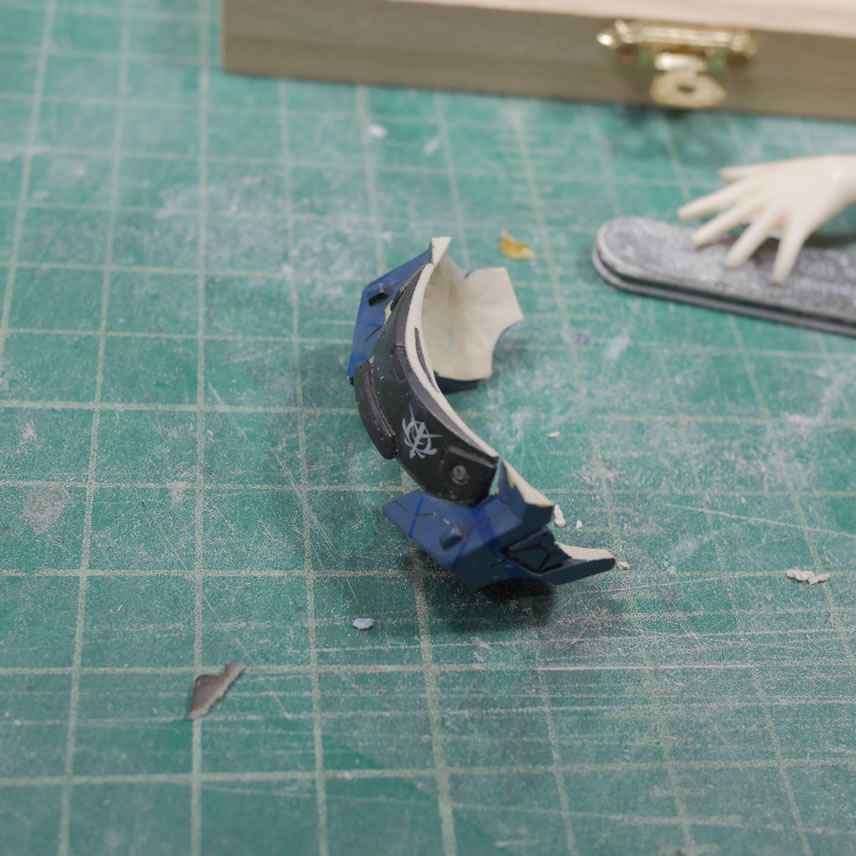
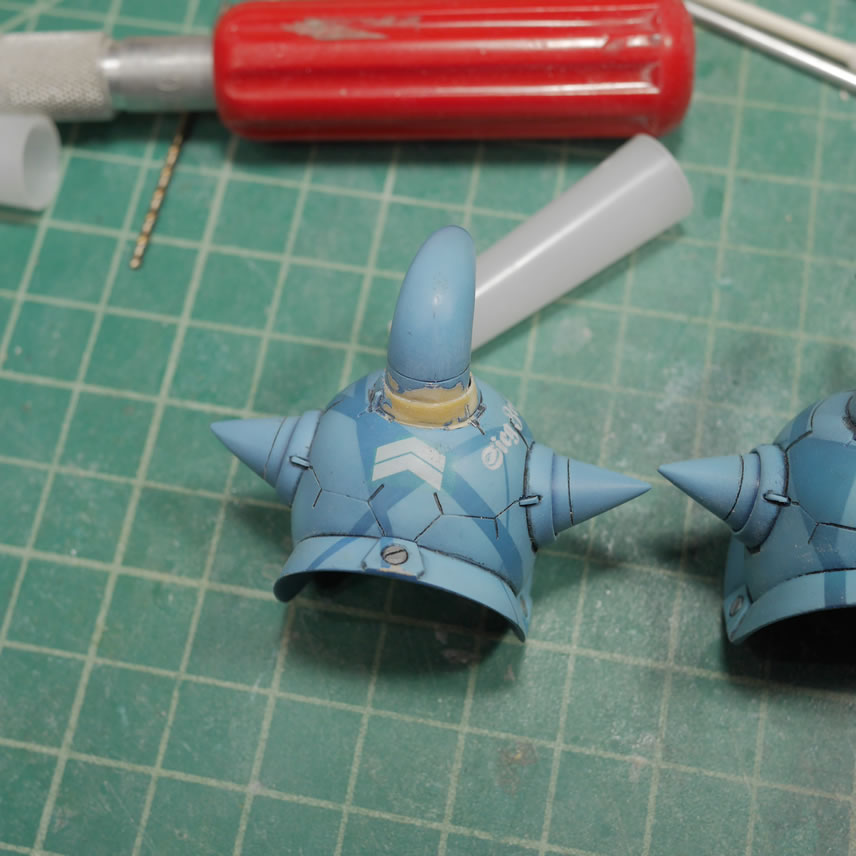
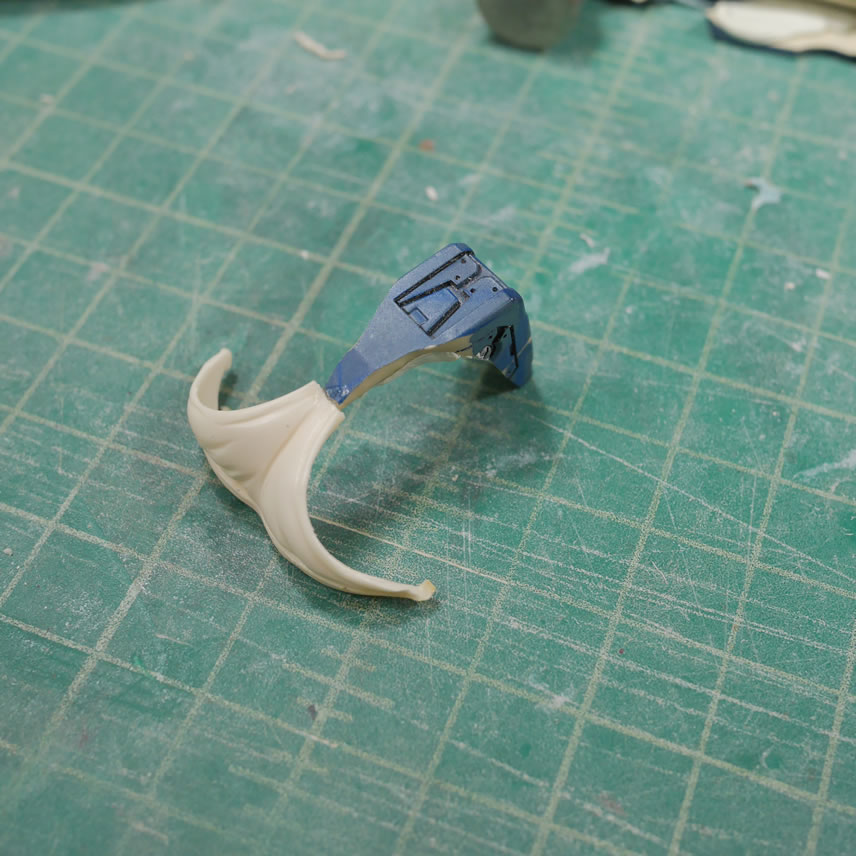
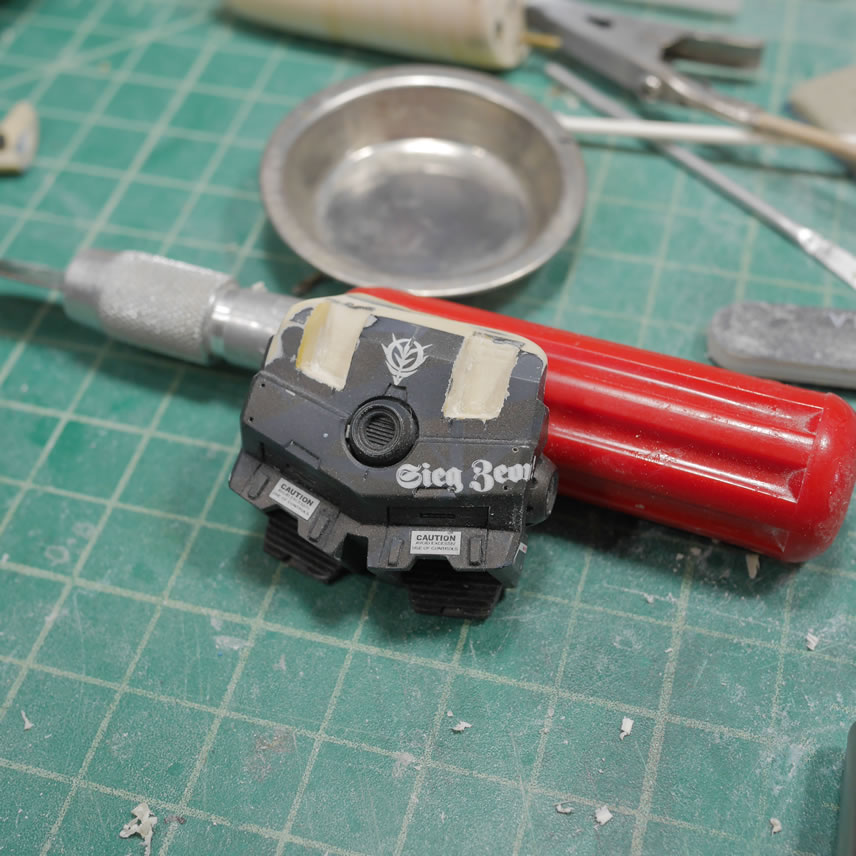
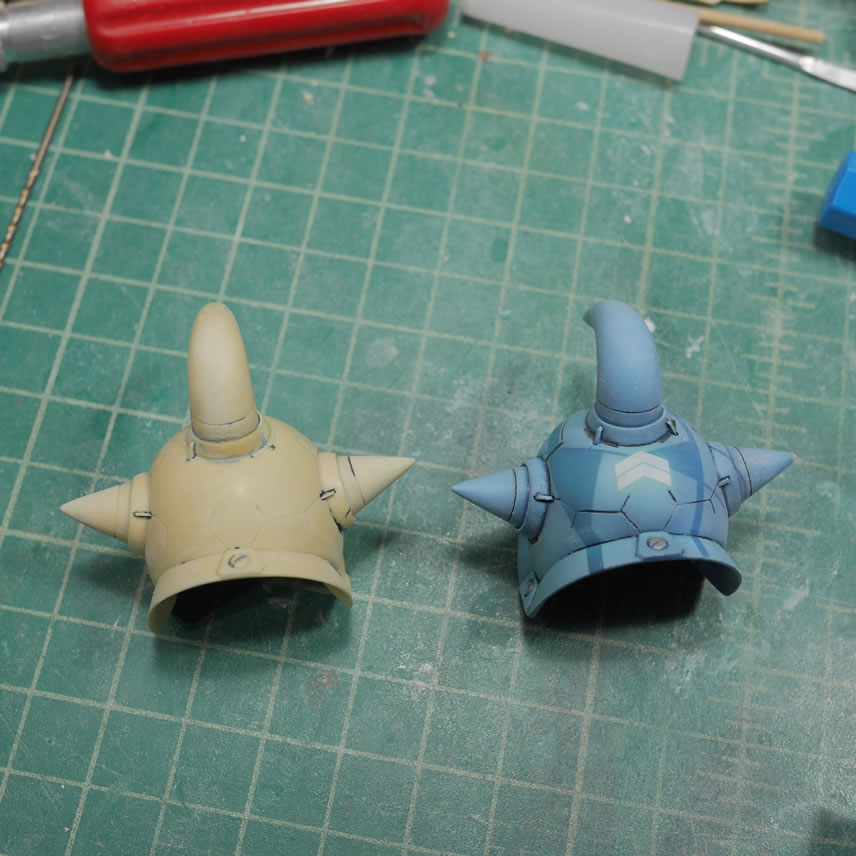
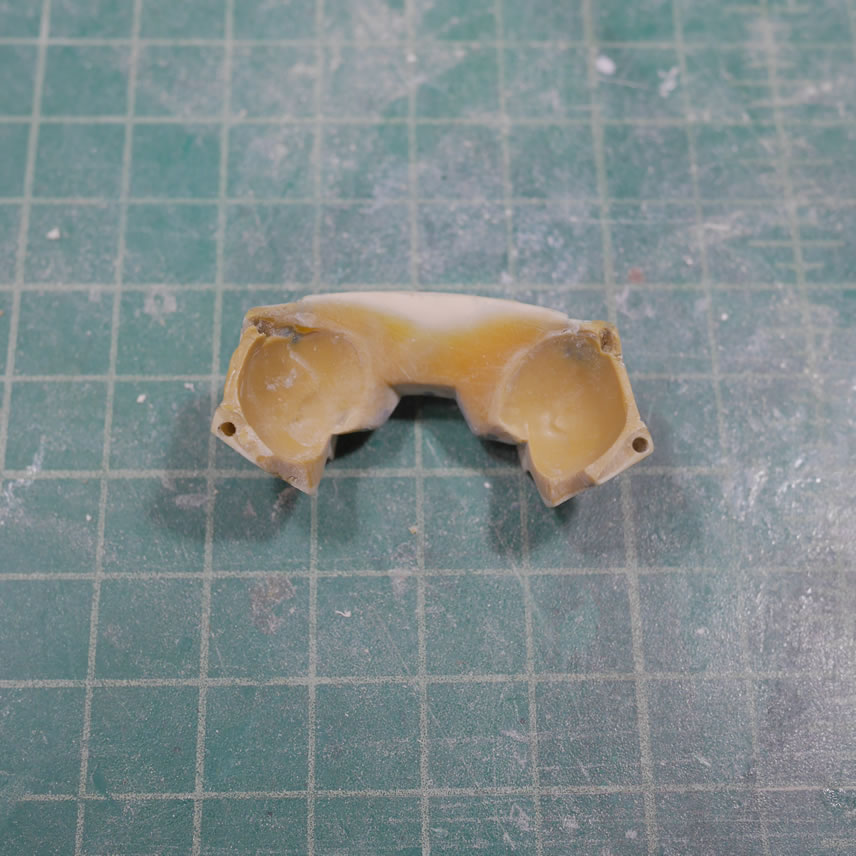
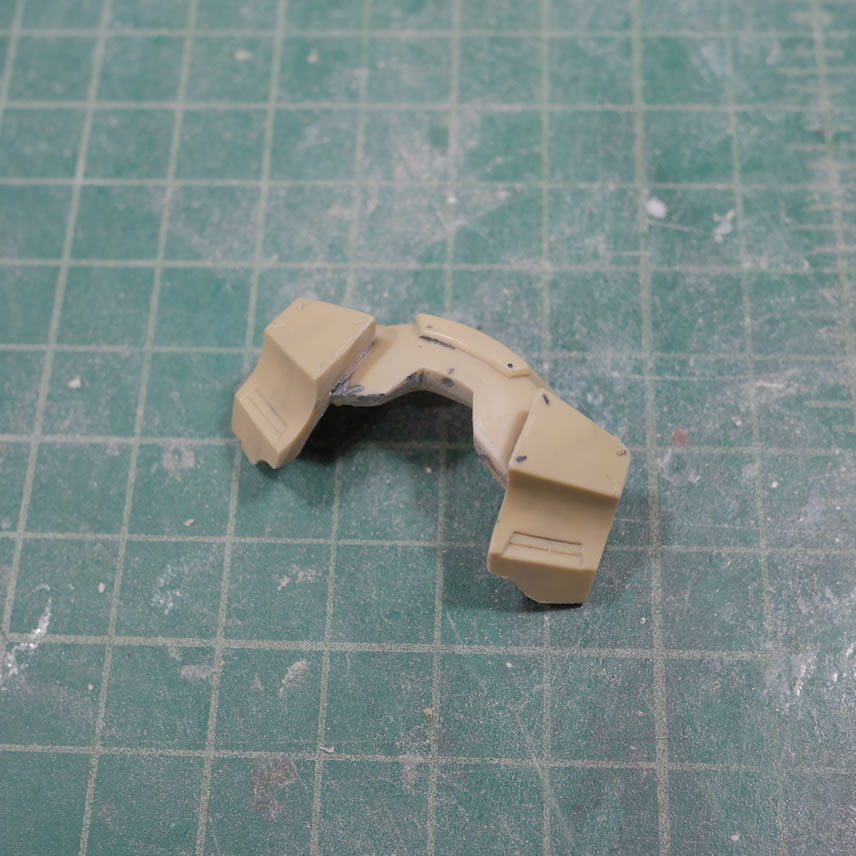
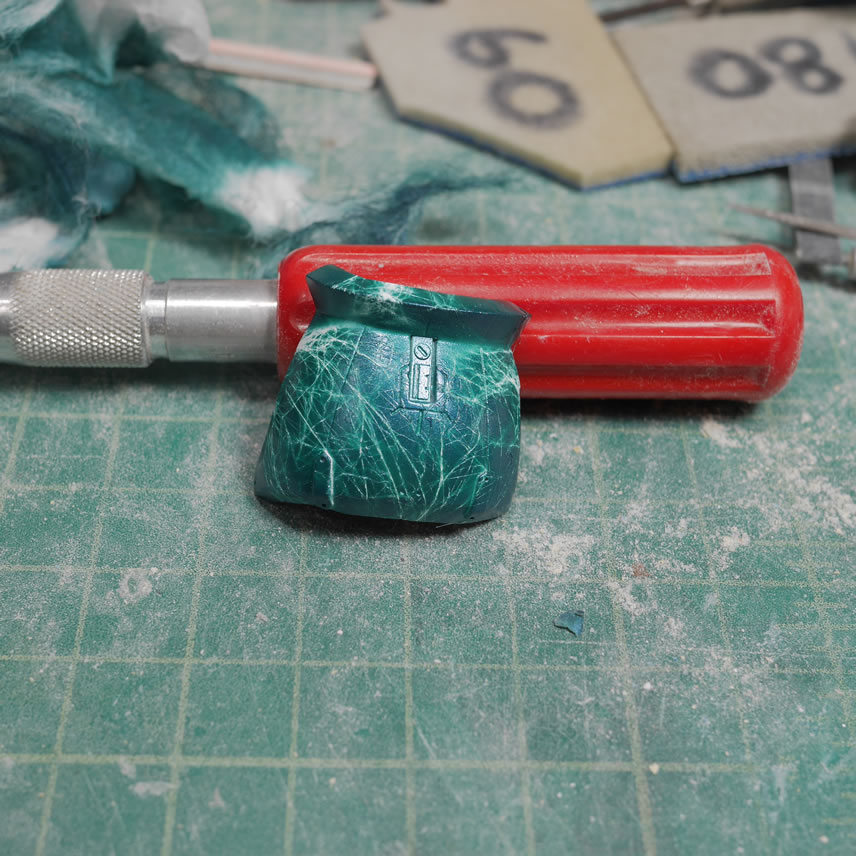
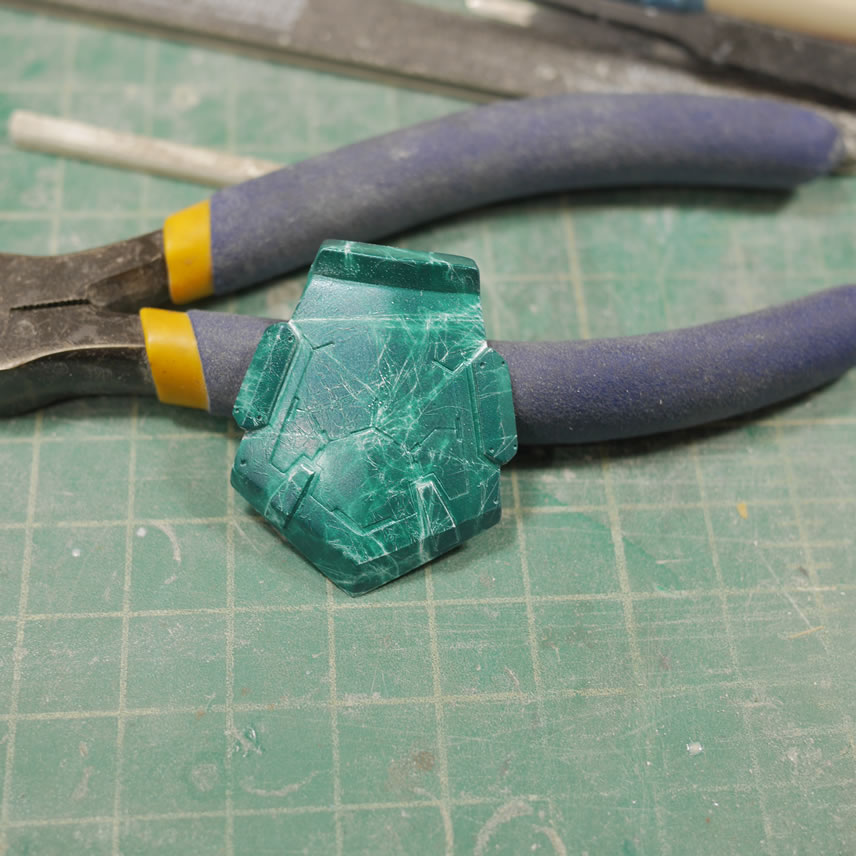
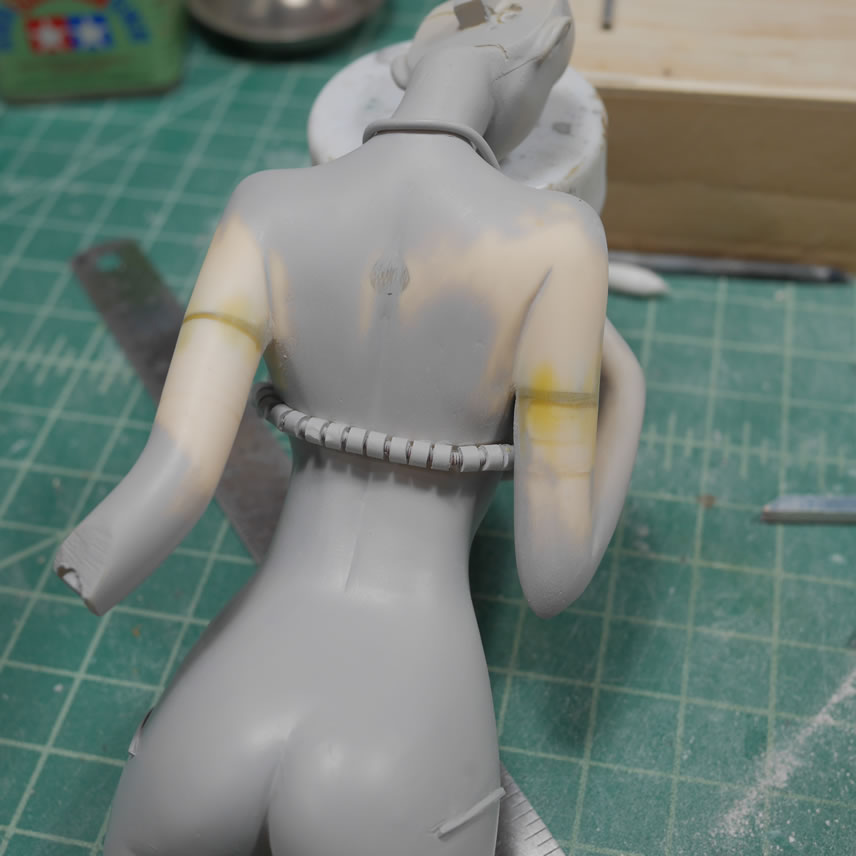
June 30, 2020: Weekly update time. Motivation for this project is still pretty damn high and I’m having a crap ton of fun working on this project. Years ago when this broke, I just didn’t feel like fixing it because it would have required a complete repaint for some of the parts with custom mixed paints I no longer had so getting the color match would have been impossible. Fast forward to last week, I finally started the repair process. Below are comparison pictures for the broken shoulder piece. The curved spike broke off the pauldron. The spike was glued back and epoxy putty is applied when I first started working on the project.
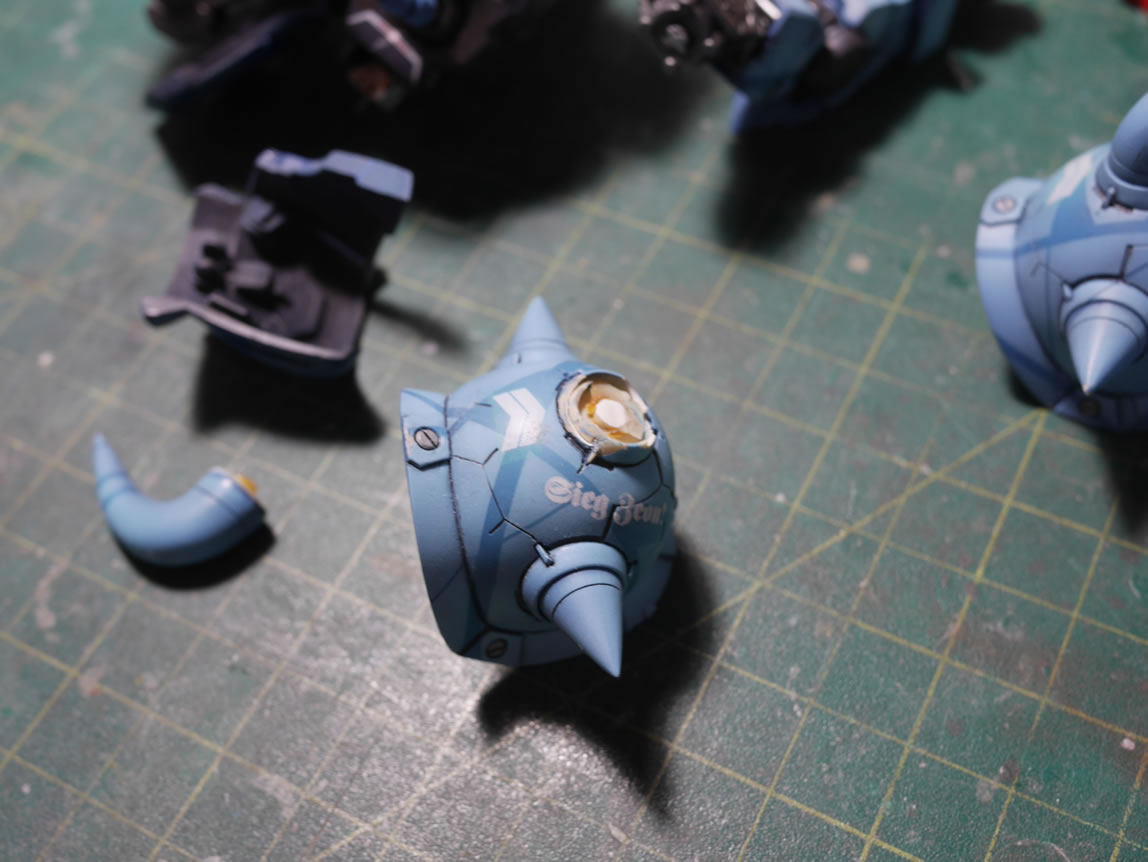
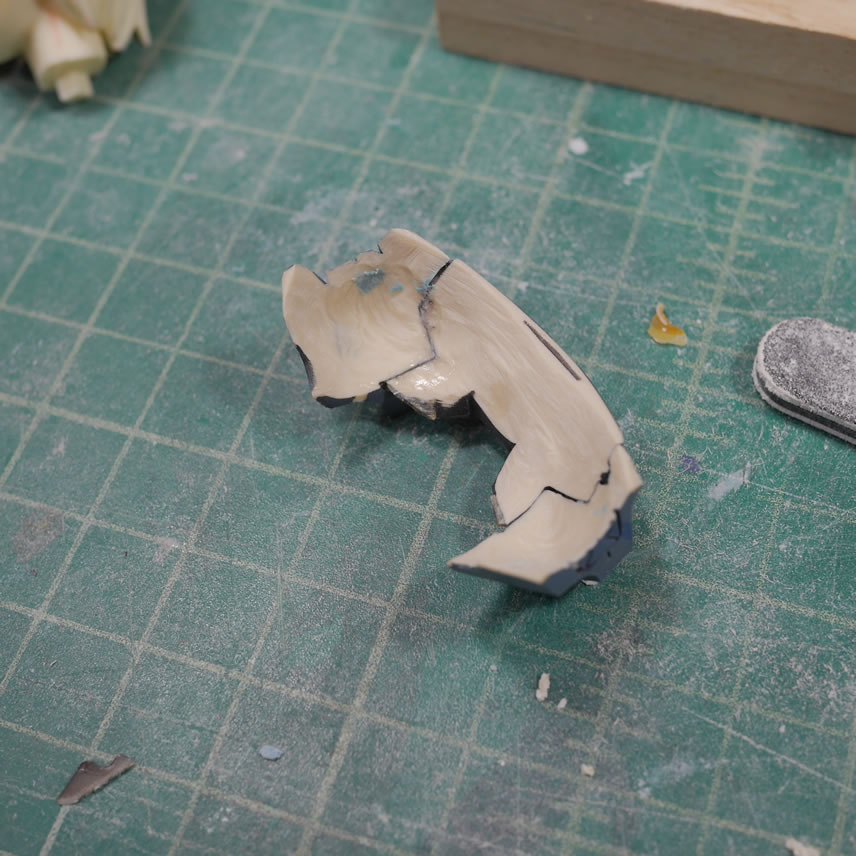
Once sanded down it starts to look close to the original. The spike insert area also had a little bit of a space, so that was scribed in with some BMC chisels. There are some detail bits that were lost on the break, so a small piece of styrene works to repaint that area. Not too difficult a fix, but a little labor intensive.
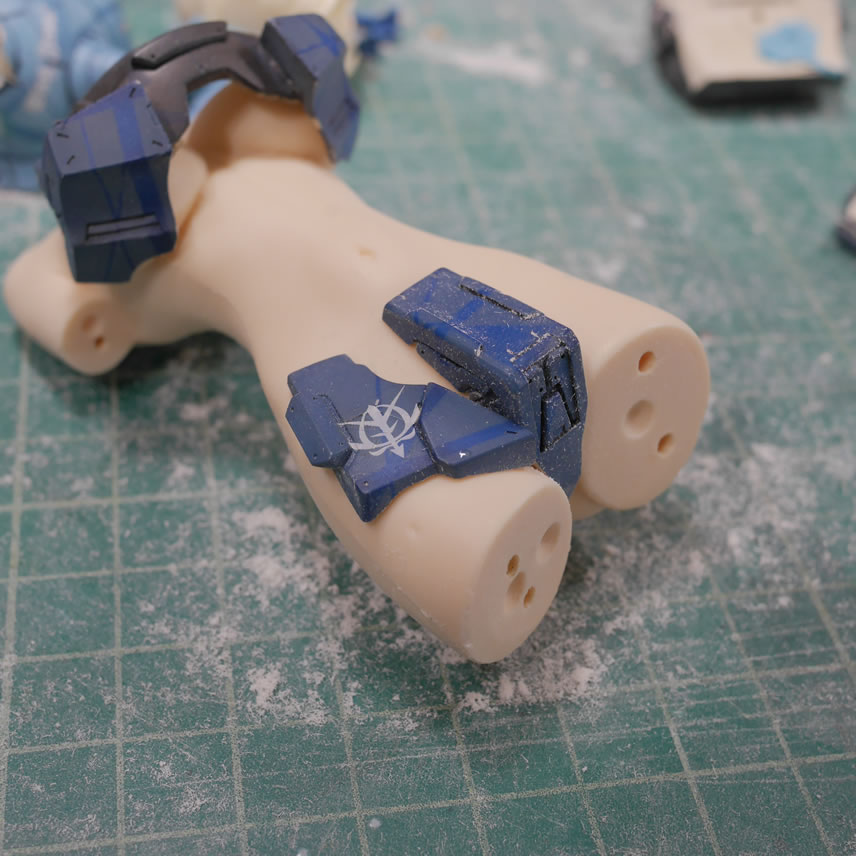
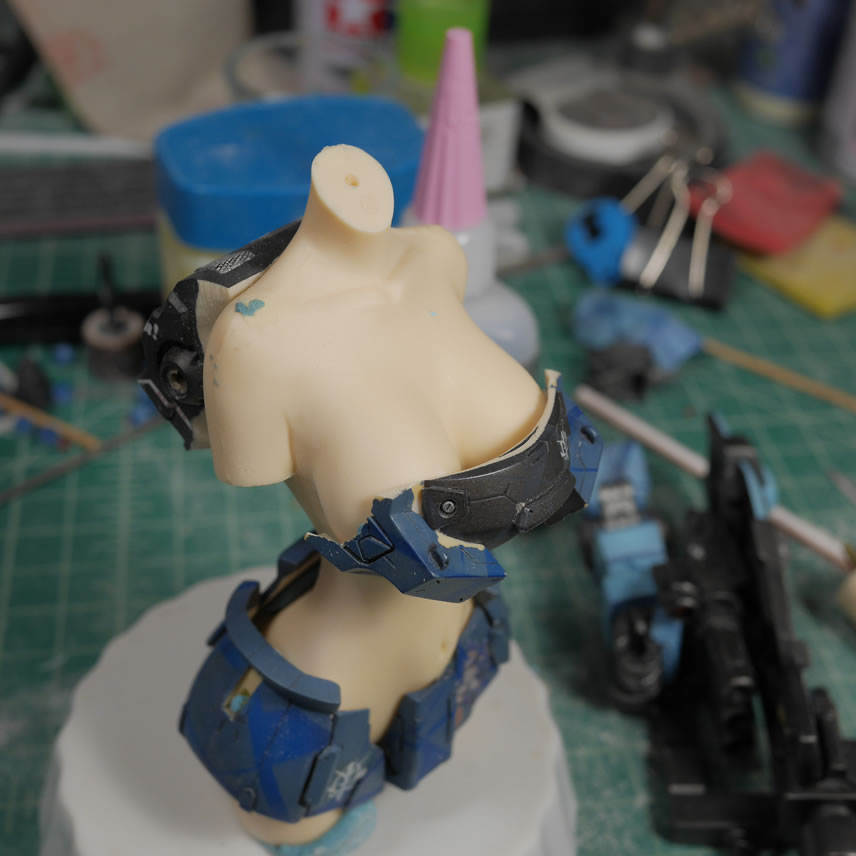
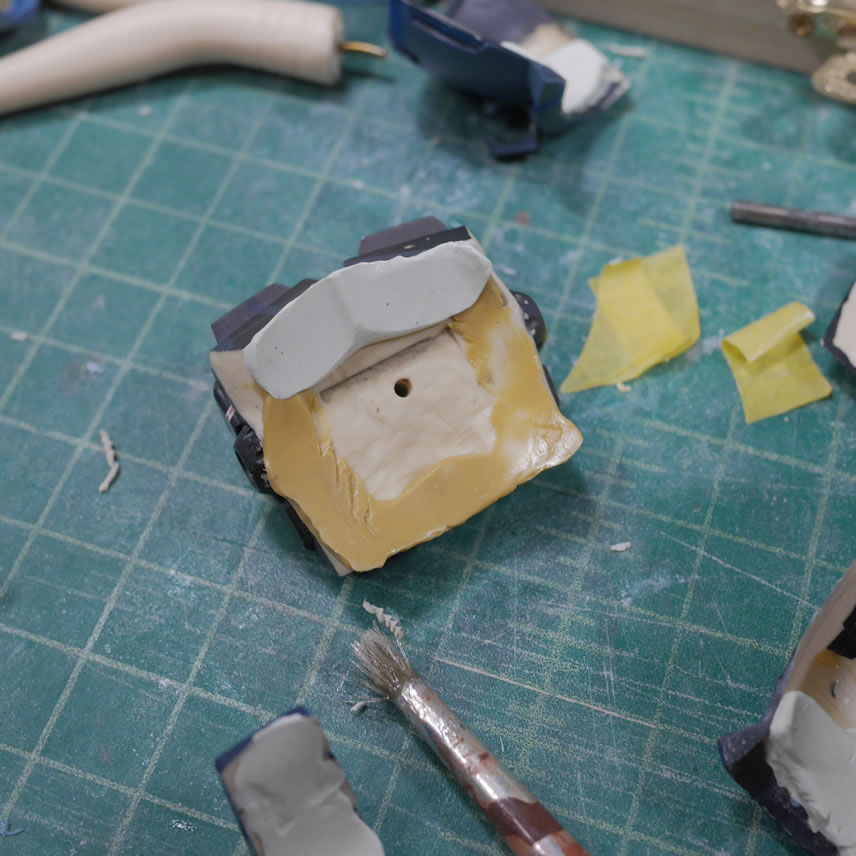
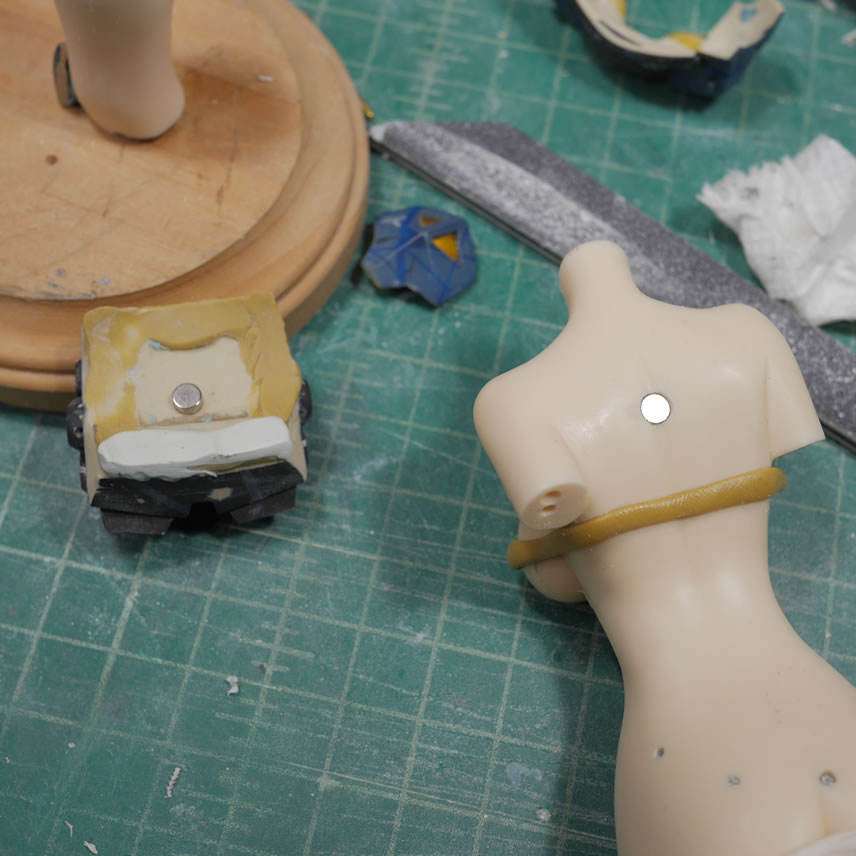
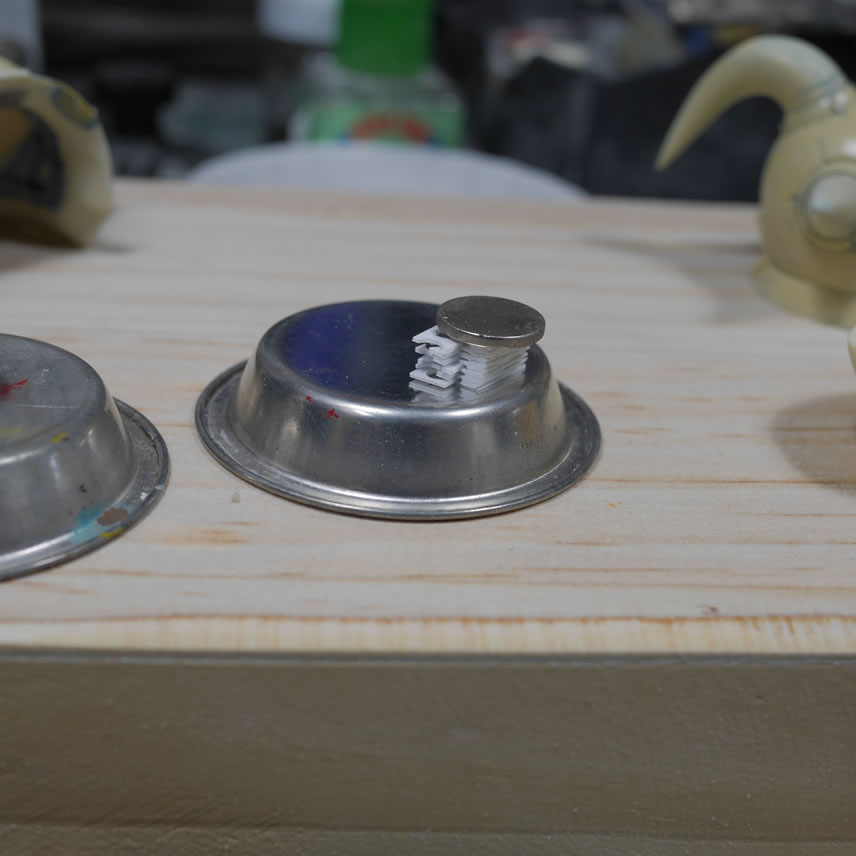
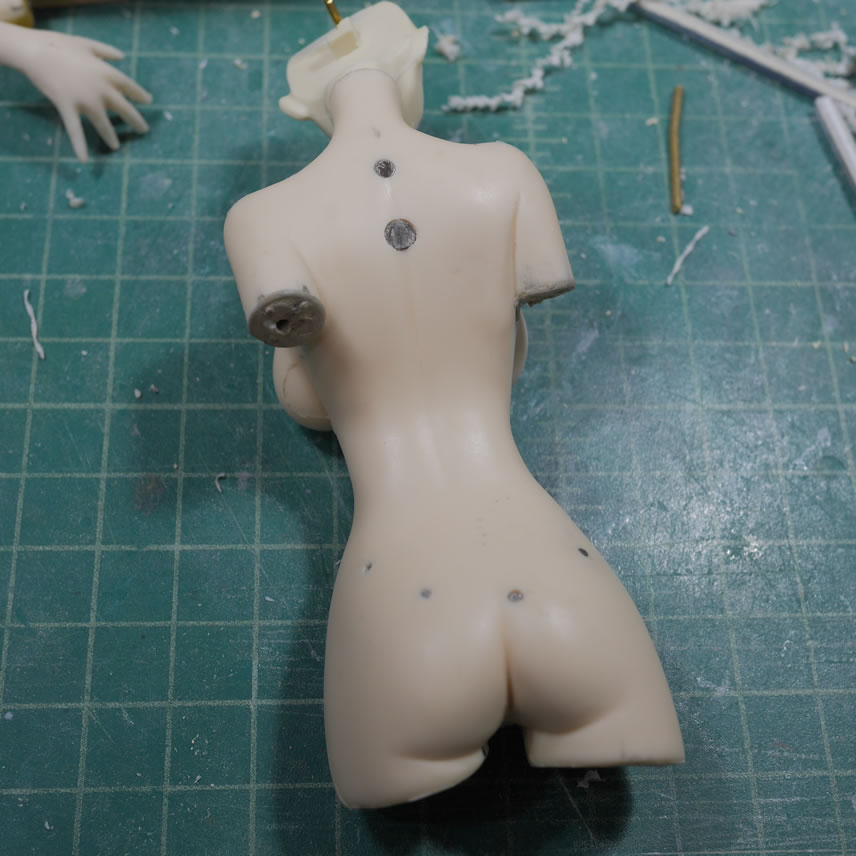
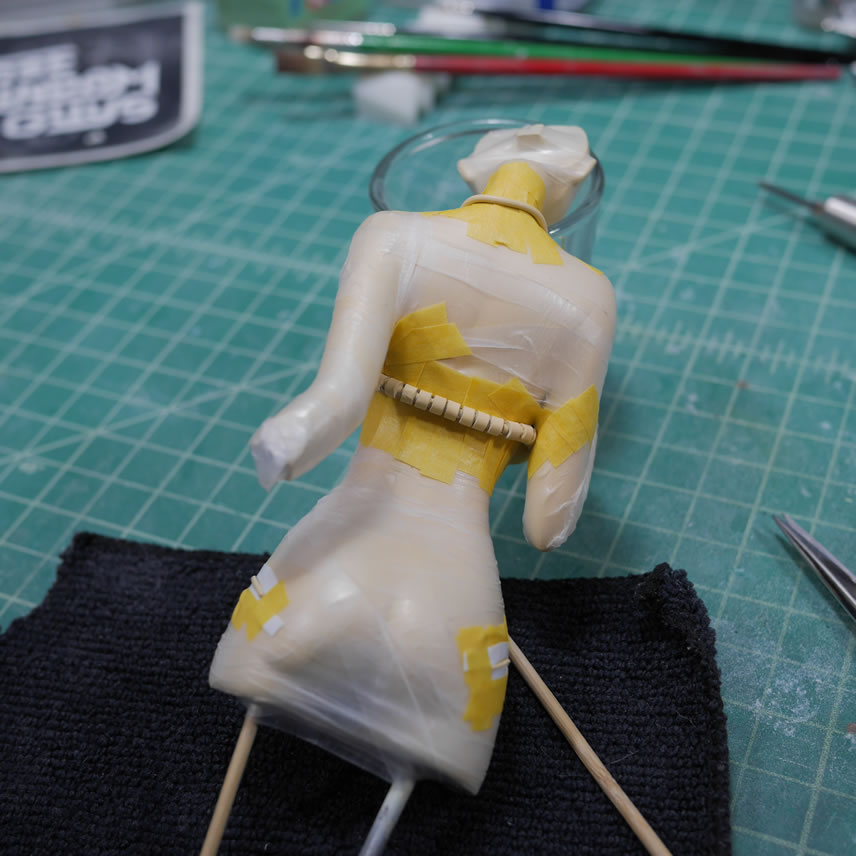
Working on the skirt and getting the correct position with the different pieces was a pain in the butt because things kept slipping. Using sticky tack works, but the skirt pieces are not flush to the figure kit, so it’s not exact. With the pieces flush against the figure kit, I just drilled holes through the skirt pieces and into the body. This creates a perfectly aligned area for adding magnets. As the magnets are added, I can continue with the correct placement of the skirt pieces.
Once the skirt pieces are in a good position, I can now add back material so that the parts fit even better against the surface curves of her body. I used smooth type epoxy putty this time instead of the quick type just to change things up. Smooth type also gives me a little more working time in comparison to the quick type. I’m still a bigger fan of quick type over smooth type. Vasaline is painted onto the surface of the body and the puttied parts are pressed against the waxed up surface. This imparts the curvy surface to the underside of the armor pieces and I get a fairly seamless transition from the figure to the armor pieces. A funny little by product of this process is her lower “man in the boat” detail when her new panties were pressed in, I got the mirror details on the panty armor.
The same process is done with the backpack to get a better fit.
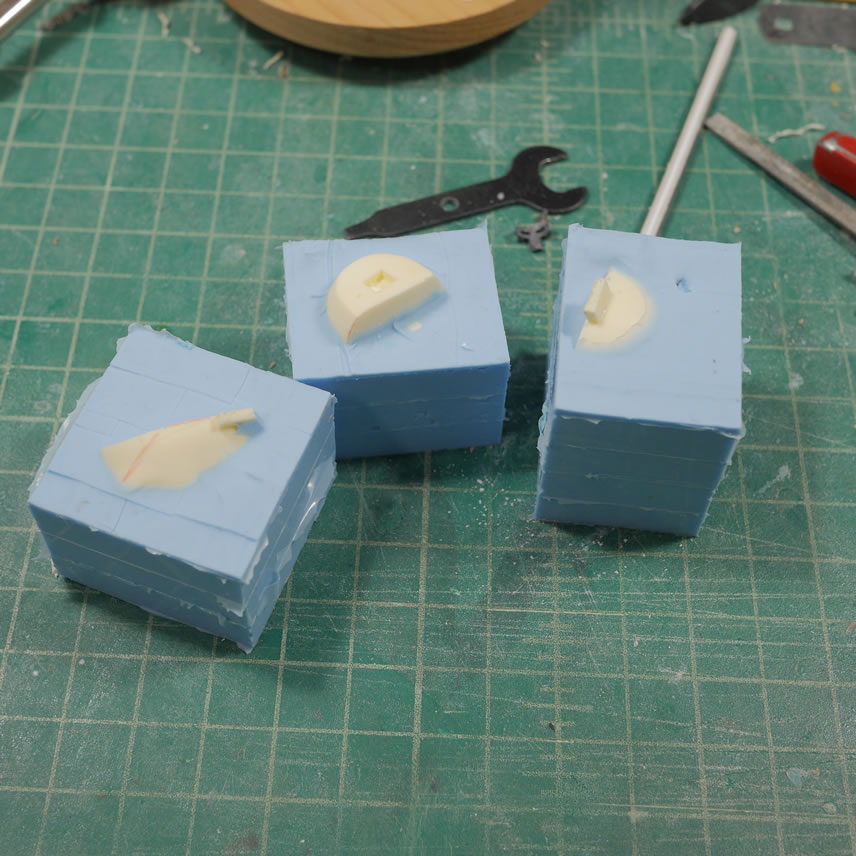
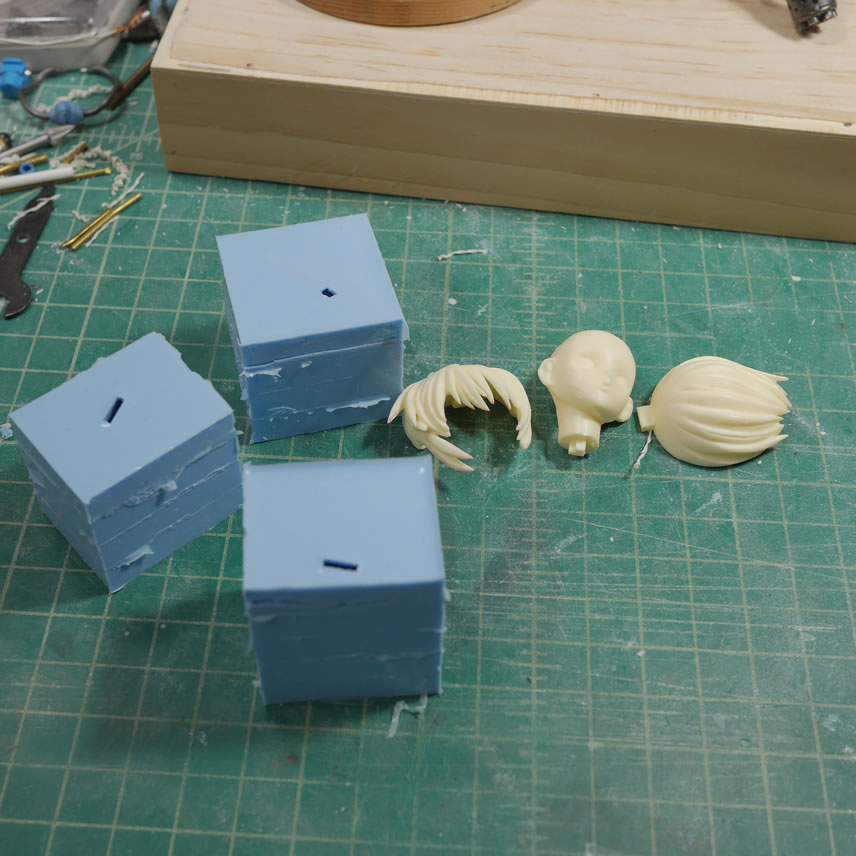
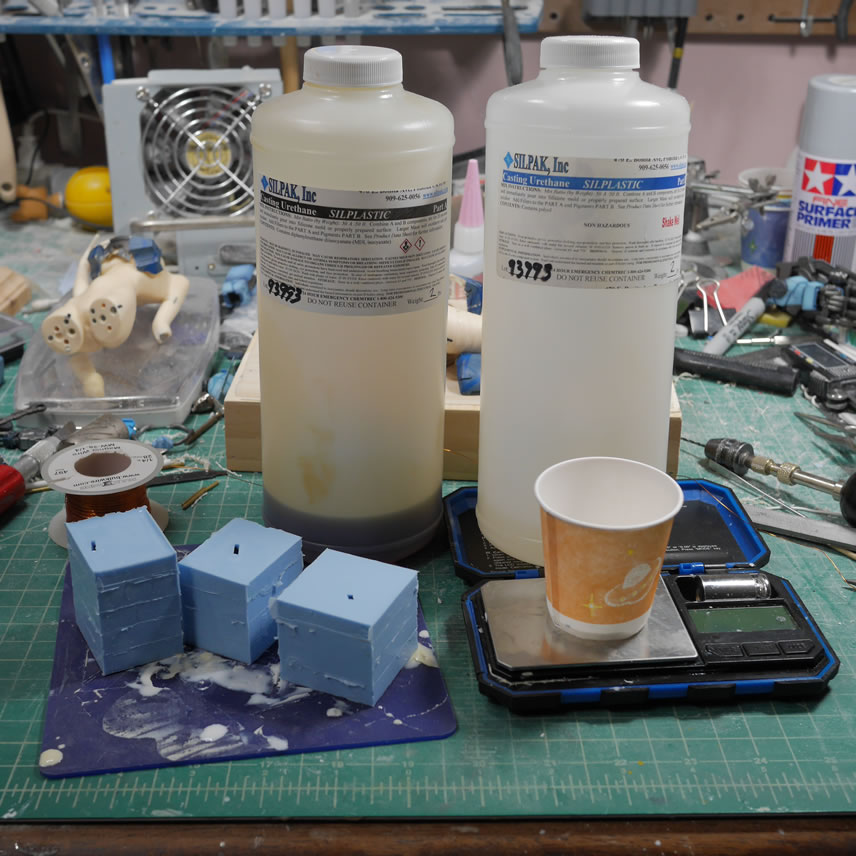
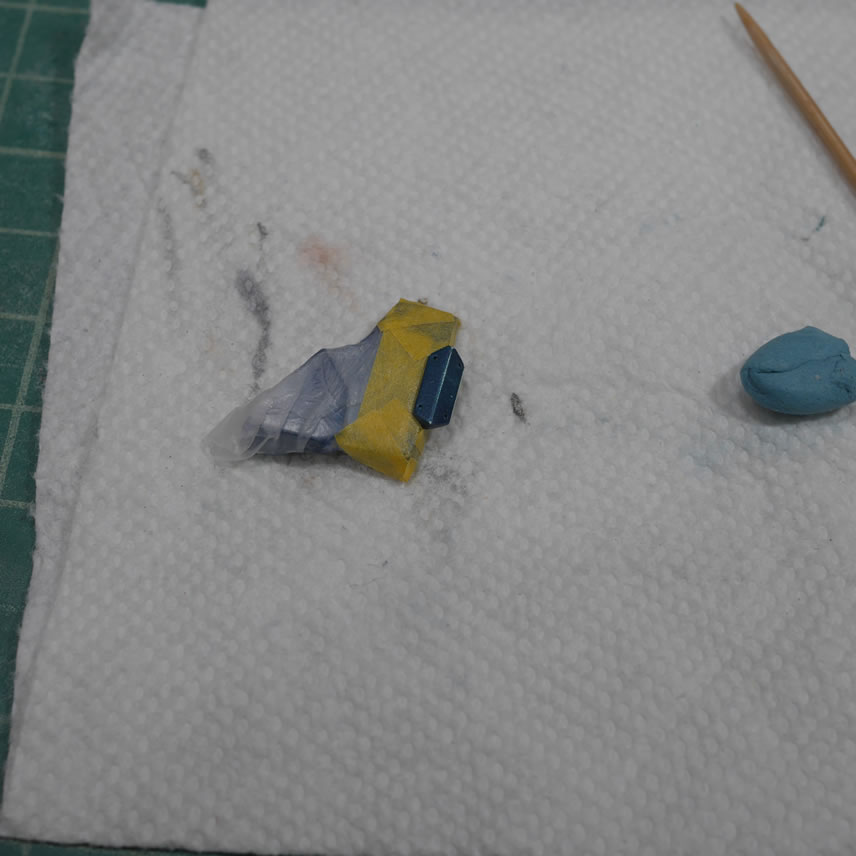
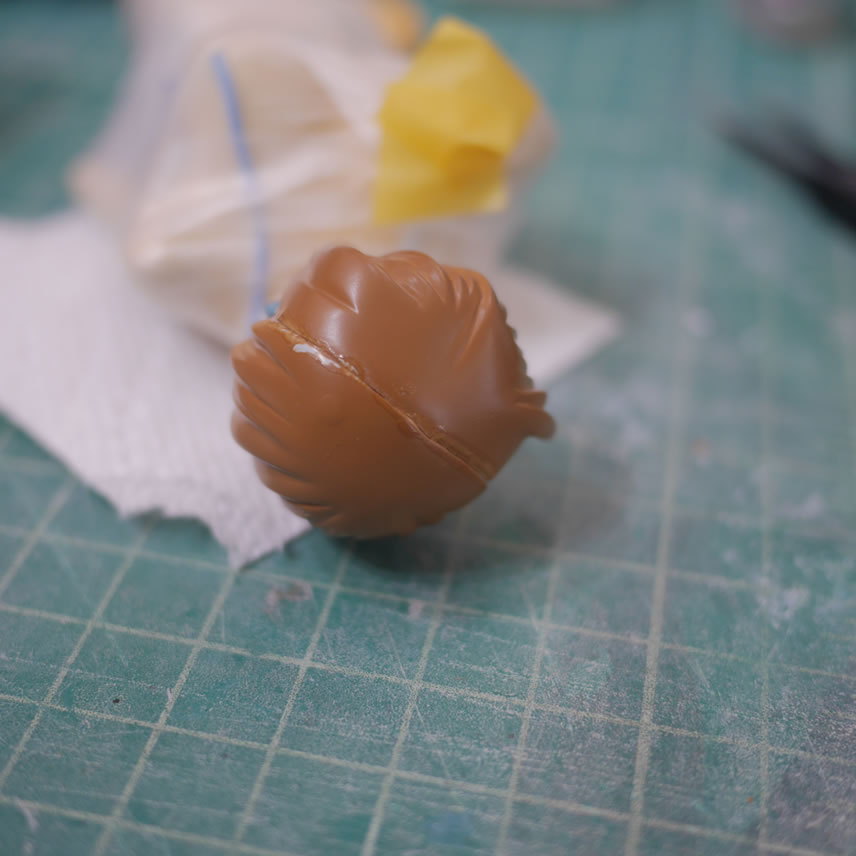
The head and hair came from another kit and since I was only using 3 pieces from that kit, I didn’t want to completely ruin that kit by taking these three parts. I made some lego boxes, added some playdough to the bottom of the boxes that works to hold the parts in place. Then poured silicone into the boxes.
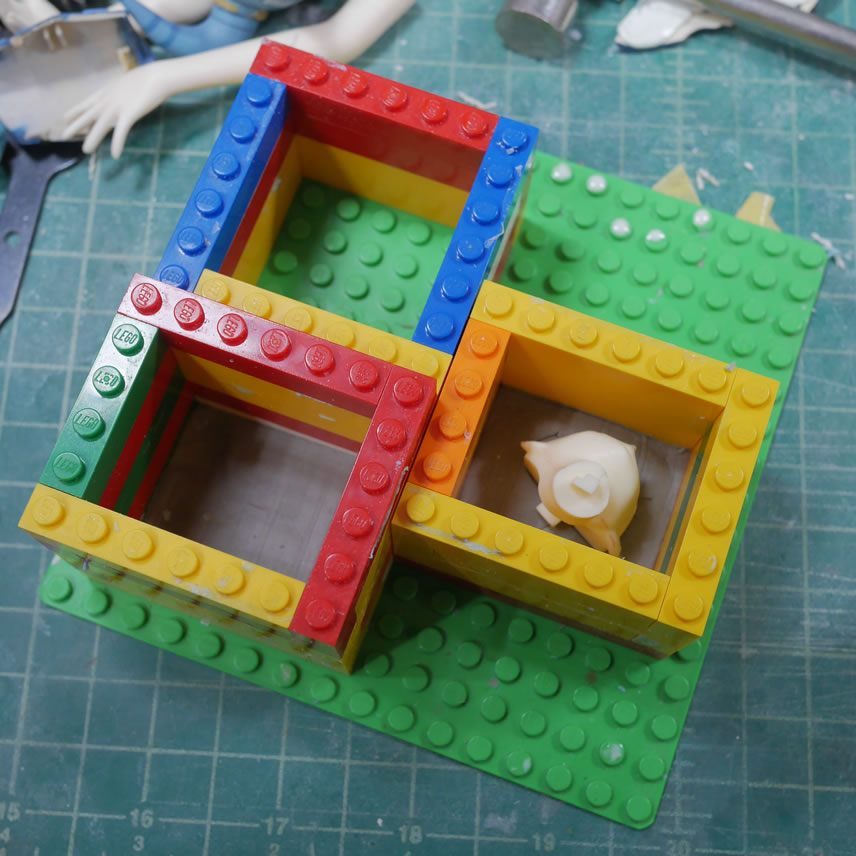

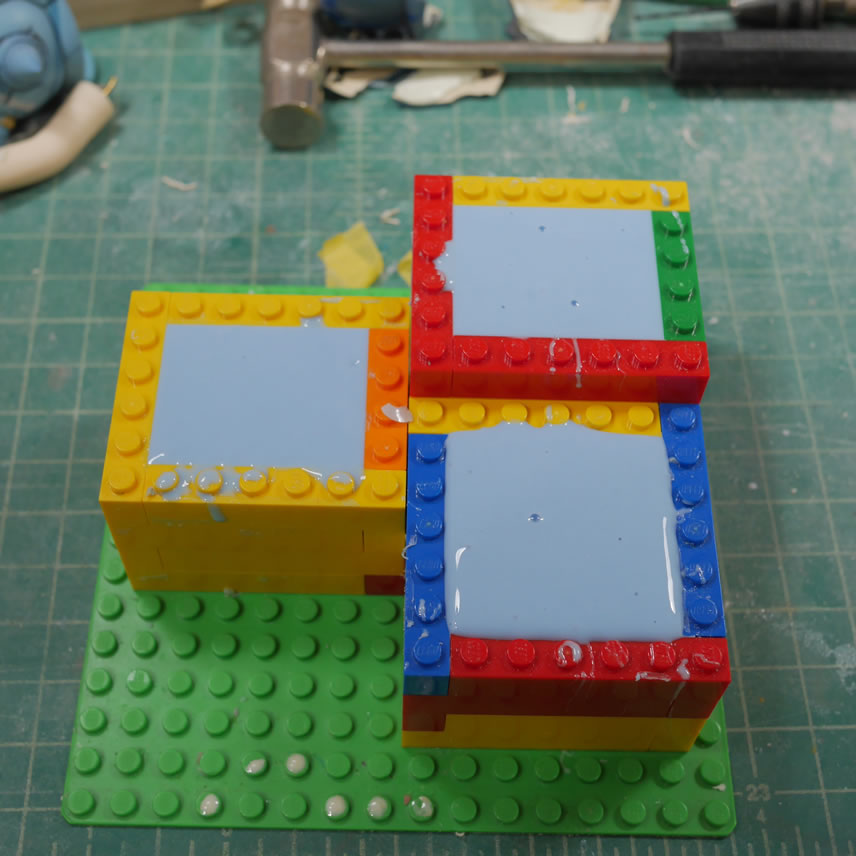
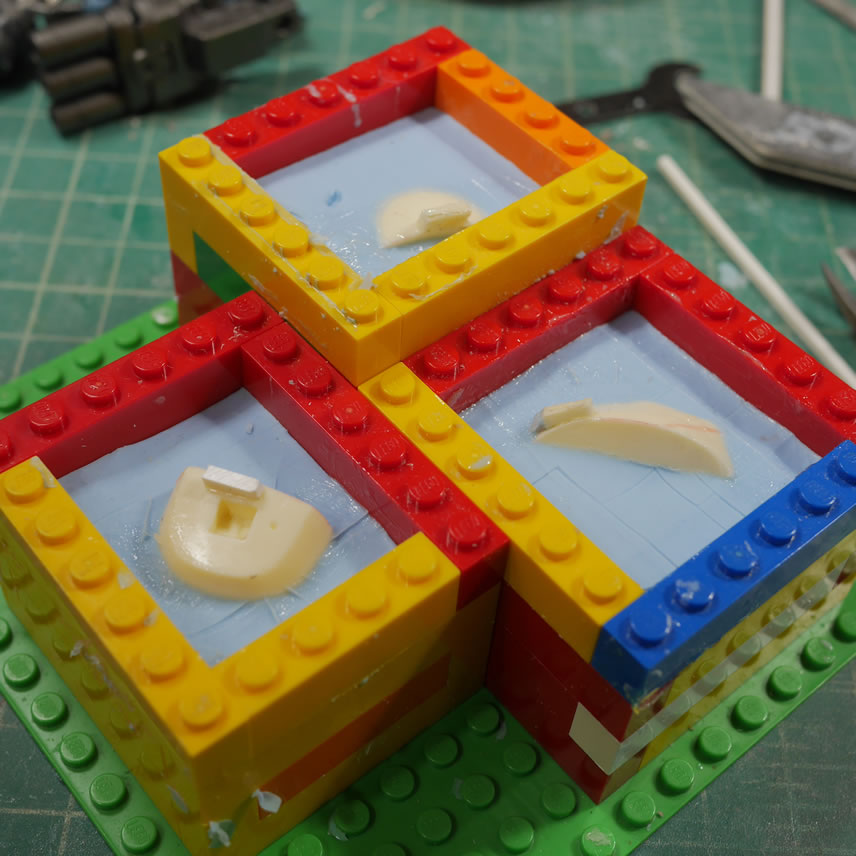
I like working with two part molds even though they have some drawbacks. The first part of the molds were removed and cleaned up to remove any residual playdough. The lego boxes are rebuilt around the molds and the second layer of silicone is poured. A little vaseline applied to half the top areas ensures that the mold stays two parts.
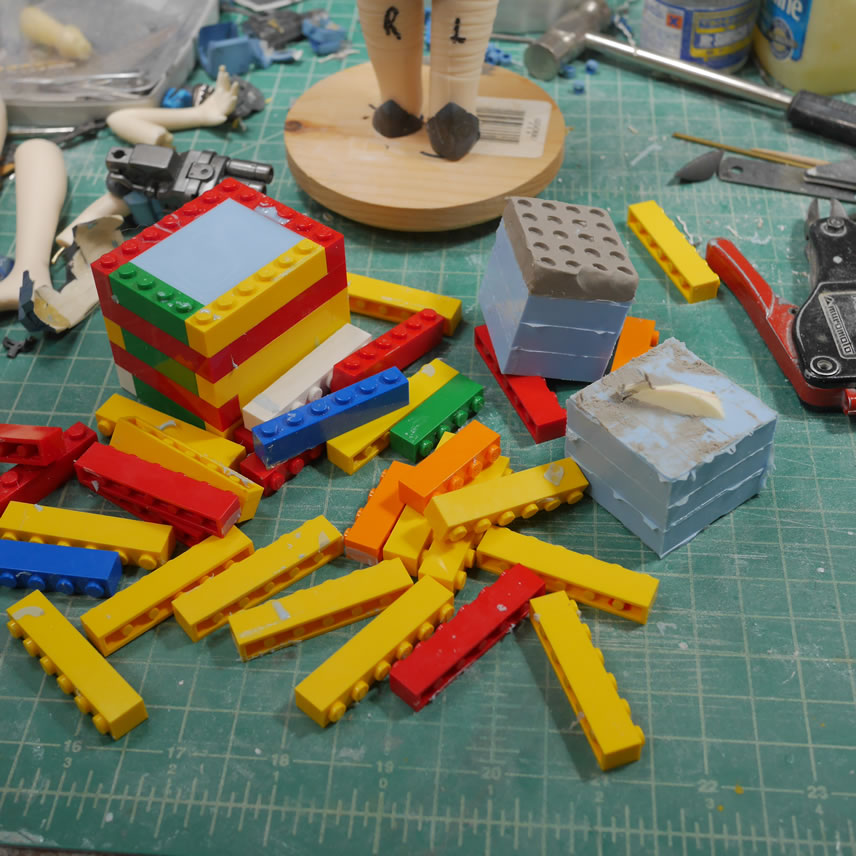
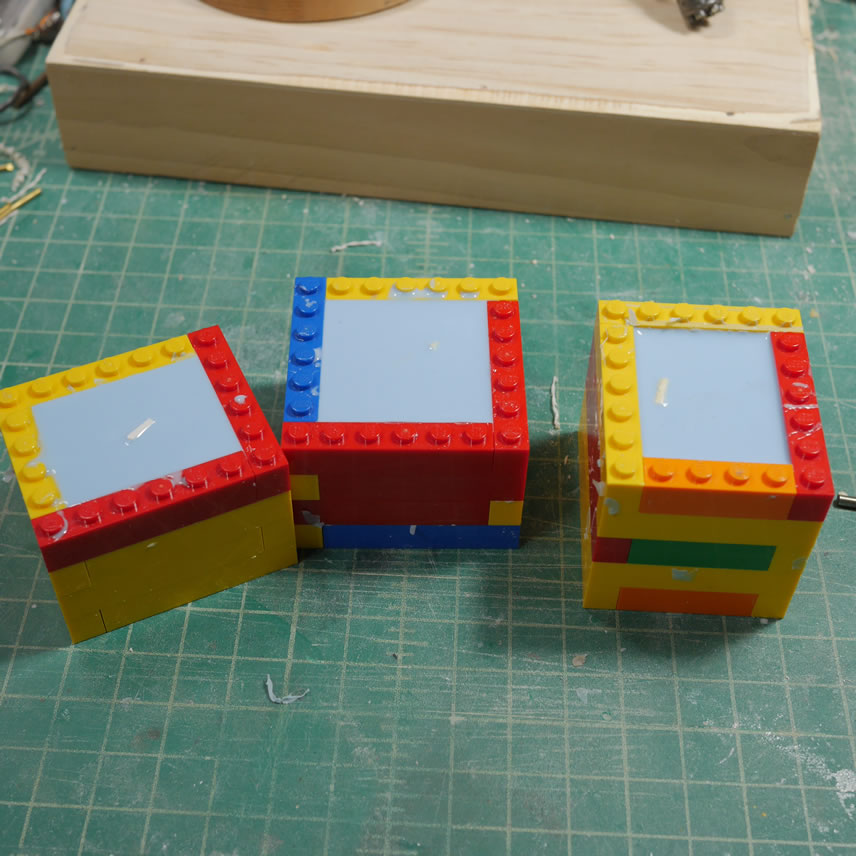
With the mold setup, I can remove the originals and prep the molds for casting. I used a 5 minute urethane resin that allows a little more work time than my usual 3 minute. And then I have fairly perfect copies.
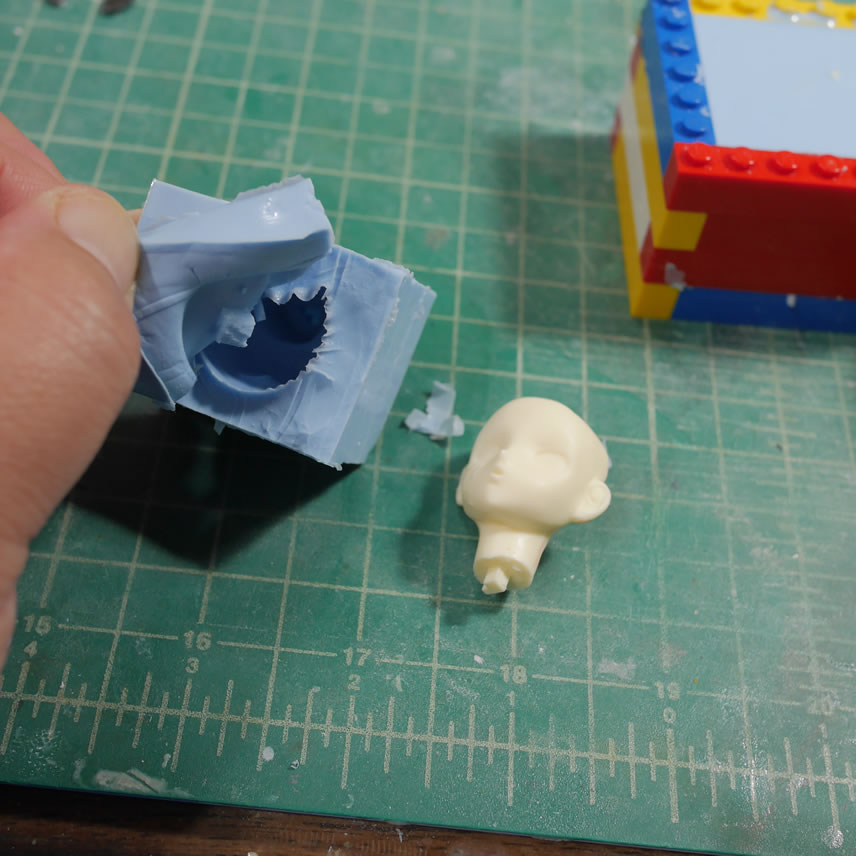
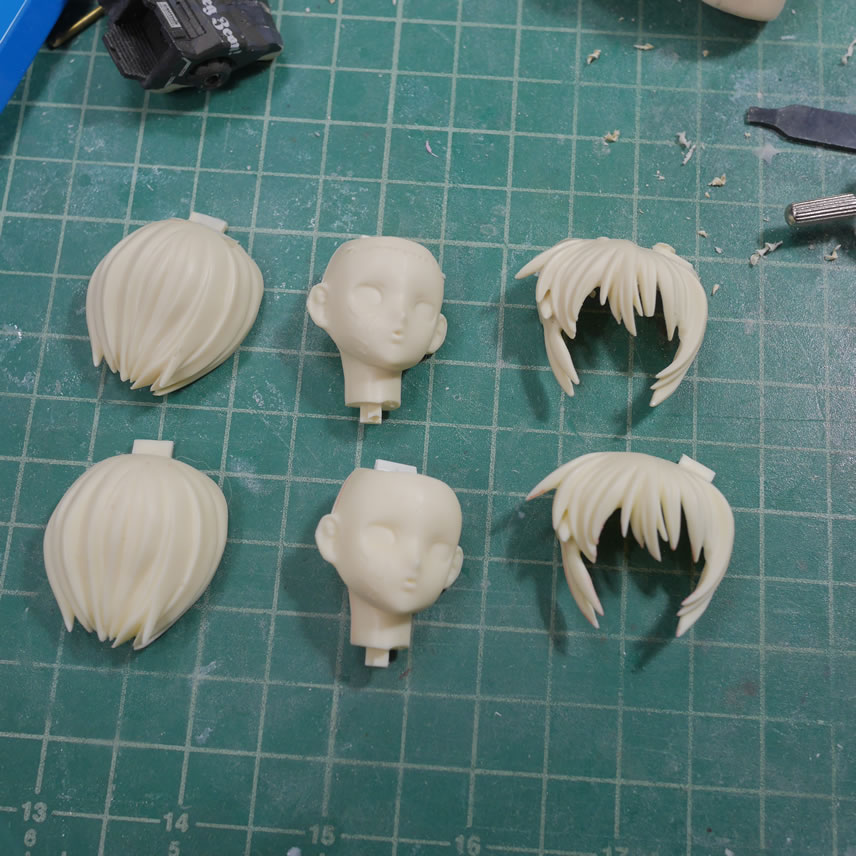
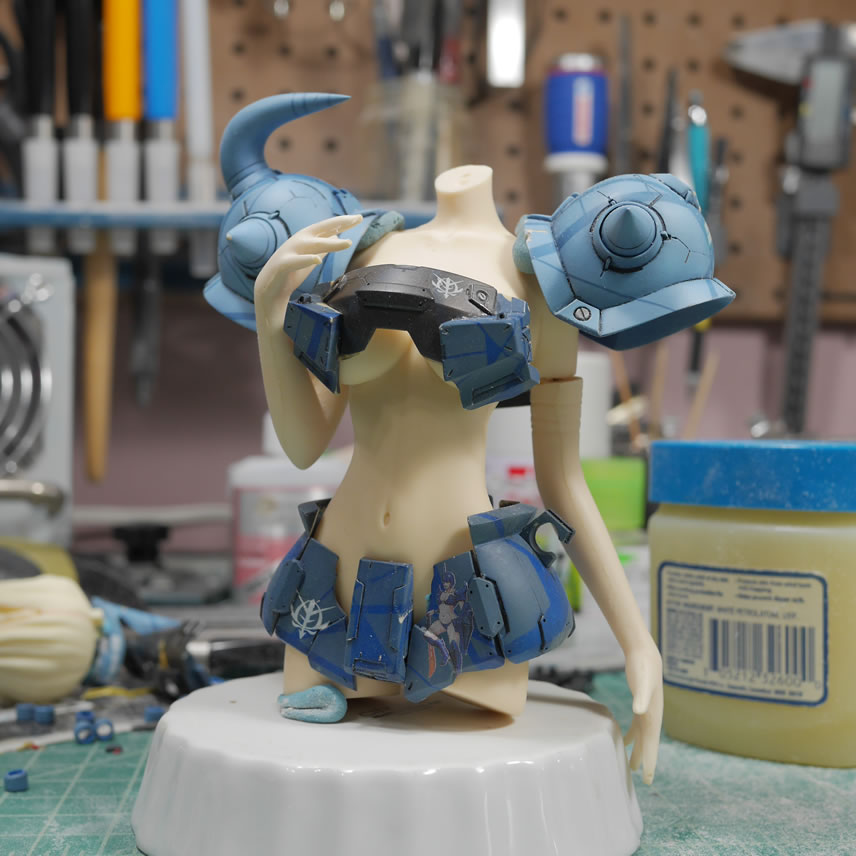
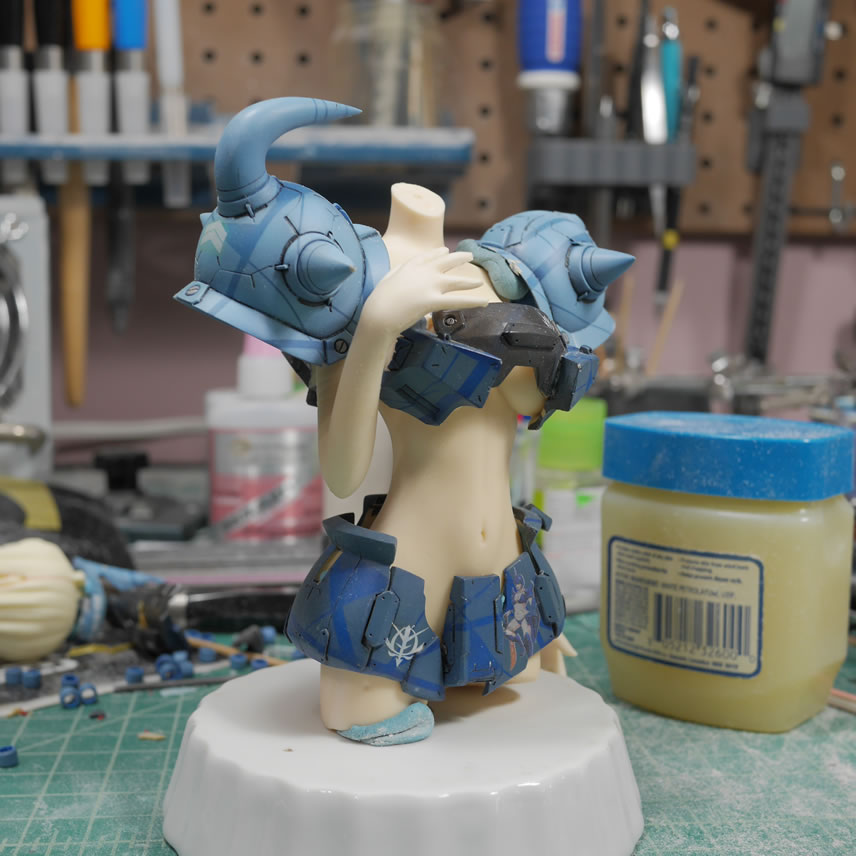
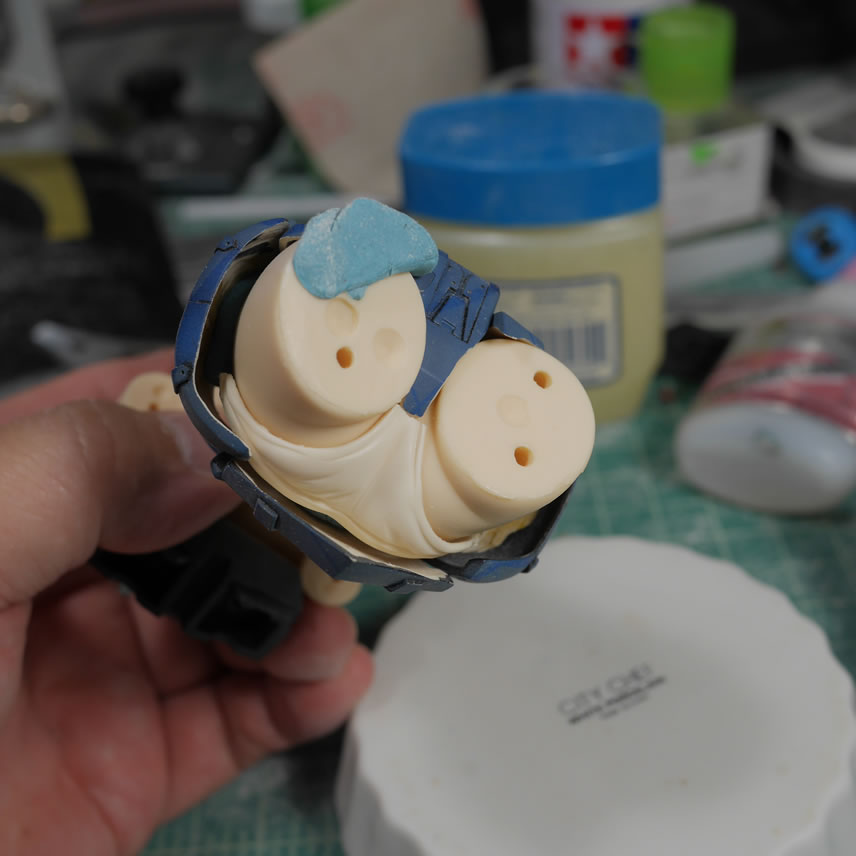
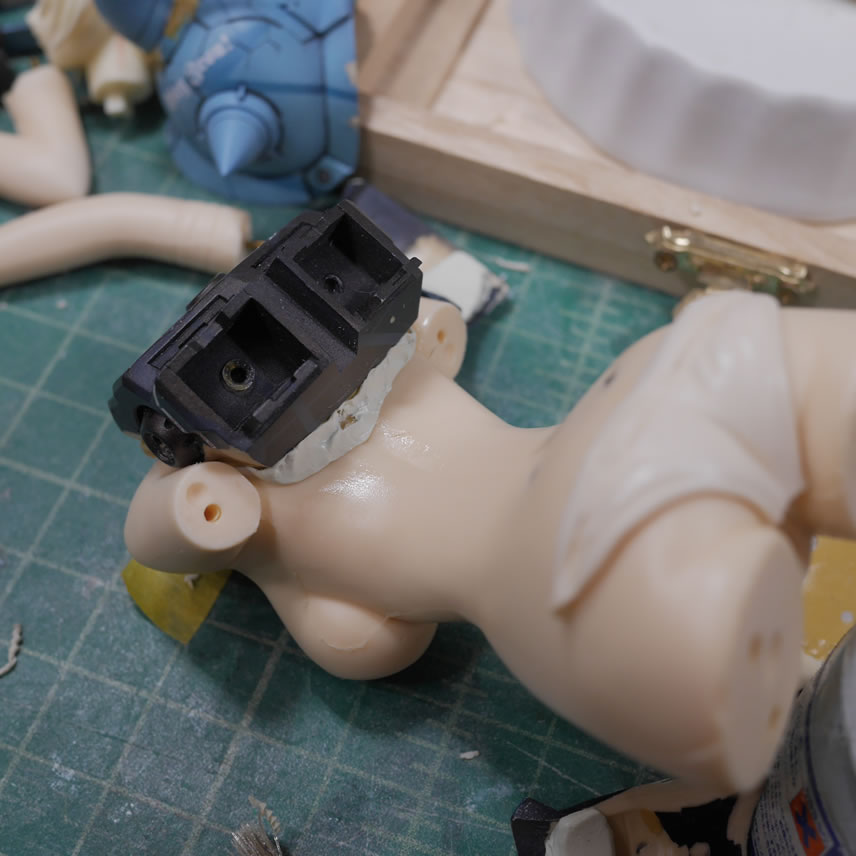
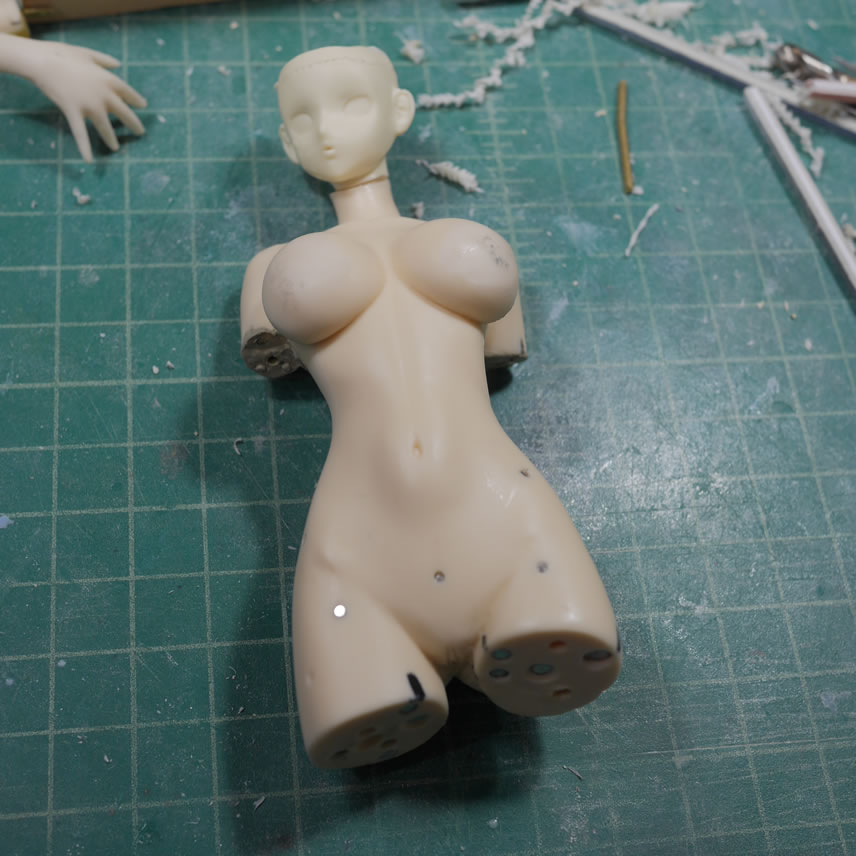
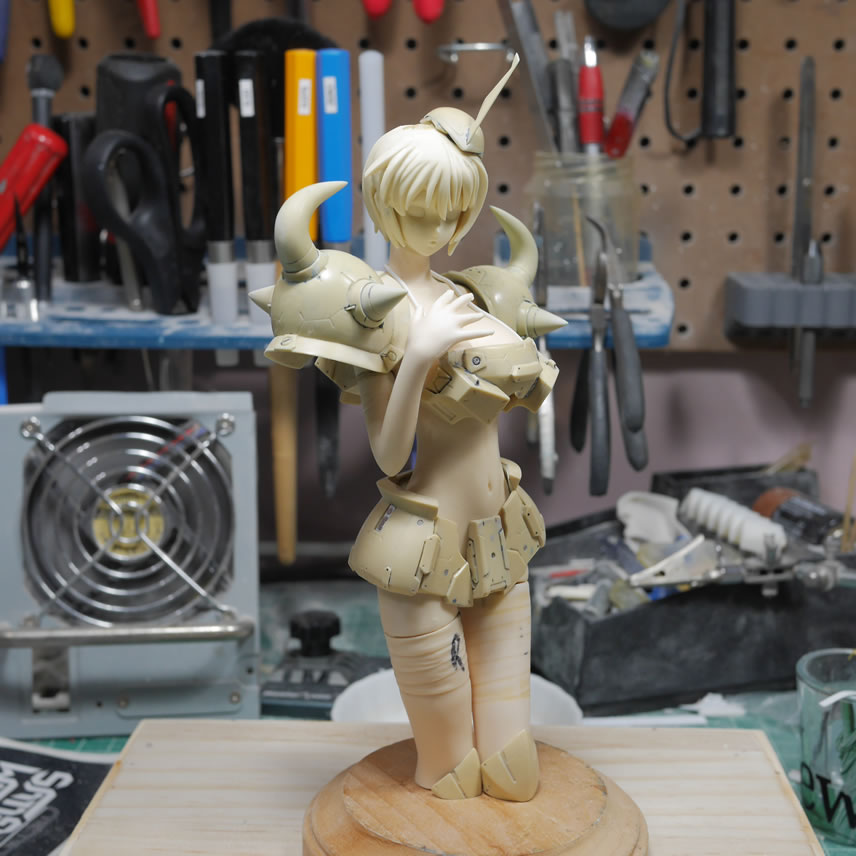
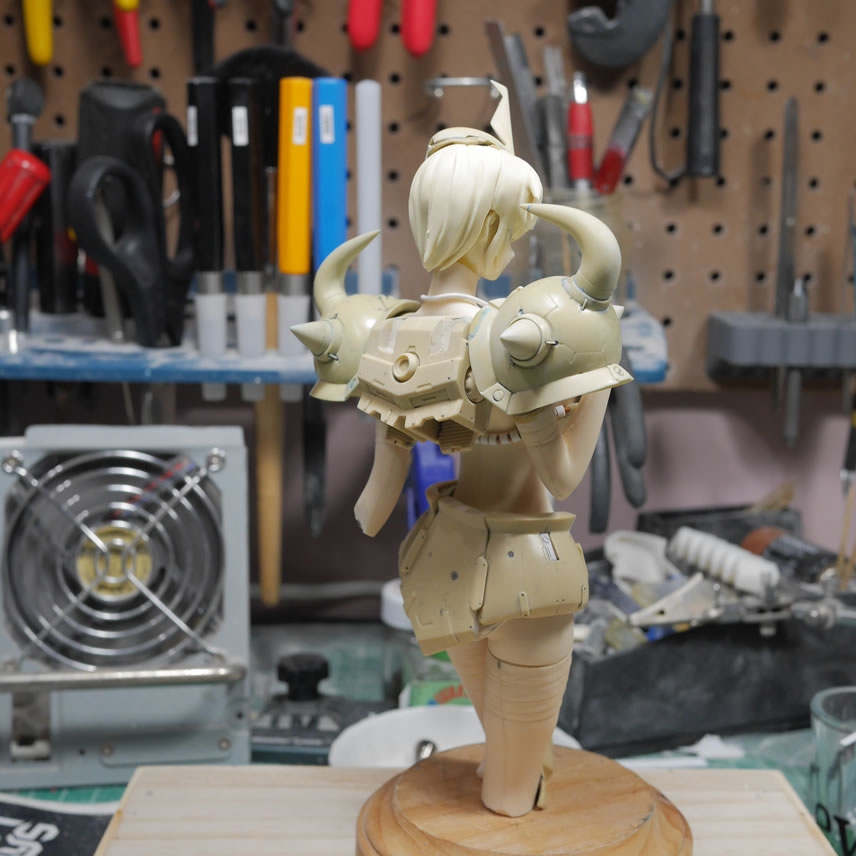
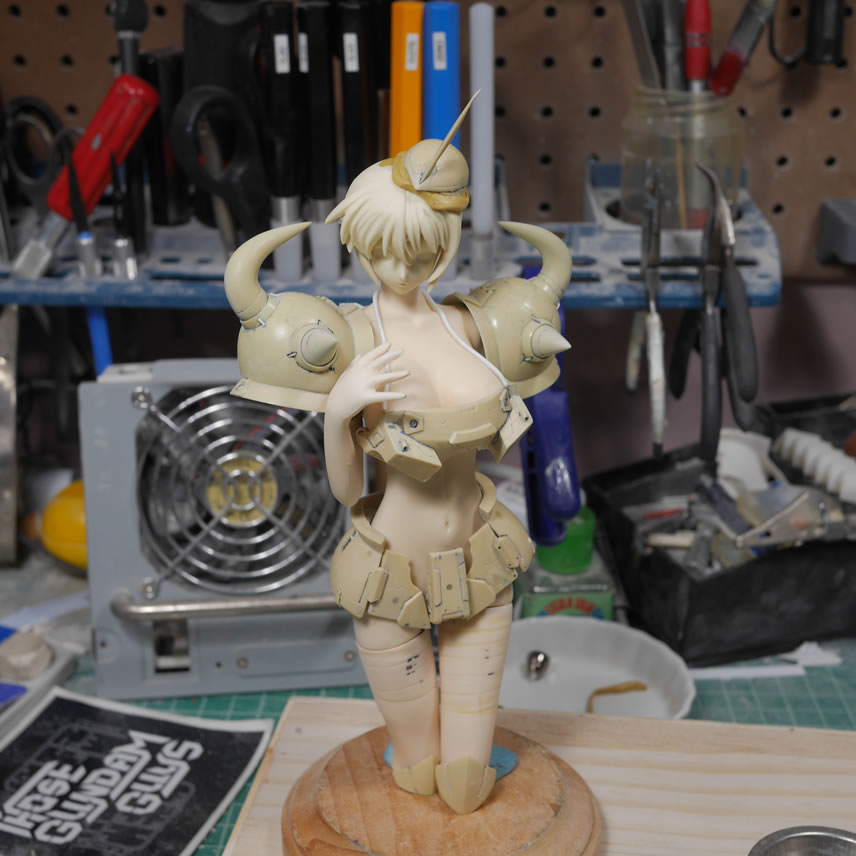
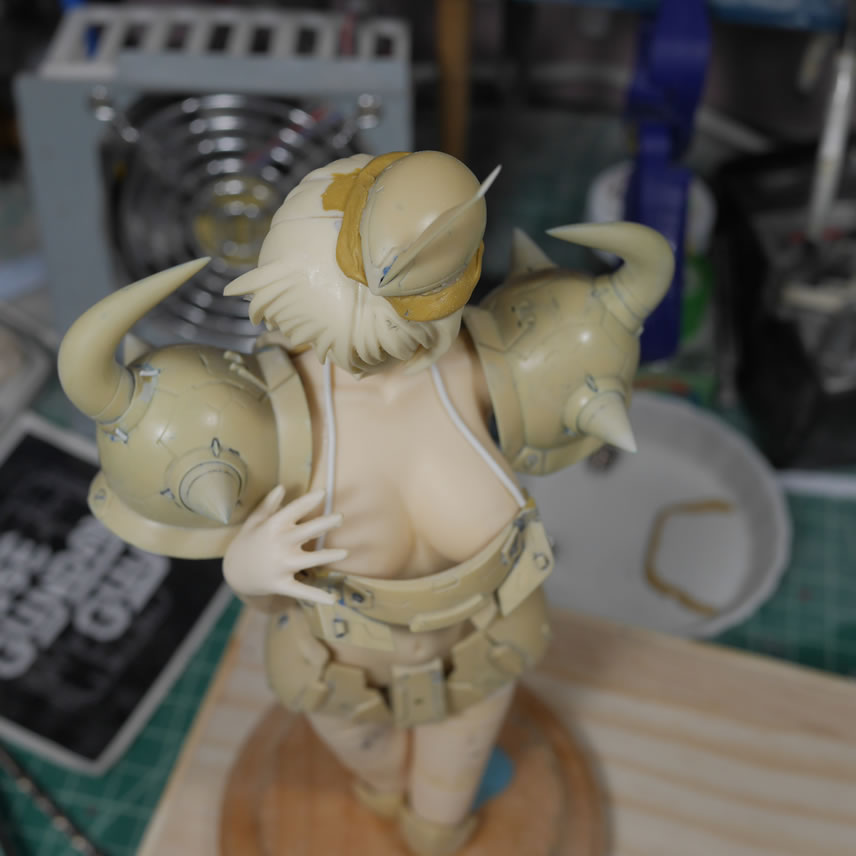
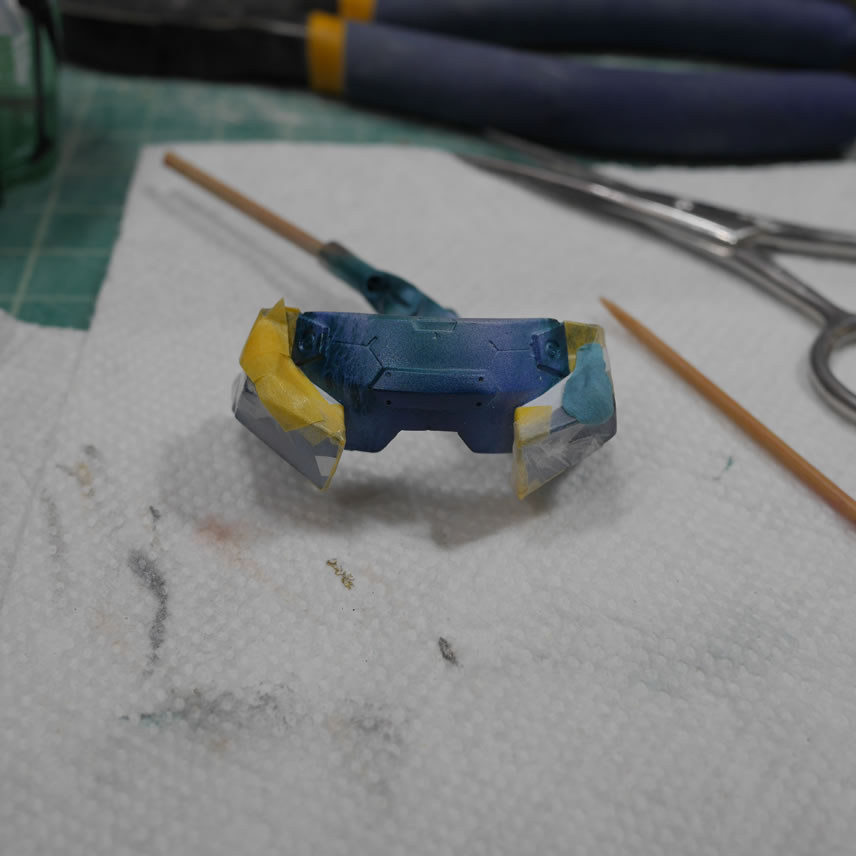
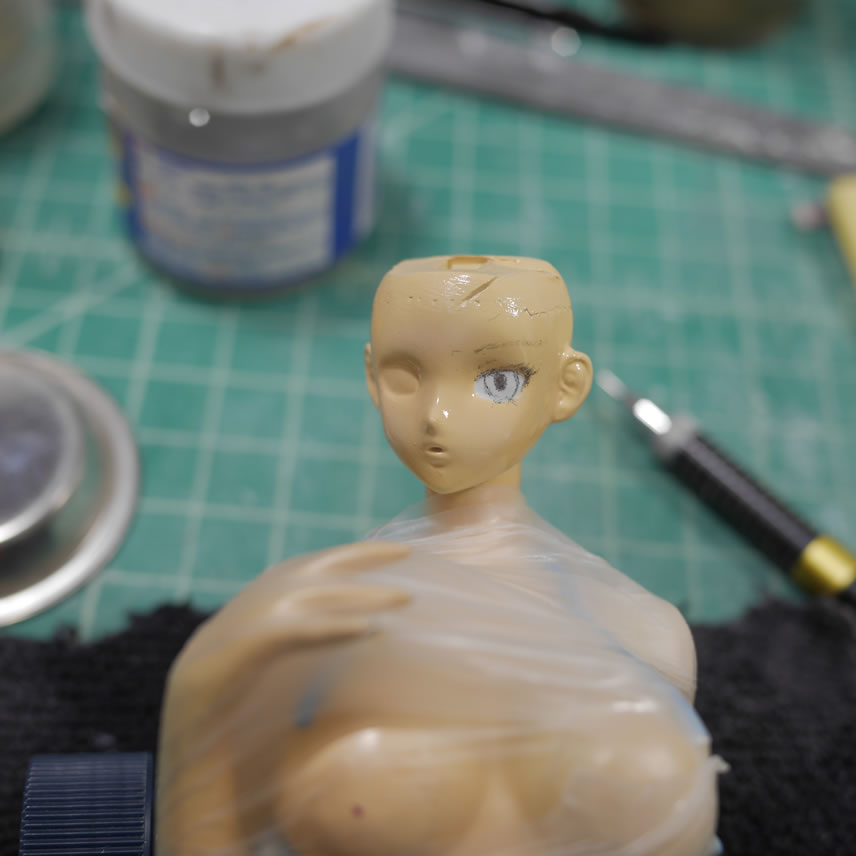
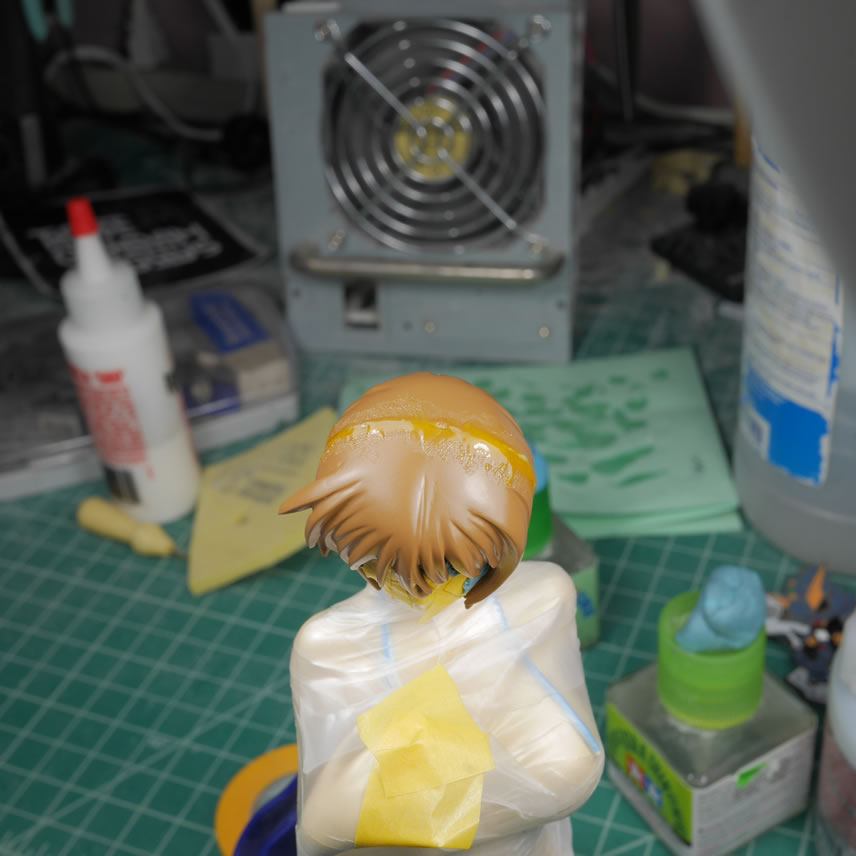
Once I have the head pieces, I can now test fit this against the body. Since they are not from the same kit, this is important to get the correct look and fit. The neck are of the head is sawed off and the head is pinned and glued to the body. Putty fills in some gaps and everything is sanded down. I think it looks fairly good. I can even test fit her goufy hat.
Back to her panty armor. I cut the original panties and just glued them to the armor piece. To create a smooth transition, light curing putty is used. This allows quick work in sculpting the panty armor.
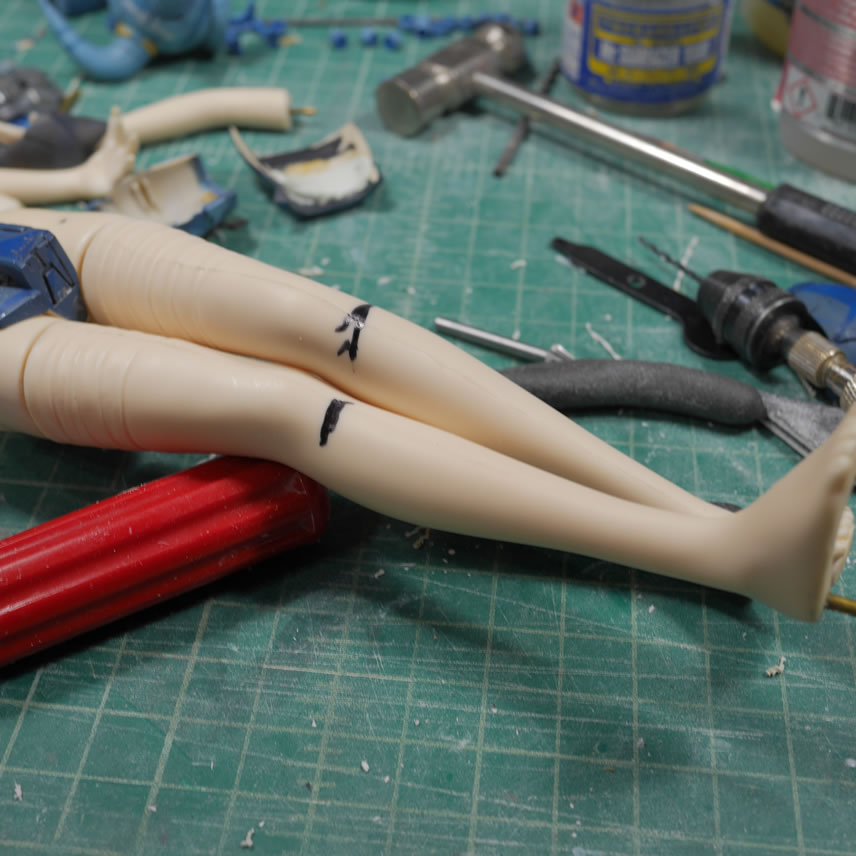
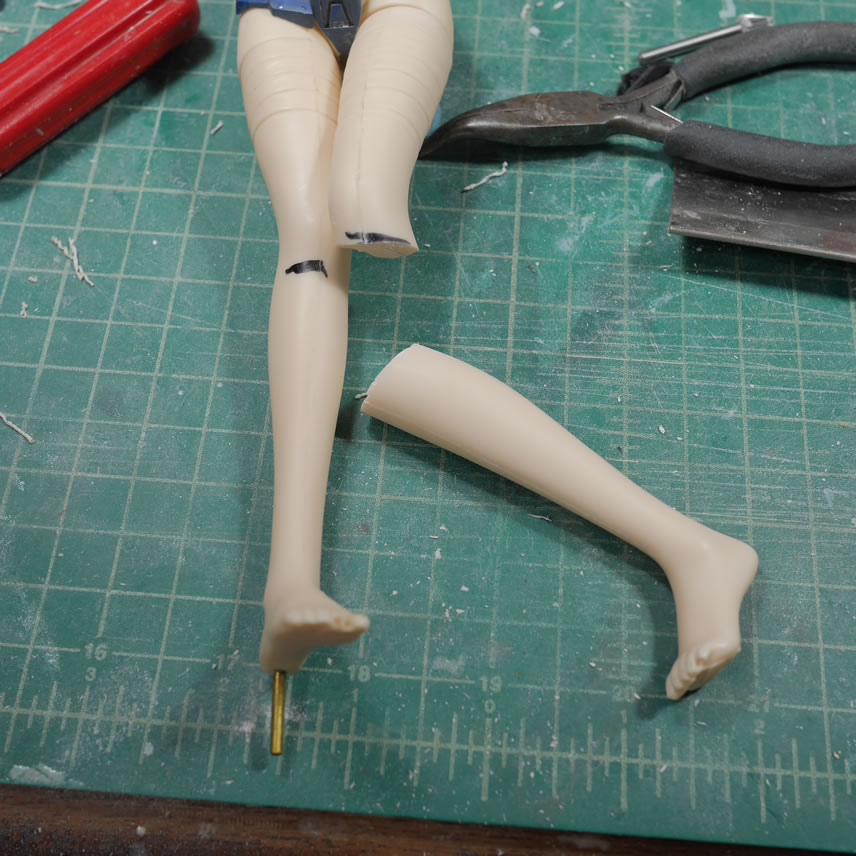
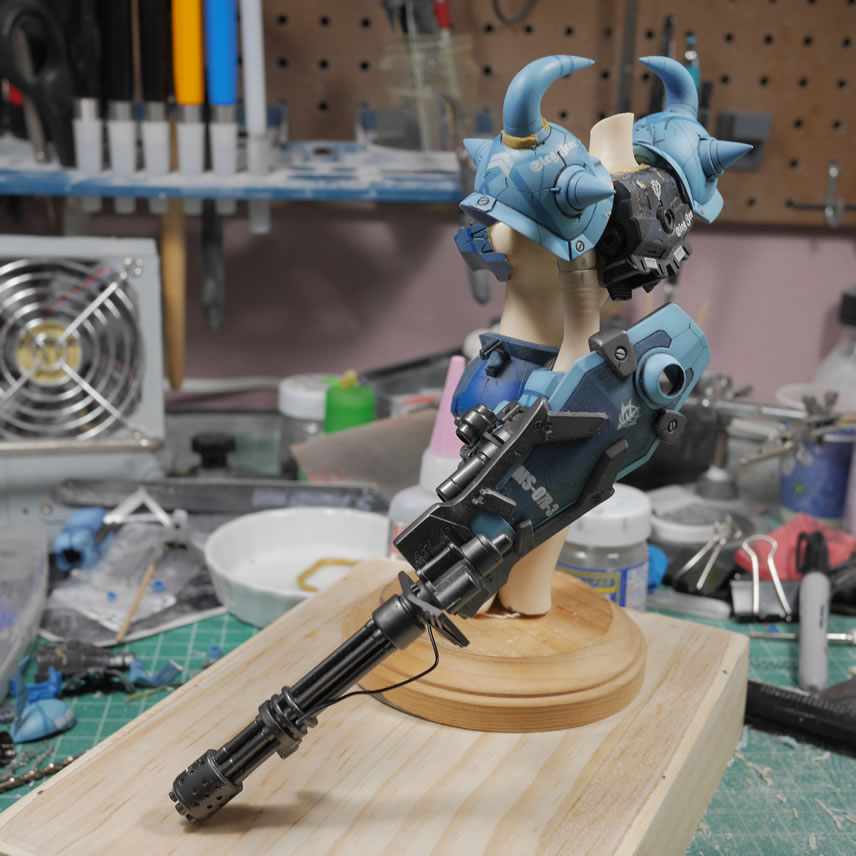
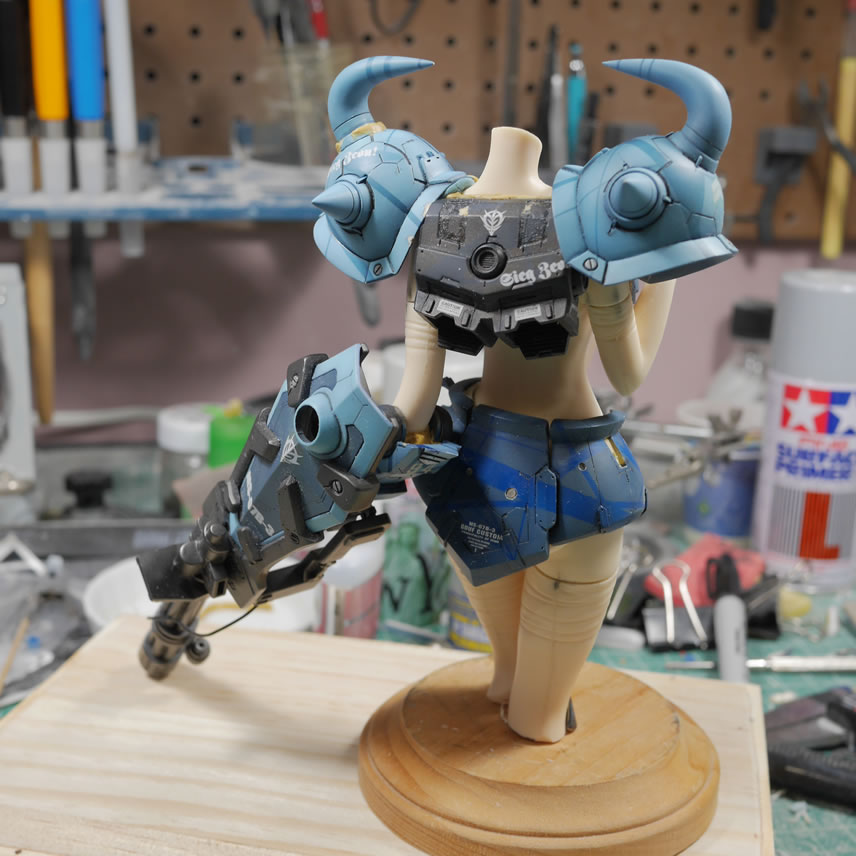
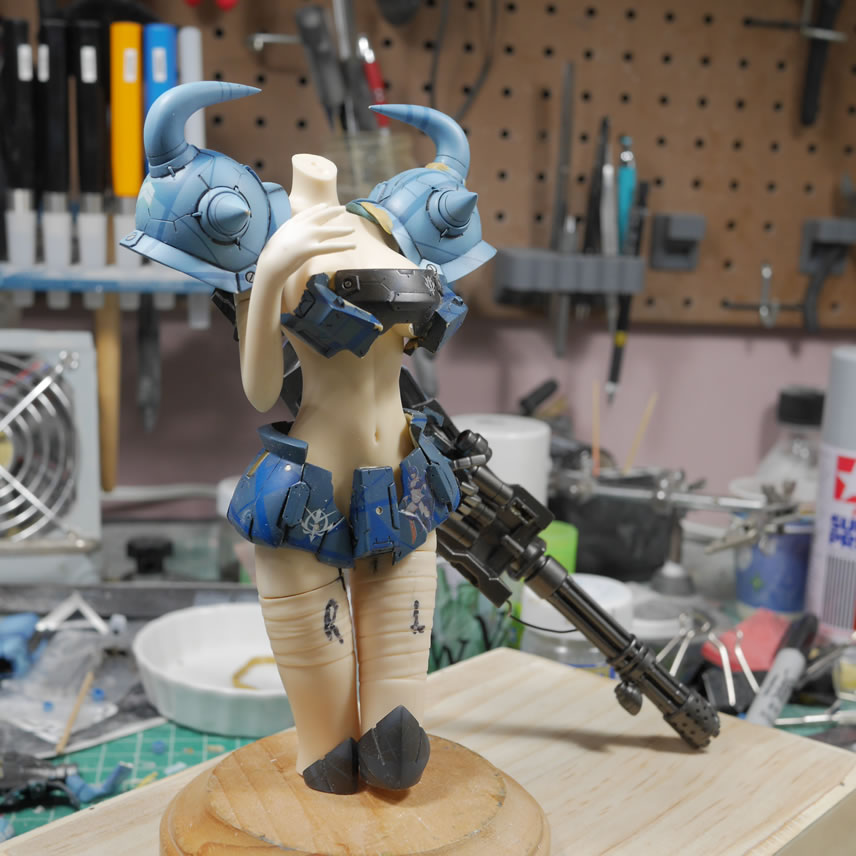
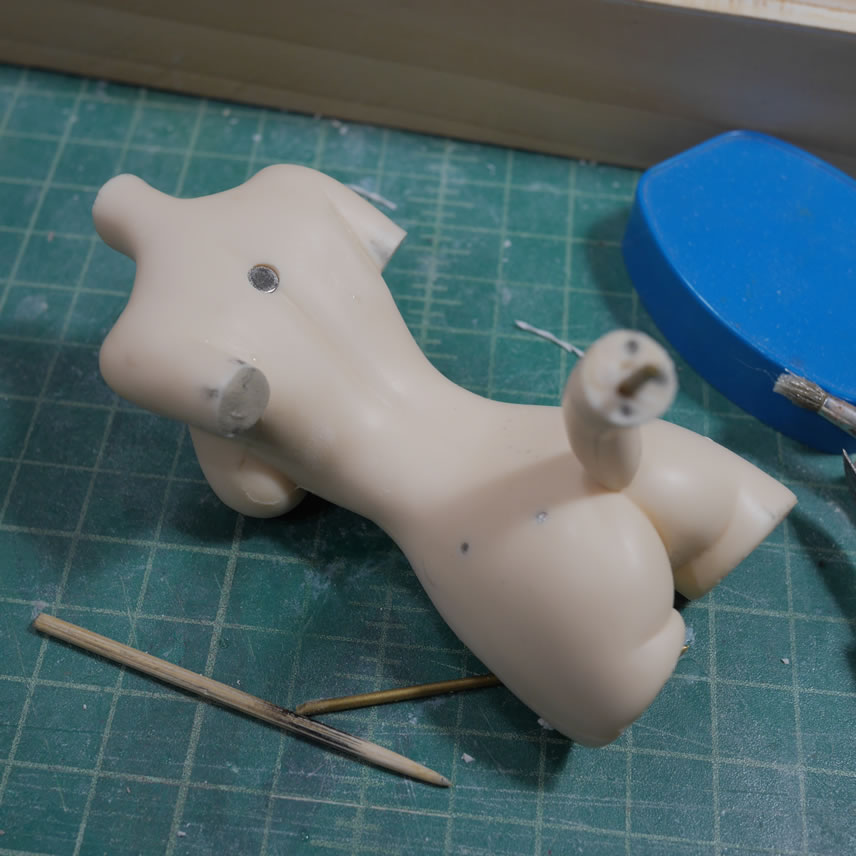
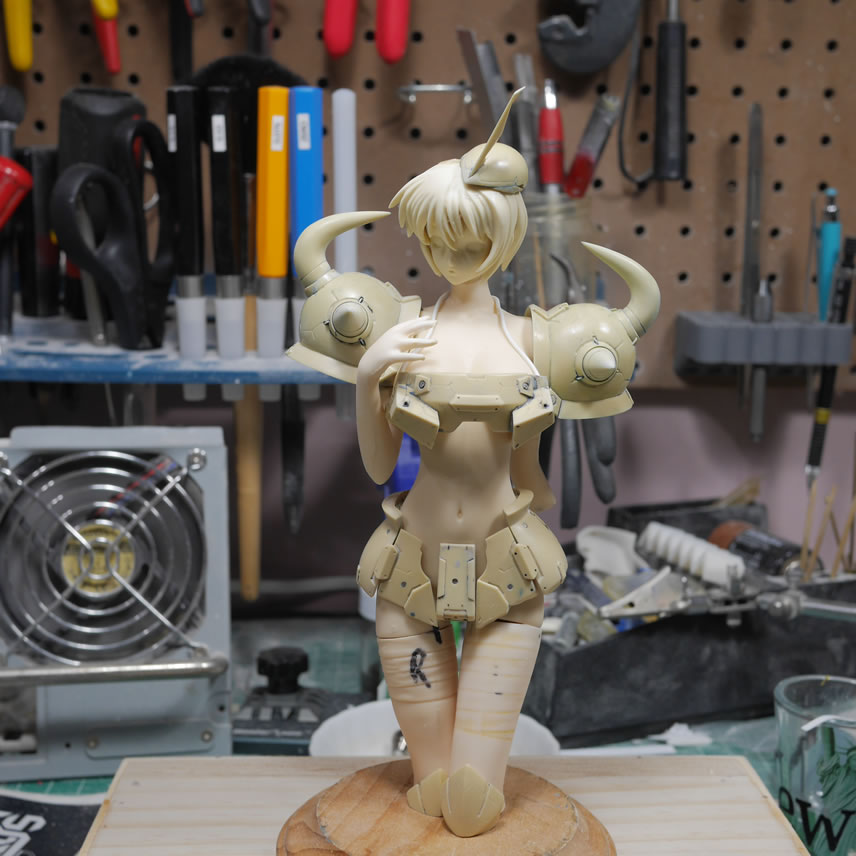
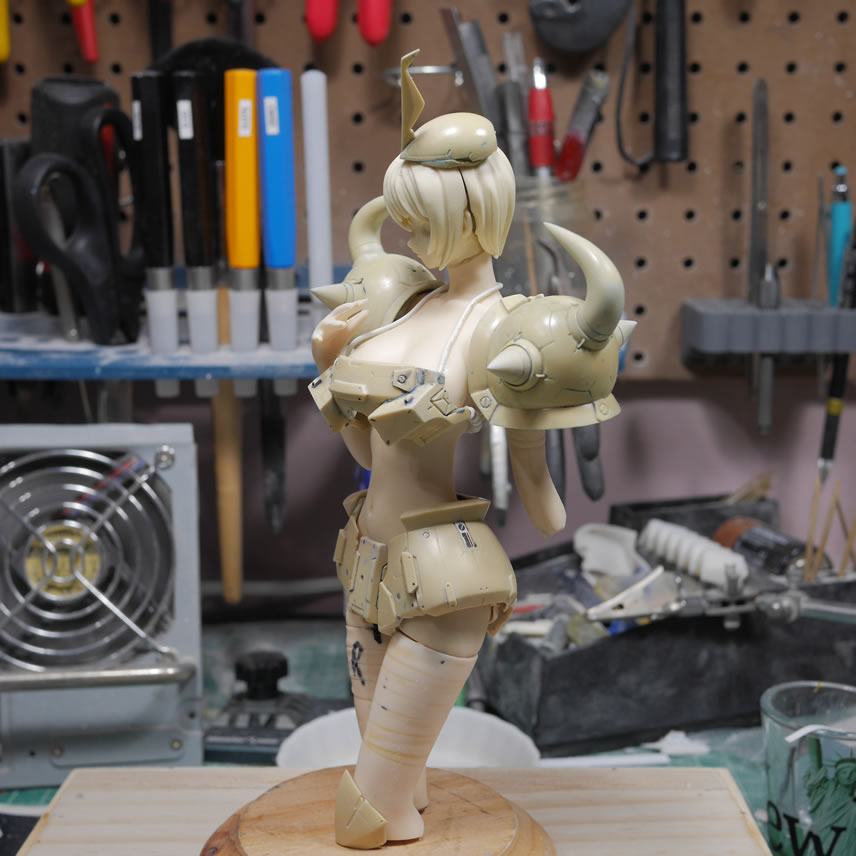
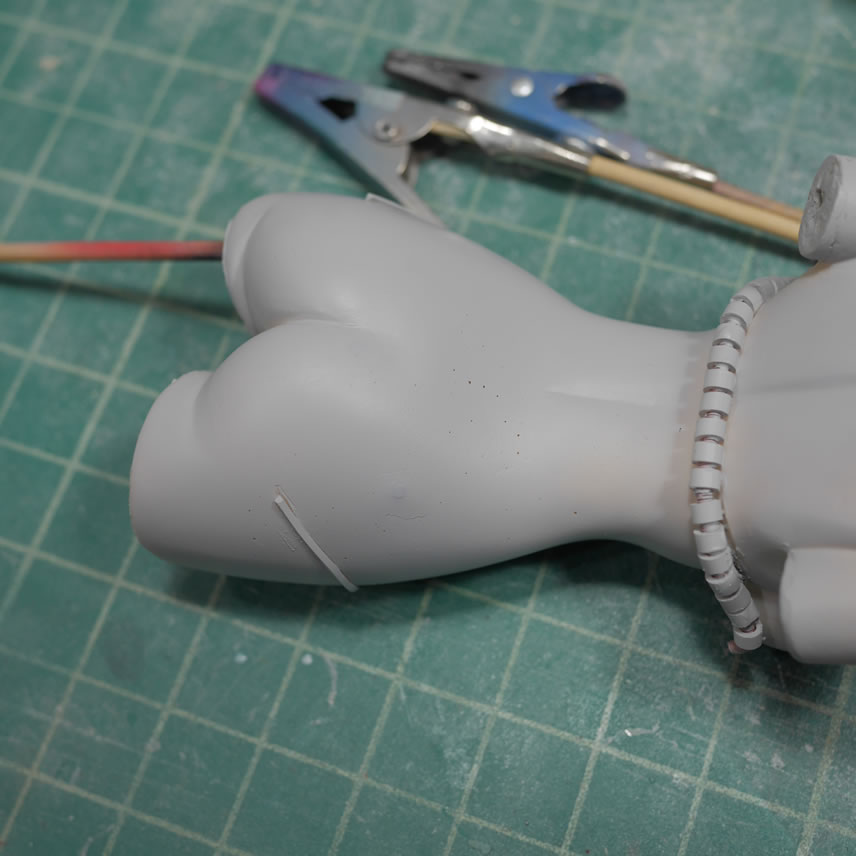
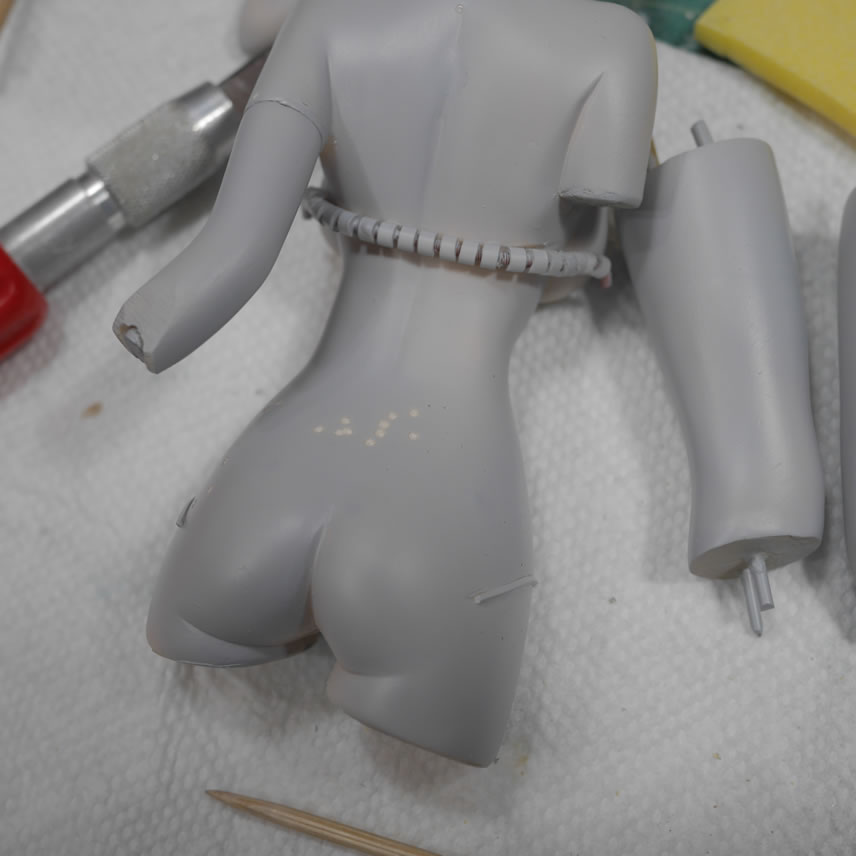
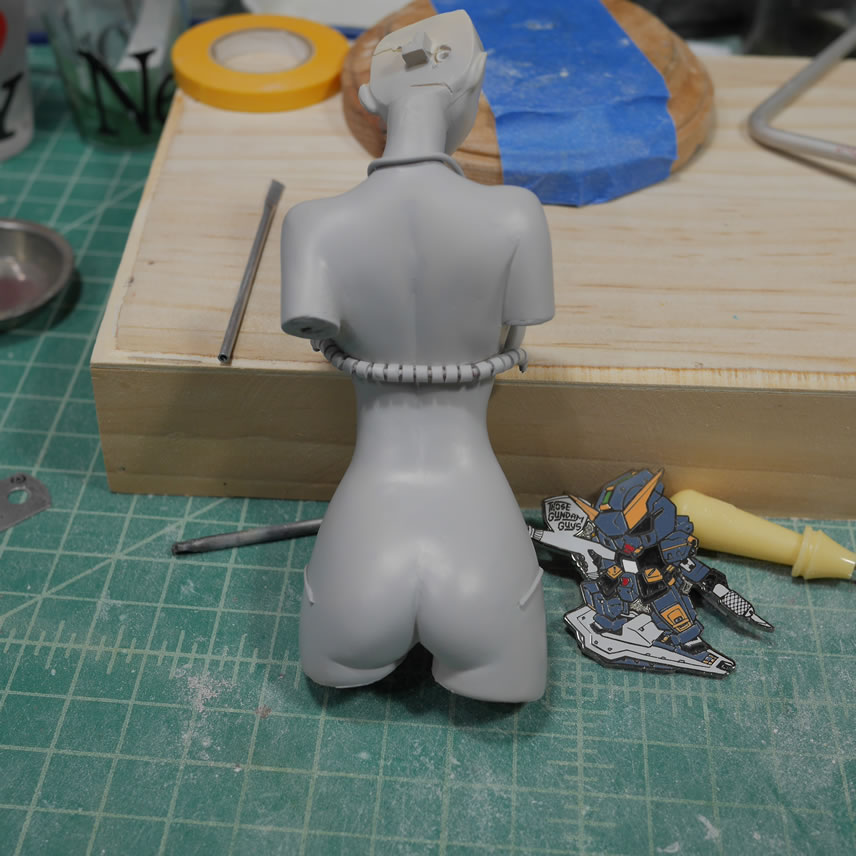
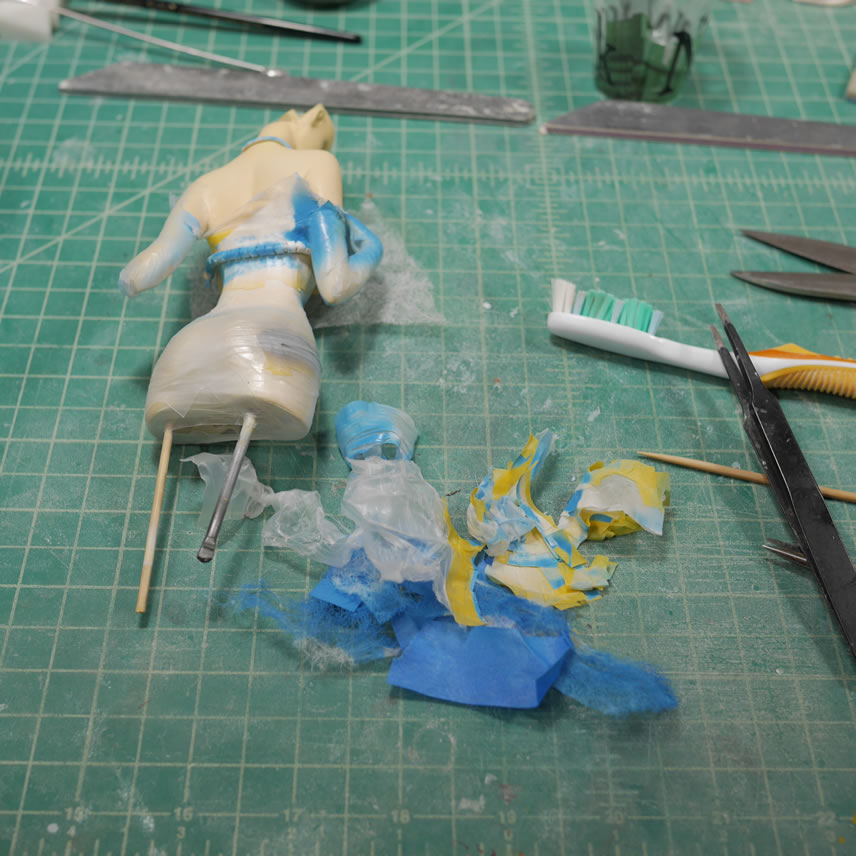
A comment on reddit got me thinking about how to deal with the legs. Up to this point, I was still trying to figure out how to mash the Gouf Custom’s leg armor to the legs and it just didn’t look all that great. Do I keep her open toed, or boot her up with giant goufy feet? The suggestion was for a bust, so off comes her legs. I made some marks and the saw came to amputate. The original kit had the legs and arms bandaged. Since I don’t need that bit of detail, the bandages are in the process of being sanded and filled with putty to smooth things out.
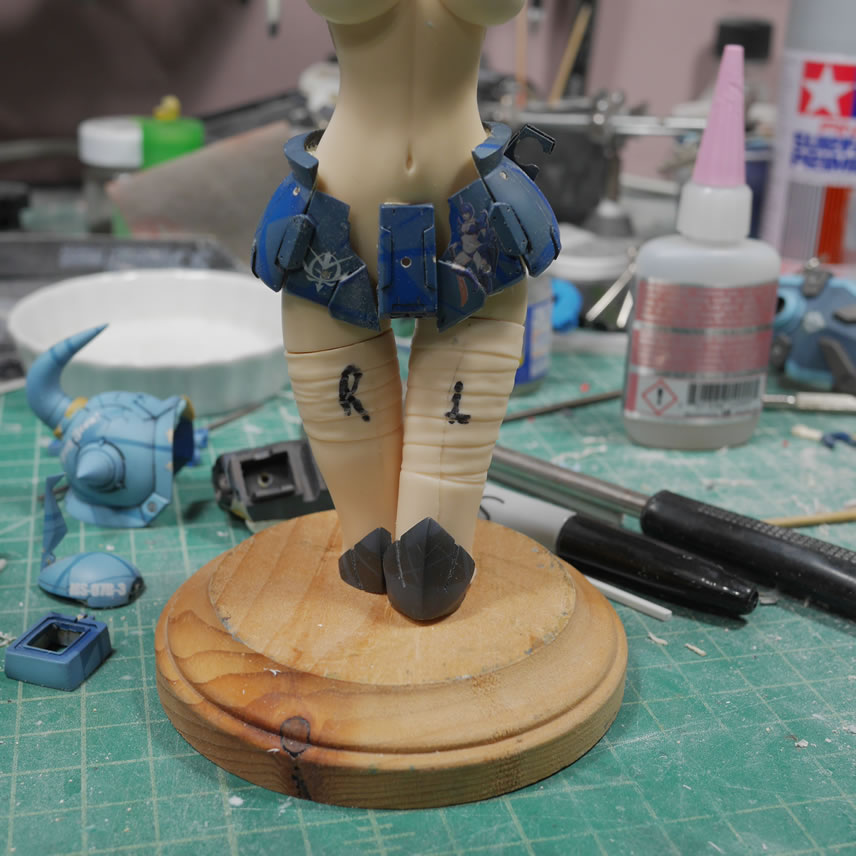
With the legs cut, I worked with the upper thigh armor to see about wrapping them around her thighs. And it just didn’t look right, so I’m abandoning that idea for something else.
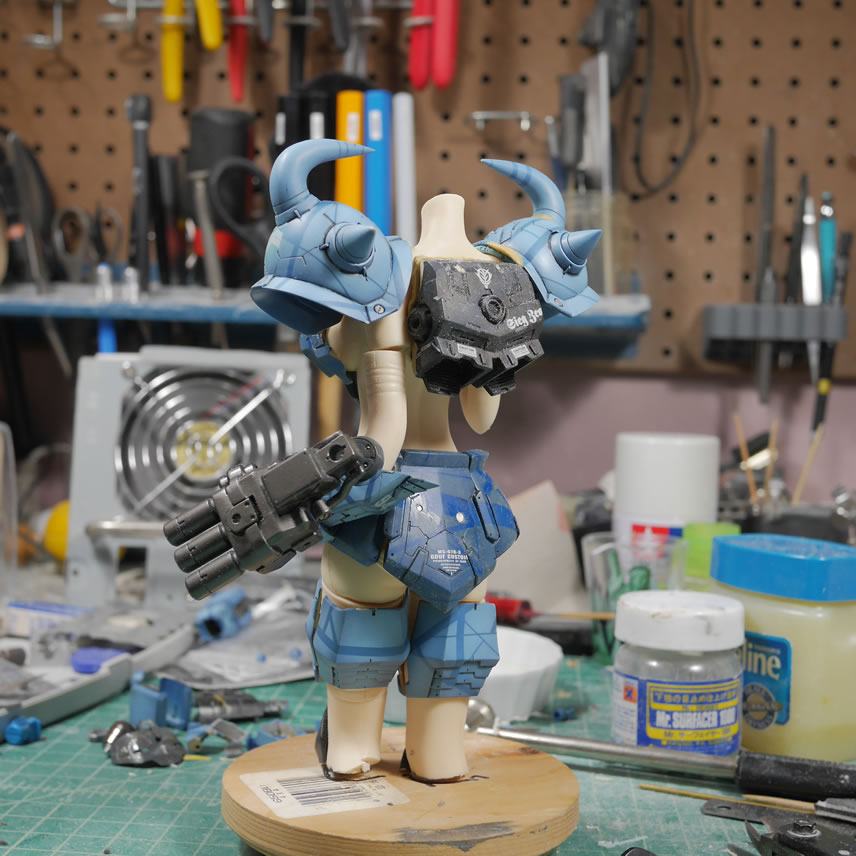
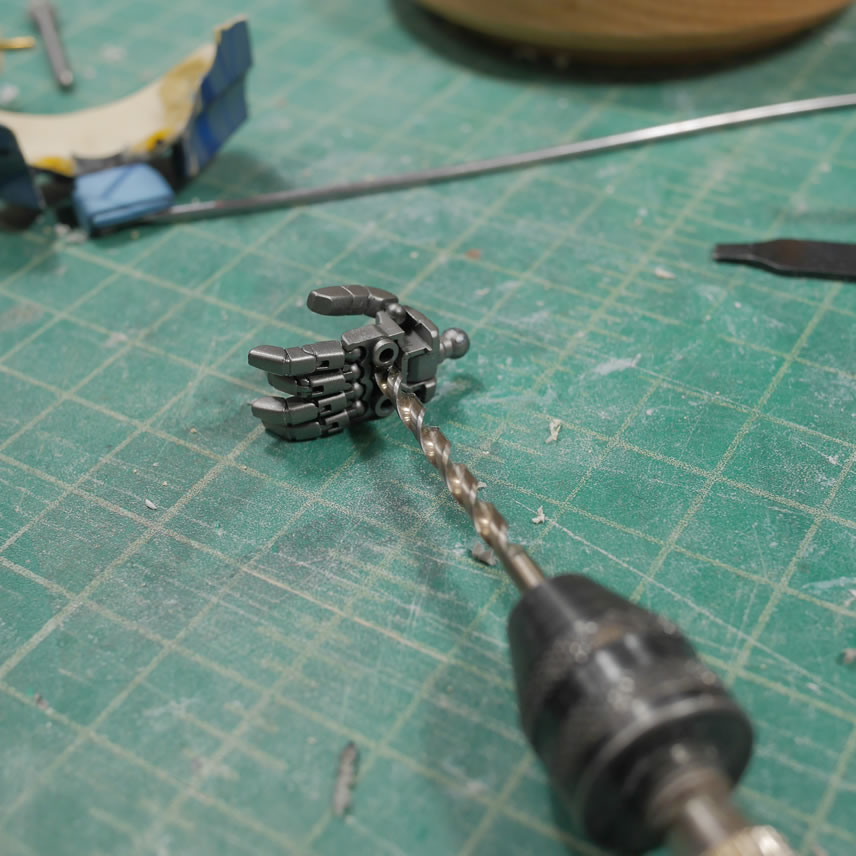
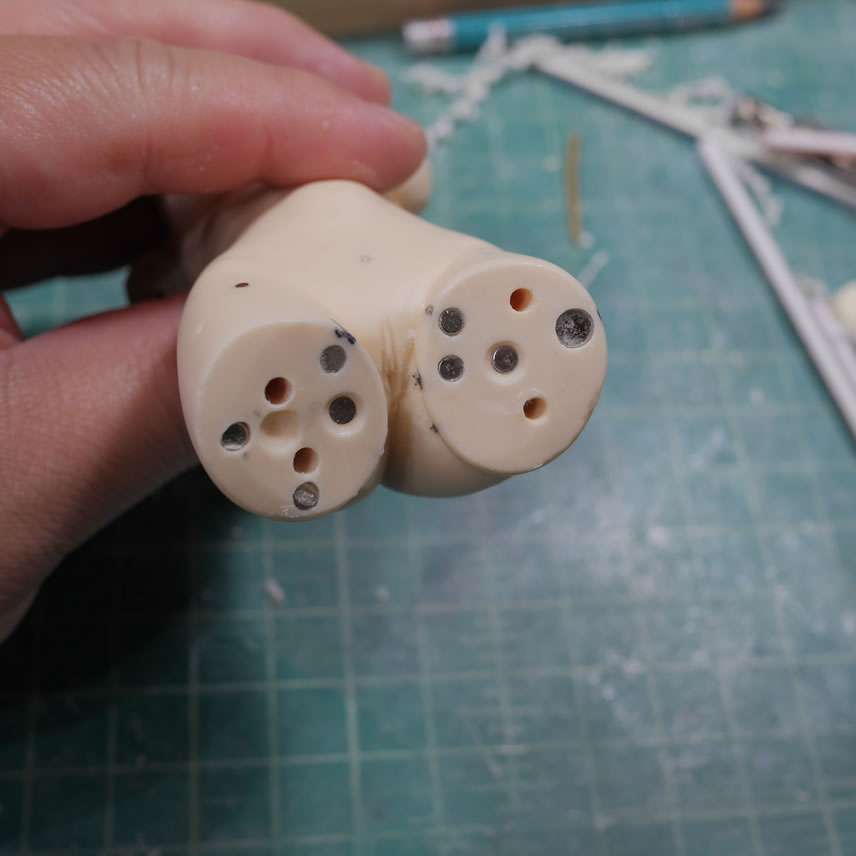
Next up is the mods to the left hand that holds the shield gatling gun. More magnets and epoxy putty to fill in gaps.
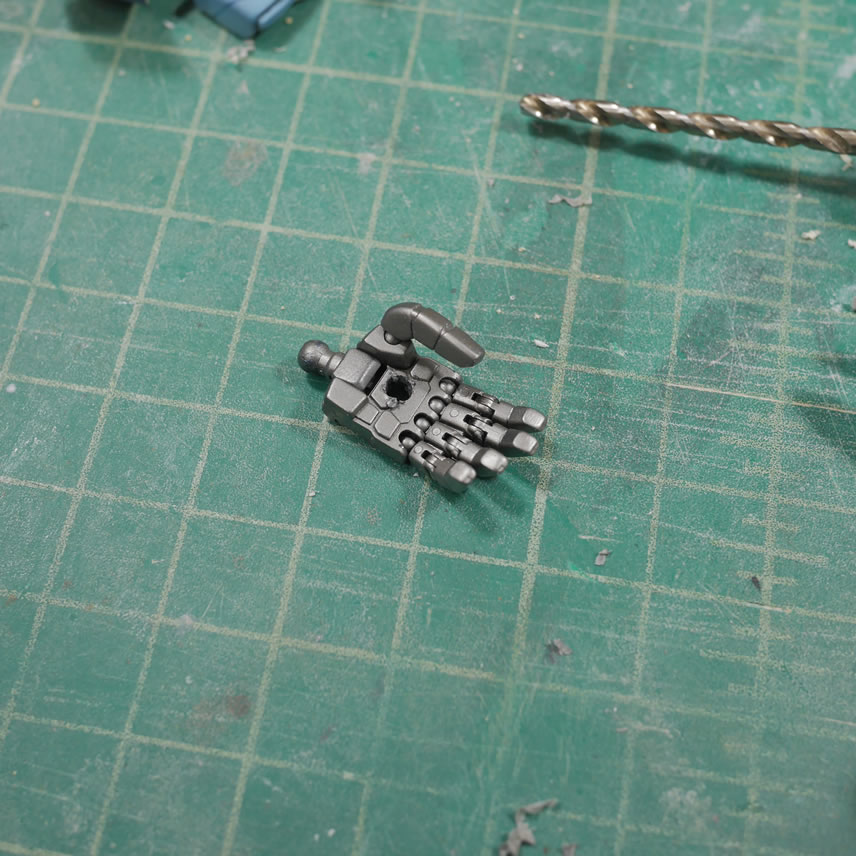
Once that is setup, I can do a quick test fit and see how well the left arm holds the shield assembly. I will definitely have to glue this area solid; but this also depends on my final pose and display assembly.
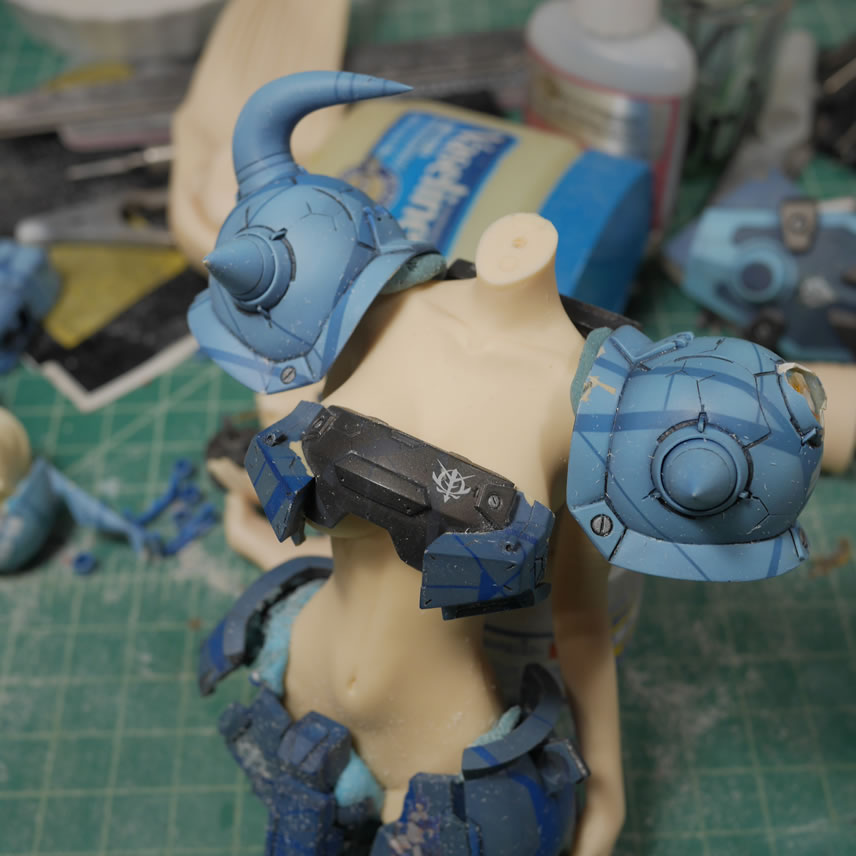
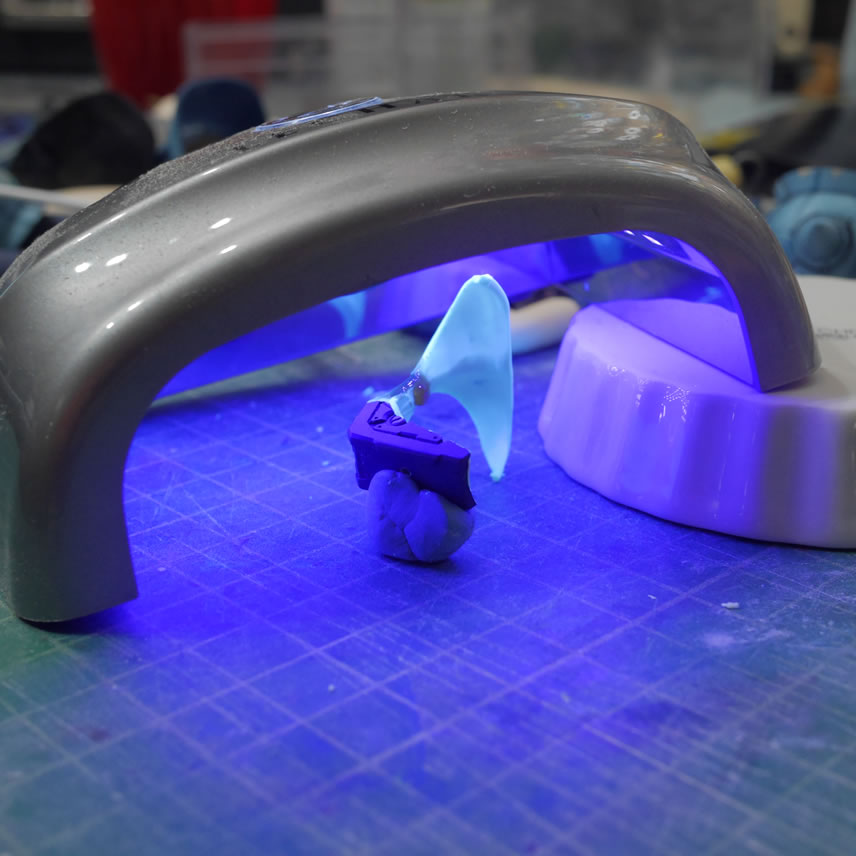
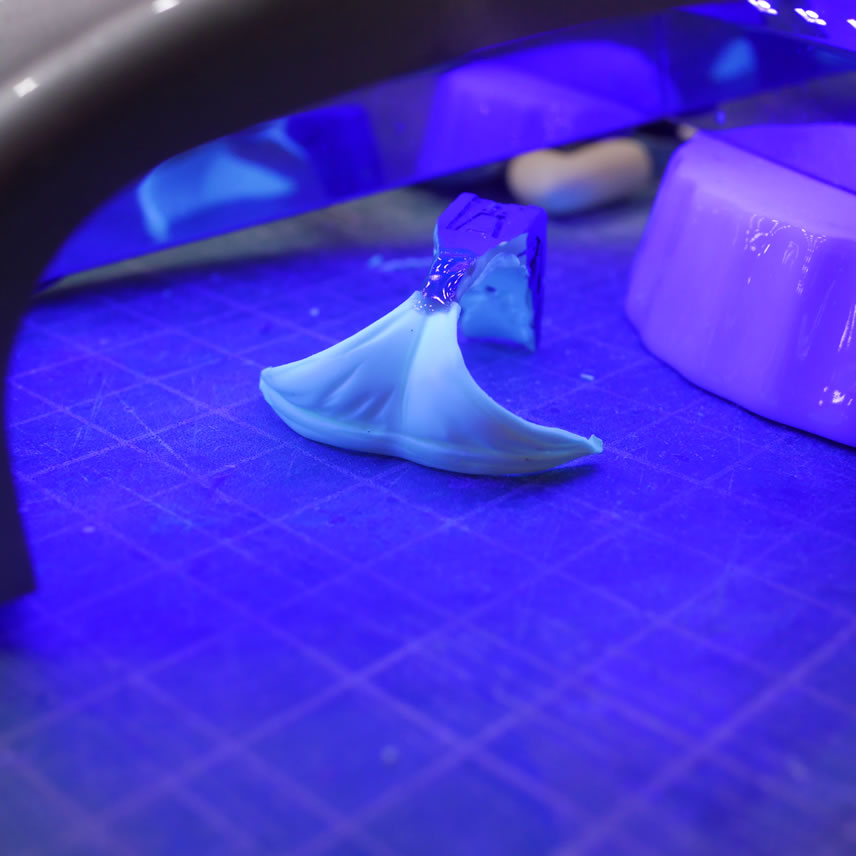
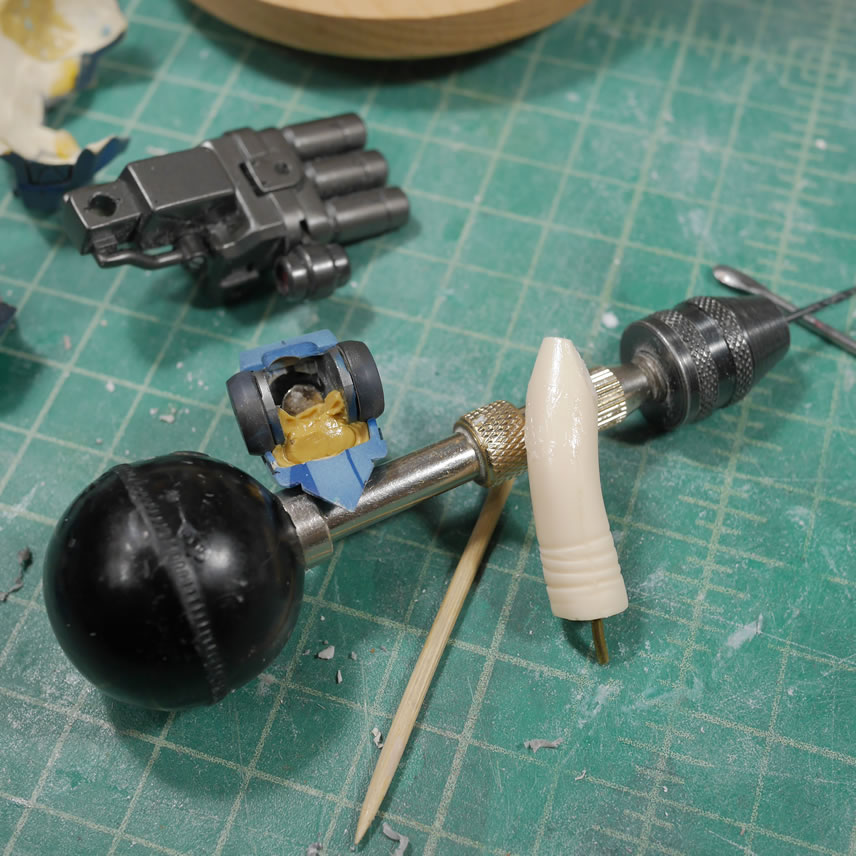
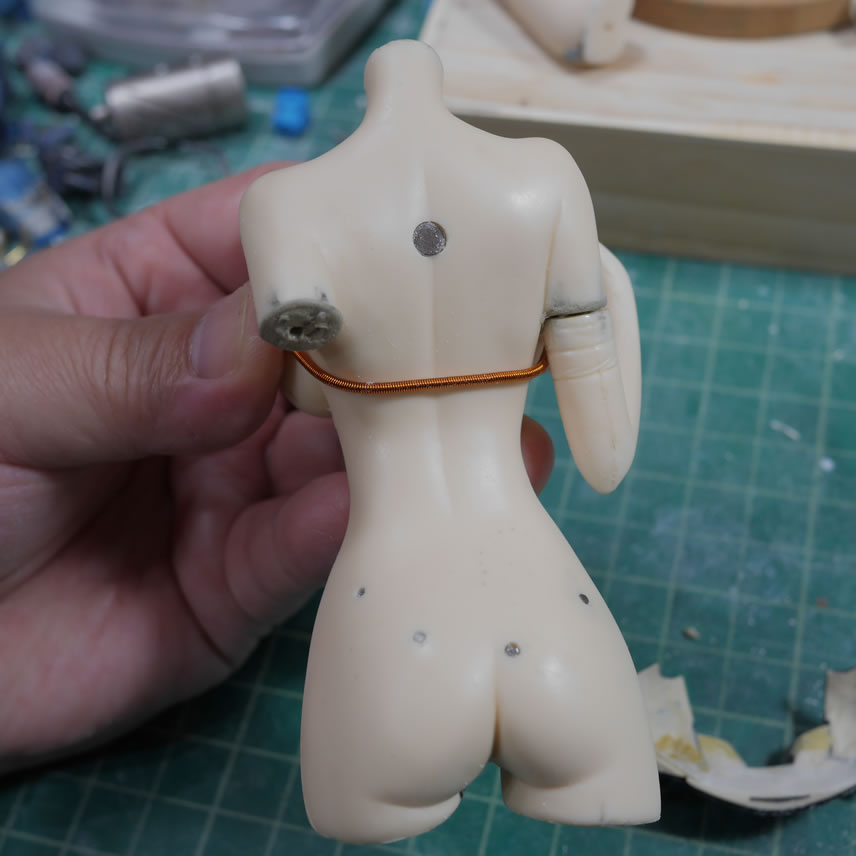
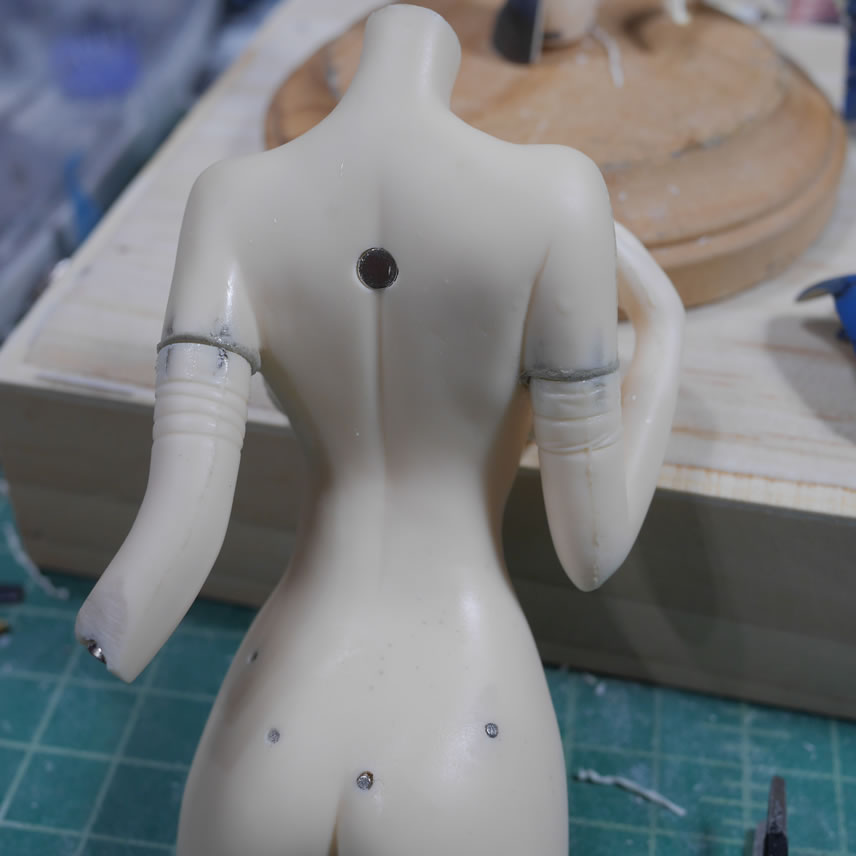
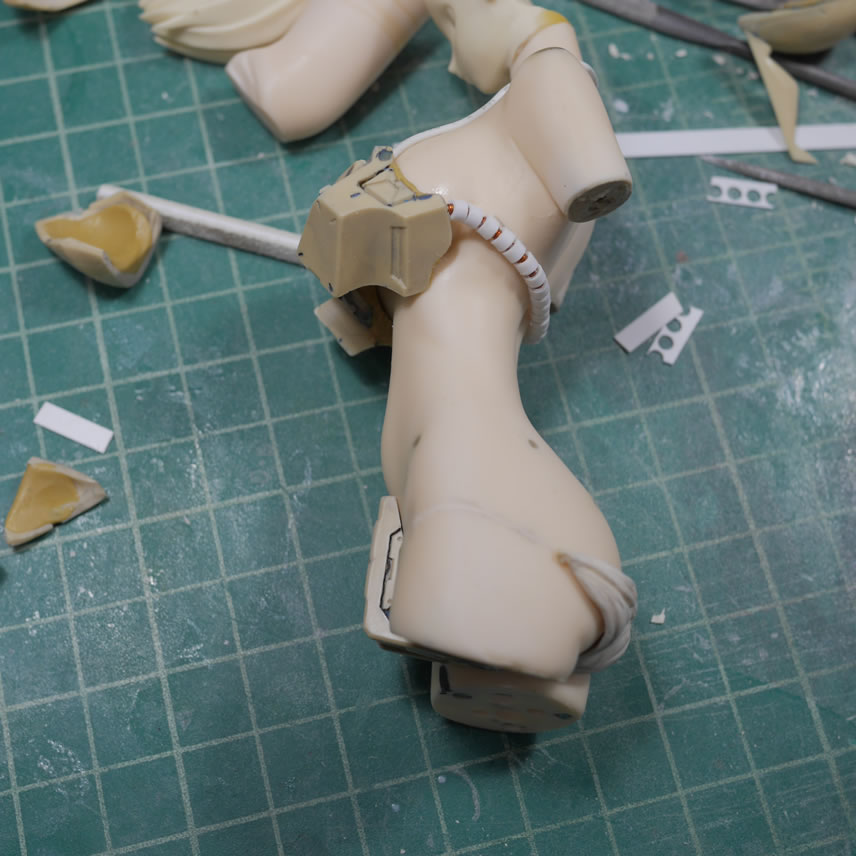
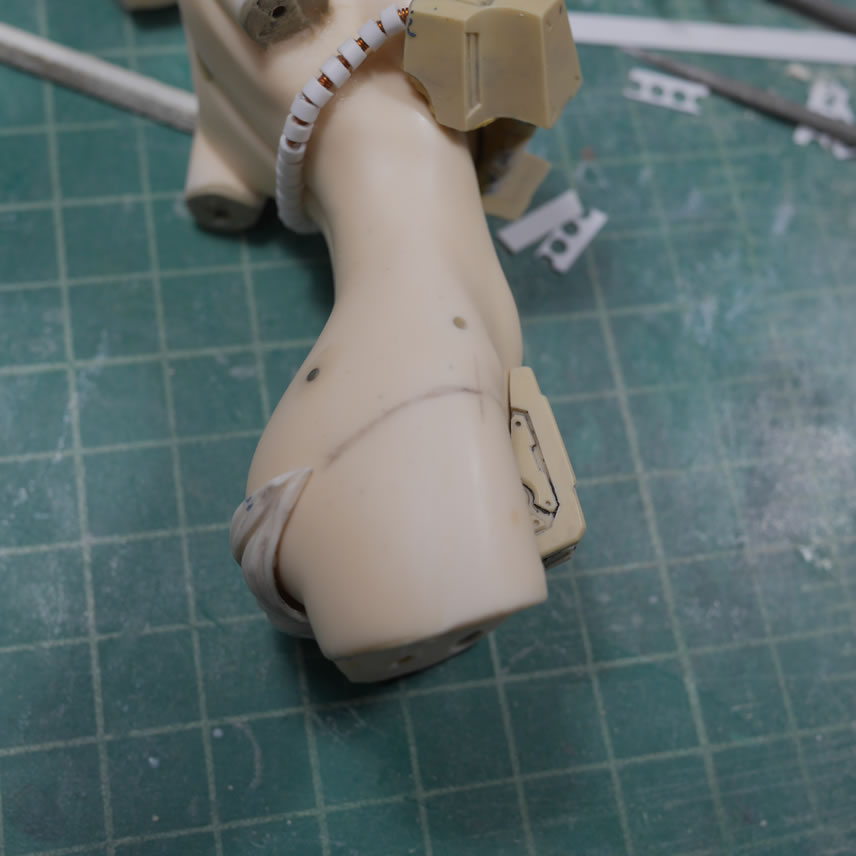
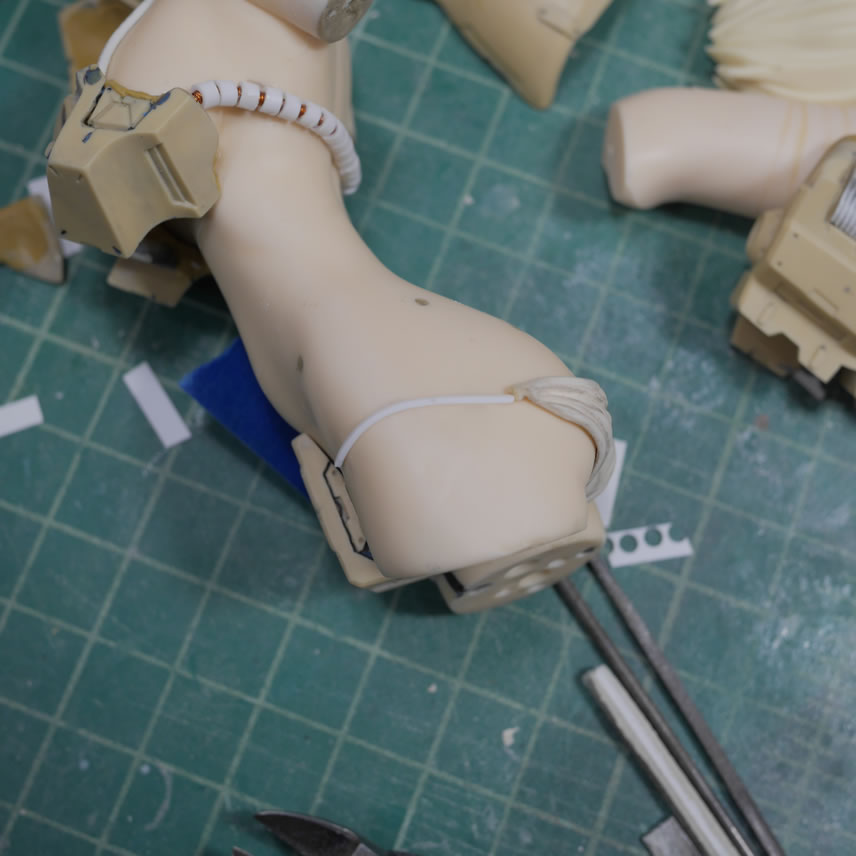
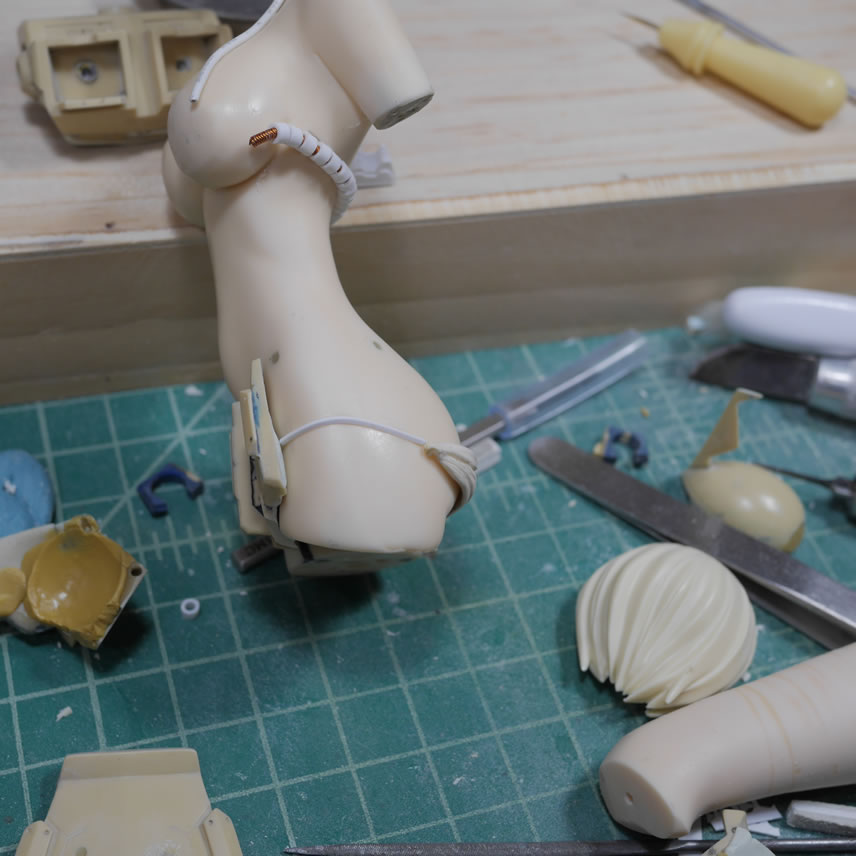
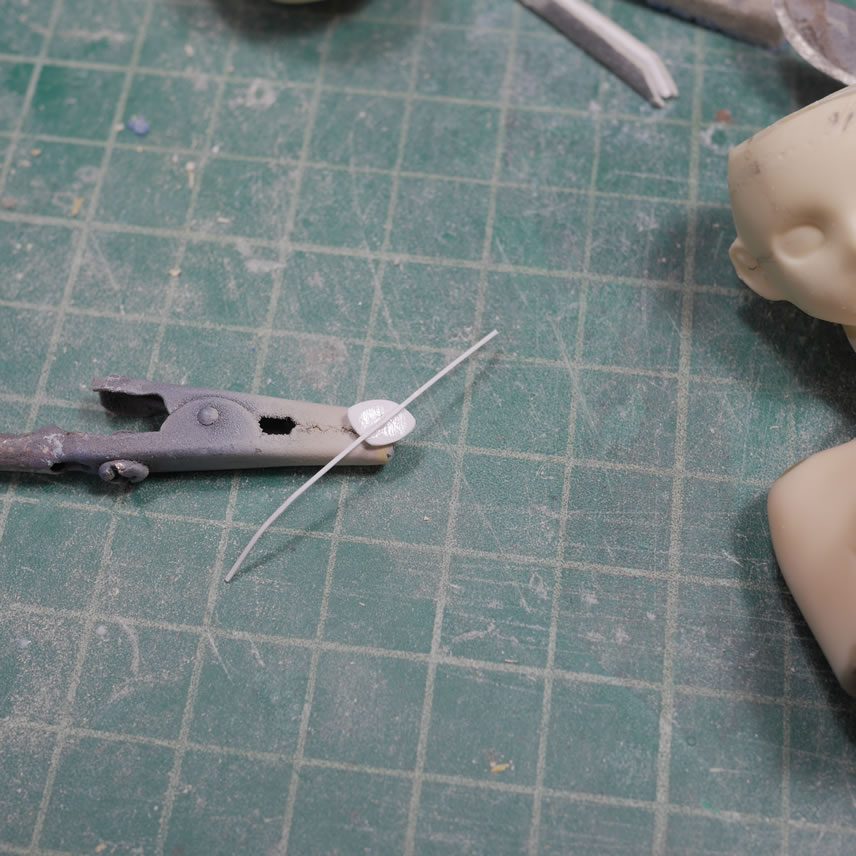
The gouf’s chest bikini top isn’t going to hold itself up. So the first idea was an epoxy putty back strap that was too delicate and too much work to sand down and sculpt. So time for another idea. A solid wire works for holding the shape. Magnet wire is wrapped around the wire.

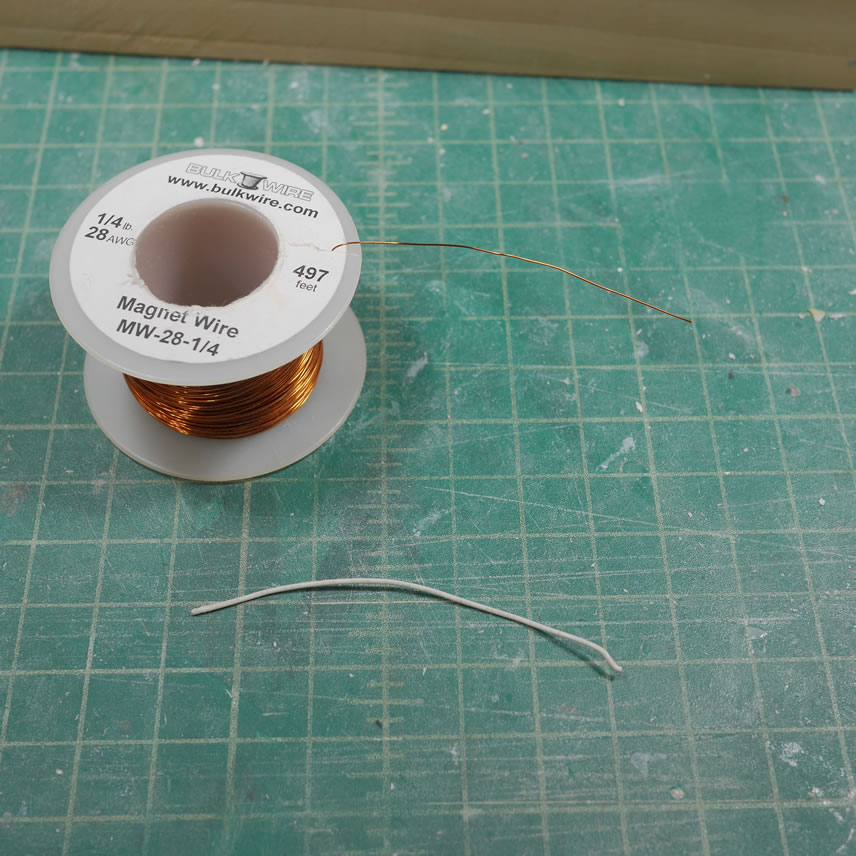
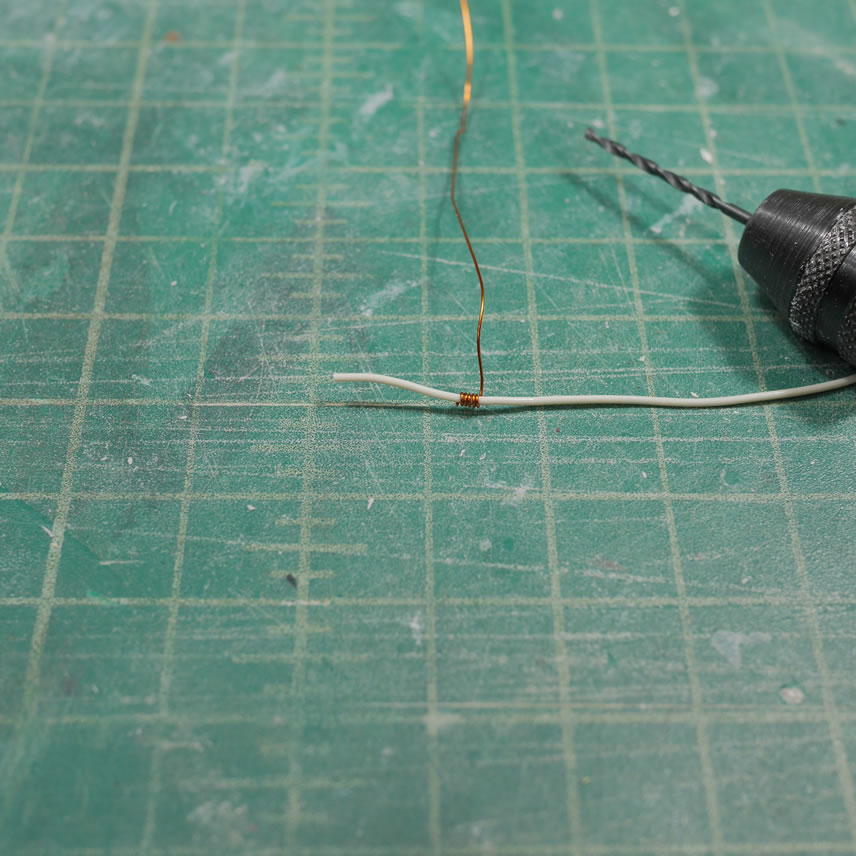
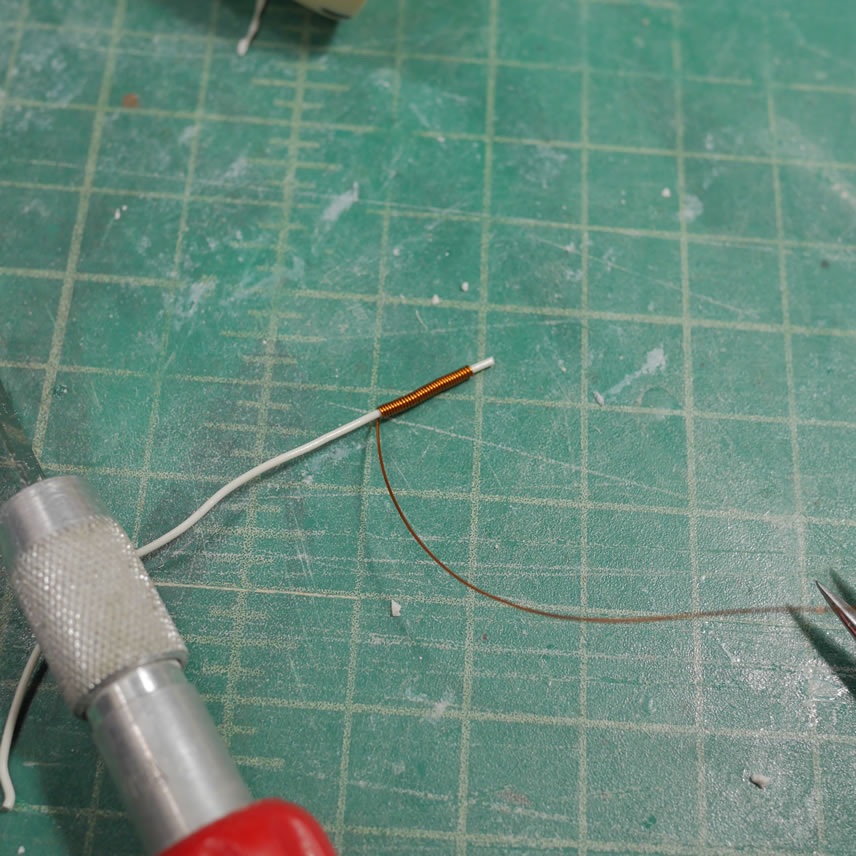
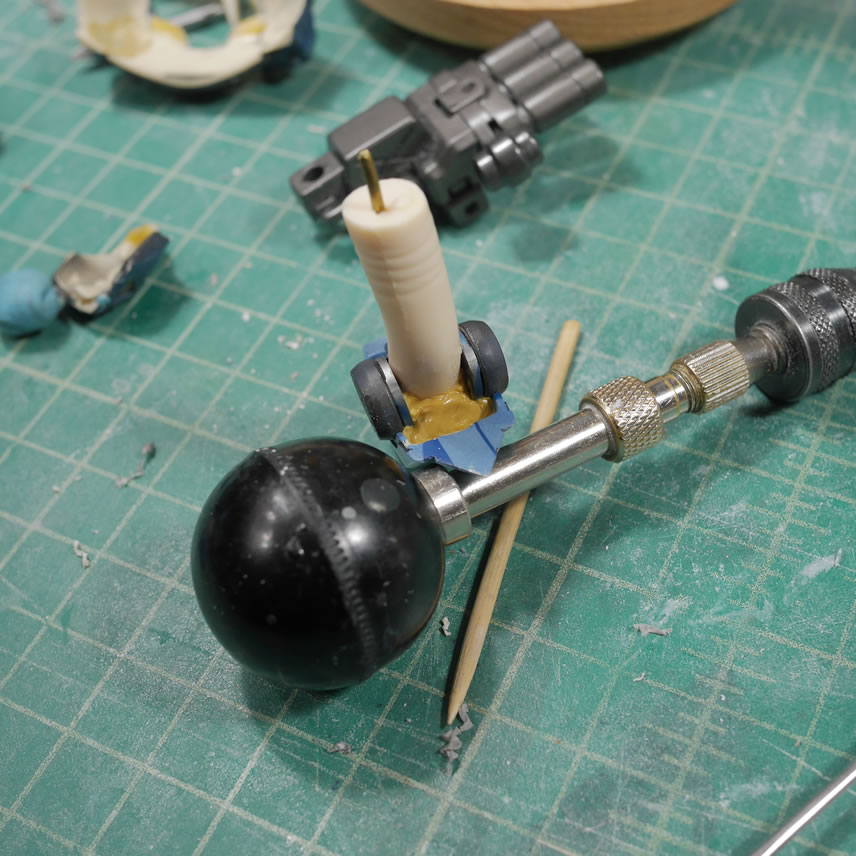
Once the wire is wrapped, a quick test fit to check clearances, we’re ready for the next step. A styrene tube is cut to recreate the gouf’s energy cables as her bikini back straps.
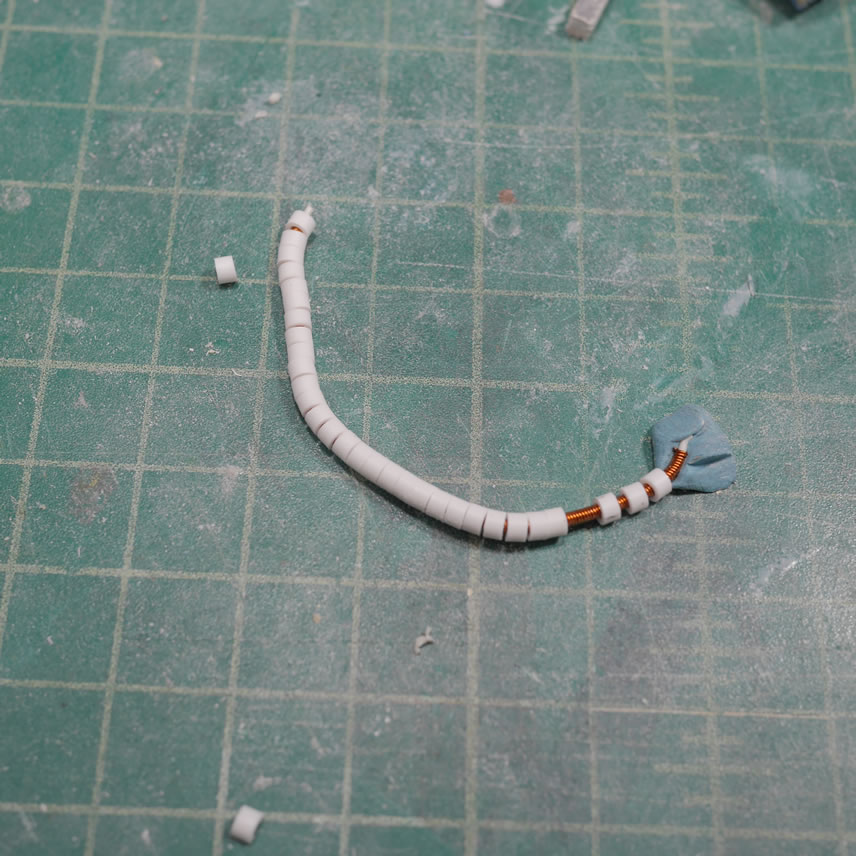
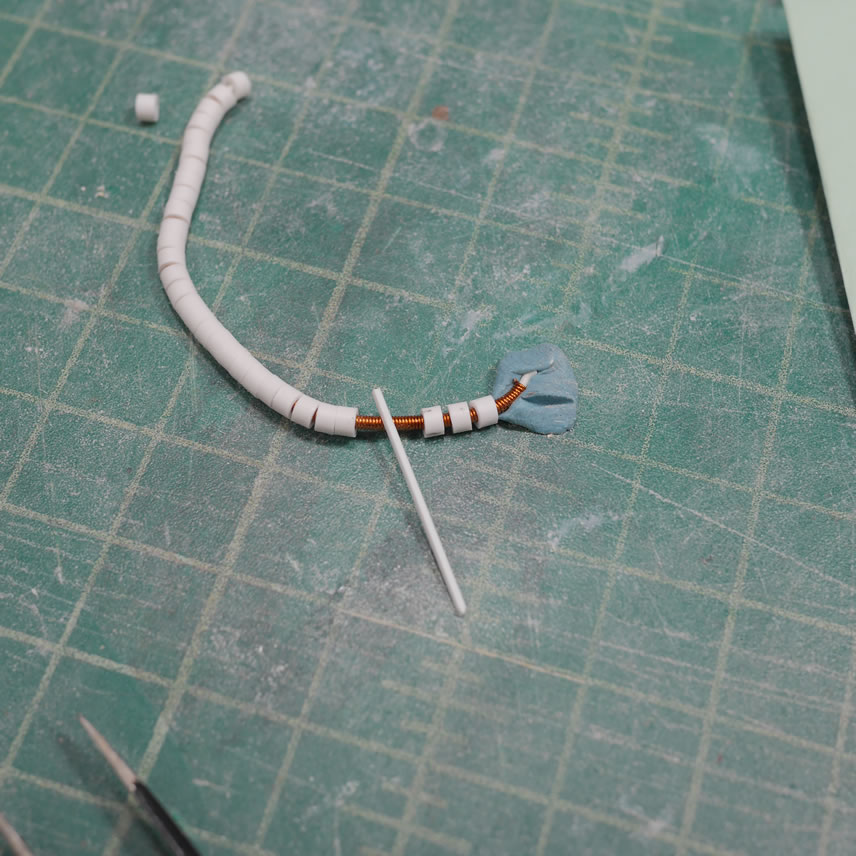
Another piece of wire is glued for the neck straps.
Moving to the backpack, I drilled a hole into the underside of the backpack. A piece of sticky tack is pressed against the back of the body and then pressing the backpack into the position I get the position for where to drill a corresponding hole for more magnets.
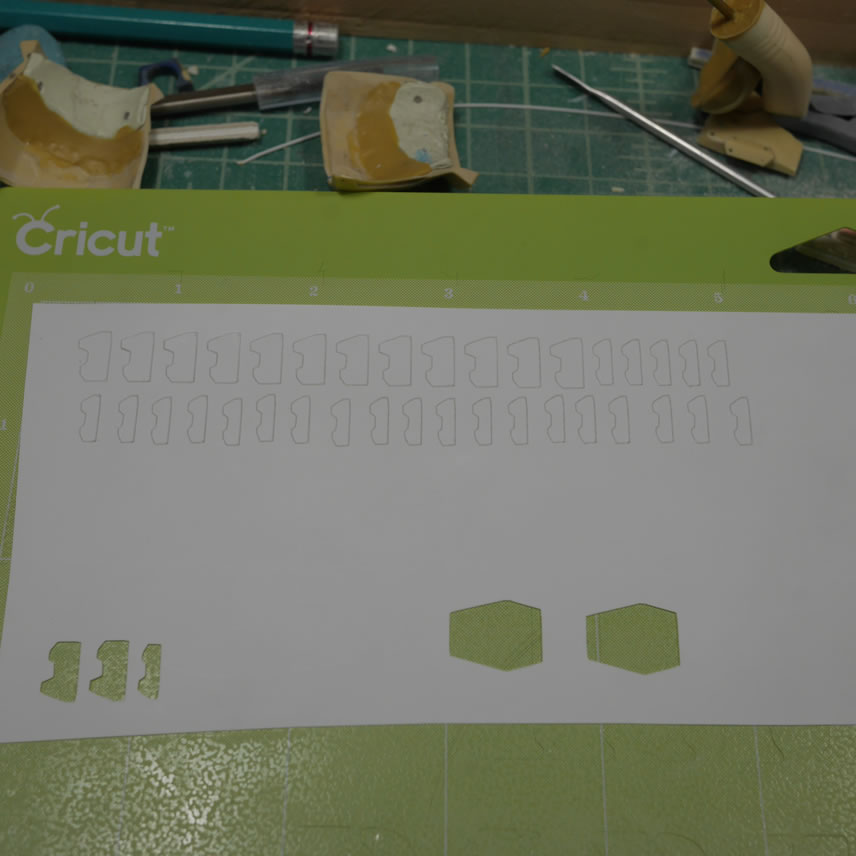
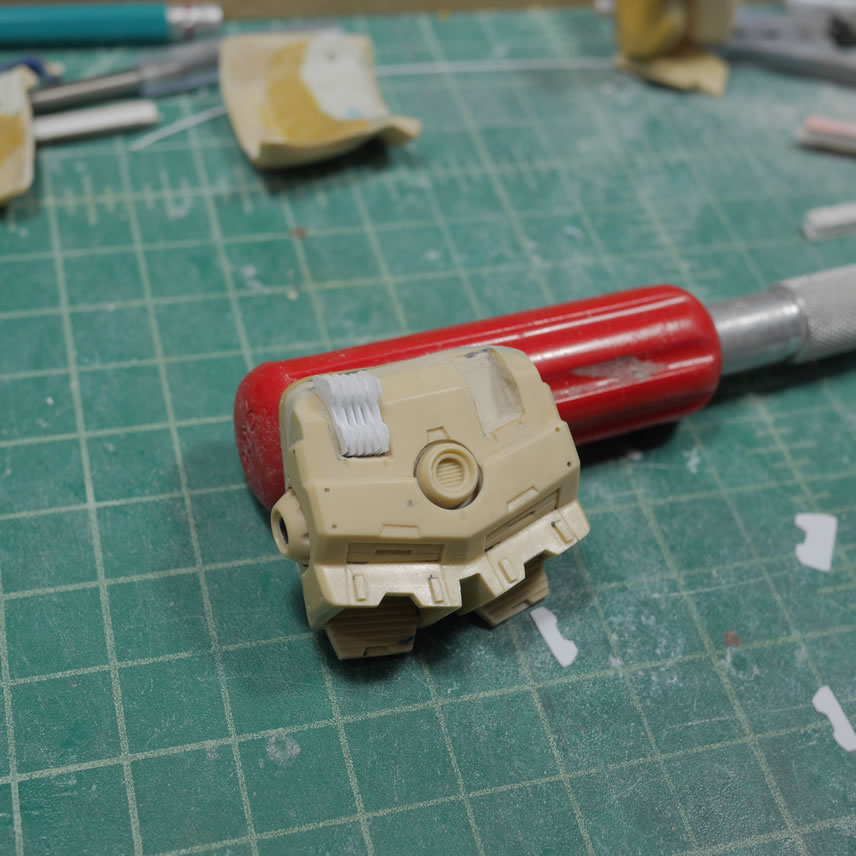
On the flip side of the backpack, I had originally had some mesh details glued into the top indented details for the backpack. Rather than reused that trick, I’m doing something a little different this time around. First step is to clear out that area. Most of the material is removed first with a drill, then some excavating dremel bits are used to clear more materials. Fine lines and final shaping is done with metal files and a 3mm BMC chisel that just effortlessly removes resin.
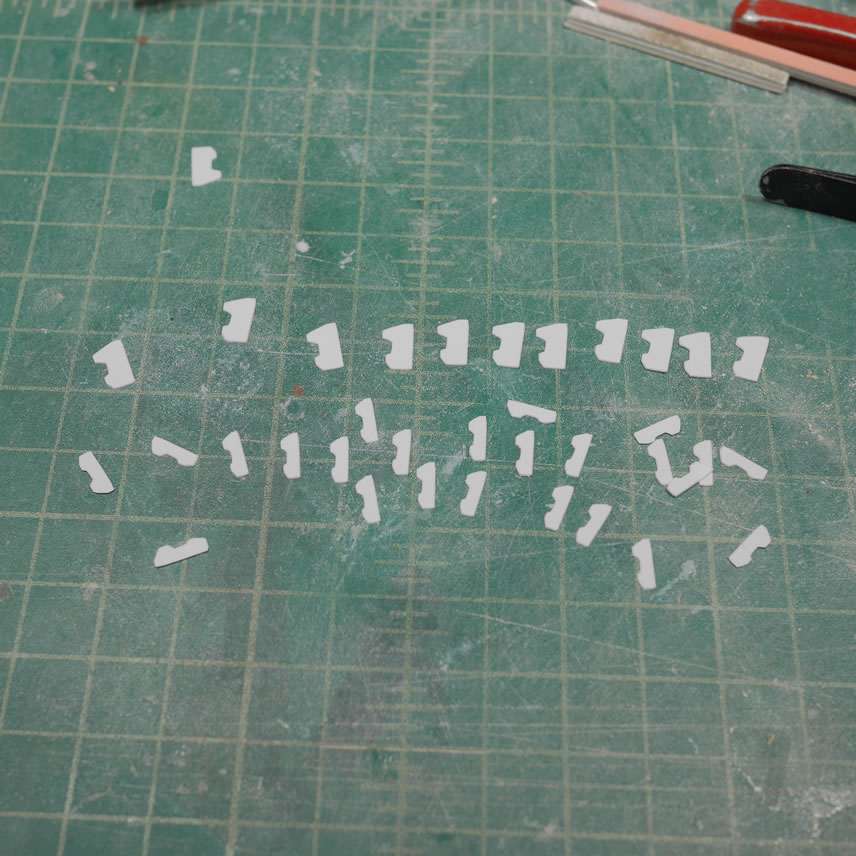
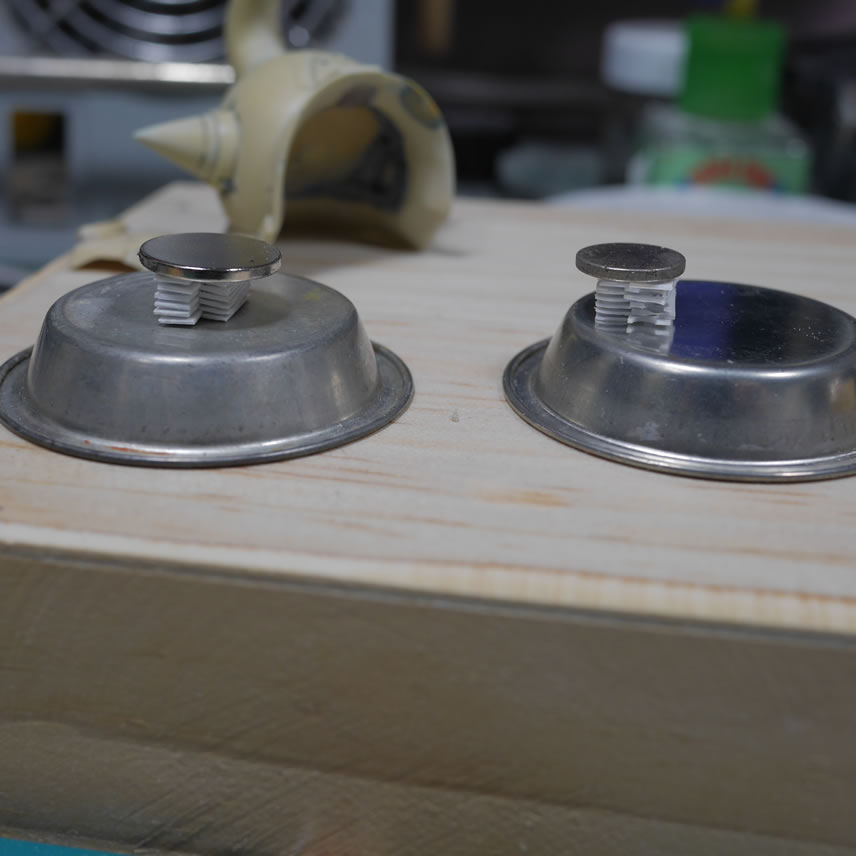
A quick design on the cricut to get vent shape drawn, a .1 mm sheet of styrene is loaded into the machine and the new vent pieces are cut and each piece is identical. Using the new cavity as a guide, the vents are built and glued together. I used some magnets and the tin paint trays to hold the parts together while the glue dried. A binder clip is too much clamp strength for the delicate piece so the magnet have the perfect amount of force to hold the pieces while the glue cures.
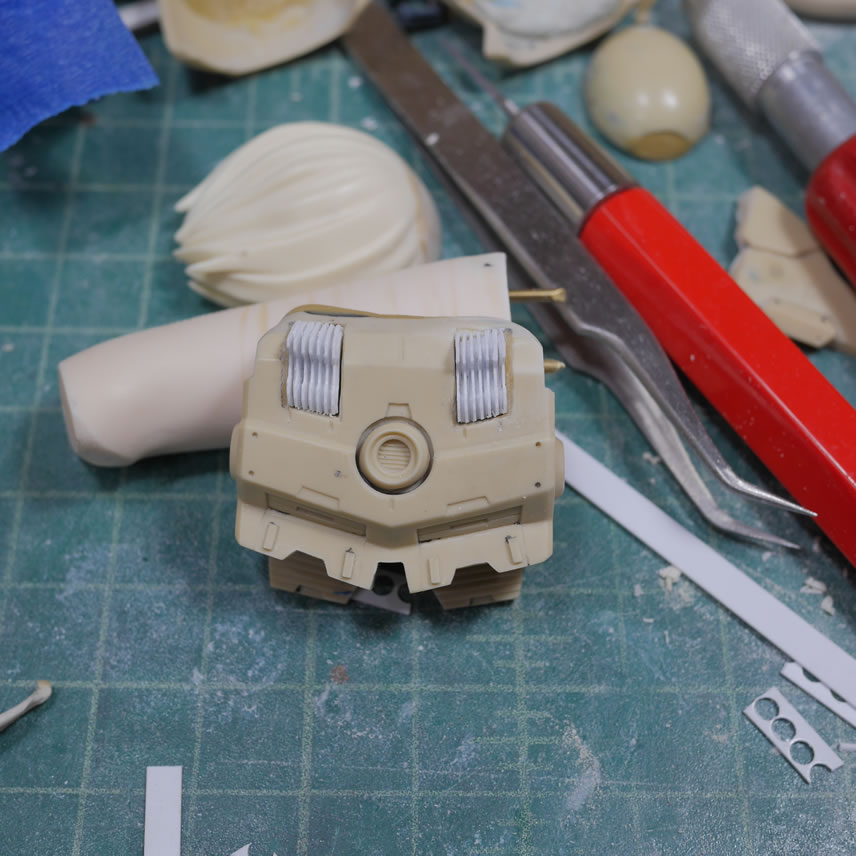
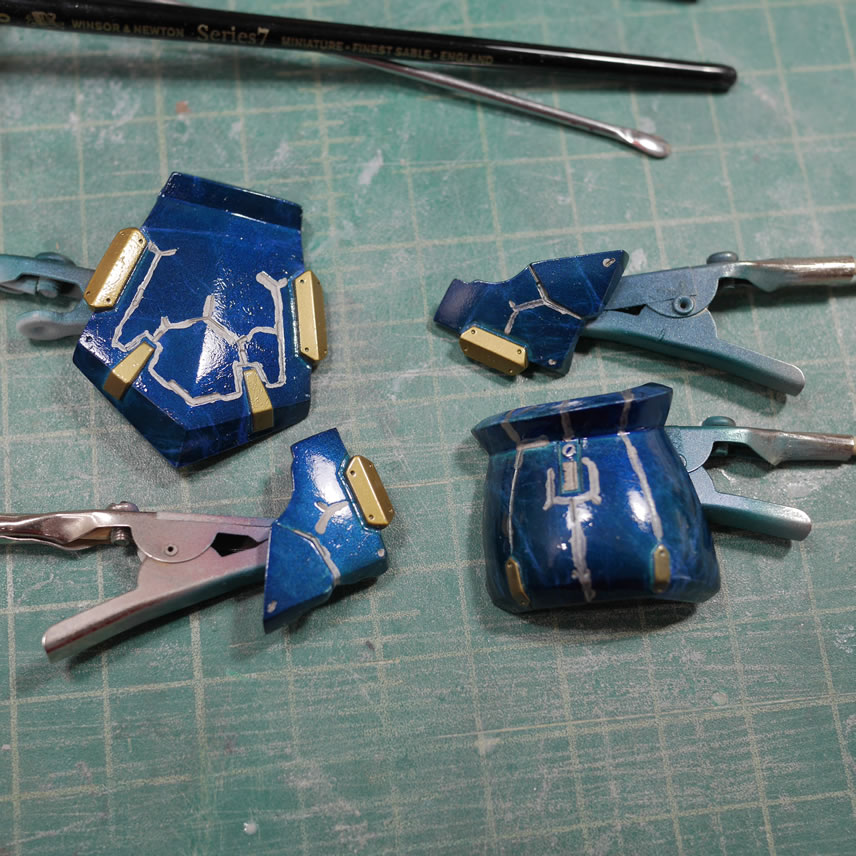
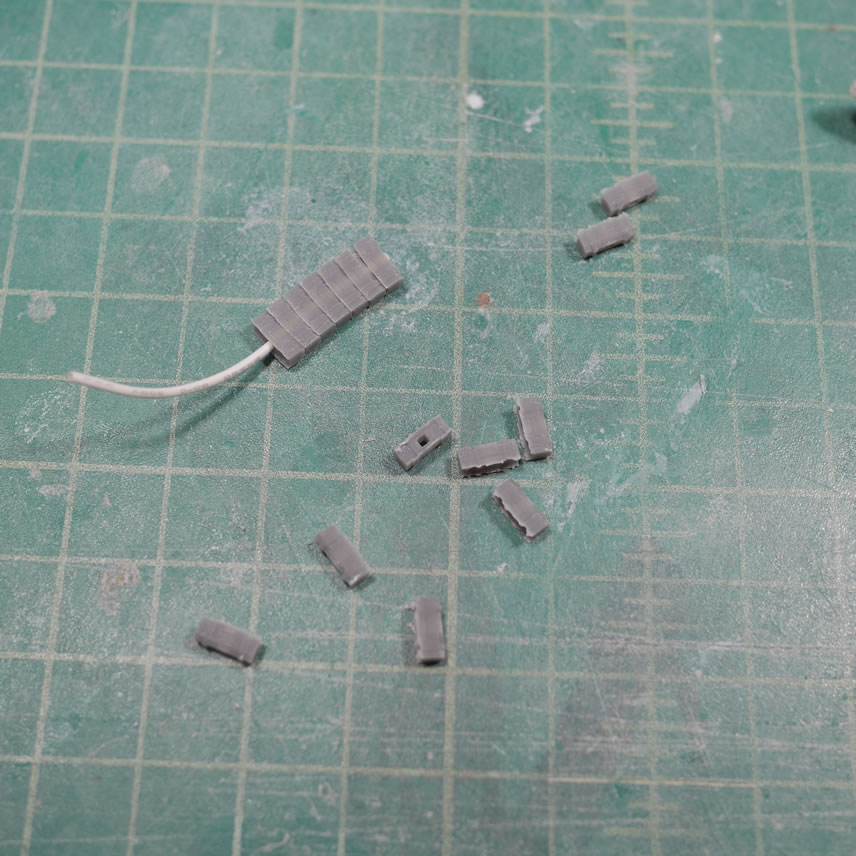
A little more sanding and refining finishes things off. I still need to refine the vent a bit, but at least the look is there. The last bit of detail is to fill in the area that used to connect the waist energy cables. Since that cable is no longer there, the empty cavity is just asking to be filled and detailed. Styrene tube are glued into position and a little photo etch detail is glued into place.
Mr Hobby’s light weight epoxy putty is used to fill in the gaps in the arms. The arms are being re-positioned from the original pose so there will be gaps. I used the light weight putty just because I haven’t used it in a while. The white part of the putty has gotten a bit dry and doesn’t mix too well. Note to others, air tight seal your moisture sensitive stuff to keep it from drying out over the years of neglect.
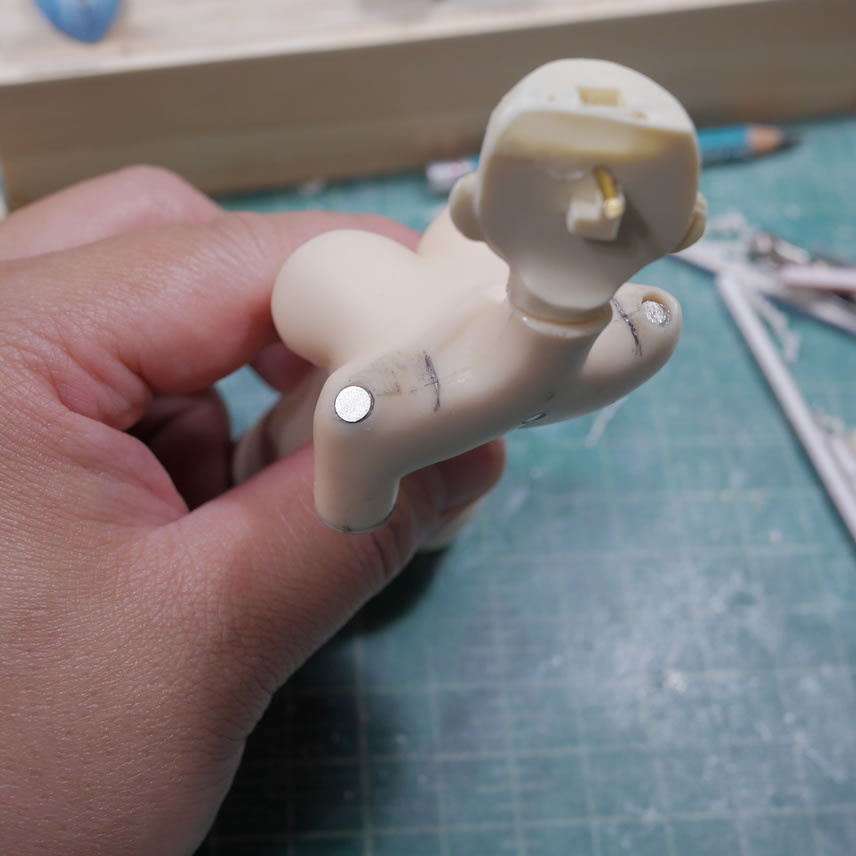
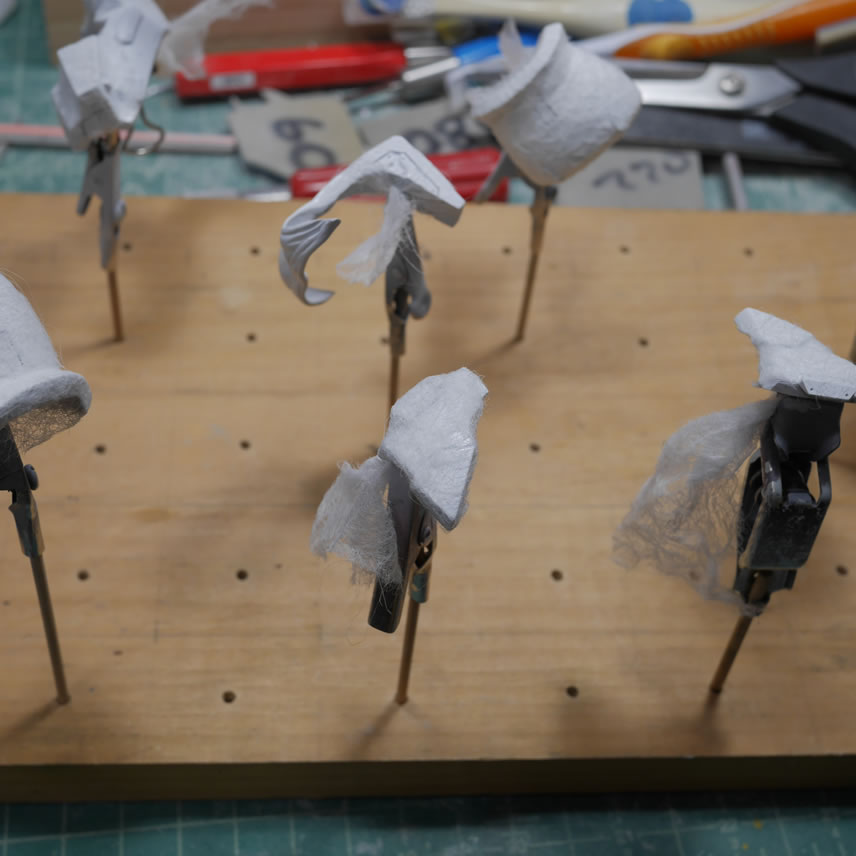
I went a little overboard with the magnets. But everything is pretty secure with the magnets augmenting the pins. Now these ares need to be puttied to hide everything.
Light curing putty for quick putty work. Epoxy putty for stuff that I’m not in a hurry to work on, or if I’m getting close to being done for the day, epoxy putty. Light curing putty is perfect for continued workflow. Light curing putty cannot be used as thickly as epoxy, as light needs to penetrate the whole putty to cure it, so there are limitations with each putty type.
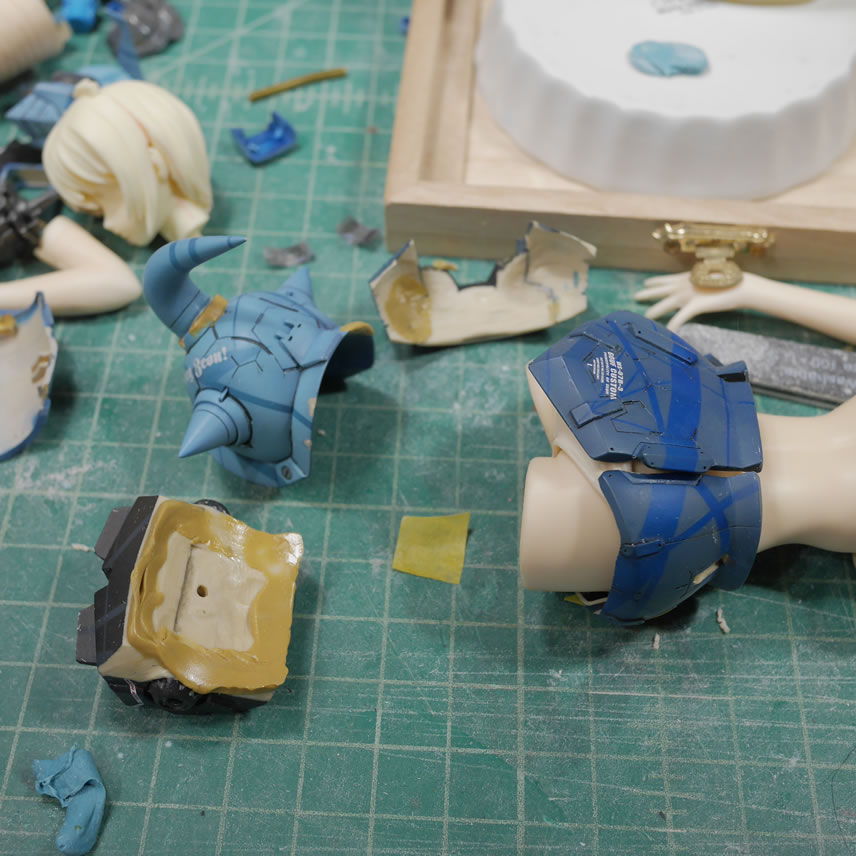
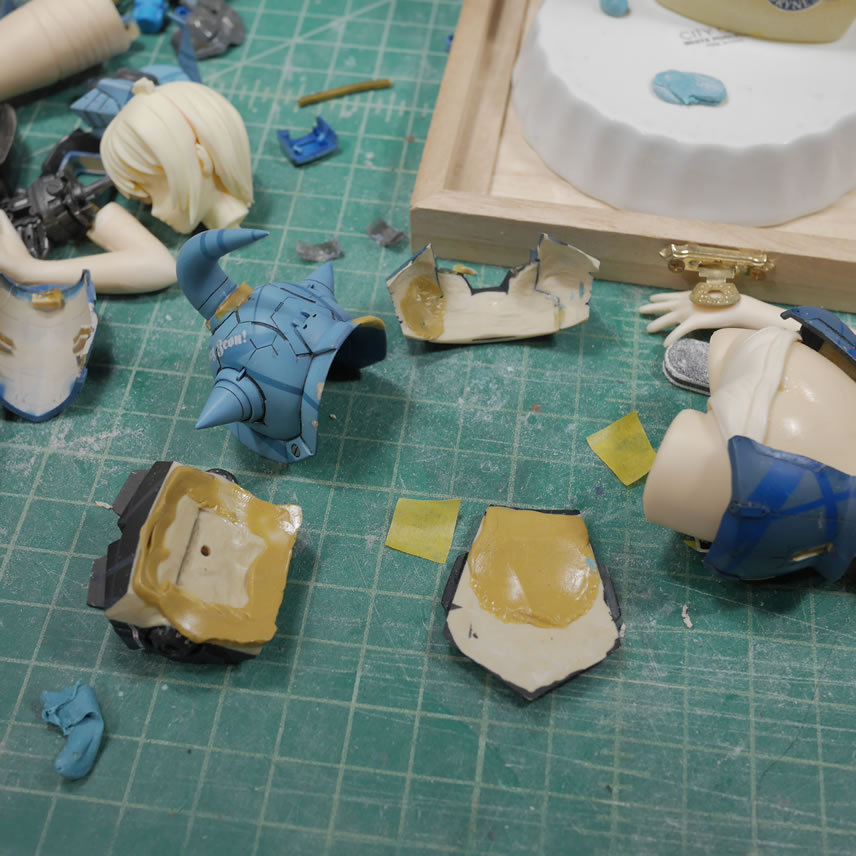
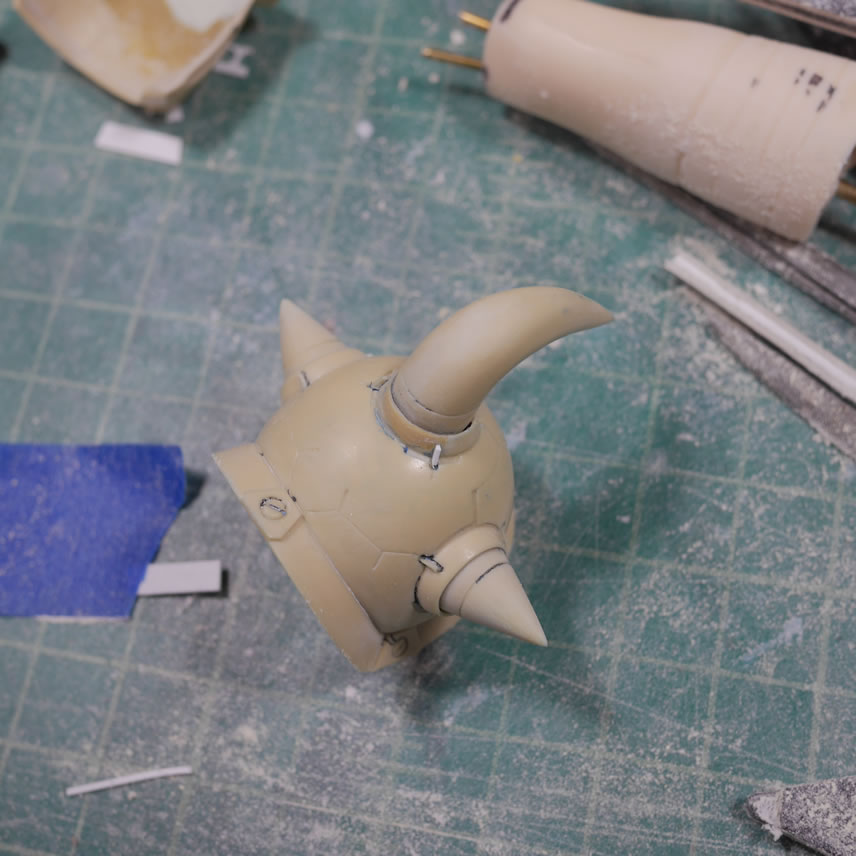
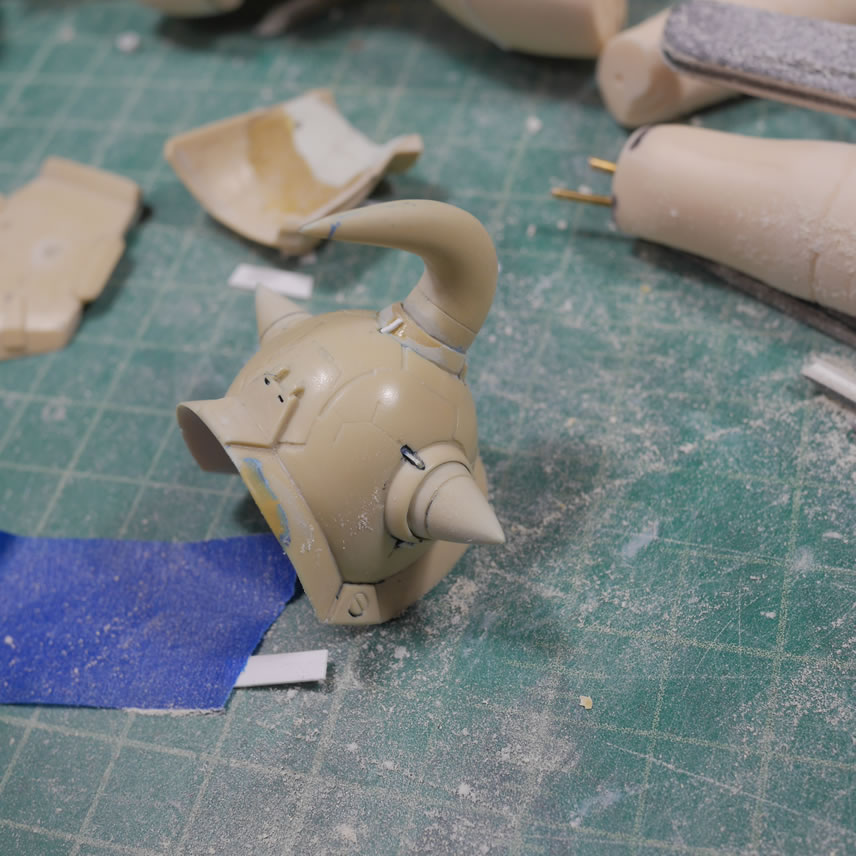
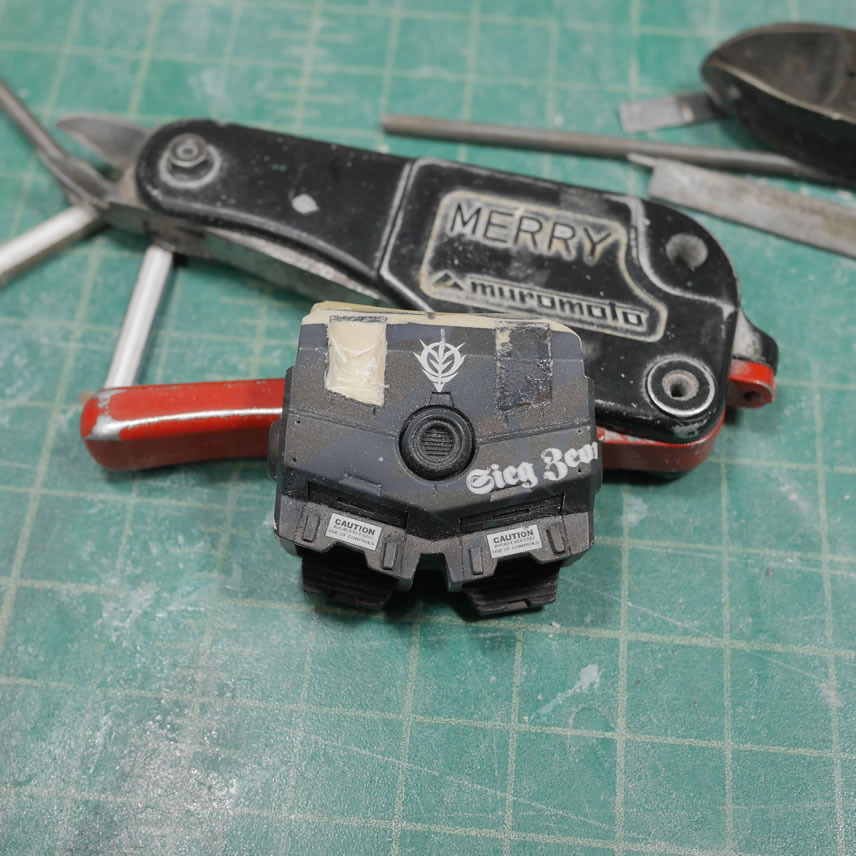
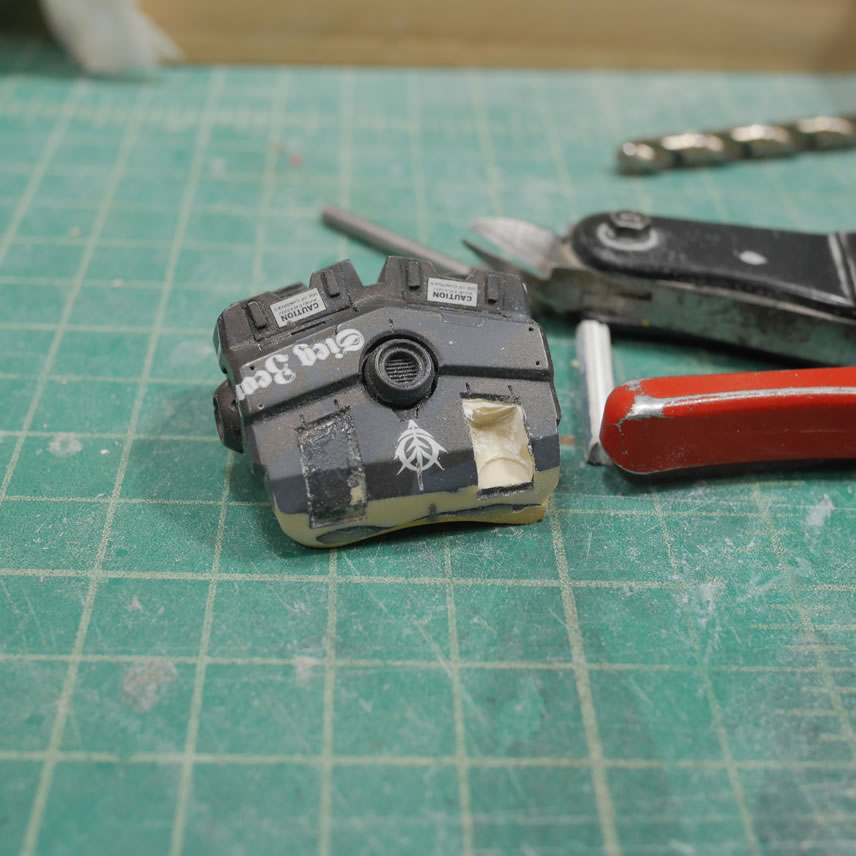
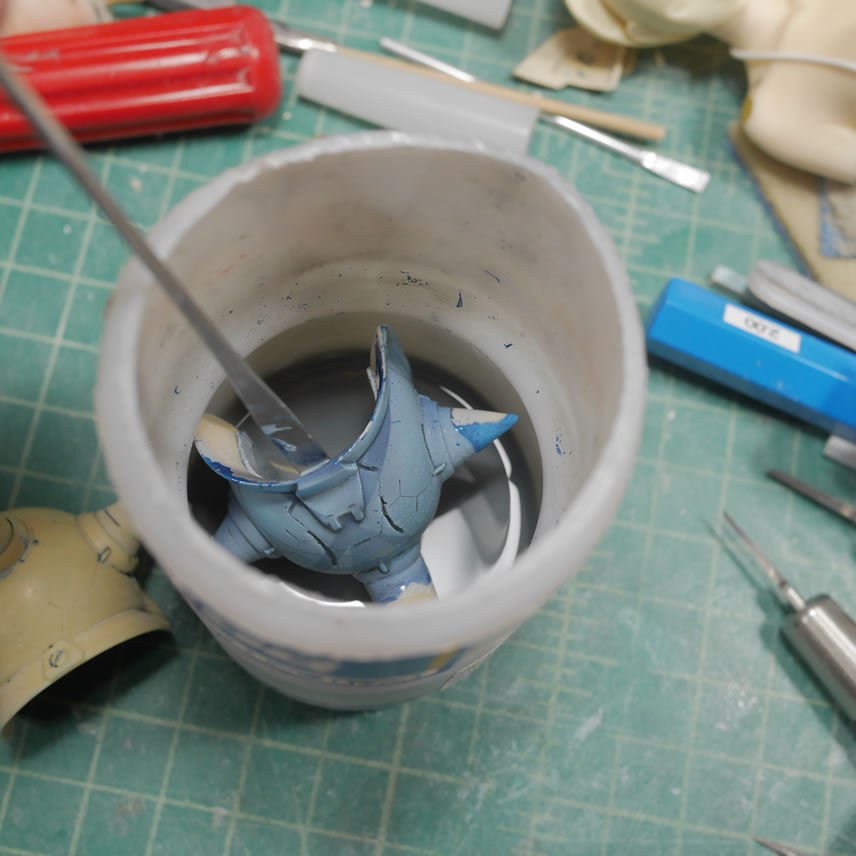
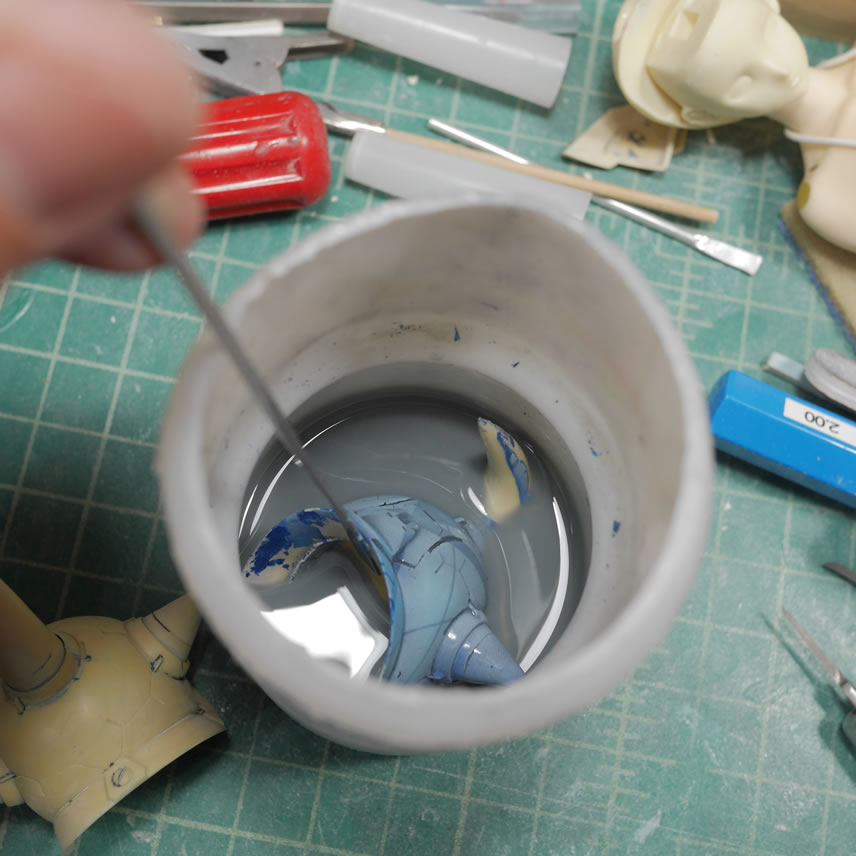
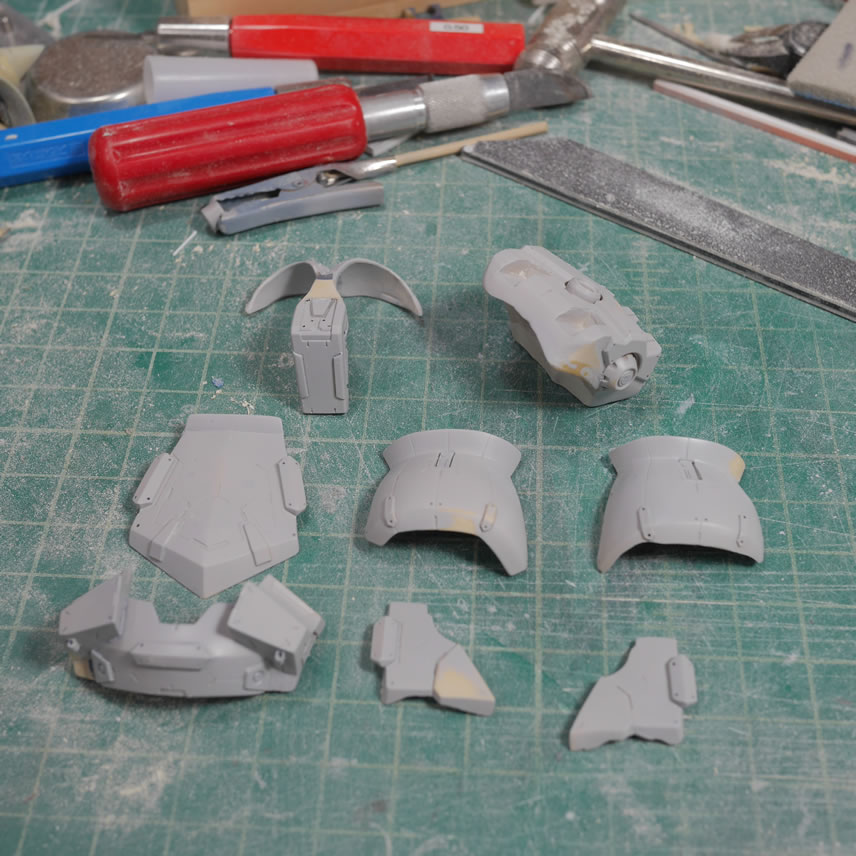
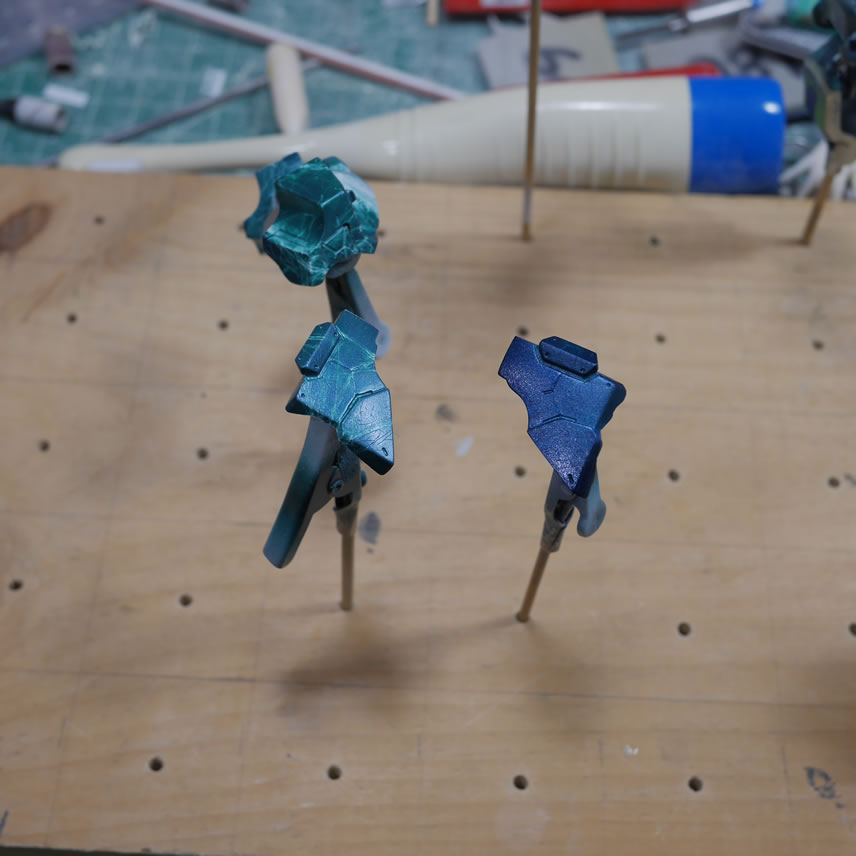
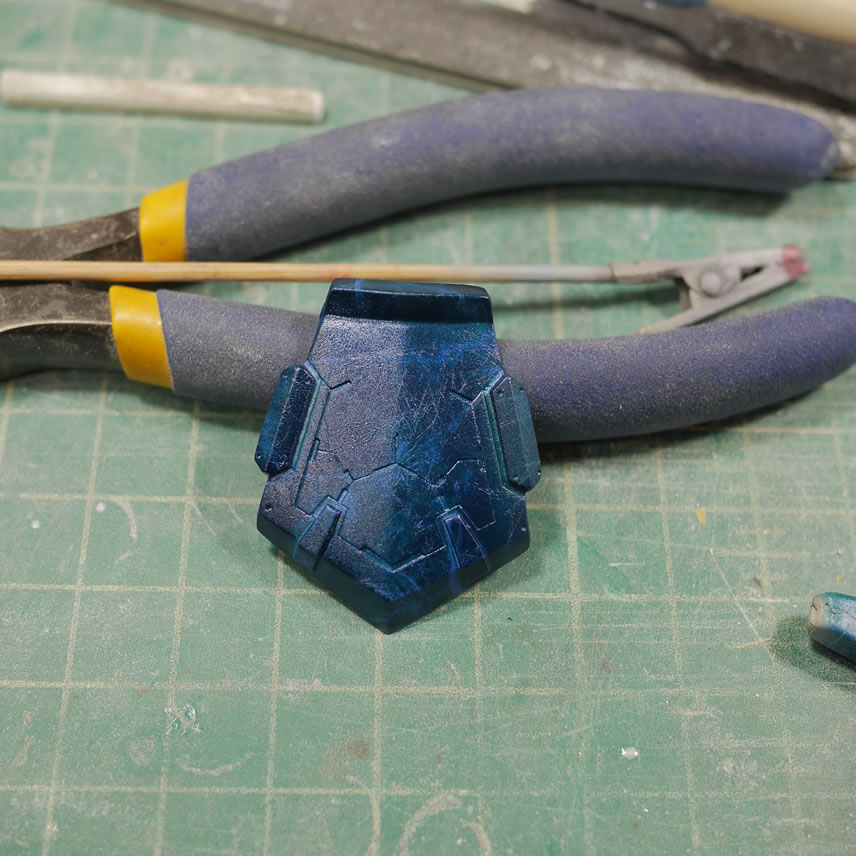
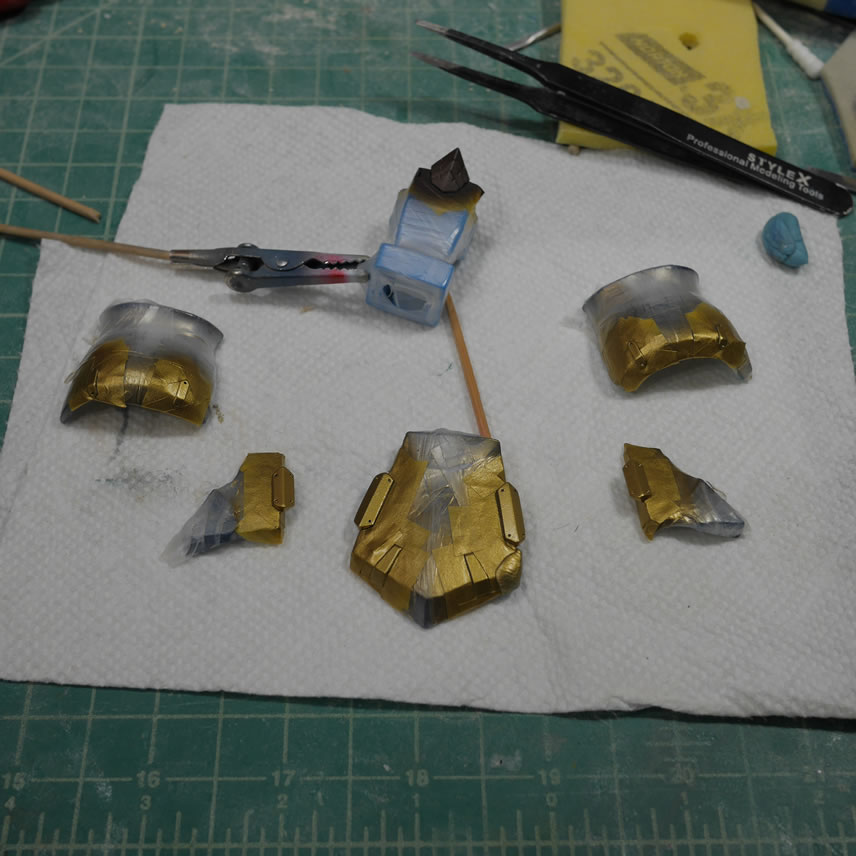
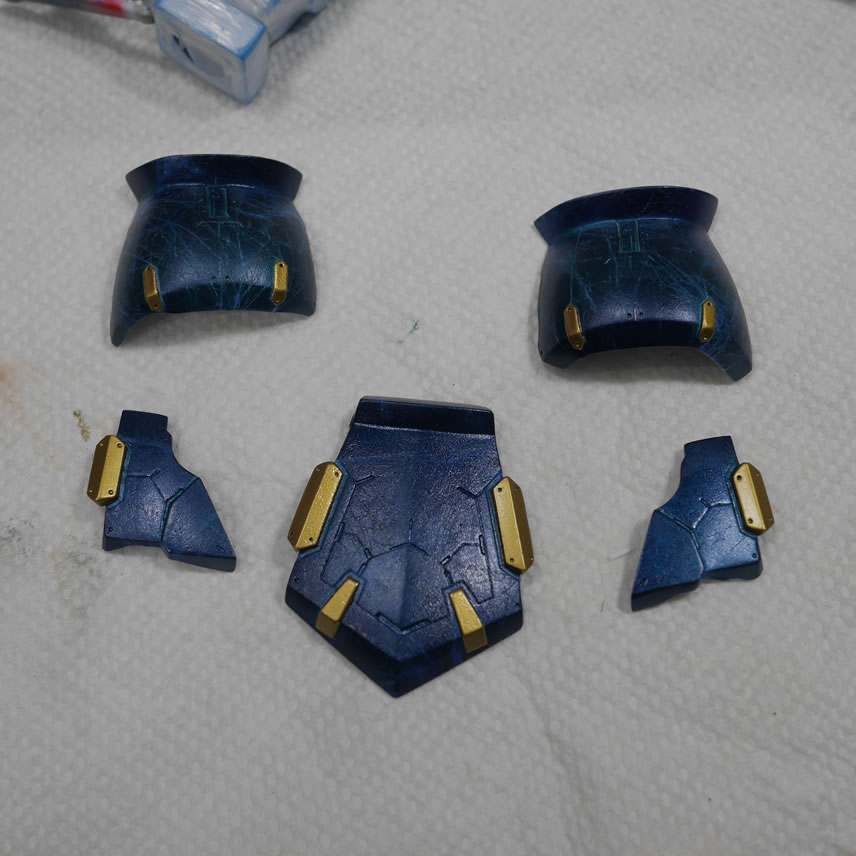
The parts are dipped in some hardware store lacquer thinner to strip the paint. During this process, the strongest resistance to the thinner were the decals, I had to scrub them a little to completely remove the decals. The last picture is a comparison for before and after.
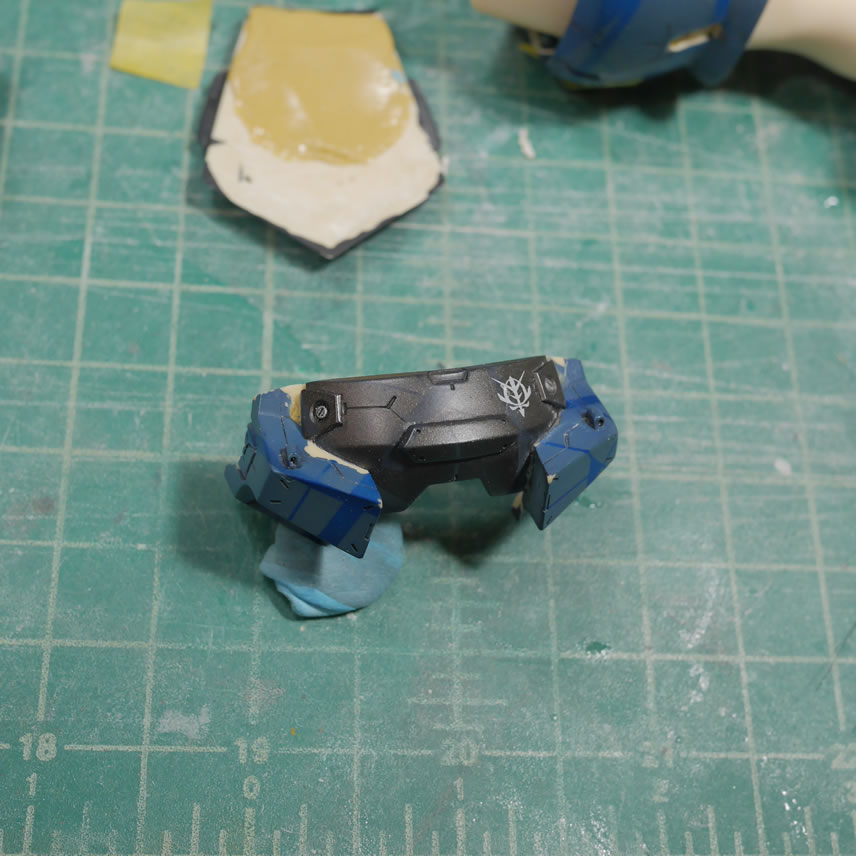
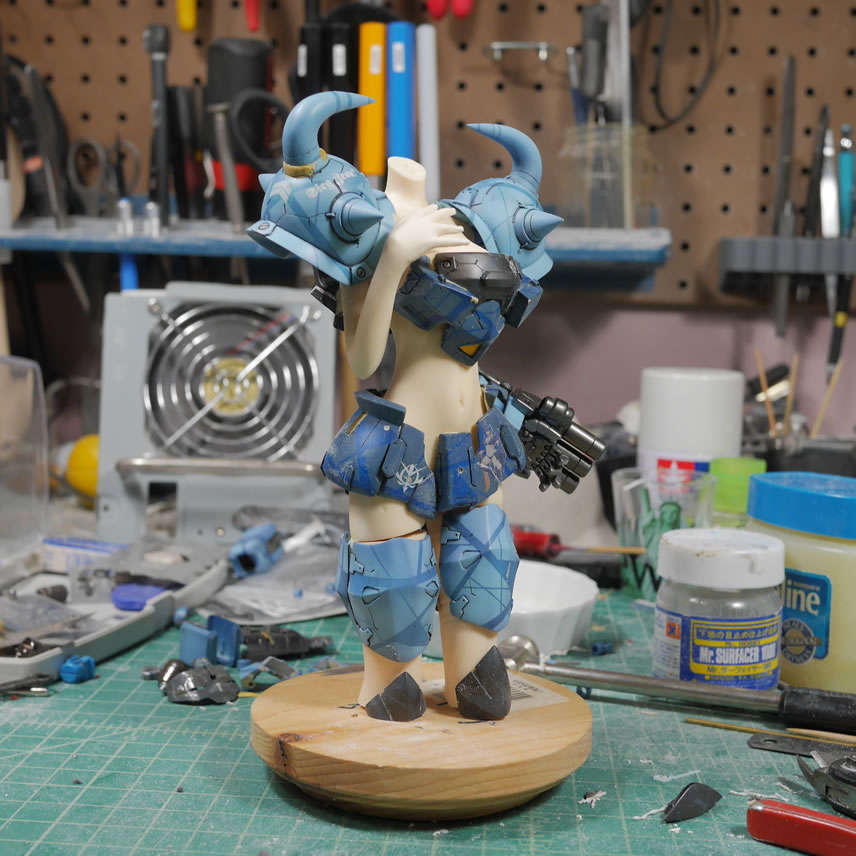
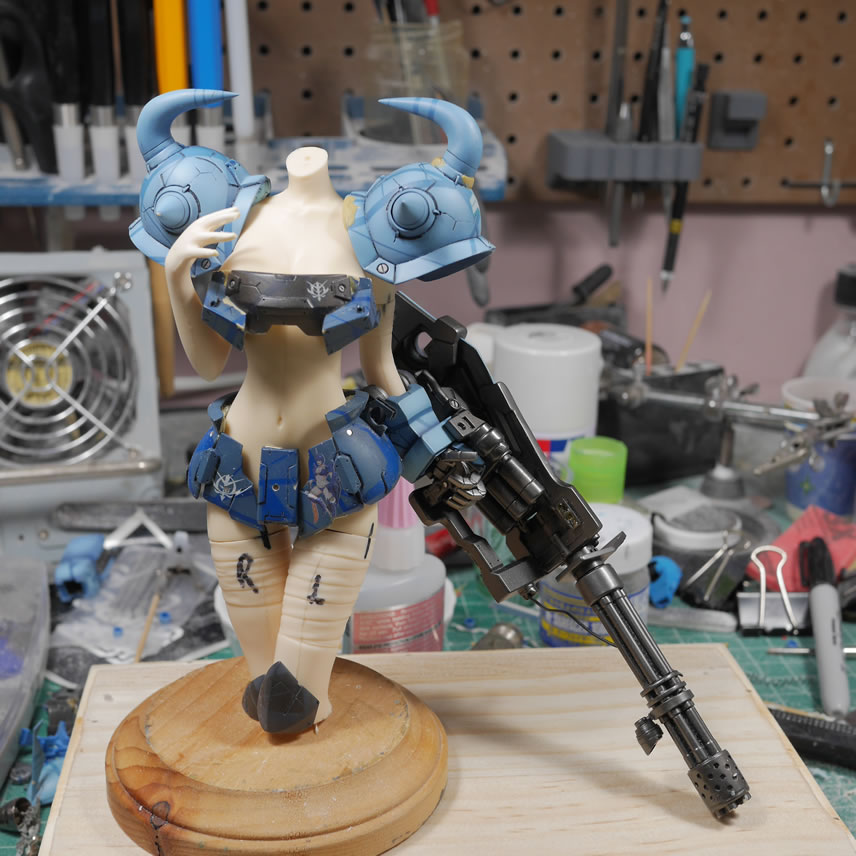
And another test fit for the monotone.
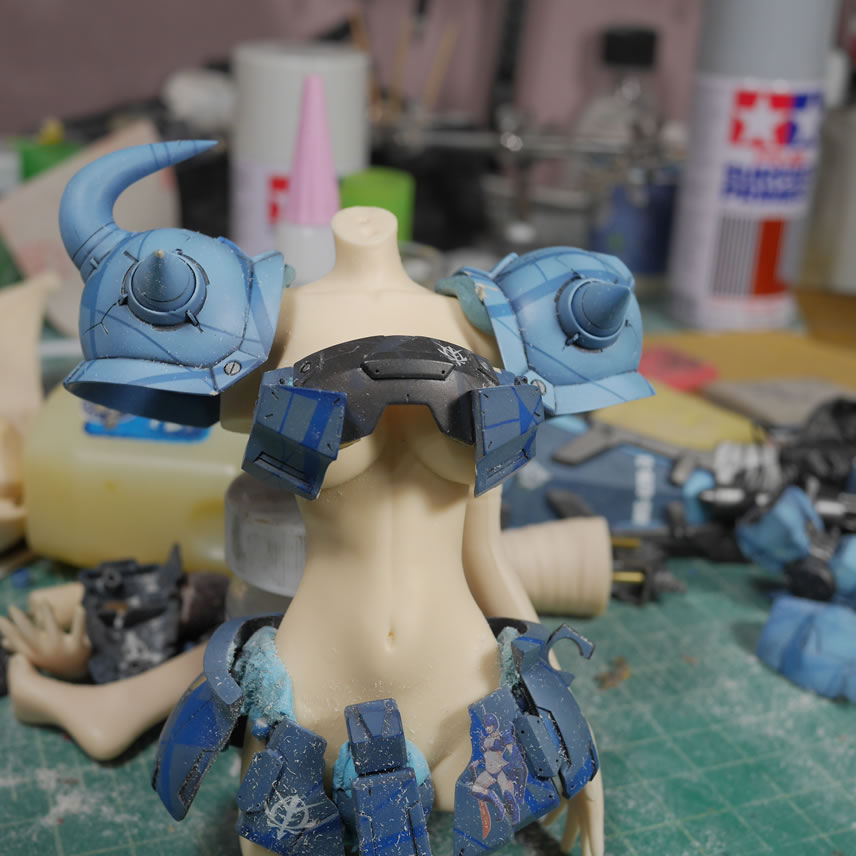
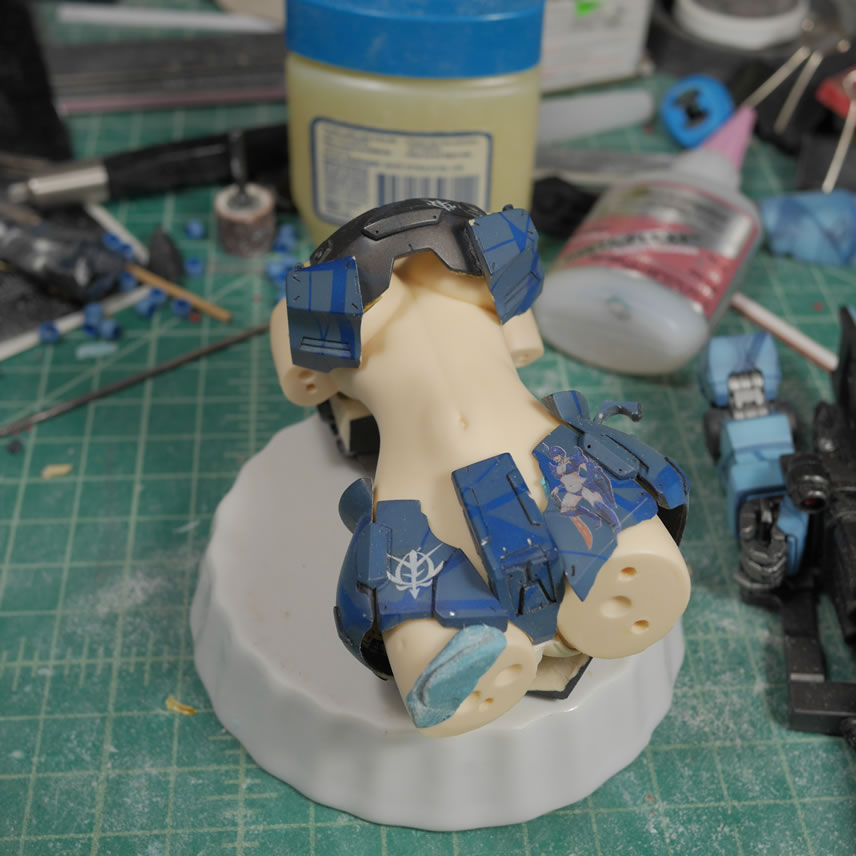
The side skirts have a holder piece for the waist energy cable. Since there is no energy cable, this needs to be removed too, and the cavity filled with a small amount of detail. A strip of styrene is cut and glued into the now empty space and on top of this, another few pieces of photoetch details is glued onto the sytrene strips with white glue mixed with a small amount of water.
The area under the skirts can be visible if one were inclined to look. So for those creepers, I marked in the area for some panty lines. Once penciled in, a BMC scriber traces out the line removing some resin as a guide. Then files are used to cut and widen the area a little more. A thin strip of styrene is glued into place and slightly sanded to finish off the panty lines.
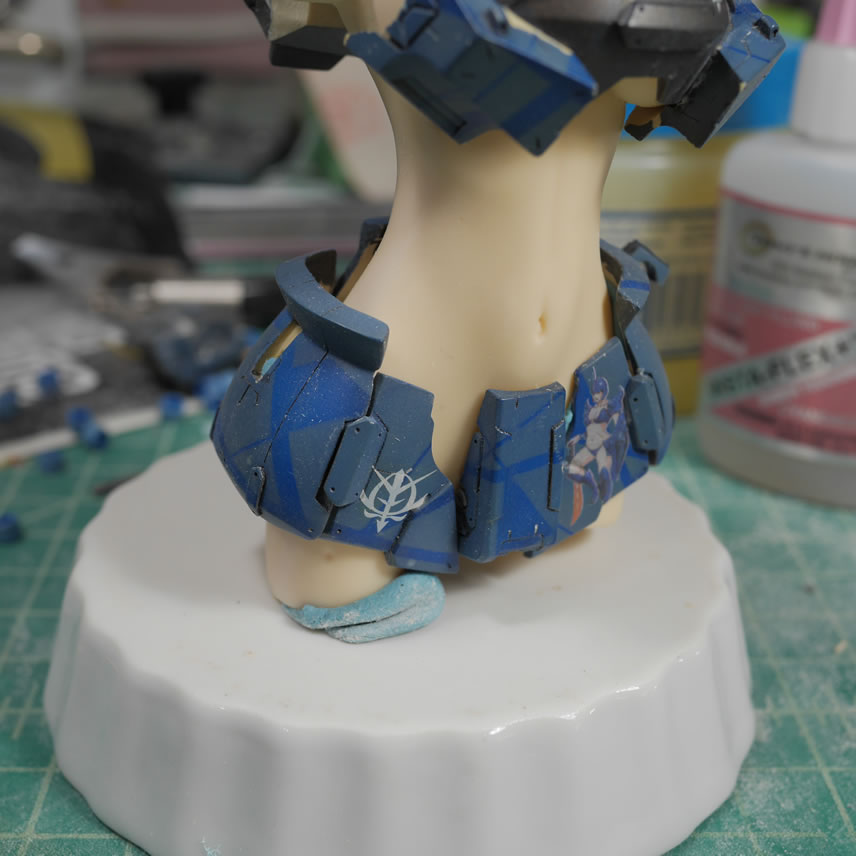
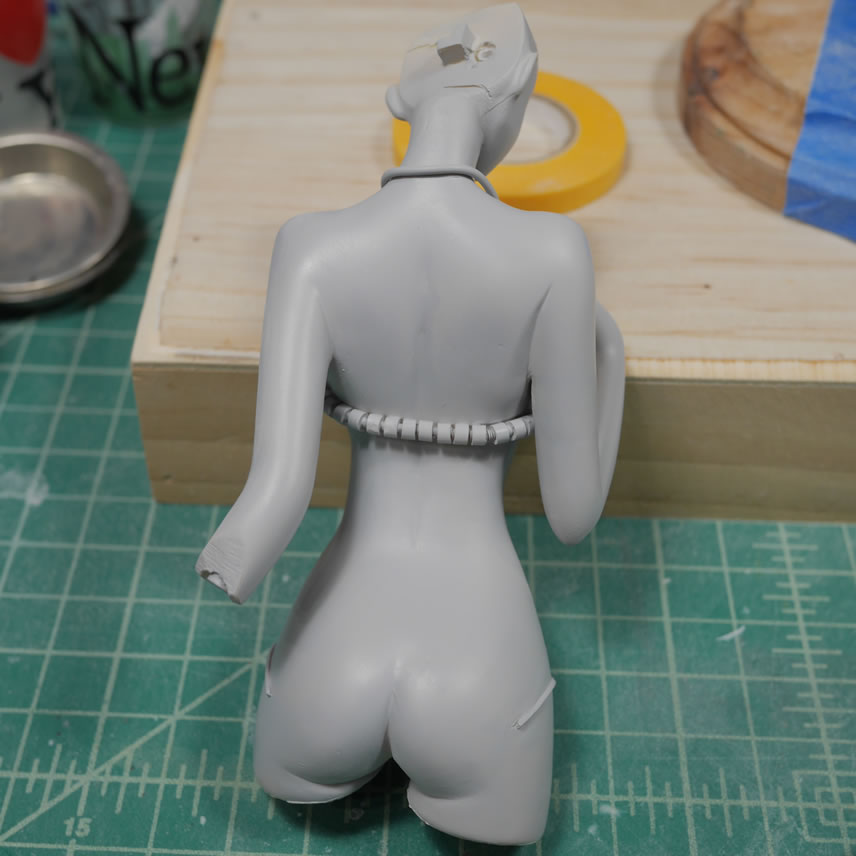
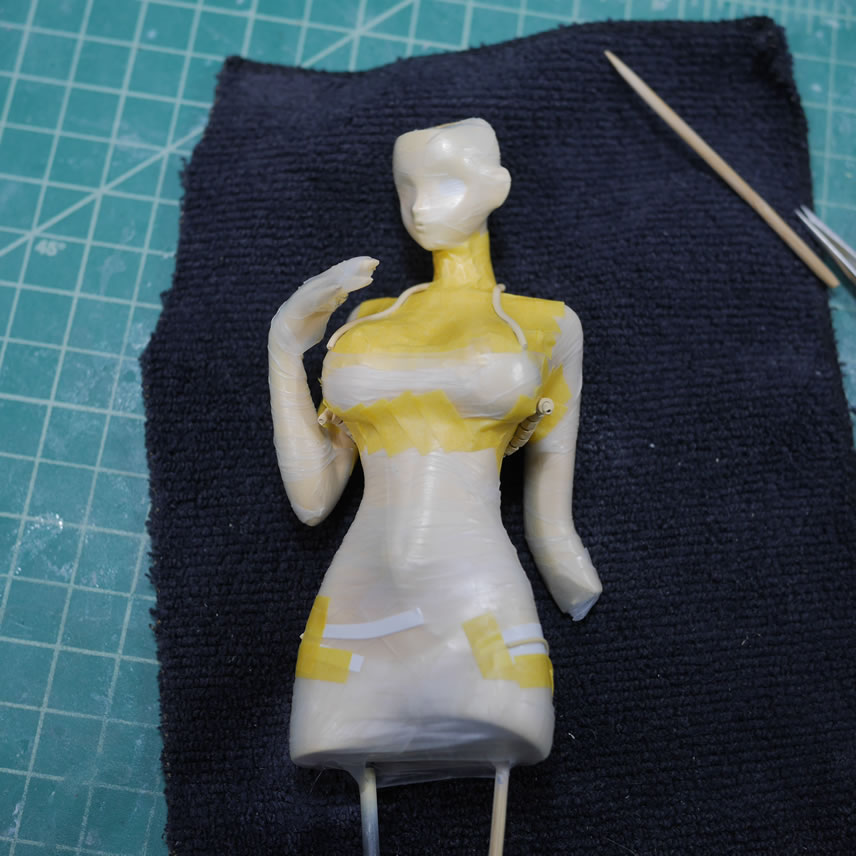
Once I was done with getting the chest piece shaped, putty is added back to the underside of this armor. Vasaline applied to the figure and the armor is pressed together to get a seamless transition from body to armor.
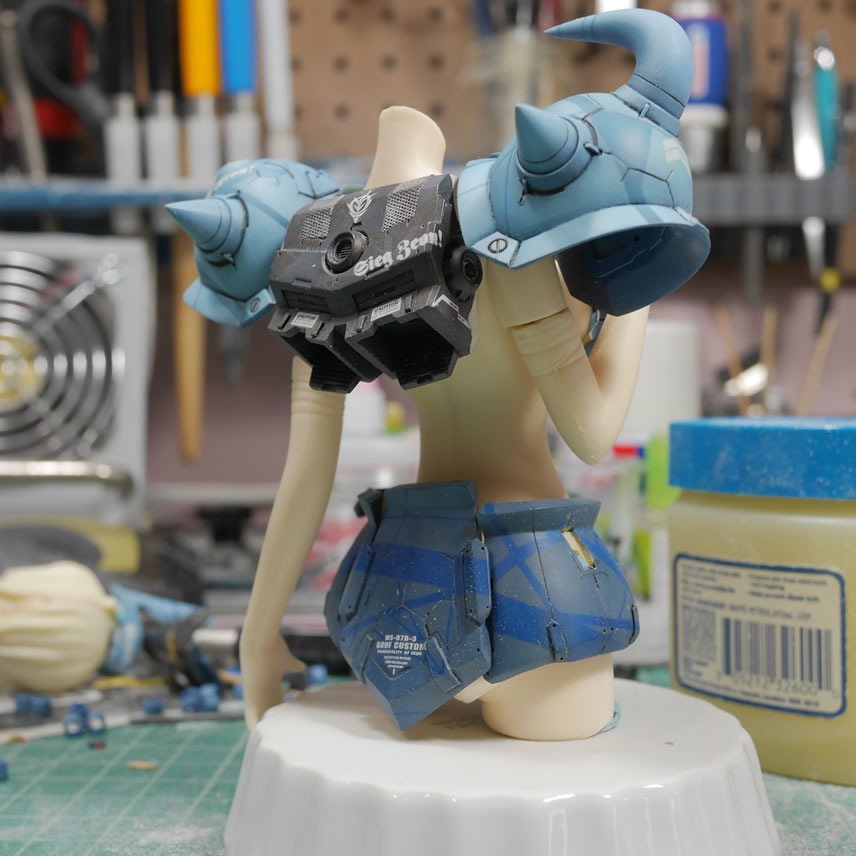
The project has progressed decently and soon I can start slinging some paint. I still have more detail work to do to finish up the body to armor transition areas, but this is a good point for a sizable update.
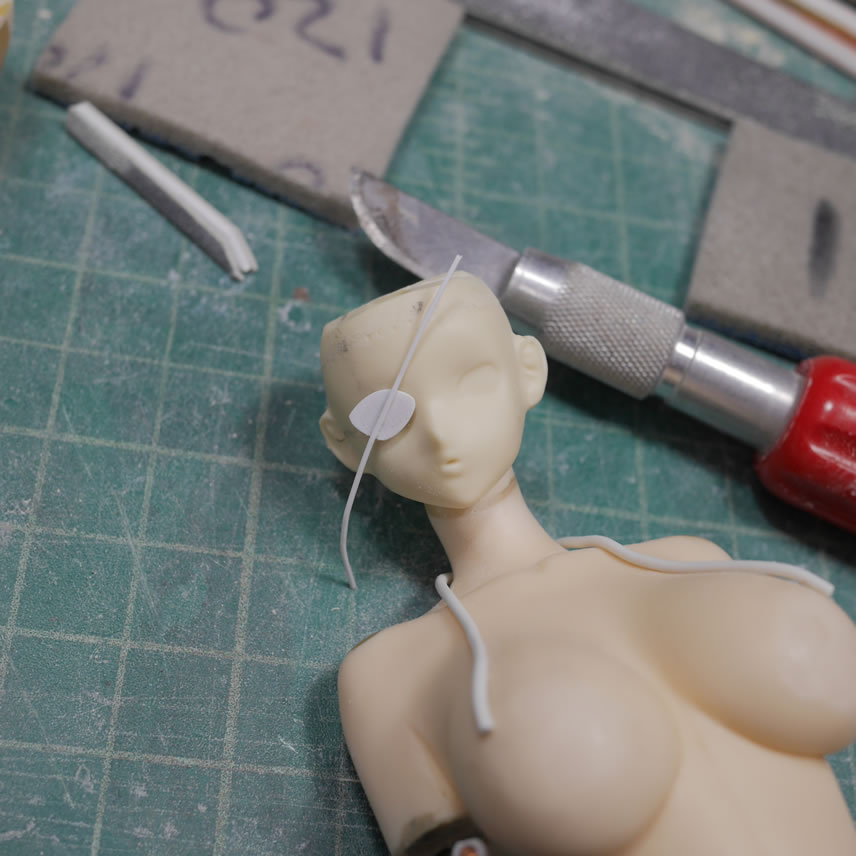
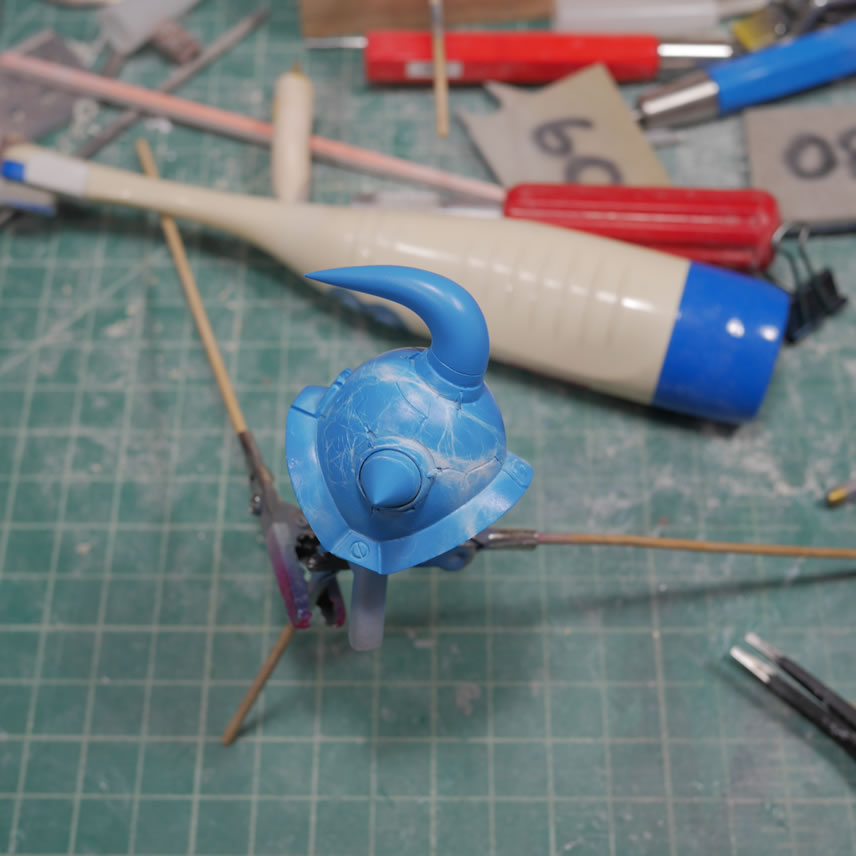
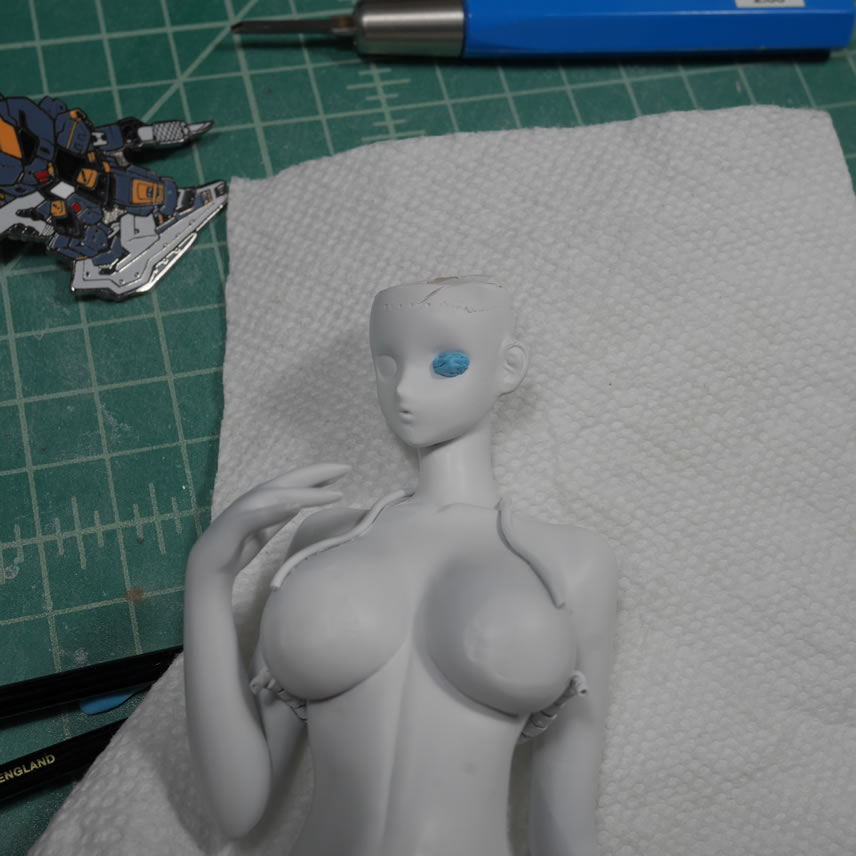
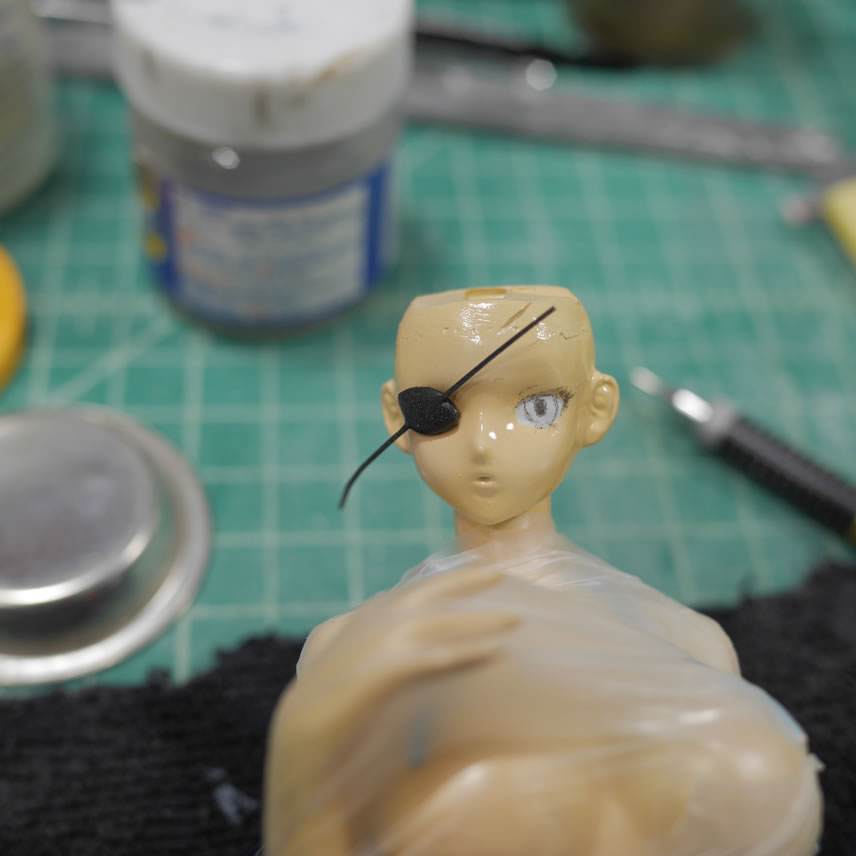
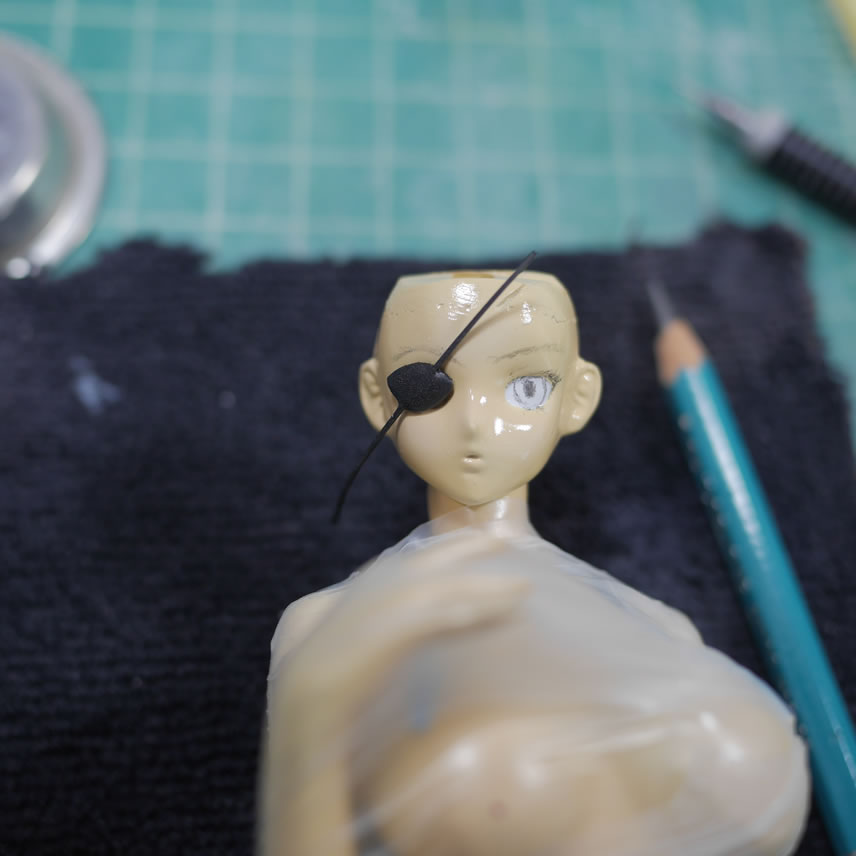
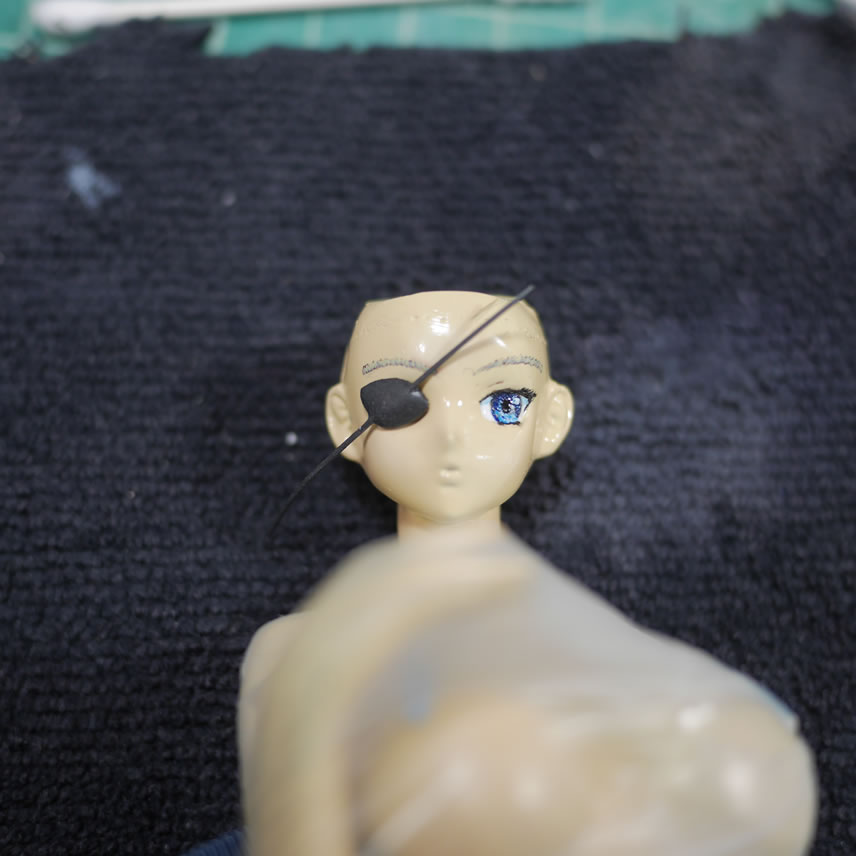
July 13, 2020: My last project picture got a response from reddit to add an eye patch as it’ll make her a mono eye, and here’s the test fit.
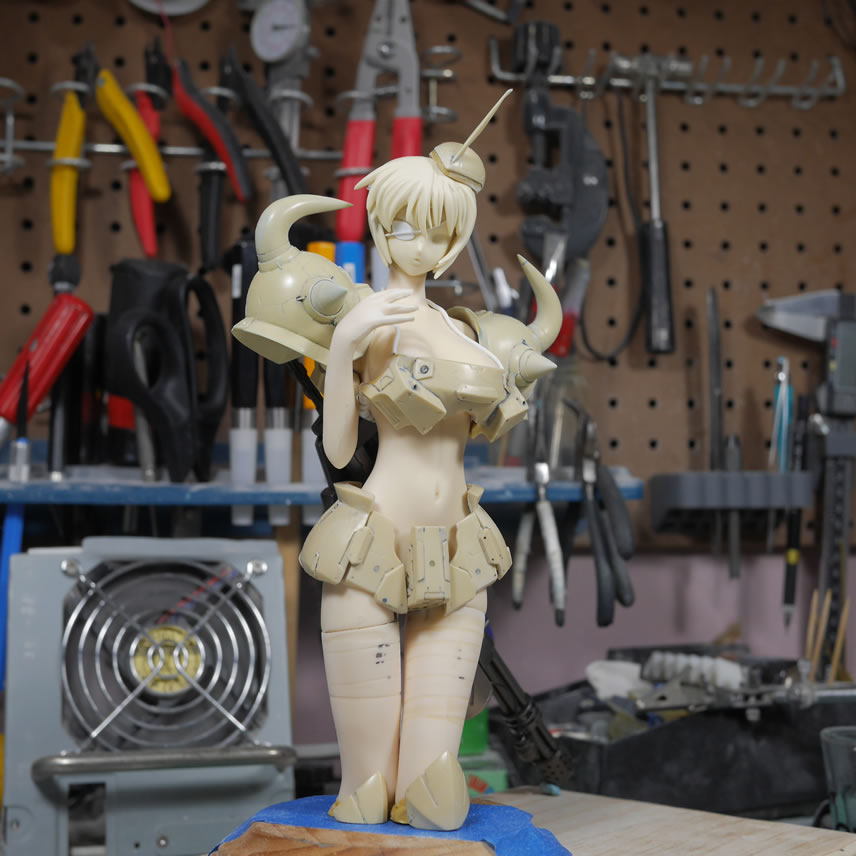
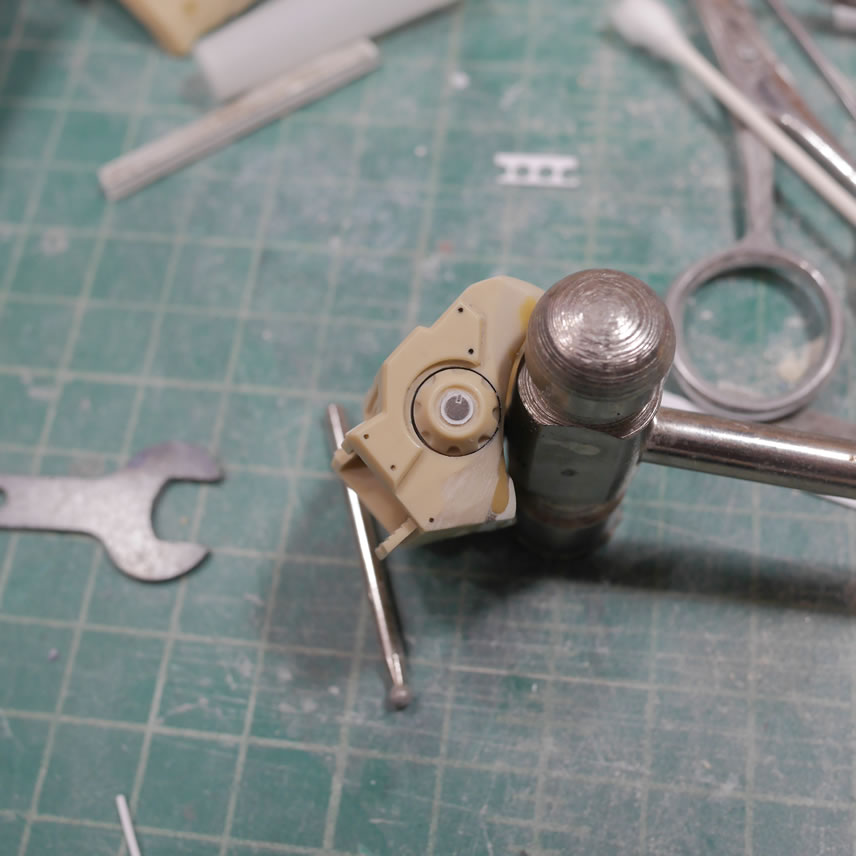
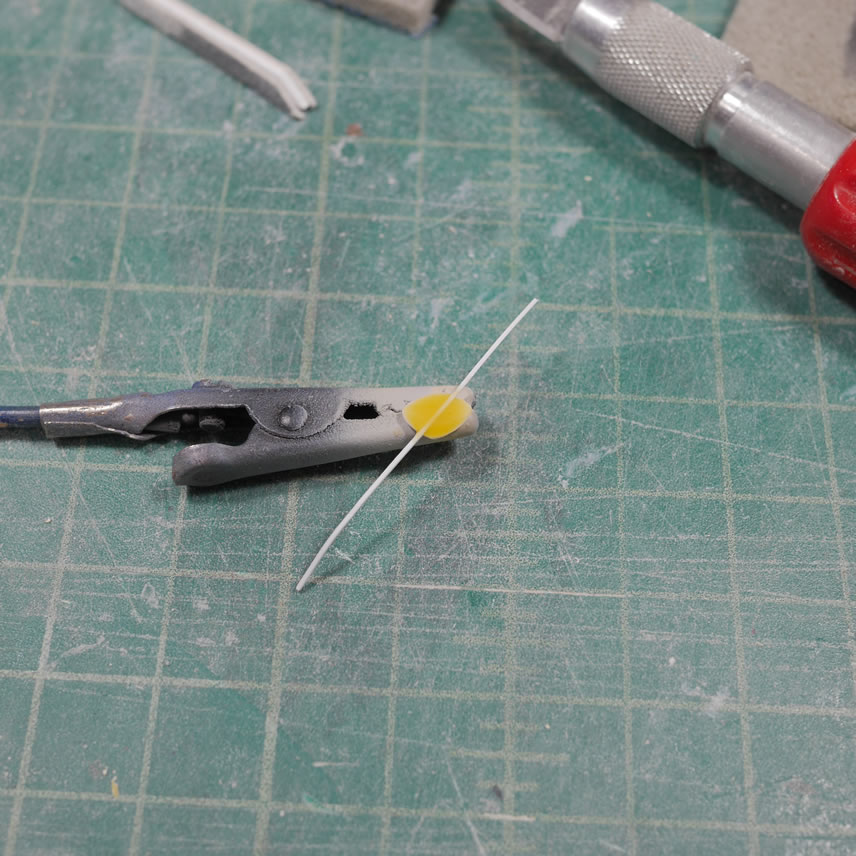
The eye patch was a simple add; a little styrene cut and shaped with sanding sticks. Glue in a thin styrene strip and done for the most part. I did drill in to the back of her head and add in a magnet and corresponding magnet to the back side of the eye patch. A little putty on the front side of the eye patch gives a little dimension and depth and it’s ready for paint.
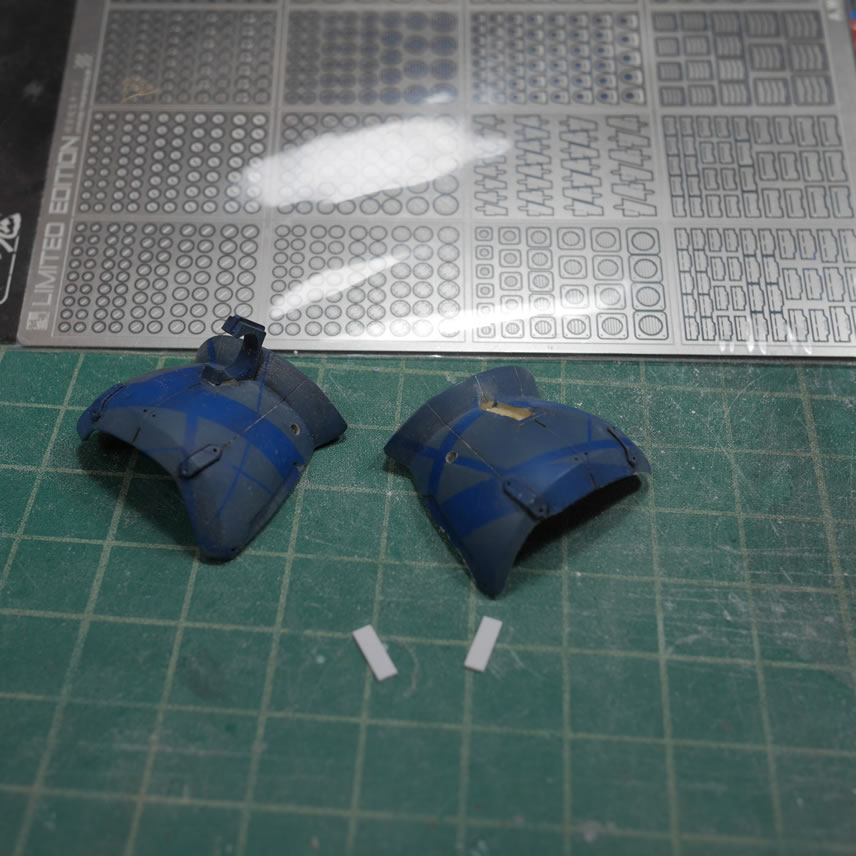
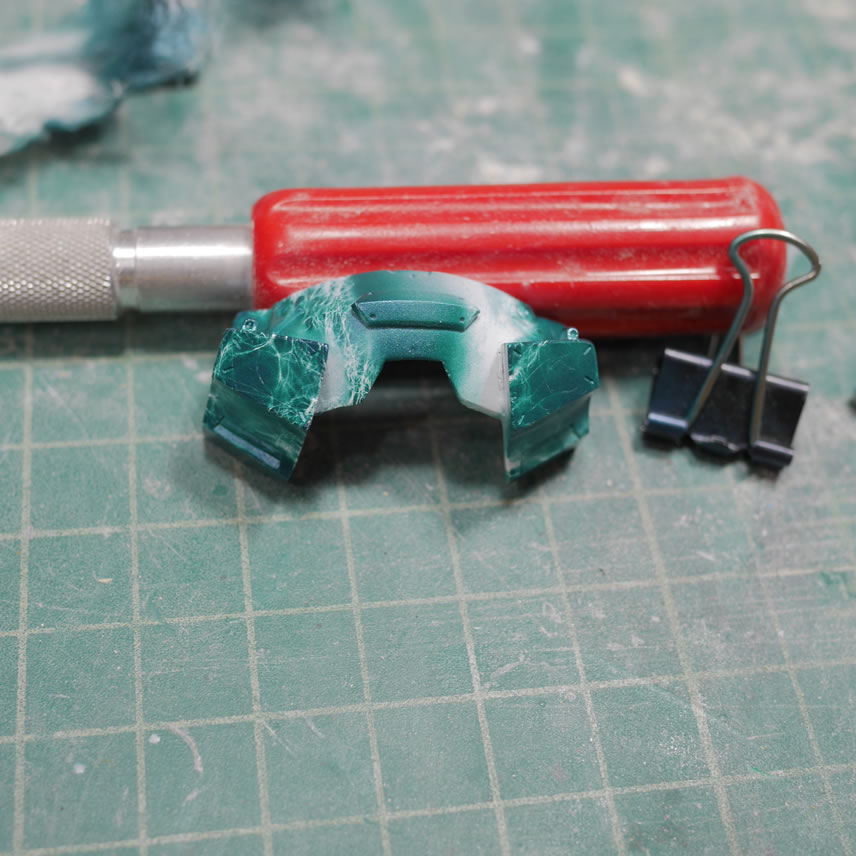
The side skirts are primed and ready for paint. I first laid down a layer of white over the primed pieces. Then using spent dryer sheets, I wrapped them as a masking technique over the parts and painted the rear skirt first as a test. The masking was a little too dense, so I pulled on the dryer sheet to get some holes and loosen the fibers a bit then wrapped and painted a mixed greenish blue color.
I made the mistake on the rear skirt of throwing the part into the dehydrator to dry the parts. It ended up melting the dryer sheet a bit and the paint into a goopy mess. I stripped and repainted the rear piece from the beginning.
Learning from this experiment, I think I did better with the rest of the parts. Pulling off the mask, I get a little bit of a marble effect. I still need a lot more practice with this, but I think I’m getting the hang of this. I’ll try this for a future project. There are a good number of variations for this effect that I want to explore.
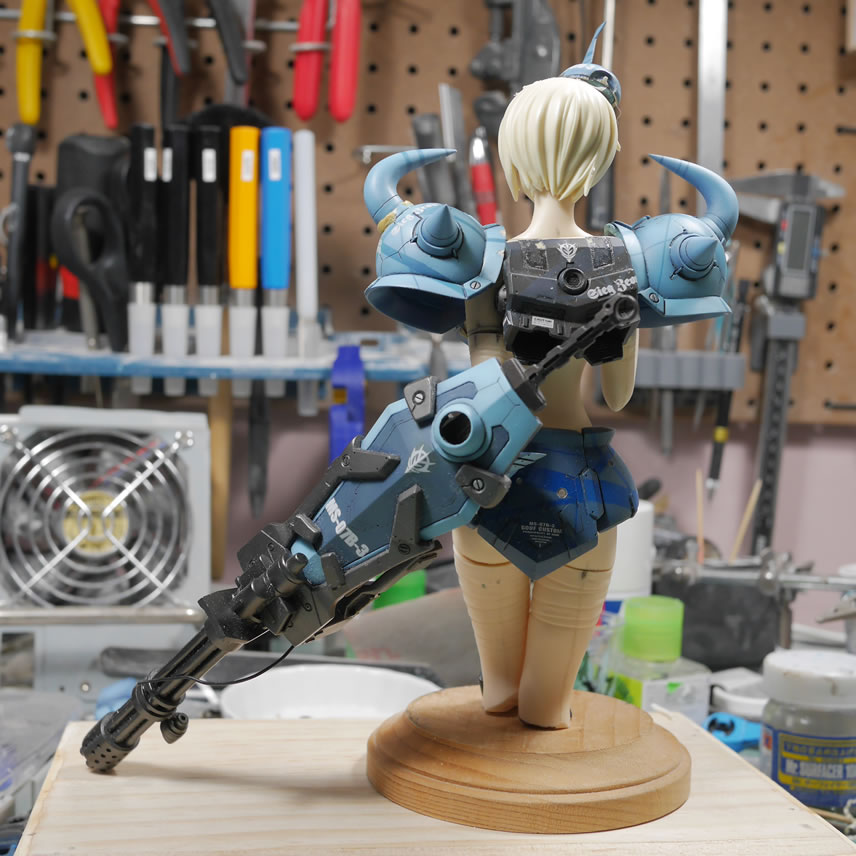
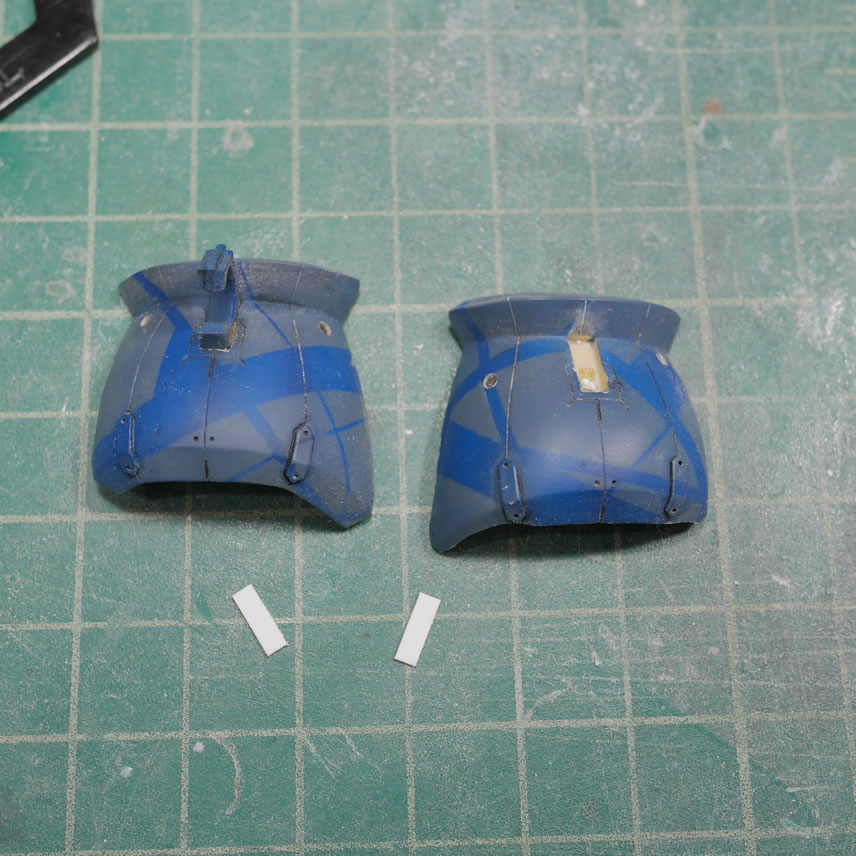
I didn’t like how green the paint turned out, so I hit the surfaces with some alclad electric cobalt clear enamel. This was more the look I wanted.
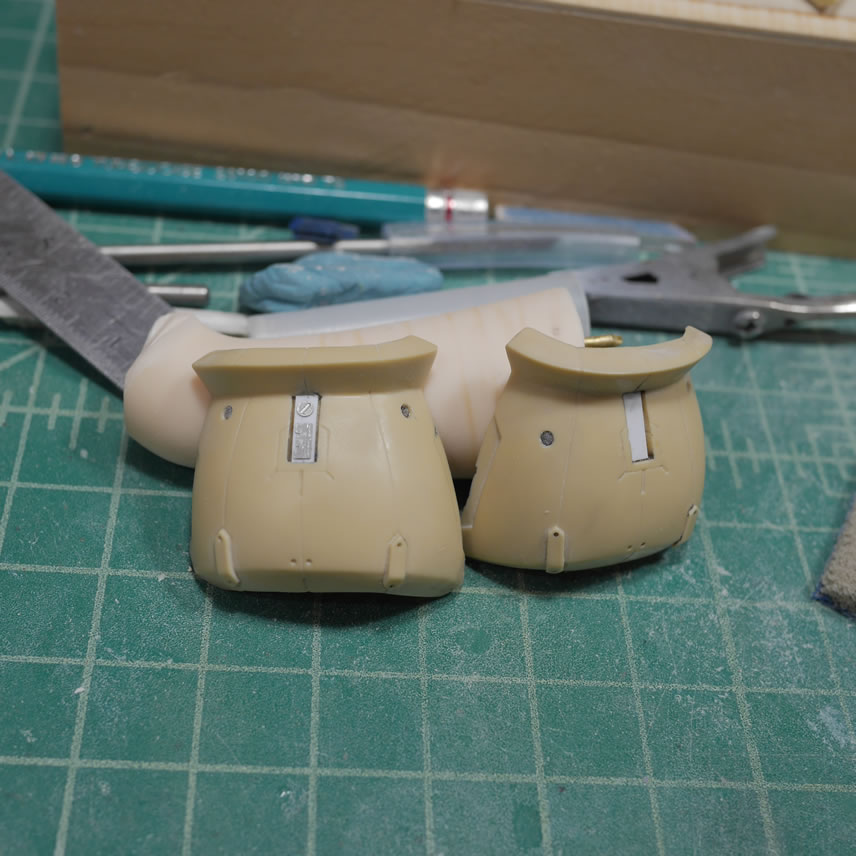
The skirt parts are masked off leaving some of the raised details. I painted these areas with alclad red gold thinned with Mr Color Rapid Thinner. The rapid thinner is the opposite of leveling thinner. It dries very quickly. Which is what works well for metallic paints.

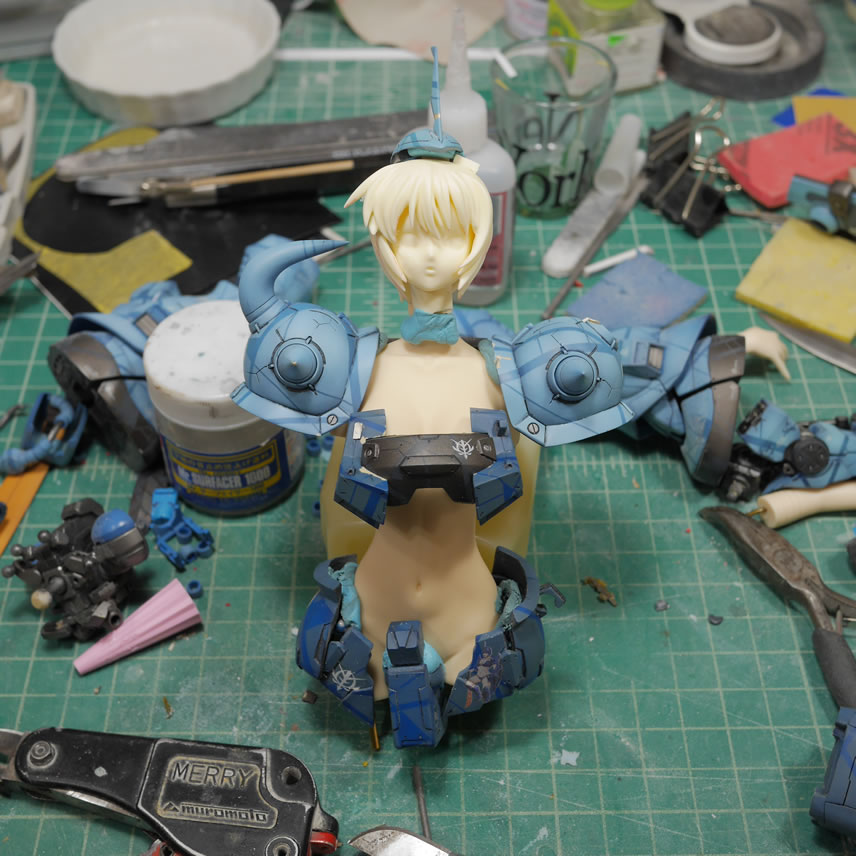
Unmasked the details are starting to pop. I painted up the backpack and new vent details. The small details were hand painted with enamel metallics. The same effect for the marbeling is applied to the shoulder and light blue pieces of the kit.
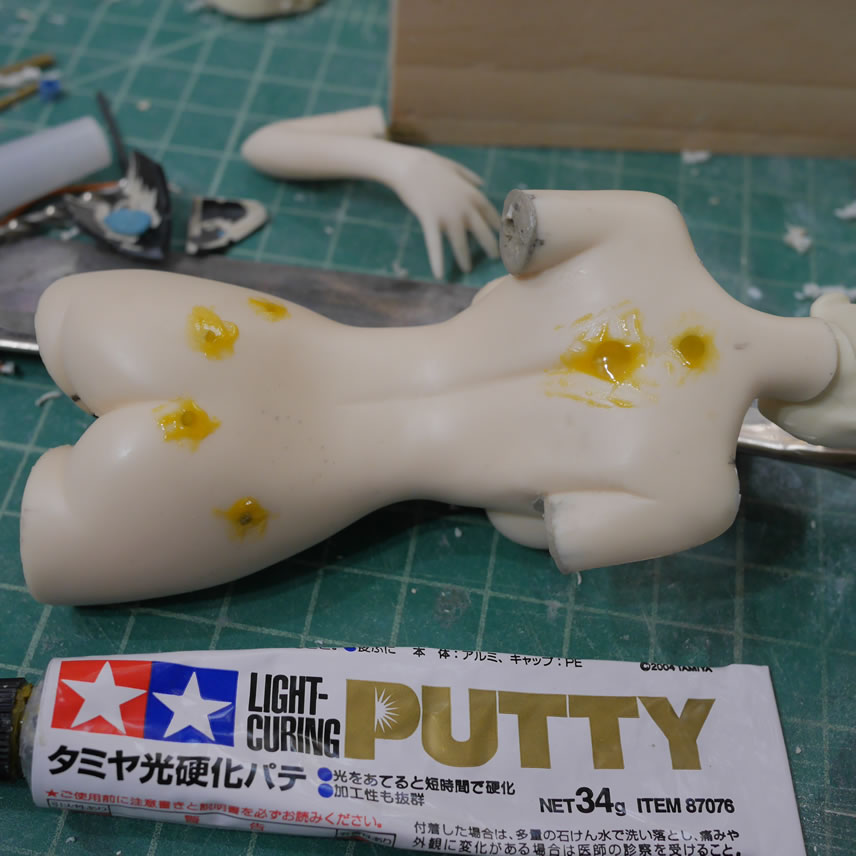
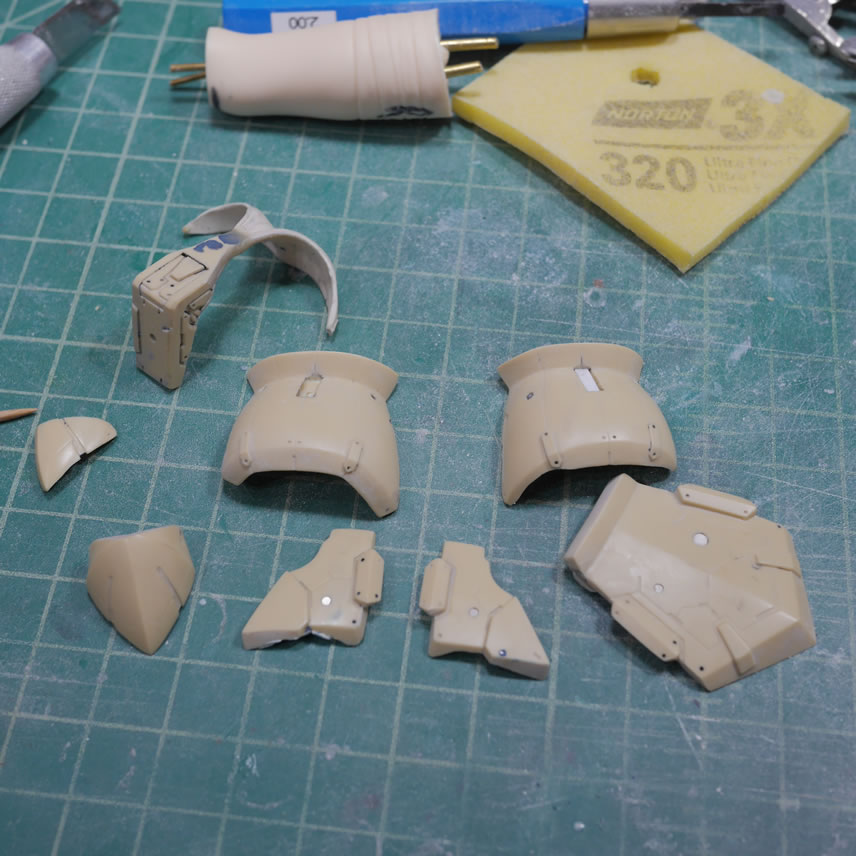
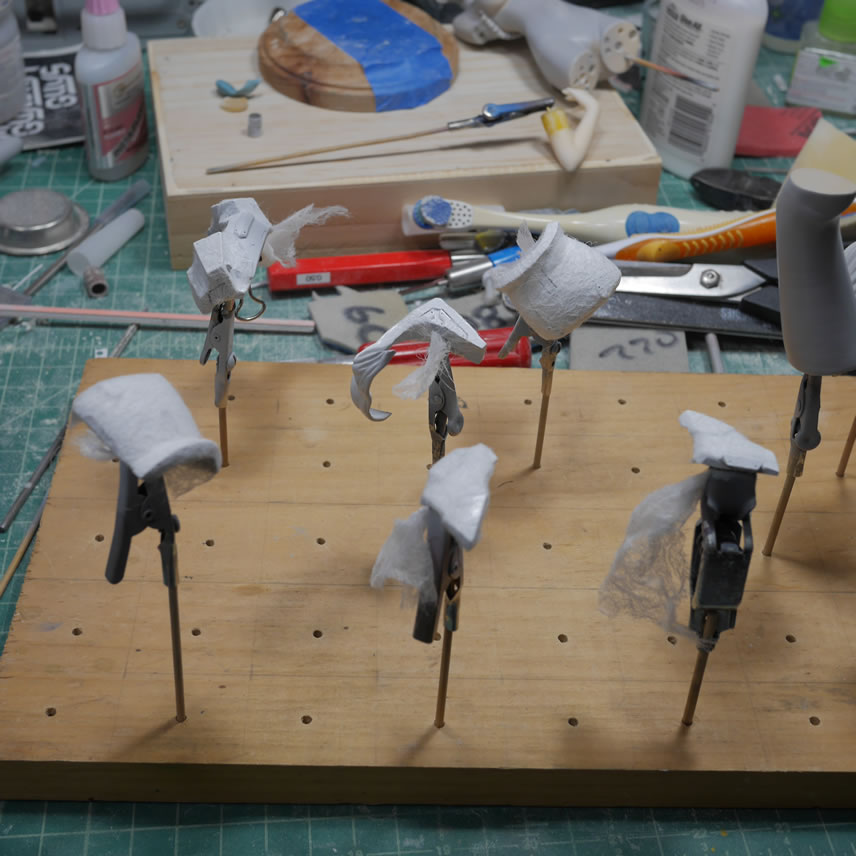
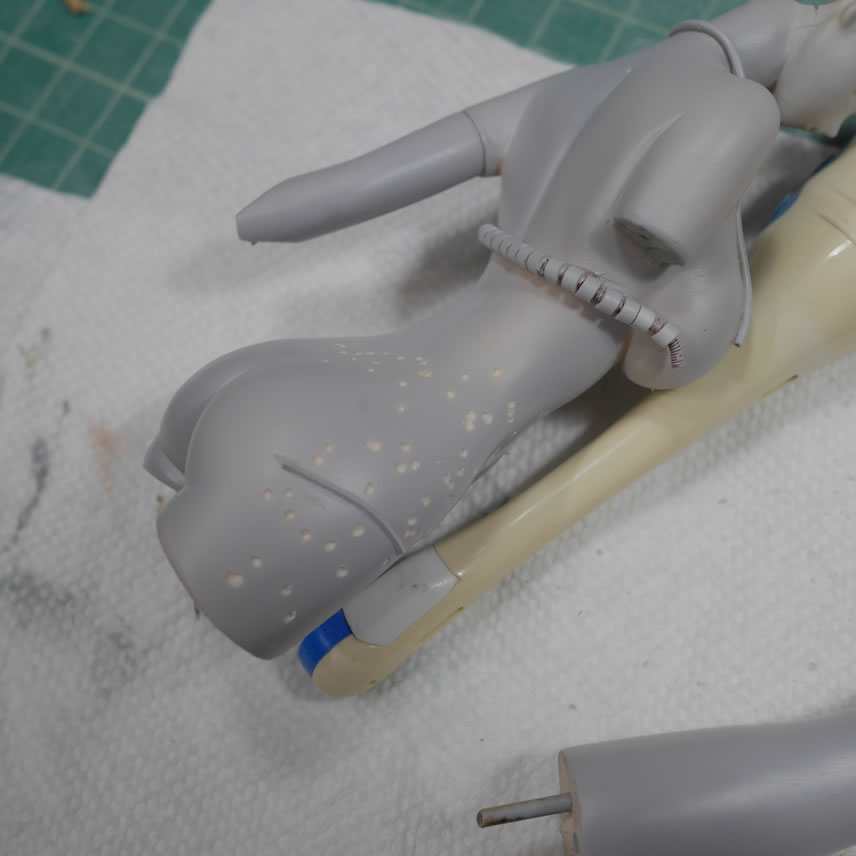
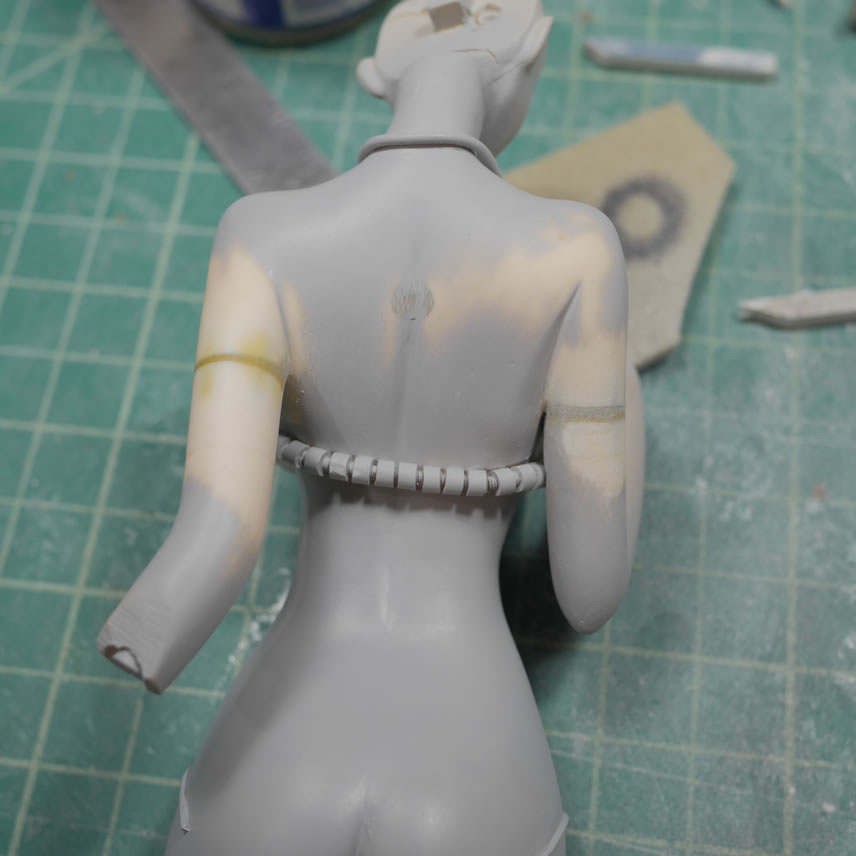
With the armor pieces out of the way, time to focus back on the main body. Once primed, the surface is riddled with pin holes. I haven’t worked on a resin kit with so many pin holes in a long while. Spoiled by QA of Volks resin figure kits. Even though this is an original kit, it was produced by a small sculpting circle, so there are bound to be quality issues with the resin.
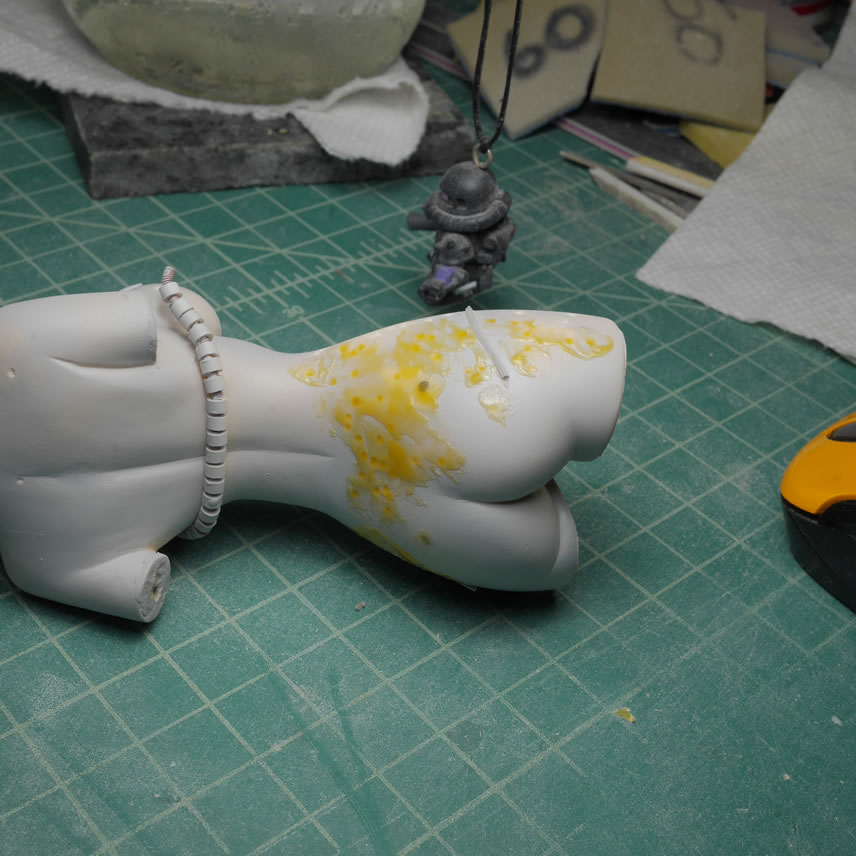
First step is to take a hobby knife and just open up all those pin holes. The problem with fixing pinholes is that what we see is usually just the top of a bubble and just below the surface, there’s a bigger cavity of empty space. Puttying over the top without opening up the bubbles gives the putty very little surface area to grab. Once the holes are opened up, I can putty like crazy.
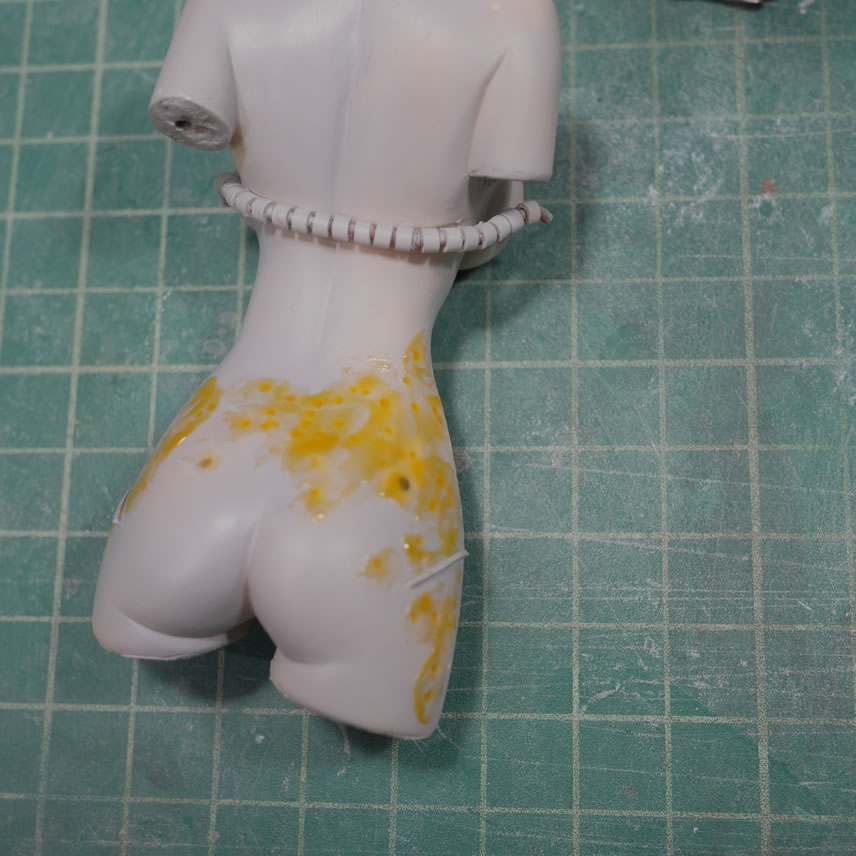
Light curing putty is amazing here as it gives me a very quick turnaround time for working on the fixes, getting it primed, and cycling through the repair process. Putty, sand, prime, repeat. And eventually, the surface is ready for real paint, sort of. The legs are also fixed and reprimed.
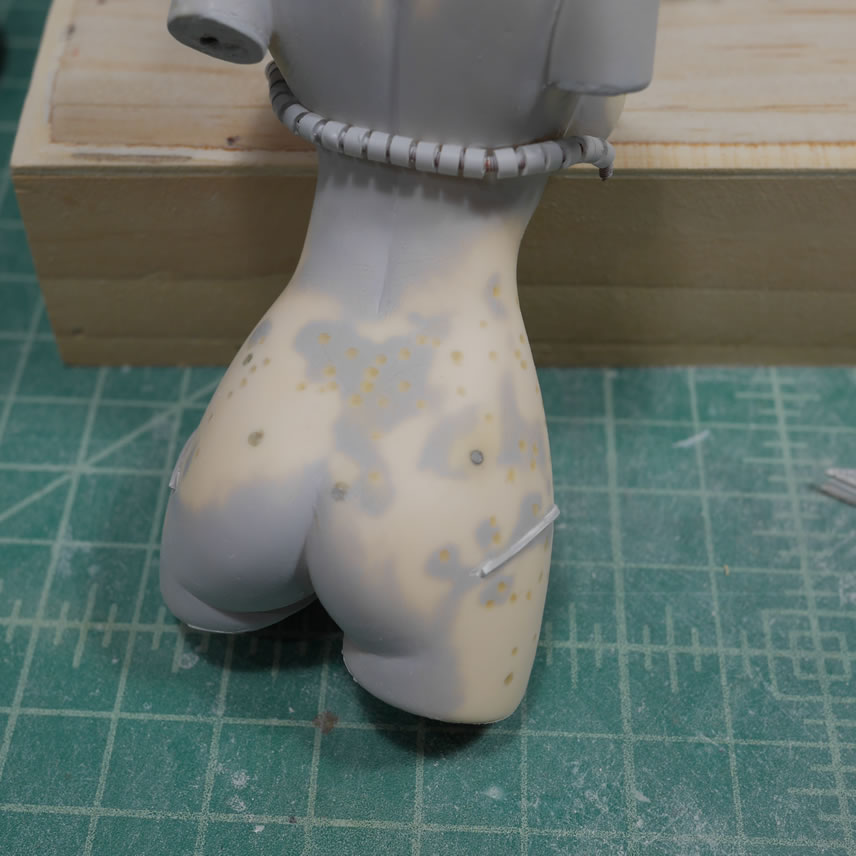
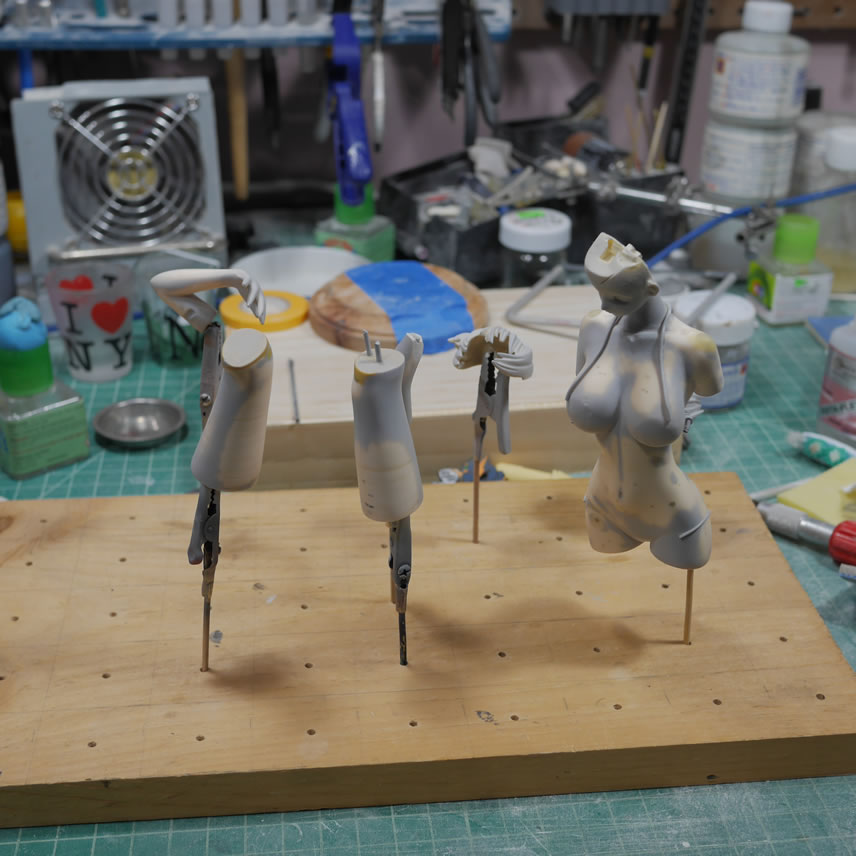
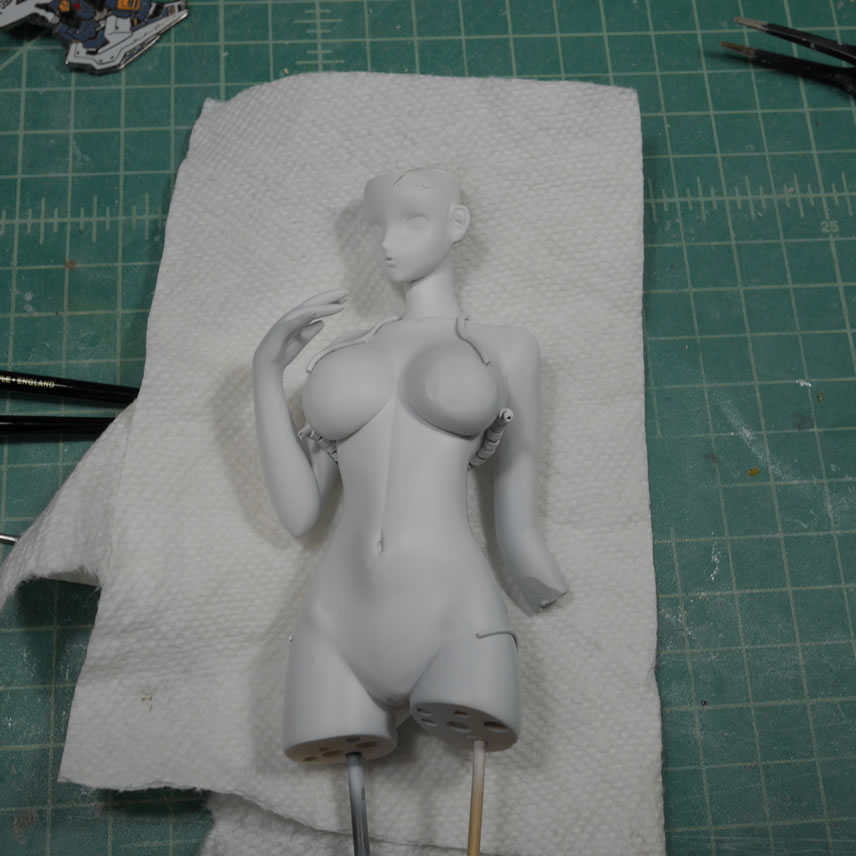
I had primed and fixed the arm pieces separately since it was easier to work on them that way. Once I got to the point that the arms are ready for paint, time to glue them to the main body and putty up the seam area. Since I removed the bandage details, there’s no reason for a visible seam between the arm and body joint areas. So this needed to be glued and puttied. And after a few putty, sand, prime session, the body is ready for paint.
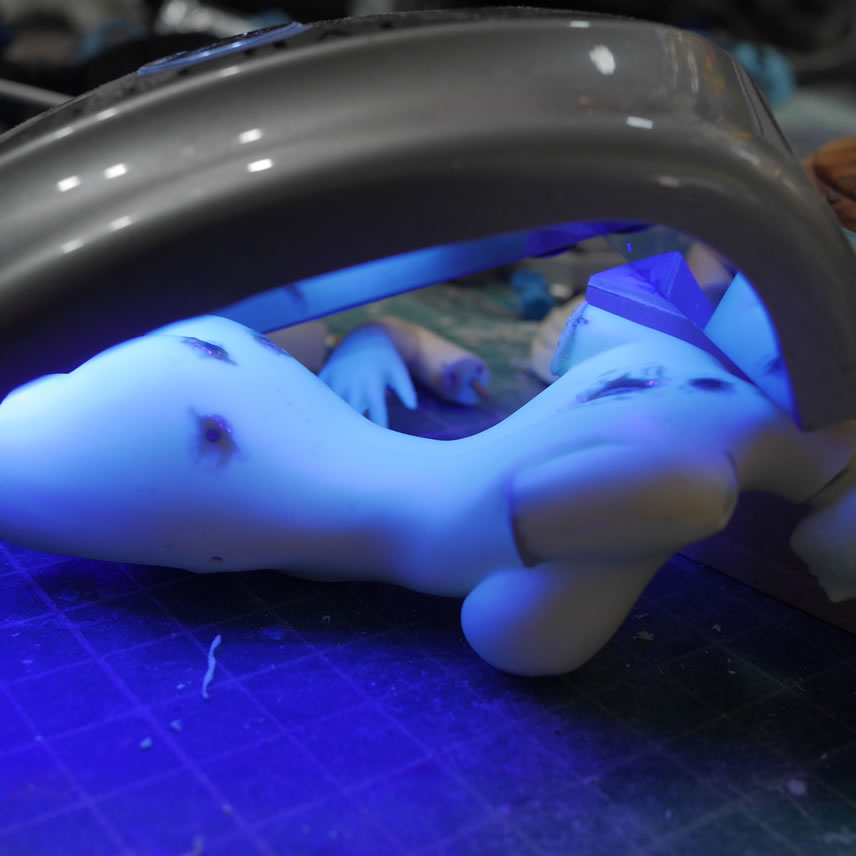
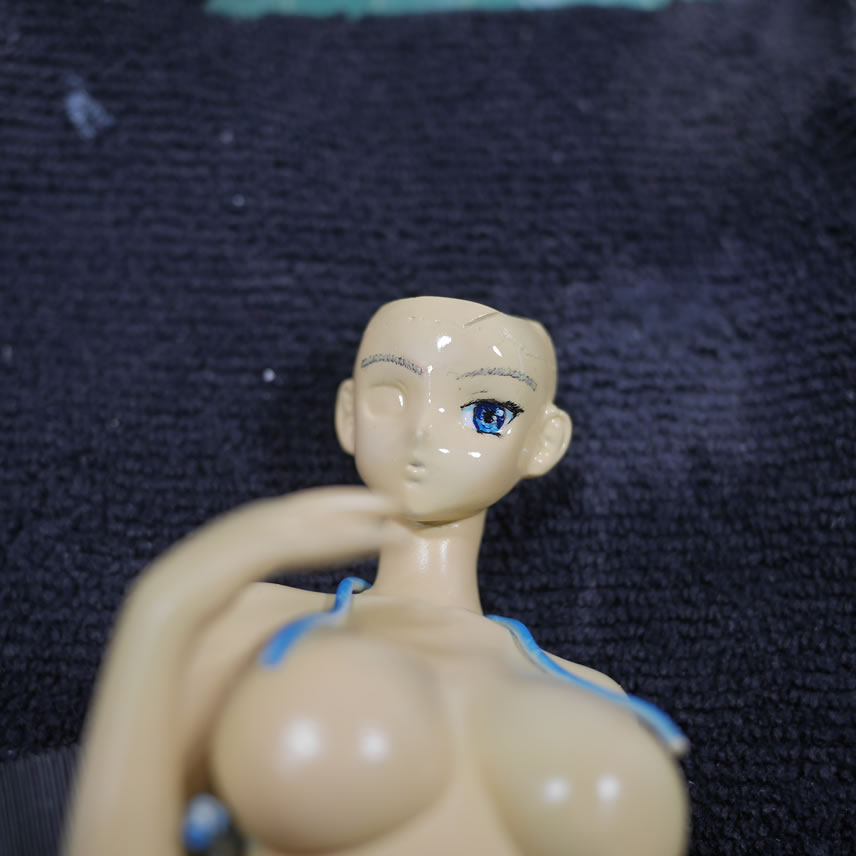
Skin tones start with priming in white over the grey primer to get a good base color for the skin. If I sprayed the skin tones over the grey primer, I’d have a zombie or dead girl look to the skin tones. Mr White Base is sprayed. Since she has an eye patch, I only need to paint one eye. That one eye is masked off with blue sticky tac. And the base skin tone is applied.
After the base skin tone, I highlight with a very light tone, then blend with a medium tone to level things out and finally, a light tone to lighten up the overall colors.
Silver panel lines for the dark blue skirt pieces. The light blue areas get a black wash for the panel lines.
The original ammo belt that came with the original conversion kit is long gone. No idea where it is and it would take more time to find it than just build one from scratch. And from scratch, I mean firing up blender and designing a new ammo belt on my computer. Once I got the design done, I made some measurements to finalize the print size and sent the design off to the Form 2 3D printer at the highest resolution setting and printed out the belt. I designed the belt pieces with a hole in the center that I can thread some wires through to keep them connected and poseable. Once painted up, I have a new ammo belt for the kit.

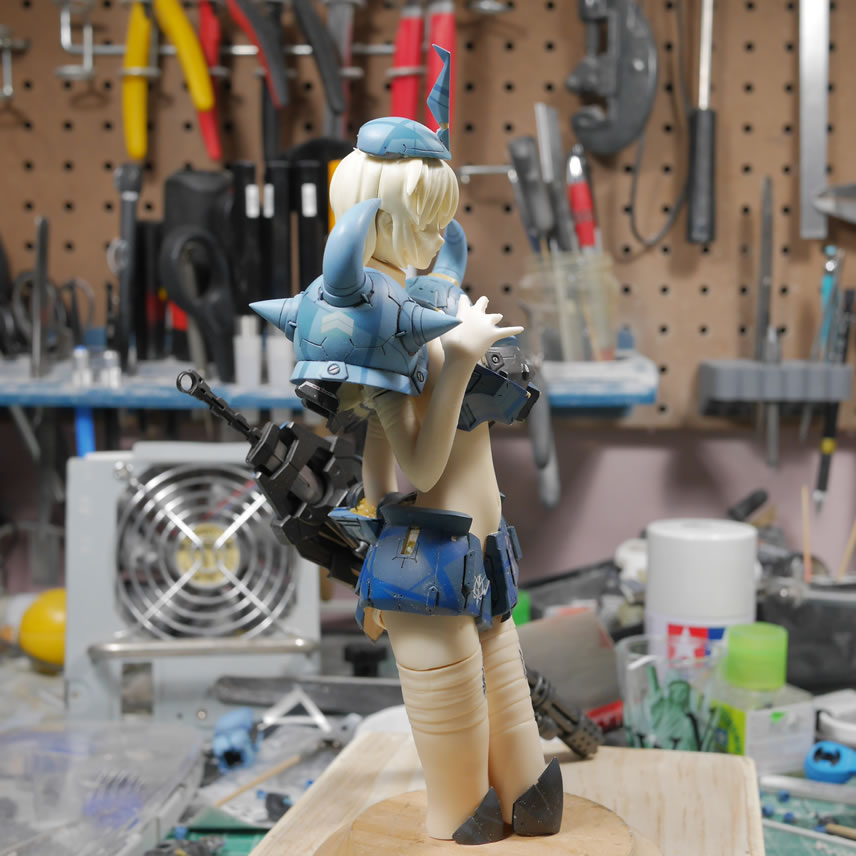
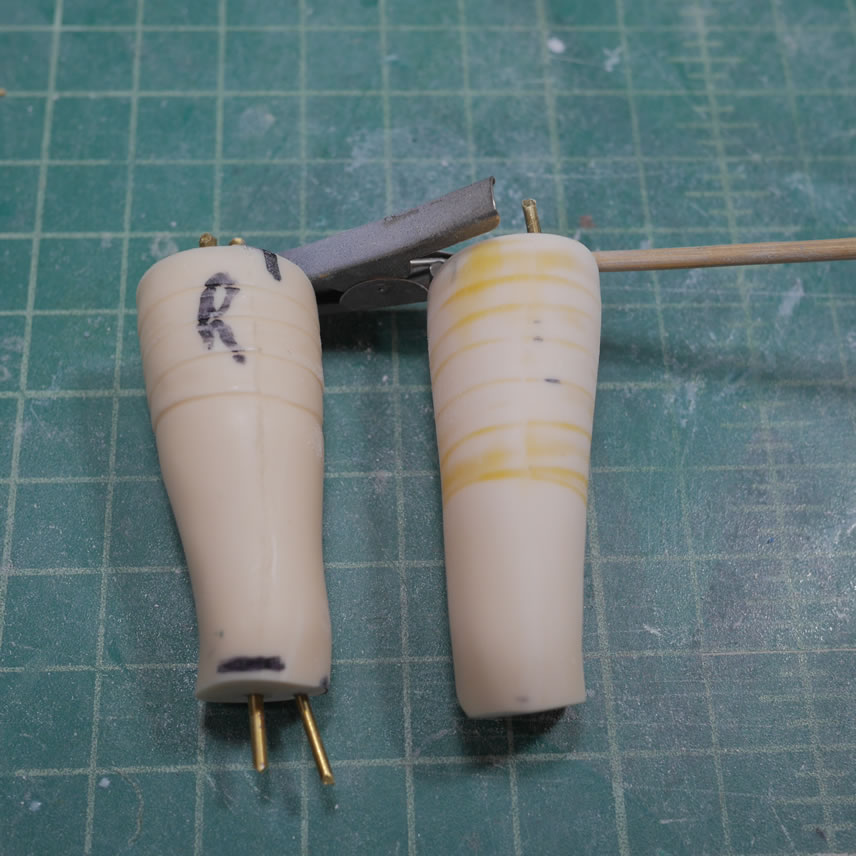
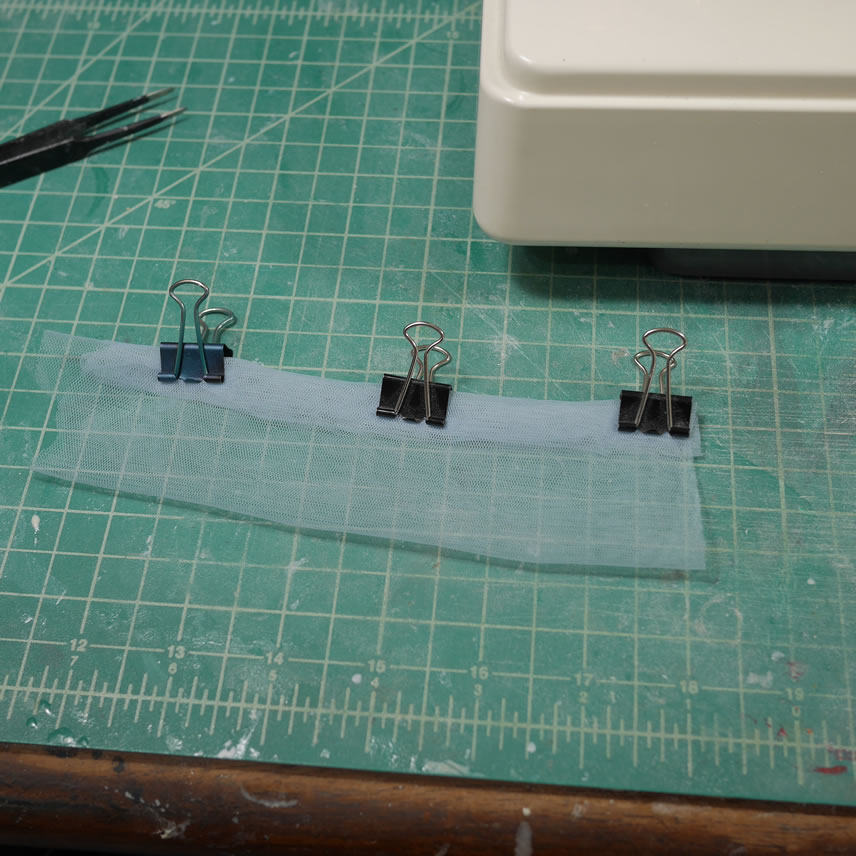
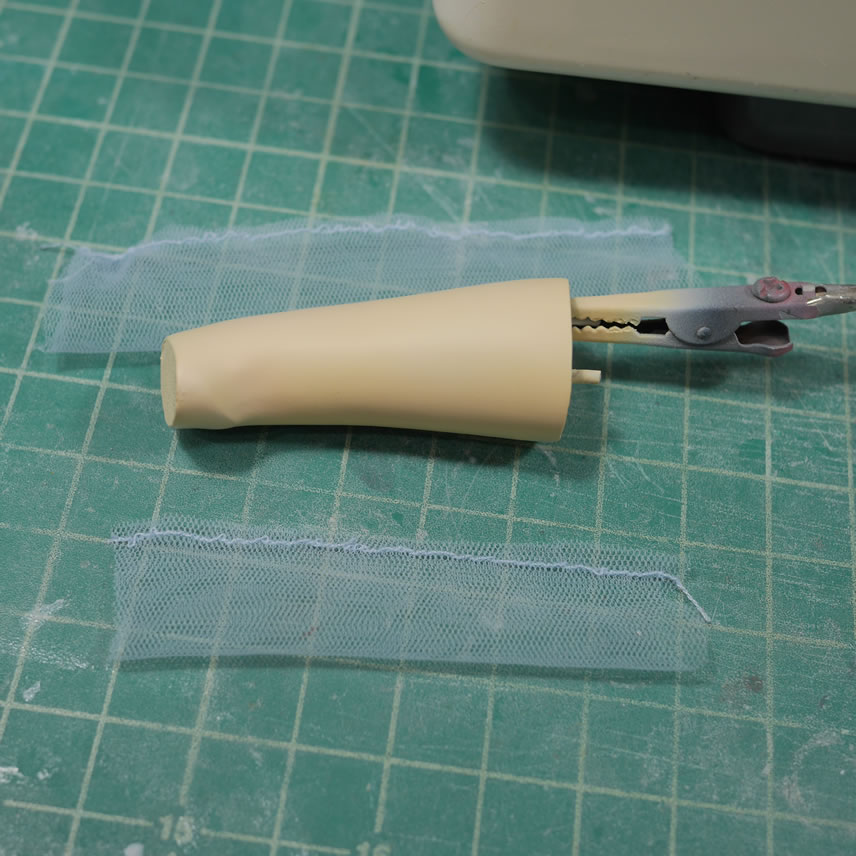
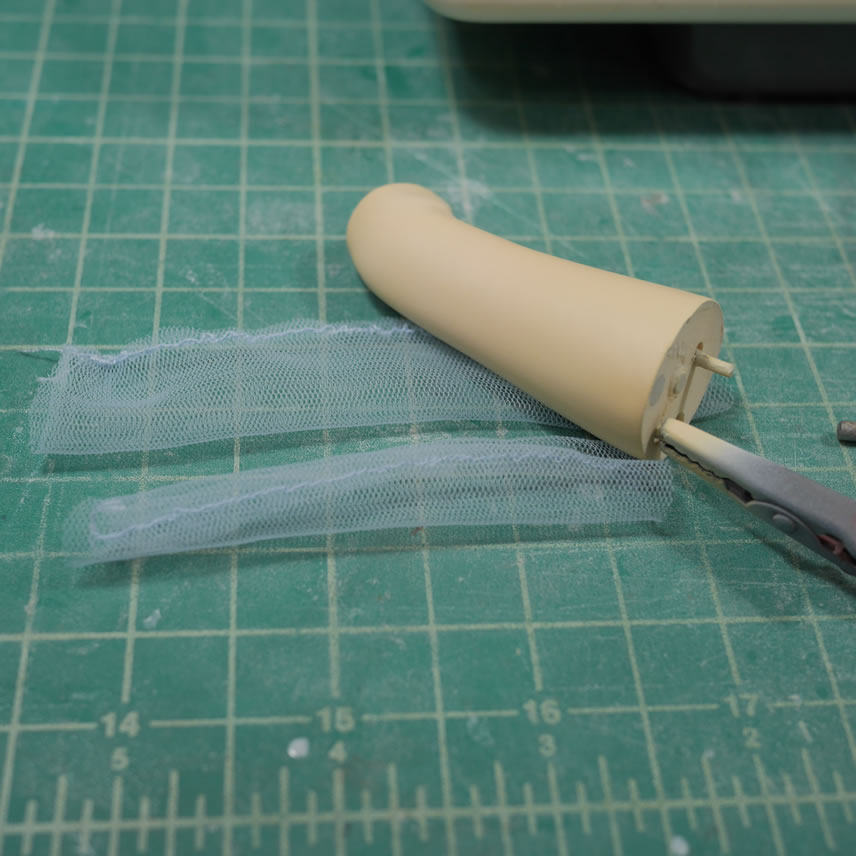
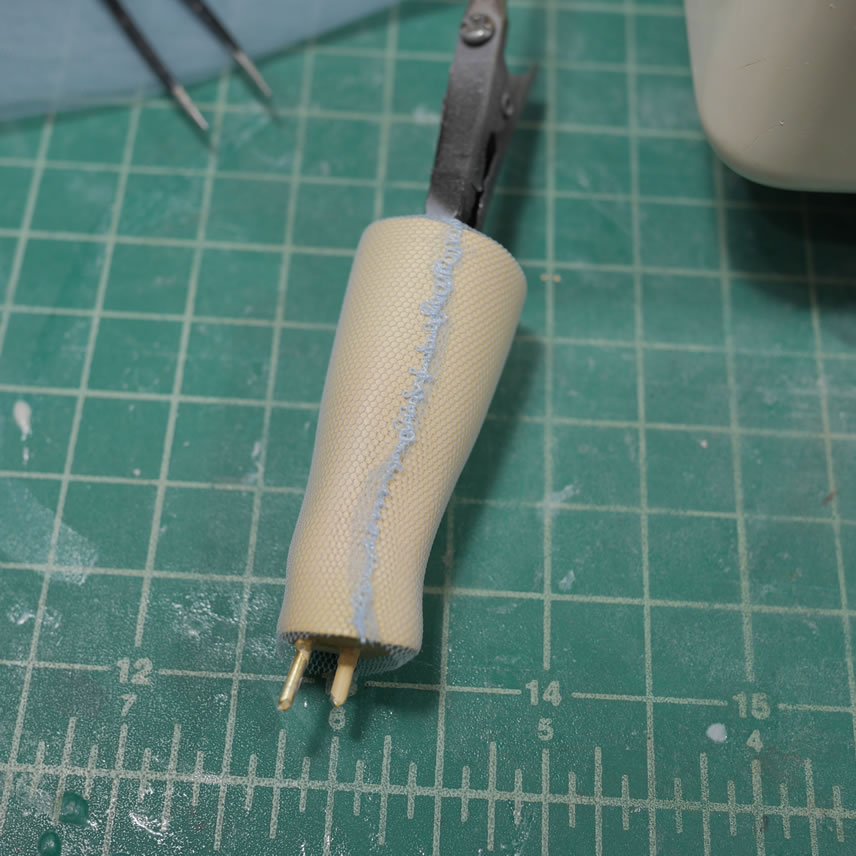
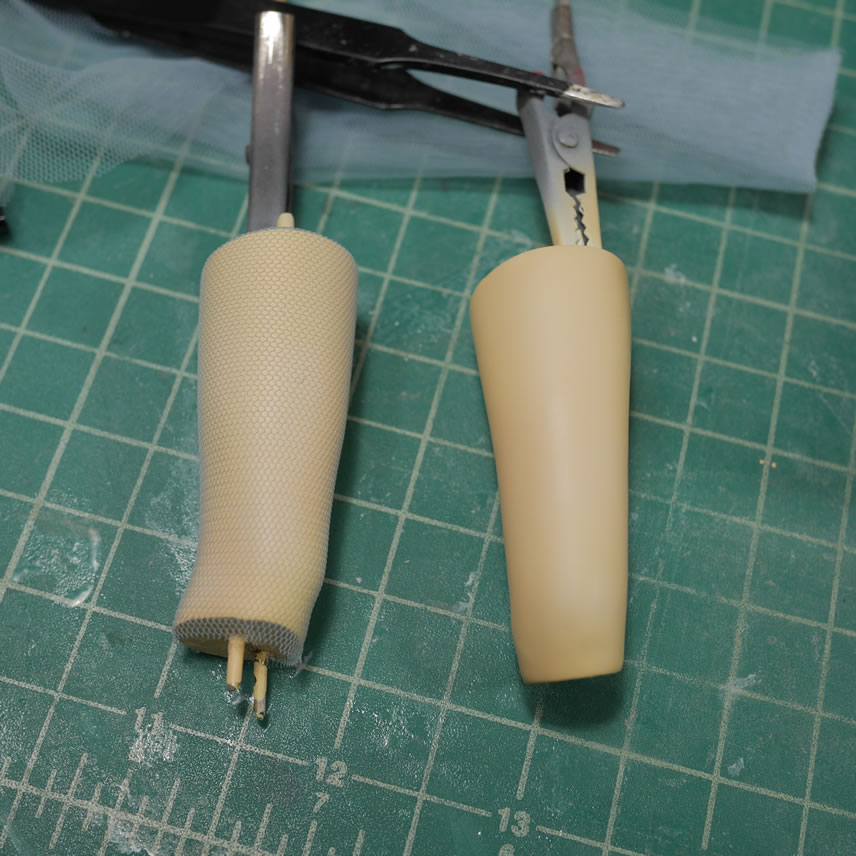
Since I have the lower legs painted and I didn’t want to glue them to the main body like I did with the arms, I still needed something that will work with the break between the leg and body. Time to make some stockings. I have light blue stocking material that matches perfectly with the shoulder colors.
Step one is to cut the material and fold the material over held together with some binder clips. Once this assembly is done, the material is run through the sewing machine. Excess is trimmed off and I have a stocking.
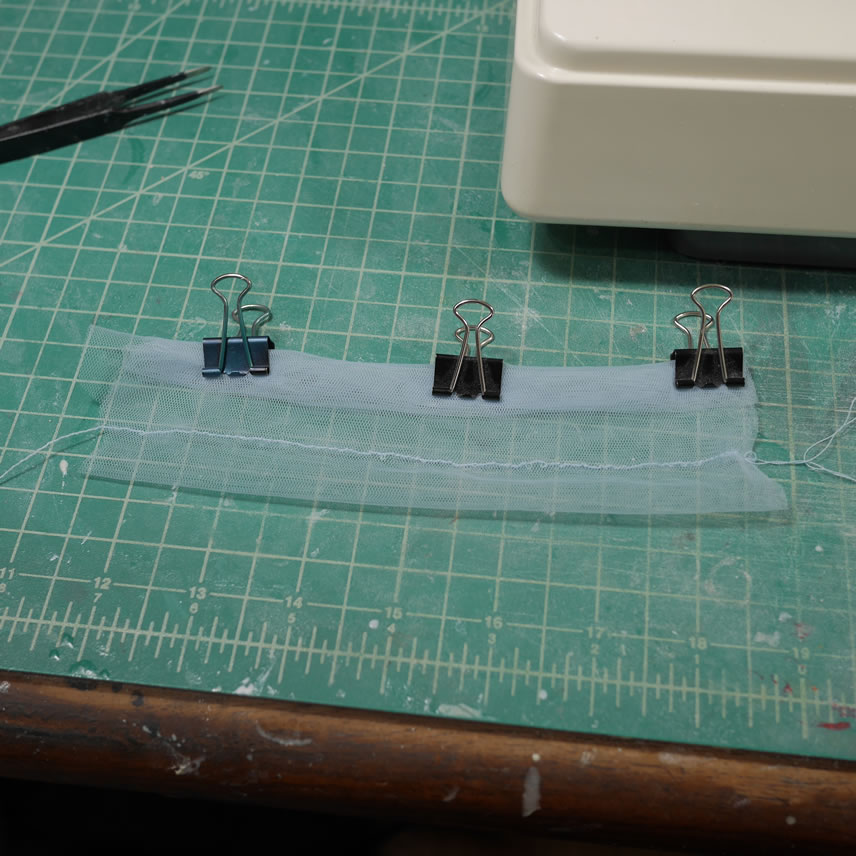
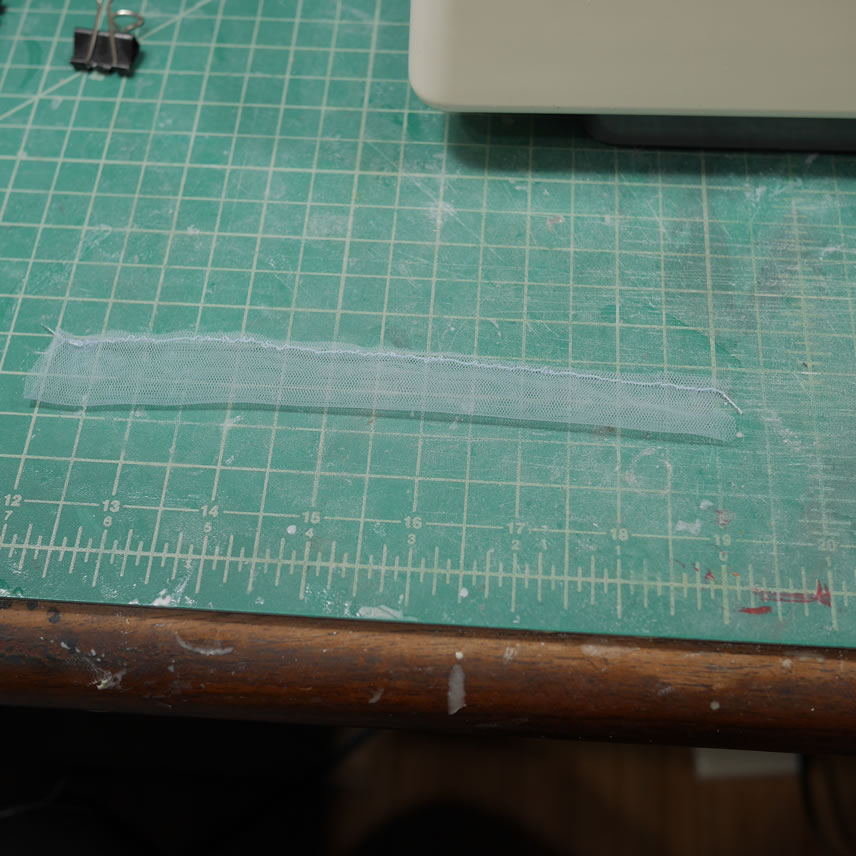
To hide the seam, more excess material is trimmed away and the sock is flipped inside out so that the sew seam is on the inside. Slipping the stocking over the leg piece completes the stocking work. Some adjustments in the alignment of the seam are the final touches.
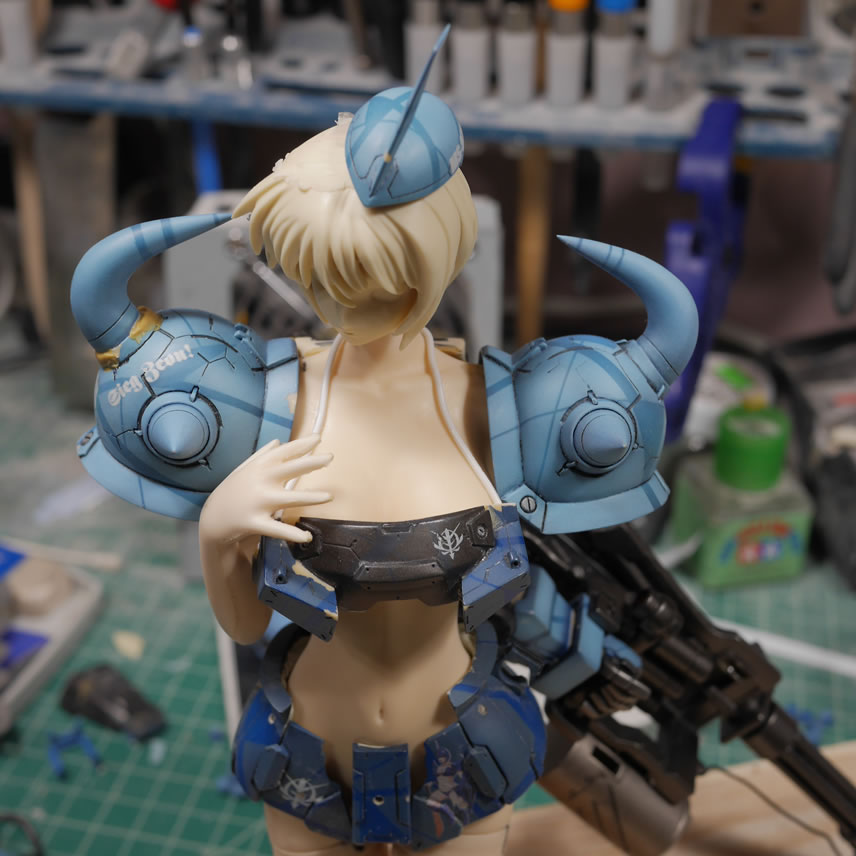
The body paint is done and cured so it can be masked and the bikini straps can be painted. The same technique is used for the bikini straps as the shoulders with white, then dryer sheet masking, then the final blue.
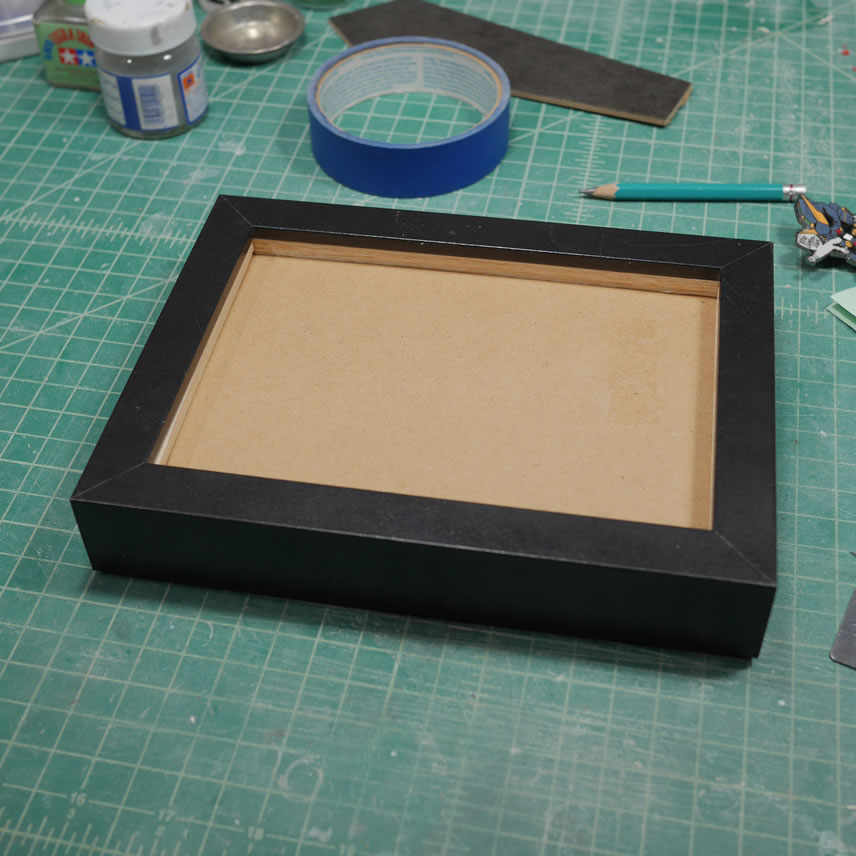
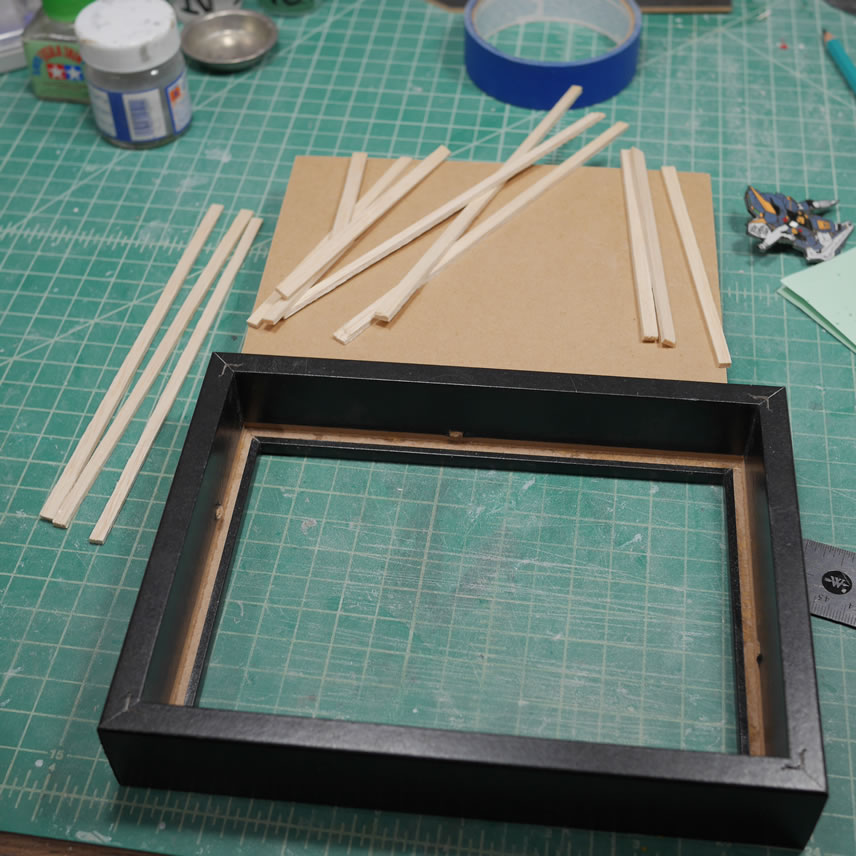
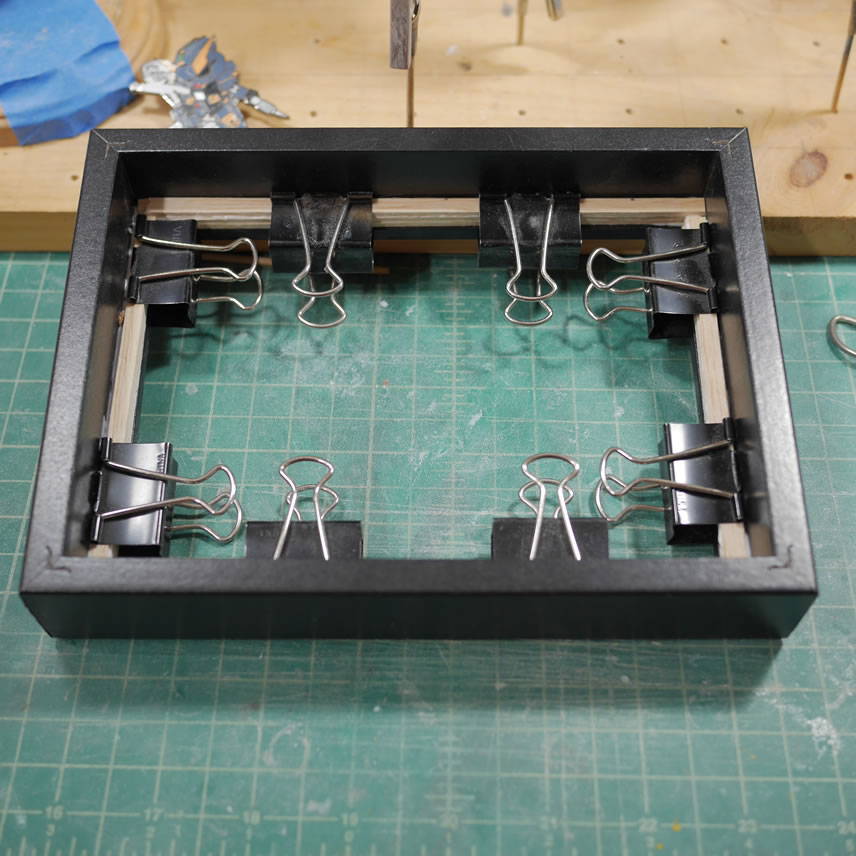
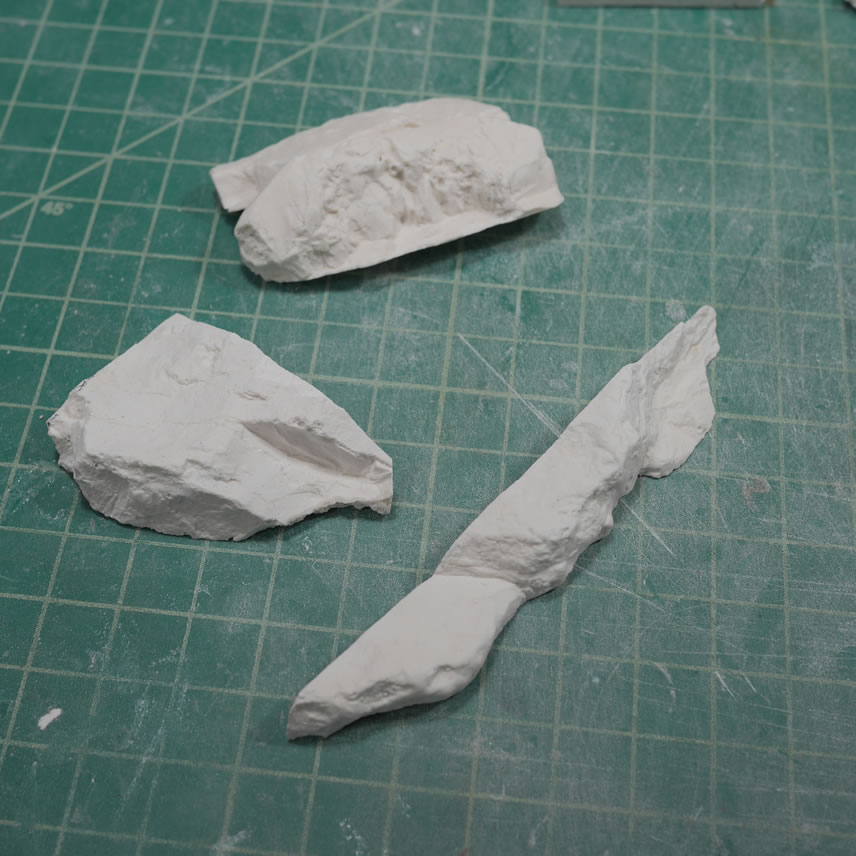
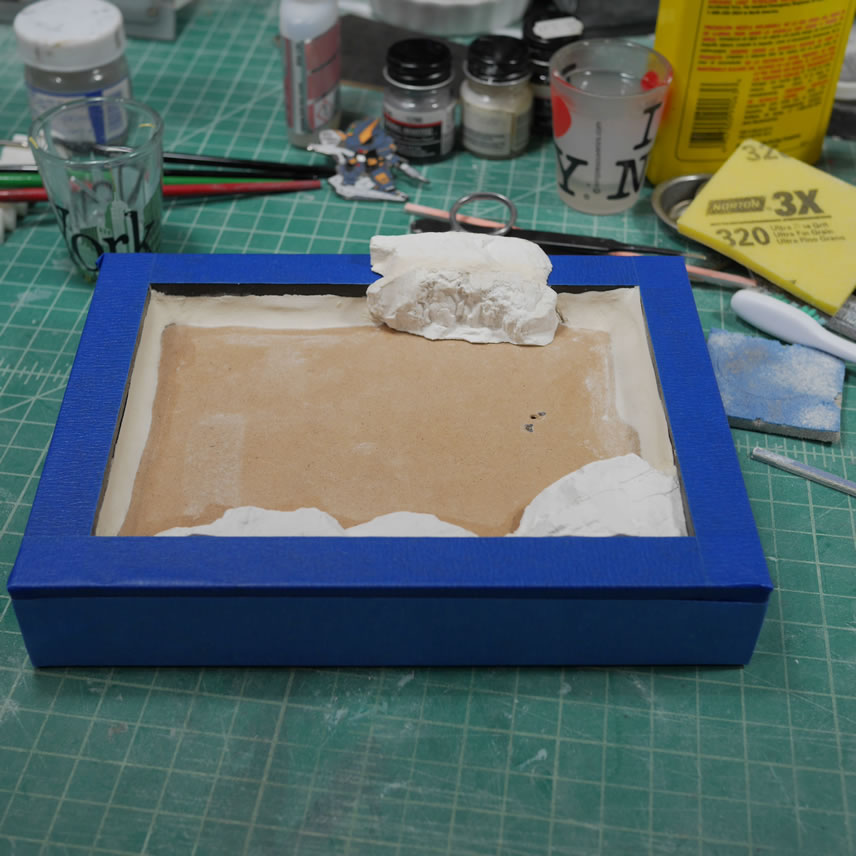
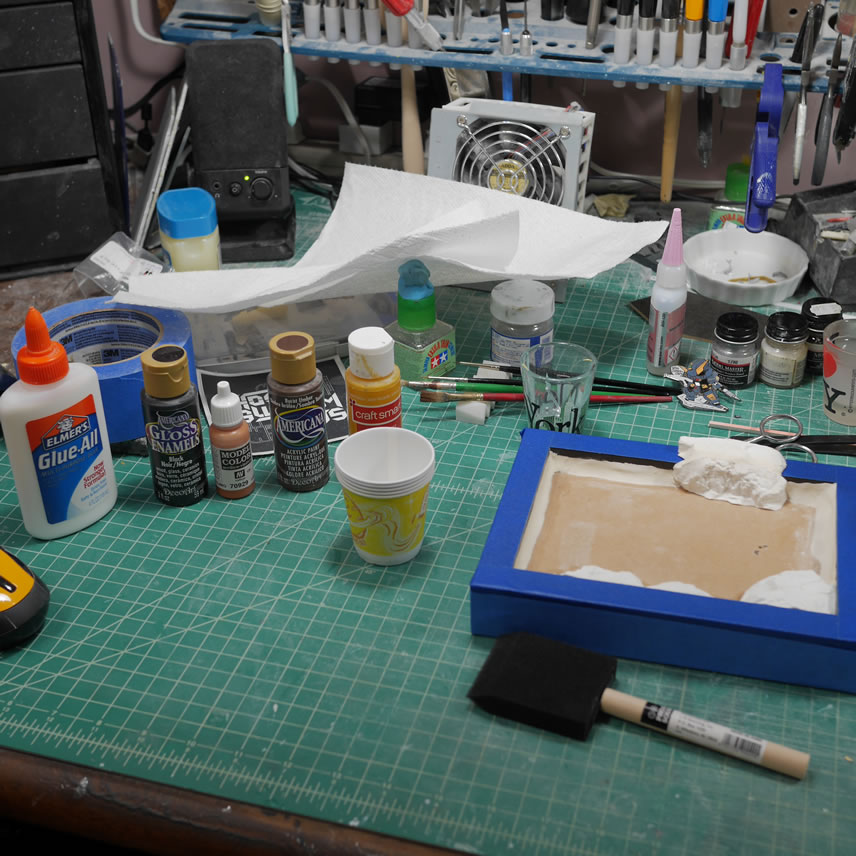
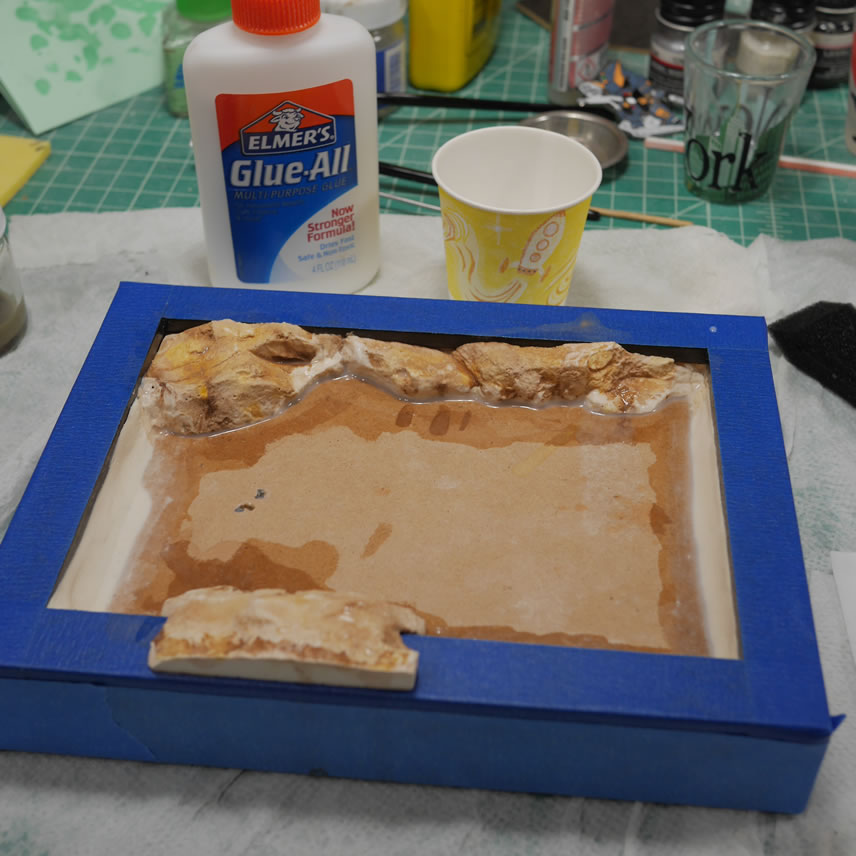
The display base is an $2 Ikea photo frame. Strips of balsa wood is cut to change the depth of the photo frame. Glue and clamps to hold things while the glue sets up. The back board is then hot glued to the cured balsa wood. Some plastic rocks are cut for details.
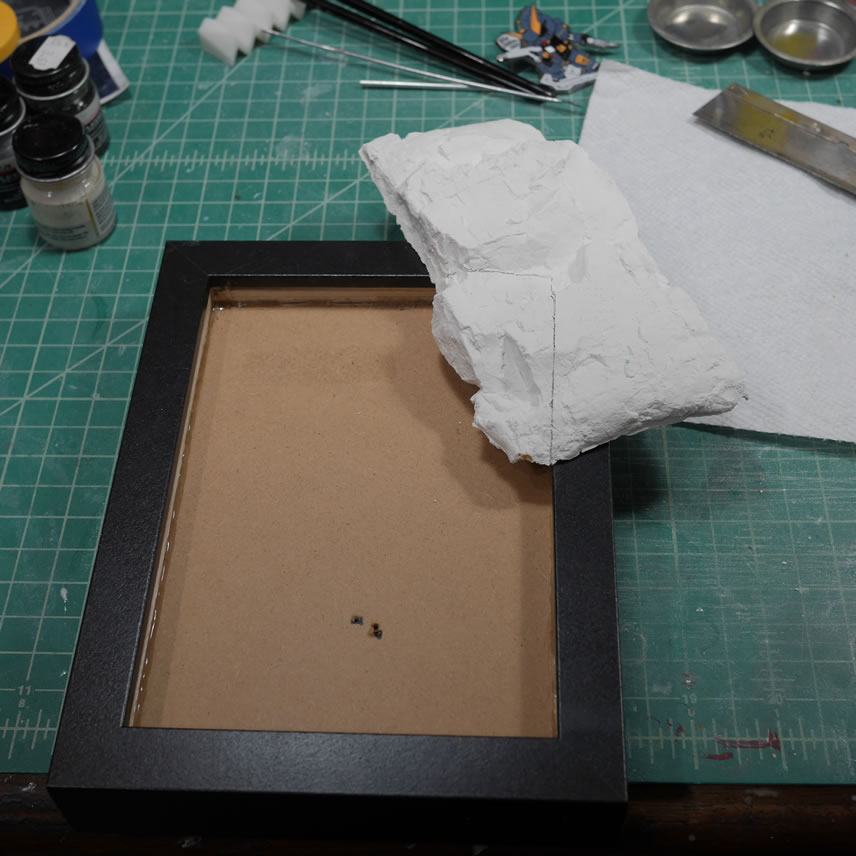
The rocks are glued into place and paper clay is added as transition and fillers around the perimeter of the display base. White glue mixed with water is used as a sealer and to help keep the paper clay from cracking while drying. The frame is masked off and ready for painting.
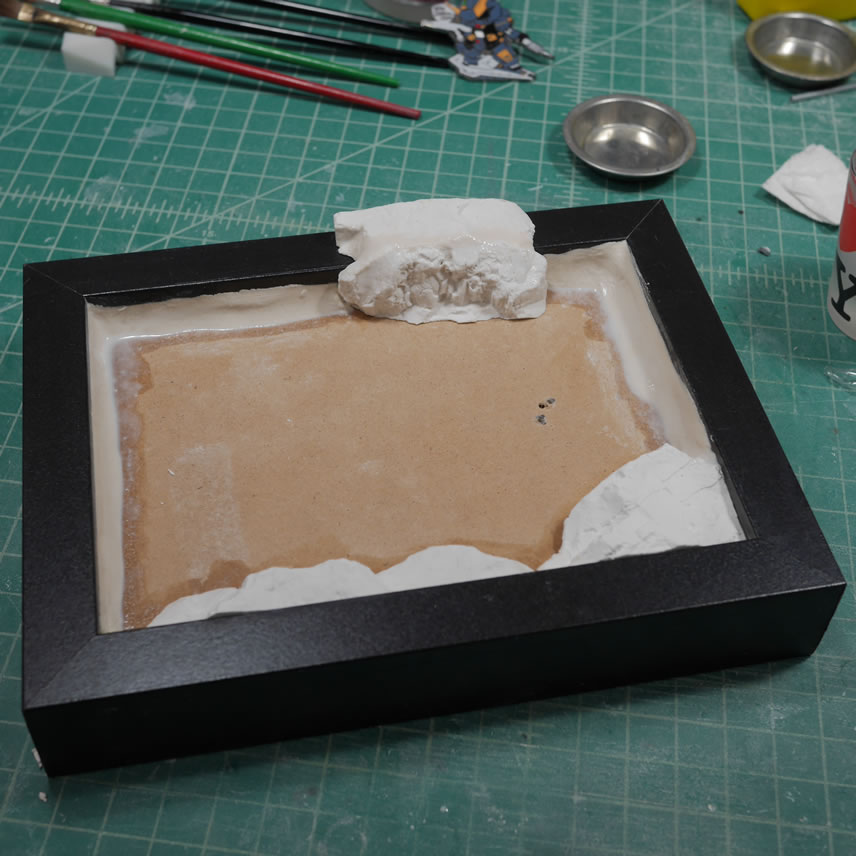
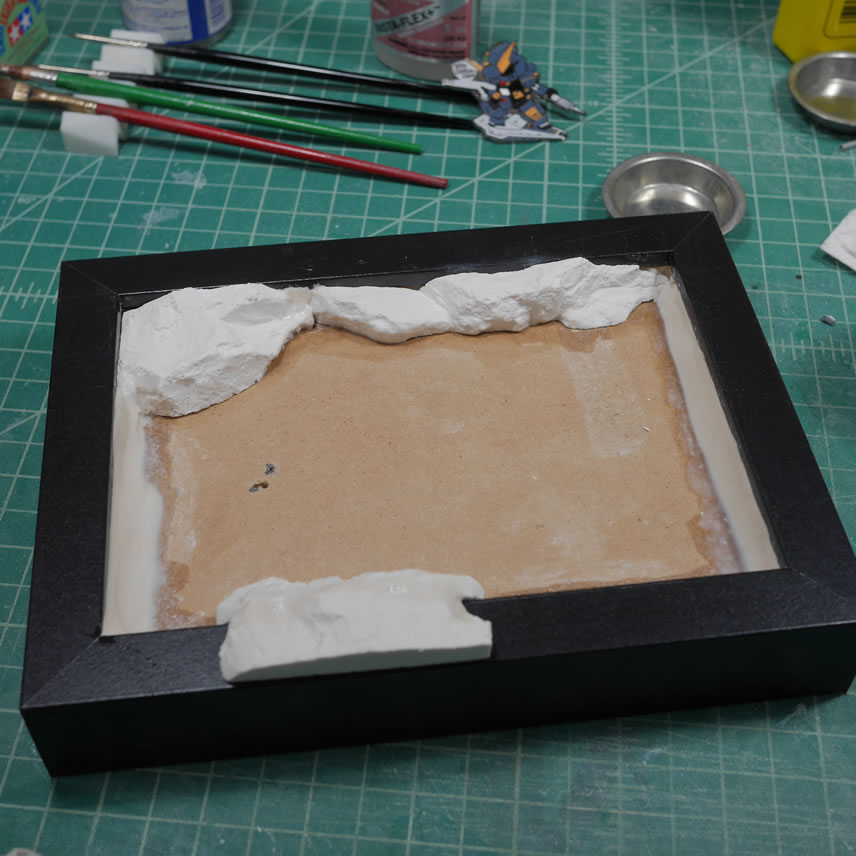
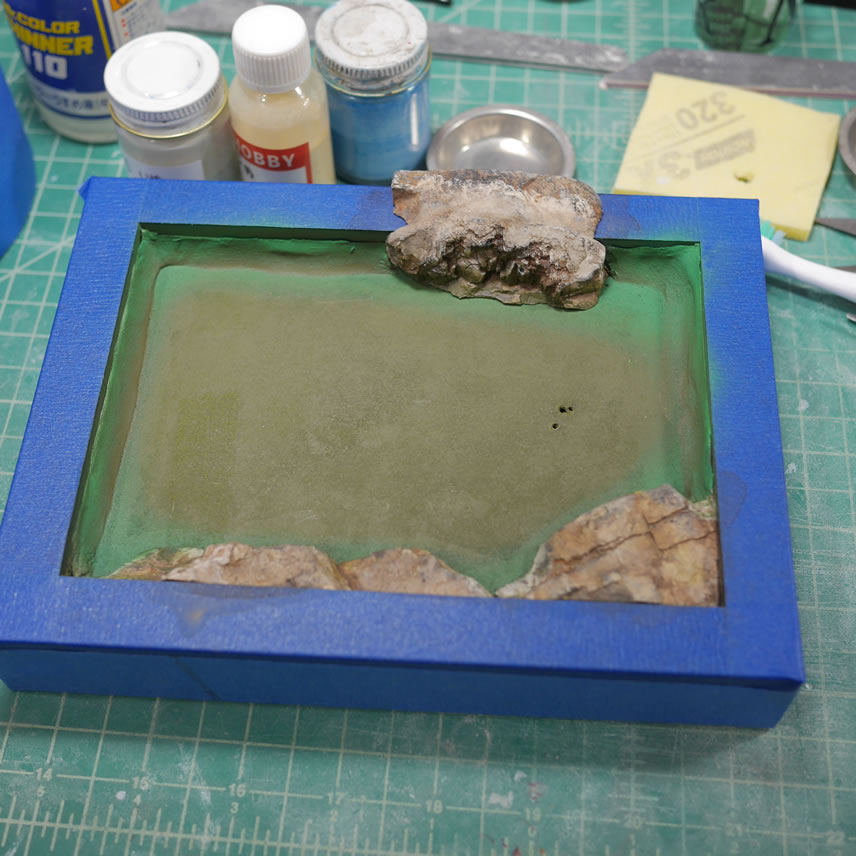
Acrylic pigments are used to paint up the rocks using the filter method. The paints are thinned at 1 part pigment to 16 parts water for the first pass. The overall washes are thinned at 1 part paint to 32 parts water.

The flat areas are painted first with a green then a darker green, and then followed by alclad electric cobalt as I didn’t have a dark transparent blue to use.
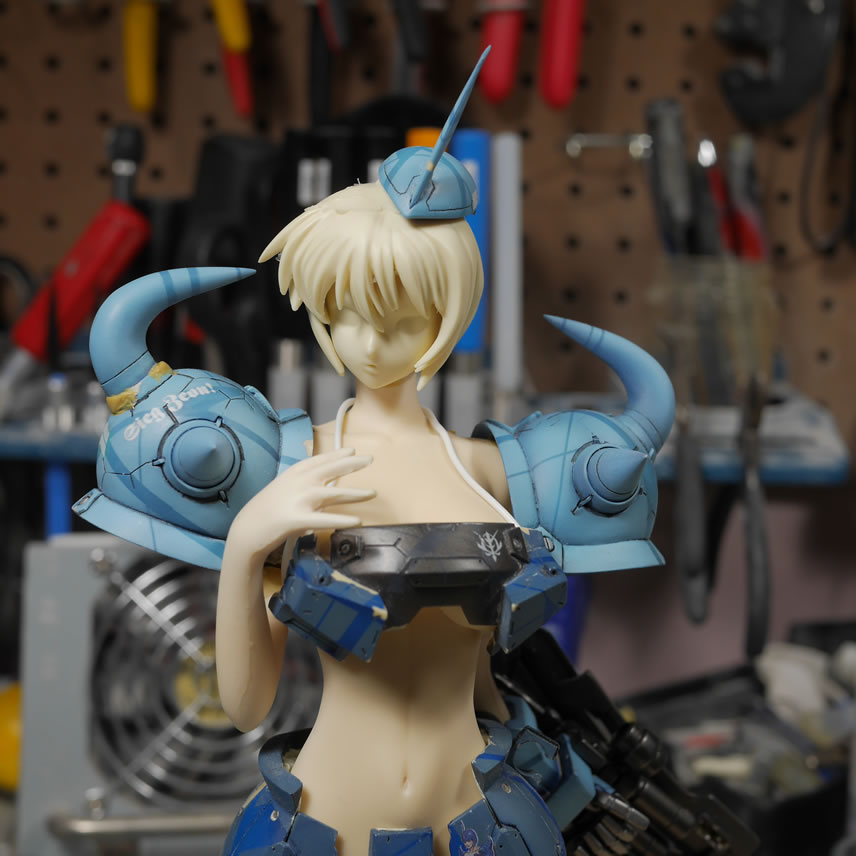
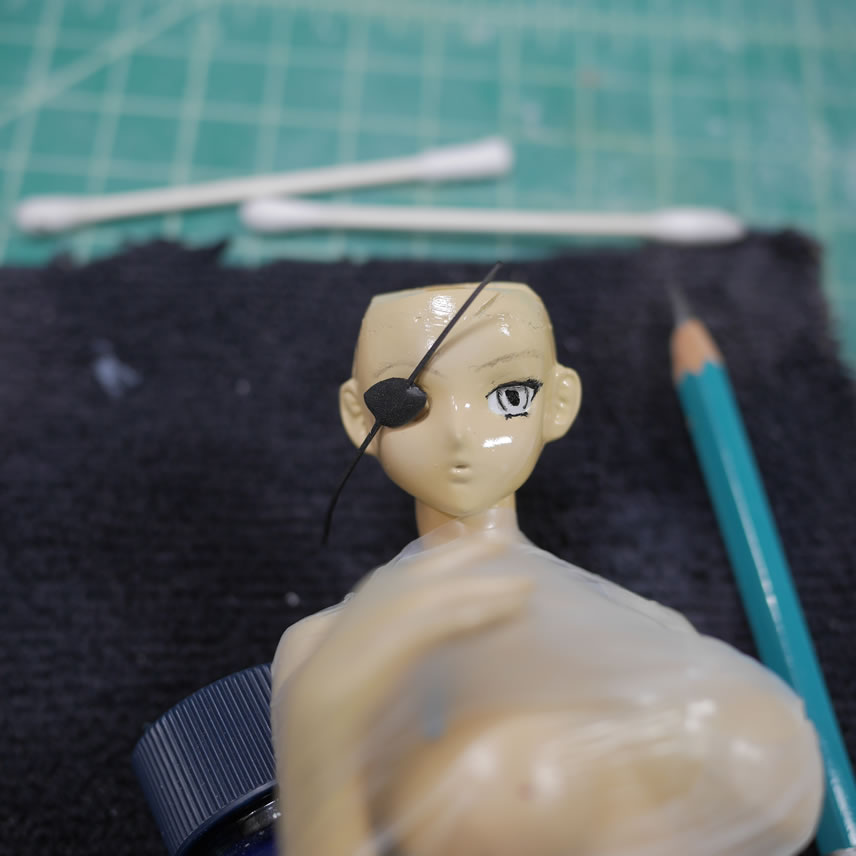
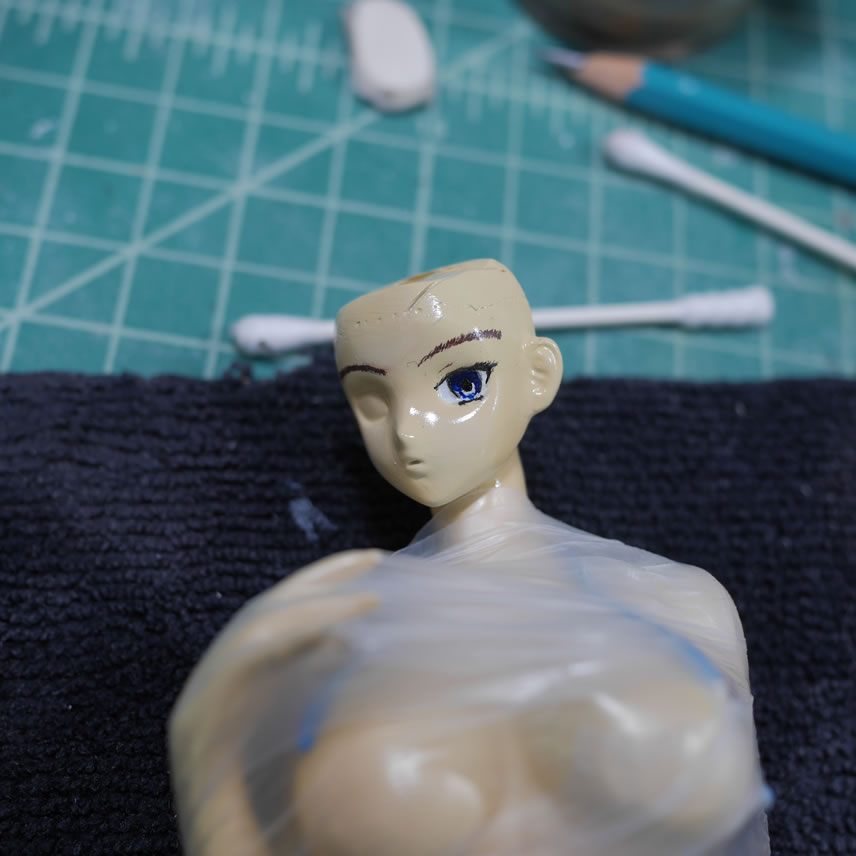
Back to the figure, time to paint the eye. I start off with a pencil to draw in the basic shape and look of the eye. The eye brows are drawn in as well as small eye details.
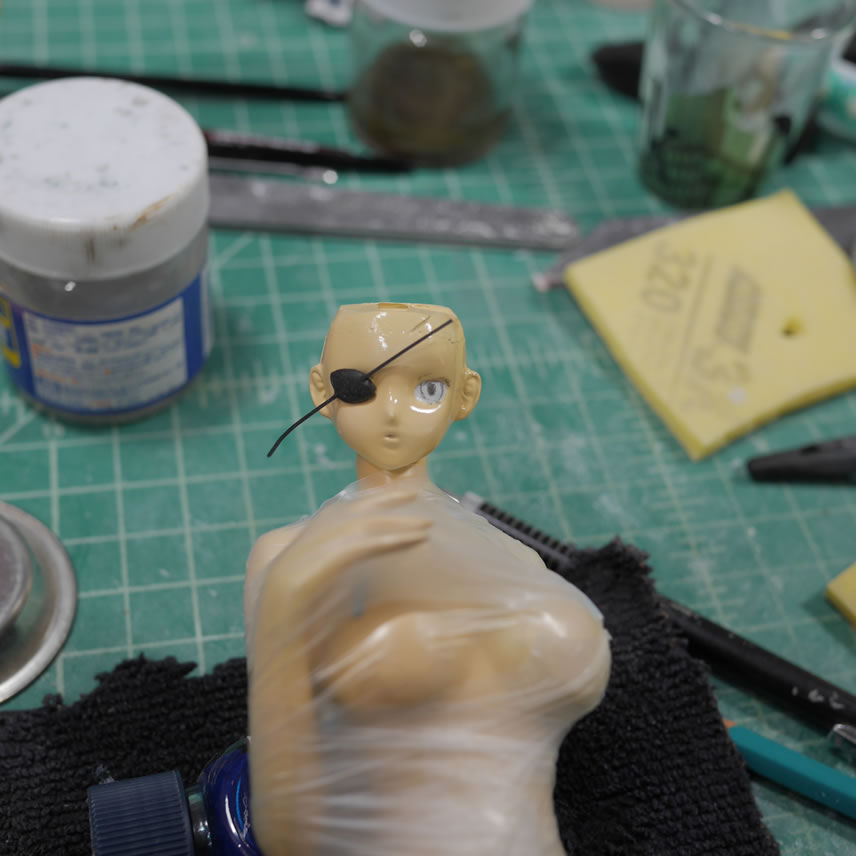
The eye is painted with black first to line everything. Then a dark blue is painted followed by a light blue and white for highlight dots. Once this is dry, the eye is sprayed with a clear gloss to seal everything and give the eye a wet look.
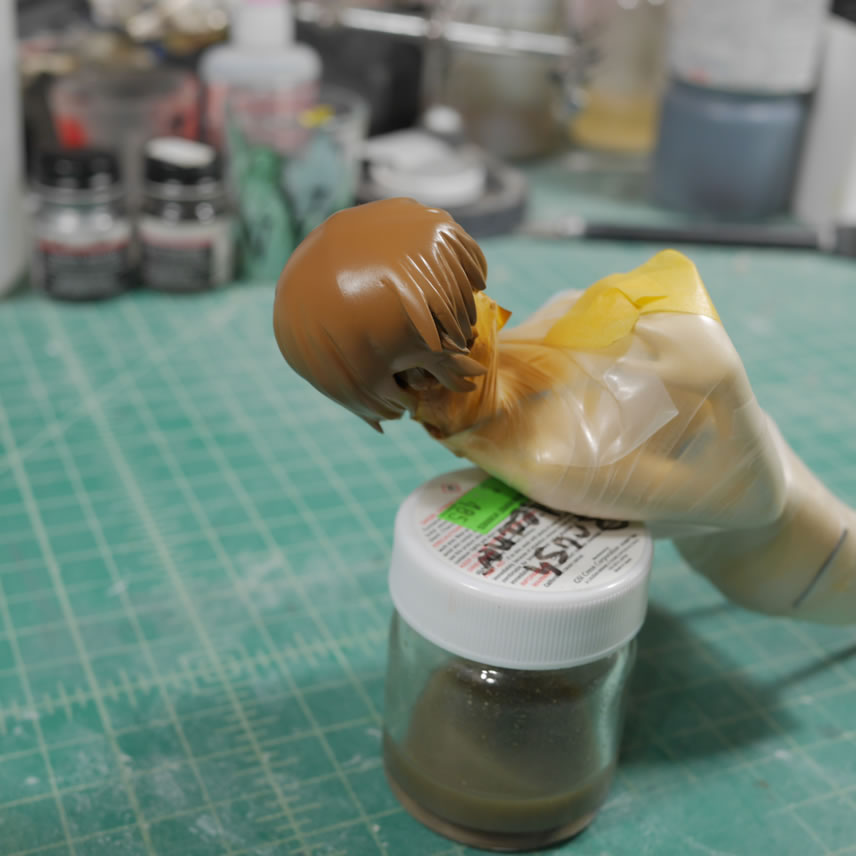
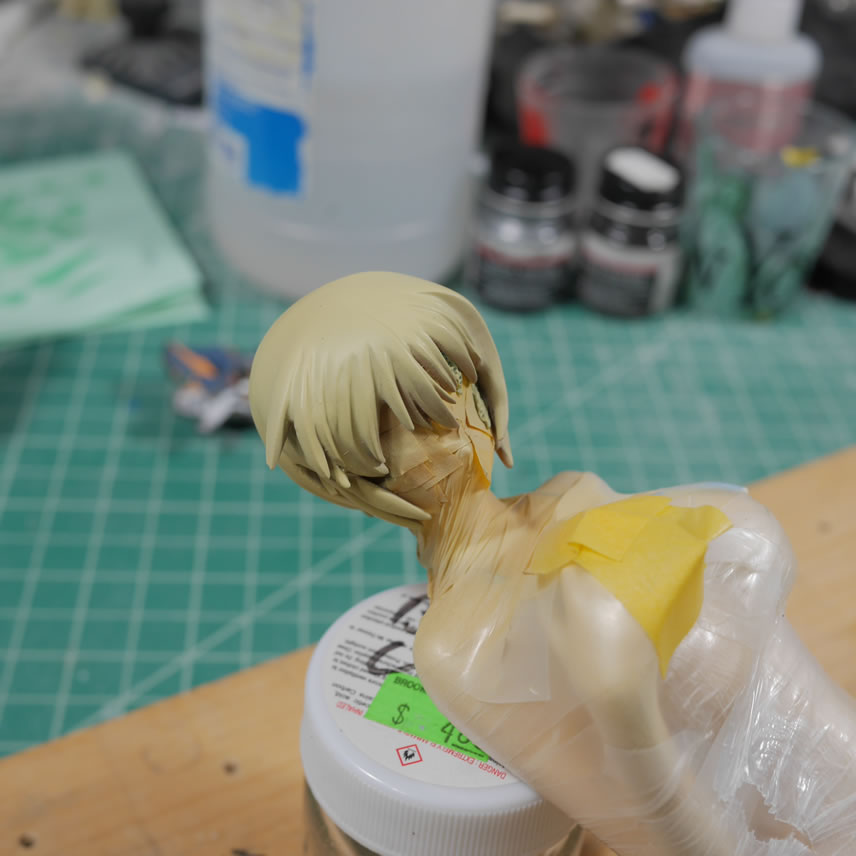
With the eye painted and eye patch glued into place. The two hair pieces are glued. I previously painted the base colors for the hair and stopped there. Since I need to seam up the hair, it is easier for me to paint the whole pieces separably first then work on combining them and the putty/sand/paint work to fix the two parts. The face and body are masked off and the two halves are glued together with CA glue. Once the glue sets, light curing putty is applied along the seam and the seam is sanded and shaped.
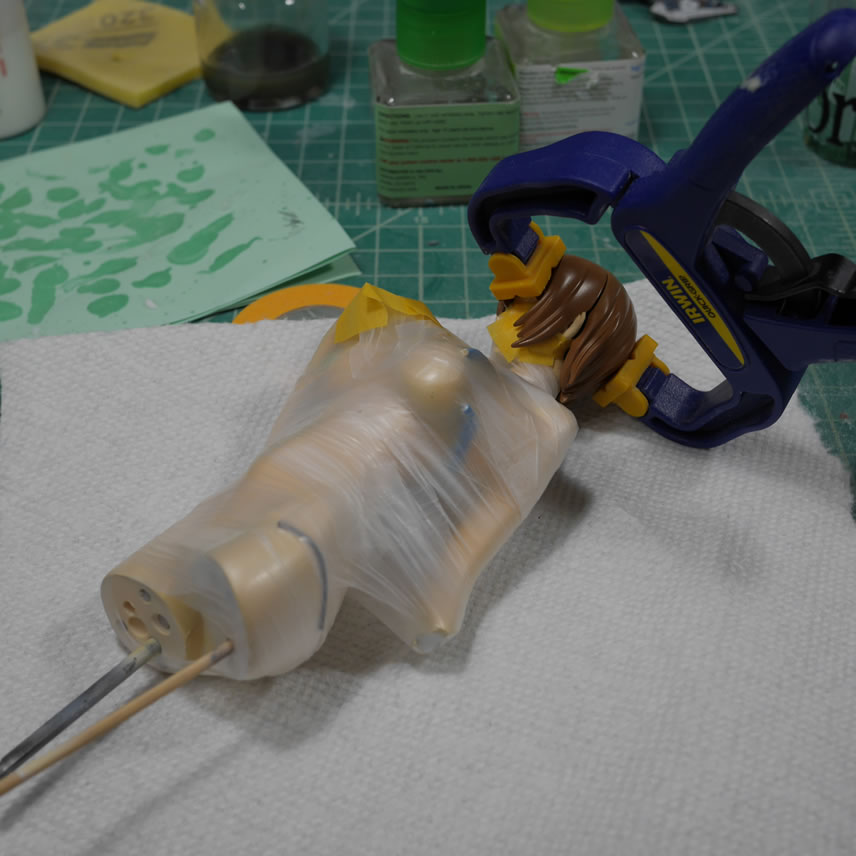
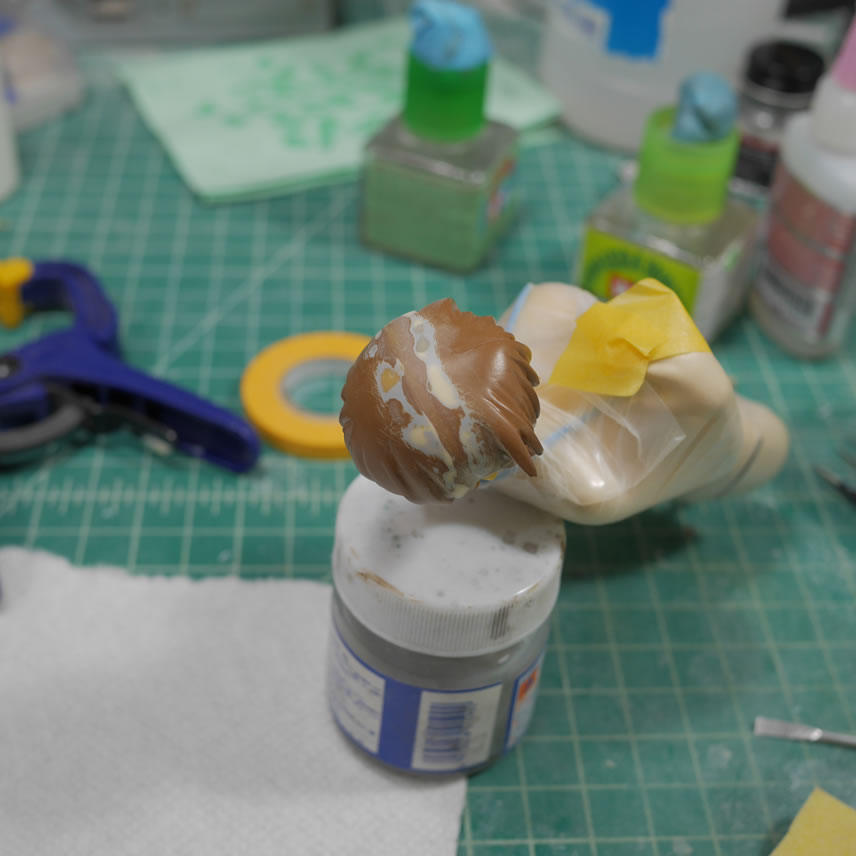
Primer and a few more putty/sand fixes get the part back to where we started with everything painted brown (mr color sand brown). A custom blond color I had is then sprayed using the brown base as dark highlights.

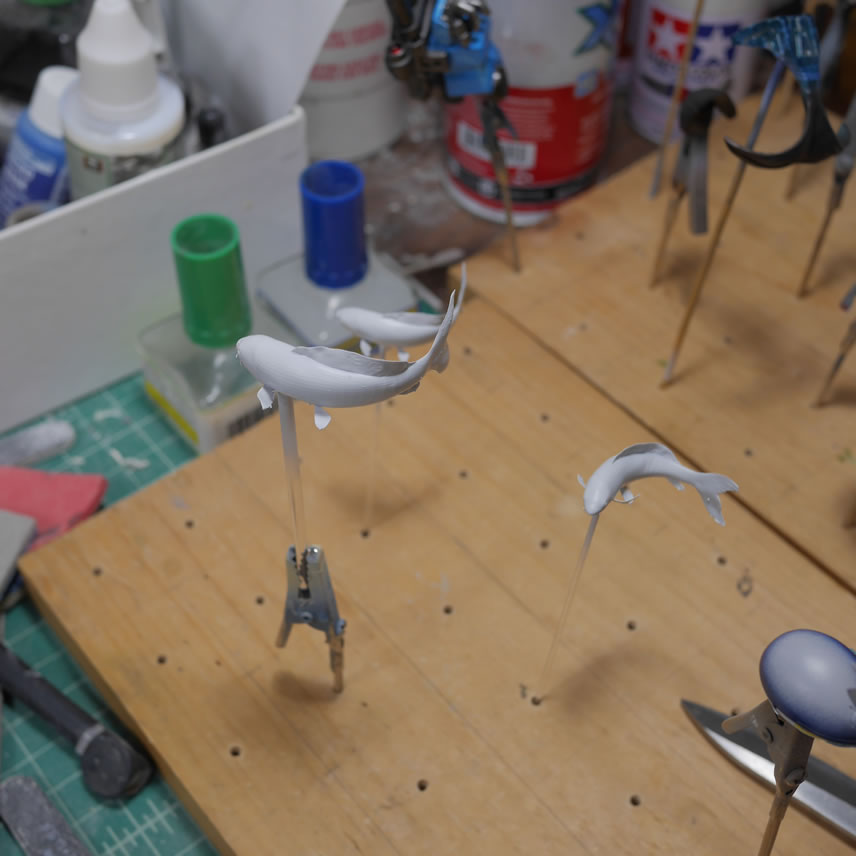
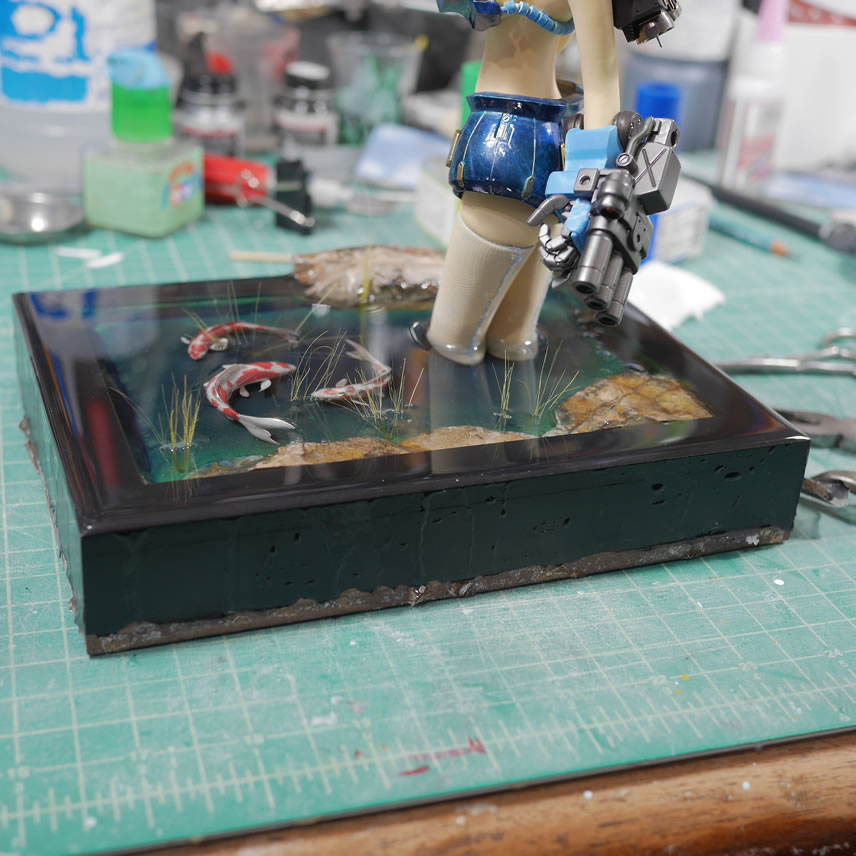
I found a nice koi 3D sculpt online and made a few modifications and printed a few of them. Once primed, they were painted with white and hand painted to finish. Then everything including the main figure are glued to the base. The last thing, not pictured, is mixing some clear epoxy resin and pouring it into the base to create a pond of sorts. Next update should be the final touches and final pictures of the Goufy project.
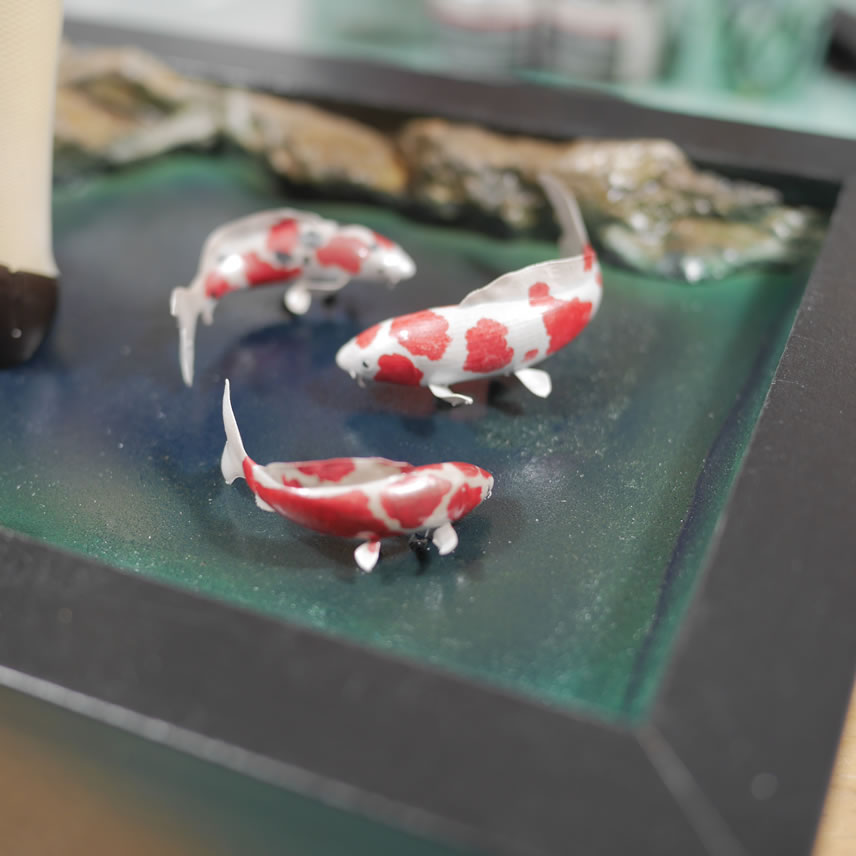
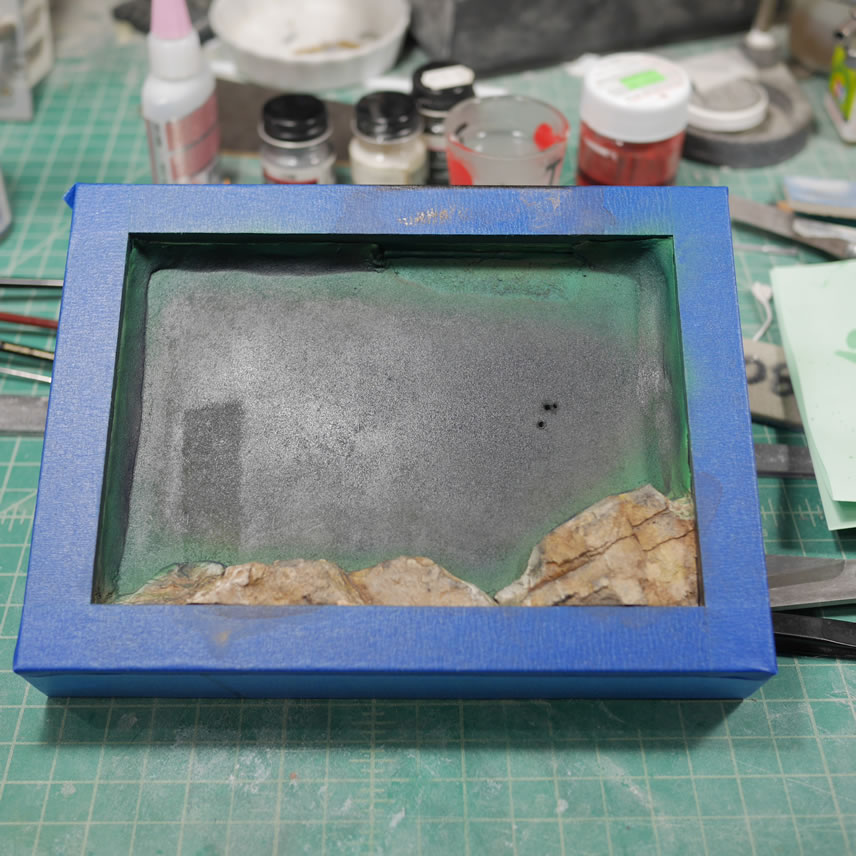
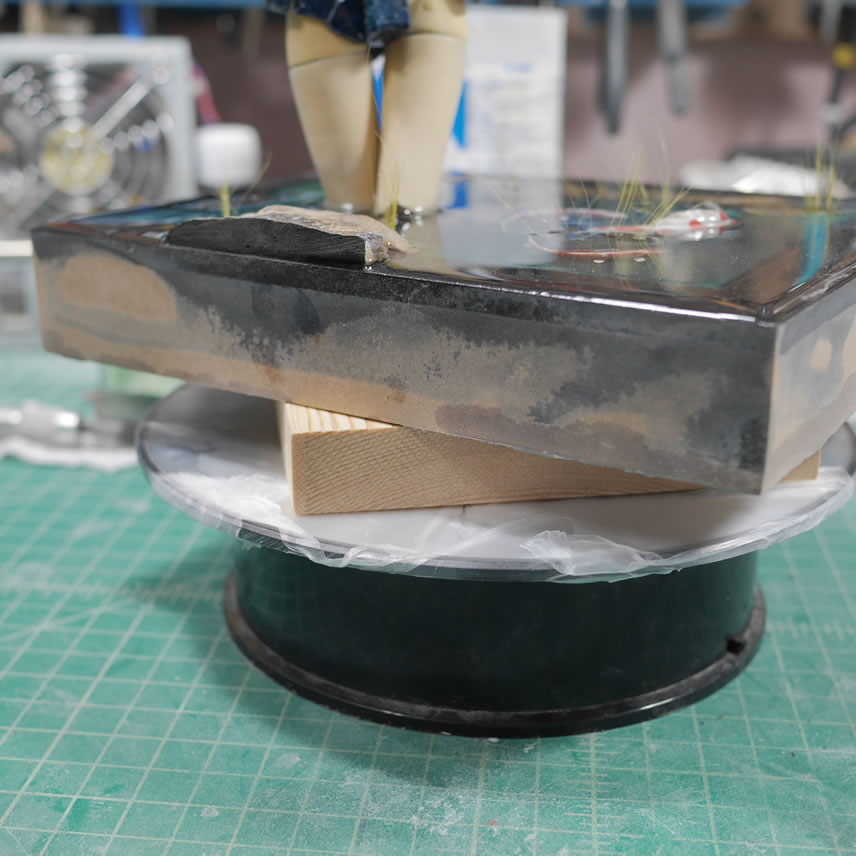
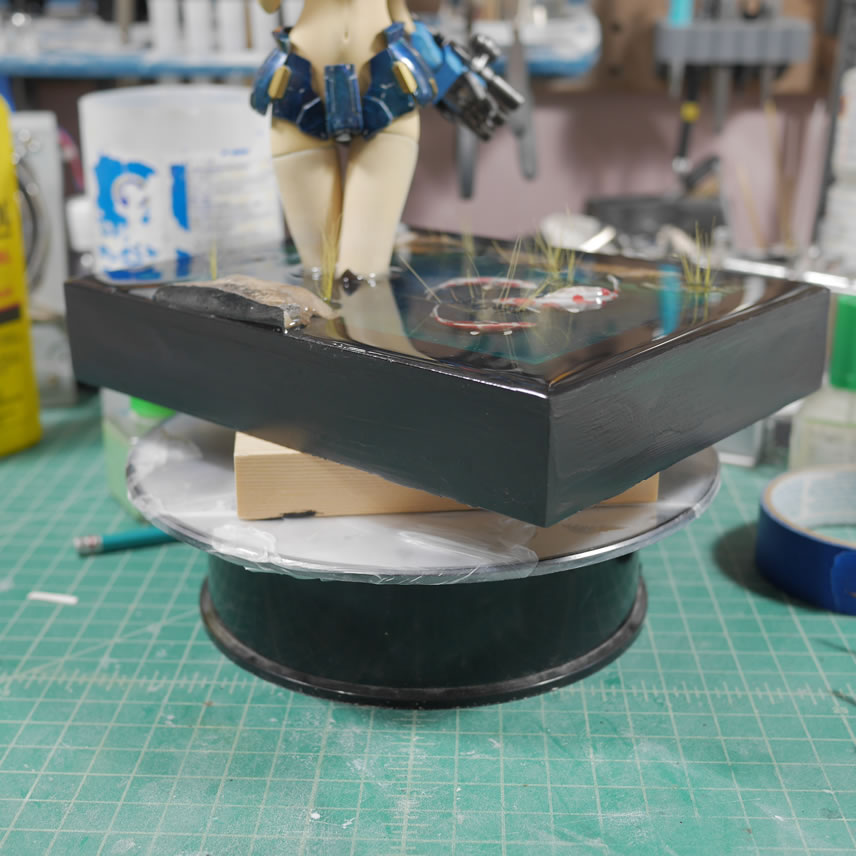
July 24, 2020: The pieces were glued to the base and ready for the clear resin. I used a very slow curing epoxy resin since the whole base is too big to fit into the pressure port. Also, a slow cure resin means lower curing temp. Fast curing resin will get pretty hot during the curing process and that would potentially melt things down. Since 99% of the kit is resin, this shouldn’t be too big a problem, but why take that risk. The resin I used works well with bandai plastic too. The resin was poured in three stages. To make sure I fill the area and to over flow it a little so I get an infinite top kind of look. I needed most of the resin to cure first before pouring additional layers. Once all the layers were poured and cured; the kit is removed from the dust free drying chamber I had and the excess resin can be cut and pulled away. This sort of ruins the sides of the base, but I’m not too concerned as this was expected.

An orbital sanded was used to quickly smooth out the sides and remove any excess resin. I started with an 80 grit, and moved up to a 180, then 220, and finally a polishing grit of 320.
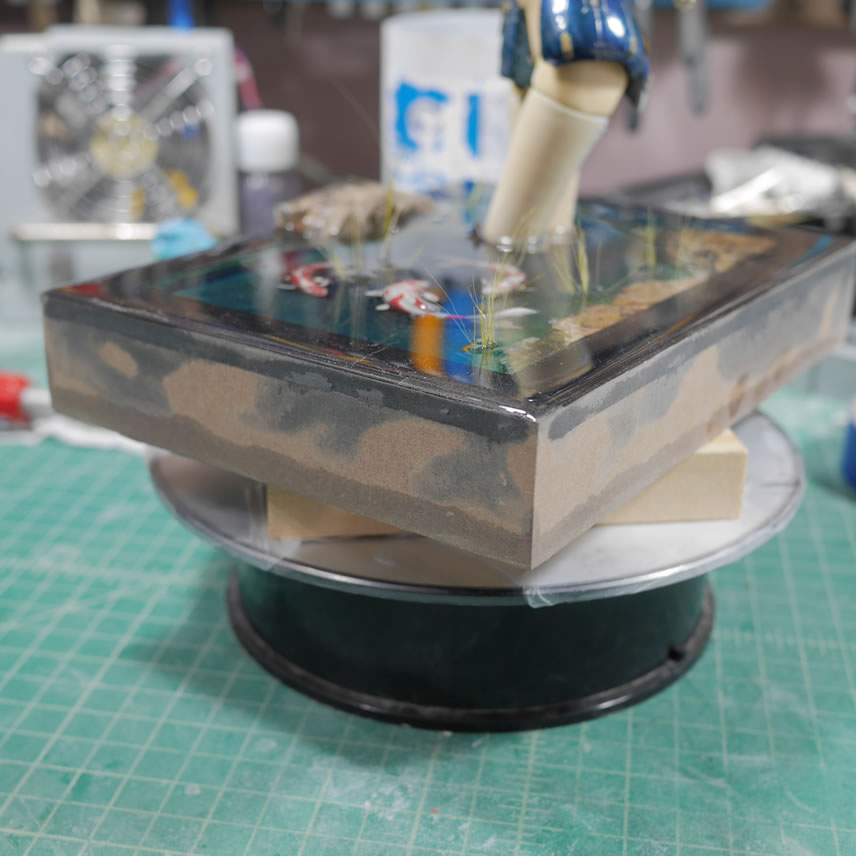
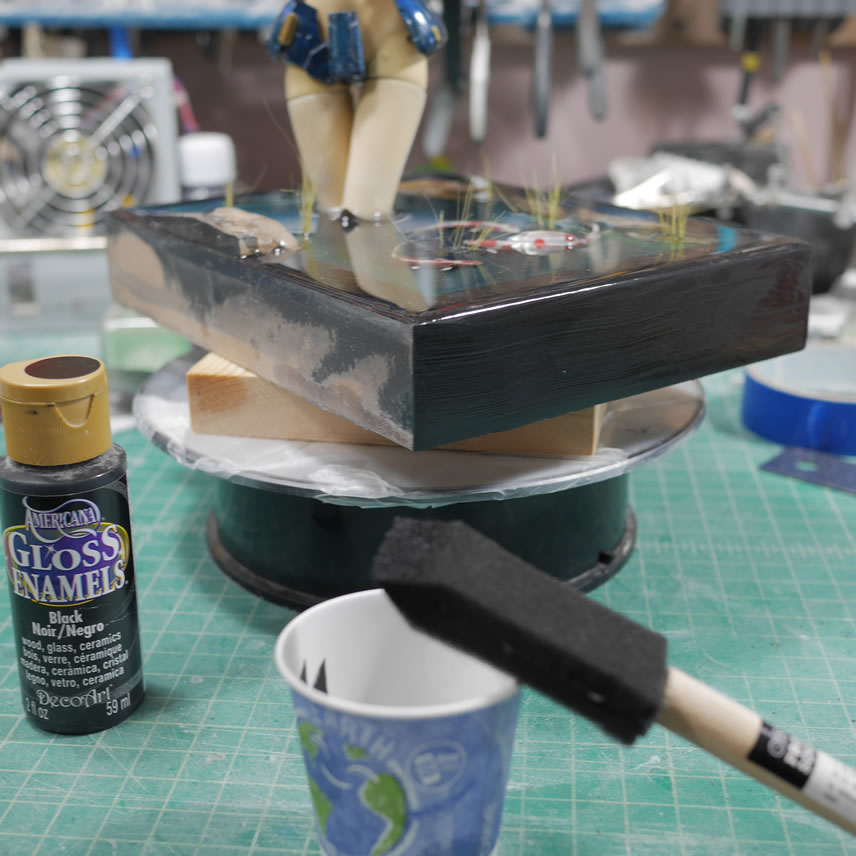
Once smooth, the sides are wiped down with a damp cloth, dried, then painted on some black to finish the base.
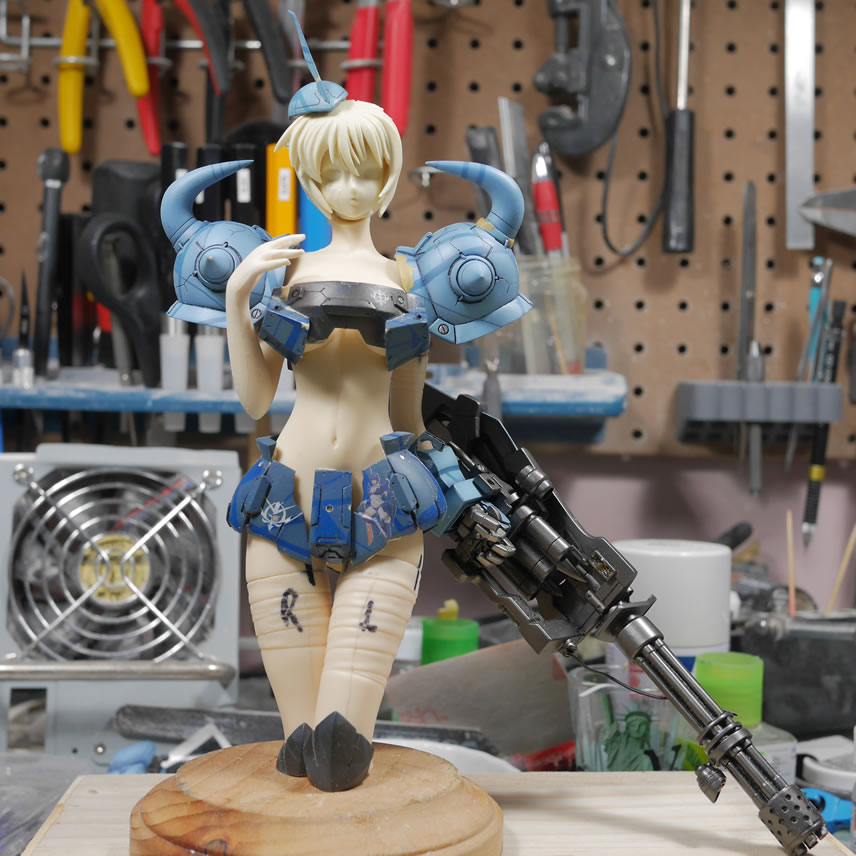
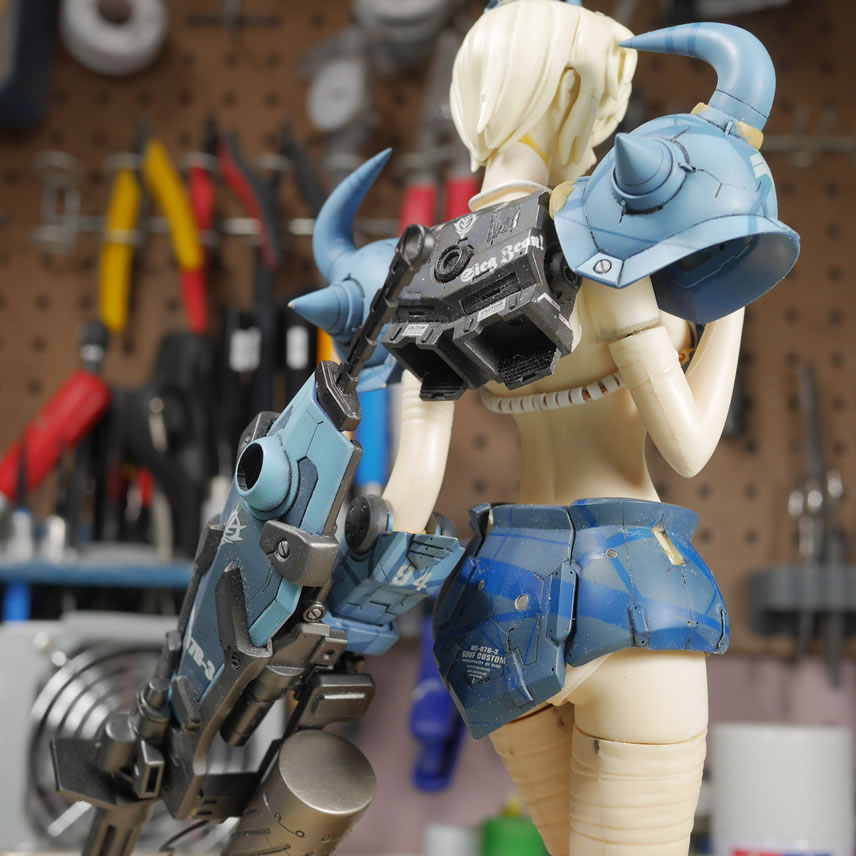
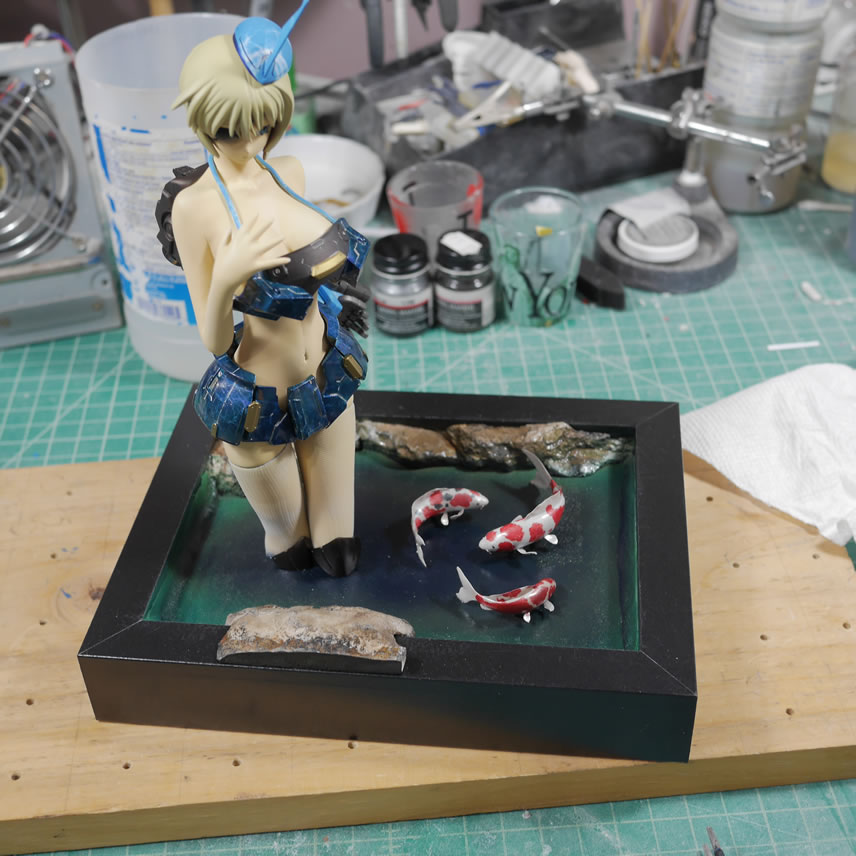
The last bits were painting in the lips, finger tips and small little details such as the wires in between the cable tubes for her bikini strap. And she’s done. A fairly quick project completed in about a month’s time.