This is a combination of all the progress posts for this project.
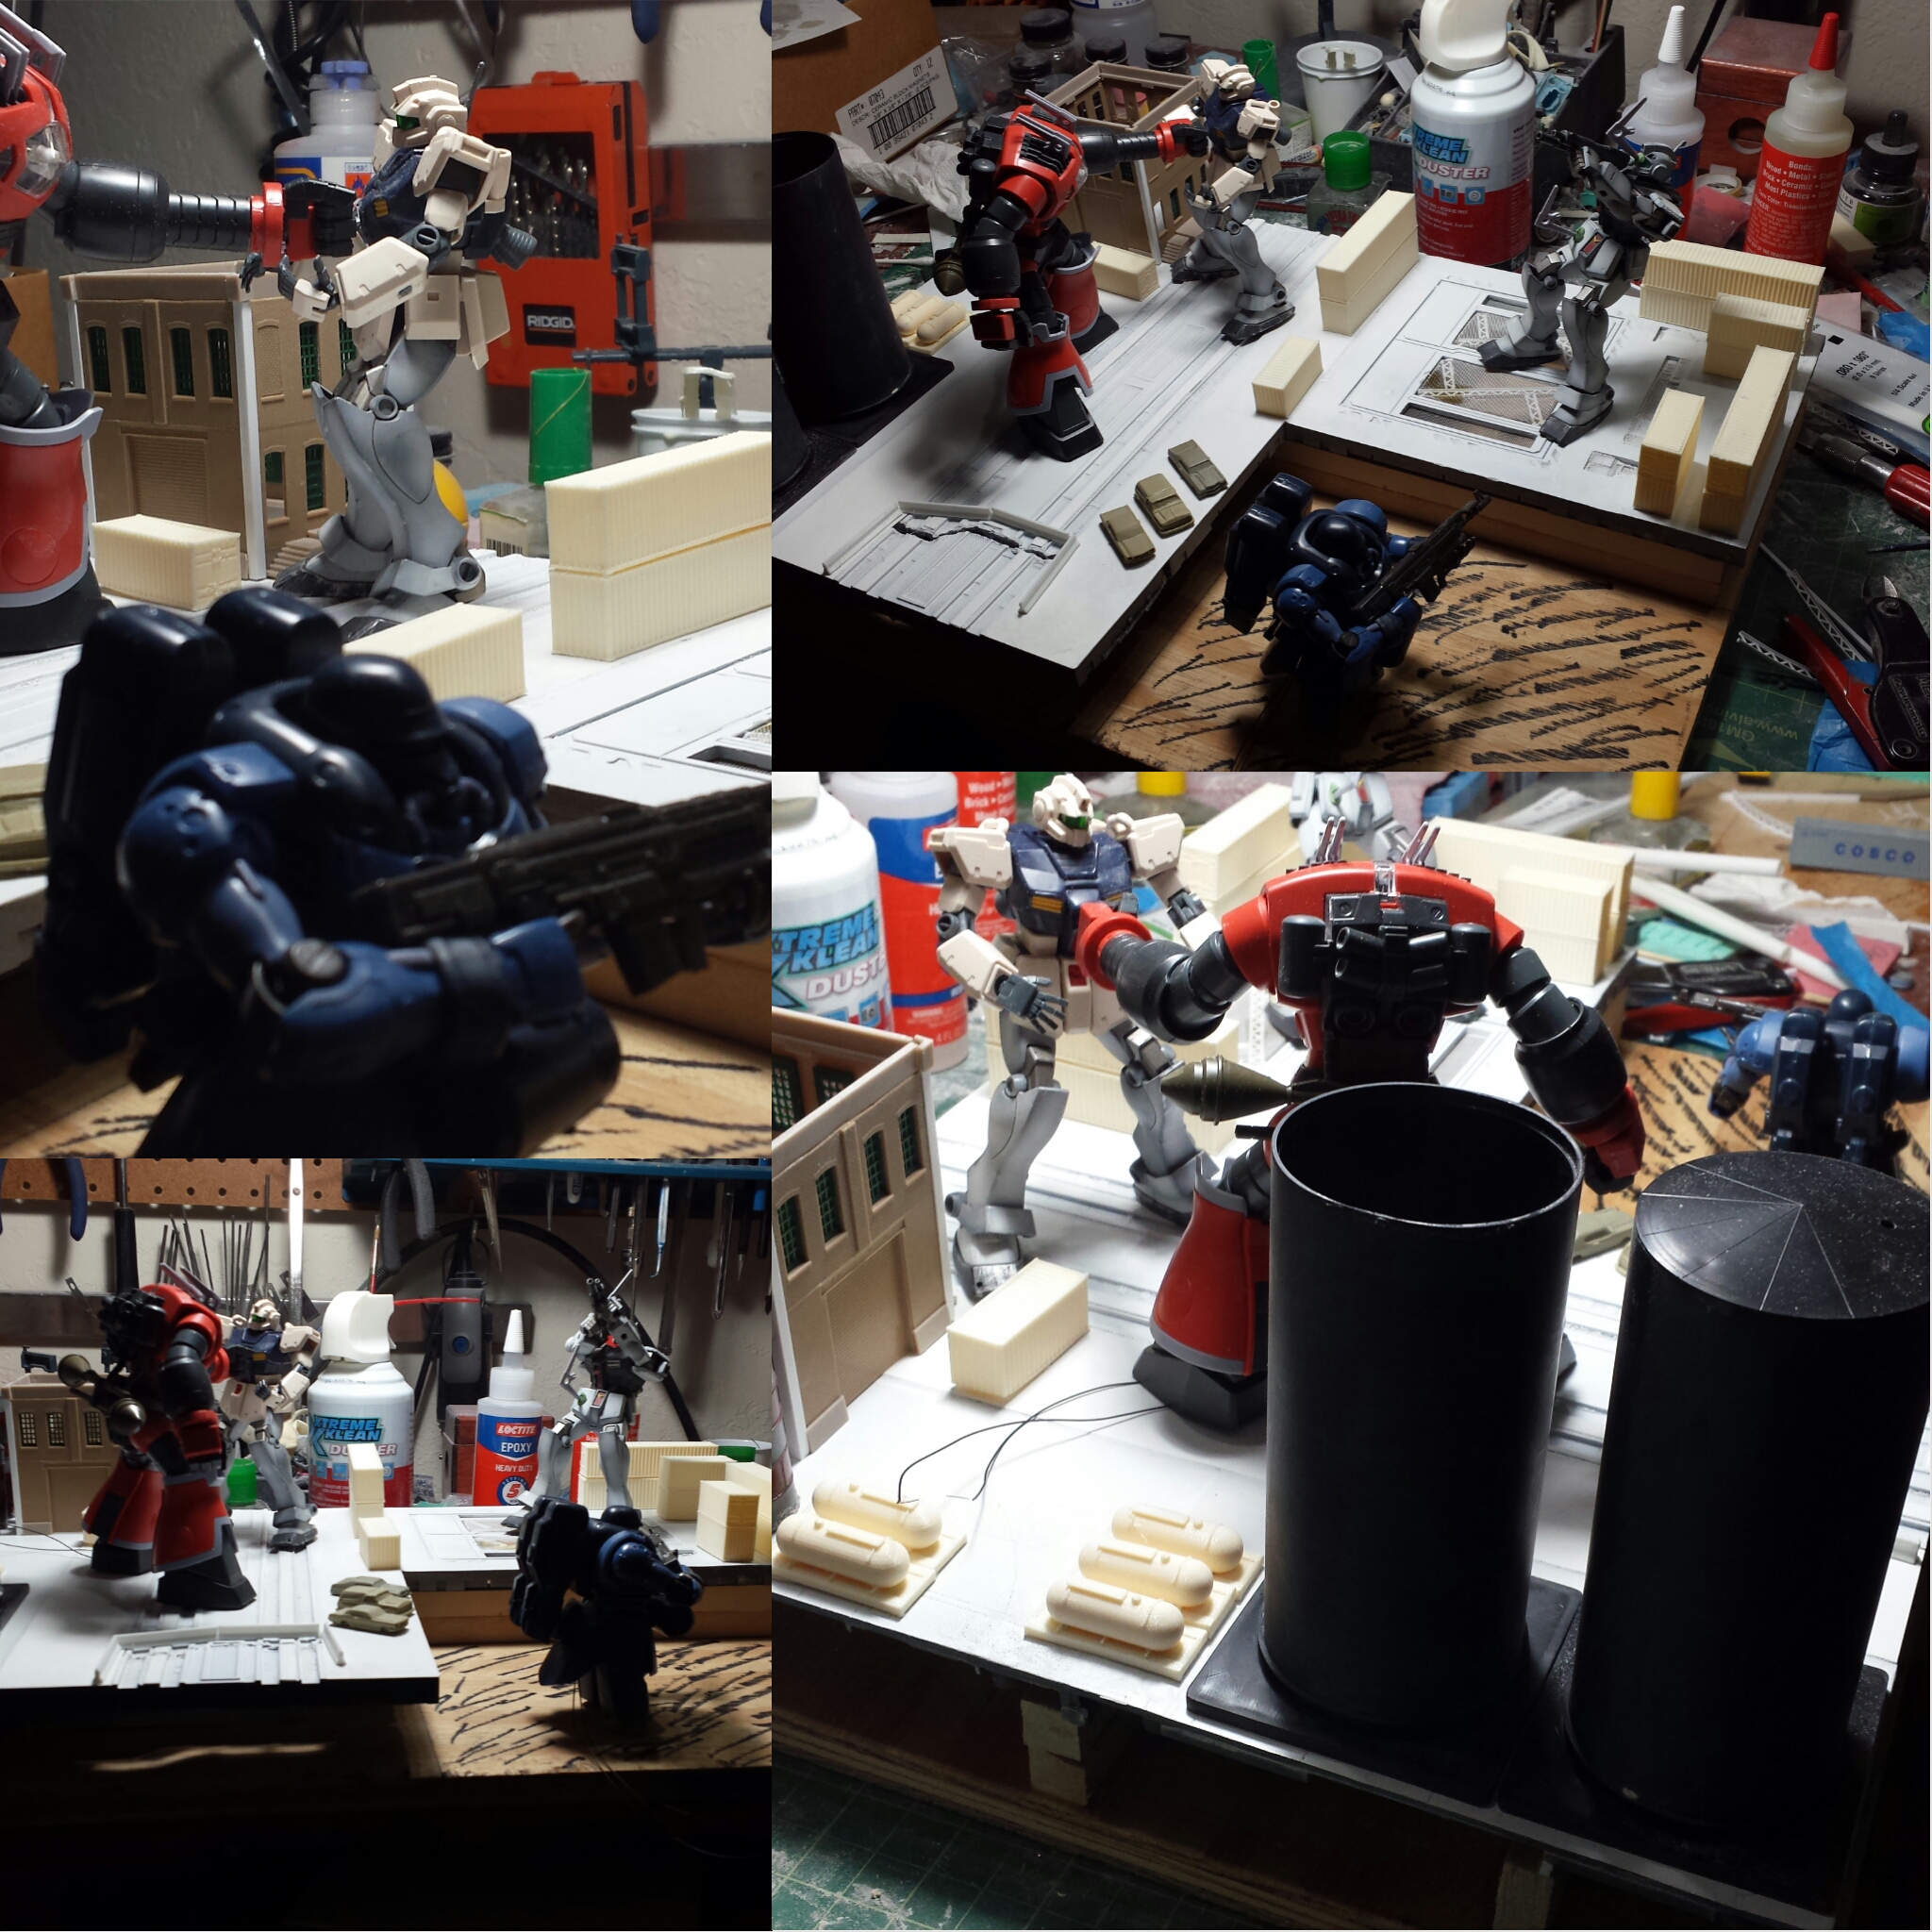
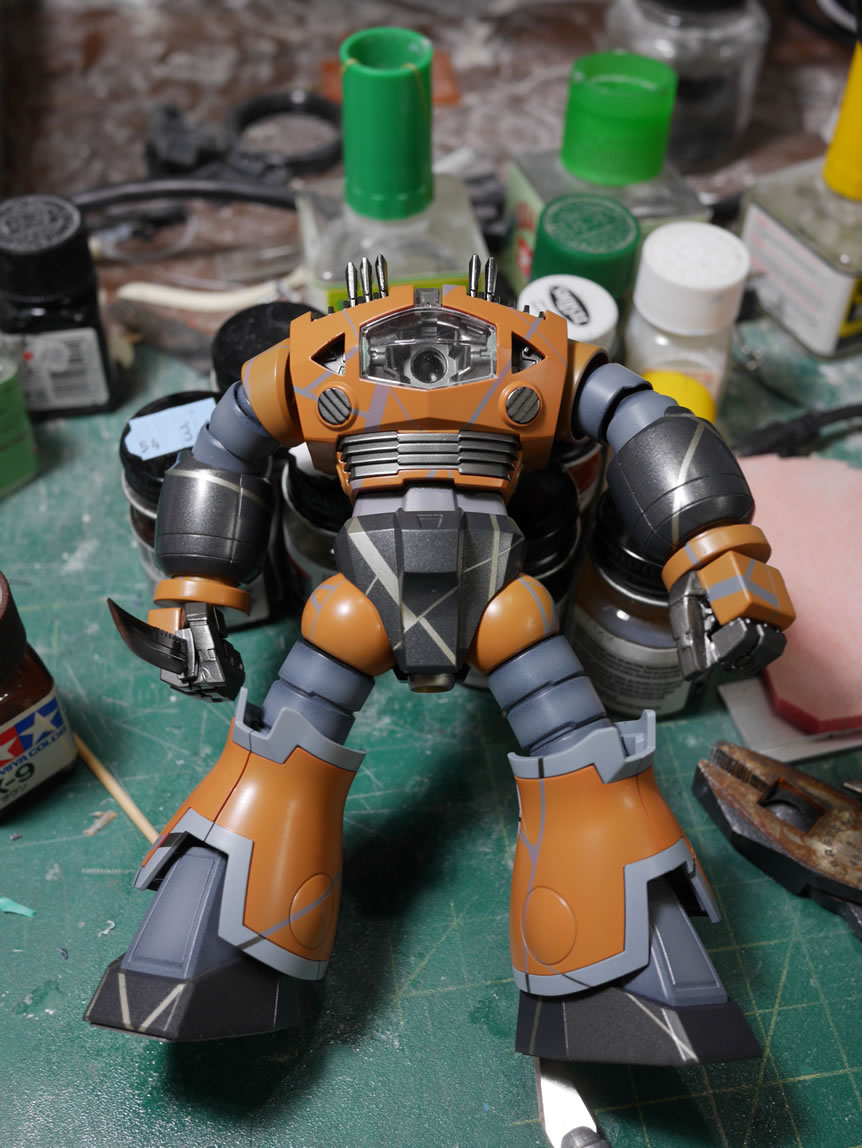
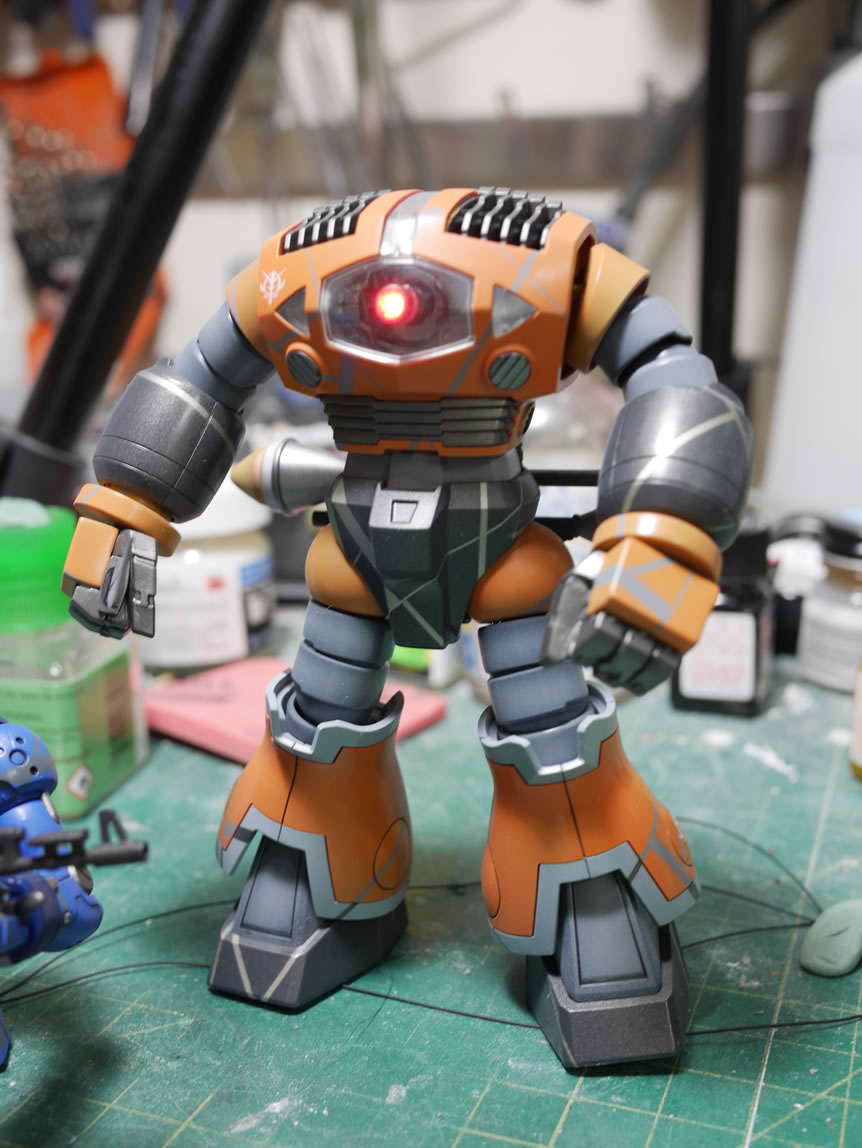
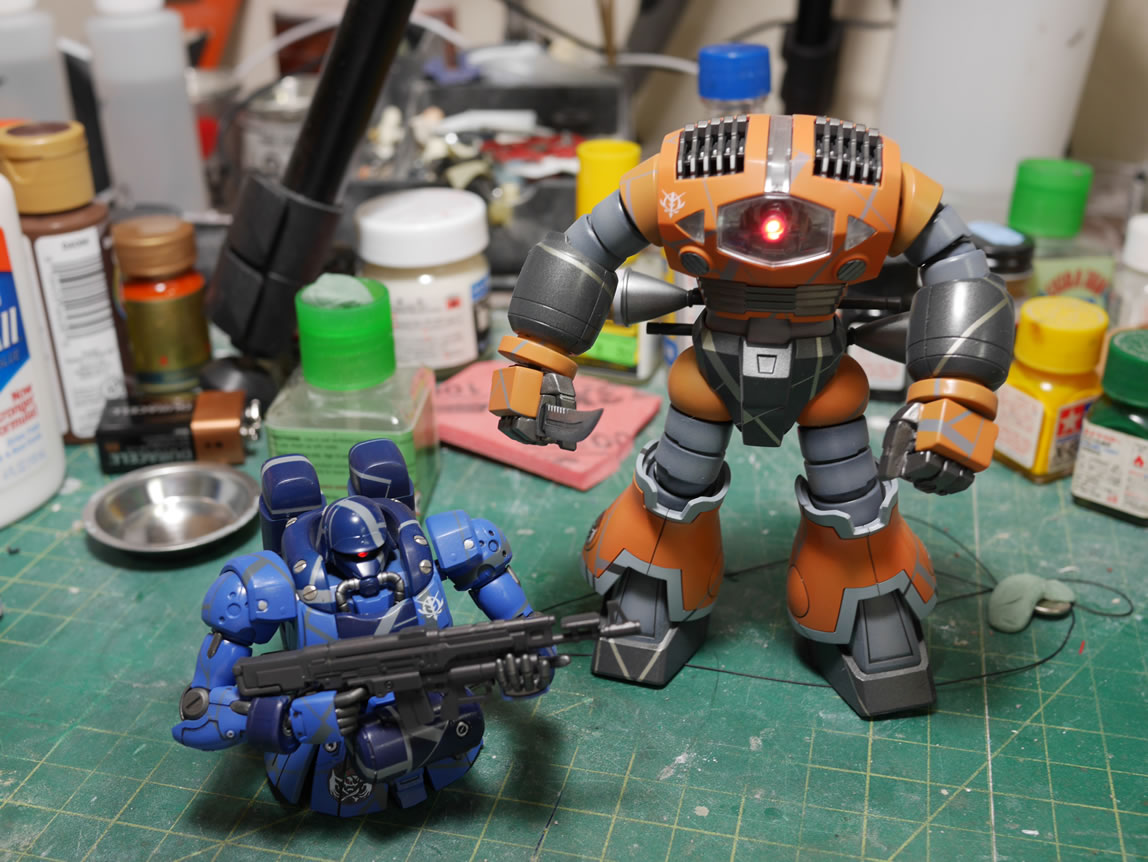
I added a quick little mod to add a light up mono eye to the Zogok.

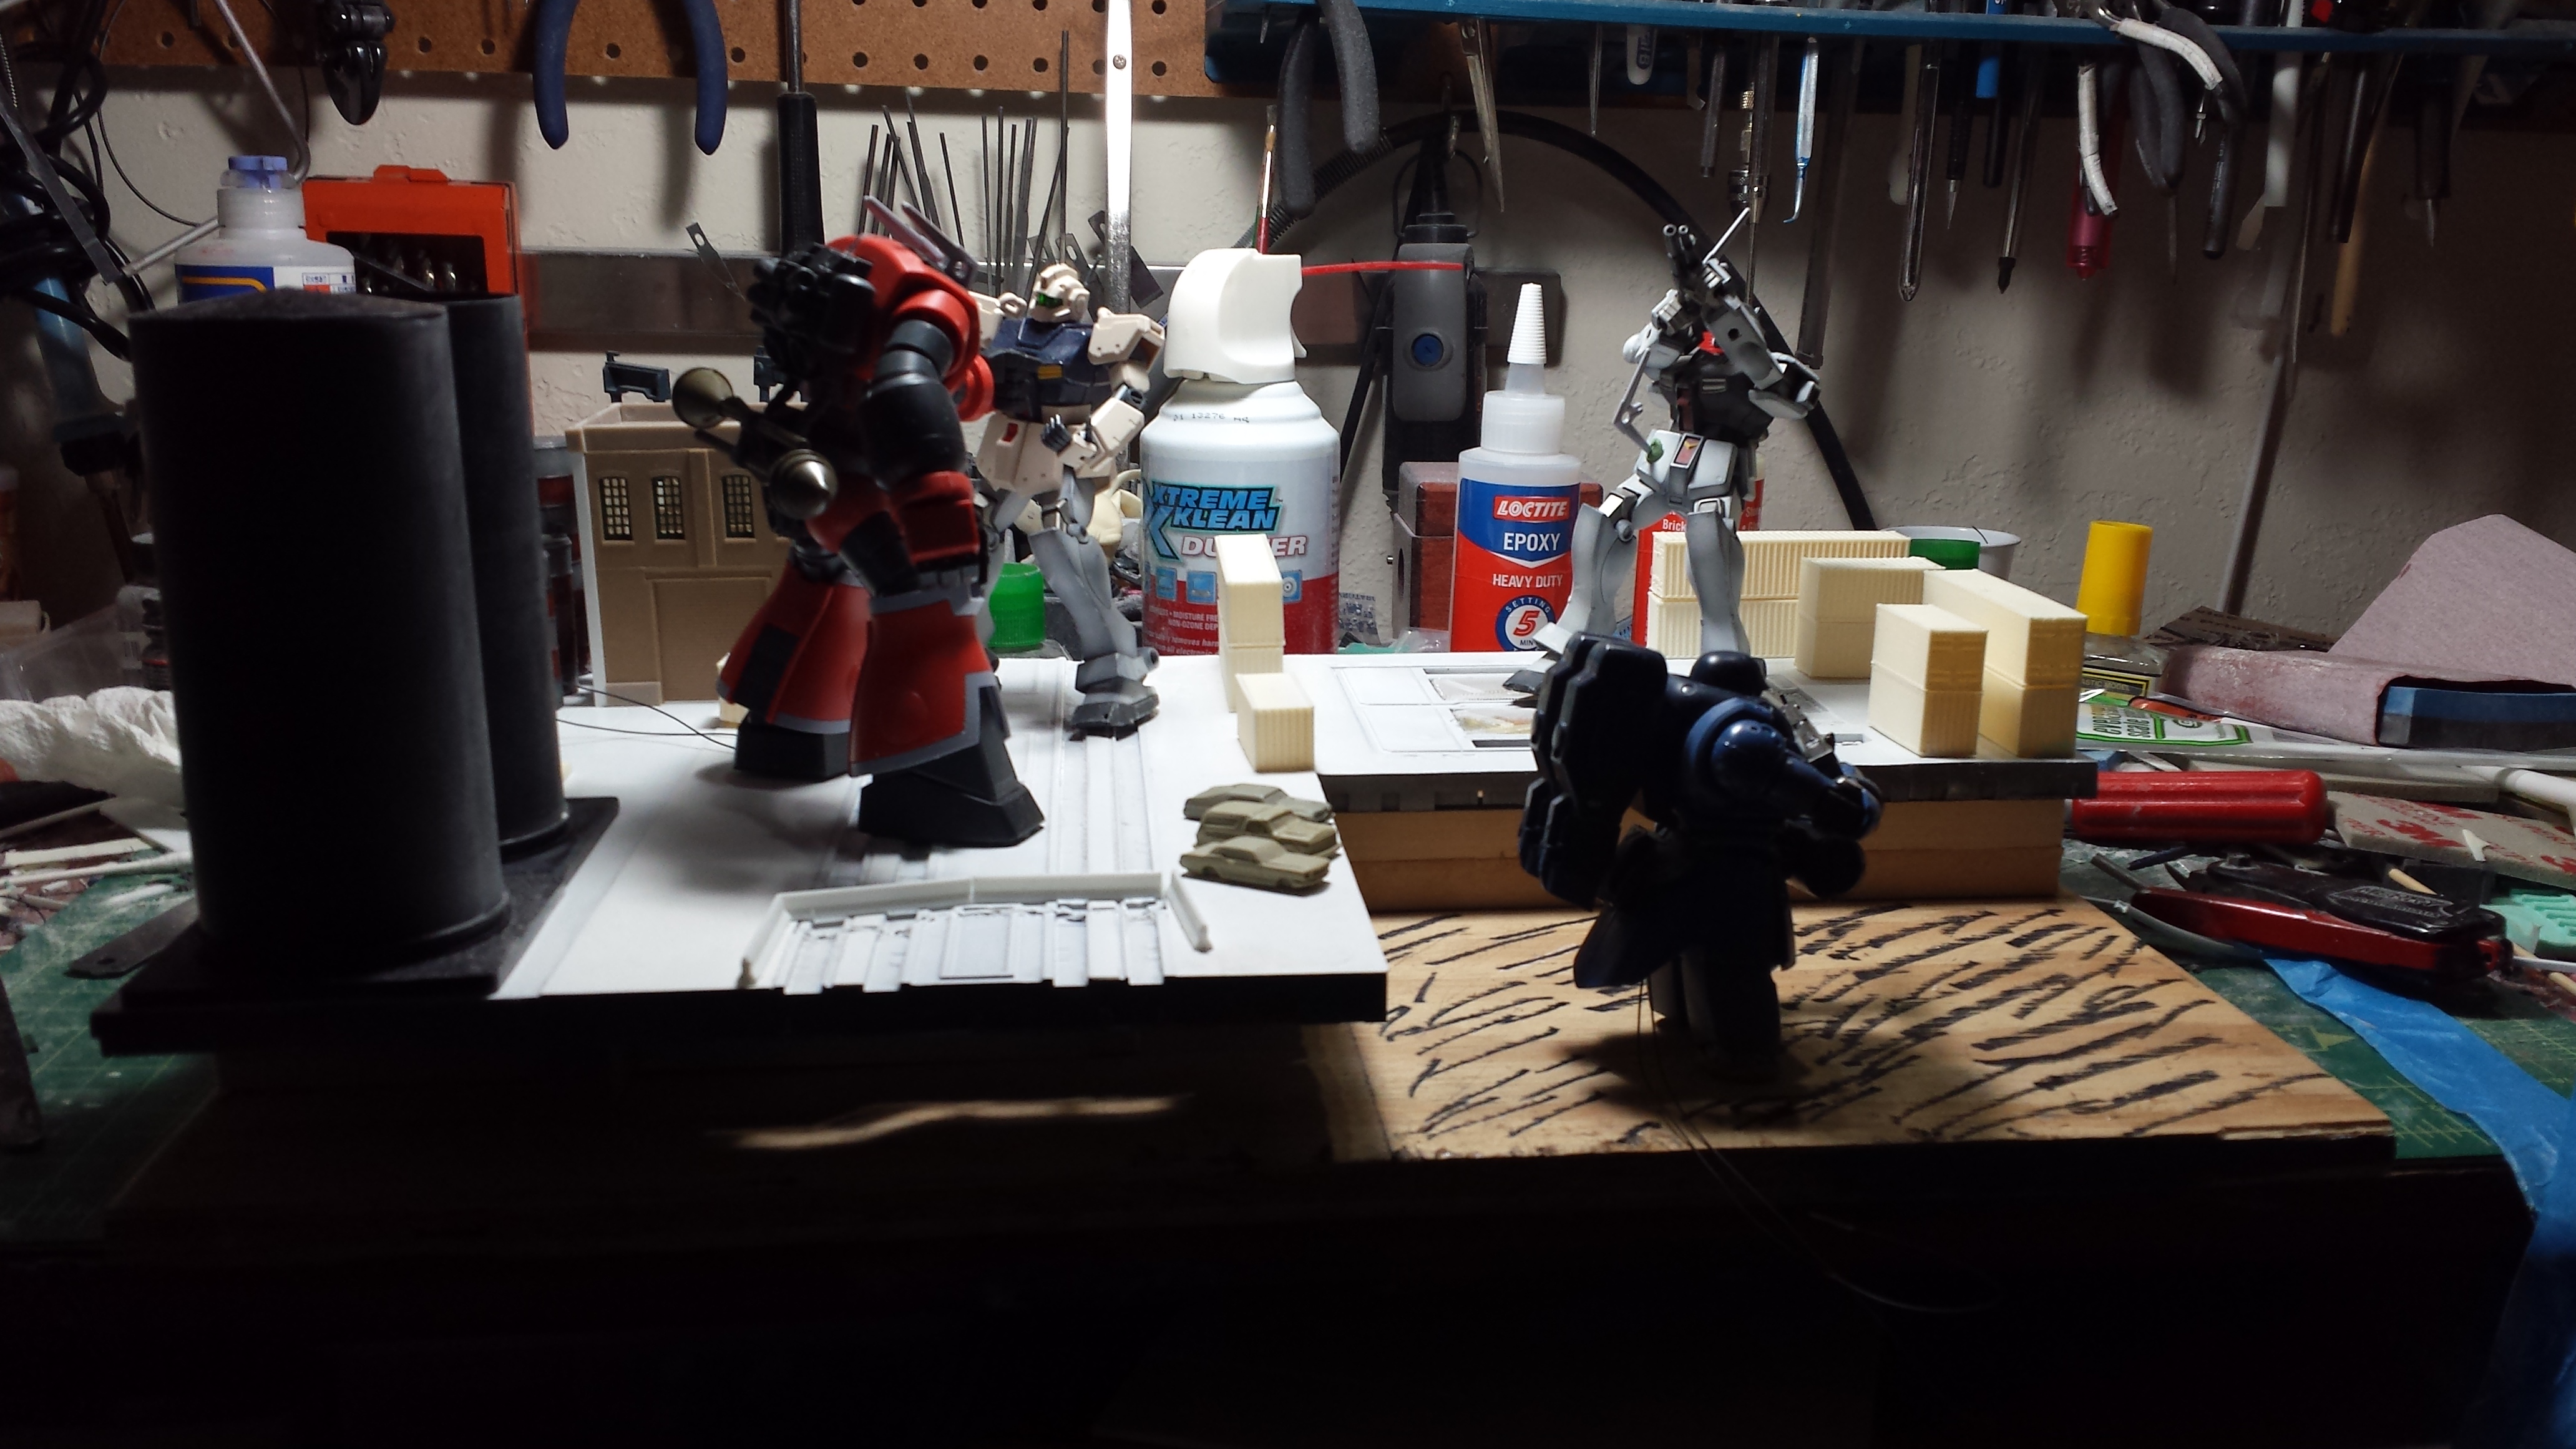
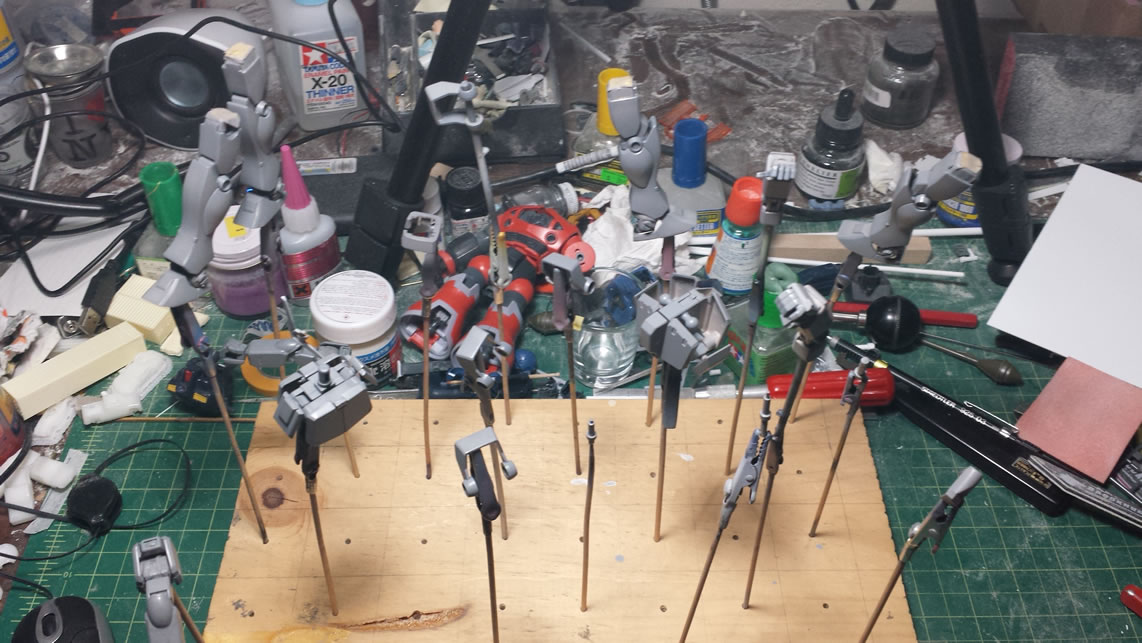
Then planning out the diorama project with some ten year old GM D’s

And finally, the not so friendly chest bump…

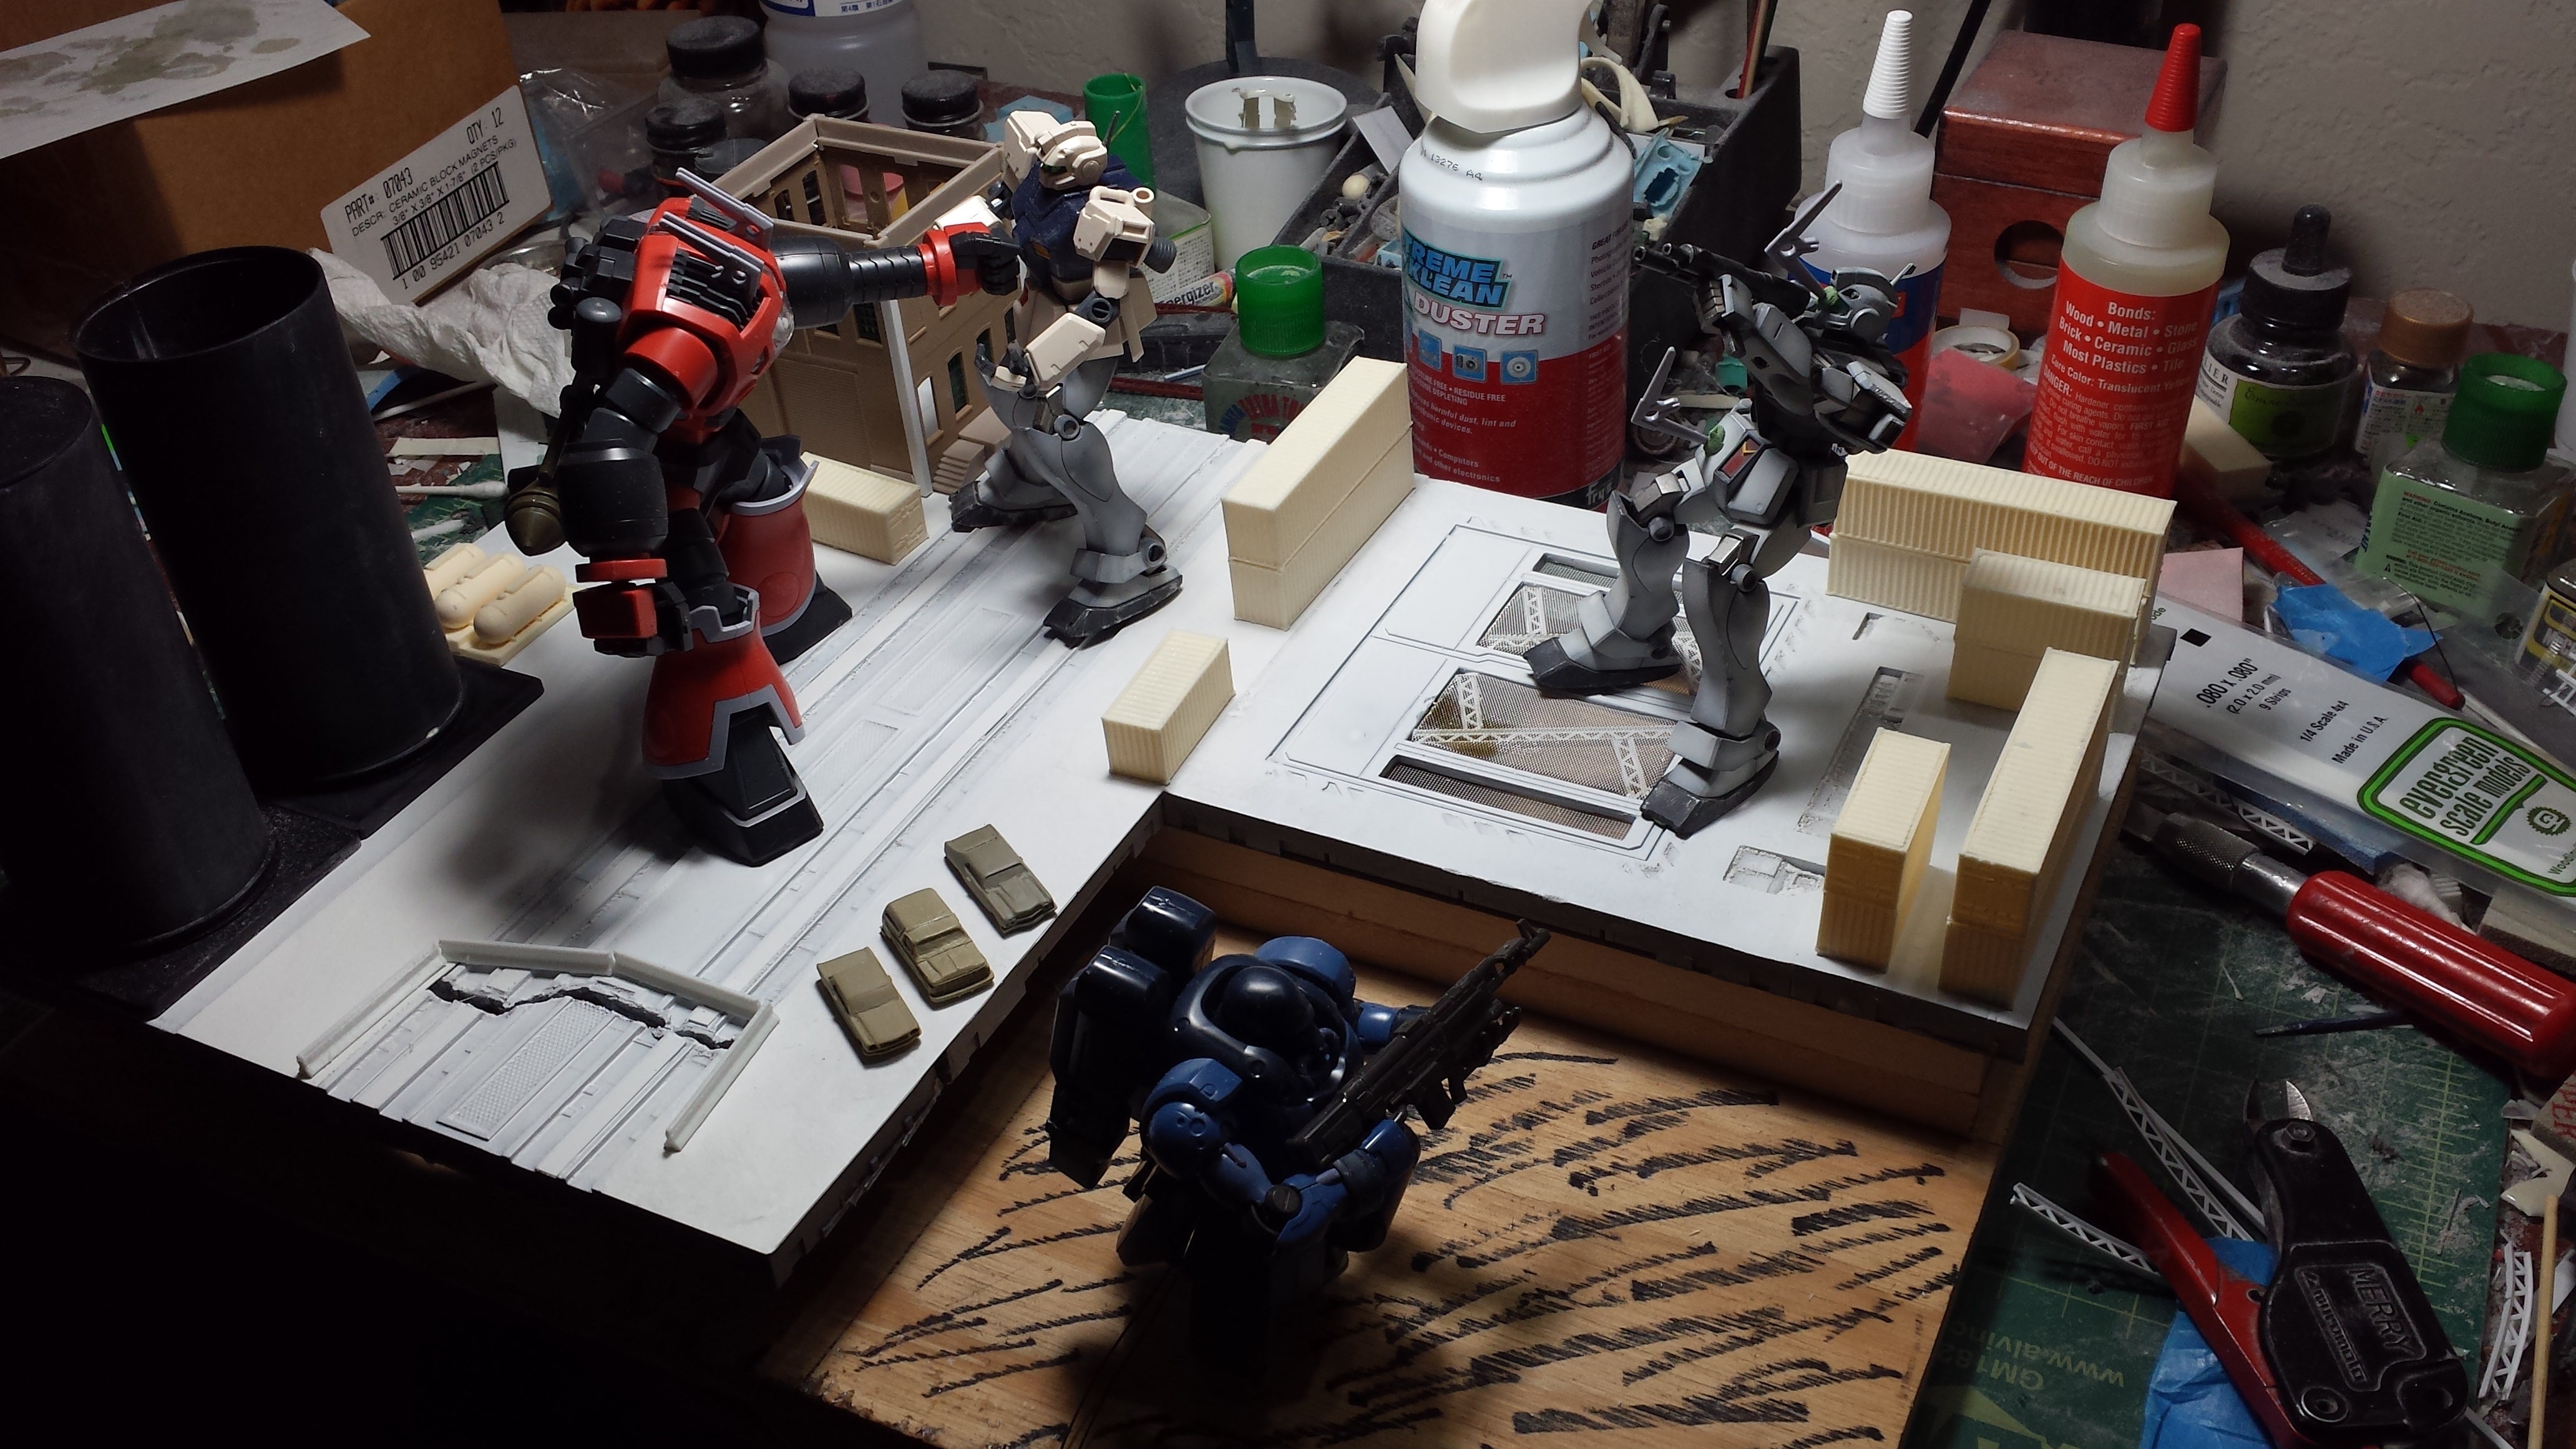
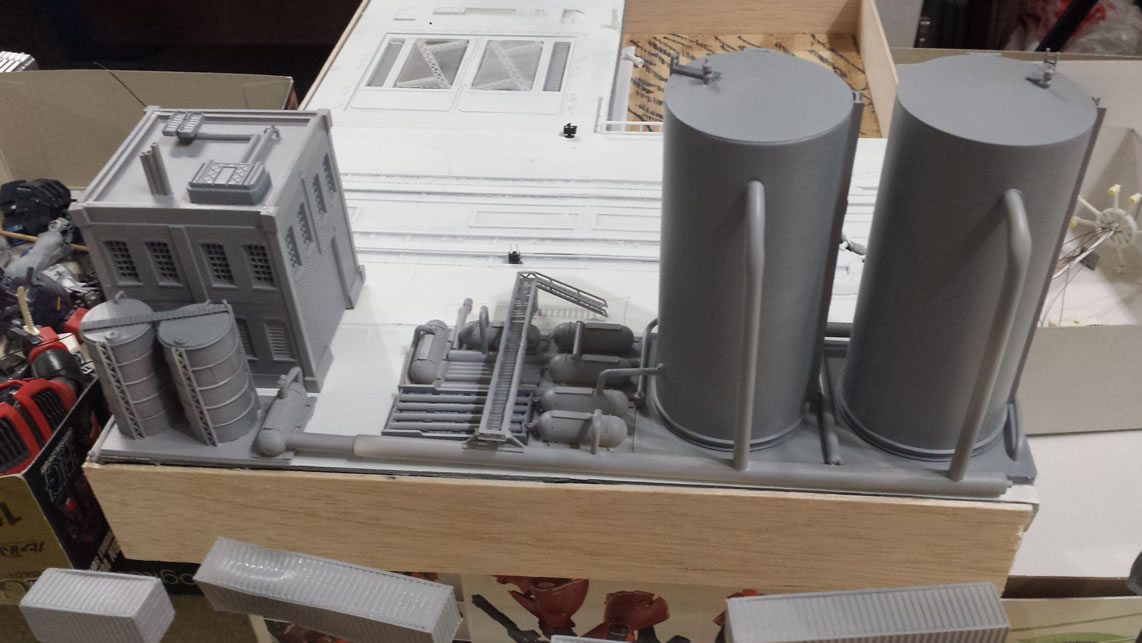
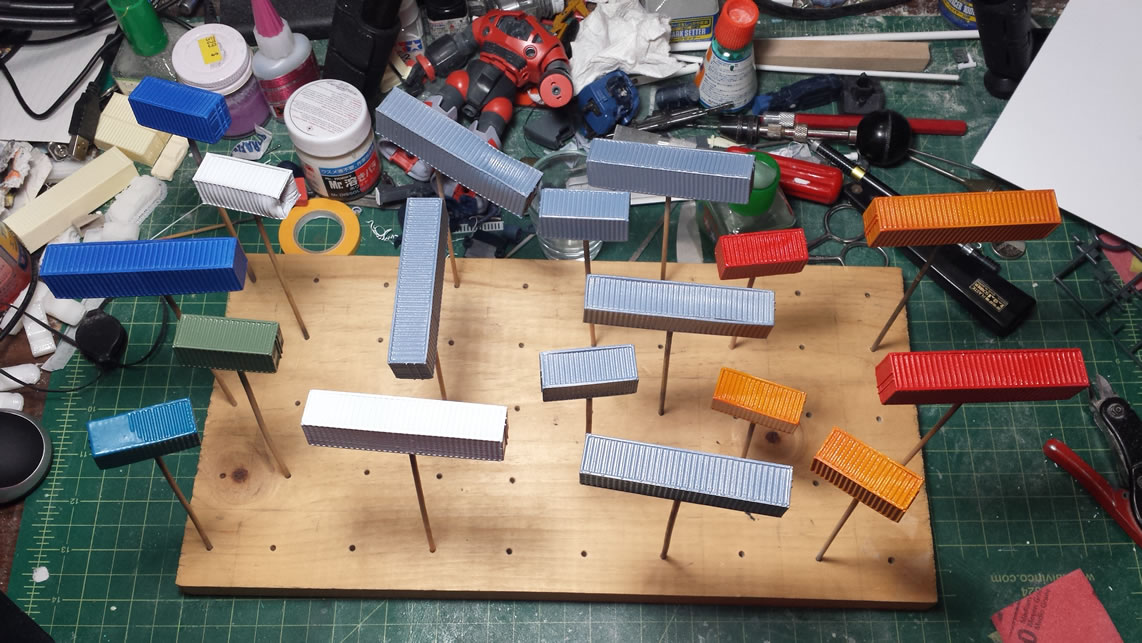
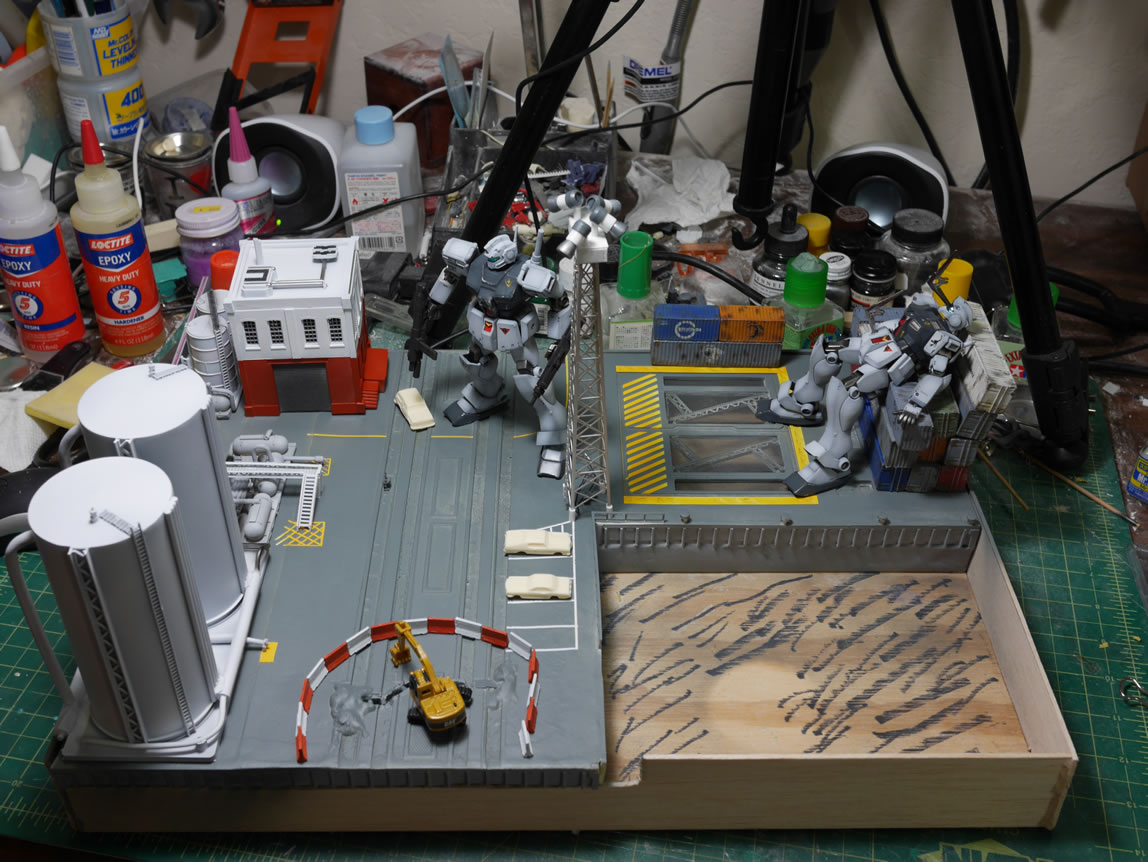
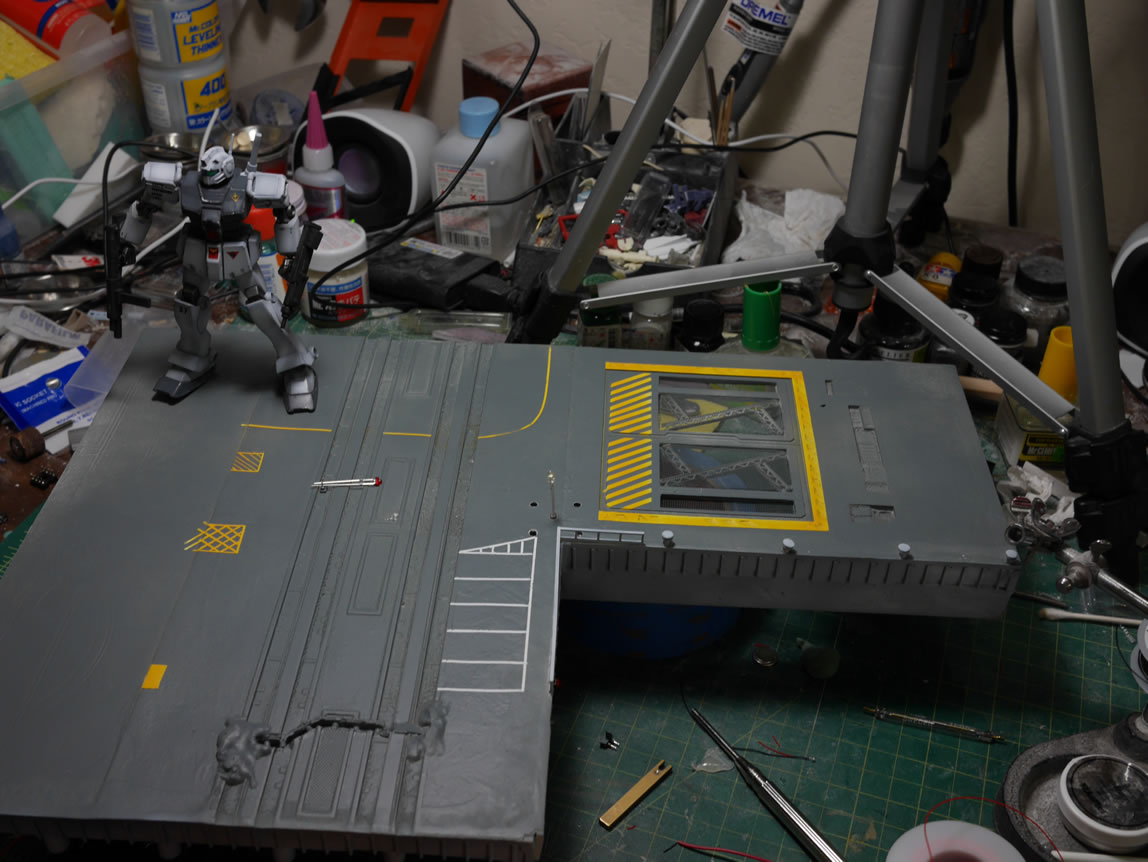
Continued layout work. Still making adjustments. There are still plenty of add ons and replication (mold and cast pieces). But the major players are all on board, literally. This is a rough plan, and things still may shift.(and when you scroll down, you can see how much things change)

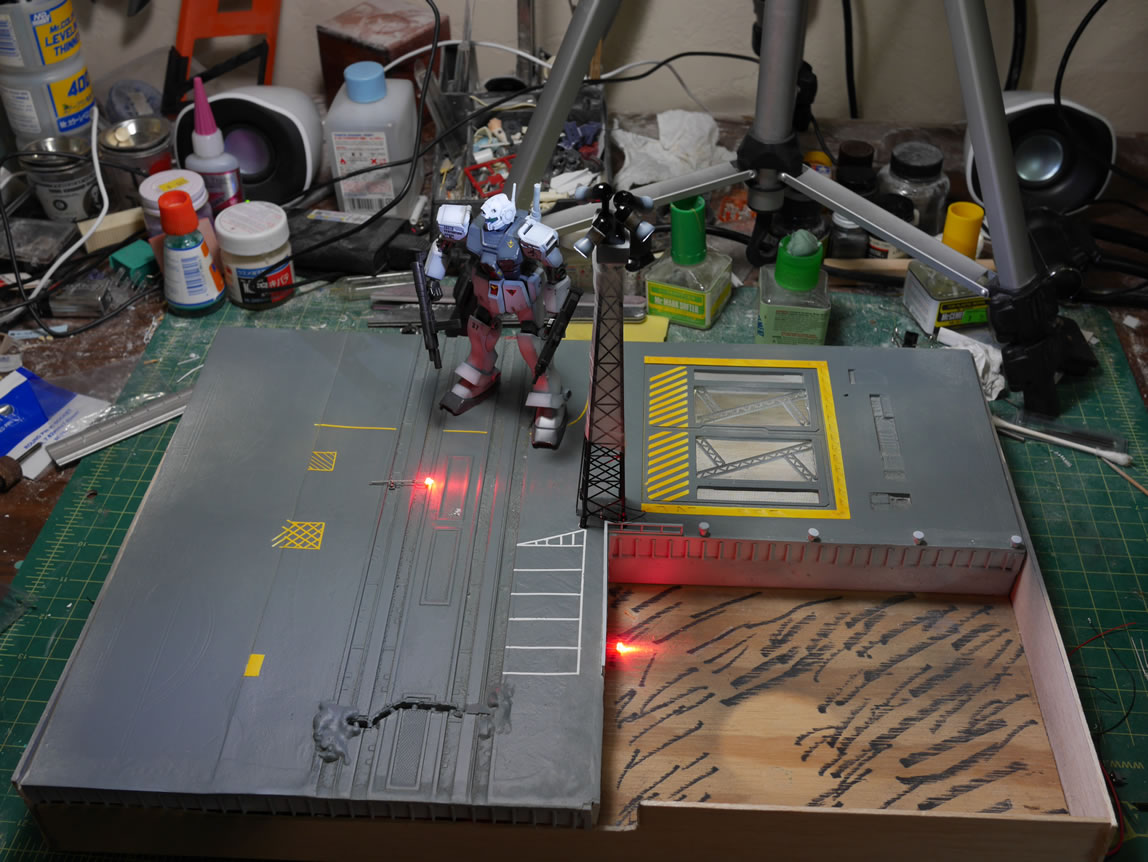
Things are progressing along. A few changes to positioning and objects here and there. More changes will continue as the project evolves. Current stage sees the addition of this kotobukia mechanical chain bases. Some cutting, gluing, and filling is at hand. These bases are great; but the one thing that really bugs me are the peg inserts all over the base. Even painted, it takes the realism of it all out. So those spots need to be filled.
Holes need a filling.

Filling the holes

Sanding and gluing; I still have a ways. But it’s shaping up slowly.

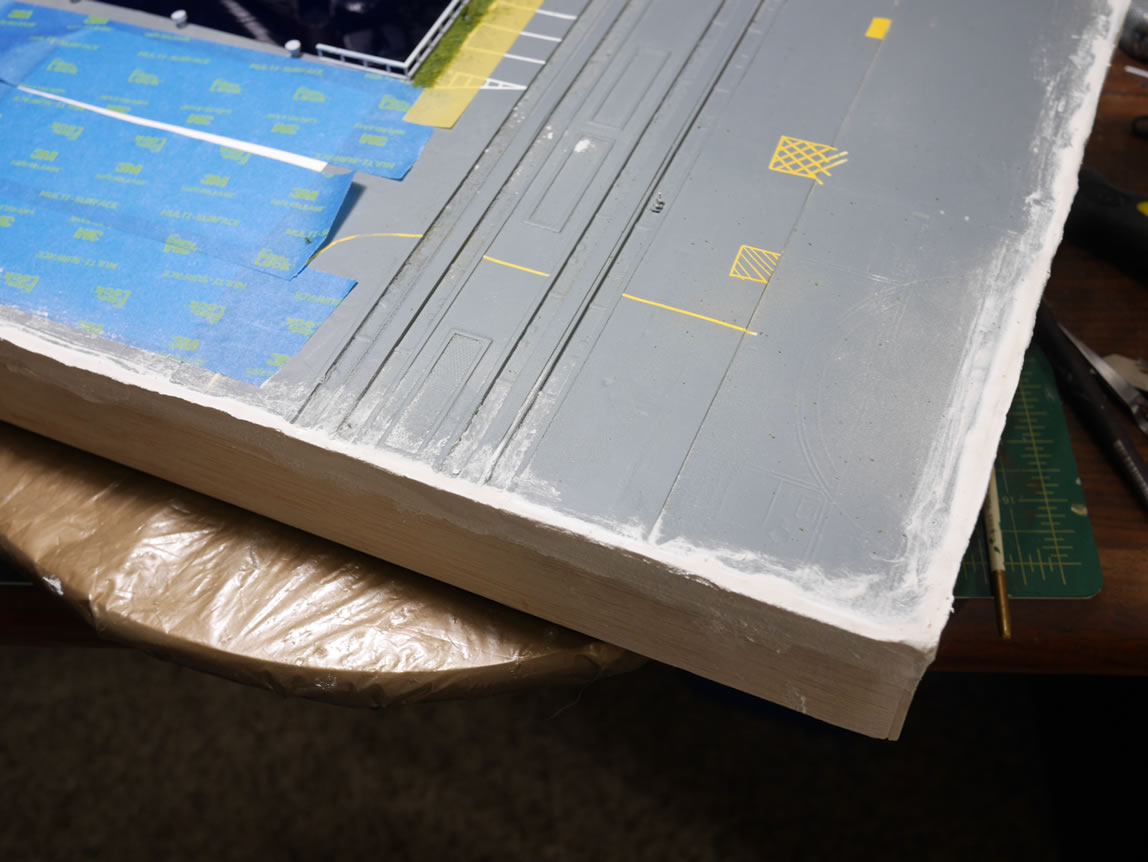
Last week, time was spent applying a pavement texture to the surface of the plastic base. With all the holes filled or covered with plastic the surface was ready.
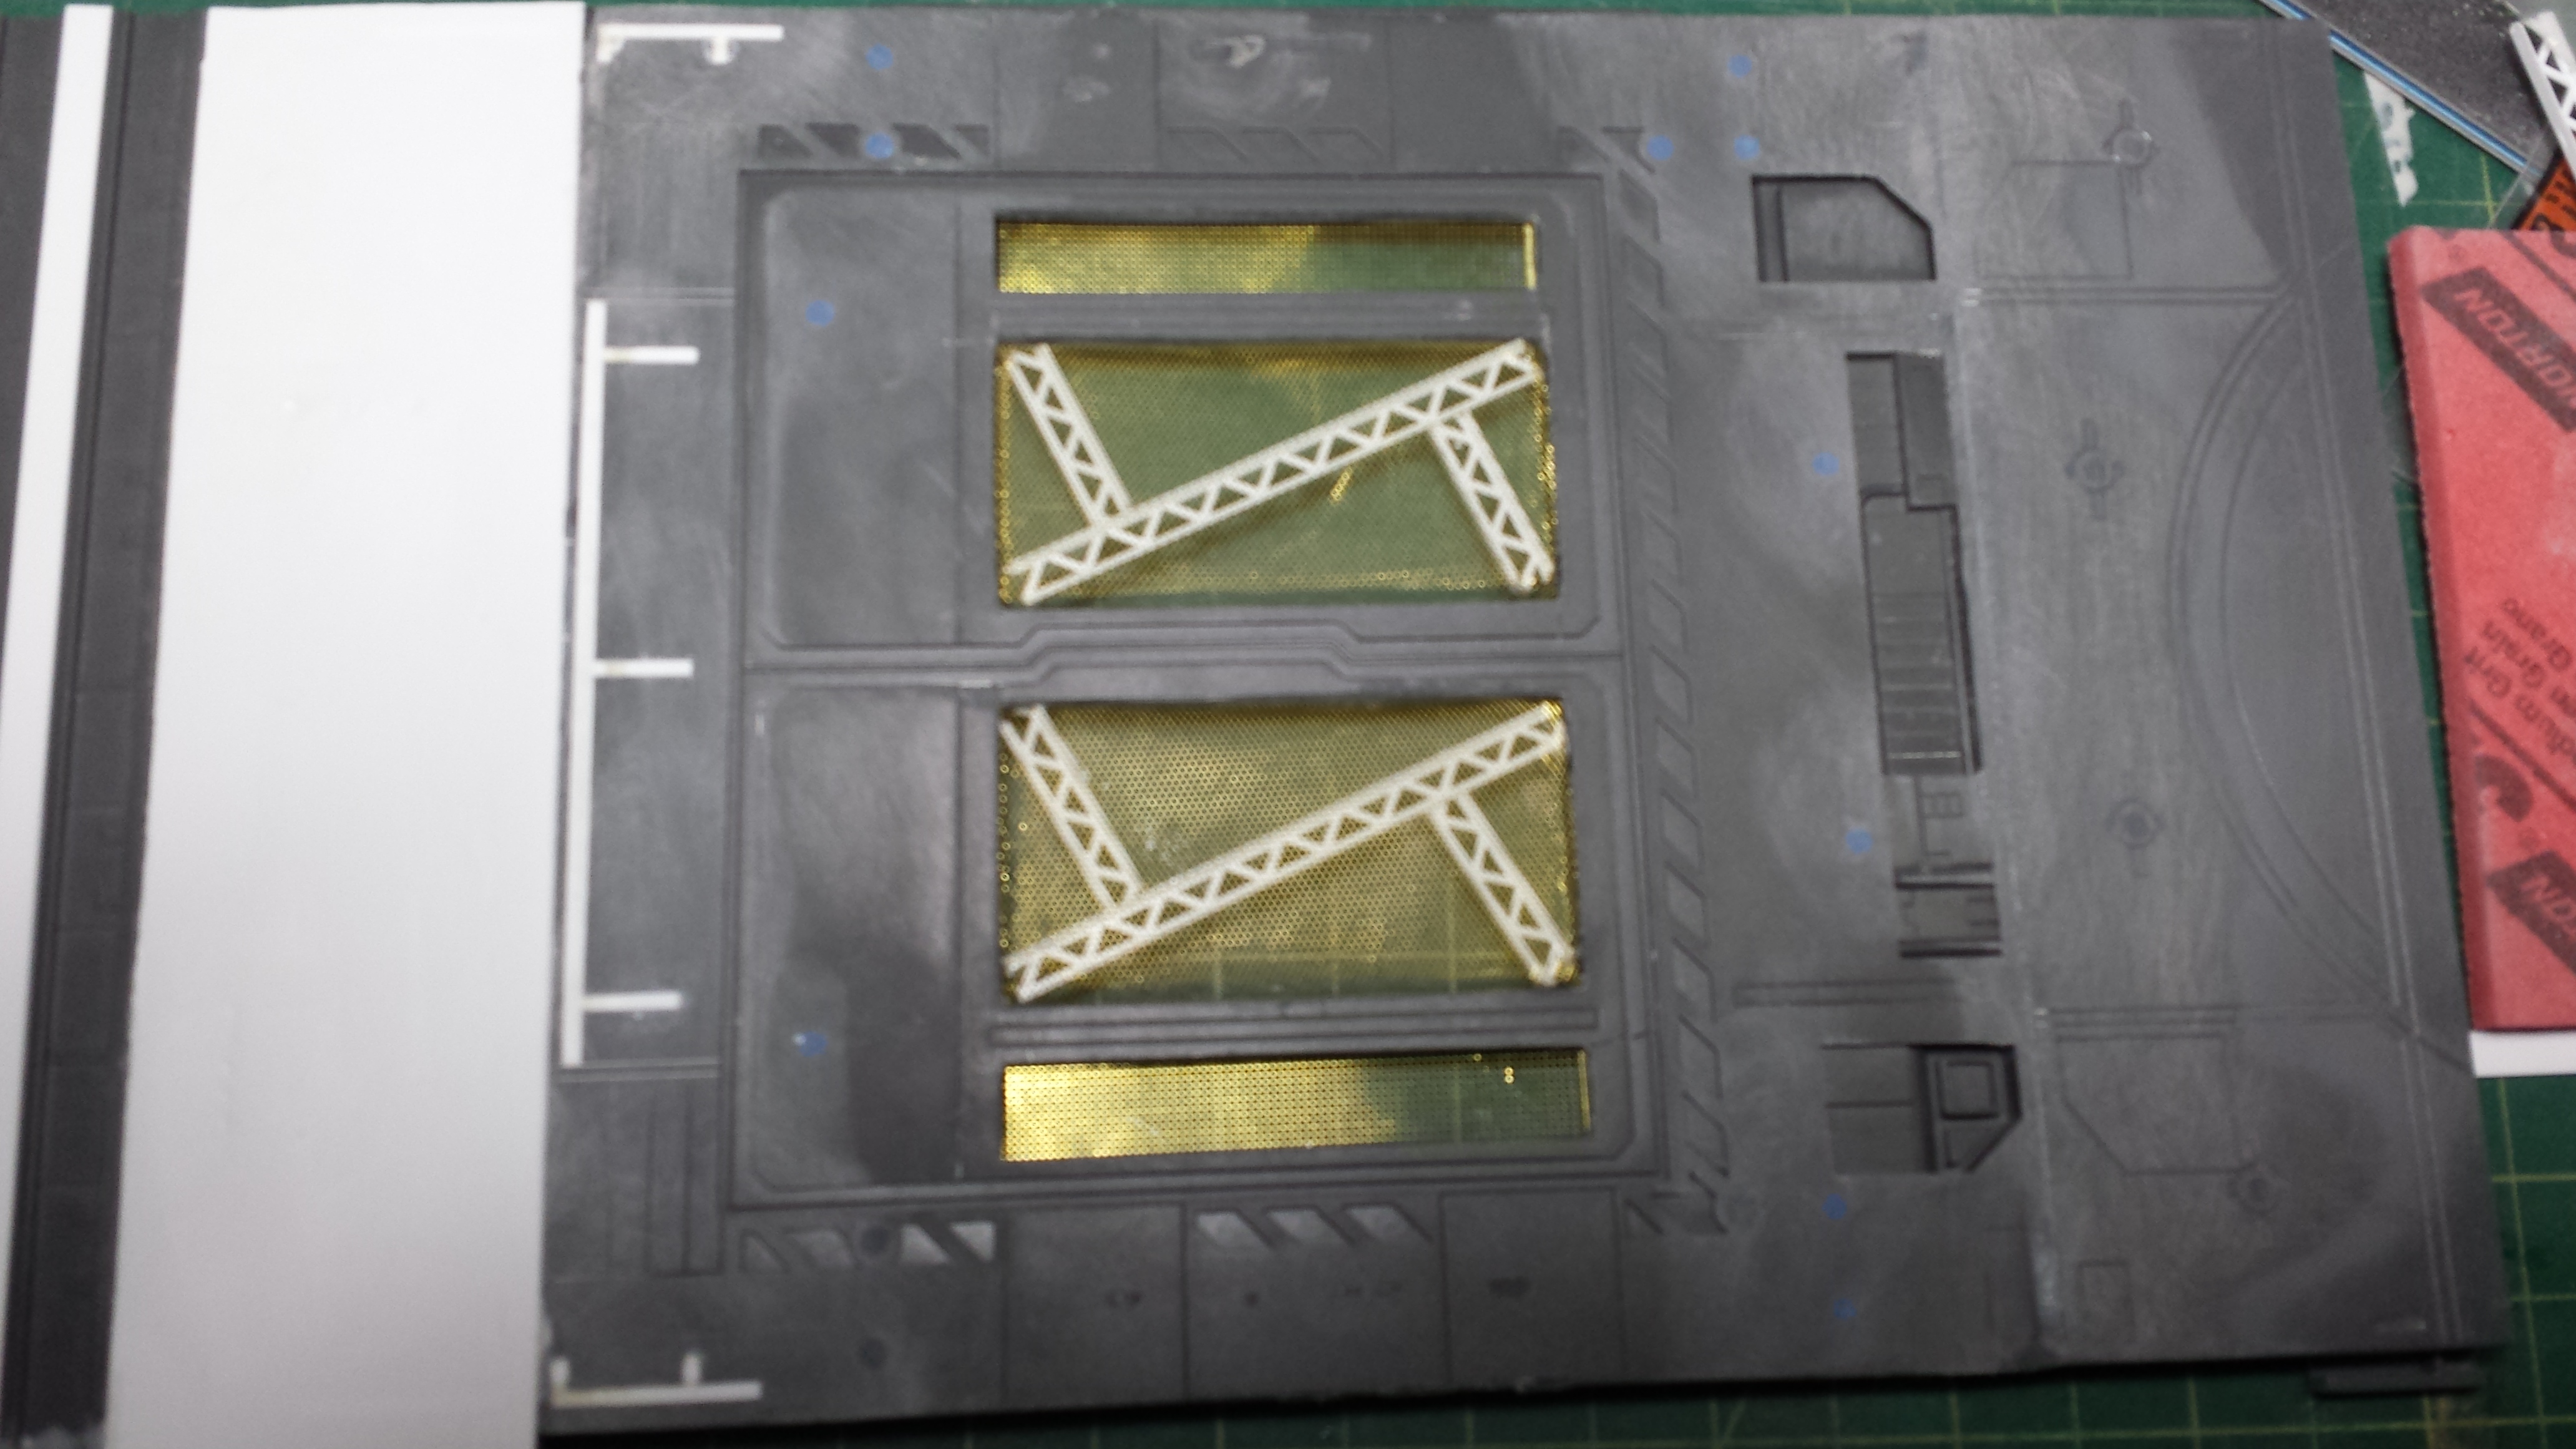
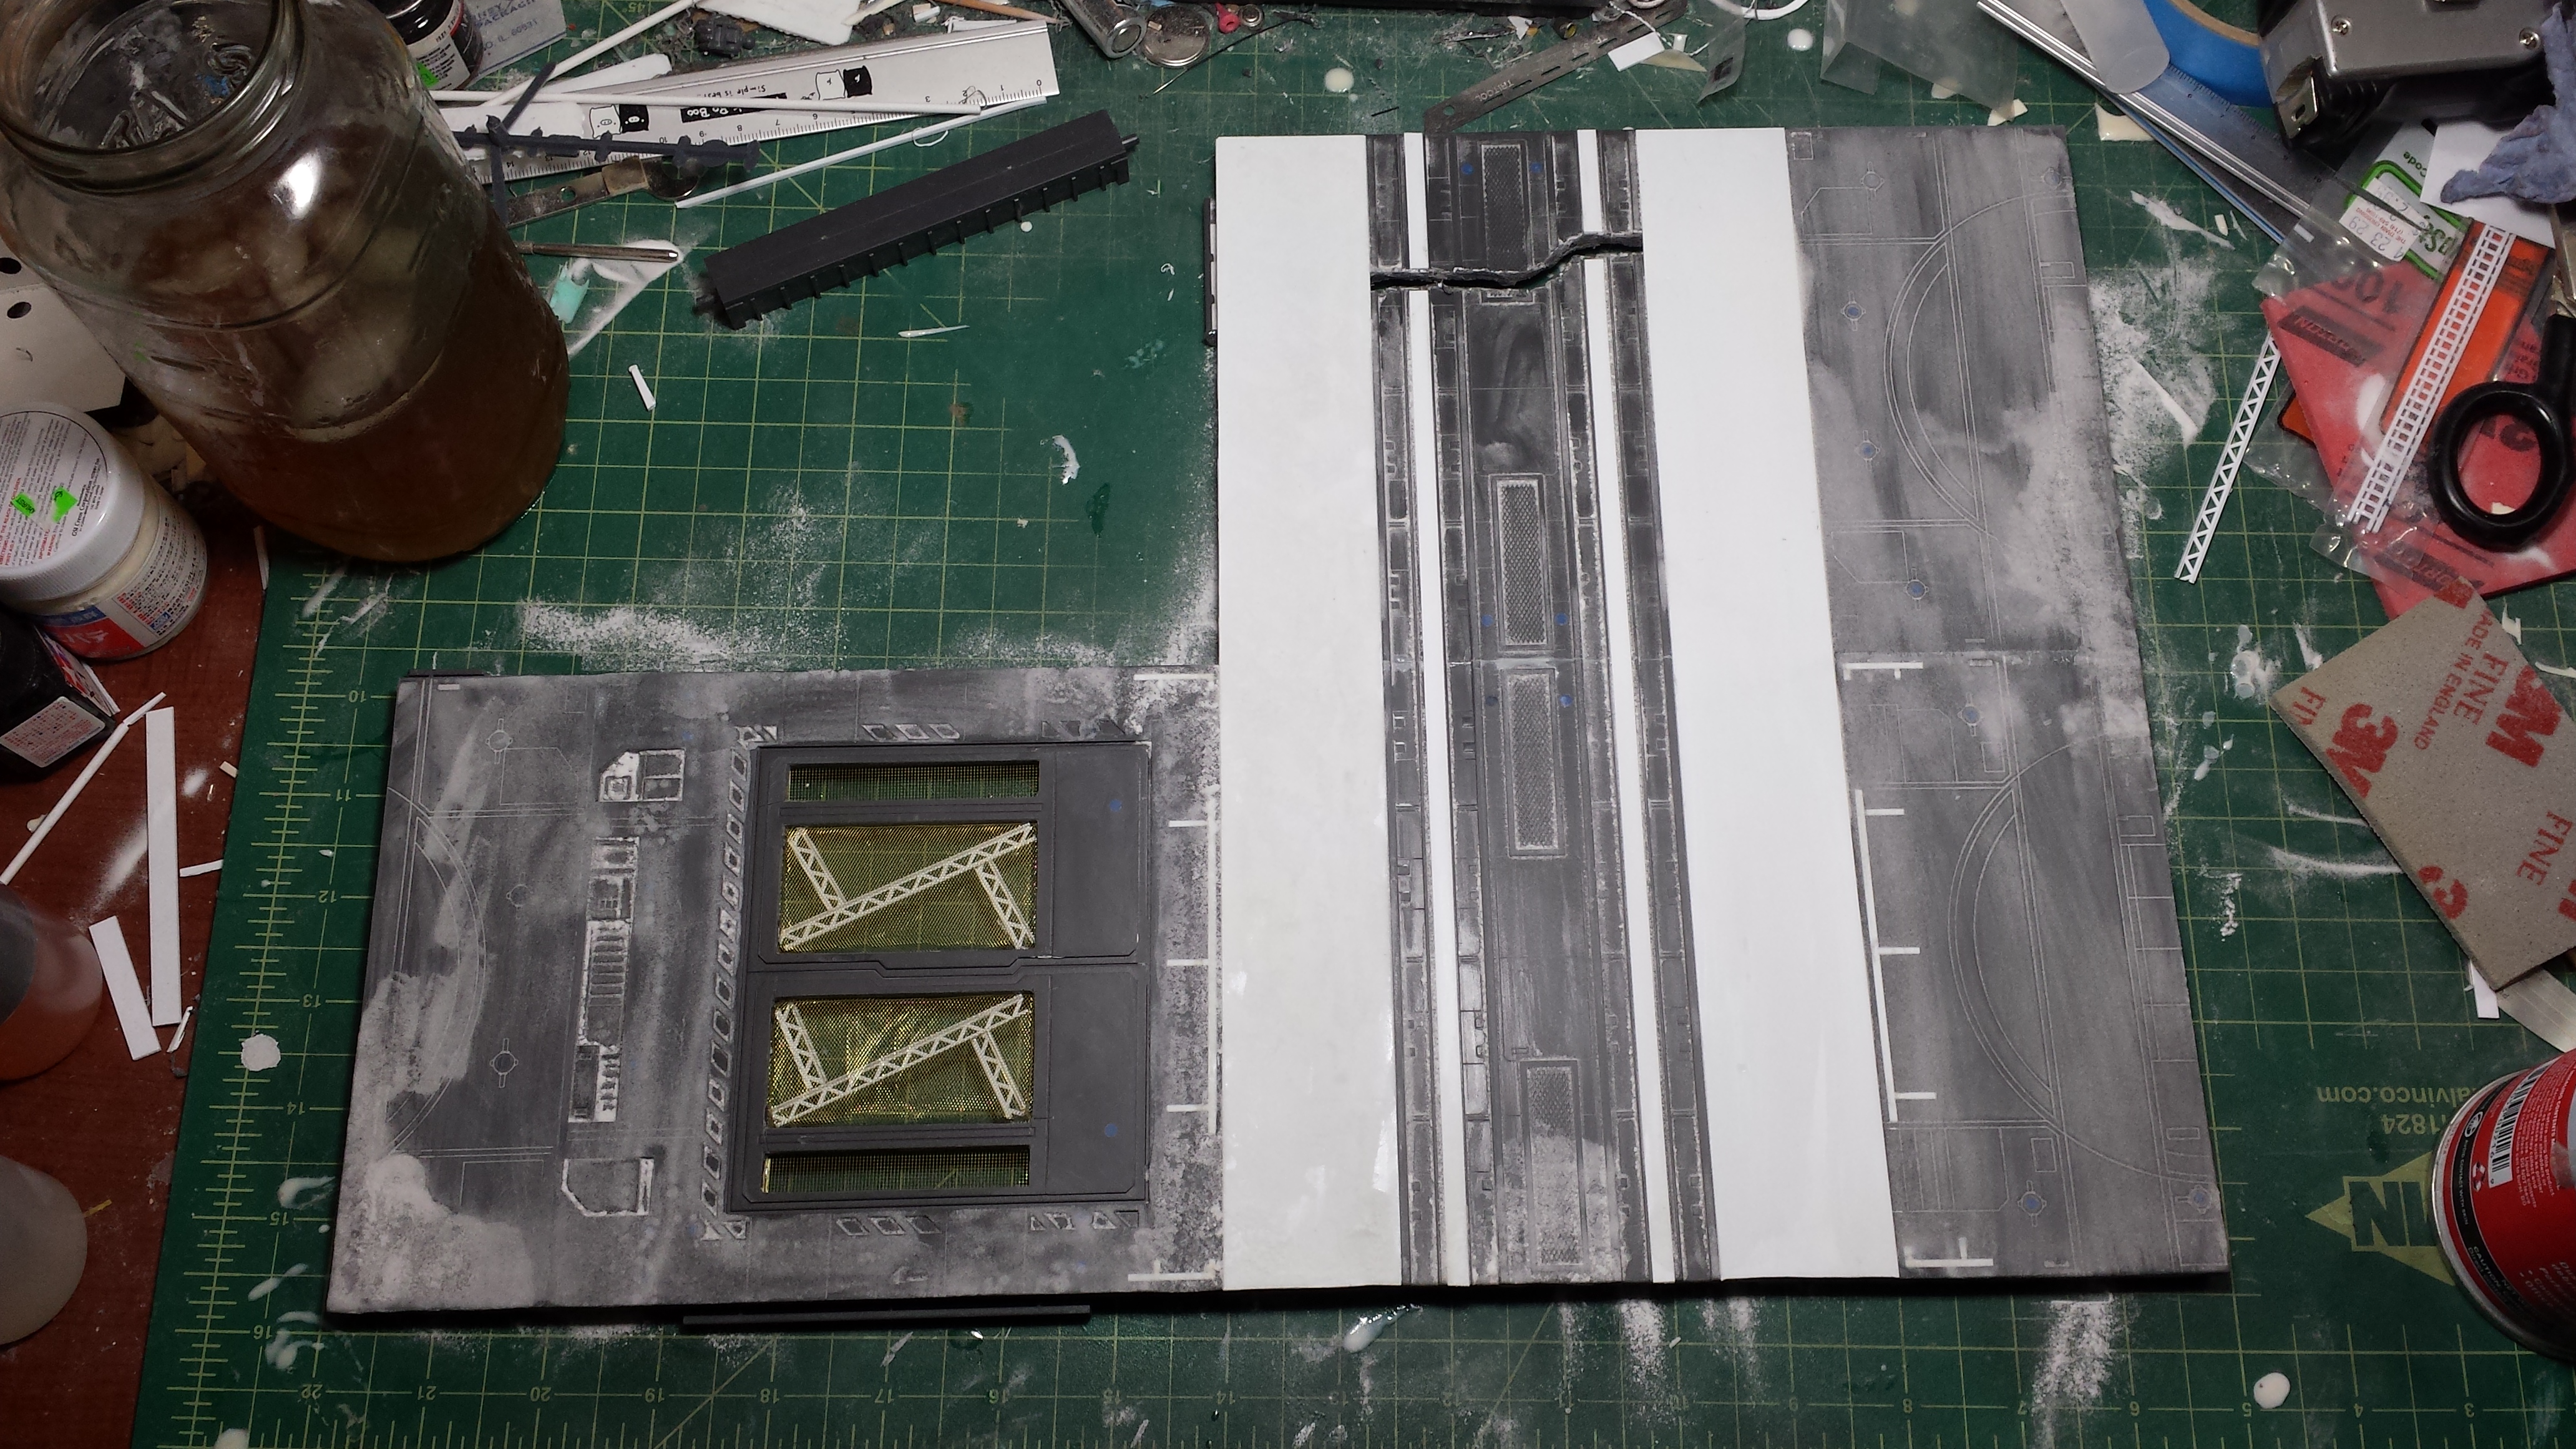
First thing done on the base since the last update was to till in the hole that I cut out. For this, I glue in some metal mesh, and for some detail, I glued in some styrene structure.
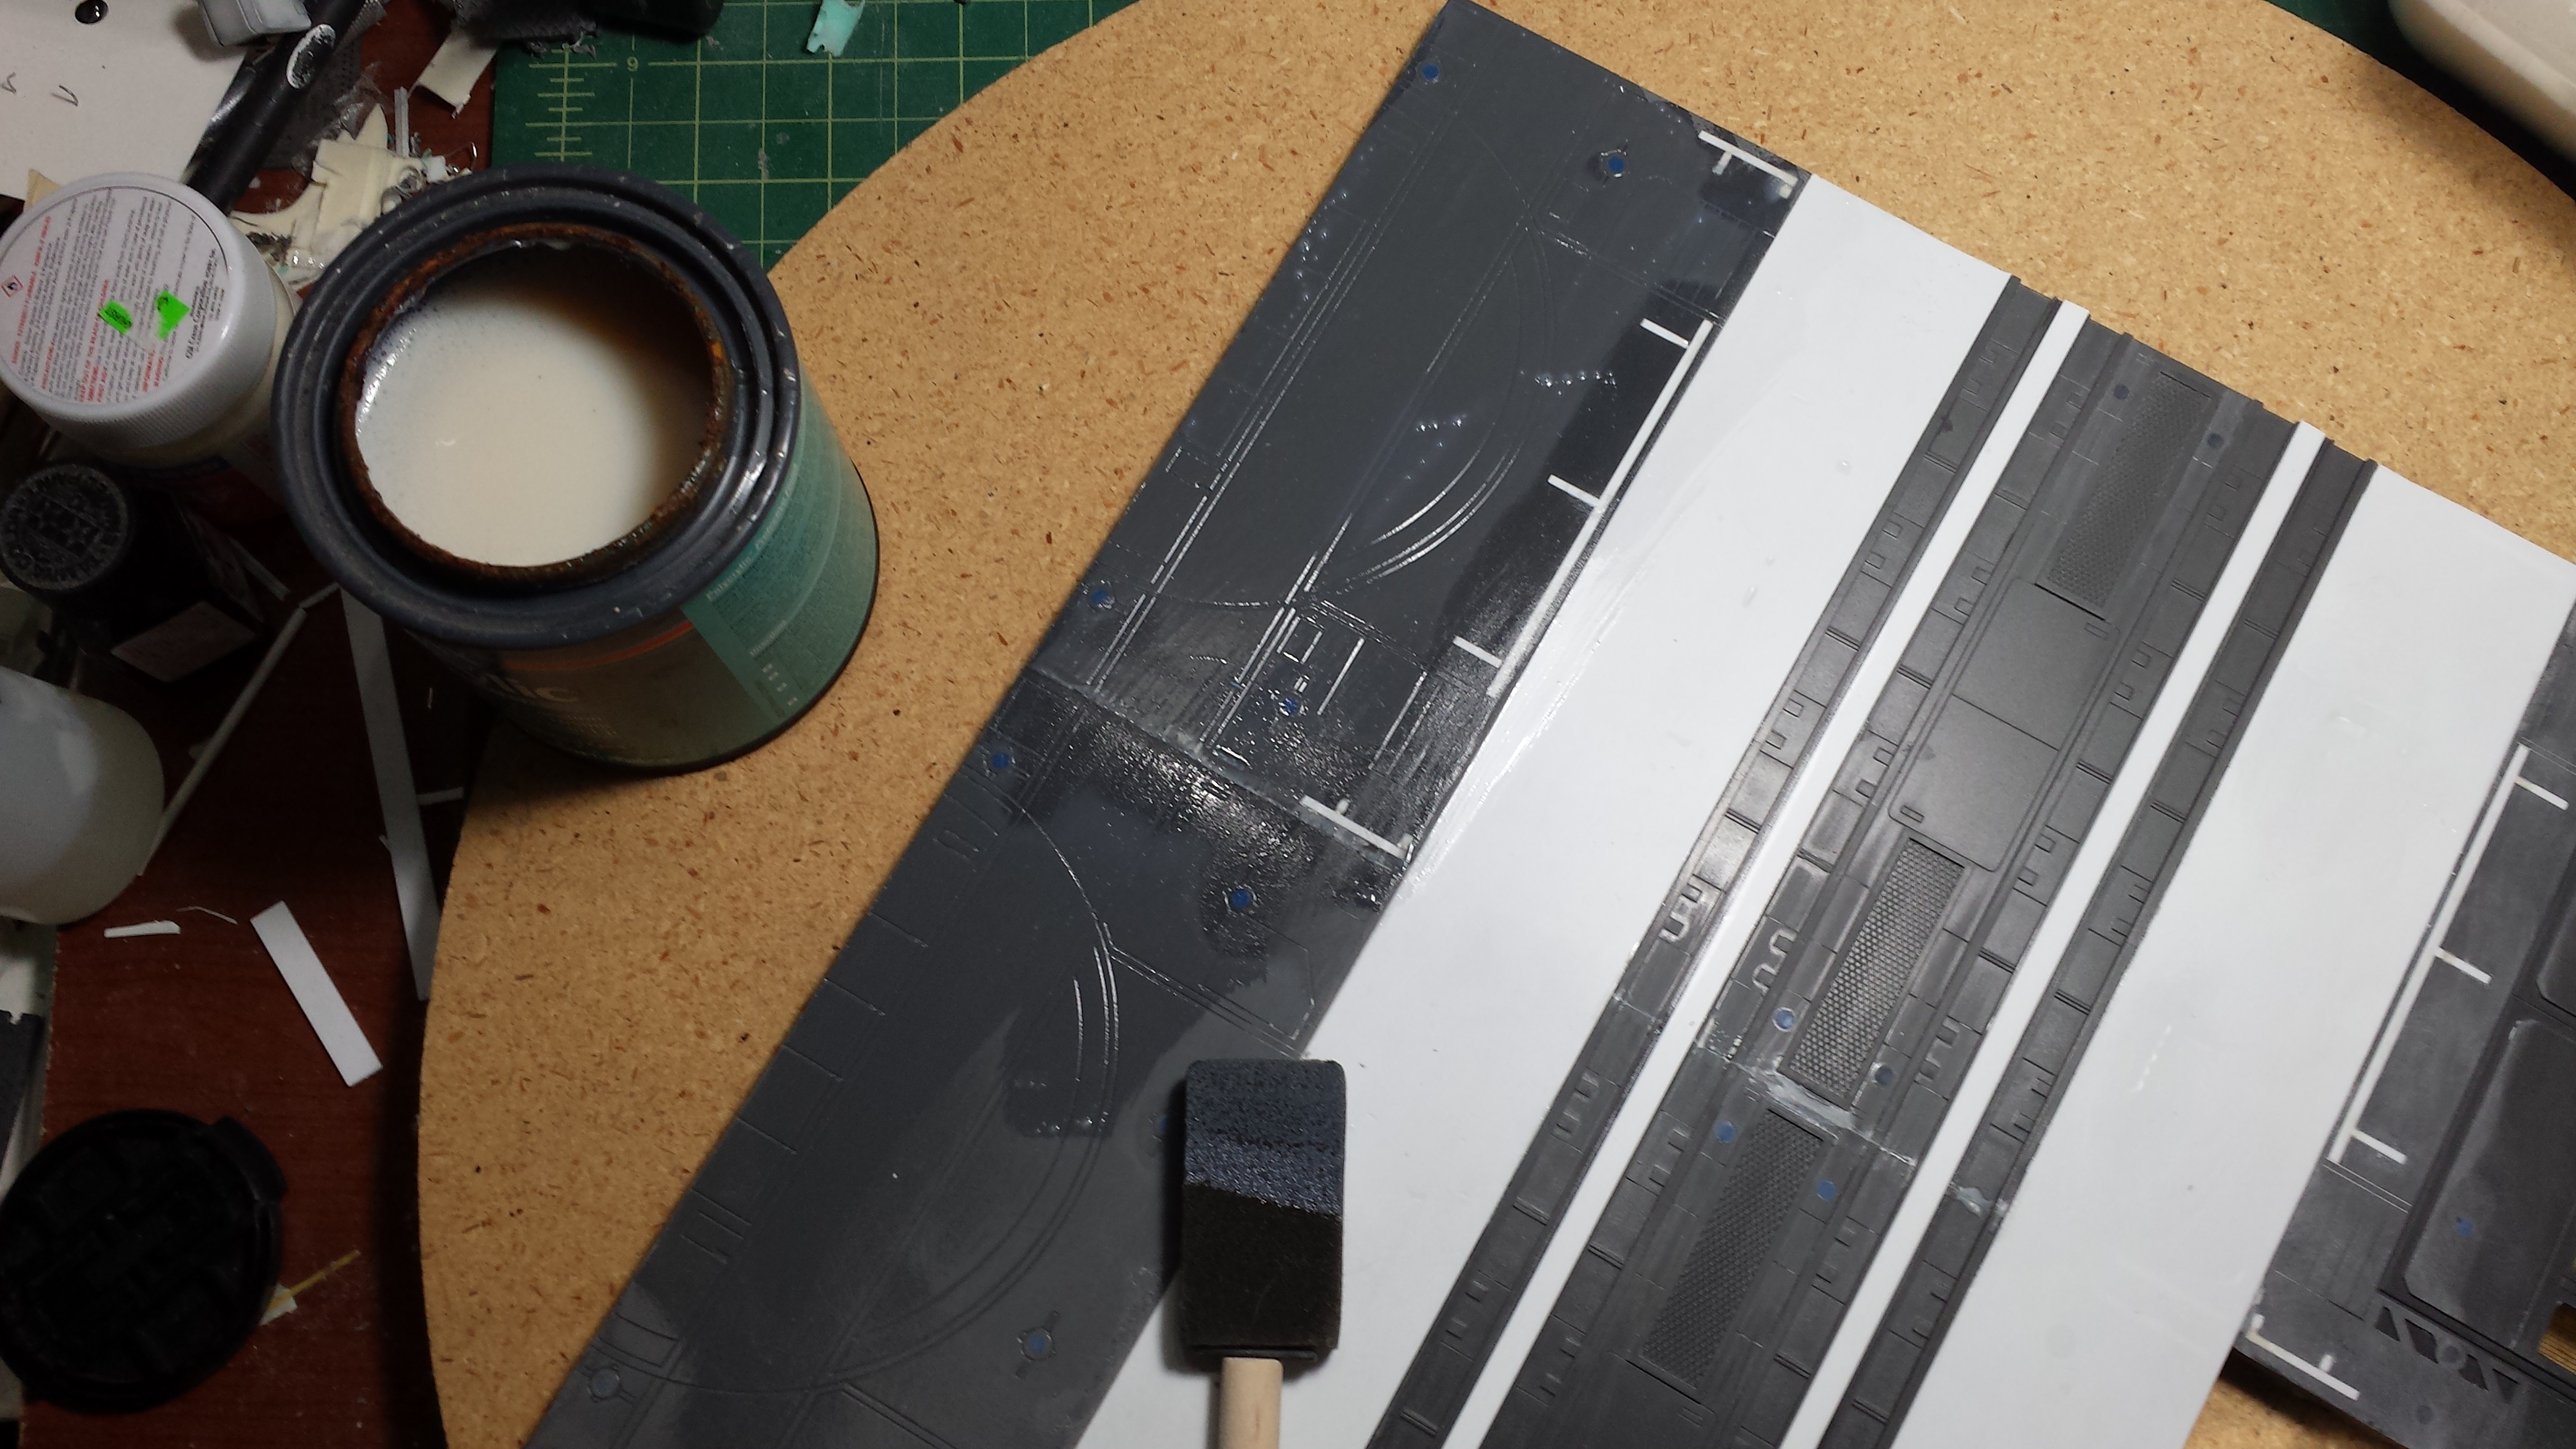
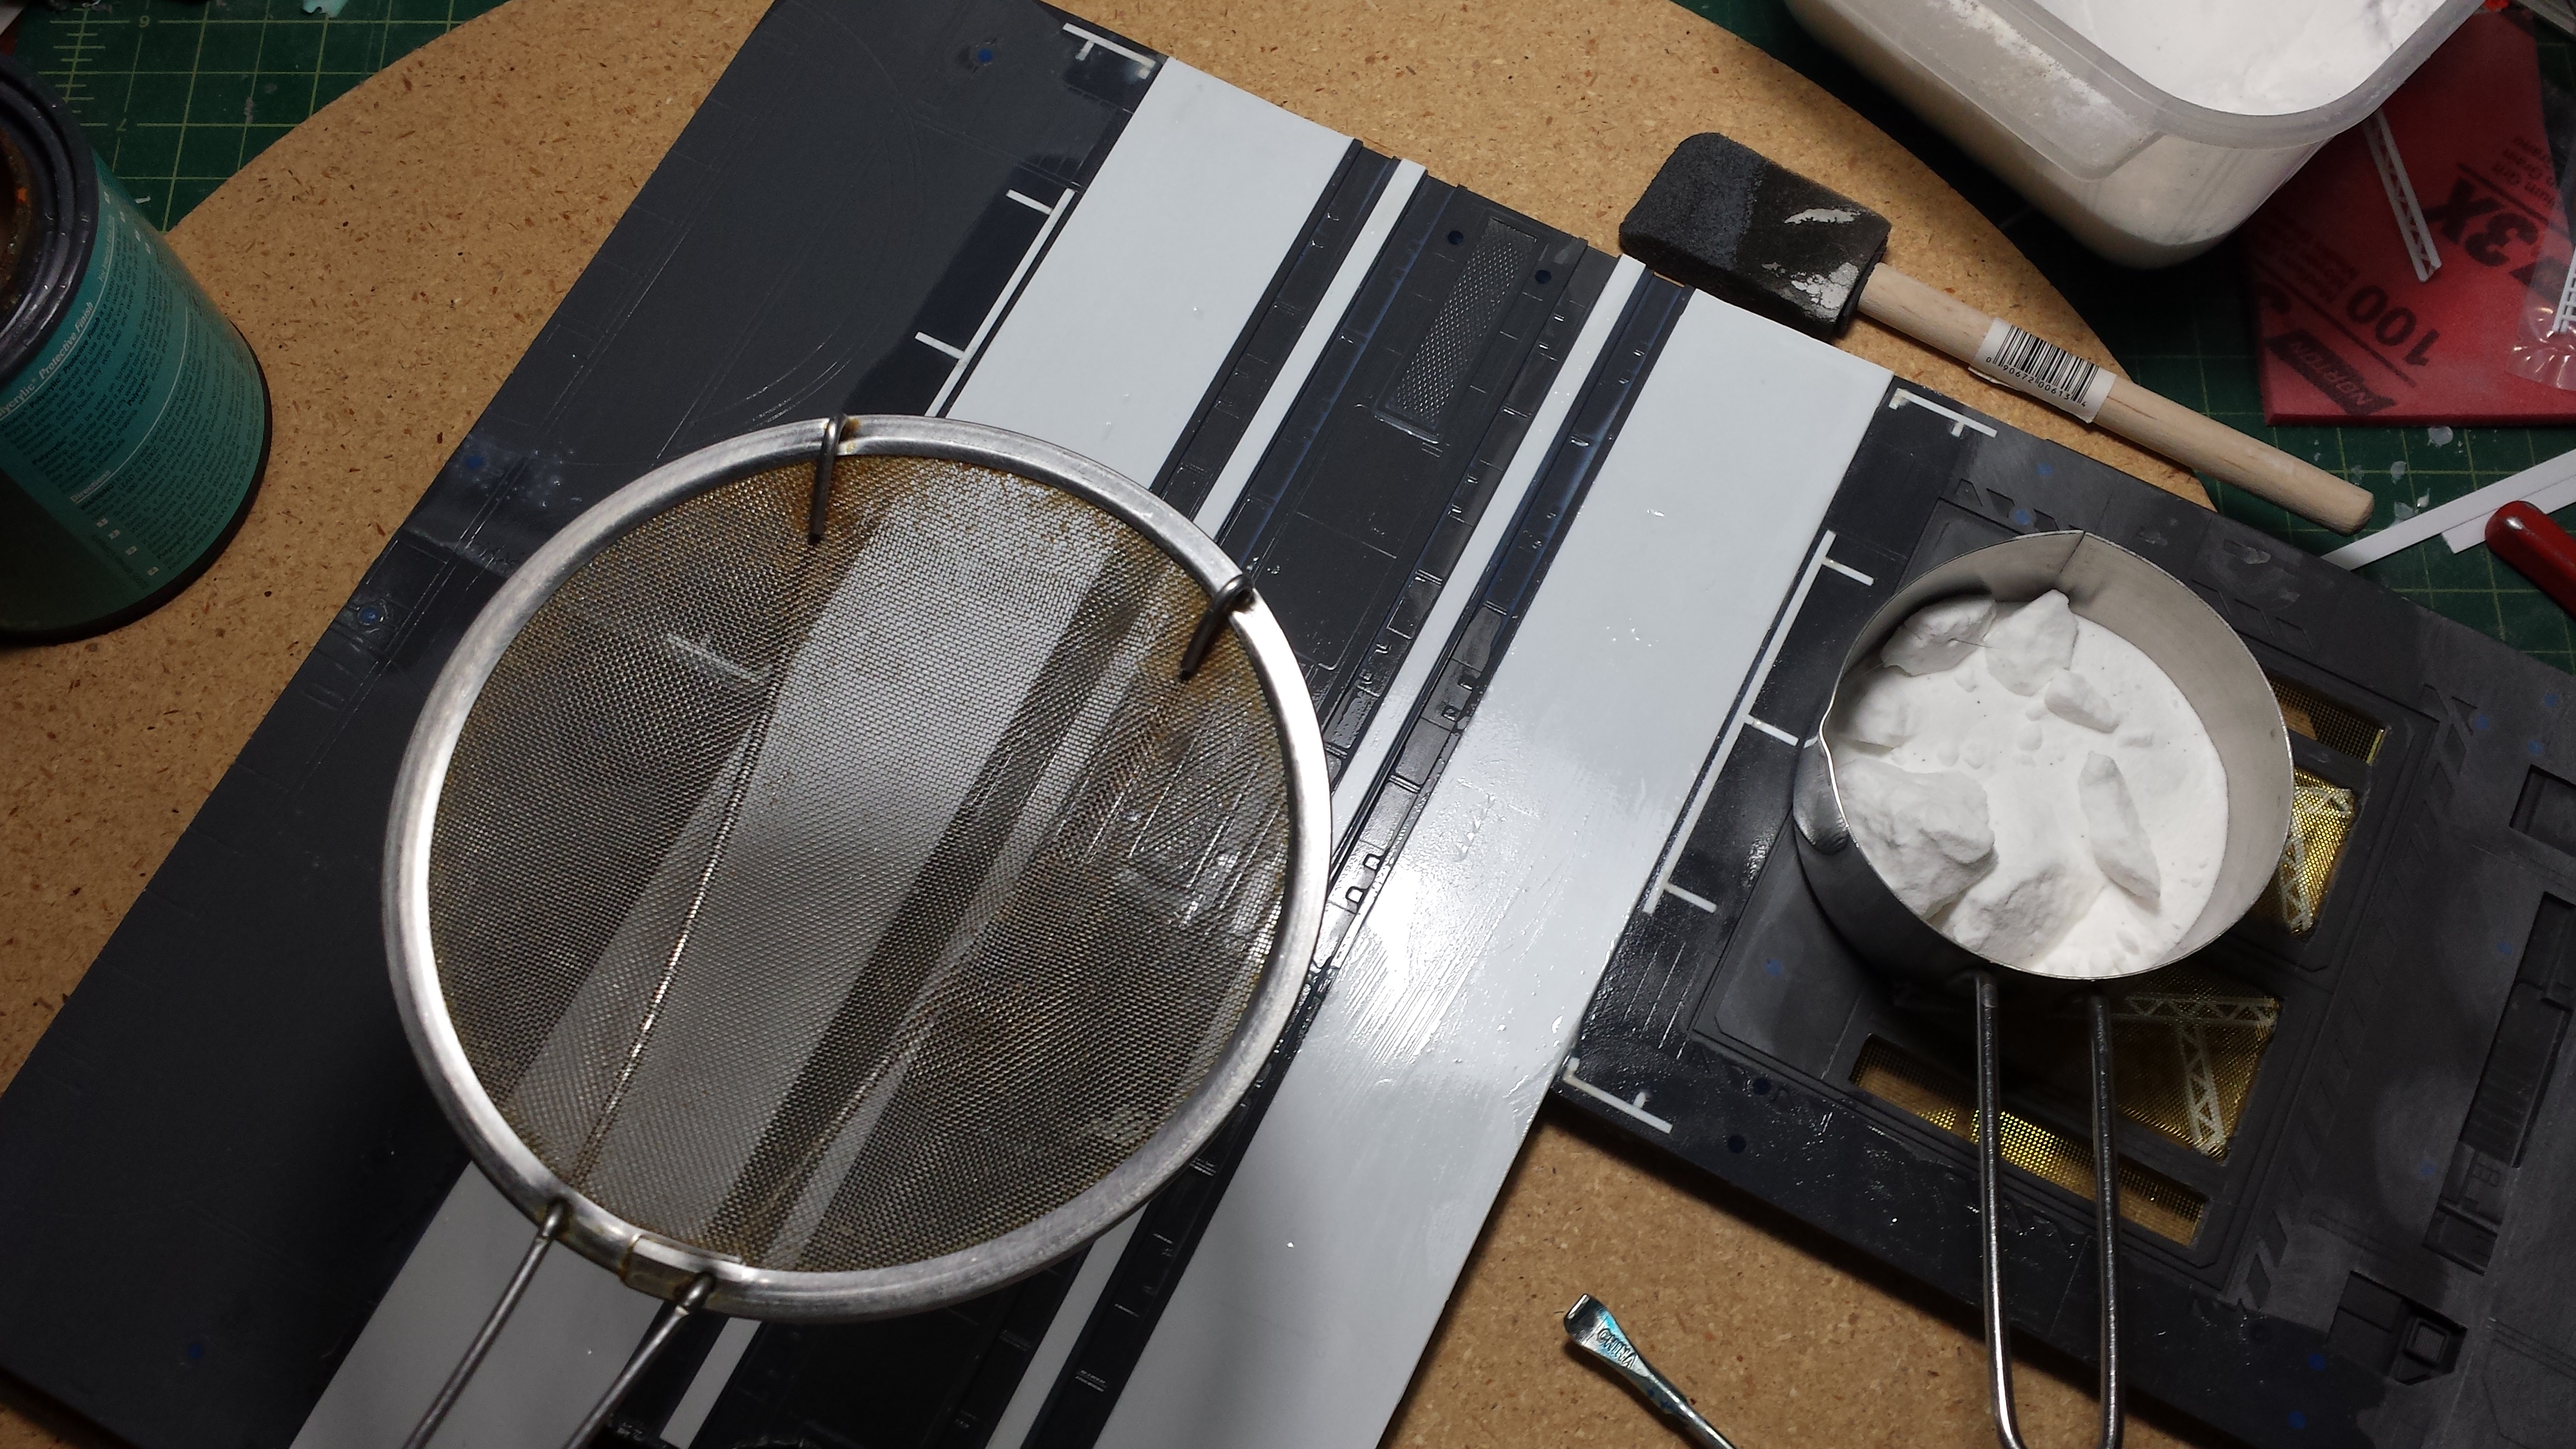
Once that set up, I grabbed some clear acrylic medium, a sponge brush, baking soda, and a wire mesh for sifting the baking soda.
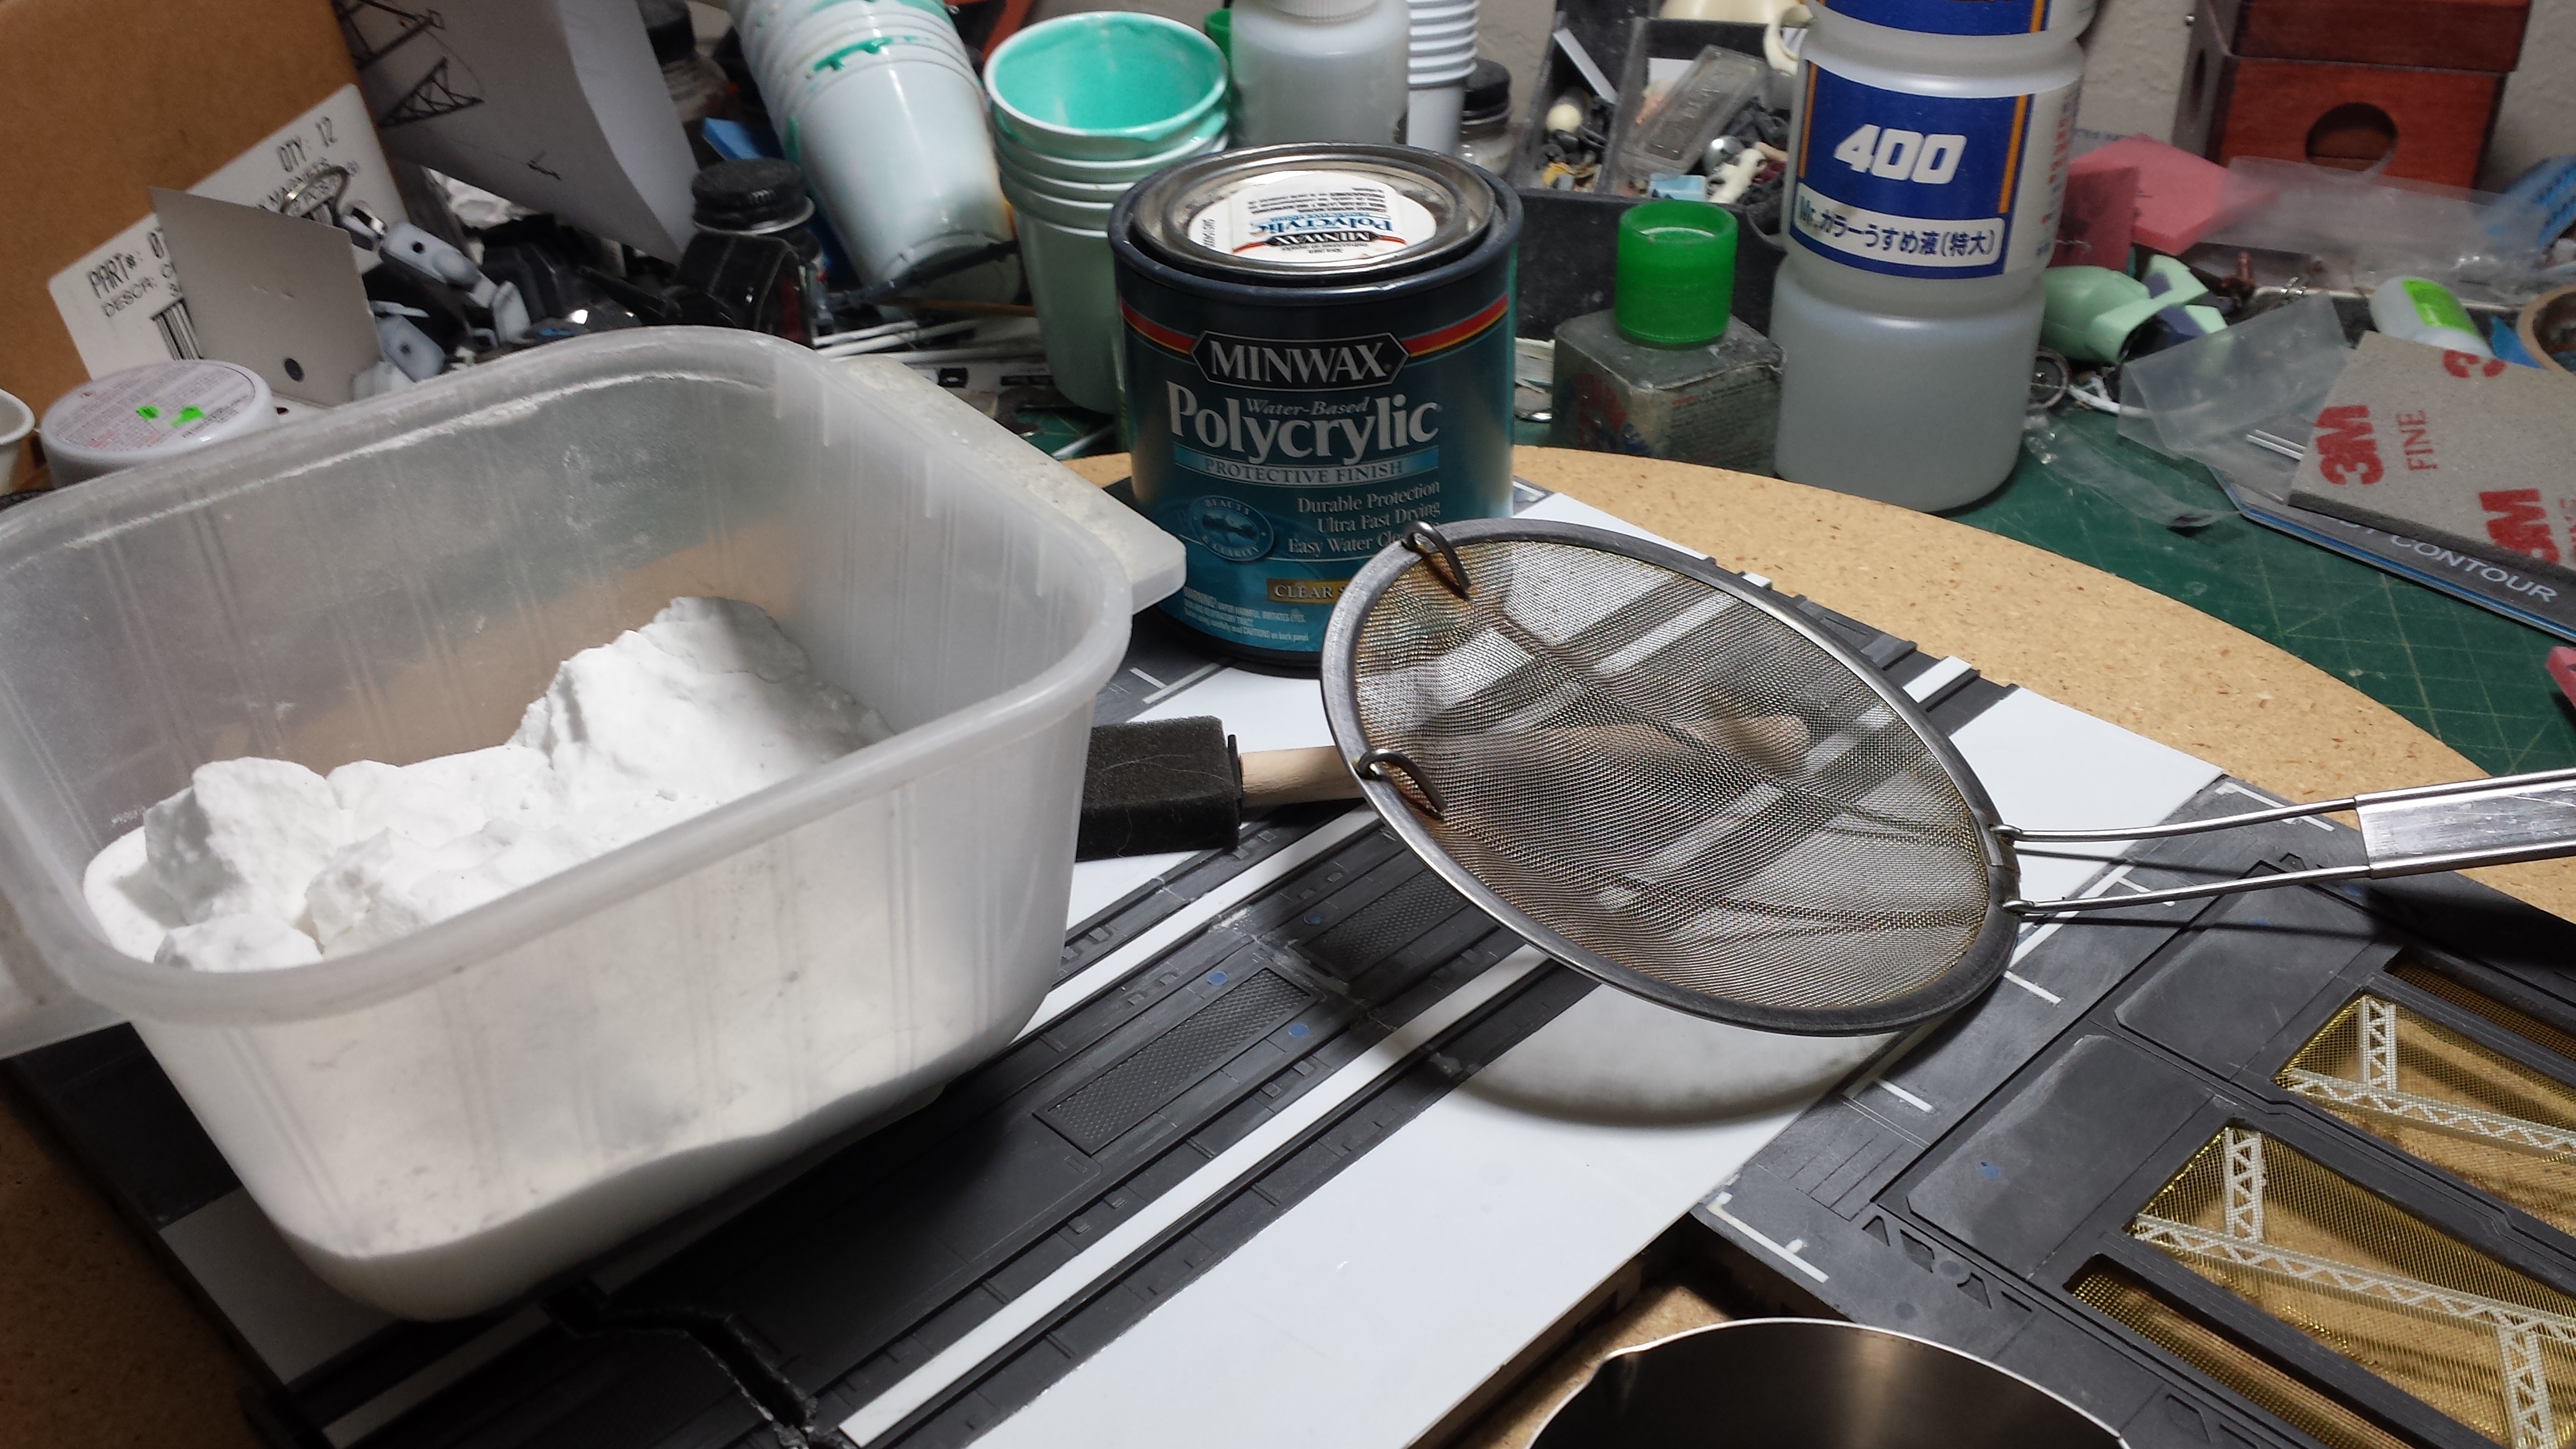
The acrylic medium is painted on to the surface of the base, and while wet, the baking soda is sifted over the wet surface. The base is left to sit over night while the medium dries.
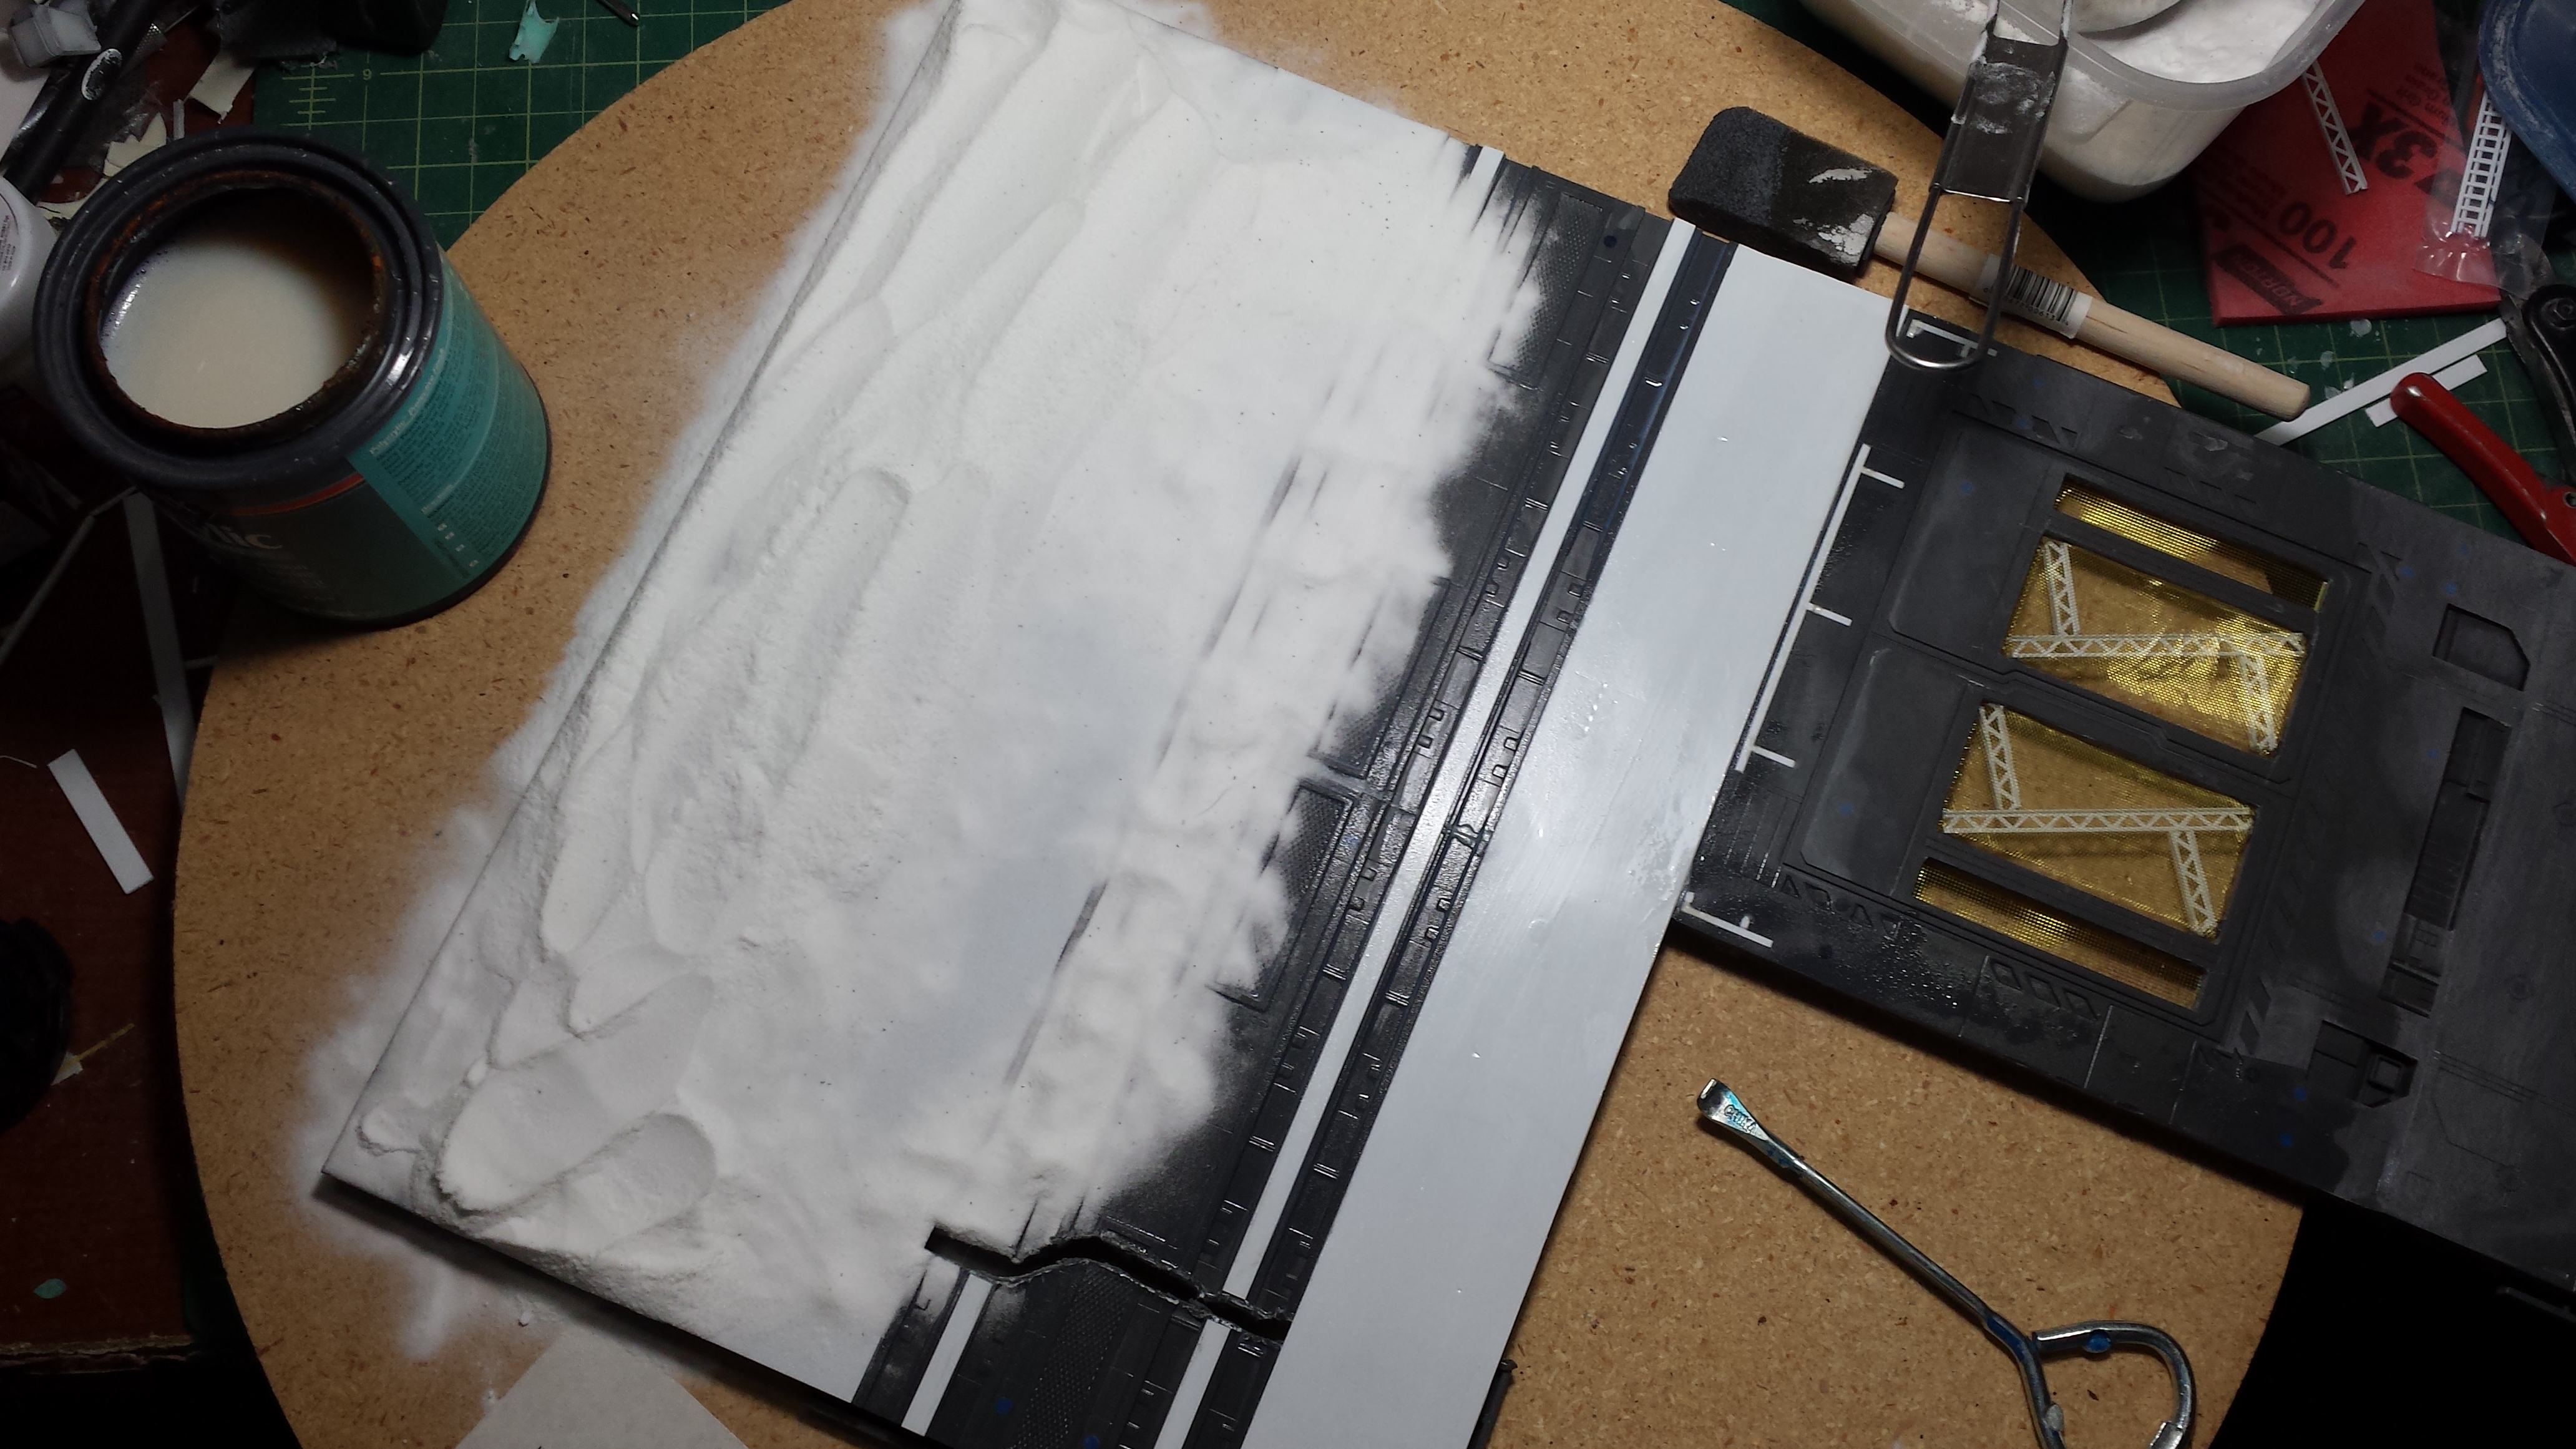
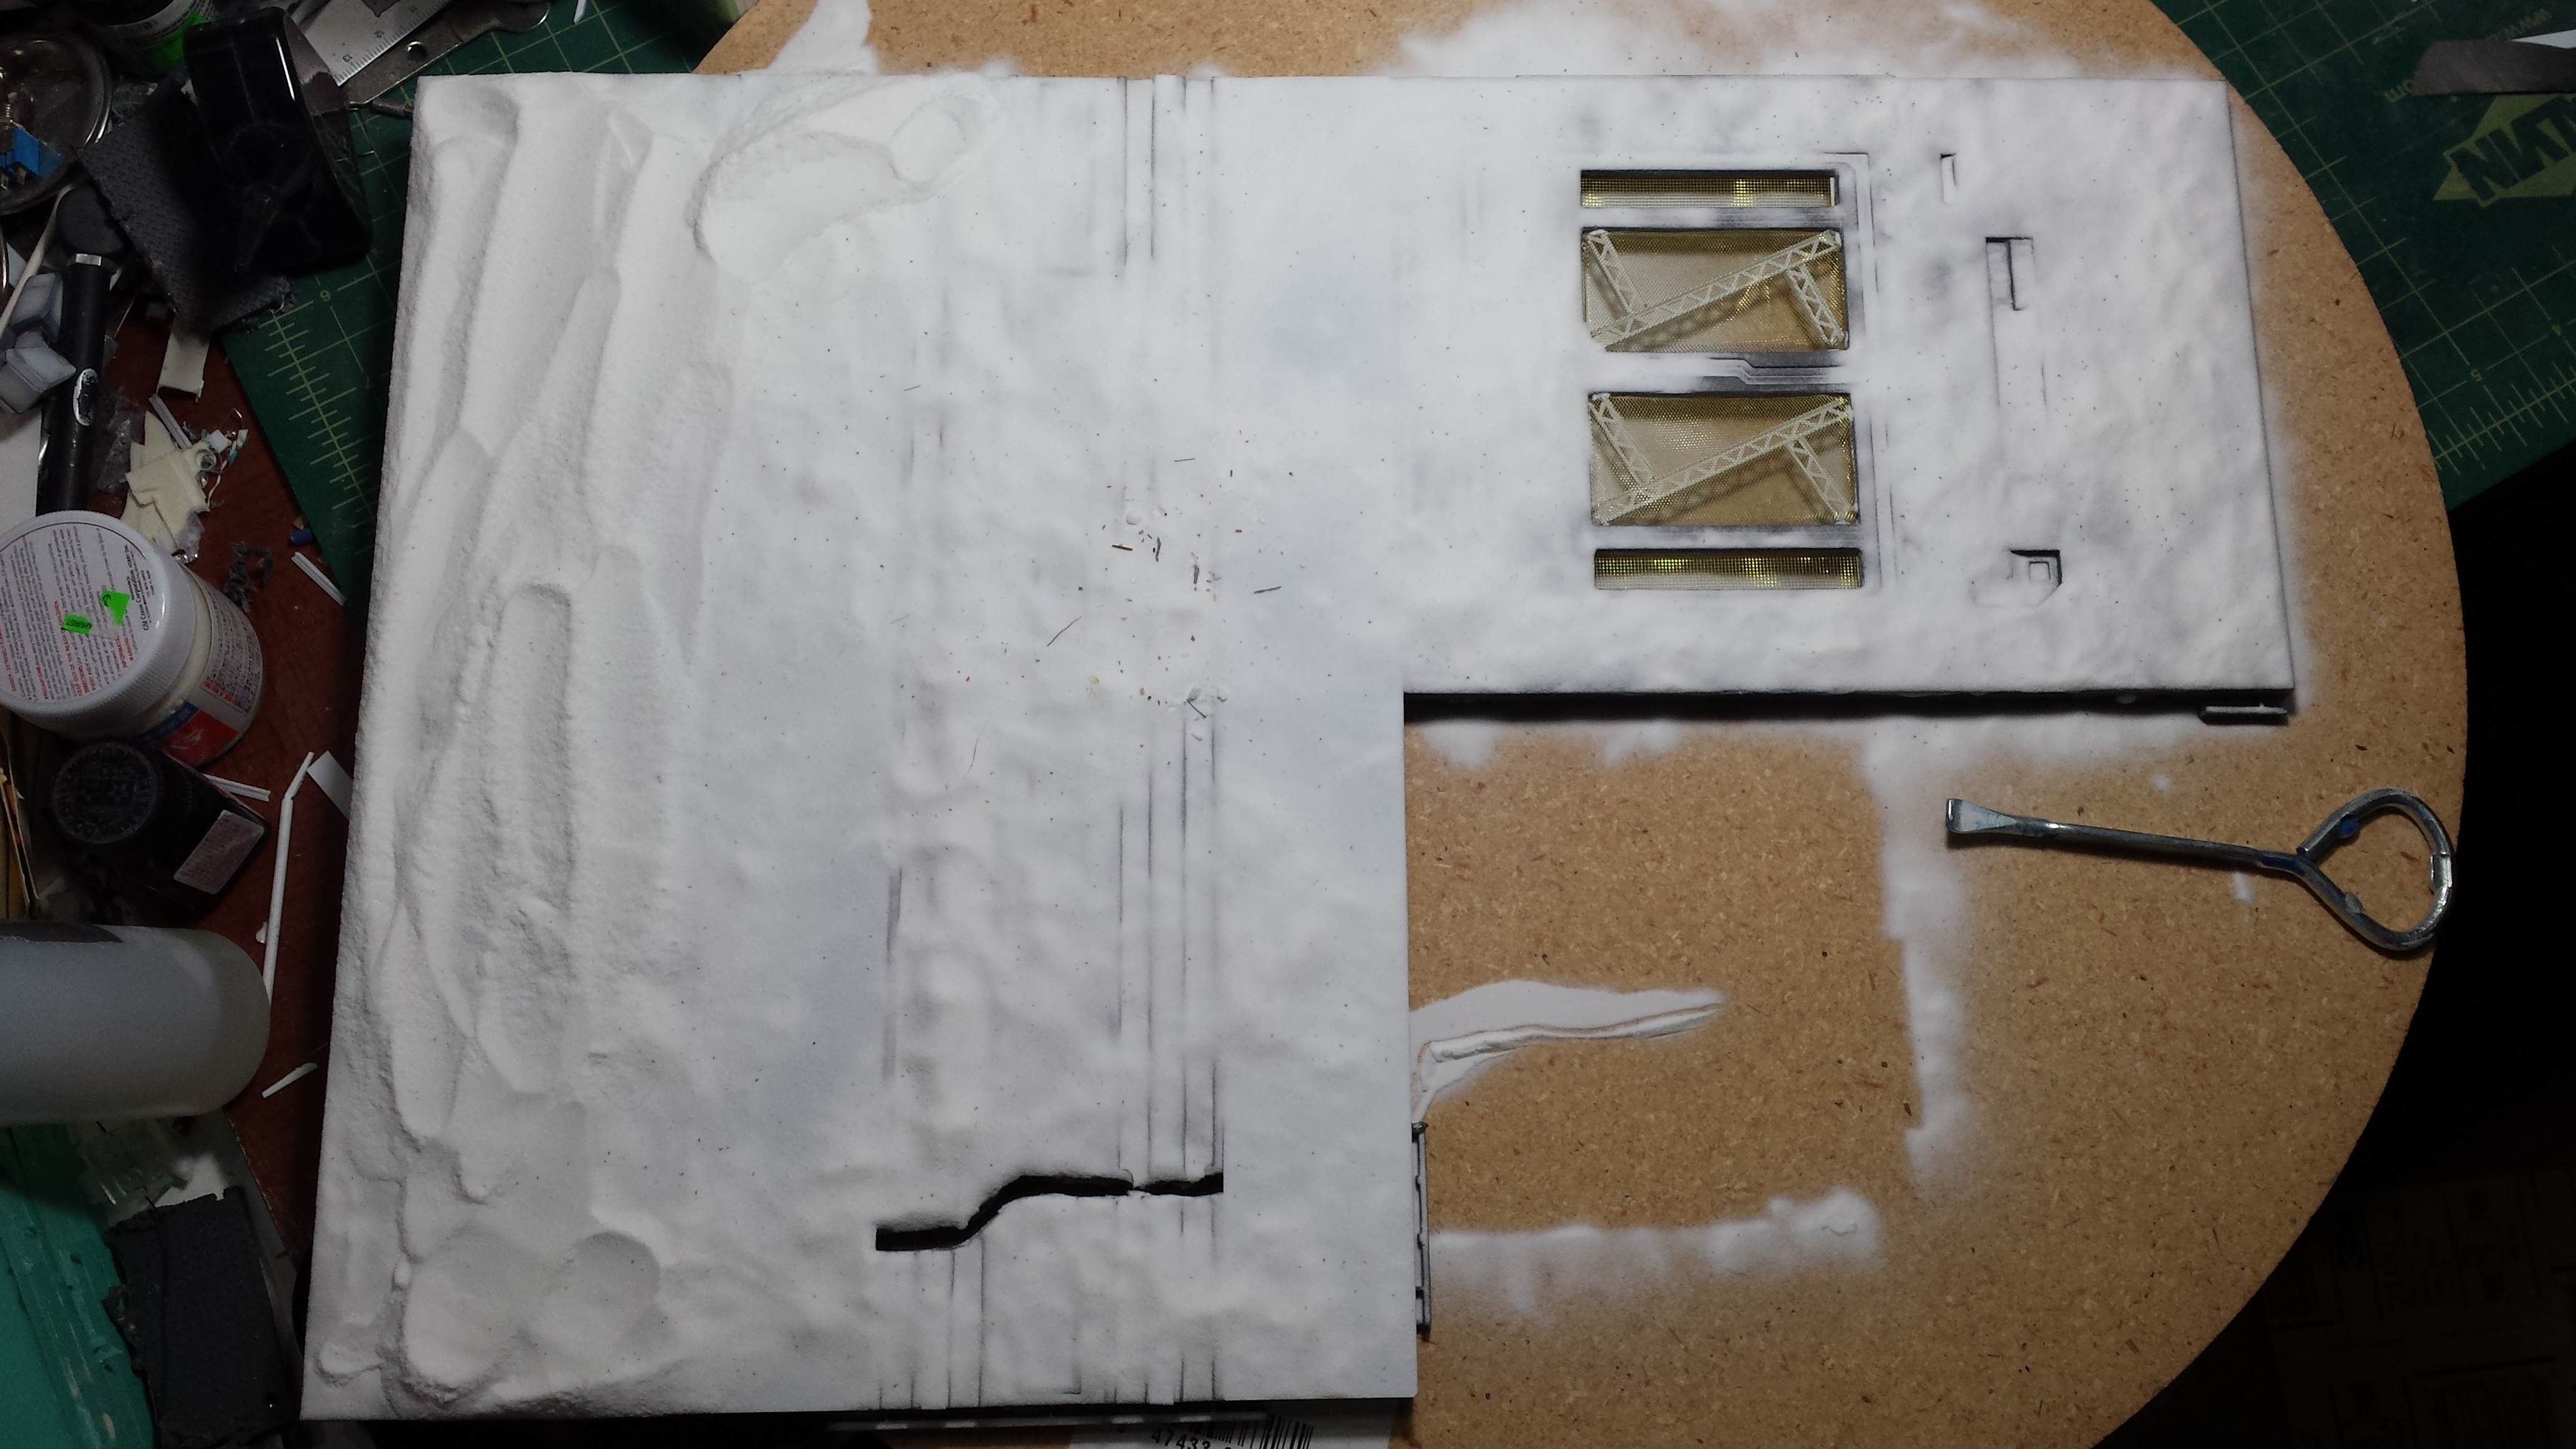
The following day, the excess baking soda is brushed off the surface. And the surface is lightly sanded to level things a bit. Now the surface has a little bit of a rough layer.
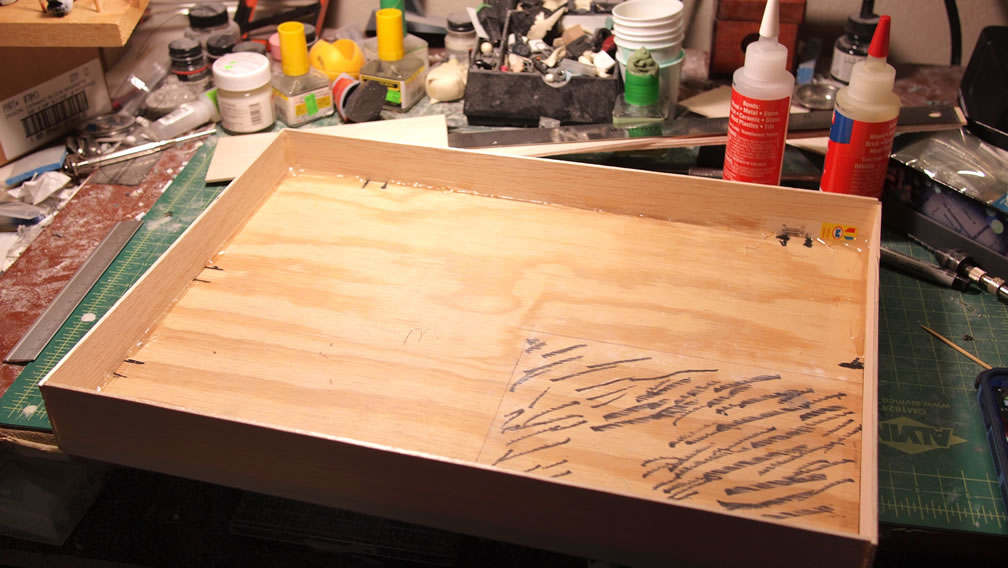
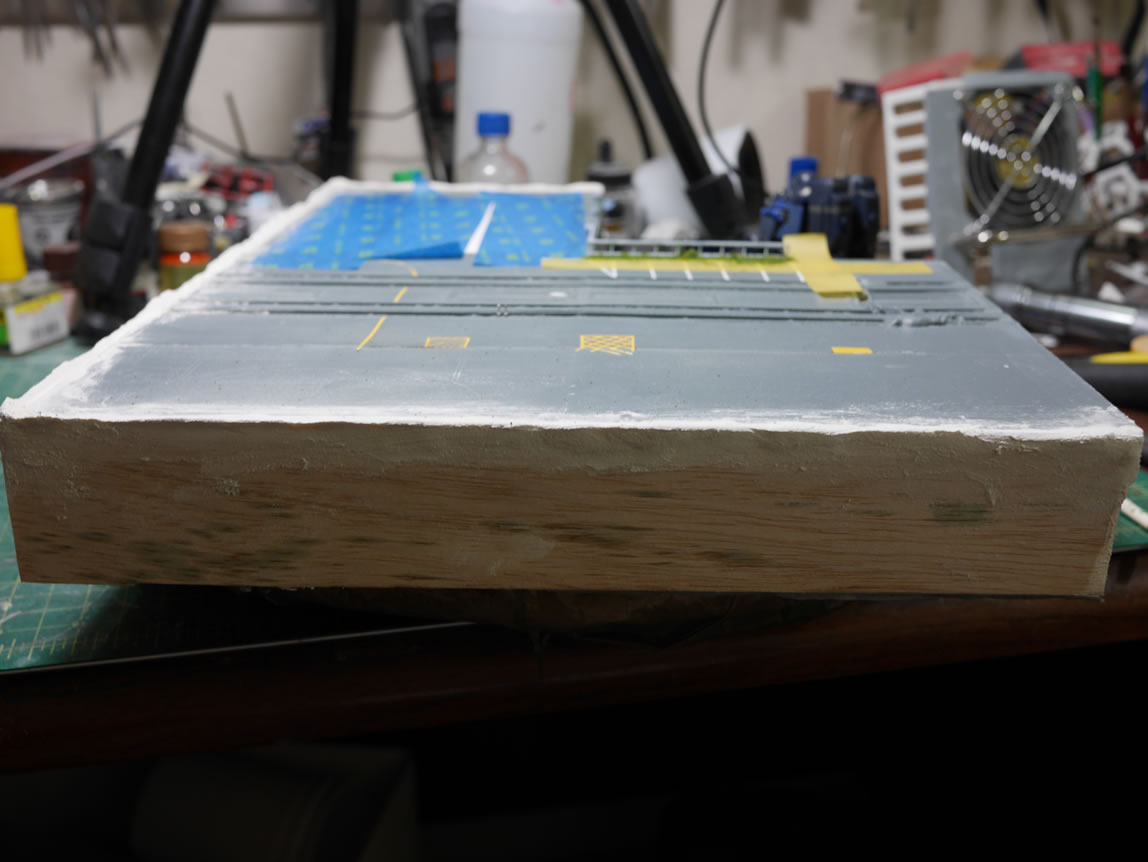
Next, the base was flipped over and balsa wood is glued to the underside to raise the base from the wood platform.

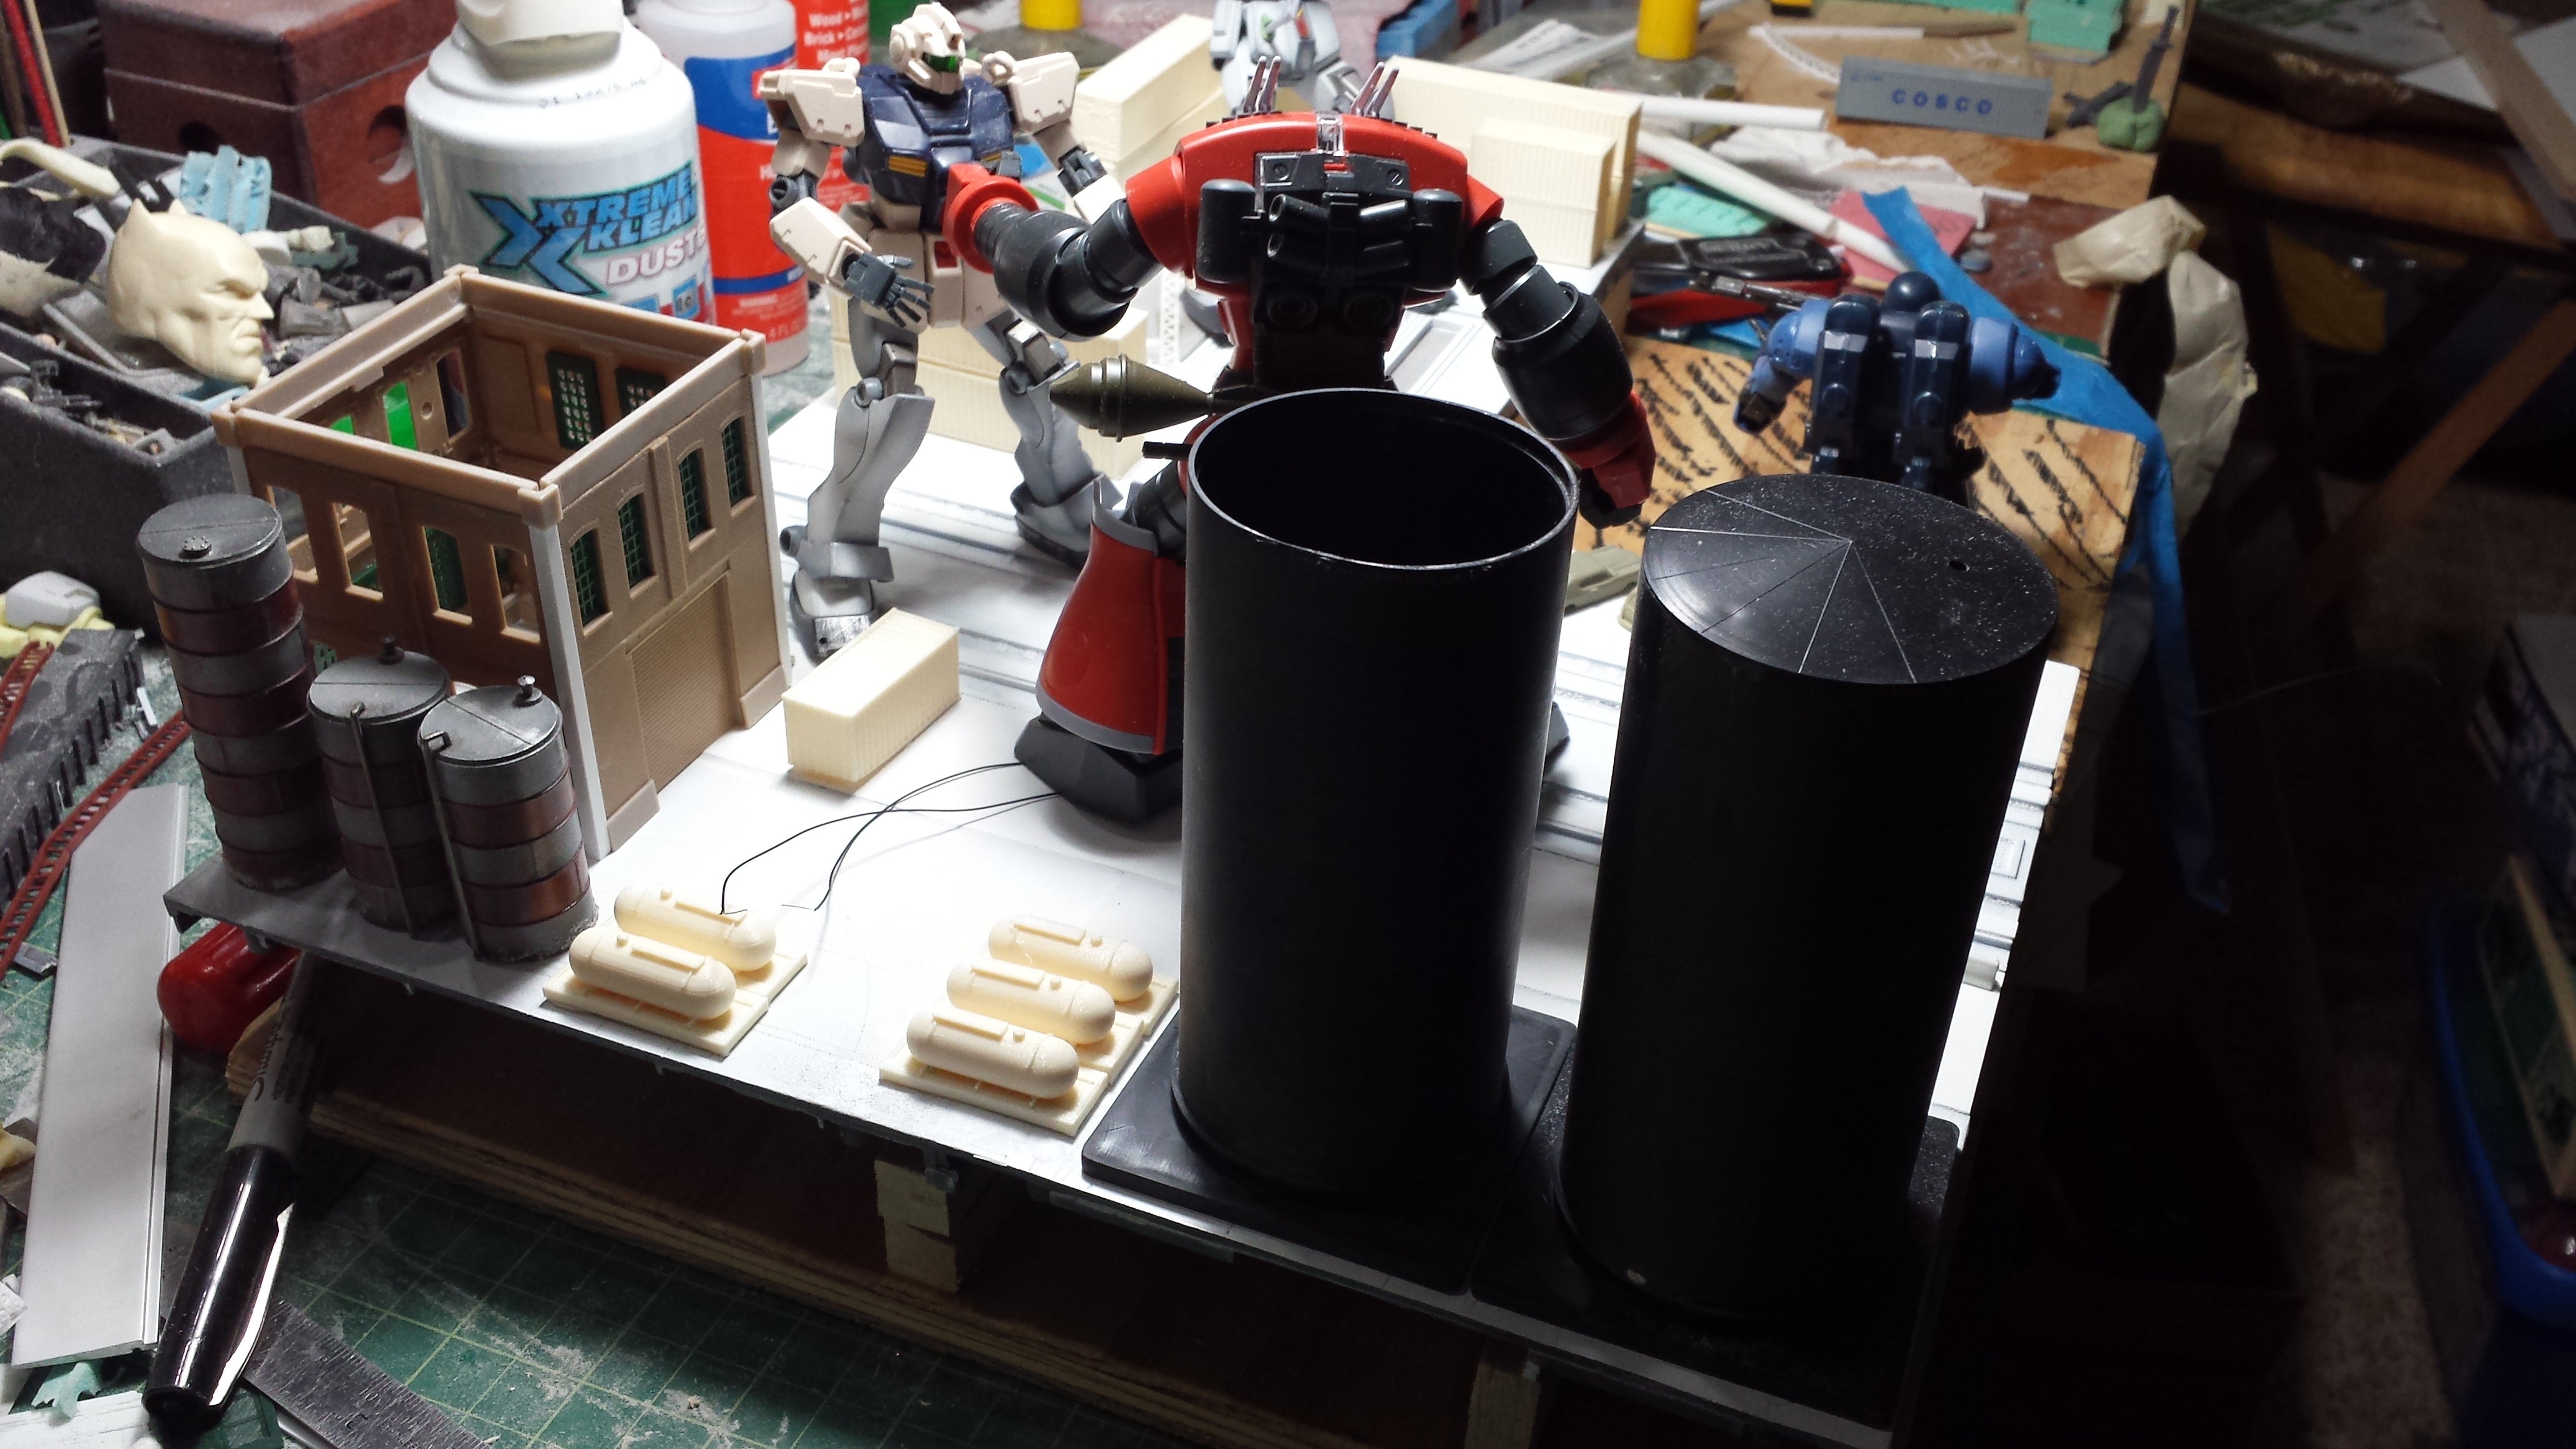
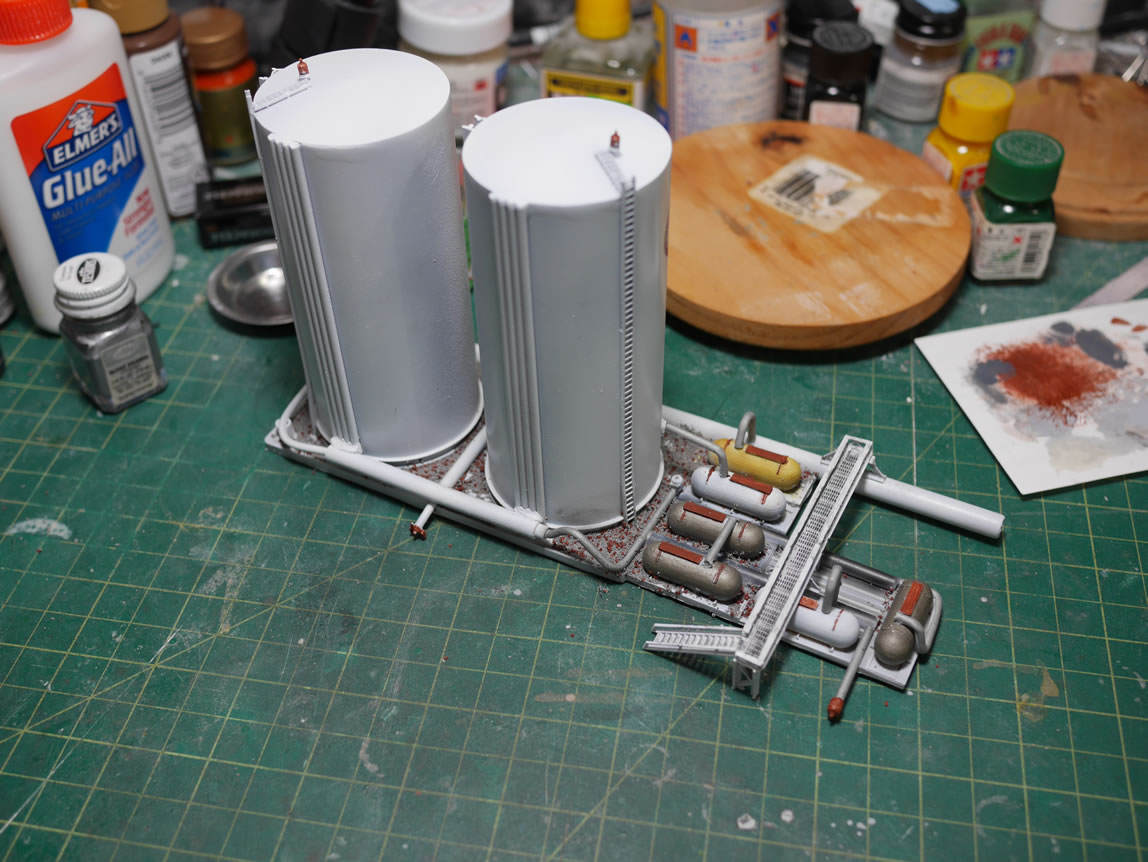
The base is flipped back over and white base is sprayed and a quick test with more resin cast containers, the worked on storage silos, small storage tanks as well as some additional work on the base’s building. Things are progressing along.

So I’ve been in a bit of a slump over the past few weeks. I have also been a little tied up with our newest toy; an afinia(up) 3D printer. I have also started back up on Battle Operation, but marginally as i get maybe 1 game in and if lucky, 3. This combination has pretty much killed progress on th8s damn project. But this month’s build gathering has seemed to kickstart the project. I got a good amount of detailing work in, with minor additions left.

A few weeks back, I got stuck inspirationally at how I wanted to detail the storage tanks and that whole left side of the diorama; so I just left it alone. Eventually, ideas returned and the flinging of glue and plastic rods started flowing.


The smaller tanks are a resin cast from a 3D print. Tubes that run nowhere are glued into place. Adding in bits and pieces from the chain base extras, i built a little trough with pipes and pipe connectikn details; and also a little foot bridge that spans over the pipes. I still need to terminate a good number of the pipes and add detail bits and pieces, but things are starting to pan out for the better. Its no longer plain, but also not too ultra detailed.
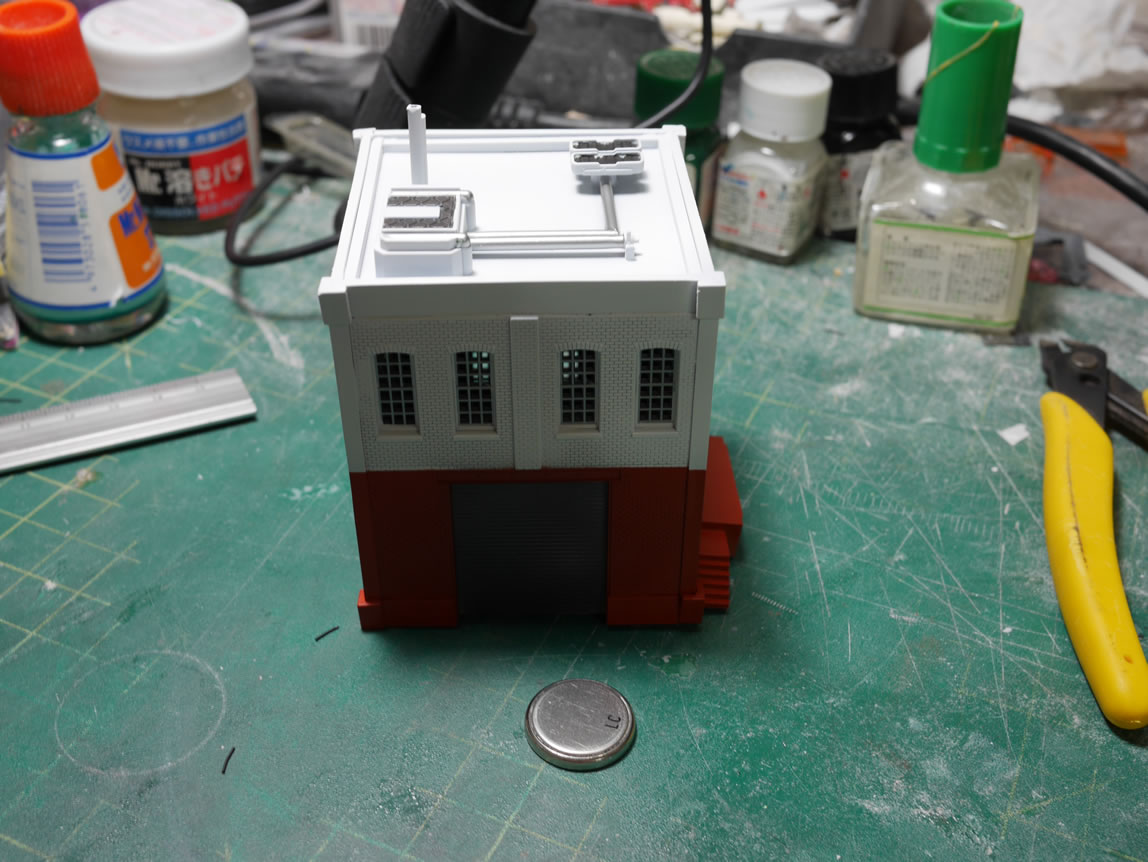
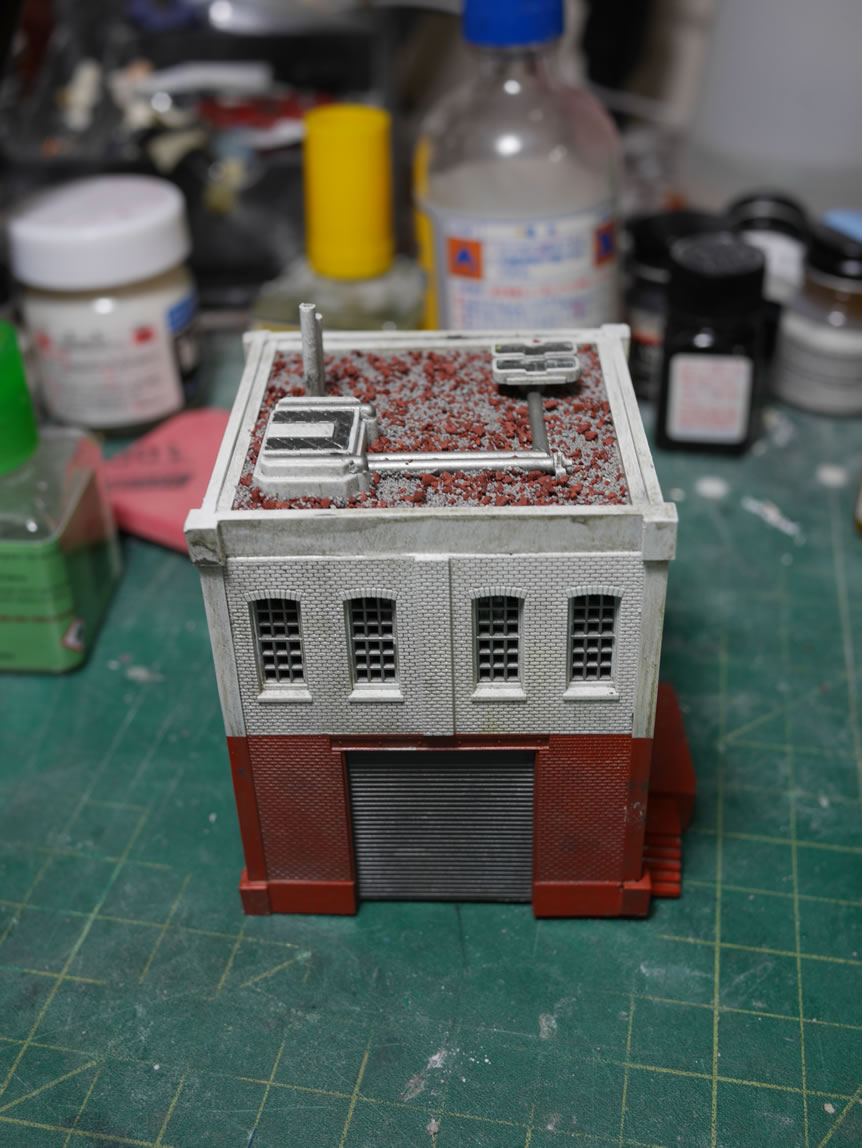
I made some mods to the building roof with more pipes and detail bits.

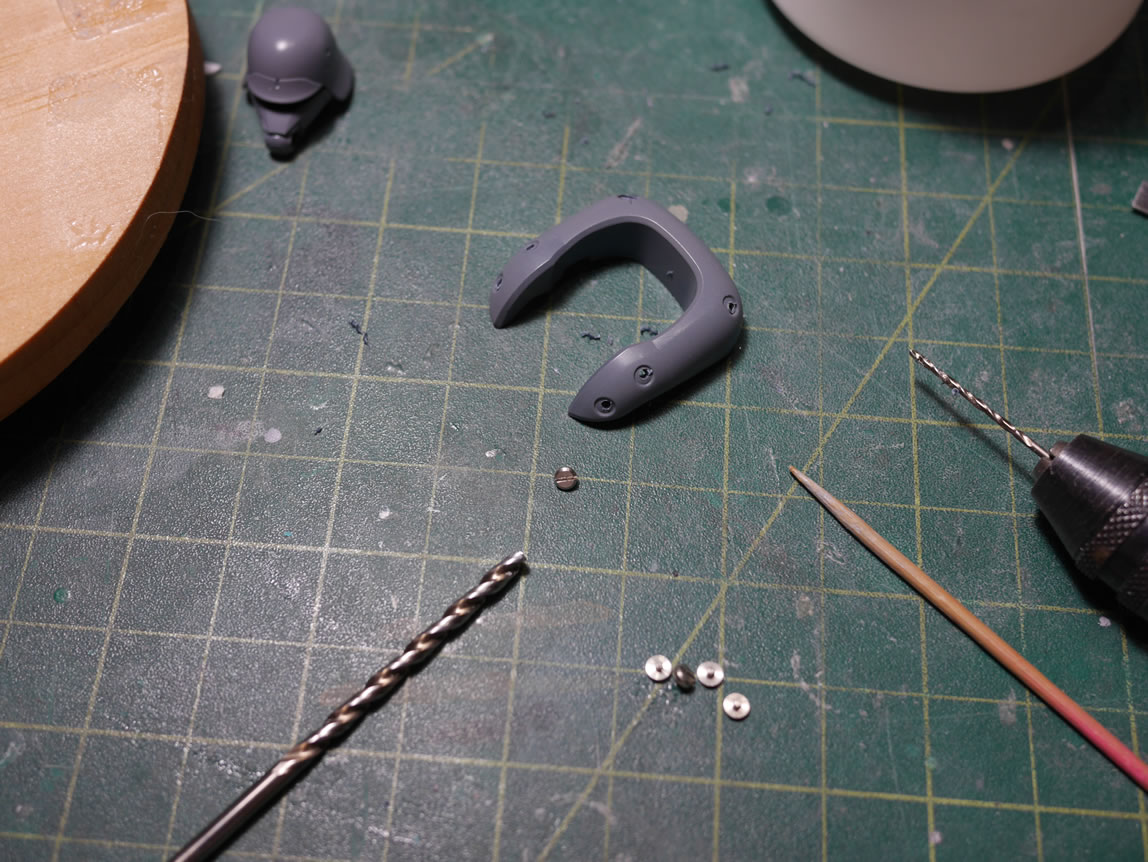
At the build gathering I got down to sanding to sharpen the ZoGoks boomerang blades(or what ever the hell they are called). So a few holes are drilled in select spots kn the poor Cold Districts GM and the blades are glued into position.

Almost a full year later…
Motivation, inspiration and other ation-esque terms sometime fades away as a project progresses for a host of reasons. This project was chugging along last year and just stopped cold. It sat on my workbench and just occupied the space for a good while before I came to the realization that I did not want to work on it. I boxed it up and shelved this for a little over a year. I recently revisited a 7 year shelved kit that has since been shelved to get some quicker little projects completed. This happens. Interests wanes and sometimes, it is best to just put something away in hopes that someday, the interest returns and the project gets completed.
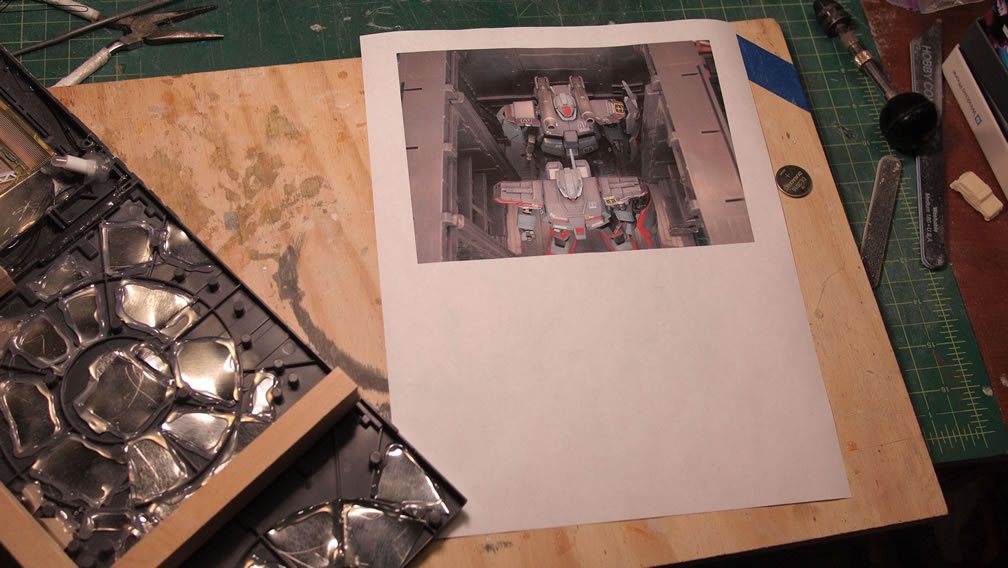
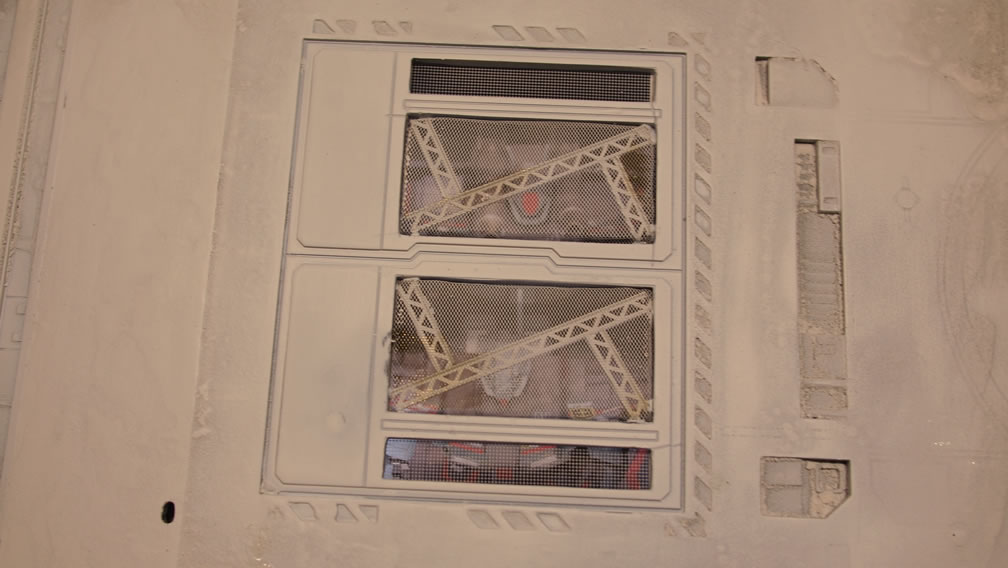
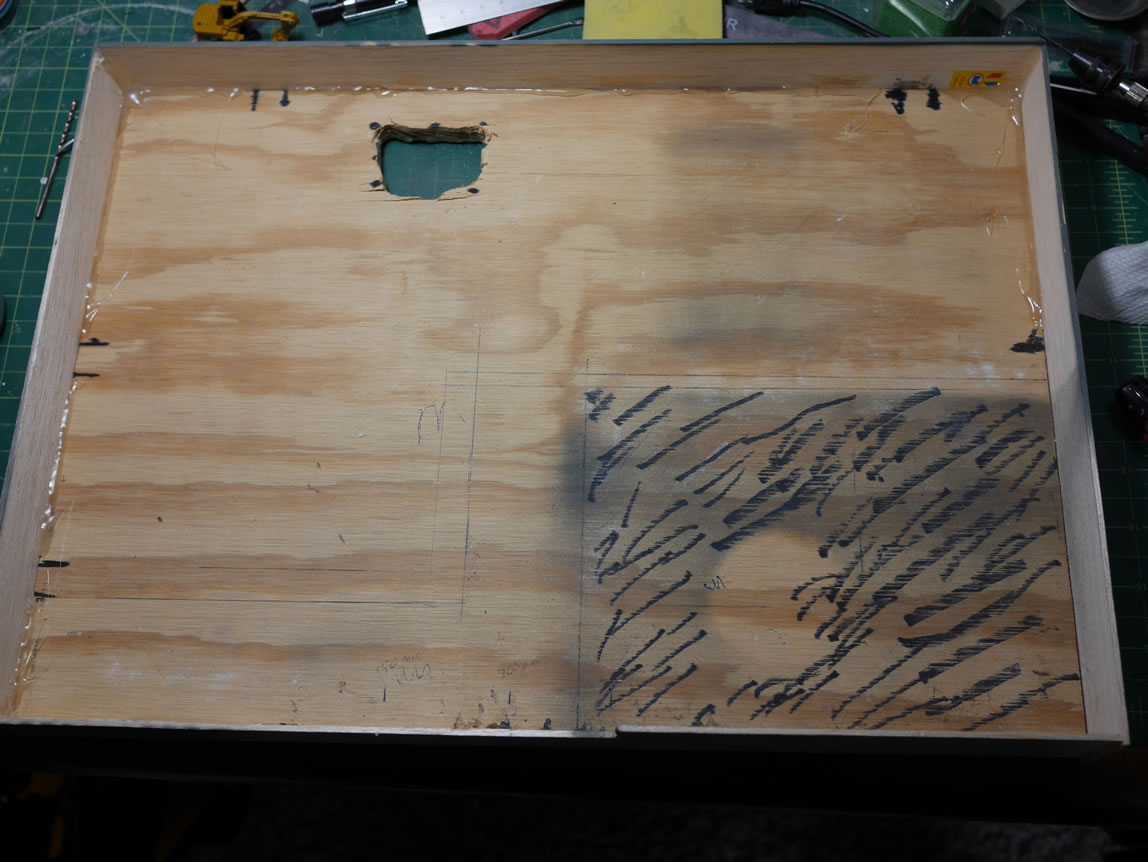
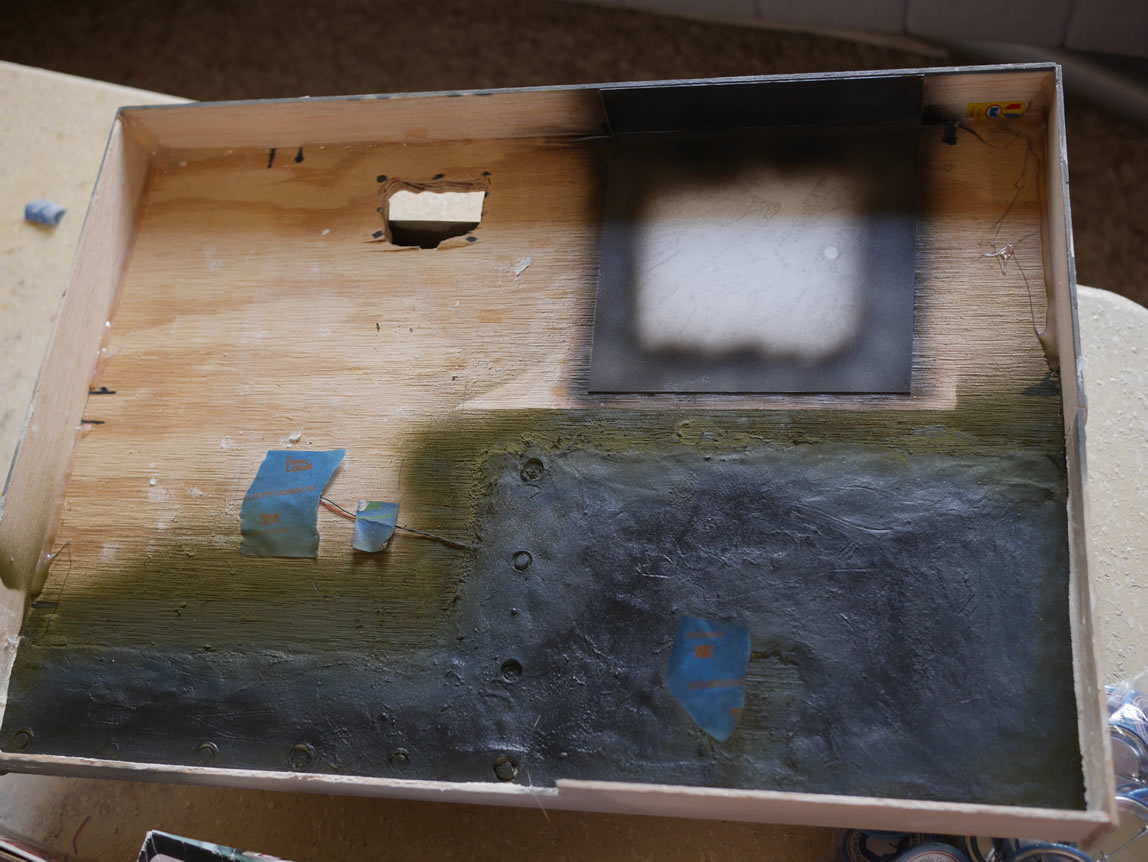
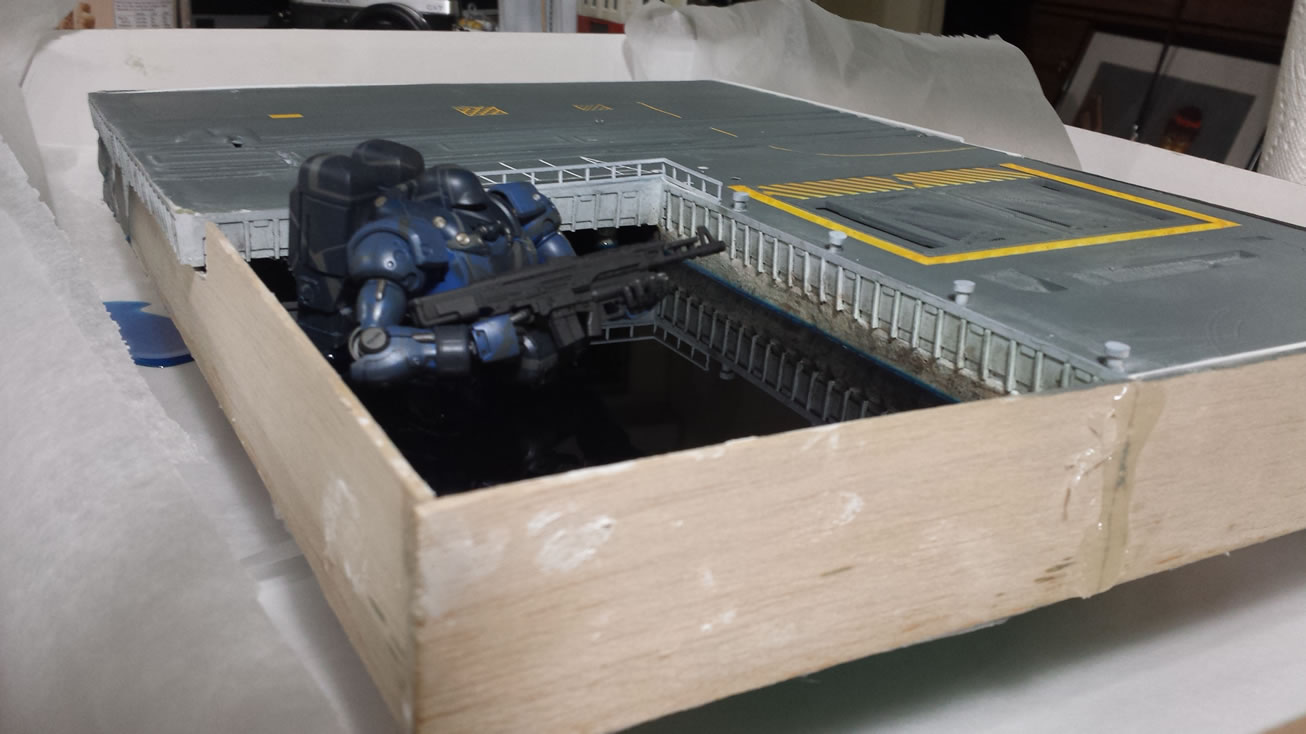
The first set of pictures was where I last left off. I had started getting the main base piece together. I had cut a hole out, glued some mesh in place. The idea here is to use a picture of some GMs I had previsouly built, and place the picture under the base to create an illusion that there is an underground element to the base. The wood base is built up with some balsa wood sides. This was about where I stopped last year; I had some work on various pieces and there was no mental execution plan for the project.
About a month ago, I brought the project out of storage and laid it out on my workbench. And there it sat again. I think the issue here is that I didn’t really have a plan. Projects of this size can easily get out of hand because there are just so many pieces and just focusing on a starting point was difficult. So there it sat, again. This week, however, renewed energy suddenly returned and a plan for finishing was actually written out. I needed to start with finishing smaller pieces one by one; so I focused on the shipping container element.
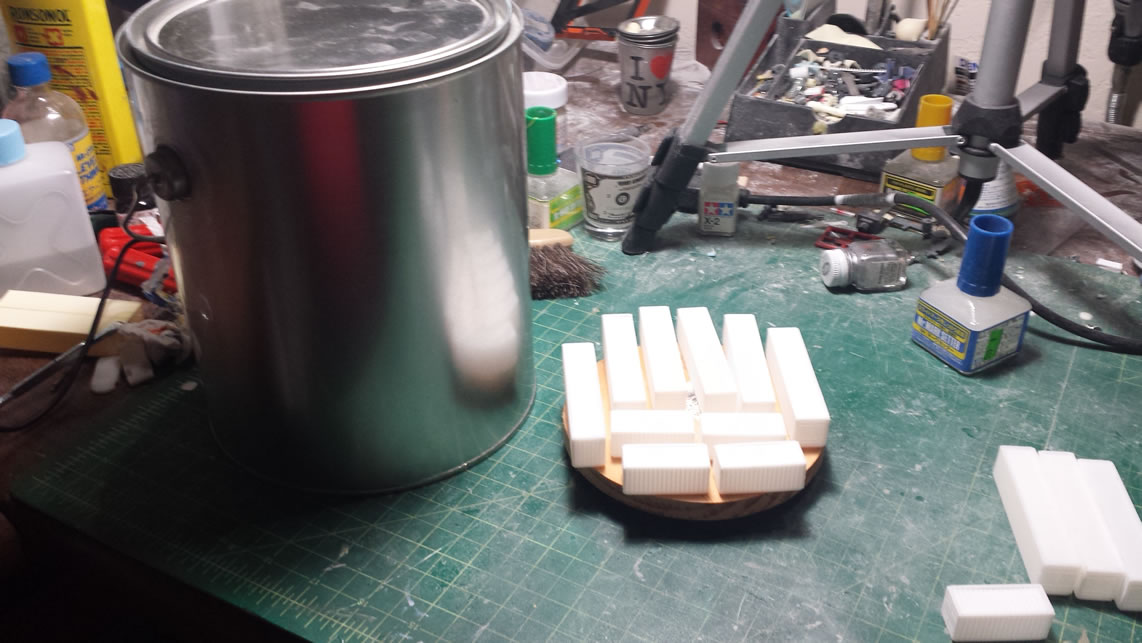
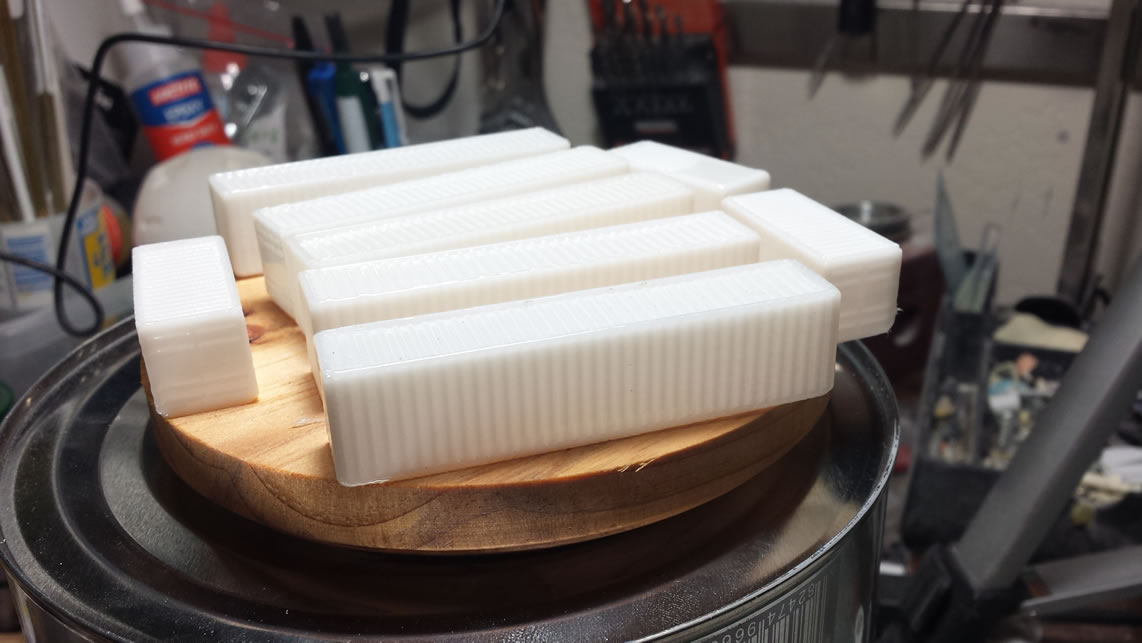
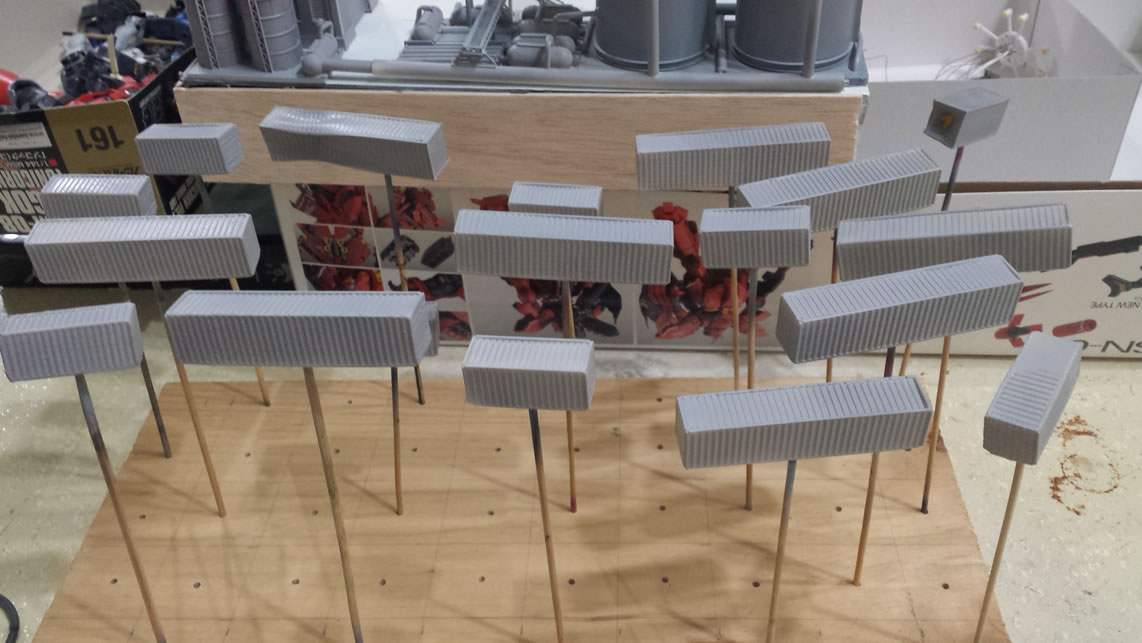
I printed out some new containers as I wasn’t really happy with the resin copies I made last year. I made 40 ft and 20 ft containers.

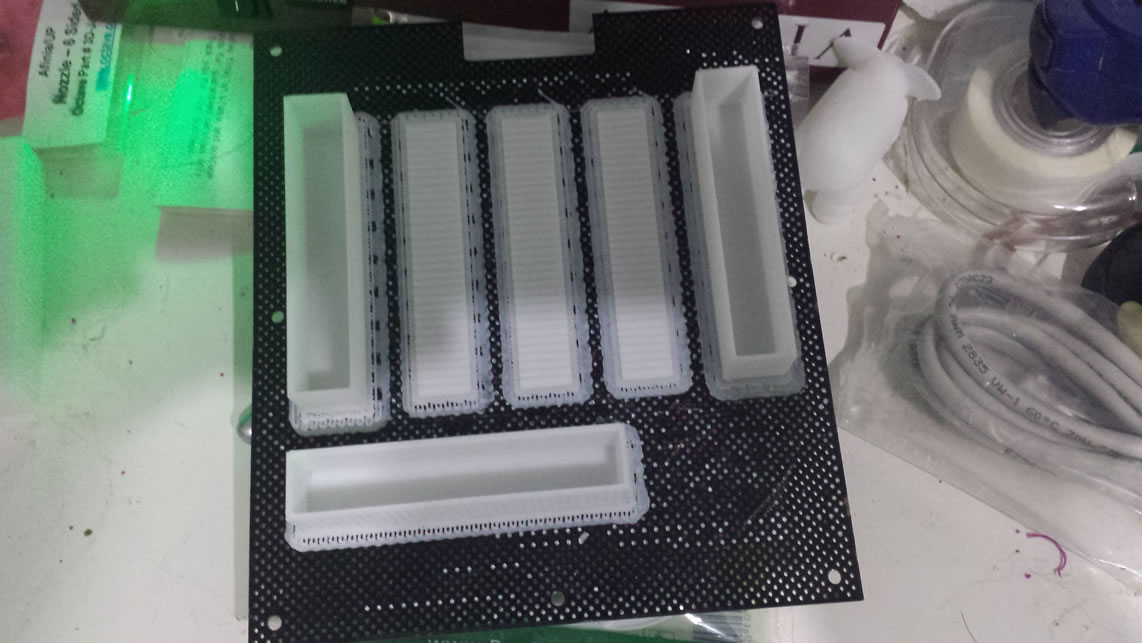
Once printed, I needed to put the containers into a acetone vapor bath to help dissolve the byproduct 3D printing resolution lines.
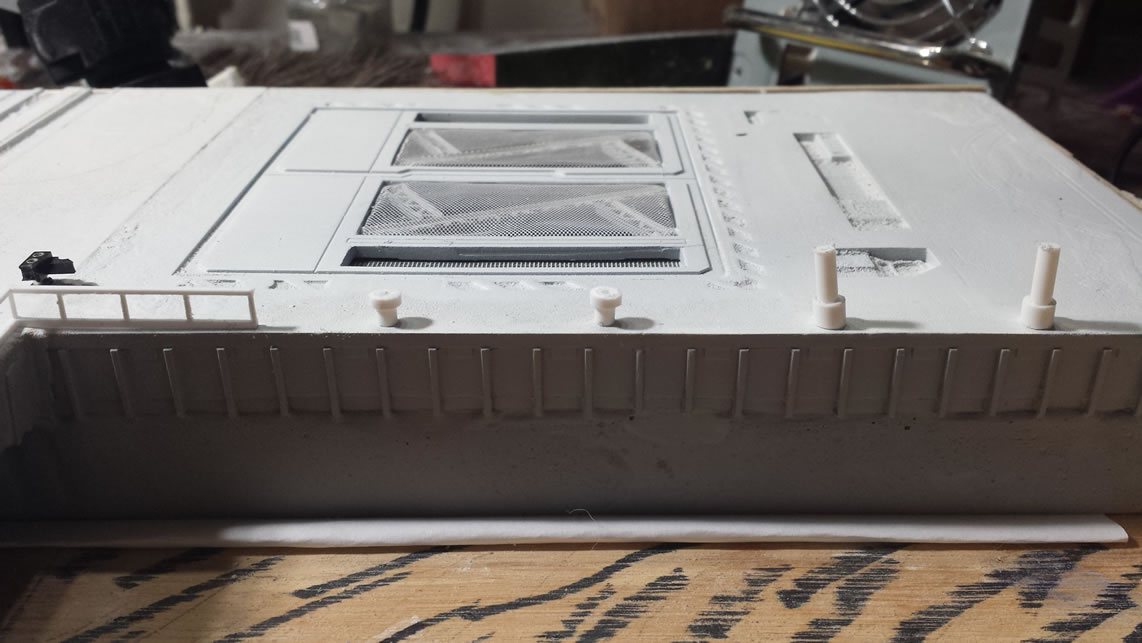
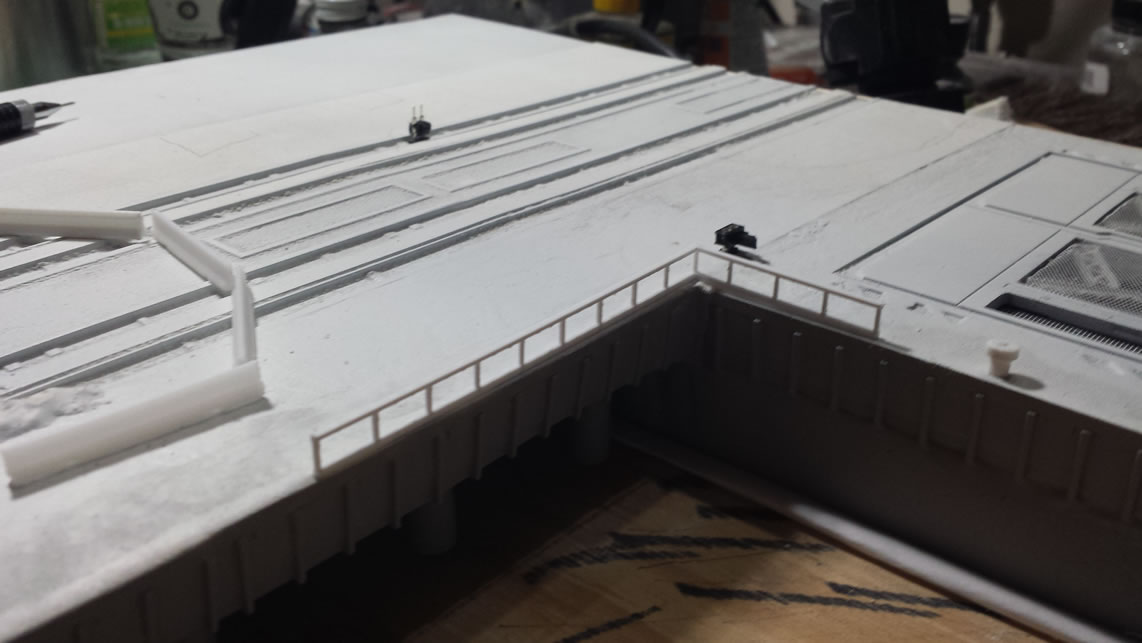
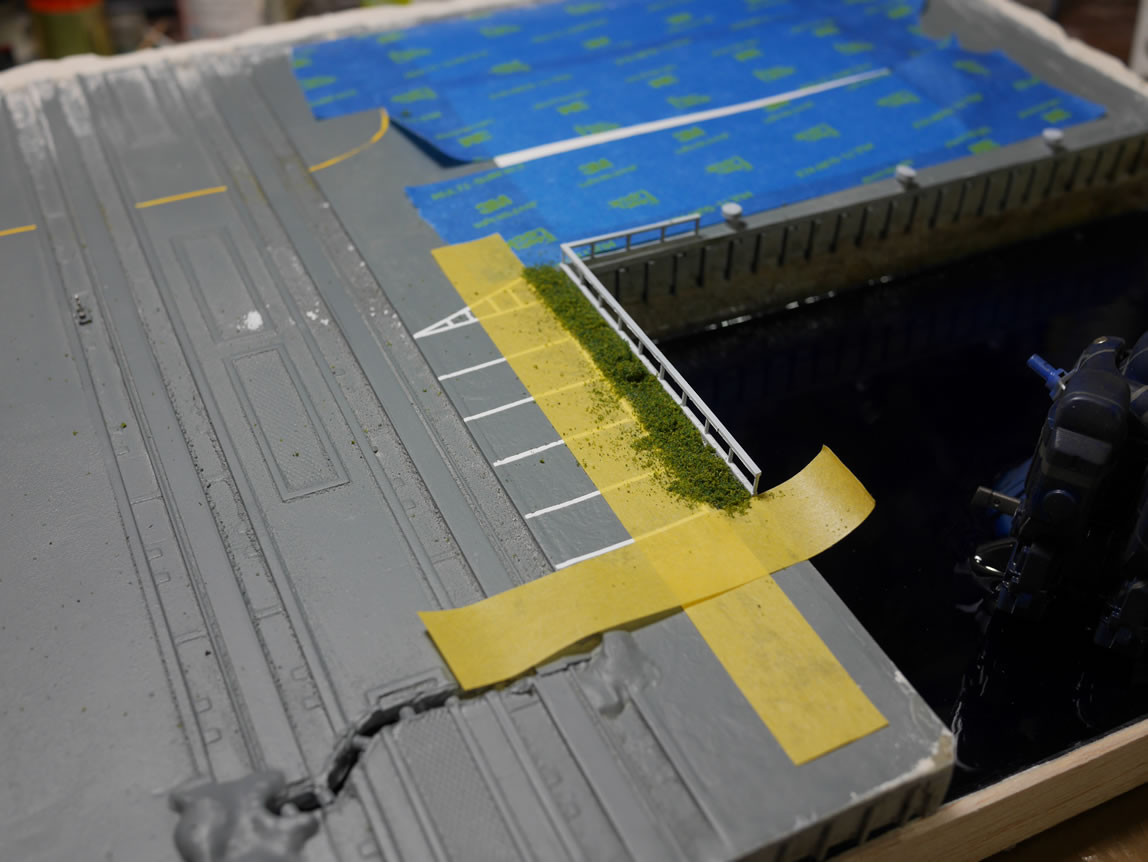
Returning to the base. During this week’s live broadcast; I did some small detail work on the base. A railing is added as well as some dock anchors made from styrene.
Once the containers dry from the vapor bath process; they were primed. I also primed the “refinery” element for the base as well.

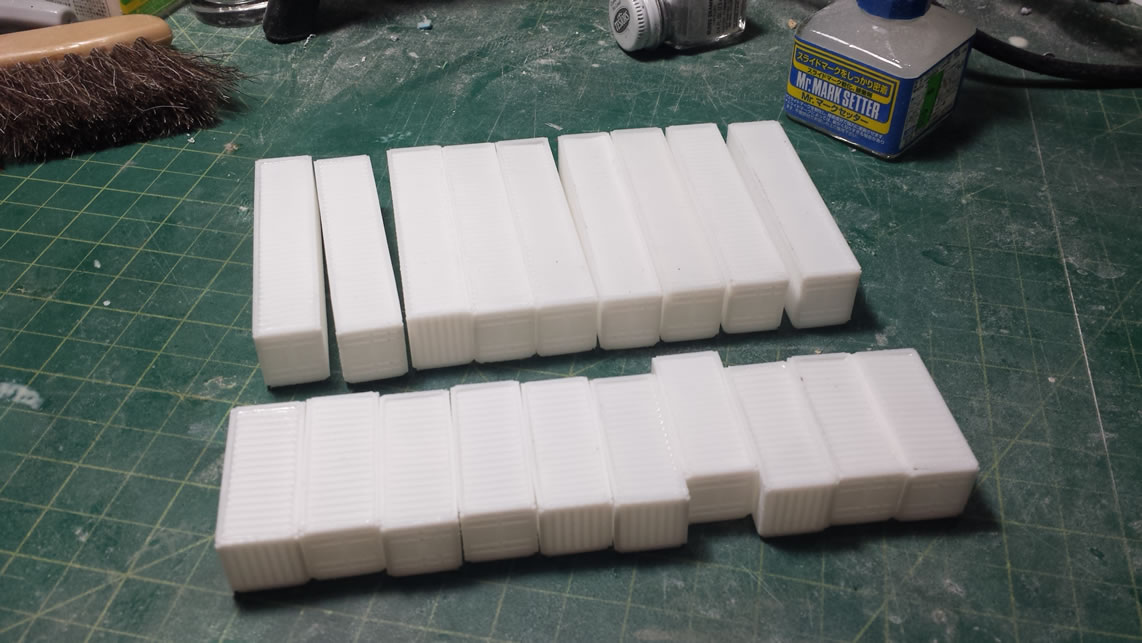
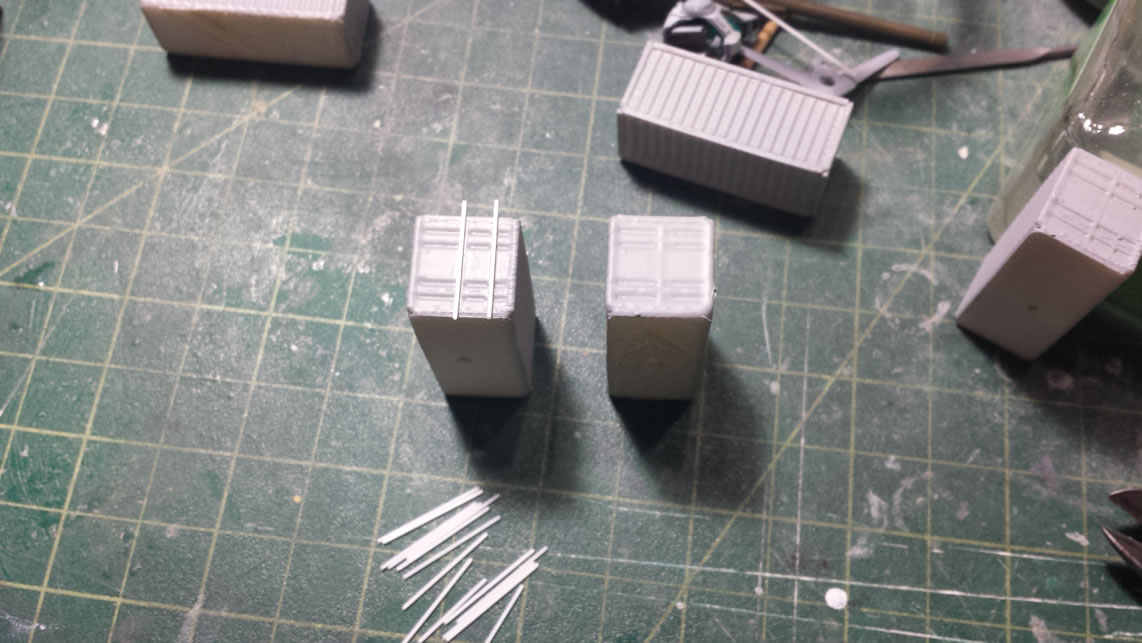
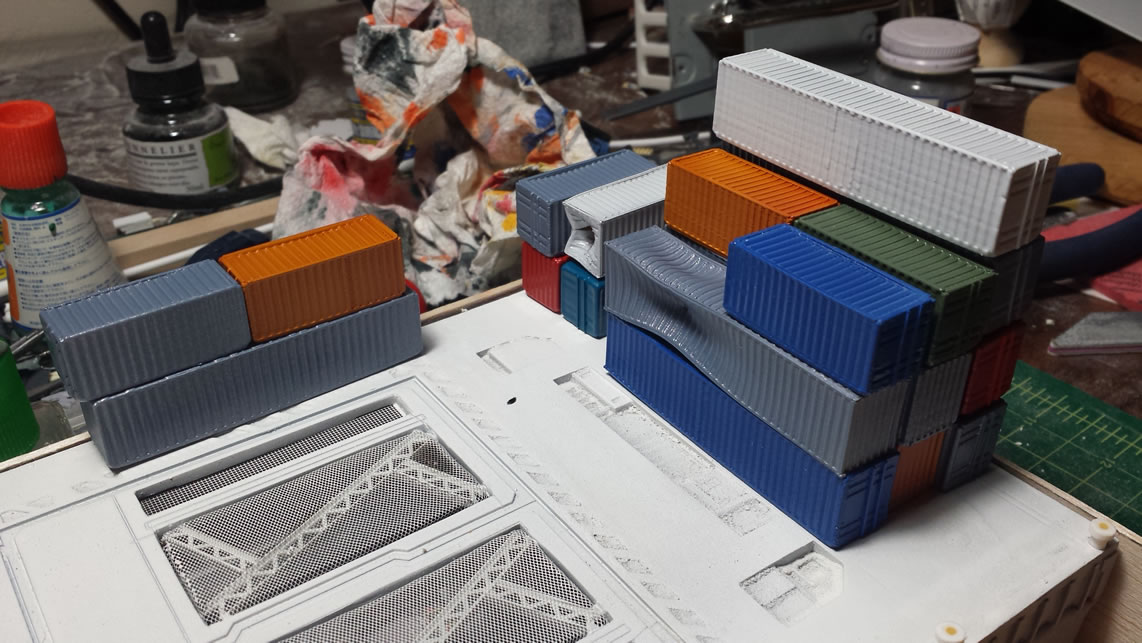
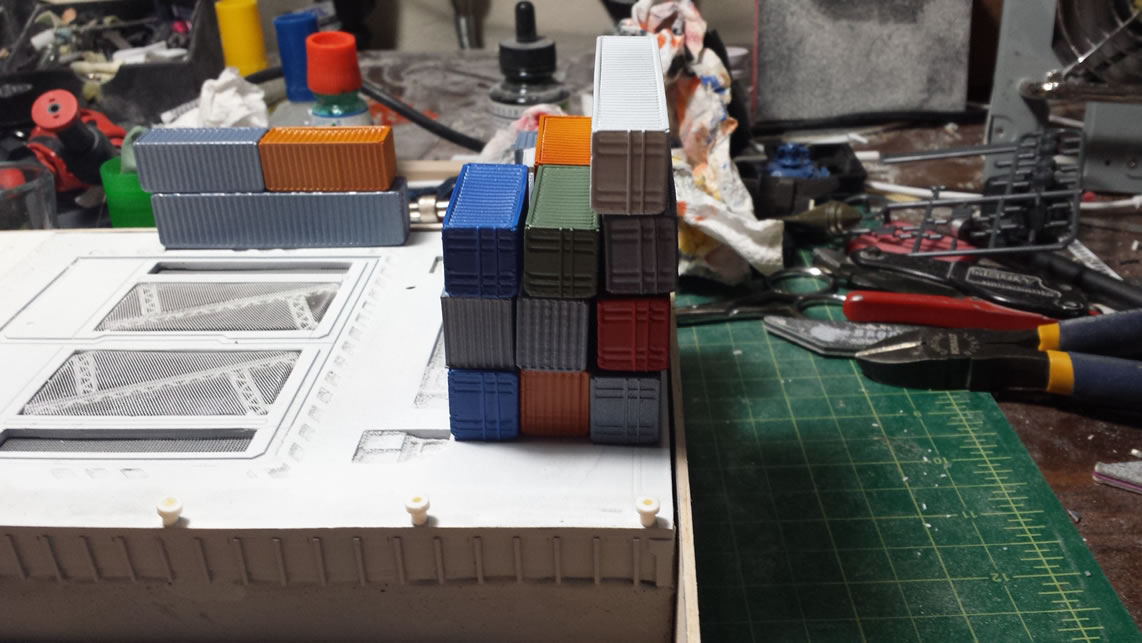
The sides of the containers were missing some details, so I glued in some strips of styrene, and once painted, the containers start to look better.
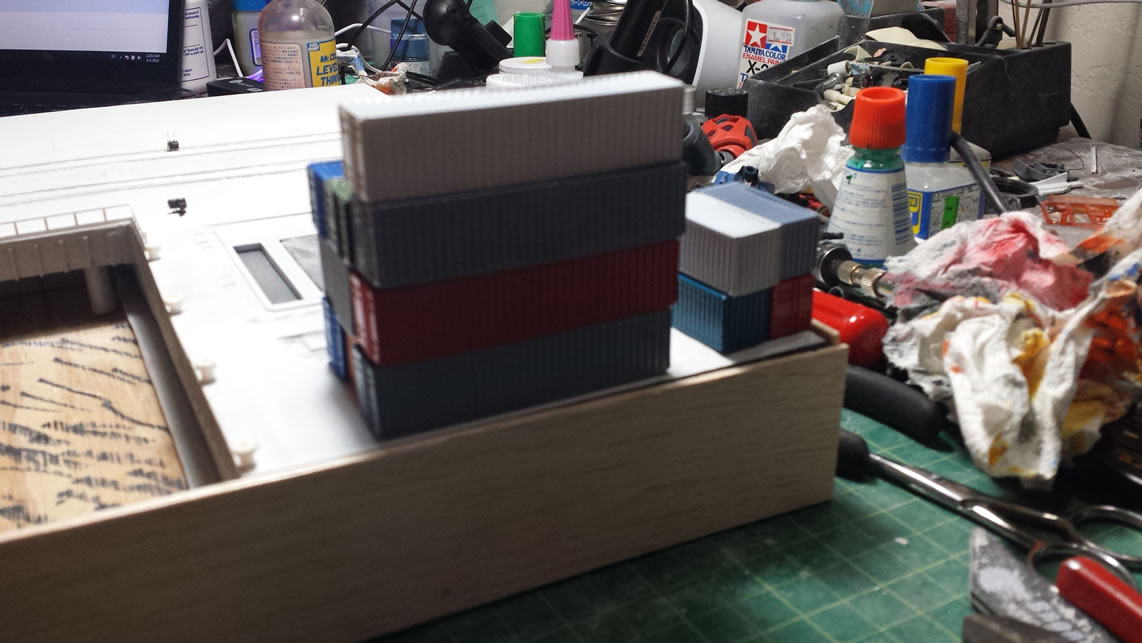
I picked out a few colors and sprayed the containers and got them gloss coated. More planning with the base help visualize things as well as gives me a photographical plan for the container placement. There’s still plenty of work on the containers, but it’s coming along and there’s a sense of accomplishment which helps keep the motivation going.
Keeping in with the focus on specific elements of the base, the GMs were sanded and base coated.
I still have to finish sanding the Zeonic suits; but it looks like things are moving along. I may actually finally finish this damn thing.
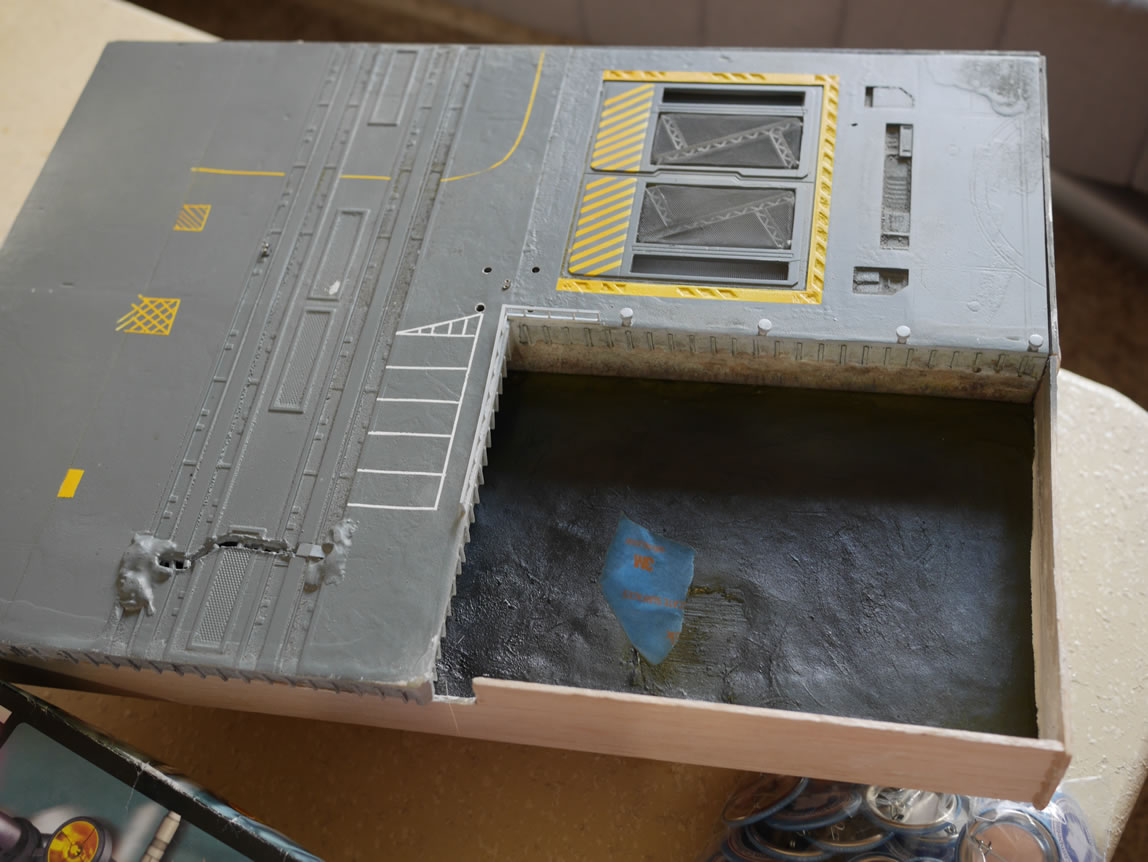
First rewiring session
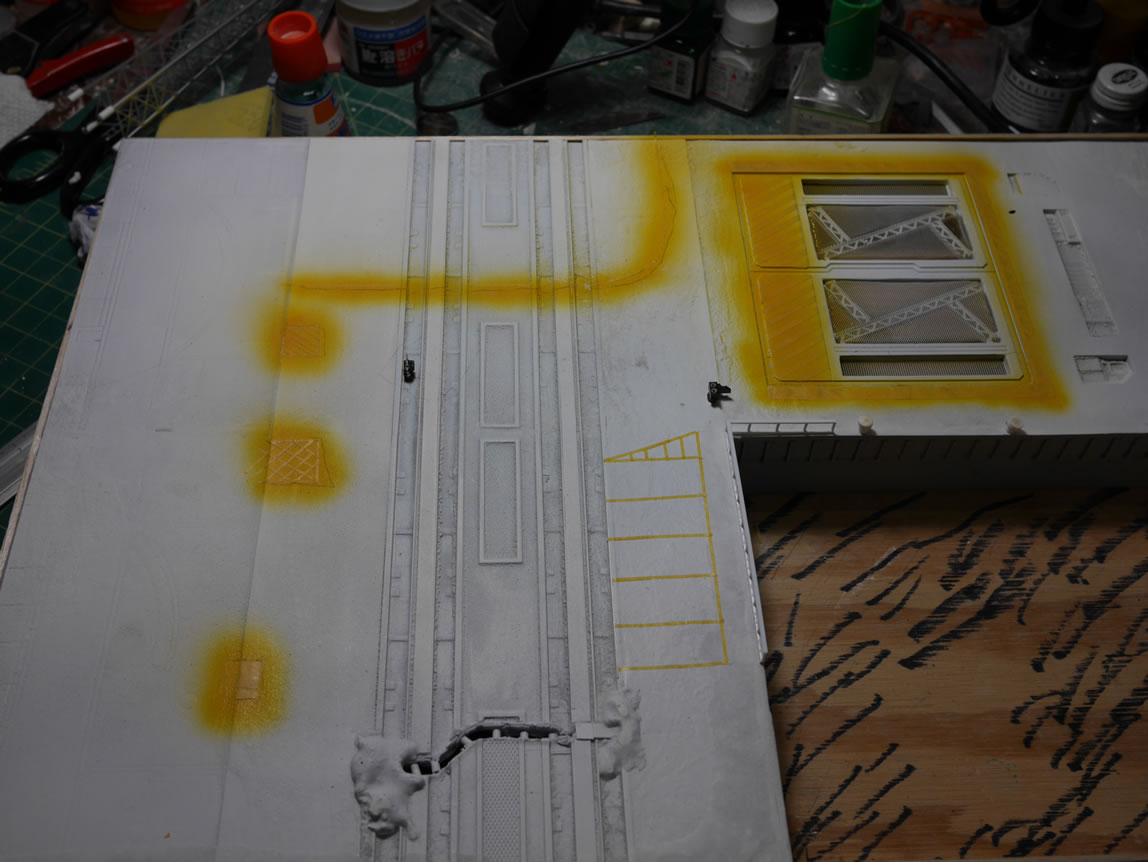
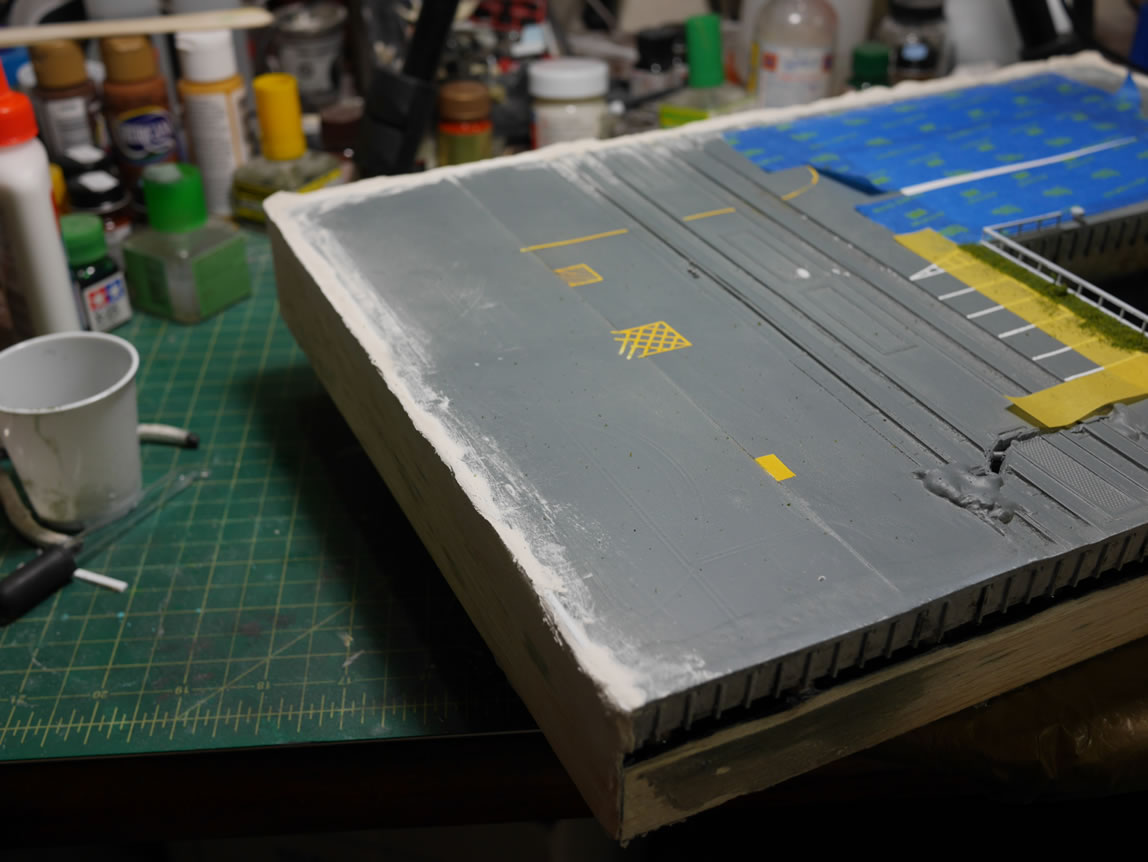
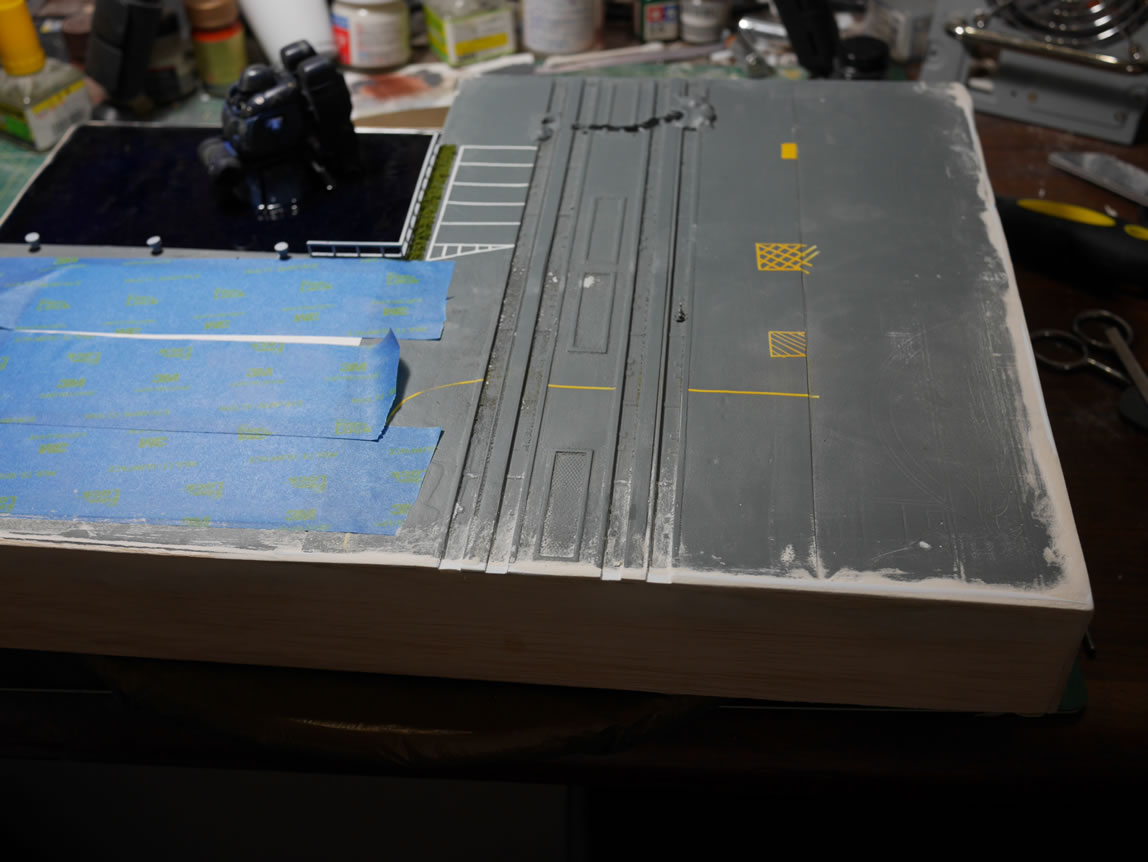
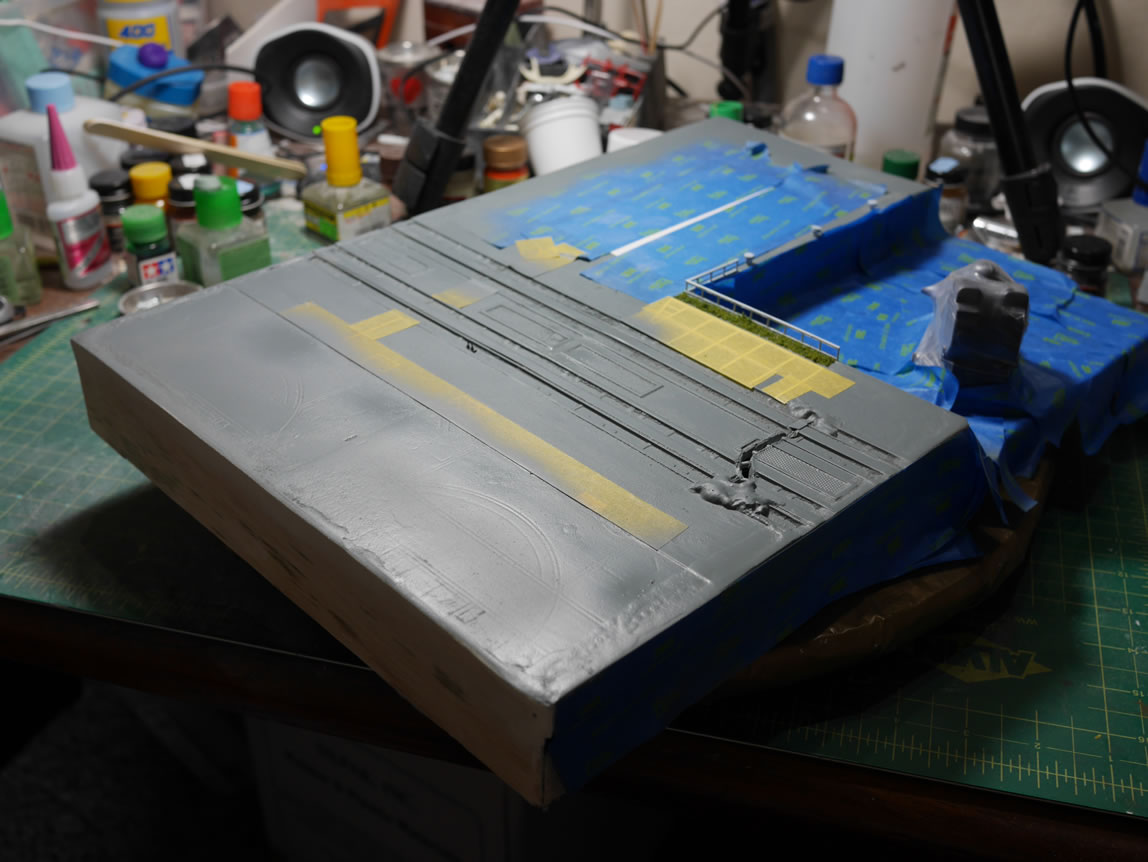
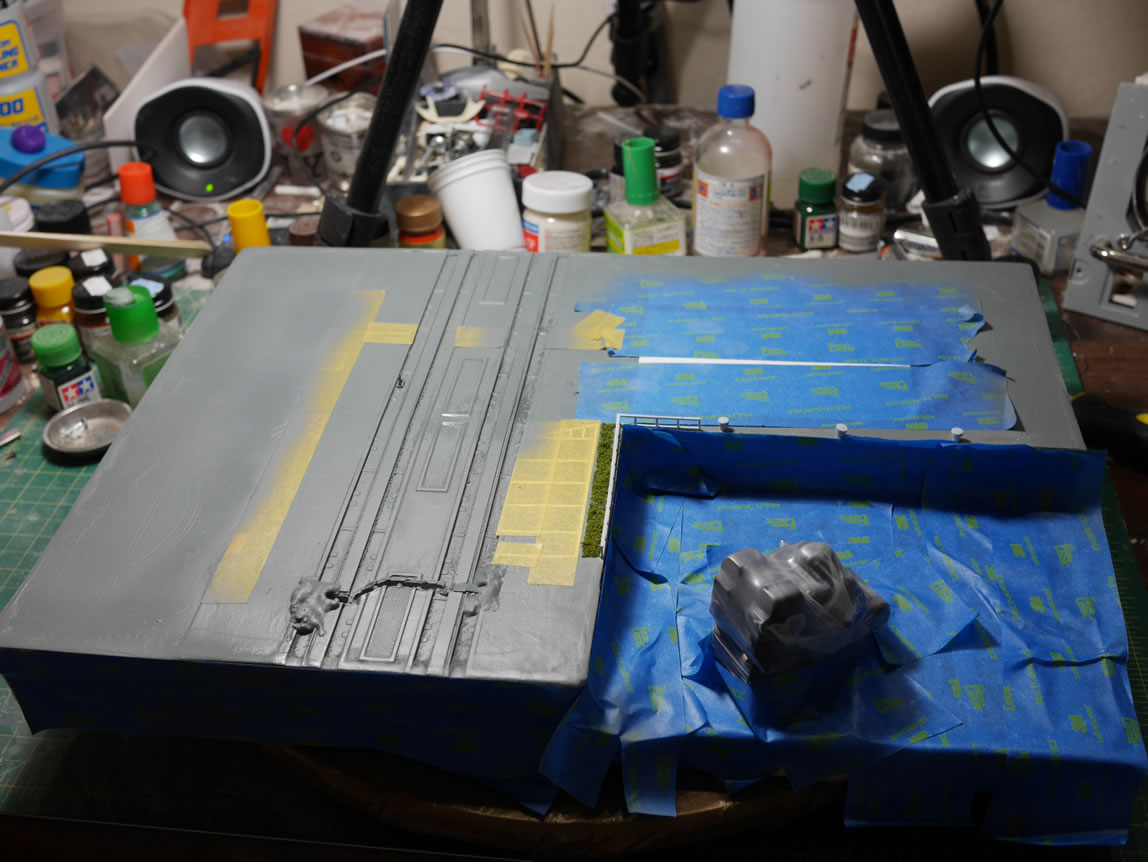
Work on the diorama continues. Some areas slow down a bit as a good deal of work is not overly visual, at least from a progressive standpoint. Getting tired of just the white base coated base, I masked off a small parking spot, then painted on some yellow. Then masked that off and sprayed a light grey over everything. I failed to snap pictures of the masked off base and the results after I painted. With a project this size, I end up juggling things so that while one area sits and cures, I can focus on another area; but also keep from working on too many separate pieces so that it becomes overwhelming. I learned this lesson last year around this time when I really wanted to push this sucker out. I simply got overwhelmed and the interest to even work on it died. I currently have an outline written out for this project. This is the first time I actually wrote something out; the help with organization is amazing, and I can see that certain things should be done before other things. And with areas of the project are completed, I can cross those off as being done and keep the focus. Currently, I’ve finished the containers, the GM’s, and recently, the base light that I had trouble figuring out the last time around. That’s at least 40% of the players for the diorama completed.
As the title says, I had to do some wiring work. I previously wired the base up; but as the build progressed, things changed and the wiring scheme must also evolve. I have a video of the re-wiring process after the jump!
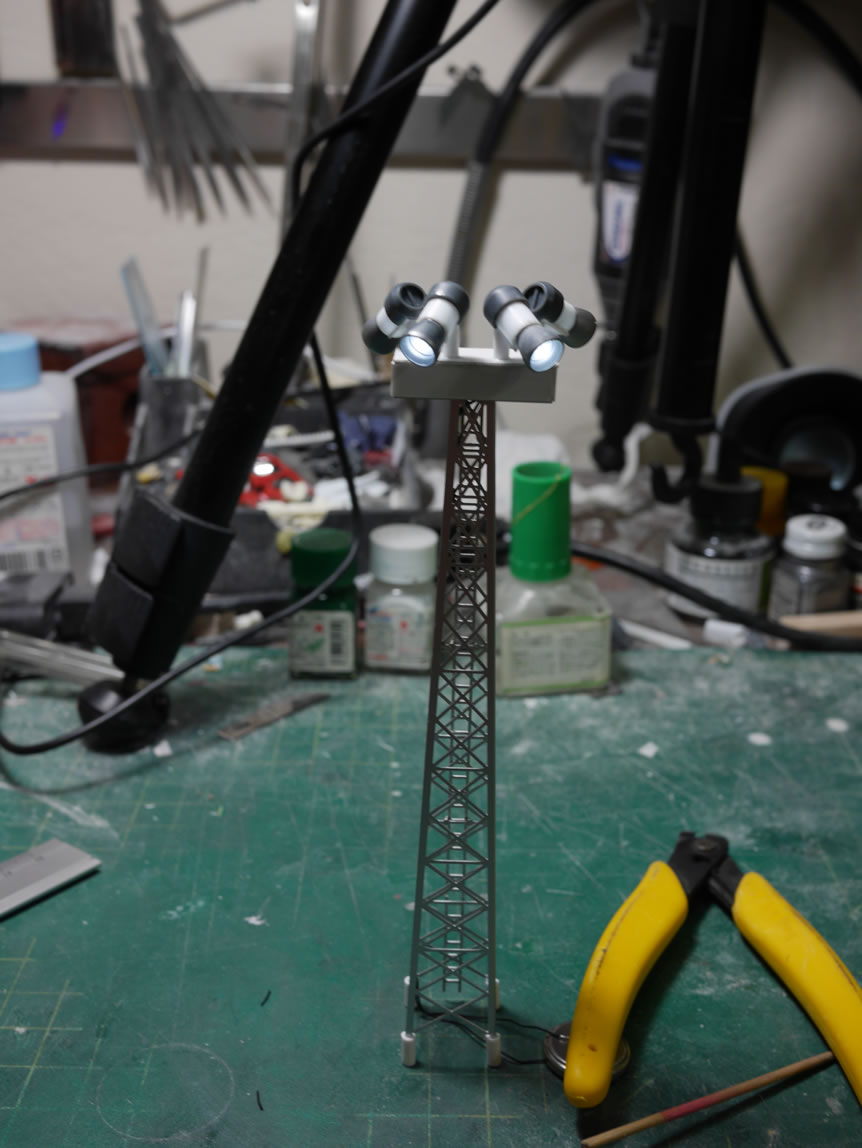
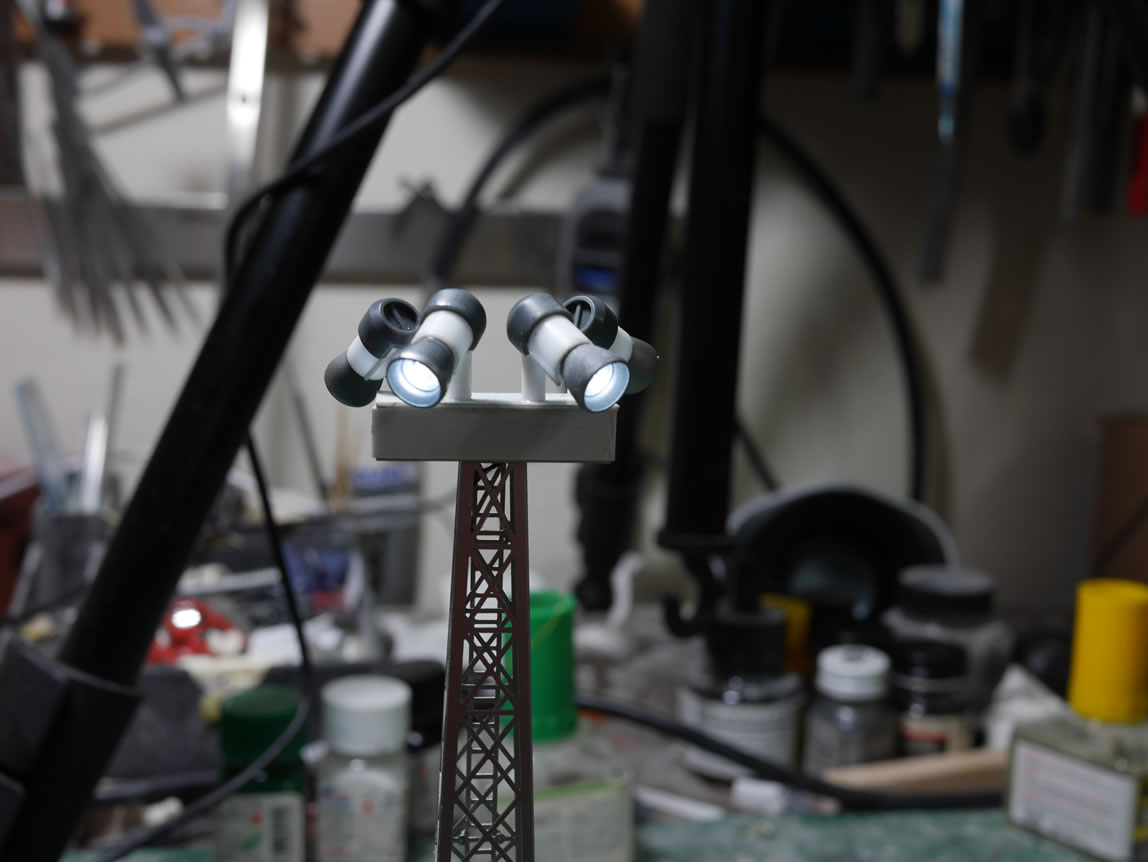
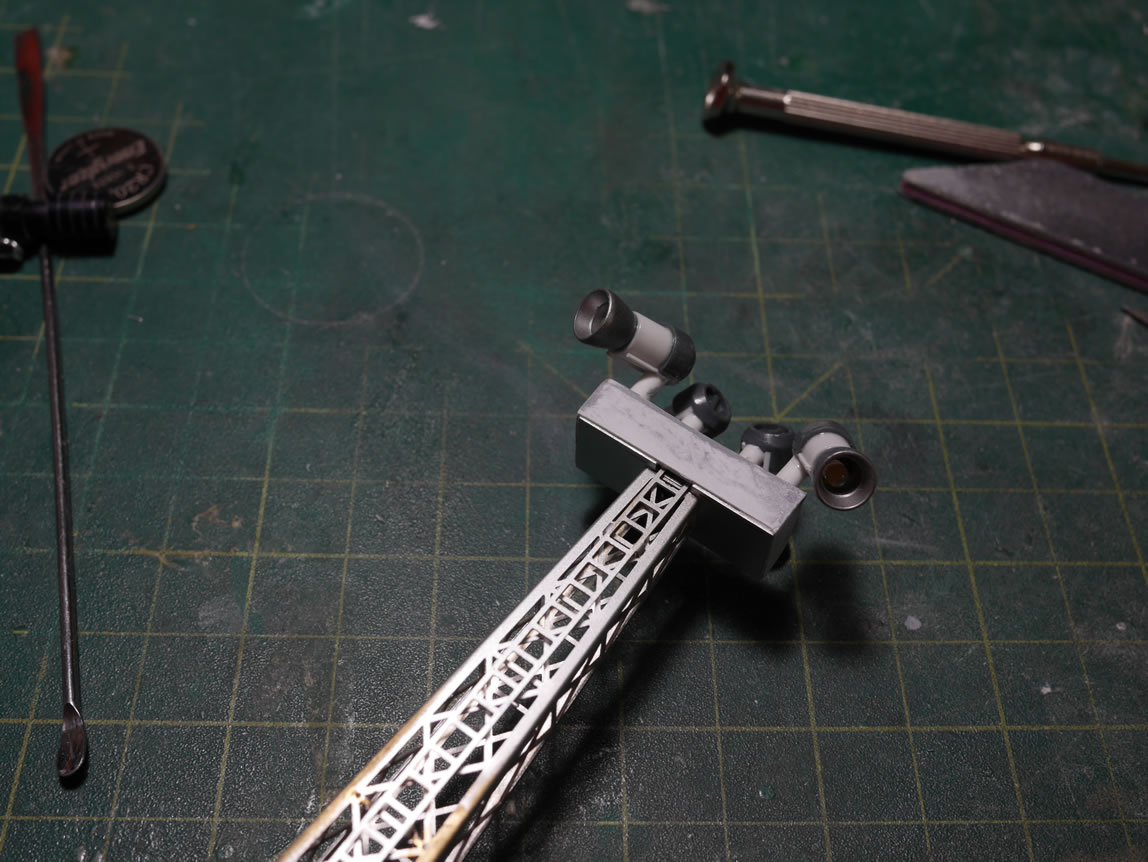
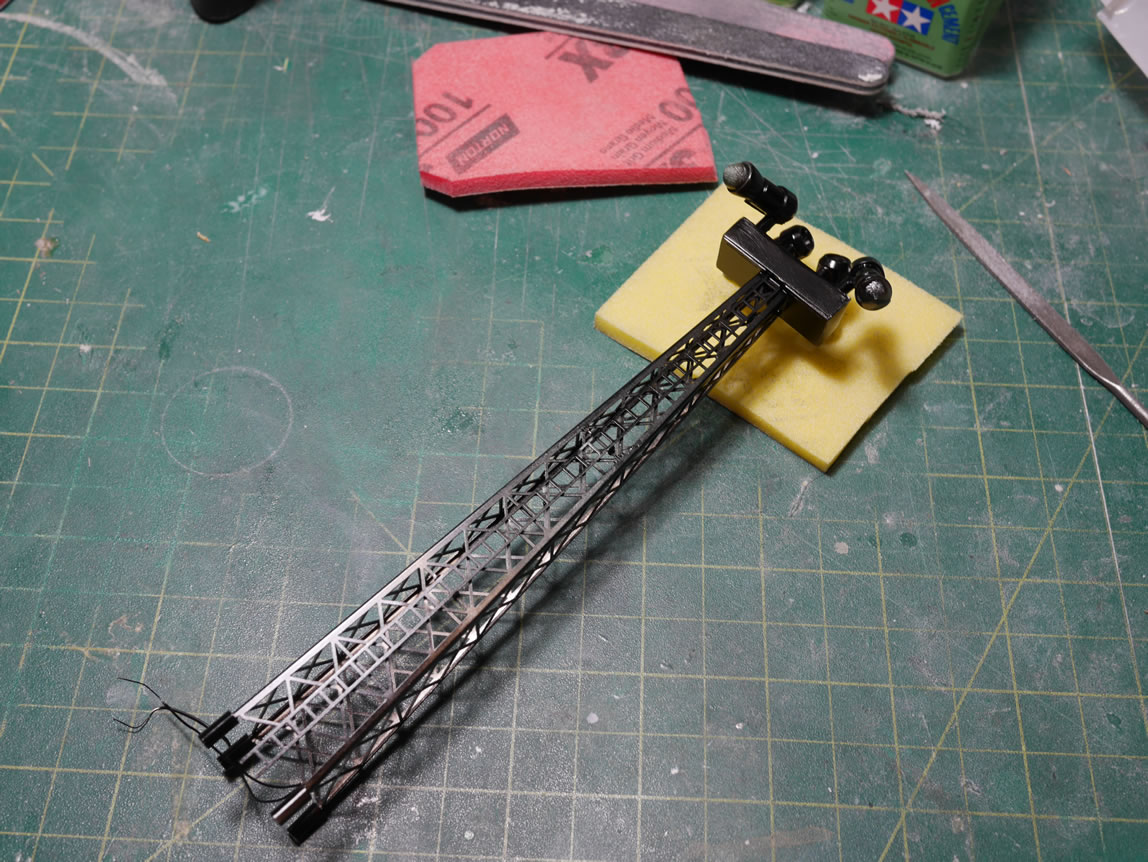
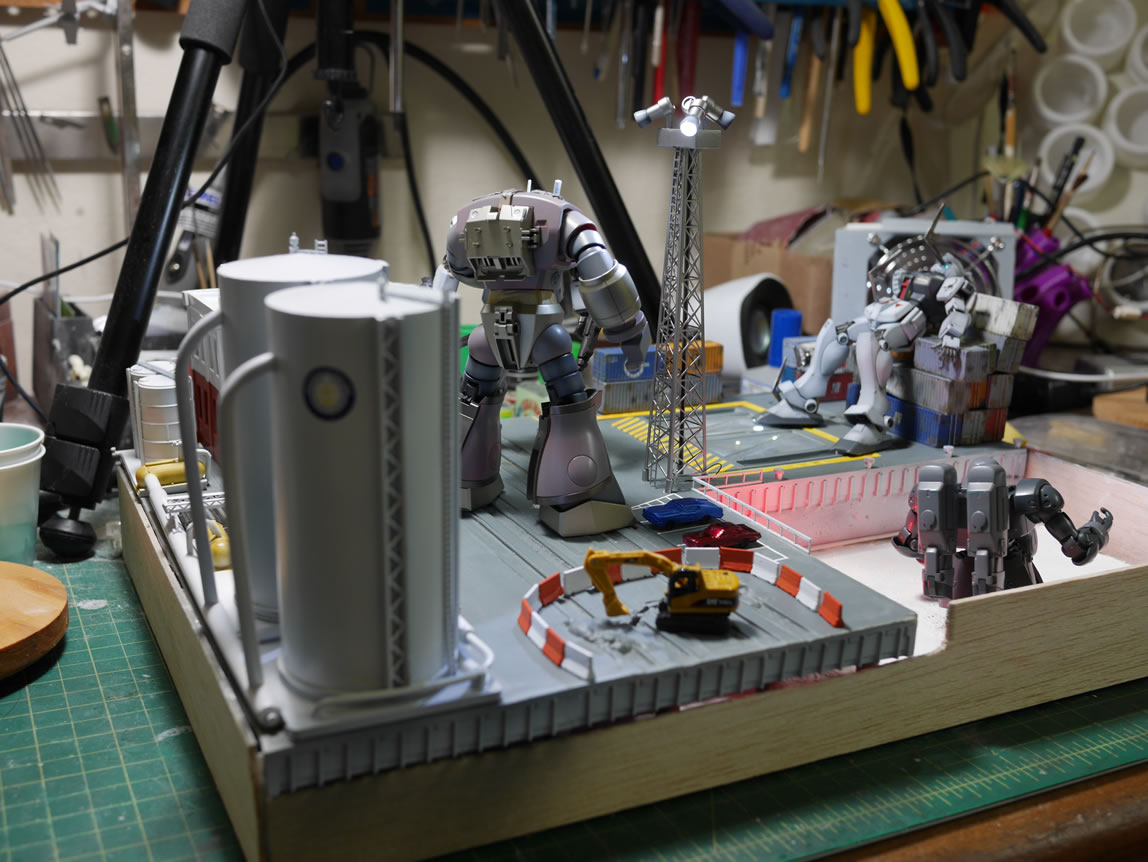
Speaking of lights, let’s visit the last progress for the light tower. I got the four spot lights wired together and glued the plastic bits together. A quick test makes sure I didn’t screw up anything in the wiring. The wires are twisted and run down one of the tower legs. They are glued into place and once painted, they should be fairly well hidden. The plastic box has now cured so some putty work is applied and sanded down. I used regular tamiya basic putty here because I wasn’t in a hurry to work on this piece. I had other parts to work on, so while the putty cured, I focused on other pieces of the project. Once sanded, the light bells were painted with a light grey, and the rest of the tower was base coated with finisher’s gloss black. I then finished the light tower with Alclad dark aluminum. Some holes in the base were drilled out and the plastic legs I created for the tower fit right perfectly; so I can eventually glue the assembly in place with the guide holes.
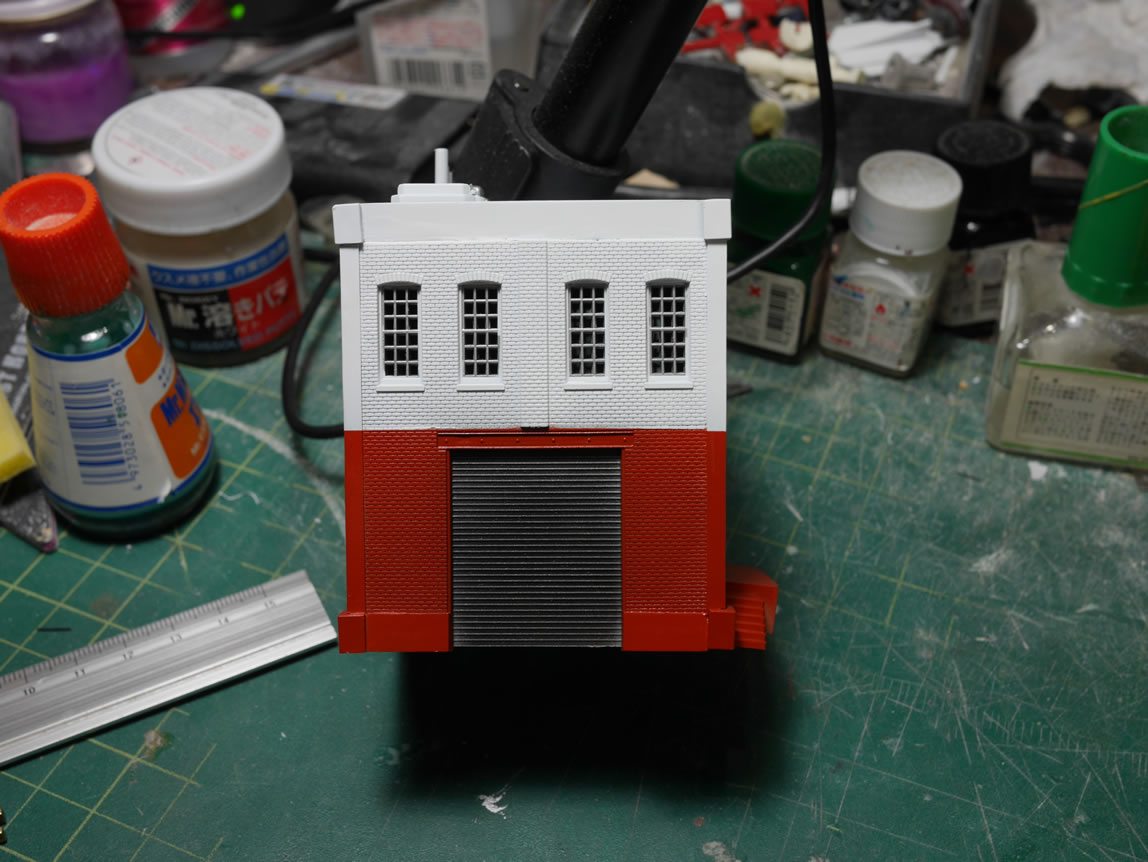
In the mean time, I masked off the painted windows for the building, then painted the top half in white. Once that cured, I masked off the top and painted the bottom half in brown with alclad steel for the garage door. The building is currently waiting it’s turn in the queue for some weathering and finishing touches.
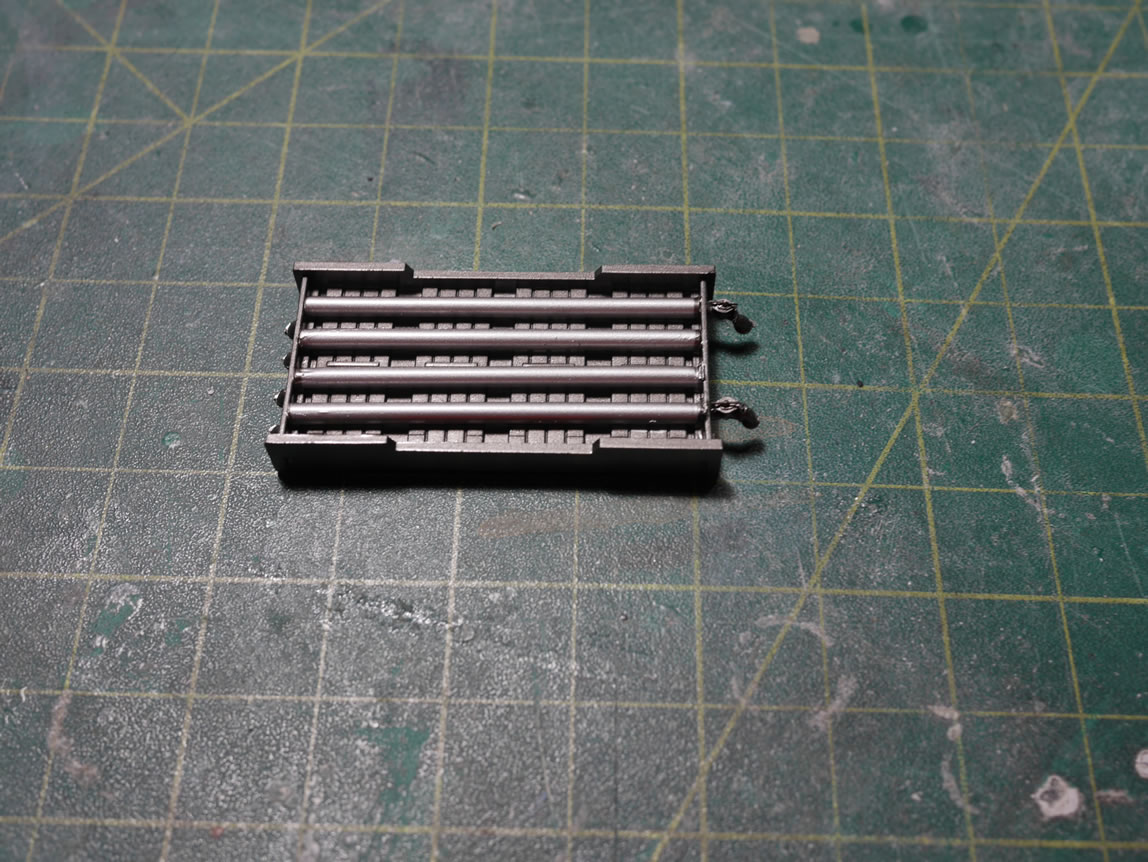
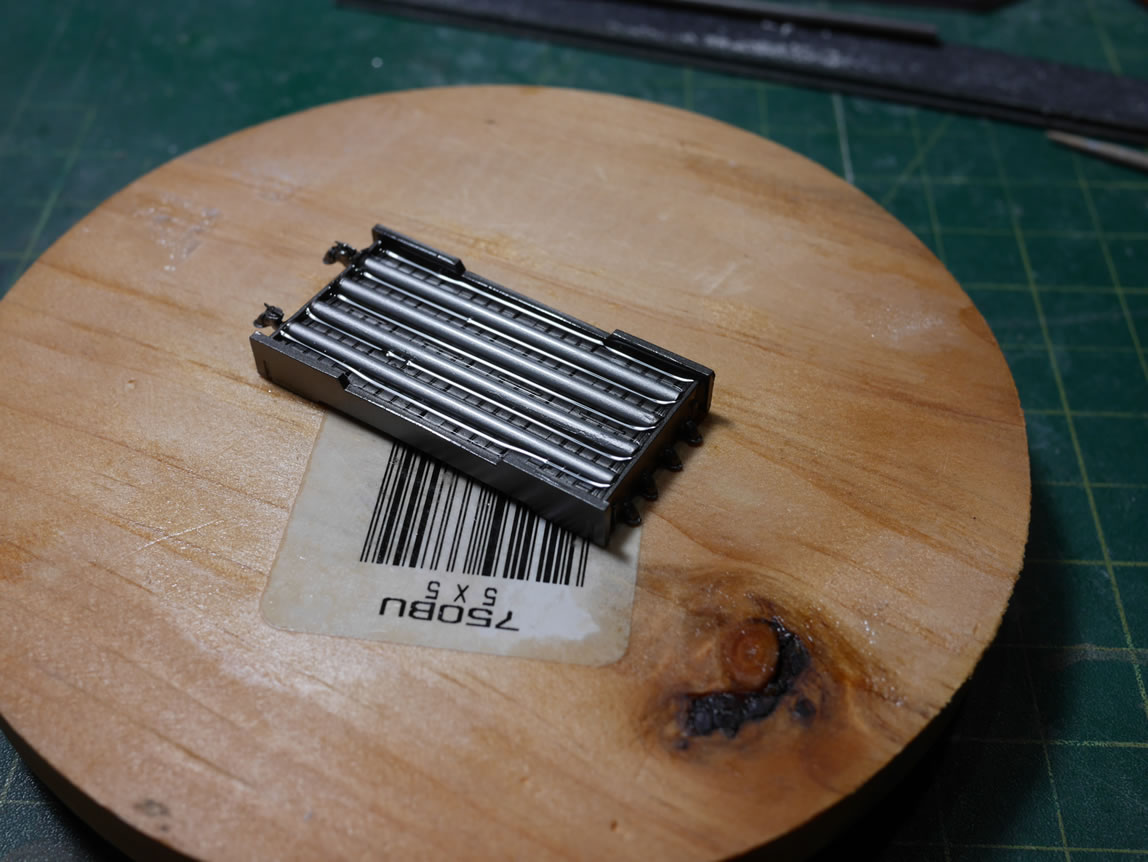
Next up is a little pipe tray that I threw together. I mixed some clear resin and poured it into the tray as kind of a cooling pool type thing. That’s once piece of the pipe structure that’s complete; now I gotta worry about the rest of it.
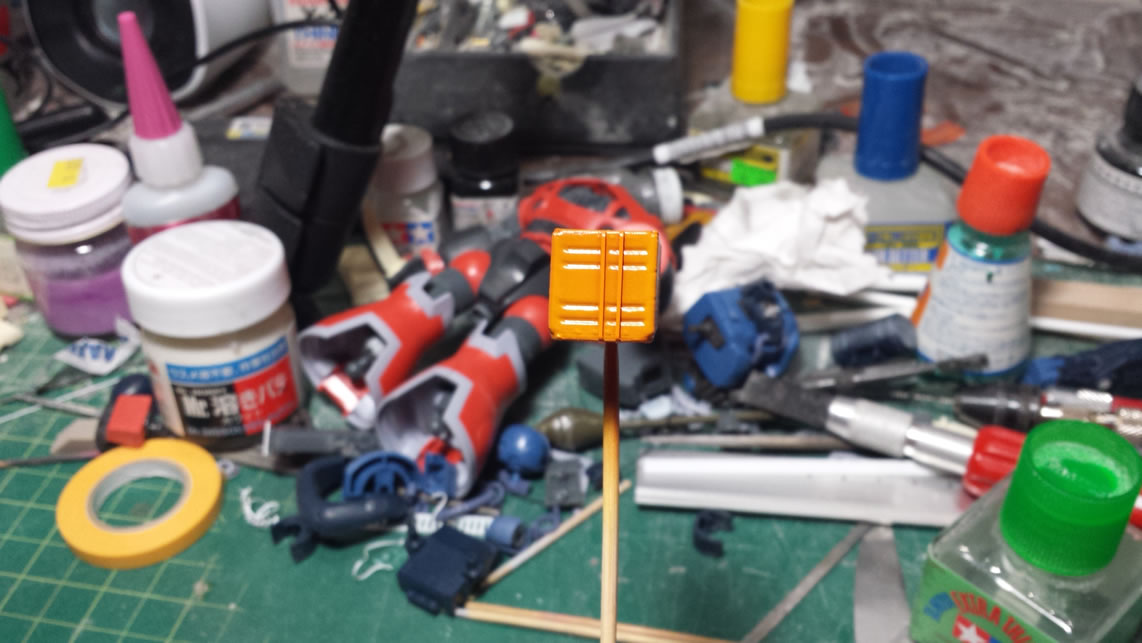
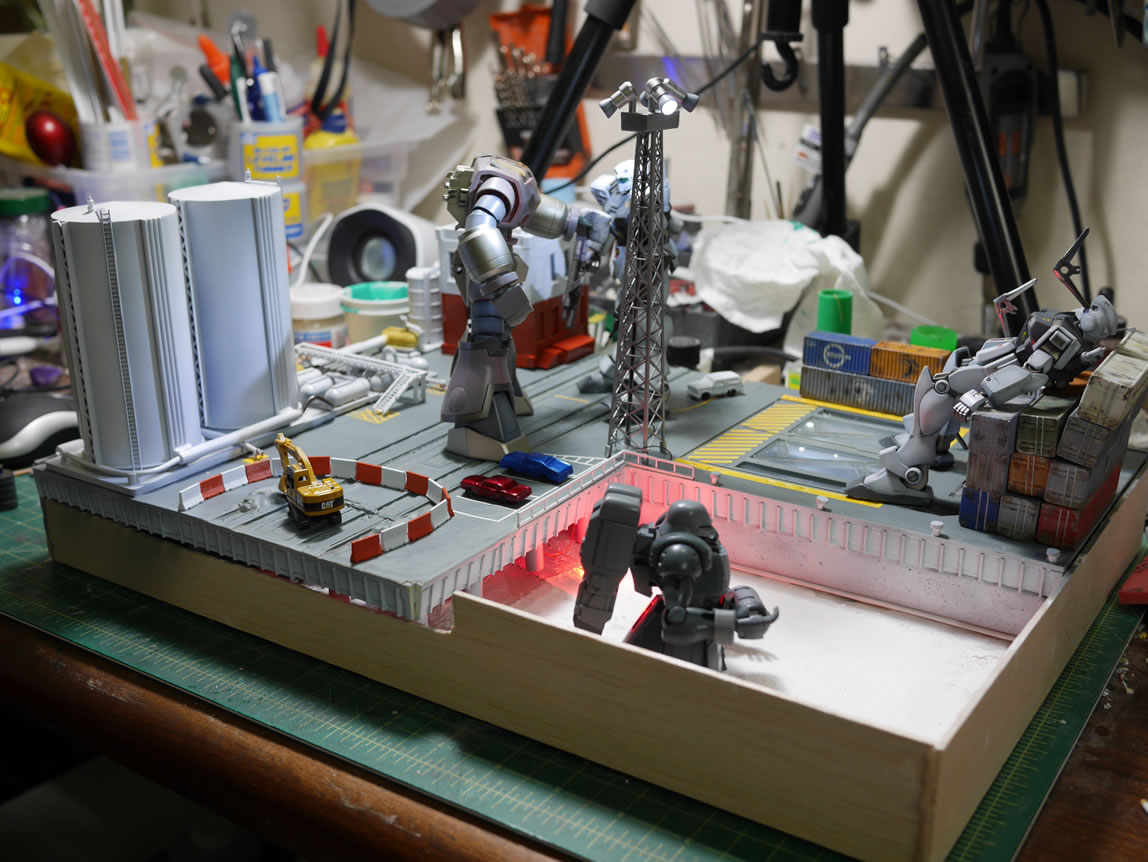
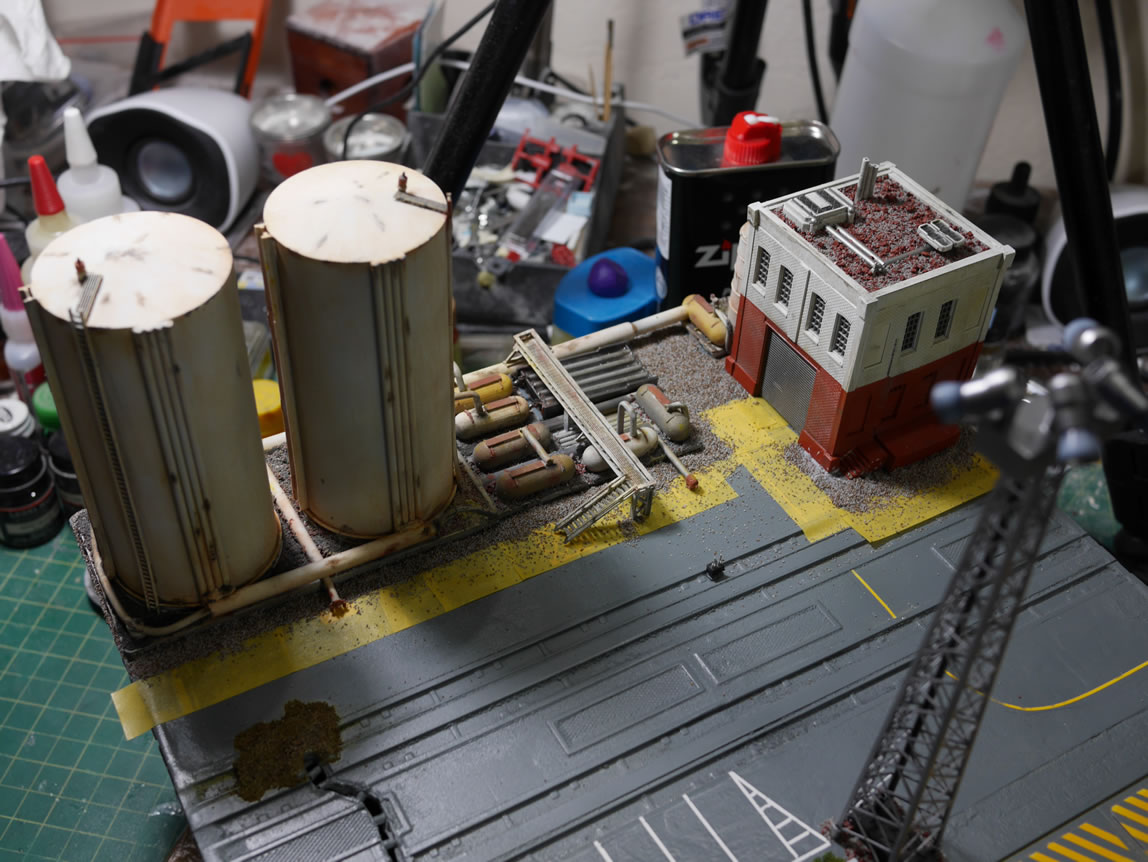
With the building painted and parts of the silos and pipe structure painted; I threw completed parts of the base together for a quick progress picture. These are the pictures that really show the project’s progression. I have the little barriers 3D printed and painted. And we see the results of the masking job from earlier in the post.
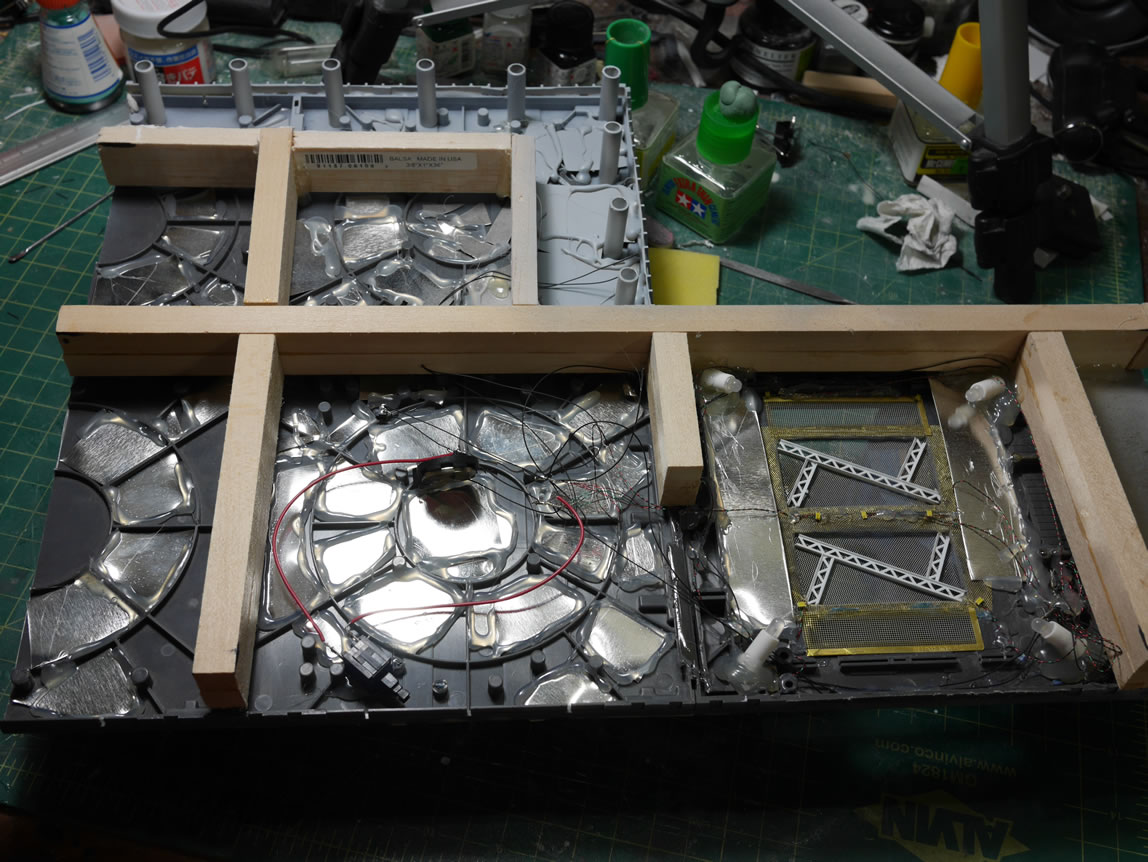
Having focused quite a bit on the top side of the base, it was time to give some attention to the ugly bottom side. The wiring is a mess. Prior to this update, the wiring was all done in parallel. Meaning, all the negative ends for every LED is tied together and all the positive ends for every LED is tied together, then with a push button switch and a 3 volt button battery source completing the system. This won’t work. I have a mix of LEDs, different sizes, different colors, different types. The size and types don’t really matter too much. It’s the color difference. Different colored LEDs require a different amount of power to light it. Since I’m using two red LEDs, a set of 4 white LEDs in the tower, and a whole set of white LEDs for the underbase lighting; having these run parallel won’t work.
Since it has been a while since I posted a new video; I made a video of this whole process; condensed into a 20 minute long video. The video explains the difference between parallel and serial wiring schemes. And for this project, I’m actually using both schemes; just in a different hierarchy.
The following pictures were taken while I made the video. The wiring scheme was clipped apart and re-arranged. The push button switch was swapped out for a reed switch; and the power source was swapped to a bigger 9 volt source. I have two sets of white LEDs that are wired in parallel with one another. The two red LEDs are wired in parallel. So effectively, I have 3 sets of lights: the under base white LED set, the tower light set, and the red light set. For these three, I wired them in series, so that I can successfully power all three light systems off one battery and switch assembly.
Putting the reed switch strategically under one of the GMs that just so happens to have some magnets in its feet; I can power on the whole system by just placing the GM on the base.

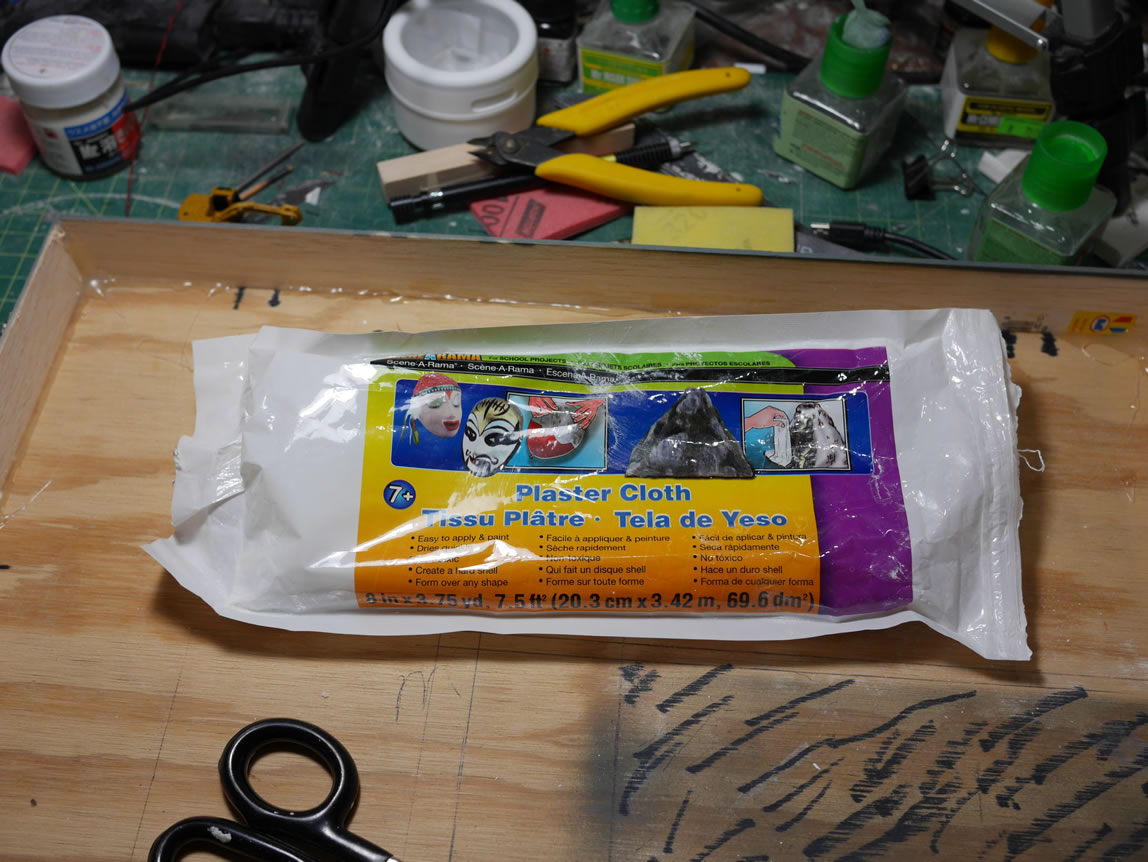
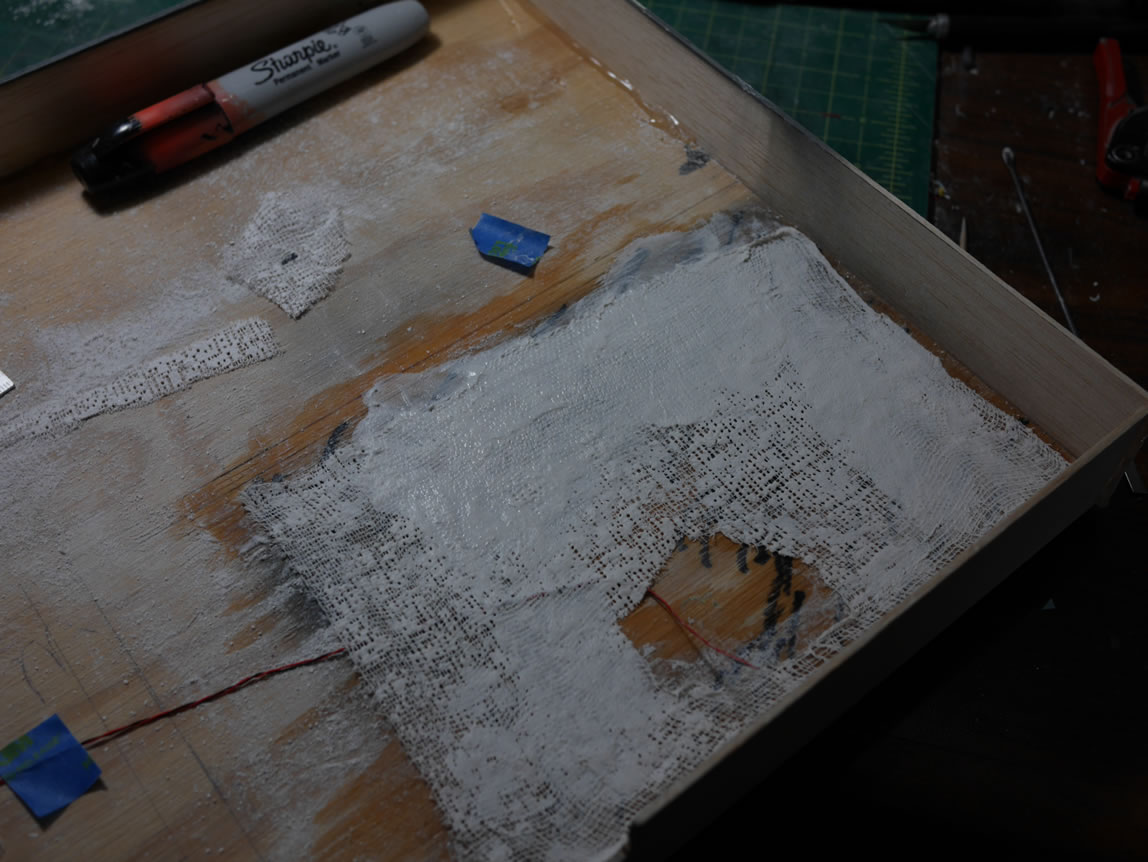
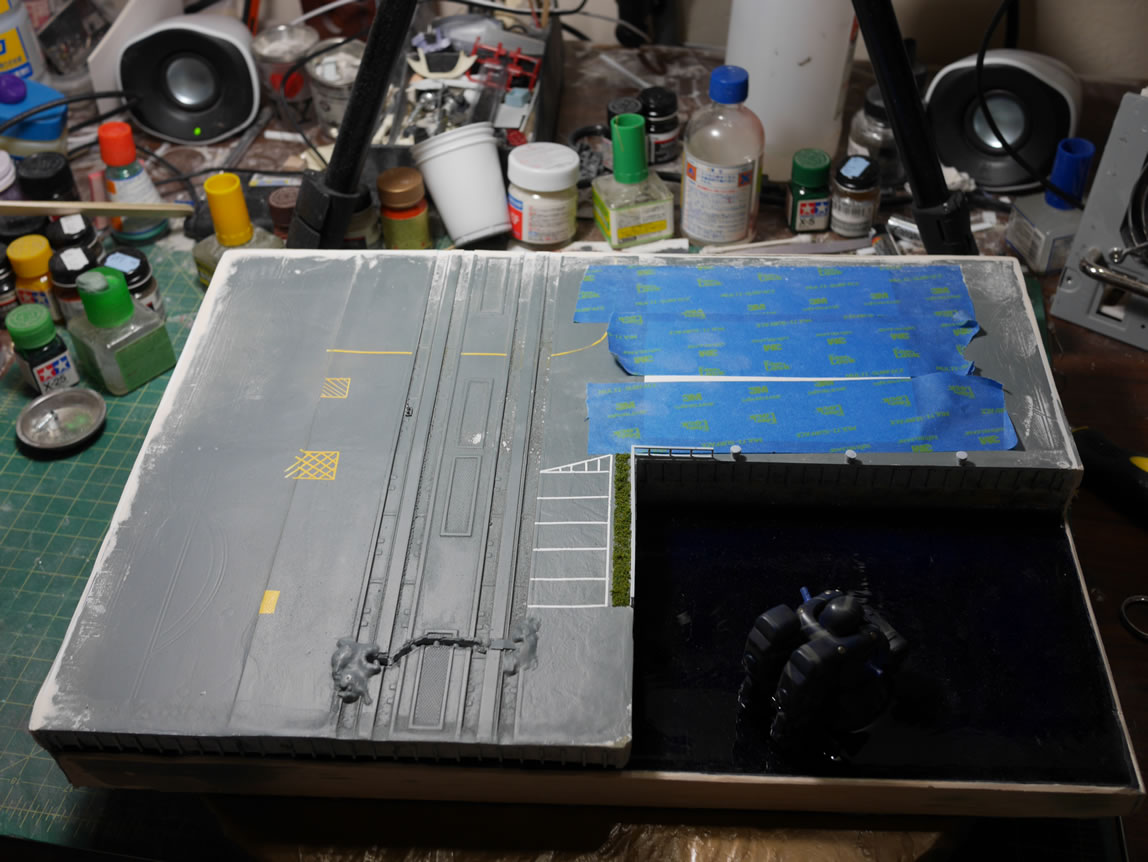
I did a partial update post early Sunday morning for the work accomplished over the previous week through that Friday. I have day on Saturday and accomplished a ton of work on the project. So here’s that bit of an update. Returning to the base itself, I started laying down the groundwork for the “water” part of the water front. I needed to lay some wires down, so I taped some wires down and laid plaster cloth over the area. I typically use plaster cloth as a start point for terrain, wrapping it around cut styrofoam as the basic shape. Here’s I’m just using it as a surface prep as well as to hold down the wires. I will be adding some paper clay on top of this so the plaster cloth acts as a intermediate.
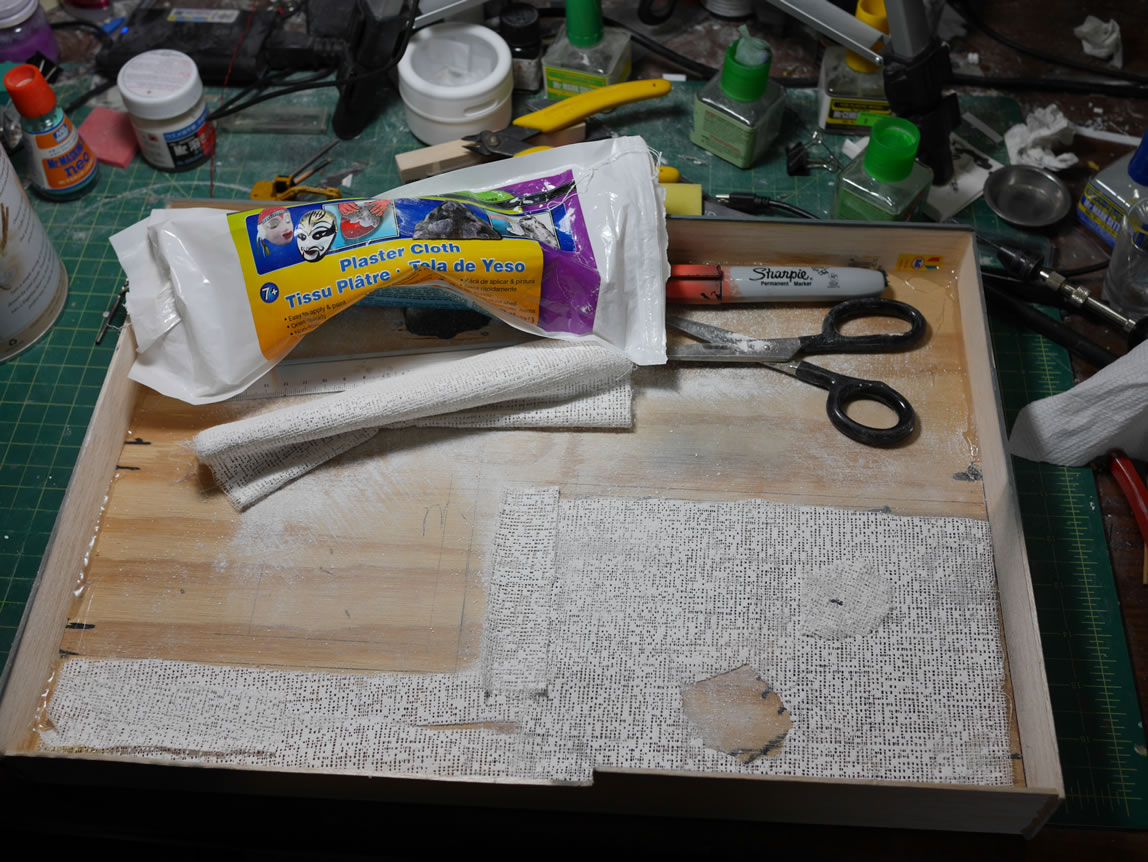
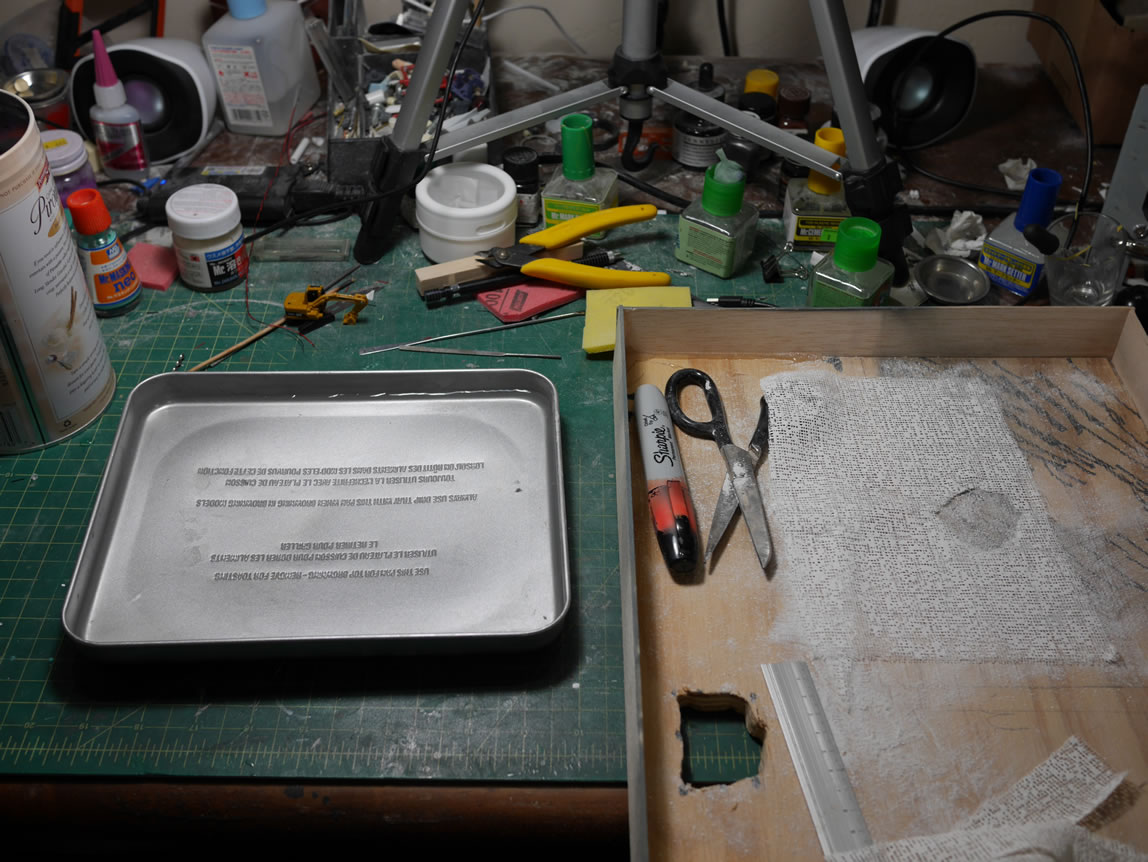
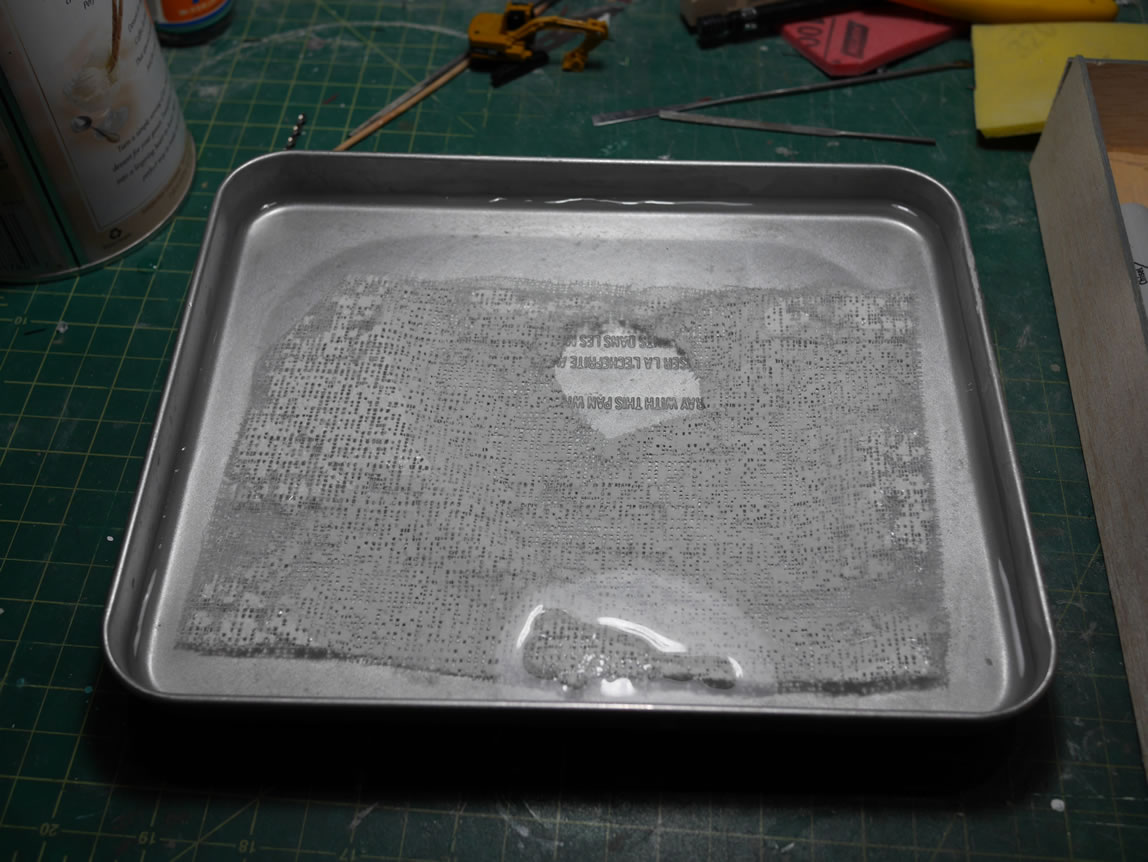
The plaster cloth is measured out, cut, and dipped into water to “activate” it. One wet, the stuff is just laid out and using wet fingers, the plaster is spread along the water area.
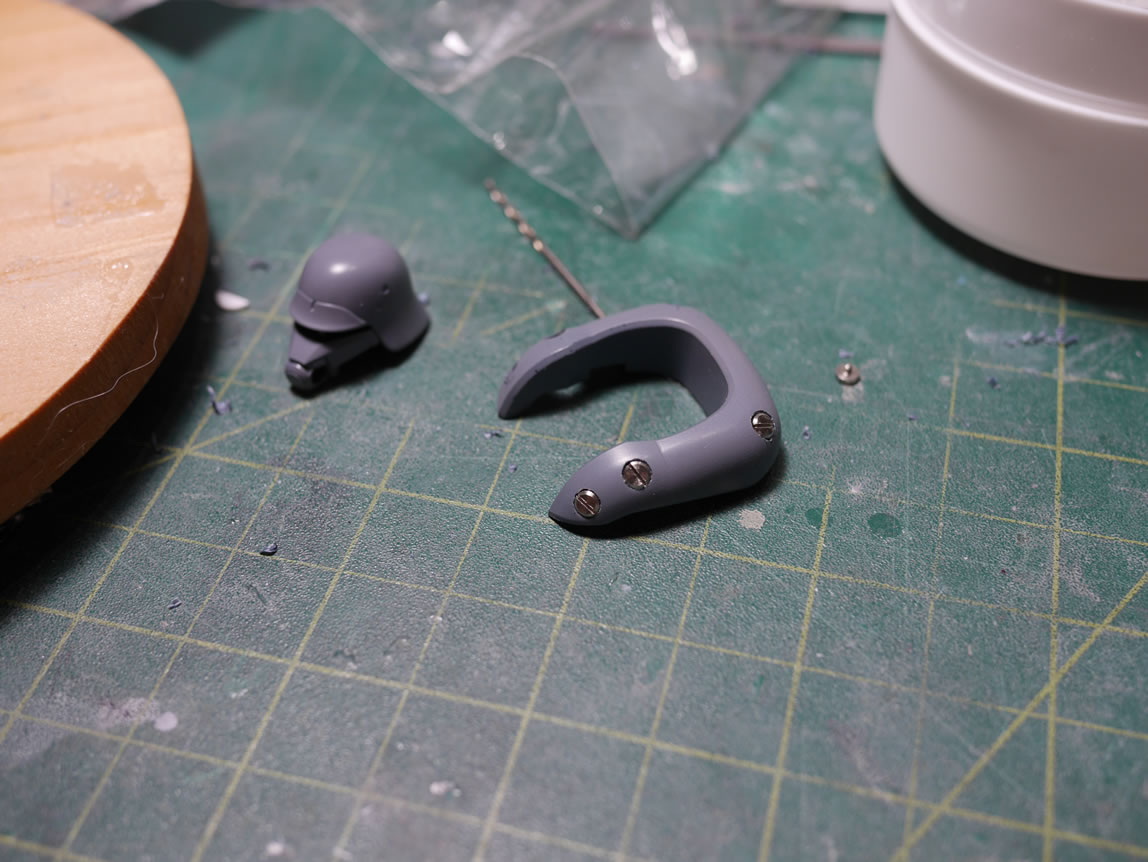
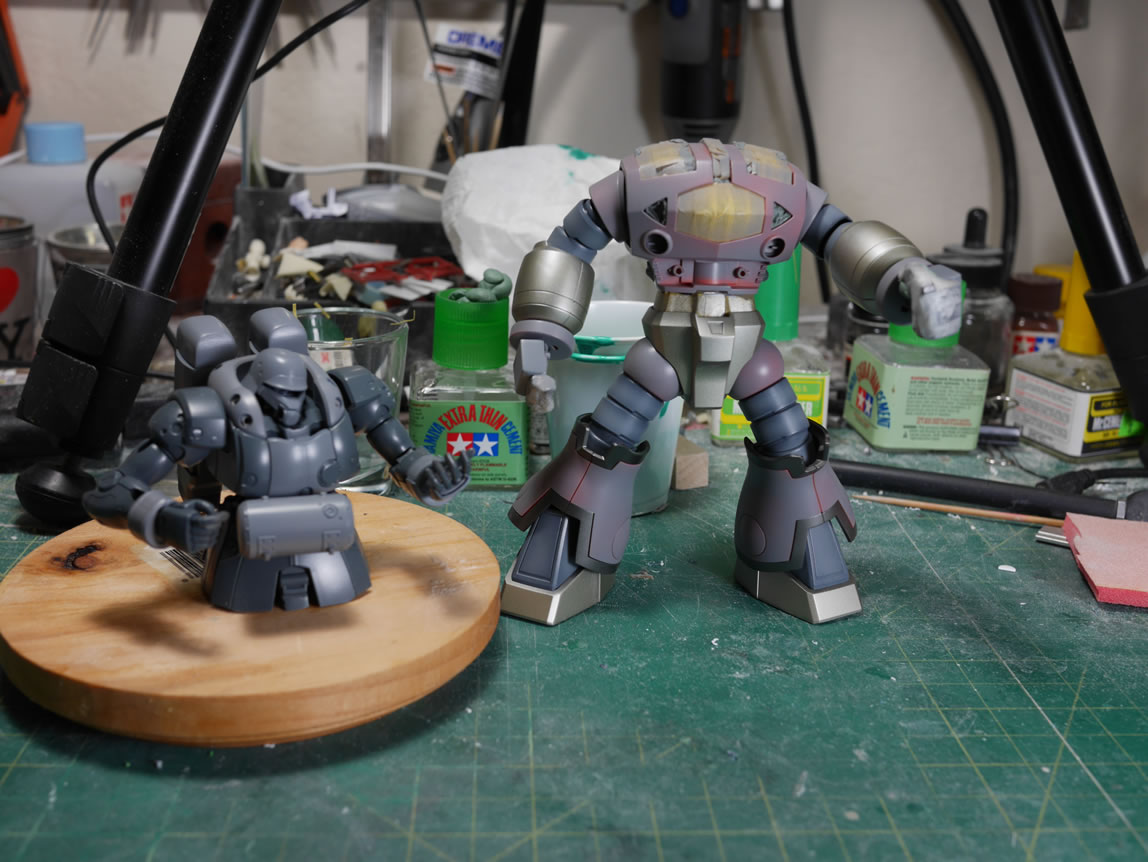
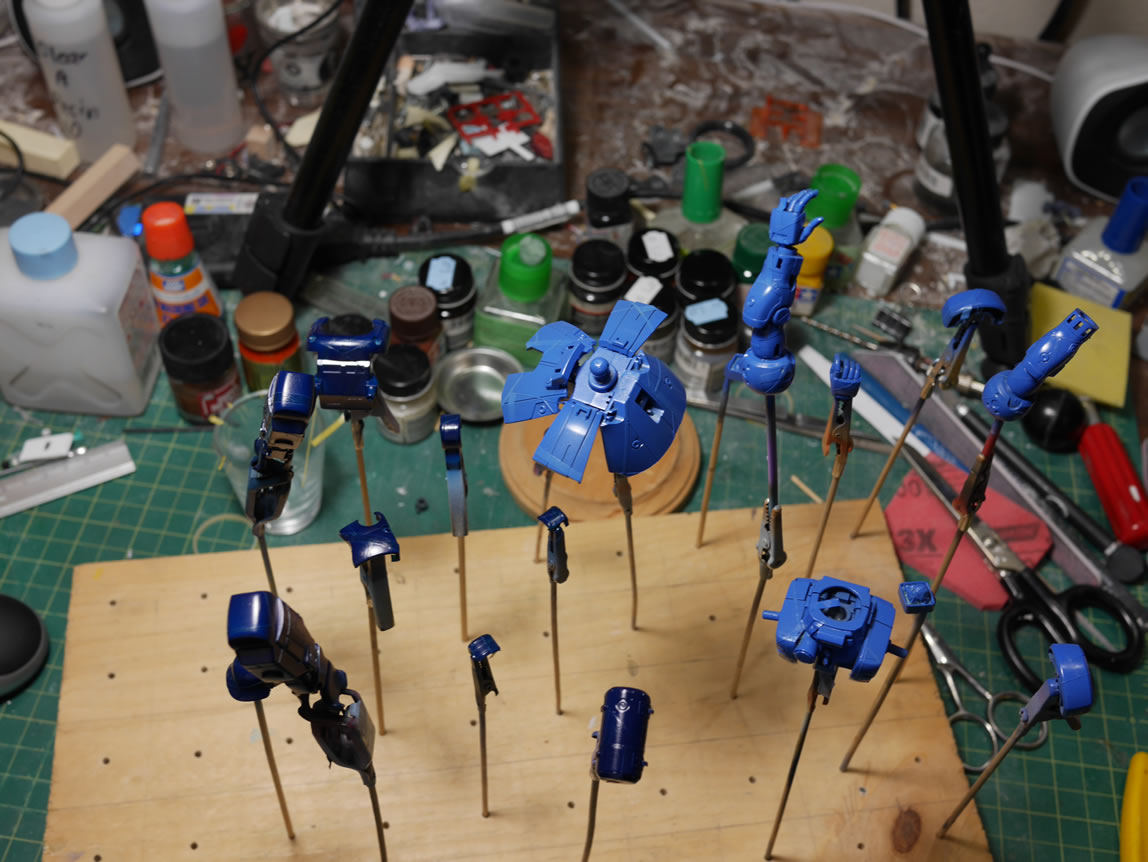
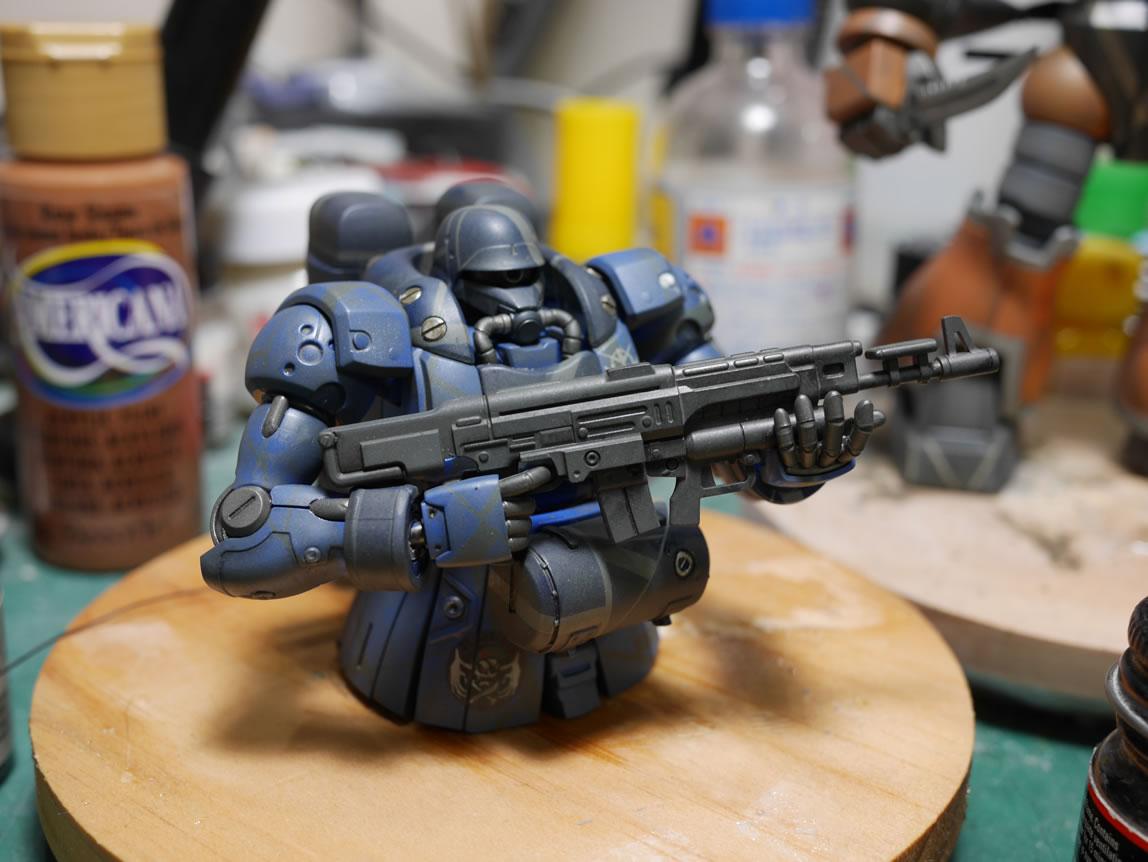
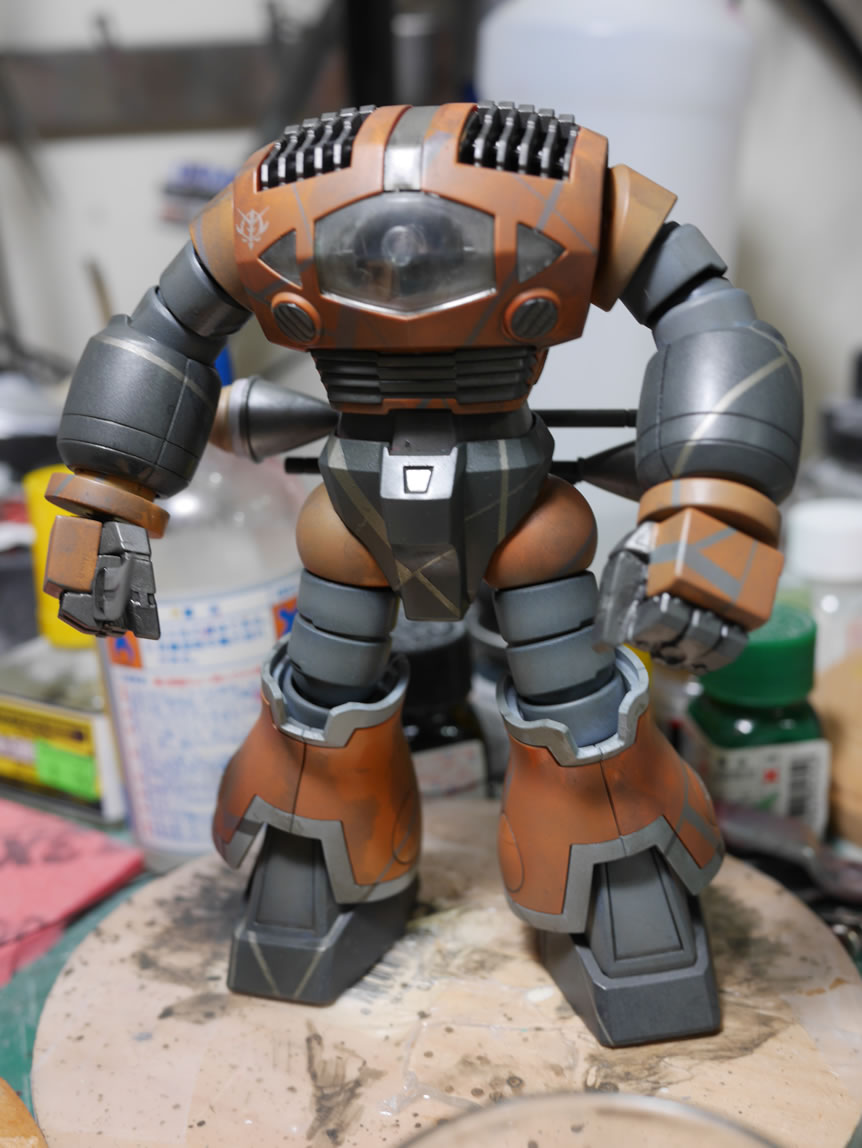
The base is left to dry. While this dries, I can focus on the two other “actors” on this stage, the Zeeks. I’ve base coated this, and will be doing some masking; but for now, I have some basic colors laid down. The Zee Z is up first.

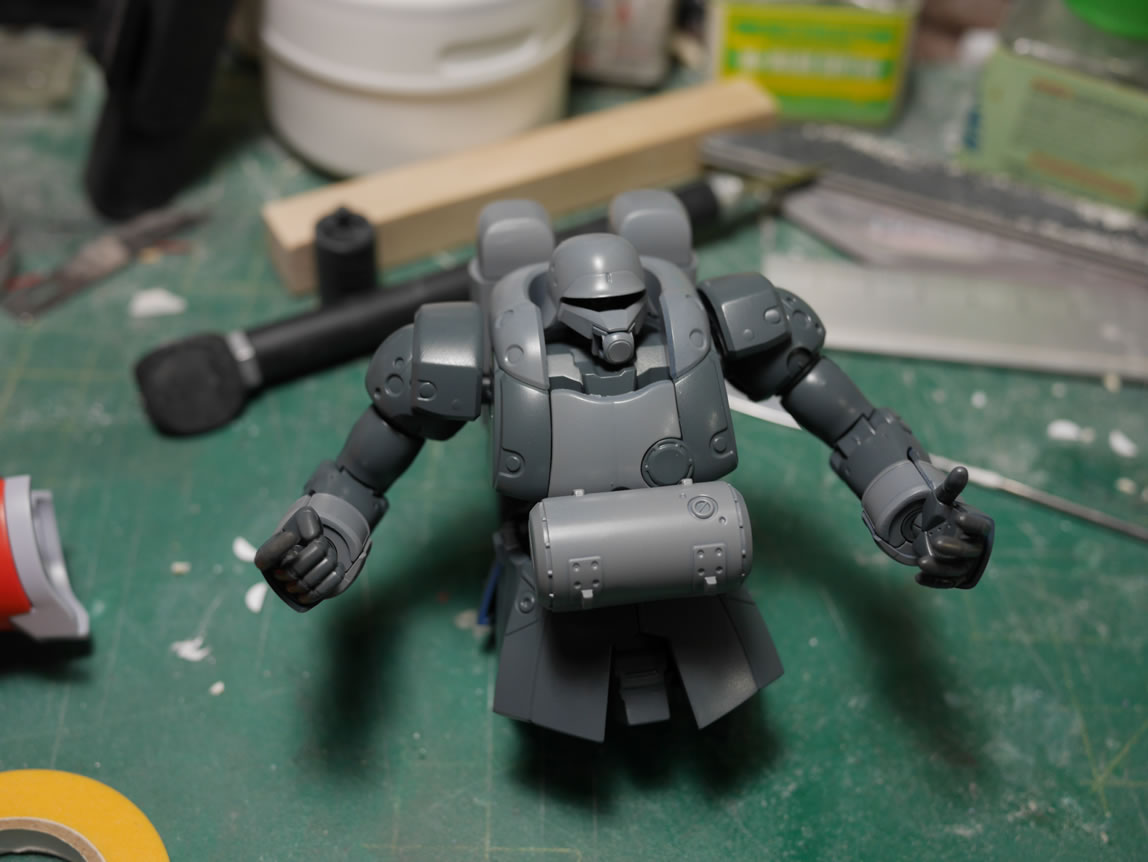

And while I sat there taking pictures, the idea to drill holes in its life jacket crept into my head. And a drilling I went. So I can add metal details.
Some frame bits on the Zogok were painted then the two halves of the main body are glued together. I couldn’t tell if there is a natural seam, but it didn’t look like one, so the two halves were glued together. Once the glue set, I masked off the painted internal areas and sanded the seams away. Some detail parts for the Zee Z and Zo were painted and now sit in a box after curing so they don’t take up skewer and wood board space.
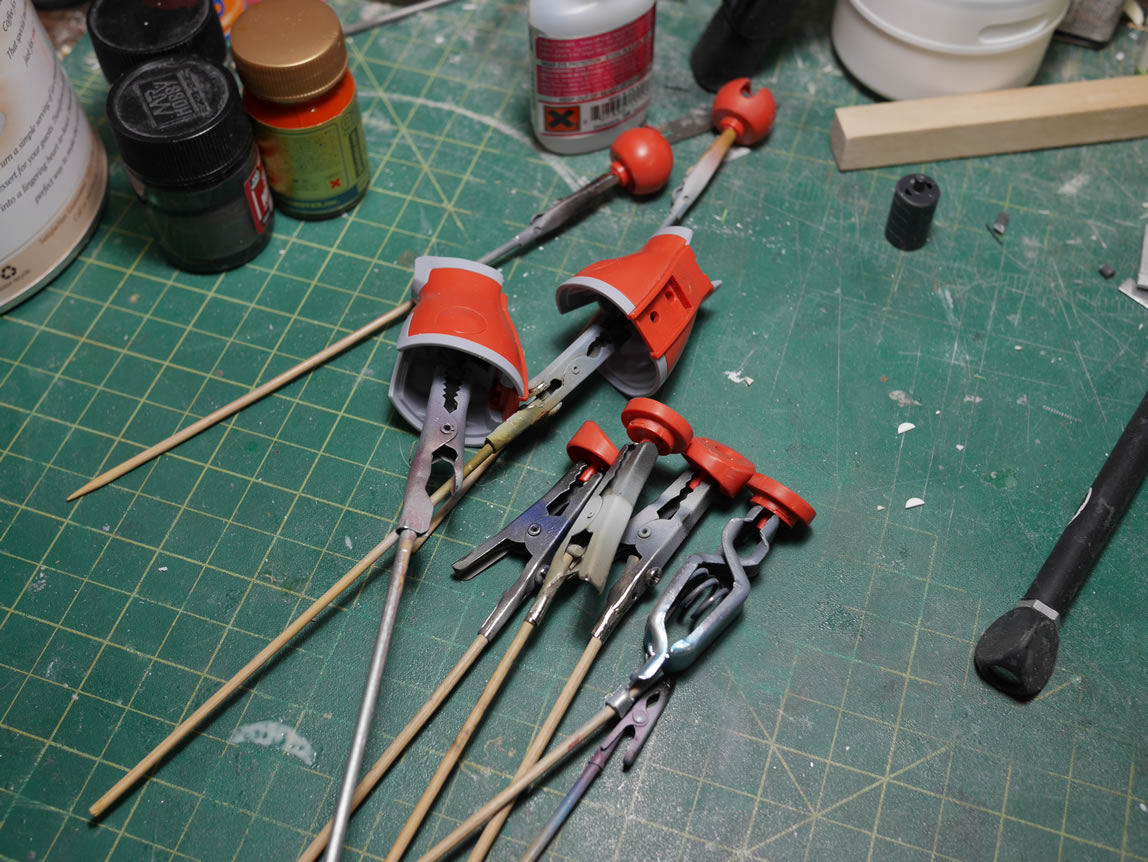
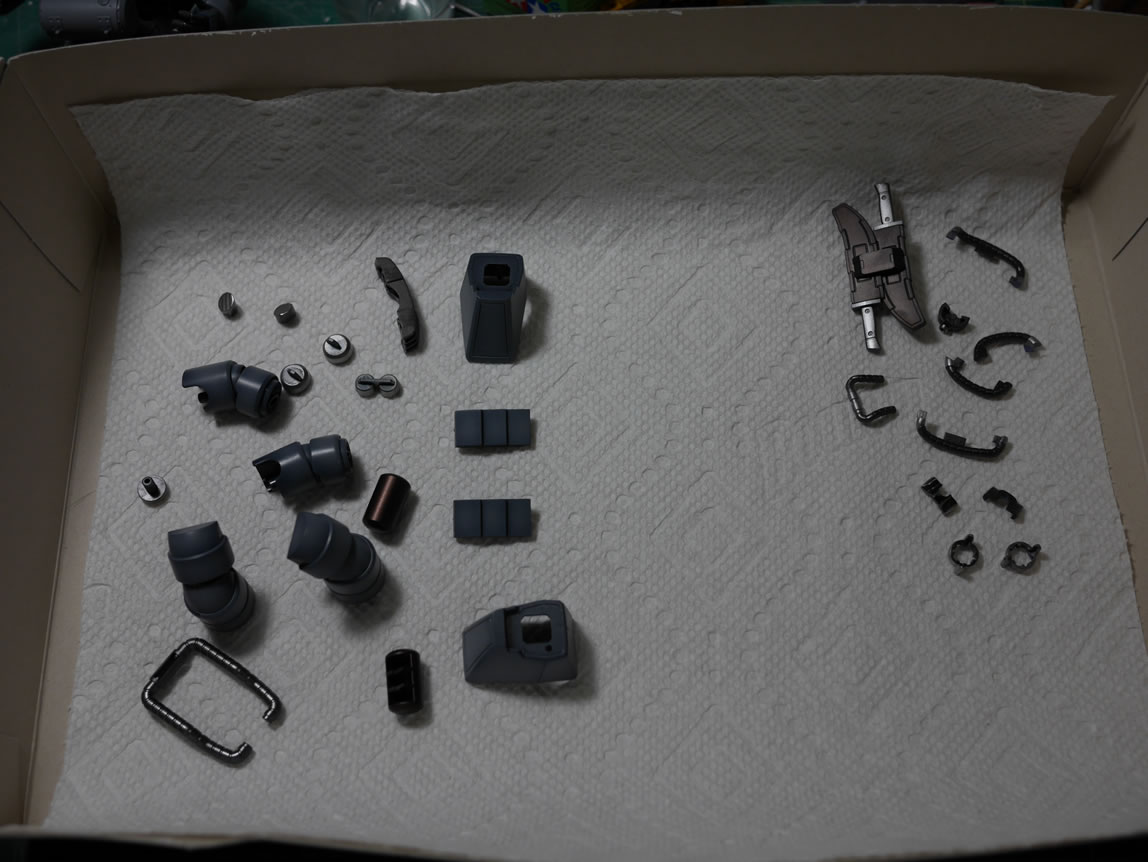
And here’s what the two little buggers look like now. For the upcoming TGG & Friend live broadcast; I will spend the time working on masking off these two.
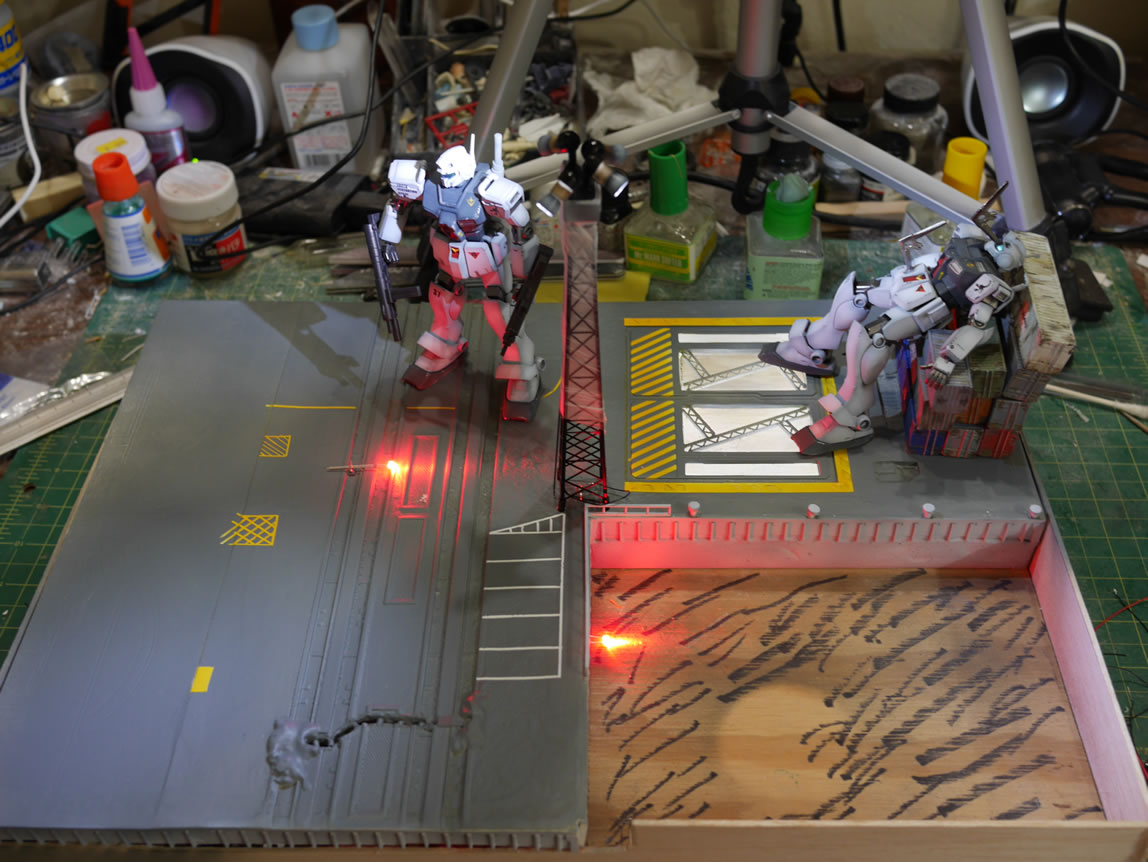
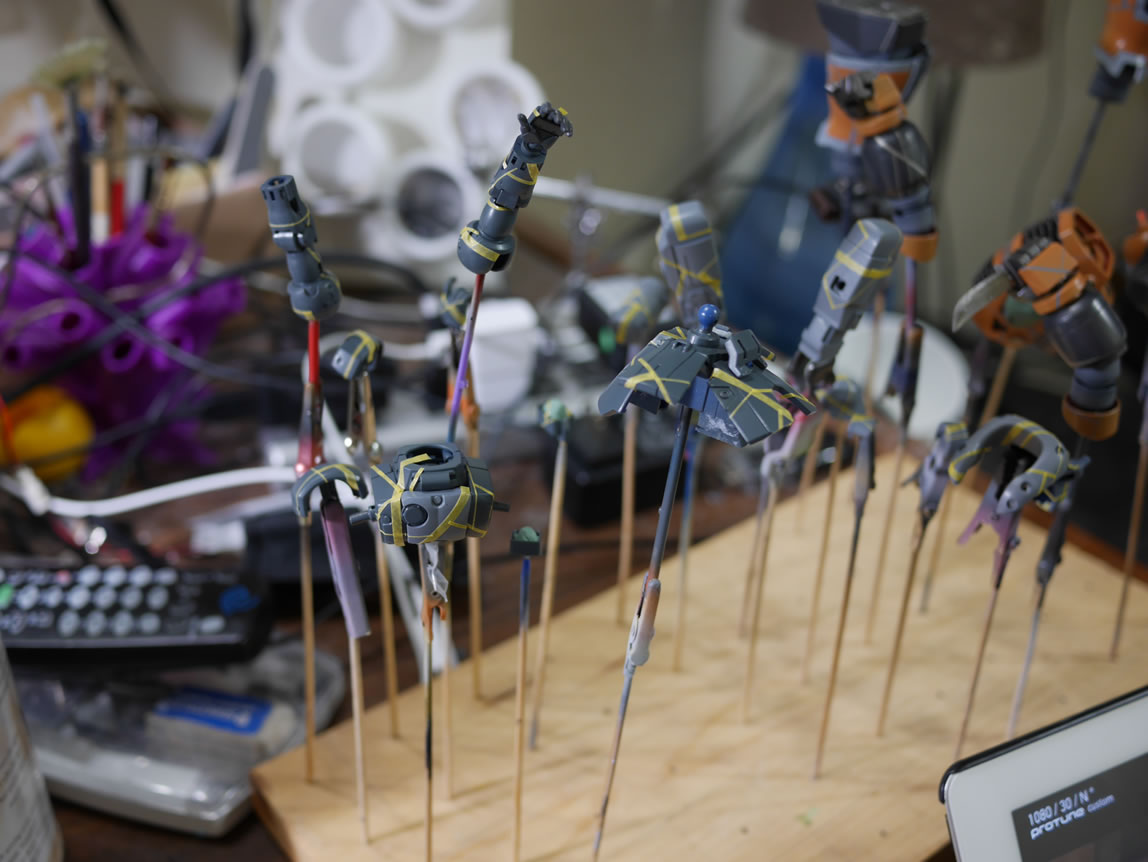
At various points in the progression, it’s good to put all the players together and get a quick snapshot of how things look. Things change and so adjustments to the original plans need to be made. This should be a decent advancement from the last broadcast two weeks ago when I was also working on this project.
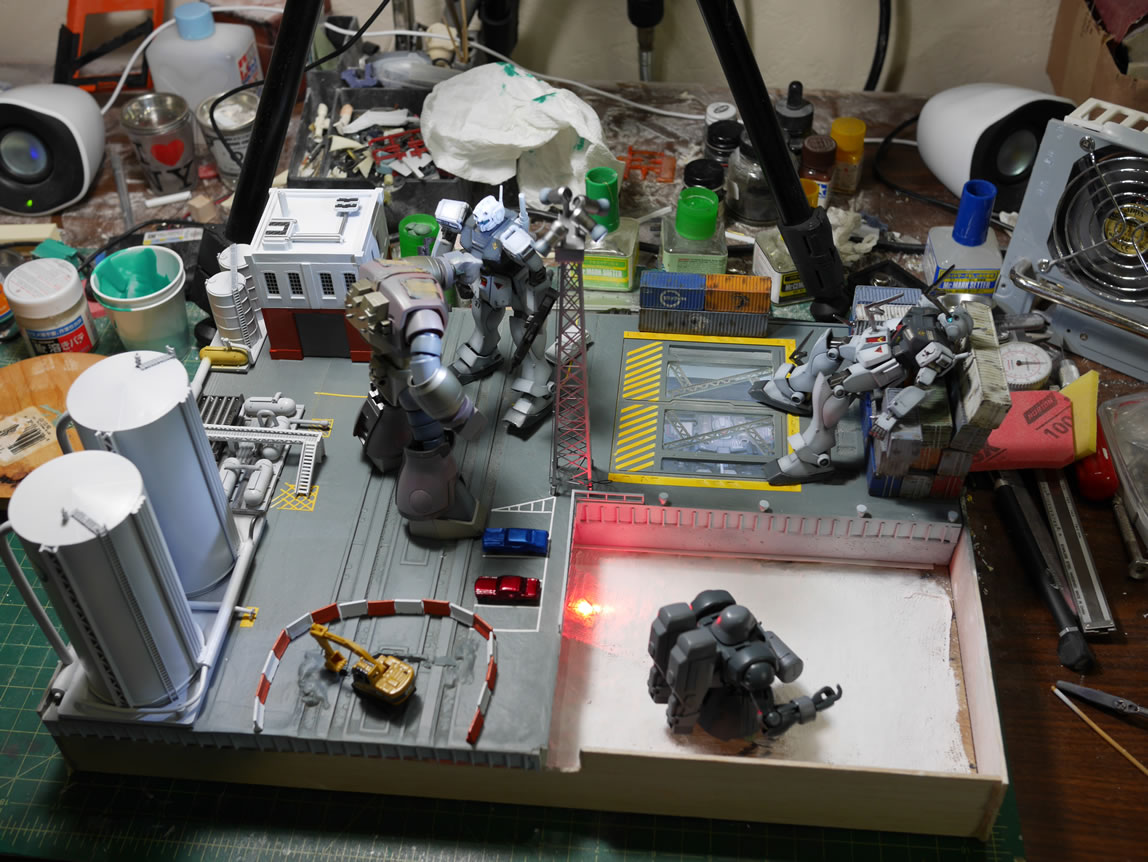

Here’s a visual montage of the project from the planning stages and the various changes as the project progressed up through tonight as I finish writing this post.
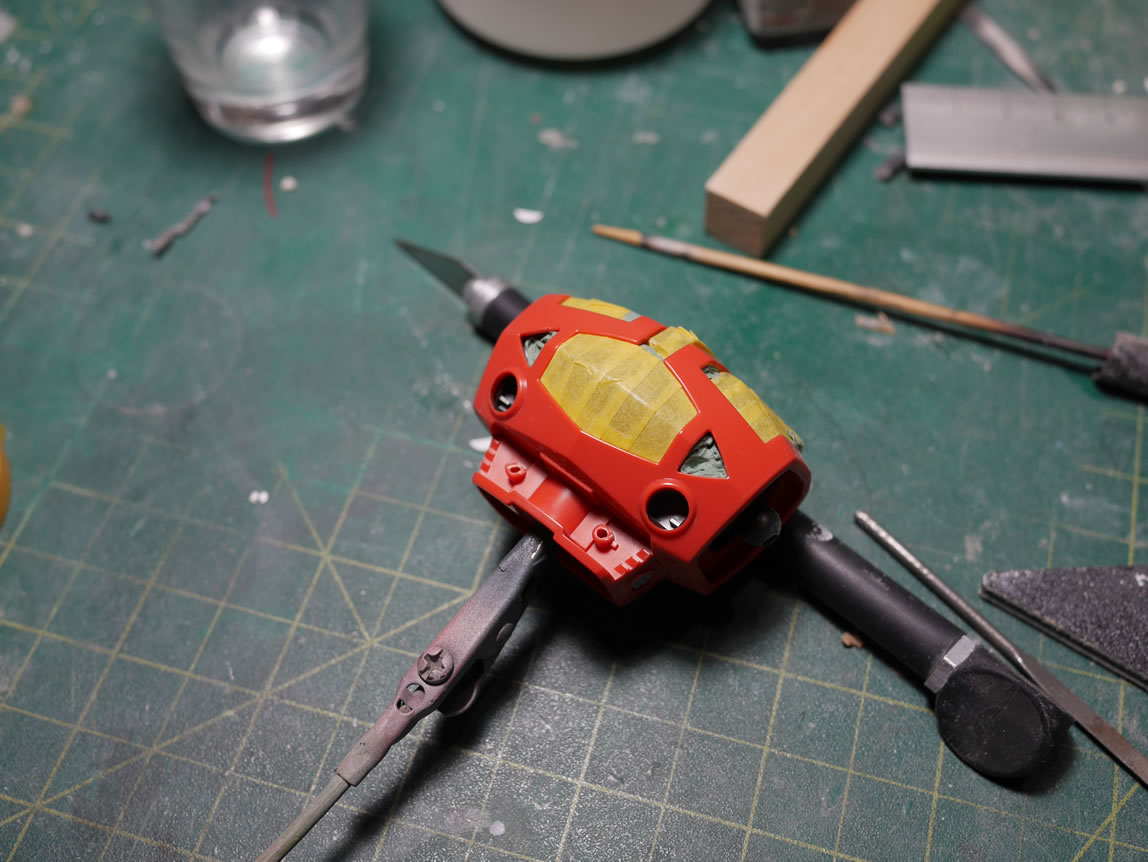
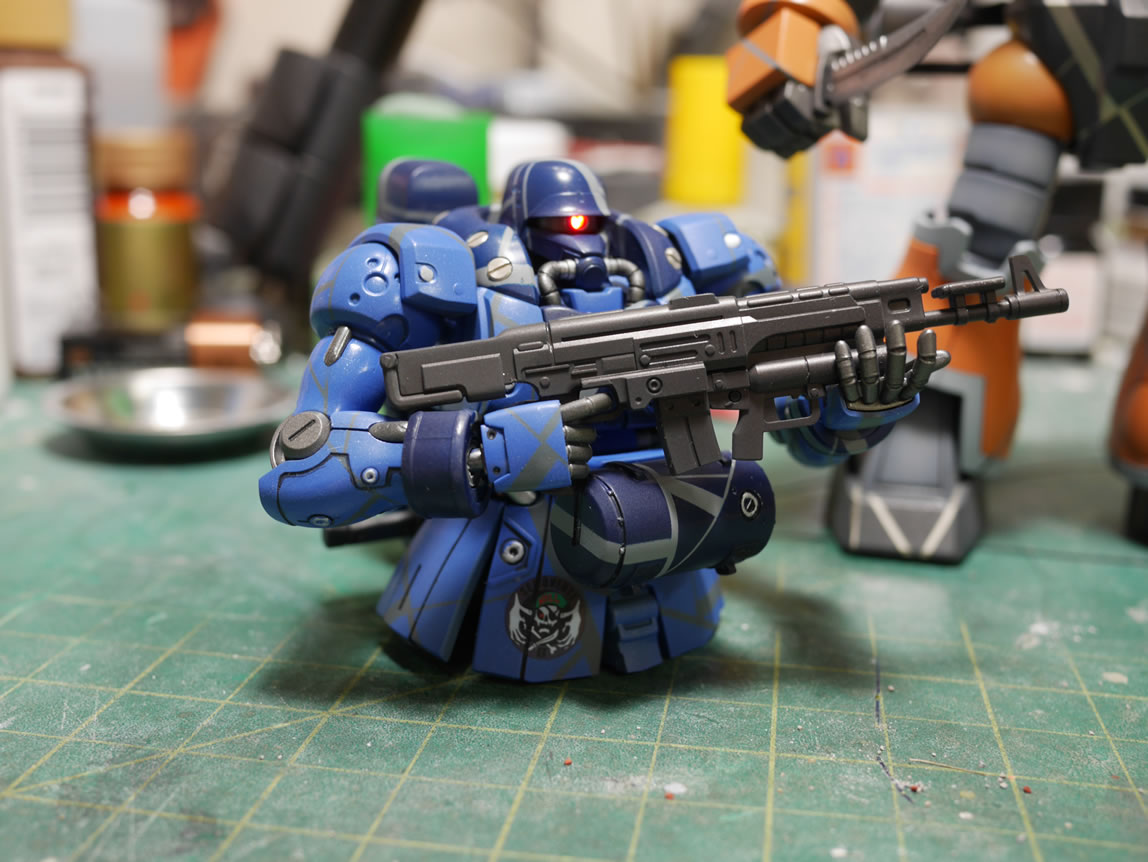
Another productive week/weekend for the diorama project. Last I left off, I had just finished base coating the Zeonic suits. A few days were spent masking off the two kits and getting the main colors painted. I have a bunch of different thickness masking tape reels from a company called Aziu. This makes for an easier job for masking off a simple design. Running off a fractal style scheme, this works to add some style to the basic color scheme, since I was trying to get close to the stock colors for each respective kit. Hours of masking and only minutes of painting. Then waiting for the paint to dry a little before removing the masking tape.

There is a little debate on when to remove the masking tape. If there are layers upon layers, then the unmasking happens when all the painting is done. Some believe that while the paint is not completely bonded, it will be better to remove the masking tape as it reduces paint chipping. Others think that this shouldn’t matter and the paint is a thin enough layer that there’s not affect. I’ve done both, I’ve gotten chipping on both. So there you have it. What ever the hell works for you, stick with it. I believe I waited a day, not because I wanted the paint to dry, but once I got done masking, it was pretty late so I only have time to spray on the paint then call it for that night’s progress.
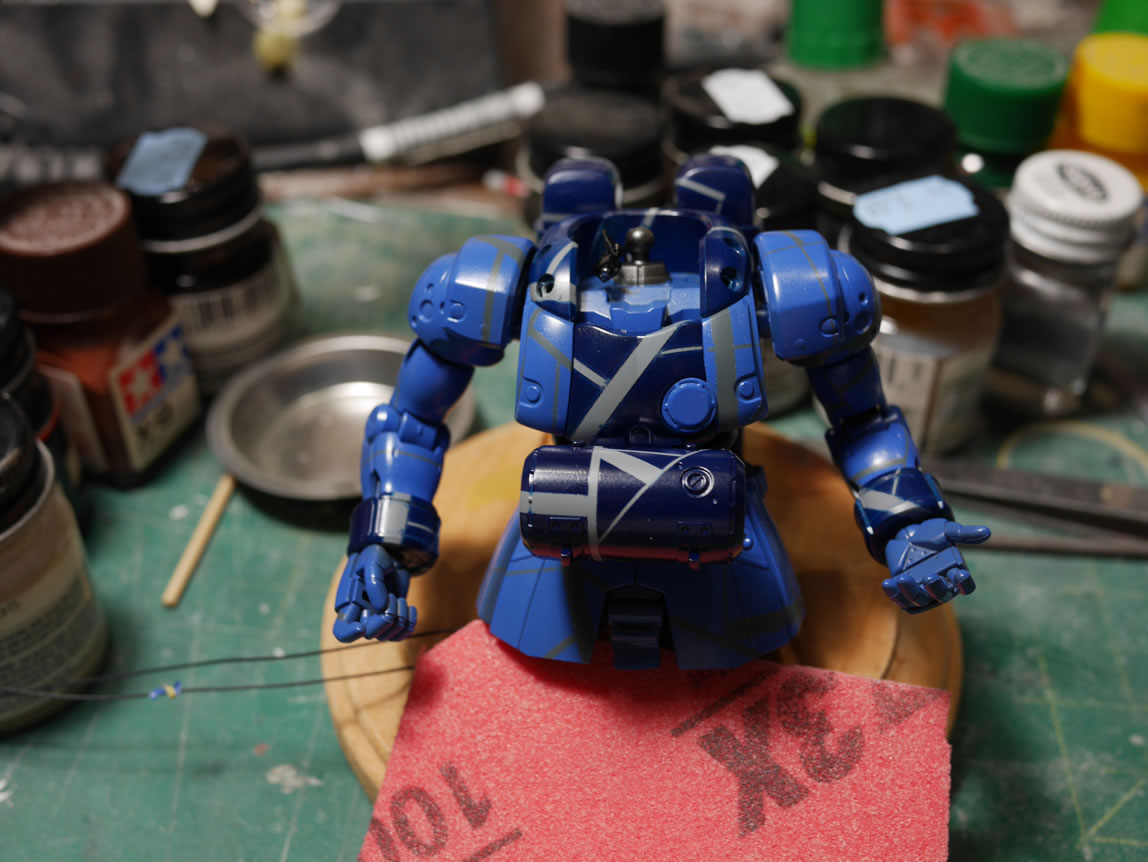
The masking tape is removed and we can see the Zulu and Zogok have a pattern emblazoned. This is complete personal preference, and I just think it looks cool. I’ve done this on a few project in the past… the lesson here is working with a familiar skill.
This was all done earlier this week. Some of the masking for the Zogok can be seen during our bi-weekly TGG & Friend live building broadcast:
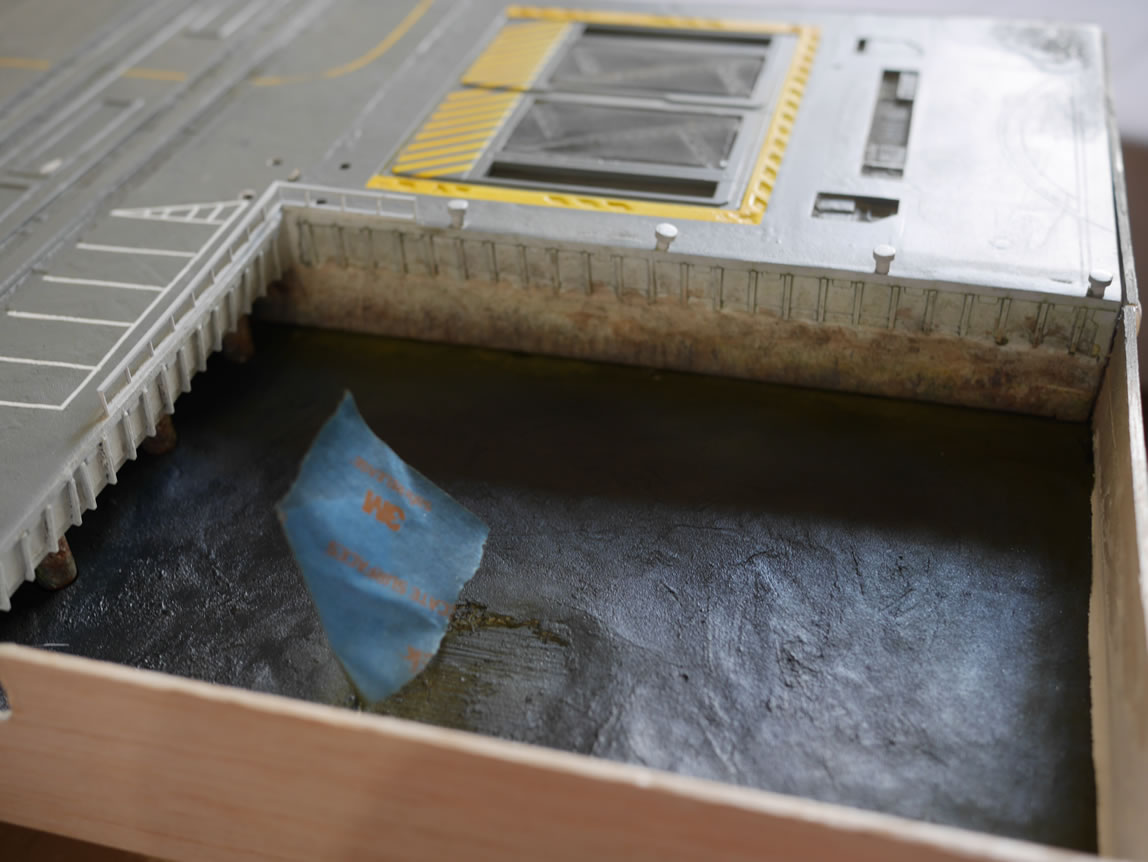
I returned to the diorama project today getting some more work on the base proper. I applied paper clay to the water area a few days prior, so now that it’s dry, I threw down some paint. A base coat of dark green out of a testors spray can from God know’s how long ago. Then sprayed two different dark blues to create some variance. The a clear gloss to seal in all the colors.
The water facing sides were weathered with some fades and dry brushing; then also clear glossed to seal in the paints. I’m getting real close to permanently attaching the two pieces of the base. Once I do, there’s no turning back, so I’m taking my time with that to make sure everything I need underground is done.
The silos/pipes/tanks were painted and graveled. The building was weathered during the live broadcast on Tuesday, but I finally got around to gluing down some gravel to the roof to finish that part.
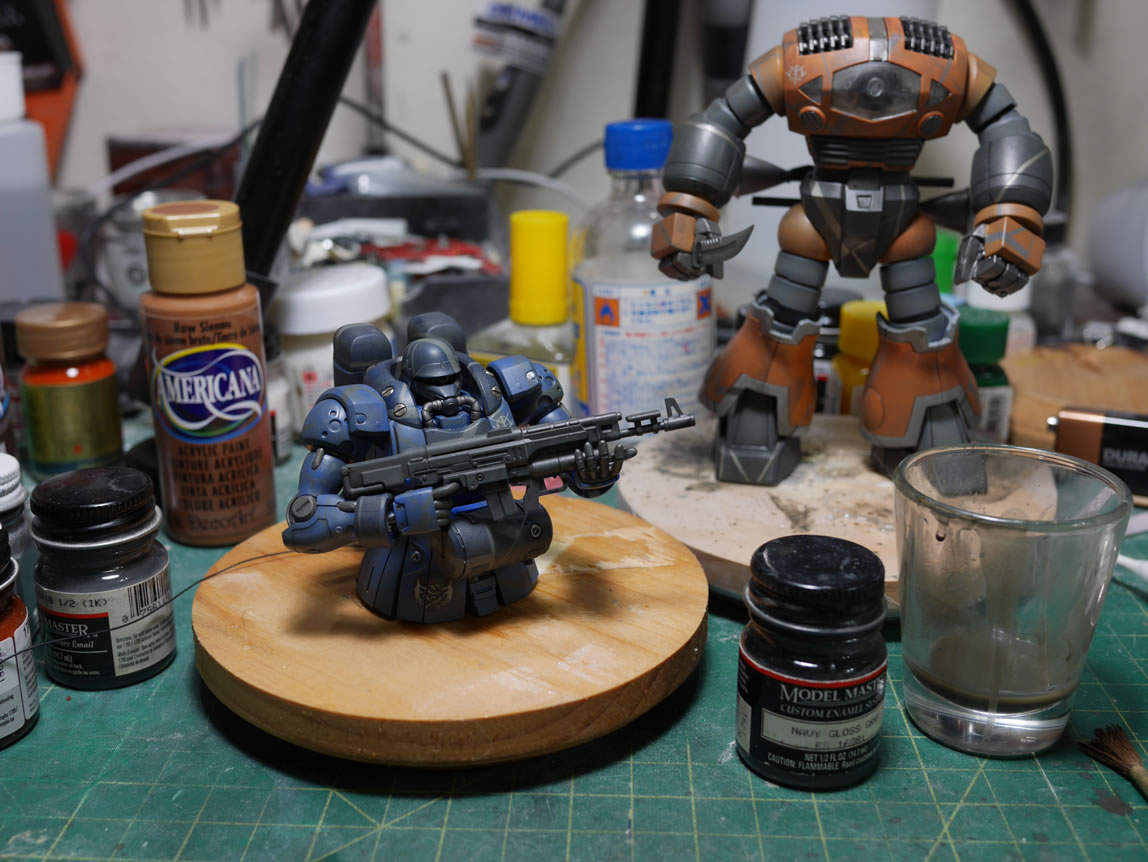
The rest of the day was spent with washes and detail painting for the Zeeks. A clear flat was sprayed and with a quick battery test for the mono-eye lighting; a quick little photo shoot works as a nice stopping point for the weekend. This week will be busy but slow with the progress as everything slows completely down at this point in the project scheduling. The deadline looms; I think I have enough time; but this is not counting the possibility of seriously screwing something up. Something that I’ve already done by losing one of the backpack thrusters for the Zogok. It was painted and finished. Then vanished. So the remaining finished piece was silicone molded and a resin copy was made, painted, and mounted. You get upset when things go awry; and model building is just a test of that stupid patience and practice of being zen and keeping one’s head. Such setbacks really test that patience.
Second re-wiring session
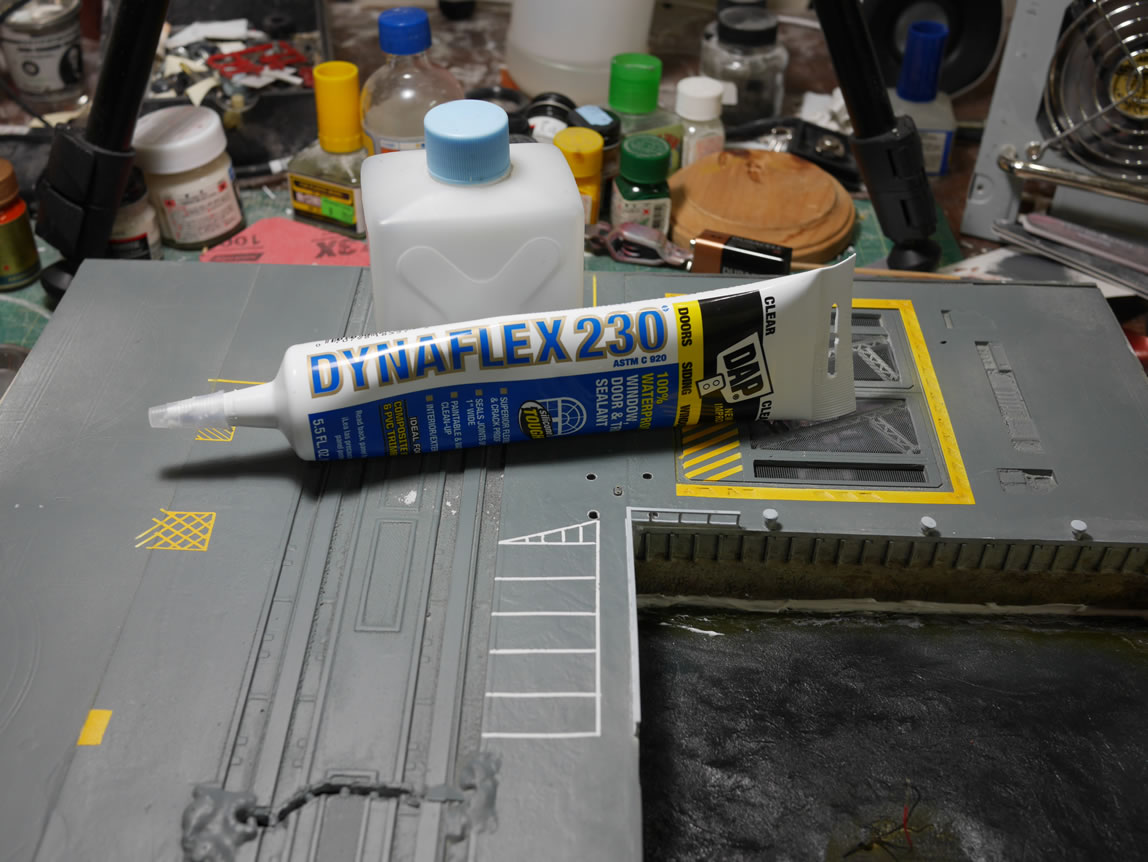
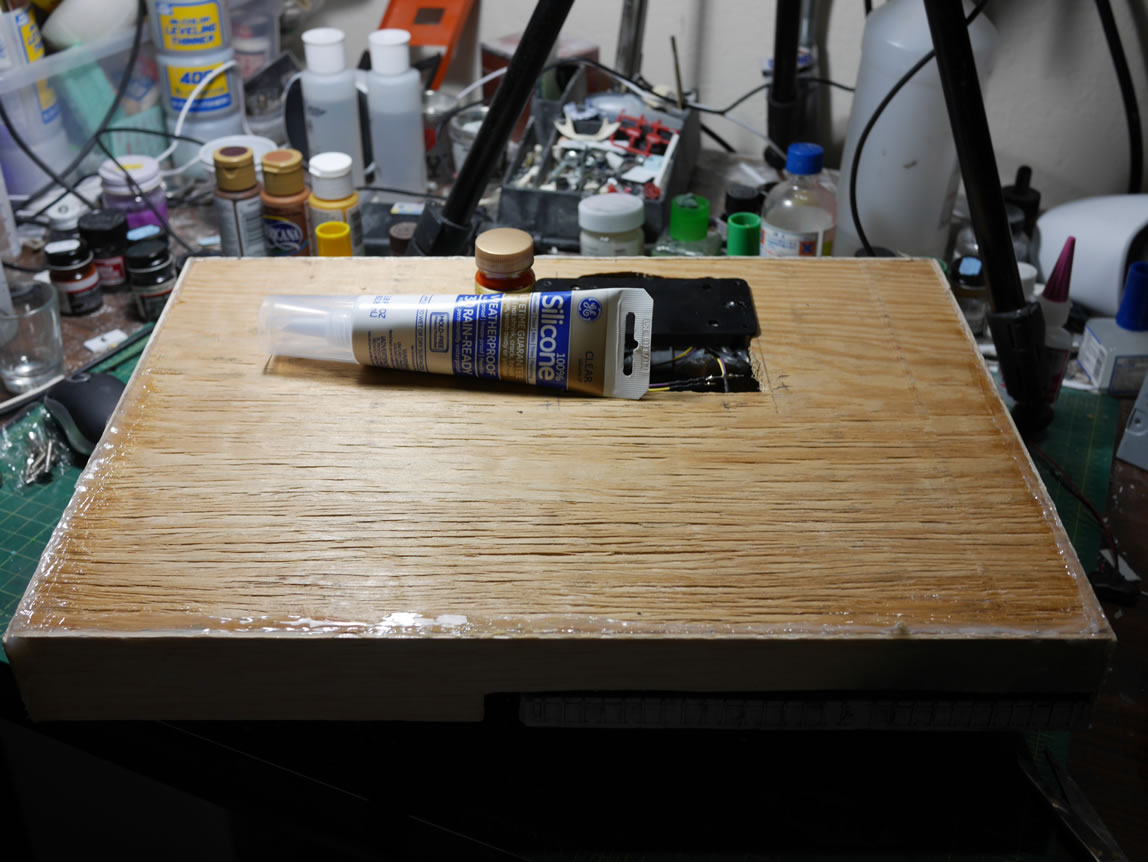
So this week started off fairly normal. The weekend’s progress was good and I started to focus on getting the base completed. The pylons and water facing areas were weathered with a sponge and Mr Surface 500 to give it some texture, then painted, then weathered. I then went and picked up some clear window sealant that dries clear, is watertight, and sand and paintable. The stuff works as an adhesive to mate the two halves of the base together. This is very important to be watertight so that when I start pouring the clear resin, it doesn’t start leaking and run all over the place. Lessons learned from the Z’Gok paper weight experiment. So hopefully I’m better prepared this time around. The sealant needs a few days to fully set up, but I only used a fairly thin bead of the stuff so it shouldn’t take that long. I’m hoping. The tube says 7-14 days. I really need to start pouring the resin soon, as that takes several days to fully cure. Time is running very short.

While the base is sitting pretty, I get back to the Zeonic frogs and apply a quick filter/wash to dirty them. I used model master enamel navy gloss gray, over thinned with tamiya enamel thinner. The tonight, I sprayed on a clear semi-gloss to finish everything off and set it ready for the base.
Earlier in the week, I was picked up a battery box for the base at the local electronics shop. Battery longevity was on my mind; because a single 9V square cell just does not have the capacity for long hours running the LEDs. But a battery box that lines up 6 AA cells does; so off I went to get a box. While wandering the evil store; I glazed over at the site of Arduino products. Namely some starter kits. I’ve seen some folks online do some pretty cool things with a microcontroller and their gunpla. The east coast modeler Squee (Chris R) has done some damn cool things with micro controllers. So I grabbed the bluetooth starter set and started learning the ins and outs. There’s a little bit of programming, but so far it’s pretty basic and my programming skills are VERY rusty; but the damn things are pretty fun, and seriously powerful.
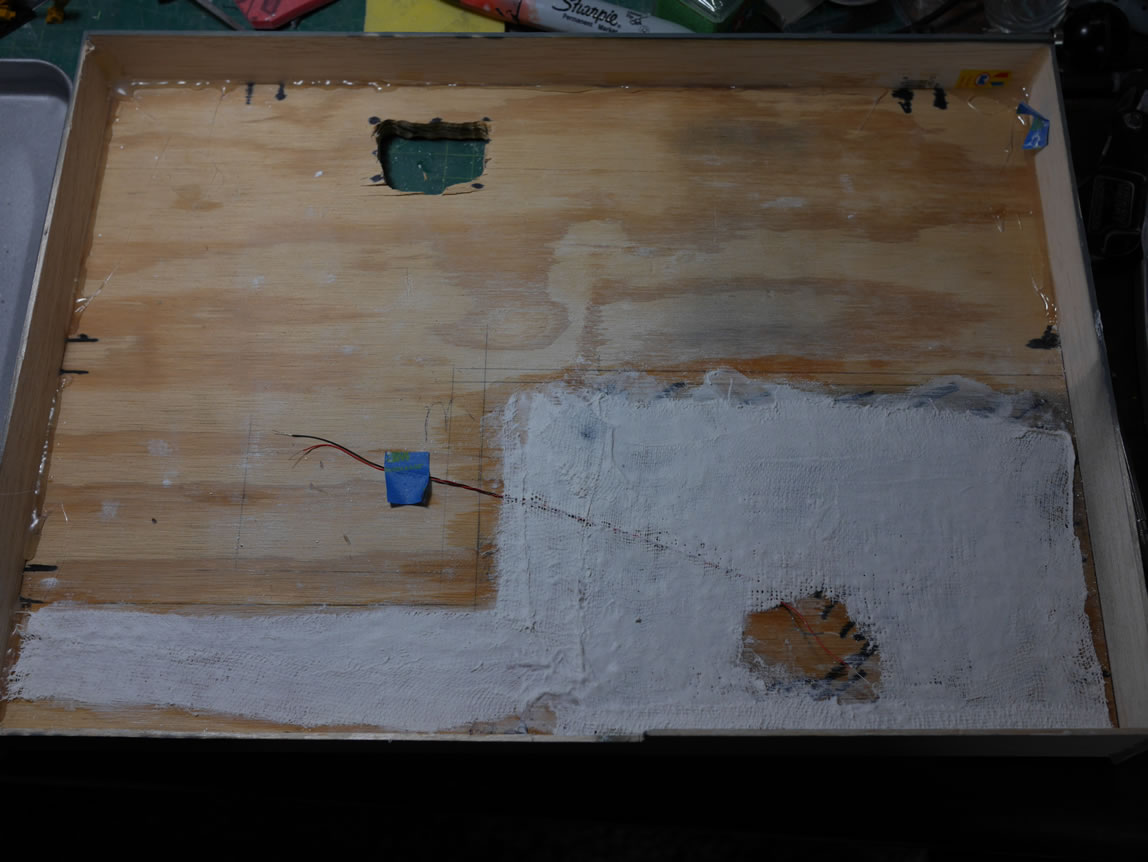
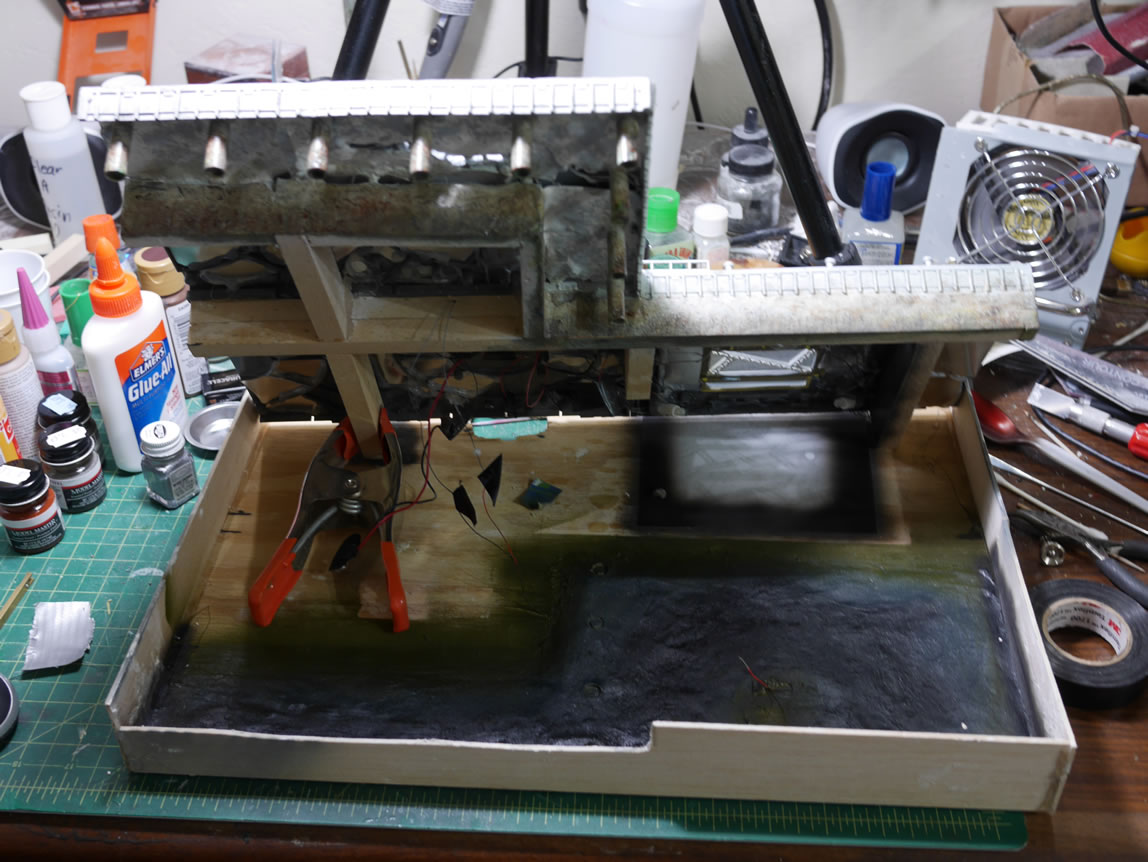
So I get home, and the board’s been drying for a day. I flip the sucker over and start drilling pilot holes. And end up cutting out a chunk of the board just above the wiring. Why? So I can stick my chubby sausage fingered hands into the area to rip out the already redone wiring scheme…
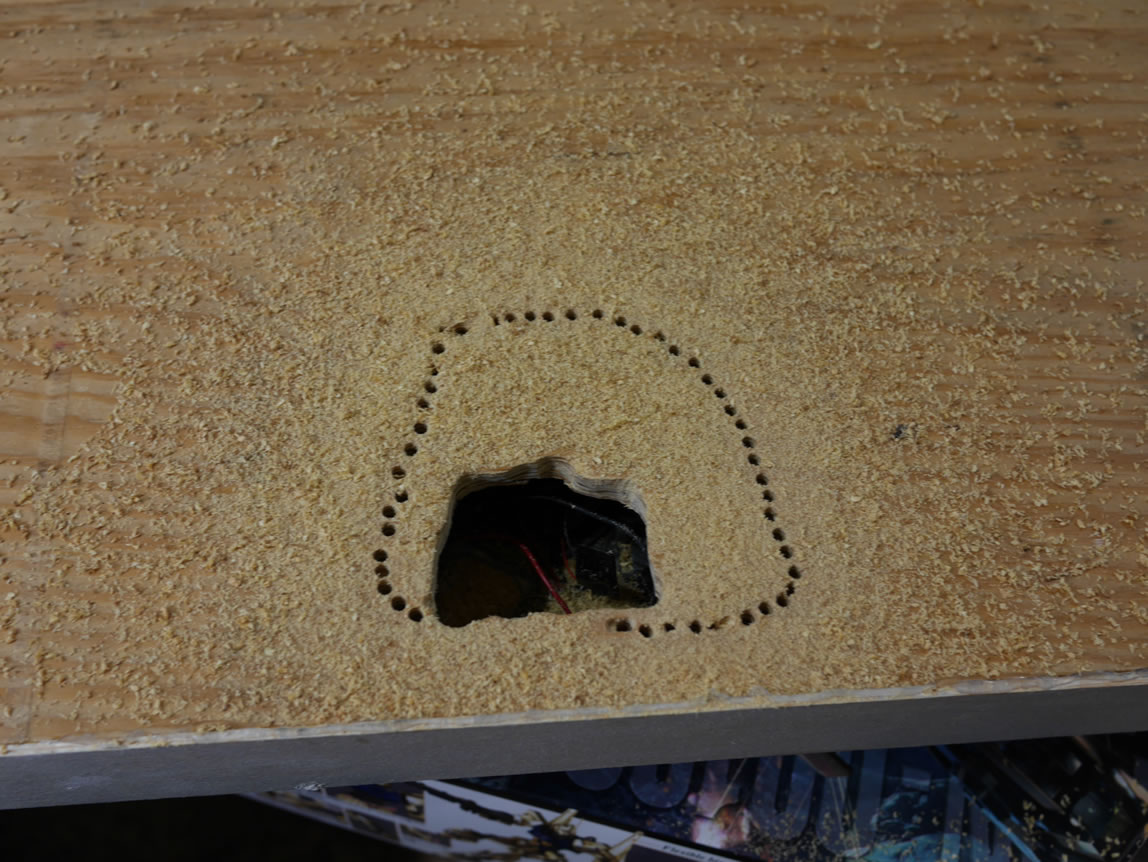
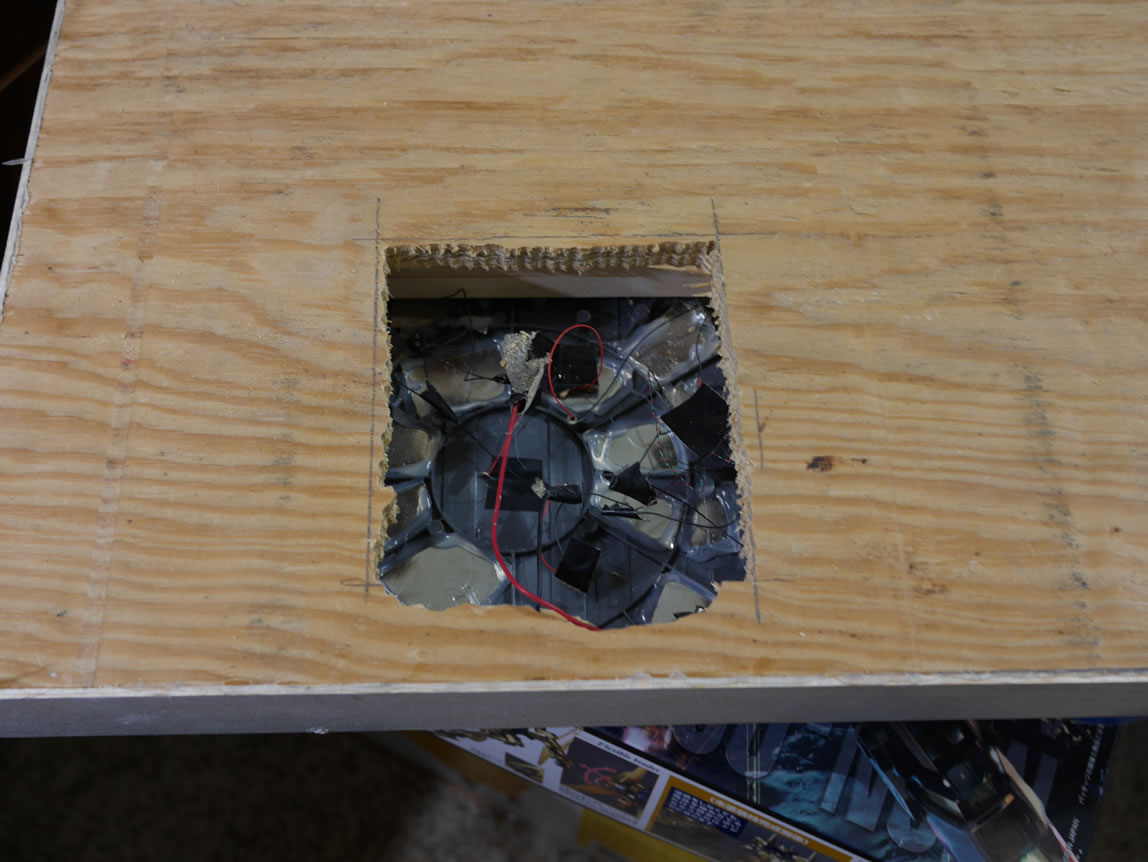
And here’s a video of progression from this point on and the results:
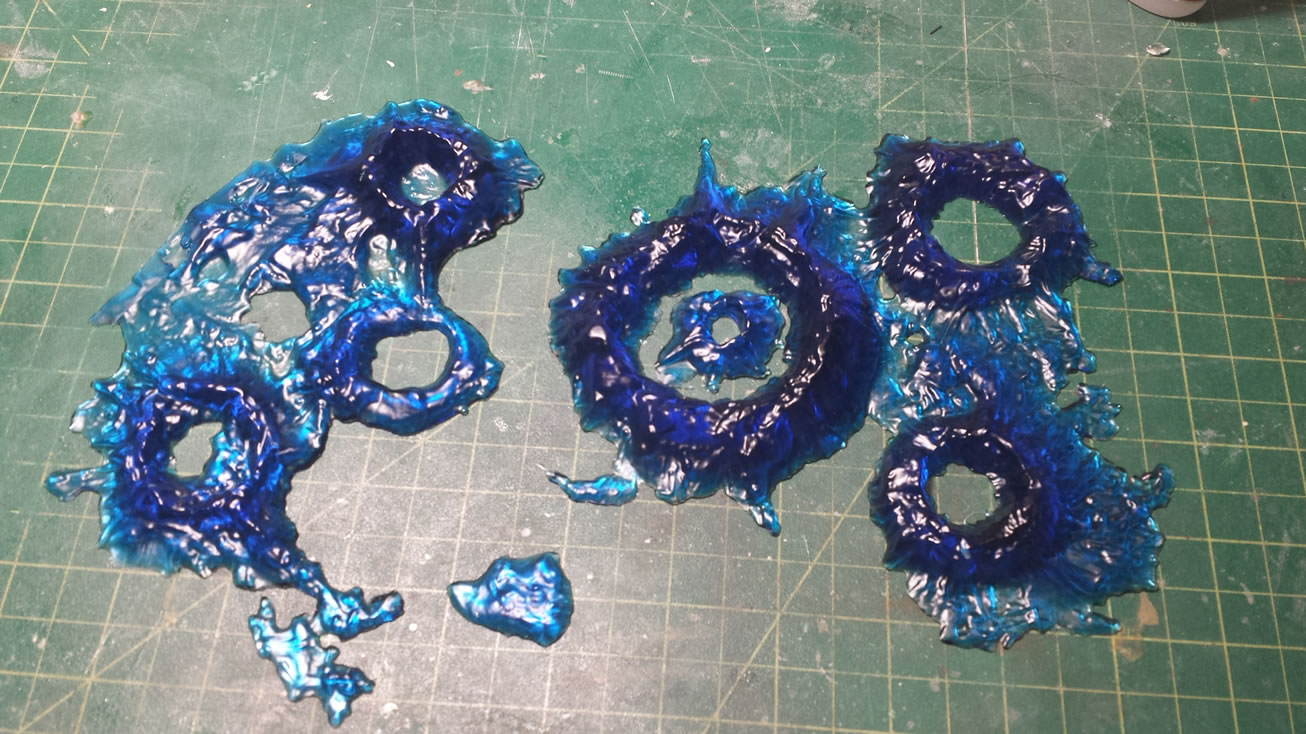
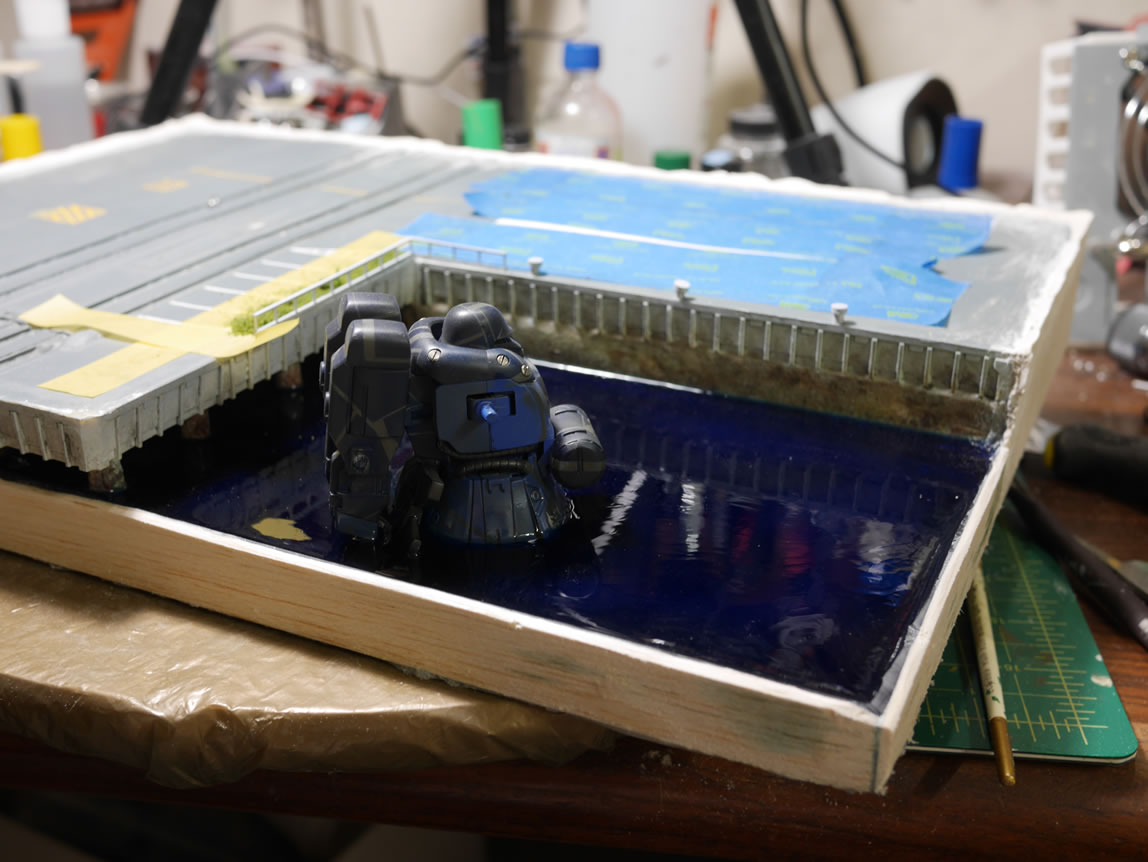
It’s getting down to crunch time. A little less than a week to go and things are slowing way down because things just need time to cure/setup. On Friday, I mixed and poured clear resin with some blue and yellow dye; but much more blue so the clear resin came out a deep blue. I should have mixed more yellow to get a greener tint, but I may just do some clear green tinting to get that effect. Or I may just leave it as it’s more “anime” effect if I keep it the current blue. I may just run out of time so that it may need to stay blue.
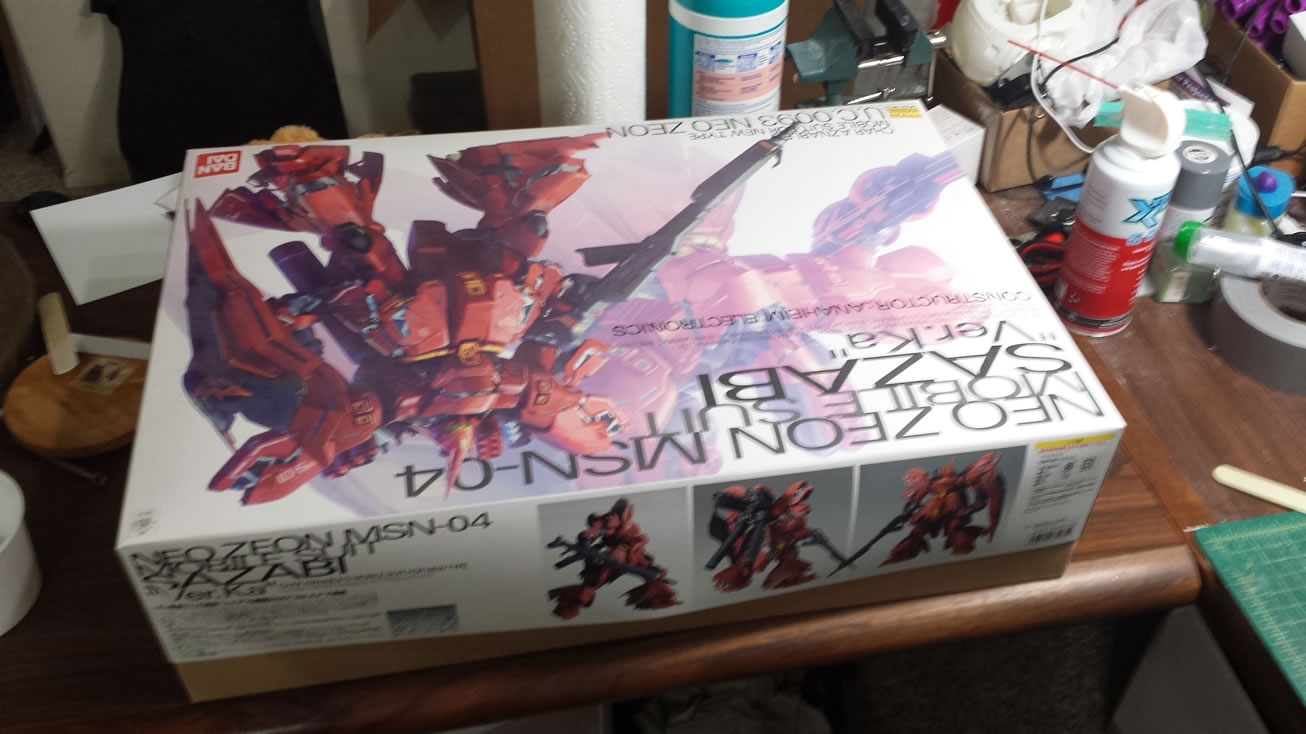
The first step was to apply a silicone sealant around the bottom, I did this last Thursday. I really did not want the resin leaking. The way the thing was put together, there is great potential for leaking; so I’m doing everything I can in precaution. Once the sealant was applied, it was left to set up over night. Friday afternoon, I mixed the clear resin and added the dyes, then poured. There was a little bit of a leveling issue, so I got some spillage from the front; but nothing too bad. I lined an empty MG Sazabi box with parchment paper too. The whole base was placed on top of two rolls of blue painters tape. Again, another precaution that if it does leak, I don’t have the entire base sitting in a pool of clear resin. Excess resin was poured into another mold that I keep around for making moon bases.
The resin I used is an enamel based resin that takes several days to cure. Since the base is too big to fit into my pressure pot, I needed a slow curing resin that will allow for bubbles to escape. The whole thing was then covered with the top of the Saz box to keep dust out while the resin cured.
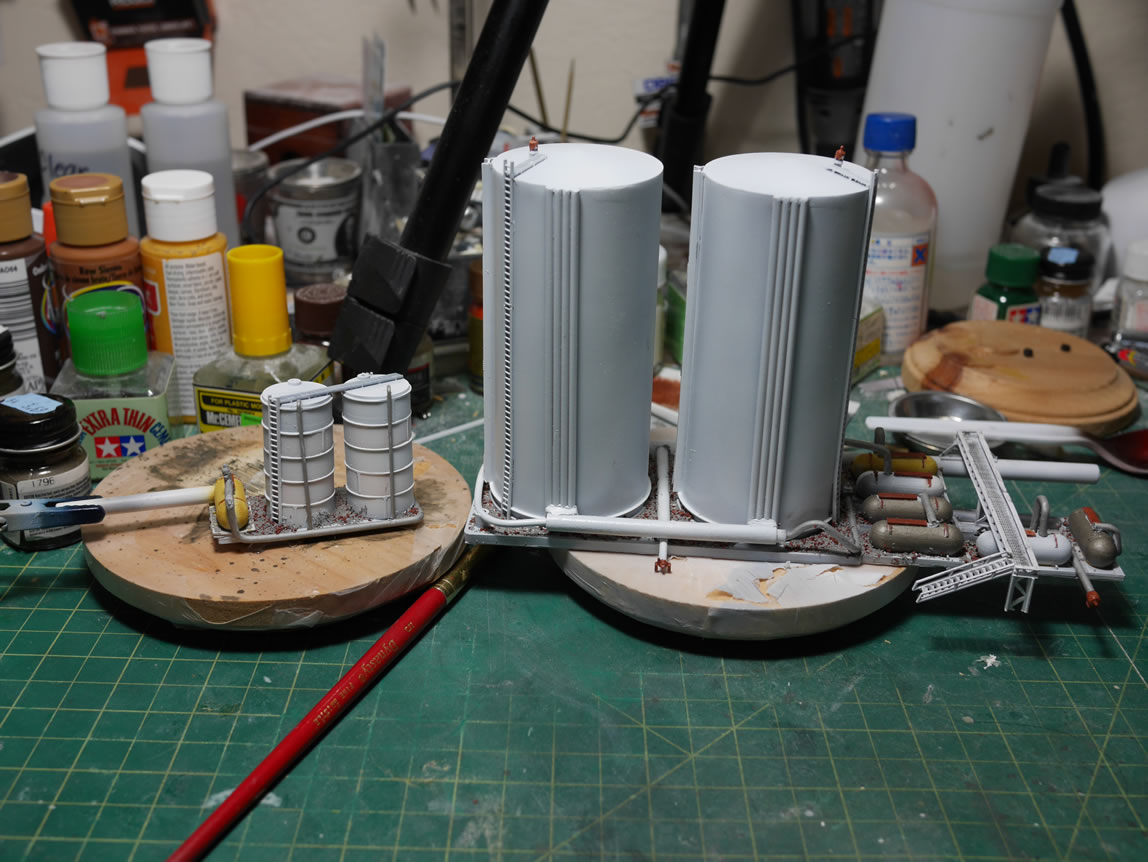
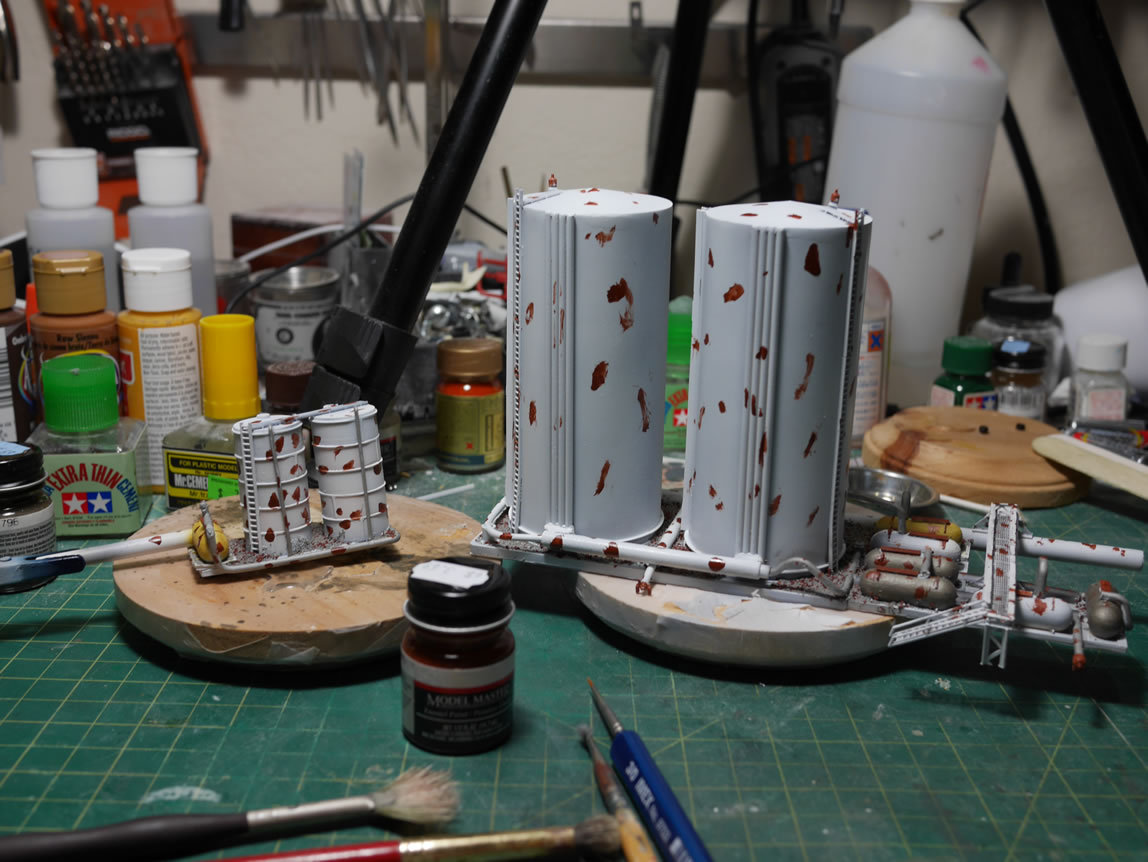
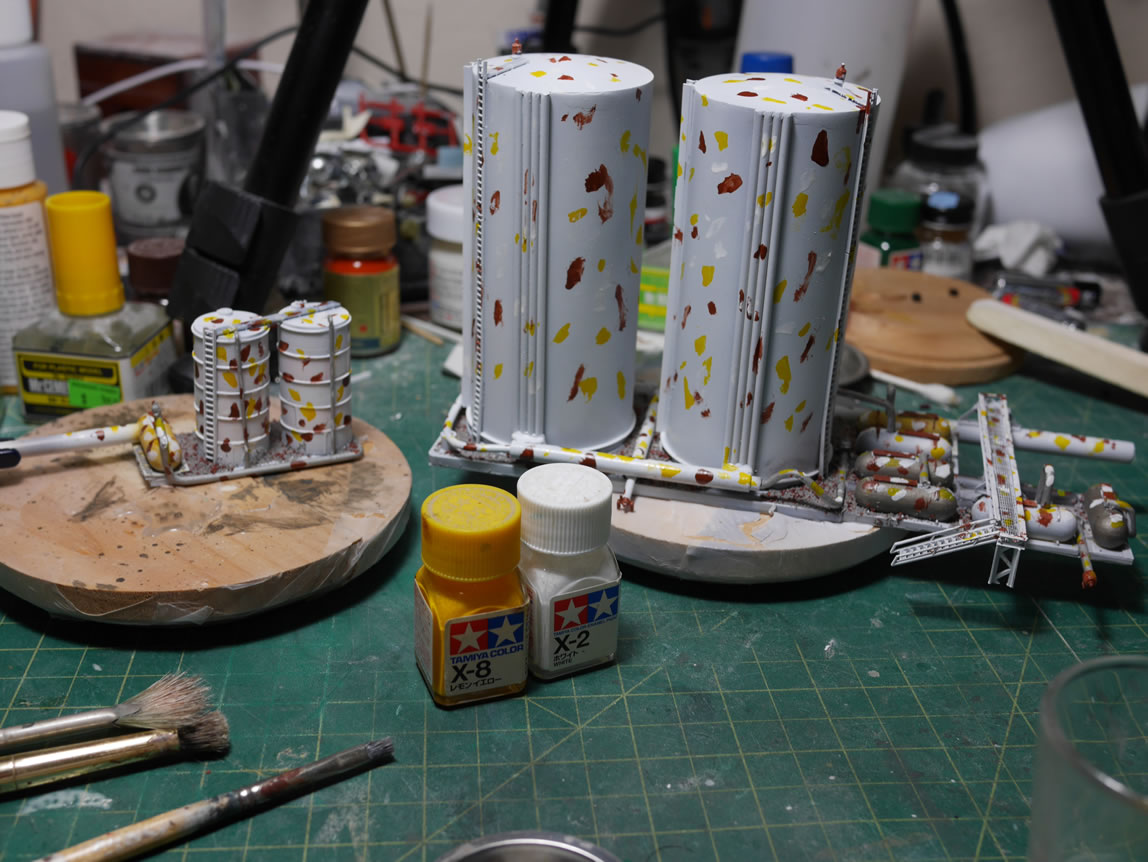
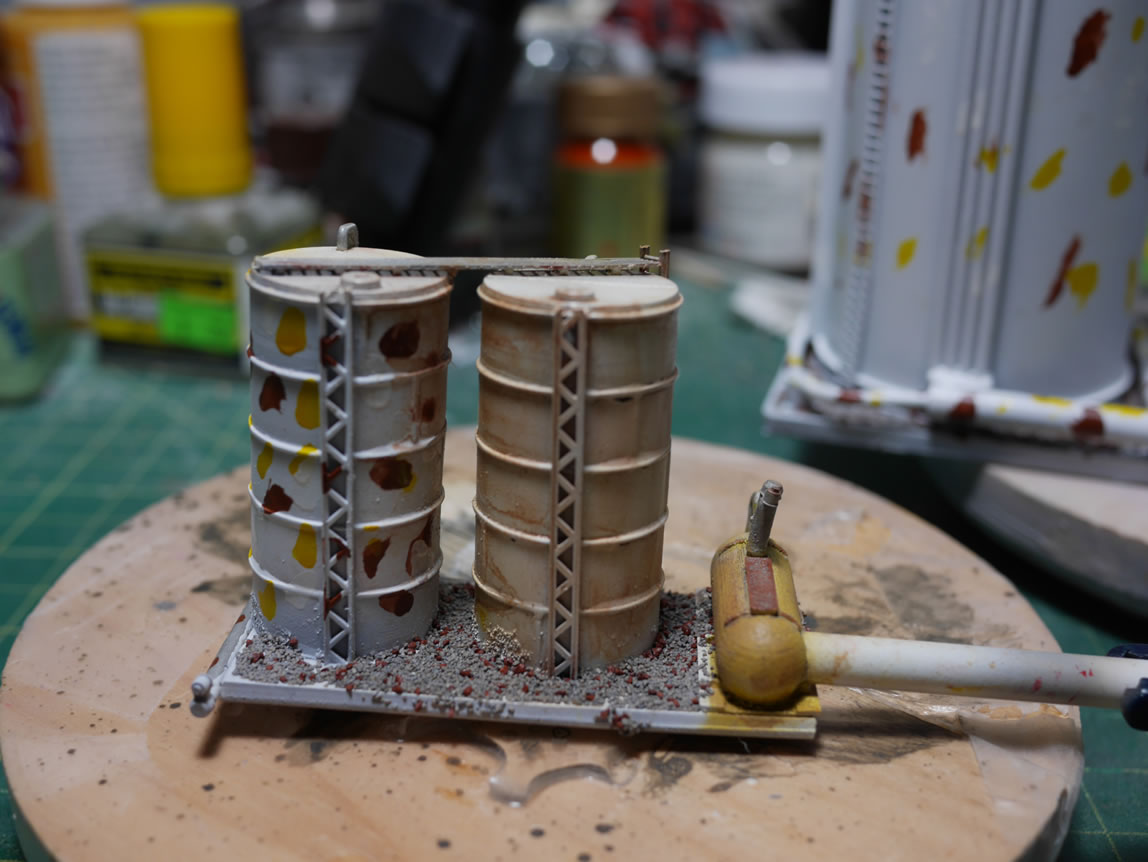
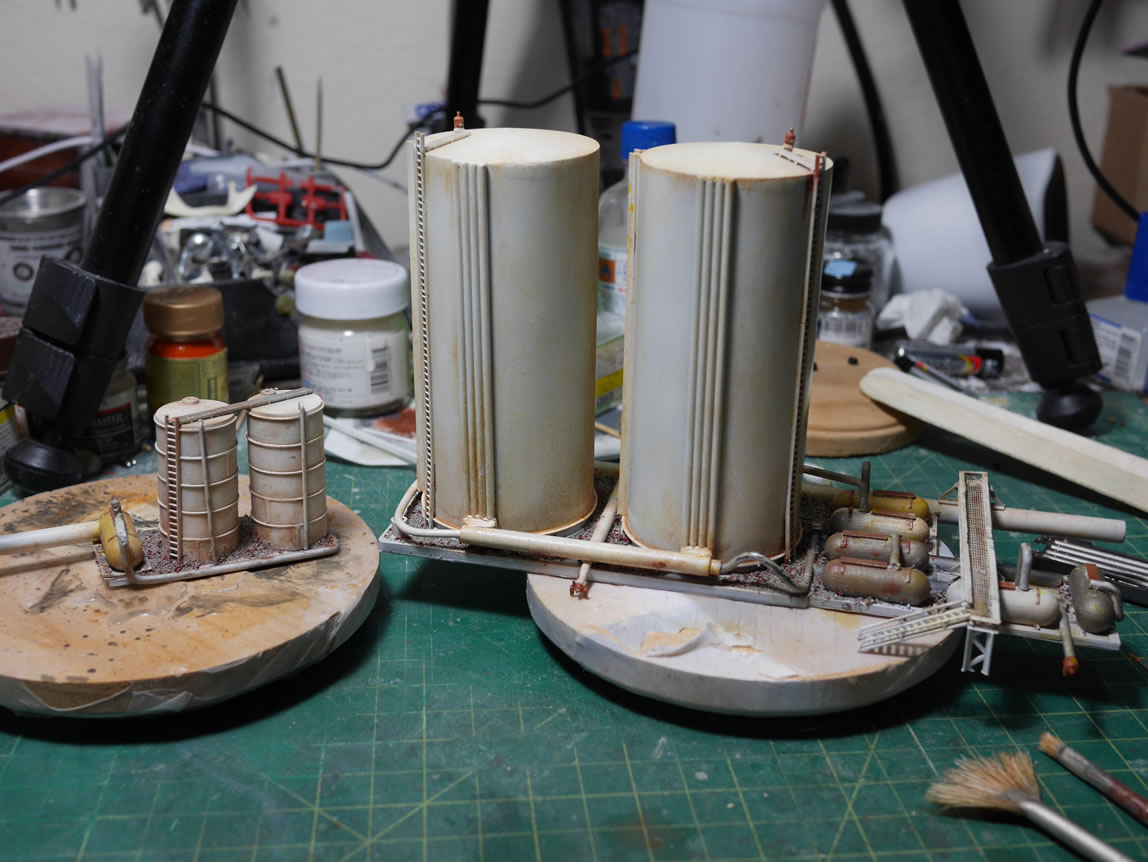
While the resin cured, I focused on weathering the silos. Using the same technique with the enamel paints dotted up then washed away with the enamel thinner. The silos got some nice weathering. I still have another layer of weathering and some washes to apply to the gravel; but these are pretty close to being completed.
Saturday afternoon, I checked on the extra pieces of resin and those parts work as a good guide for how well the base resin was curing. I removed the resin and while it is still a little malleable, it was well into the curing process. I can unbox the base as the top most part is cured. A few more days and it will harden up completely. Removing the base from the box, I noticed that one of the tape rolls was sticking to the bottom of the base. And by sticking, I needed to use a scraping tool and a hammer to loosen and finally remove the roll of blue tape from the base bottom. The back side leaked slightly. Well, slightly enough to fill at least a quarter inch or half inch of the blue painter’s tape roll. Some of the electronic wires got clear blued, so those needed to be removed and fixed. But the leak was fairly minor and not very noticeable in terms of water line drop.

The parking lot was masked off and I painted on some thinned down white glue and added some grass.
Next, the sides of the base that attach to the bottom part of the base needed to be addressed. There are gaps between the base and the balsa wood that surrounds the base. The bigger areas were filled with styrene, glued into place, then sanded down a bit. Then I used paper clay to line the edges on the three sides. This was left to dry overnight. I used paper clay for this because it works very well with the balsa wood. The adhesive is nice, and they’re both wood products so when it comes down to staining the wood sides, the transition will be more subtle.

The paper clay dries very quickly, and just leaving it overnight allows good sanding. The sides and tops were sanded down. I covered areas that I didn’t want to ruin and focused on sanding the edges so everything matches up well.
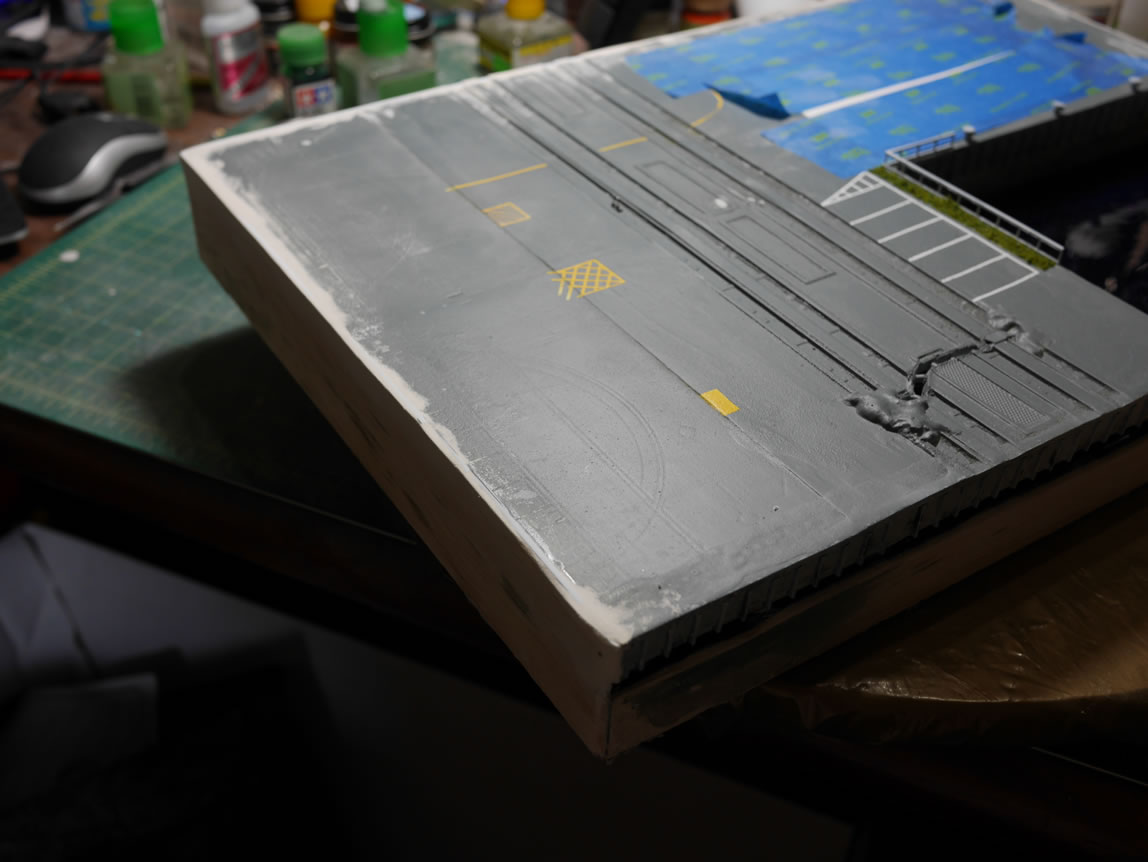
Done with the sanding, the area is dusted and wiped with a dampened towel. Then the rest of the detail painting is masked off and a spray can of the grey is sprayed over the edges and anywhere paint lifted during previous work sessions. Once painted, the base looks fairly seamless from the balsa wood to the top of the base.

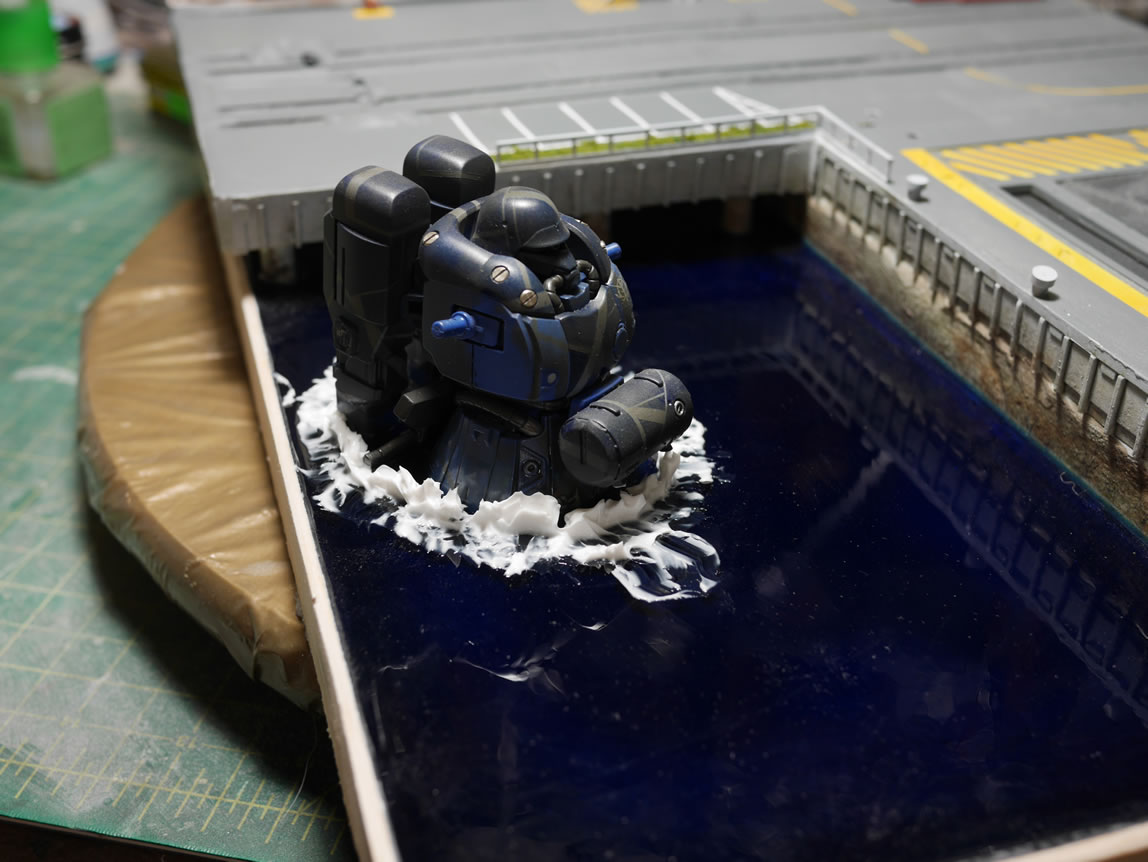
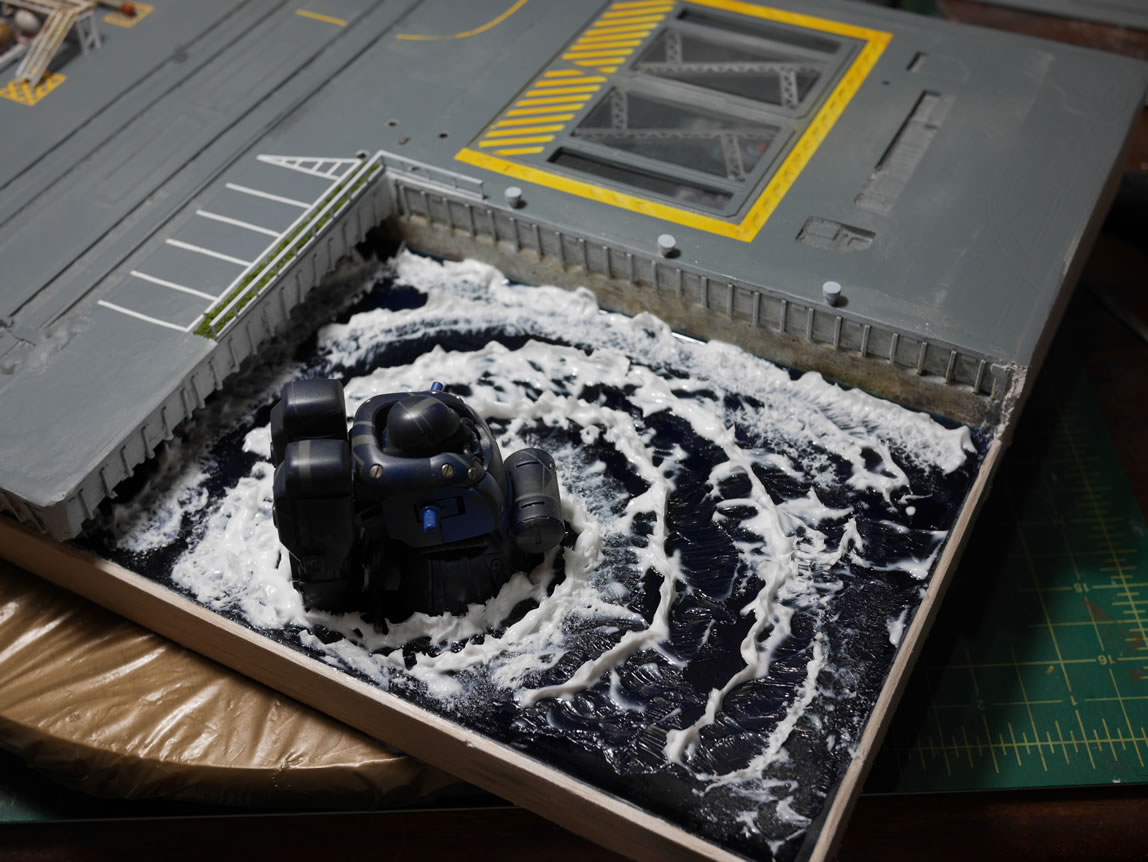
The last bit of progress was to apply the expensive woodland scenics product, water effects, to the diorama. Granted I could have gone to the art store and picked up a Clear Acrylic Medium that works much the same way for much cheaper; I had already bought the woodland scenics stuff years ago for another water project and never got around to using the stuff. AND, the woodland scenics product comes in an apply bottle… yes, that was sarcasm. Wood tongue depressor moved the water effects to create some waves and splashes on the base. The stuff goes on white, but dries clear. And the thicker the medium, the longer it will take to cure and fully clear over. Hence the slowdown in build progression.
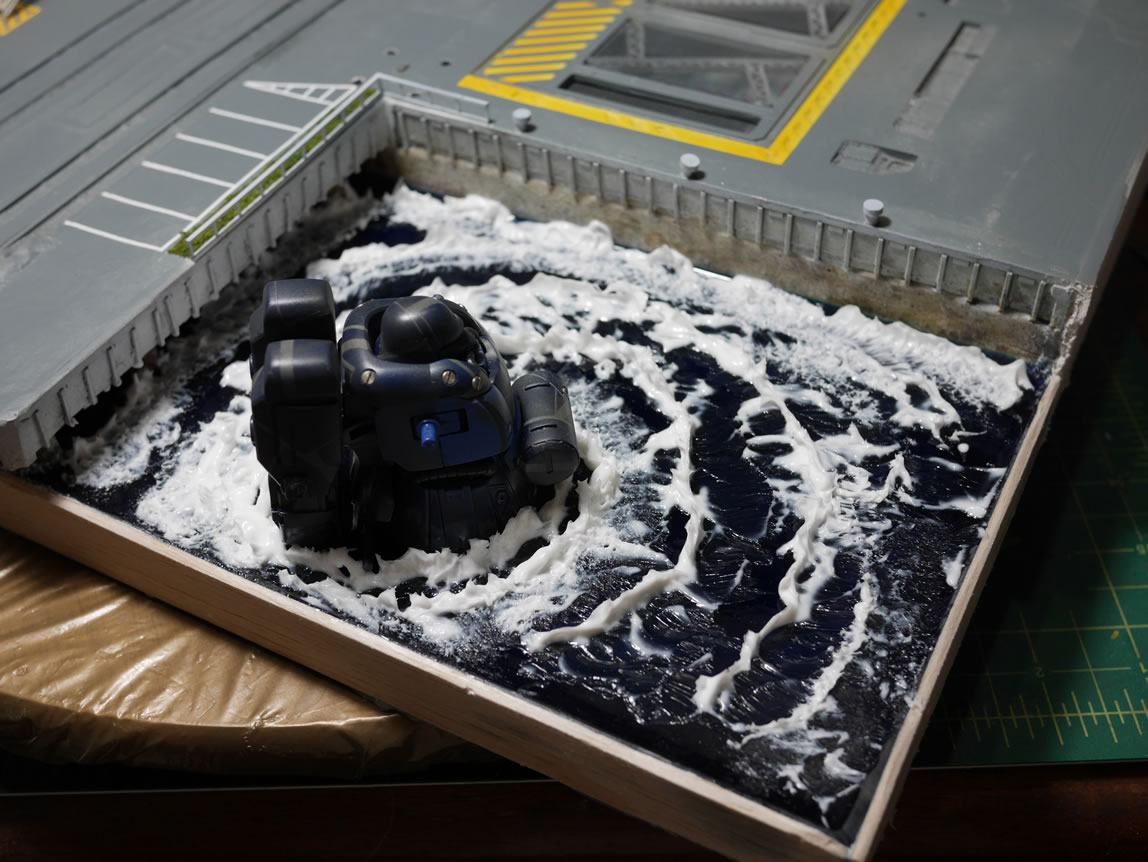
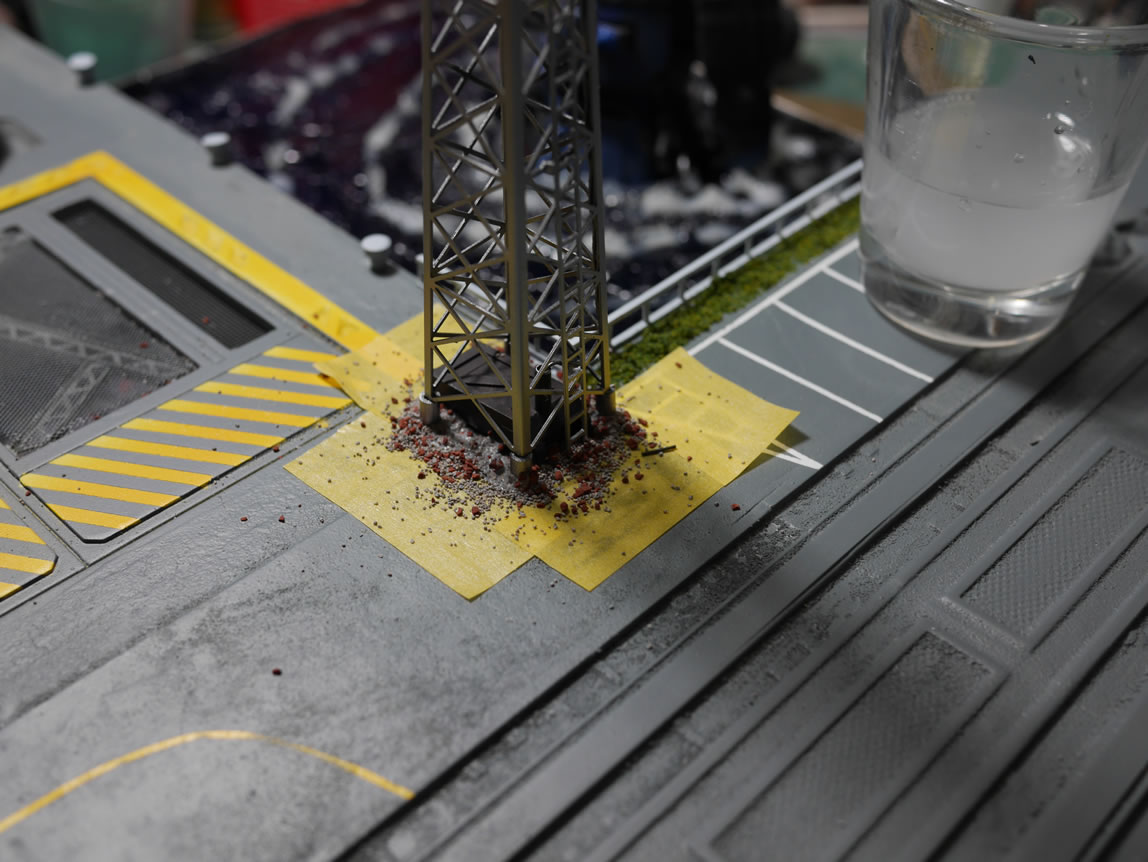
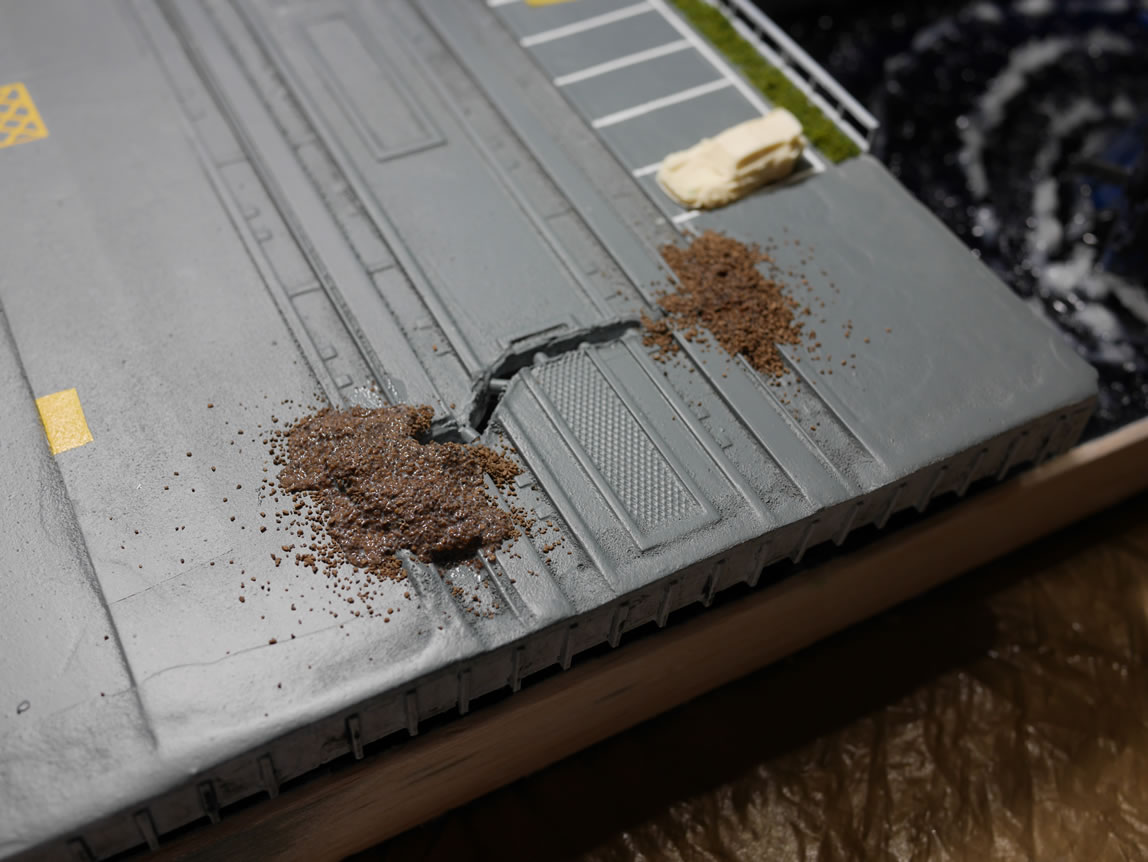
From the last update, I started attaching the completed pieces of the project to the base. The silos and pipe works were glued onto the base. The tower light was attached and glued into position. The one building was also glued onto the base. Once these pieces were in place, I taped off some border areas and using some elmer’s white glue thinned down slightly with water; painted the watered down glue and then carefully sprinkled some colored ballasts (model train store scenics stuff) The stuff is great for replicating gravel and comes in a variety of colors. The damaged base area was painted with the diluted white glue and more gravel was applied. Once the glue completely dries; a few hours as the stuff dries pretty quickly (I let it sit for at least 8 hours as I’m paranoid). I did an enamel wash with a few colors to give a some dimension to the gravel. I also dropped in some more diluted white glue and added some yellow turf as a weedy undergrowth.
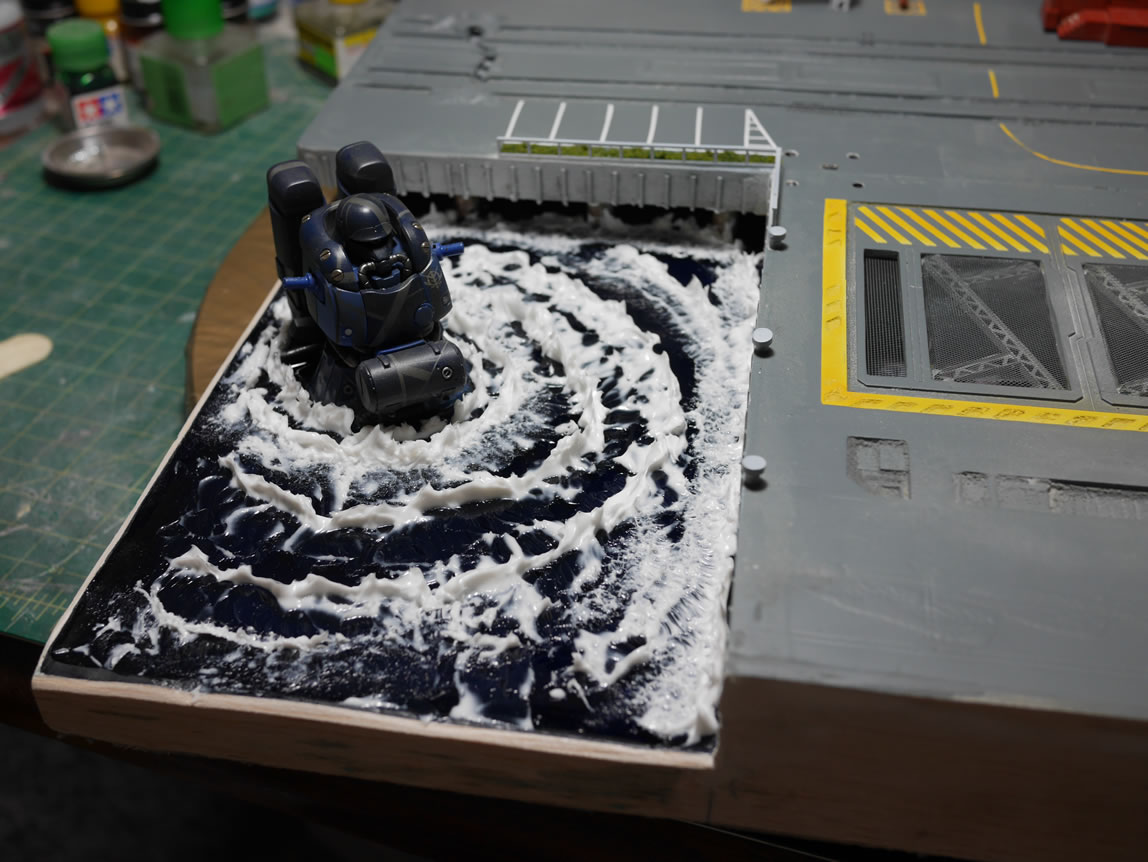
With the resin cured, I used some water effects from Woodland Scenics (which is basically a repackaged clear gloss medium – a clear gesso), and using a wood tongue depressor, created some waves to get the effect of the Zulu rising out of the water and making all sorts of splashes. This stuff takes a long time to cure. Longer if the application is thicker. So the thinner areas cured up relatively fast and goes completely clear. The bigger waves stayed white for a while.

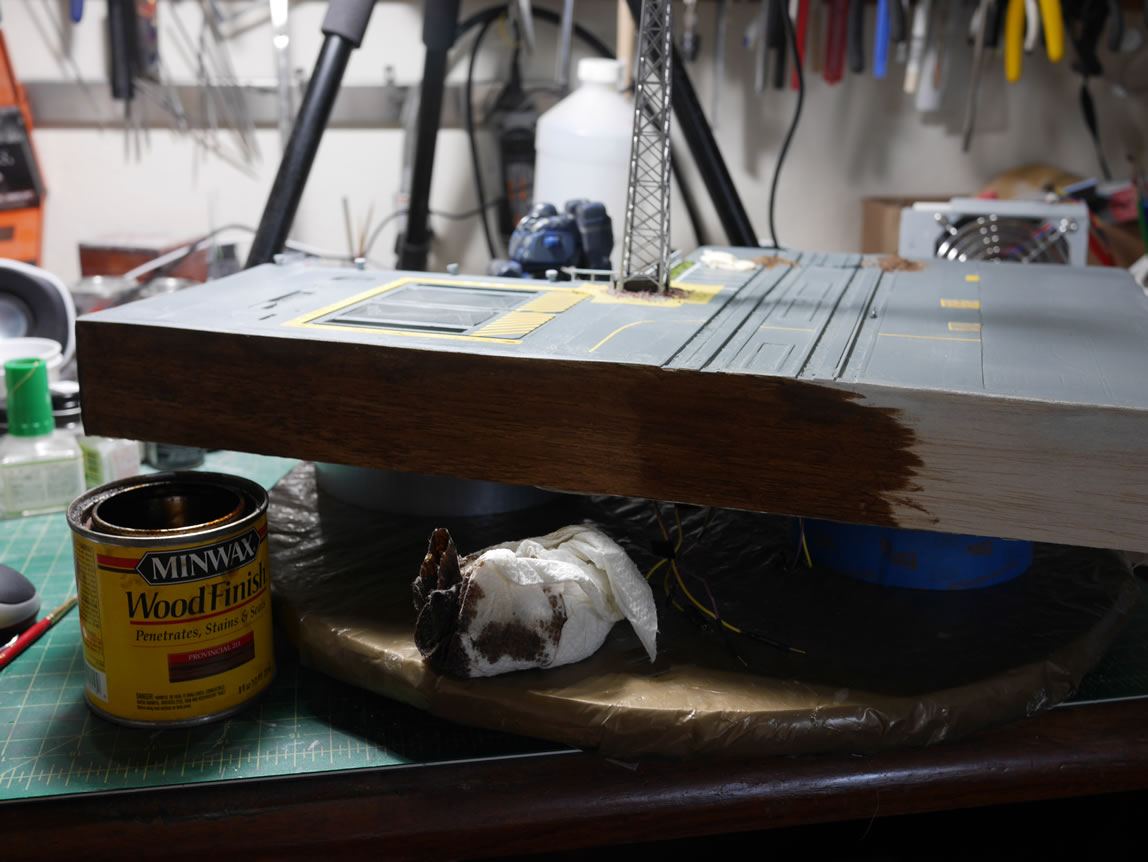
The sides of the base needed some attention, so I did a quick stain for the balsa wood with a paper towel, then sealed it all up after it cured with a semi gloss clear finish.
During this week’s Those Gundam Guys Live (towards the end of the video):
I used some enamel white paint and drybrushed over the water effects to complete the water effect.
The last few days were spent finishing up little details such as the cars. The parking lot needs some vehicles. I also added in some people running from the scene and just reacting to the scene. The white Bronco is heading towards the GM/Zogok confrontation and slamming on the brakes, hence some smoke off the front wheels and tire marks on the pavement.
The four LED points, Tower, Underground Base, Zee Zulu, and Zogok are wired to an arduino microprocessor with a bluetooth connection. The microprocessor is programmed to spit out a morse conversation between the Zulu and Zogok. And with that, I’m done! I don’t have the lights turned on but will take a short little video of that after AX.