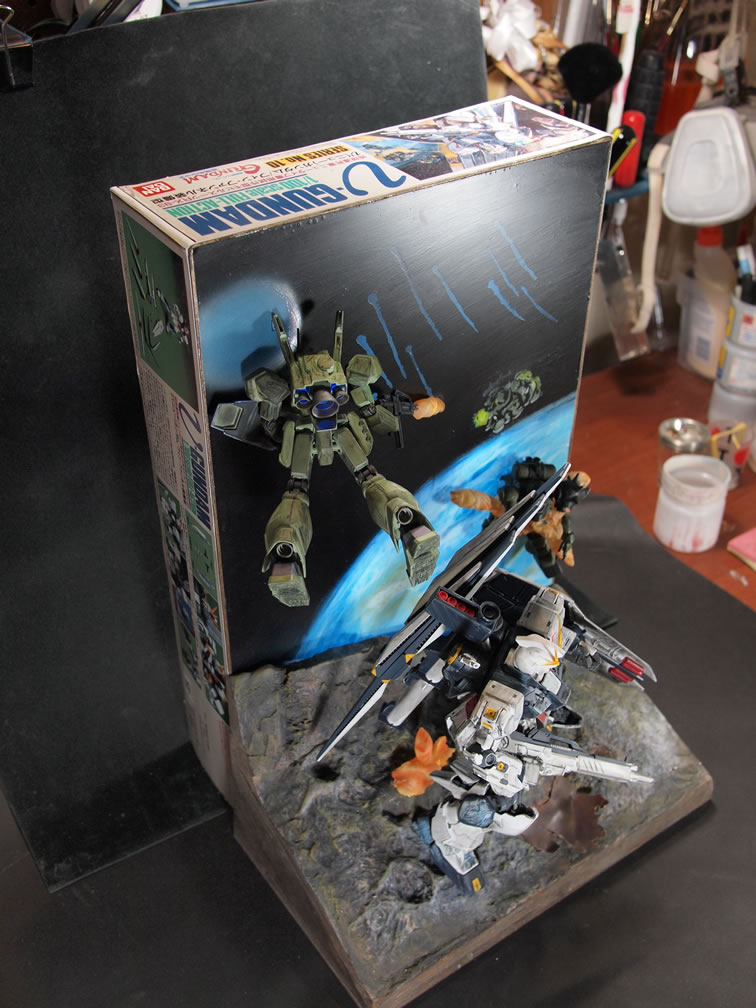
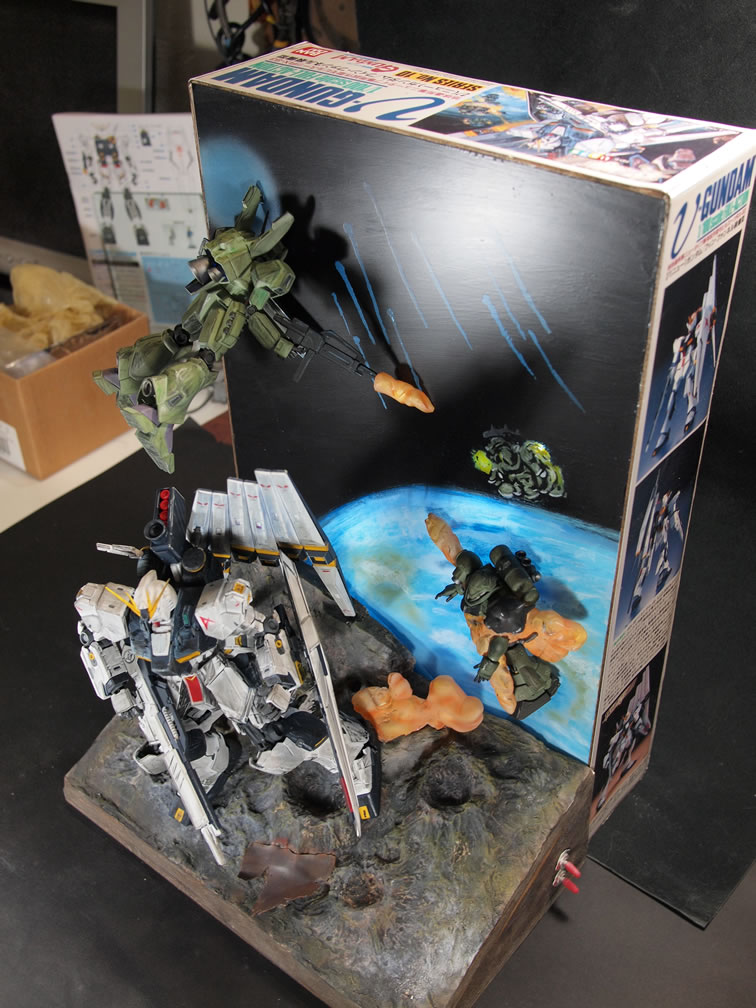
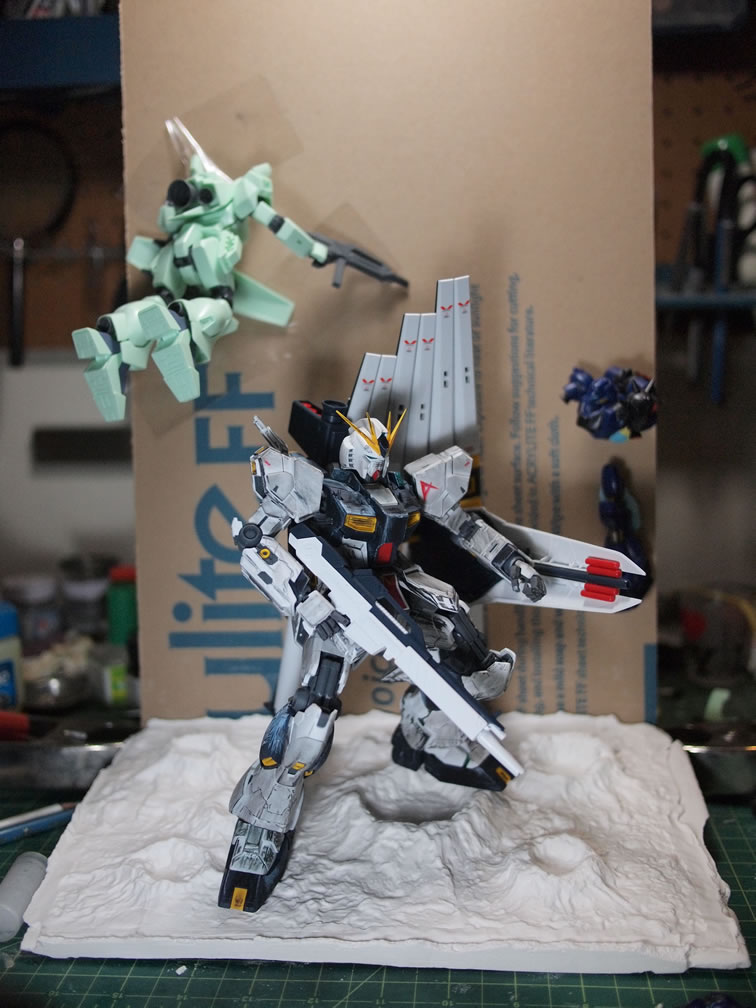
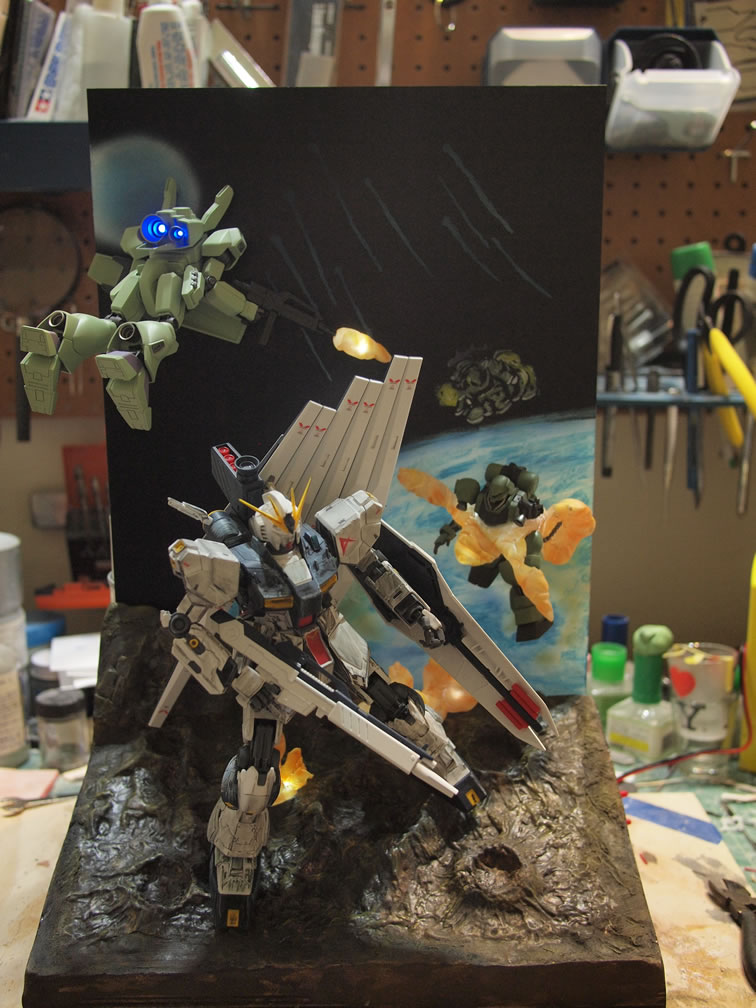
The Nu Gundam Ver. Ka came out in December 2012, and upon getting the kit and brainstorming over what I could do with the suit; the idea to pay homage to the old 1/100 Nu Gundam box art crossed my mind and never left. When I started building gundam models, a little over 25 years ago, these old 1988-1990 era kits were brand new and just released. I was a huge fan of the box arts as they were normally done as oil paintings and just looked damn cool. The idea developed as I thought about it and discussed it with a few friends and then the quest to reproduce the box art as a three dimensional diorama began.
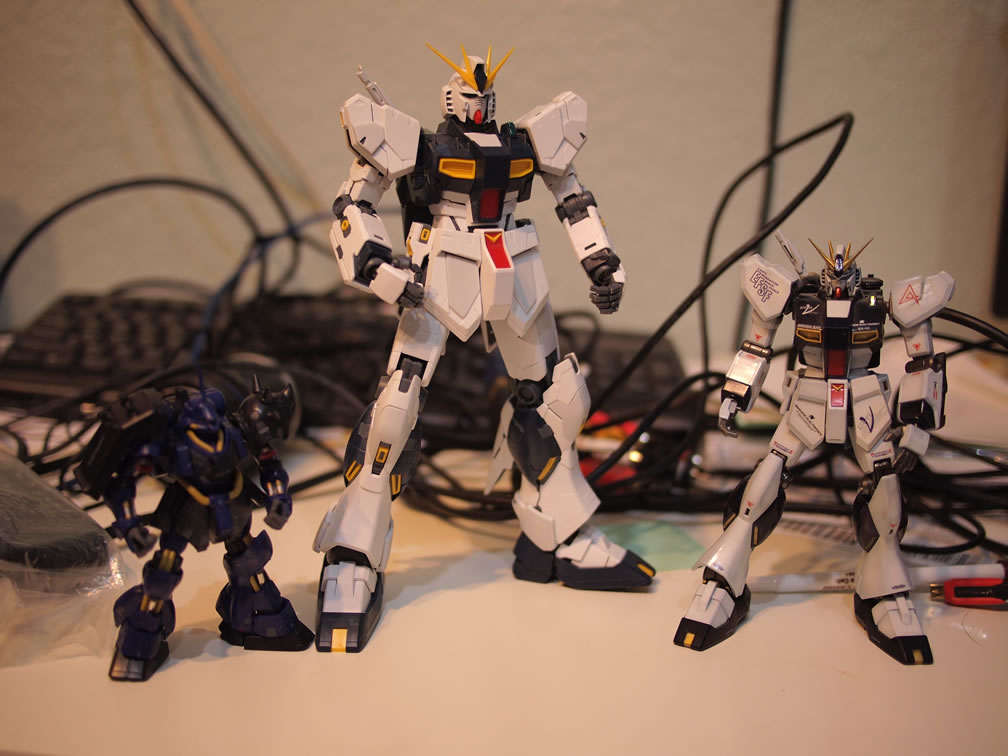
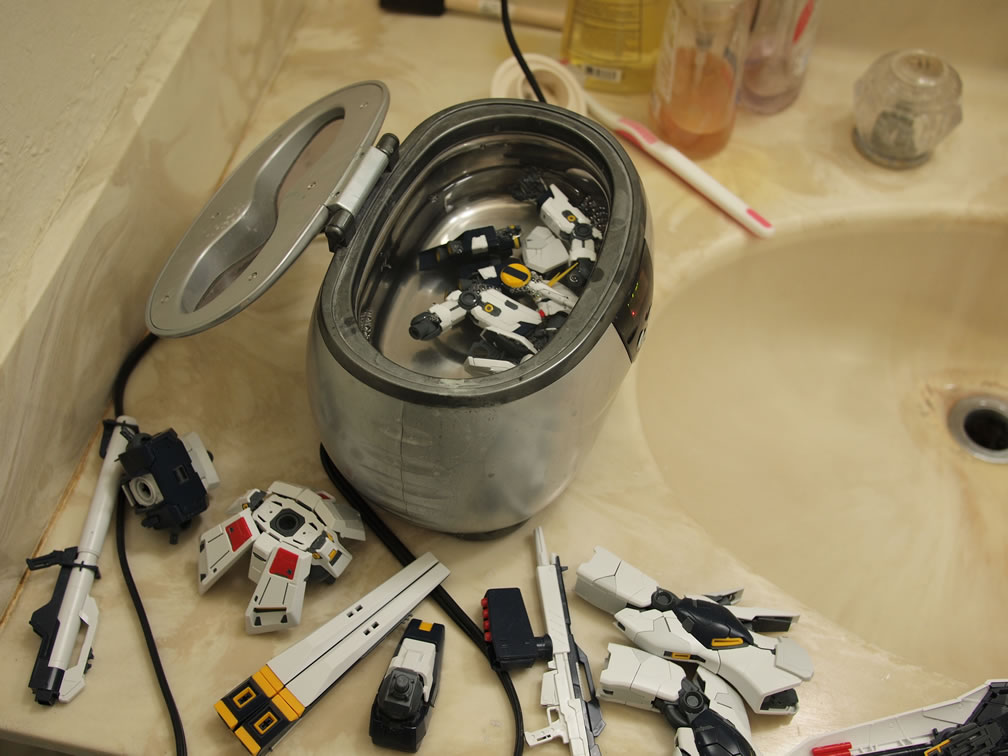
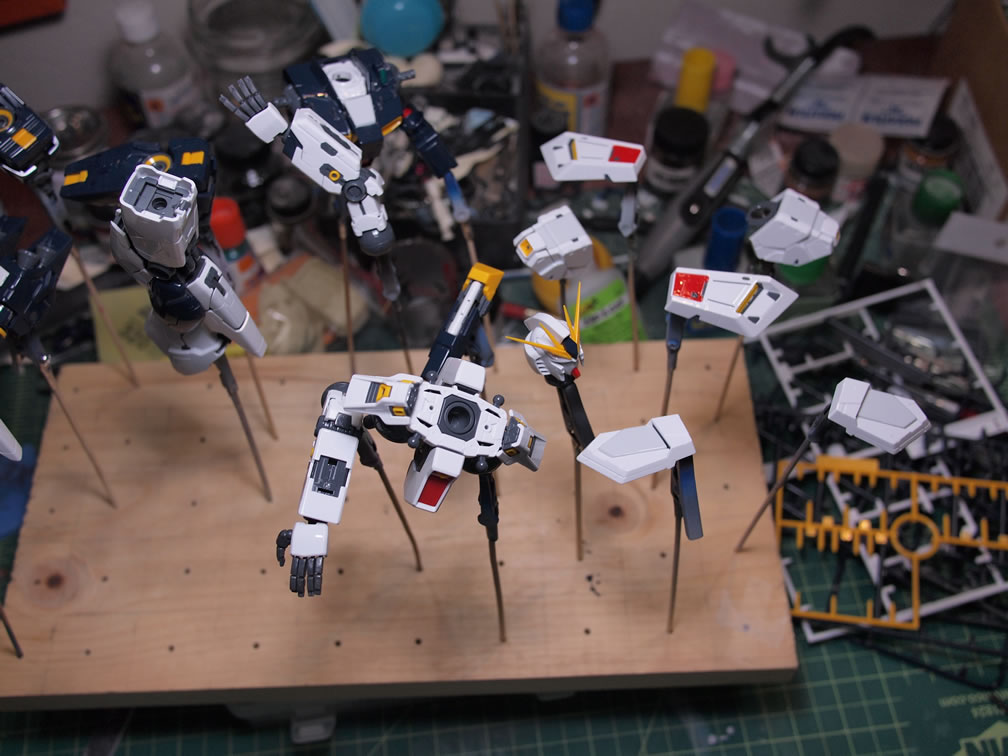
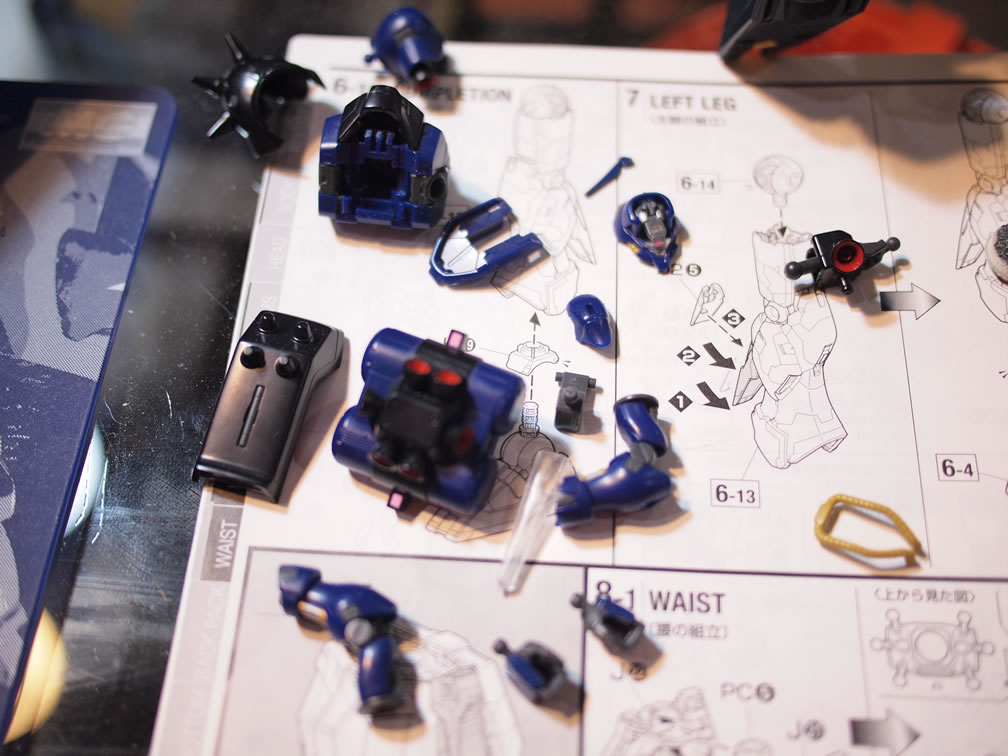
This work in progress page will be different from previous progress pages as it isn’t really an updated progress as I build since at the time of this posting, I’ve already completed the project. So this will focus on the different aspects of the project. We begin with the main characters, the Nu as the center piece, the Jegan, and some Dogas. Since there exists no 1/100 Jegan or Doga yet (granted there is the MG Doga that is coming out very soon) and the simple fact that I did not want to to build a massive diorama; I decided to use forced perspective. The Jegan is a HGUC 1/144, and the Doga is a 1/200 HCM pro kit. I originally molded and casted the 1/200 Doga as I was going to build two of them for the background, but to keep with the essence of the forced perspective idea, I dropped the resin parts and just used the HCM pro kit.
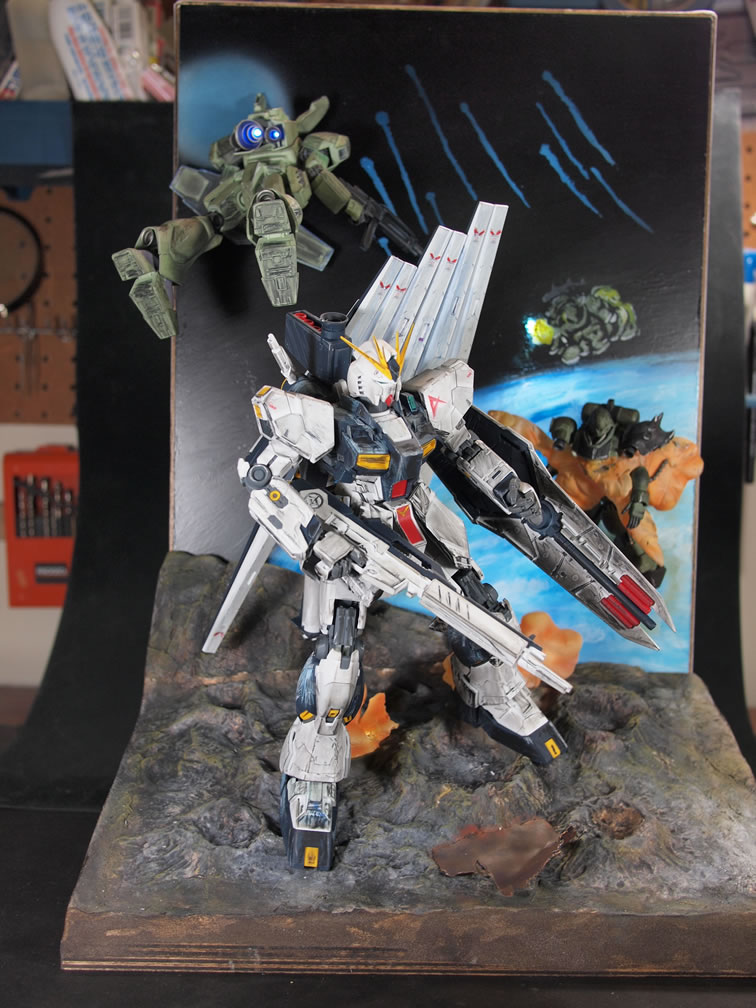
The Nu
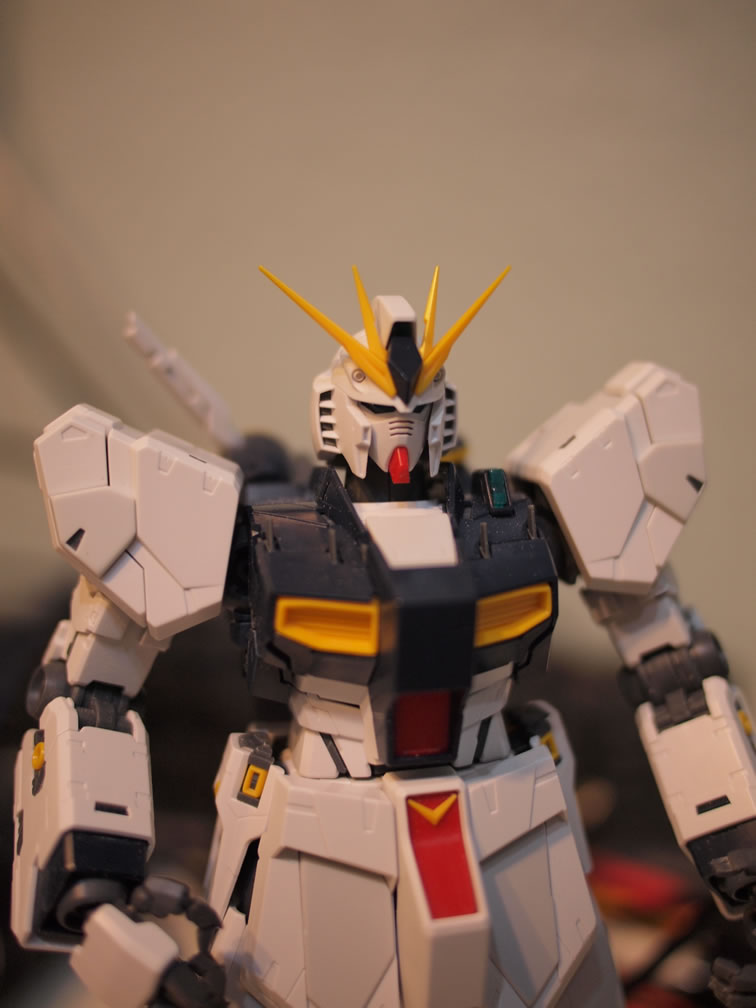
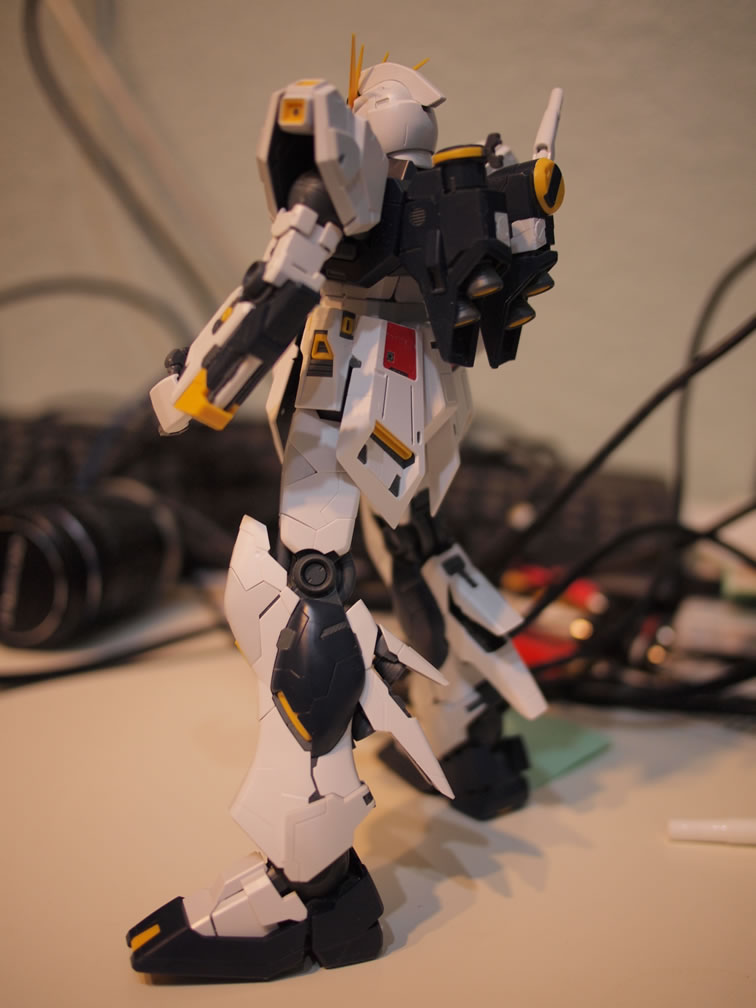
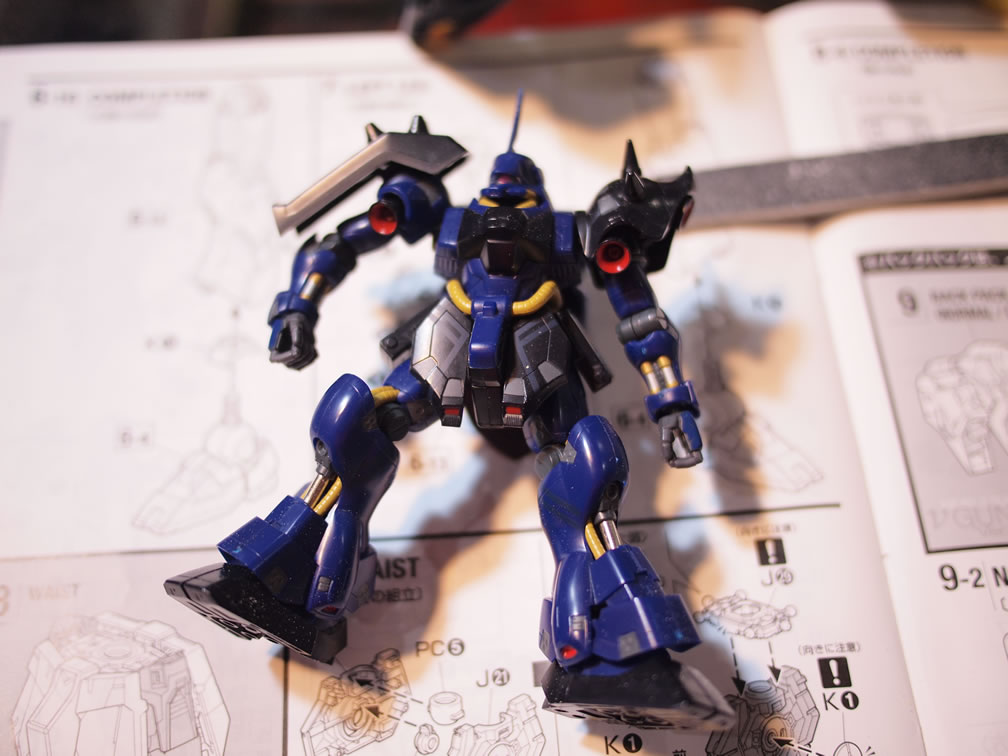
Having snapped the Nu and thinking about how to go about the painting, a discussion with my friend Jason got me leaning towards reproducing the oil painted look. The best way I thought would work was to just use the existing kit as is and use chalk pastels. The kit was washed and a clear gloss was sprayed.
It was a shame to lose the use of all the decals that came with the kit, but keeping in line with what is on the box art, I went with only the decals that are visible on the box art. Decals were applied and then the suit was blasted with clear flat. After the clear flat, the box art as a visual guide, the kit was chalked and color penciled getting as close as I could to the oil painting effect. The kit was then clear coated and set aside.
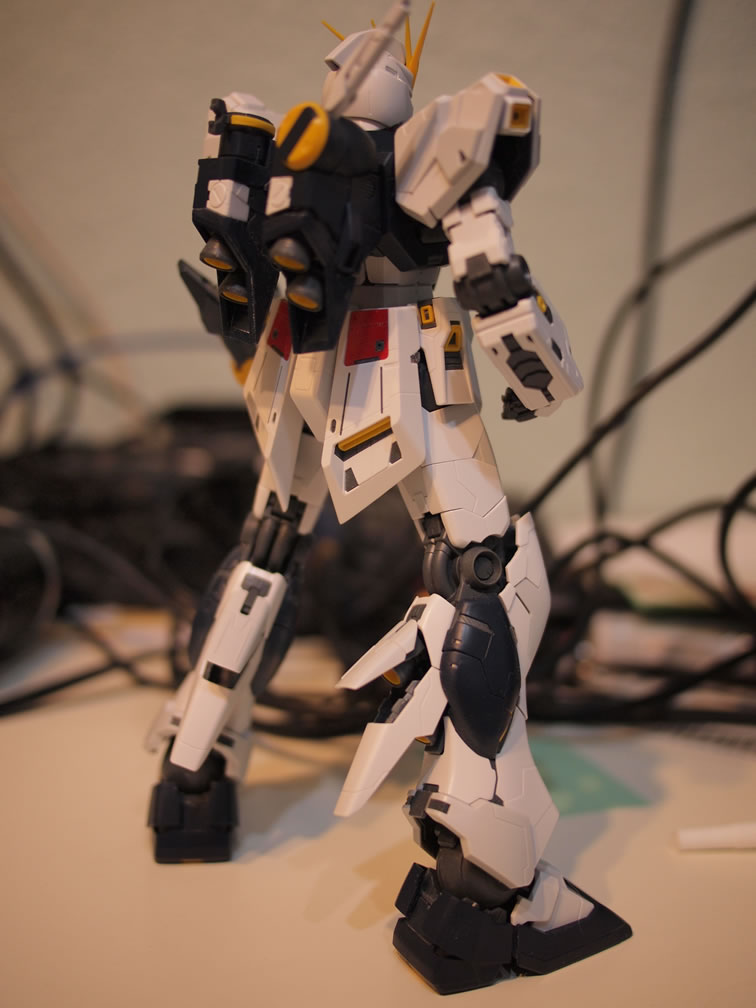
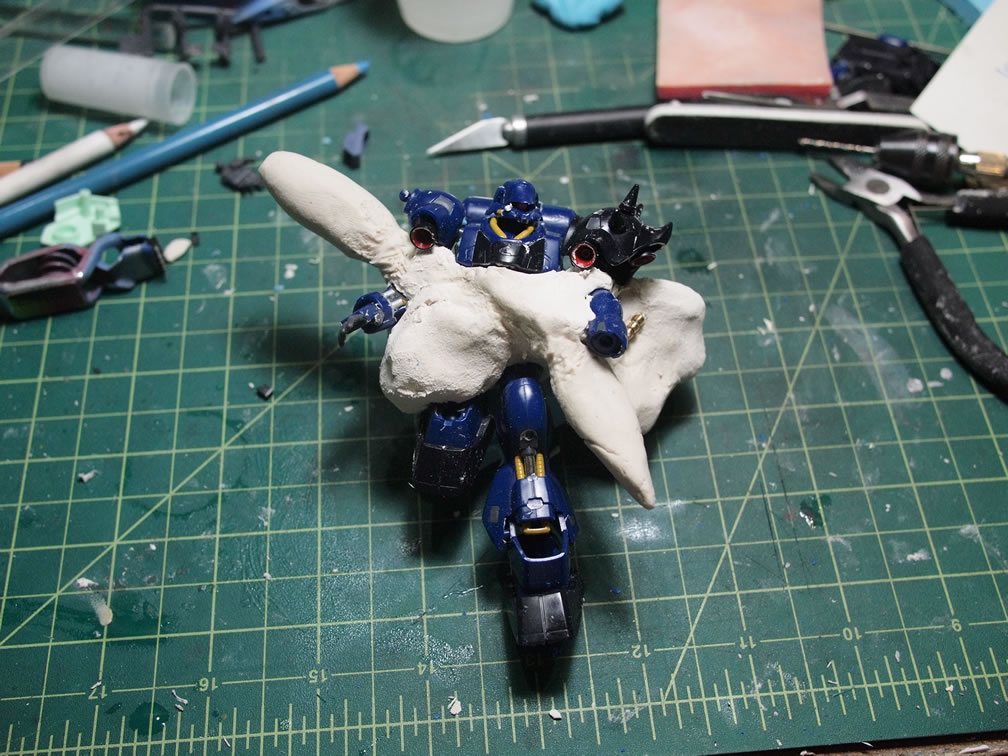
Next came the Funnels. Just snapped, they’ve quite flimsy, so I ended up gluing them to one another. The center top pieces also had openings for connecting the funnels to the backpack, so all but the one that connects to the backpack were cut and a square piece of styrene was glued into the area to replace those details. The connection piece to the funnels have them straight; which causes problems when I tired to pose the kit on the base. The box art shows the funnels at an angle, and with the shield’s position, having the funnels box stock was not an option. The funnel connection is extended with a metal rod glued into the funnels that extends the spacing between the funnels and the backpack, this allows for a little more room on the shield, but mods to the shield position are needed to match it up with the box art. It’s not a perfect reproduction, but it’s pretty damn difficult to translate something from a 2D piece of art to 3D display, compromises and concessions are needed.
The Jegan
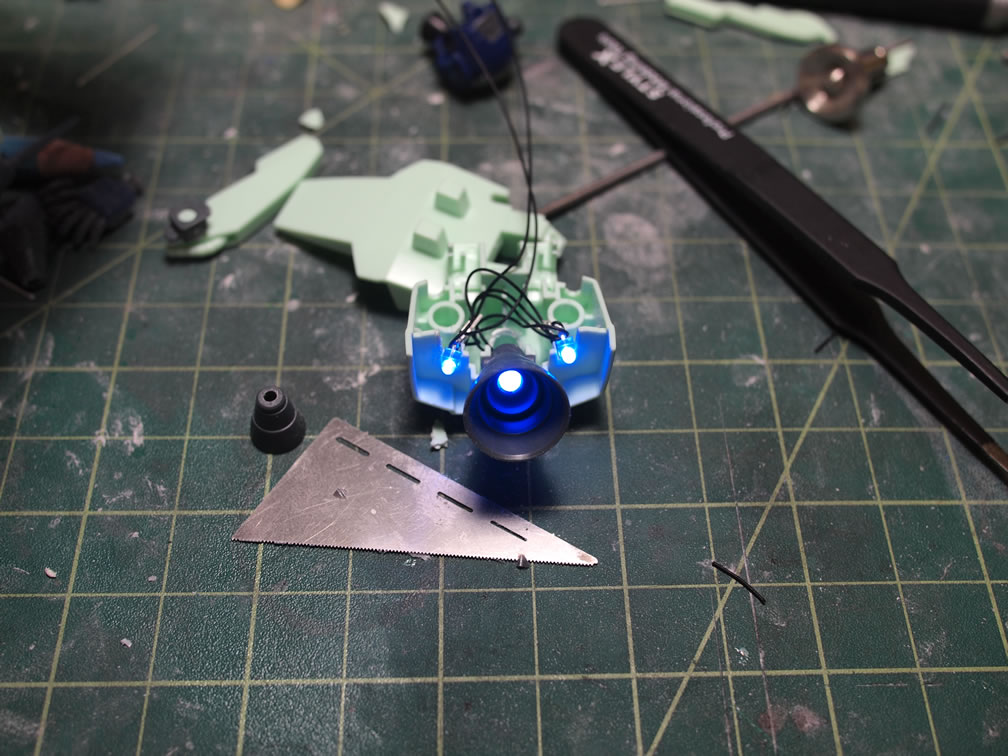
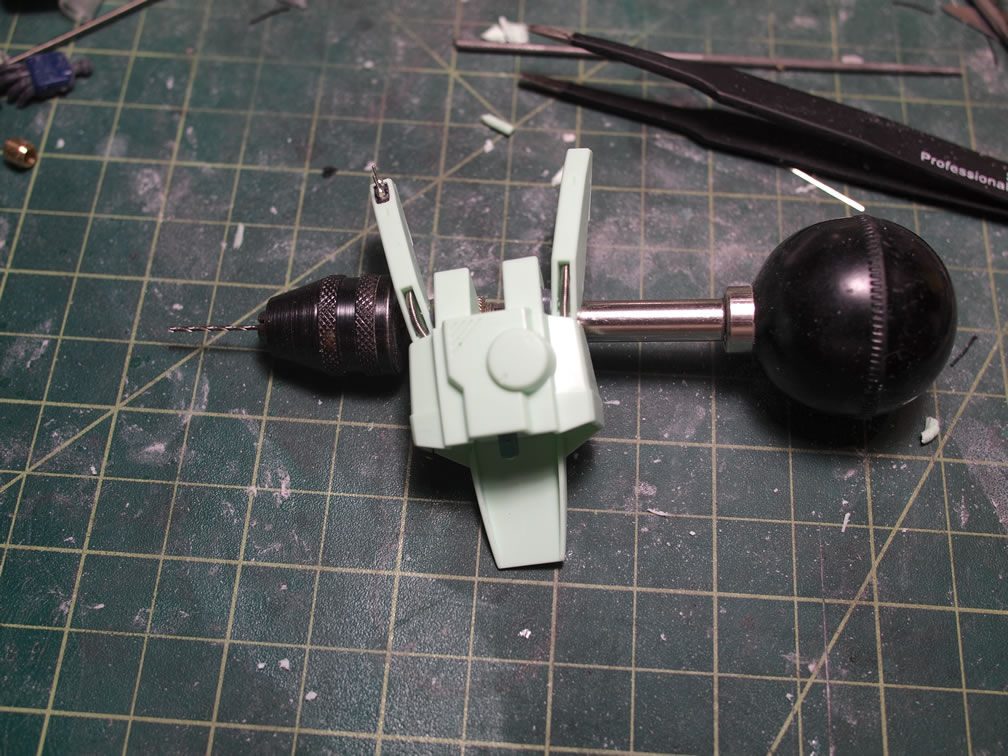
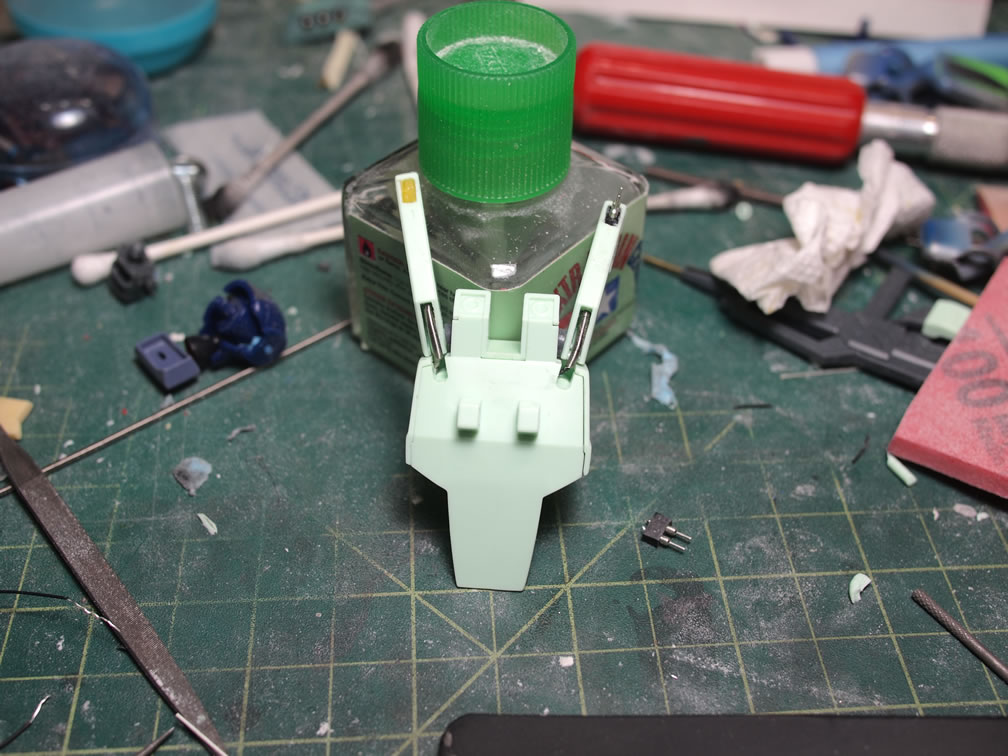
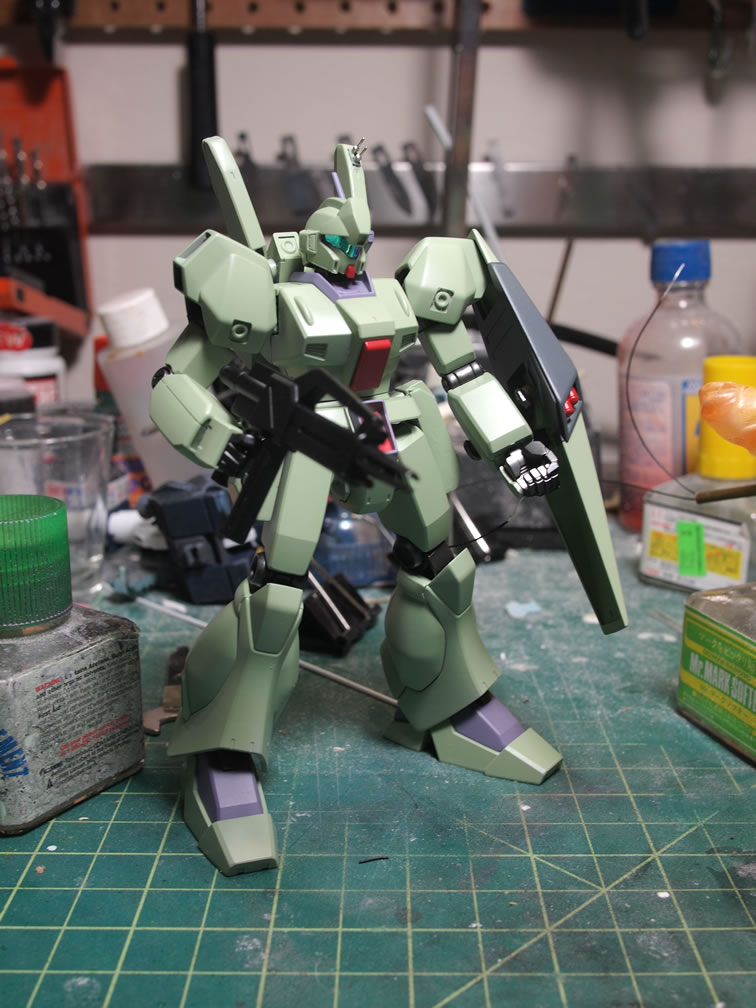
When I started with the Jegan, I couldn’t find the HGUC version anywhere, so I picked up the old 80’s era kit form Robot4Less, ugh, having built the HGUC version, I quickly gave up on the older version and picked up one of the HGUC versions online. The angel of the Jegen displayed on the box has it positioned with the backpack facing out and as the box art depicts, the thrusters are blasting, so naturally, the first thing I do is to work on the lights for this kit.
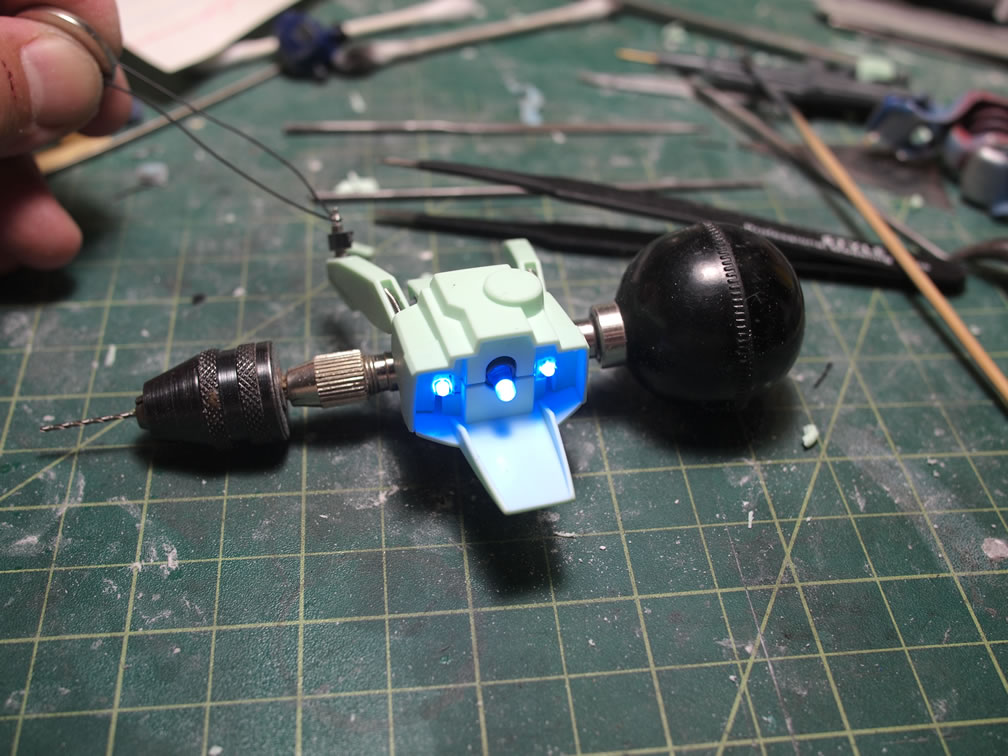
I’ve added lights to this very kit before with the Sazabi base, but the last time I ended up chopping up too much material. Learning form my last build, I use a more surgical approach, cutting and removing only what is necessary. The thruster nozzles are trimmed and the bottoms drilled out. There is a big thruster bell and two smaller bells, so I used blue LEDs at 3mm and 1.8mm respectively.
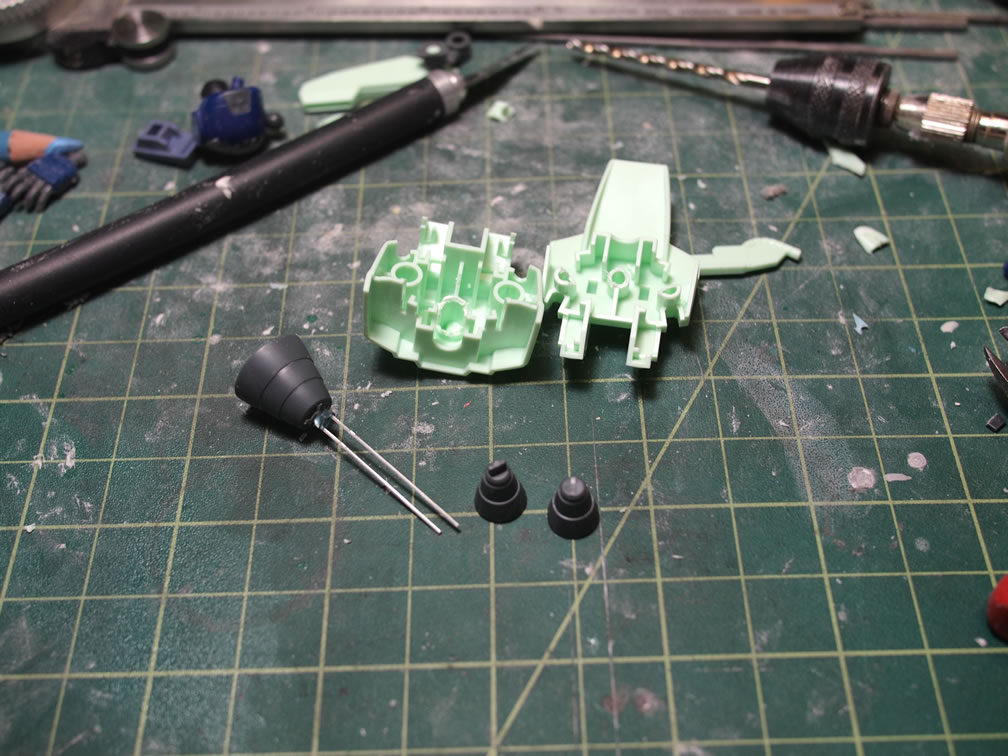
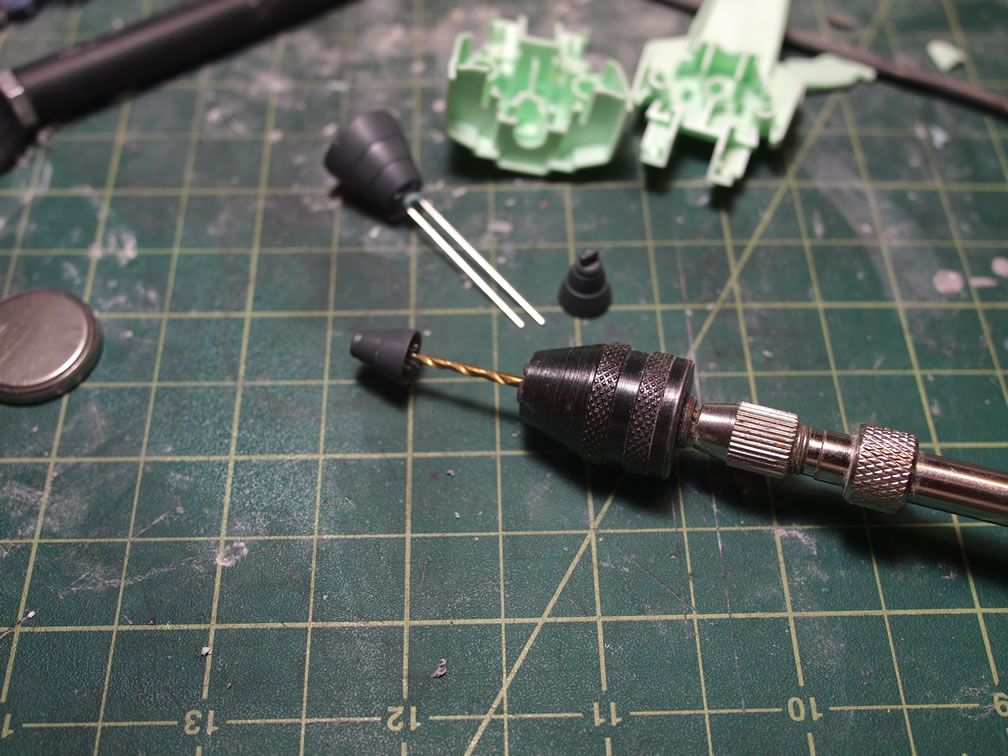

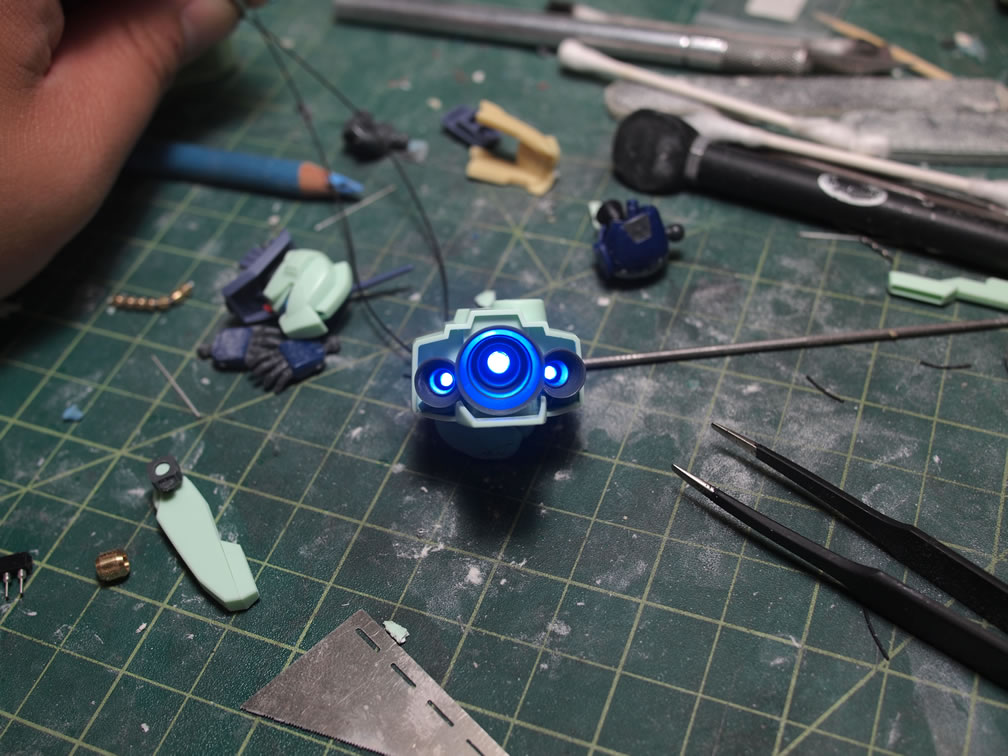
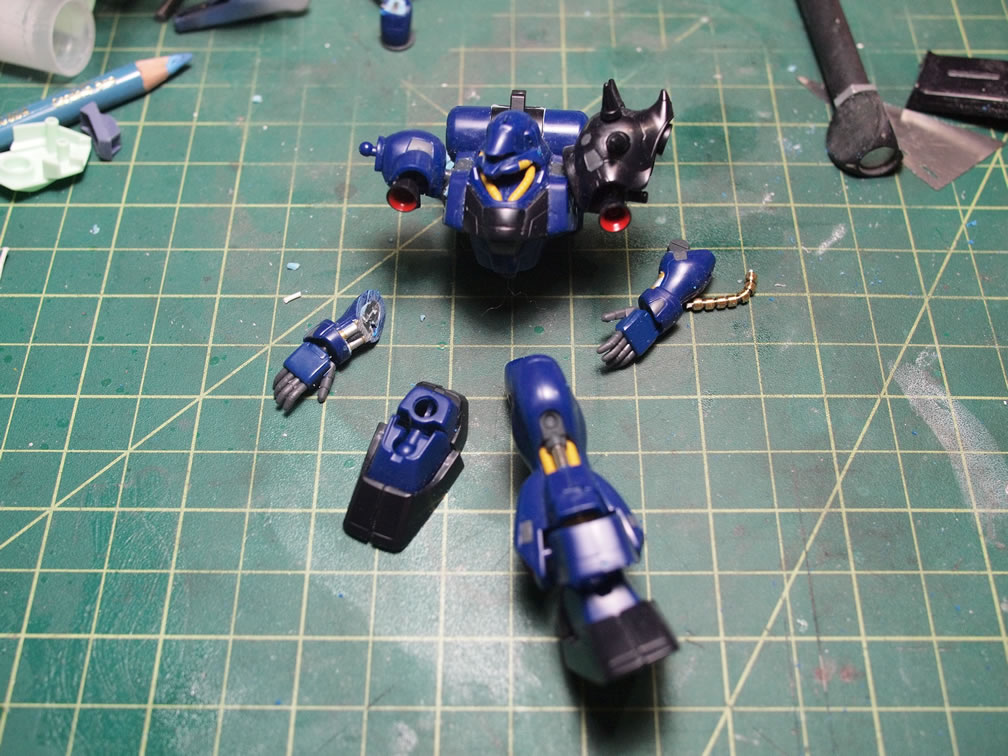
The backpack is then cut and filed down to fit the LED leads as well as the wiring. The center connection piece of the backpack is cut away as well. The LEDs are wired up in parallel, so all the negative ends are wired together and then all the positive ends are wired together so that a battery will power all three lights with about 3 volts of power. I’m constantly testing so that I’m wiring them up correctly.
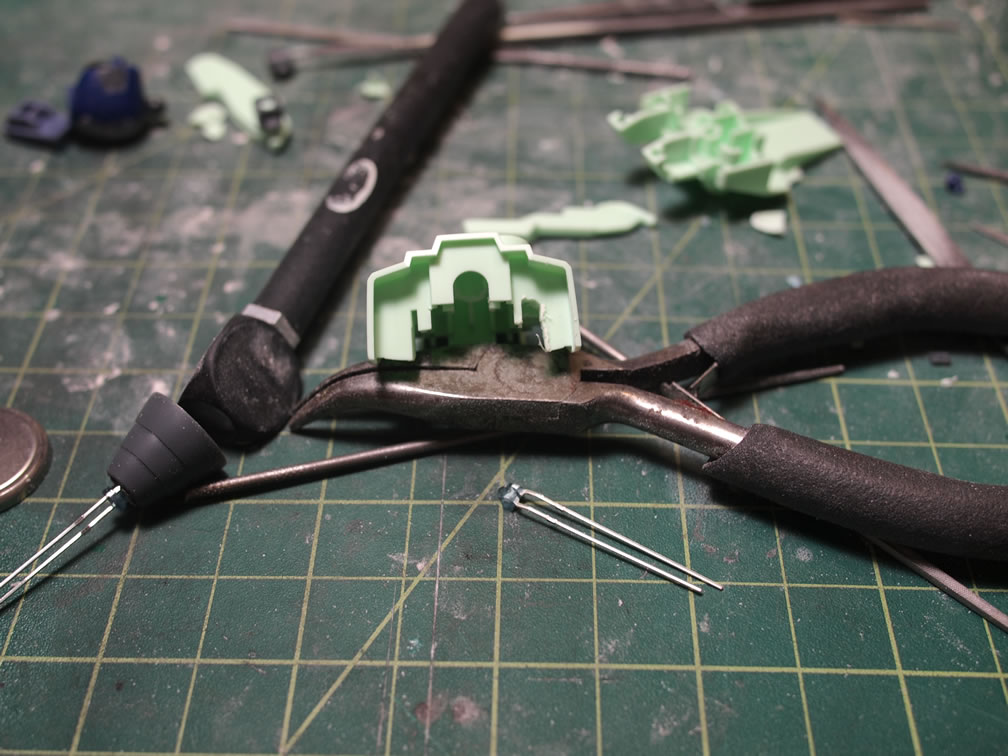
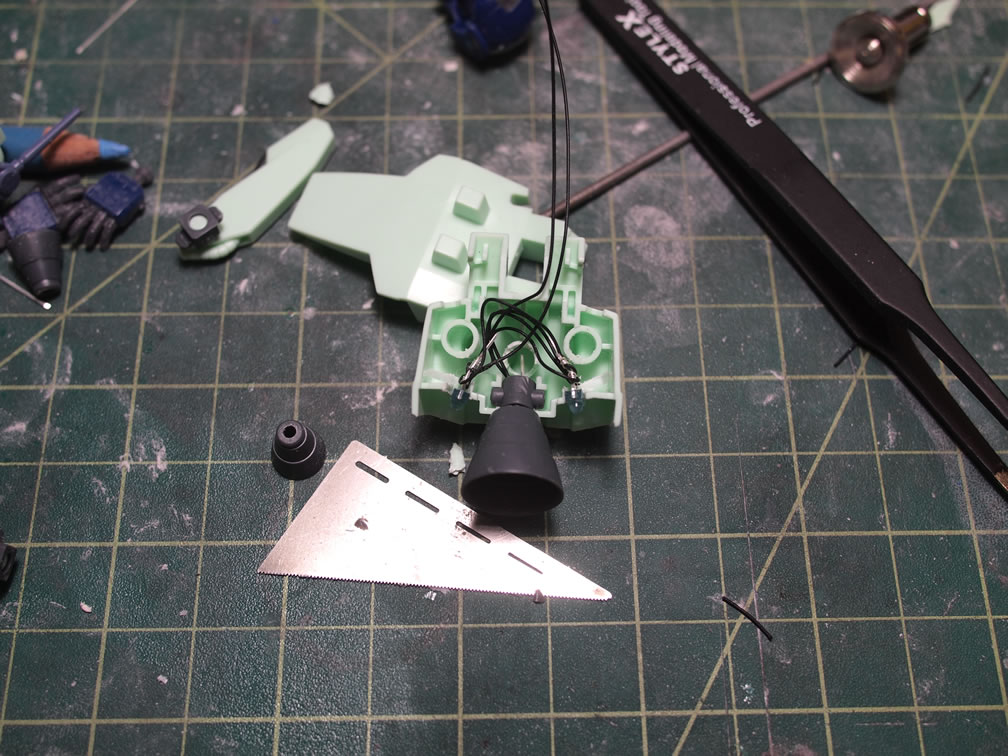
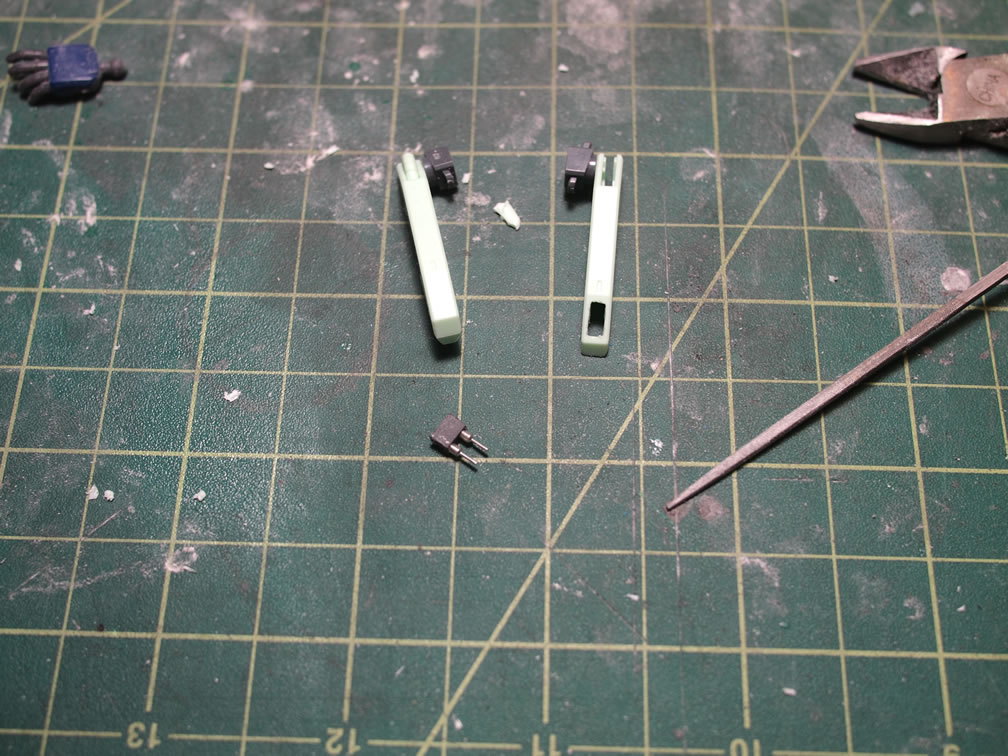
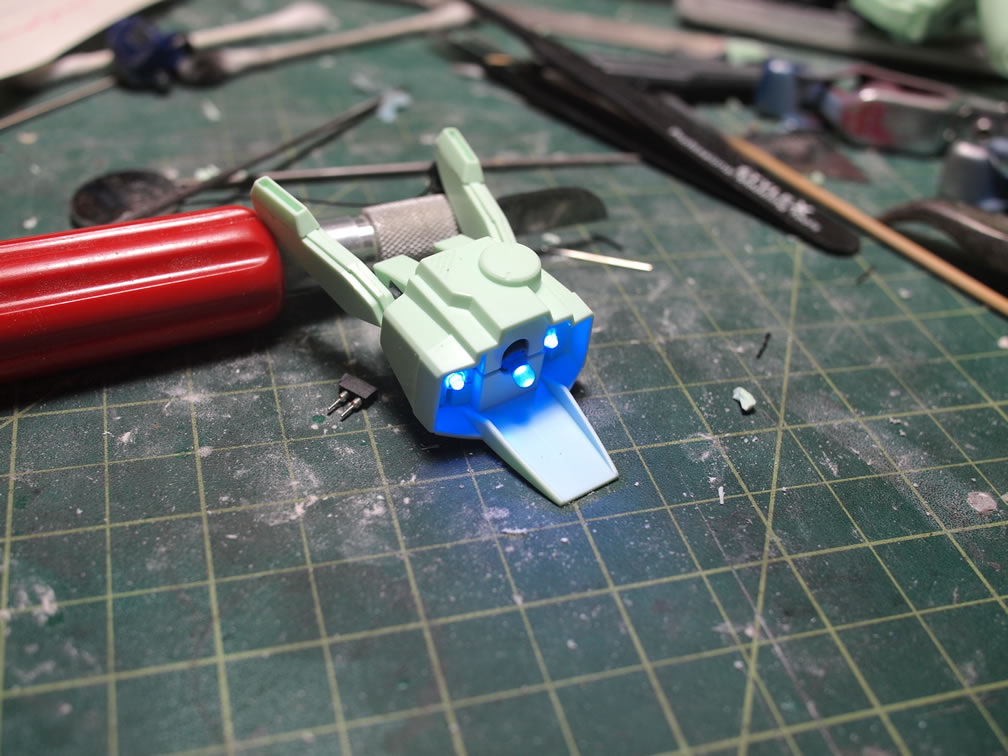
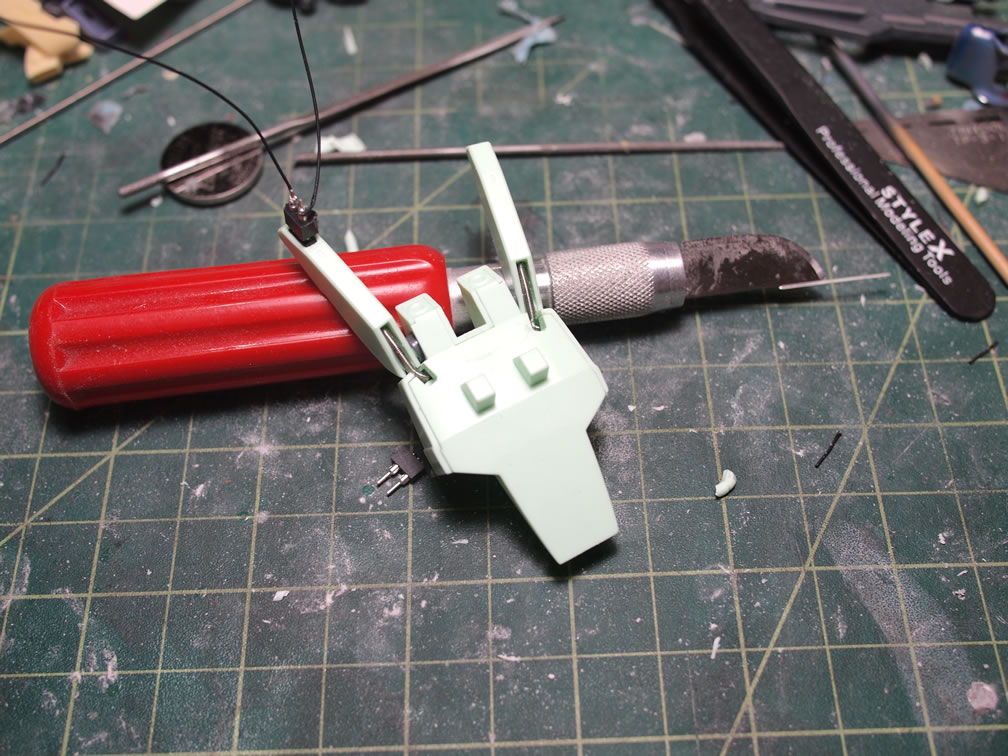
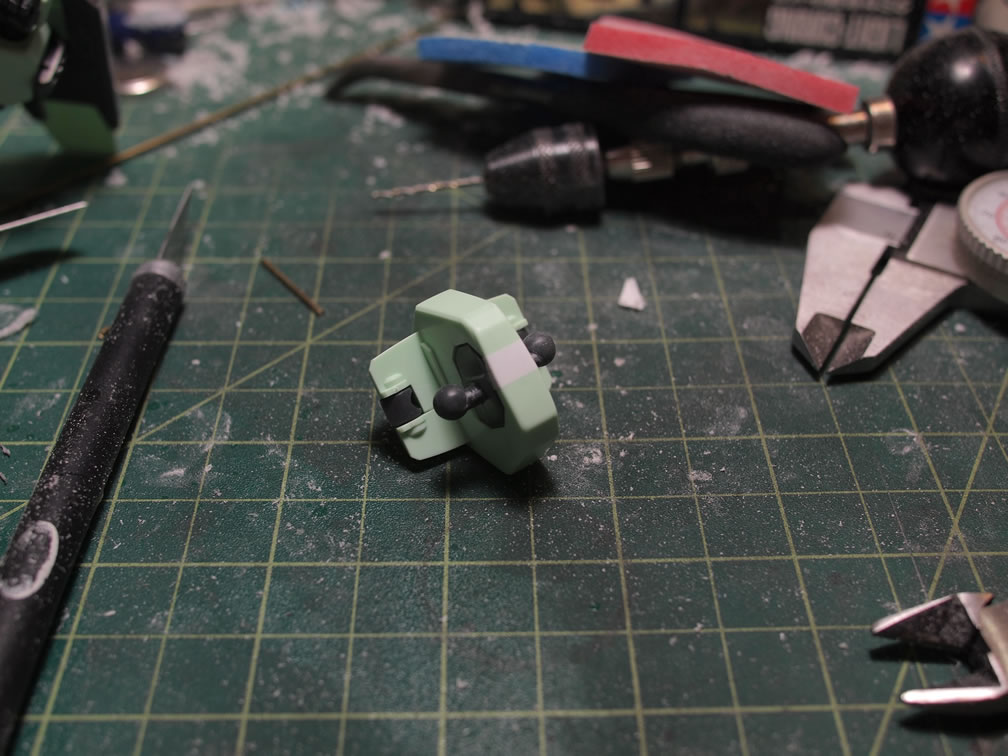
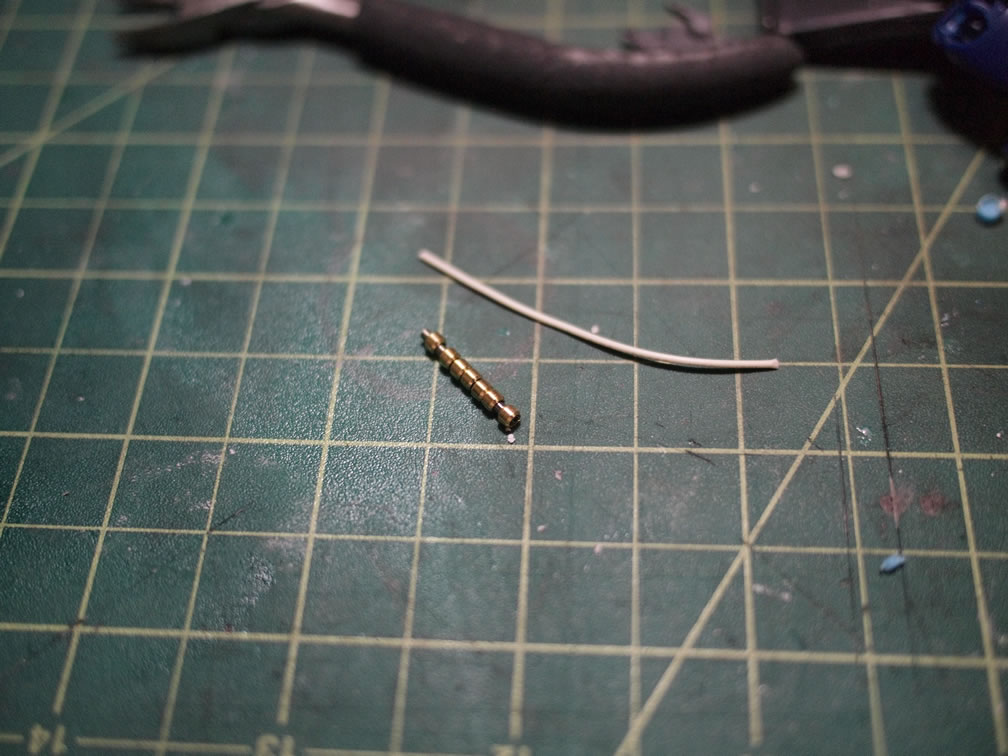
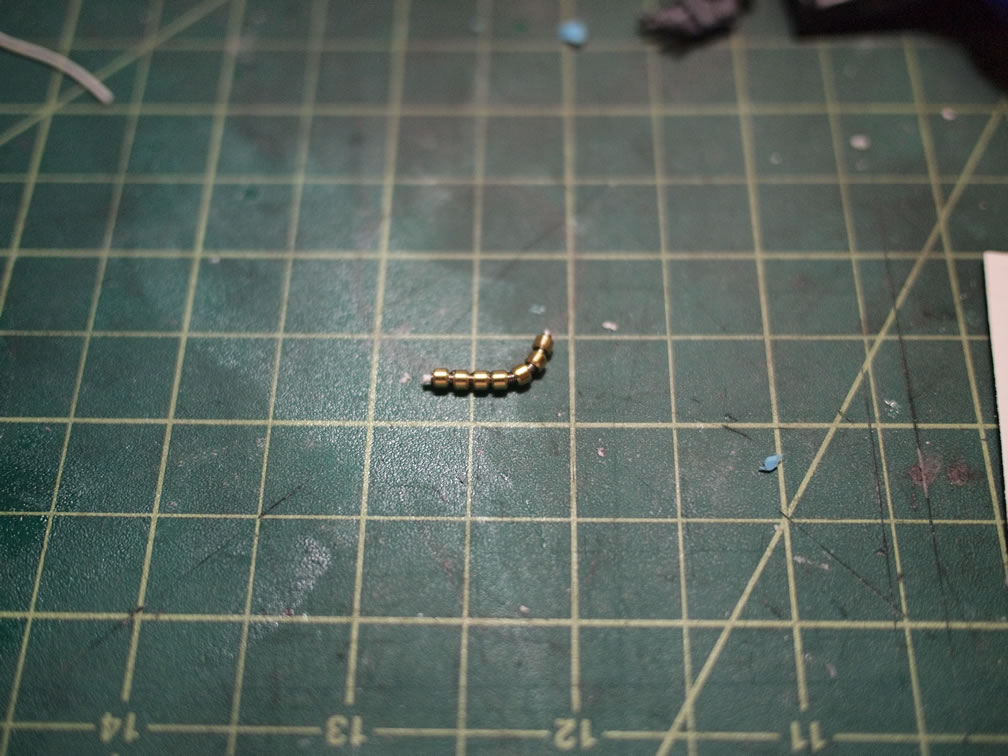
The backpack is completely self contained with the wiring and lights, but there is no room for a power source. I also want to centralize the power source as much as possible, so using a socket connection, I wired up a male plug along the top of one of the verniers, and ended up cutting and gluing together the incorrect. So I ended up having to cut up the other and putty in the incorrect one. Twice. Because apparently, I’m a moron and I couldn’t distinguish between the left and right sides of these parts. Mistakes happen when you build while sleep deprived, or build past your normal functioning time frames. The plastic tubing detail is cut away to make room for the wiring and a simple wired wrapped spring was made as a replacement. Even without needing to do this for the wiring, the metal spring mod is a simple and nice little detail change to the kit.
With the verniers wired correctly, the entire assembly is put together and tested to ensure that it all works.
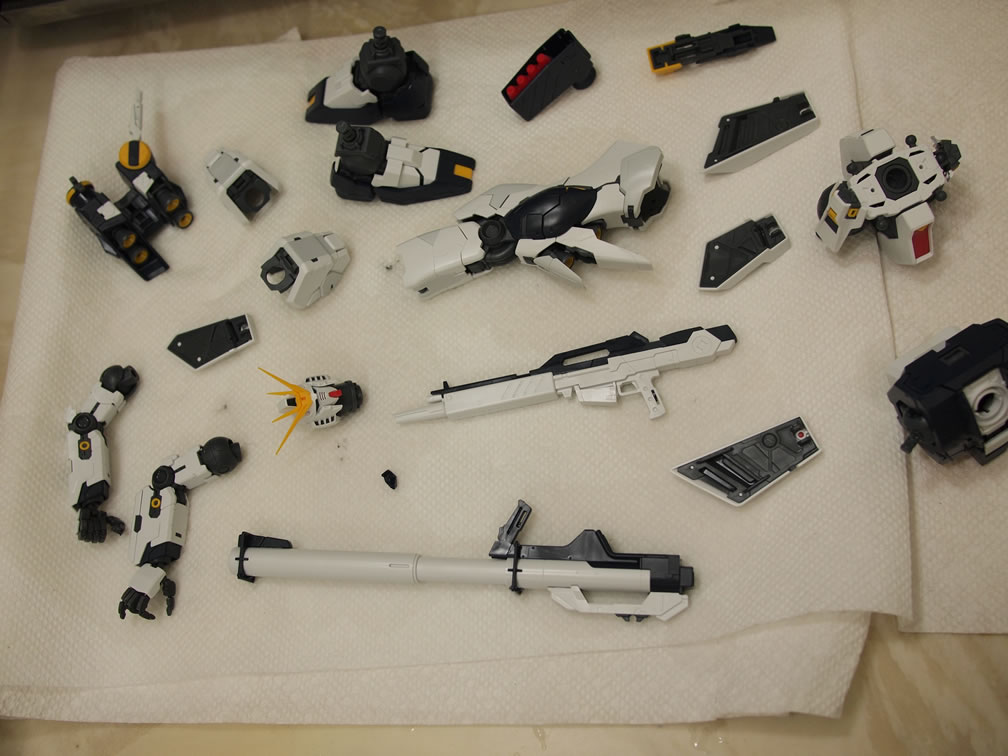
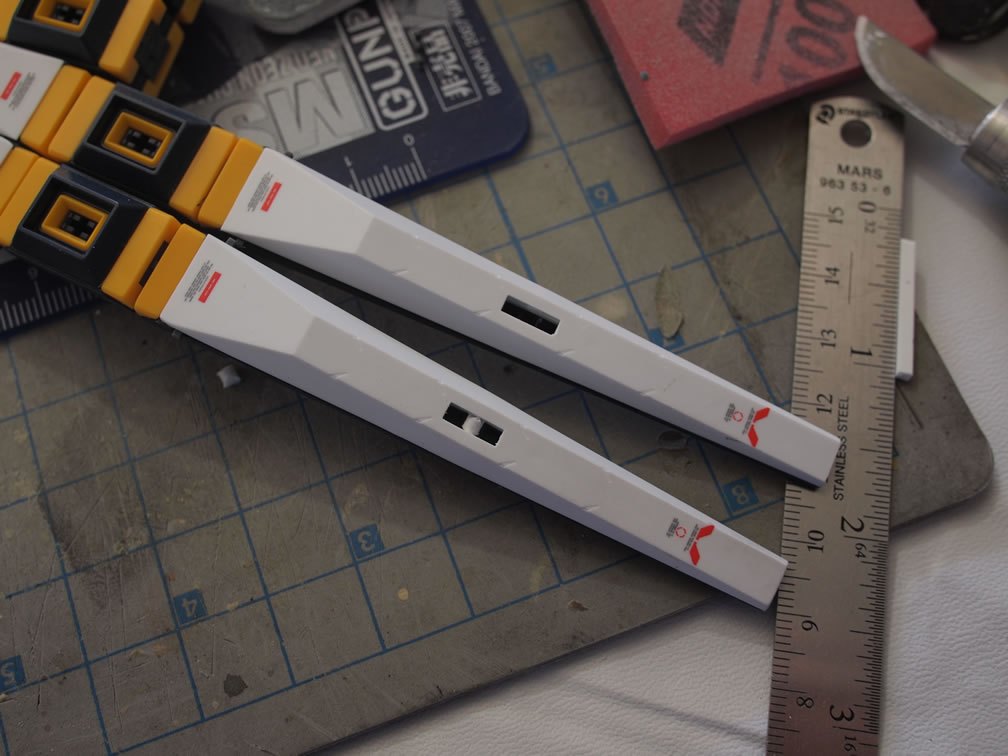
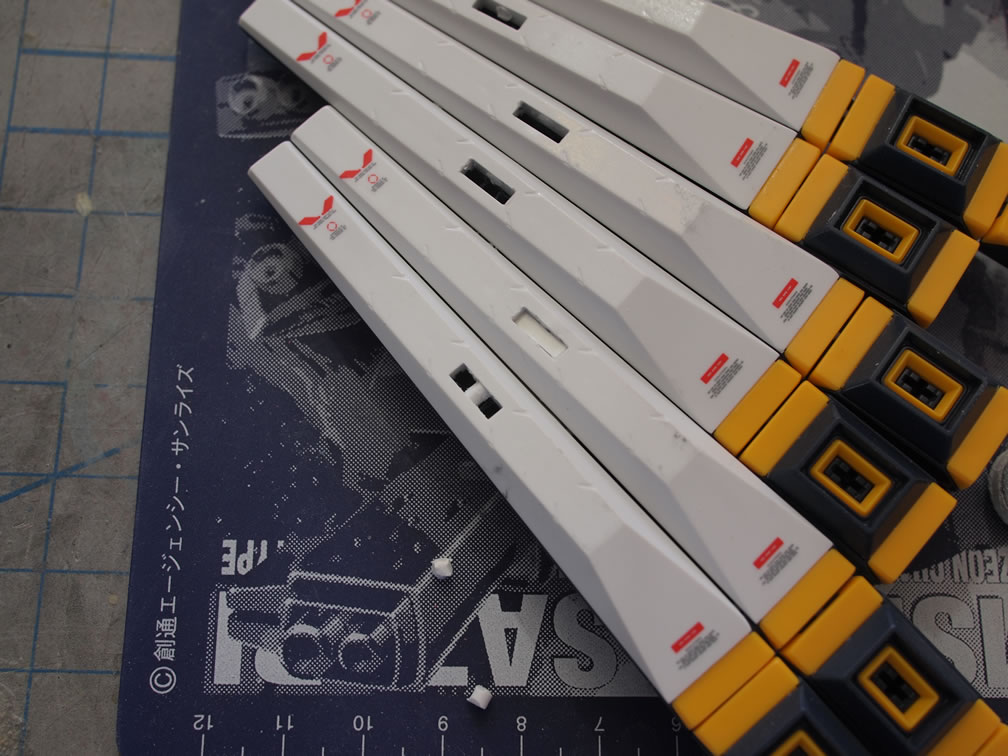
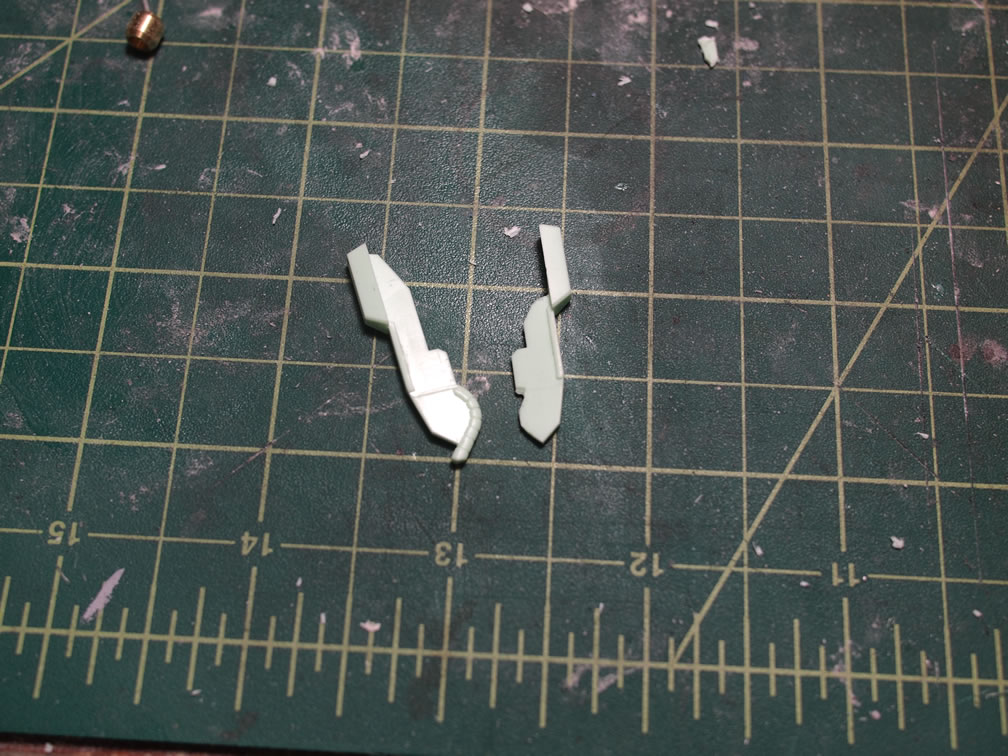
There was minimal other work on the Jegan other than seamlines here and there. There is no need for the stand attachment at the bottom of the Jegan’s waist piece, so that area was filled with styrene stacked and glued into place, then sanded and puttied to fill in surface defects. Again, looking at the Jegan’s positioning in the diorama, I decided to add strips of styrene to the back of the side skirt pieces. Gluing strips of styrene over a detailed piece of styrene that looks like vents, a small amount of detail is added here. Granted, it’ll probably be missed but on close inspection, someone may be able to see it.
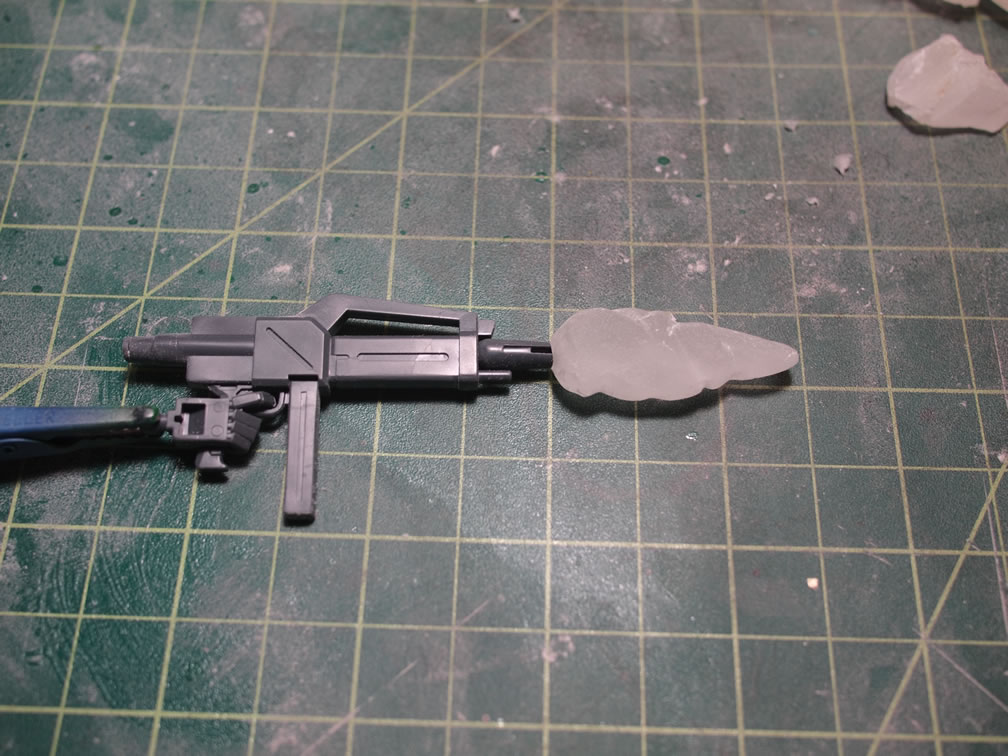
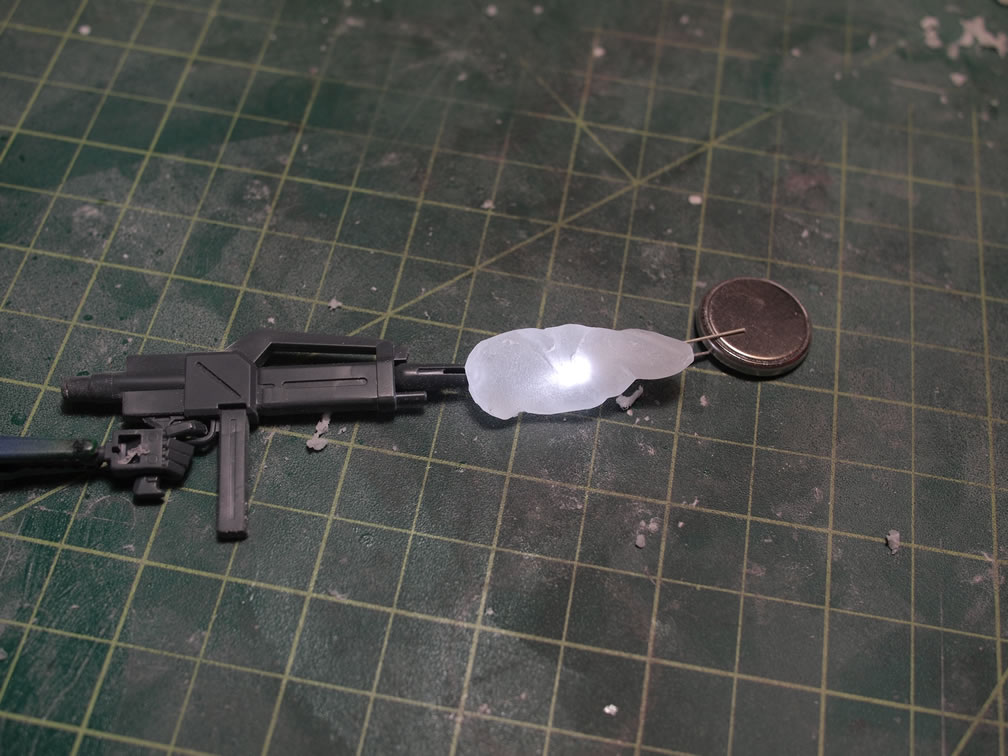
I added a piece of clear resin to the end of the gun that will be painted and used as a means to light and give the effect that the Jegan is firing upon the Dogas as depicted in the box art.
The Jegan is painted and flat coated. The last thing done was to weathering up the Jegan with chalk pastels and color pencils so that it matches up with the box art.
The Doga
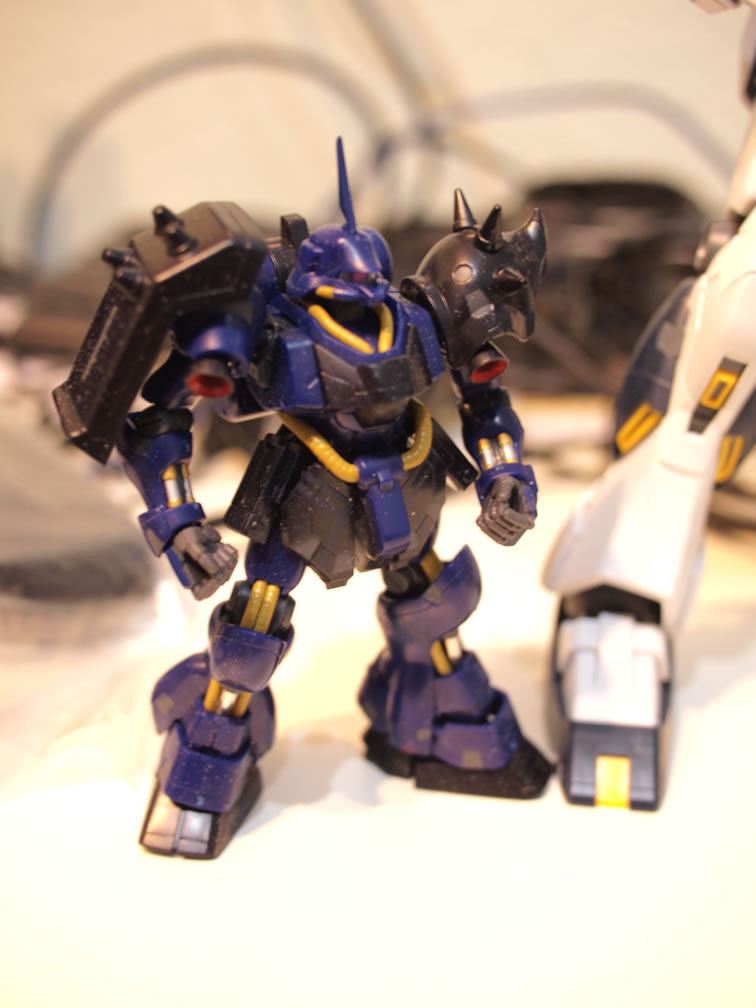
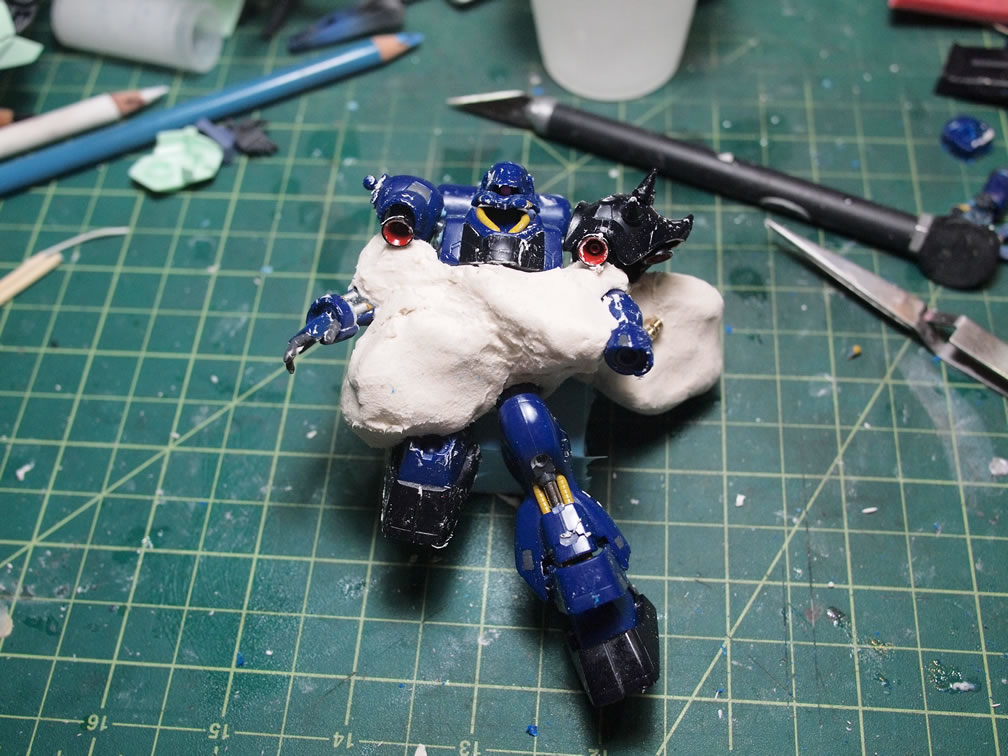
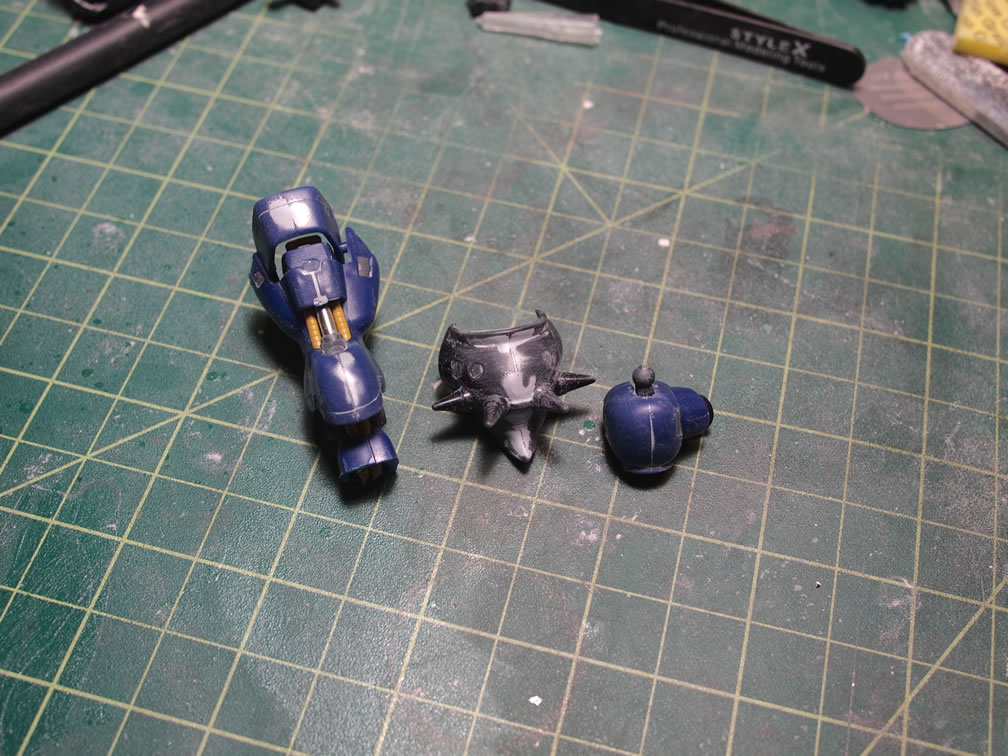
To keep with the forced perspective idea, I needed a Geara Doga that was smaller than the 1/144 Jegan. The only thing I could find was the HCM pro kit which worked out perfectly. It is taken apart as much as possible to focus on transforming for use on the diorama.
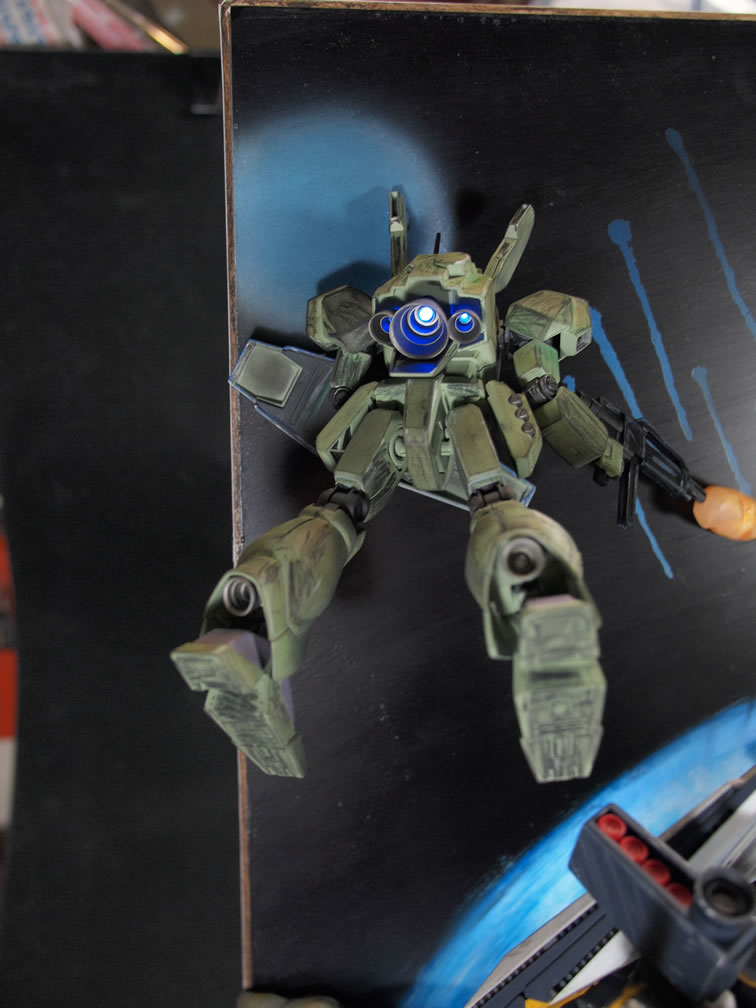
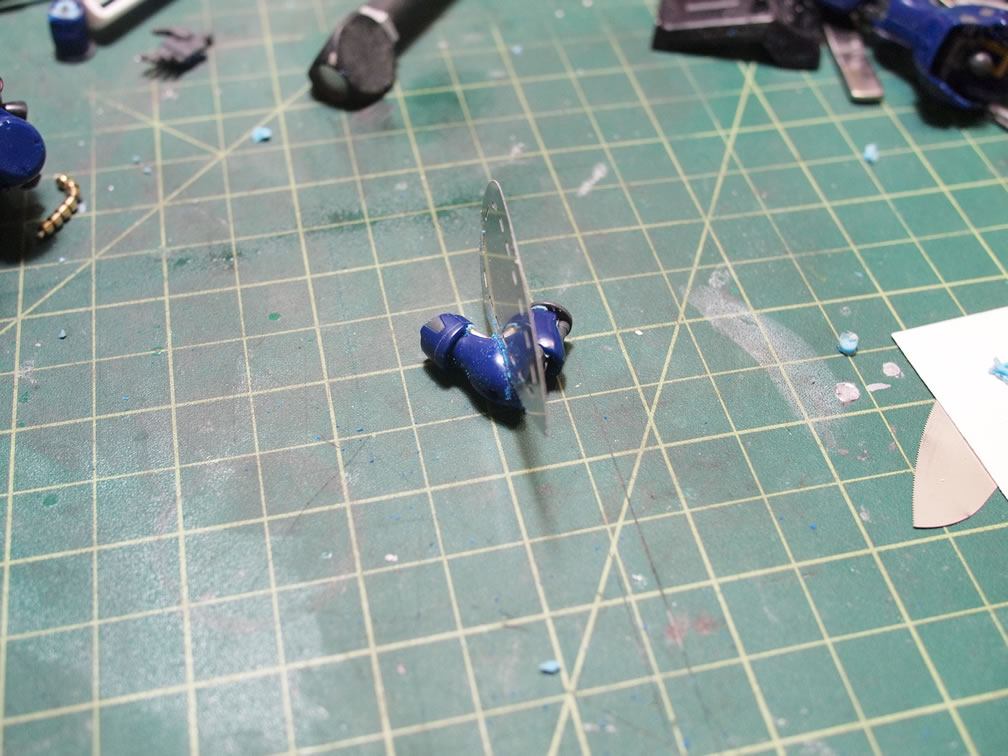
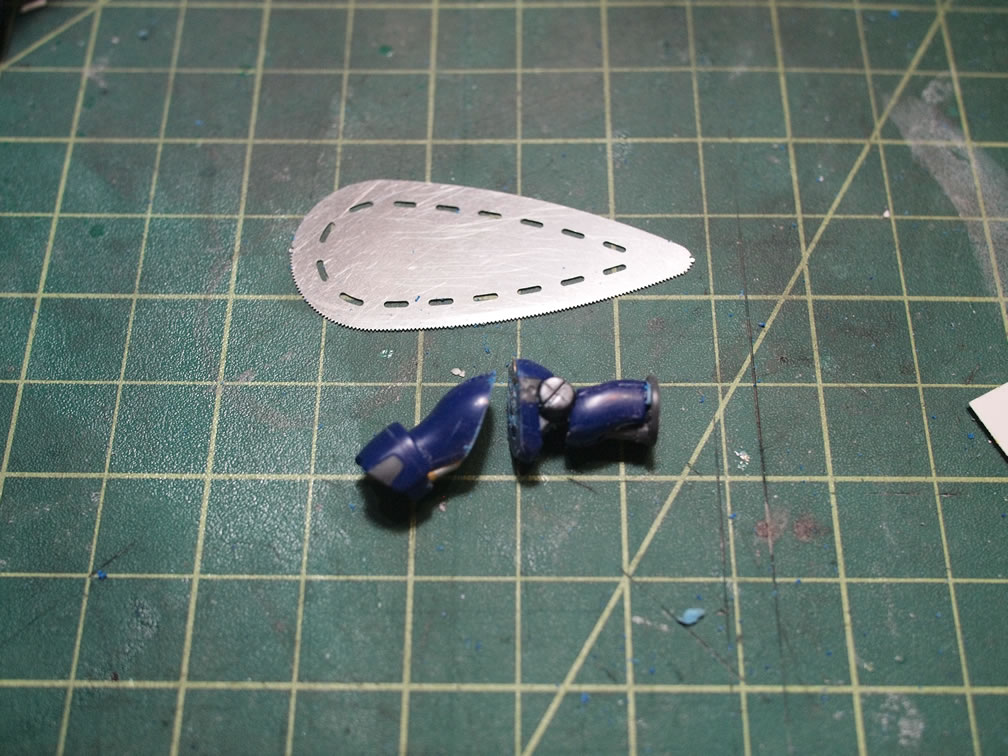
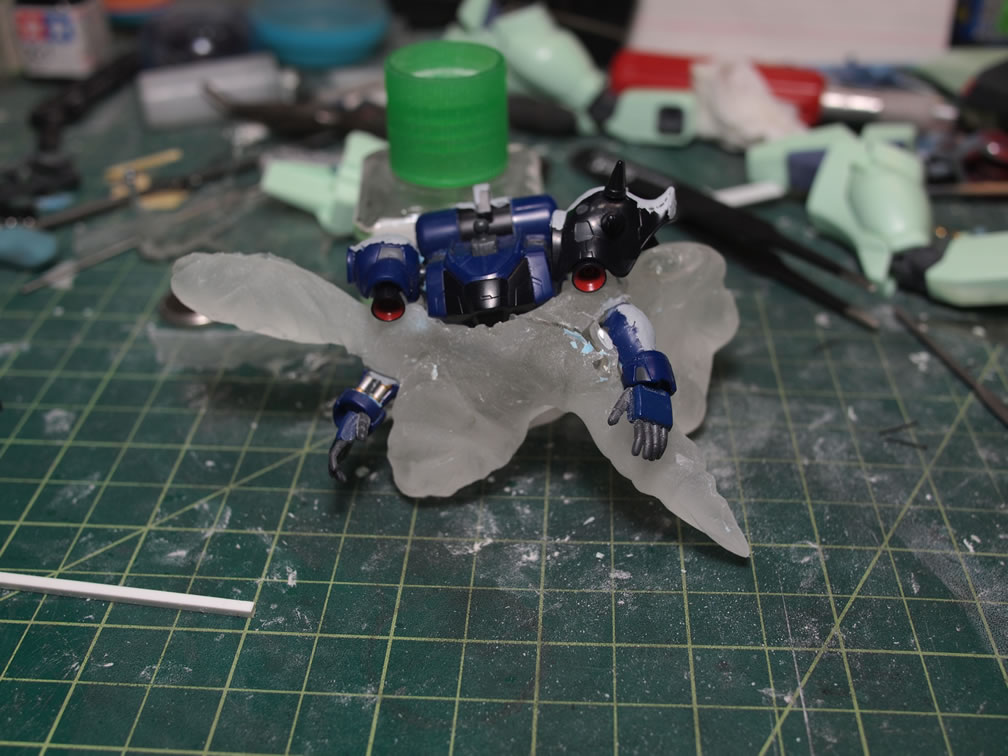
Since this Doga is being blown up in the box art, the first thing done was to decide what to use and to cut up those areas to fit around the explosion. Using the thing hasegawa tritool saws, the Doga is cut apart for one leg and the arms.
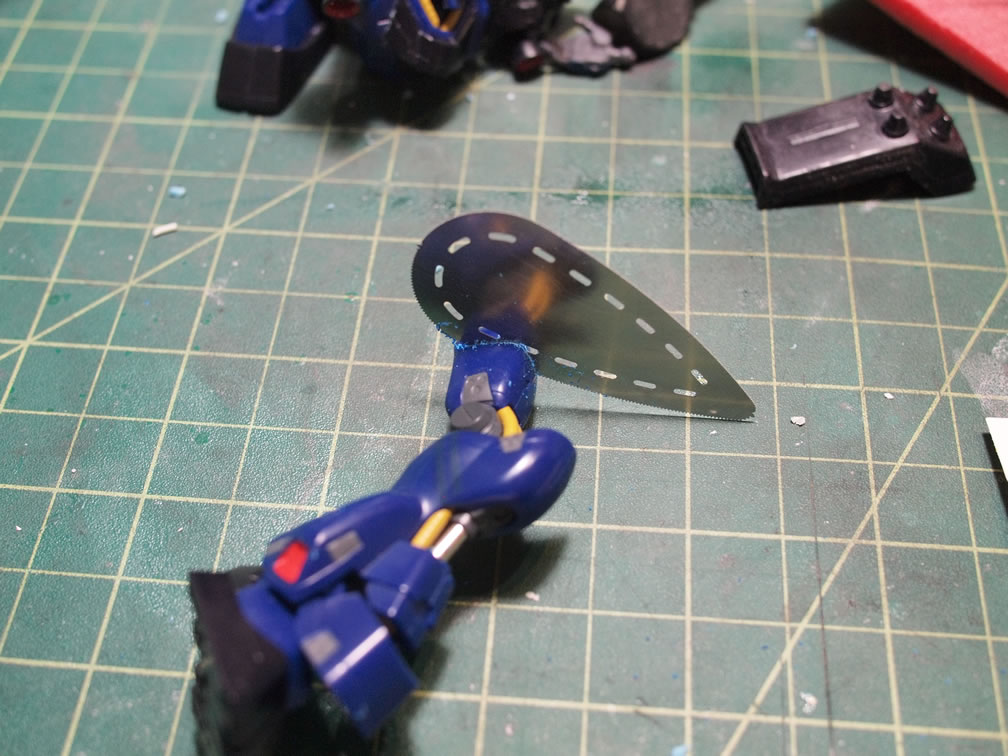
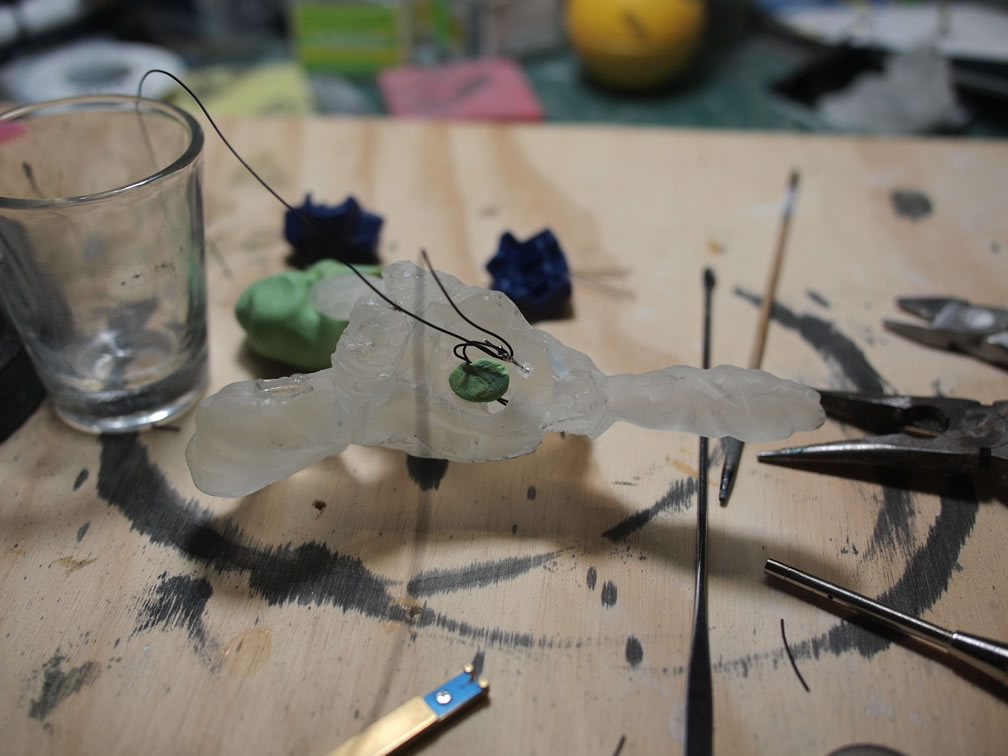
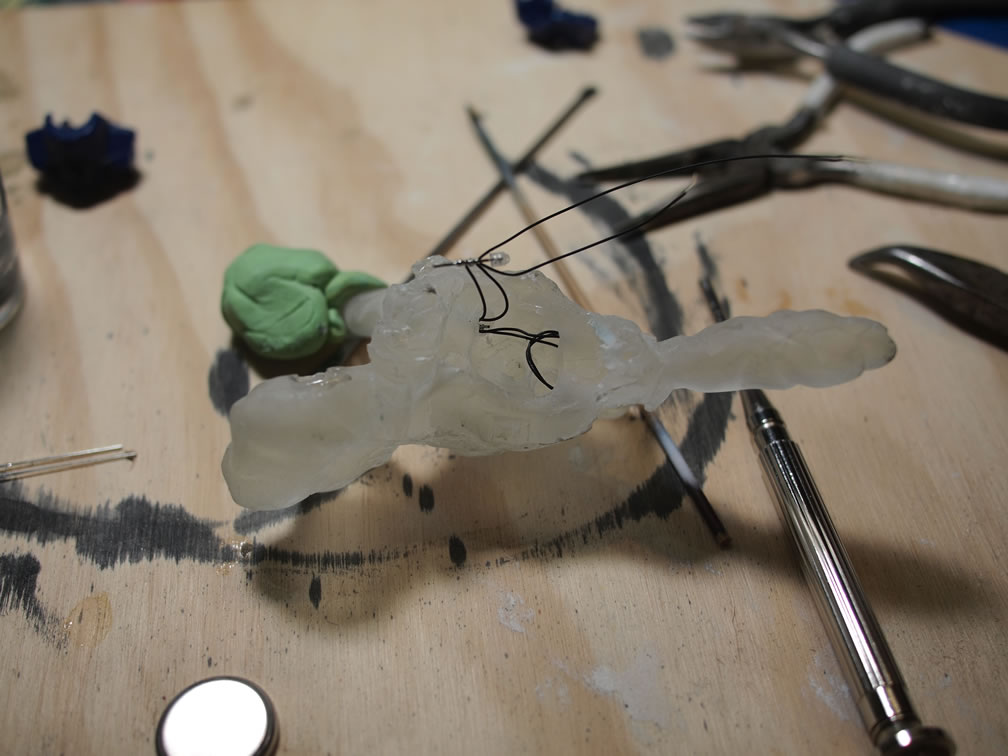
In the box art, the exploding Doga has parts of it’s waist cables in the explosion. The waist cables for the HCM pro kit is the soft rubber like plastic that is just horrible to work with, so using a thin wire for structure, a wire wrapped spring, and small metal collars; a chunk of waist cabling is created to be embedded into the explosion.
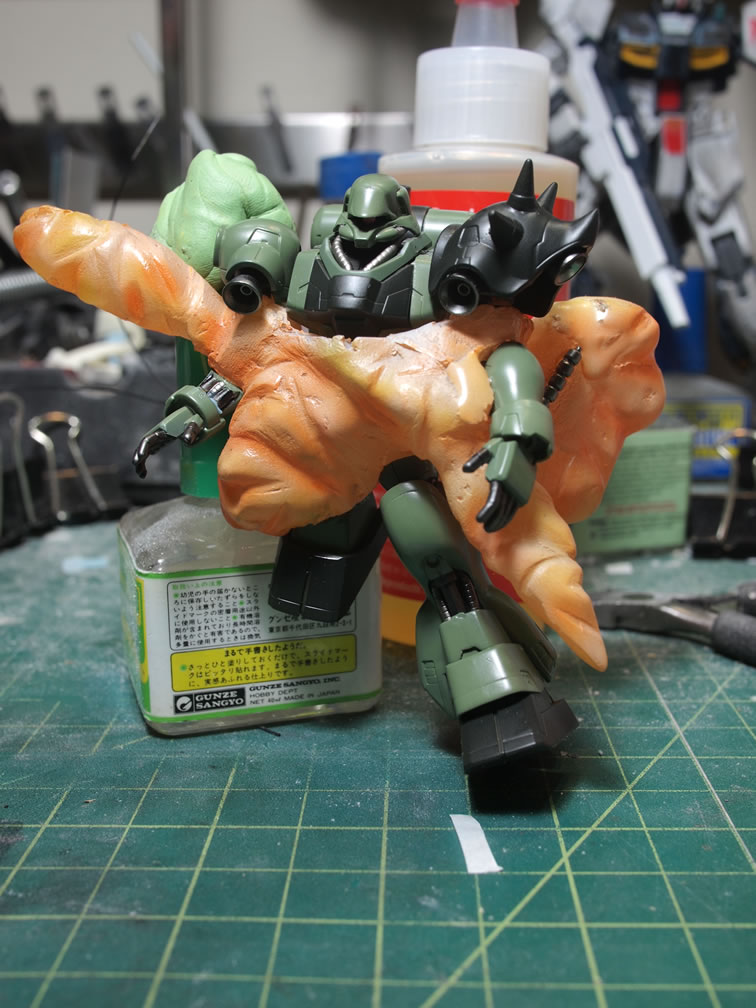
The pieces of the Doga are ready, it’s time to create the explosion.
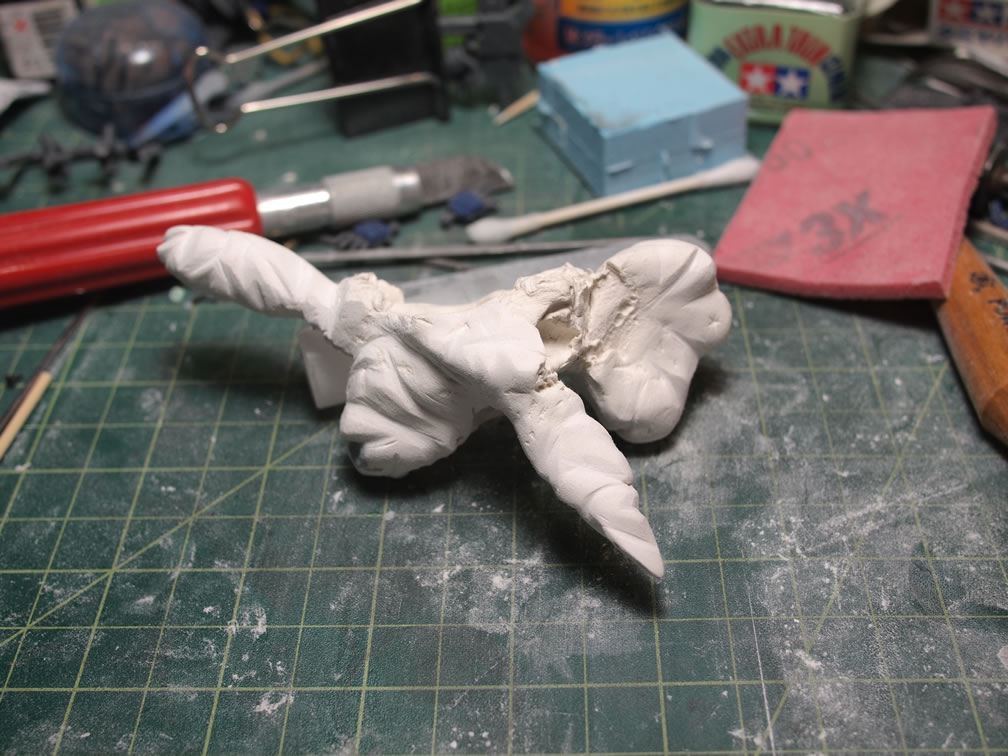
The explosion piece is several steps, the first step is to make a master for the explosion. For this, I used paper clay. The Doga plastic is coated with Vaseline so that they don’t stick to the drying clay. A rough shape for the explosion is meshed together with some of areas getting a wood skewer for support and the assembly is left to dry for a few days. Once dry, I took some sanding sticks, metal files, and a hobby knife and started cutting, sanding, and filing the paper clay, shaping it into a solid explosion piece.
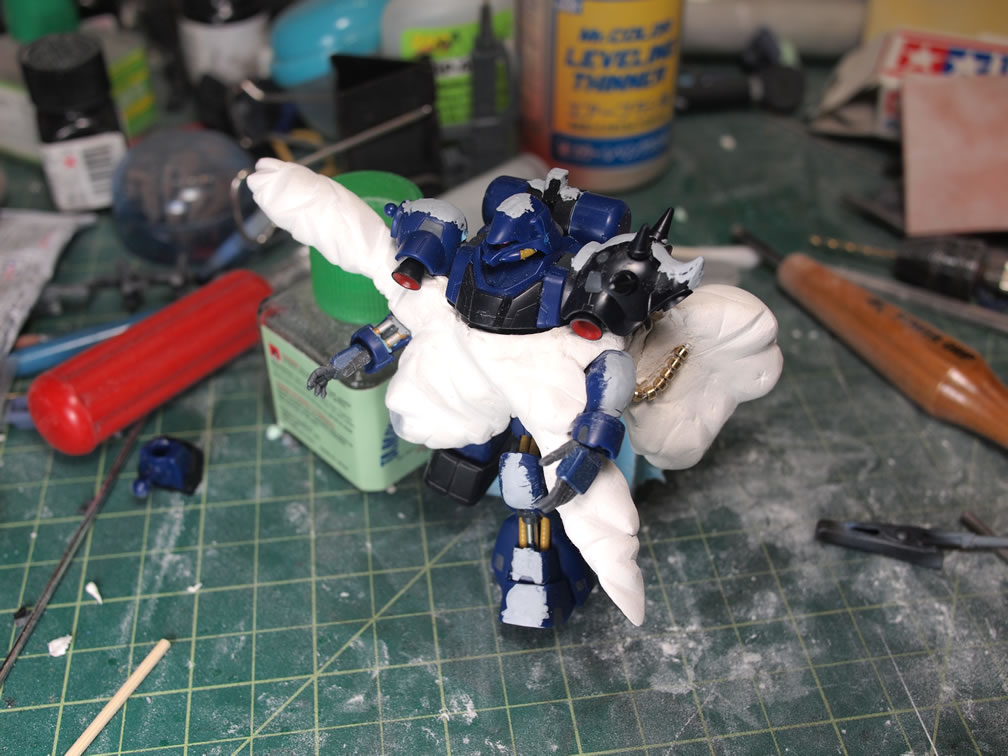
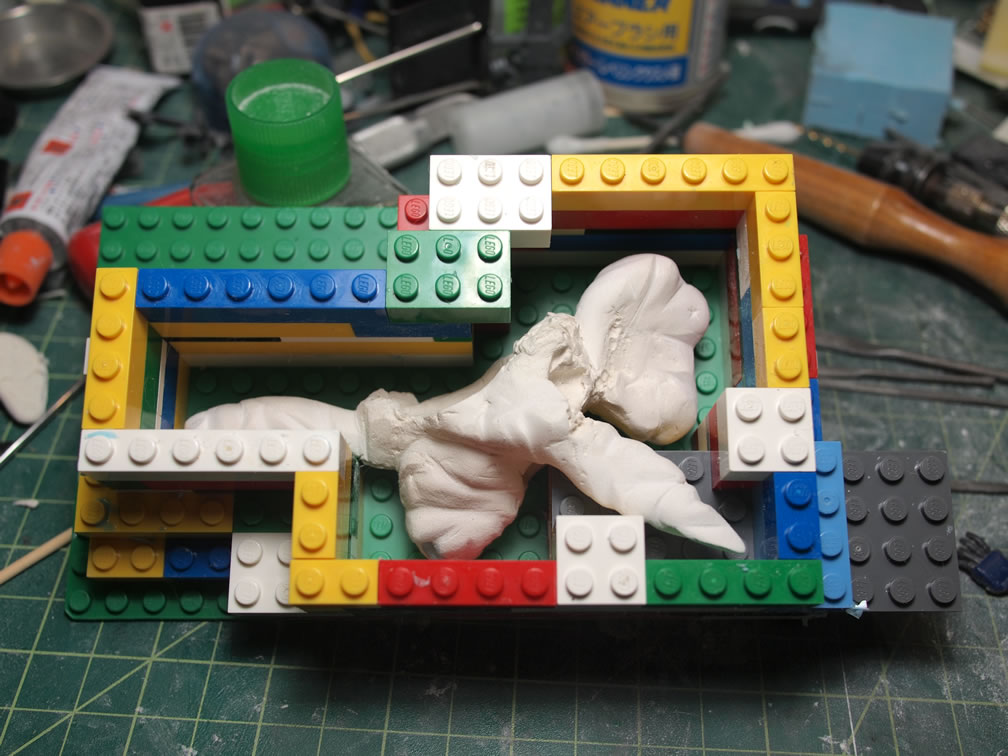
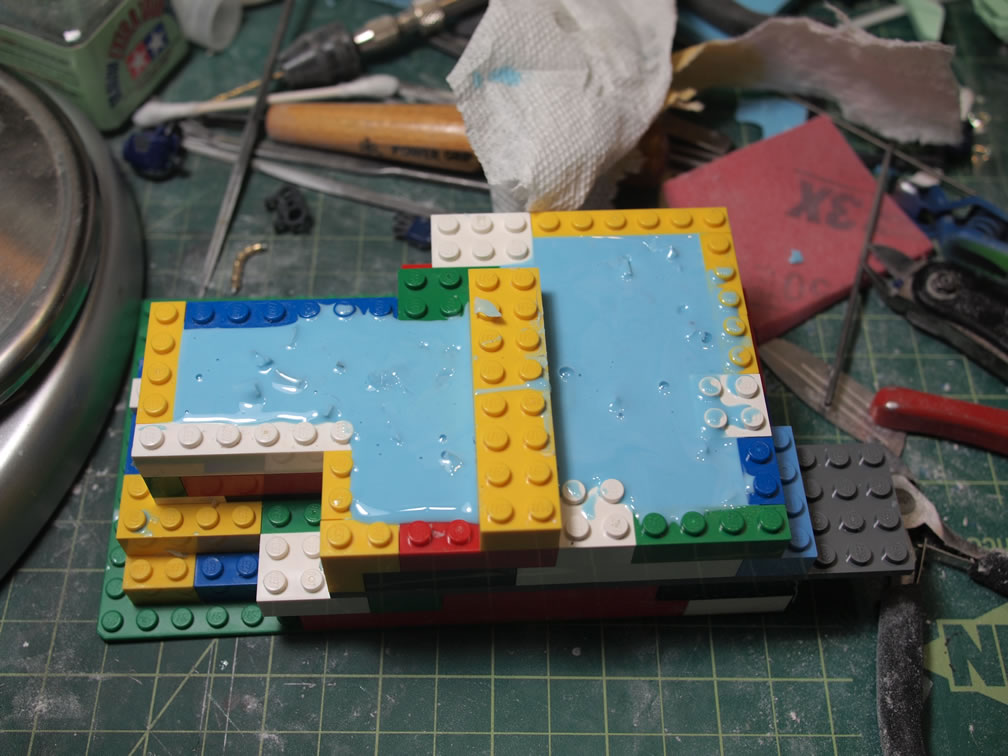
With the paper clay dry, a Lego box is built around the paper explosion and filled with silicone. The mold cures up after a day and the paper explosion is cut out of the mold. I was able to case two copies of the explosion in clear resin, but on my third casting attempt, I used a different brand that has a different ratio and apparently, a very slow cure process so my mold was effectively destroyed. But I have two good pieces of clear explosion to work with. The main pieces of the Doga are test fitted.
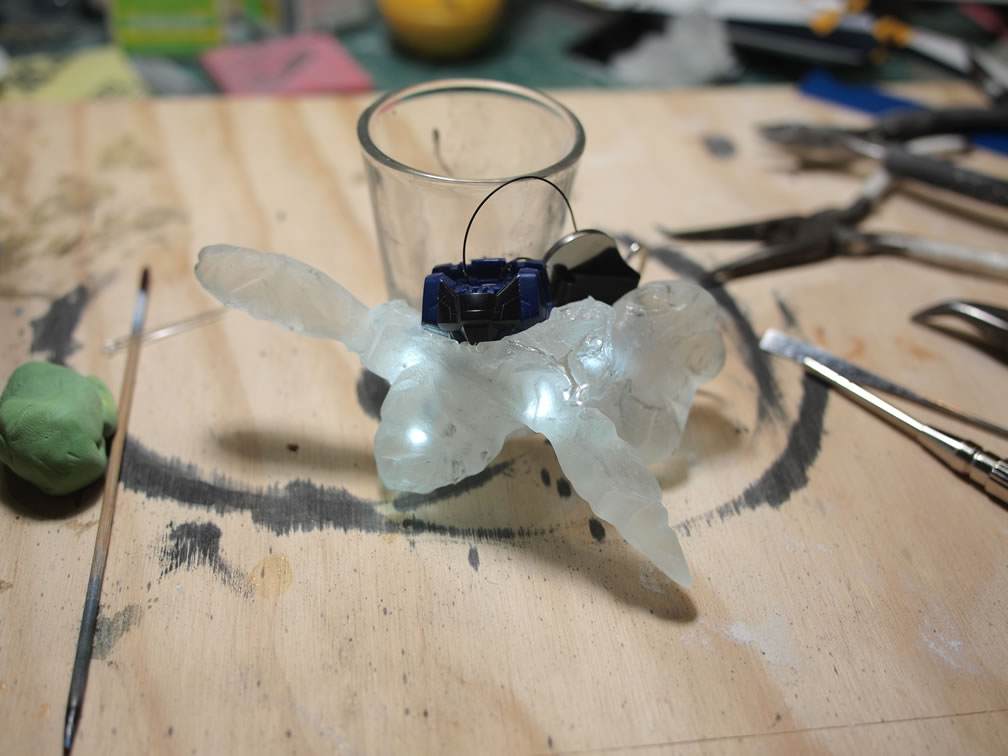
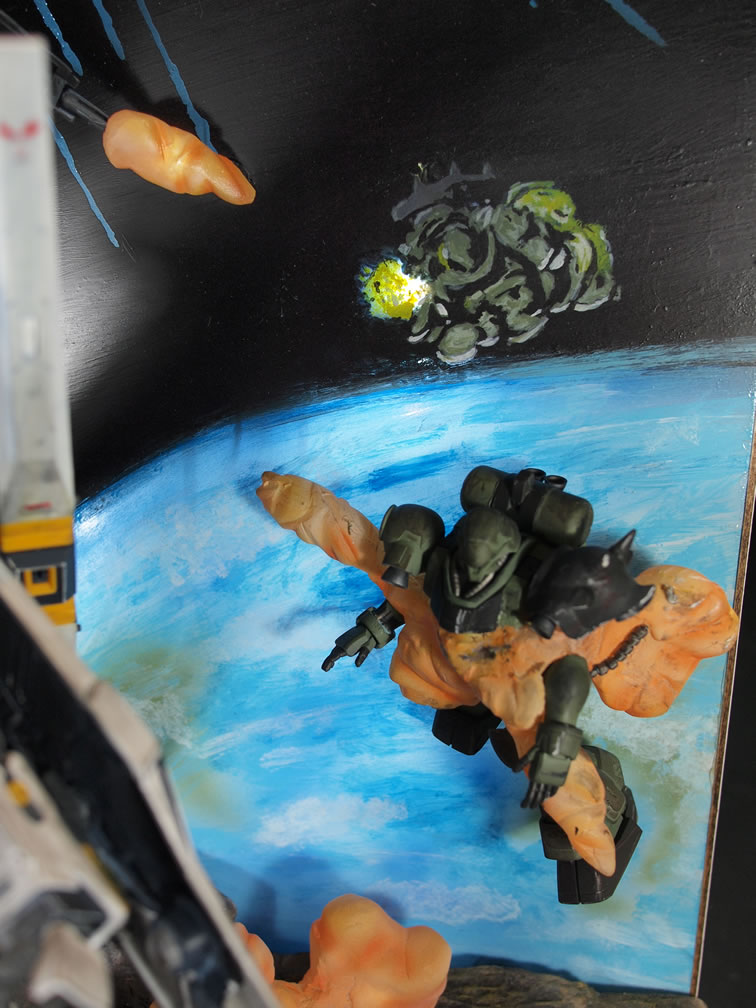
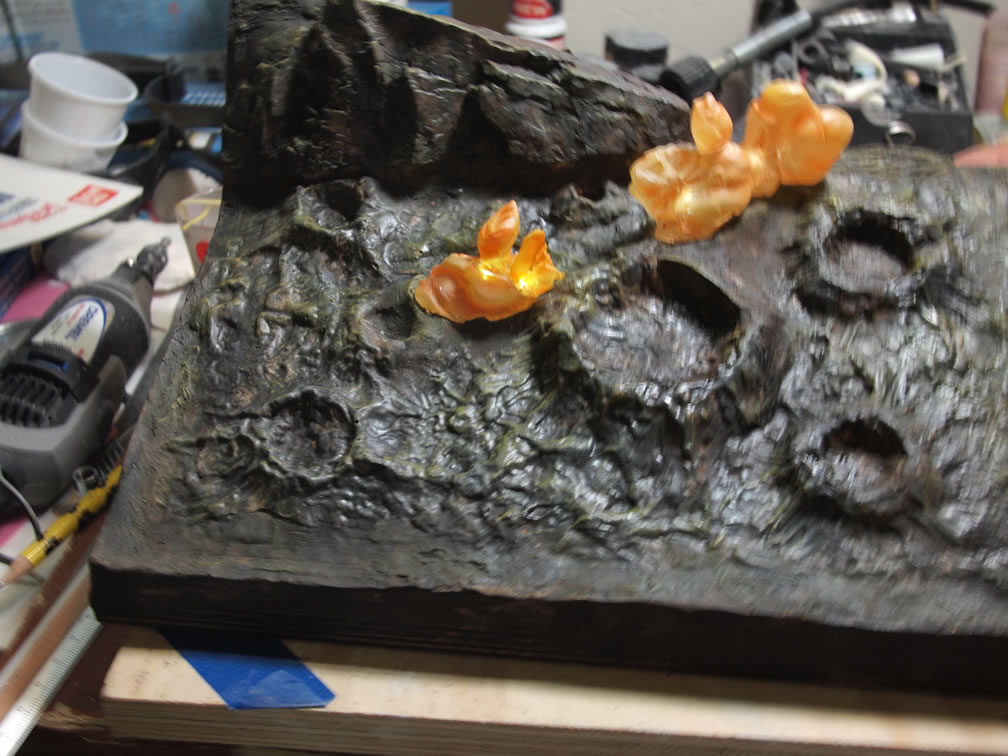
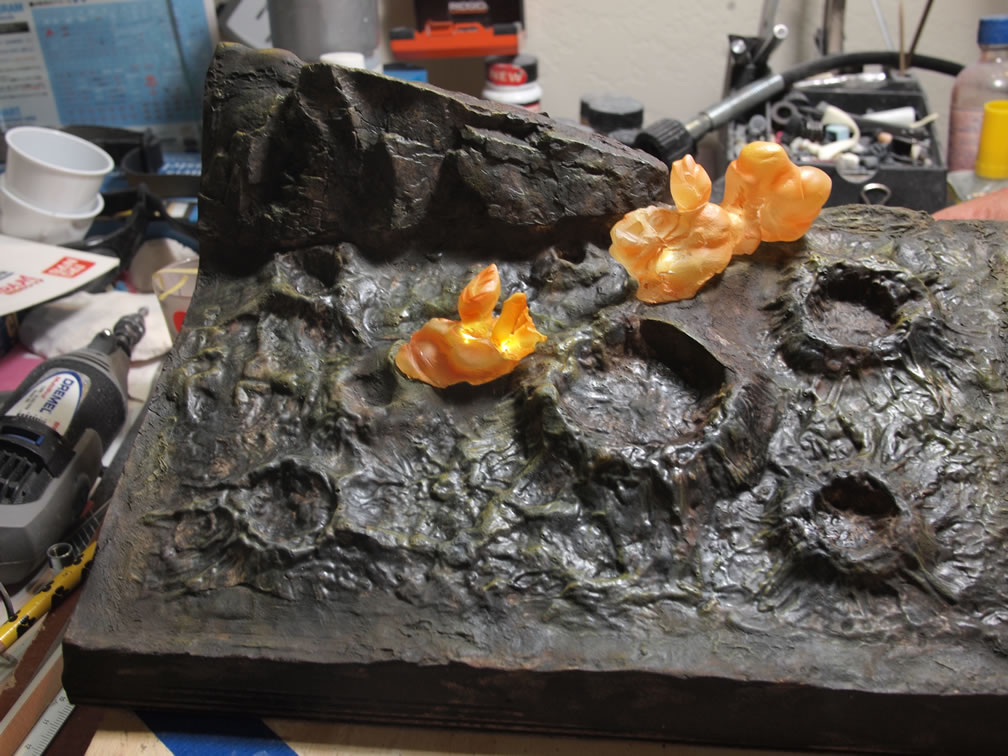
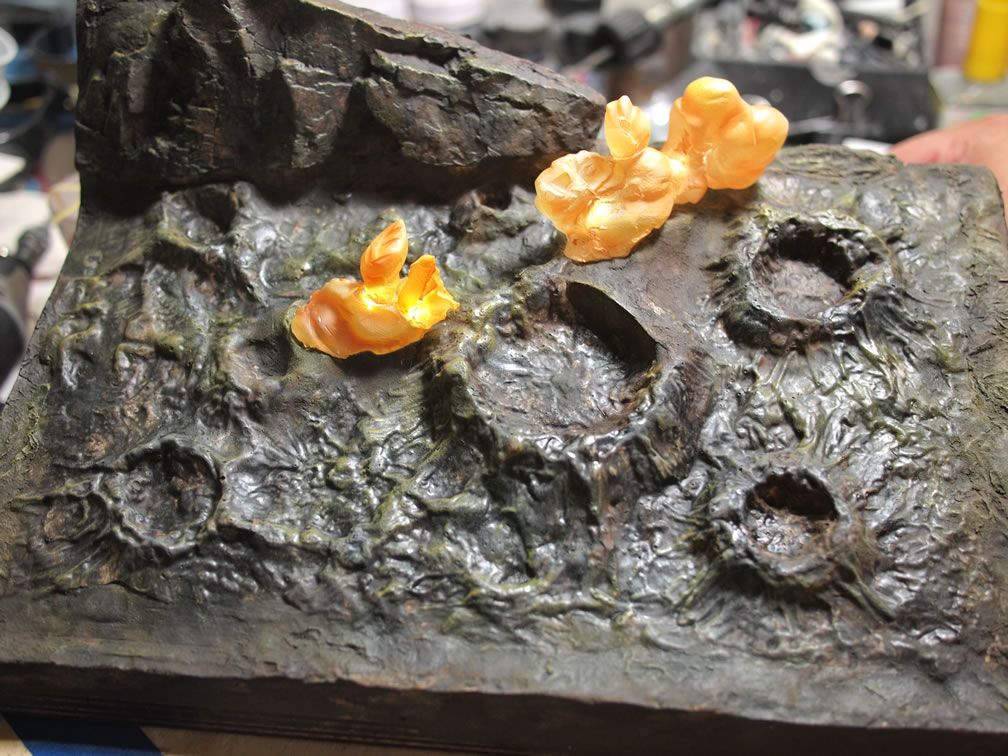
I drilled holes into the explosion piece for LED drops. Since I want to light the explosion. I used a white LED and then an orange LED before deciding to stick with the white LED. They were brighter and would shine through better once the clear pieces were painted.
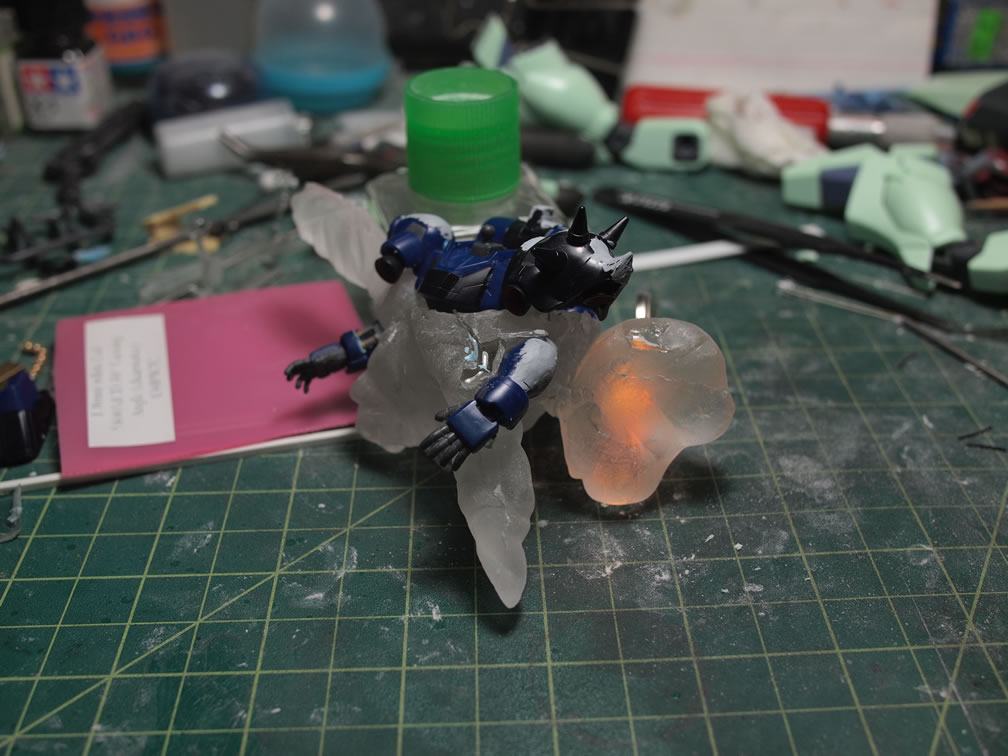
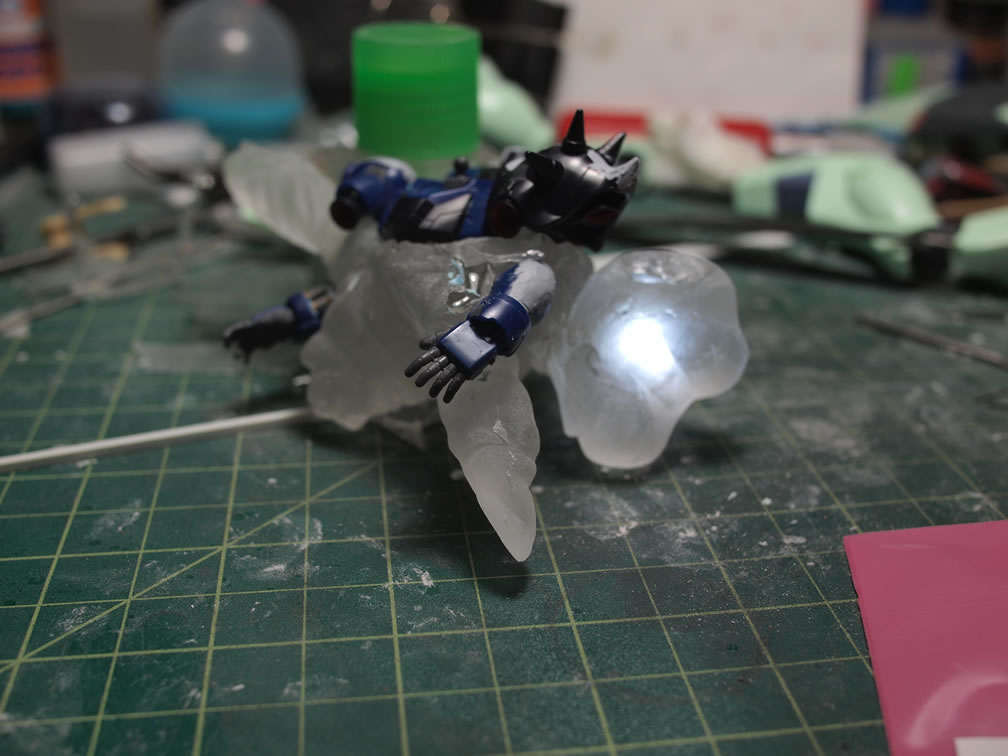
Tests completed, more holes are drilled into the clear resin and then the LEDs are wired together in parallel. Same as how I did the Jegan’s backpack lights.
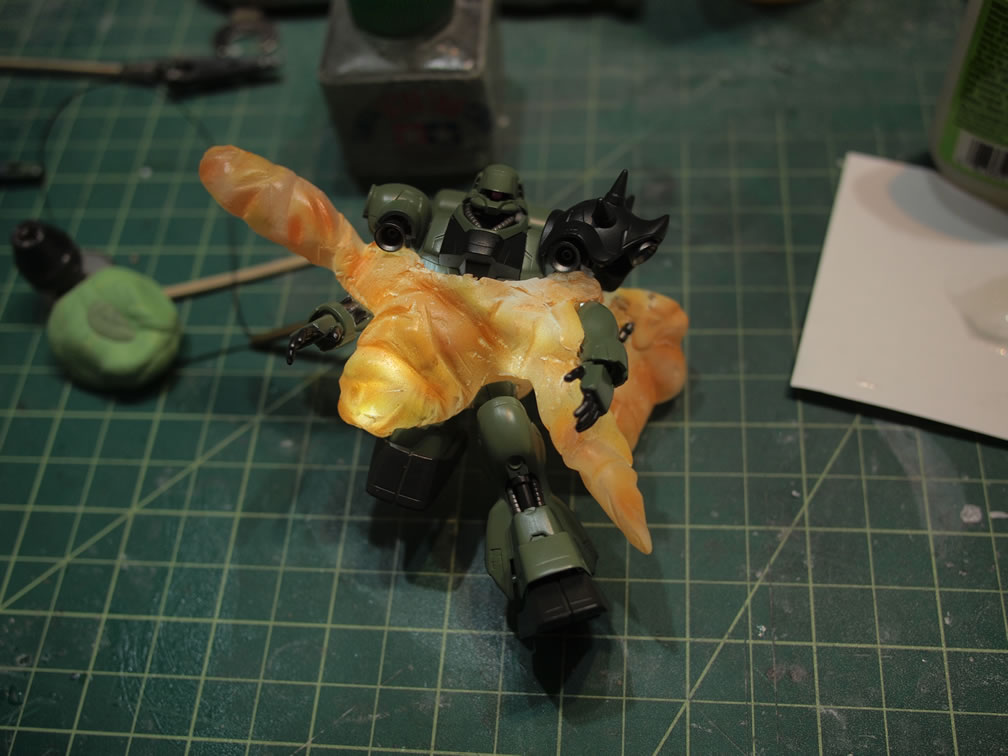
The explosion piece is then painted using white as a light base coat, followed by clear yellows and clear orange to get shading effects as well as matching up with the box art.
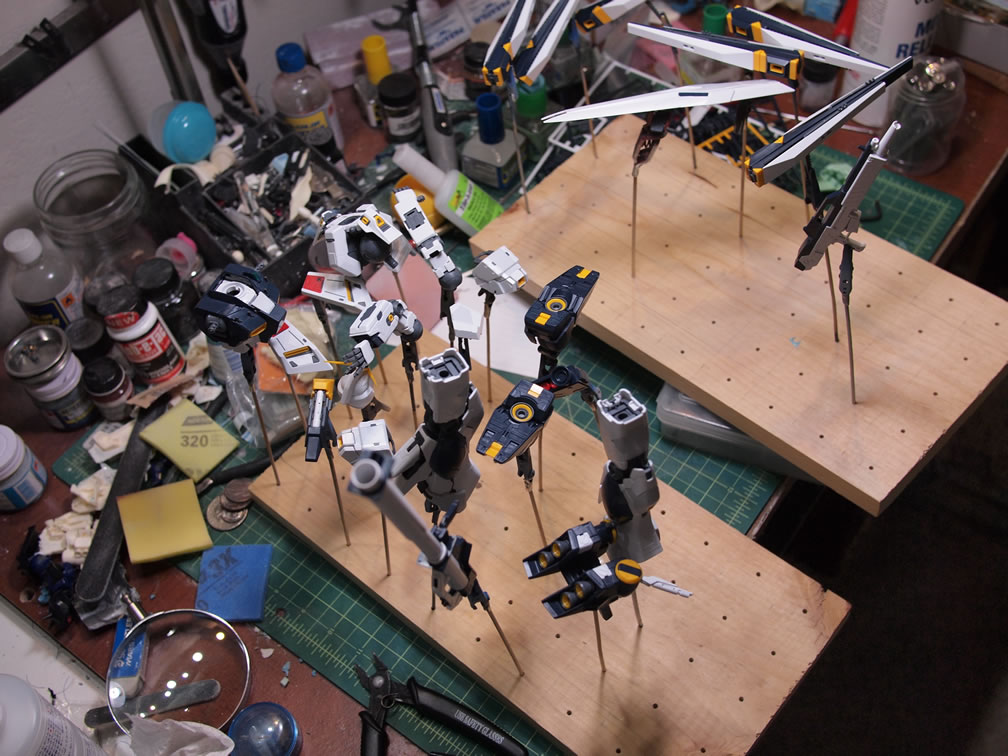
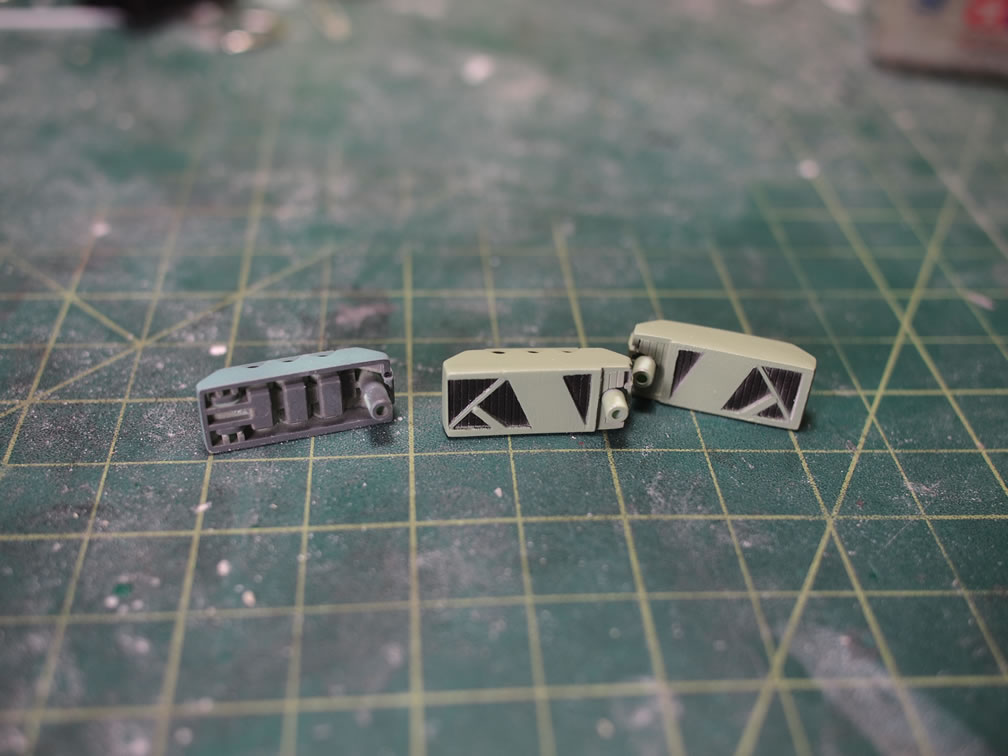
The HCM pro kit is riddled with nub marks and seams. The Doga’s parts are shaded and putty is used to fill in seams as well as some of the holes around the kit that are used for various weapons attachments. Once all the surface prep is completed, the entire kit is primed for a final check. There were a few areas that needed additional attention with light curing putty, but that was a quick fix and it was on to painting the standard grunt green for the Doga. A test of the lights and the explosion piece seems to work out nicely.
The Doga is glued to the surface of the explosion and a little bit of filling here and there was done. The last step for the Doga is the pastels and colored pencil treatment to match it up with the Nu and Jegan.
The Base
The planning for the base was simple, the Jegan would be attached to the background with the shield as the main point of contact and then the left vernier would be one light anchor point and the gun barrel connected to the second anchor point. The Doga would be attached to the background via a metal tube connected to the Doga. The Nu will be standing on a hydrocal base that is slanted at an angle. Having the rough plan penciled into the background, work on the base truly begins.
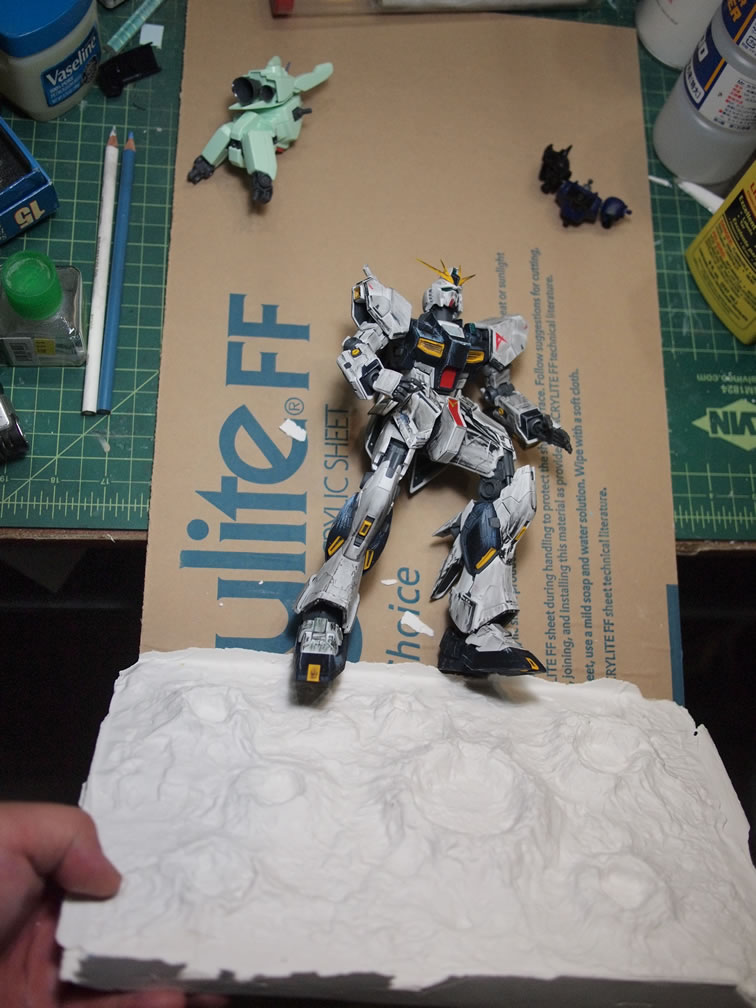

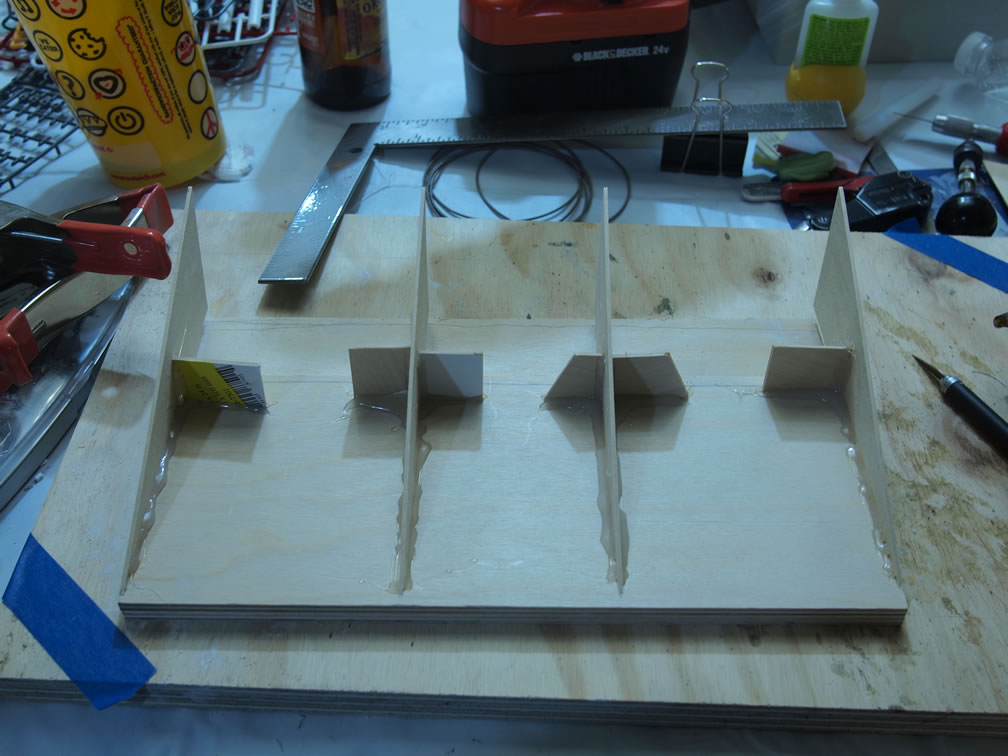
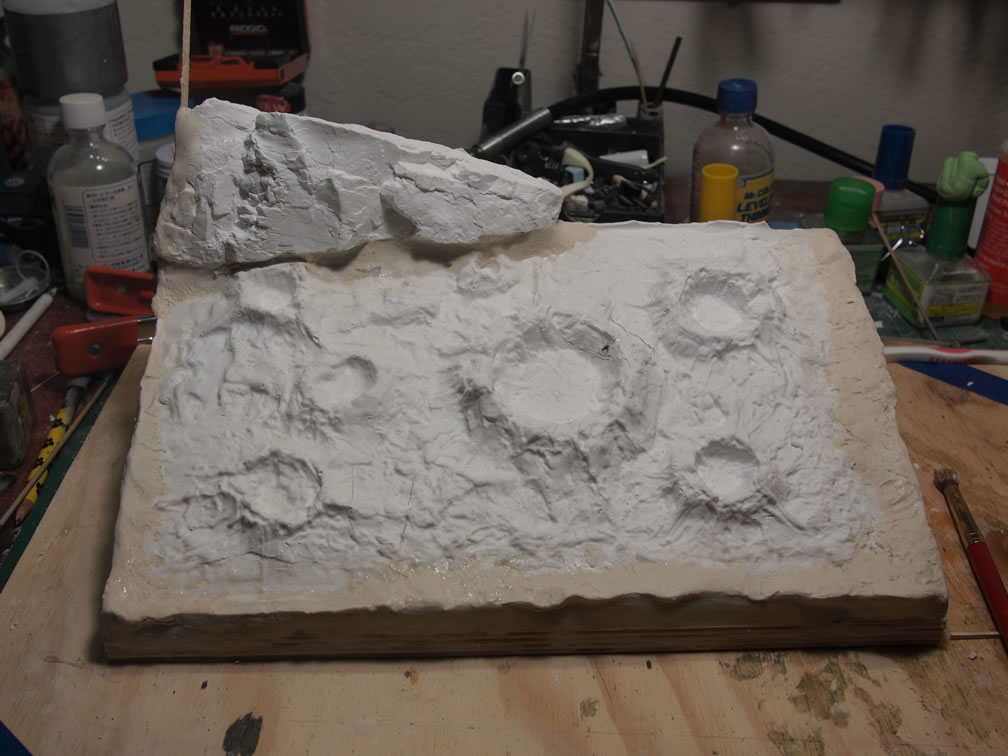
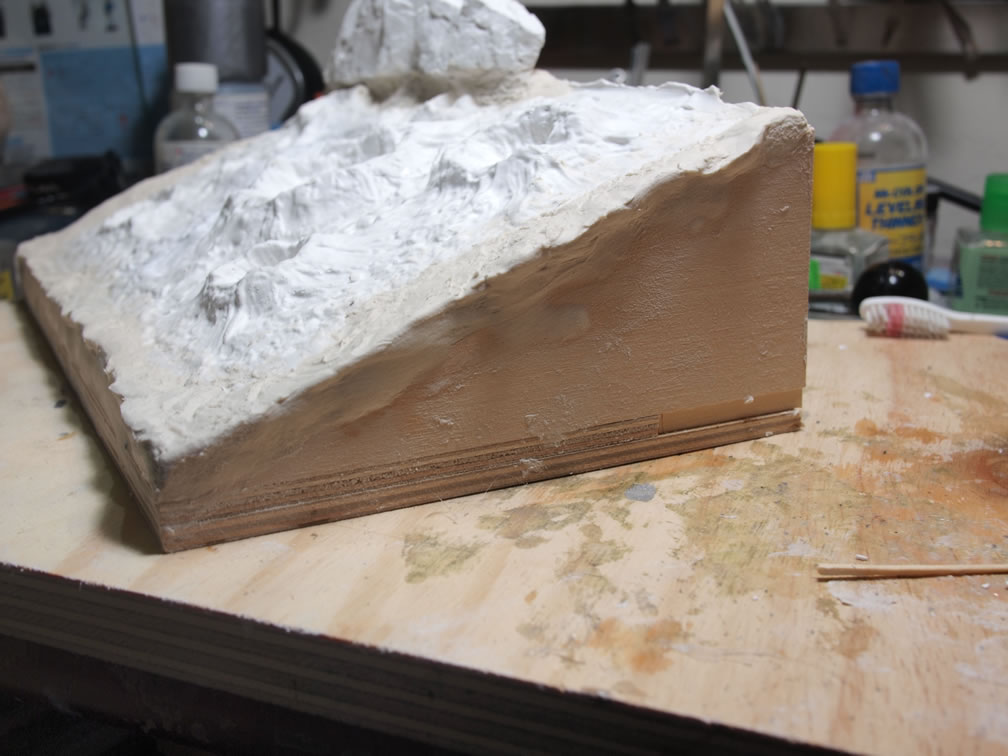
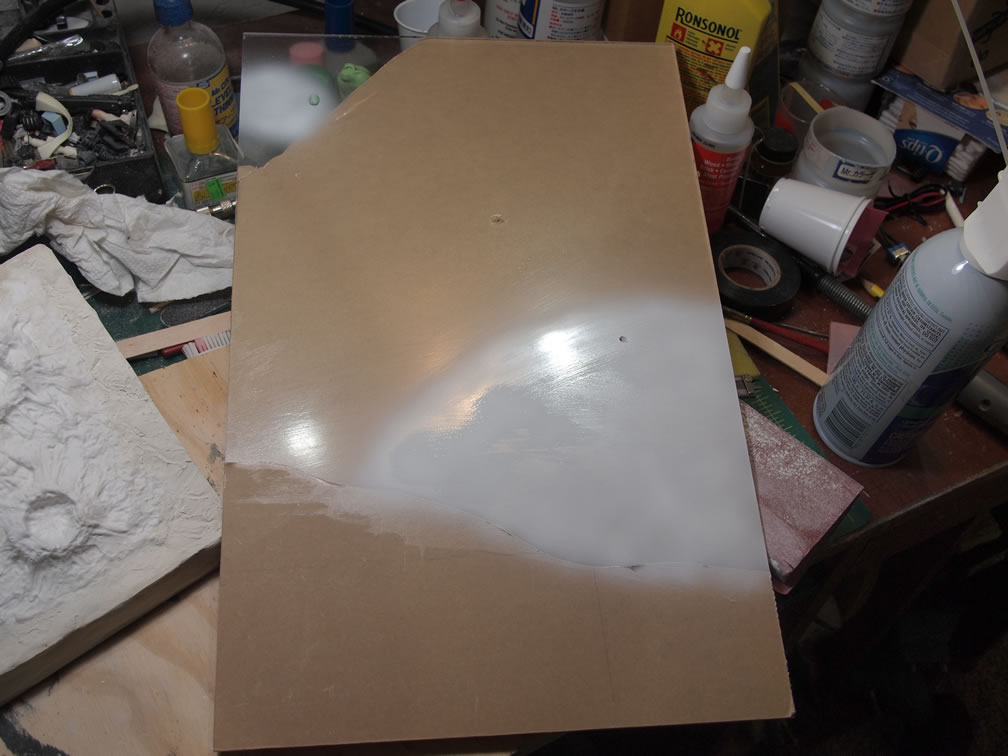
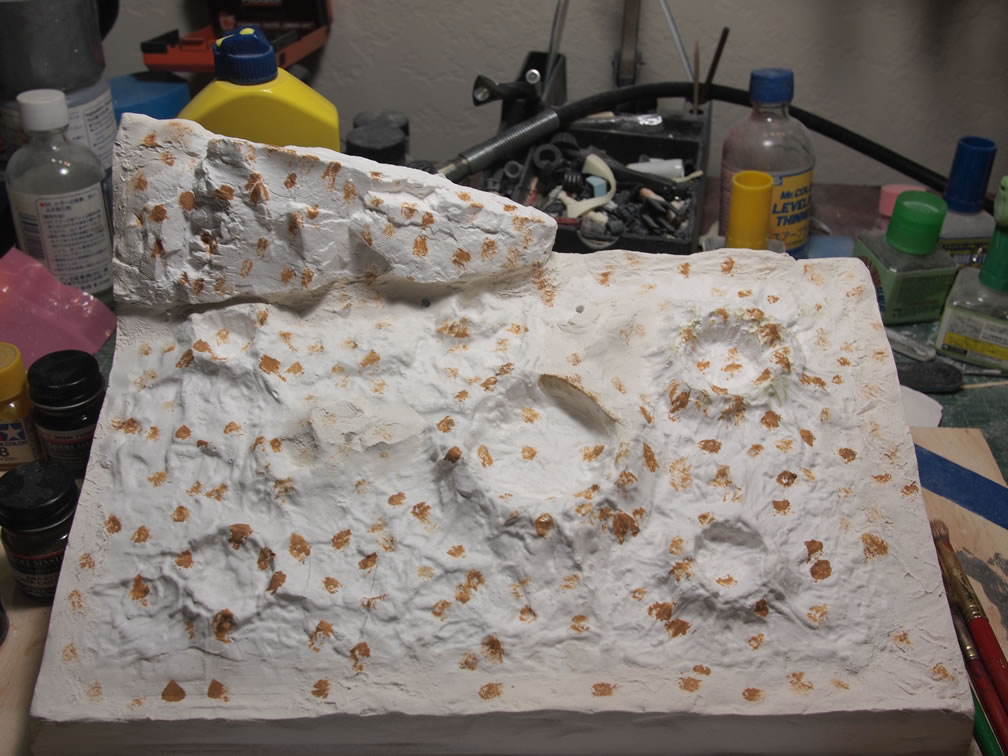
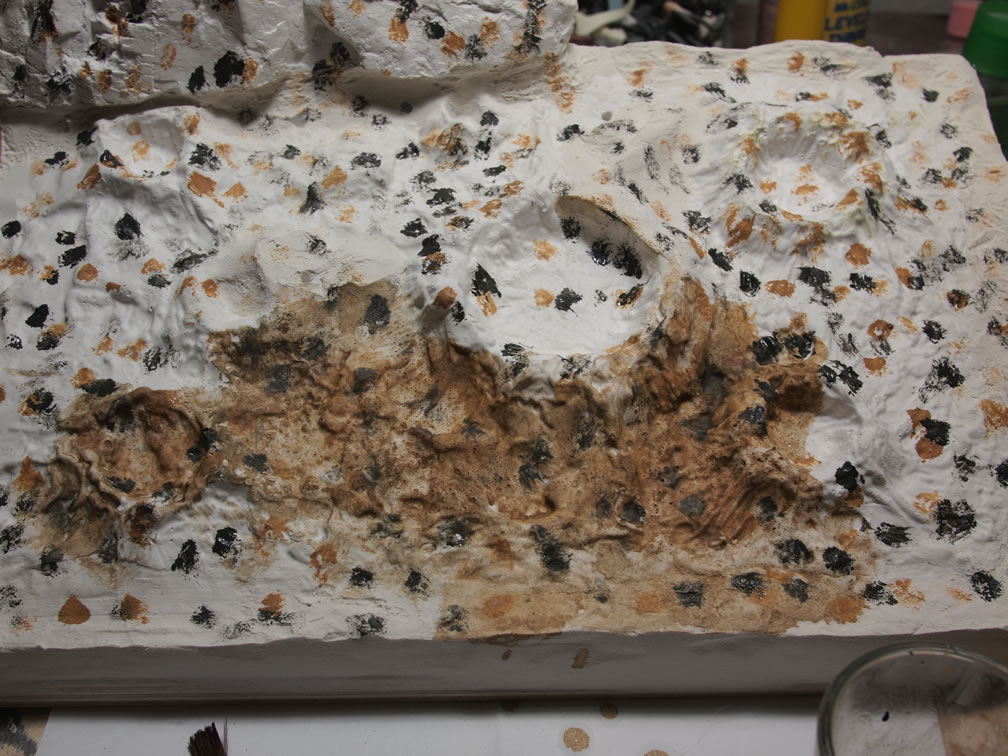
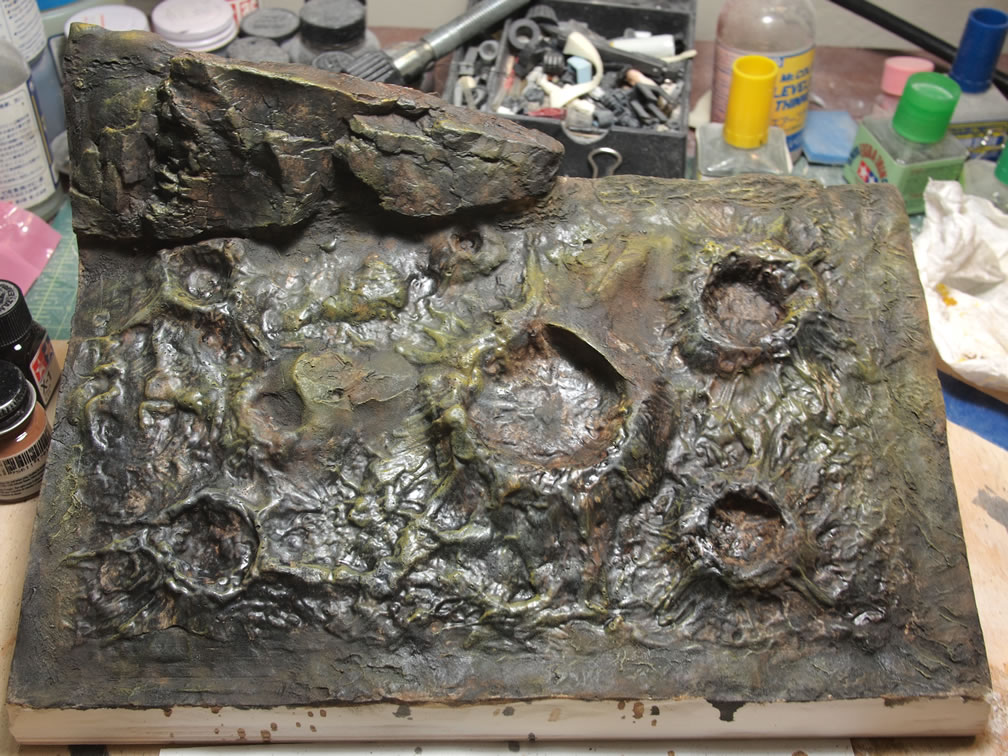
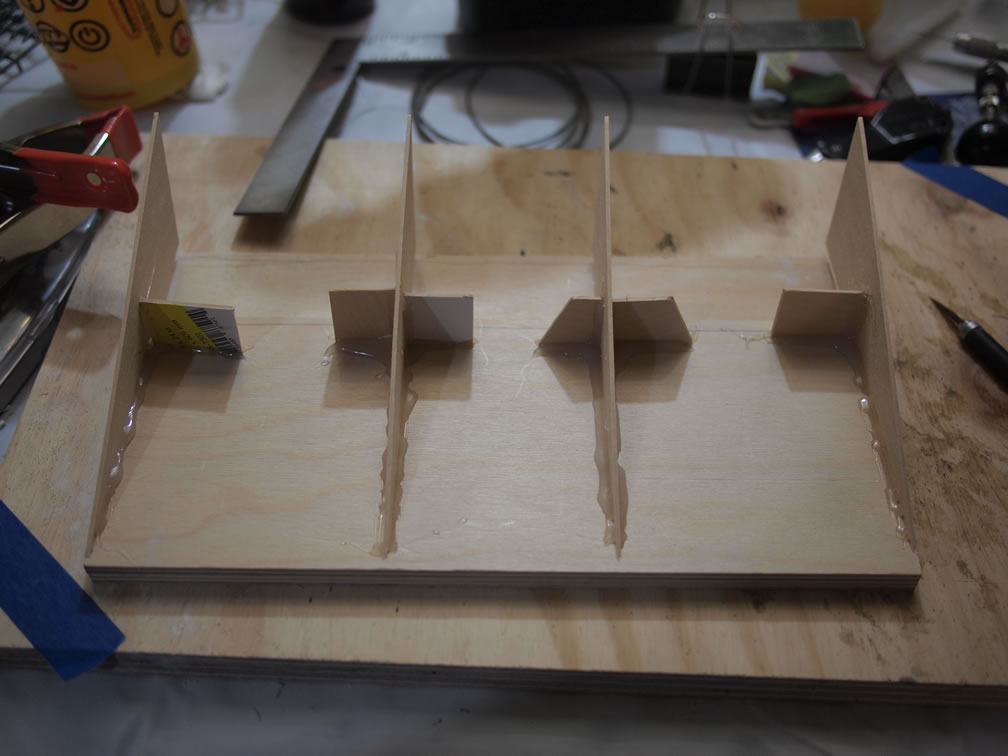
The base is made from pouring the hydrocal/water mixture into the rubber asteroid mold I have. I have found that the hydrocal plaster is much easier to work with as well as lighter than a resin version. Sanding, drilling, and just cutting through it is much easier and paper clay adheres very well to the plaster. The basic wood frame of balsa wood on top of a cut up piece of plywood starts off the main section of the base for the Nu. With the wood frame set up, the plaster base is glued into position. Once that is set, paper clay is employed to fill in small gaps and the crappy areas around the plaster base. A plaster rock wall is built and glued to the base, paper clay is also used here to blend the two pieces of plaster.
It is always a good idea to constantly test fit to make sure everything is moving along and that everything fits as it is supposed to and looks correct. A quick test fit with the principals ensures that the project is on track and hasn’t detoured too badly.

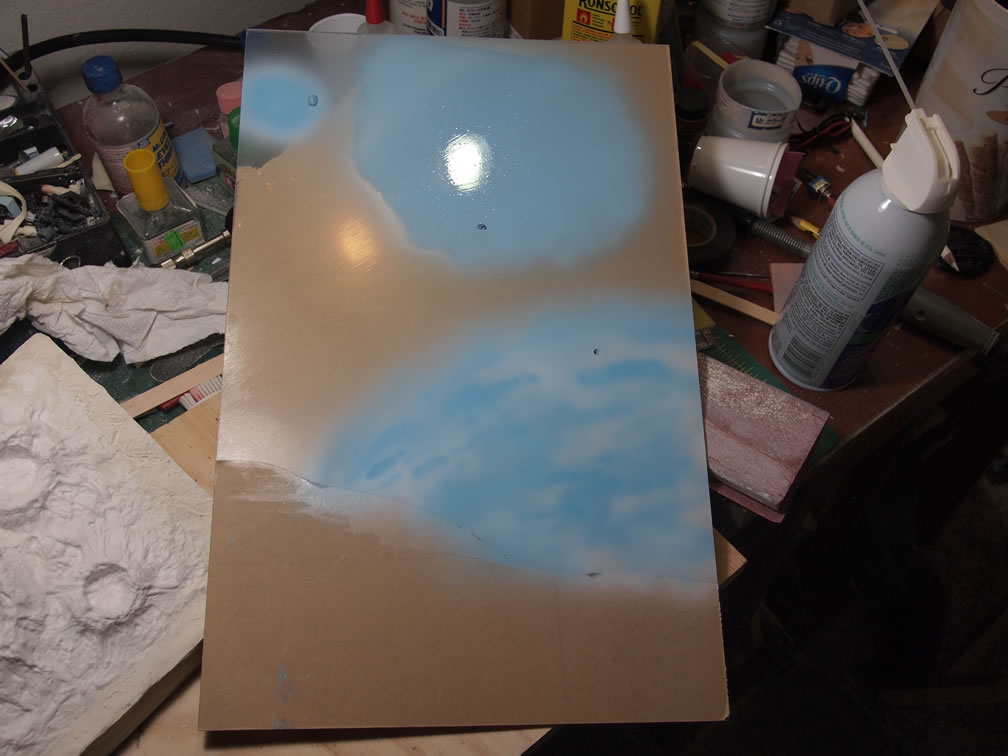
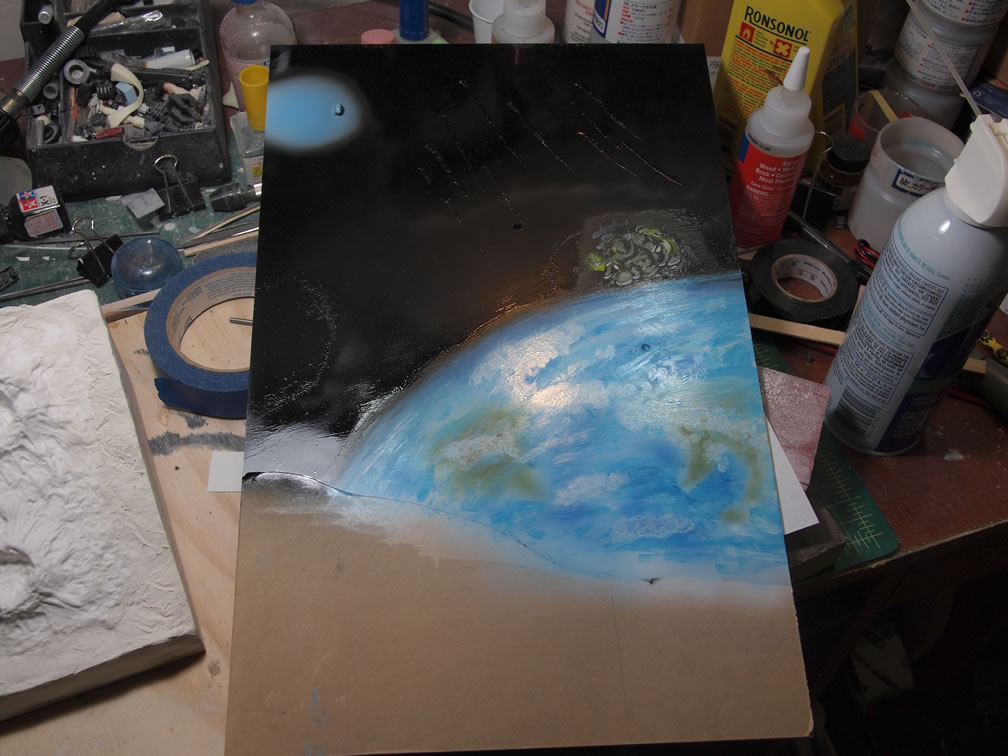
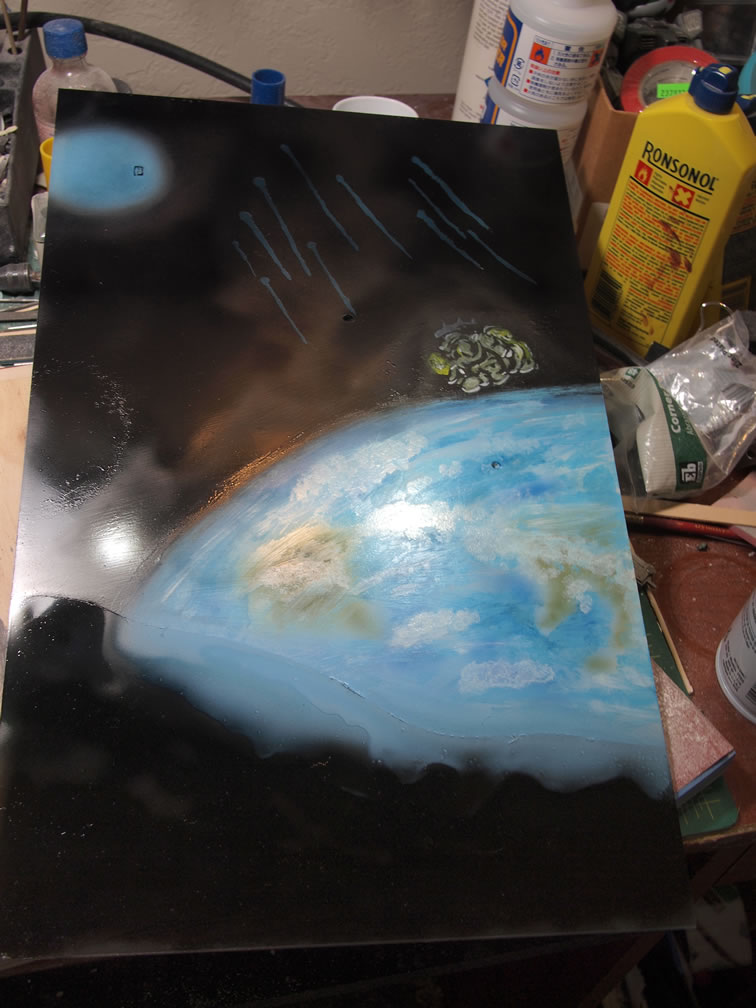
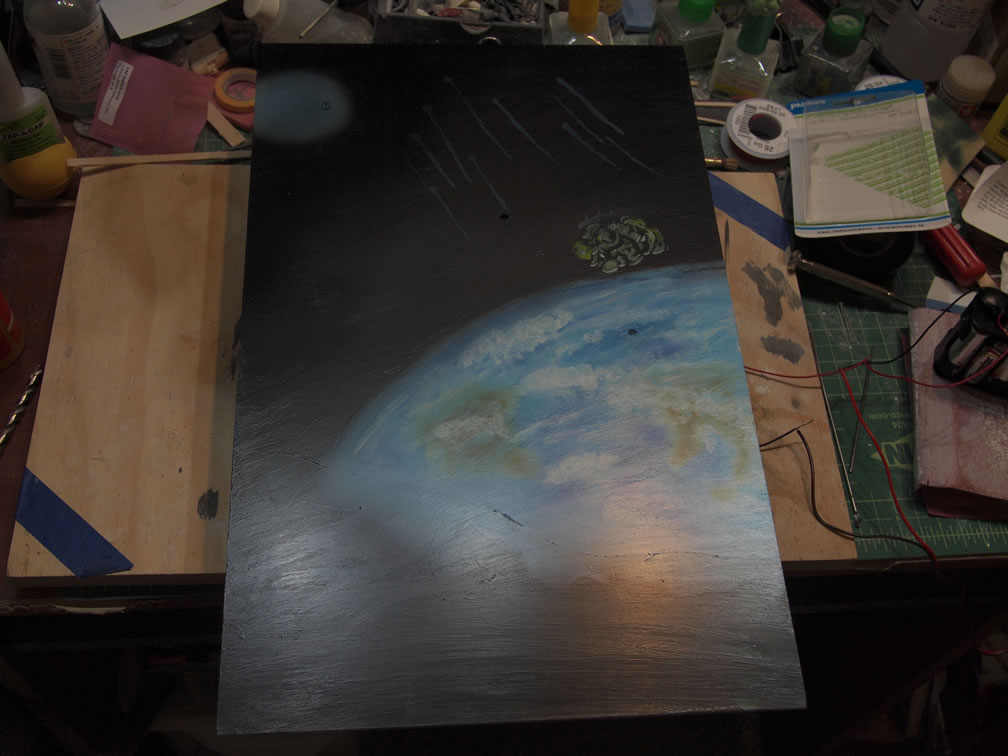
Next up, one side of the protective paper backing for the acrylic sheet is removed and the surface is coated with an acrylic medium as a base layer. In hindsight, I should have thoroughly cleaned the surface of the acrylic as there was dust and other bits of impurities, but it wasn’t that big an issue. The clear acrylic medium is hand brushed on, which gives the surface a little bit of texture as a hand painted image. It also works as a clear primer for the oncoming layers of paint. The first layer of paint is a light blue. I used Finisher’s foundation blue, which was VERY thick and I had to rethin several times to get the consistency correct. The foundation blue is sprayed on the two blue areas of the base, the Earth sphere and the area around the Jegan for which I’m not entirely positive if it has to do with the Jegan’s thruster blasts or if it’s the moon. White and darker blues are airbrushed over the earth sphere creating clouds and depth to the blue. Brown is also lightly sprayed for land mass.
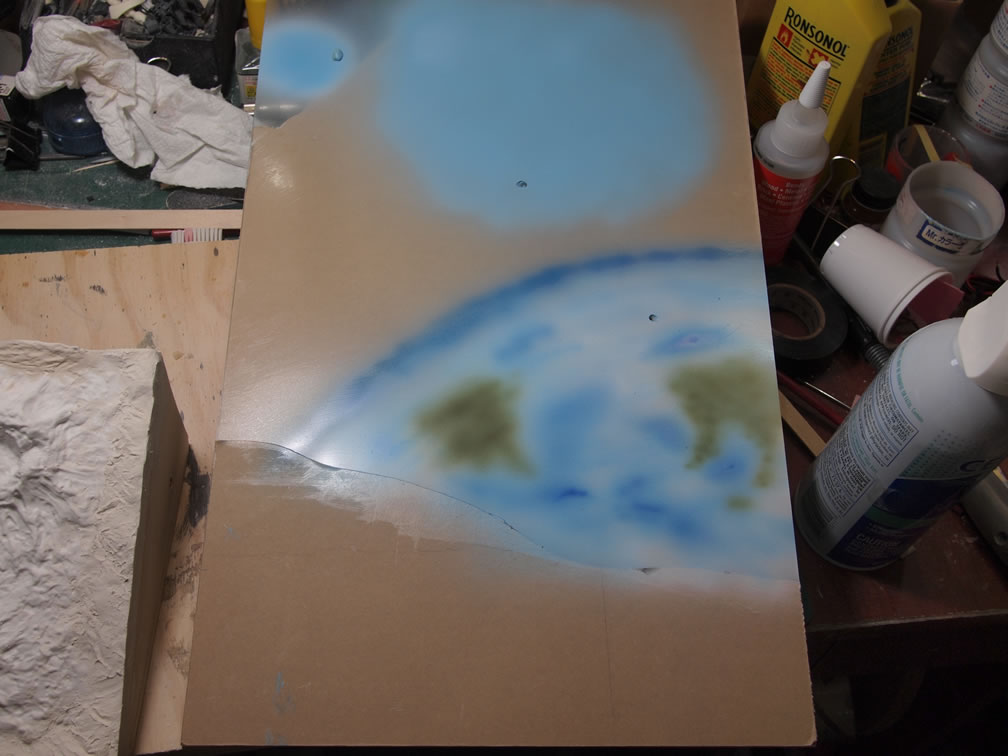
I had passed on the idea of two physical Dogas as I didn’t have one smaller than the 1/200, and I didn’t want to use two 1/200 Dogas as it would have skewed the forced perspective. So I hand painted the second Doga using the same Mr Color paints as the 1/200 Doga. With the Doga painted in, the streaking area of the background are masked off with Mr Masking Sol, the stuff was a little hard to work with, and in hindsight, I should have just used sticky tack. But once masked, I sprayed Finisher’s Black Blue which I believe is a clear color over the background avoiding the Doga, Earth sphere and moon. A quick test against a lighted background showed areas I needed to spray more black blue. Using enamels, I painted in clouds and ocean details for the Earth sphere. Once all this was dry, another layer of clear acrylic medium was hand brushed over everything to blend it all together and give the background a uniform surface. This also works as a protective layer.
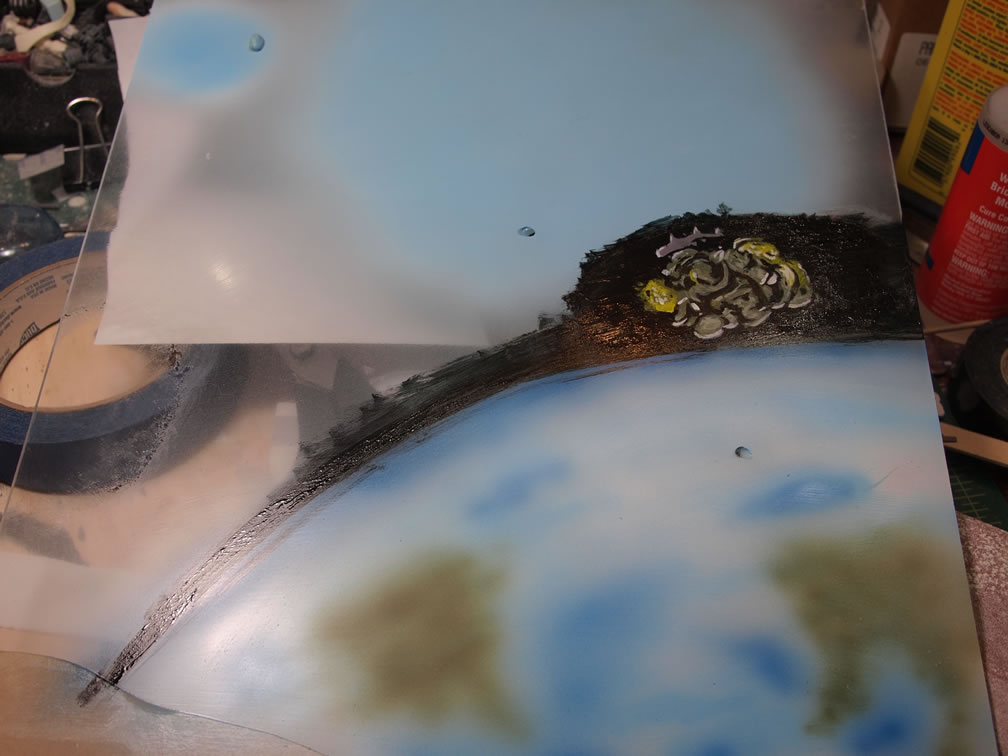
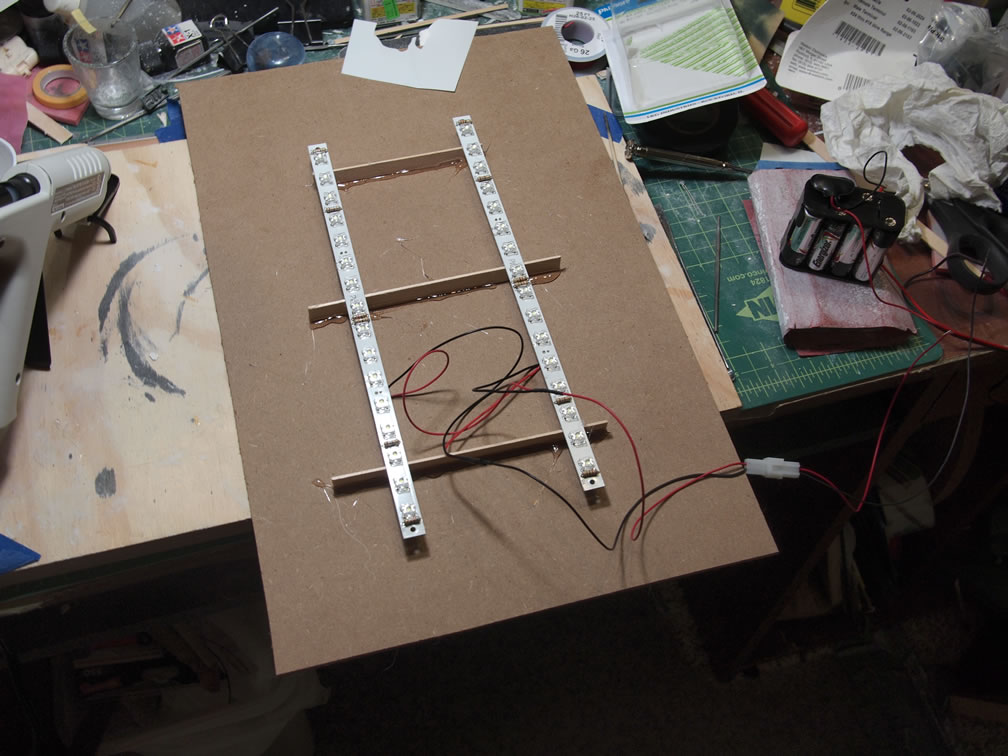
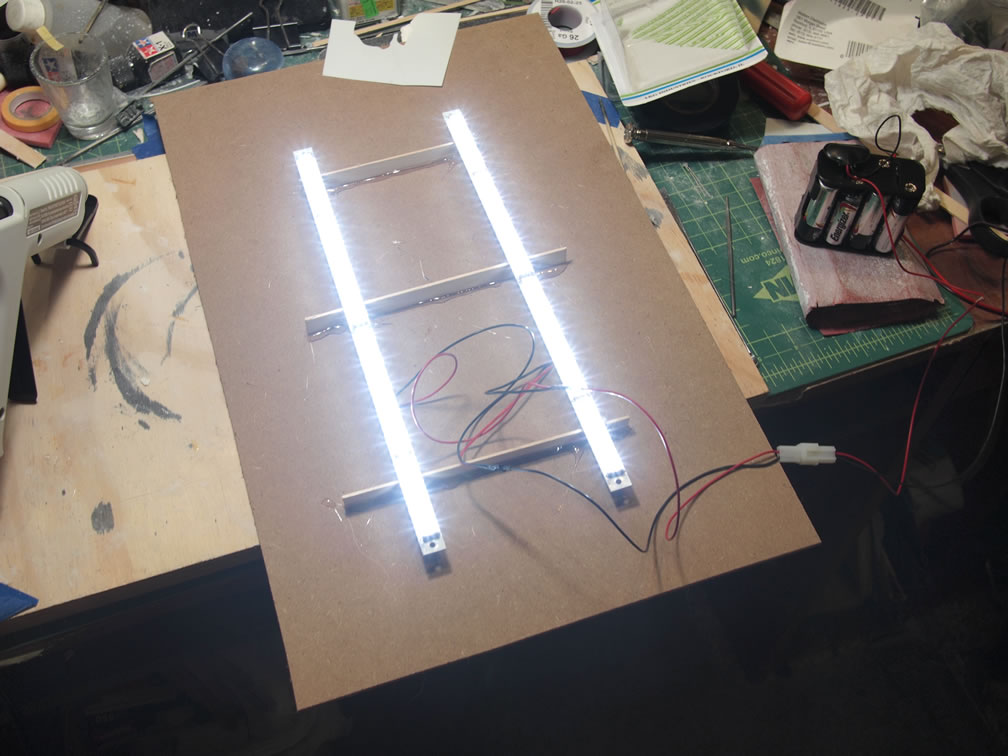
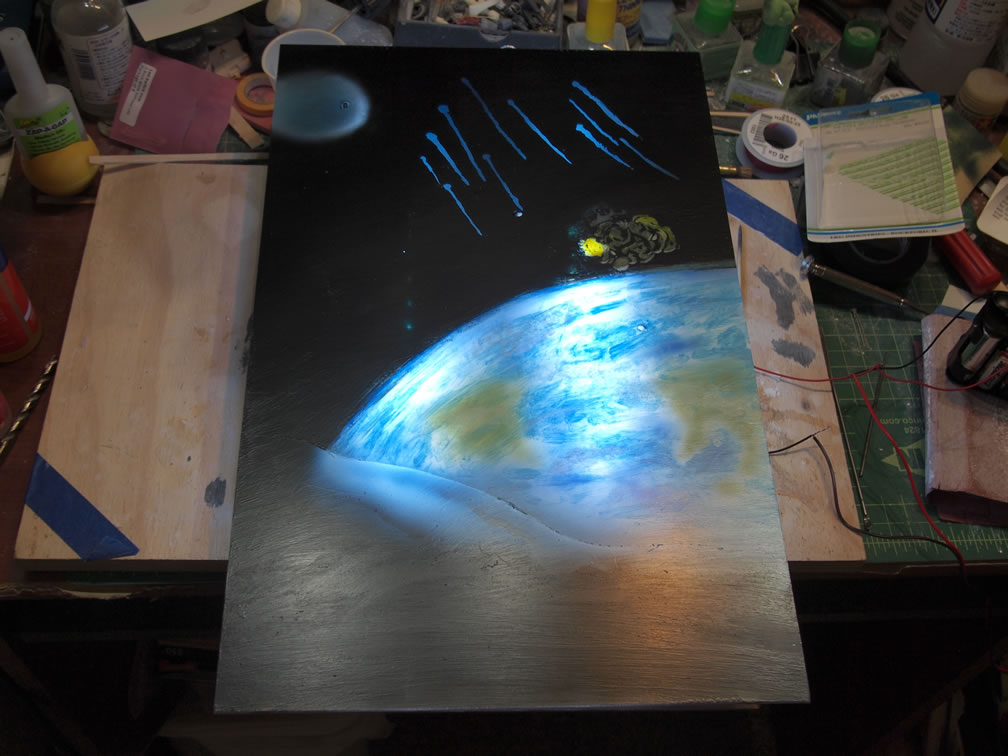
Next up, I have a thin particle board backing that I glued two white LED light strips. These light strips require 12 volts of power and will be used to back light the background. With the strips wired up and glued down, I tested the light strip against the background. This gives the Earth as well as the painted in Doga’s thruster blasts and machine gun blasts a nice glow.
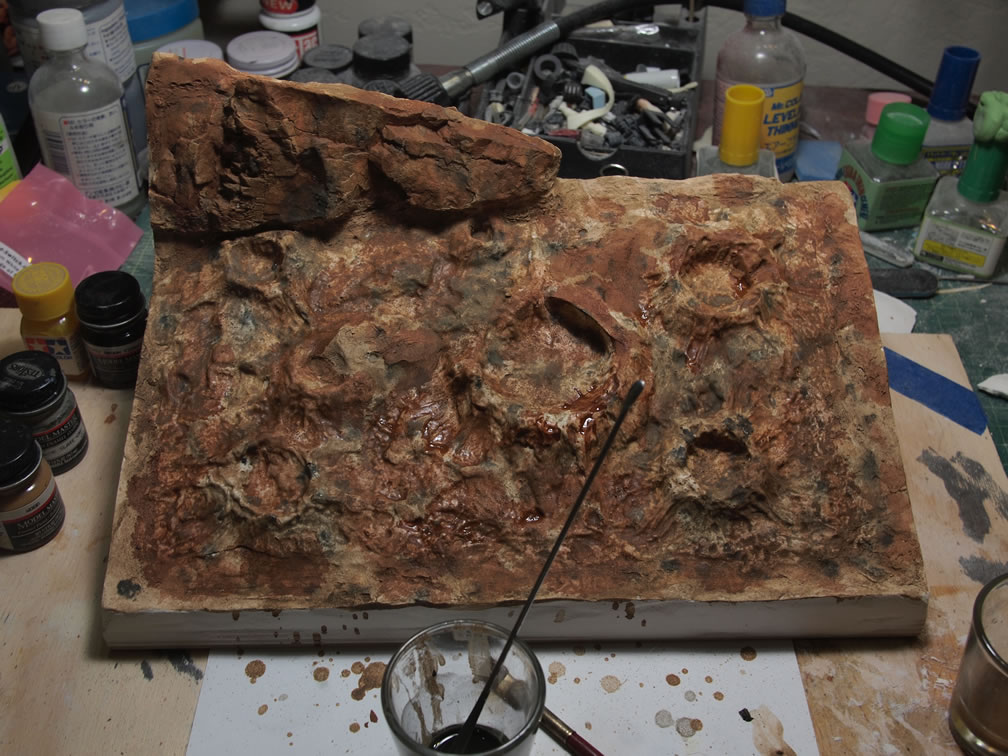
With the background done, attention returns to the plaster base. The base is painted with enamels. I had started with a filter style paint job but forgot that the way to paint these plaster bases is with washes.
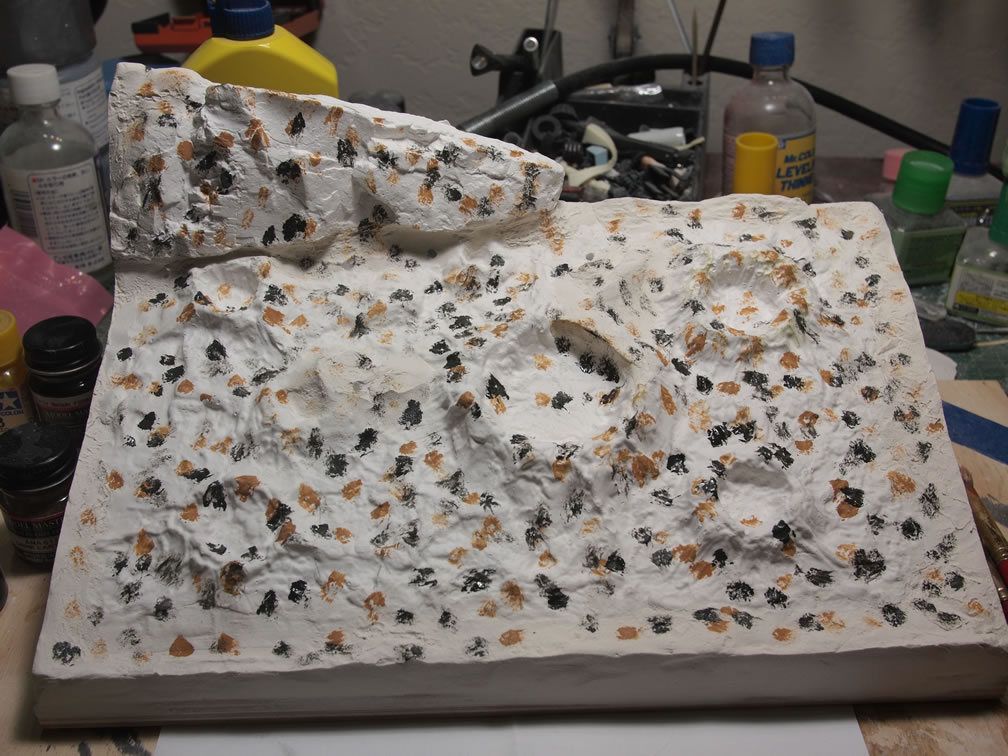
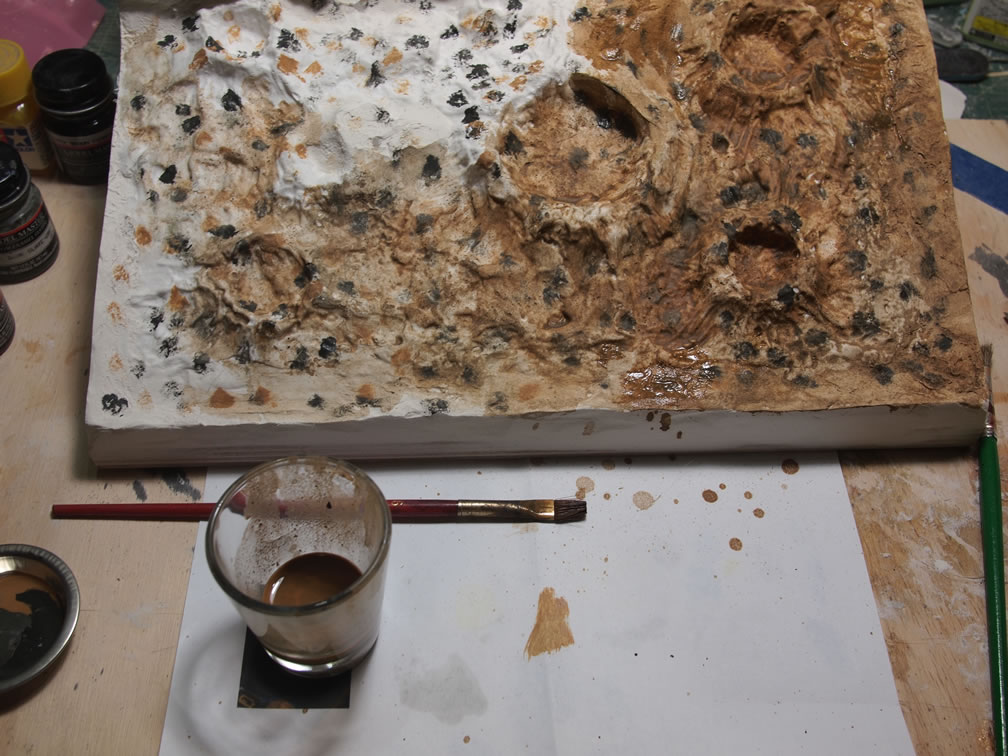
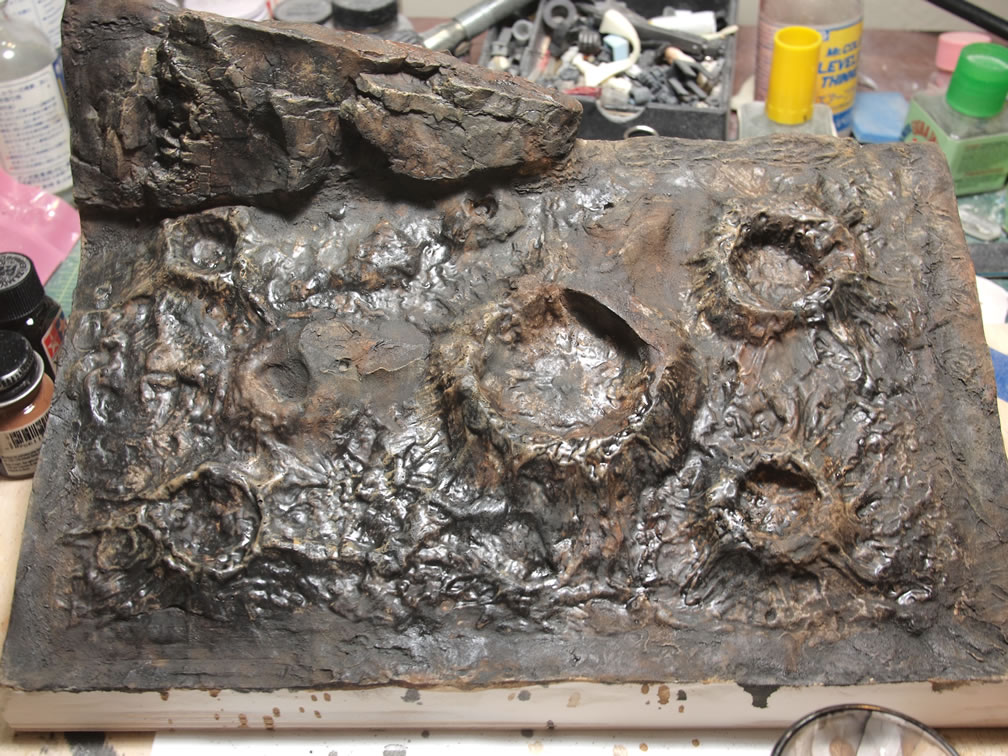
A few washes later, and some dry brushing here and there, I finish painting the base.
The second clear resin explosion was cut up and glued back together in two different pieces with a a third piece of the explosion used for the Jegan’s rifle blast. The two newly formed explosion pieces will be attached to the base, so prior to painting, they were mounted to the base and paper clay was added to fill in some areas so that the flames matched the surface better. Once everything was painted, the flame pieces were glued to the surface and the wires from them running through the base and then wired to each other in parallel.
I then spent a day wiring up the entire assembly. I originally planned on using a single 12 volt battery source. I picked up a battery holder that puts 8 AA batteries together for a 12 volt source. Drawing out the wiring schematic on paper with all the proper math, I was having trouble getting everything to work. It was pushing 3AM and I had even mentally noted that I should stop before I make a really bad mistake.
Too late, I flipped the switch with the base LEDs wired to the 12 volt source and there was a split second of bright white light followed by a loud popping sound and I knew that I had blown out the base LEDs. The problem? Those LEDs are sealed inside the resin pieces by additional resin effectively making them part of the resin piece, which themselves were glued to the surface of the base. I had sat there dumbfounded thinking about alternatives. I could just leave them as is and only light the Jegan and Doga. Fiddling with one of the base flames, I broke it off the base and along with it came bits and pieces of the paper clay. I broke off the second flame piece. The cured paper clay is cleaned off the flame piece, then new paper clay is patched back onto the base and later painted to match the rest of the base.
The following day, the flame pieces were redrilled basically drilling out the existing blown out LEDs and new LEDs were wired and glued into place. The base was touched up so the flame pieces were then glued back to the base. The wiring scheme changed. I now set up two switches and two power sources. A 9 volt to run the various LEDs and the 12 volt to run the LED strip back lighting. Testing and testing, everything seemed to be working fine so the base piece was pretty much done. The sides of the base were stained as a finishing touch.

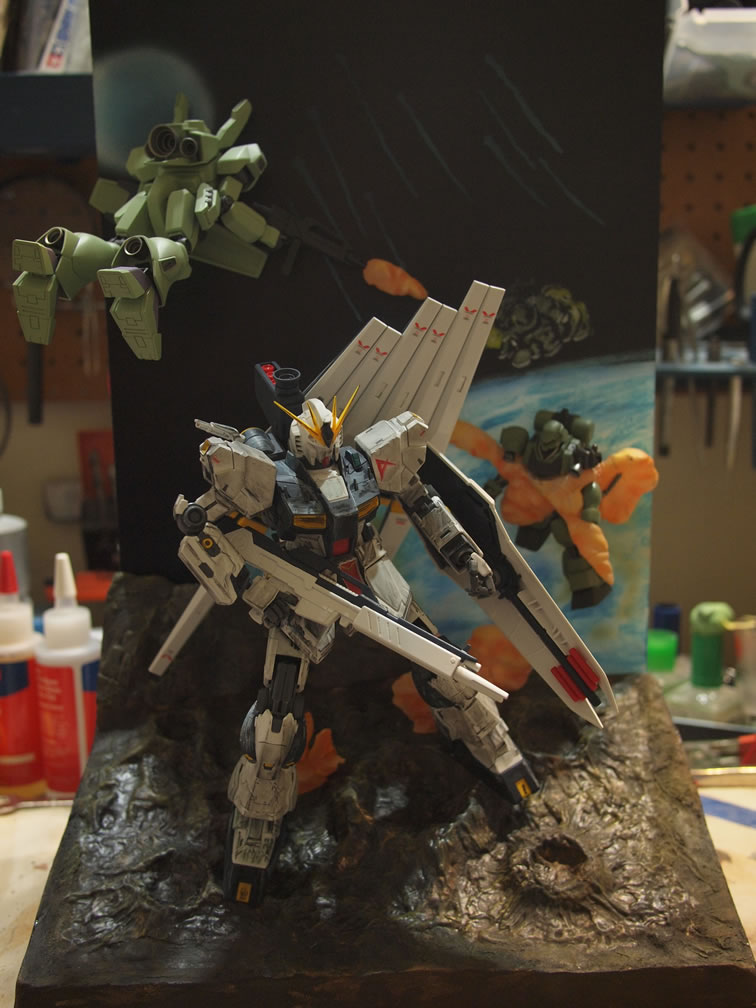
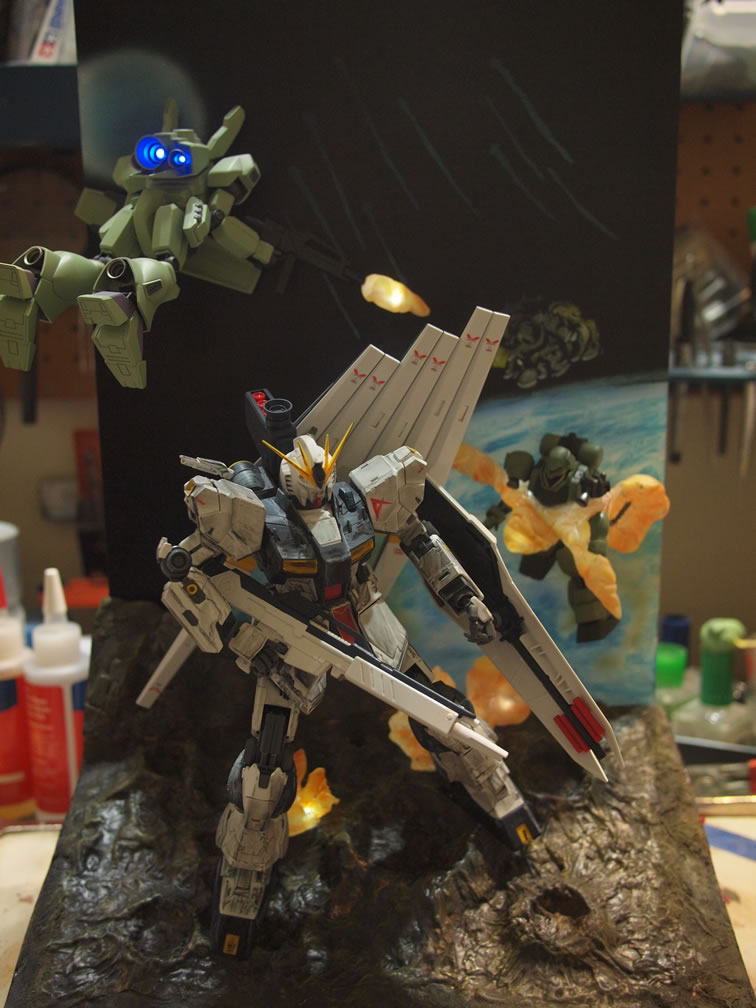
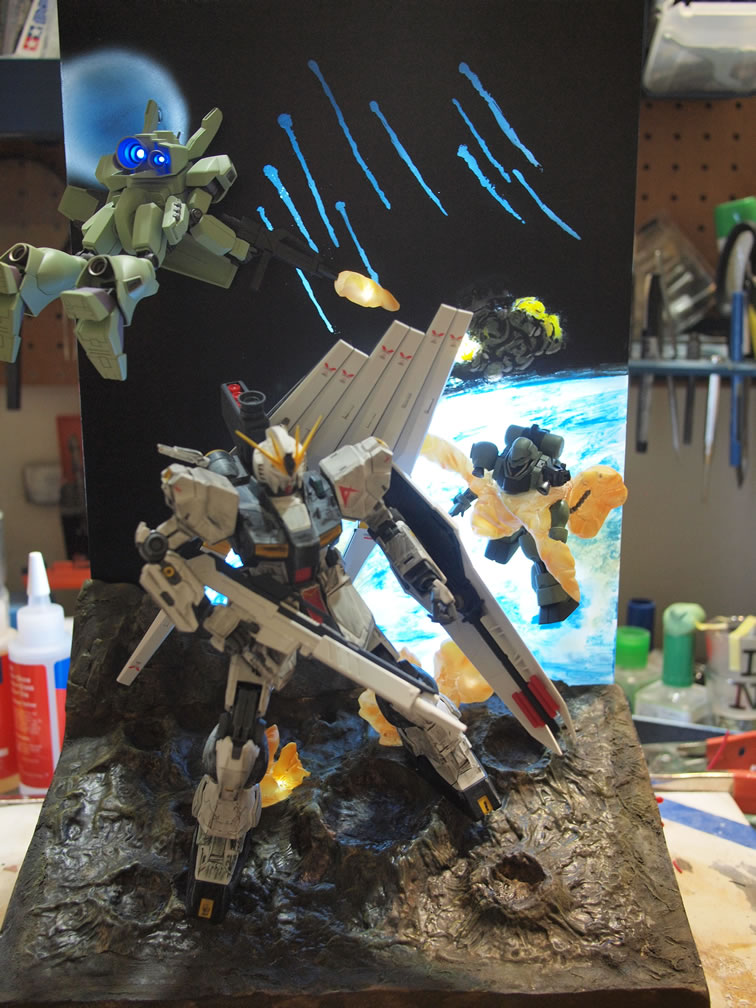
Since the individual LED sets were all 3 volts, I now have 4 distinct LED modules; the Doga explosion, the base flames, Jegan gun blast, and the Jegan backpack. Since I’m using a 9 volt source, I made a parallel connection between the Jegan gun blast and Doga explosion connection, then wired everything else in series. Basically, the negative end of one module connects to the positive end of the next module, and so on. This allows for the blue LEDs and white LEDs to work properly. If they were wired in parallel, there one color may require more power than the other resulting in dimmer lights. The assembly is put together and below we have the assembly without lights, only the individual lights on, and then the background lighting on. At this point, the Jegan and Doga are still in progress.
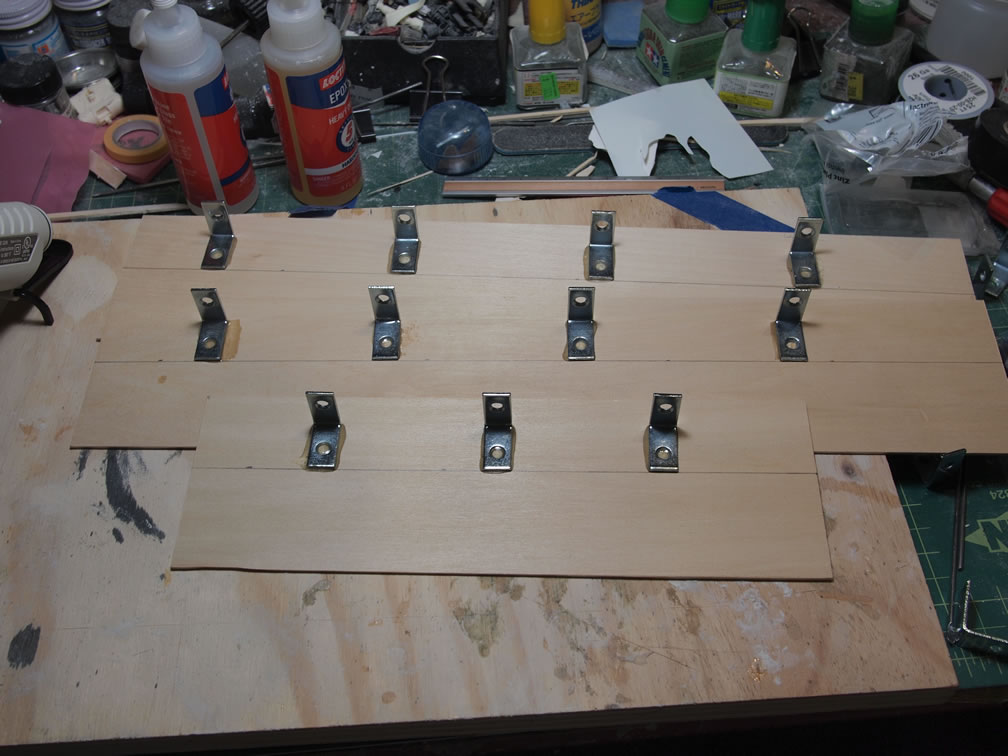
With everything nearing completion, I get to work on the last piece of the diorama, the box. I had scanned in the sides and top of the original box art and printed them out to the specifications of the project. Using balsa wood, I cut out box sides. To these box sides, I glued metal brackets that correspond to magnets glued into the backboard with the LEDs. This will act as the box’s bottom as well as hide all the wires behind the background. The images are glued to the sides of the box and the box sides are glued to the background. Everything wired up and running, the project is finished in time for the Gunpla Builders World Cup event at Anime Expo.