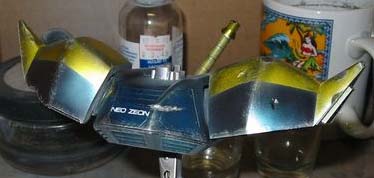
This tutorial will go through the final touches I use for finishing my models. At this point, the paint has cured and is ready for the final finishing touches. This includes dry brushing, pastel application, decal application, and the top coat. The following pictures are tools I use for finishing my models.


Dry Brushing
Dry brushing is a technique used for adding the look of typical machine usage. Metal rubbing against metal scratches away paint. Other object hitting the MS also has this effect. Dry brushing is a very easy technique, but it is also very easy to over do. The following picture shows the tools used for dry brushing.

Select a brush for the dry brushing technique; I’ve found that stiff bristles works well. Also, this brush should be designated your "dry brushing" brush, since dry brushing can rough up you nice brushes. Select the color you want to apply. Paints used for dry brushing are usually flat paints. Depending on the type of weathered effect, choose the paint you want to use. For example, for metal on metal, I use flat aluminum, and for mud, I use an earthy color. The dry brushing is applied to various raised surfaces. Corners, edges, and other areas prone to damage are the best areas to start.
Using the brush selected, load a small amount of paint onto the brush, and using a sheet of paper, brush away most of the paint, with the small amount of paint on the brush, start brushing the areas selected for dry brushing. Another technique for dry brushing is use of tissue paper dipped in a small amount of paint. The application if the same, rubbing the small amounts of paint against the target area. The following picture shows the difference from non-dry brushed to dry brushed.


Applying Pastels
Pastels are a very useful method for applying weathering. Effects like powder burns, rust, exhaust residue, dust and dirt, etc are easily replicated via pastels. Again, as with dry brushing, it is best that a designated brush is used for all pastel applications. The following picture shows the part and two different colors of pastels to be applied.

Load the brush with the pastel and apply directly to the target ares. Here, the areas pastels are applied to are the bullet damage, and along some of the dry brushed areas for help accent them. The following picture shows the part displayed above after pastes have been applied.

The following pictures shows how pastels accent the damage effect of the shield; there are before then after pastel and dry brushing application pictures.


Top Coat
Top coats are applied for various effects, but mostly they are applied to protect the paint and weathered effect applied to the parts. Top coats are especially necessary for acrylic paint jobs. Acrylic paints are not as strong as enamels or lacquers, so an additional protective top coat is necessary. I use Future Floor polish as the base for my top coats. Since Future is an acrylic based polish, it is perfect for coating acrylics.
There are several effects that can be achieved through top coats. The top coat can produce a ultra shine, satin, or dull finish, or anything in between depending on what is added to your top coat mixture. I apply the top coat via airbrush, Future is sprayed straight out of the bottle through the airbrush. Applying Future with no additives will produce a very glossy overcoat. To counter this effect and create a more satin finish, I add a small amount of tamyia flat base; see picture below.

Depending on the amount used, a more dull effect can be achieved. Too much flat base will result in a white haze, so experiment a bit. My personal mix is 3 parts Future + 3 parts alcohol + .5 part flat base. The following picture is a side by side view a part with the top coat applied and a part that has not been coated yet. The part on the left has been coated and the part on the right has not.

The following picture is the part that has been pictured throughout this tutorial after the future top coat mixture has been applied.

The parts should be allowed at least 24 hours to completely dry and cure; however, 48 hours is recommended. I am impatient, so it is hard for me to wait that long when the pieces look dry.
A side note about using top coats. Applying future and alcohol thinner alone, without any additives to areas where decals are to be placed greatly increases the adhesiveness of the decals. This will reduce silvering. After the future has completely cured, apply the decals, then at this juncture, apply the desired top coat. Future is self-leveling, so applying enough coats will result in reduction in the visibility of the decal edges.
Great article! I’ve always used “pastel fixative” via spray cans. The flat finish produced works well on my model RR cars and buildings.
Your “Future” floor polish looks worth a try! Thanx for the info!
Vinny