The following are basics for proper photography of models.
- Digital Camera
- Tripod
- Colored Printmaking Paper
- Lights
The Camera Setup
Most digital cameras have customizable functions and a custom photography mode. For taking pictures of models, it is best to use this mode to take photos. The auto mode really limits the capabilities of the camera and what one can do when photographing static objects. The following terms will help you optimize your camera’s functionality, granted depending on the camera, some functions may or may not be available.
- ISO
- Flash
- Macro
- Zoom
- F-Stop/Aperture
- Shutter Speed
- White Balance
- XTimer or Shutter Release
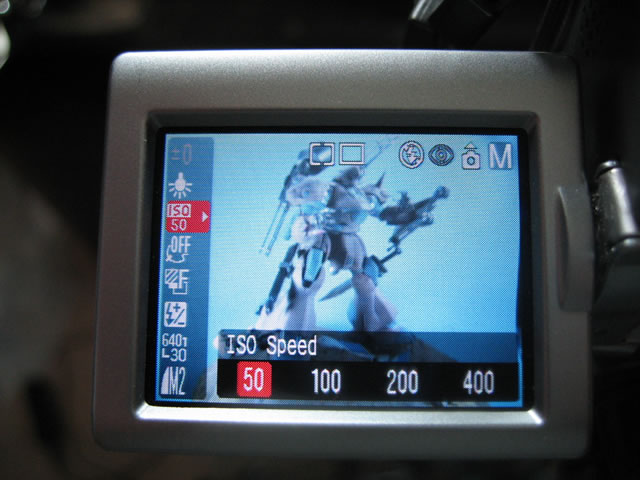
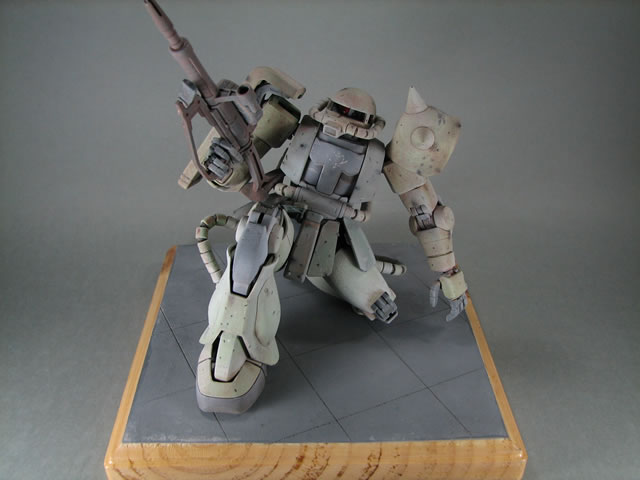
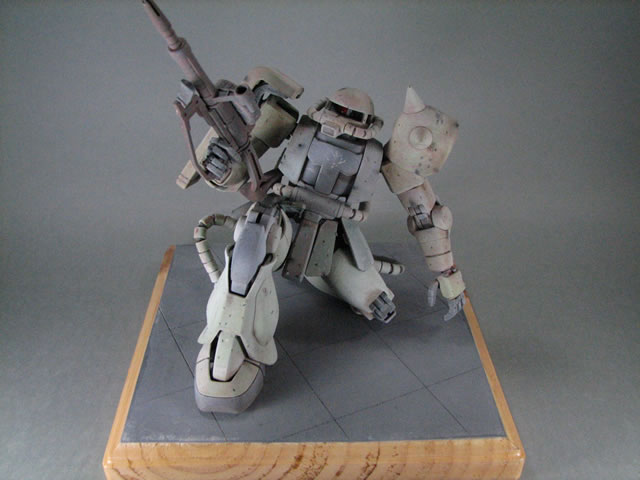
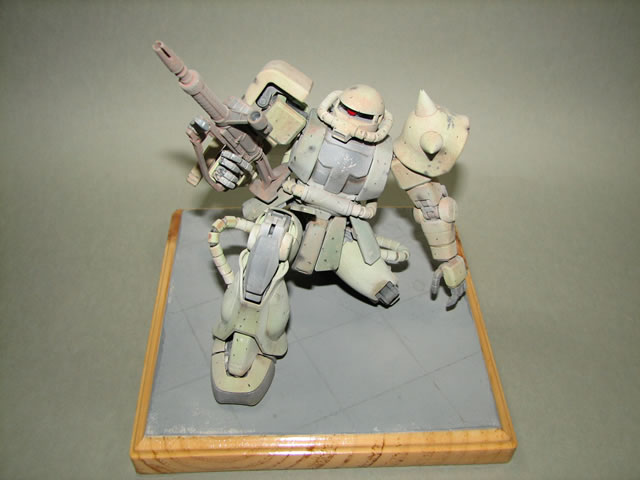
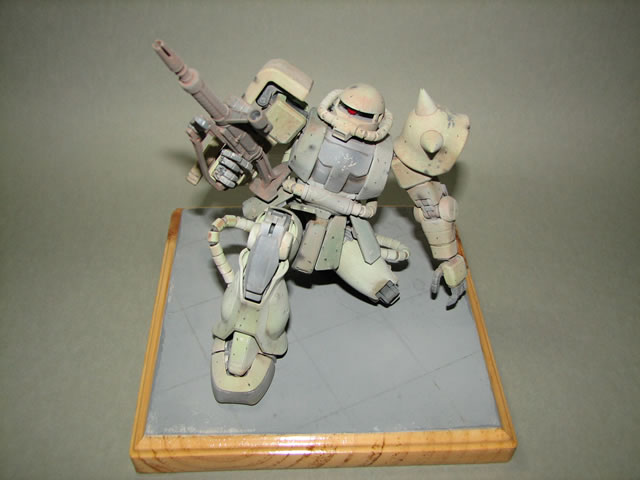
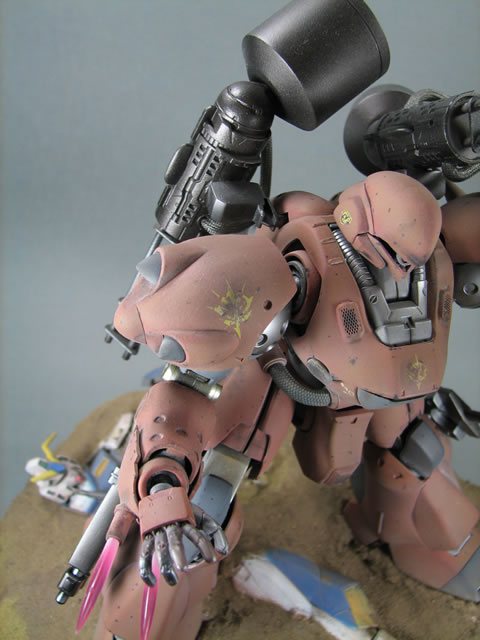
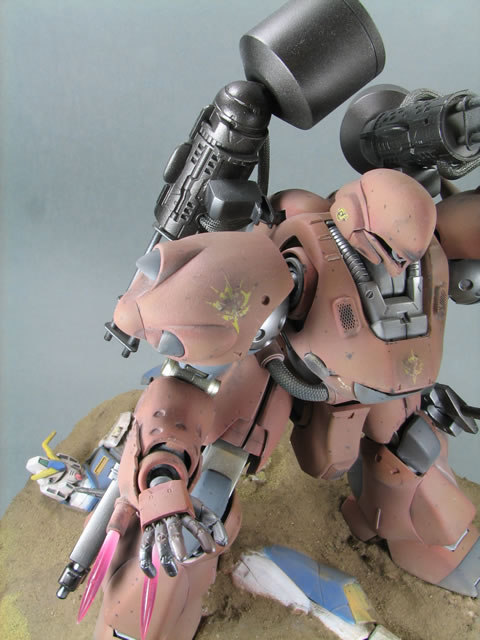
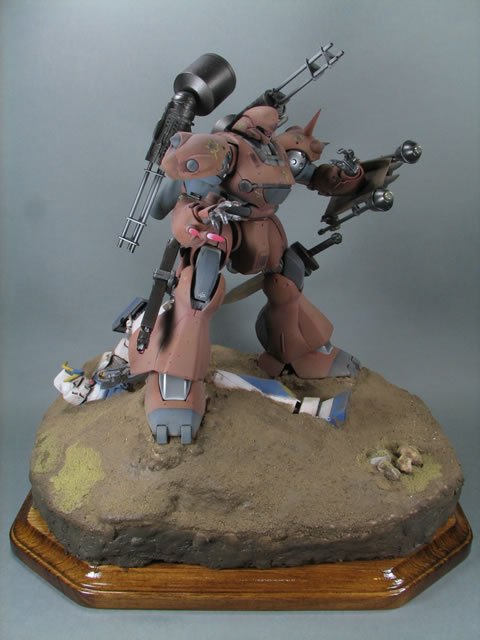
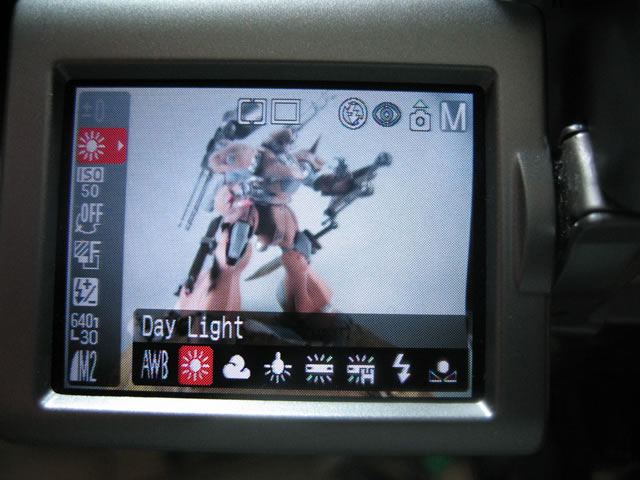
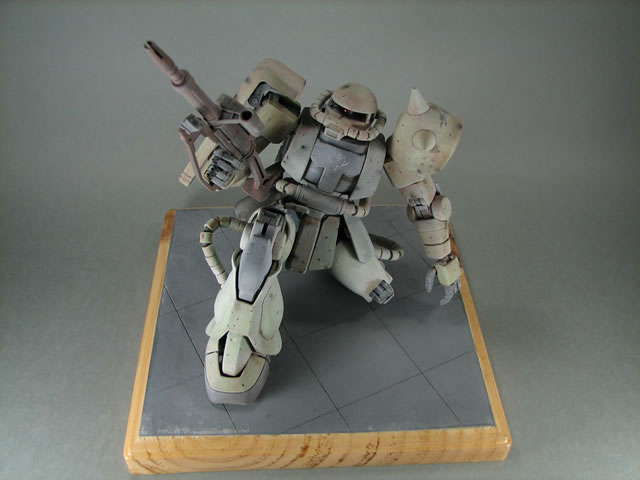
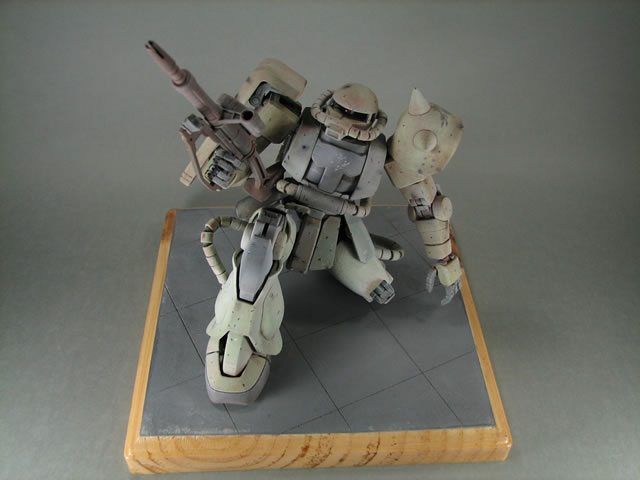
The ISO function changes the film speed; changing this setting will change the level of graininess in the photos. The higher the ISO setting (400), the grainier the photos. The lowest setting will result in the least grainy photos. The biggest factor in determining which ISO setting to use is if you have a tripod or not. If you are taking pictures without a tripod, depending on how much hand shake you get, a higher ISO adjustment will get you more focused pictures, however the draw back is that the pictures will be grainy. Using a tripod, you can set the ISO to the lowest setting which cuts out the hand shake issue, and produces photos with the least amount of graininess. See the pictures below. The first picture is the setting on the my camera followed by a picture of the Zaku using the lowest ISO setting. The next picture was taken using the highest ISO setting for which you should clearly see the noise and increased grain in the images.
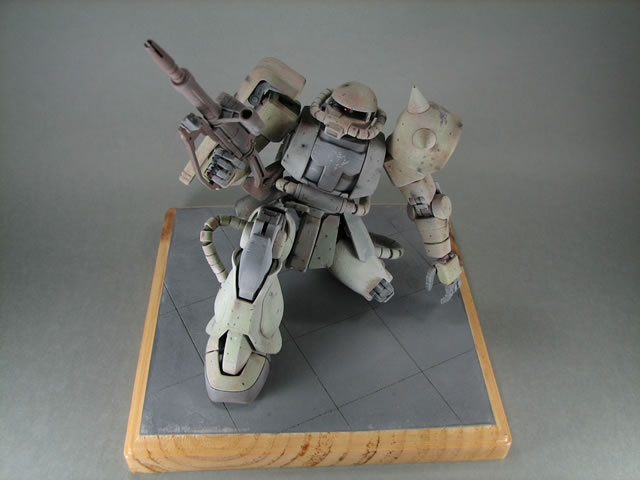
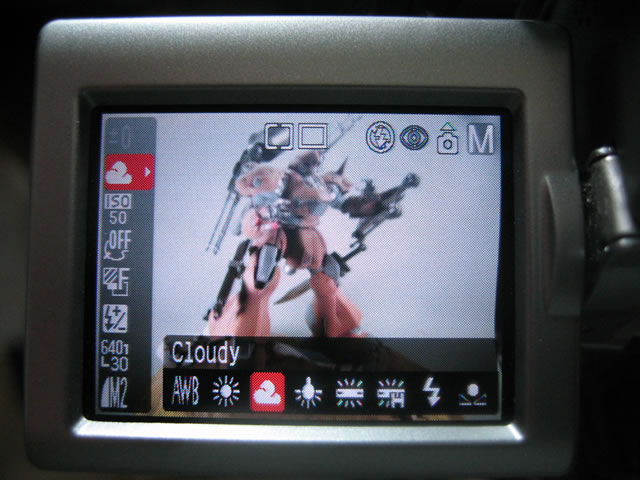
Generally, the flash should not be used. For such close range photography, the flash is just too powerful at these distances. Using the flash tends to fade and diminish the real color of the models. Many camera’s have settings to change the flash output which can help in reducing the color fade, but if you have the proper lighting setup, then the flash is not necessary. Below are some examples of pictures taken with the flash. The colors are a little washed out. If you are able to properly set your camera up, by all means use the flash. Currently, I haven’t experimented enough or learned enough about proper color compensation when using a flash in photography so for simplicity, I have refrained from using it.
The macro function tells the camera to change its focus length allowing you to move the camera up close and personal to the model and take clear focused pictures. In the following picture, the flower icon appears when the Macro Setting is turned on. This setting is very important in getting focused pictures when photographing such small objects as models.

Since you can move the camera closer to the target, there is no reason to use the zooming functions of the camera. In my experience, the camera has more difficulty auto focusing in macro mode and using the zoom. It is much easier to just move the camera close to the object than getting a good focus with the macro and zooming. In the following picture, you can see how close my camera is to the subject. I rarely ever find the need to use the zoom. I move the kit closer or move the camera closer to get zoomed in shots.
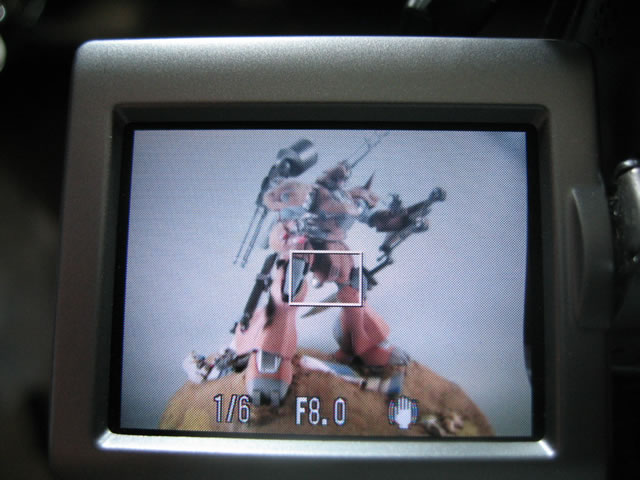
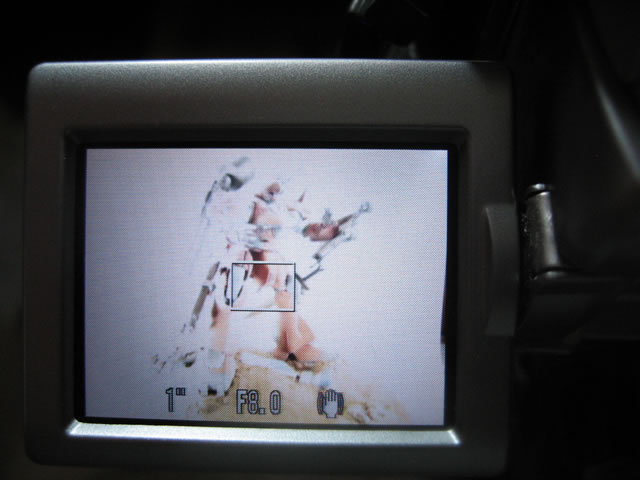
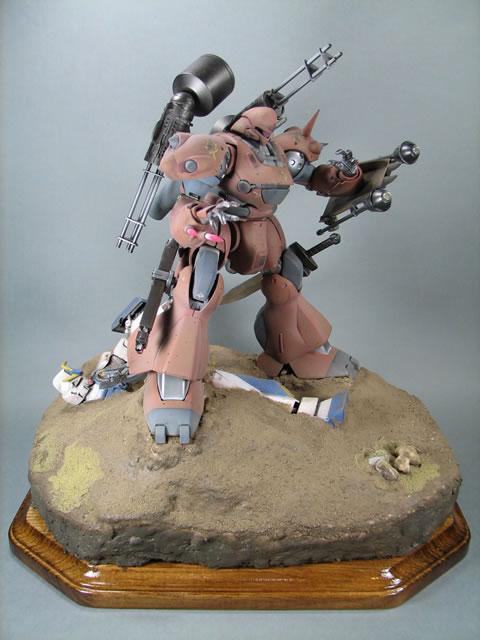
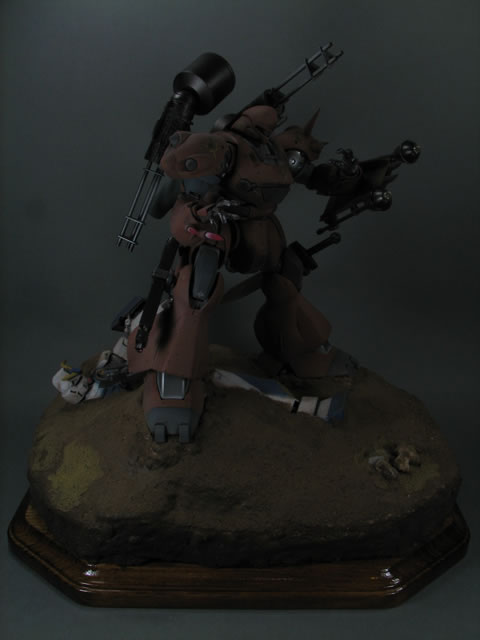
Aperture determines the amount of light entering the lens, and is adjusted by f-stops. F-stop changes the depth of view; The lowest f-stop setting will produce a picture with one subject in focus and everything surrounding out of focus, while higher f-stop settings allow for more subjects in focus. This is important when taking close up pictures; or when you have several focus point, you can adjust the camera to focus on a single area. In the following pictures, the Aperture and F-stop have been adjusted in accordance to the smallest F-stop setting (single focal point) and then to the largest F-stop setting (multiple focal points). You can clearly see that when the F-Stop is set to the lowest number, the shoulder is clearly focused upon while the Alex head and surroundings are out of focus. Conversely, when the F-stop is set to the highest setting, the background is now in focus, as well as the foreground, but the foreground, although fairly clear, is not as clear in comparison to the previous picture.
Shutter speed works to adjust the exposure time. This works against the aperture setting; so when adjusting one, the other must also be adjusted. Adjusting this function gives you brighter or darker pictures. Below you can see some example settings for the shutter speed. The screen also shows how the different settings affect the brightness and darkness of the photograph.
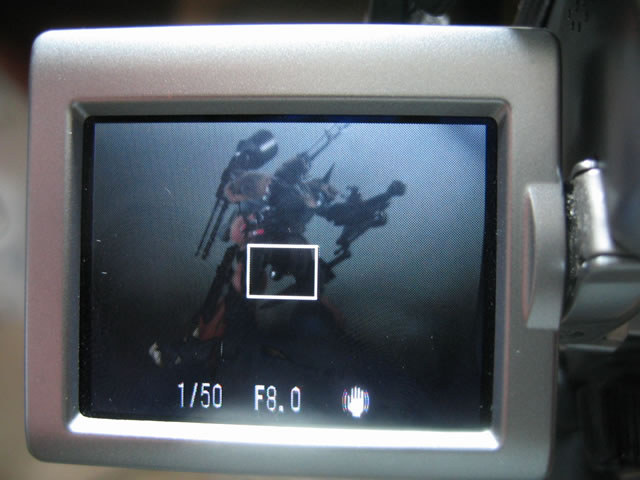
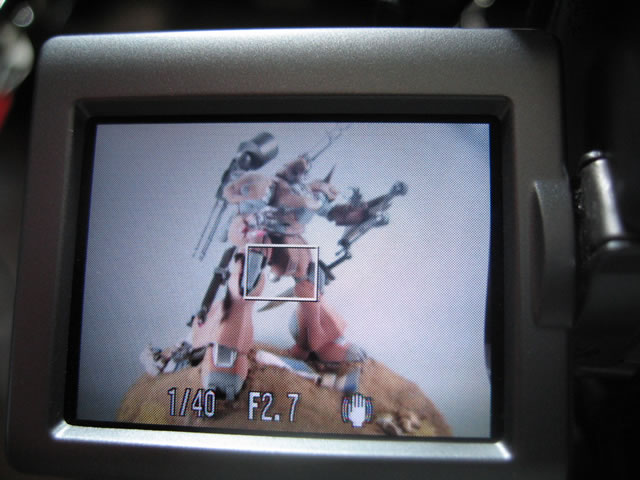
In the following set of photos, the first picture was taken using a shutter speed of 1/60 (of a second) with the F-Stop of 2.7. Changing the F-stop to 8.0 results in the following picture which shows a darker version of the first picture. Adjusting the shutter speed to 1/13 of a second to compensate for the change in F-stop (which remained unchanged) results in the last picture of the group.
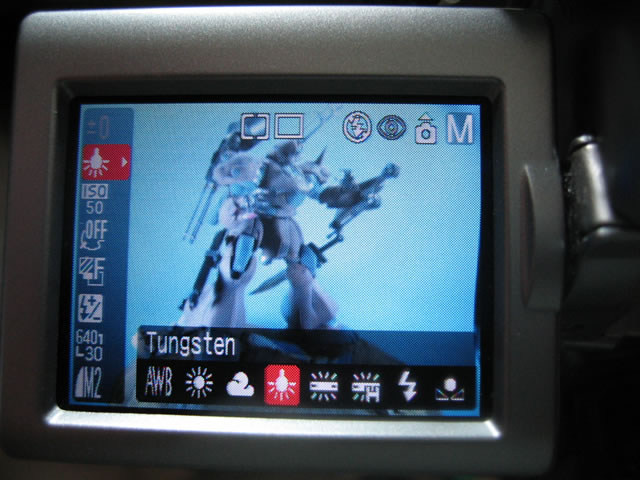
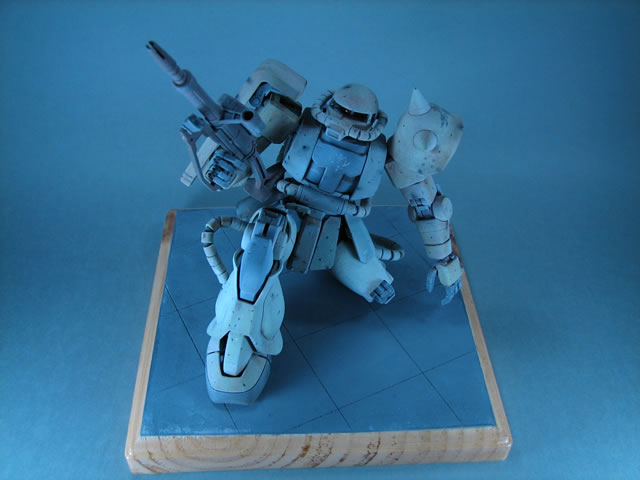
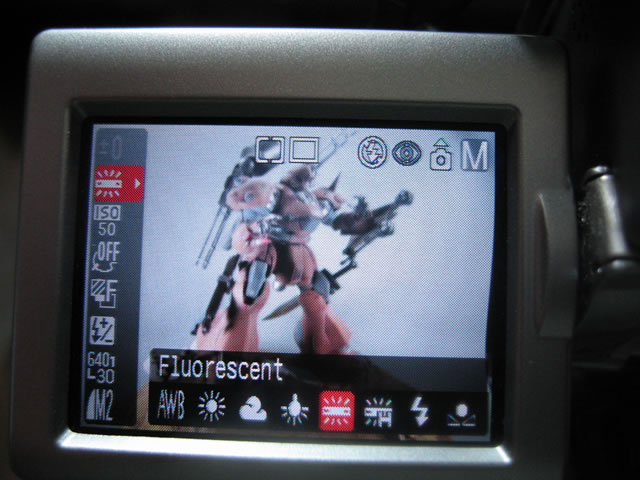
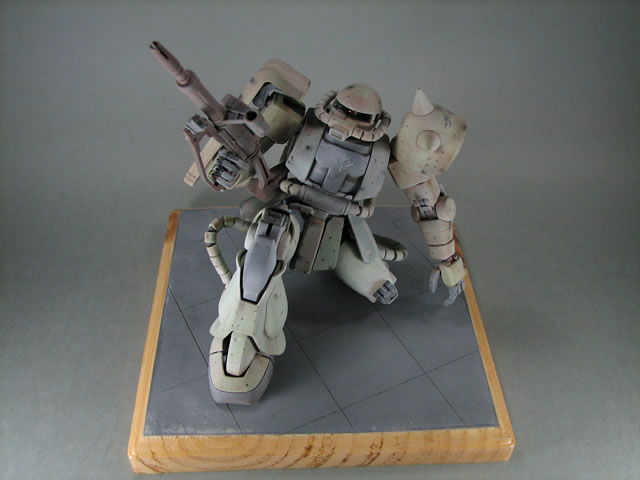
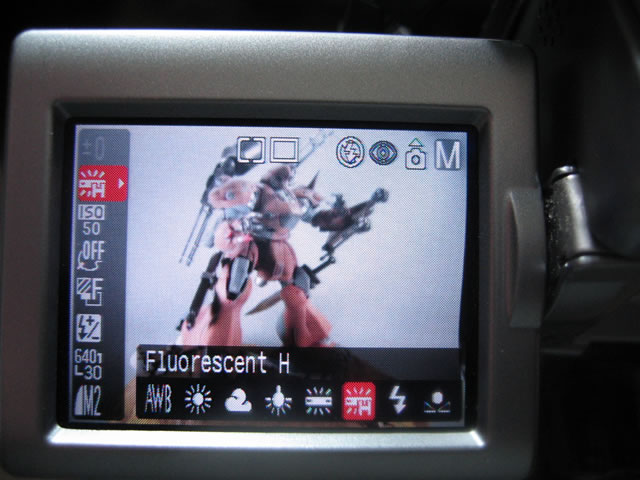
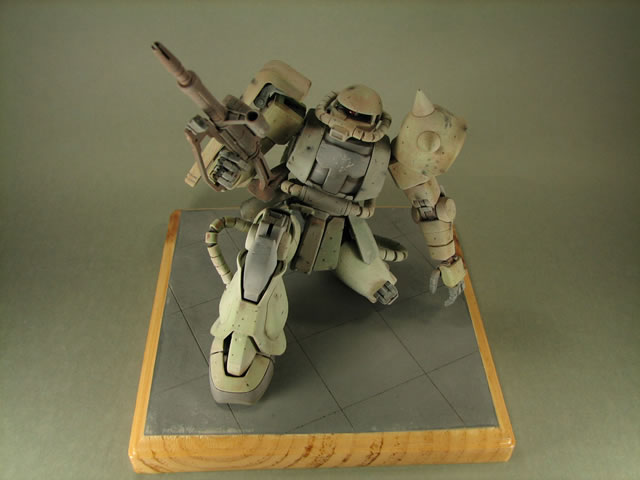
White balance is important in digital photography. The white balance function is dependent on the type of lighting you use. If you notice that in some of the photos you take, there is a slight yellow tint in the pictures; this is due to the white balance not adjusting properly to normal incandescent lighting. Most digital cameras have white balance settings that adjust for various types of lighting conditions; fluorescent, incandescent, natural sunlight, and tungsten are a few standard settings. When setting up your lights, remember to adjust the white balance with respect to the type of lighting/light bulbs you use. Below are some examples of photos taken using different white balance settings. You do not want to diminish the quality of your photographs with unwanted color tints as a result of your white balance or light bulbs you use when taking pictures.
When you press the shutter button on your camera to take your photo, you are potentially moving the camera at the same time, making even a well-focused picture turn out blurry from the motion. Using a tripod can greatly decrease this effect: if you still find your photos are turning out blurry, however, it may be helpful to use either the camera’s timer mode or a remote shutter release of some kind. Activating the camera’s timer feature causes a delay between when you press the shutter button and when the picture is taken. This means that any disruption you cause by pushing the button has ended by the time the camera opens the shutter. Alternately, if your camera provides some kind of remote shutter-release feature, such as a cable release or a remote control, that is another way to avoid shaking the camera by pressing the shutter button.
Tripod
The type of tripods used for this type of photography is fairly inexpensive. You can pick up a versatile tripod for about $20.00. Tripods are important in taking focused pictures. They reduce the fatigue in physically holding a camera in the various position and eliminate the problem of hand shake. With a tripod, you can make further adjustments to the camera to utilize a lower ISO setting.
Colored Printmaking Paper
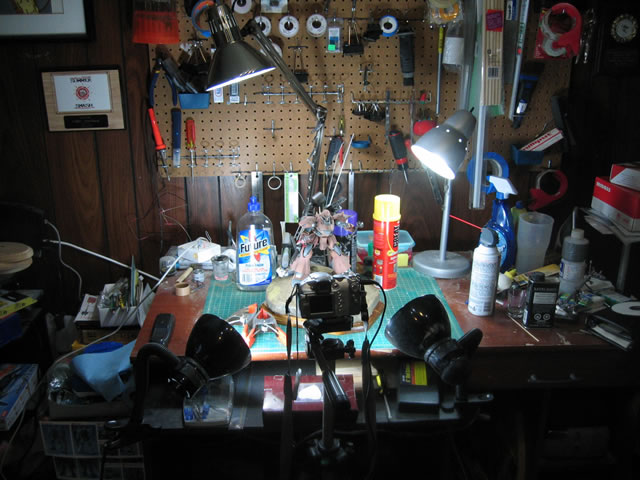
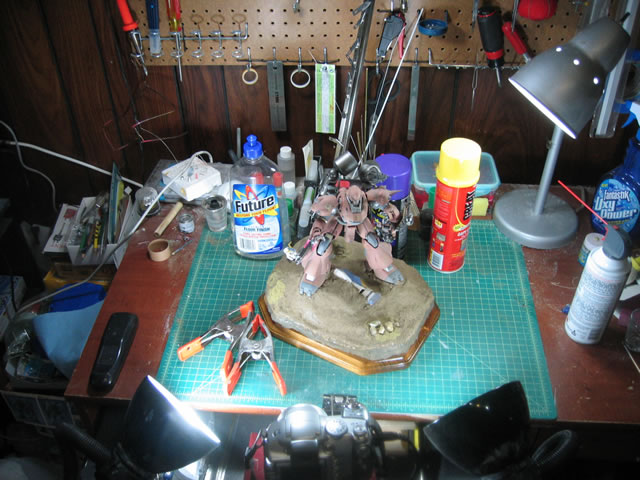
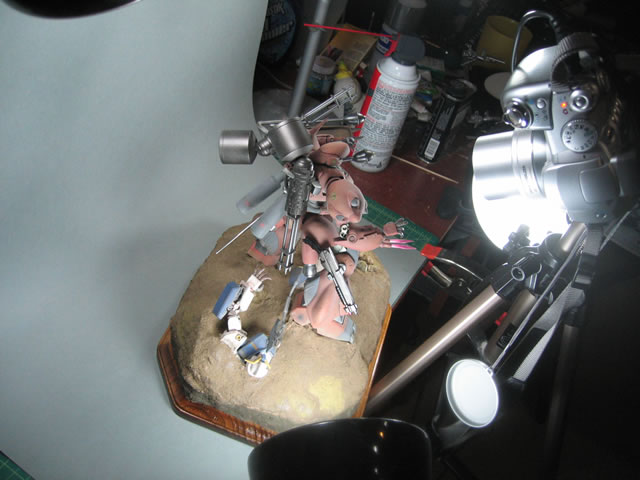
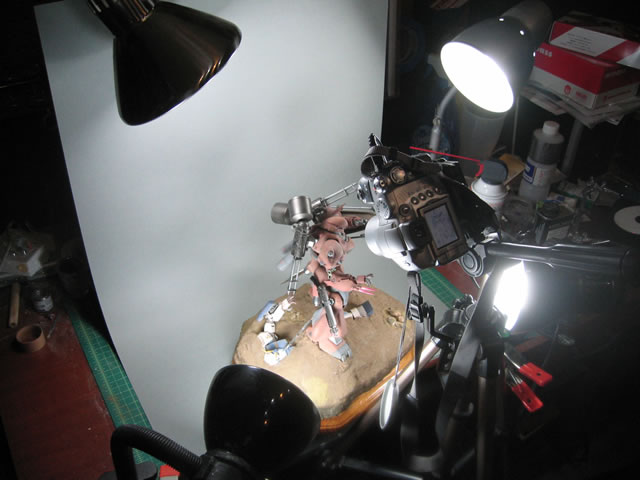
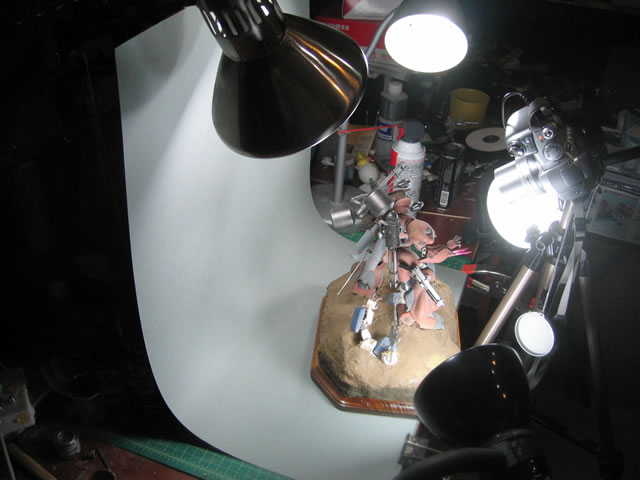
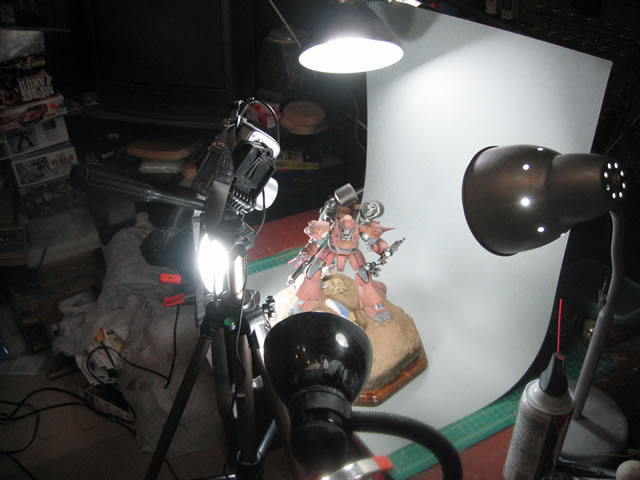
When taking pictures of models, it is best to remove any background distractions. Using a single large sheet of colored printmaking paper as a background will help the camera focus on the single target. Printmaking paper is thicker than normal bond paper and is perfect for model photography. Place the model on top of the paper and using solid supports such as a wall or bottles full of liquid to prop up the paper creates a slight curve that is not noticeable in final pictures. Below is an example of the lighting and printmaking paper setup:
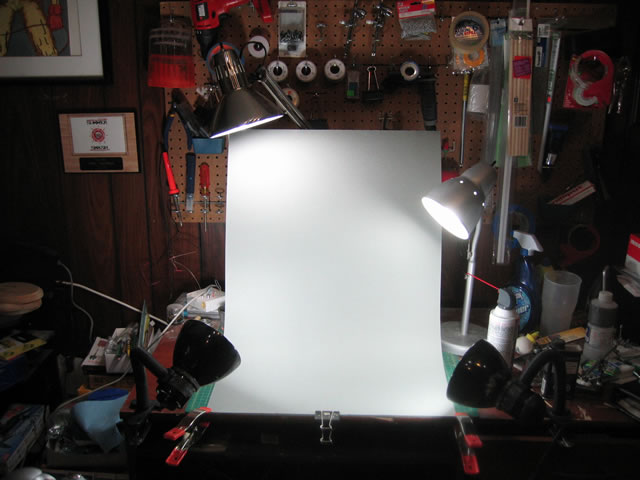
Lighting is very important to photography. With proper lighting, you can reduce shadows, show off the wonderful colors and effects applied to the model, and eliminate the reliance on the camera’s flash. In the above setup, you can see that I have three lights focusing in different directions at the target. These lights can be further adjusted depending on the photographing angle. The sheets of paper over the lights is tracing paper that I use to diffuse the lights. This softens the lights focused on the object. The light bulbs used in the above example are GE Reveal incandescent light bulbs that are advertised as a white/natural light color. I still needed to make white balance adjustments when using these bulbs. Always remember to make the proper white balance adjustments according to the type of lighting setup you use.
Light Box
Below is a link to a tutorial for building a light box. This is yet another method for creating a self contained photography set up. This little light box is great for a quick and dirty photography setup to take some quick snaps.
Yo, great tut. One question though, do you attach the tracing paper directly to the hood of your bulbs? I was just wondering if it was safe, I don’t wanna burn down all my kits. Thanks
The tracing paper is just held in front of my flash as a cheap makeshift diffuser. It’s not physically attached to anything, just held in my hand while I snap pictures.