This tutorial will discuss the basics for airbrushing. Many of the basic has already been demonstrated in the primer tutorial.So this tutorial will focus on spraying color; for the purpose of following the build layers chart. Start with mixing the paint.A rough starting point of about 60% thinner to 40% paint is my typical start point. Depending on the final mixed consistency, I will either add more thinner or add more paint. The normal consistency I use is close to milk. It is best to test out the mixture through the airbrush. If you get sputtering, the mixture is too rich and you need more thinner. If you spray the mixture and it is not sticking very well to the surface and is generally very watery, the mixture is too thin and you need more paint in the mixture. The more you paint and mix, the more comfortable you will be with what works best for you. Please only use this as a rough guideline.
Below is a video showing my mixing technique. I use a medical glass eye dropper found at your local drug store. I like the glass as I use lacquer based paints and cleaning these dropper is easier. The droppers also provide fairly good measuring, this helps in mixing custom paint colors as well.
Get the Flash Player to see this player.
Next up is spraying the part. The technique is similar to spraying primer, first spray on a lighttacky coat, this will look like small dots on the surface, or a very light looking coat; this is normal. Whatis happening here is that this light coat is going to start sticking onto the surface and create a buffer zonefor the following layers of paint. Once the tacky coat is on, you can go and spray heavier. If you start off heavy,the paint will just slide around and not stick onto the surface. Also notice that I am moving both the partand the airbrush, this is to keep the airbrush paint flow from concentrating on a single area for too long and creating puddles of paint.
Get the Flash Player to see this player.
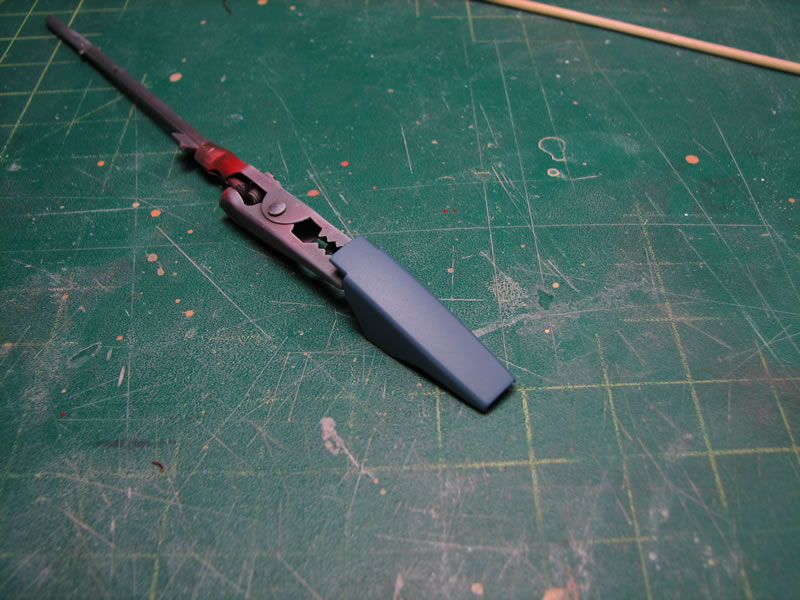
Below is the resulting picture for spraying on the base color coat:
Below is another example with a different part. The same process and techniques are used.
Get the Flash Player to see this player.
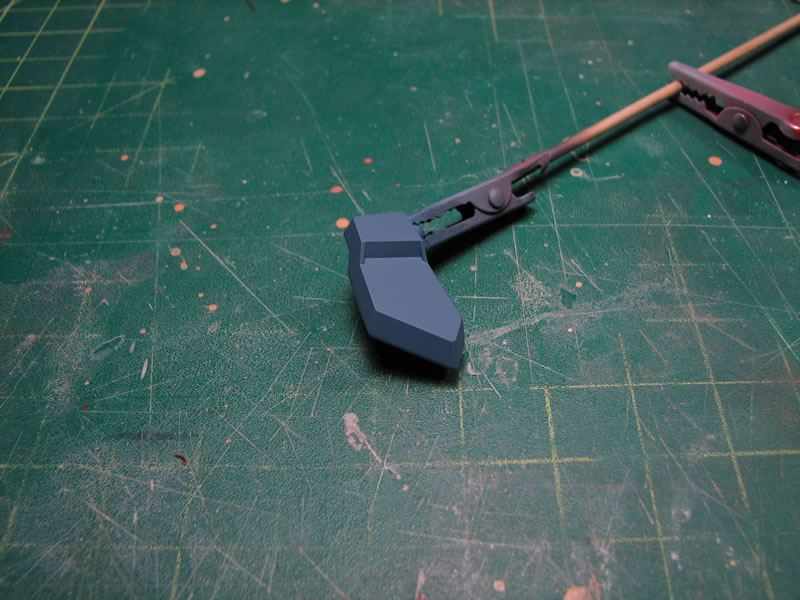
And the corresponding painted part:
Base coat for Metallics
Below is a video of base coating parts for a metallic paint job. This follows the second build layer chart for painting metallics. After priming, the basecoat has to be a gloss black. The potential in metallic paints are fully utilized over a gloss blackbase. For this example, I am using Finisher’s Pure Black which is a lacquer based gloss black. As with spraying primer and paint, I am going to spray on a light tacky coat first, then spray heavier on top of the tacky layer.
Get the Flash Player to see this player.
Once the gloss black base color has cured, the alclad metallic is sprayed. For this example, I’m using AlcladSteel. Alclad paints are lacquer based, so it is important to take that into account when choosing the properbase gloss black – ie if you use an acrylic, the alclad will eat it, and you are left with an interesting paintmess. The alclad paint is also prethinned, meaning there is no need to thin the paint further, and the stuffis simply poured into the airbrush and ready to paint right out of the bottle. Below is a video showing an internal frame piece painted with Alclad Steel:
Get the Flash Player to see this player.
Airbrush Cleaning
The airbrush I am using is an Iwata HP-C. The design of the nozzle makes it very easy to clean my airbrushafter each use. After spraying paints, I pour out the left over and then wipe the cup with a paper towel. Next,I pour some lacquer thinner (keen strip brand from my local hardware store). Turing the nozzle a couple of turns,this creates a block for liquid in the cup. Pressing down on the trigger to first get the air flow going, thenpulling back on the trigger to release the liquid, the thinner is then cycled through the airbrush effectivelyflushing through it and cleaning the airbrush. The same technique can be used if you can create an airtight sealaround the nozzle of the airbrush. Once the thinner has flushed through the airbrush for a couple of cycles,I spray the thinner out into a collecting jar (airbrush cleaning station).
Get the Flash Player to see this player.
Once you get the hang of this technique, swapping out paints takes less than a minute.
Here’s an updated video for basic airbrushing and shading:
So I’m thinking about painting the frame of my PG Strike with Alclad Magnesium. If I were to paint on top of that with another paint like a Tamiya Clear Red for a metallic red will it eat the acrylic because Tamiya is acrylic? Also if I decide to hand brush detail with game workshops acrylic what would it do to those and is there anyways to make it work? Also thanks for all your posts they have helped me very much (one of the main reasons why I started gunpla) and inspired me to create my own blog.
Spraying tamiya acrylic over the alclad is fine. Hand painting is another issue, I’ve never done that so I don’t know what kind of results. Clear paints are different from regular paint in that it reacts and acts differently. I do not recommend hand painting clear paint at all. Alclad is formulated for the airbrush, and cannot be hand brushed. So if you are airbrushing the alclad, airbrush the clear.
As for hand brushing accents over the alclad; use an enamel and make sure you let the alclad cure for a full day to two days before hand brushing. Also testing out the specific brand of paint over the alclad is highly recommended to see if there are any adverse affects.
Thanks for the advice! I wasn’t planning on hand painting any of the clear paints, I do mostly airbrushing. I only plan on detailing some piping later on so its good to know what kind of paint I should use. Thanks again!
I am looking an airbrush for gundam modeling now. What kind of airbrush do you use? Do you think I will need the one with precise control? Could you recommend somethings else for me?
I had ever seen the airbrush before. I read the guitarist magazine and Dowell Piers was trying to paint old guitar into new form. I like that quite very much and i excited to do that but problem is, i want to try airbrush painting and make it for my income generation. i can’t draw even a straight line. i want to present these techniques in my country (Nepal) as well. We don’t have such kind of painting yet in our country. Please help me with your wonderful ideas.
It’s probably a stupid question, but how do you clean your eye droppers ? I use disposable ones myself, because I can’t clean them good enough for my tastes :-/
I no longer use the eye droppers. After mixing paint for a while, you get used to eye balling it. But when I did use the eye droppers, I used glass ones and those are much easier to clean. The rubber piece can be removed and the entire glass part can be soaked in some thinner to clean them. I then use a paper towel and twist it into the eye dropper to completely clean it up.