This is a complete start to finish build for a Sena Kashiwazaki resin anime figure. The figure is from Haganai, and is cosplaying a character within a game she played in the manga. The kit was made available from Ques Q at Wonfes 2015 then a few weeks later from their online shop.
The first video shows the unpacking of the kit, some initial flash clean up, and the pinning process. The nice thing about thie kit is that a majority of the parts had guide holes to help align the pins. A good number of anime garage kits do not have these guides, so there is some guess work involved and some other techniques involved to pin the kit.
Once the kit is pinned together, the next video covers the initial sanding. The initial sanding cleans up any visible mold lines, excess flash, and other surface defects. Sanding sticks, metal files, sanding pads, and a flexi-file are used.
After the initial sanding, the surface of the parts need to be cleaned. When unpacking the kit, the surface of the parts will have an oily feel. This is a layer of mold release film that is on the surface of the parts. This helps extend mold life and facilitate the removal of the parts from the molds; however, this mold release will prevent primer and paint from sticking to the surface of the kit. The parts must be soaked in some kind of a degreaser. For this video, I’m soaking the kit parts in purple power, an industrial strength cleaner. The parts are soaked over night, then rinsed off in some clean water, and placed in an ultrasonic cleaner for a scrub session, then pulled out and dried on some paper towels.
Once the parts have had time to dry, they are placed on skewers or held by alligator clips on skewers. The parts are ready for the first priming session. Using an airbrush, Mr Resin Primer is sprayed on the parts first with a light misting coat at about 3-4 inches away from the parts; then a heavier coat sprayed at about 1 to 2 inches from the part. The technique is to create an intermediate layer of paint that acts as a bridge between the dry surface and the paint. Without the mist layer, the paint has a greater chance of not sticking well and just pooling. When spraying heavy, the idea is to get the surface just start looking glossy/wet and then stop spraying the paint. There is a threshold from where the paint will start pooling if you continue to spray after the surface starts to look glossy/wet. At the point, the part is completely primed. The primer will dry to a flat finish.
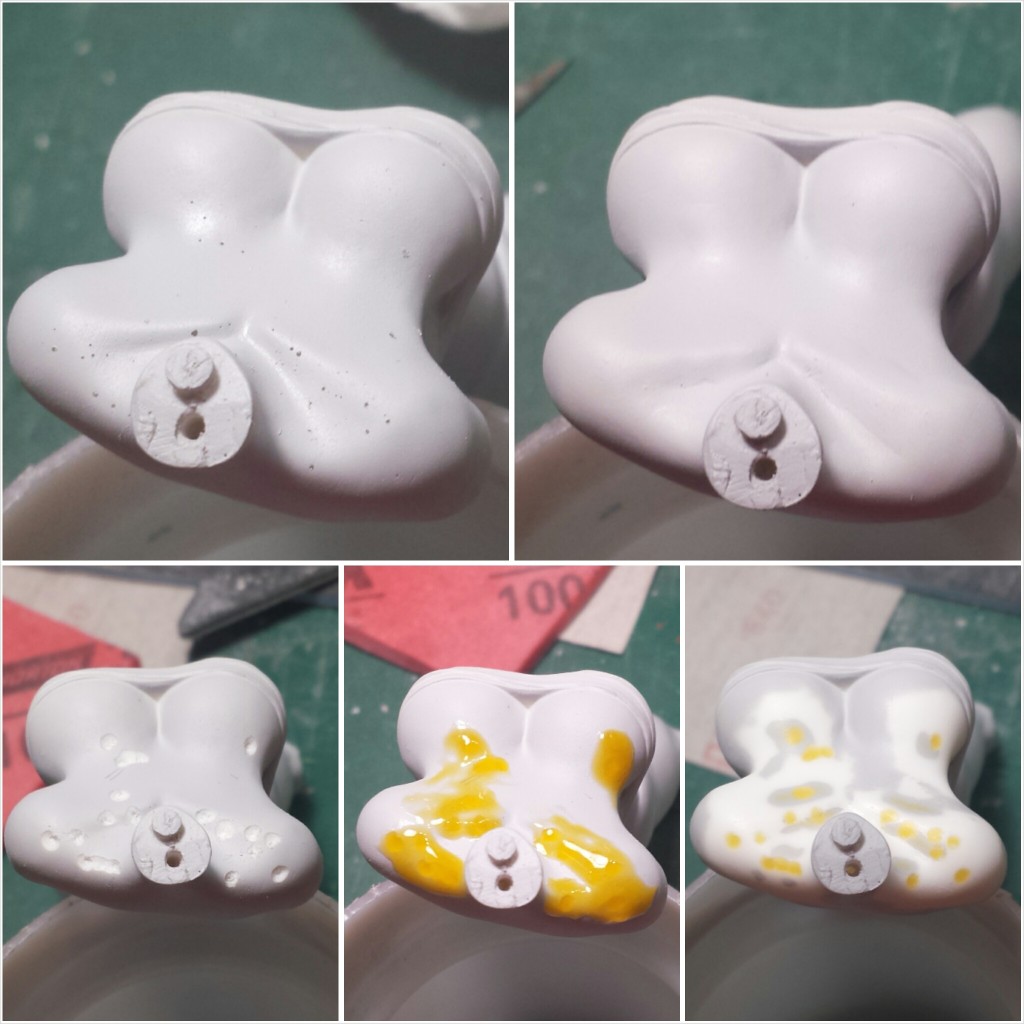
For any resin figure, after the fun pinning phase, the initial sanding phase, and the first primer; everything goes into a perpetual cycle to work the surface preparation. The first primer layer will reveal most if not all the mistakes in the surface. Pinholes are bubbles in the resin and when found, these are typically just the top of the bubble and just below the surface is the actual bubbles so just applying a filler over this pinhole will not resolve the issue. Rough sanding spots are hard to see in the bare resin and shows up clearly in the grey primer. Missed mold lines are also easily found after the surface has been primed.
Spraying white base on bare skin surfaces. And spraying base colors.
Mixing a base skin tone.
The prepared surface is sprayed with a white base first so that the grey layer does not show up in the successive paint layers. On top of the white base, the base skin tone is sprayed. The raised areas or light areas are painted with the lightest highlight tone. After the highlights are sprayed, the middle tone is sprayed to blend everything. Also in this video is the masking off and painting the other parts and how to repair paint chips if the masking items pull up any paint.
The other parts are painted using the mask – paint – mask – paint process.
The face is base coated with Mr White base, then the eyes are masked off for the skin colors to be painted. The eyes are unmasked and a pencil is used to draw in a template. The template is inked then the eyes are painted. The face is then gloss coated. Eyes remasked so the gloss is preserved on the eyes and the face is flat coated.
The hair is first painted as separate parts. When the eyes and face are done, the head piece is glued to the main hair piece, then the front hair piece is glued into place and the seam down the middle of the two hair parts is puttied, sanded, primed, repeat. Once the seam is gone, the hair is base coated then shaded with a lighter tone. The parts are gloss coated as a precursor to adding a wash to some of the lines of the kit. Most notably, the chaps and butterfly piece. The butterfly piece is finished with a sharpie and the kit gets a final flat coat and assembly.
And this is the complete start to finish for resin figure building.

This is the best, most easy to understand guide for anime garage kits ive found! Thanks, now im not afraid to try my first kit now