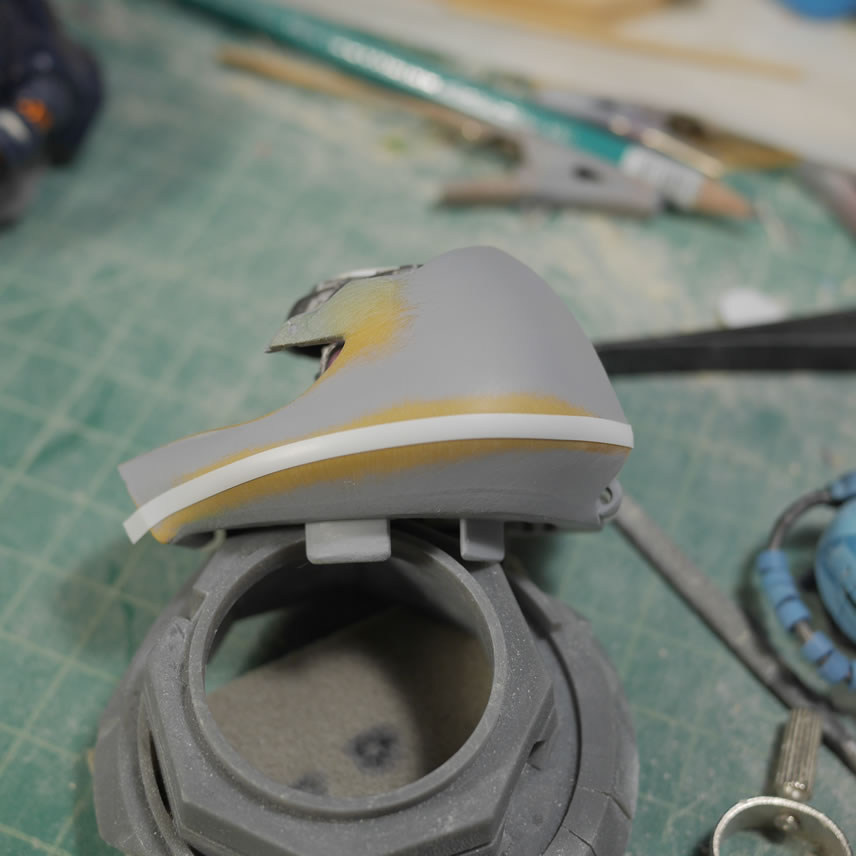
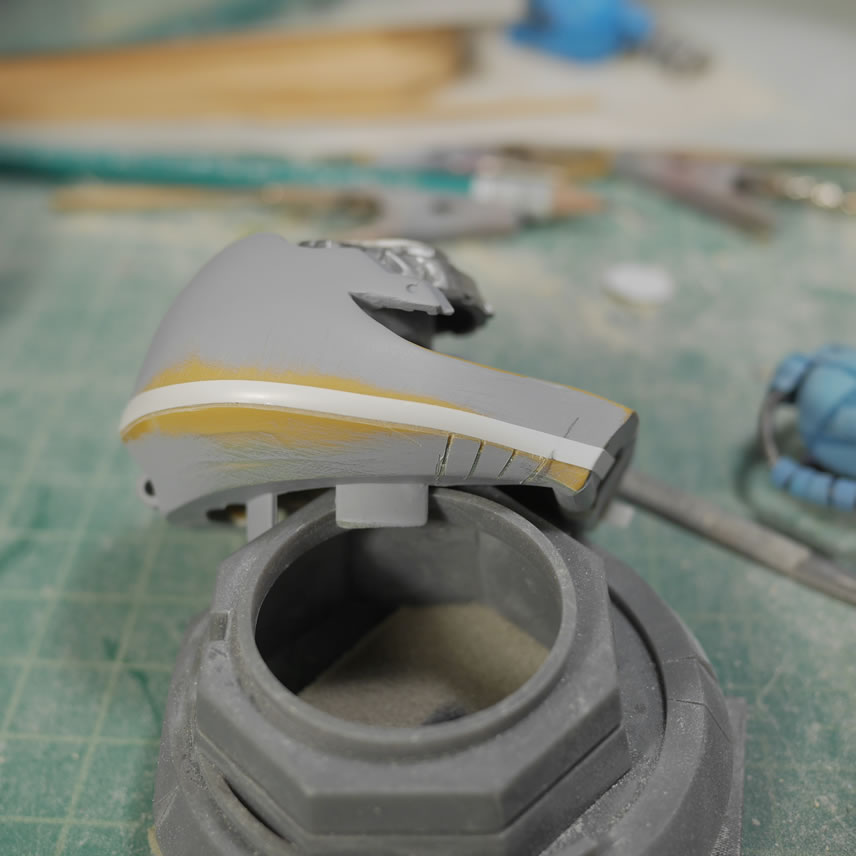
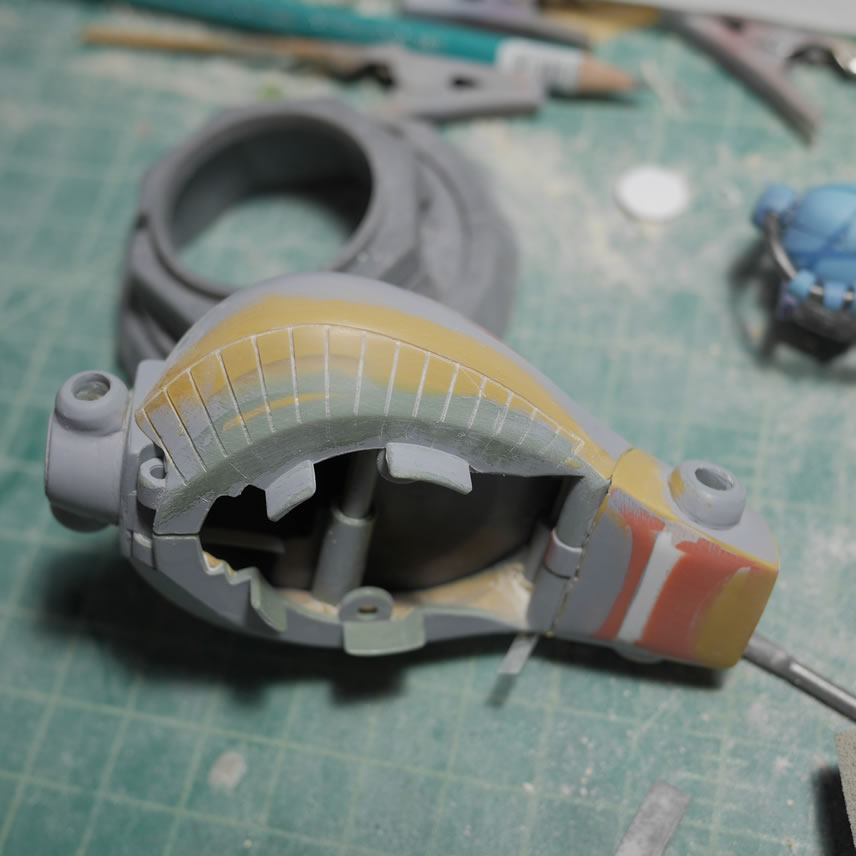
Time for a little update on the Gouf Custom Exceed Head conversion kit progress. This has been a fairly productive month, most of the time has been spent making the mold and making casts for all the parts. But time to play some catch up. The last time I left off, I was still working getting the shape of the head correct, or to a point that I found acceptable. After the priming sessions to check for the correctness of the surface, I can get to scribing the final bits of detail for the side of the head. There is a definite order of operations here, since scribing before getting the shape right would just lead to rescribing details that are covered up by more putty used to shape the head. The first thing is to lay down some tamiya masking tape for curves. The tape is a little rubbery and considerably thicker than the standard yellow tamiya masking tape. This allows for the tape to curve and keep a continuous line along the surface. This is perfect for masking curved surfaces and just having curves. I’m not using this to mask, but as scribing tape to help guide some chisels. If I am careful with the chisels, I can scribe in a perfect line. For the purpose of scale, I used a .5mm to scribe in the lines. I started with a .3mm but found they were a little too thin for the scale. 3mm Mad Works carving tape is used as the scribing guides for the detail lines perpendicular to the line that runs along the lower half of the head. I liked using the Mad Works carving tape over dymo tape since it’s clear, which makes alignment very easy; and I can reuse the tape a couple of times in comparison to dymo which is only useful once then the stickiness is completely useless.
More updates and information about the pre-orders for the limited casting run of this project after the jump.
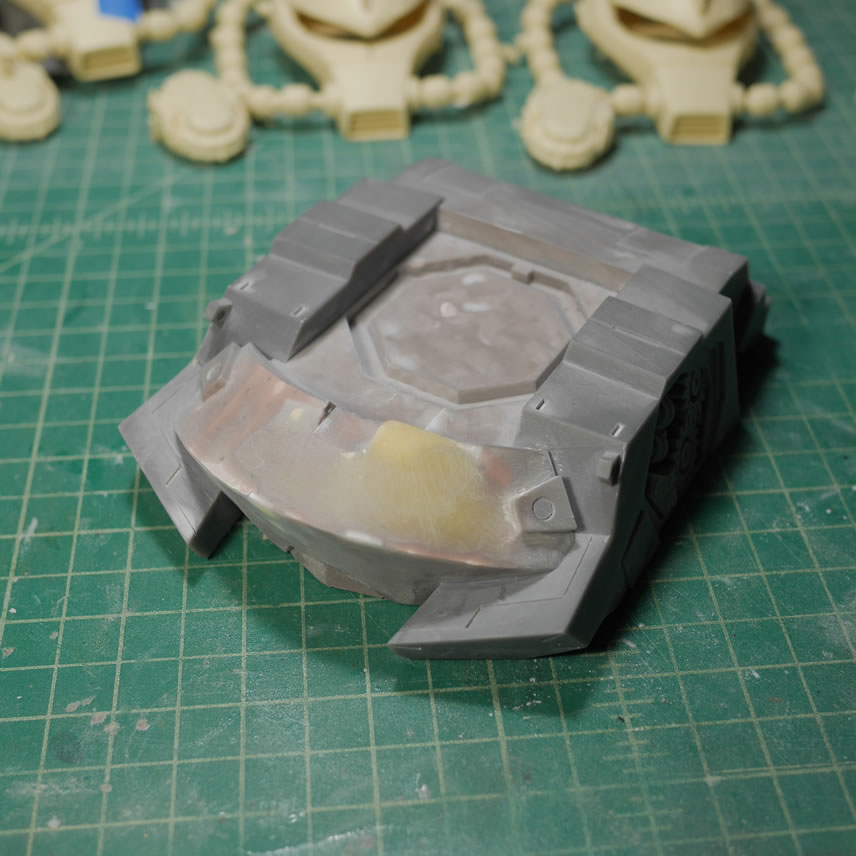
Here is a before and after shot of the lower half of the head details. I also scribed in some detail lines near the visor opening using the same Neograde kit I used as the reference for building the the conversion. Once those were scribed, I did a quick prime session and did a few final checks before setting up the parts of molding.
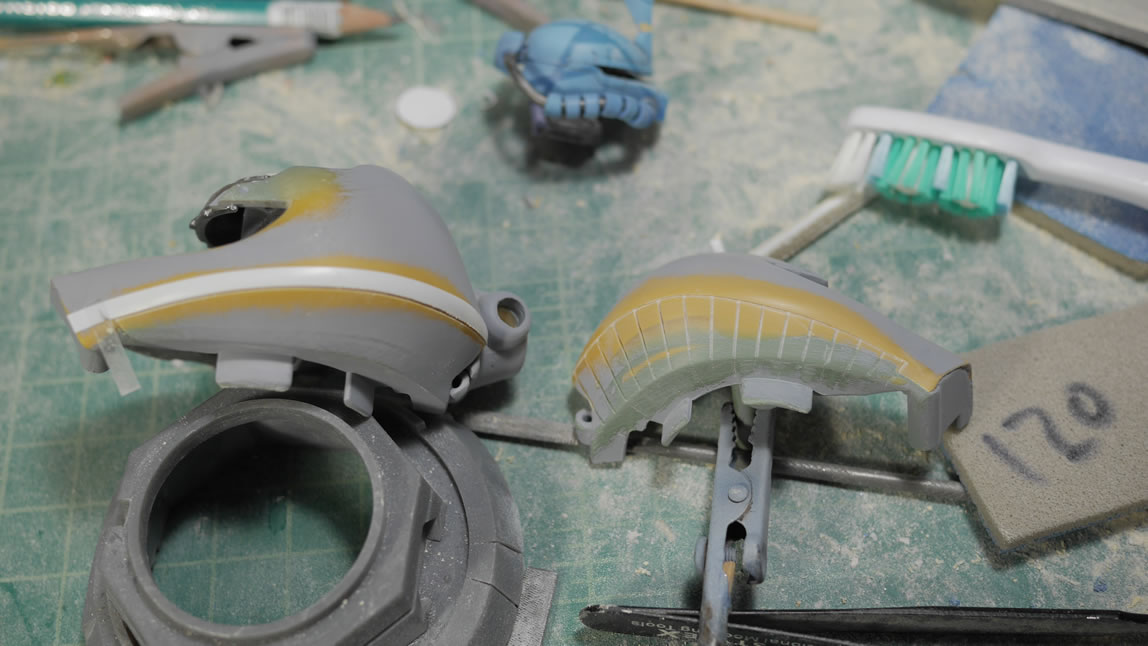
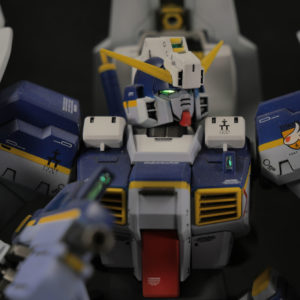
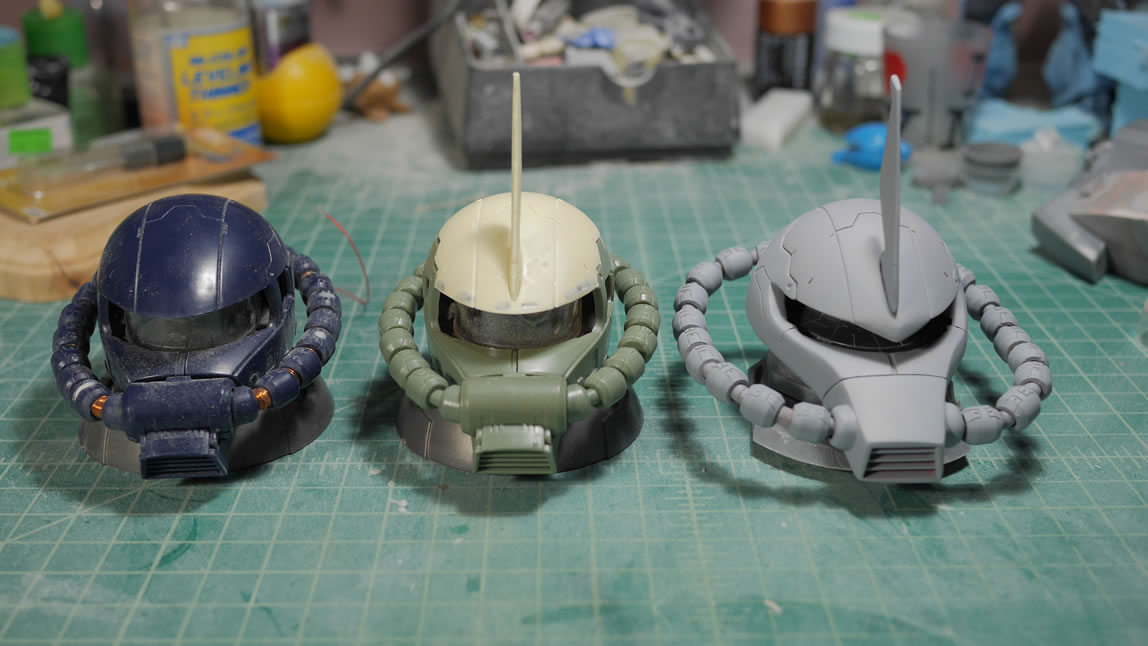
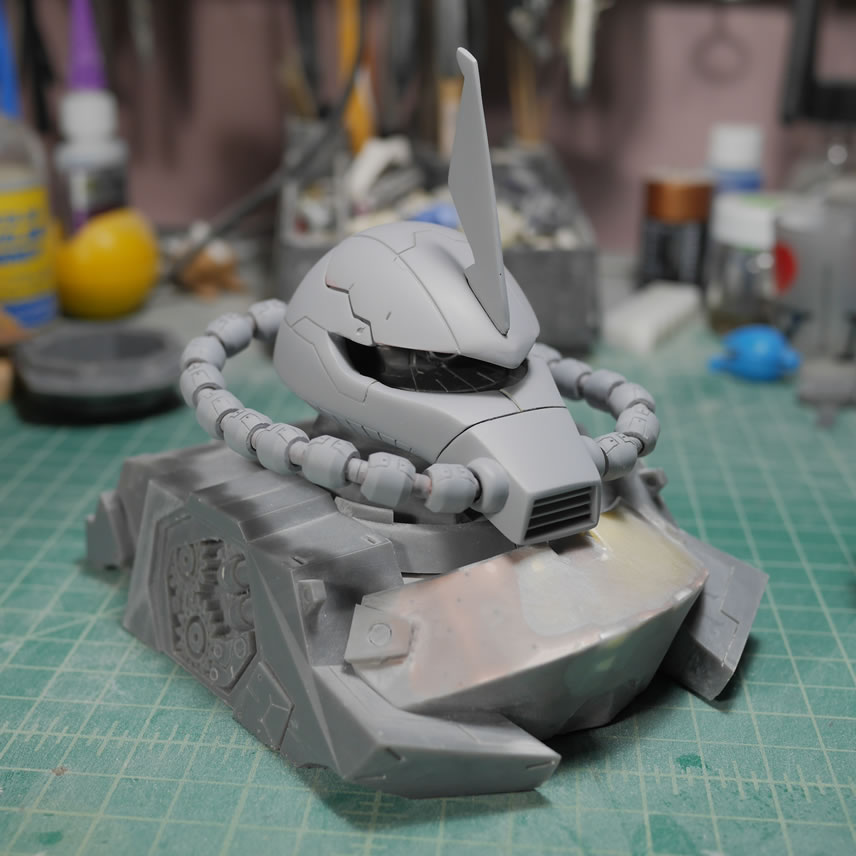
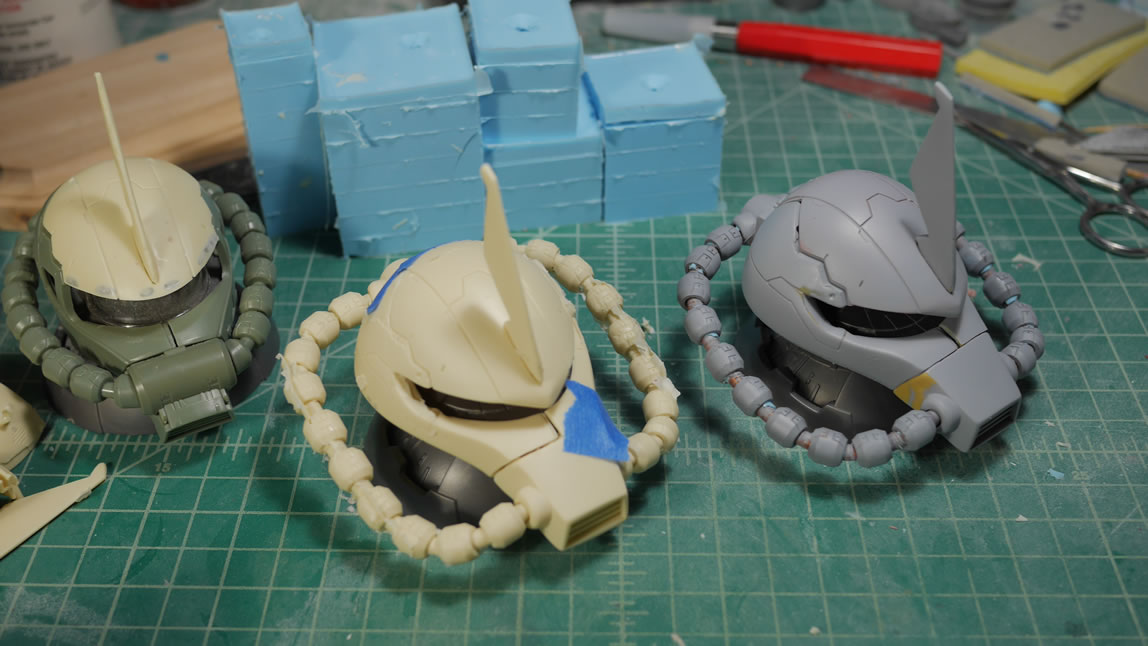
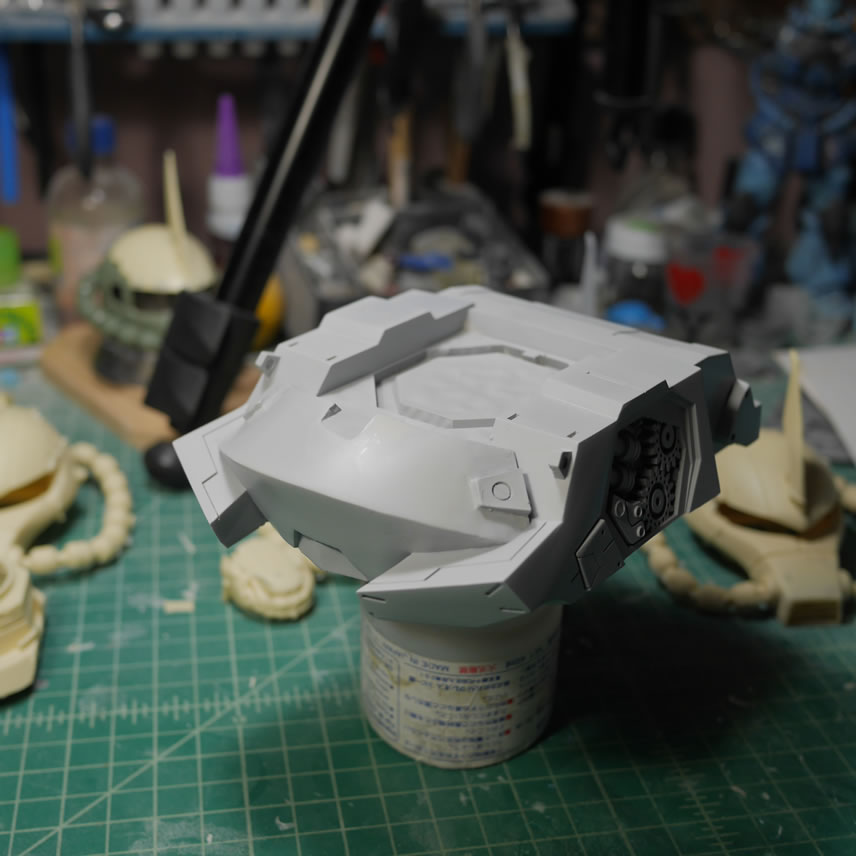
Satisfied with the priming session, I put the kit together and here are some comparison shots with the two other Zaku Exceed heads. Hopefully the differences are pretty clear.
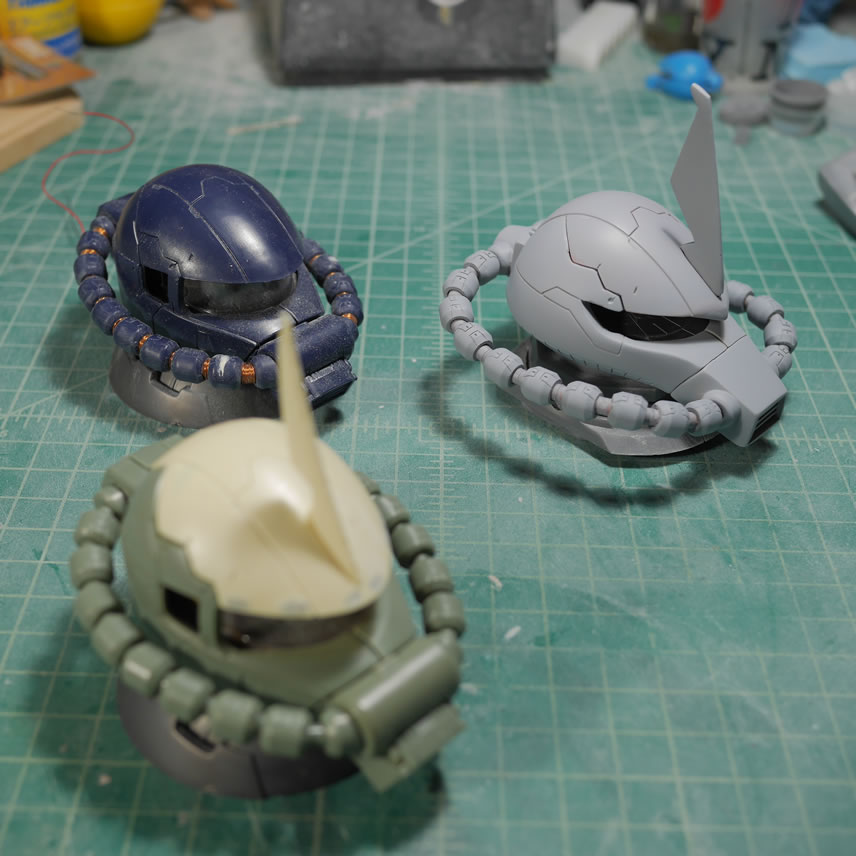
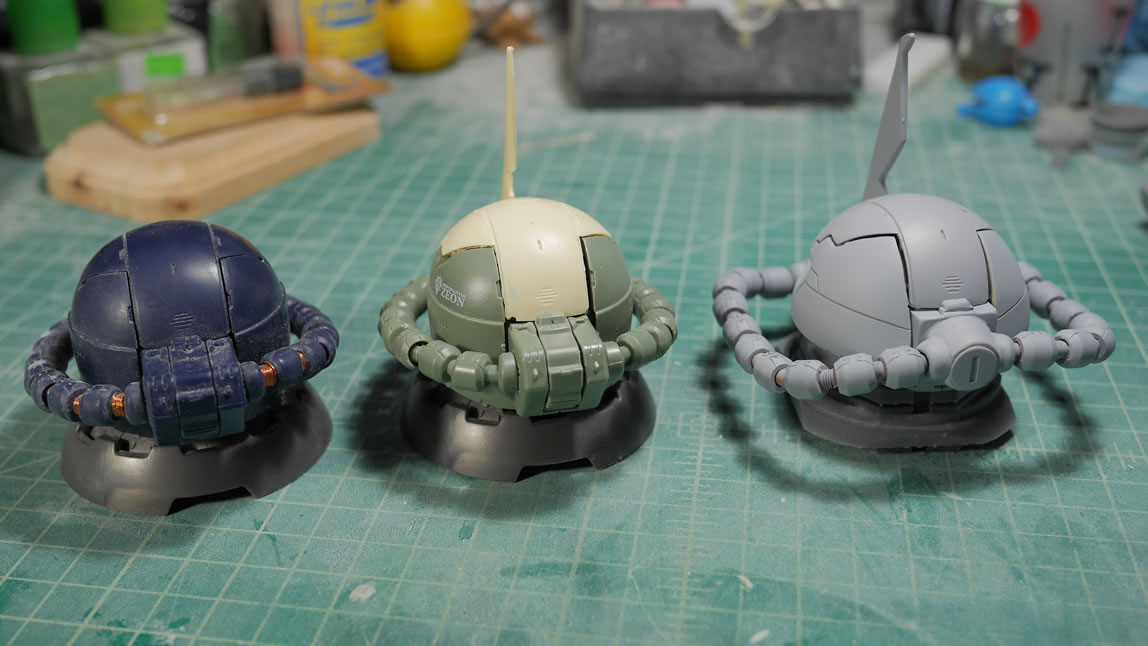
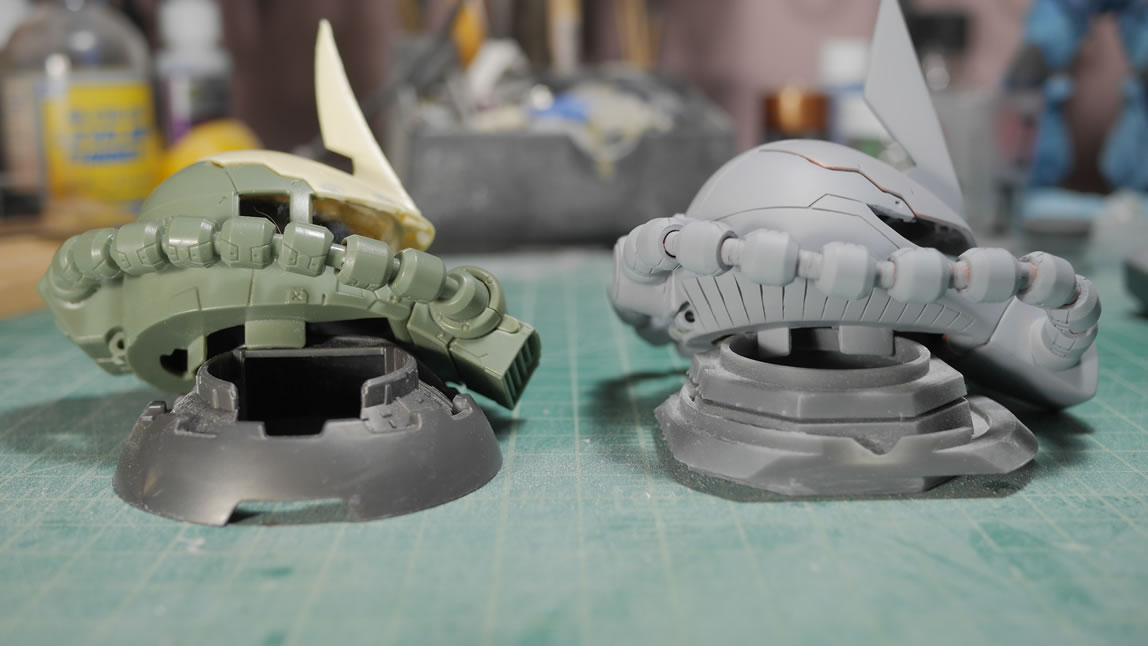
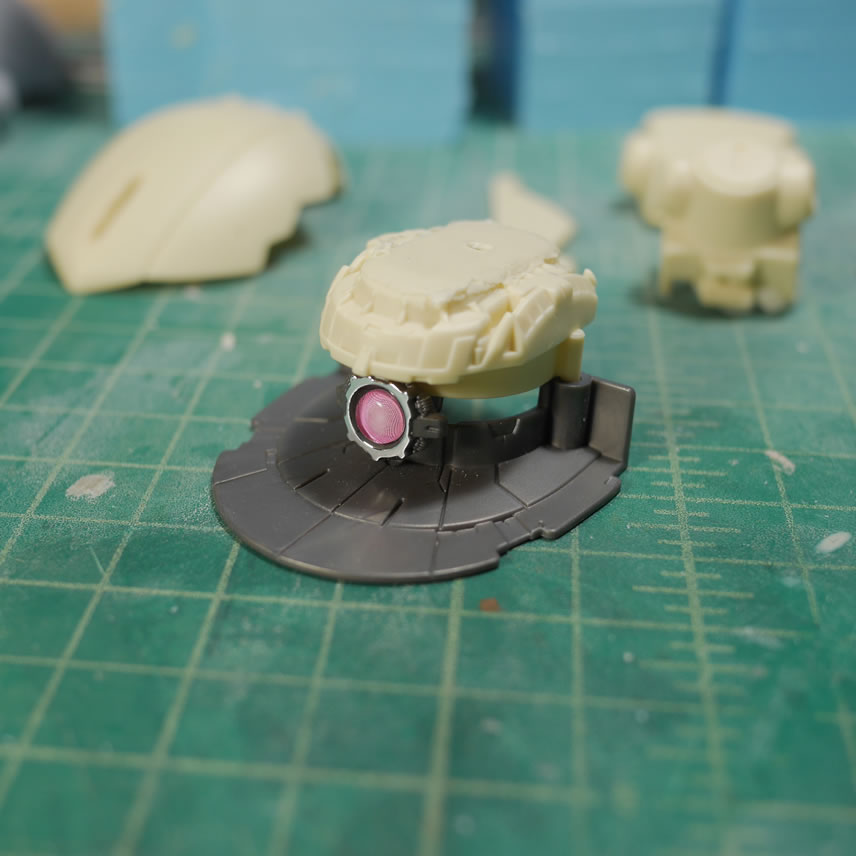
Showing off the lower half of the head and you can see the curve in the head cable that is special to the Gouf and the differences in shape and details.
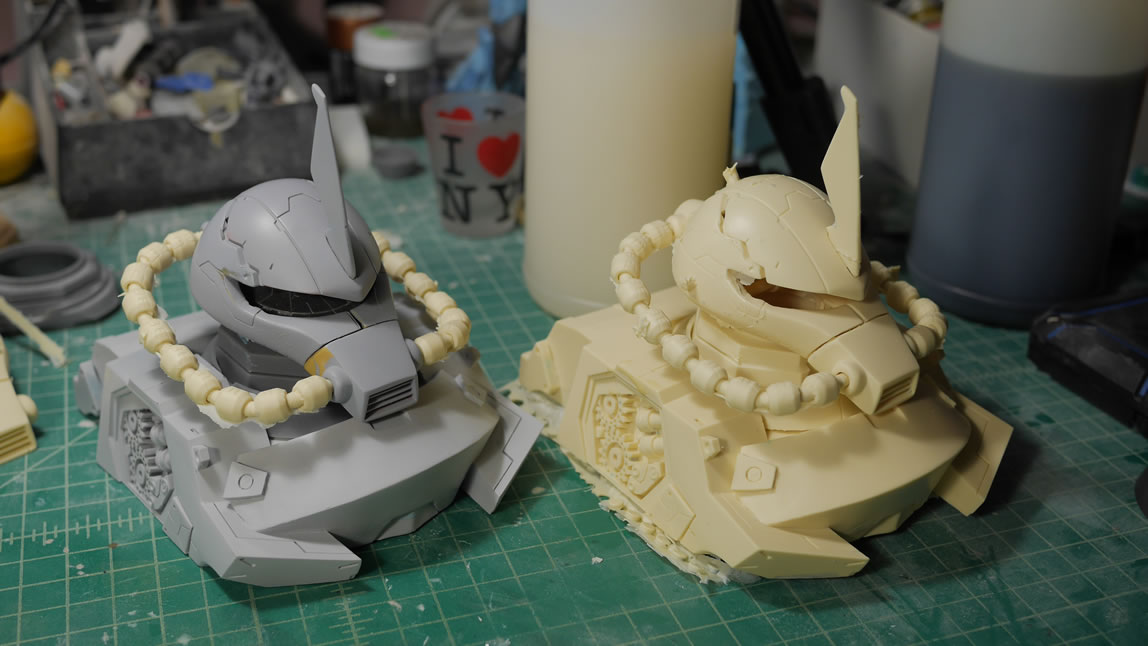
A quick pictorial check on the two busts that I have. The half bust will be the version that gets molded and cast. It would just be too cost prohibitive and time consuming to cast the larger bust. My original plan was to cast that large bust but once I had the sucker in hand, I realized the scope of that project was beyond my willingness to commit. So the second picture is what will be available very soon! I could send it out to some place in China to have it molded and casted, but then the next day I’d see the kit on sale at E2046 and other pirate resin sellers. So yeah, not a fan of that idea.
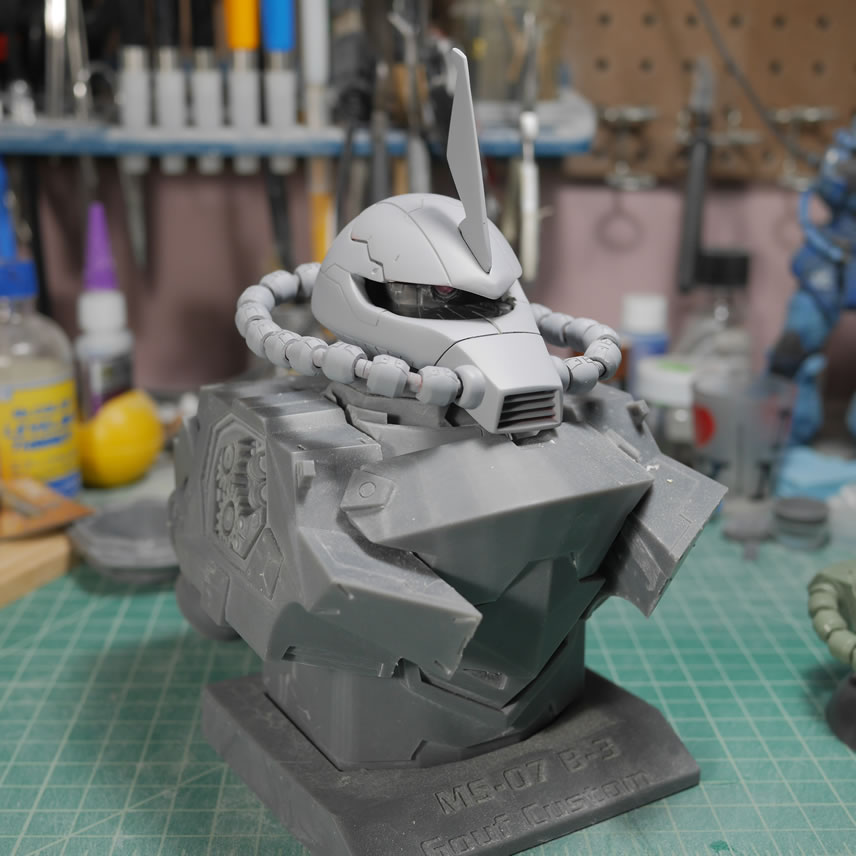
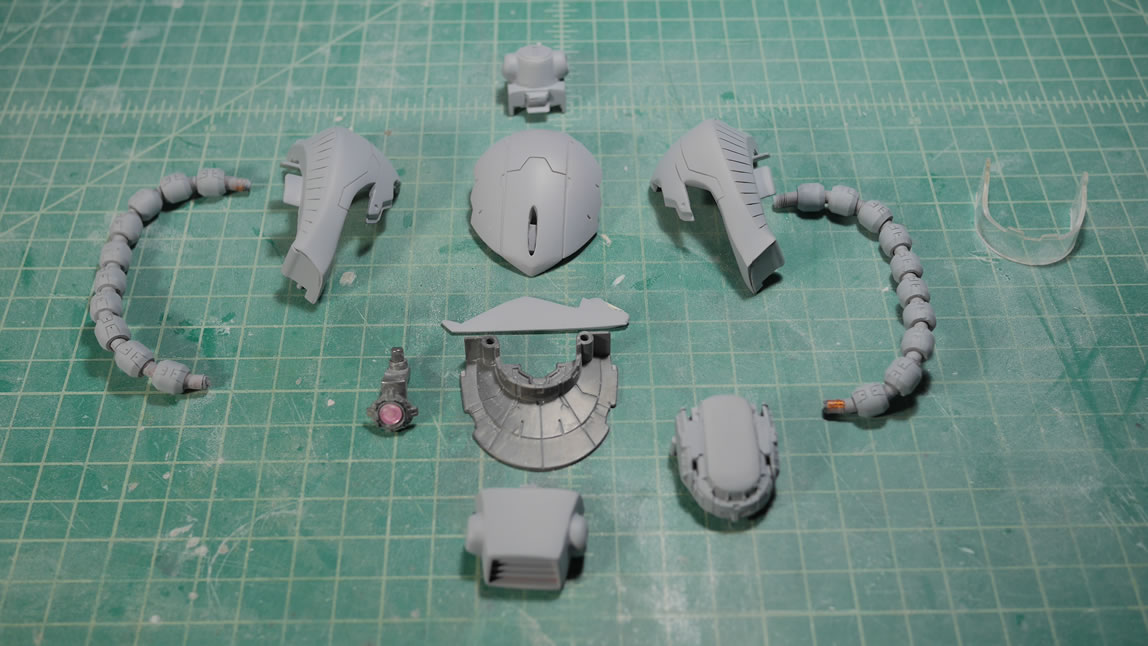
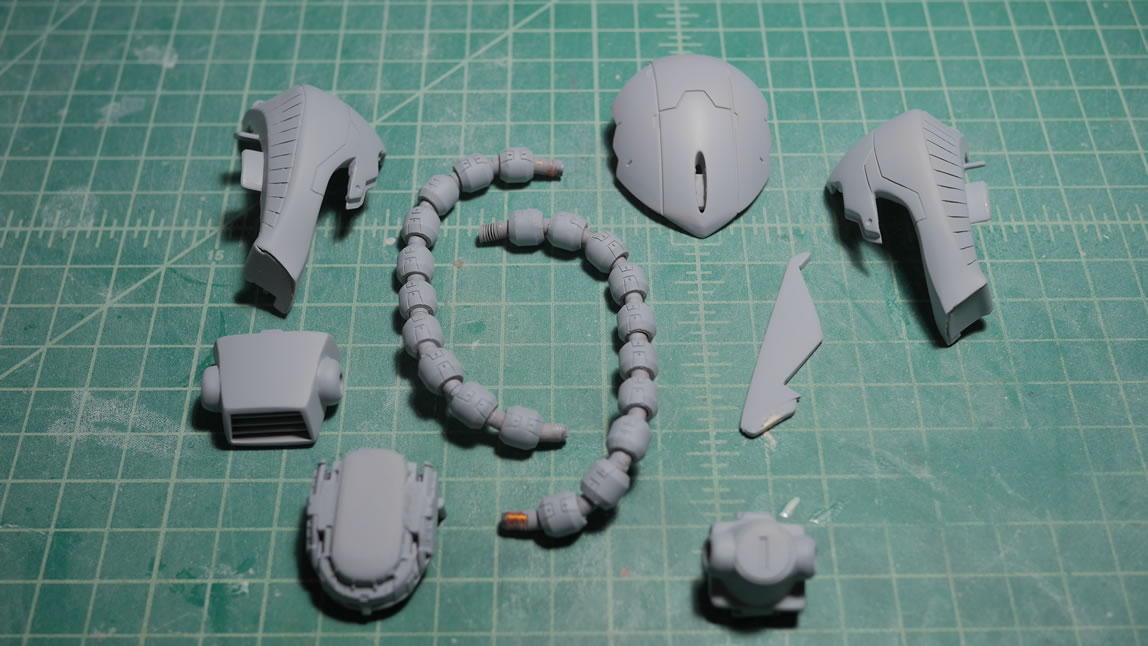
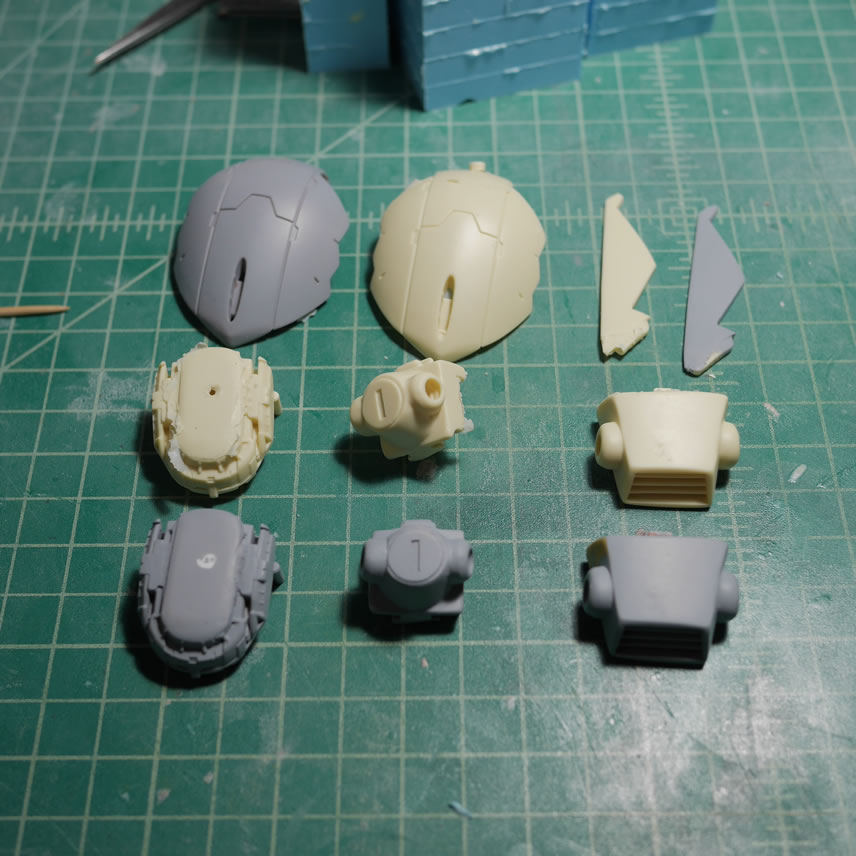
The kit is taken apart and it is pretty much just like the Zaku Exceed head in total parts count. The one difference is that I did not account for the visor. The original visor can still be used, but will need to be trimmed/sanded down to match the correct height of the Gouf’s visor opening.
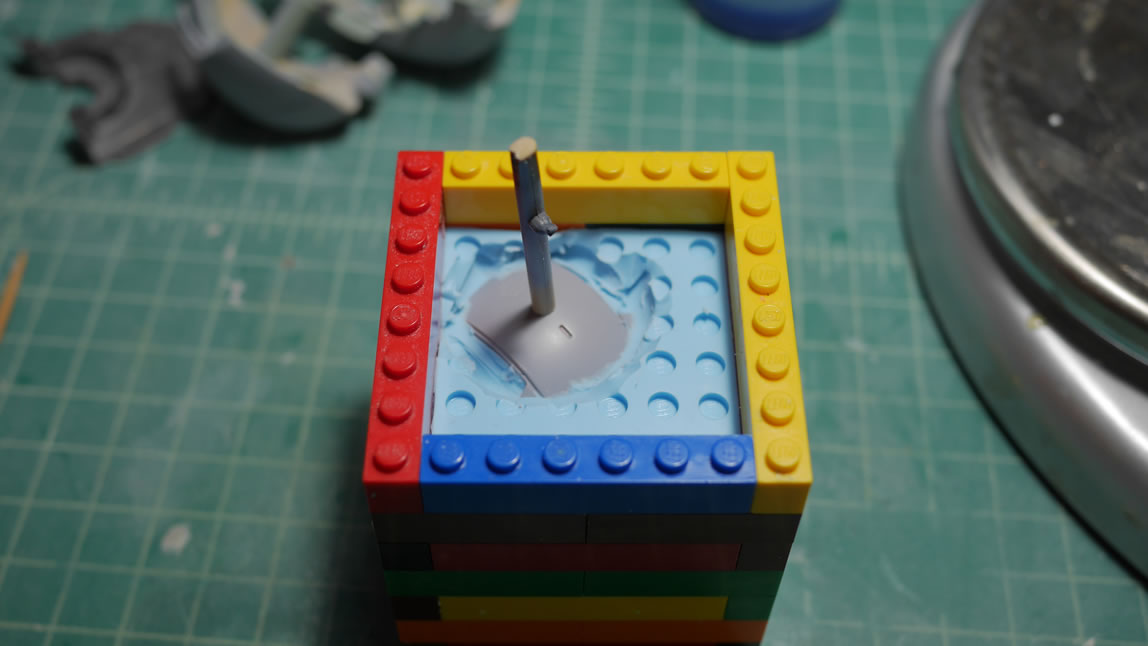
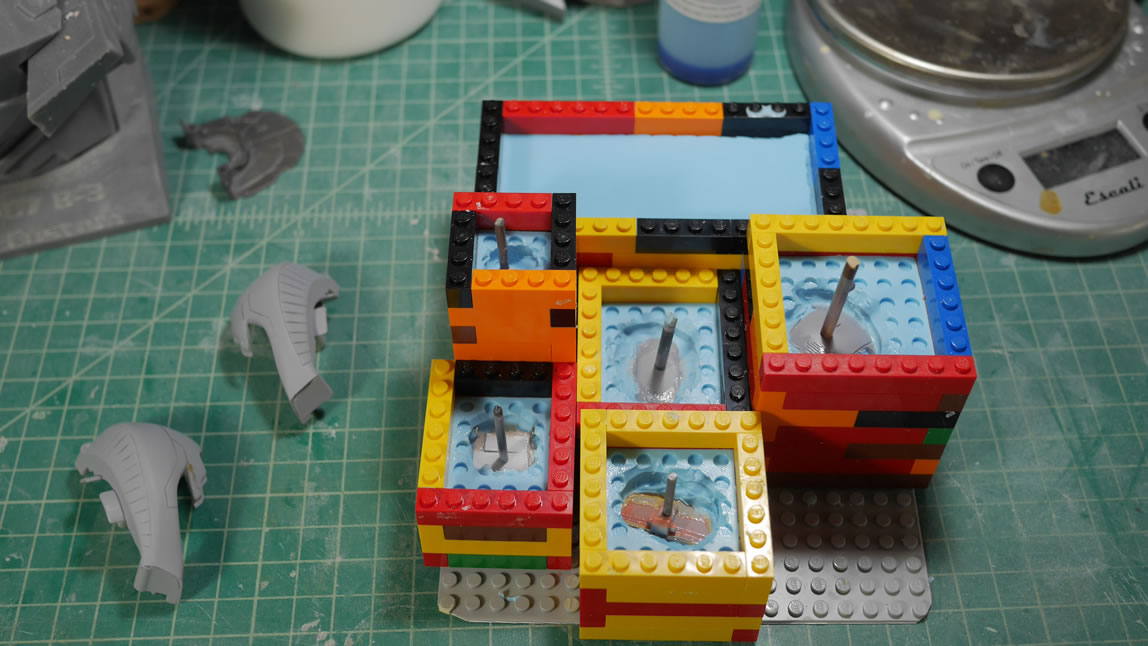
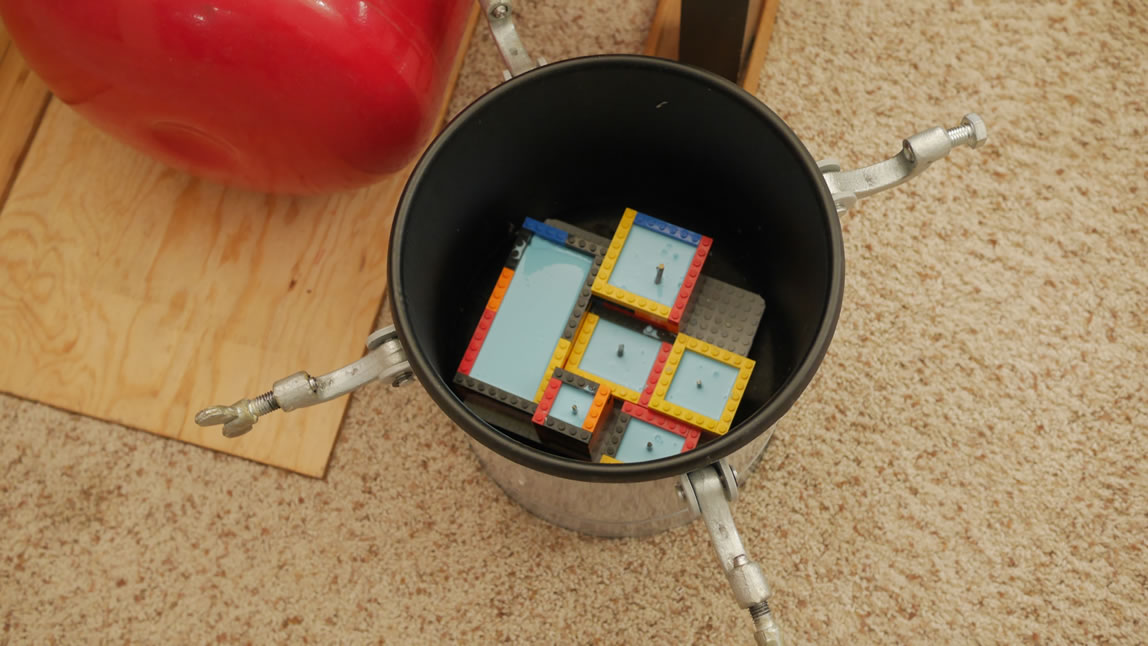
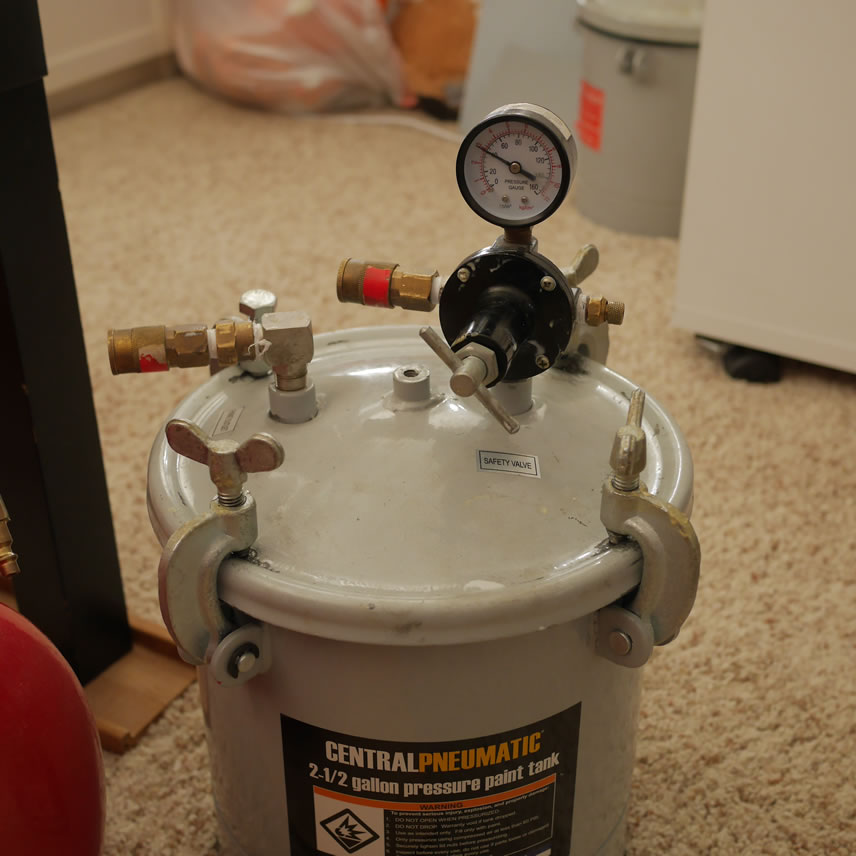
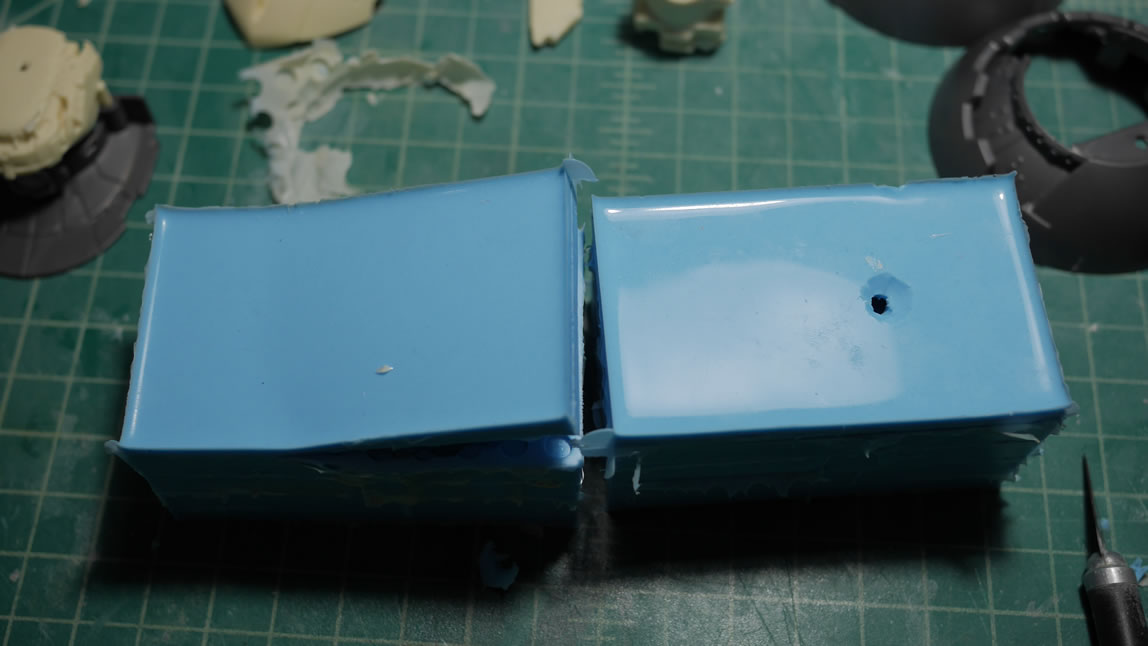
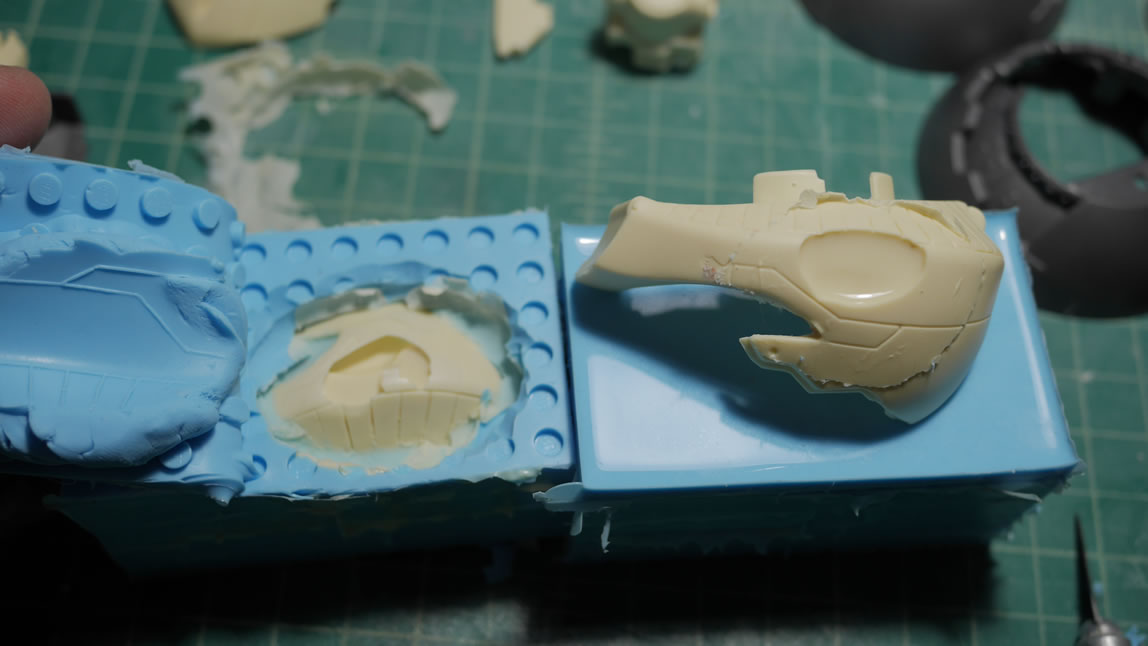
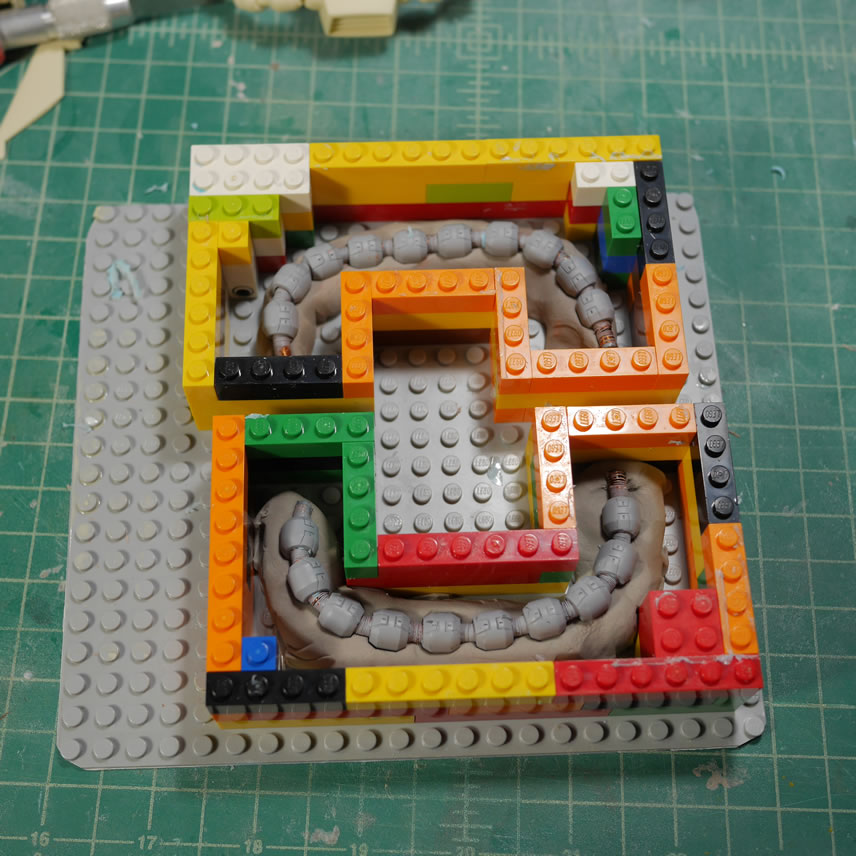
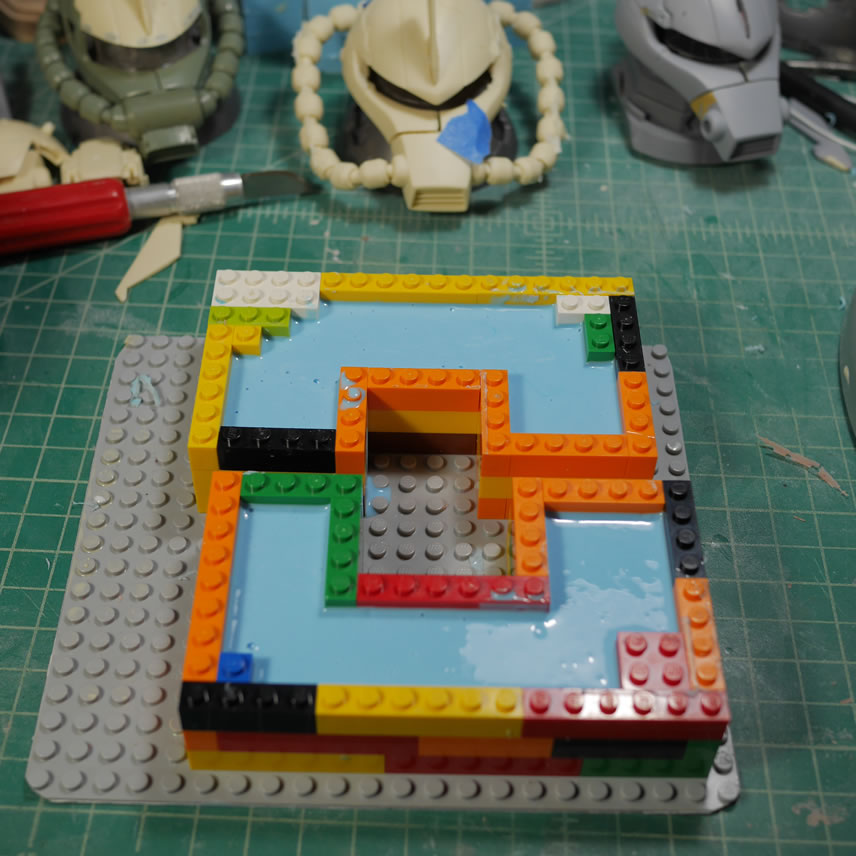
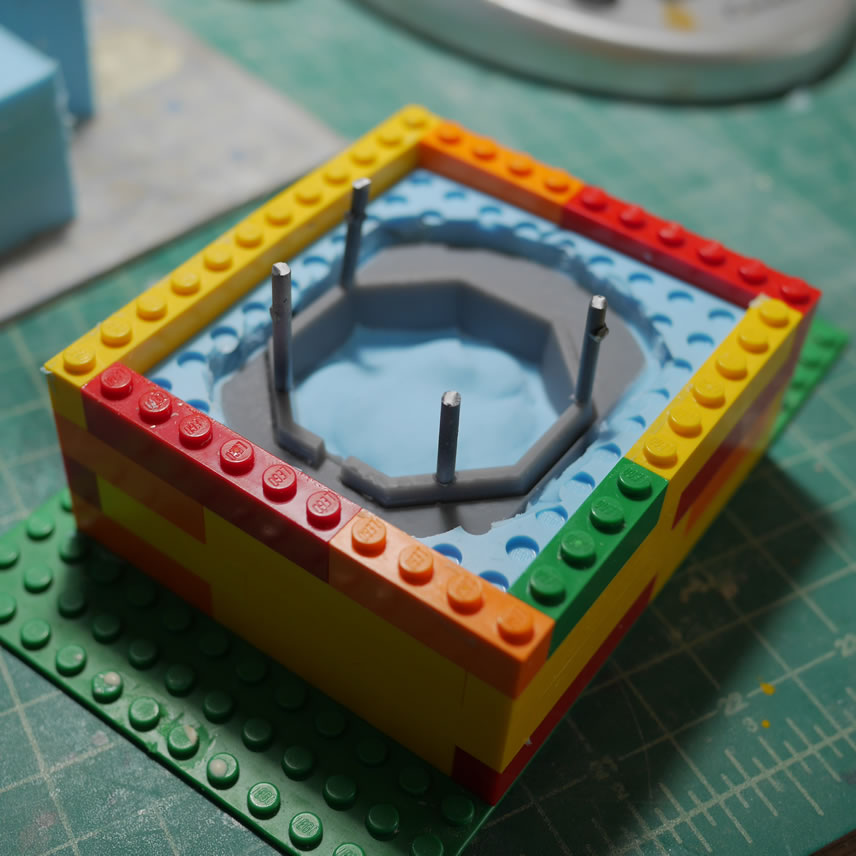
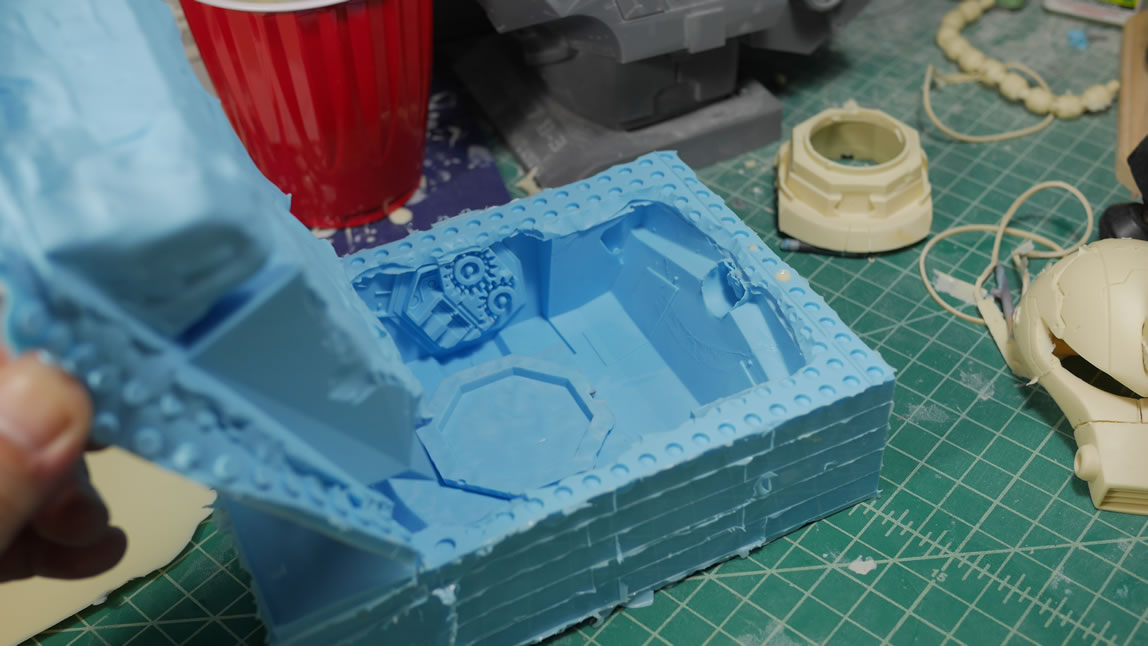
Silicone molding I like using legos as my mold boxes as it is very modular, but it can be a waste of silicone. I’m used to this method for making molds so it’s always best to work with what’s most comfortable. Holding the parts in place and in some cases filling some cavities in the parts; I use playdough. It is easily washed off and can be reused so for my purposes, it is the perfect clay for silicone molding. Once that is done, the mold is filled with silicone and the placed in a pressure pot for curing. Once cured, I break the molds out of the lego pieces and have one half of the eventual mold. I flip the mold and rebuild the lego box. I glue on a piece of plastic sprue to a flat surface on the parts and let that cure up. Vaseline is applied to the part and one side of the mold to keep the silicone from sticking to itself. And the second half of my squeeze mold is poured. The plastic sprue will act as an exhaust port for the resin when I get to pouring. This will be very important further down this post. The parts are placed into the pressure pot which fills the pot with air and compresses any bubbles that may form.

I also did a live broadcast of this process while working on another mold part, so that video can be seen here:
And in the pressure pot, the can is filled to 40 PSI and the molds are left to cure for about 3-6 hours.
Once cured, the masters are removed from the molds and mold release is sprayed into the molds. The molds are then placed into an oven at about 140 F to bake the mold release into the molds as well as activate the release properties. Once that is done, it is time to mix some urethane resin and make some casts. Below is the first cast and pull which is pretty good so far. After a few mold pulls, the molds will be reconditioned with another spray of mold release and baking cycle to help prolong the life of the molds.
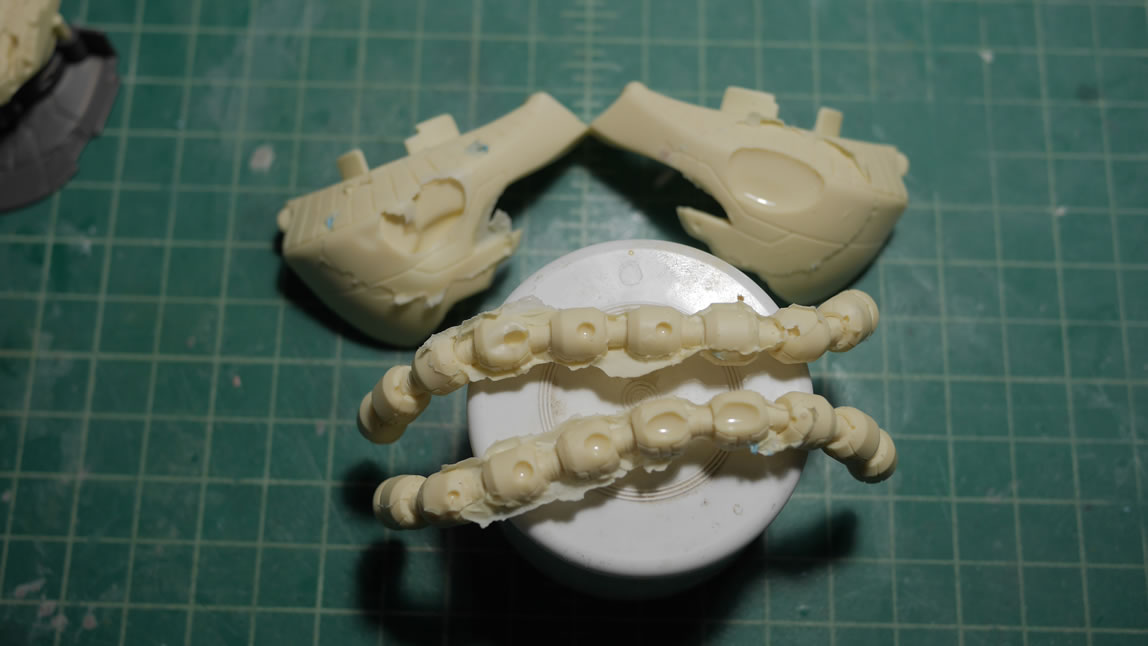
Earlier when I stated that we need vent holes; that statement is demonstrated clearly here. If I’m not making mistakes, I’m not model building. For the head sides, I forgot to glue in a piece of spruce for the vent holes, so the cast without the vent holes shows what will most likely happen. I got a huge bubble. Without a vent hole, while under pressure, the bubbles in the resin has nowhere to go but to the top of the mold, and gets trapped creating a huge bubble in the cast. I can fix this by cutting out a vent hole in the silicone mold. I had a similar problem with the cables. But the problem with the cables was deeper, I tried to save time by molding both cables in the same mold, and that was just mistake 1 of many. Short cuts always come and bite me in the asshole later. But this will be addressed later, I’m way too excited on getting the first casted copy out to worry about my casting problems.
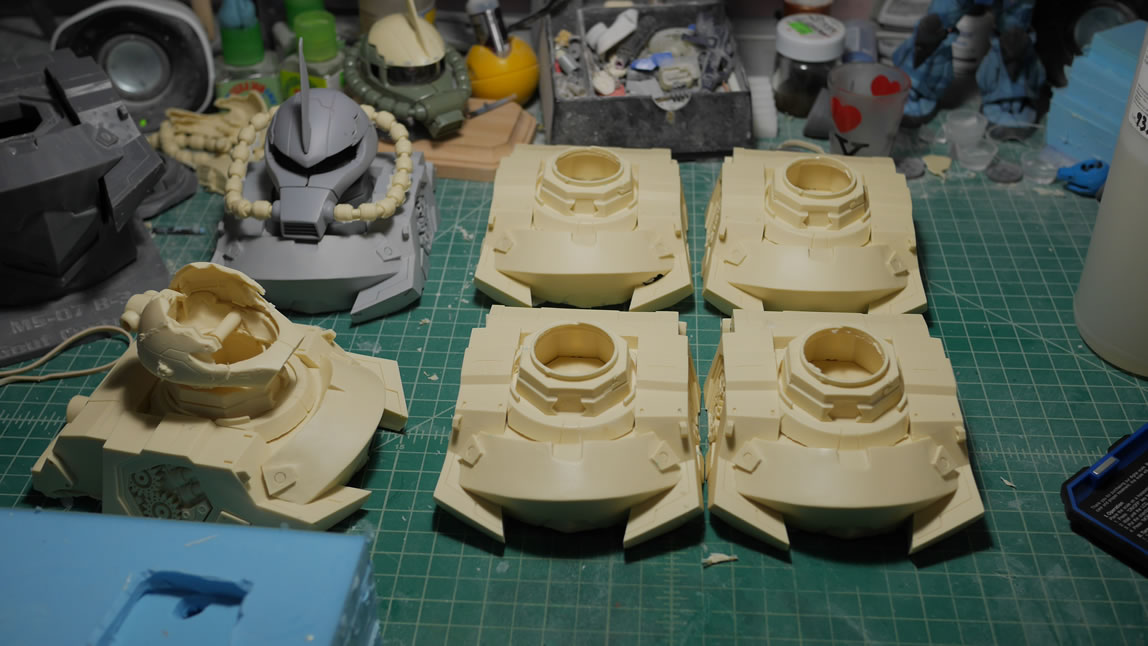
The first cast sitting next to the master. Not too bad, but for mass production, I will need to make some adjustments and fixes to the molds – for other pieces, a whole new mold is warranted.
I also went live with a video on casting here:
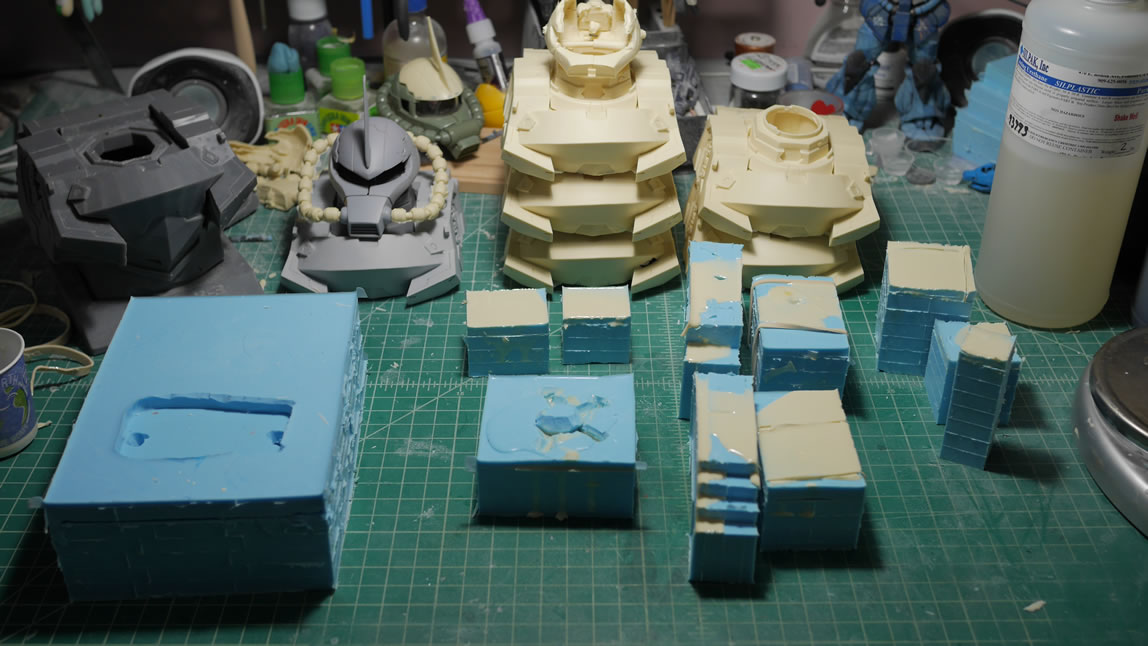
Time to remake the molds for the cables. I split them to their own molds this time; something I should have done the first time around. The same process is being done here as above. I also started on making the mold for the neck piece, this time not forgetting to add in the vent holes.
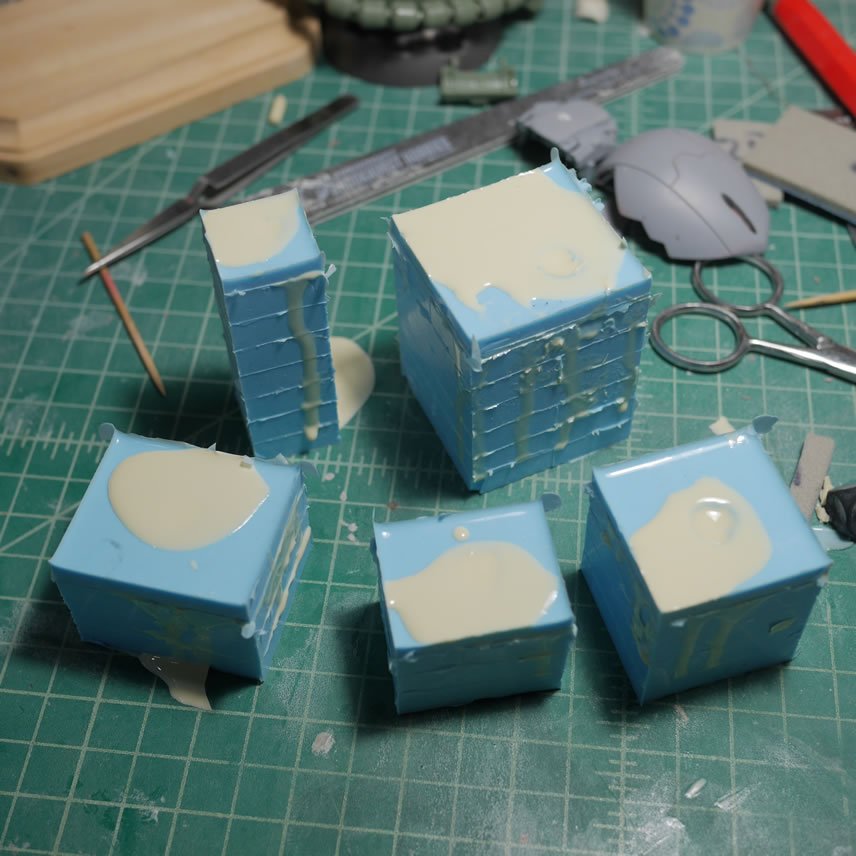
Taking a break from the casting cycle, I went and finished up the fixes to the bust to prepare it for molding. After a couple of sessions with the light curing putty, the sanding sticks, and a few primer sessions; I got the surface good enough for molding. This is where the above silicone molding video above covered, at least partially.
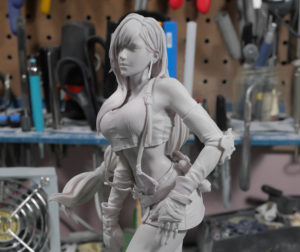
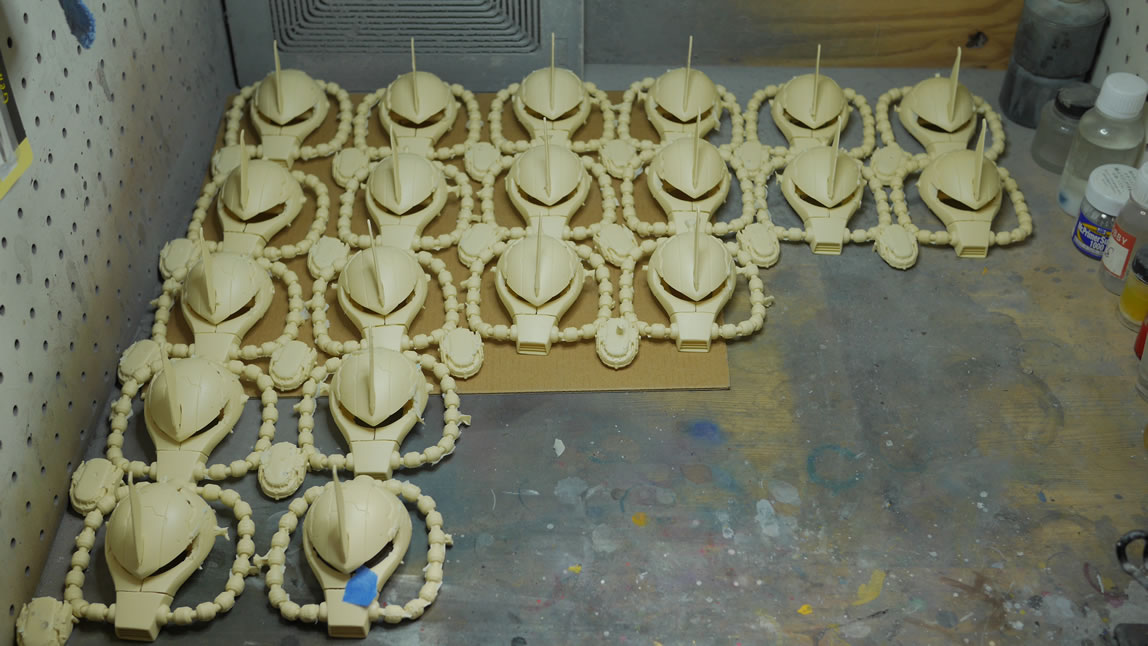
Now I have all the molds I need for the project and here’s the first pull on the bust; and it’s a near perfect copy of the master. Time to build my army!
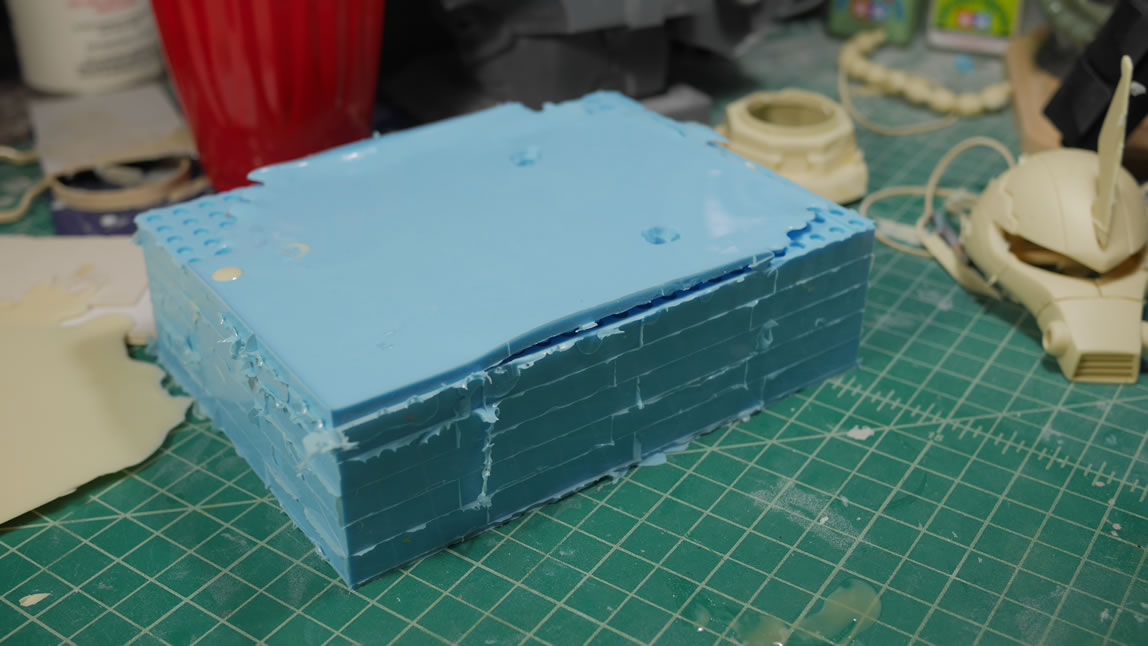
The mold for the base is massive, but so is the base. This makes it all the more clearer why I went with the half base instead of the full bust I had created first. I plan on casting a total of 10 busts to put out for sale.
As of last night, I have an army of 20 Gouf heads. My magic number I want to reach is 30, then I can start shipping the heads out.
So you want to buy one of these heads and or the bust? I have the kit up for pre-order in the store: Those Gundam Guys Online Shop Pick up a shirt or two as well to help support SCGMC! The heads/busts will ship once I hit those magic numbers of 30 and 10 casts respectively. This should be another few weeks, so about mid October to end of October. And of course, if the preorders do well, I will try to make more casts dependant on how well the molds hold up after I’m done with the initial casting run.