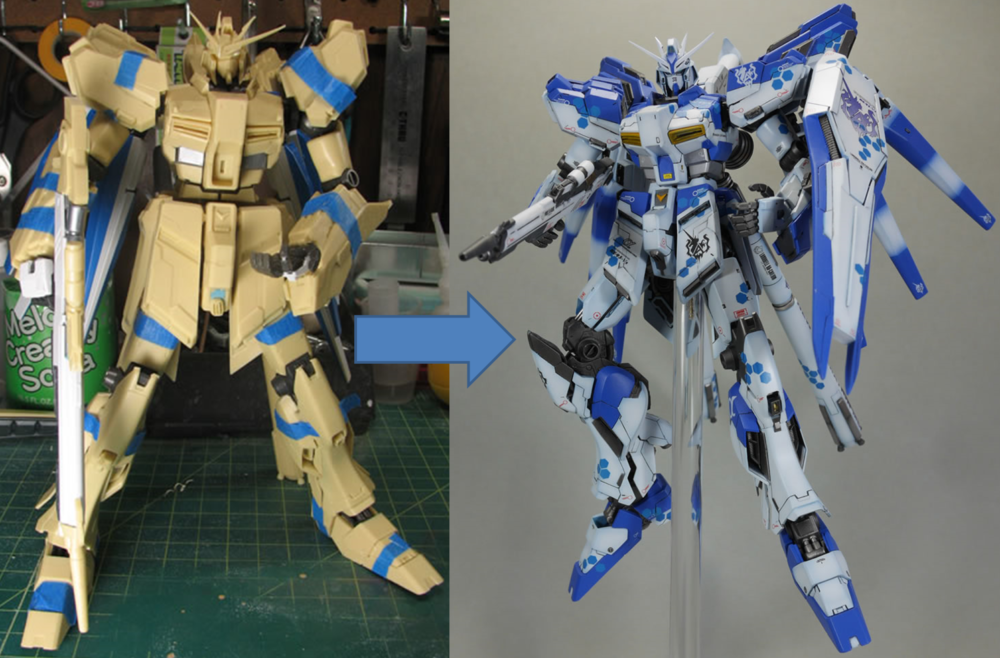
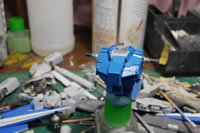
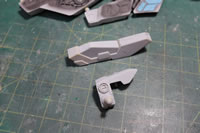
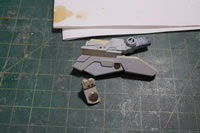
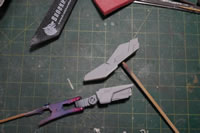
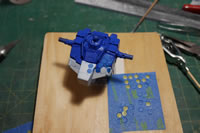
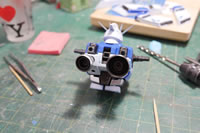
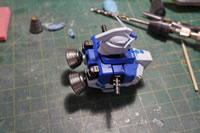
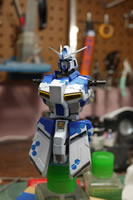
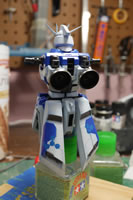
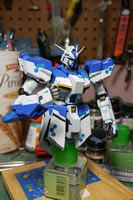
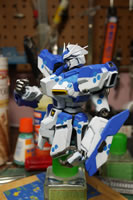
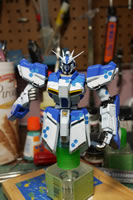
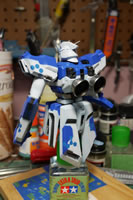
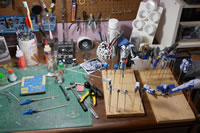
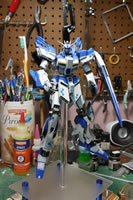
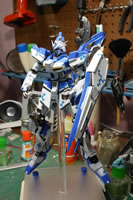
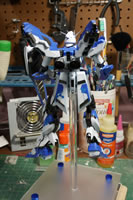
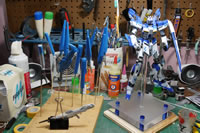
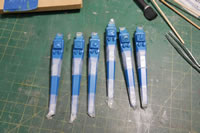
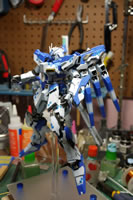
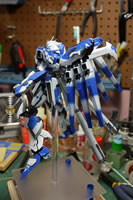
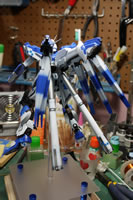
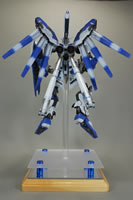
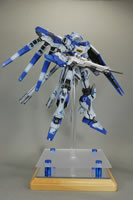
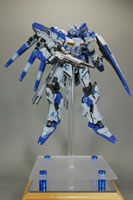
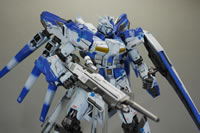
This project was finished on July 15, 2016, a little over 8 years after starting on the project. Below is the complete start to finish taking the kit from the test fit with tape to hold everything together, the modifications needed, the broken pieces that needed to be fixed, to finally completing the project and taking final pictures.
March 10, 2008: I started this kit earlier this year, but put it aside to work on some resin figures. Now that I have some of the figures out of my system, time for some gunpla. This is a conversion kit from Vicious Project for the Master Grade Hi Nu Gundam. So far I just have it snapped together with the resin parts to get a better idea on what I need to do with the kit. From the initial sanding process, I haven’t seen many issues with the casting, so hopefully I can get through the sanding process fairly quickly.
March 18, 2008: The following process happened over the past week or so. After the test fit, the parts were taken down and some of the smaller parts were glued together. All the parts were then sanded to remove the pouring gates or any defects I could see. The sanding process went from low grit(60) to high grit(400). Once all the sanding was done, all the resin parts and some plastic parts were thrown into the purple industrial strength bath (Purple Power from Walmart) This is absolutely necessary when working with resin as it removes any left over mold release agents that may still be on the surface of the resin. If this residue is not removed, paint, primer, etc will not stick to the surface of the parts.
The parts sit in the purple bath for a full day. Afterwards, I remove the parts with a glove and place them into an ultrasonic cleaner. I’m lazy and the ultrasonic cleaner takes care of the scrubbing session on the parts to really clean off any residue mold release and cleanse the part of the industrial strength cleaner. The solution in the ultrasonic cleaner is water with a small drop of dish soap. If the parts still feel a little oily, I rinse them again through the ultrasonic cleaner with water only. The parts are then taken out and dried.
Placing the parts on holders of every sort, clips, skewers, or sticky surfaces, they are ready for the initial priming session. This will show all the sanding mistakes and areas that need to be corrected with putty. Lots of parts were primed tonight.
November 9, 2010: Project resurrection after a year and a half from the last time this project was updated. The project stopped because I just ran out of steam on it and didn’t have a paint scheme in mind. A few days ago, I cleaned up the workshop and looked upon the kit and got some inspiration. So the kit was pulled off the shelves and checked for missing parts. The only thing I couldn’t find was the manual. This isn’t too big a deal as I’ve already done the test fit and most of the initial building and sanding was already done.
On to the paint scheme. Not wanting to do the typical blue on white scheme, I went with a varation. Cobalt blue over a medium gray. Additionally, to break up the dual tones, I will be adding either a white strip or a red strip; see the two rough line art schemes below.
As stated above, the parts were checked and with everything there, the return to where I last left off on the project.
The shield and the resin pieces didn’t quite fit, so a little cutting for the shield was in order. The two resin parts were glued and then assembled. VP’s design has a break between the upper shield and the lower shield, I will be filling these breaks as I don’t much care for that design. The shield is glued together and tomorrow I will be filling in the gap area.
Last I left the kit, I had sprayed on the inital layer of primer. I had also started to fill the surface defects with light curing putty. A good number of the parts needed the clean up sanding for all these areas that were previously fixed.
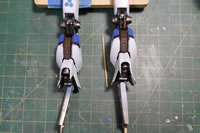
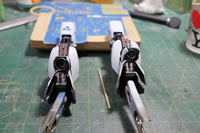
Some parts have some visible gaps that I filled using styrene strips glued to the resin. I started using this as it was much easier to get a uniform edge with the styrene than putties. Any small fills would be done with putty, but the major gap filling is done with styrene. In the second picture, there is a small amount of white at the ends of the upper forearm area, this is the styrene strip that was glued and sanded down to fill this gap.
I’m preparing all the parts for the second priming session and hopefully I’ll be onto the color painting sessions in a few days.
November 11, 2010: The past two days have been spent continuing the sanding after the initial primer layer. Finding surface defects and sanding, filling, and fixing them. The break up the laborious task, I’m detaling up the middle sections of the fin funnels. One of the things I hated most about the MG kit is the lack of details on the funnel sections. So, some measurements were taken and then the lack luster middle square pieces were sawed off.
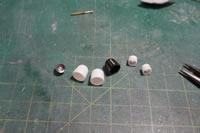
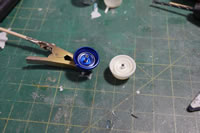
Raw materials for building the details. Styrene sheet base, styrene rod, styrene strips, some metal beads, and a resin thruster. Using measurements taken from the orignal part, an outline was down on the styrene base. Styrene strips were glued together for the walls of the detail part.
Once the walls were solid, they were cut, sanded, and placed on the styrene base with the other parts for a test fitting. Satisfied with the test fit, the wall pieces are glued into place and clamped down to cure overnight.
With the wall and the base solidly glued to one another, the excess areas were cut and sanded. The walls were then beveled with a sanding stick.
After beveling, the tubes, metal collars, and thruster are placed into the box for a test fit. Satisfied with this, the parts are glued into place using epoxy glue for strength and a longer working time than CA glue would give. Now the new detail part can be compared with the old piece. It may look a little odd, but once primed and painted, this should be a big improvement over the old design.
I built one master. I have 6 fin funnels to fix, so time to make copies. First thing is to build a box with a small amount of playdough at the bottom to hold the detail piece in place. Silicon rubber is mixed and poured into the mold box. This box is placed into my pressure pot to sit over night while the silicone cures.
I filled the gap in the shield with light curing putty and sanded it down. Primer will be needed to check the gap.
Continuing with the gap fix on the funnel system units, the gaps are fixed.
The back of the legs have tubing and looked a little on the plain side, so a little magnet wire wrapped around the tubes add a little more detailing to this area.
November 17, 2010: Small update. Slow progress as the mold is cured, cleaned up and resin is poured making six copies of the original detail master. The resin poured into the molds were placed into the pressure pot while it hardened cured. The resin pieces were then unmolded and left to fully cure for a few days, then sanded to clean off excess resin. Once cleaned, they were placed in a purple power bath to clean off any residual mold release.
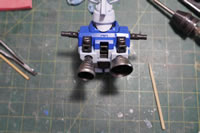
Here’s a test fit and comparison picture with the old funnel detail in comparison to the new funnel detail.
The funnels were sanded and prepared for the resin pieces. A few strips of styrene are glued to the funnels to act as a contact structure for the resin detail pieces. Once cured, the excess styrene is sanded down and the resin pieces are glued into place using styrene glue. Once this cures, I finish cleaning up the funnels and get them ready for the initial primer layer.
And finally, since the parts were sitting on the shelf for over a year, after all the clean up and sanding, they were run through the ultrasonic cleaner to thoroughly clean the parts before applying the second layer of primer.
June 27, 2016: The last time I made an update to this blog about working on this kit was November 17, 2010. And I had just finished priming and was starting to spray the metallic colors for some of the frame pieces. I had originally started this project in March 2008 when the Bandai Hi Nu and Vicious Project conversion kit was around. Over the past 8 years, the kit has been unboxed, looked at, and possibly got some work; but it ALWAYS got boxed back up and thrown back onto the shelves. It’s gotten to a point of being a running gag on being in development hell. Motivation to finish a kit plays a huge part in actually finishing kits. It’s not that I didn’t have the time to finish it; I just was not motivated enough. I’m sure I had some more recently updated pictures on my computer, but all I could find is what I’ve already uploaded. And it is only a picture of the sand – prime – sand process. And that process alone is excuse enough to kill any project.
I even had a paint scheme planned out all those 8 years ago. That’s completely changed now since I started back up this past week. At this point, I just want to finish the sucker, so nothing too fancy with the paint scheme. I’ve had some Hi Nu decals sitting for longer than 8 years, so time to stick with the basic scheme; with just the smallest amount of personalization. The parts are strewn on my workbench and I’m quite surprised that I’m not missing anything. At least nothing vital so far.
Since the kit was already primed and actually partially masked off; it was pretty easy to just start throwing down the base color. I still have a small amount of the custom blue I used to the 1/100 Gusion project; so why let that paint go to waste. It’ll work as a good base color for shading the white as well as work for my masking plans.
I also started gluing together some smaller subassemblies to make things work easier. 8 years ago, I would have painted things separately then glued them together at the end. I glued together the forearm piece that has the shield attachment. And it was only after I had glued that piece together that I discovered a second resin part for that arm that has the actual attachment to the shield. It was meant to be an interchangeable piece for display with or without the shield. Whoops. The part wasn’t going to come off without significant damage to the part so I left it. Focus went to the shield piece. I cut off the shield connection frame, then drilled holes into the already perfectly primed glued together arm piece. Magnets are glued into the drilled out holes. Over the magnets, some putty, some sanding, and some priming to tie it all together. Ok, it didn’t go quite as smoothly as that; but after a second putty/sanding/primer session. I now have an arm that will function with and without the shield without swapping the actual arm part.
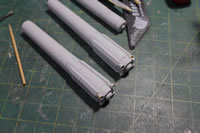
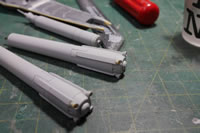
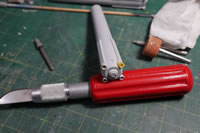
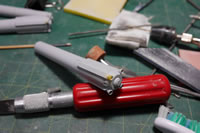
Now onto the next problem I discovered. One of the thruster bells on the fuel tanks (yeah, I know right? Who the fuck puts boosters on the end of a fuel tank) At least I’m pretty sure those long cylinder looking things attached to the back of the Hi Nu are fuel tanks. Ok, I went and looked it up. Yes, those are propellent tanks. Ok, the thrusters look cool. But seriously, WTF? Since I didn’t want to cut all the thrusters off; I thought about other options. I could go head and cut them all off and replace them with cooler looking thrusters. Or I could just try to fix it.
Light curing putty to the rescue. The stuff is awesome. With the less than one minute long curing time, I can build up the part and work on it very quickly and even have it primed and ready for paint in under an hour. The putty is applied as a base shape then sanded to sculpt everything out. A cone shaped sanding tool and my dremel on low speed helped sculpt the inside of the thruster bell.
A few sessions of putty – sand – prime; and the broken section has been rebuilt. I guess I could still cut all the damn things off and use aftermarket thrusters – or make resin copies of some aftermarket thrusters.
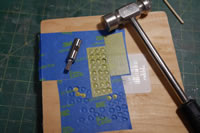
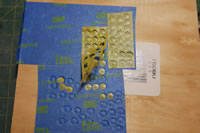
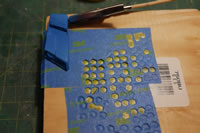
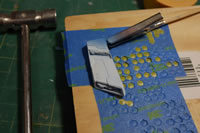
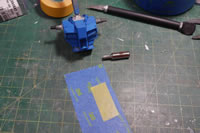
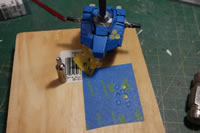
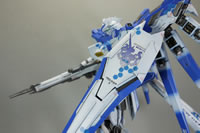
Slowly, I got all the small issues on the kit fixed and was on to full time base coating. I’ve almost used up all the left over Gusion paint, so that’s a good thing. Not so good if I need to do serious touchups. Bonus is that it frees up a bottle for a different mix of custom paint. But I digress. With the base color on; I can do some fun masking. For this project, I wanted to put some hex designs. So I picked up a 4mm hex punch. The idea here is that I can cut hex shapes out of tamiya masking tape. It didn’t really work so well on my cutting mat. But on the back of a wood plaque; the thing works wonderfully. I first lay down a strip of blue painter’s tape. Then a layer of tamiya masking tape. Then using the punch and a hammer. I punch out a bunch of little 4mm hexs. Once I’ve finished with the tamiya tape, I just peel up the tamiya tape and the punched hexes are left. Sometimes the punch doesn’t go all the way through, or I slip and get an oddly shaped hex; but for the most part, this works. I have uniform hex shapes fairly quickly.
The hex mask is applied to the chest and skirt pieces. Learning from the Shiki project. Masking off subsections and painting that subsection really works wonders in keeping the motivation. The only issue I have with this project is that I’m shading – so it’s important to compare pieces constantly so I don’t off tone anything too badly. Oh, it’s going to be off tone in some parts; but hopefully that will be kept at a minimum.
Next up, after looking at the hideous thrusters that came with the kit, I ordered some metal thrusters. These damn things can get expensive if I were to just waste them on a kit. And painting metal is a paint in the ass. I understand that most folks will just leave the metal alone and use the thrusters as is. Fuck that jazz, I want to paint them. Silicone molds are made and I now have an endless, on demand, supply of cool looking resin thrusters.
Here are some comparison shots for the original vs fatty replacement thruster. The actual metal thruster I used was an inner thruster to an even bigger bell. I didn’t want to go overboard so I just used the second inner level.
July 5, 2016: This weekend was fairly productive. The main painting for the head, chest, waist, and skirts are done. And there’s something fairly interesting to show. And more importantly; the motivation to keep masking and painting the other parts of this kit is still there.
Last time I posted an update, it was for the damn V-fin that broke a few times. So with that, we go back a few days before the break as I was continued to paint the kit in parts. The upper torso was done so I took the painted parts and did a quick assembly. I’m liking this paint progress because I’m not getting burnt out with masking a ton of parts and I’m getting decent visual cookies that keep me chugging along.
The upper torso done, time to get on with the legs and feet.
Getting the legs painted, here’s a quick comparison with the other set of replacement thrusters. The original on the right, and the new more can like on the left. The new thrusters are bigger and there is much more detail in comparison to the originals.
The legs and feet done, another assembly session to keep the visual motivation in high gear. I created a custom display stand with an acrylic rod and some styrene. I’m using the original kit’s bottom base attachment part and the fit is perfect. And this hold the kit up nicely.
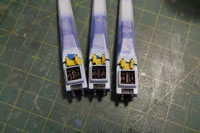
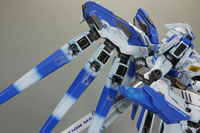
I still got the funnels and rear venier piece to paint up. I’m using the standard Hi Nu color scheme which has a fade between the white and blue. I first masked off the funnels and painted in the white, then unmasked and freehand airbrushed the blue to get the slight fade.
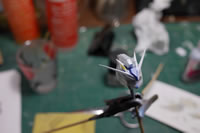
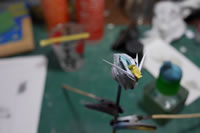
Having finished all the principal painting, I start putting the last bits together. The two solid resin fuel tanks, the partially solid resin funnel holders, the solid resin center venier and the plastic funnels with a small resin detail that I scratch built. The original stand was designed for the original kit, not the resin conversion. So with all this extra weight in the back, the kit started tipping off the styrene/acrylic rod stand I made and fell off it. This was when my finger caught the V-fin and snapped the stupid thing. Read about that fix here.
Pealing away the masking tape, some of the paint on the funnels came off too, so I needed to remask and spray some touch ups to these areas.
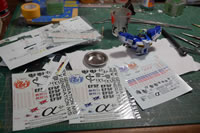
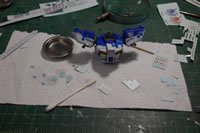
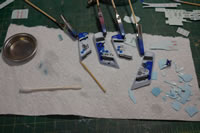
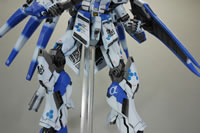
V-in is being fixed so time to continue with the project. A clear gloss was sprayed over everything. Decals. I dug though my decal box and found that I had collected a rather large collection of Nu/Hi-Nu decals for 1/144 and 1/100. The decaling was a fairly long process and took two days. I ended up using a ton of decals for this kit, more than what I’ve usually done for other kits. I think the decals work well for this kit. Especially for a clean build.
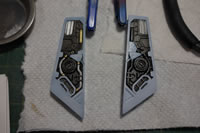
The underskirt details were hand painted with enamels. I thought about masking and airbrushing this, but I did not want to risk pulling up paint and hand painting such details is much faster. And now many people are really going to upskirt this bugger?
The decals got a clear gloss to protect them and a panel line wash was applied. It’s when I was cleaning the panel line wash that I BROKE THE FUCKING V-FIN AGAIN! Ugh. In hindsight, I shouldn’t have glued the damn fin into position until I was completely done with the kit and doing final assembly. But too late now. it broke again. I glued it together and there was a visible line. I thought for a night about just leaving it, but chanced my mind the next day when I looked at it.
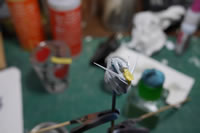
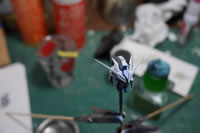
Rather than pull the V-fin off and risk more unwanted damage, I just parafilm wrapped the head, masked off the blue section of the v-fin and started working on a fix. Light curing putty applied. Cured. Sanded.
Then Primed. Base coated. Shaded. And the quick fix is done.
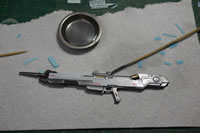
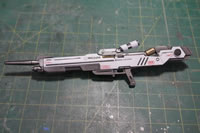
The last piece of work is always the weapons for me. This is nothing new, so it gets painted, clear glossed, decaled, clear glossed, then panel lined and a final semi gloss sprayed to complete the project.
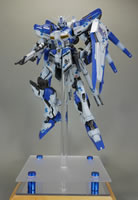
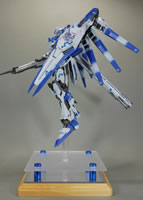
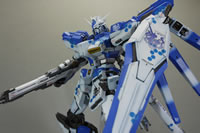
And with that, 8 years later; the damn thing is done.
|
|
|
|
|
|
|
|
|
|
