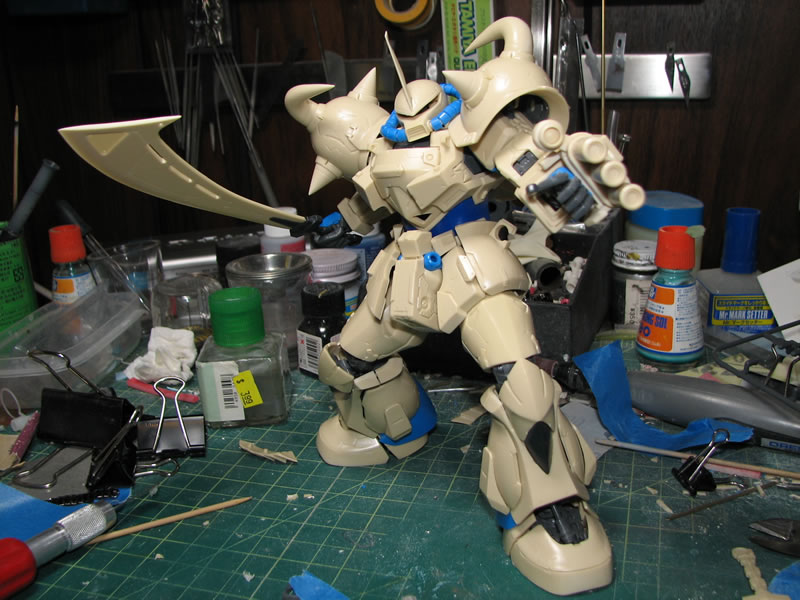
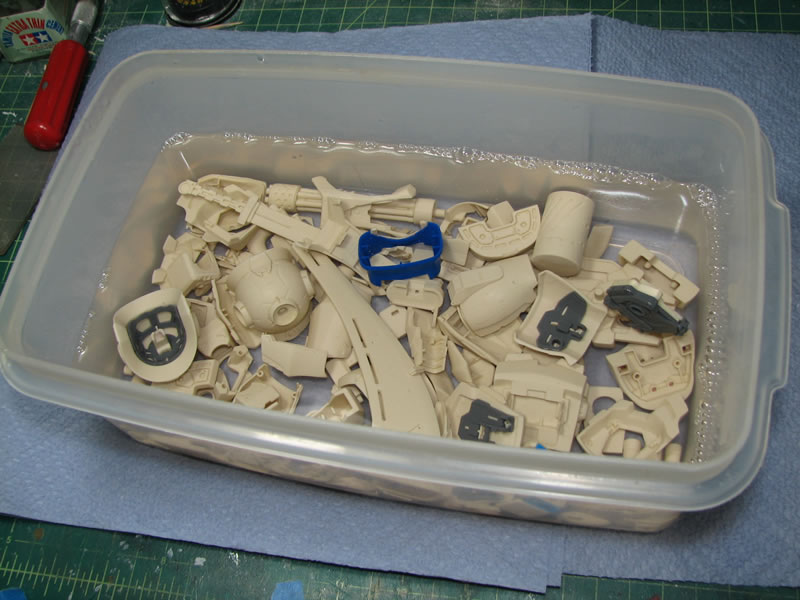
July 25, 2010: I started work on this kit this weekend. About two weeks ago, Manny asked me about this kit, and I hadn't heard about it, so I looked it up. After looking at the kit, I placed an order and then put a challenge on Manny for a build off on the kit. As he had already ordered a recast. I picked up an "original" from the NeoGrade folks, but the quality is similar to many recasts I've worked with in the past. Resin quality anyhow. The casting quality is pretty good. Some pretty crisp details and some interesting locations for flash and gates. Being inspired from AX and looking at the kit, I need to keep steam going so I can actually finish something.
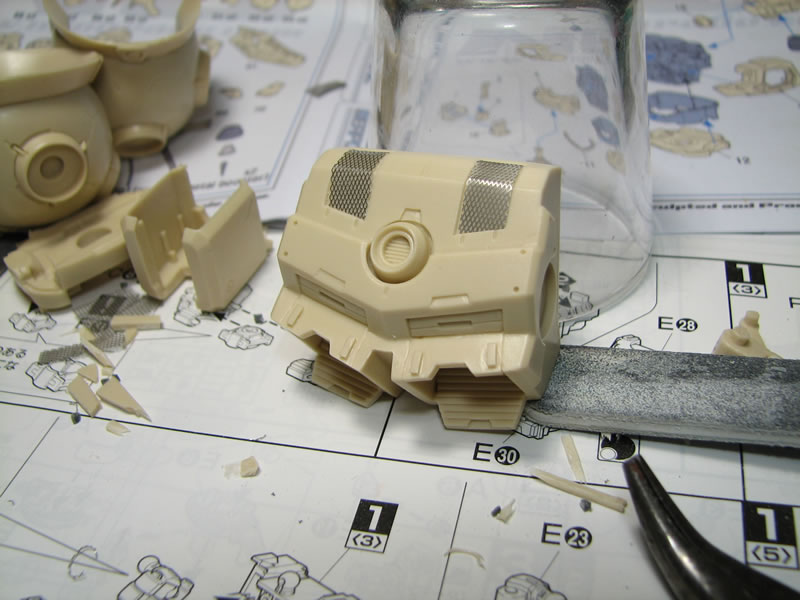
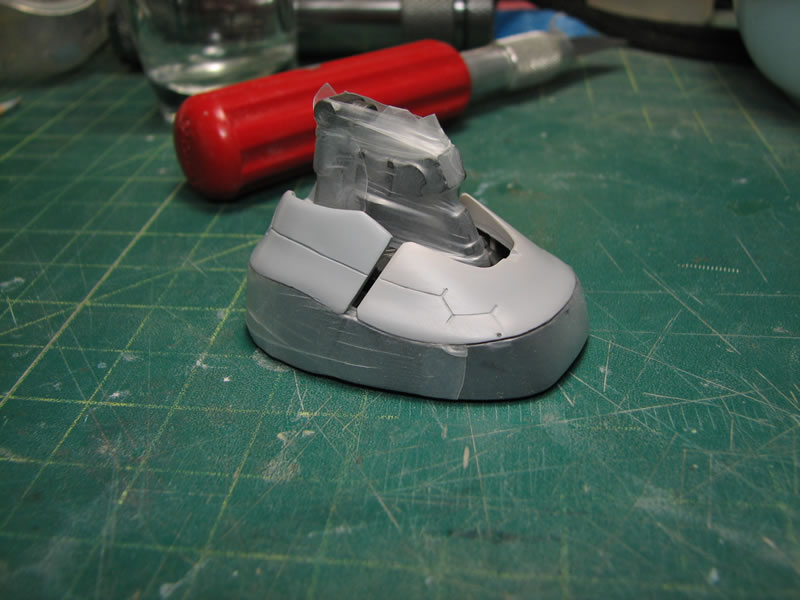
Starting with the body. I thought the backpack was a bit on the plain side, so I cut out some mesh and glued it into place for some added details.
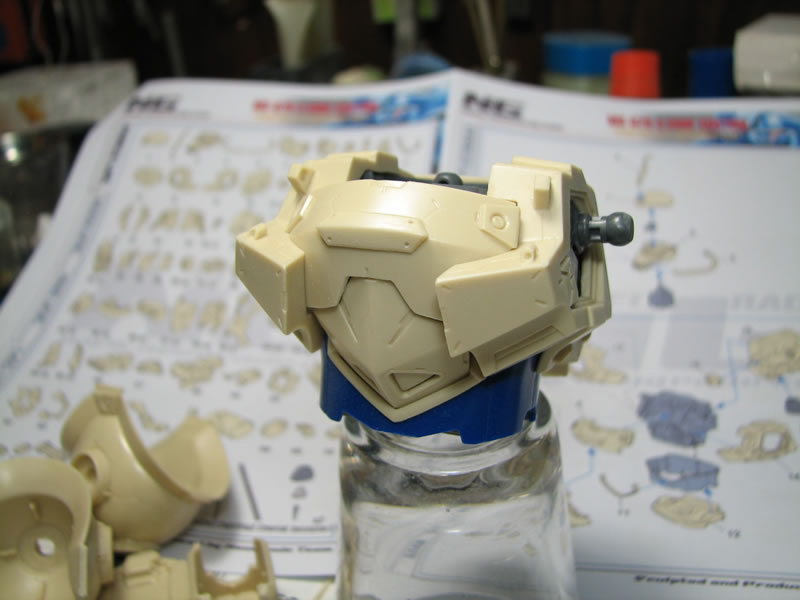
Here's the backpack with the mesh temporarily in place as I measure and cut the pieces out.
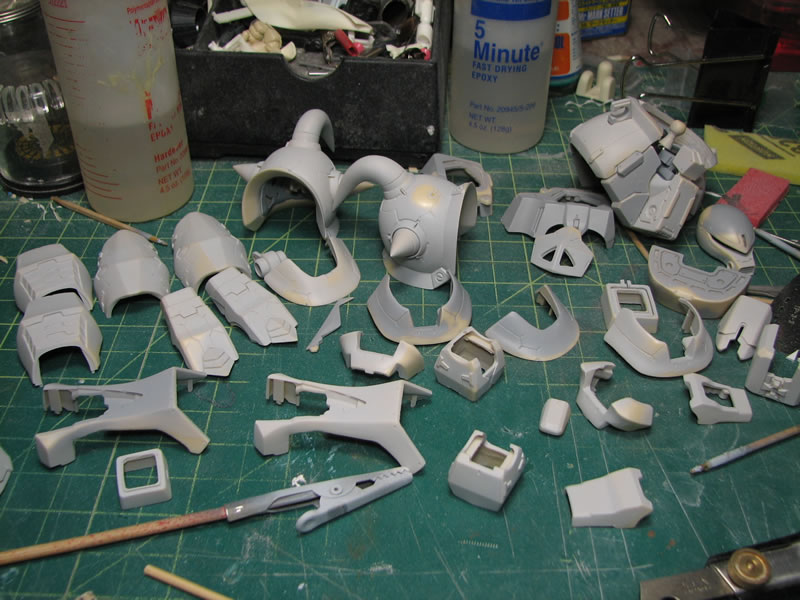
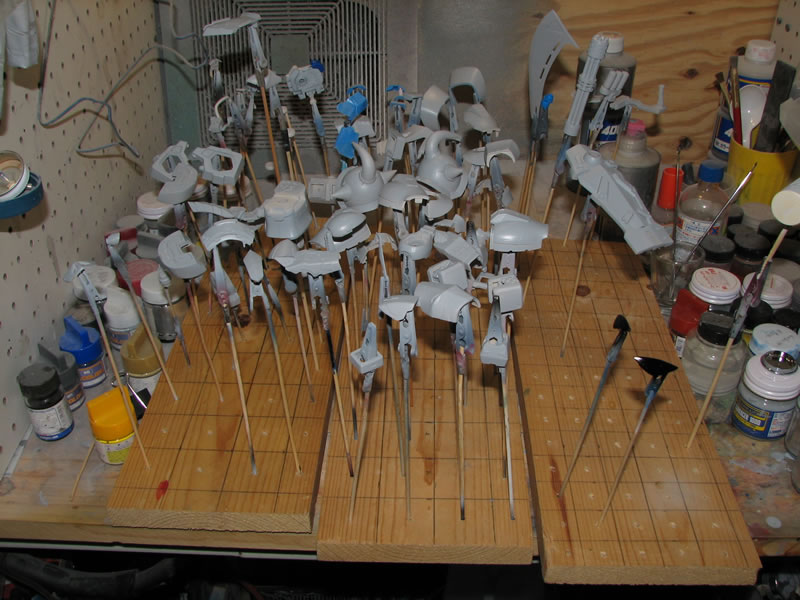
It's been a fairly busy weekend so I didn't get as much as I wanted done on the kit. I found a few bubbles on the kit that I need to fix, but so far, I have the legs, torso, and waist done. Next up are the arms and weapons. Once I have the sucker test fitted, I can get down to work on the surface prep and any other details that I may add to the kit. It's still fairly flimsy, so I'm deciding on how I want to tackle the kit. Paint planning and all that good jazz. No real seams to deal with on the kit as it's designed along existing seams, So paint planning should be too difficult a phase.
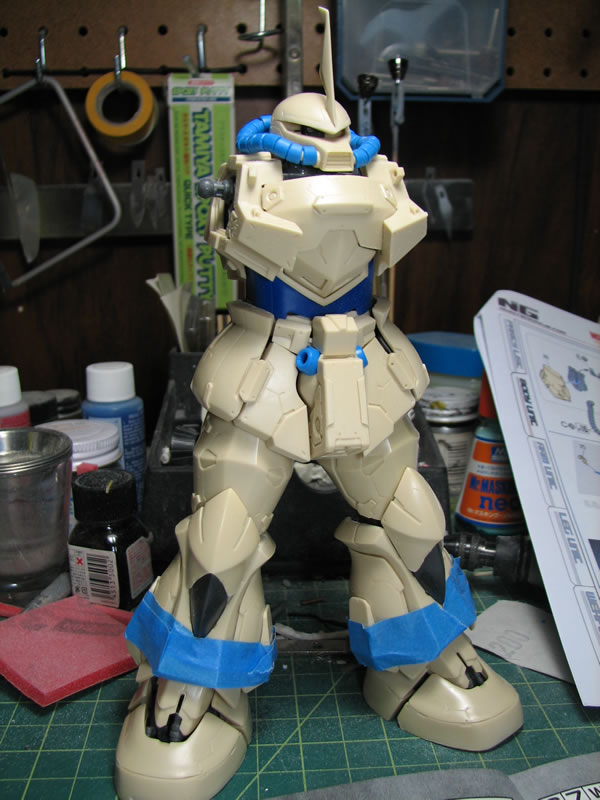
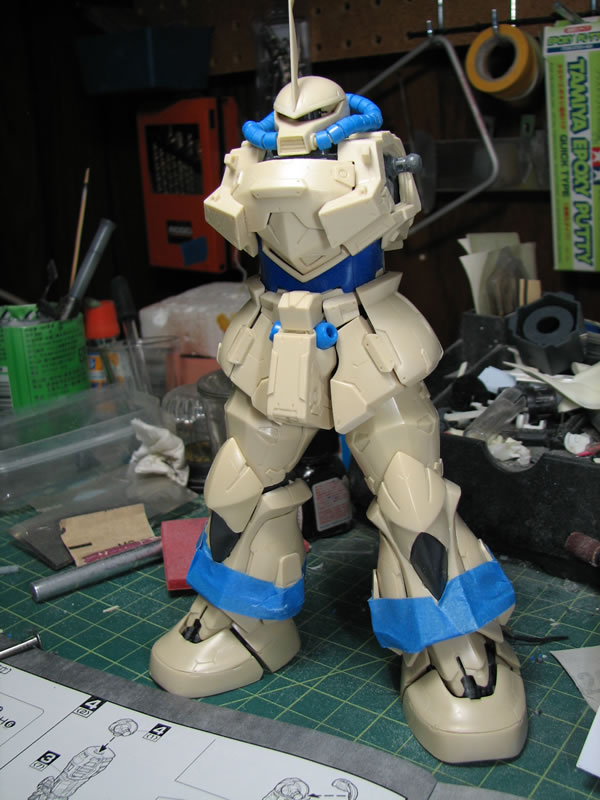
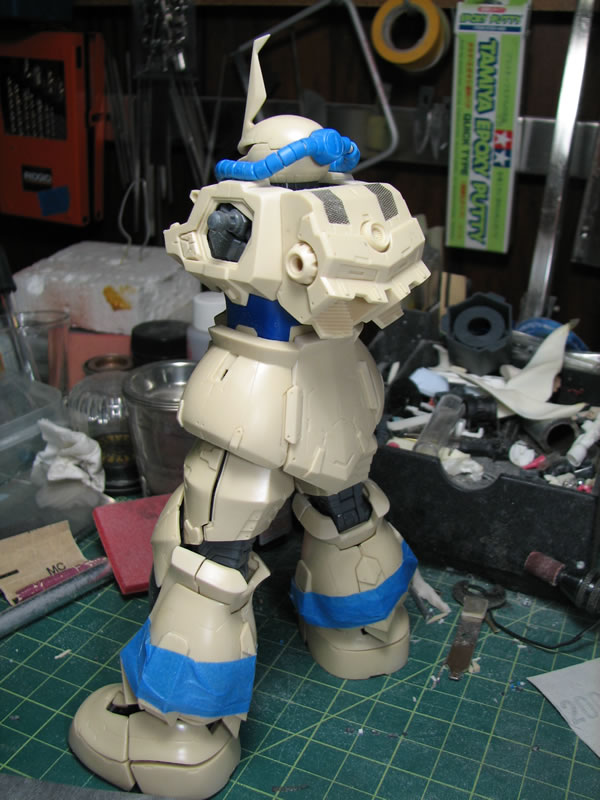
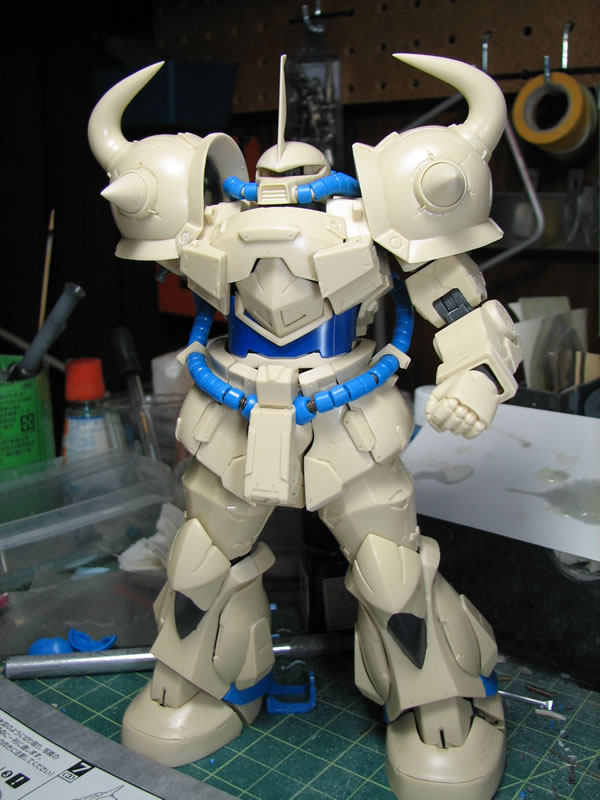
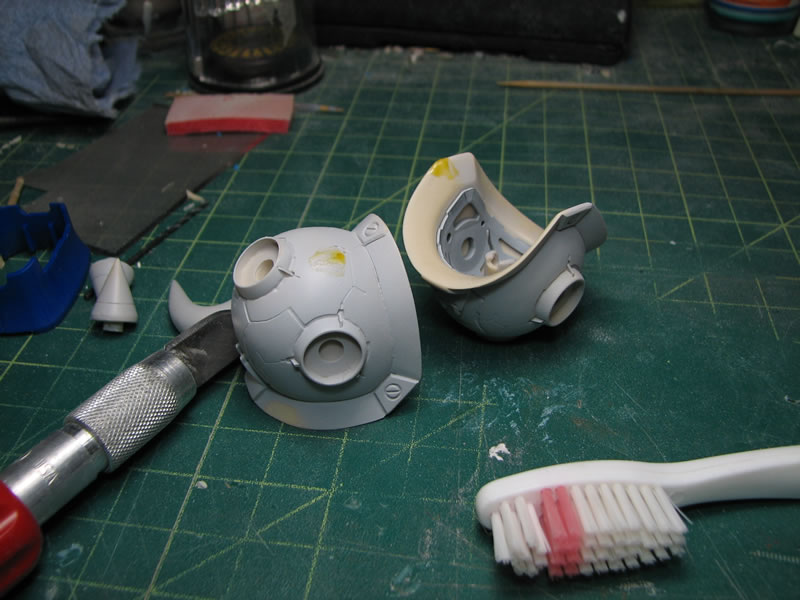
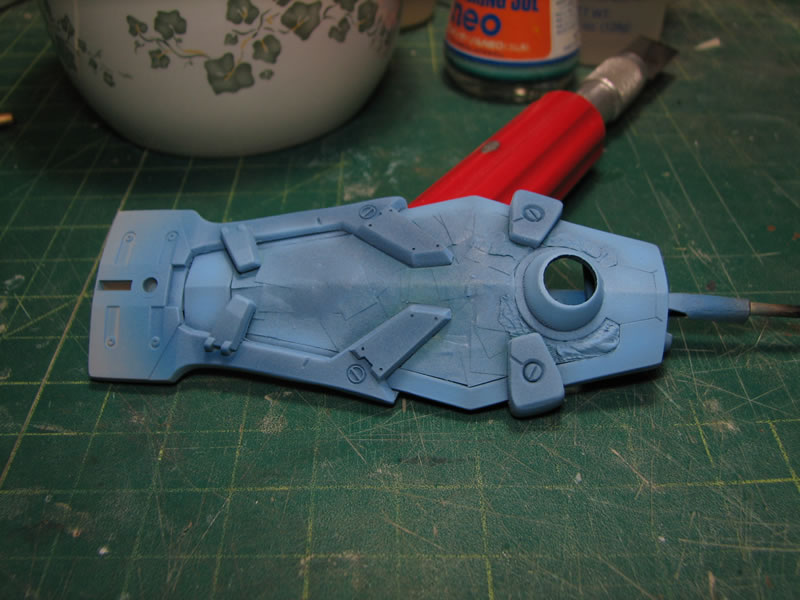
July 27, 2010: Test fit and initial sanding sessions are completed. The shoulders are a distinct sub assembly on their own and building that took a little bit of work. Additionally, the previous post didn't complete the torso, so the little bits such as the metal thrusters, and tubin around the waist were added.
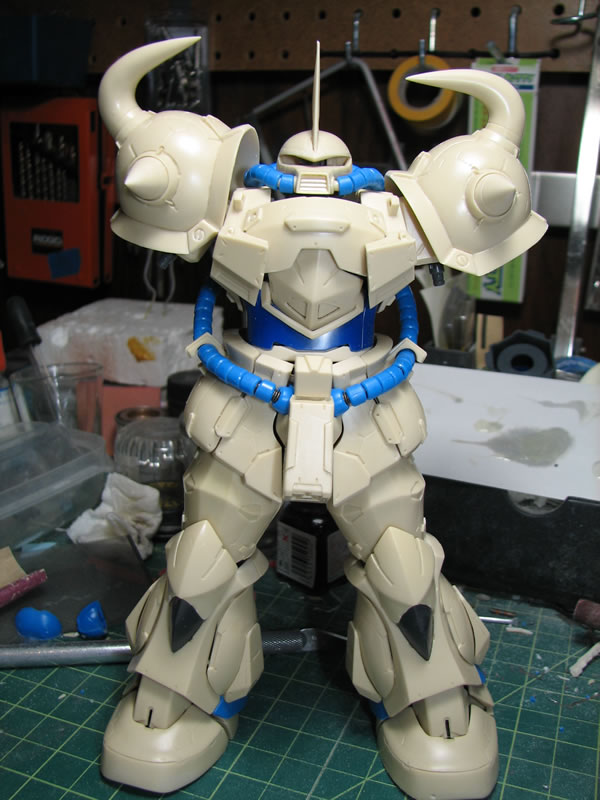
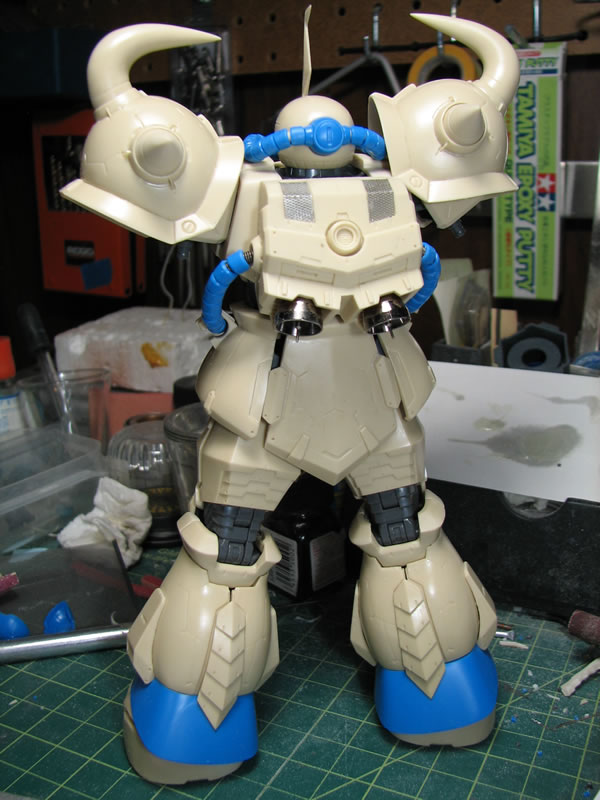
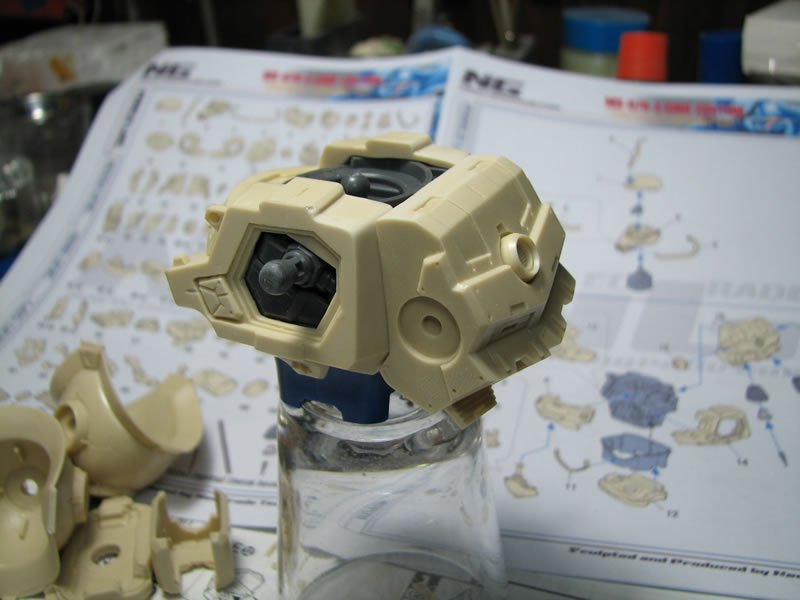
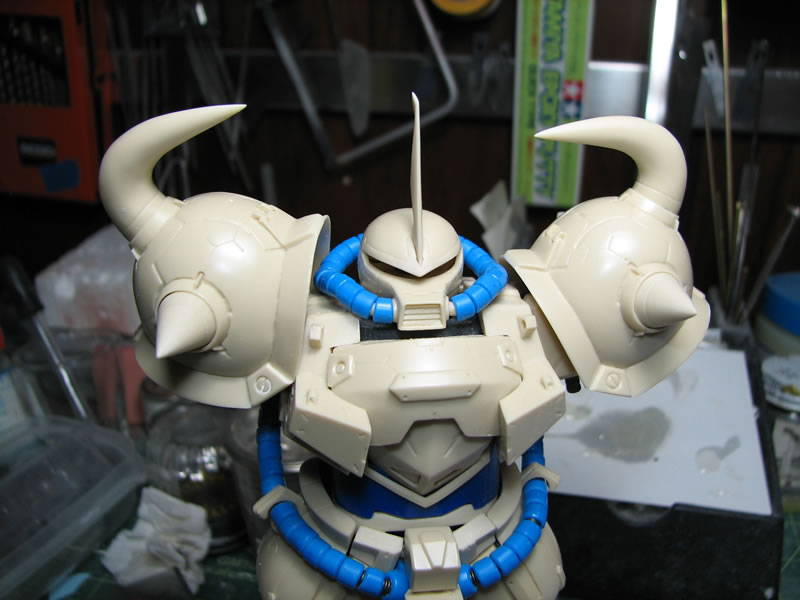
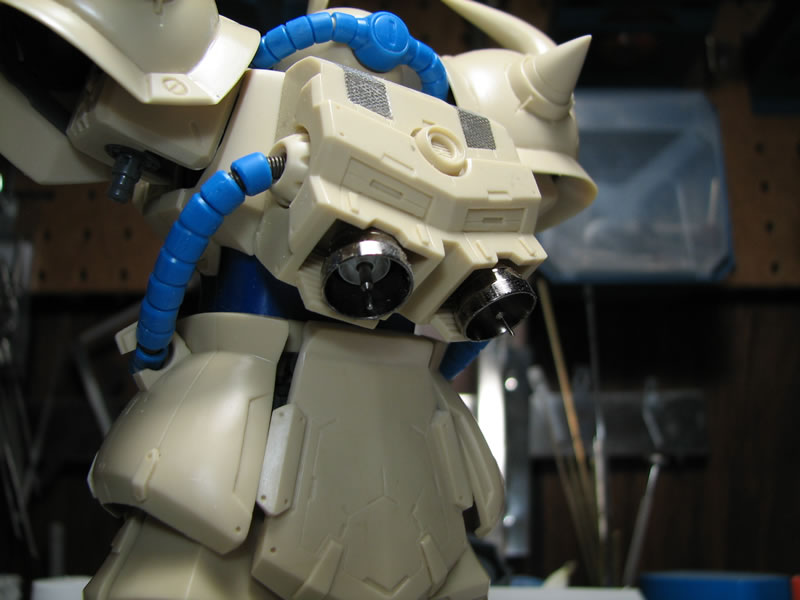
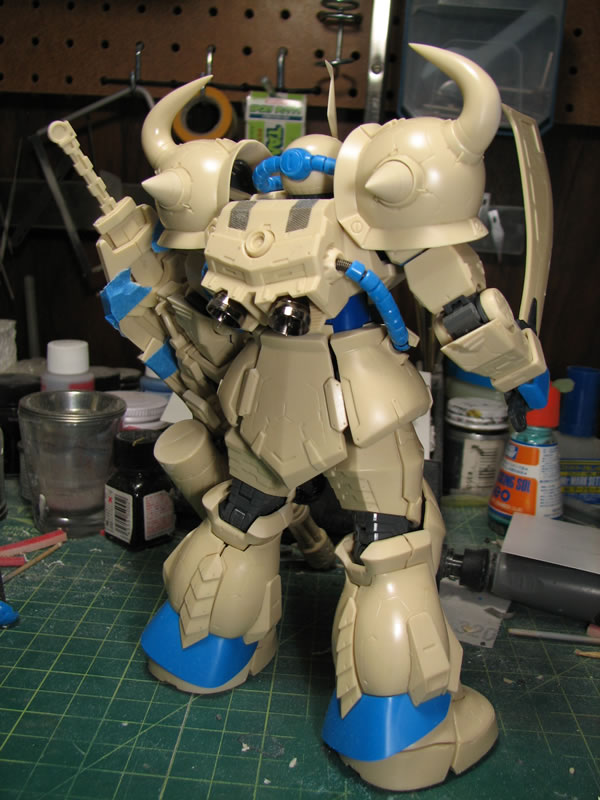
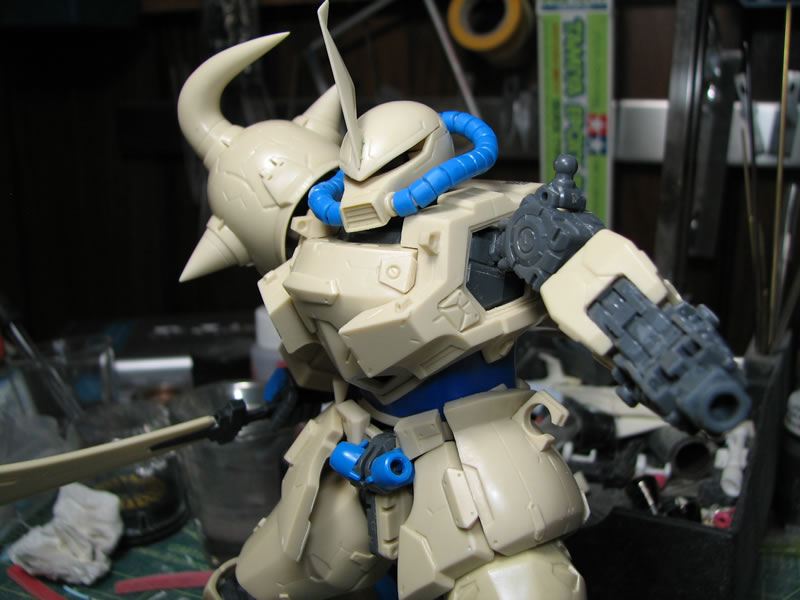
Here are some close ups of the shoulders, the backpack and the metal thrusters that came with the kit. The thrusters are VERY nice, so I don't think I'll be painting them at all, they look good as they stand. A side note for the shoulders, there are extention resin pieces that replace the orignial shoulder connection point. The contact area is very loose, so I added some epoxy glue to the resin contact area so hopefully this will add enough padding to tighten up the connections.

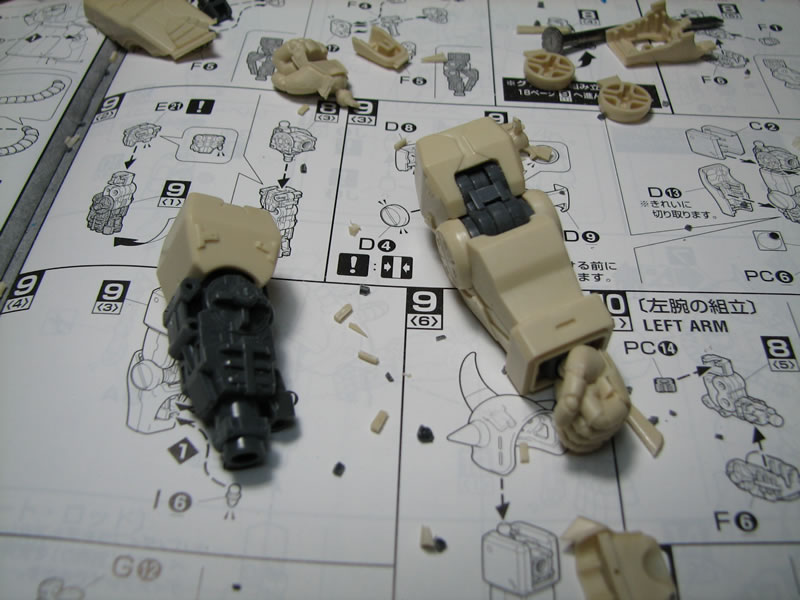
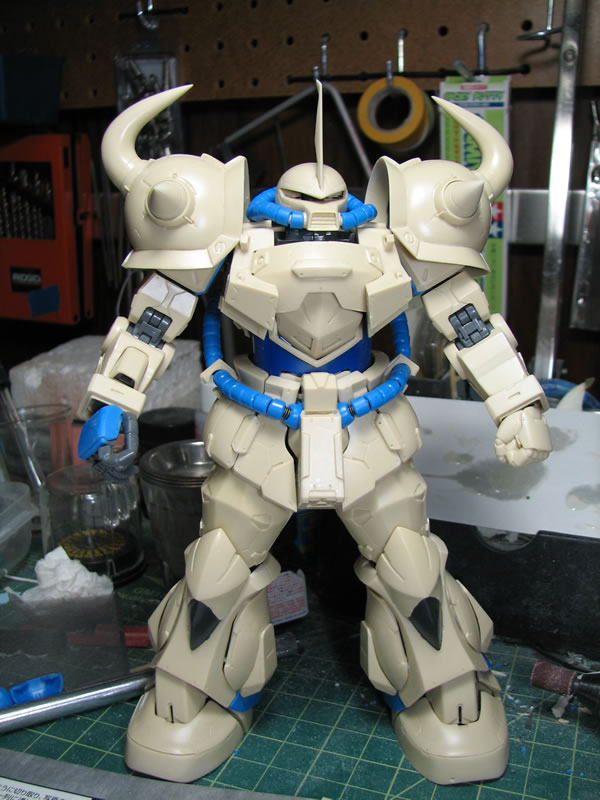
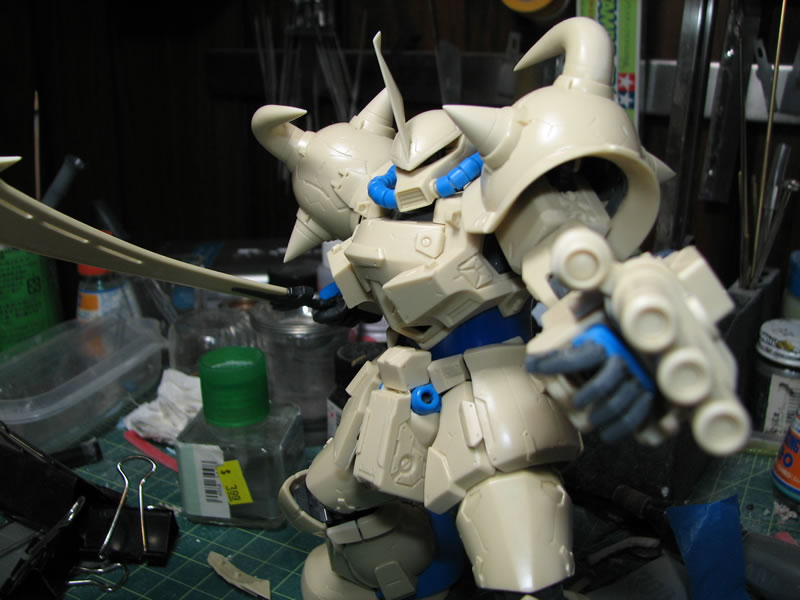
One arm, followed by the other. The kit comes with resin fists. They're fairly nice, but a little lose in the ball joint. And while they look fantastic, they're utterly useless for holding weapons, so they may just go back into the spare parts box.
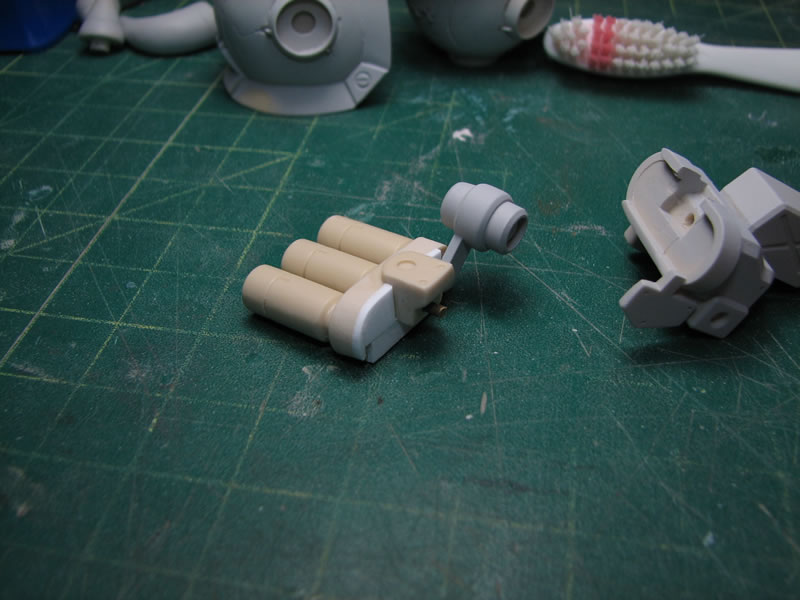
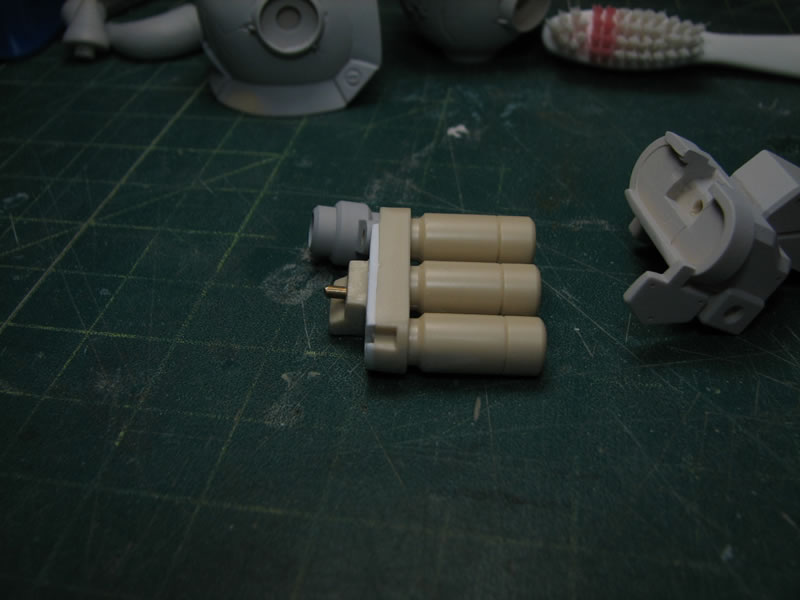
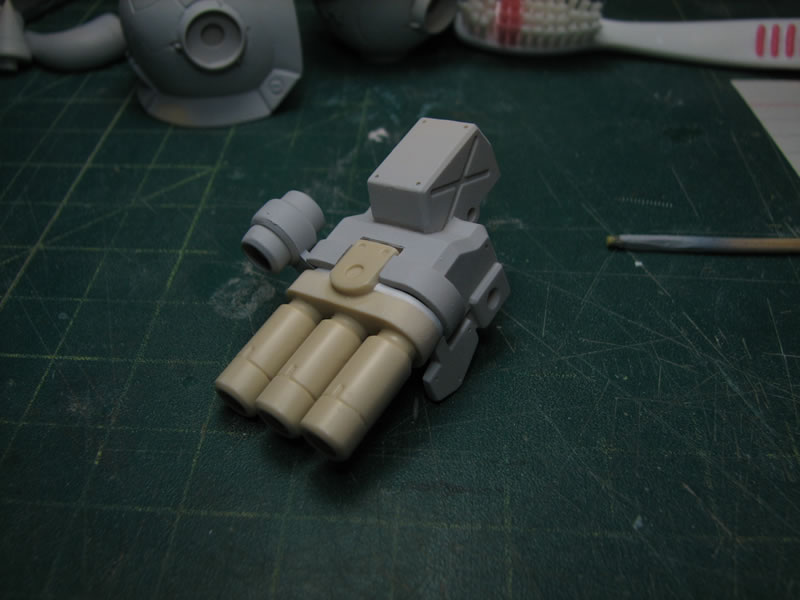
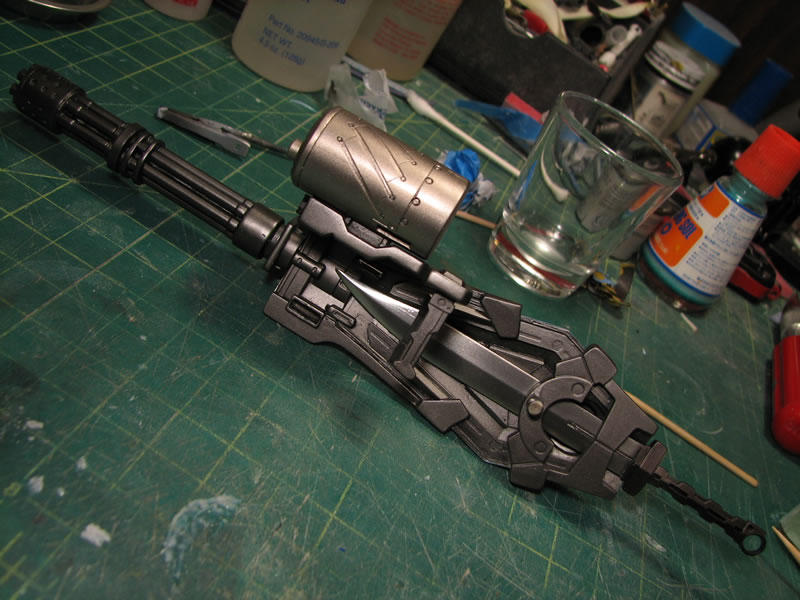
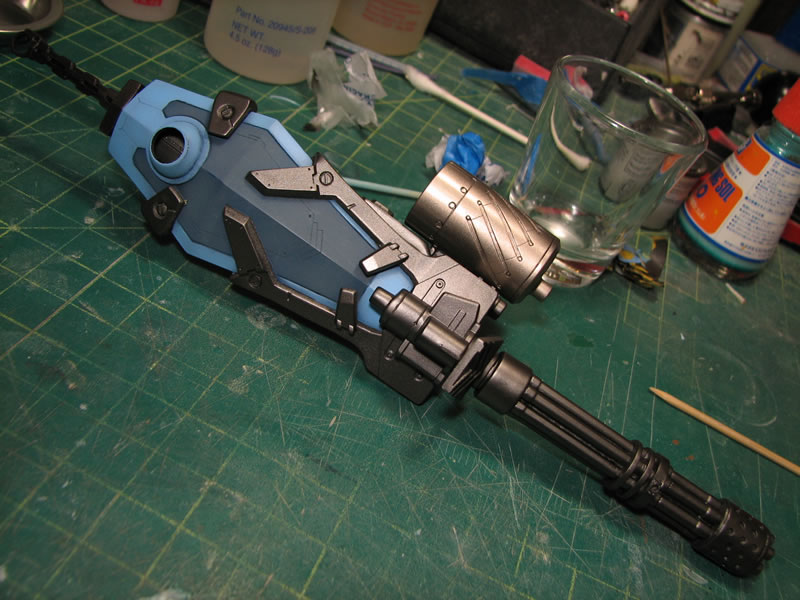
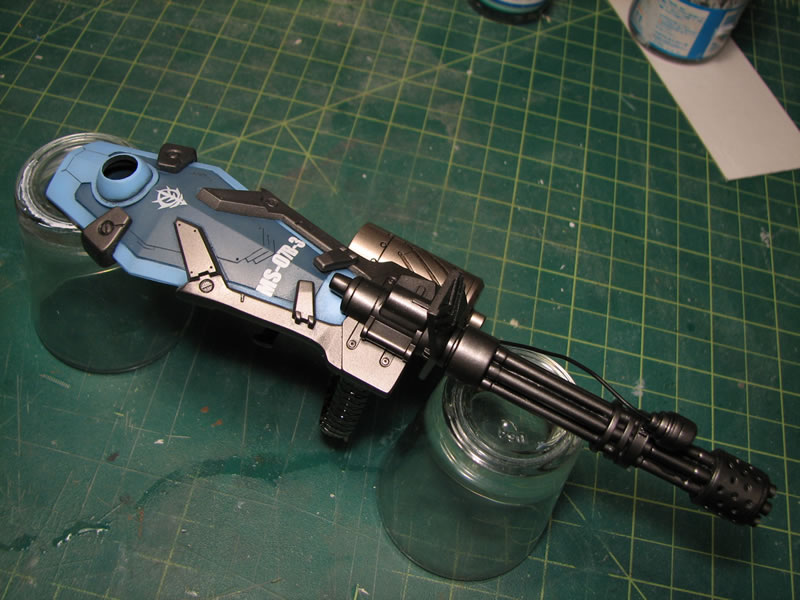
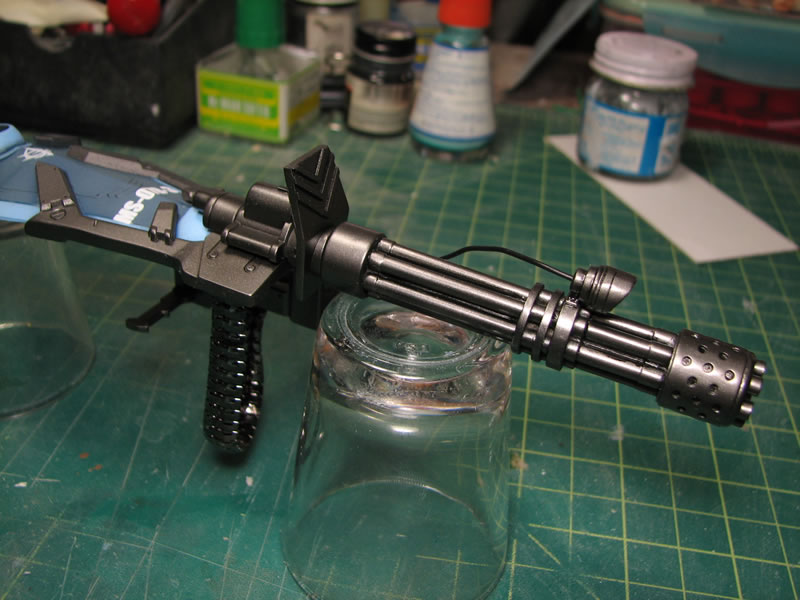
The weapons. Looks pretty much a cast of the original MG Gouf Custom's weapon system as far as the cannon and shield gat go. I've completely butchered my MG Gouf Custom's weapons and they're all over the place on different kits I've built so I don't have anything to actually make decent comparisons; but form the looks of things, I believe they're just casts from the original MG kit.
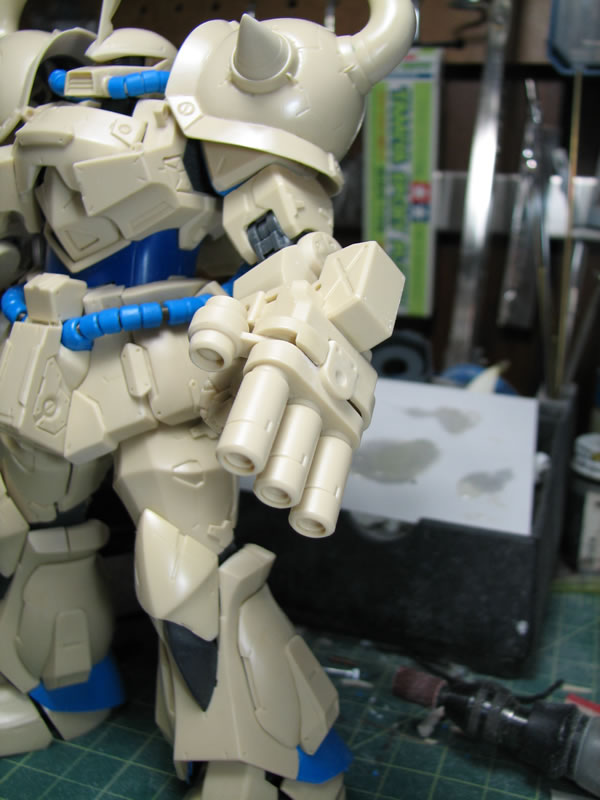
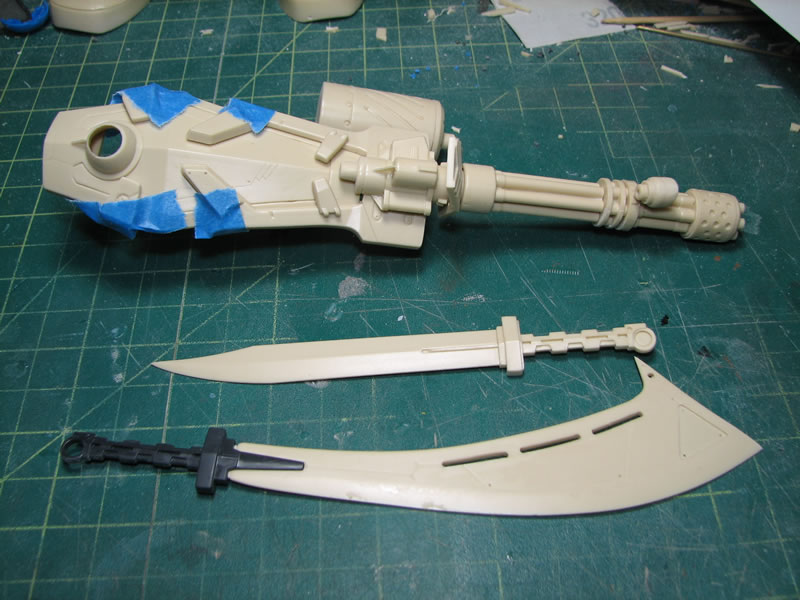
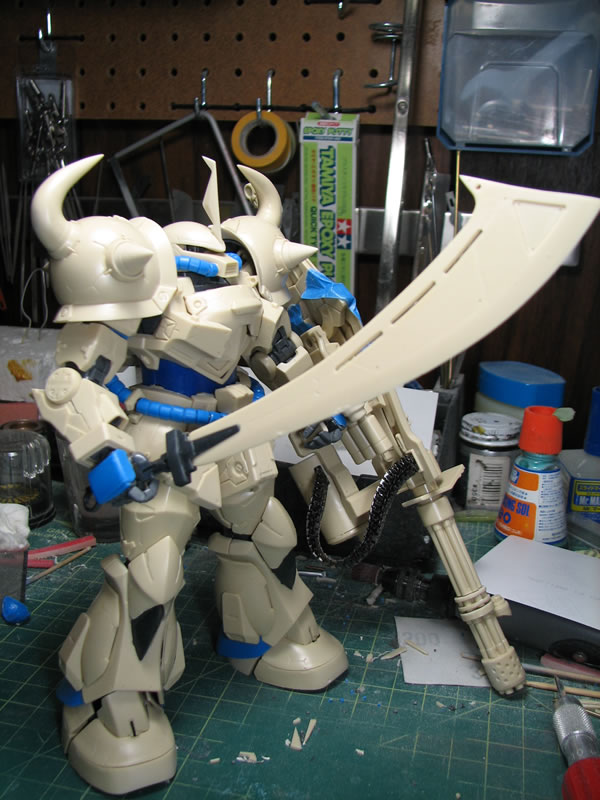
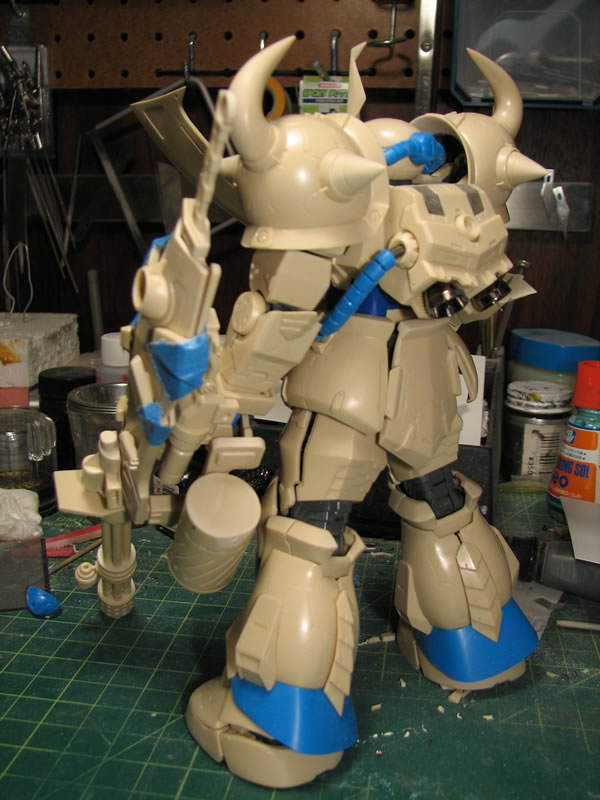
And the sucker with all the weapons. I do like the large heat blade. The kit comes with the shield blade as well as this large cleaver. The full resin gatling sheild weapon is a bit unwieldy, and the kit slants with the gun shield attached. The weapon serves as a crutch. Unless I fix pose the sucker, I don't think I'll be able to freely pose the kit with the weapon. But I do have a pose in mind and that would most likely require fix posing the sucker. But it's a "resin" kit, they're supposed to be fixed posed.
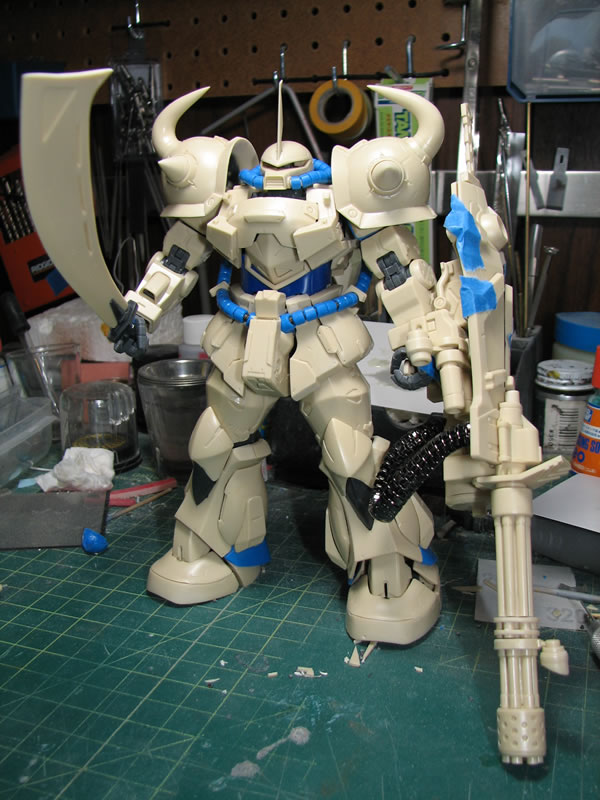
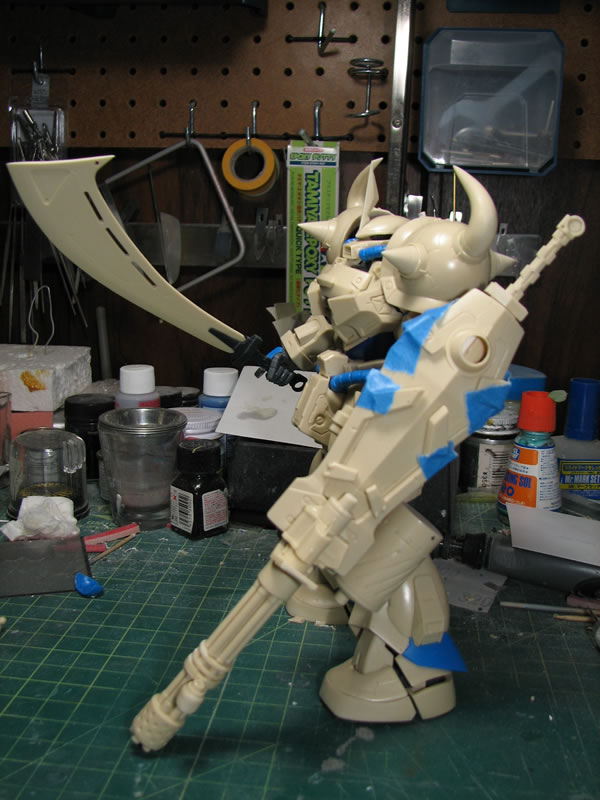
Parts are taken apart to glue several sub assemblies. The skirt parts are glued to their counter part frame pieces. The shield is getting glued together, granted it will require masking when I paint, but I'd much rather mess with glue now, than after I've painted the kit. Glue in unexpected places as an issue of royally messing things up. Next up will be fixing the pose then off into cleaning fluids for mold release removing bath.
August 1, 2010: I settled on the pose I want and set the left arm into place with glue.
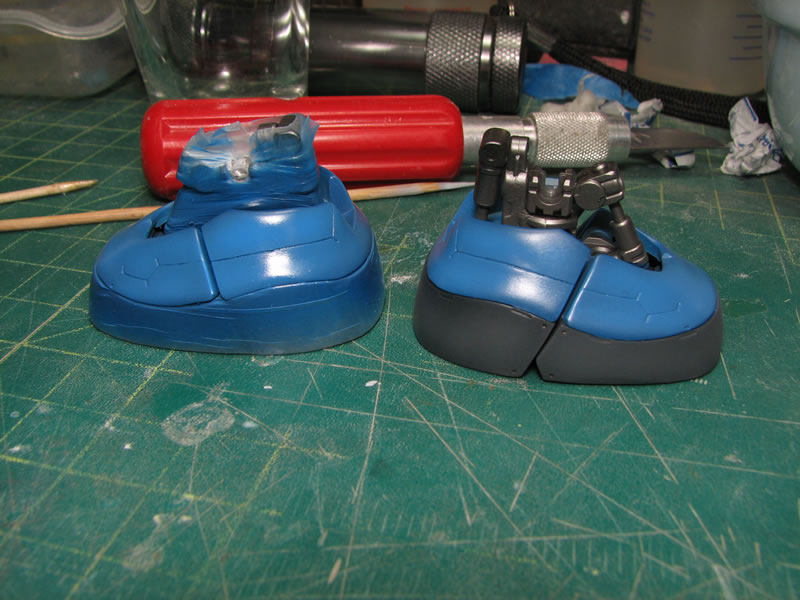
Here's a comparison with the recast kit and the original. The recast was considerably lighter and there were a few issues with details and overly thin resin. But it looks like a fairly decent cast. The recast will definitely require more attention to build.

Update pictures for Duke in his "I'm working on warhammer" pose.
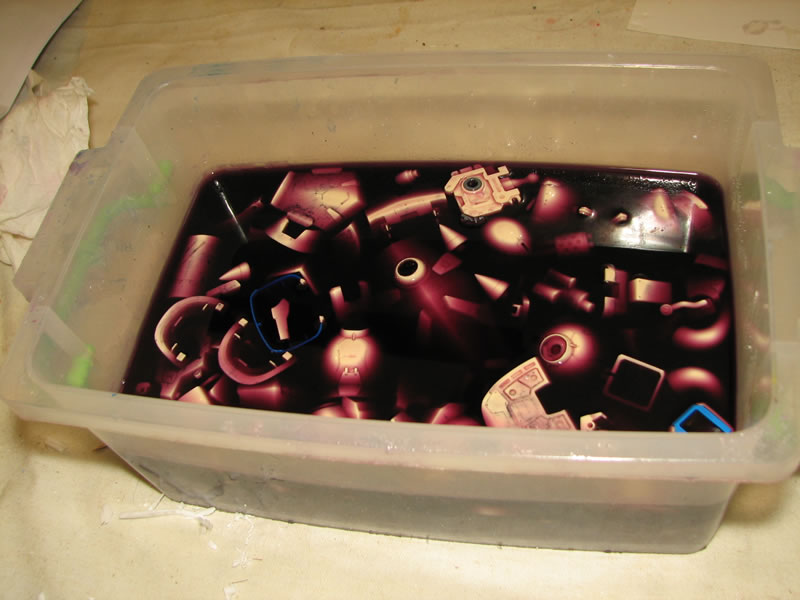
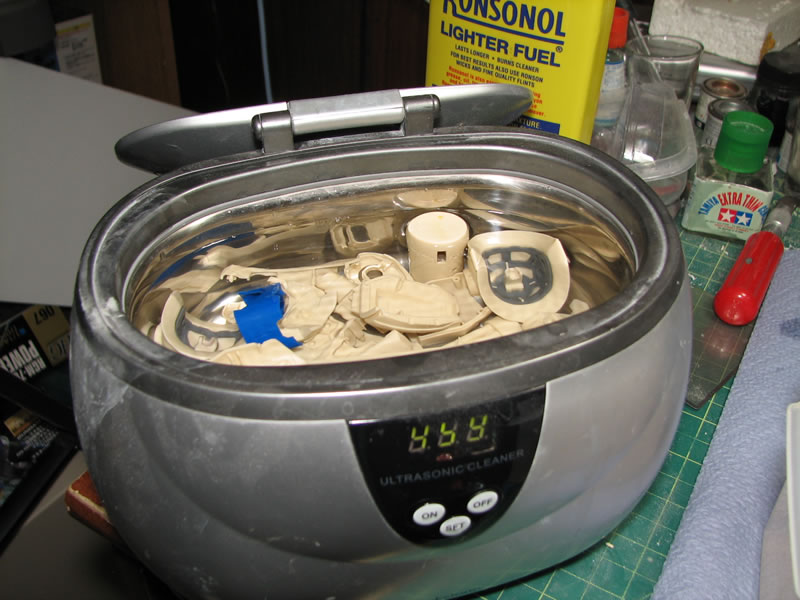
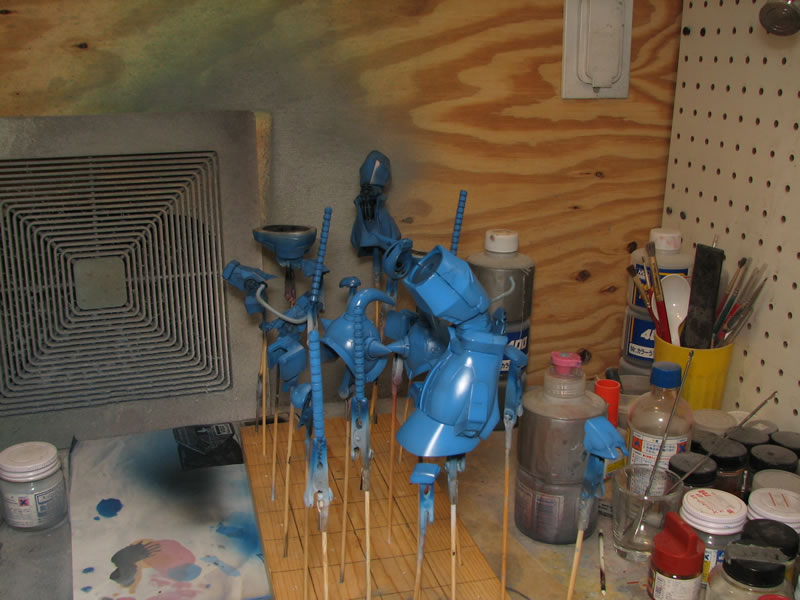
After the initial sanding and fixes to visible surface defects, the parts are thrown into a purple bath for a day to clean the resin and remove any residual mold release. After the soaking, the parts are put into clean water, then run through the ultra sonic cleaner for a final scrubbing.
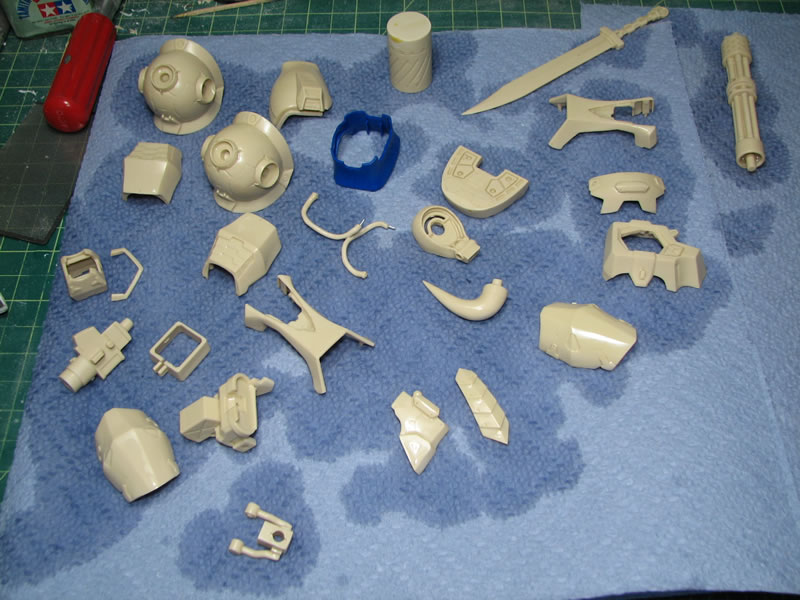
Parts are then pulled and placed on a paper towel to dry off.
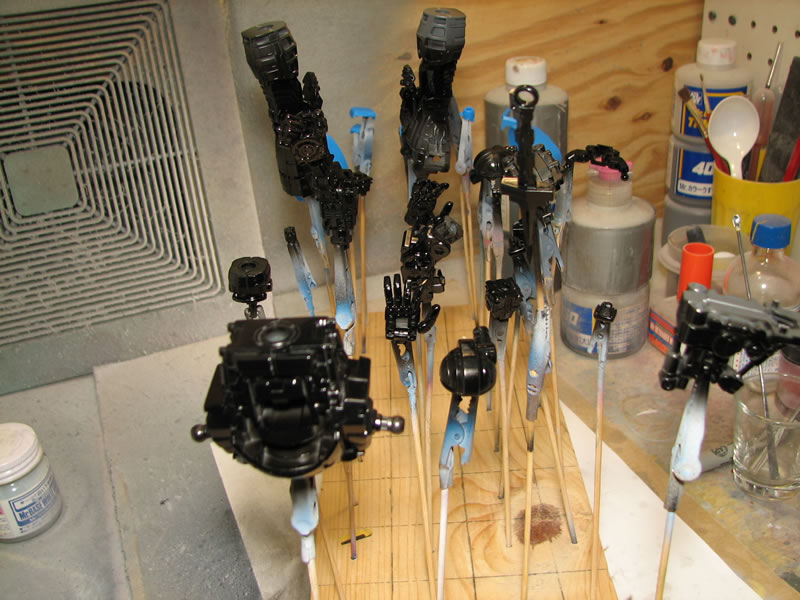
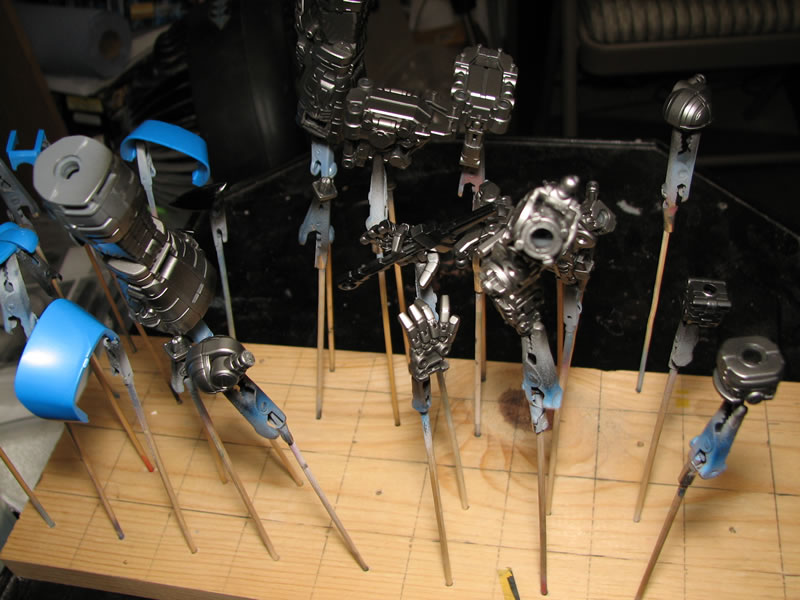
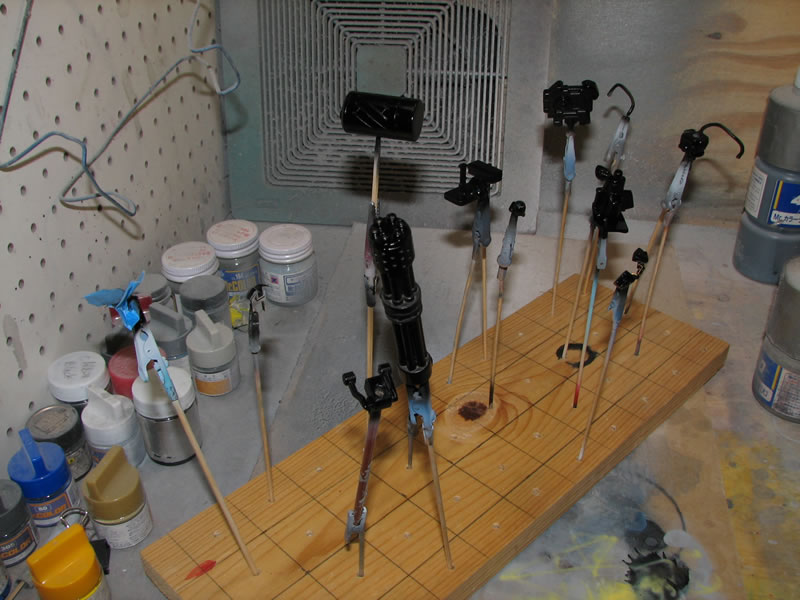
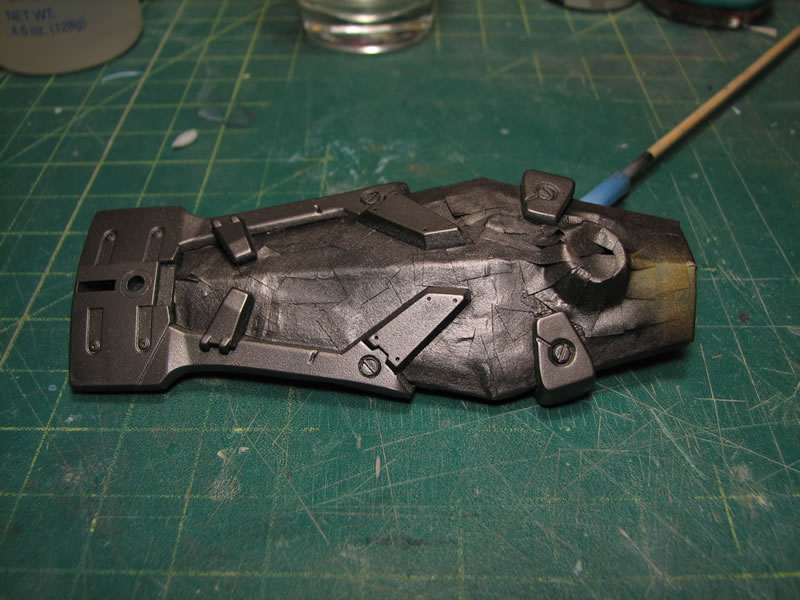
The internal frame parts were skewered, base coated with a gloss black, then painted with alclad magnesium.
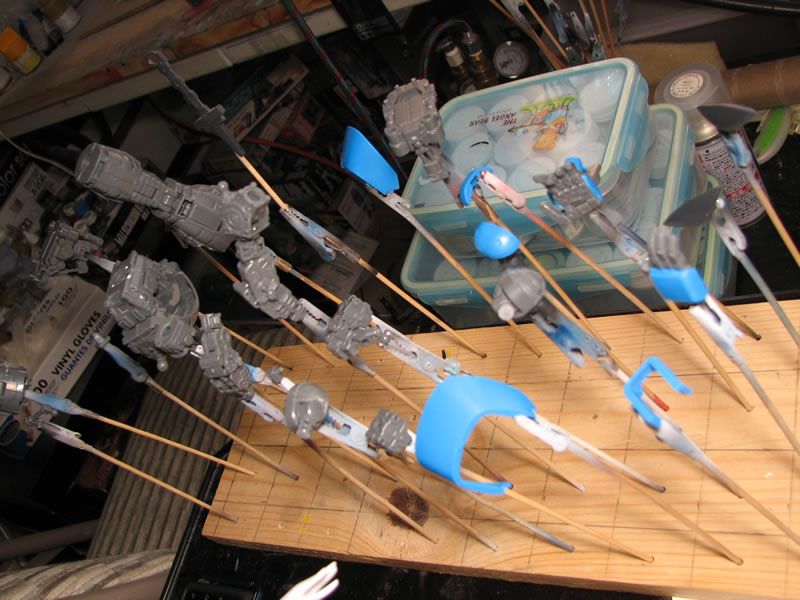
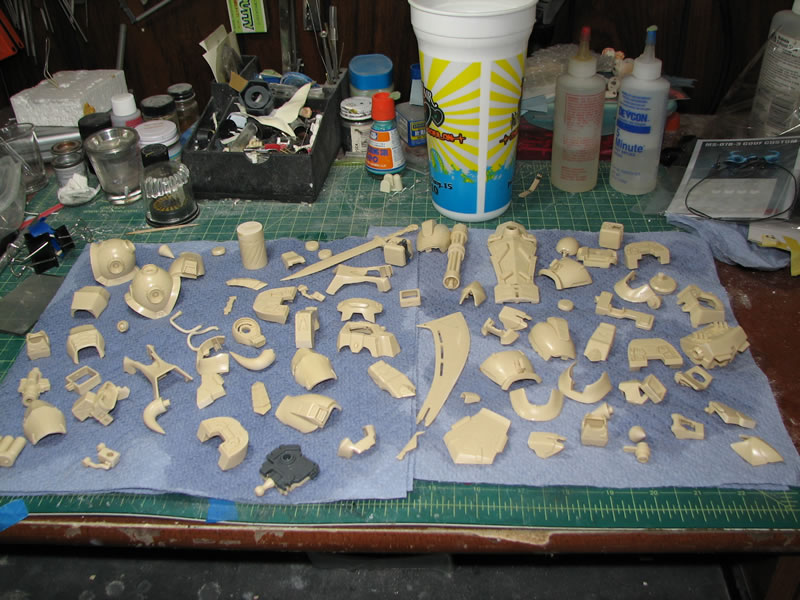
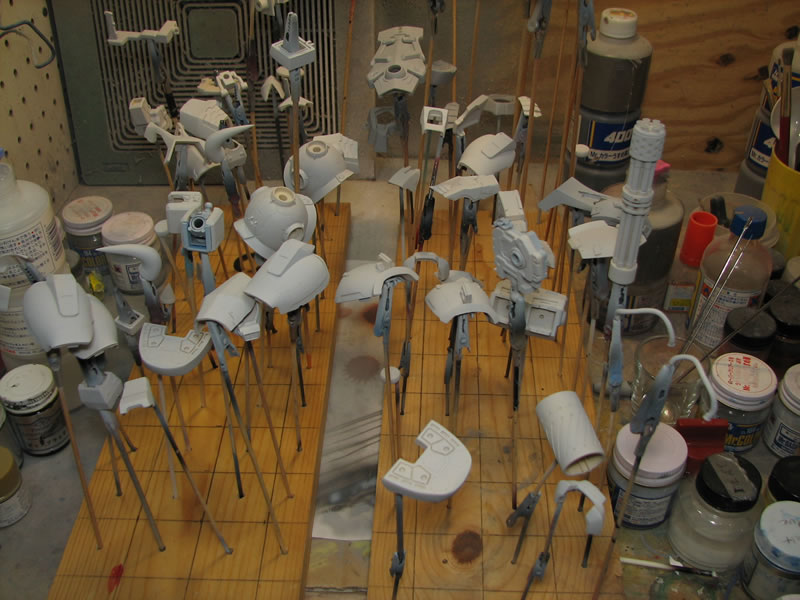
After the resin pieces have dried, they are skewered and then primed. This is considered the inital priming session as the primer usually shows off missed sanding spots and more surface defects that need attention.
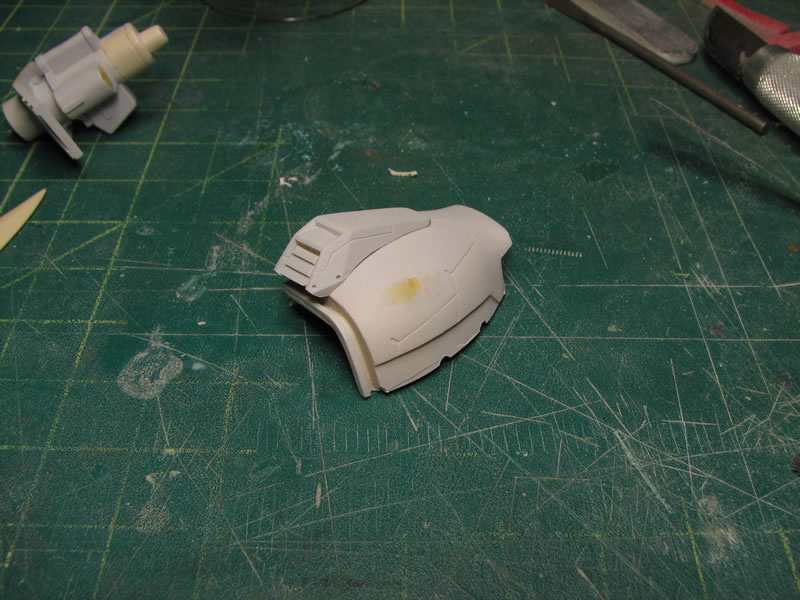
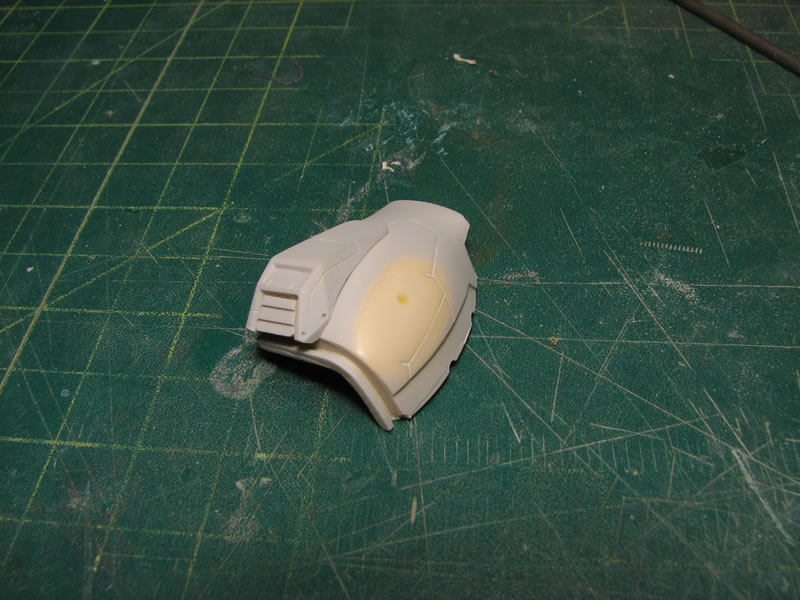
August 3,2010: Small update on the sanding. After the initial priming session, the real work on the kit starts with fixing all the fun little defects that are easily missed in the bare resin but clear as day after the parts have been primed. I fixed a few issues using tamiya light curing putty and sanded down the areas.
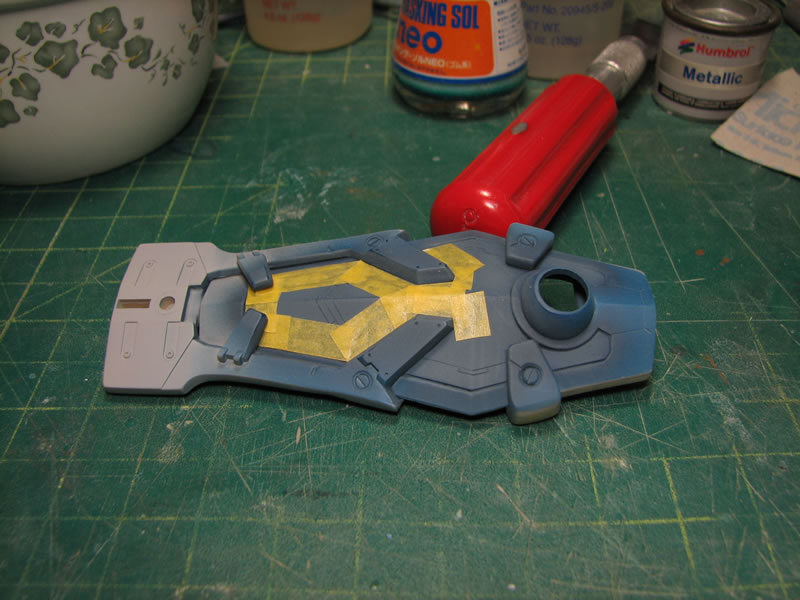
The hand cannon for lack of a better word had a horrible gap and the easiest way I found to fix this was to just glue some styrene into the area then sand off the excess. It's a pretty quick fix for areas that have a decent gap.
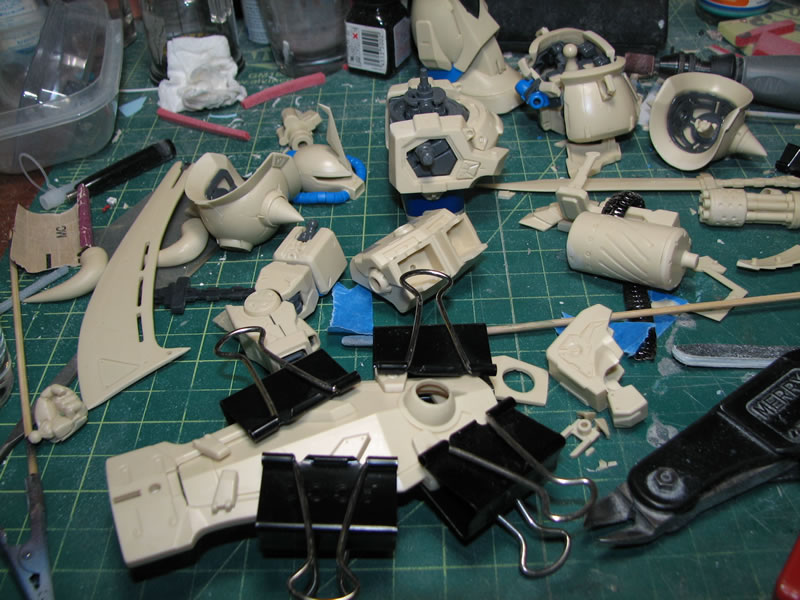
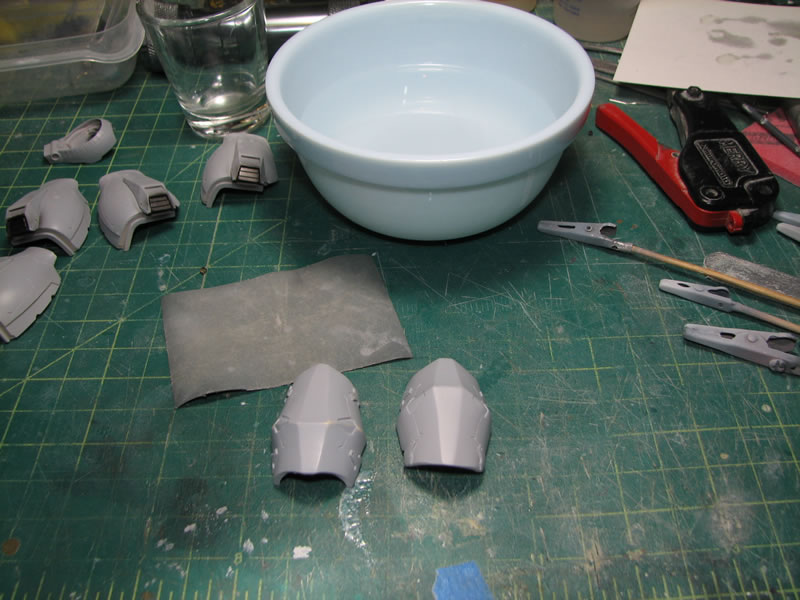
A full night was dedicated to sanding and fixing surface defects, and I didn't even get through all the parts. I still have a handful of parts that still need this clean up. I took break from sanding and fixing to work on something a little more interesting.
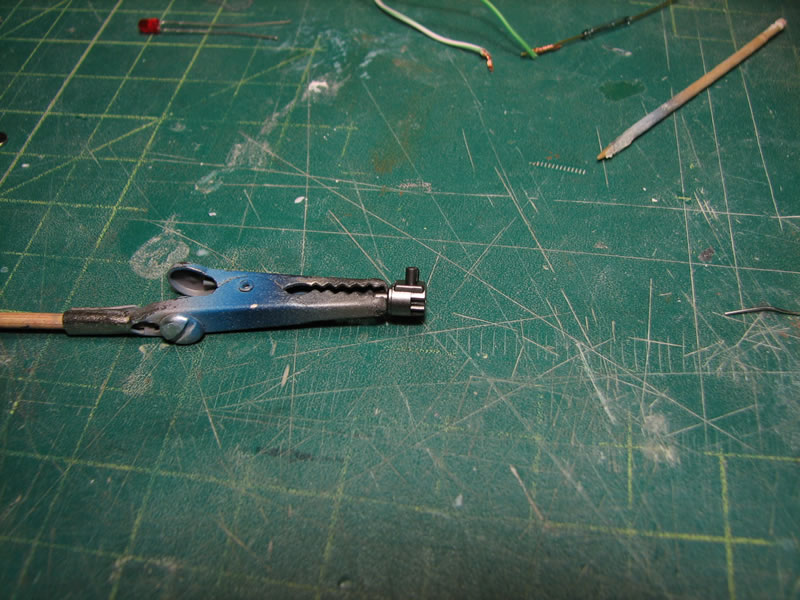
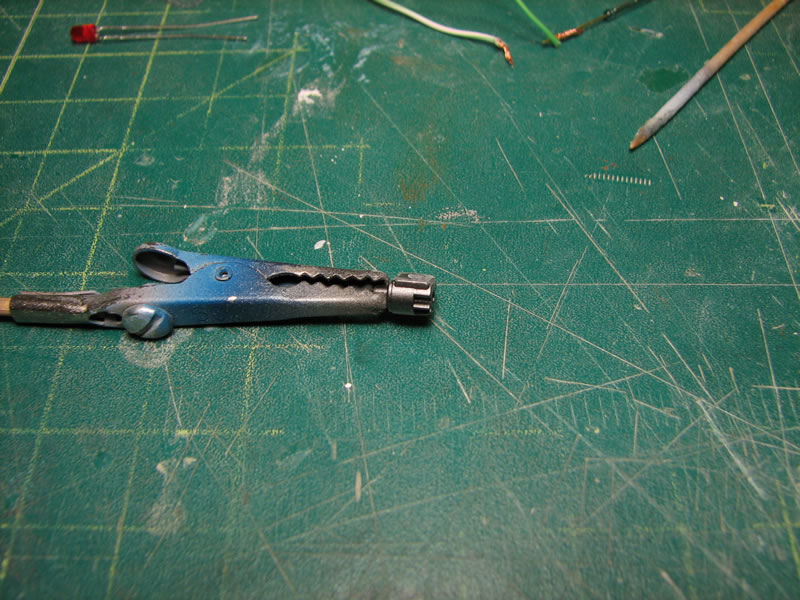
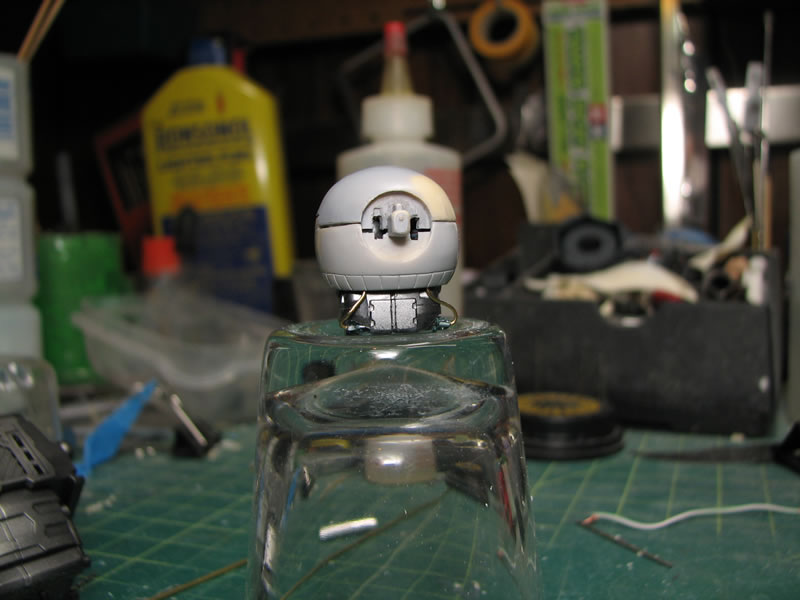
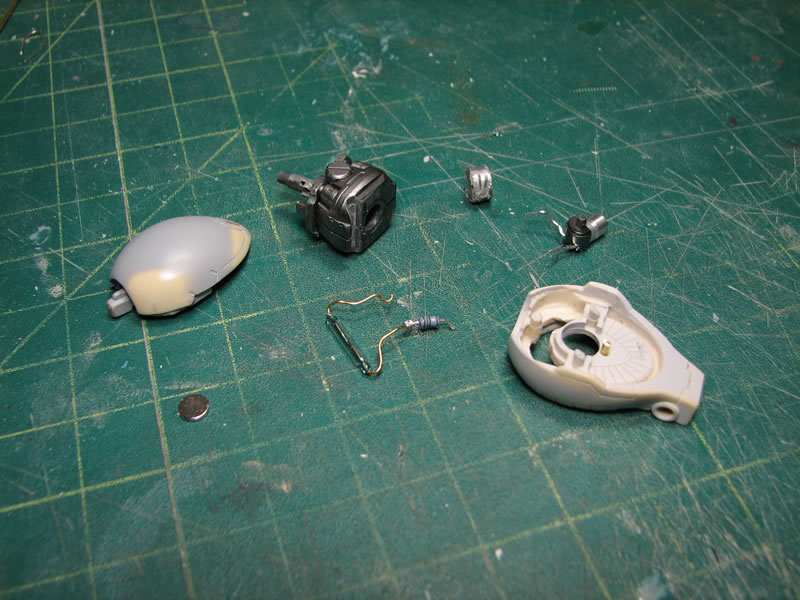
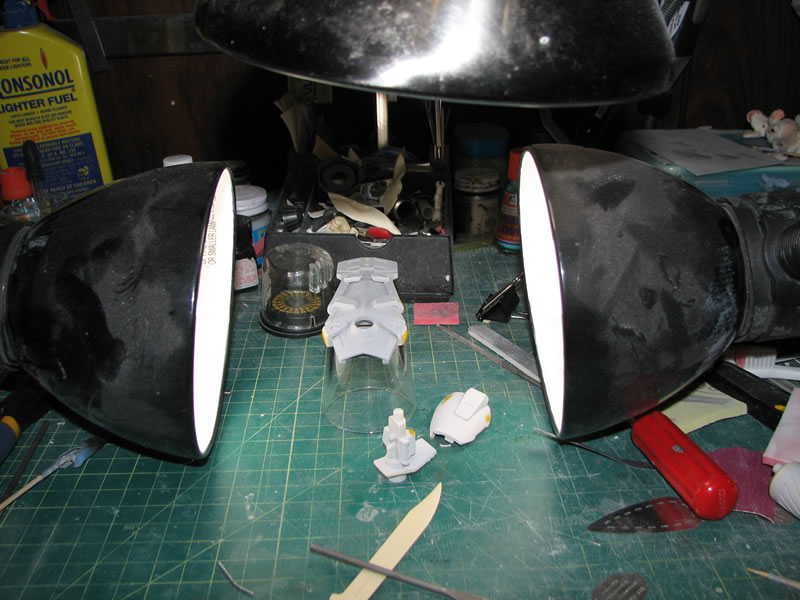
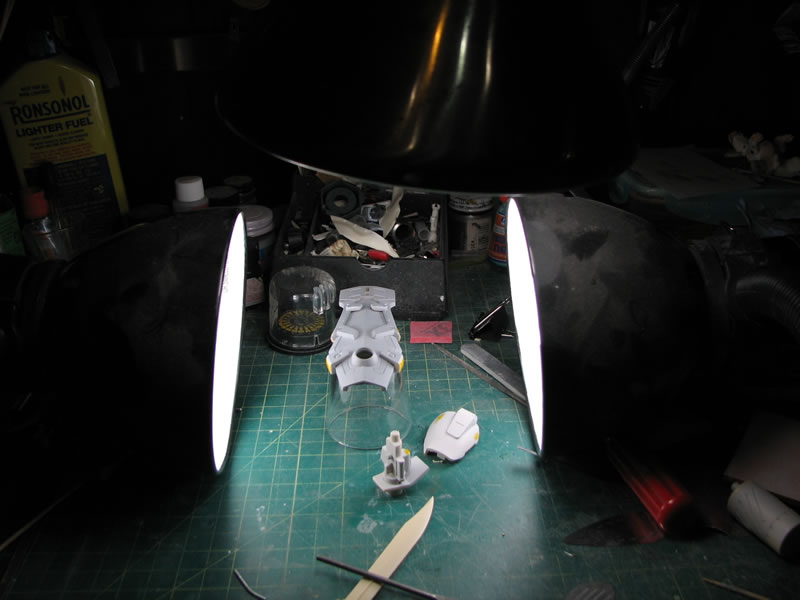
It's high time I revist the "LED installation tutorial" But this time, as opposed to having all sorts of wires running through the kit, using a fairly sizable switch assembly, a battery holder and battery assembly; I'm going small scale. So the parts involved are listed in the picture below.
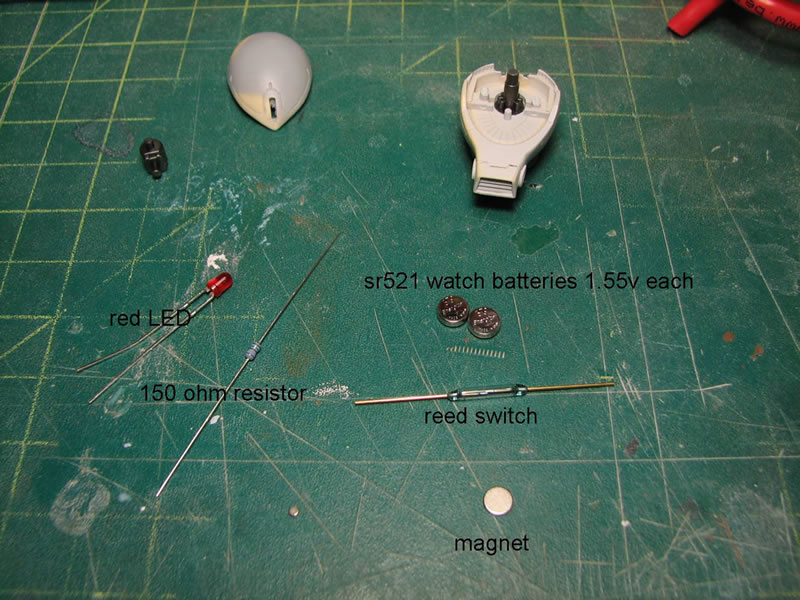
The idea here is to keep the components as small as possible so as to fit within the confines of the head assembly. The reed switch is a magnetic switch assembly. It is basically two leads piped into a glass tube, and placing a magnet over the leads or over the glass causes a connection to form. It's pretty damn cool, and these switches were about a buck a piece, so this beats the hell out of building my own magnetic switch or just using your standard mechanical switch.
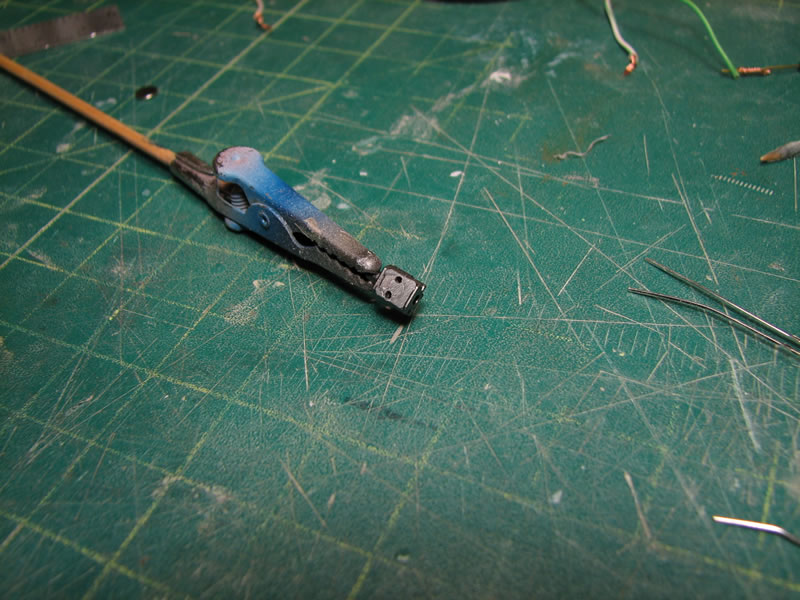
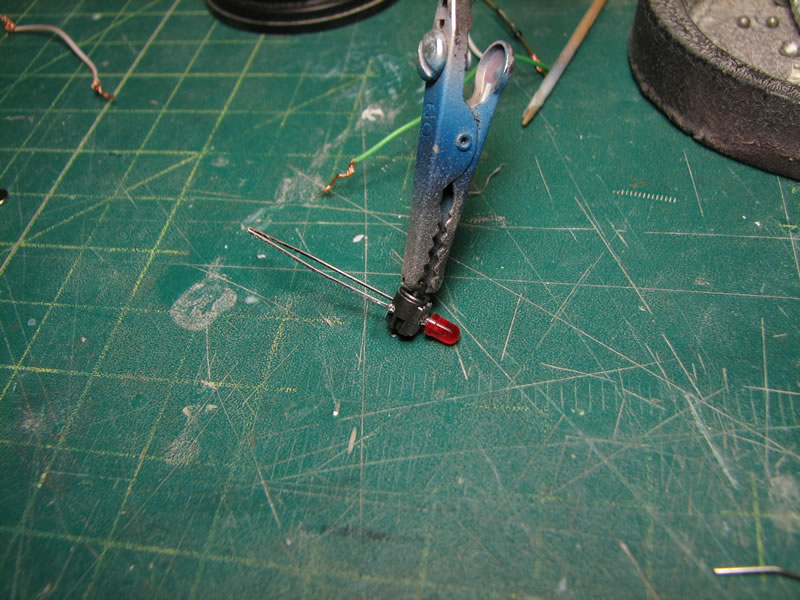
The resistor is calculated out according to my power source and the LED's specs. It's pretty basic math: resistor (R) = (Power Supply Voltage - LED's forward Voltage)/LED's current rating. OR you can just cheat and use an online LED calculator. But with what I have, I need to use a 150 ohm resistor. First things first, connecting all the components and just doing a quick test.
Here's a video of the assembly working:
Get the Flash Player to see this player.
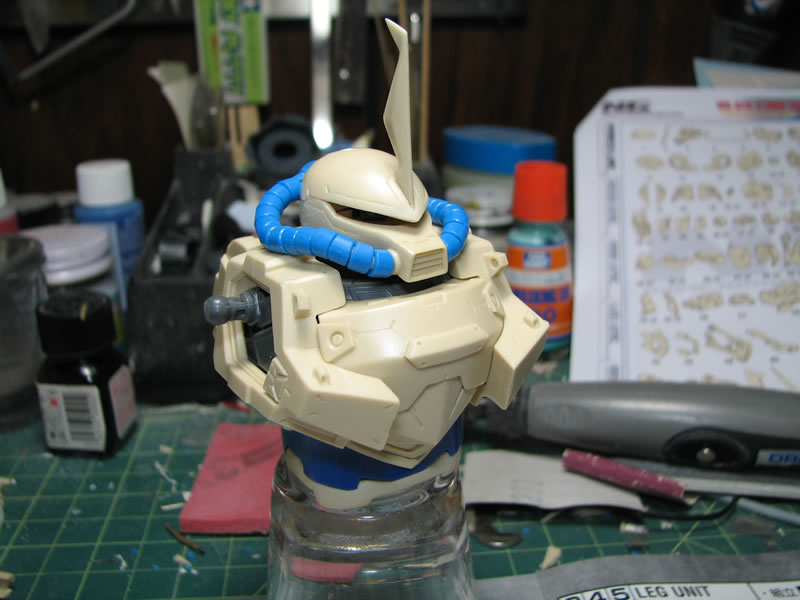
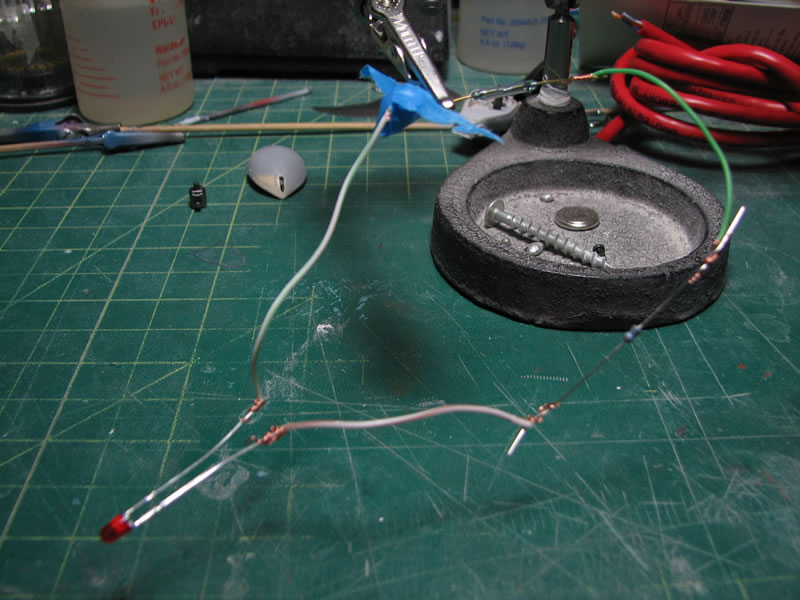
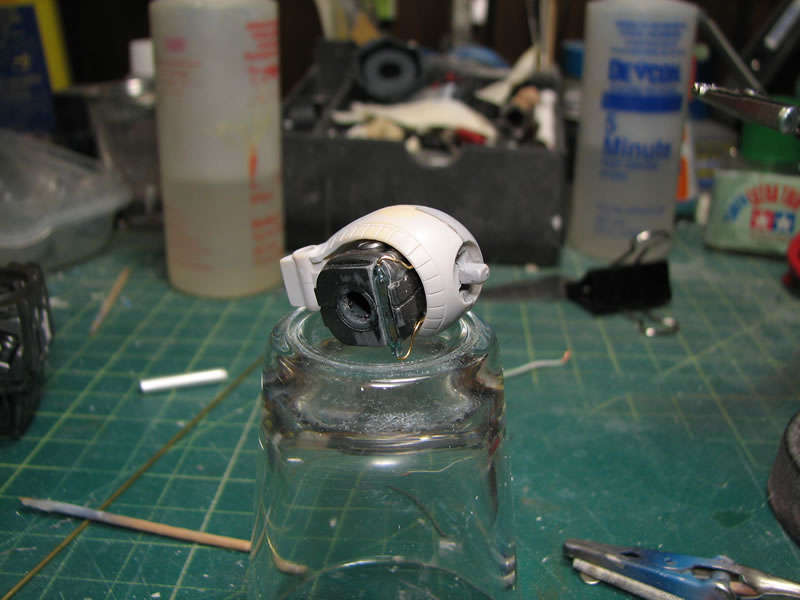
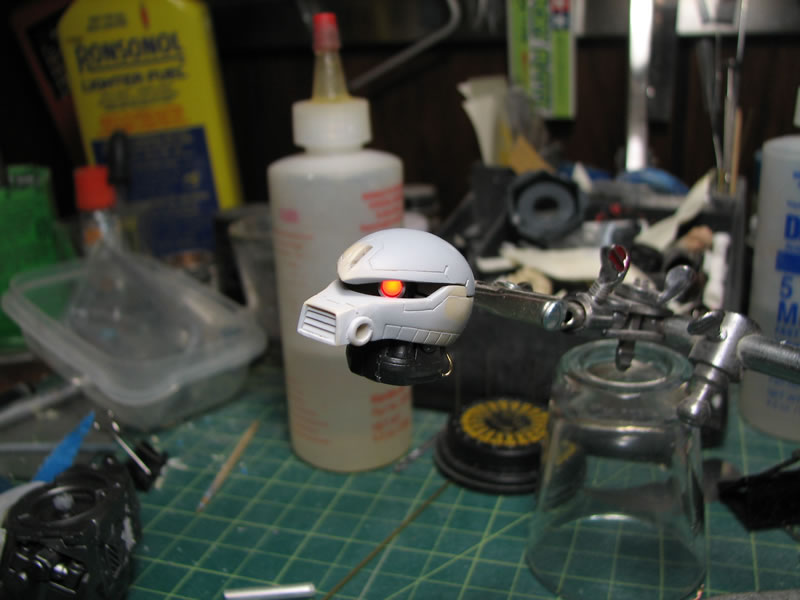
Next up is to modify the head and internals so that everything fits into place. The mono eye holder is cut and sanded, then two small holes are drilled to accomodate the LED anode and cathode. The LED assembly is test fitted, which resulted in the need to futher grind down the mono eye holder. About a third of the part was sanded away.
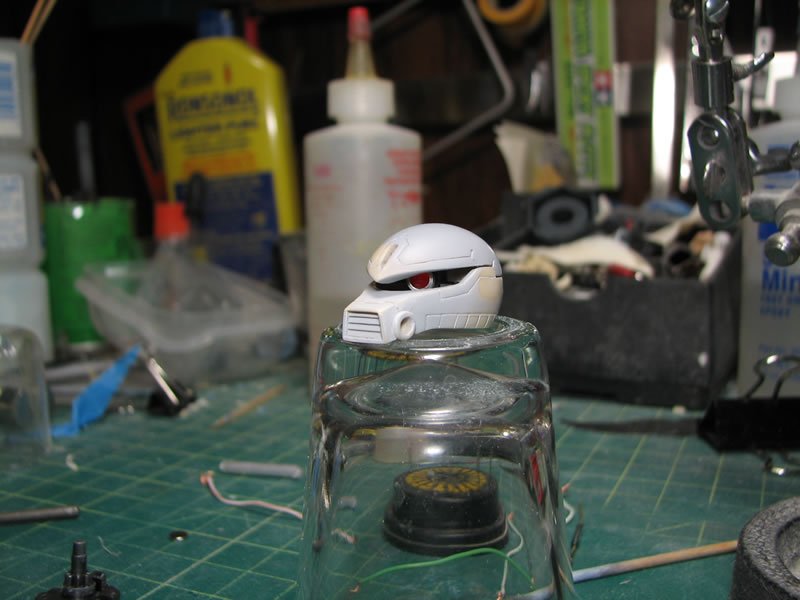
The LED alone is kinda tacky, so to make it look more mono-eye like, a metal collar is added. Even with the small mono eye window, this small amount of detail is still fairly clear, and will be even clearer once the mono eye lights up.
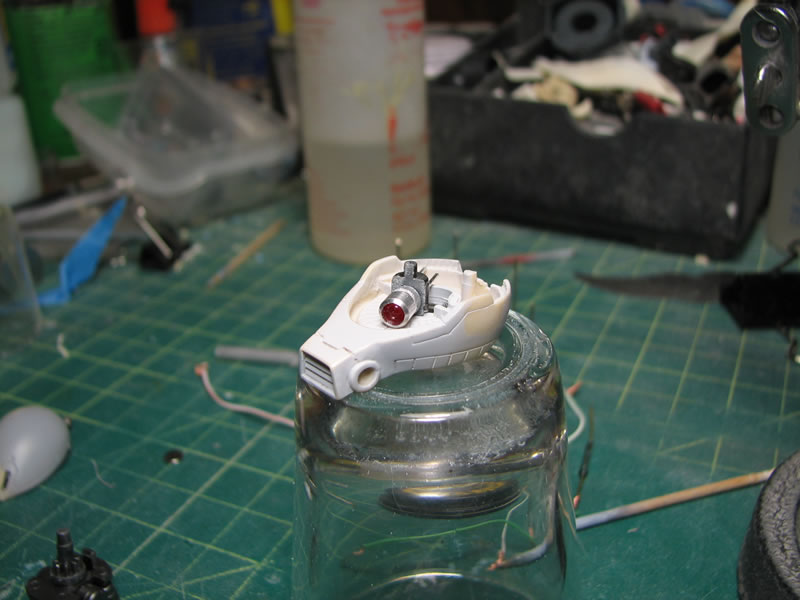
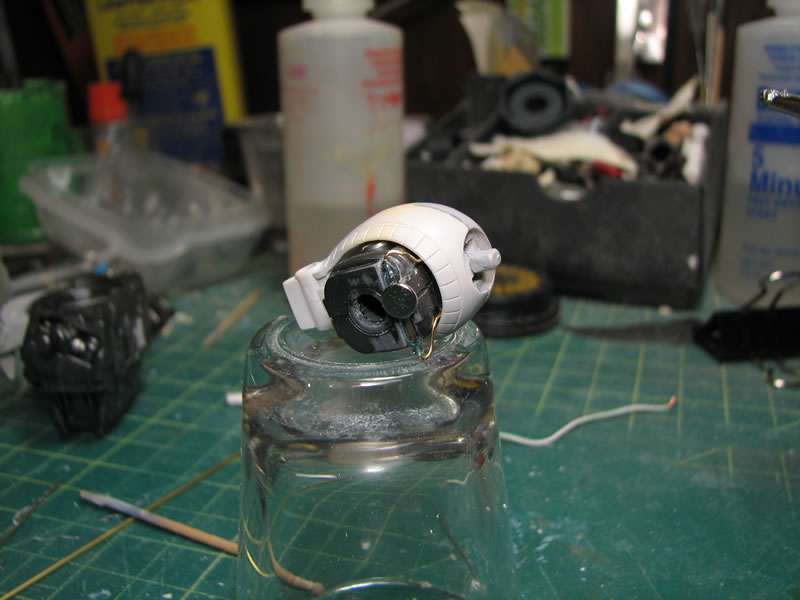
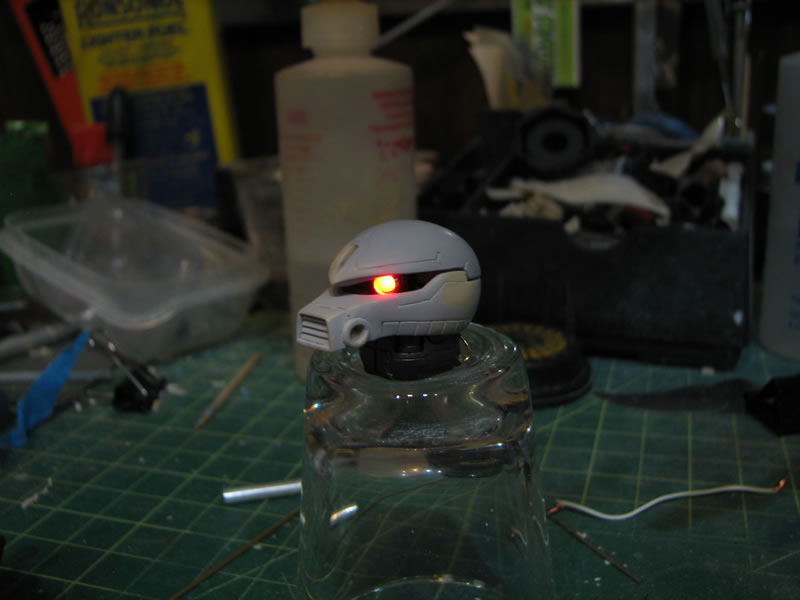
Now for the rest of the electronic components. The batteries are wrapped and placed in series so that I get a total output of 3.1 volts. 1.55 volts in the single battery cell isn't enough power to light up the 1.85 volt LED. The batteries are wrapped with duct tape. The internal section of the head at the back is completely open space and perfect for fitting most of the electronics. A bit of resin carving and shaving was needed to get the battery pack to fit just right.
The reed switch, as small as it is, wasn't small enough to fit inside the head assembly, so a modification to the bottom of the neck piece was needed. A concave cavity was carved out of the bottom that fit the red switch. The leads were then carefully bent (as while I was bending my first reed switch, the glass broke) and positioned to run up the bottom of the head. The bottom of the head piece was carved to open up room for the switch leads. One switch lead connects to the negative end of the battery pack. The resistor is sodered to the other end of the reed switch and then bent to fit and contact the cathode end of the LED with the anode end of the LED connecting to the positive end of the battery pack.
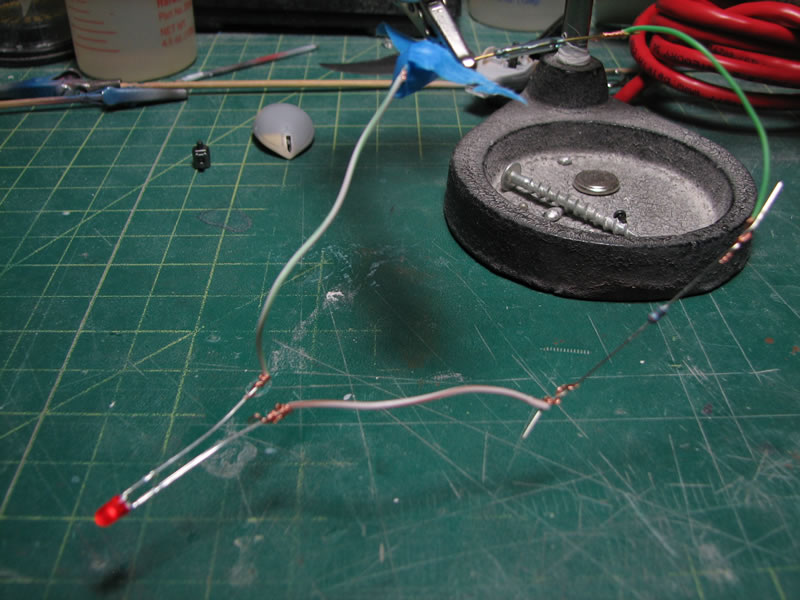
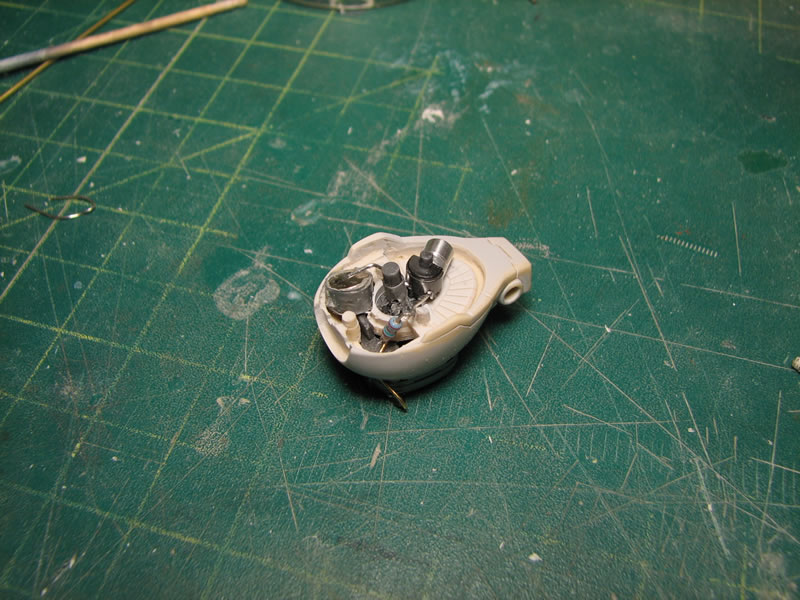
The only issue I have is that the switch leads are exposed and run up the side of the neck, but this is an easy fix with some mesh tubing, it'll even look like a small bit of added detailing.
Some fiddling with the fit and everything came together quite well. And placing a magnet at the bottom of the neck assembly turns on the LED. A definite improvement upon the previous LED tutorial.
Video of the assembly at work:
Get the Flash Player to see this player.
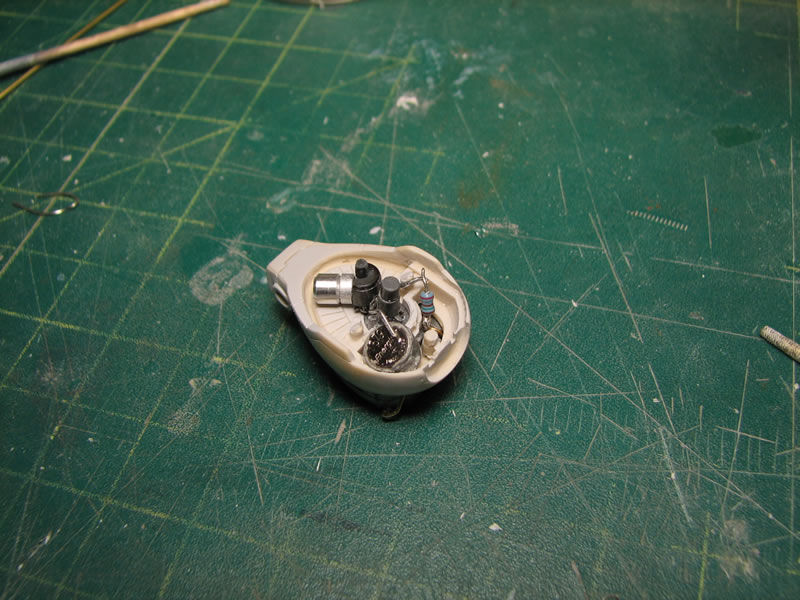
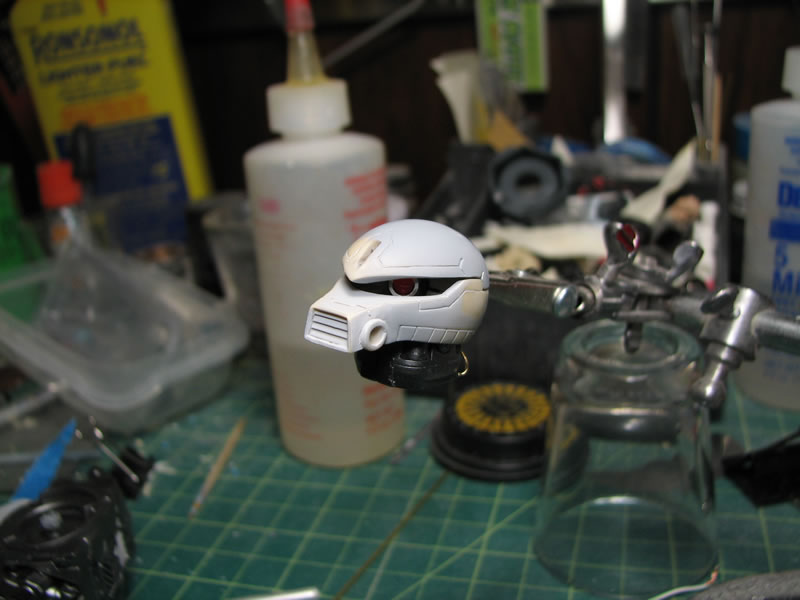
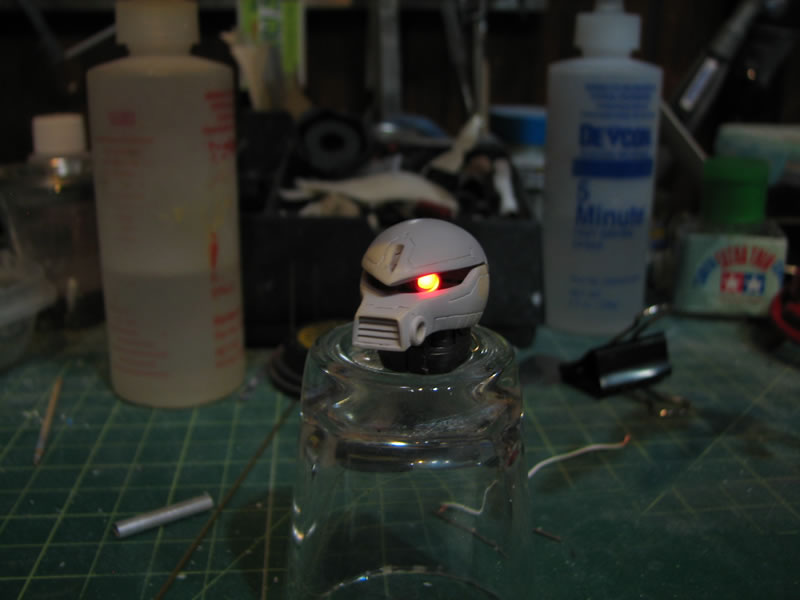
August 8, 2010: Weekend update. I spent the last bits of the last week finishing up some fixes to the surface, small defects here and there were fixed. First off, here is a picture of the head piece and the componets that light the eyes up. Very small and simple components.
For the small surface defects, I used light curing putty. The putty cures in minutes under direct light and I can sand and continue working without having to wait a full day for epoxy or other putties to cure. Once the putty cures, the parts are sanded and reprimed.
The second priming session and final priming session for most of the parts. At this stage, there are very few surface defects, and I can now go into applying the base layers of paint.
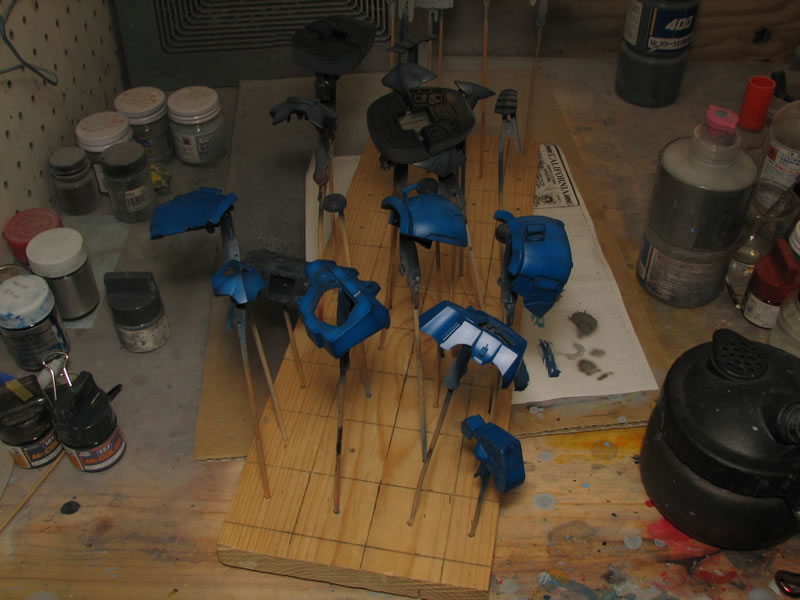
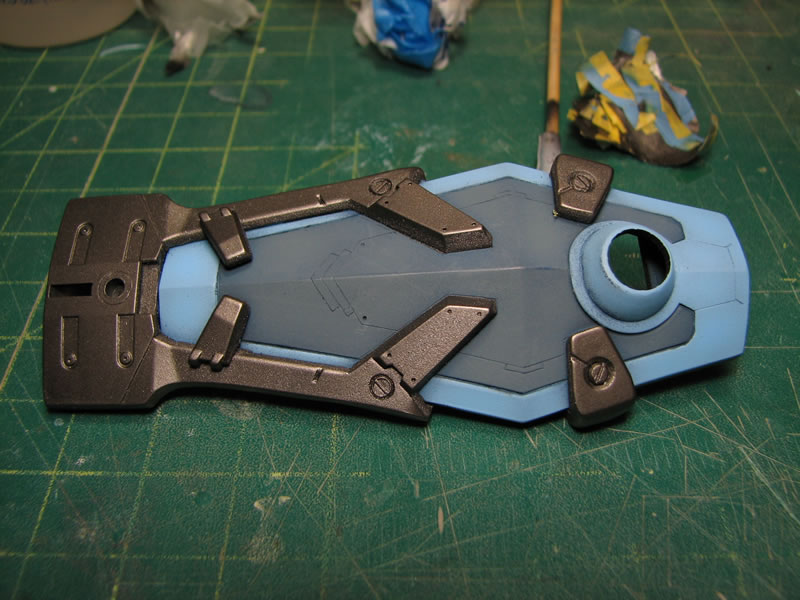
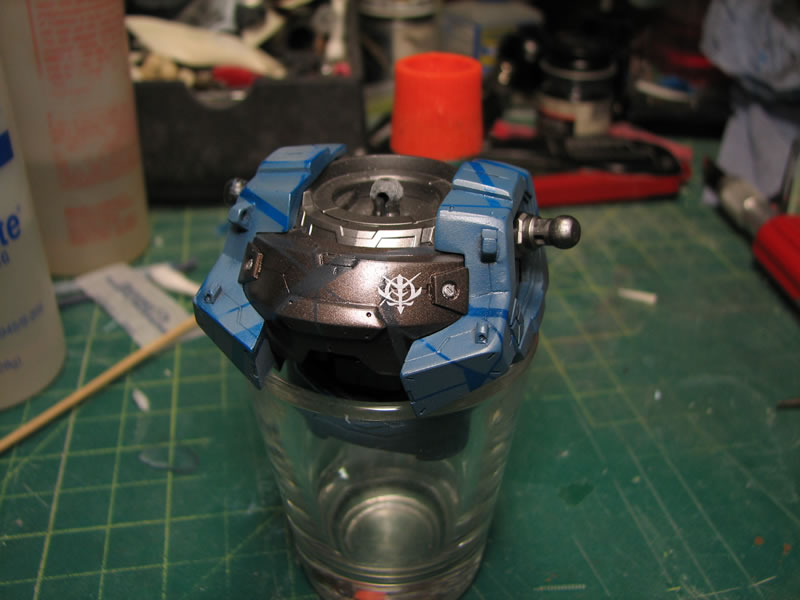
The last bits of the internals that were resin as well as the weapons get coated in a gloss black as the first layer of paint over the primer. The chest and skirt pieces were primed in black, then preshaded with gray primer to get a shading effect. Then a dark blue is sprayed over the parts to create a shaded look. The blue did not show up well when sprayed over the black so gray primer was used to lighten up the surface for the blues. A gray was sprayd over the knee, upper chest, and bottom foot pieces, shading over black. And for a quick mock up, I put hte chest unit together. The orange piece was just tamiya enamel clear orange over alclad polished aluminum.
Prior to painting, I wet sanded the surface of the parts with a very high grit sanding mesh dipped in water. It wasn't really a sanding session as much as a wiping session with the wet sanding mesh.
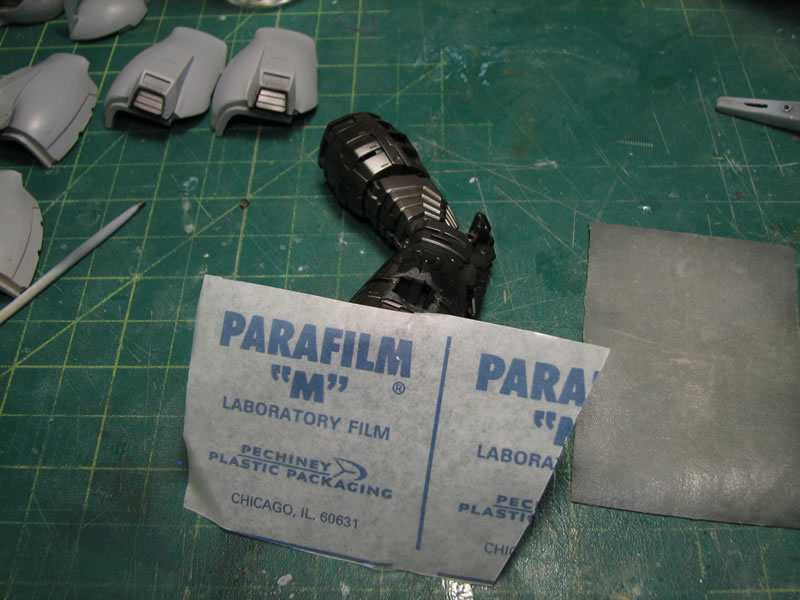
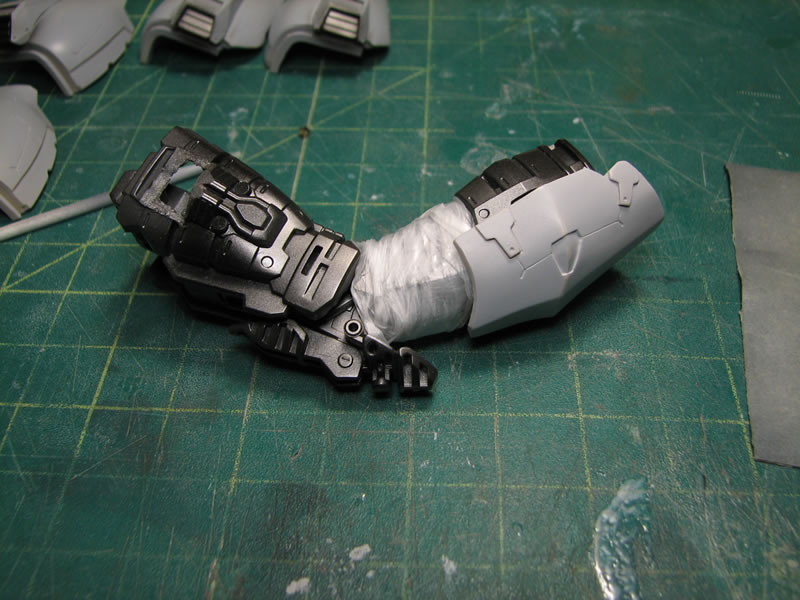
Since I will need to glue the main armor pieces to the frame, I had the frames painted first. Before placing the armor pieces on, I wrapped up the exposed joint areas in parafilm, then went on to paint. In the next example, I had painted the bottom parts of the foot, then wrapped the assembly in parafilm and attached the top pieces of the foot then painted it. I do this so that I keep a consistent color tone on adjecent pieces. Removing the parafilm after the painting process and we have the last comparison picture.
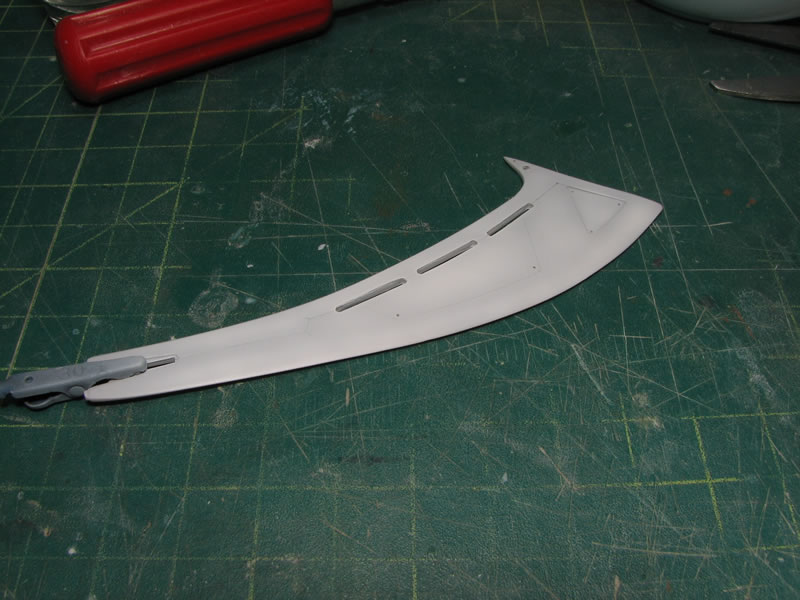
Since I wanted to shade the sword and do the sword in orange, I first sprayed white over the gray primer shading with the white. Once that was done, I sprayed clear orange over the part to finish the giant blade. Scroll down for pictures of the completed blade.
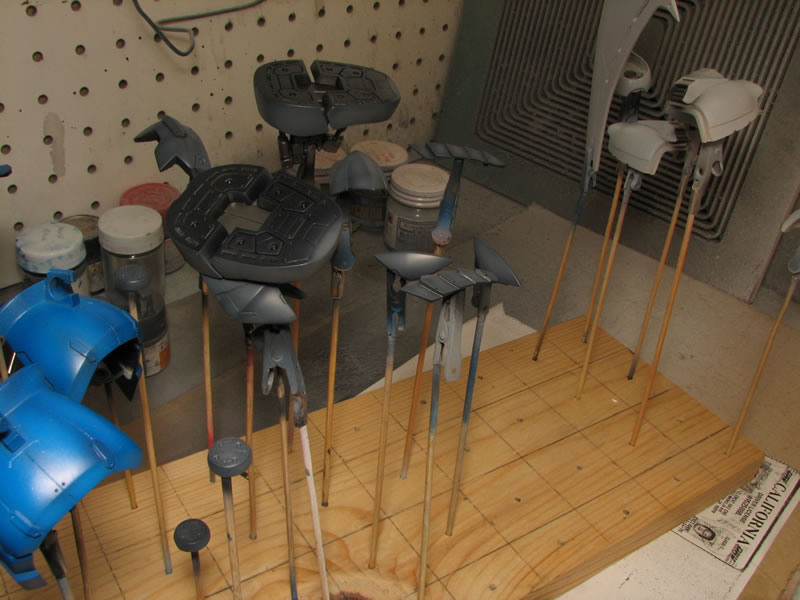
The armor pieces were painted first with a base coat of wolf blue as the first coat. Then shaded with a custom mixed lighter blue.
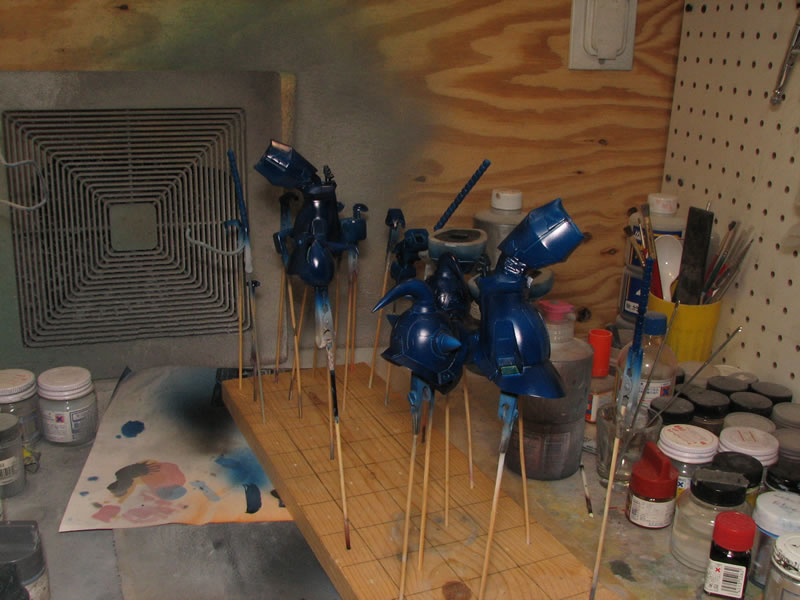
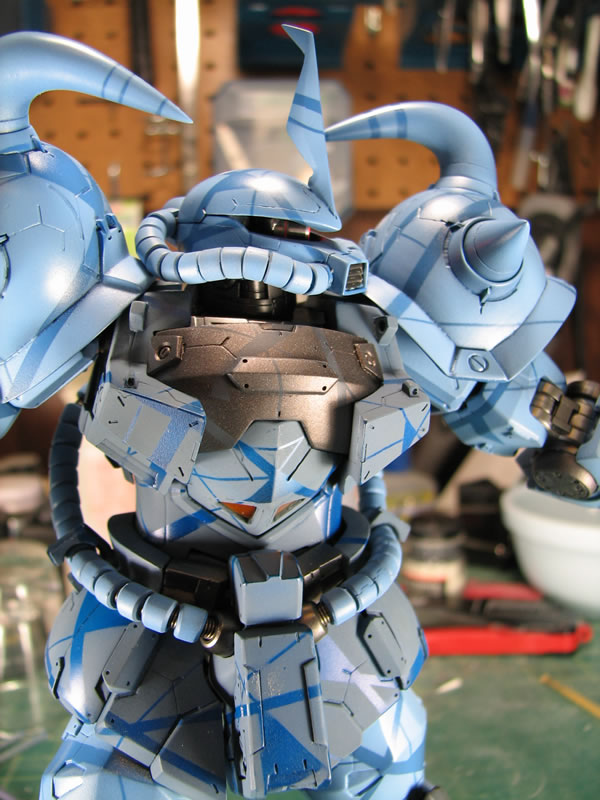
And here's what the Gouf looks like after the second layers of paint, preshaded. Shading is very strong.
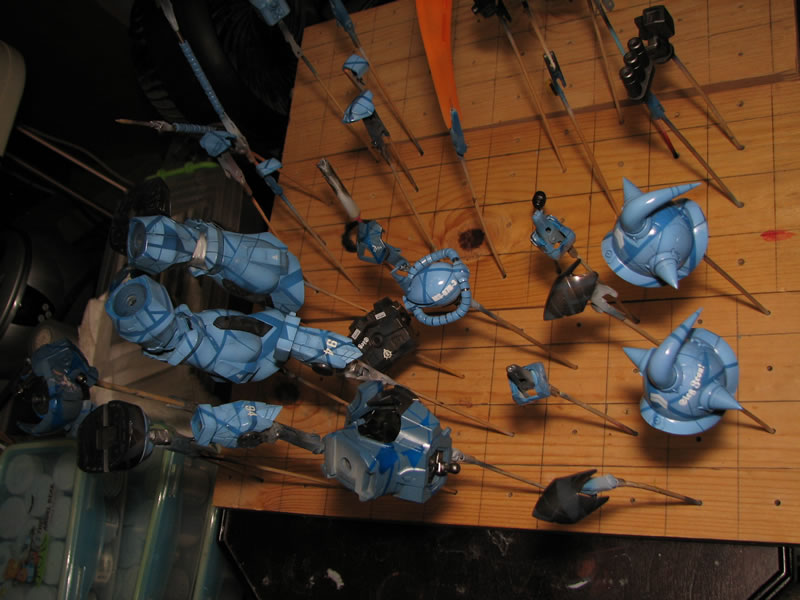
At the build gathering, I spent my time masking all the parts off. The process was so damn tedious that I didn't finish and aside from a small two and a half out excursion out for a wedding reception, I didn't finish masking off the parts that day. I ended up finishing up the last bits of masking today.
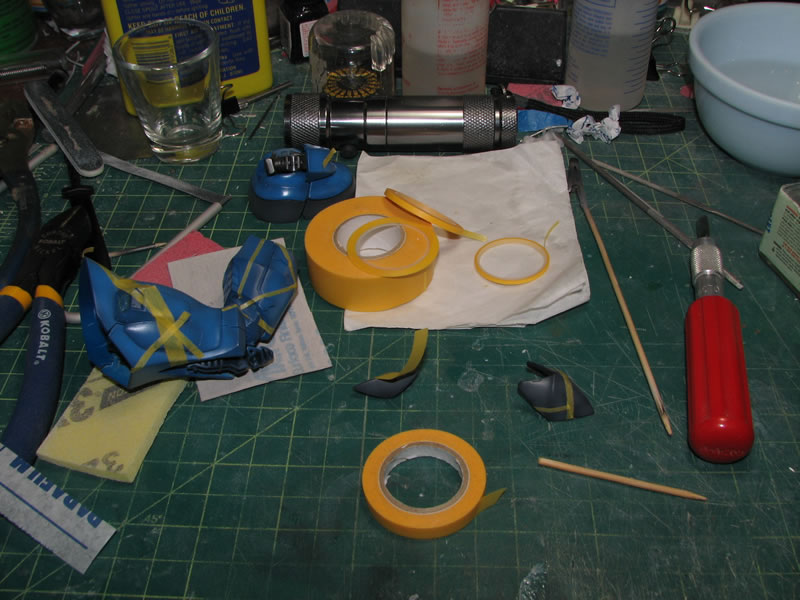
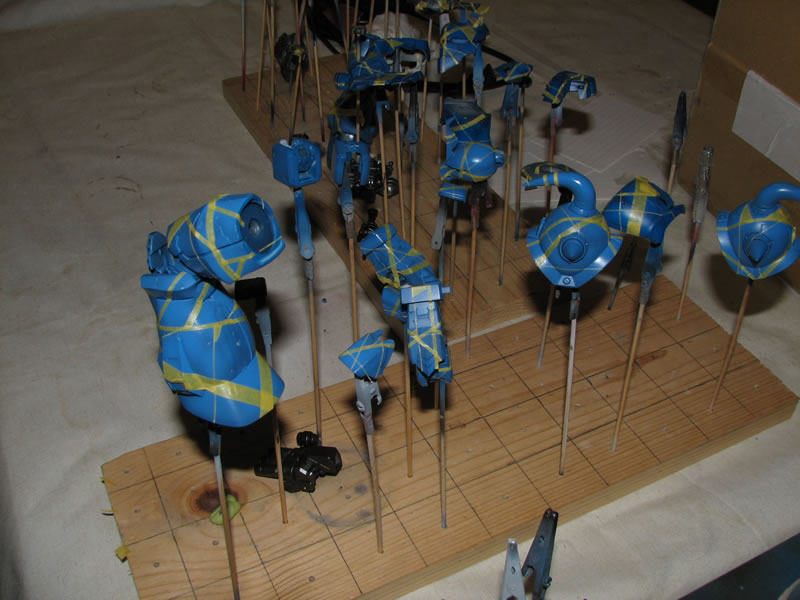
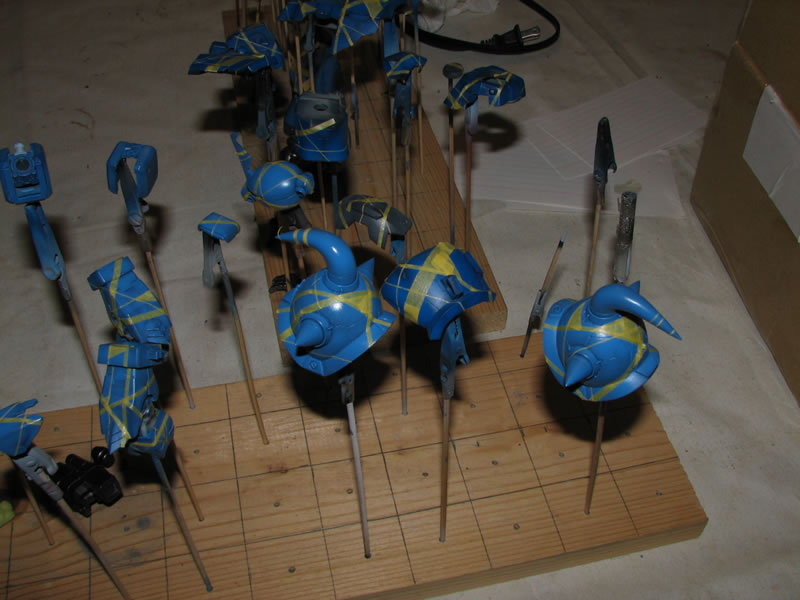
Once masked, I spayed on the third layer of paint. The "final" colors for the kits using the masked off colors as details.
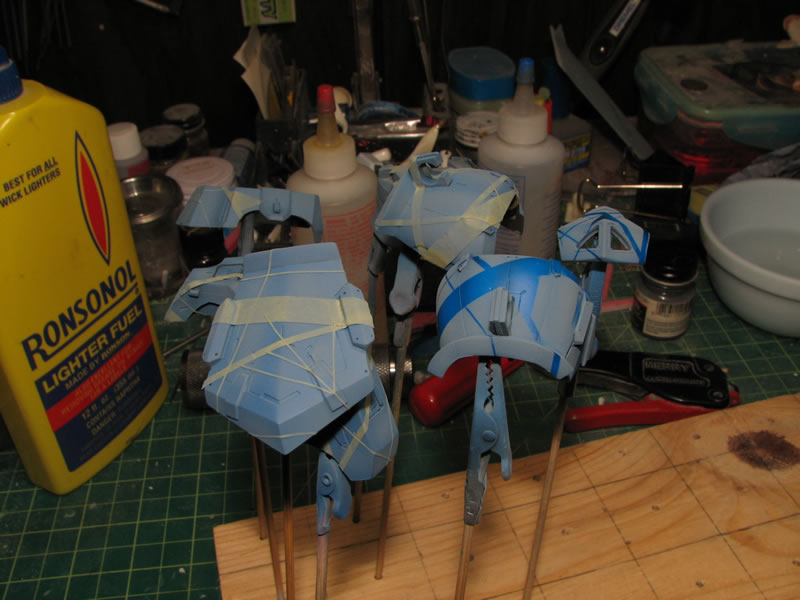


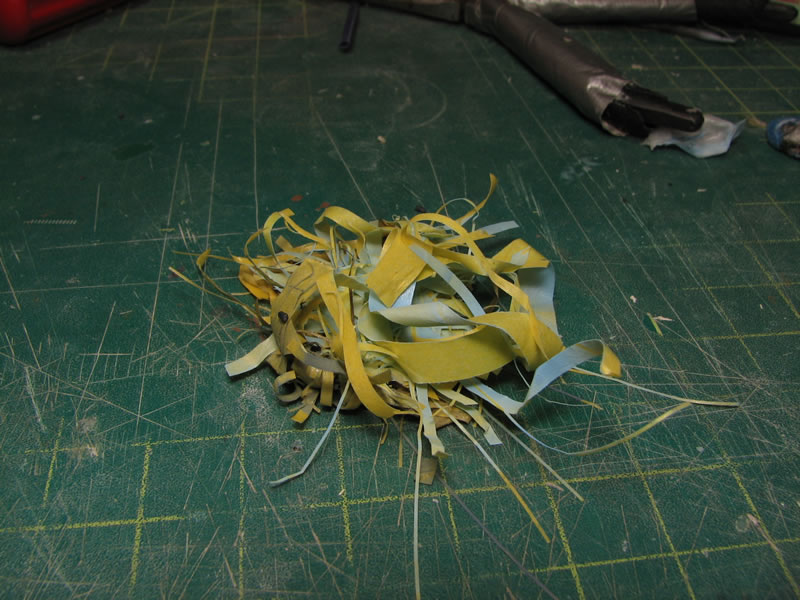
With the parts painted in respective colors, the masking tape is carefully removed so as to not chip the paint. And we have a pile of masking tape. It took hours to mask off the kit, minutes to paint, and tens of minutes to carefully remove all the masking tape. I'm not quite sure if the tediousness of the process is worthwile.
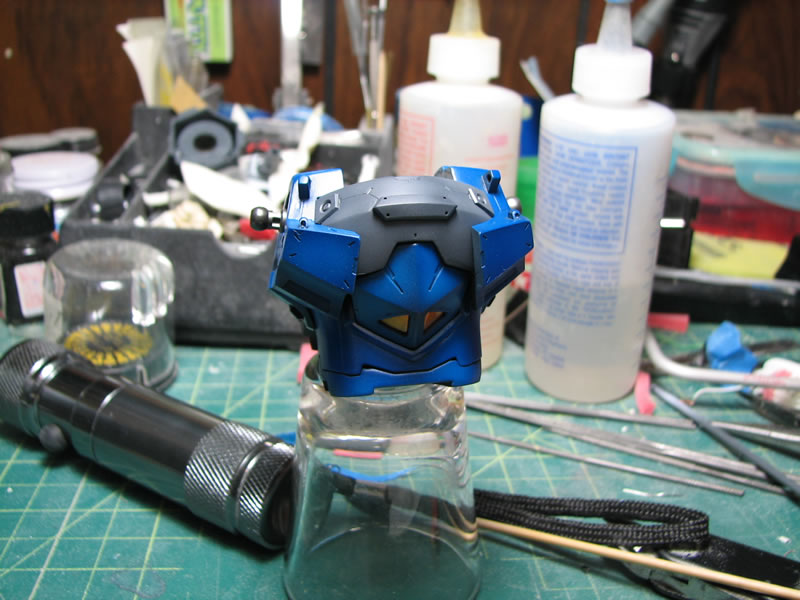
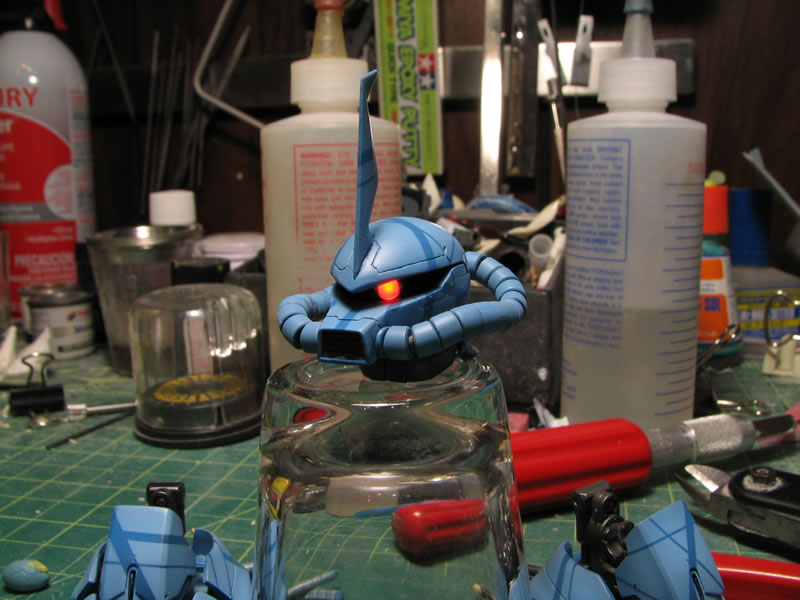
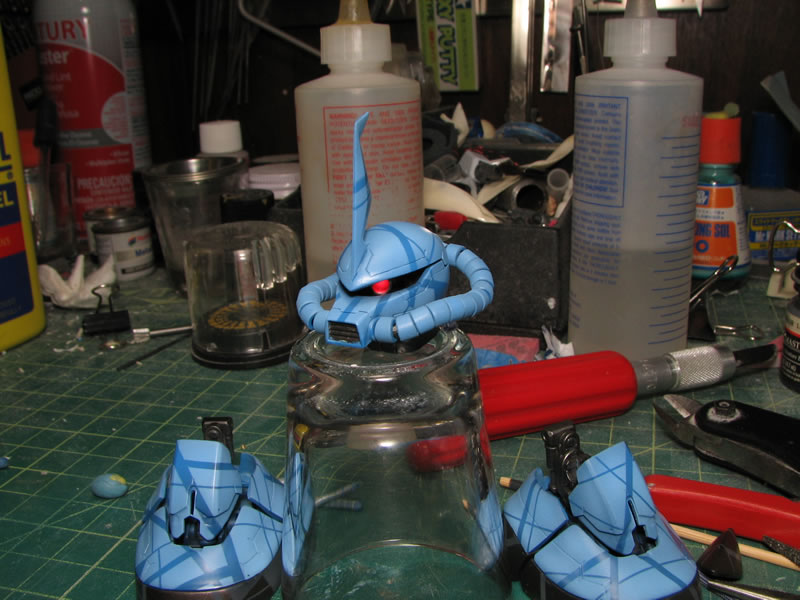
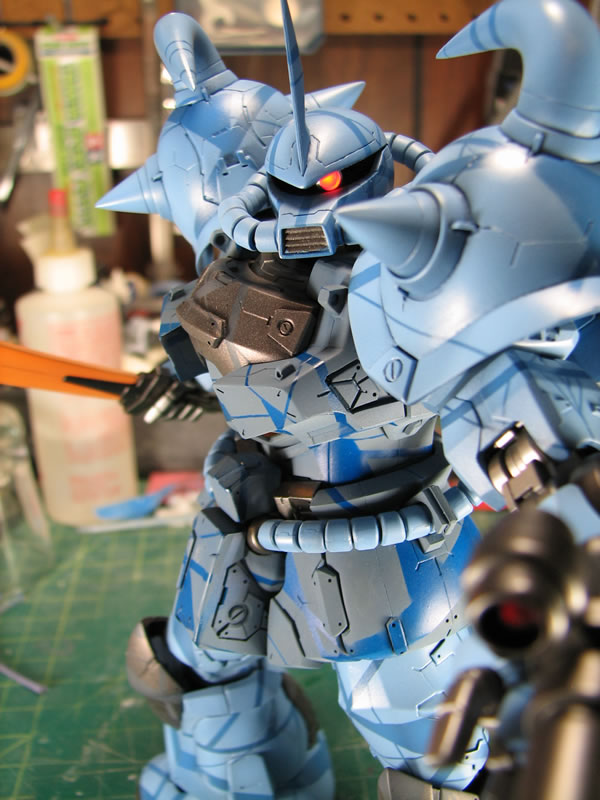
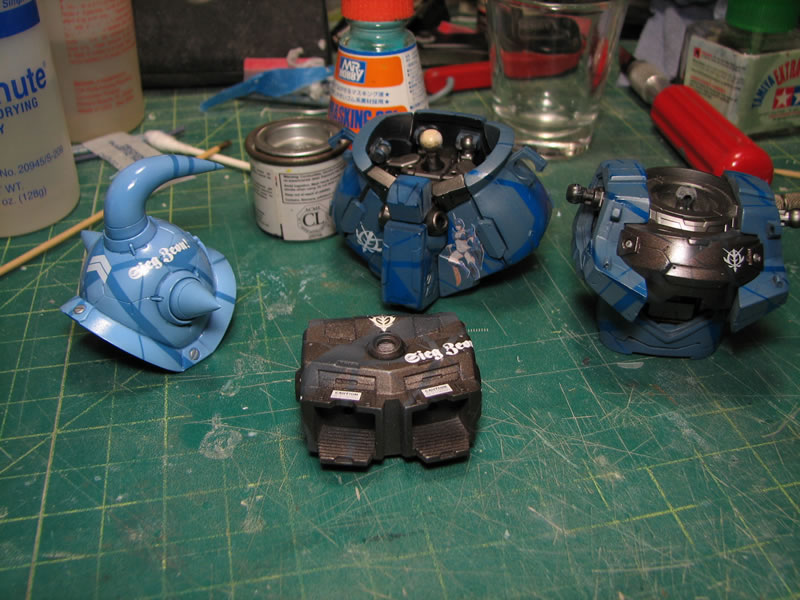
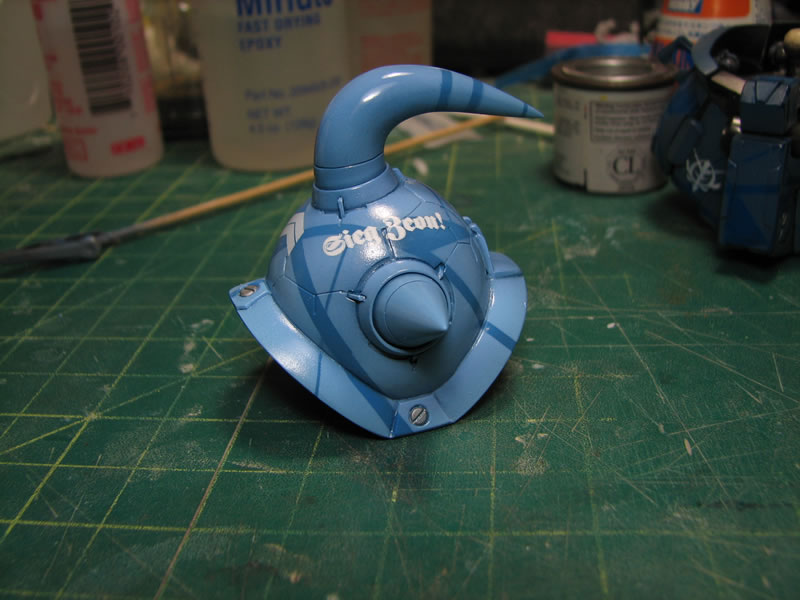
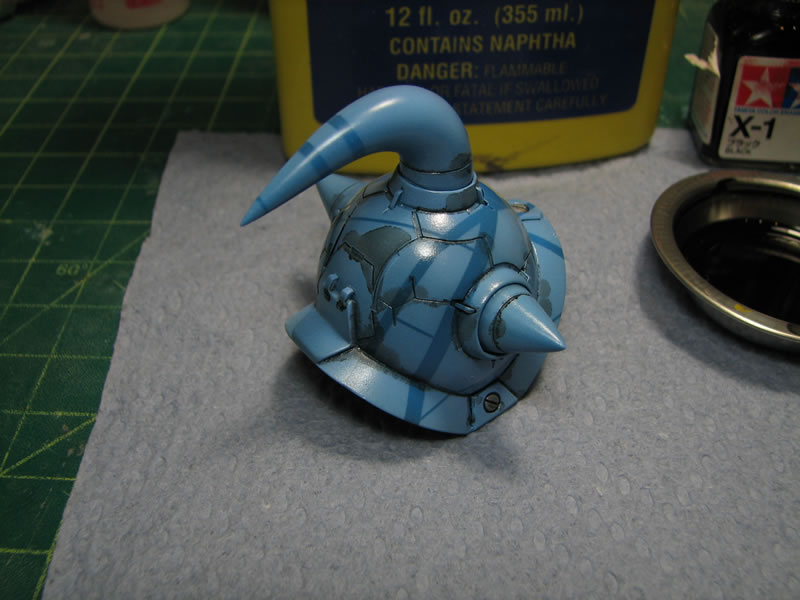
The head piece painted and complete with tubes and lighting system.
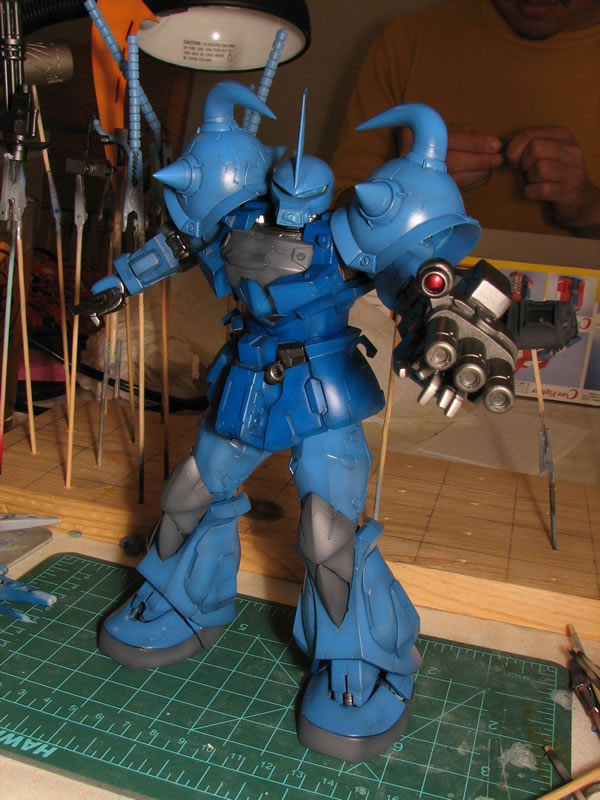
And now I present Mr Burberry Gouf Custom... This is where the process completely slows down as time is needed for curing and each, very minimal chances will be seen. The parts will be taken down to sub assemblies and clear gloss coated, decaled, clear gloss coated, panel lined, and then a final clear flat coat will be sprayed. The minimum amount of time for this whole process will be a full week - and that is if I have the time to work on the kit during the week.
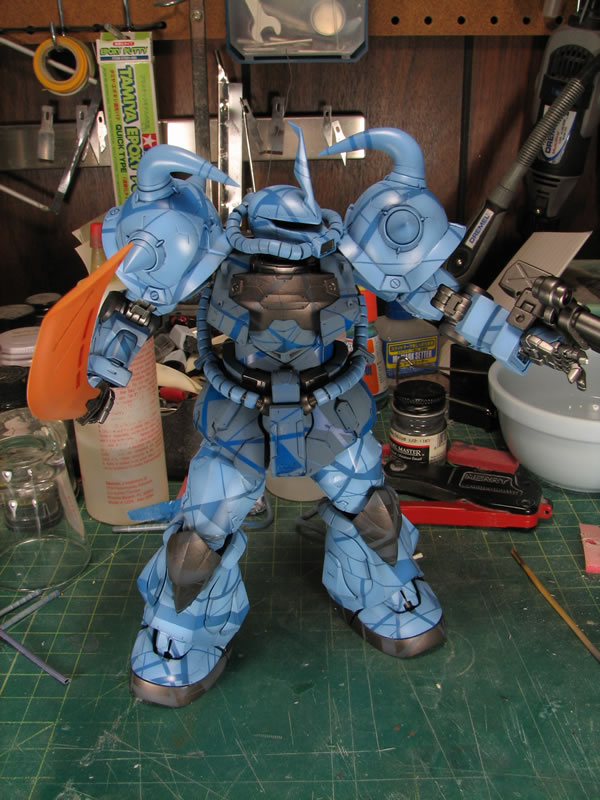
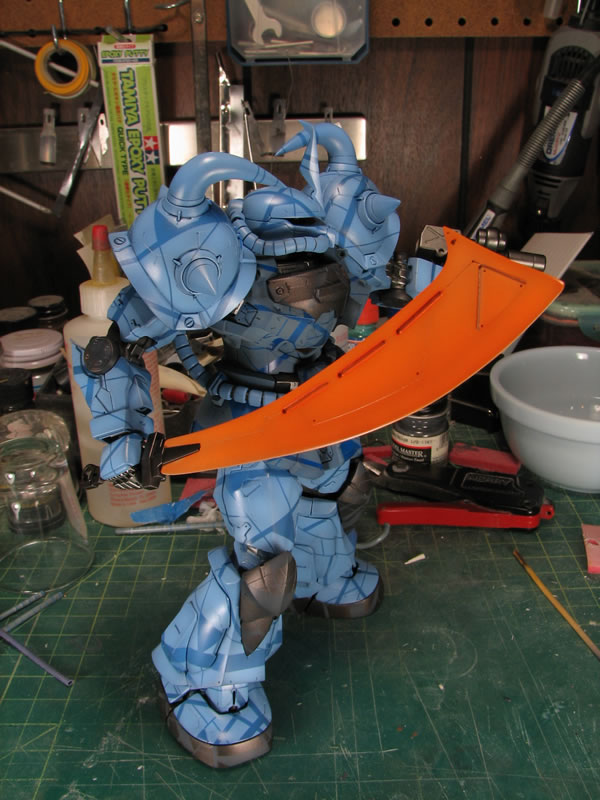
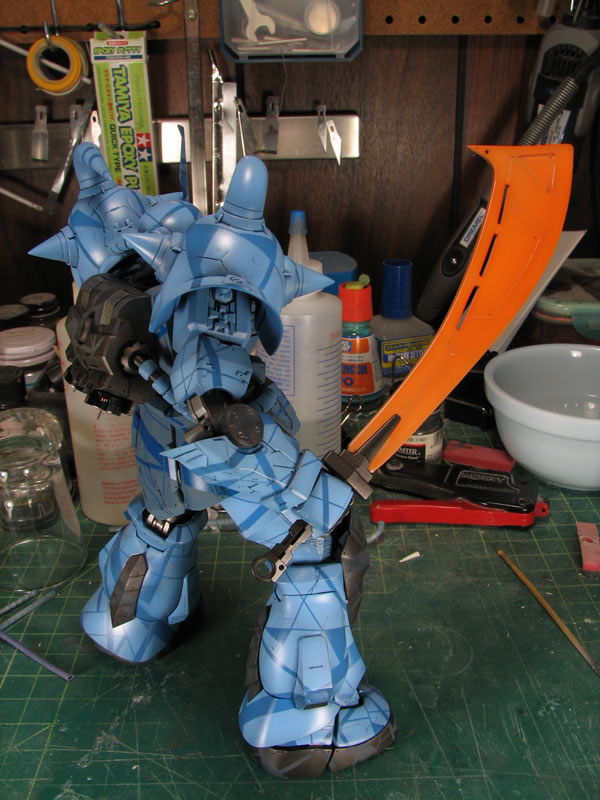


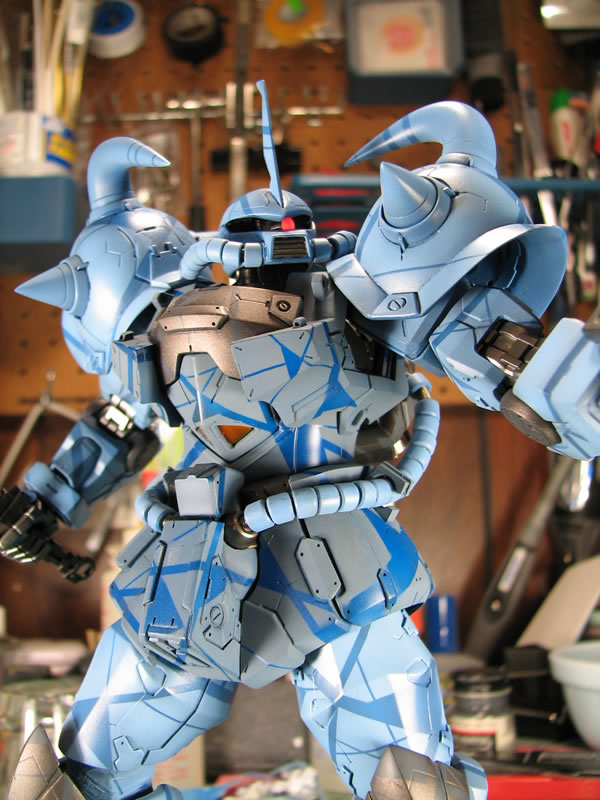
I'm afraid to put the guy in it's final pose, but once I get everything done, it will be close to this pose. I still need to finish work on the shield, which has only see the first layers of paint and will be requiring several layers of masking and painting.
August 12, 2010: As stated earlier, when it gets down to the final stretch of things, the build progress slows down to a snails pace as much of the work is visibly insignificant and quickly done, as well as the needed time for things to cure between each of the last few steps of the build.
Being so consumed with the main body, I had neglected the shield, so returning to paint the shield, since I had glued and put the shield together, I needed to pain from the inner layers, outward, masking at each paint level. Starting off with the bluish gray which is a humbrol enamel paint colored azure blue over a dark base. This was then masked off after a day of curing and the outer rim of the shield was painted according to the color scheme for the main armor pieces. After another day of curing, the outer rim was masked off to paint the metallic frame that is the gatling weapon attachment.

And with the metallics painted on the shield, all the masking layers can come off and here's what the shield looks like. And after looking at the below pictures, there is a little bit of an issue with the center opening of the upper shield, some paint was sanded off to smooth out some rough edges. After the below pictures were taken, this area was touched up with a little bit of paint.
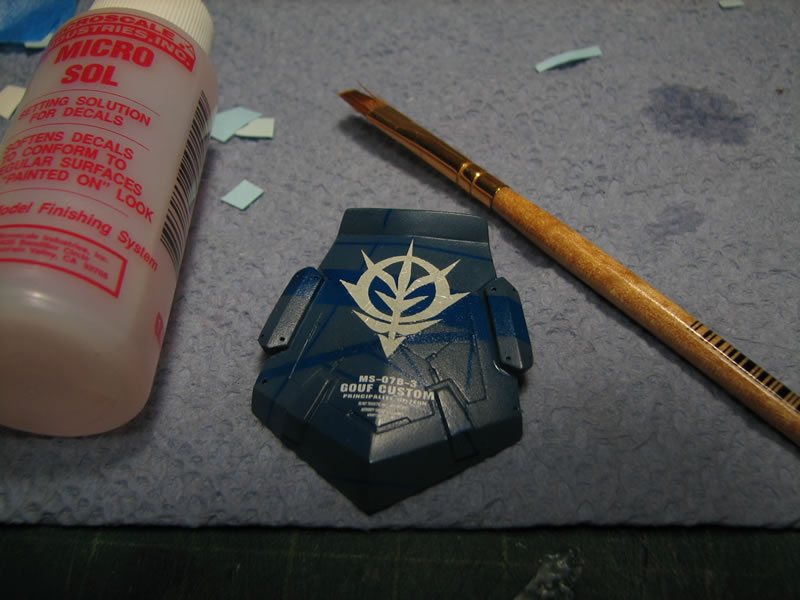
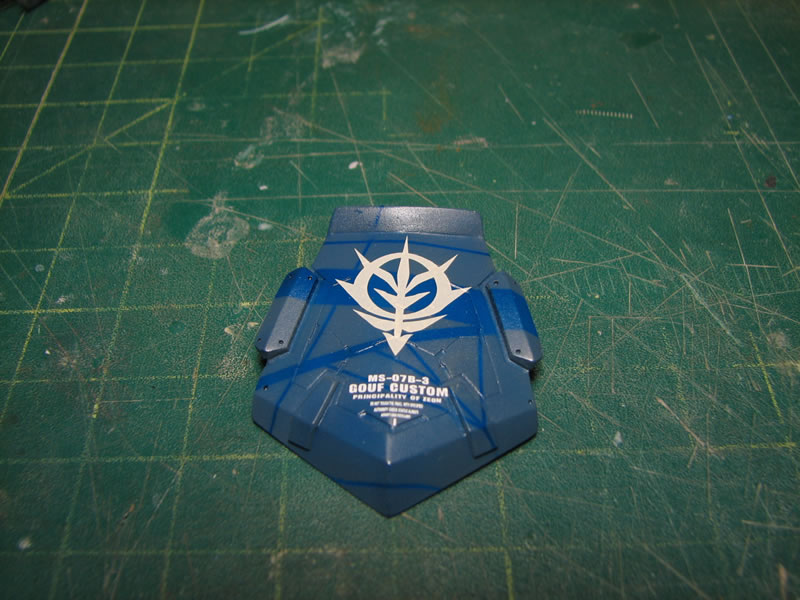
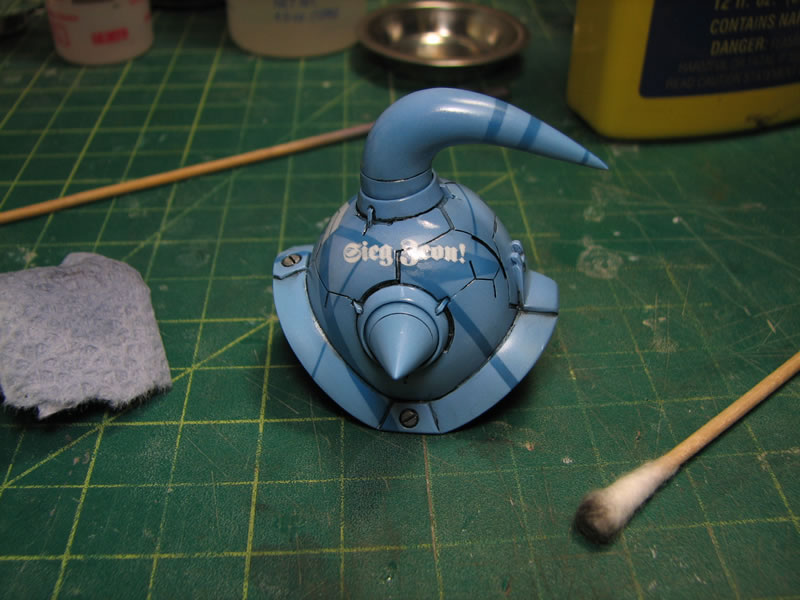
I spent the previous night decaling the kit. I didn't put many decals, but just hit up the usual spots with warning labels and insignias. In the pictured example, after applying the mark softening agent, you can see the decal wrinking up all over the place. This is normal. NEVER attempt to straighten this out as you will only end up ruining the decal - tearing it, misaligning it, etc. Just leave it alone. Walk away from it. Now a full day later, or when ever all the decal softening solution has evaporated away, you can see that the decal is nice and flat, no wrinkles. Again it is important to just carefully apply the decal softening agent by just placing a drop of the stuff onto the decal as it is placed on the kit then walk away. The solution will work it's magic and even if it wrinkles in the process, the final decal will be nice and flat. Here's proof.
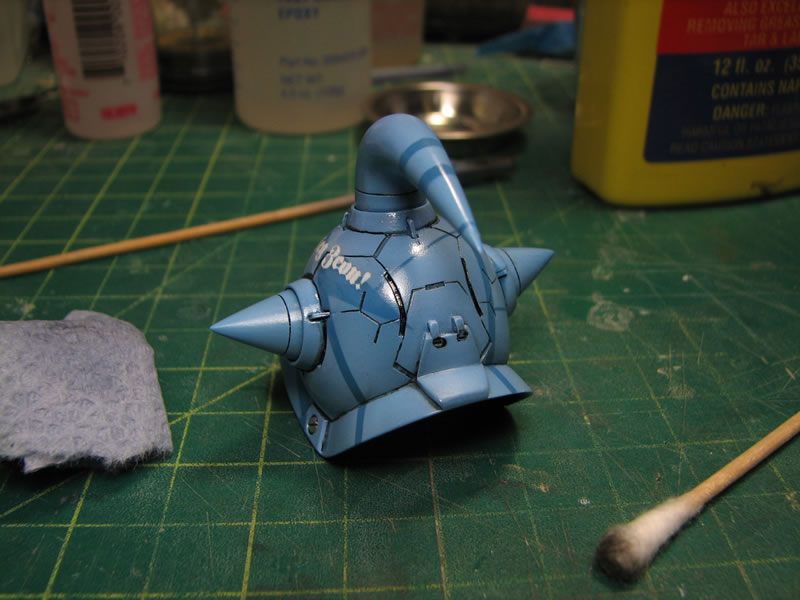
All thep parts decaled and ready for another shot of clear gloss to sandwich the decals between two layers of clear, futher removing any trace of decal lines as well as protecting and preparing the surface for the next phase; the panel line wash.
Another thing done before the next clear gloss is sprayed is to paint the small details. I used an enamel metallic and a fine brush to apply the detail accents to the various areas on the kit. This needs to fully dry/cure before I move on to spraying the clear gloss. At this rate, it should be at least another several days to a week before the kit is finished. If there is another update, it will detail the panel lining, then baring anything catastrophic, the kit should be done sometime next week.
August 14, 2010: Down to the final stretch. Panel lines are applied to the surface after the last gloss clear coat has cured. The enamel wash is tamiya black enamel mixed with rosonol lighter fluid to get an ink, then applied to the lines. This is left to sit and dry for several hours.
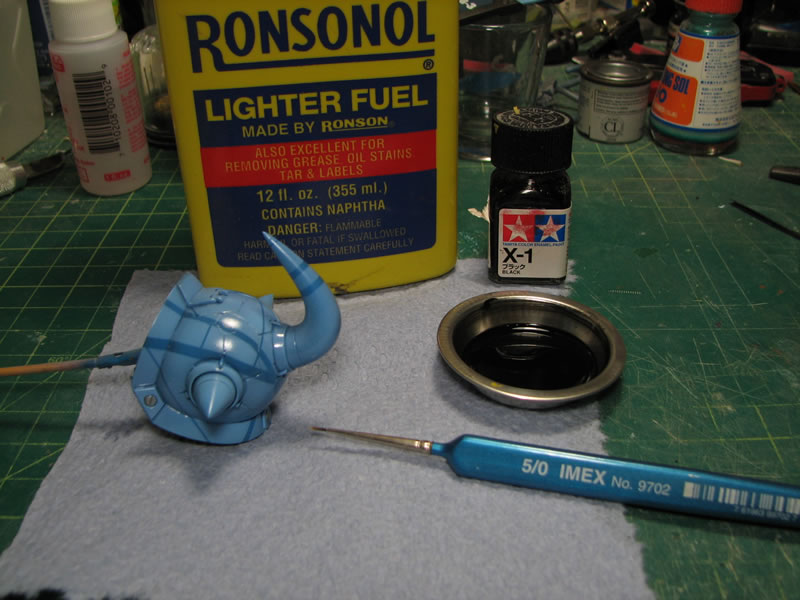
After drying for several hours, q-tips and paper towels moistened with lighter fluid is used to clean up the areas outside the panel lines.
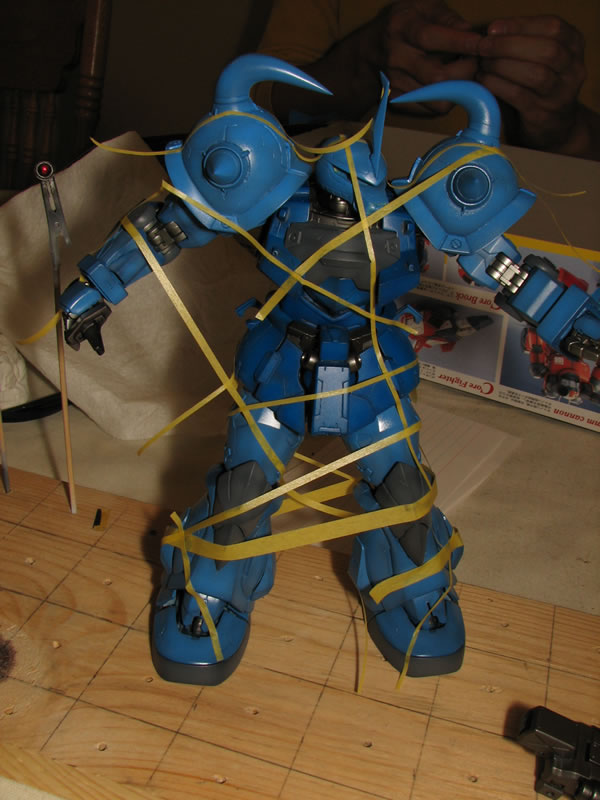
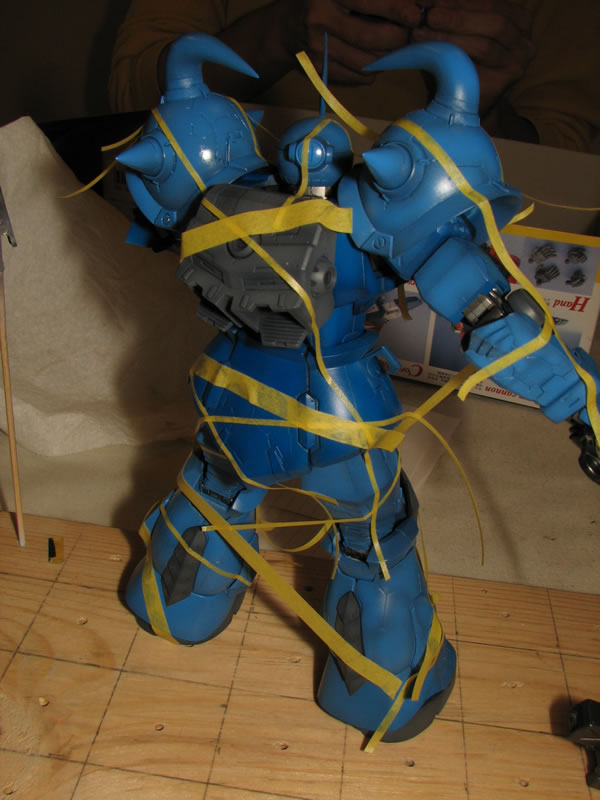
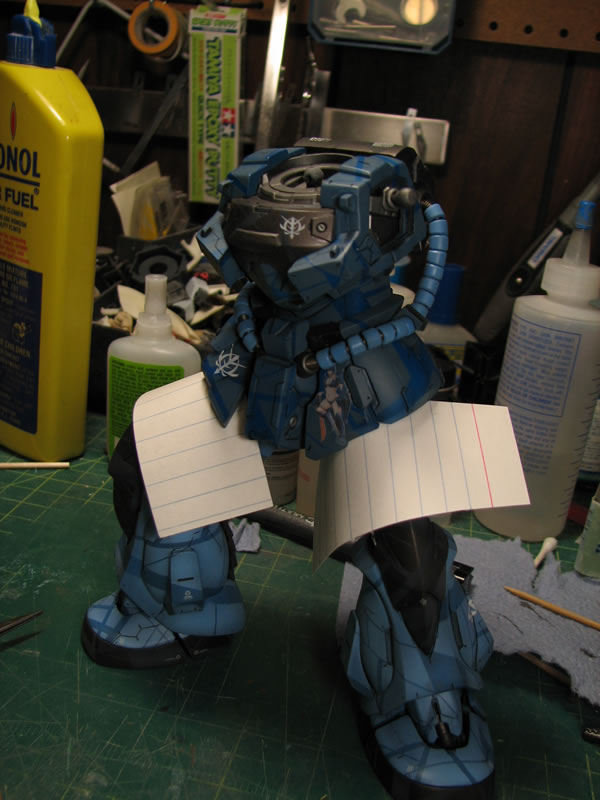
A final flat clear coat is sprayed at the end of the night before I went to bed. The next morning, I get down to the final assembly of the kit. A neat little trick to help with final posing and positioning of the kit is to slide some note card paper between areas of the kit that may rub together while you fiddle with the final pose and position. This thwarts the inevatible paint scratching scenario that happens when we get down to this point in the build. Once the pose and position is set, simply remove the note cards.
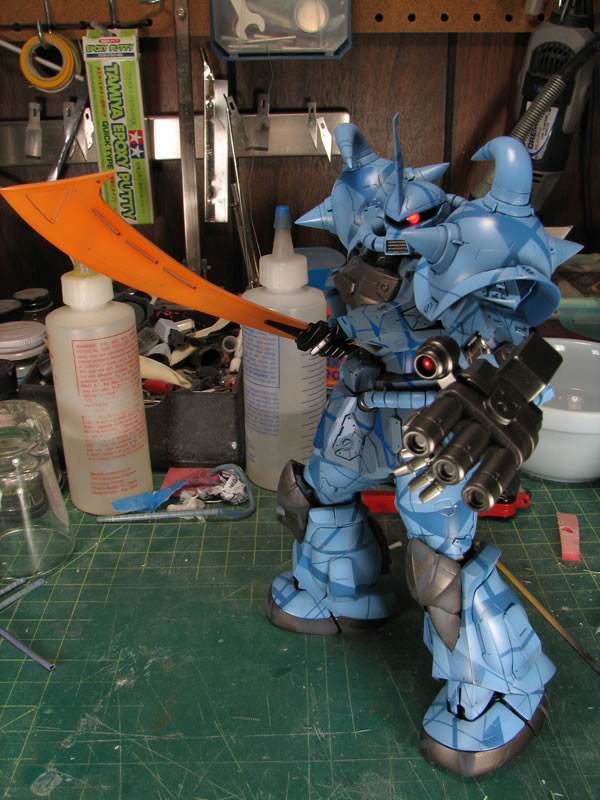
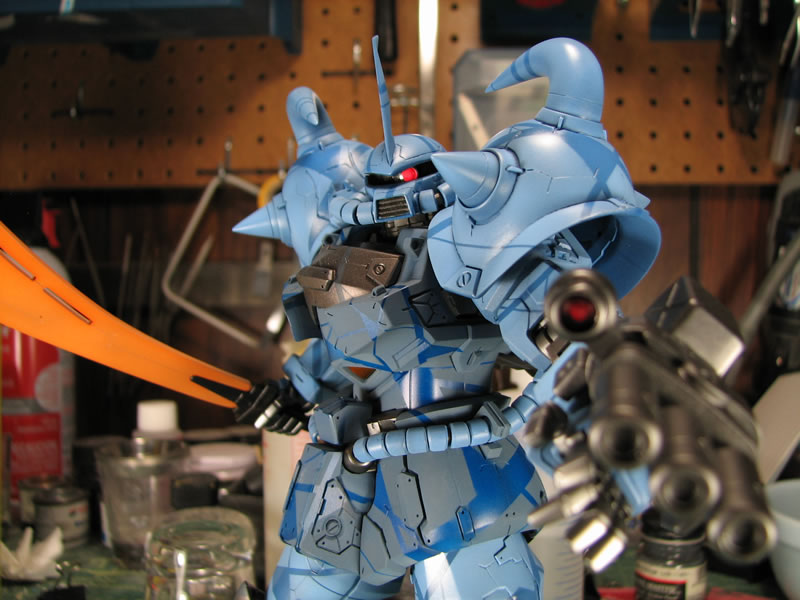
"Gator needs his gat!". Gatling shield is done. And with that, the kit's complete. Not too bad a build in span of three weeks. Click here for the completed pictures page.

July 25, 2010: Started work on the Gouf 2.0 conversion kit to Gouf Custom
July 27, 2010: Torso built, arms build, weapons built, initial sanding done.
August 1, 2010: Set up the pose, resin cleaning, priming, and painting.
August 3, 2010: Putty and sanding after the initial priming and adding an LED for the head.
August 4, 2010: Small fixes, priming, base coats, second coats, masking, and third coats.
August 12 2010: Shield work, clear gloss, decals, and detail painting.
August 14 2010: Final update, panel lines, putting it together, and the shield gat
Click here for the completed pictures page.