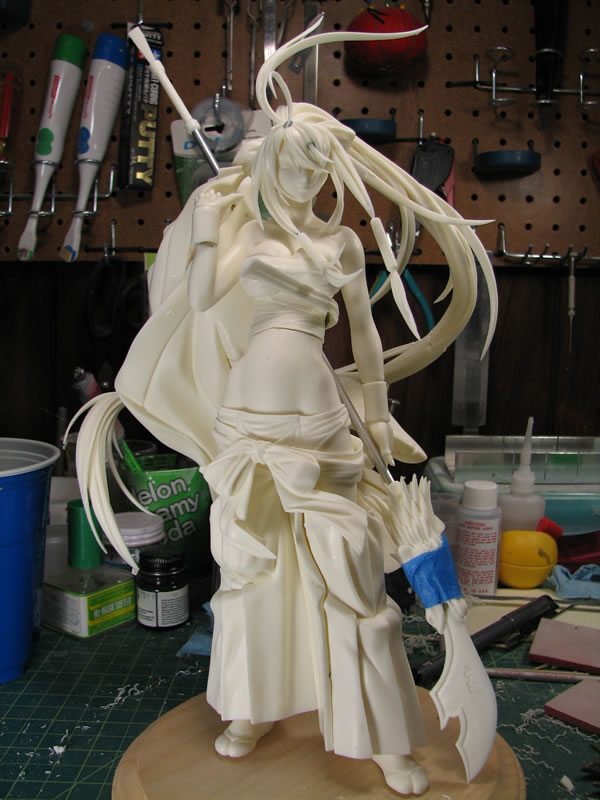
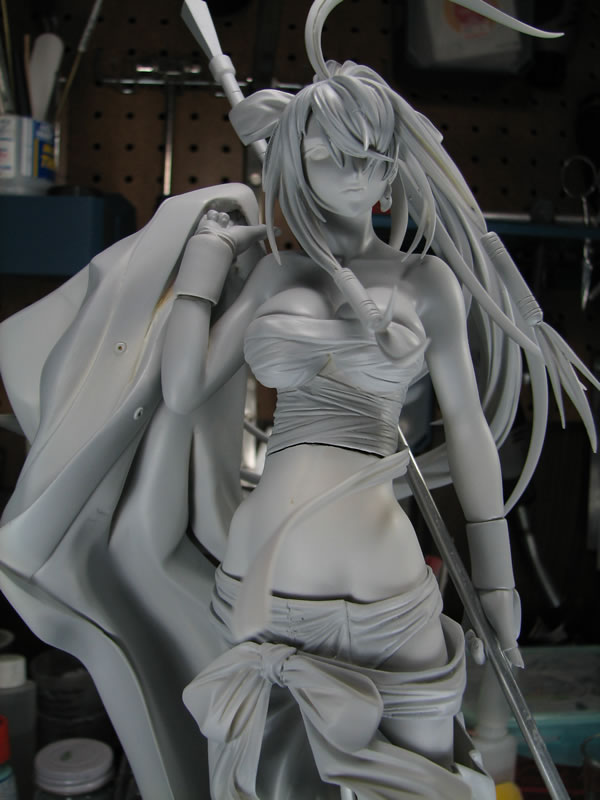
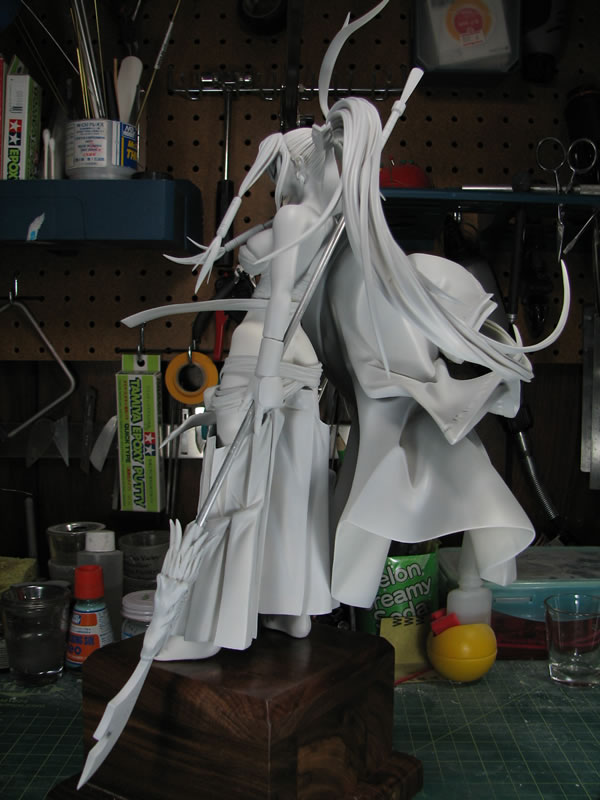
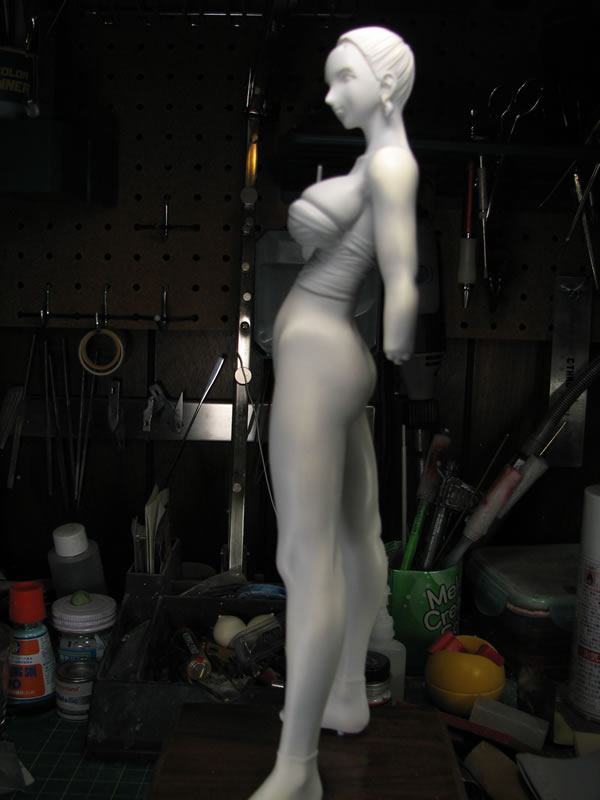
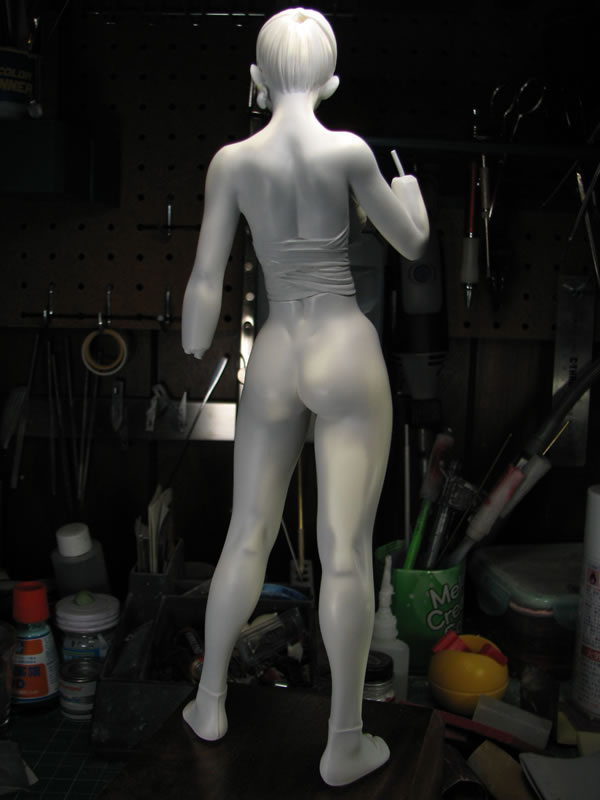
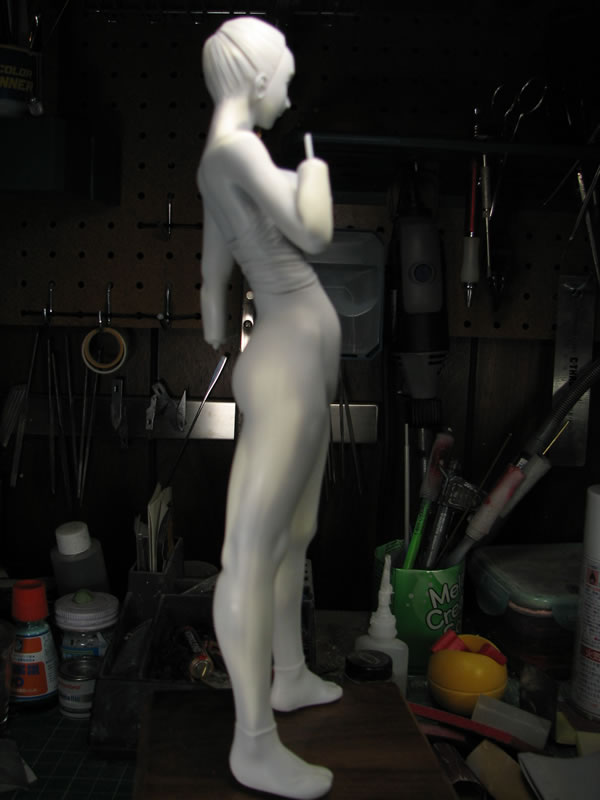
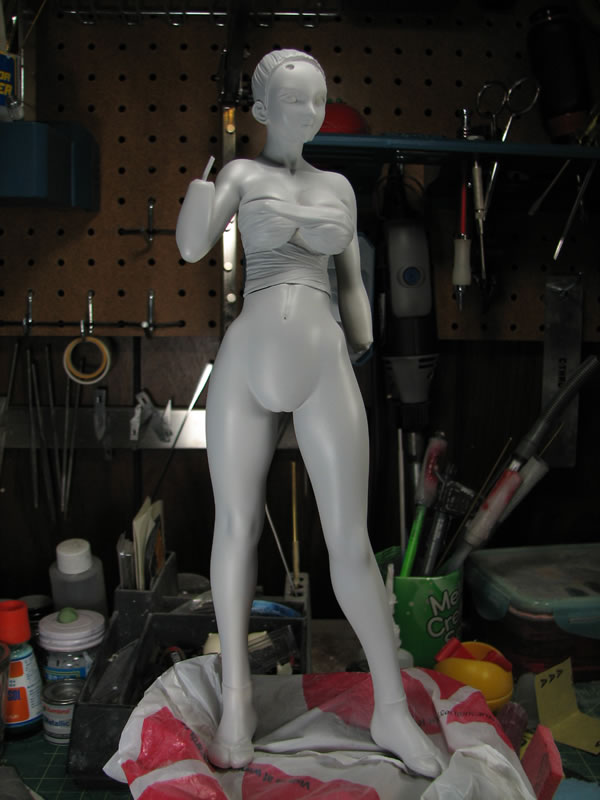
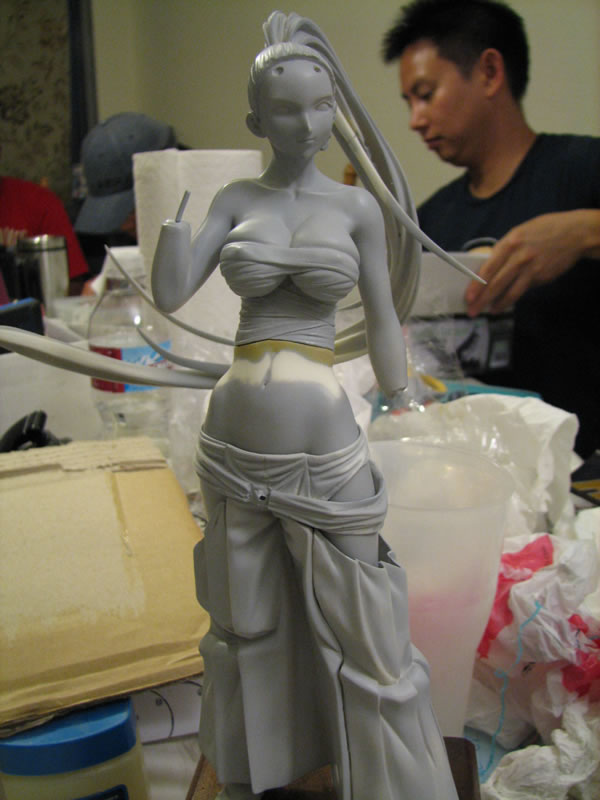
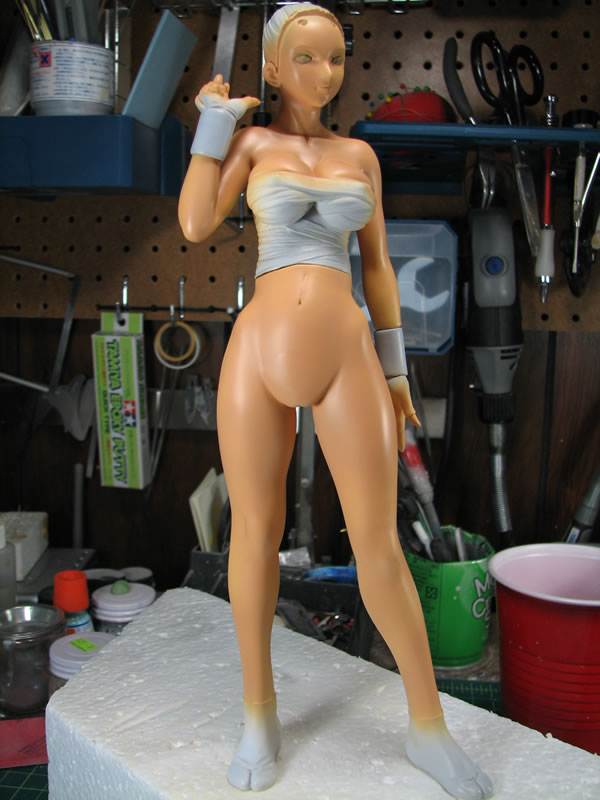
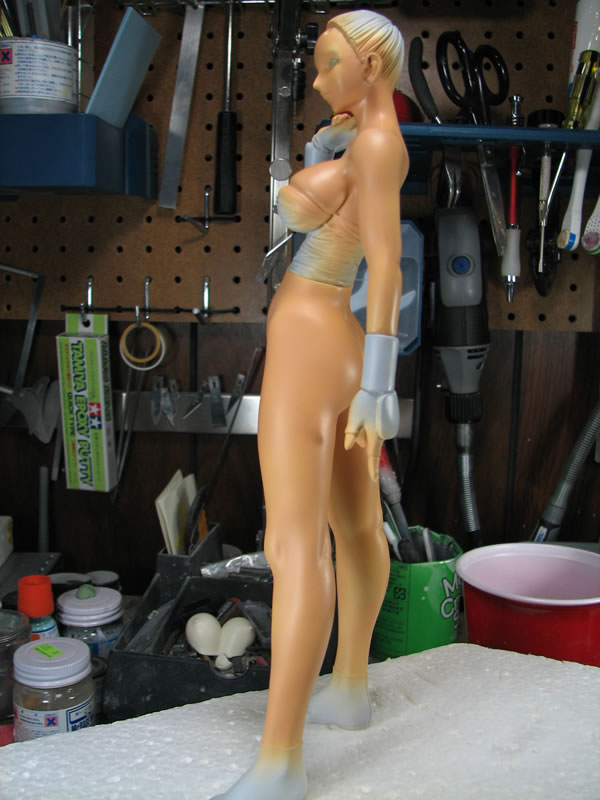
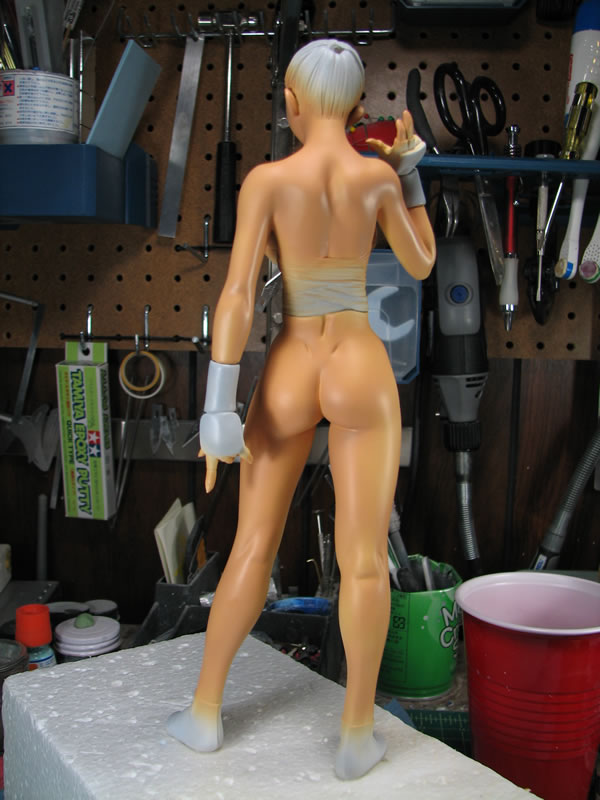
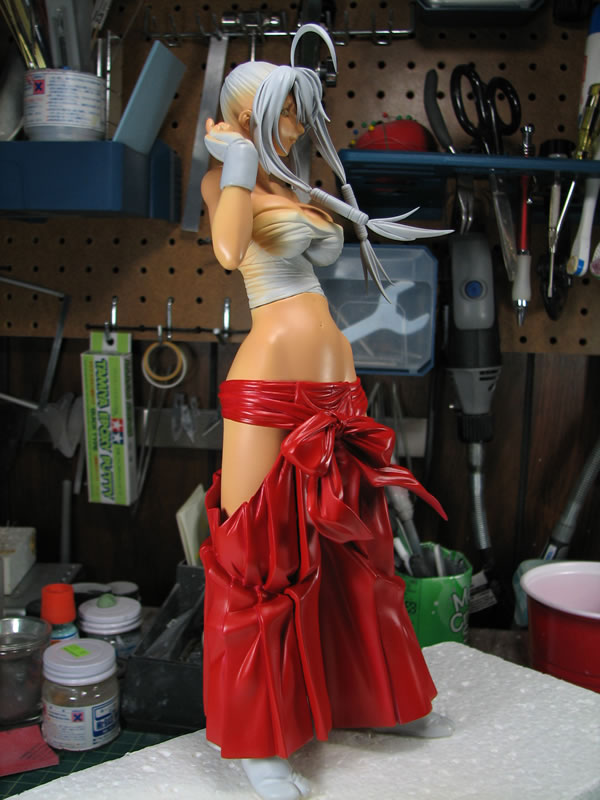
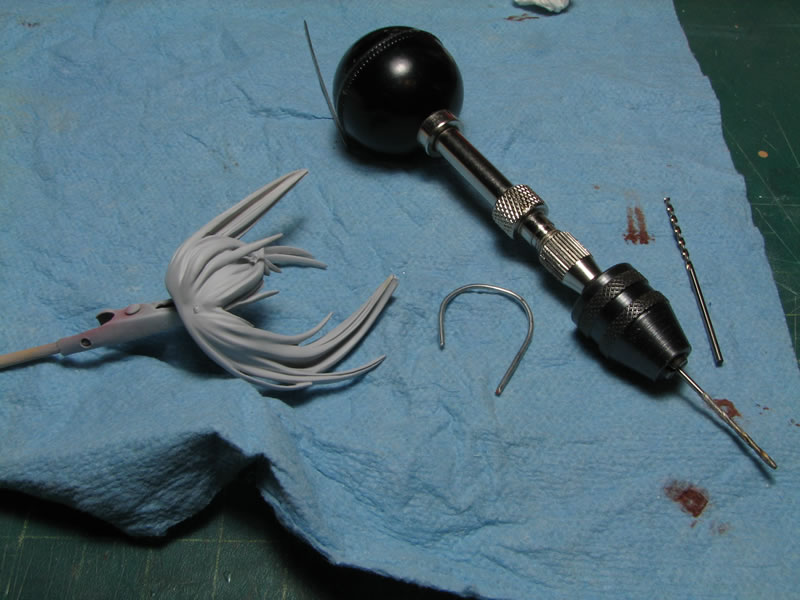
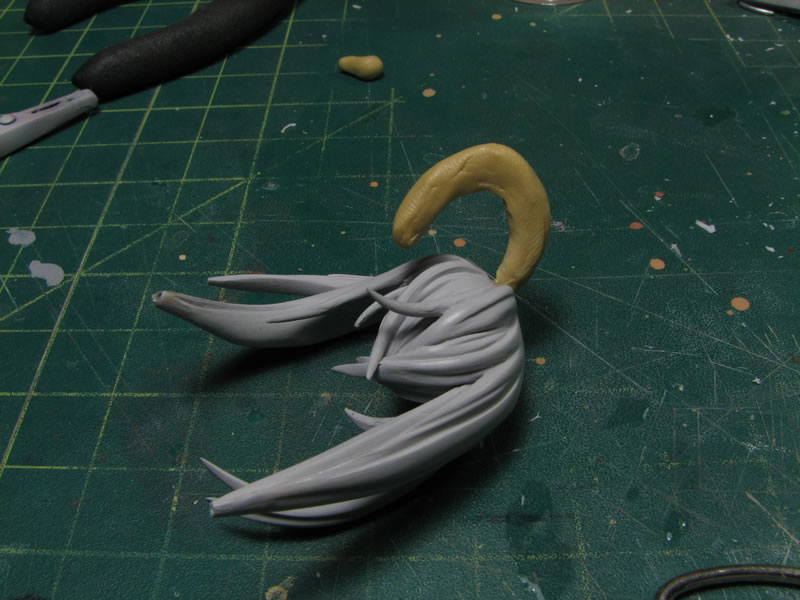
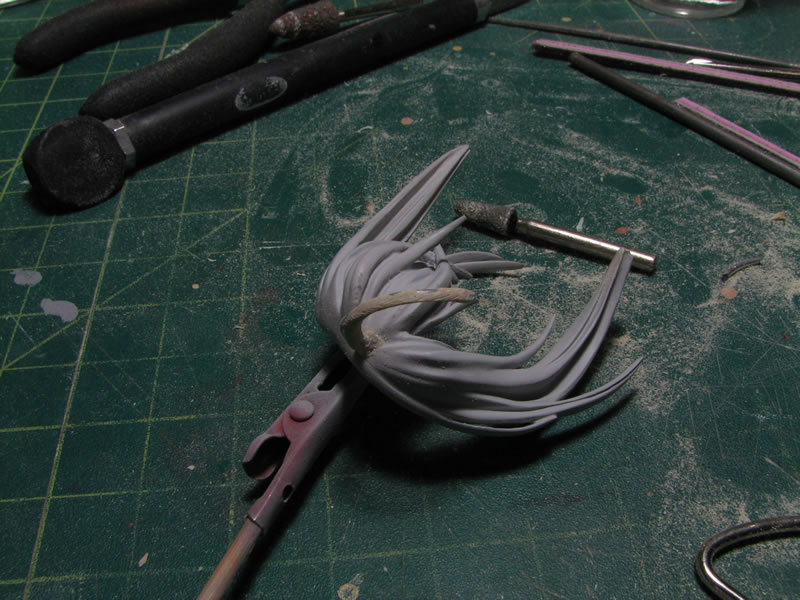
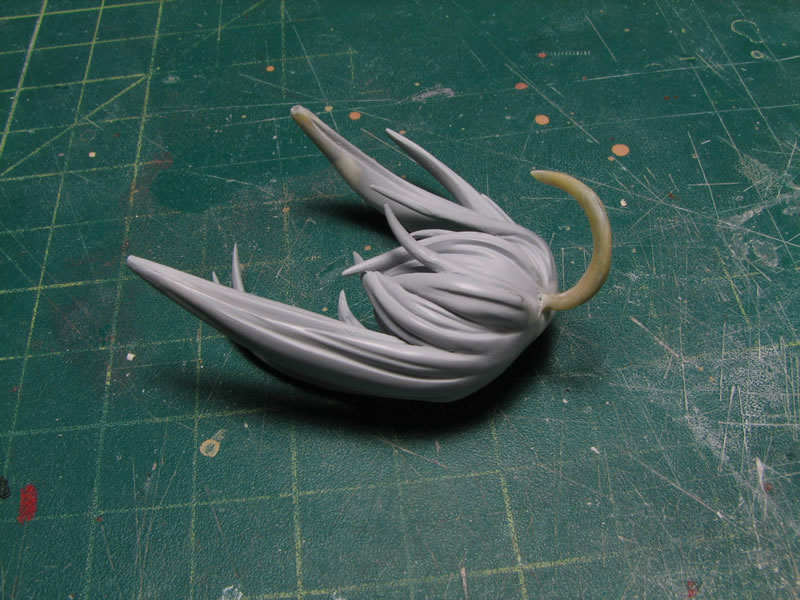
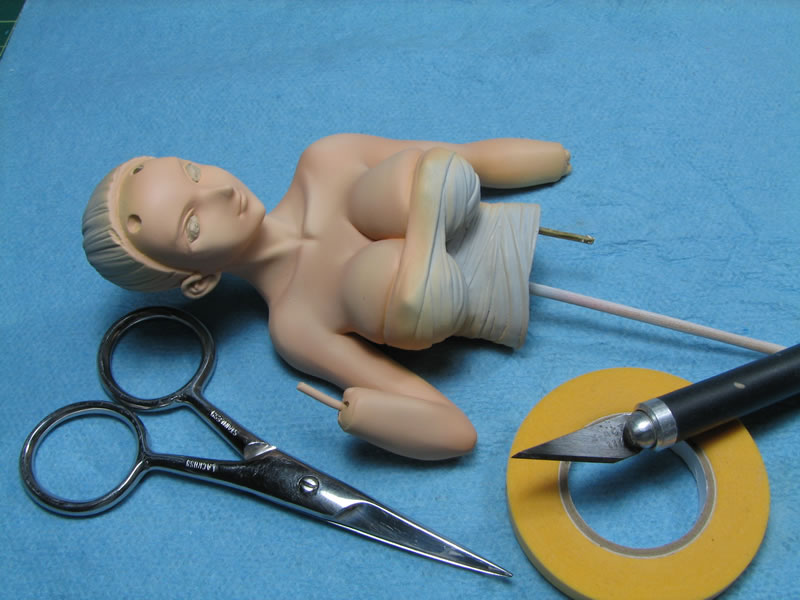
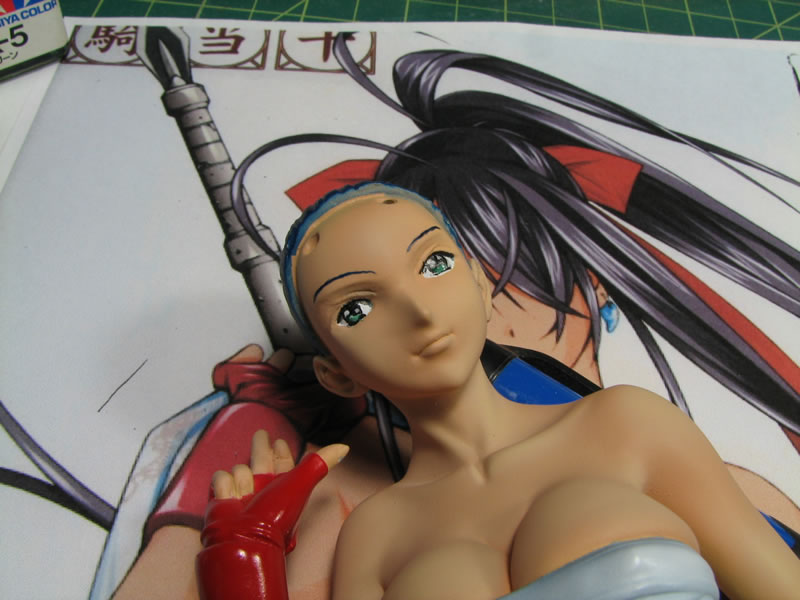
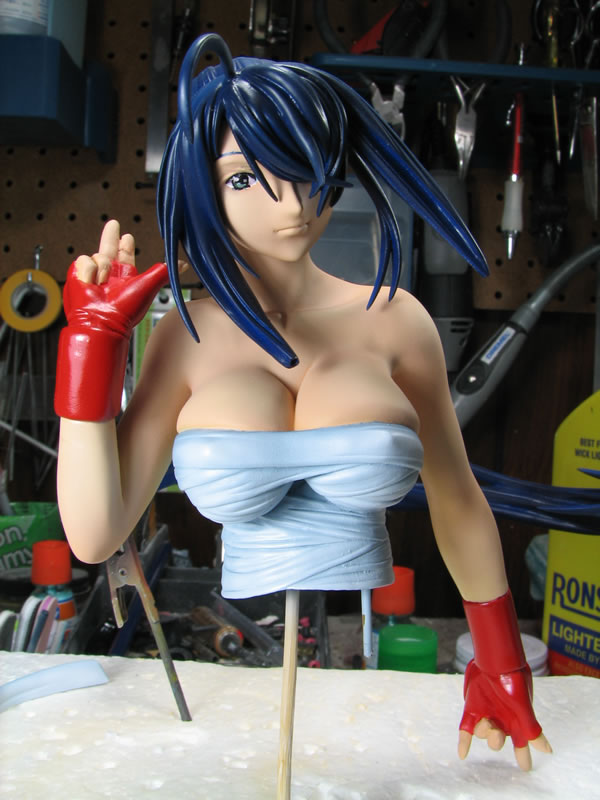
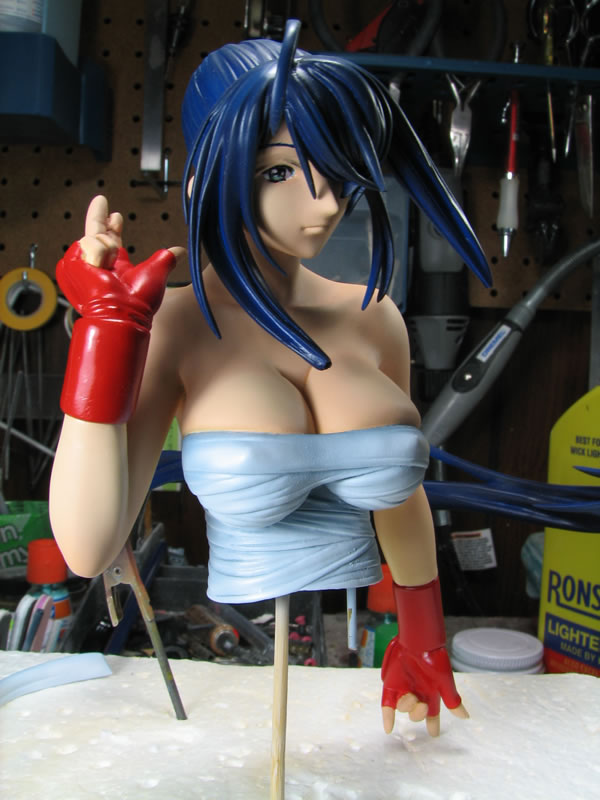
May 17, 2008: This is a 1/6 Kanu Uncho from Ikki Tousen. I picked up a Bome 1/4 scale sculpt earlier this year, but I haven't had time to work on that kit and the 1/6 size should be a much quicker build. I will be focusing on using this project build to update my figure model building tutorials with videos; so hopefully I can finish this kit in the next month and have the tutorial materials ready for Anime Expo 2008.
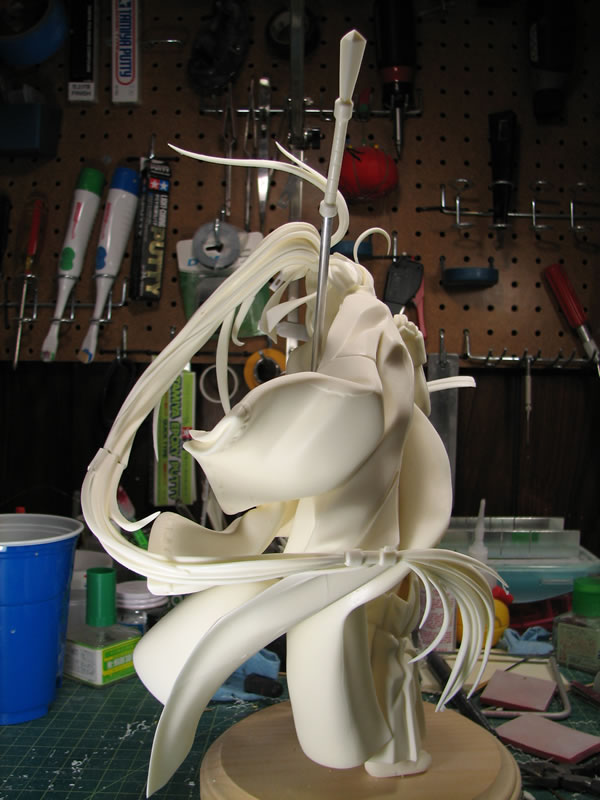
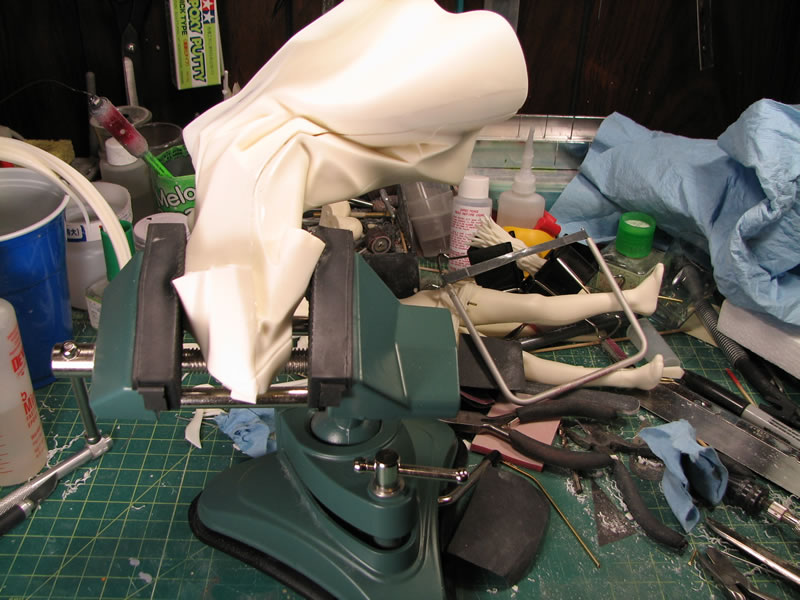
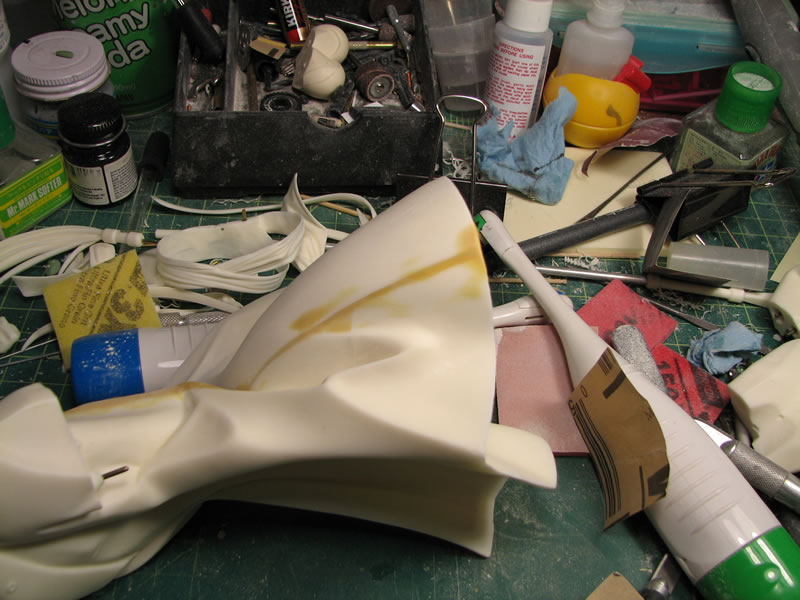
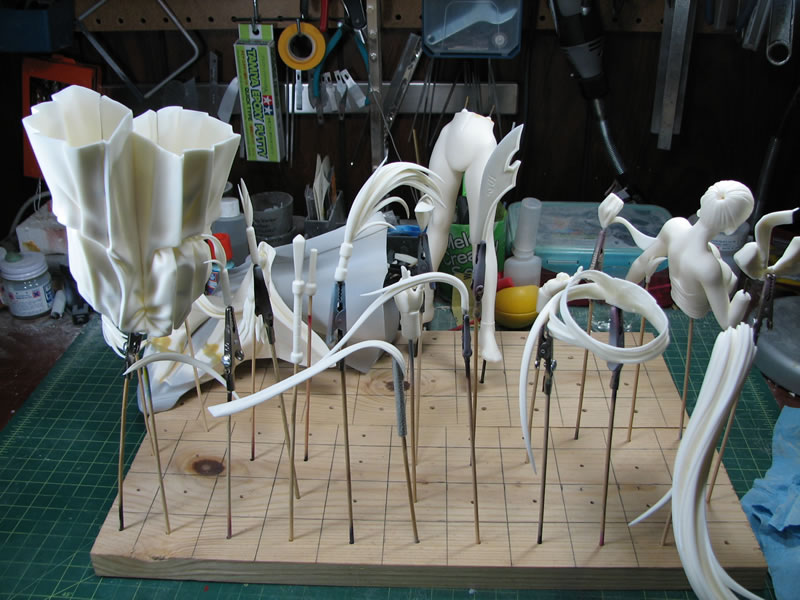
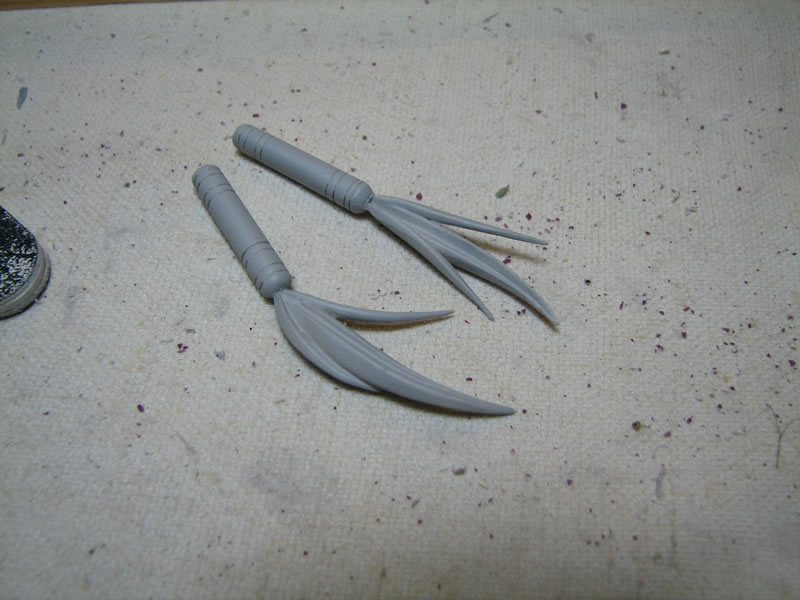
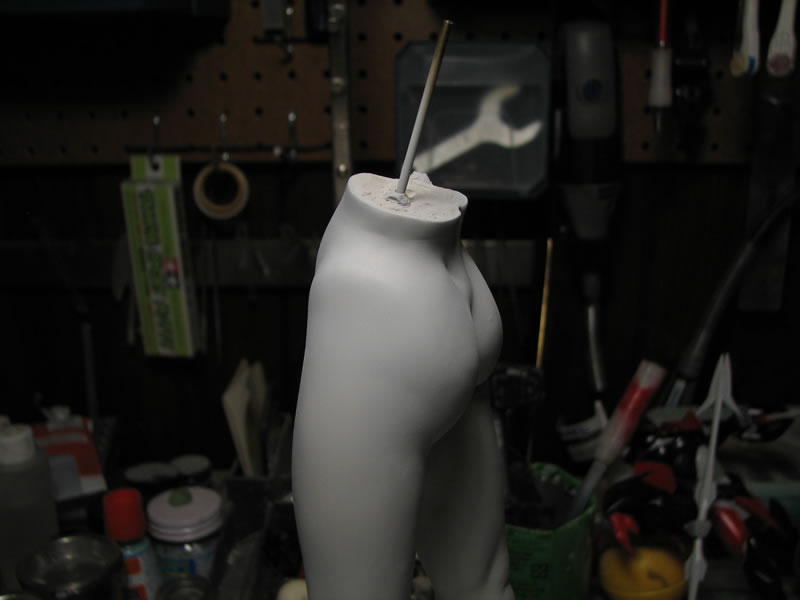
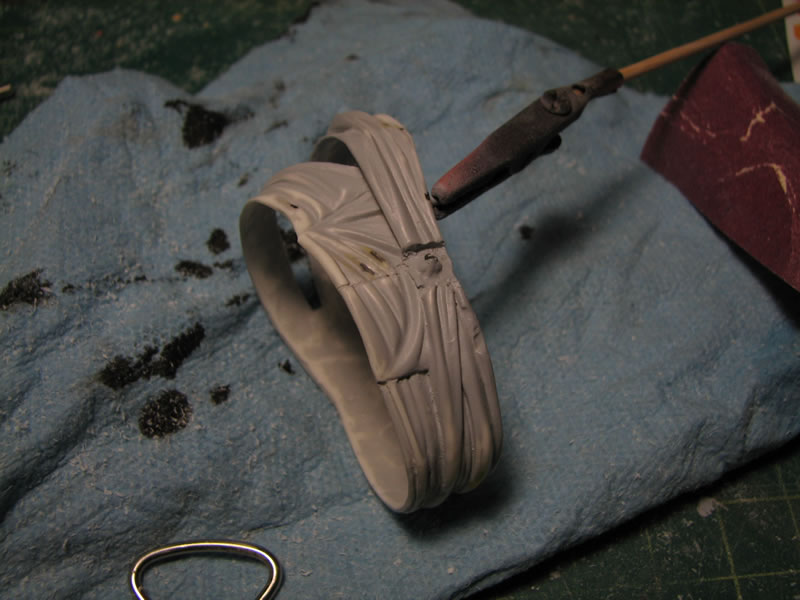
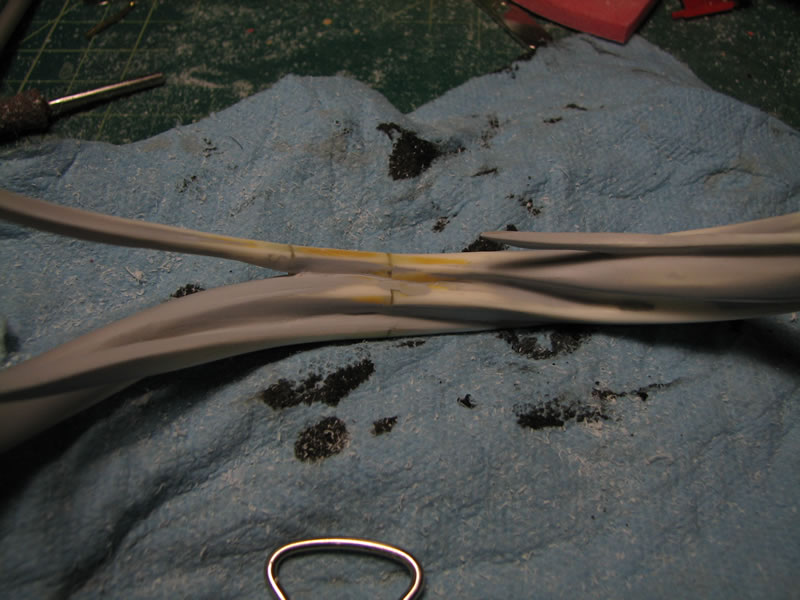
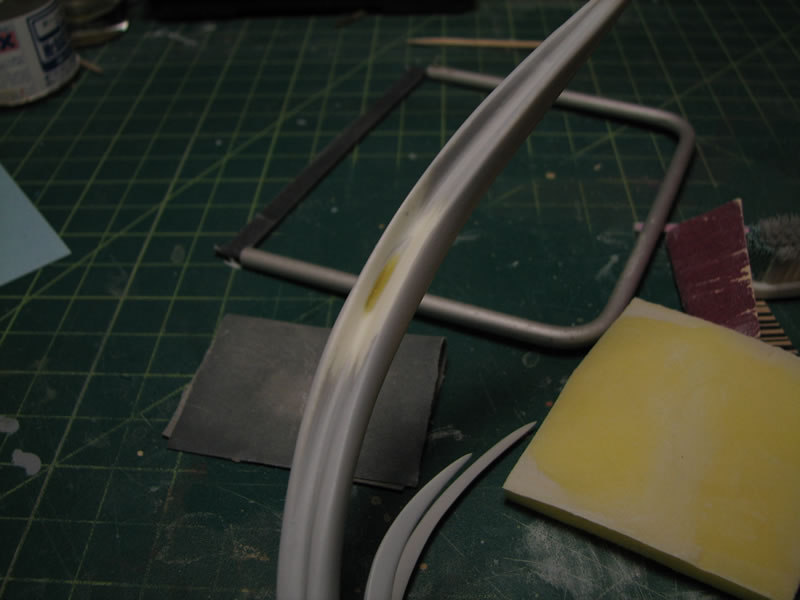
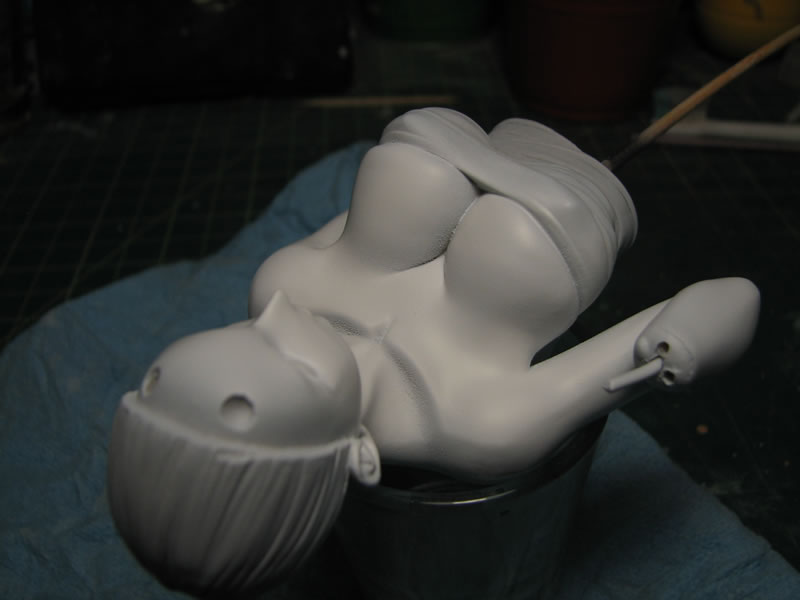
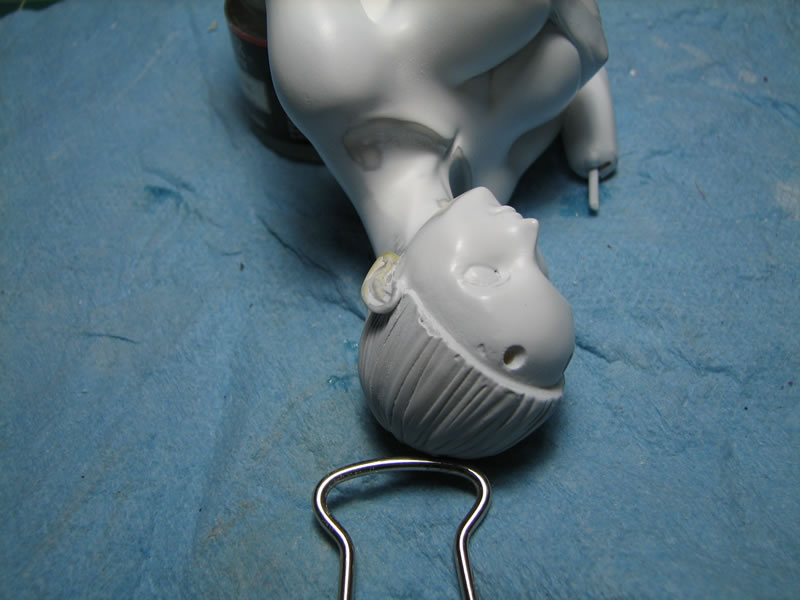
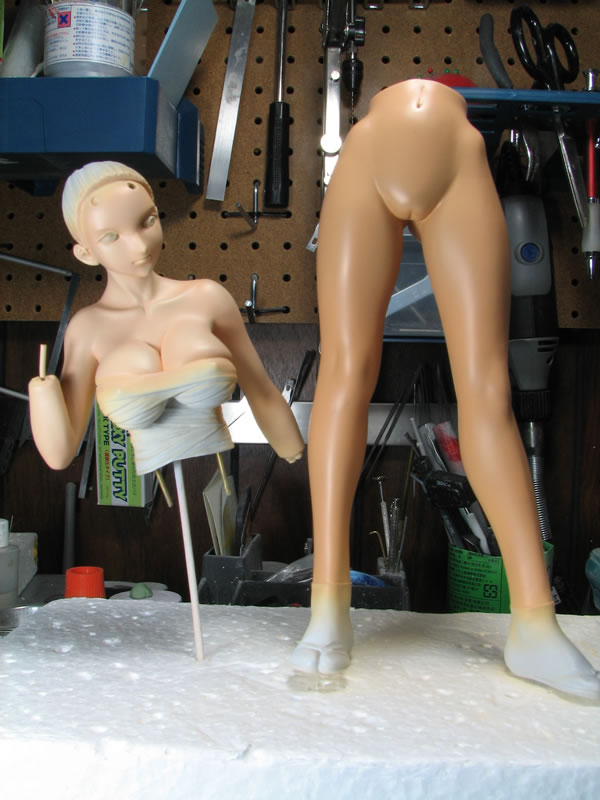
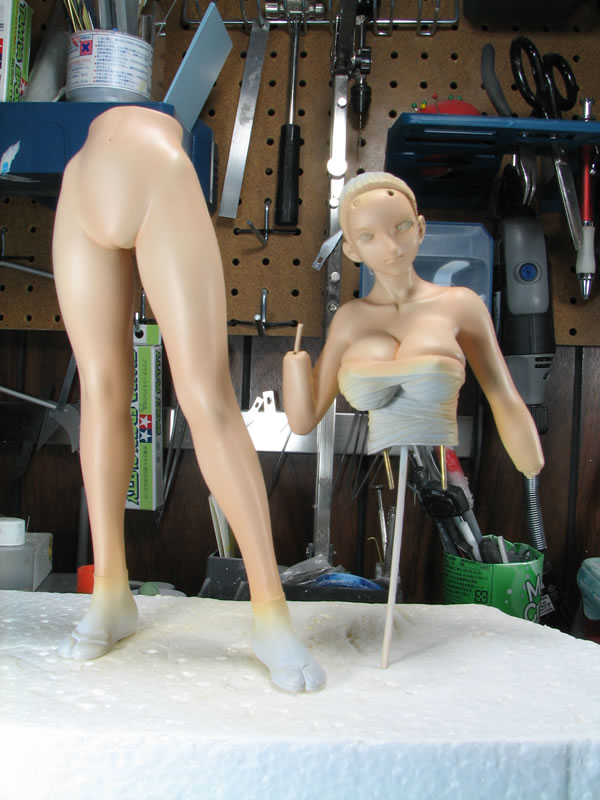
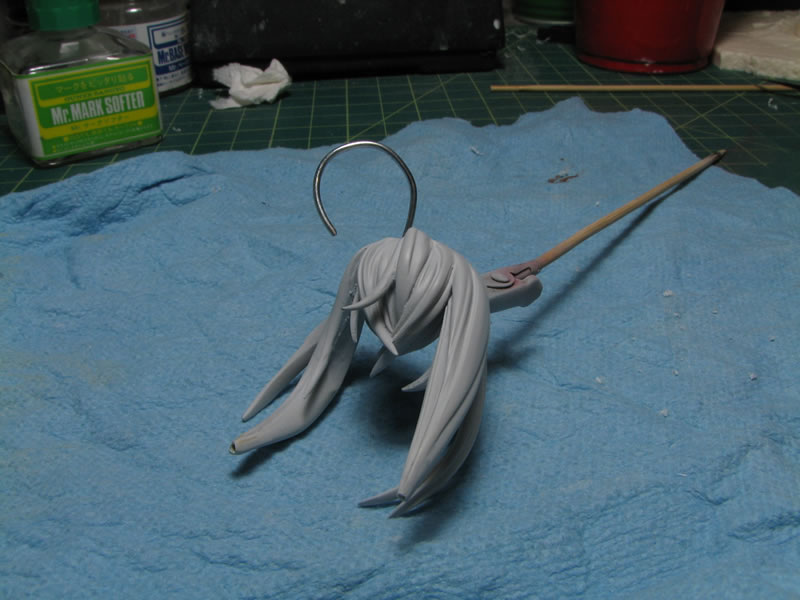
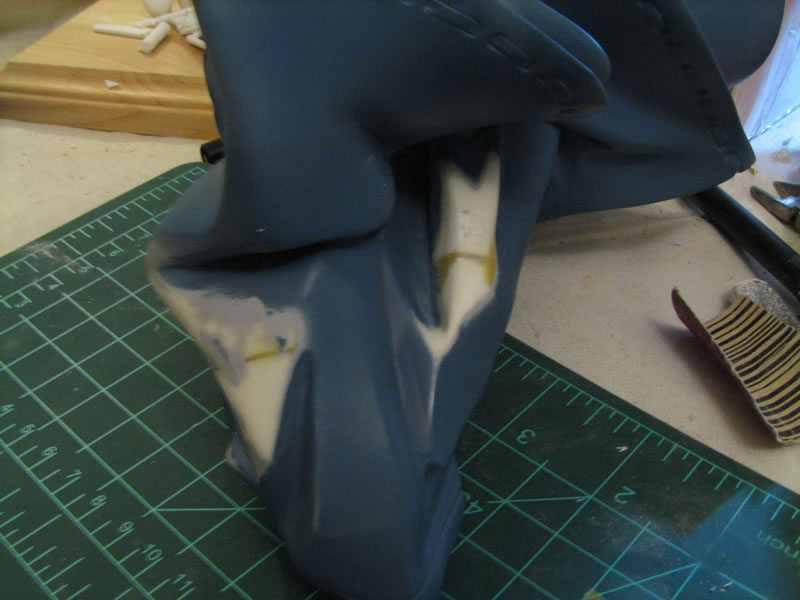
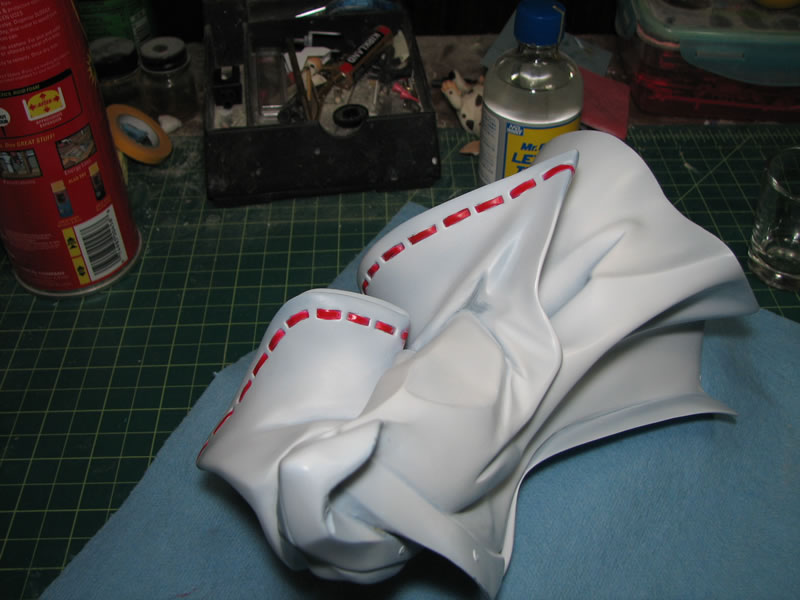
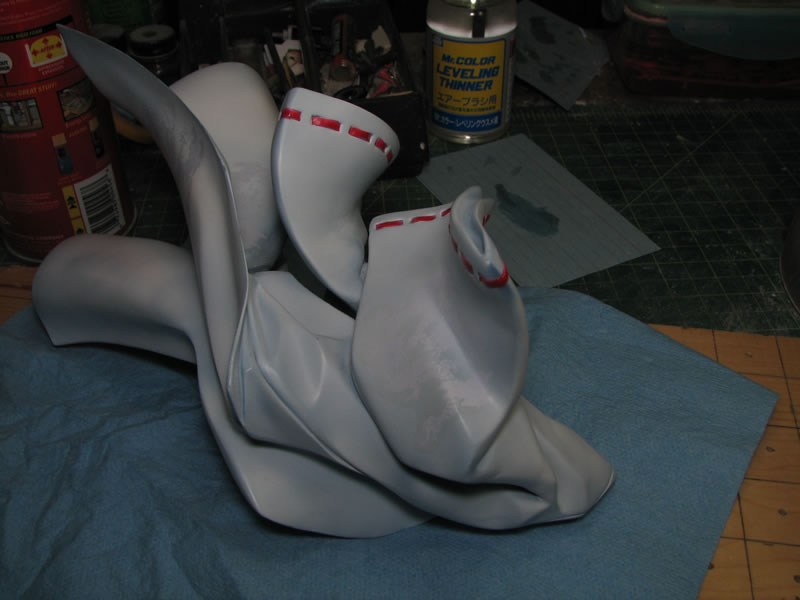
Below is the kit right out of the package bags, the kit comes with a parts listing and a sheet of water slide decals. This is a first for a resin figure kit that I have purchased so far. The next couple of pictures show the flash removal and mold line removal. I took some videos of the process so when I make some updates to my tutorials.
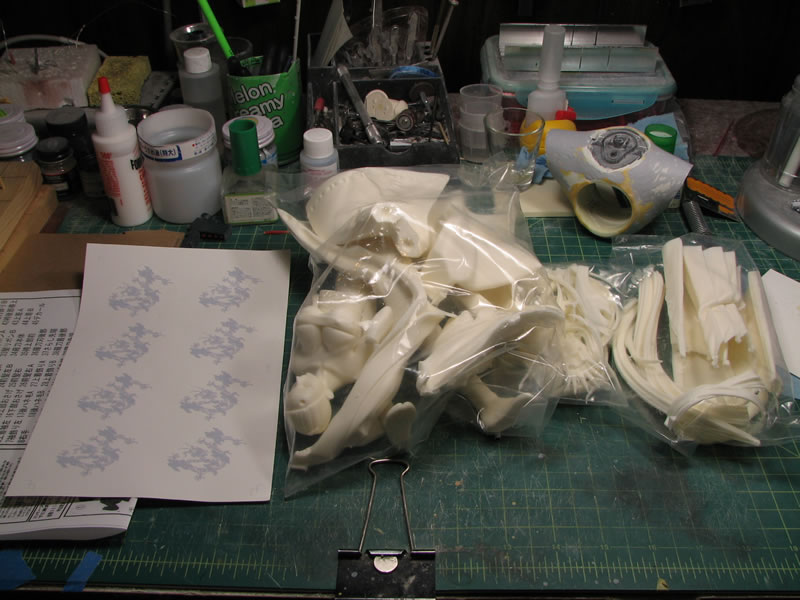
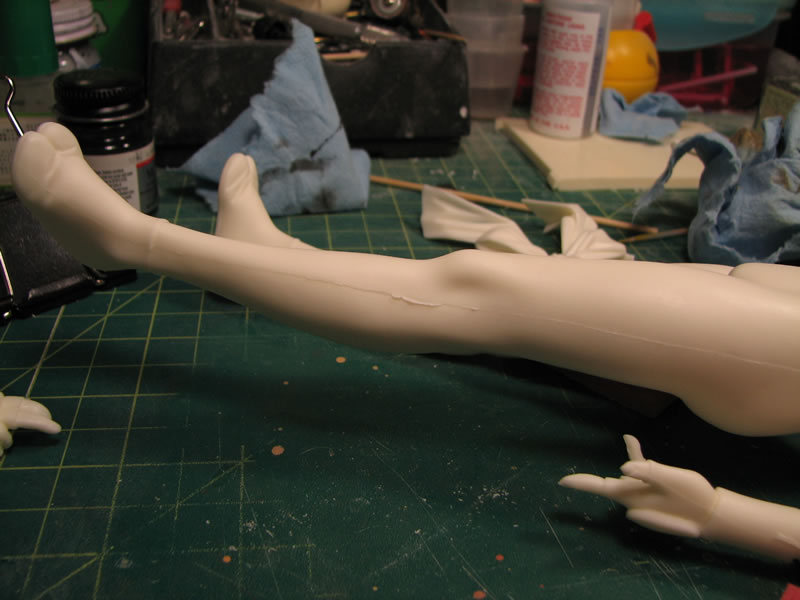
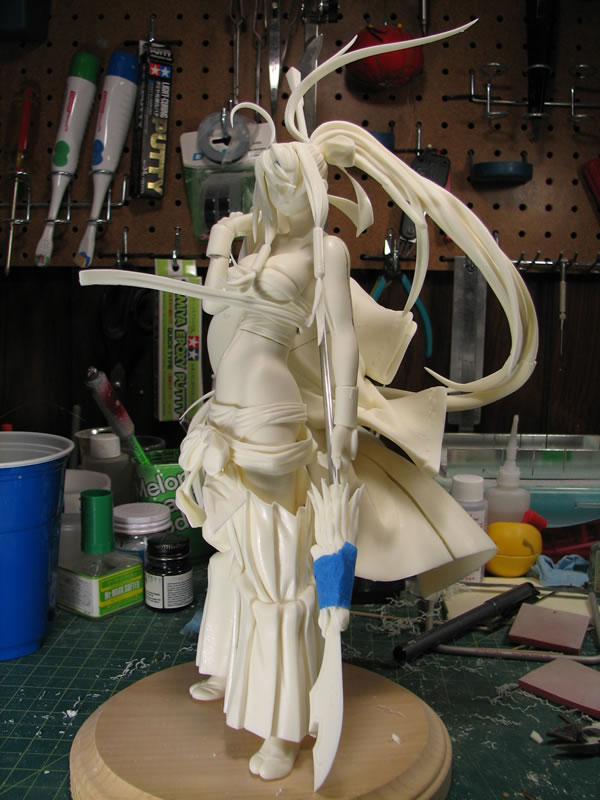
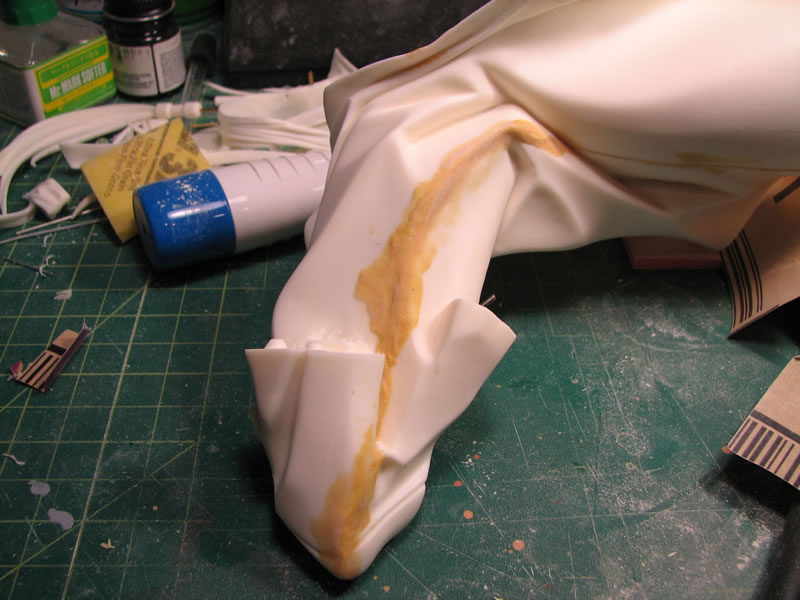
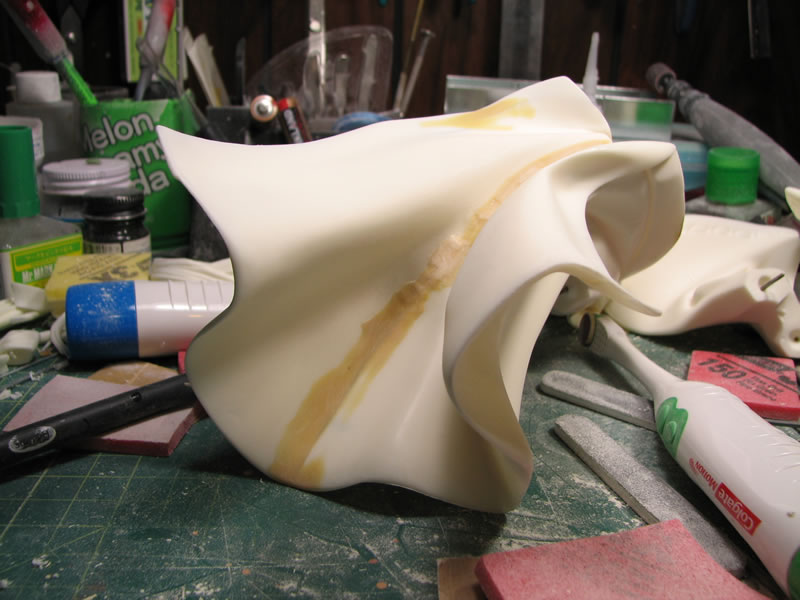
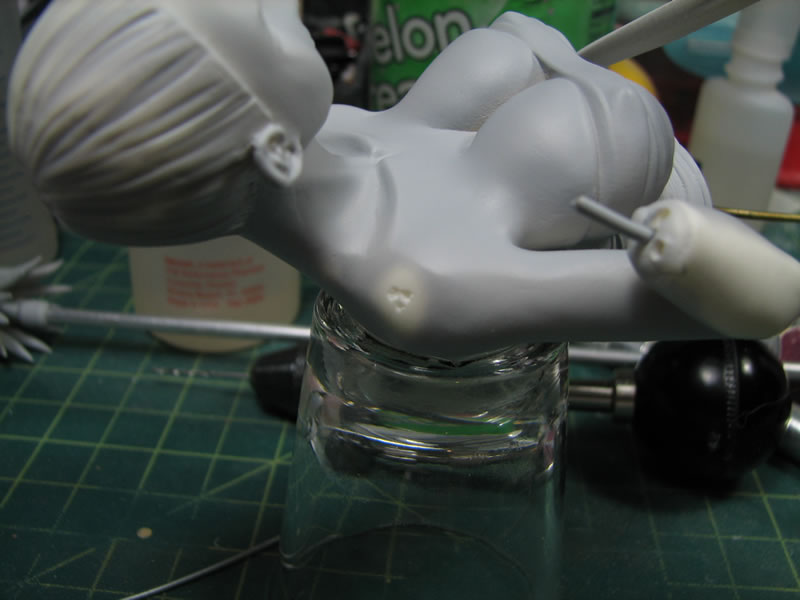
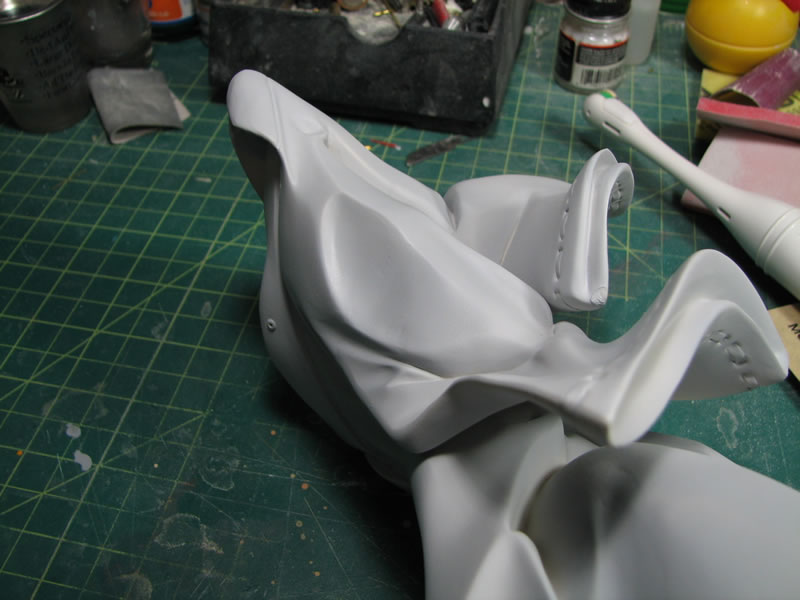
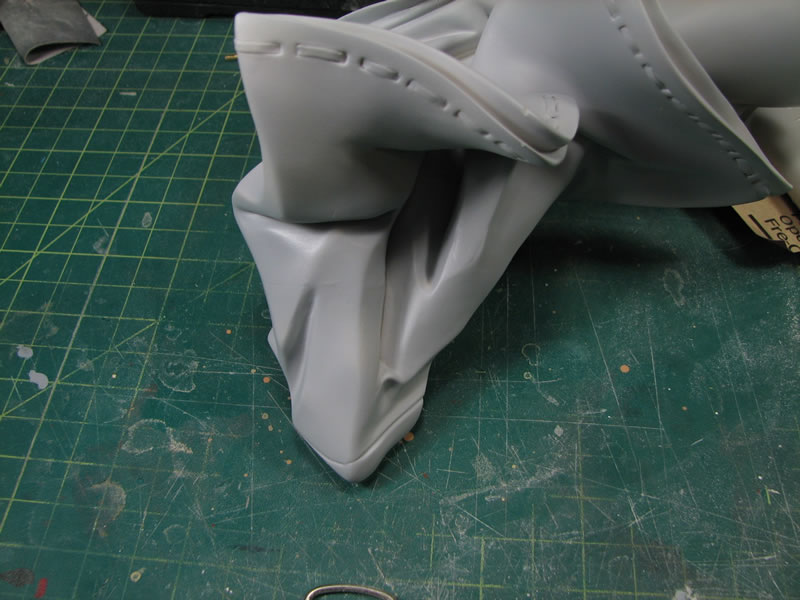
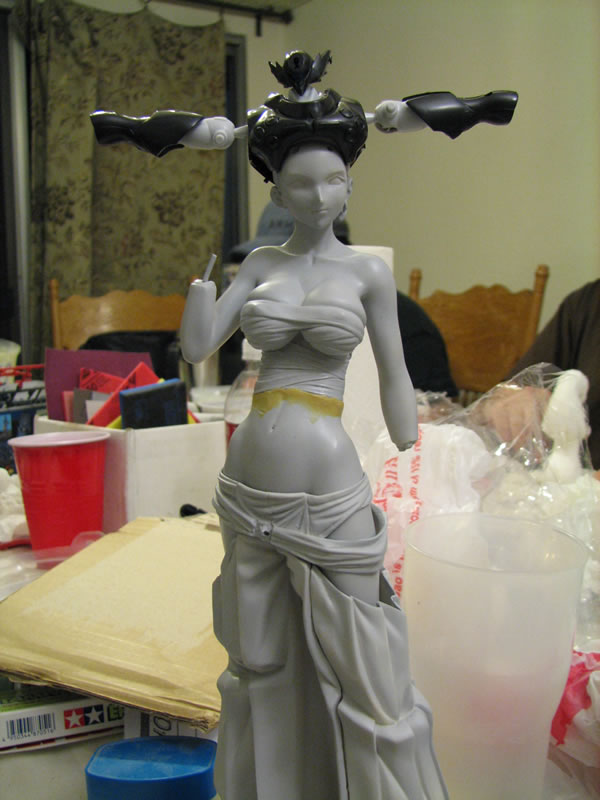
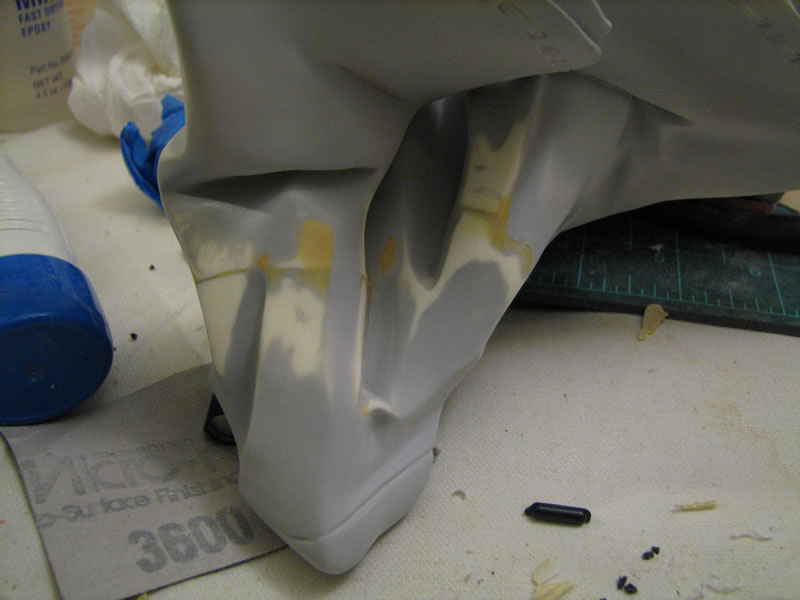
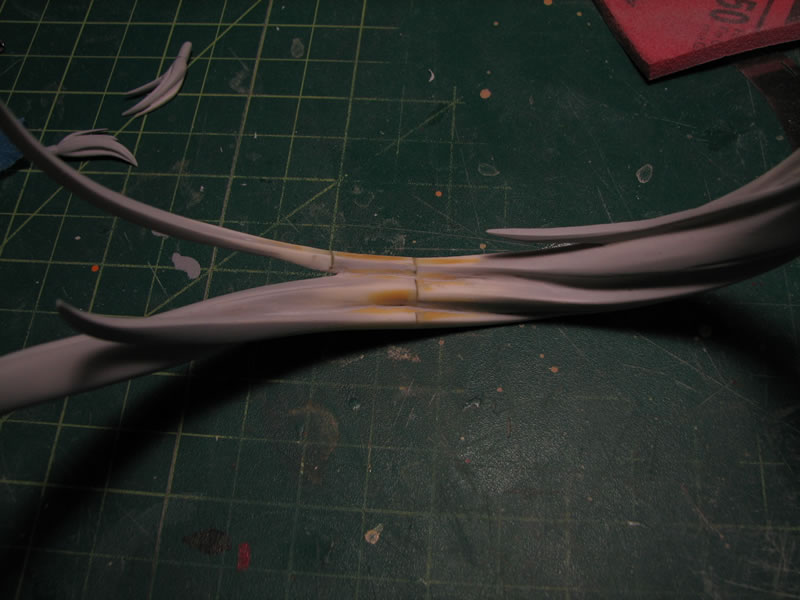
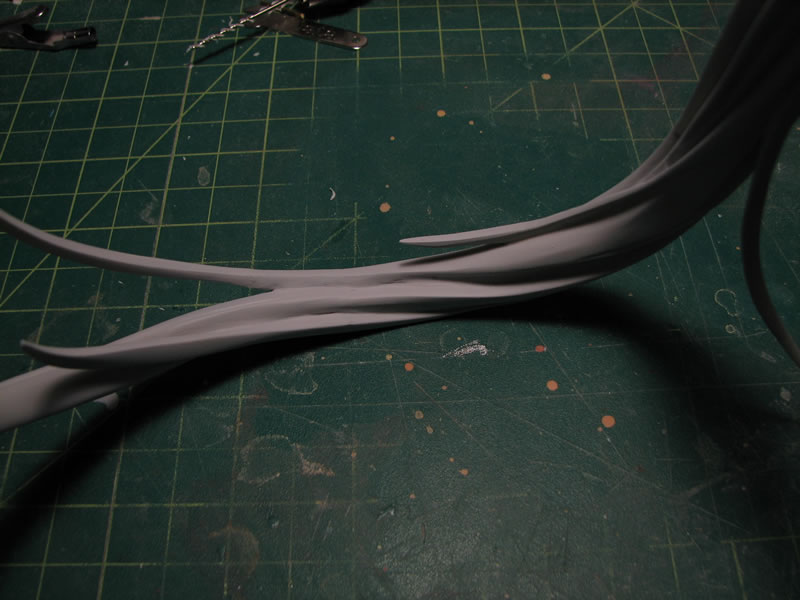
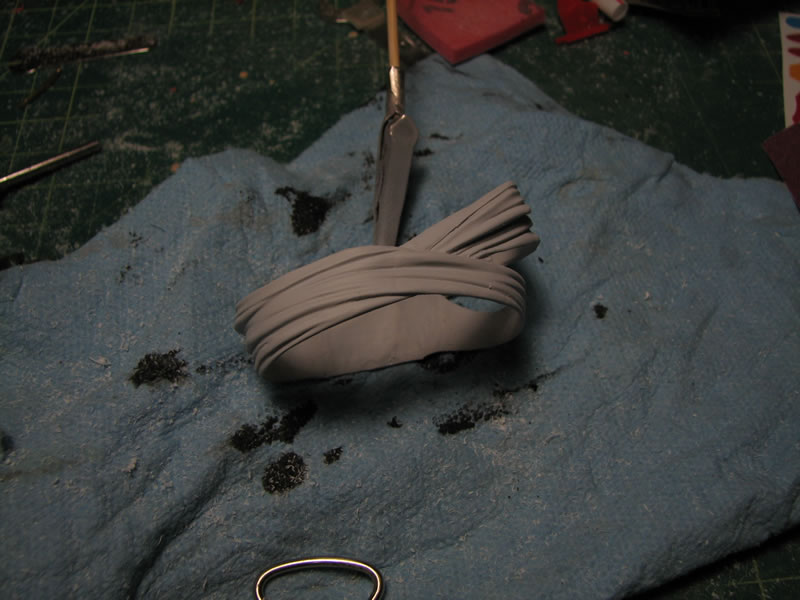
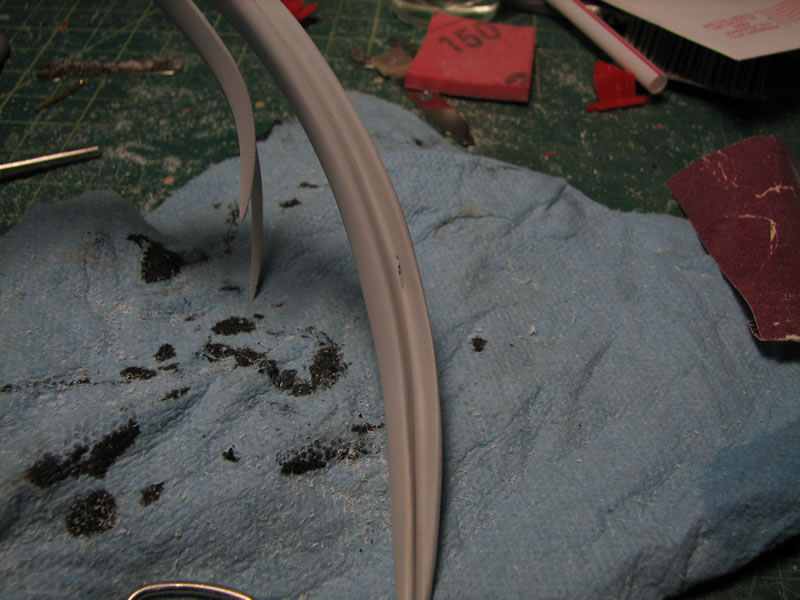
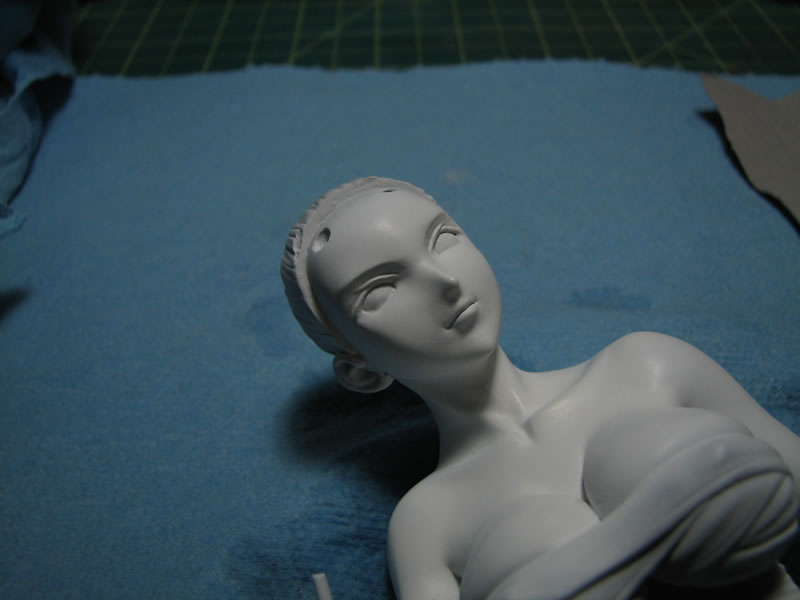
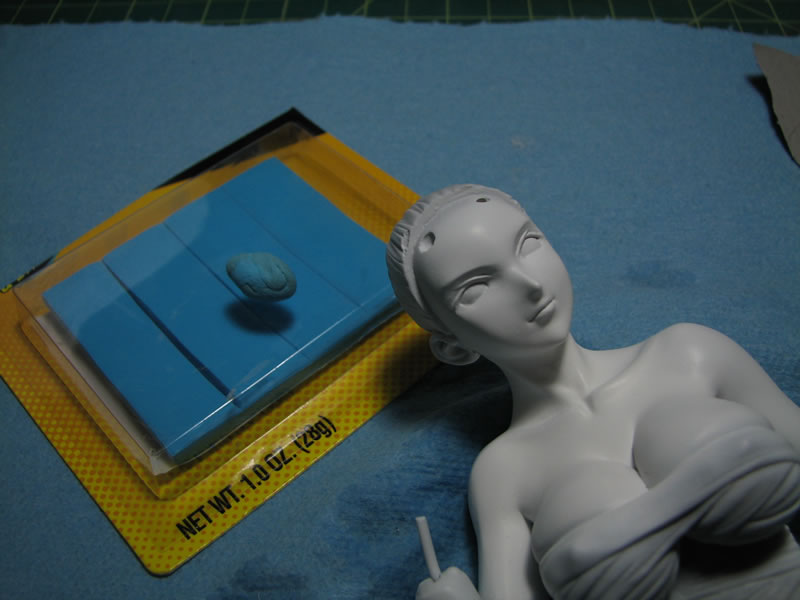
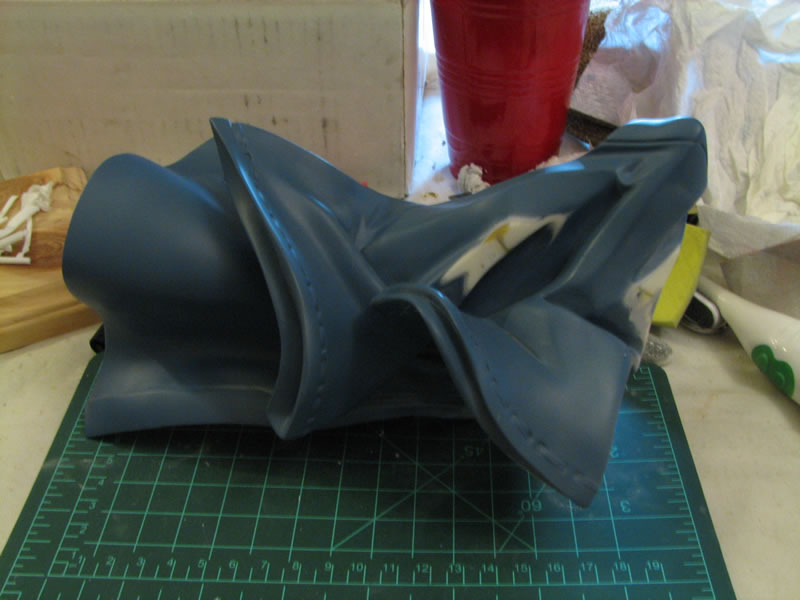
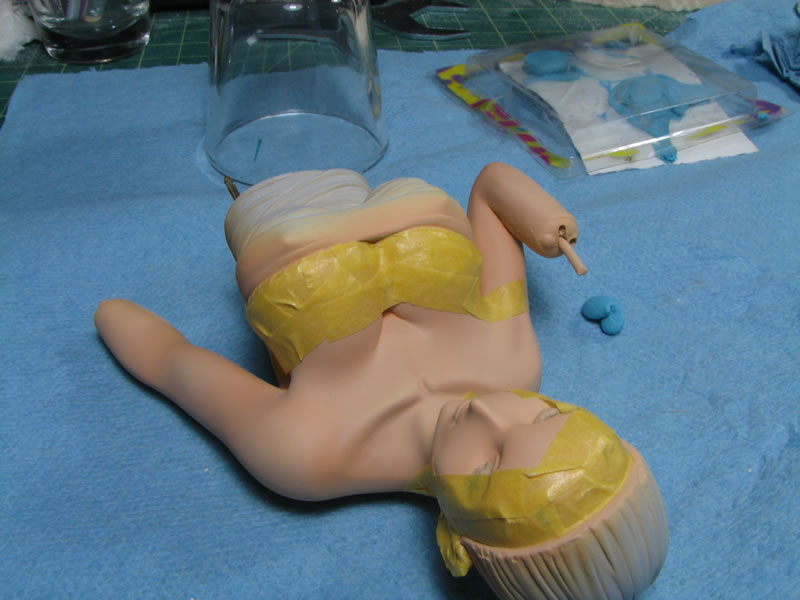
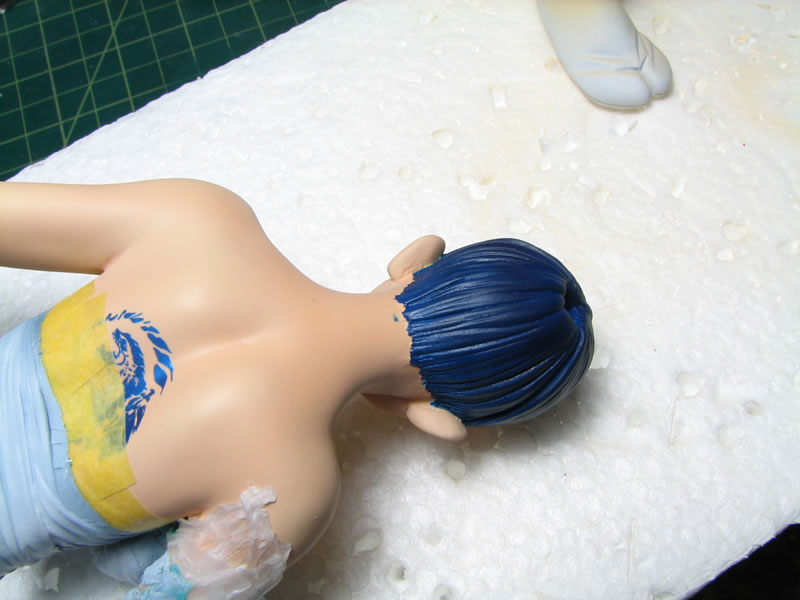
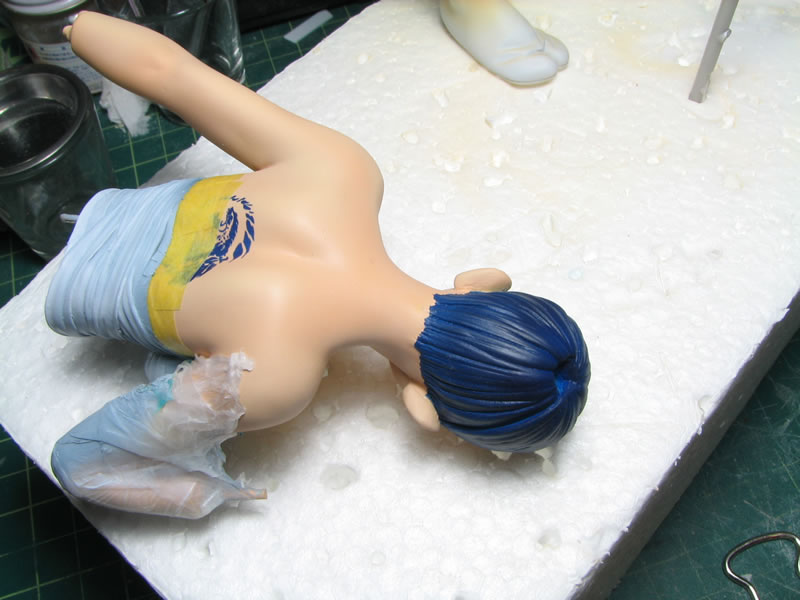
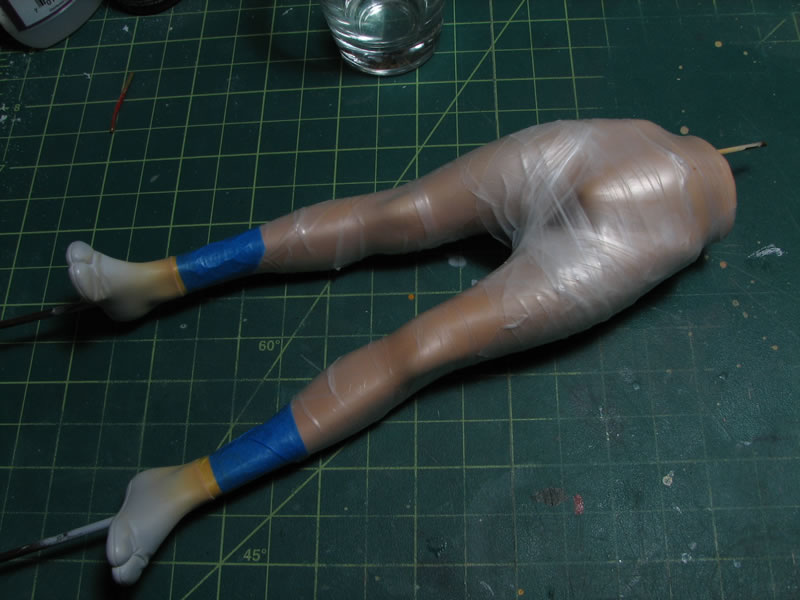
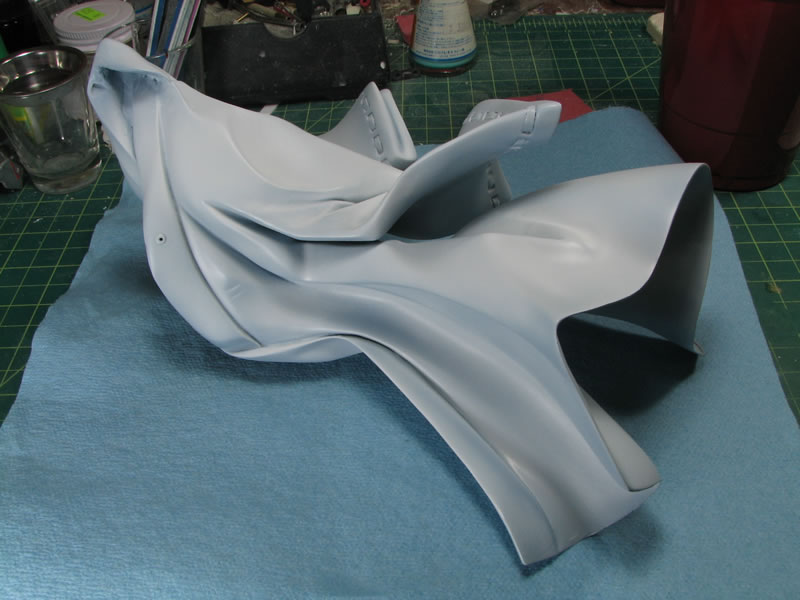
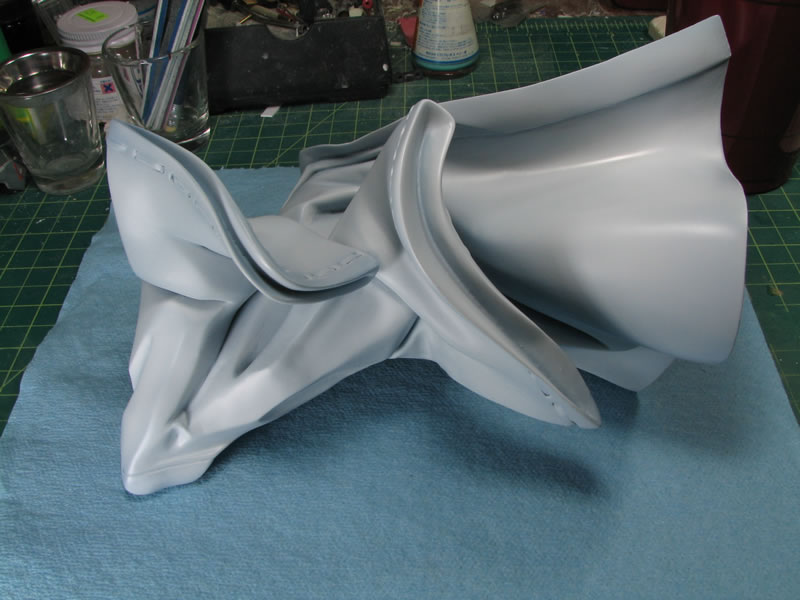
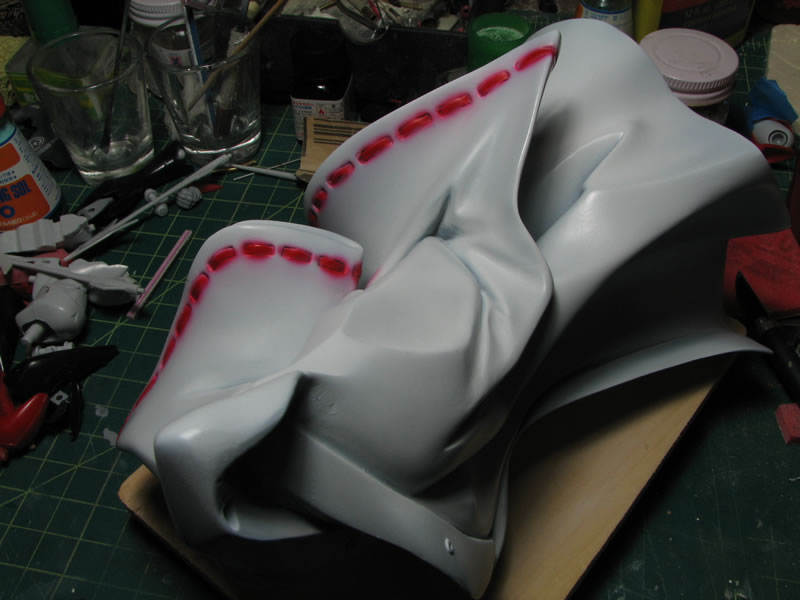
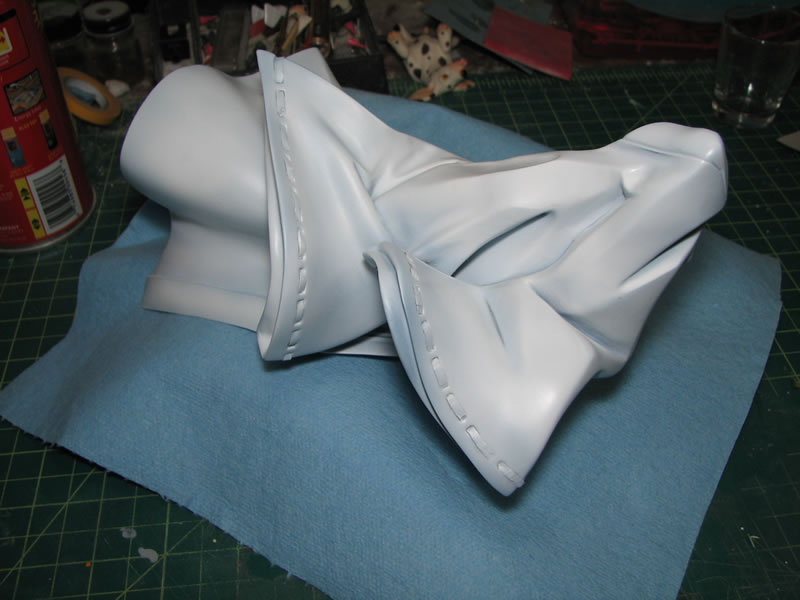
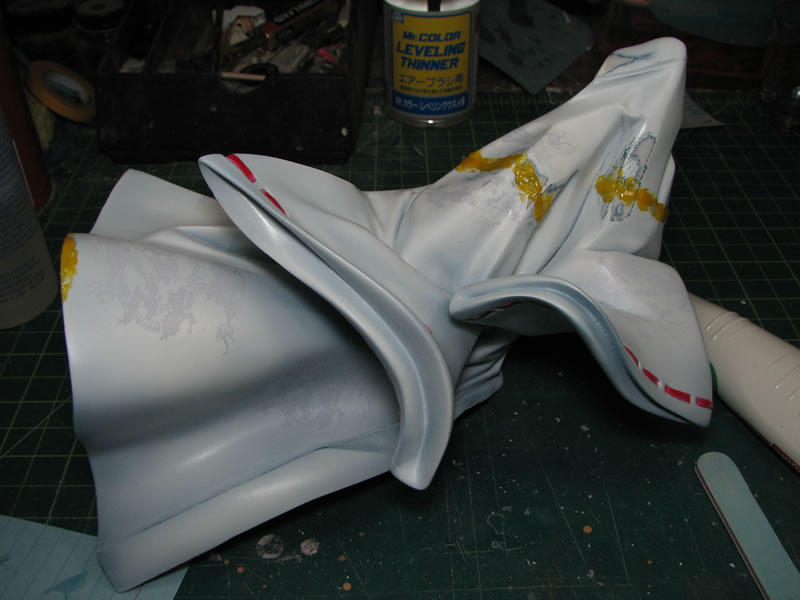
The break down for this kit is done much nicer than Bome's sculpt. There are only a few areas where I need to fix seams. The skirt is split into four parts. I glued the inside two parts together with epoxy glue, then drilled out some holes for pinning. I was able to easily pin the right side of the skirt, but the front area of the left side was too thin for decent pinning, so I drilled some shallow holes then popped in some rare earth magnets. I'm building the skirt so that it will be removable once I'm done, so the magnets work well for this purpose.
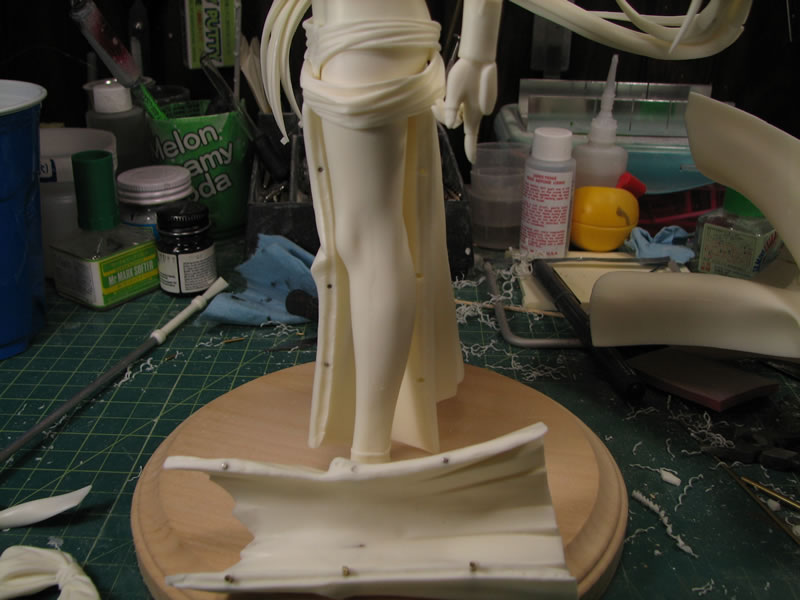
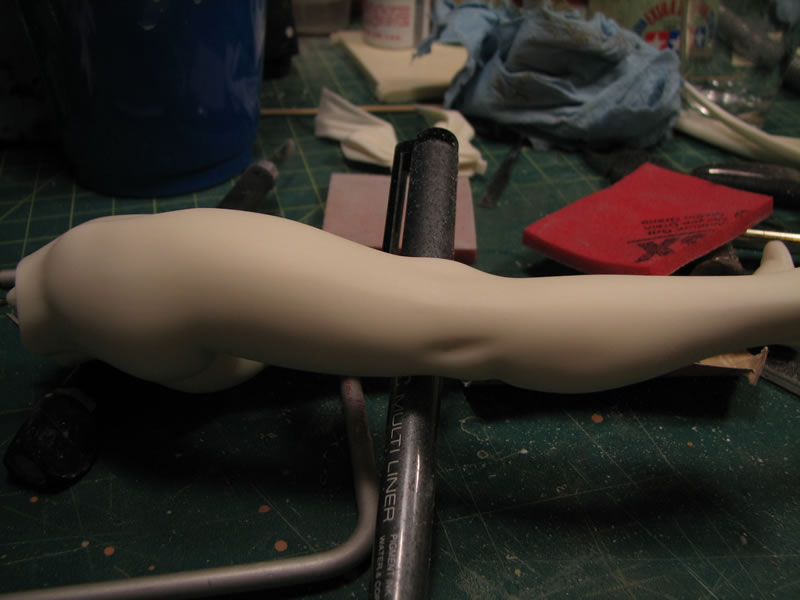
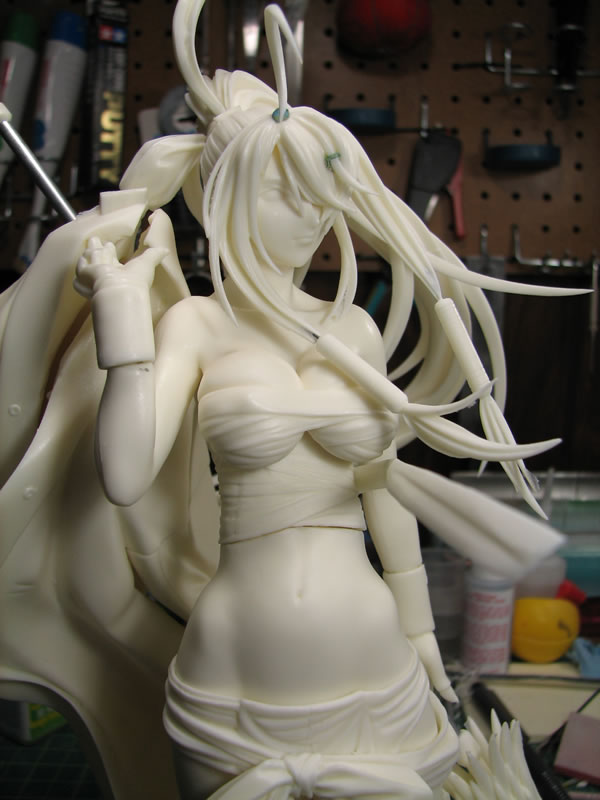
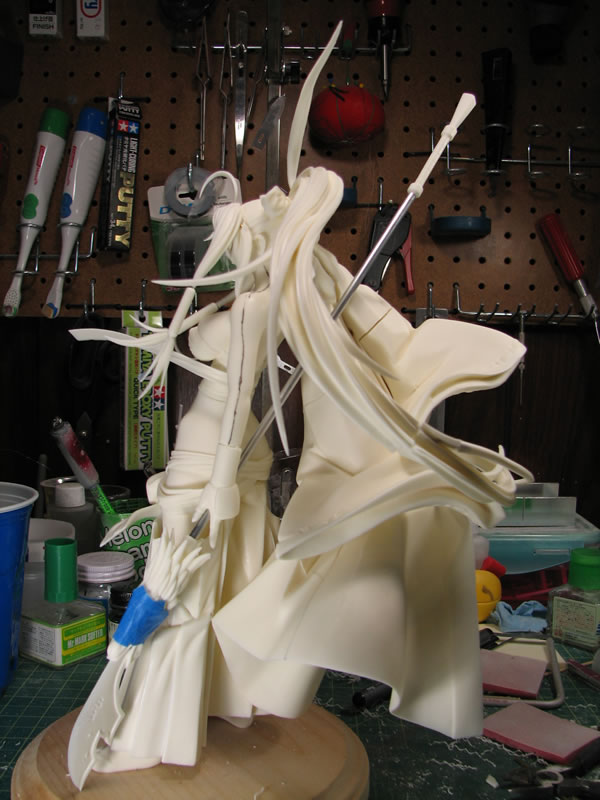
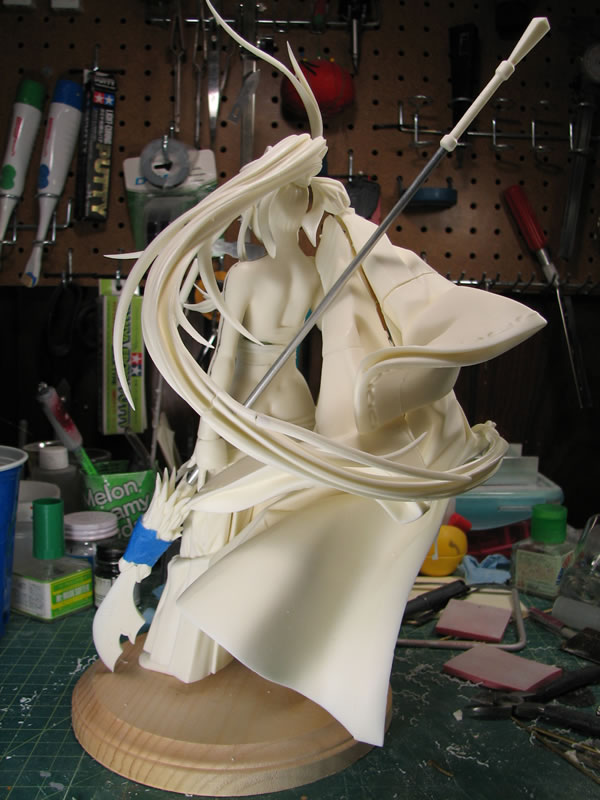
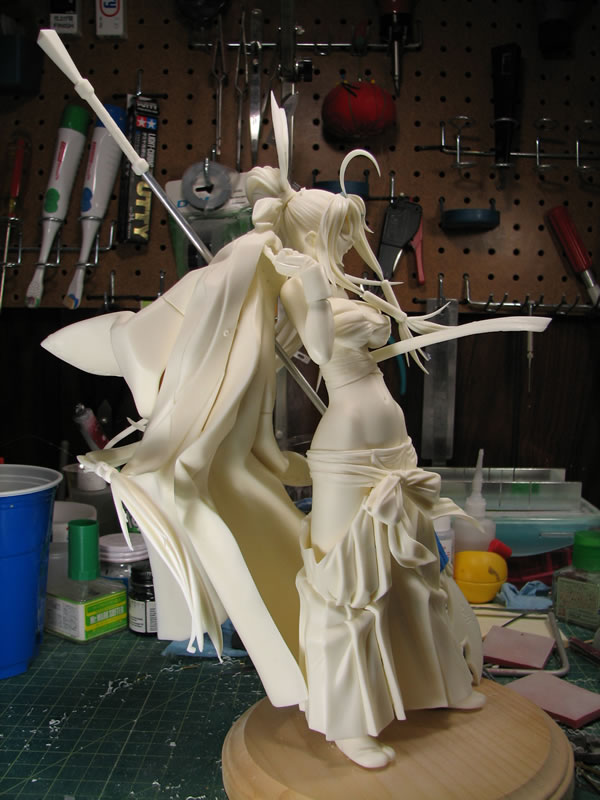
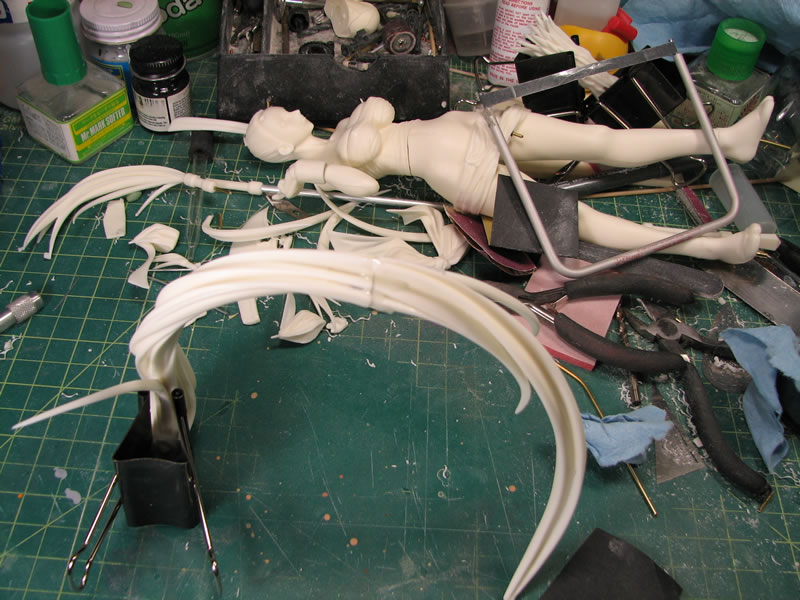
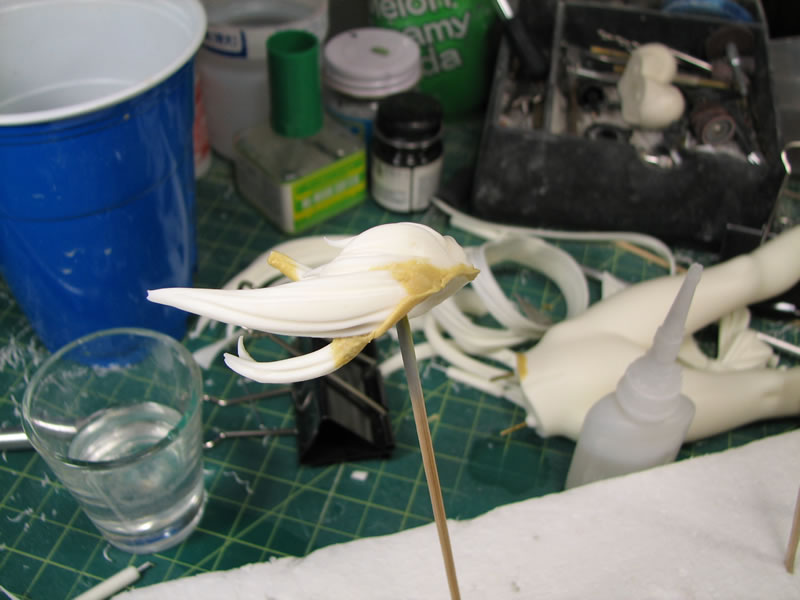
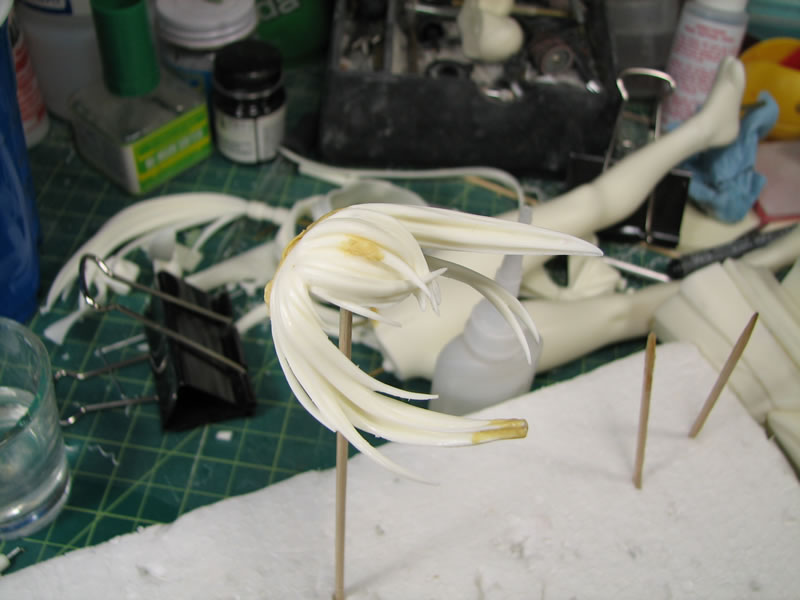
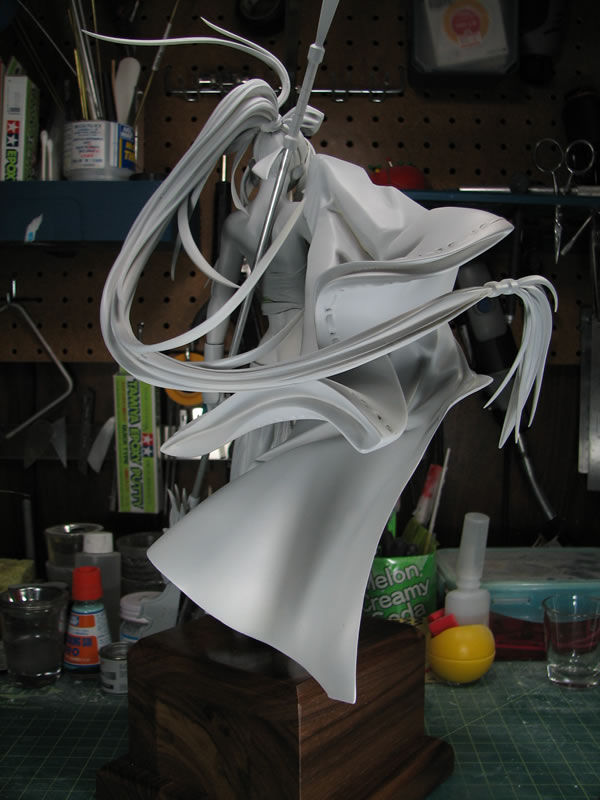
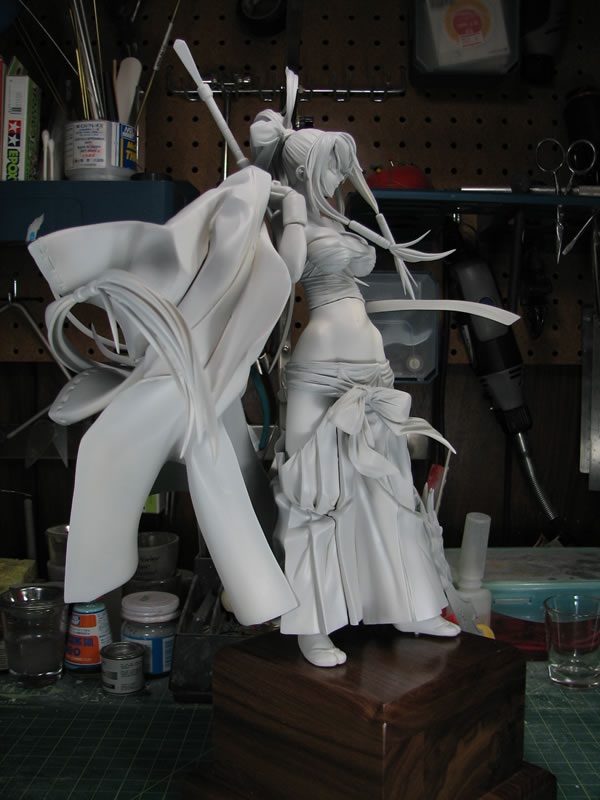
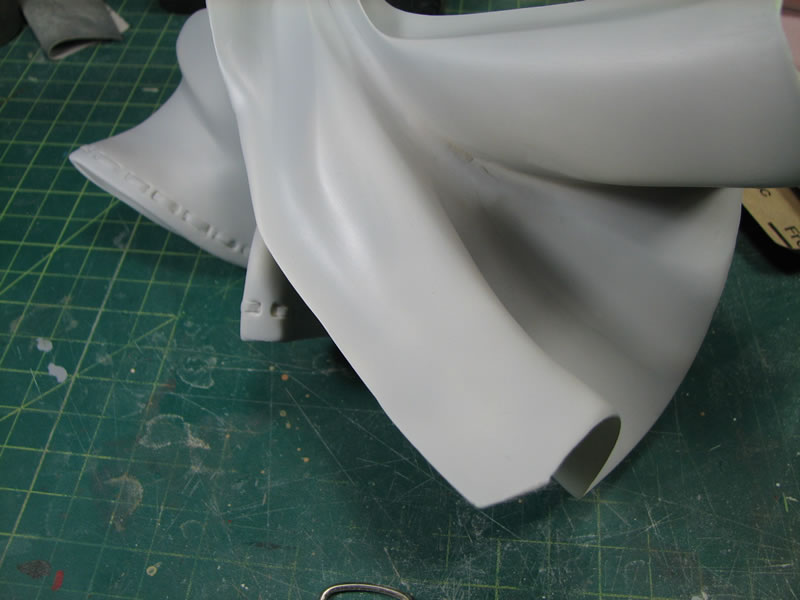
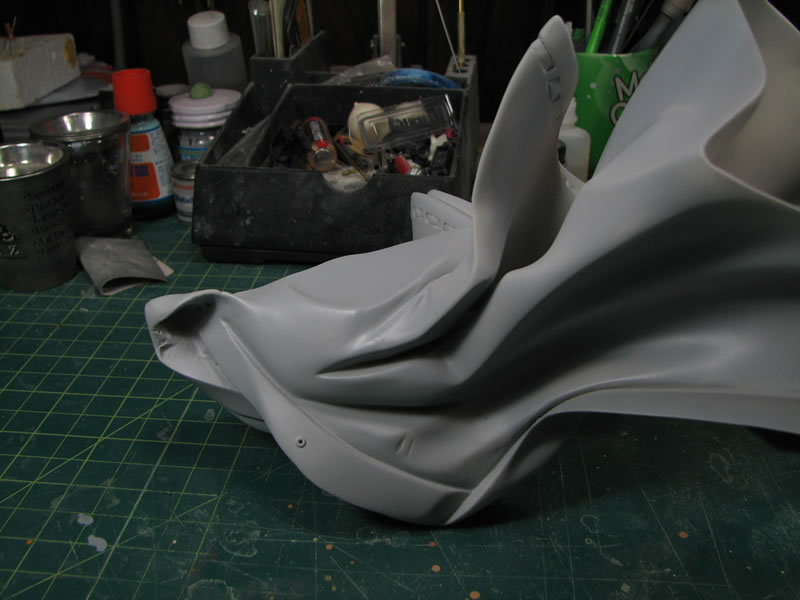
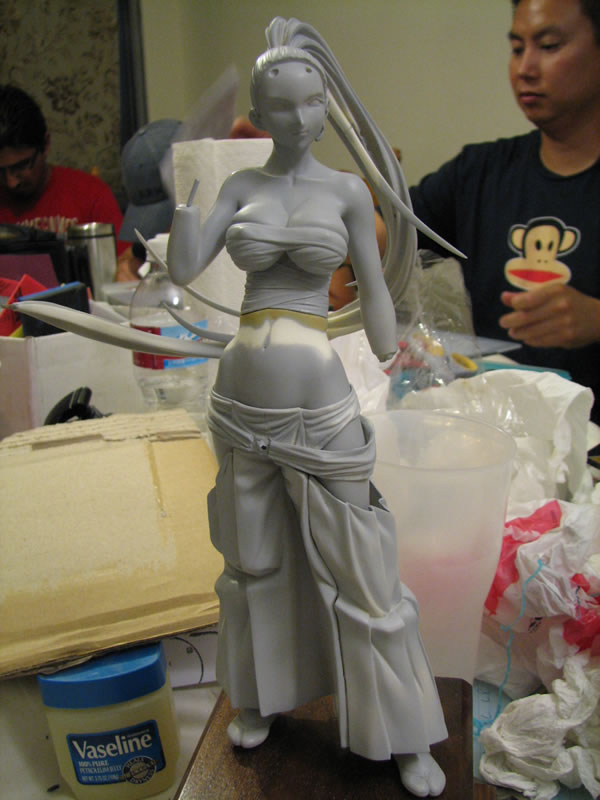
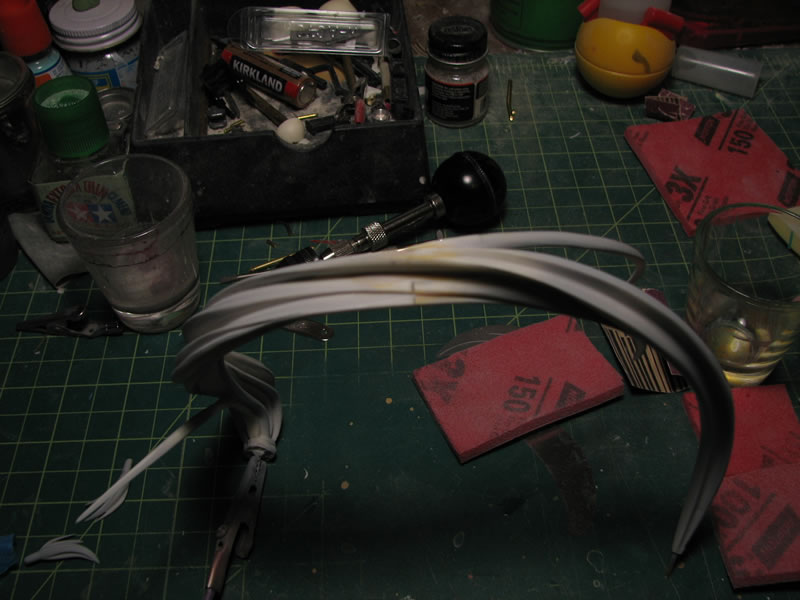
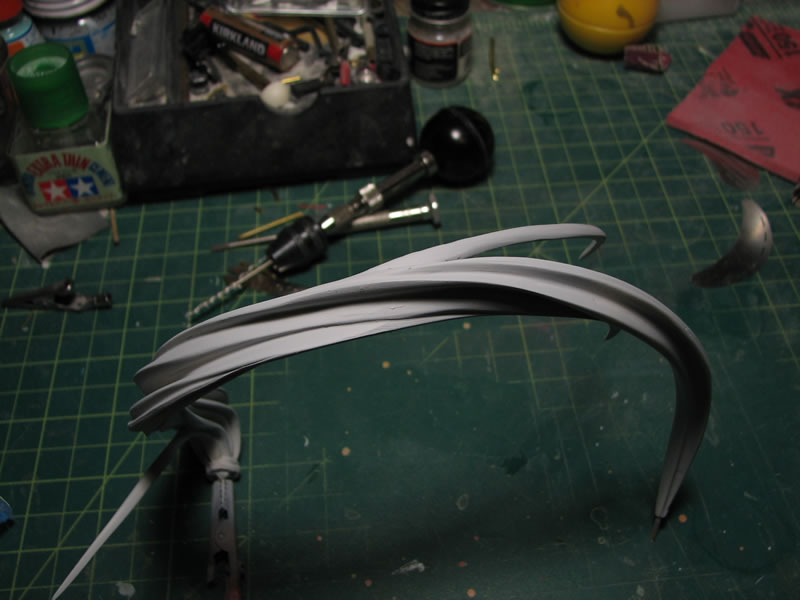
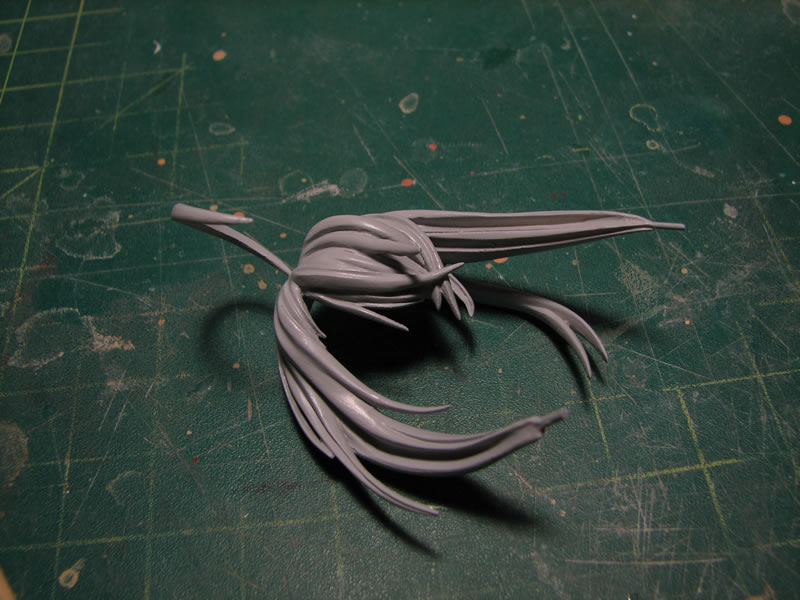
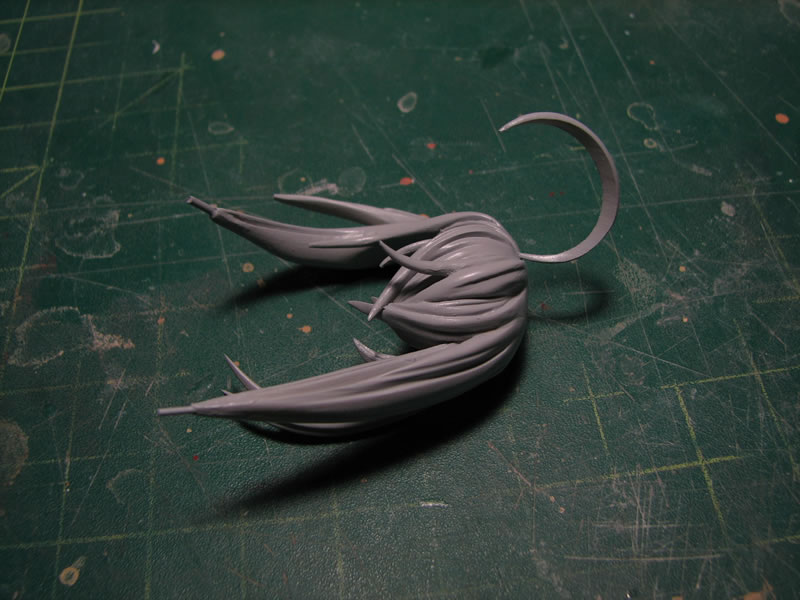
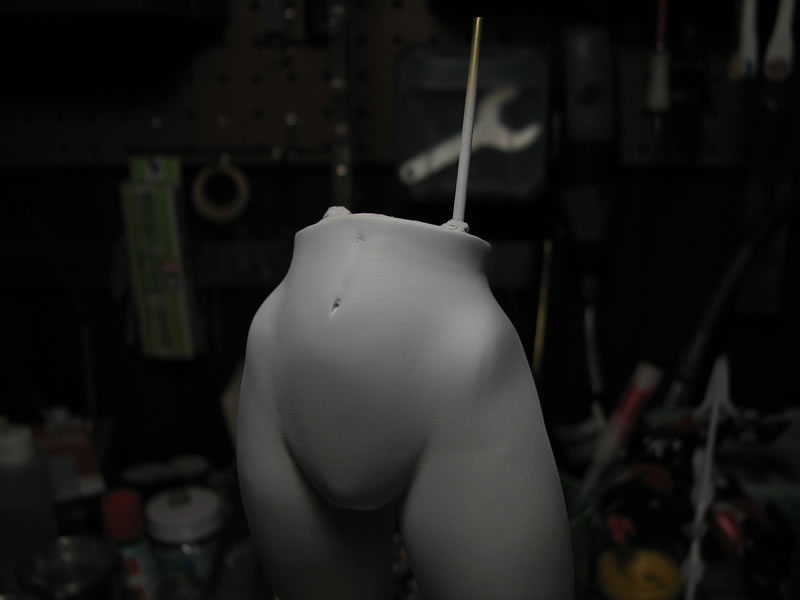
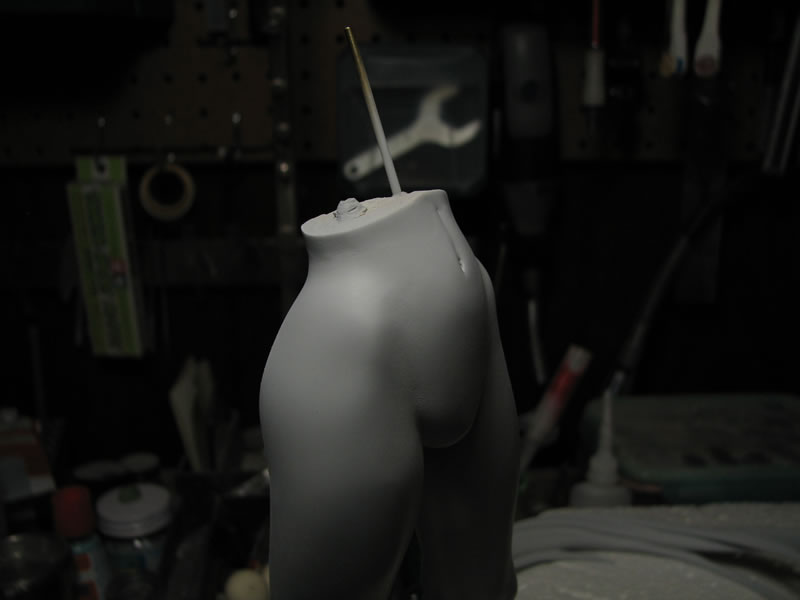
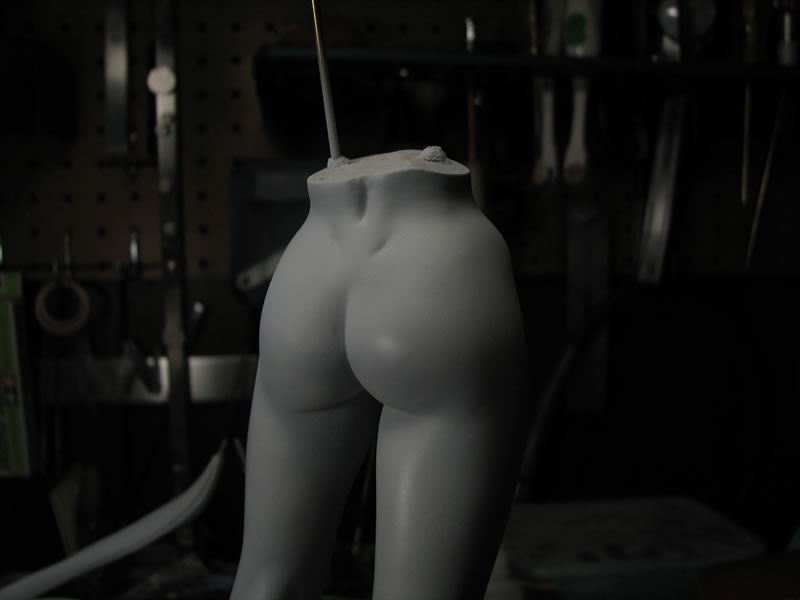
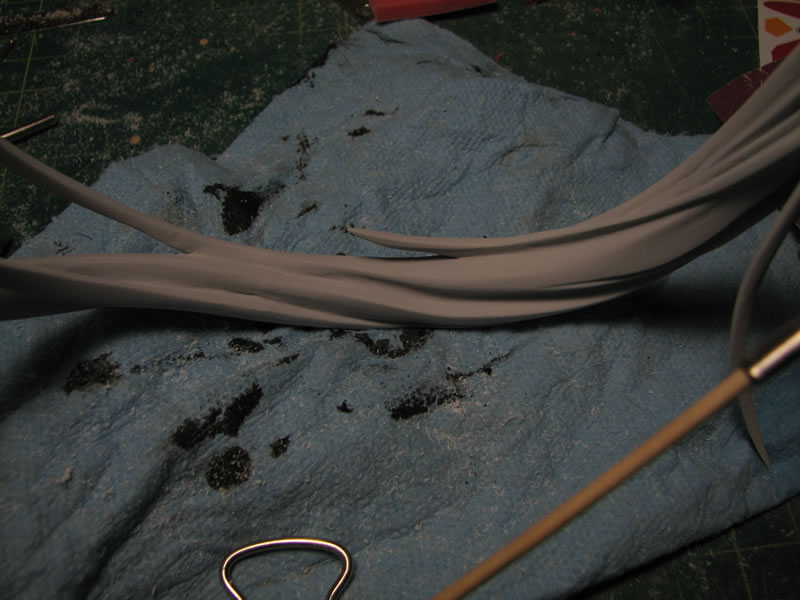
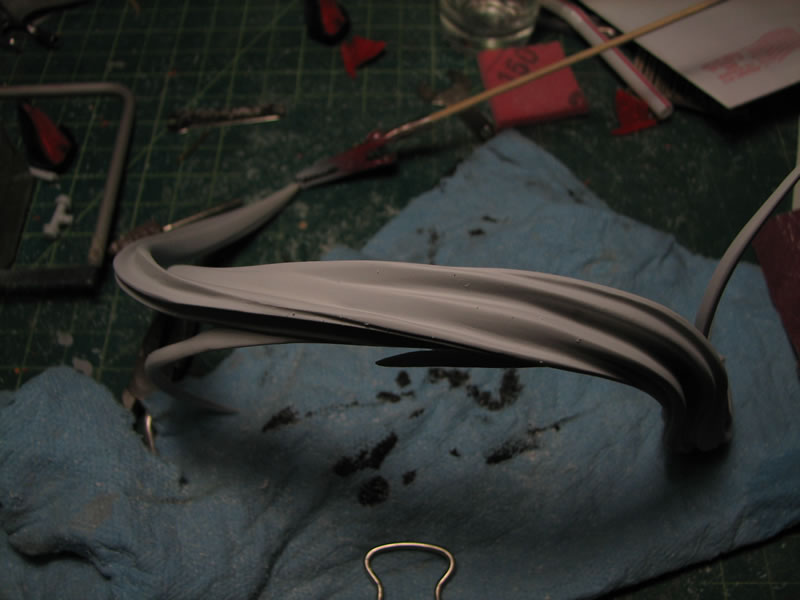
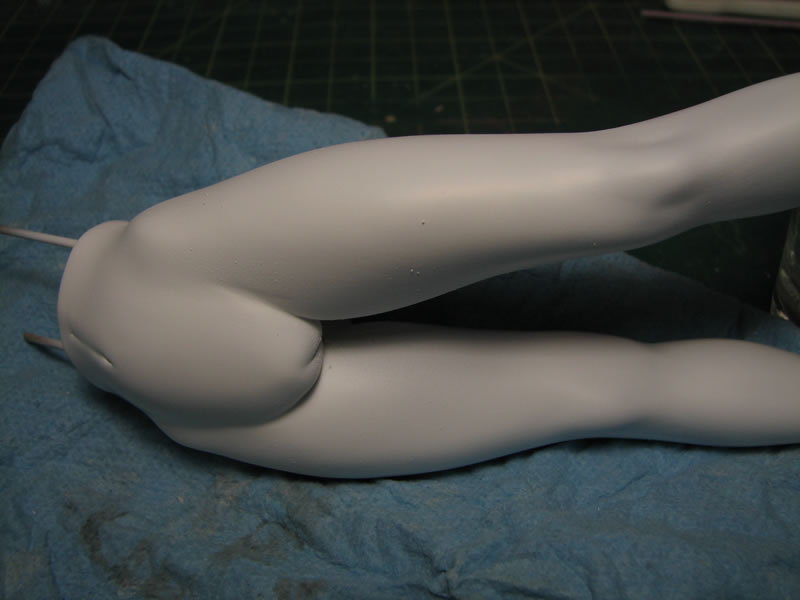
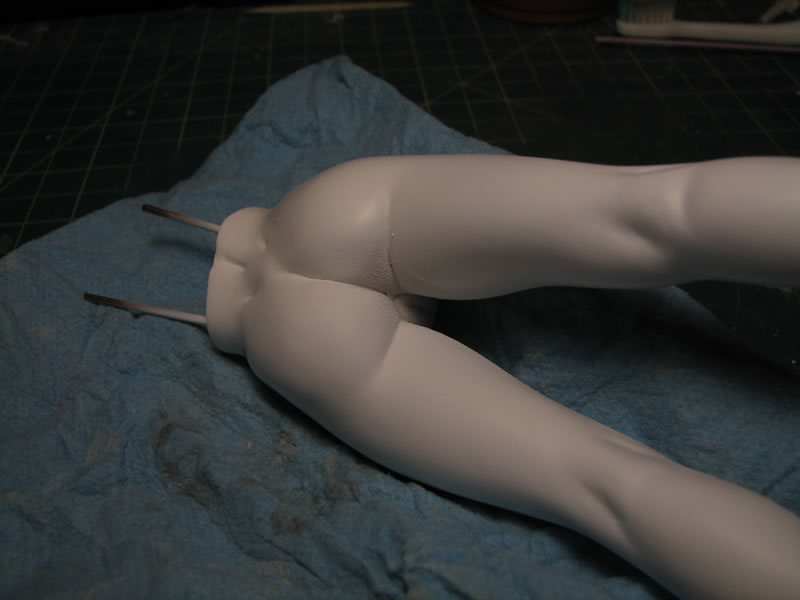
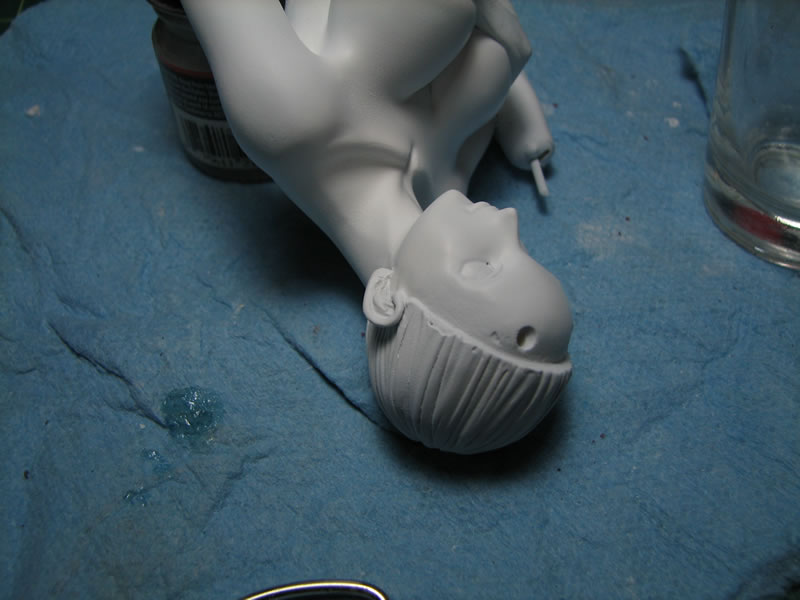
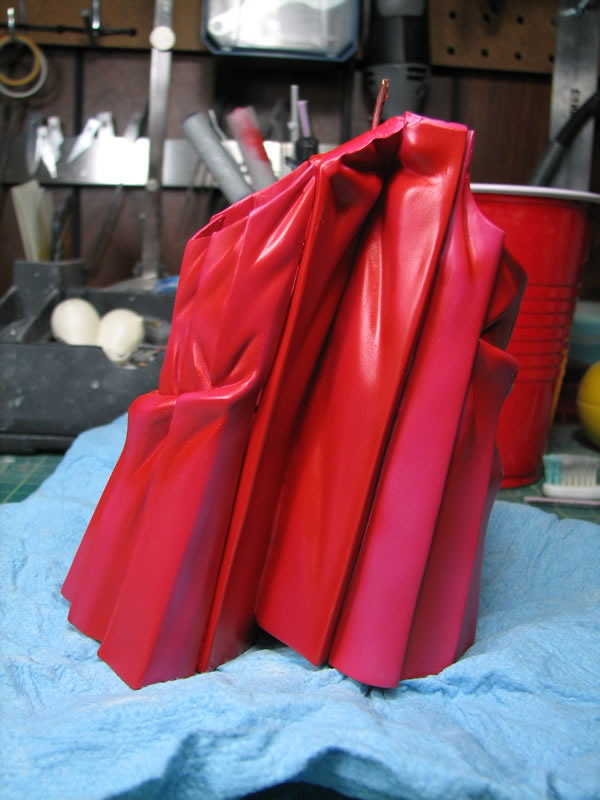
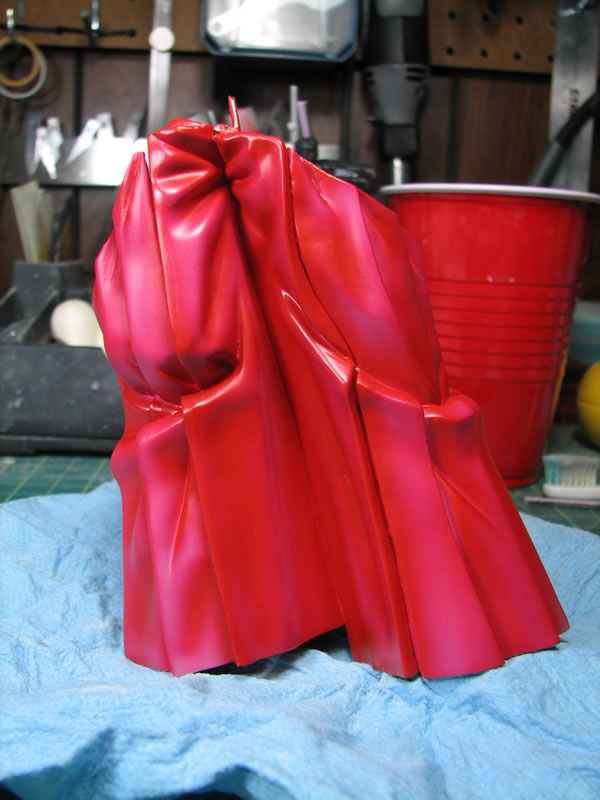
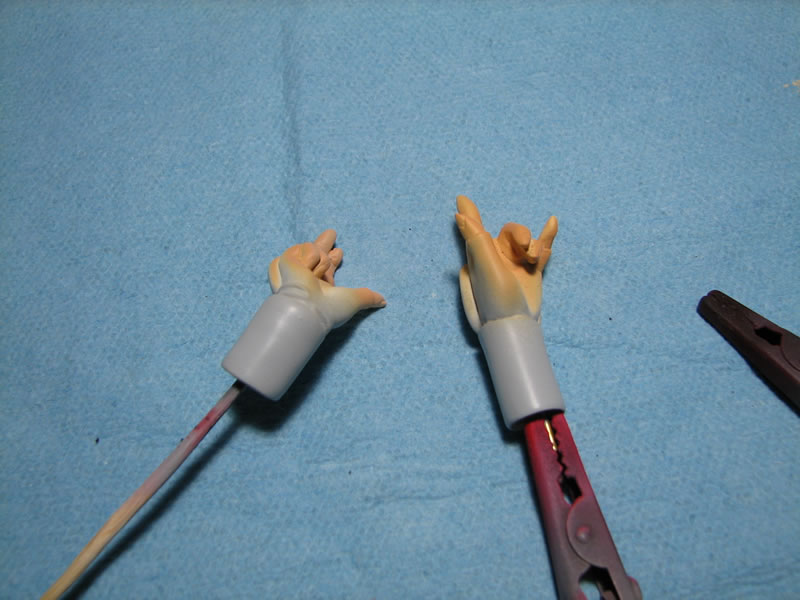
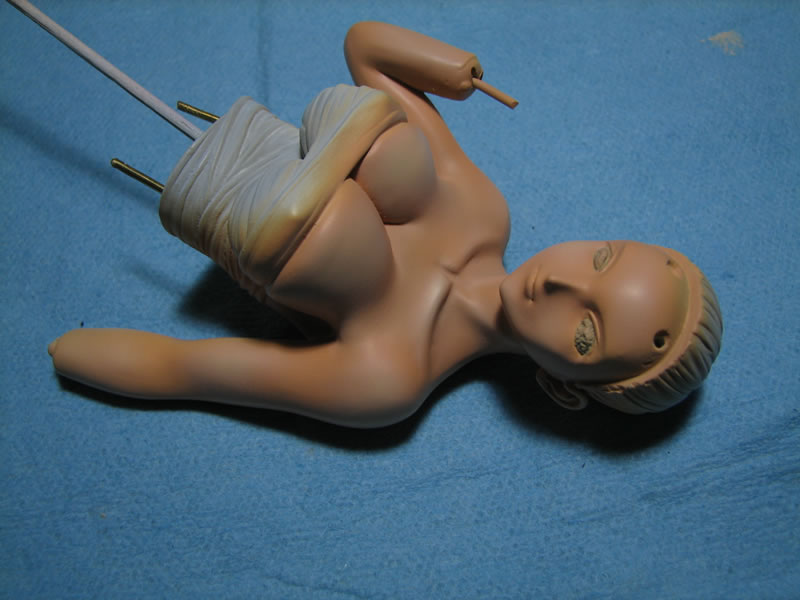
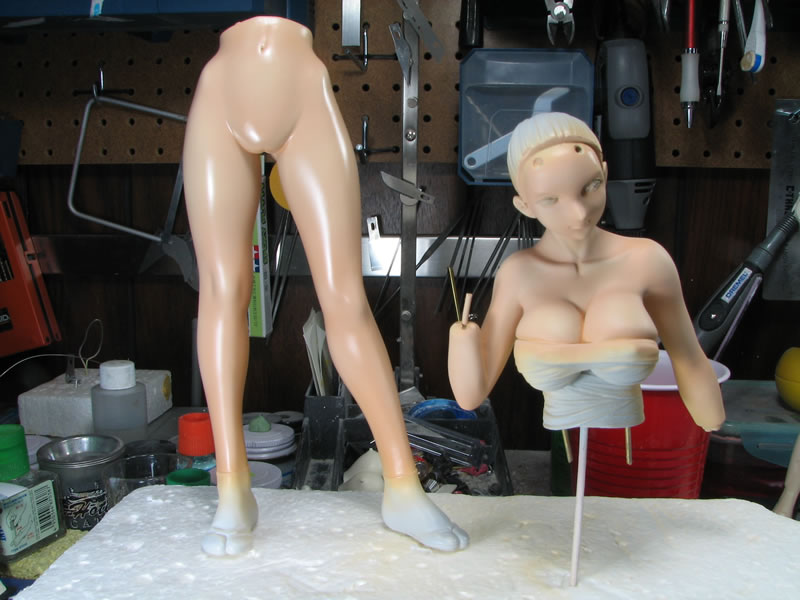
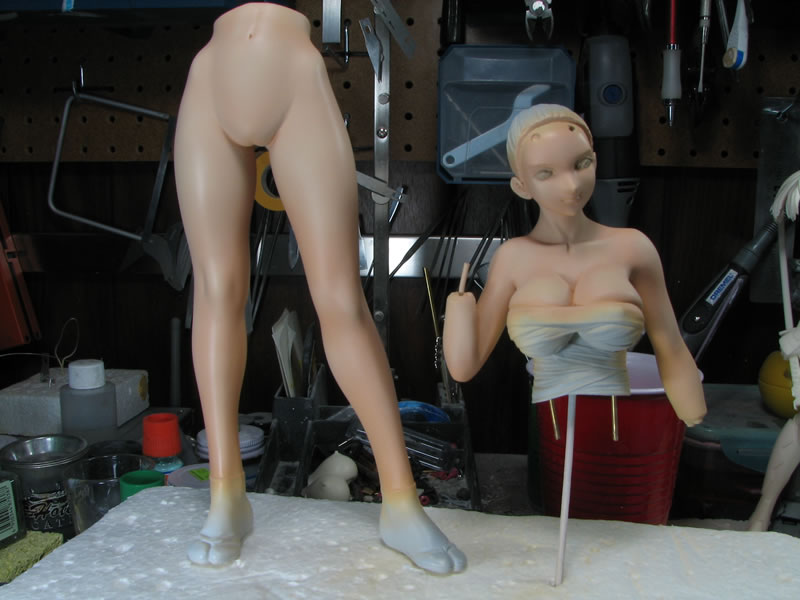
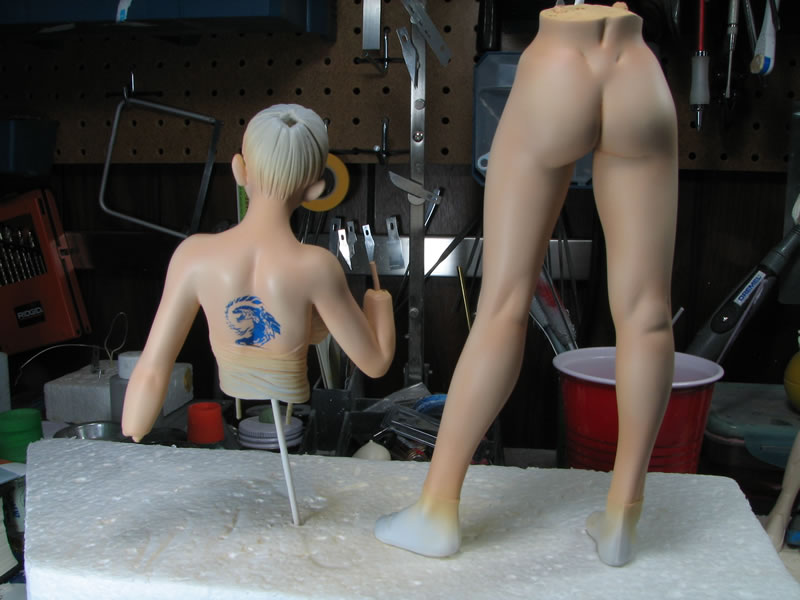
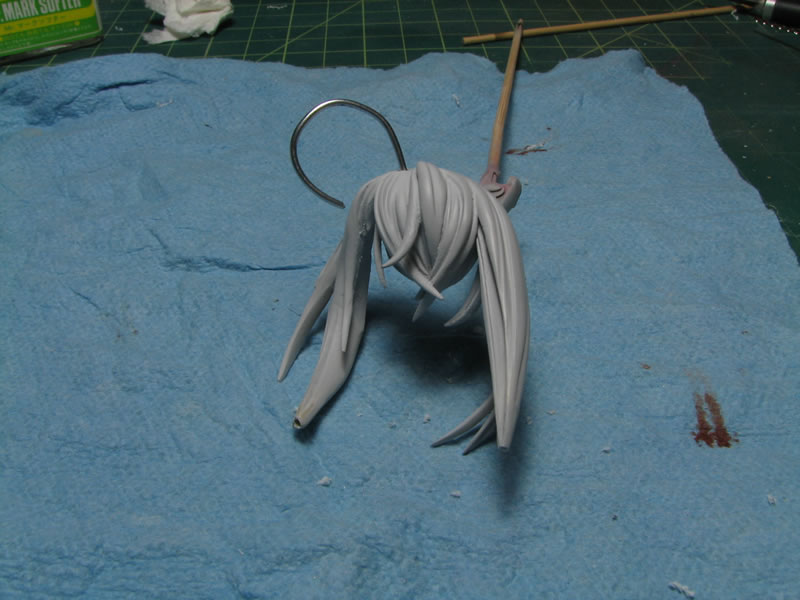
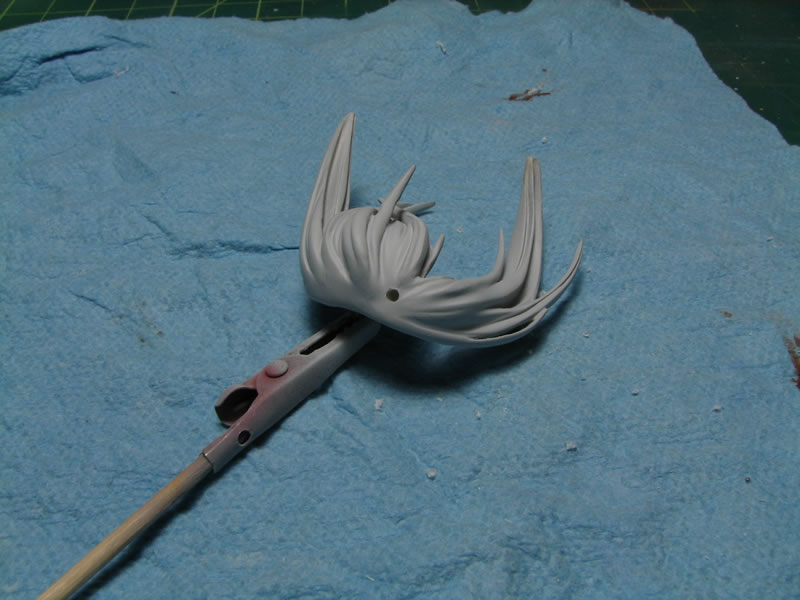
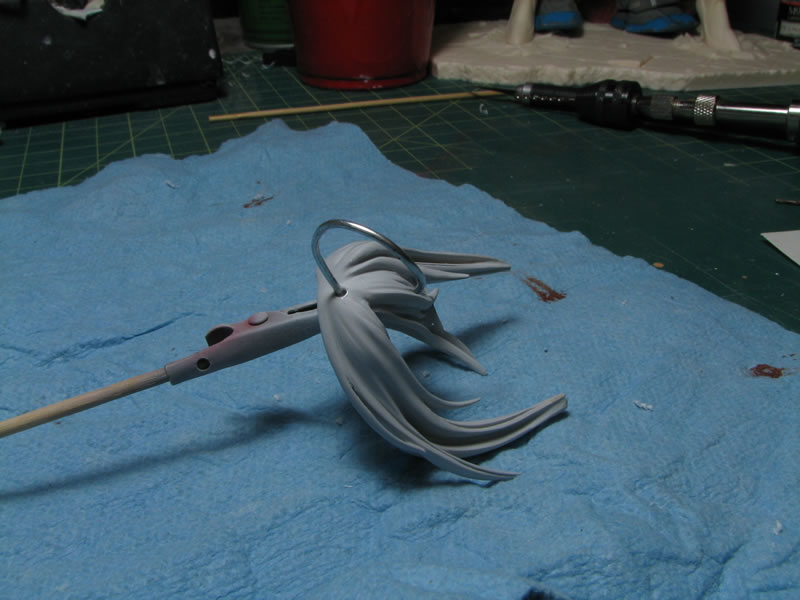
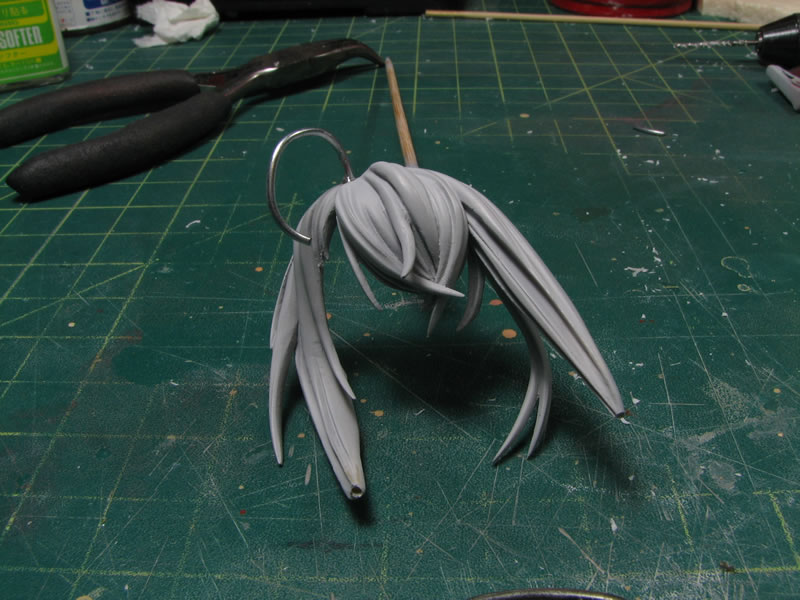
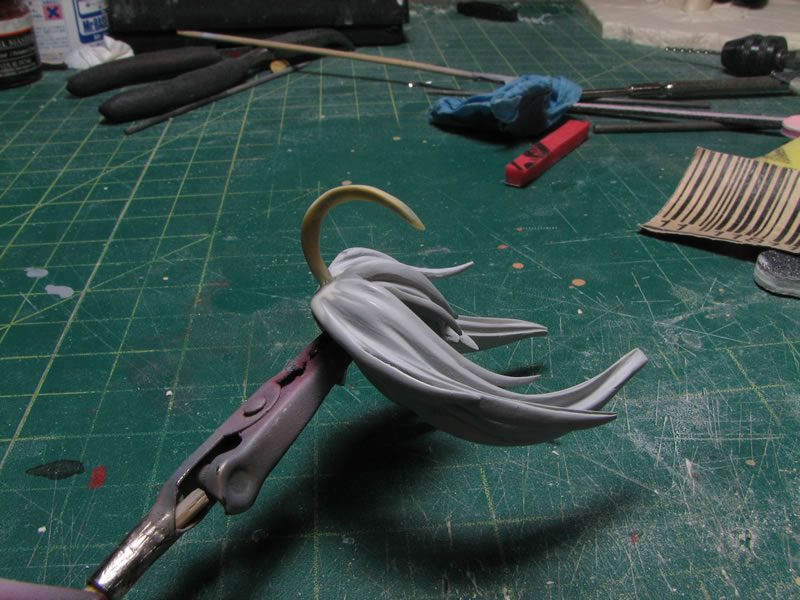
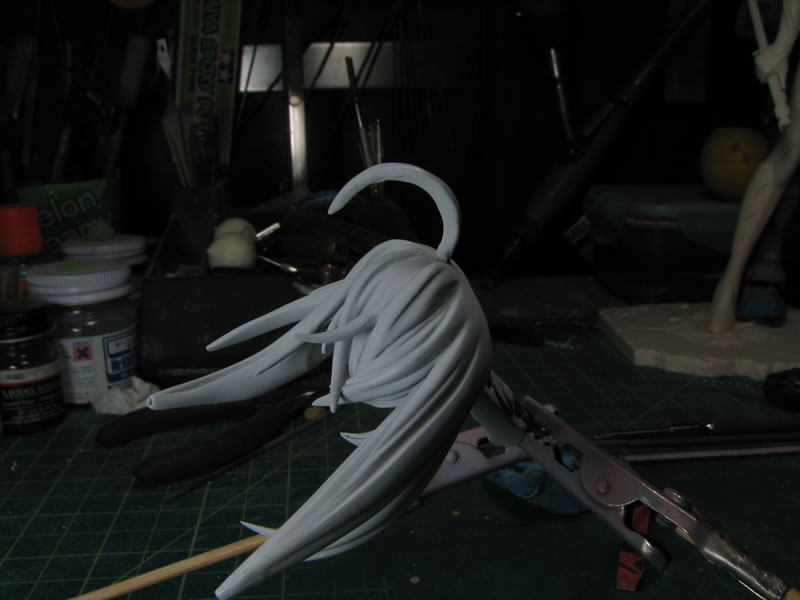
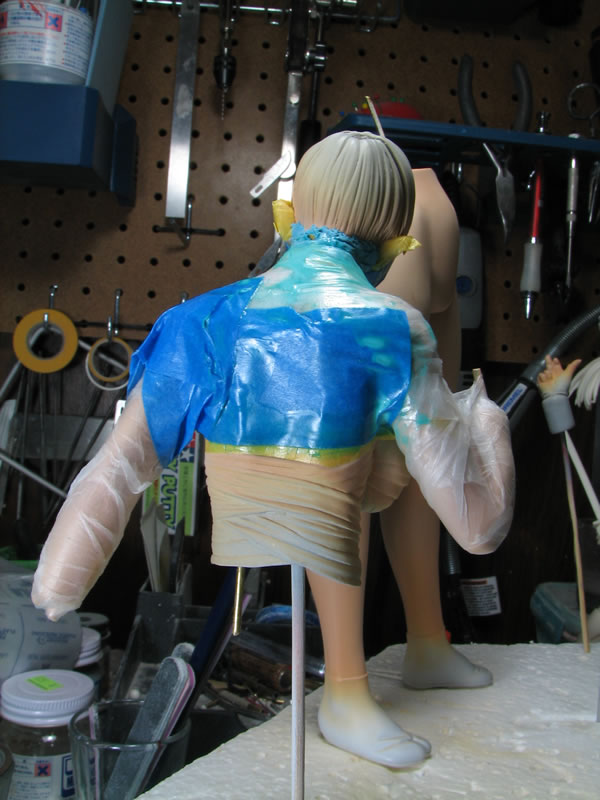
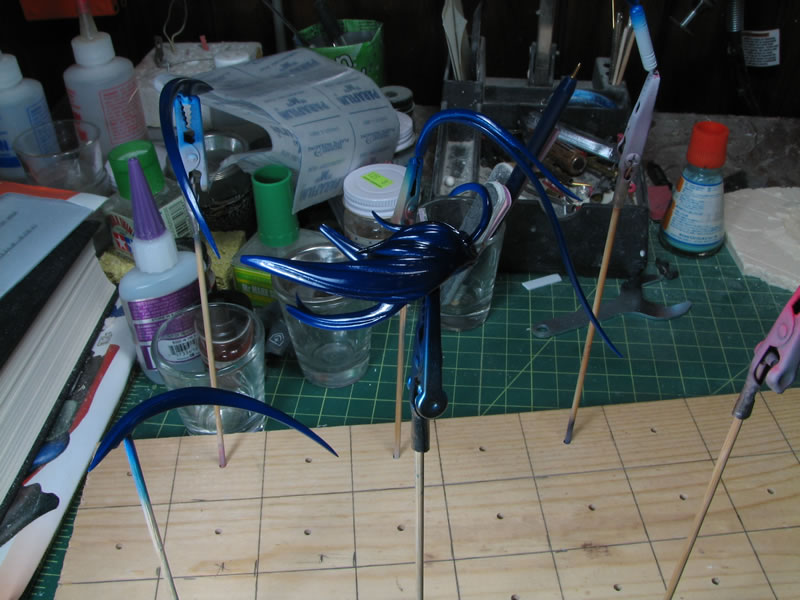
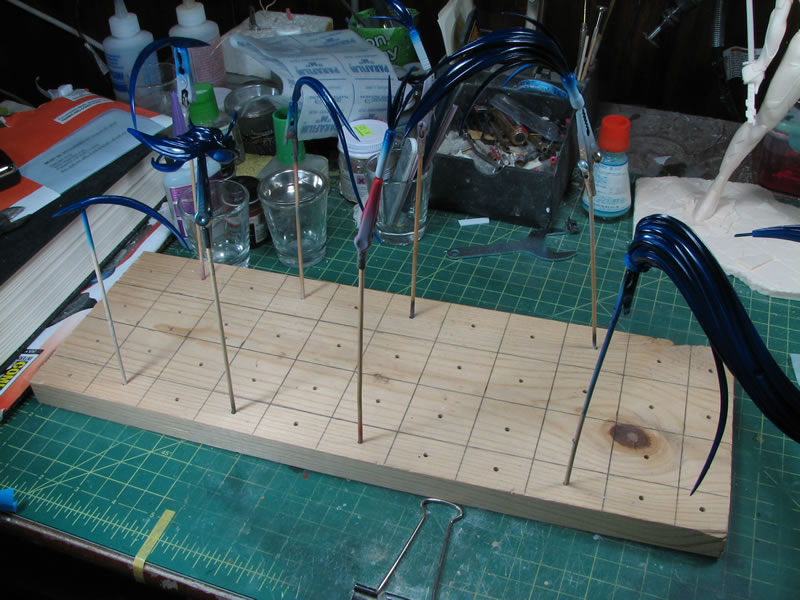
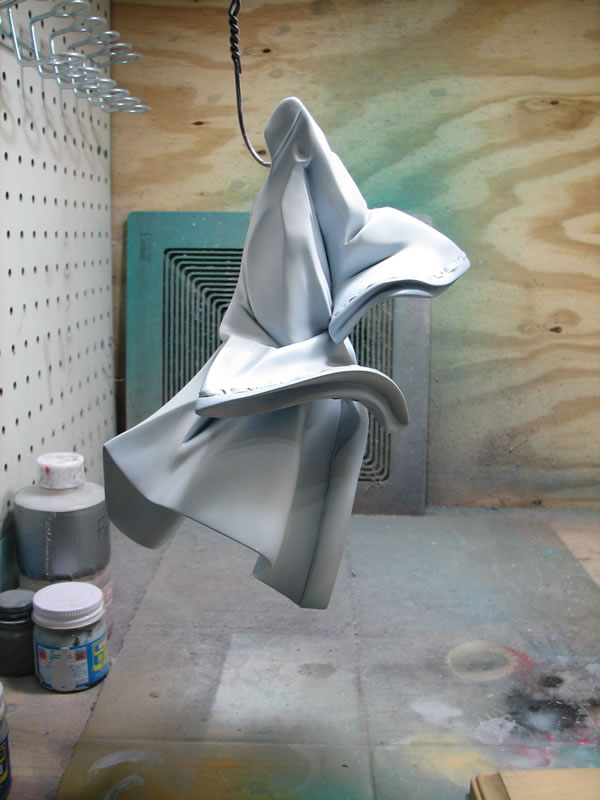
The rest of the day was spent cleaning up, pinning, and building the initial mock up for the kit. There are several hair parts that will need to be glued then seamed up. The kit will be very back heavy since she's holding up her robe with two fingers of her right arm. The robe is amazingly heavy, so I will be changing the display for a more solid piece of wood that will help support the weight.
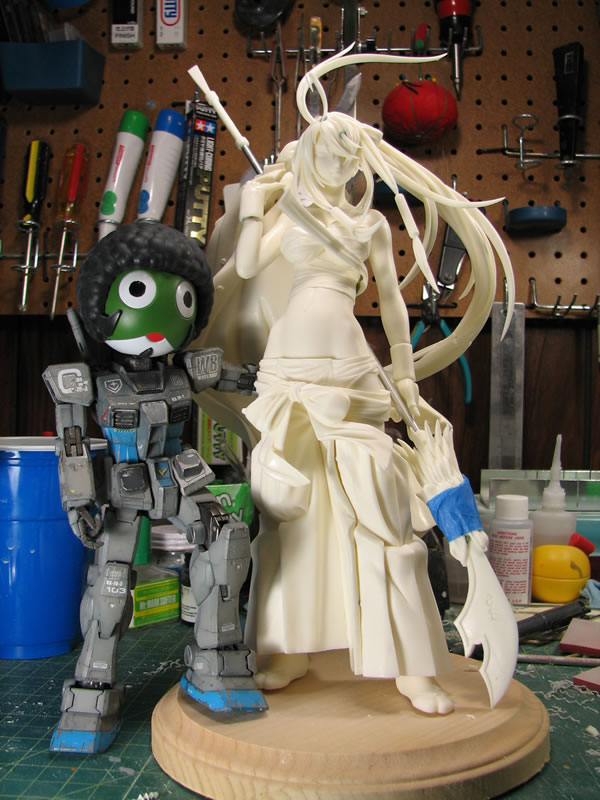
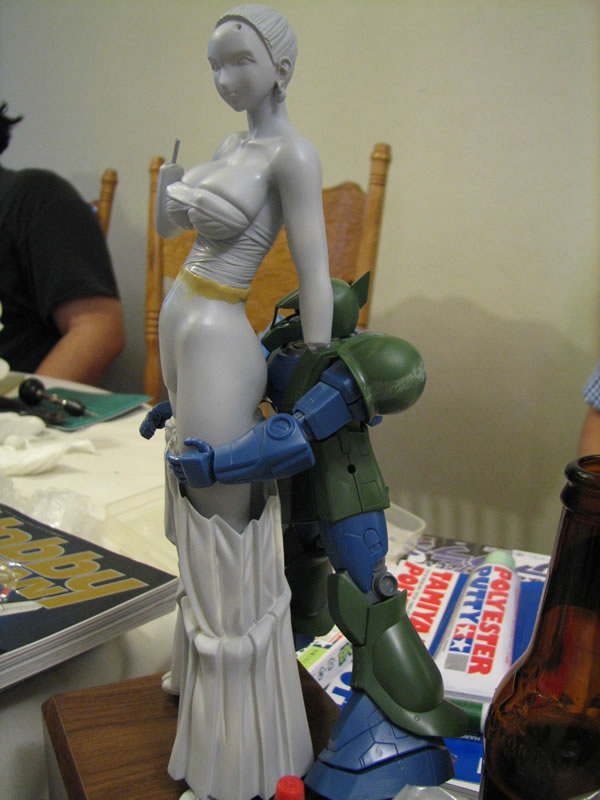
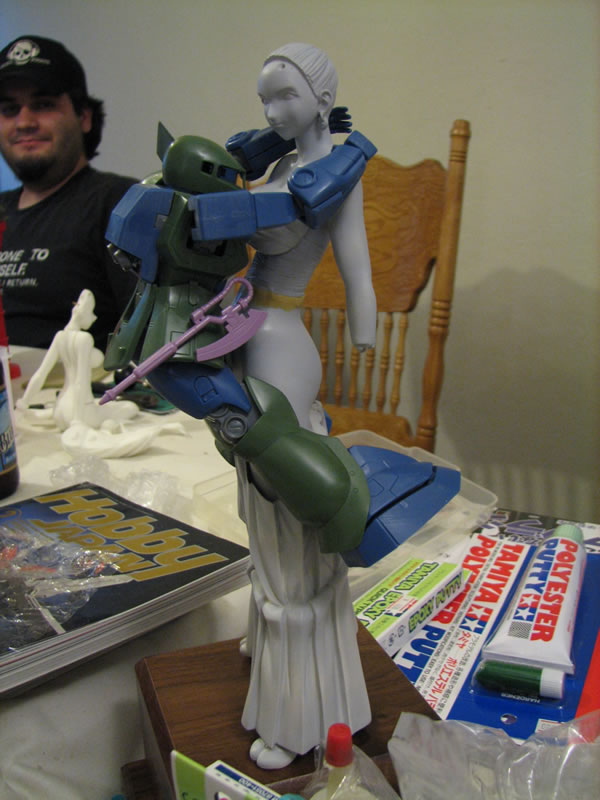
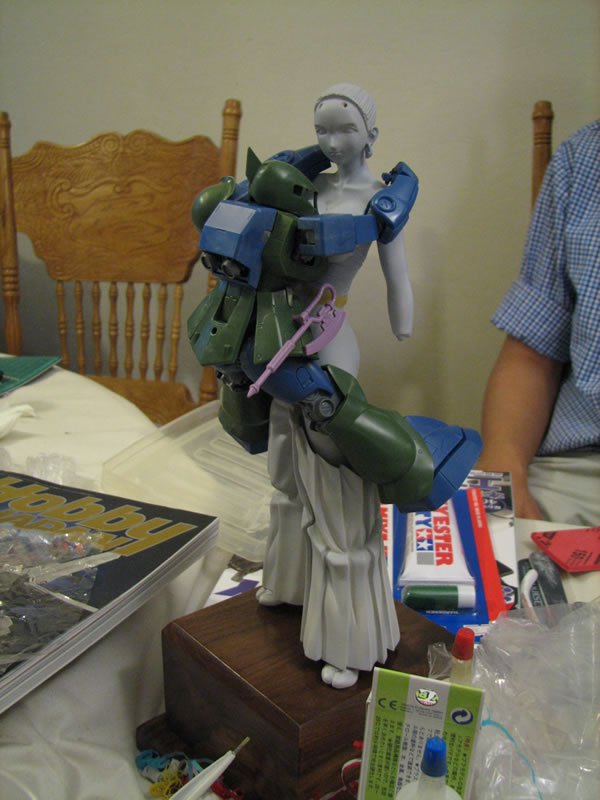
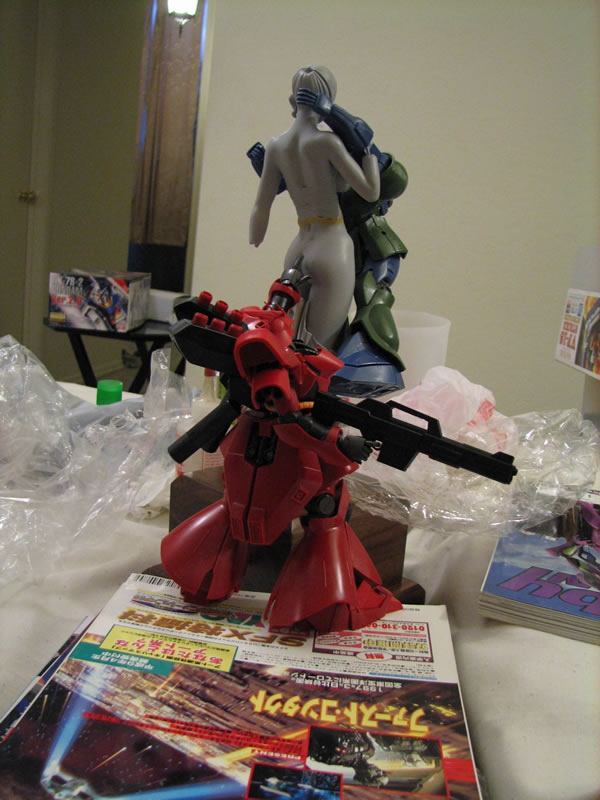
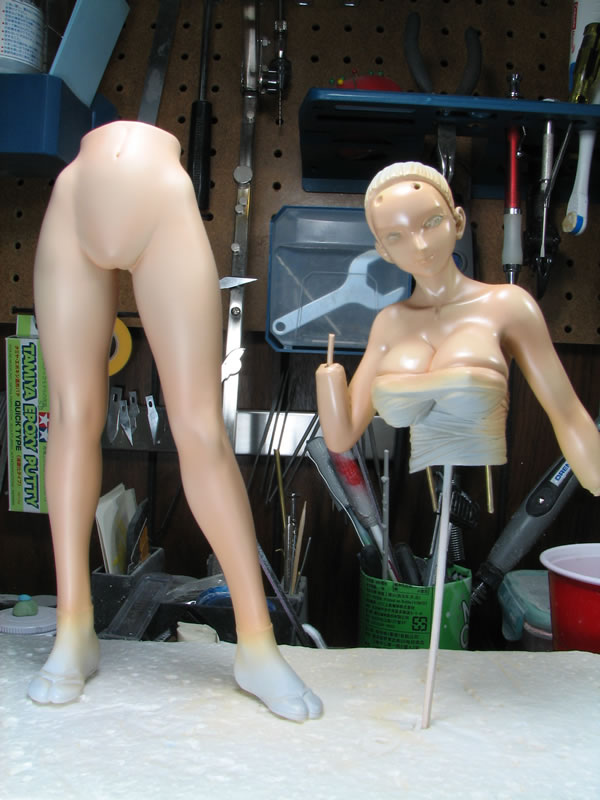
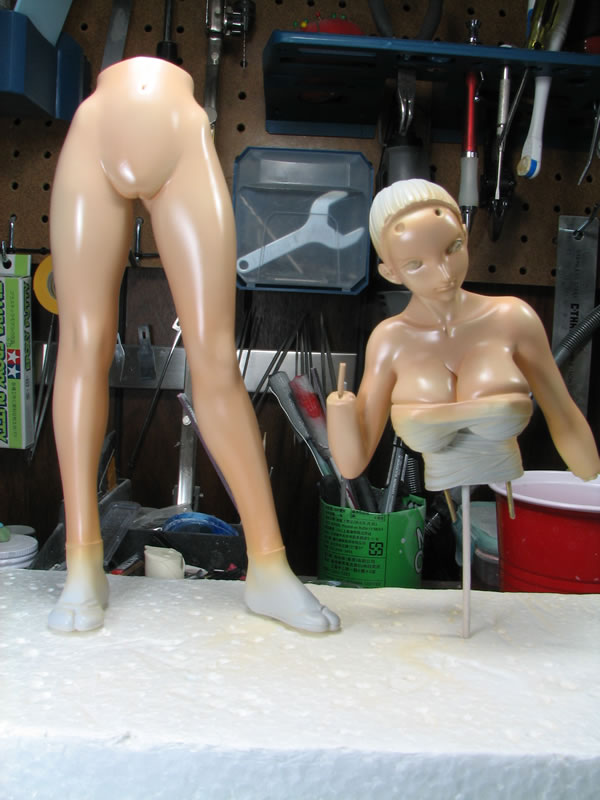
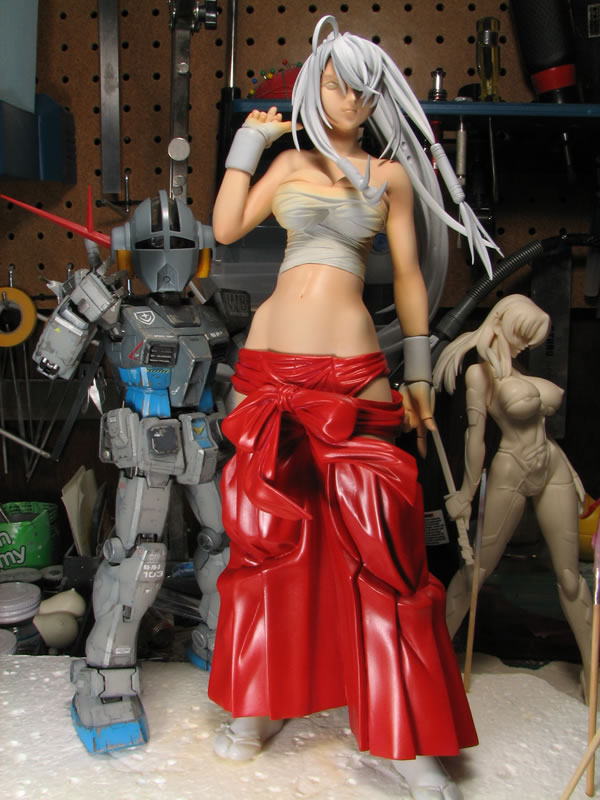
And as always, gotta have the "size" comparison picture with Mr Keroro 3.
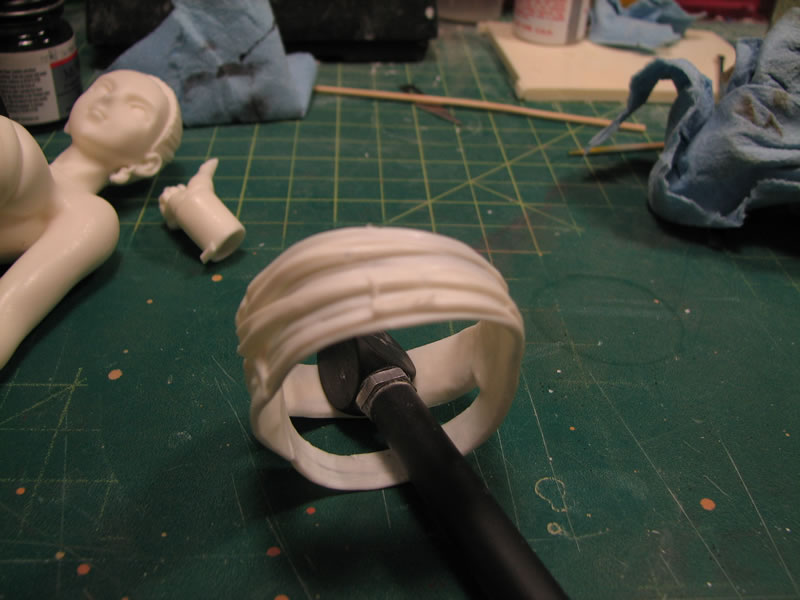
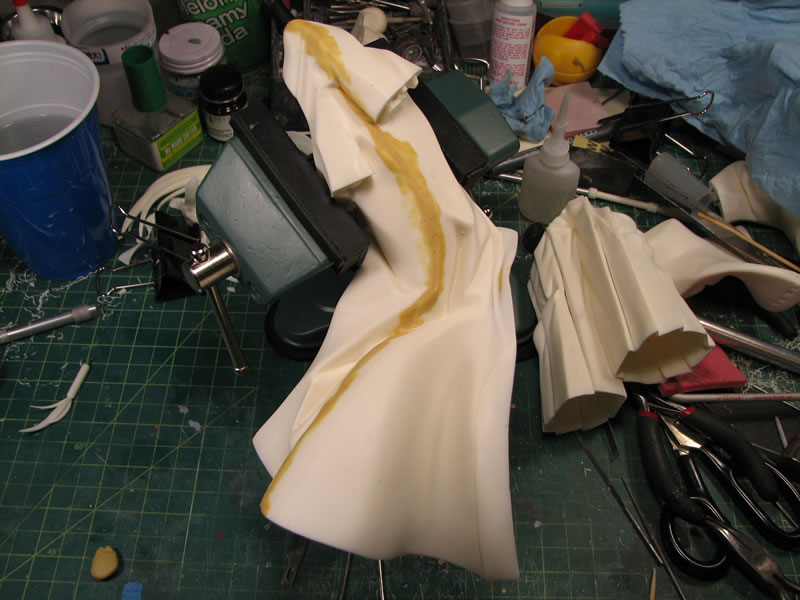
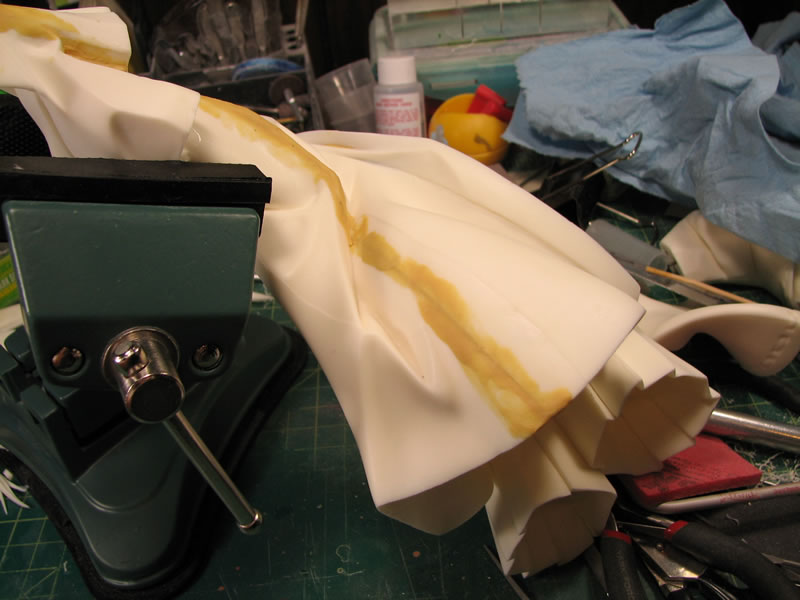
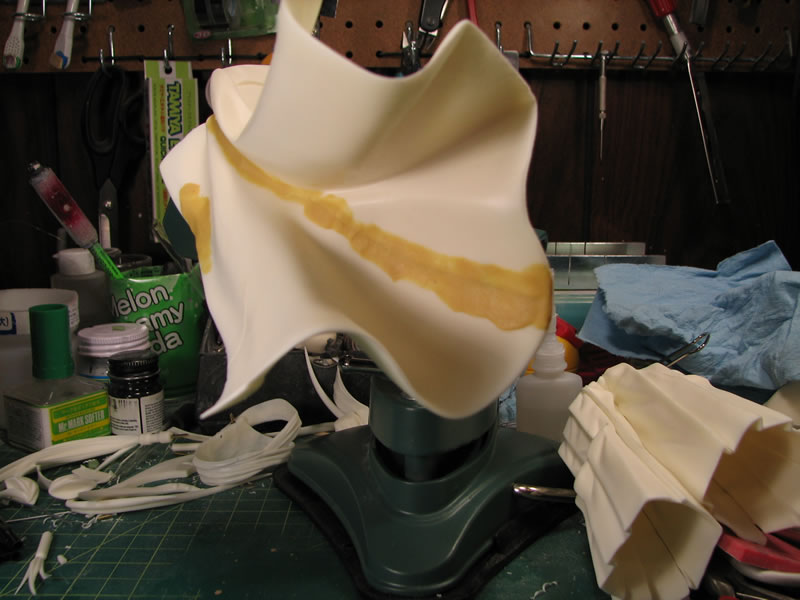
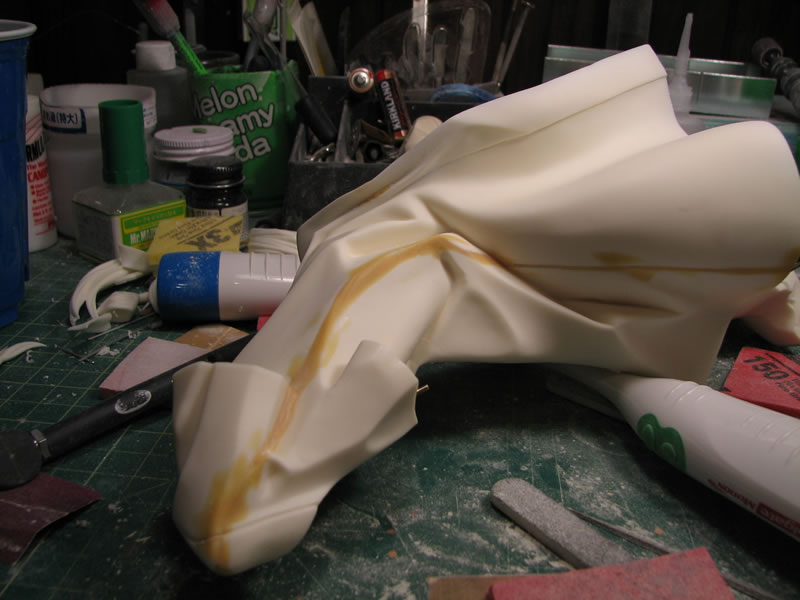
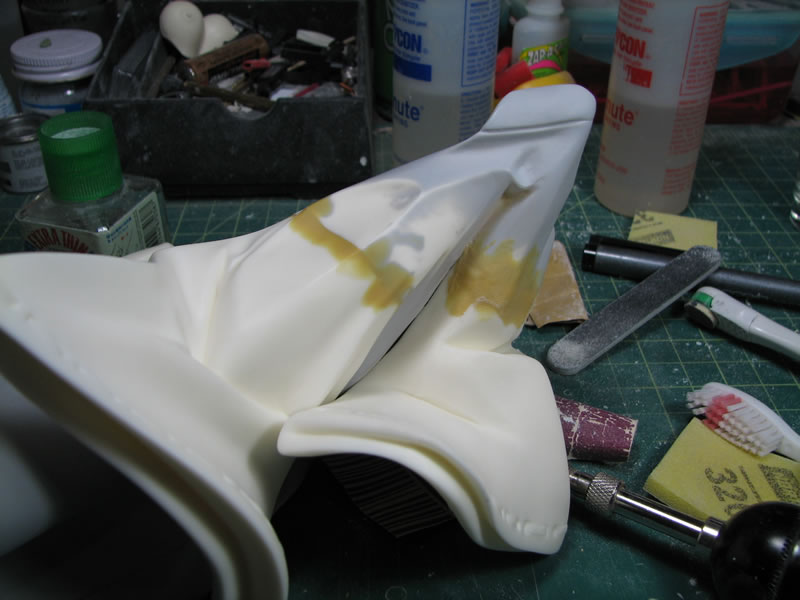
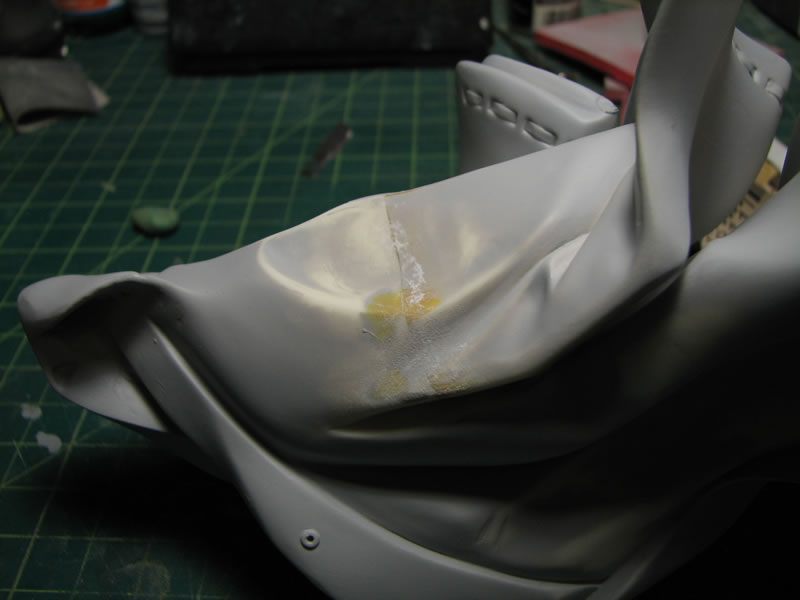
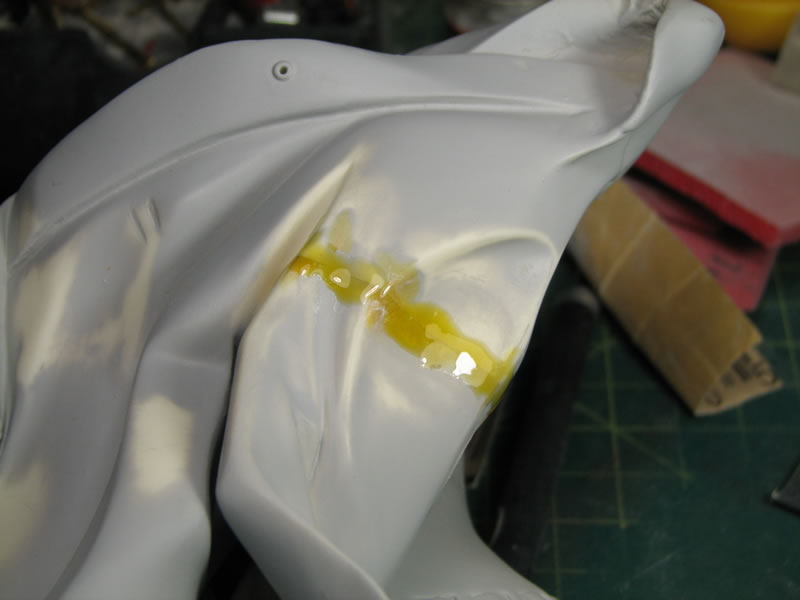
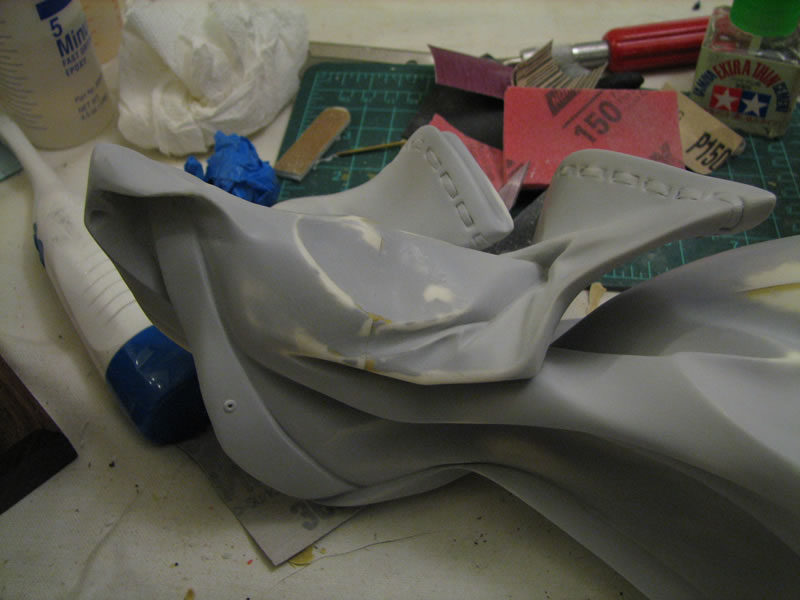
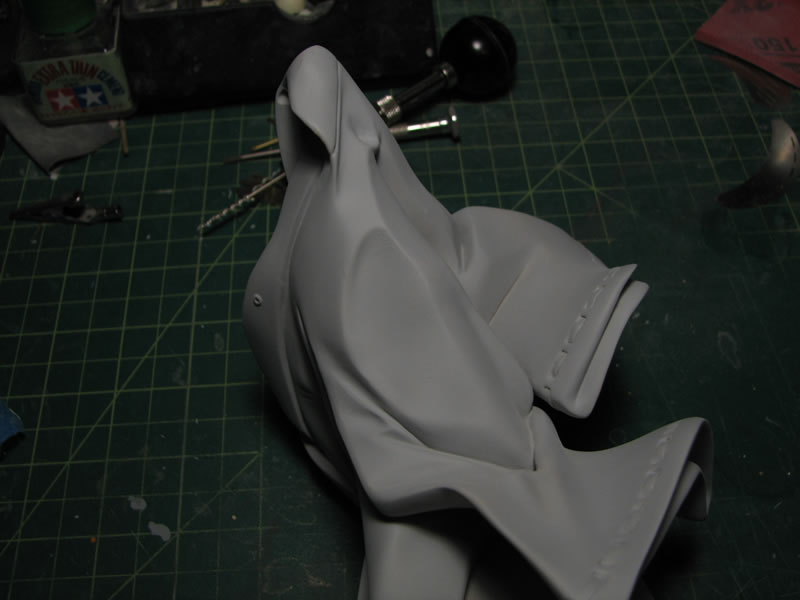
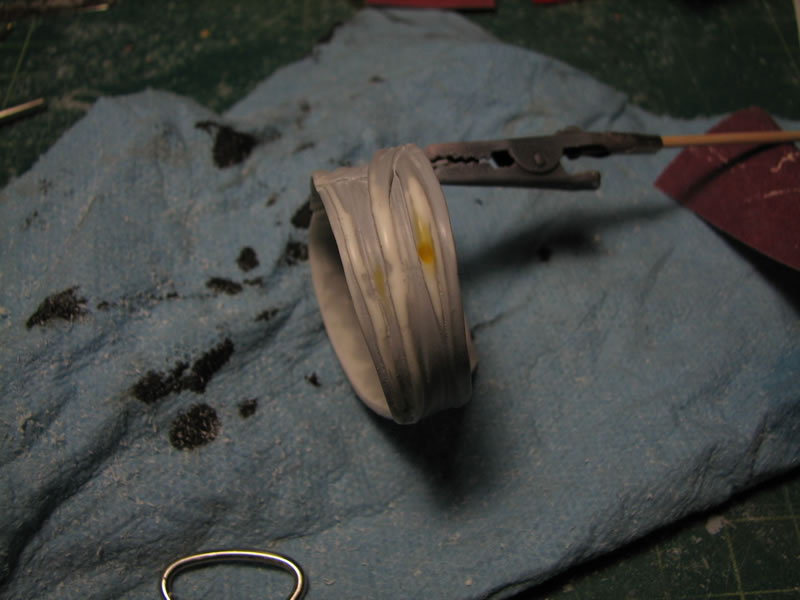
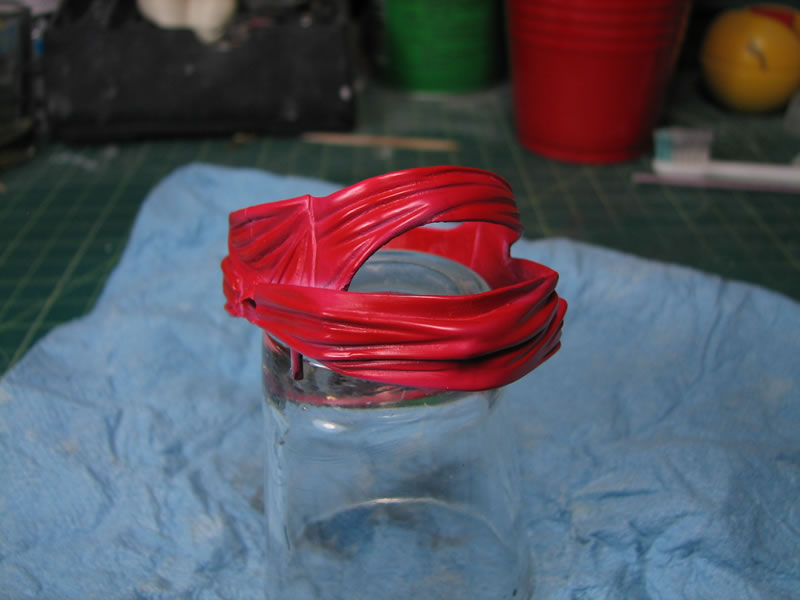
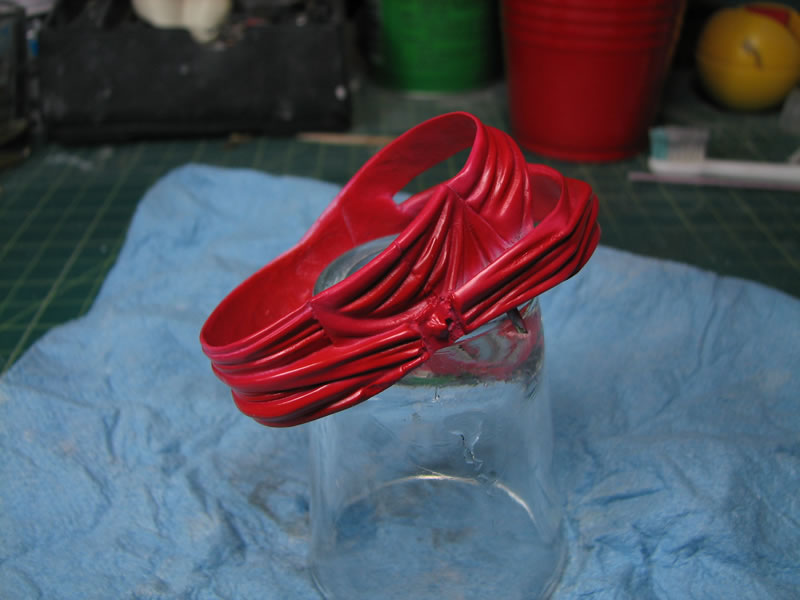
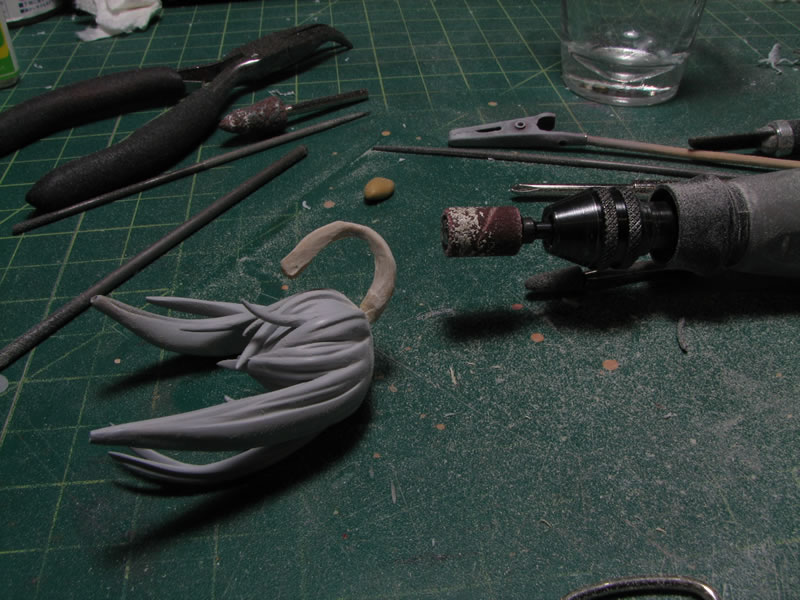
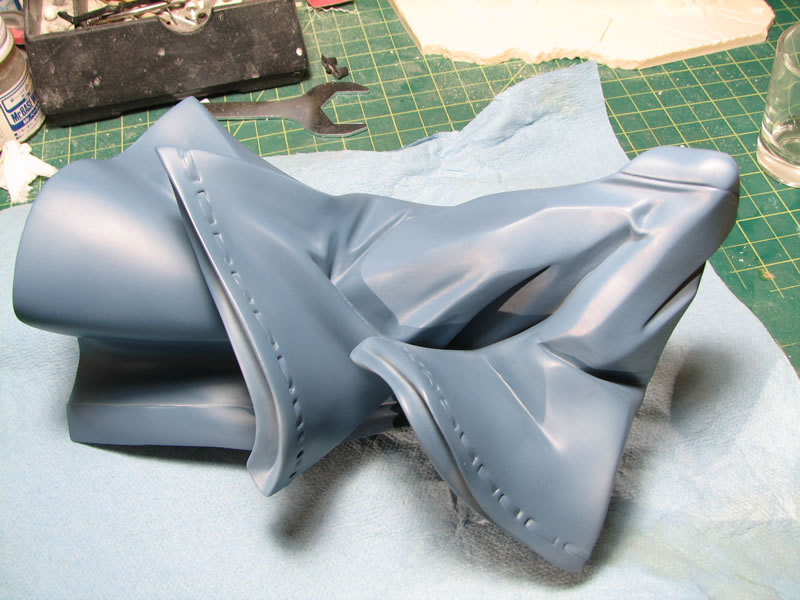
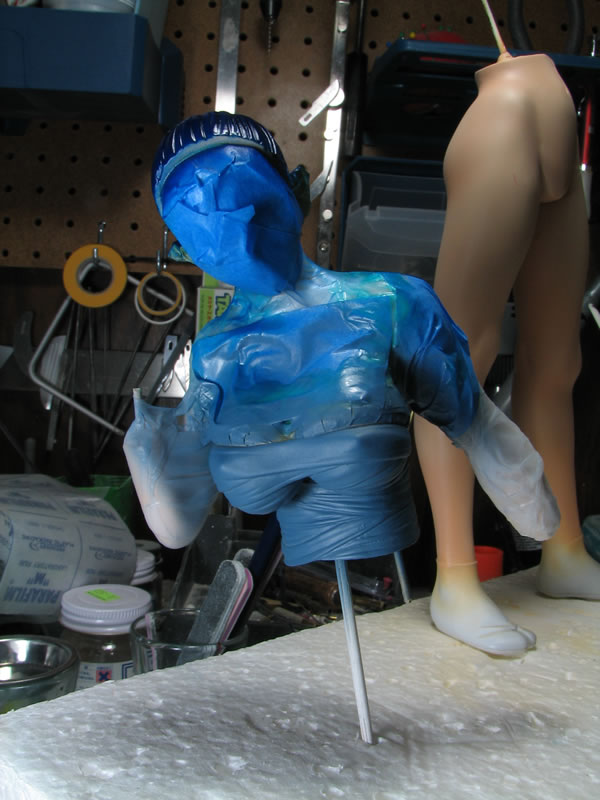
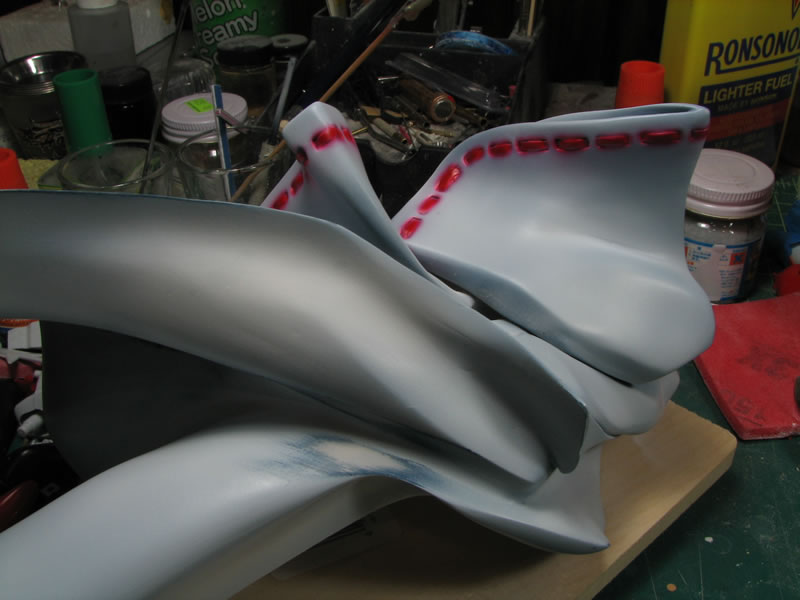
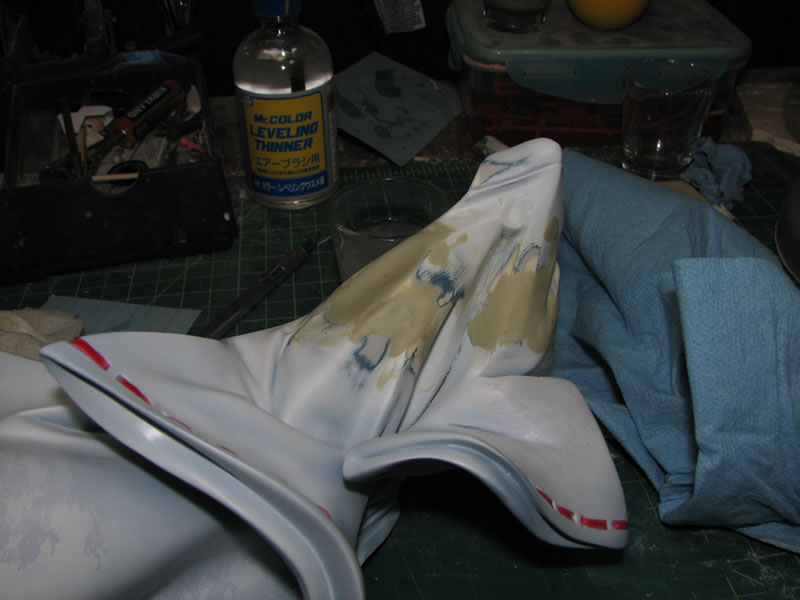
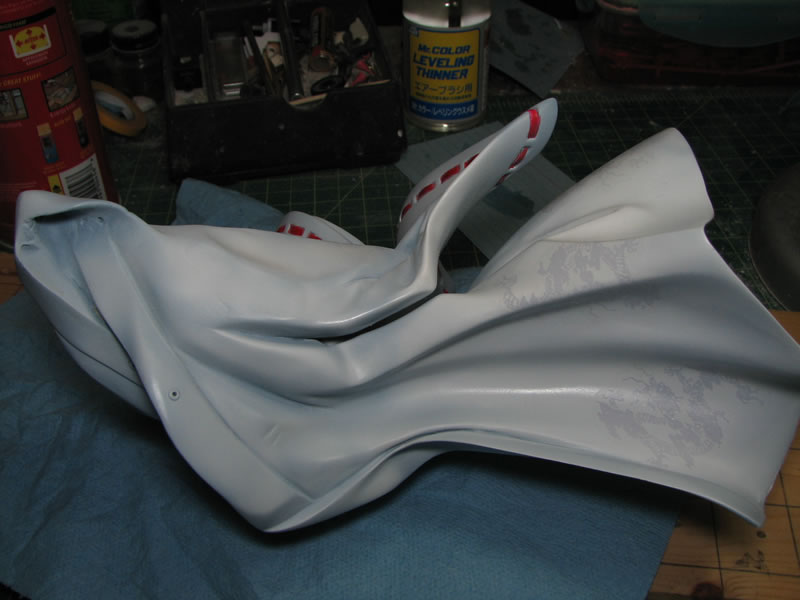
May 20, 2008: Small update. The previous night, I pinned the two main pieces for the robe then glued them together using epoxy glue. To ensure that I get a tight seal at the top, I used a vice to press the two pieces together while the glue cured. Doing the same with the lower section of the robe would have snapped the part, so and I wasn't too concerned about dealing with the gaps in that section. I let the glue set up over night and today, I did some rough sanding of the area then applied more epoxy glue to the gap areas as a filler.
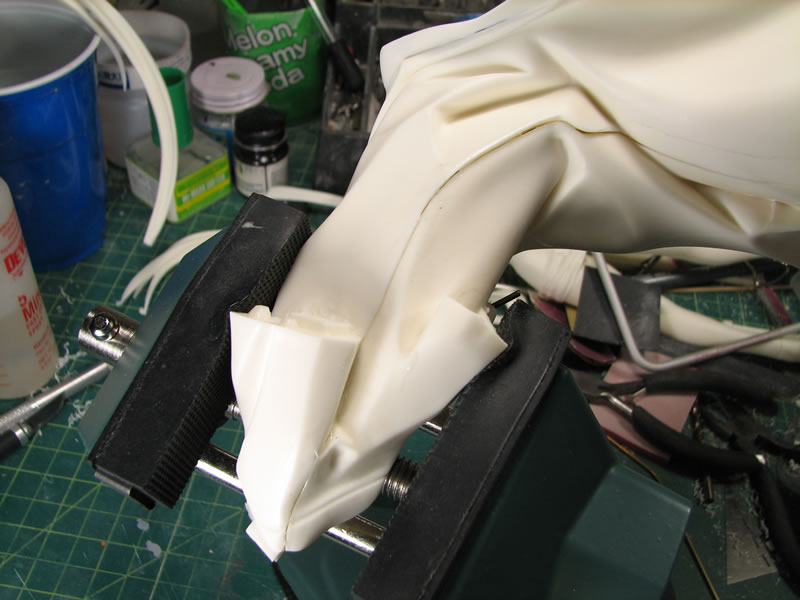
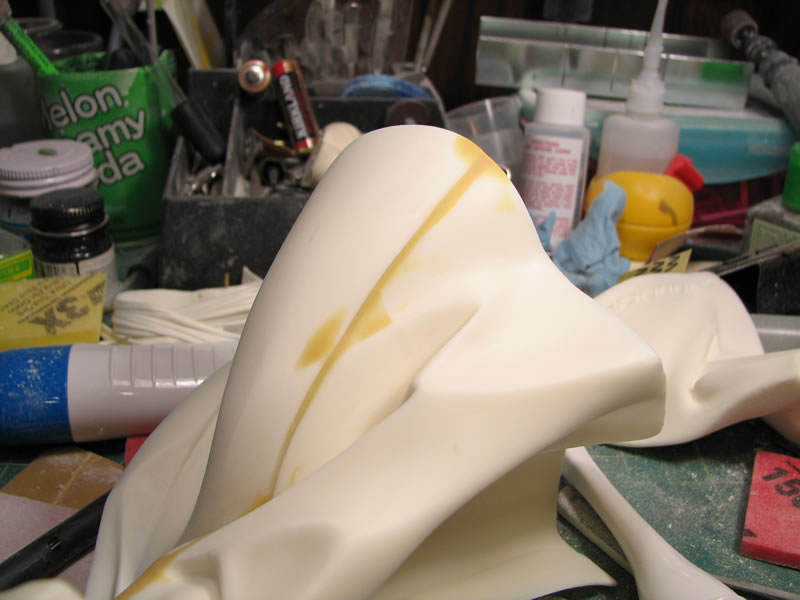
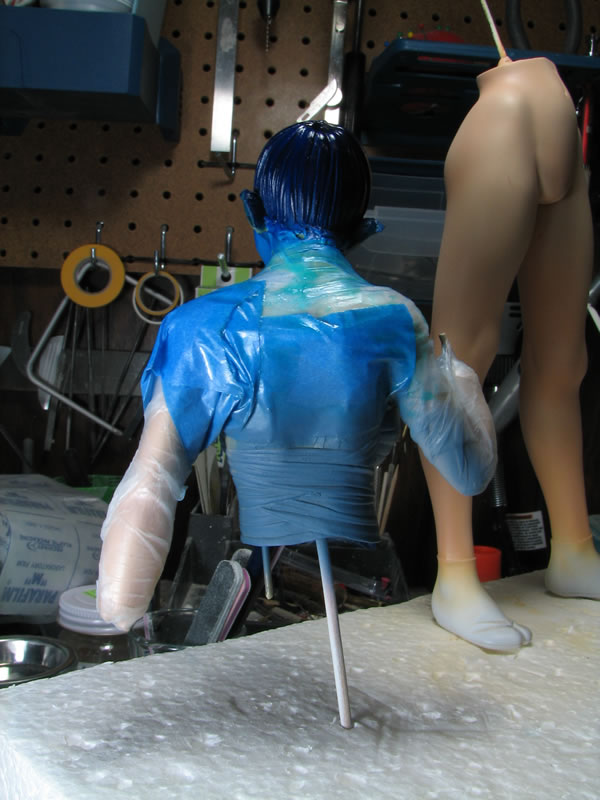
Below, you can see that the gap and surrounding areas are a bit on the shiny side, this is the epoxy glue that has been cured and is now a filler that I can use to structurally hold the epoxy putty. Using the epoxy glue also helps save on having to use too much epoxy putty. I did the same for the hair pieces.
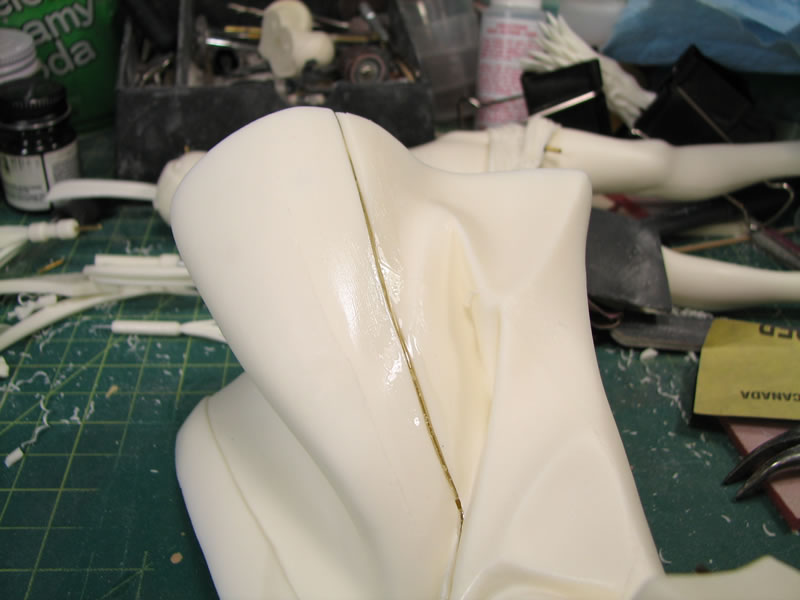
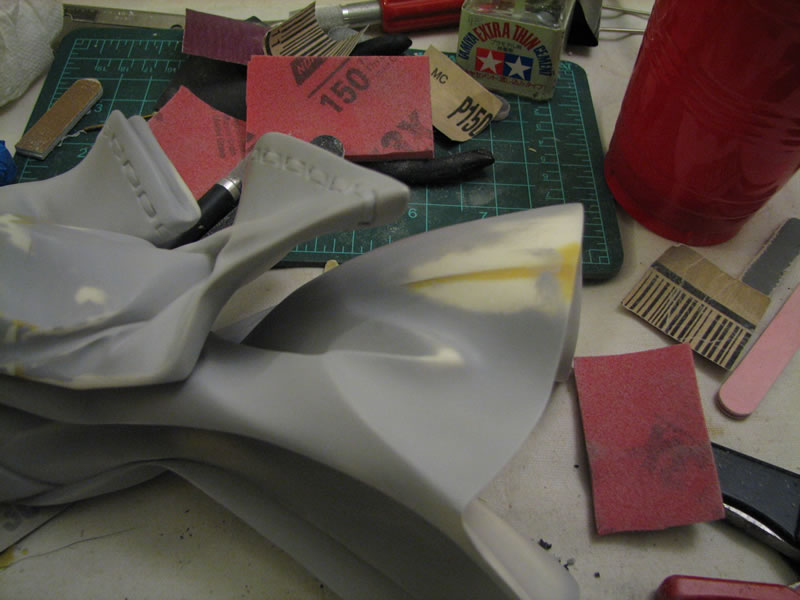
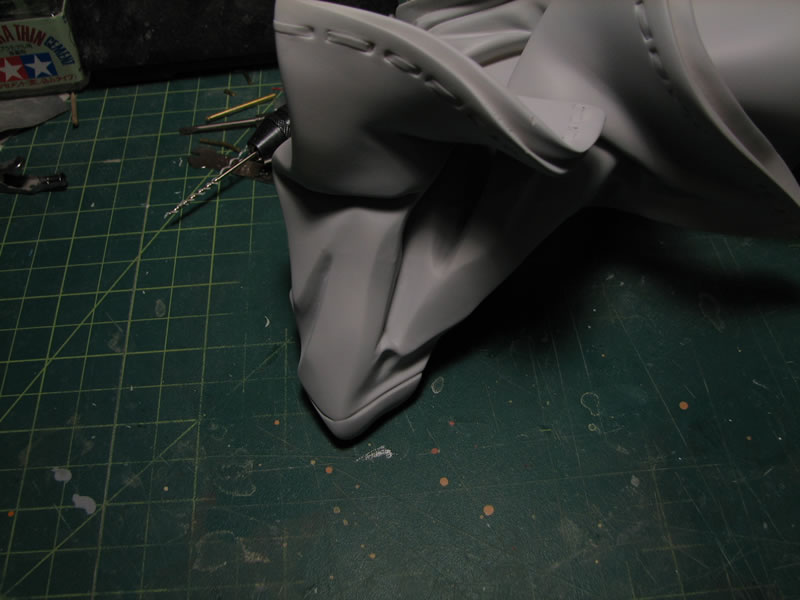
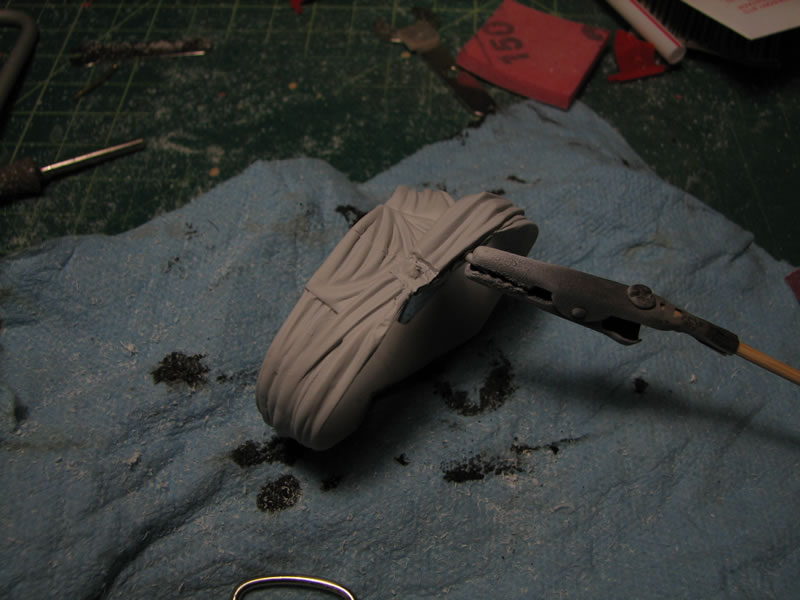
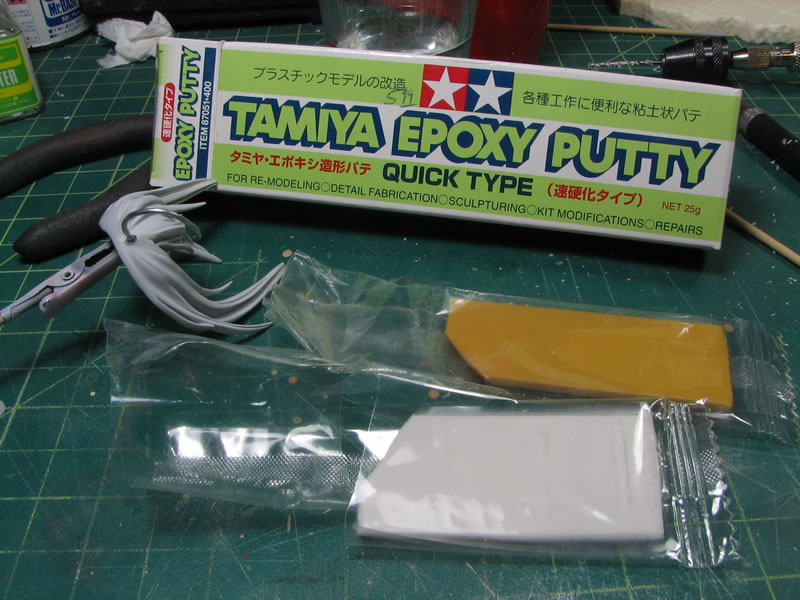
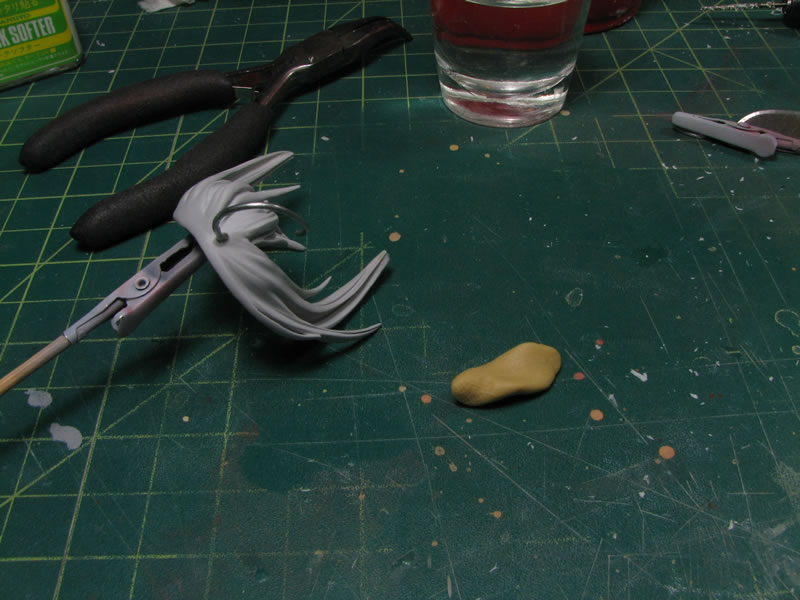
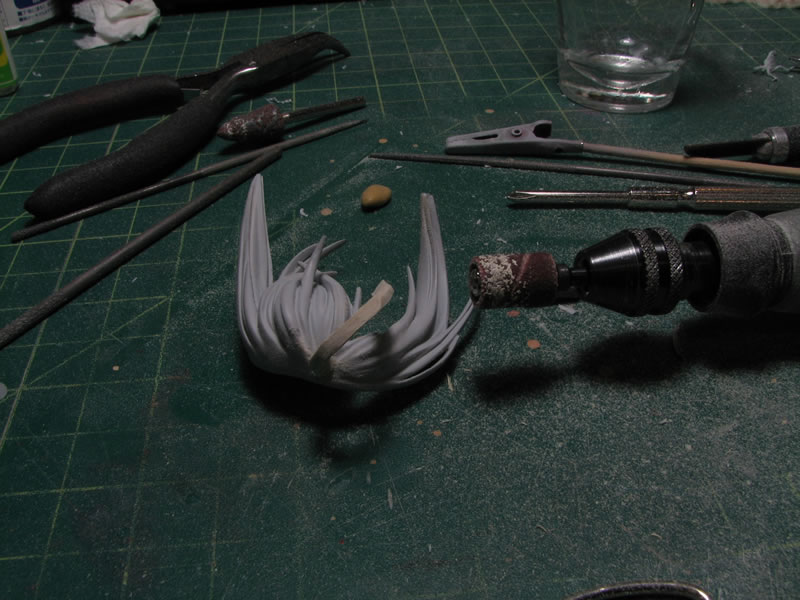
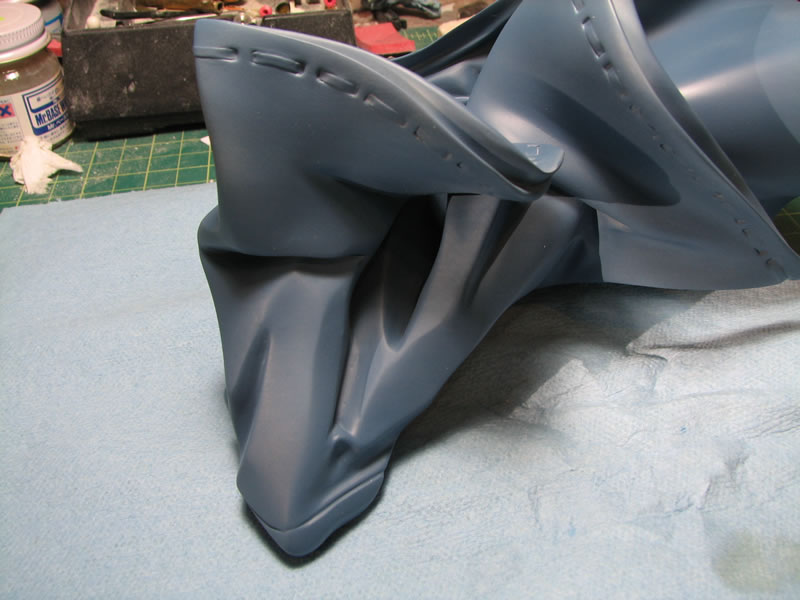
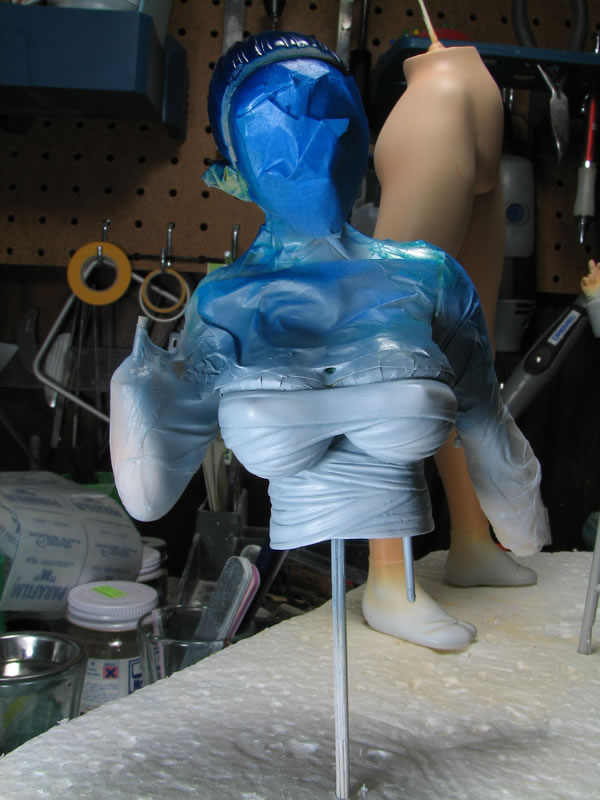
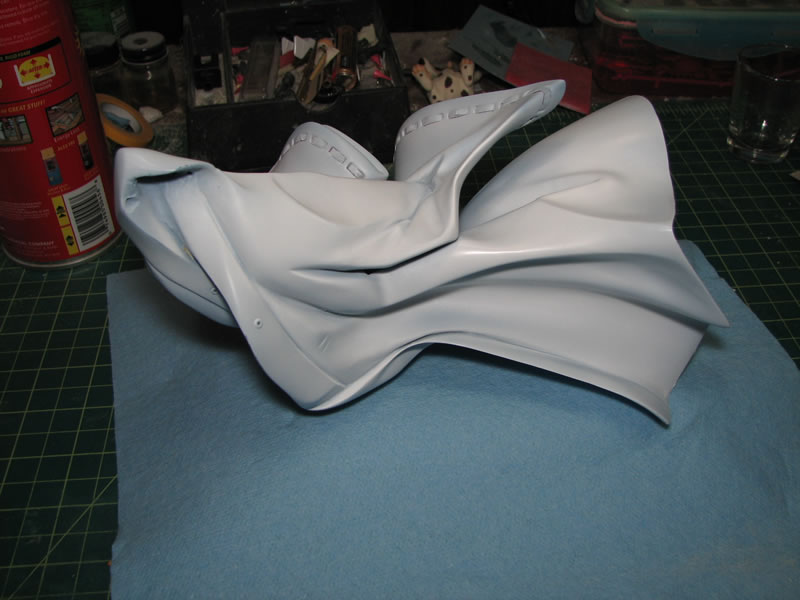
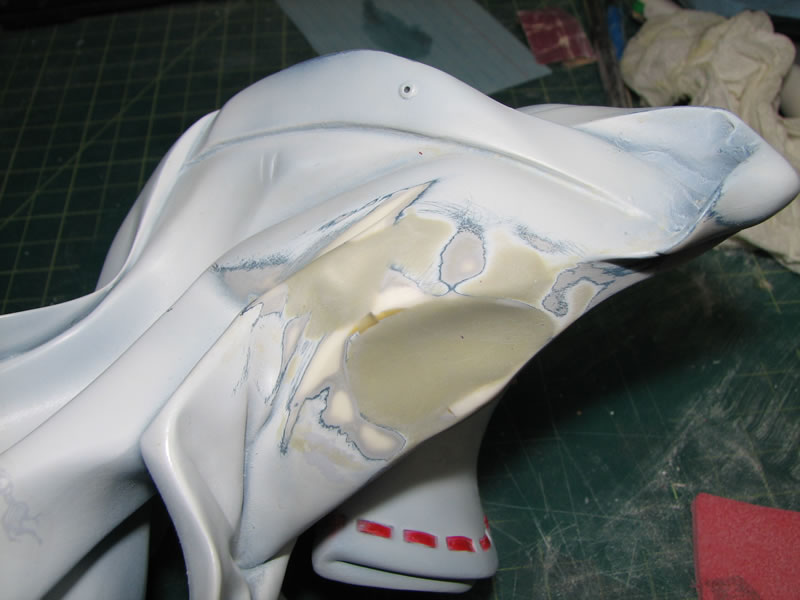
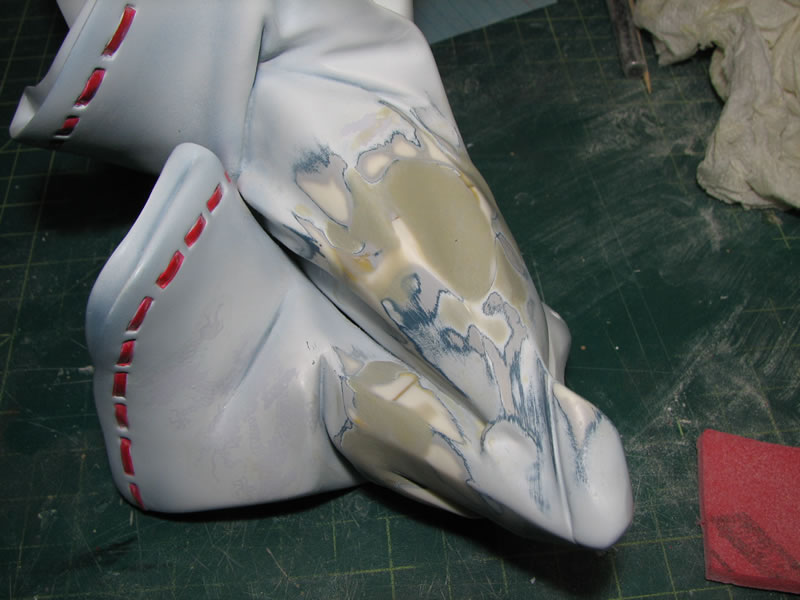
Below I fill the area with epoxy putty. I used tamiya epoxy putty quick type.
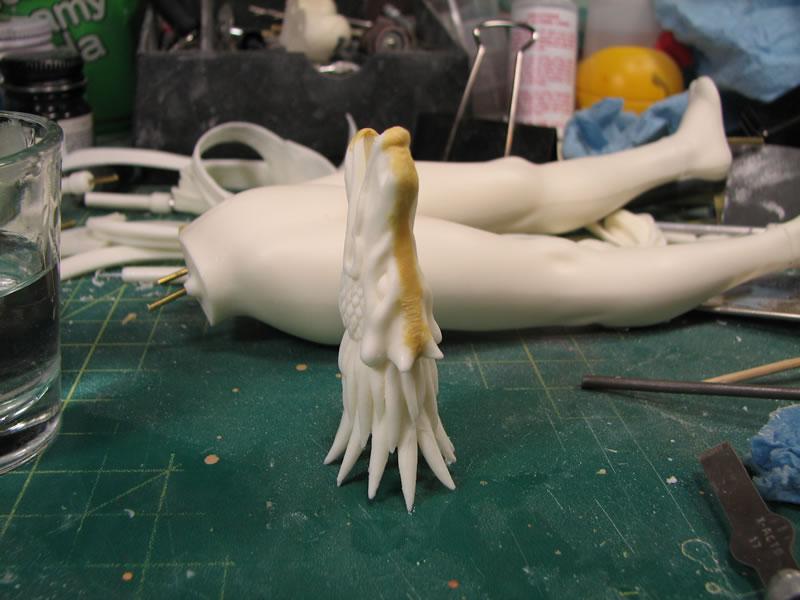
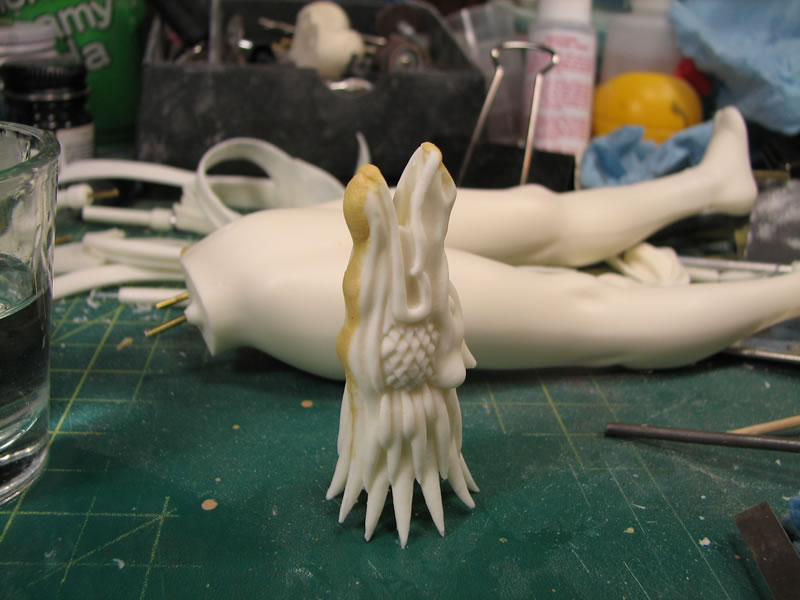
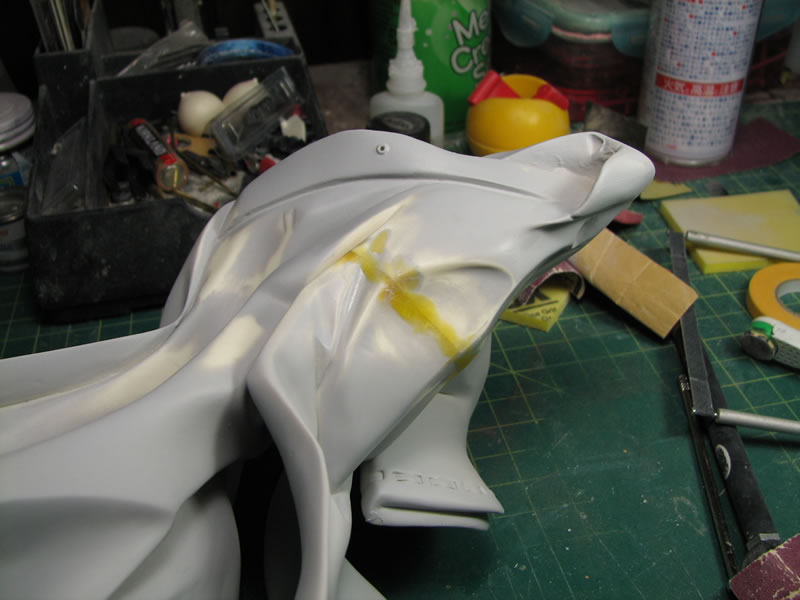
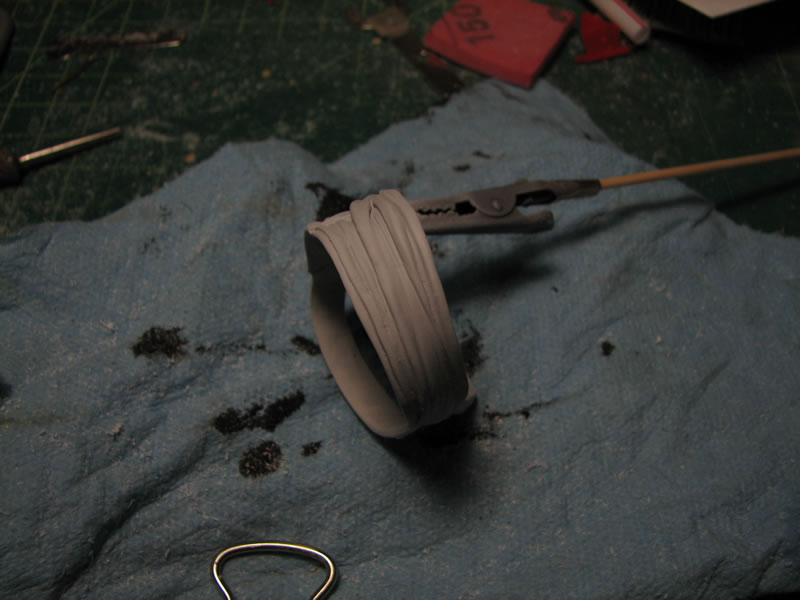
The same epoxy putty was used for the hair pieces.
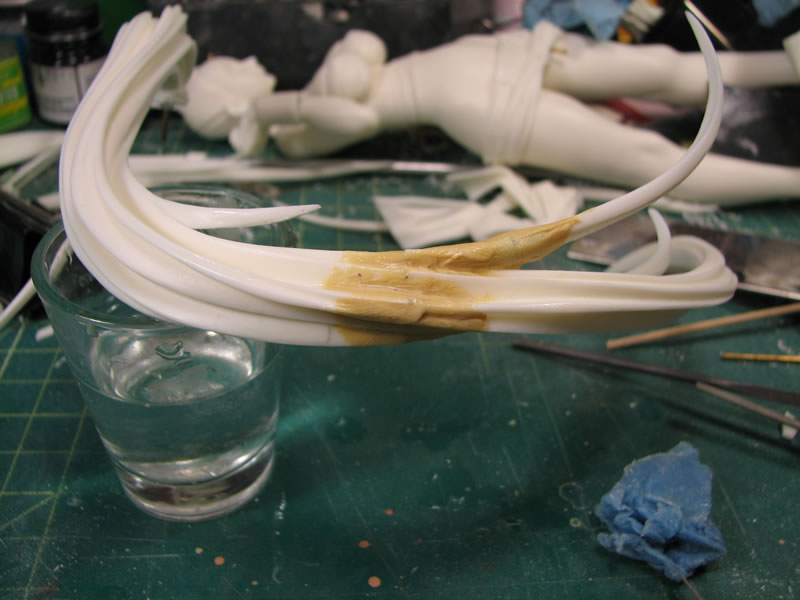
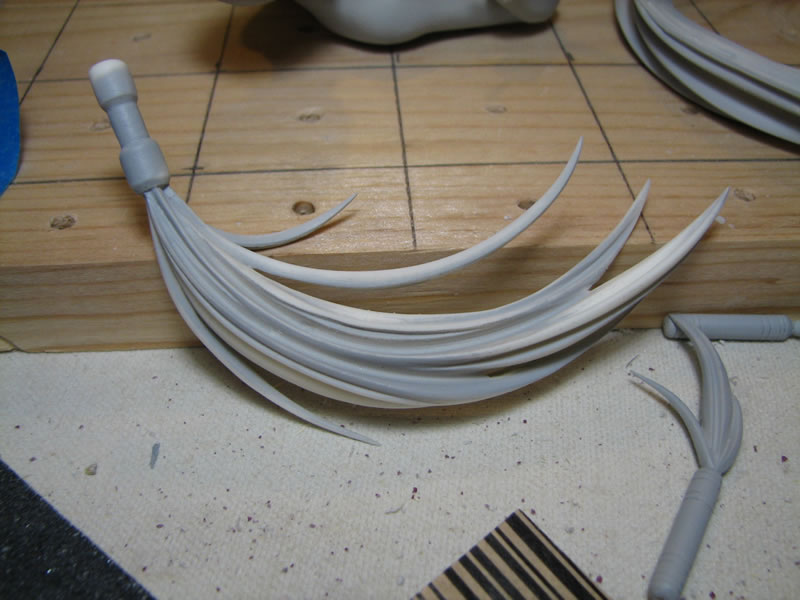
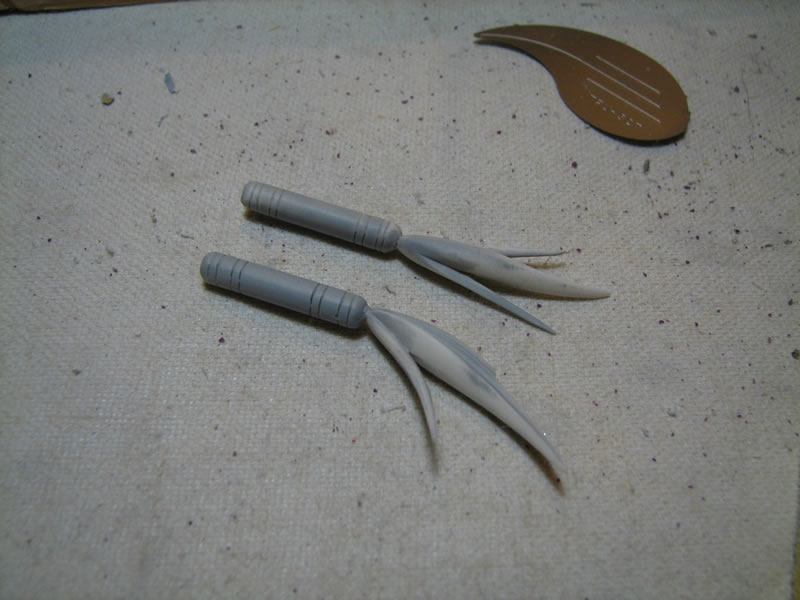
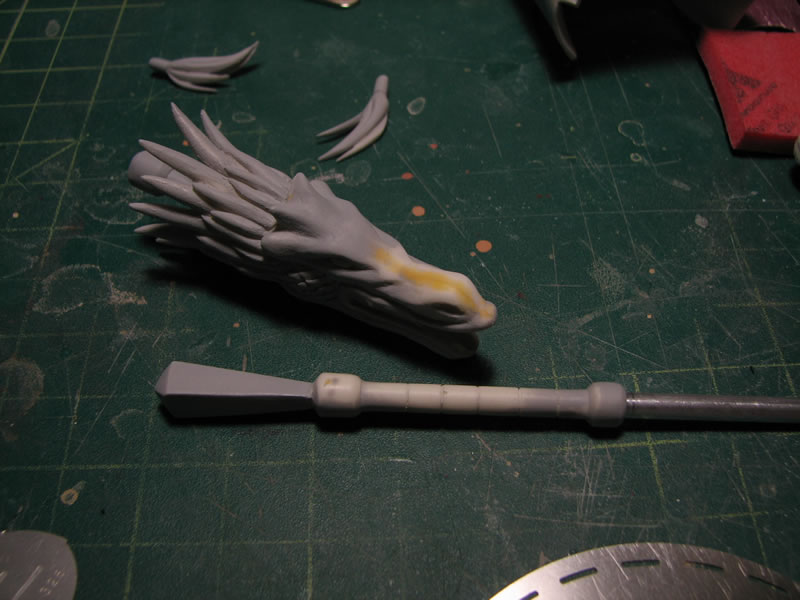
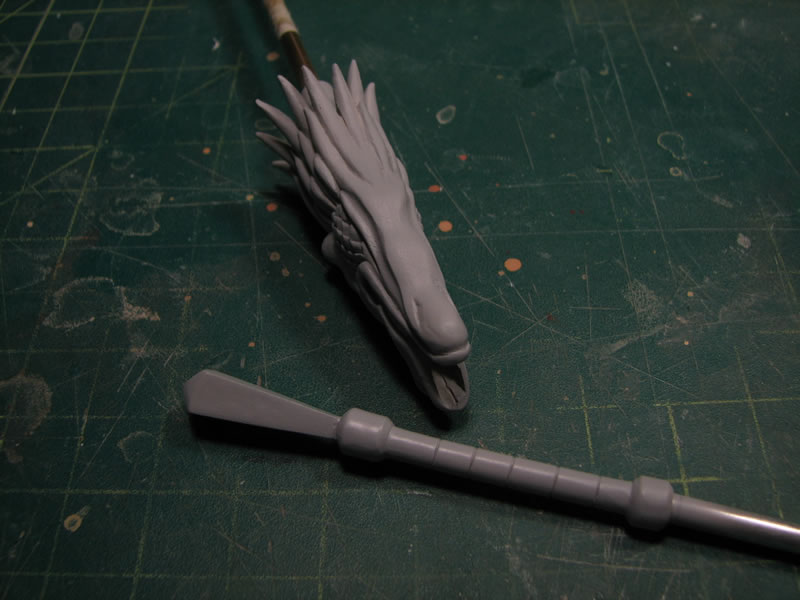
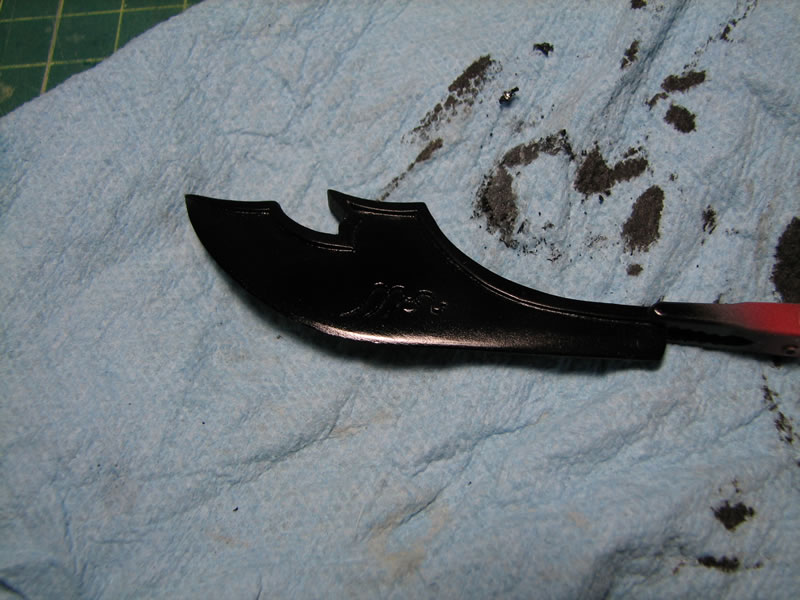
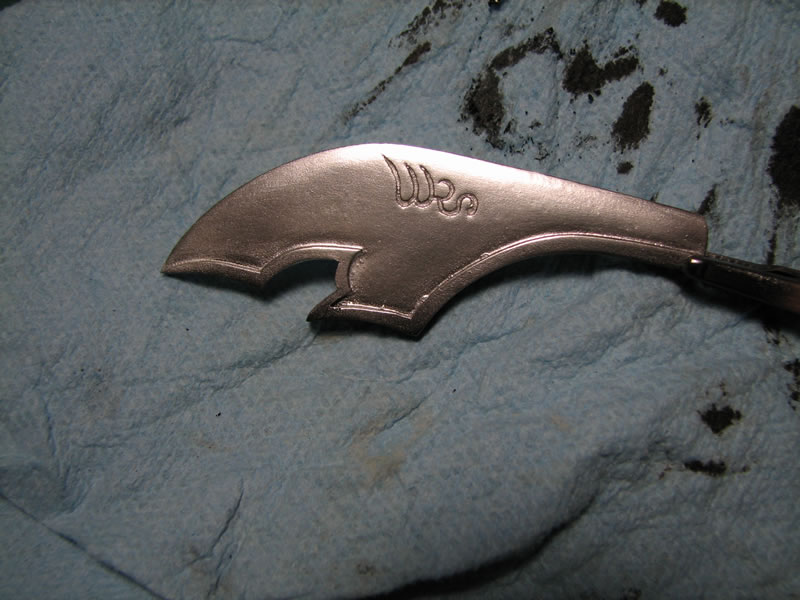
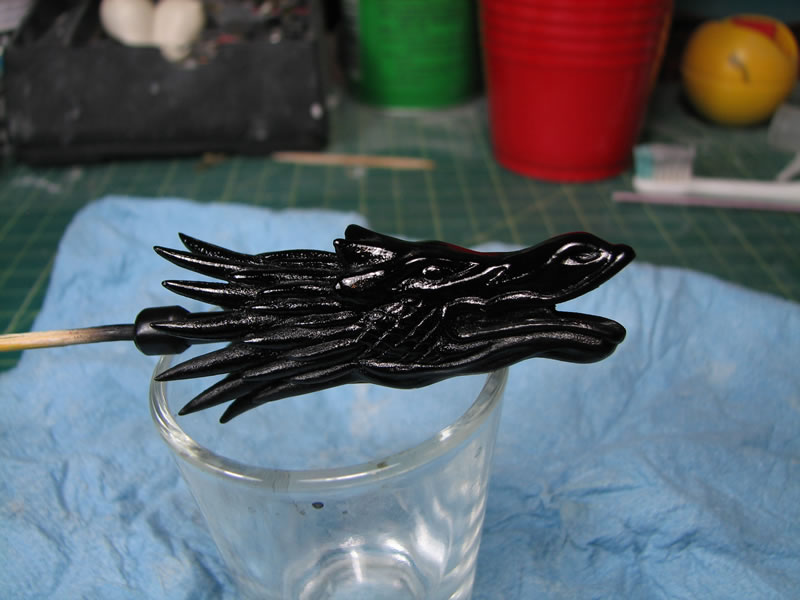
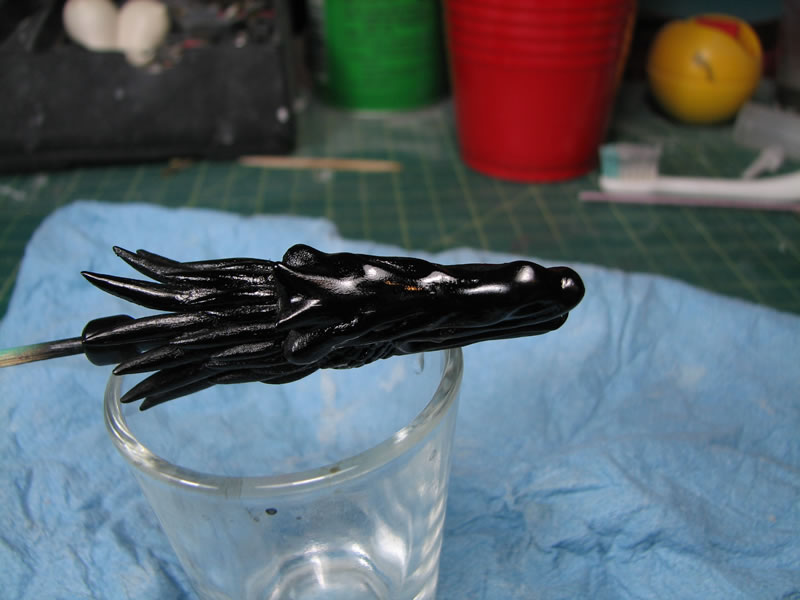
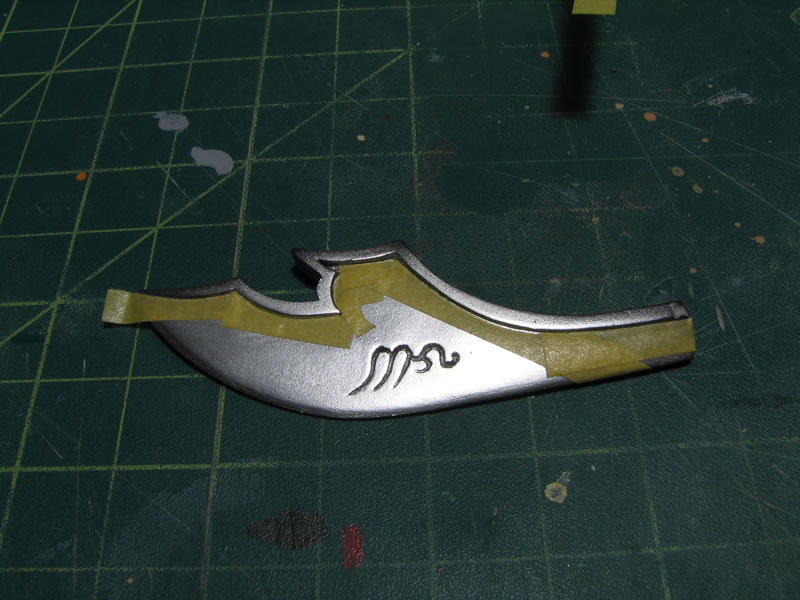
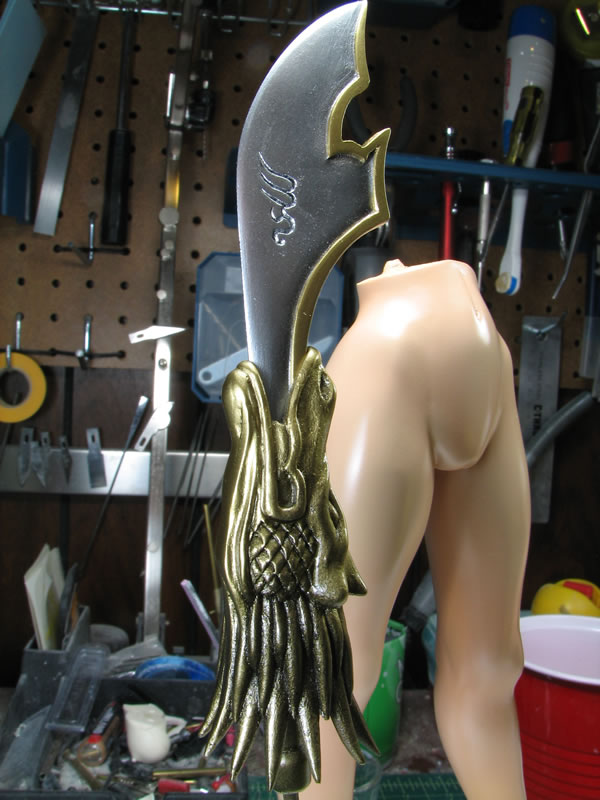
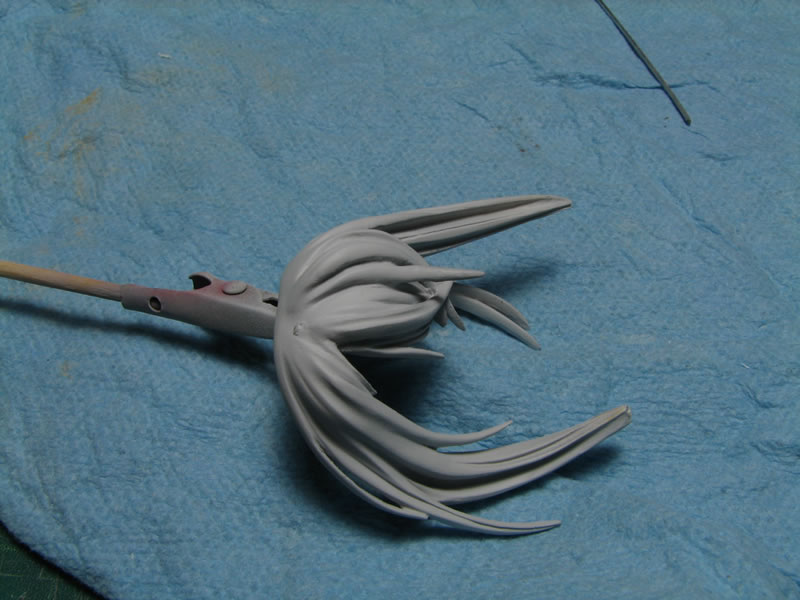
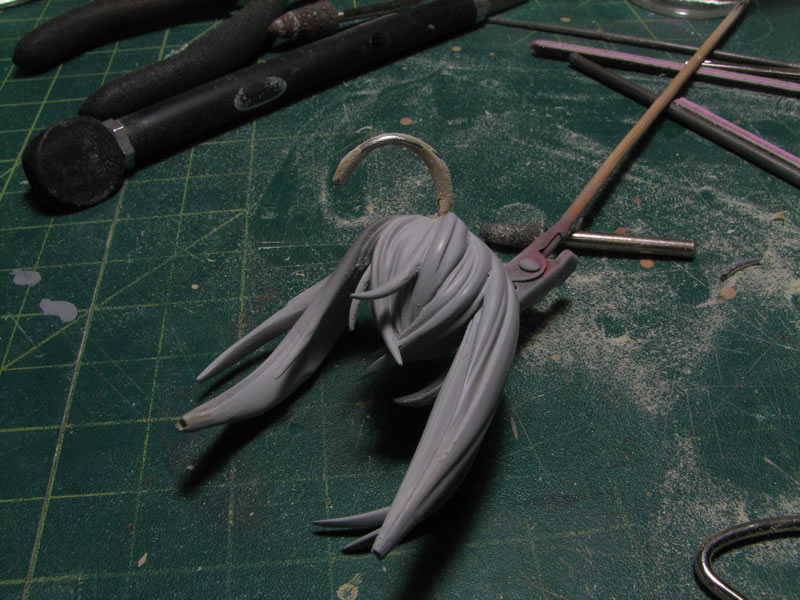
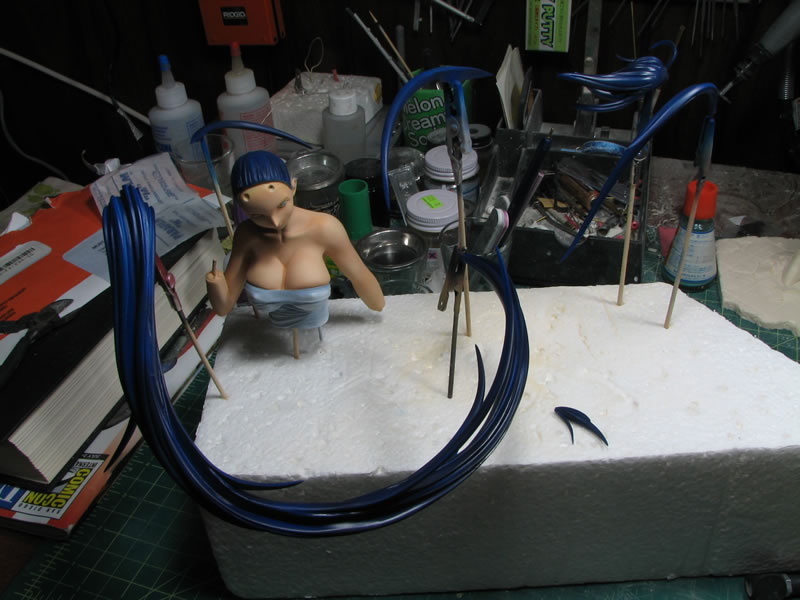
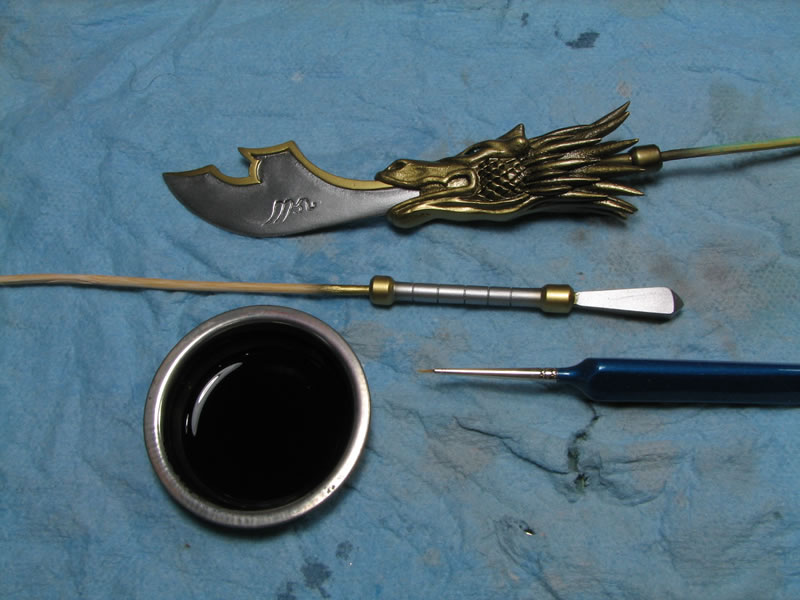
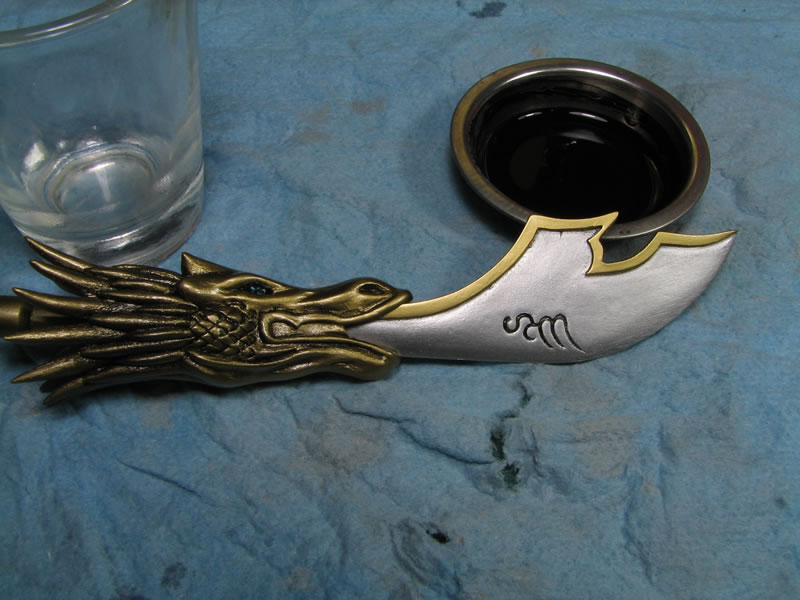
And again for the two part dragon head that holds the blade.
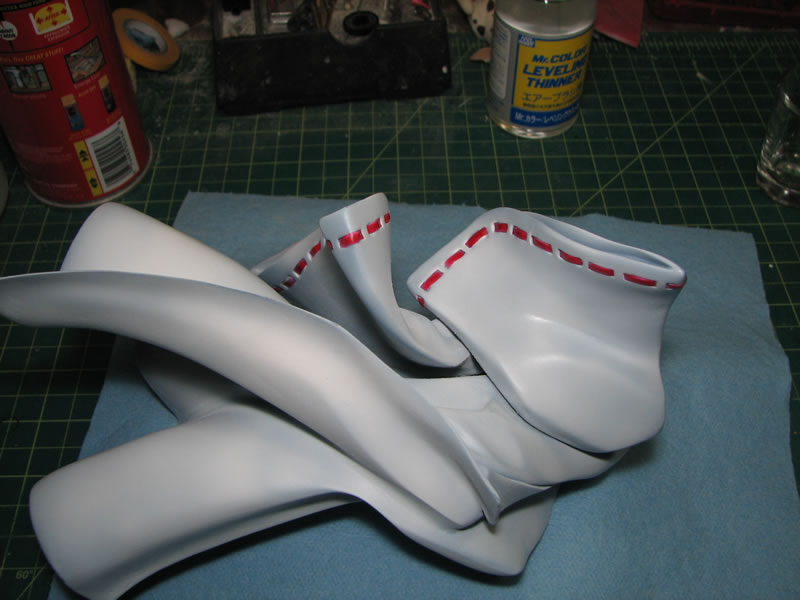
June 5, 2008: With the scheduled work on the HGUC Nus completed, I started back on this project full steam. Continuing with the gap filling, a few days after applying the putty, I started getting down to sanding the putty. I started with a low grit sandpaper, then moved slowly to higher and higher grits to polish the surface and prepare it for paint.
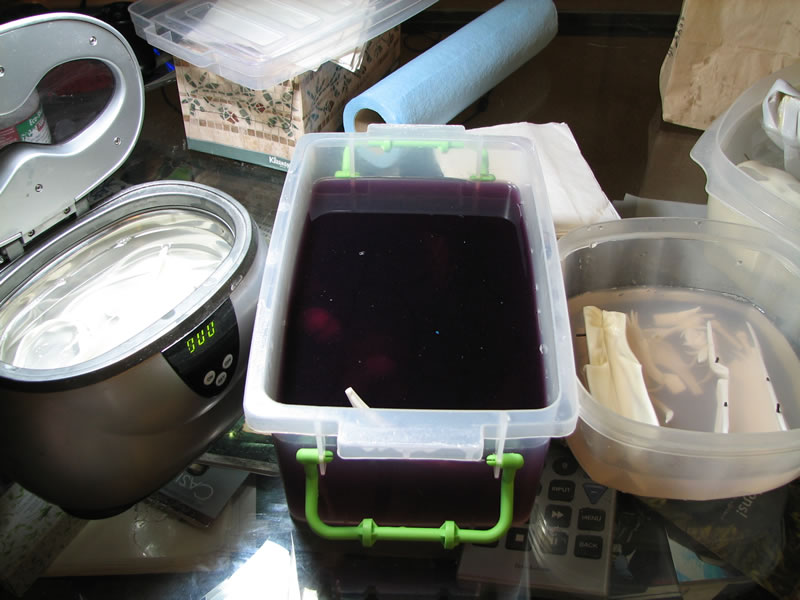
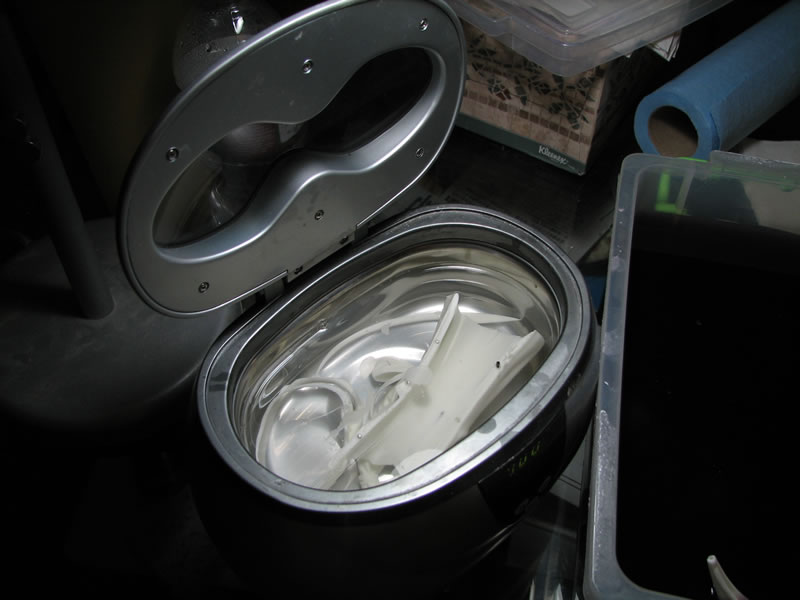
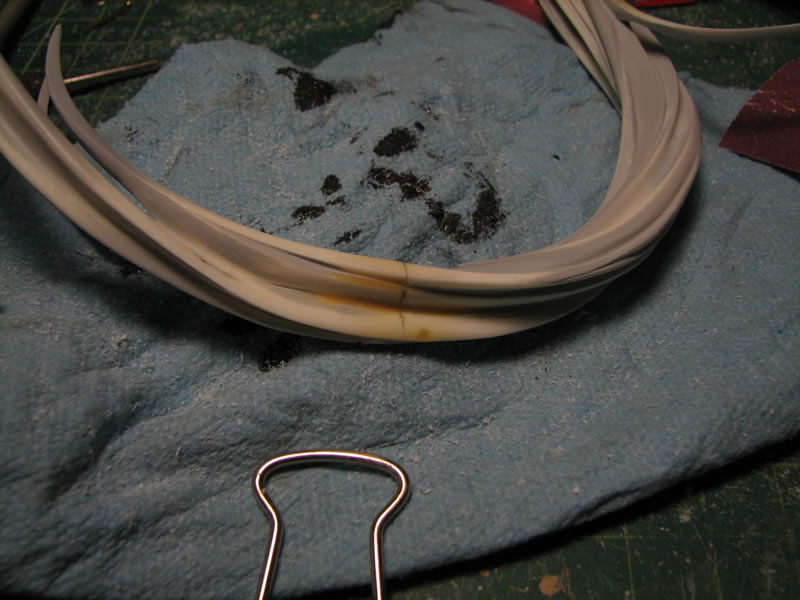
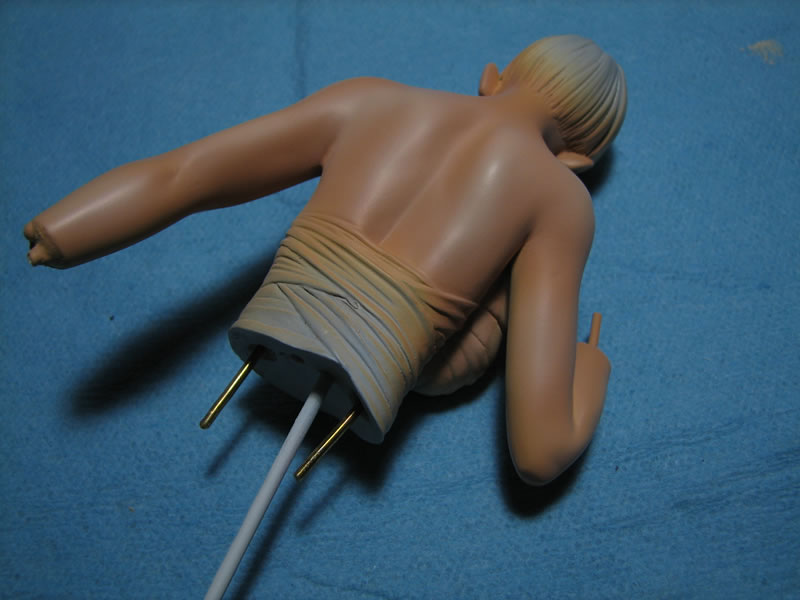
After sanding all the parts, I threw them into some purple colored industrial strength cleaning solution for a couple of days to completely remove any trace of mold release. After a few days of soaking, I pulled the parts out and dunked them into a tub of water to clean off most of the cleaner. From there, I threw the parts into an ultrasonic cleaner for a thorough cleaning. After cleaning, the parts are completely dried and then mounted on skewers or aligator clips for the initial priming session.
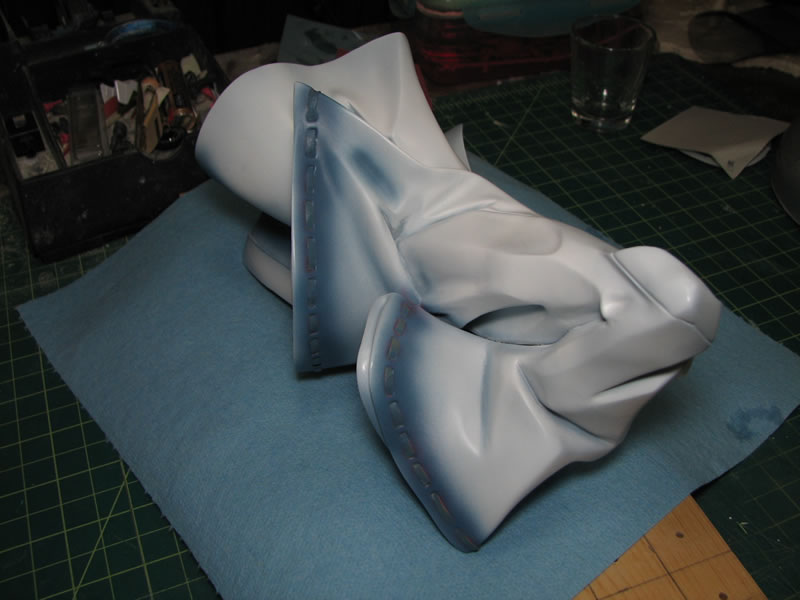
The parts here have been primed. I refer to this as the initial priming session as this is usually not the last time I prime the kit. The primer shows all the sanding mistakes, pinholes, and defects in the resin. With the gray primer, it is much easier to see mistakes. From here, I will be applying more putty and doing some more fine tune sanding.
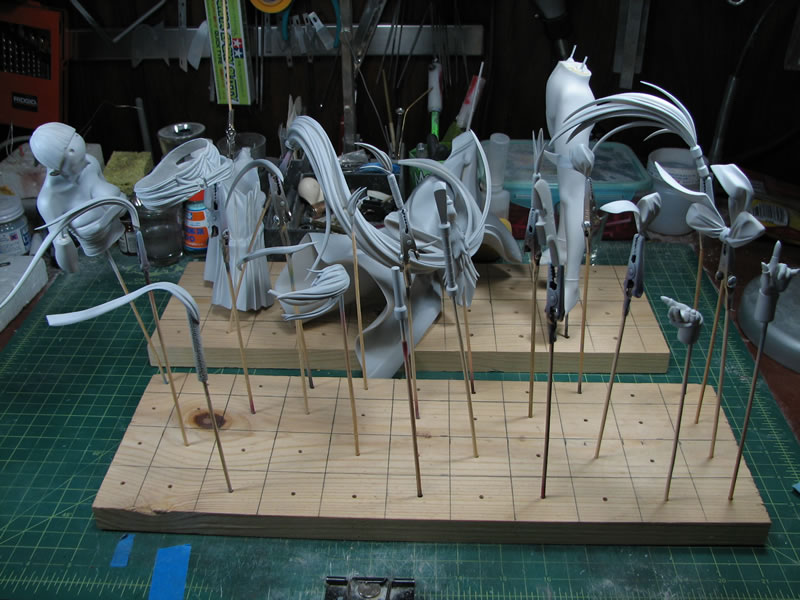
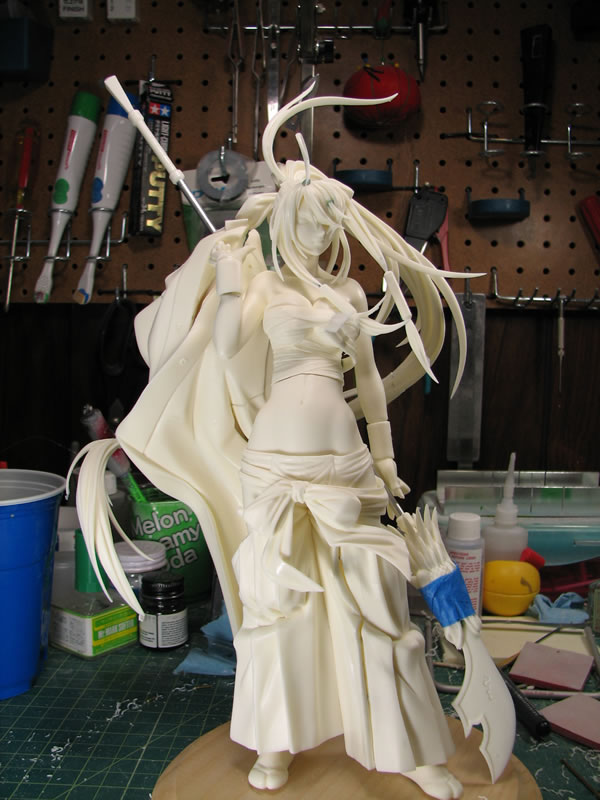
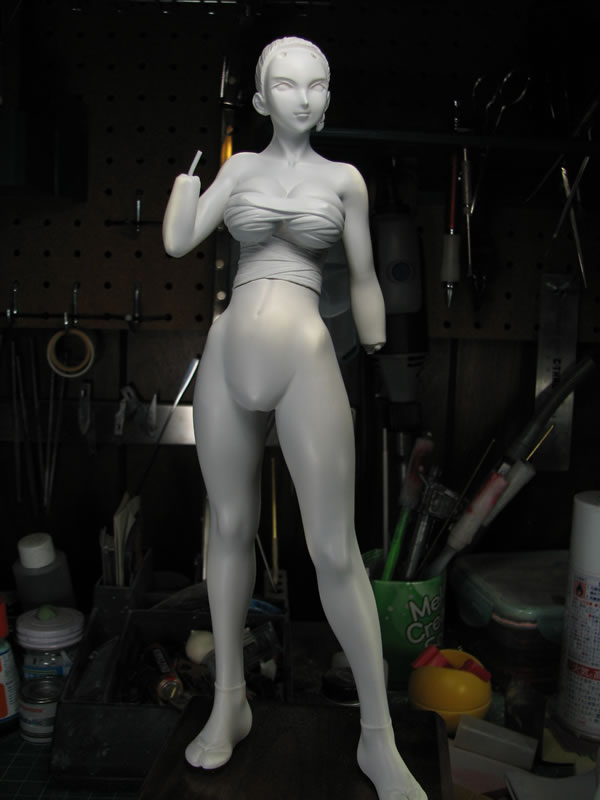
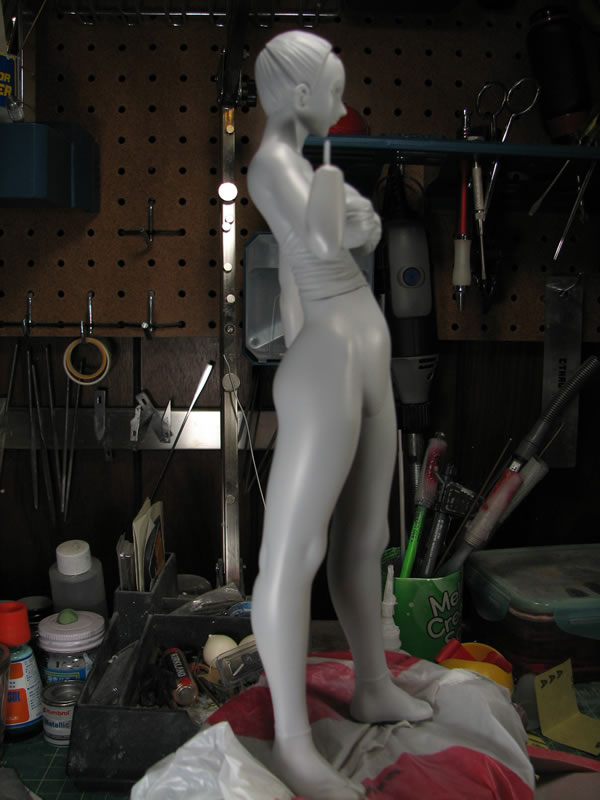
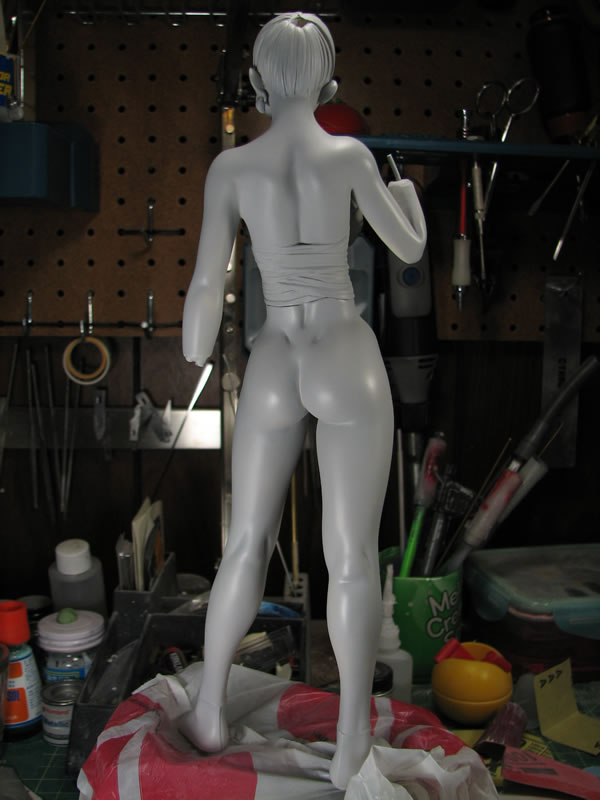
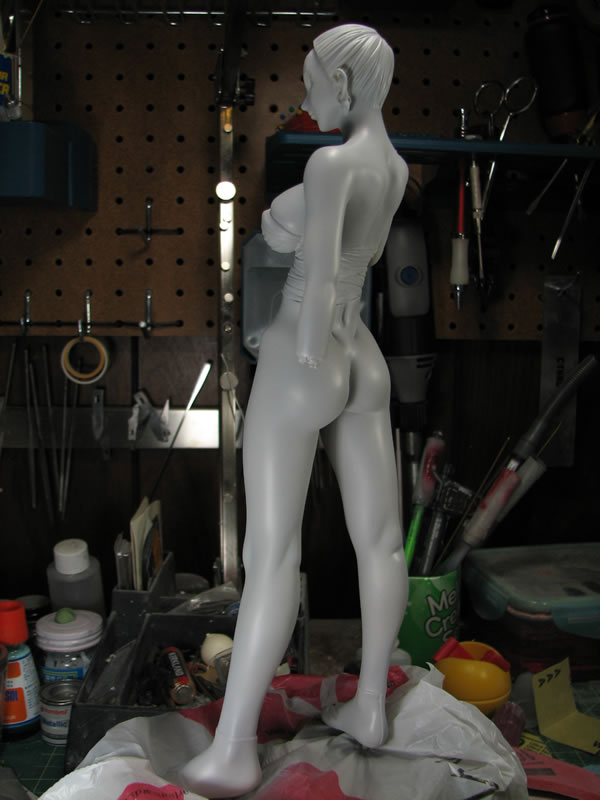
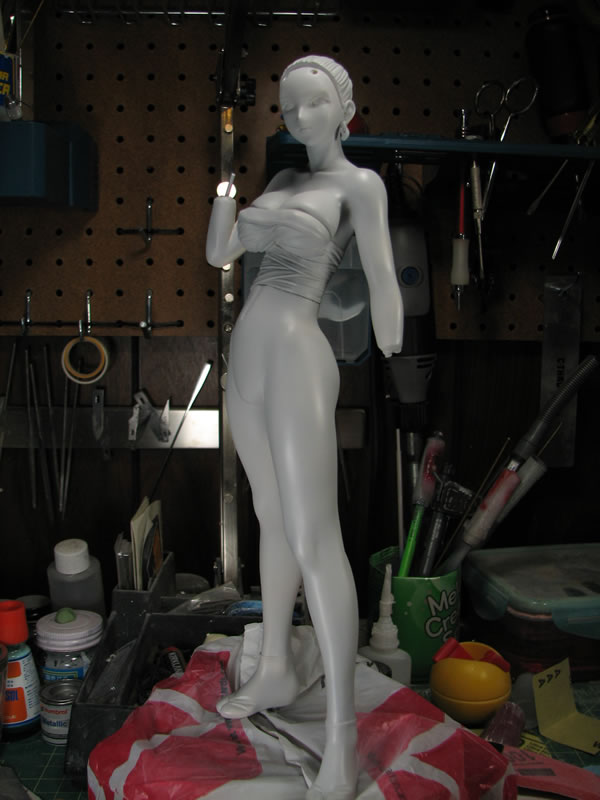
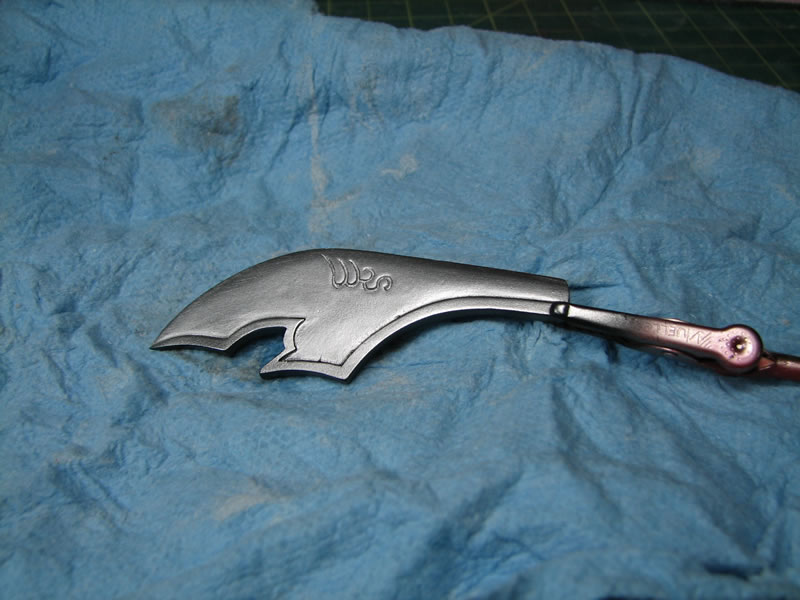
And before I fix things, I did a quick pin of the parts to take some pictures of the kit in it's initial primer stage.

August, 14, 2008: Finally getting back into the groove of working on a kit. Thanks to Brian and stupid Skype, I'm suckered back into building, as sitting there talking and watching Brian work on his Gouf Ignited and Sumo spurs me to get some work done. So the first set of pictures were actually taken a while ago when I was working on finishing up some additional videos for Anime Expo, so about the first of July was when these pictures were taken. I had the parts initially primed and I was starting in on the sanding process to clean up mistakes found after the intiial priming session.

Below I used a knife to open up the bubbles I found in the resin and filled them using a light curing putty. I will add a link here when I get that tutorial up.

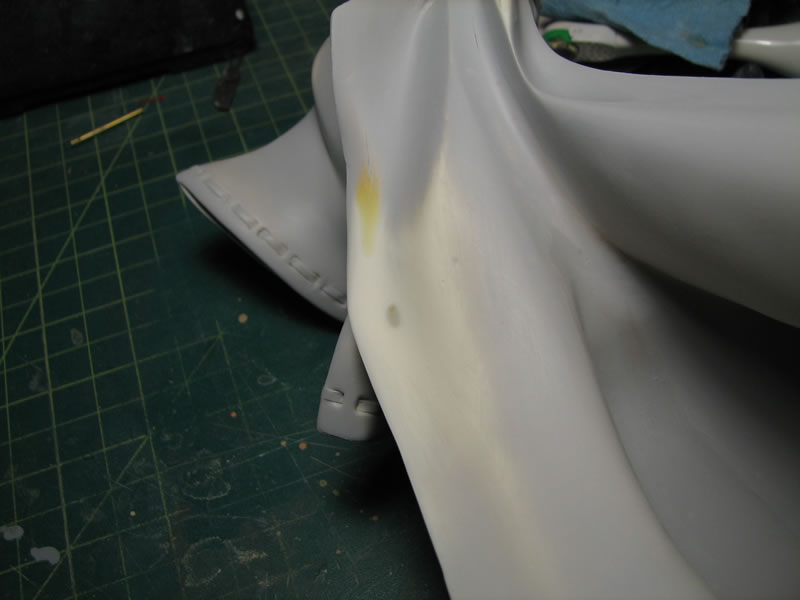
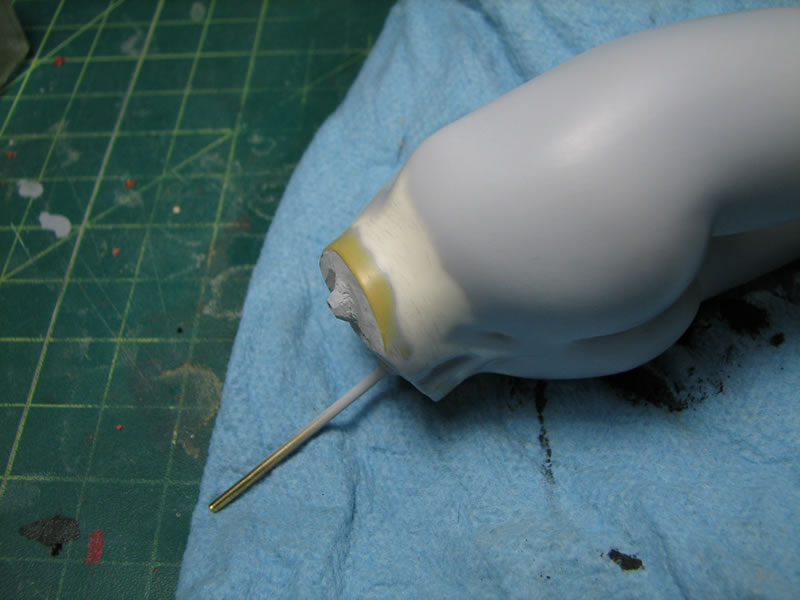
The earthquake that hit us last month sorta had stuff fall ontop of the kit, so I found that one of the pieces in the robe came lose so I filled it using CA glue, sanded that down, then added some light curing putty to finish filling the area. All this was sanded down and then ready for the second priming stage. I also took the time to fix other defects that I found in the surface.
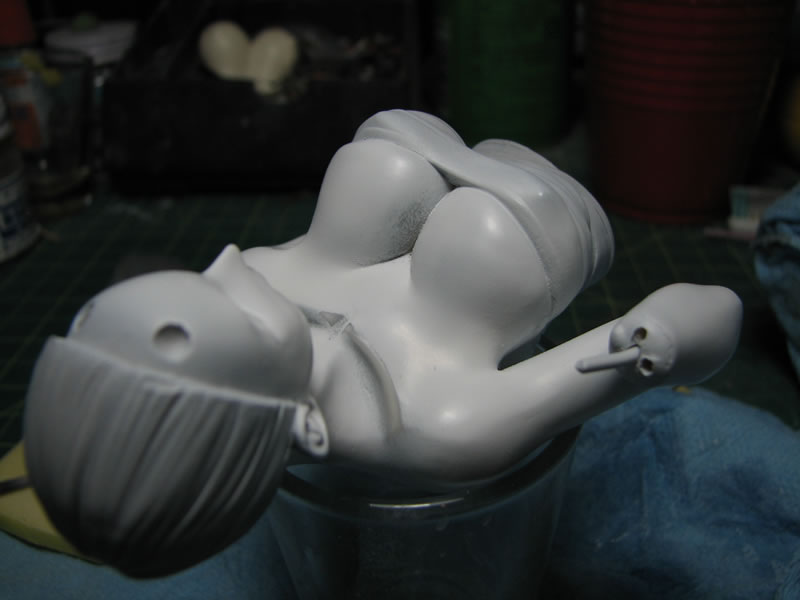
Here is Kanu sanded and ready for the second priming session.
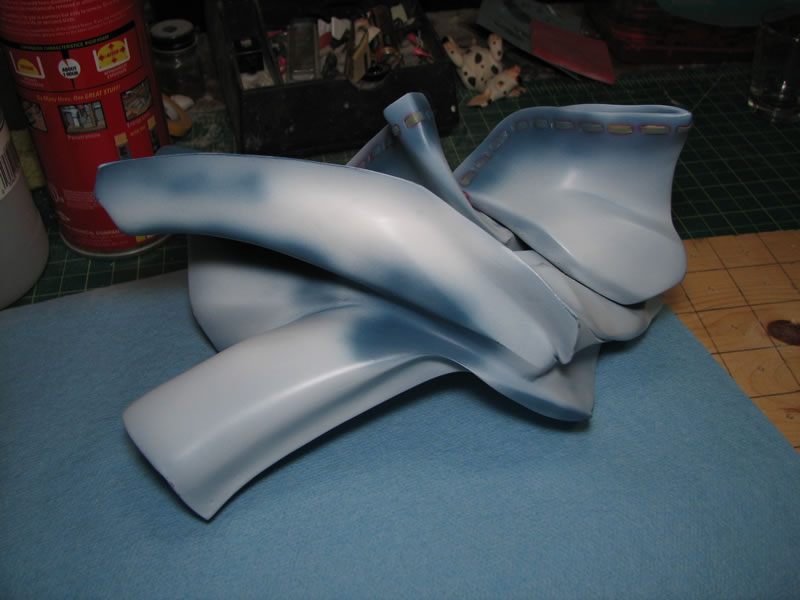
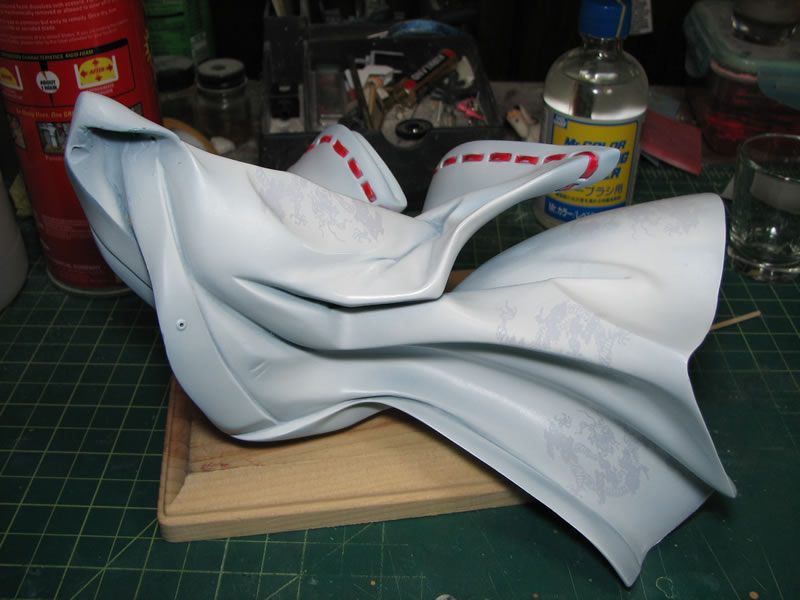
Here is what Kanu looks like after the second priming session. I need to let the primer cure over night and I'll check for more rough spots and any other issues that I may have missed. Once I fix those, I can do a spot priming session and then her main body will be ready for some skin tone.
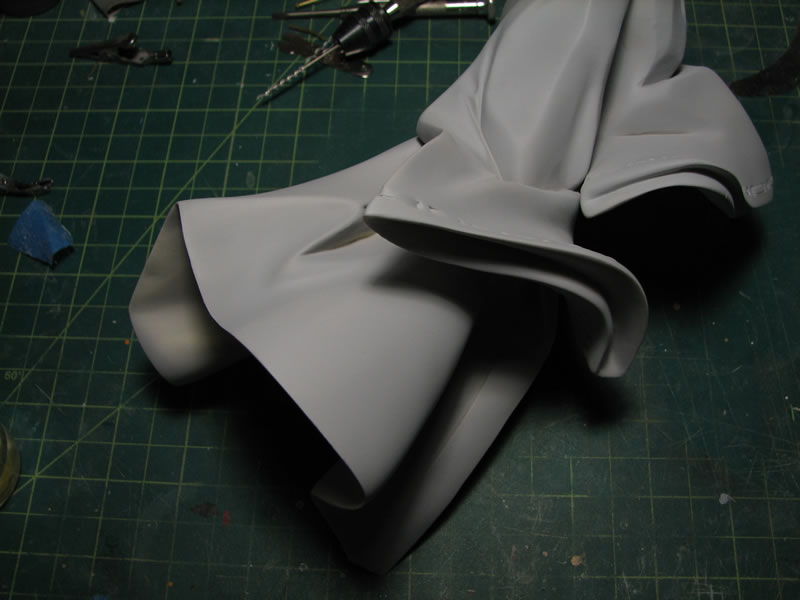
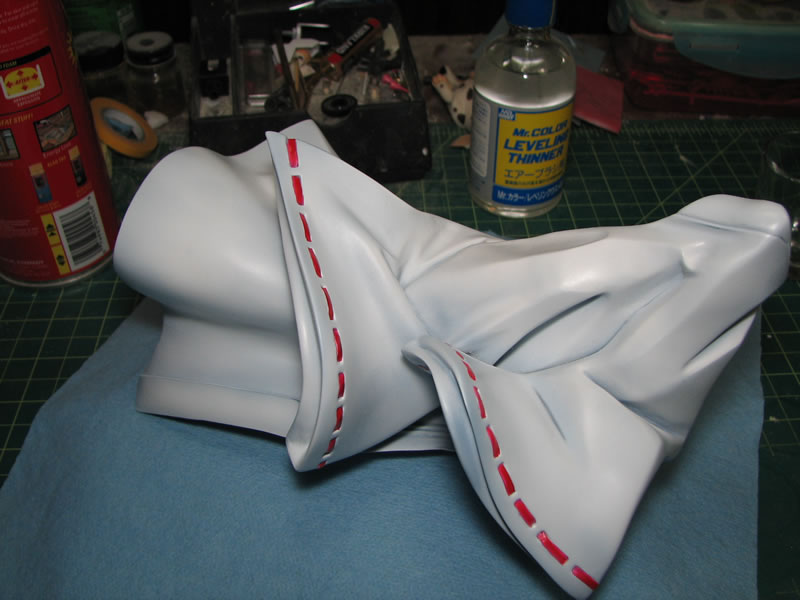
Below is the robe/cape that has gotten the second priming session. Most of the areas where I filled with CA glue and the light curing putty filled up nicely, and sanded down well. But there are still a few areas that need to be addressed so there will be more sanding and filling tomorrow. Most of the small surface defects have been fixed, so the next priming session should only be a spot priming session on the areas that still need attention.
August 18, 2008: I did some work on Kanu during the build gathering, but the folks around me had other ideas as to what to do with Kanu....

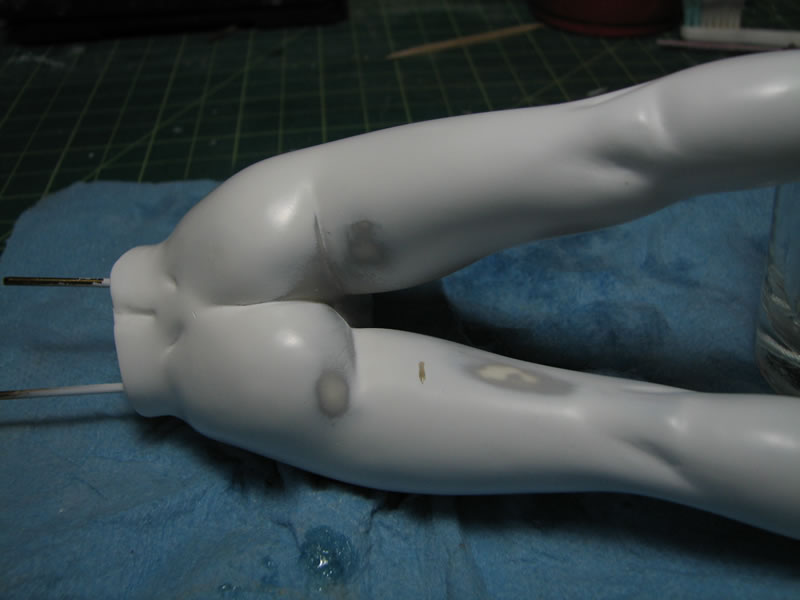
More monkey lovin', but I was able to get some decent work such as filling the gap between her upper torso and lower body. I also picked up a commission project the Tekkaman Evil kit that Kanu's using as a hat.
I accidentally snapped the part I fixed during the build gathering so I went back and used epoxy glue instead of CA glue to fix the issue. The lesson here is that CA glue, while quick drying and fairly easy to sand, is too brittle to use for parts that could encounter shearing stress. Best to do things correctly the first time around over making the mistake and having to do it correctly in the end. The rest of the mistakes and rough spots that were fixed after the second priming session has been fixed during the build gathering and the parts are ready for the third priming session.
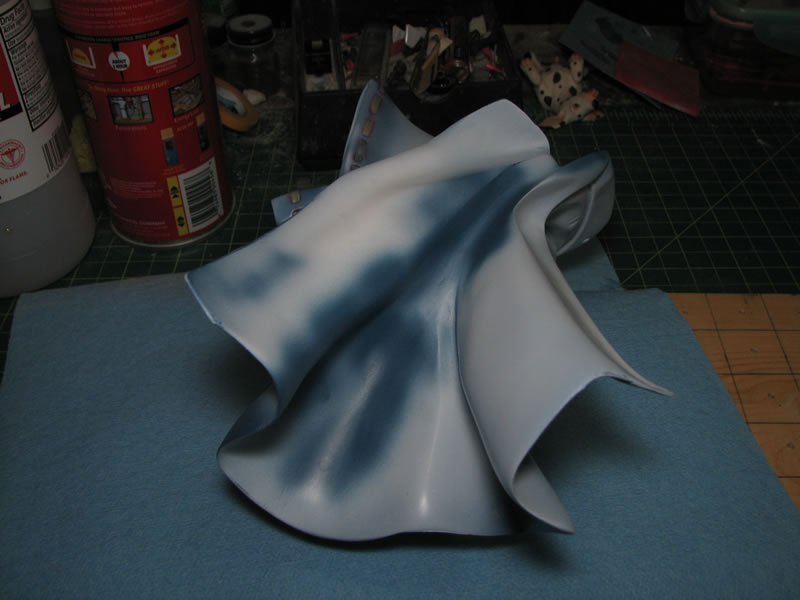
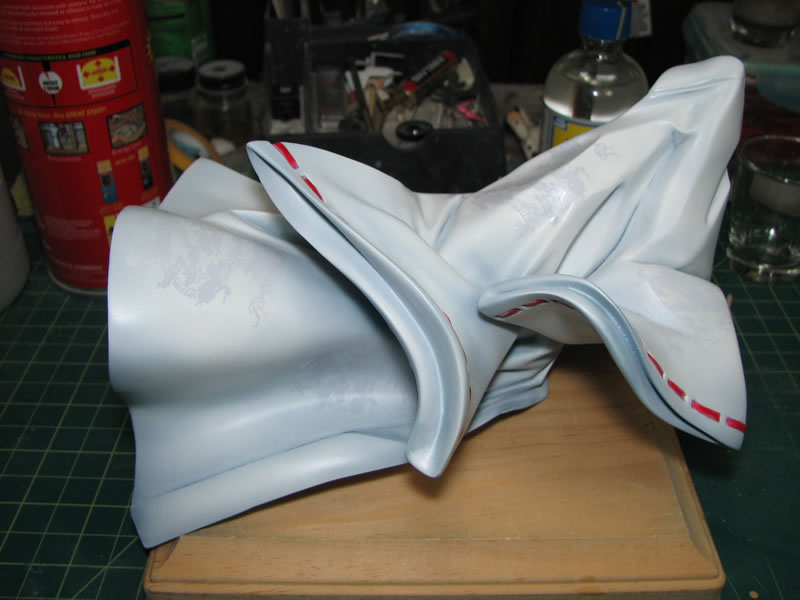
And below is the results of the third priming session for the above parts.
I used some light curing putty to fix the seam that was still apparent after the initial priming session. And the following picture is the primed part after resanding and filling. These parts are now ready for paint.
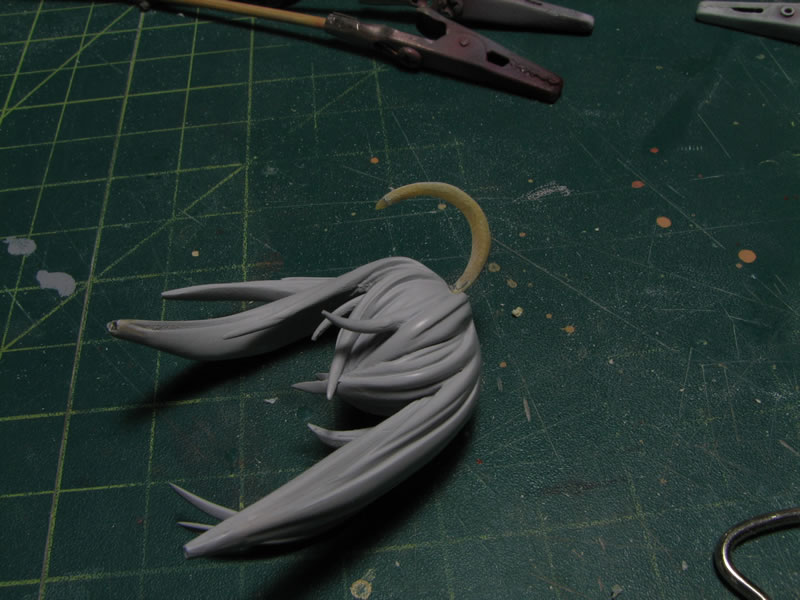
One of the most tedious processes is gluing and seaming the hair on these kits, especially if the hair pieces are fairly elaborate such as Kanu's. In the following pictures, you can see where the two main parts of the hair meet up and all the putty work. Each picture is followed up by the second priming session. There still needs some clean up on the rough sanding, but for the most part, the seams and gaps have been effectively filled.
The first picture in this set was taken from above as a comparison between the initially primed piece and then the cleaned up and reprimed piece. There is still a little bit of clean up that I will be doing to the hair piece, but at least it is a lot cleaner than the initial priming session.
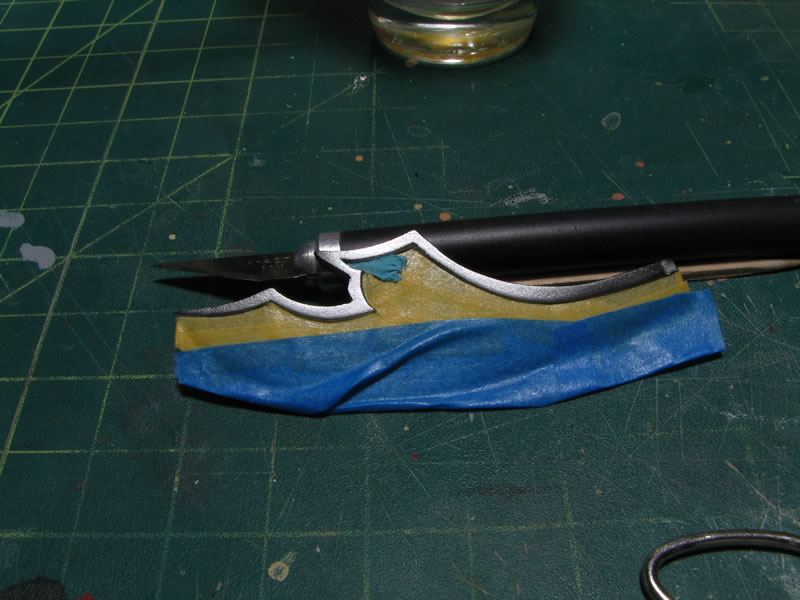
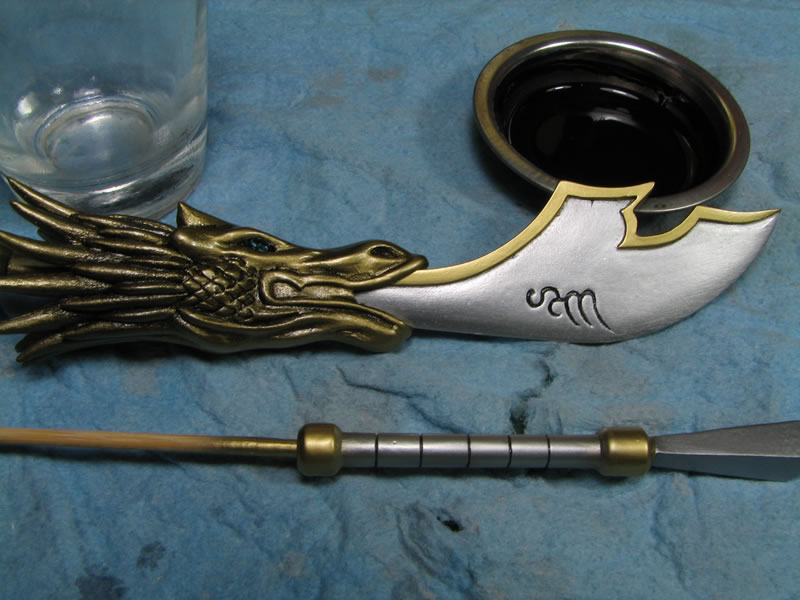
August 24, 2008: Weekend update on Kanu. We start with some work I had last week. I painted the blade a gloss black first. Once that cured, I sprayed on Alclad II Chrome. That was allowed to cure for a few days, and today I spray on a clear gloss. I did this so that I can mask off the blade and paint the edge of the blade.
Round and round we go, more sanding, re-priming, sanding. From the primer, I still saw scratches in the surface, so those were then sanded out and the part was re-primed to my satisfaction.
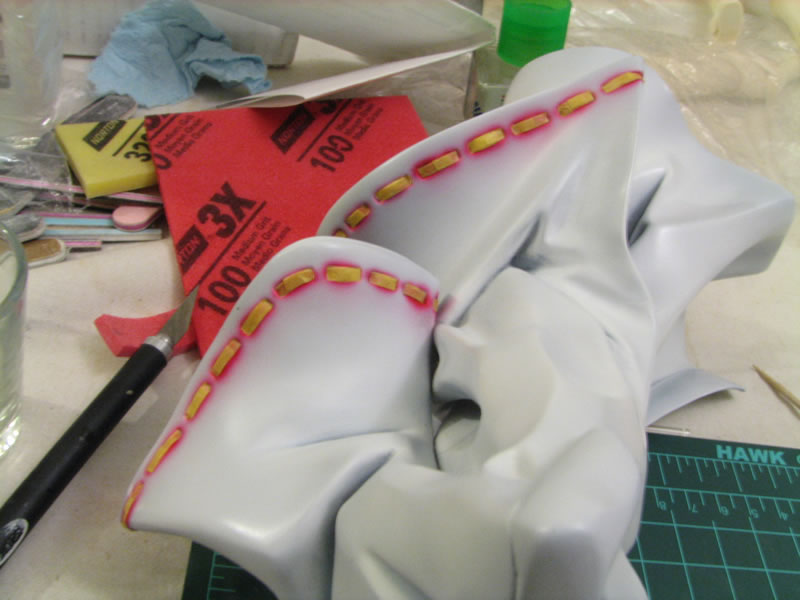
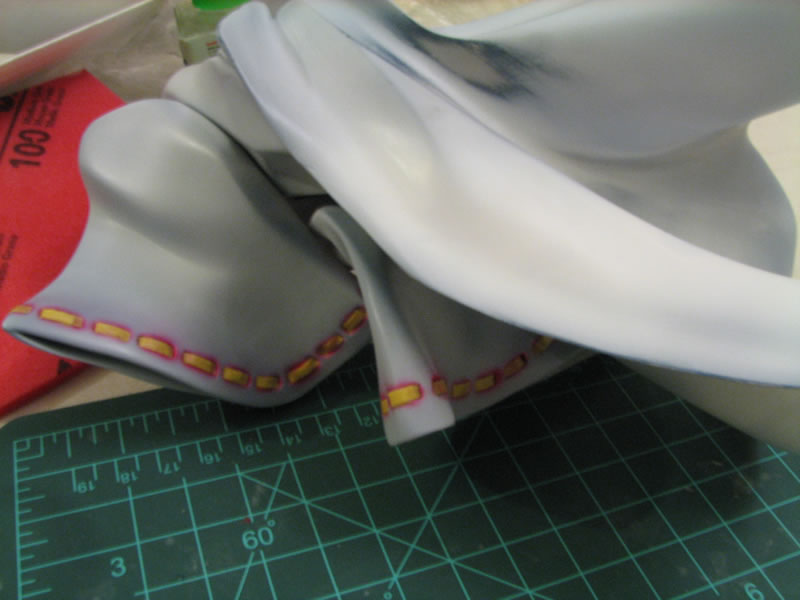
There were a good number of surface defects in the top part of the dress, so I cut and filled using light curing putty. The putty was sanded and the part was primed. No more defects.
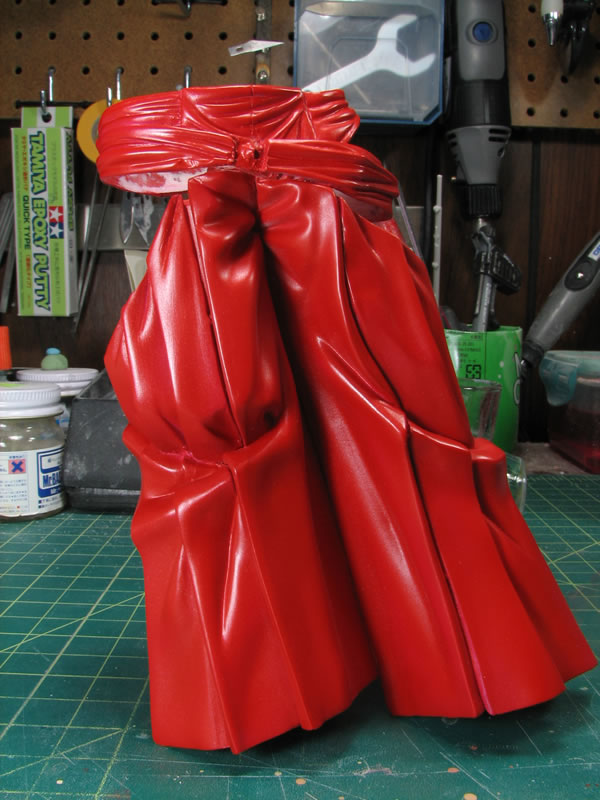
With the defects gone, the primed part was wet sanded, then the first layer of paint went down. I used Finisher's Silk Red for the base red.
More repairs were needed on the hair pieces. There was even an area where the resin in one of the hair folds was so thin it was an actual hole, so that was filled using light curing putty.
I'm doing something different from my previous builds. With the surface prep done, I'm spraying base white over the skin parts of the kit before I start laying down the skin tone. This should help lighten the skin tone. The problem here is that the white base is fairly thick and I started to get little dust balls collecting in some of the areas where I didn't really get the wet sanding done well. The surface in these areas were still a little dusty from the primer, while wet sanding fixed this in most of the easily sanded areas, some of the hard to reach areas didn't get wet sanded. The result is that the white base built on top of that dusty rough surface. So once the coat of white base was dried, I went in and sanded the areas.
While doing the fine sanding, I broke the signature Ikkitousen earring for the 100th time. So rather that reglue the part, putty, sand prime, repeat; I just use some light curing putty and sculpted a lower ear without the damn earring. Not too fan of the earring anways. If I get adventurous, I may just drill a small hole and add in a metal earing with a new sculpt of the Ikkitousen earring. Right now, having it continually break off while I do fine sanding just annoyed me too much. I resprayed the white base and you should see a difference in comparison to the previous picture. I still need to wet sand the white, but that will be to just remove the light dust, and she'll be ready for skin tone.
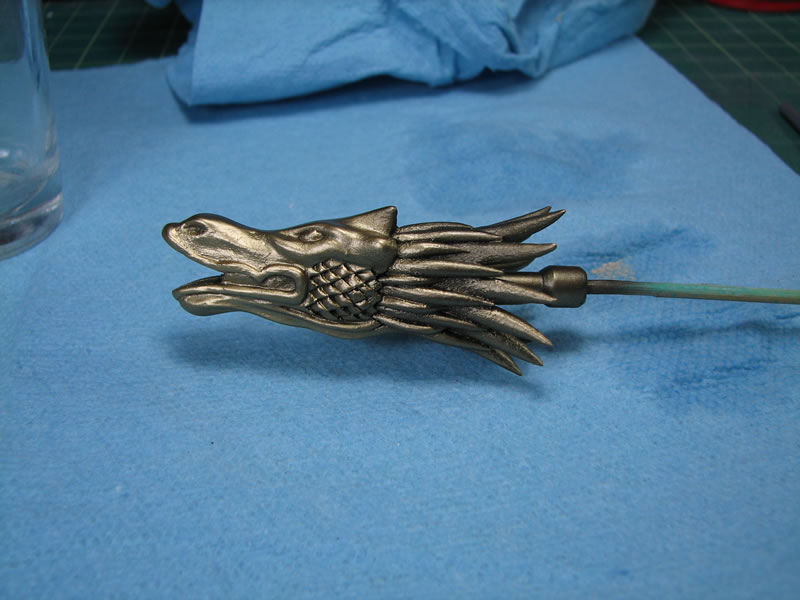
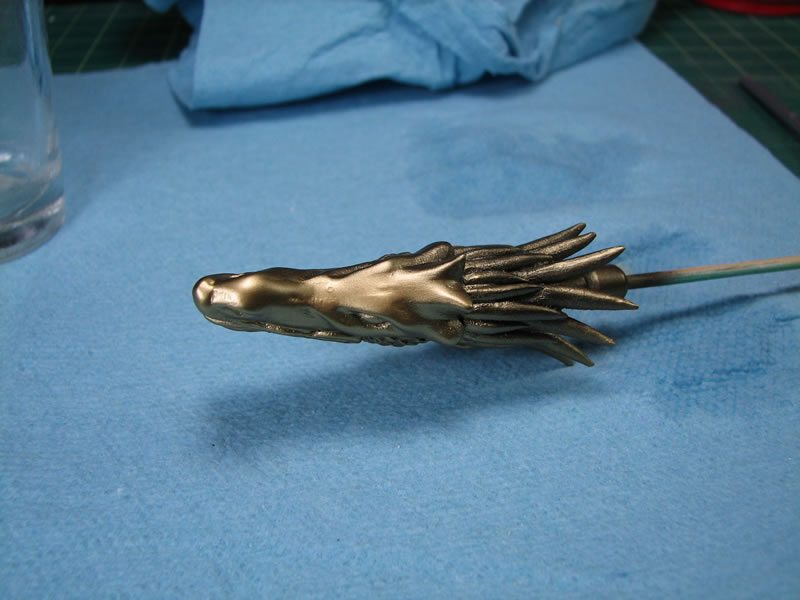
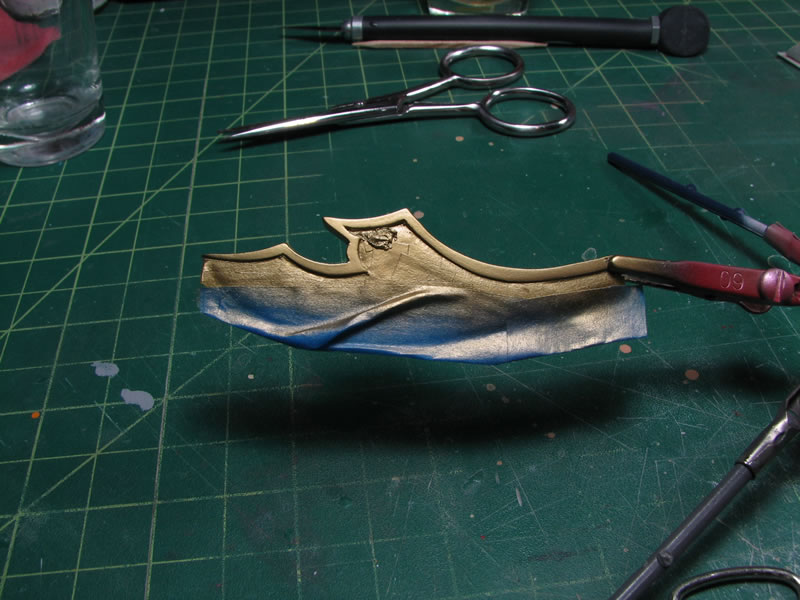
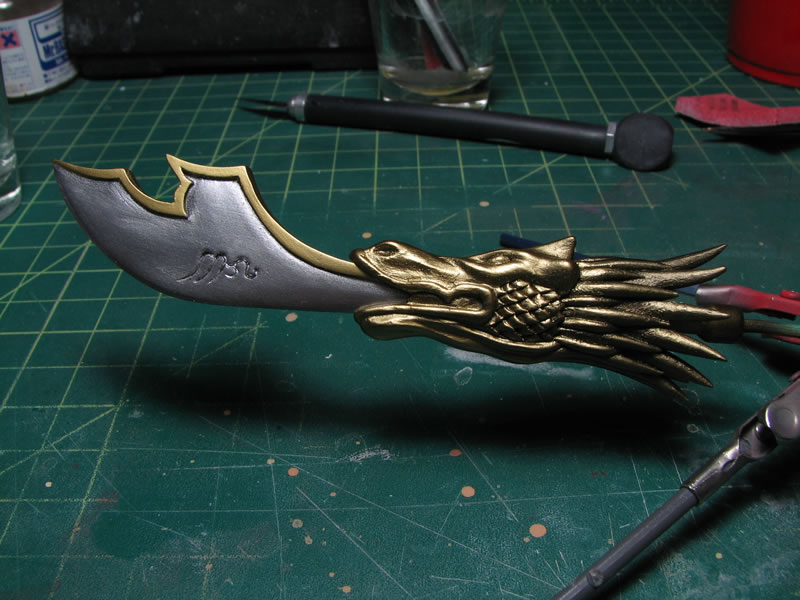
The Dragon Lance was painted with a gloss black because I plan on using metallics and metallics need a gloss black base for best results. This is just a place holder for when I get the rest of the dragon head painted.
Edit: I have painted the dragon head gold.
Like the upper section of the skirt, the main skirt piece was painted with a base coat of Silk Red.
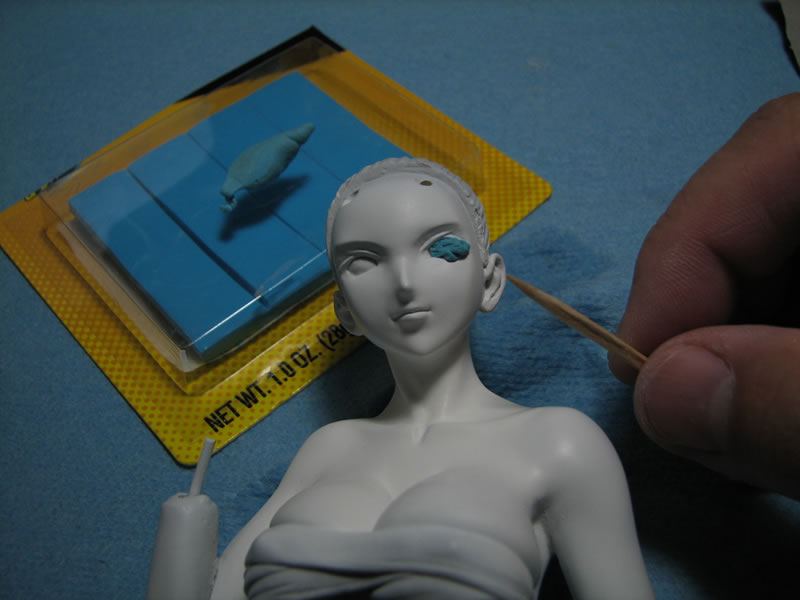
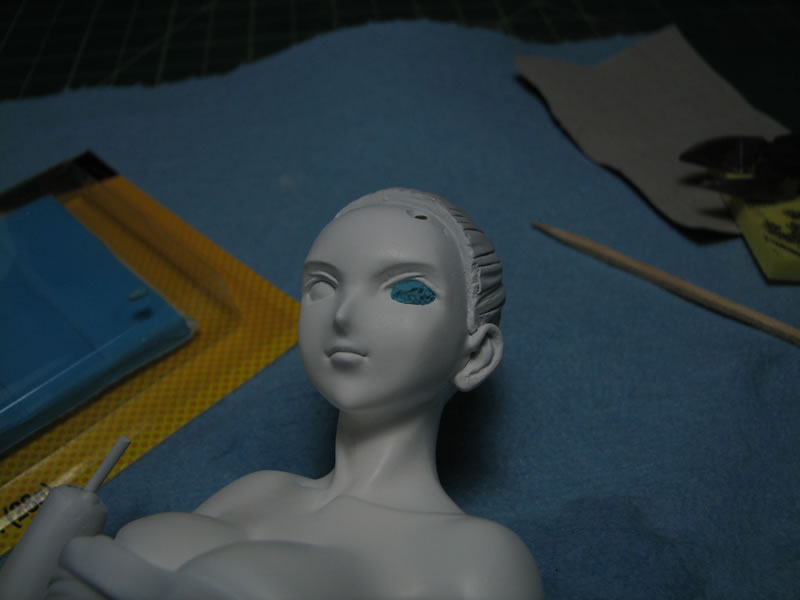
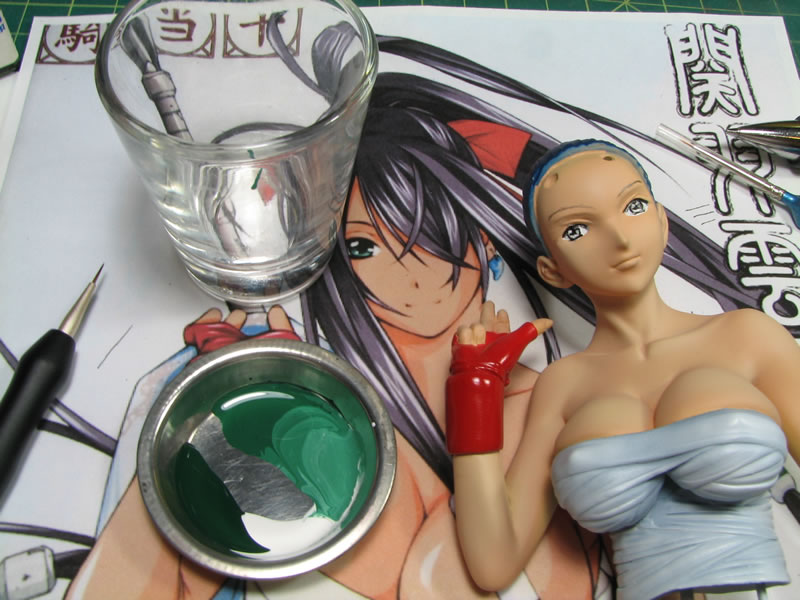
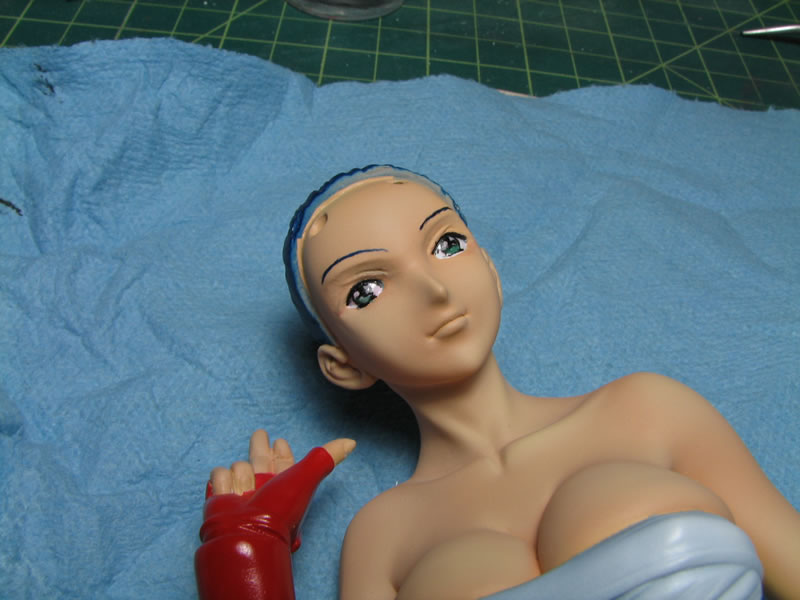
August 25, 2008: Once I'm into the painting phase, the visual progress really picks up. With the white painted, I masked off the eyes using blue sticky tack. I take a very small amount and just seal the edges and apply the tack using a toothpick. Once the masking tack is in place, I'm ready for the base coat.
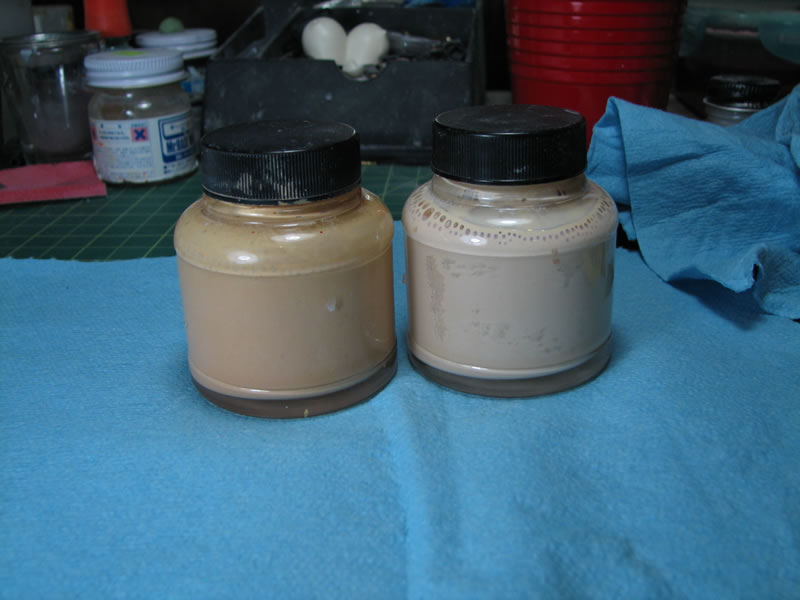
I have two mixtures of skin tone, and I usually start with the darker tone first, then pre shade using the lighter tone. I finished spraying the base skin tone and Kanu looks as though she's been to the beach.
Finisher's Bright red was painted on for the red parts and then blended with the darker silk red for some subtle shading.
And here is a quick mock up with the skirt. More to come.

August 26, 2008: With the base skin tone cured, today I sprayed on the lighter tone. I use a preshading technique using the lighter tone to highlight areas on the body. Below is the comparison between the the hands during this process. Next is the upper torso showing the highlighted areas that I hit with the lighter skin tone.
Once I have all the highlights, I raise the air pressure and spray from a distance misting and blending the skin. Below is the before and after picture of the lower body with the finished upper torso there for comparison.
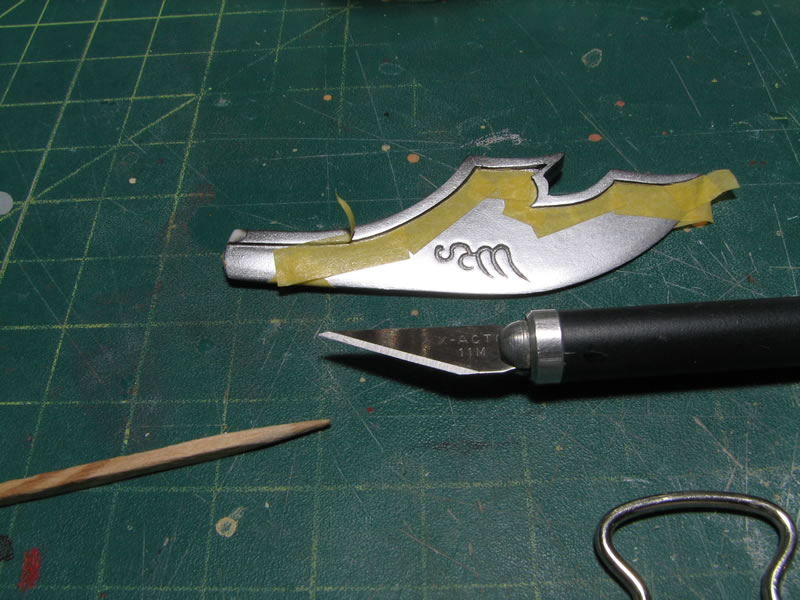
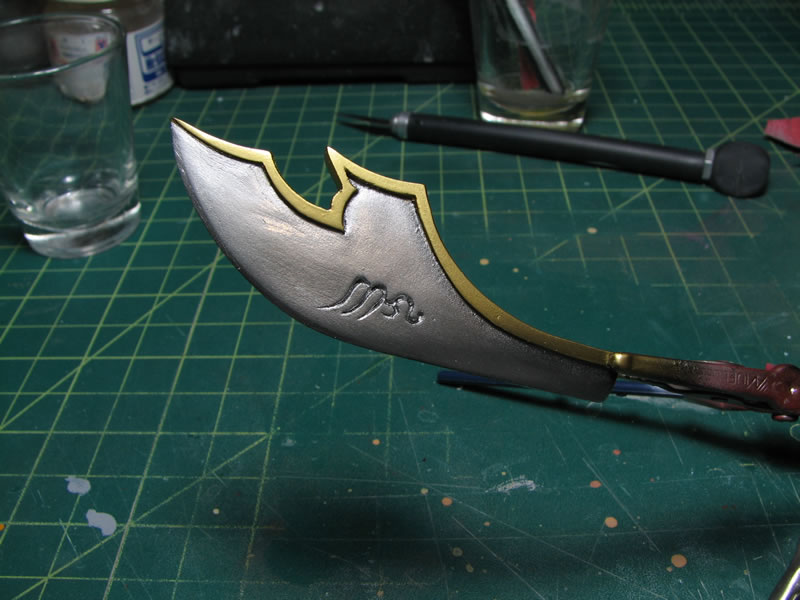
Next I masked off the cured blade to paint the gold edge. I use tamiya masking tape, a toothpick, and a brand new hobby knife blade. The masking tape is very thin and folds nicely along edges. The toothpick is used to position and press down the edges. The hobby knife is just run along the edges with a slight amount of pressure which cuts the thin tamiya tape cleanly. The excess tape is removed. Blue sticky tack is used to mask off areas that are difficult to mask with the tape. Blue painters mask is used for larger areas so as not to waste the more expensive tamiya masking tape. The blue 3M painter's masking tape is much thicker than the tamiya tape, so I only use it to mask over larger areas rather than use it to mask detailed areas.
August 27, 2008. Small update tonight as the process requires a bit of patience. The narcissist in me needs to put my stupid tattoo logo on all my figure kits, so the first step towards that is to spray a clear gloss coat onto the skin. I sprayed all the skin tone with the clear gloss even though I will only be applying the decal in one area. The reason for spraying all the skin areas is to keep consistency in tone. The first picture below shows the upper torso clear coated, notice that the tone is darker now. A clear gloss will darken the tone, and conversely, a flat coat will lighten the tone. So to keep everything uniform, I gloss coated everything. The gloss coat needs to cure, then I can apply the decal tomorrow (I haven't decided where I want to put the decal yet...) Then the following day, I can apply a flat coat, then wait another day for the flat to fully cure and set up before I mask off the kit to paint the rest of the parts such as the feet, hair, and body wrap. Patience comes into play because it is imperative that I allow each coat to fully cure for a full day or longer. The dragon lance was also clear coated so that I can apply a wash that will help bring out some of the details in the lance.
Not sure if it is noticable in pictures, but I sprayed a clear semi gloss mixed in with micro pearl powders for a small little pearlescent sheen. The red parts are now completed.
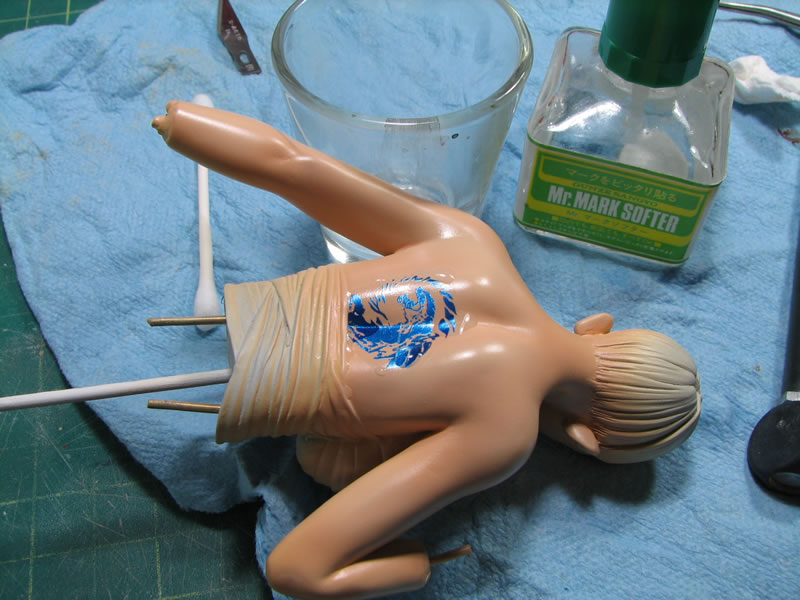
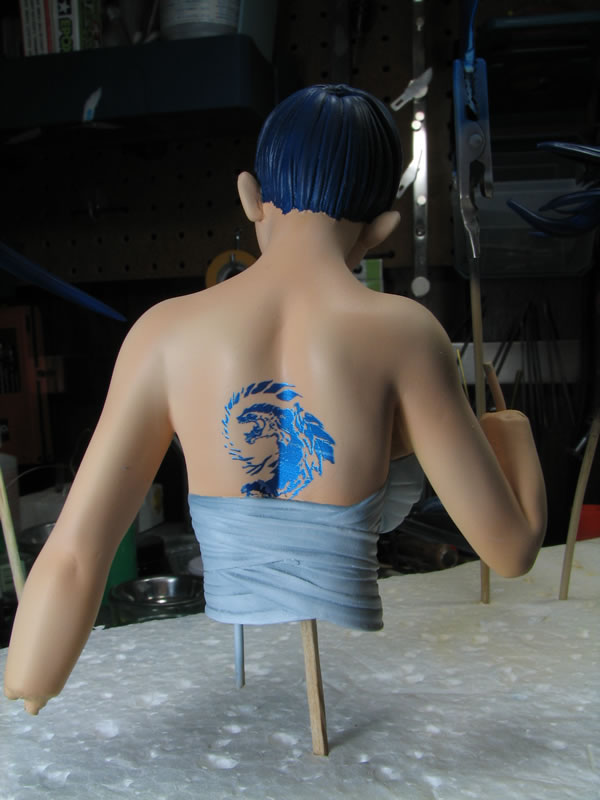
August 28, 2008: WIth the clear gloss cured for a full day, I can now apply the decal. The first picture shows the planning stage. Once I have a good idea on where I want the tattoo (decal) placed, I can now dip the decal in some water for a few seconds then take the decal out of the water and let it sit on a napkin for a minute or so. This loosens up the decal from the paper backing and doesn't completely dissolve the glue that's on the decal film. When I went to slide the decal onto the skin, the decal fell apart, several decals fell apart... so I took my gloss clear and sprayed the decal sheet and let that set up for a couple of minutes. Once that completely dried, I tried the attempt again, and the clear gloss added some strength to the rather thin decal film. The bad part about this is that the clear gloss added a little thickness to the decal film.

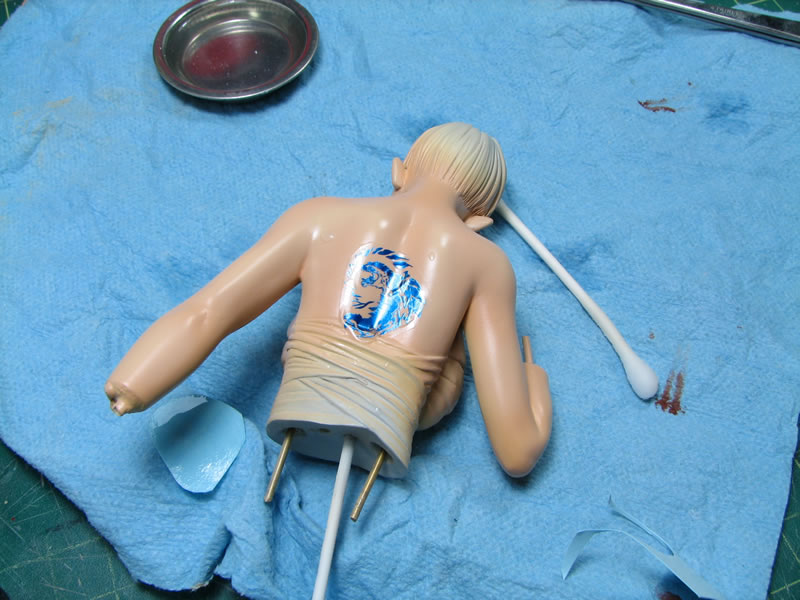
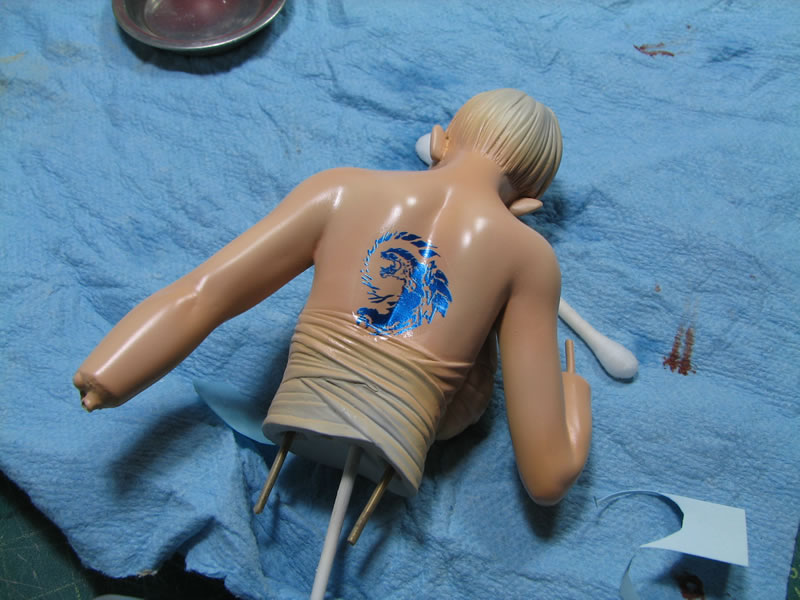
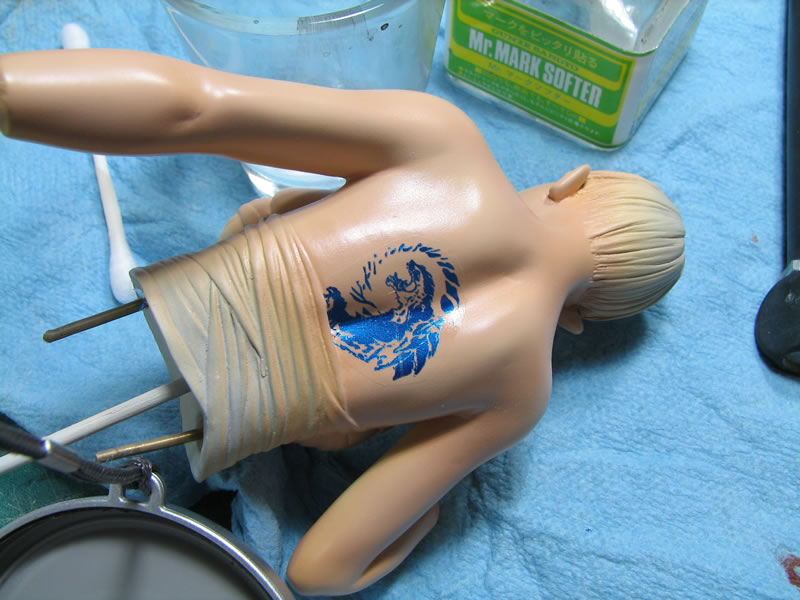
I position the decal using a wet q-tip and once in place, I take a dry piece of napkin and carefully dab out any remaining water under the decal making sure I get rid of bubbles in the surface. Once the decal is firmly on the part, I take a very sharp hobby knife and cut away the excess. With the excess cut away, I bring out Mr Mark Softer. A little note, if you are using acrylic paints, DO NOT USE MR MARK SOFTER as it will discolor the acrylics. Careful application will avoid this, but the stuff is really formulated for all the other lacquer based products that Gunze puts out. If you are using acrylics, use Micro Sol as the decal softening solution.
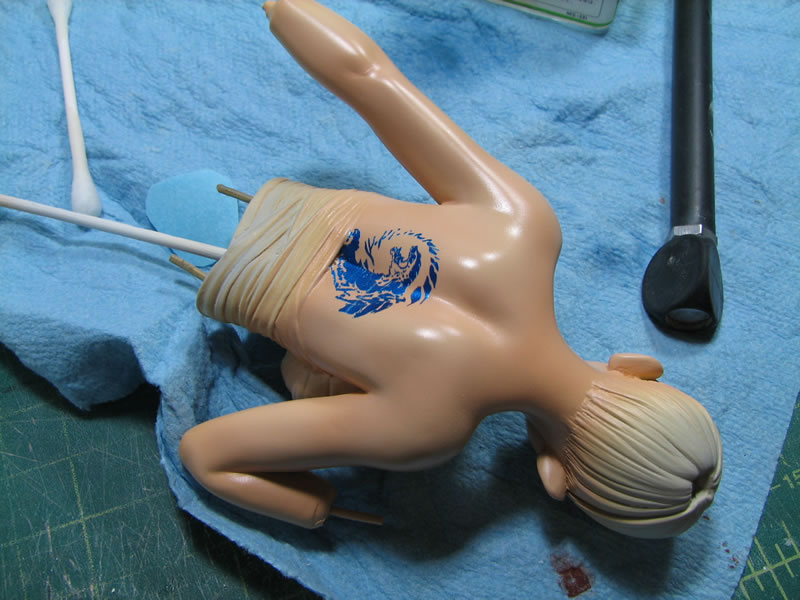
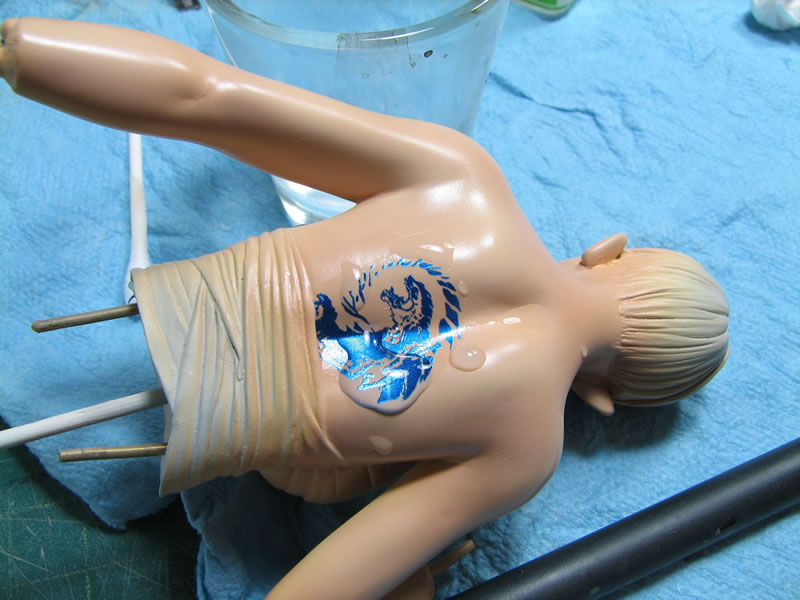
The decal solution is just placed onto the surface and allowed to evaporate on its own. If the decal wrinkles when the decal setting solution is applied, THIS IS A PERFECTLY NATURAL OCCURANCE. DO NOT ATTEMPT TO STRAIGHTEN THE DECAL OUT. It will unwrinking itself as the solution evaporates. It is very cool to see; but again, you must leave the decal alone and let the setting solution work it's magic. Once done, the decal will meld nicely with the surface. Now with this decal, I have some defects and wrinkles left over after the decal solution has dried, I just take a hobby knife to carefully cut the bubbles out and then apply more setting solution. Once this is dried, I will apply another clear gloss coat to help seal and help hide any remaining decal edges to make the decal look as if it was painted on.
September 1, 2008: Labor Day weekend update. Starting with the main body parts, the decal setter did it's work and Friday morning, I sprayed on a gloss clear coat to sandwich the decal between two clear gloss coats. Friday night, I went in and sprayed the flat coat on the skin and here are the pictures from that.
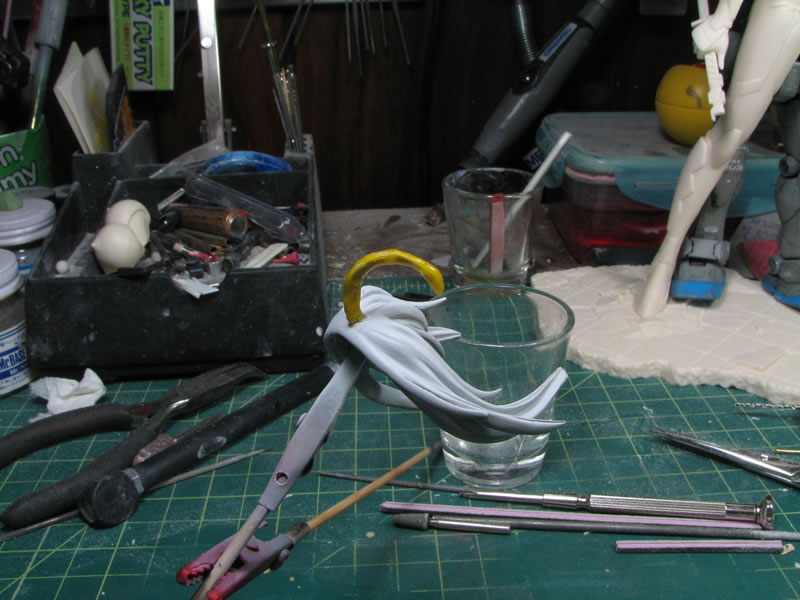
Late Thursday night, while looking over the hair parts, I noticed that something was wrong wth Kanu's front hair piece. The curling piece of hair had broken off and worse, was missing. My dog probably ate it or it's somewhere hidden in my room. Regardless, I didn't feel the need to search the room or question Hugo, so I just did the next best thing, rebuild the damn thing.
I drilled a hole where the hair piece used to protrude out from, and I used some thin but strong stem wire as a structural base. I glued the wire into the hole using epoxy glue. Once the glue cured, I used spoxy putty to form a quick chunk of hair around the wire.
A day later, with the epoxy putty cured, I took the dremel and carved out the rough shape of the hair piece. Some fine tune sanding was done with fairly low grit sanding tools. Once I got the rough shape and size of the hair piece done, the next putty stage came.
I used light curing putty to build, sand, and rebuild the piece until I was satisfied.


At the build gathering this past Sunday, I spent some time on Kanu's robe, base coatiing it first, then going in and fixing a few blemishs between a few seam areas. Those were fixed and the part was re base coated.
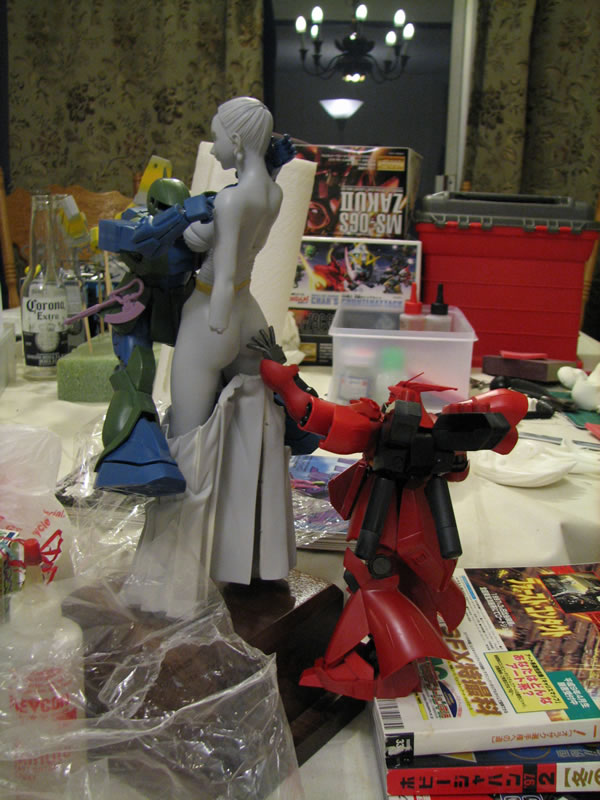
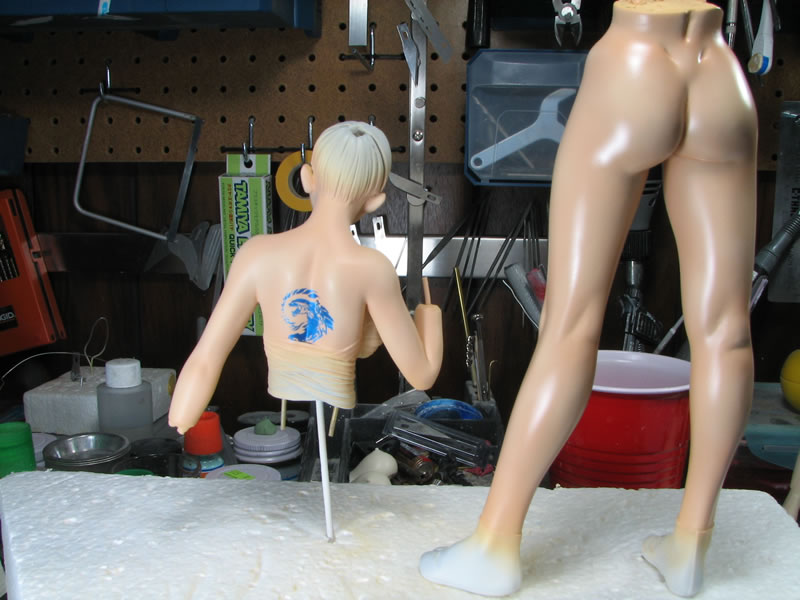
A little update picture with Mr G-Zeong.
September 4, 2008: Did some masking and painting today. Starting off, I masked off the edges between the skin and body wrapping using tamiya tape. I do two layers then move on to masking the hair. The back of the hair is aslightly jagged so I used blue sticky tack as the masking agent.
Next I used parafilm to mask off most of the larger areas and the arms. Then used 3M Blue painter's masking tape to seal up the masking edges. Finally, I used Mr Masking Sol as a final sanity check to ensure I have a tight seal around the different levels of masking.
Base color and final colors are painted.
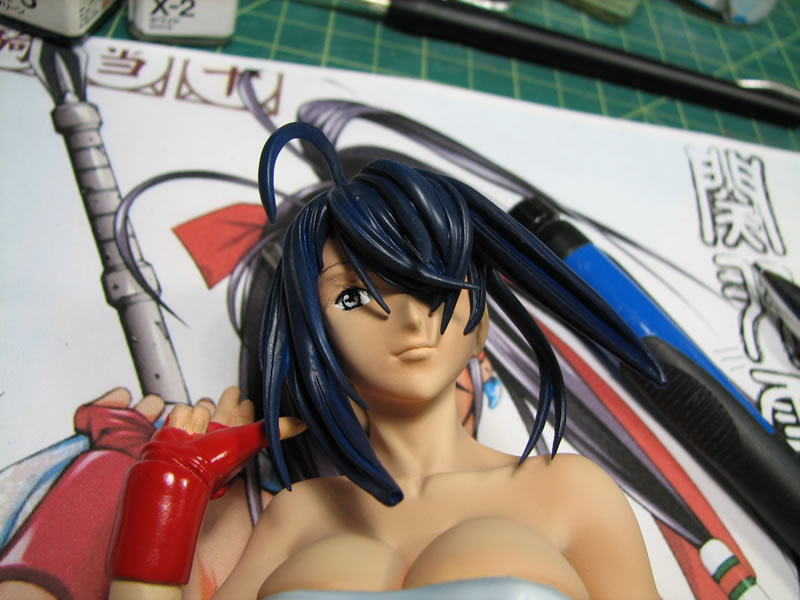
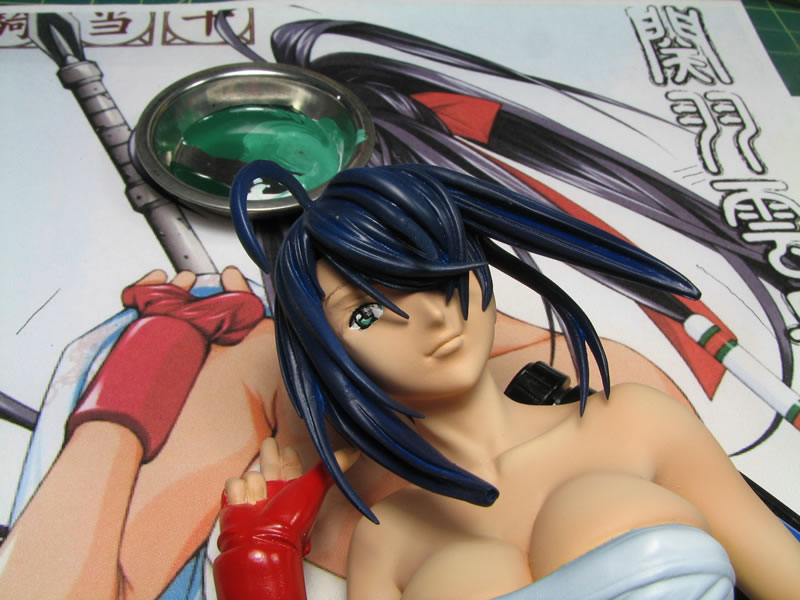
And finally the hair is base coated using Finisher's Wolf Blue.
September 6, 2008: After all the trouble masking and painting, removing the masking tape reveals a little dot of blue in an area where I missed, even with all the redundancy in masking, I still missed a spot. The spot was small, so I took some 3600 grit sanding mesh and just sanded the spot away. I did some touch up paint on the area just to blend things together. Pretty easy fix, but would have been avoided altogether had I been a little more deligent in the masking process.
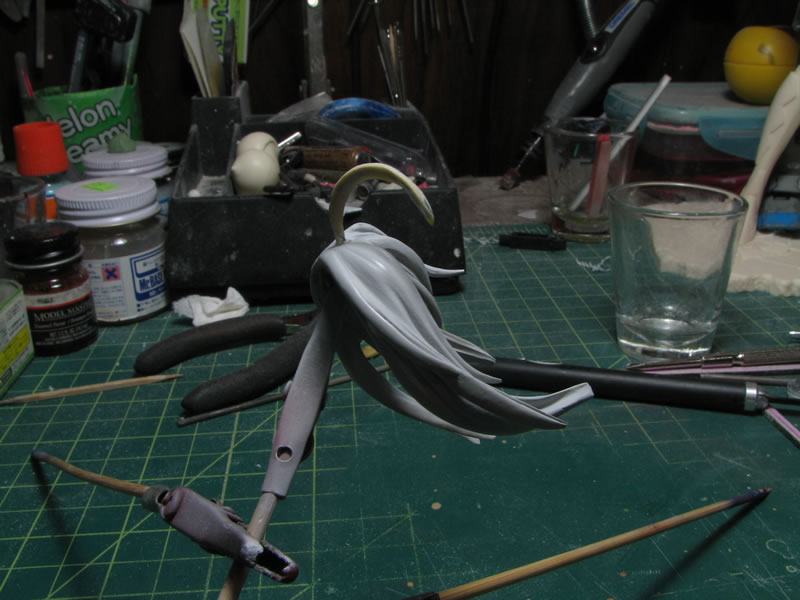
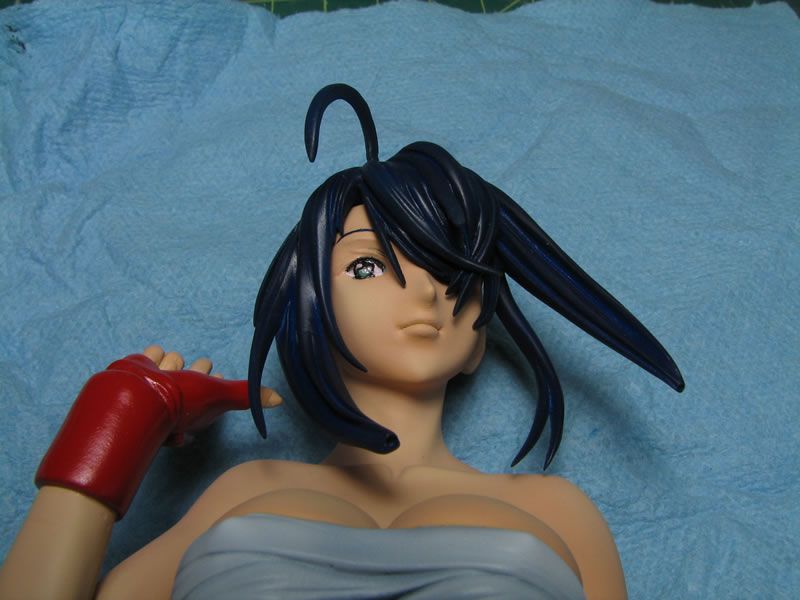
The lower body was masked off and the feet were painted. Also is a picture of the completed hair pieces.
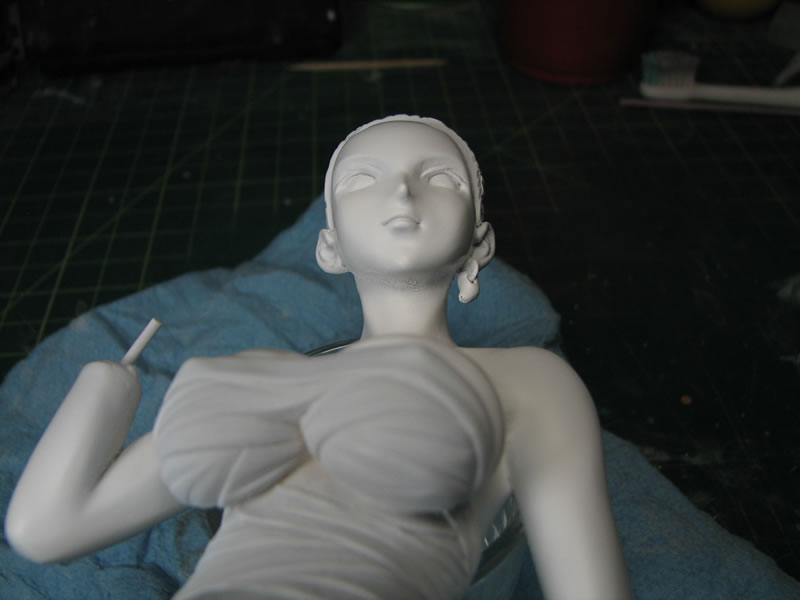
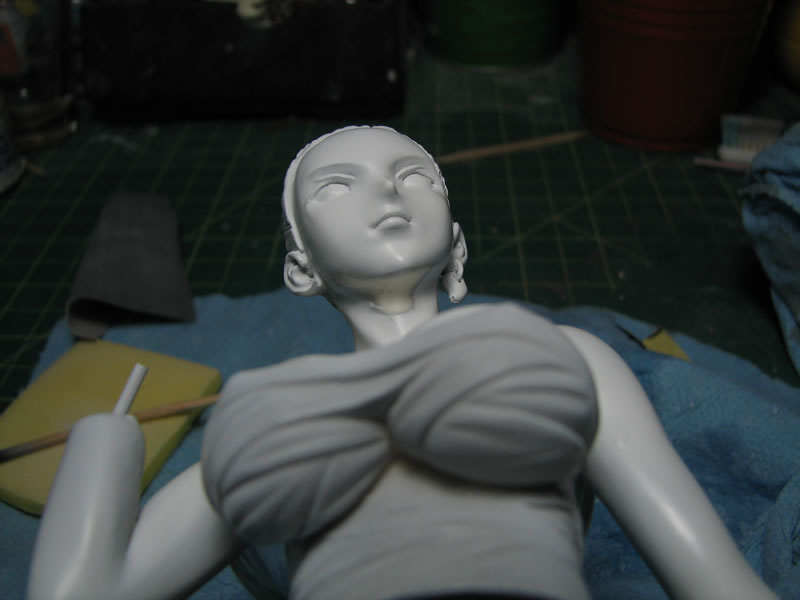
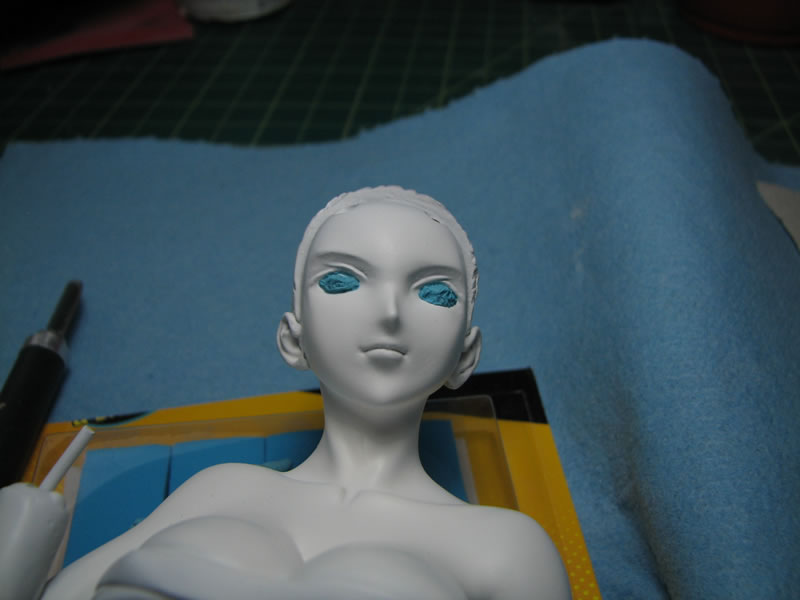
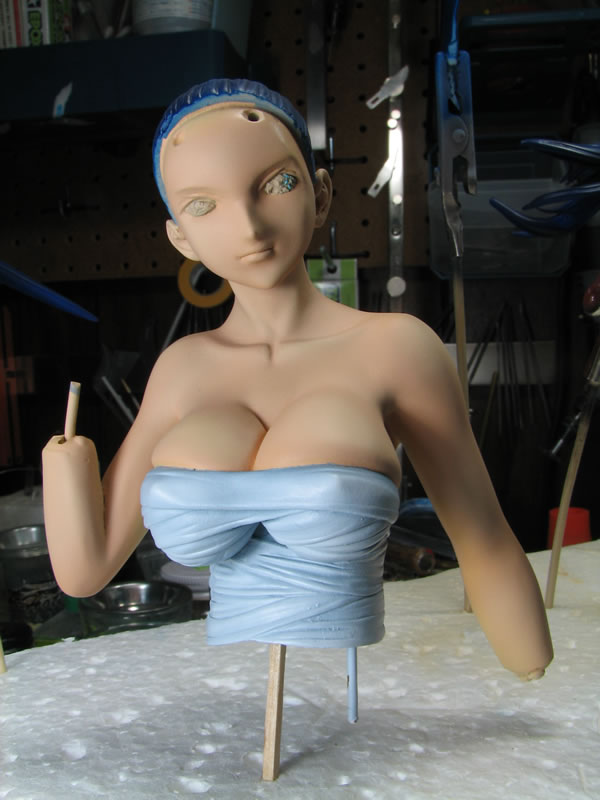
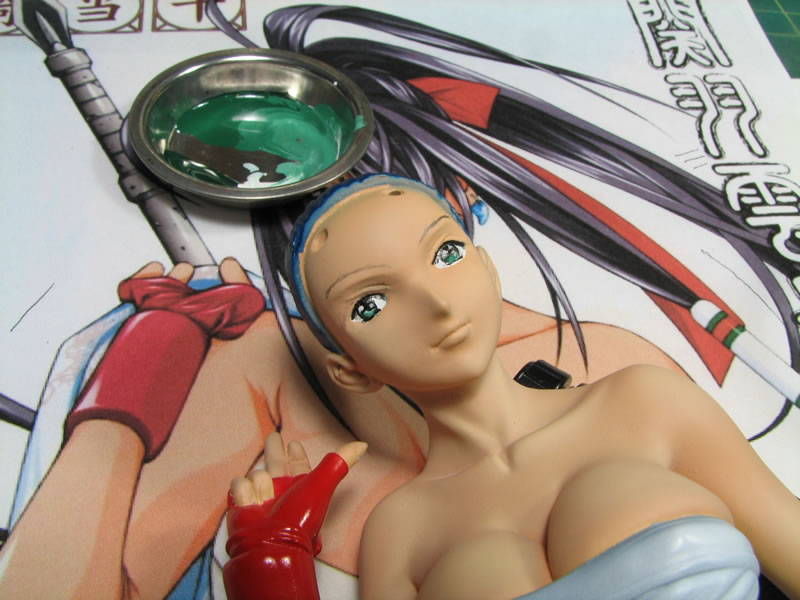
Eyes and other facial details are the last part on the upper torso to take care of.
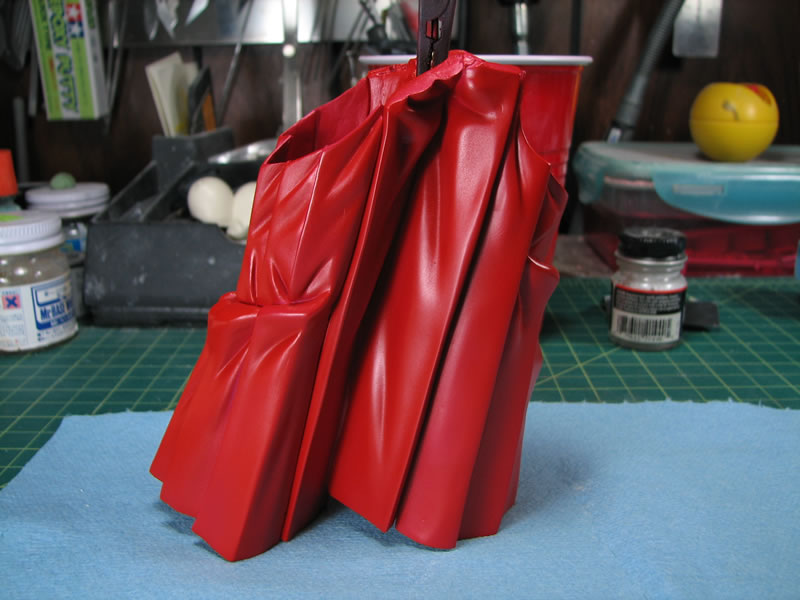
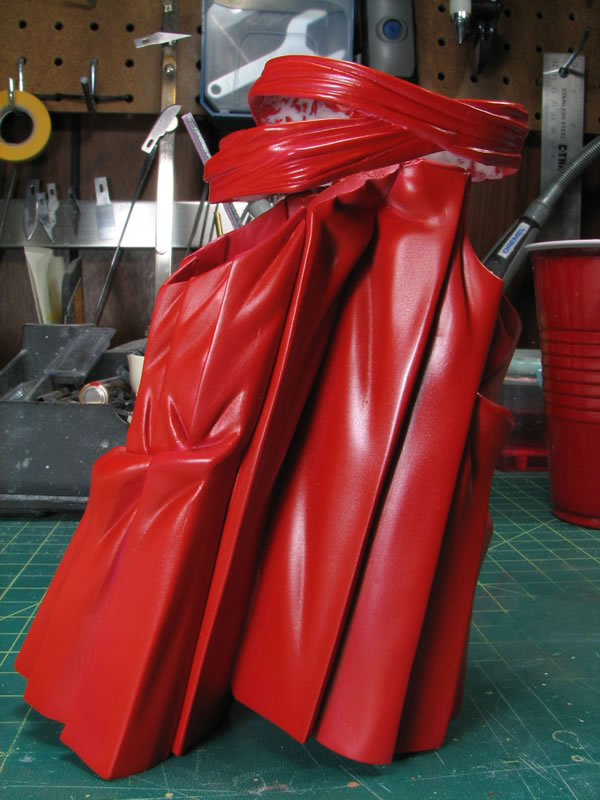
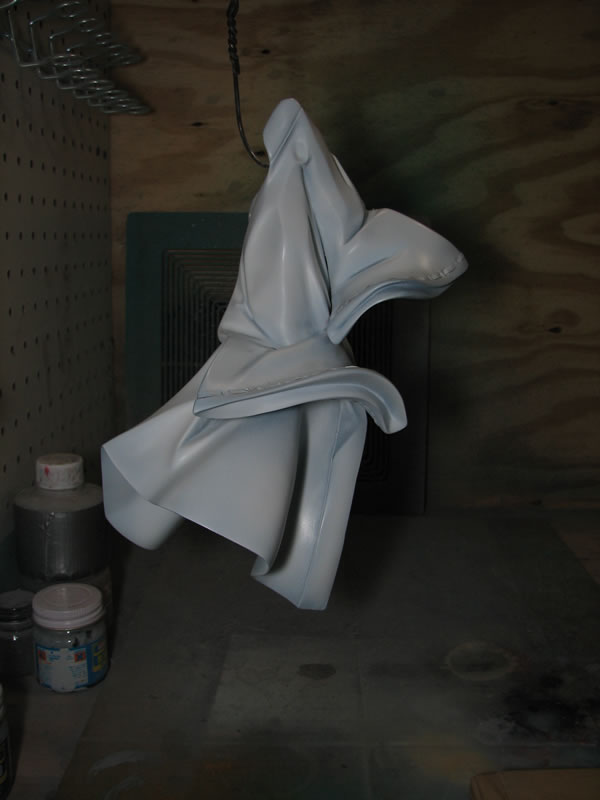
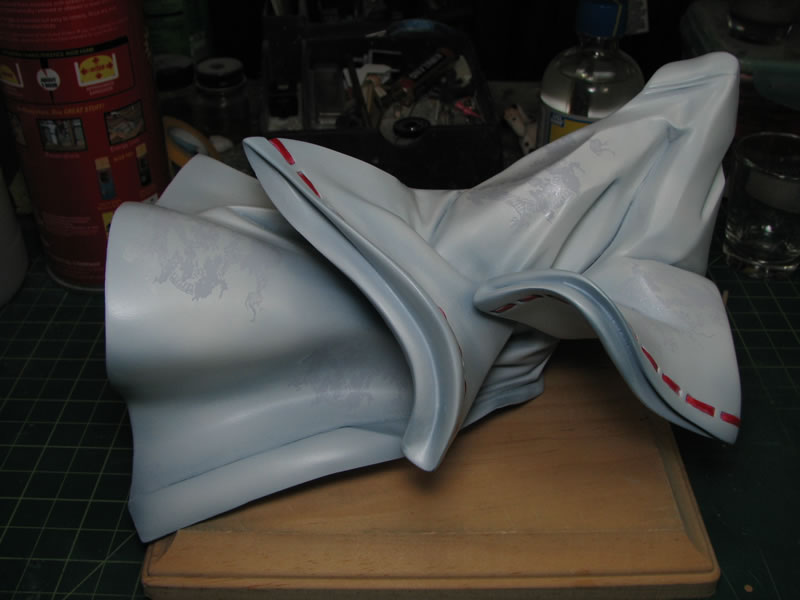
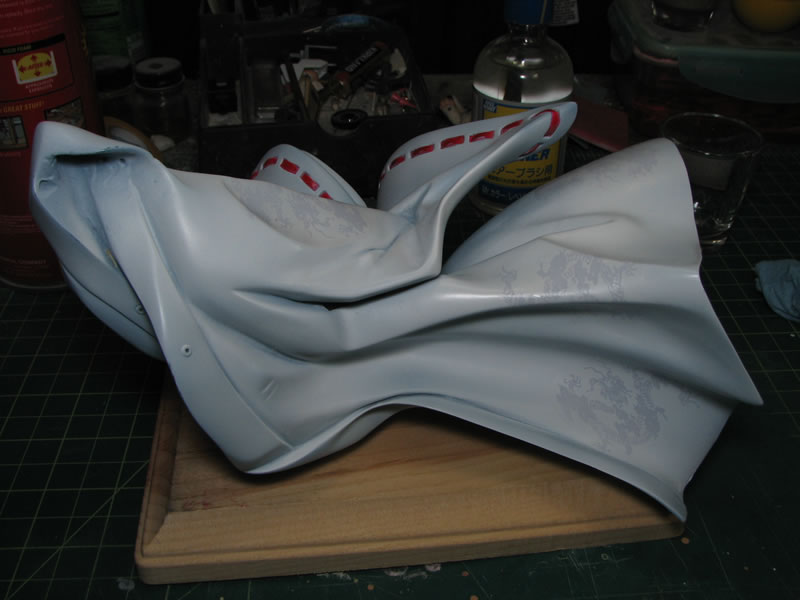
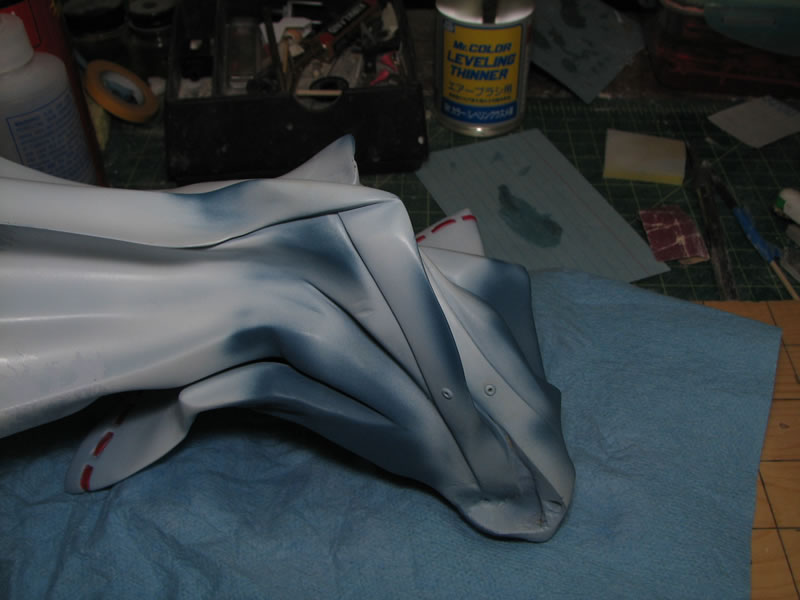
And the robe has been painted white. I still need to mask it off and paint the red details, clear coat it and apply the decals that came with the kit.
For the blade, there are some details that I wanted to highlight, so I used an enamel wash. I used a small drop of tamiya enamel black and used lighter fluid to create a soupy solution. Dipping a small brush into the solution and touching it into the detail areas, the enamel wash runs itself through the detail. Clean up is as simple as a paper towel dampened with some lighter fluid and lightly wiped accross the part to remove excess wash that is outside the detail areas.

September 7, 2008: Eye painting update. Below is the progression on the robe.
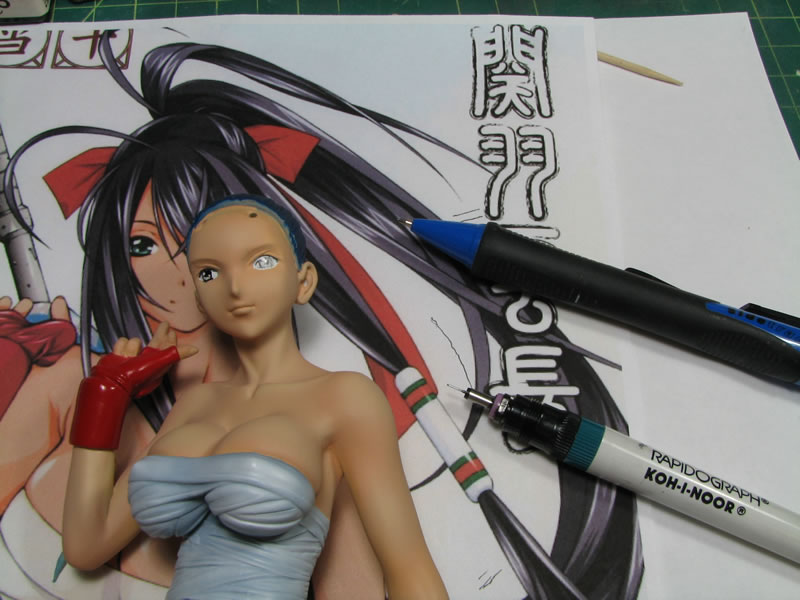
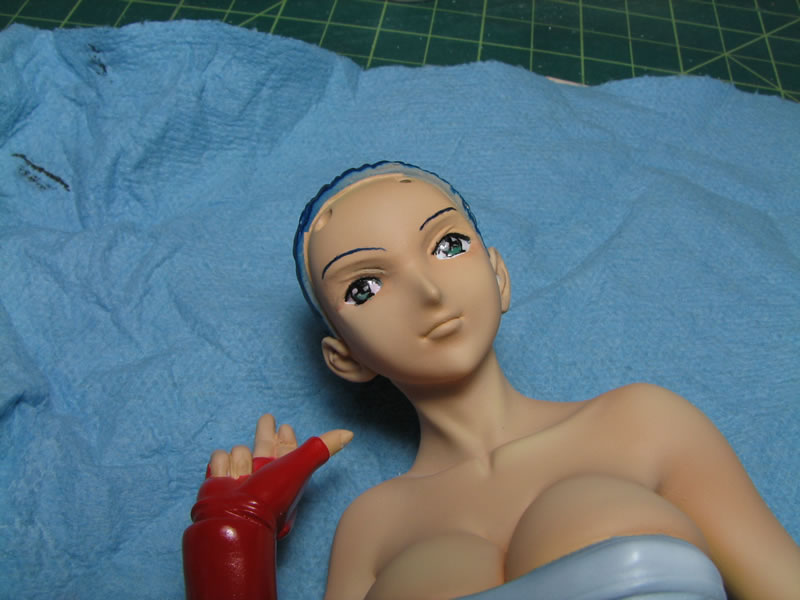
For eye painting, I use several items, a rapidograph technical pen that has a .13mm tip, your standard mechanical pencil, enamel paints, lighter fluid for thinning, a reference picture, and a blank sheet of paper. To begin, I practice drawing the eye from the reference on the blank sheet of paper. Getting my hands used to the motion of drawing the eyes helps relax and helps the hands learn the motions for drawing a decent eye. Once I have practiced enough, I move on to the kit.
I first draw out the eye using the mechanical pencil on the kit. If I make any mistakes, I can simply erase the drawn eye and start over. Once I am satisfied with the eye drawing, I trace that out using the technical pen. The eye ball, white highlight areas, and eye color areas are drawn negatively, meaning I just draw around those areas and leave those areas white to be addressed later.

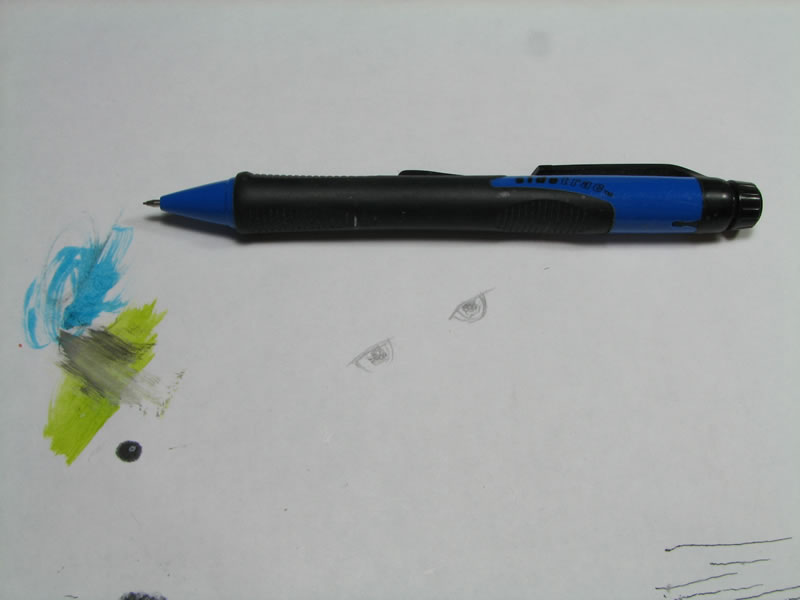
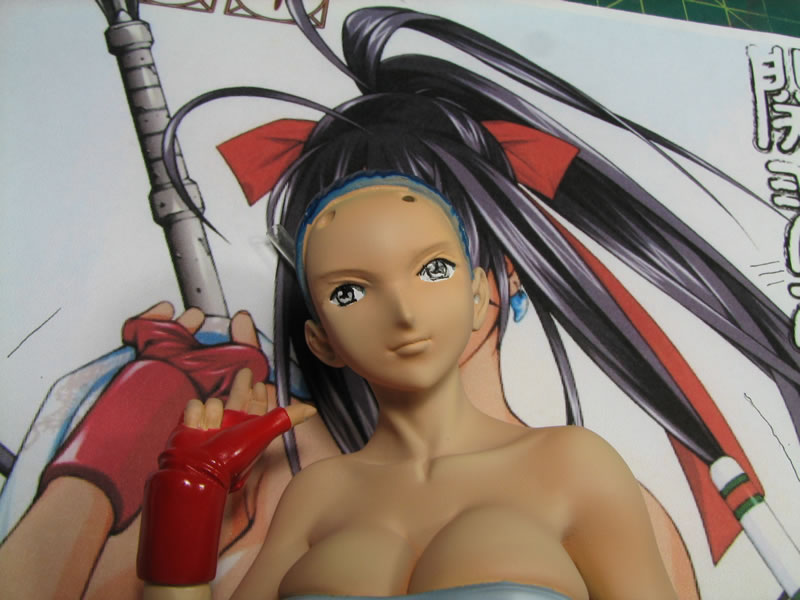
Below I have both eyes traced out in black ink. I'm not going to worry too much about messing up the left eye because that area will be covered by Kanu's hair. I also use the pencil to draw in her eyebrows.
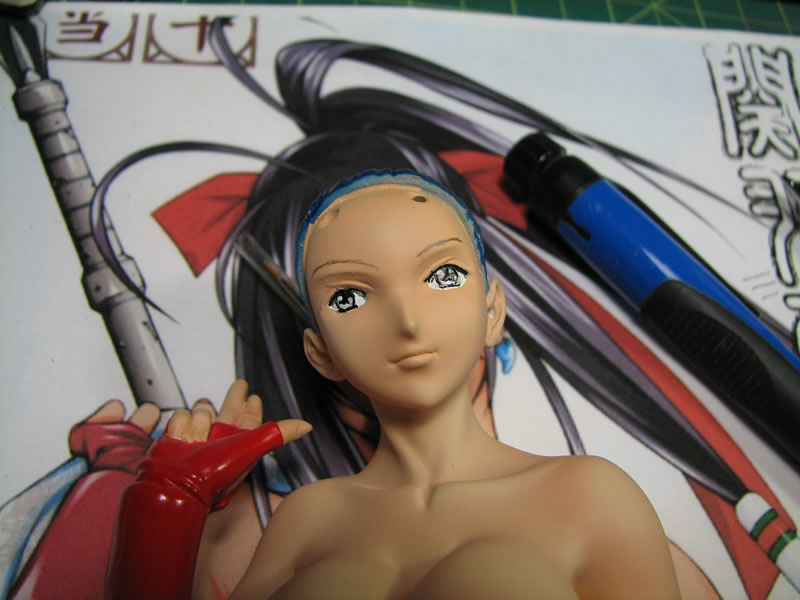
Next up is the first color for her eyes. Running off the reference picture, I mixed several shades of a green eye color that I will be using for the main eye color and highlight areas. And using a 000 sized brush, I paint the darker iris color.
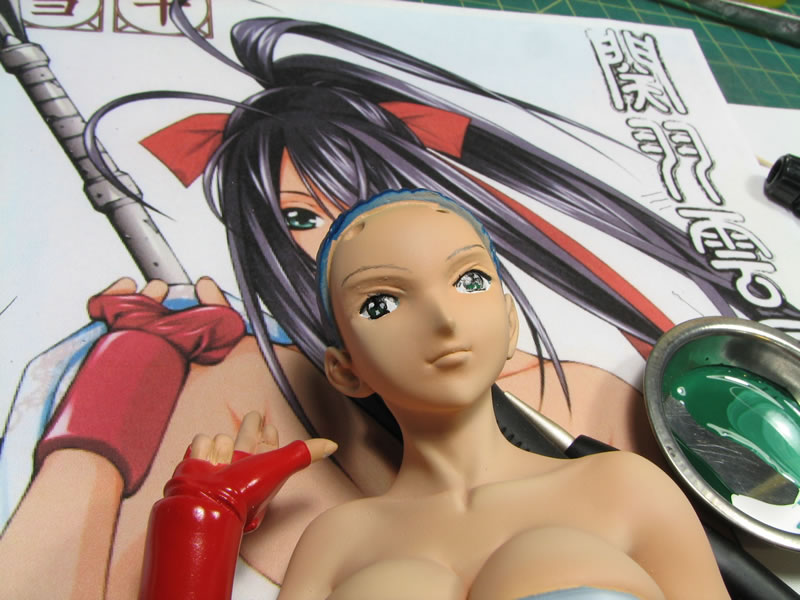
The wonderful thing about enamels is the slow dry time, so this makes it easy to blend colors. A lighter shade of the green is applied and blended in from the darker shade.
With the eye painted, I paint in the eye brows using the same base color as the base color of the hair. Allowing the enamel paint to dry for a couple of hours, I spray a light coat of clear gloss to give the eyes a wet look to them.
And with that, her eyes and face is done.
October 26, 2008: Finally, I have a small update on the progress for the kit. I've been slacking, on vacations, and tied up working on a commission kit that I just finished this past weekend. That said, I spent my "free" build time at the gathering masking the red. And around 2:00 AM, the robe was masked off and ready for final paint.
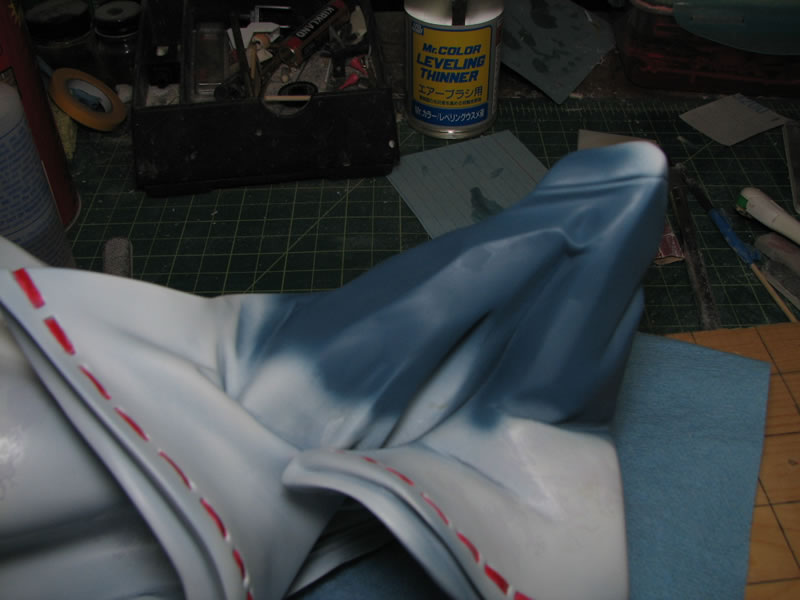
Today, I spot sprayed intermediate blue as the base coat.
Once the blue was painted on, pure white was sprayed allowing for some subtle shading from the blue. To allow the part to properly dry, I had to hang the damn thing in the spray booth for a little while.
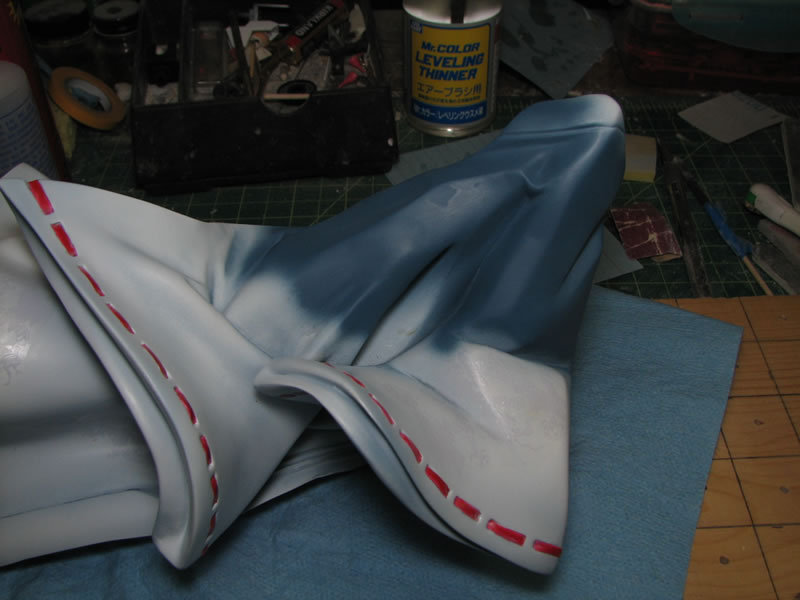
With the white dry to the touch, the masking tape was removed. I still have to allow the paint to fully cure for a day and I can go in and do a quick light wet sanding session to smooth everything out before putting on the decals and finishing the damn thing. I hope to finish the kit sometime this week.
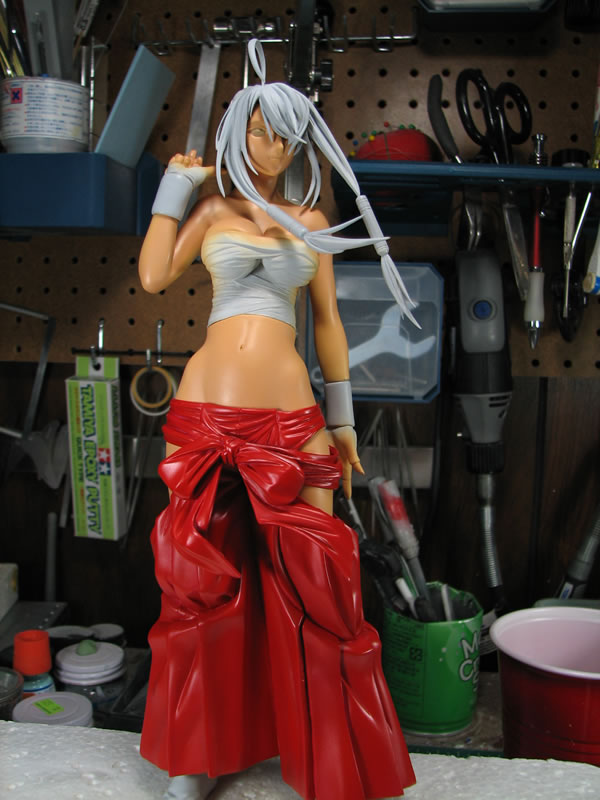
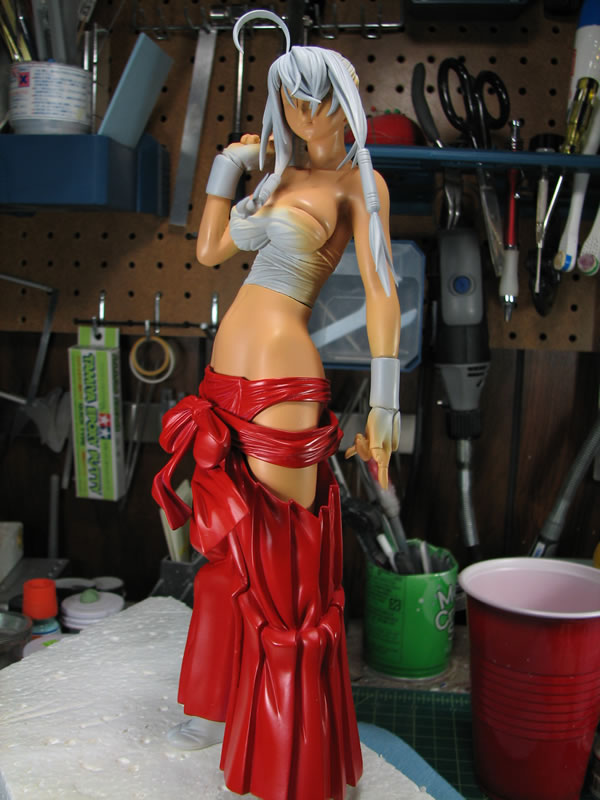
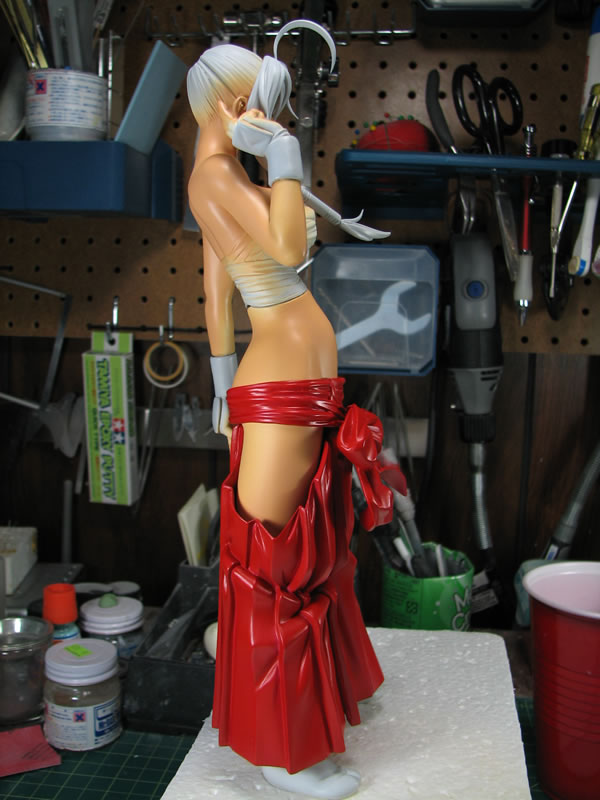
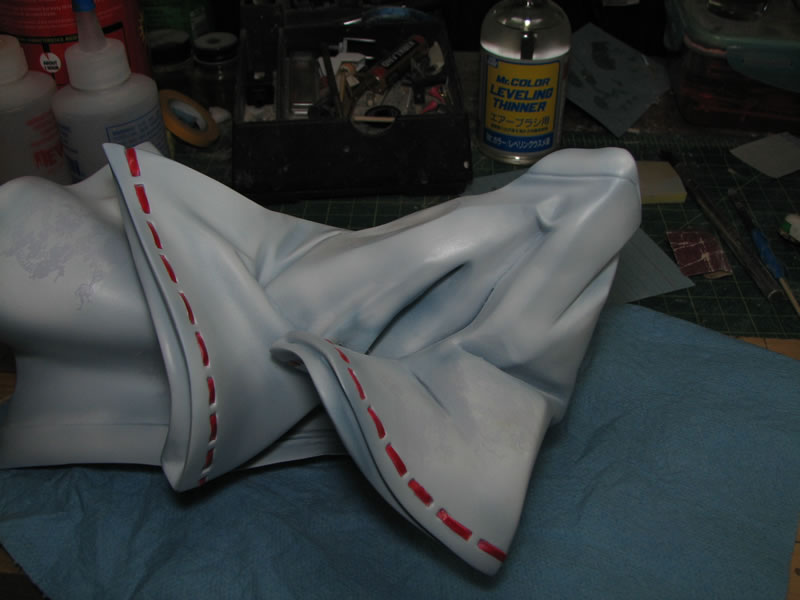
October 28, 2008: Last night I put on the decals for the robe and use some decal softener to melt the decals onto the surface. Today, I took a quick snap of the finished robe and then prepared to take final pictures of the completed kit as the robe was done...
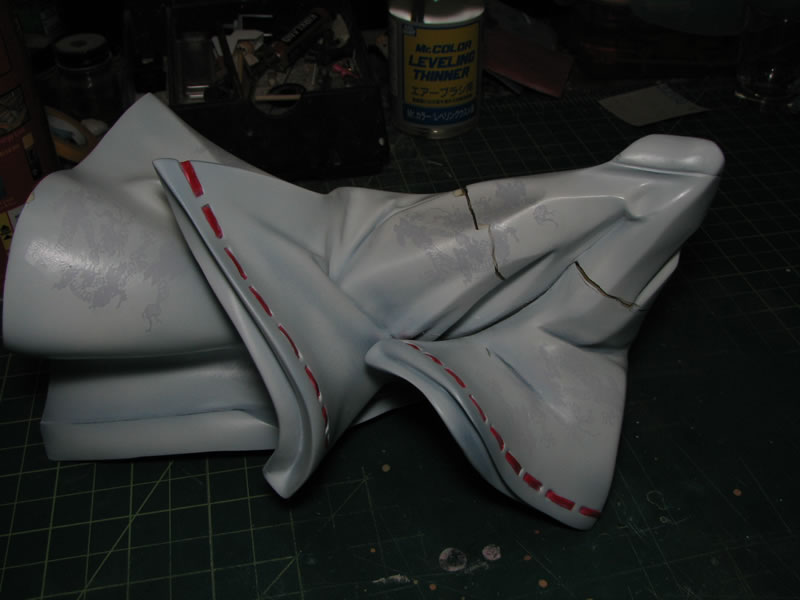
Oh the agony of getting kicked in the nuts... While trying to set up the photo studio, the brillance that is me knocked the damn robe off the bloody table. WHAM! Apparently it fell just right to knock two of the four pieces that compose the part out and crack open the puttied areas that I had to go back and fix repeatedly. Oh this cursed robe just wouldn't go quietly into the night. It is a wonder why I kept losing focus and desire to finish the damn thing. I should just shelve it and work on something new.....
At least it has been puttied and hopefully quick sanding session will lead to a quick paint session and then I can finish this stupid piece by the end of the week... I really ought to refrain from mentioning that I'd finish anything in the next few days, as karma, Murphy's Law, etc will effectively put my nuts into a vice and just ruin my day.
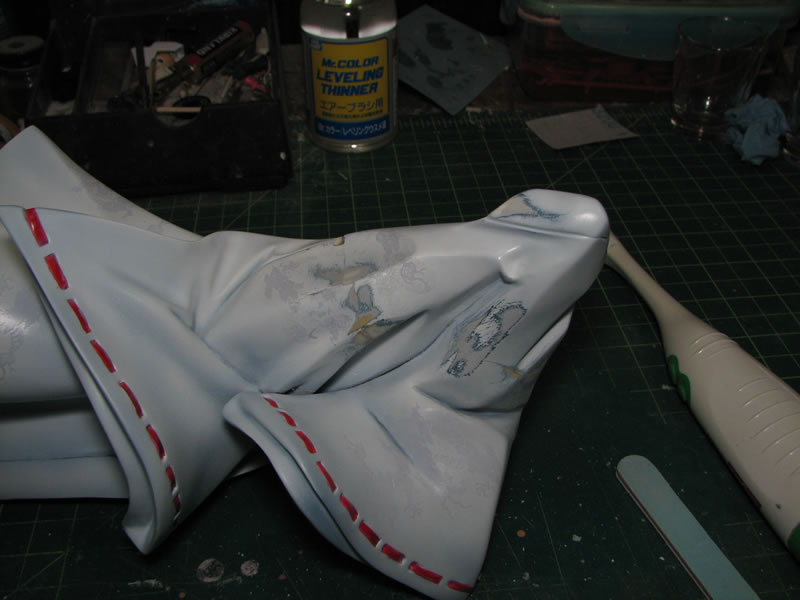
October 29, 2008: After hitting the gym, I came back and sanded the miliput. The miliput worked out quite well. I may actually continue to use the stuff. One of the two parts of the miliput has gotten a nice layer of oxidation around it so I really need to get to using the stuff before it becomes utterly un-useable.

I skipped the priming phase and went right to the base coat as the base coat was dark enough to cover everything and show any surface defects. And with some fairly decent luck tonight, not many surface defects....
The white was painted on and now the part is just sitting there to cure up over night before I go and start handling it again.
May 17, 2008: Started a new project, Kanu Uncho from Ikkitousen. I will be using this project to update videos and workshop materials for figure building.