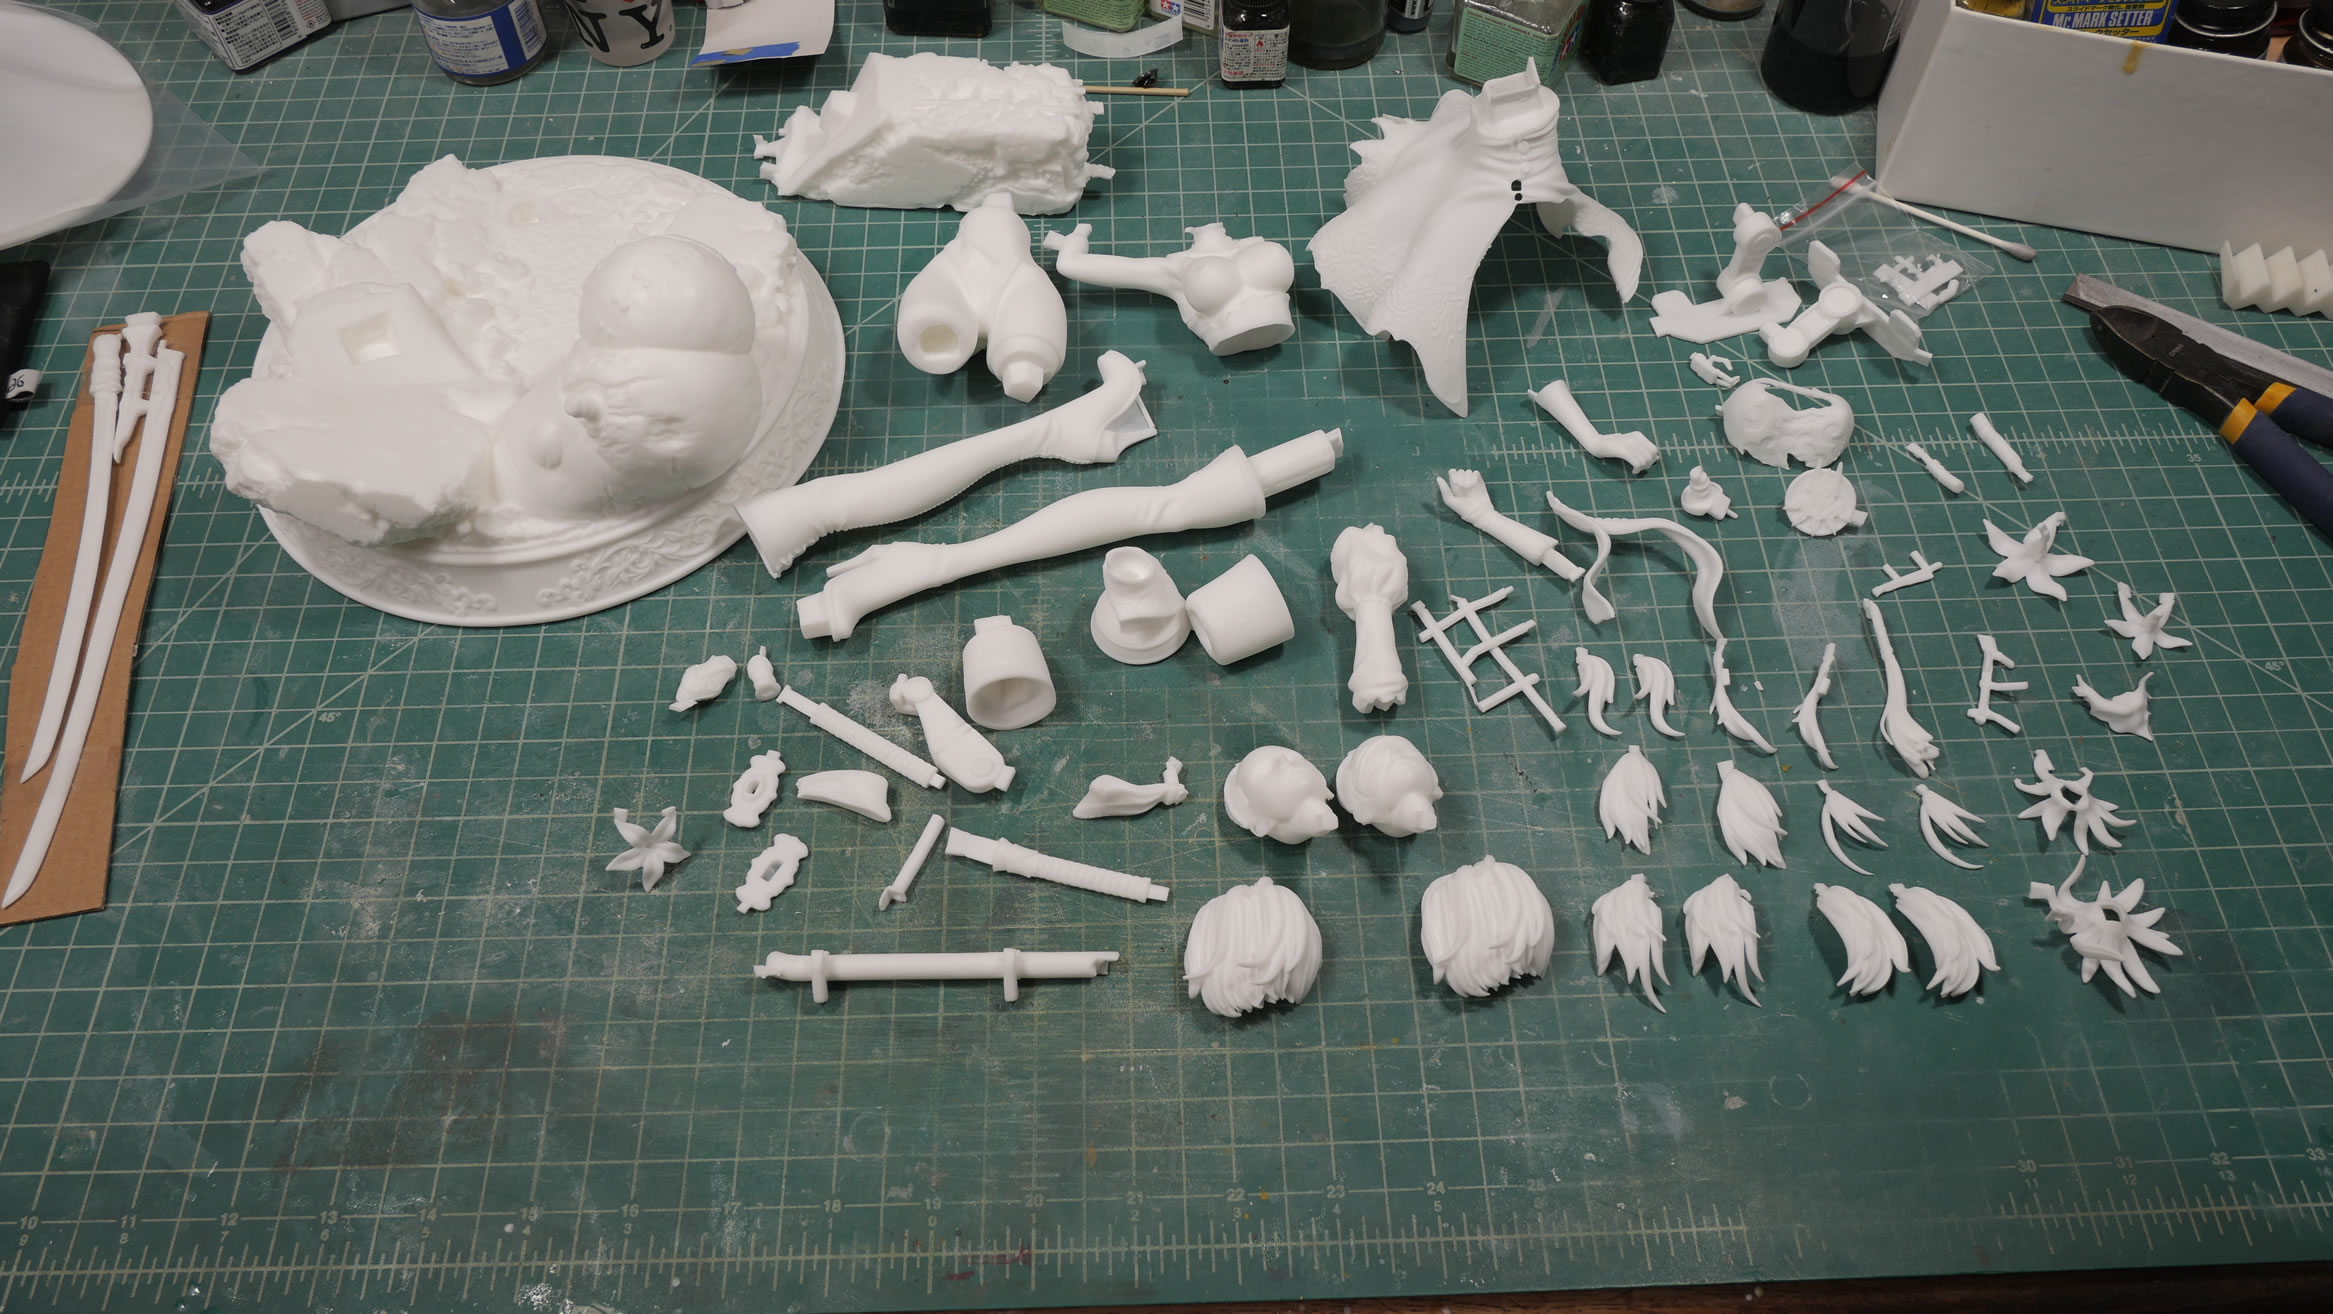
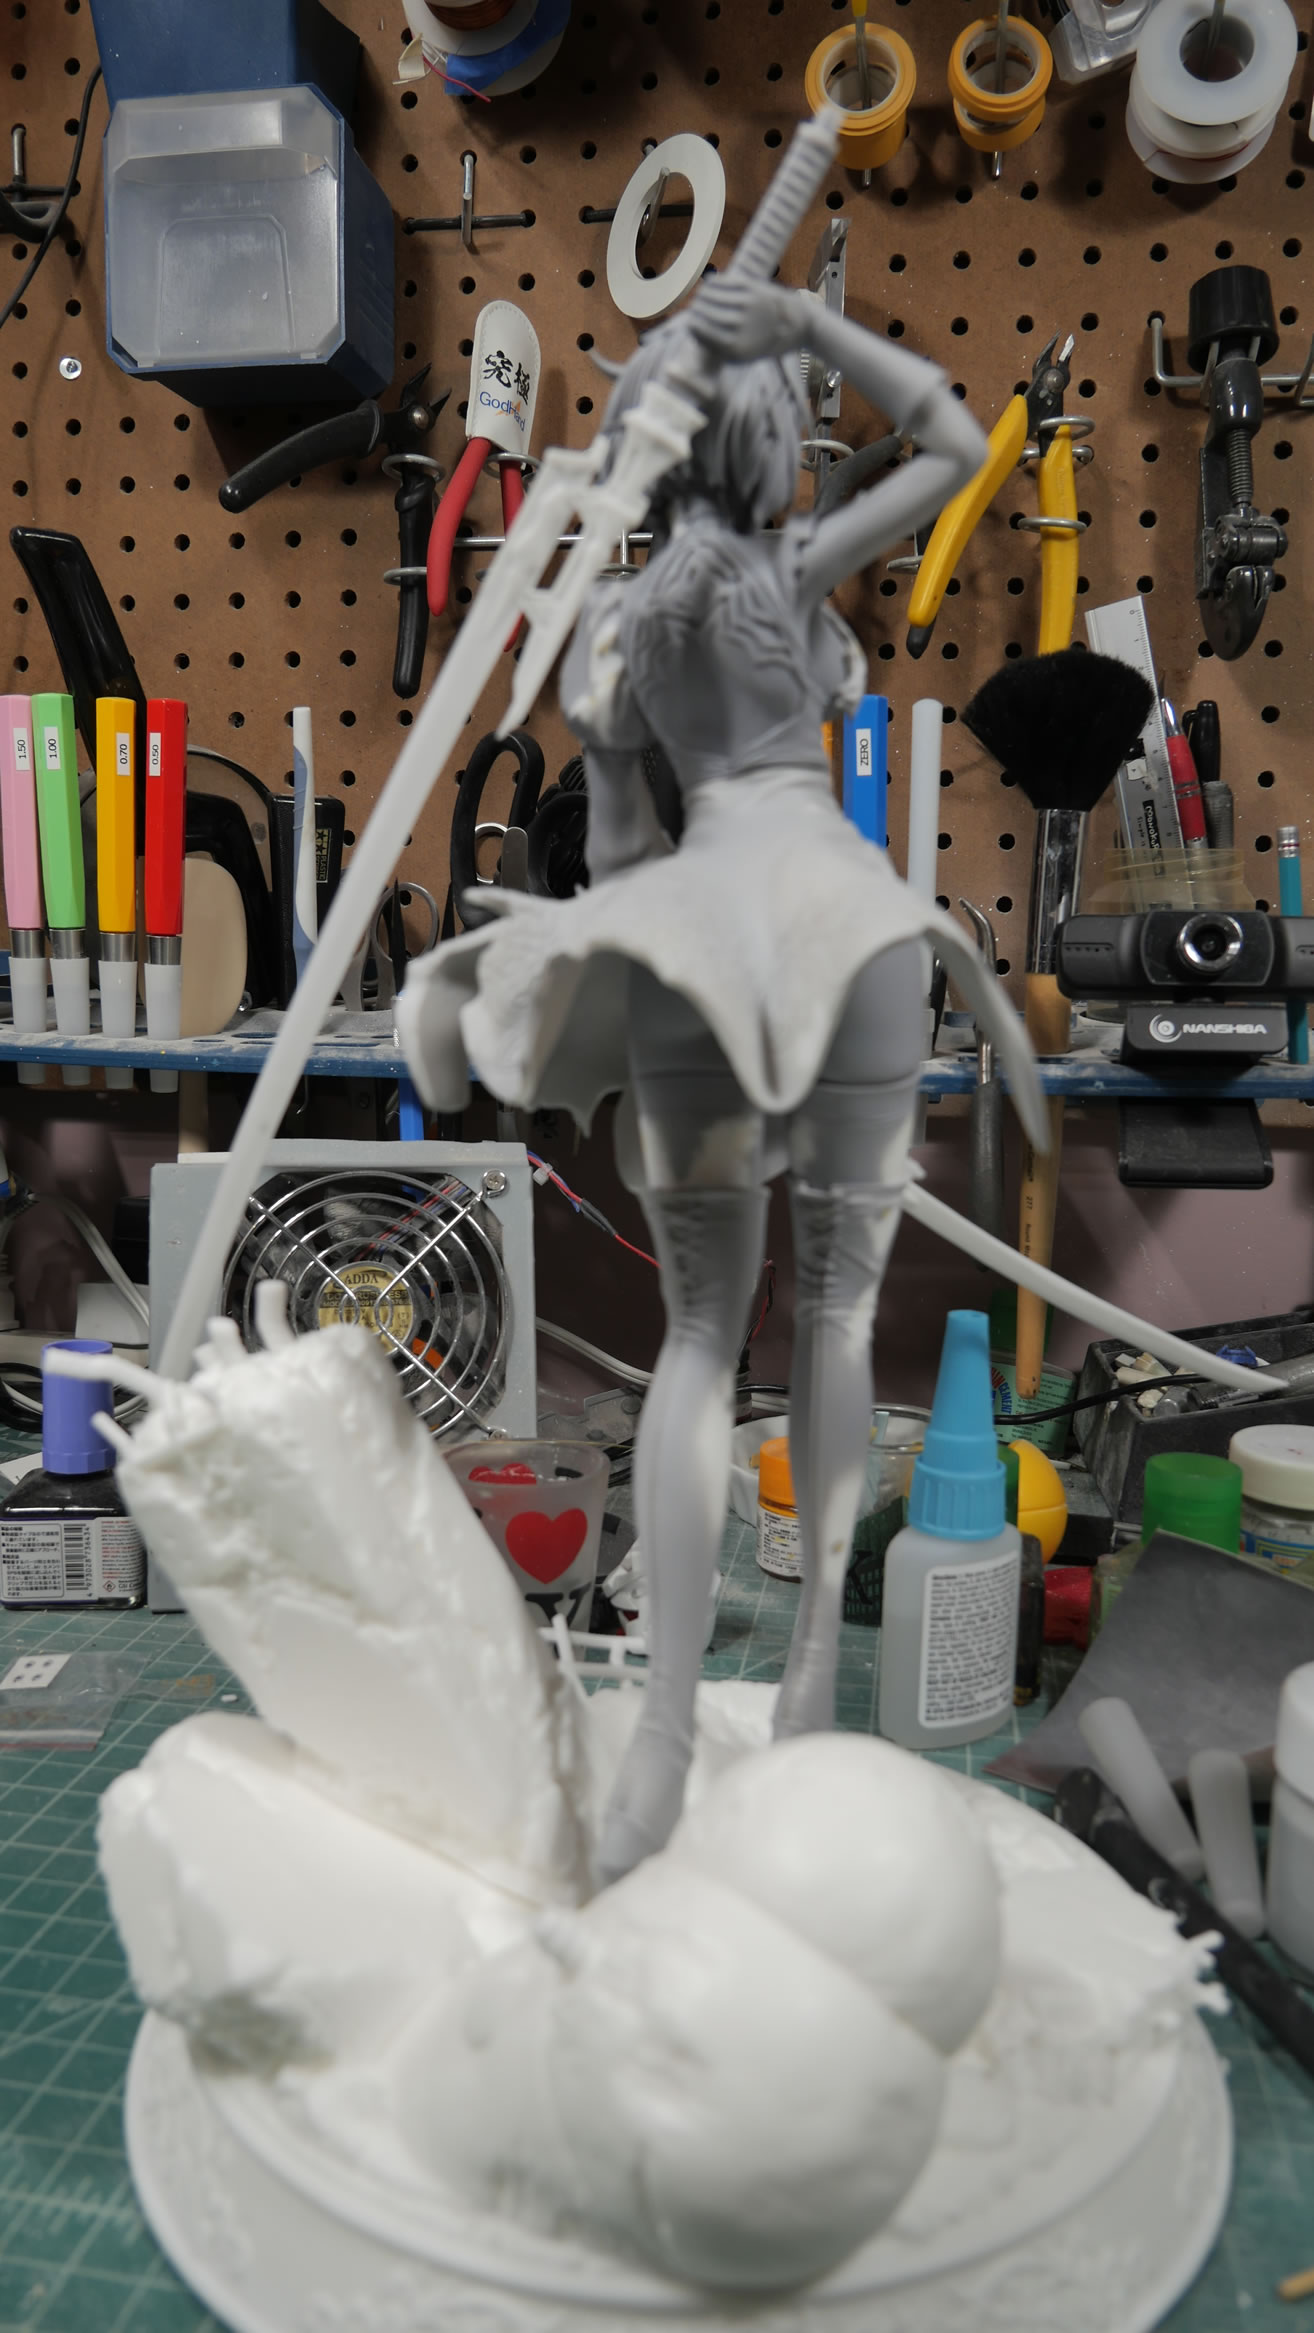
Off to a good start this year with my first started and finished project of 2022. Granted, I ordered this kit in Nov 2020, it took over a year to fulfill, supply chain issues from covid is my best guess. Regardless; it arrived a 11 days into January and I cleared off my workbench and started laying out all the parts.
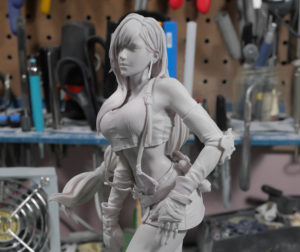
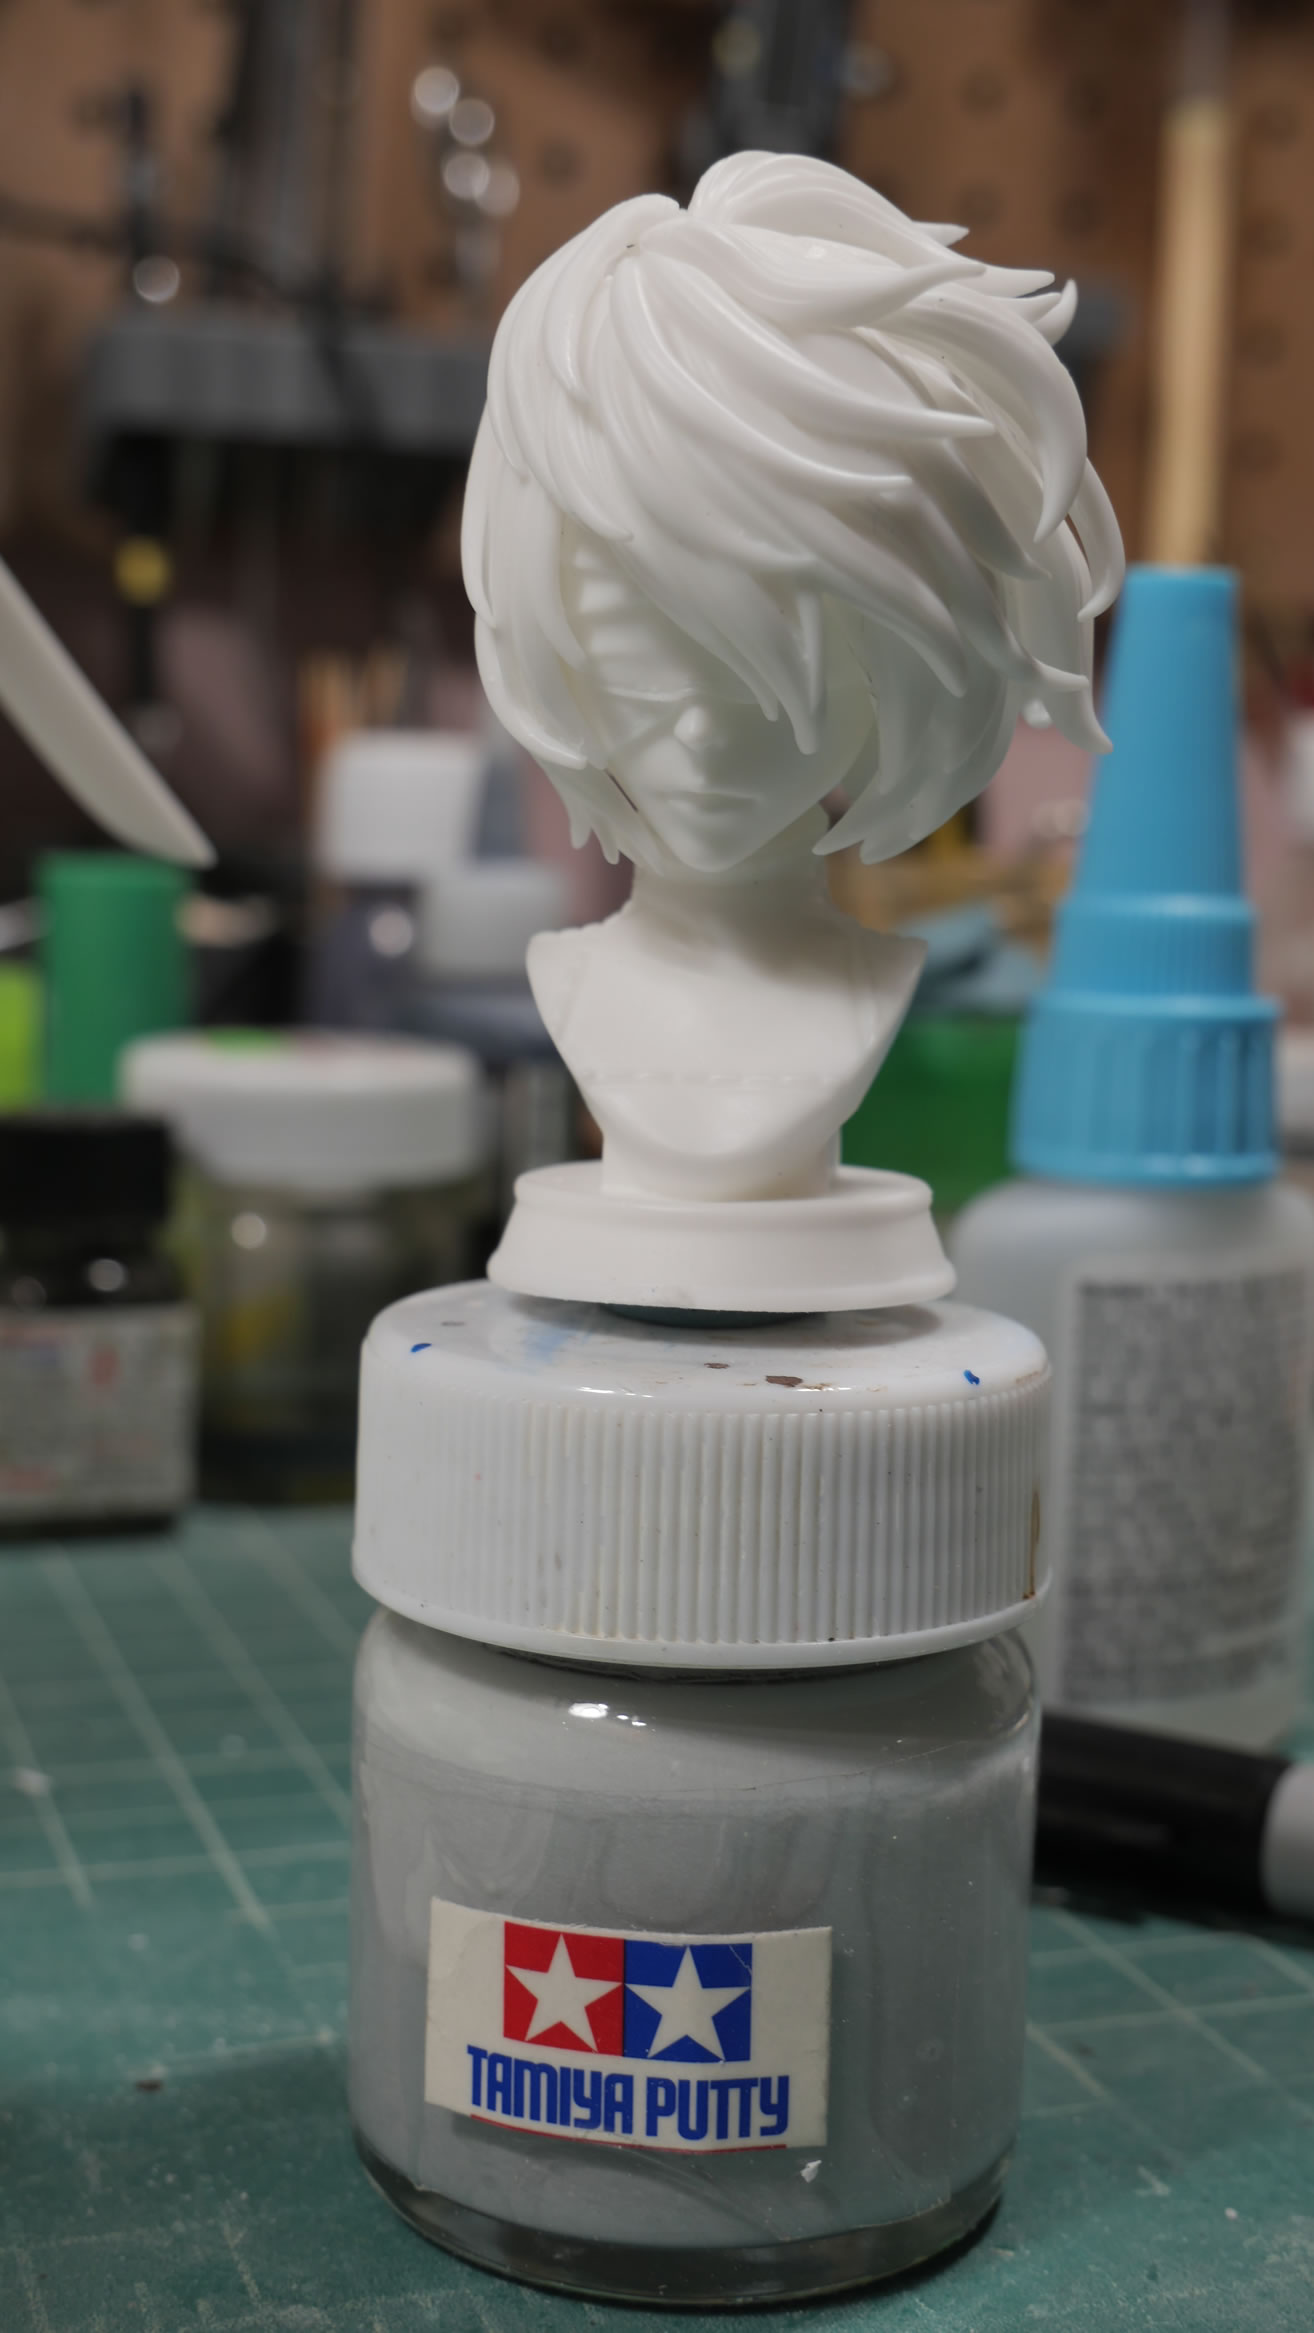
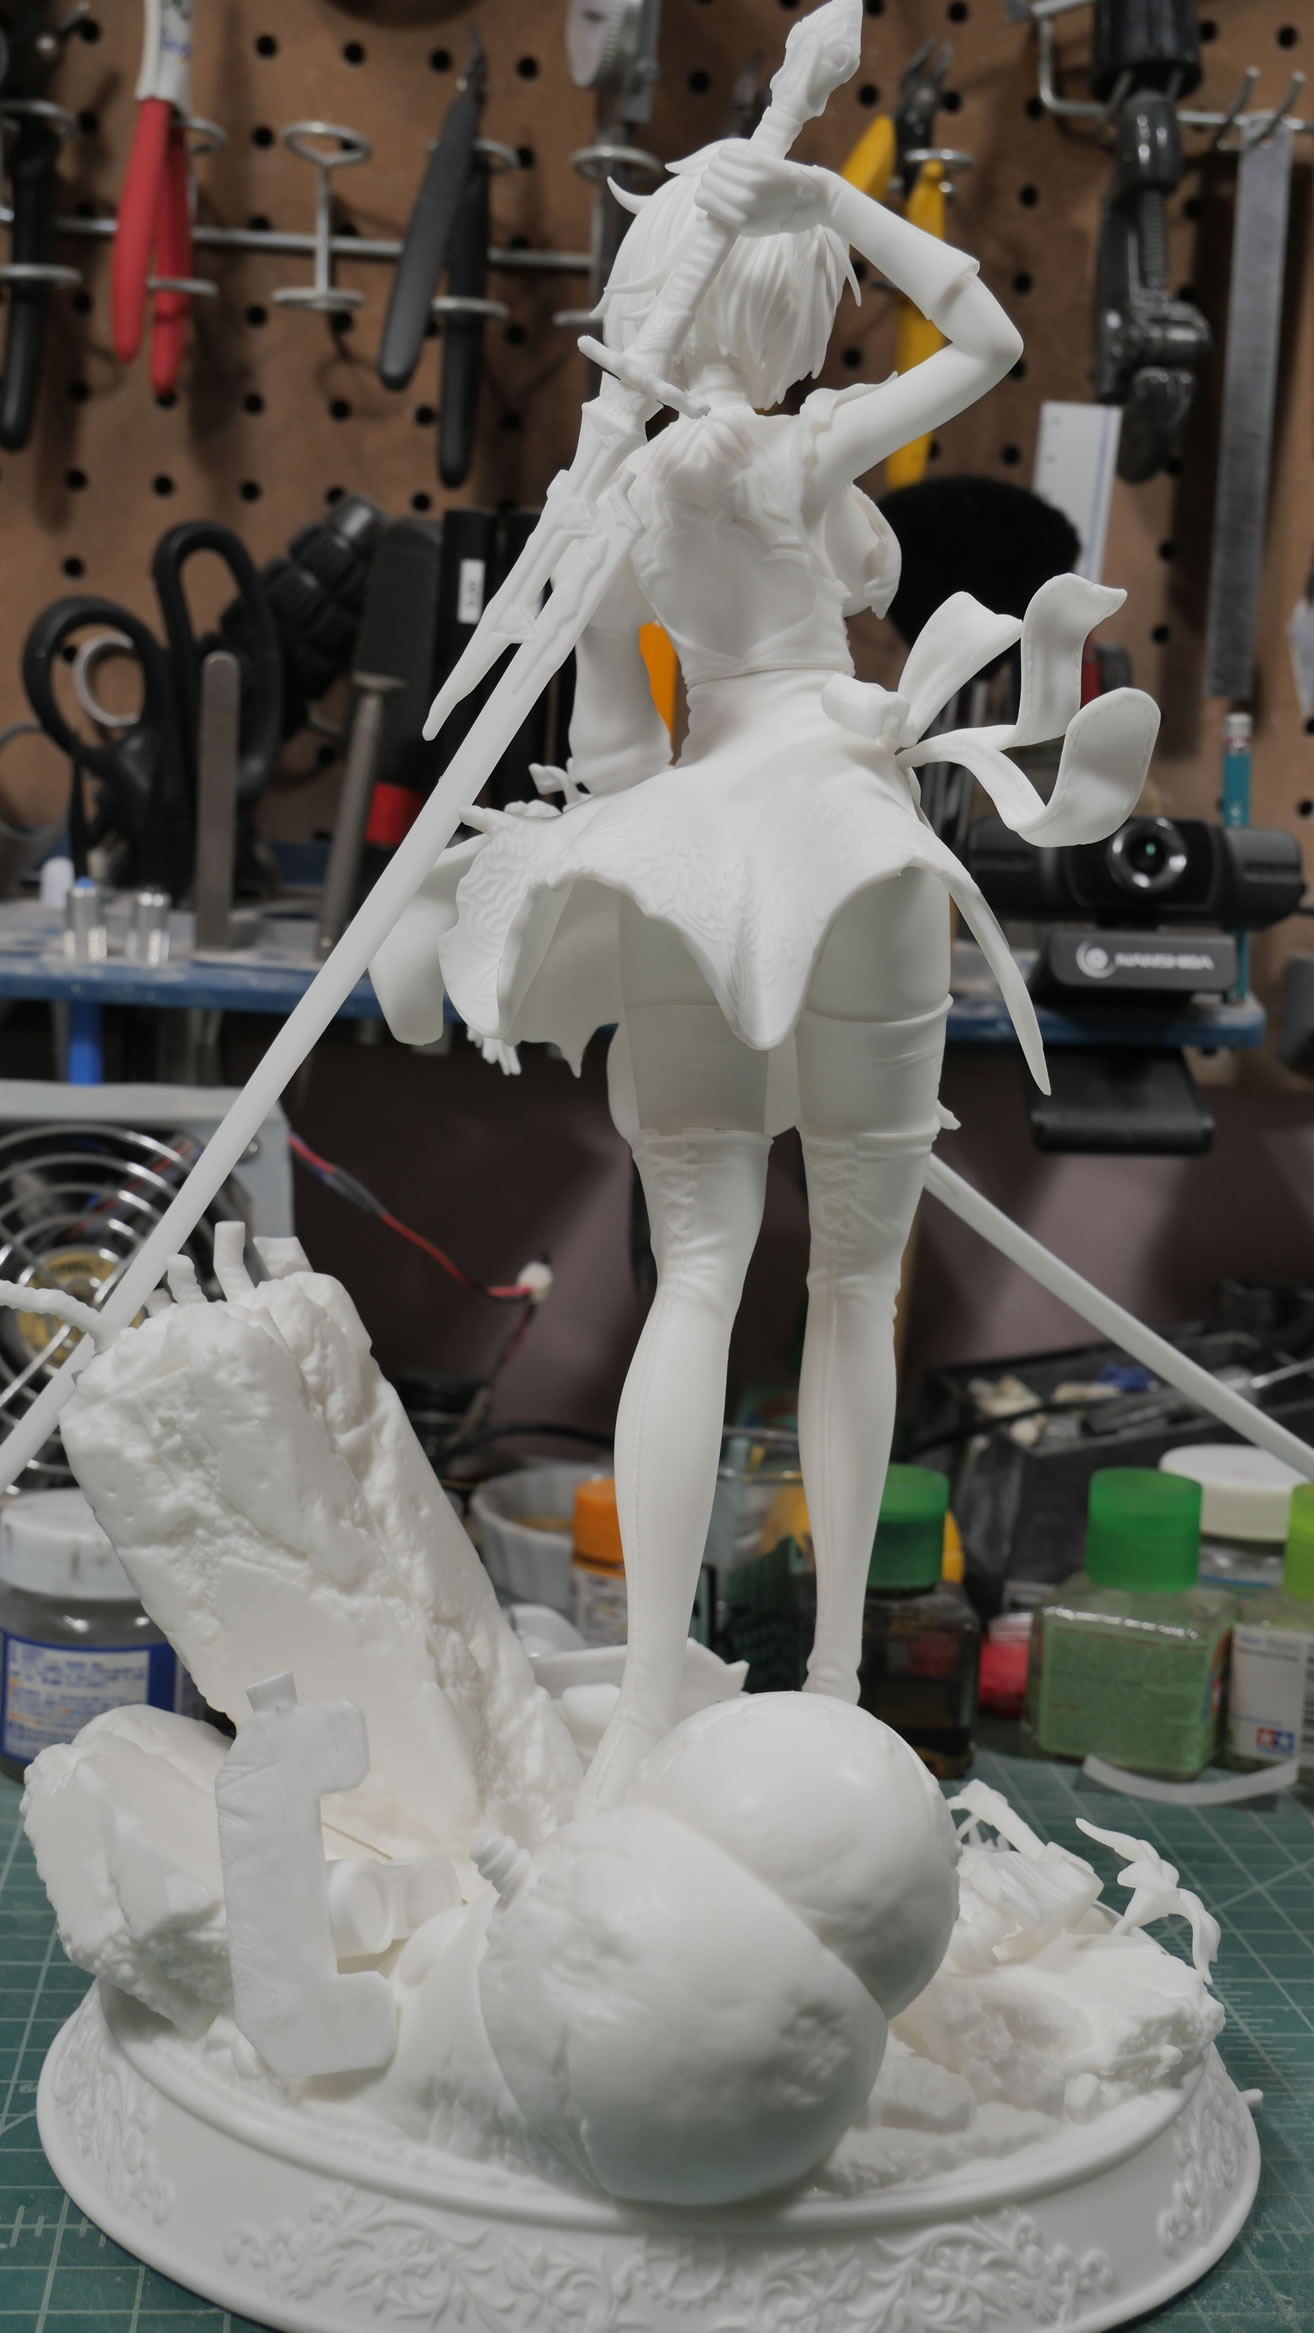
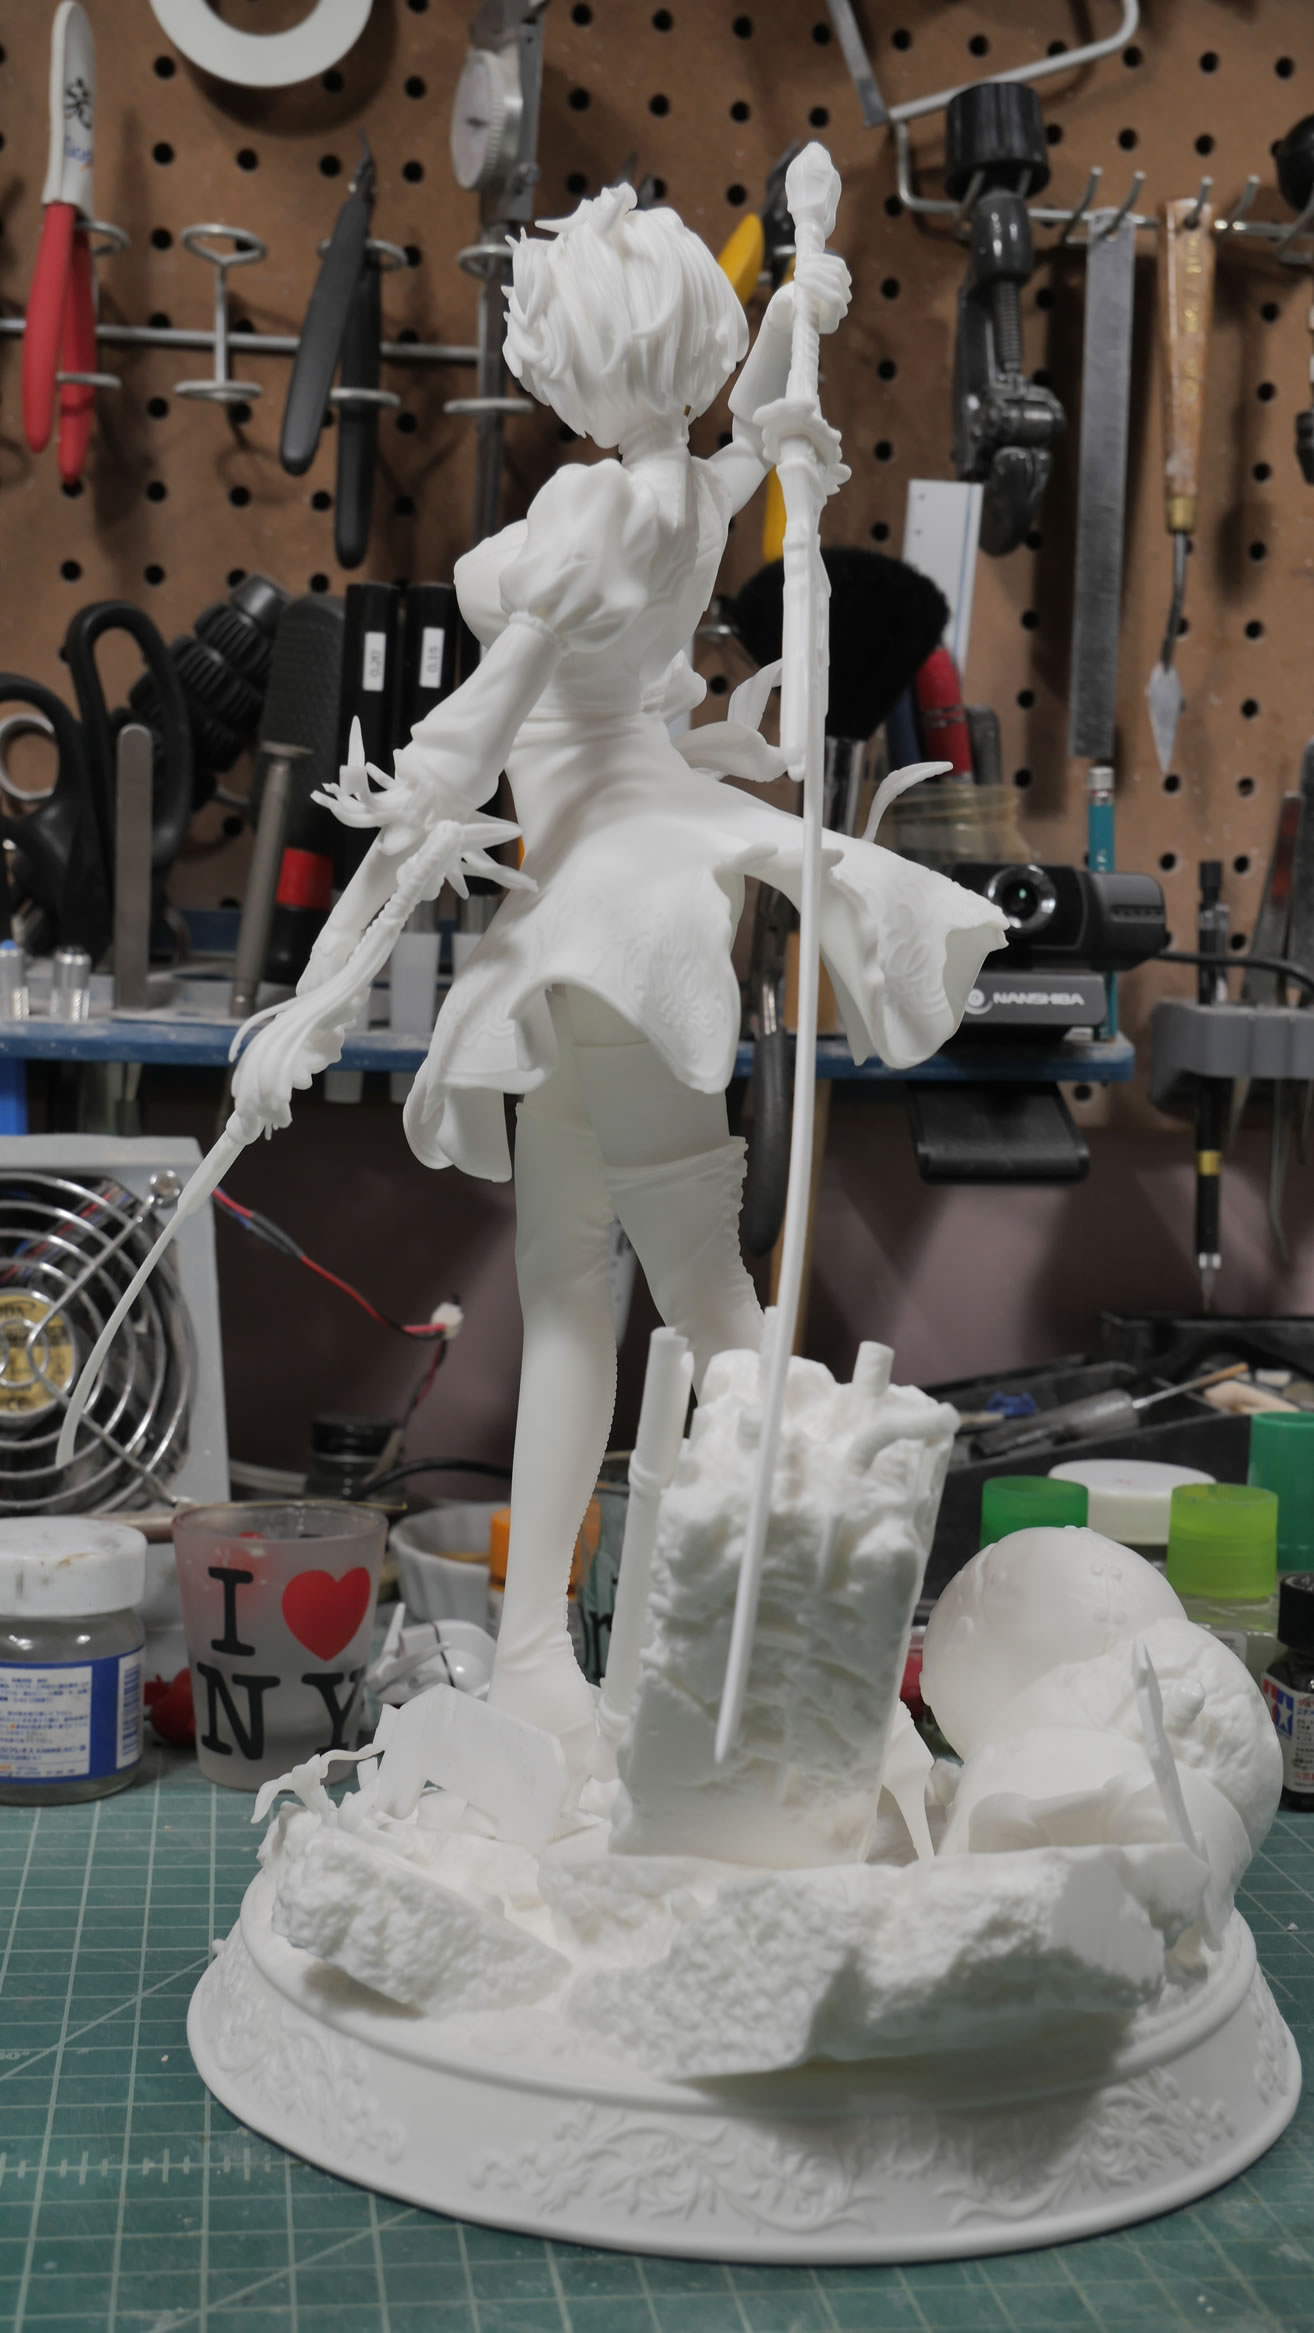
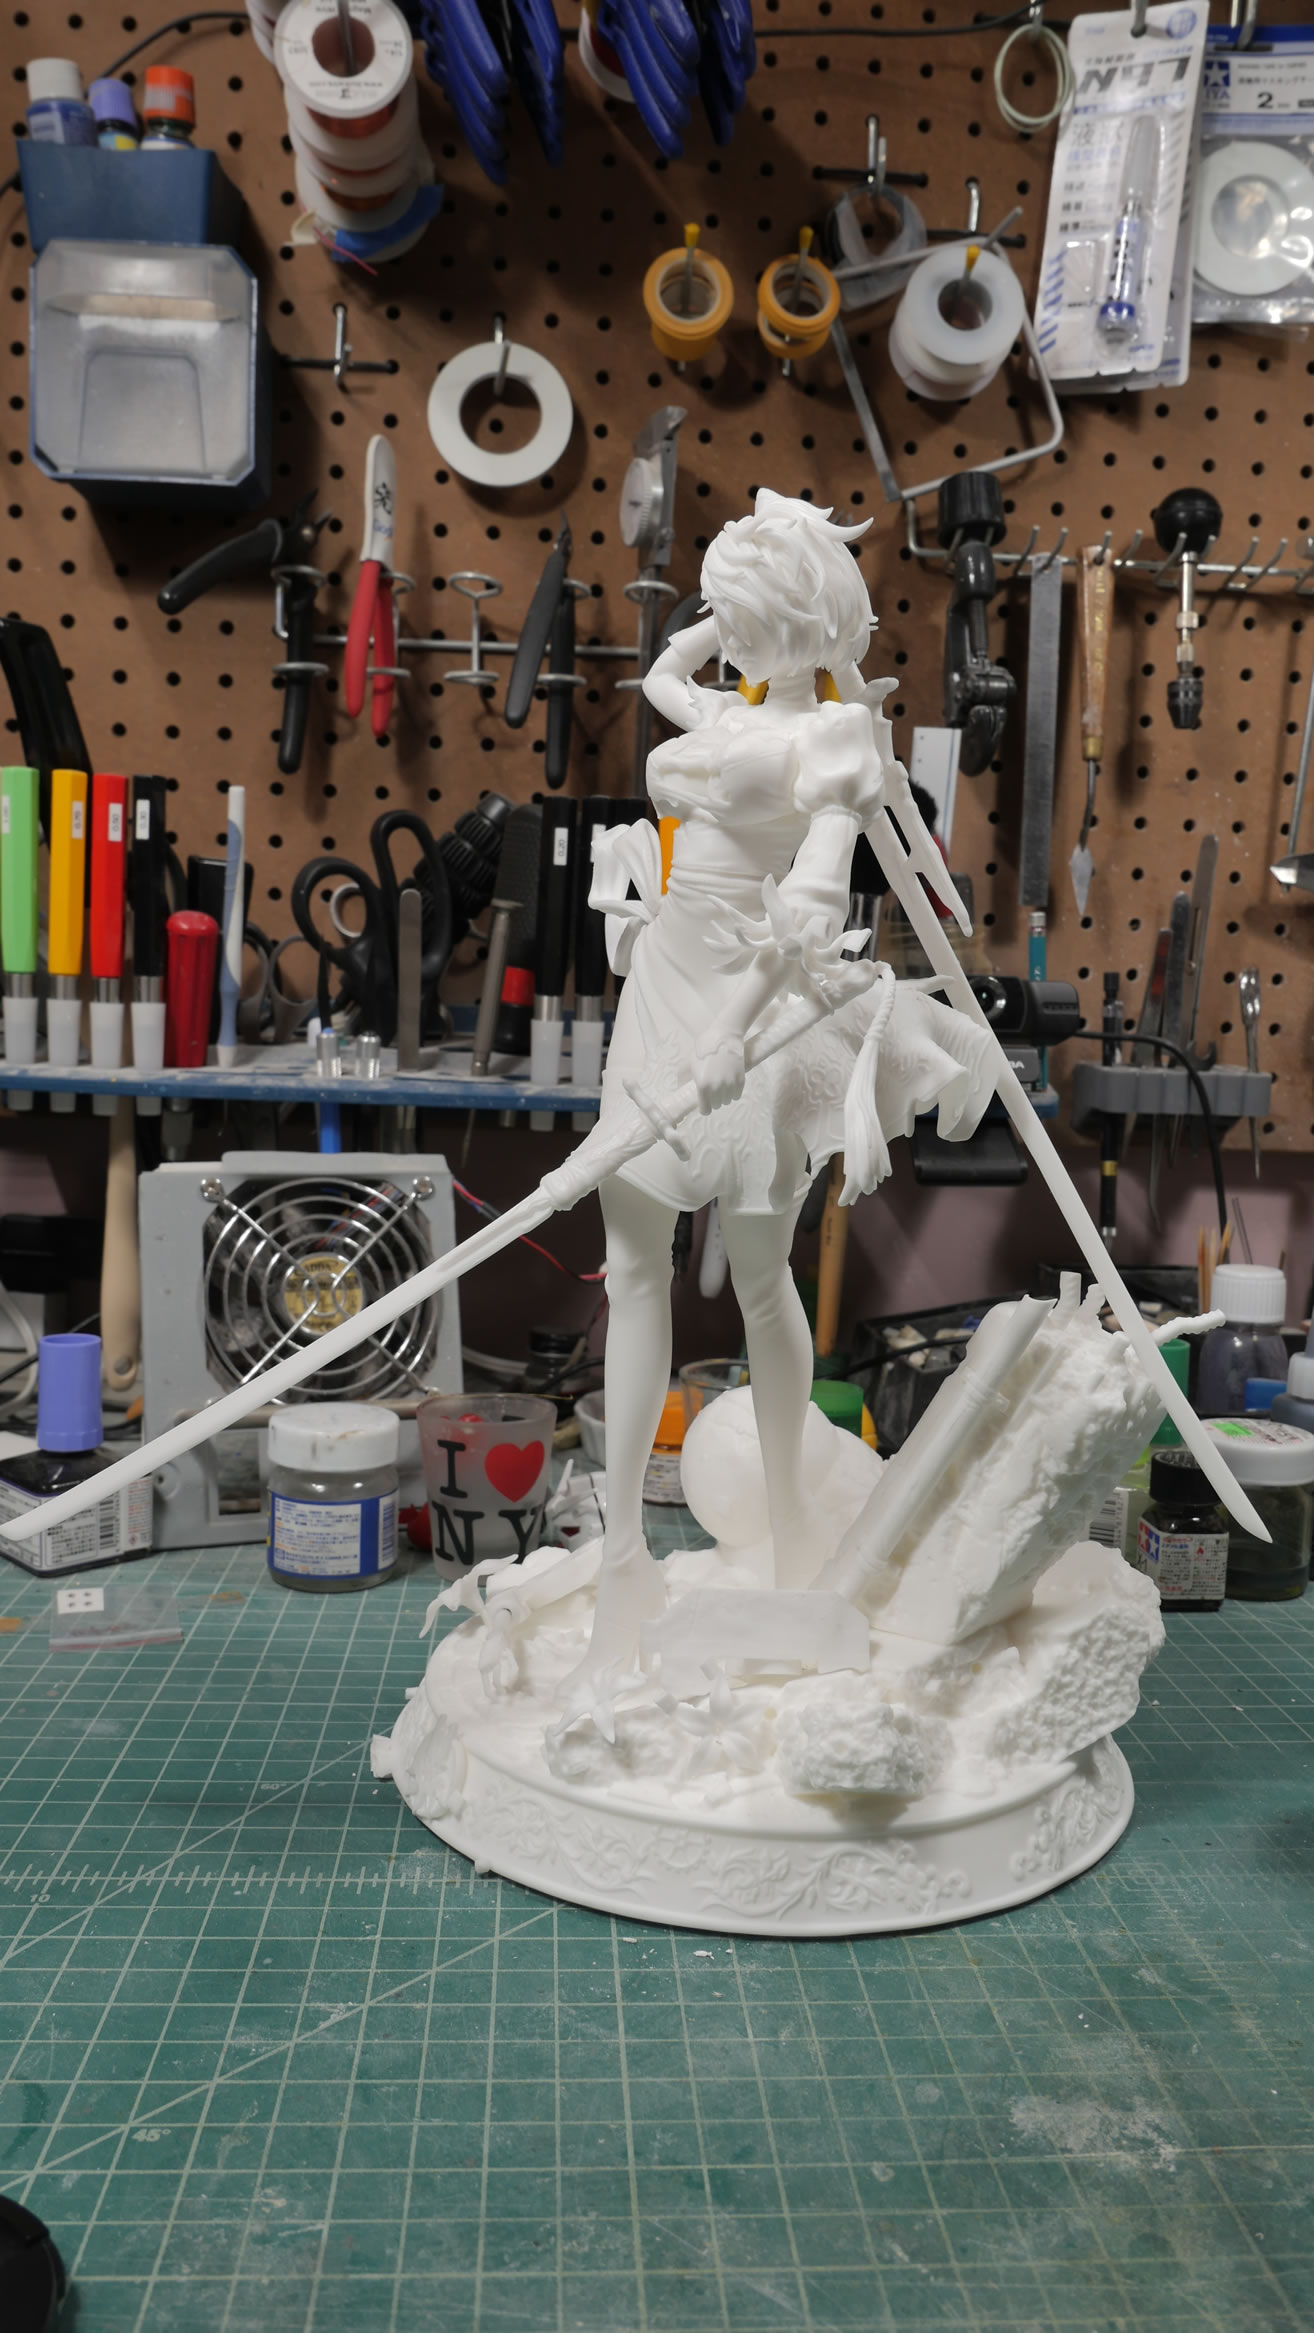
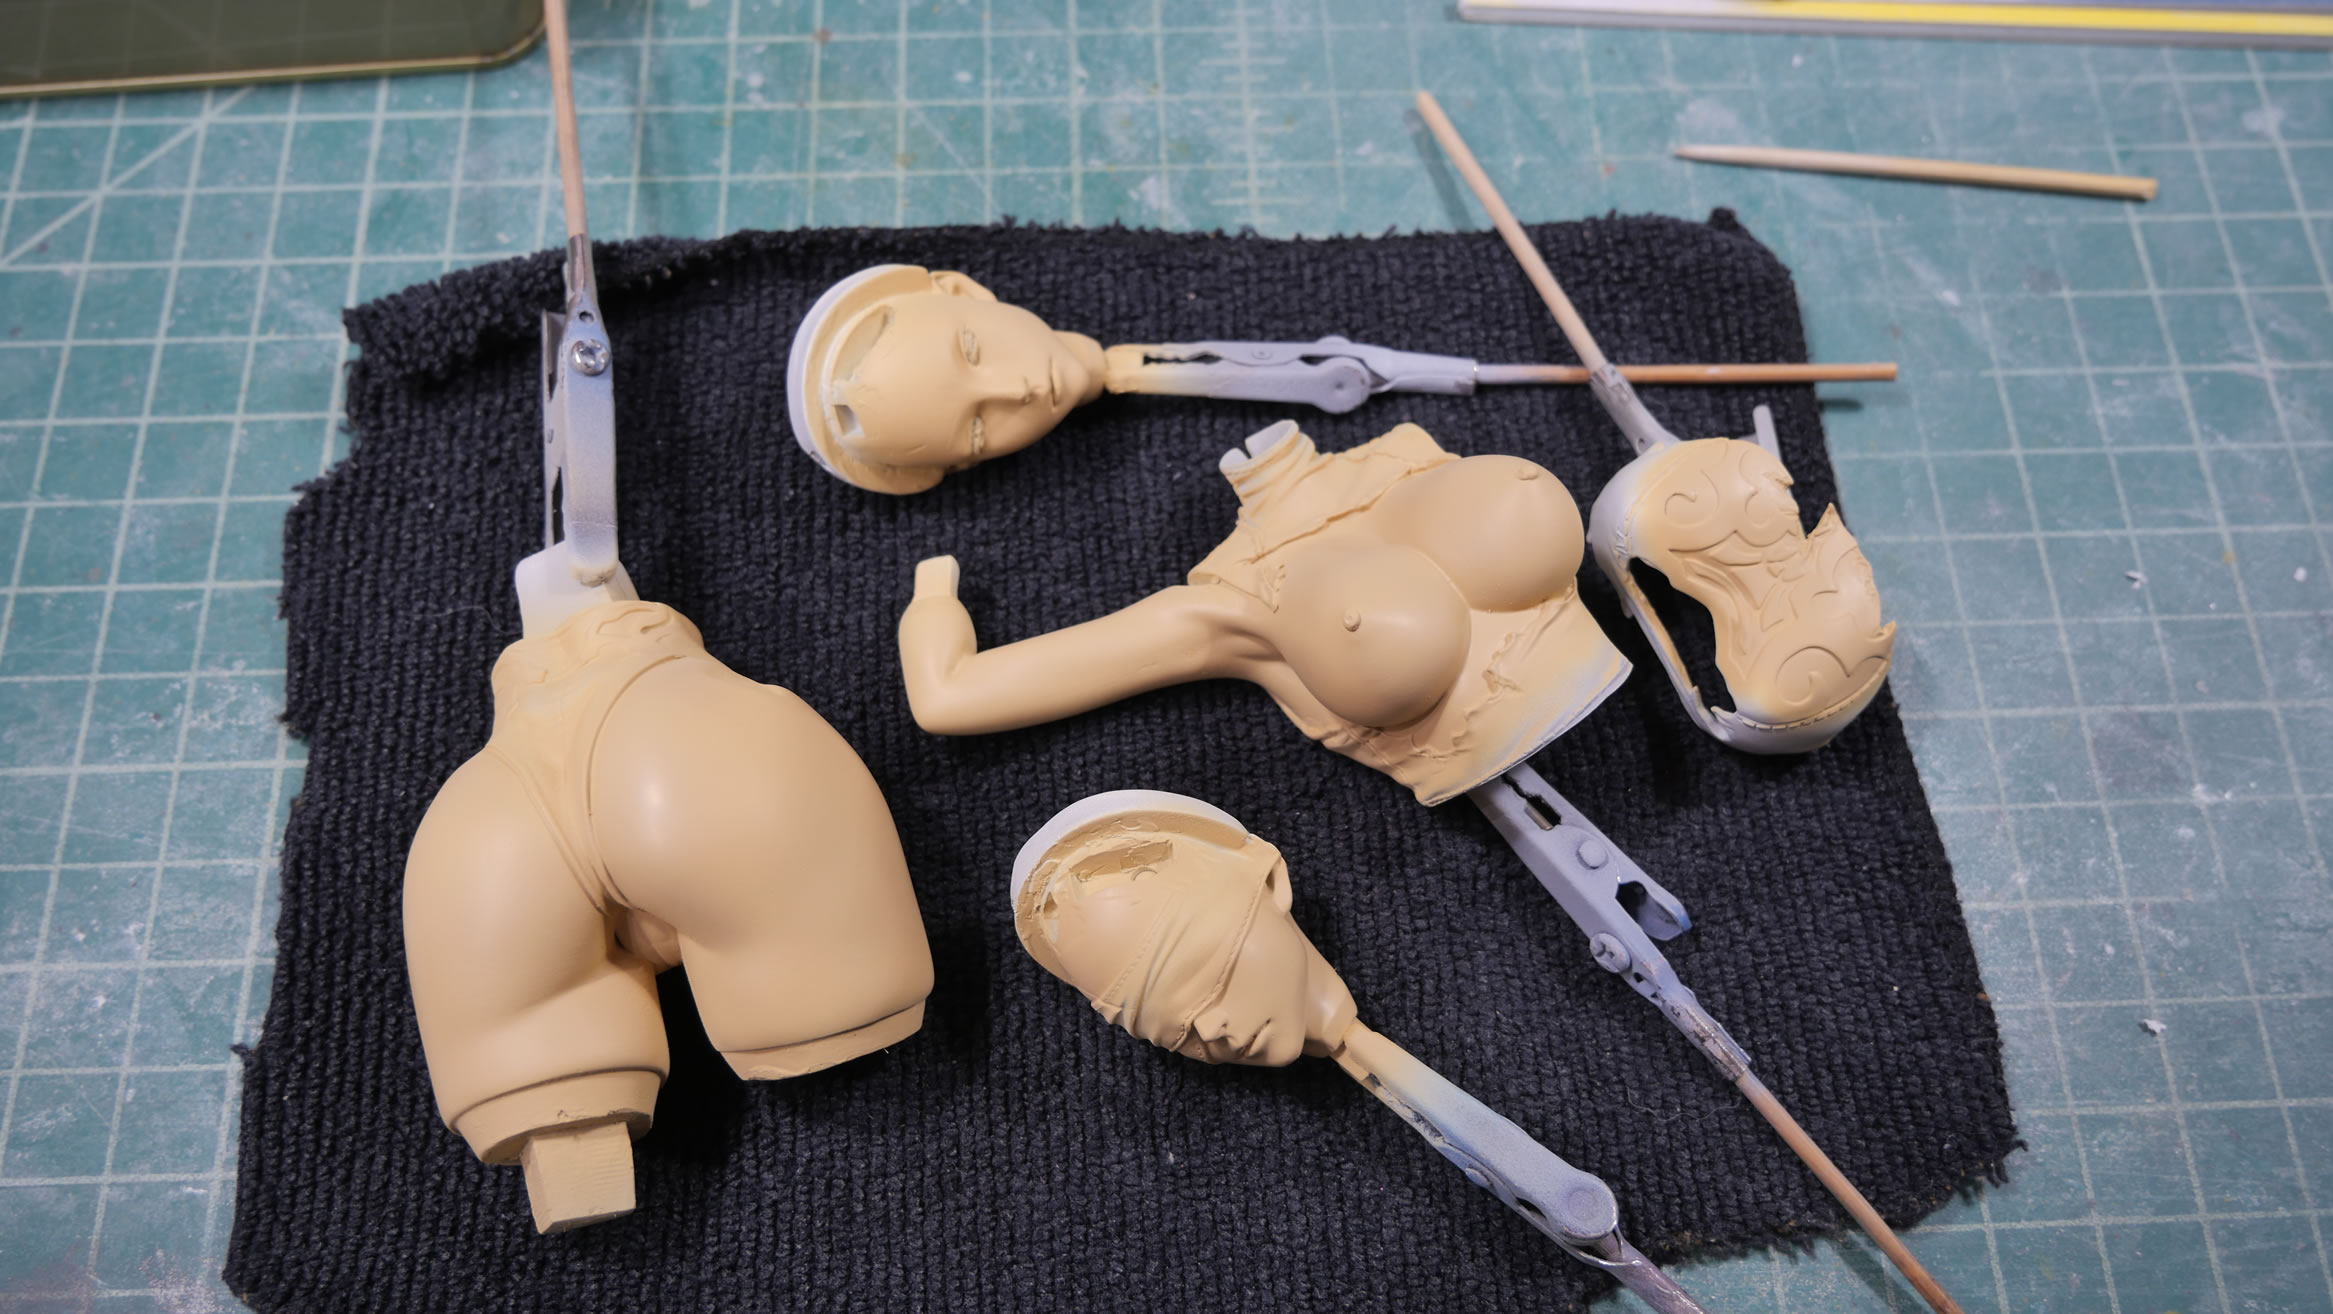
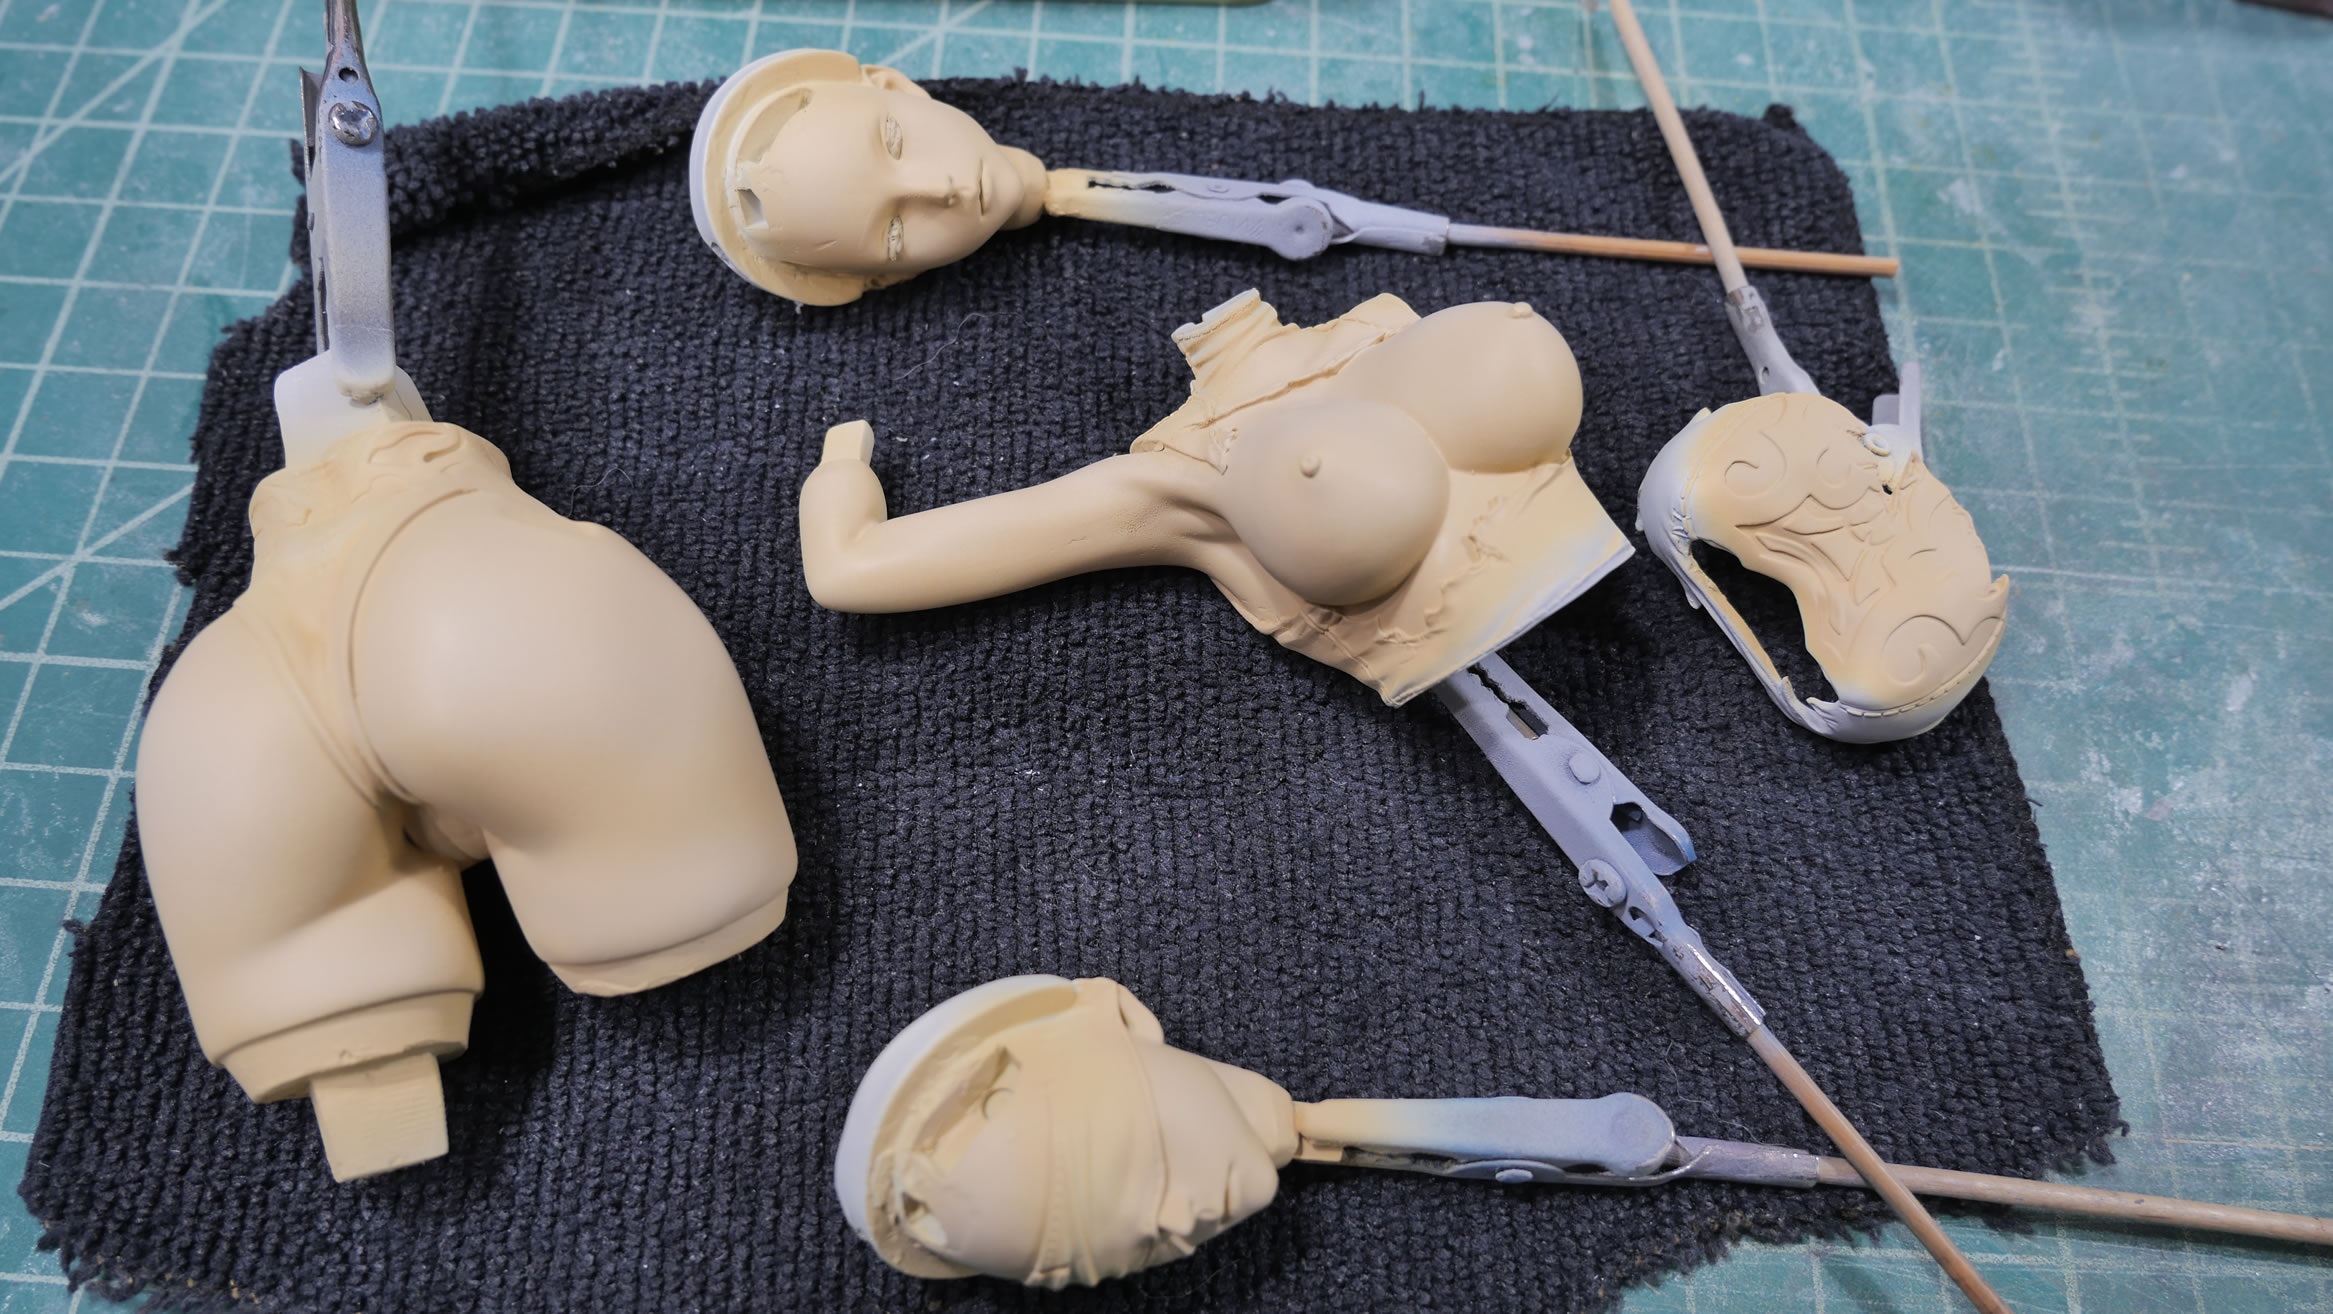
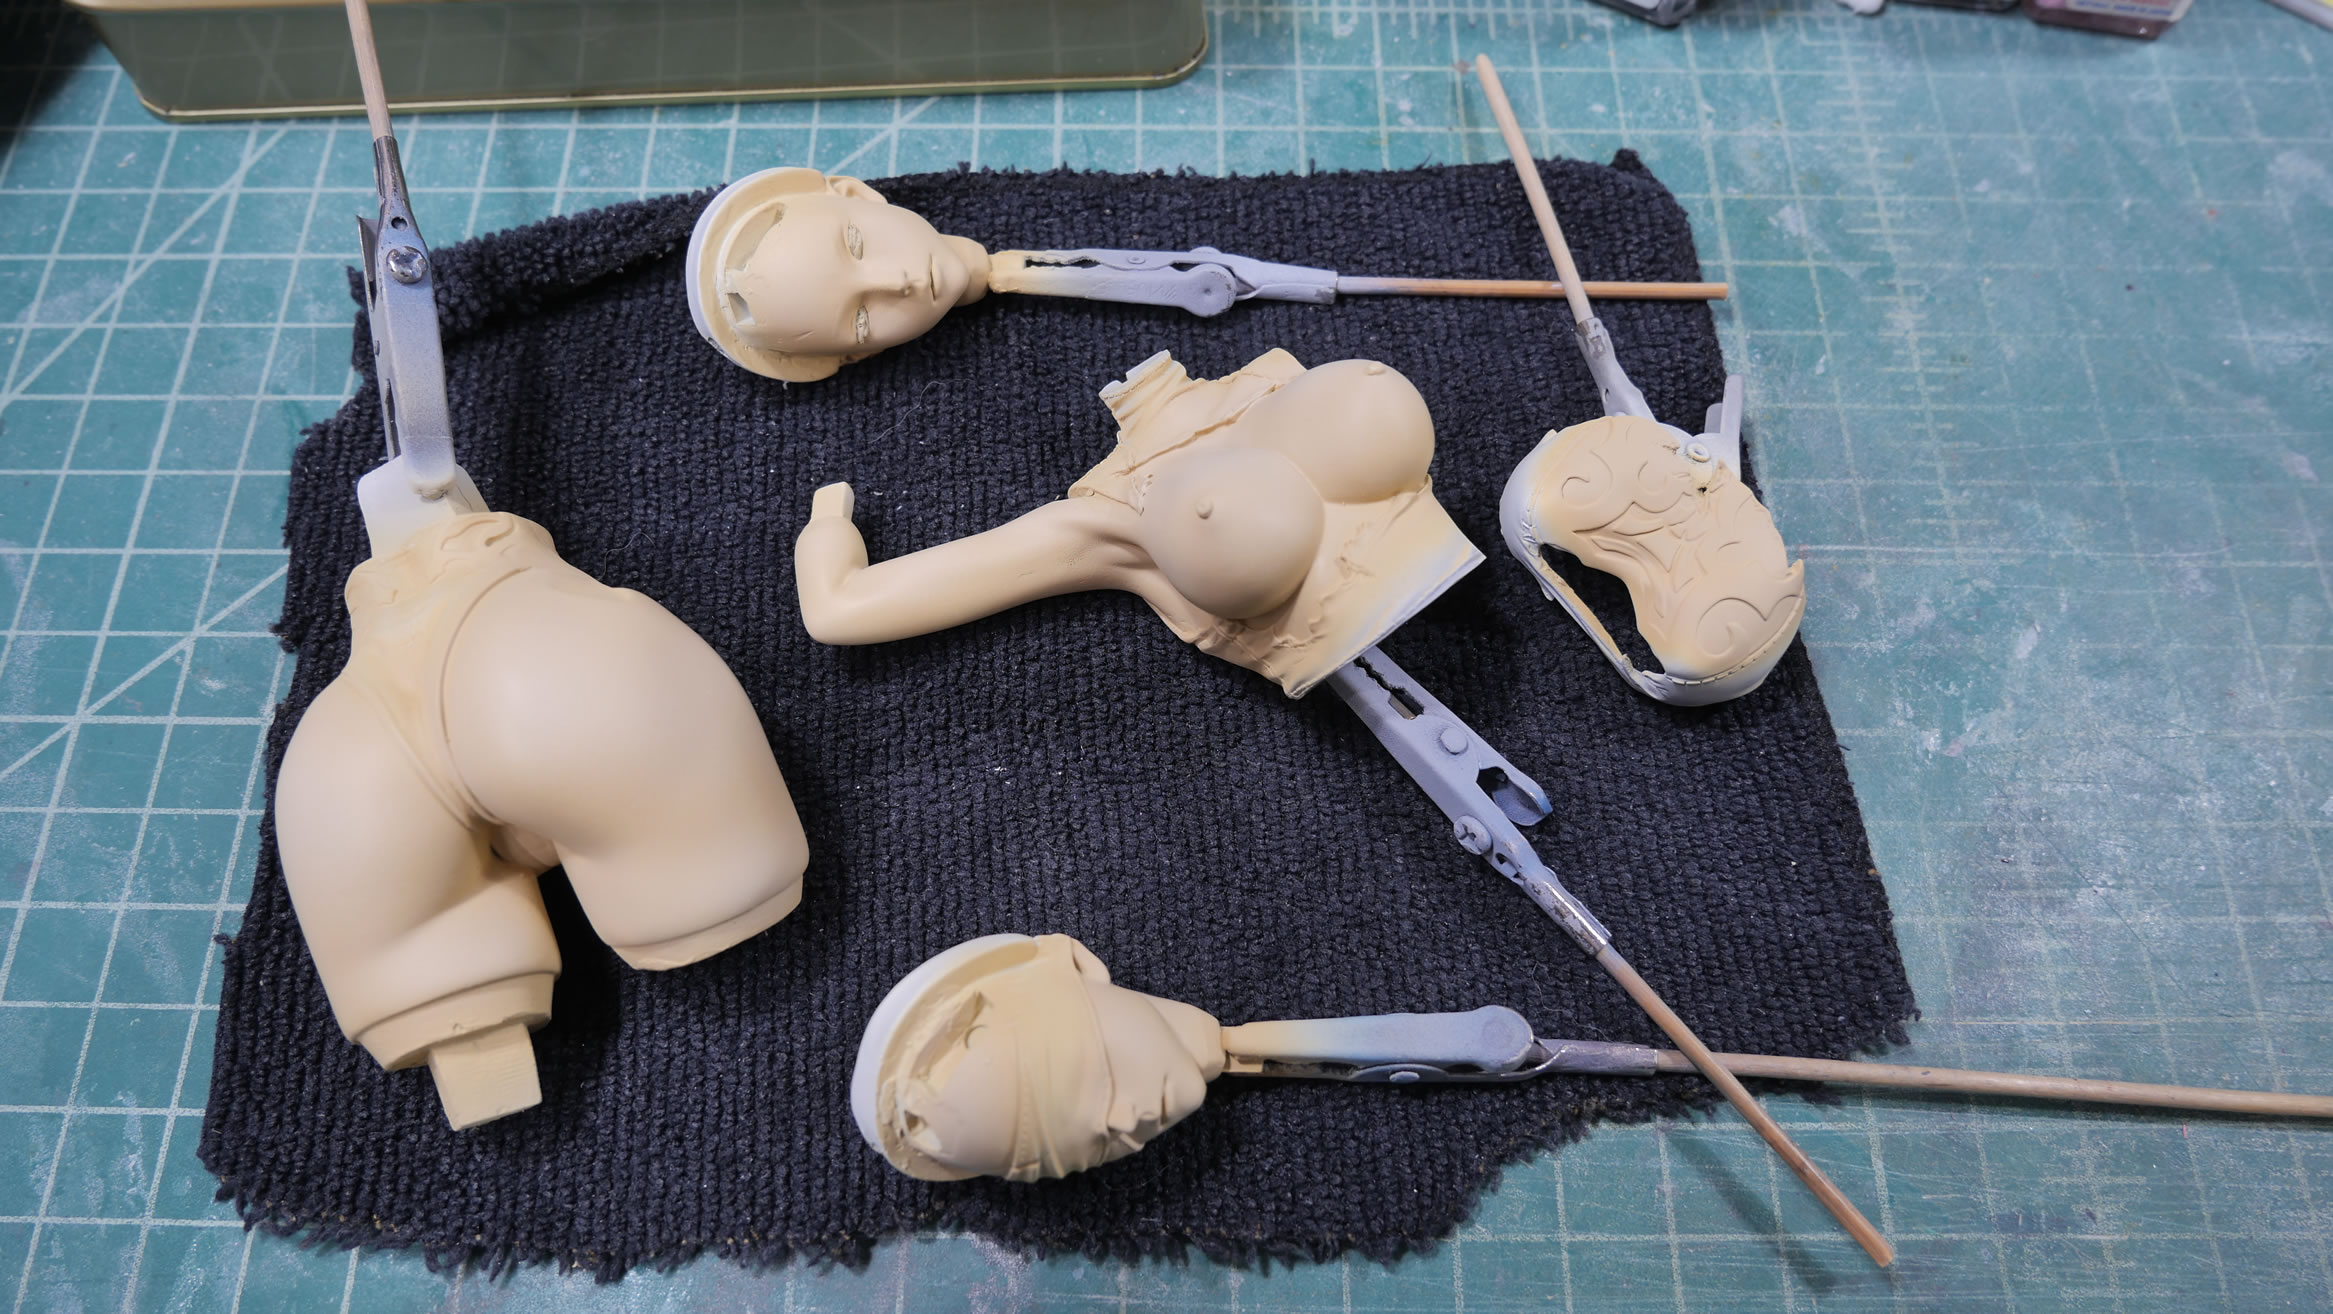
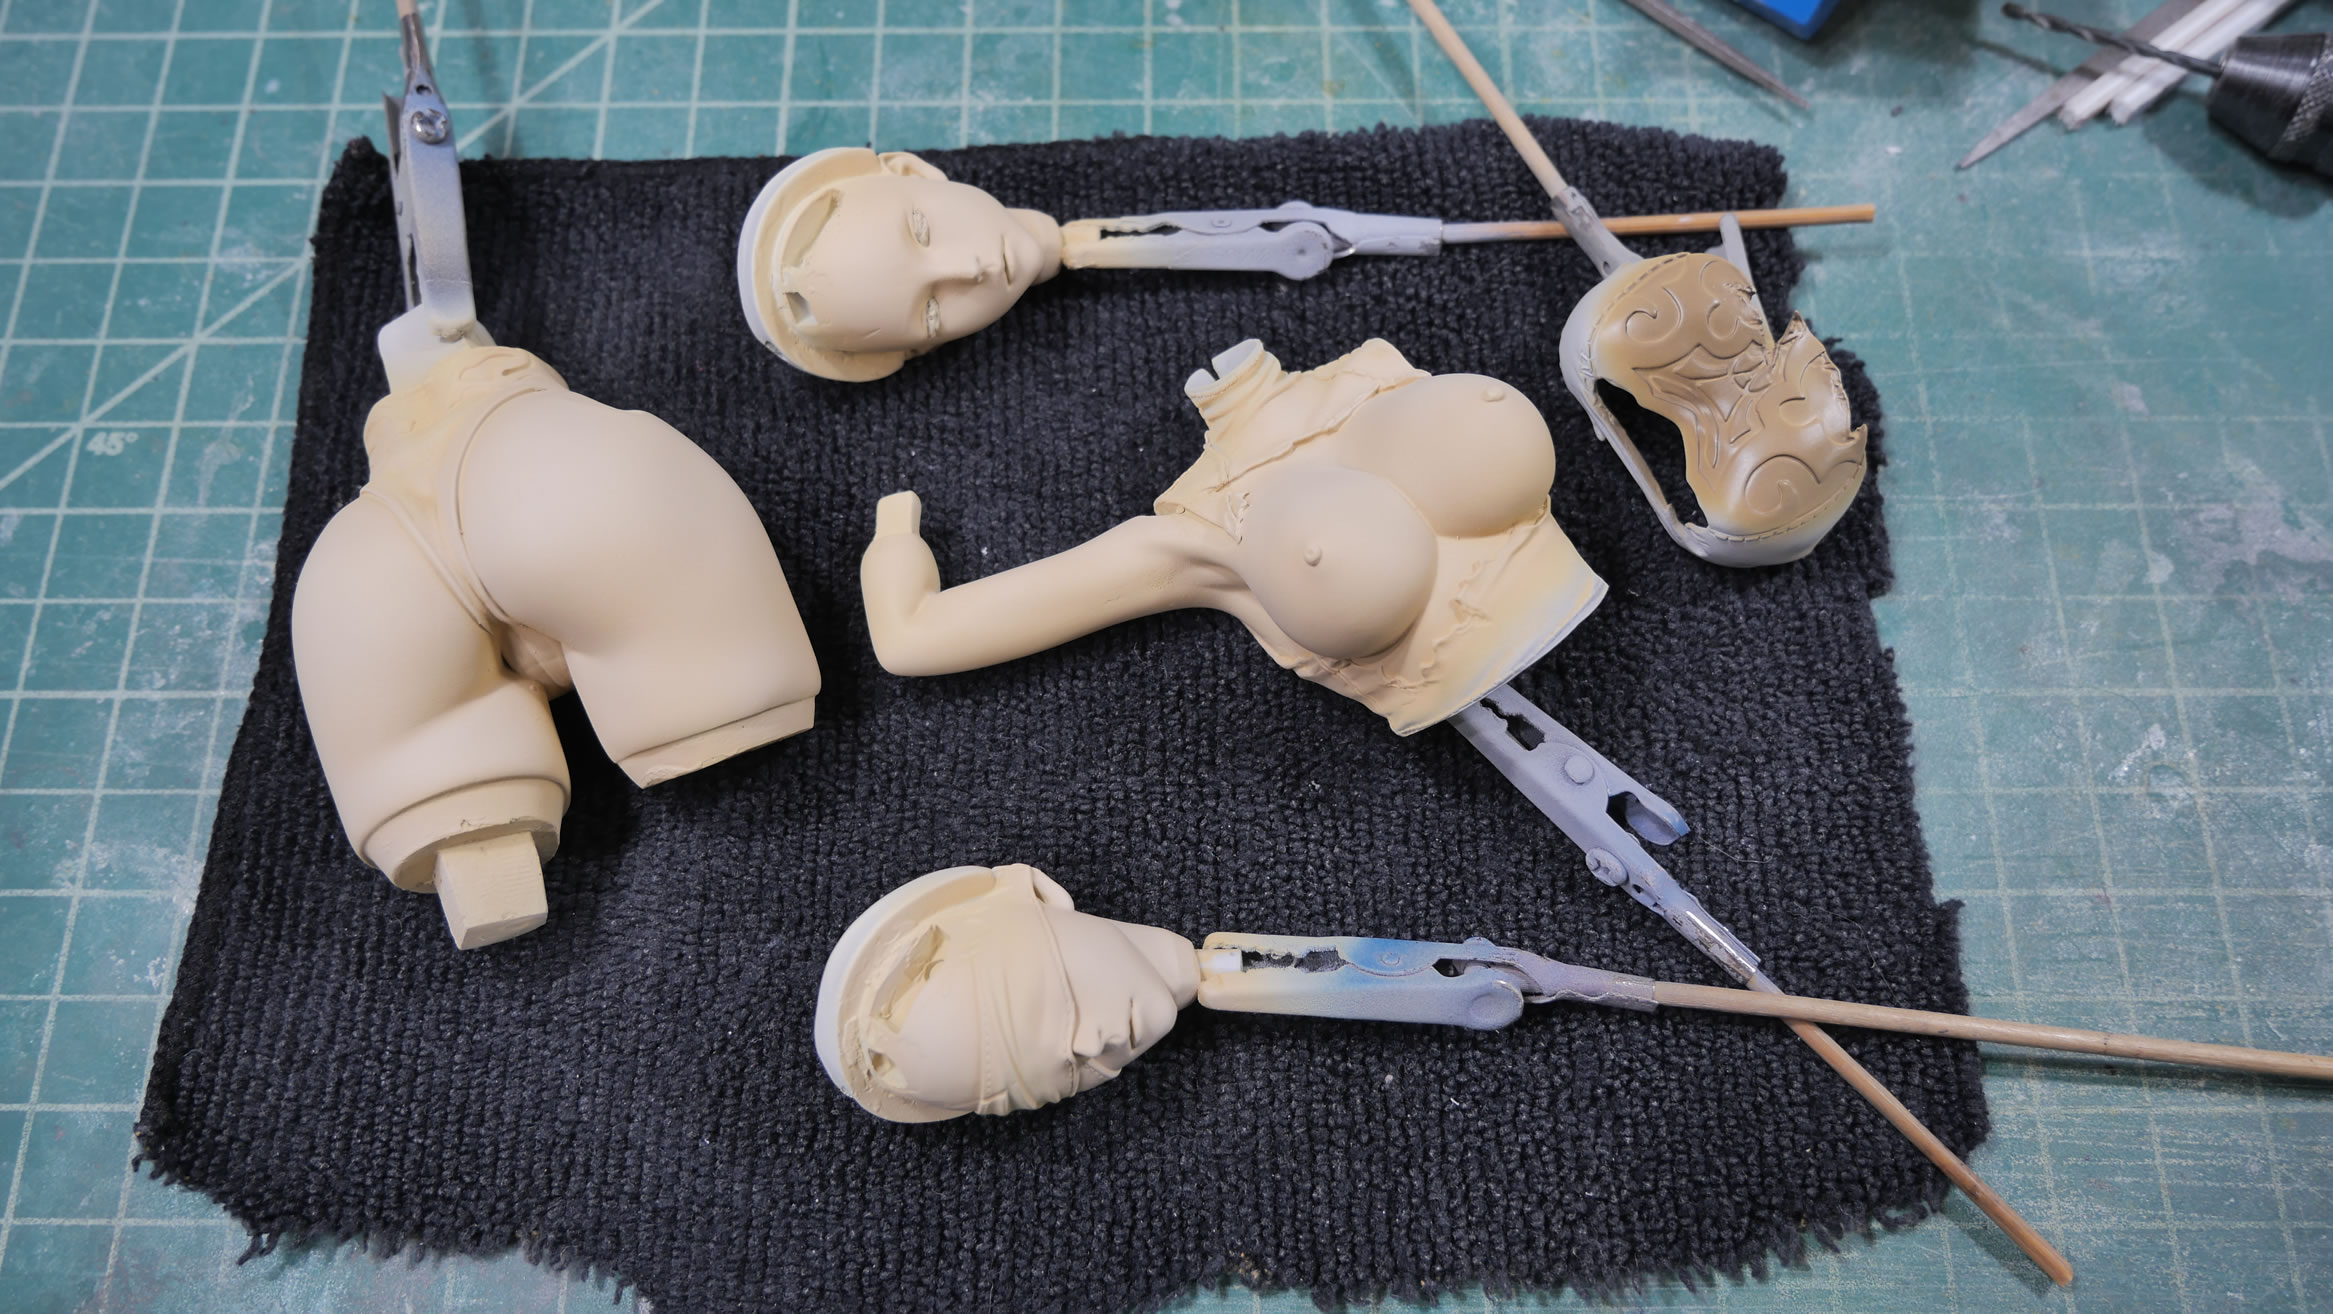
This is a good amount of resin. That base is an impressive amount of resin alone. One thing leads to another, I had the subassemblies test fit. I started drilling out and adding magnets to the subassemblies. Some of these parts will be glued together, but for the build progression, it’s nice to have a quick magnetic snap between parts. I’ve found that magnets are easier to align than pins. But some of the more load bearing areas I still use pins. The kit comes with two heads and removable clothing over her boobies. It also comes with a small bust piece to hold the extra head when it’s not in use. Pretty damn cool.
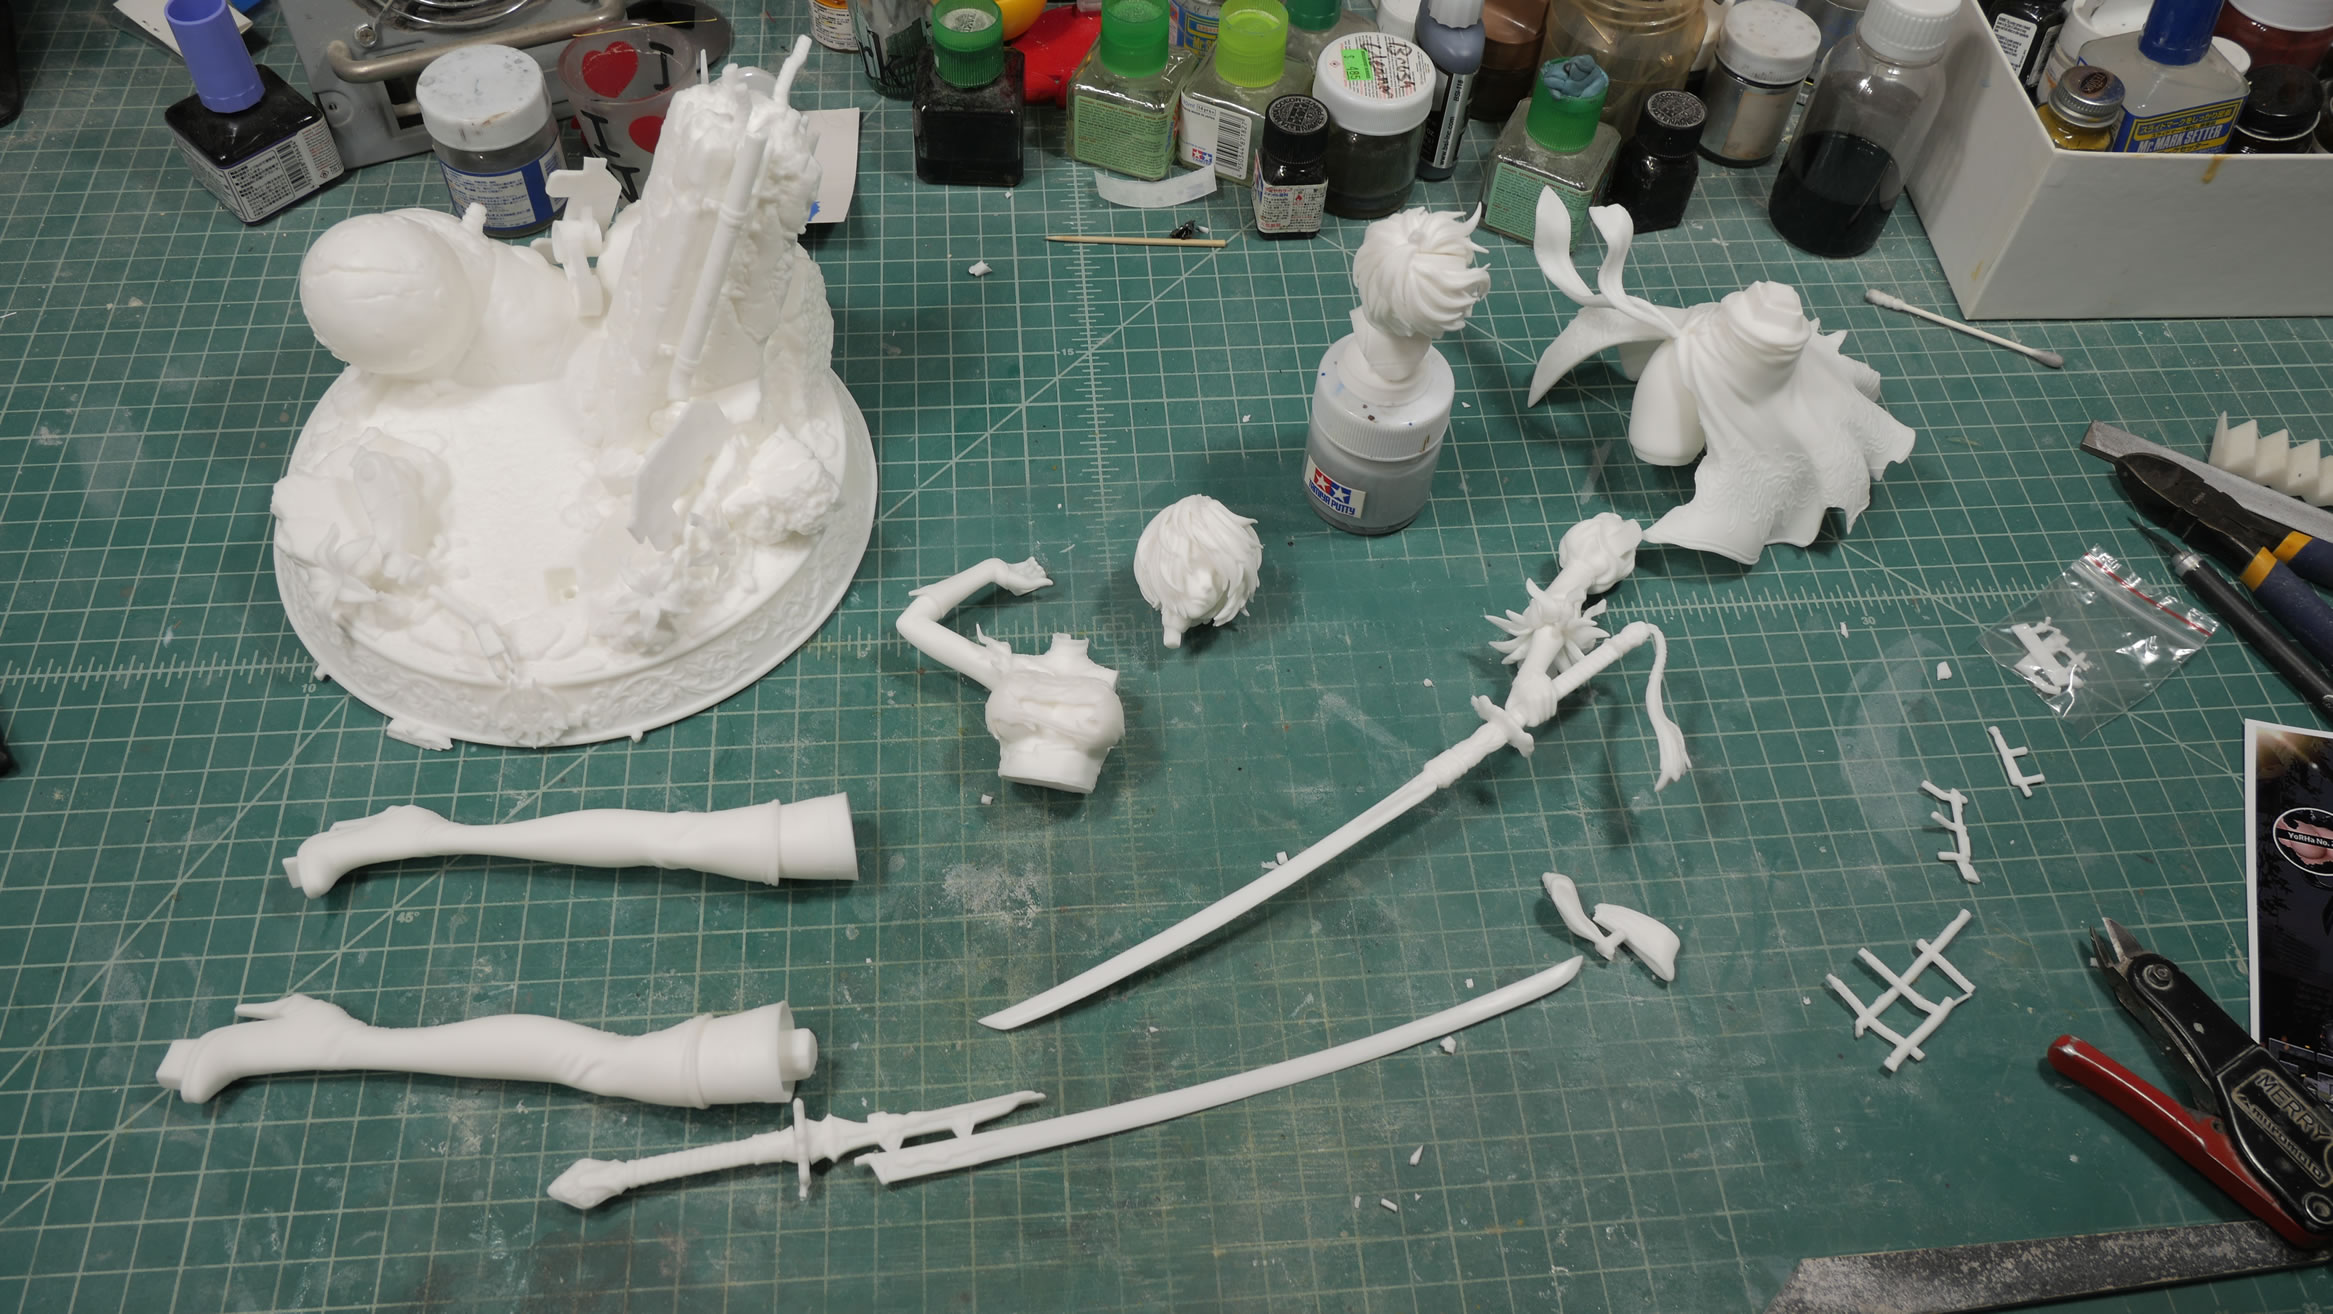
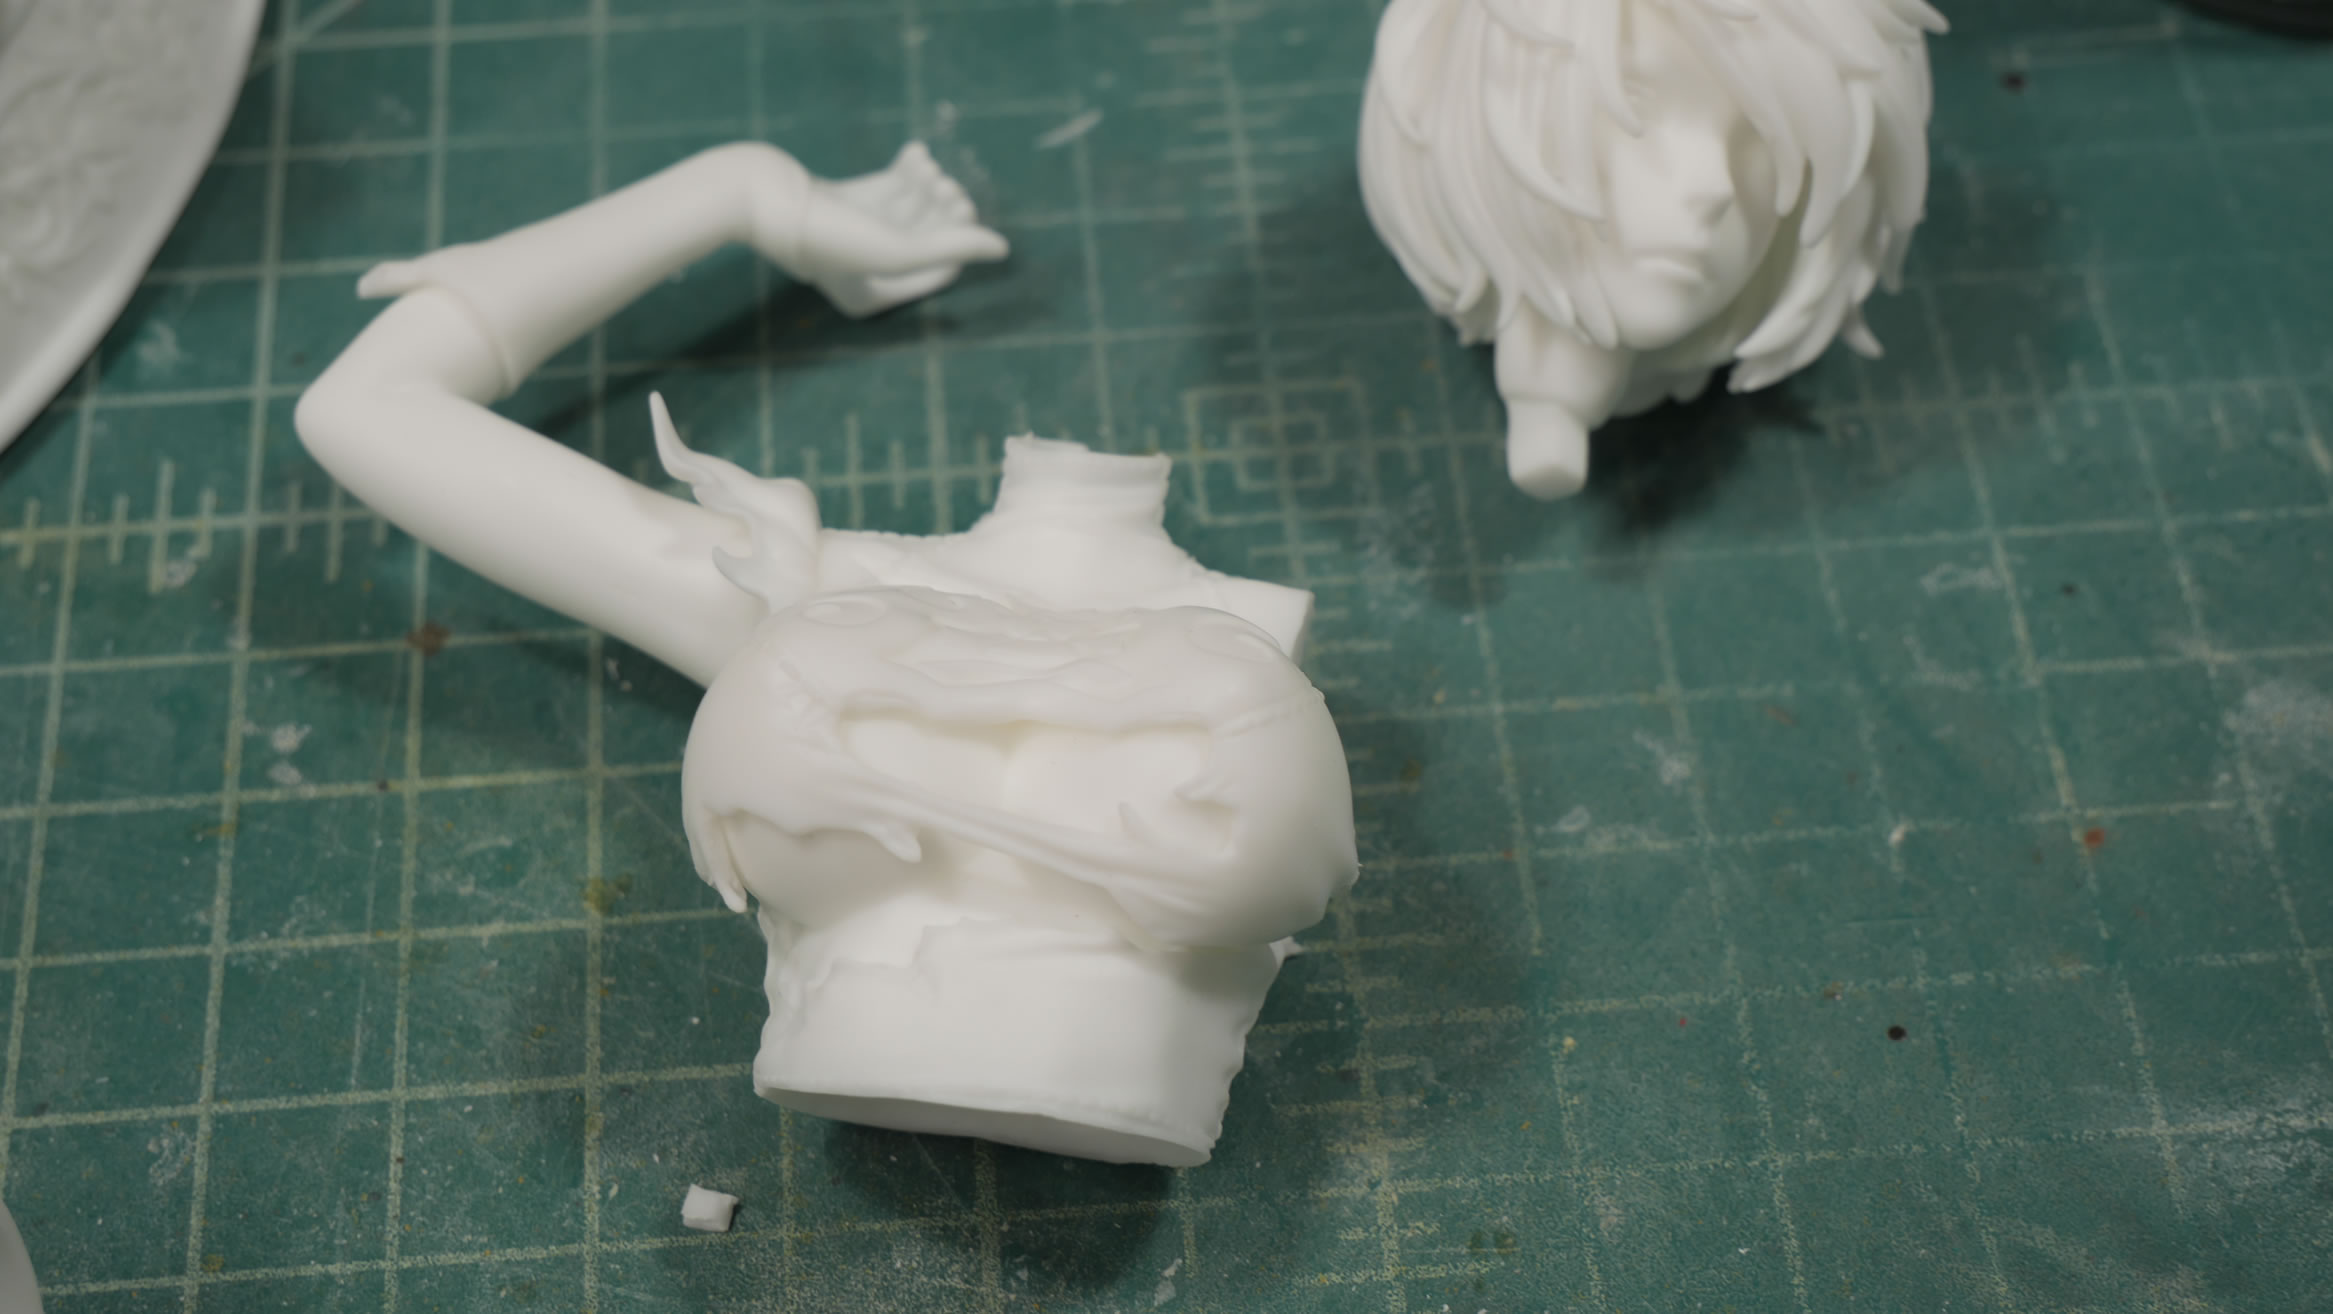
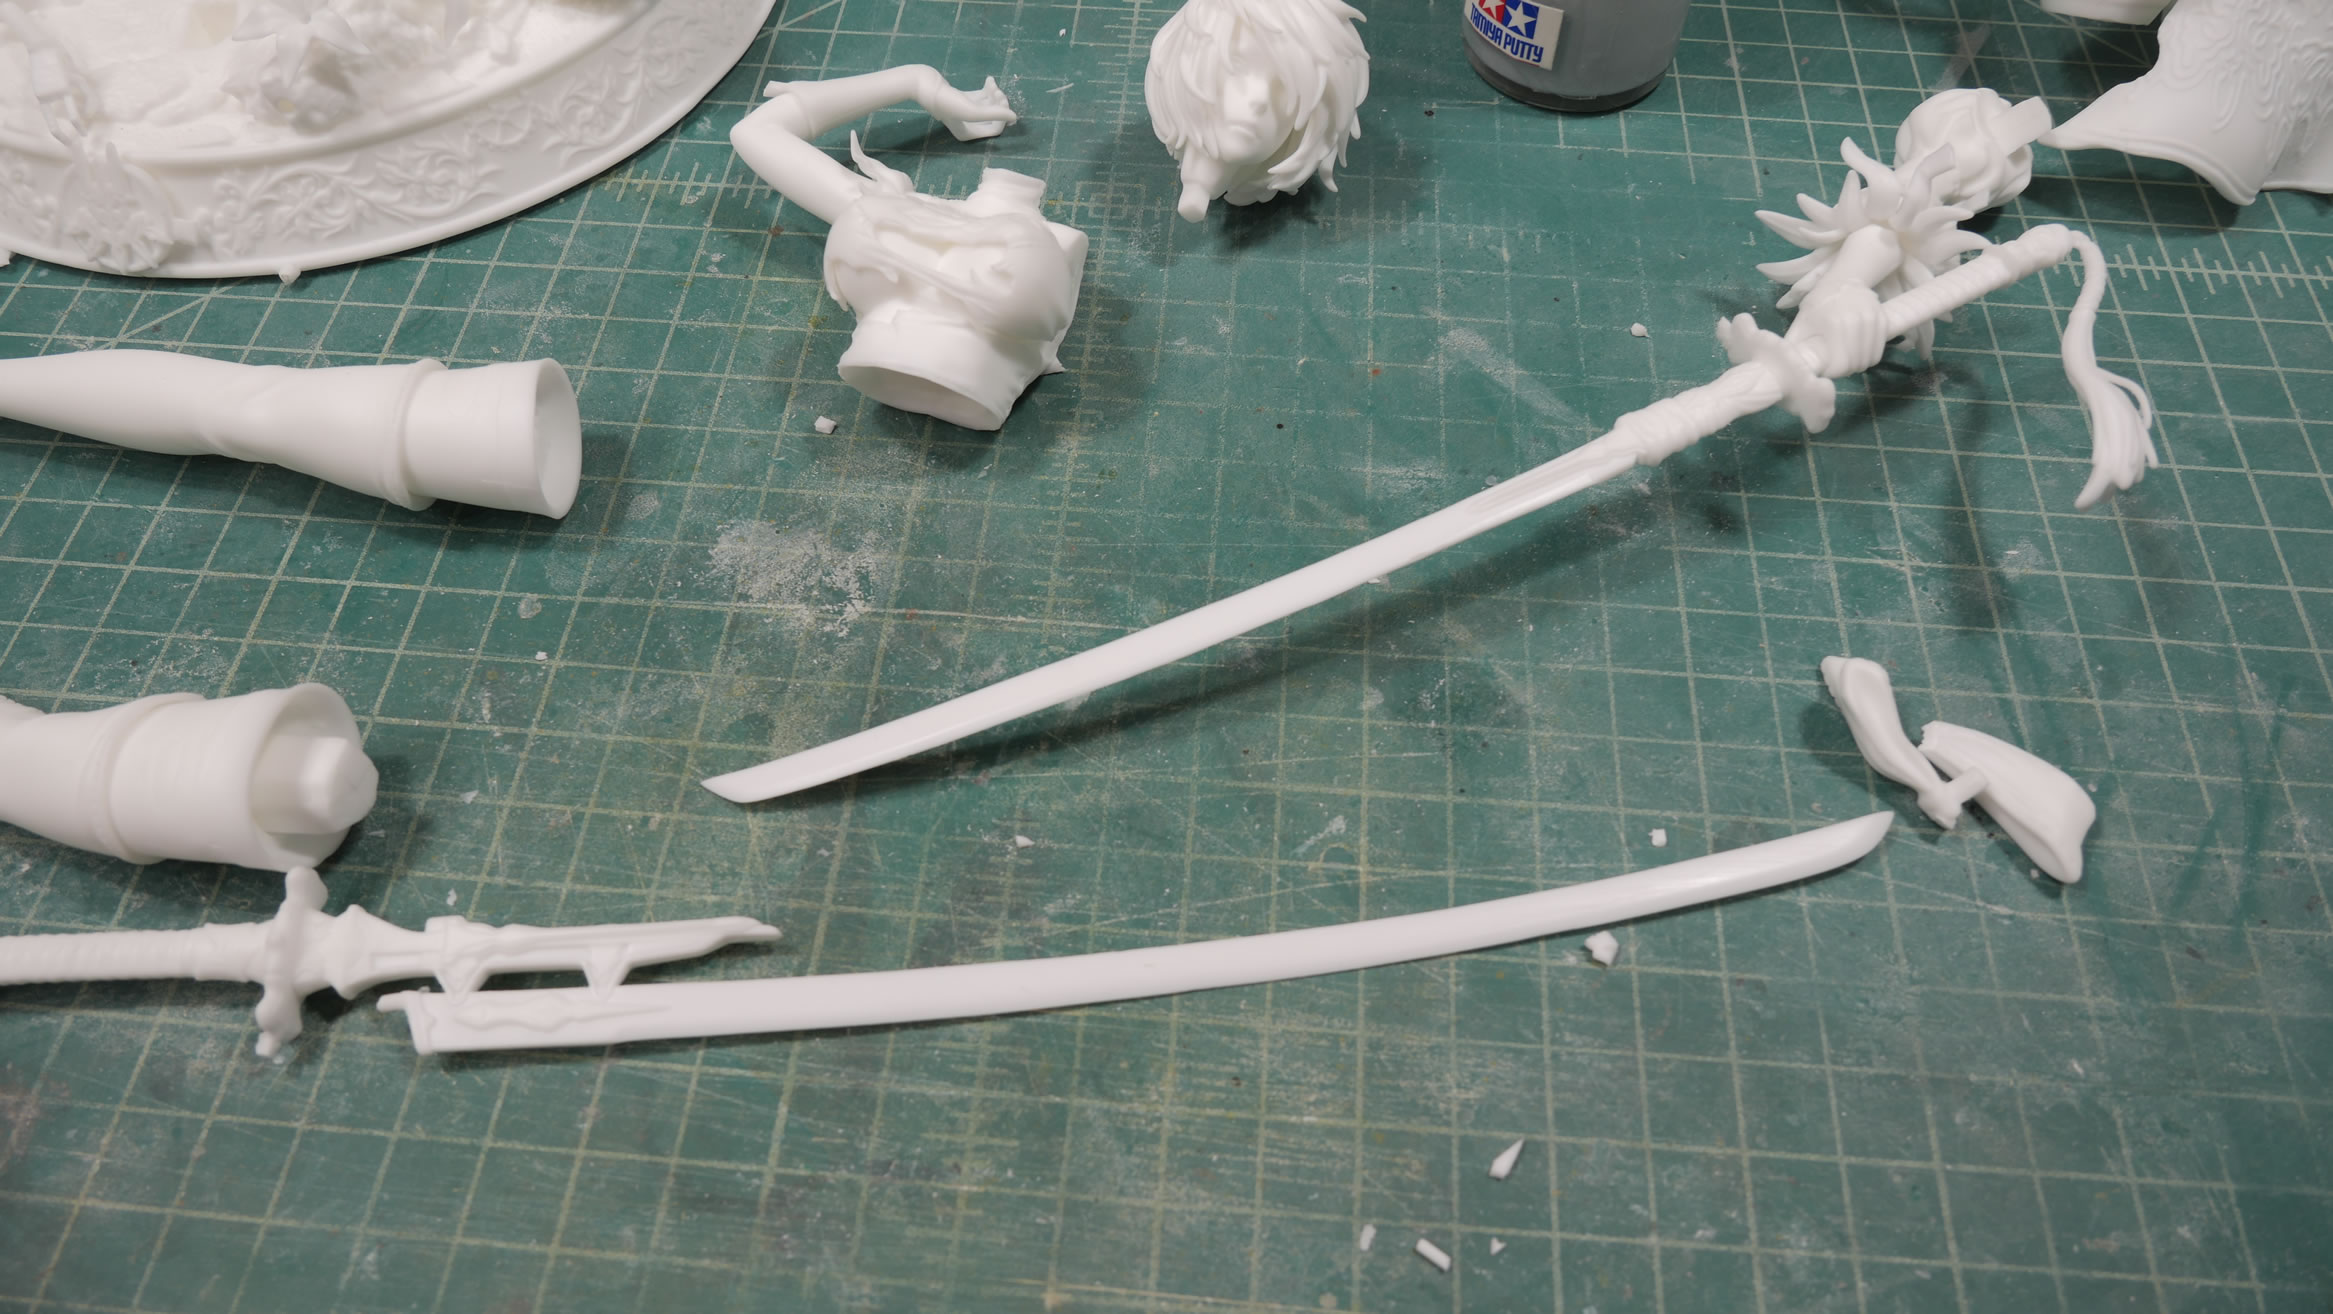
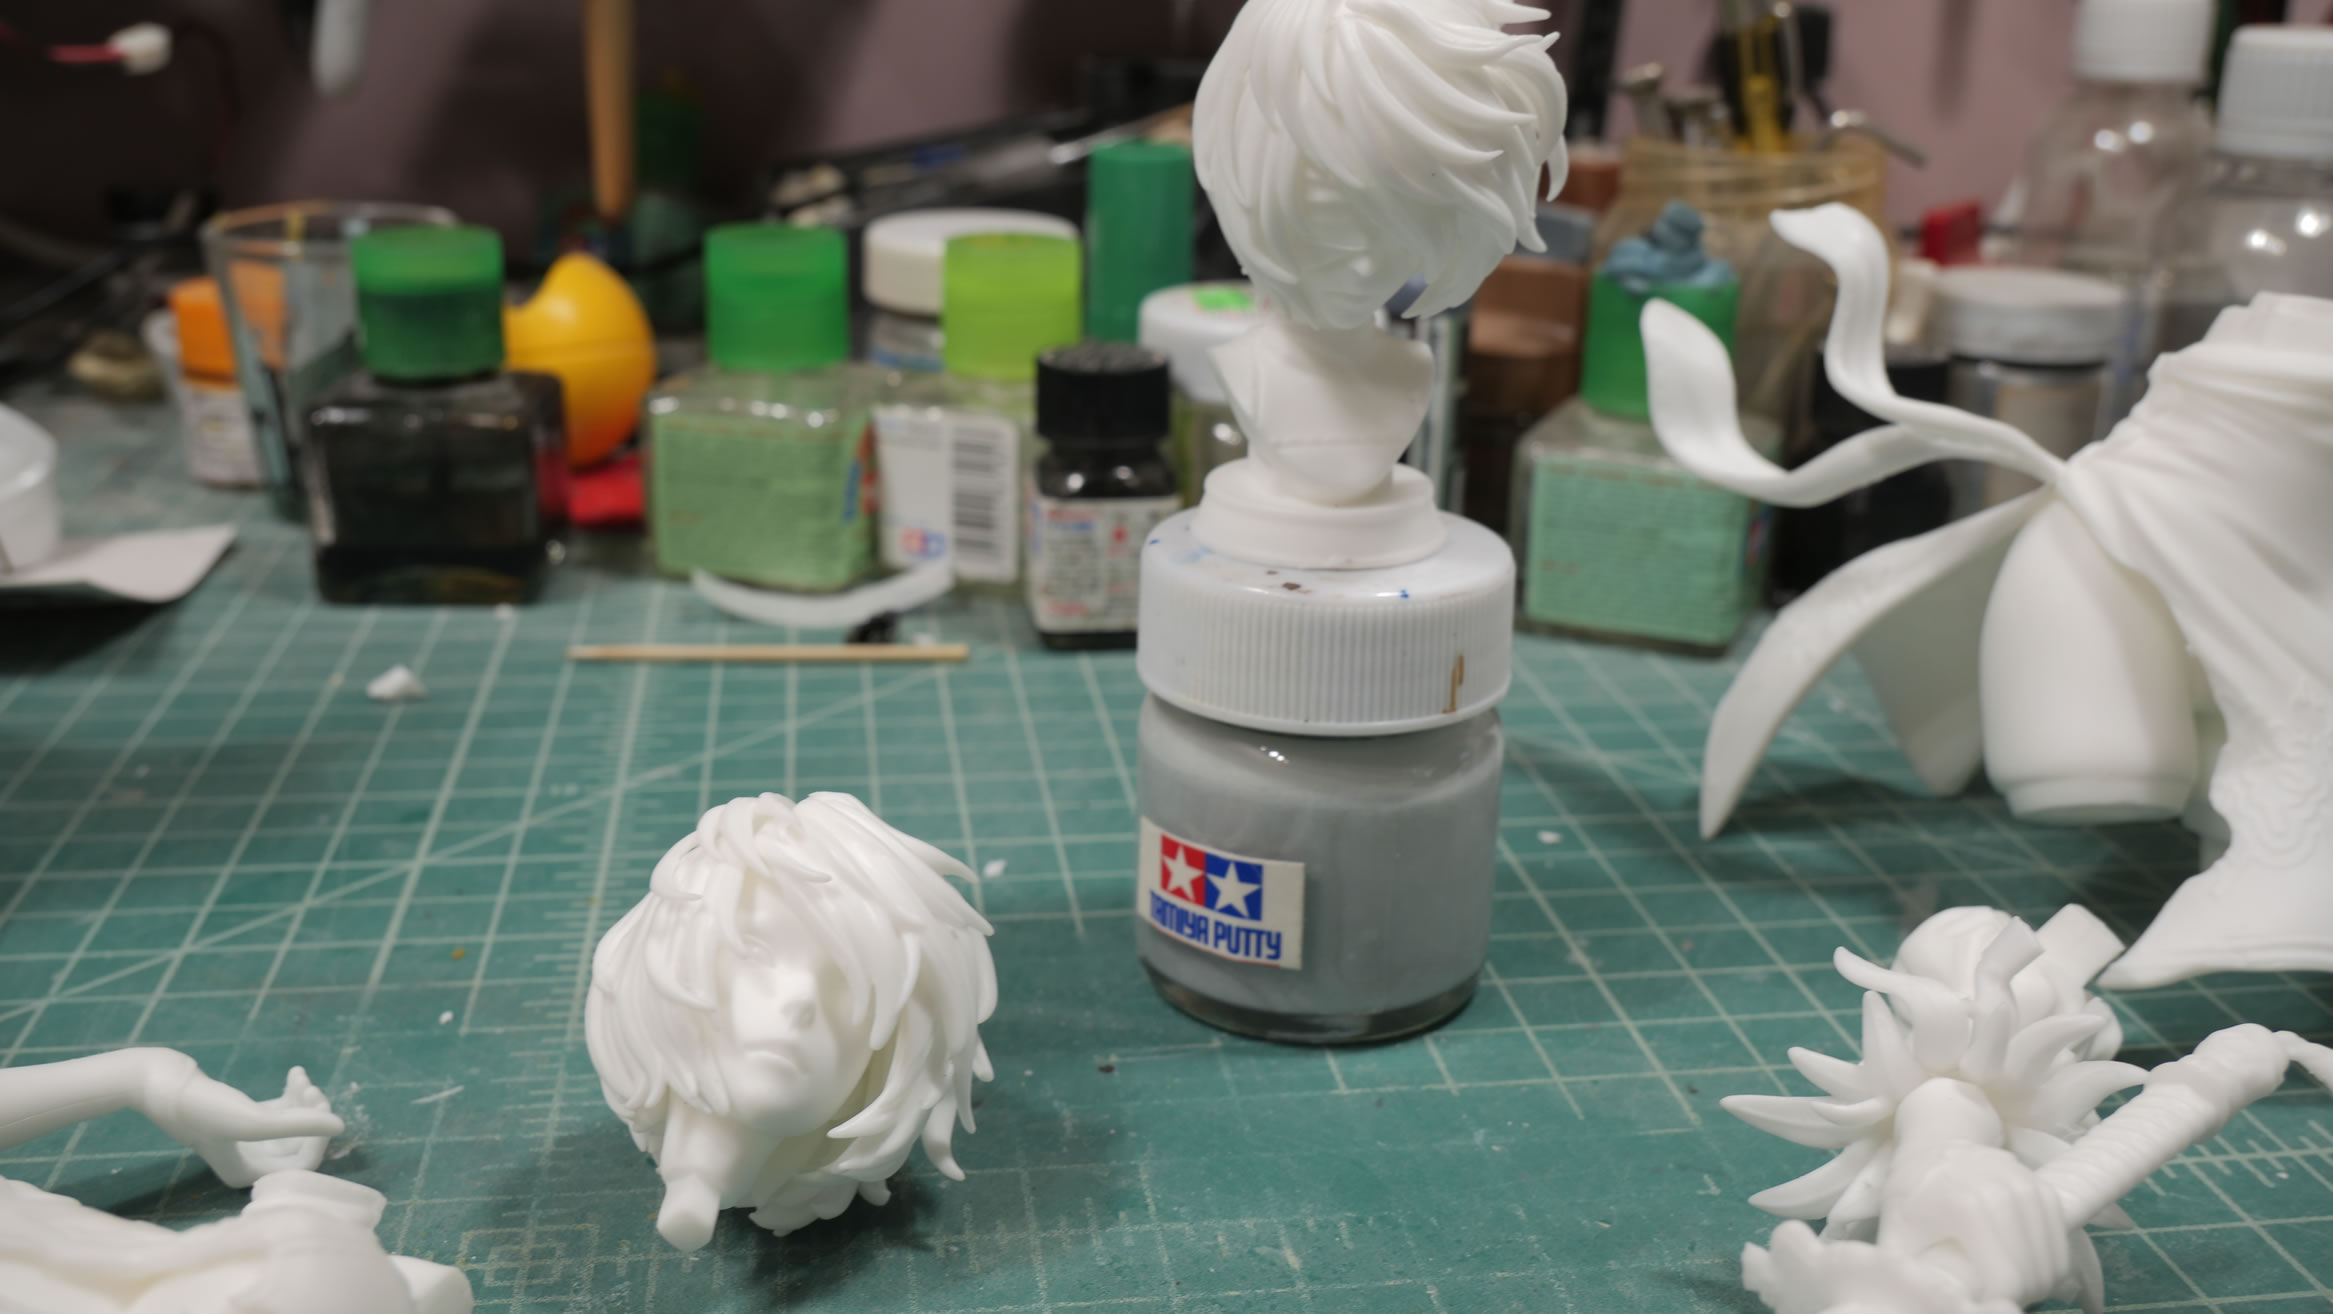
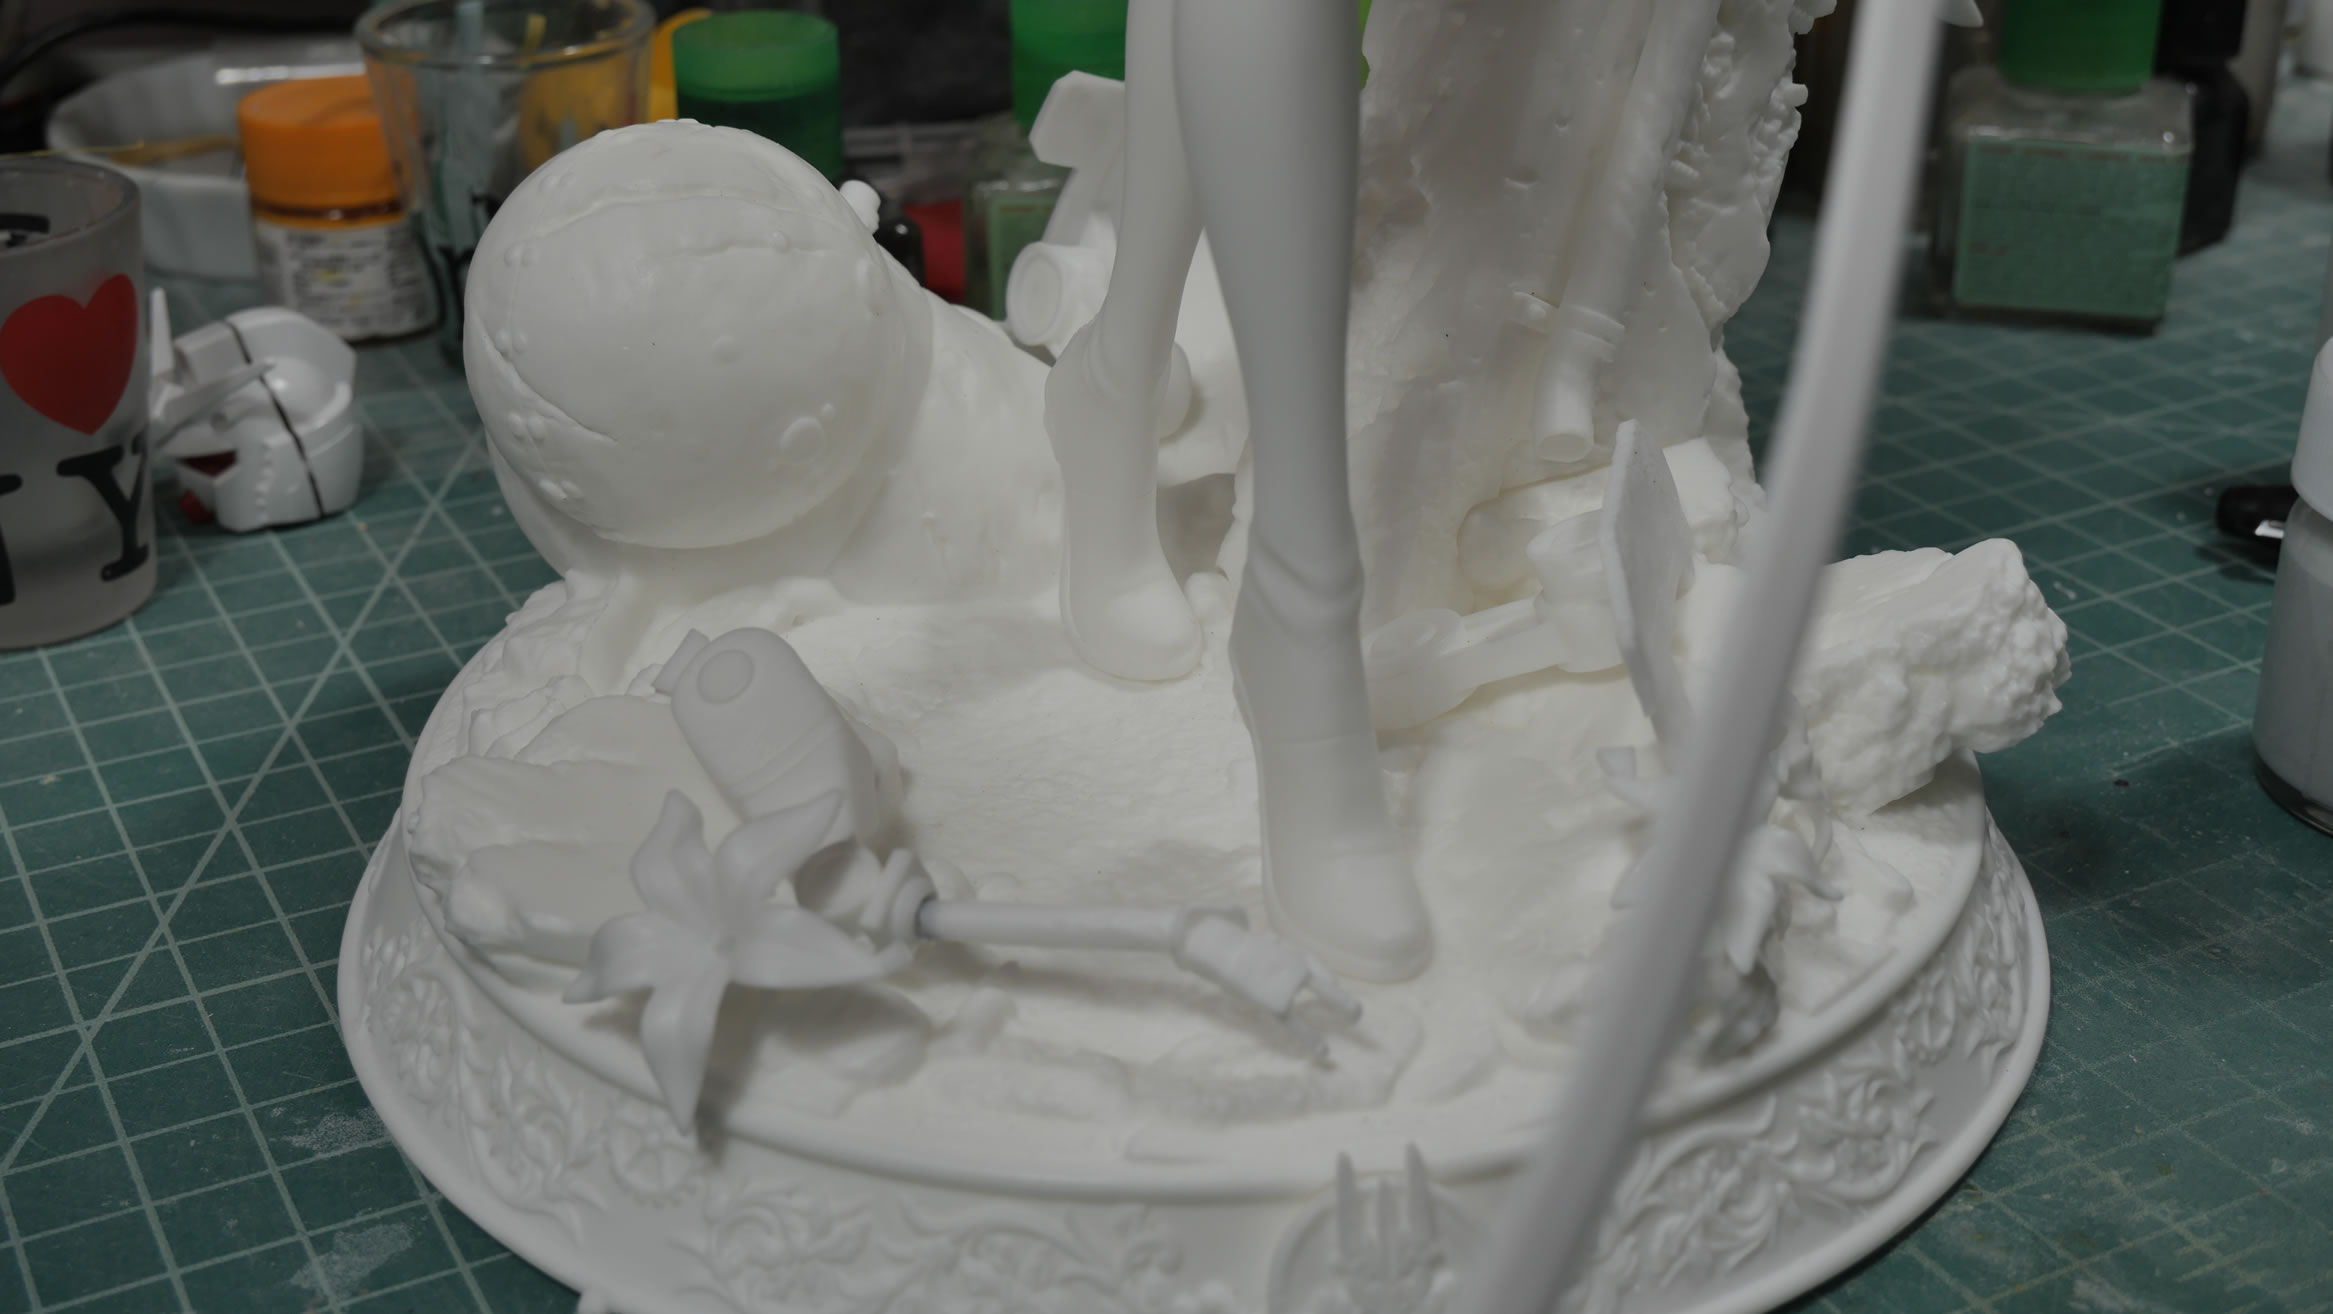
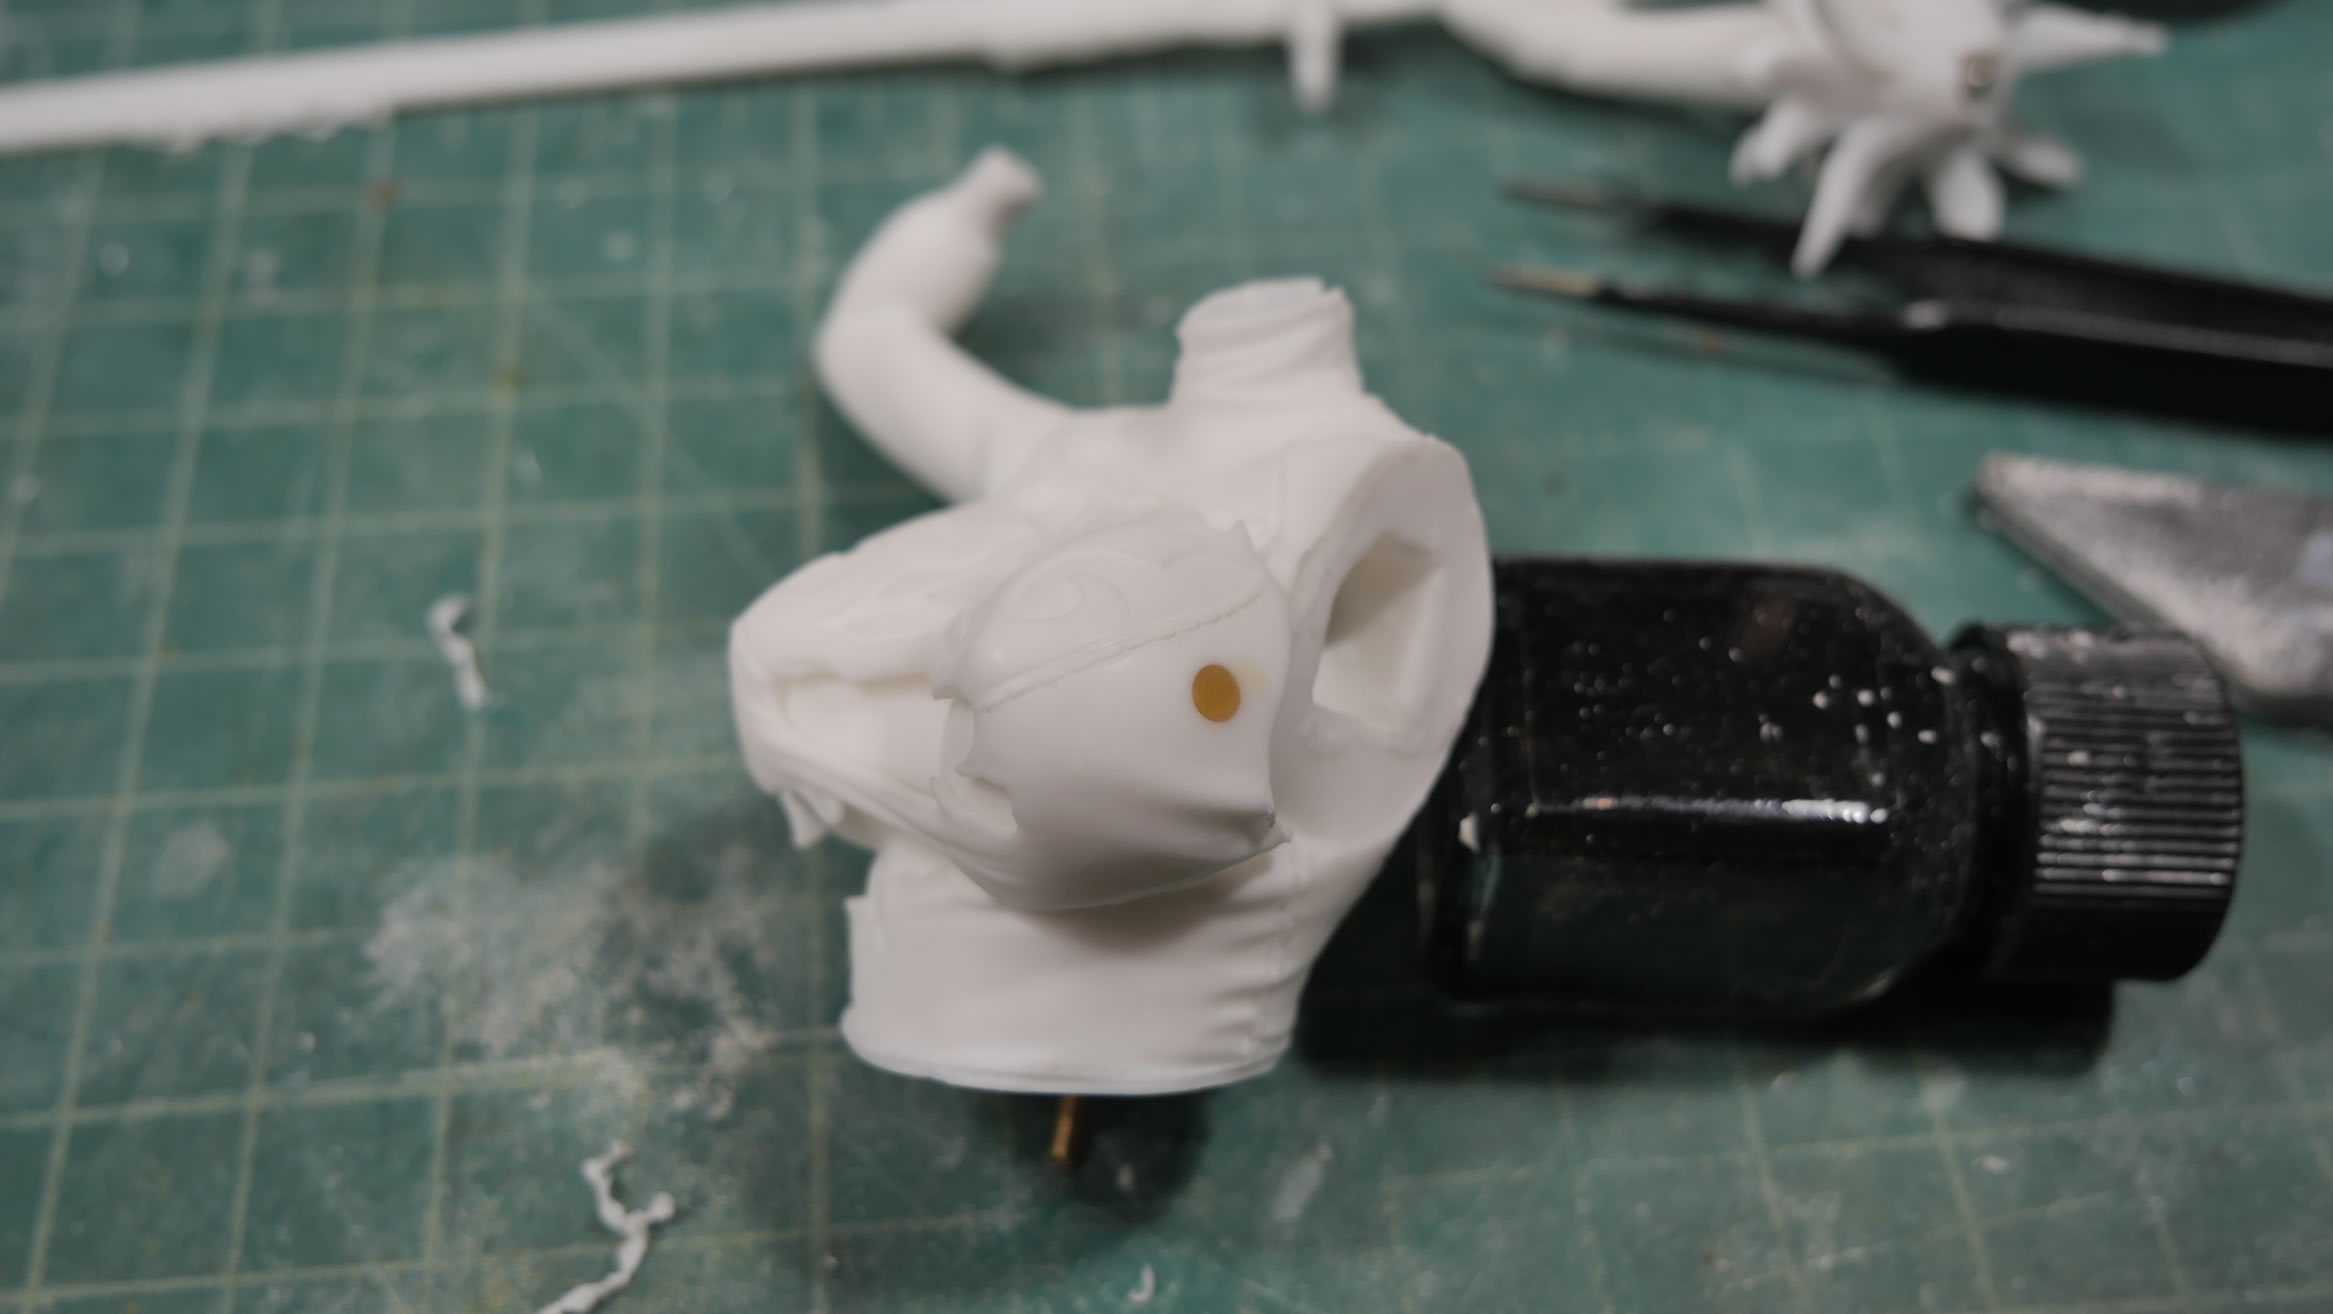
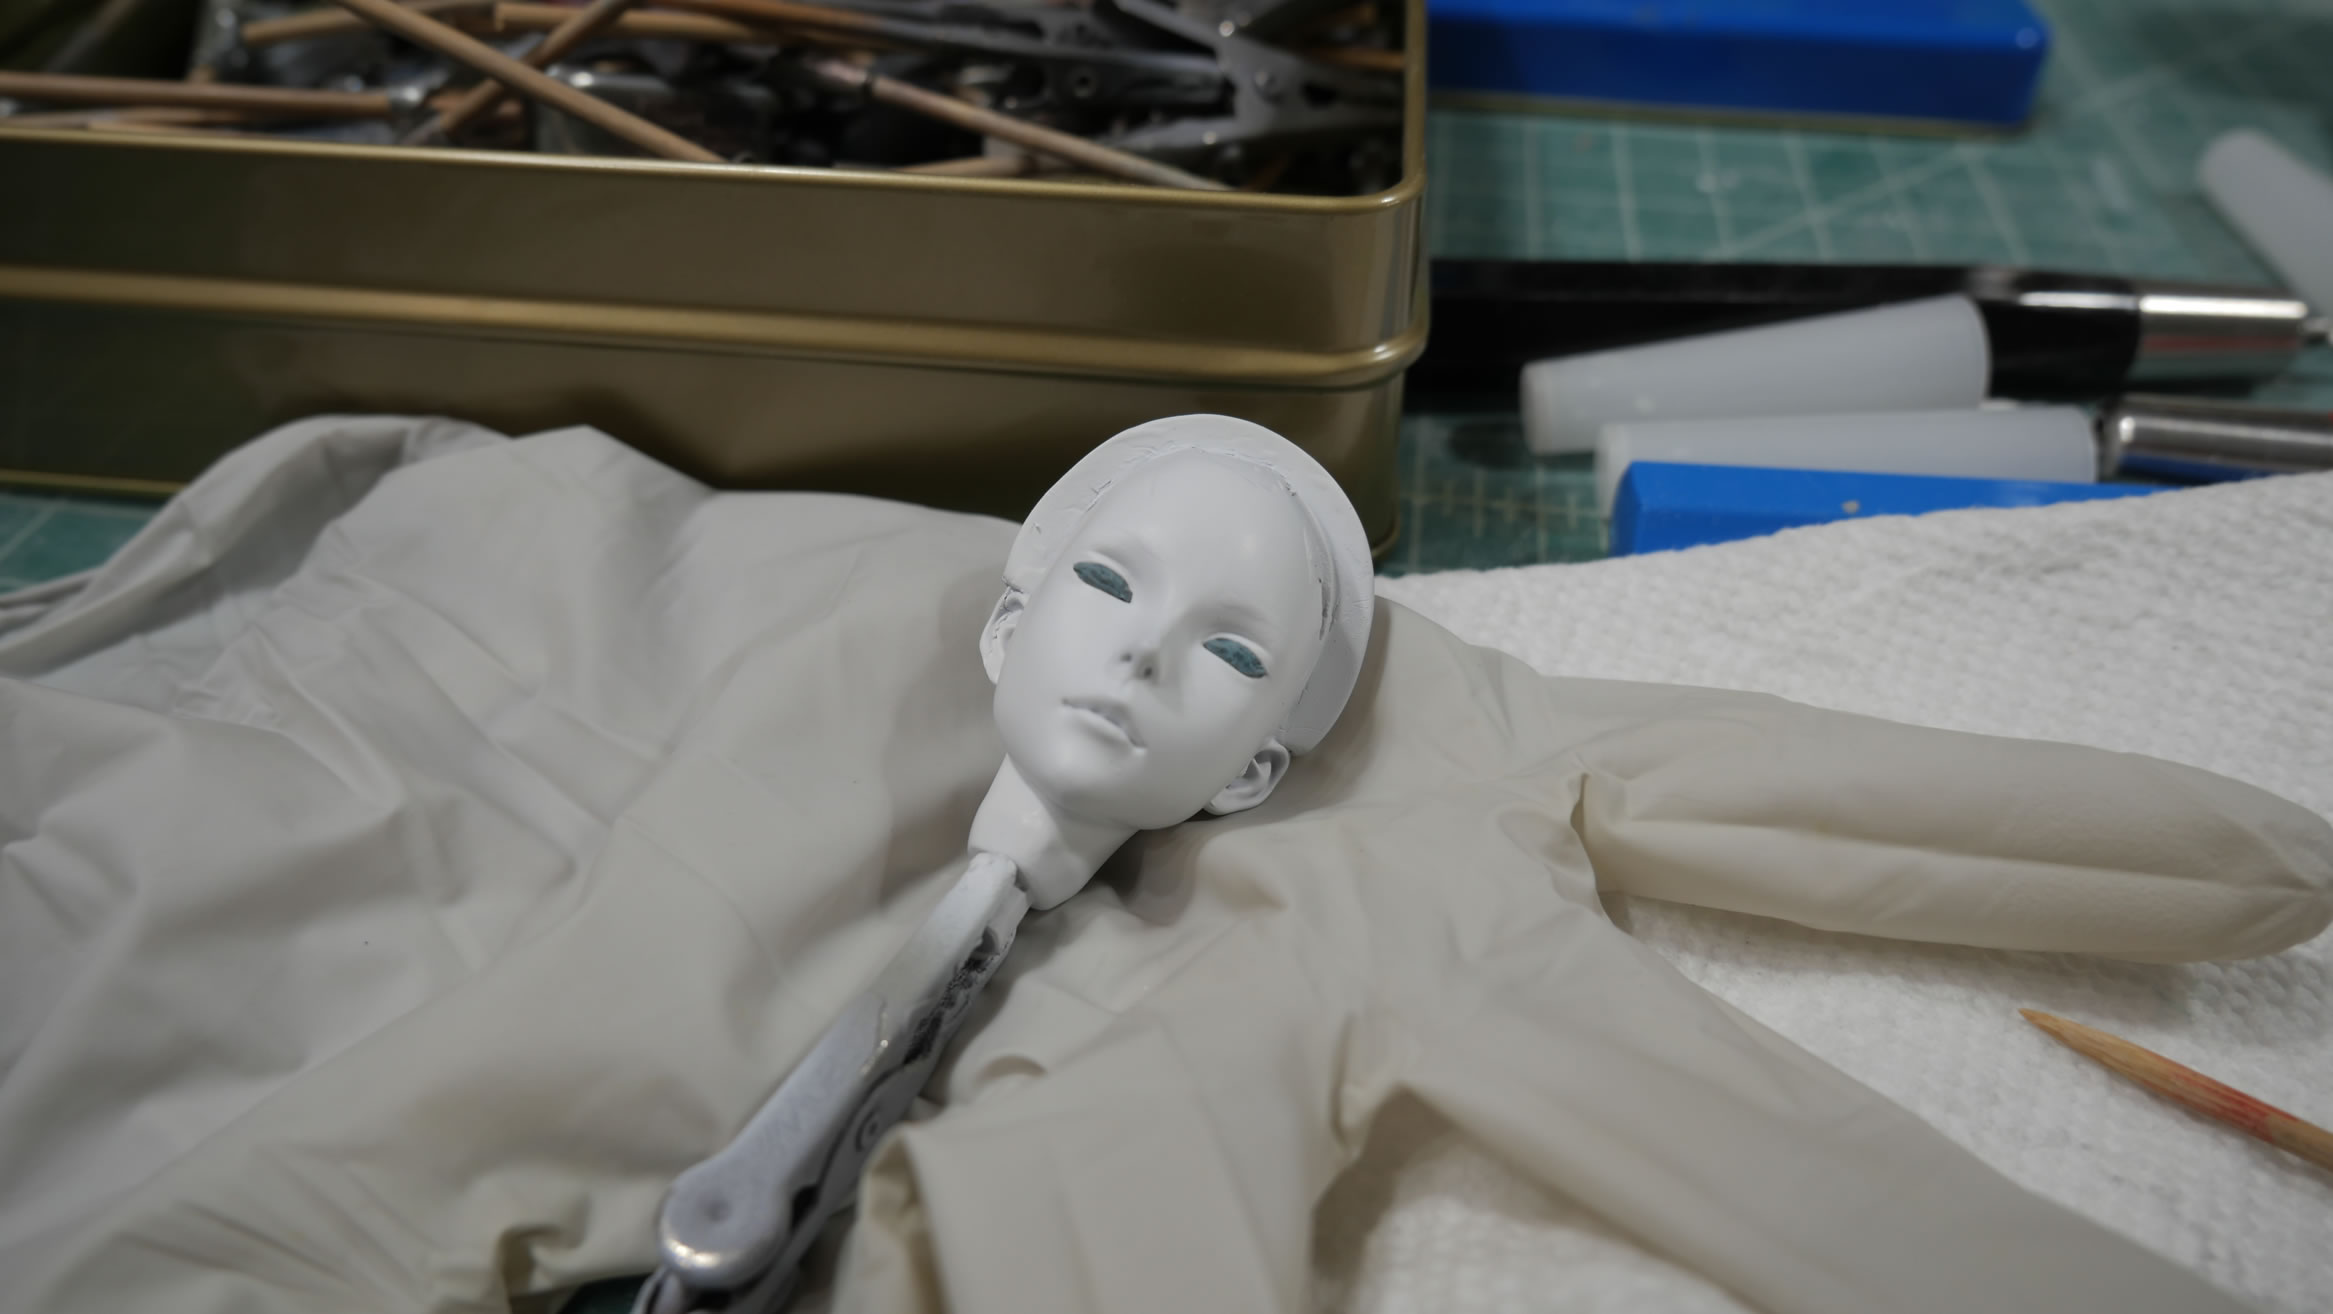
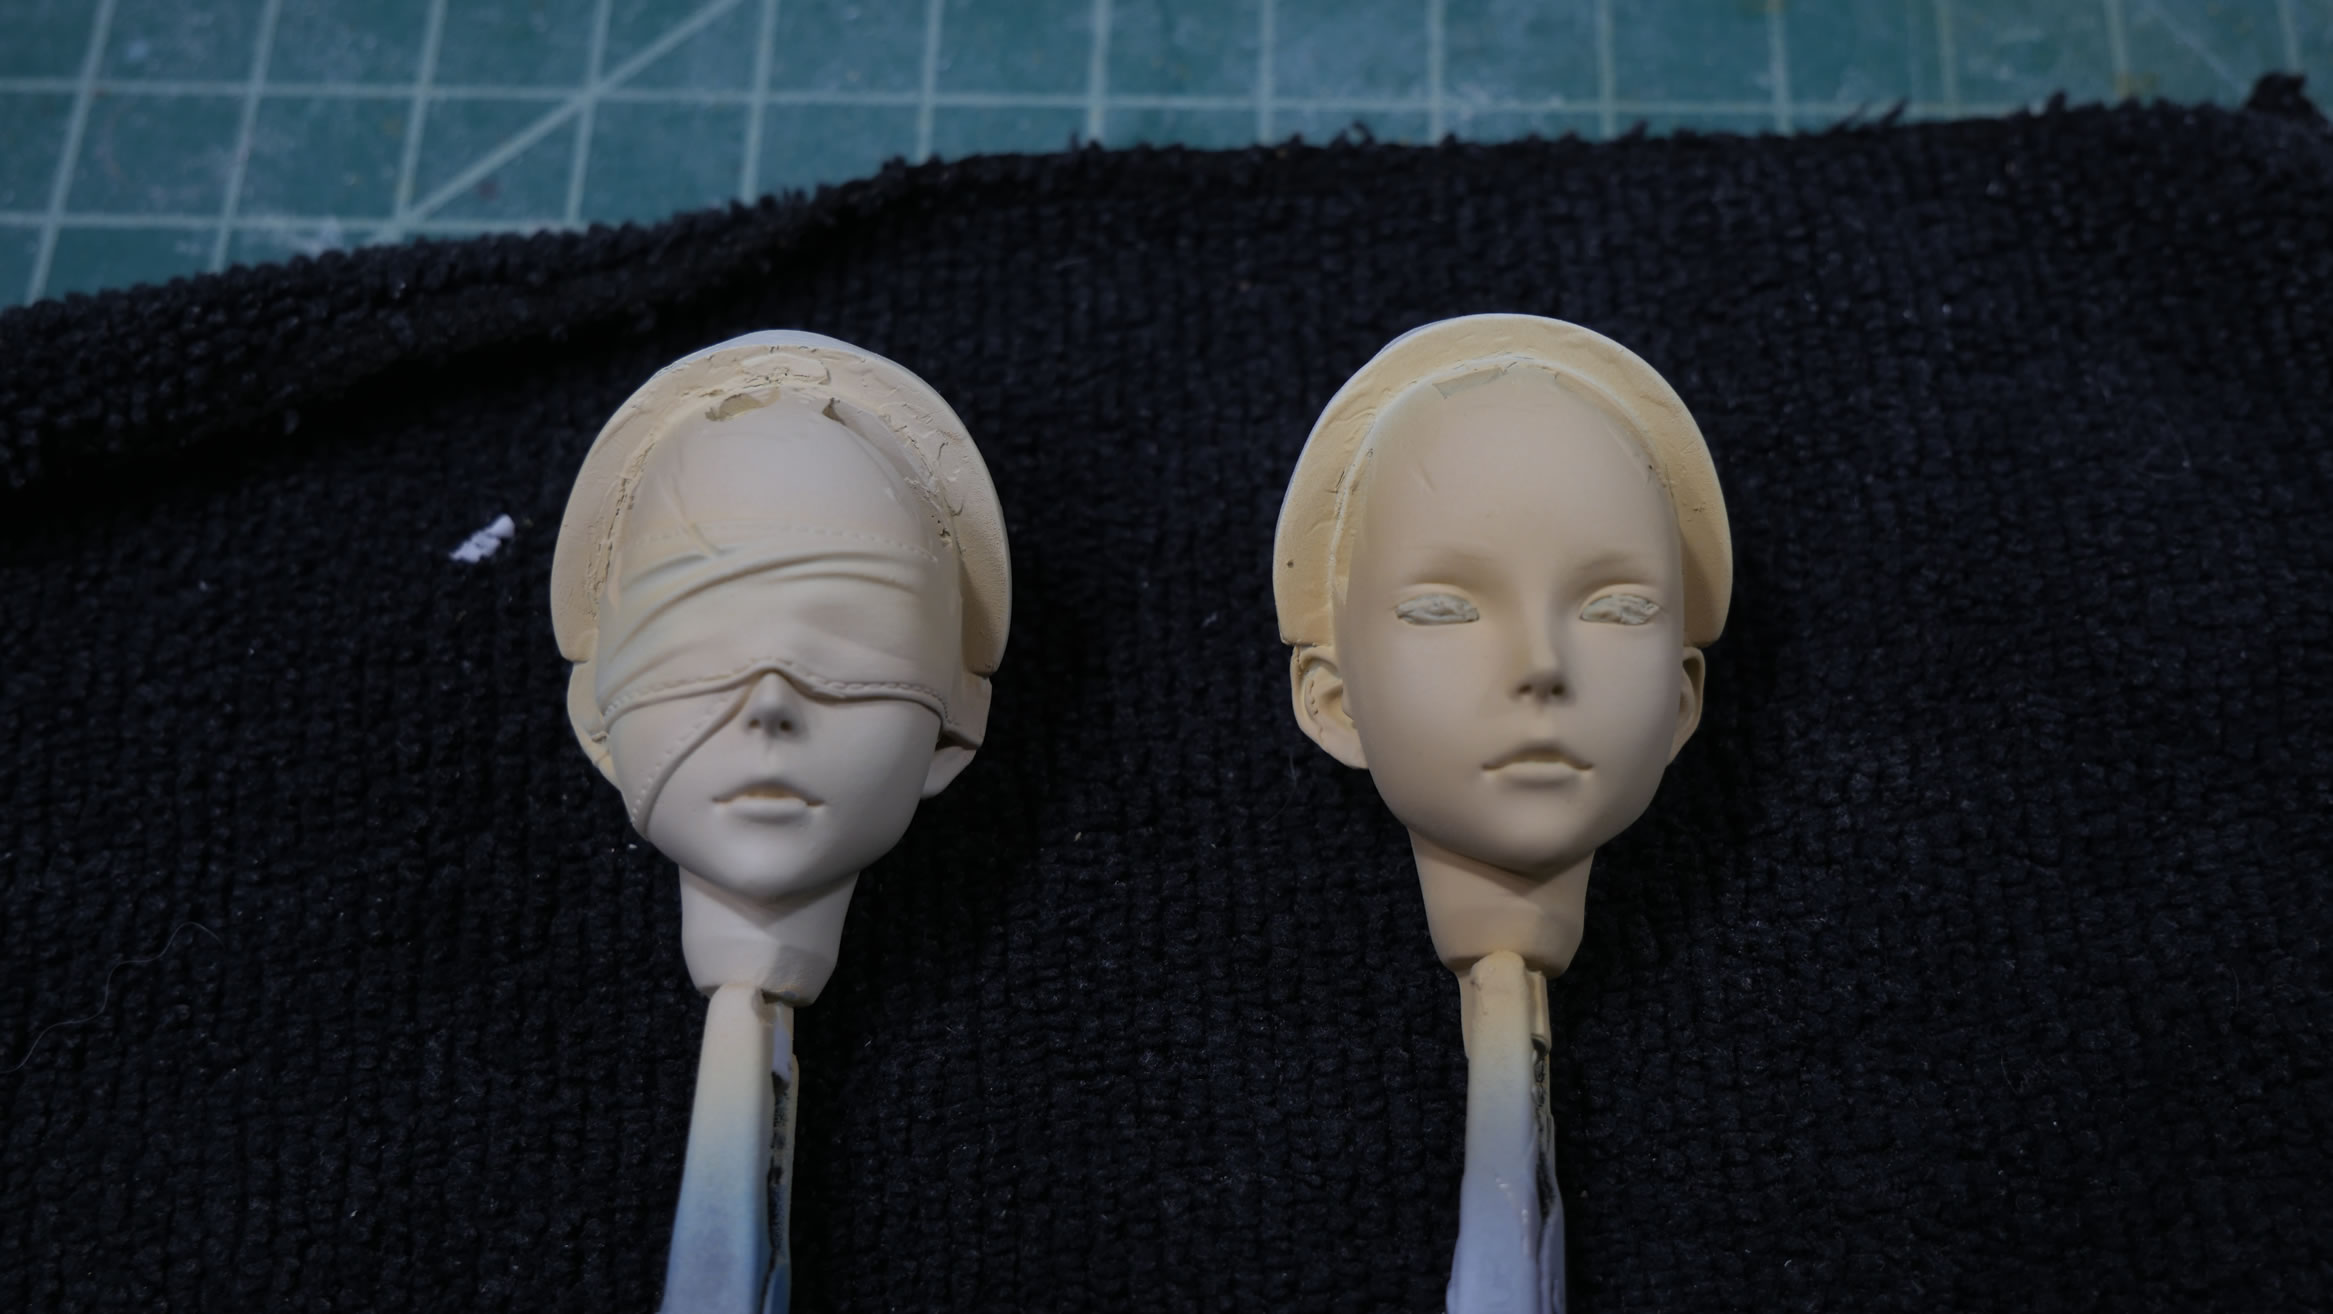
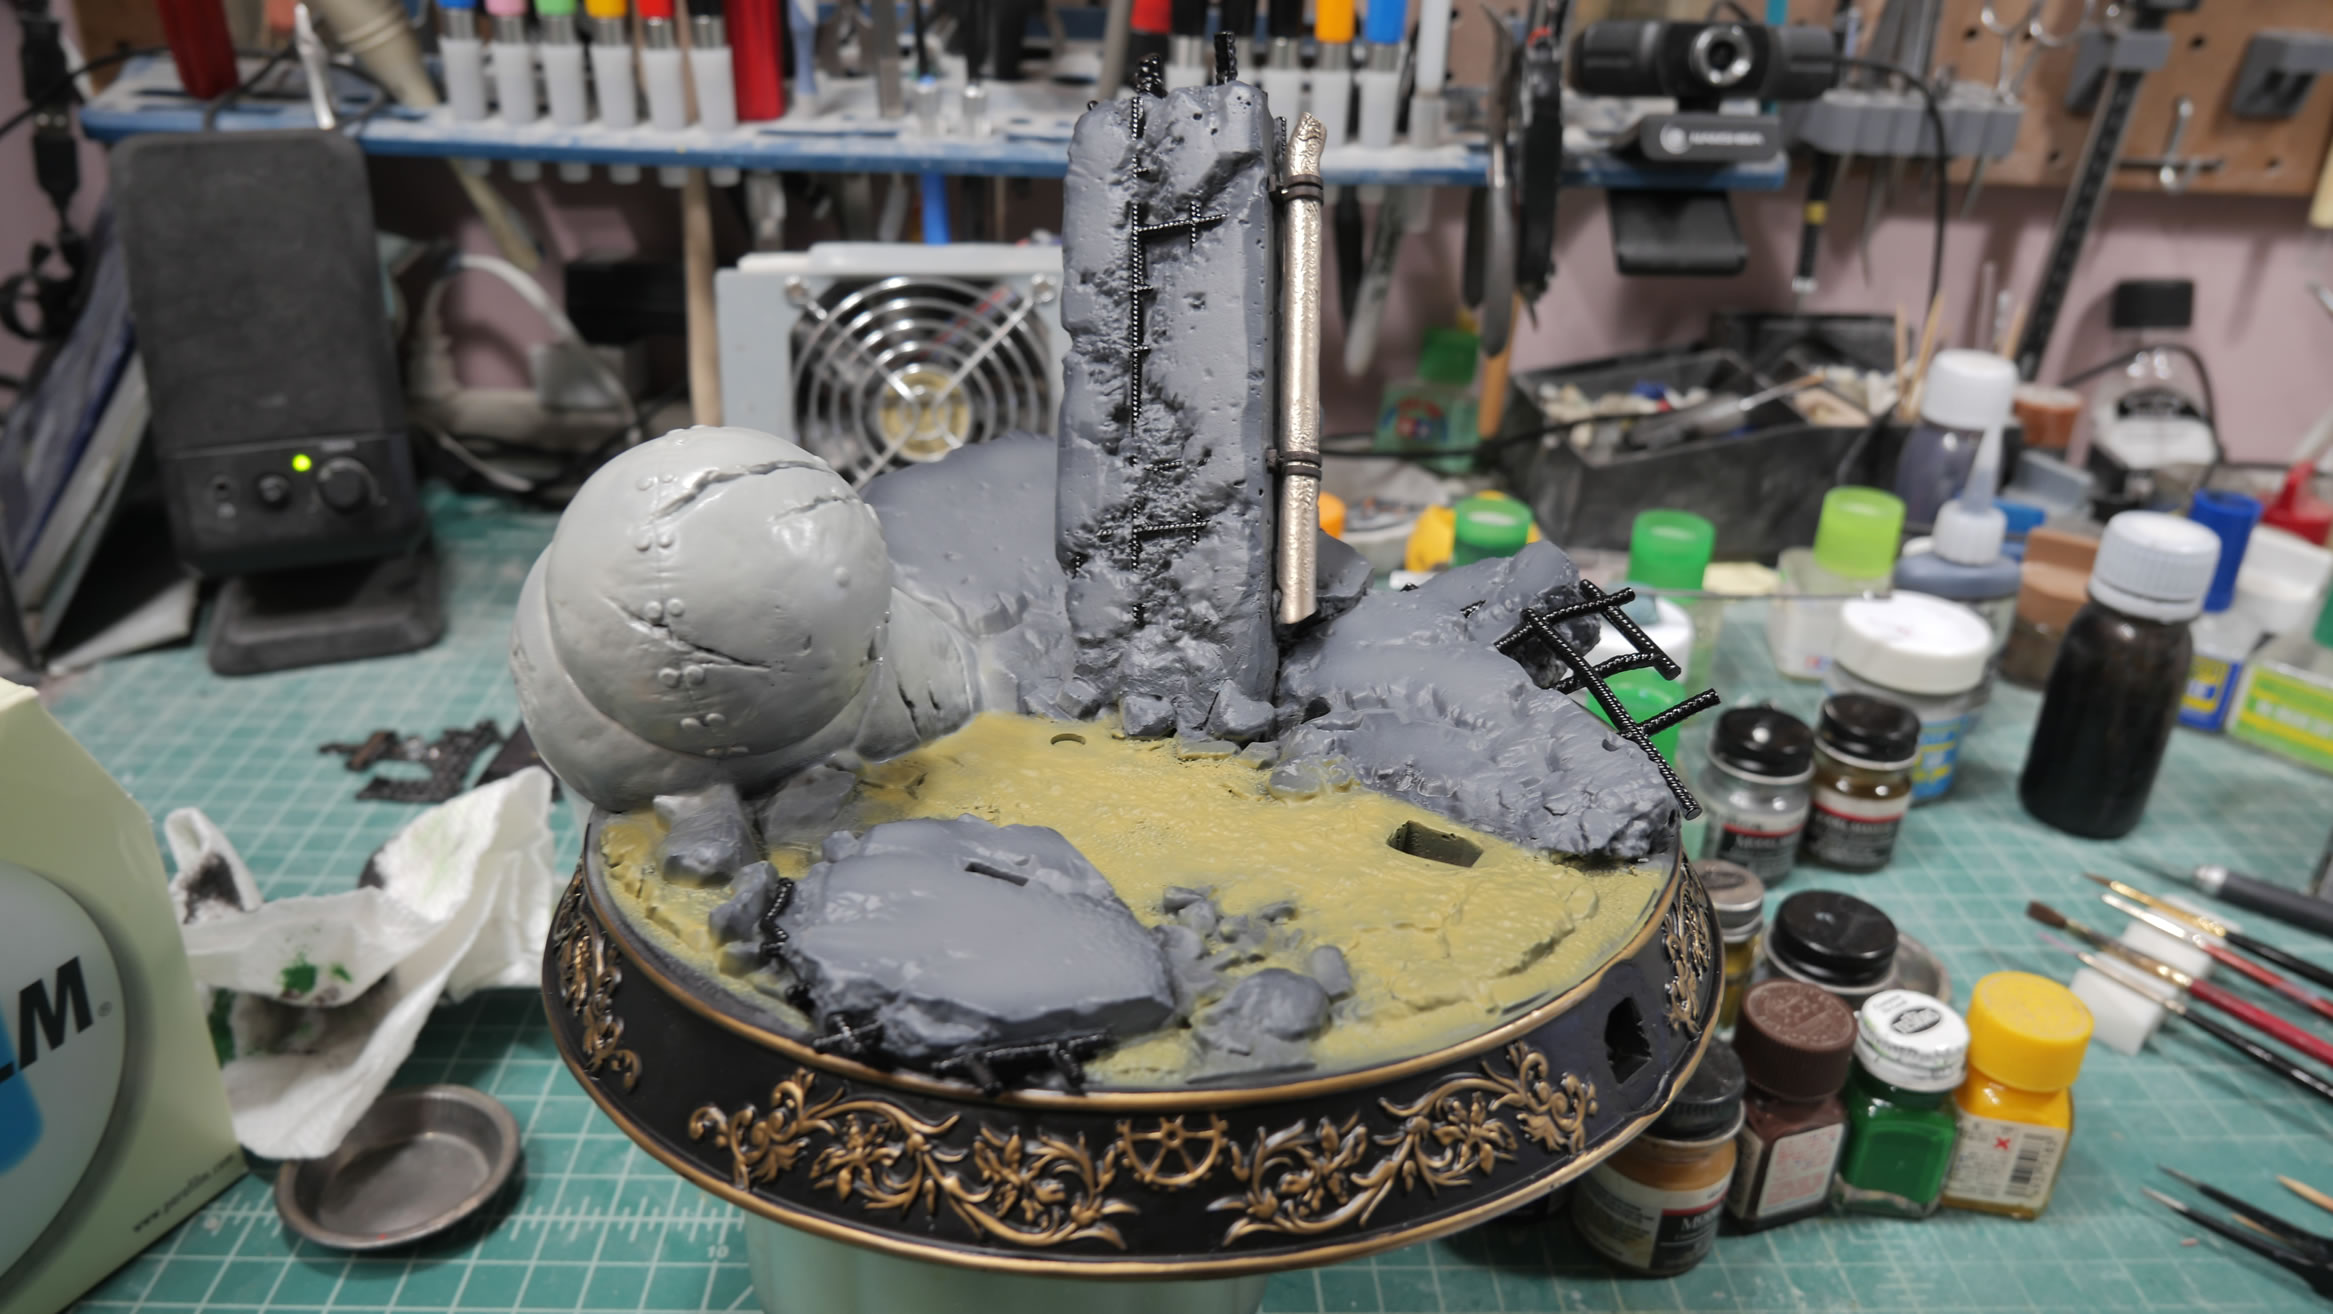
Tere are some closeups of the heads as well as the base details. Hard to discern in the pure white glory of the resin, but as this post progresses, the details will start blooming as paints, washes, and pigments are thrown into the mix.

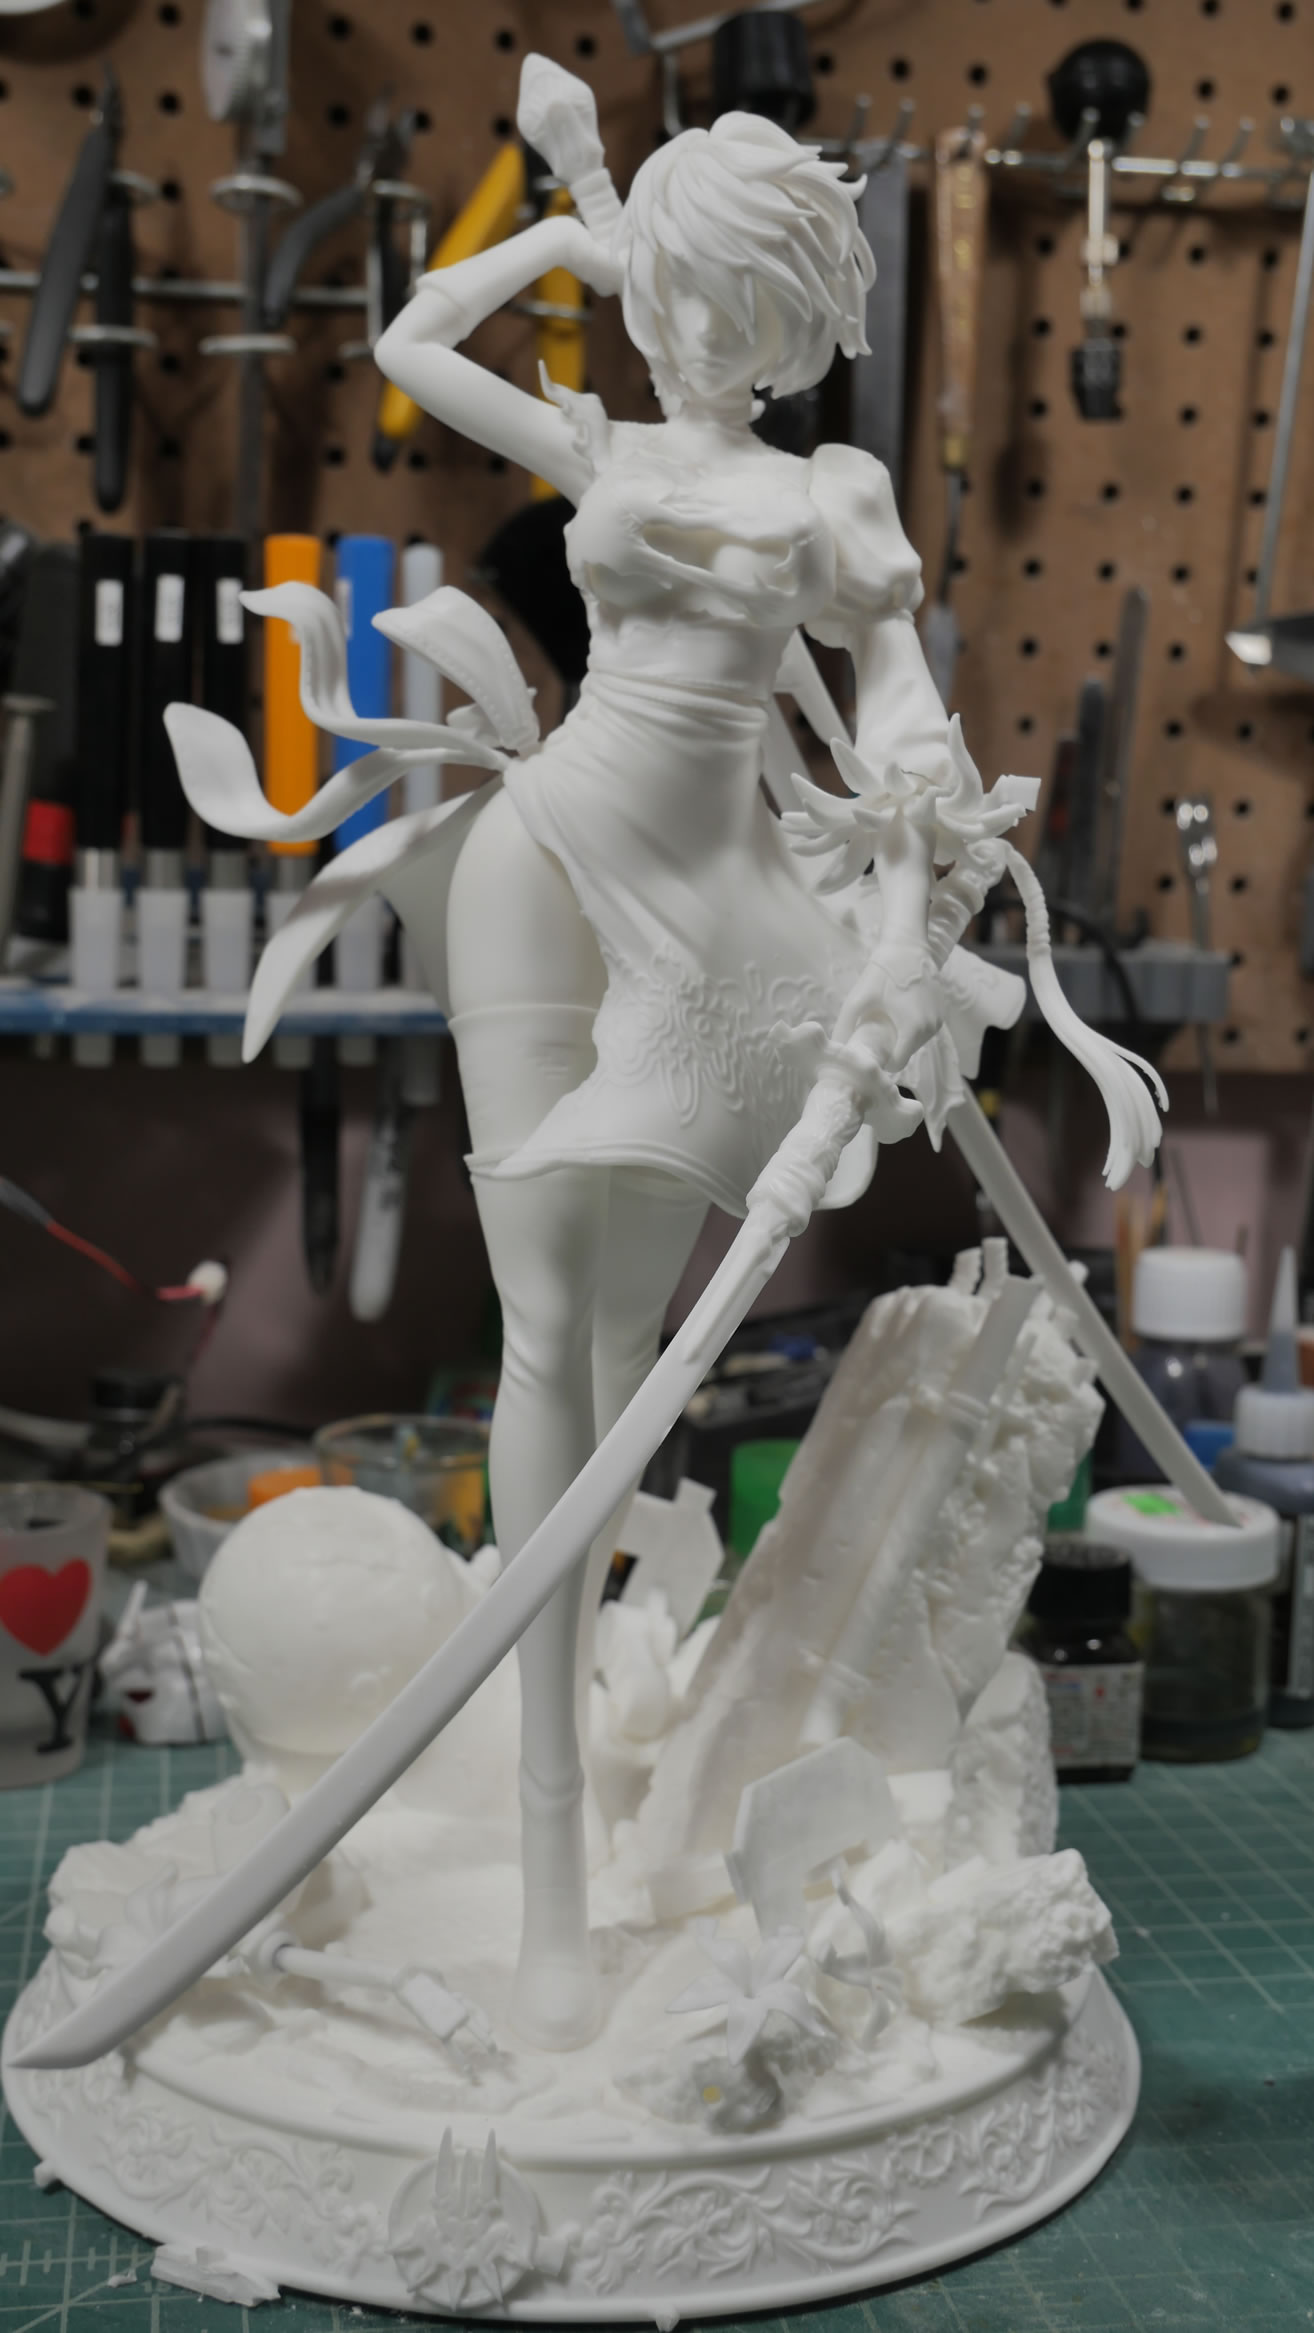
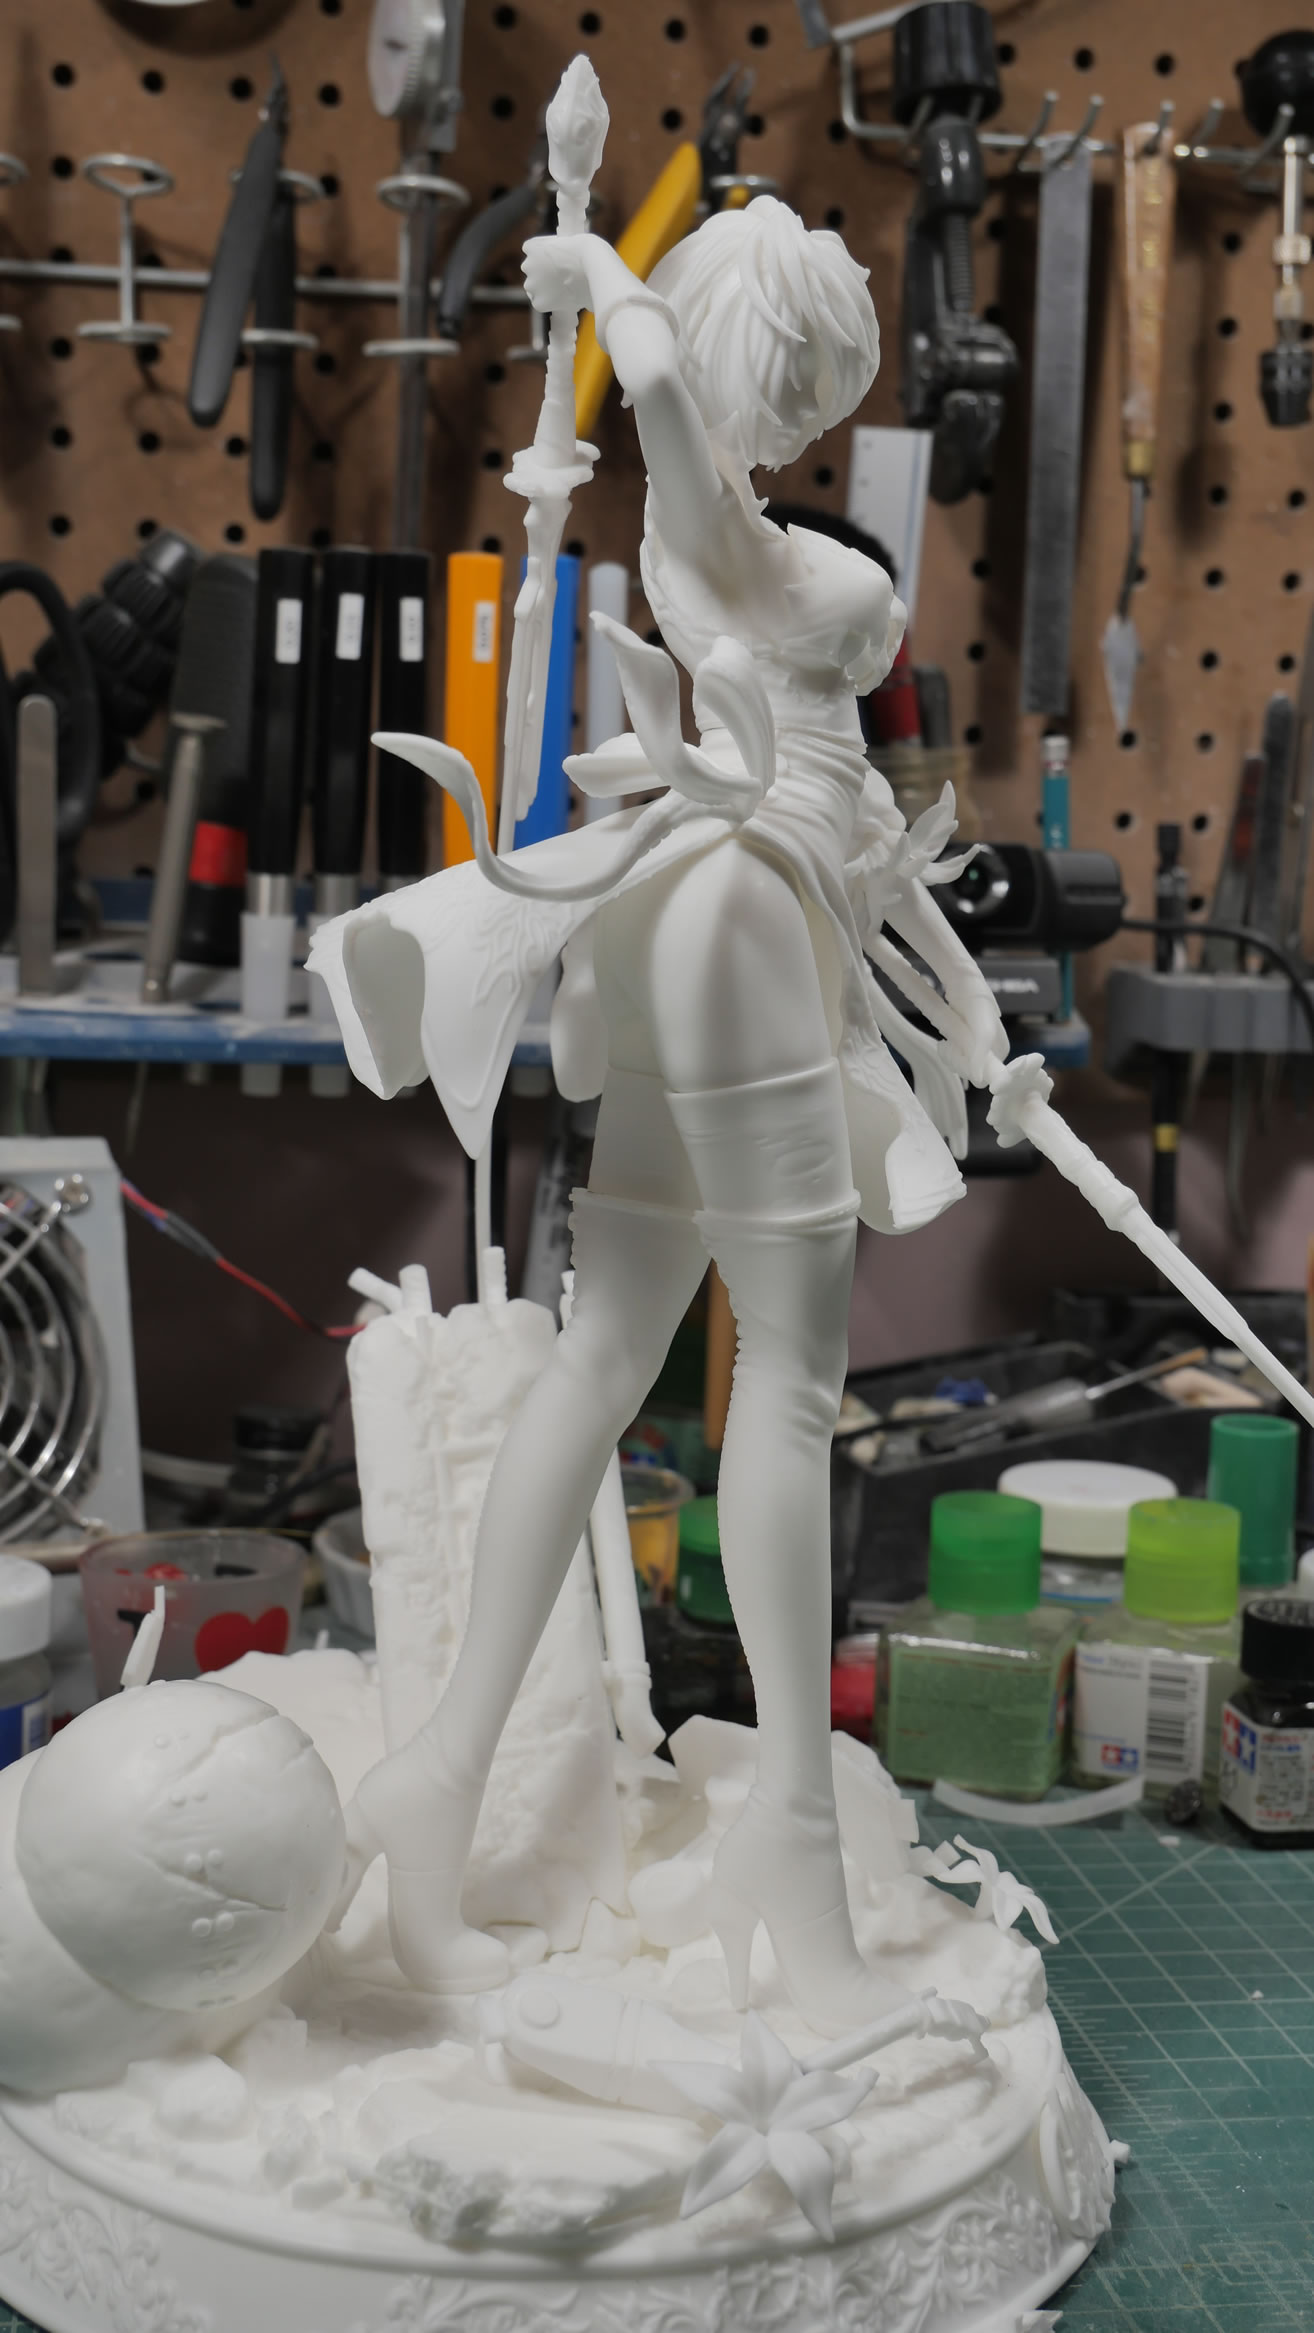
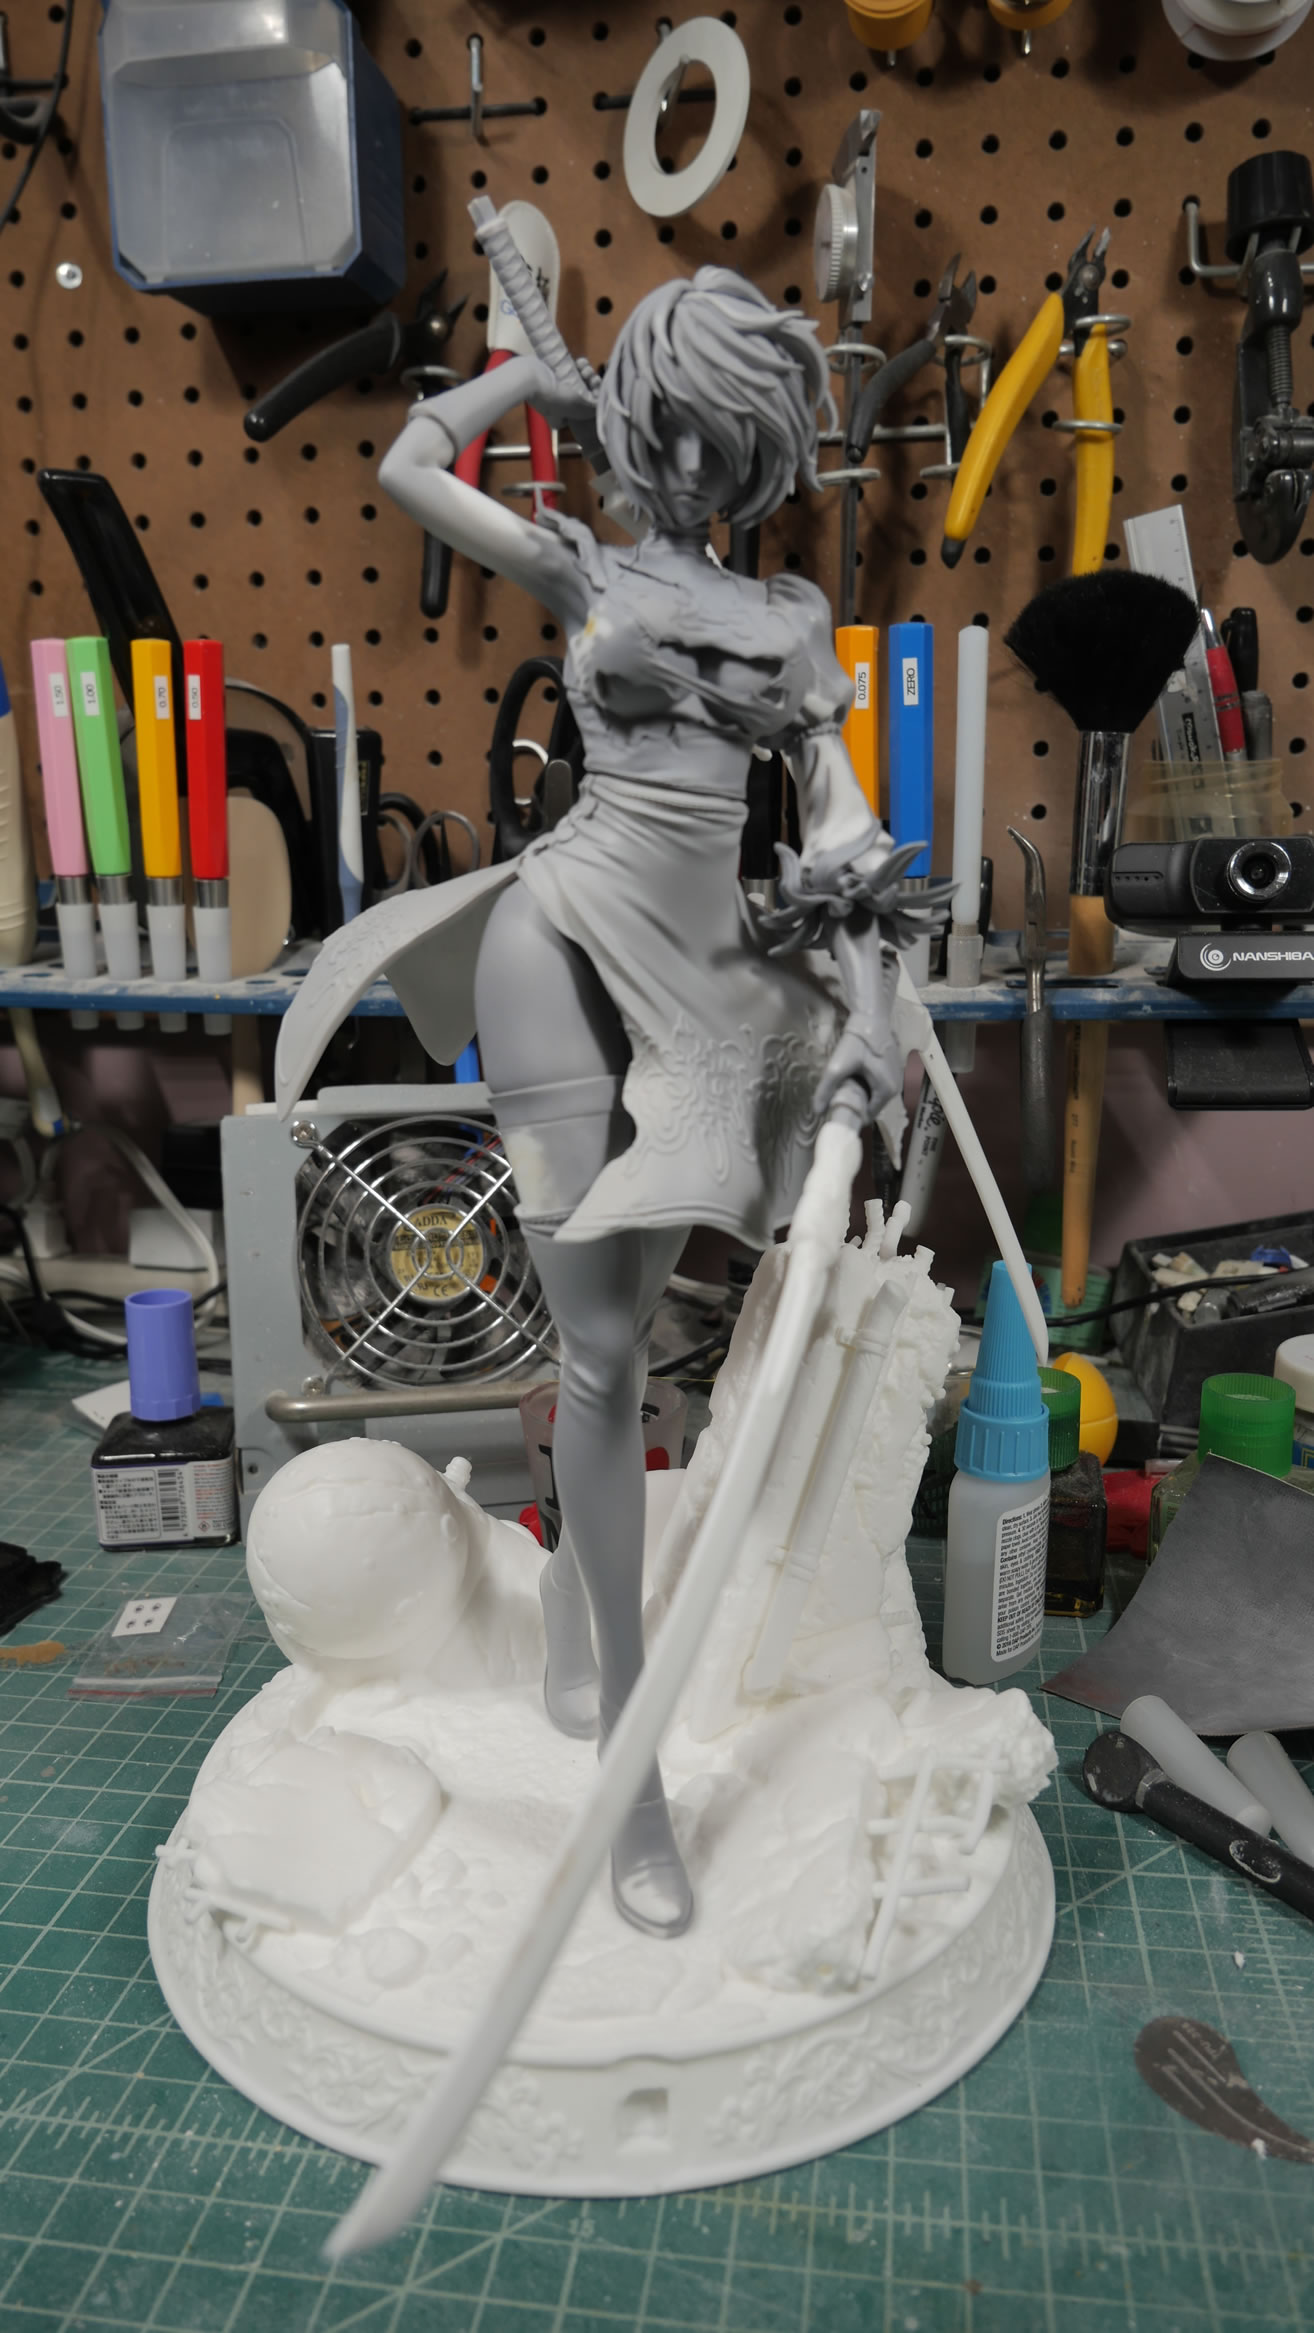
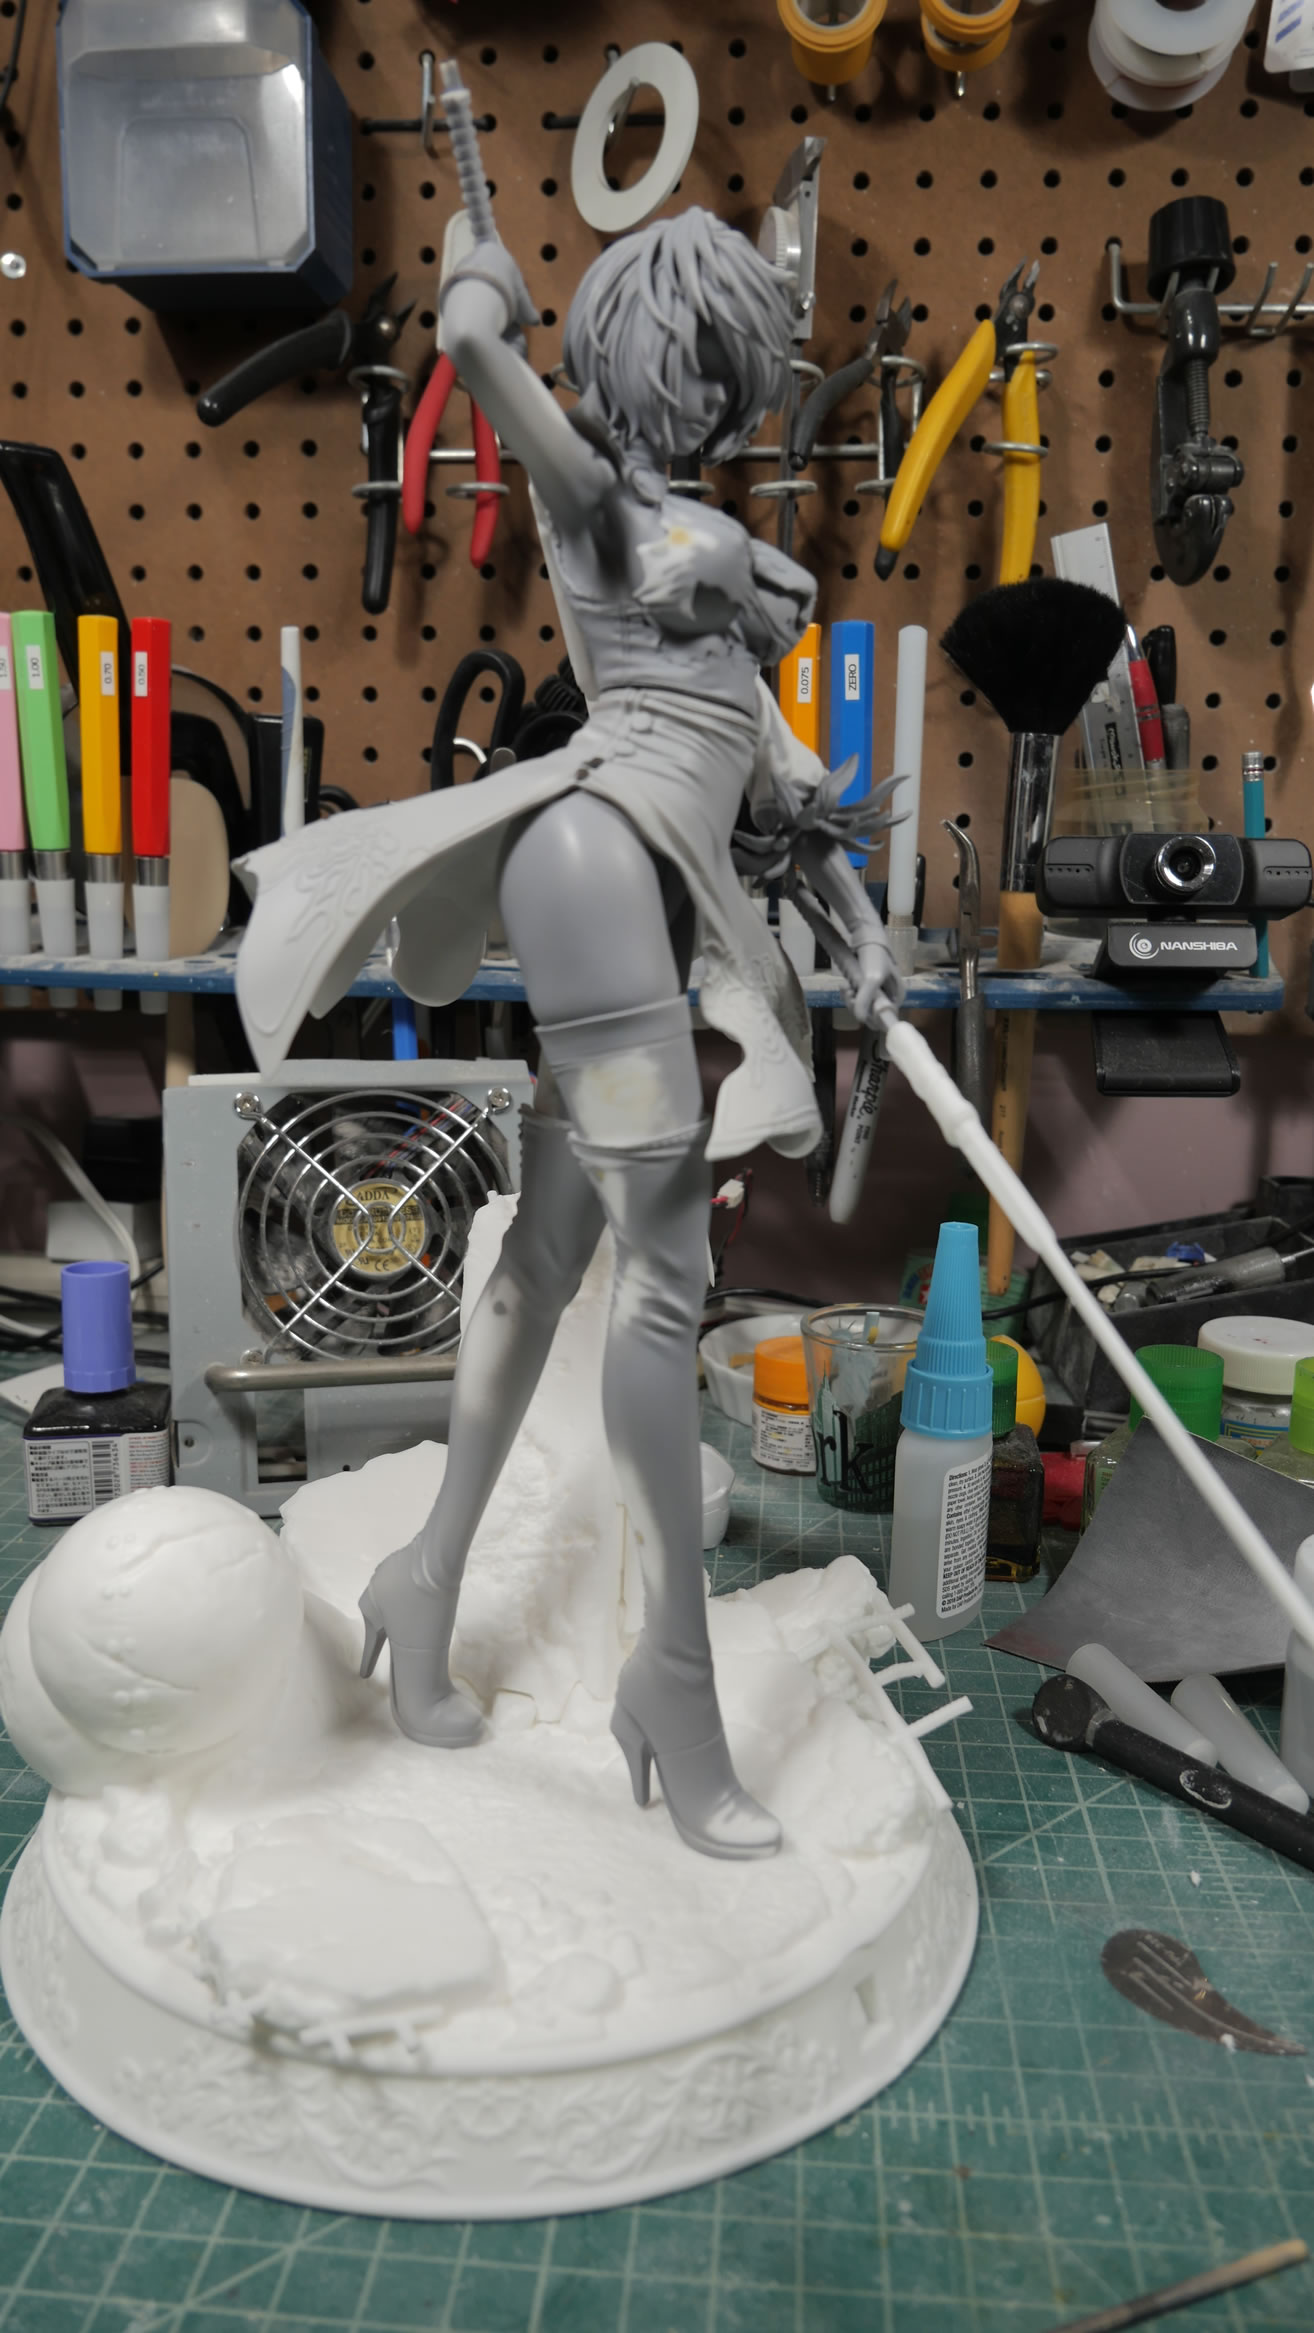
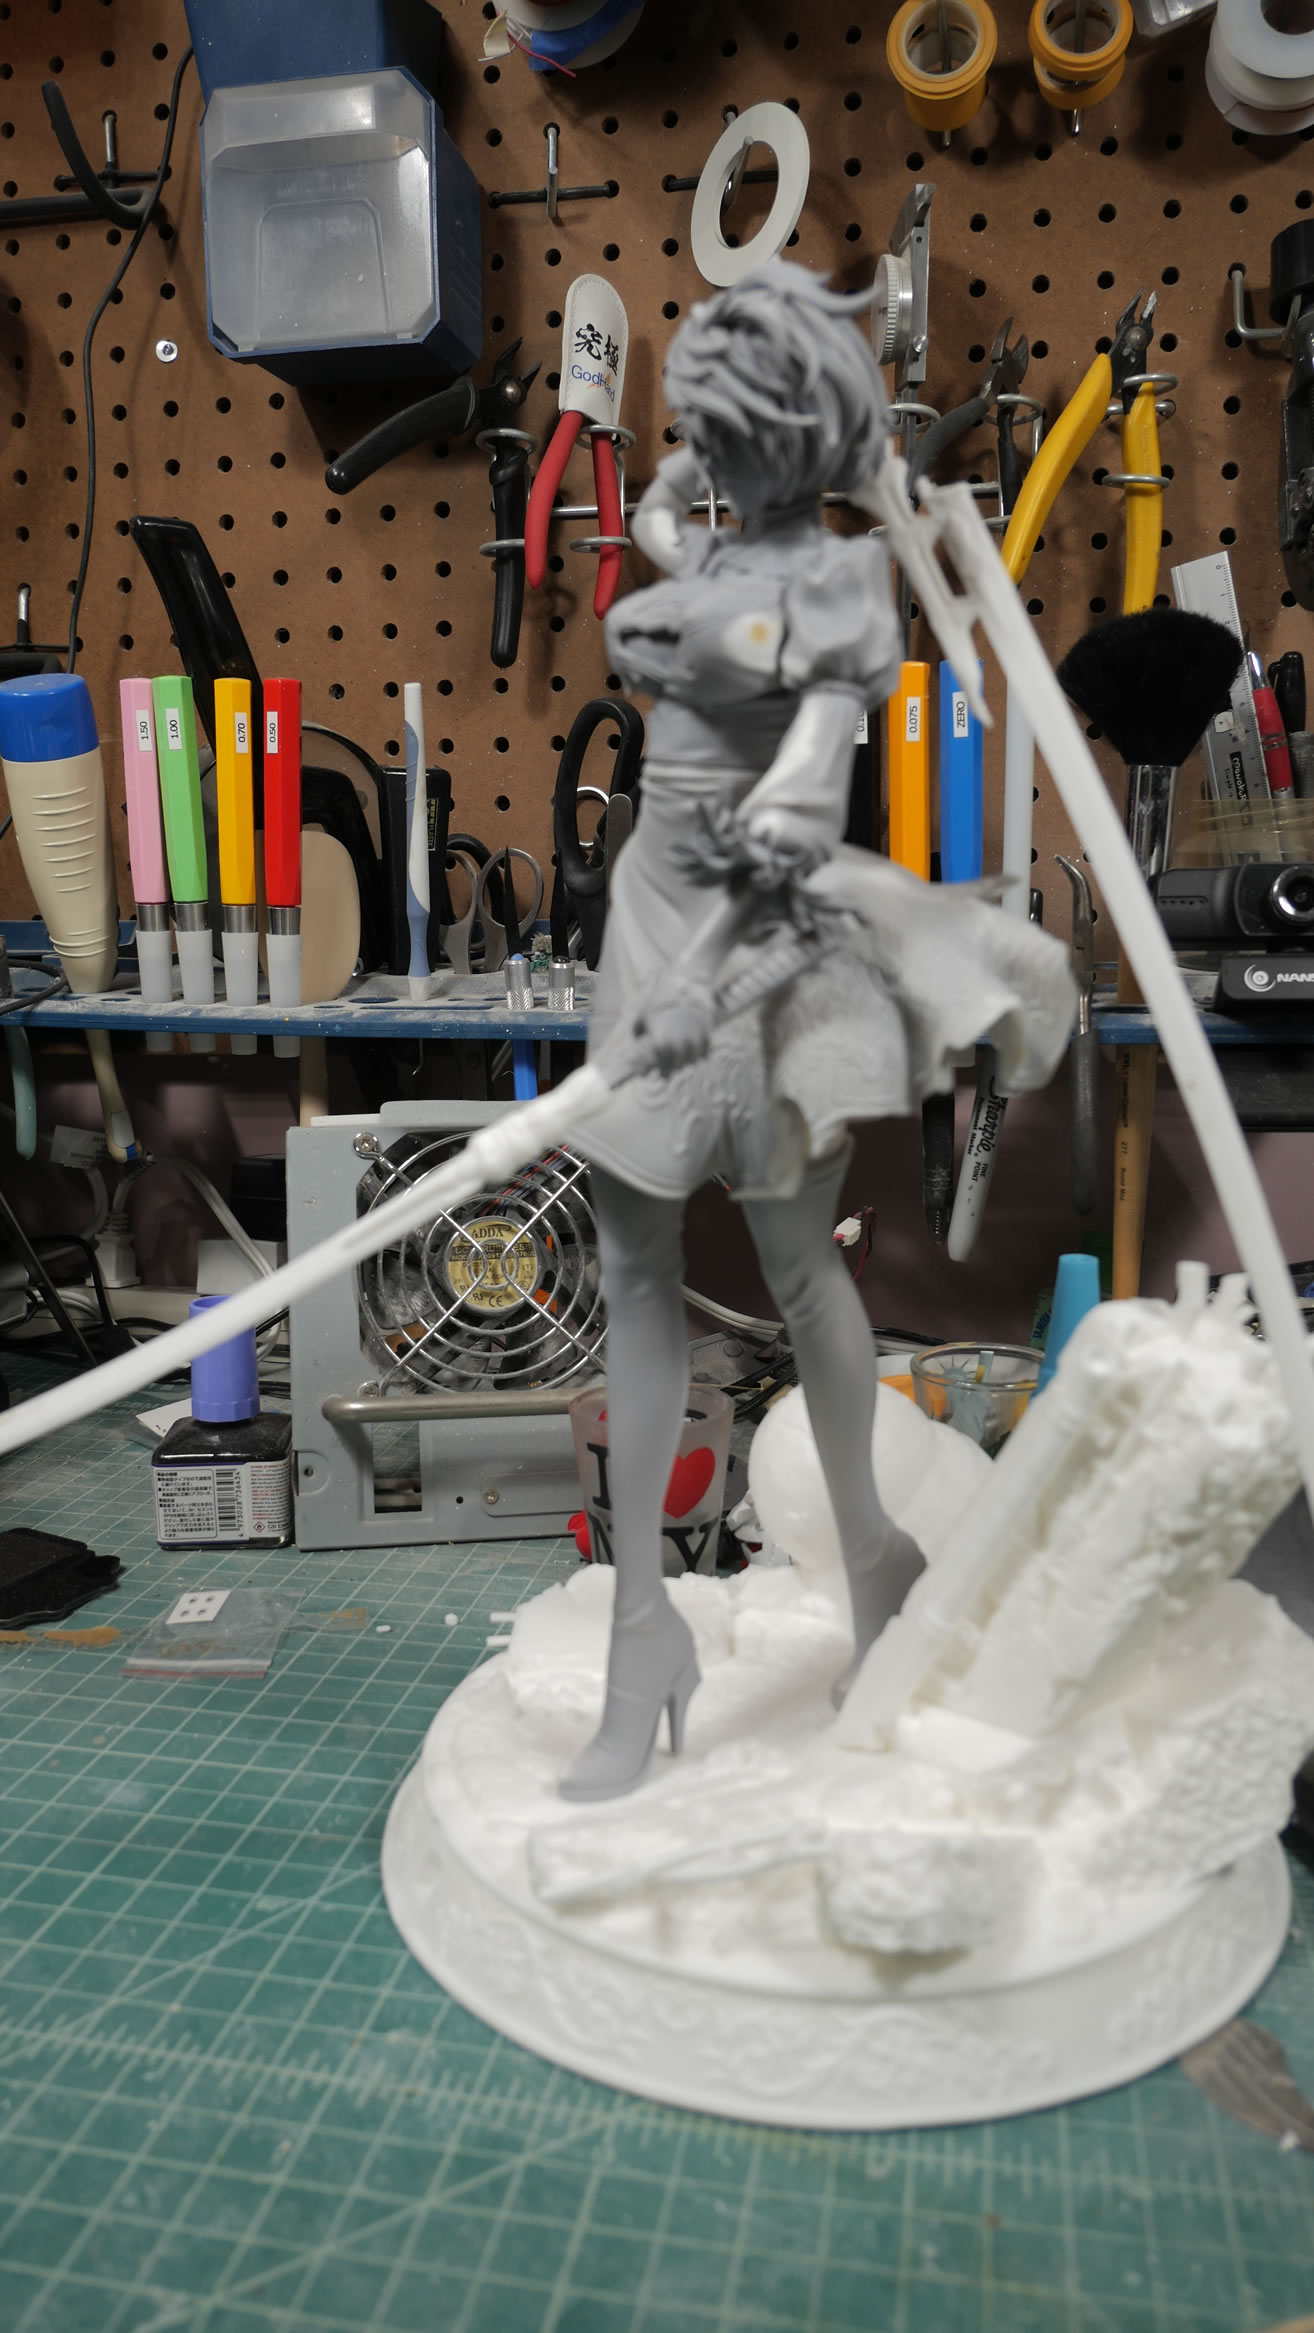
Once all the subassemblies are magnetized, we get our full test fit turn around. Next up, the kit is disassembled and the fun prep work begins.
The kit comes with a removable busted blouse part. Magnets are perfect here. However, unlike the other parts where tab A fits into slot B and I don’t have to be precise with the magnet alignments; there is none of that here. So I need to be precise with the magnet placement. Best thing to do is to drill through both parts while they’re assembled to that I have perfectly aligned holes. Magnets are added and light curing putty makes for a quick fill and sand session. Once primed, there is no evidence of any drilled hoes.

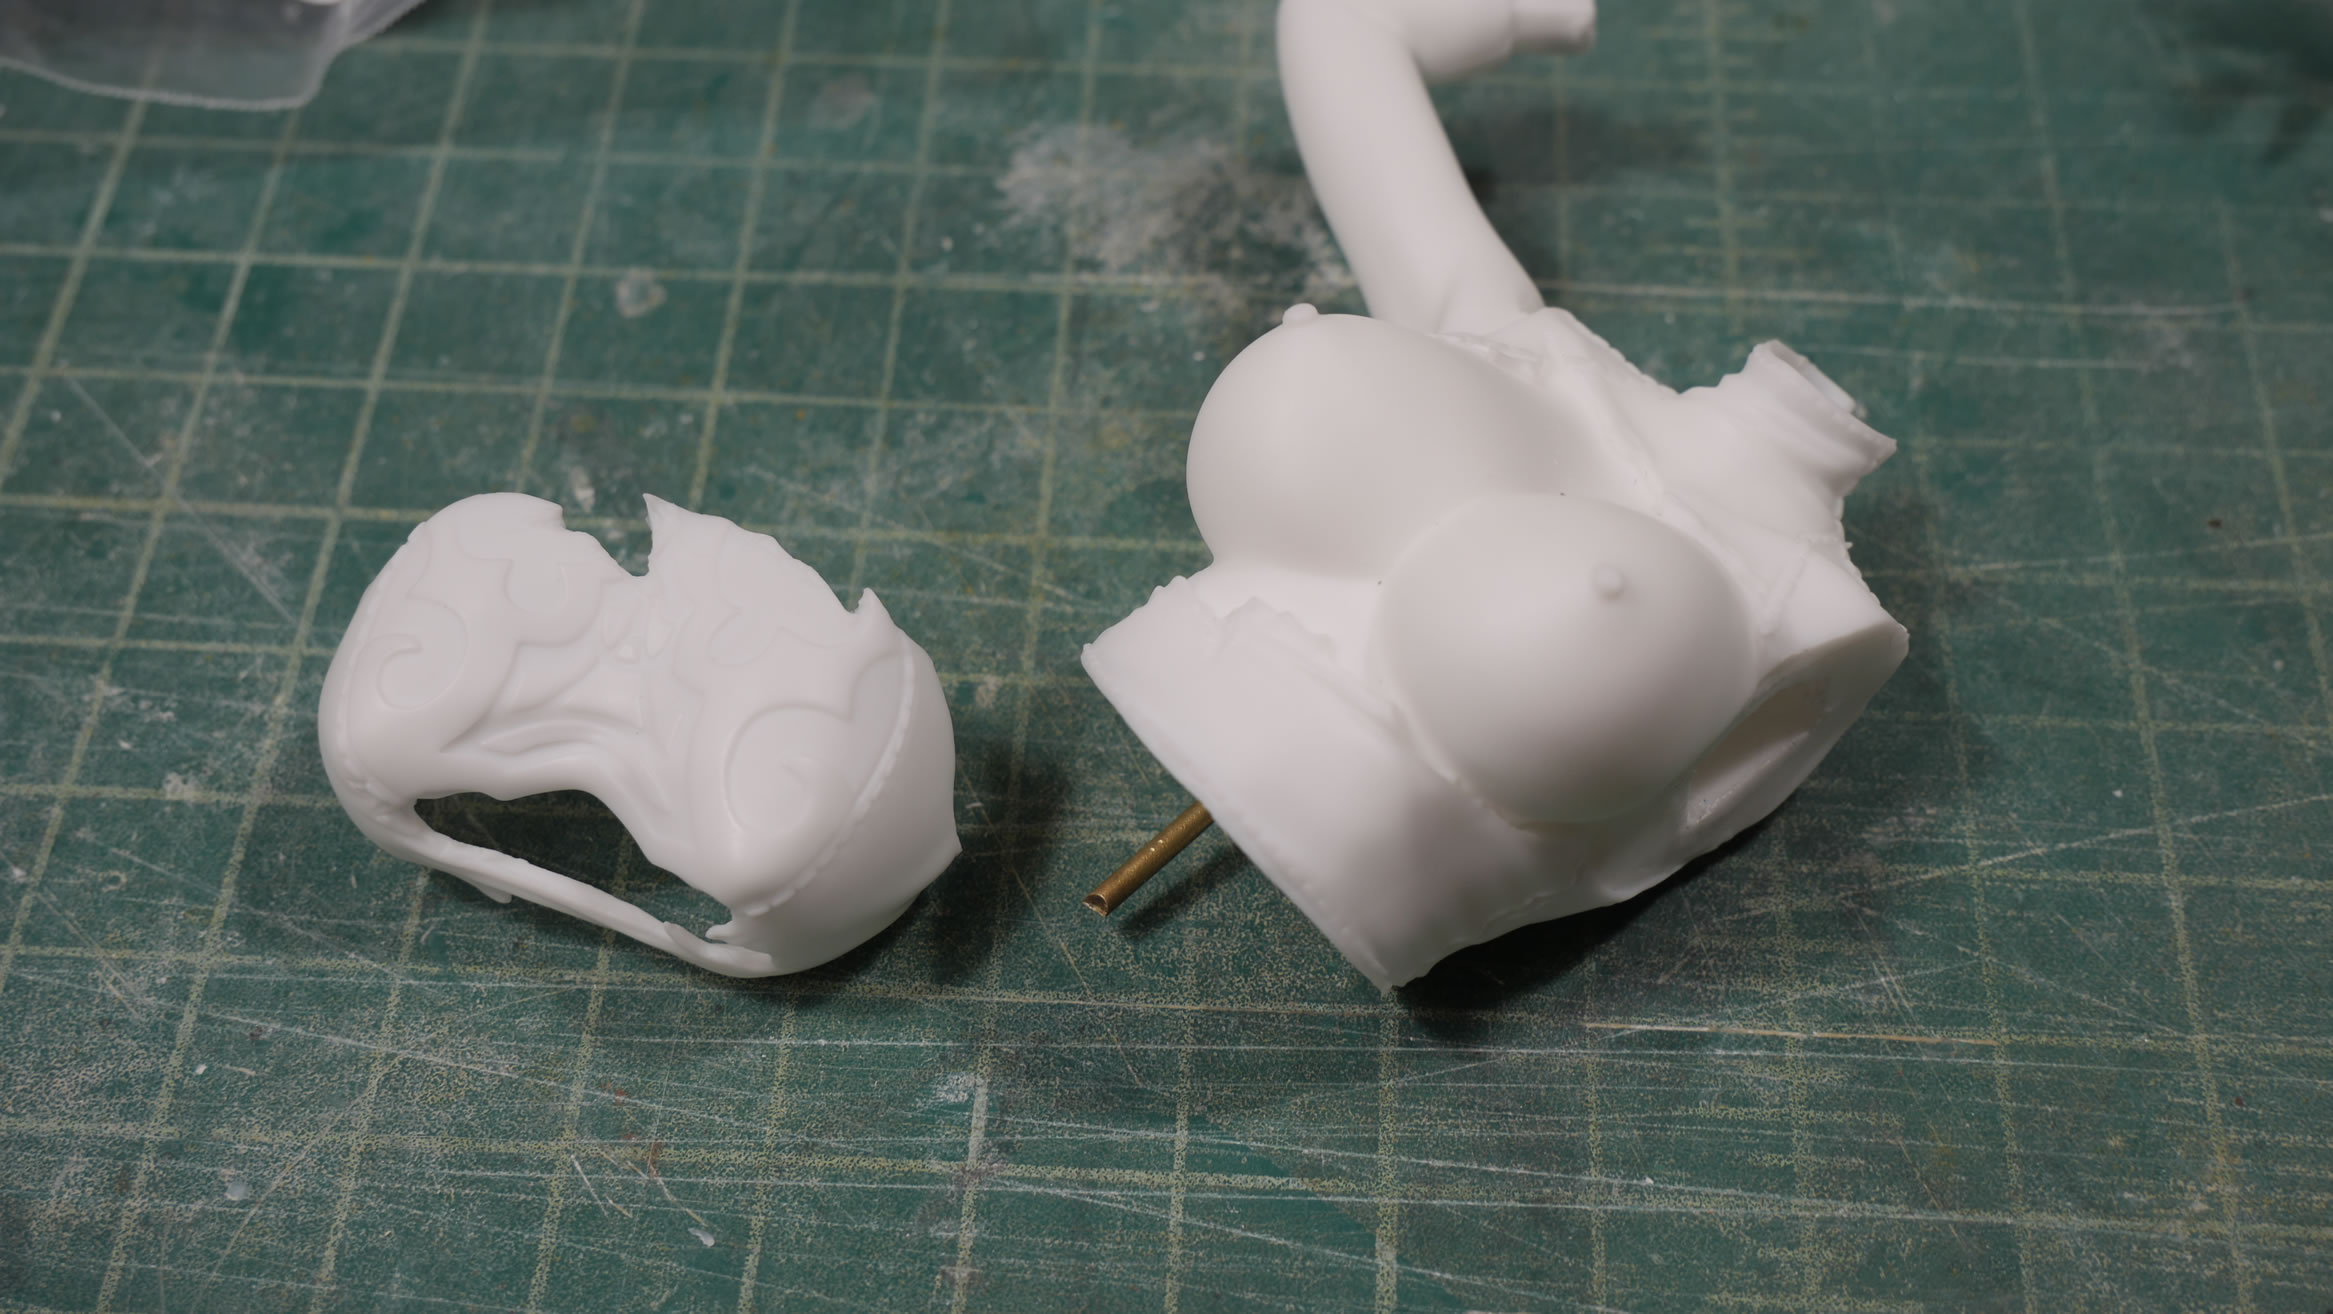
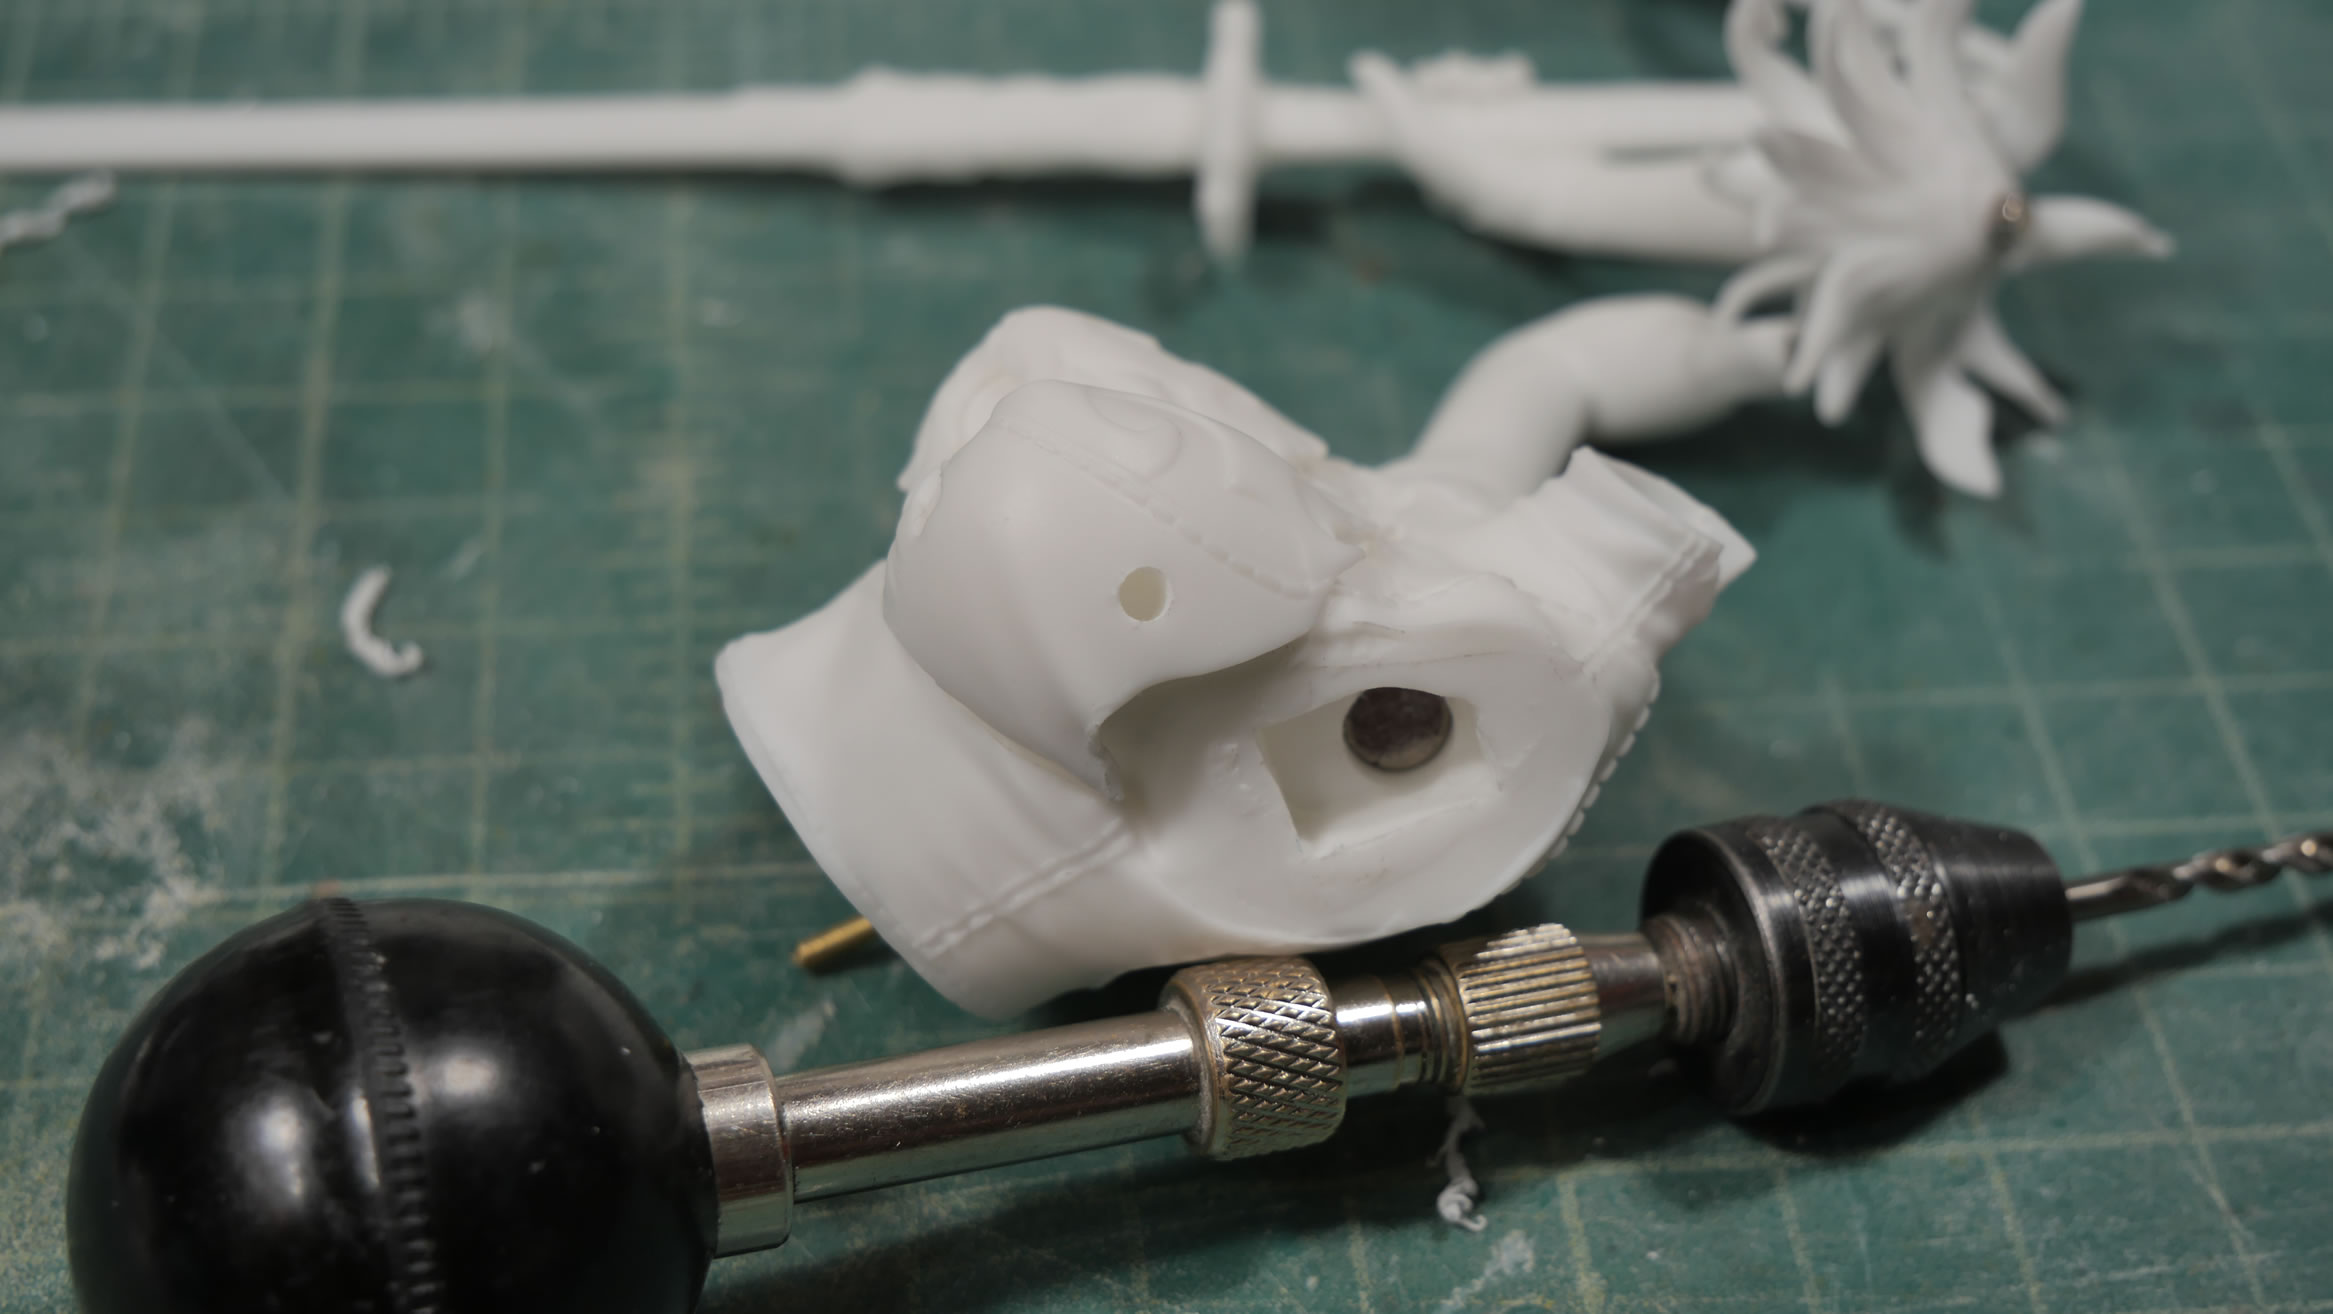
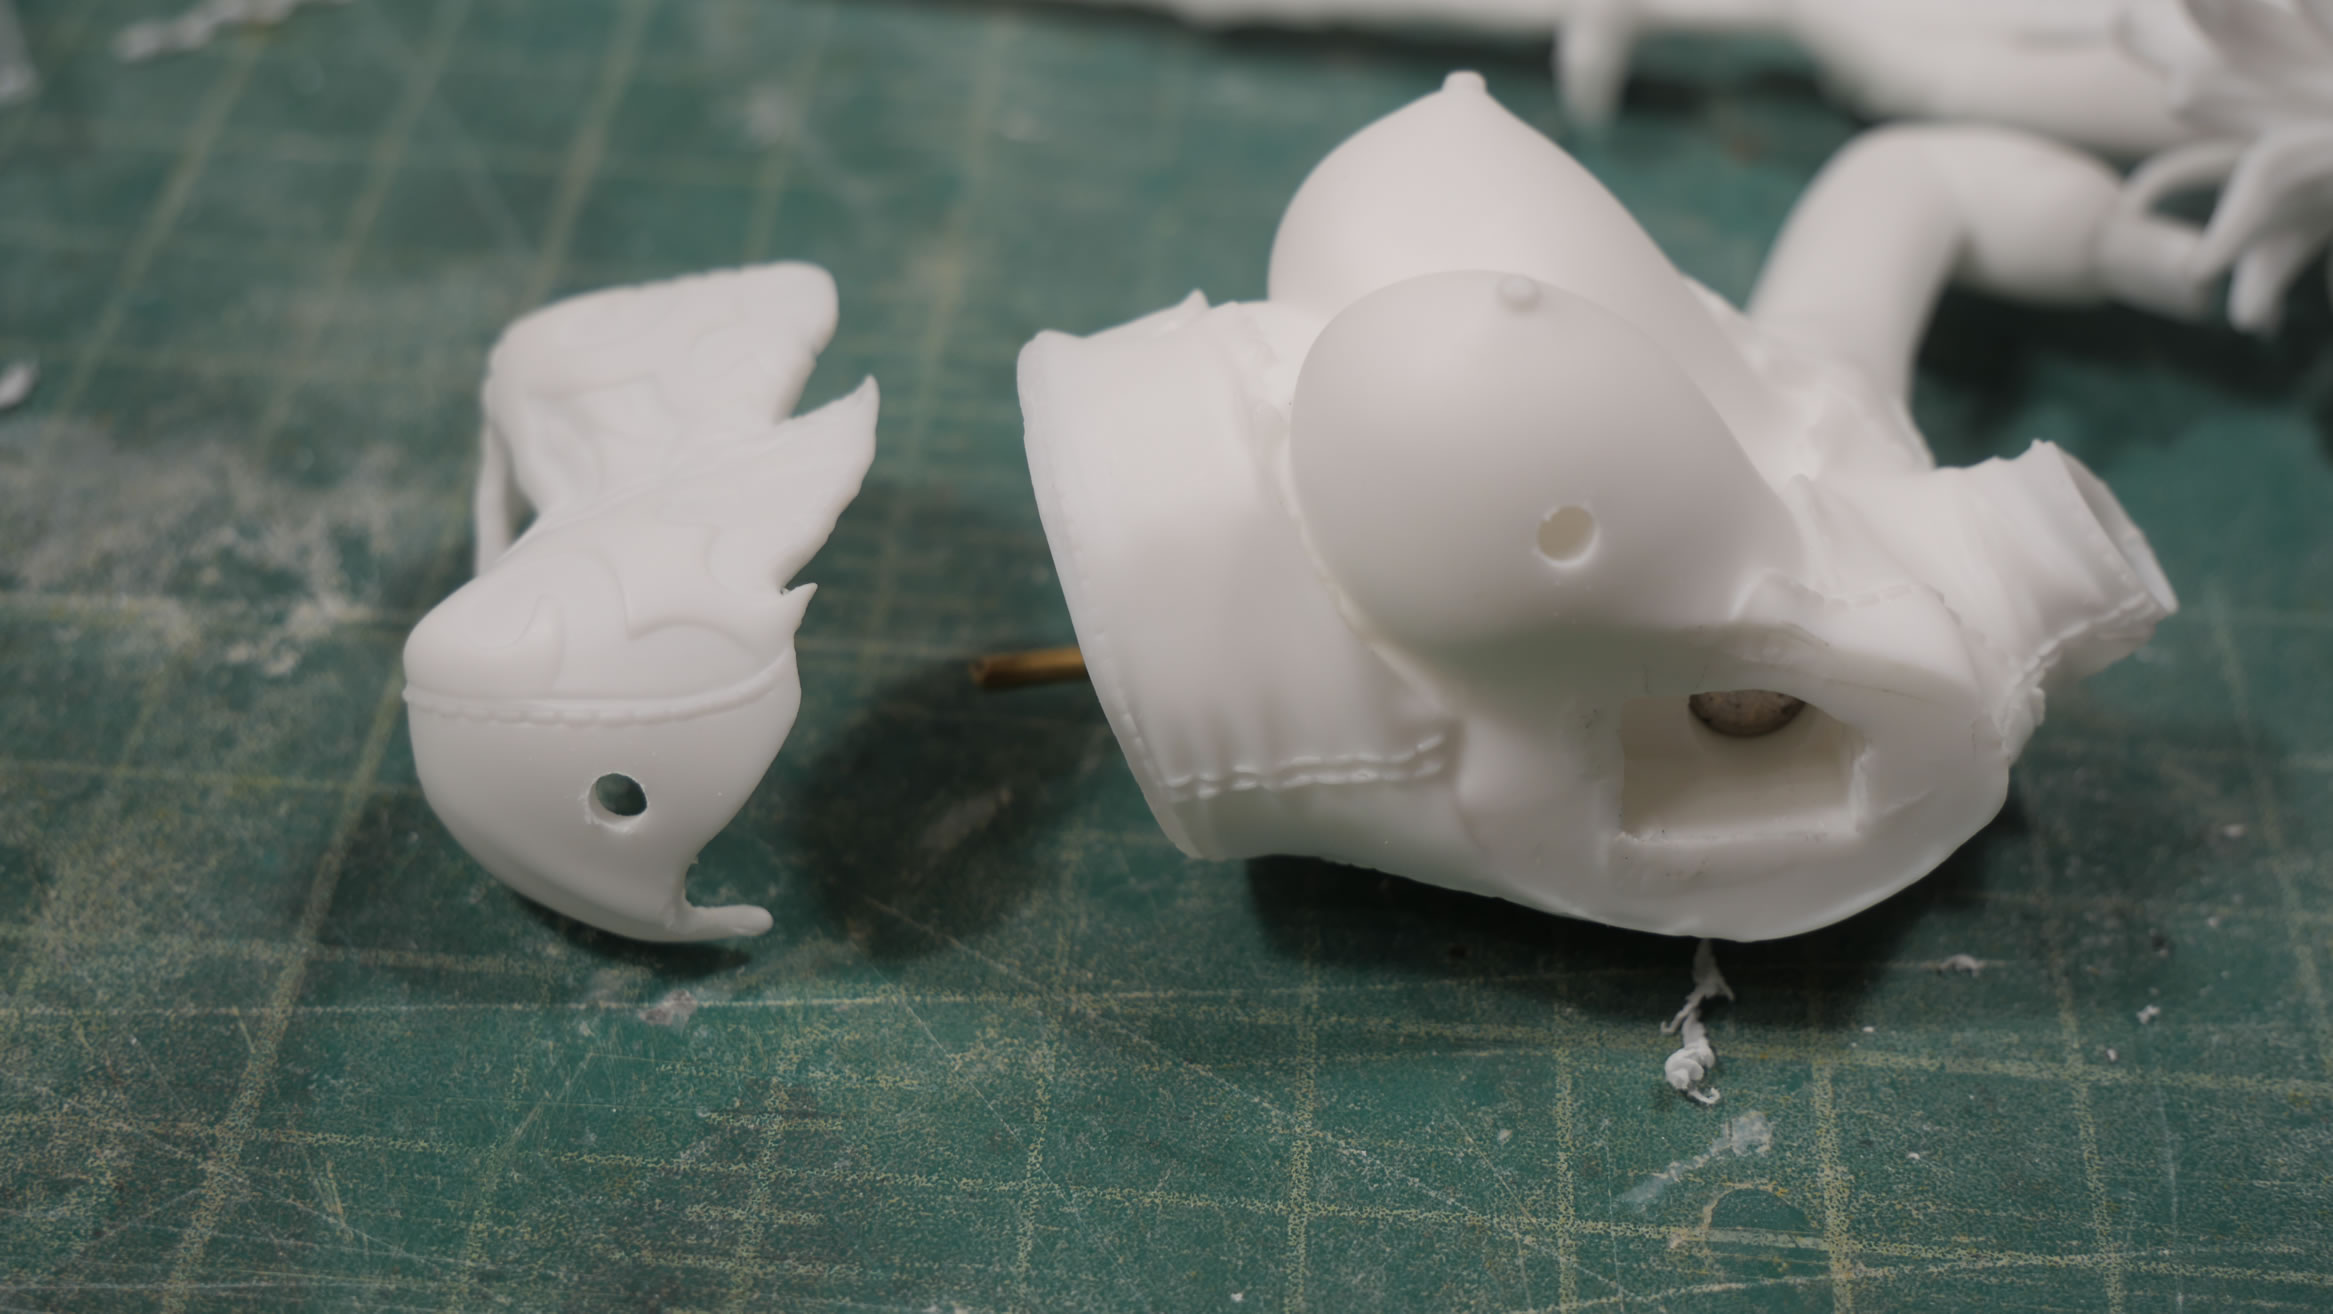
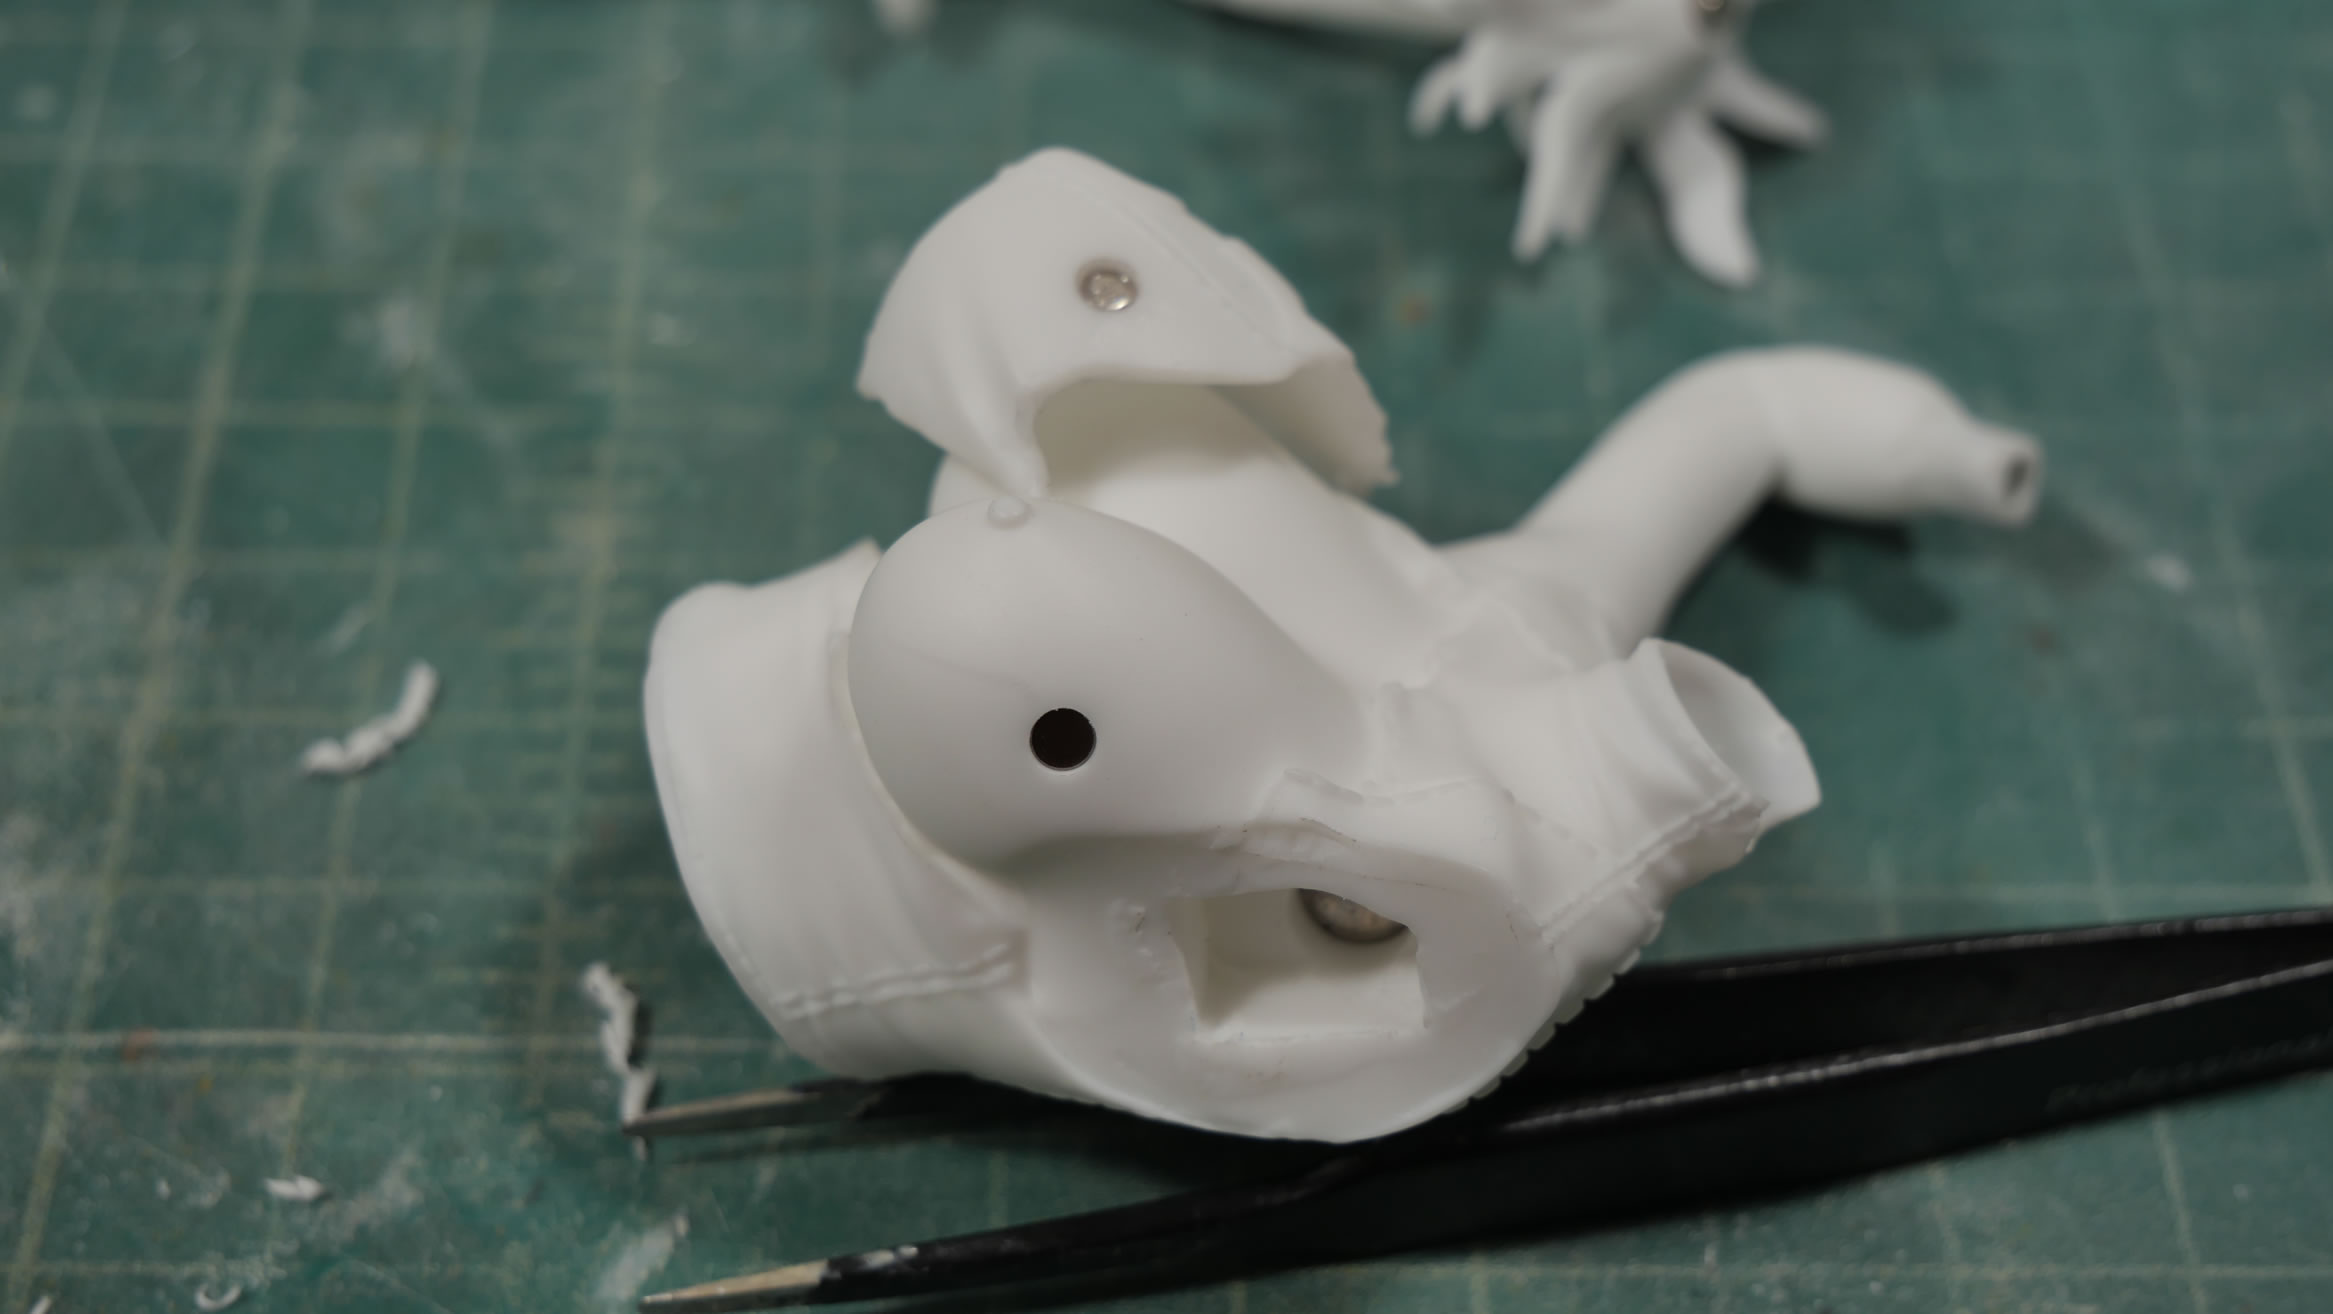
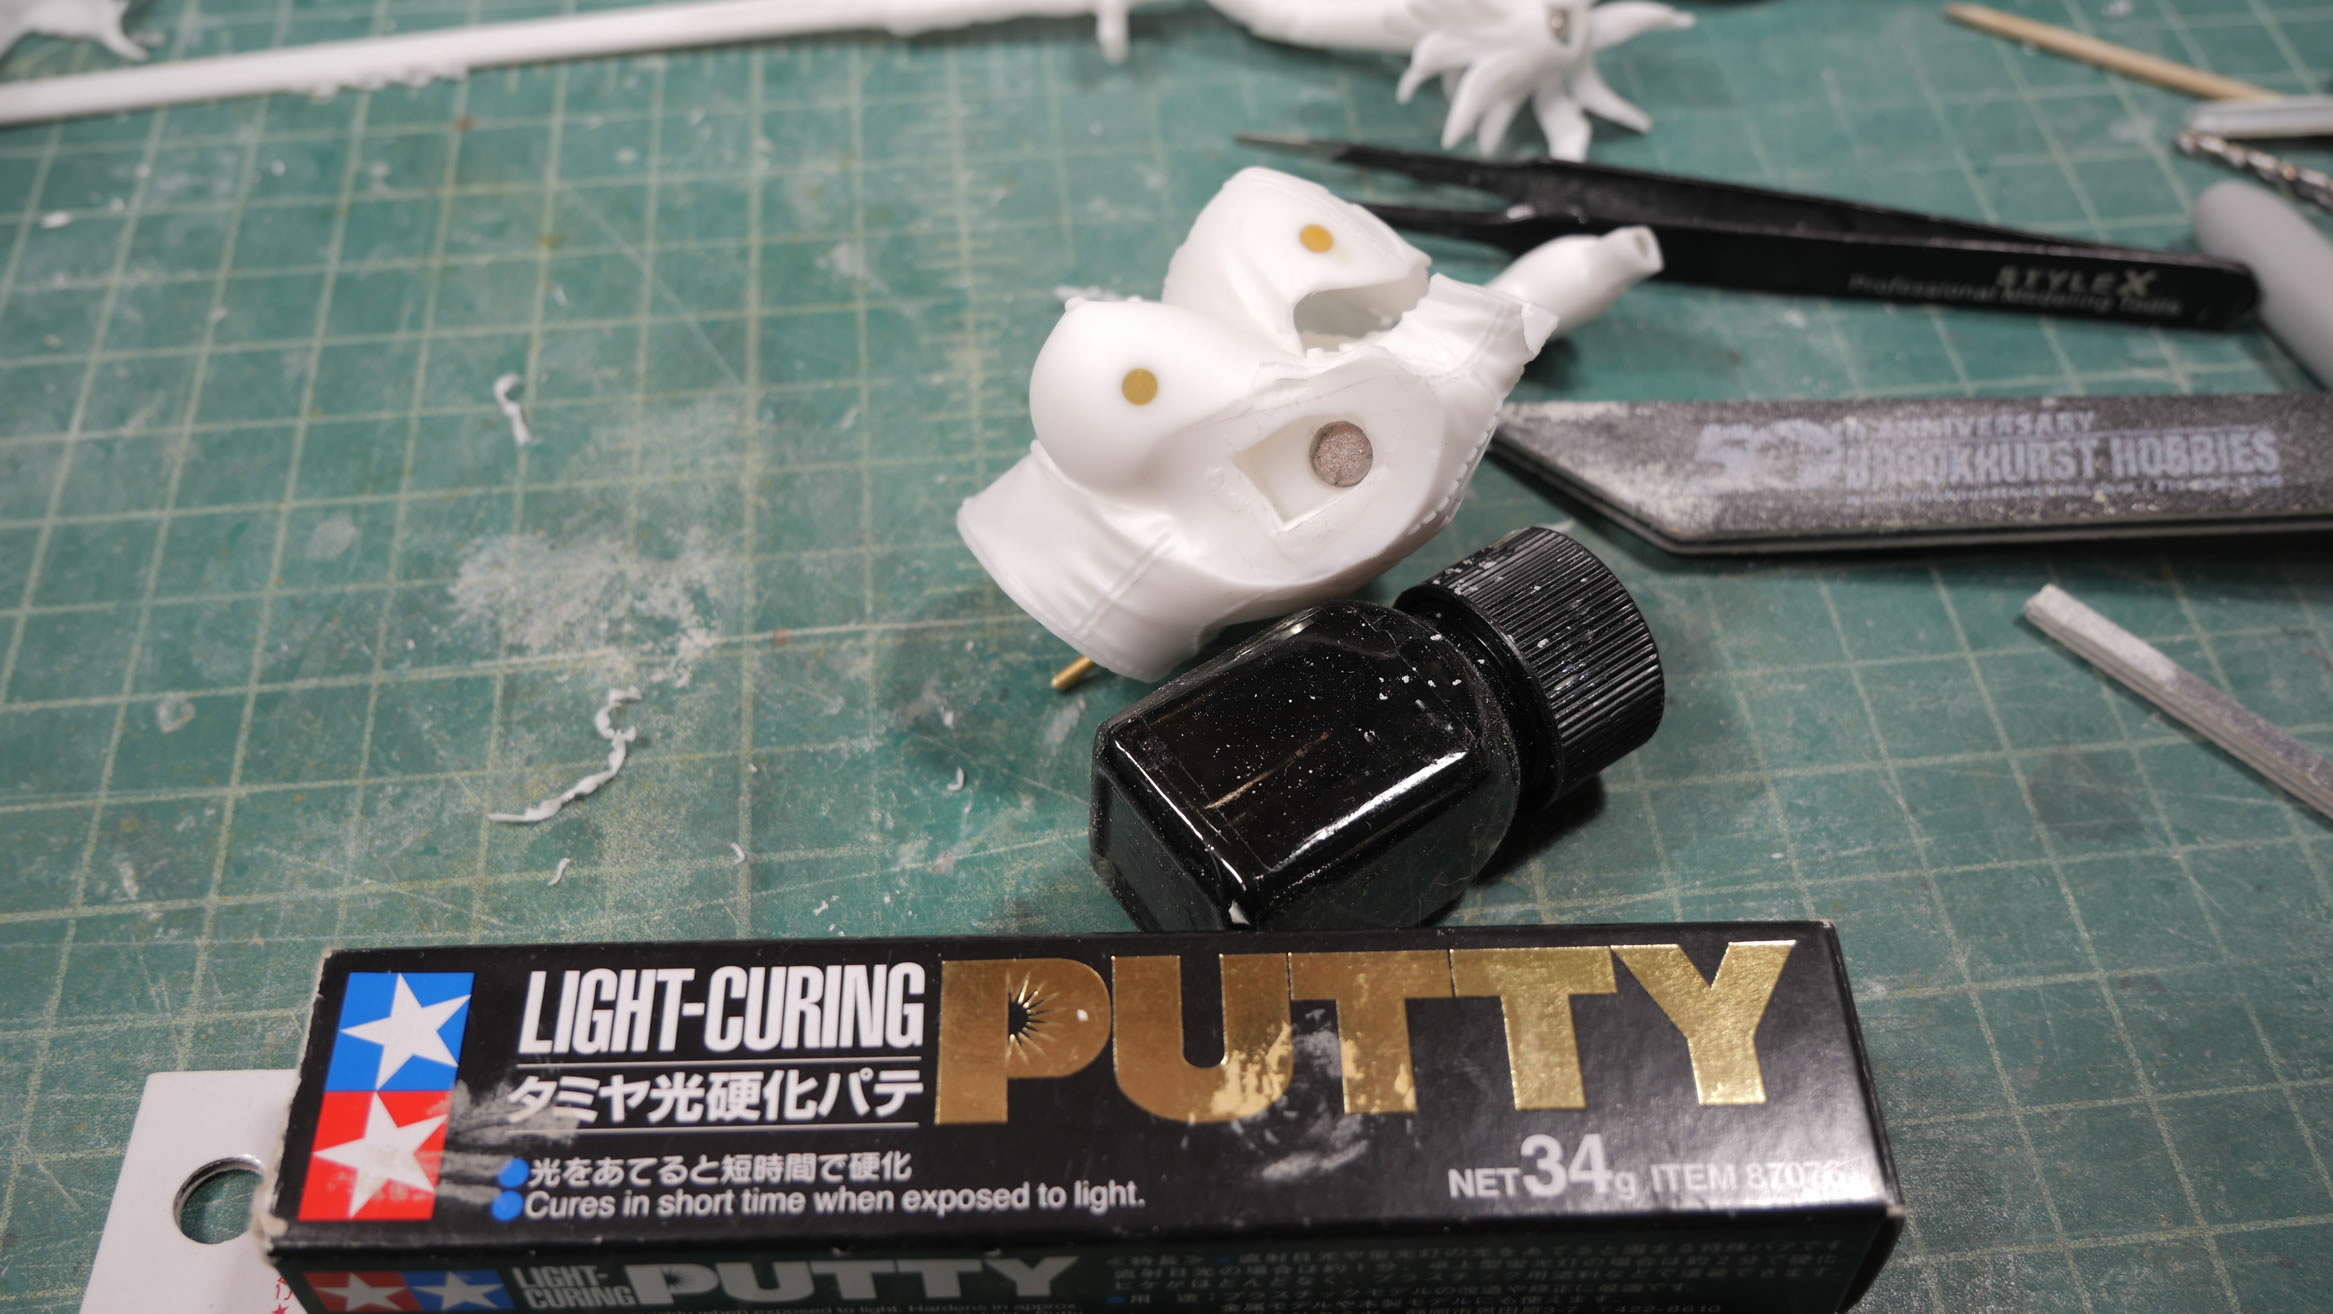
Everything sanded smooth and the proper magnetic pole alignments set. I have magnets on both sides of the boobs/blouse piece. The part easily snaps into position.
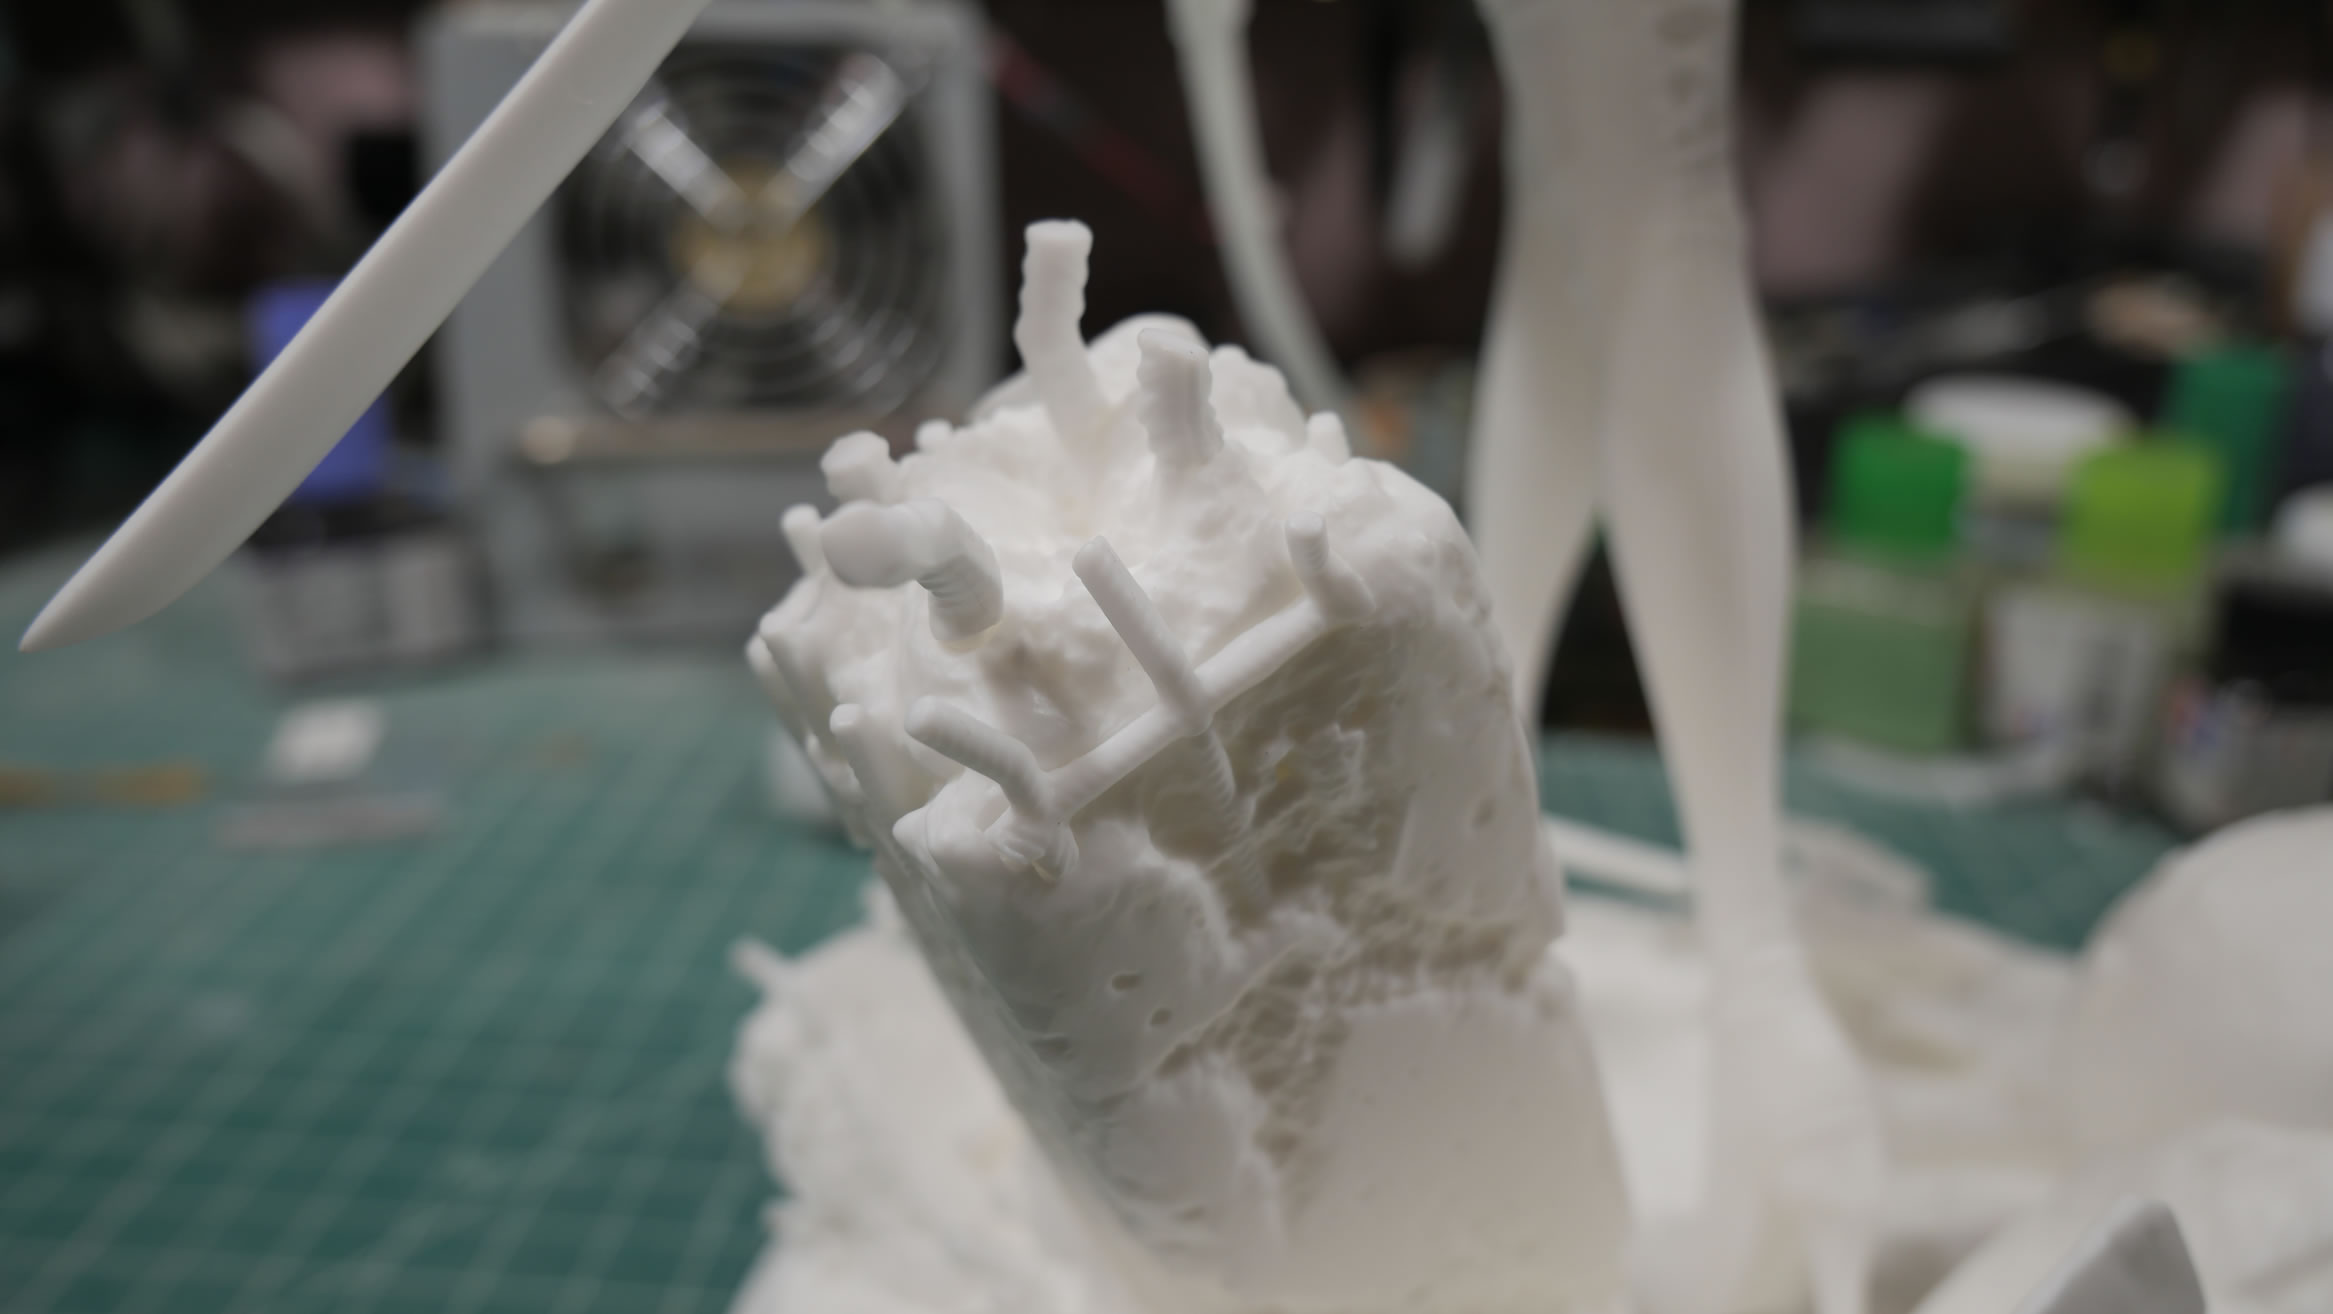
I took the picture below to reminde me where some of the small bits fit. The assembly instructions are nonexistent; so there was a bit of fumbling around to see where everything fit. But these rebar details are part of the base and the focus was on the figure kit itself as a priority.
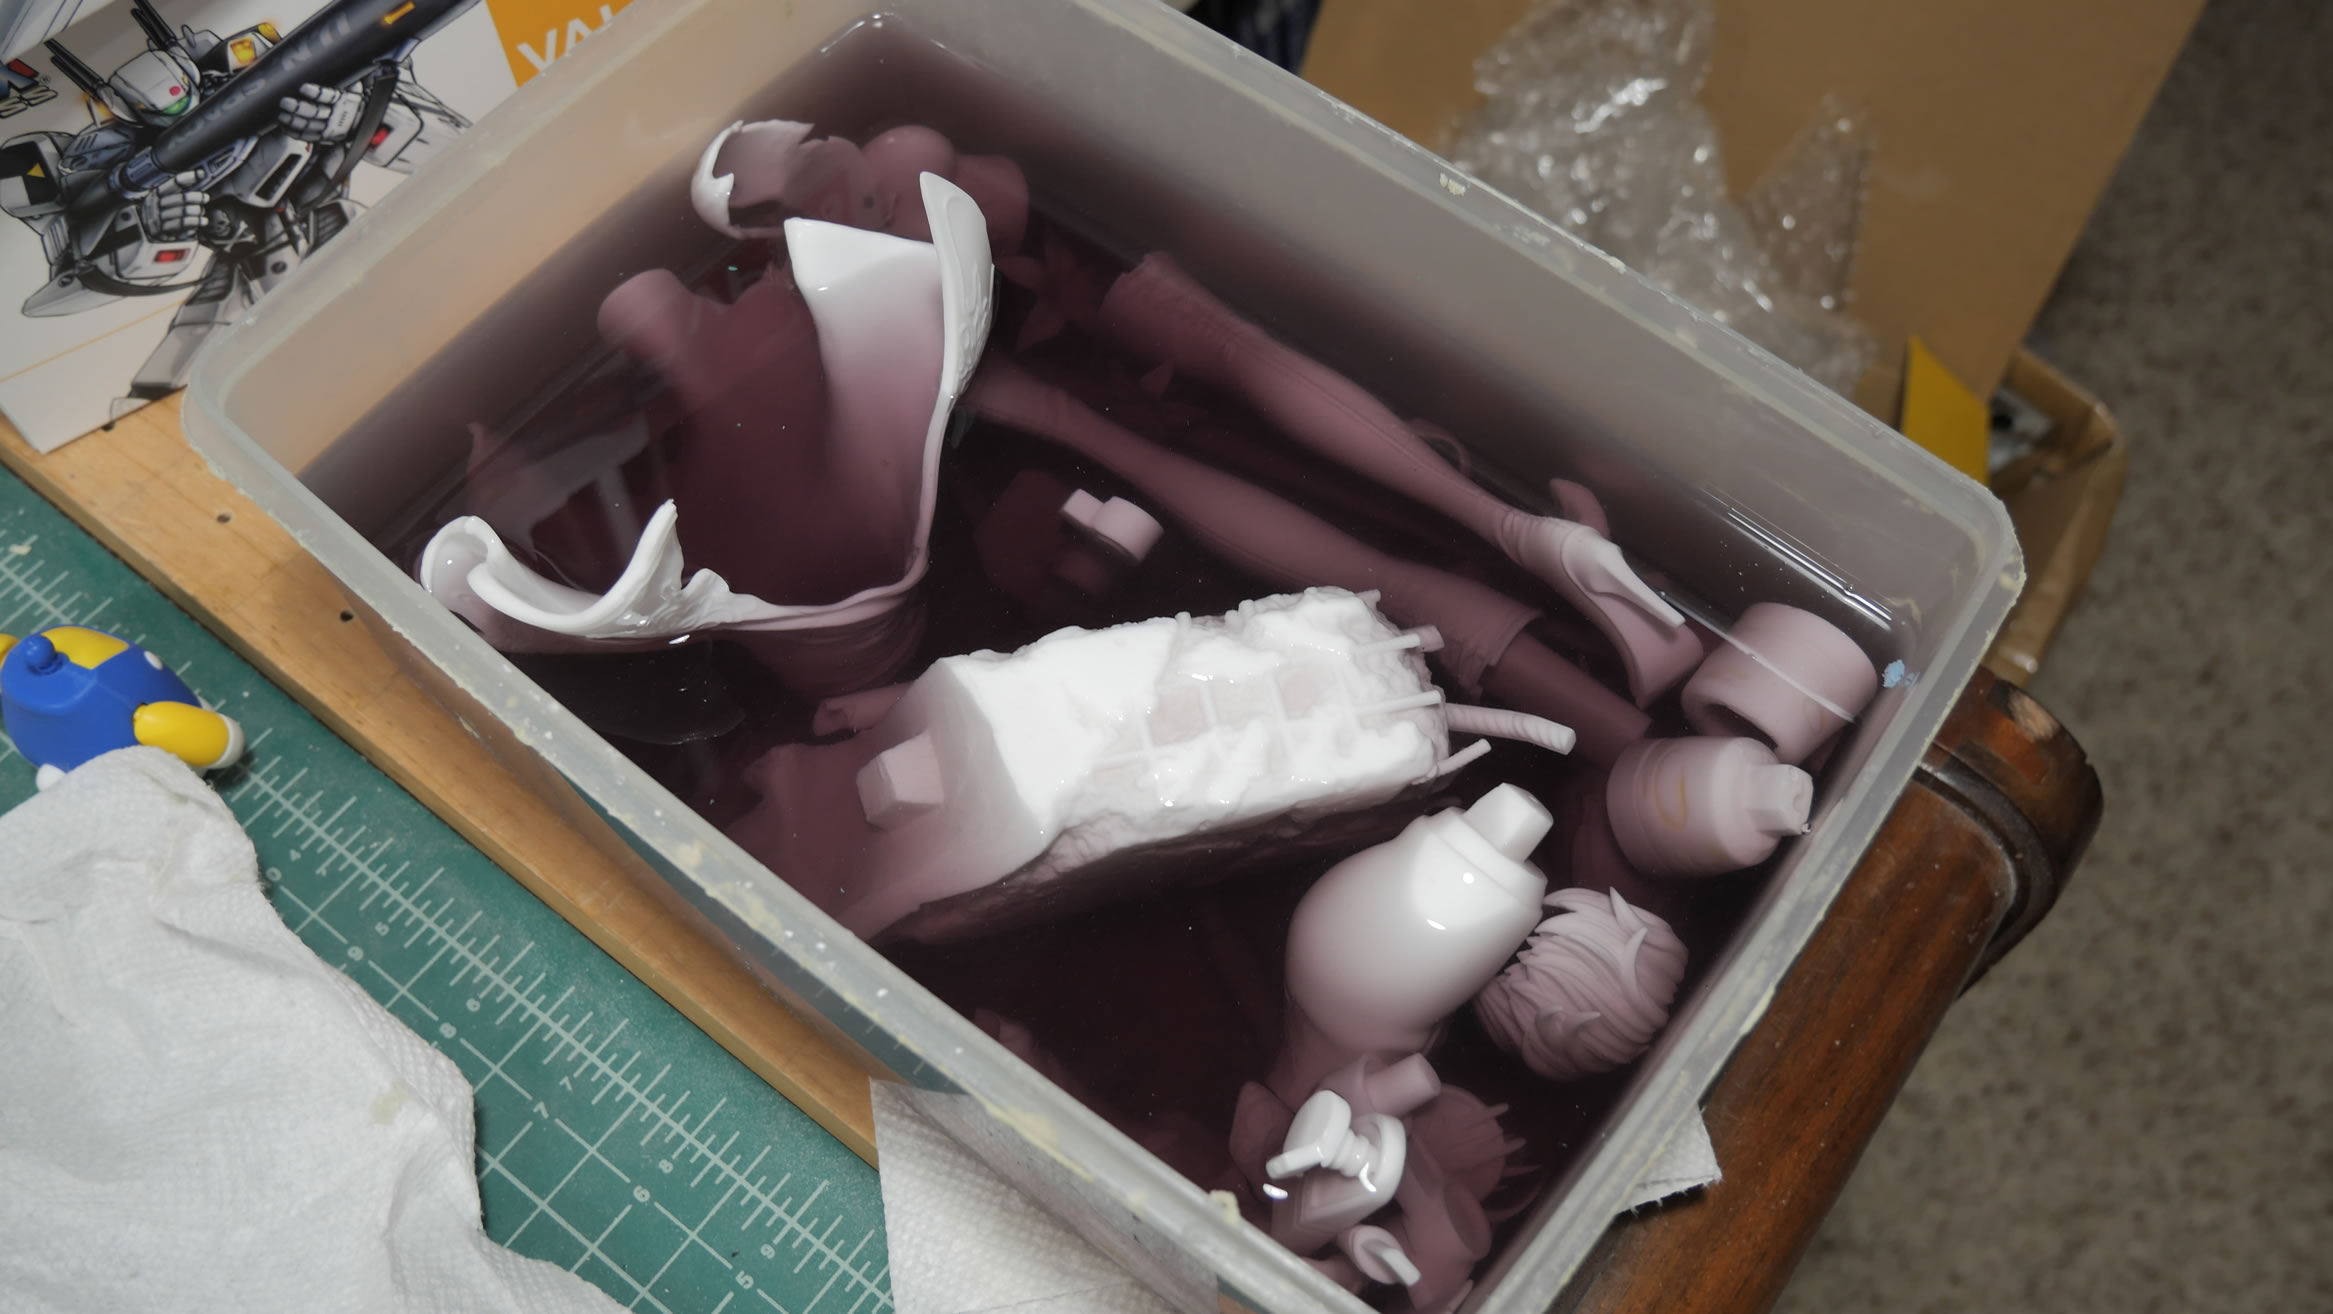
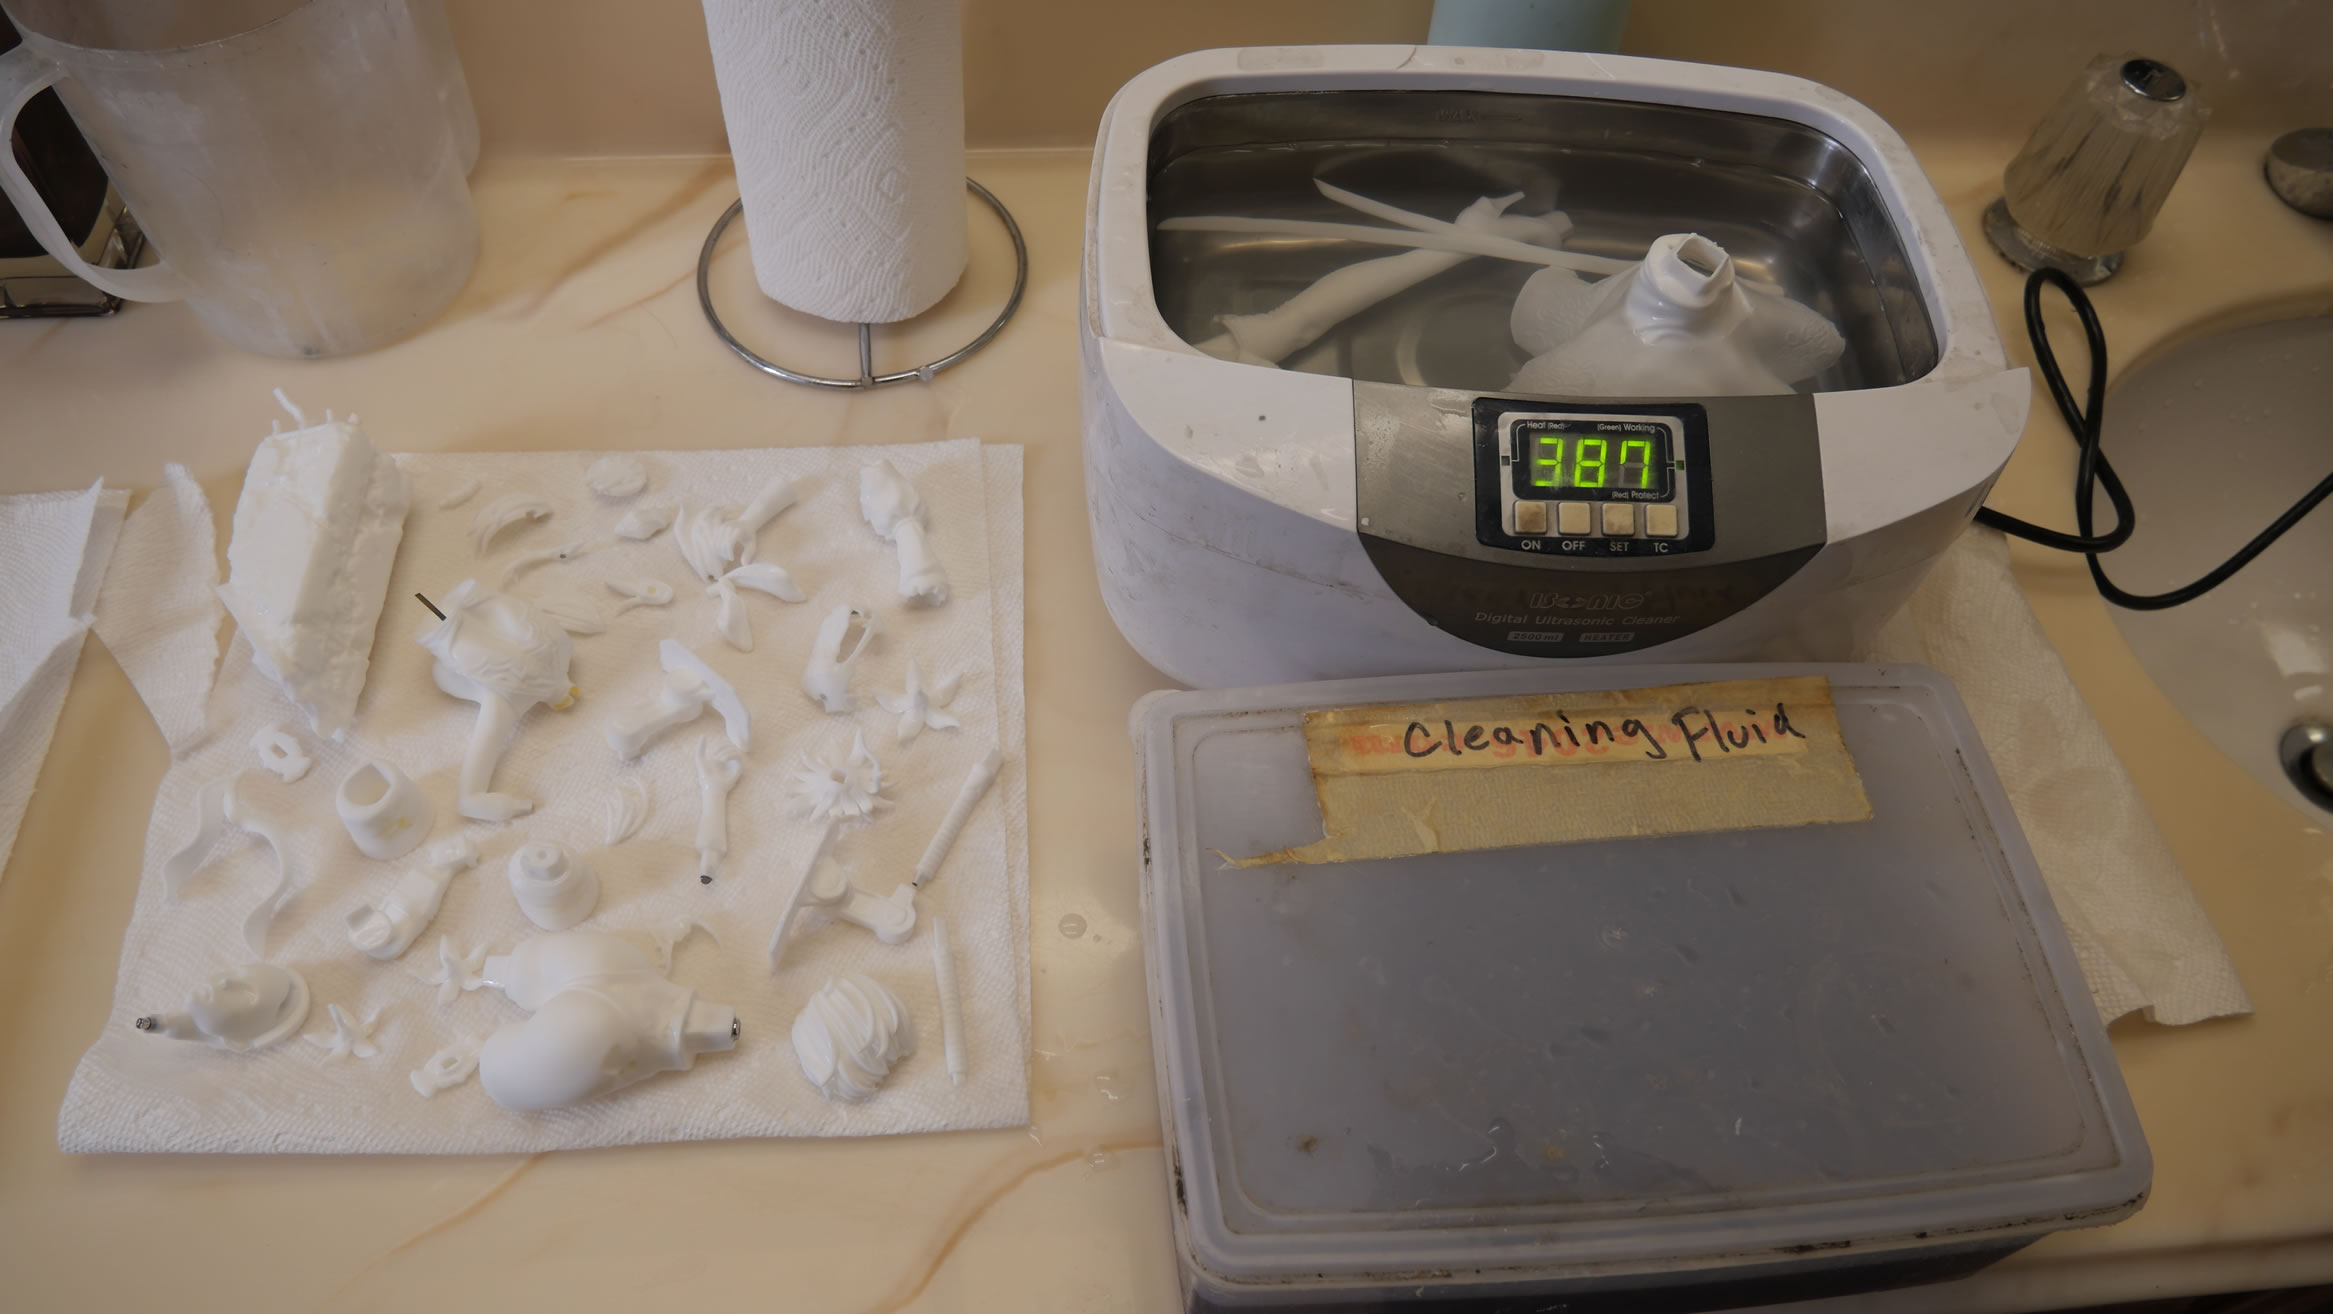
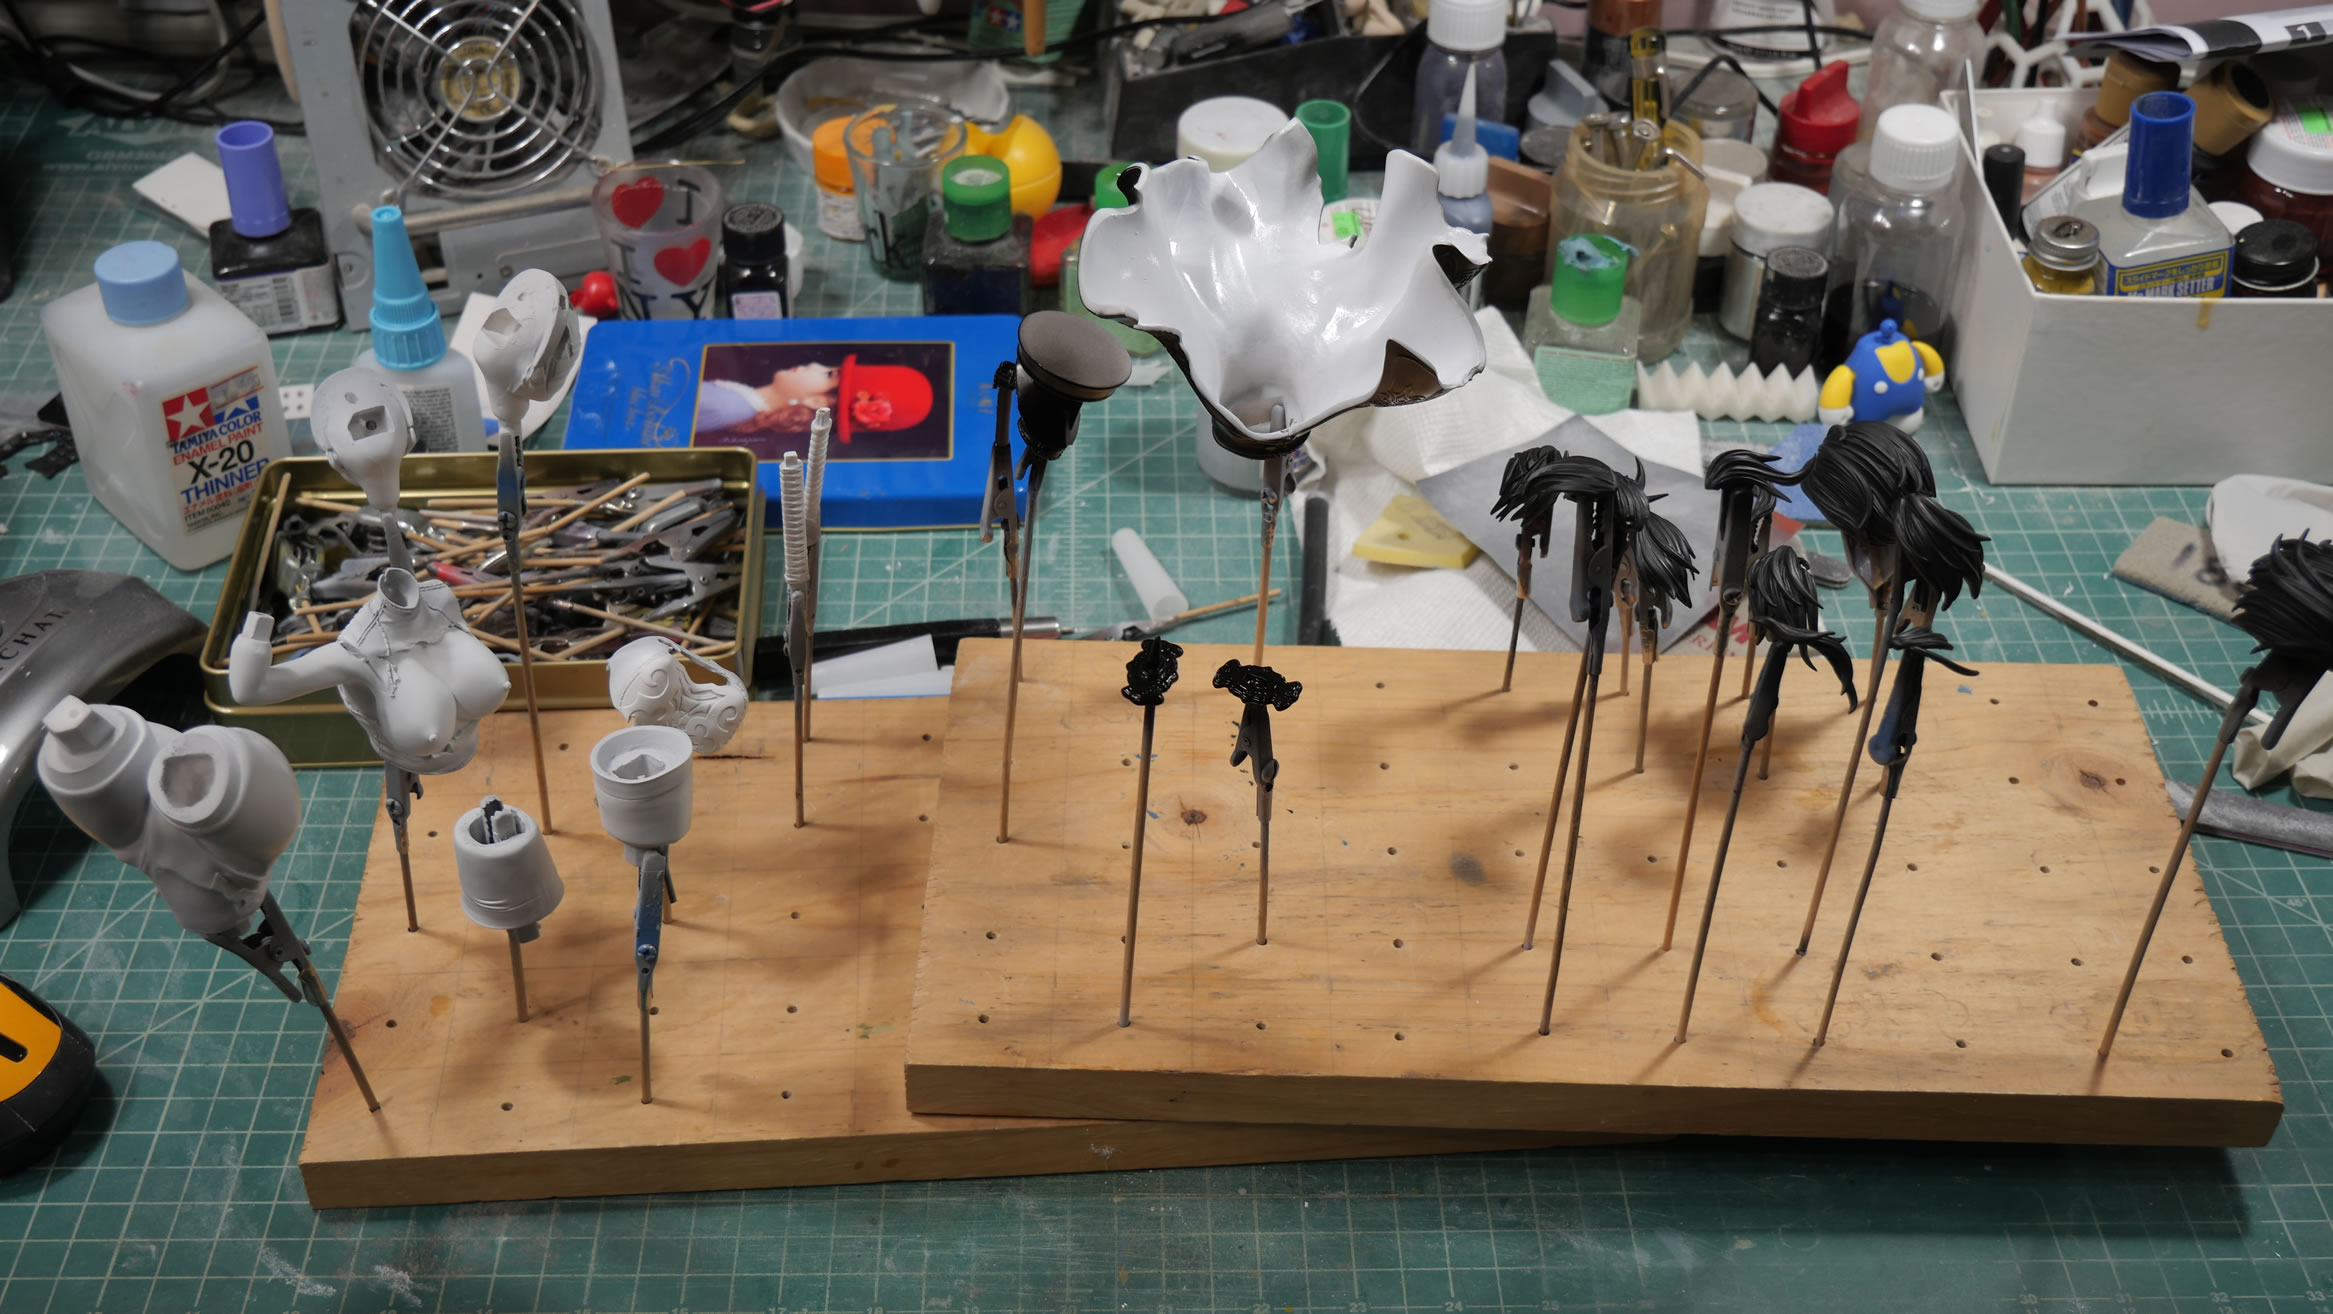
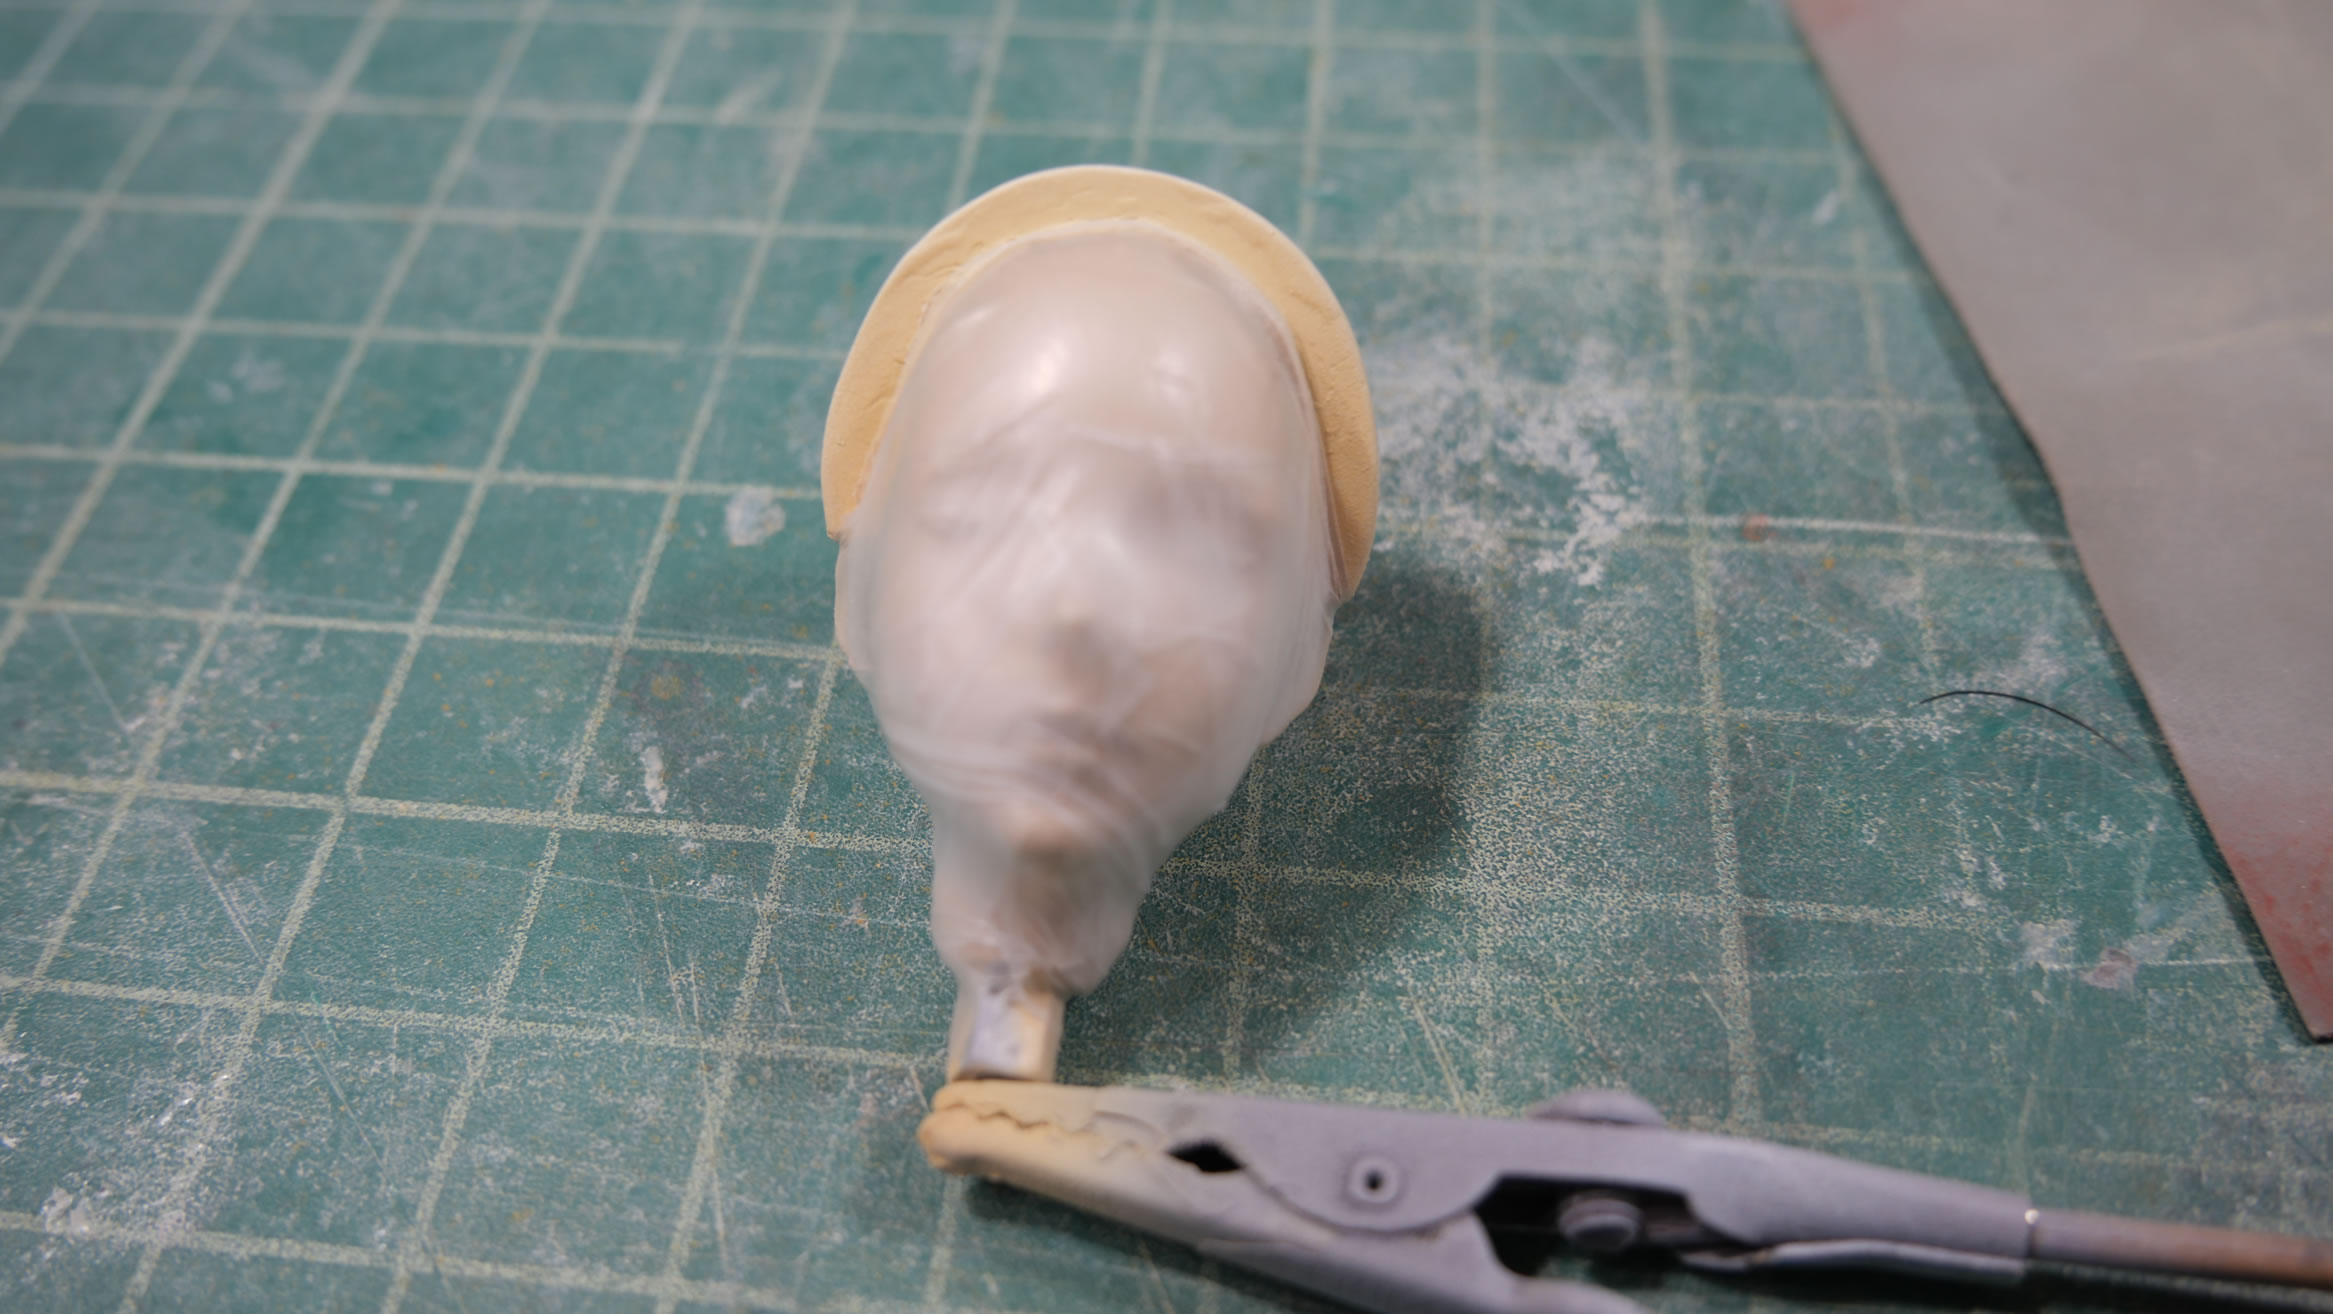
Parts are sanded as much as I can see in the white resin and thrown into a bath of industrial strength degreaser to soak over night. The following day got the parts rinsed off with water and then scrubbed in the ultrasonic cleaner with just water.
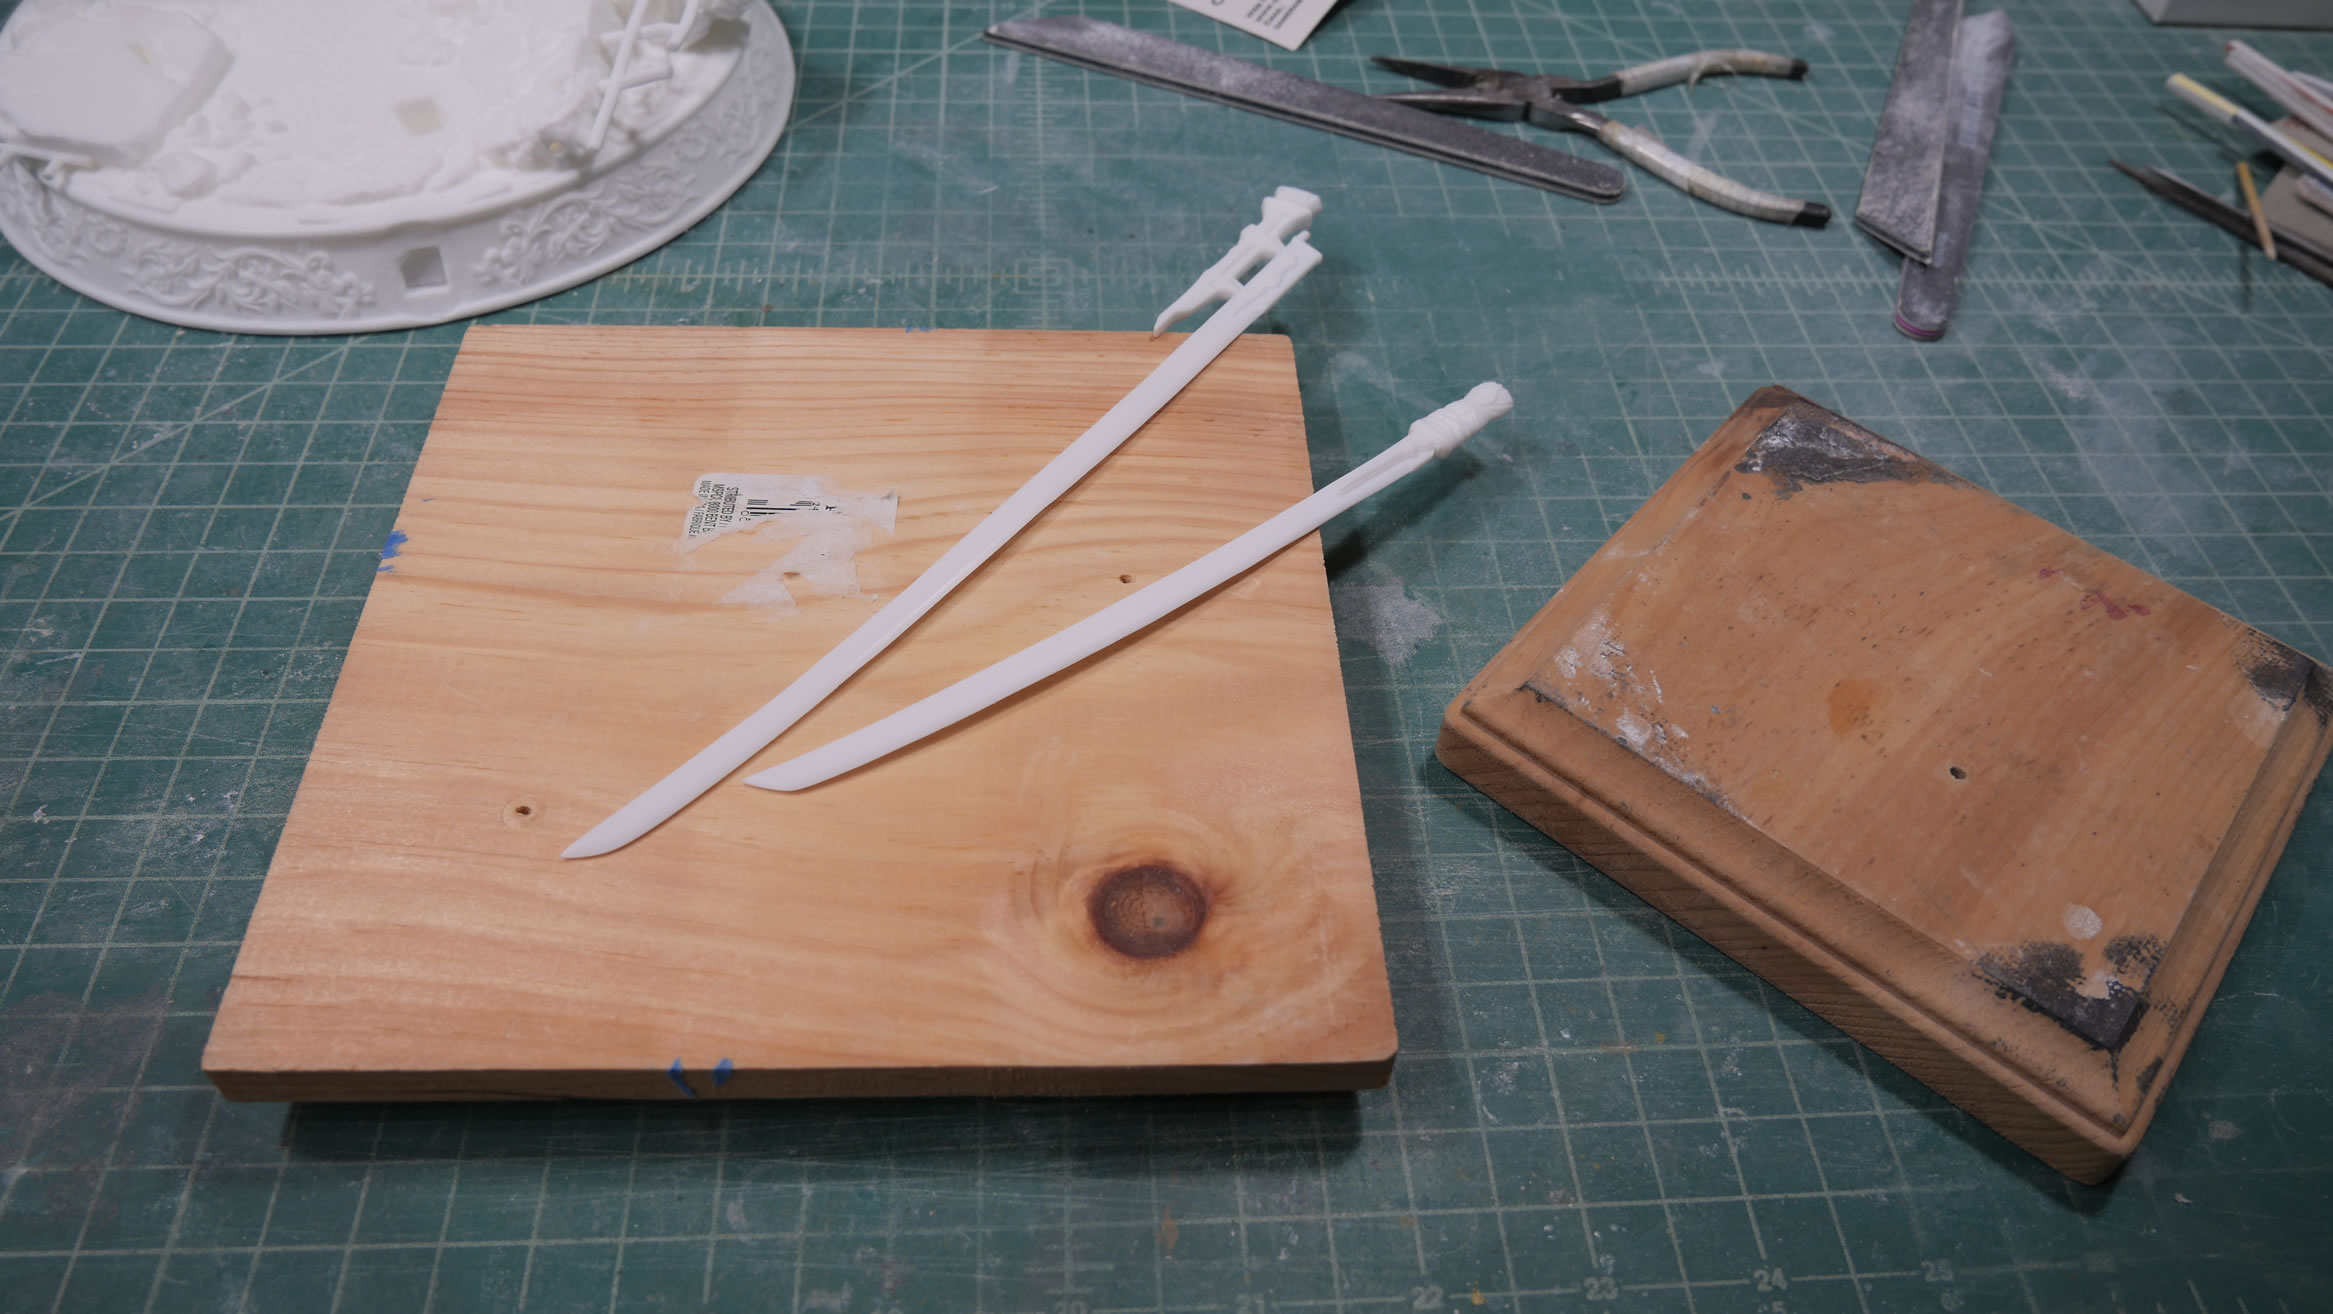
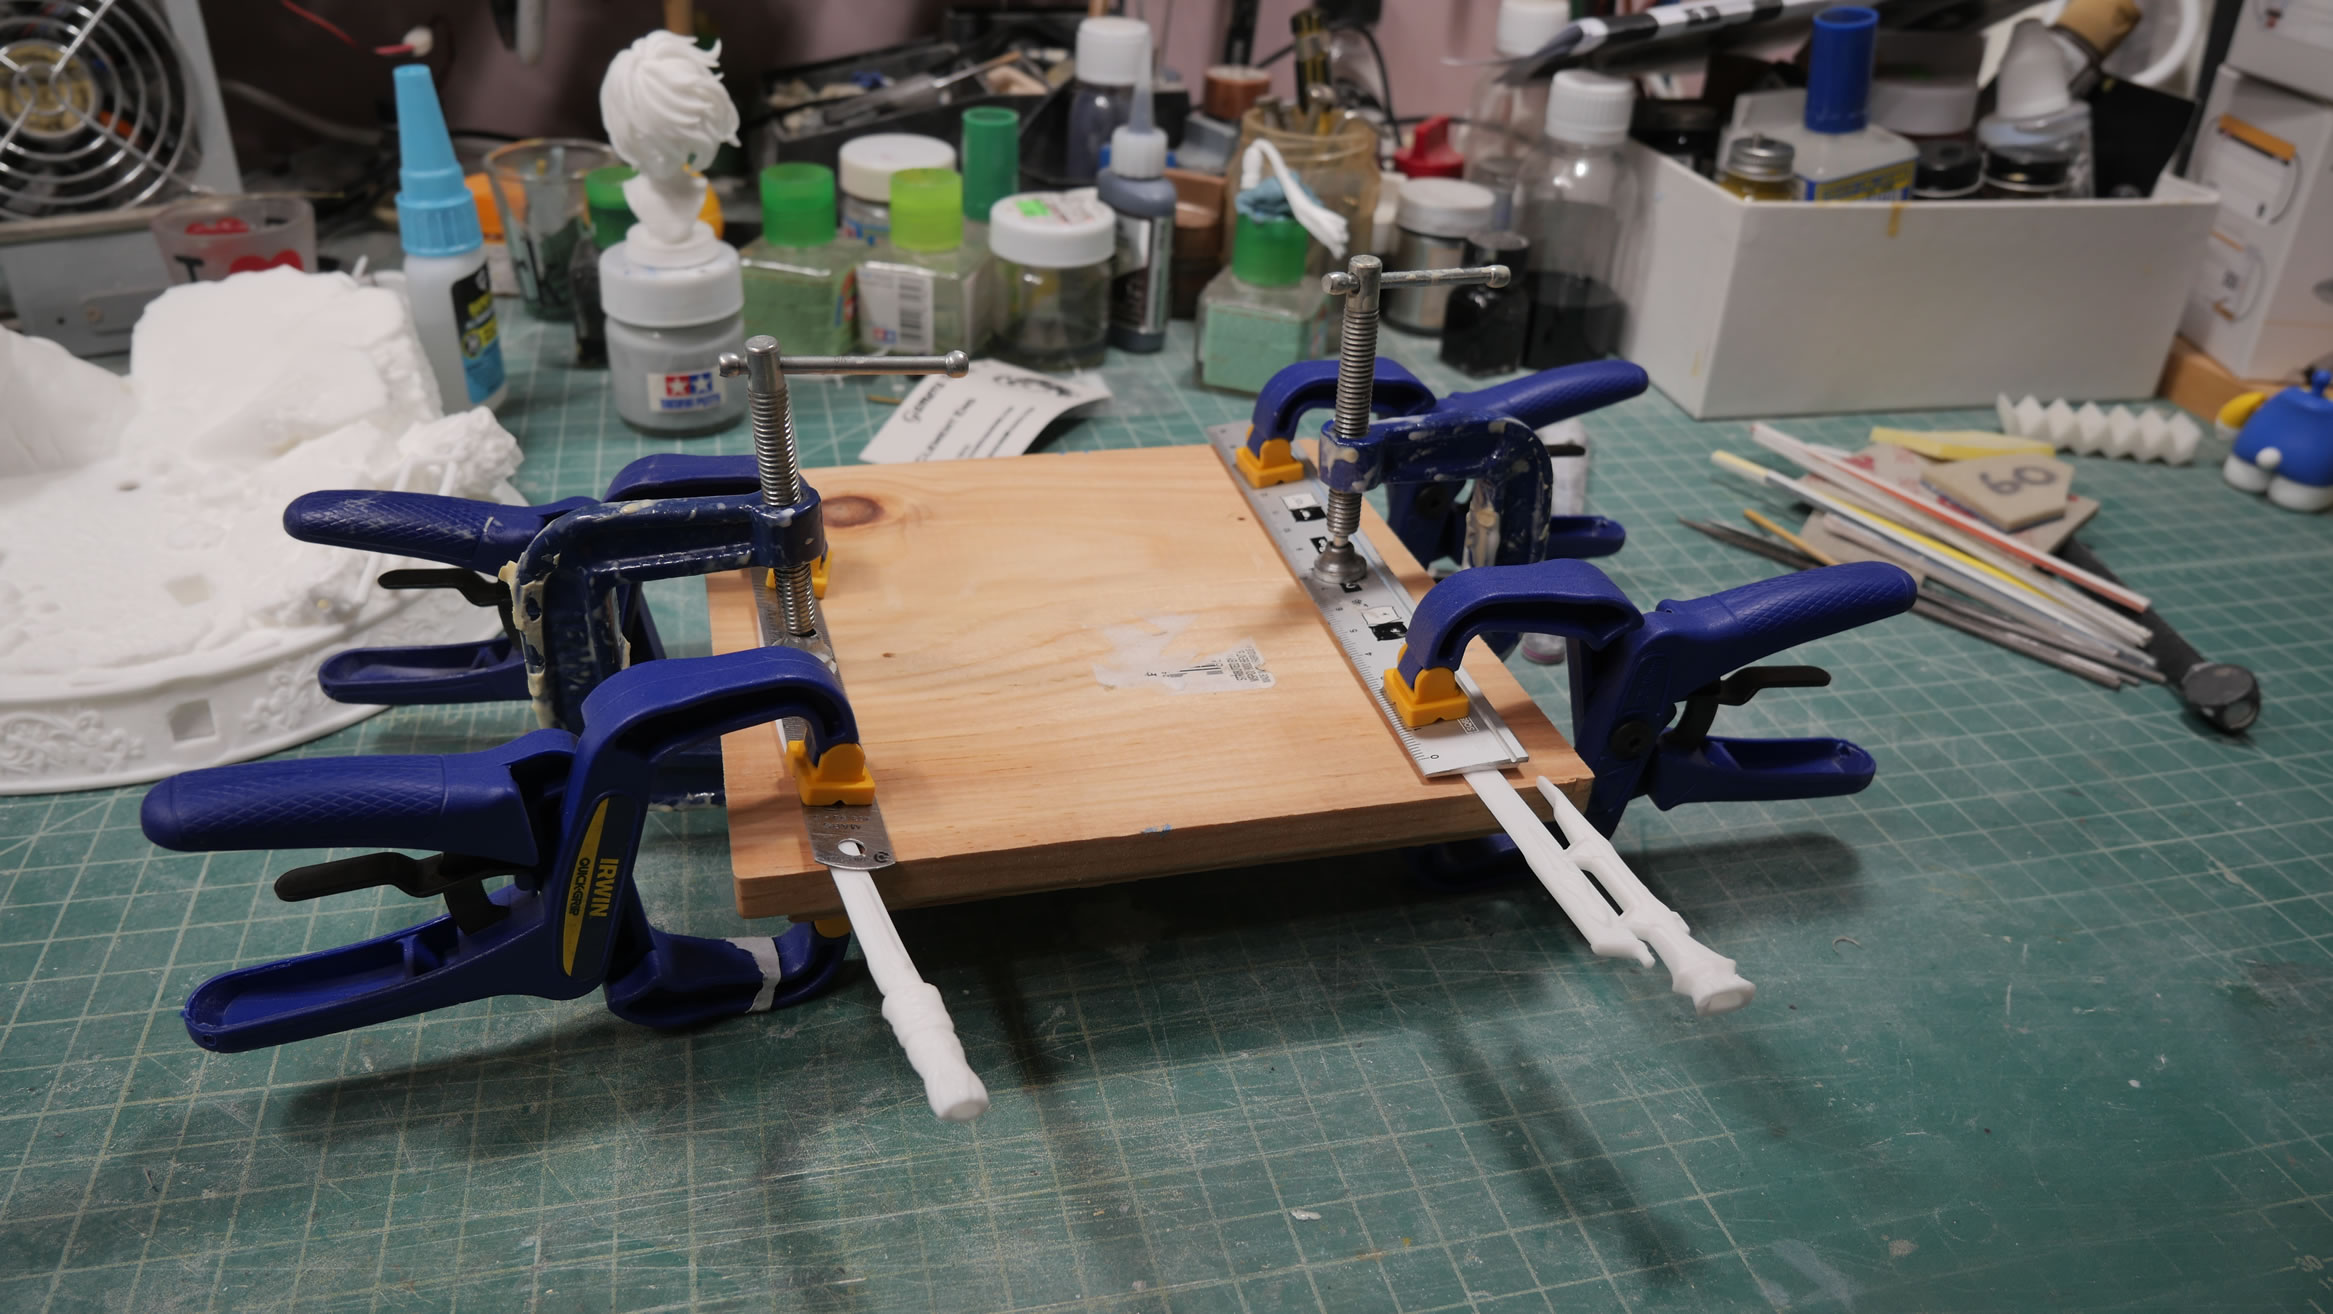
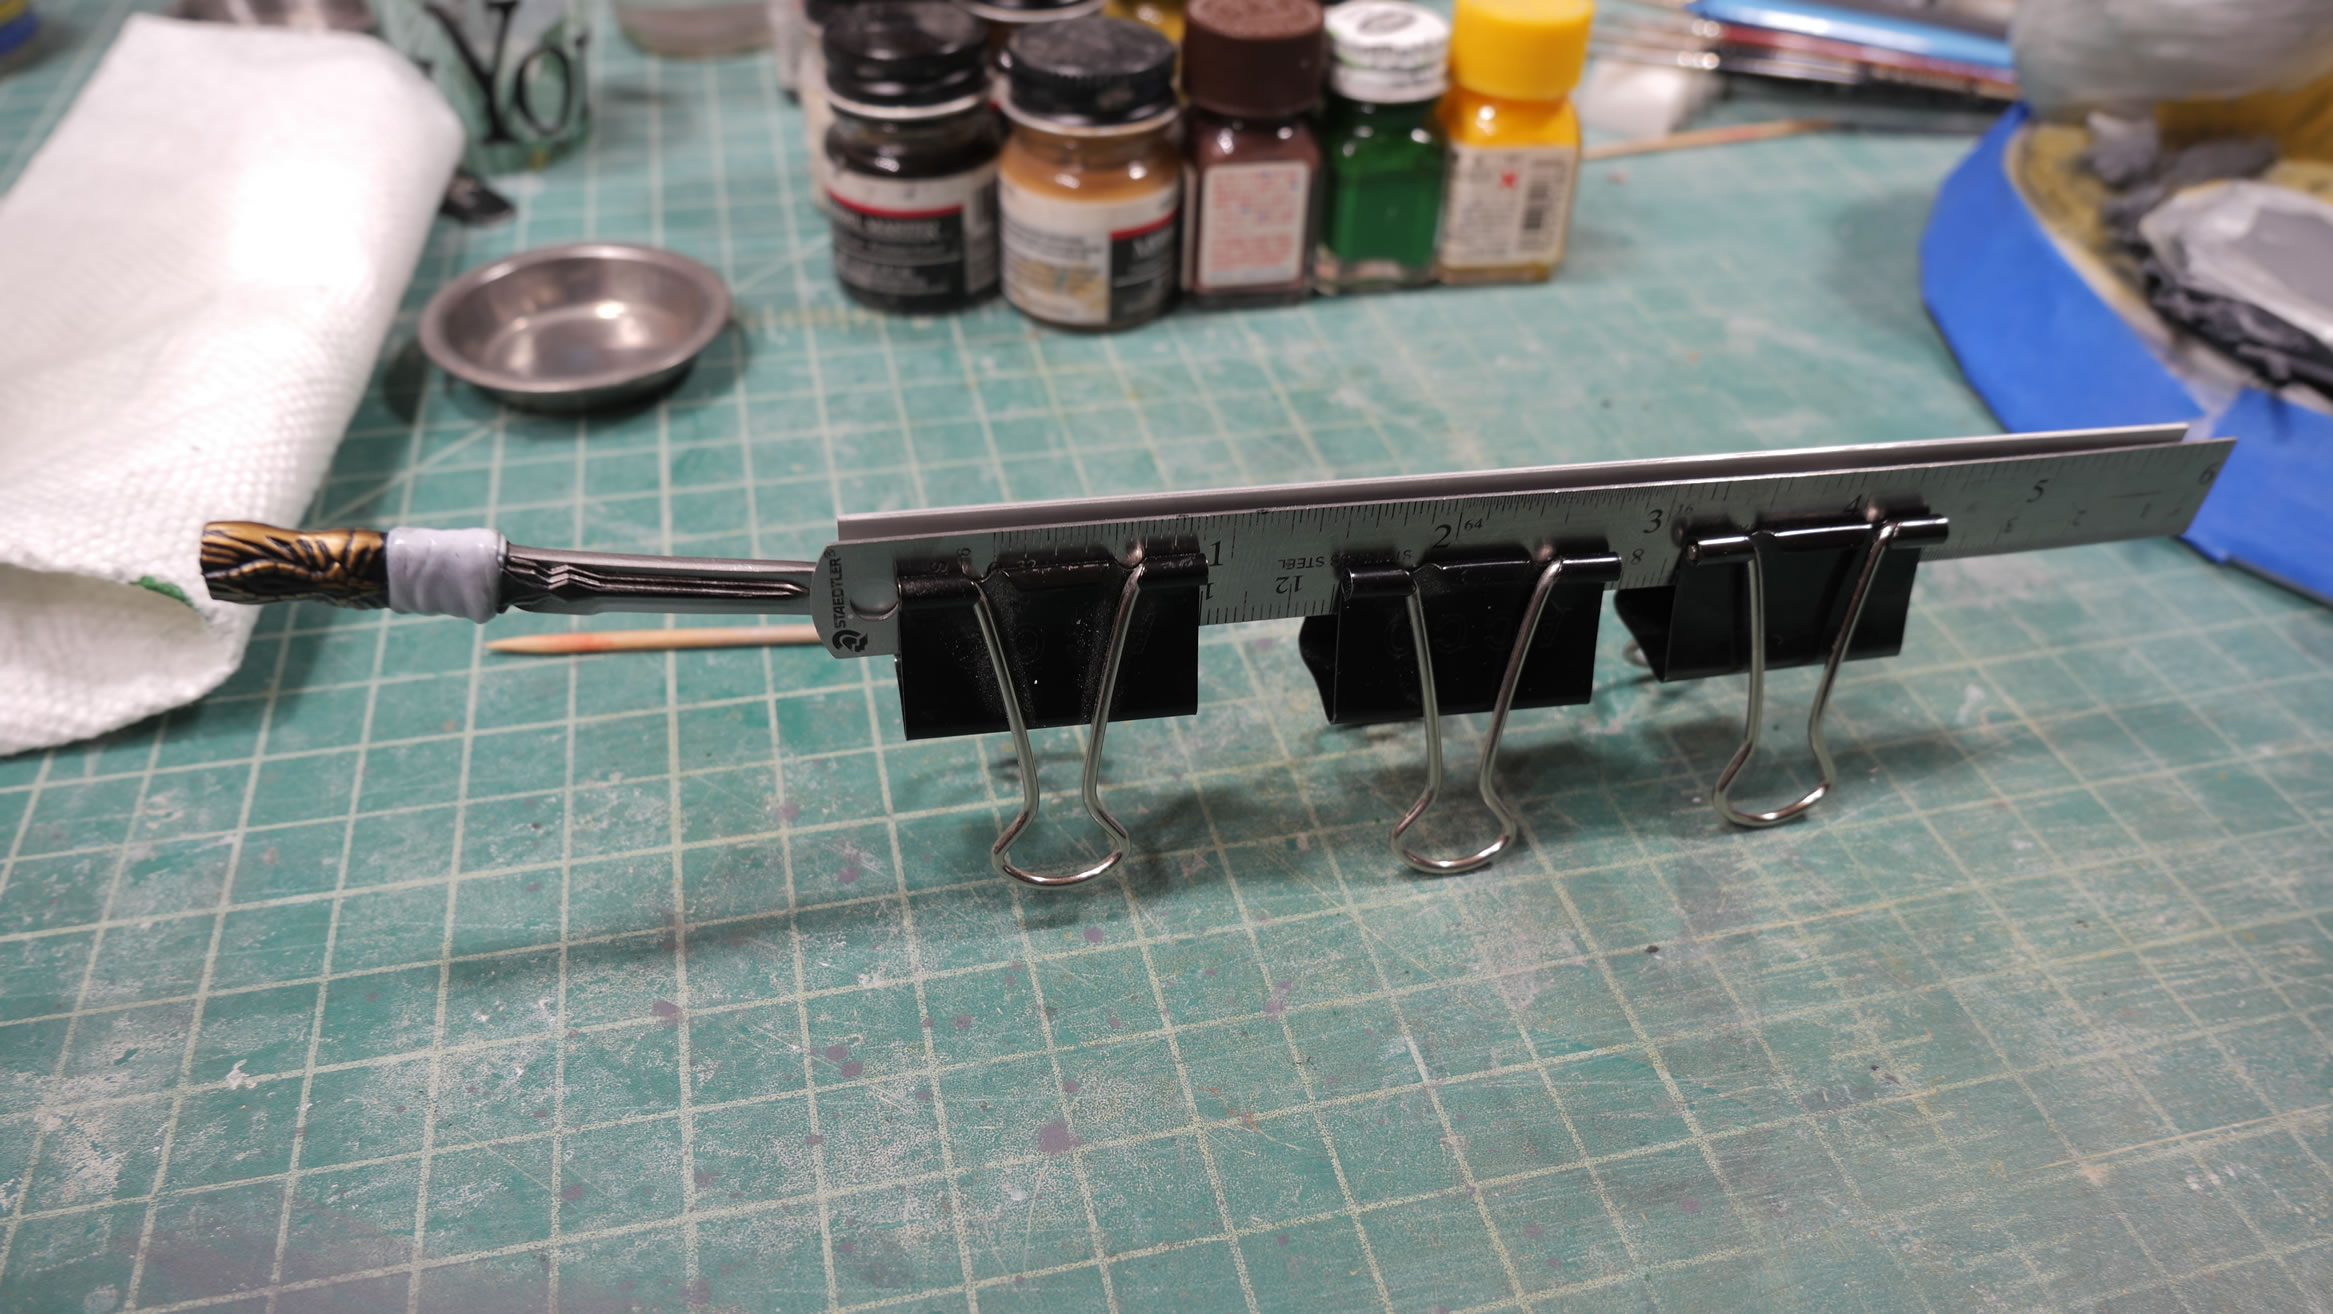
Some of the long thing sword blades were slightly warped. So my first attempt at straightening them was ill-conceived – using a wood board and metal rulers. The whole assembly is put into my dehydrator and set at about 140 degrees for 30 minutes. This heats up the resin and the rig keeps the parts straight while it slowly cools. After painting the swords, I noticed that they were still slightly warped. The better way to fix the warp was to just use two metal rulers and clamp them with paper clips and then heat the rig up in the dehydrator. And this seemed to work better as I don’t have a bulky assembly to wiggle into the dehydrator.
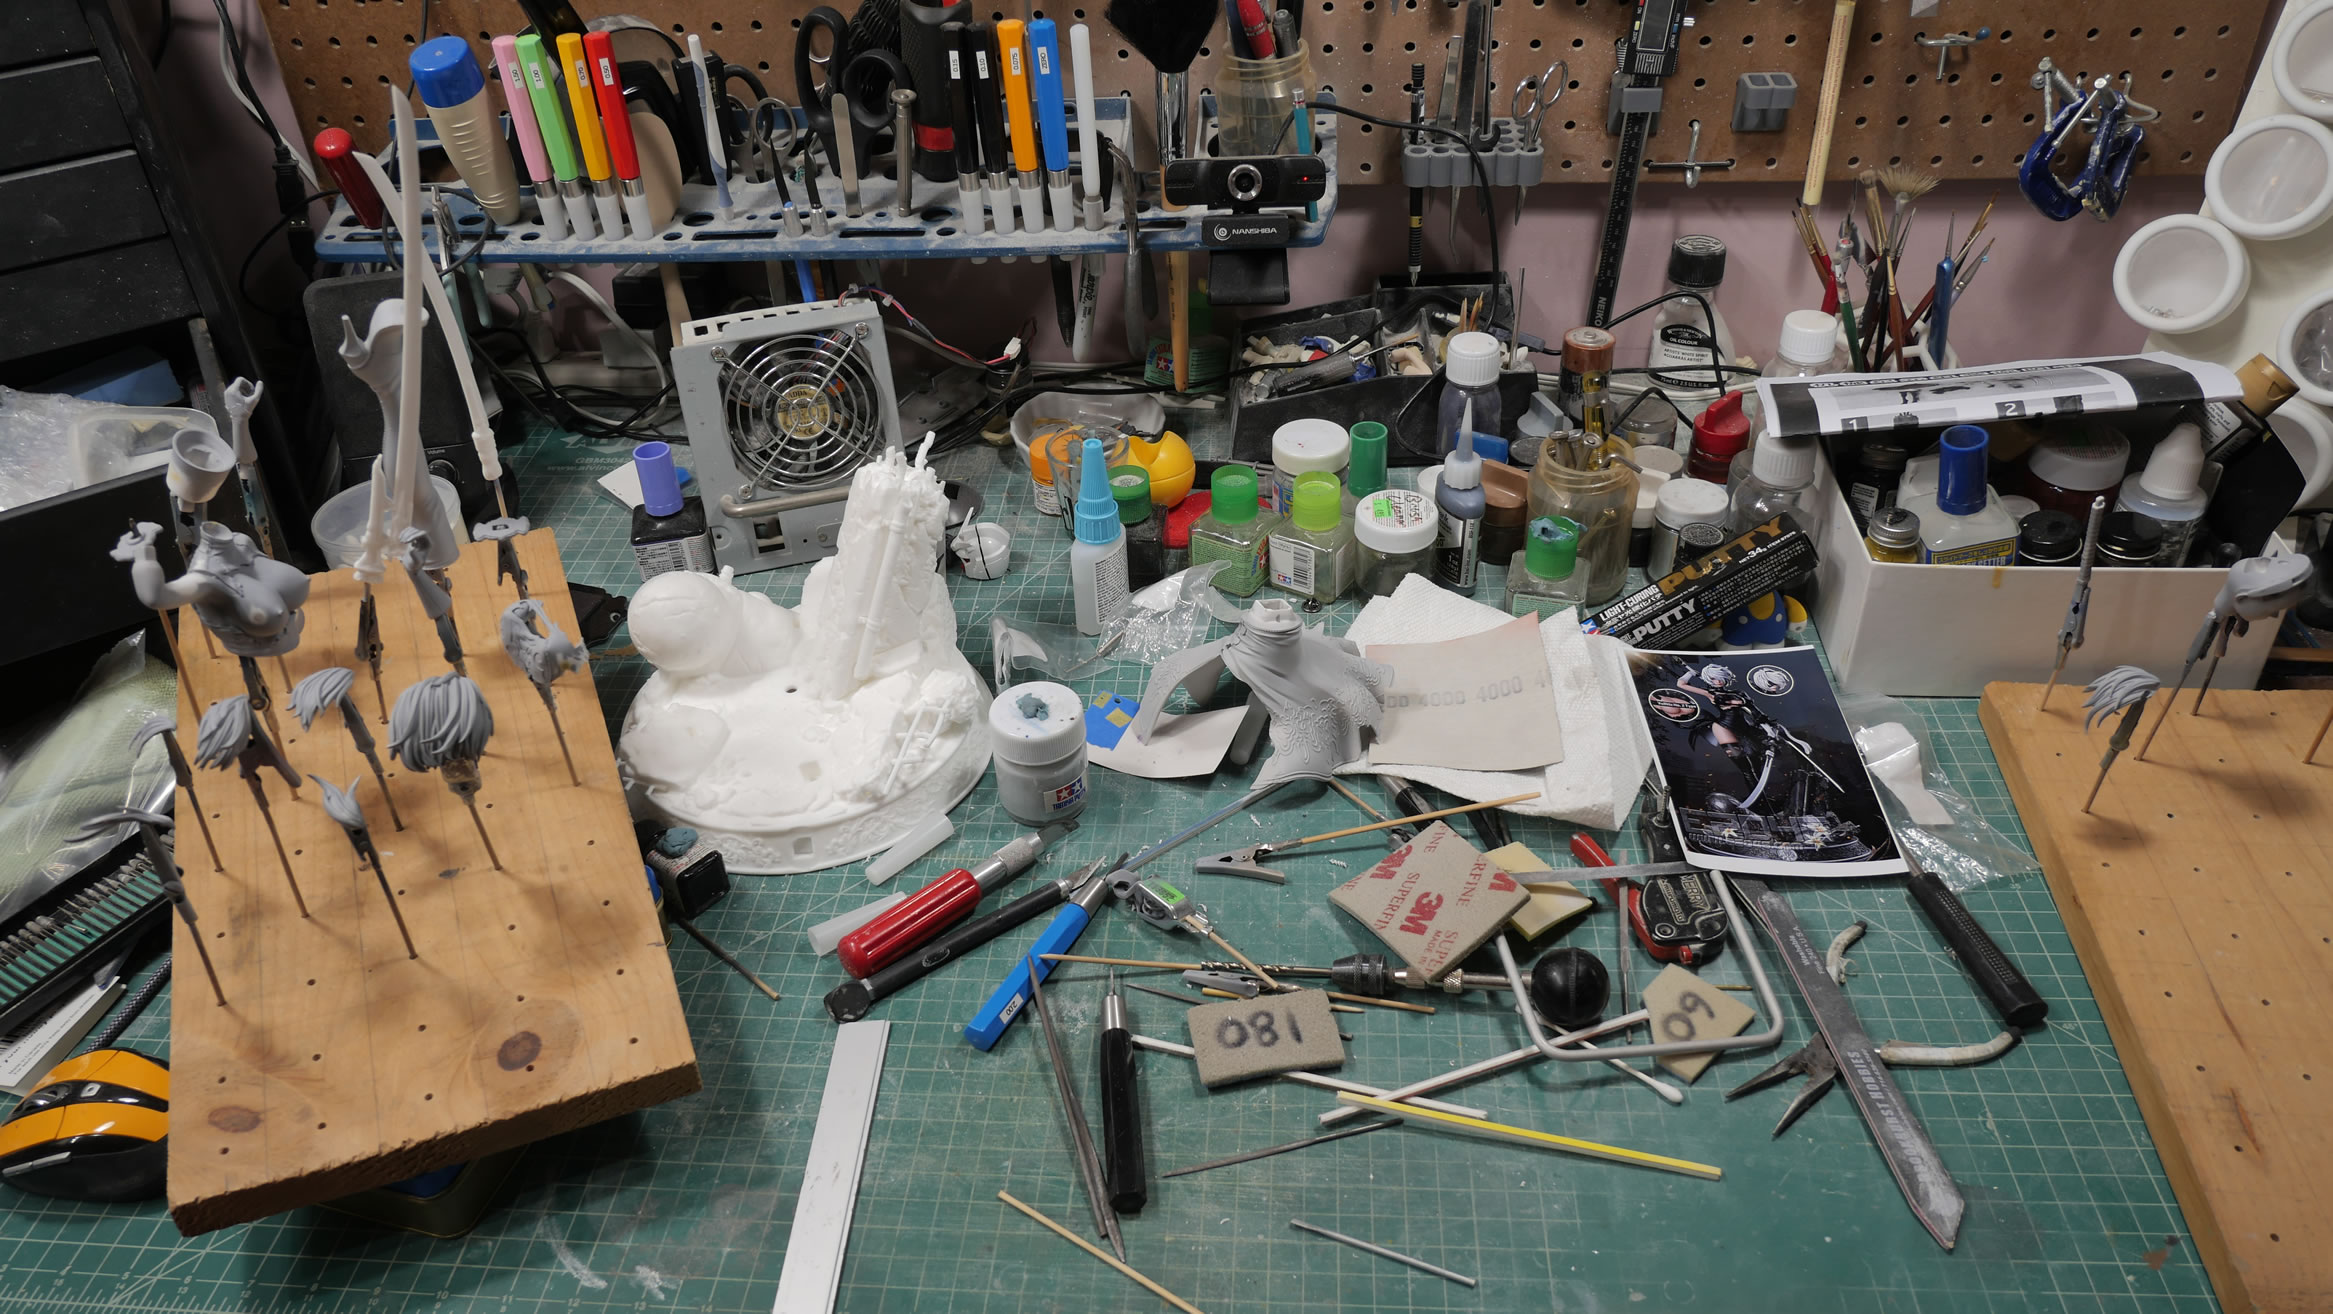
The workbench is a beautiful place with a project actually in progress.
After cleaning and drying, the parts are primed and the real work to clean up the parts begins. Another primed and test assembly turn around session.
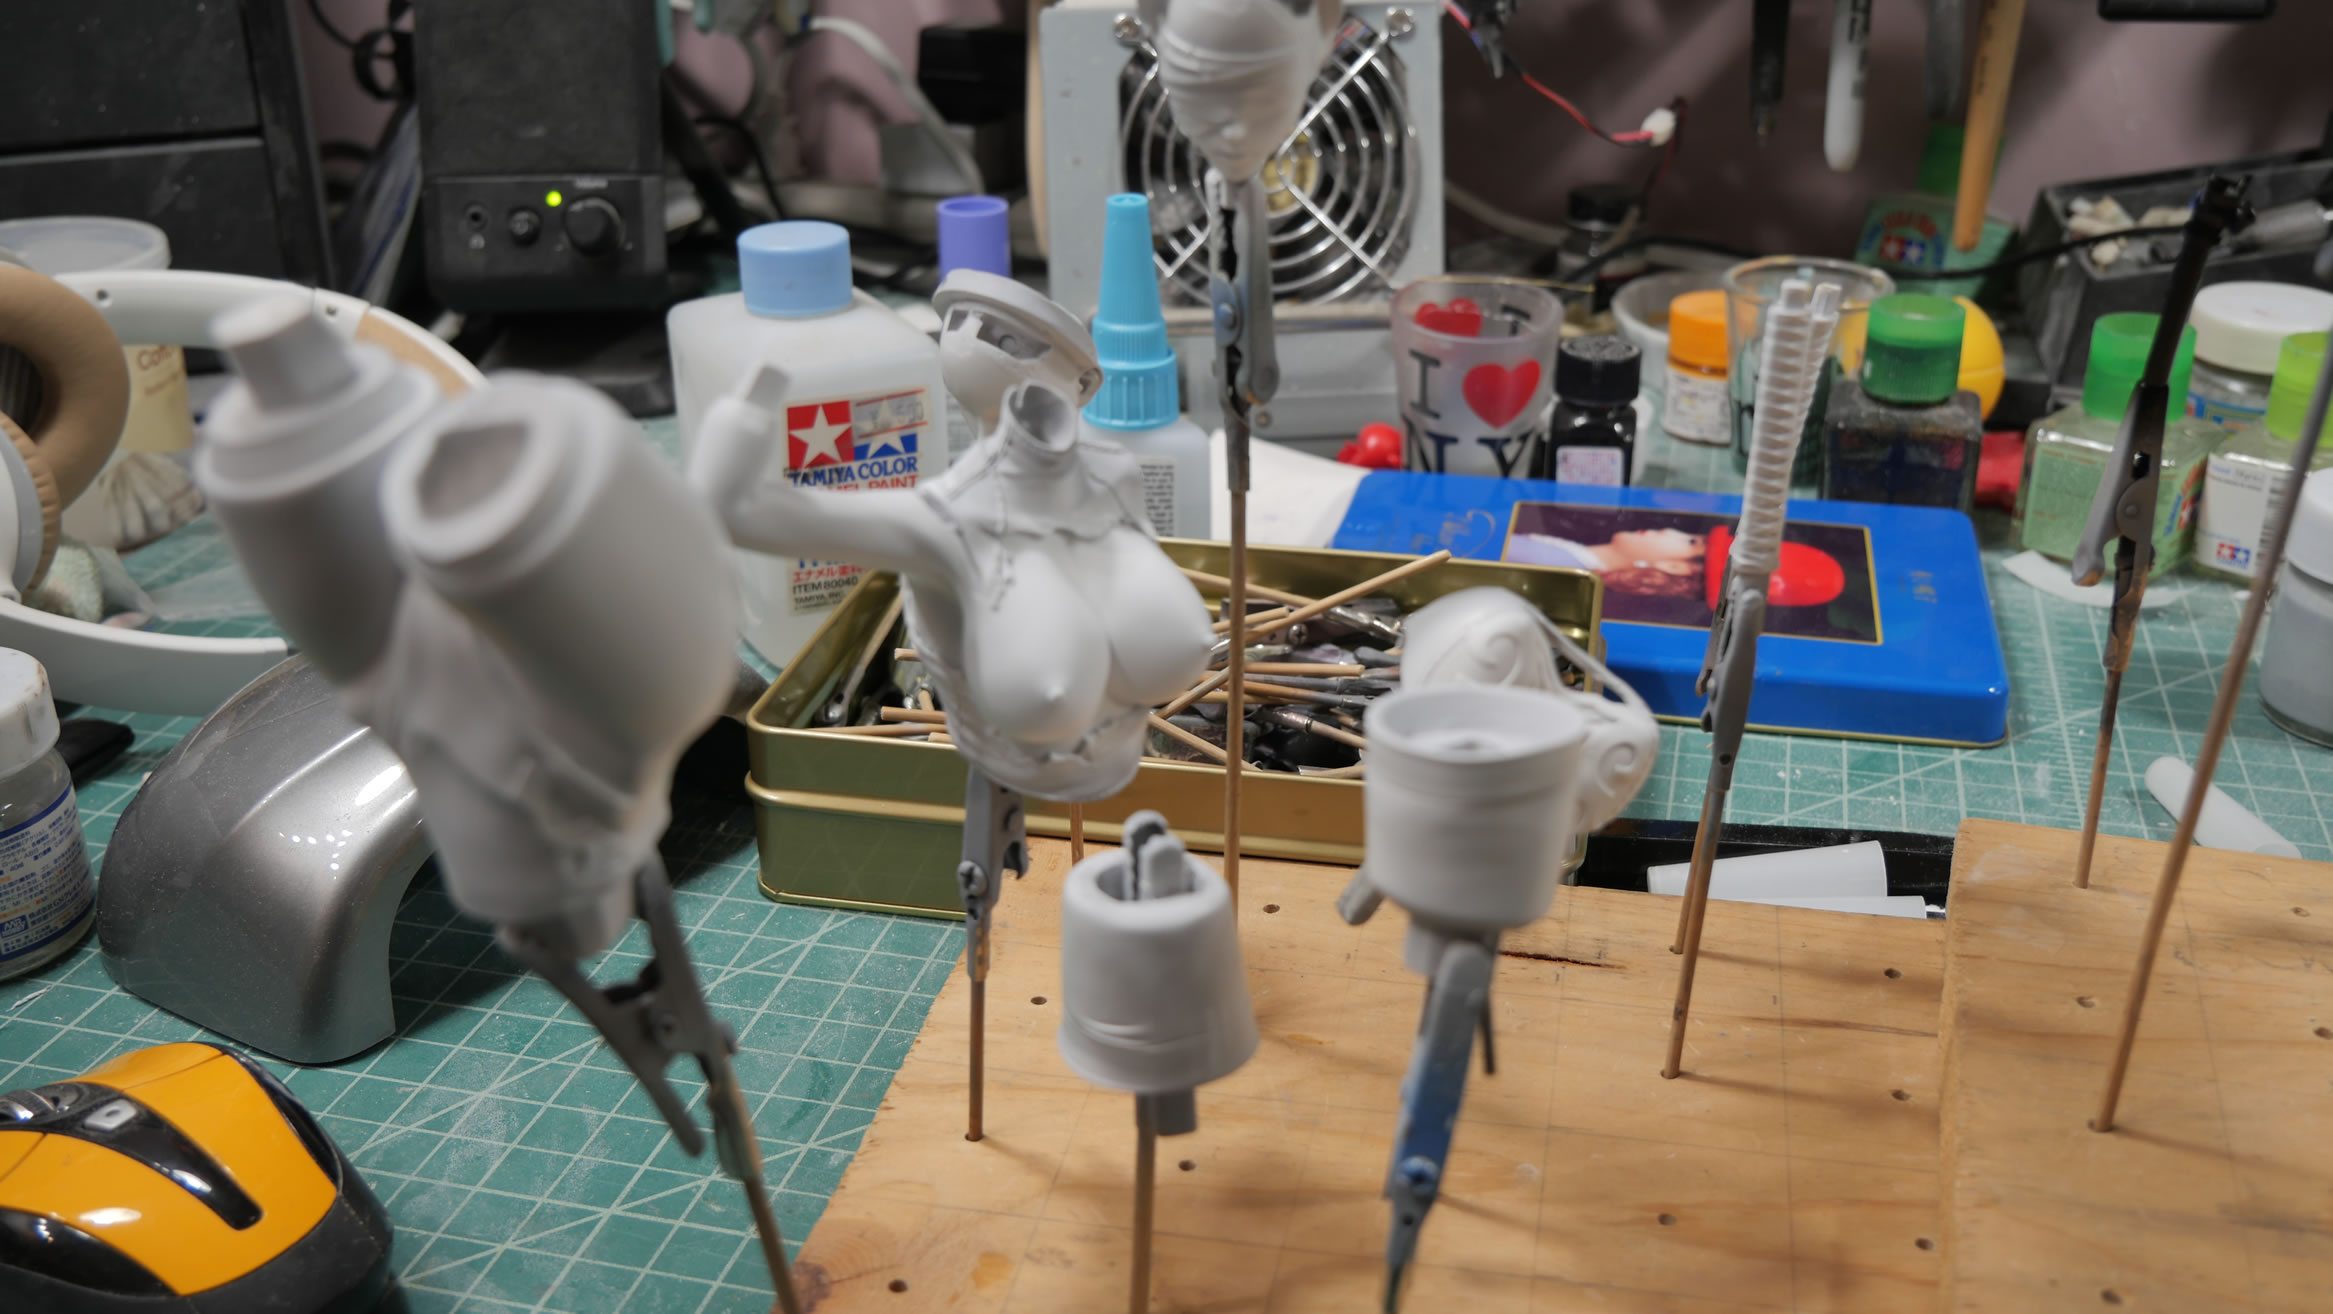
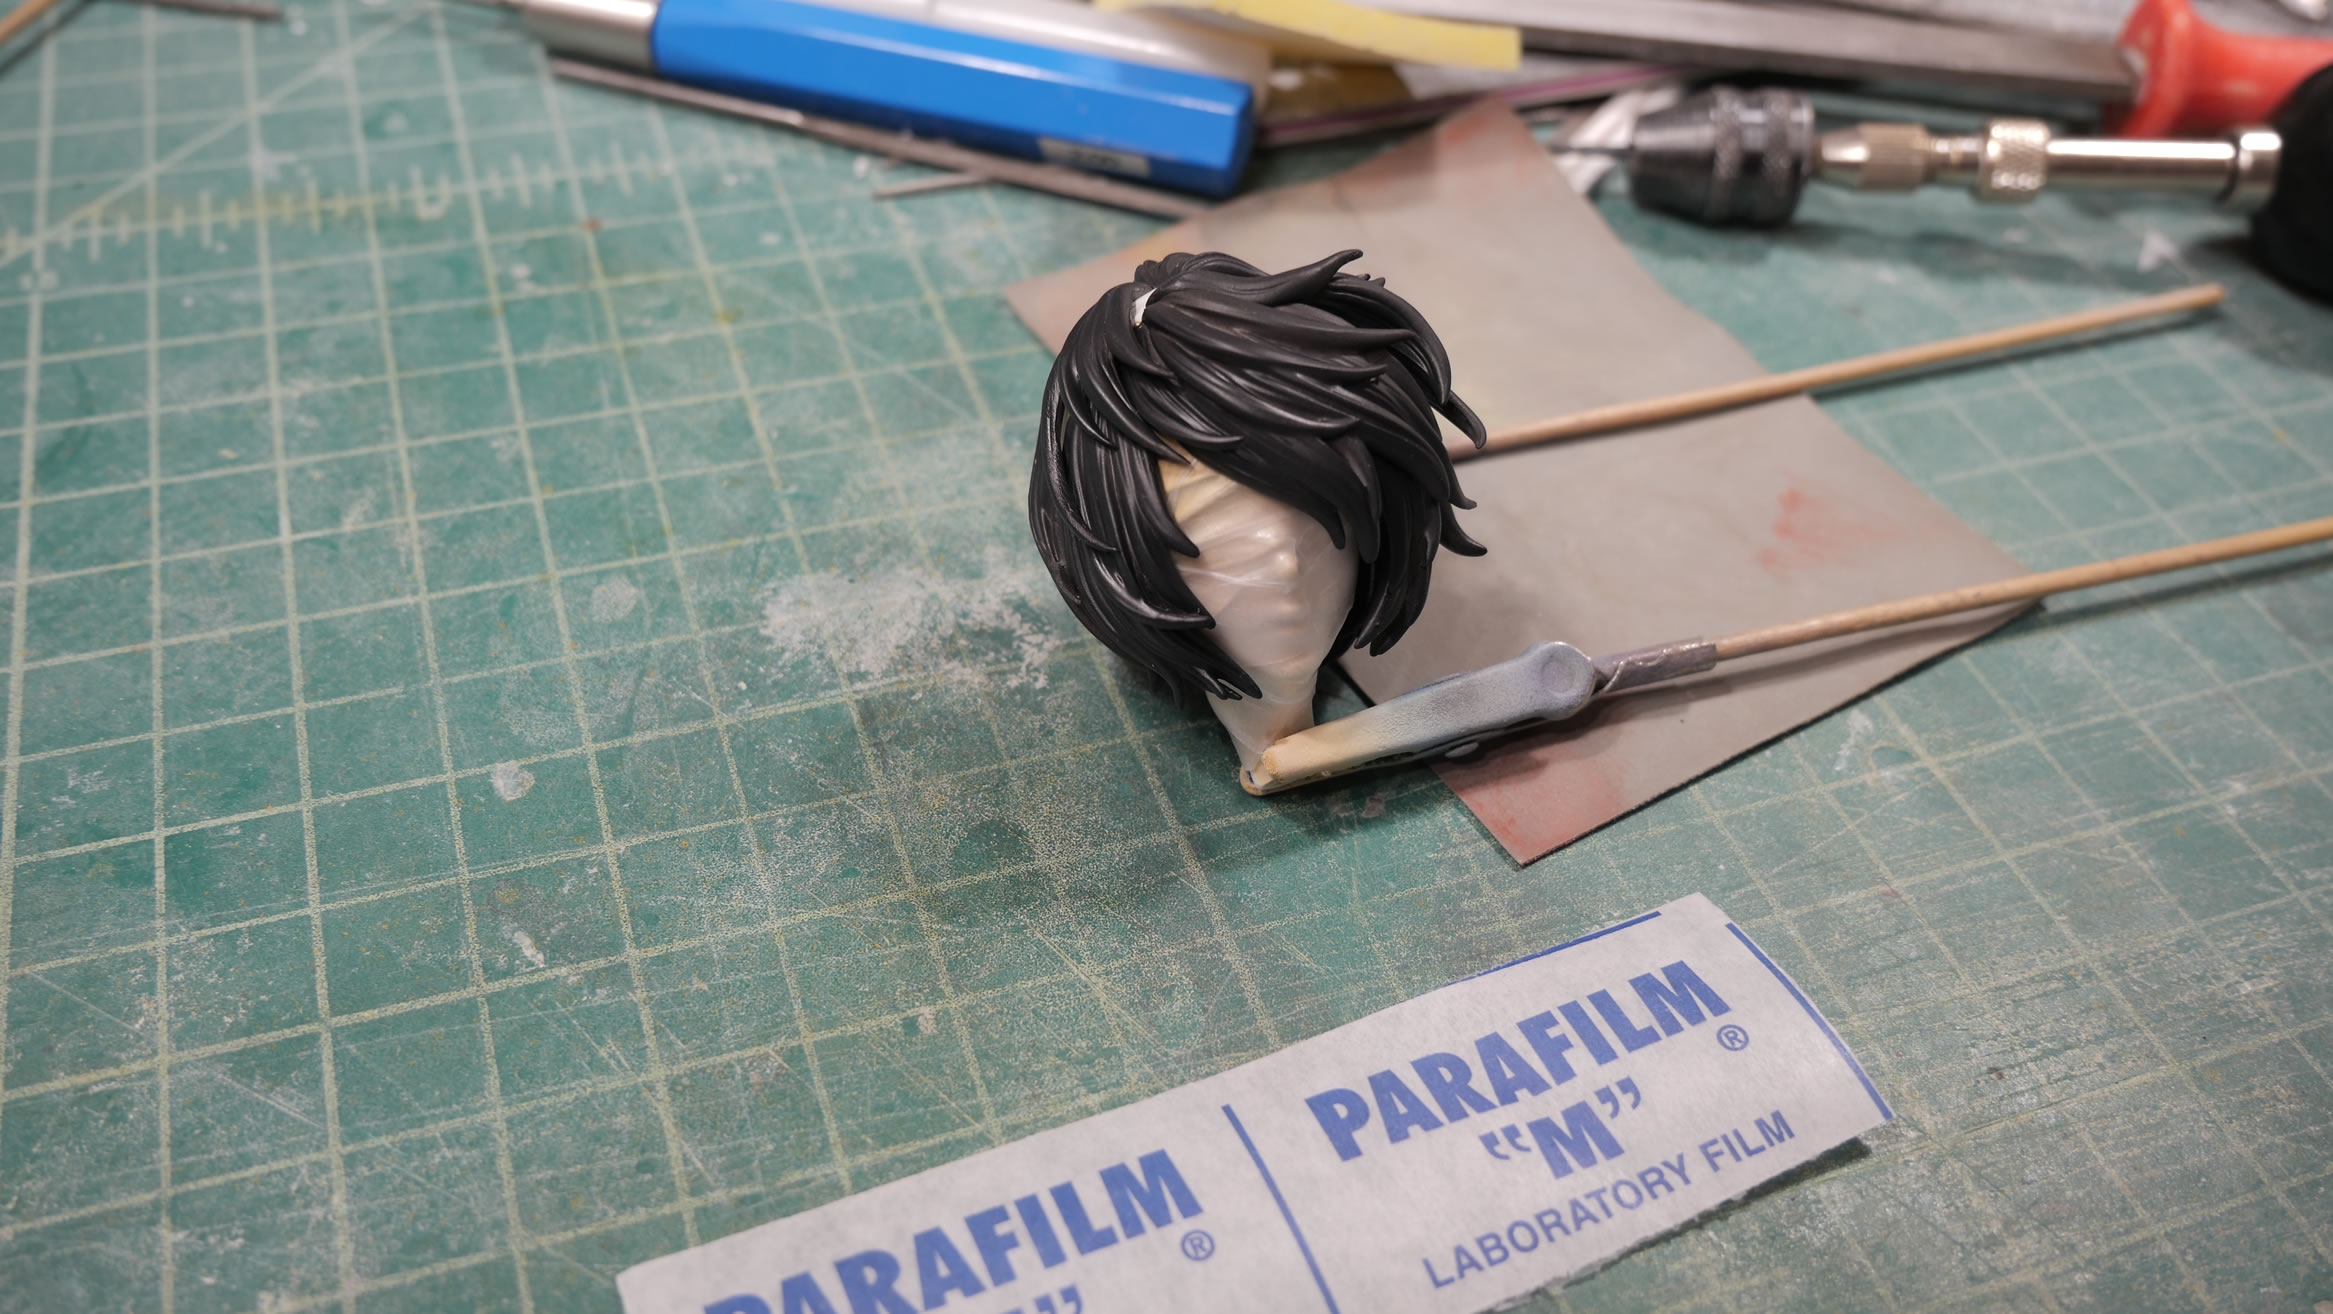
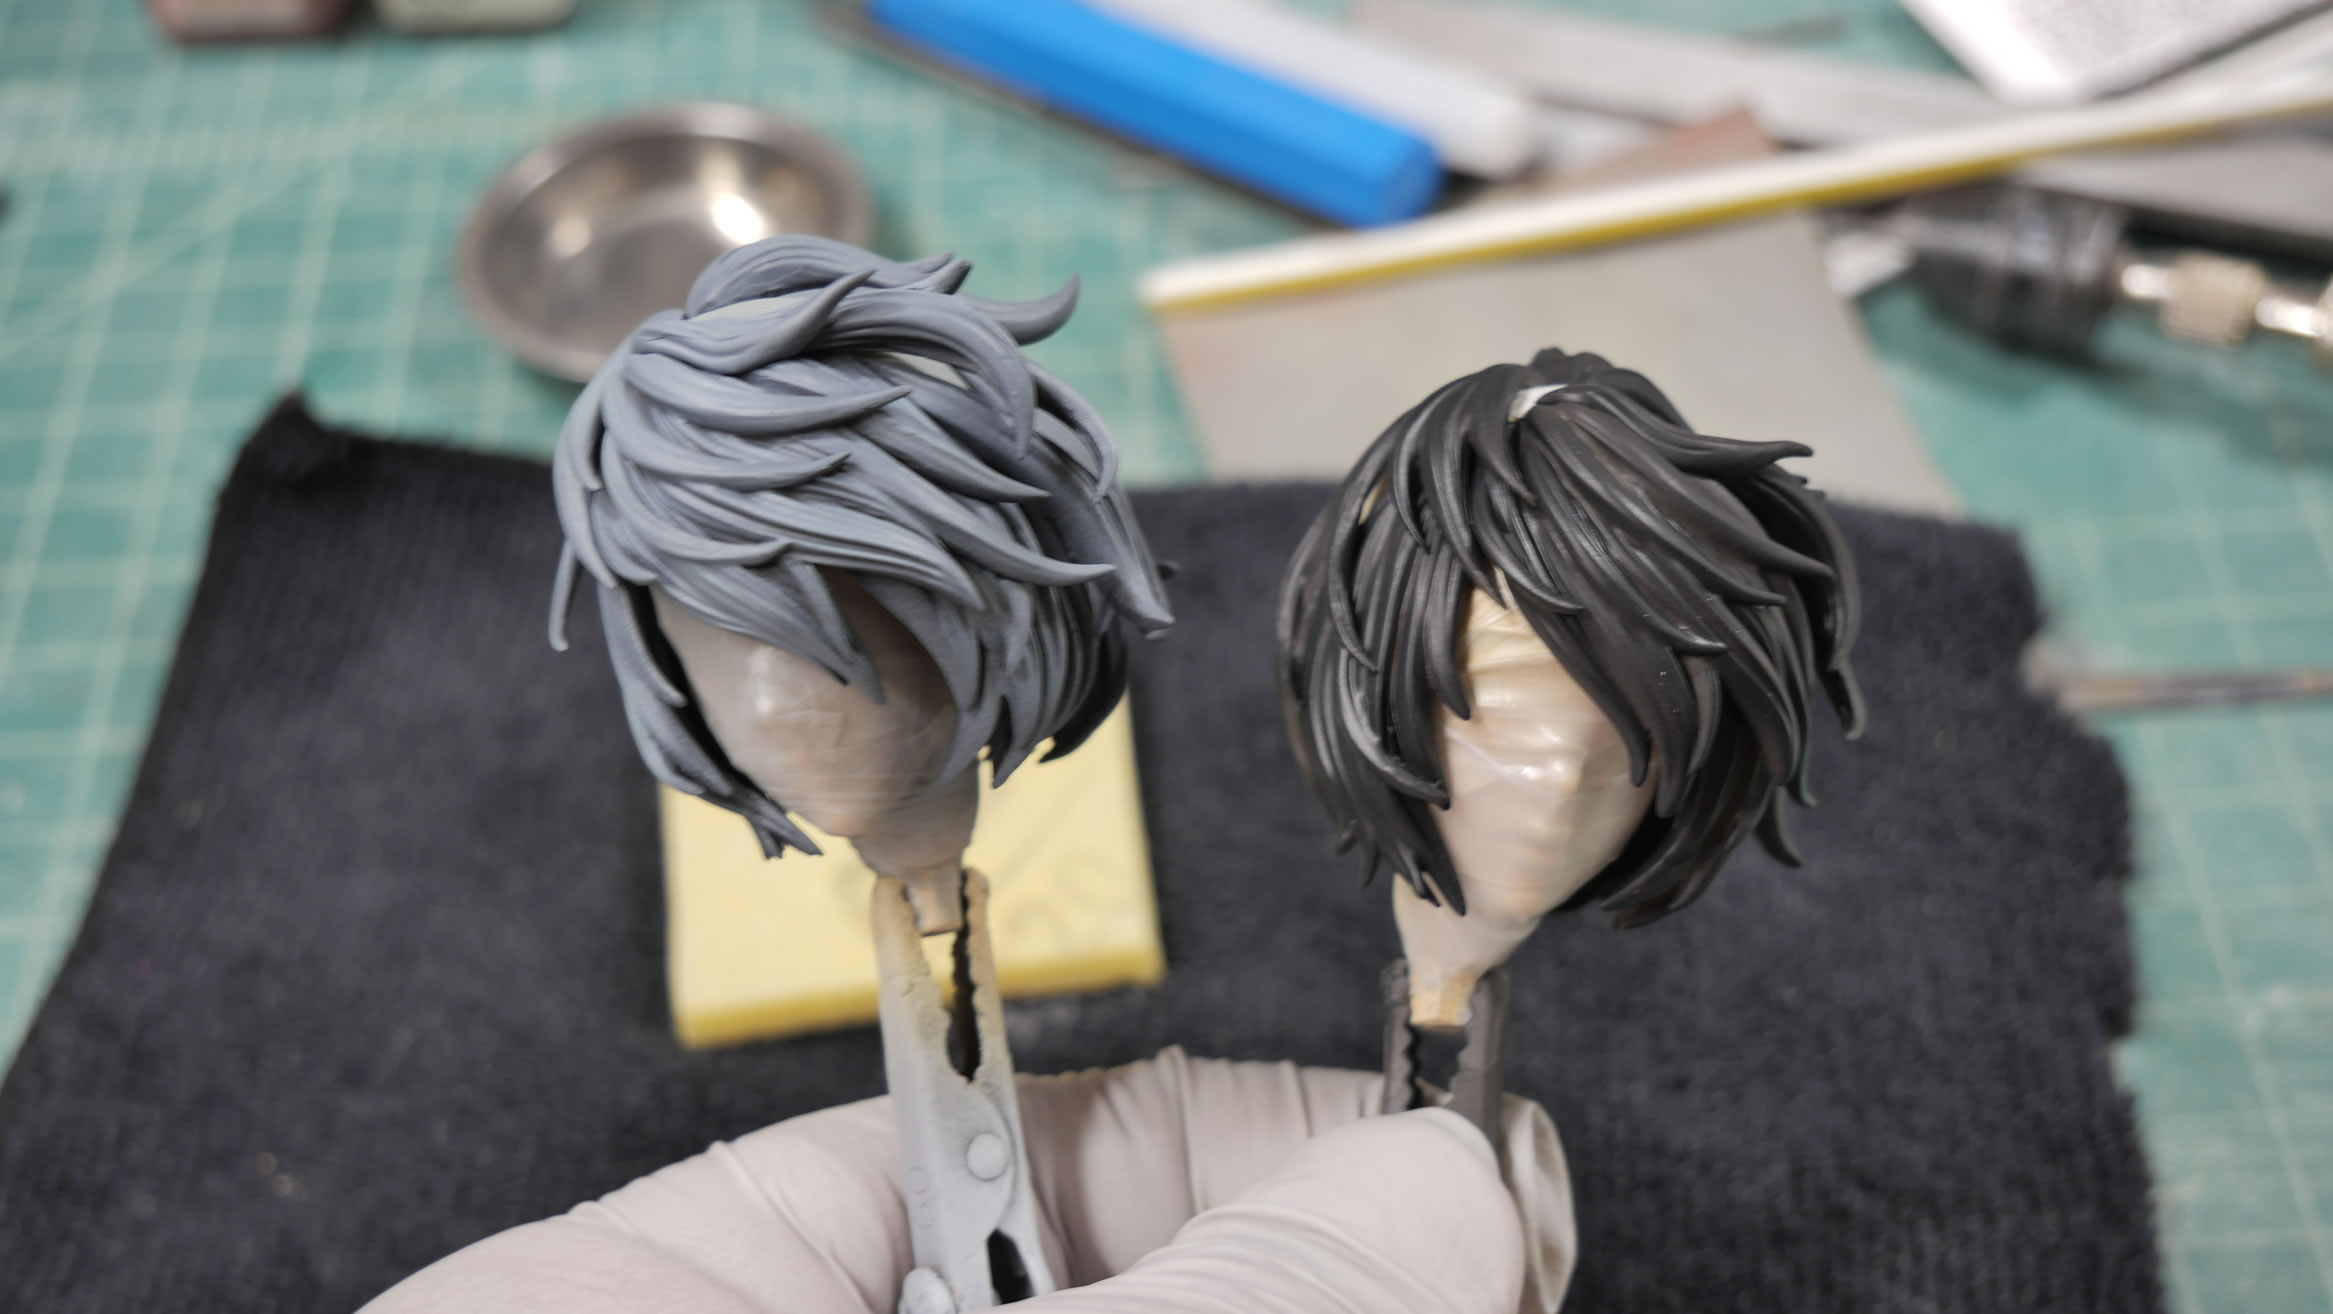
After sanding and cleaning up missed, filling a few pinholes I found, the skin parts are painted in base white. Painting skin tones over a grey primed surface is a great way to have dead looking skin tones. The hair parts are painted black. Since there are two heads, the two sets of hair are arranged on skewers of different lengths to keep things organized.

Masking off the whites of the eyes before moving on to painting skin tones.
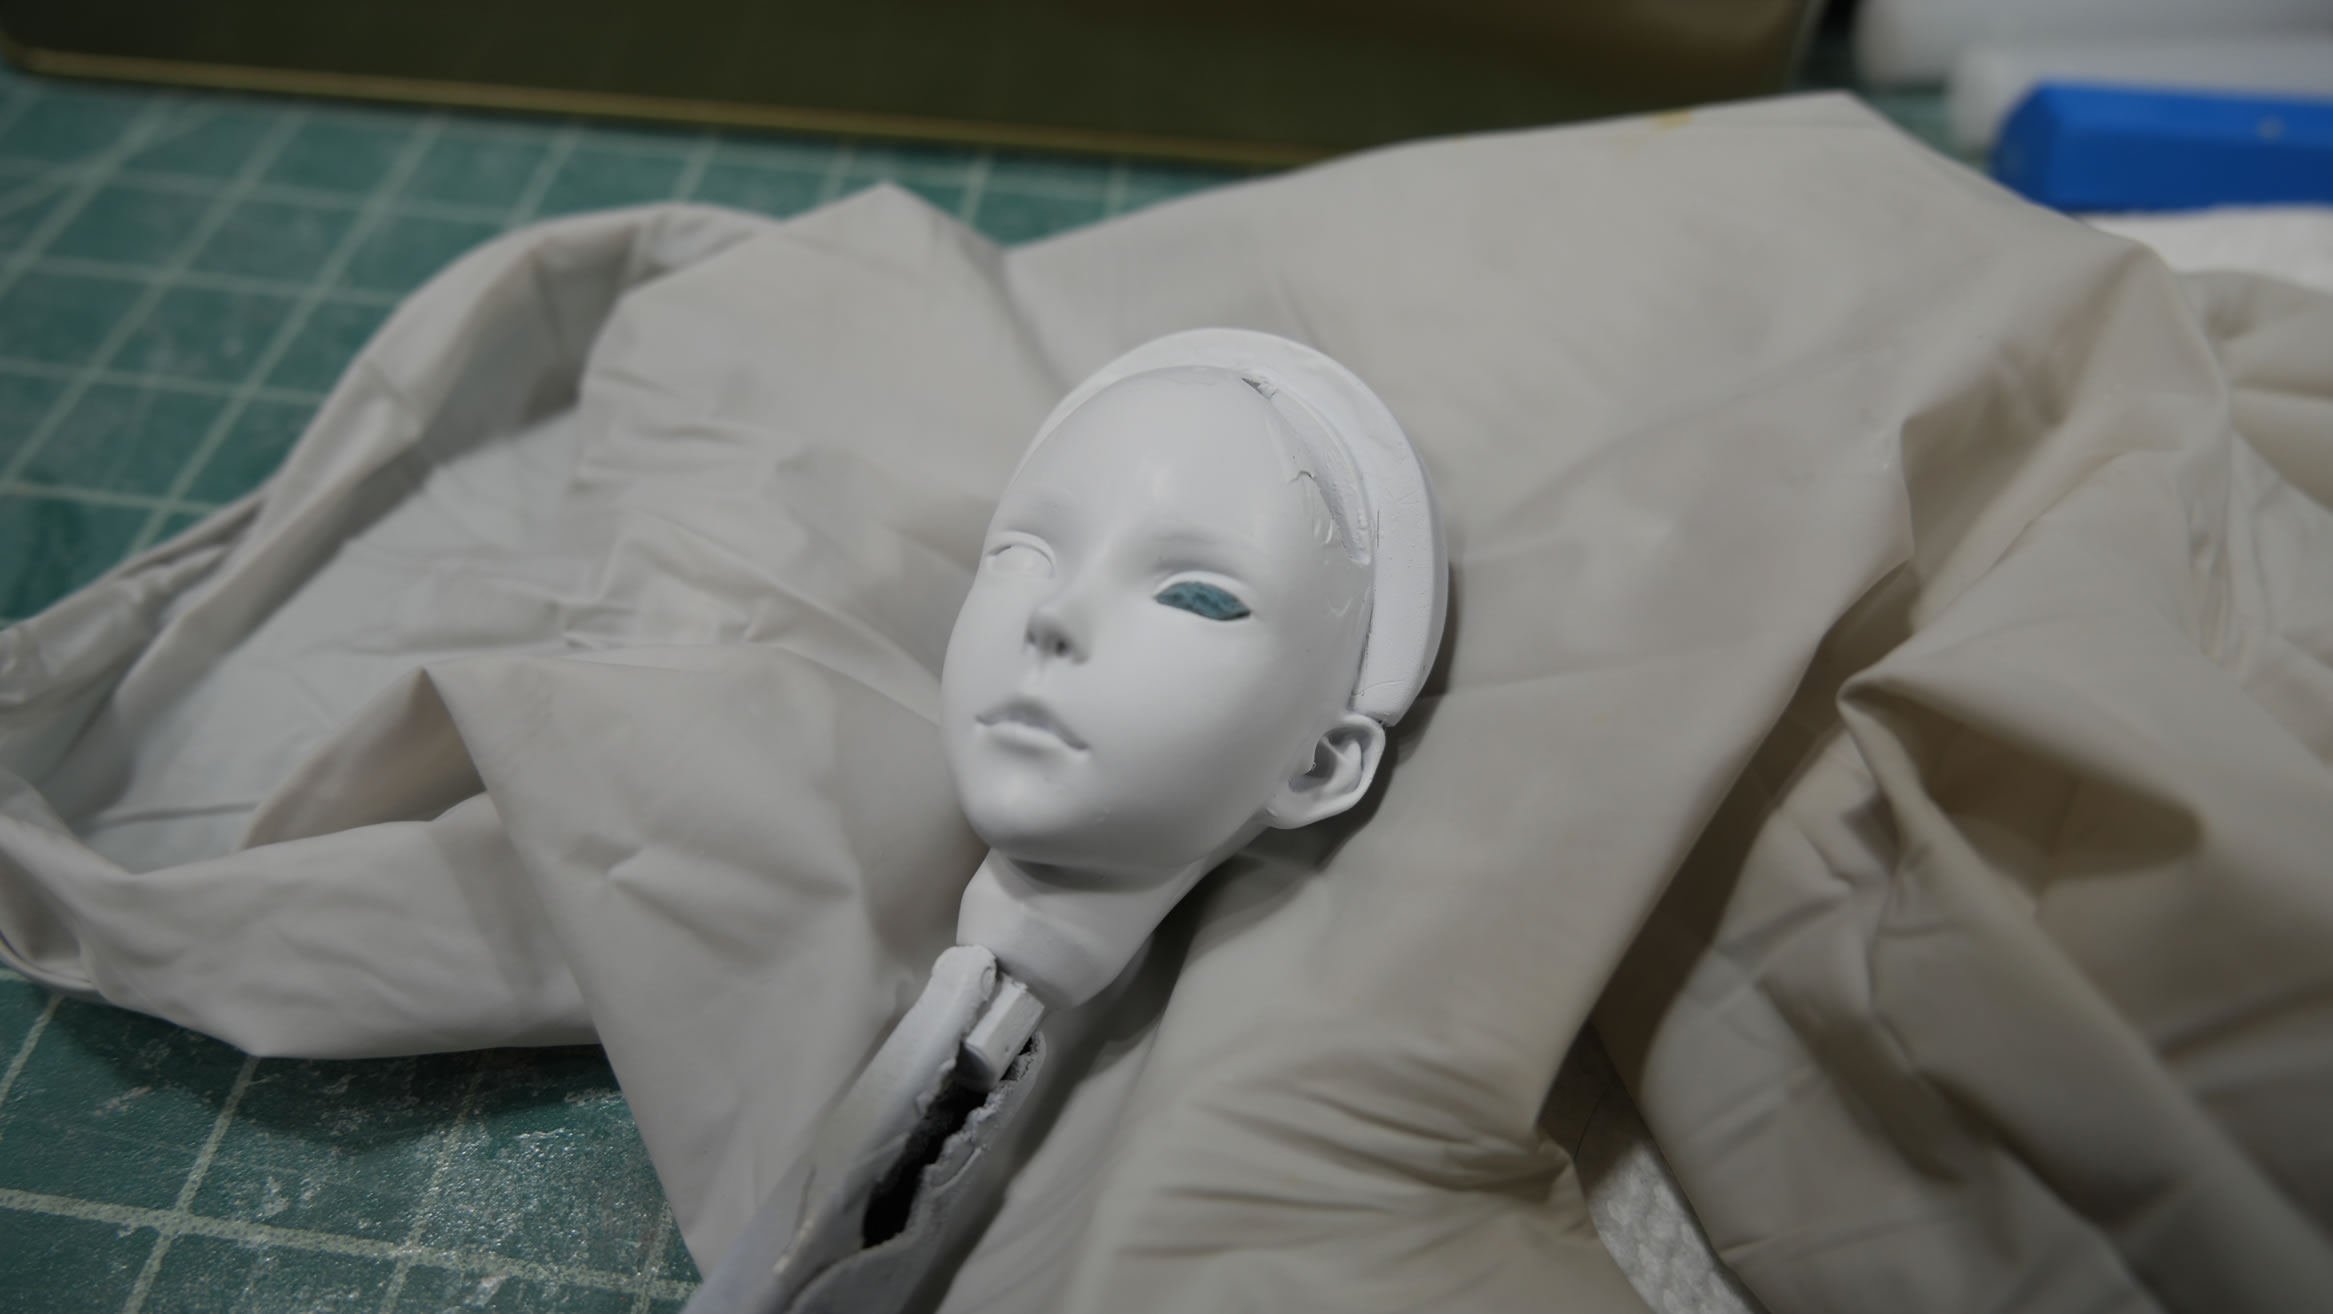
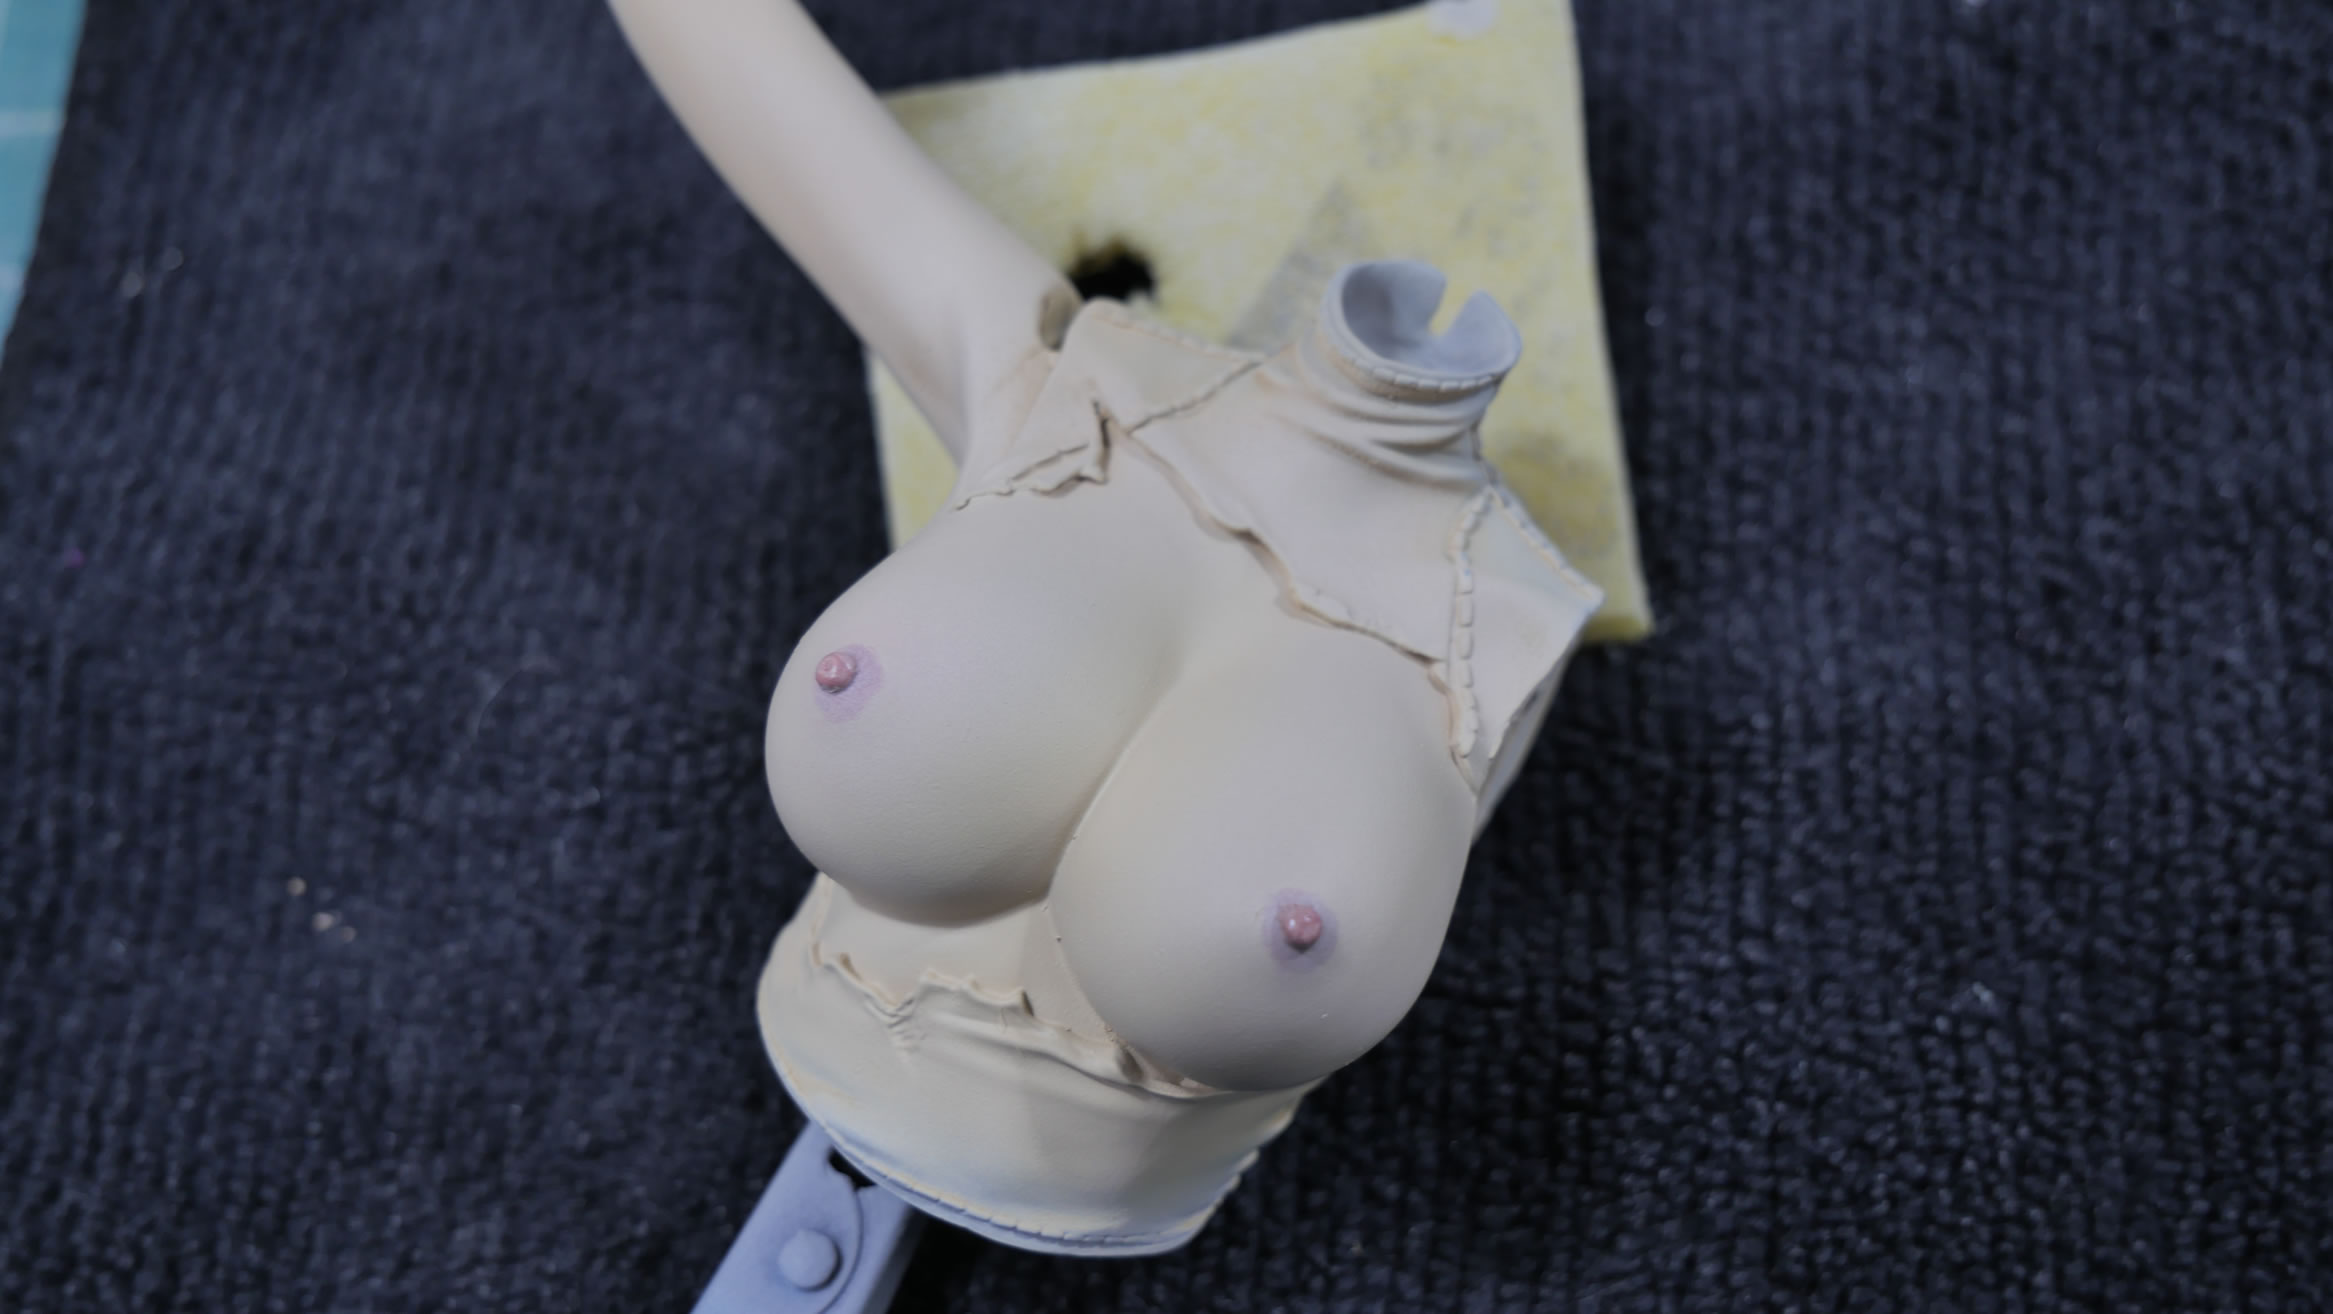
Painting skin tones from dark to light and blending. Dark skin tone first. Following by a very light highlight tones over specific areas. Then blended together with a medium tone first, then another light tone to balance out the shading.
Heads are masked and the hair pieces assembled. Then painting the whole hair as a single piece make this process much faster than painting individual hair pieces and keeps the color tones the same. Same process as the skin tone. Start with a dark base, highlight tone, then medium blend tone. I did more work on the hair that I failed to capture in images. I applied a wash to get some of the sculpted details and I sprayed an even lighter tone of grey to change the overall hair color to a lighter grey color after the wash.
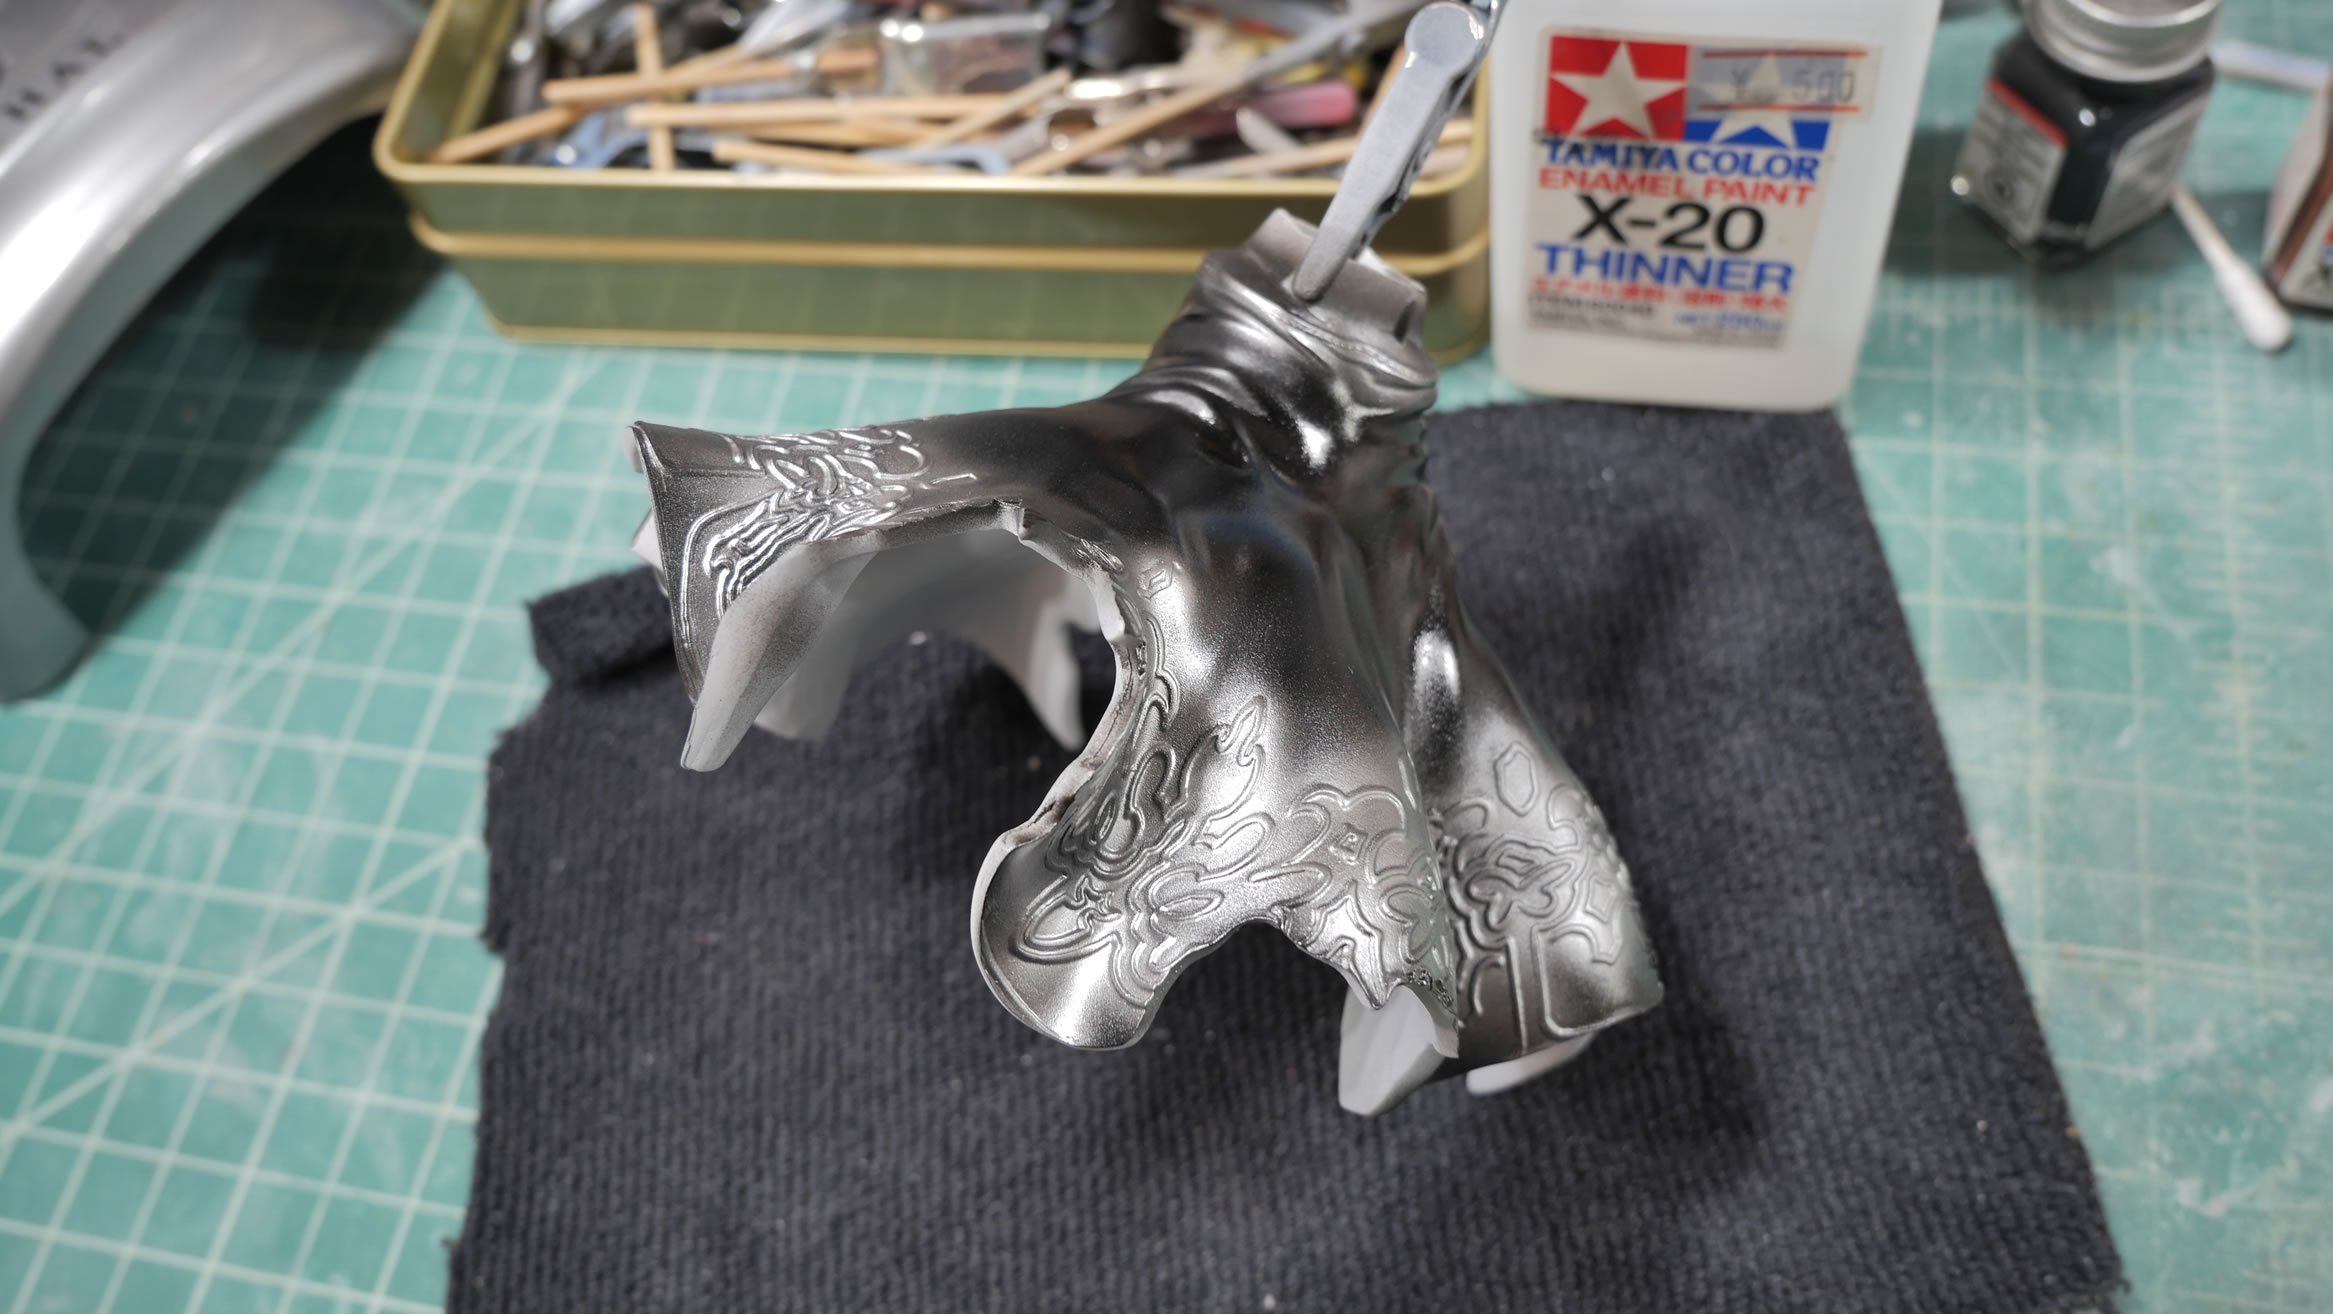
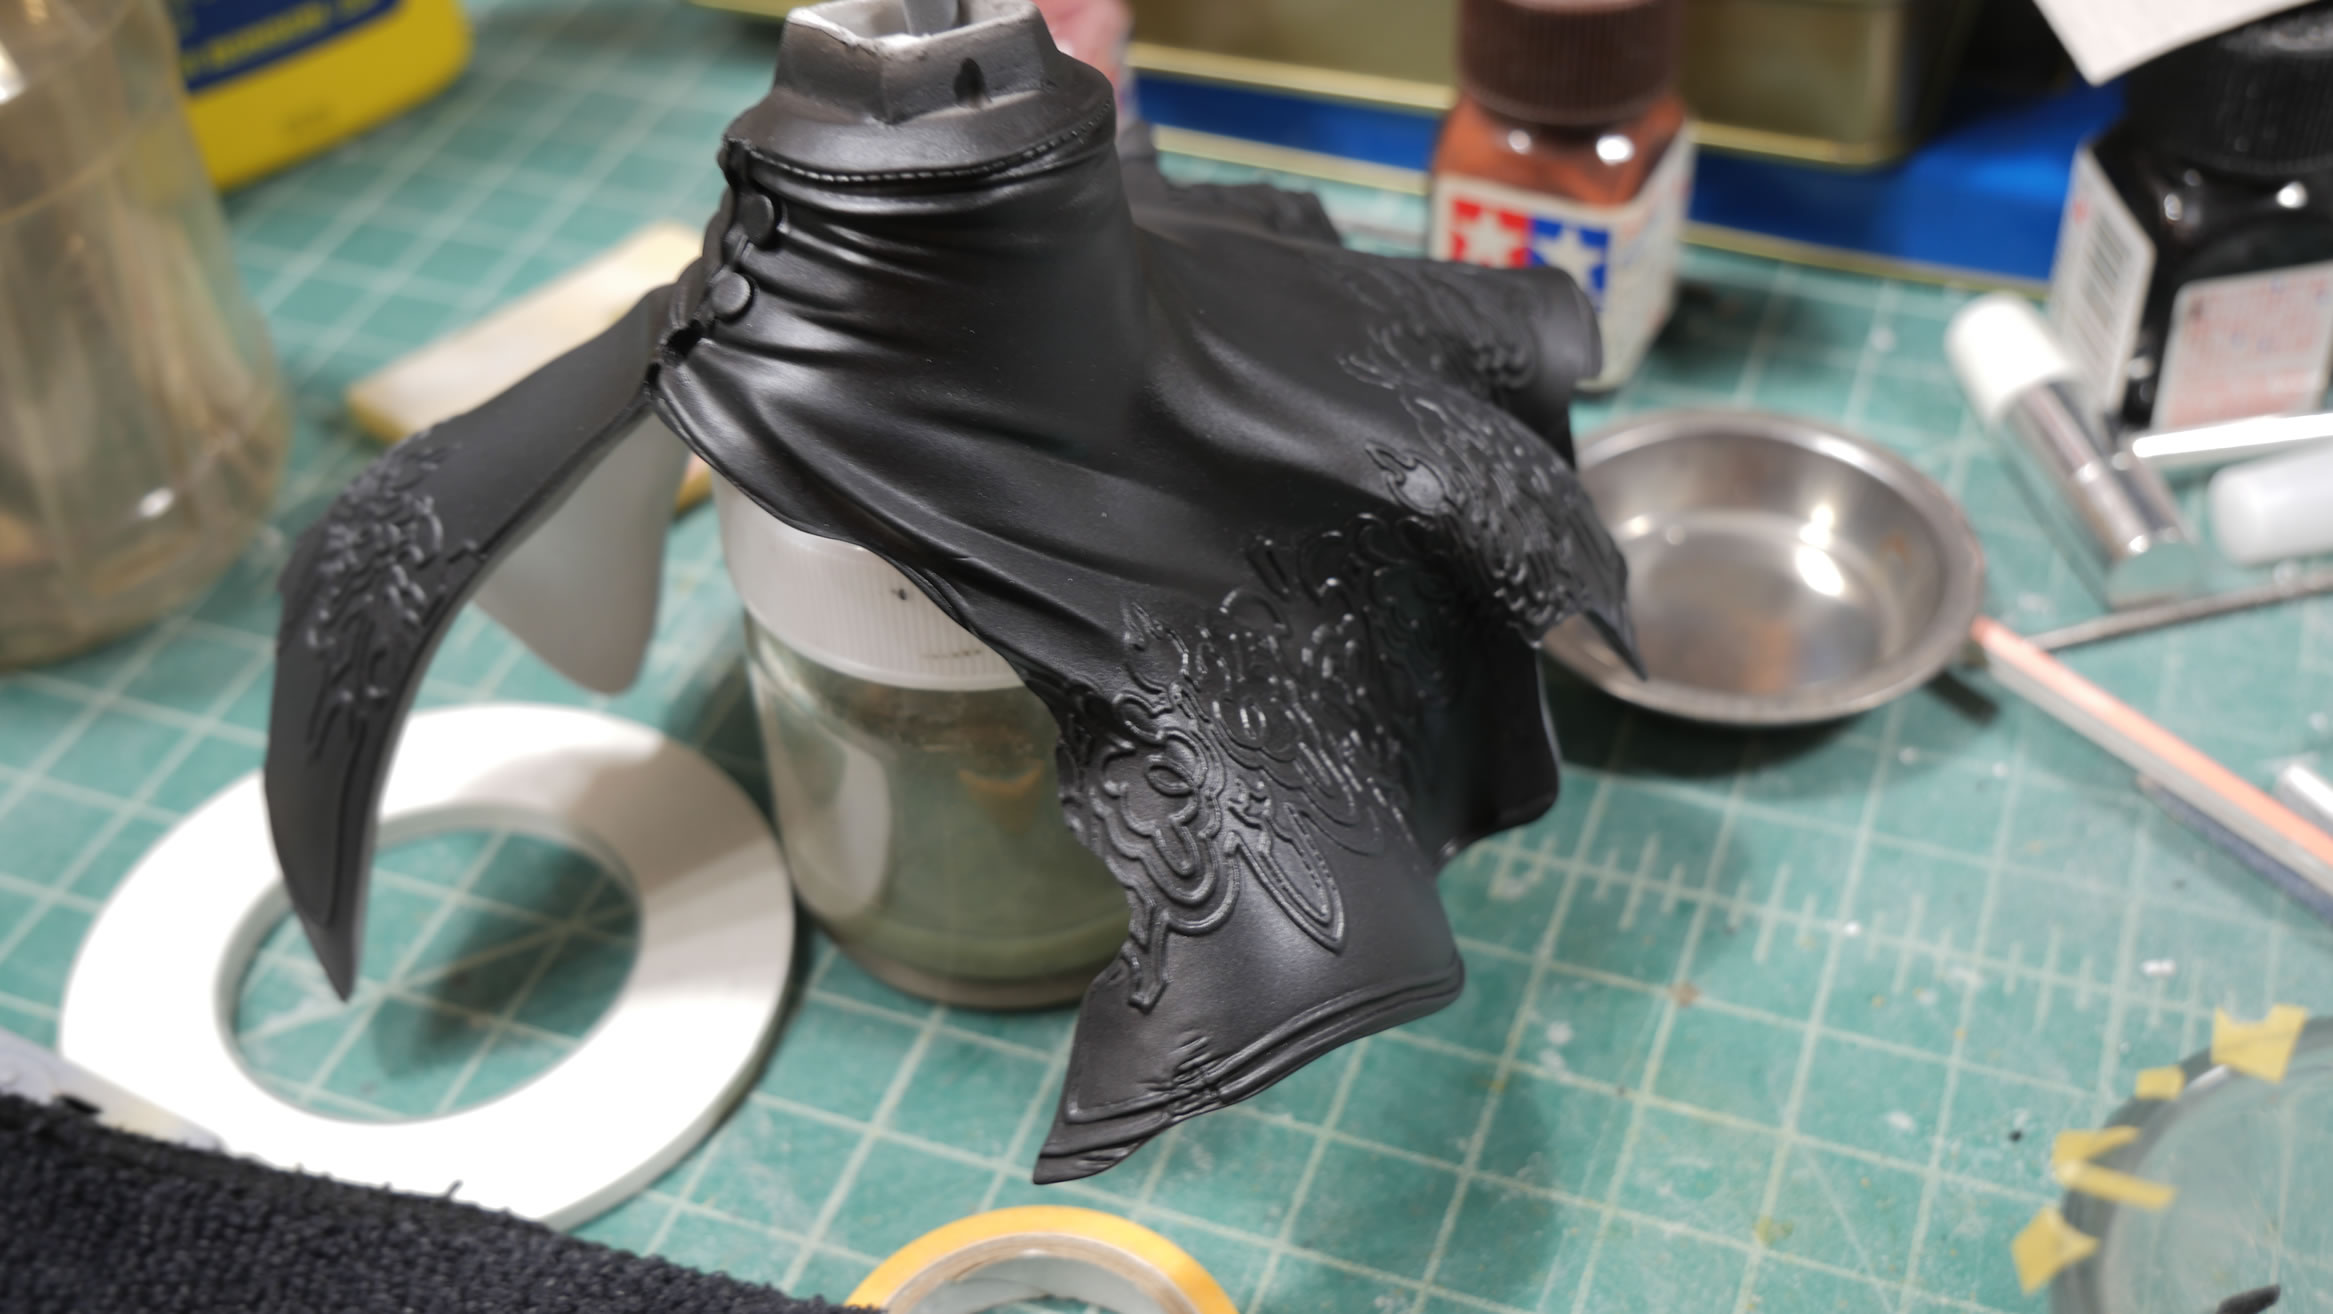
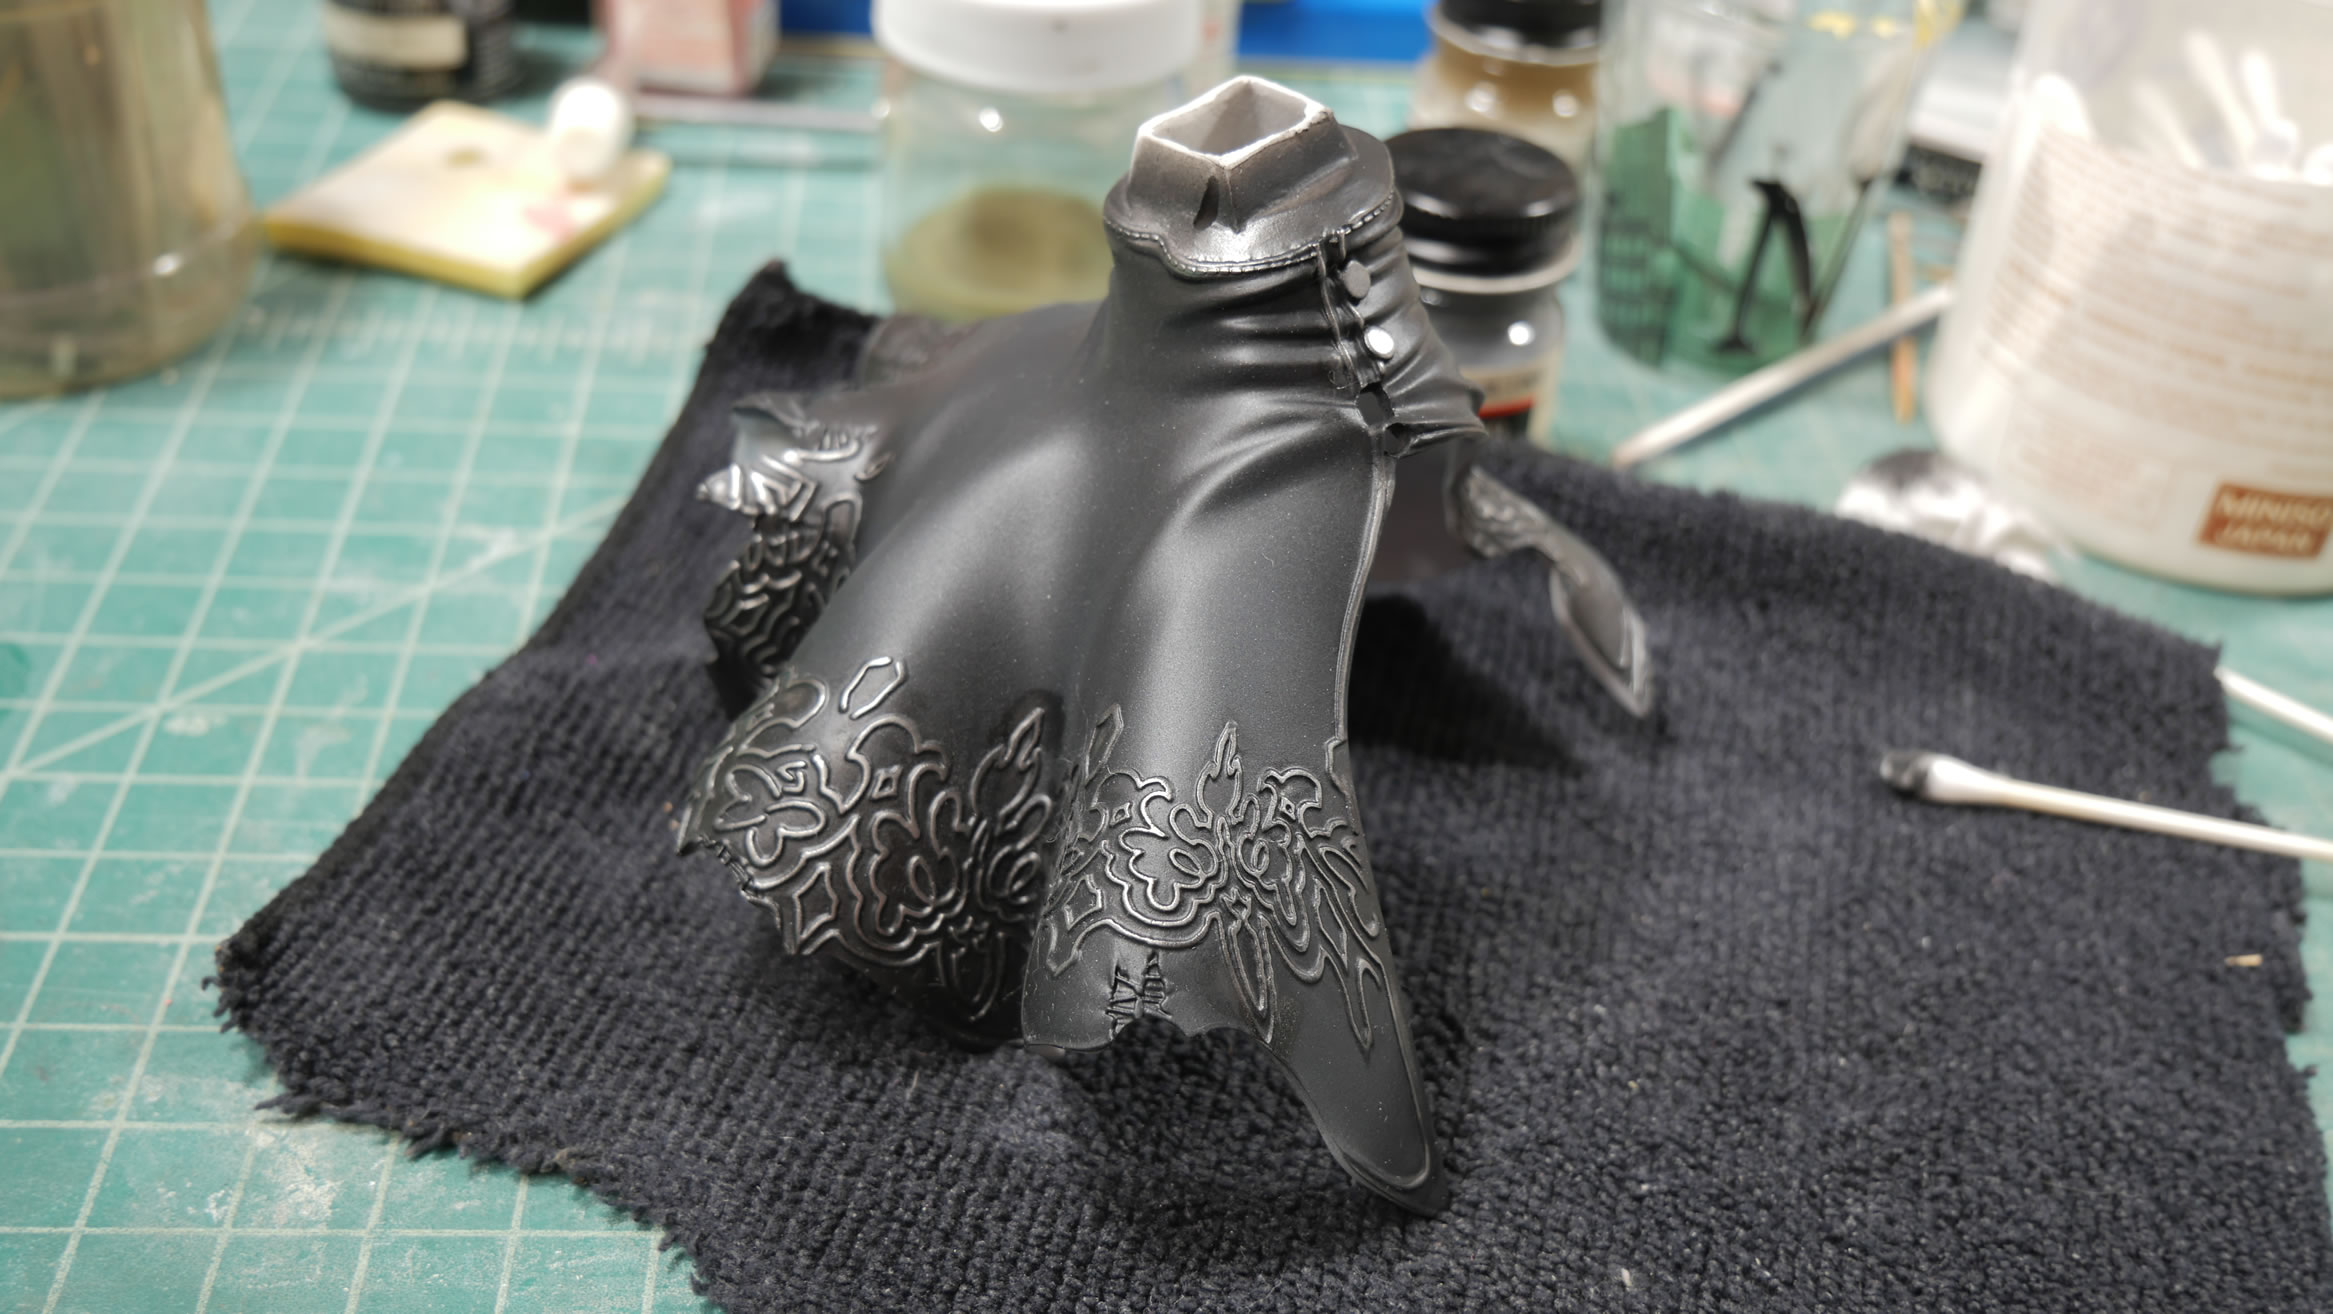
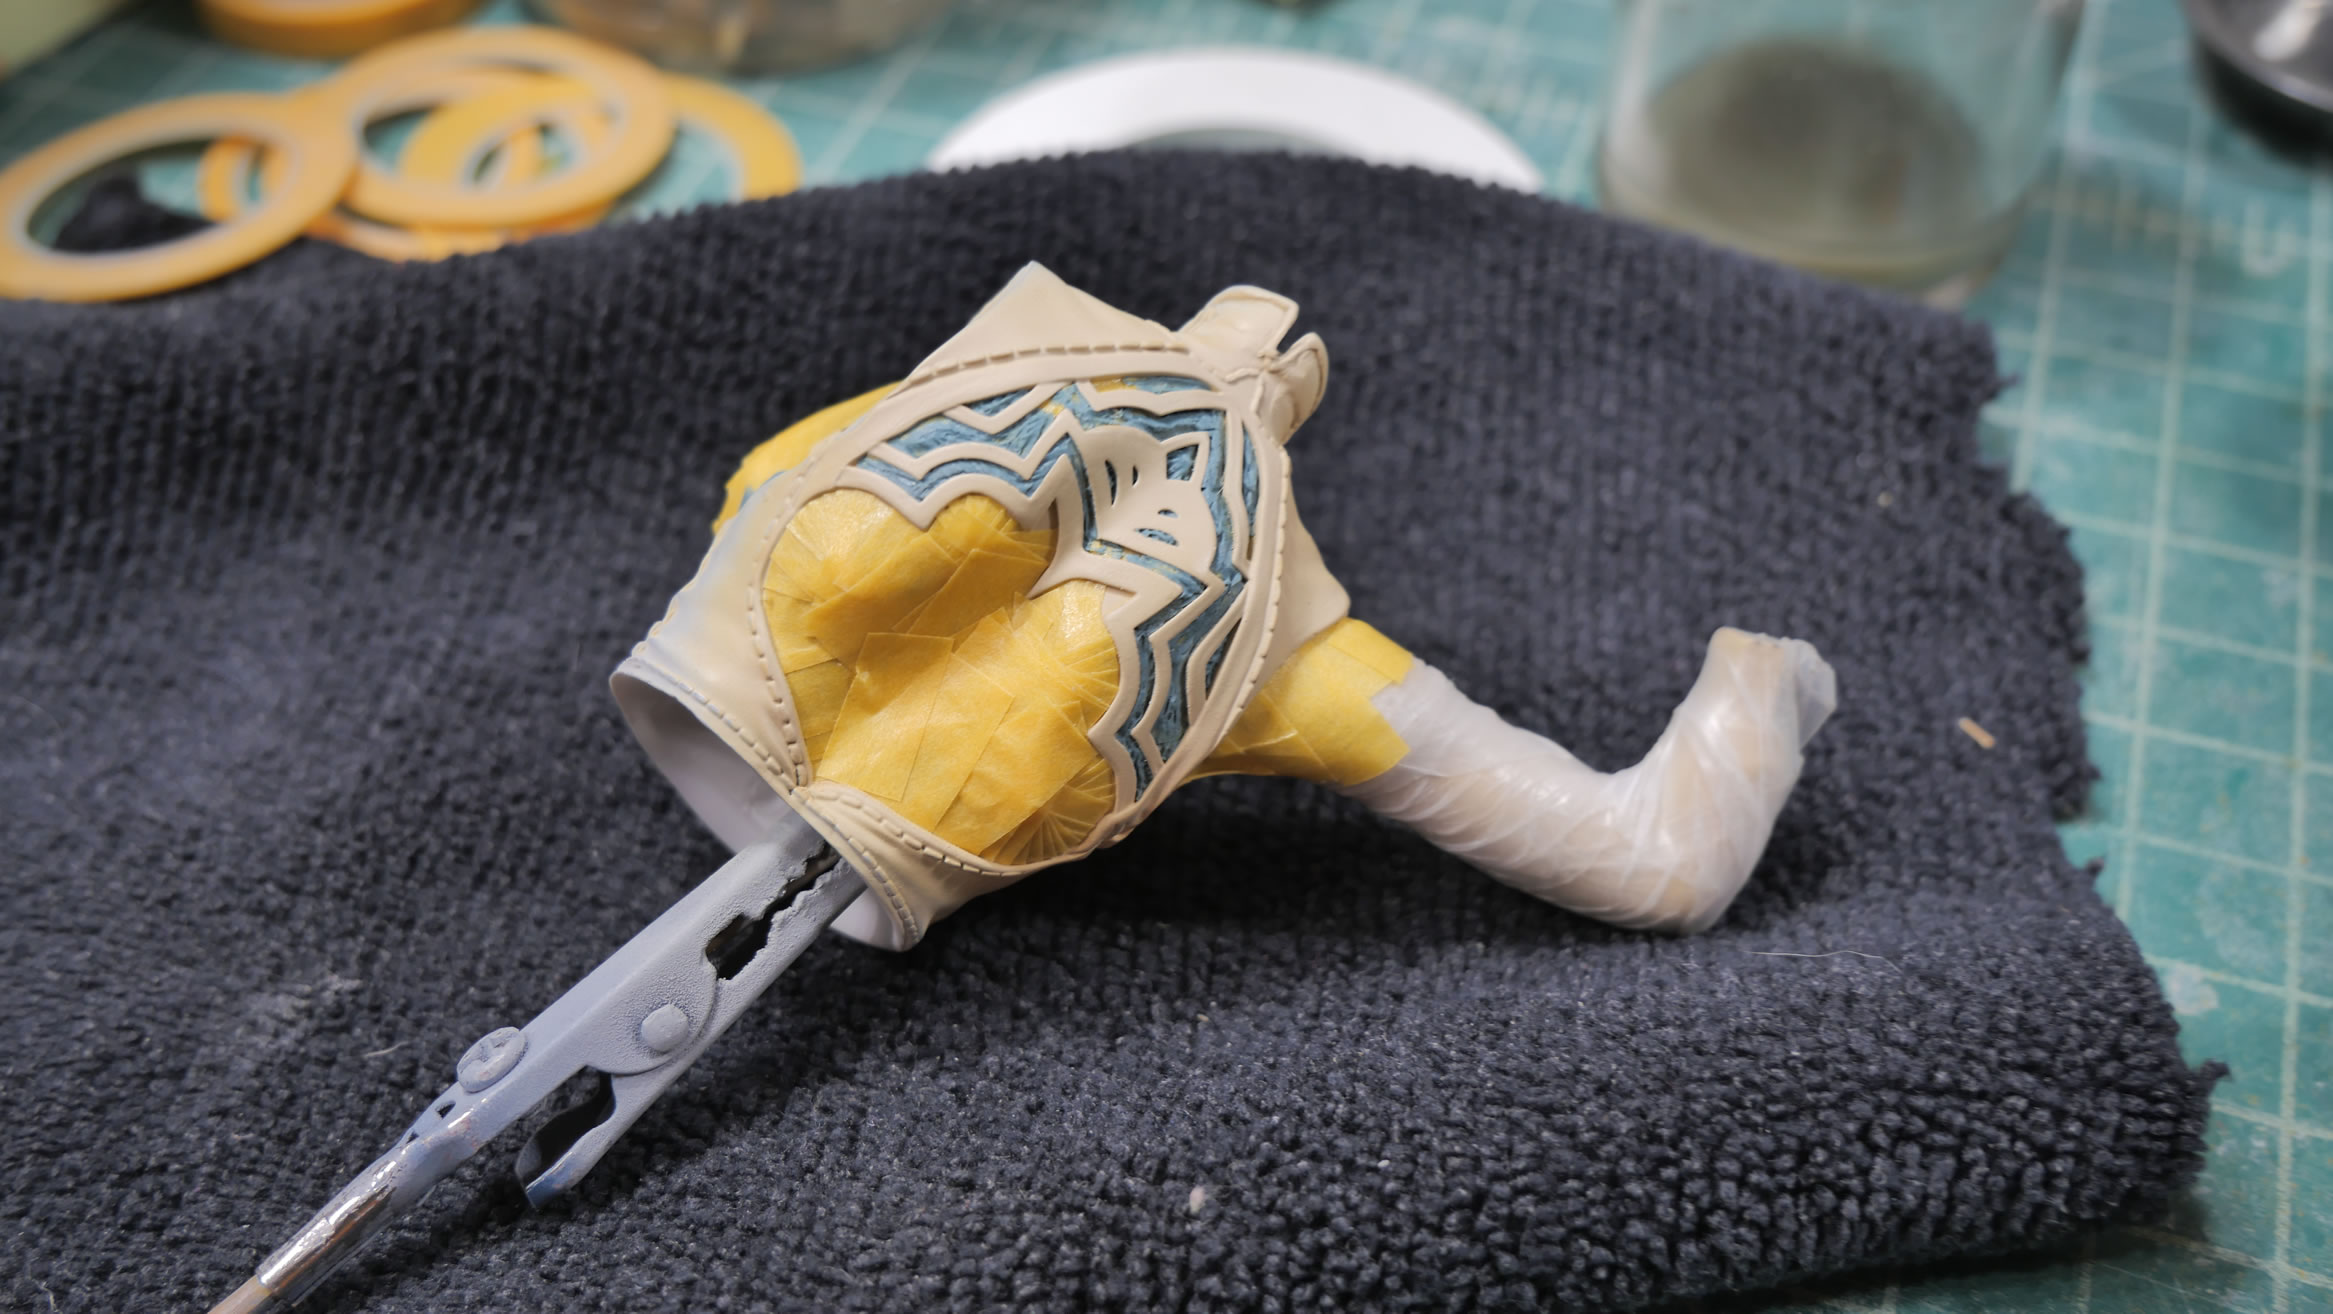
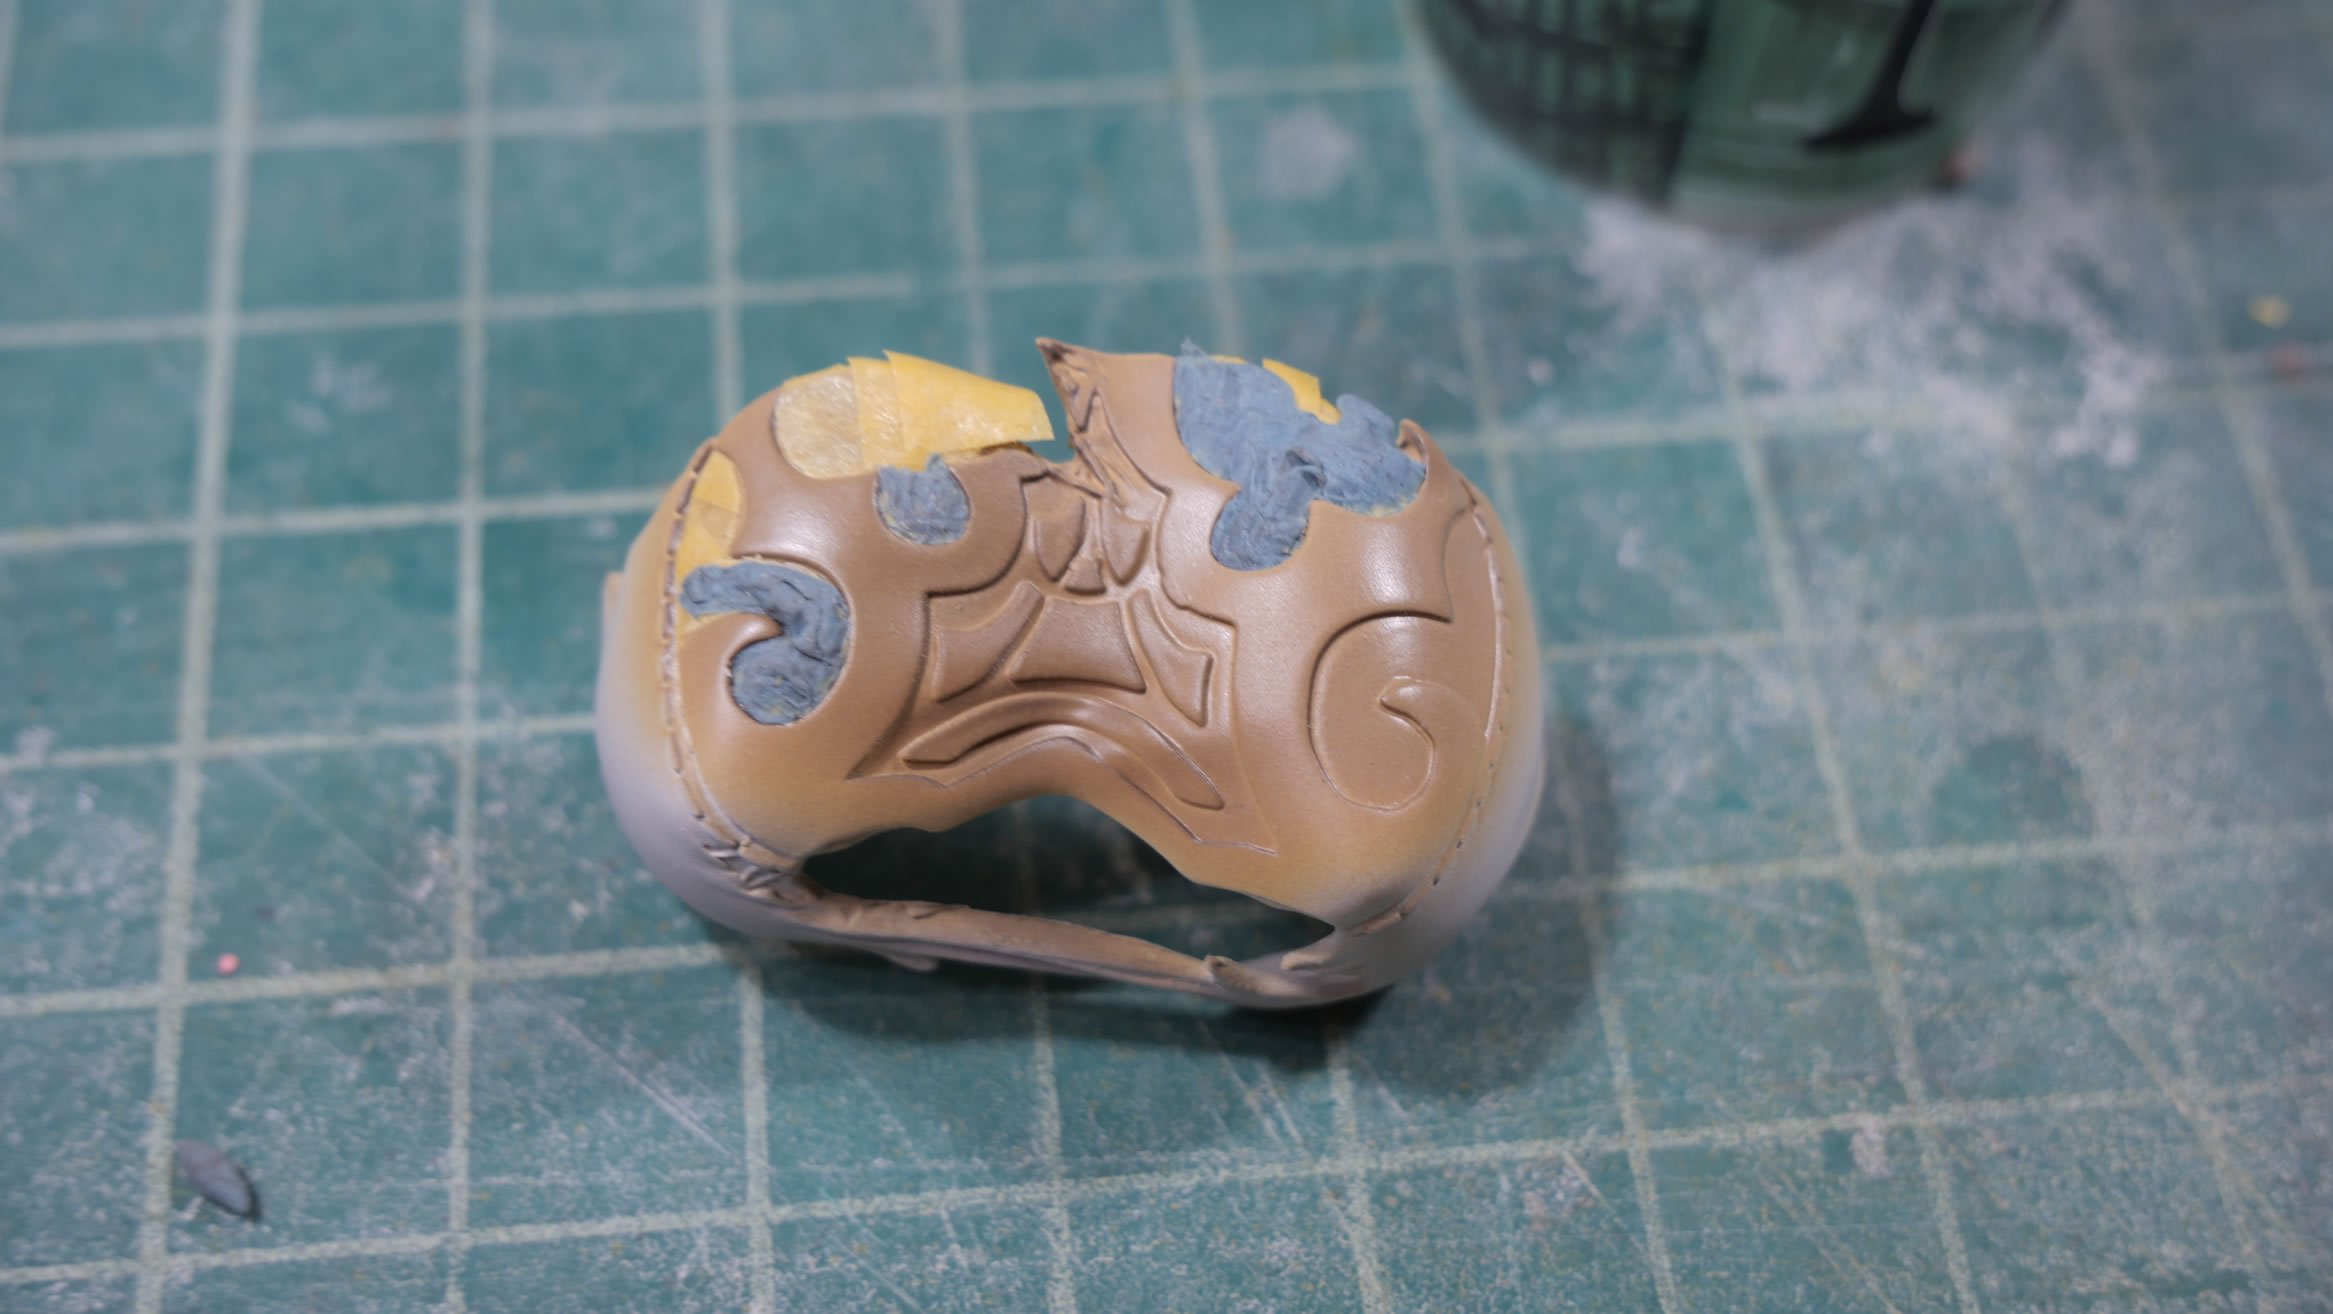
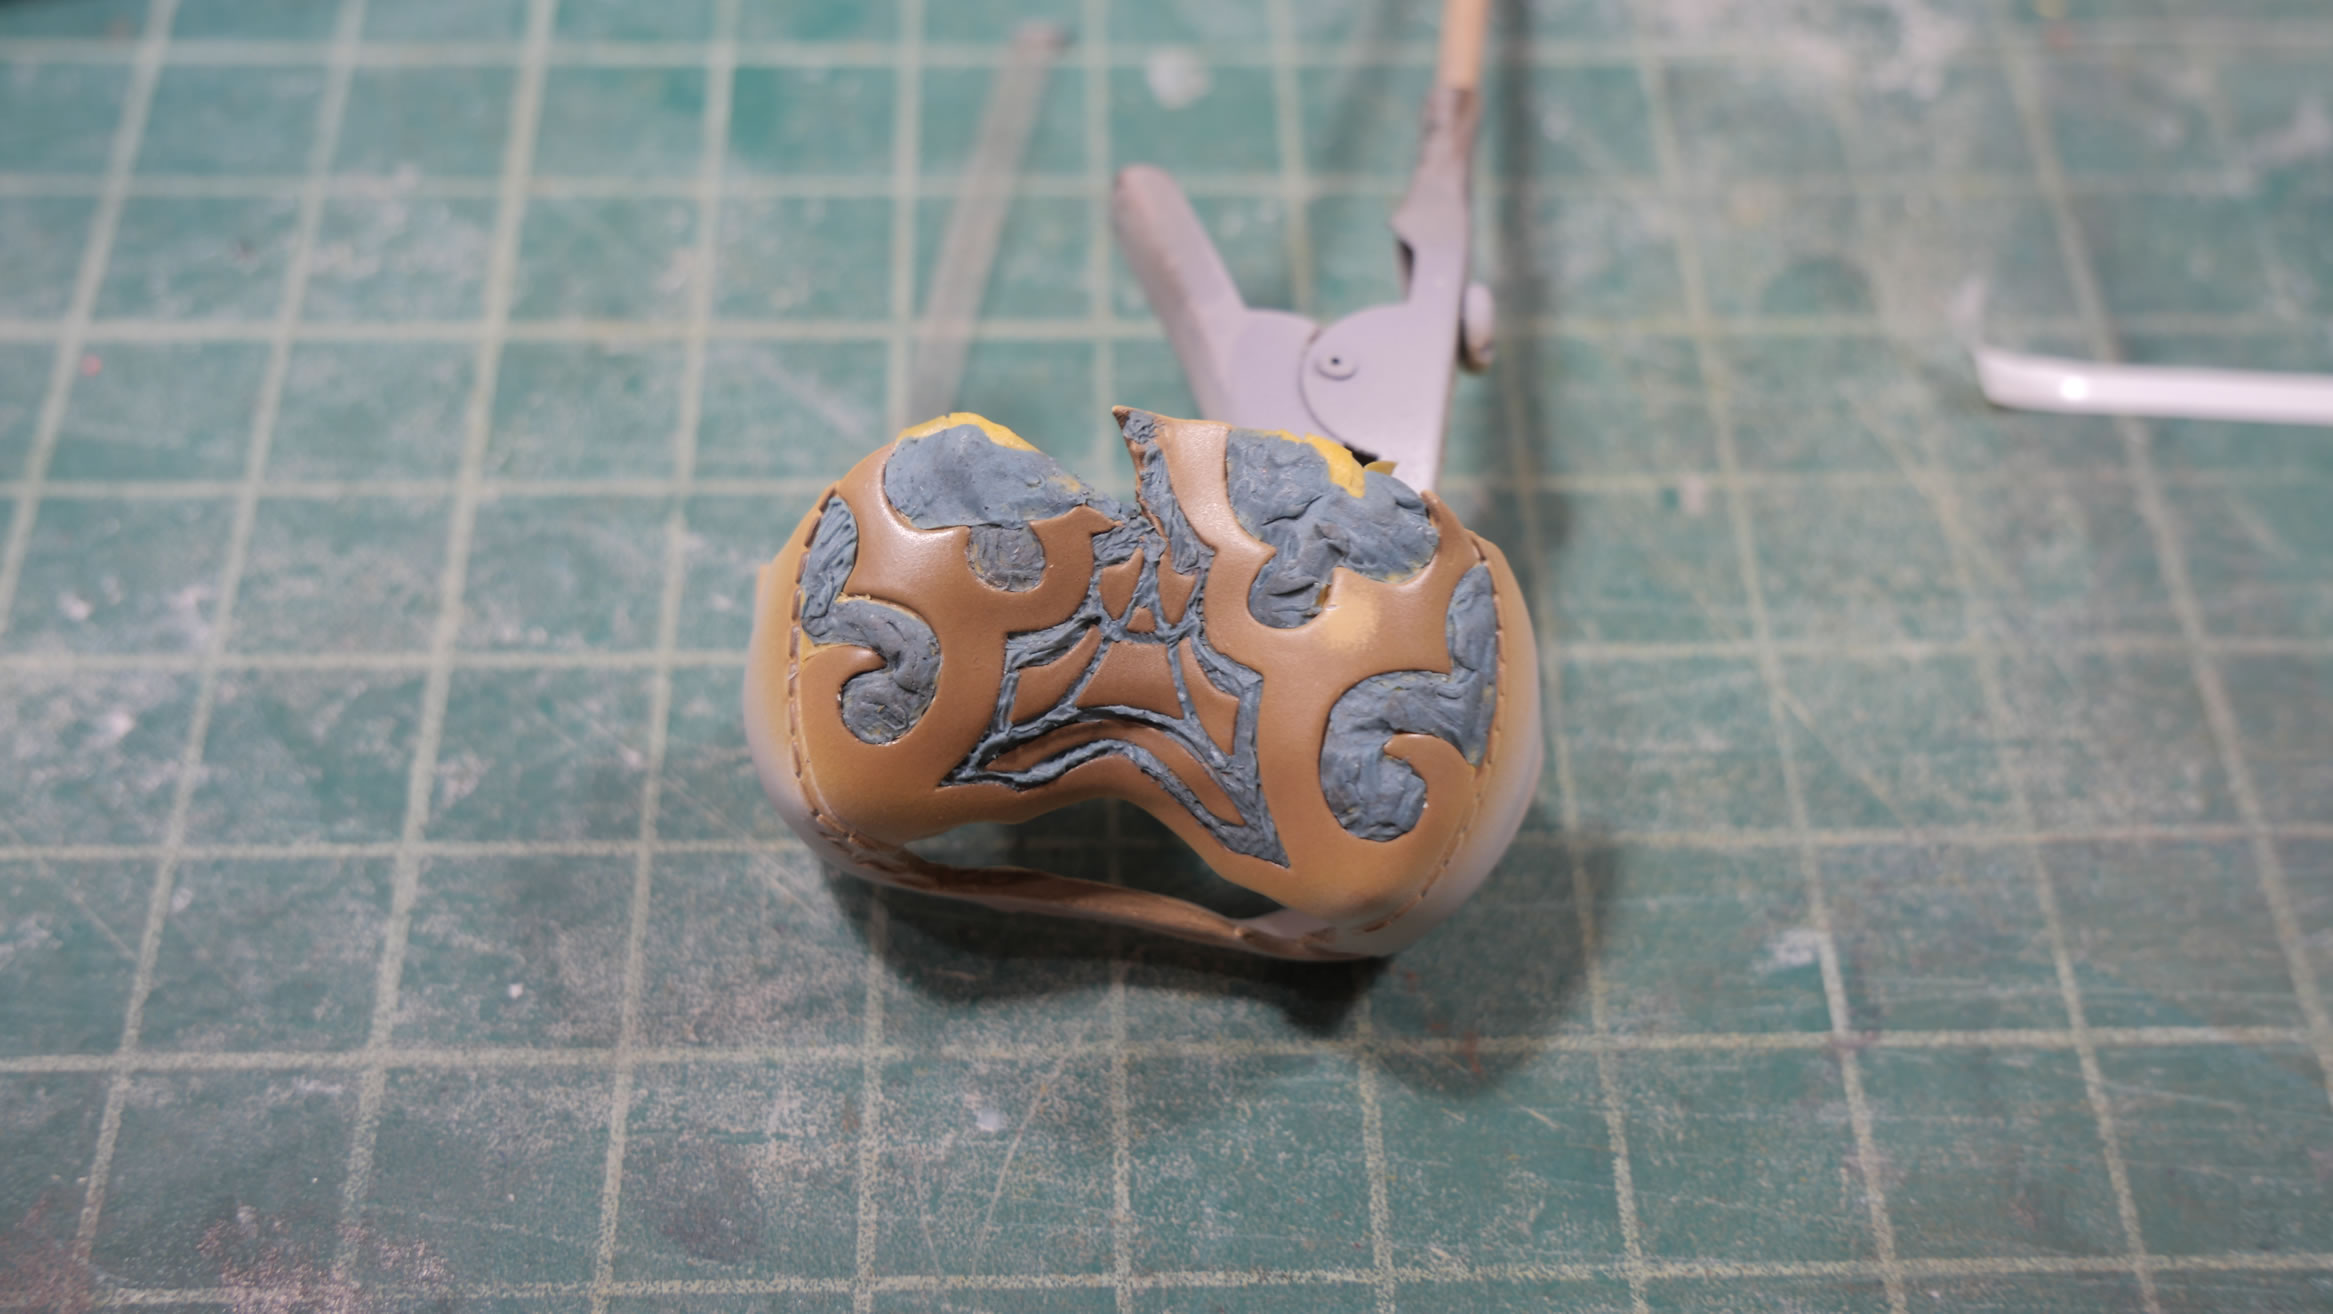
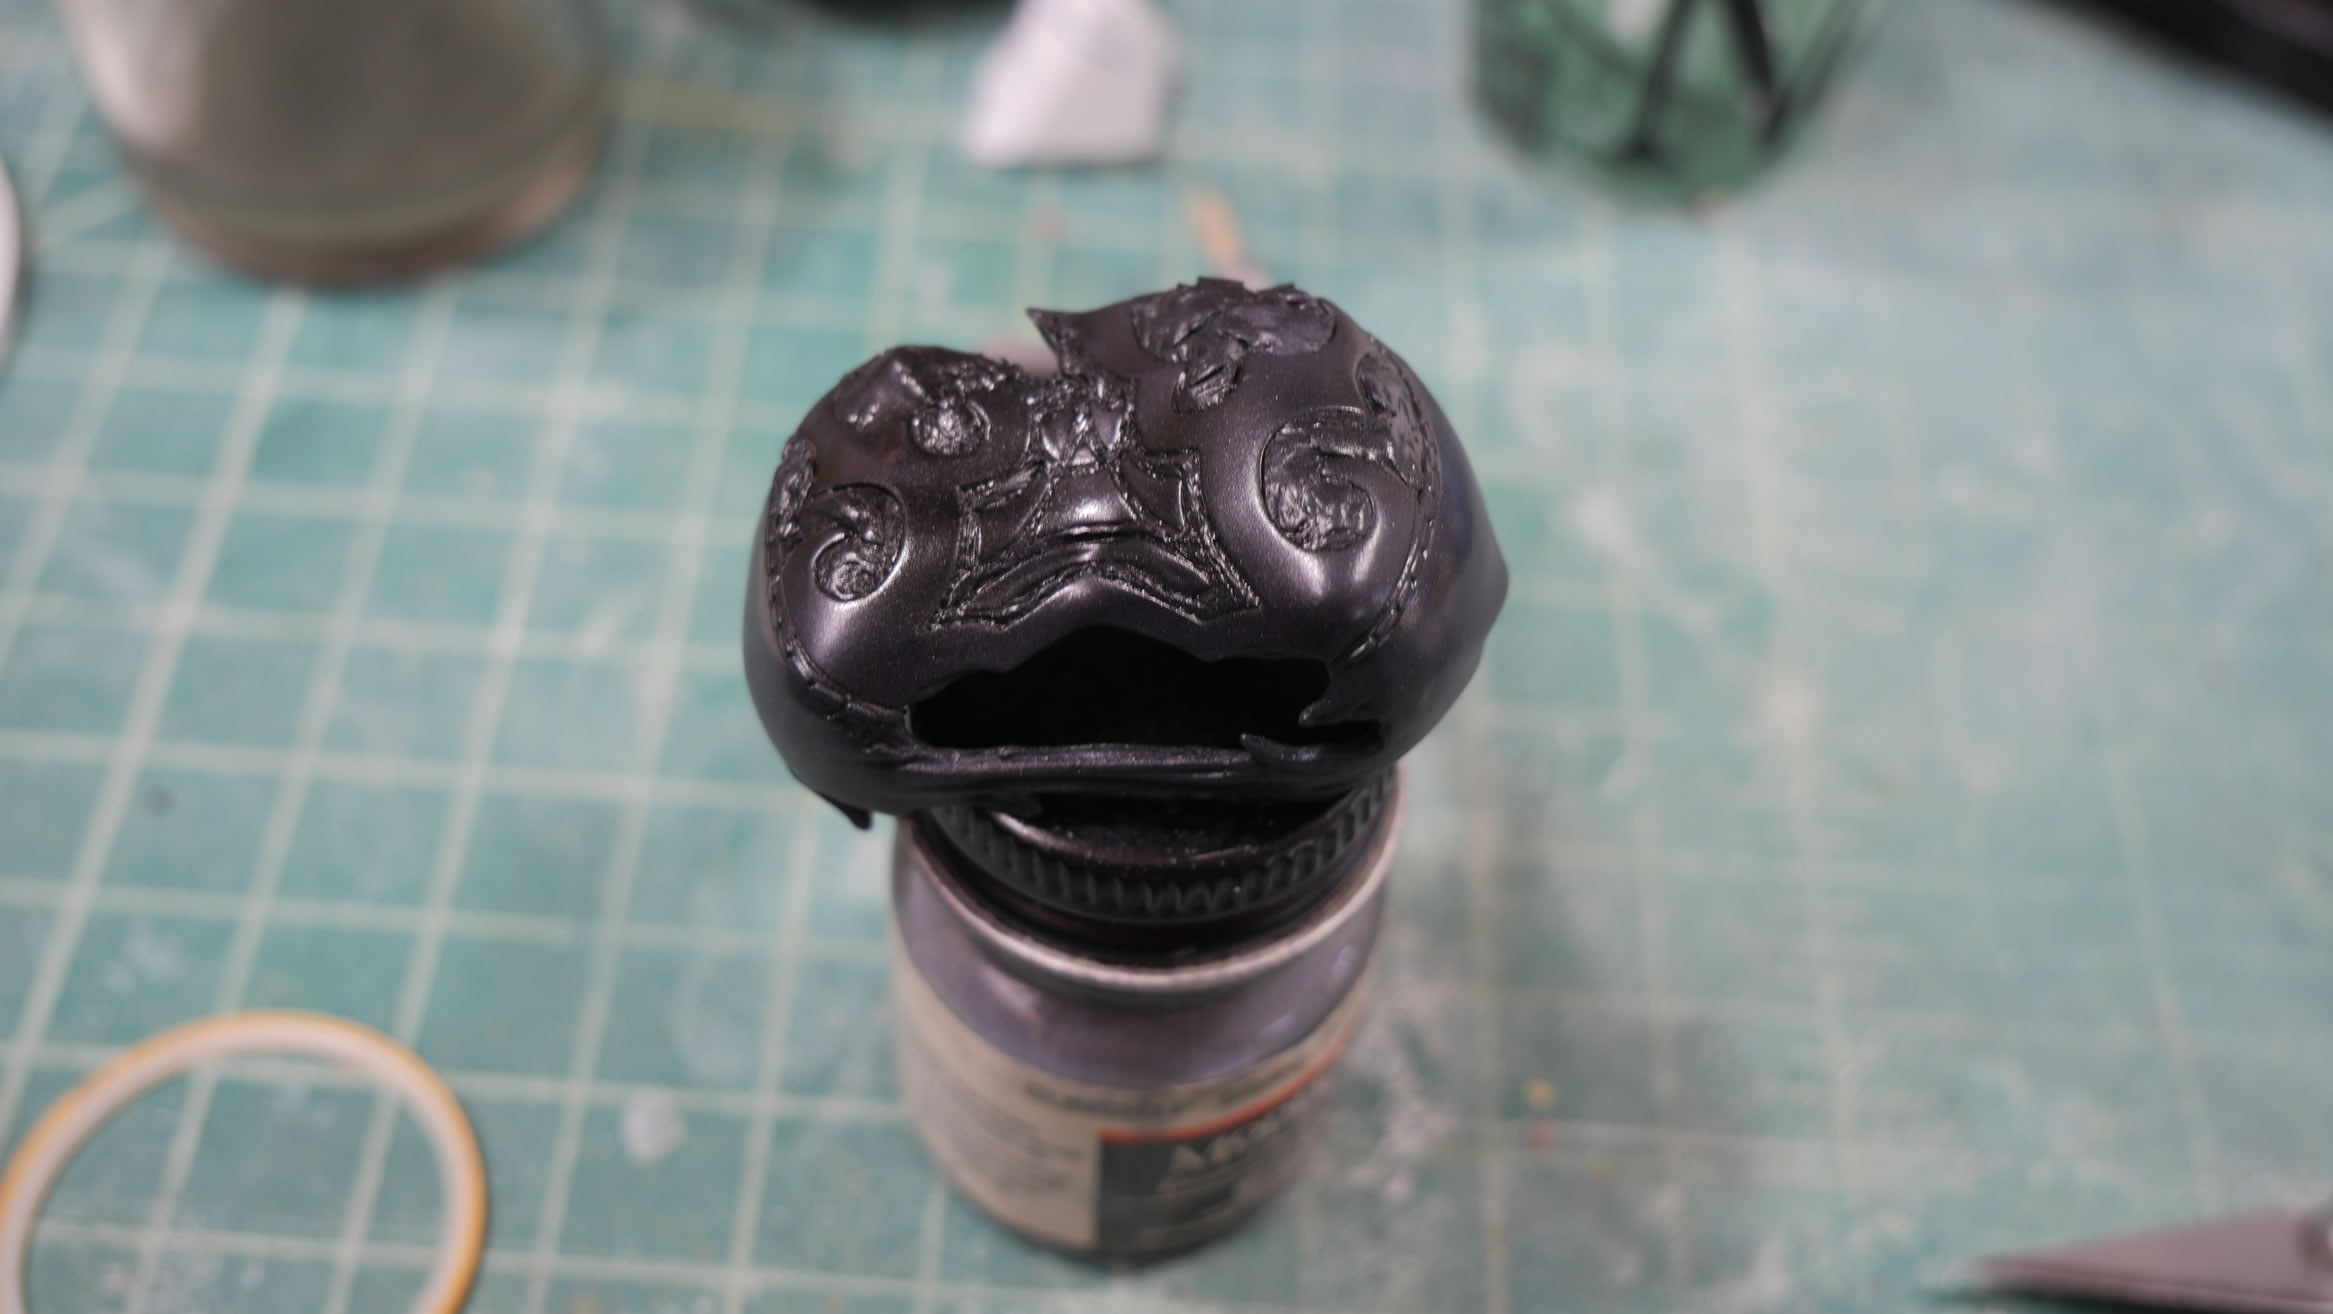
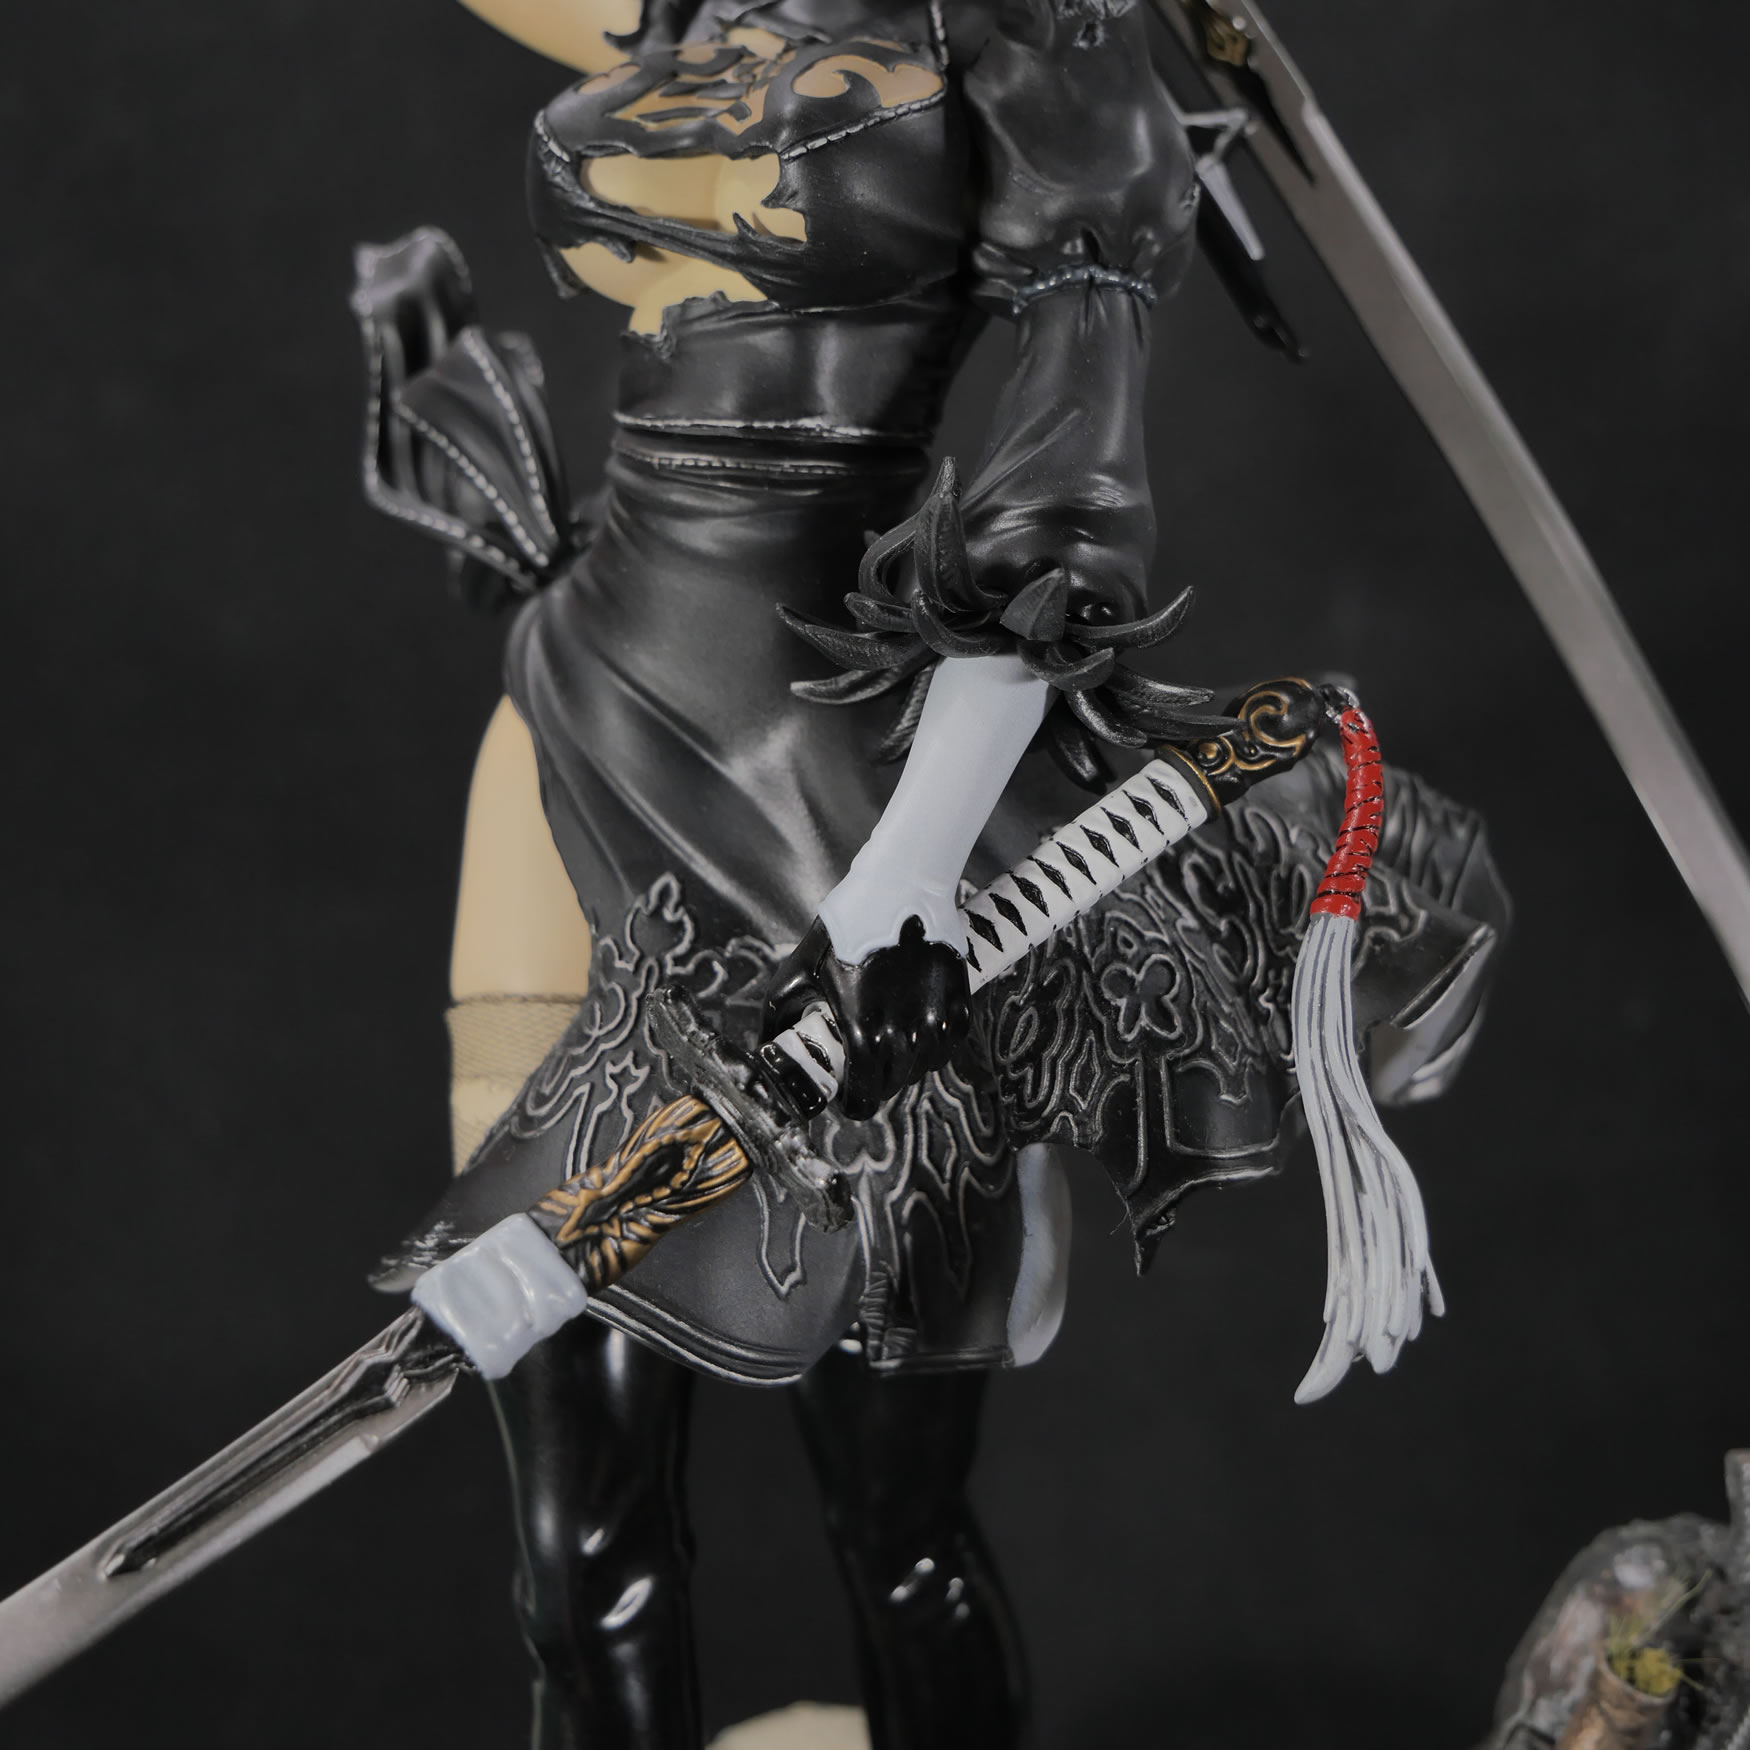
The skit has a lot of great details that in other images I saw of builds or the production painted figure, it not detailed. To do this, I first painted the skirt in my usual finisher’s lacquer black paint. Next, I painted tamiya light stainless steel over the detail areas. Once that cured; I painted an enamel black. Curing again, I painted an enamel gunmetal as a shading tone for the skirt. Allowing that to dry, I hit the detail parts with q-tips laced with lighter fluid that worked to remove the enamel layer of paint while leaving the lacquer based paints to shine through. The reverse wash process I first coined years and years ago while working on another figure kit. The technique works very well, and only a few touchups with another shot of enamel paint and the lighter fluid/q-tip wipe trick finishes this detail.
Nipples are painted and blended in with some skin tone to help balance the transition. Then the whole thing is masked to paint the clothing areas of the torso part.
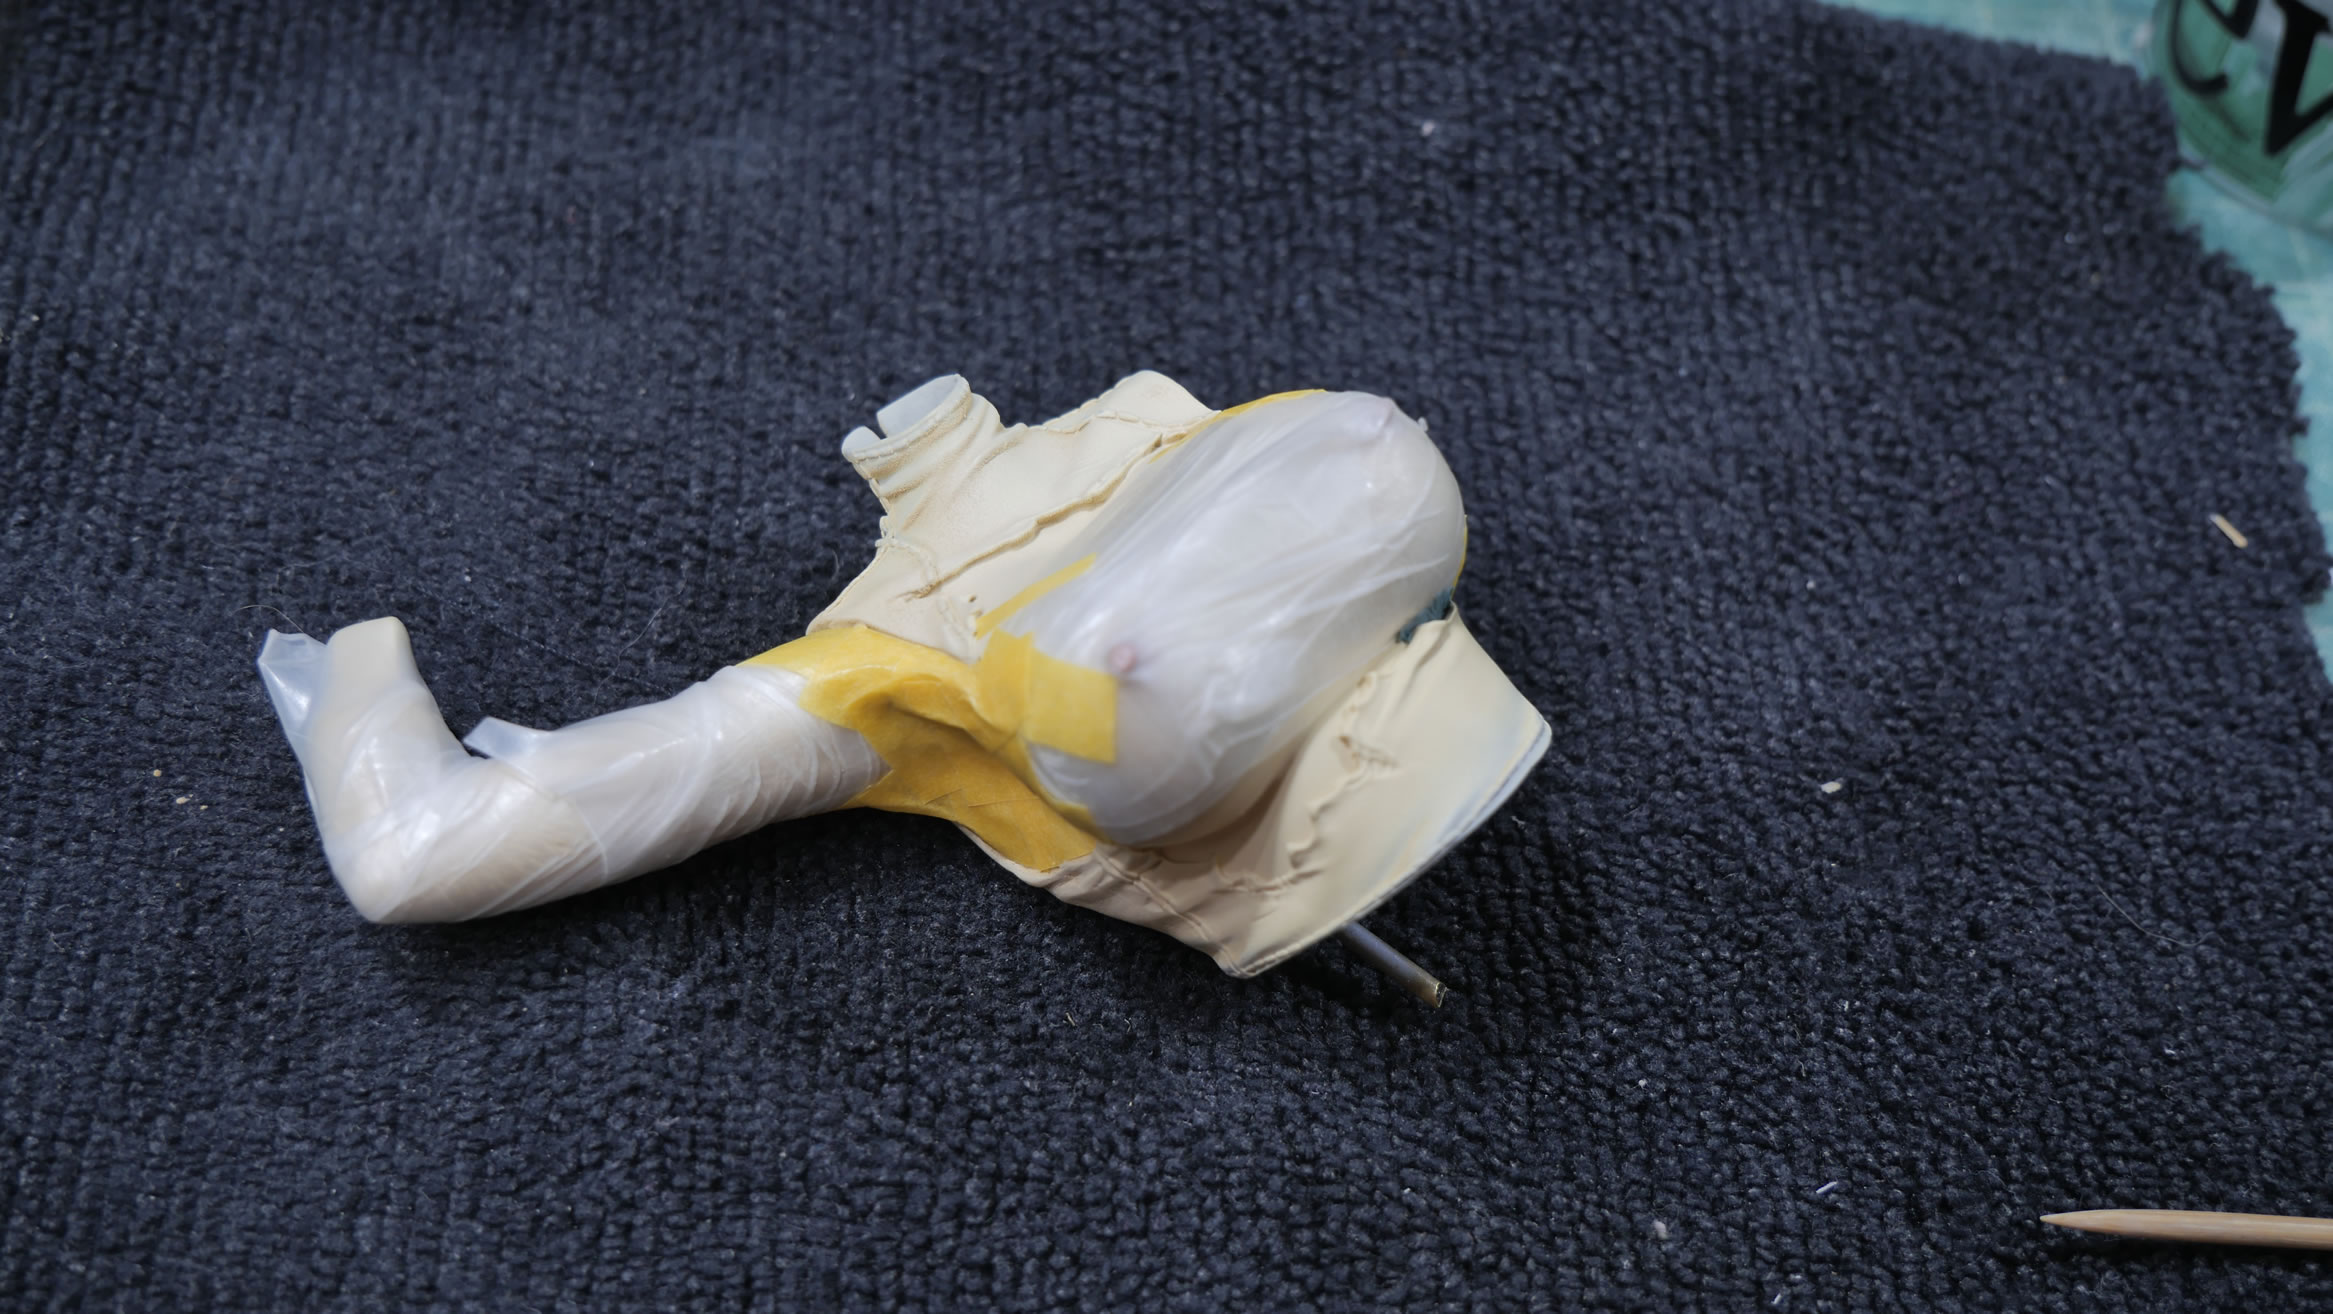
The removable blouse piece is painted and masked. A dark skin tone is painted first then masked. From pictures, this clothing piece is a dark shear, so to replicate that, I painted the skin tone and sprayed a clear black to shade in the tinted shear look. Once that dried, it’s masked off and the same black enamel and gunmetal is painted/shaded.
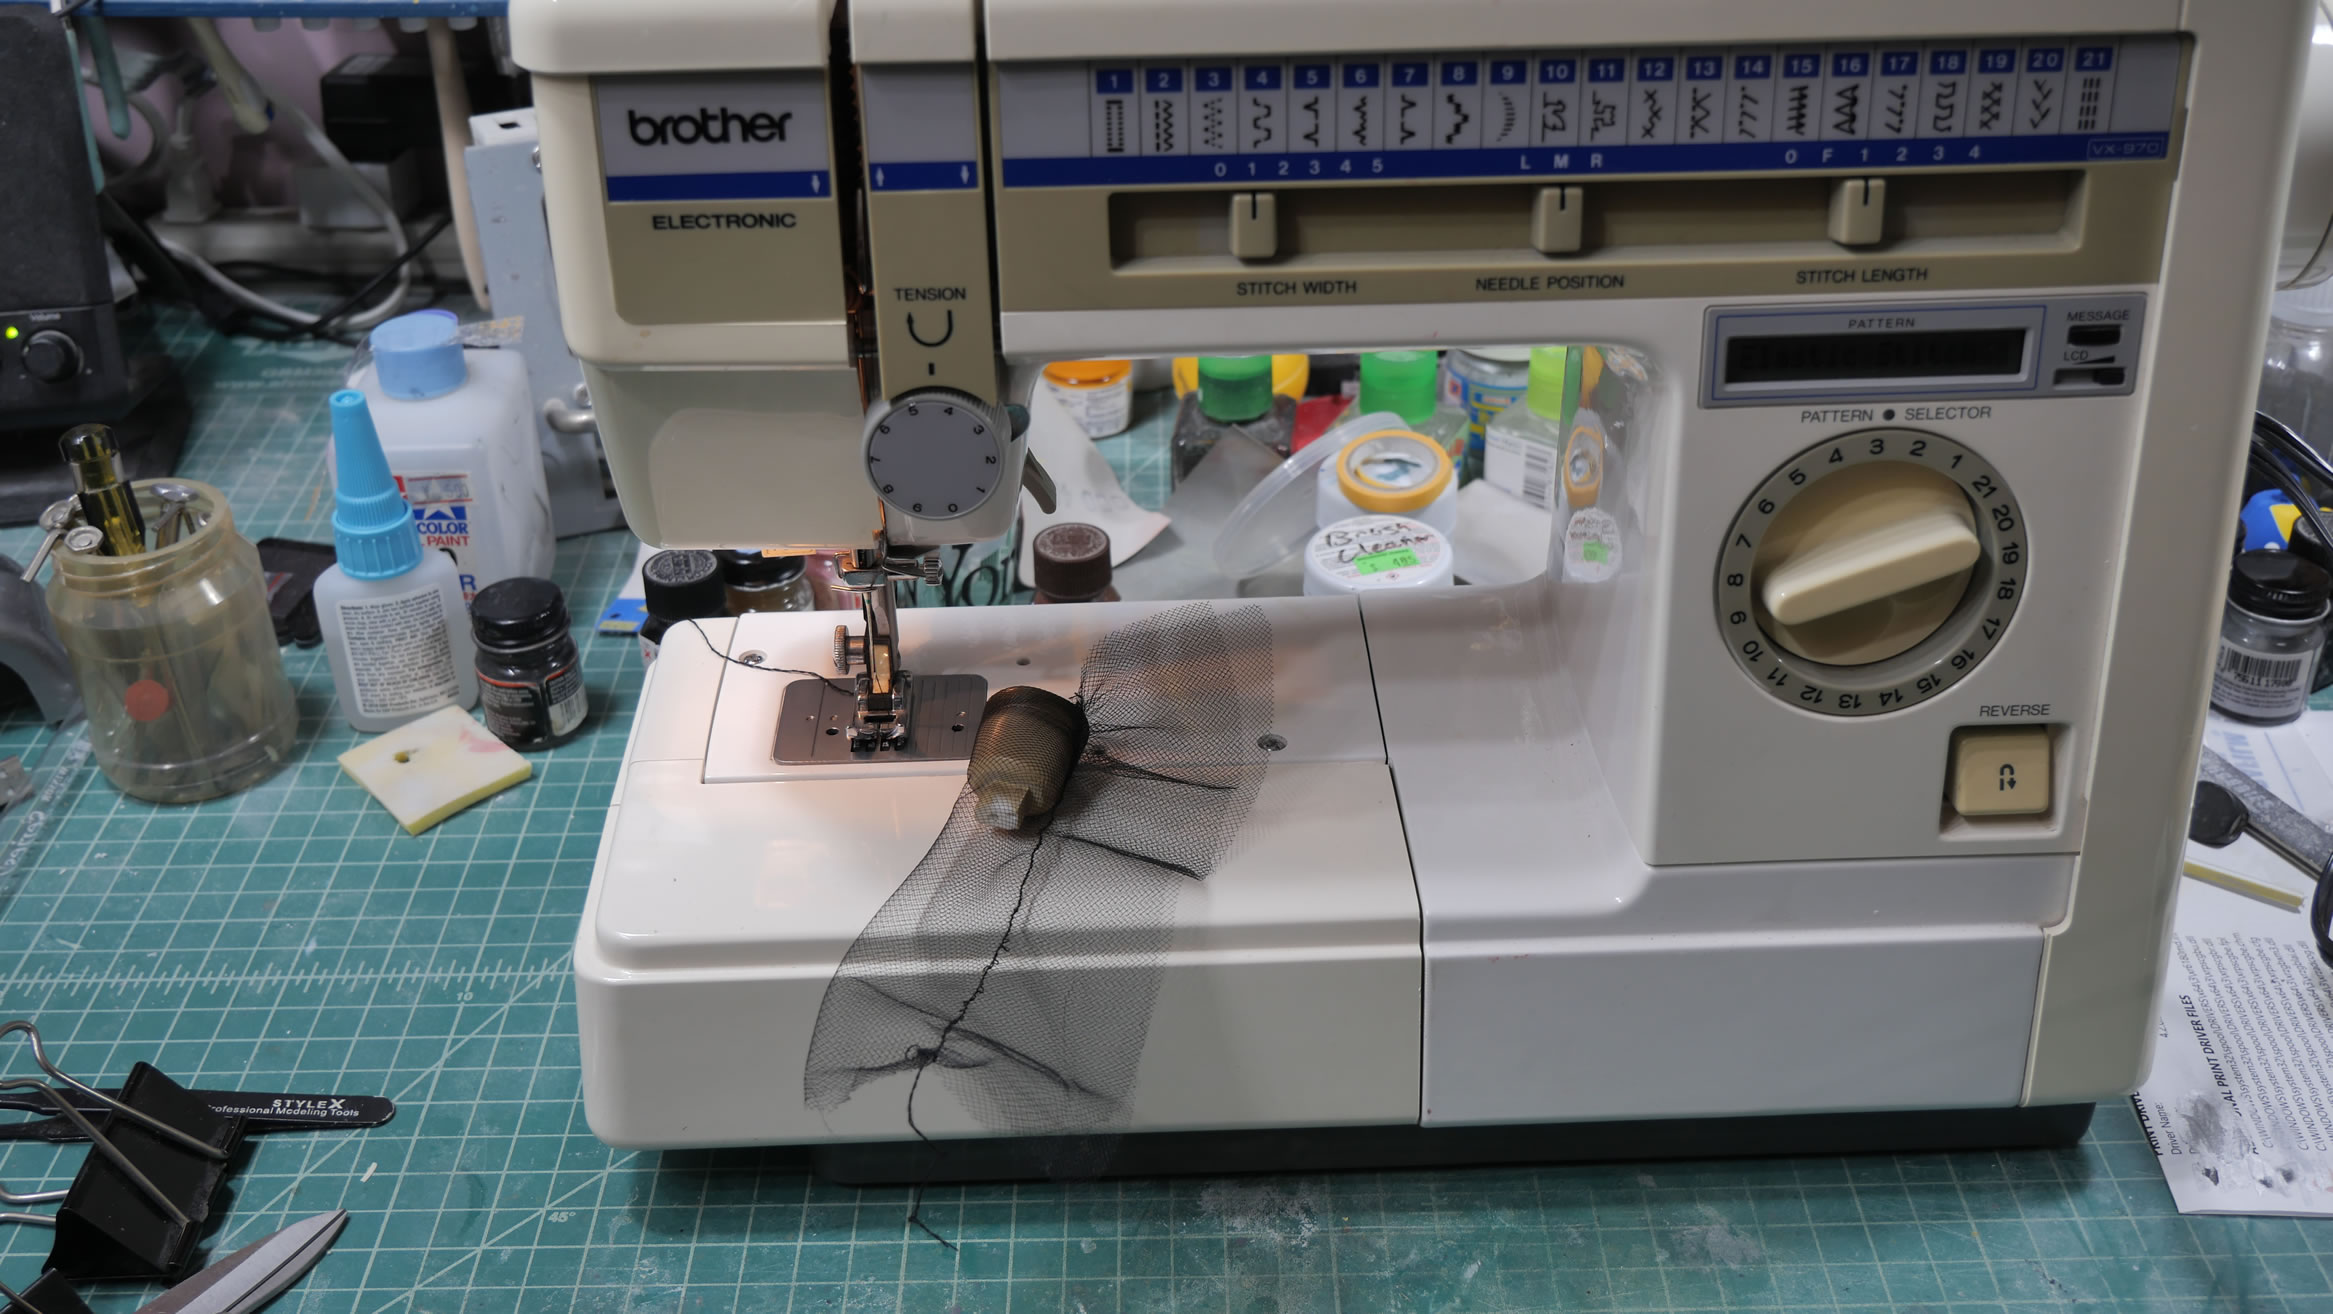
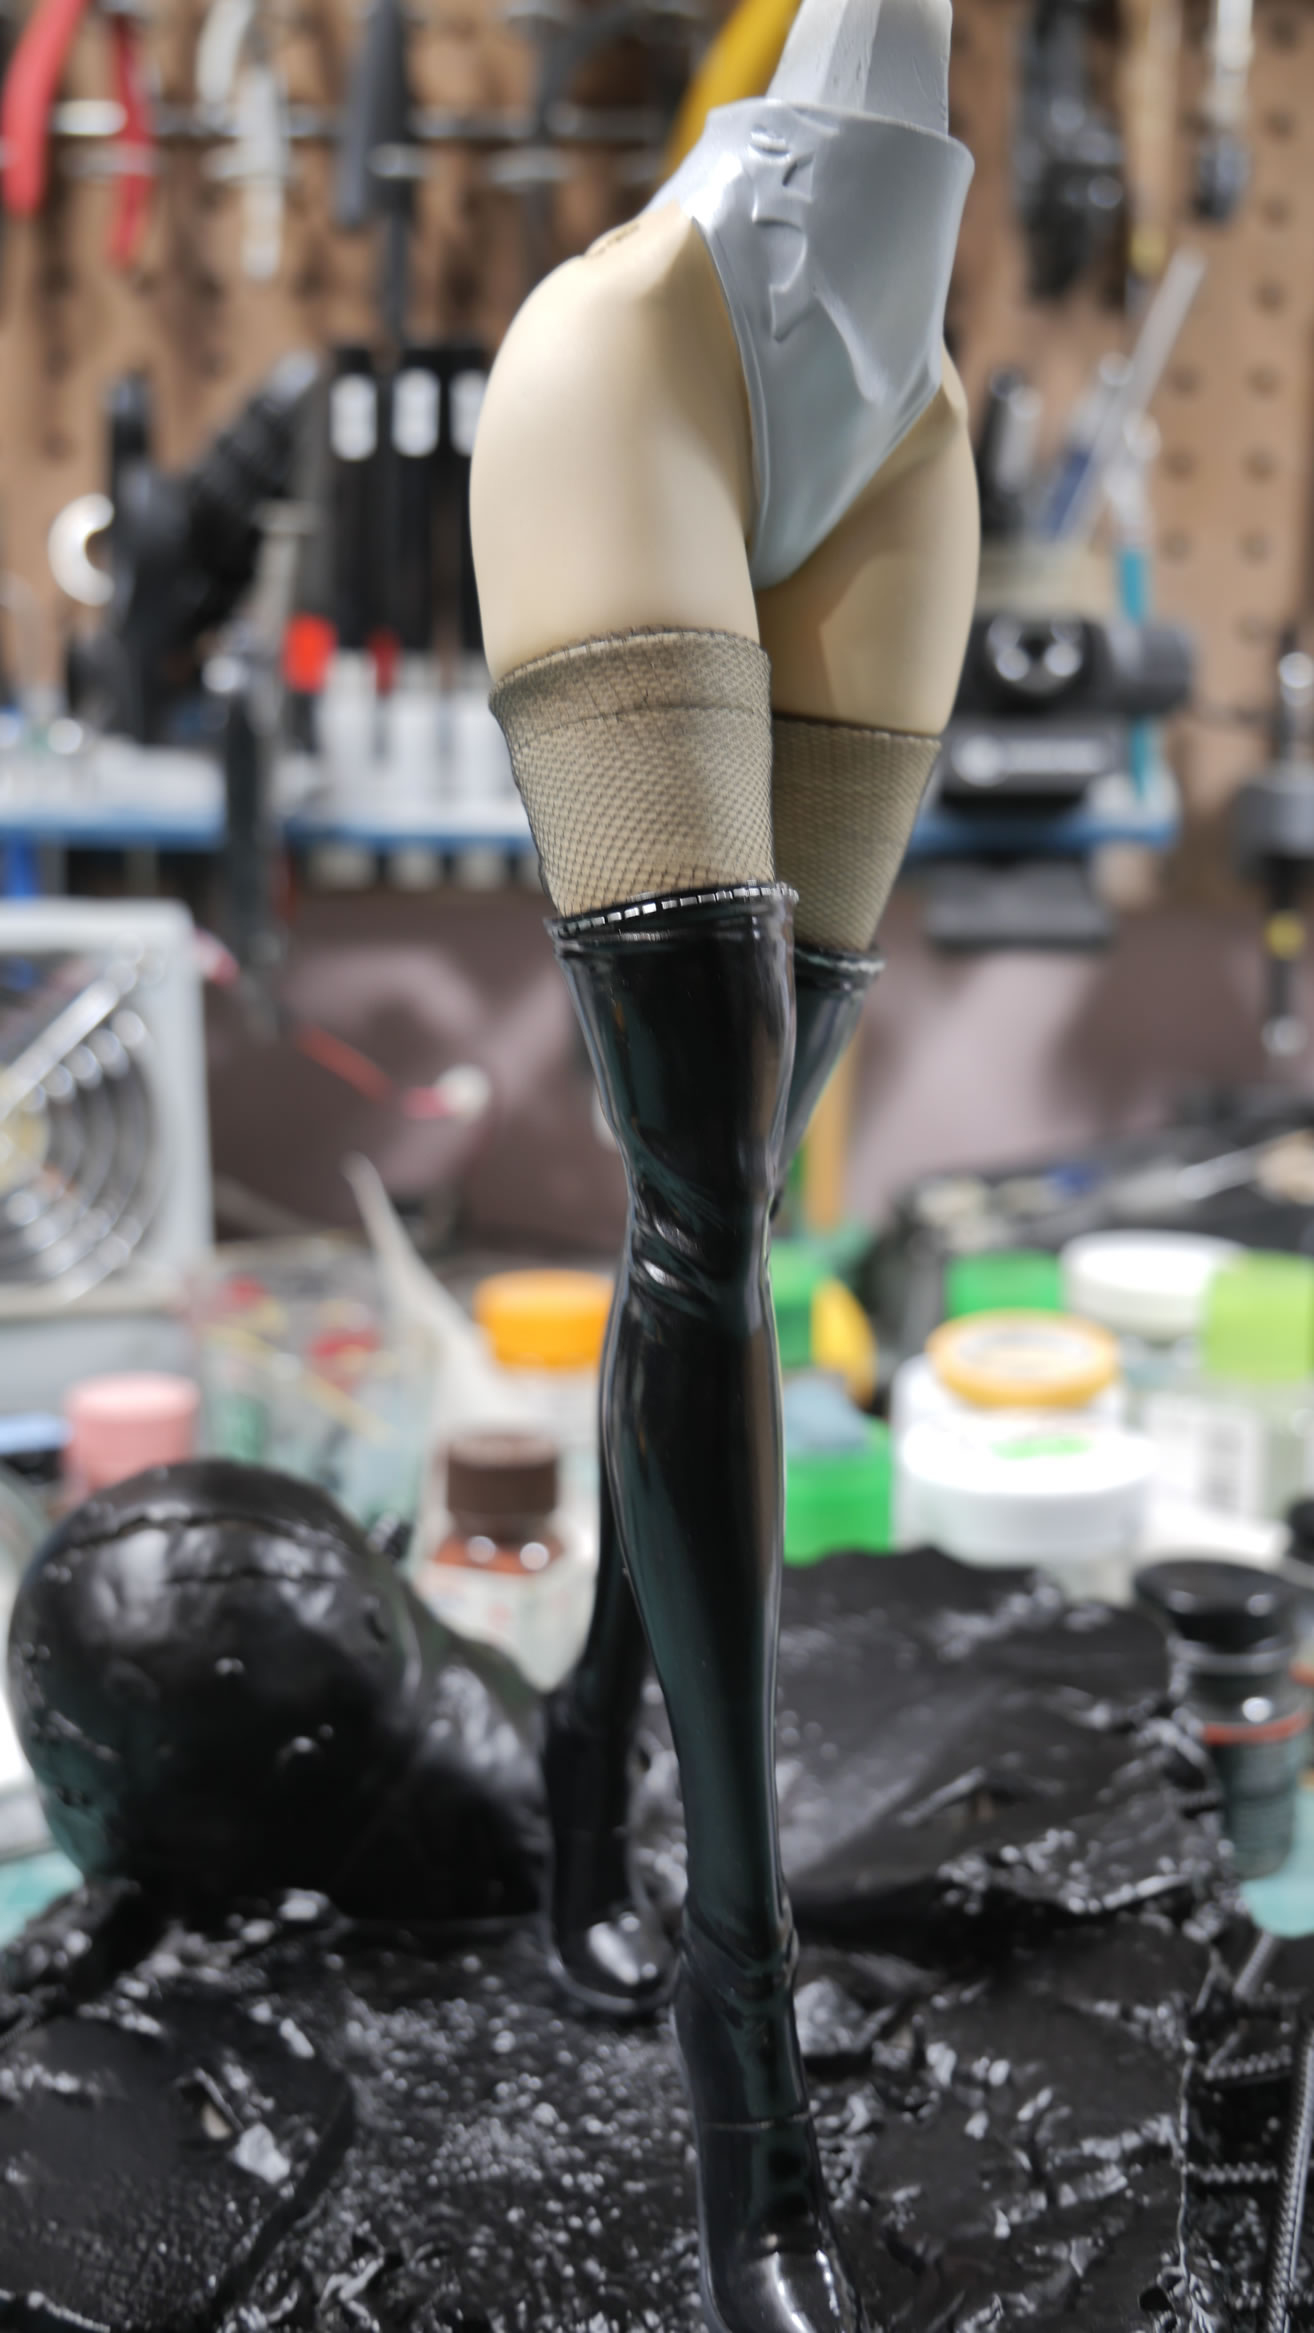
The upper skin tone leg pieces had details for ripped pantyhose. I didn’t want to bother with masking all those details so I puttied and sanded away those details and just painted those upper thigh parts the standard skin tone colors. Breaking out the sewing machine, I sewed up some nylon panty hose and socked it over the painted thigh pieces. Once I get further along with the build, I’ll just trim out the rips in the hose.
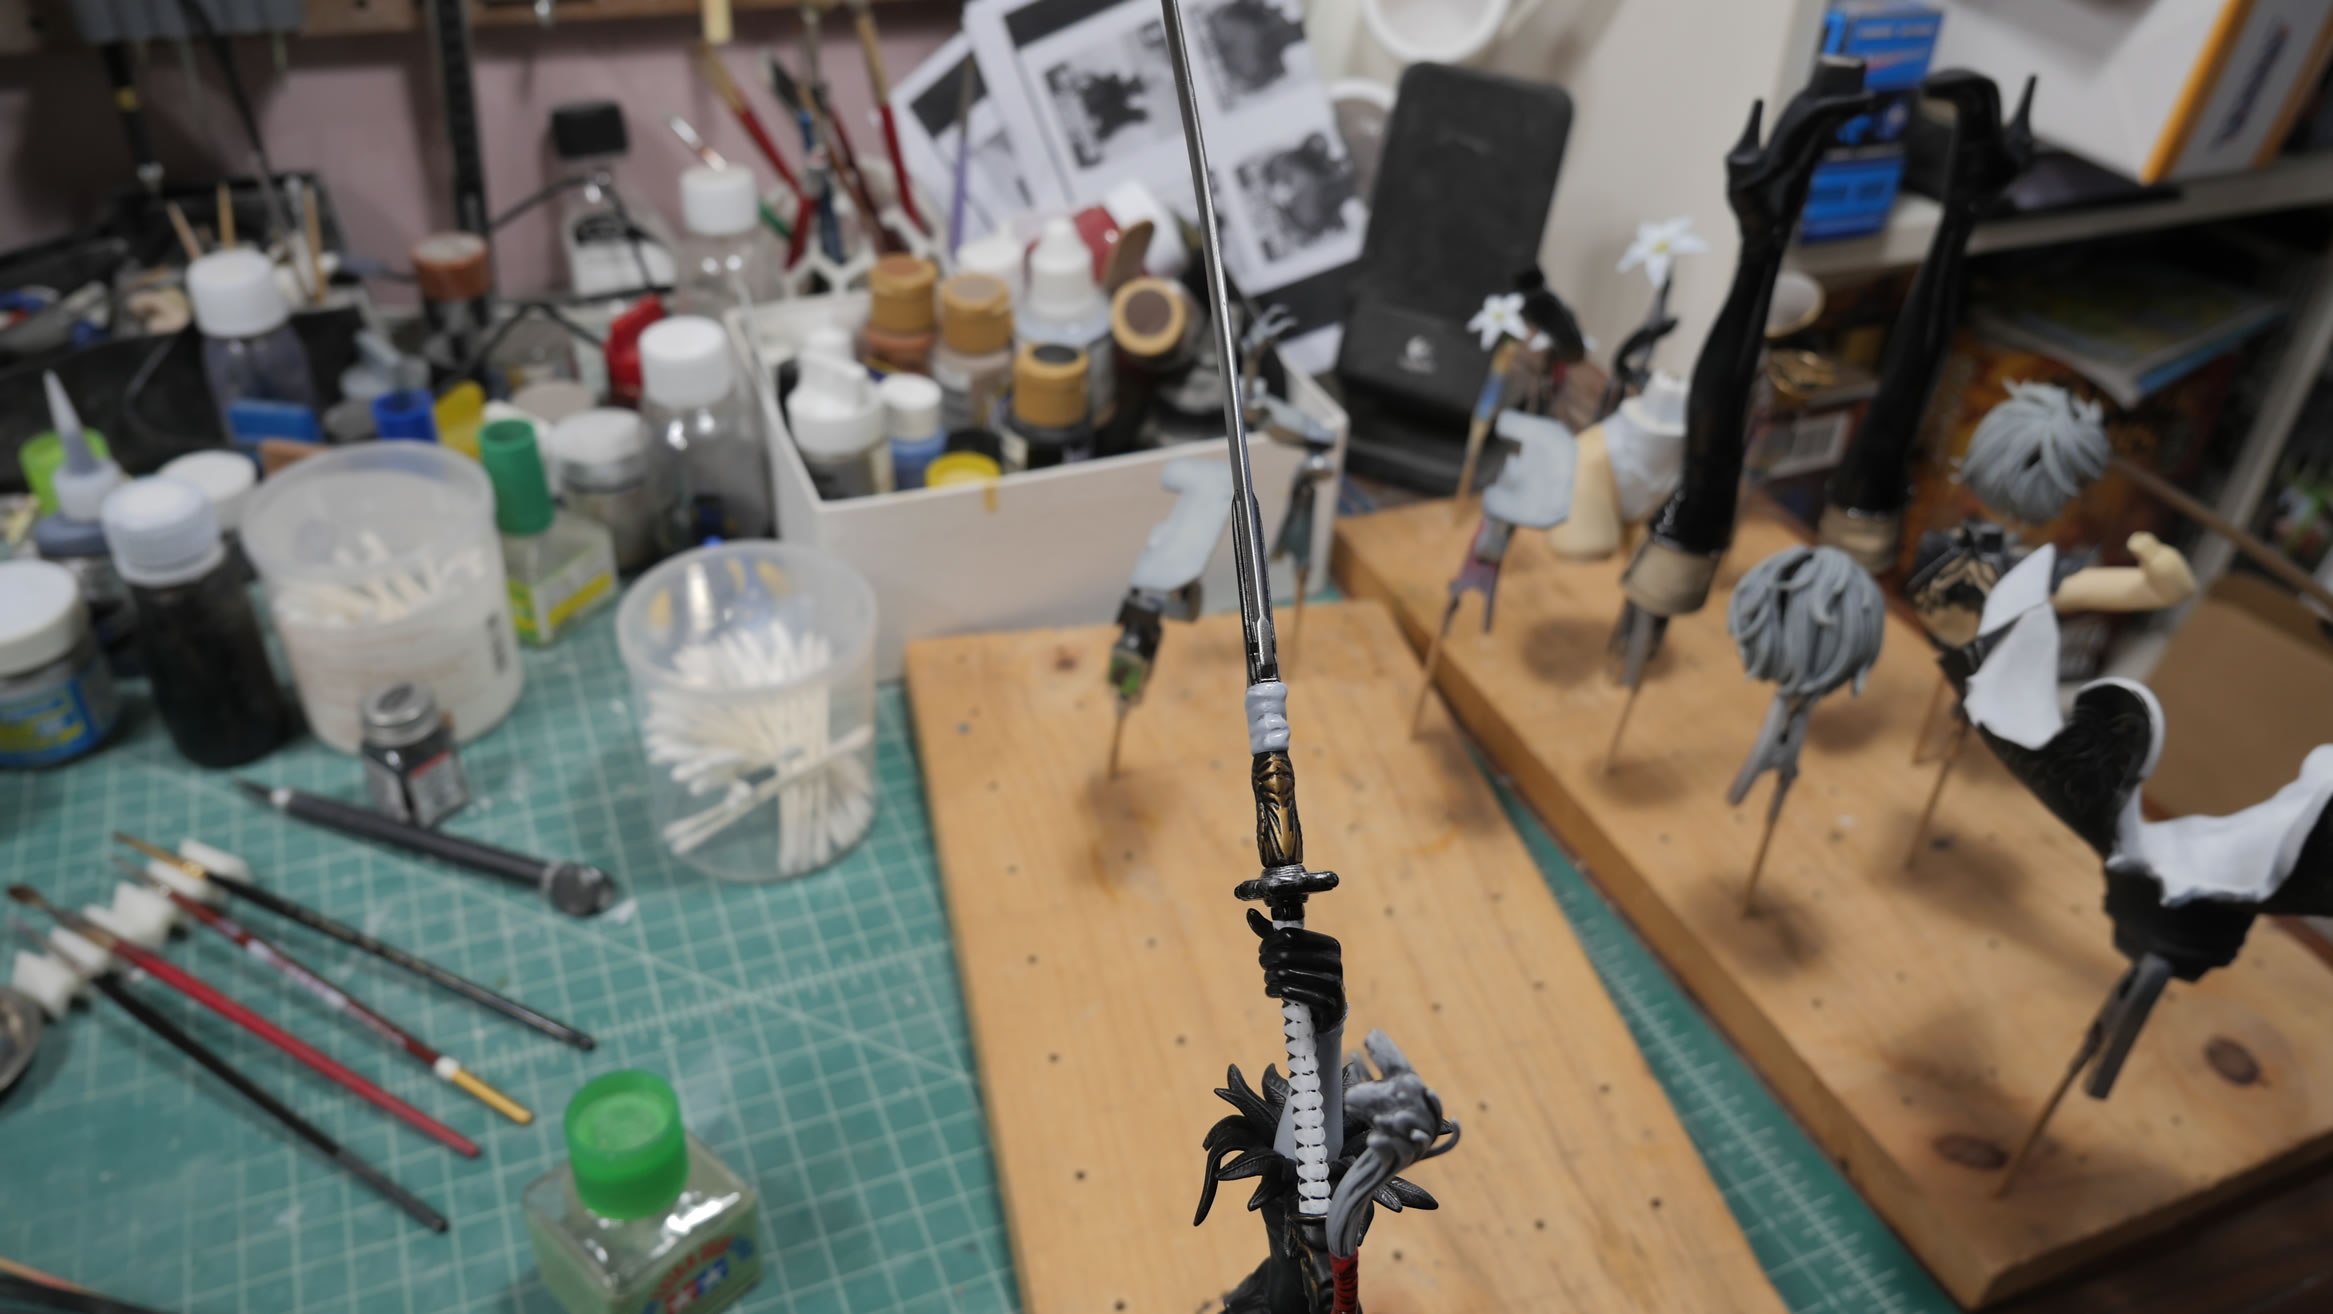
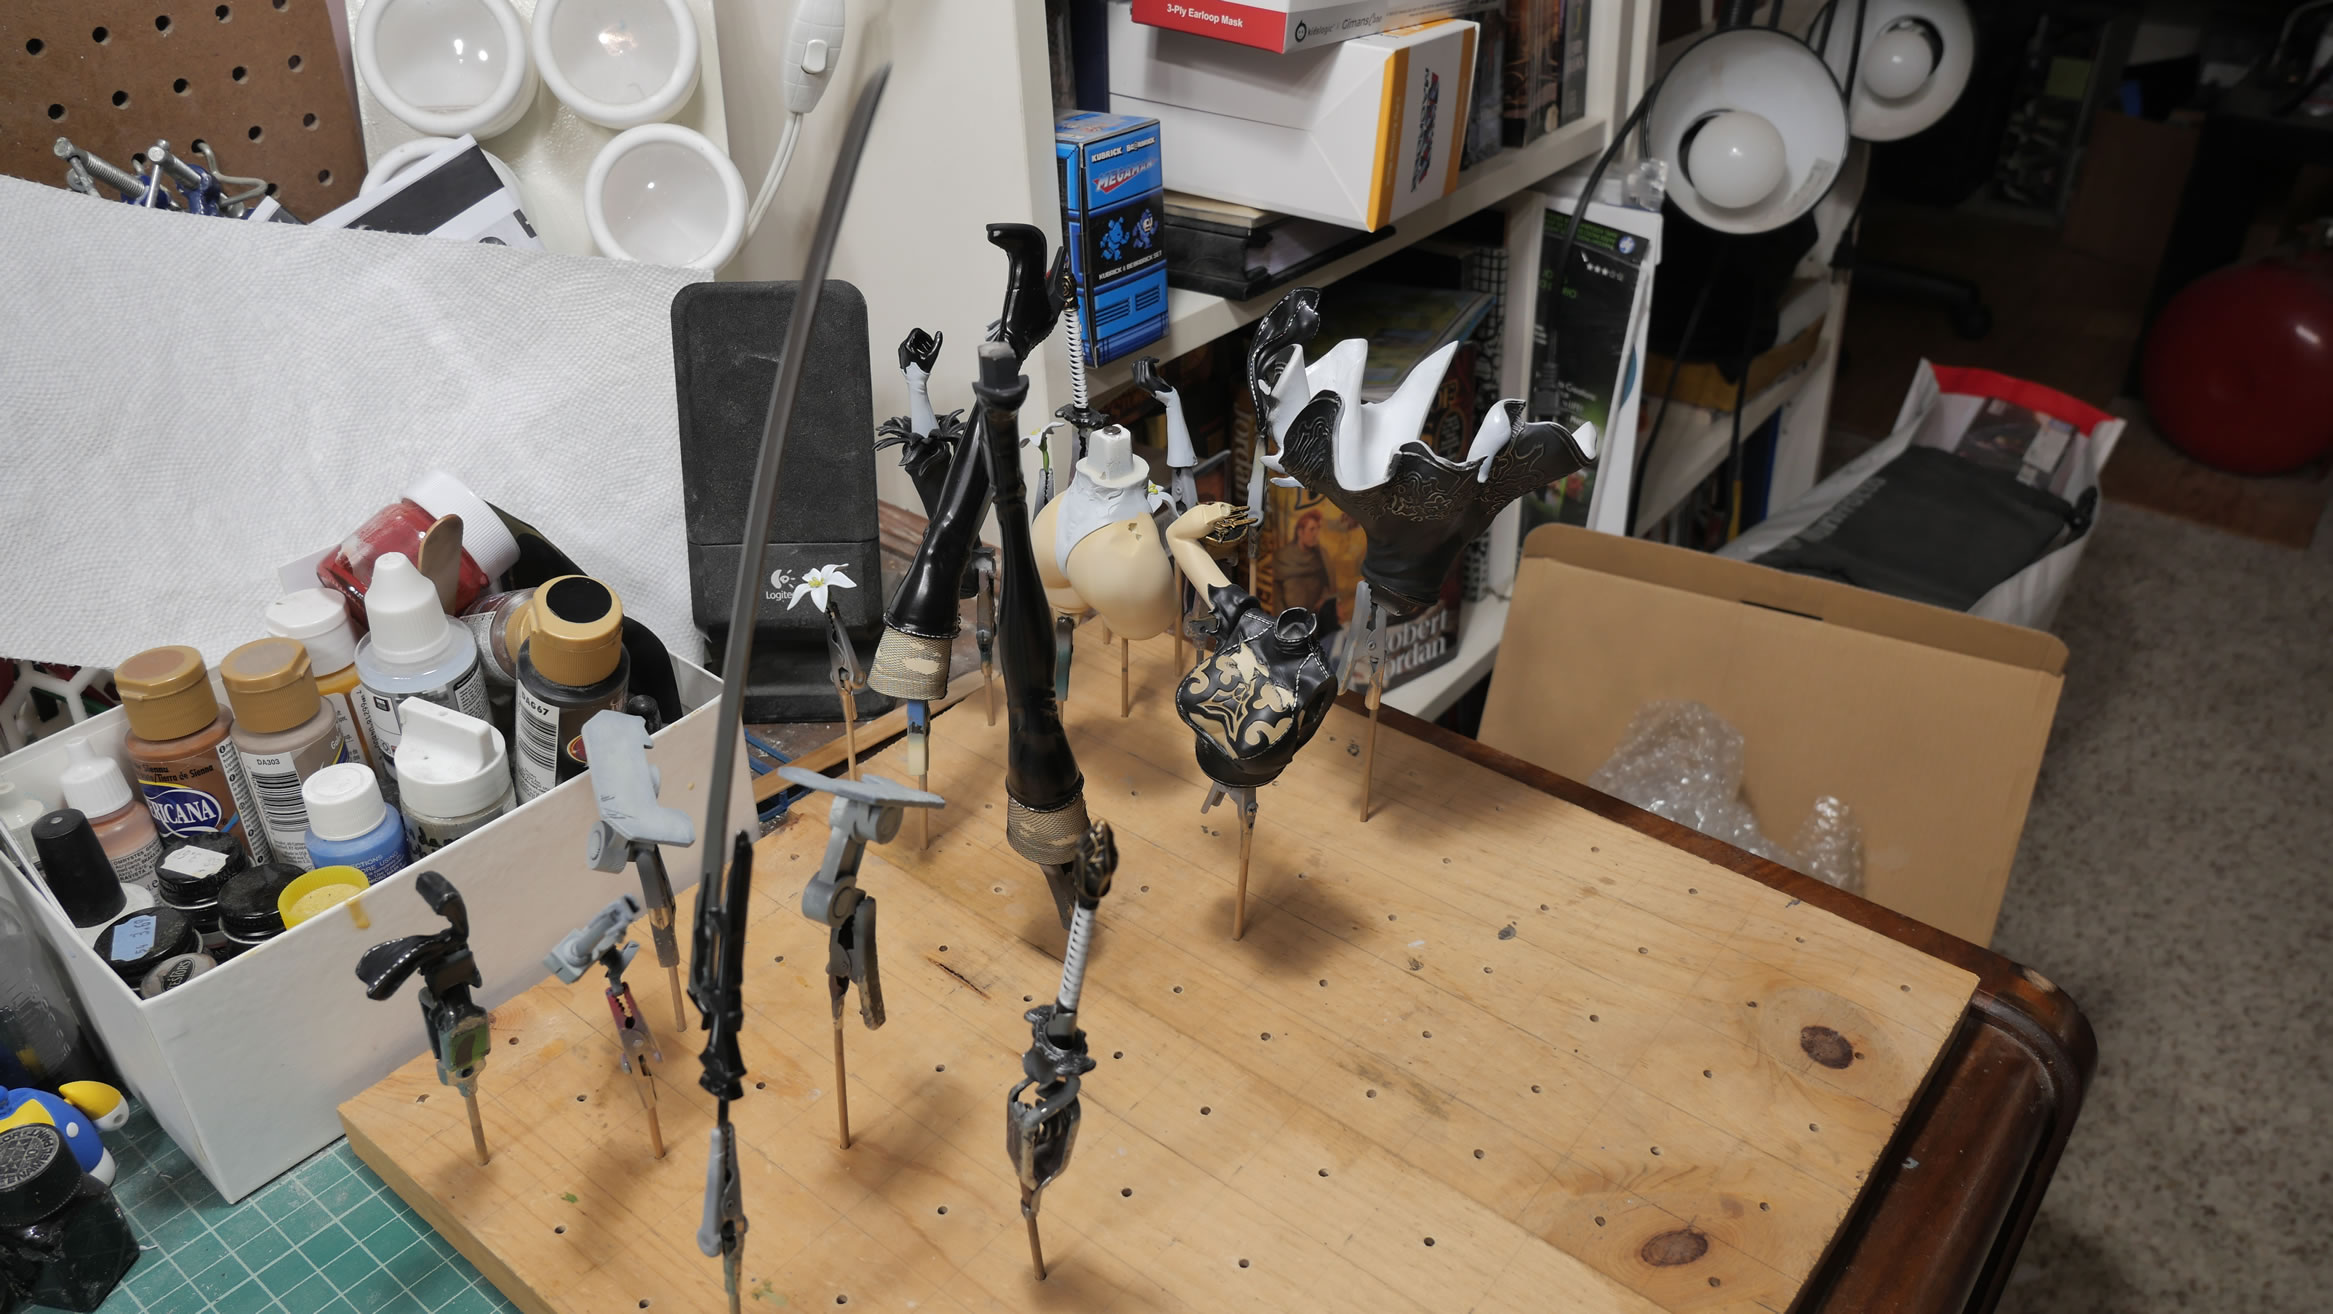
The main figure is almost done. The swords still need detail work, but another quick turnaround for the main figure.
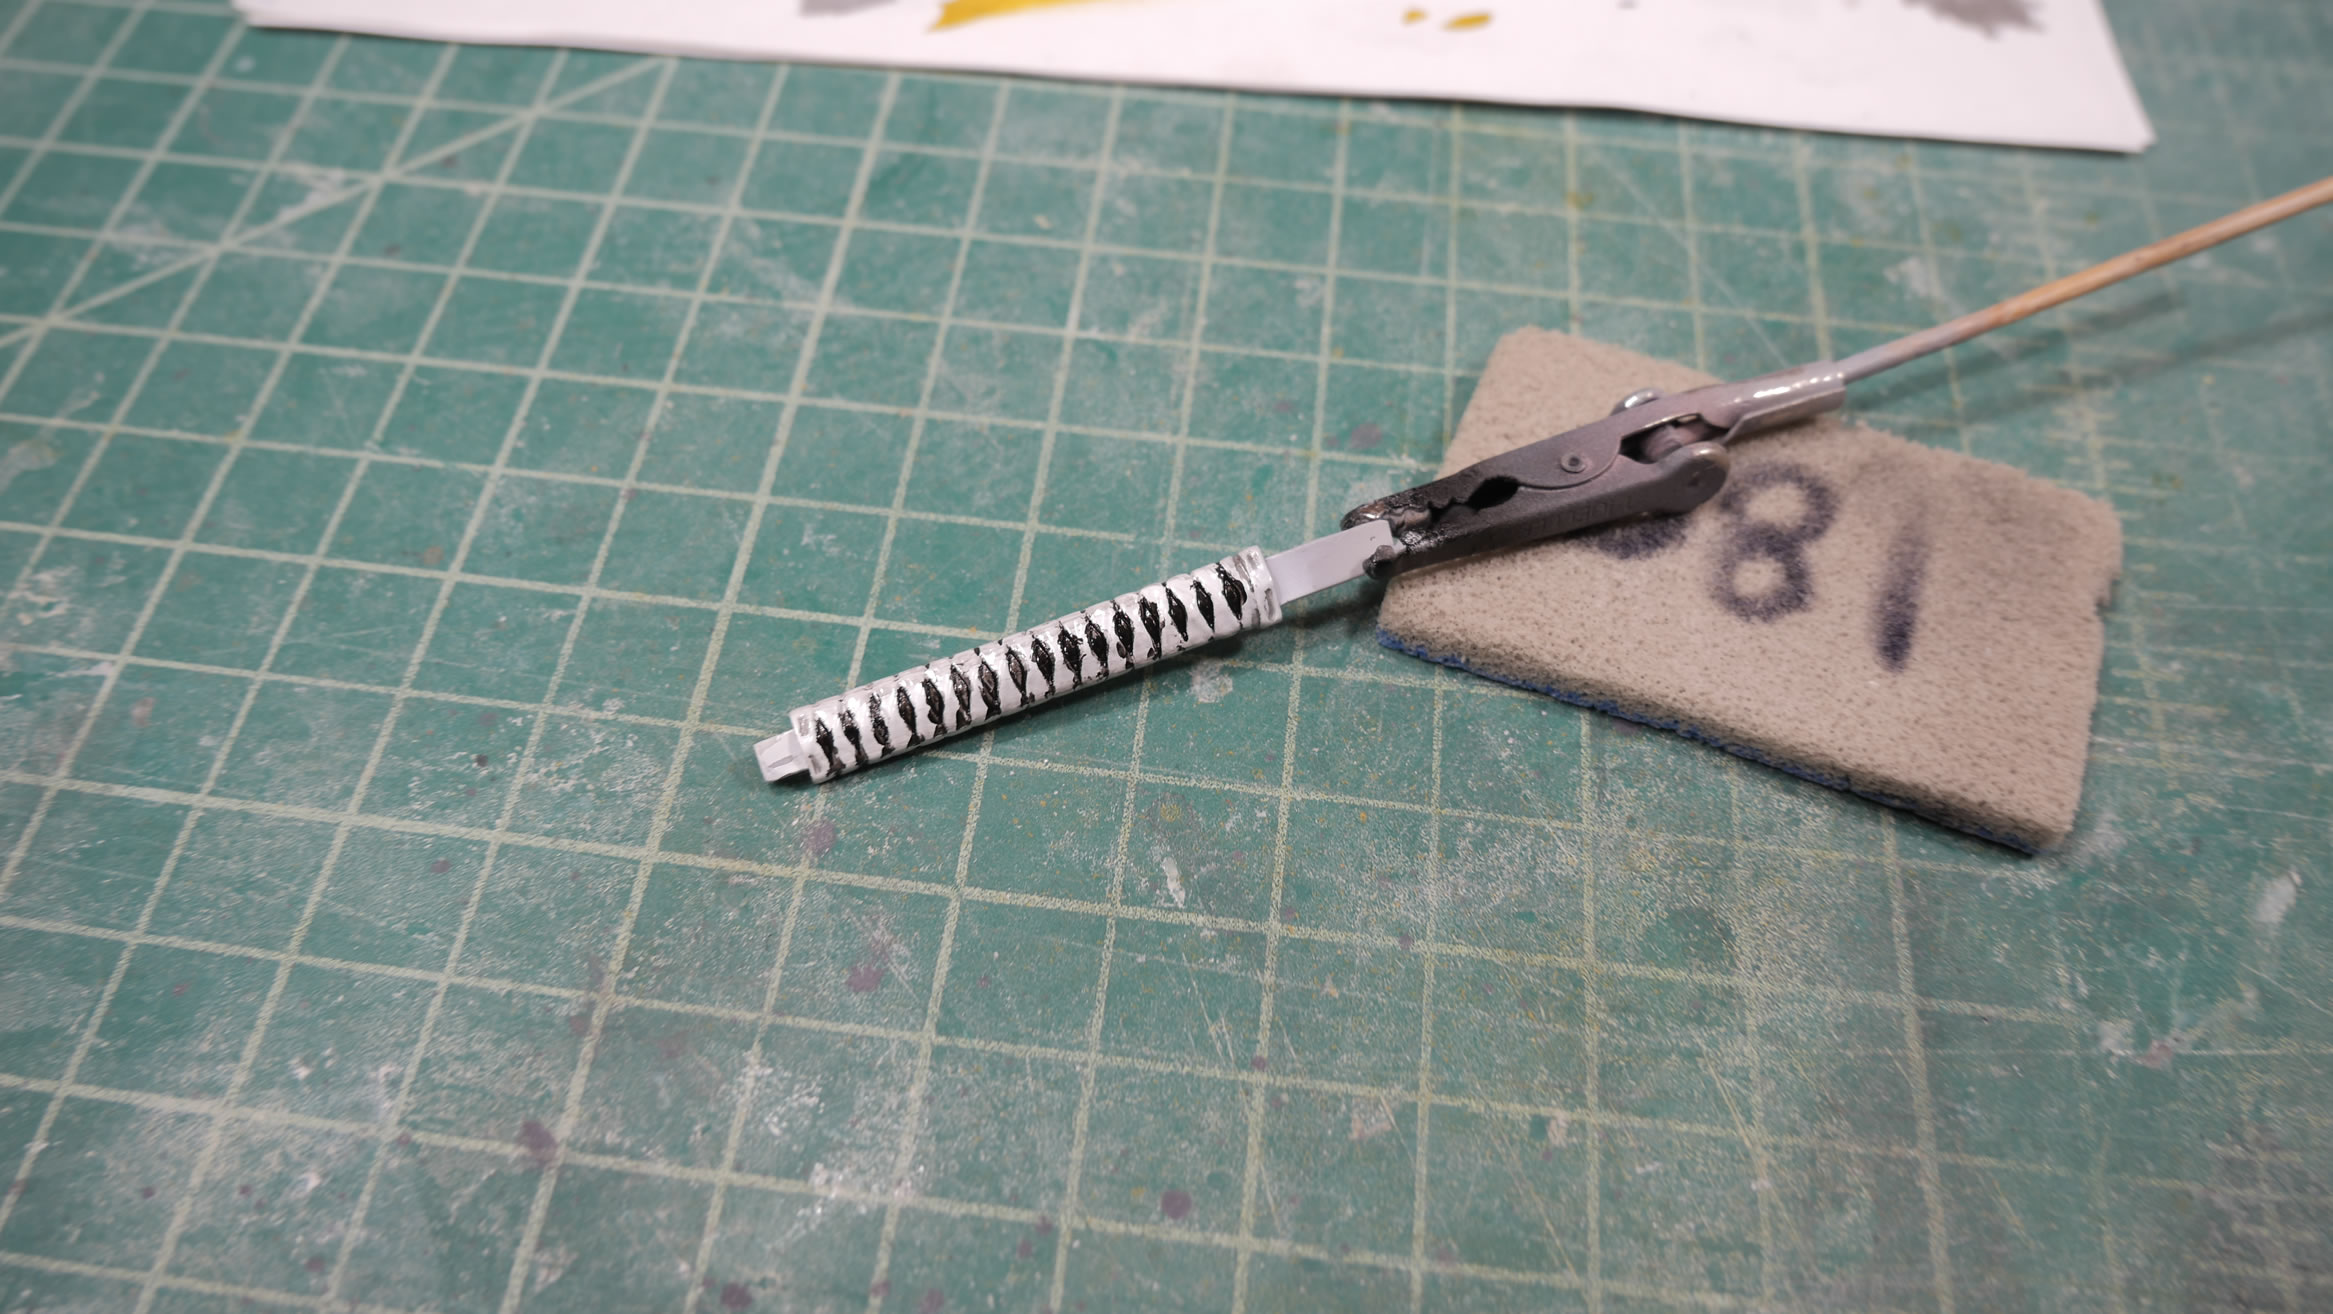
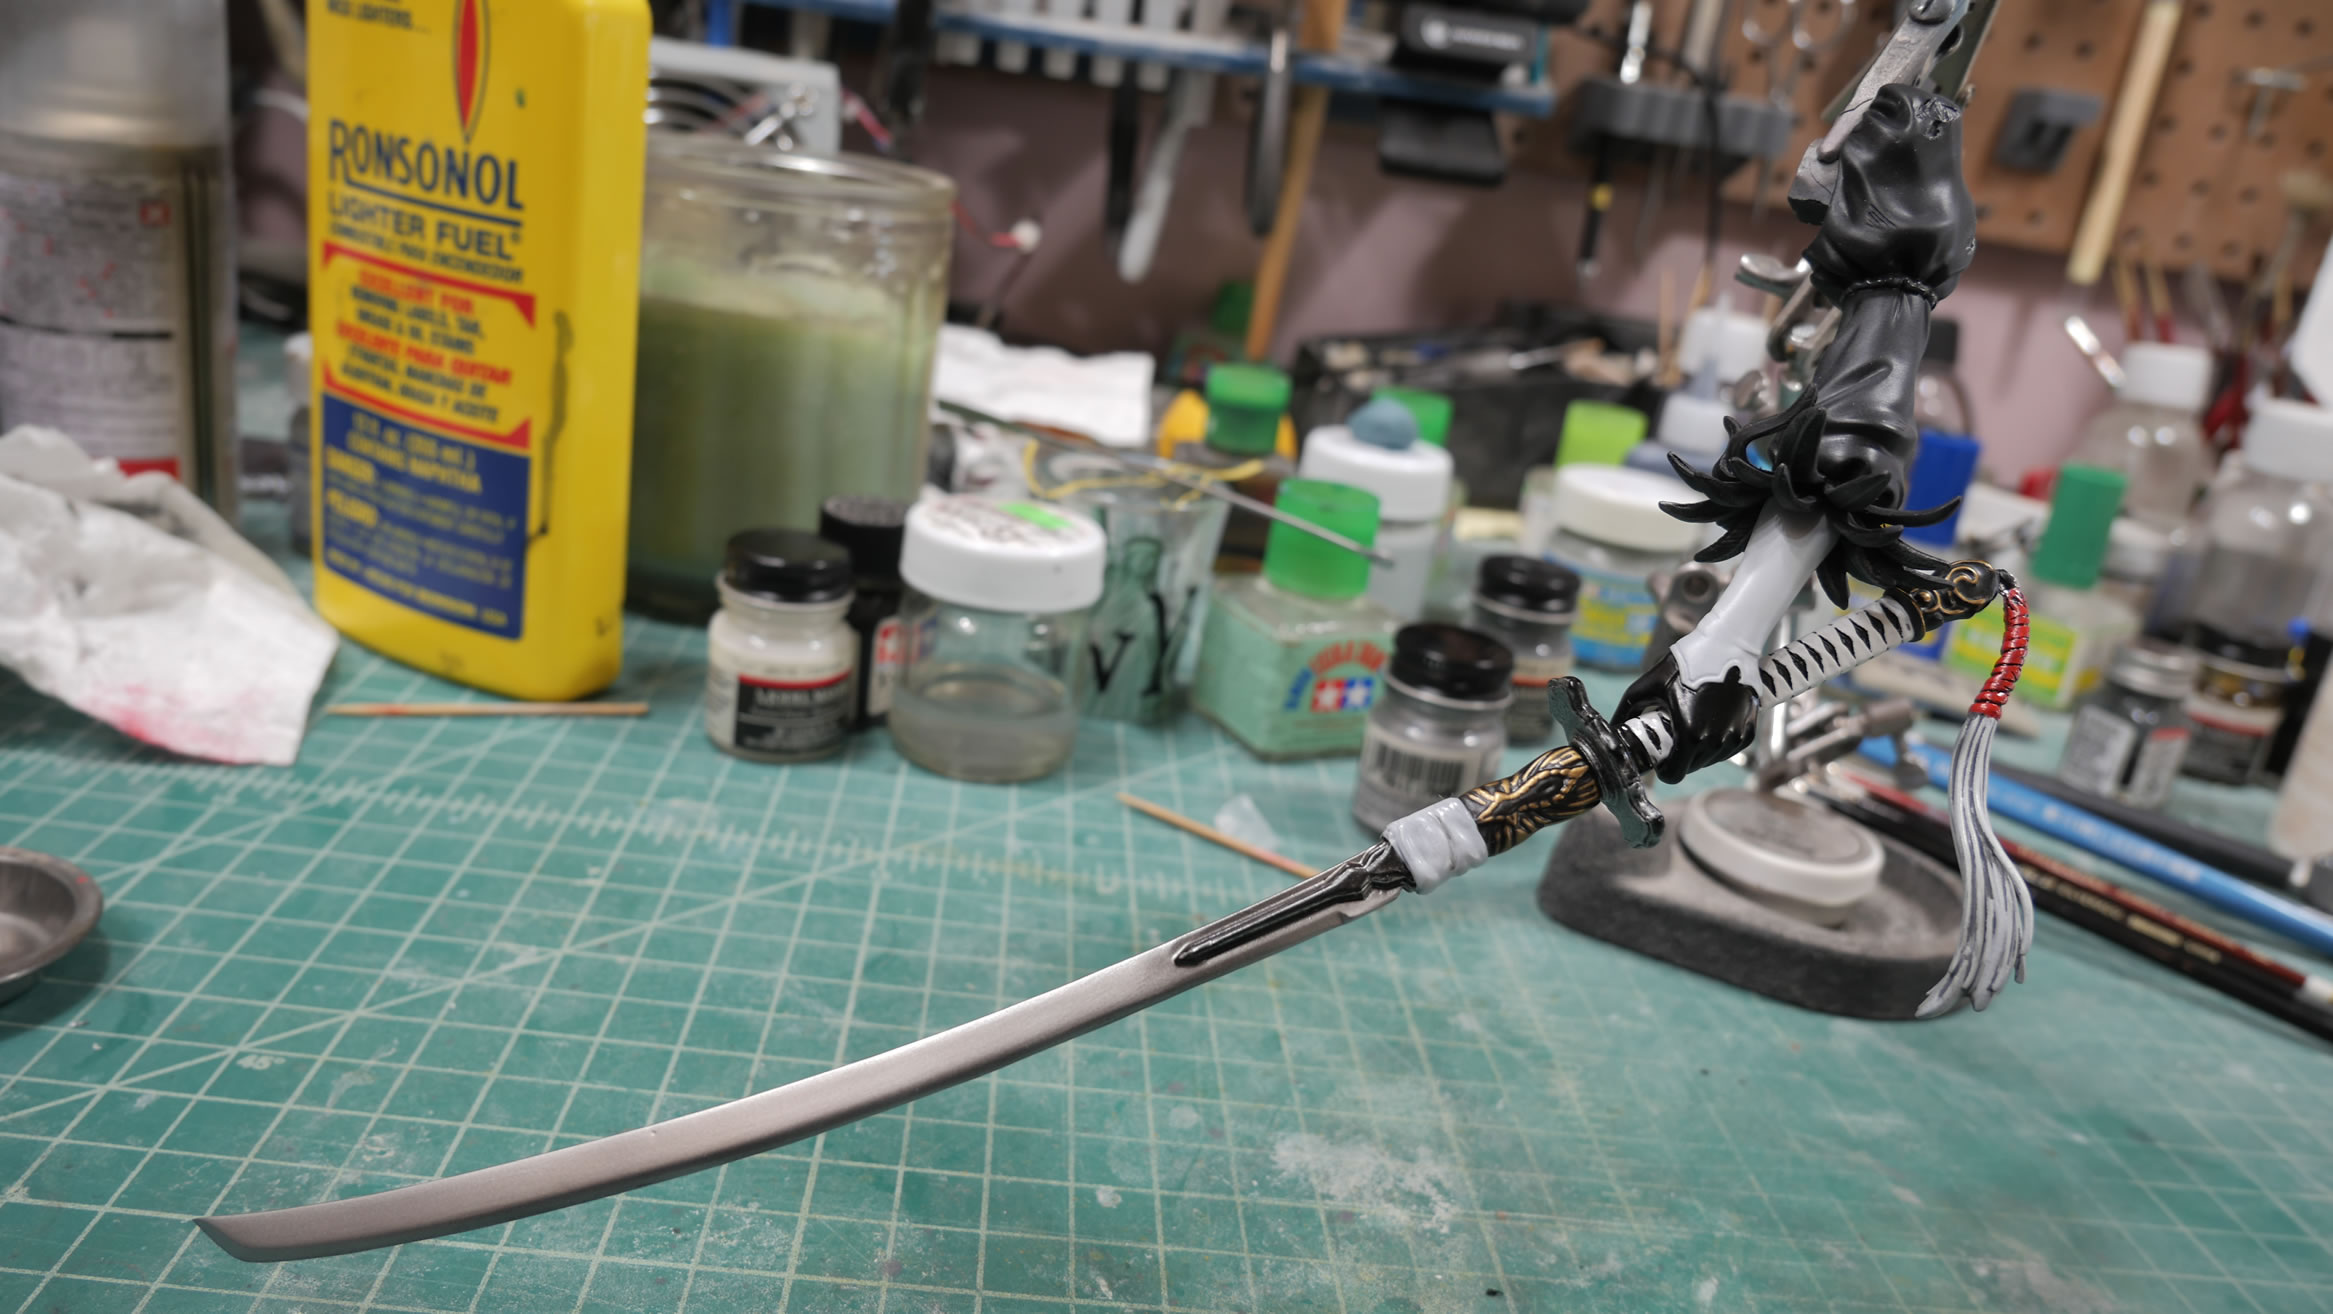
Sword hilt detail work. Enamel black paint over the lacquer white make for easy cleanup and detailing. The rest of the parts are sitting and getting the slow cure treatment while I get ready to move onto the base.

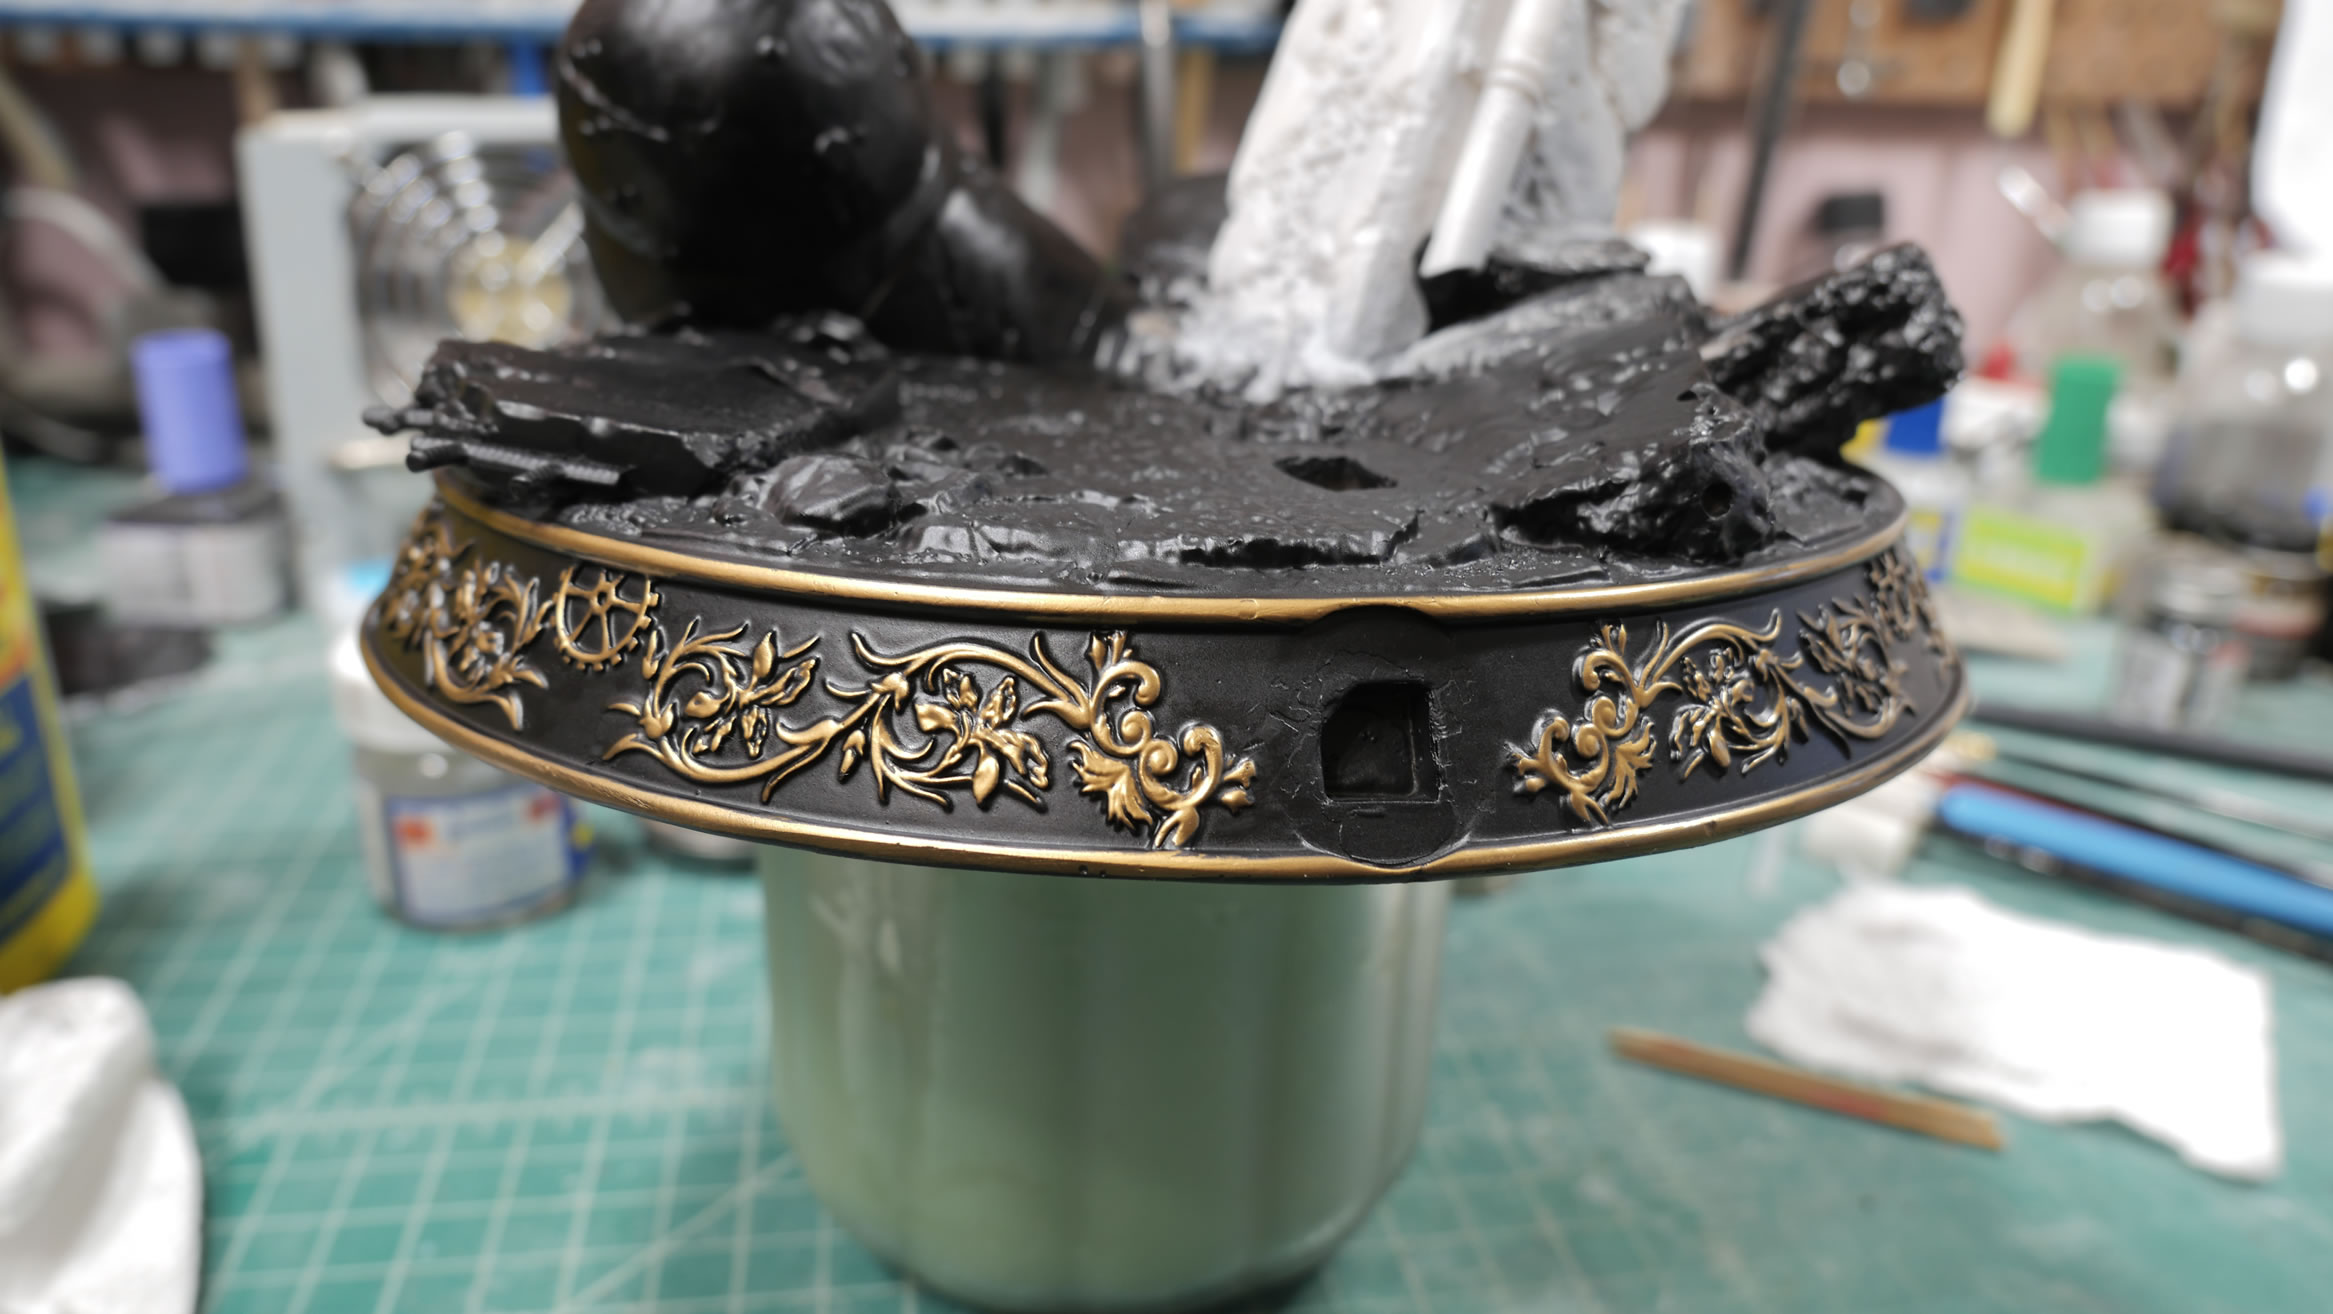
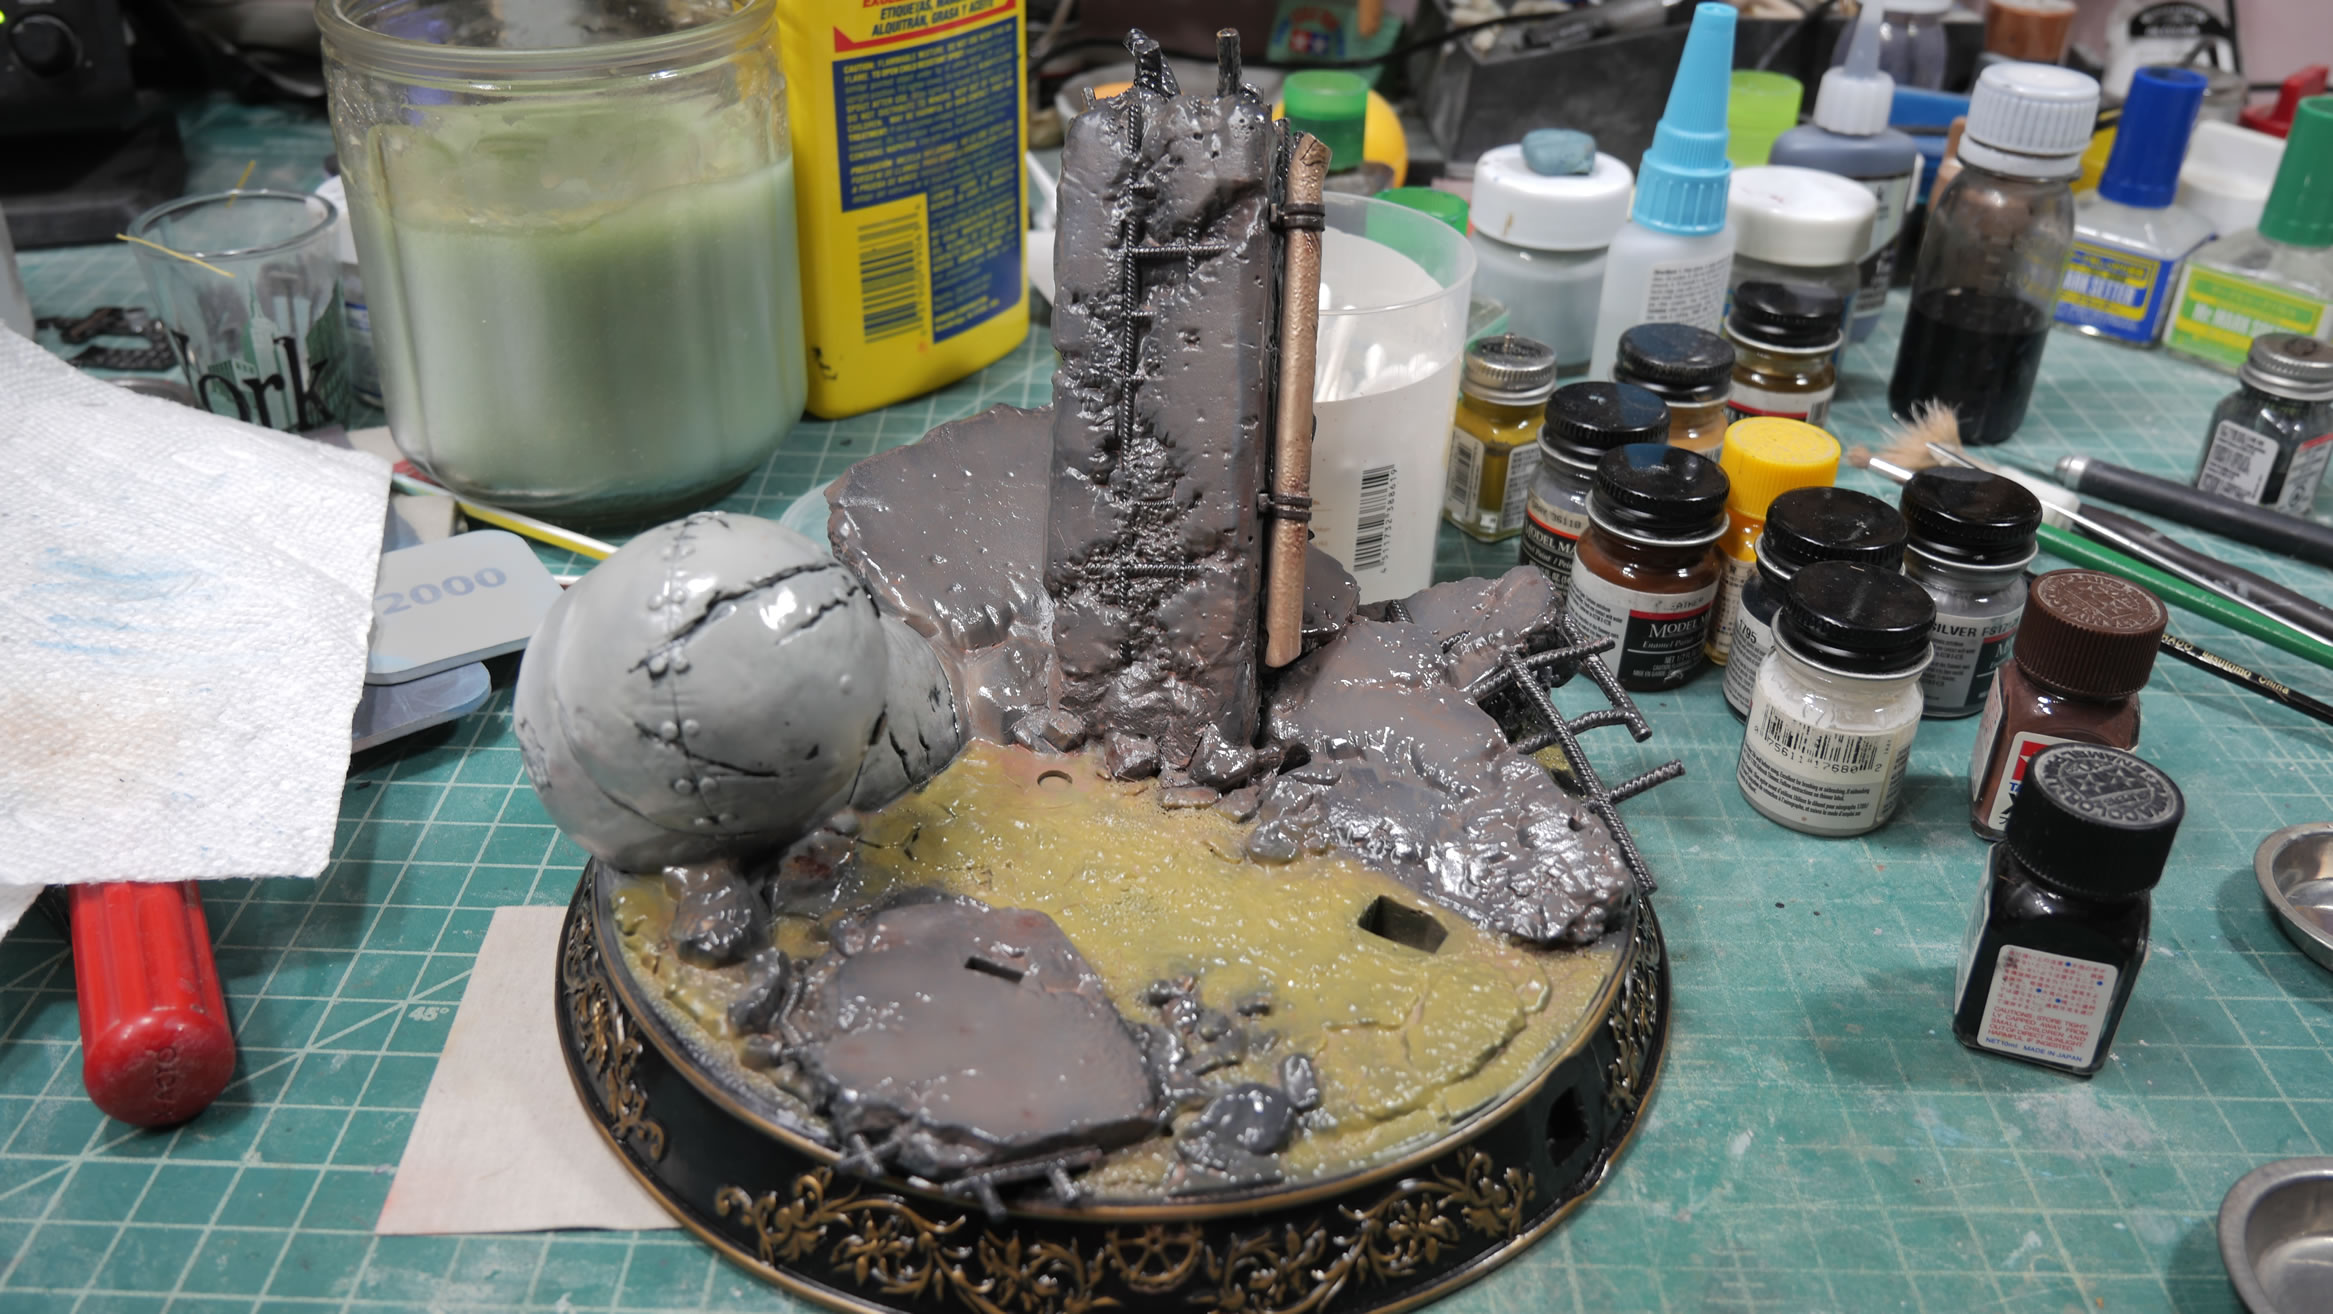
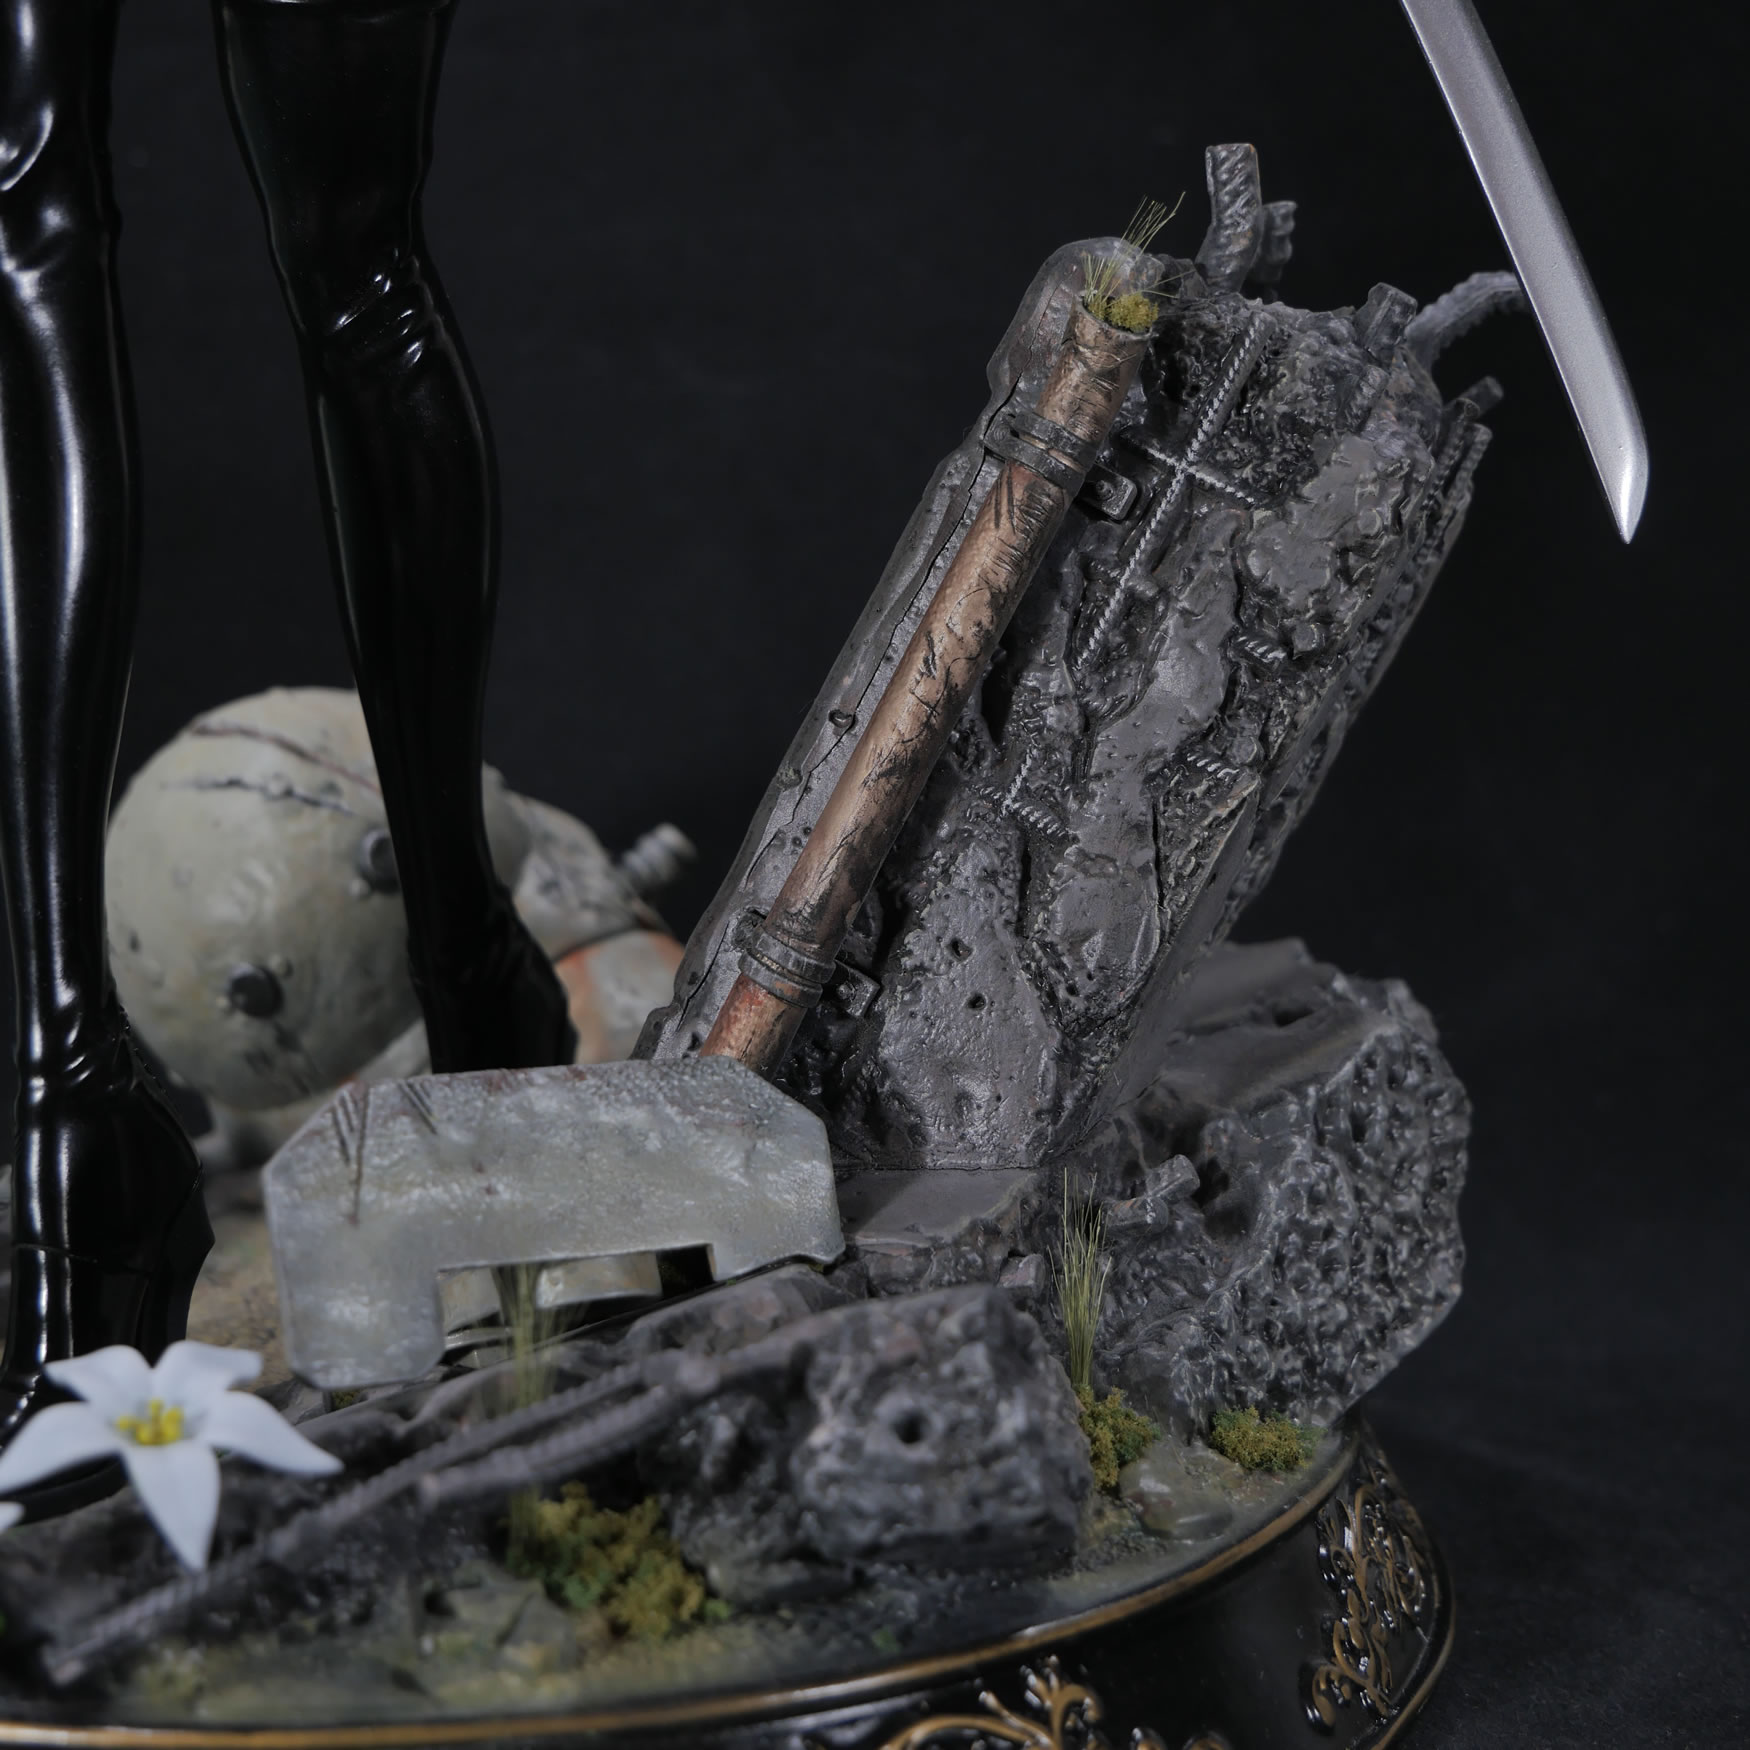
The base gets the same treatment as the skirt details. This time with finisher’s hot gold as the detail color. Once the enamel black dries, the q-tip with lighter fluid goes to work to reveal the gold details below. It also gives a bit of a burnished bronze look to things. Once that is done, the base is dried another in the dehydrator to fully evaporate any residual lighter fluid and wrapped.

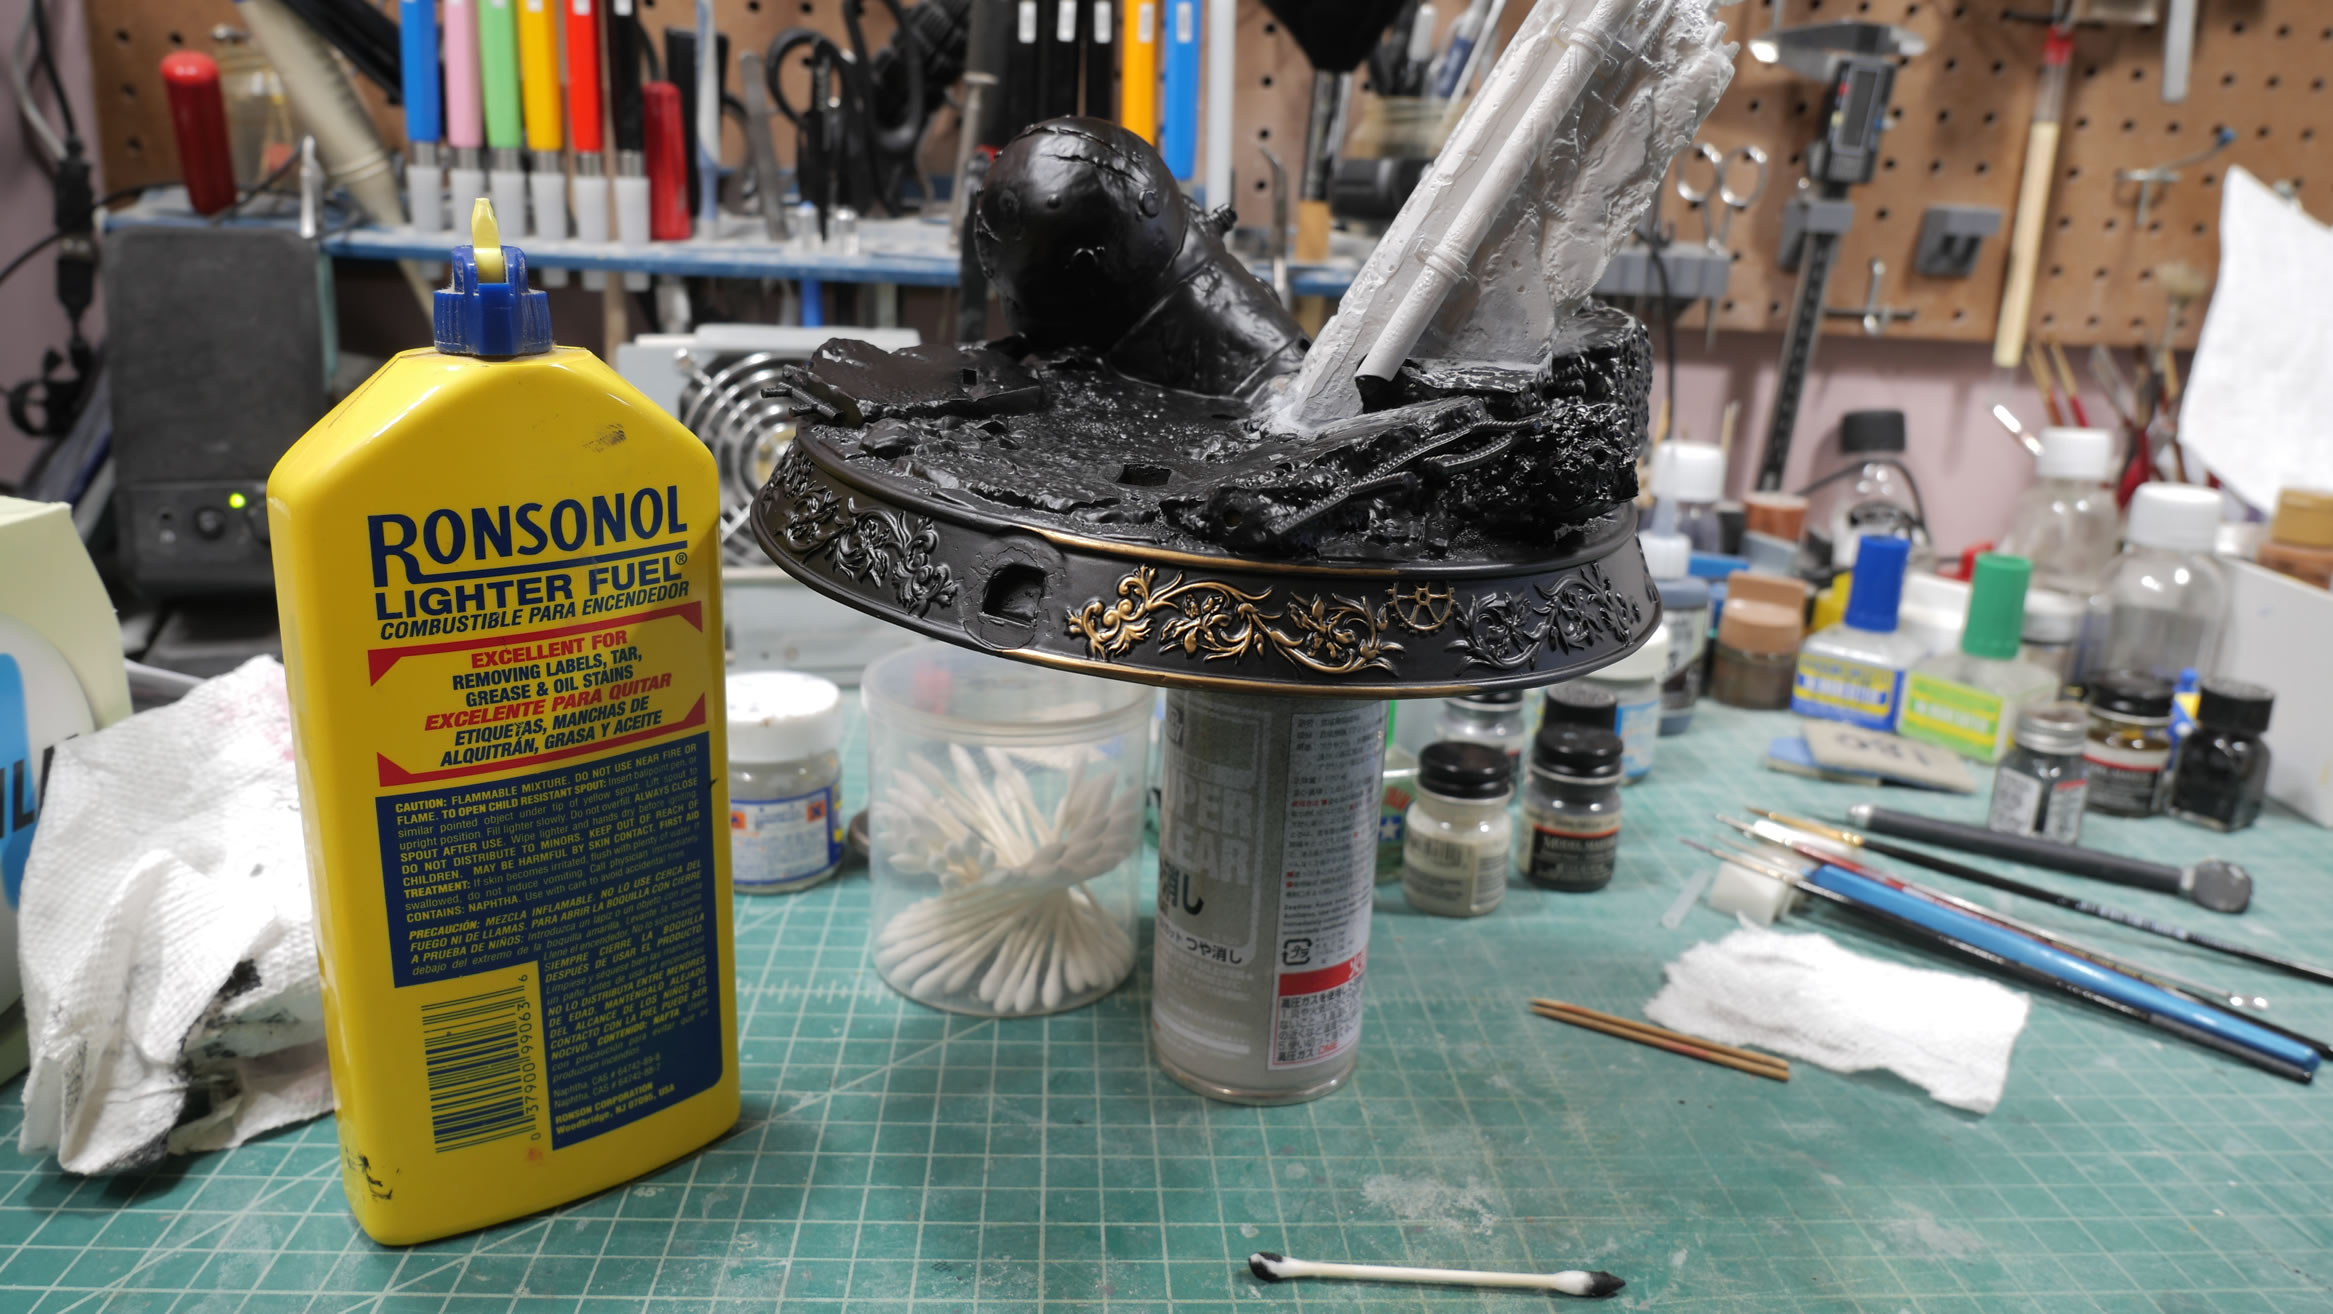
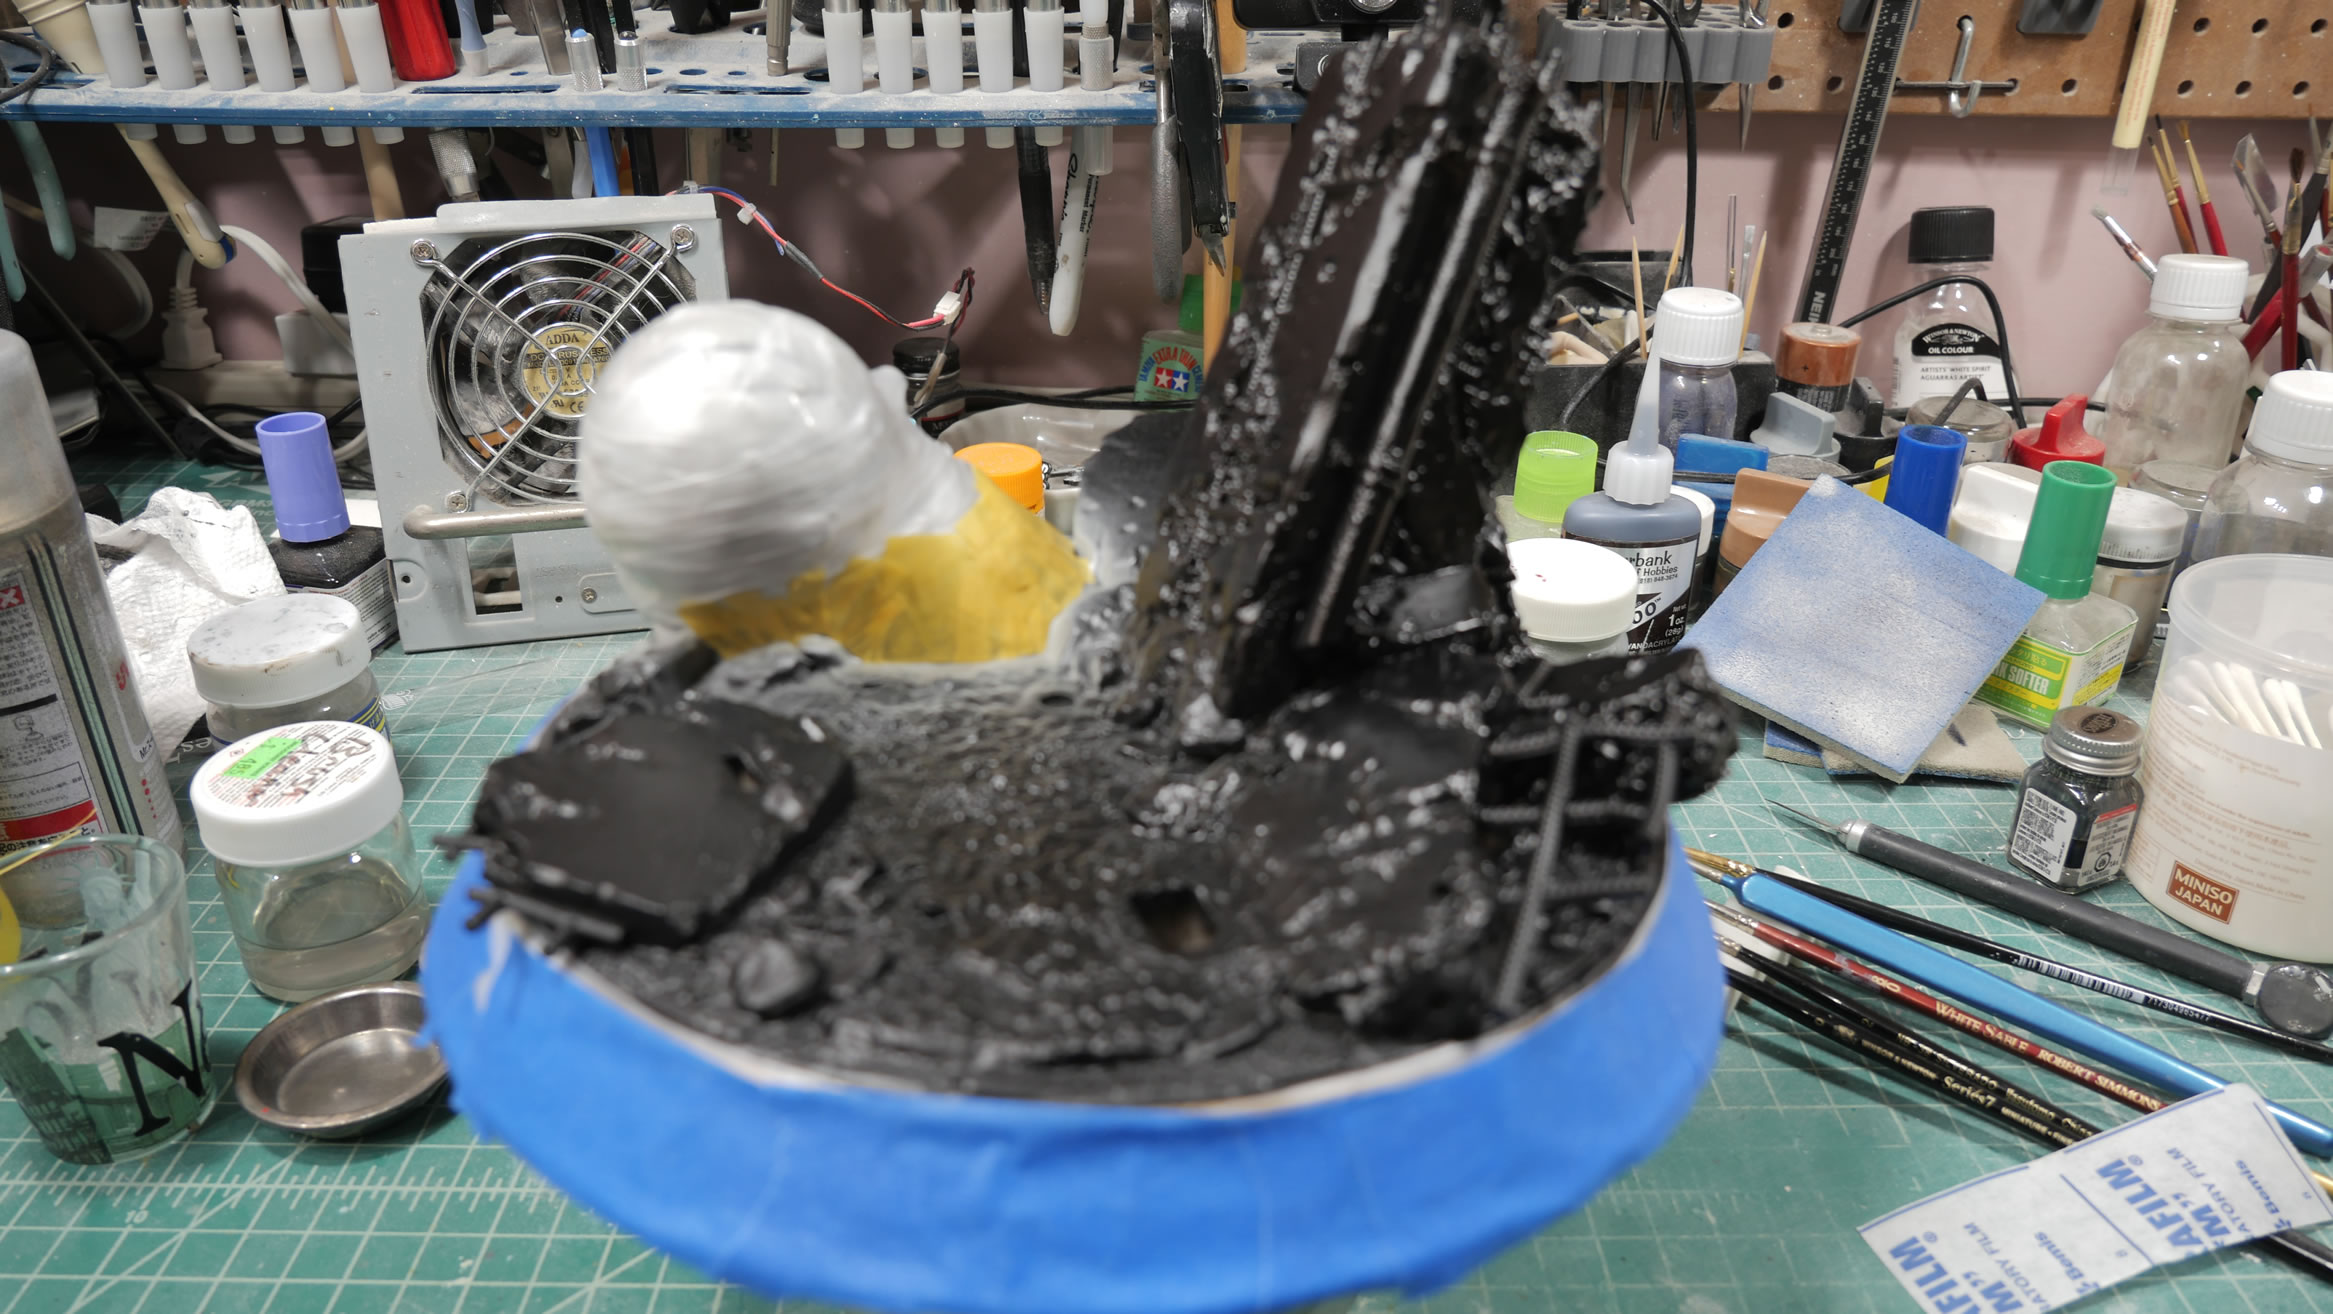
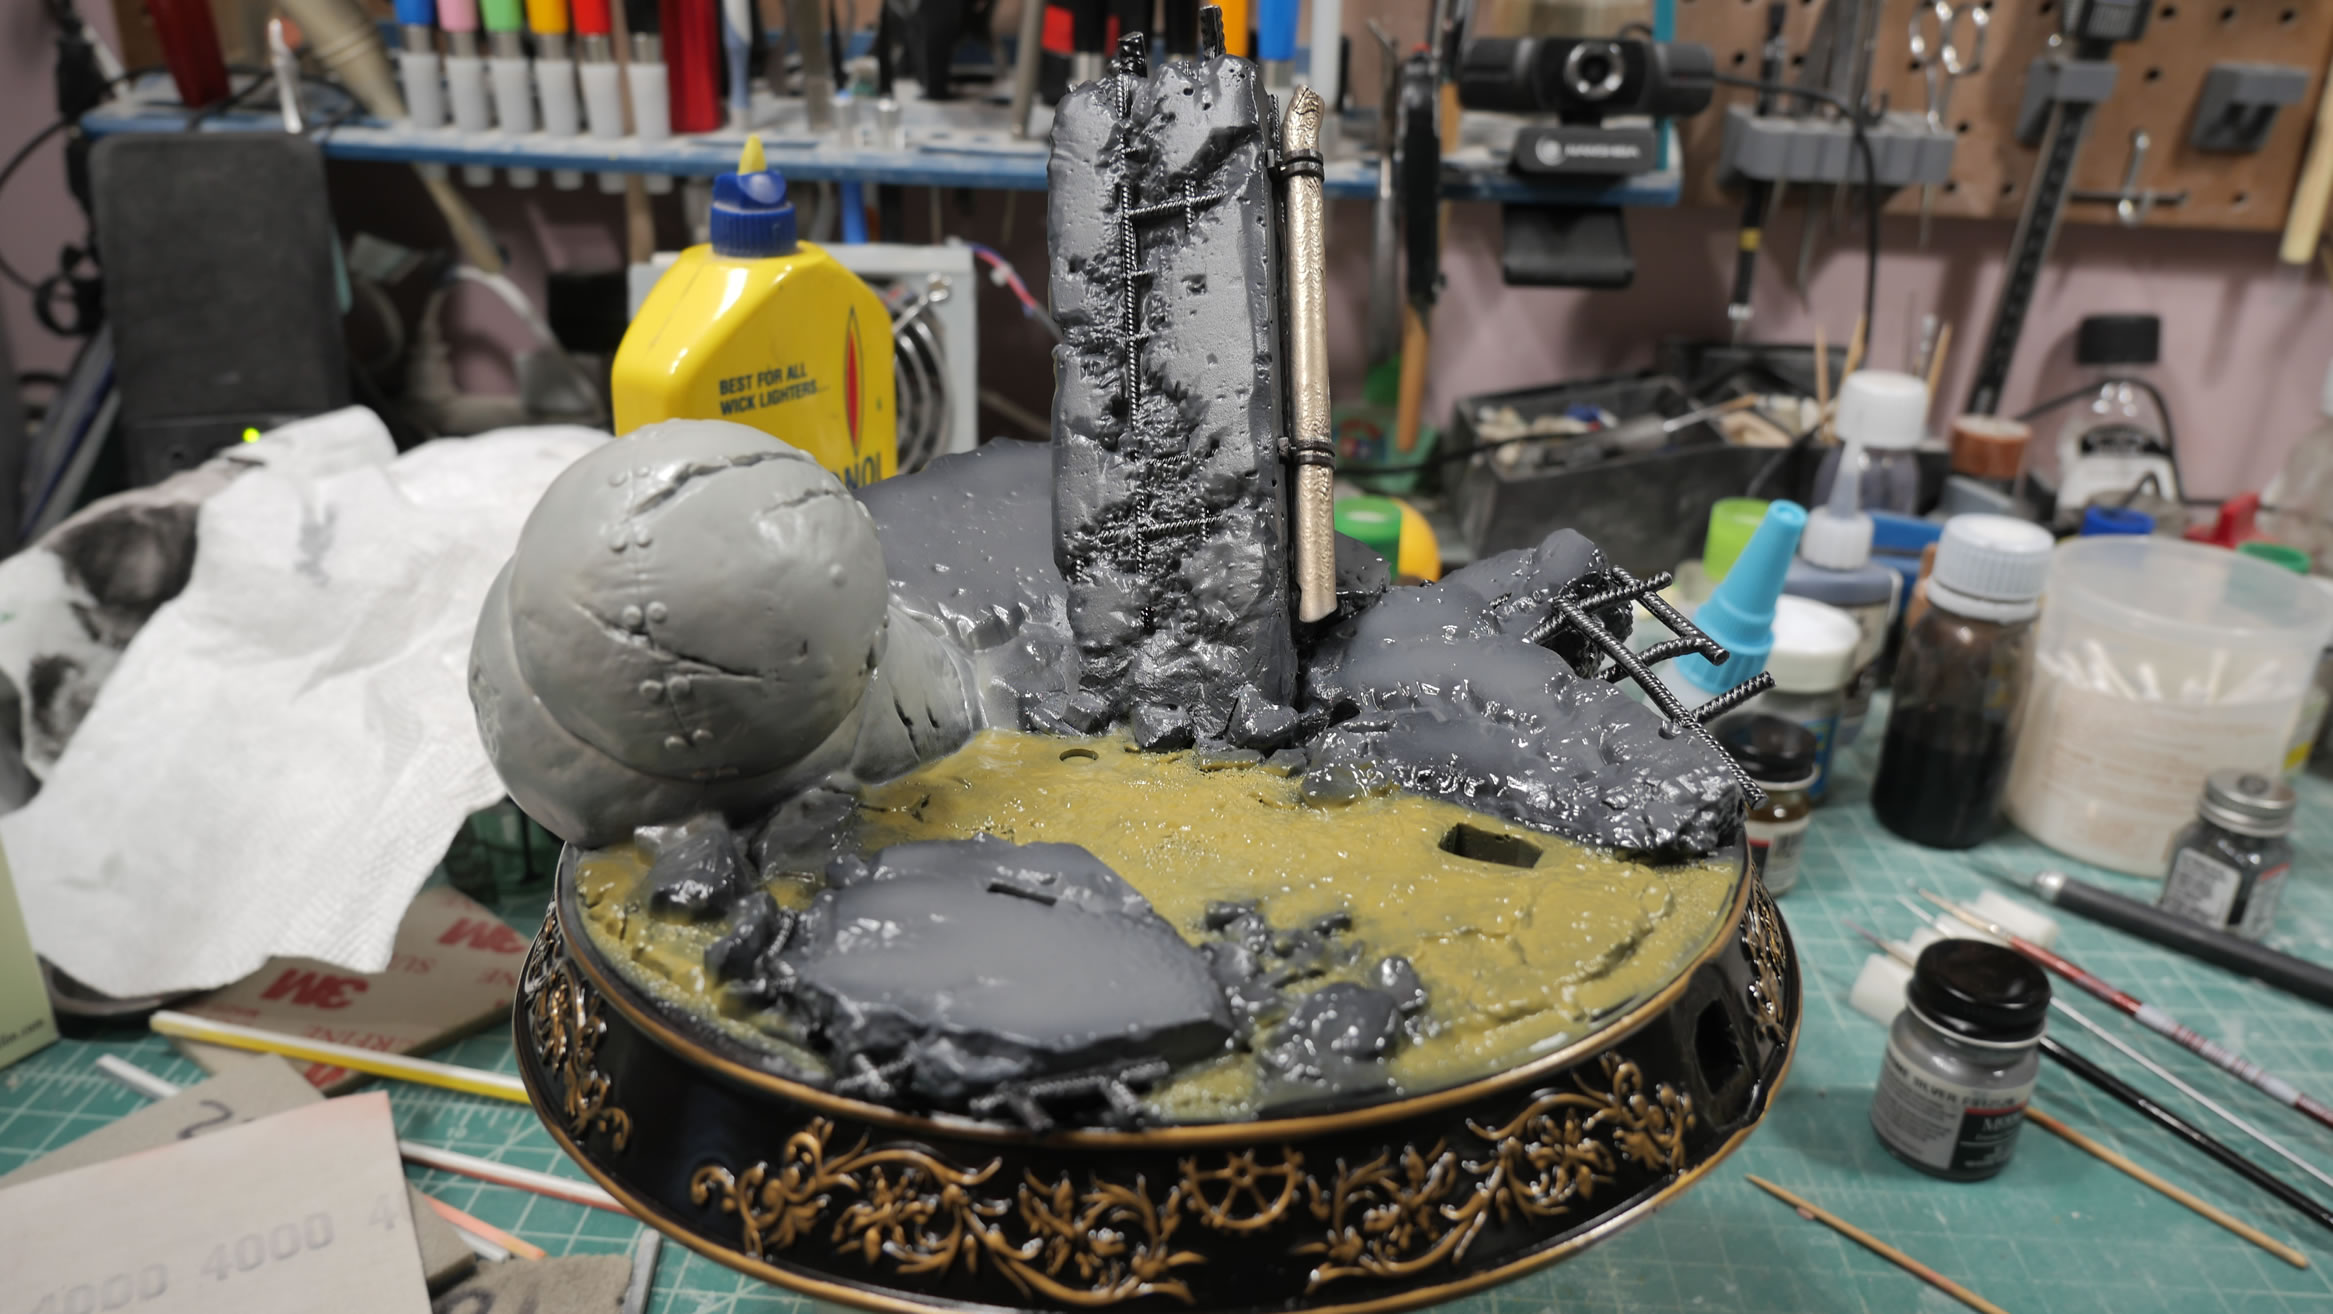
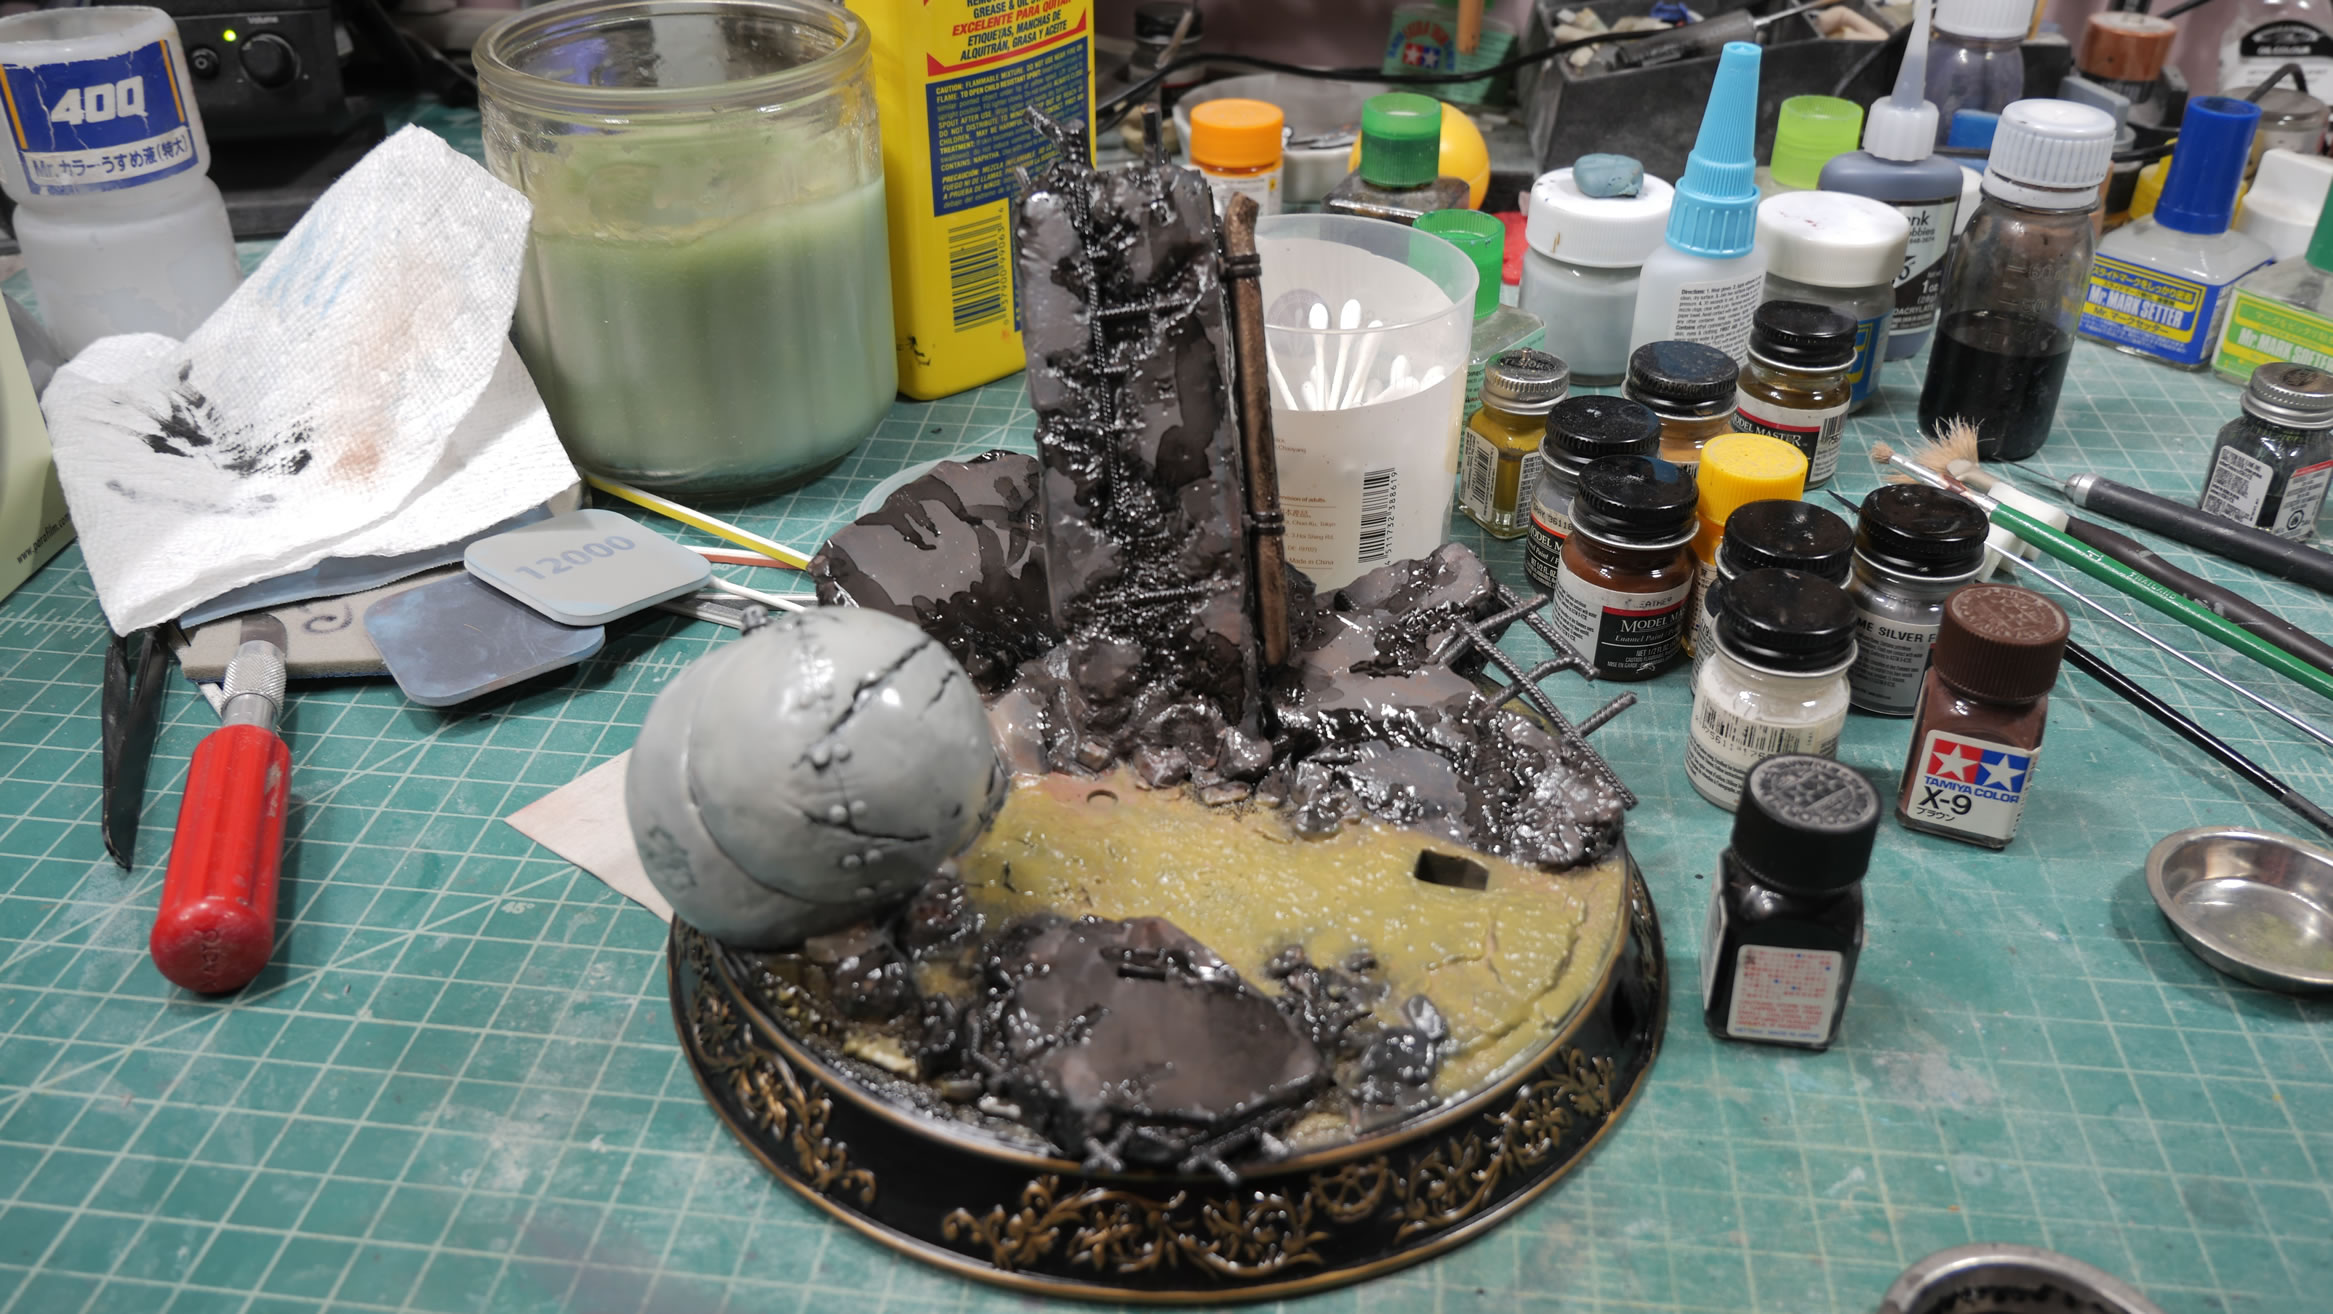
Wrapped up, the rest of the base is primed in resin black primer from volks. The stuff comes in a can and works very nicely as a resin primer.
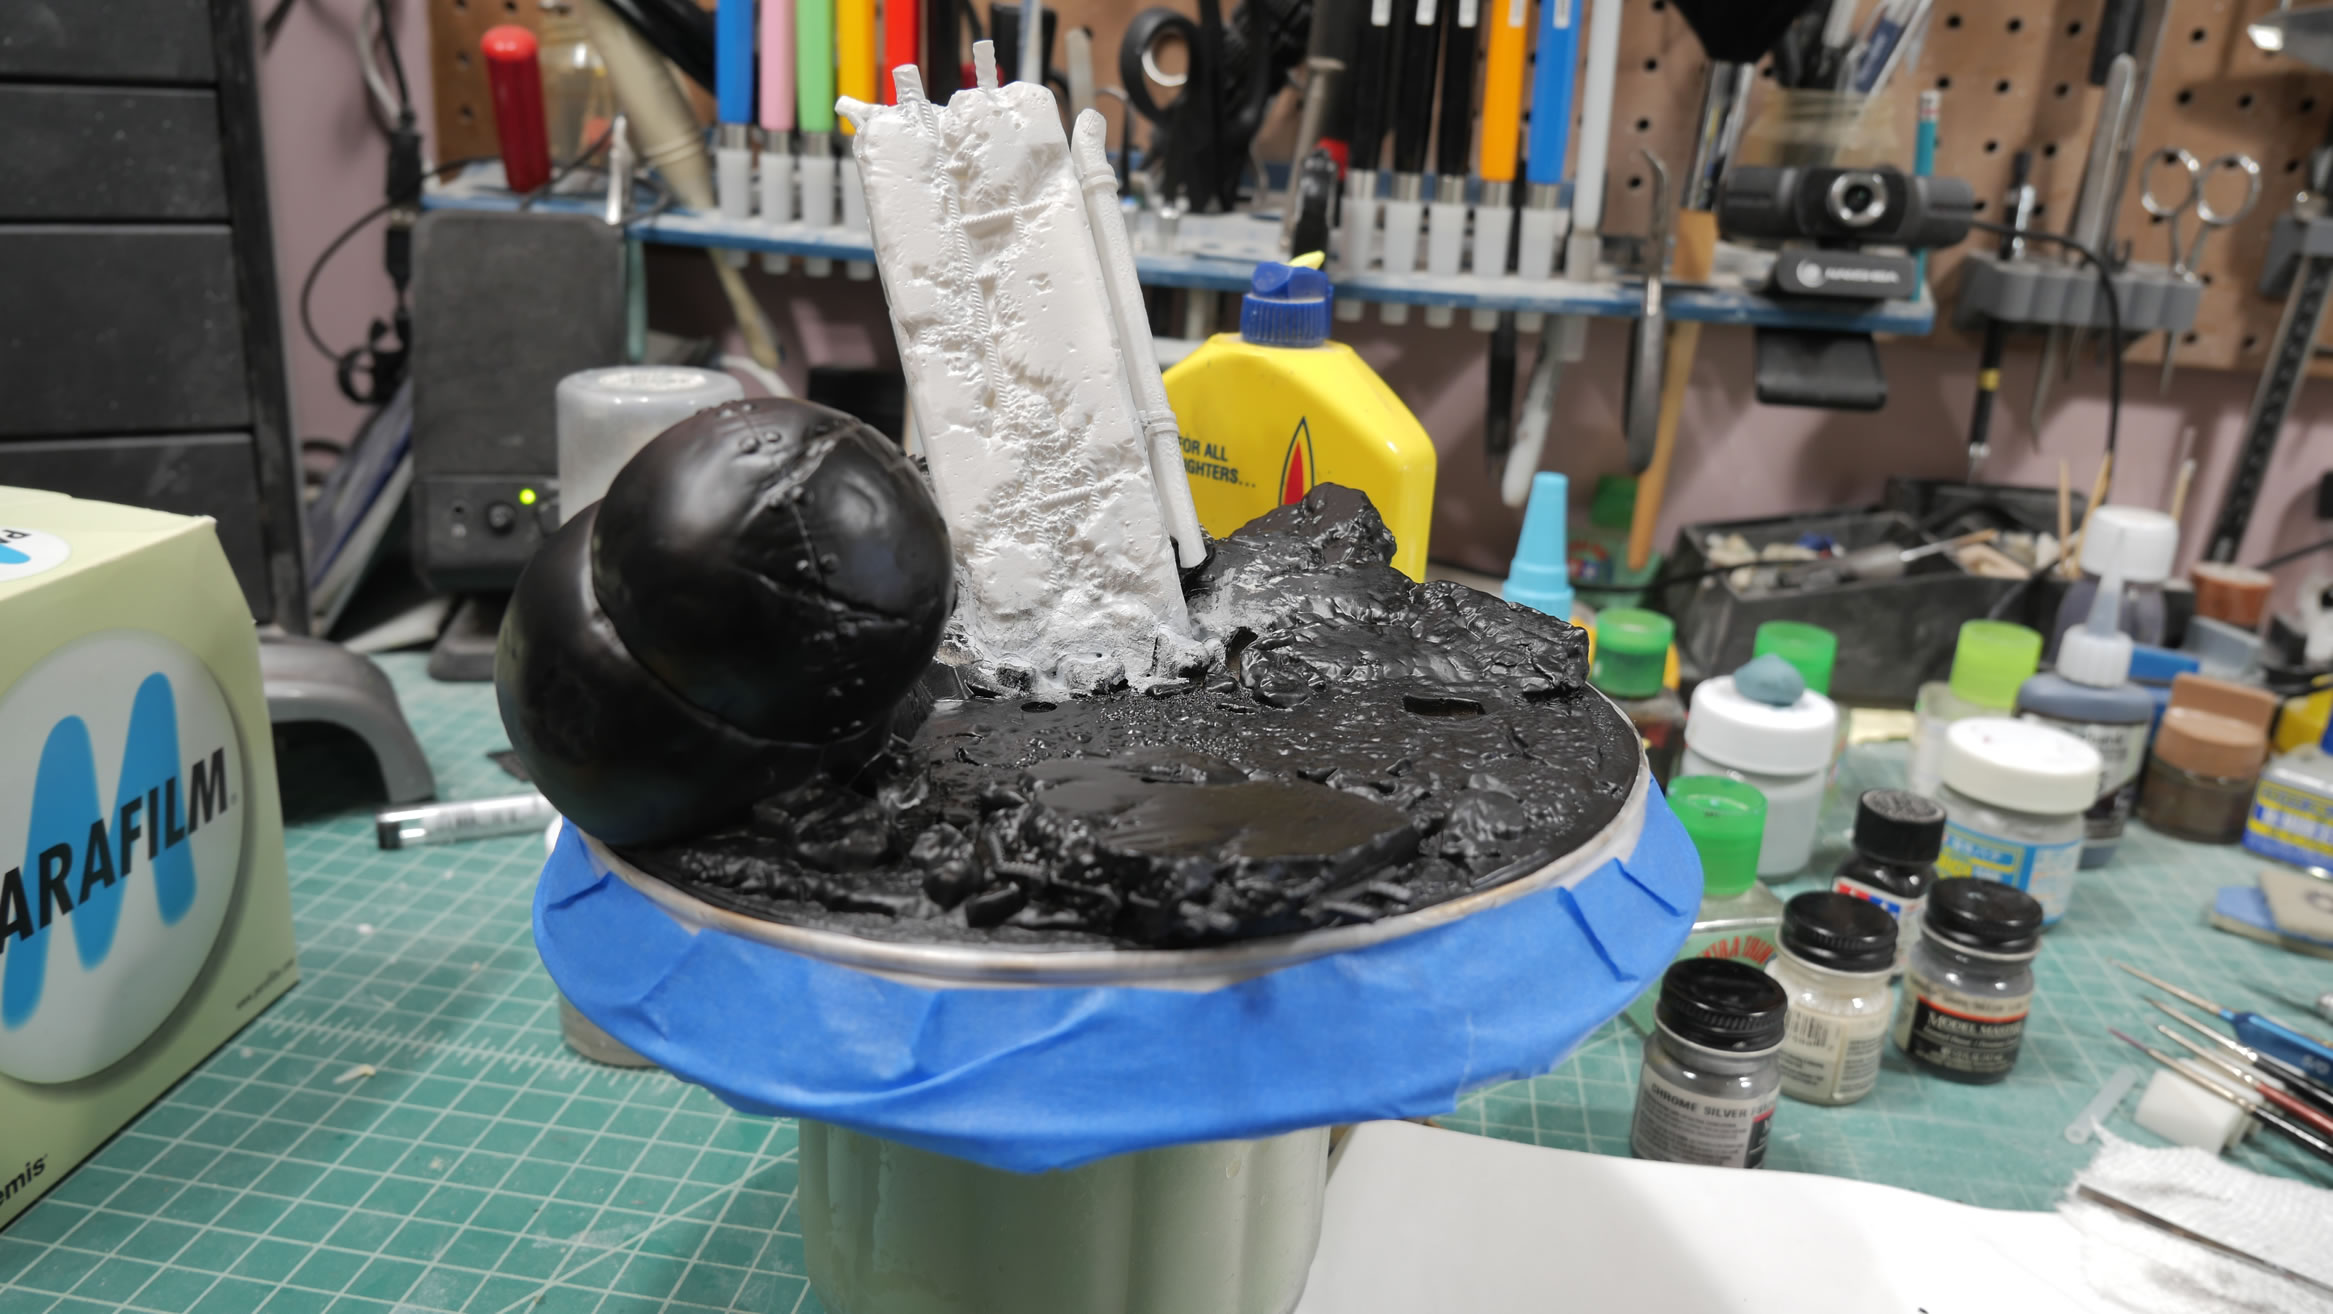
While the above is happening, the sword details get finished. Same reverse wash technique applied and a few washes here and there bring out more details.
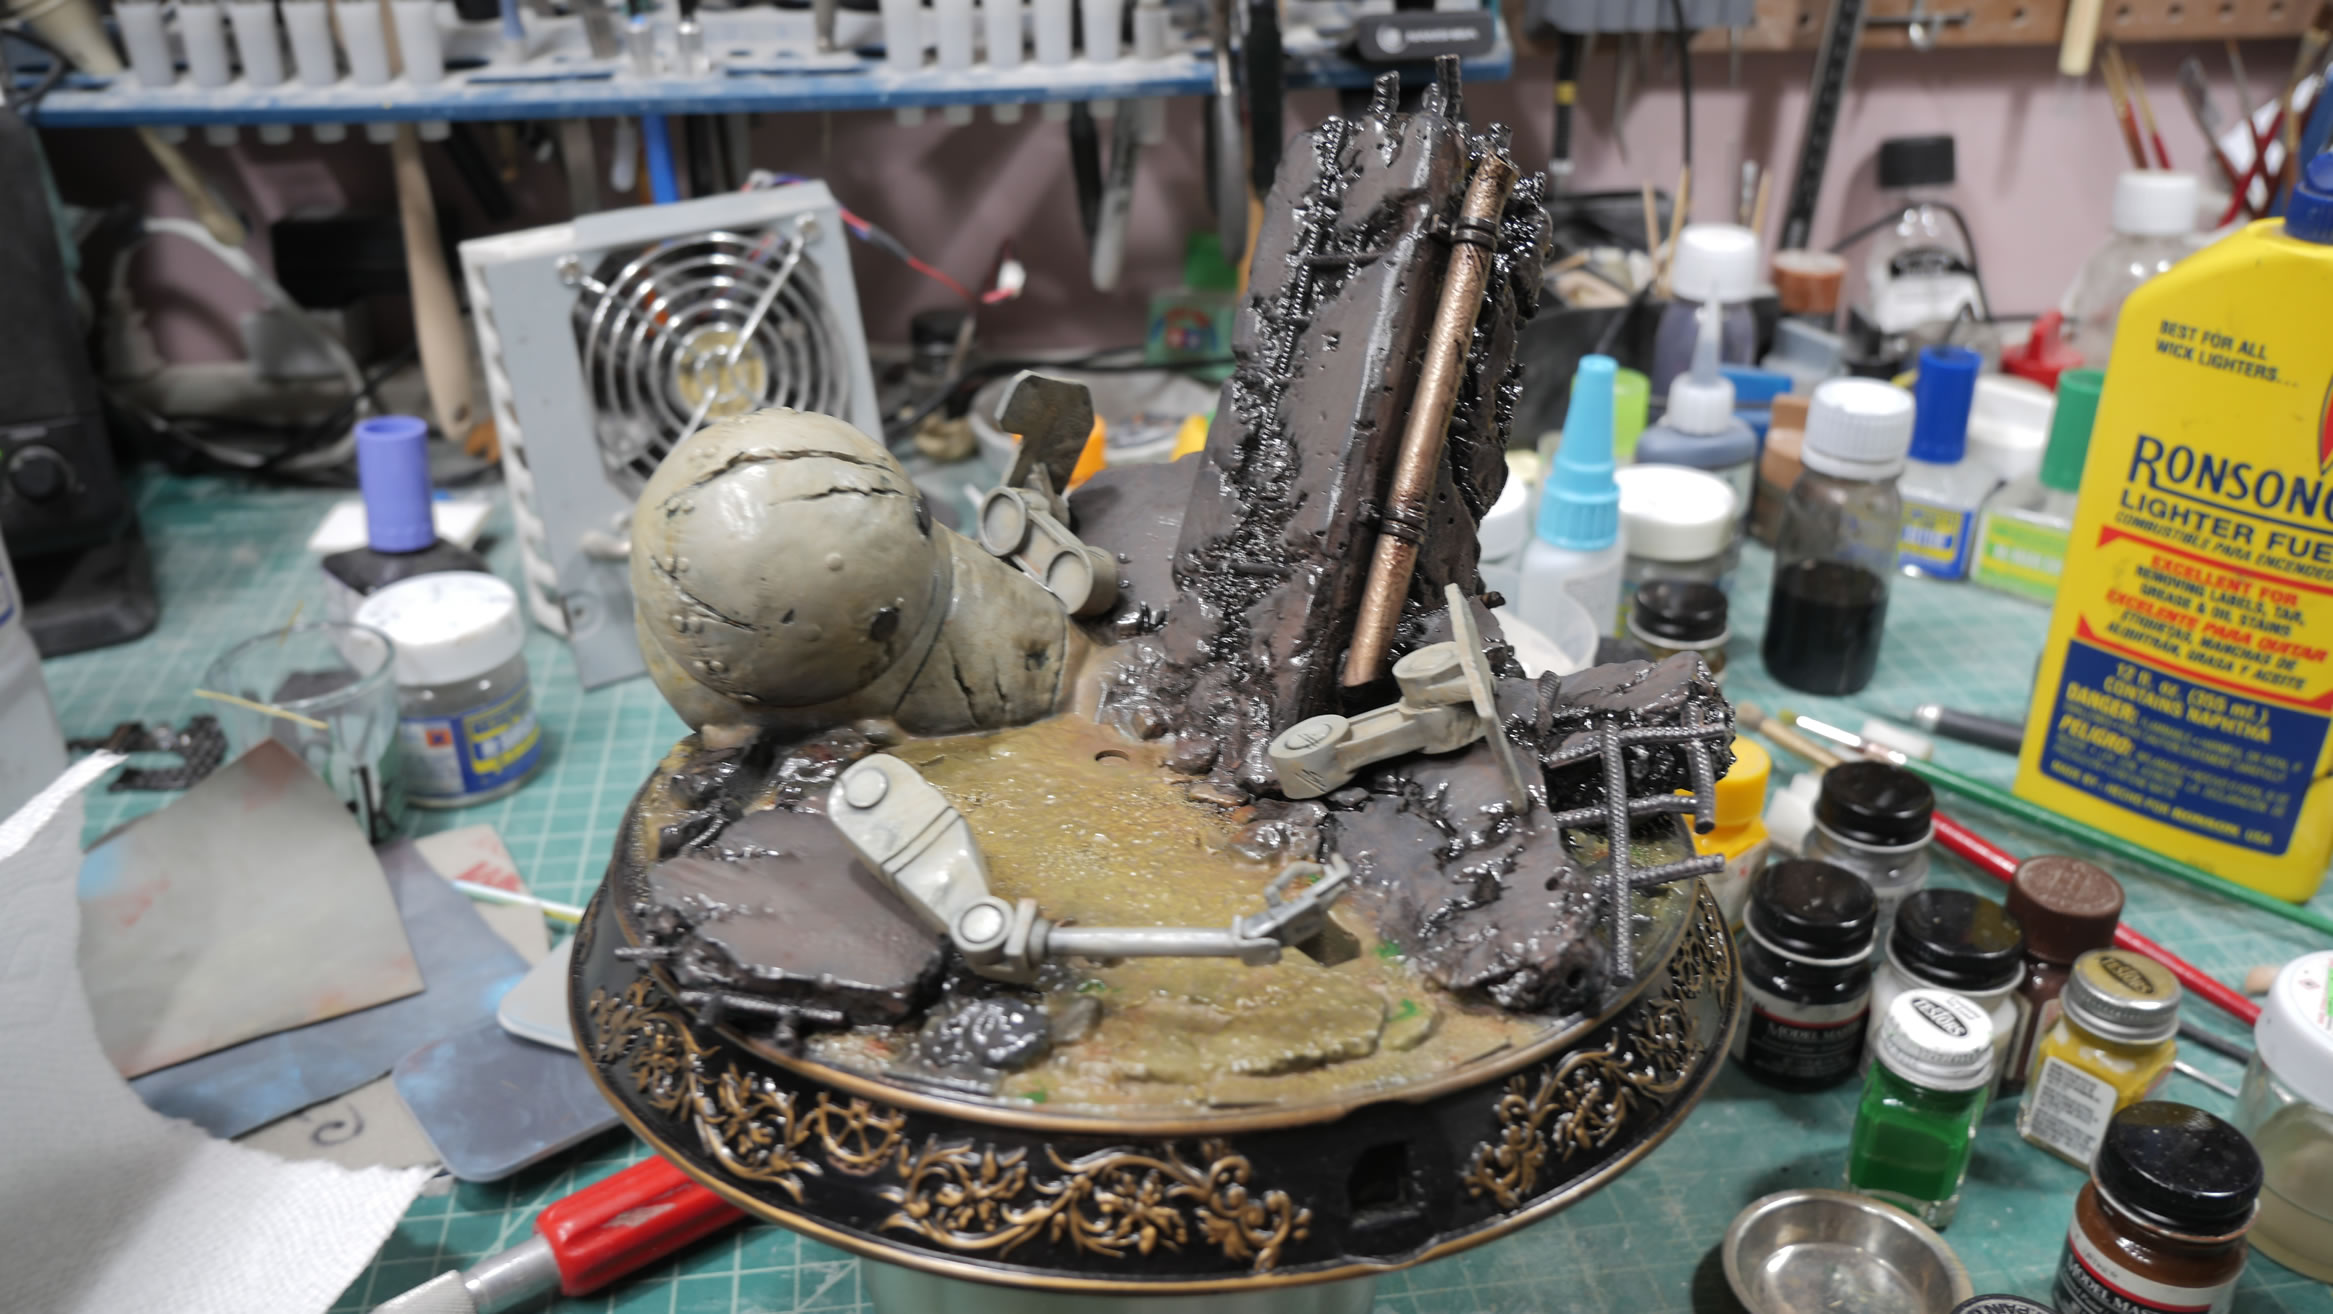
Swords are done, the nylon hose is “ripped”, and another 98% completed figure partial turnaround; more a front 180. The Stubby and it’s parts are painted.

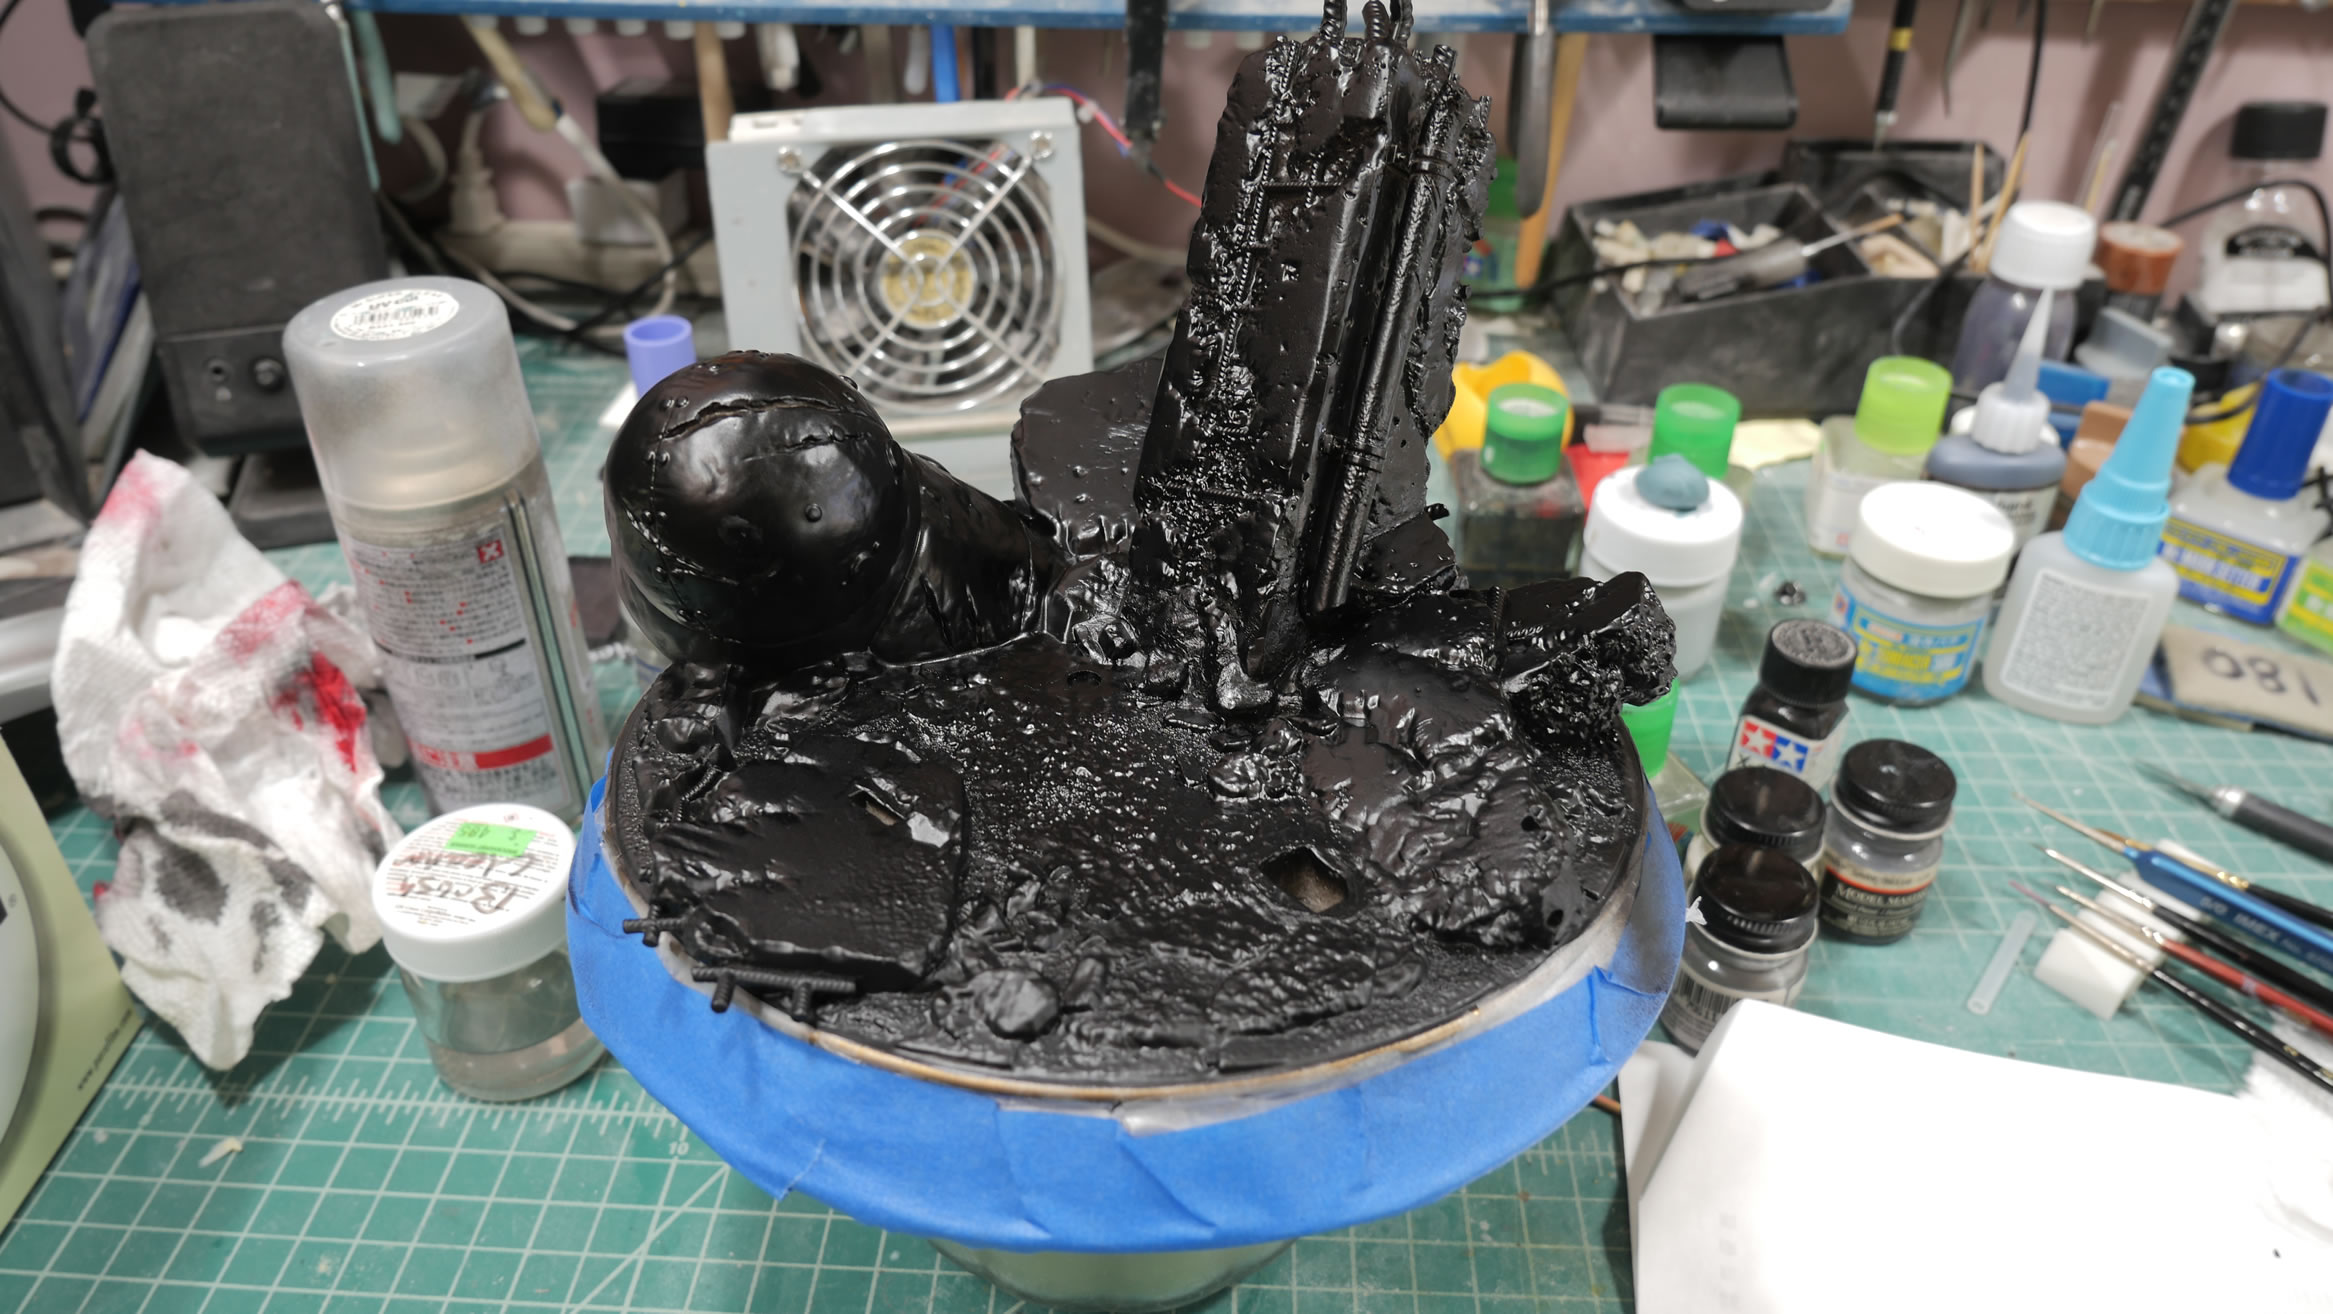
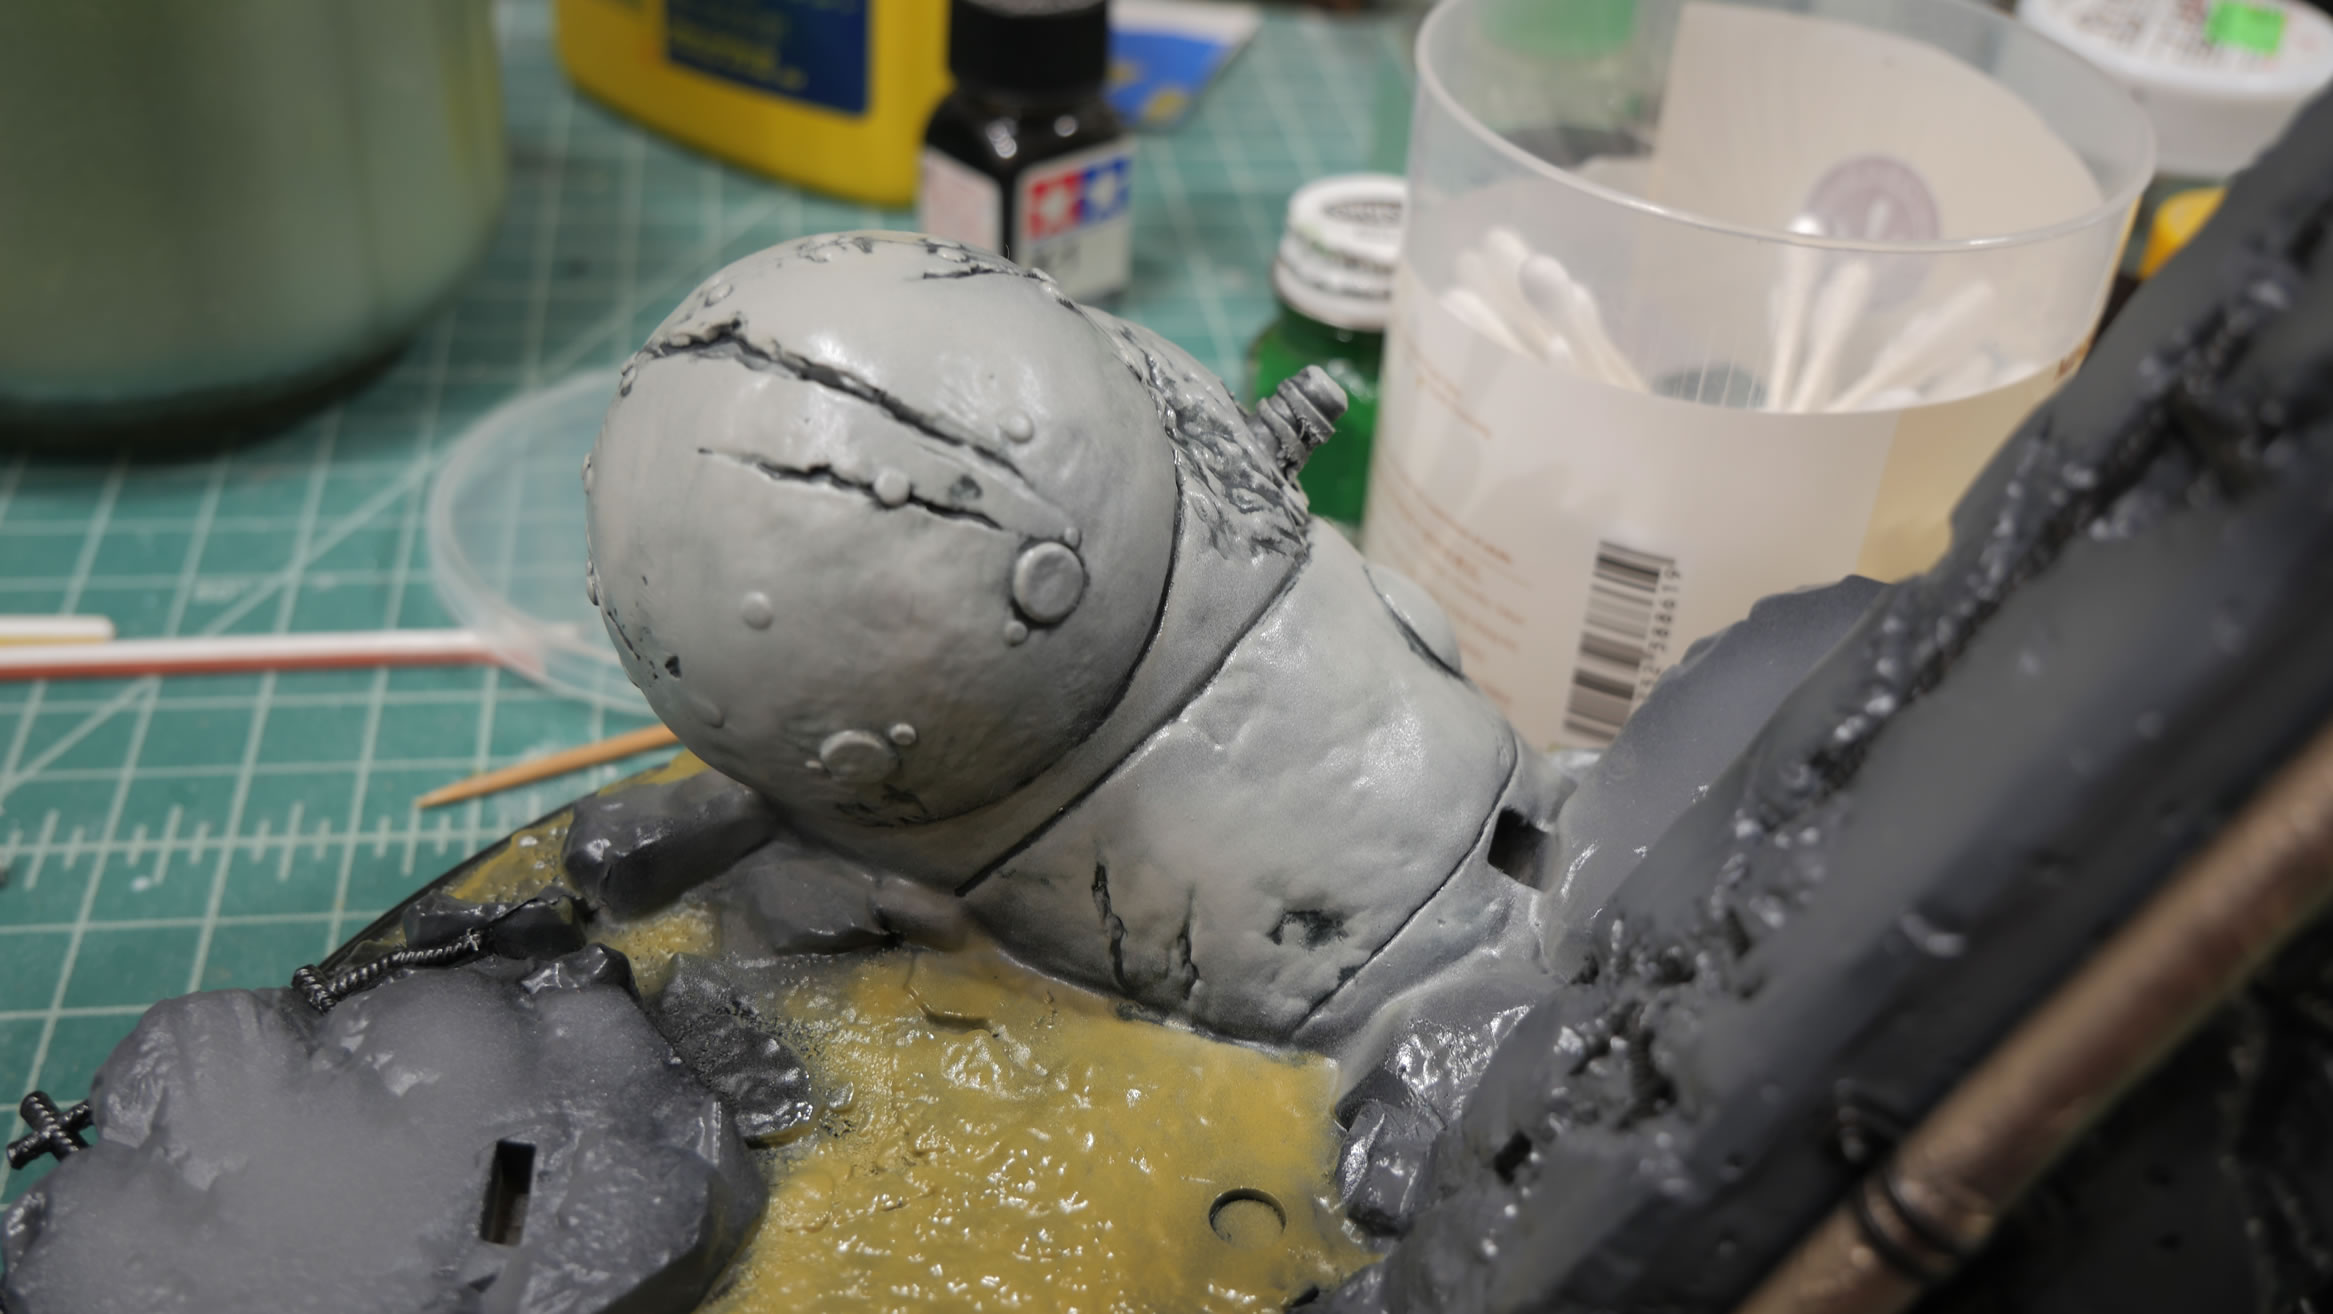
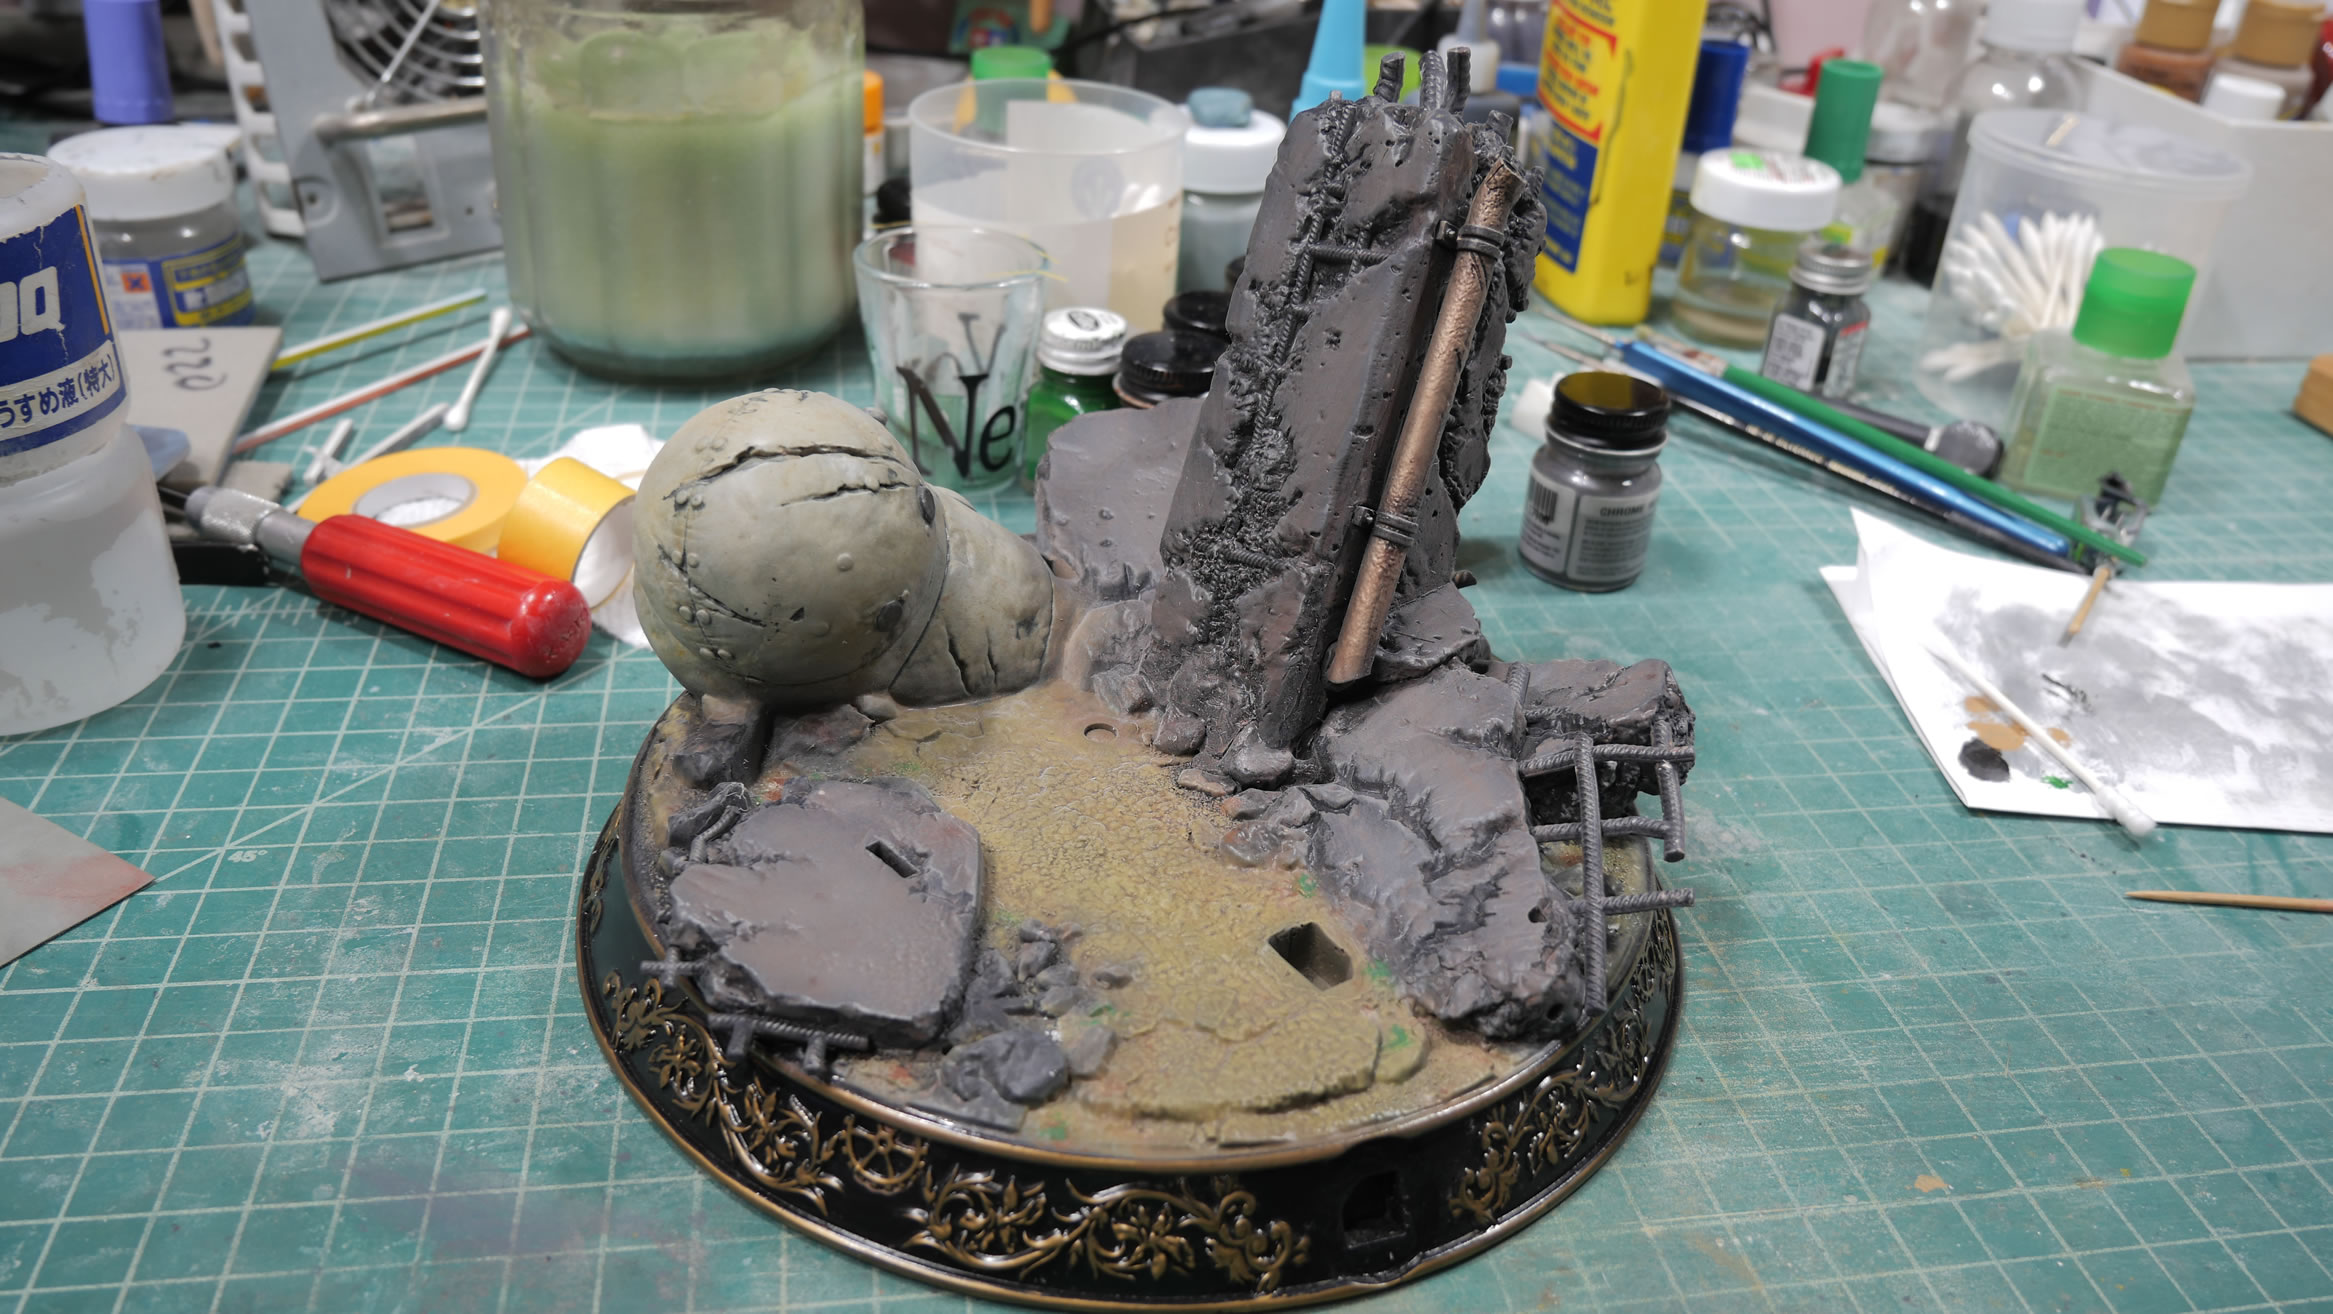
Masking off the Stubby, the building pieces are painted in a neutral grey shading over the black. Then more masking and the ground is painted in a middle stone color. The pipe and pipe fittings are painted as well.
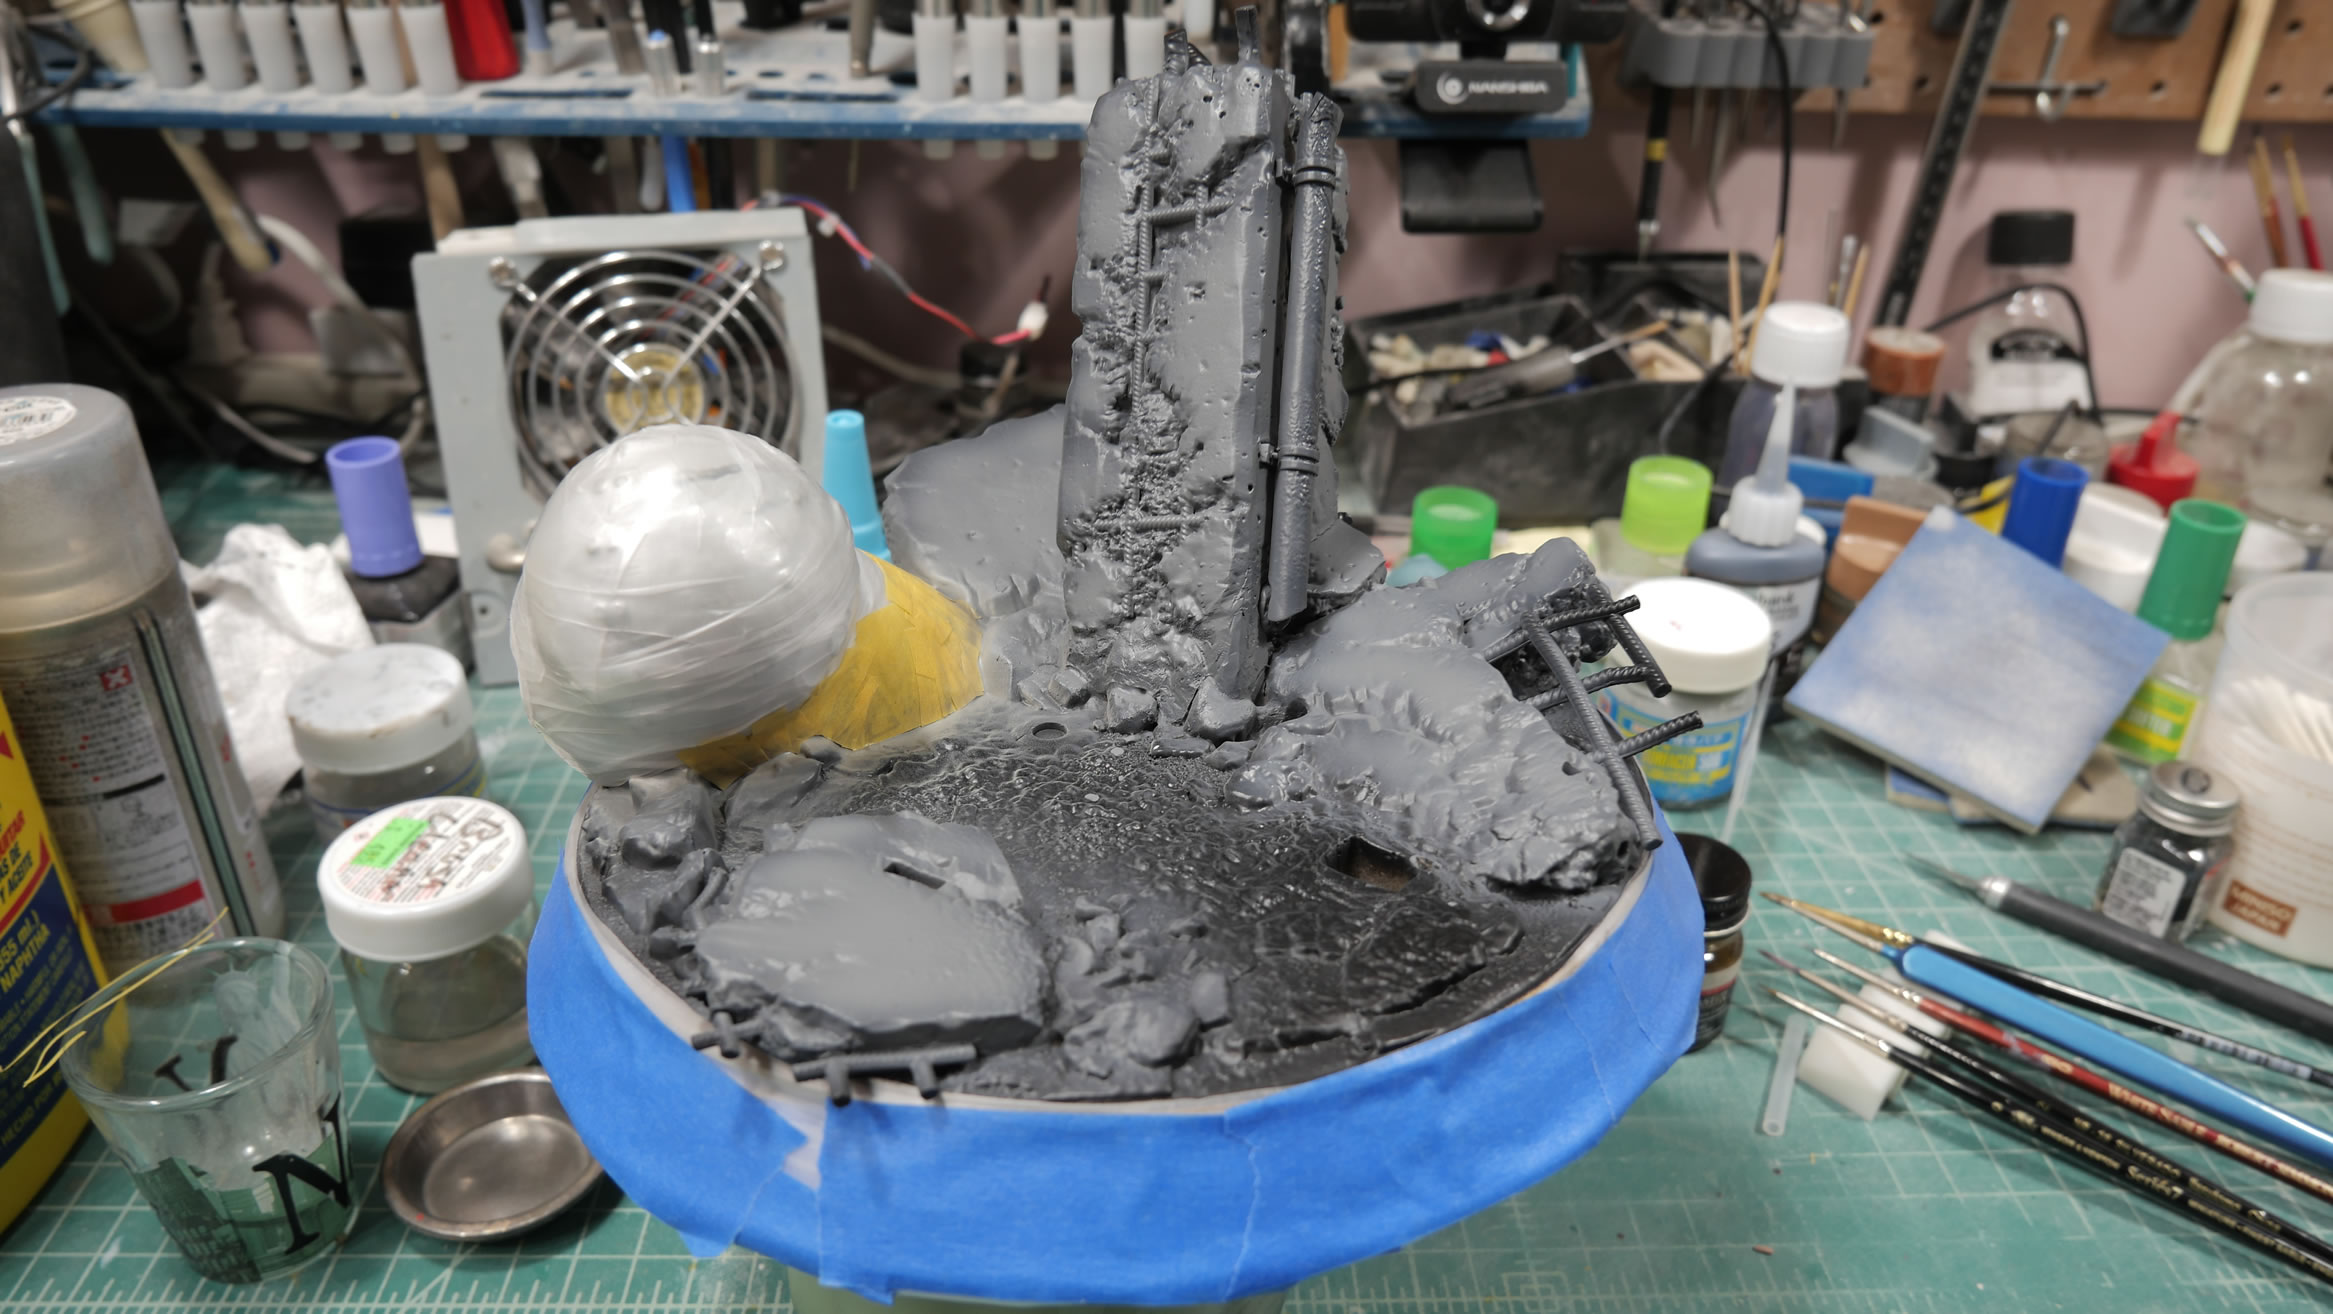
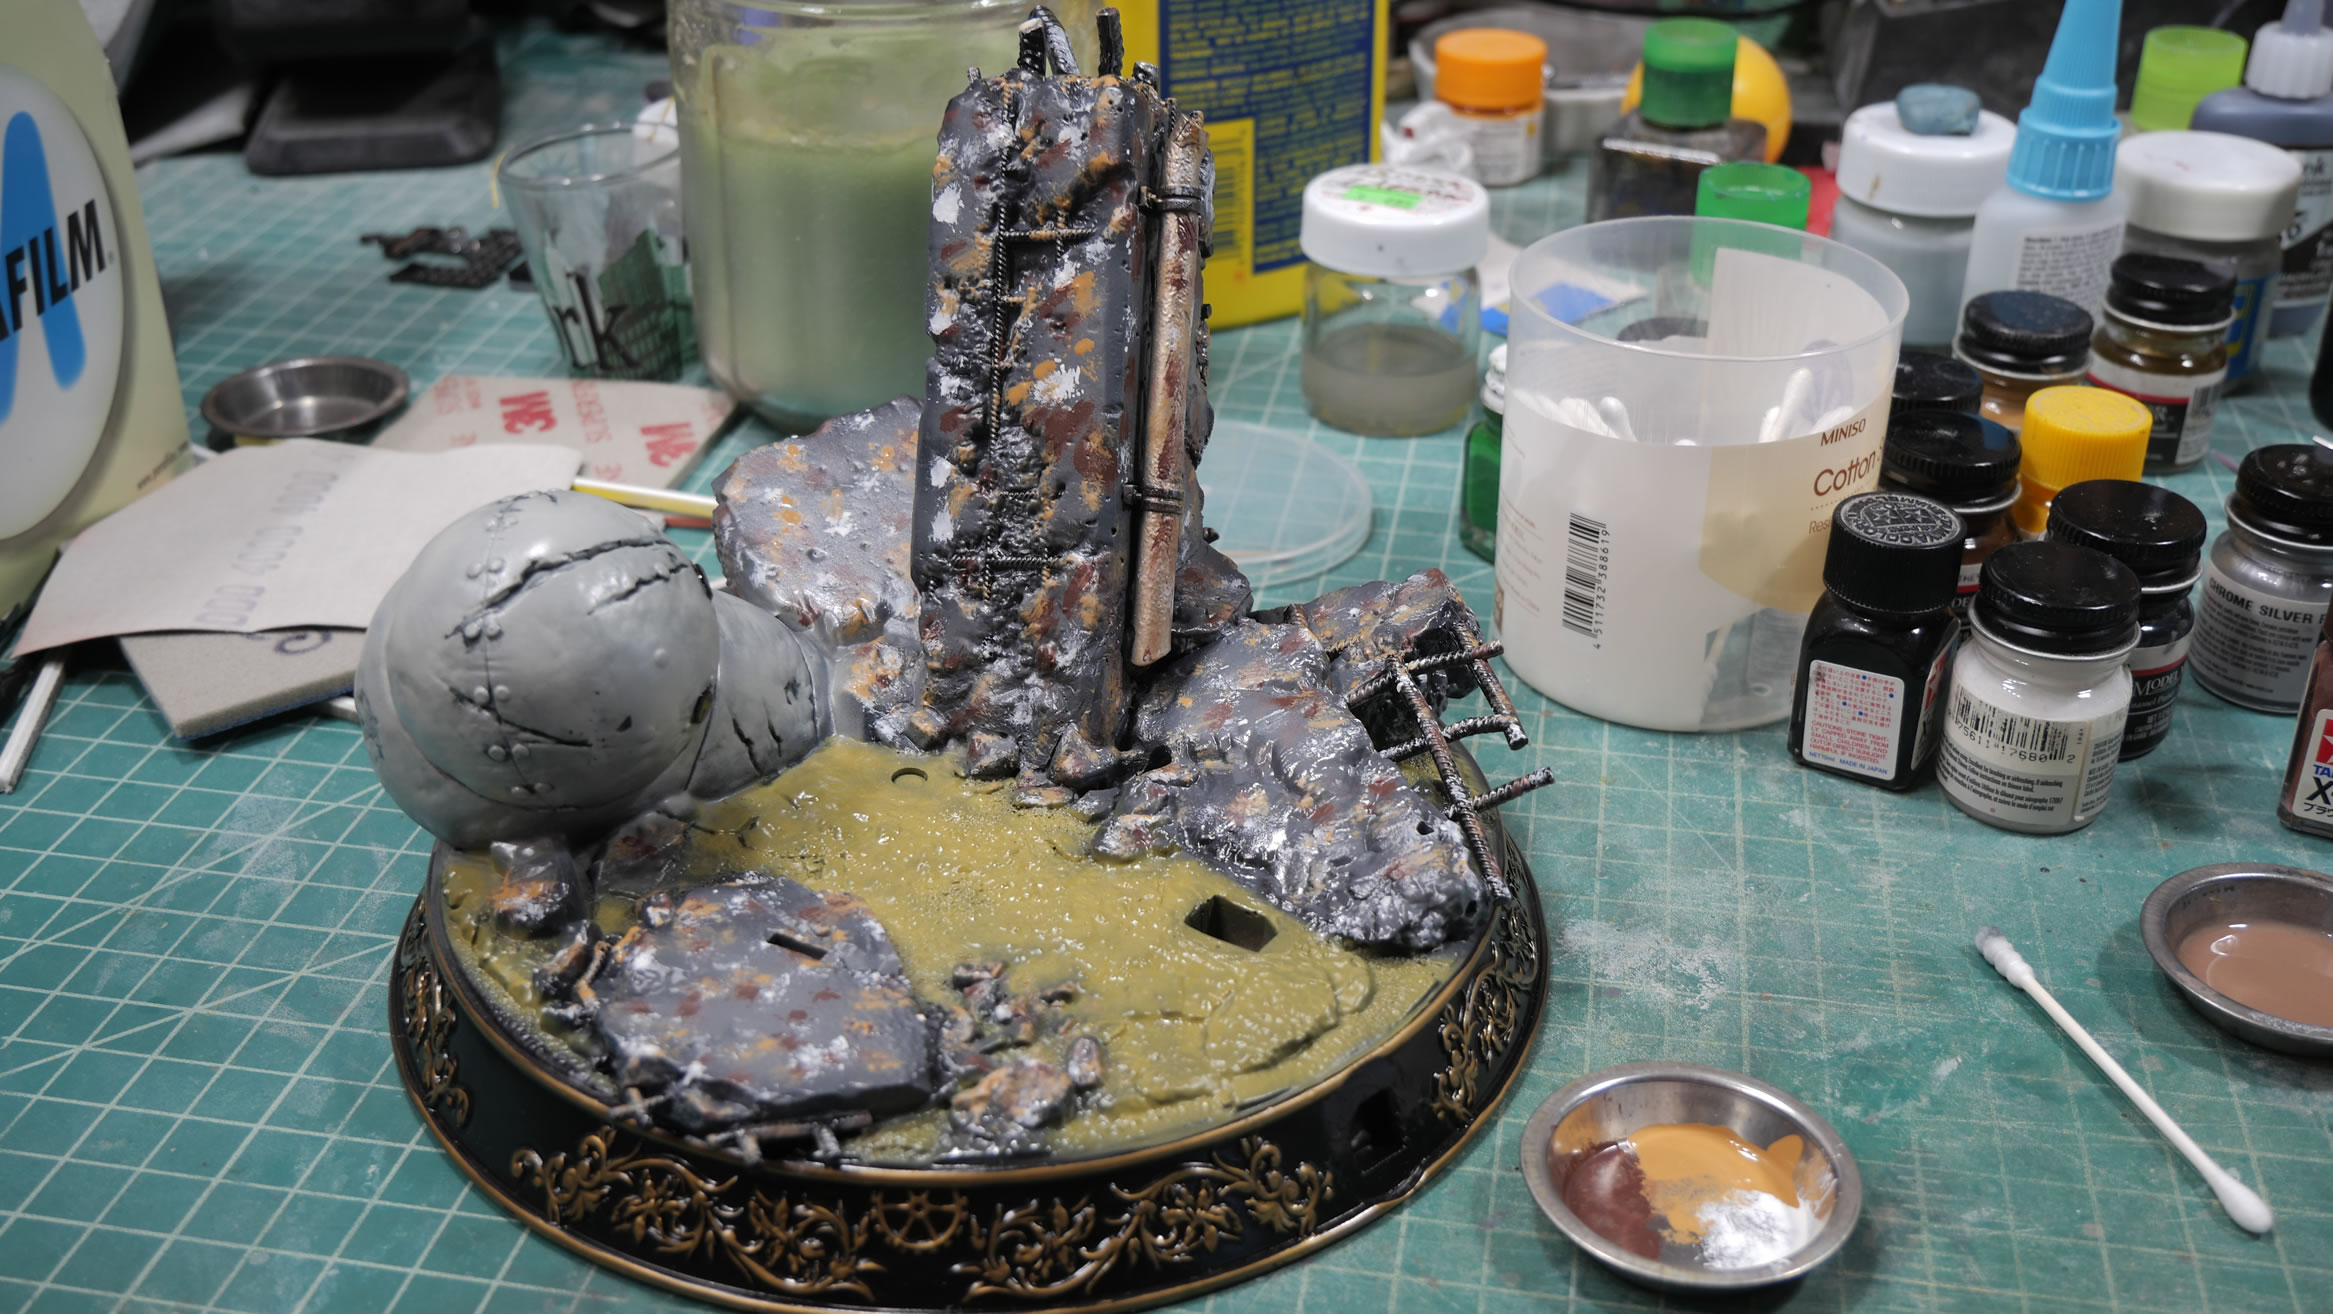
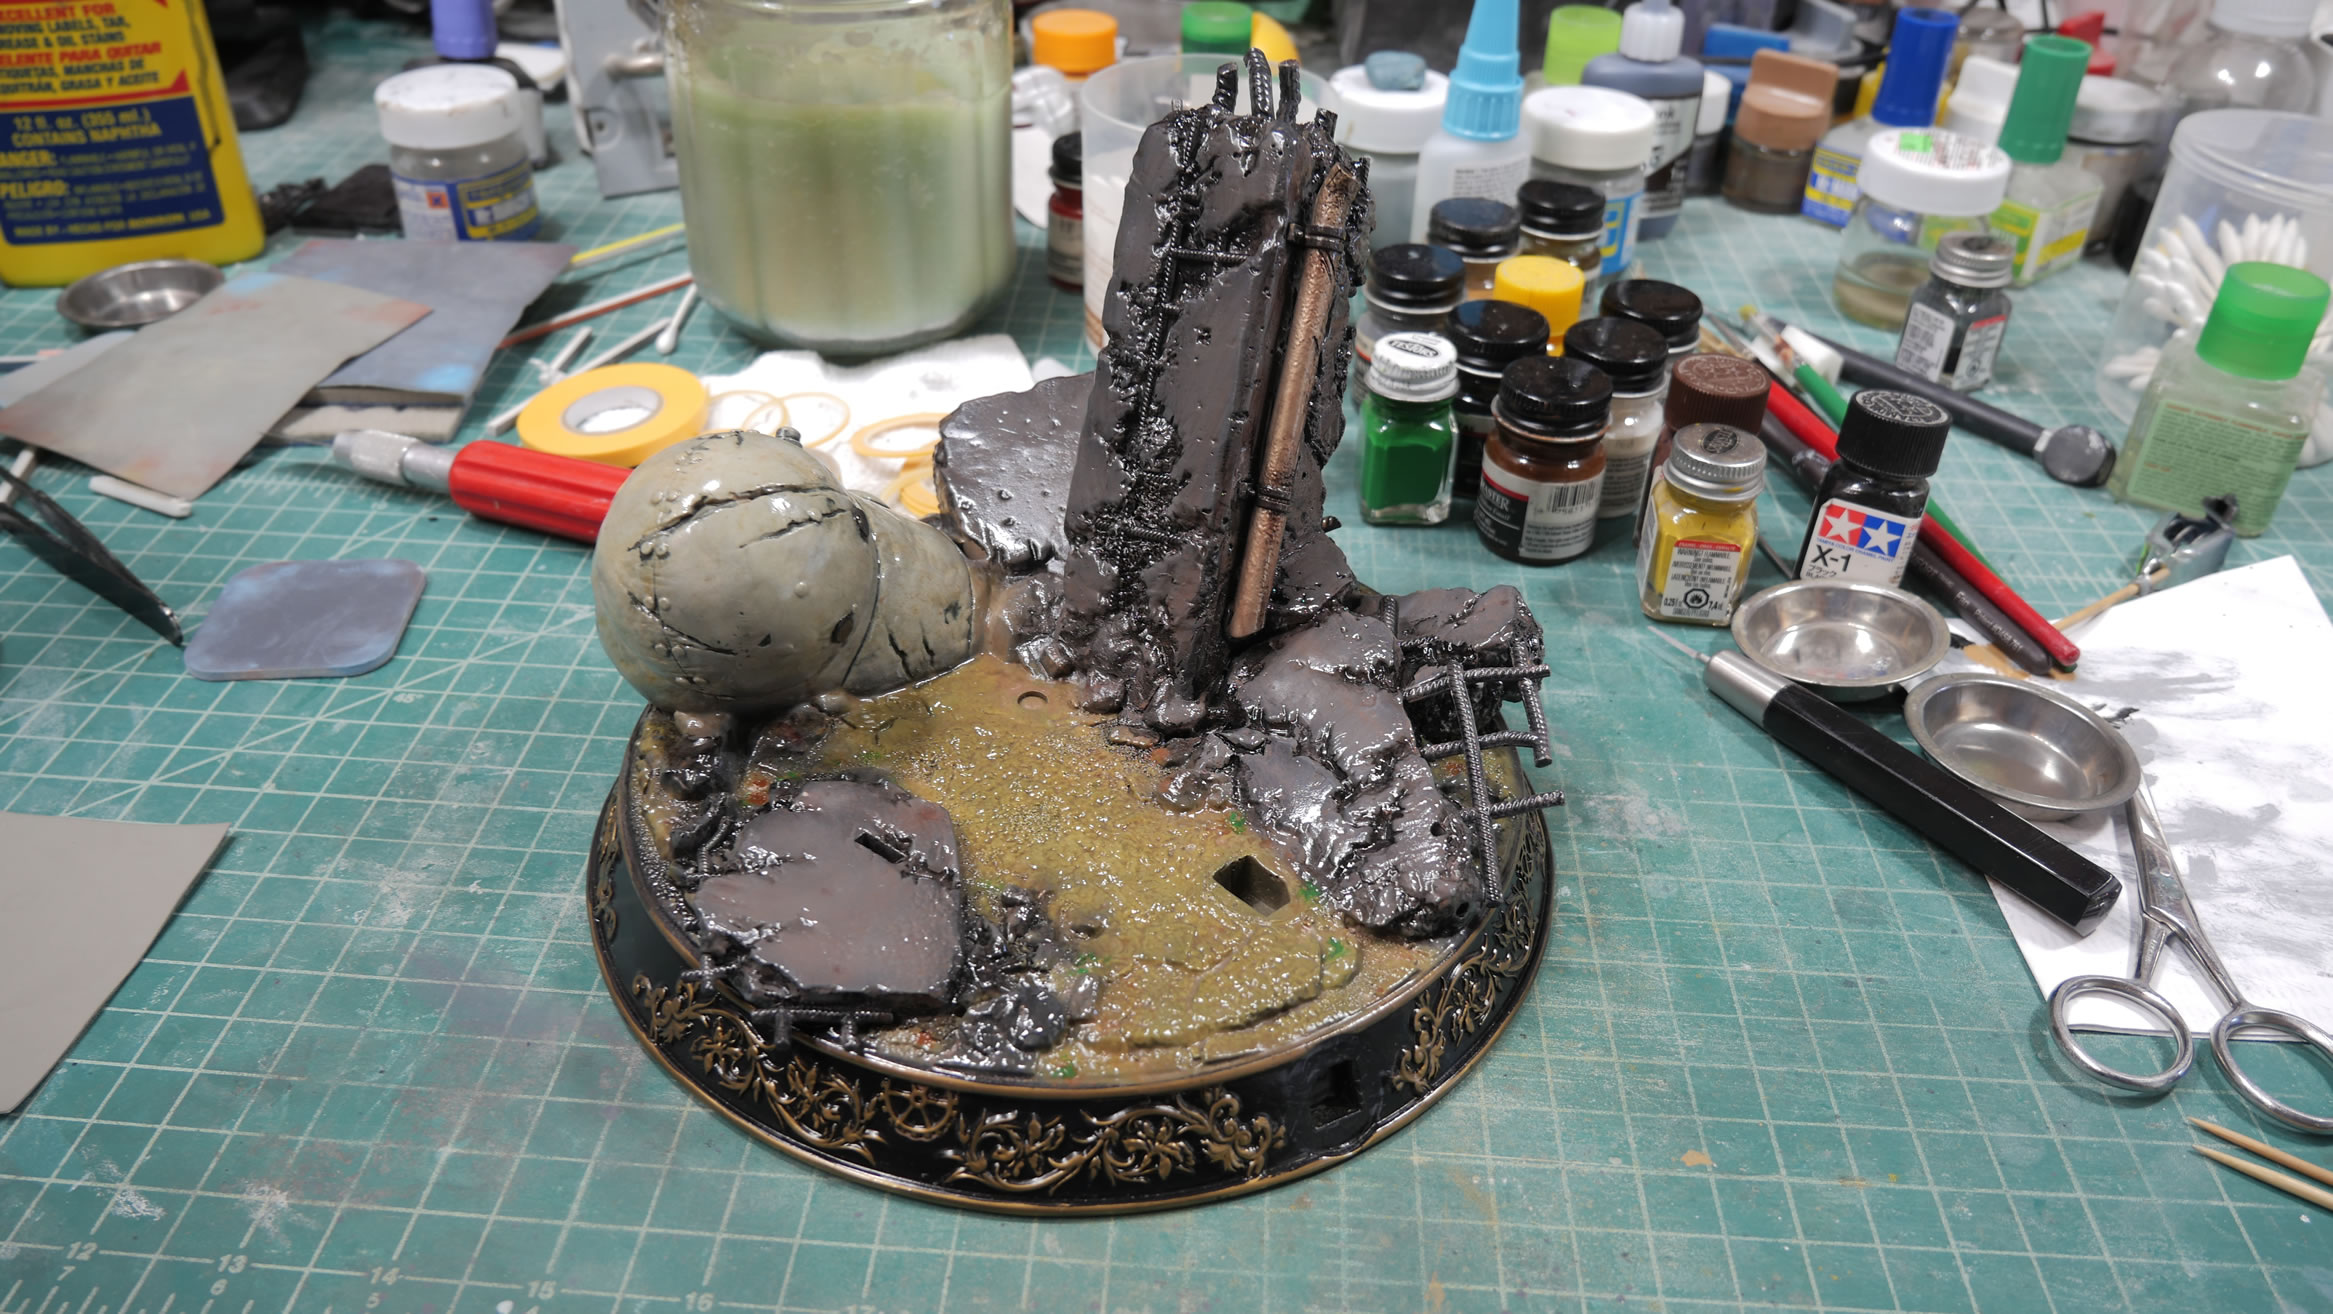
The bottom detail ring is unmasked and the whole assembly is sprayed with a clear gloss. Every step going forward requires a clear gloss to protect each layer. The rebar is painted black then gloss coated. A black wash is applied to the stubby and the concrete. The wash is cleaned up and dried. Another clear gloss.

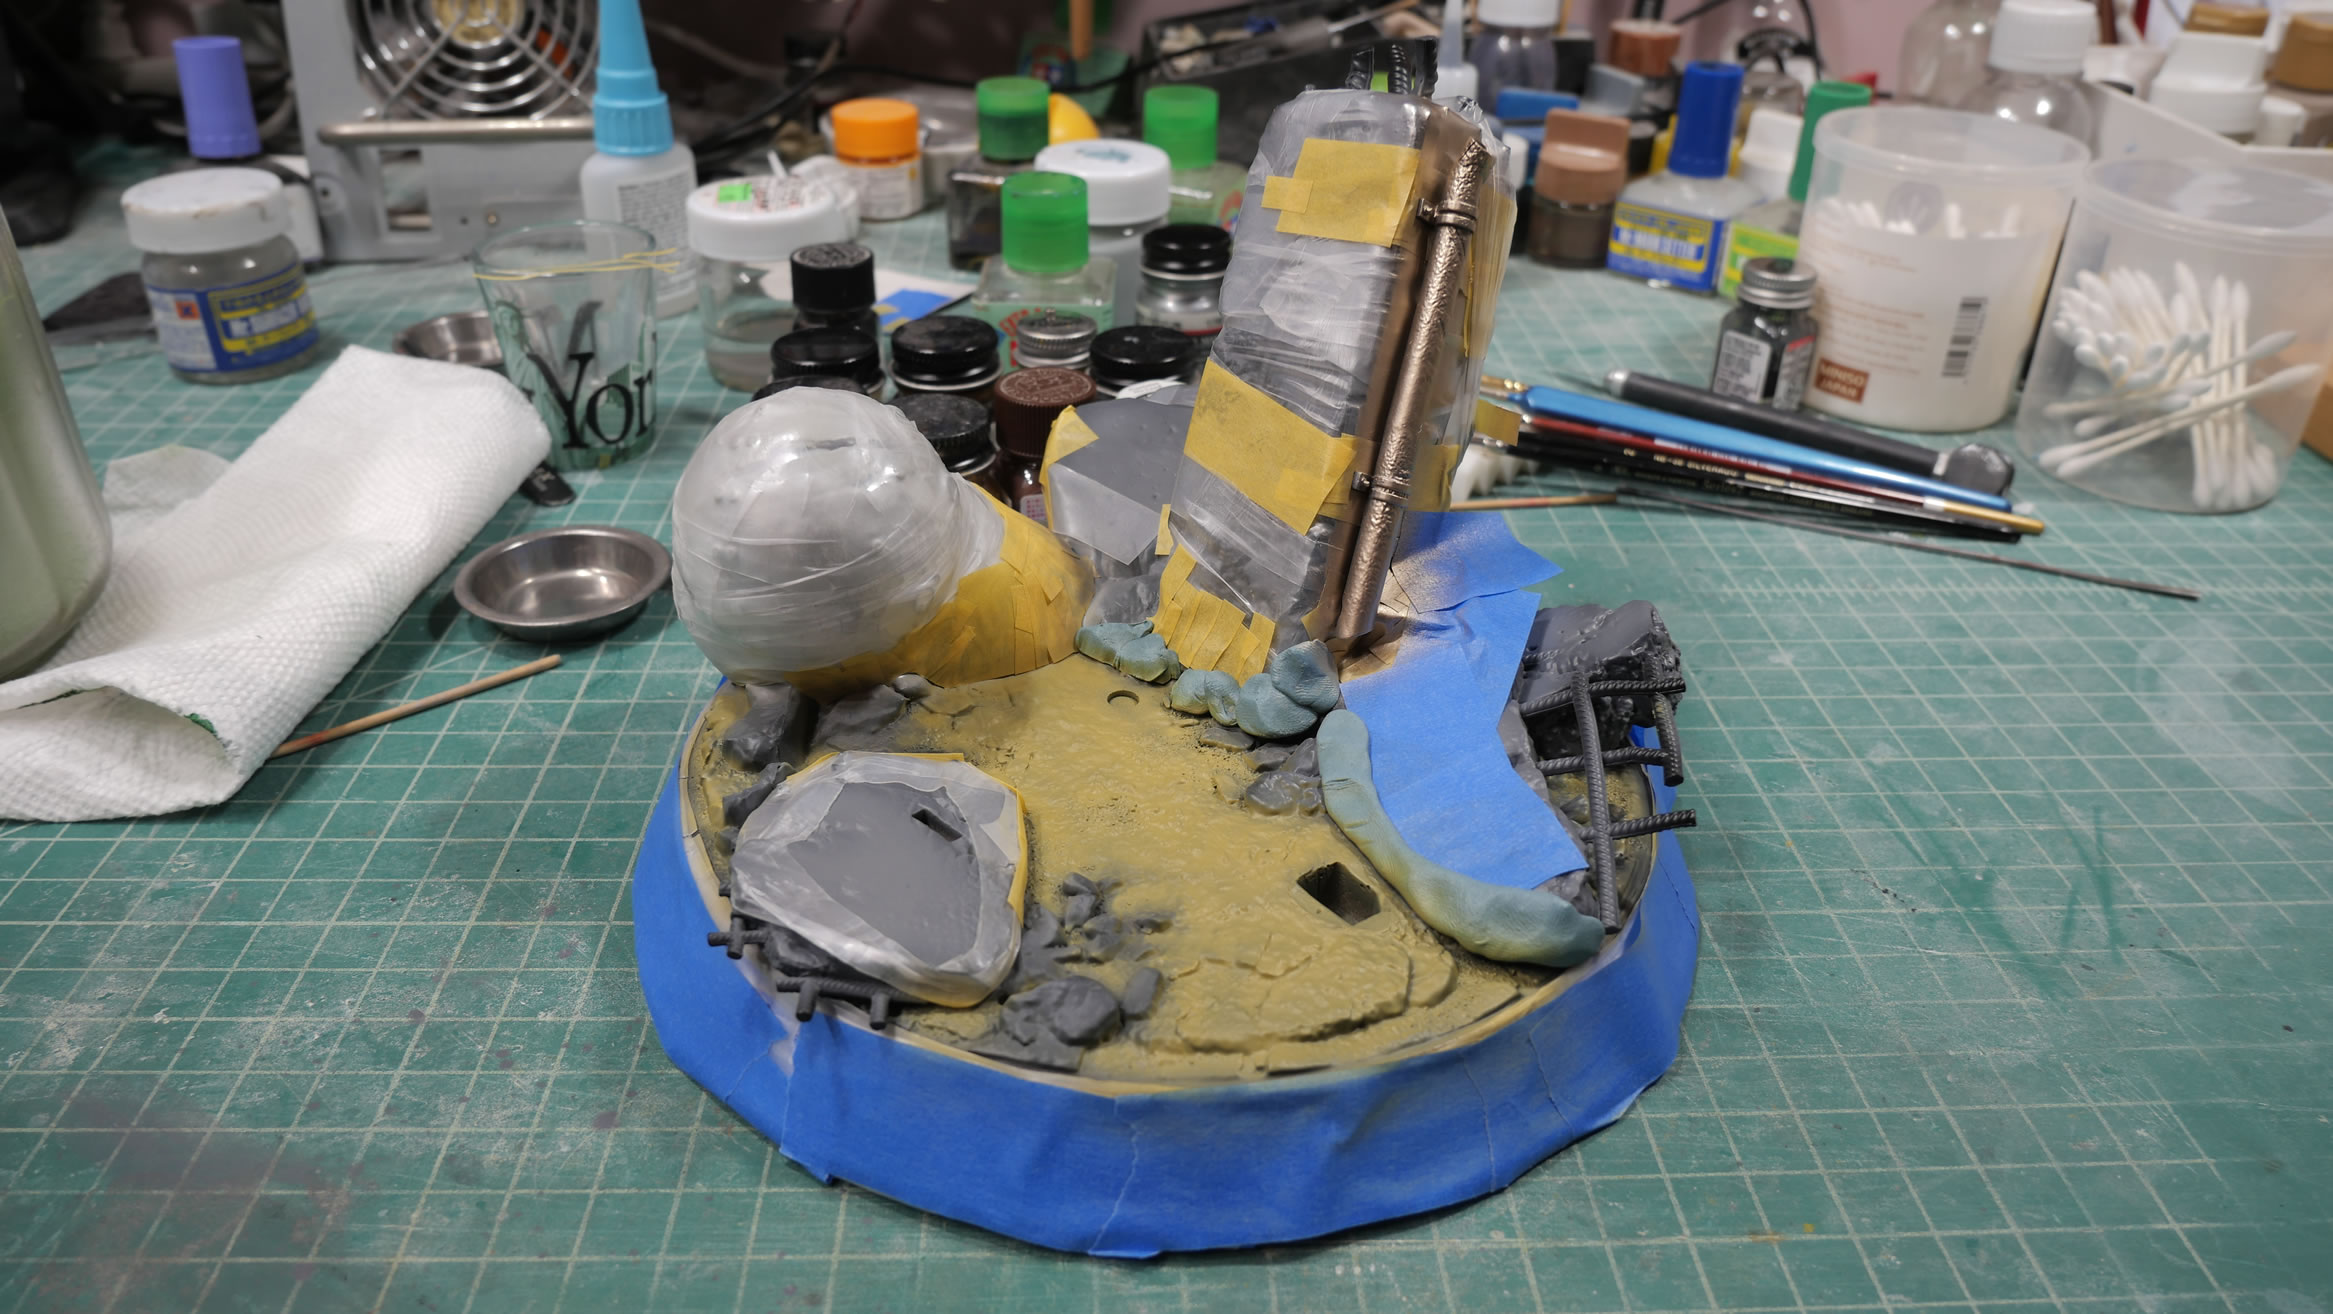
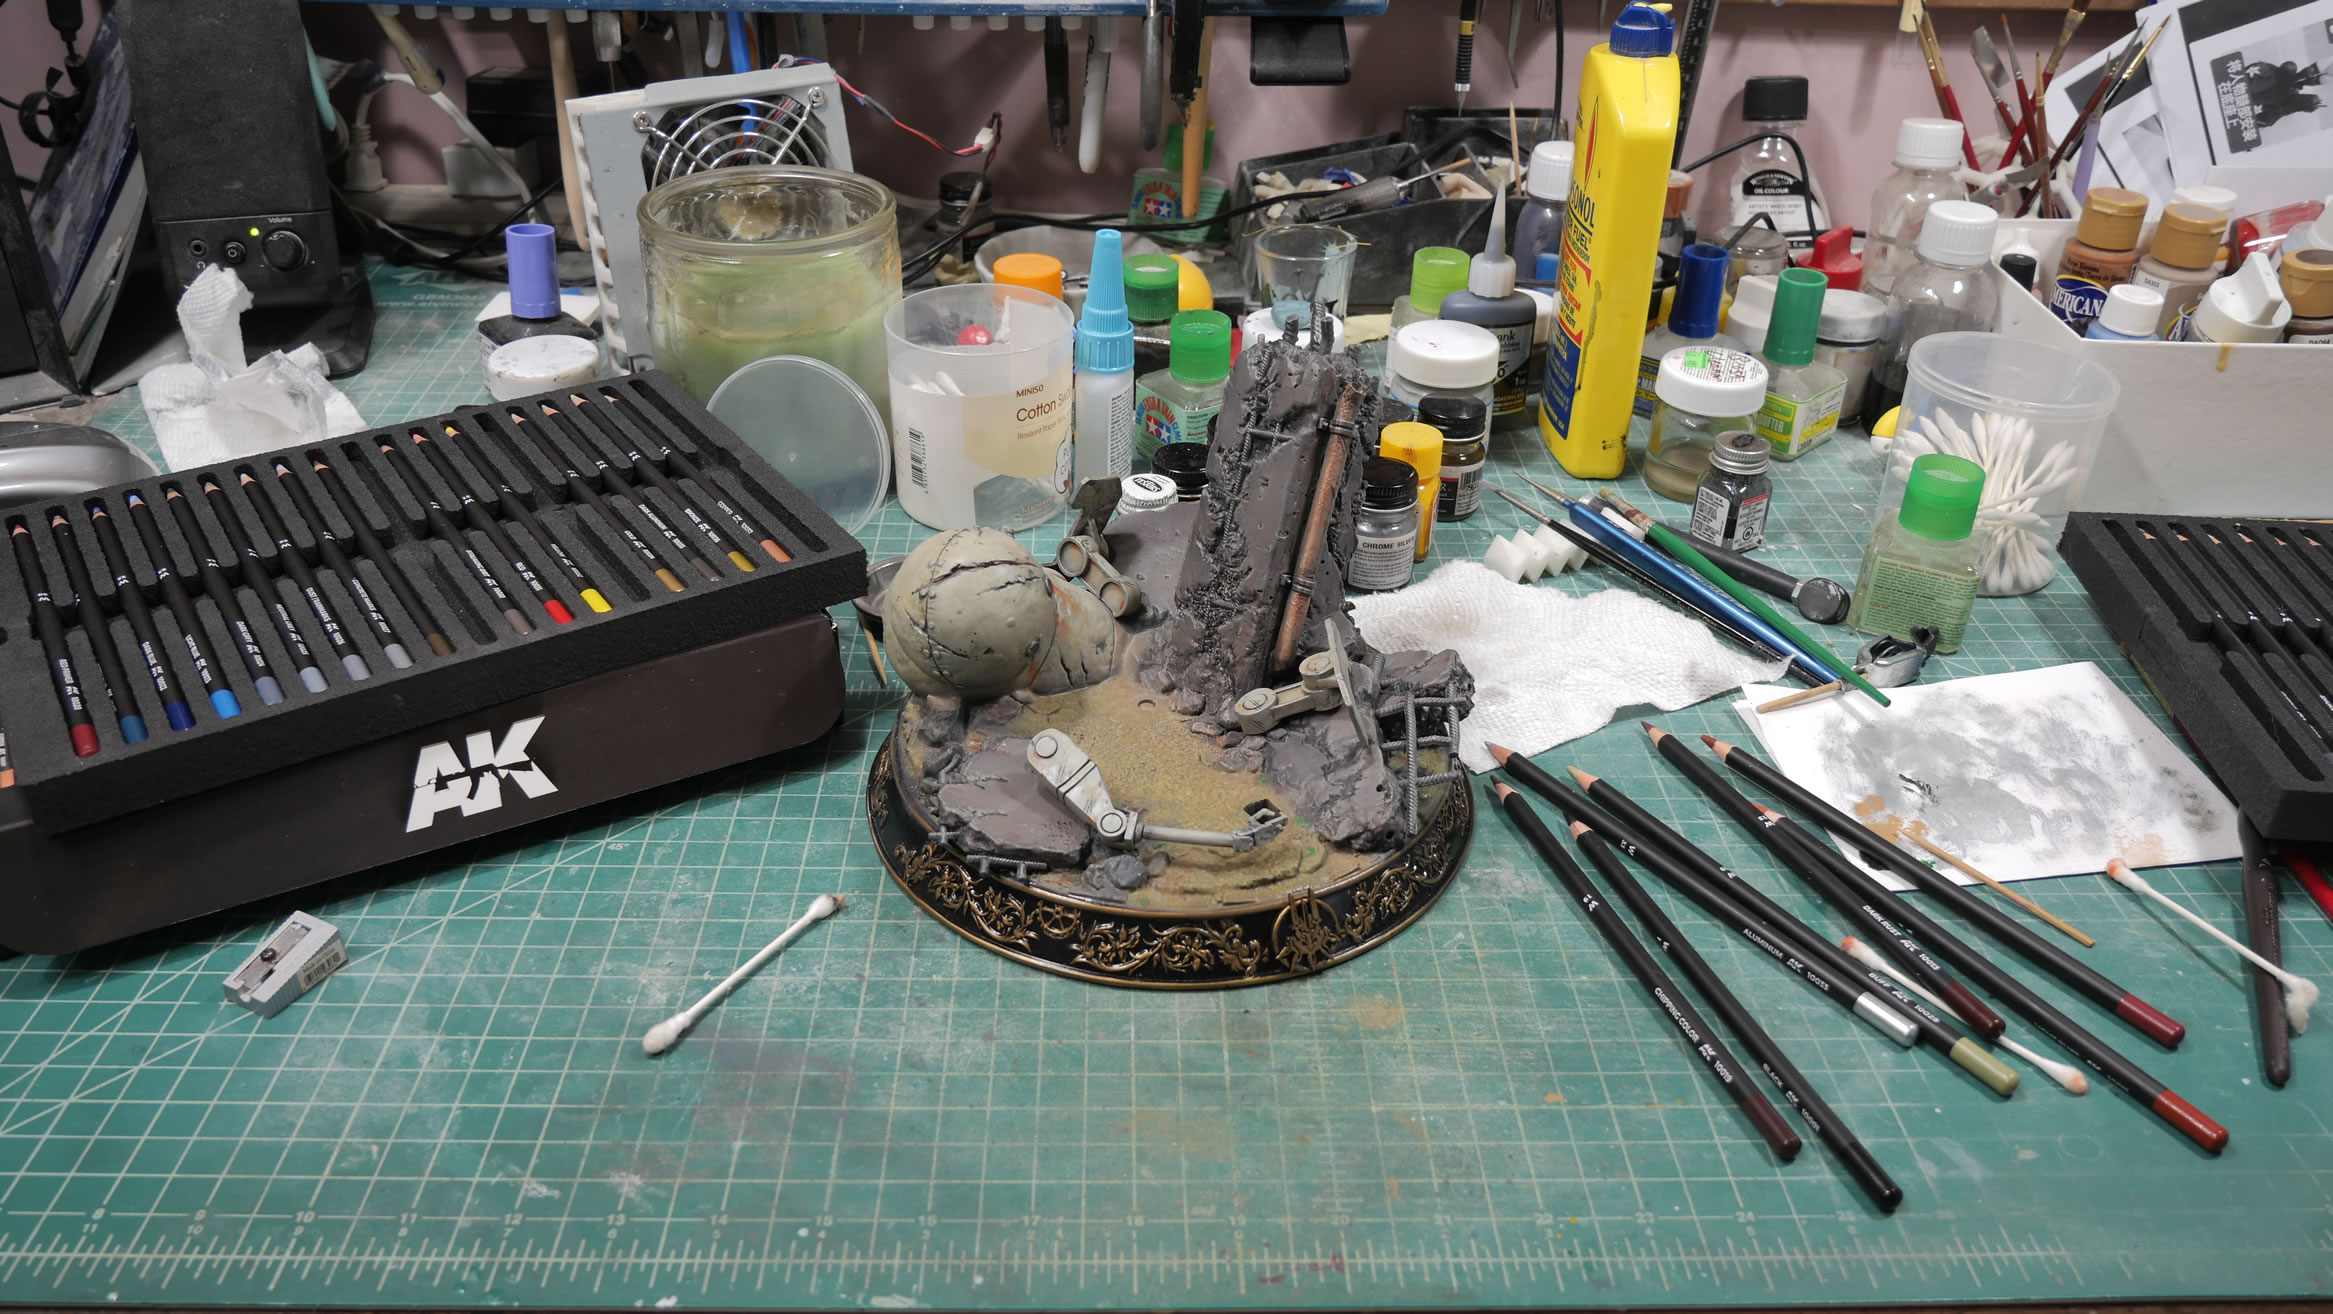
A filter is applied to the stubby, the concrete and the ground. Also clear glossed. Dry brushing details here and there, and another clear gloss. Another black wash is applied and cleaned up.
A final clear gloss to seal everything together. And a clear flat before moving to the next layer. The clear flat lightens the tone of the base considerably.
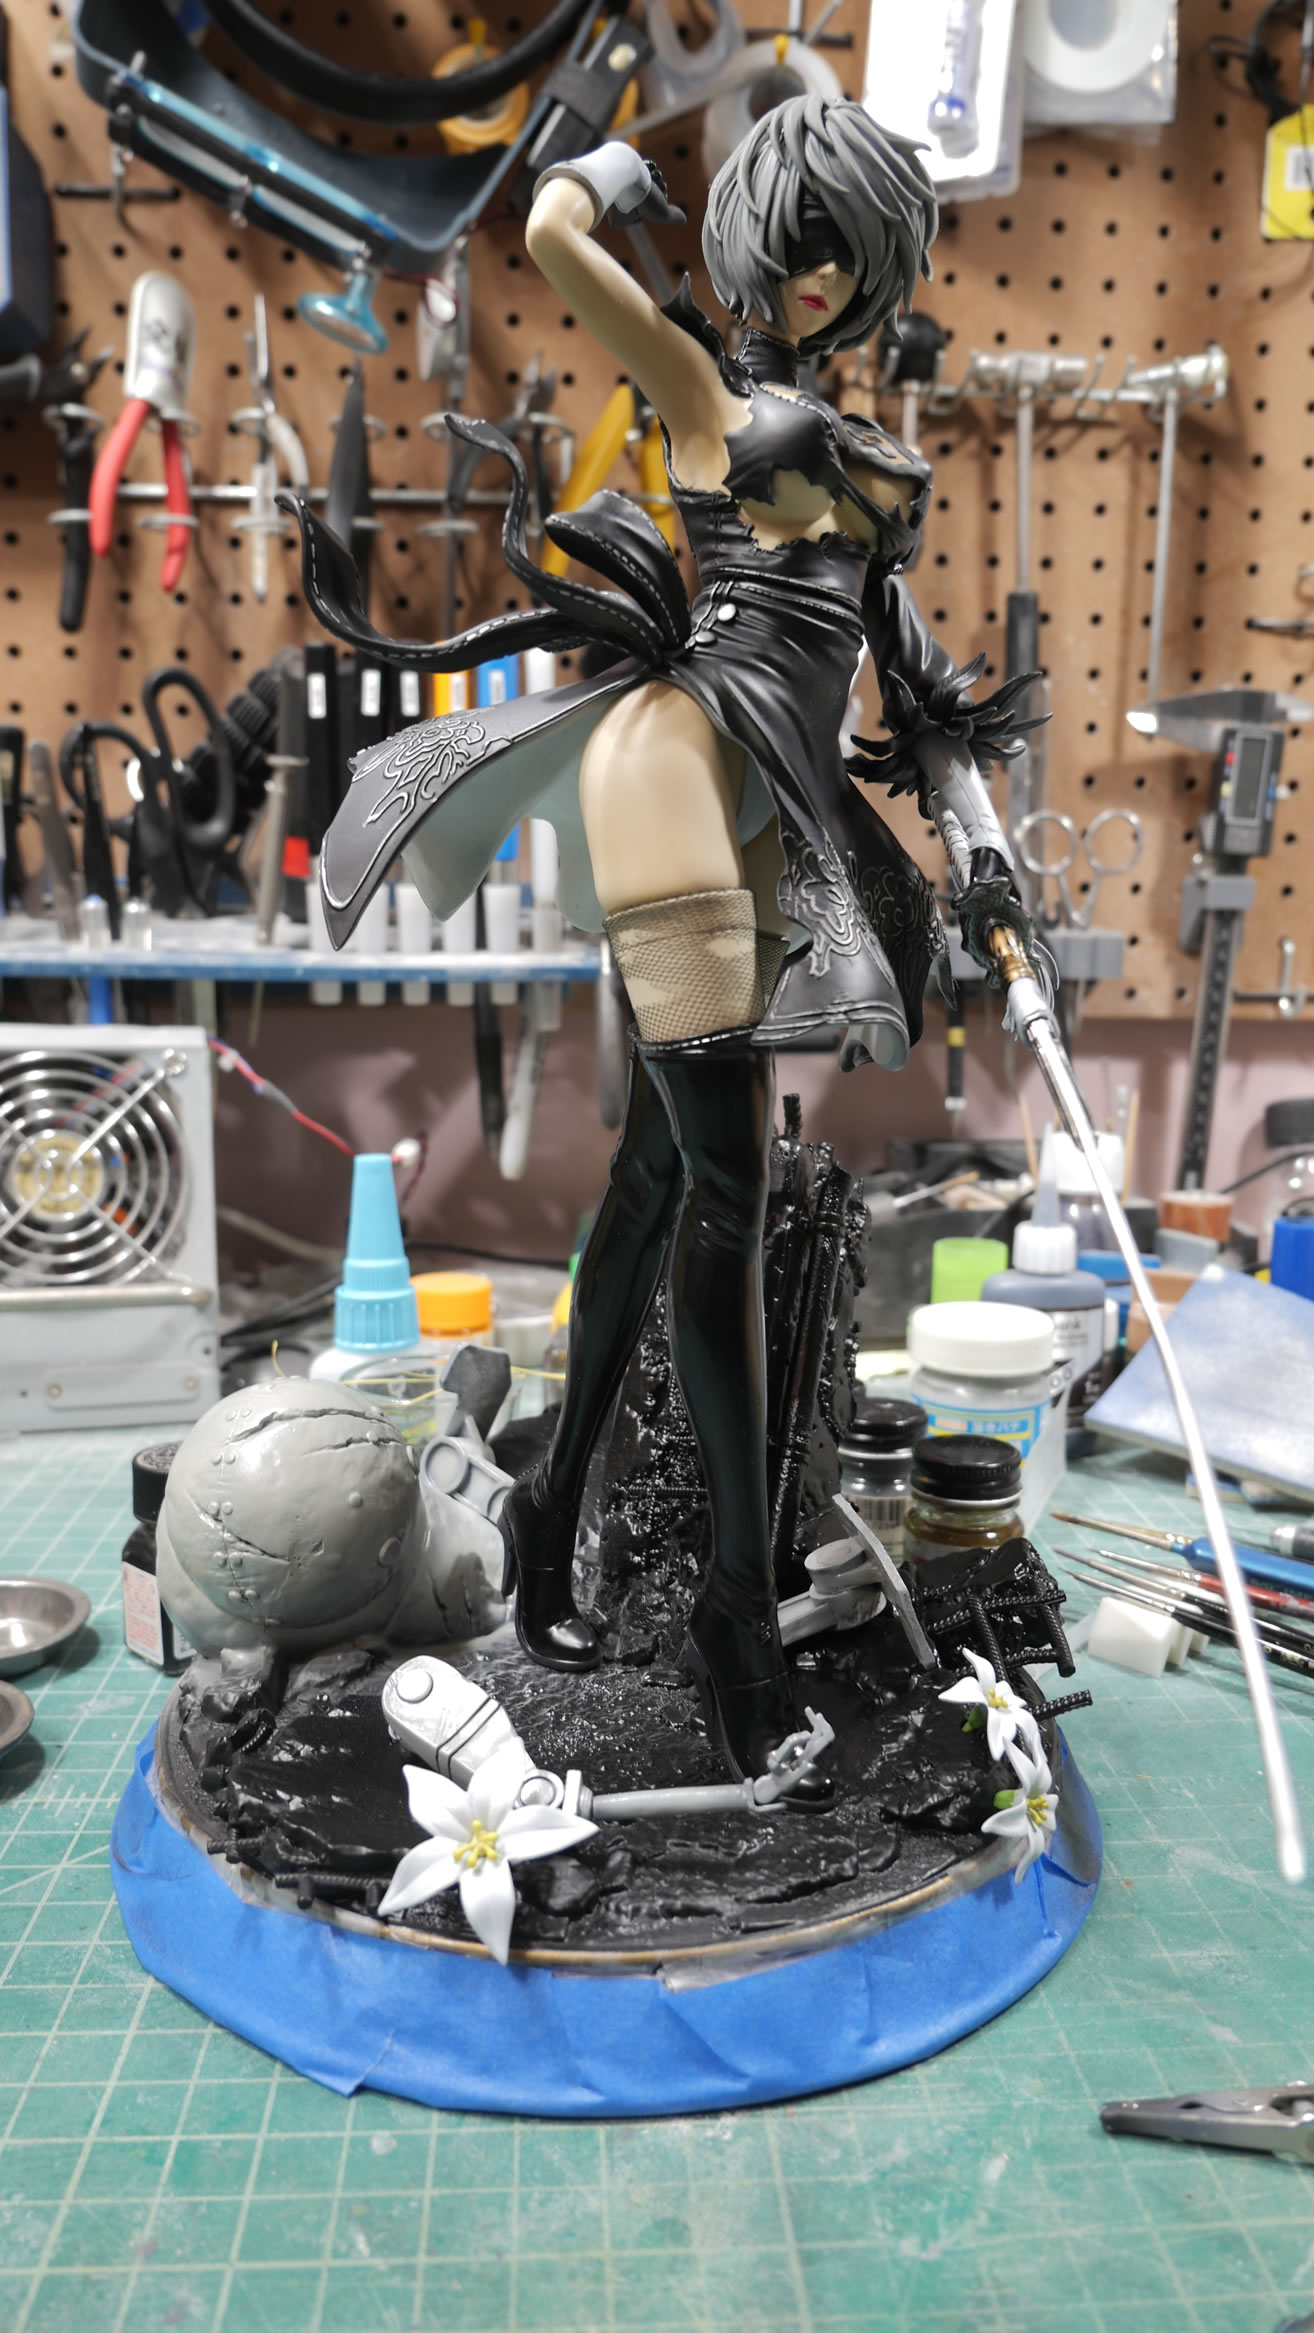
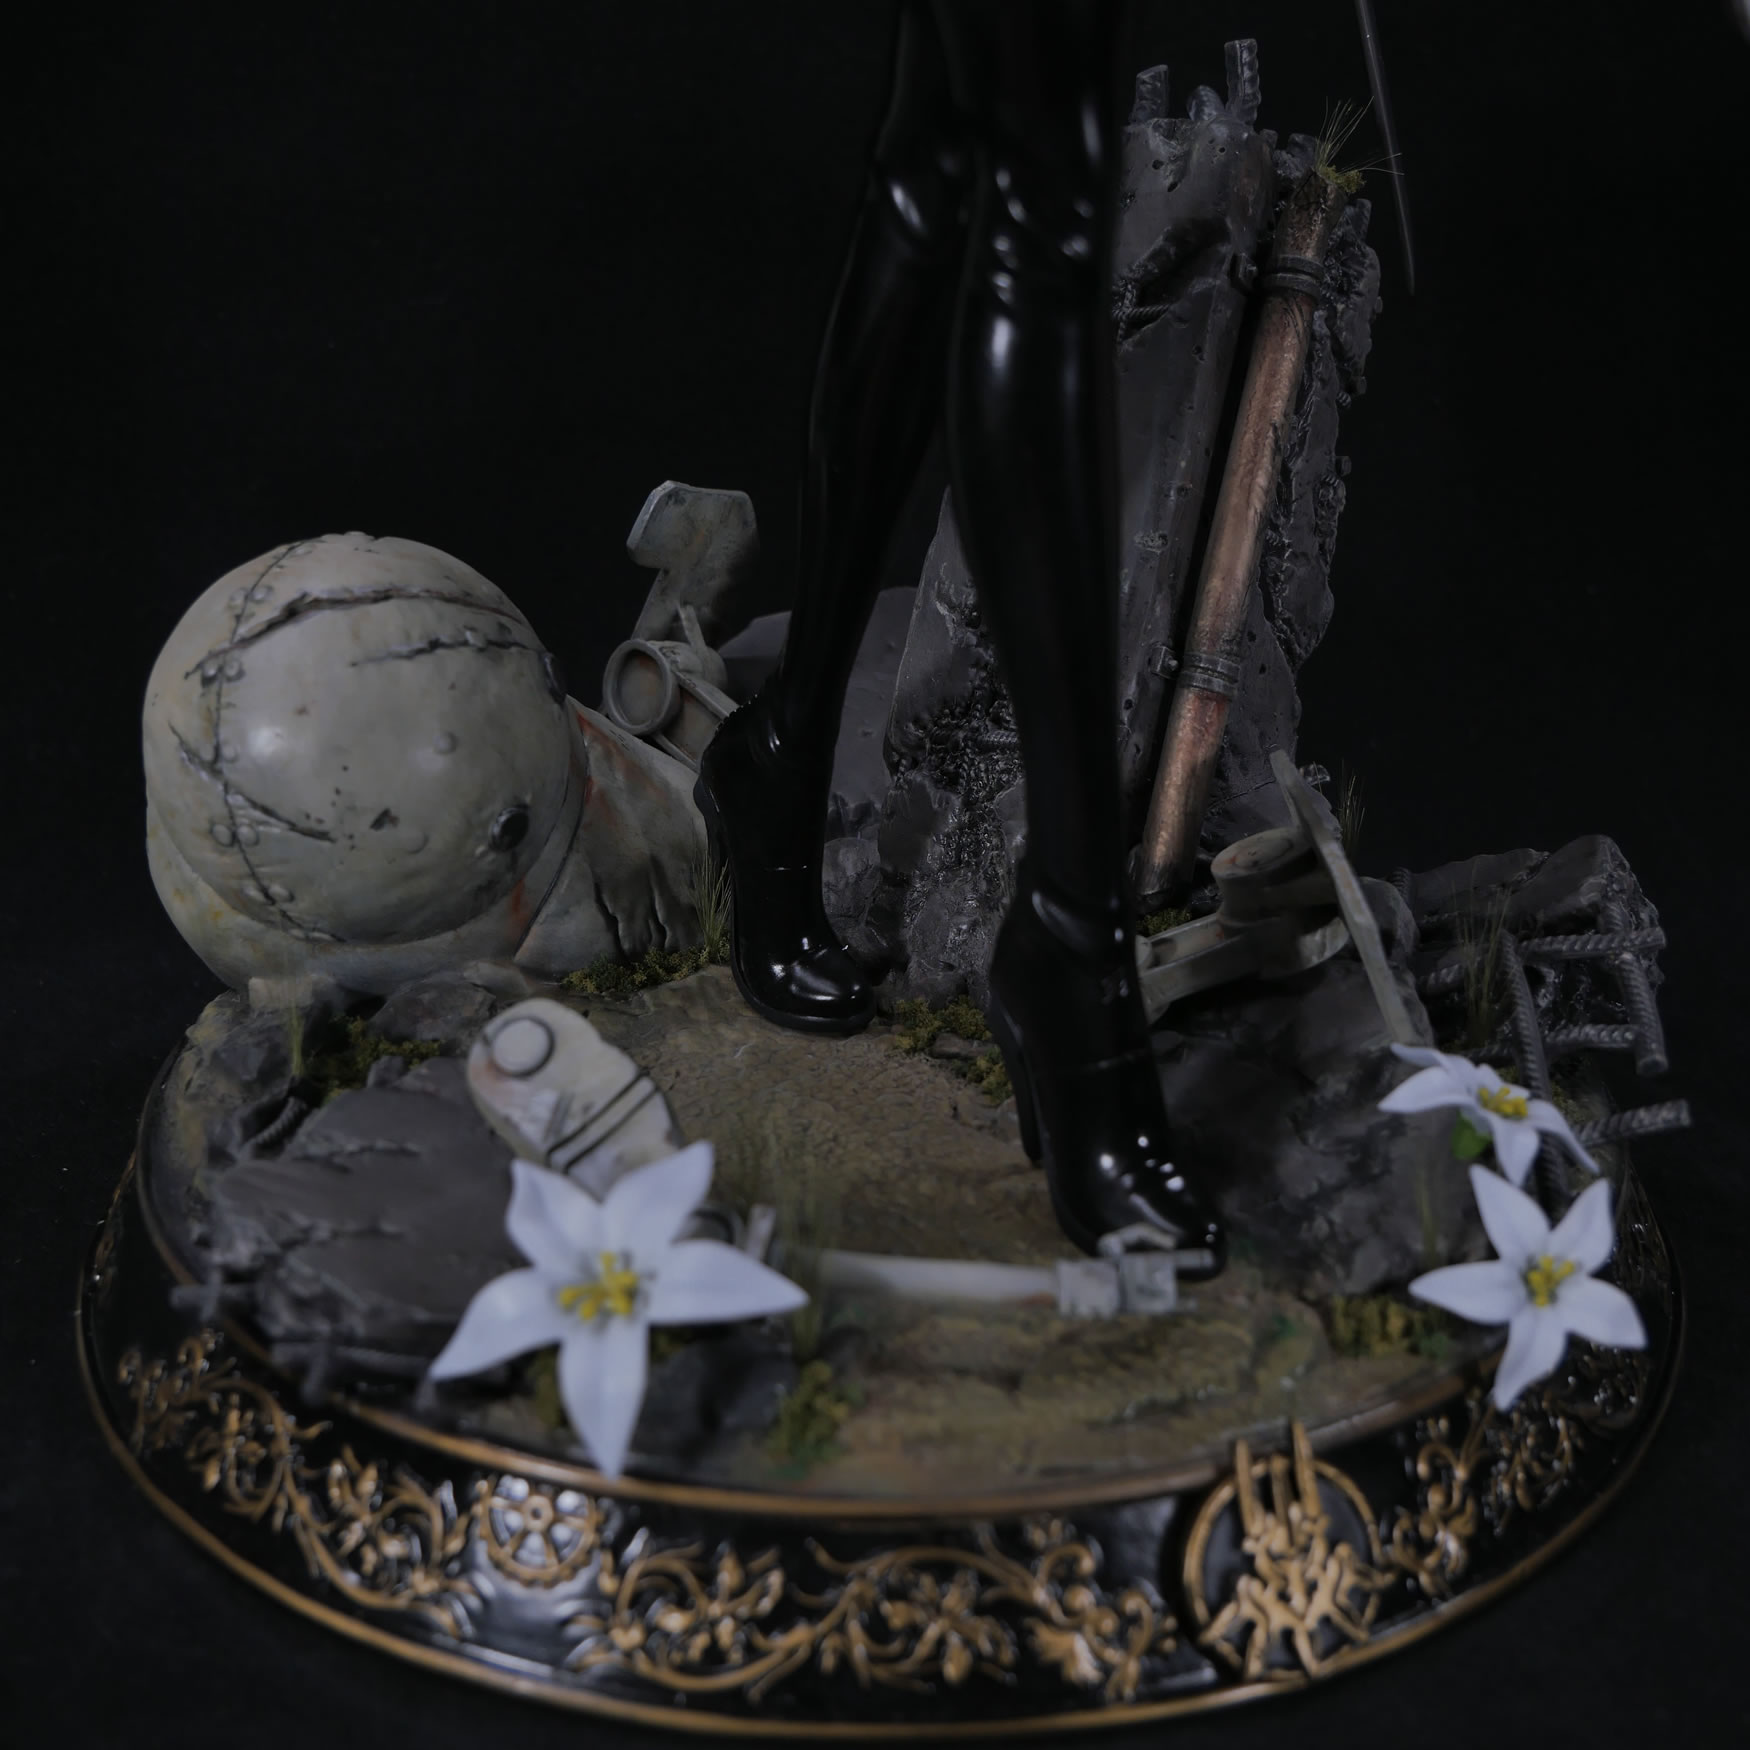
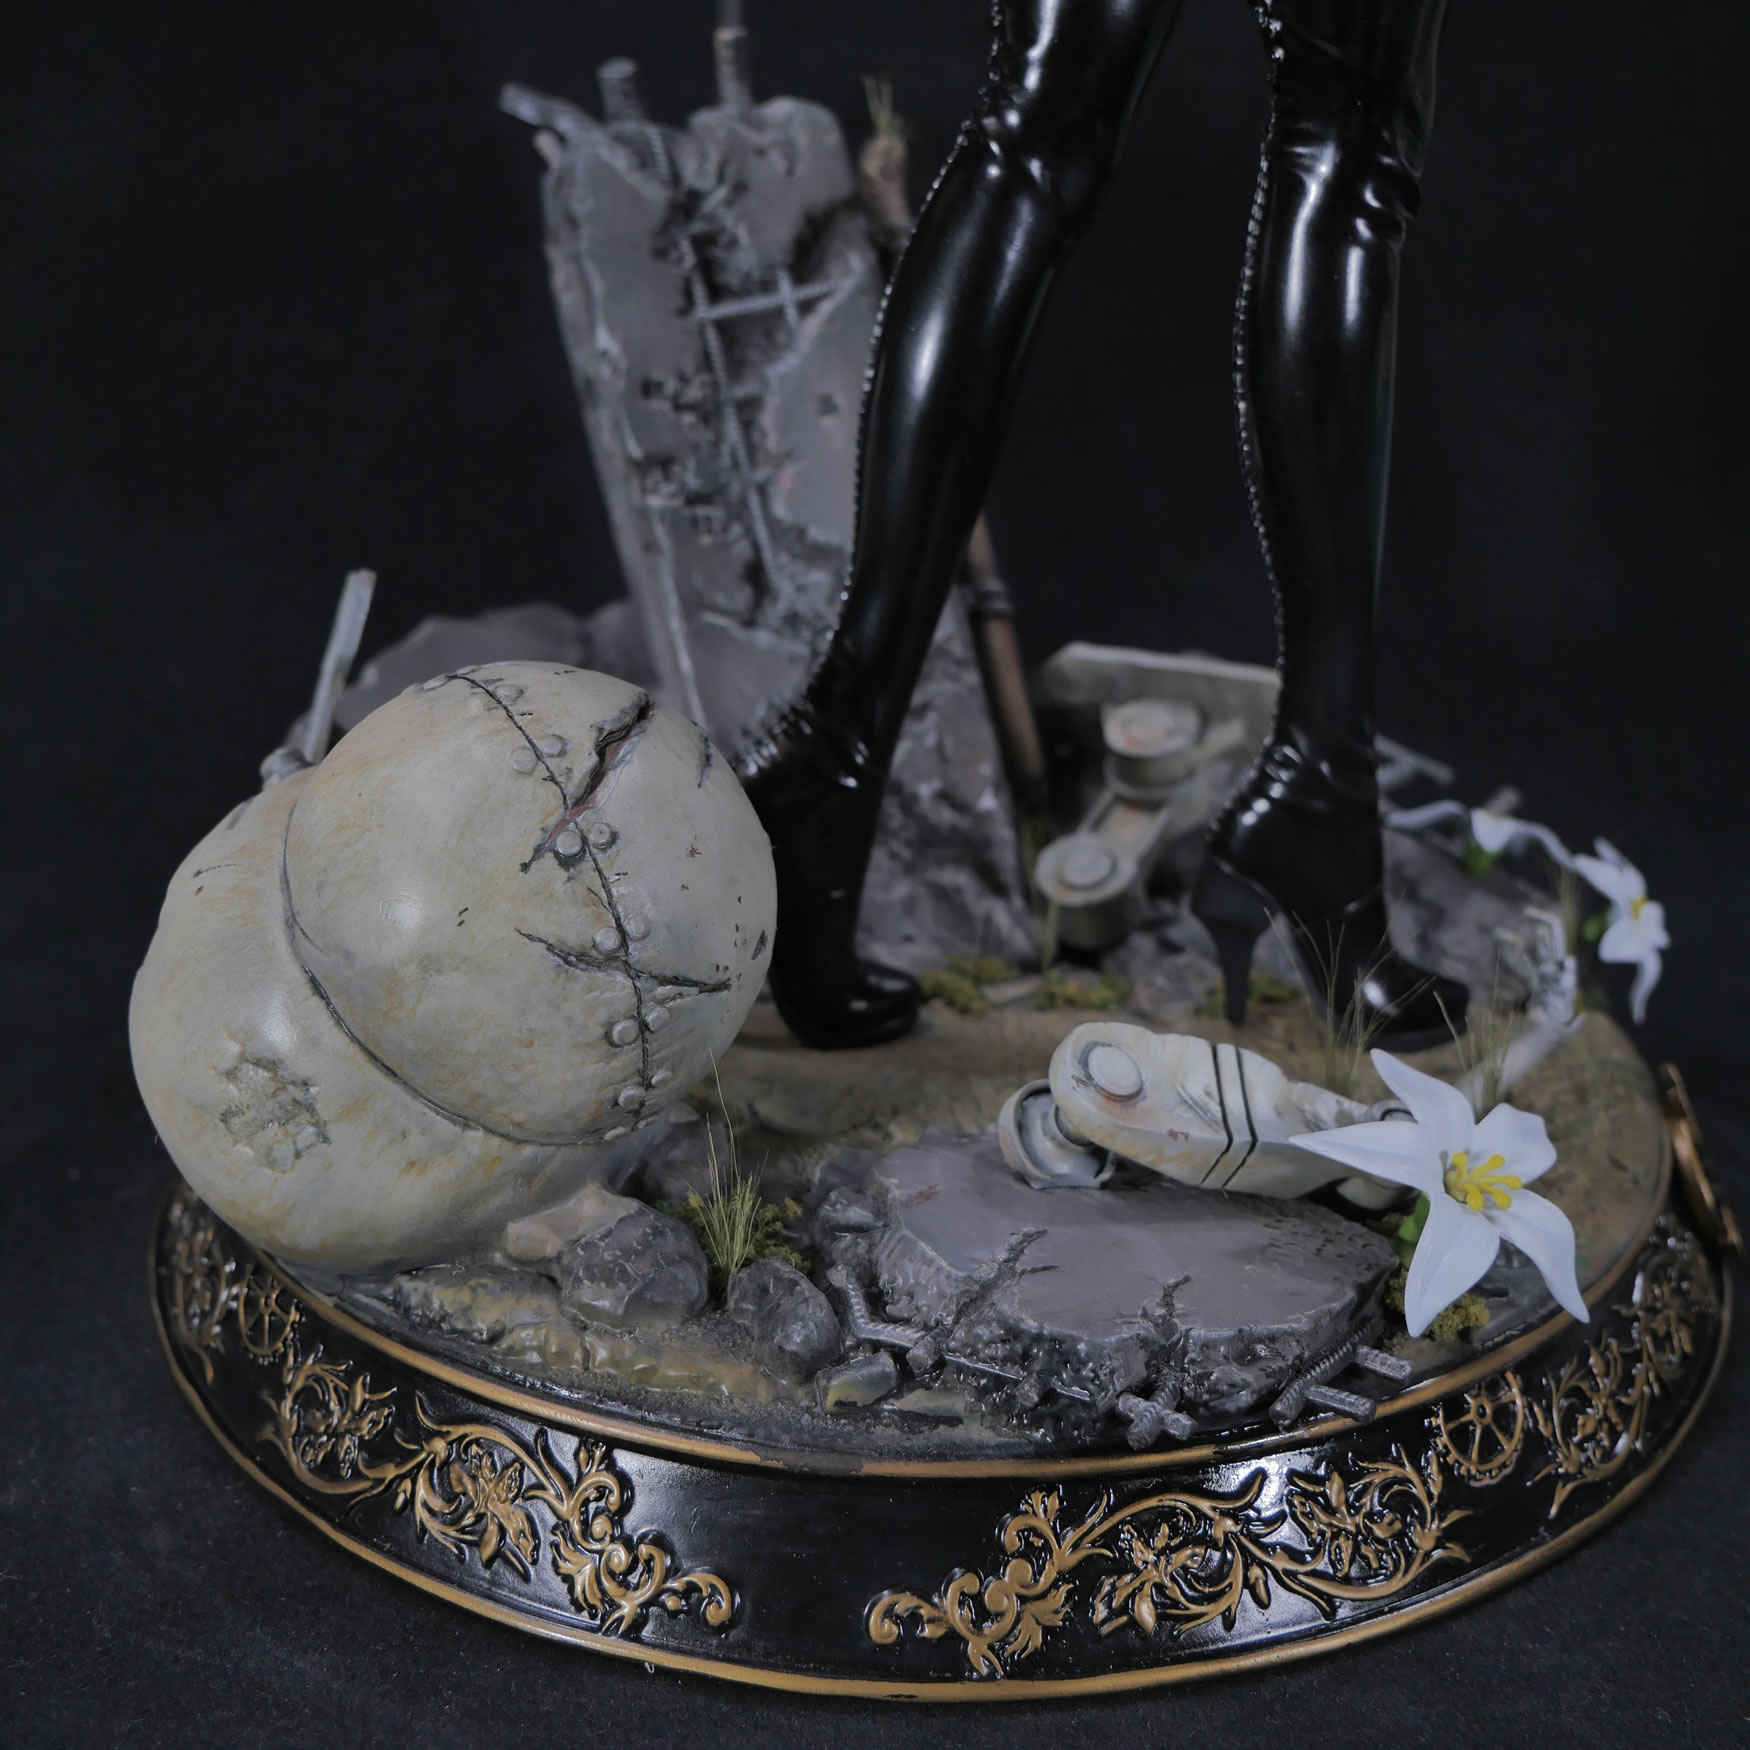
AK weathering pencils are used to add final bits of rust, soot, dust, and little tonal details here and there. I could spend forever here just going deeper into a rabbit hole, but once this is done, I can move to the final steps of gluing the rest of the stubby parts onto the base as well as the flowers.
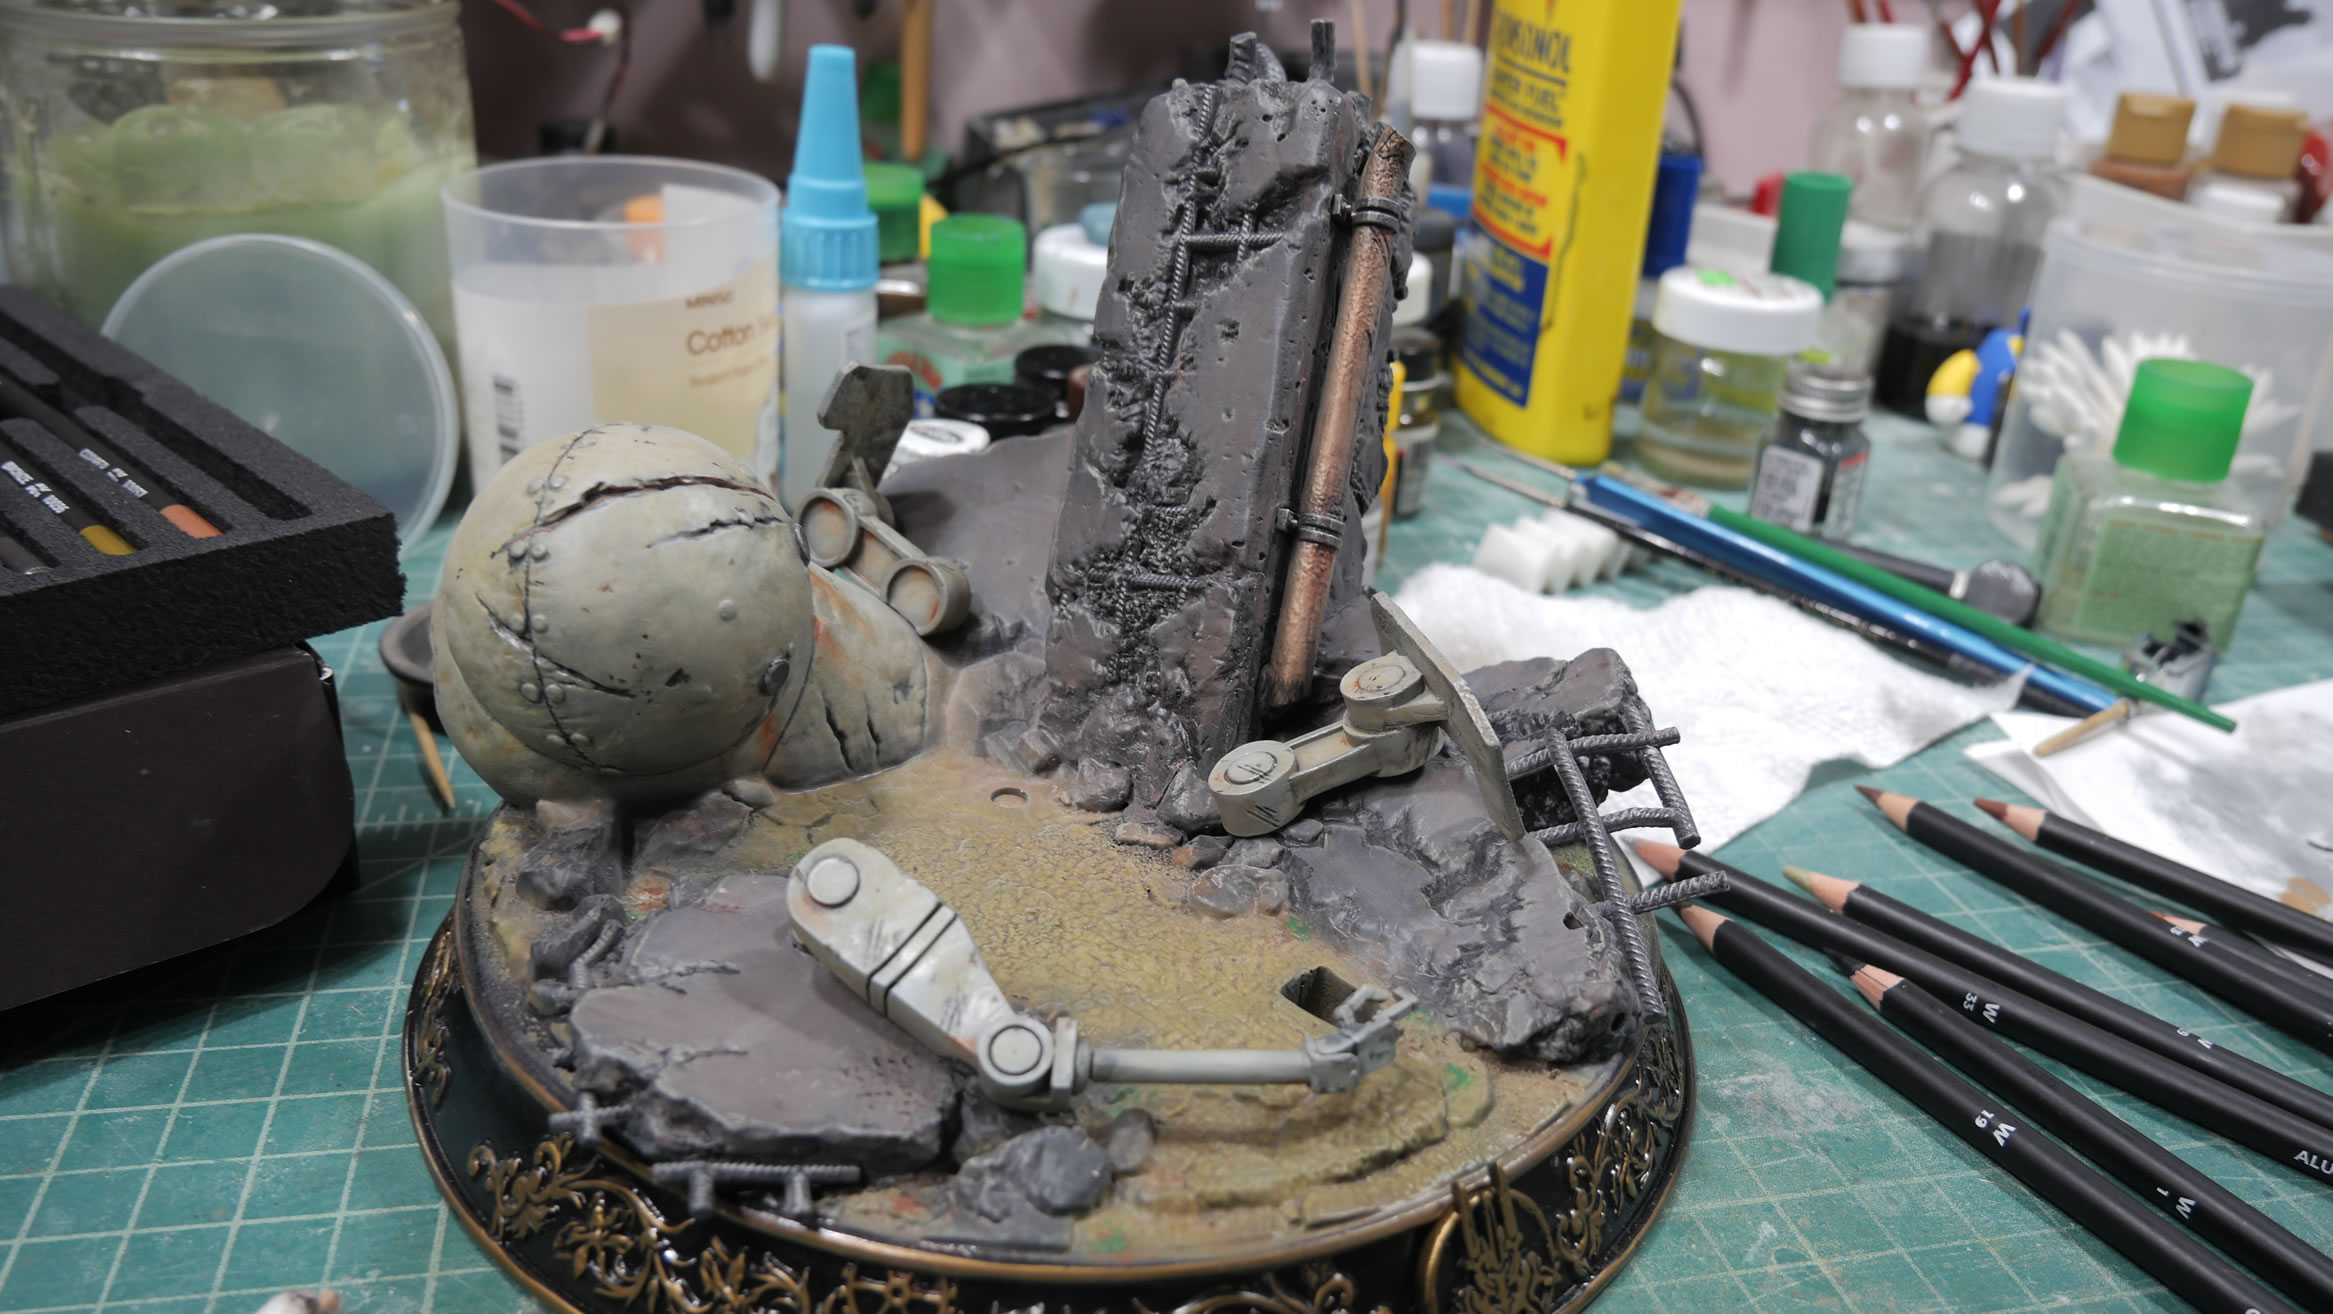
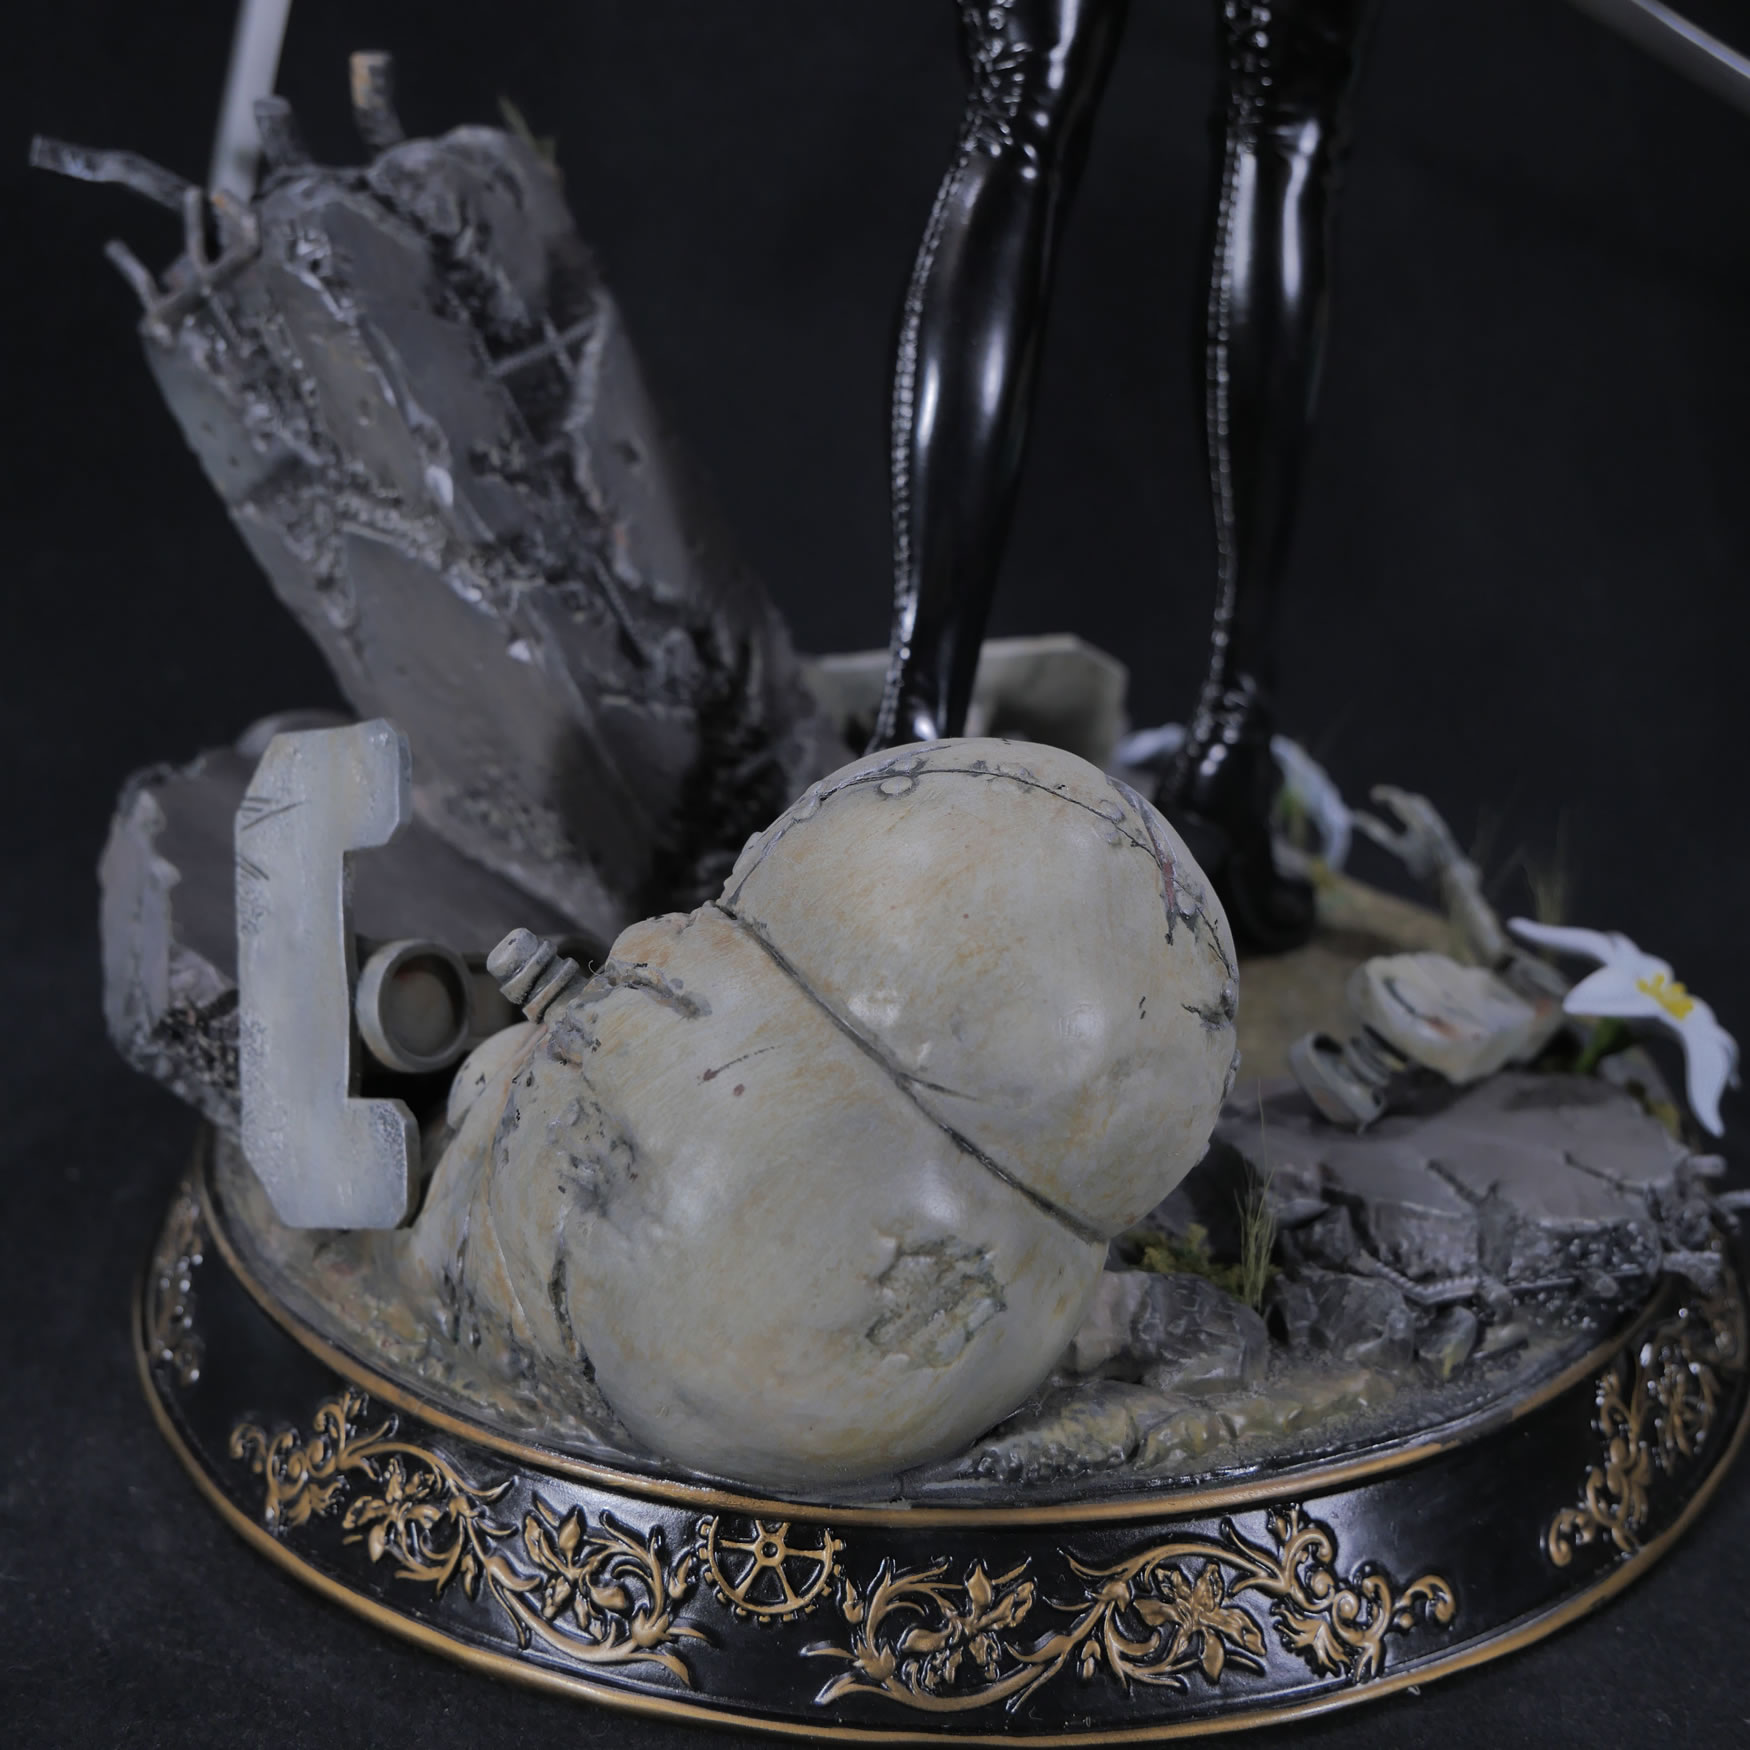
The last bit of details is some ground effects. Using woodland scenics; I got a mix of different shrub colors and glued them down to some of transition areas to help hide and blend things. Some grass is glued down in spots as well.
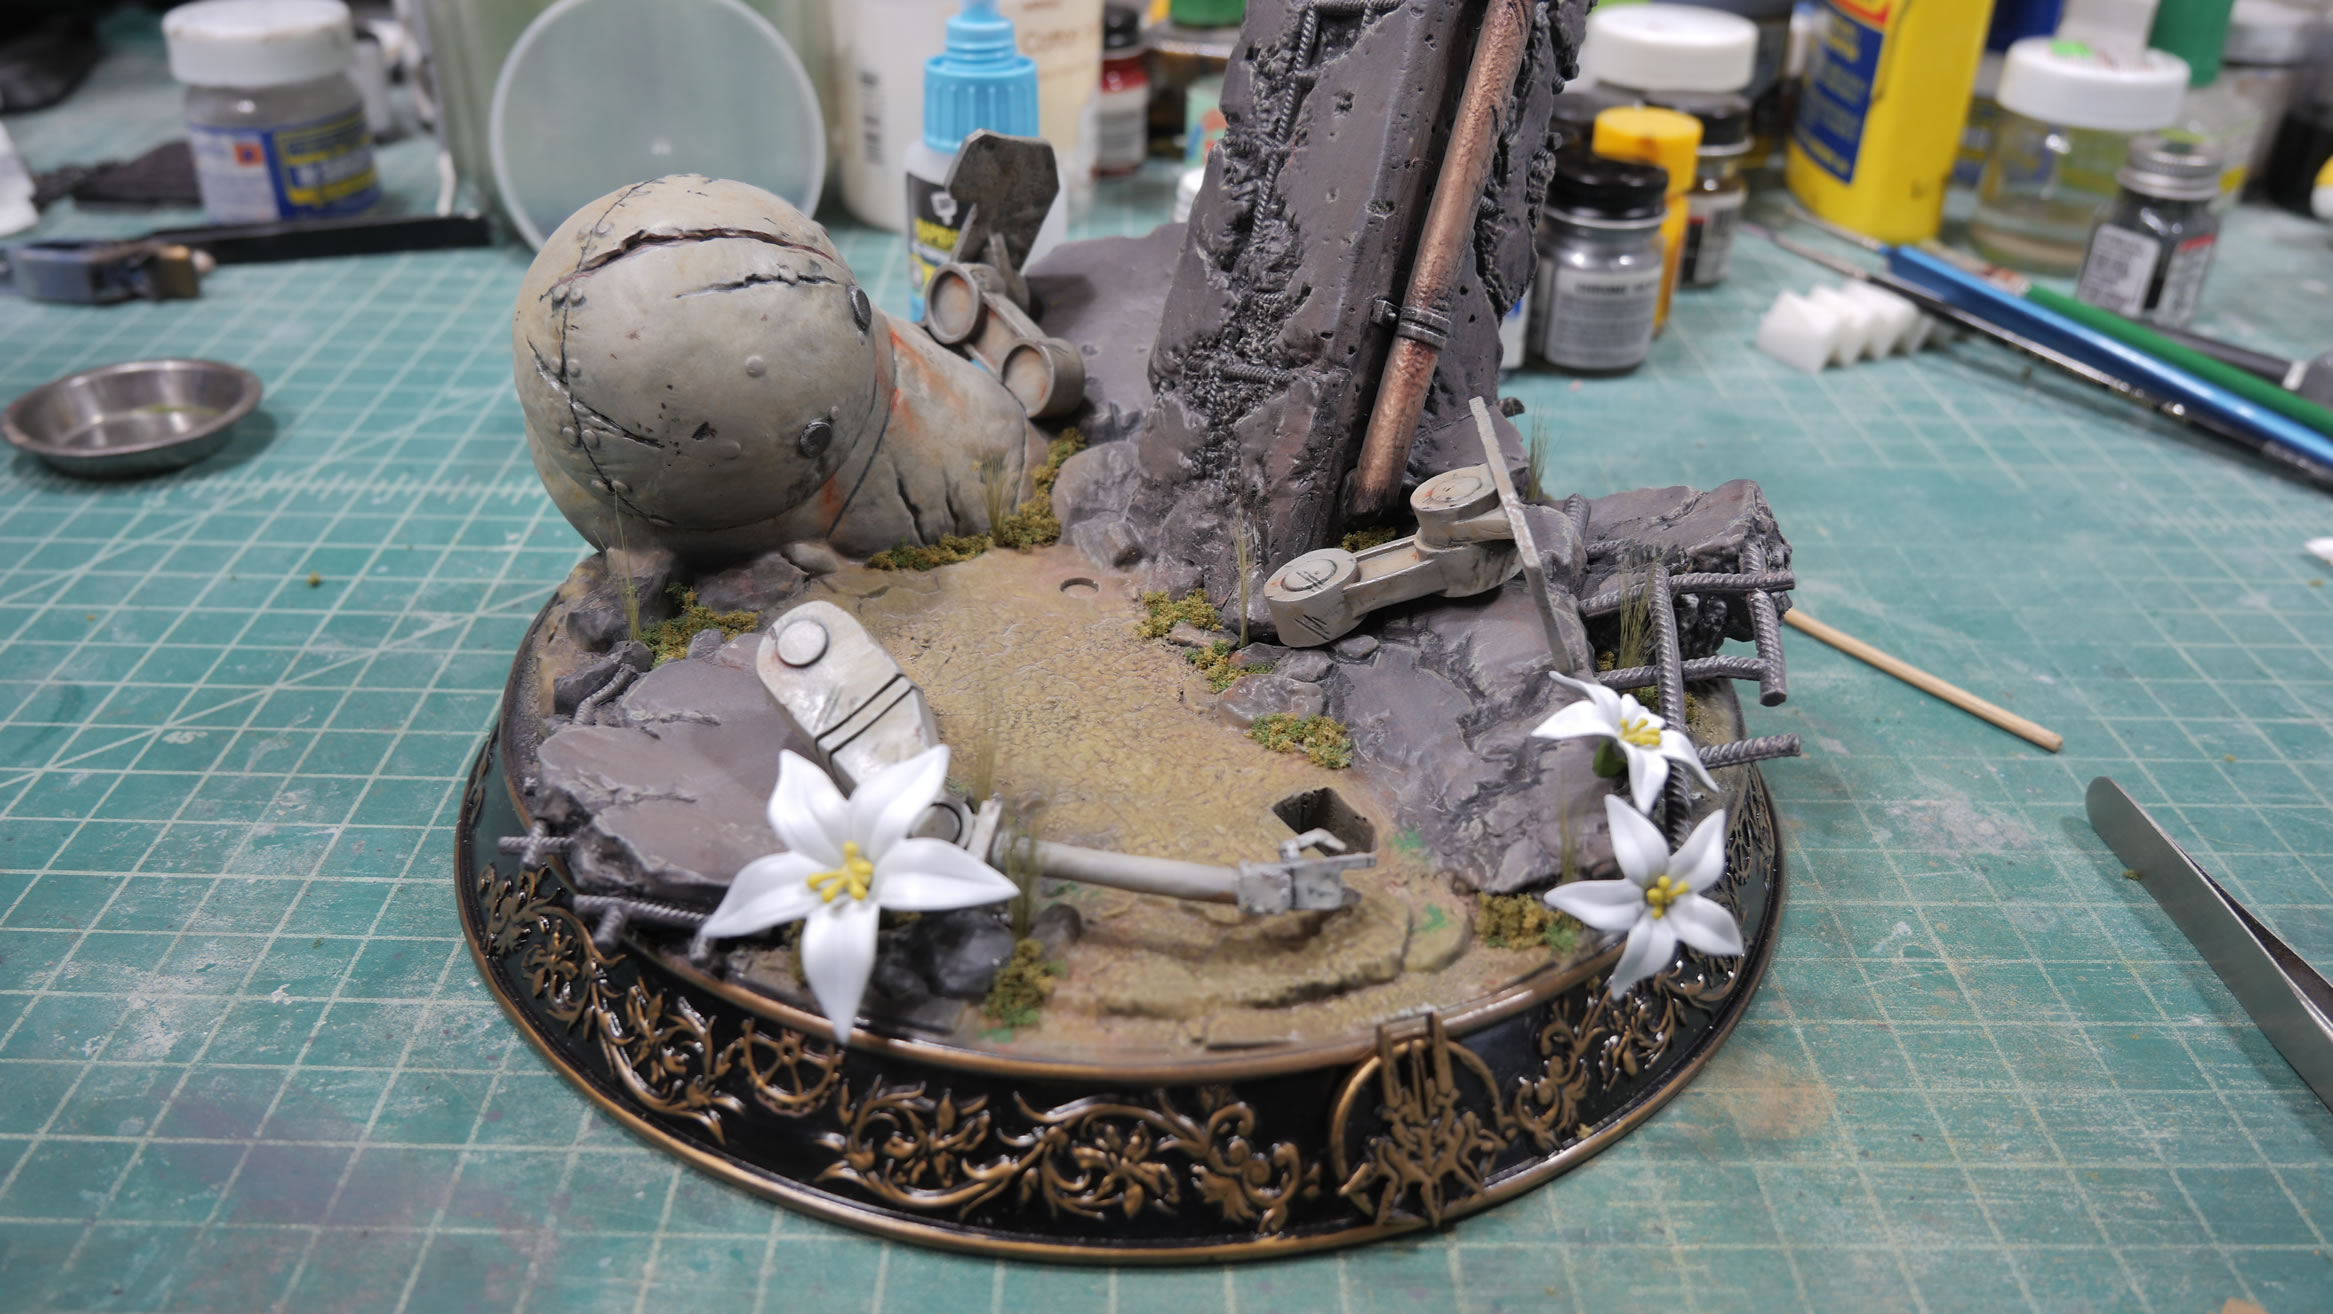
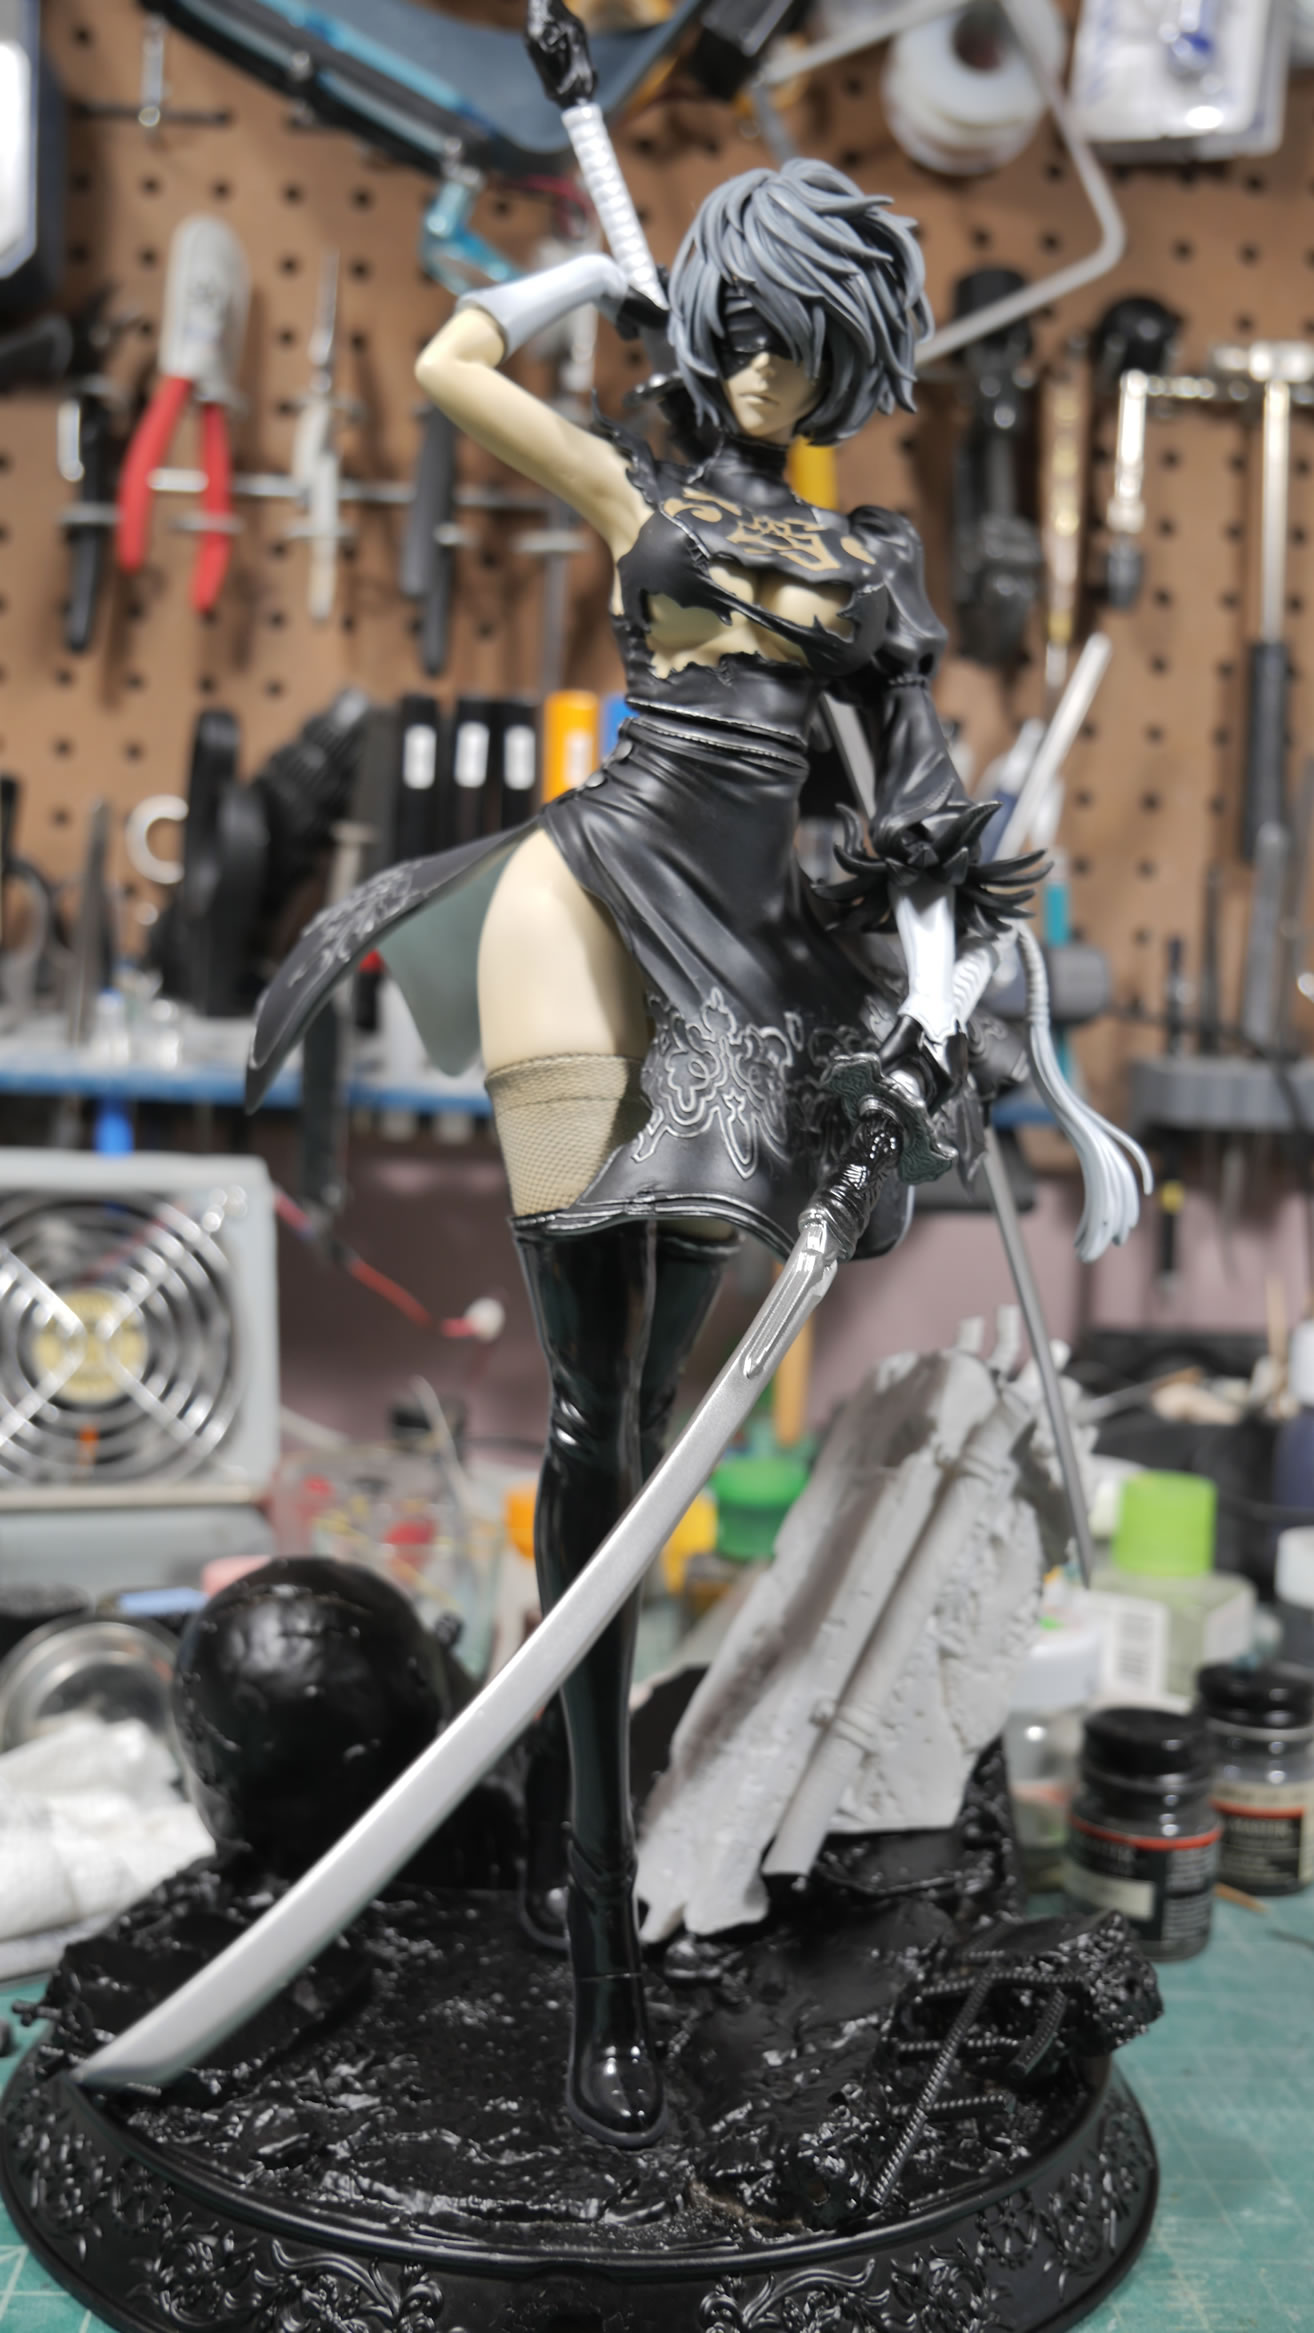
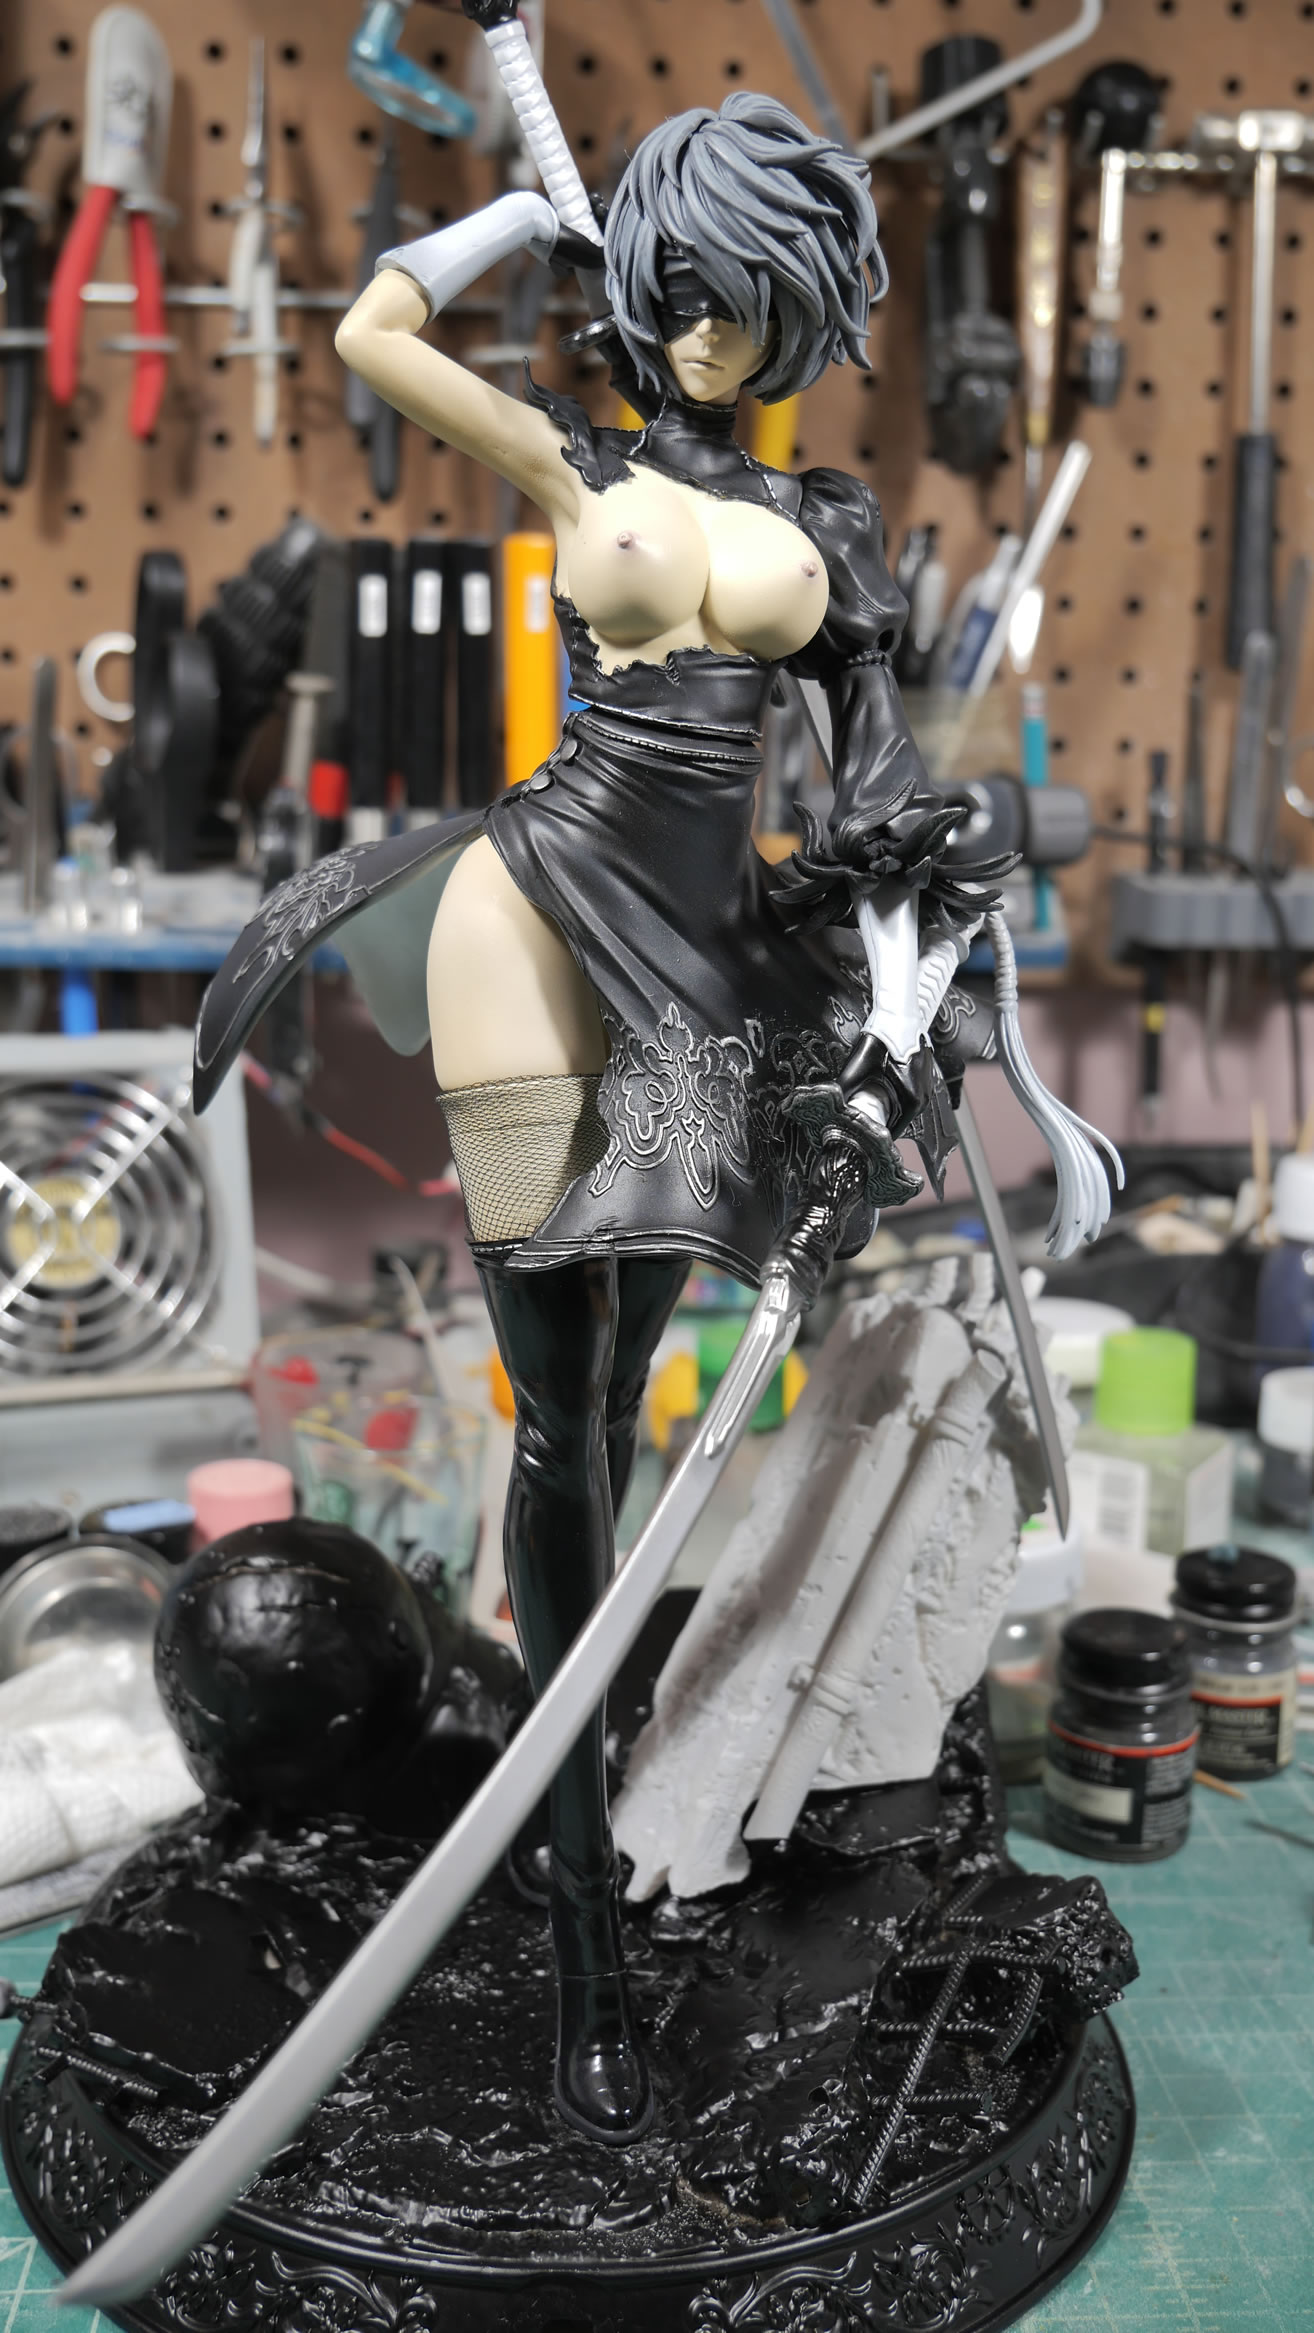
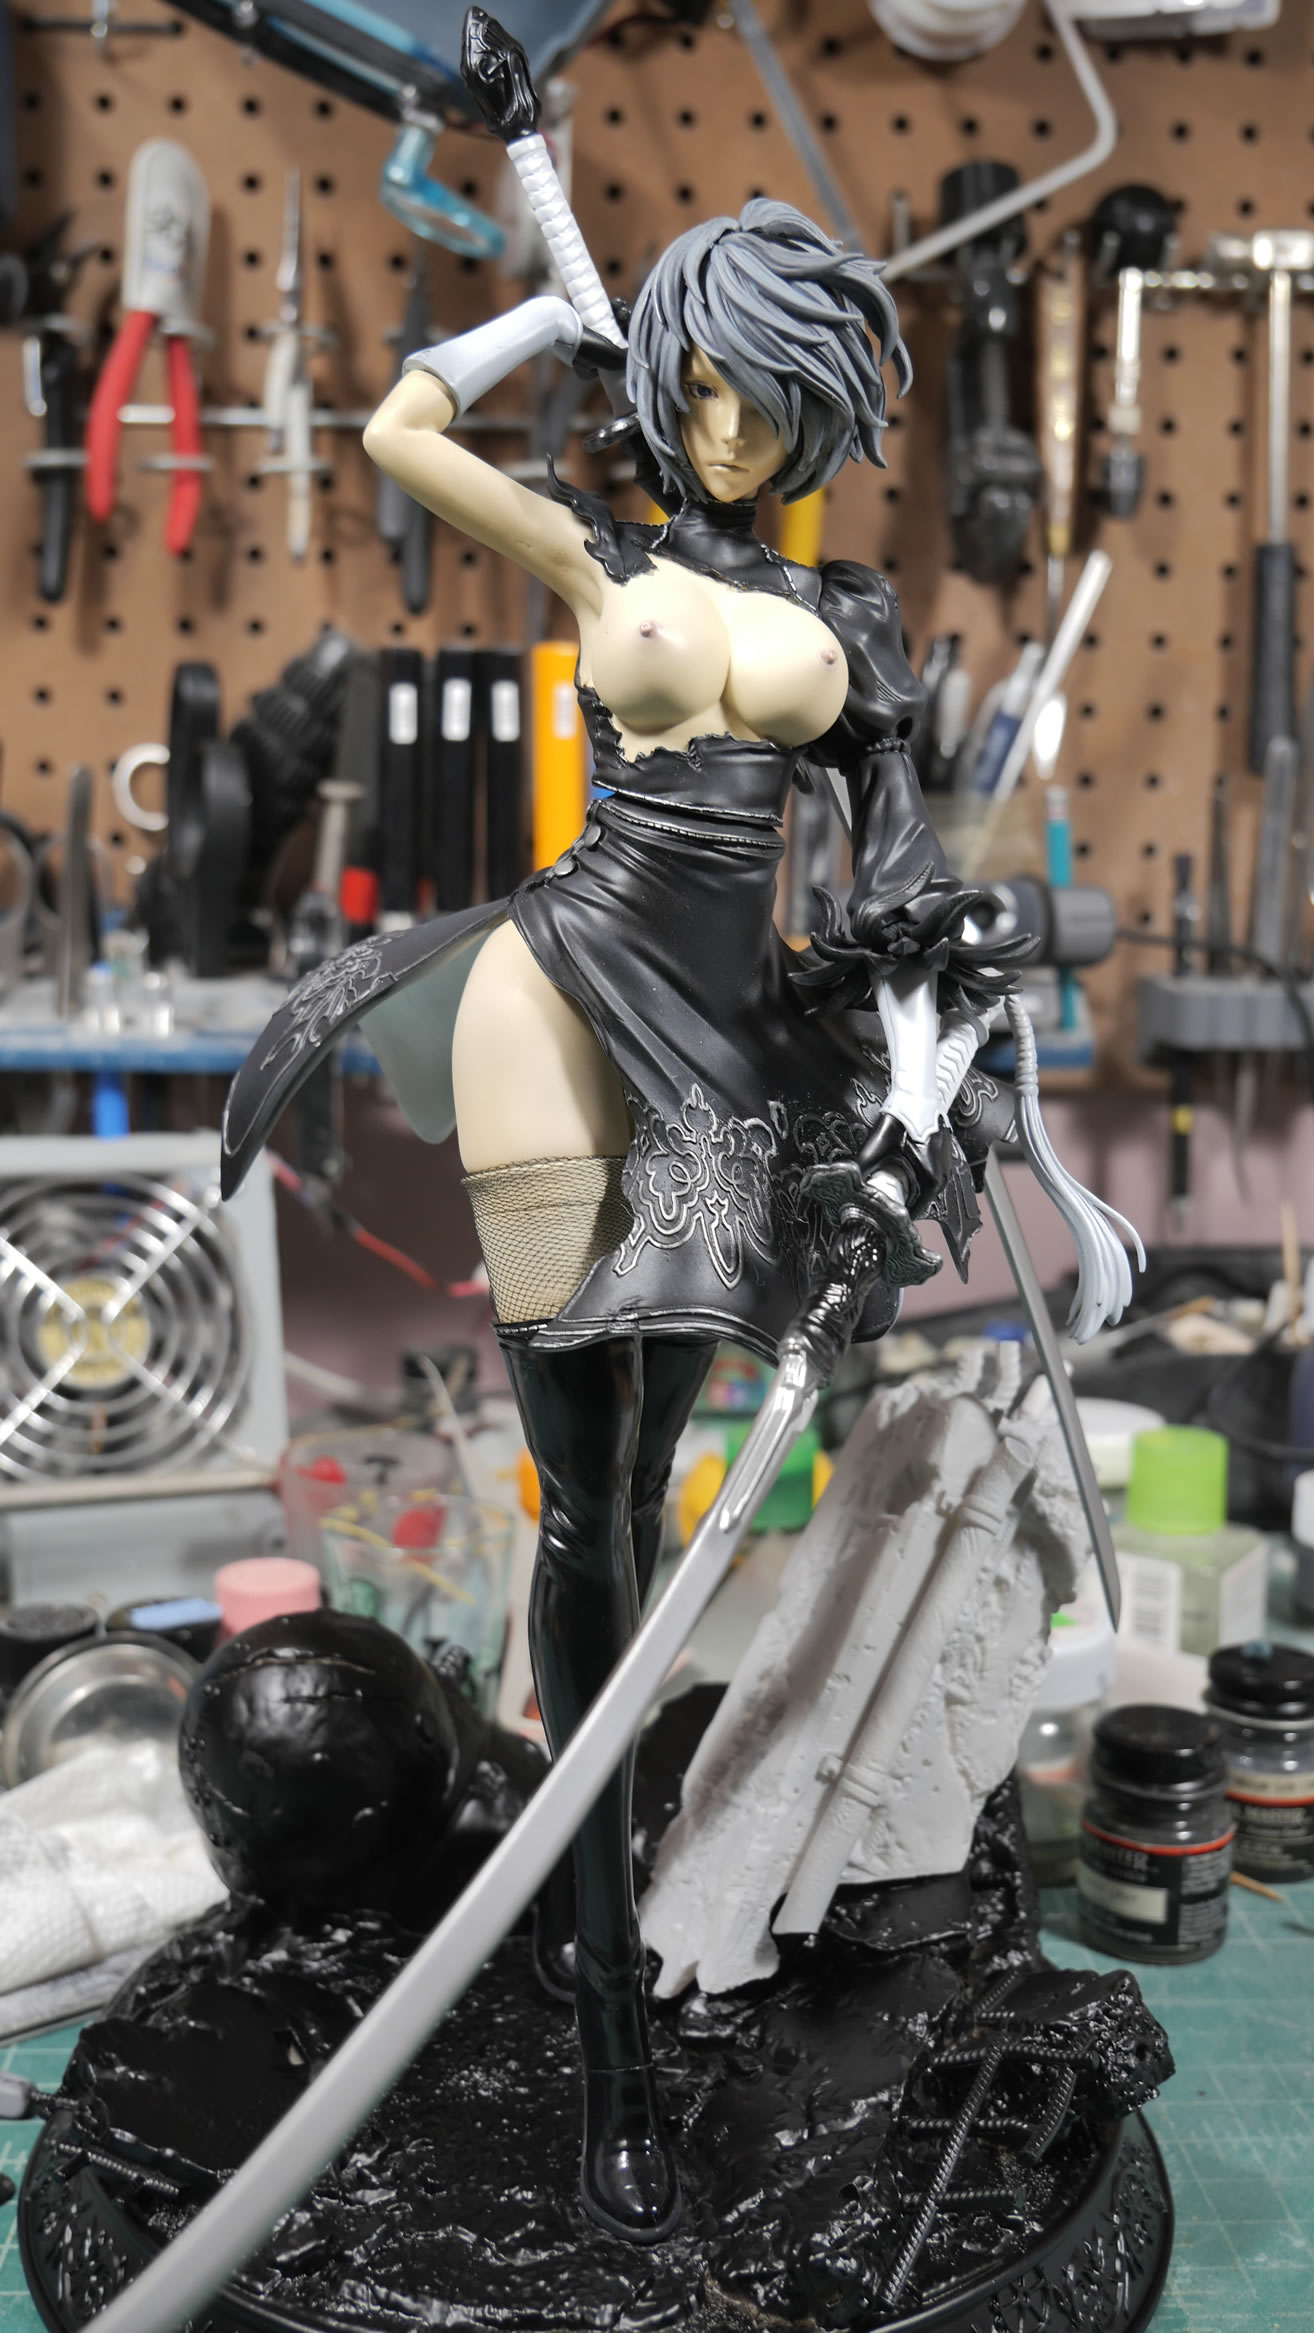
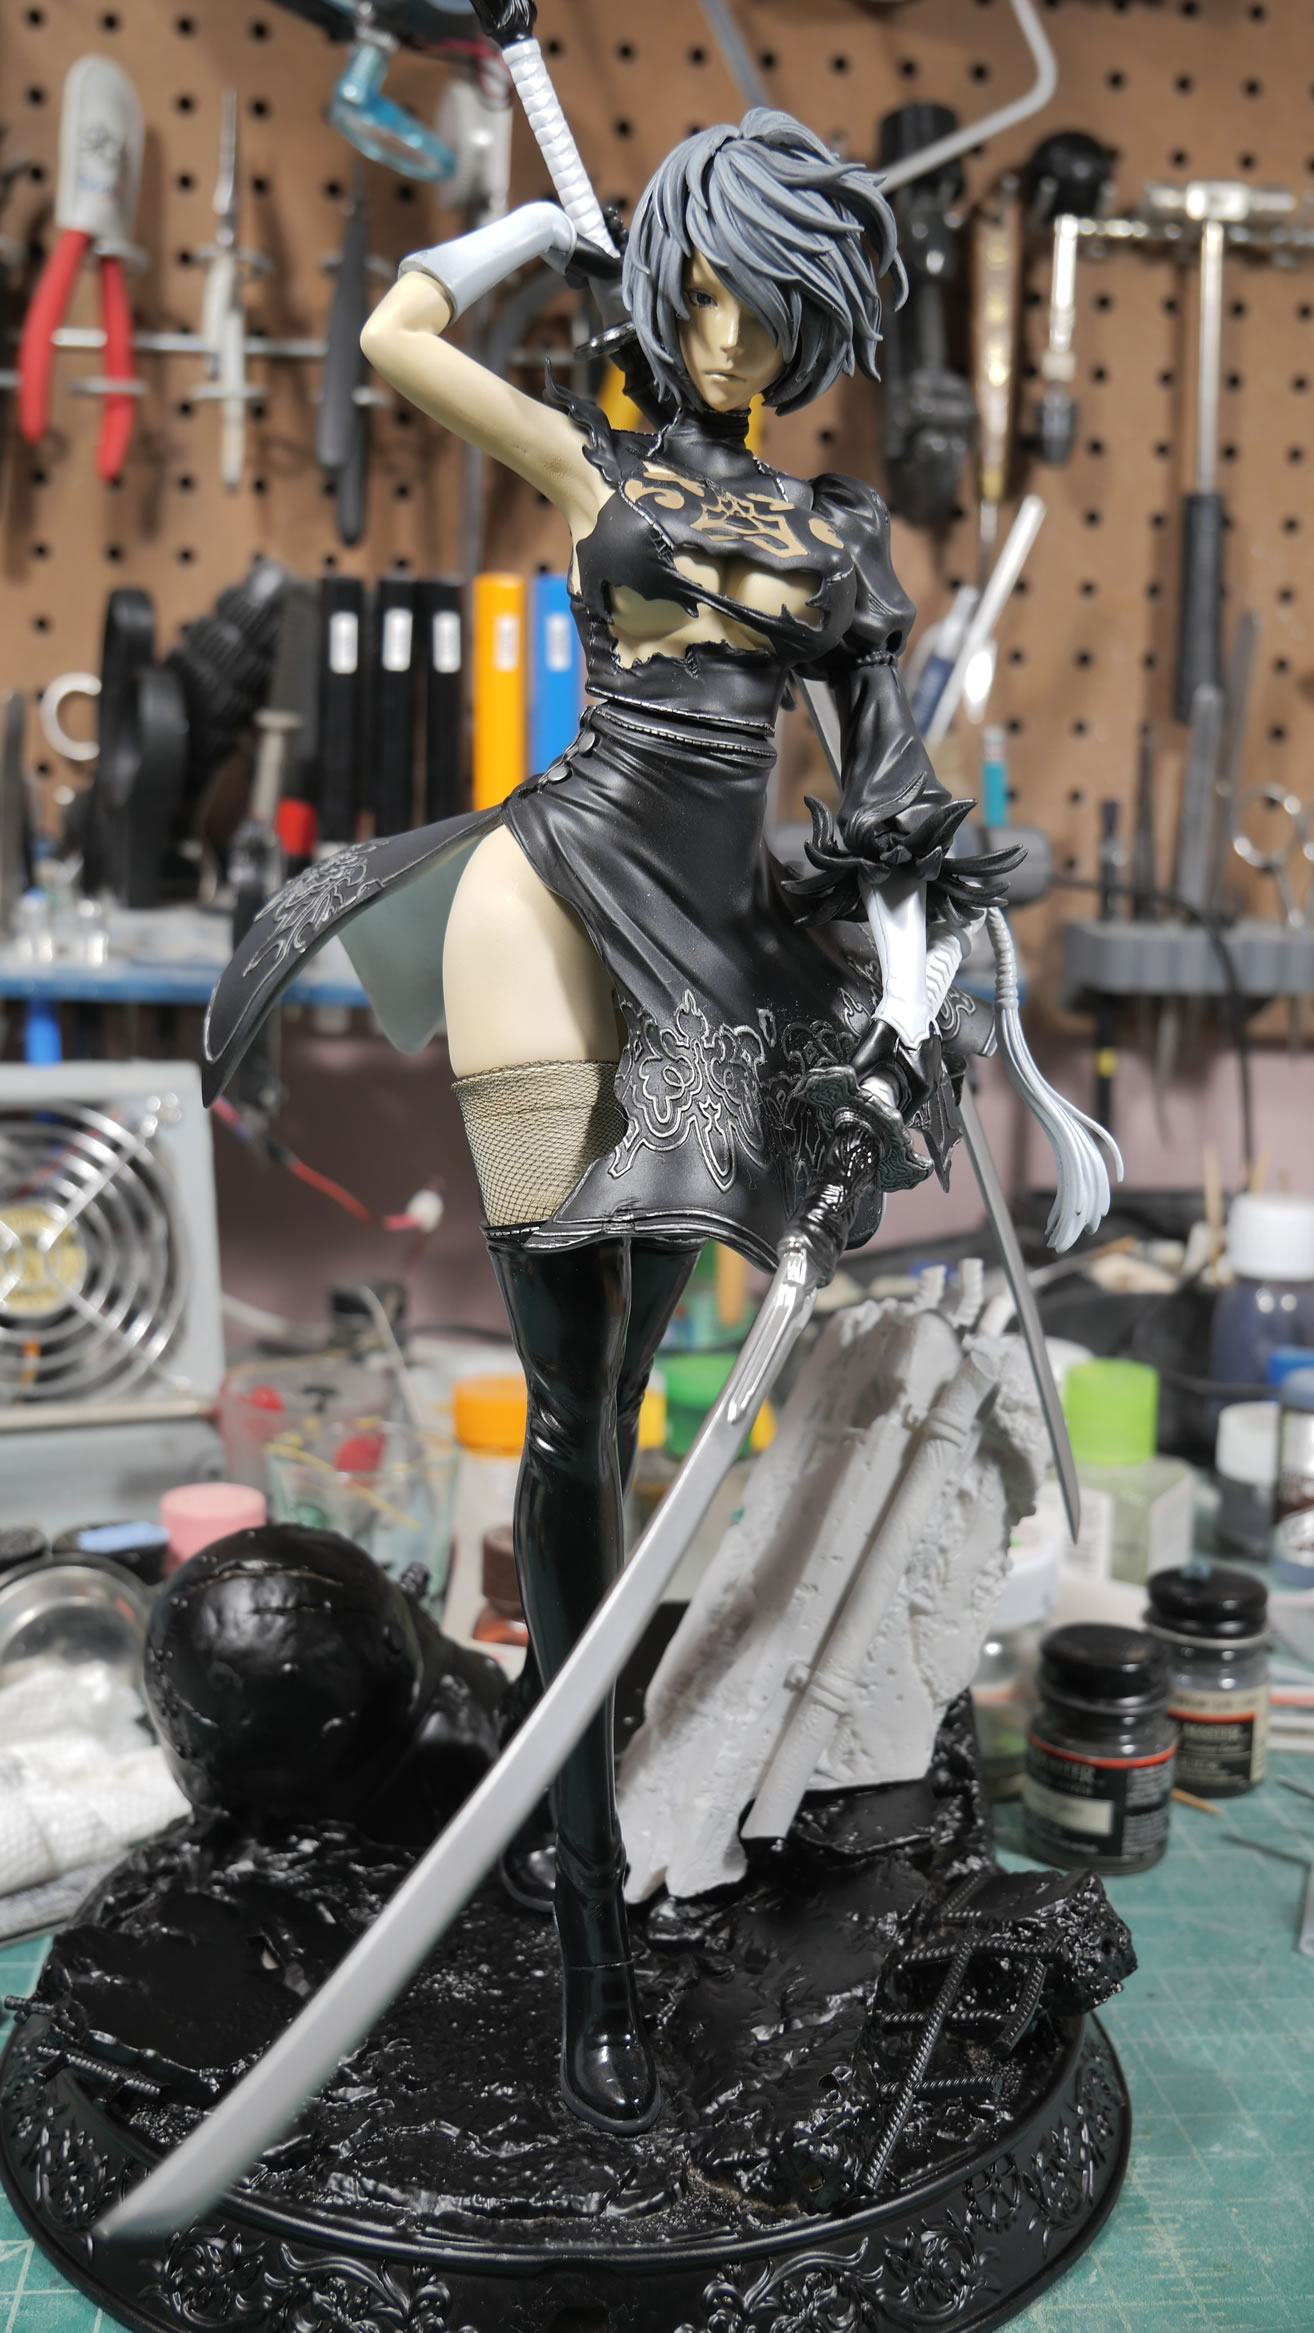
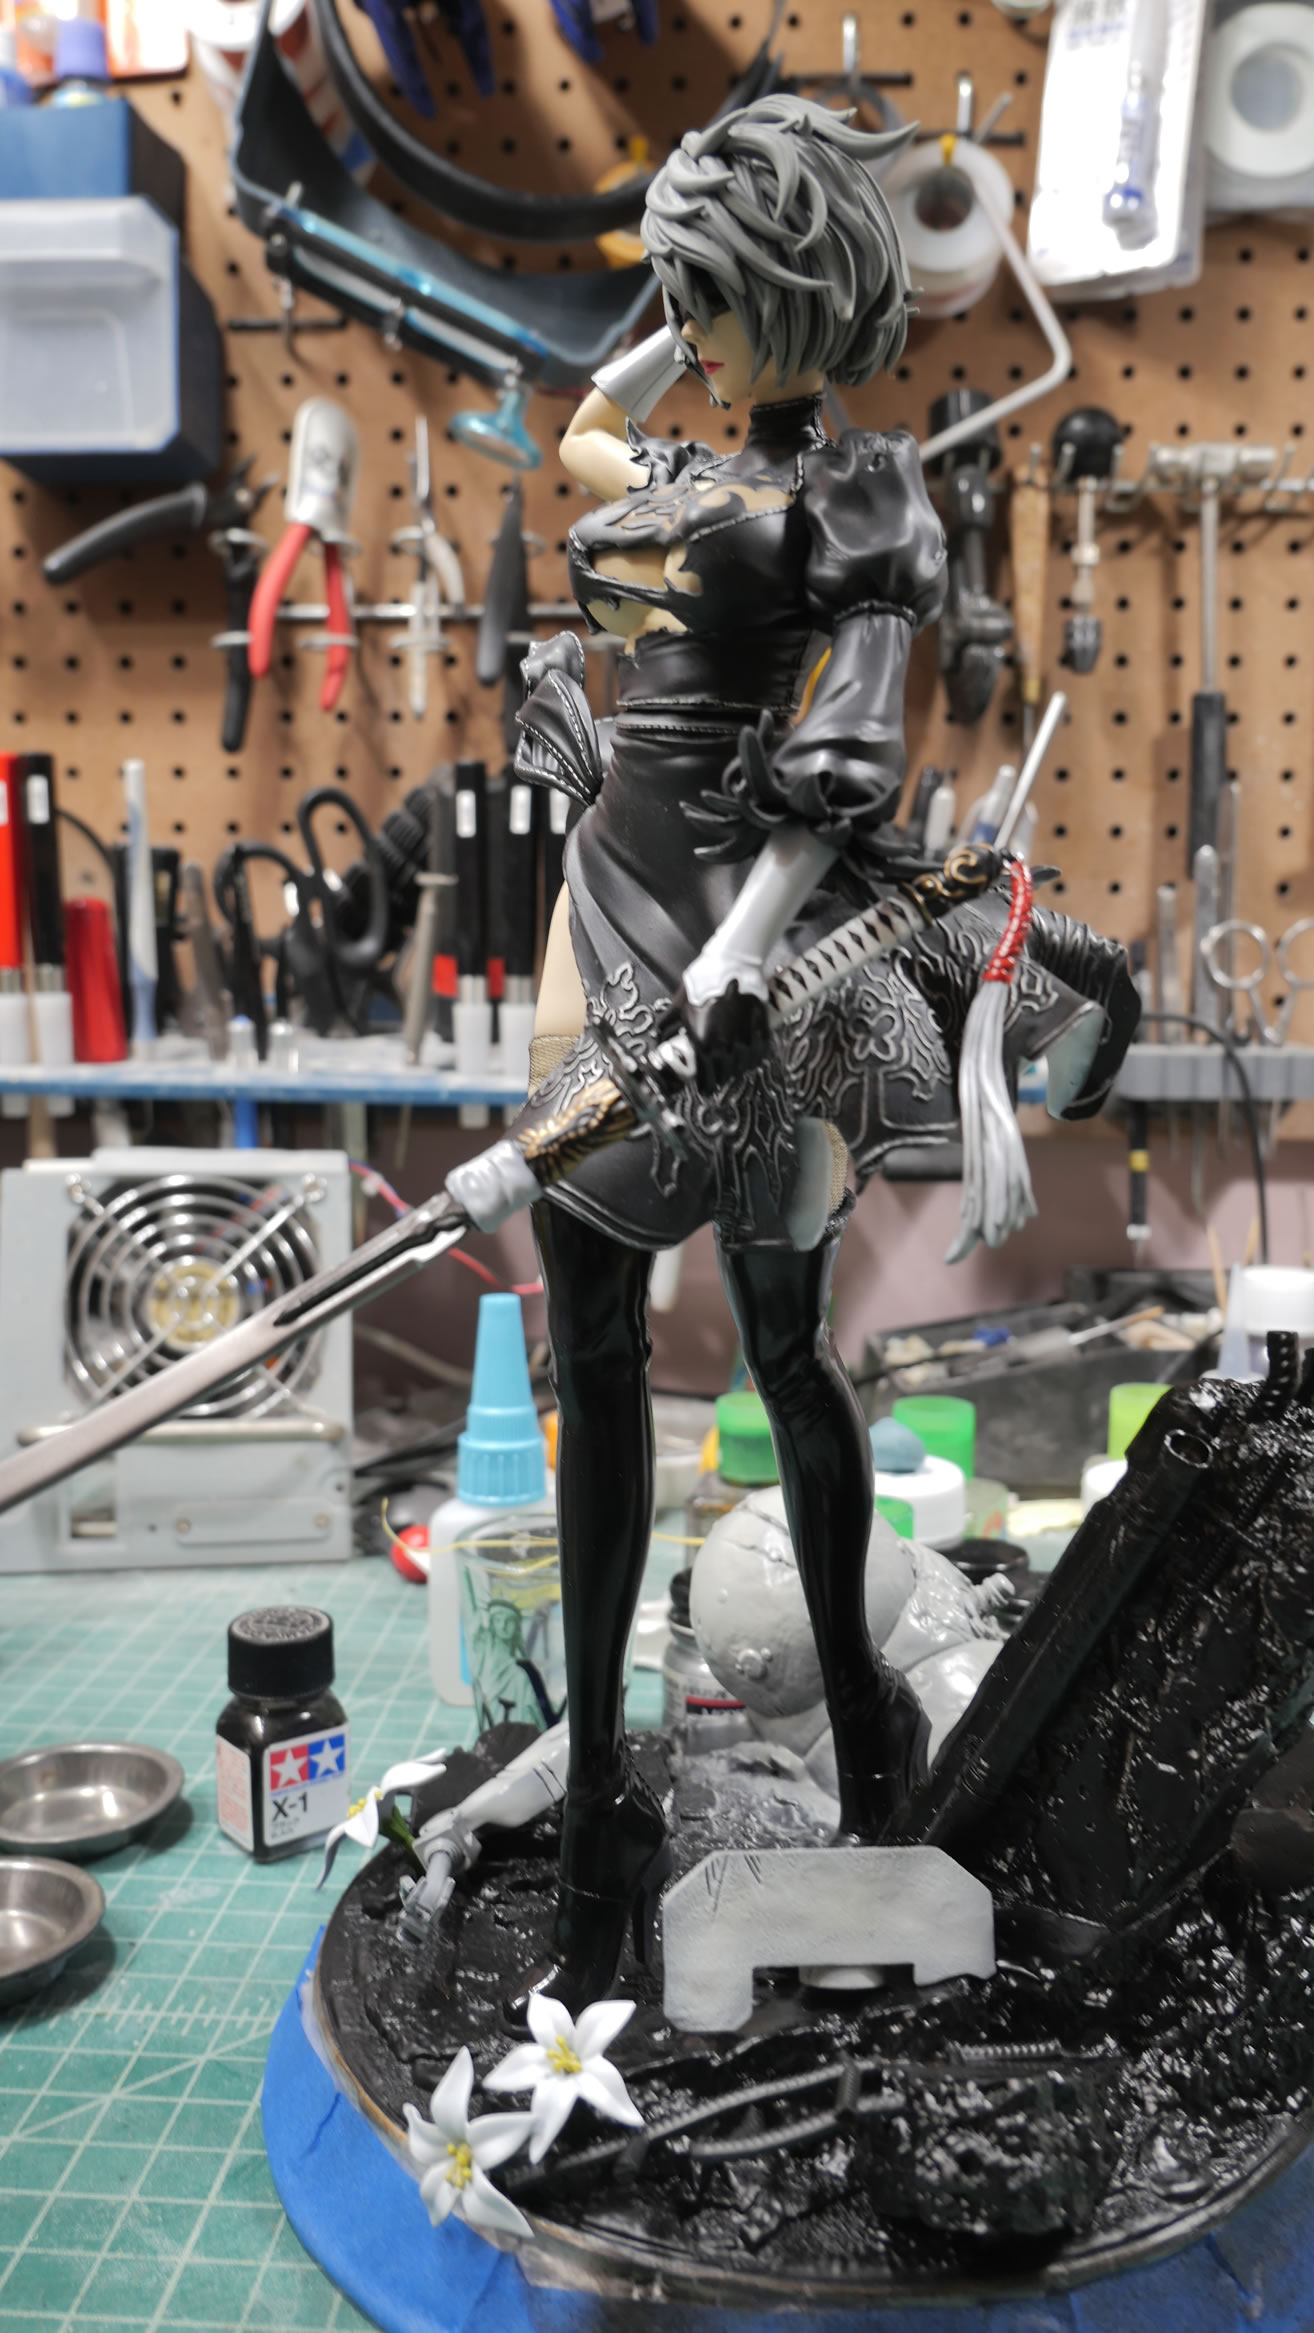
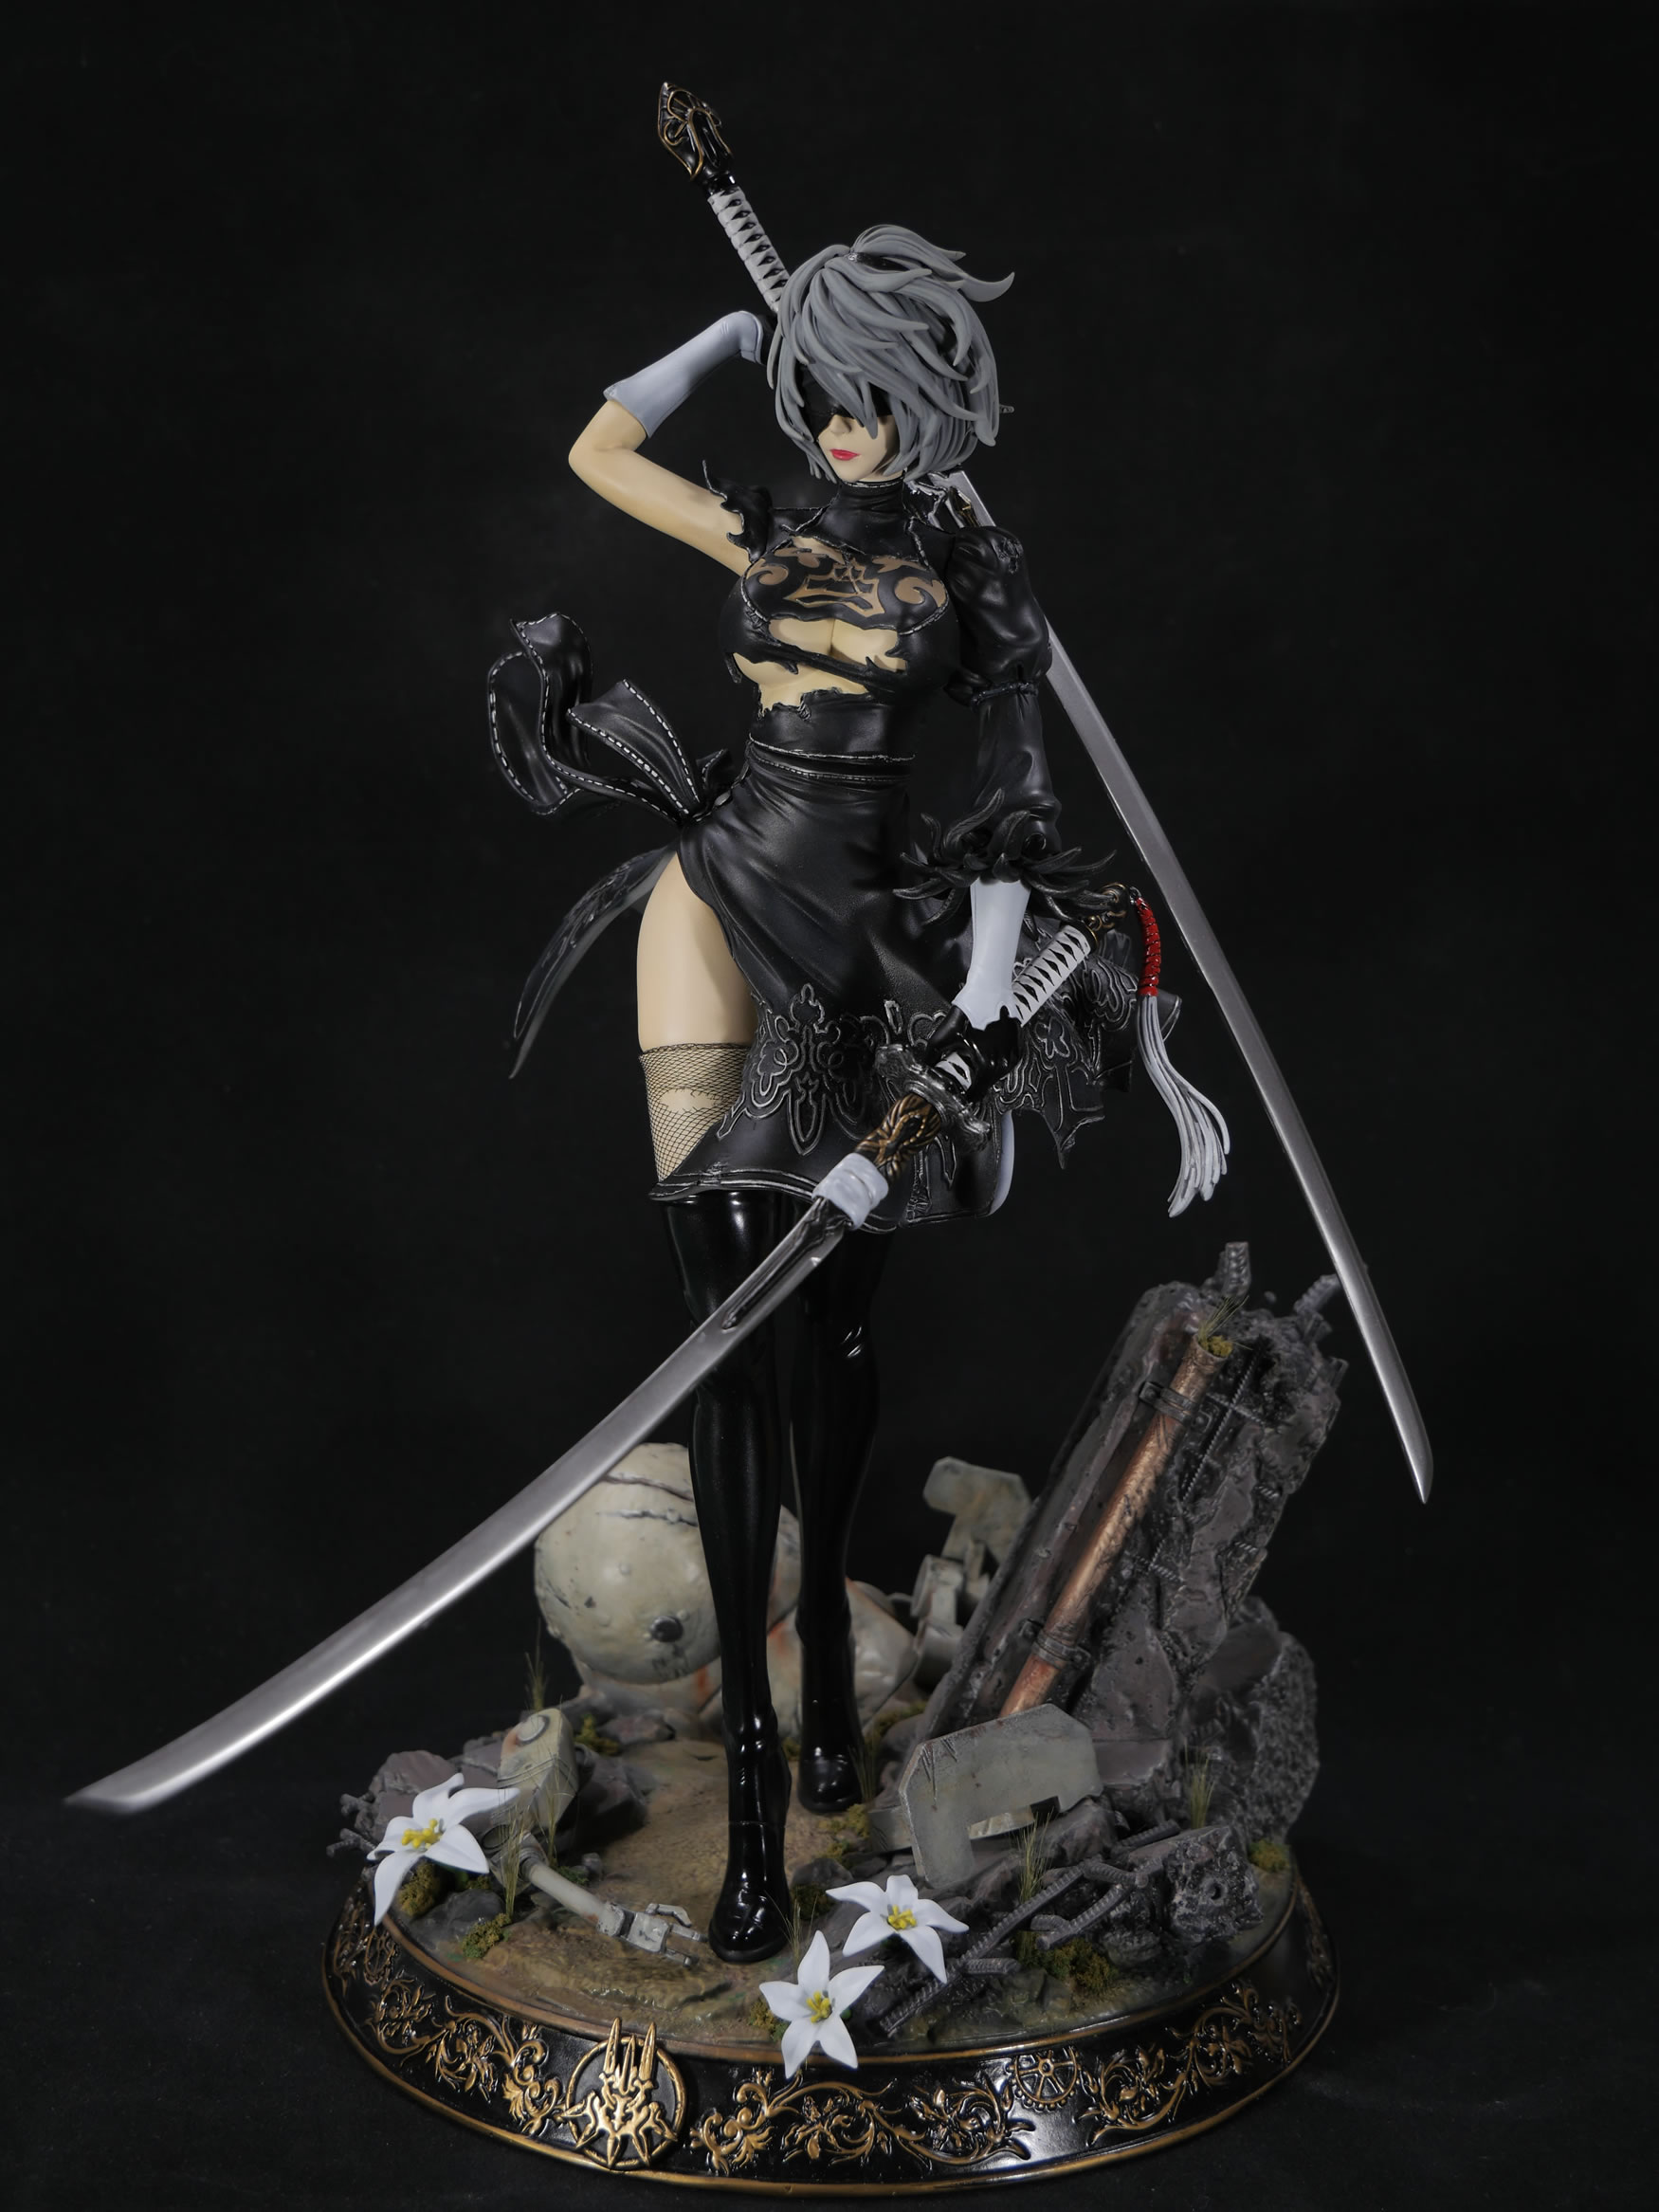
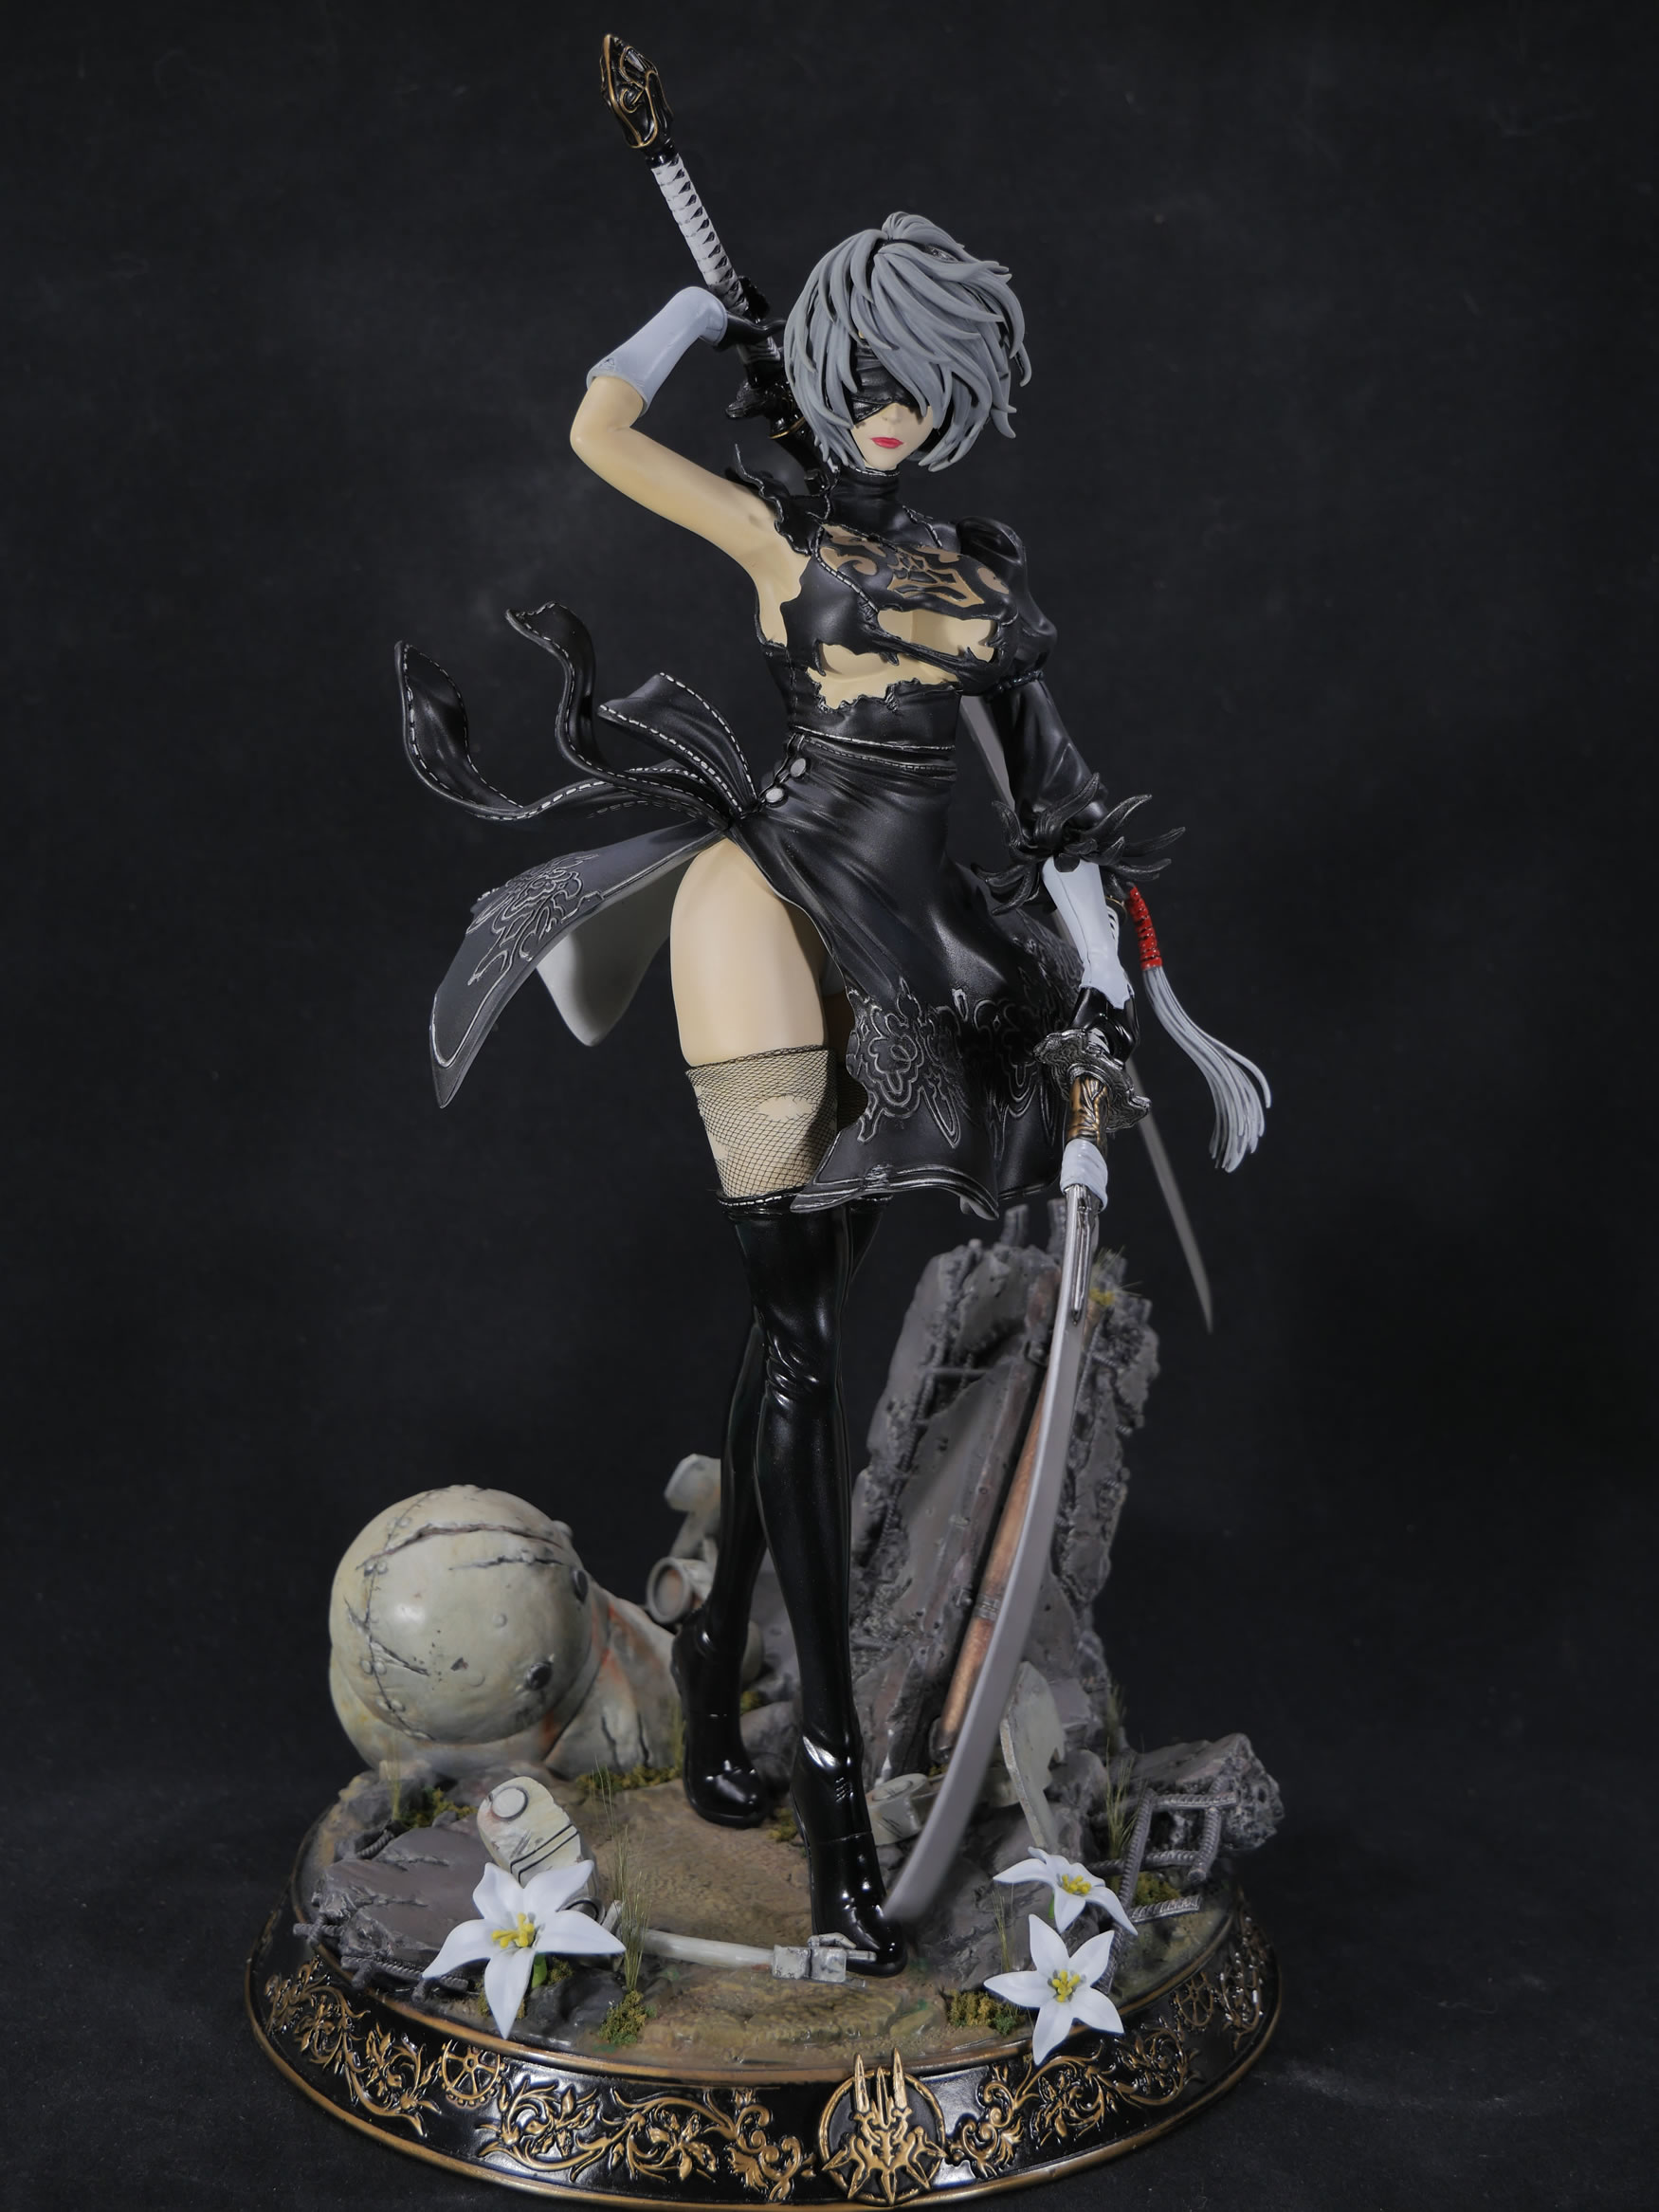
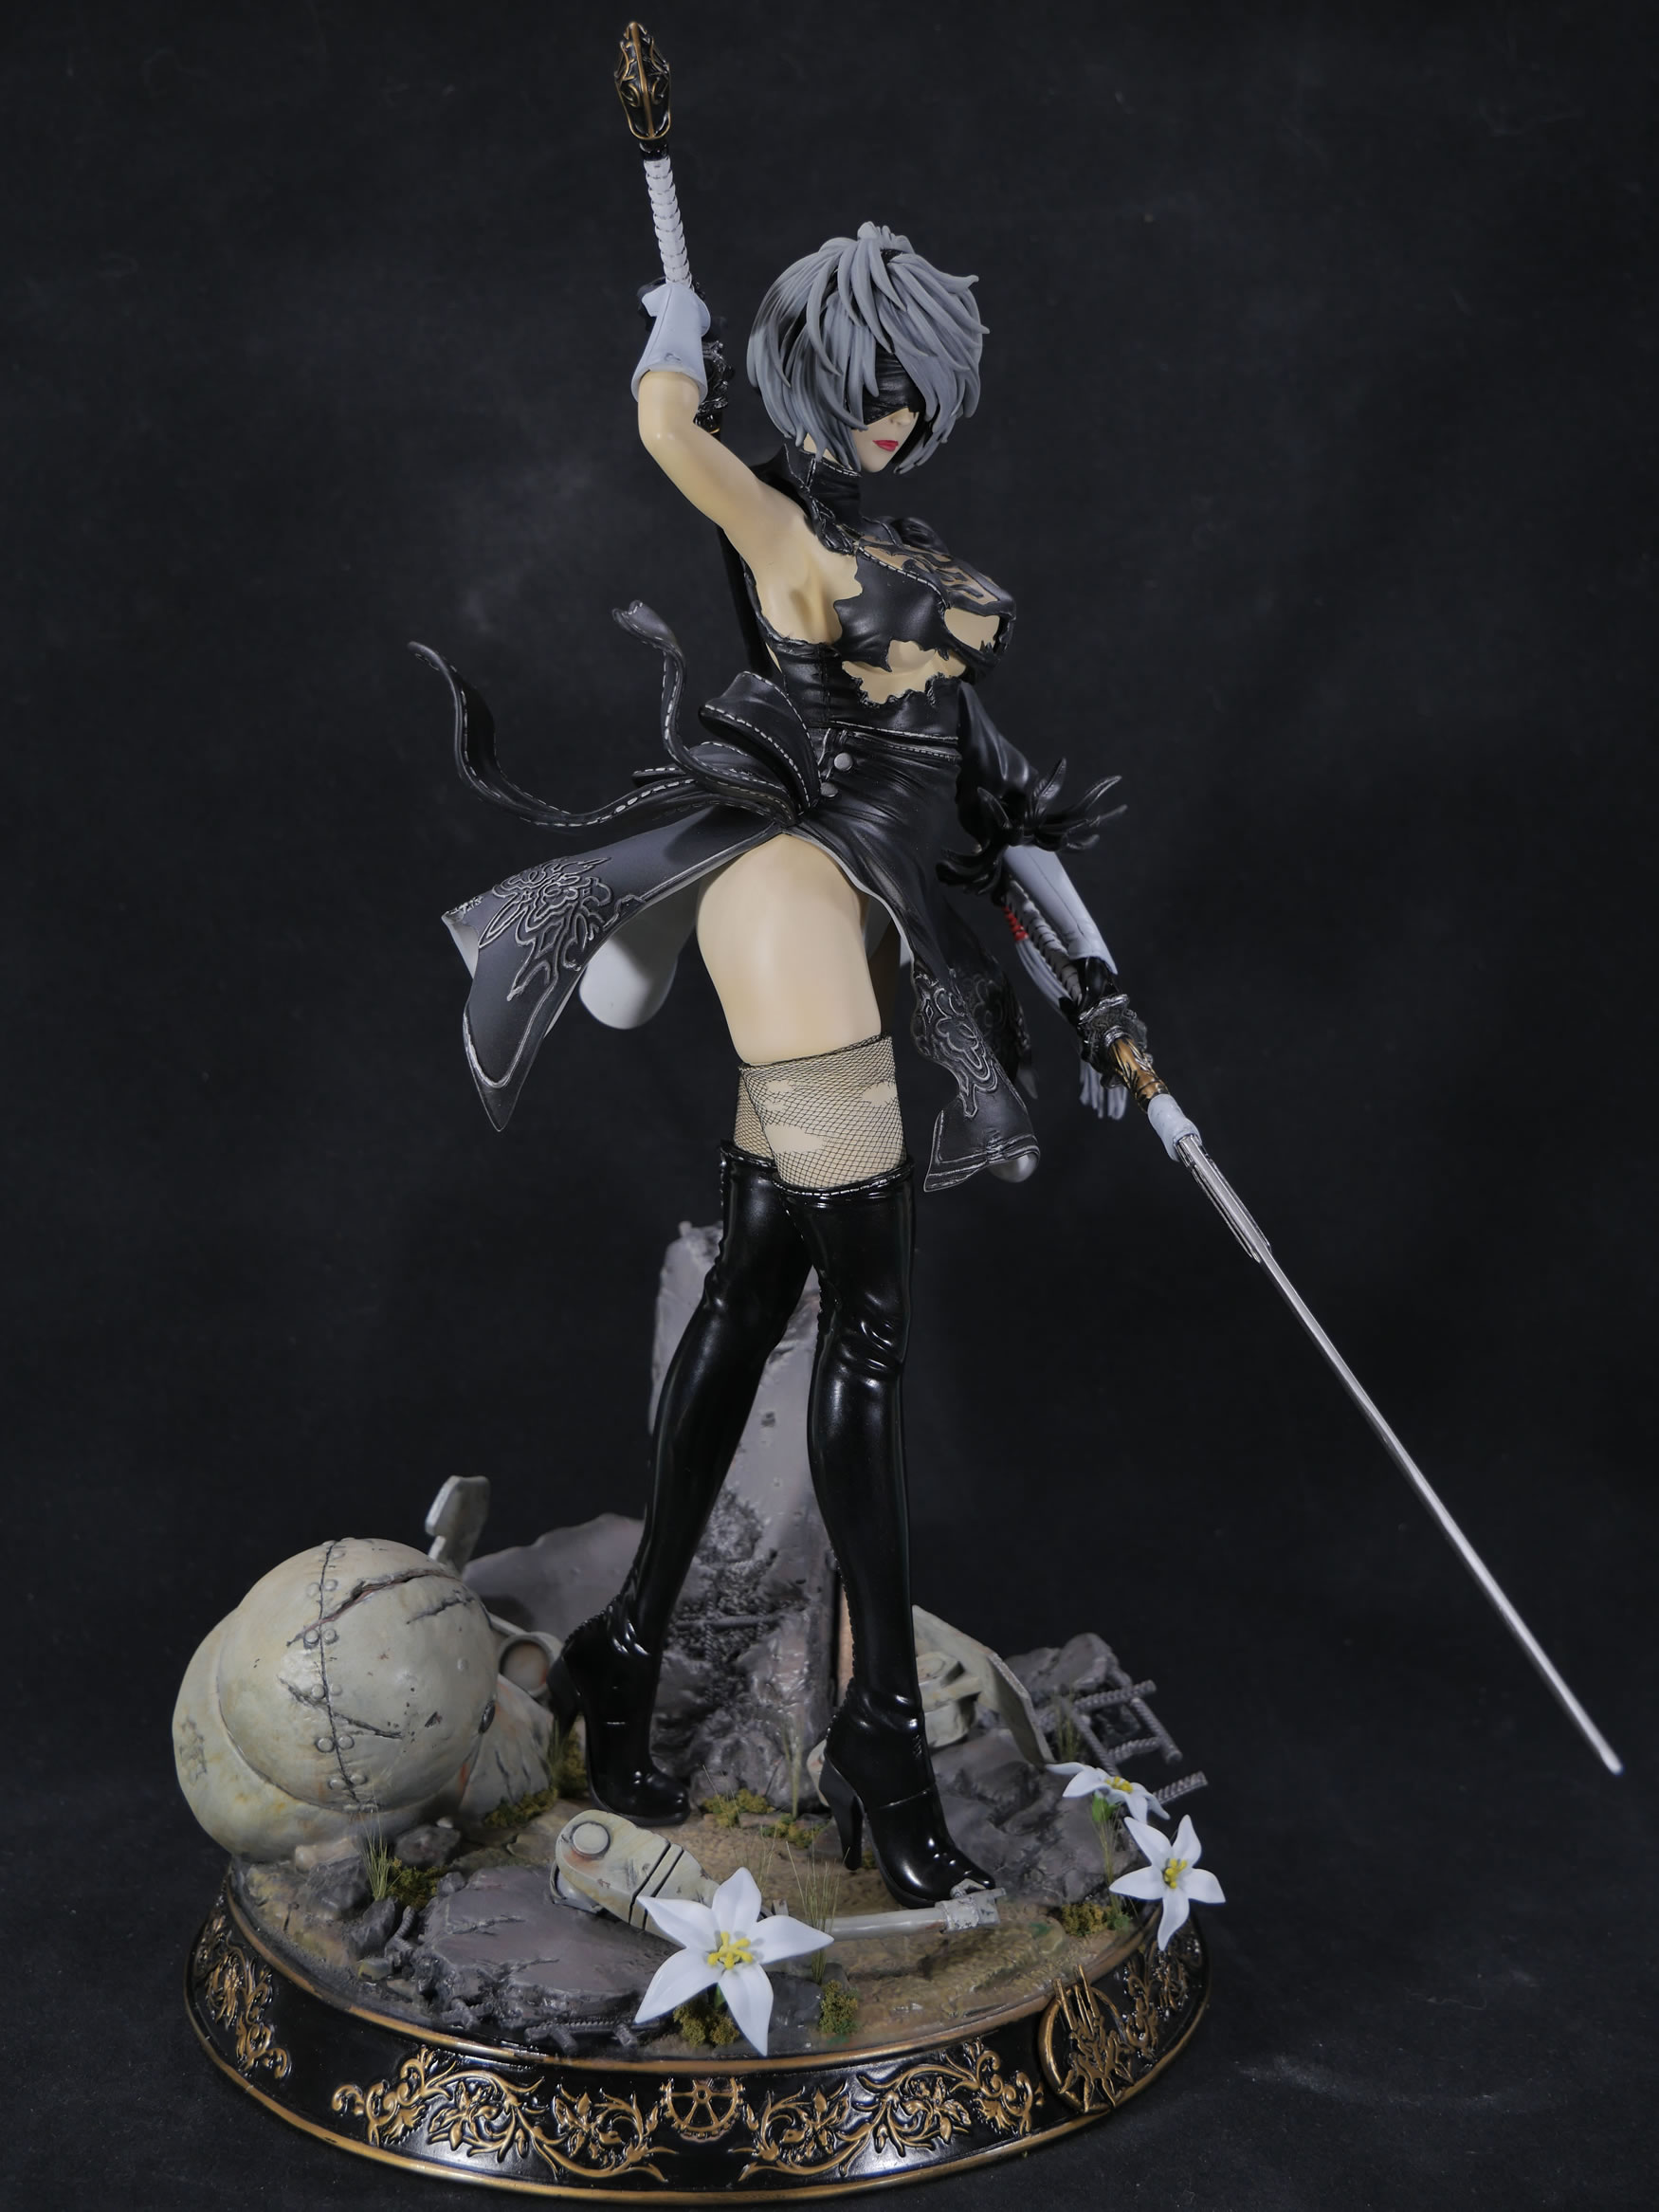
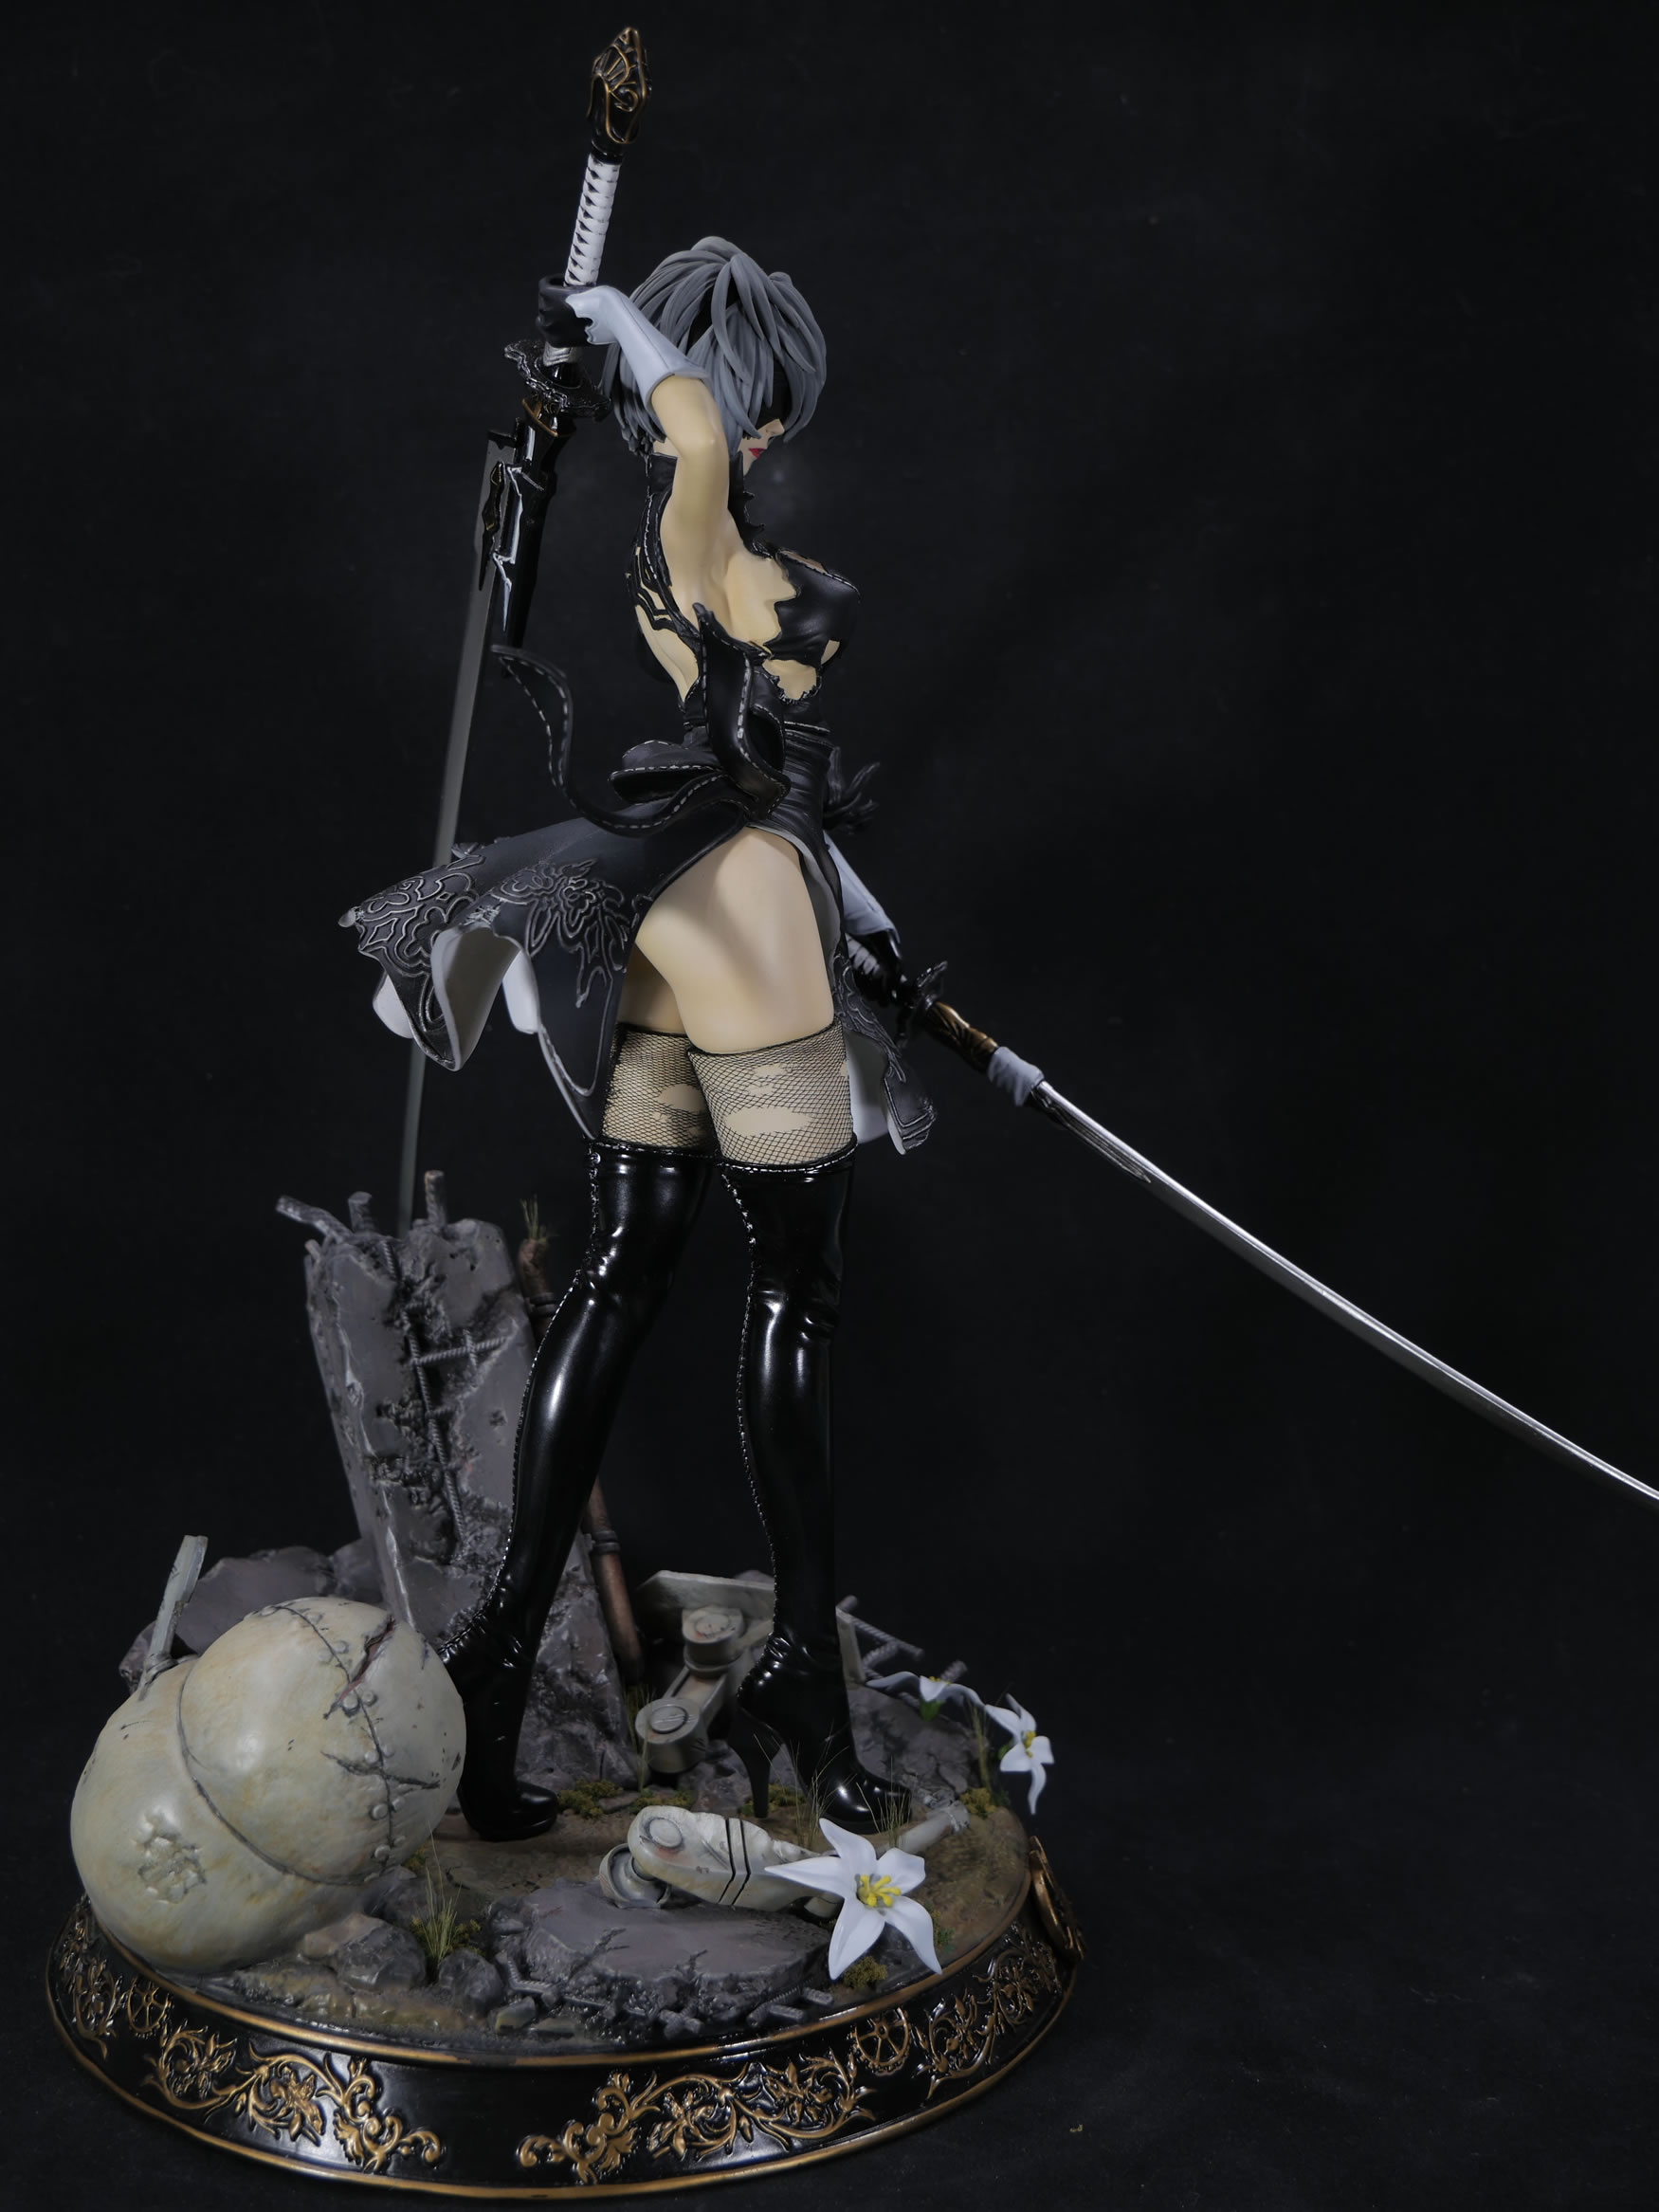
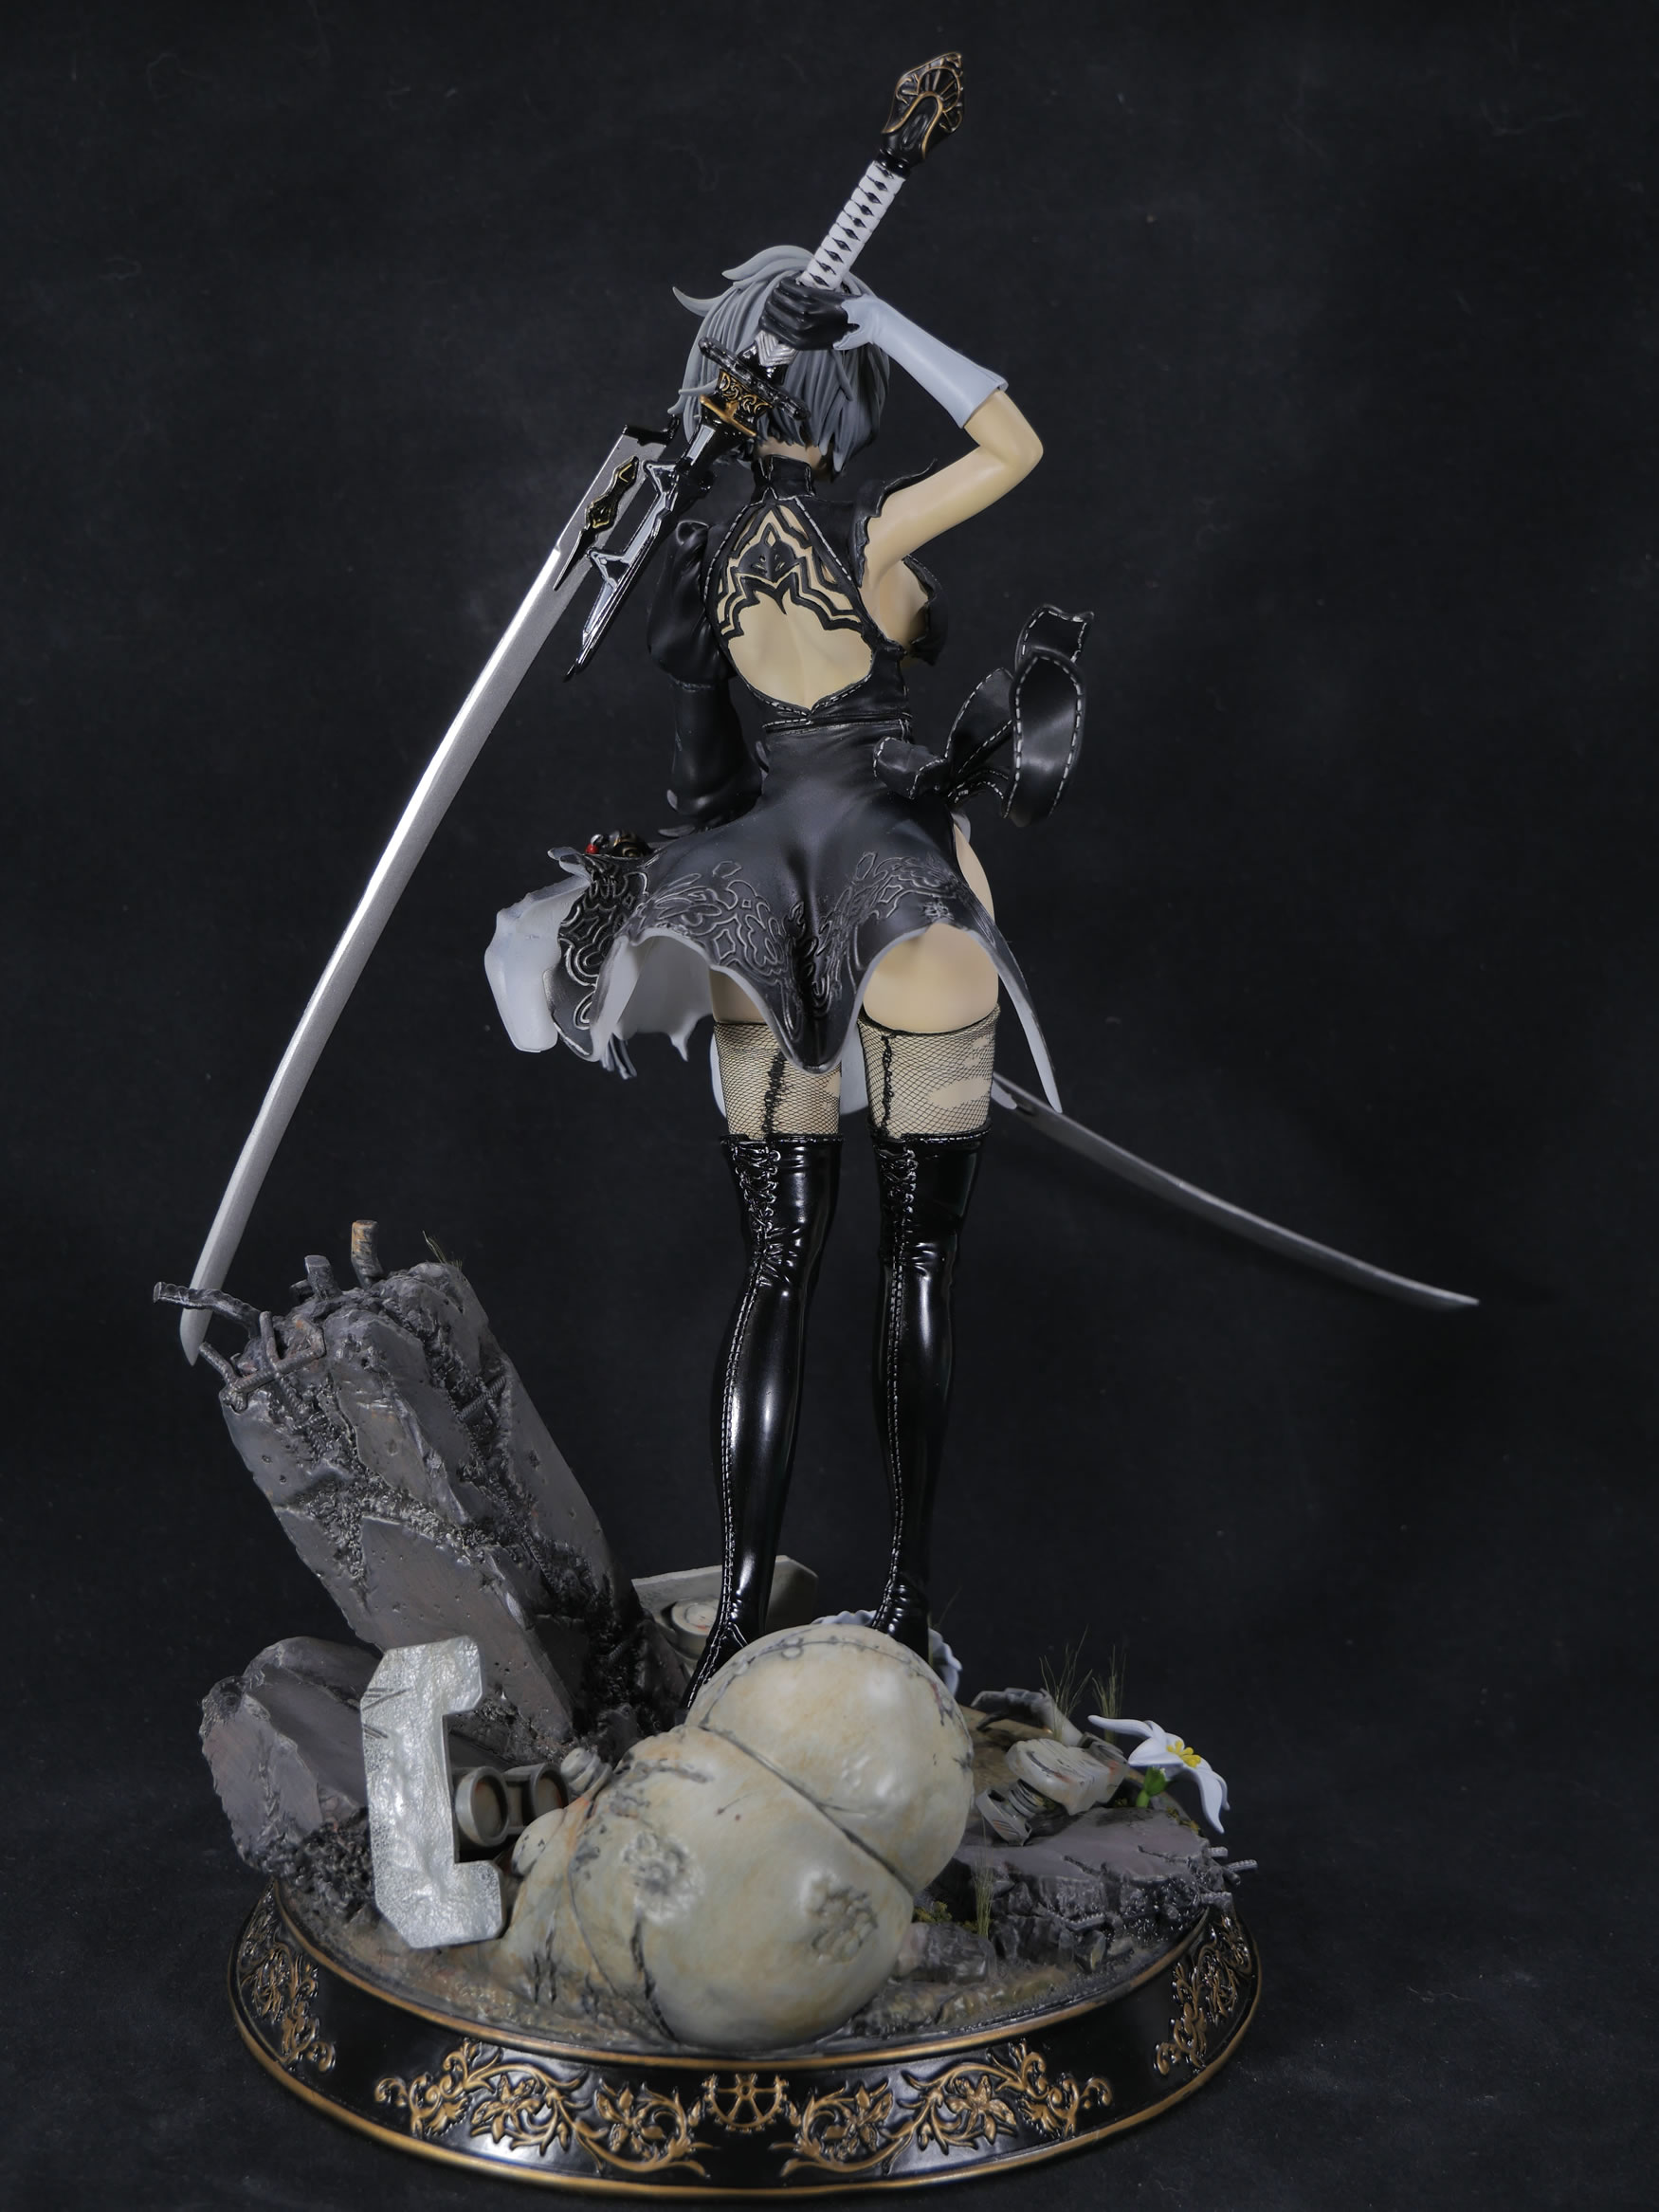
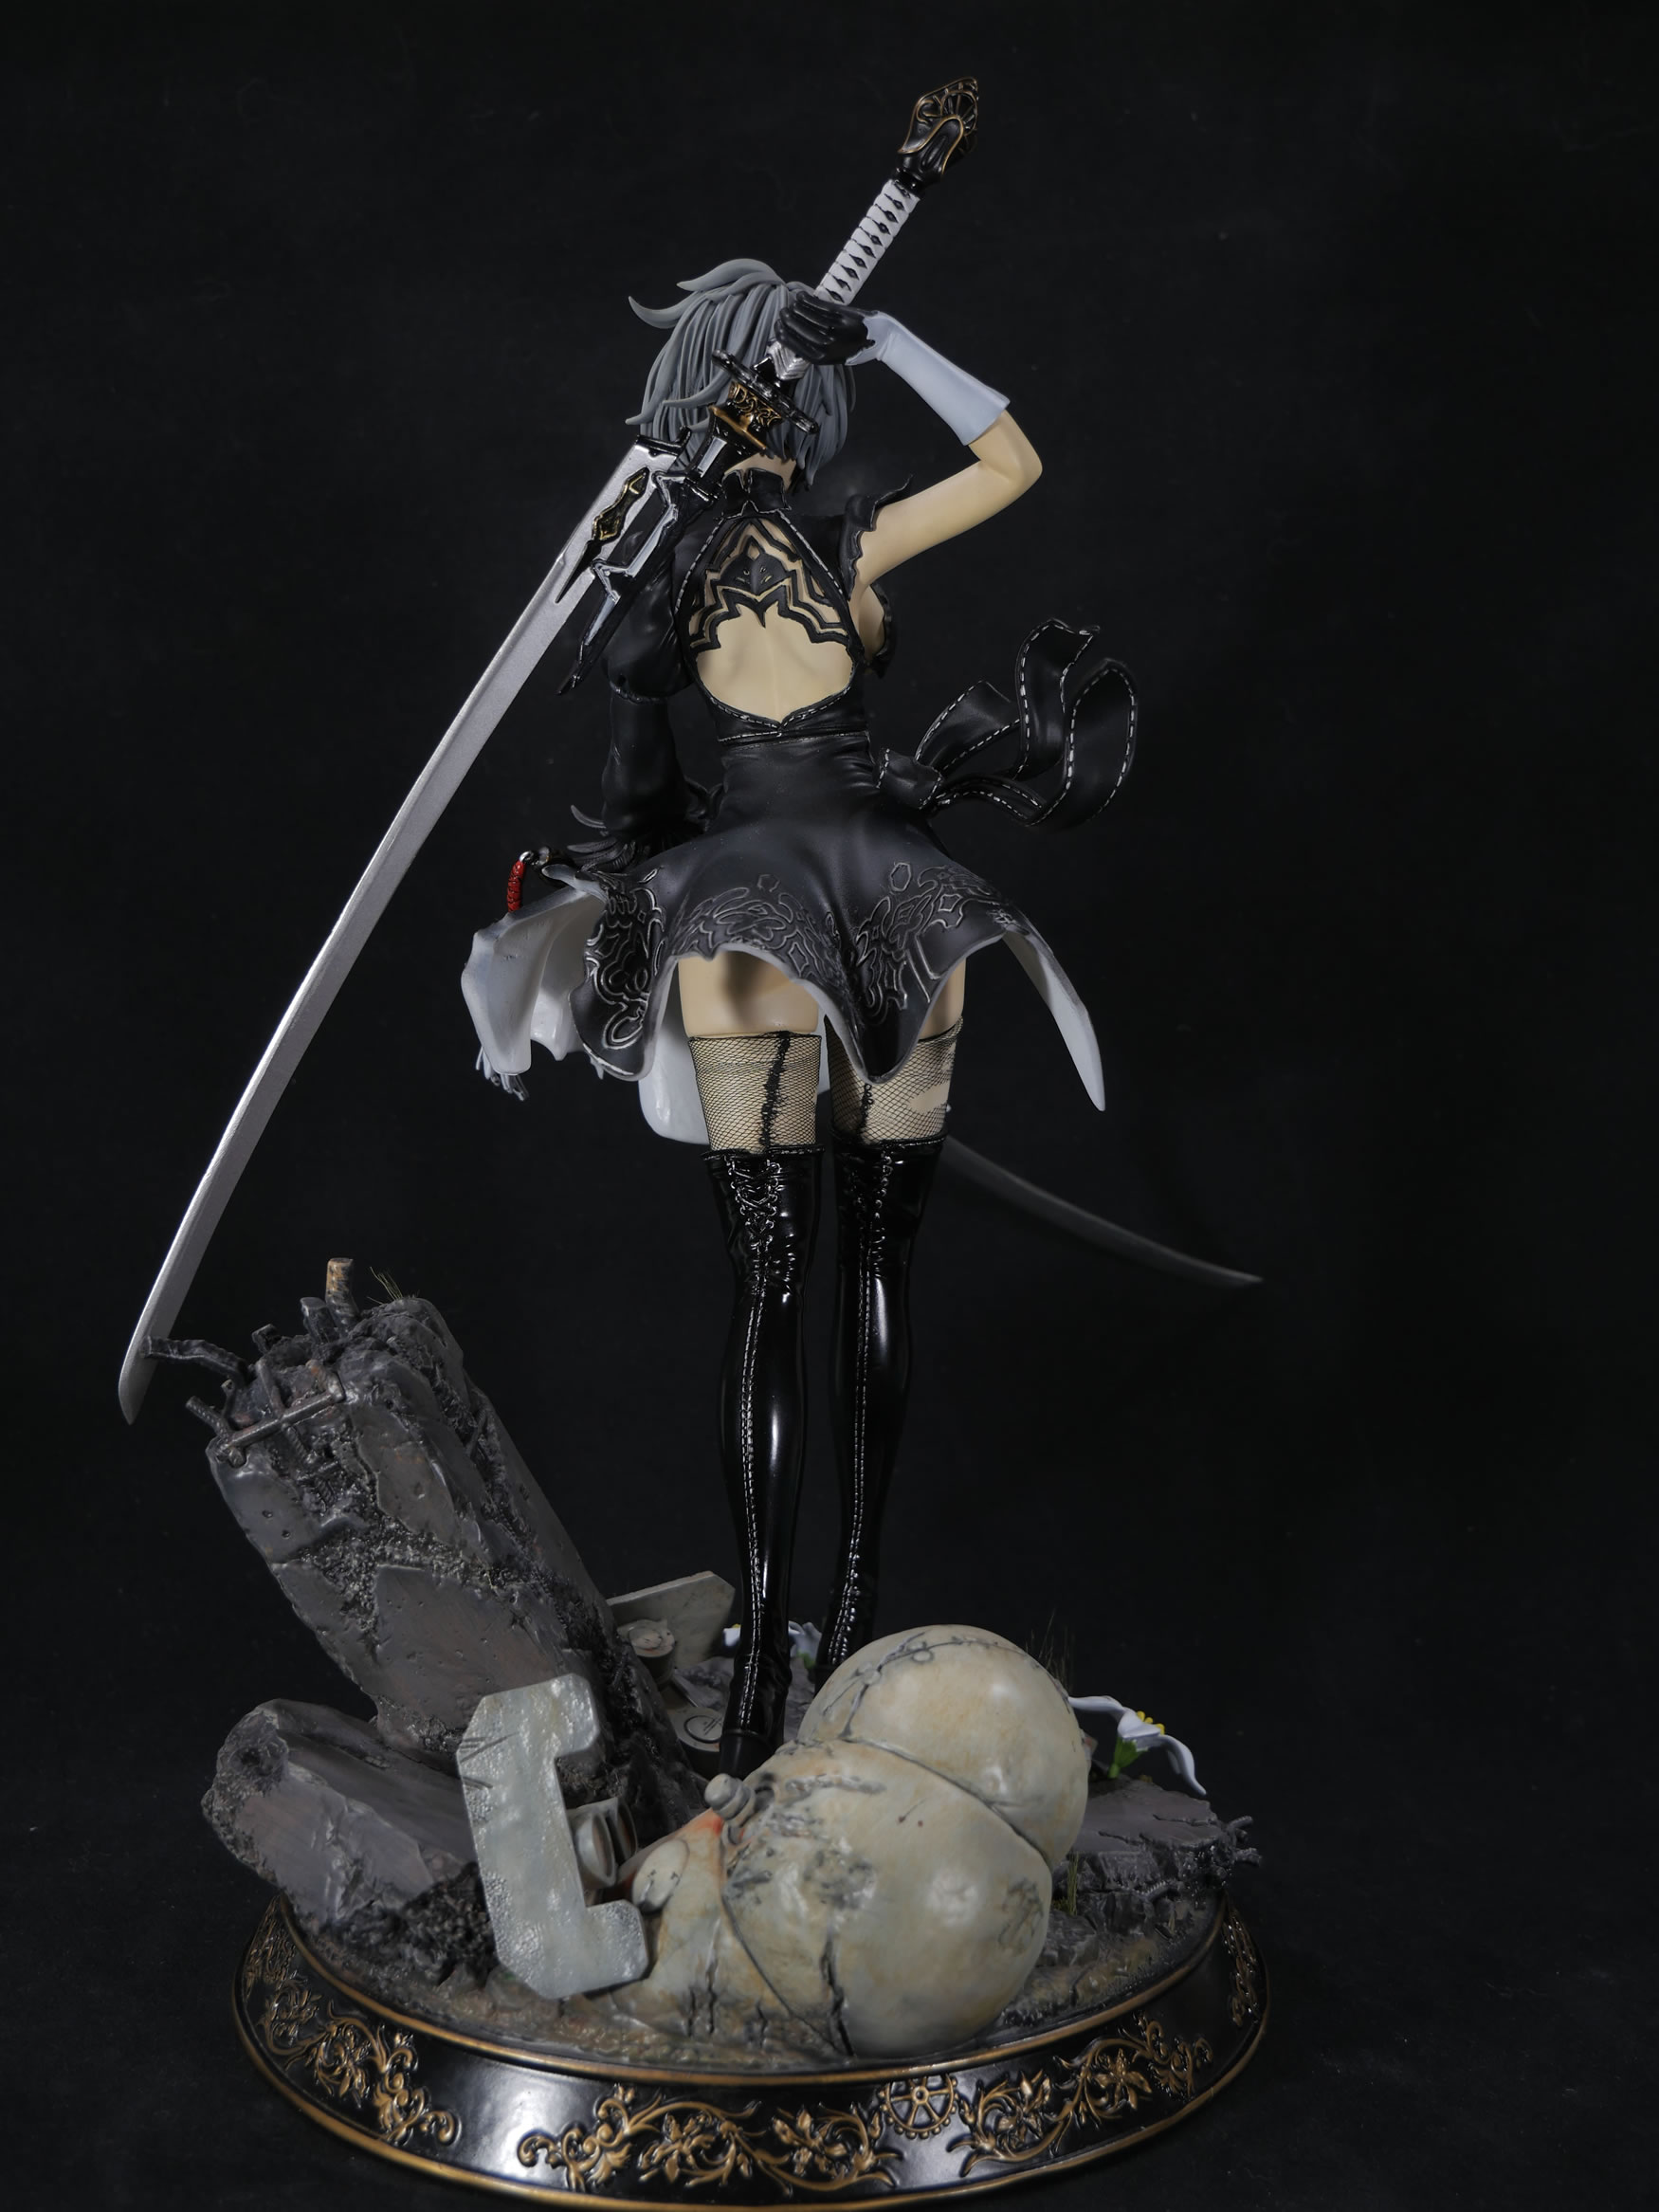
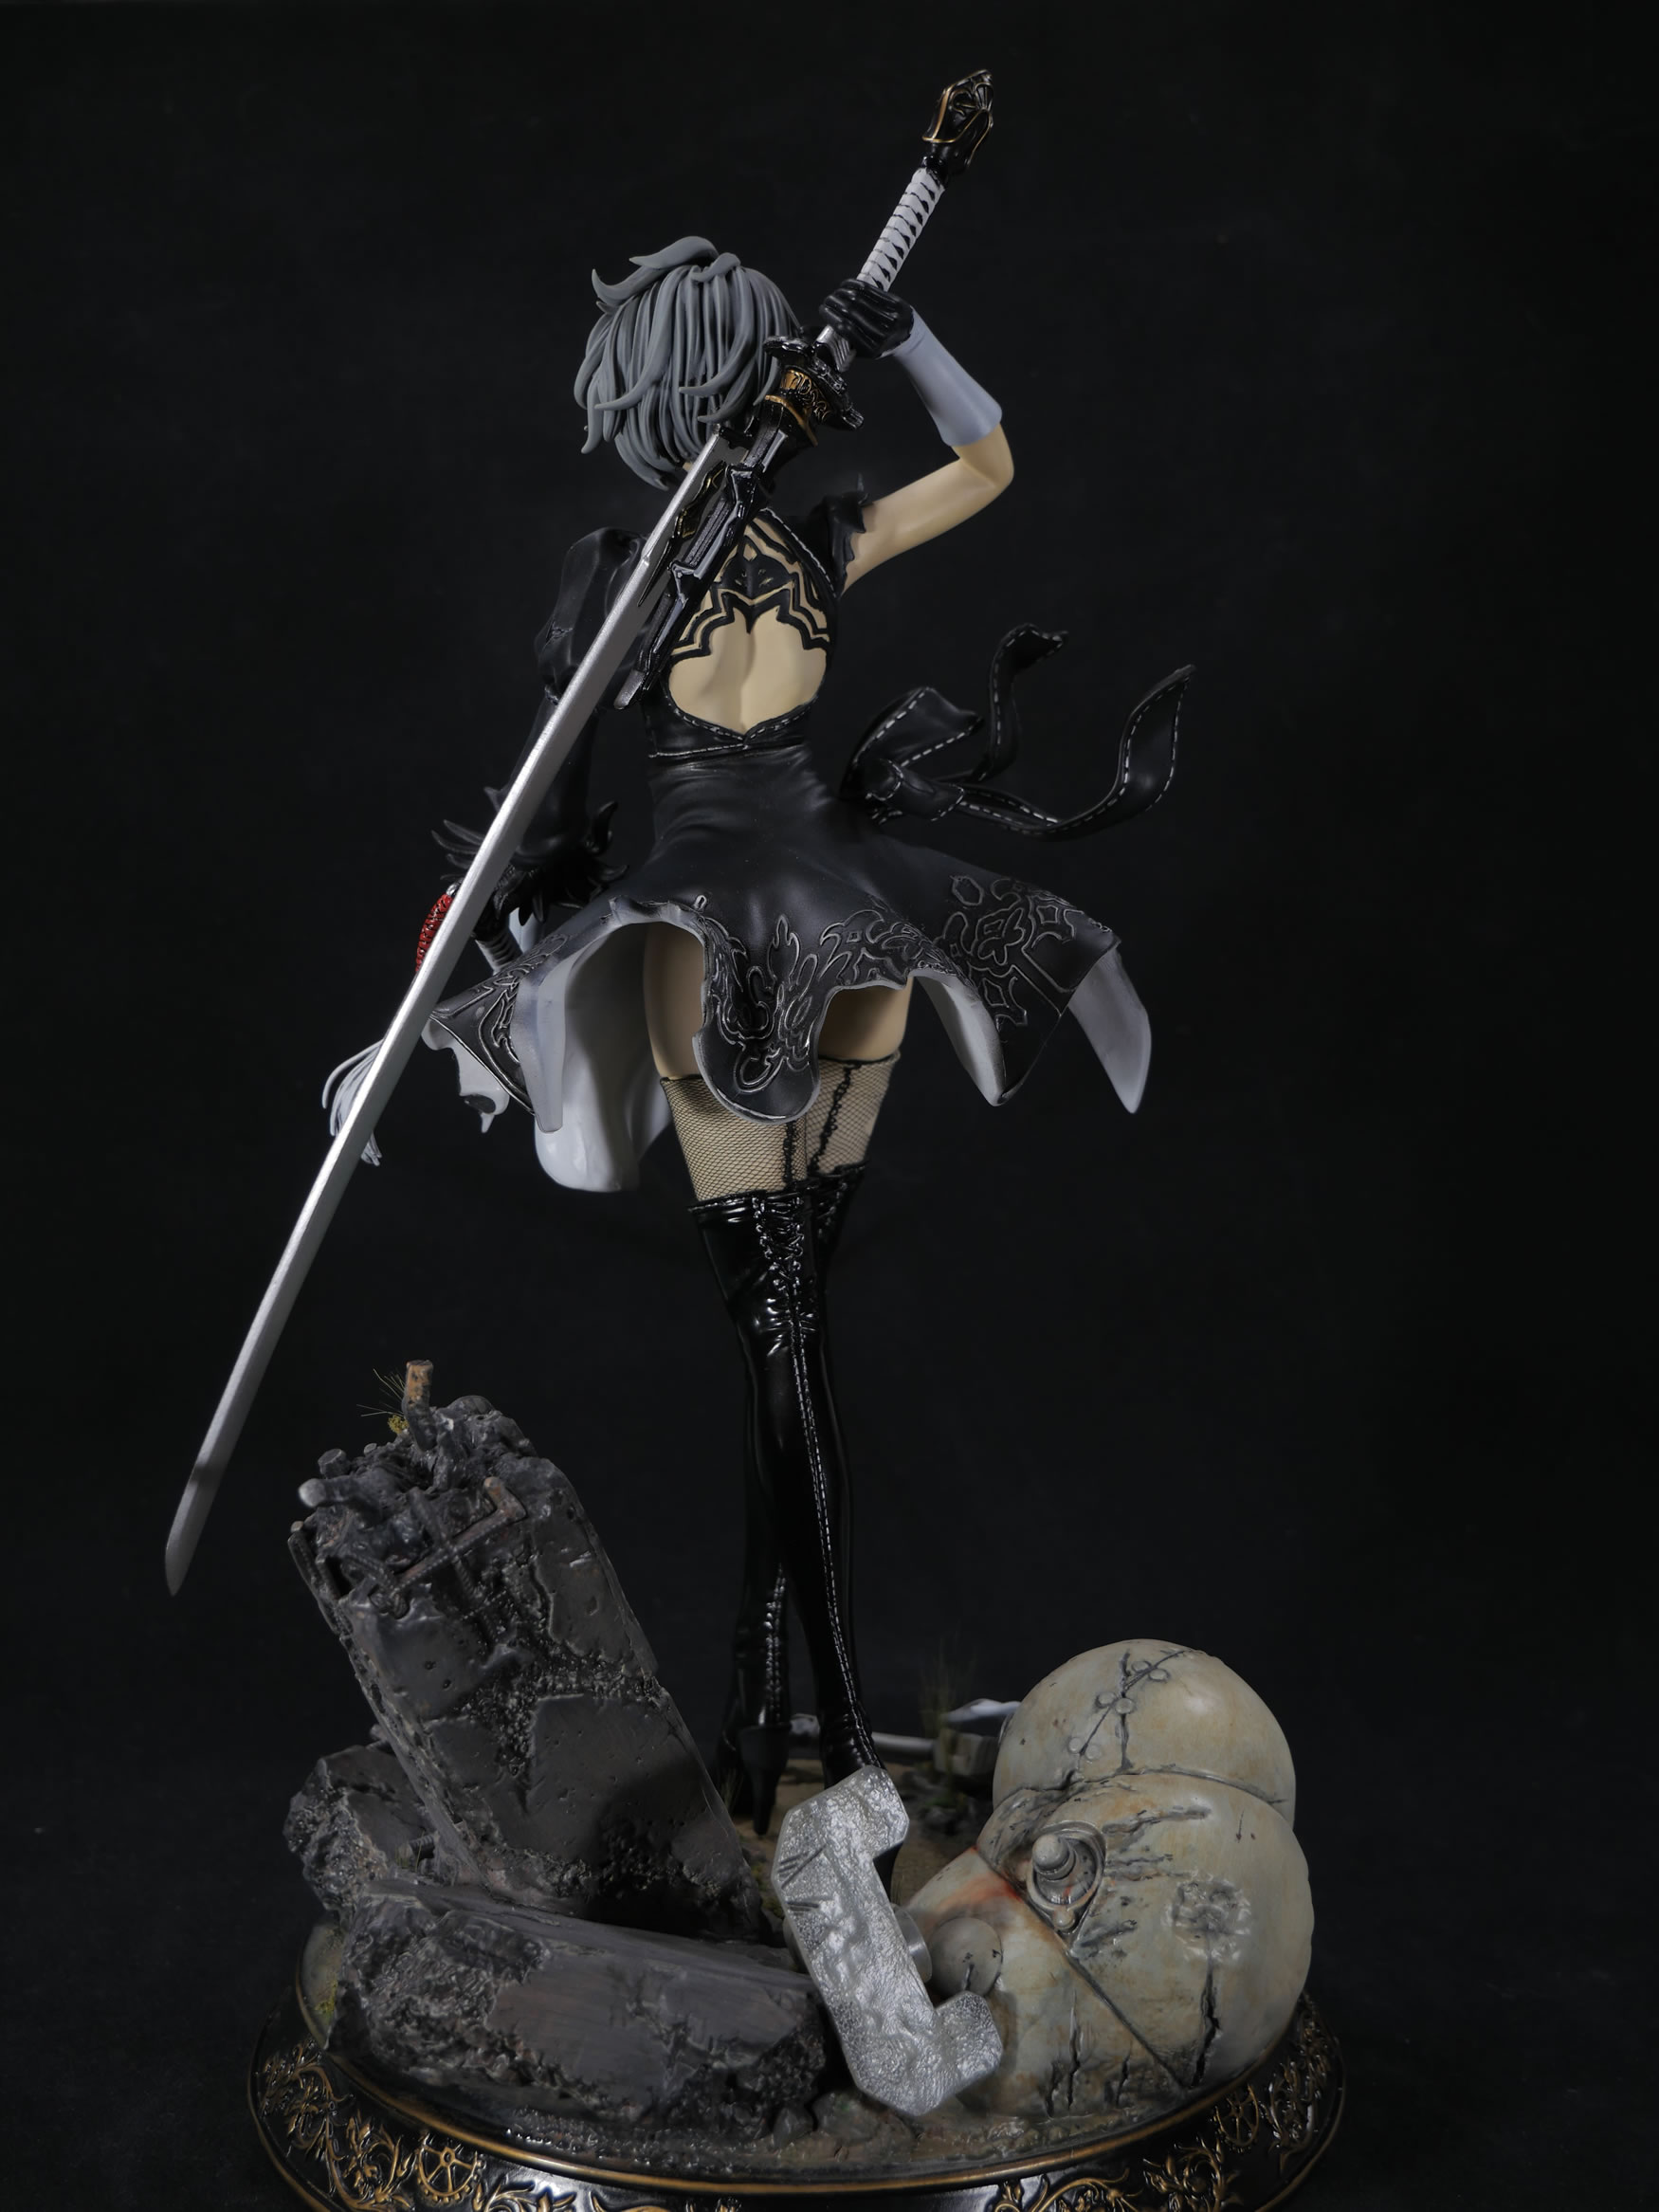
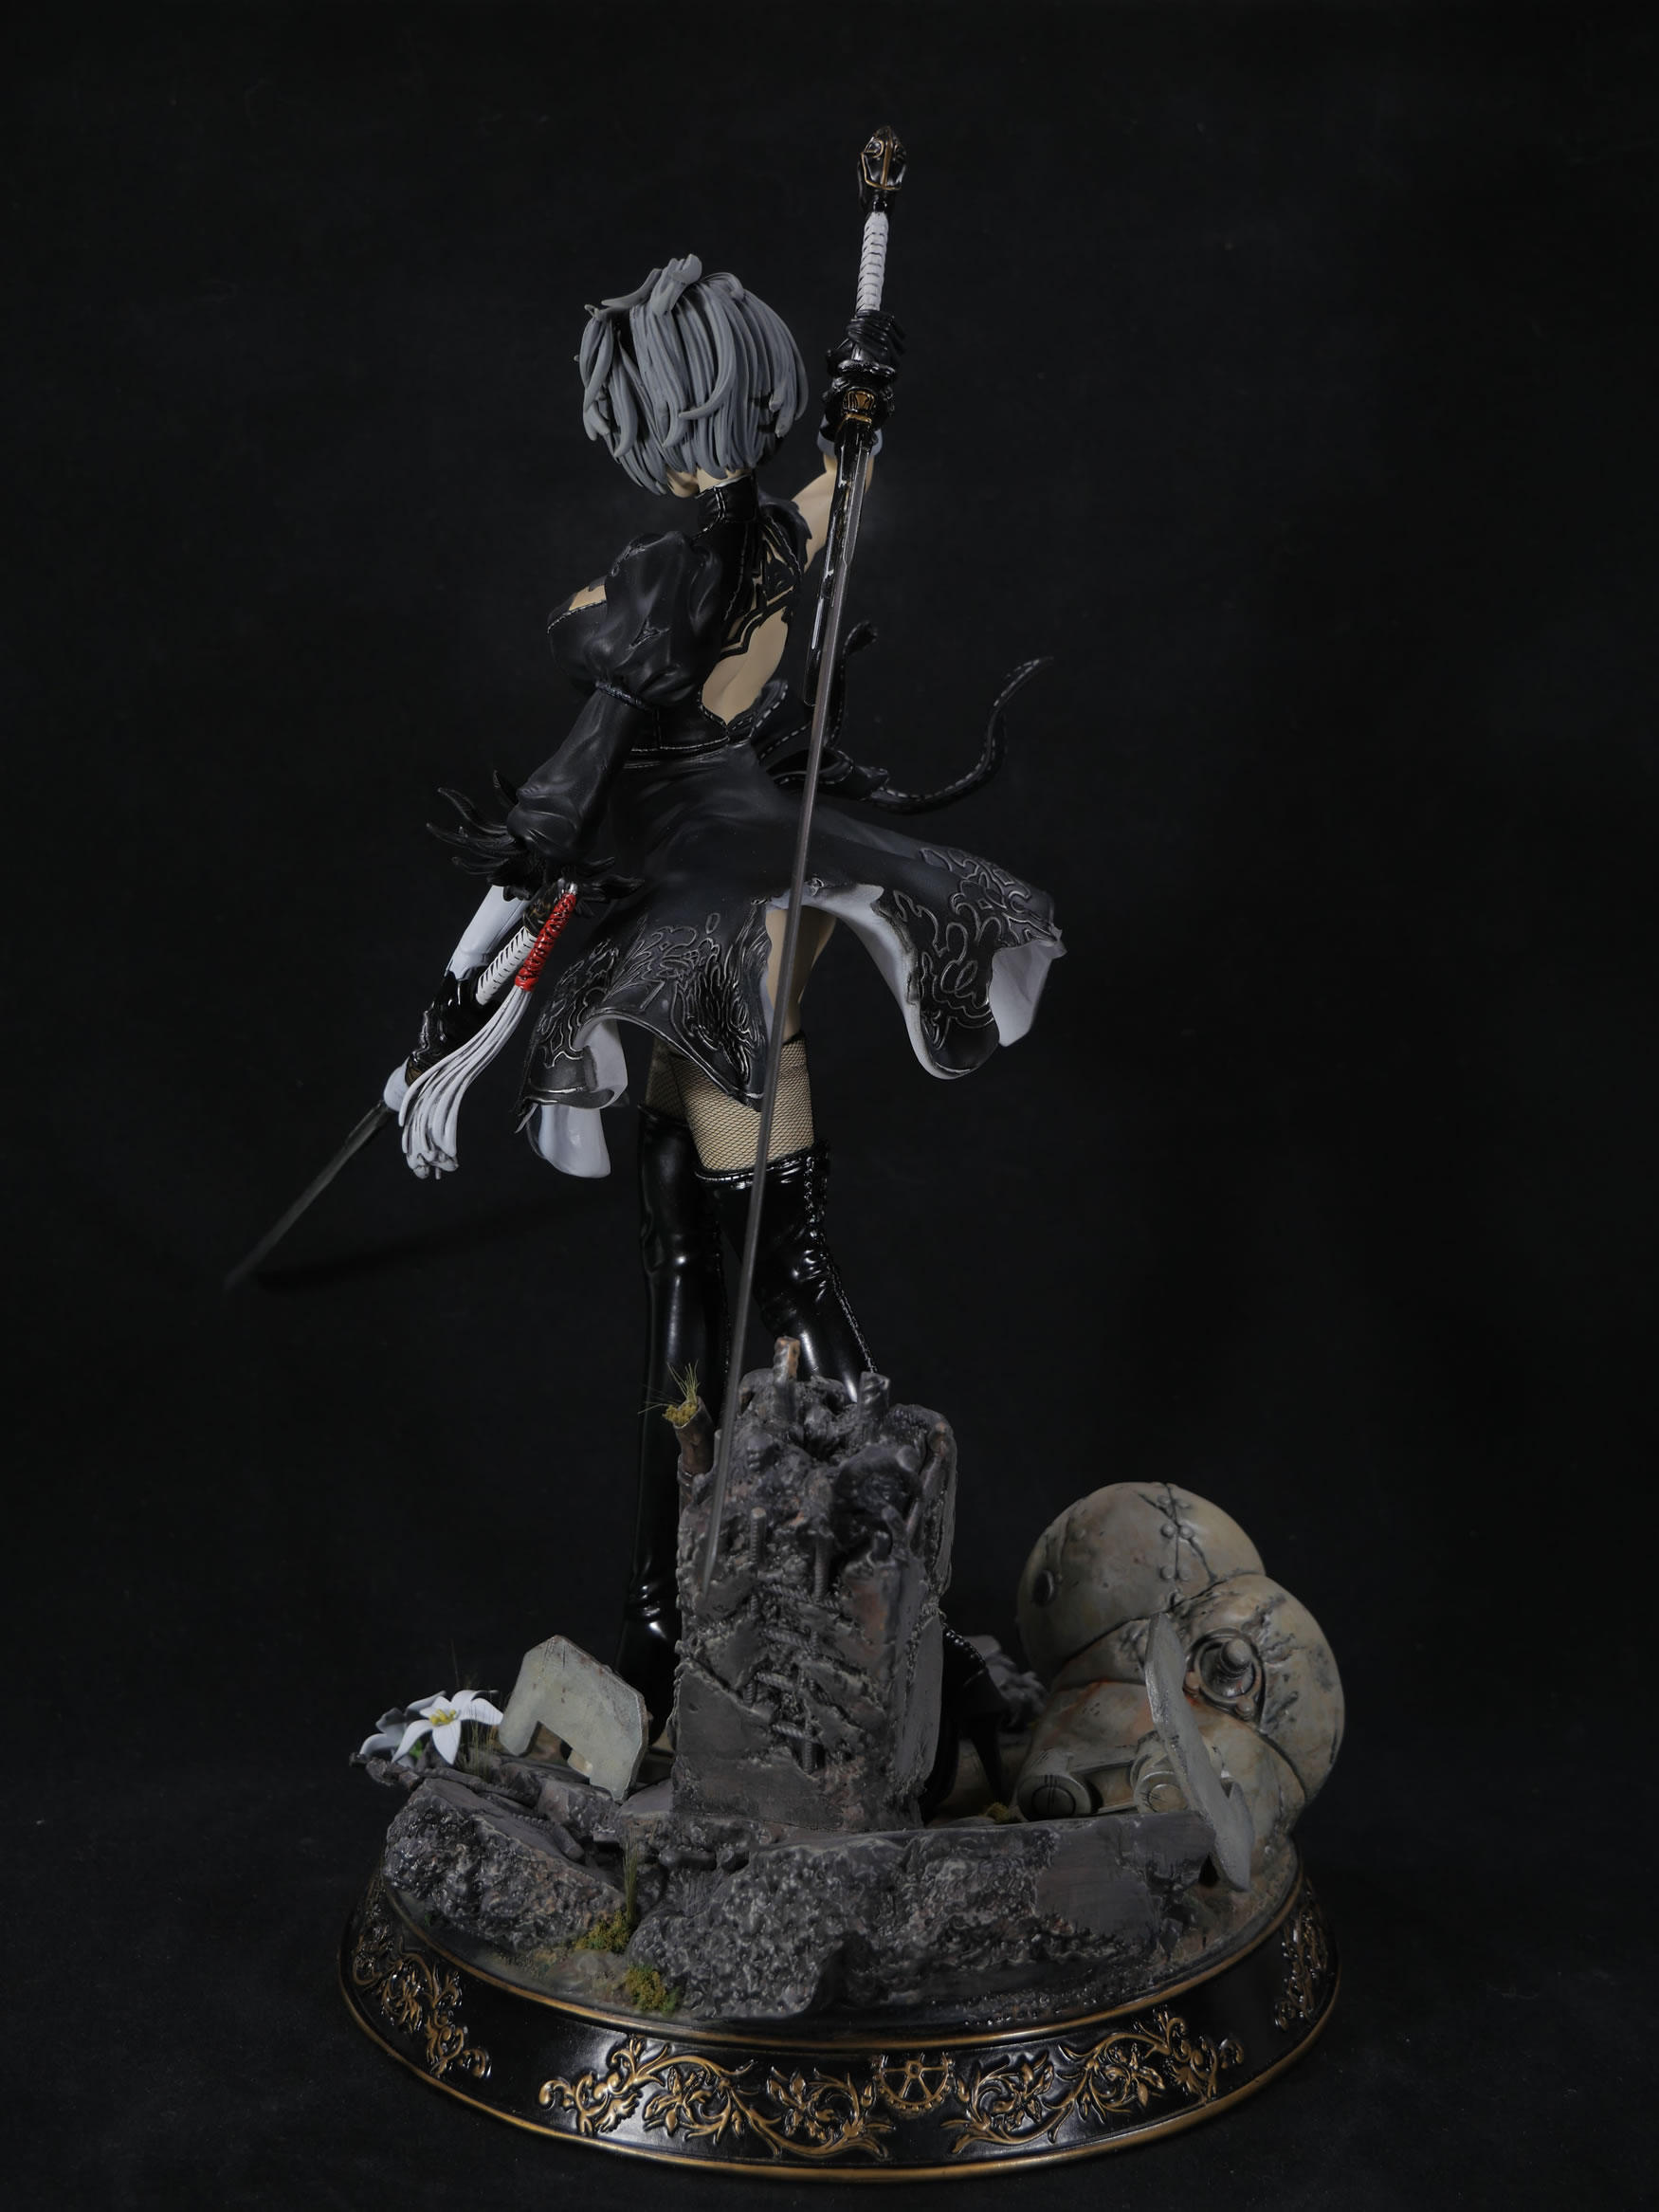
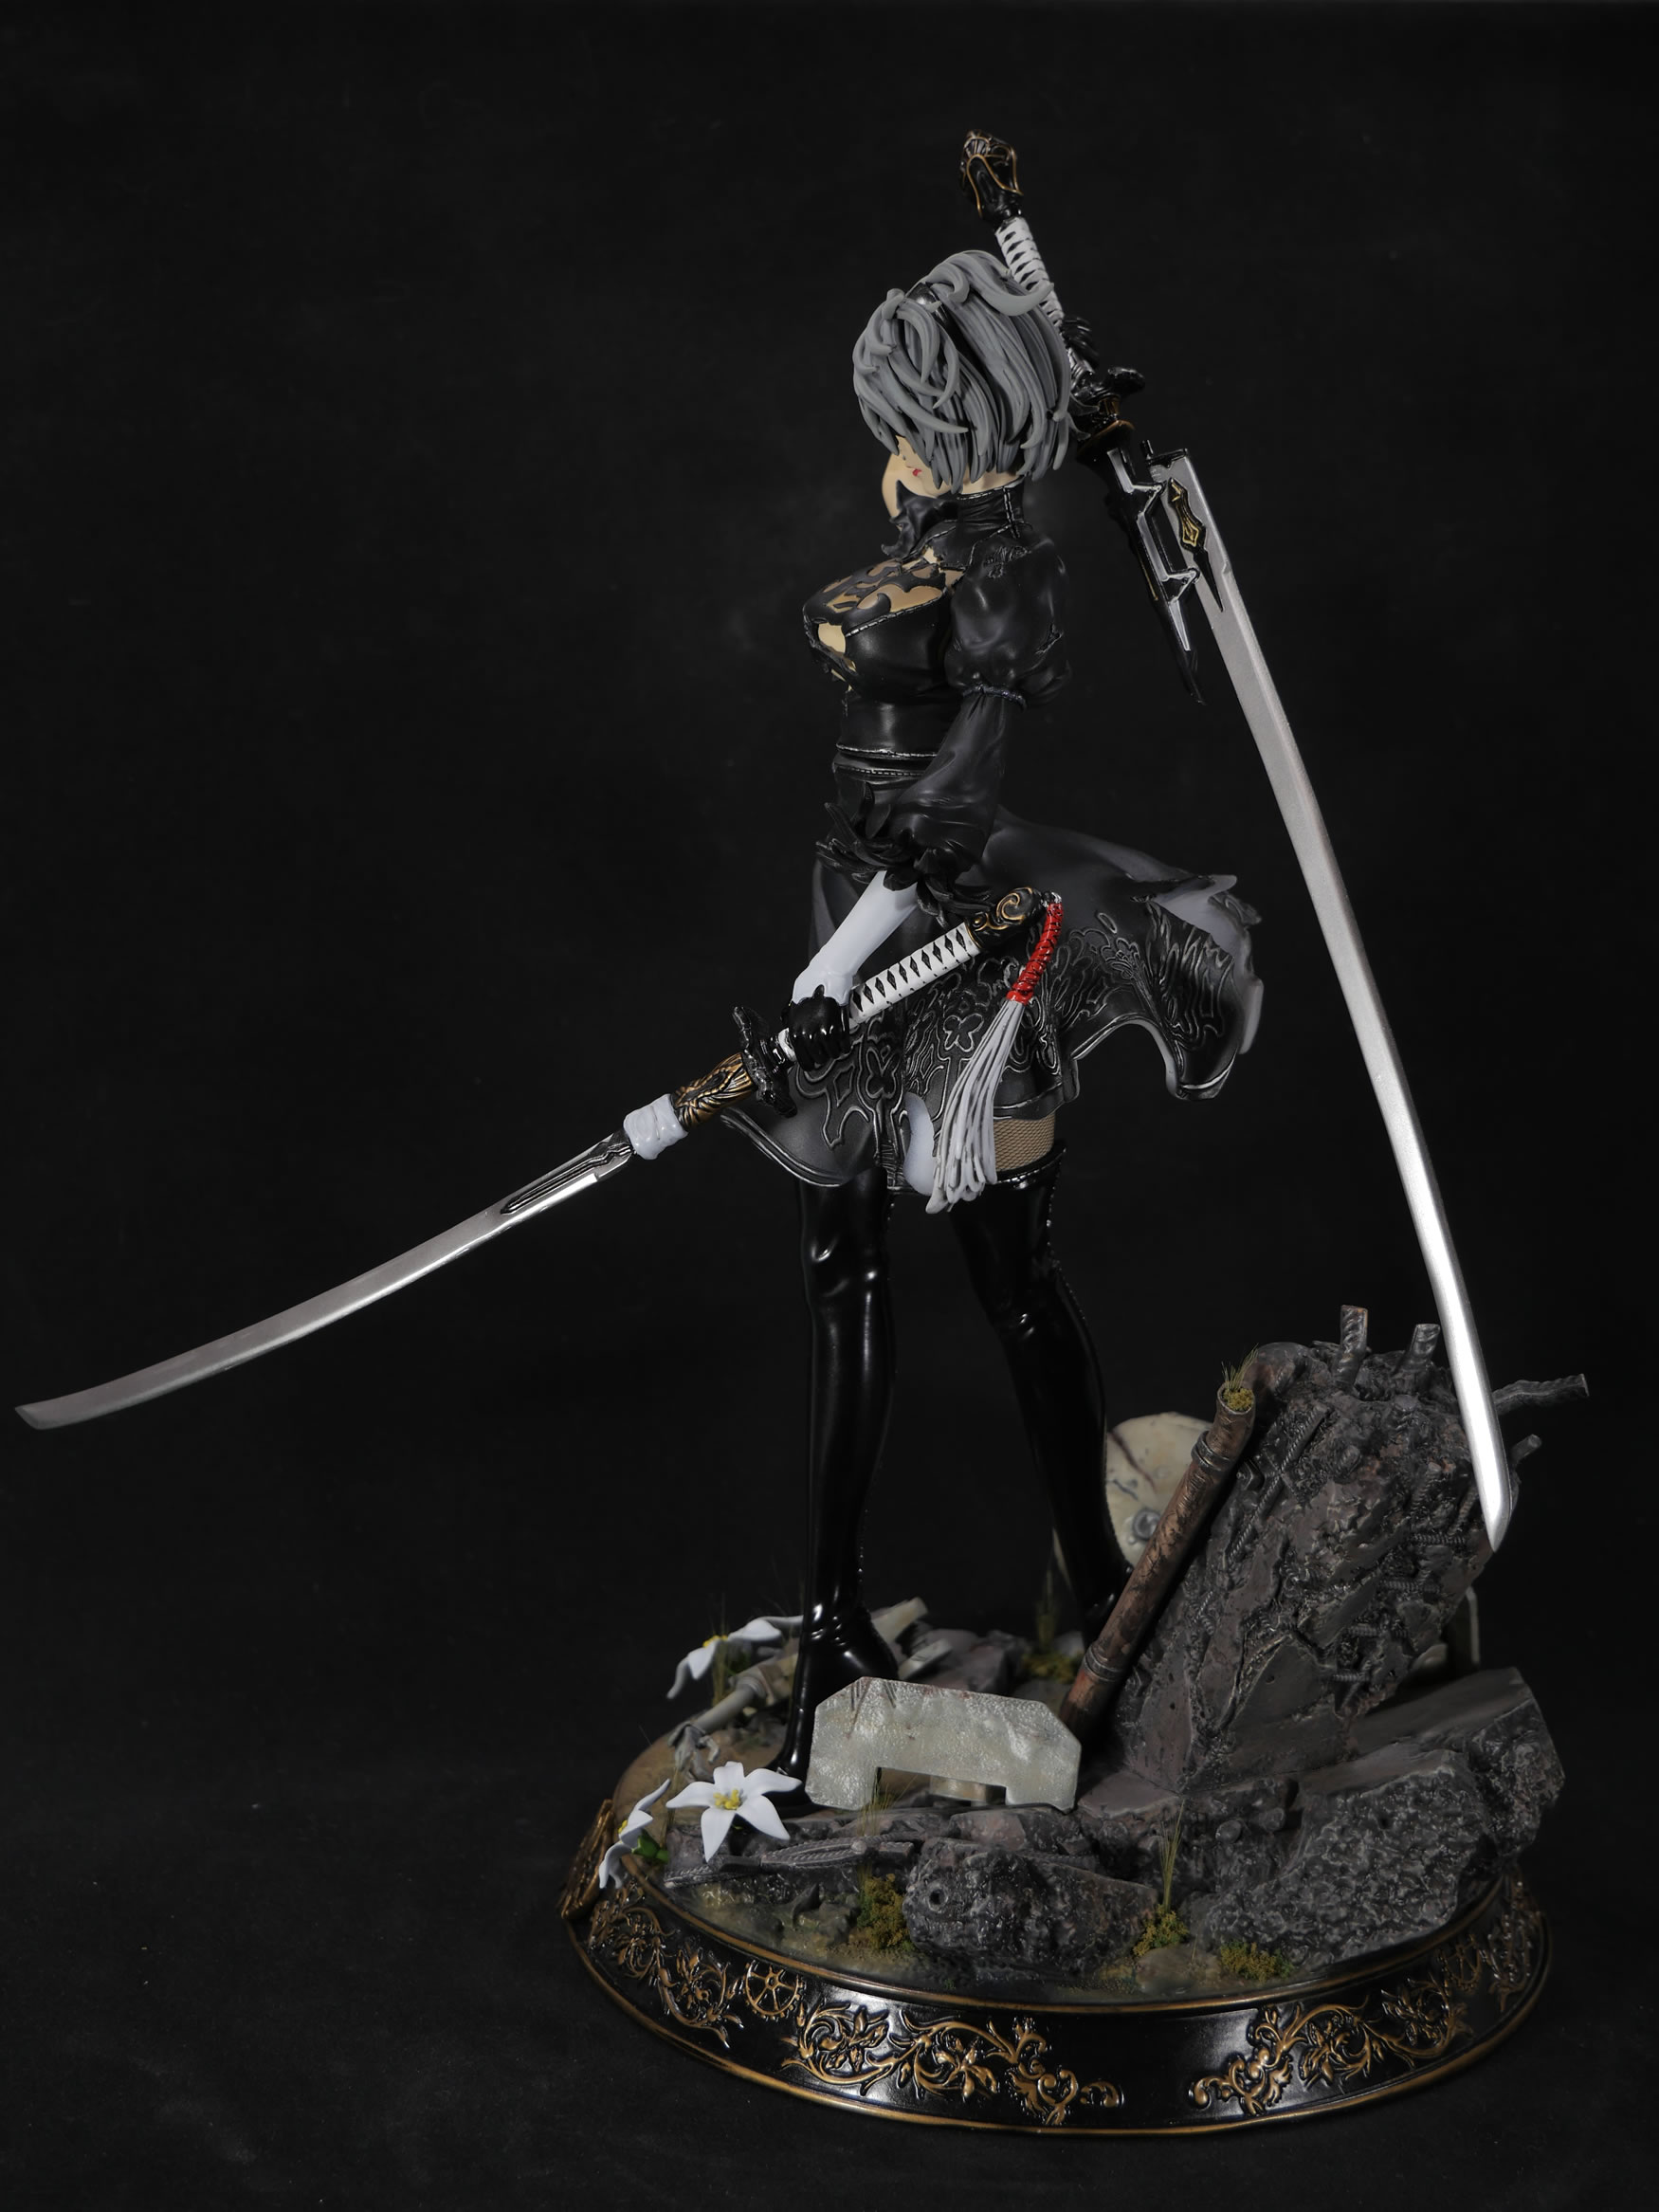
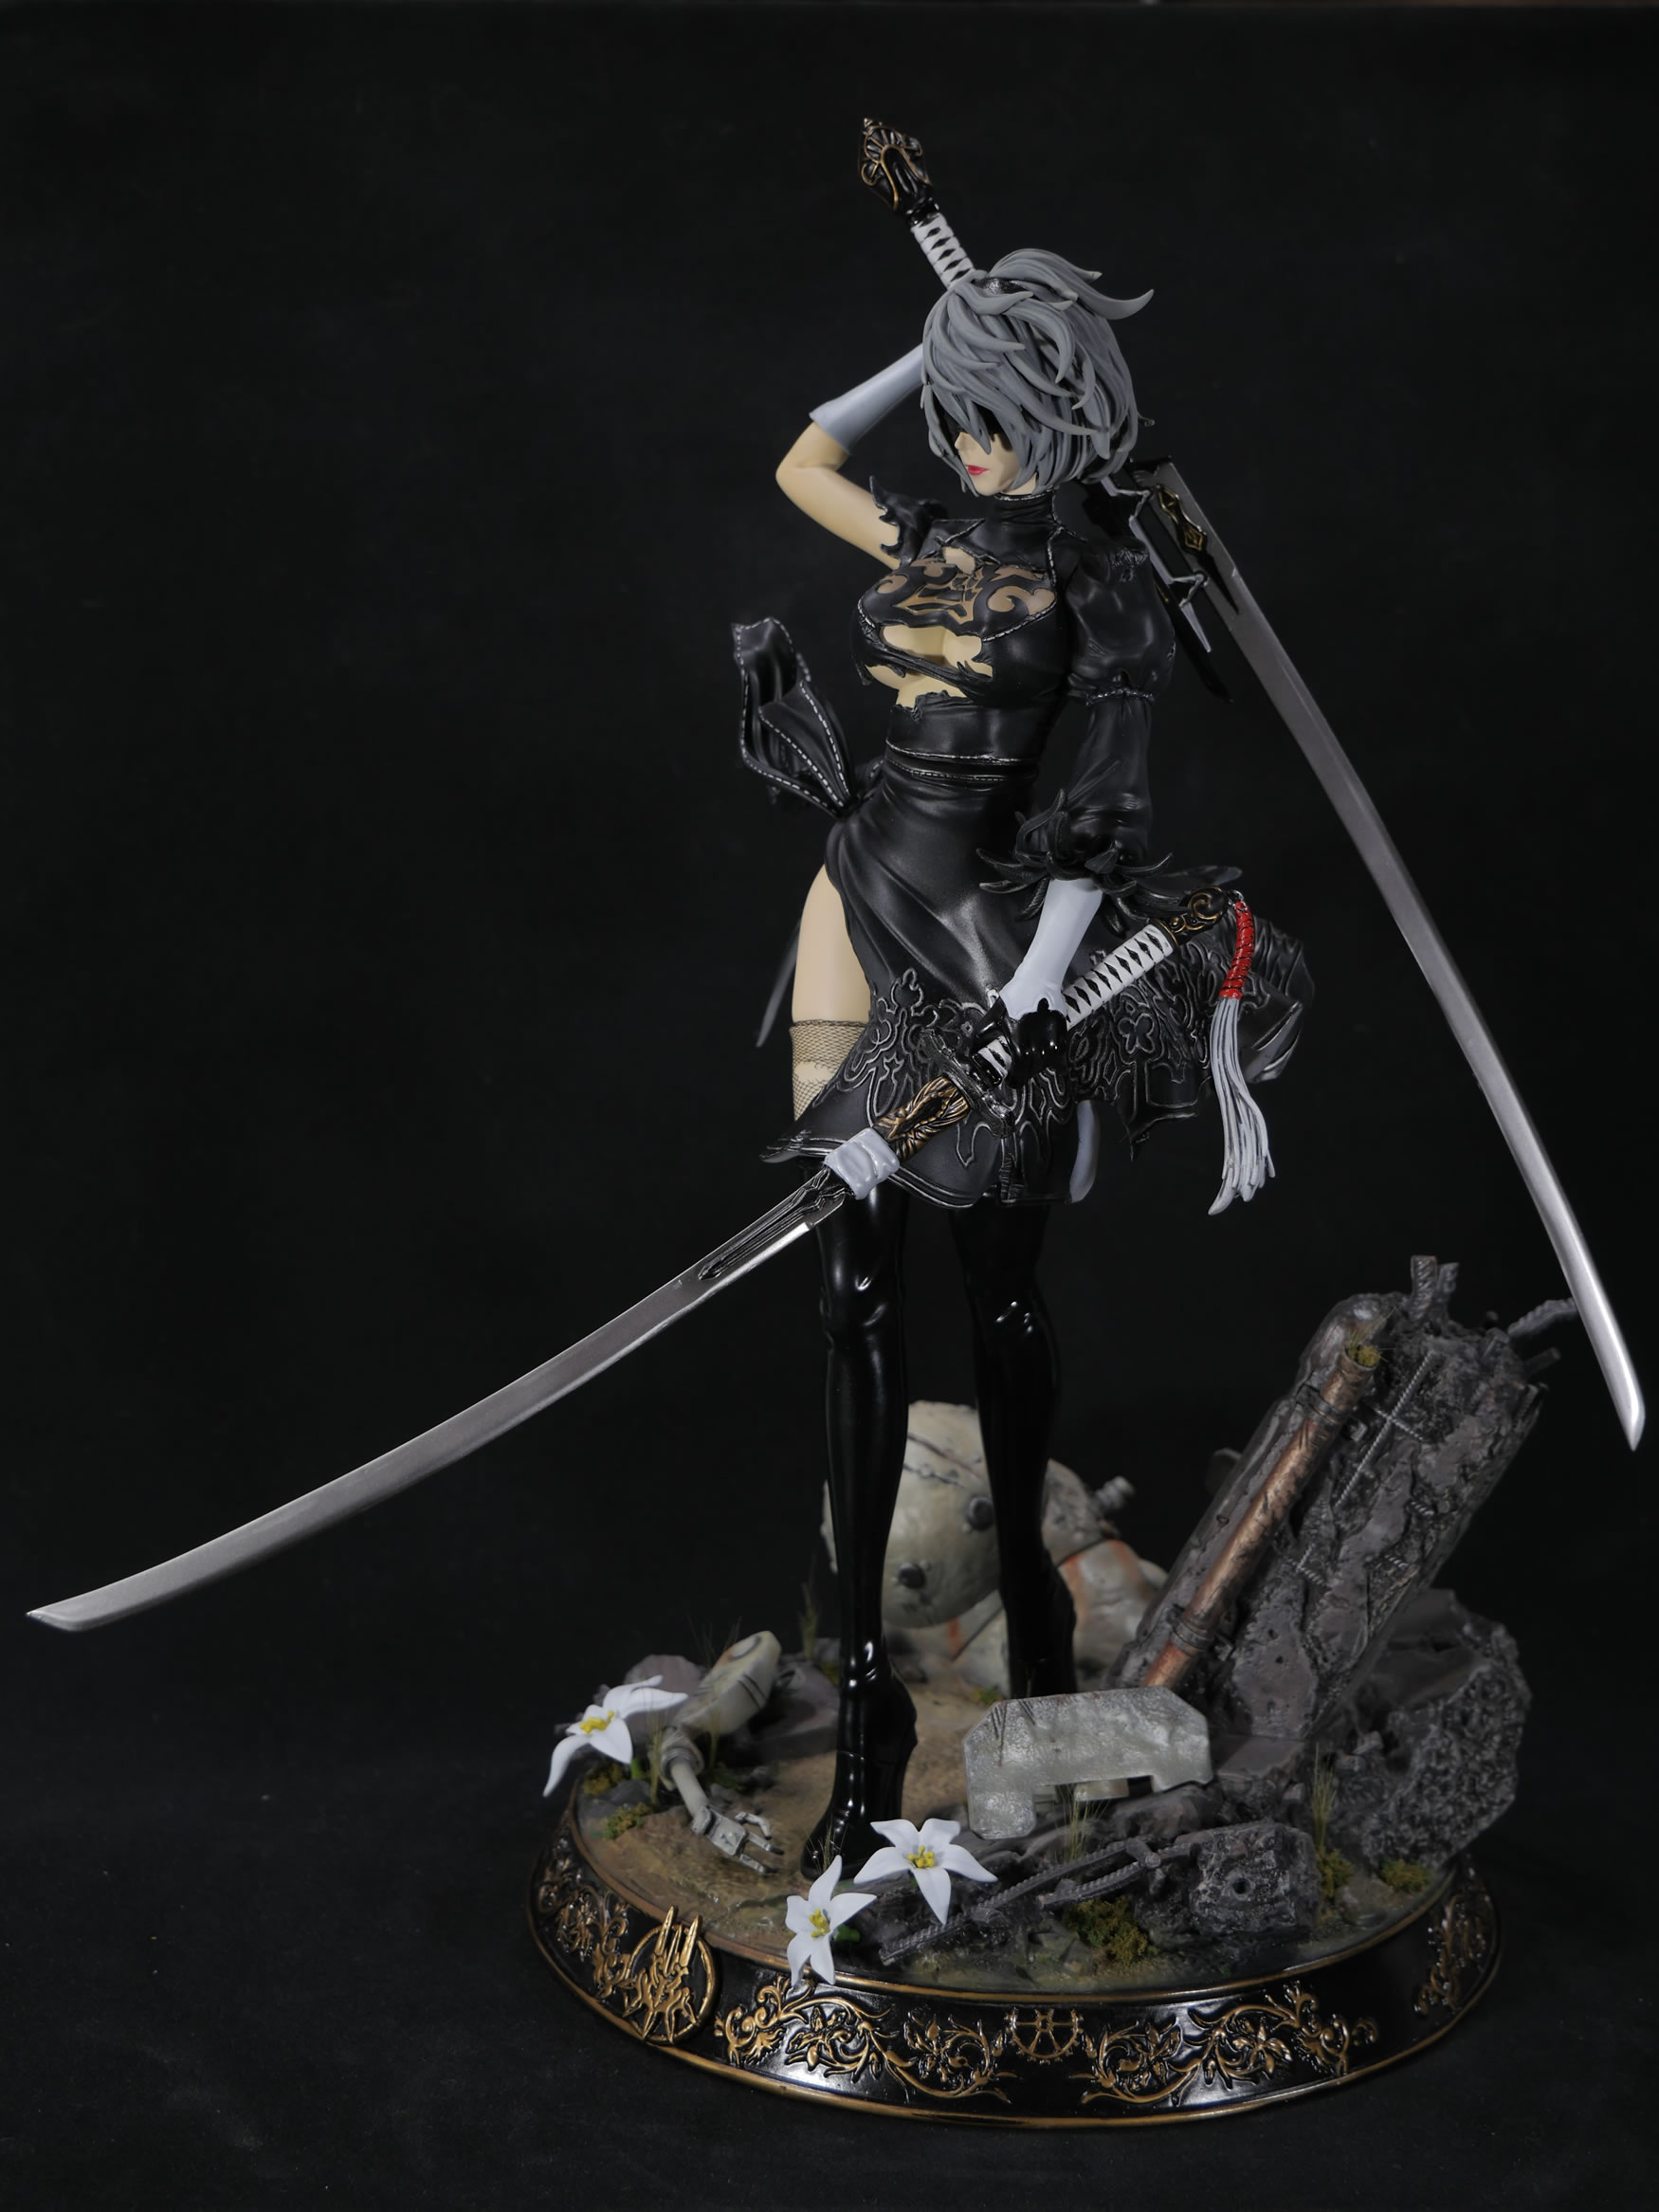
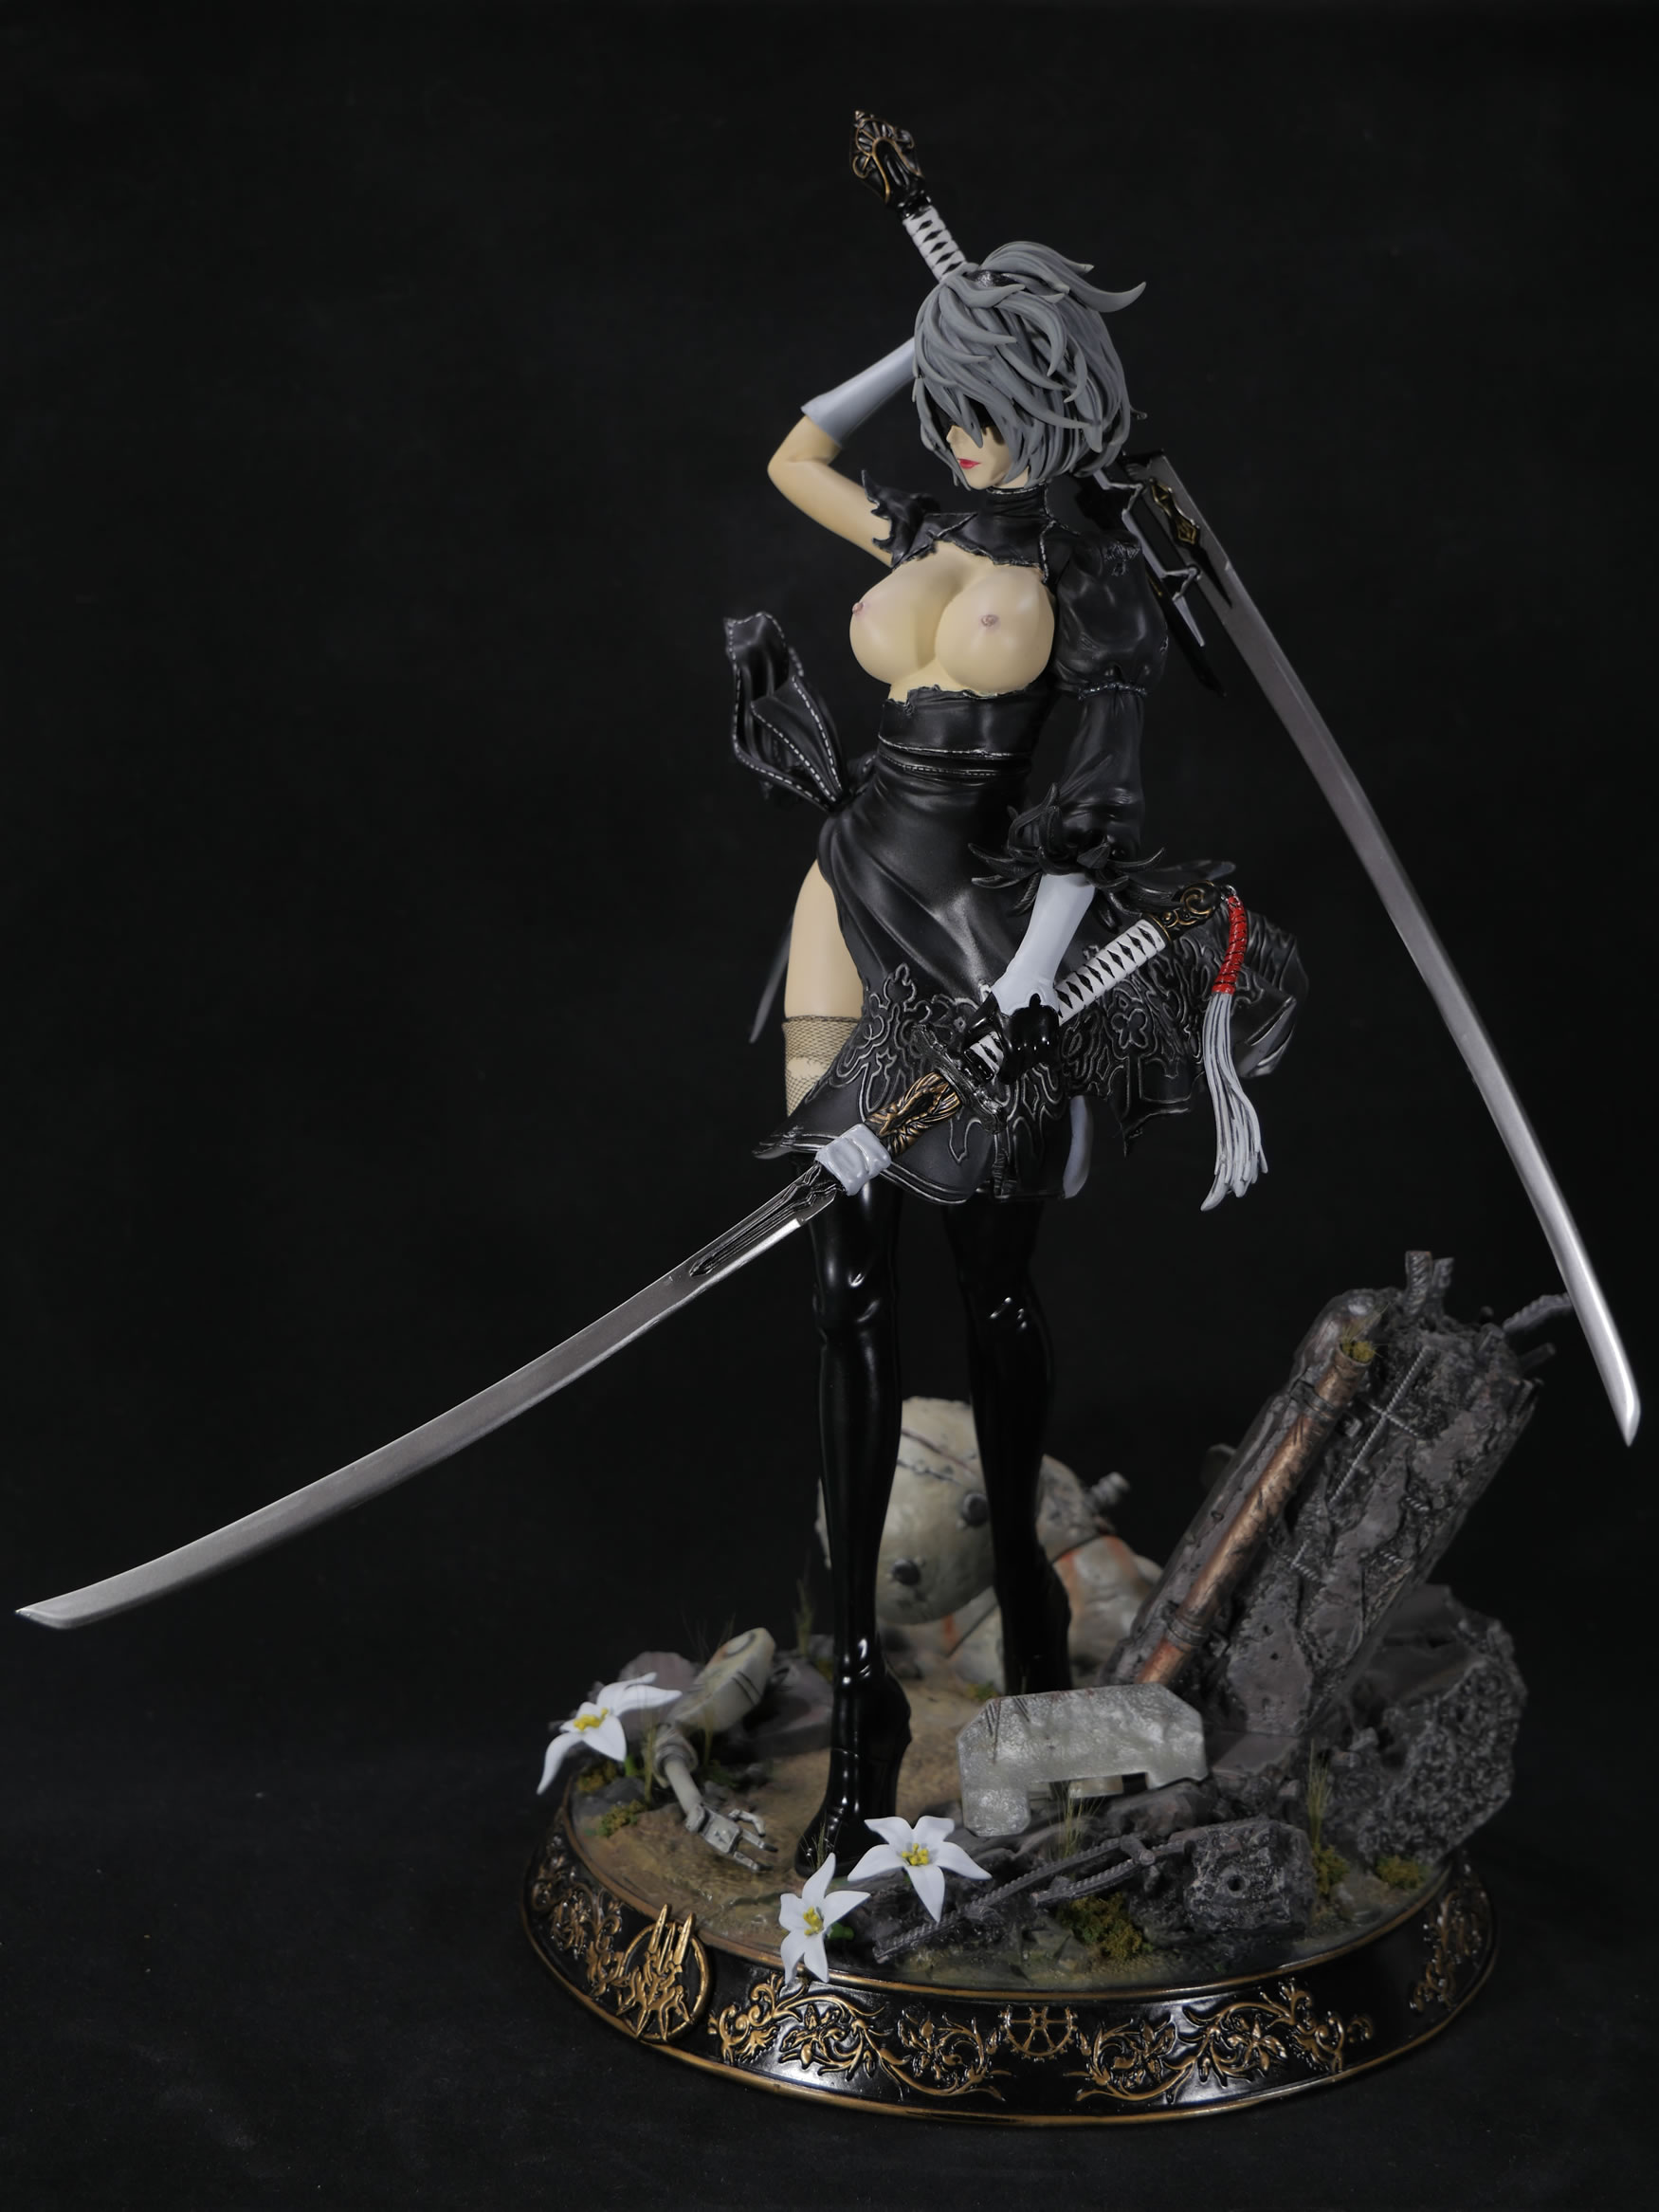
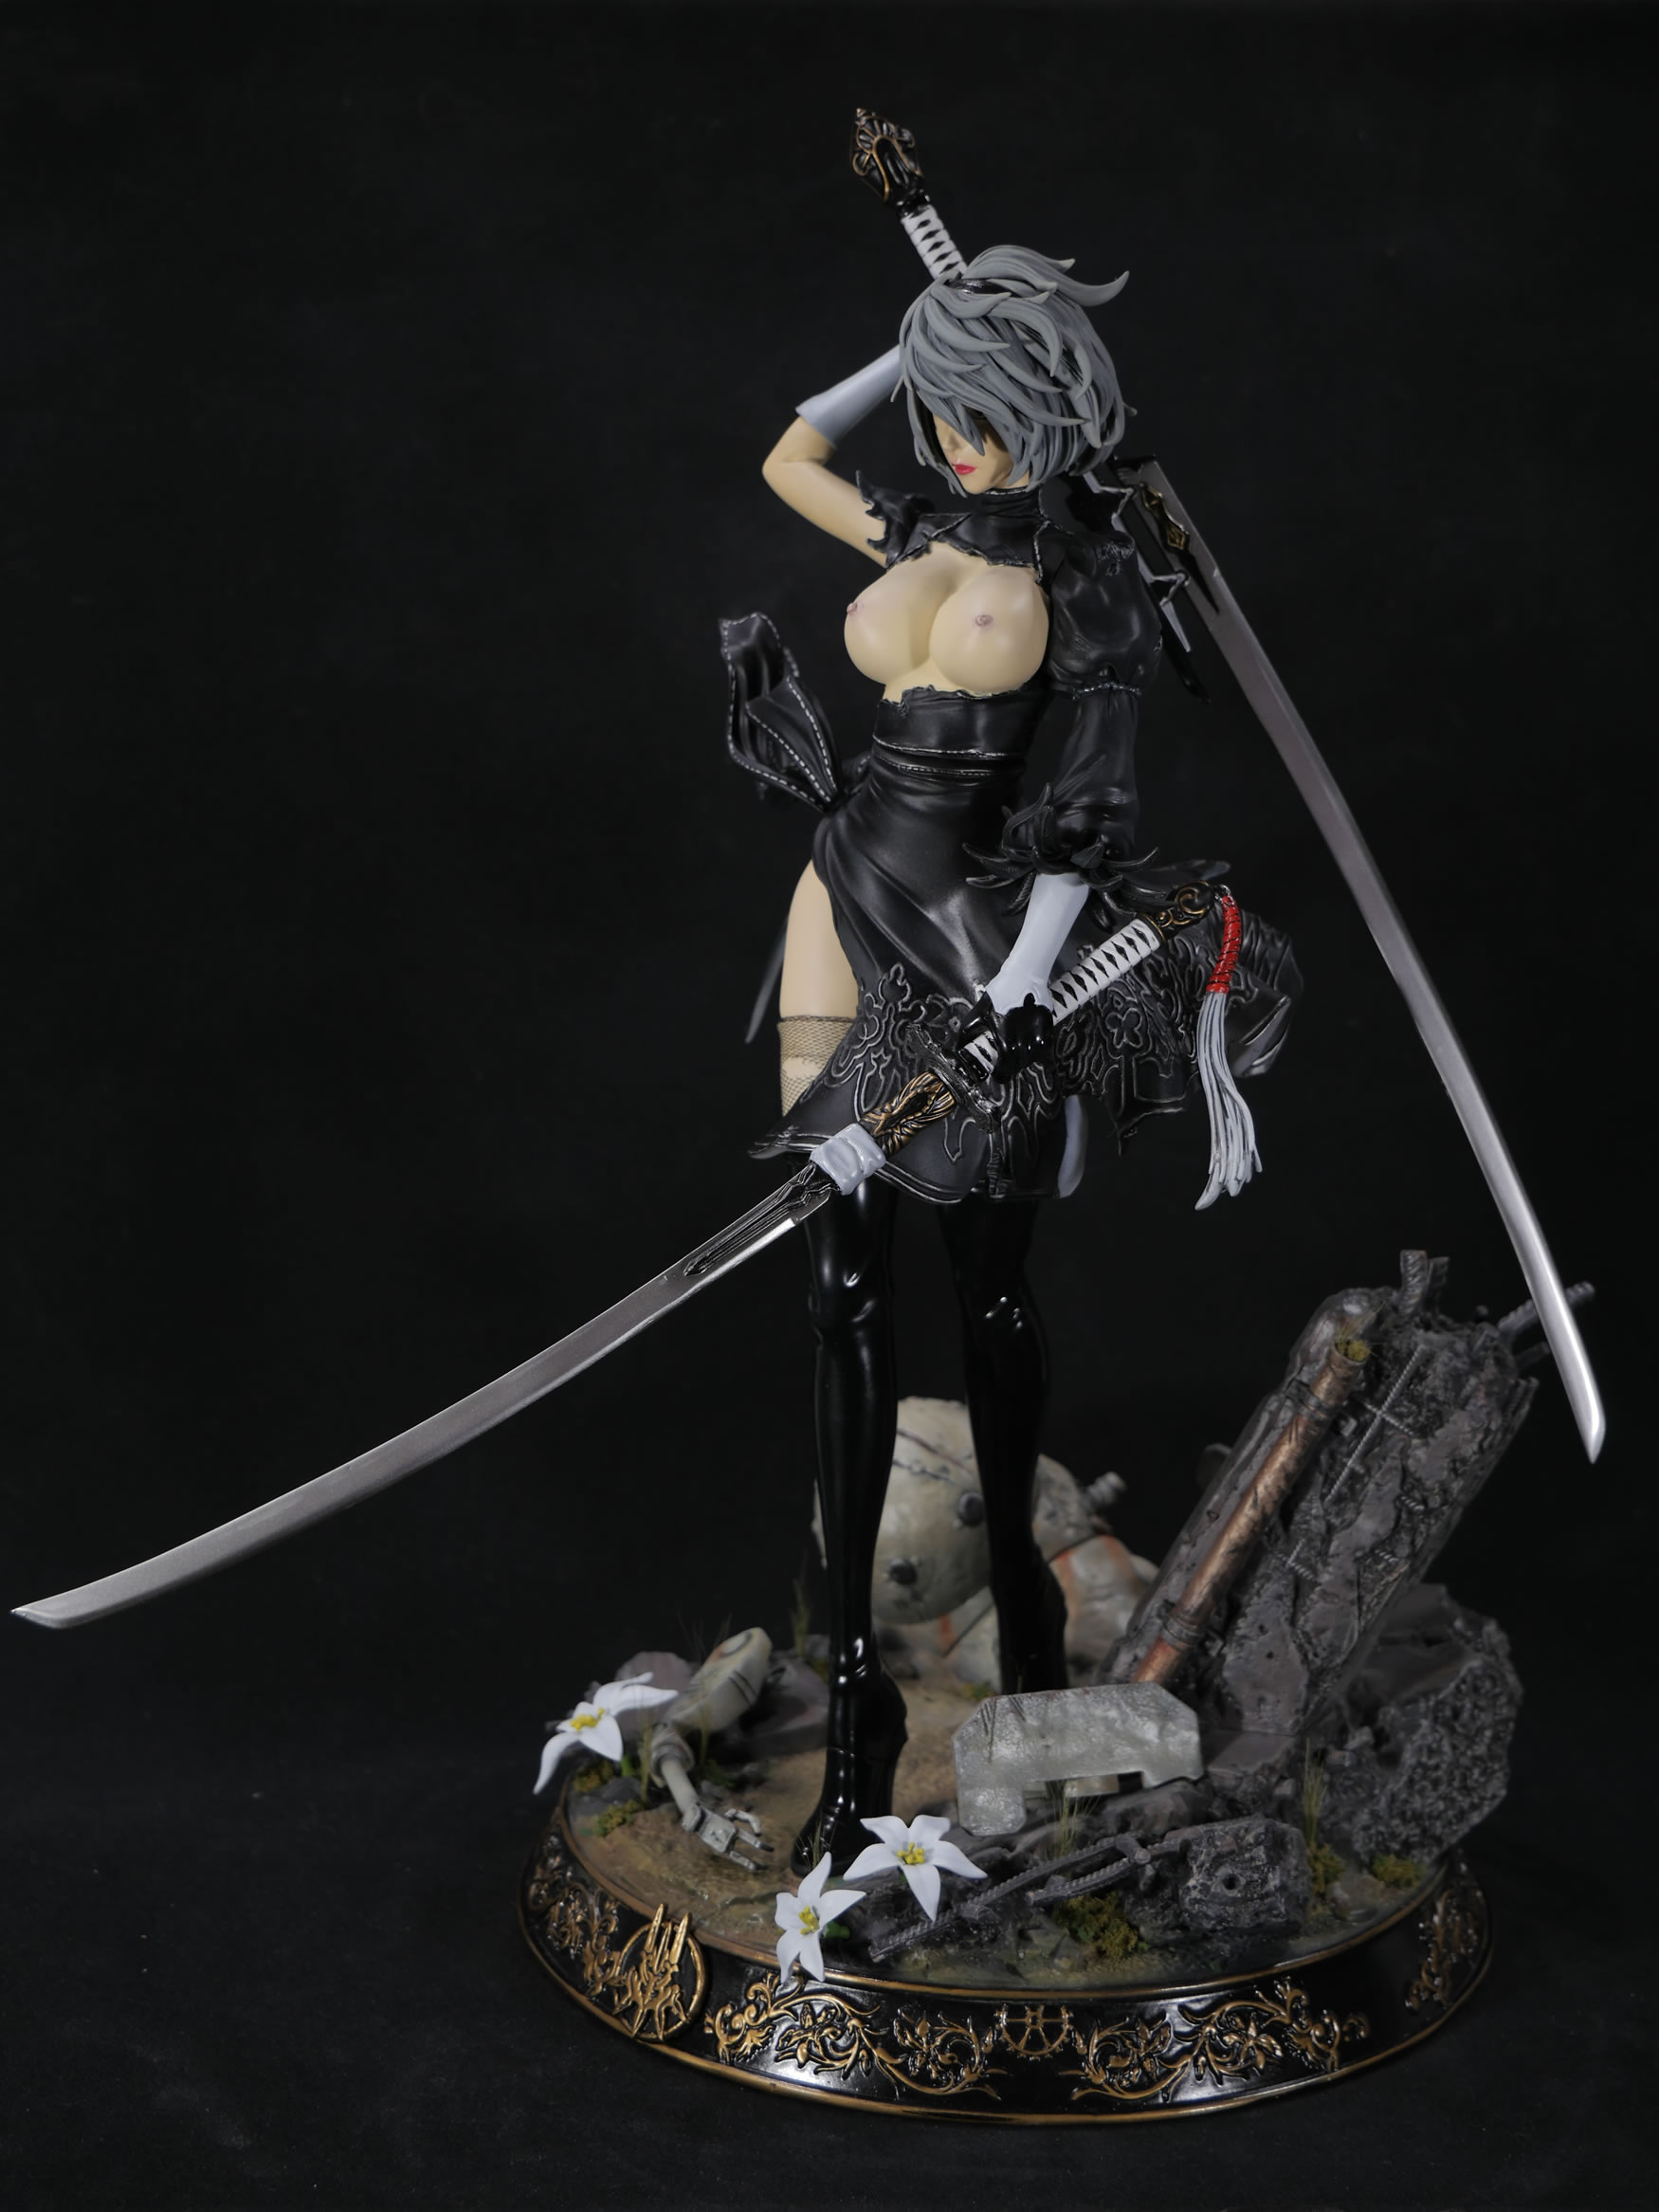
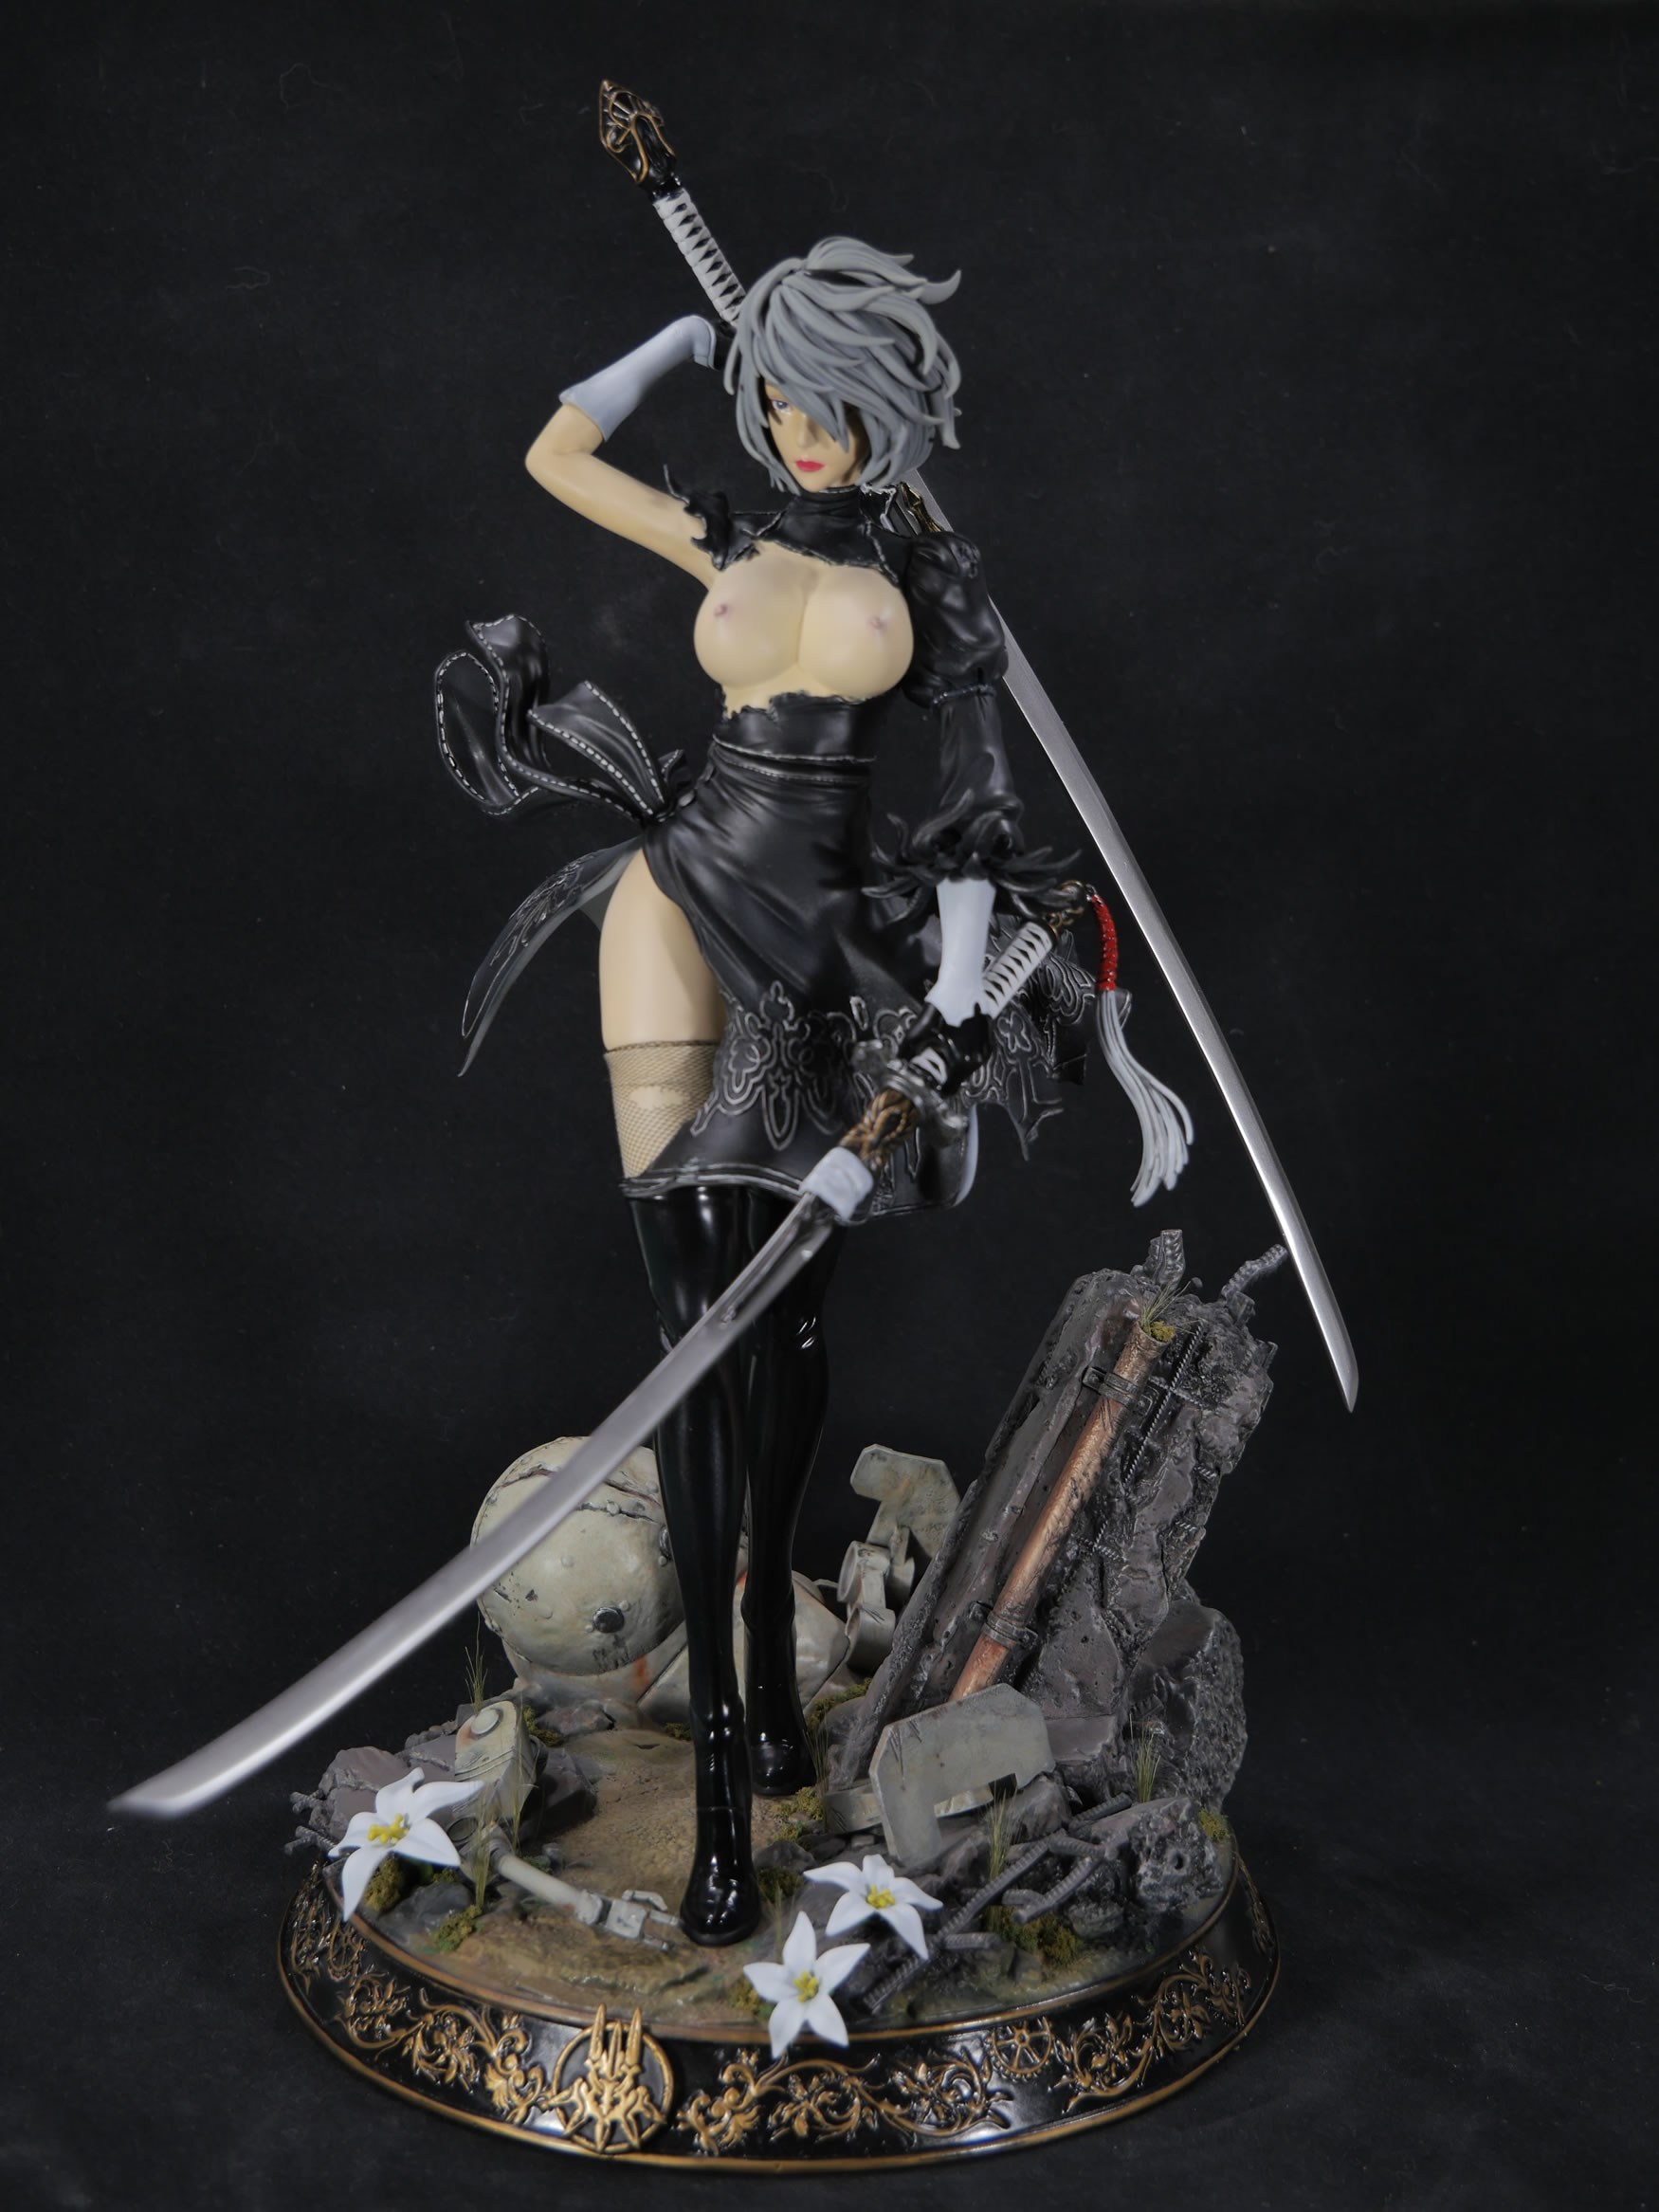
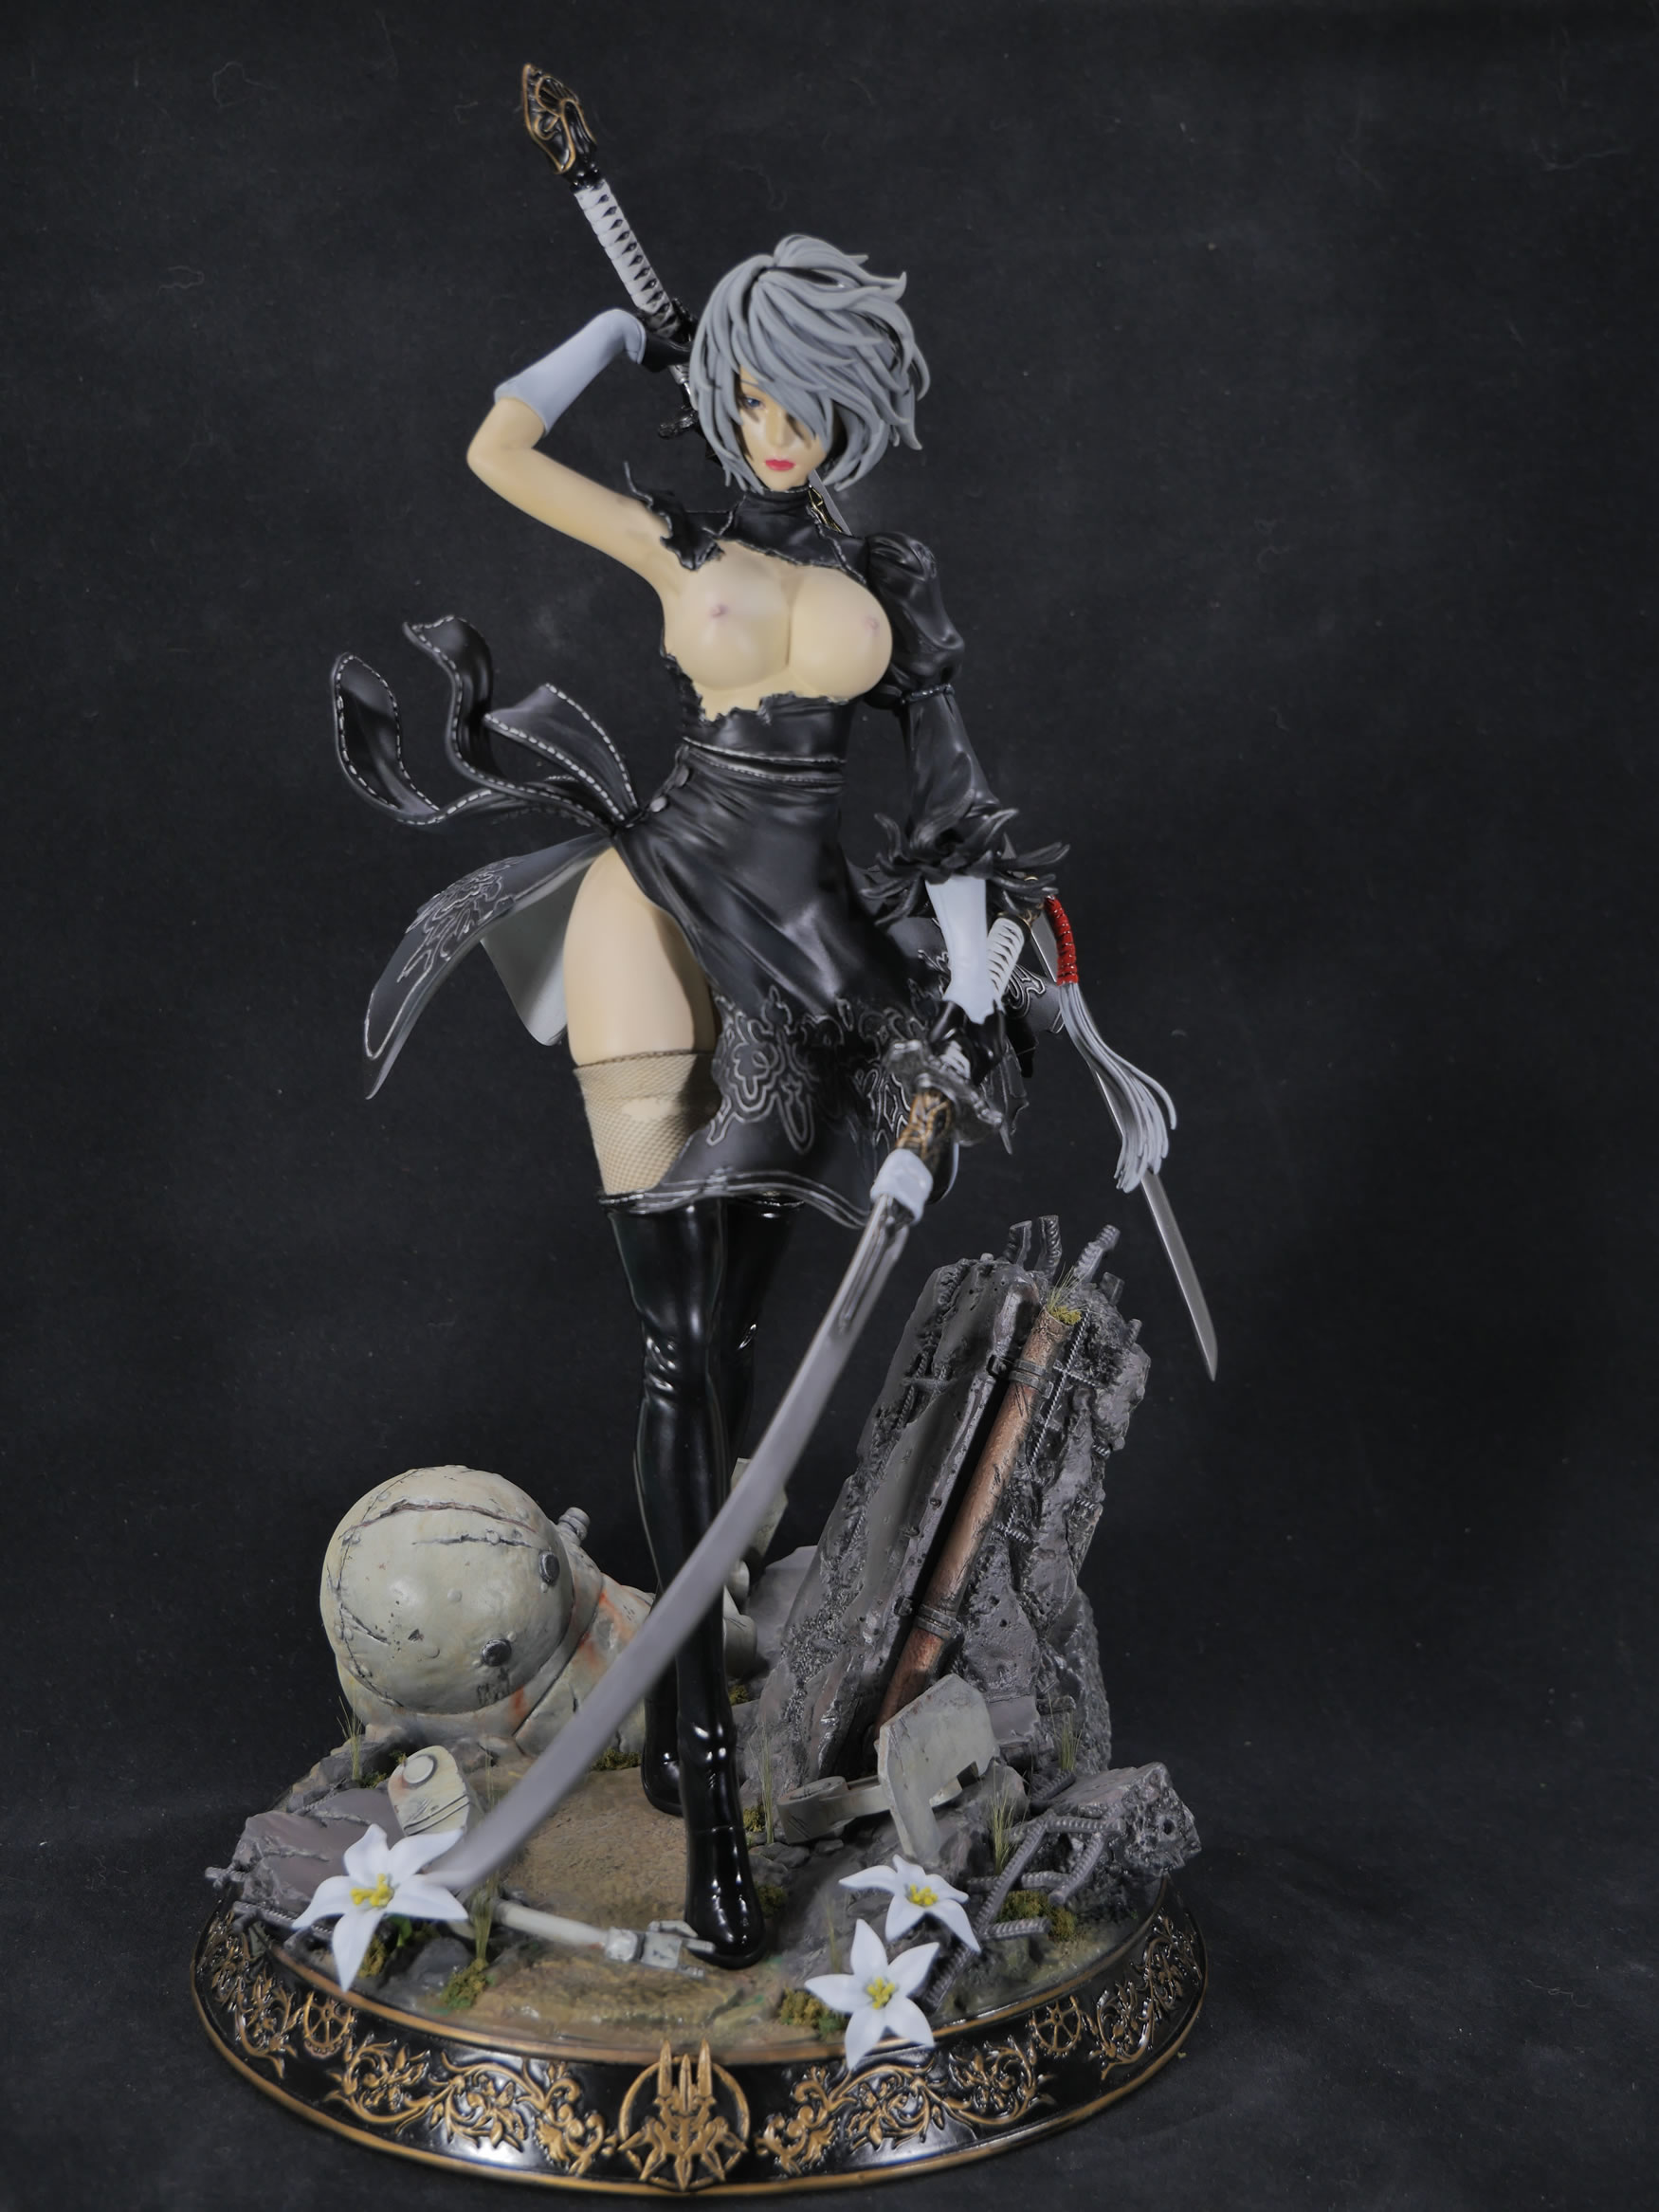
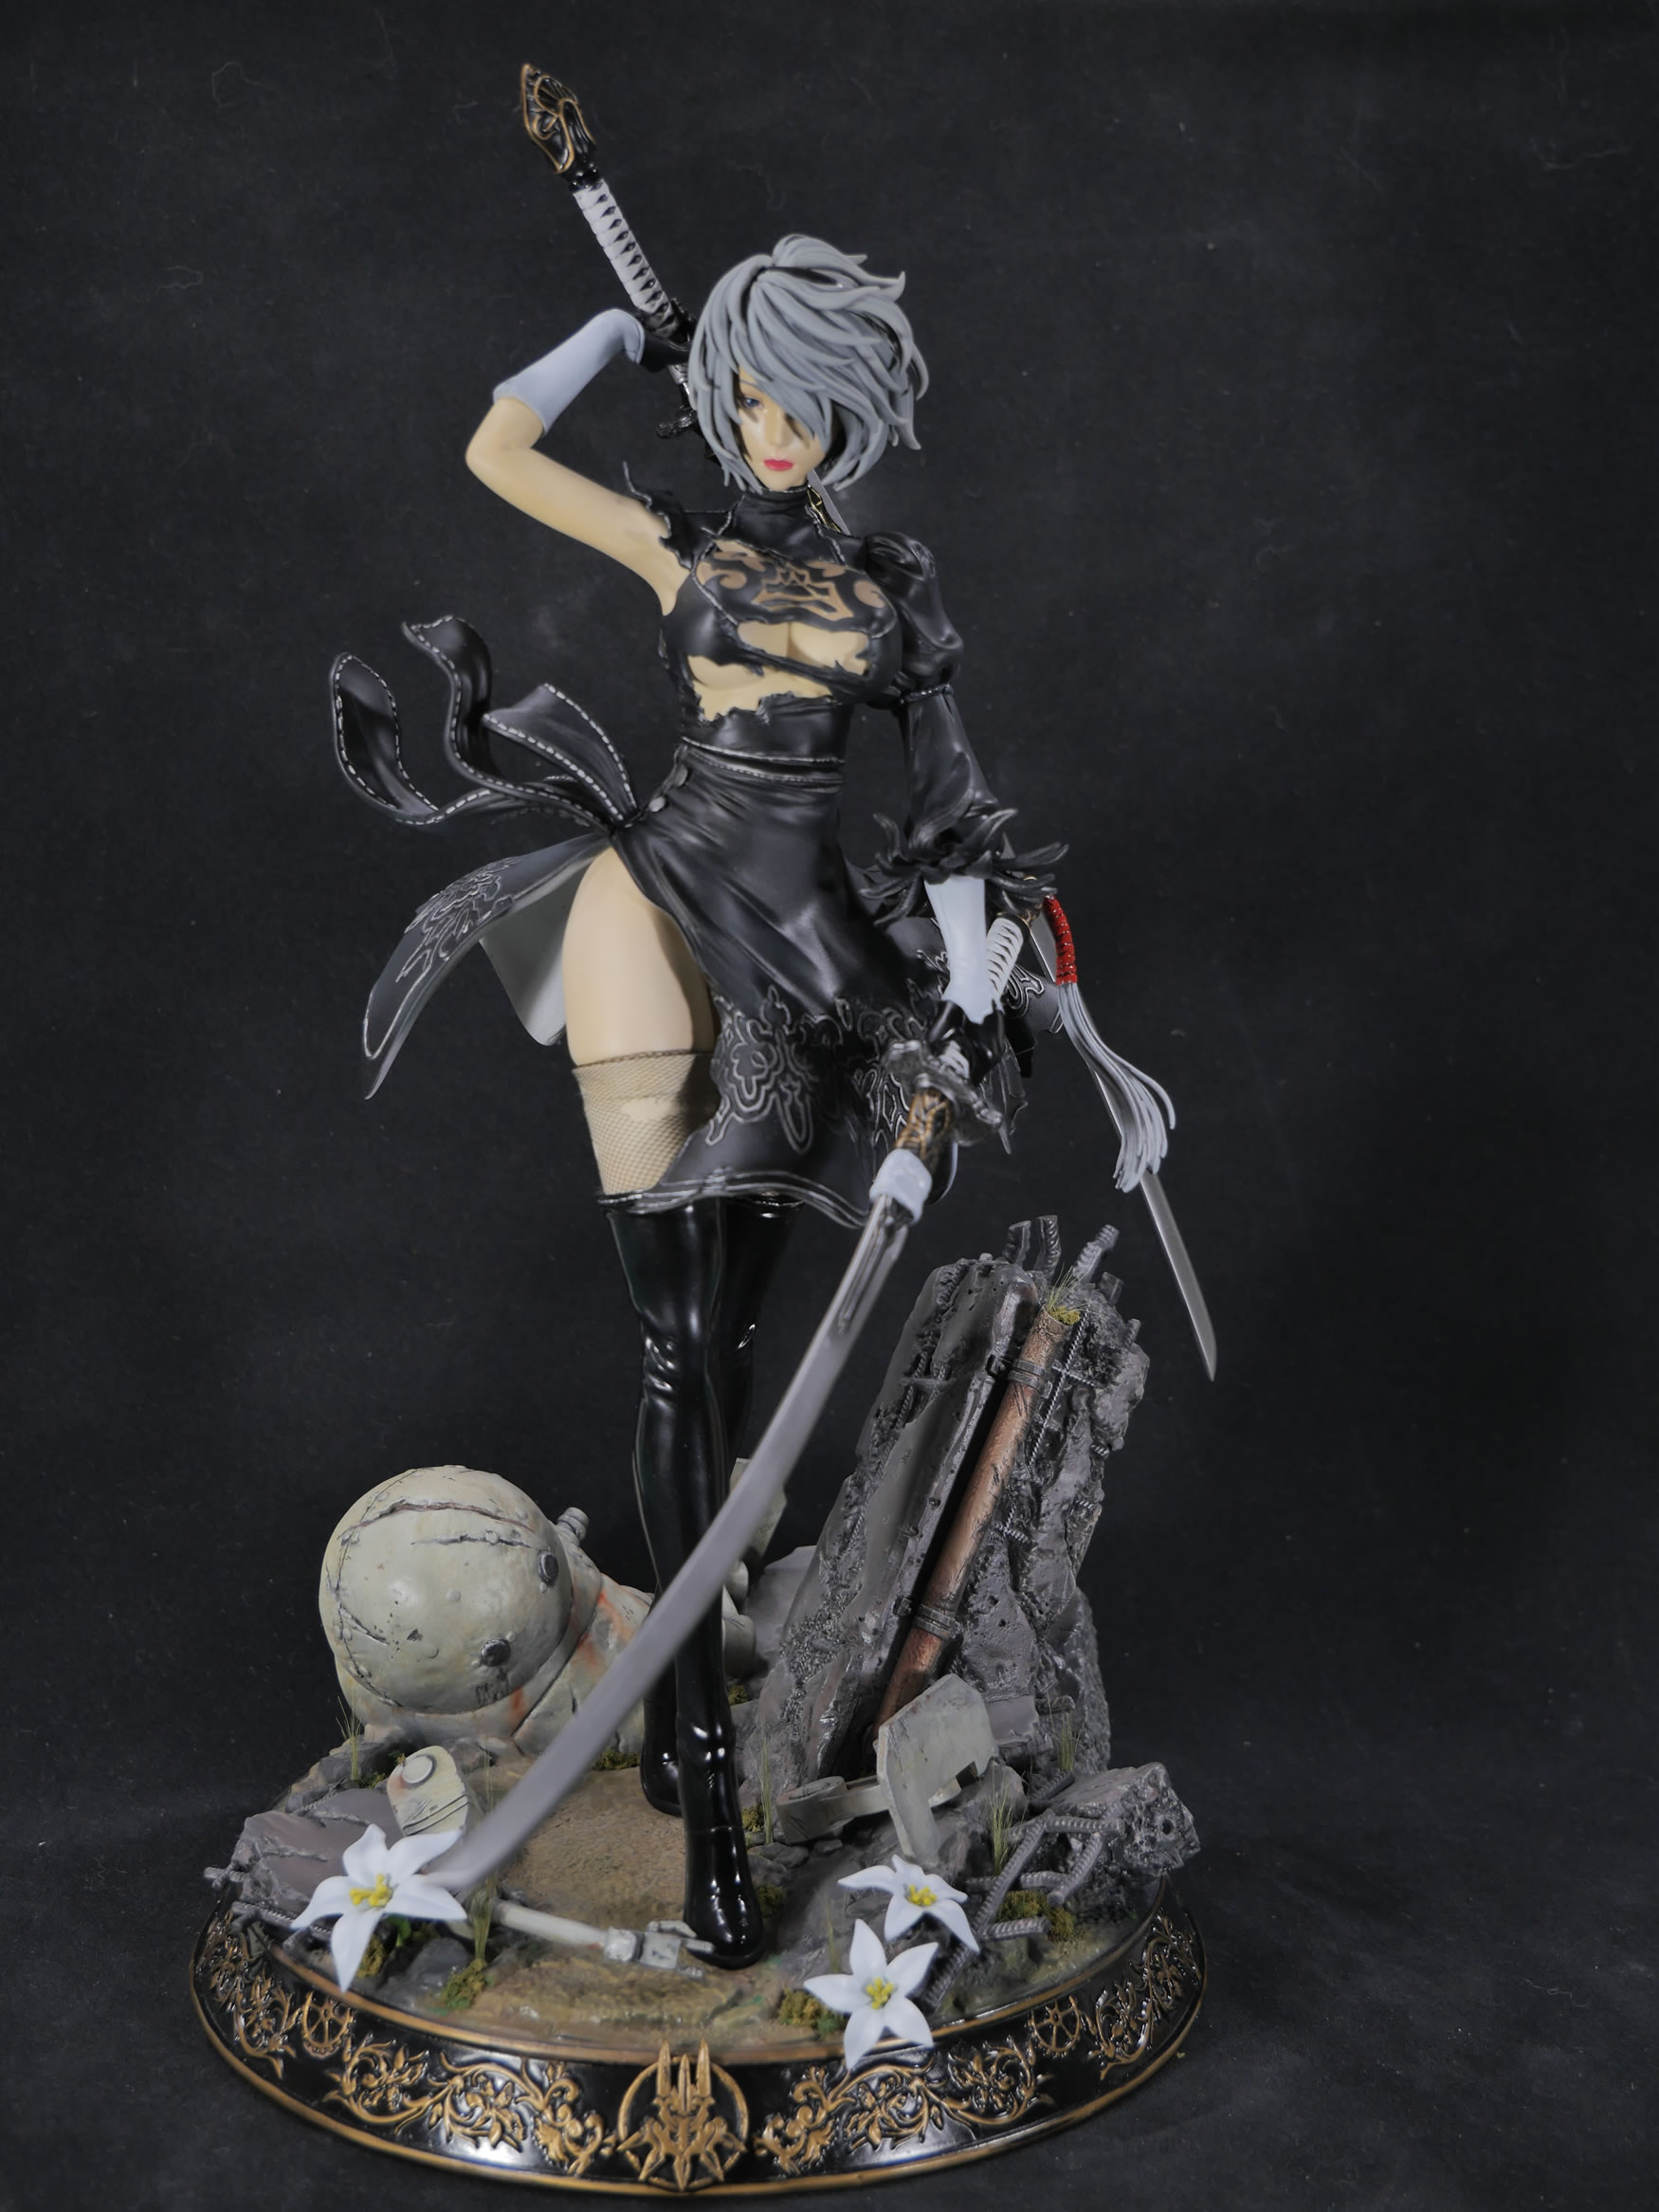
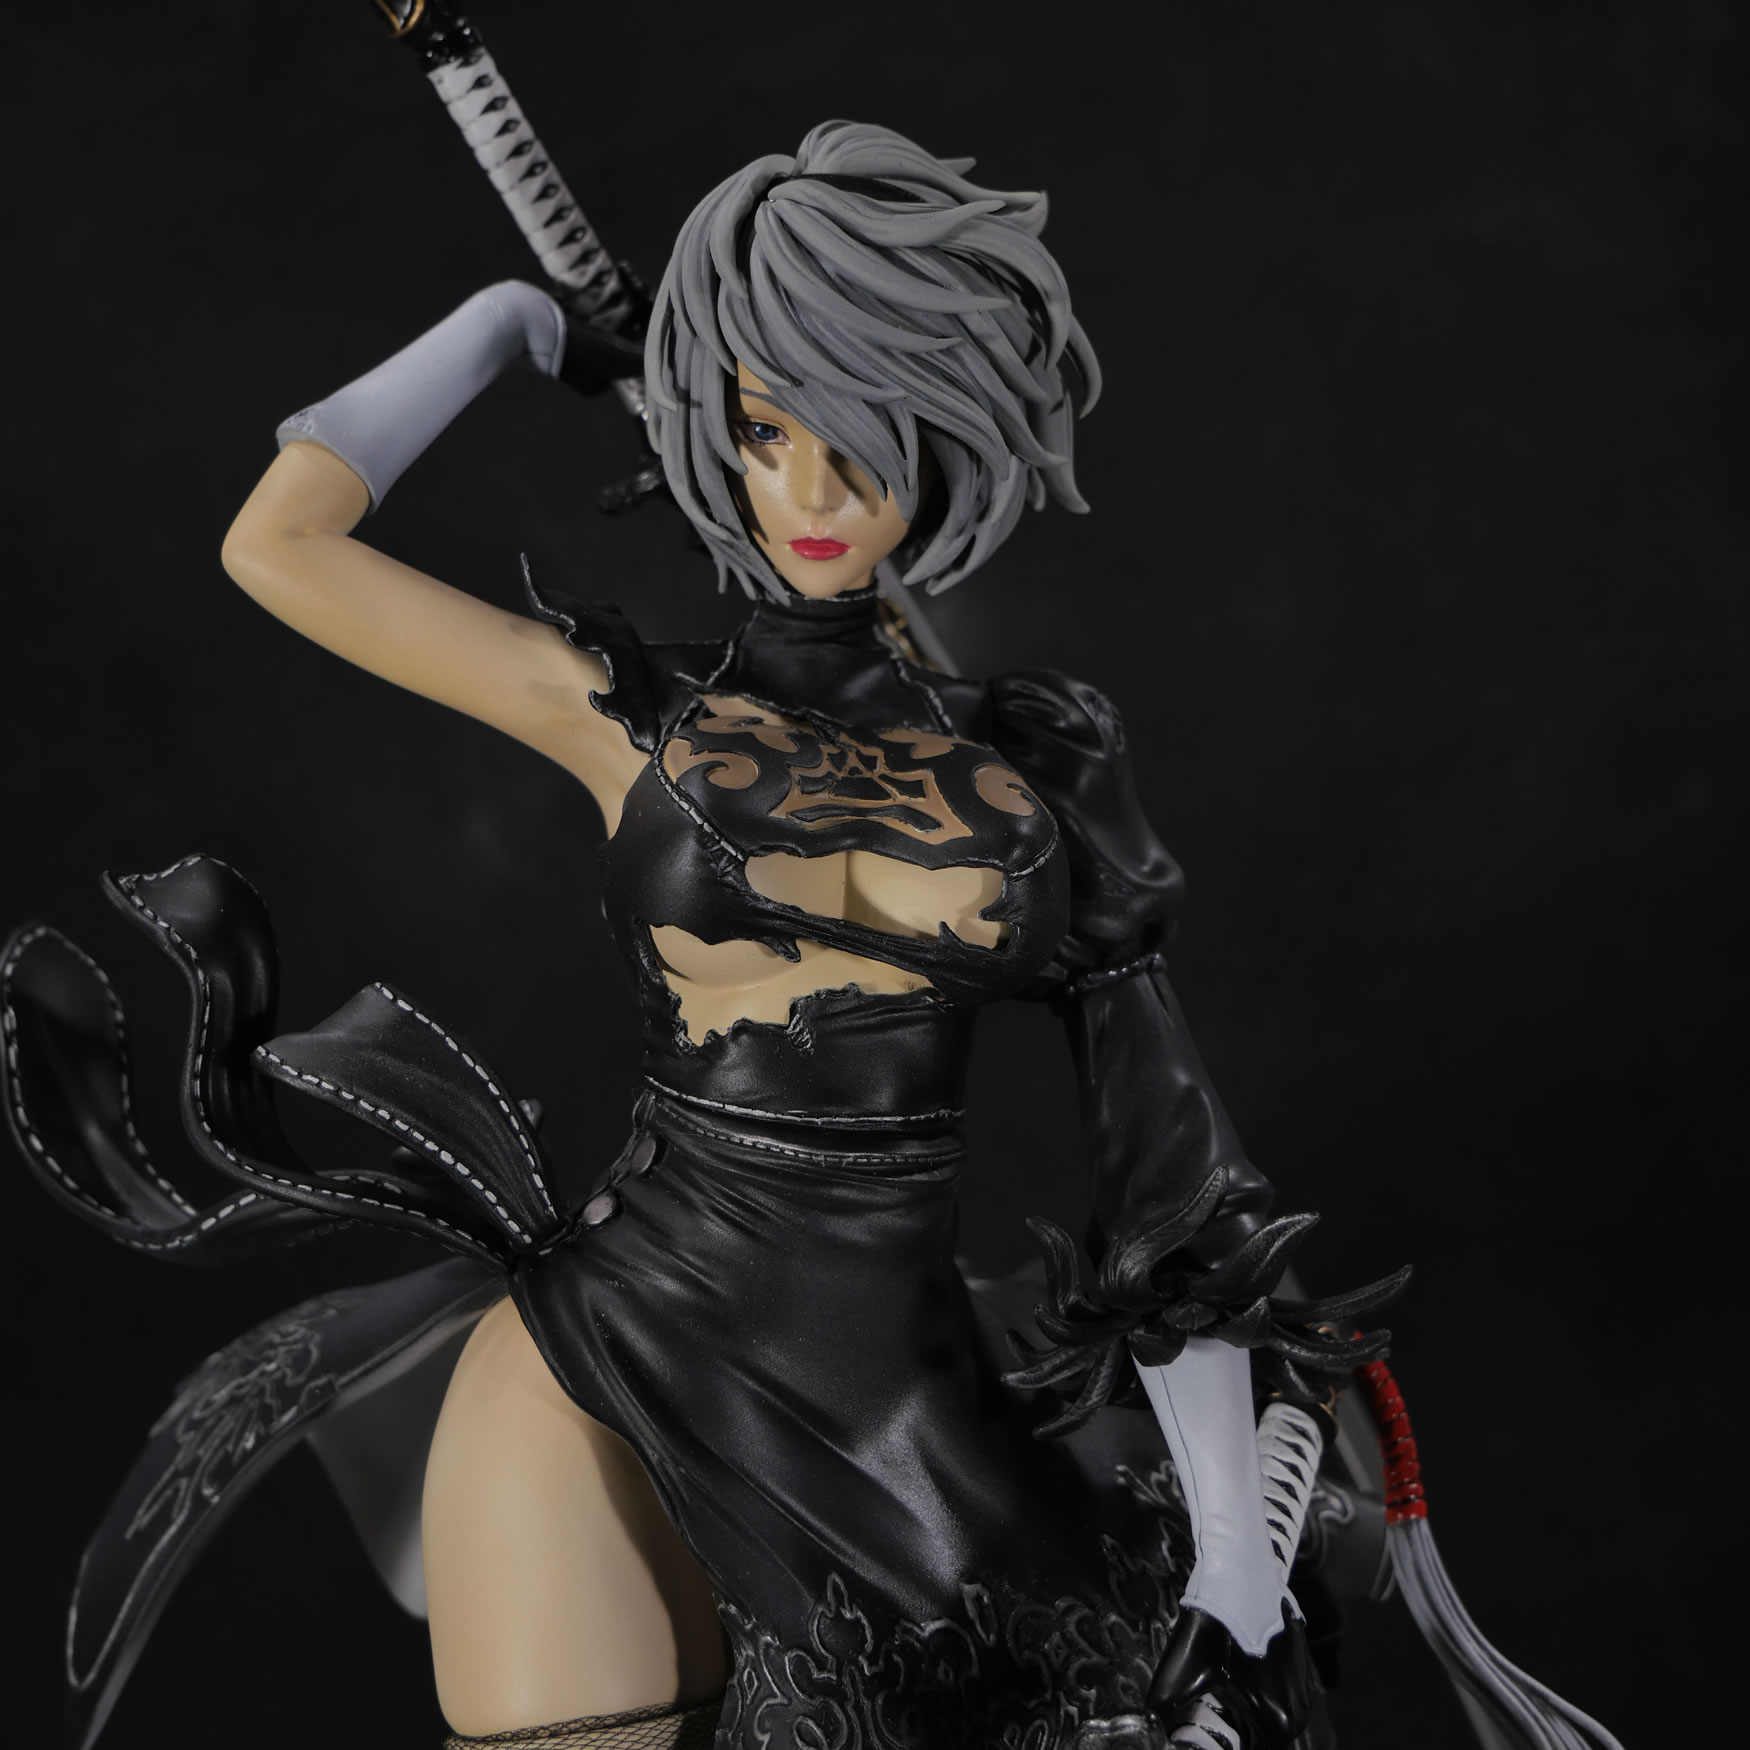
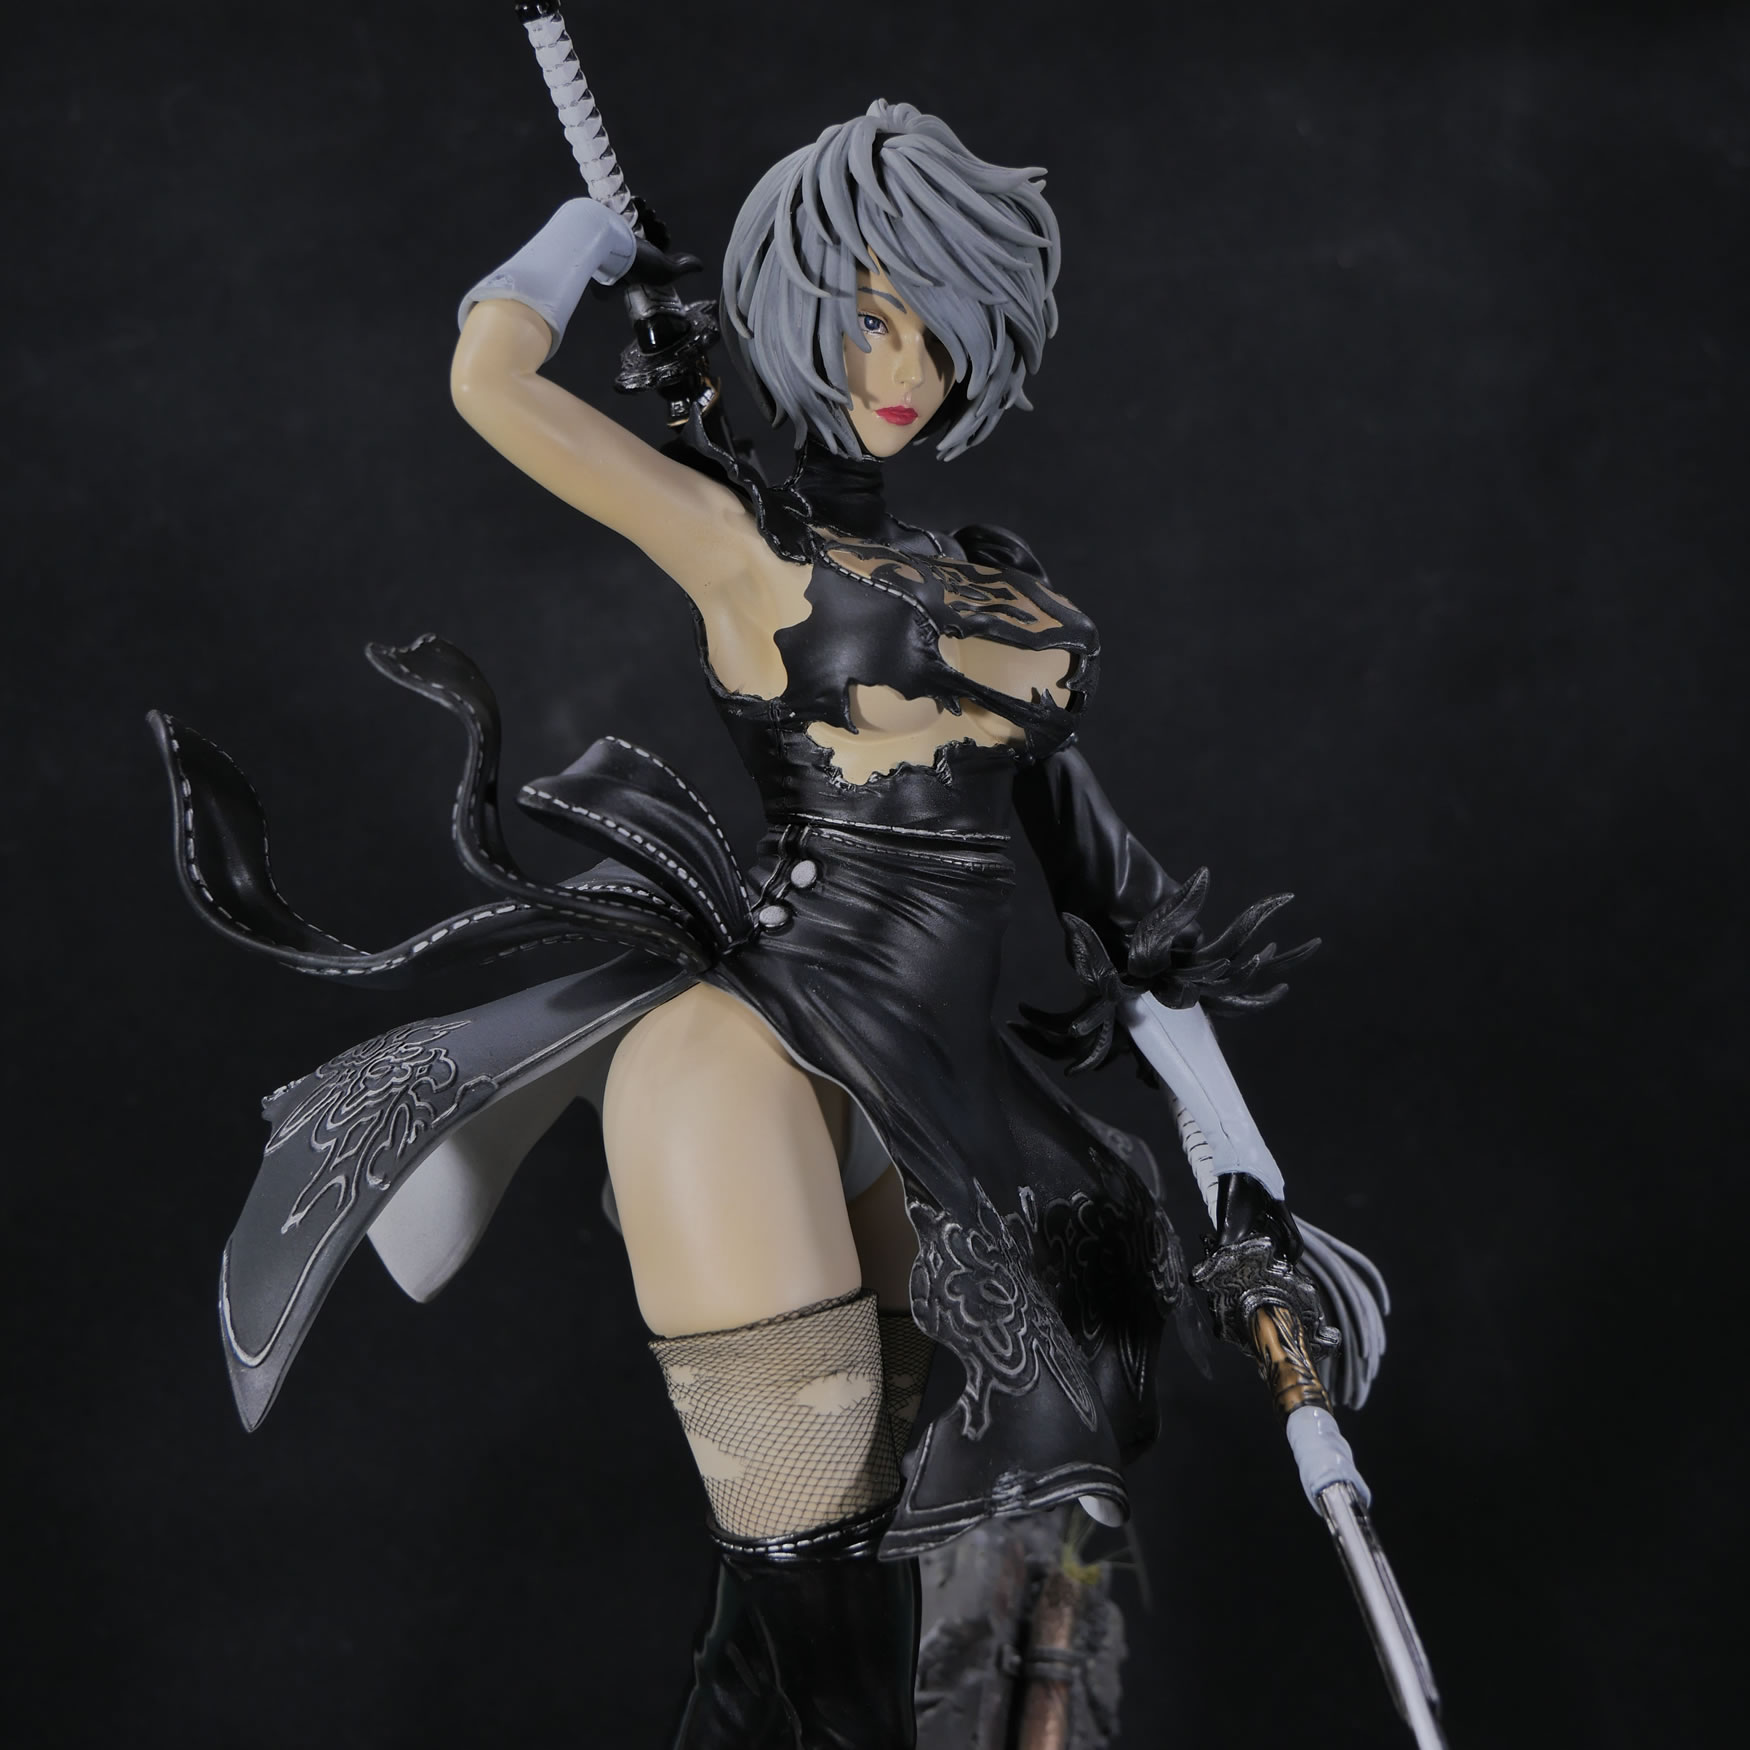
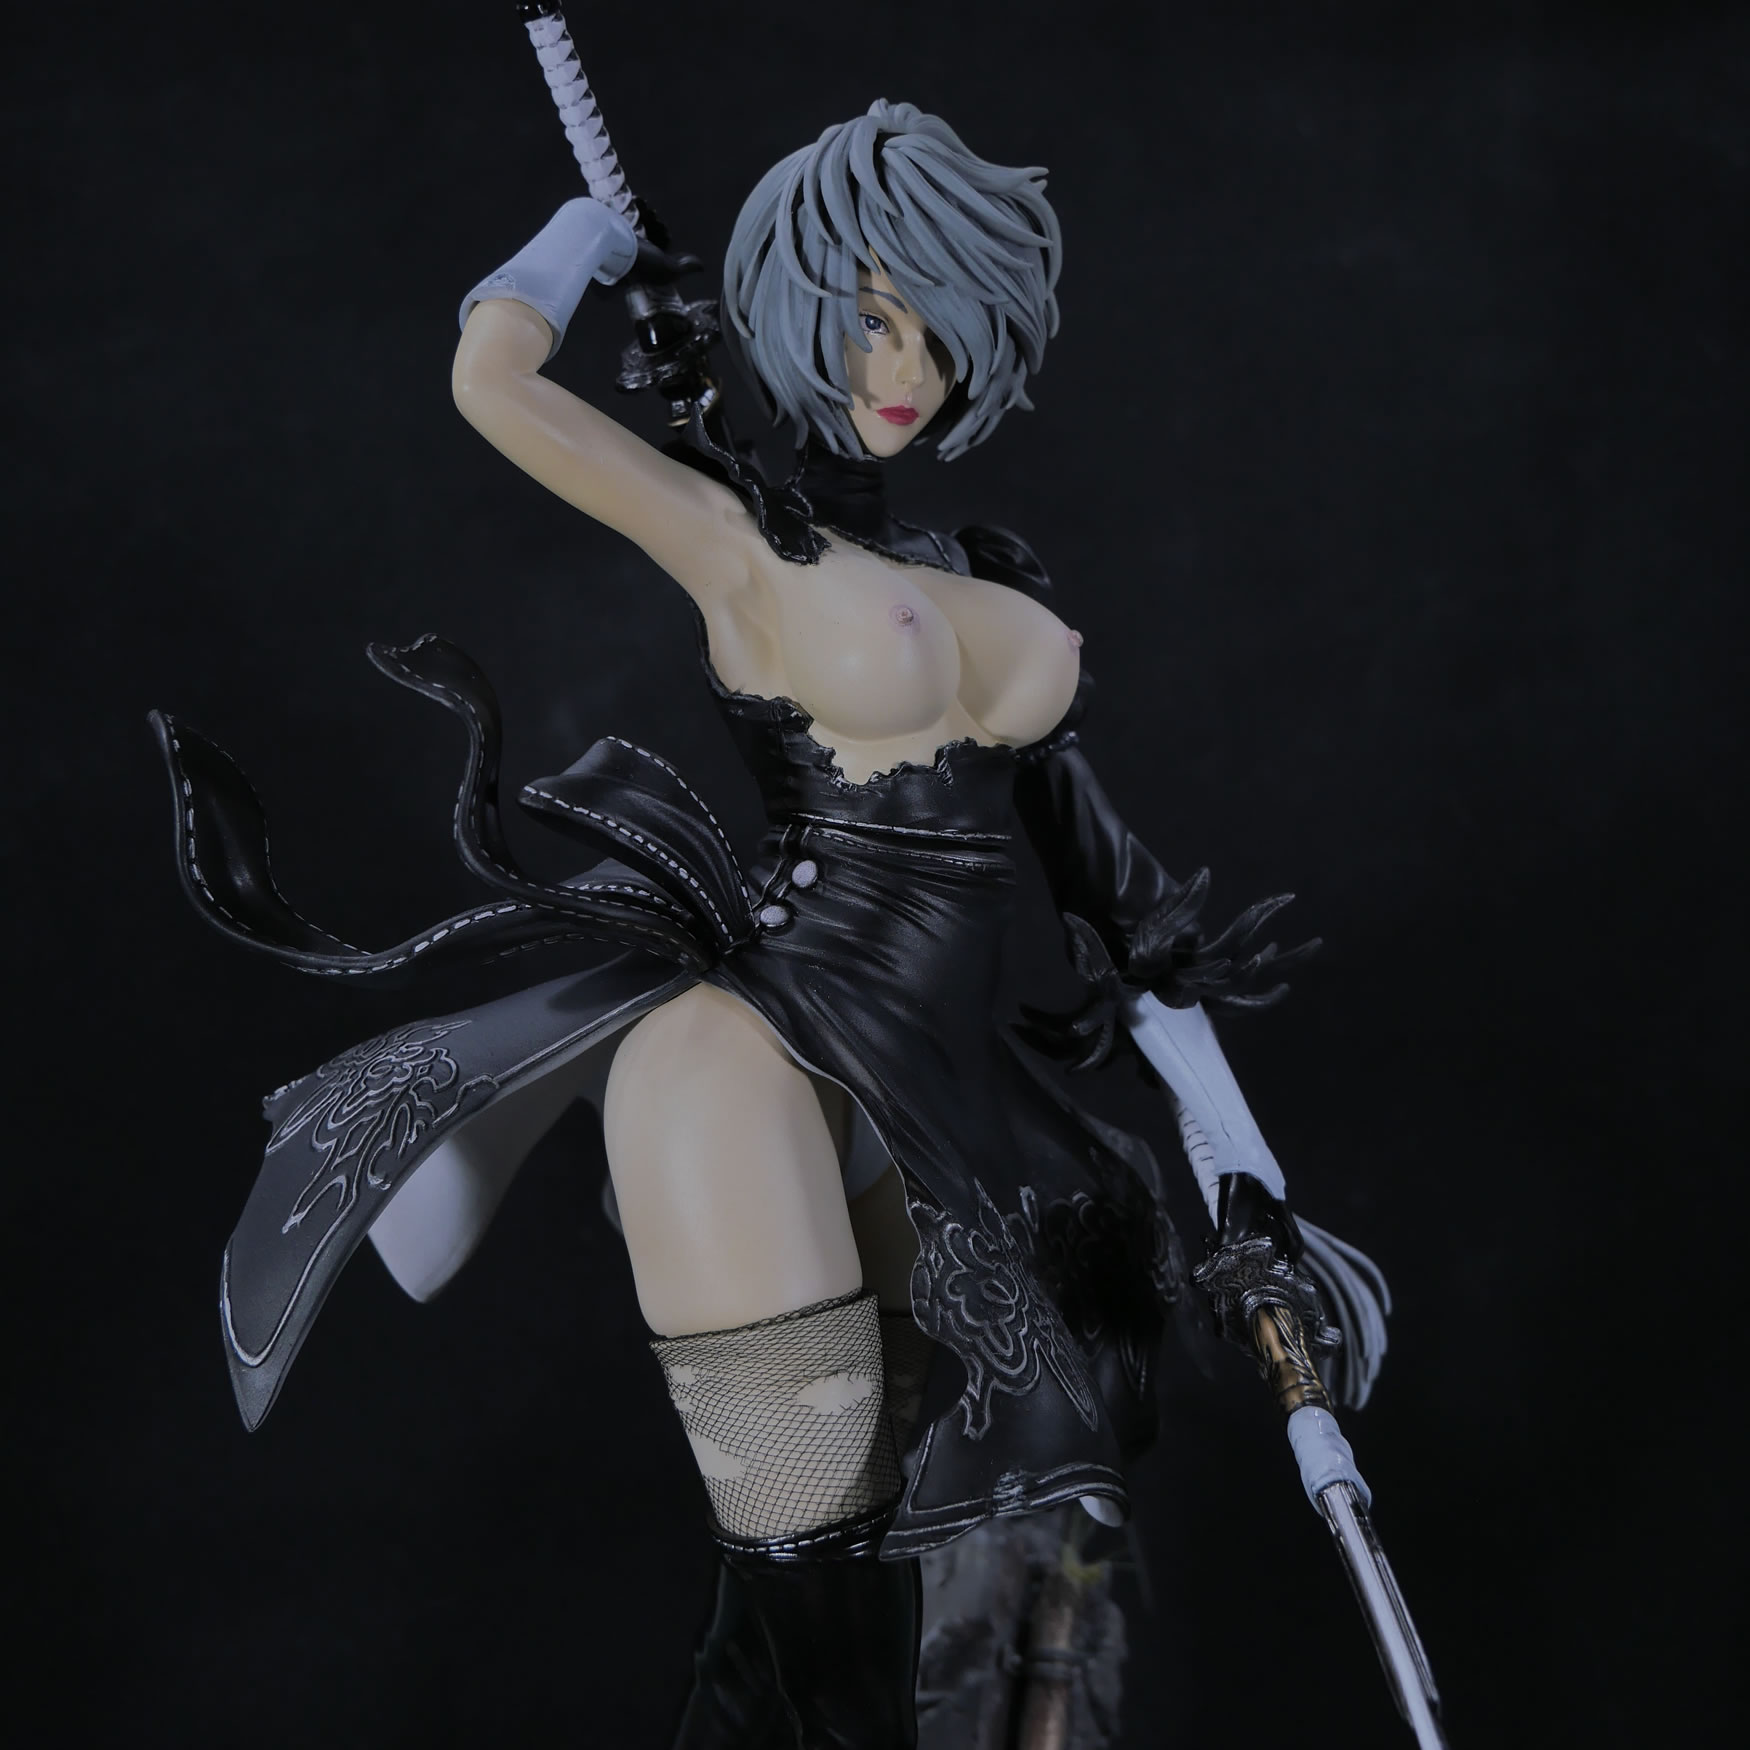
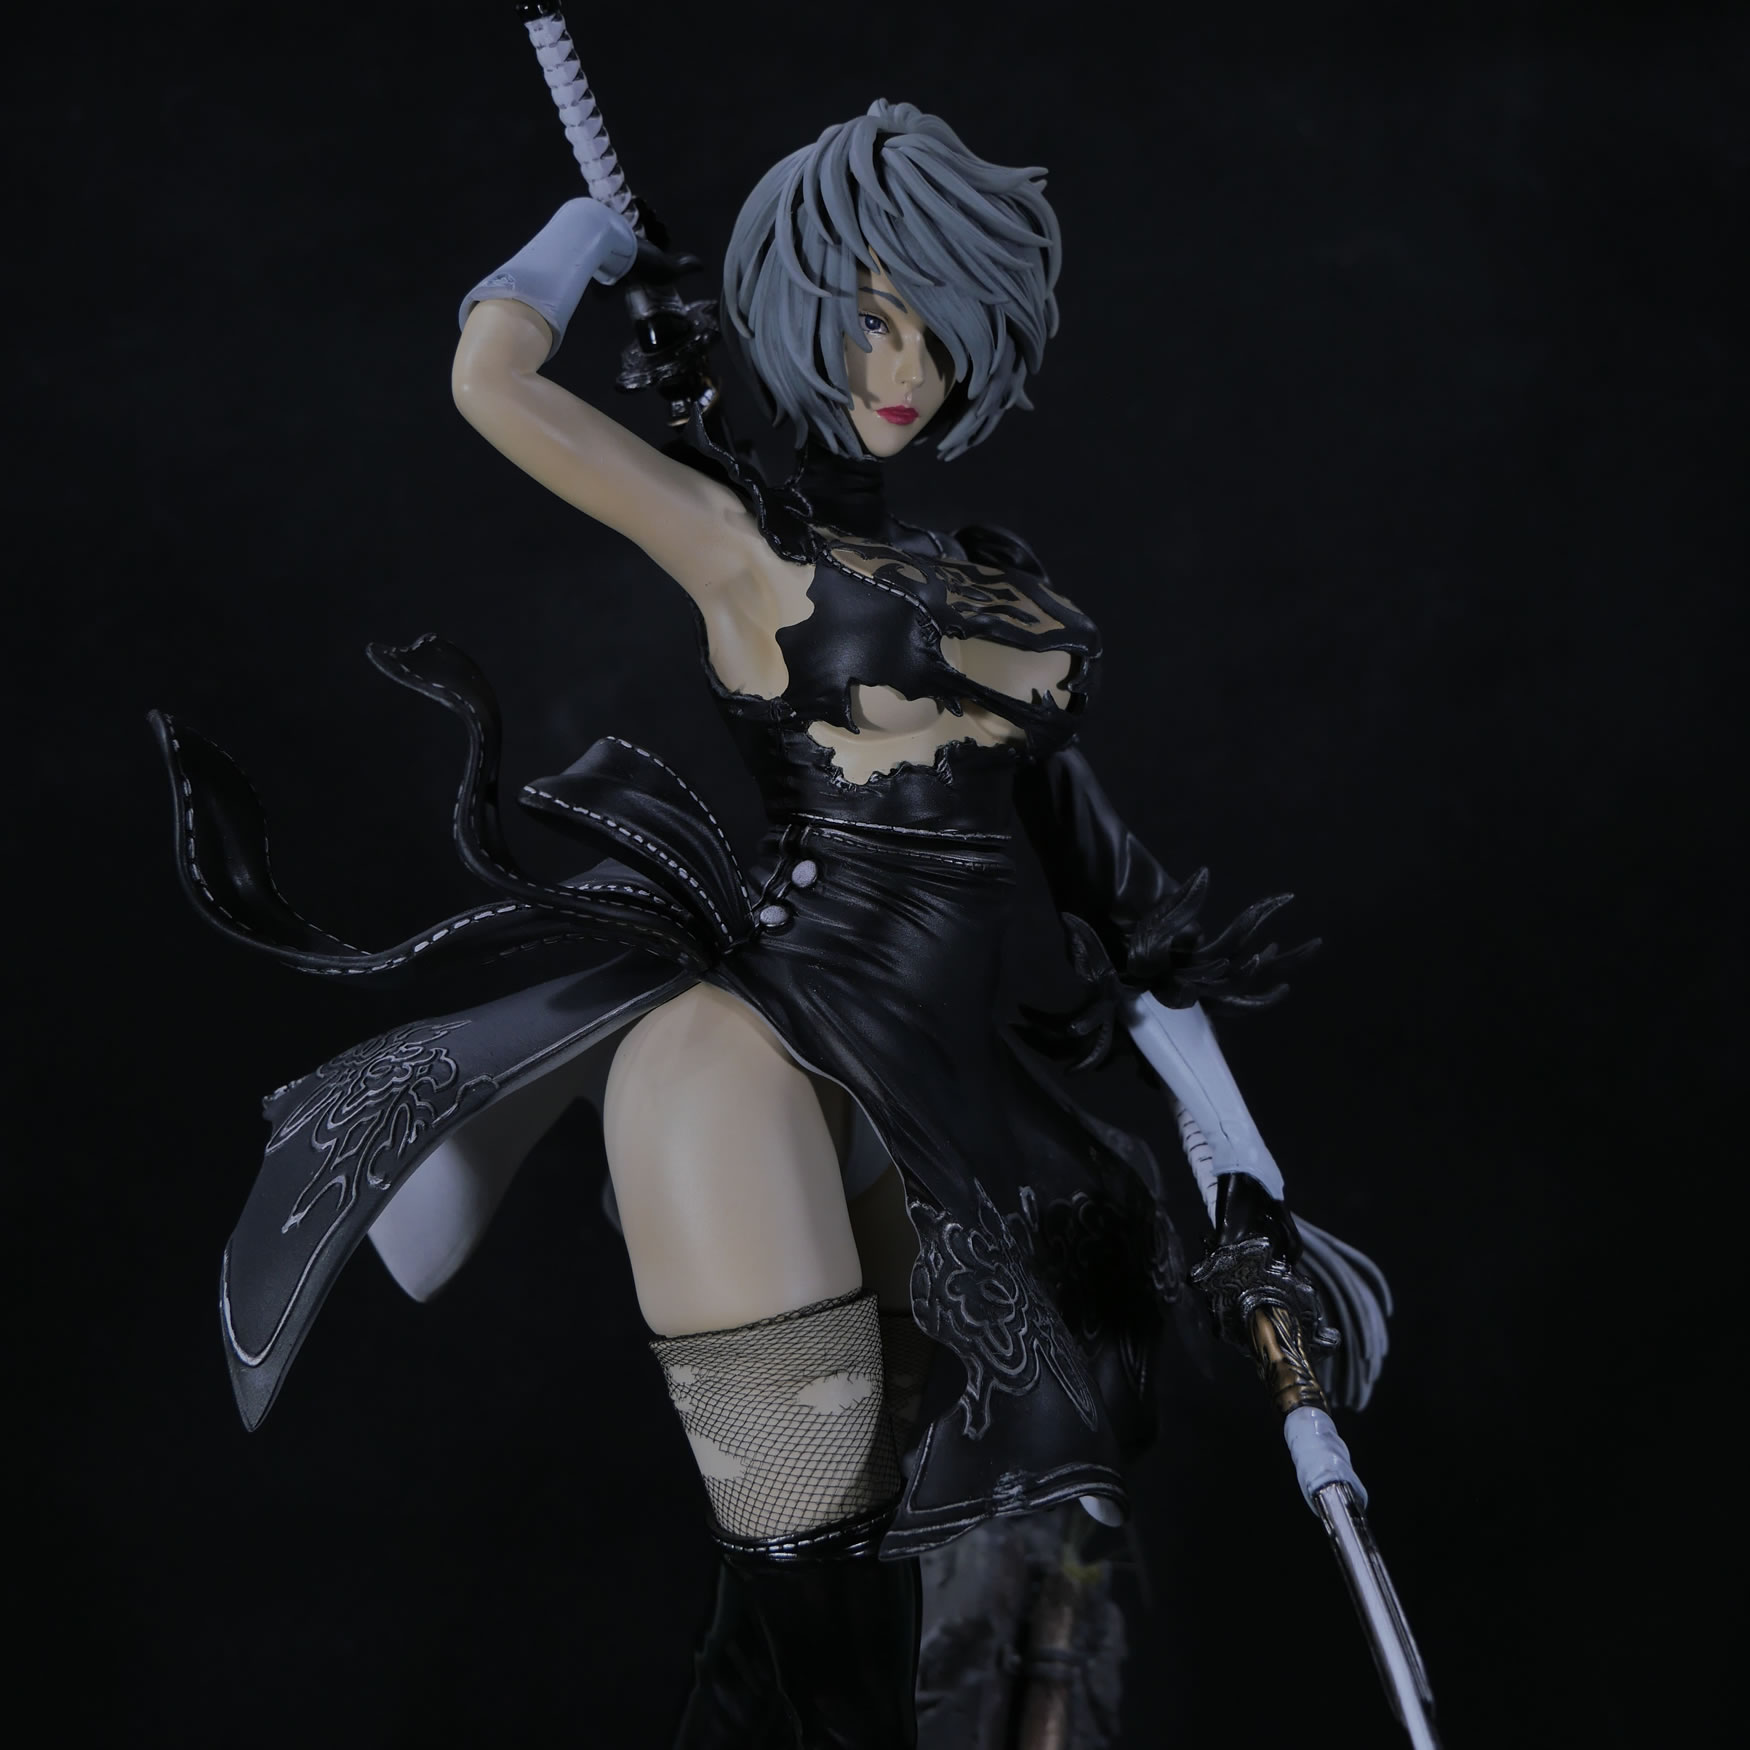
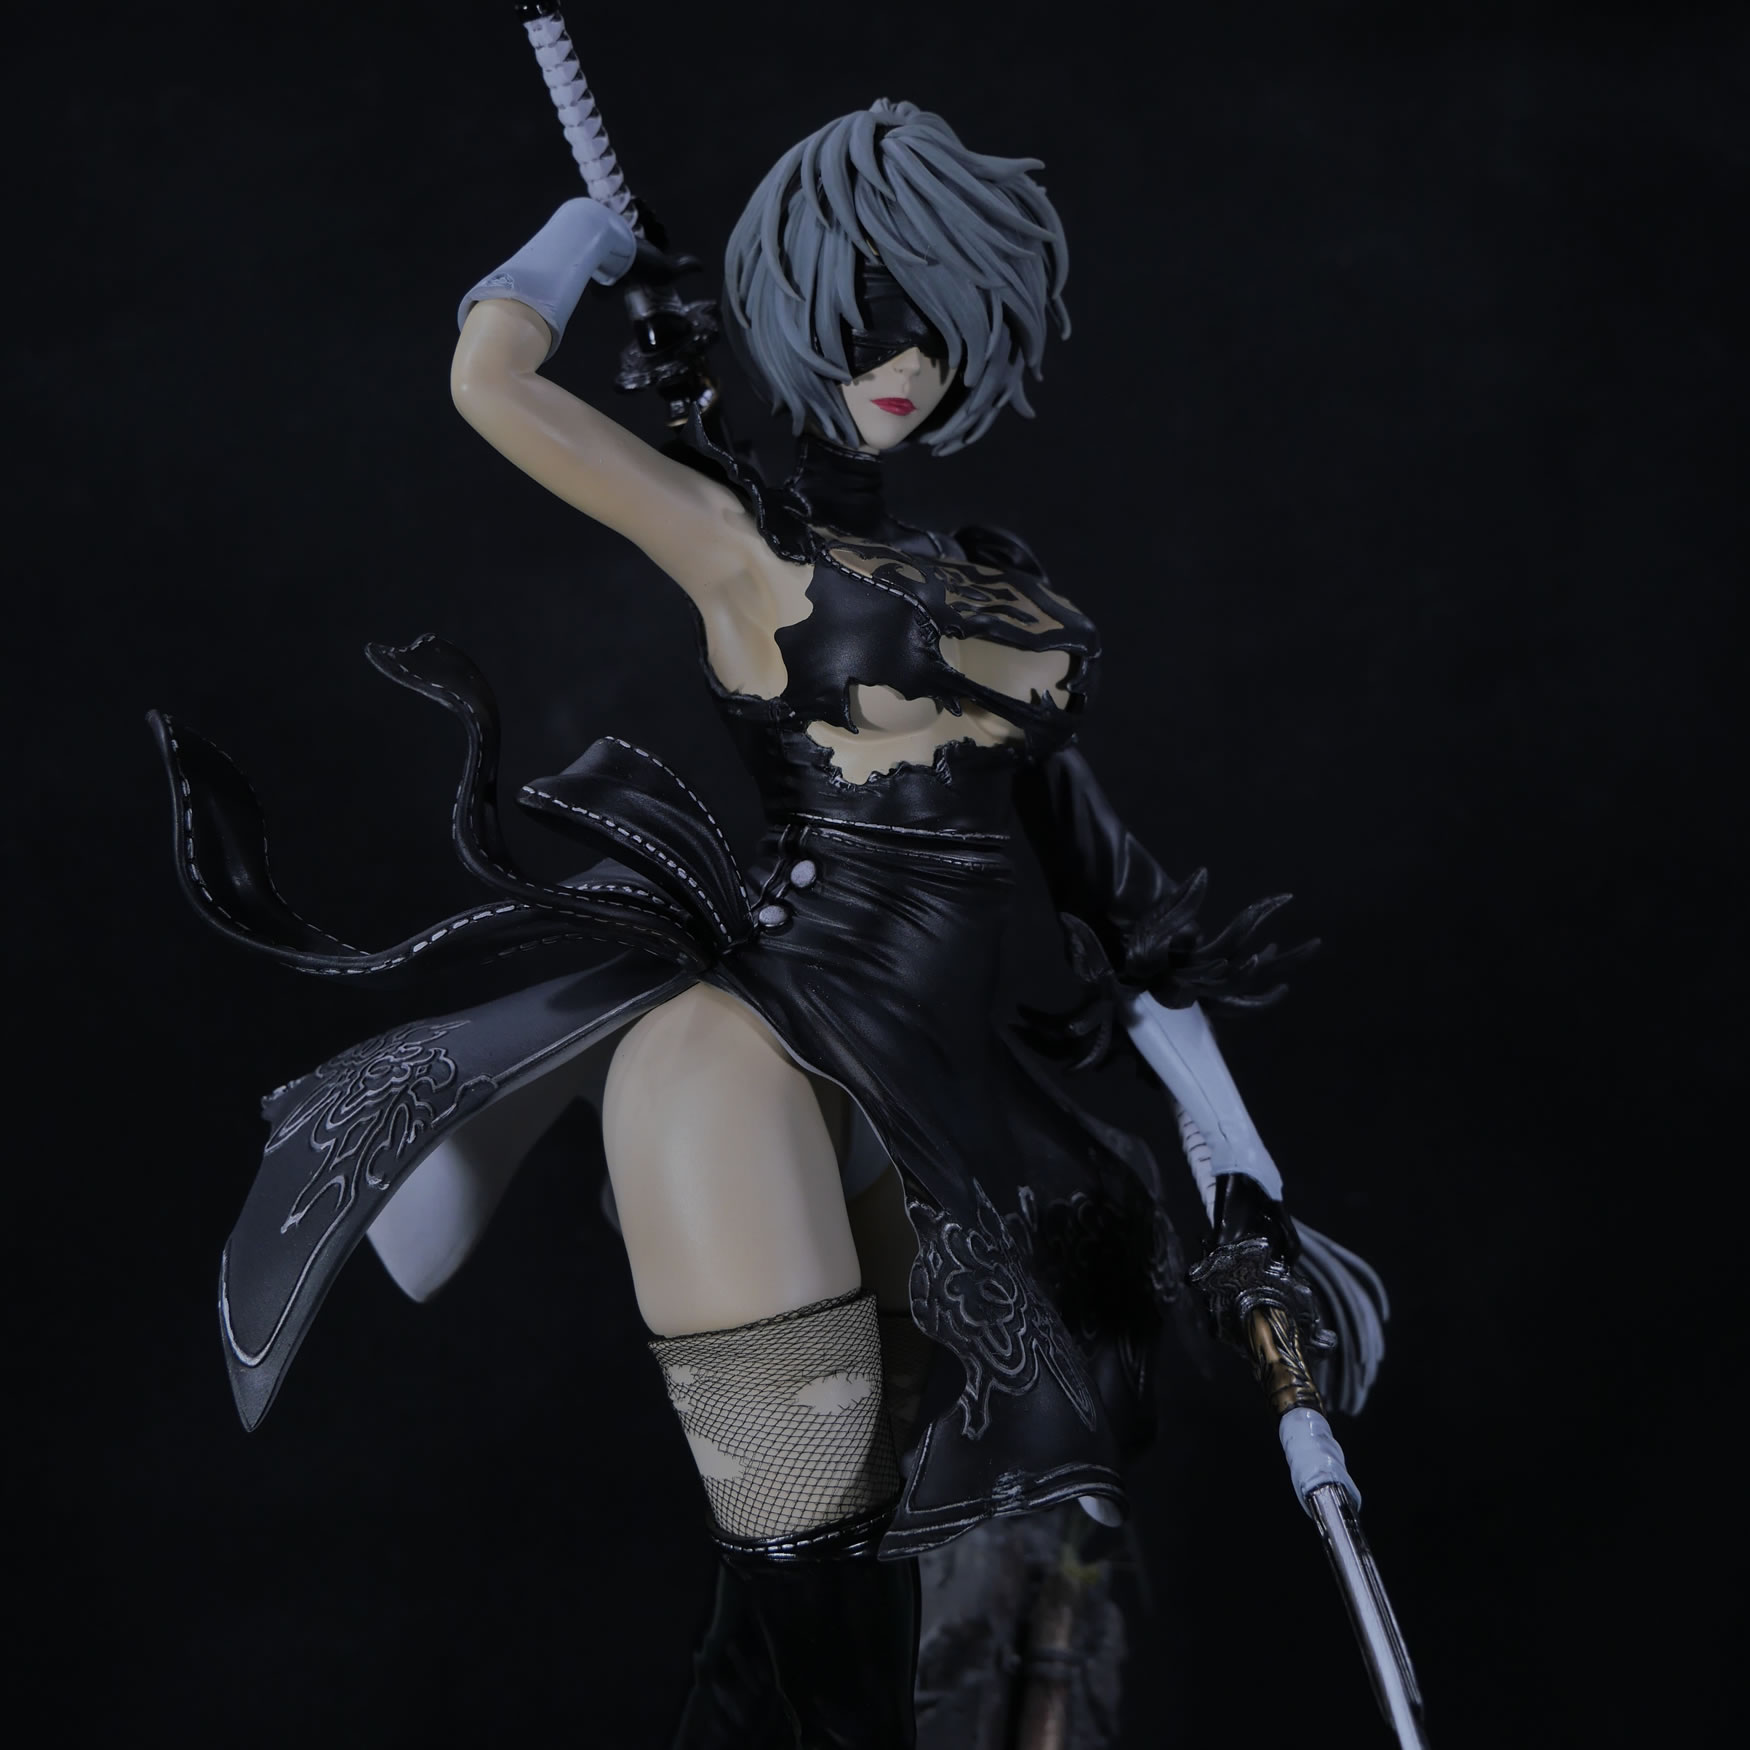
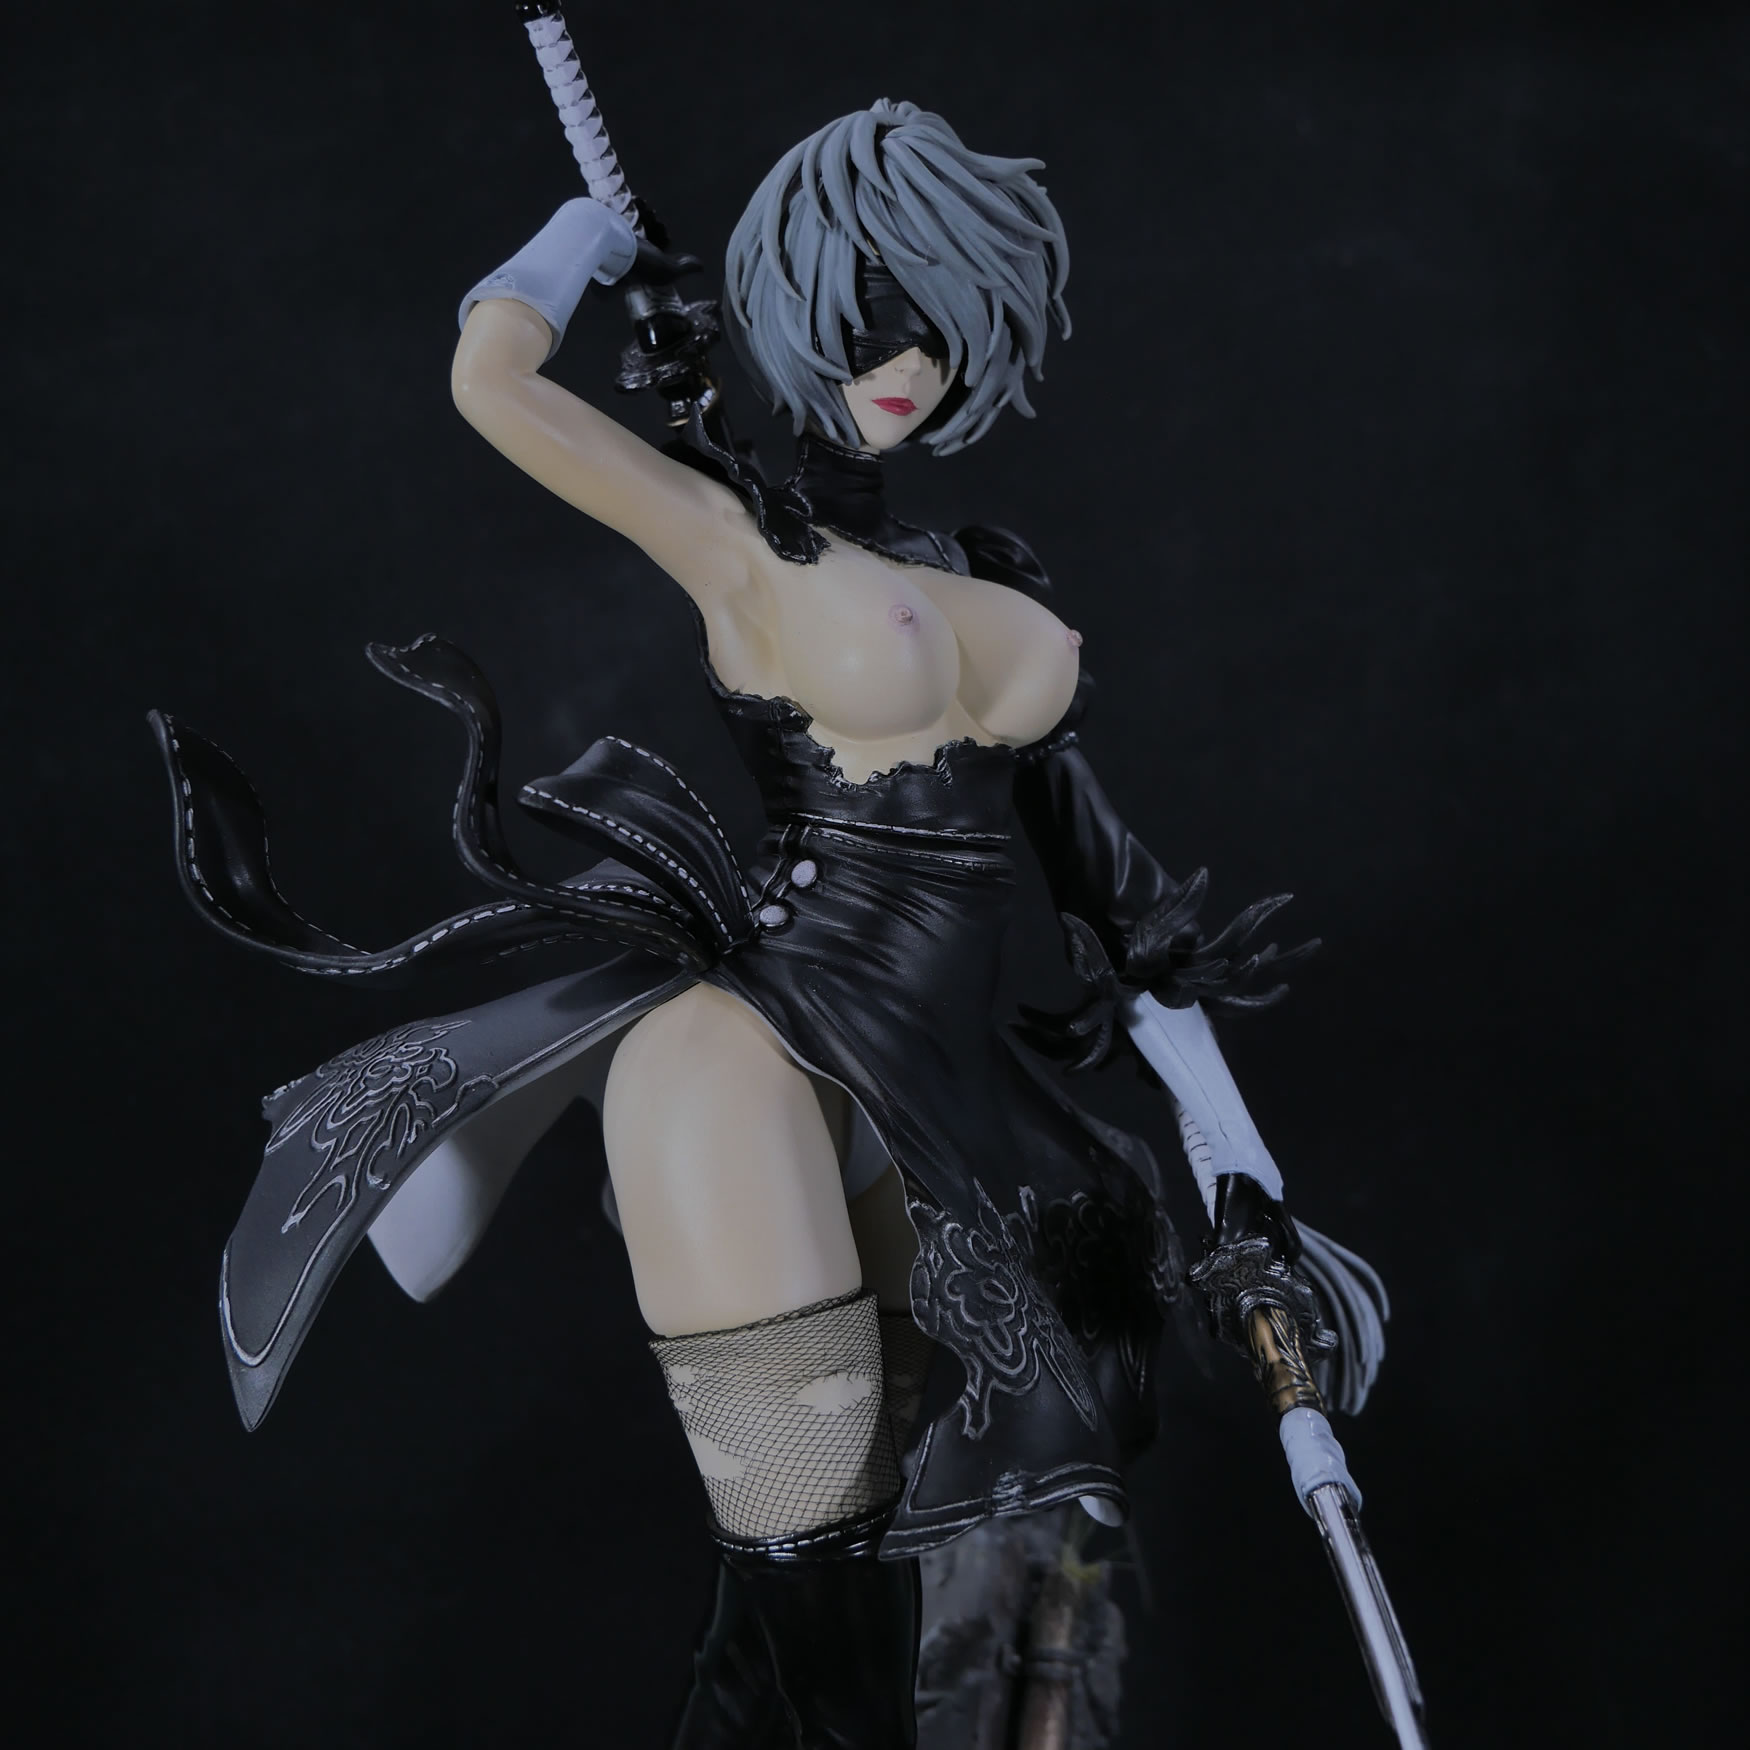
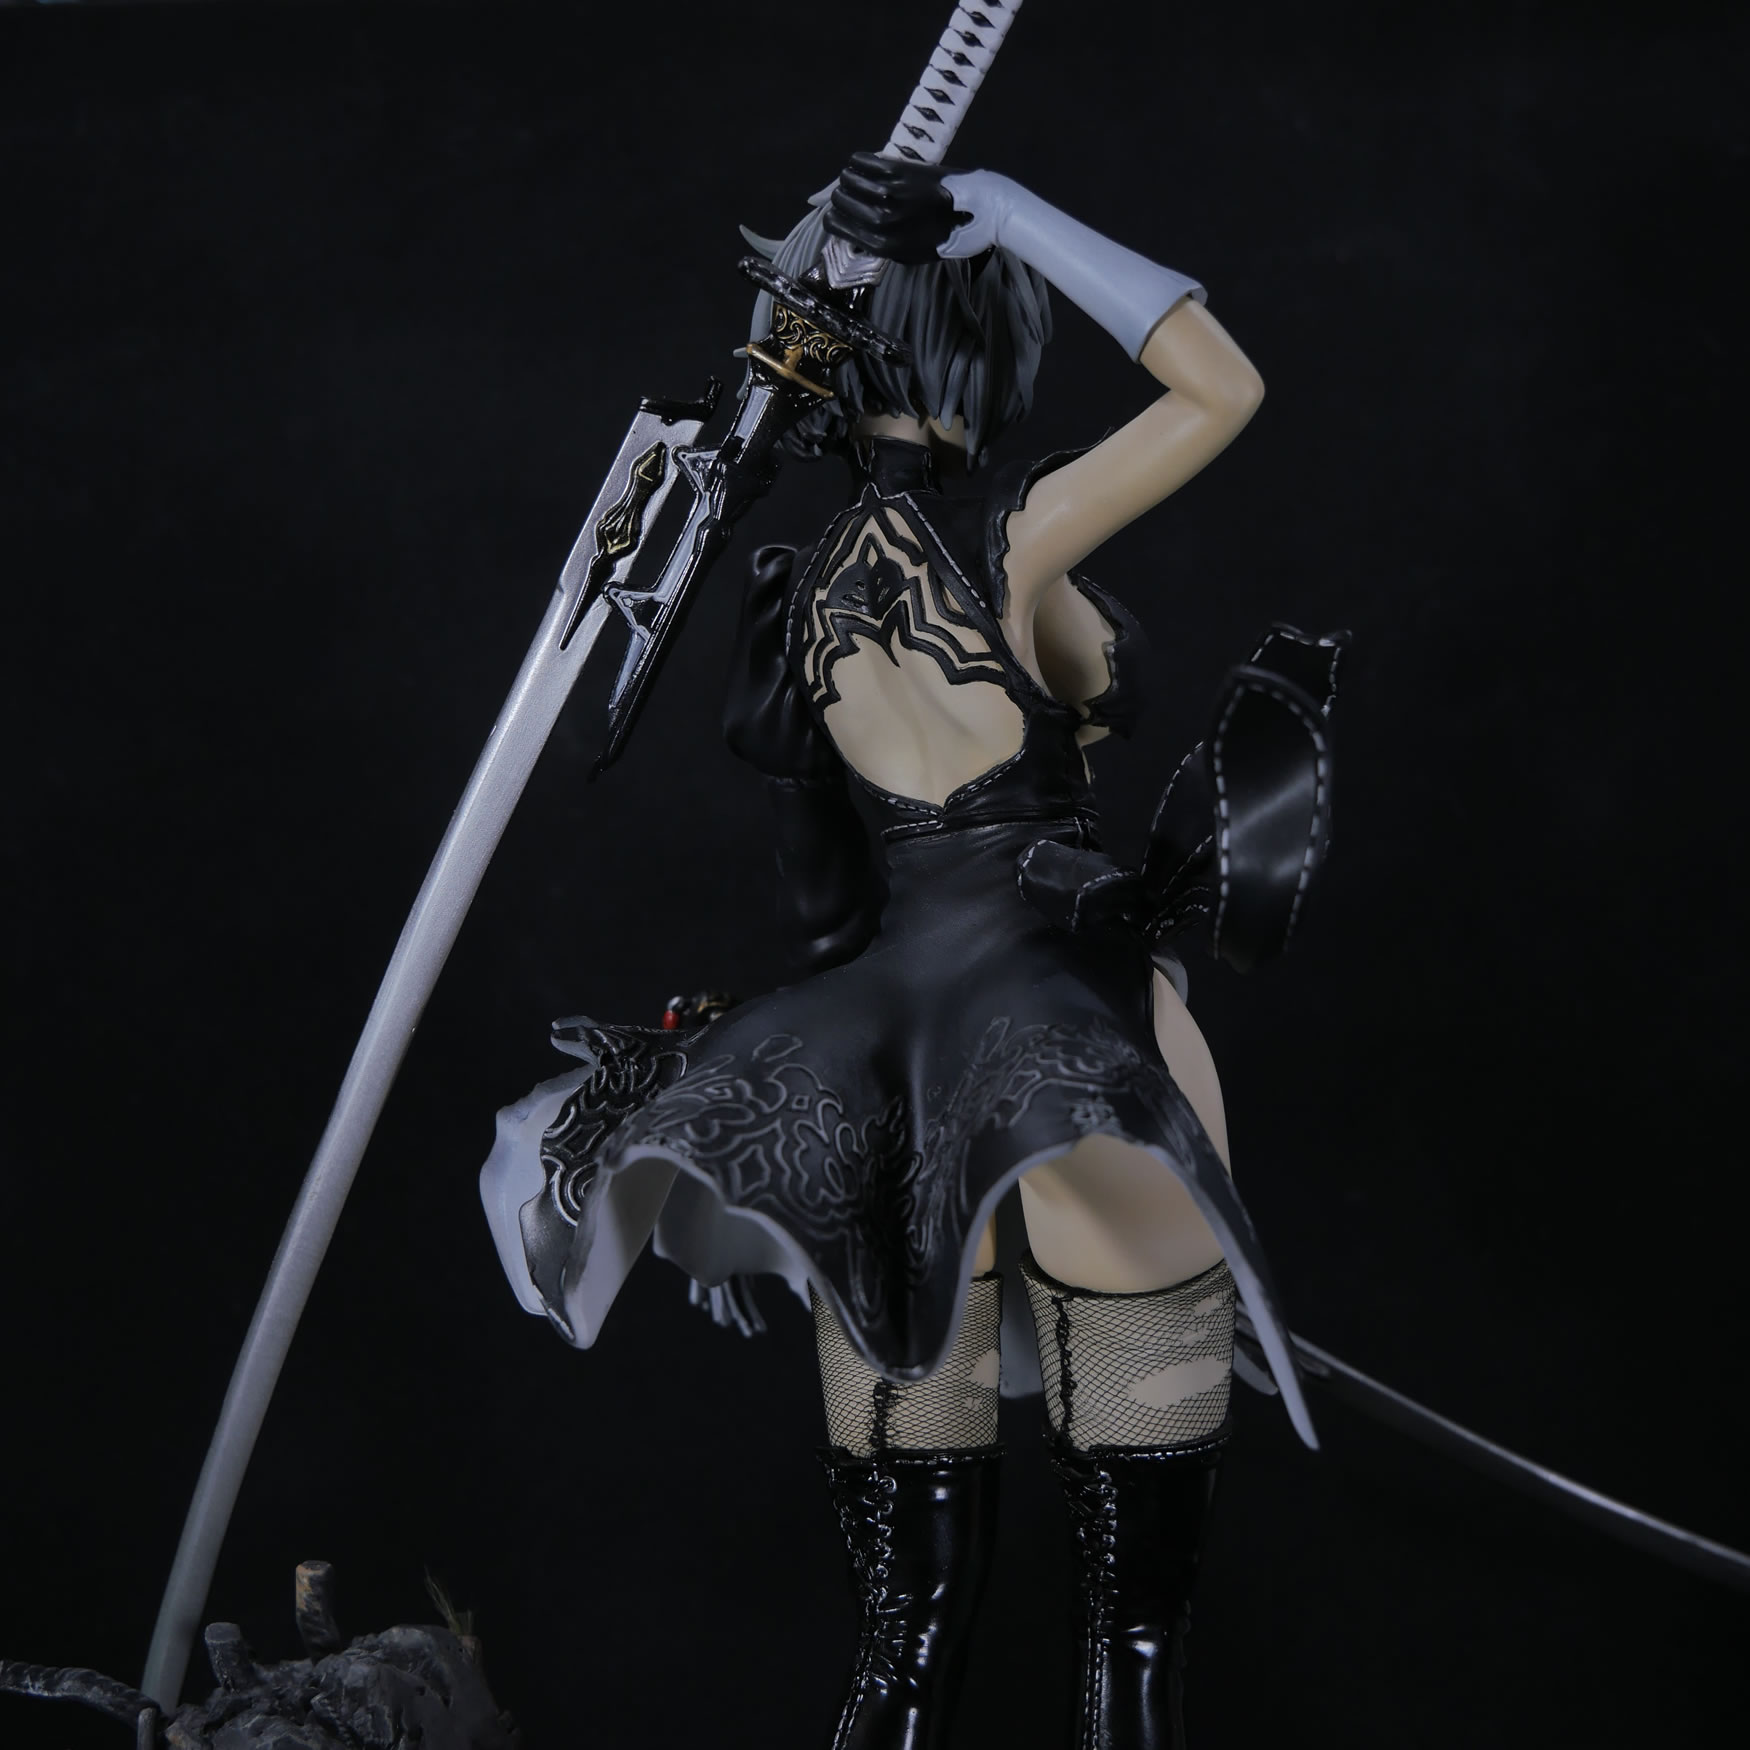
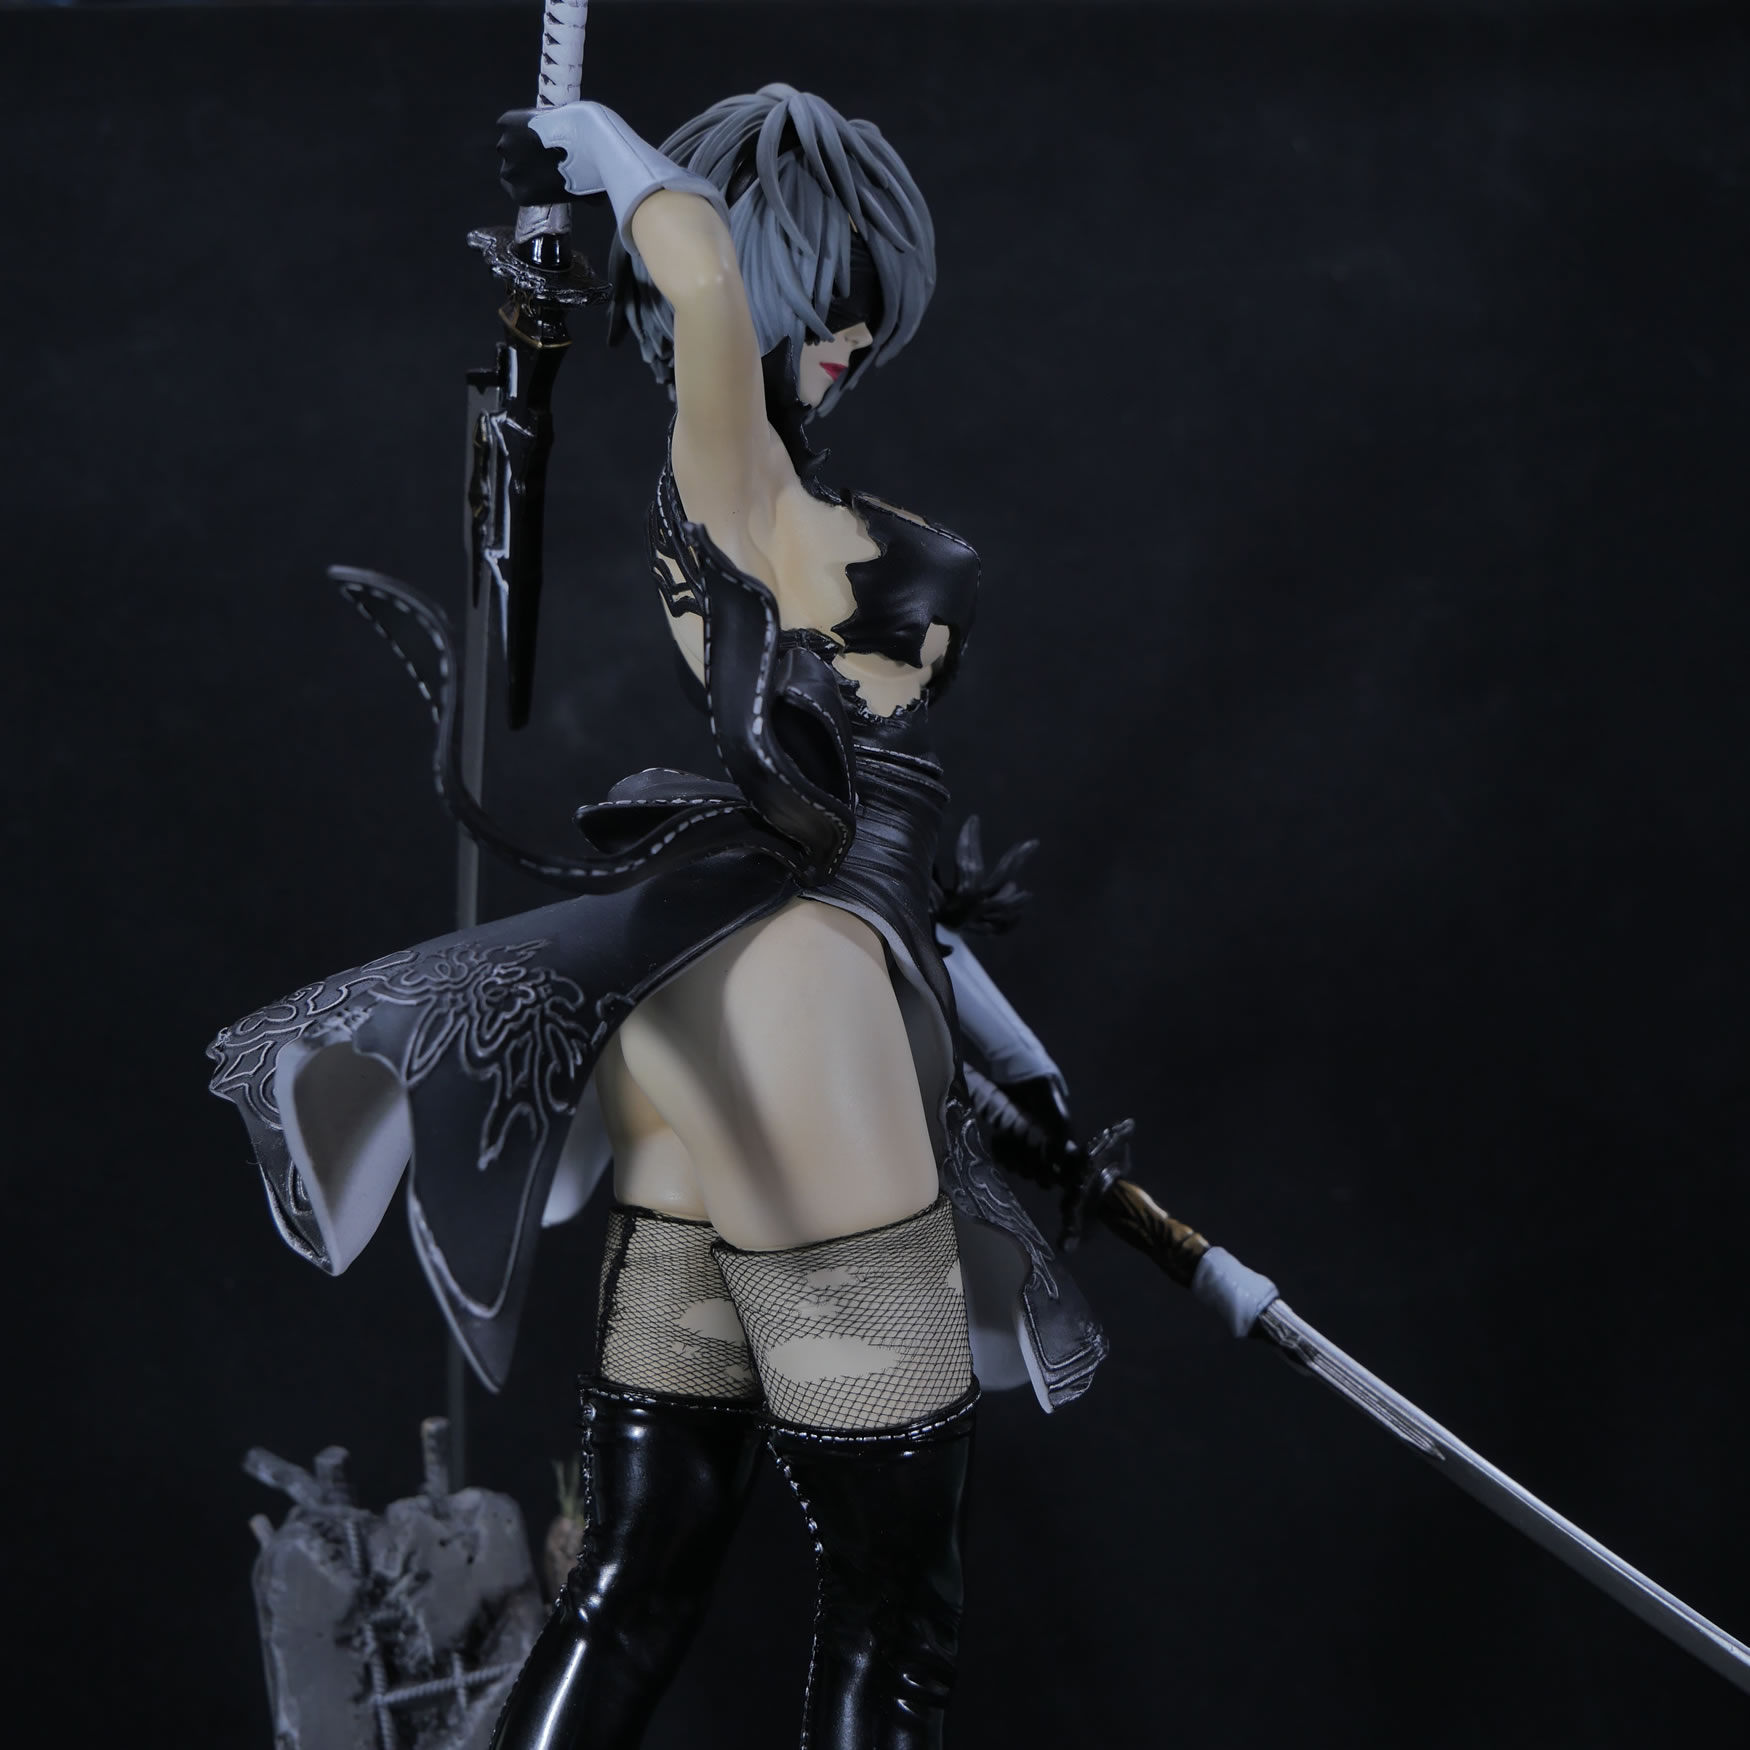
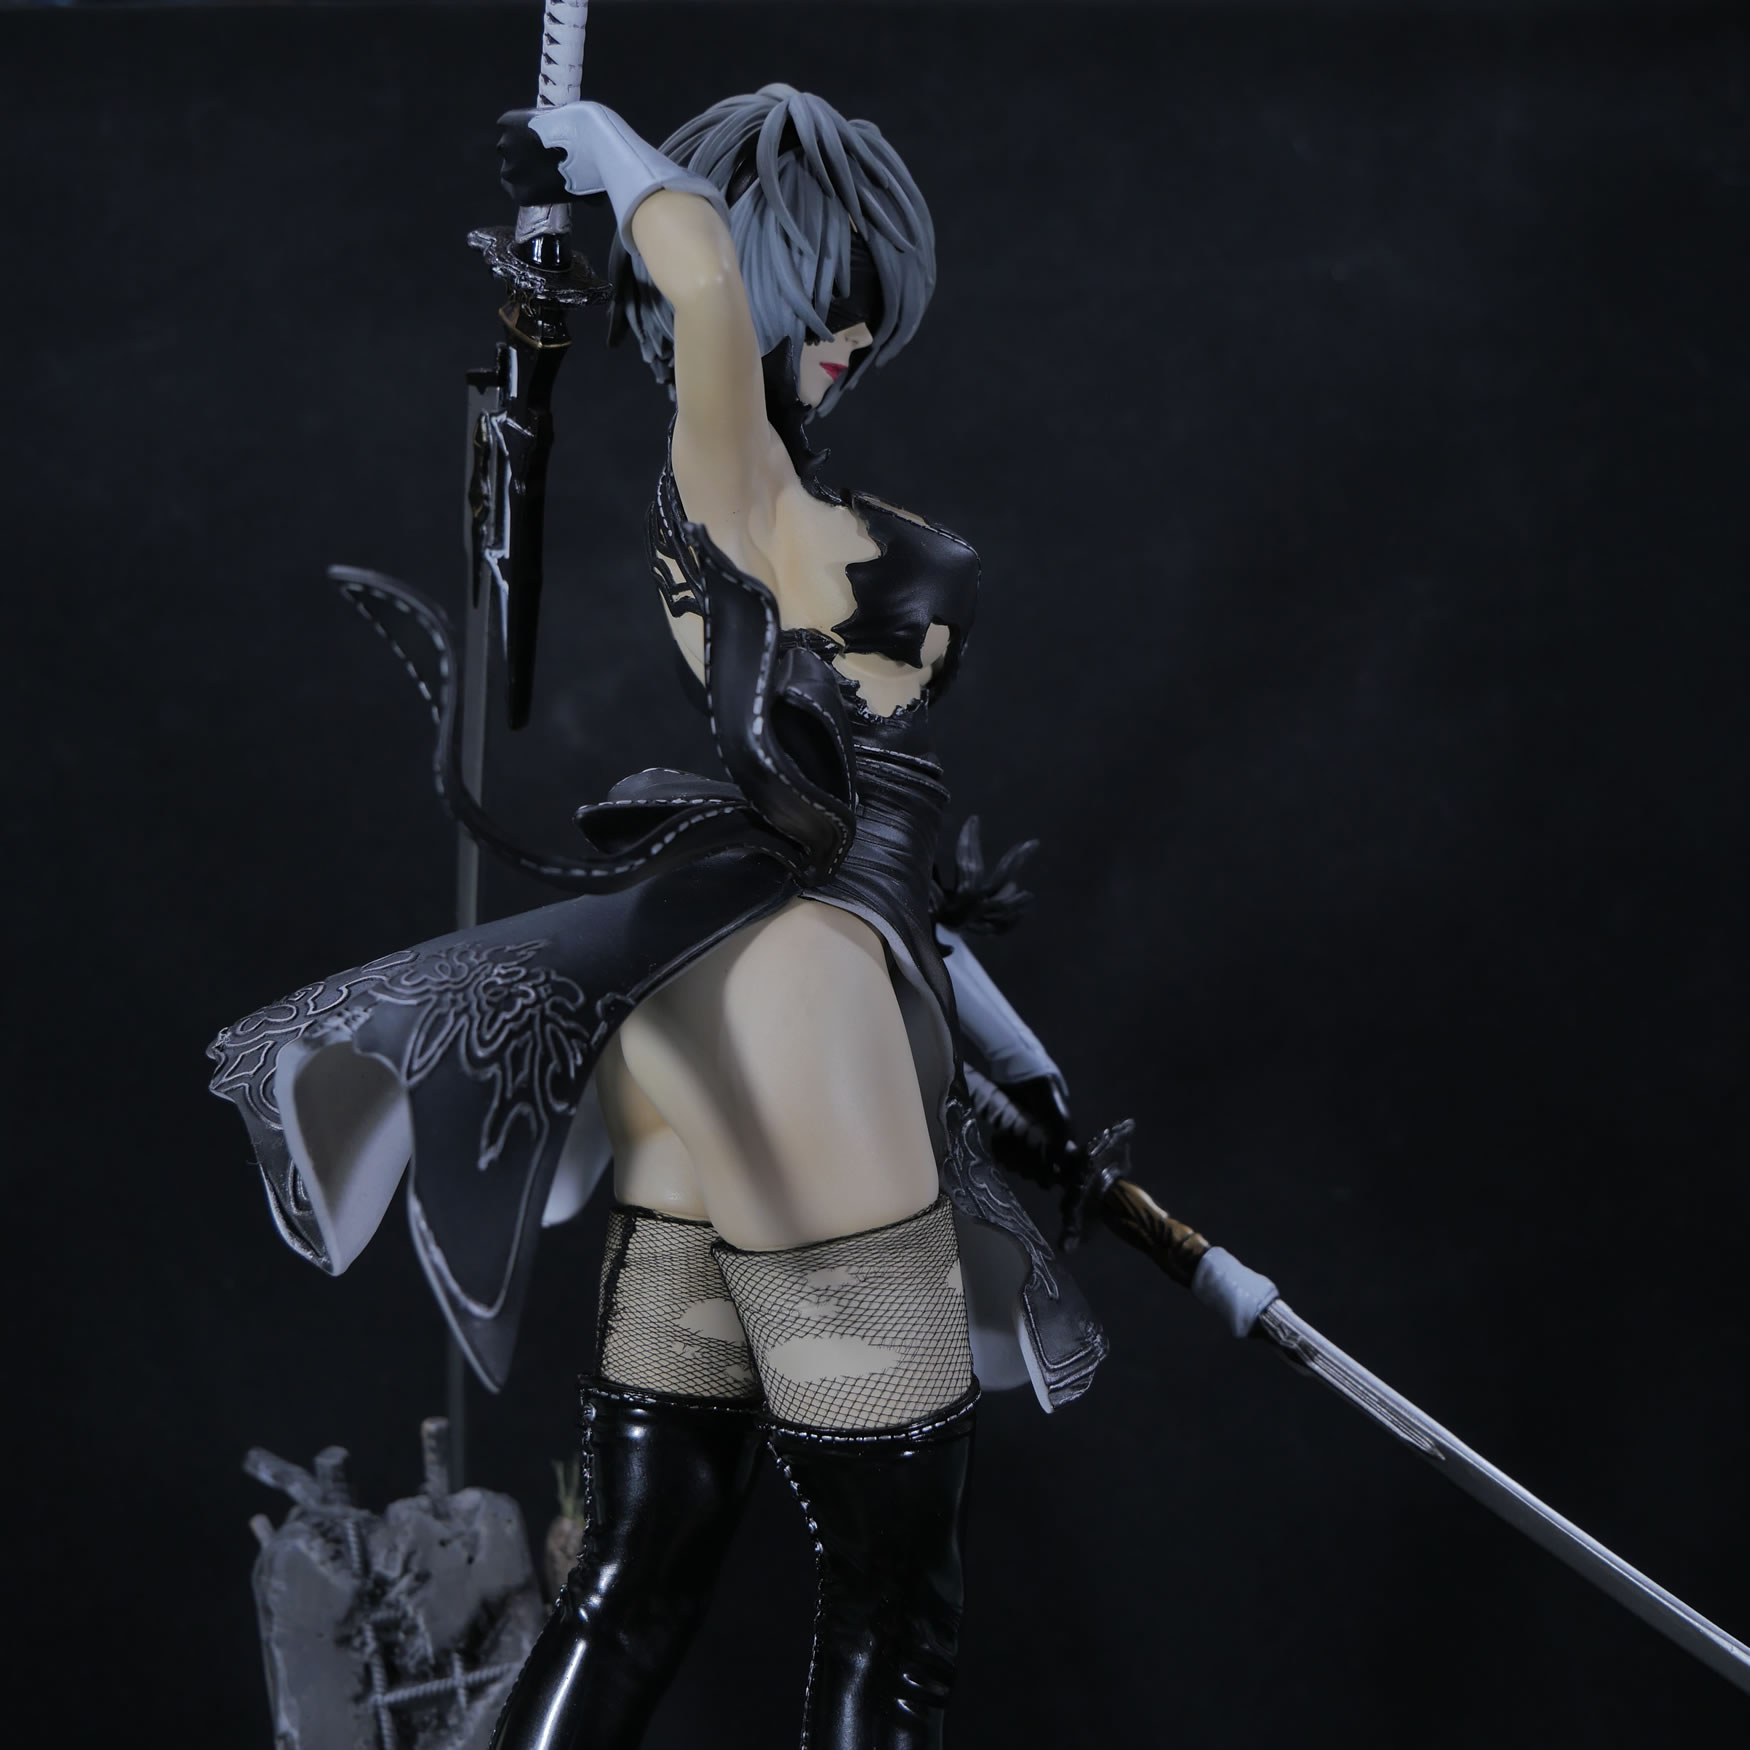
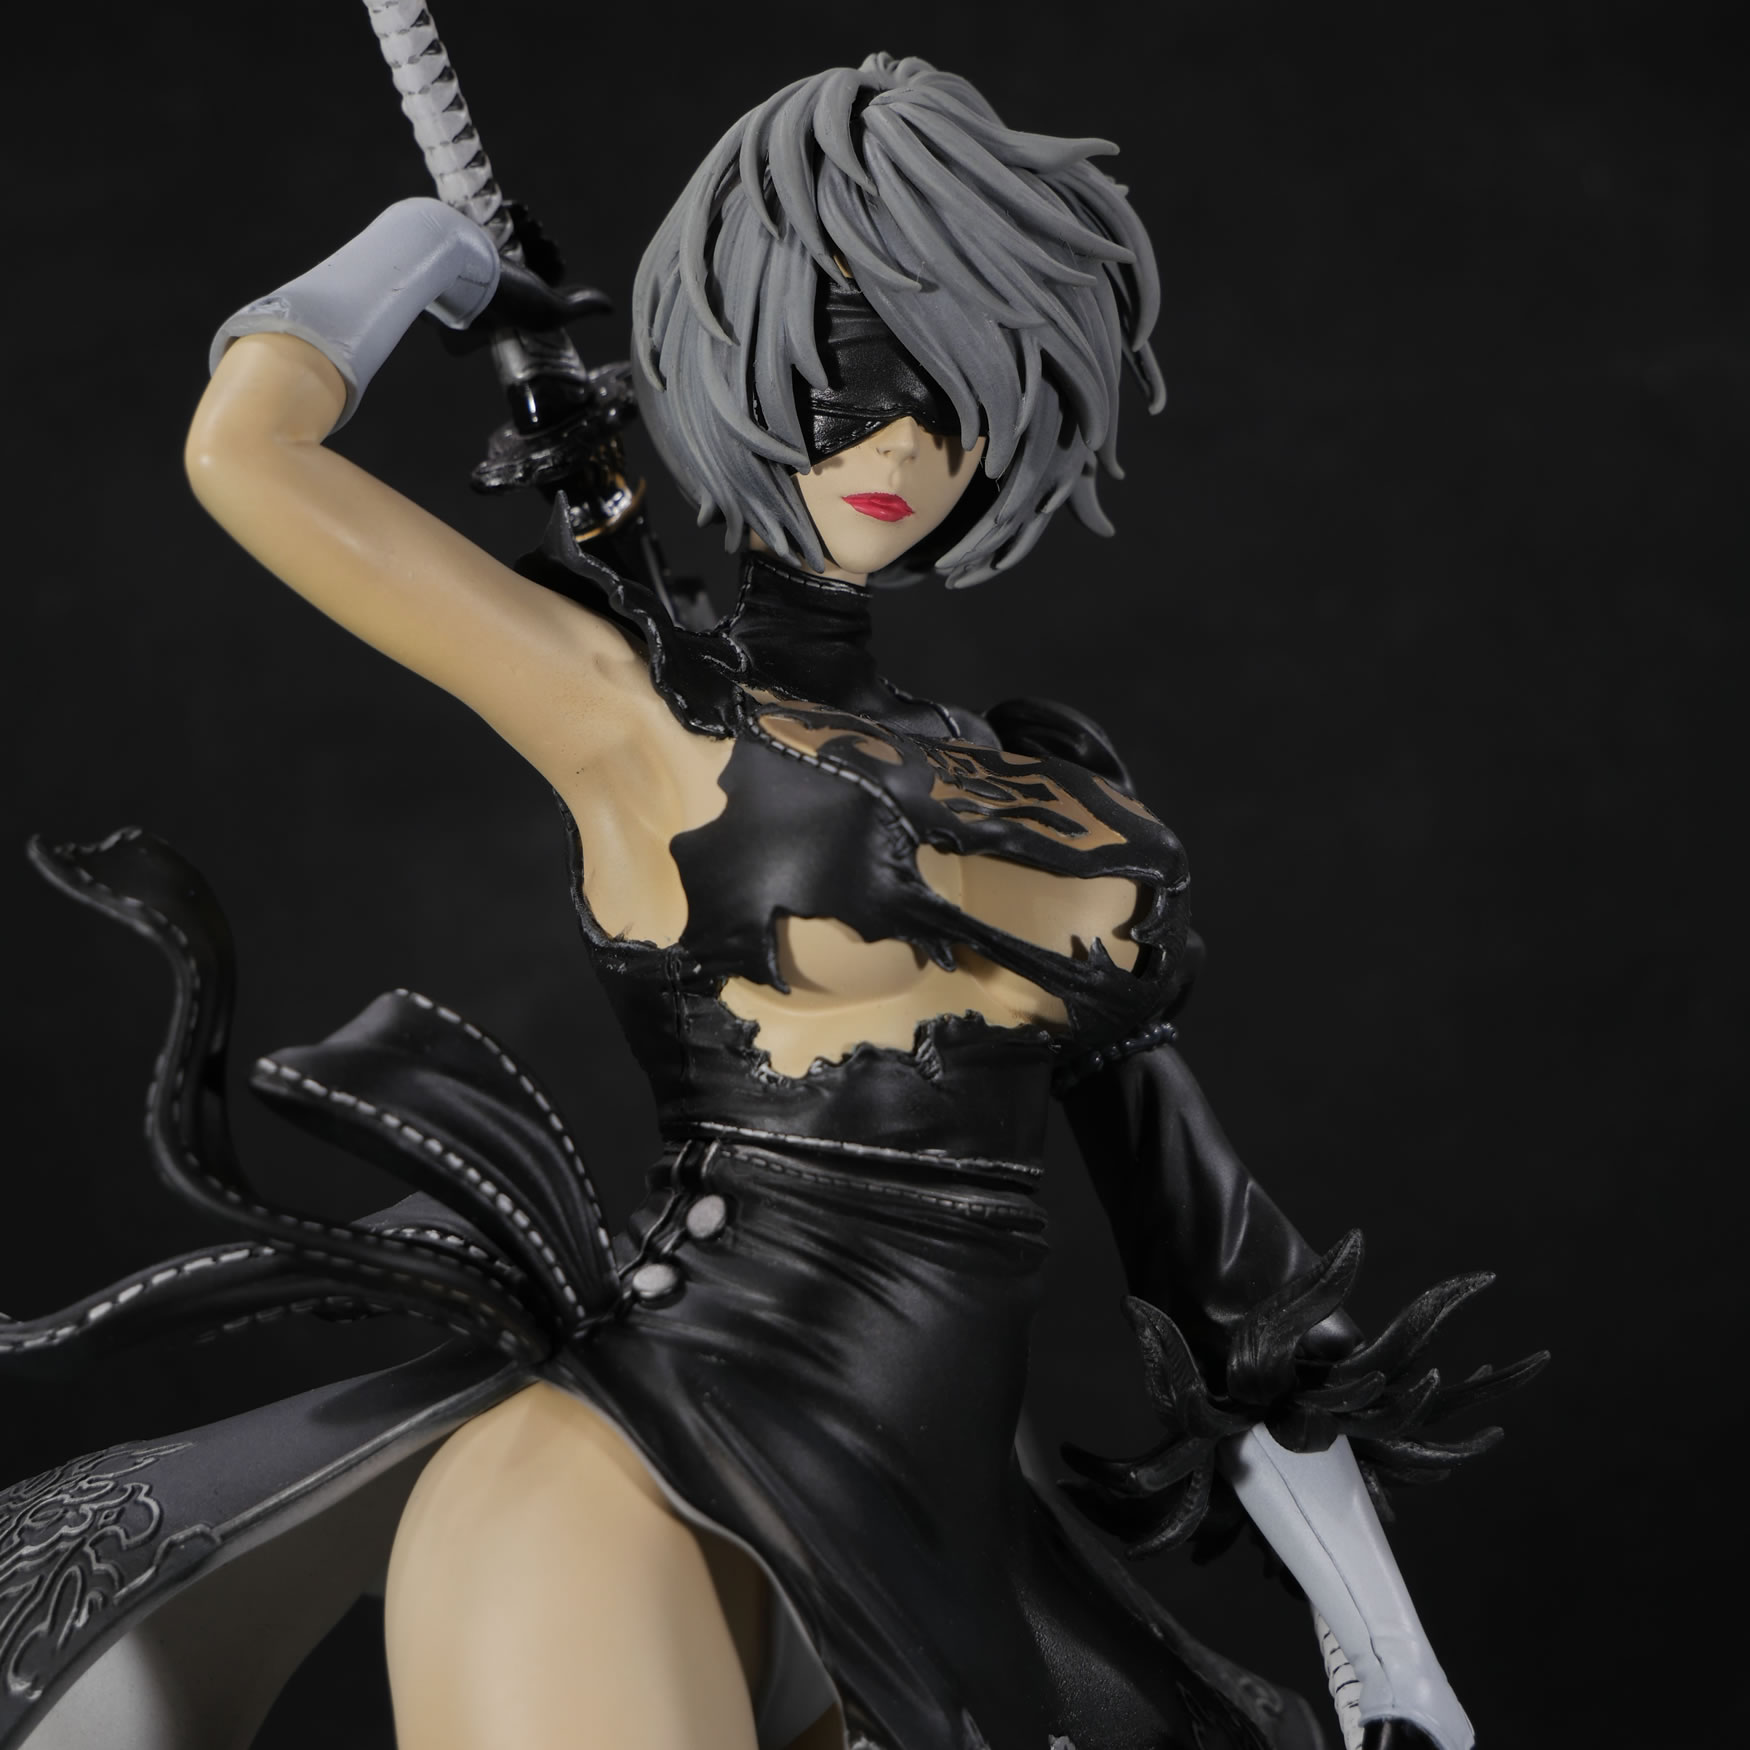
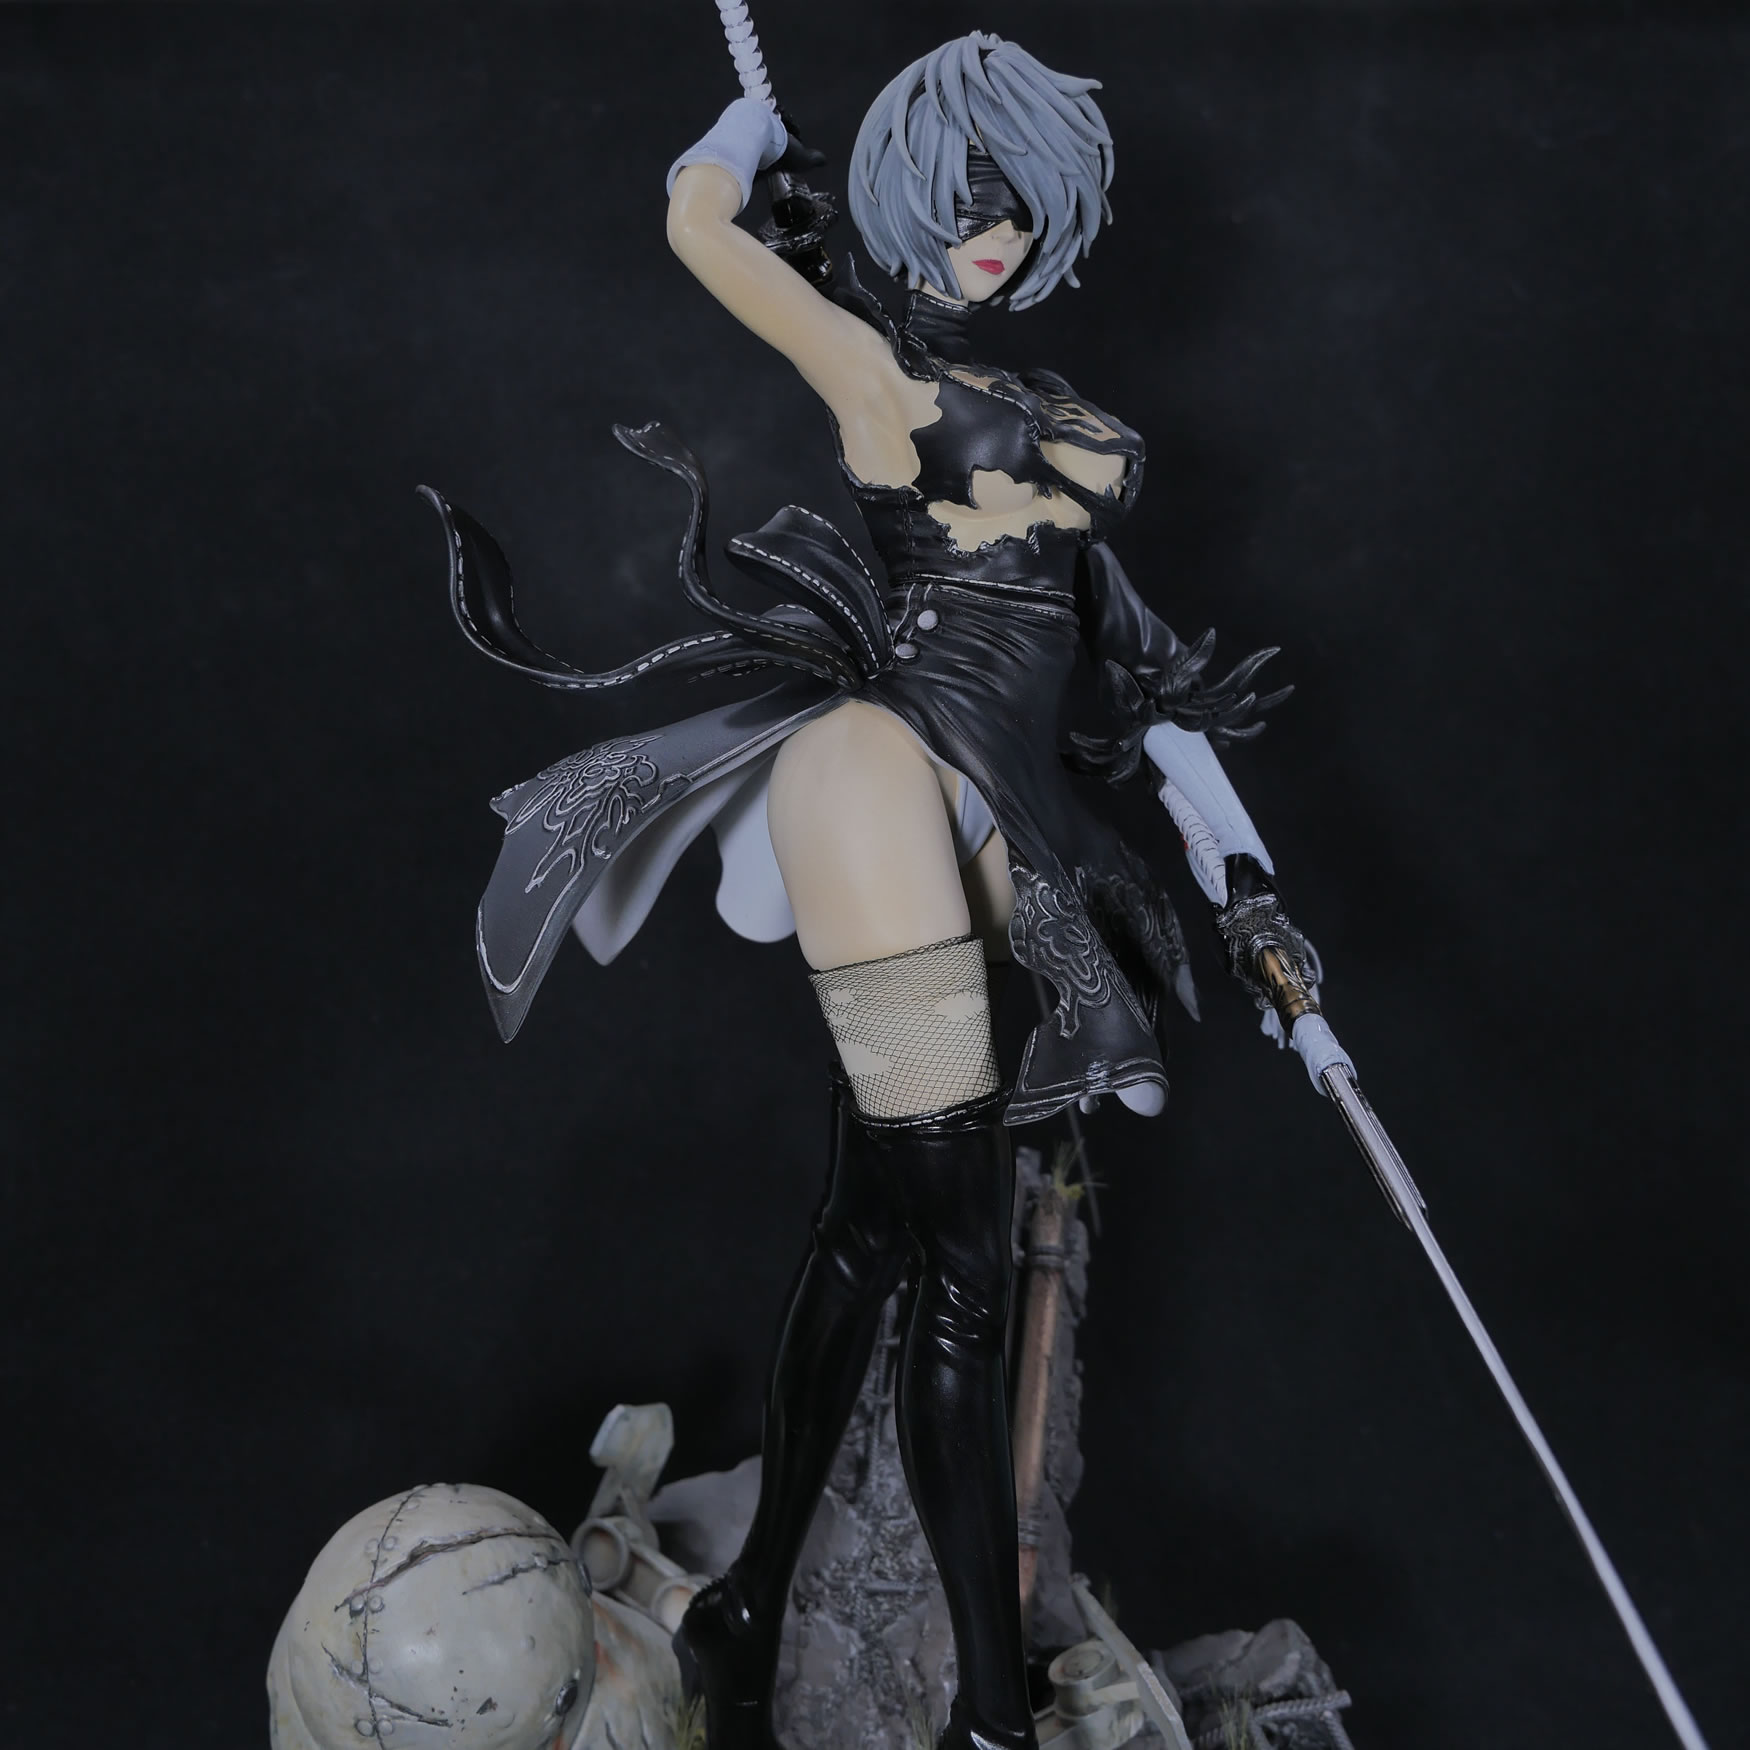
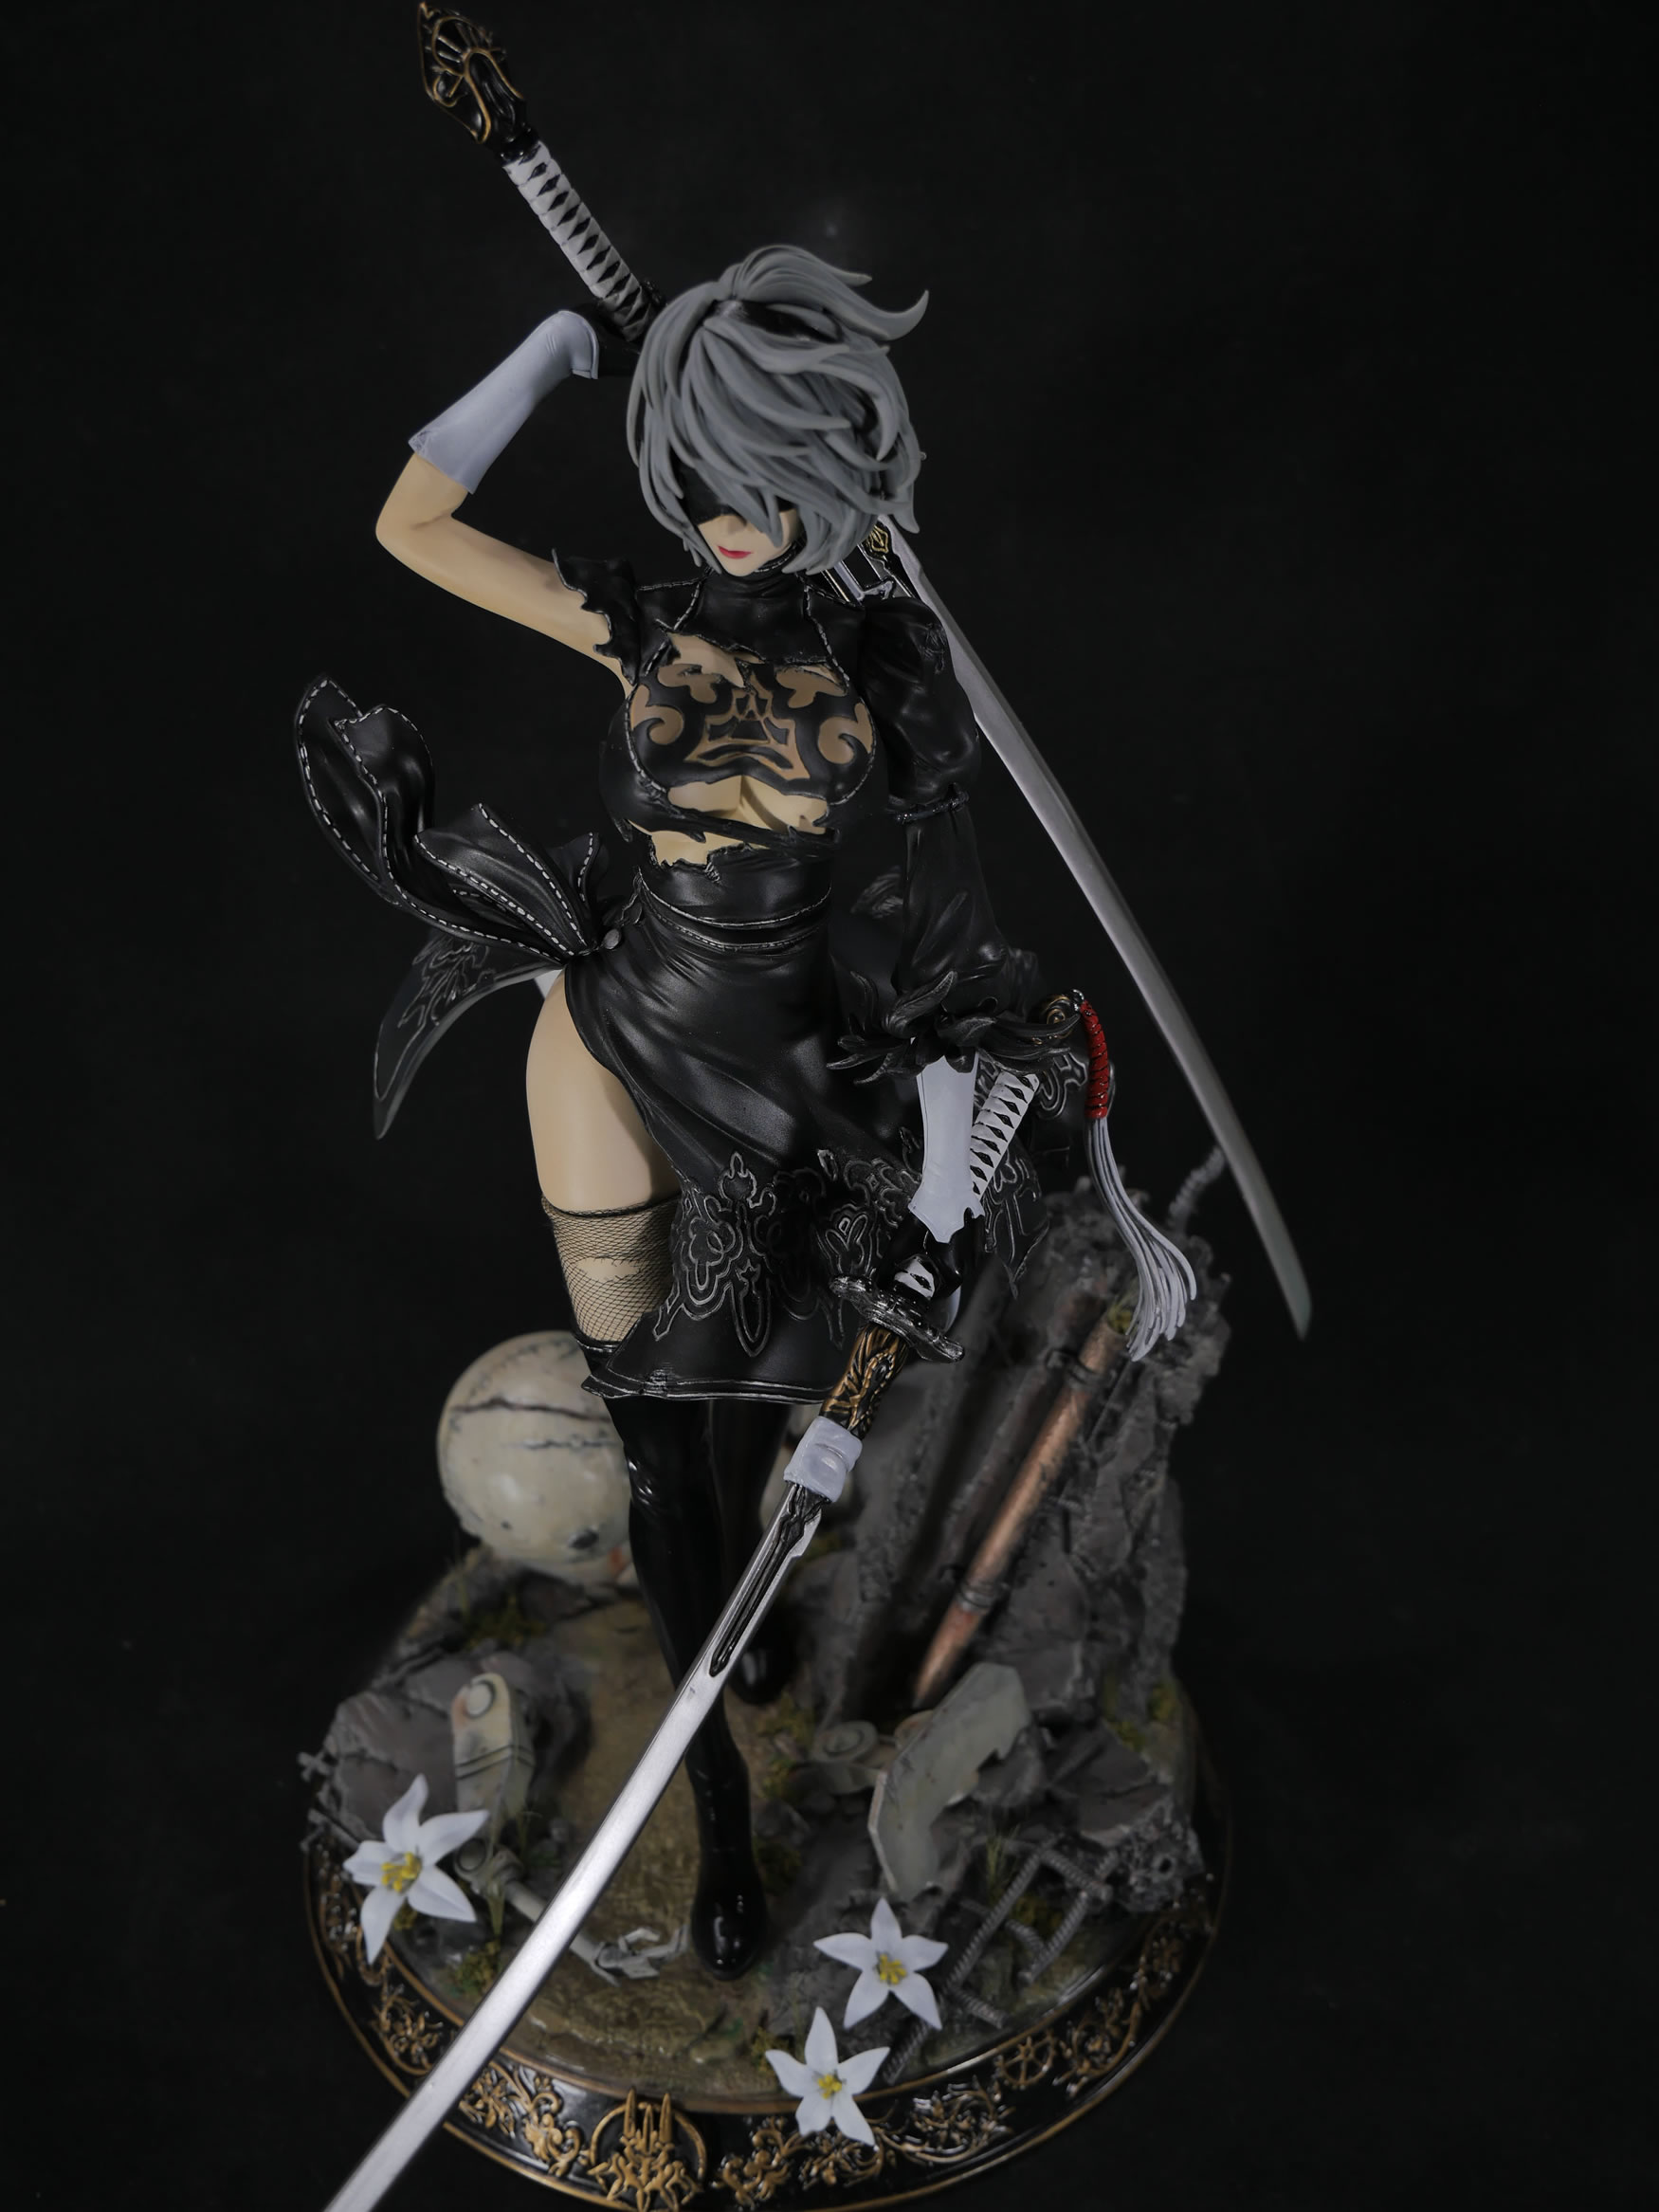
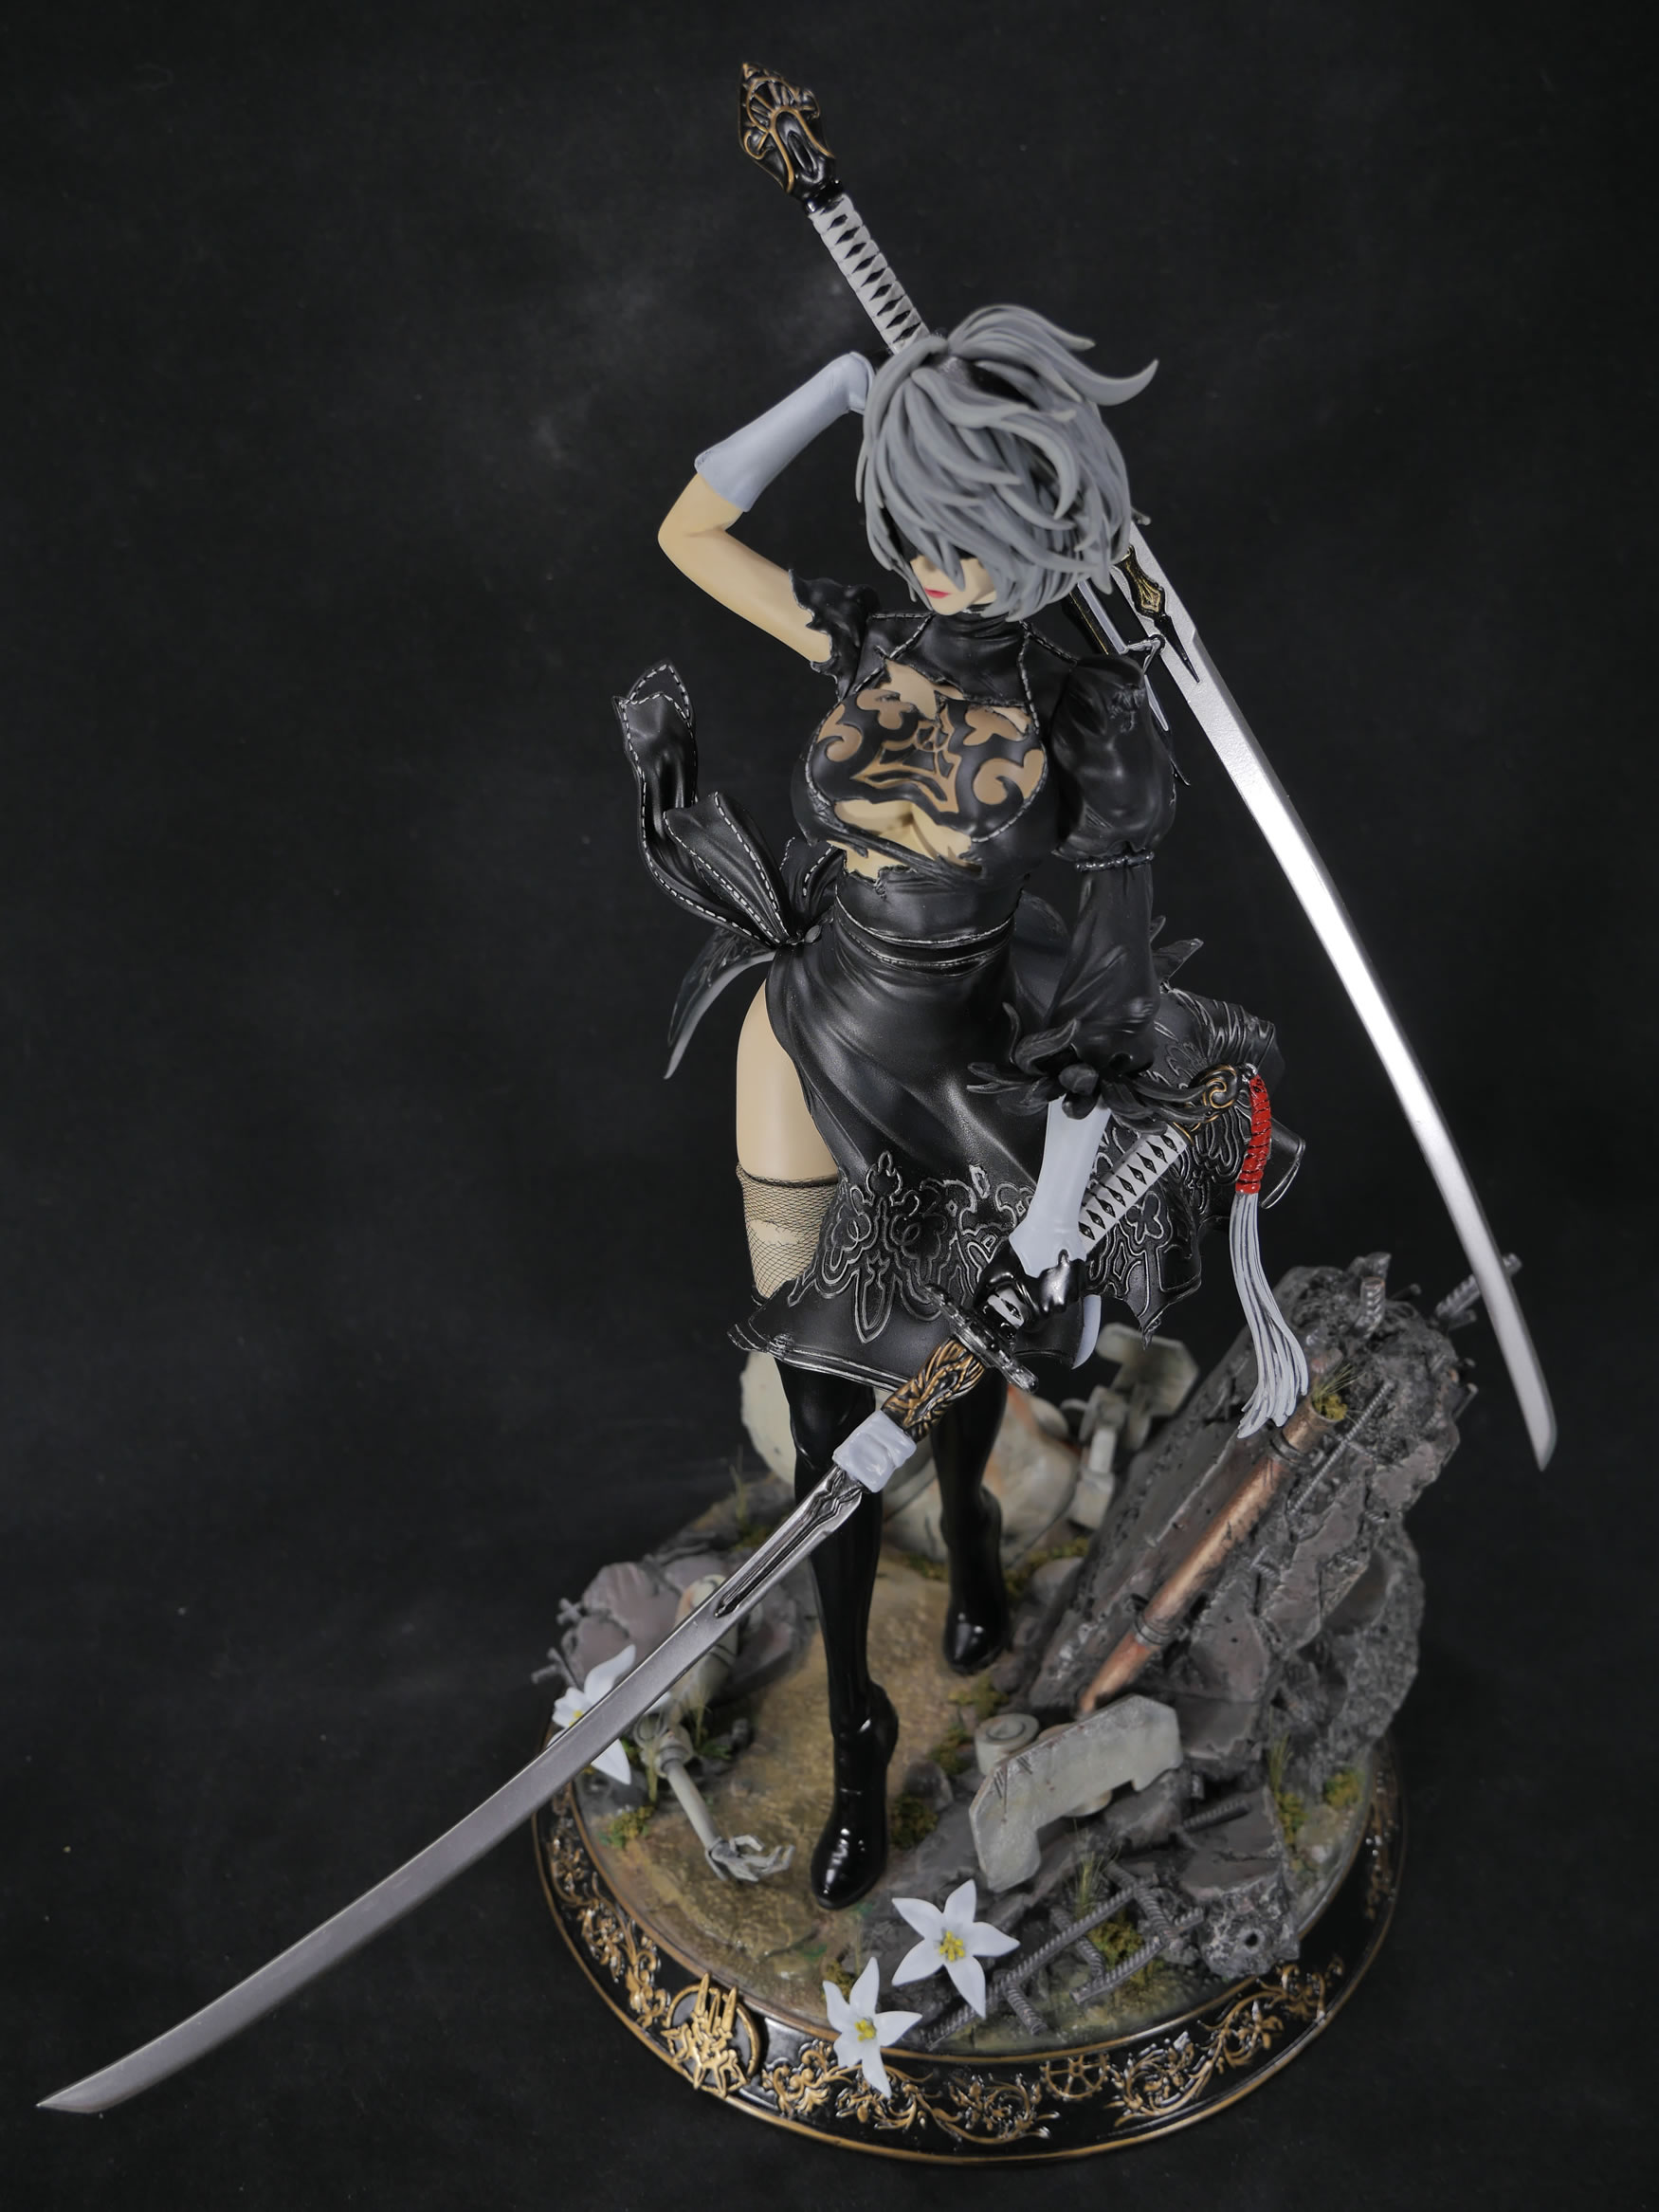
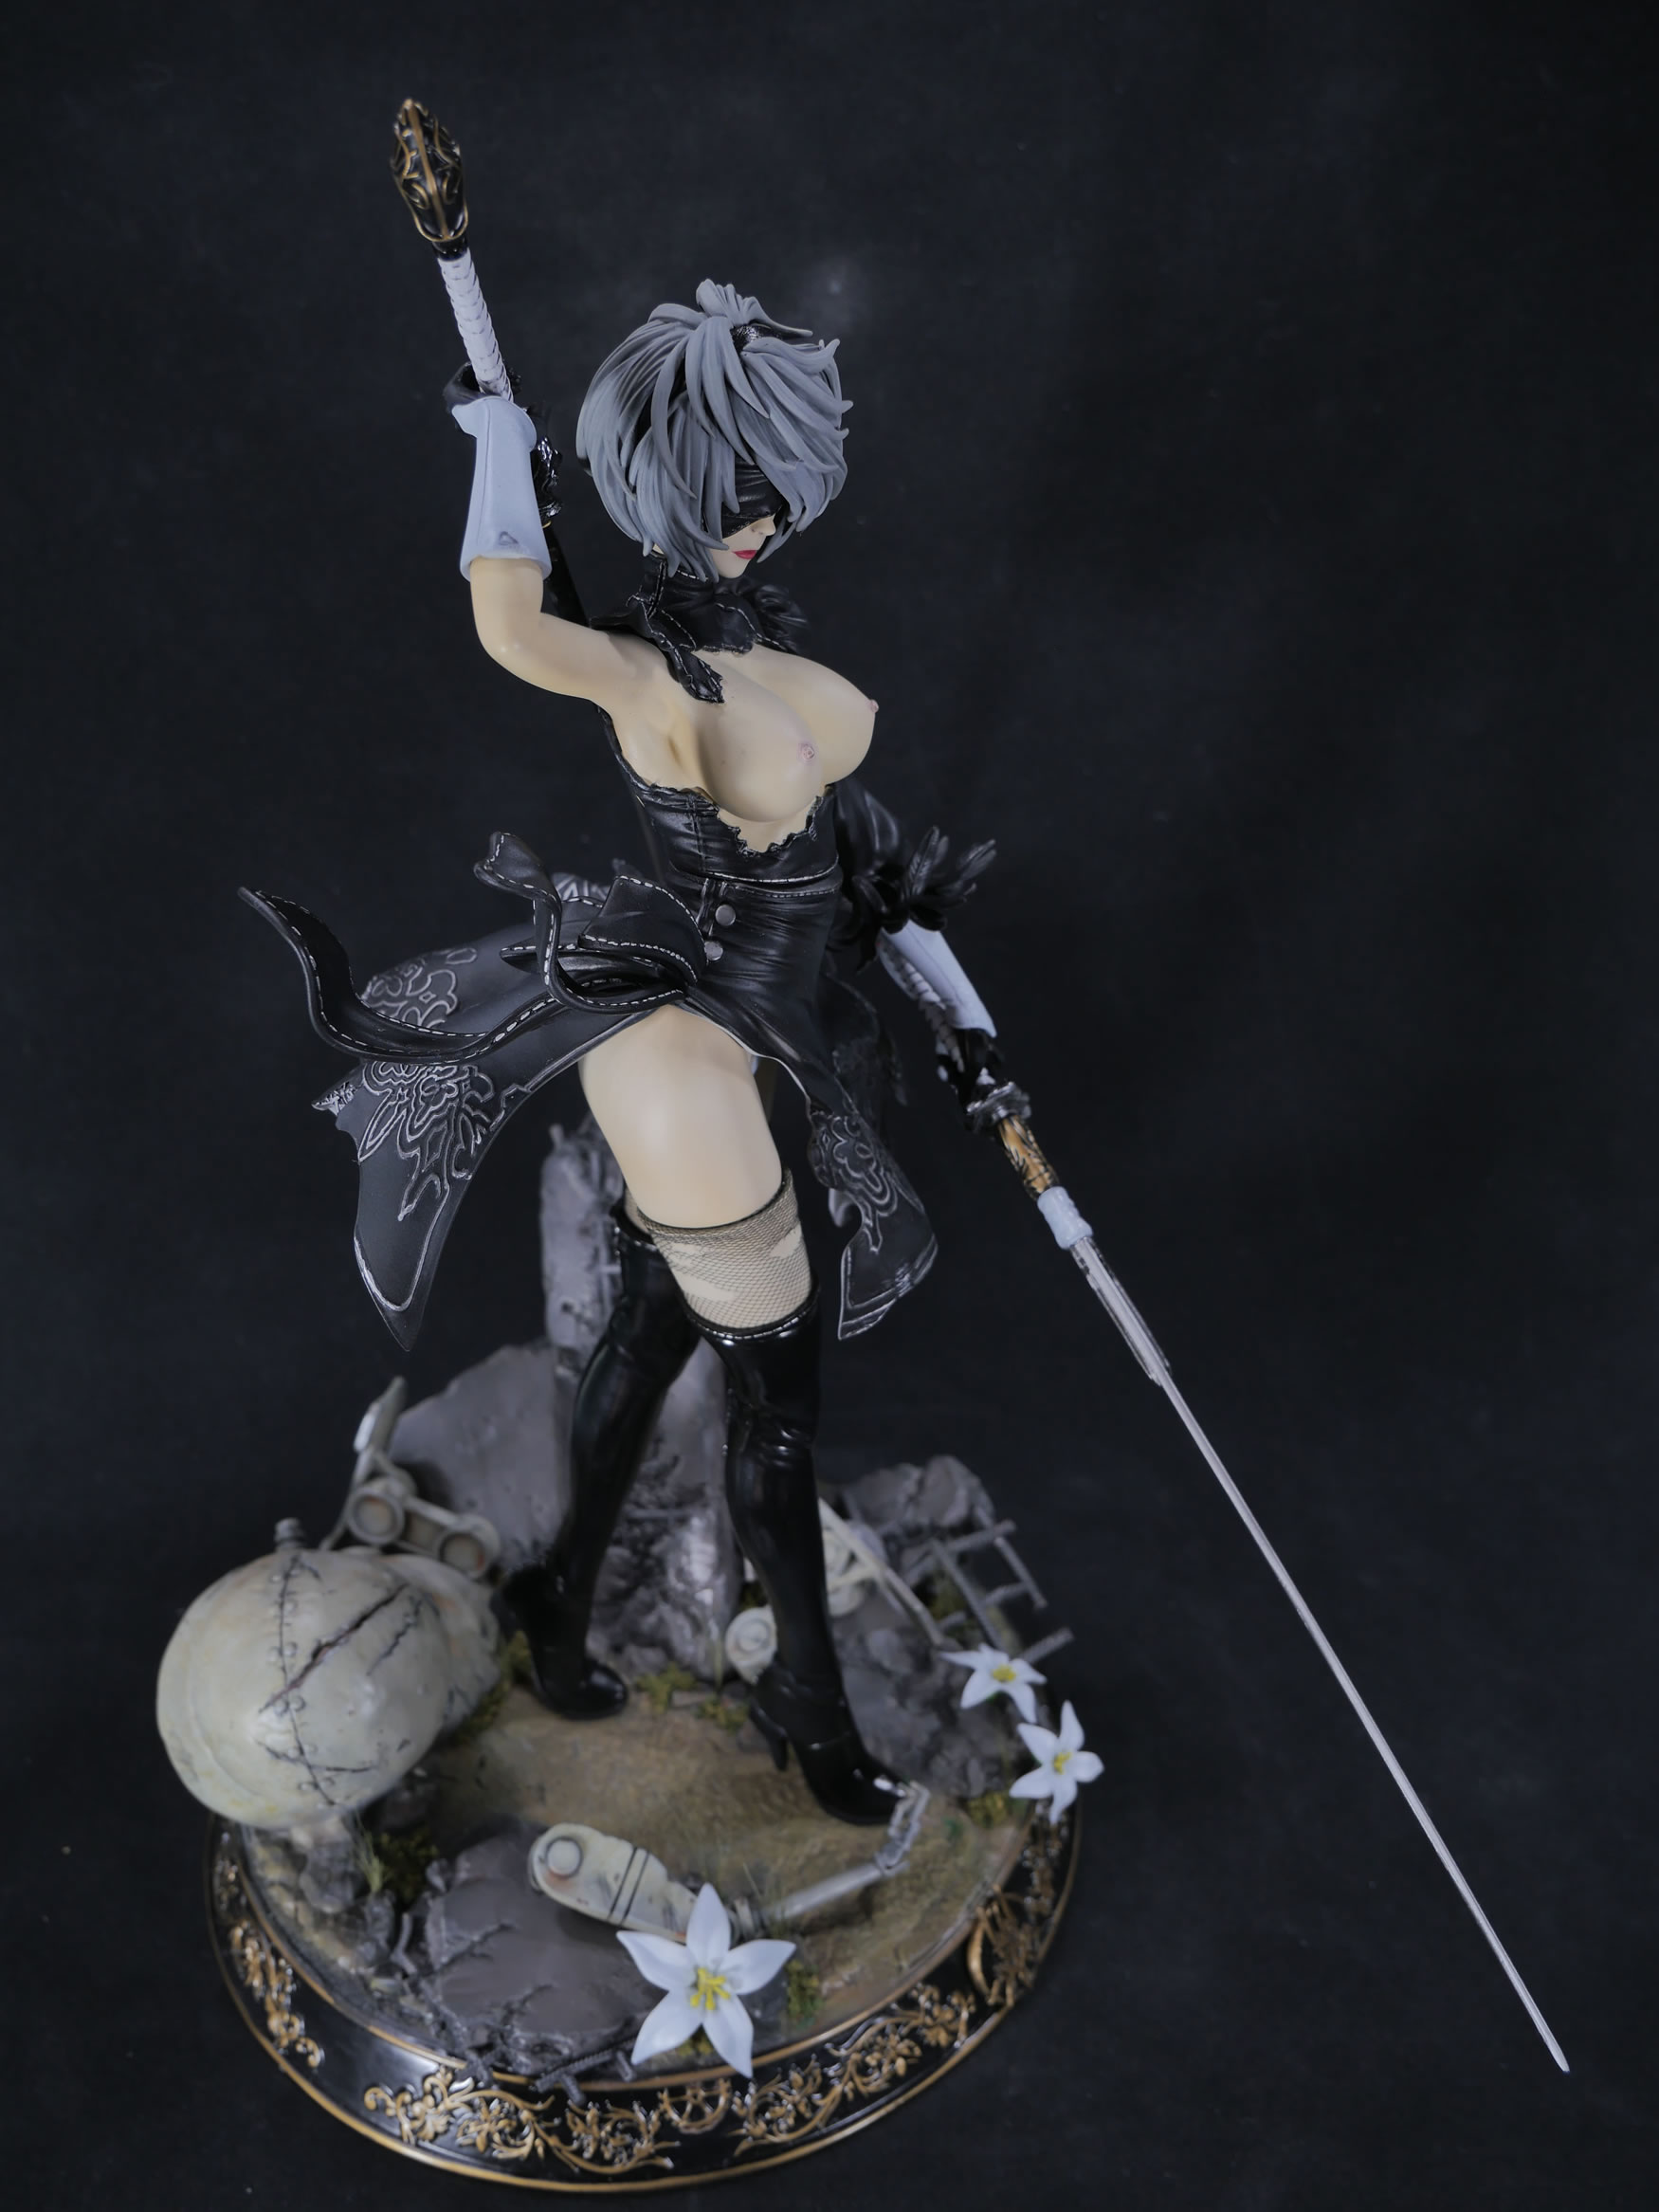
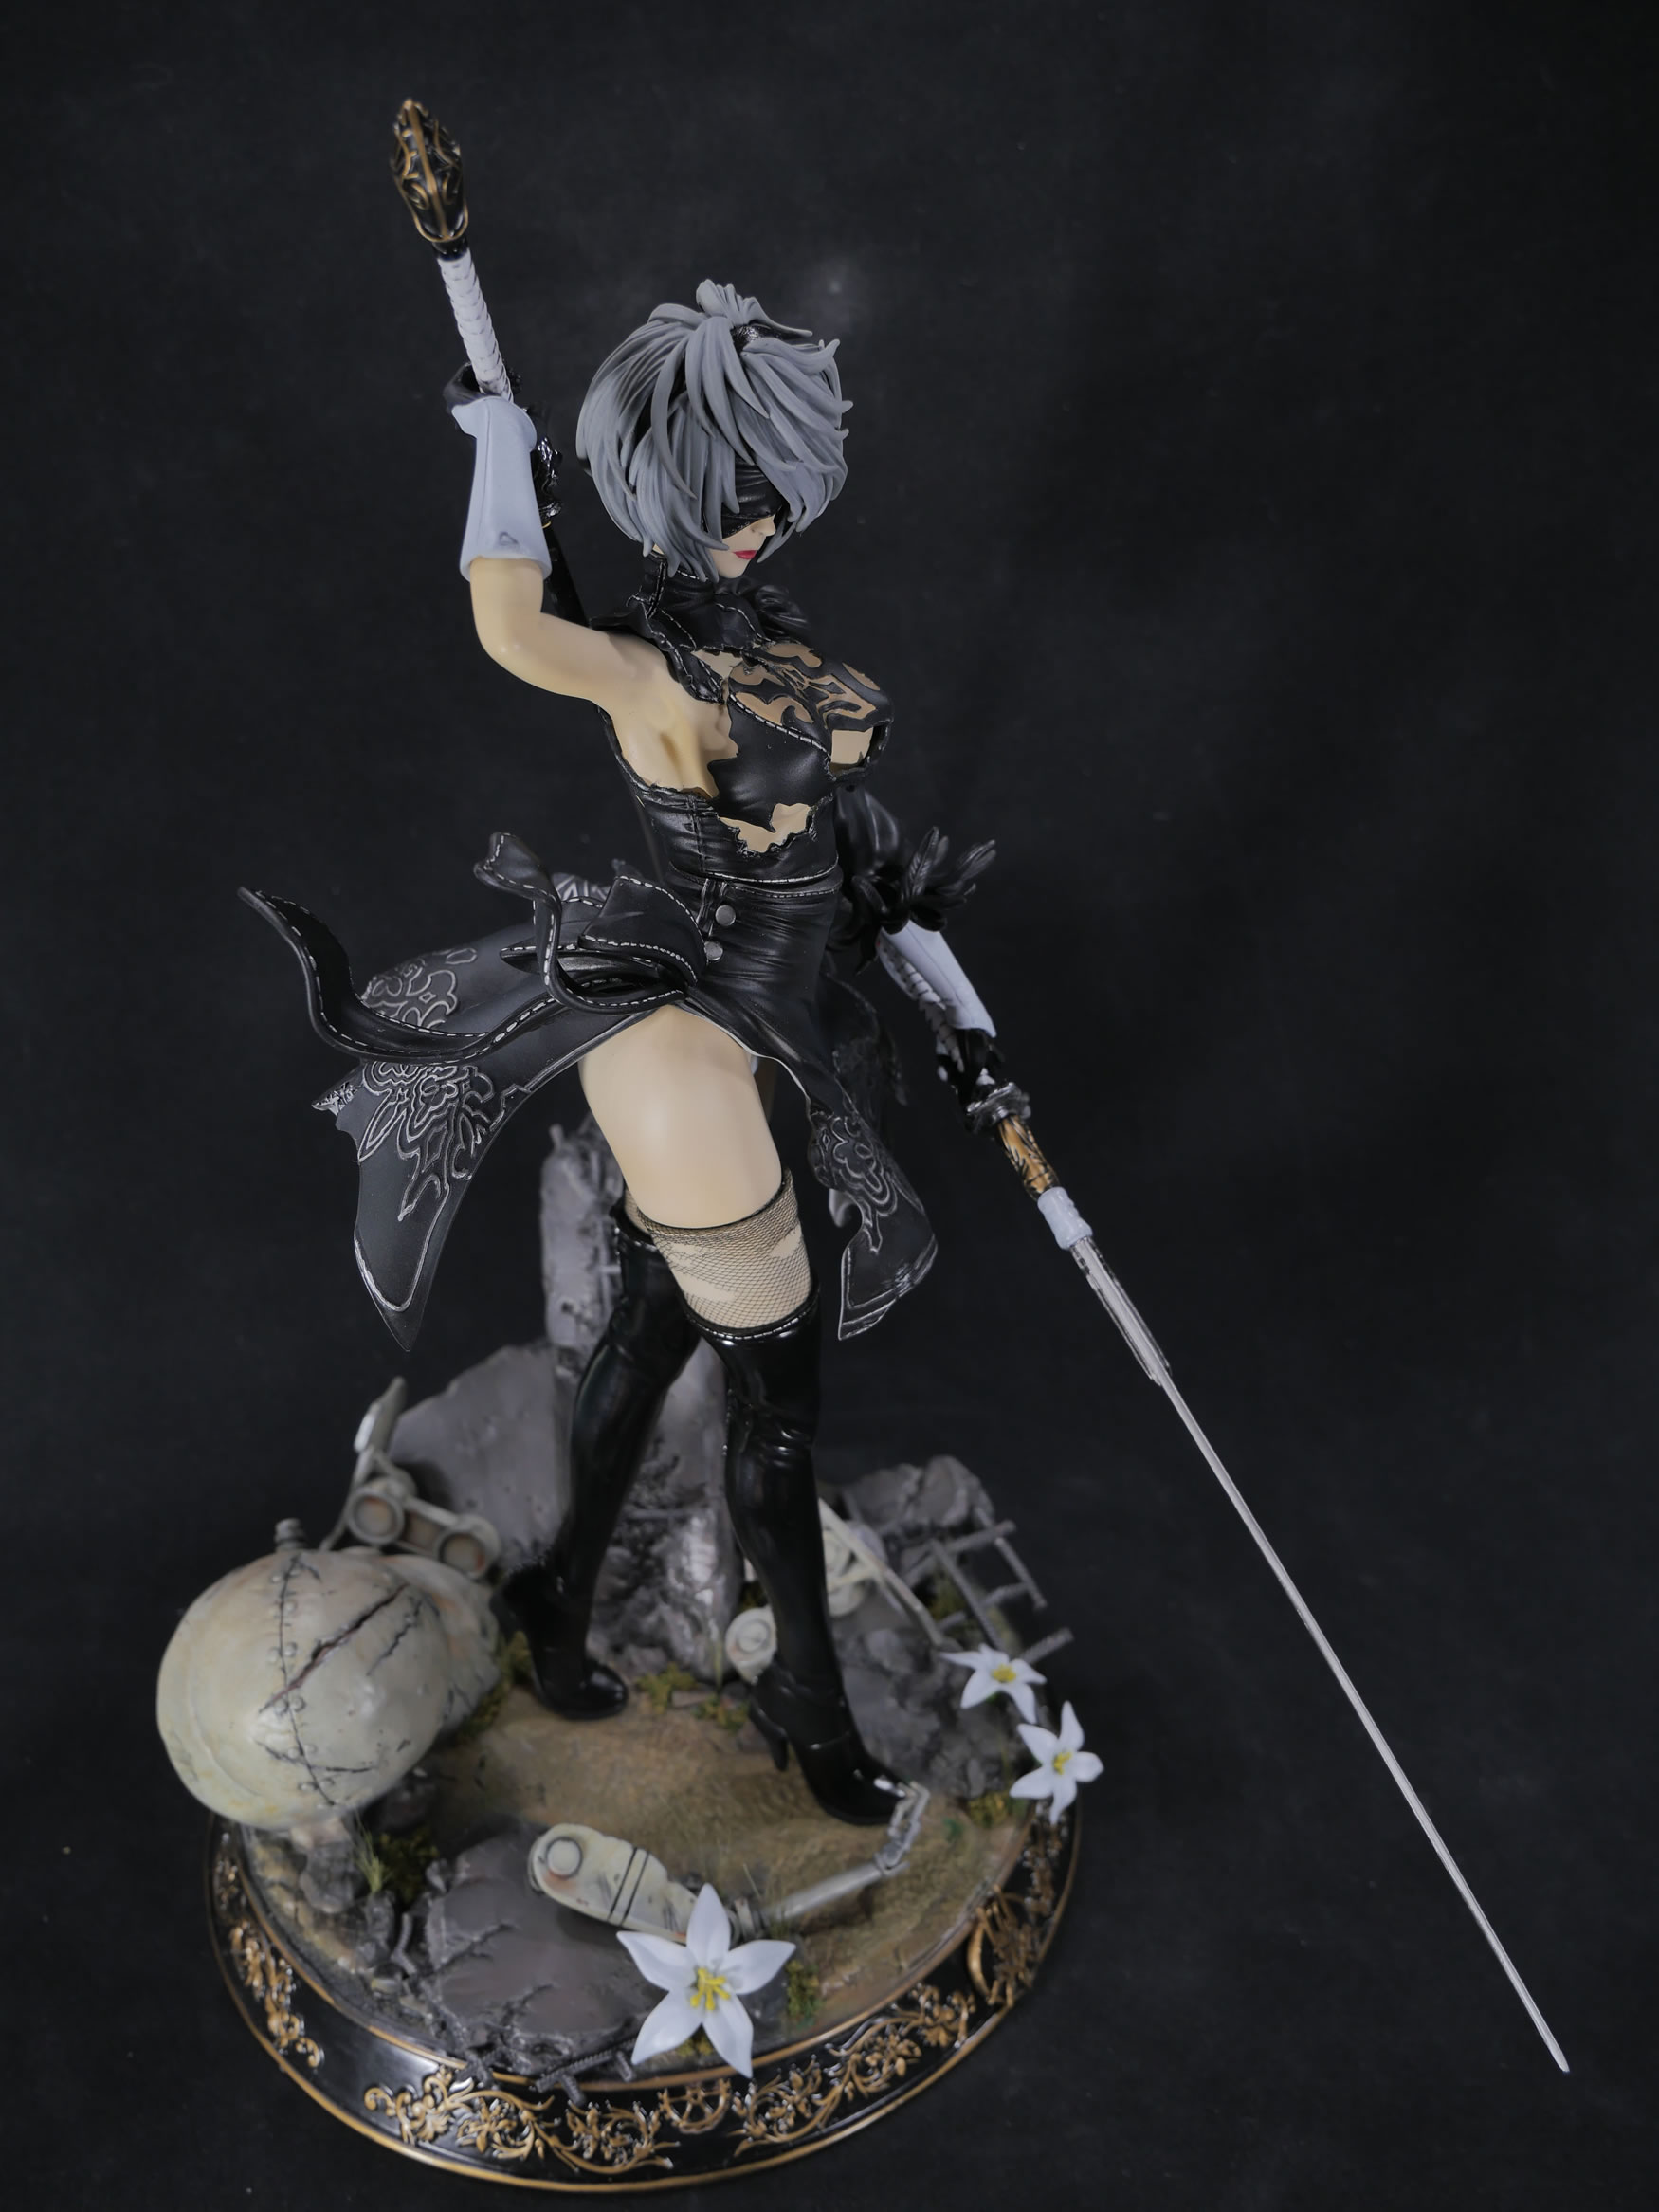
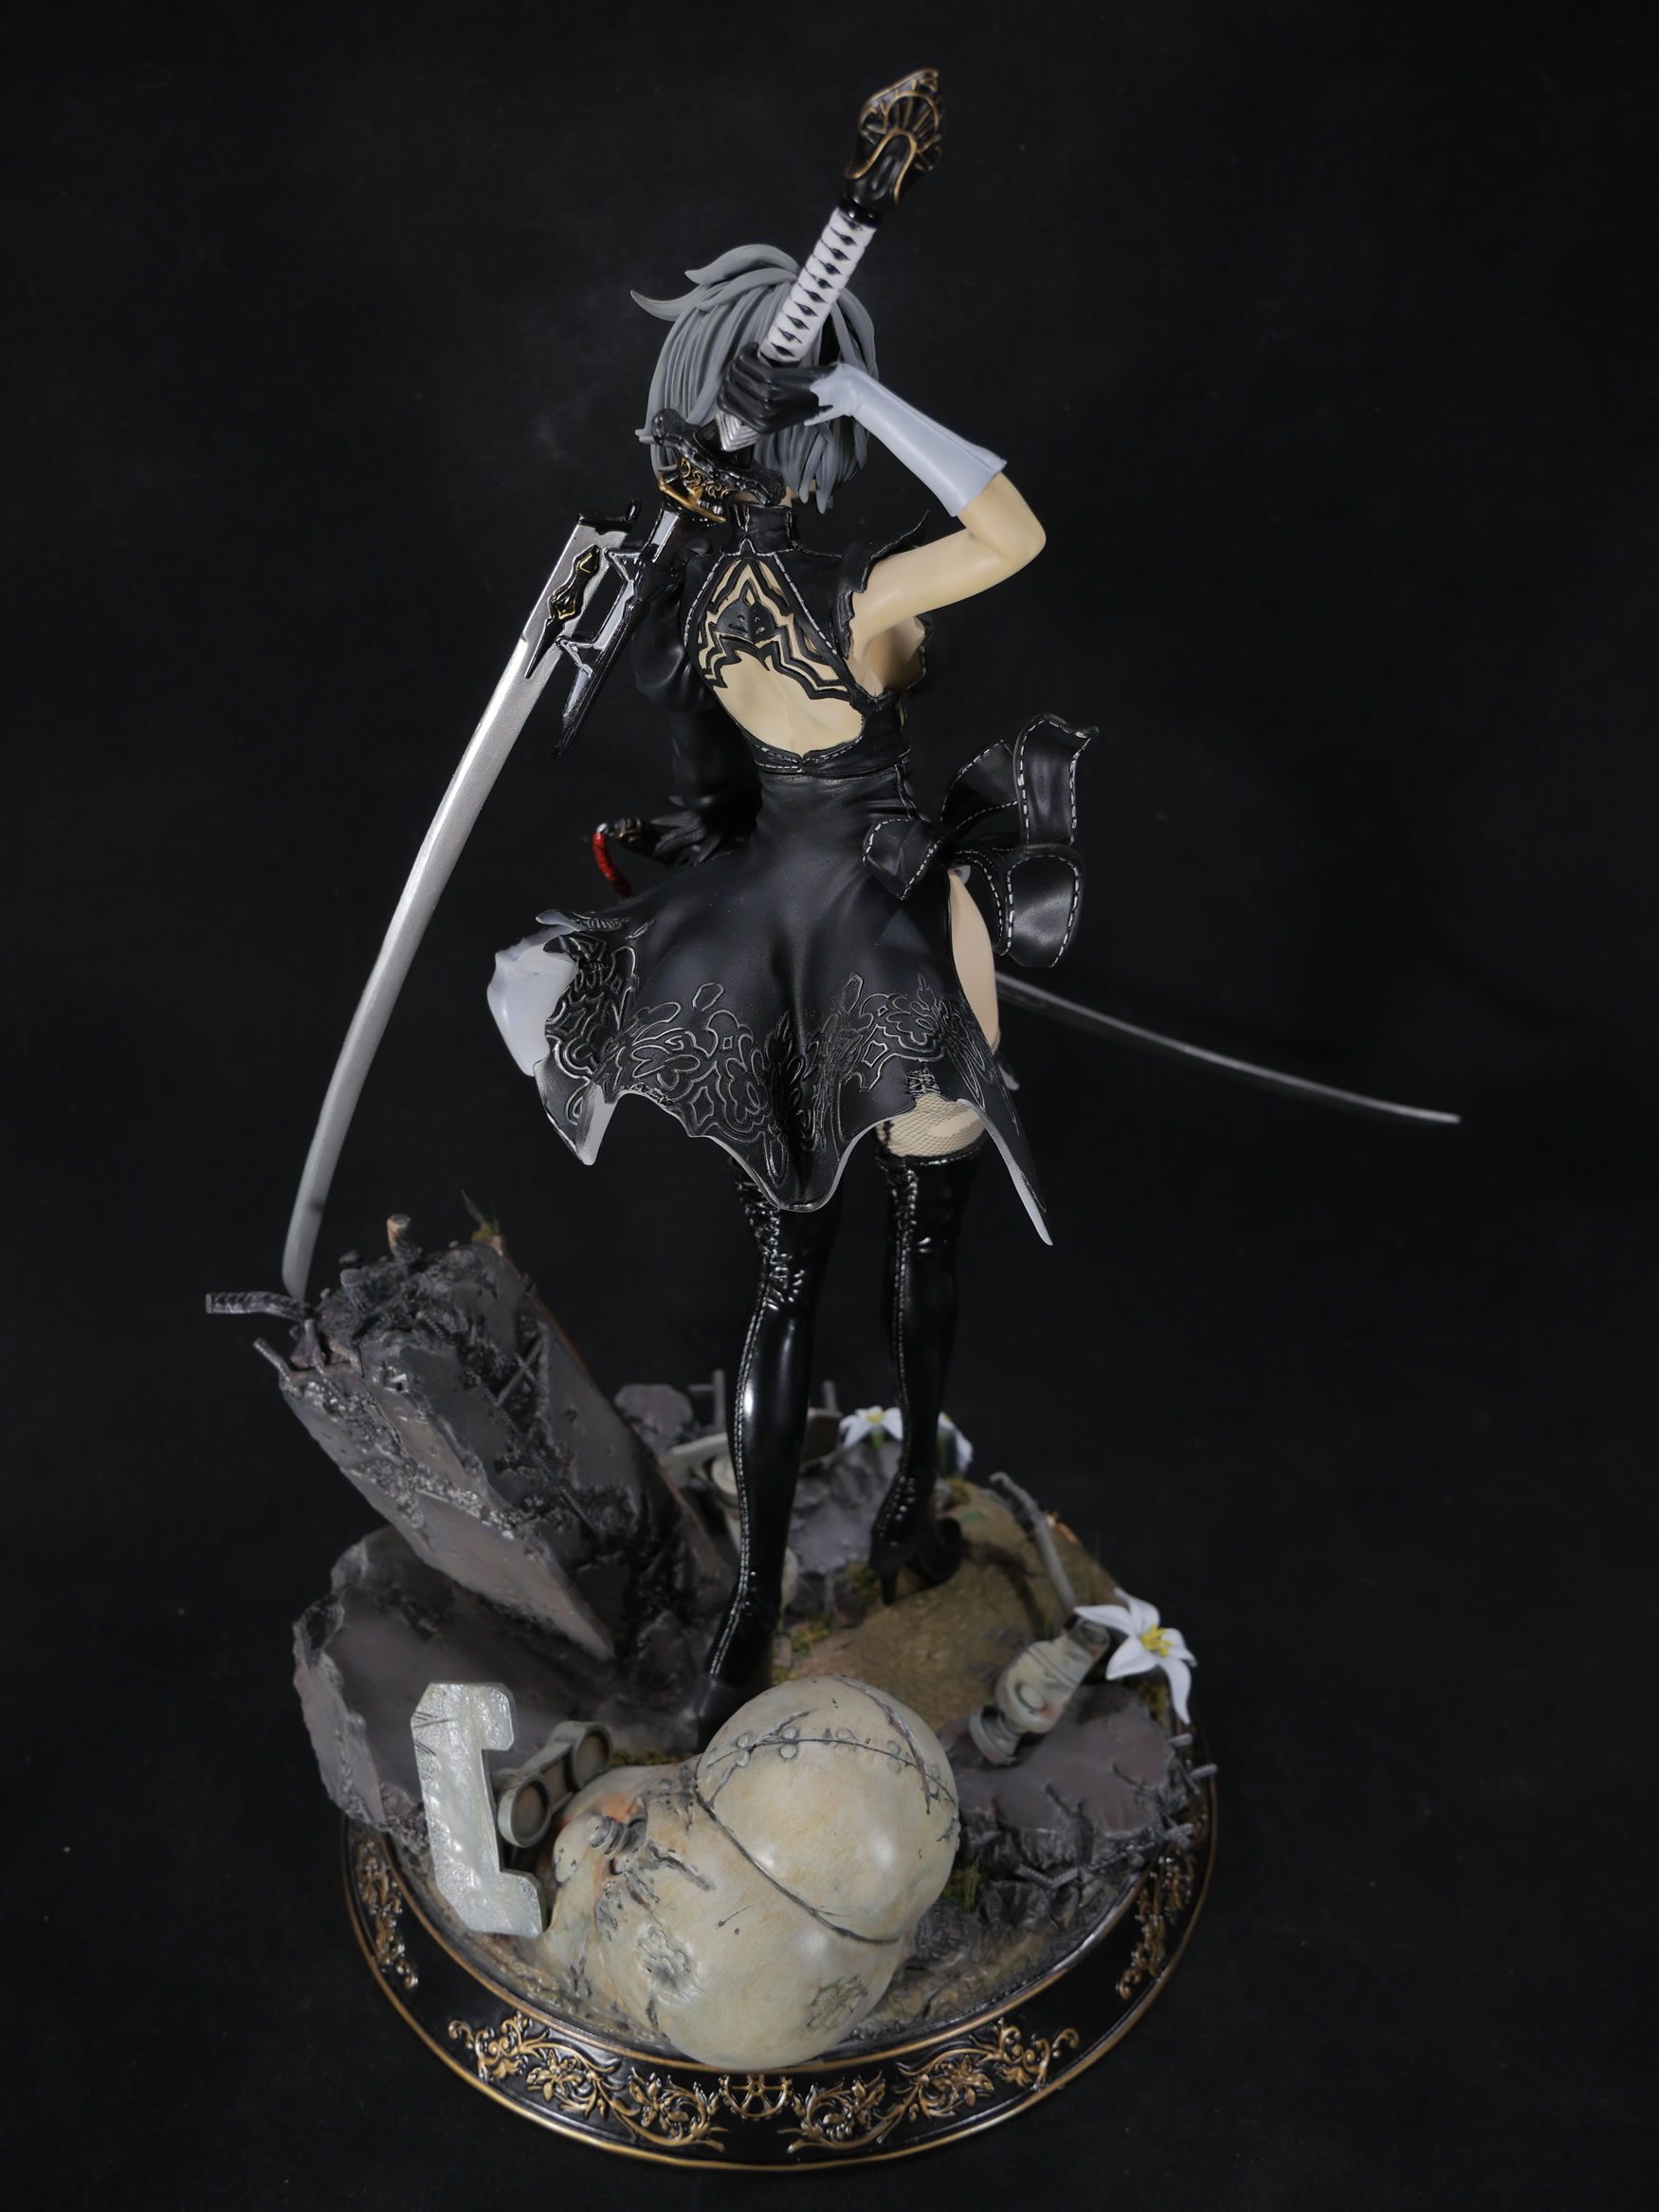
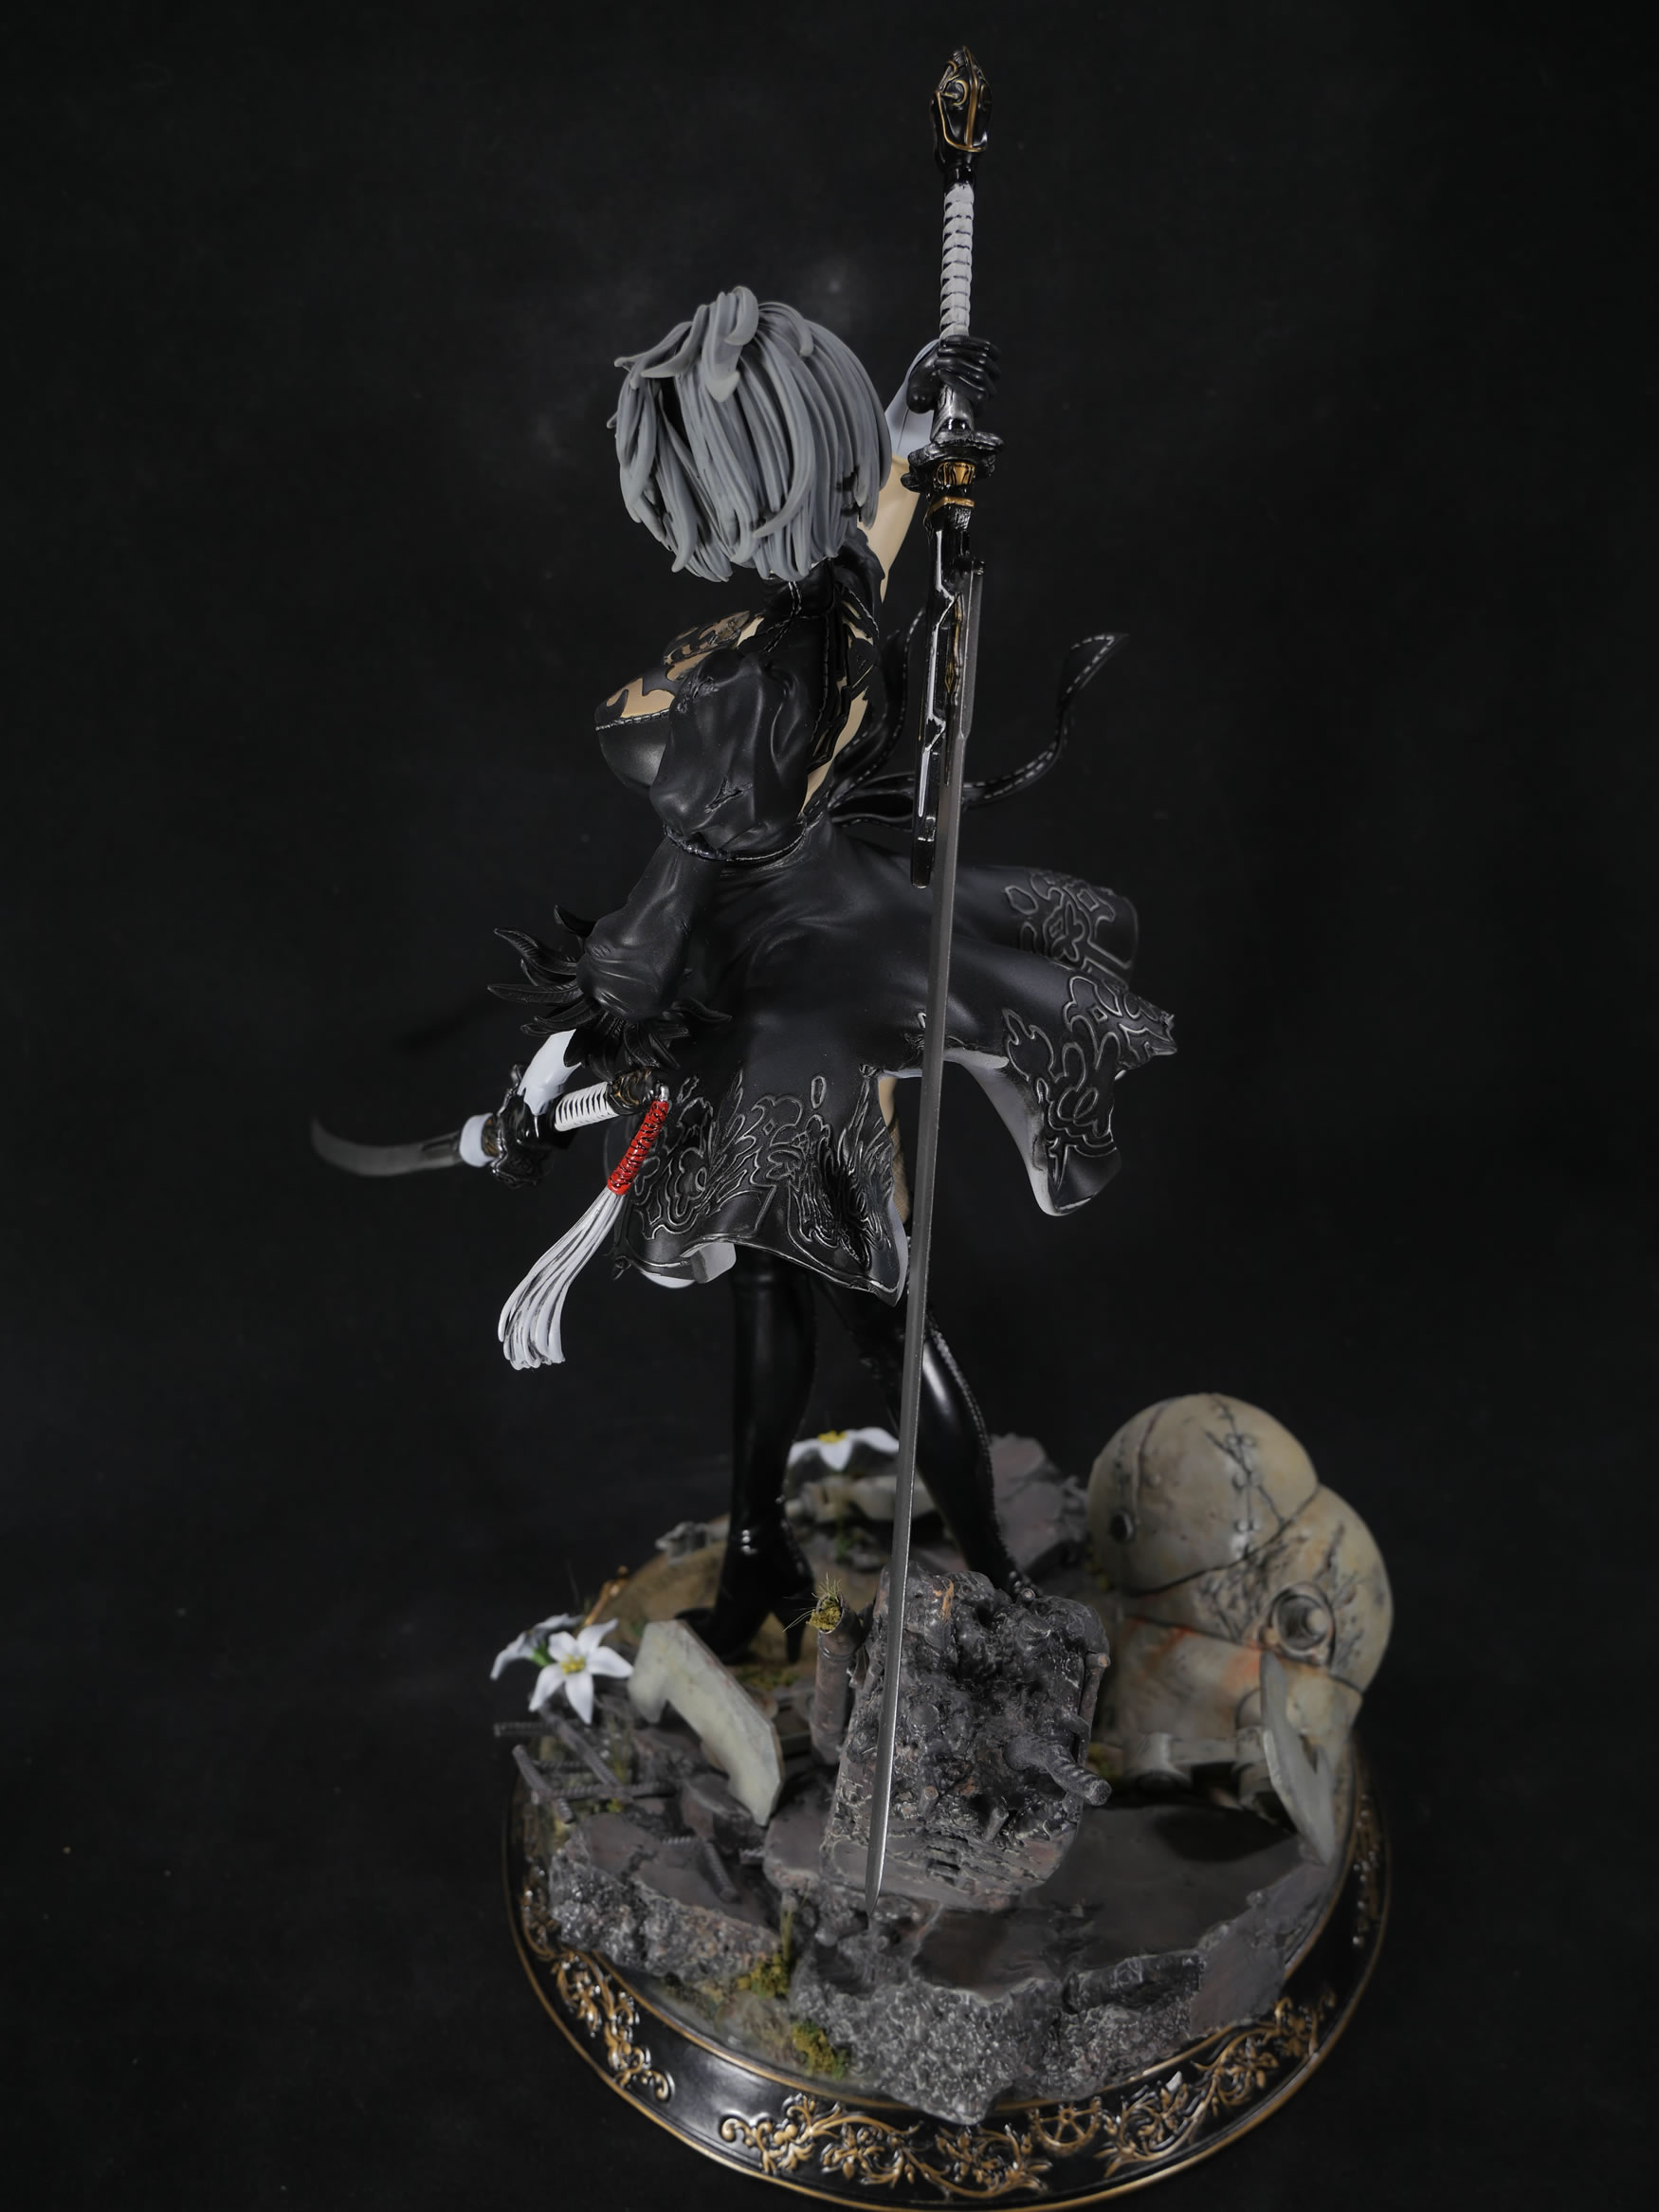
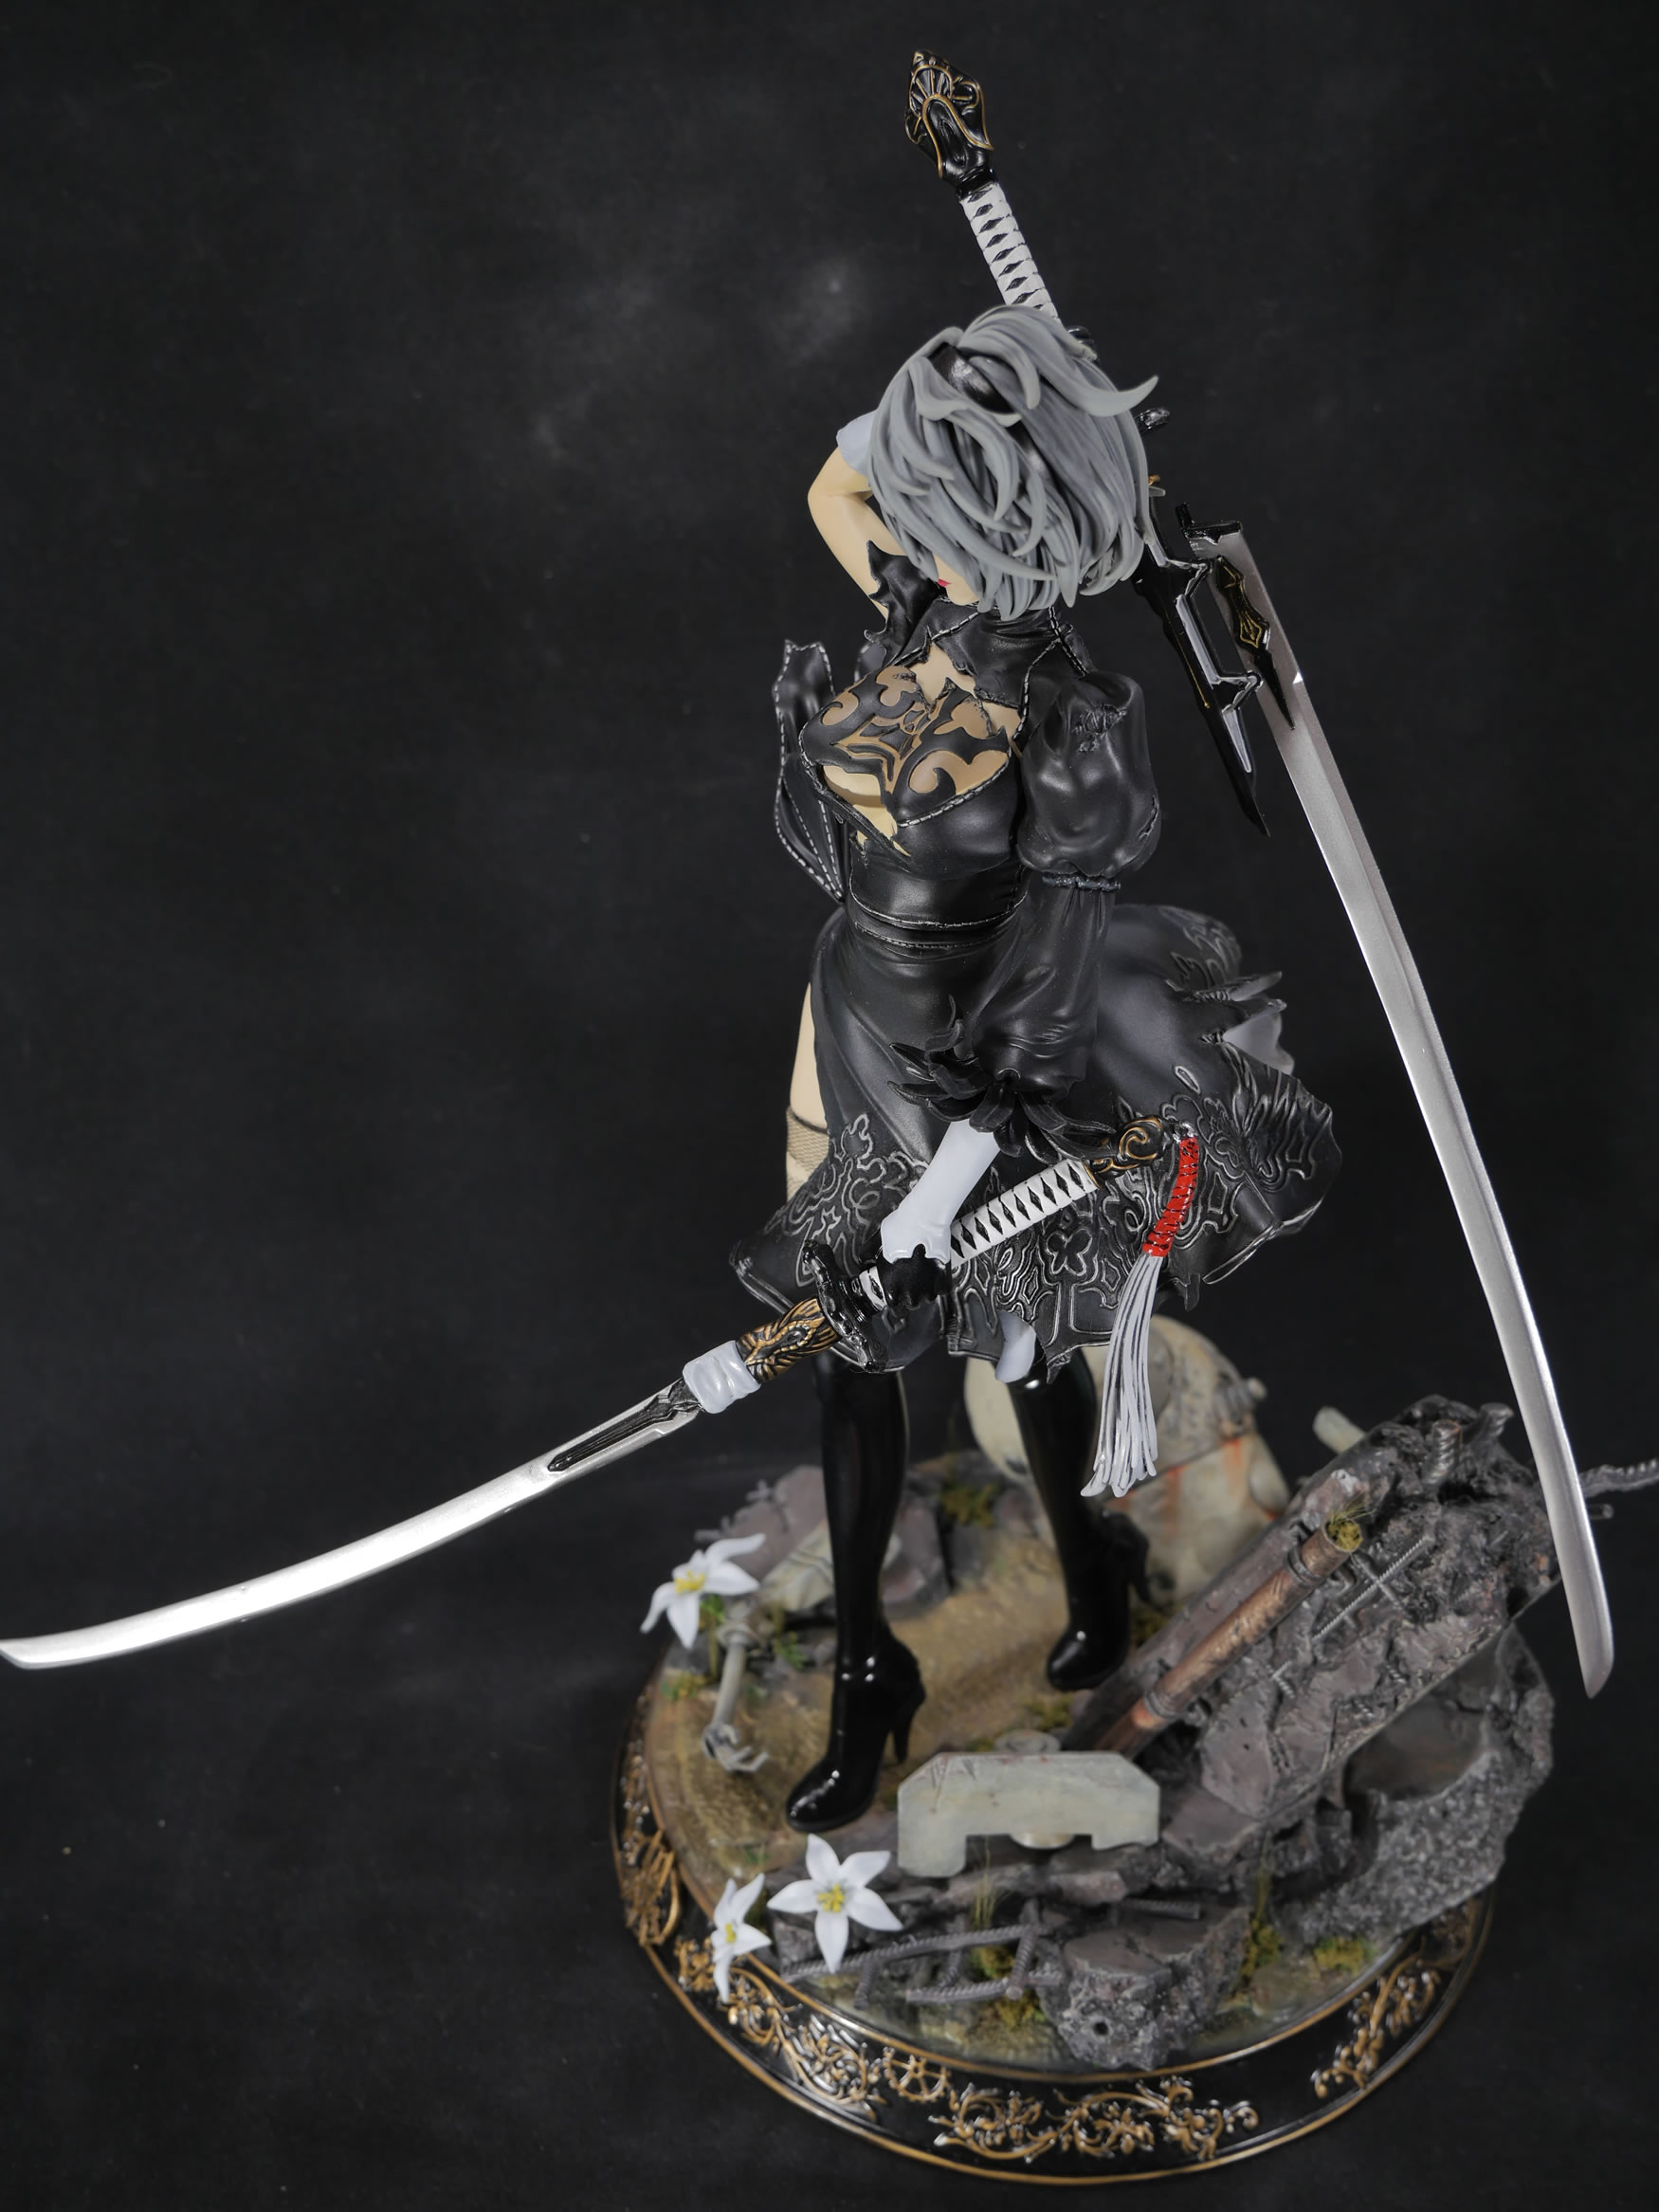
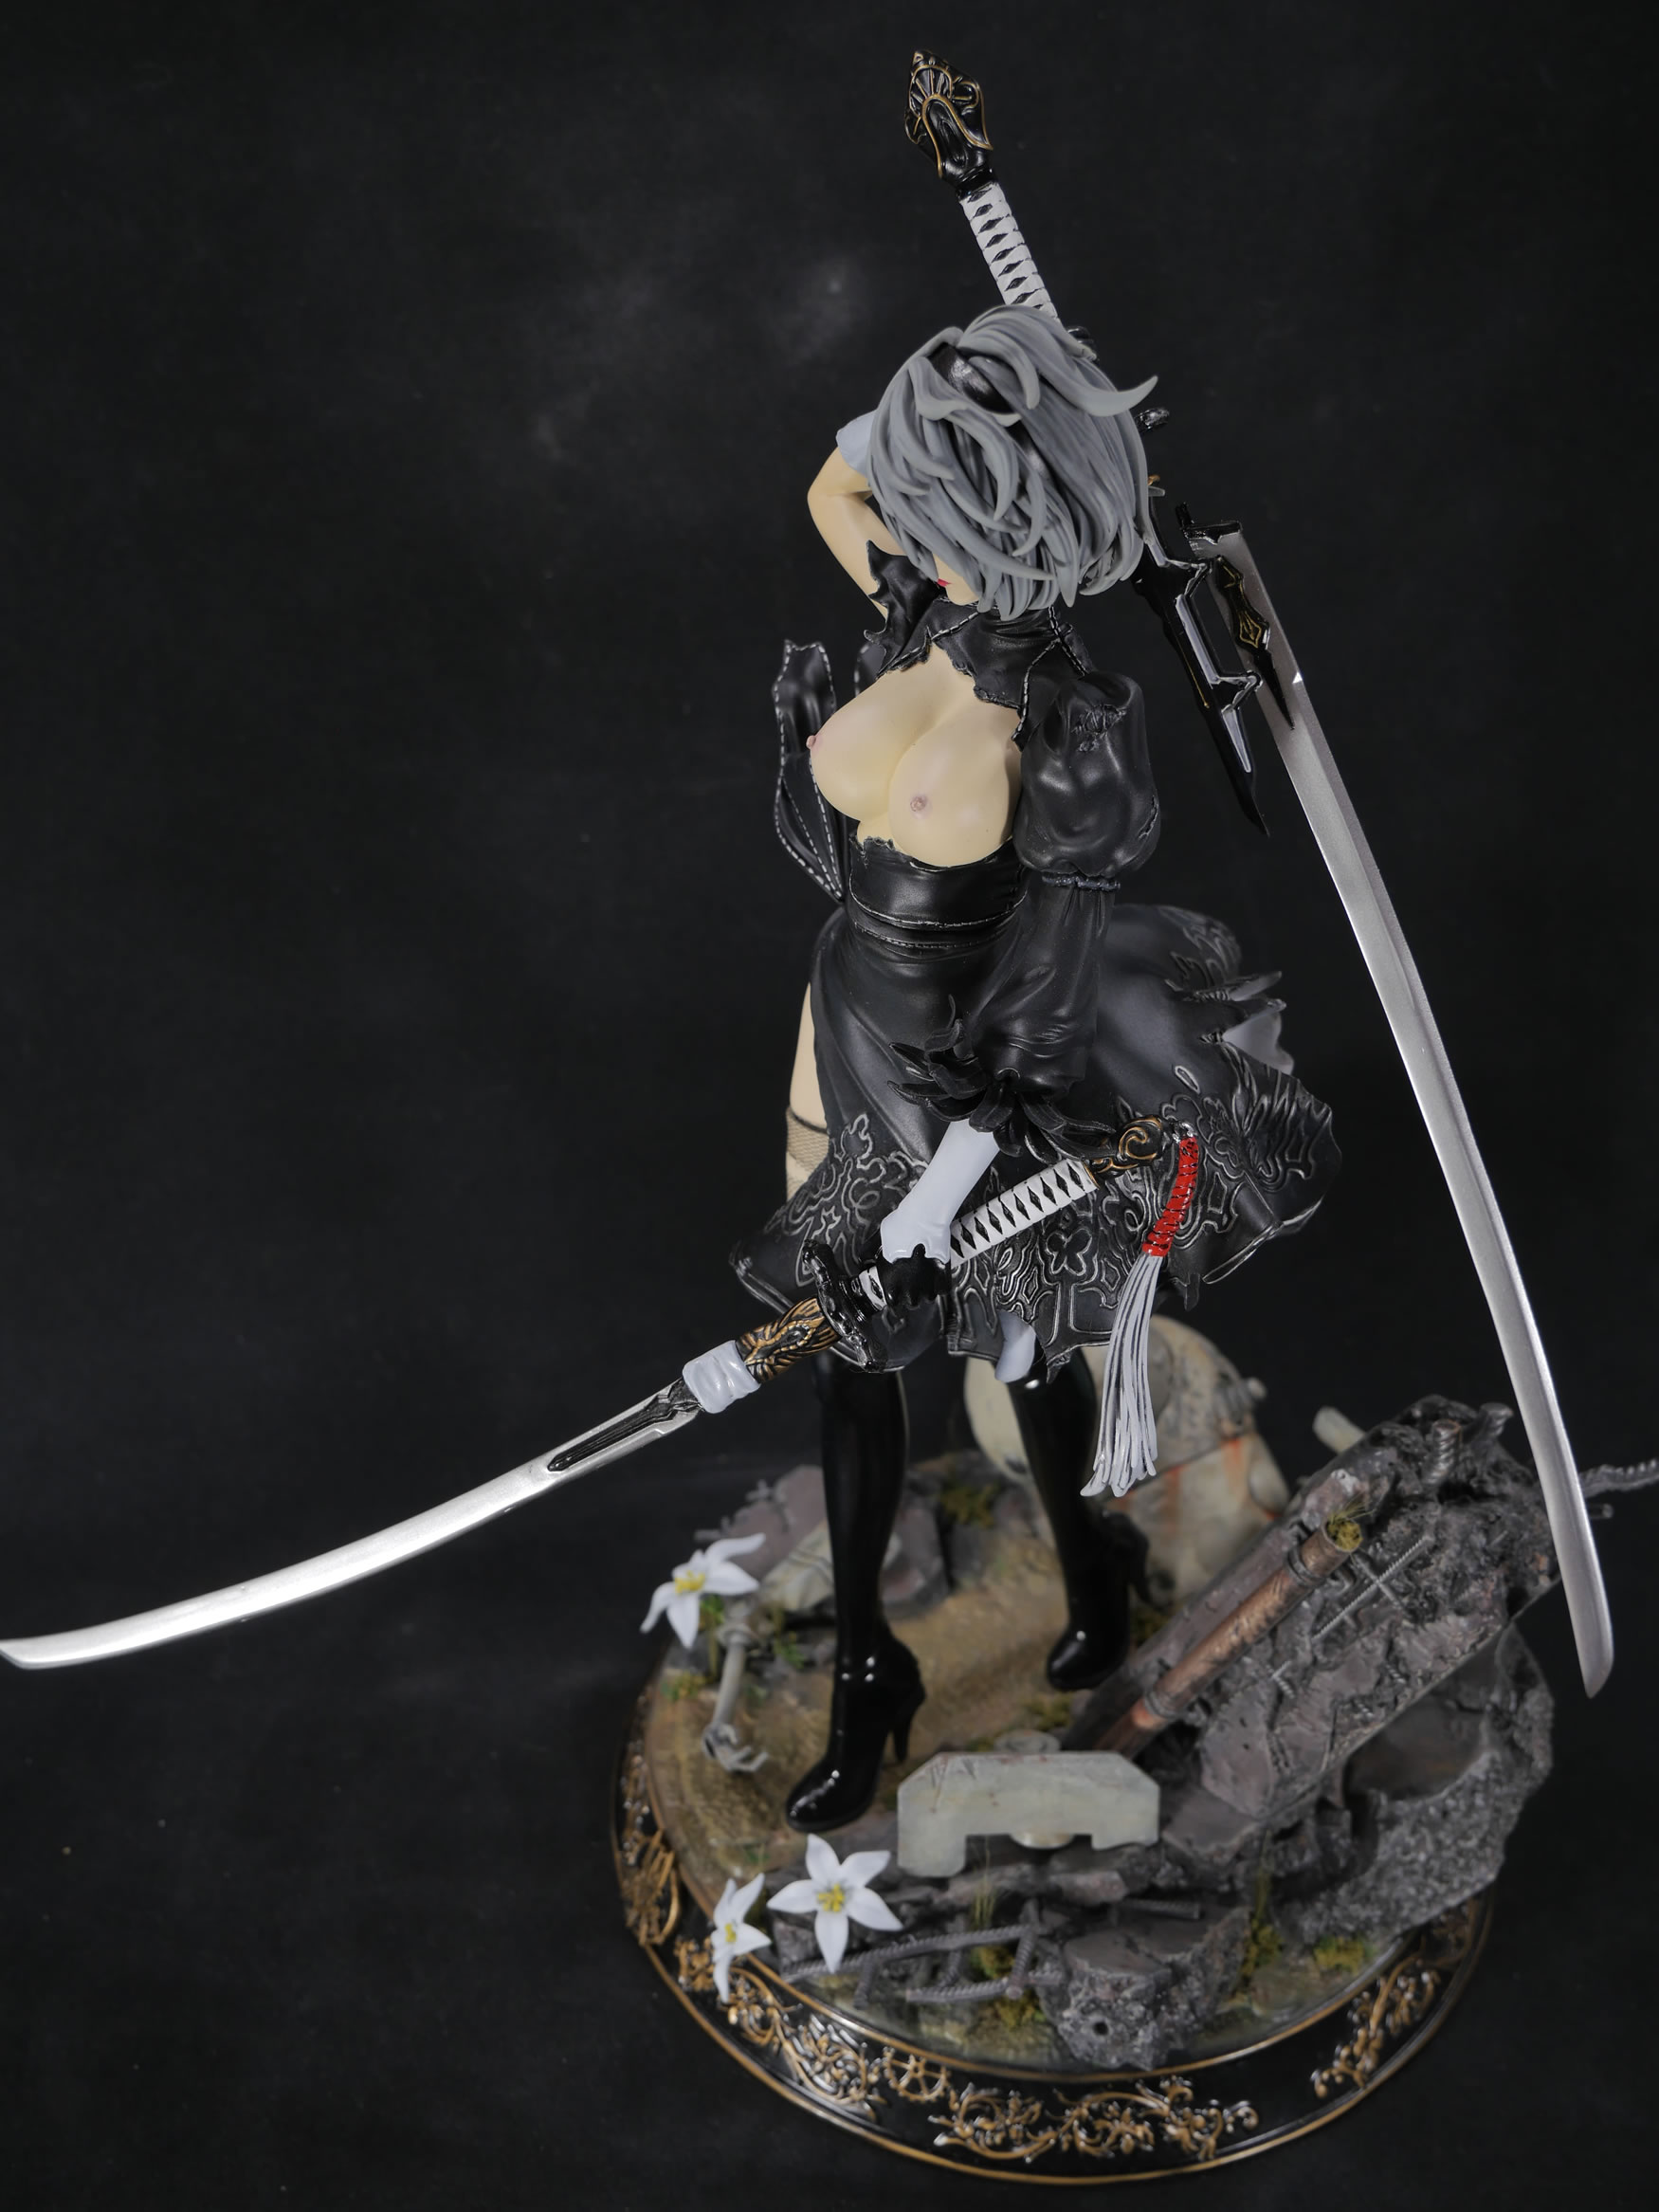
With the base done, I just need to assemble 2B onto the base and take final pictures:
|
|
|
|
|
|
|
|
|
|
|
|
|
|
|
|
|
|
|
|
|
|
|

|
|
|
|
|
|
|
|
|
|
|
|
|
|
|
|
|