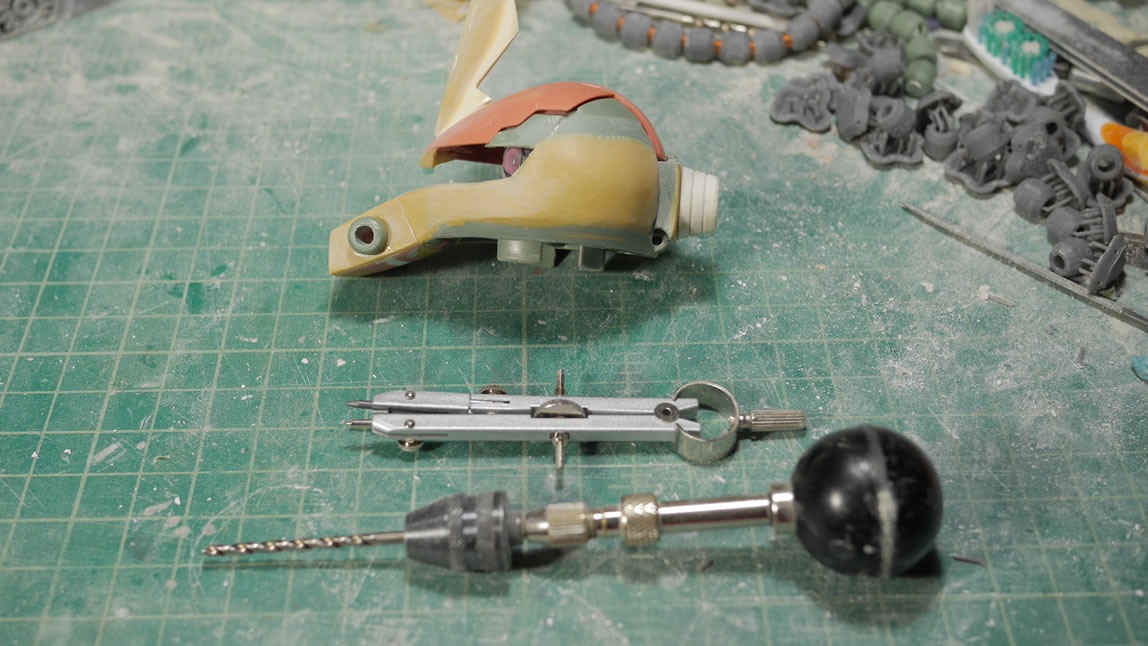
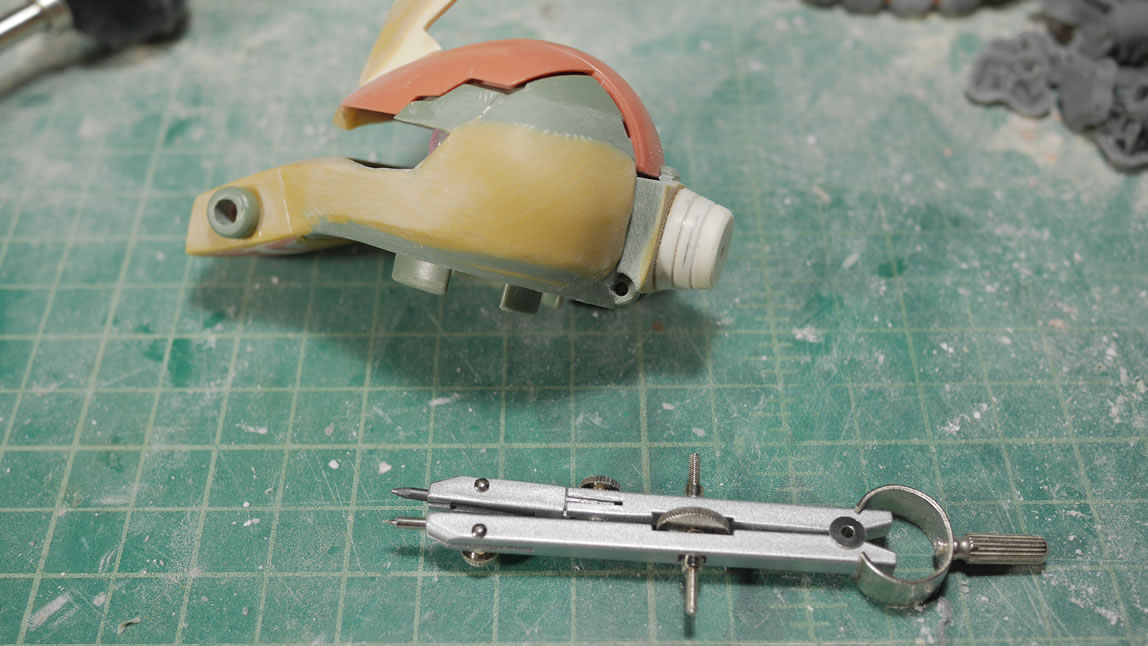
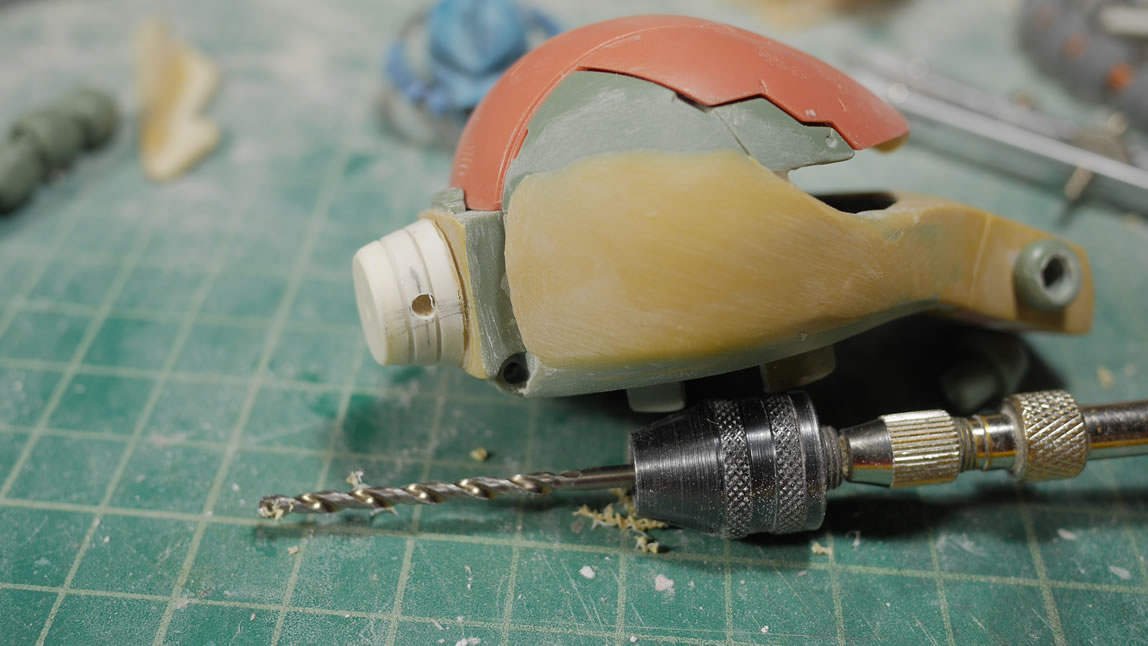
Slow progress, but I hit a decent milestone at the end of this past weekend with the first session of primer, so it’s time for a post. I have a couple of tool discussions here so this will be good for future reference as well. First up is the drafting compass. We’ve all used these in the past to draw circles on paper. There is precision with the wheel adjustment so here, I can use this to mark up an area on the kit for drilling a hole. The back of the head needs a attachment point for the Gouf’s cables. The compass comes in handy to accurately measure how how far from a point of reference to make the marks. And I can easily mirror the mark on the other side of the head so I have symmetry.
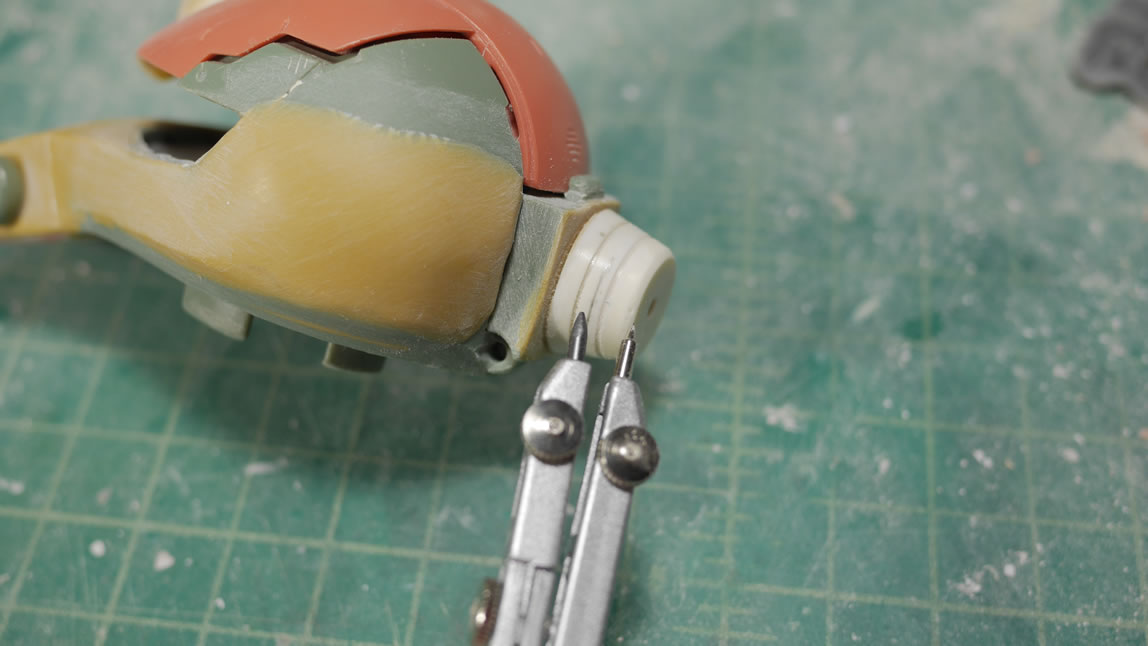
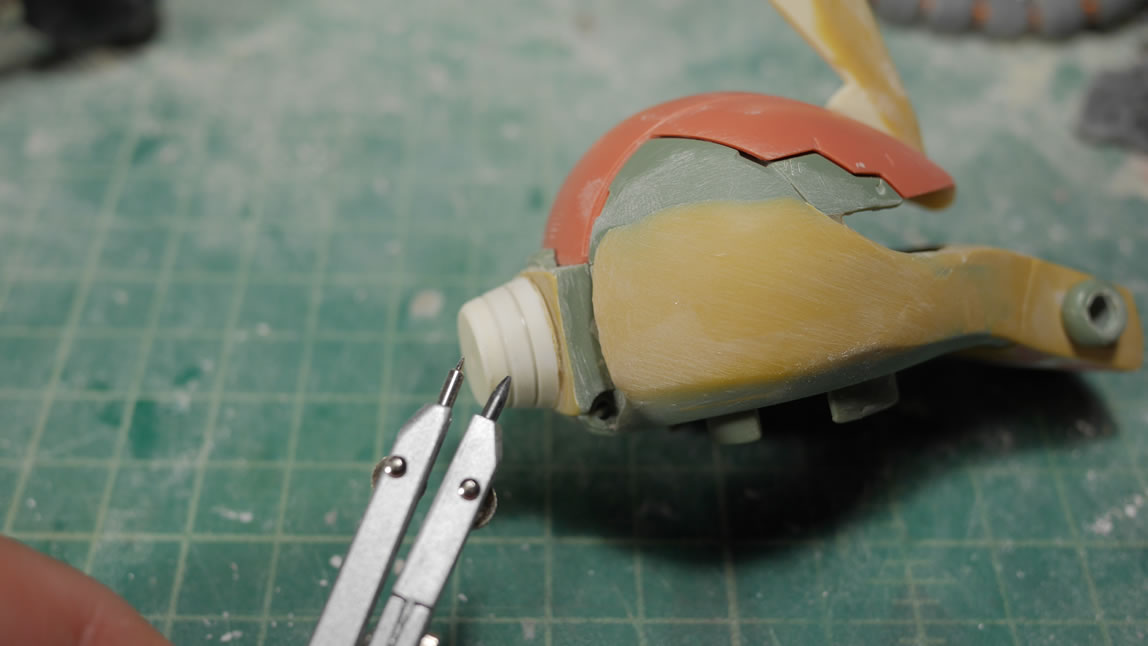
Once marked off, I have a guide for drilling in the holes that will eventually dock the head cables.
If I take the compass and use the needle end as a guide along the bottom of a plastic piece, I can run this line and effectively draw a parallel line to the edges of the parts to draw in a guide that I can then tape along and scribe in a parallel detail line.


More about the build and another tool after the jump.
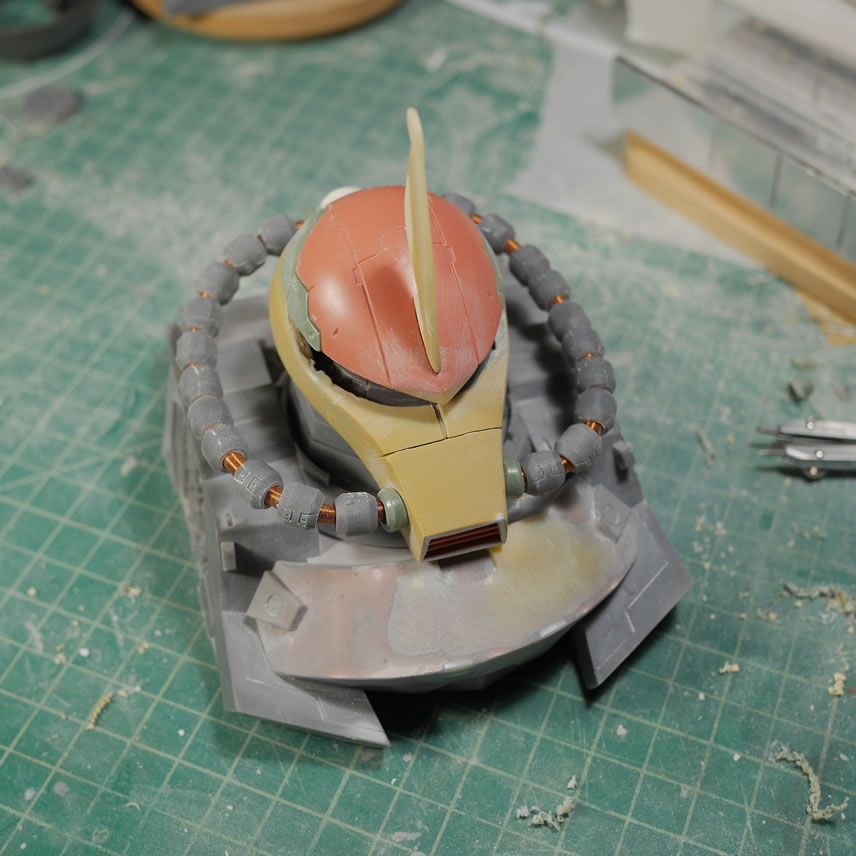
From the last post, I was testing the cable tube fitting. I threaded the other tube and I have a quick test fit for the tube. Things are starting to look less Zaku I-ish and and more Goufy. I also start doing some bends in the cable wire to get the correct shapes. I originally thought that I could just mold the individual collars and then the cable separately, but decided that I wanted to glue them into position. I cut the original cable front connection point, drilled through it, and glued it to the front of the nose where I had drilled in some holes as the docking point for the cables on the front of the head.
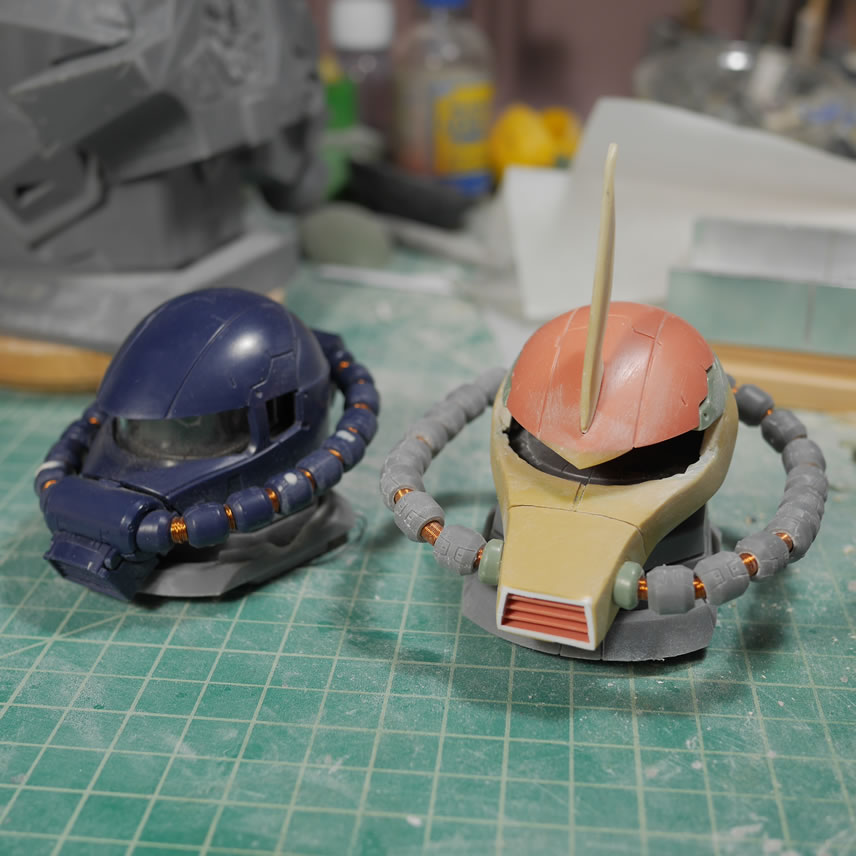
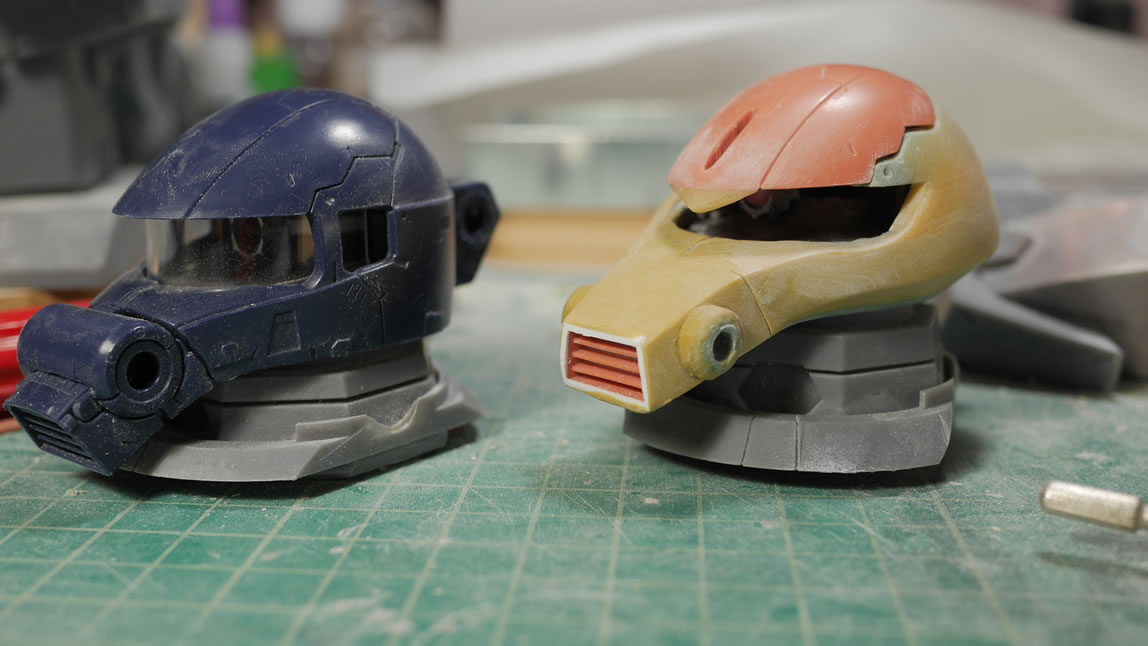
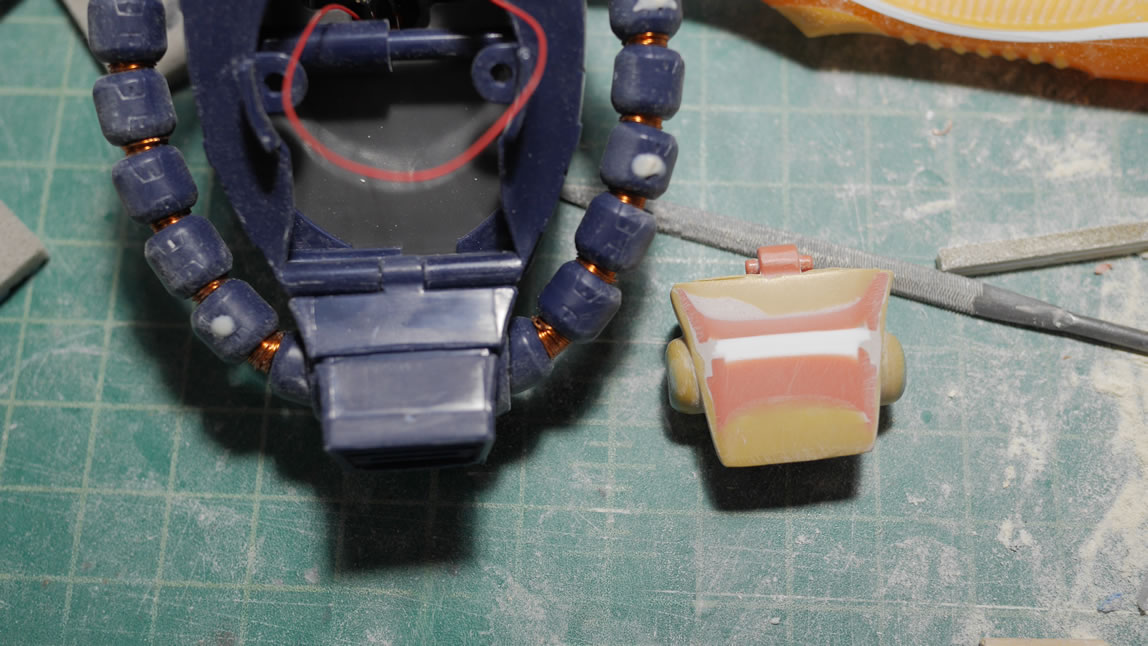
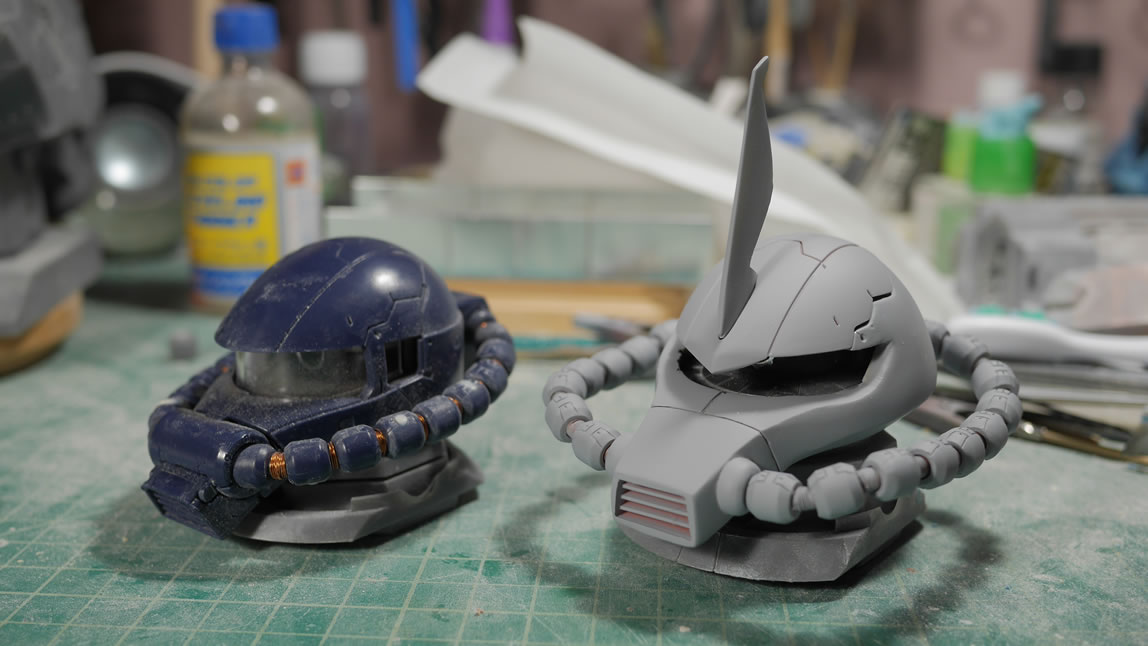
Here is a quick comparison of the Gouf against the almost OOB Zaku head.
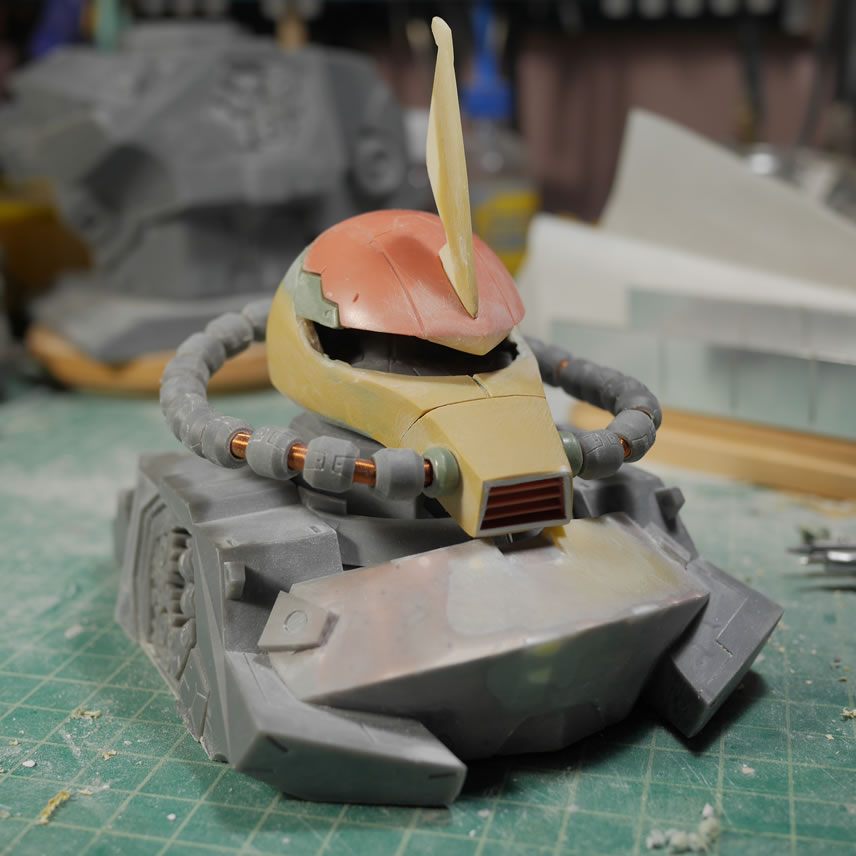
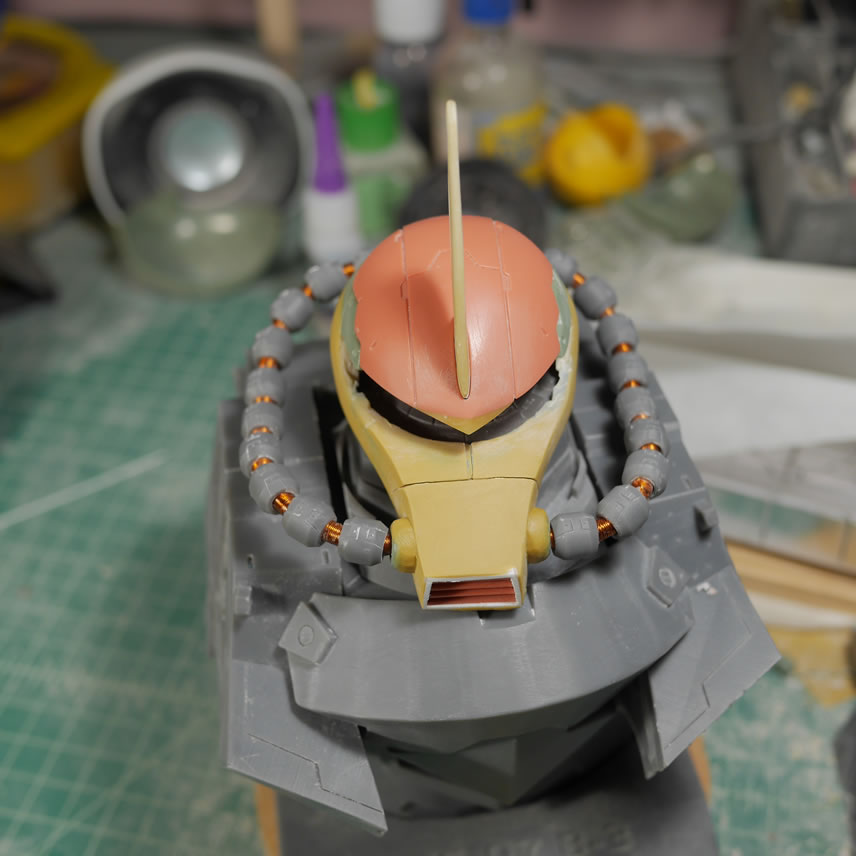
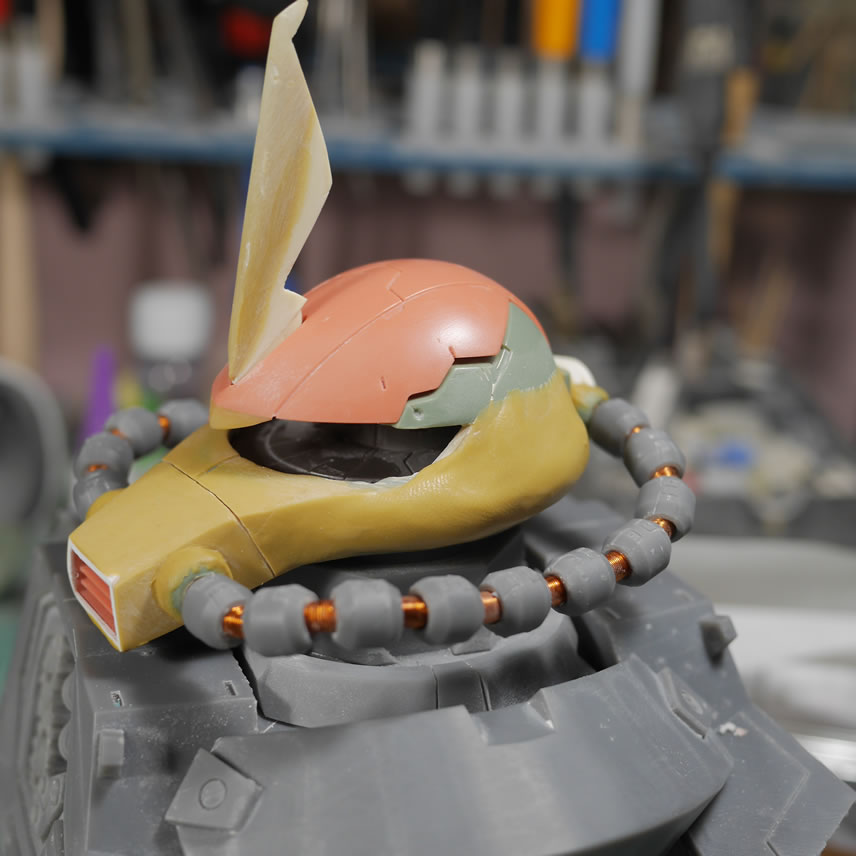
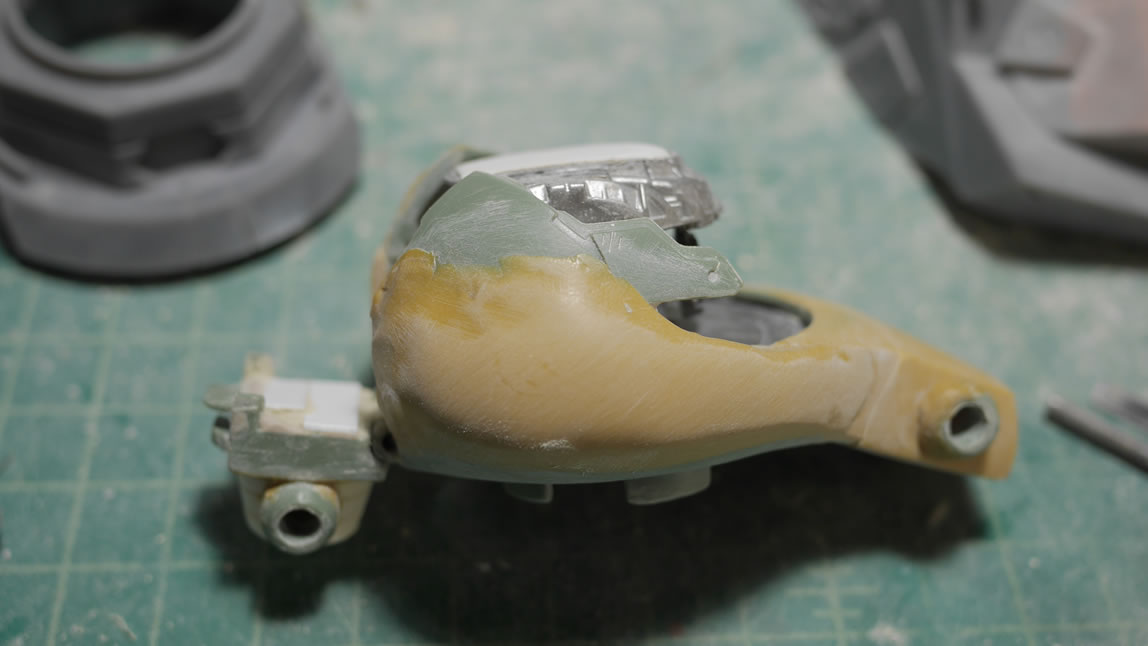
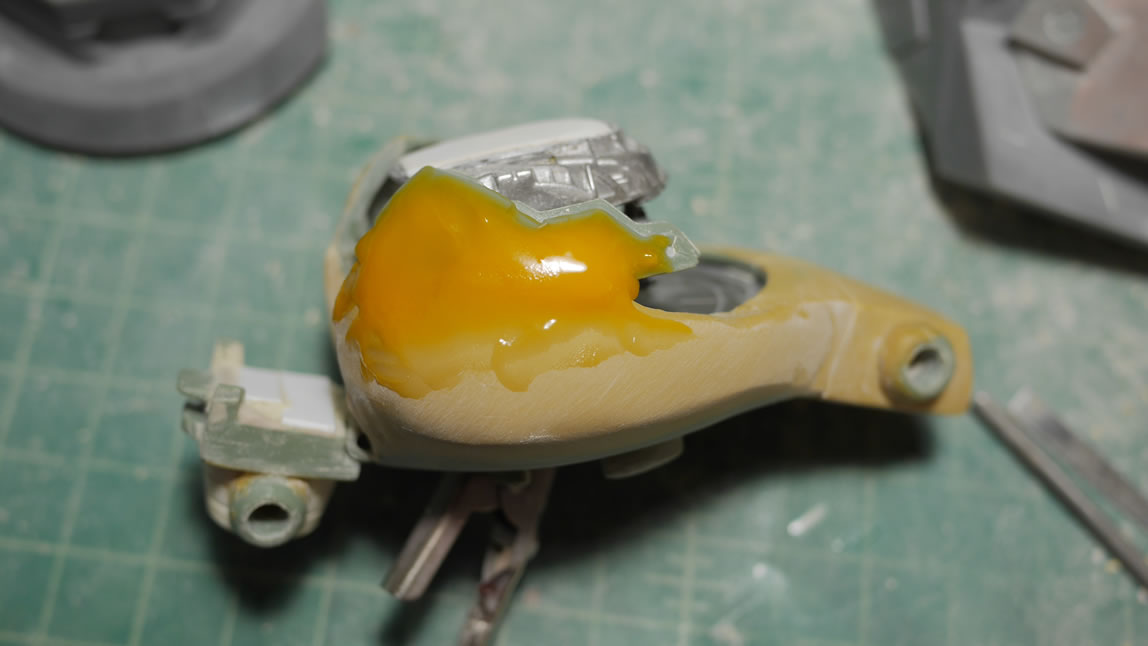
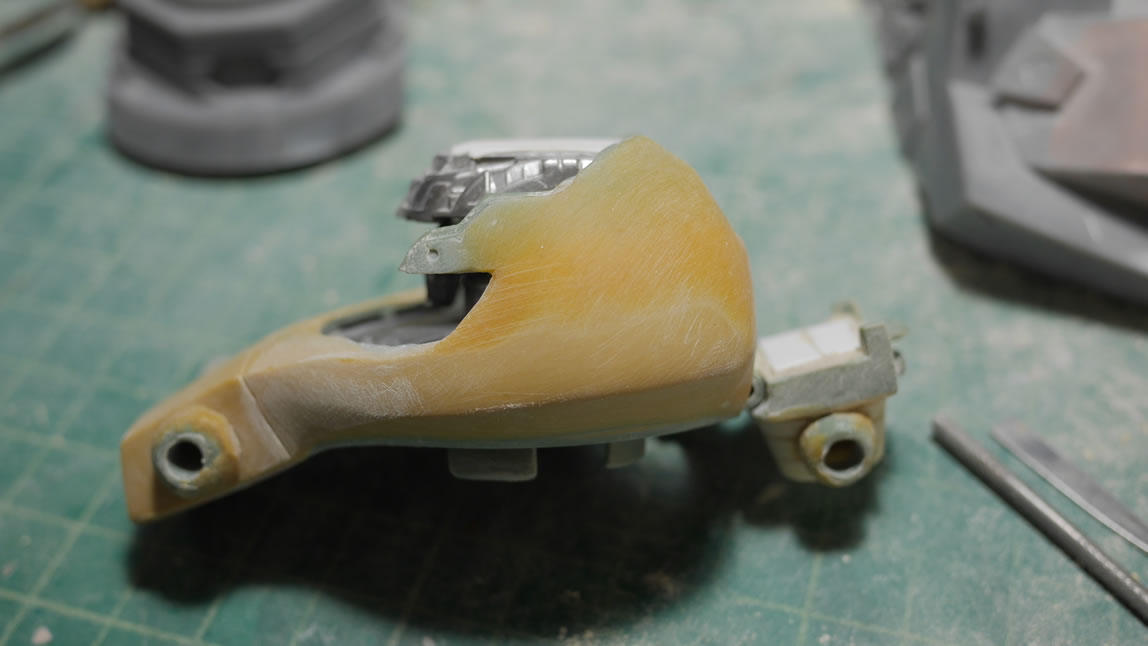
The first picture shows the glued cables. The nose cable attachment point got some putty to fill in gaps and solidify that connection. CA glue is a bit brittle so too much twisting snaps this piece off the nose. Putty helps cement the add on piece. The cables flare out from the head a bit by design. I based the design off the Gouf Custom head from the Neo Grade resin conversion kit I built several years ago. But they looked to be flared out a little too much, especially if compared to the Zaku where it looks fairly tight against the sides of the head. Putty is applied to the sides of the head to flare out the cheeks and sides of the head. The cable collars are glued to the frame cable so that can be twisted and shaped into a final form.
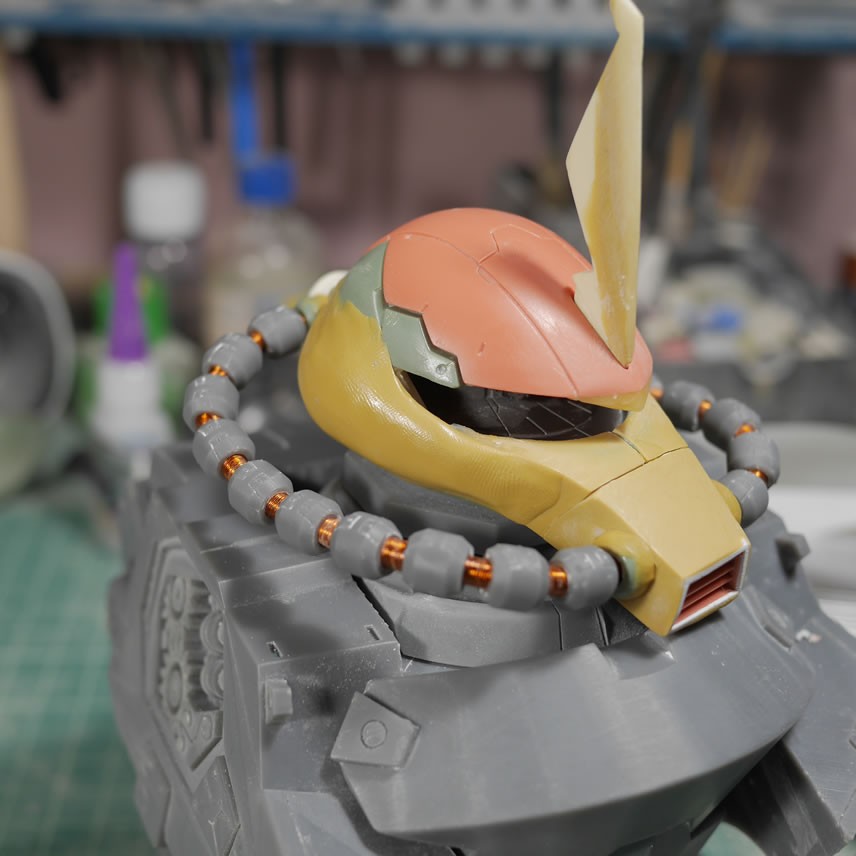
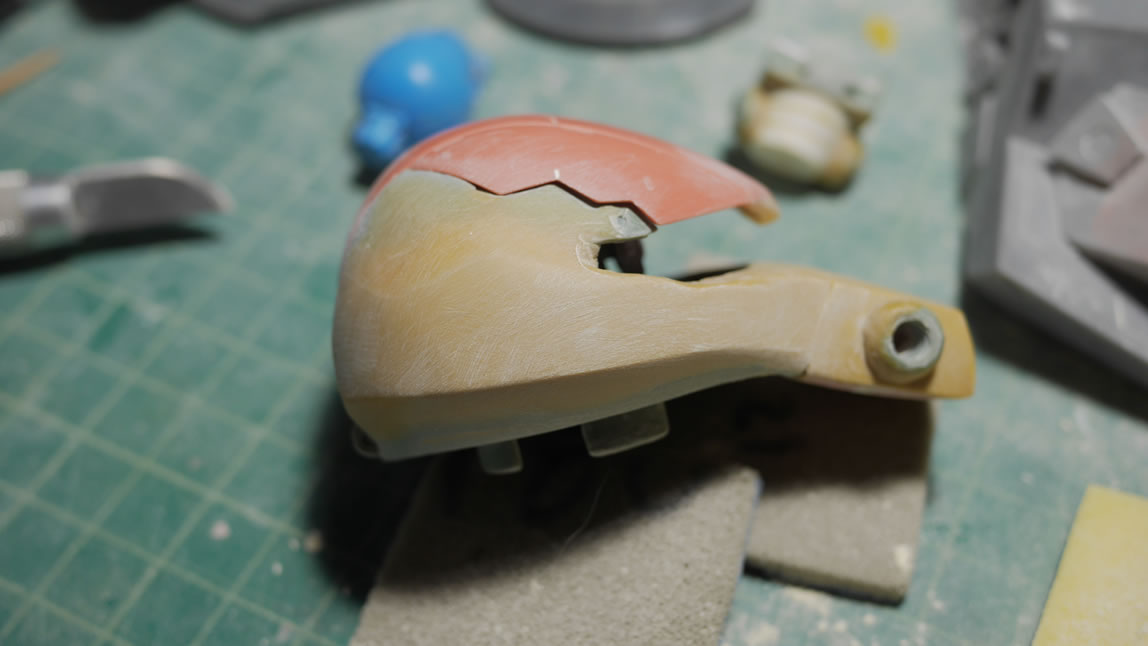
The sides of the head are sanded down to get the final shape. Light curing putty is applied to smooth out transition areas and do more build up from the lower sides of the head upward. It is all sanding sticks and sanding sponges from here on out.
In the middle of sanding and cleaning up things, I snapped a picture of the Zaku head as a comparison to how different the sides of the heads as well as the nose looks now. The cropped off top of the head is noticeable too.
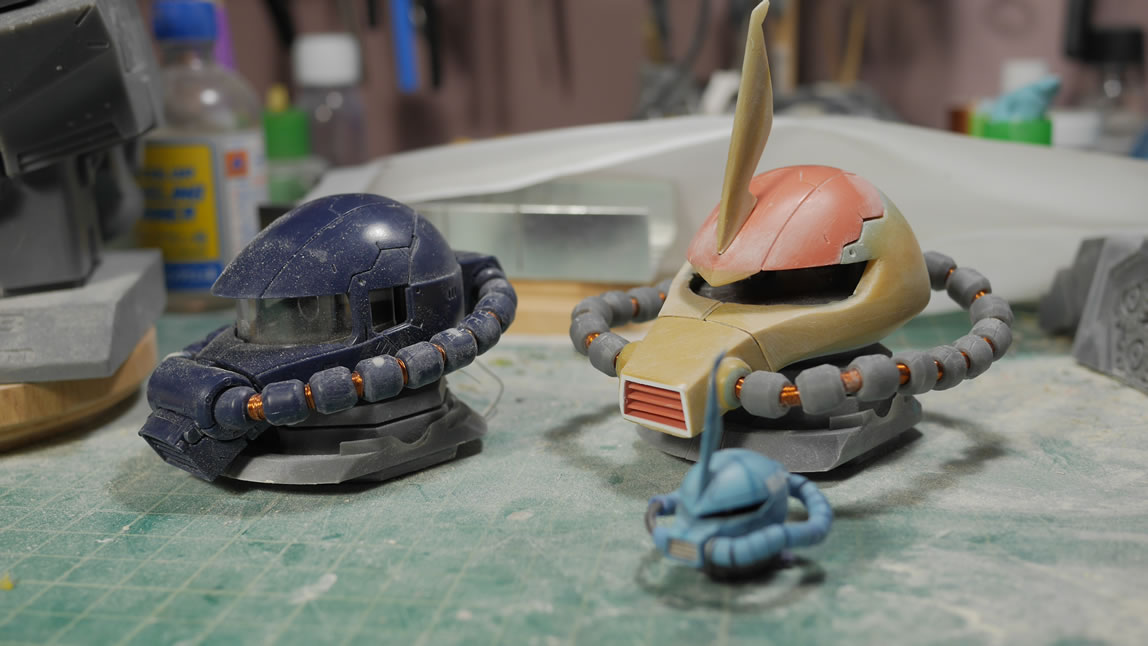
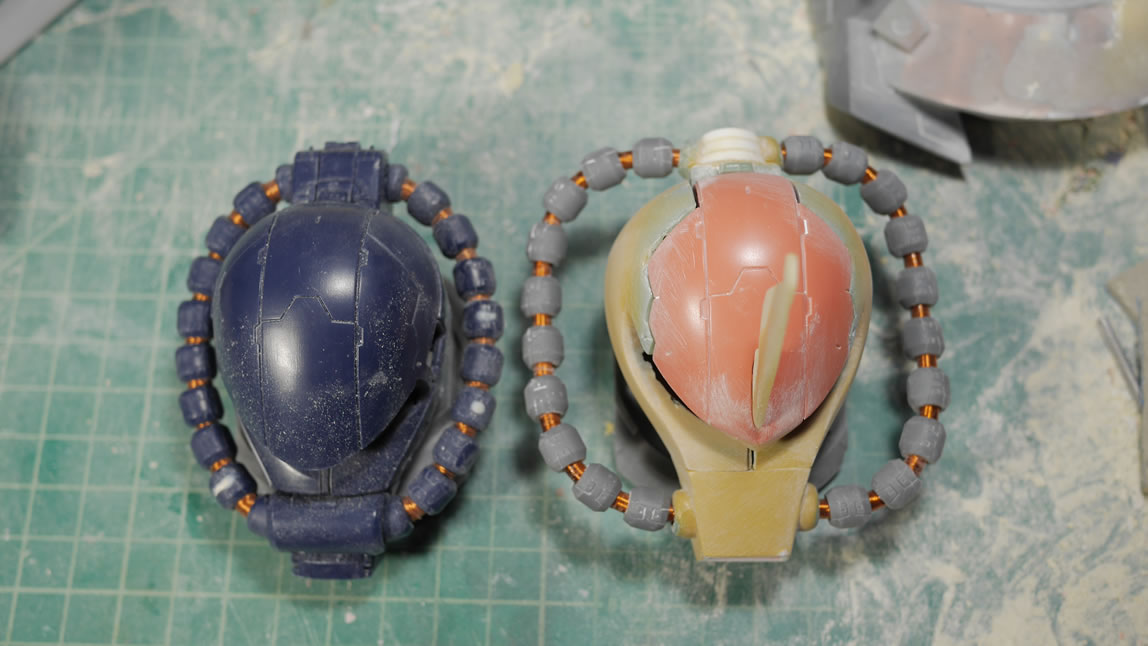
Cables are now ready. I glued the end pieces of the original Zaku cable to the back of the head at the holes from the beginning of this post. Putty is applied here to help cement them into place. The cables fit on the front and back and we have more comparison test shots. The original part I used for reference is in the middle picture. The last picture of the set is the bottom side of the nose to see that I only extended it by very little, but it makes a huge difference.
Lots and lots of sanding to smooth things out before the first primer session. I’m not going to worry about catching everything, but I’m trying to catch as much as possible. Things still look pretty mismatched with all the different putties, different kit colors, etc. But still sanding and doing a few details.
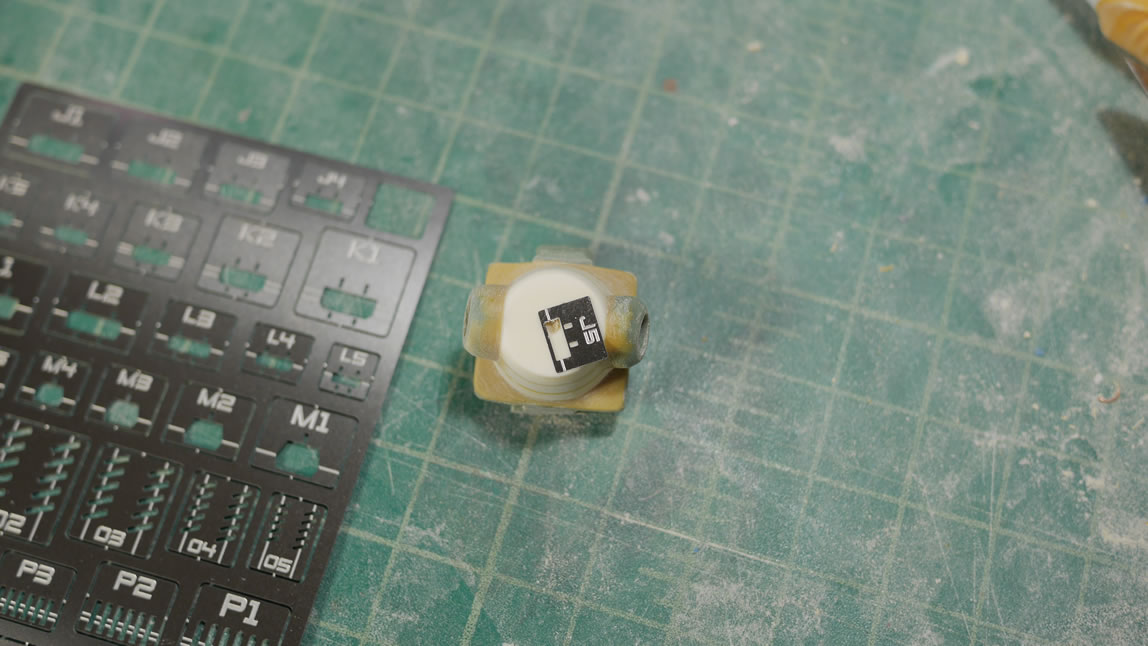
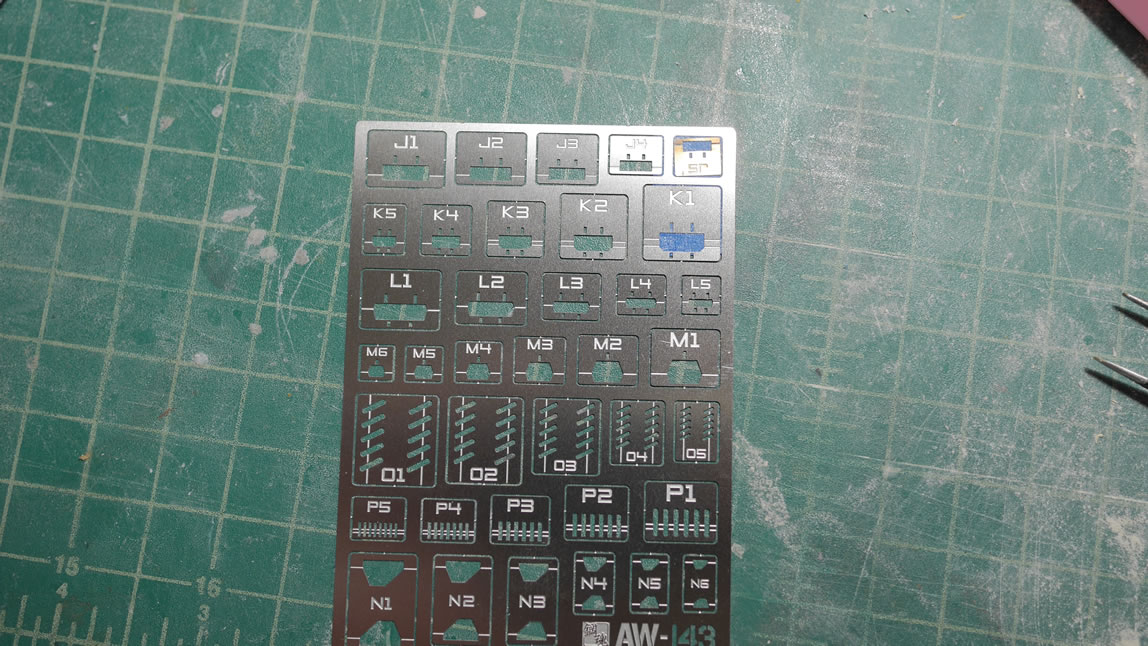
Next up is something not new, the scribing templates. I’ve had and been using Hasegawa scribing templates for at least 15 years now. What is new, is how some newer companies are approaching the scribing template. It’s still a sheet of templates, but each template detail is detachable from the template tree. This makes working with the templates on smaller pieces much easier than trying to position a 4 inch long template sheet.
- Step 1: Remove the template from the tree and position it on the part you want to scribe
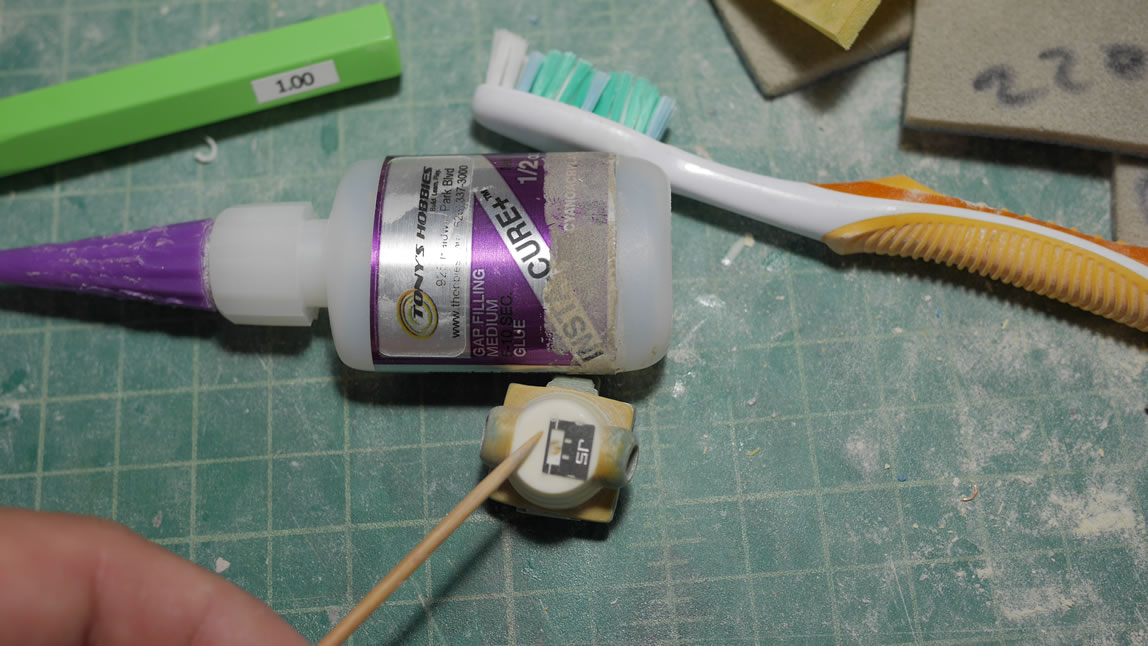
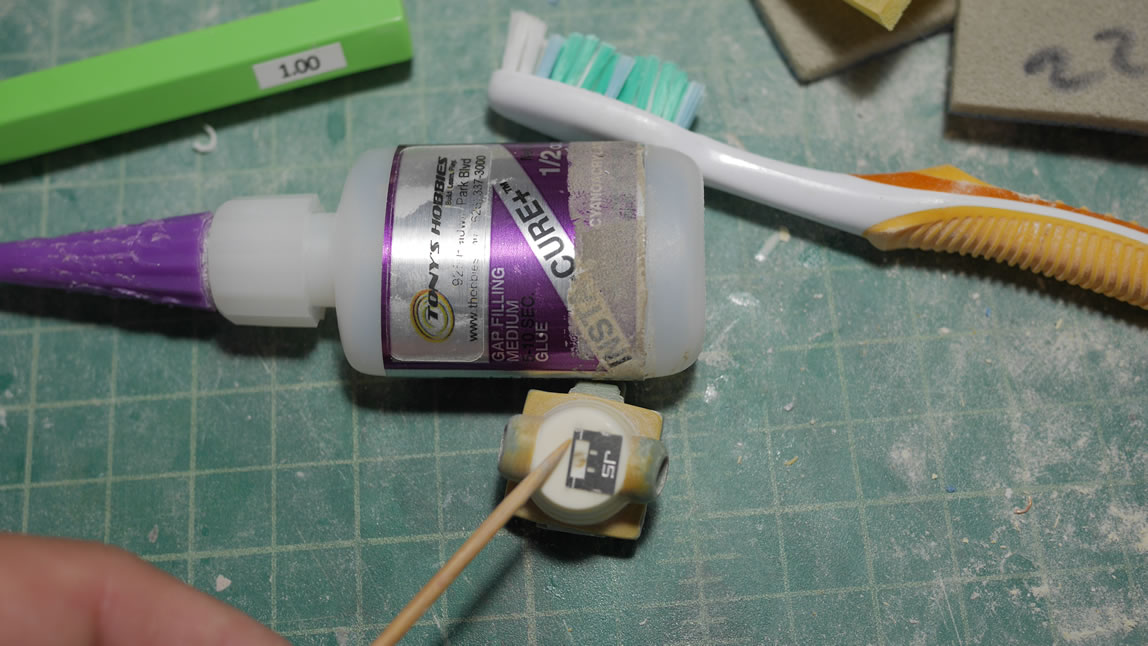
- Step 2: Attach the template to the surface of the part. In the past I’ve used tape, but I have found that this solution isn’t the best. The template will move if too much pressure is applied while scribing. What I’ve learned recently, is that folks have been using CA glue to attach the template to the part. This is great as CA glue dries and bonds very quickly, yet the actual bond is quite brittle so that the template is easily removed from the part. Here I use a toothpick and apply CA glue to 4 corners on the edge of the template.
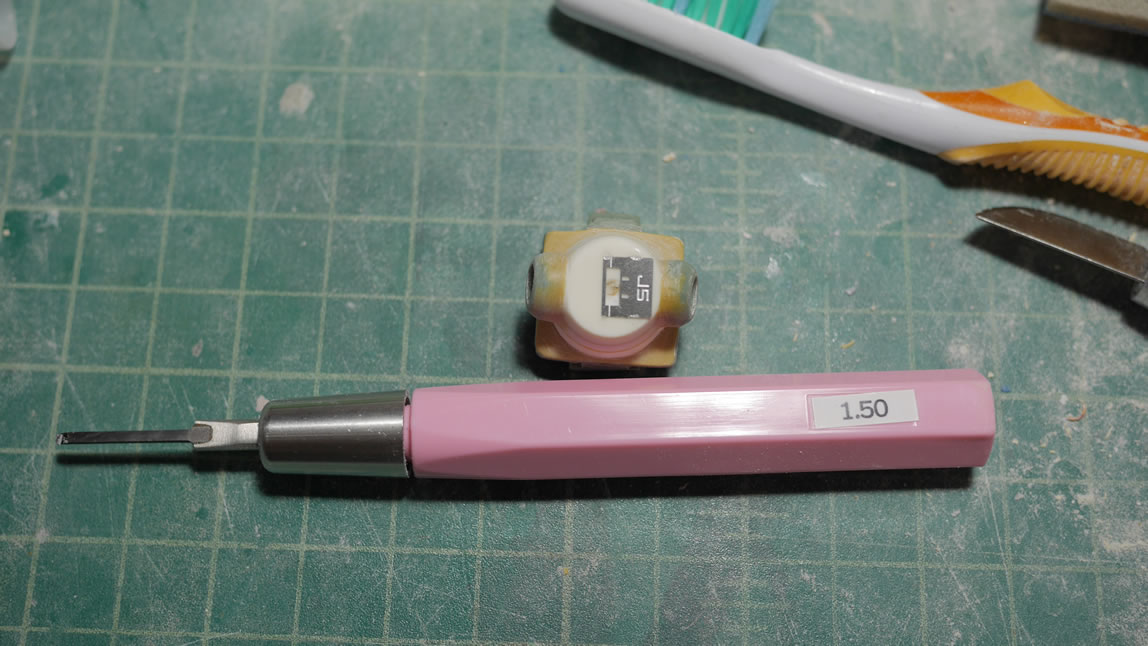
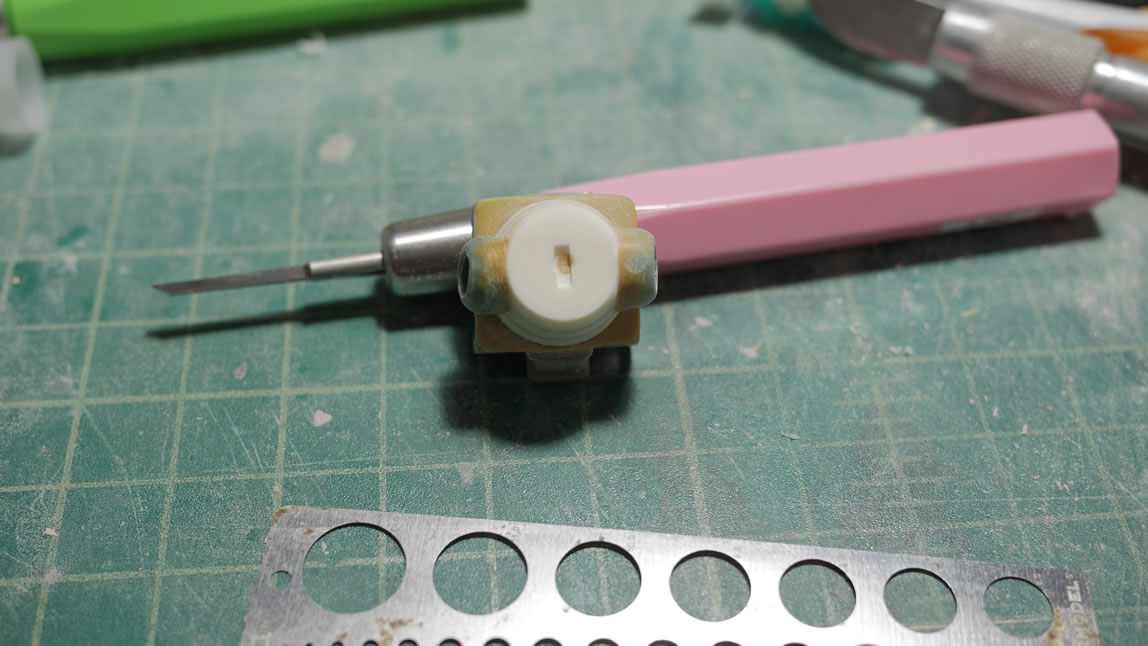
- Step 3: Scribe using the template as a guide and whatever scribing tool you like. Here I’m scribing in a 1.5mm recctable detail.
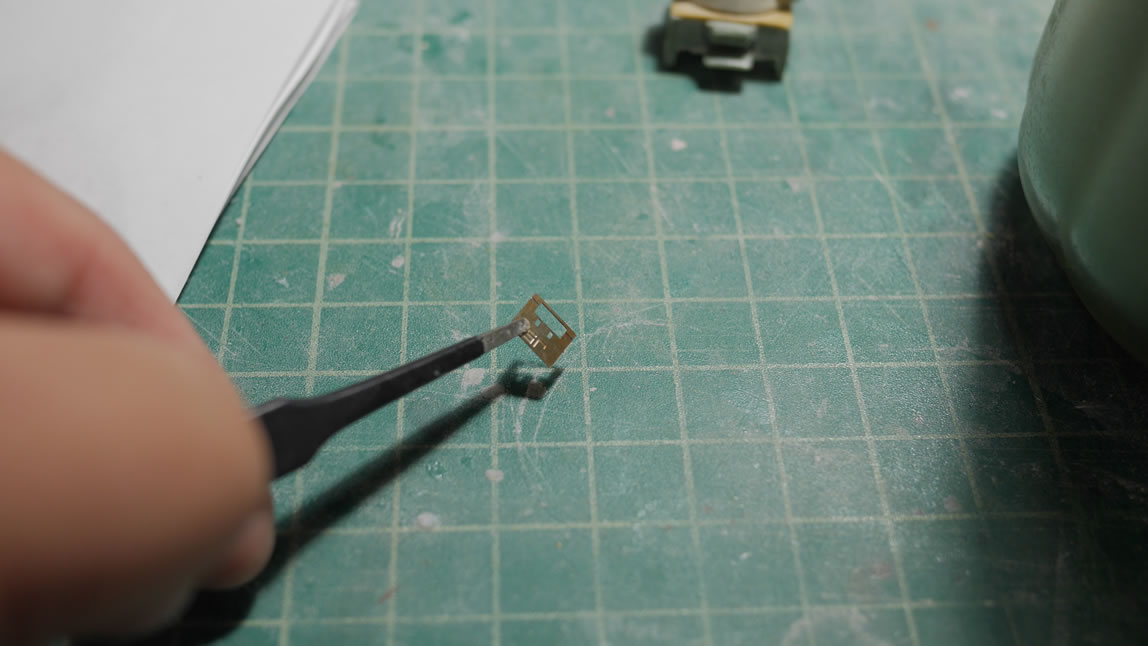
- Step 4: Pull the template from the part. I used a wide hobby knife blade and just twisted and the template popped off.
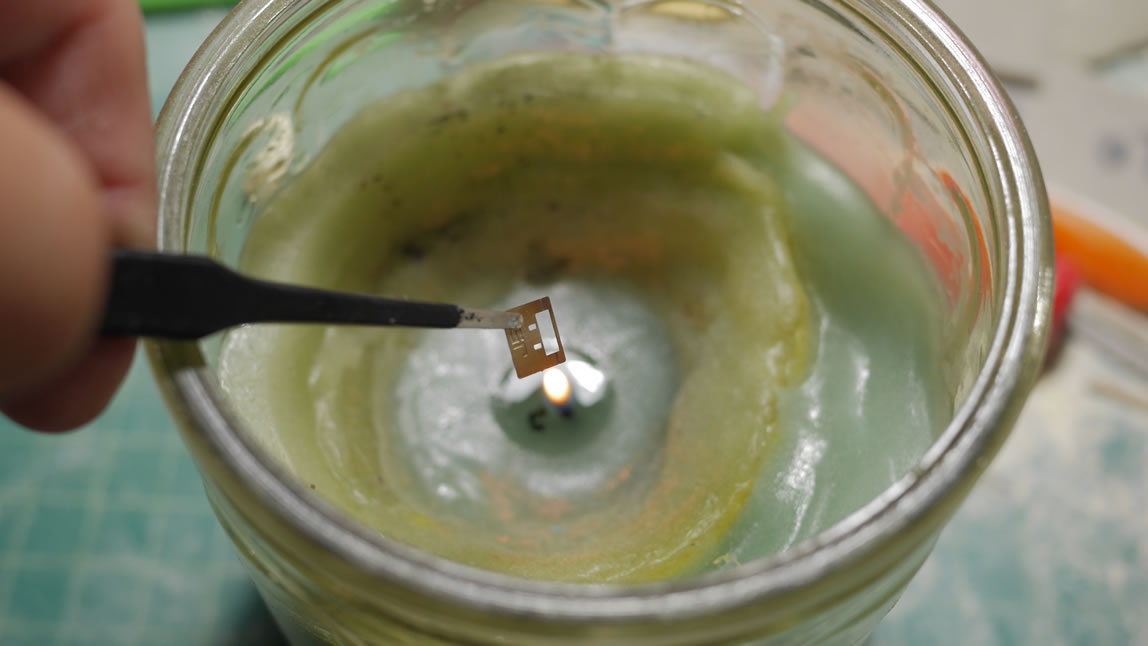
- Step 5: Clean off the excess CA glue from the template. Fire works well here. I lit a candle and using some tweezer, held the template and burned off the excess CA glue. Do this in a well ventilated area. The CA glue is only on the edges of the template so this was easy to do.
- Step 6: Place the template back with the tree and attach with some masking tape so that I don’t lose the template. The the template is slipped back into the packaging plastic it came in.
- Step 7: Clean off the excess CA glue off the part with a sanding stick.

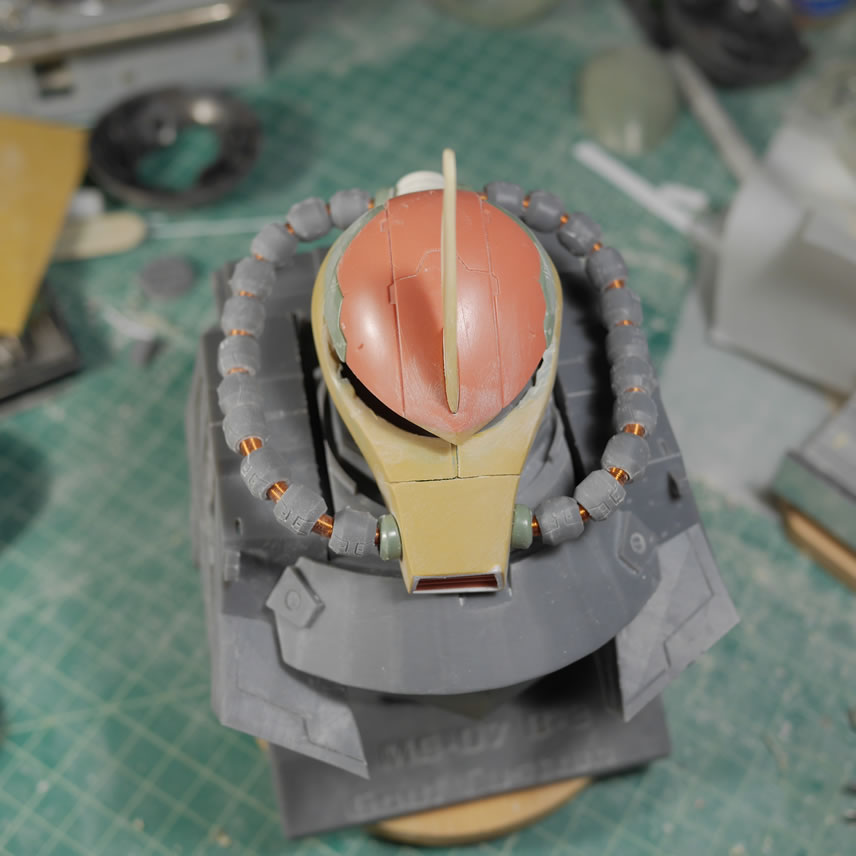
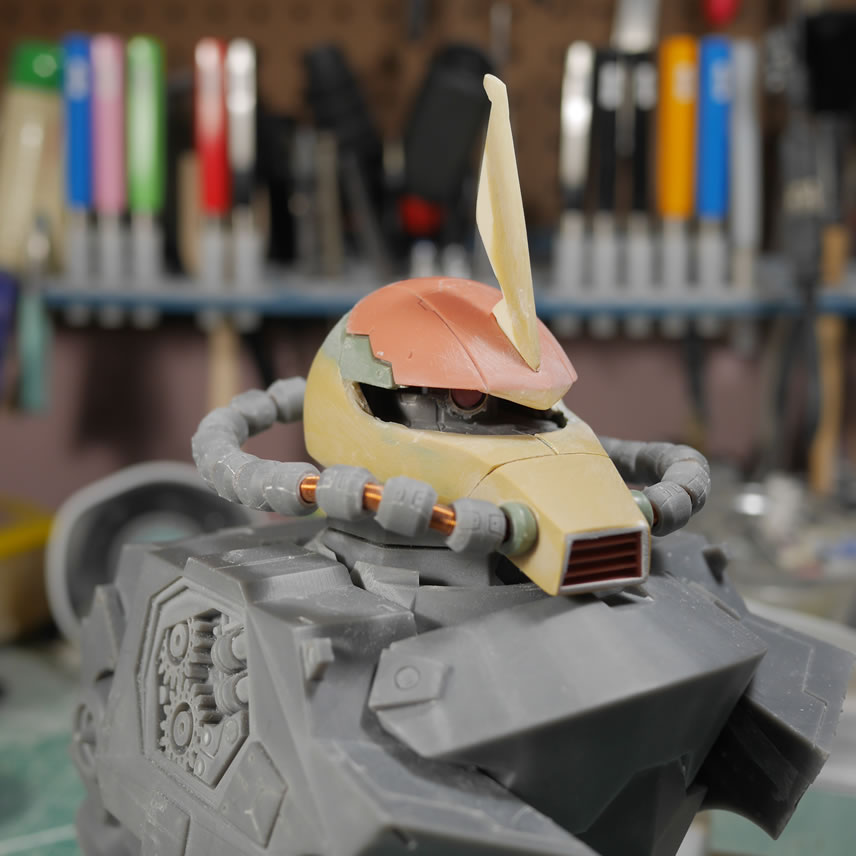
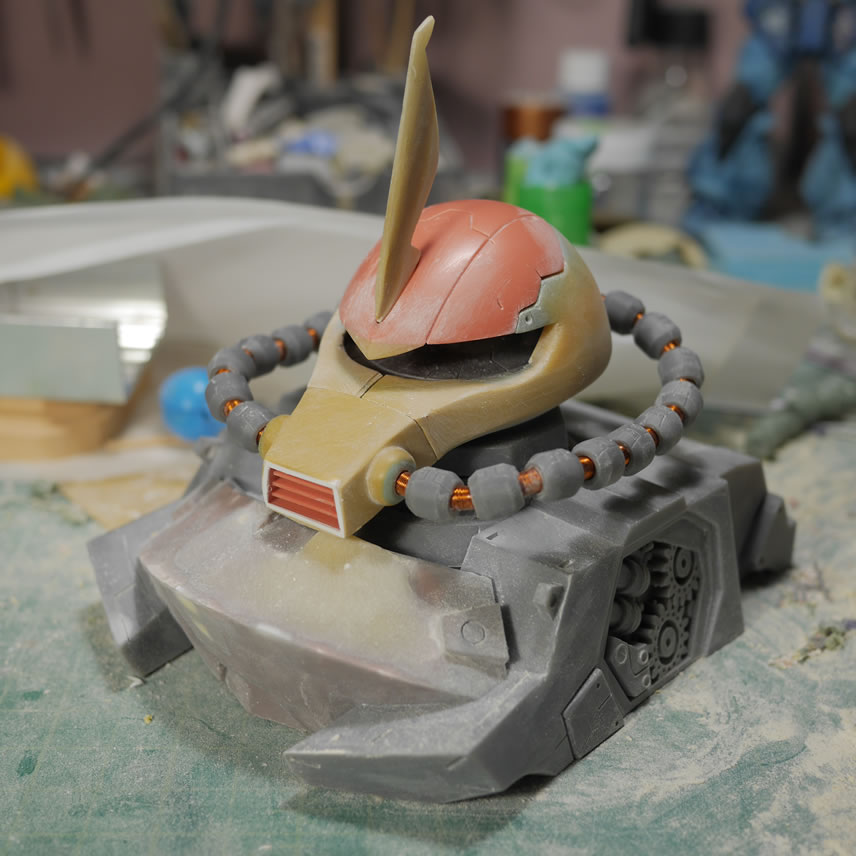
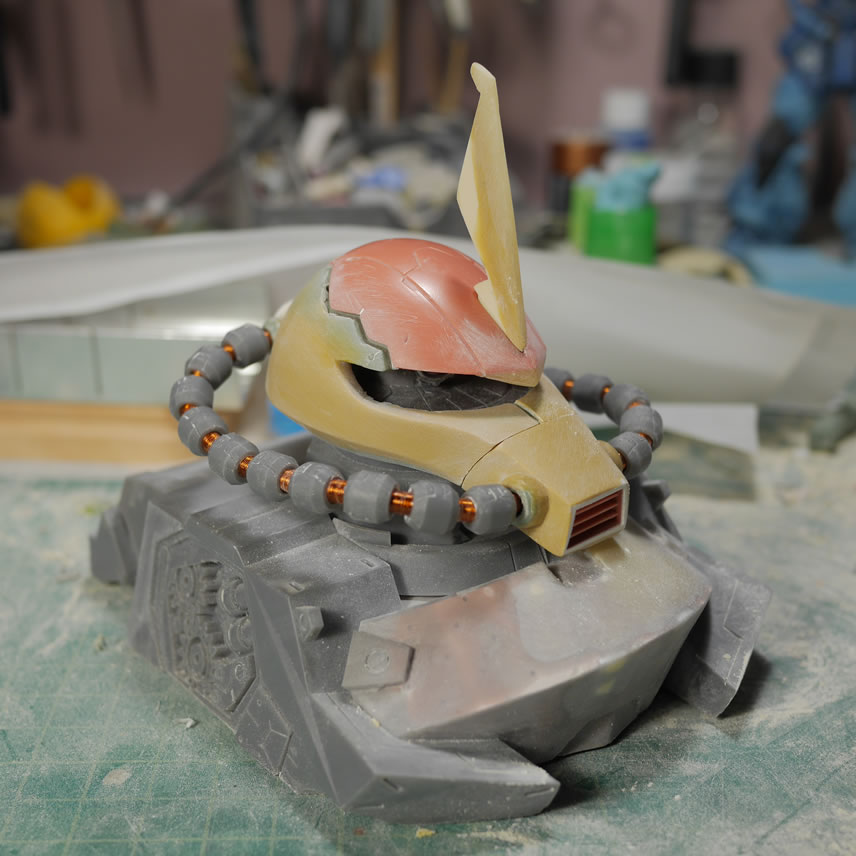
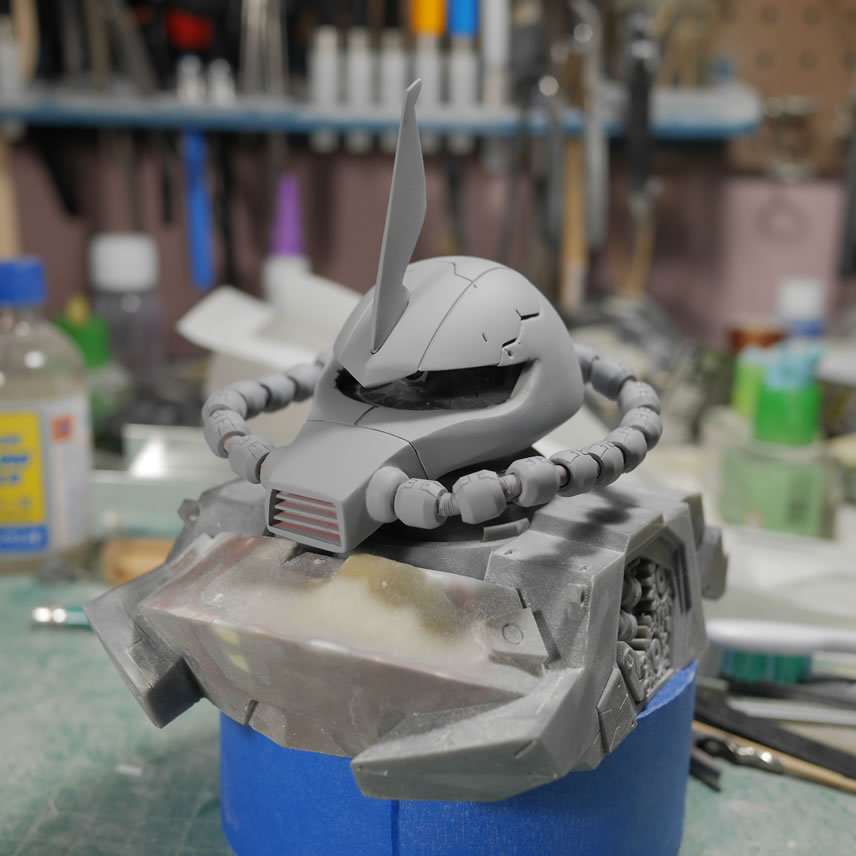
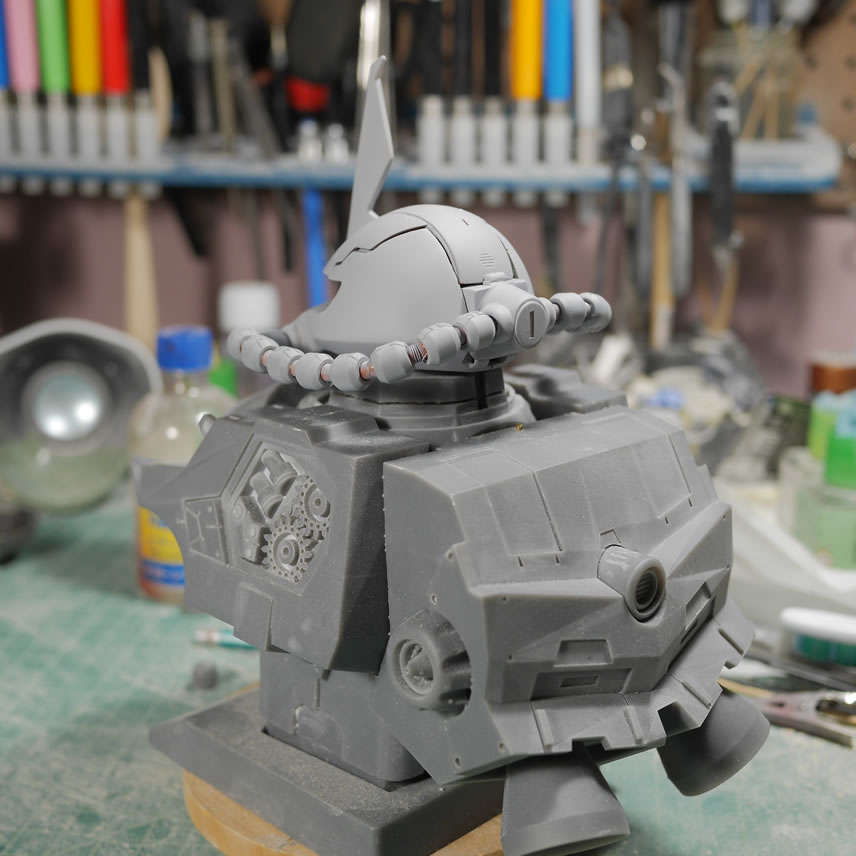
Details sanded, and the parts are prepared, time to spray some primer. A quick assembly after letting the primed part sit in the dehydrator for a few hours at 122 degrees. Its starting to come together.
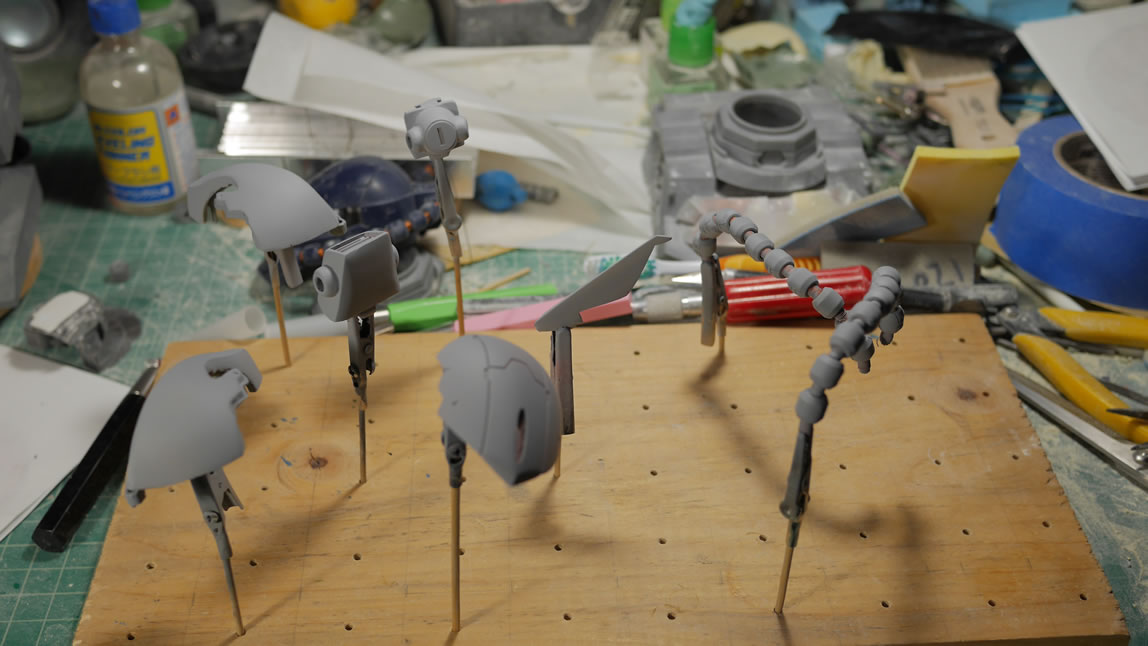
First a test fit on the half bust piece.
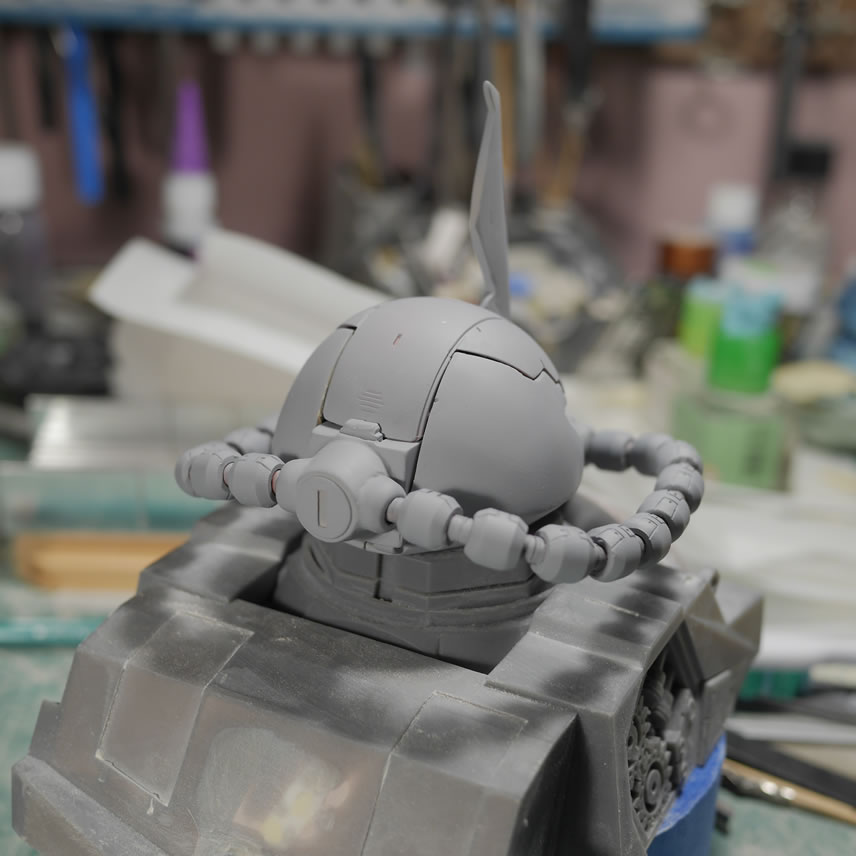
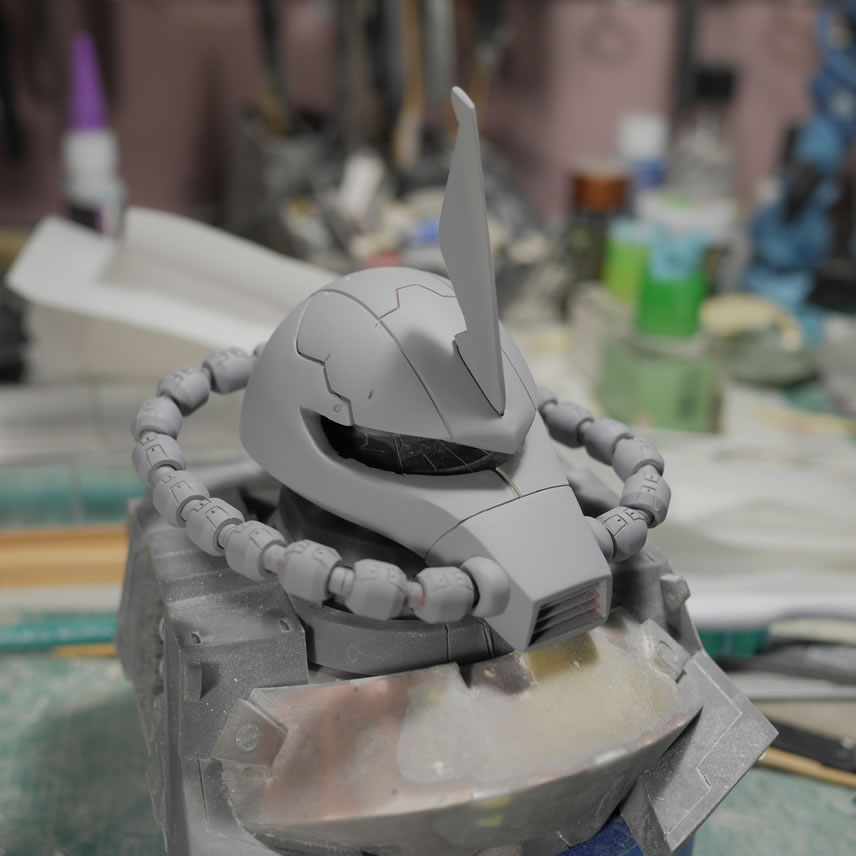
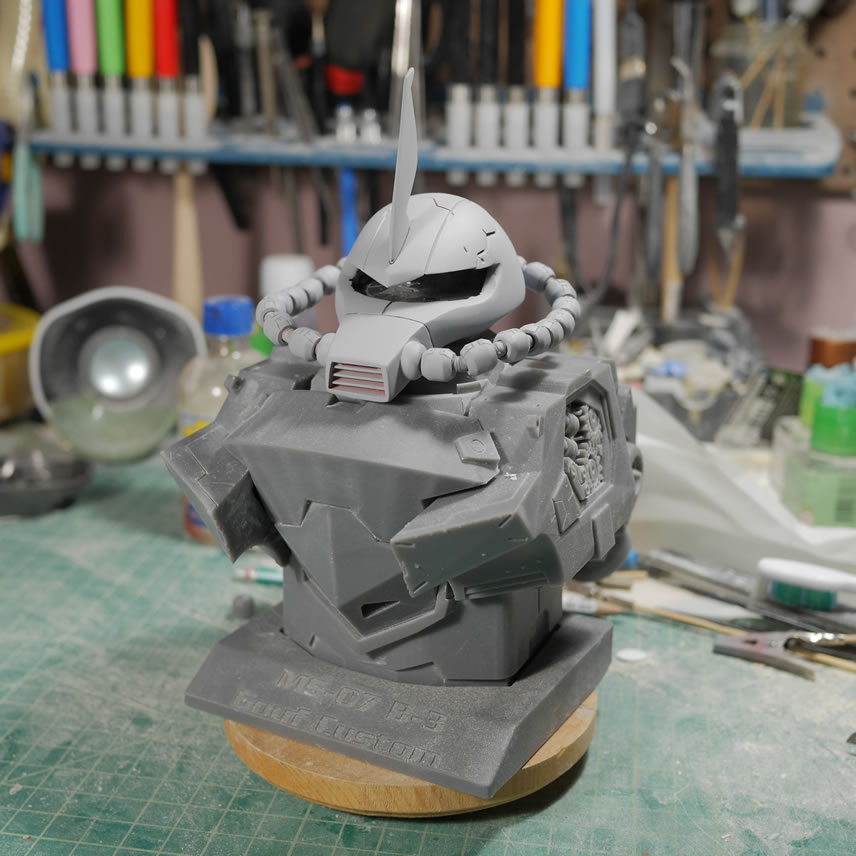
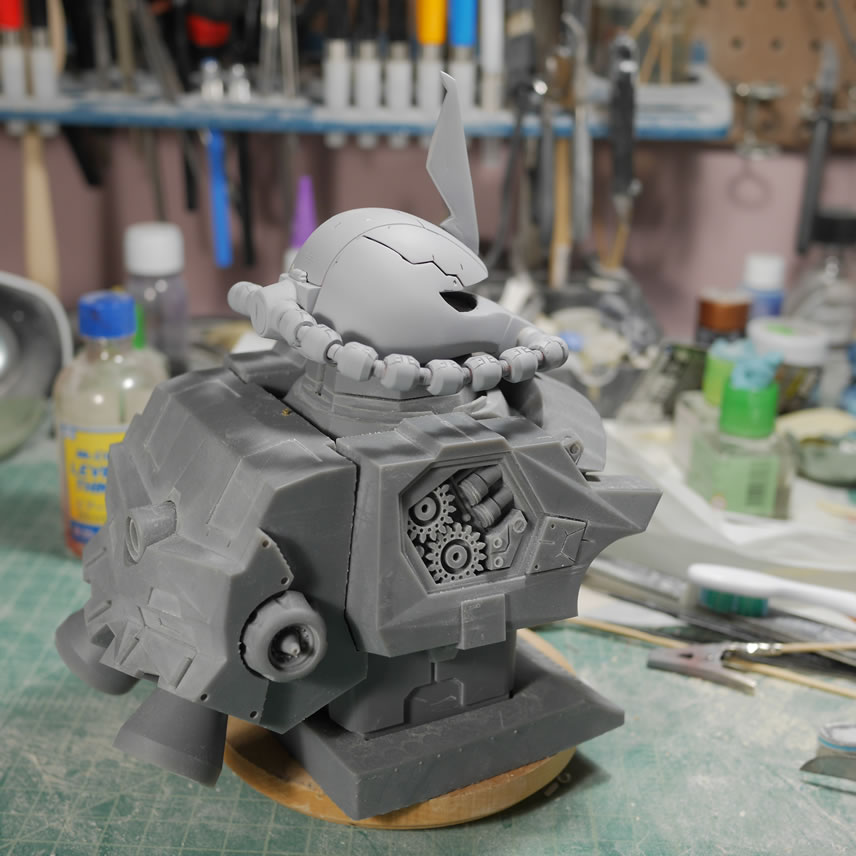
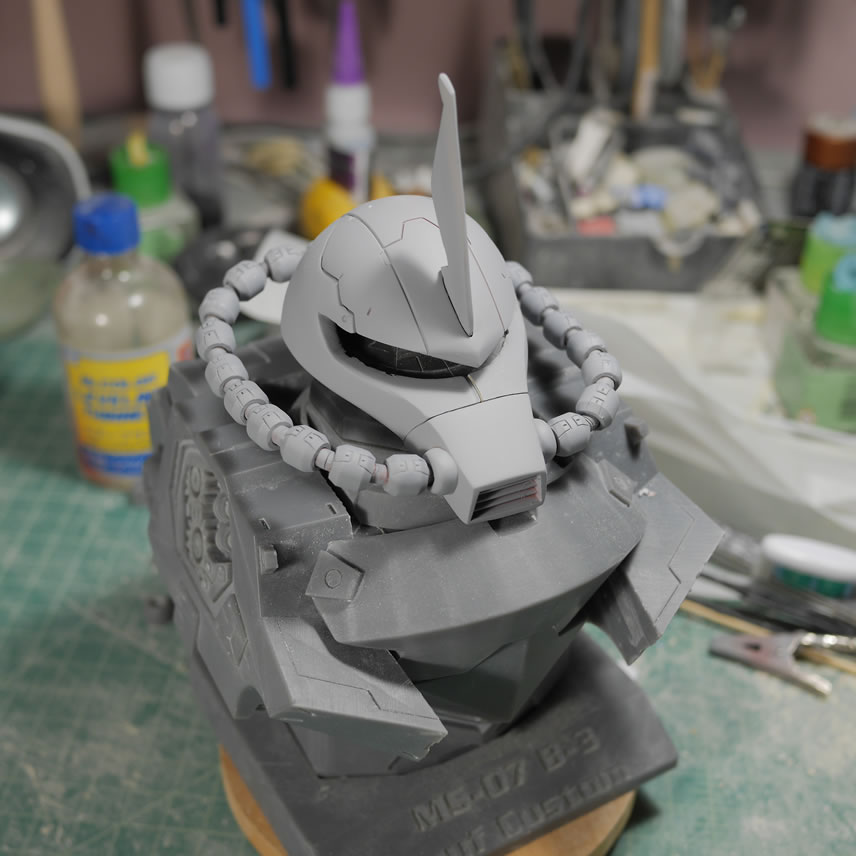
And some turnarounds for the display on the full bust piece. There are areas that need attention and I will need to scribe in more details into the head that were erased when I cosmetically puttied up the sides of the head. But things are pretty good.
