A while ago, I found these pictures on a facebook page that I don’t remember what it was, *edit* someone let me know: https://www.facebook.com/Dioramasphere/ but I had the forethought enough to download all the pictures to my phone. And randomly, there was a guy asking about how to do ground work for dioramas and I remembered I had these pictures. I couldn’t find the facebook page, so I transferred the files to my computer and uploaded them to my webpage so I can create a tutorial using these pictures. Again, I do not remember who originally made this, so if someone recognizes this, message me so I can properly credit them.
I’ve used hydrocal and tulle fabric for different reasons and didn’t even think about combining the two. The pictures and texts in the pictures are pretty descriptive but I’ll add in my color commentary for the sake of expanding on the steps as I understand them.
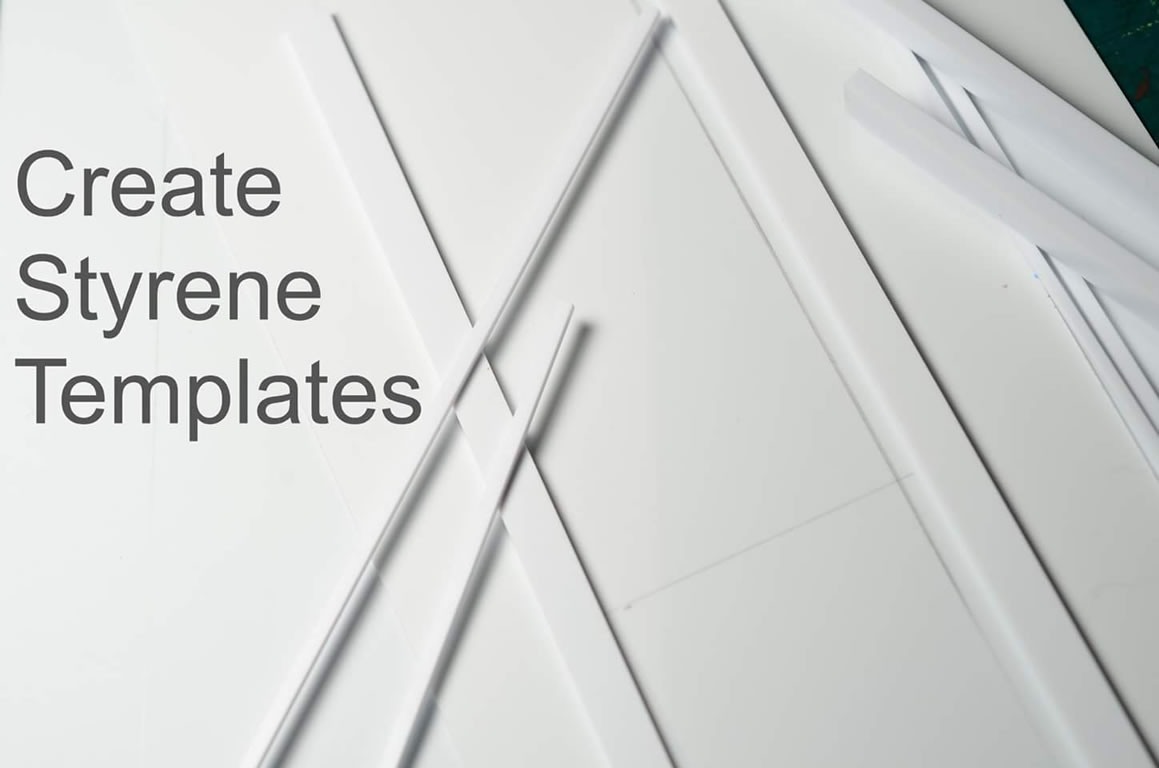
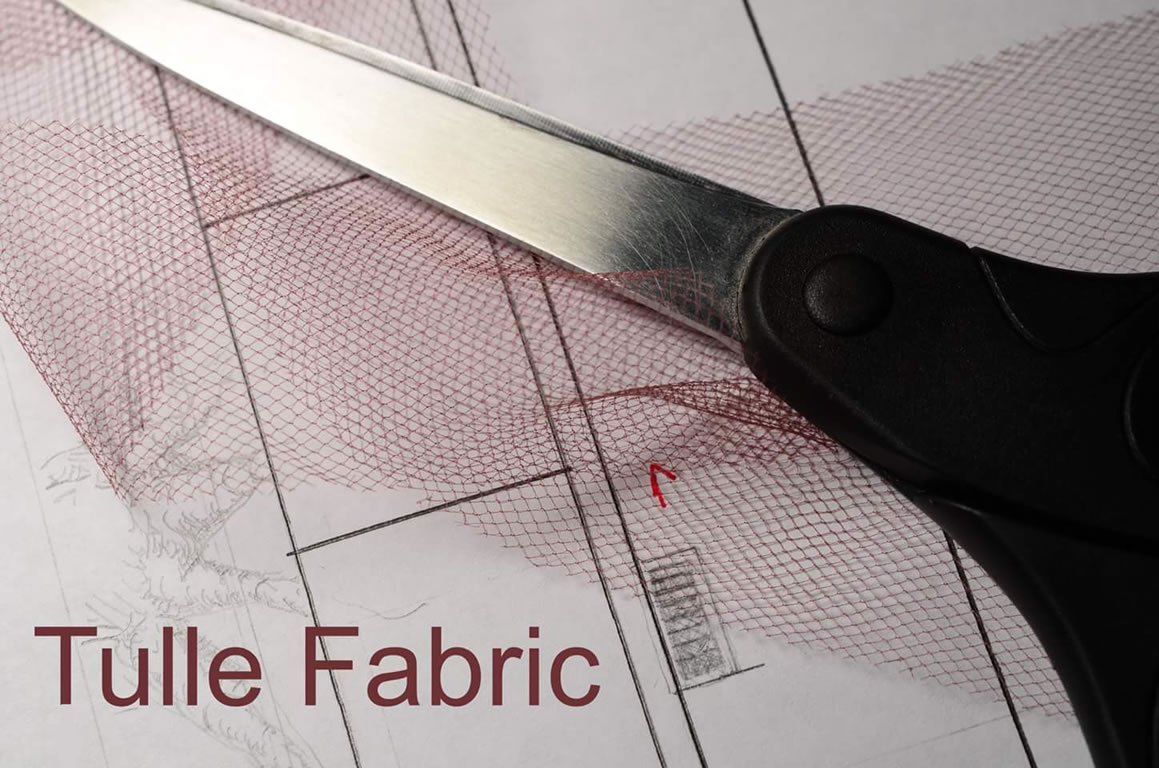
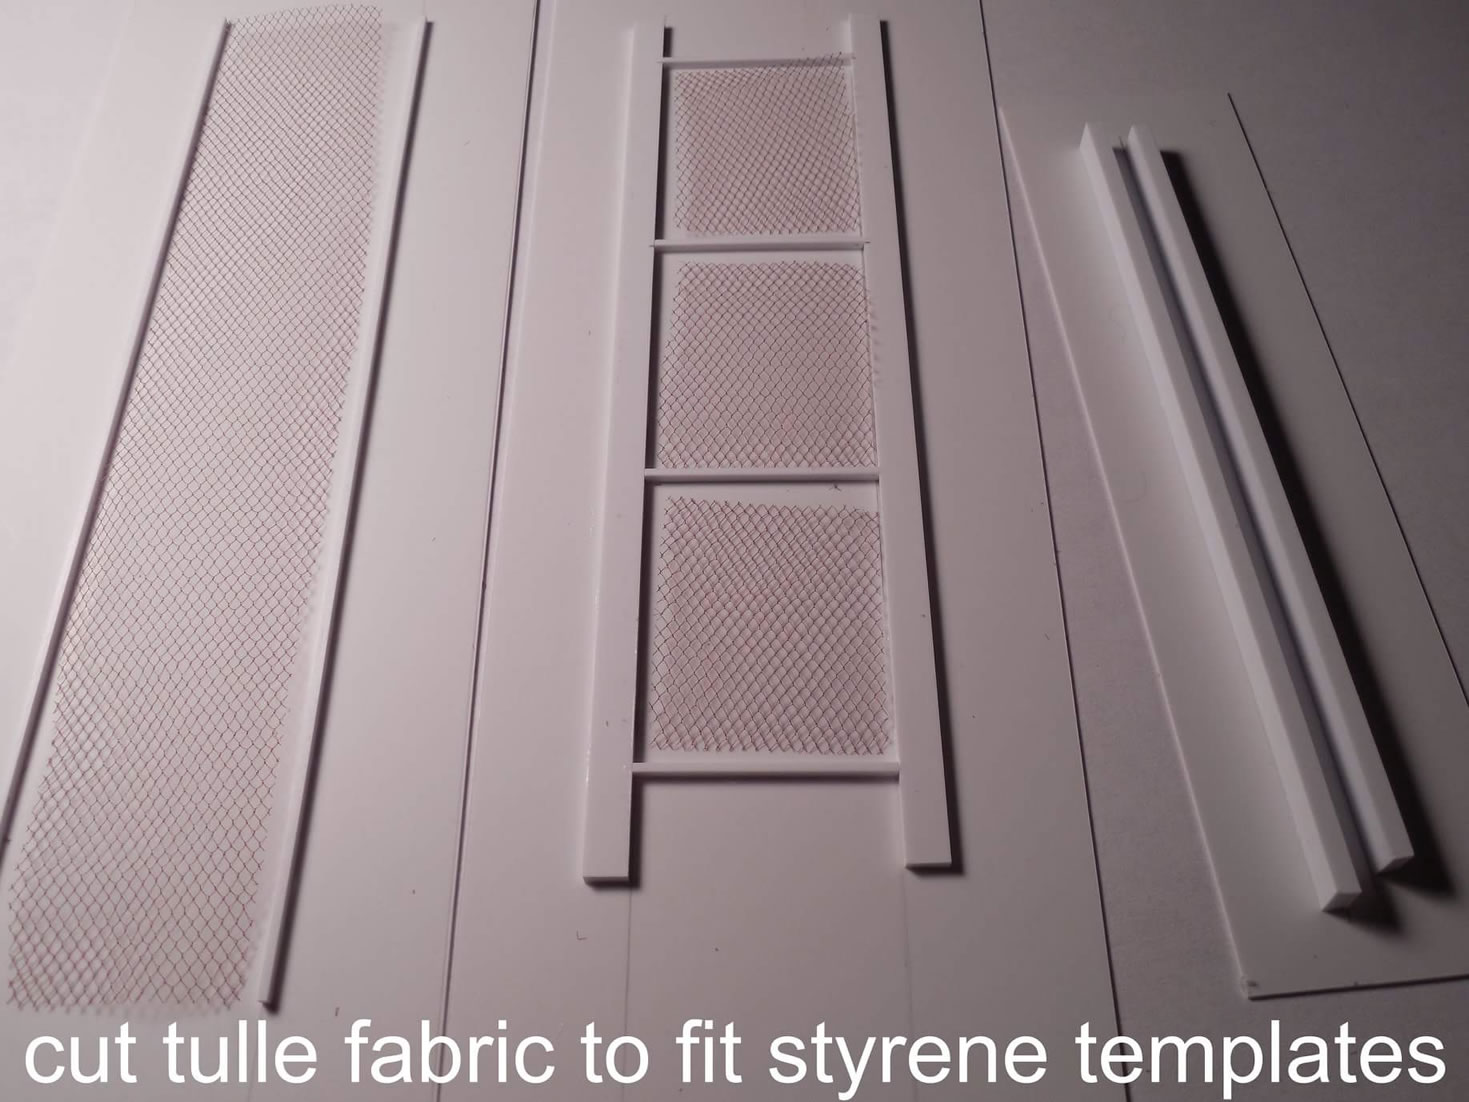
Everything starts with a template. Here, the builder is using styrene to measure out and create the templates. Fro the look of things, this could be a sidewalk. The same templating can be done to create roadways, stairs, etc. To hold things together, tulle is used and this is just fabric from any fabric or arts and crafts store. The fabric is cut to the size of the templates. In this picture, these look like sidewalk blocks. The best thing to do is to take pictures while you’re out in the while and translate those pictures to templates in styrene for recreation.
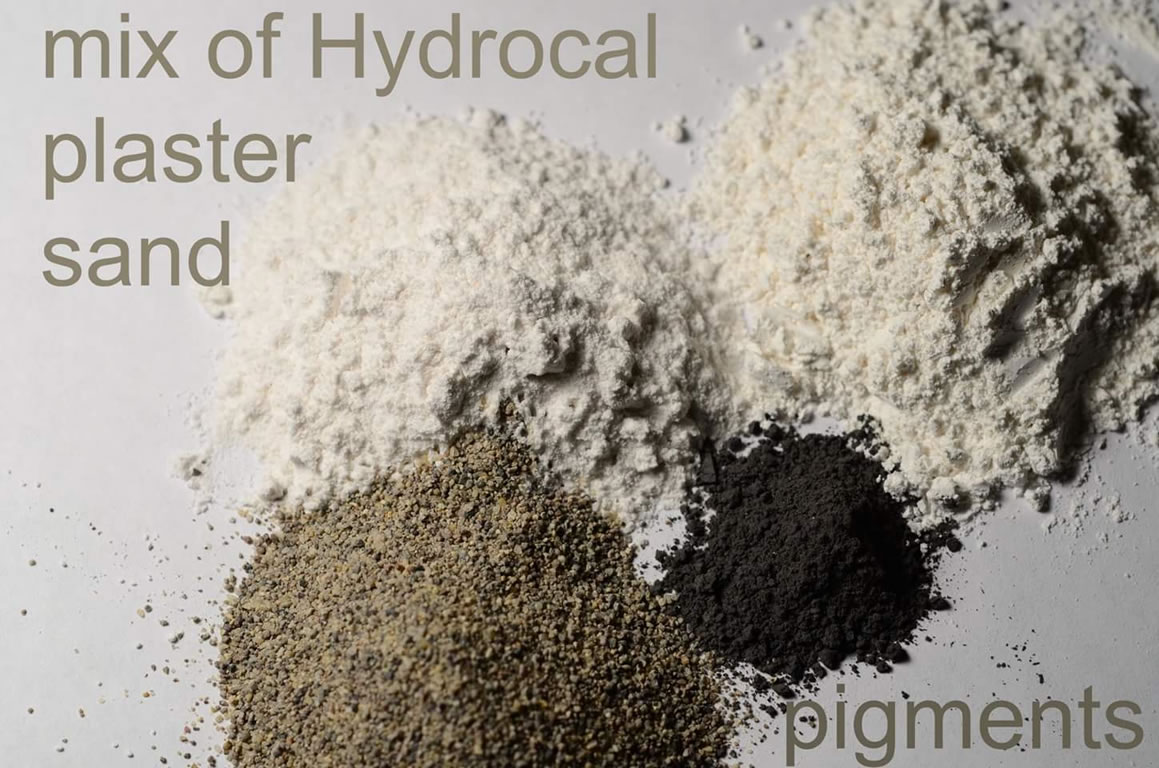
Next up, there is a mixture of plaster, sand, and hydrocal. I’ve used hydrocal and the consistency is very chalky, so I see the benefit in addition of sand and plaster. The finer the sand/plaster, the finer your ground is going to be. So for scale reasons, keep this in mind since at 1/100 the little rocks and cracks are going to be much finer in scale.
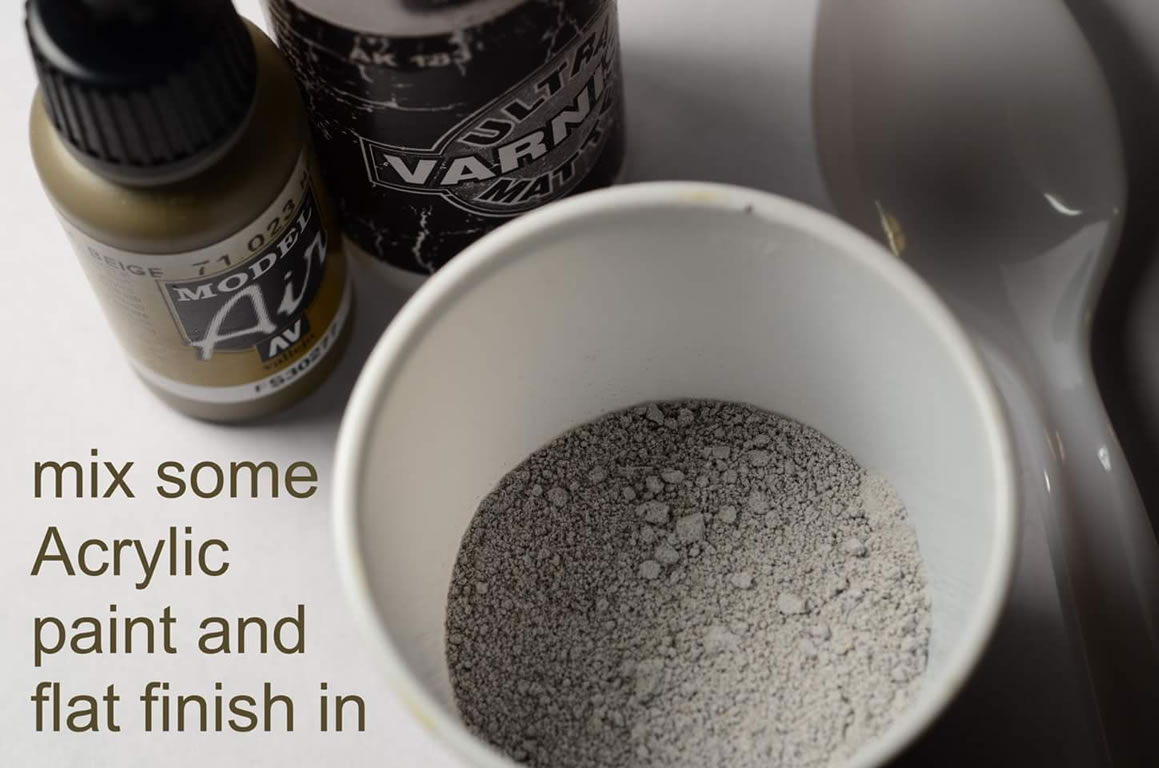
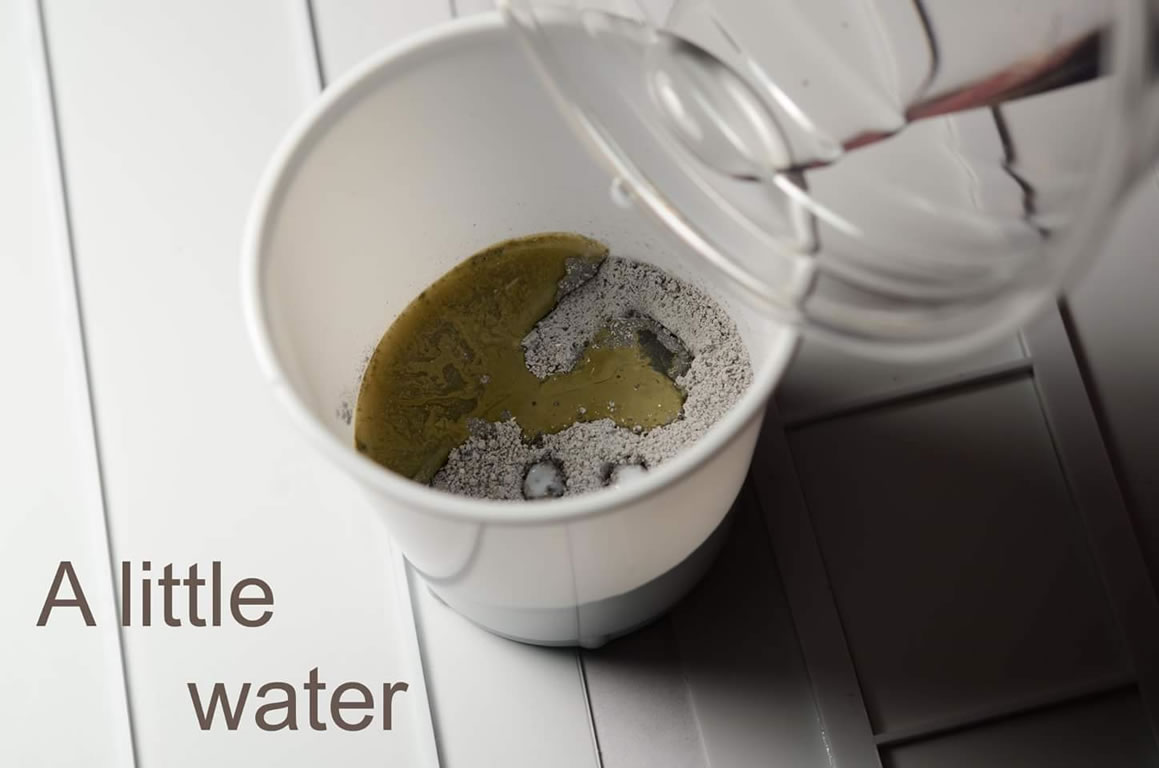
The acrylic paint and flat finish is a guess to me, but I would bet that this is to help color the ground work. Again, refer to your pictures of the wild ground works you see around you and add in the appropriate colors. Acrylics mix will with water which is the next step to activate the hydrocal and get it to start forming the concrete. I would recommend mixing according to the hydrocal instructions which is to let the water sit for a minute or so, then start mixing for another minute of so.
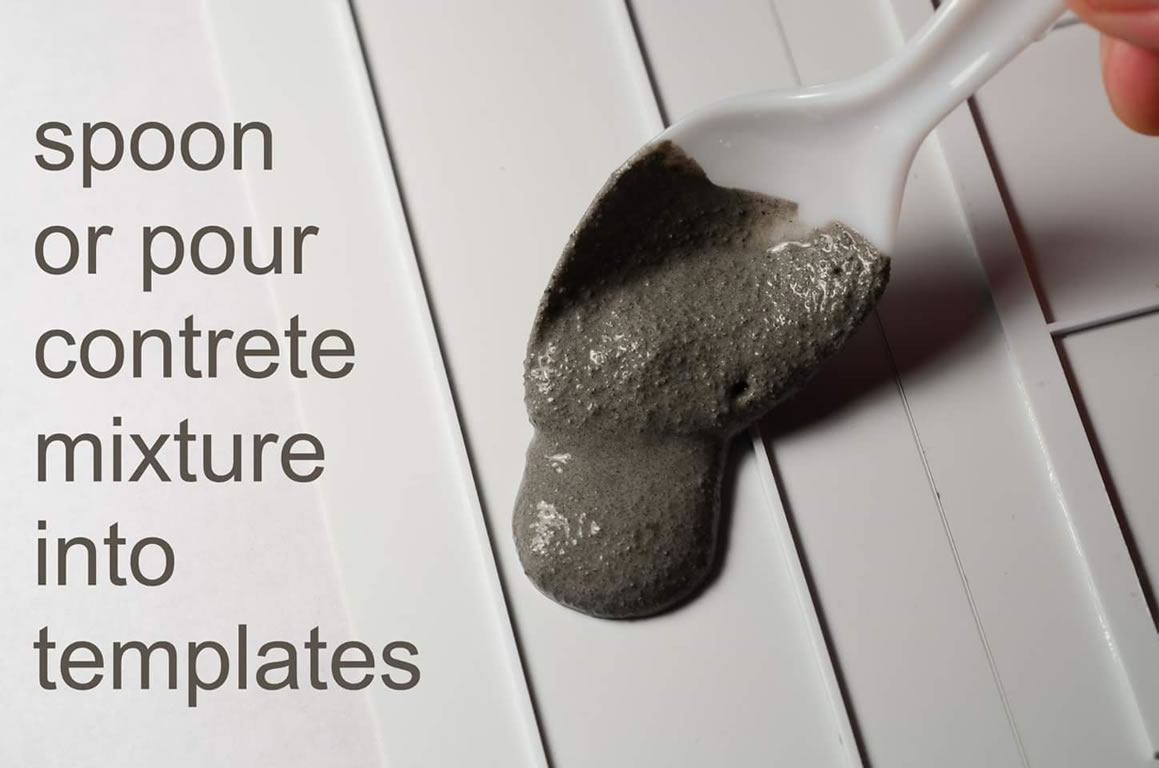
Once you have your mixture as a wet cement like paste, spoon or pour over the templates. The next pictures shows straight edge to run along the top of the template runners to get a smooth and flat surface to the poured concrete. While still wet, lay the tulle down.

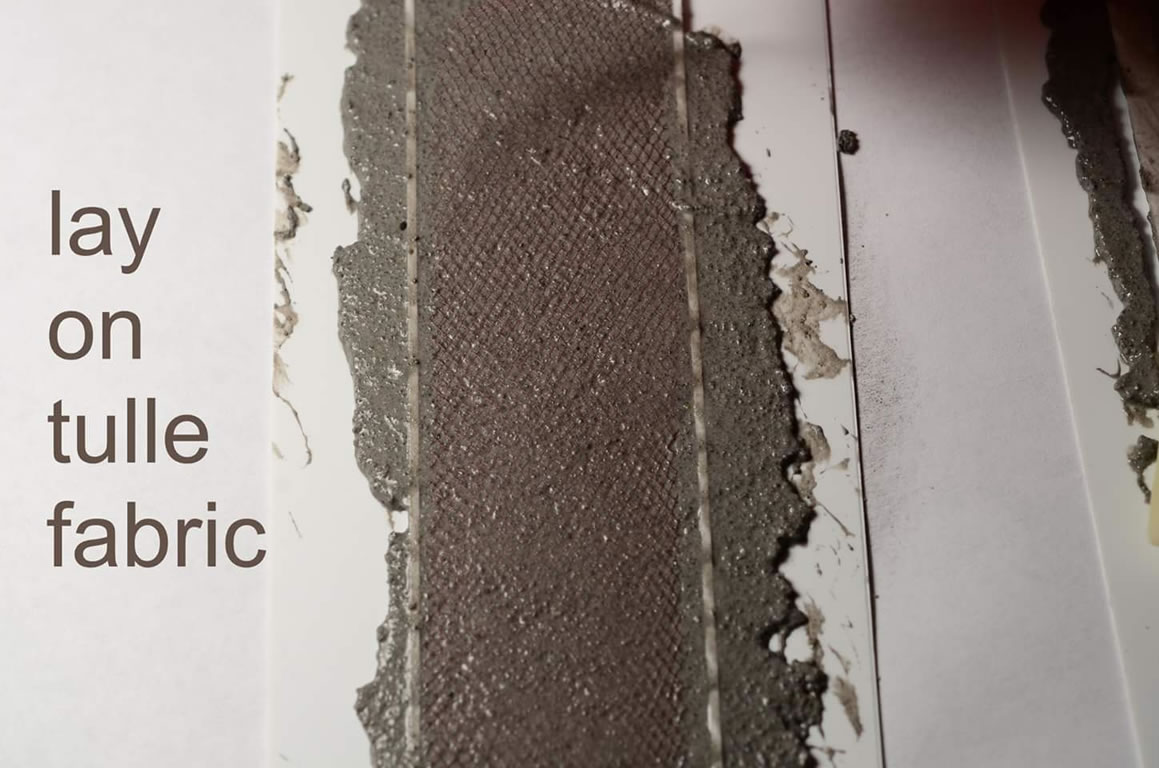
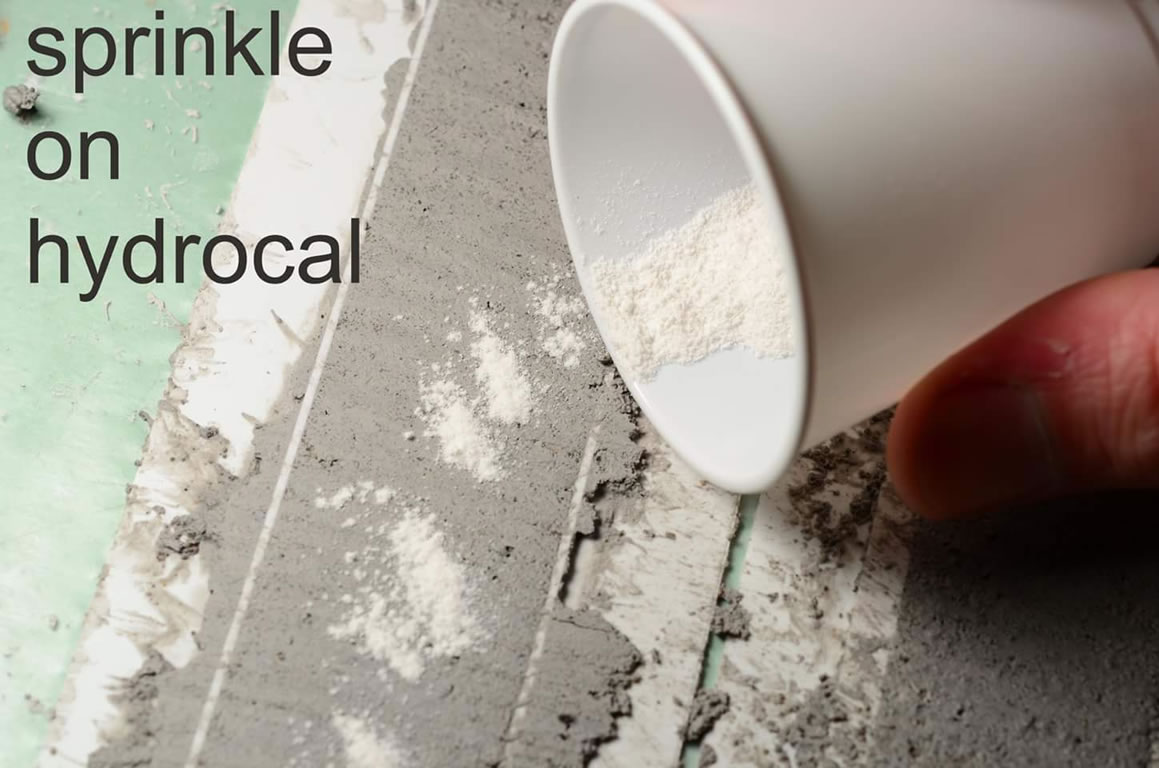
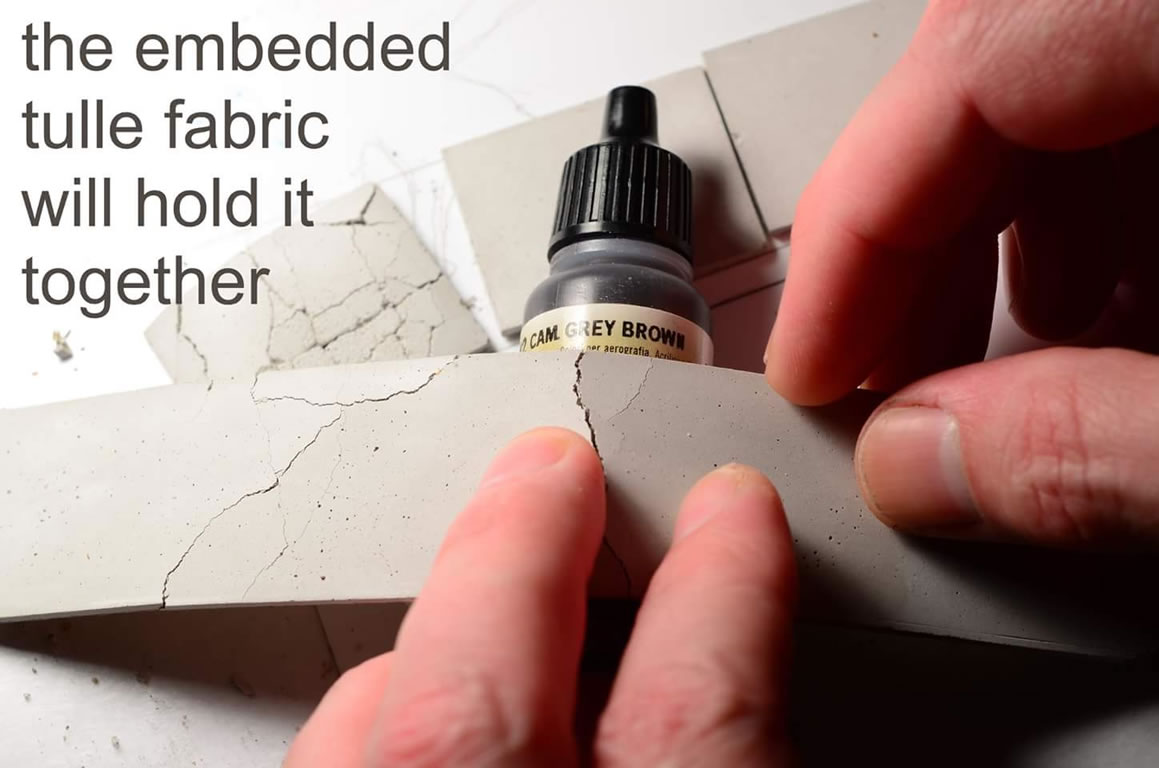
Then follow up with some more concrete and the pass with the straight edge. The idea is to embed the tulle fabric into the concrete so later, there’s something to hold the concrete together when we start making the cracks. I’m not entirely sure why dry hydrocal is sprinkled on top after the tulle embed, but this doesn’t hurt. My best guess is to get some fine pot marks for when this is broken up later.


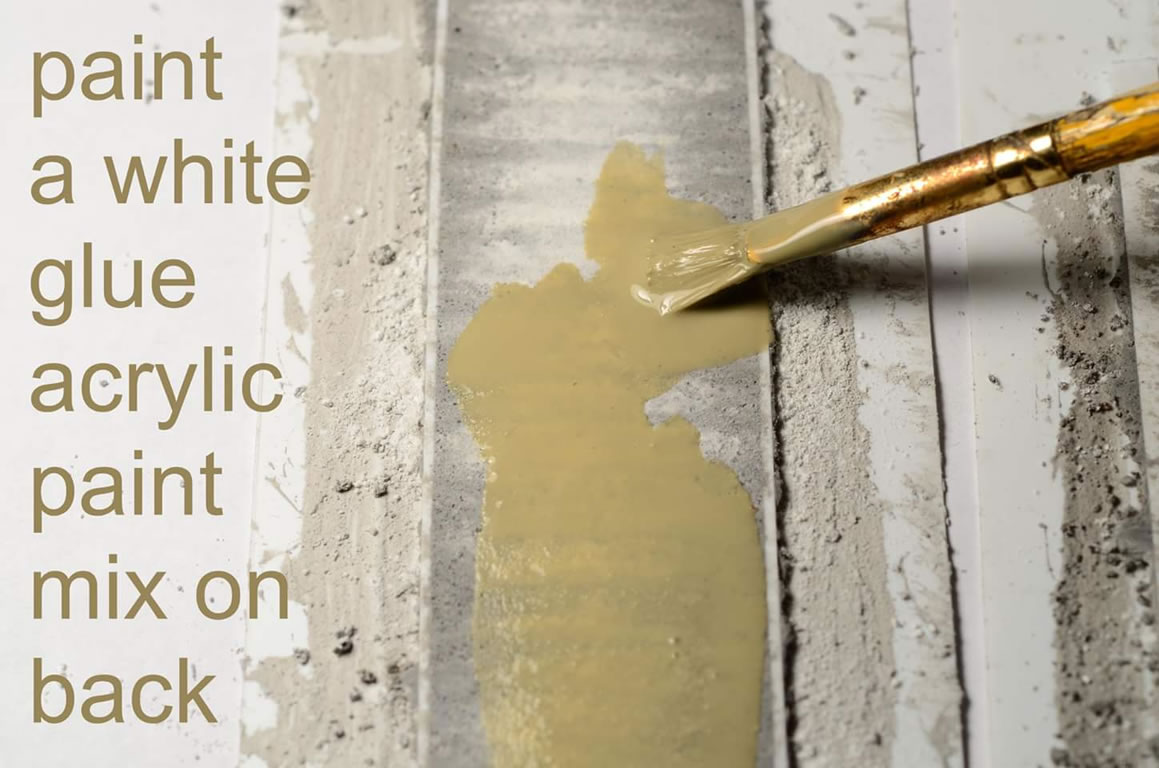
From the looks of the picture, it seems the block has had time to dry a bit. It is not as wet looking and will hold paint and glue brushed onto the surface. My guess is that the paint is used to pigment the top layer while the white glue is used as a binding agent for the block.

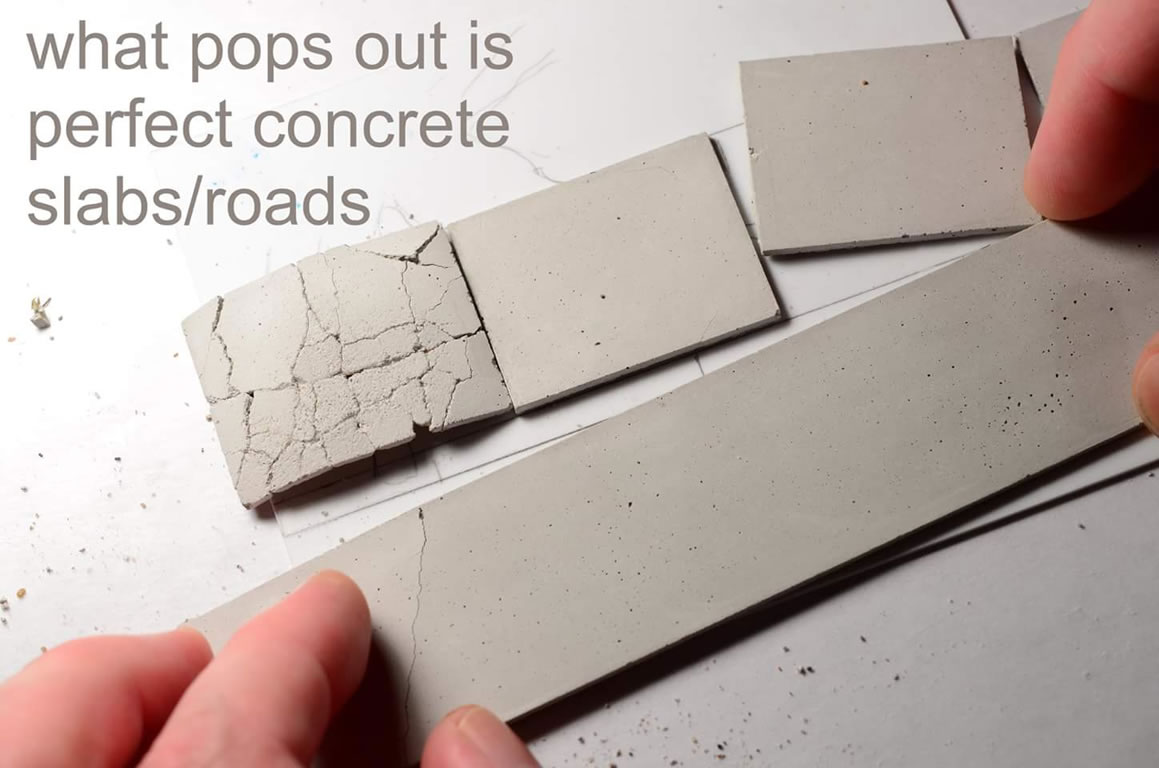
Once the block is completely dry, pop it out of the templates and you can start making the crack designs. With different acrylic pigments, you can create concrete colors, asphalt colors, or however many colors your reference sidewalks look.
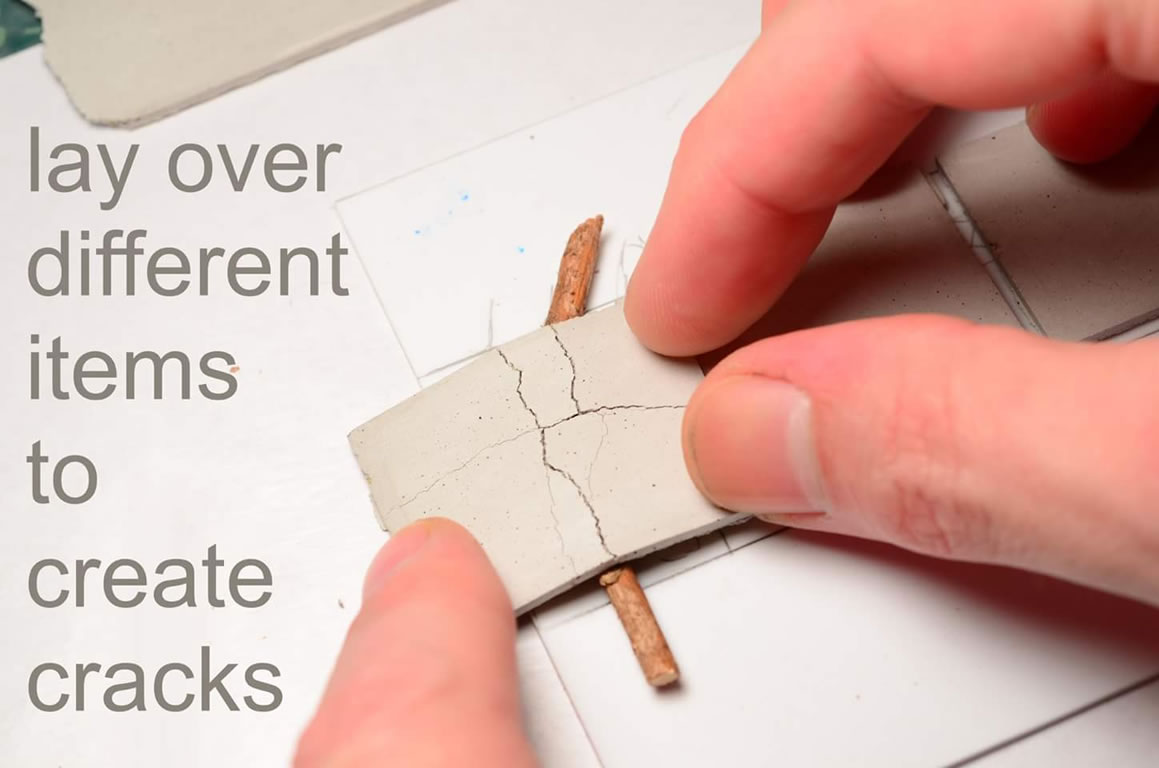
The next step seems the most fun, breaking things. The builder is using different objects to lay the slabs over and create different crack effects. The embedded tulle holds the slabs together.
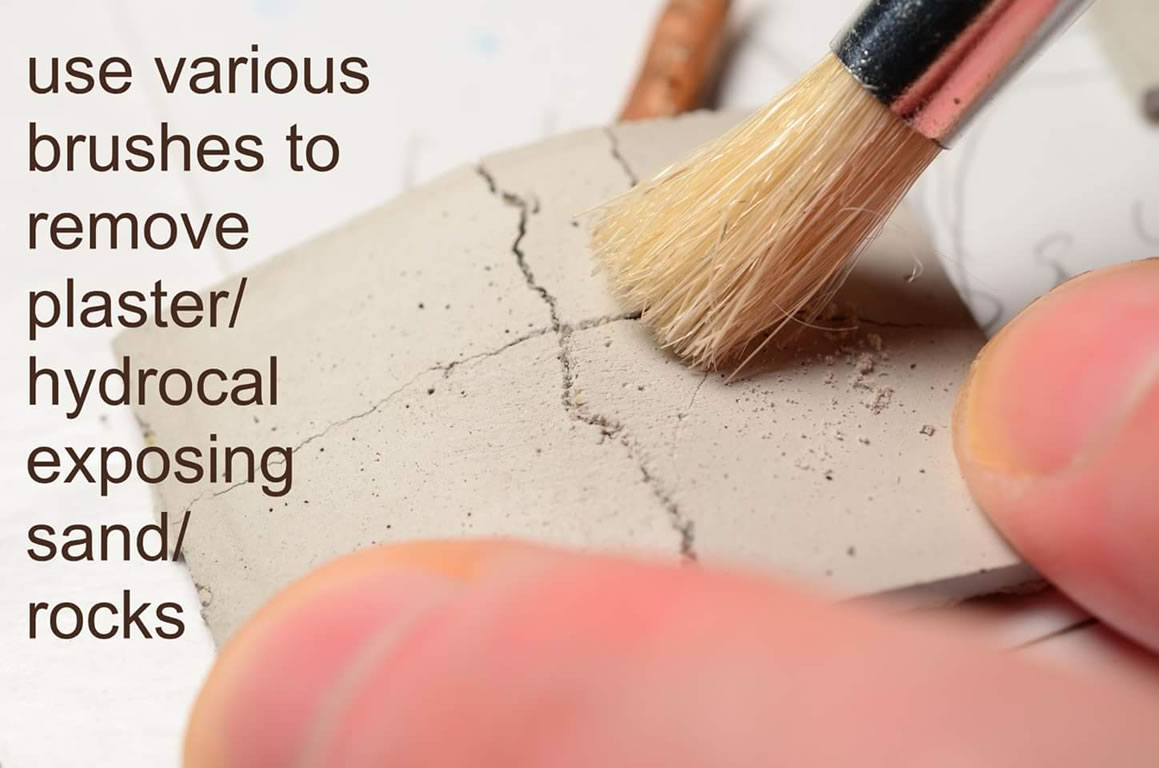
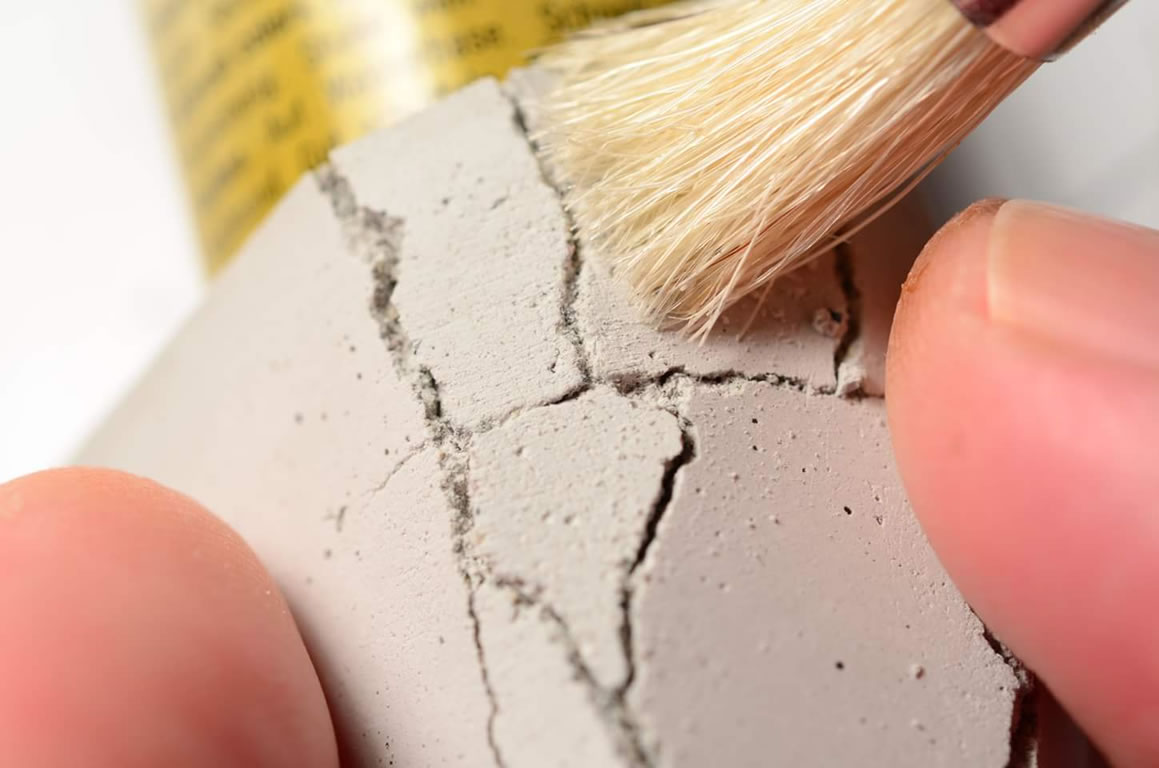
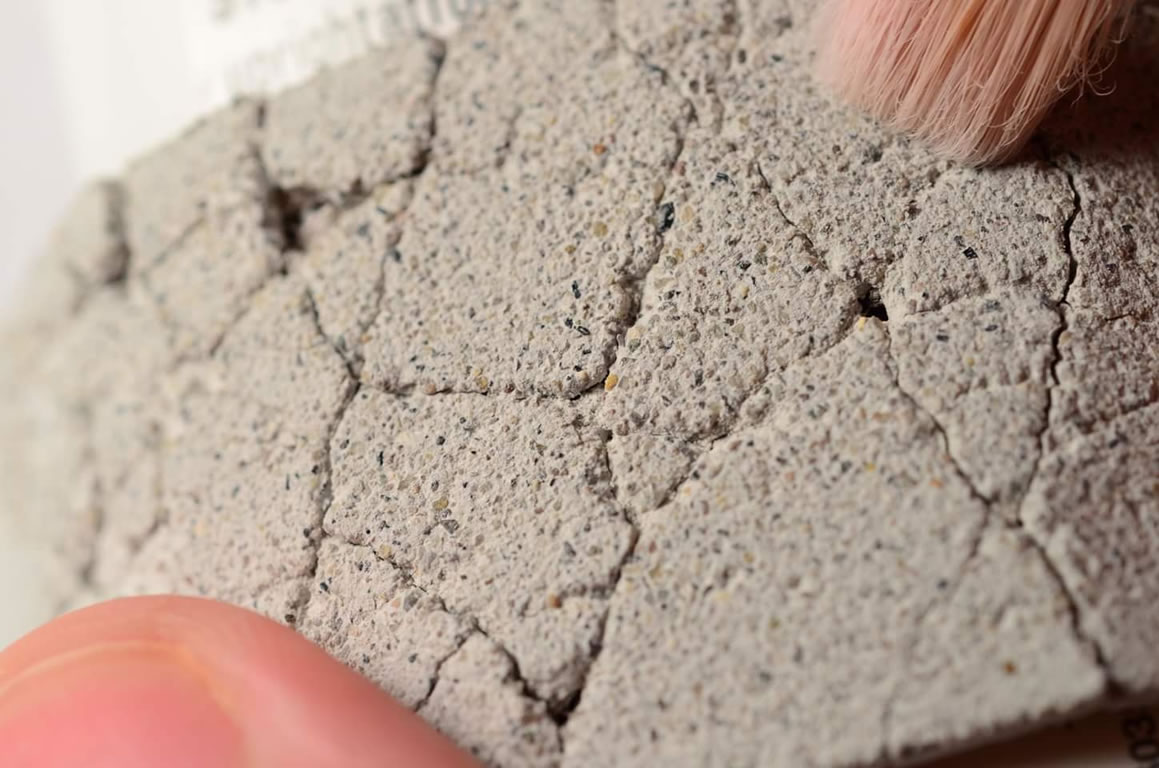
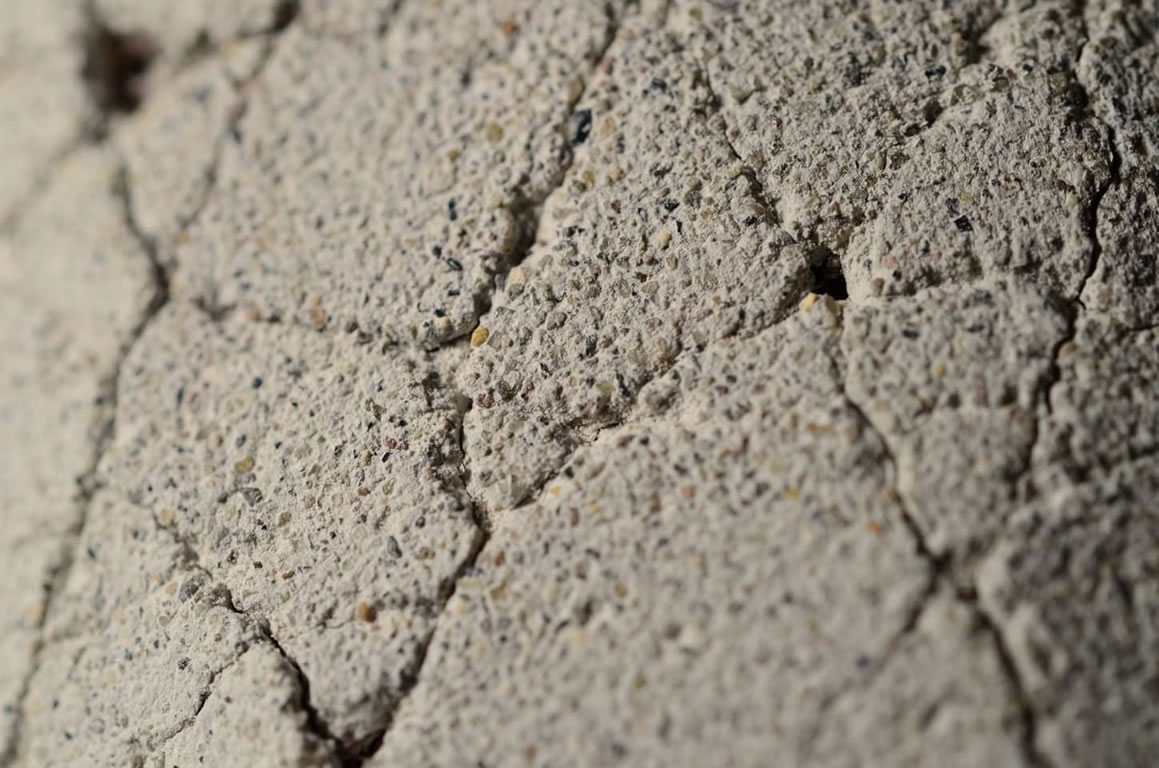
A brush is used to remove all the small bits of plaster, sand, and hydrocal. You are effectively creating the little pot marks and exposing the cracks more in this process. The successive pictures shows a closeup. Again, from the earlier step of how fine your sand/plaster is, results in how “to scale” your slab is for your project.
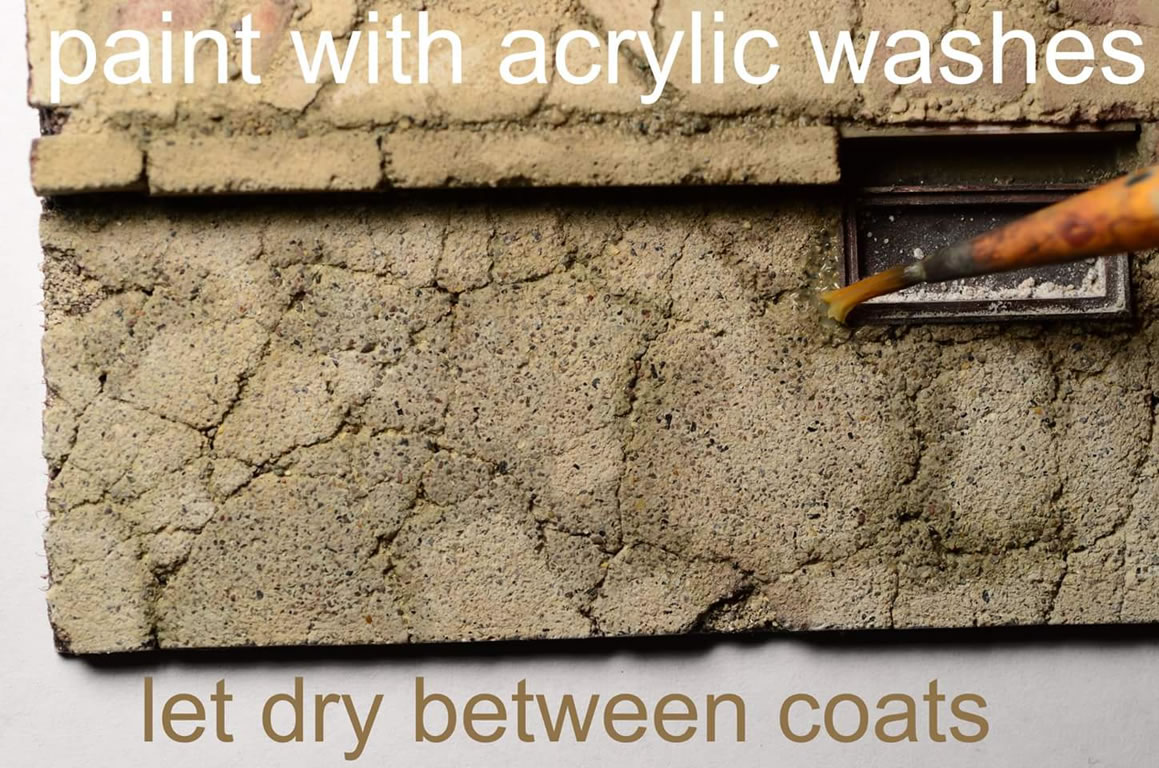
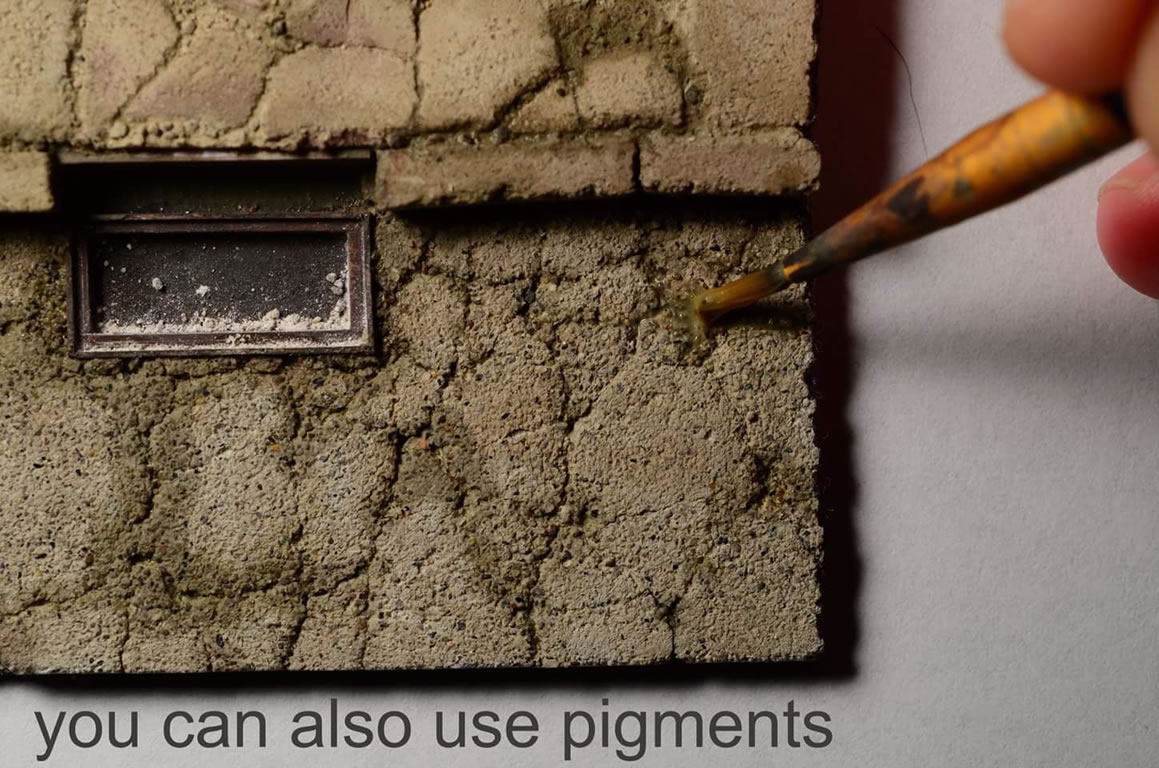
Not shown is the slab glued to the diorama base. Once the slabs and roadways are glued to the diorama base, the work to weather and blend it into the overall diorama begins with washes or pigments. The artist here uses acrylic washes which is good, but I believe enamel washes will also work here. Allowing each layer to dry and possibly clear coating each layer in a lacquer based product may actually help create the ground works with more depth. Layers create depth.
Again, thanks to the original artist that did this, I will be doing this on my next diorama, so some future WIP will have these steps. I just wanted to create this so that there’s something I can refer to when I need it.