Time for the first resin figure project of the year. This has been a fairly productive year so far with finishing a number of gunpla project. Time to get at least one figure kit. I picked this kit up at Anime Expo at the Volks booth. They were there last year and back again this year. They even have a location in Torrance, so if I ever need to order something, I believe I can pick it up at their warehouse. Damn cool for folks that have had trouble getting original resin kits. And these are not your run of the mill resin figure kits. These have a high level of quality control. They are engineered using the bandai gunpla model; everything is molded in color. The color separation for these kits are insane. Last year, I grabbed a Revy kit from them and I was sold. You just shake the box and the kit’s done. It’s that friggin simple. Ok, maybe not quite that easy; but if you’ve ever built any other resin anime figure (original or recast) try these Volks kits. For anyone interested in trying their first resin anime figure kit; get a kit from Volks. The comparison is akin to building a macross kit from hasegawa to building any bandai gunpla kit released in the last 5 years.
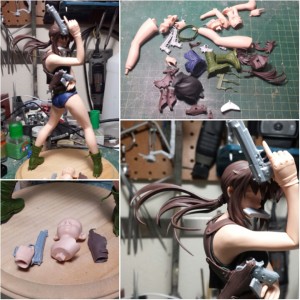
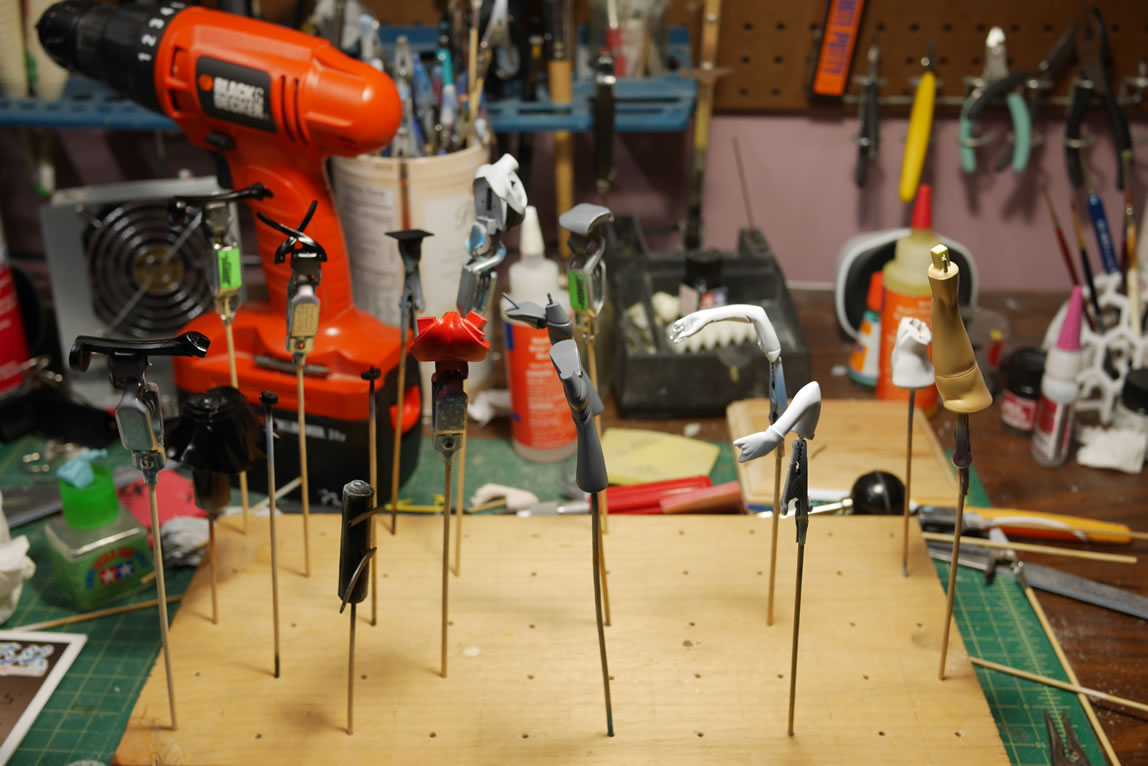
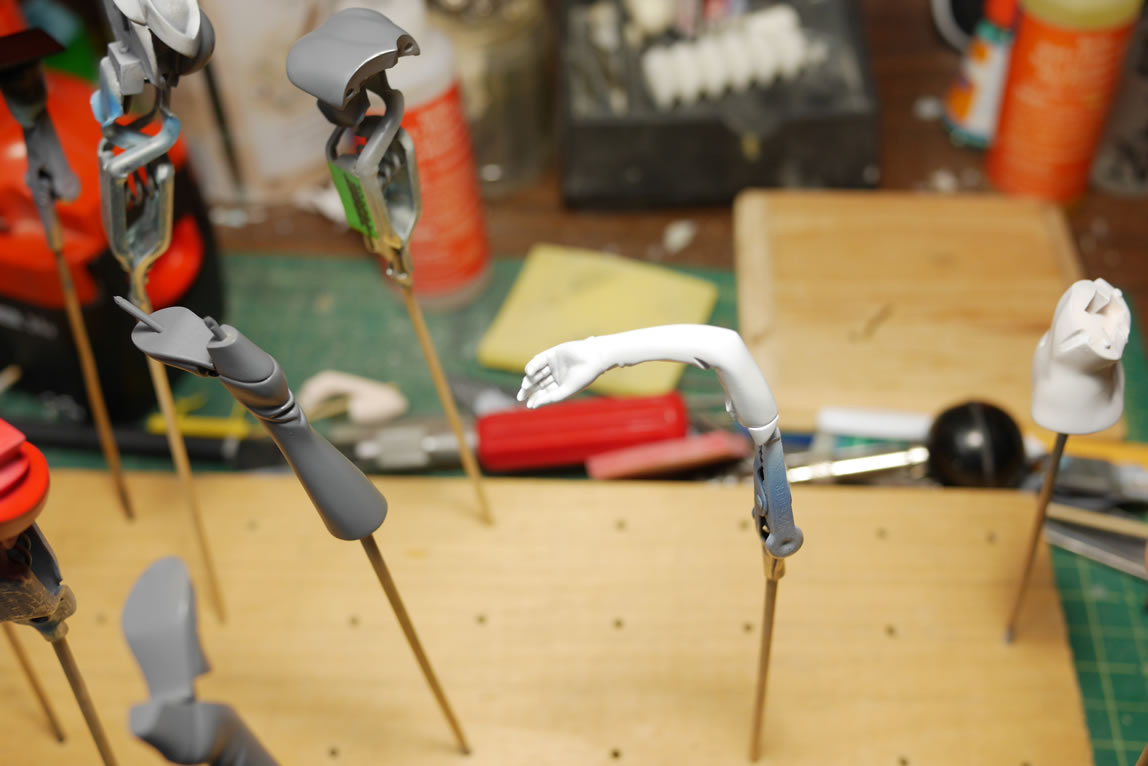
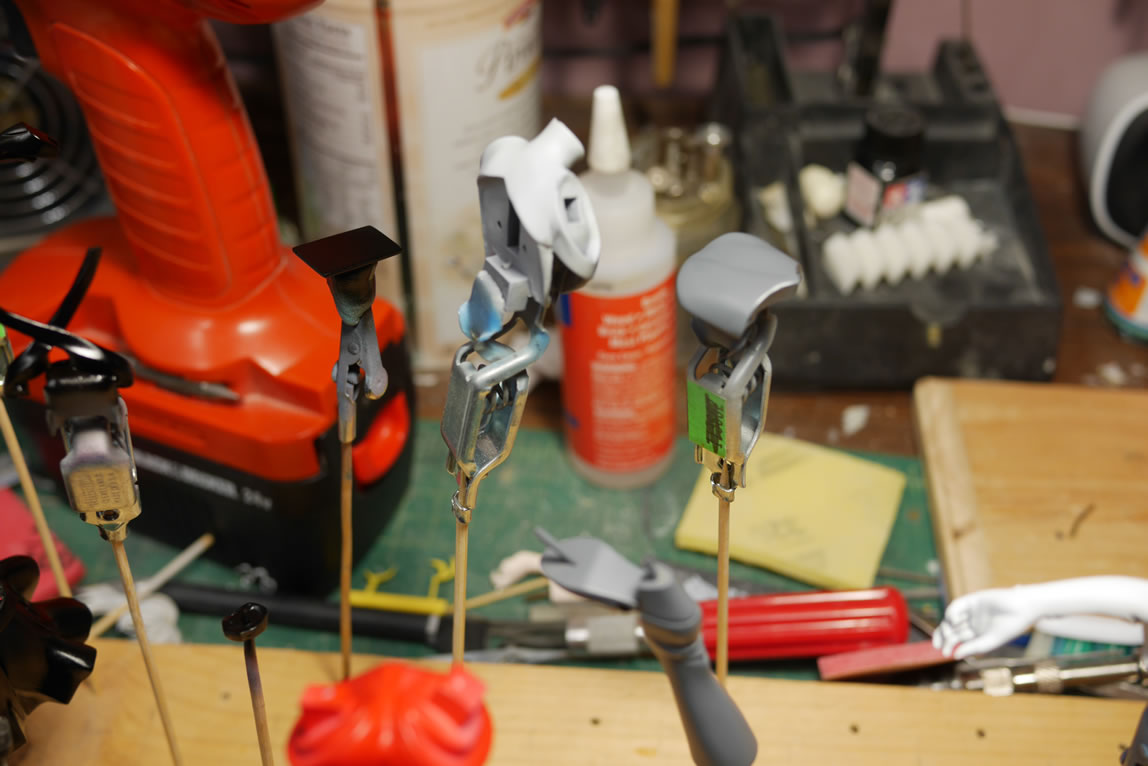
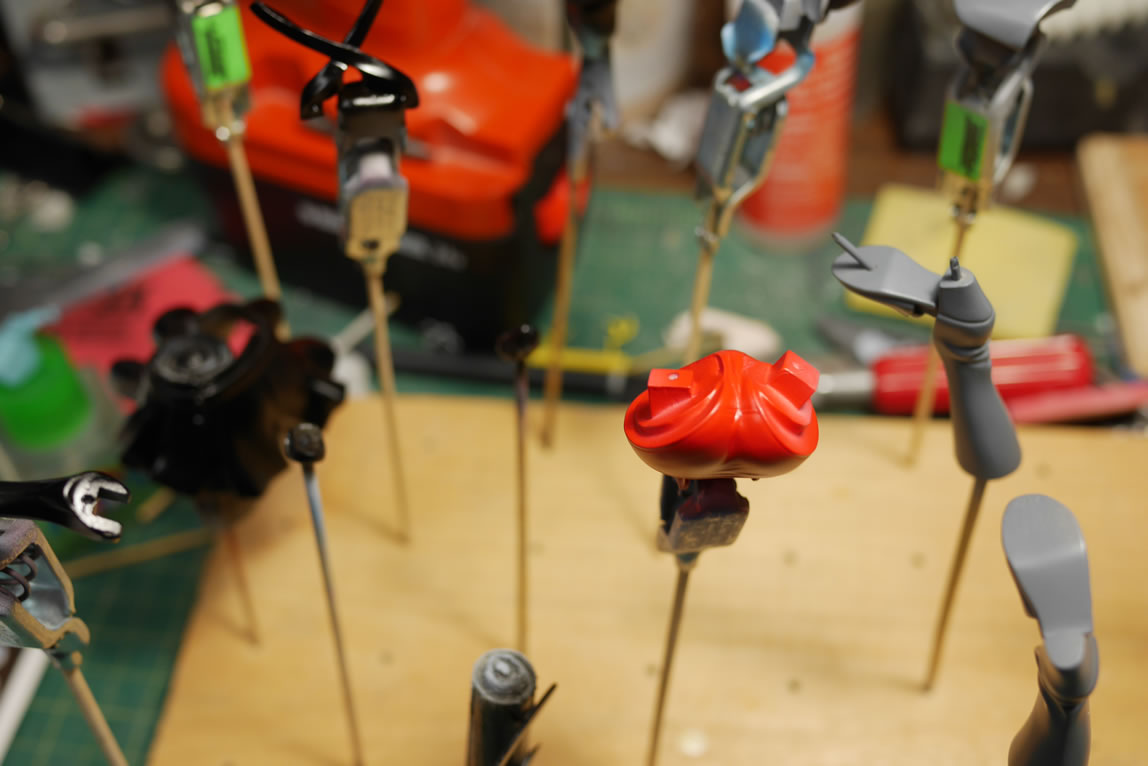
Last week, we had our July build gathering and the goal for the day was to get her semi cleaned up and pinned together. Like most other Volks kits, she has some options. She comes with two sets of right arms to hold up a sign or her jacket. Pinned together, I have her holding the jacket. Again, the pictures below show the kit as is out of the box, pinned together. The color separation and engineering is amazing.
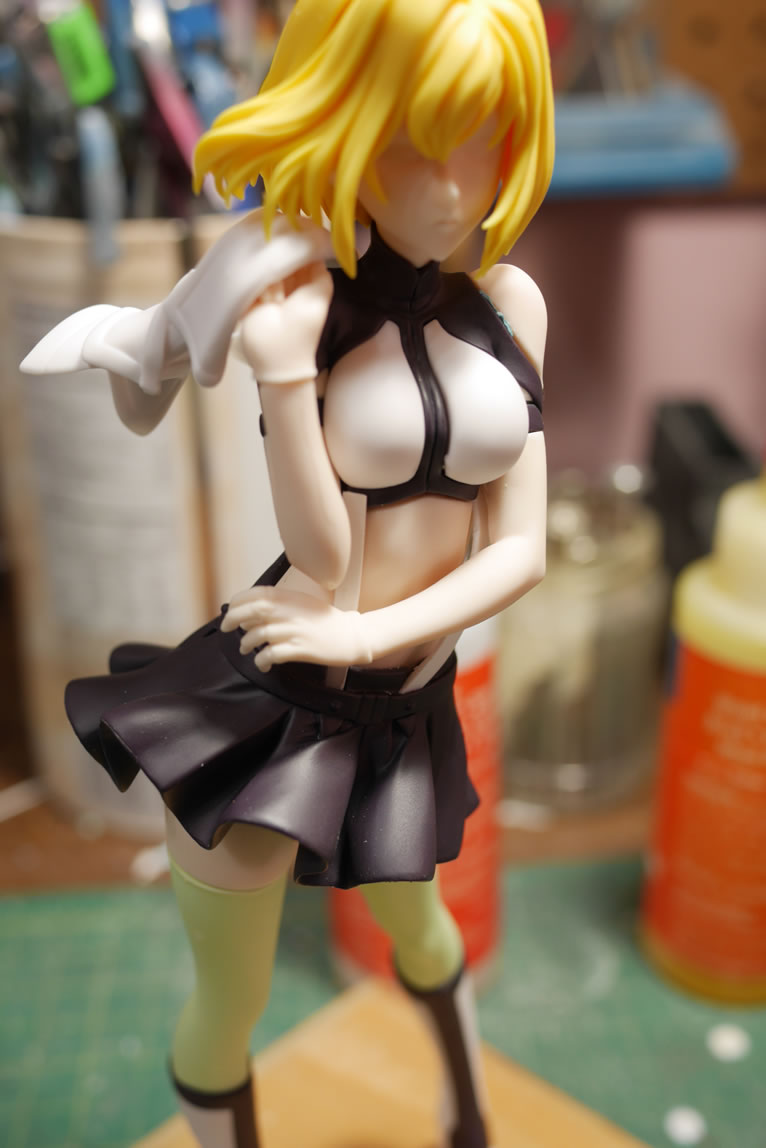
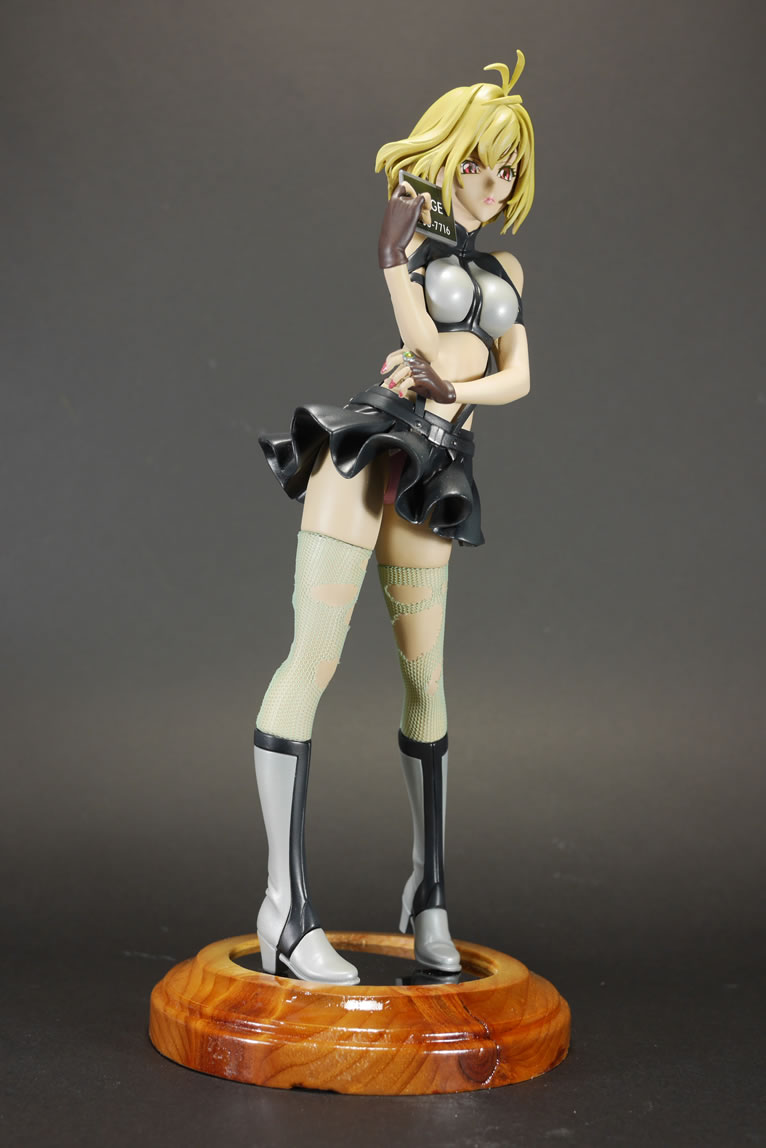
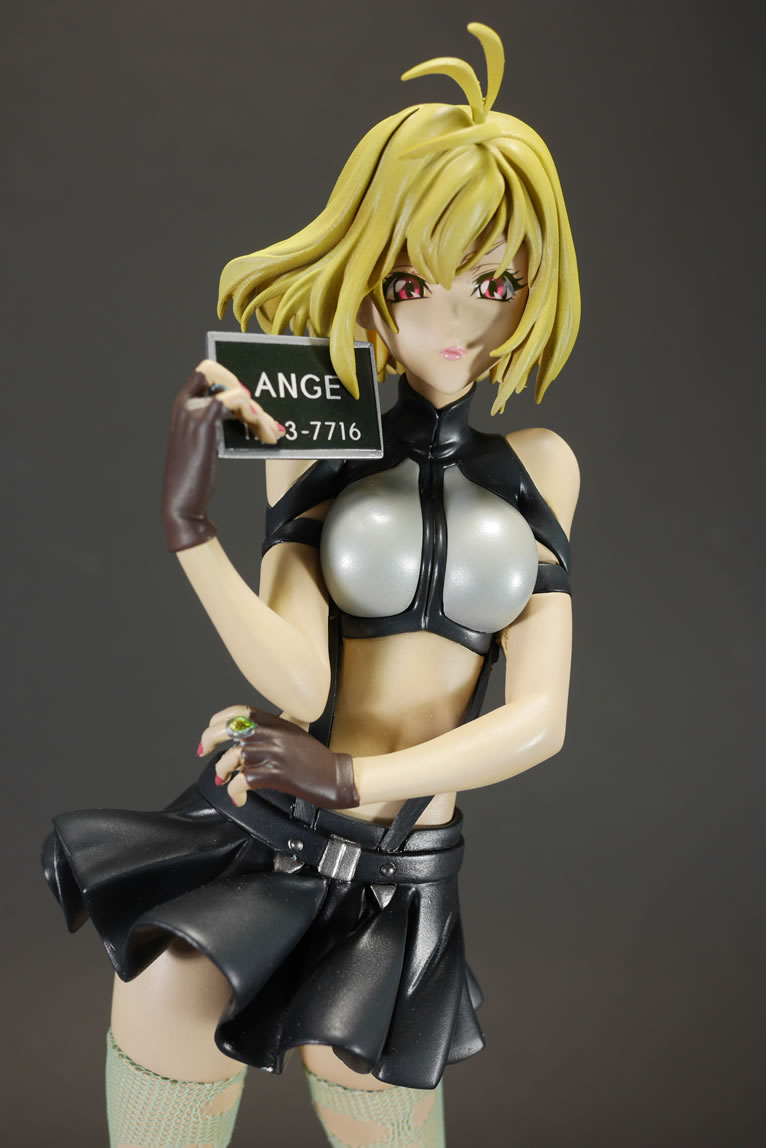
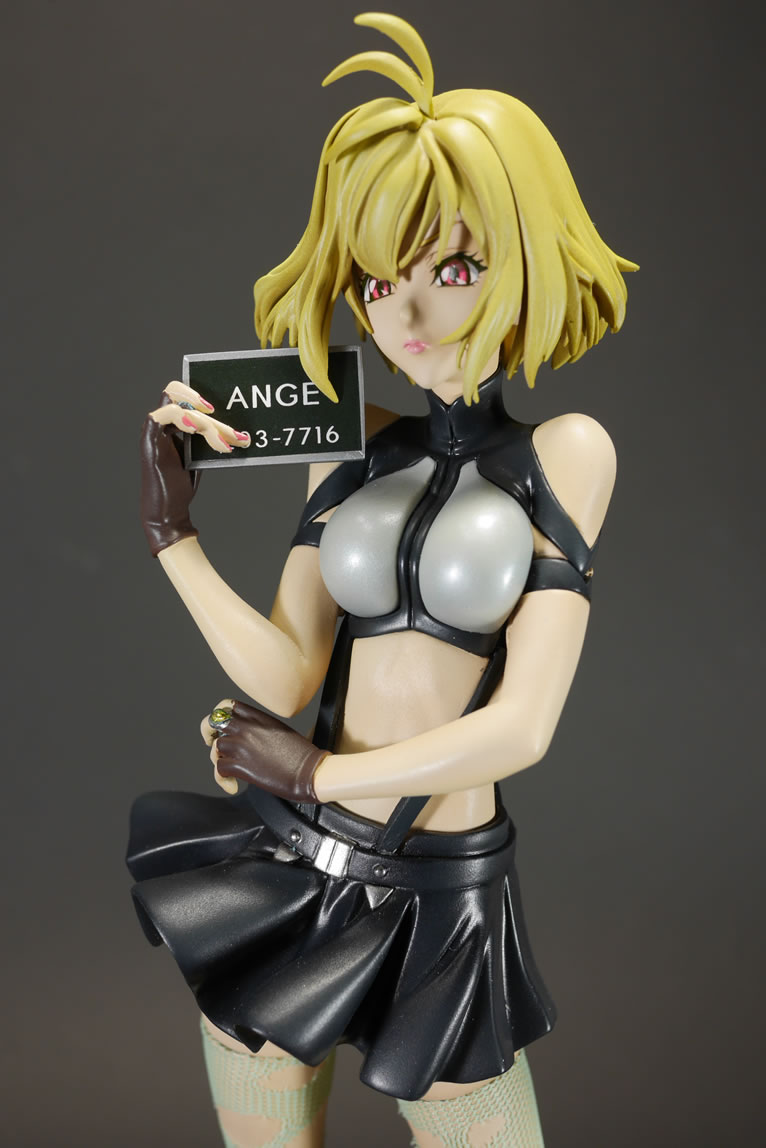
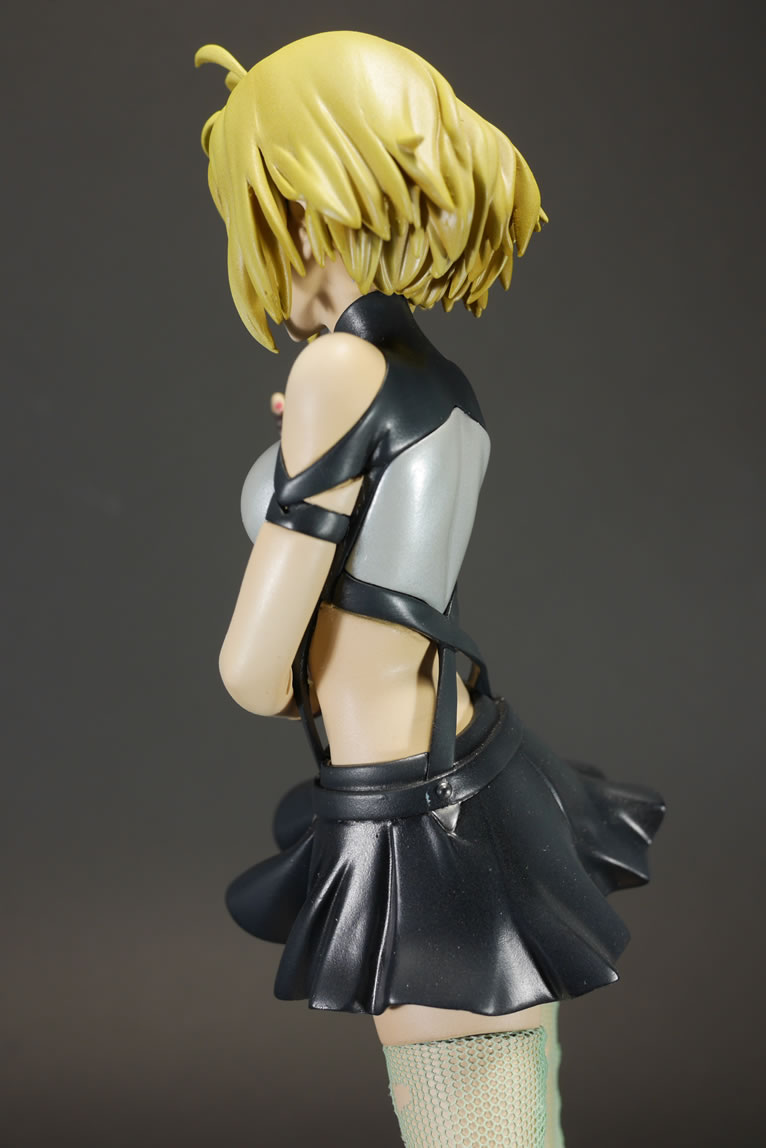
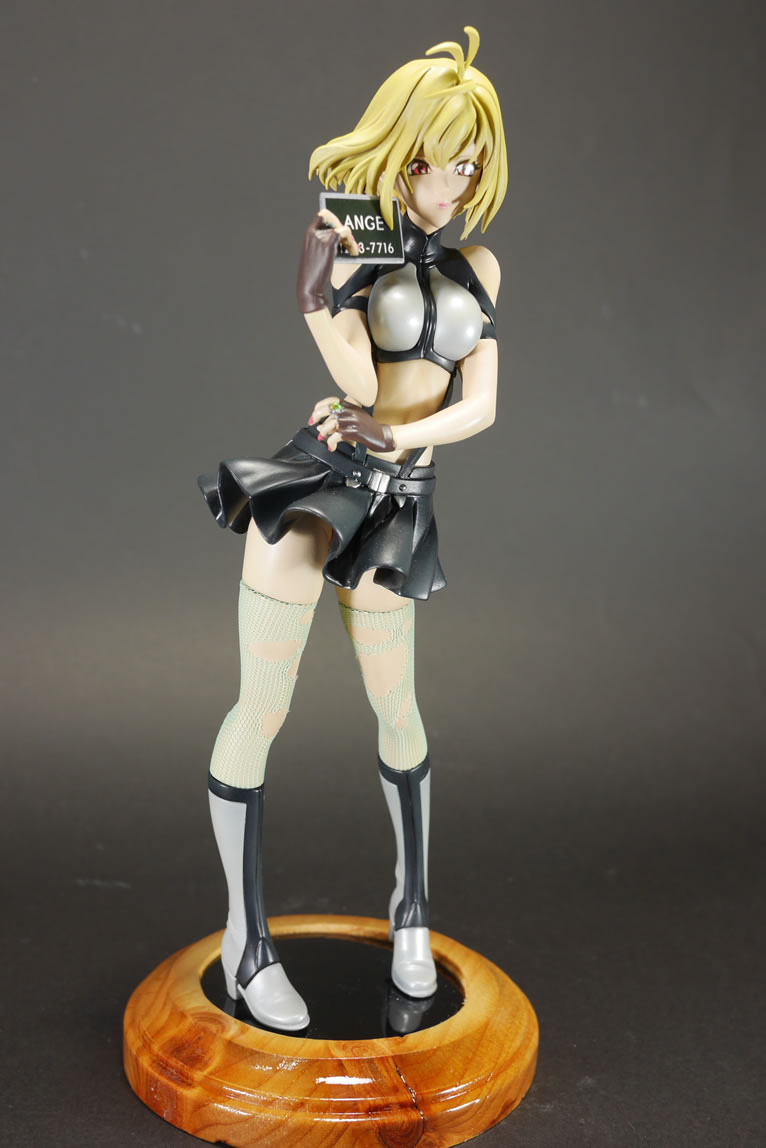
The kit is Angelise Ikaruga Misurugi from the anime/manga Cross Ange. I liked the pose and look of the character, but I know nothing about the anime/manga. I just wanted something I could quickly build and finish. At the build gathering, I actually got her completely pinned. And immediately fuck up something. Take a look at the below picture. Notice that her front suspender straps are white? That’s because those are styrene strips. In my haste to clean up my build spot, I threw away the resin straps. This isn’t too big a deal. I didn’t throw away an arm piece. So this was fairly easy to scratch build. But still; the carelessness is inconceivable.
The sculpting details…. two words: Camel Toe. Funnier still is that I have another kit that takes this detail area a step further.
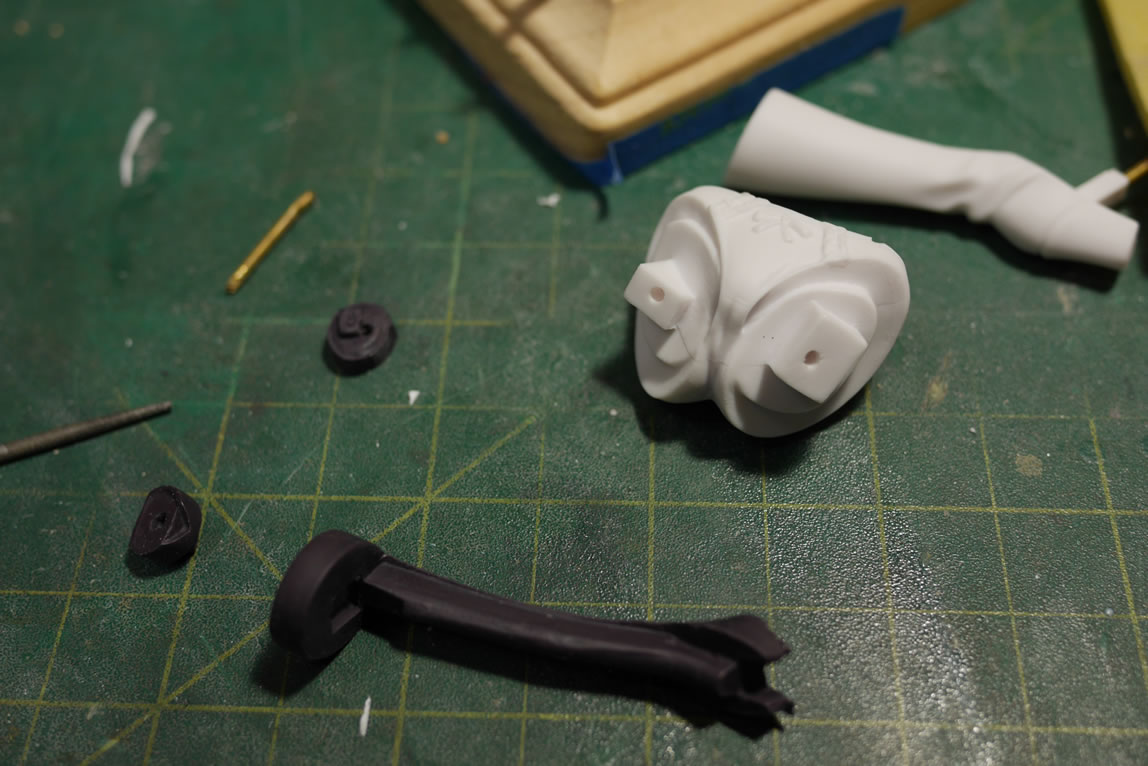
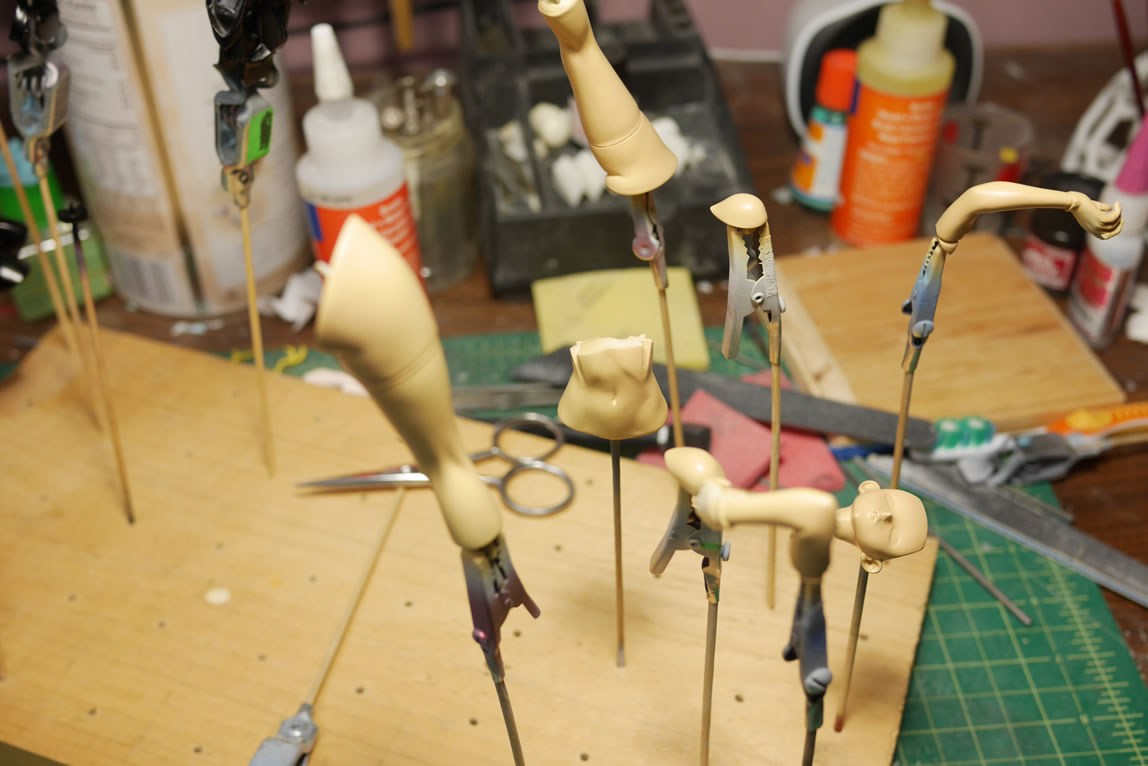
Continuing on after the build gathering. The nubs and mold lines are sanded down. And yet another note about the quality. I couldn’t find any pinholes during the sanding. I did need to fill some spots with light curing putty, but that was because I was overzealous with the drill and poked out some holes where there shouldn’t be holes. But once the initial clean up is done; the parts are thrown into a purple power bath; and left to soak over night.

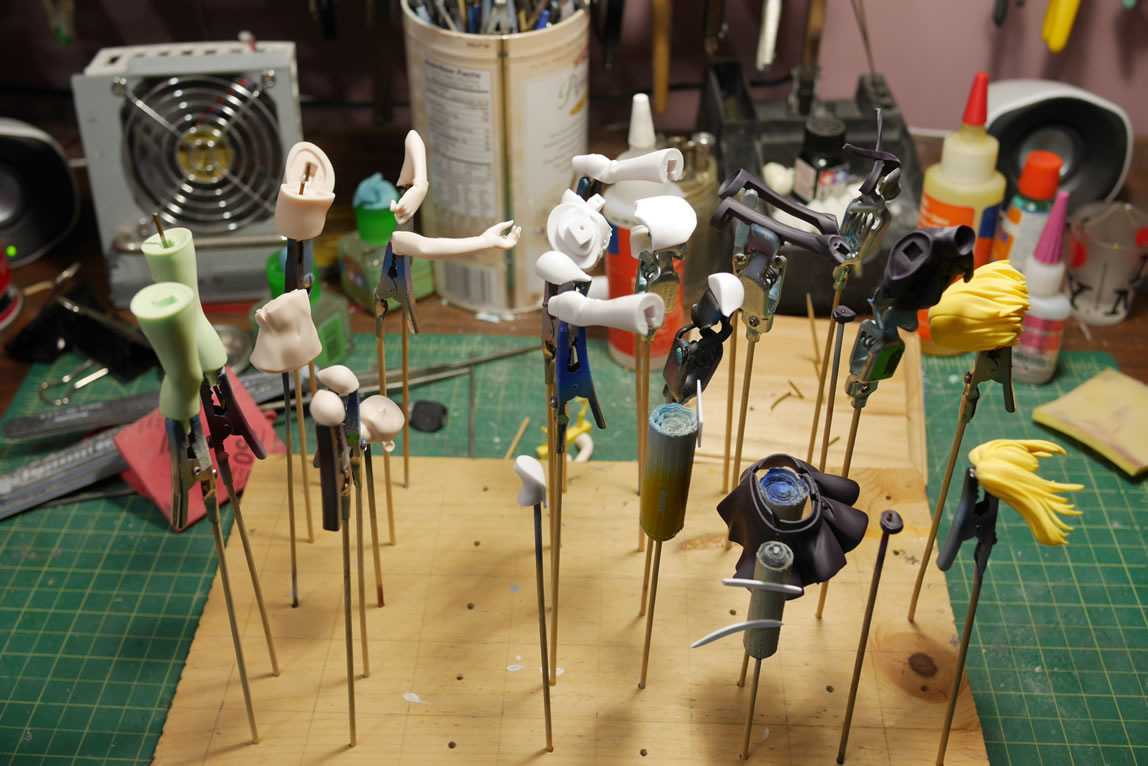
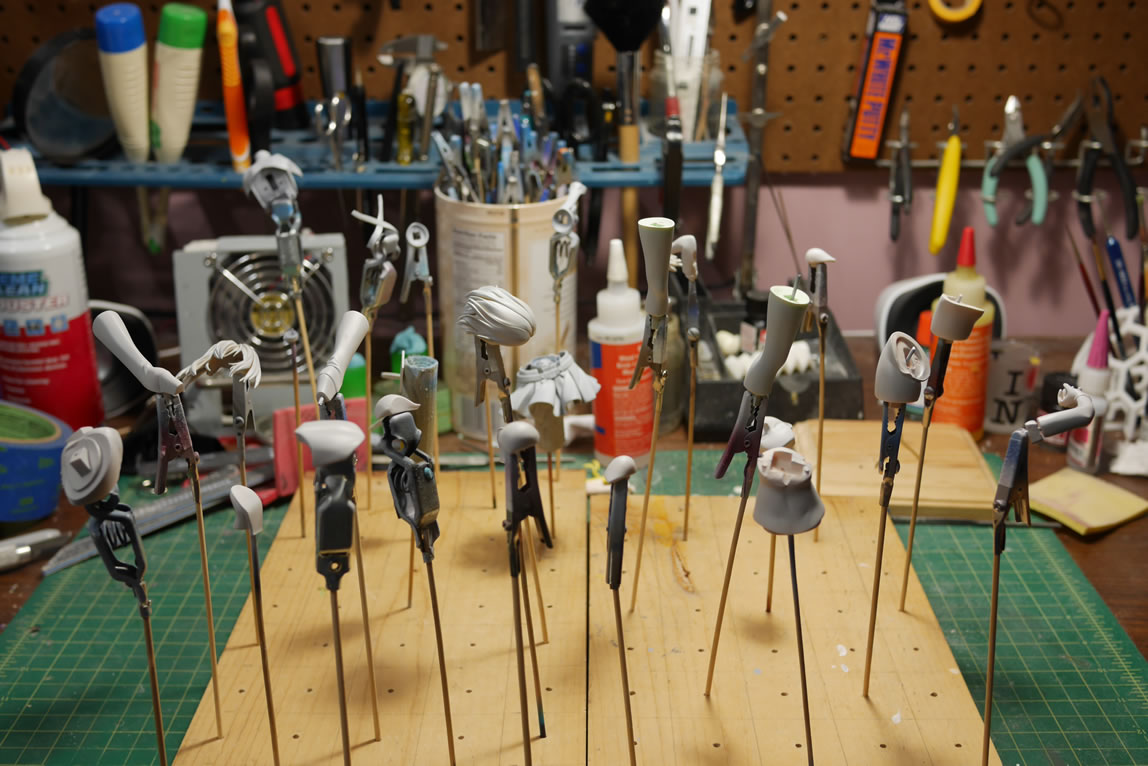
Out of the bath and into the ultrasonic cleaner to scrub the parts, then onto skewers for priming. The parts are primed to check for sanding issues and only a few parts needed some additional work. Again, the quality of the cast makes this process go by so quick and smoothly.
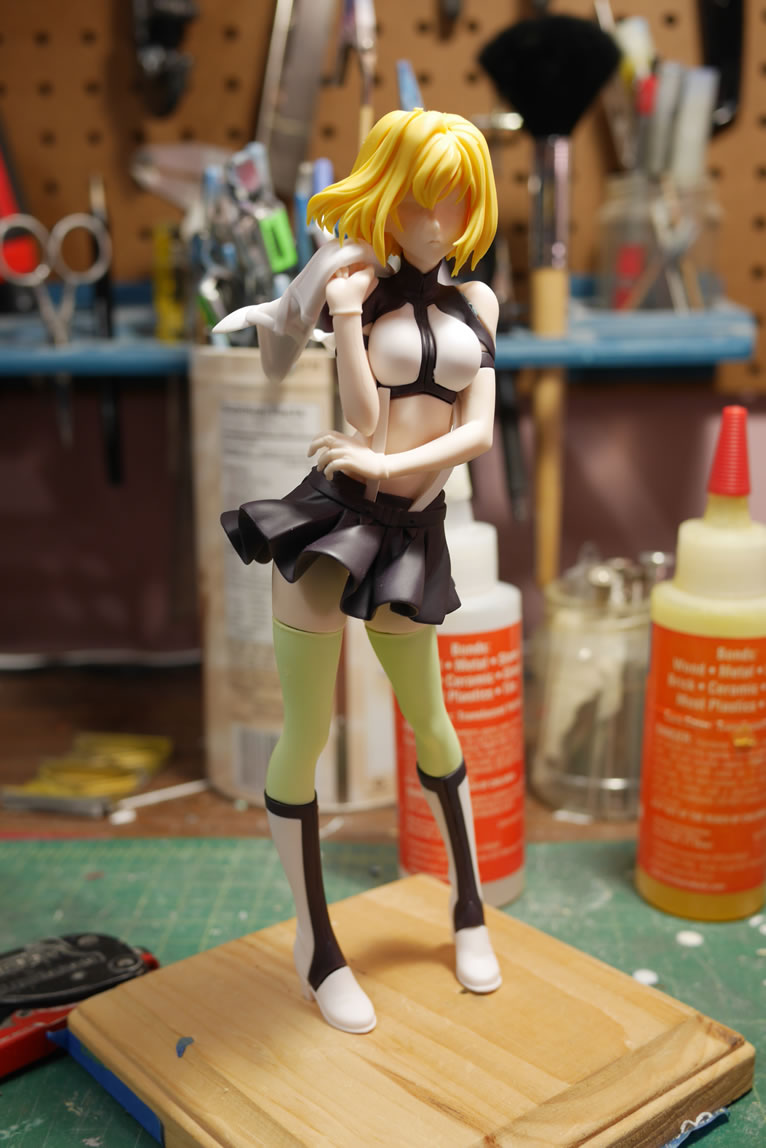
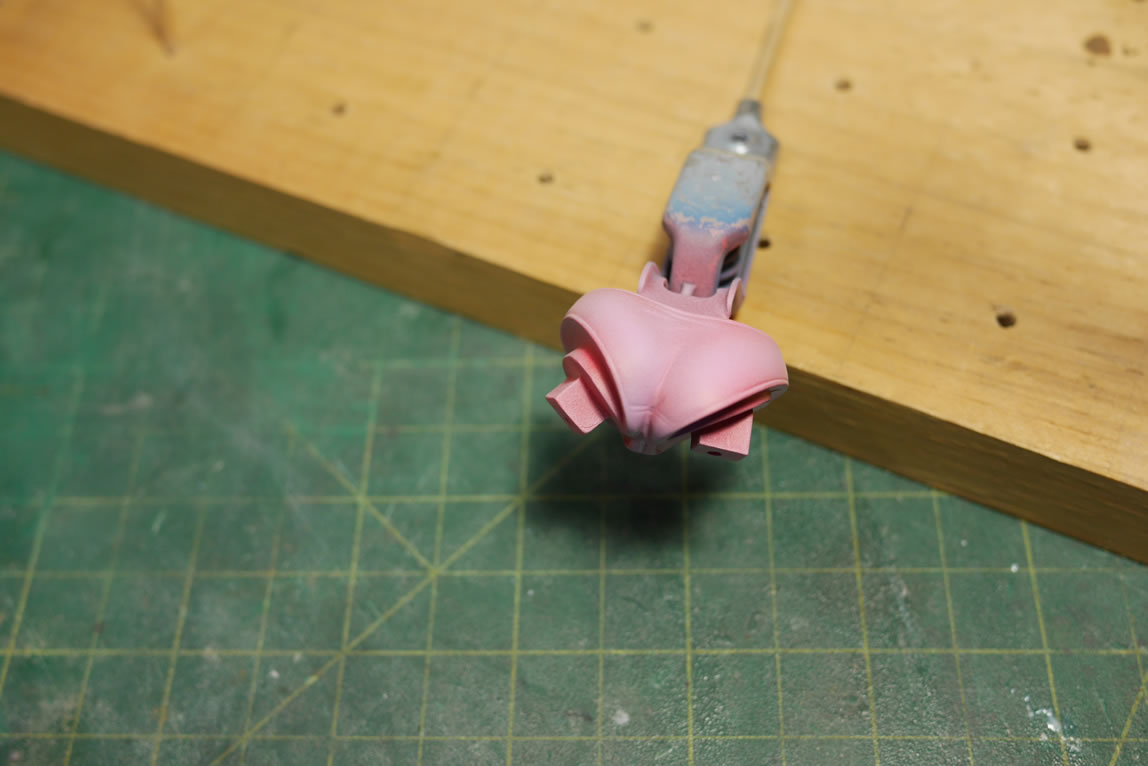
The base coats of paint are sprayed. The skirts get finisher’s pure black. The skin tones are base coated with Mr White base, since I learned years ago that spraying skin tone over grey resin primer results in death like skin tone. The panties are based coated with red. And the white pieces that are her boots and clothing are base coated in a neutral grey.
The panties are shaded with white to get a pink color. The skin tones are sprayed with a dark base skin tone then lightened with a highlight light skin tone to balance everything.
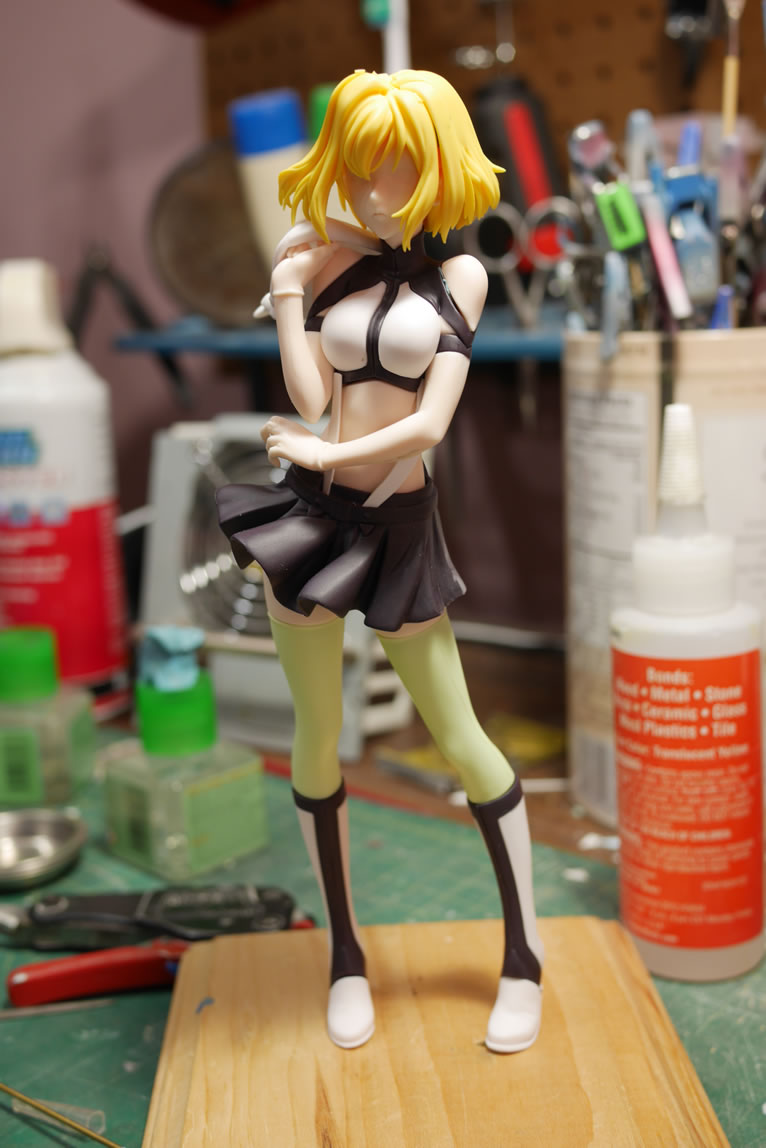
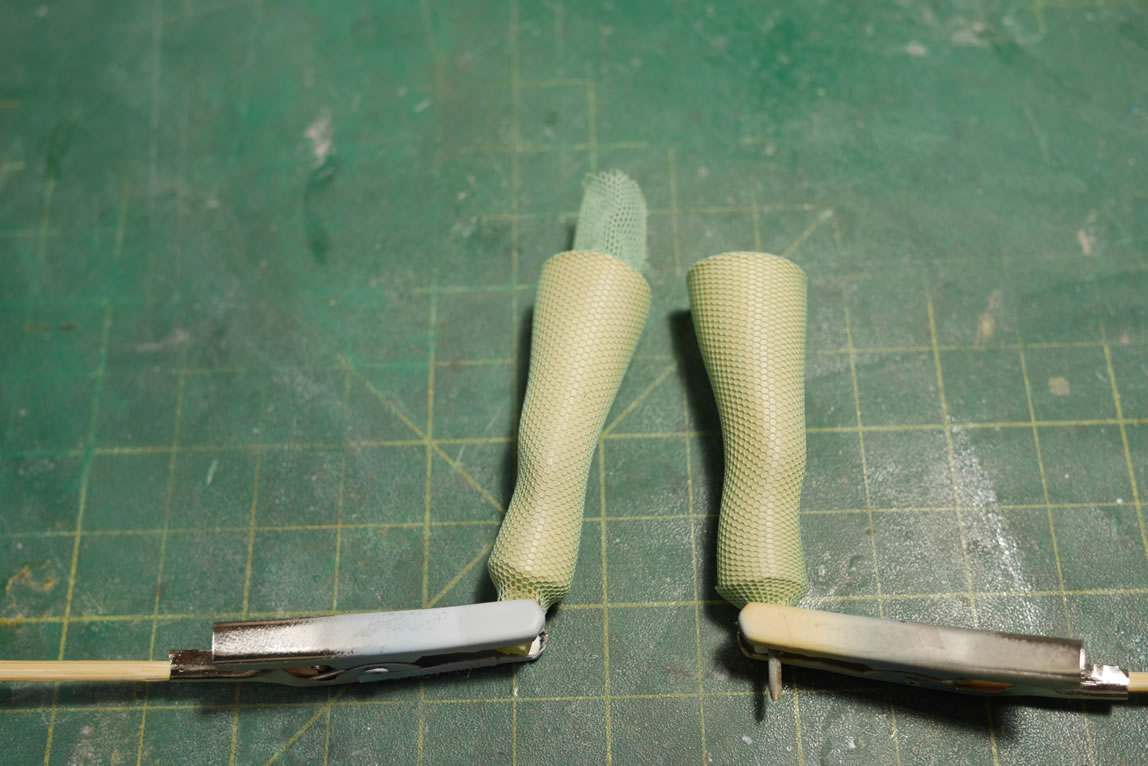
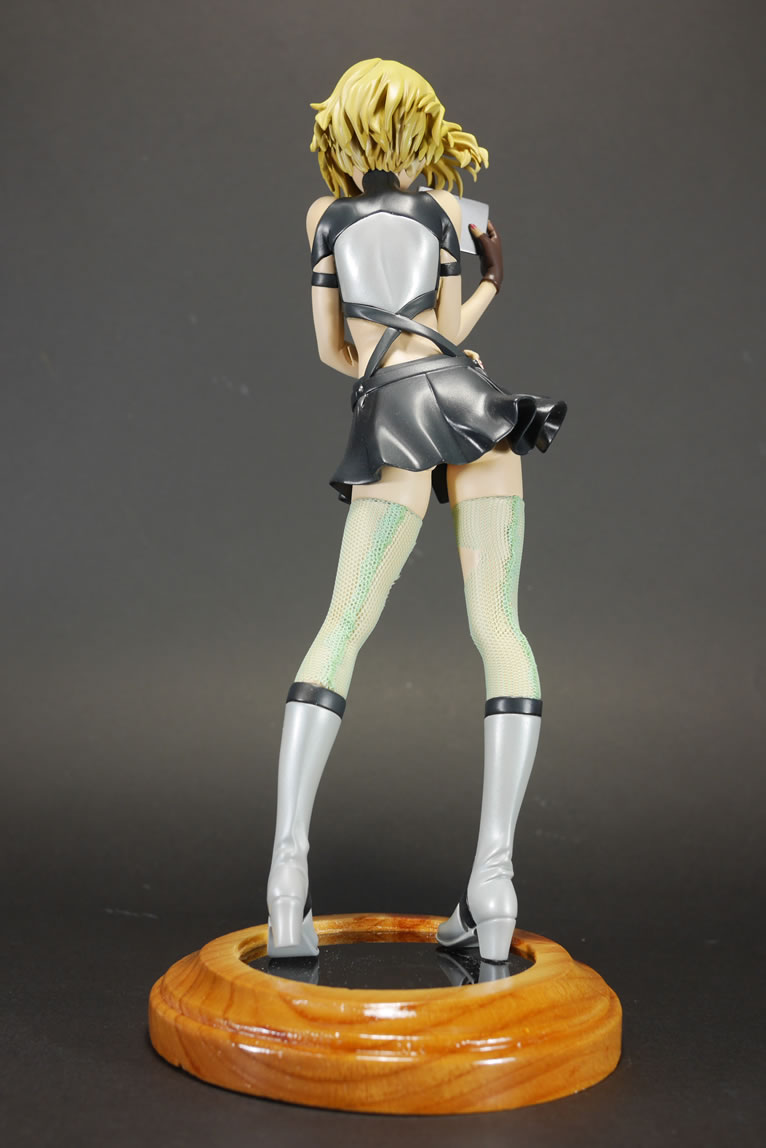
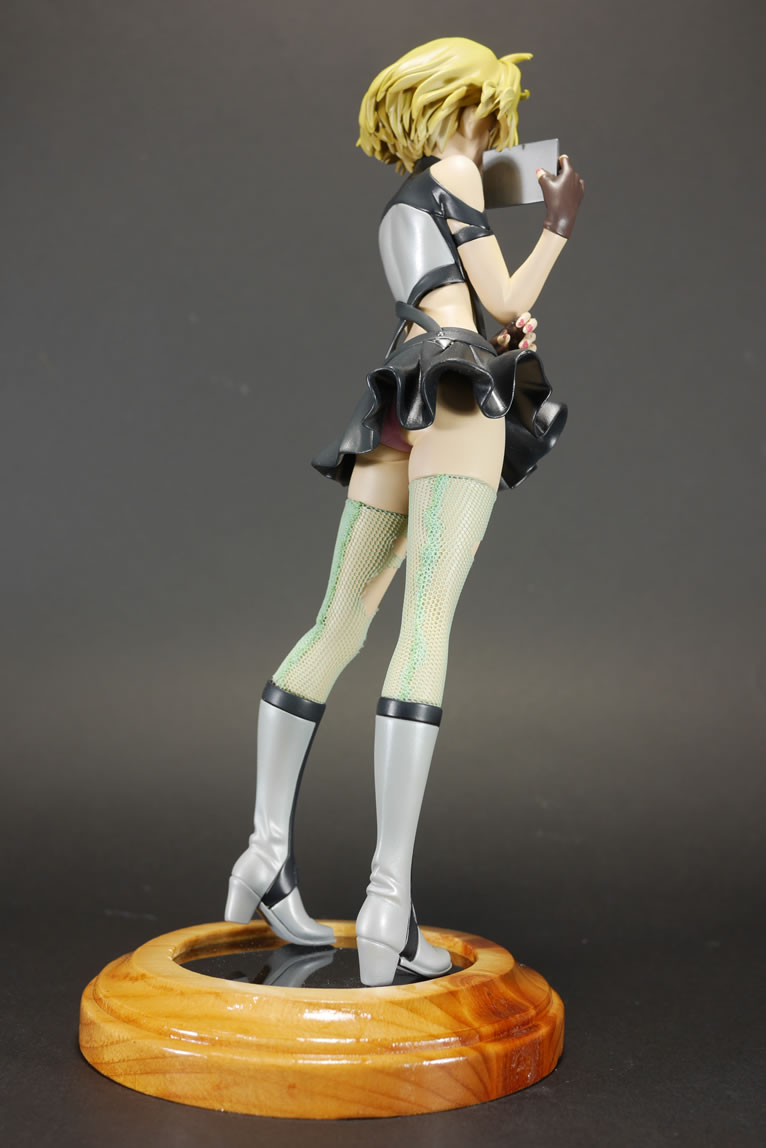
Going back to the original colored resin a few pictures up. Notice that her legs below the thighs are a different color. They’re green. The character is wearing green stockings. But moving forward to the above picture, you’ll notice that I painted these leg parts the normal skin tone. Why paint stockings when you can sew your own fishnet stockings?
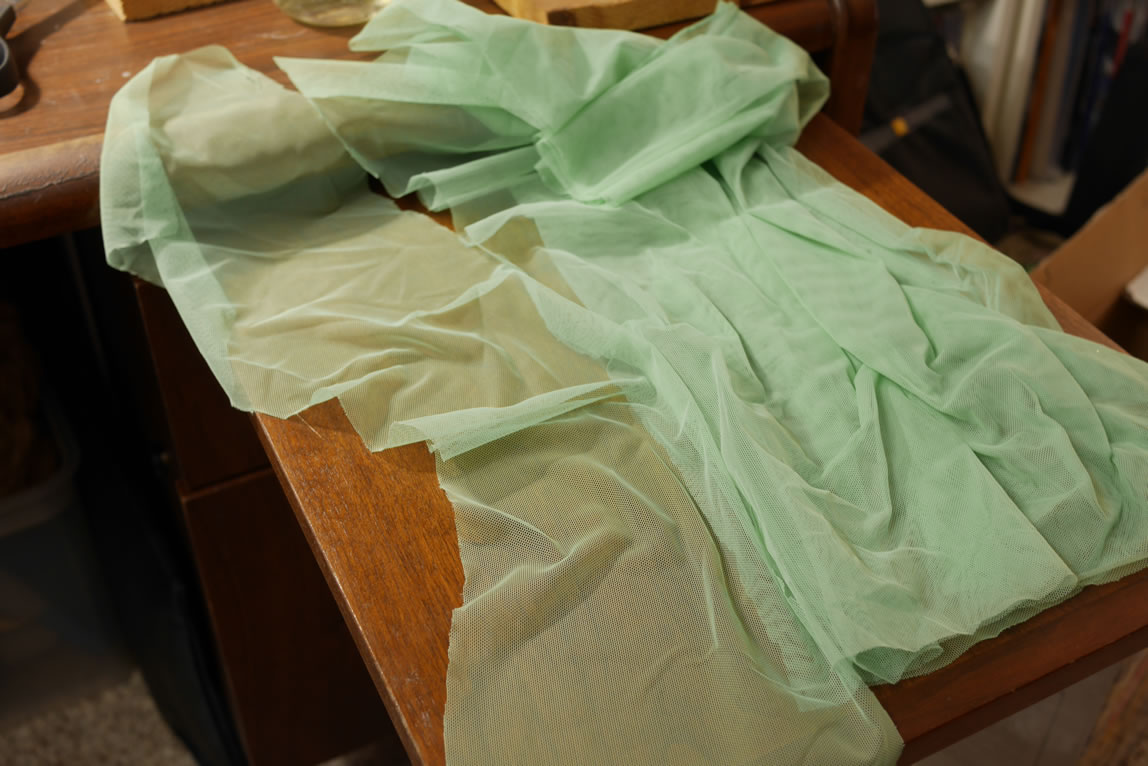
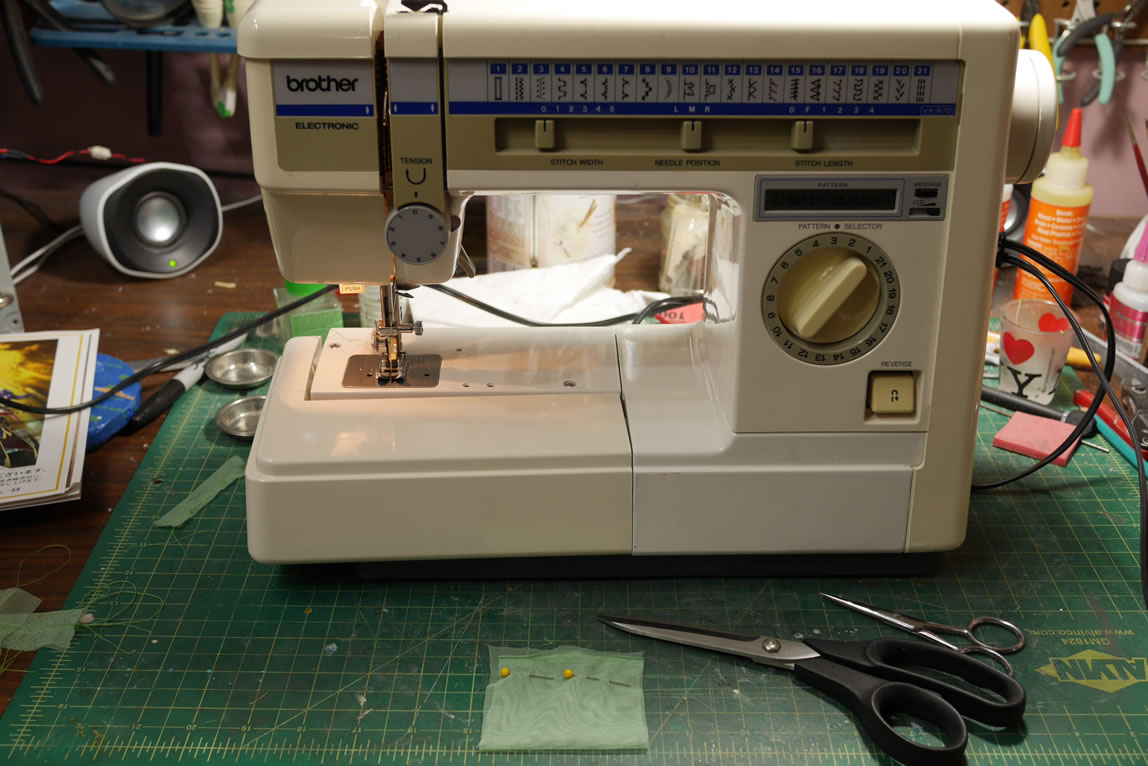
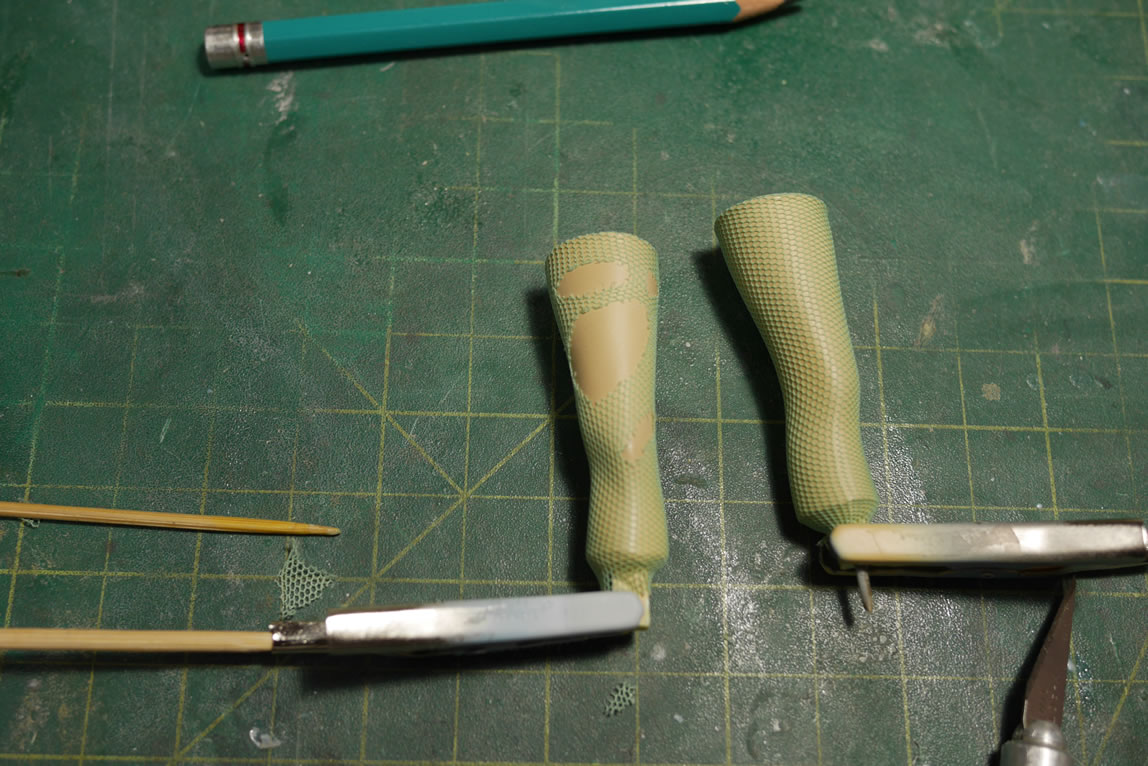
Yes, I have a sewing machine. Yes, I know how to use it. I picked up some green twill from the local Joann fabric shop. A foot of the stuff is less than $2. Cutting an appropriate amount, the twill is folded and held together with some pins. I grabbed some green thread and threaded a new bobbin with green thread and sewed a twill sock with a thin width elastic stitch. After a quick test fit, the sock is trimmed down to size and turned inside out so to hide the stitched ends and excess materials. The twill socks are then fitted to the legs.

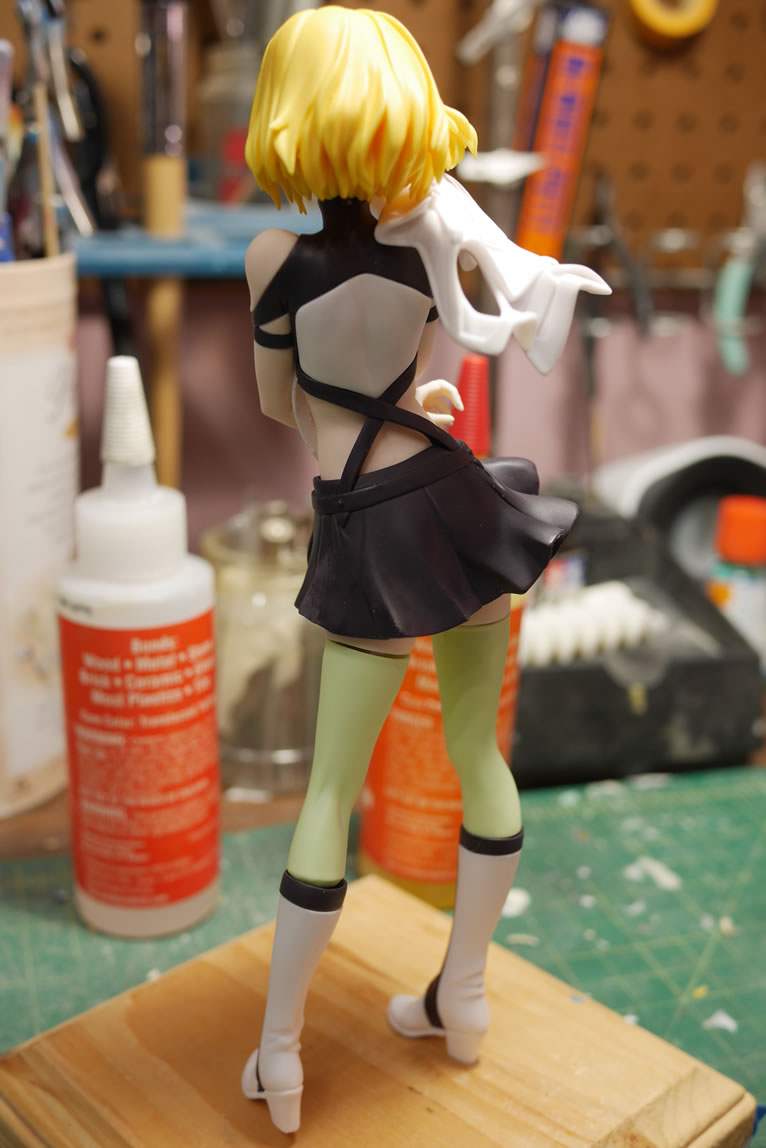
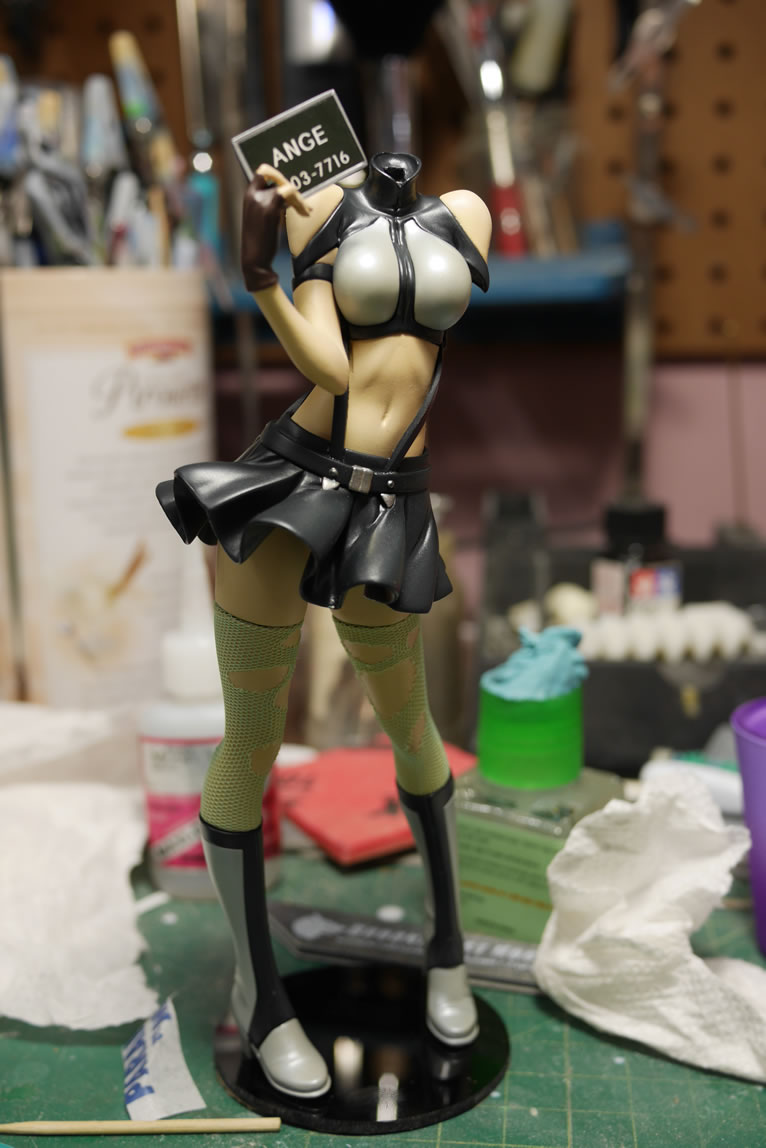
One of the pictures in the manual shows Ange with some frayed edges on her clothing and ripped stockings. So I cut up the stockings with a hobby knife and some scissors. I got about 80% of the kit assembled for a quick picture of headless Ange standing on top of a circular piece of gloss black acrylic plate
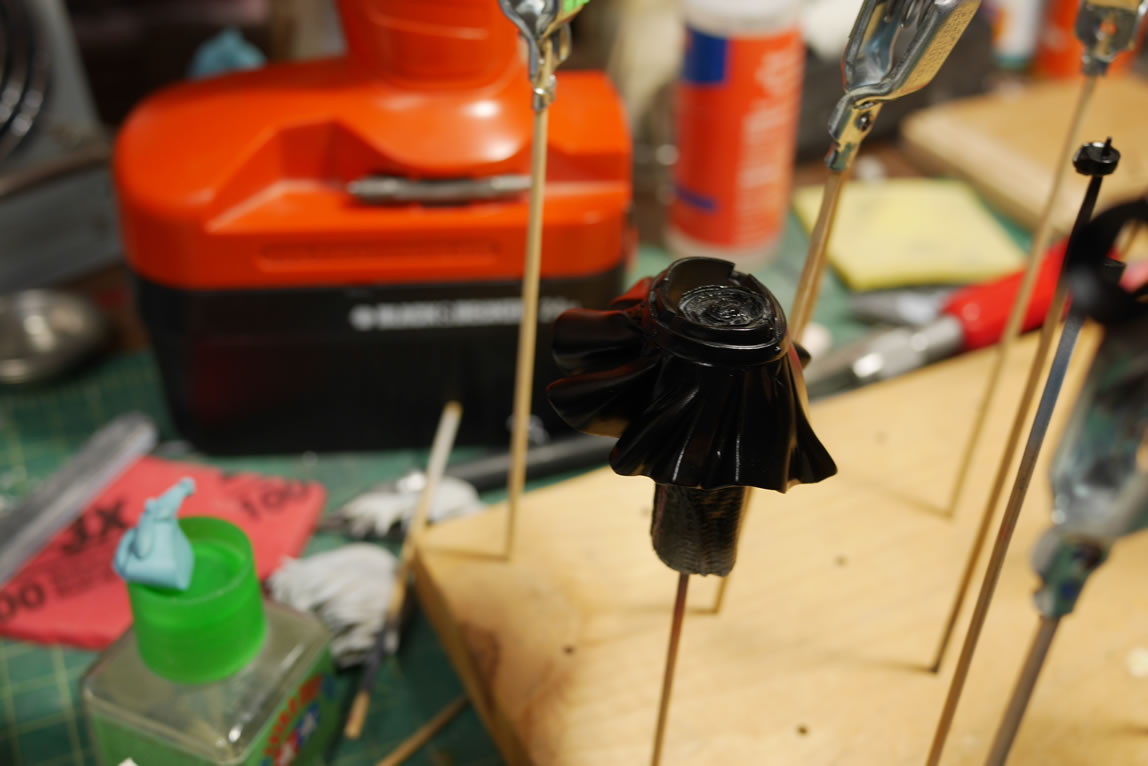
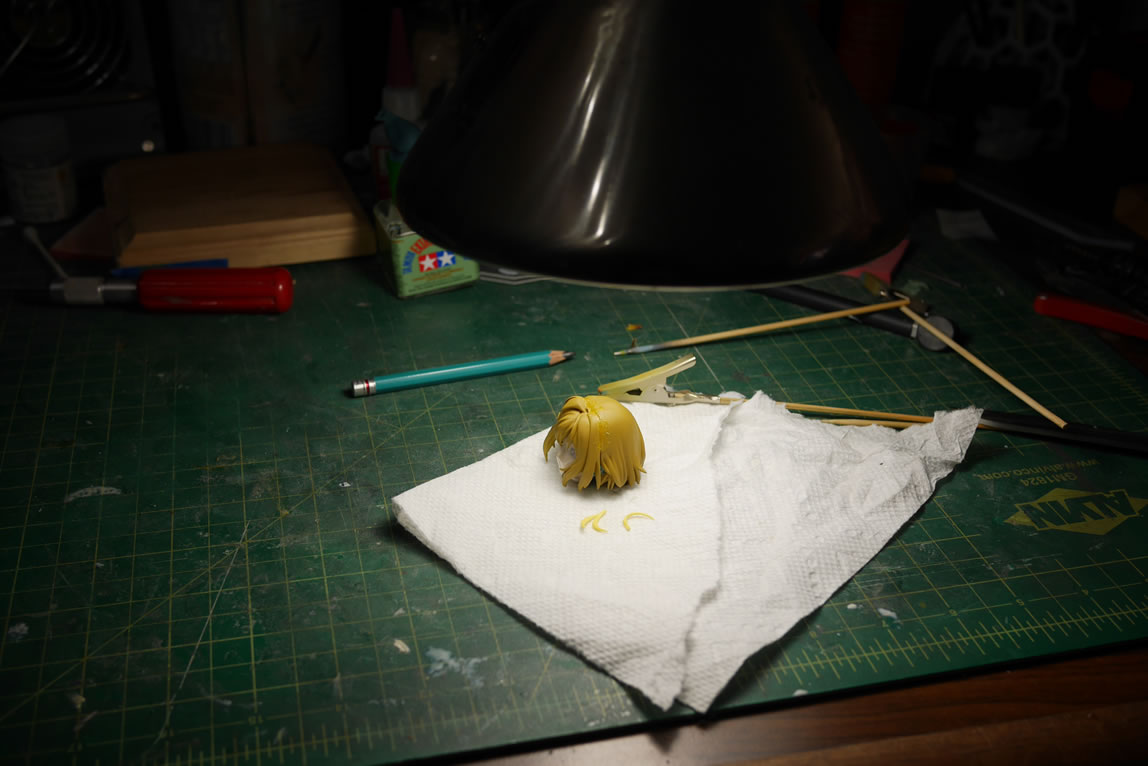
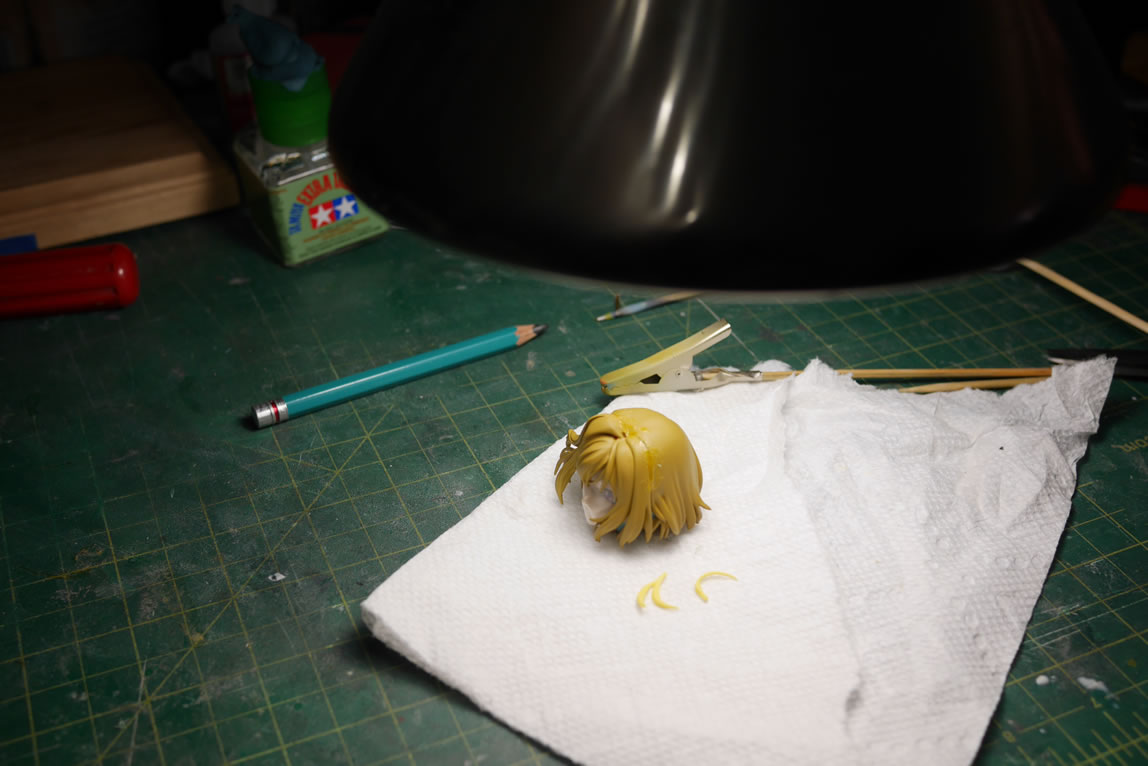
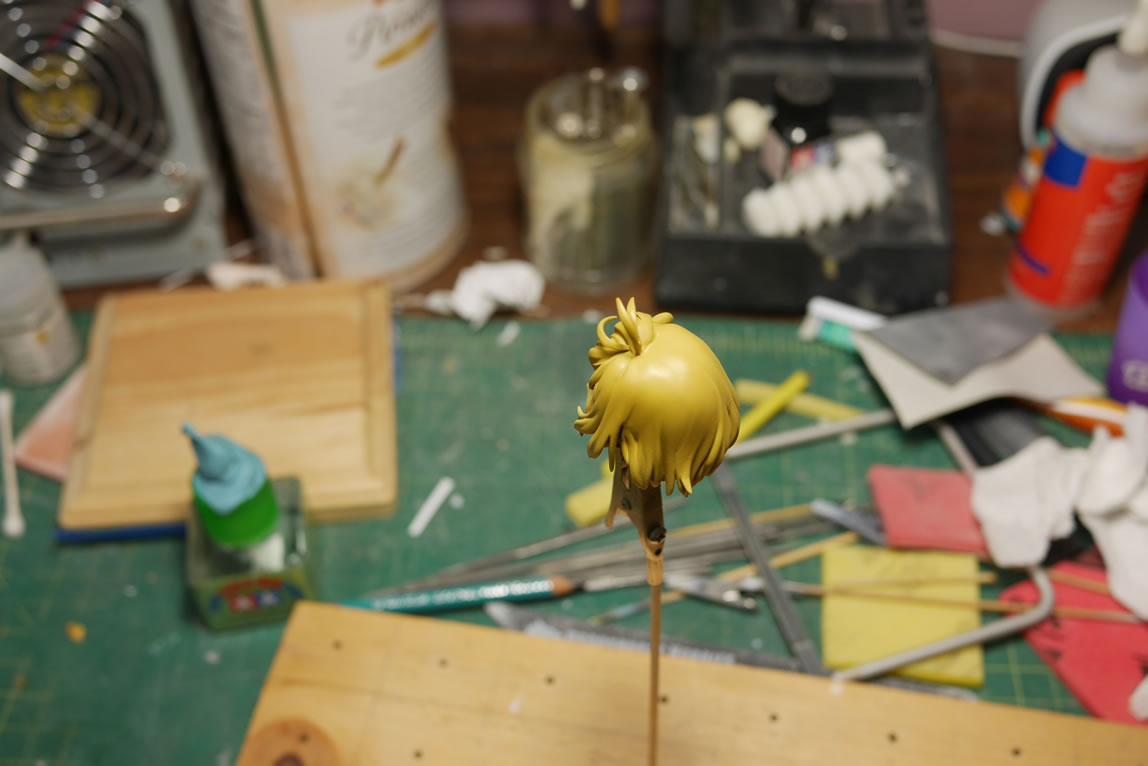
The last bit for most resin figure kits is usually the hair. Since the hair pieces attach to the head, the head needs to be completely painted first. And in my typical build schedule, this almost always puts the hair work at the very end. Below is a picture of the hair pieces when I first pinned the kit together. The whole hair piece is about 10 separate pieces. Gaps in the hair for anime figure kits really bother me, so I try my best to fill them and resculpt details to make it look more natural.

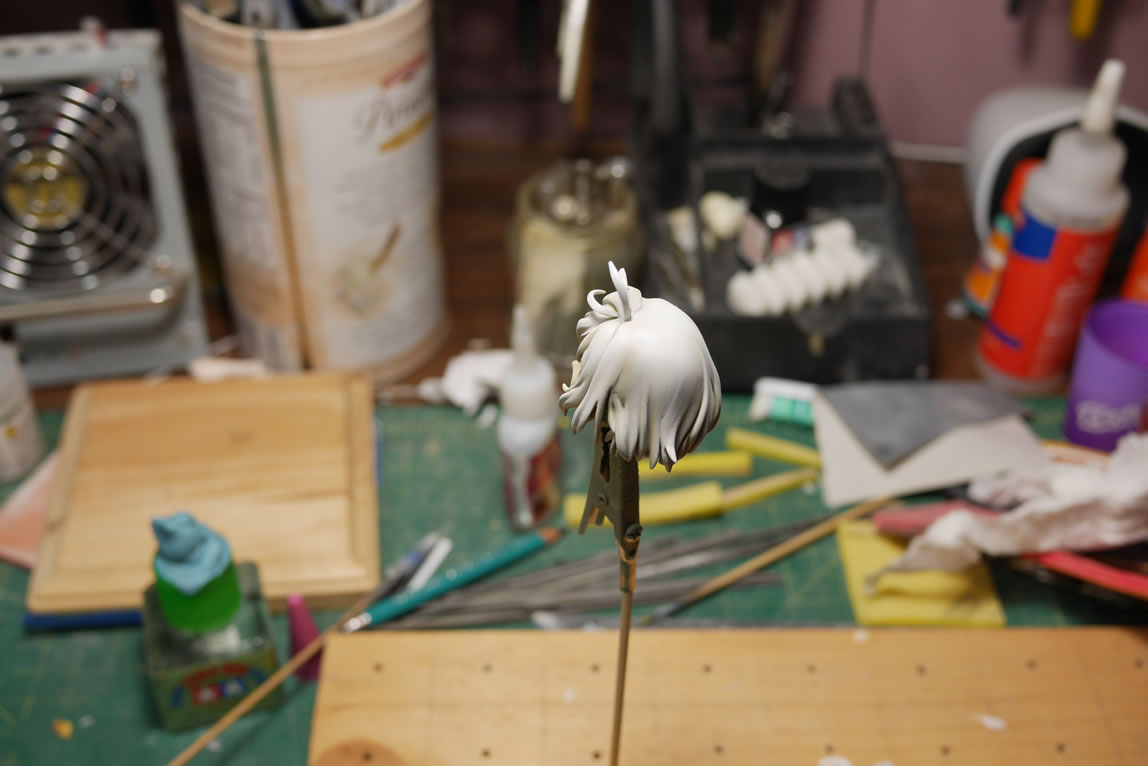
I glued together the major parts for each half, fill in the gaps with light curing putty and got the hair down to 2 major parts and 2 additional small detail pieces for the front half. The two major parts were primed and base coated with sand yellow. Once the head was done; the two base painted halves are glued to the head. I put in some parafilm on the face to mask it off and masked off the rest of the skin areas with blue sticky tack. There is a gap where the two hair parts meet, so light curing putty is used to fill. The cured putty is sanded down and the gap area is primed to check for quality.

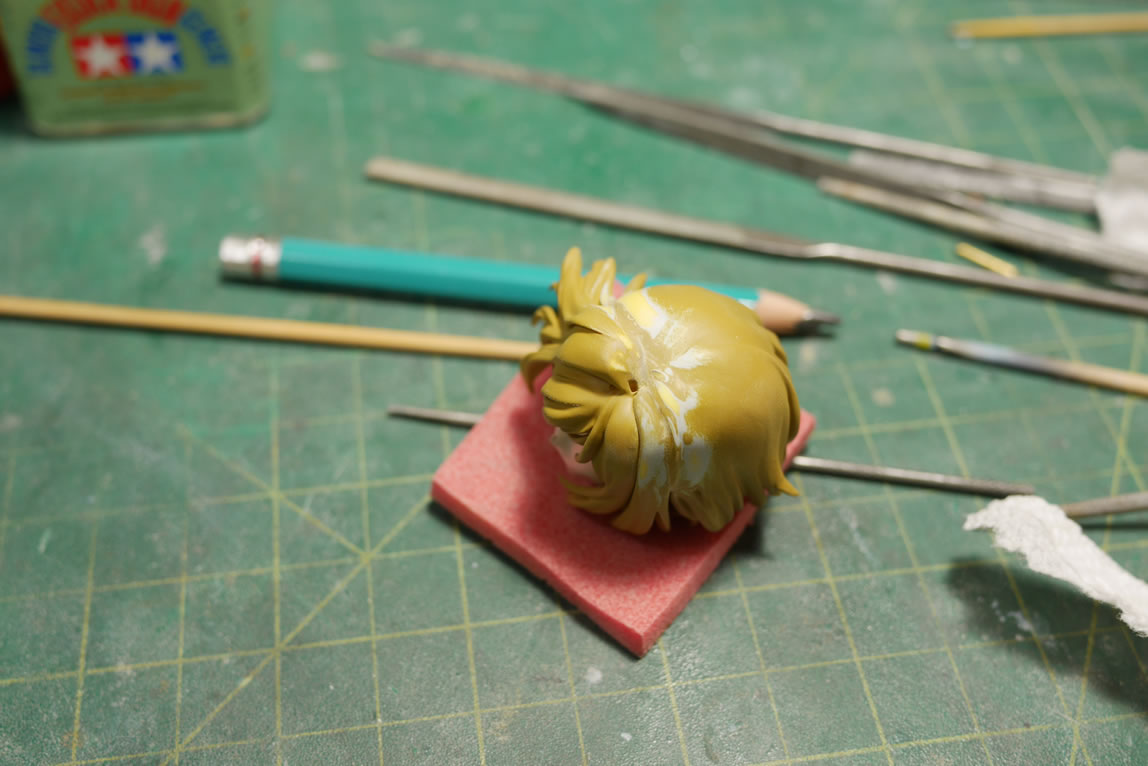
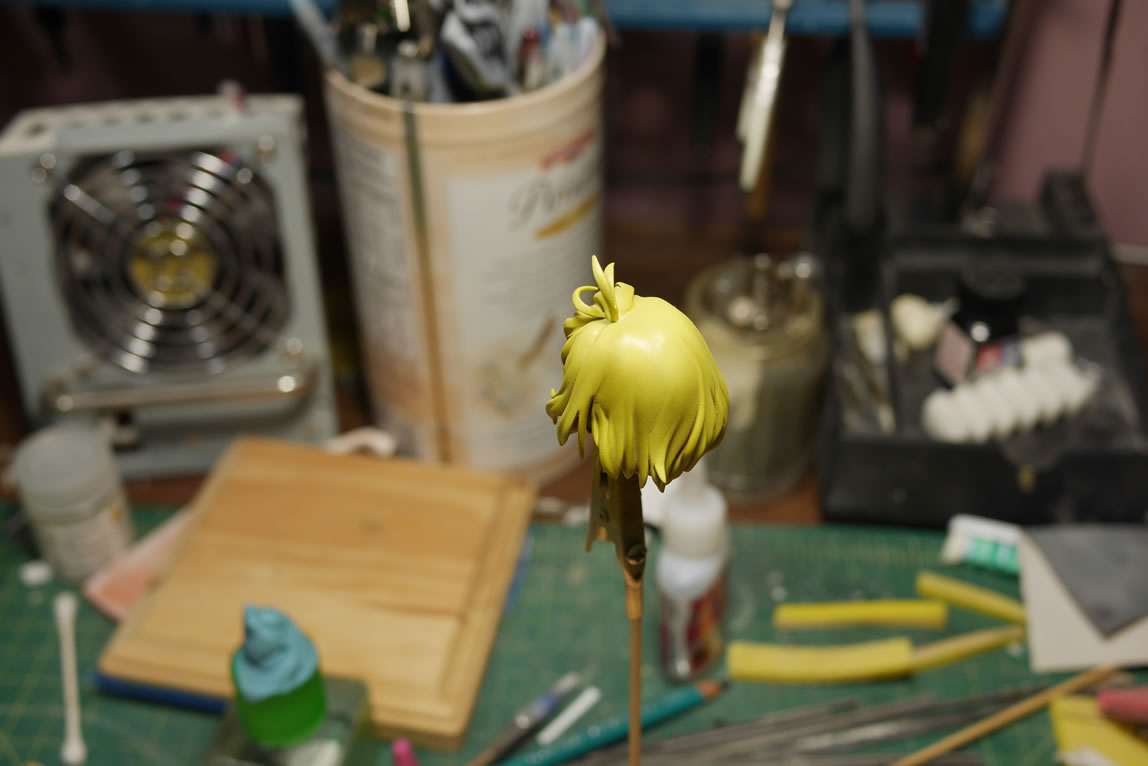
A quick fix to some missed sanding areas and the gap area is ready for base coating. After the base coat, I sprayed on character white using the sand yellow as a darker shade. Then over this, I sprayed clear yellow to get her rather bright yellow blond hair and keep some subtle shading for the hair.
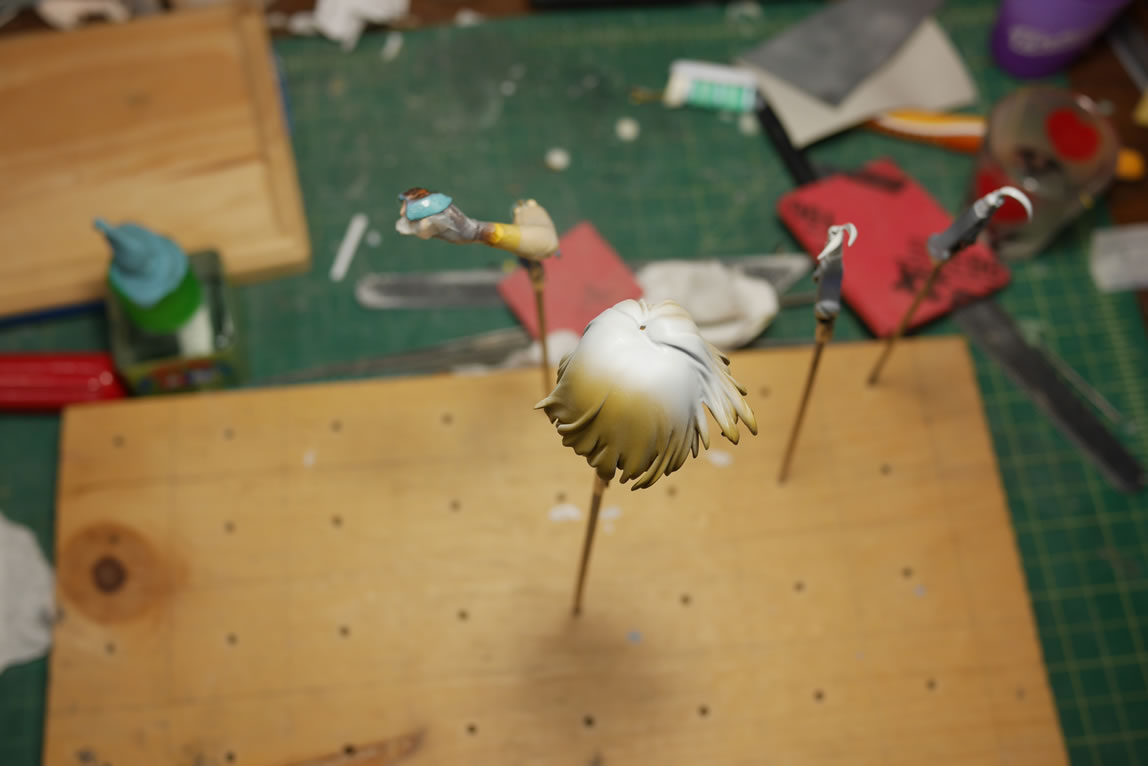
The hair was the last bit of work and the next step is to remove the mask in hopes that I didn’t screw up and need to do touchups. I still need to do the detail painting like the finger tips and lips. But she should be done sometime this week.
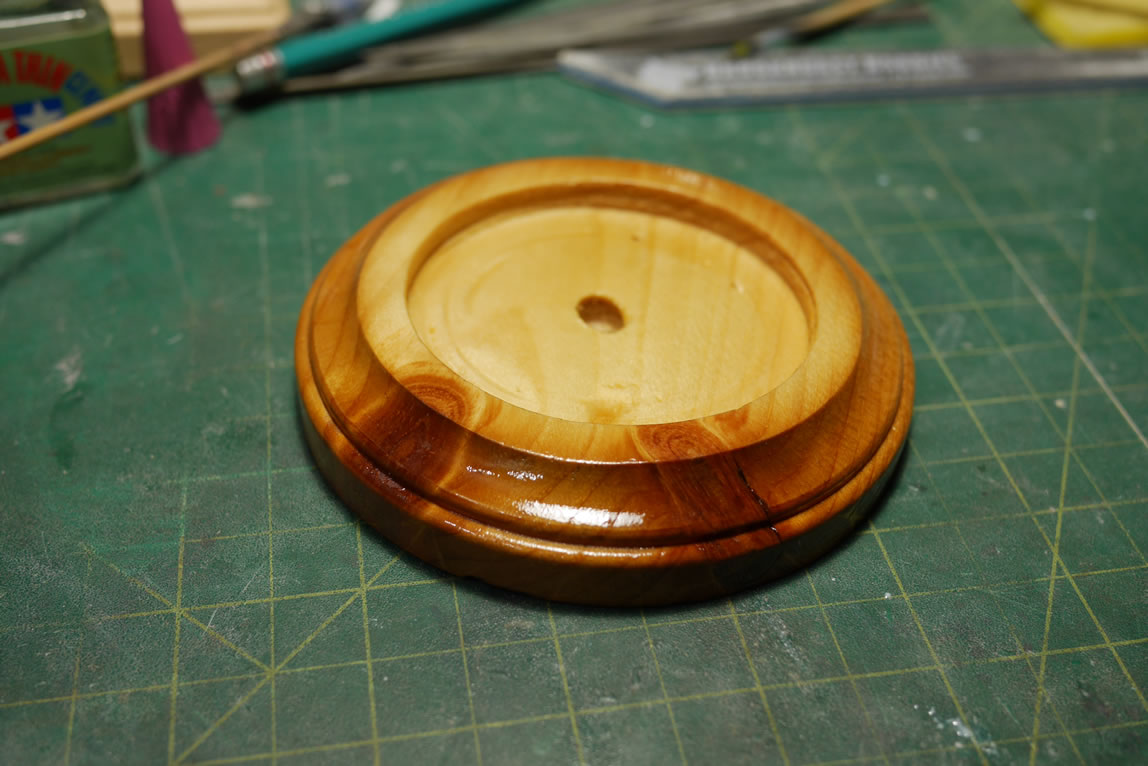
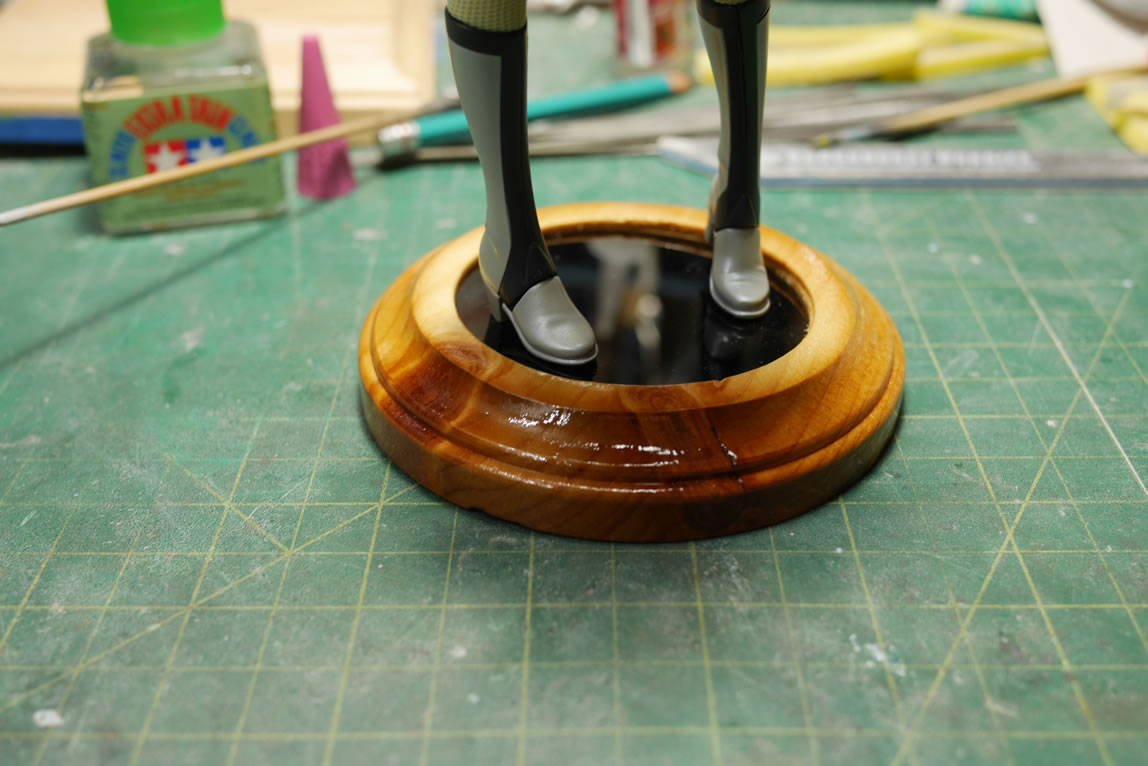
The next bit of work is for the base. I took an old round wood base and cleared out a circular area in the base. The base was then sanded and varnished with clear polyurethane gloss spray. The black acrylic stand then fits right into the wood base.
Again, I hope to finish this kit up in the next few days so I’ll have another post with some completed pictures.
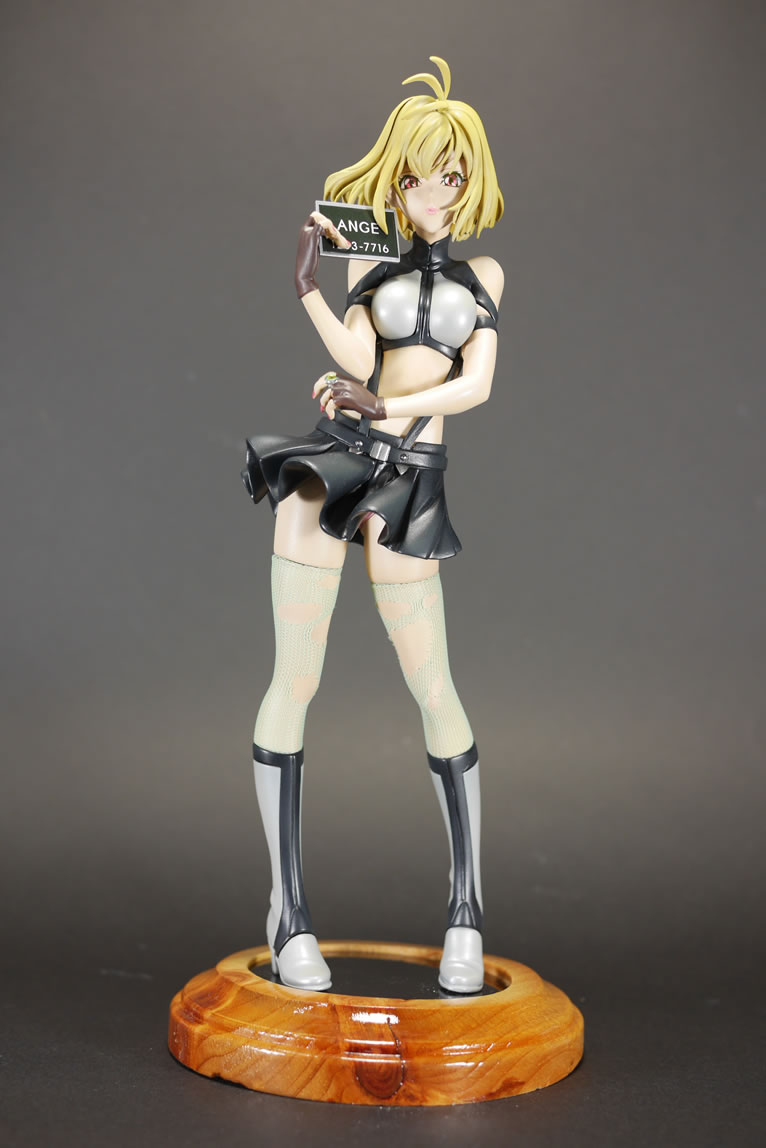
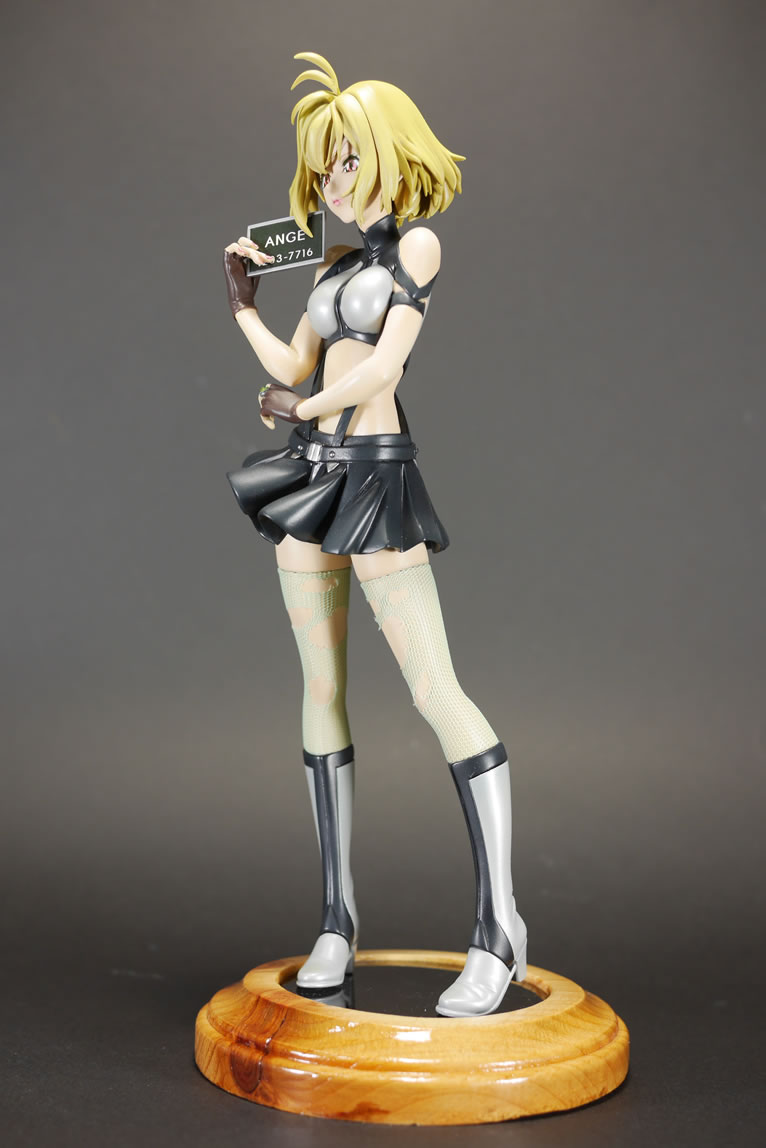
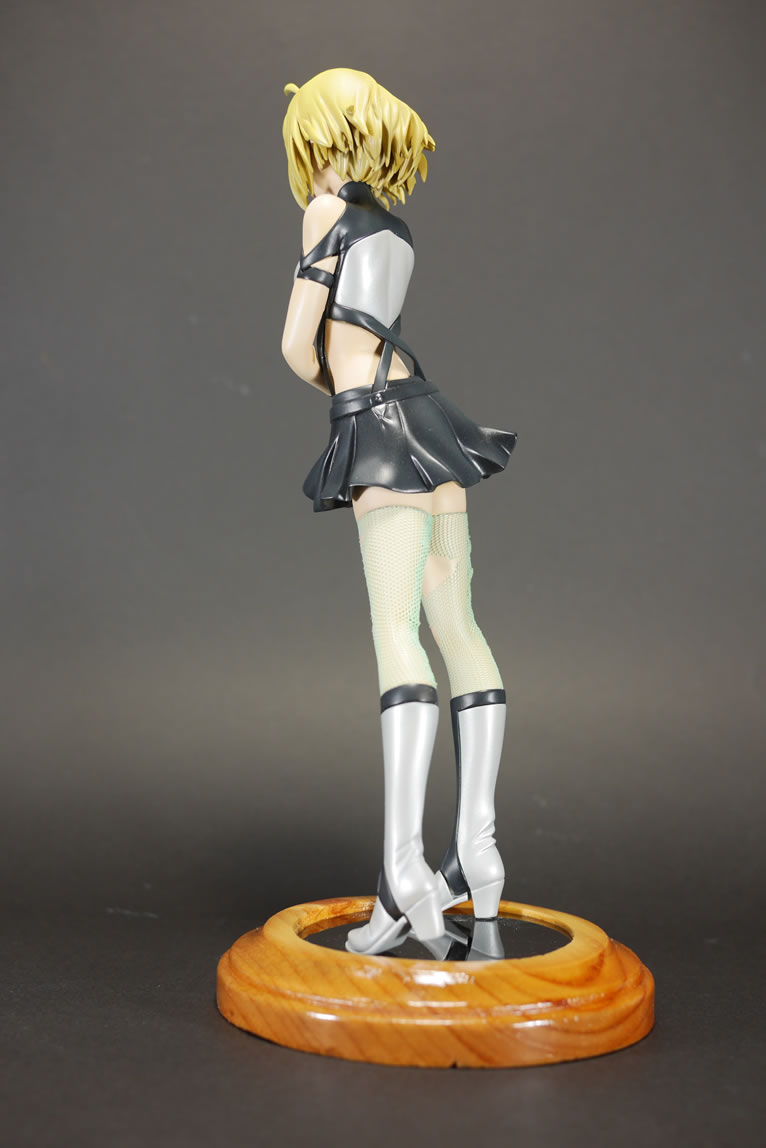
Completed pictures:
|
|
|
|
|
|

|
|
|
|
|