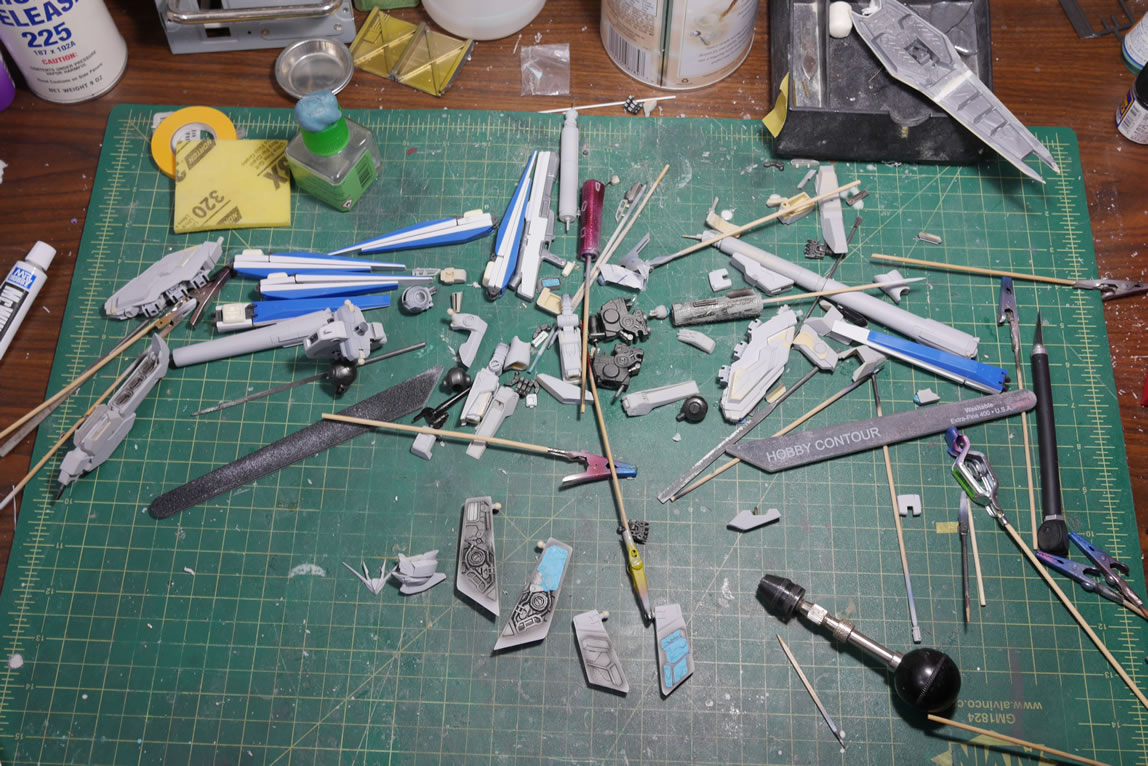
The last time I made an update to this blog about working on this kit was November 17, 2010. And I had just finished priming and was starting to spray the metallic colors for some of the frame pieces. I had originally started this project in March 2008 when the Bandai Hi Nu and Vicious Project conversion kit was around. Over the past 8 years, the kit has been unboxed, looked at, and possibly got some work; but it ALWAYS got boxed back up and thrown back onto the shelves. It’s gotten to a point of being a running gag on being in development hell. Motivation to finish a kit plays a huge part in actually finishing kits. It’s not that I didn’t have the time to finish it; I just was not motivated enough. I’m sure I had some more recently updated pictures on my computer, but all I could find is what I’ve already uploaded. And it is only a picture of the sand – prime – sand process. And that process alone is excuse enough to kill any project.
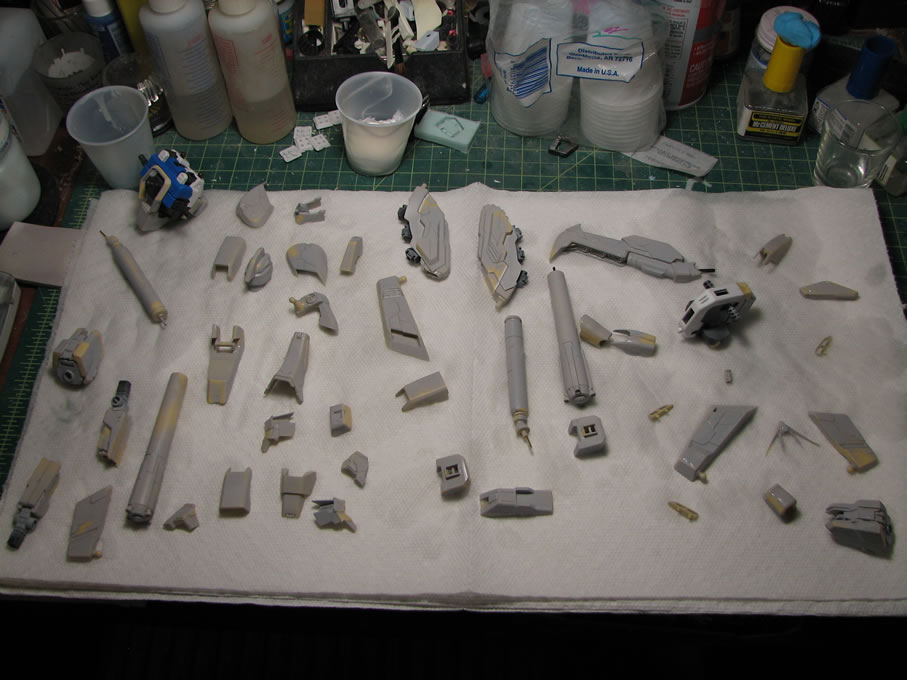
I even had a paint scheme planned out all those 8 years ago. That’s completely changed now since I started back up this past week. At this point, I just want to finish the sucker, so nothing too fancy with the paint scheme. I’ve had some Hi Nu decals sitting for longer than 8 years, so time to stick with the basic scheme; with just the smallest amount of personalization. The parts are strewn on my workbench and I’m quite surprised that I’m not missing anything. At least nothing vital so far.
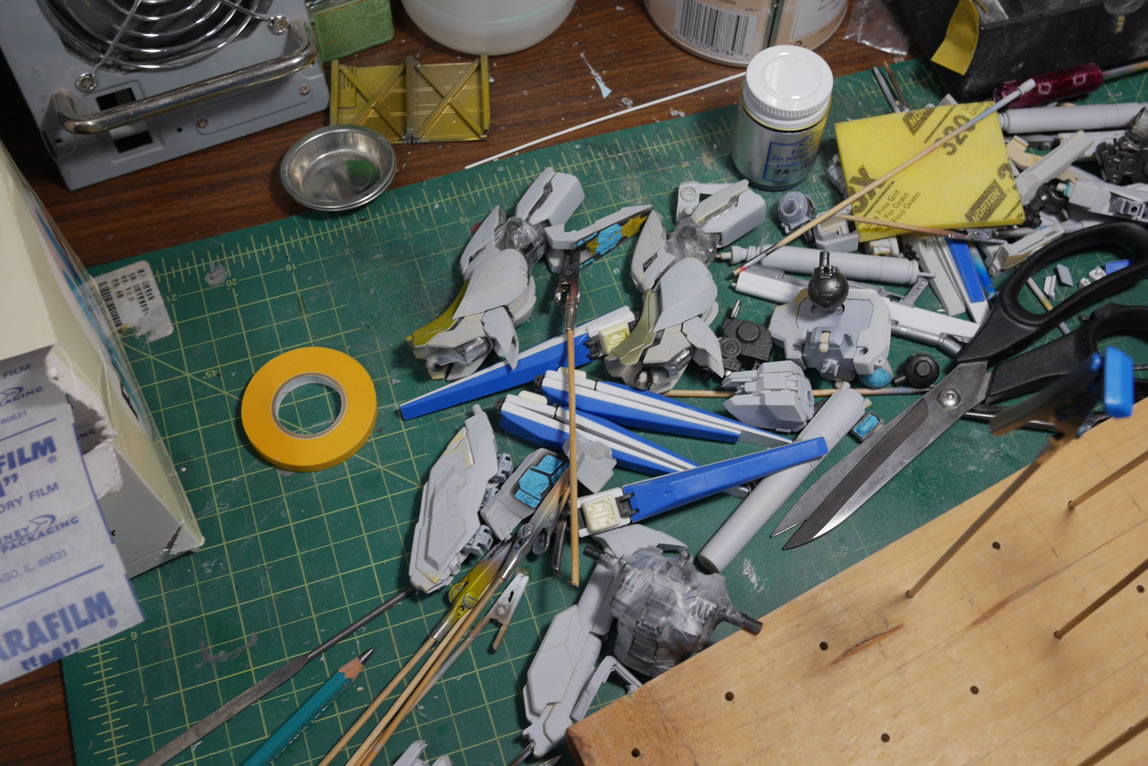
Since the kit was already primed and actually partially masked off; it was pretty easy to just start throwing down the base color. I still have a small amount of the custom blue I used to the 1/100 Gusion project; so why let that paint go to waste. It’ll work as a good base color for shading the white as well as work for my masking plans.
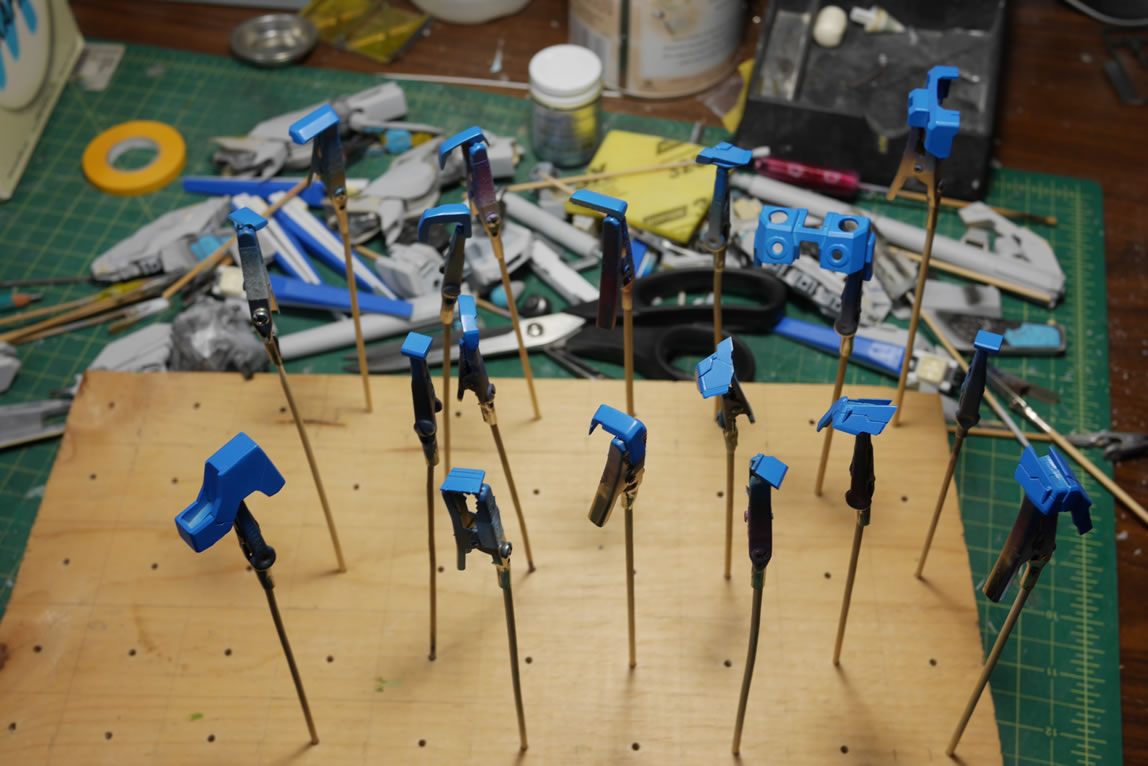
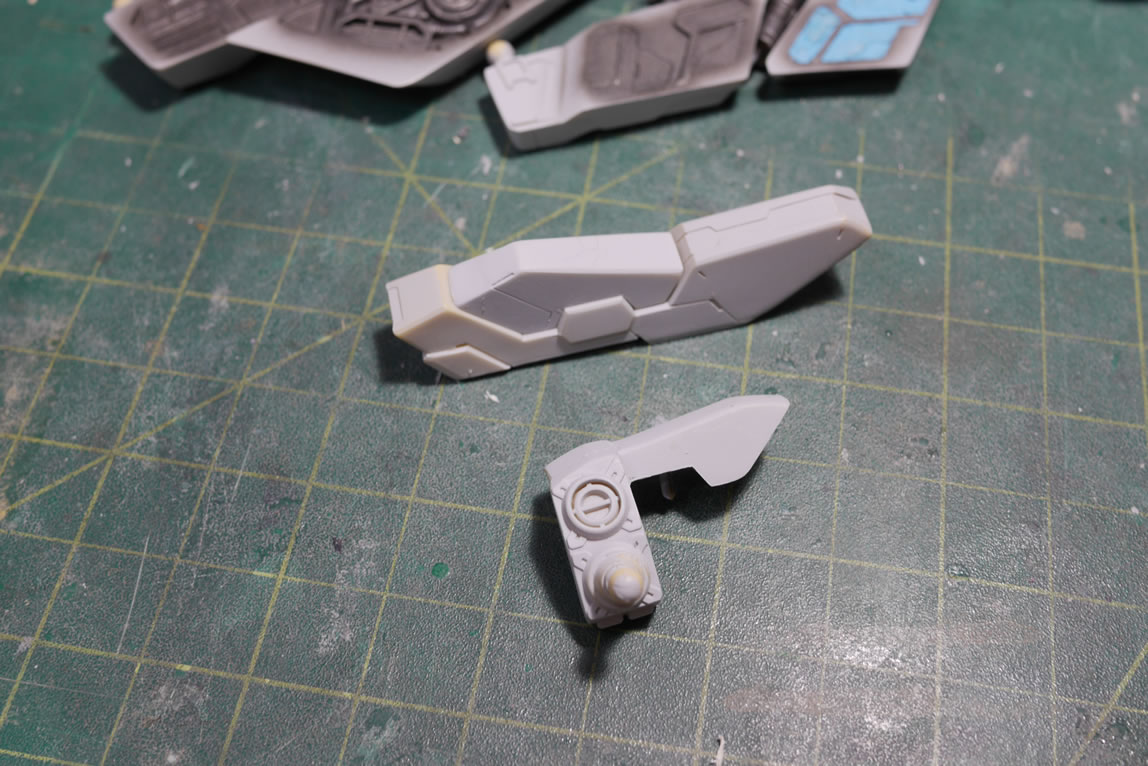
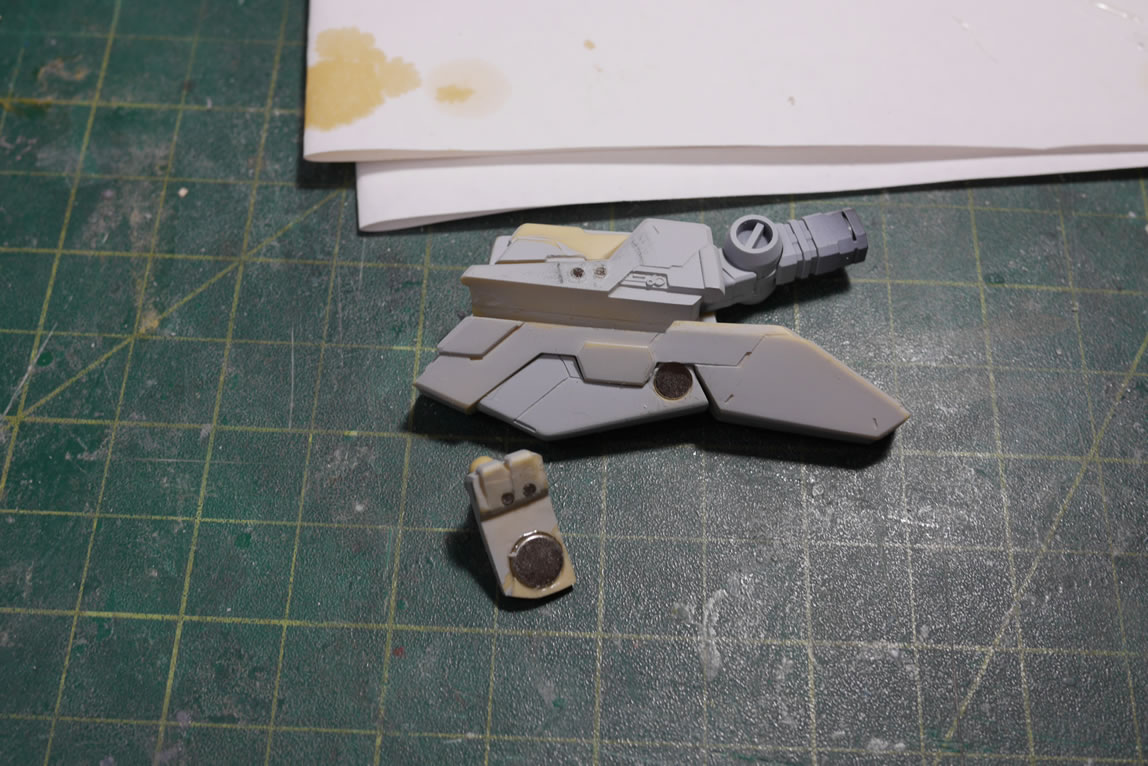
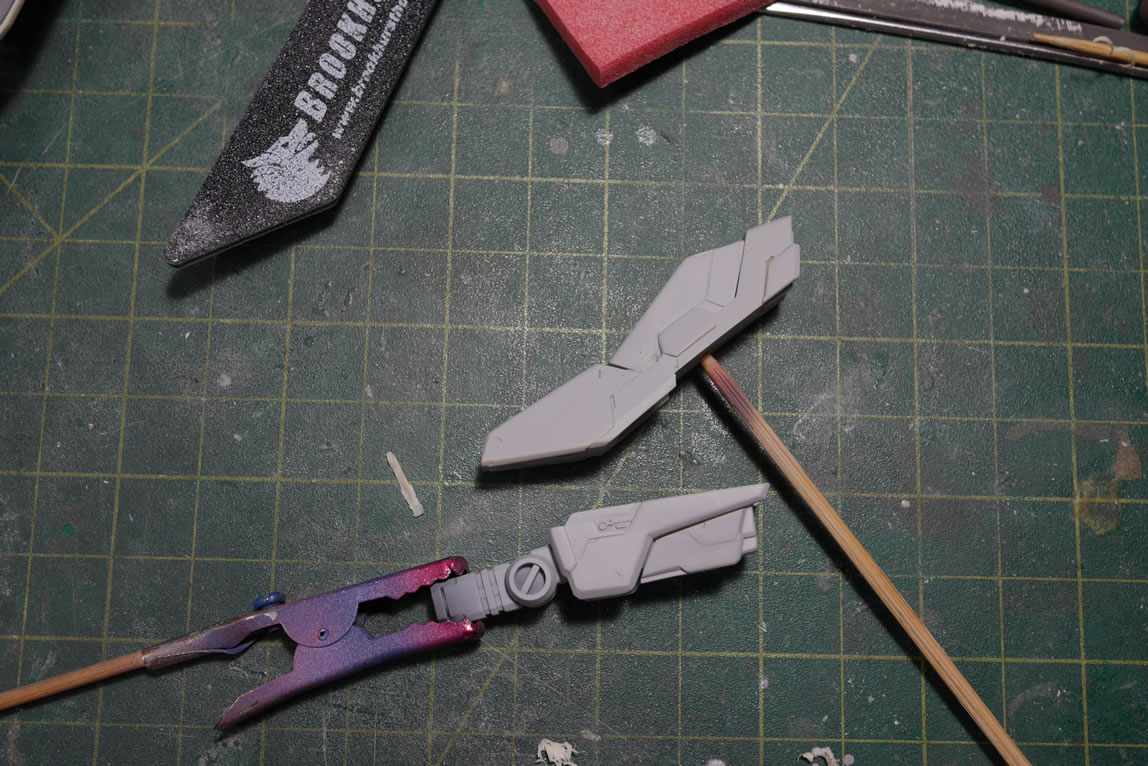
I also started gluing together some smaller subassemblies to make things work easier. 8 years ago, I would have painted things separately then glued them together at the end. I glued together the forearm piece that has the shield attachment. And it was only after I had glued that piece together that I discovered a second resin part for that arm that has the actual attachment to the shield. It was meant to be an interchangeable piece for display with or without the shield. Whoops. The part wasn’t going to come off without significant damage to the part so I left it. Focus went to the shield piece. I cut off the shield connection frame, then drilled holes into the already perfectly primed glued together arm piece. Magnets are glued into the drilled out holes. Over the magnets, some putty, some sanding, and some priming to tie it all together. Ok, it didn’t go quite as smoothly as that; but after a second putty/sanding/primer session. I now have an arm that will function with and without the shield without swapping the actual arm part.
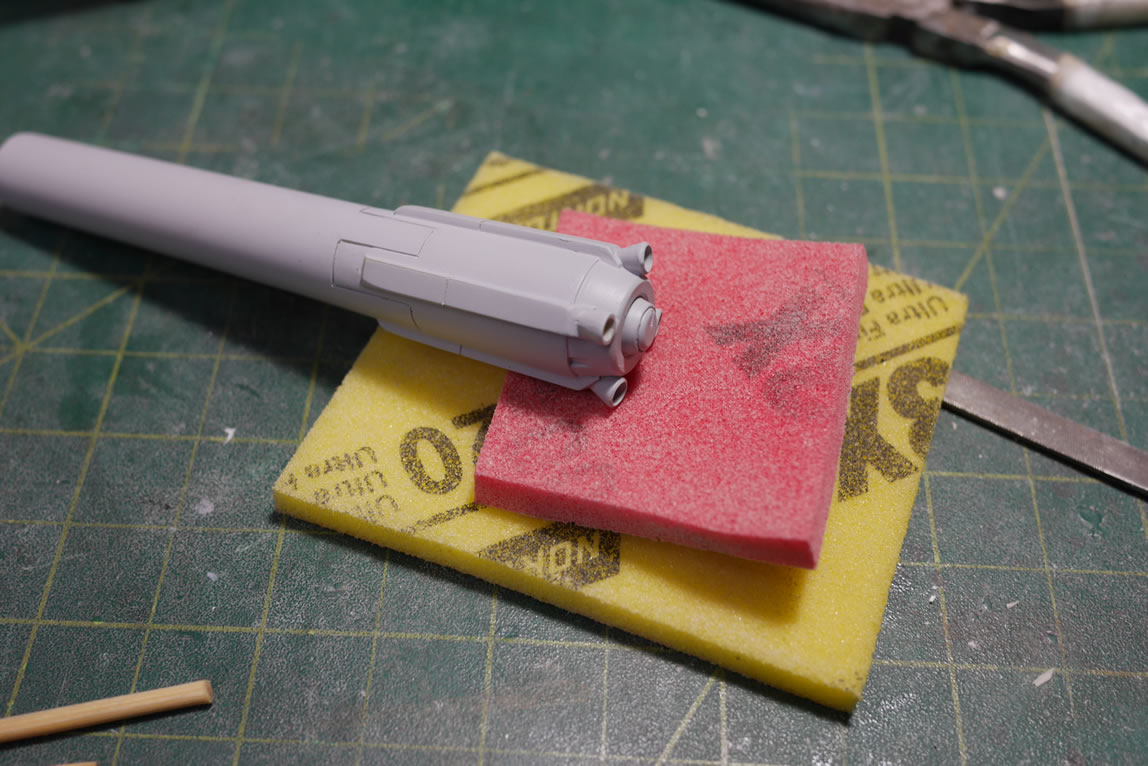
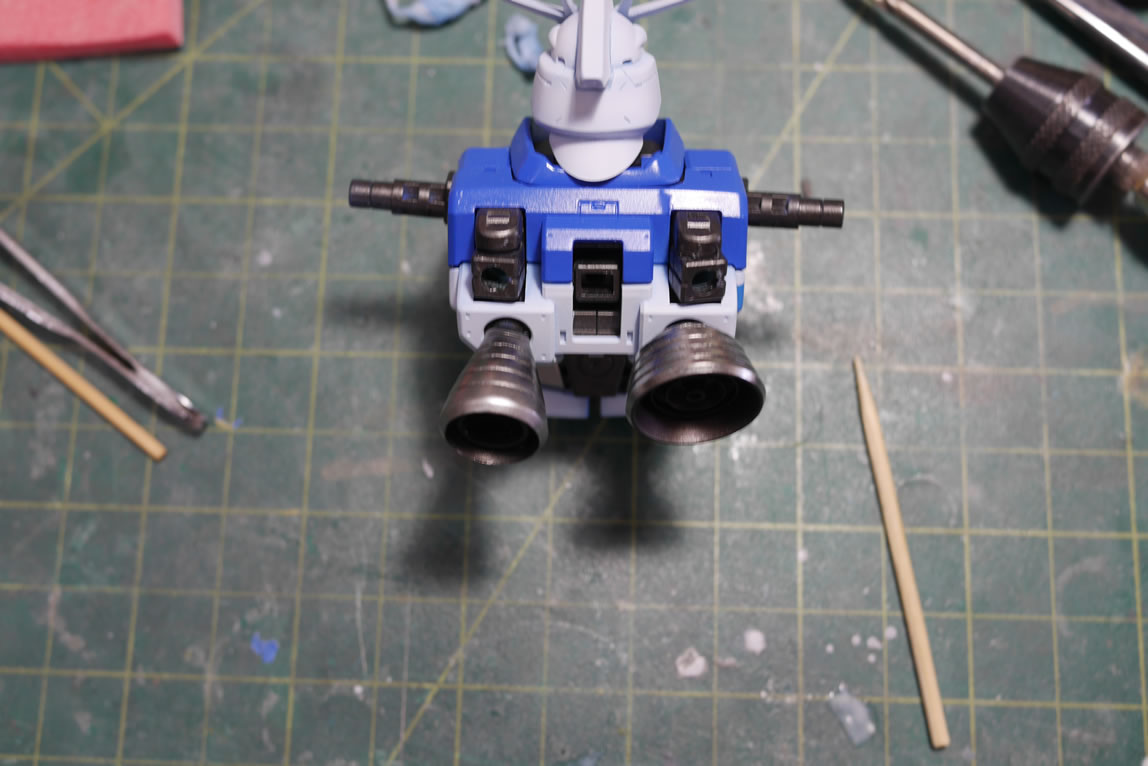
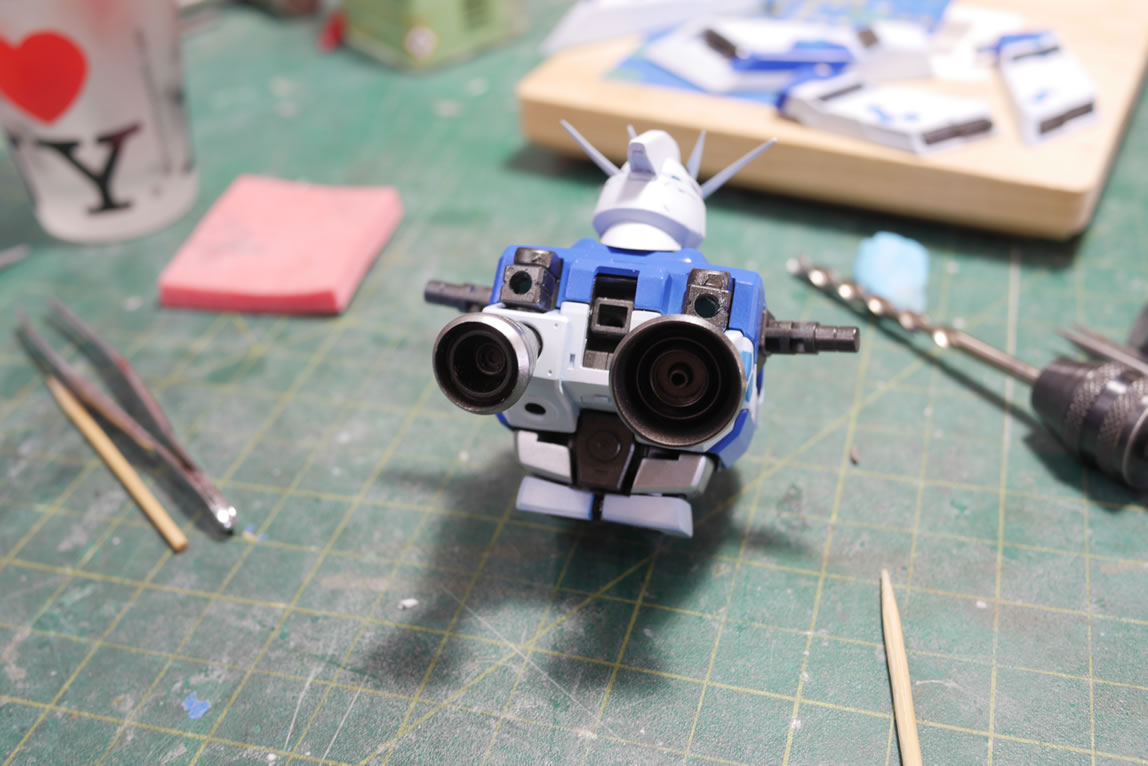
Now onto the next problem I discovered. One of the thruster bells on the fuel tanks (yeah, I know right? Who the fuck puts boosters on the end of a fuel tank) At least I’m pretty sure those long cylinder looking things attached to the back of the Hi Nu are boosters. Ok, I went and looked it up. Yes, those are propellent tanks. Ok, the thrusters look cool. But seriously, WTF? Since I didn’t want to cut all the thrusters off; I thought about other options. I could go head and cut them all off and replace them with cooler looking thrusters. Or I could just try to fix it.
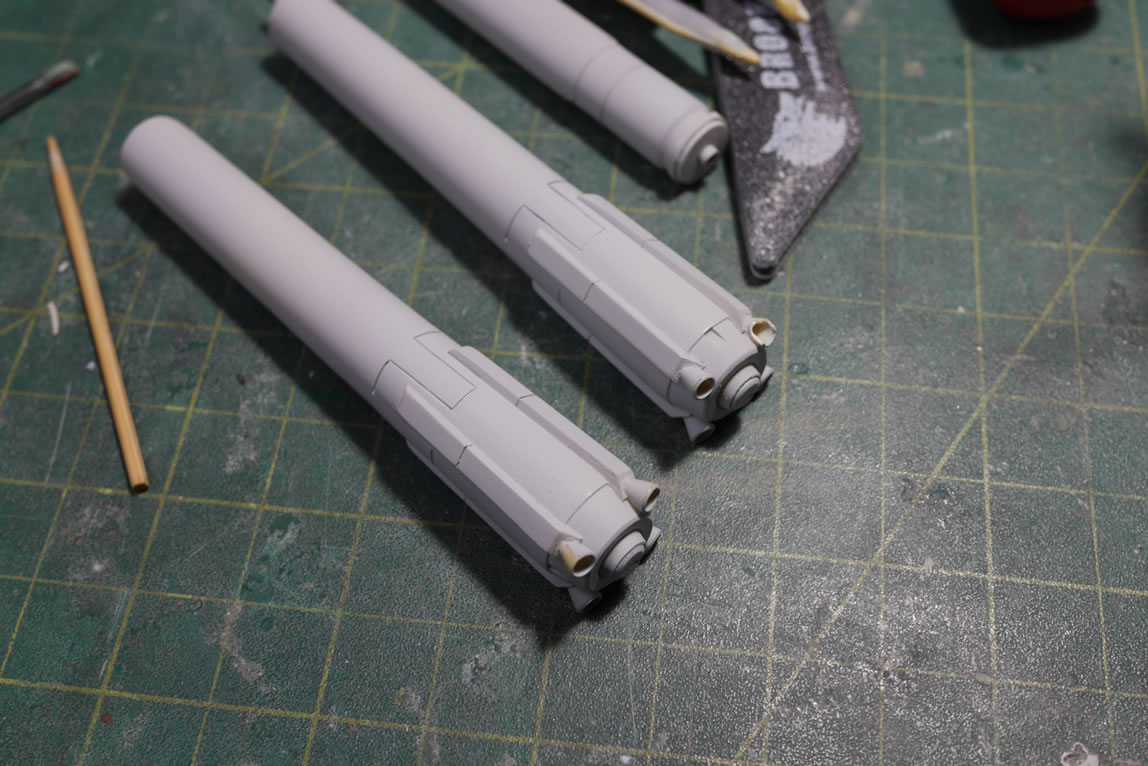
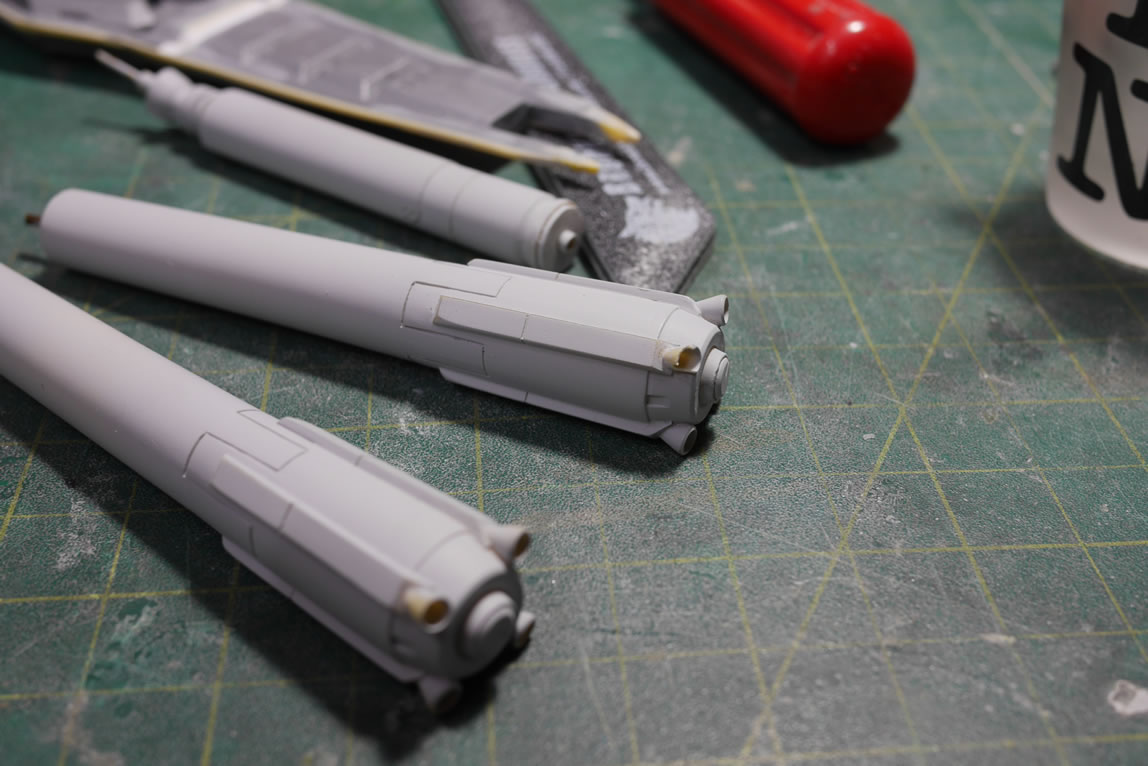
Light curing putty to the rescue. The stuff is awesome. With the less than one minute long curing time, I can build up the part and work on it very quickly and even have it primed and ready for paint in under an hour. The putty is applied as a base shape then sanded to sculpt everything out. A cone shaped sanding tool and my dremel on low speed helped sculpt the inside of the thruster bell.
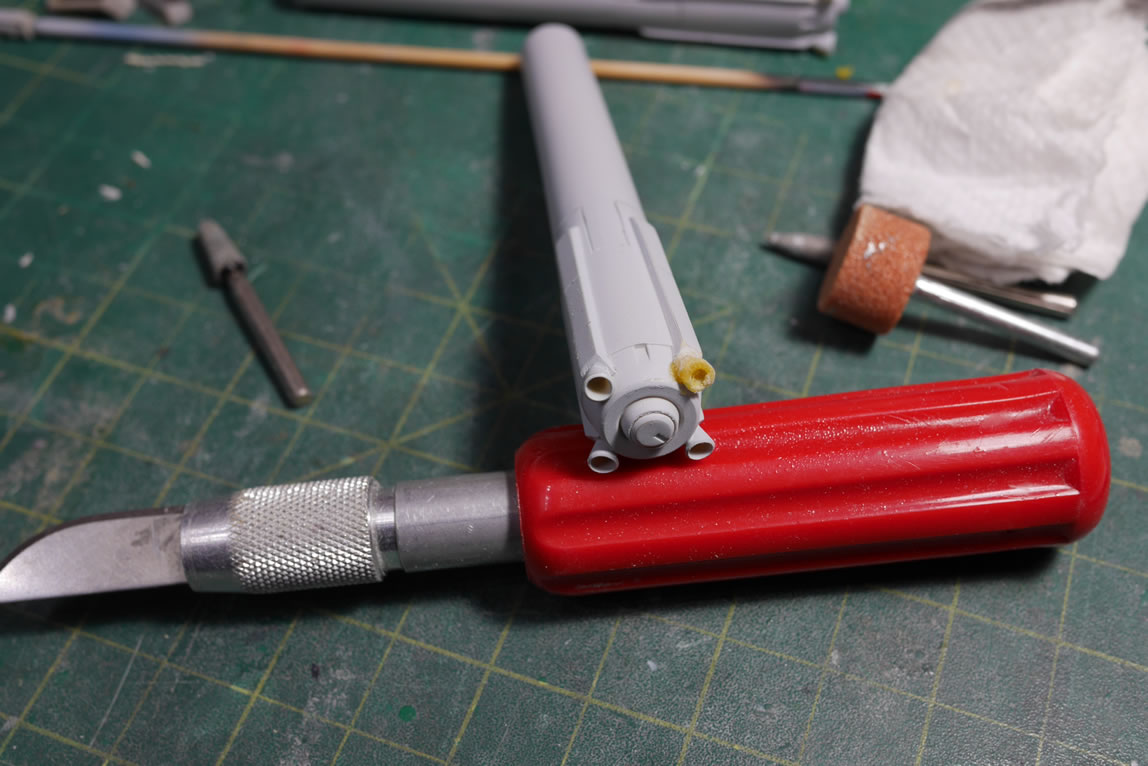
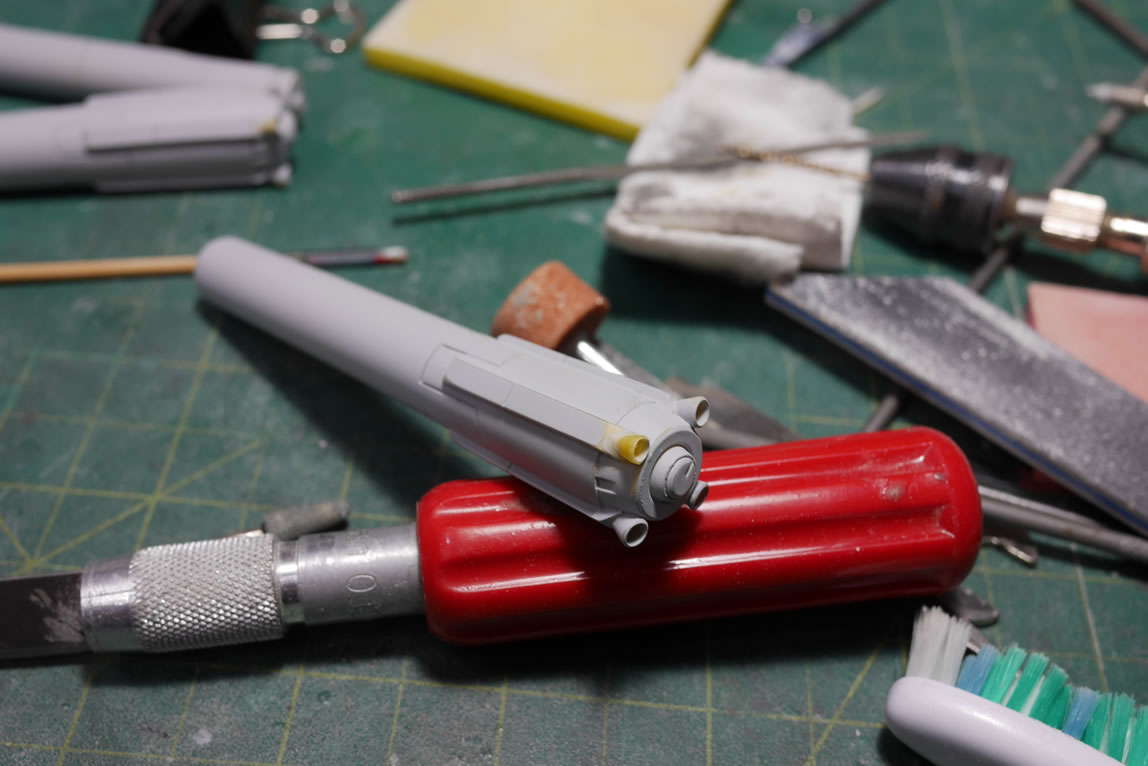
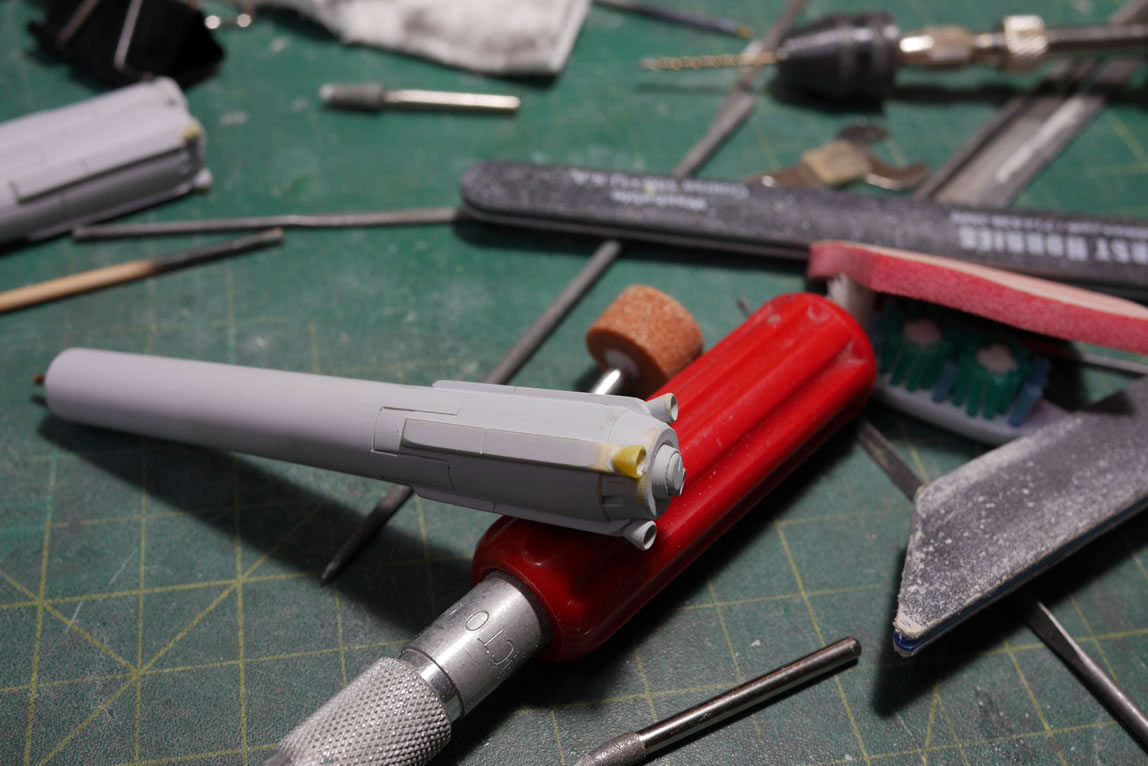
A few sessions of putty – sand – prime; and the broken section has been rebuilt. I guess I could still cut all the damn things off and use aftermarket thrusters – or make resin copies of some aftermarket thrusters.
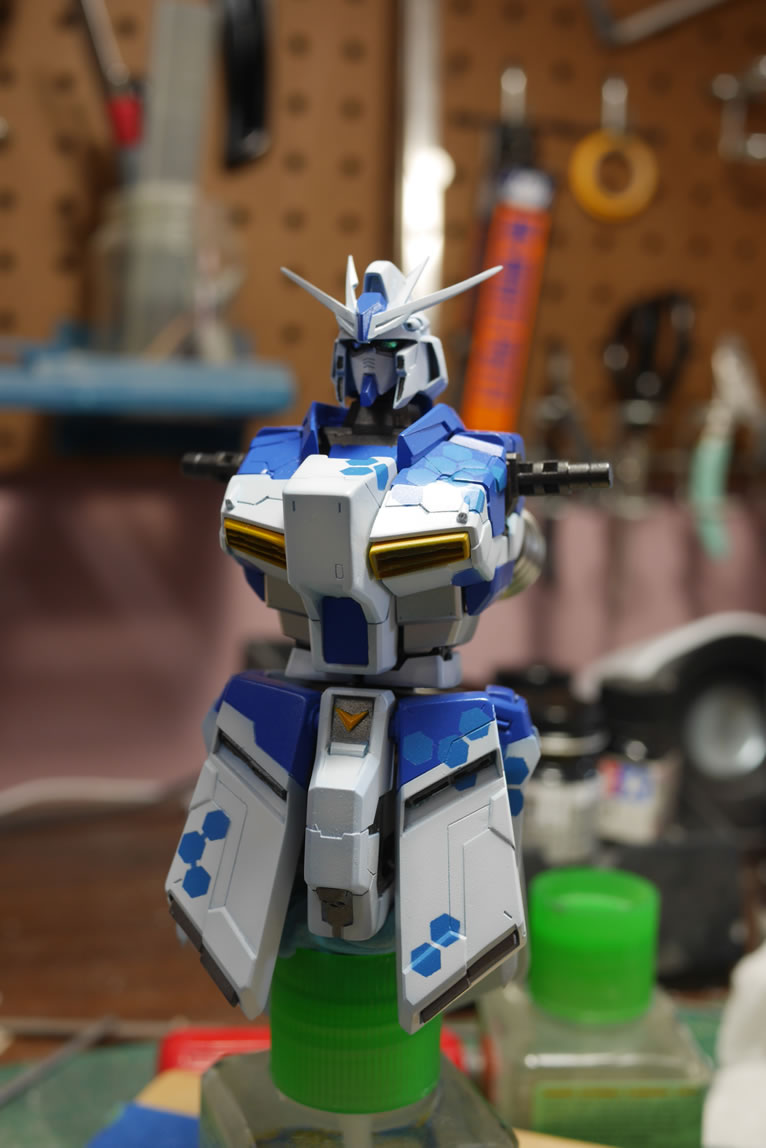
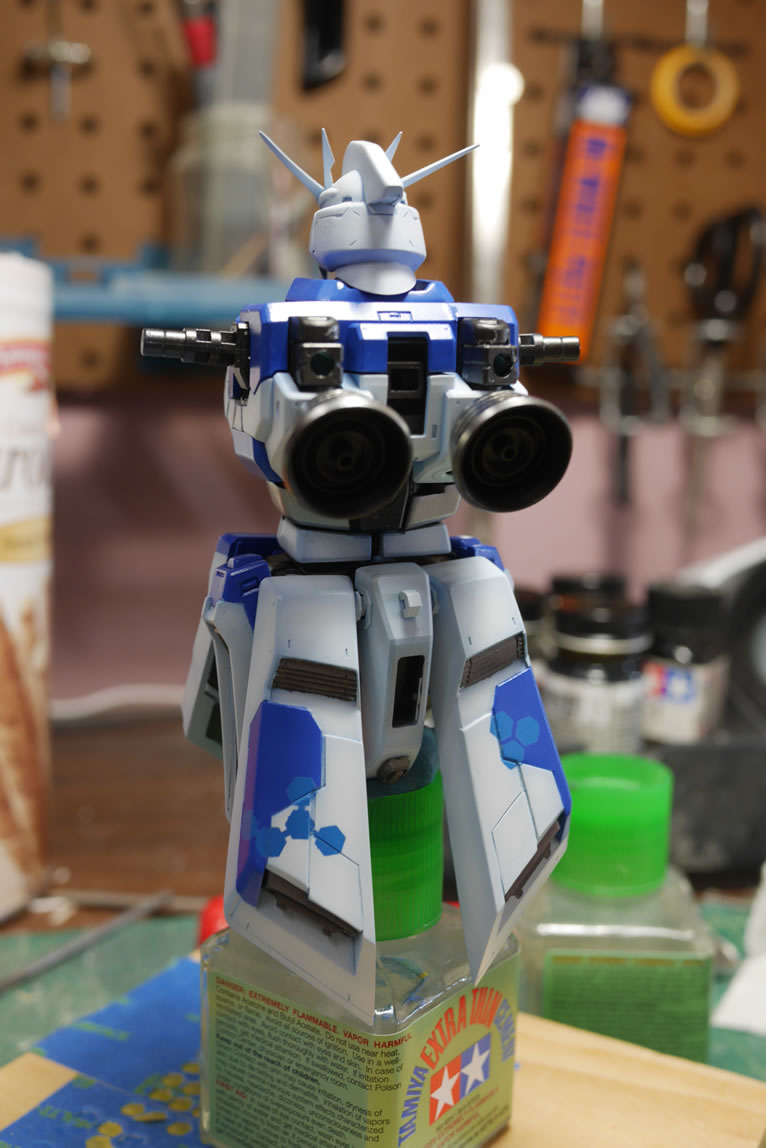
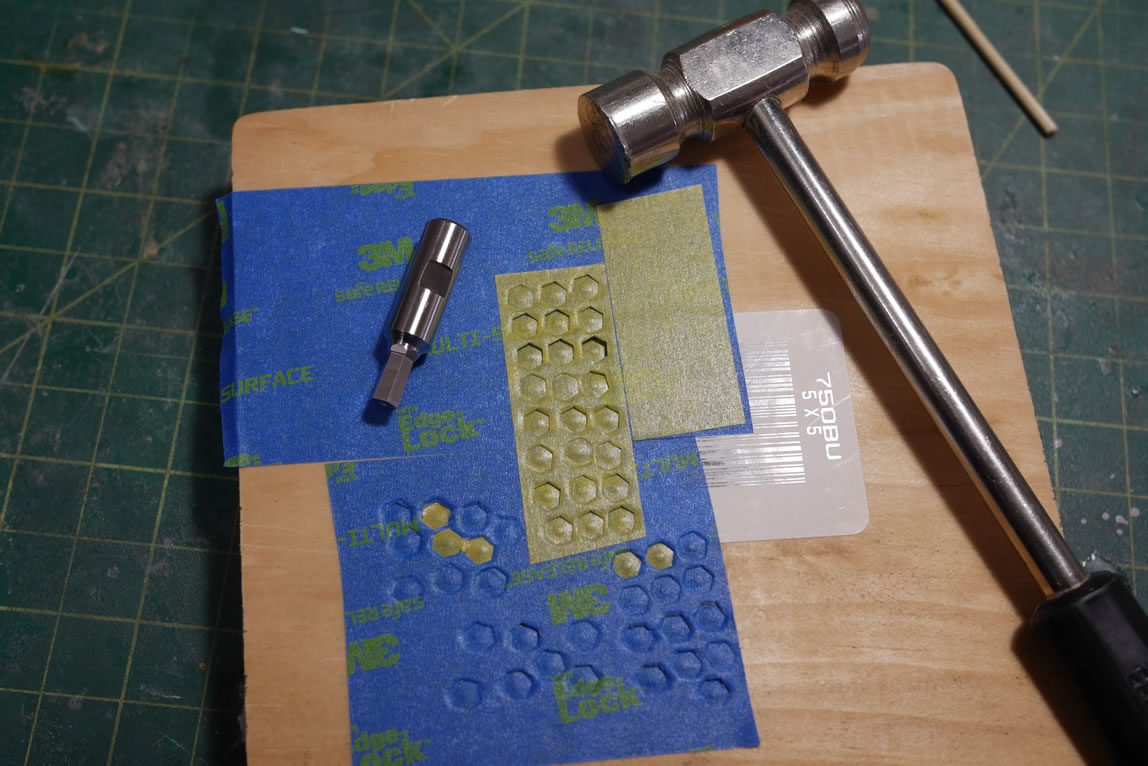
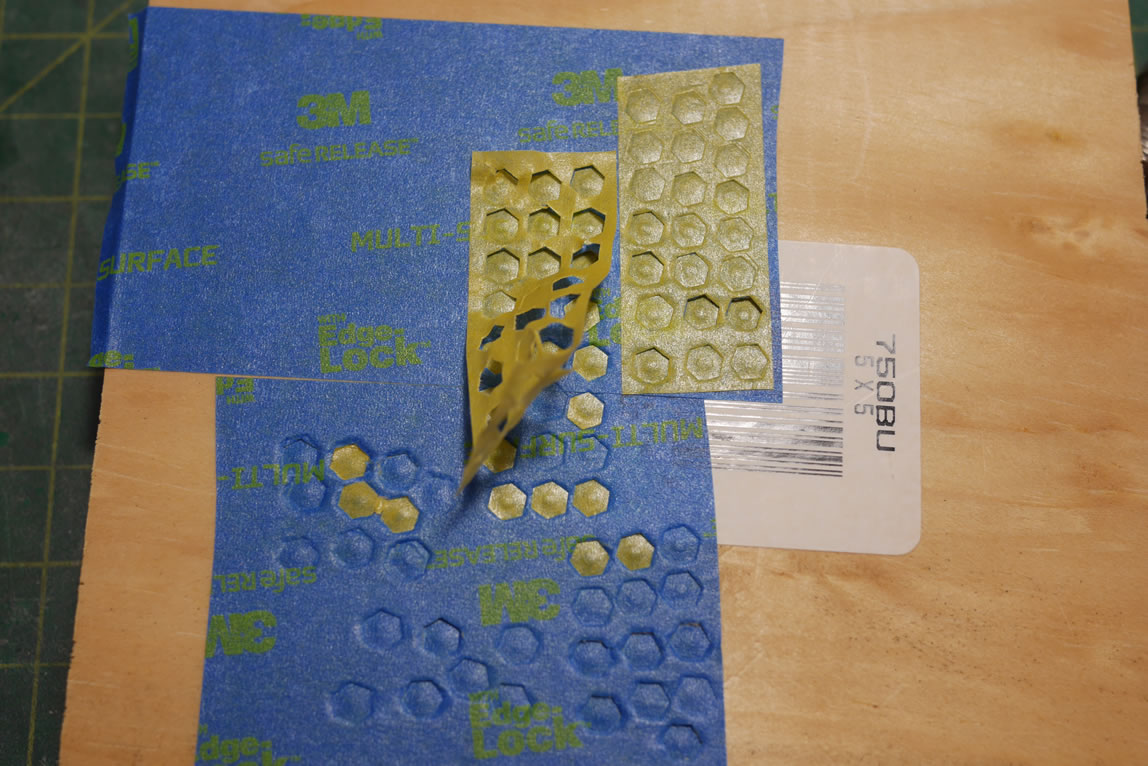
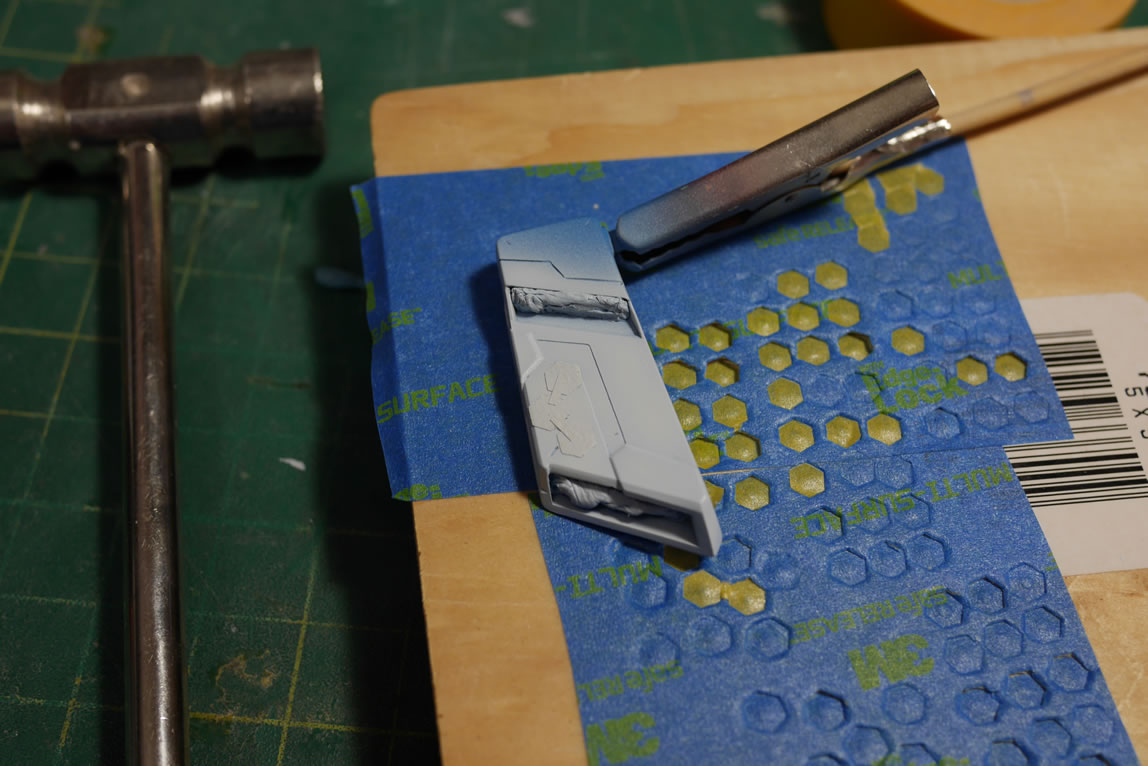
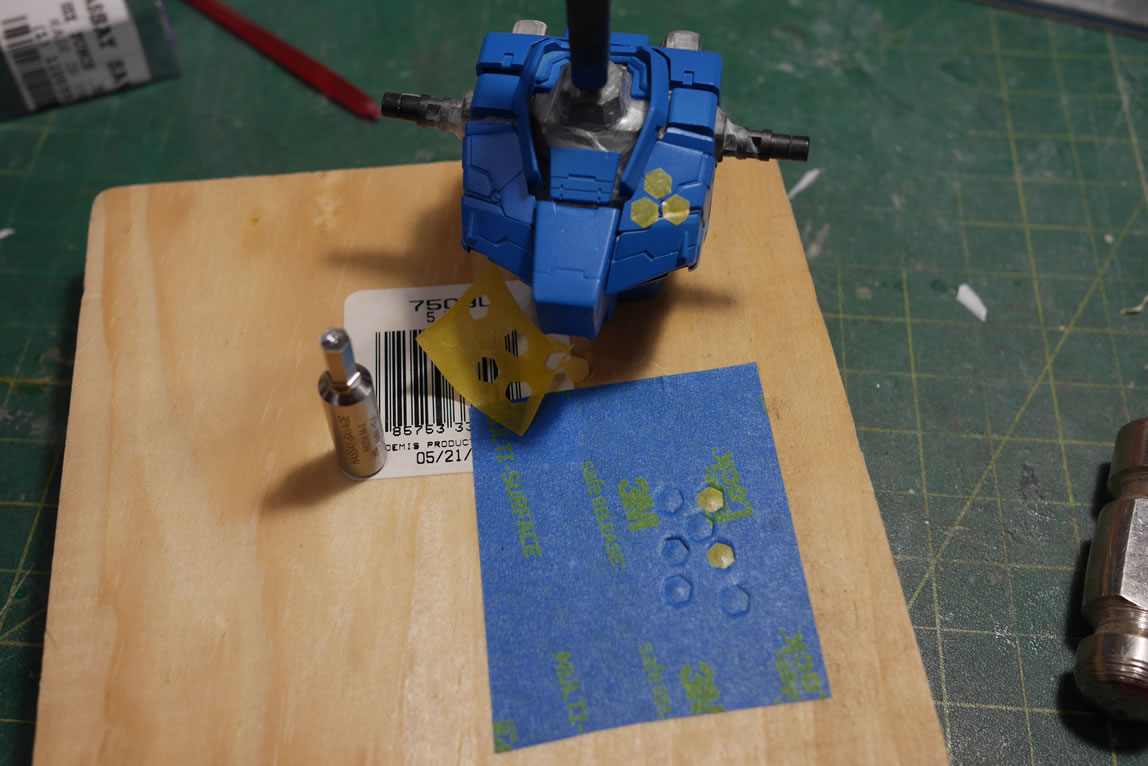
Slowly, I got all the small issues on the kit fixed and was on to full time base coating. I’ve almost used up all the left over Gusion paint, so that’s a good thing. Not so good if I need to do serious touchups. Bonus is that it frees up a bottle for a different mix of custom paint. But I digress. With the base color on; I can do some fun masking. For this project, I wanted to put some hex designs. So I picked up a 4mm hex punch. The idea here is that I can cut hex shapes out of tamiya masking tape. It didn’t really work so well on my cutting mat. But on the back of a wood plaque; the thing works wonderfully. I first lay down a strip of blue painter’s tape. Then a layer of tamiya masking tape. Then using the punch and a hammer. I punch out a bunch of little 4mm hexs. Once I’ve finished with the tamiya tape, I just peel up the tamiya tape and the punched hexes are left. Sometimes the punch doesn’t go all the way through, or I slip and get an oddly shaped hex; but for the most part, this works. I have uniform hex shapes fairly quickly.
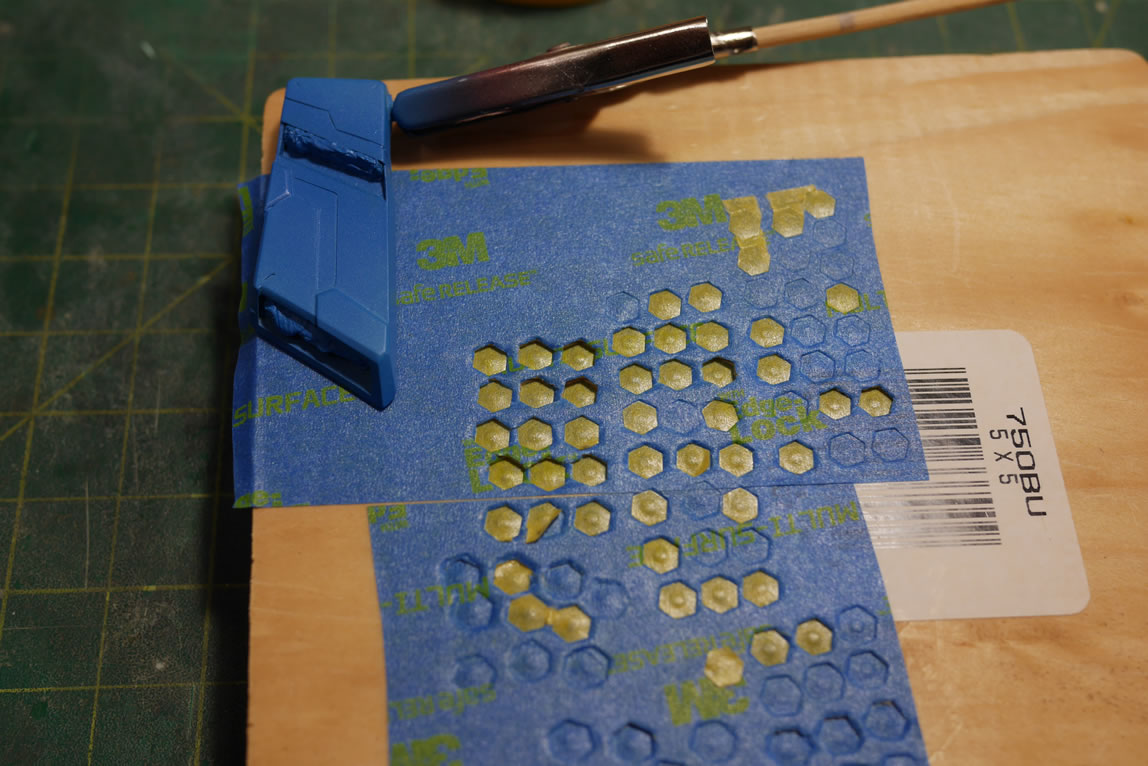
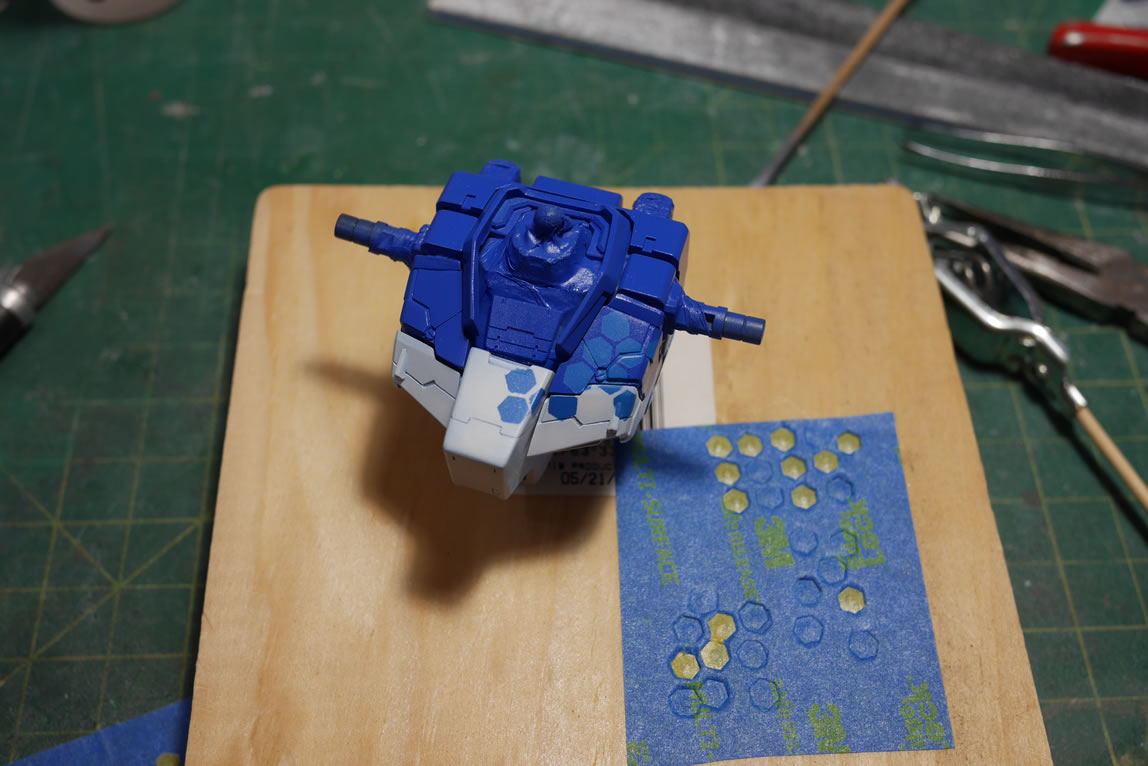
The hex mask is applied to the chest and skirt pieces. Learning from the Shiki project. Masking off subsections and painting that subsection really works wonders in keeping the motivation. The only issue I have with this project is that I’m shading – so it’s important to compare pieces constantly so I don’t off tone anything too badly. Oh, it’s going to be off tone in some parts; but hopefully that will be kept at a minimum.
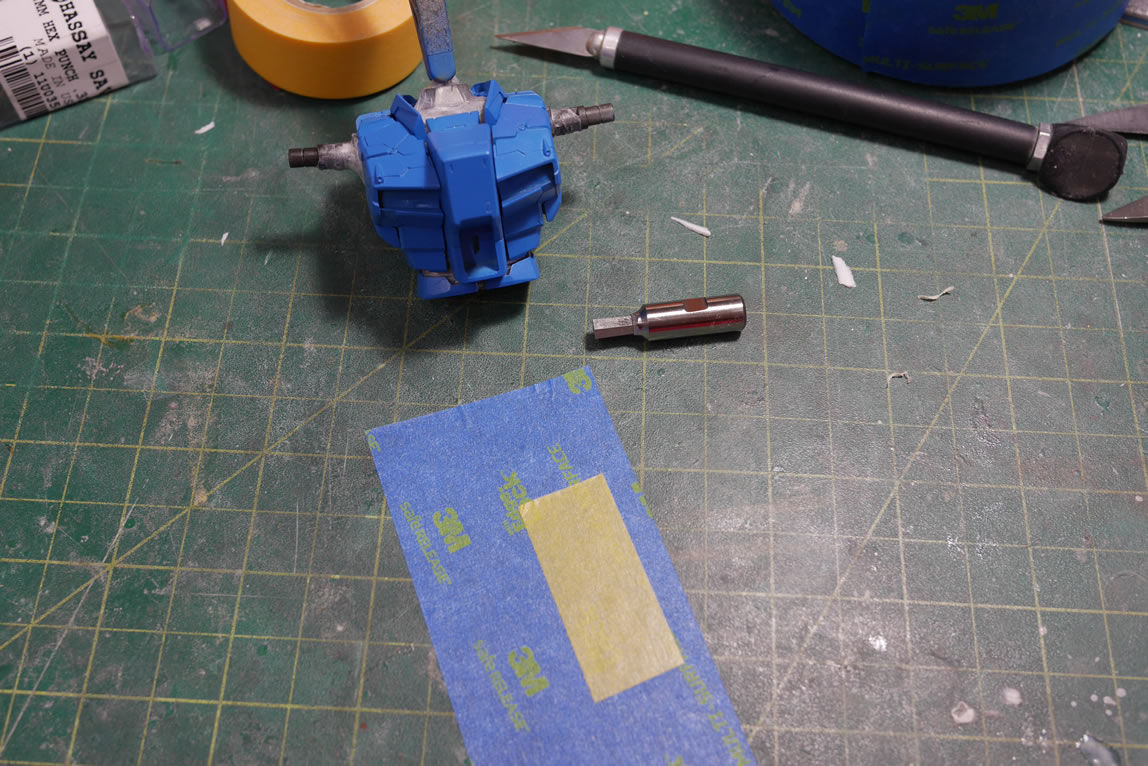
Next up, after looking at the hideous thrusters that came with the kit, I ordered some metal thrusters. These damn things can get expensive if I were to just waste them on a kit. And painting metal is a paint in the ass. I understand that most folks will just leave the metal alone and use the thrusters as is. Fuck that jazz, I want to paint them. Silicone molds are made and I now have an endless, on demand, supply of cool looking resin thrusters.
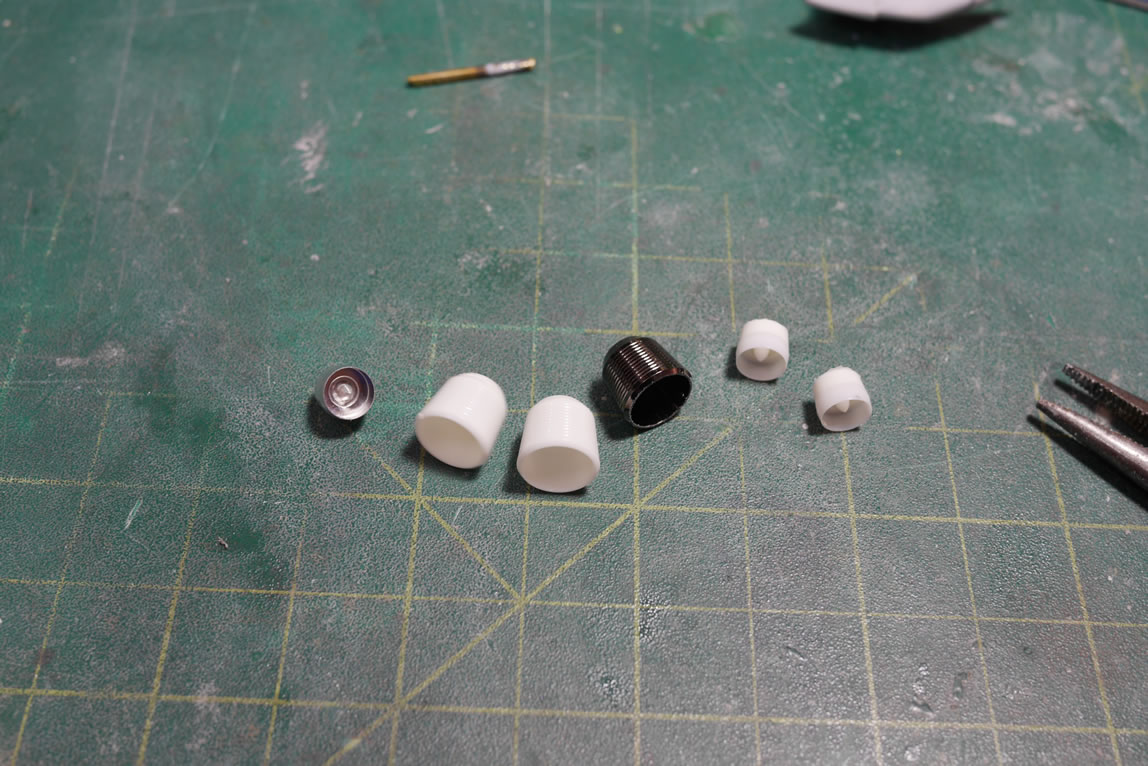
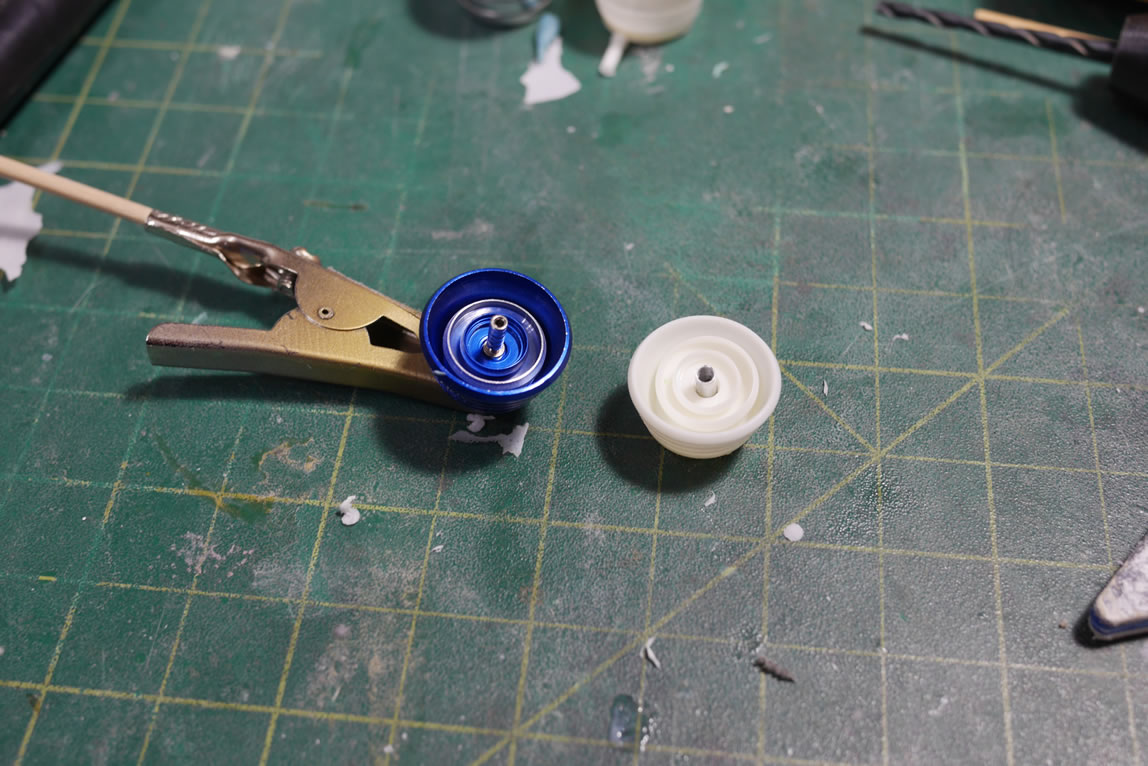
Here are some comparison shots for the original vs fatty replacement thruster. The actual metal thruster I used was an inner thruster to an even bigger bell. I didn’t want to go overboard so I just used the second inner level.
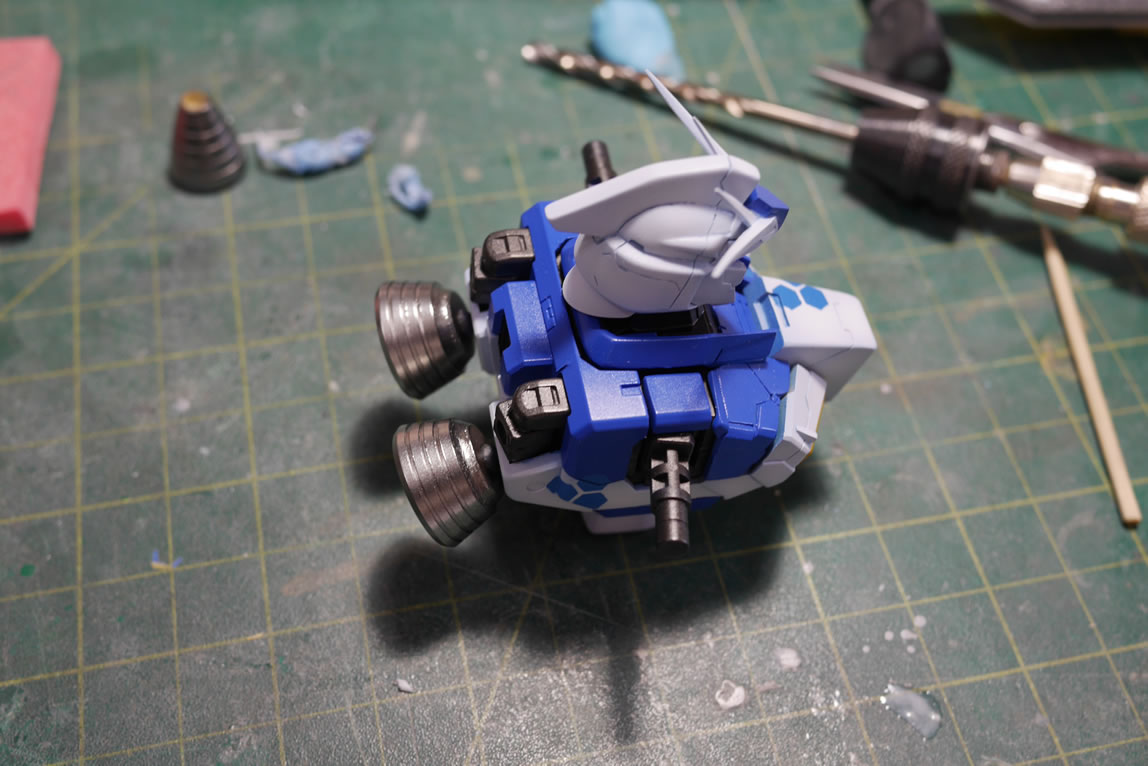
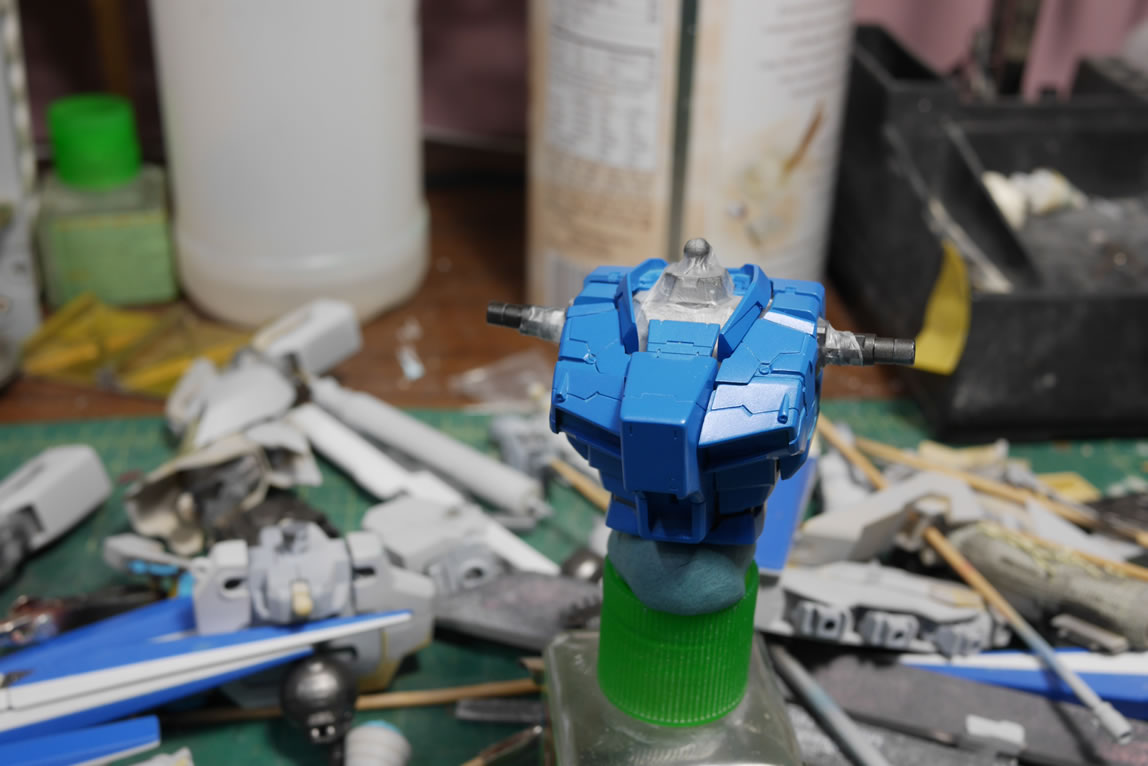
This weekend was fairly productive. The main painting for the head, chest, waist, and skirts are done. And there’s something fairly interesting to show. And more importantly; the motivation to keep masking and painting the other parts of this kit is still there.