So, early last week, I started working on this kit the day after I posted about the Bearguy ver Panda. Granted, I should just focus on the Hi Nu, but a few things got me inspired to do the Sazabi. I’m starting to get a higher appreciation for 1/144 scaled kits, granted the Saz is a fairly large 1/144 scale kit, but for all intents and purposes, it is still a 1/144 kit. The parts count is easier to handle and the potential for little modifications are pretty good – speaking specifically about the Saz in comparison to the MG sized version. I’ve been wanting to crack out the drill, files, knives, plastic tubes, strips, metal collars and a whole list of modification parts to tinker with a kit. For those that have been following the forum post about this, go ahead and skip this post. This is just a blog post discussing the build so far, as it has been a little over a week’s worth of work.
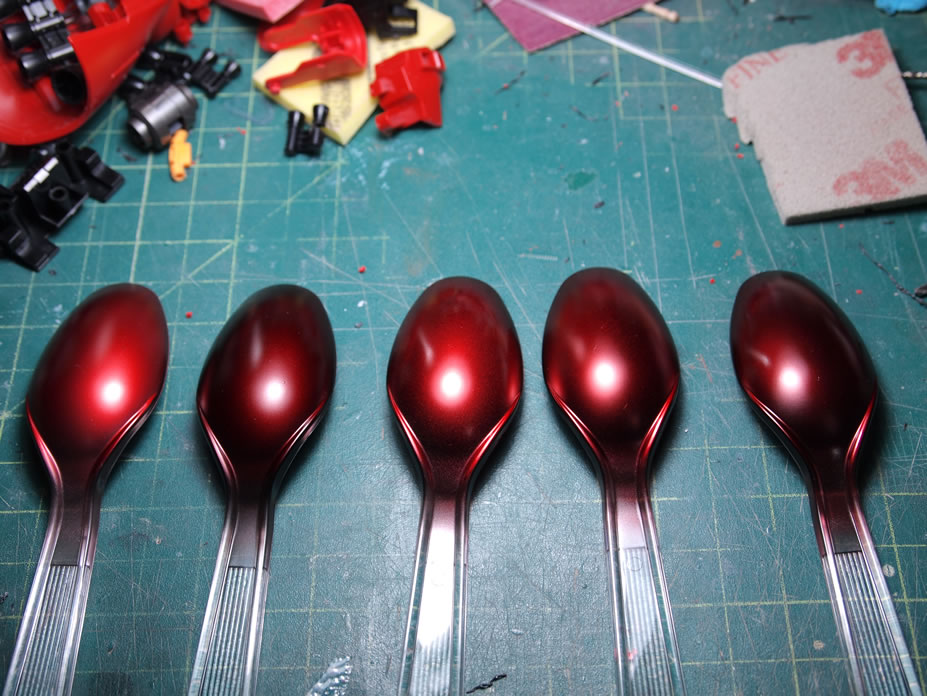
The paint scheme. So a few months back, I went to the LA Auto Show with some friends and I saw an amazing deep red paint job on a few cars. I’ve been wanting to incorporate it into a model kit and was originally planning on using it on the Hi Nu as an accent. But since that project is stalled, again, this is the other reason for wanting to work on the Saz. I want to get an ultra deep red and go ultra glossy.
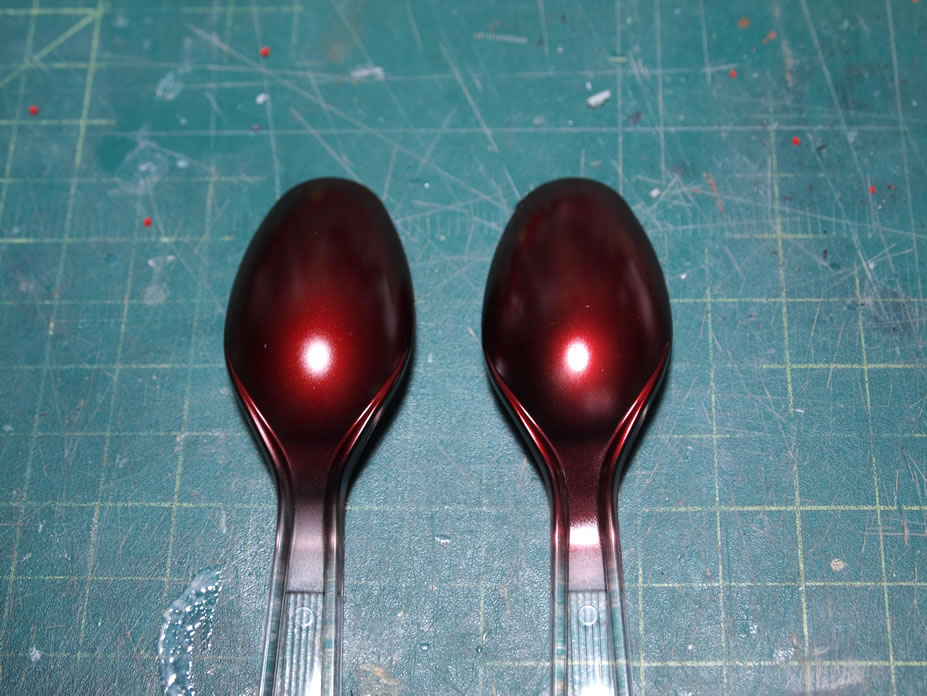
While at my local hobby store, I found a new set of Alclad colors – hot metal red/blue/sephia. At the build gathering, Nathan was showing me some color swatches and he had used spoons for his color tests. Brilliant idea and I learned something new. With the spoons, they offer up a curved surface so that the true effects of the metallic paints can be seen. This beats out my old method of just painting them on a flat piece of plastic. The spoons give the paint some dimensions. So using alclad metallic paints, starting from left to right; dull aluminum, steel, chrome, polished aluminum, and stainless steel. These were then sprayed with the alclad hot metal red. I narrowed my choice to the steel or stainless steel. I also may go dual tone, but I’ll get around to making that decision when I get the kit built and ready for paint.
Leg Lights
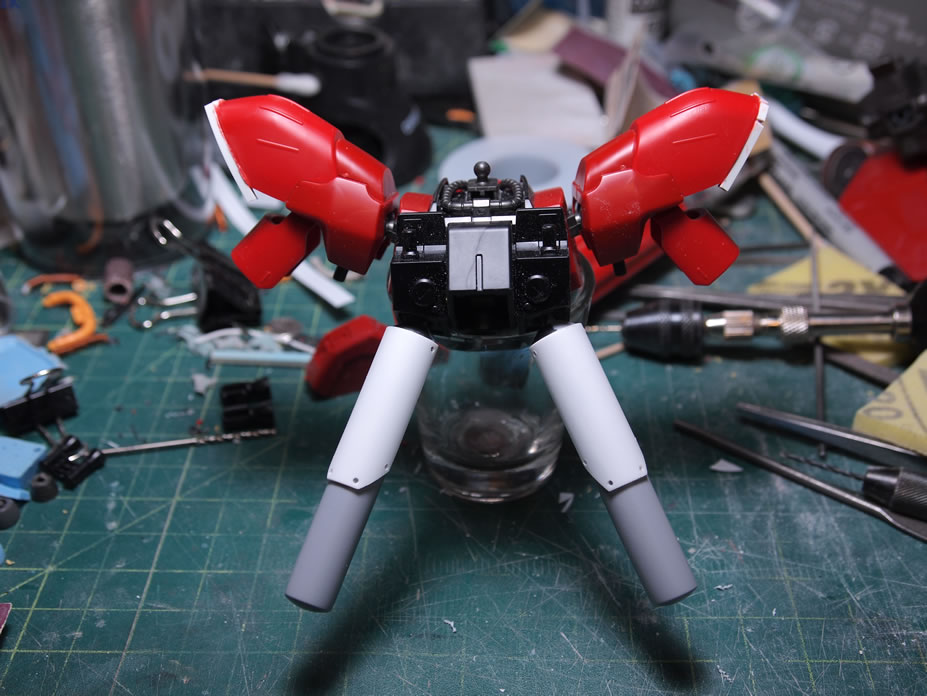
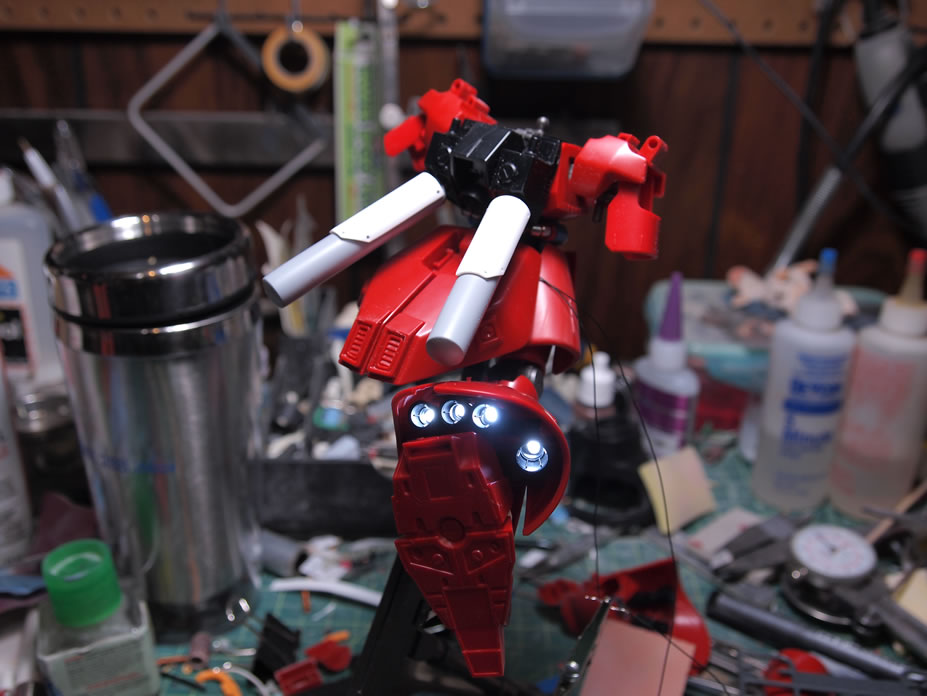
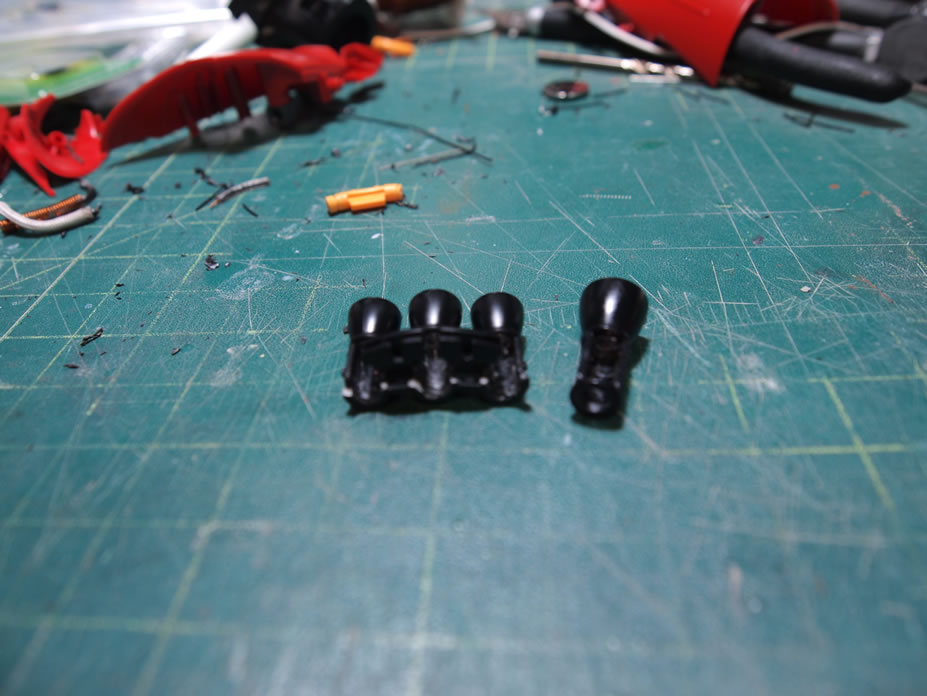
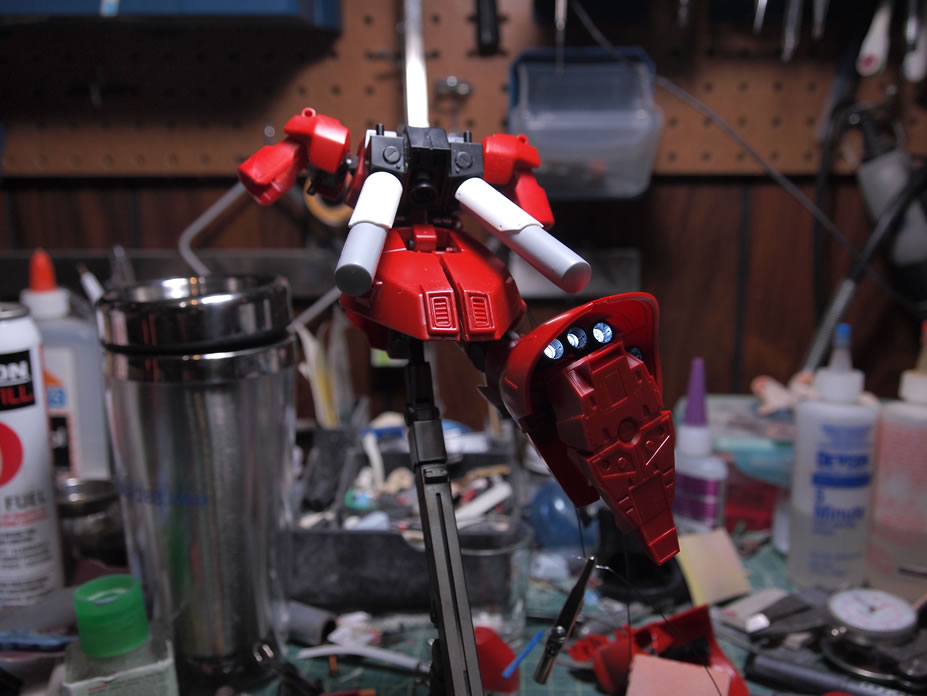
So on to the actual building of the kit. The first thing I got started with on this kit is lighting the leg boosters. I saw an HGUC Gelgoog kit on FG-site that had almost all the boosters on the kit lit up, and that just inspired me to go out and restock on 3mm LEDs. So four LEDs are wire wrapped in parallel. Then the leg boosters are drilled out so that the LEDs will slide into place. The leg is assembled and the wires are tested with a battery. Pretty simple.
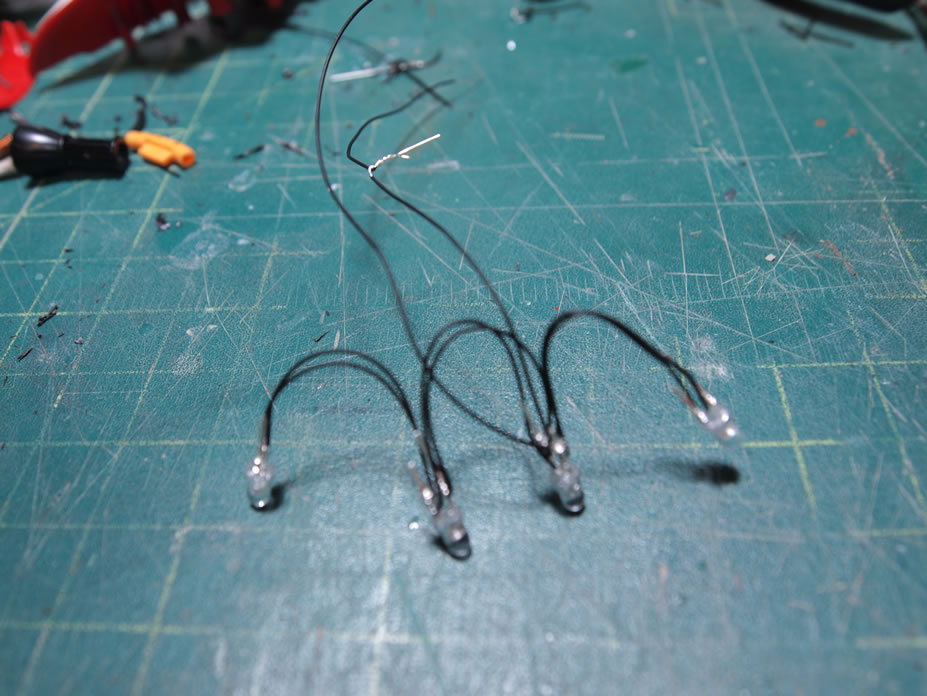
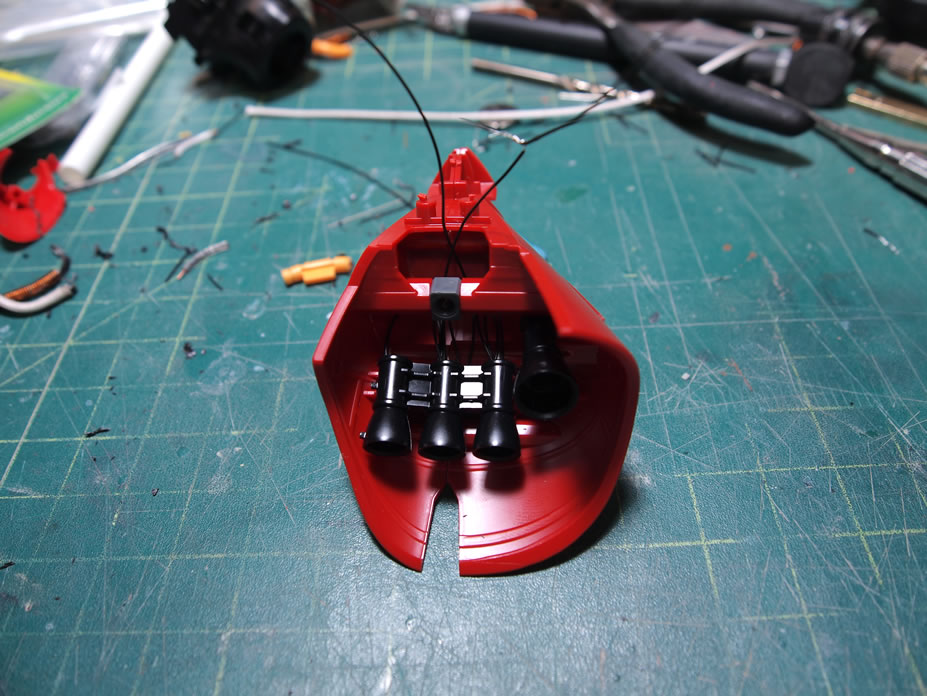
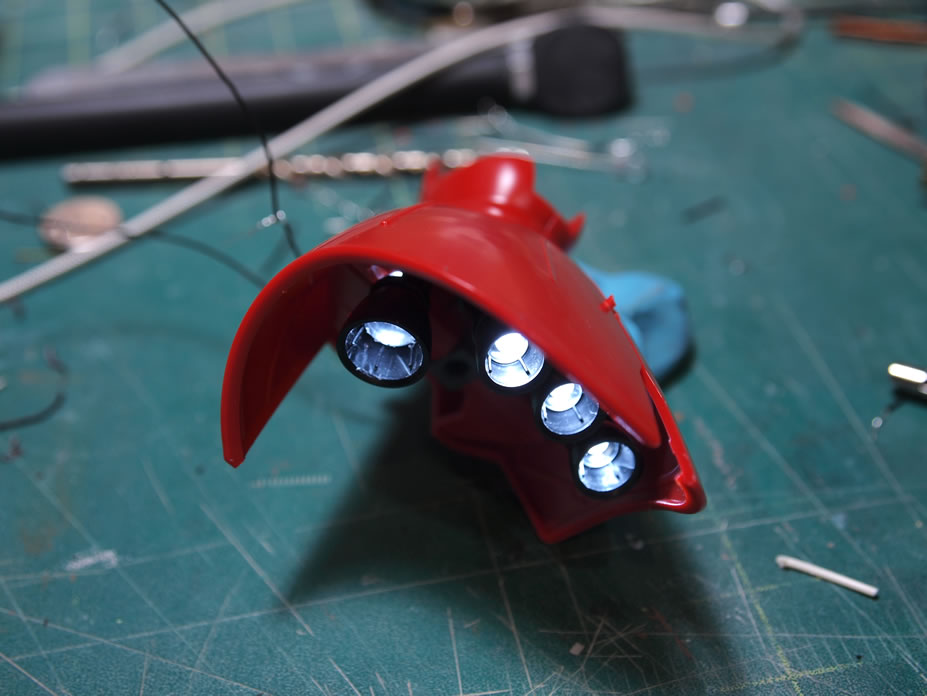
With the LEDs in place, I drilled some small holes through some of the more hidden areas leg, joints, and thigh. The wires are threaded up into the knee joint and there is a groove that is perfect for the wires. With a bit of slack in the actual joint, once assembled the entire assembly is fully functional and there is no hindrance in the joint’s mobility. And the wires are completely hidden.
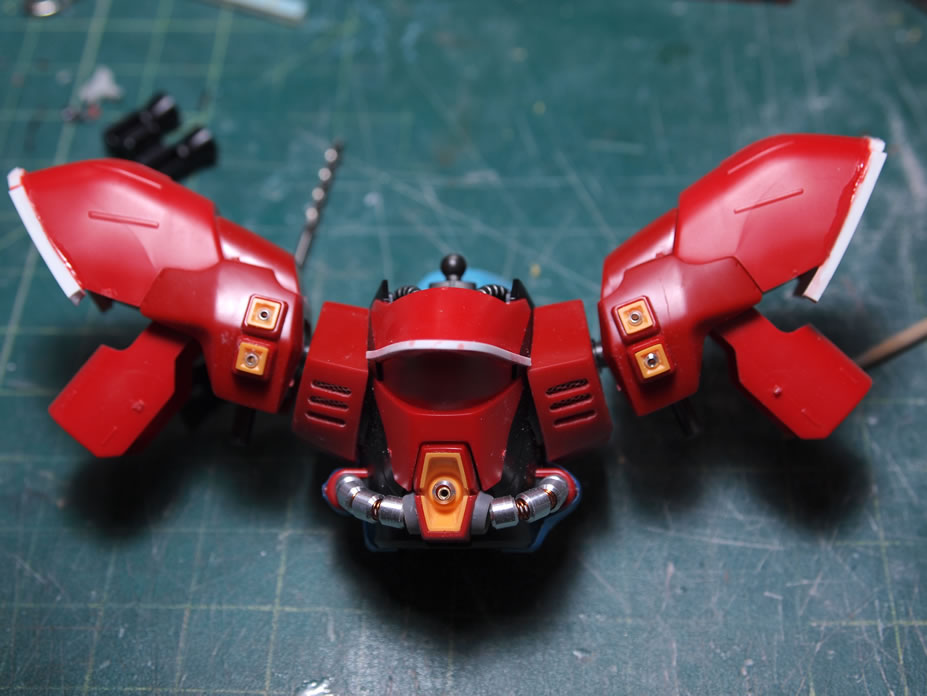
Upper Torso
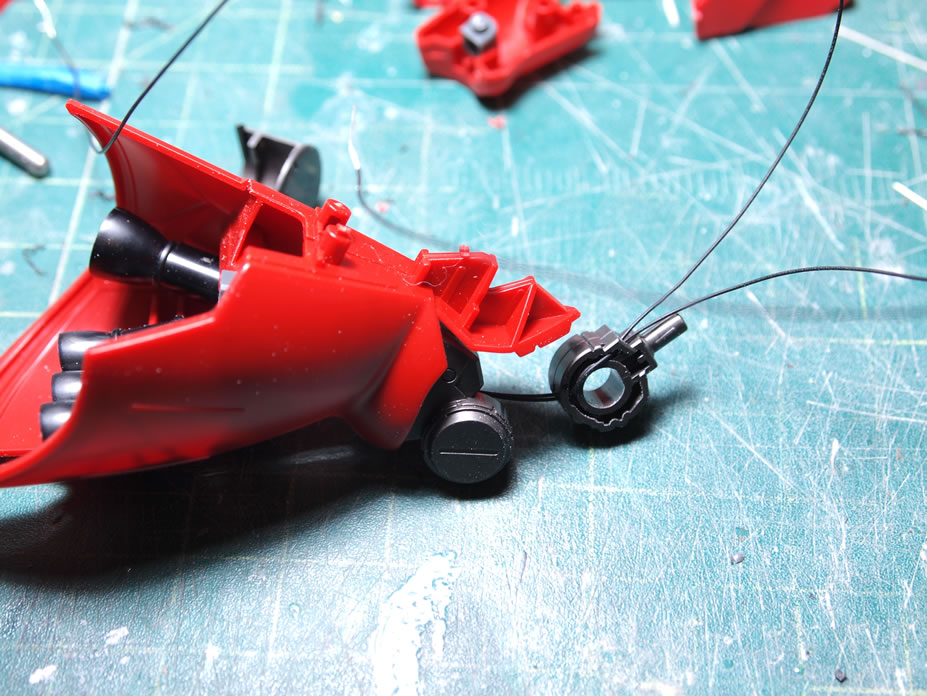
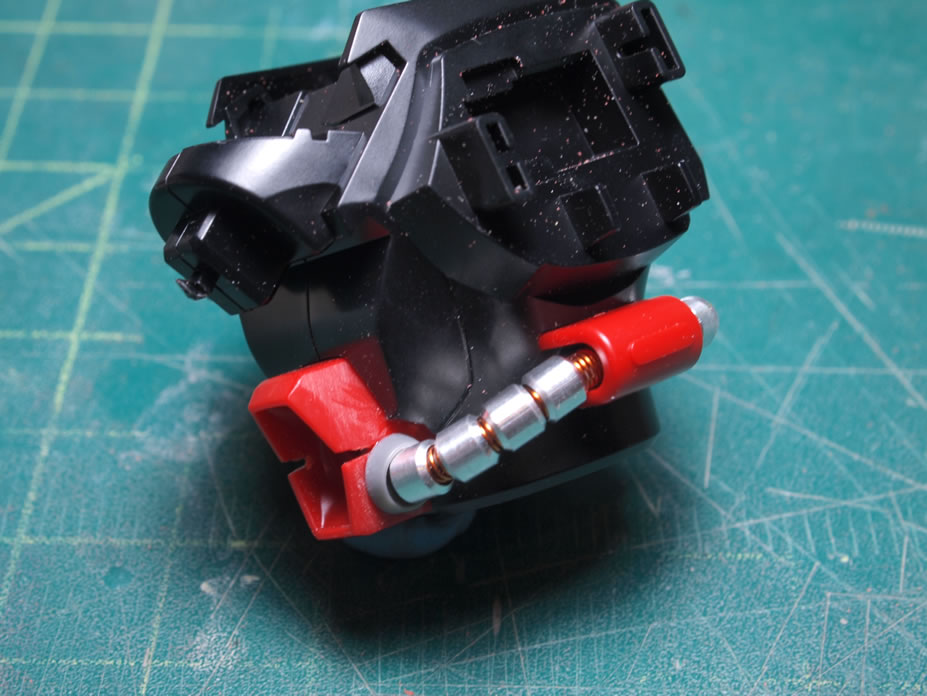
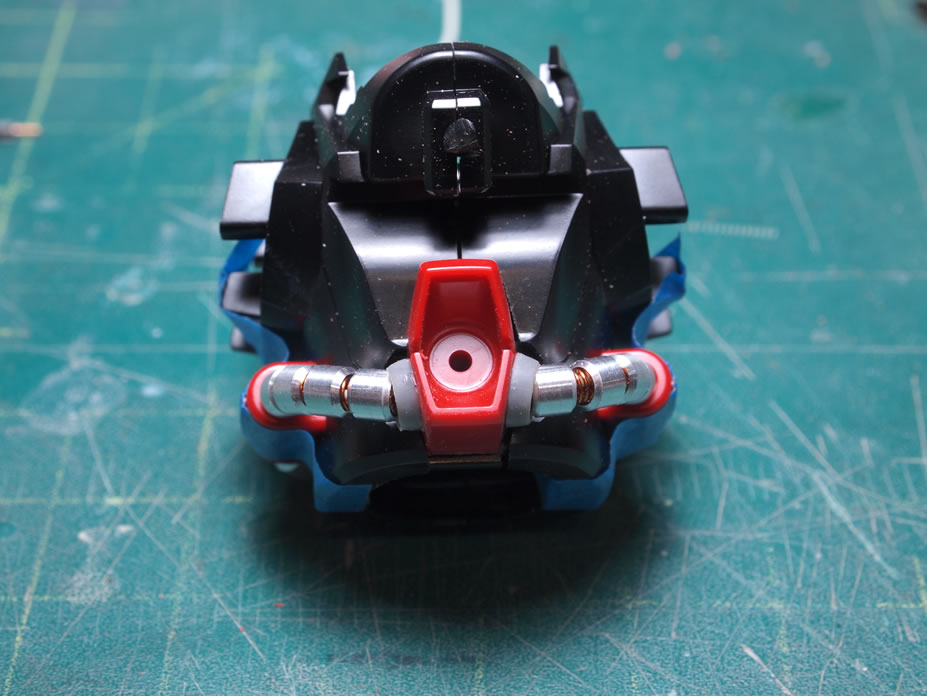
Next up, the waist cables are replaced. First, the end pieces are capped with a circular end piece on the “belt buckle” and rear end pieces. Magnet wire is wrapped around a brass rod to create a spring that is specific to the scale of the Saz. A 26 AWG wire, metal collars, and the springs made from the magnet wire will be replacing the stock cables.
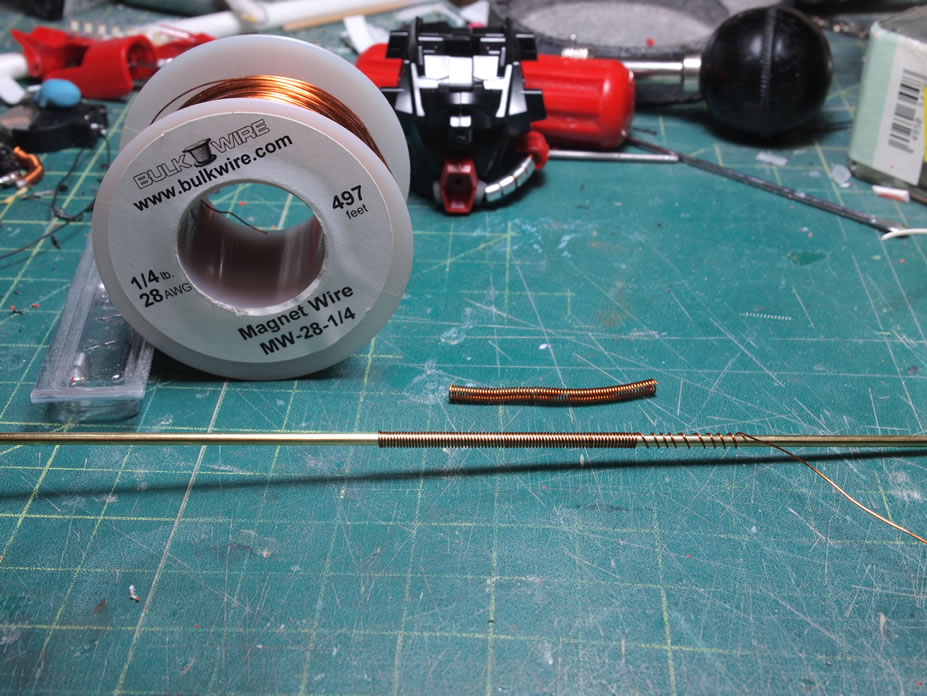
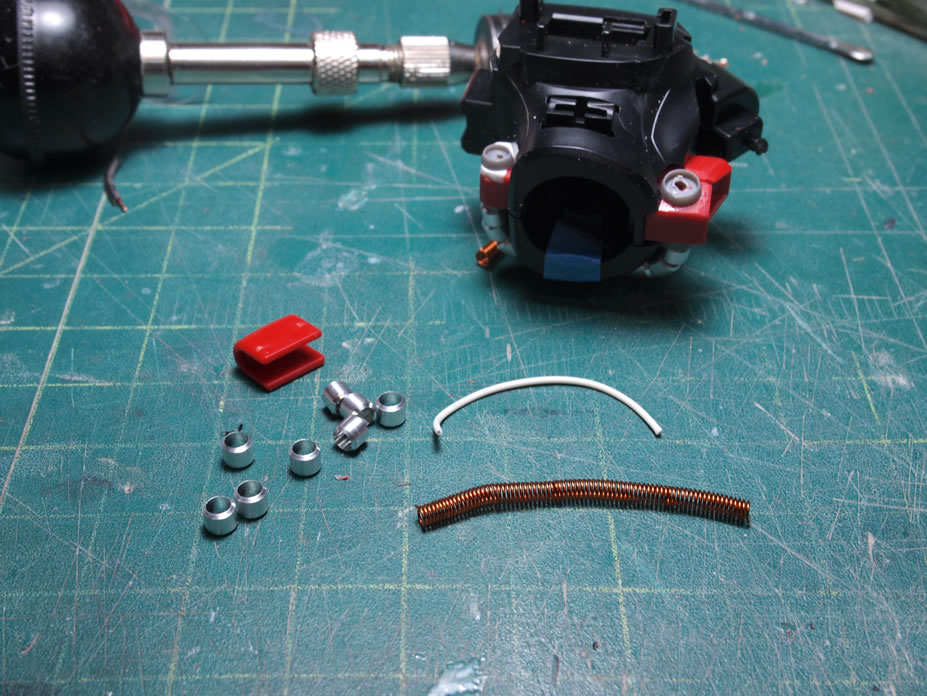
The 26 AWG wire is used as an internal structure piece. The springs are sleeved over the wire, then the metal collars are placed over the springs.
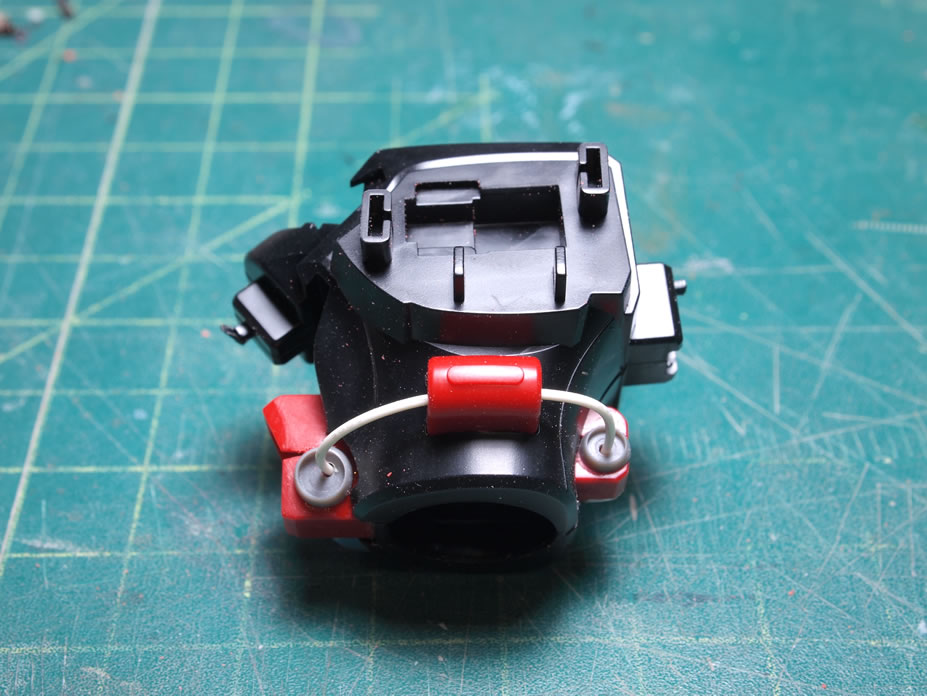
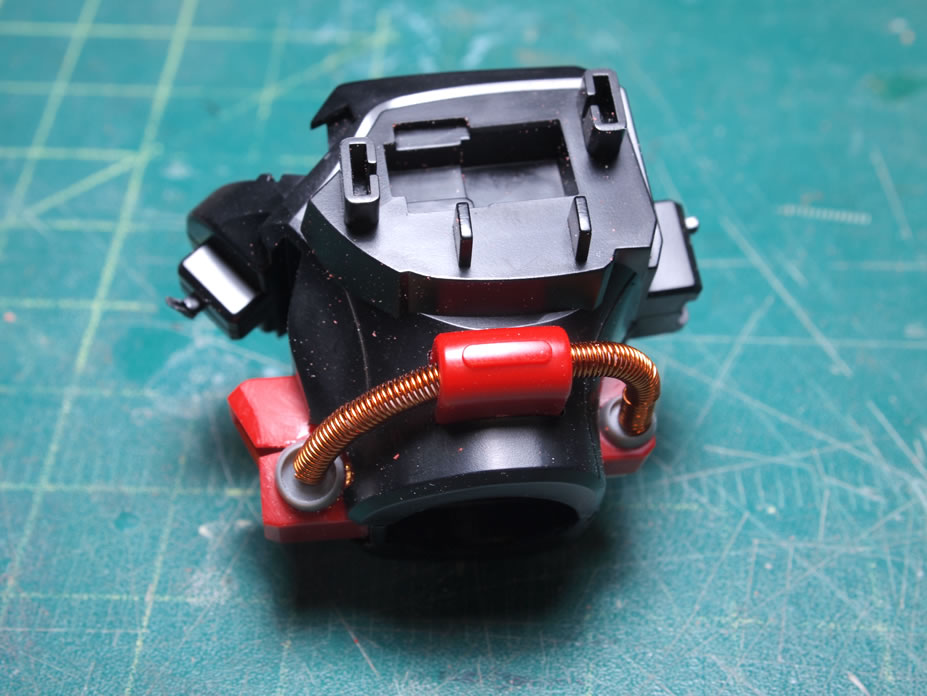
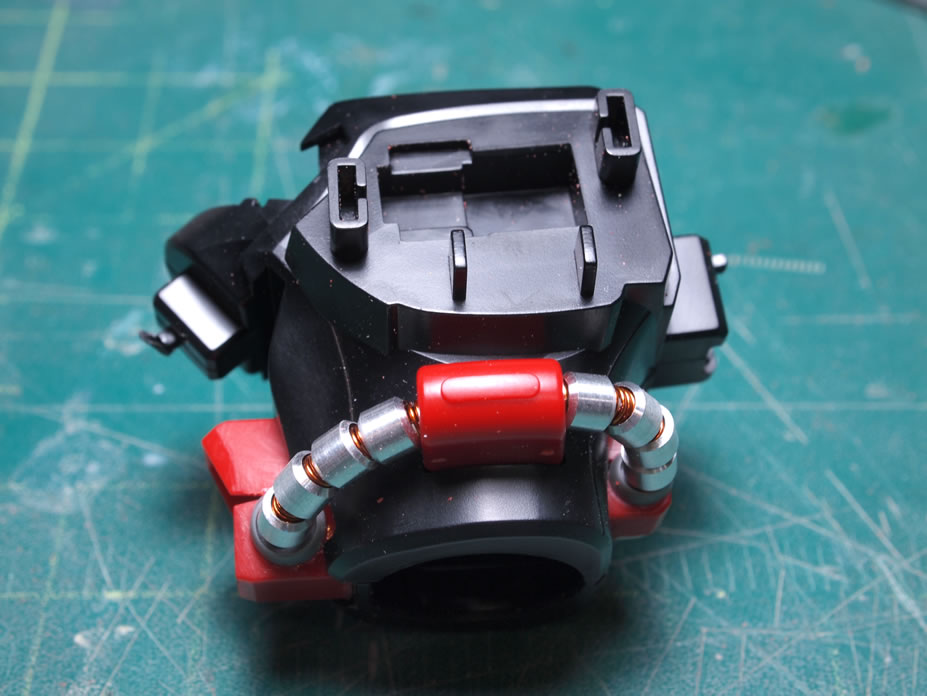
And this is what the assembly looks like with the cables replaced. I think it’s a pretty good improvement over the original cables.
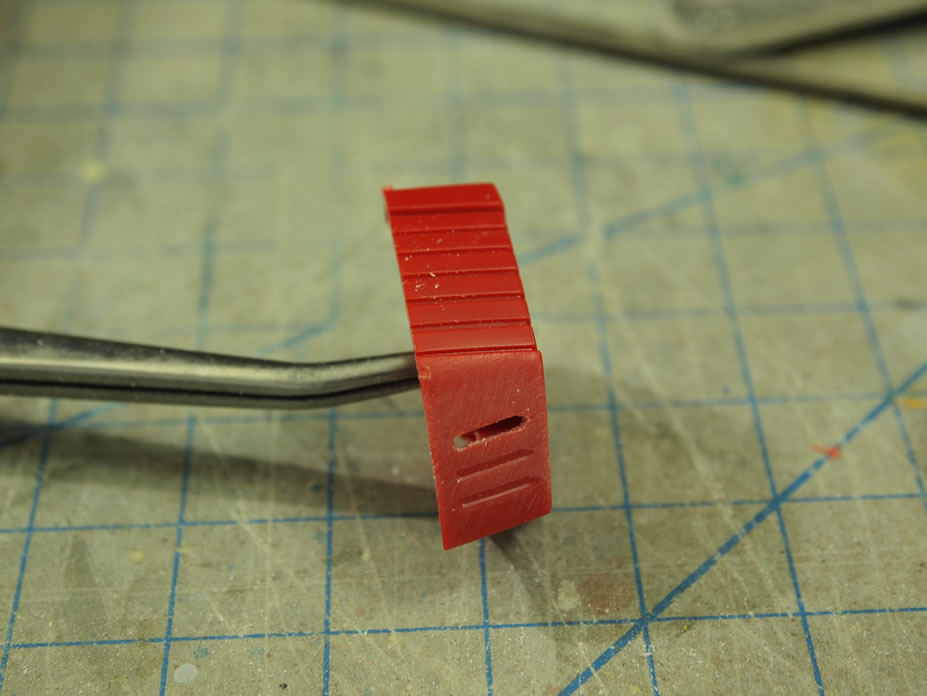
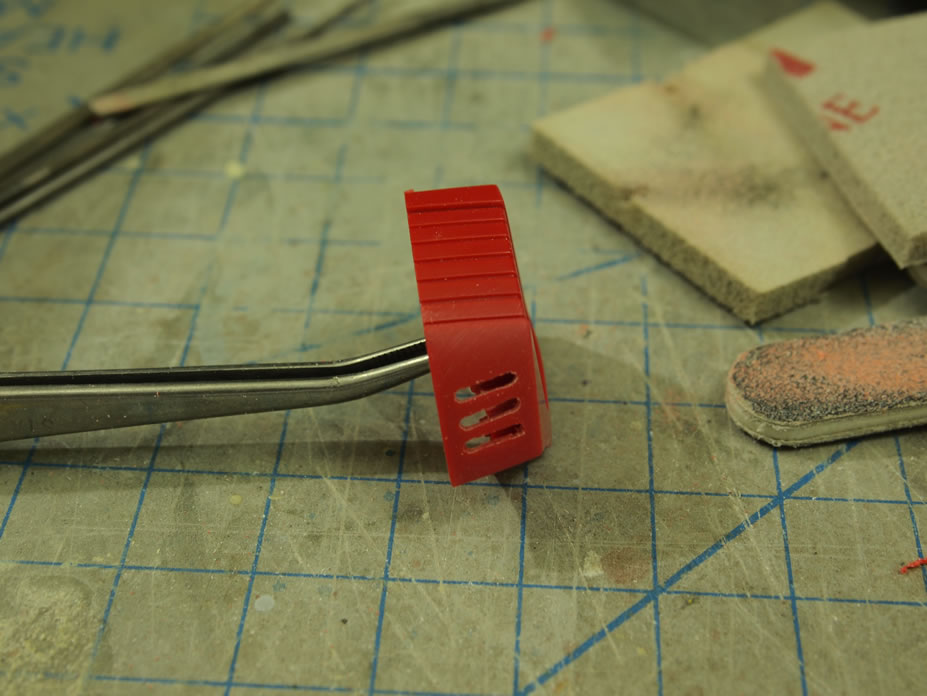
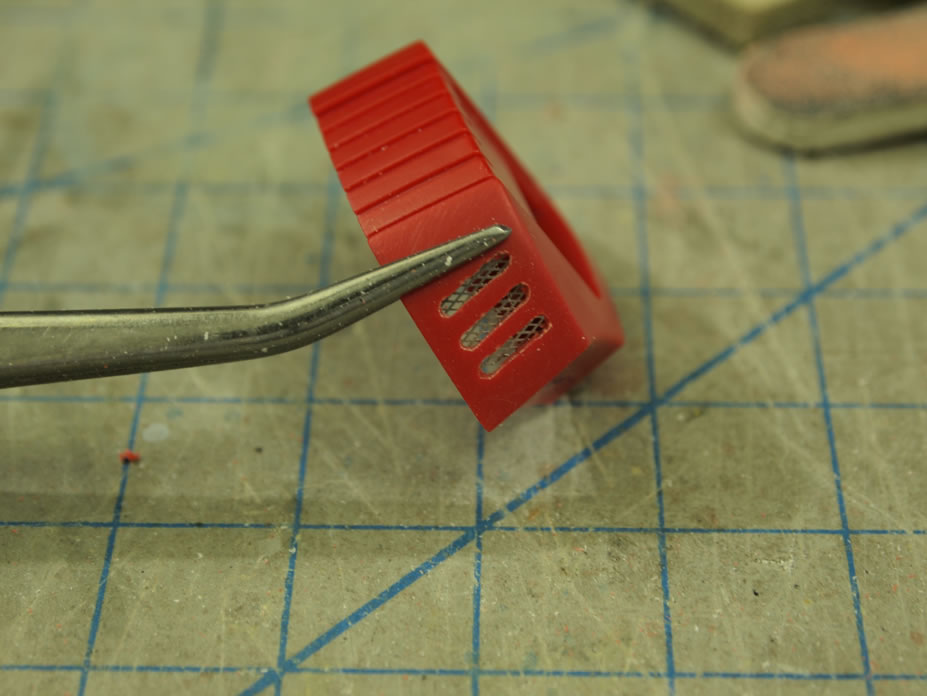
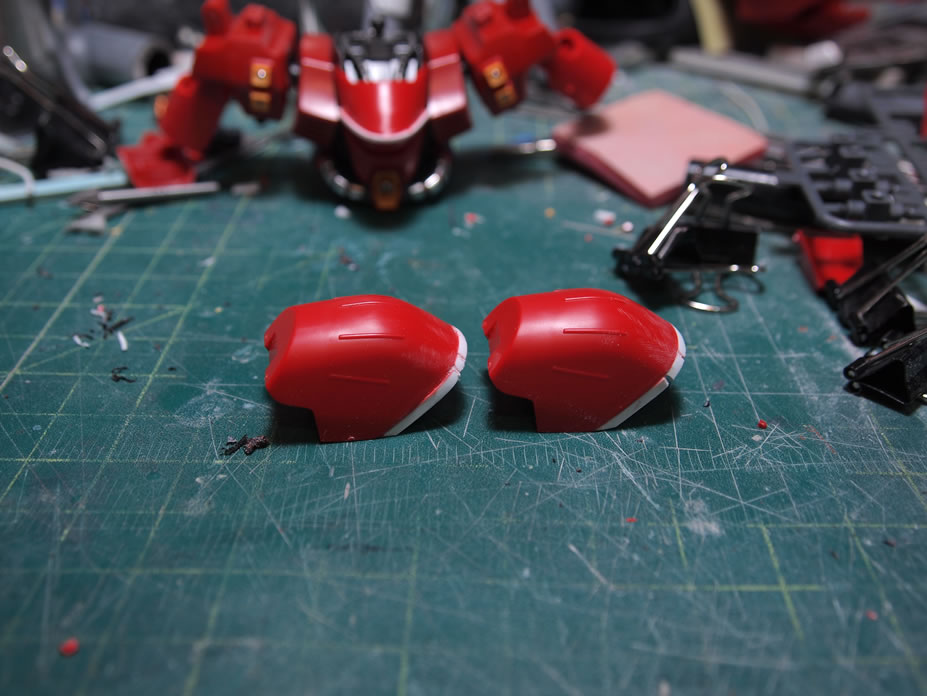
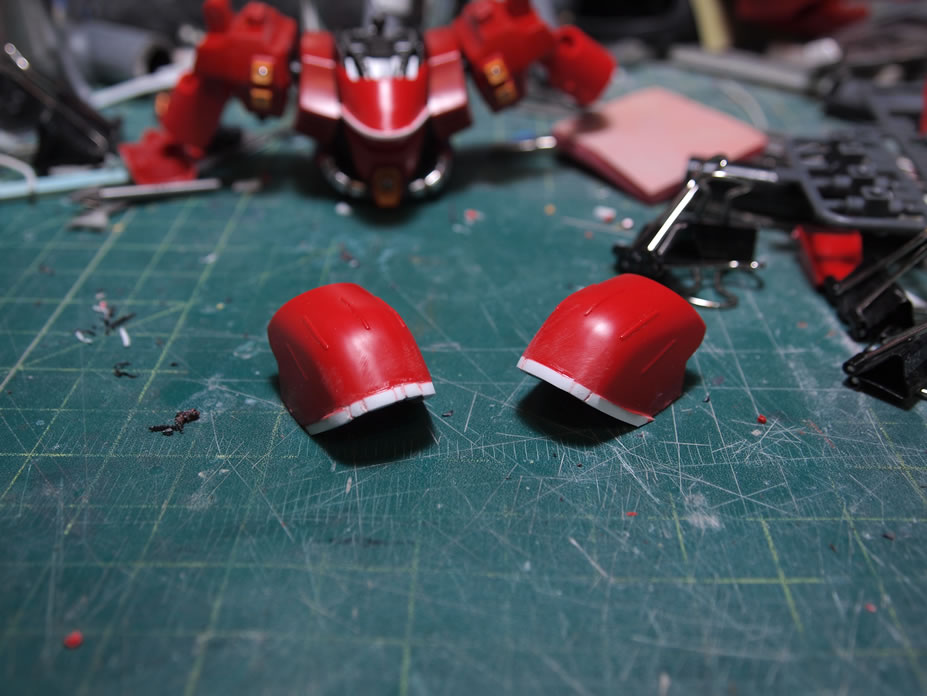
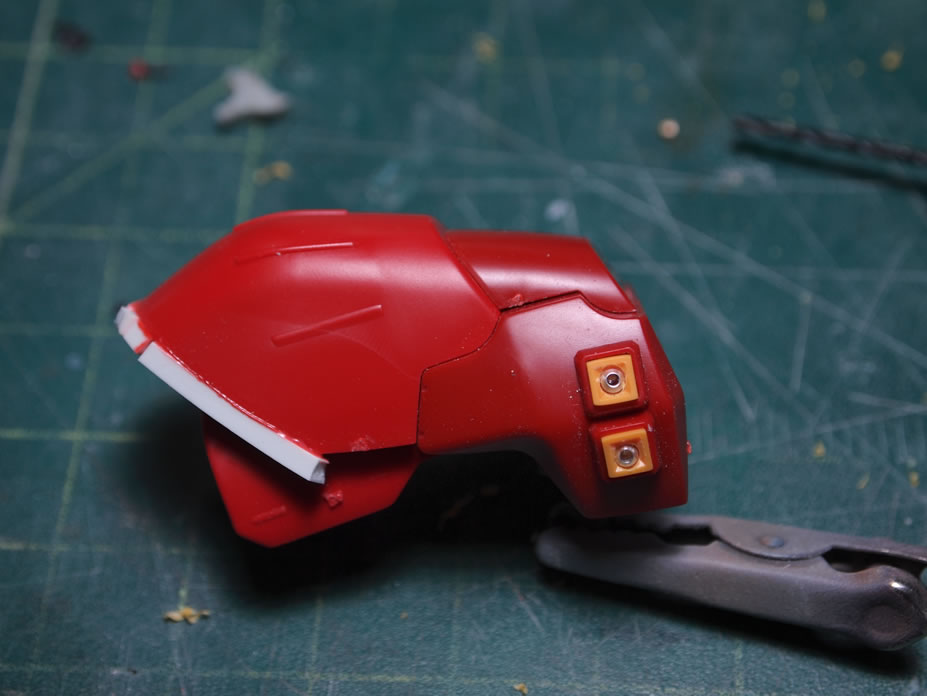
The side torso pieces were drilled and filed down to expose the vents. Metal mesh is added on the insides as added details.
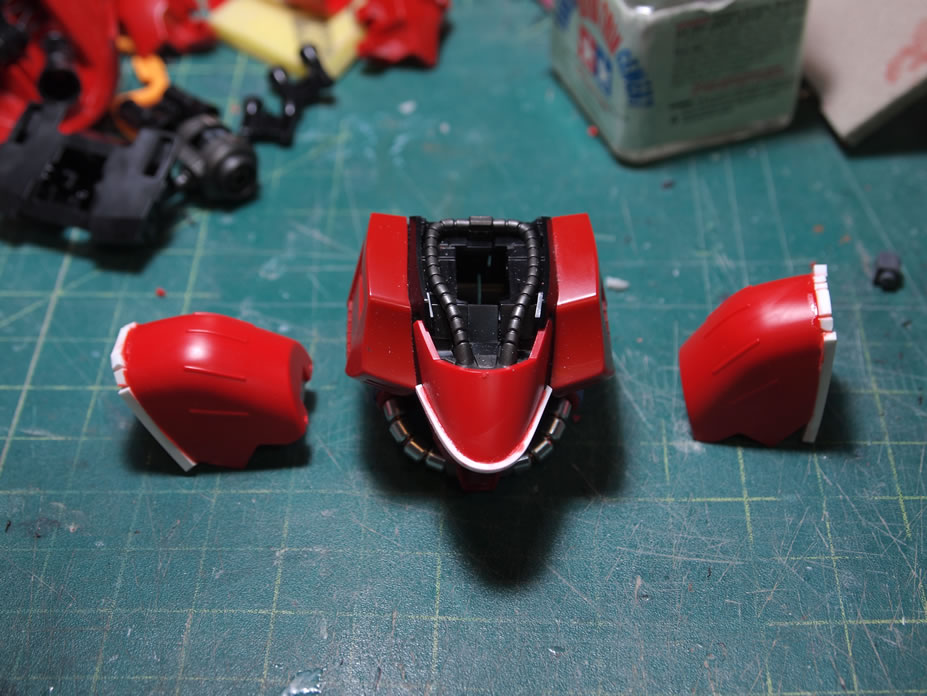
Styrene strips were added to the shoulders as well as the chest piece. The strips added to the shoulder will add some length to the shoulders and the strip added to the chest will be the base framework to reshaping the chest piece. After the glue cured over night, the excess plastic on the shoulders are trimmed and sanded down.
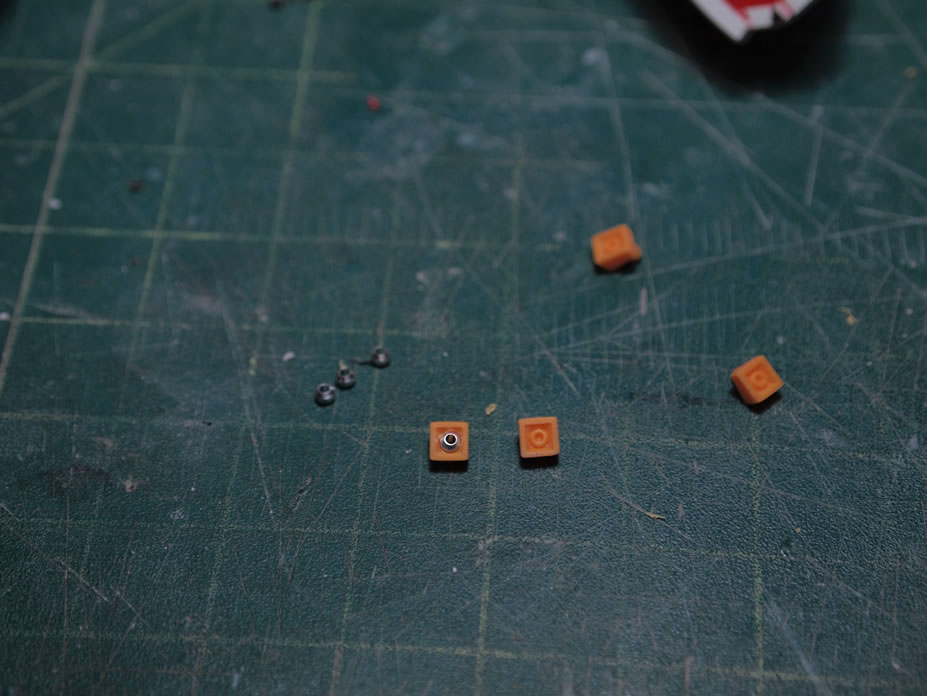
Metal collars are used to replace the nozzles in the small shoulder thrusters. A metal collar is added to the “belt buckle” as well as a brass tube insert.
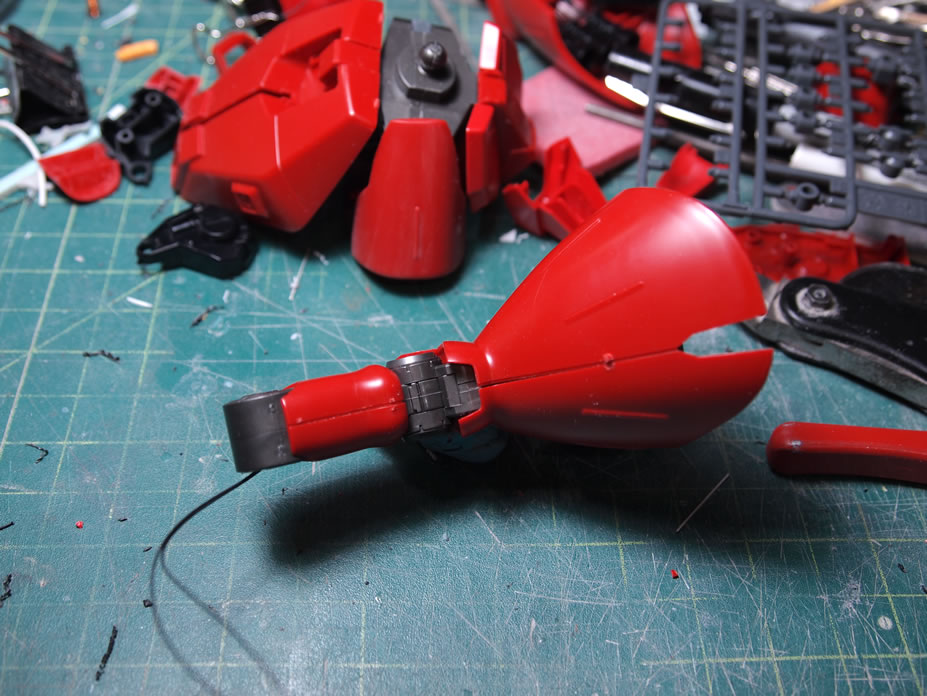
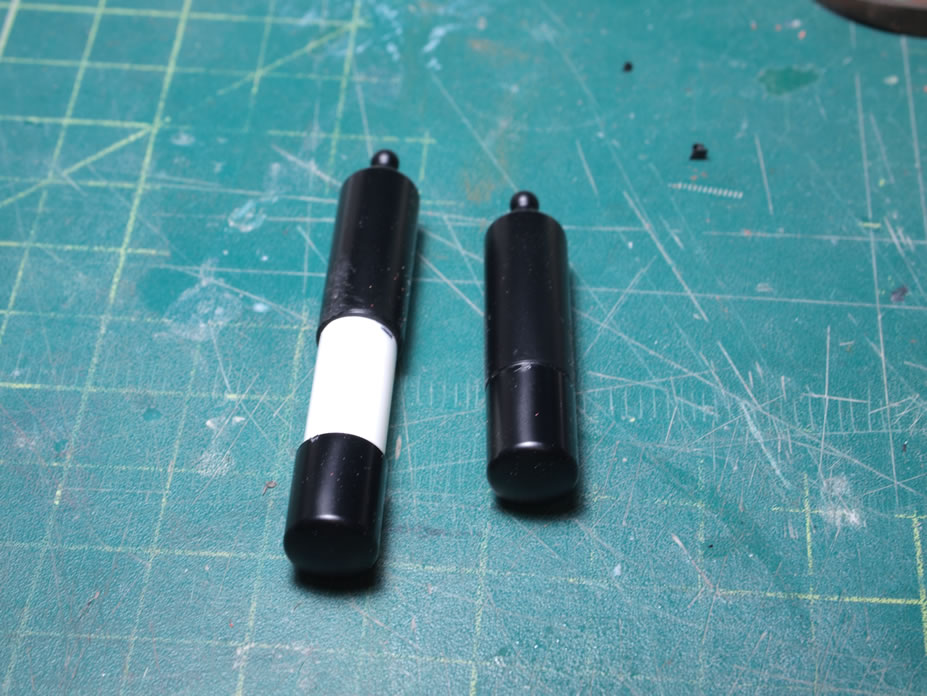
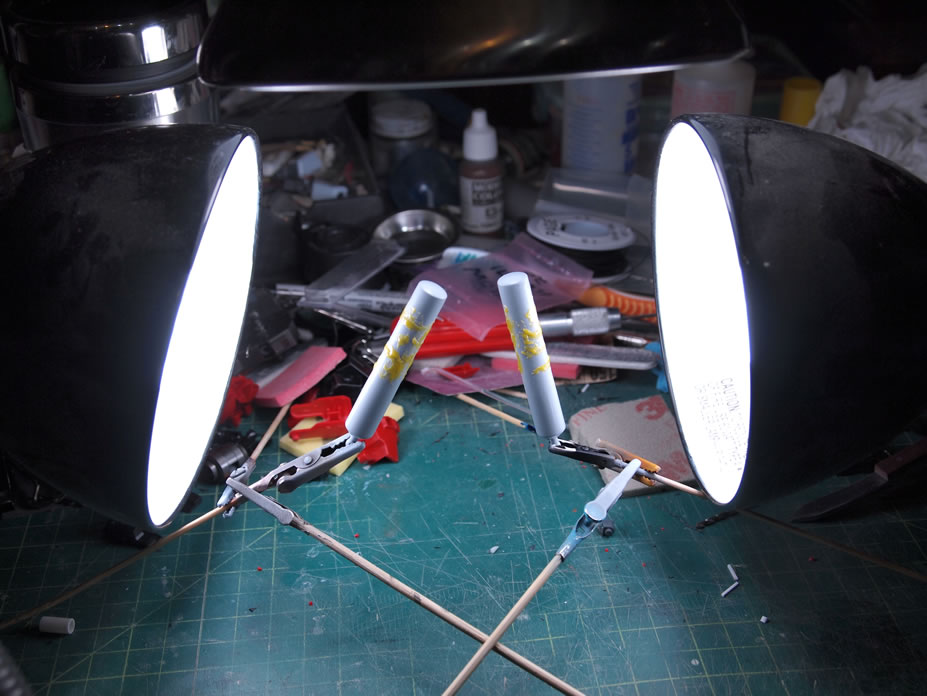
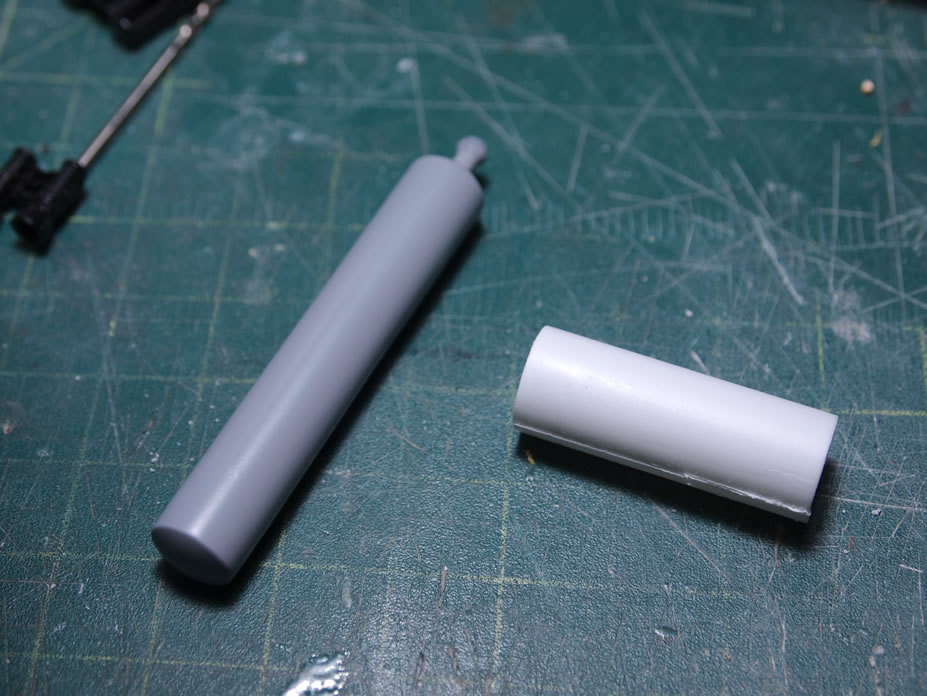
Fuel Tanks
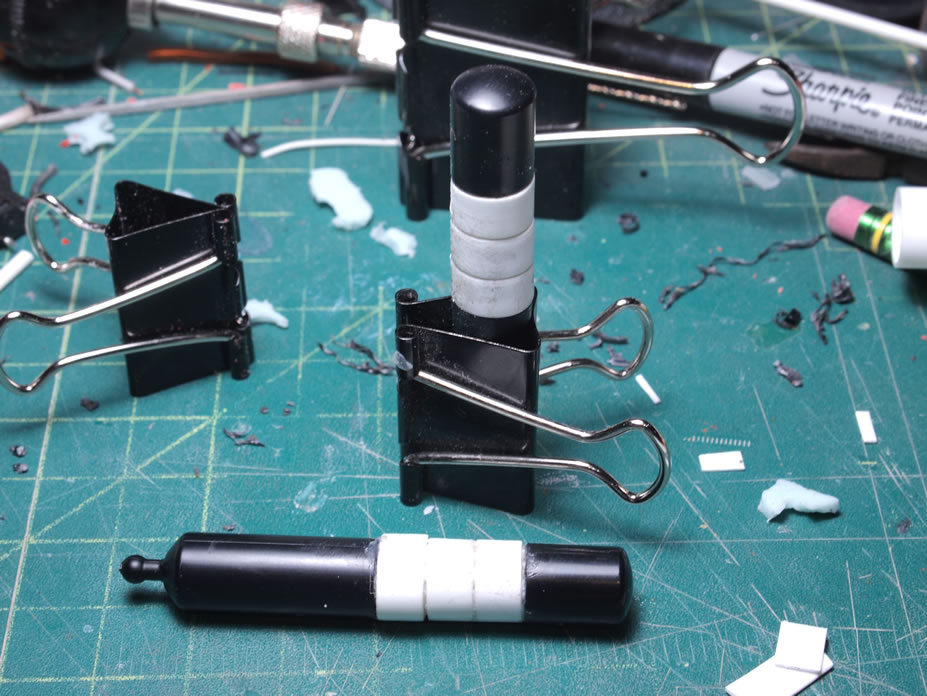
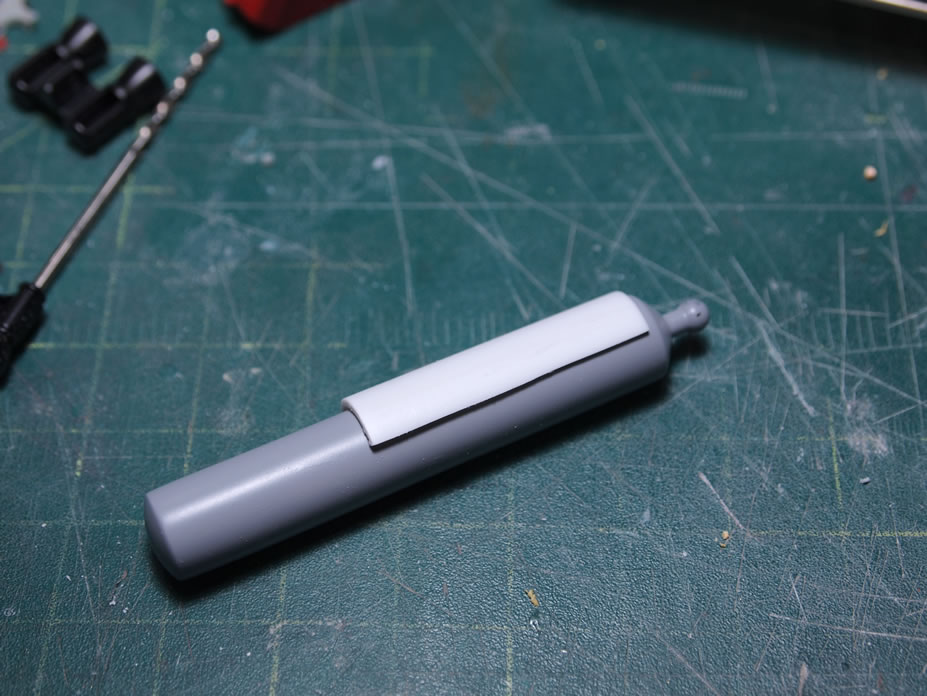
The original fuel tanks are a little lacking. They’re short, and just boring. So first thing done is to lengthen them. The two parts of the tanks have internal male/female connection, so those areas needed to be removed first. I don’t want to randomly glue a length of styrene tube without some sort of internal structure, as knowing my luck, I’ll drop the damn tanks and they’ll just snap apart. So after the internal connection pieces were cut out, a smaller styrene tube is glued in place with epoxy glue. Over this tube a larger tube is sleeved then the bottom piece is glued to the inner structure tube with epoxy glue for strength.
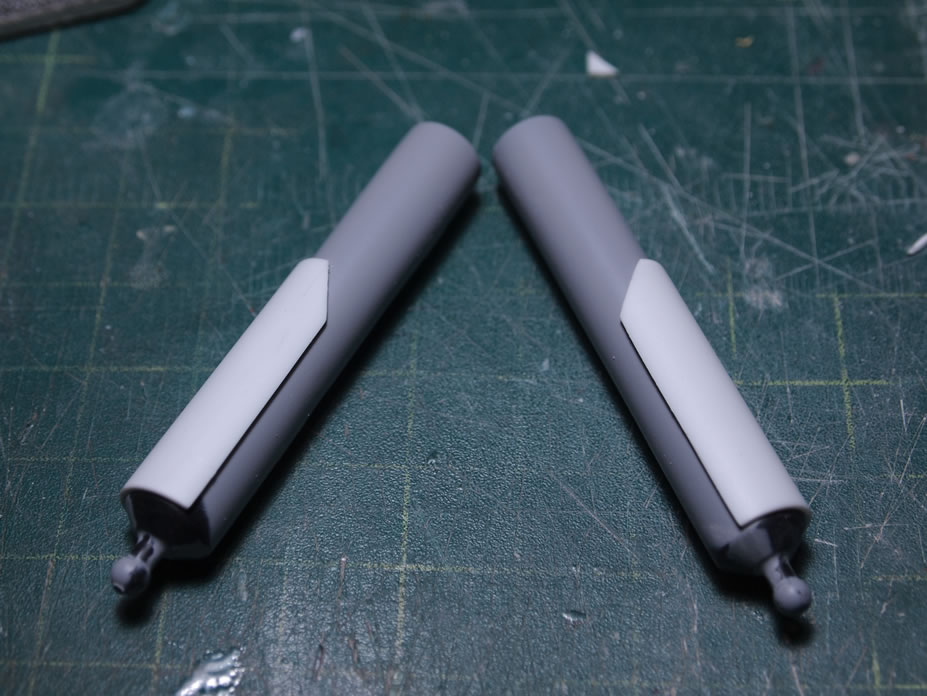
The problem now is that the added extension tube is thinner than the actual fuel tanks. So to fix this with minimal work in surface balancing, styrene strips were wrapped around the extension pieces and glued into place. Once the glue cured, the parts are roughly sanded to remove excess and balance out the tanks. With the surface still rough and gaps still present, the tanks are primed to show all the gaps and surface defects.
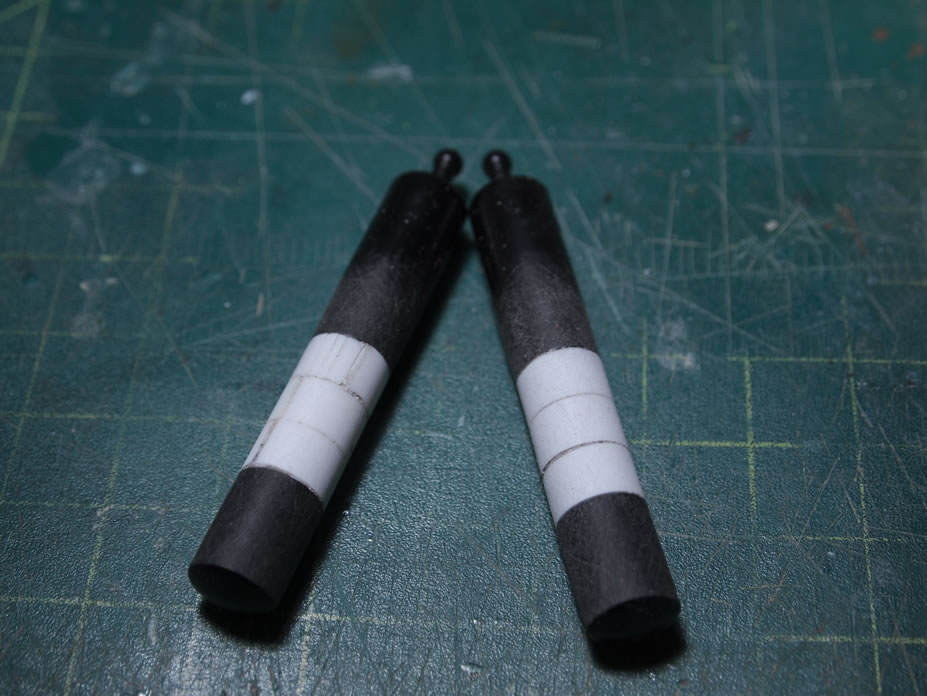
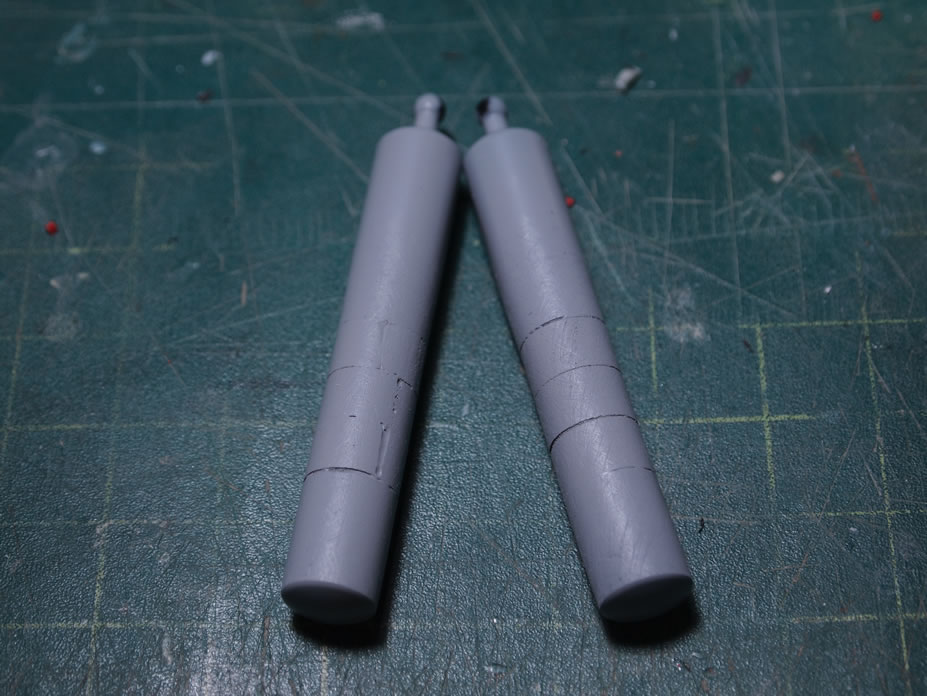
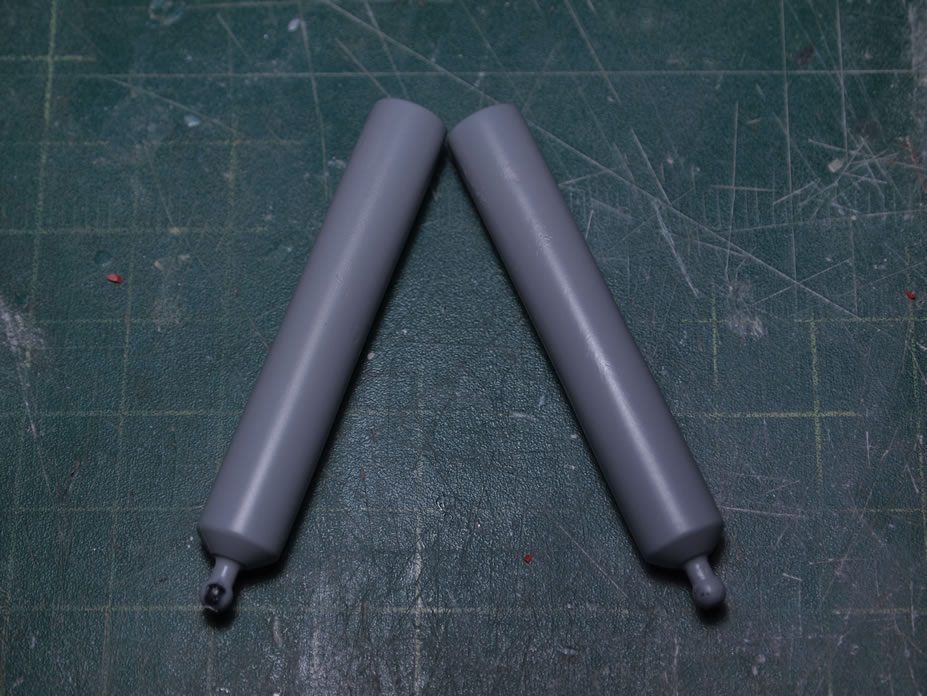
The first priming sessions shows off all the areas that need attention, so light curing putty is employed and once cured, the parts are then sanded again and then primed again. The surface looks pretty good but there are still some minor surface defects that will need additional attention.
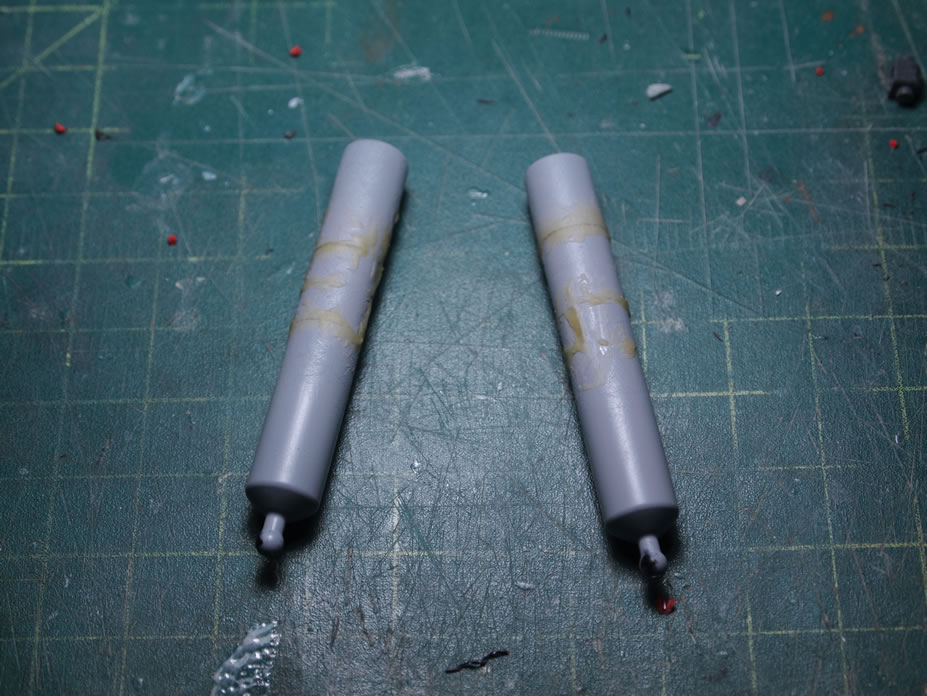
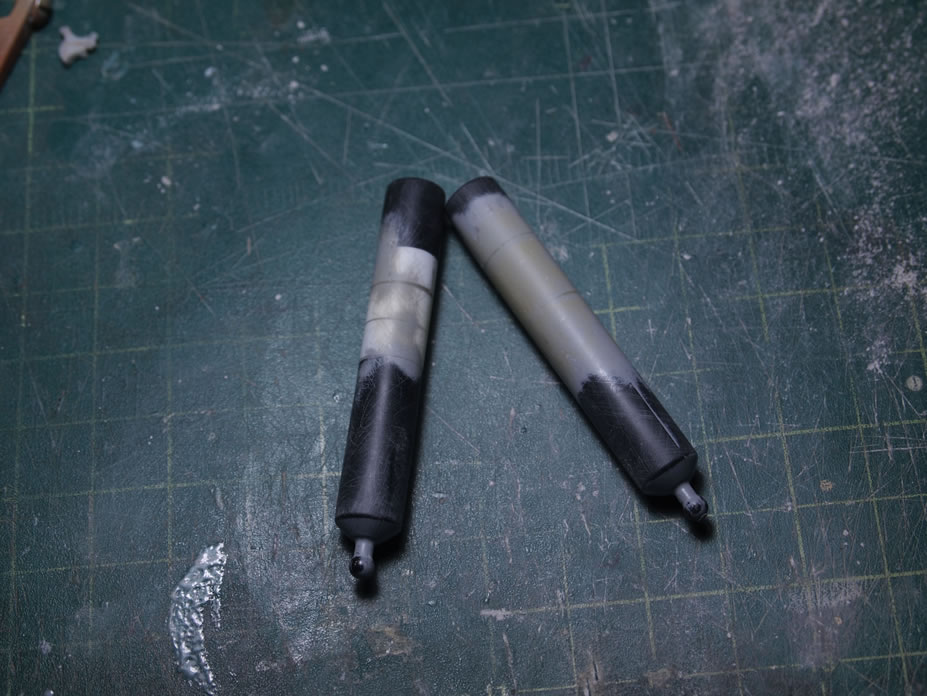
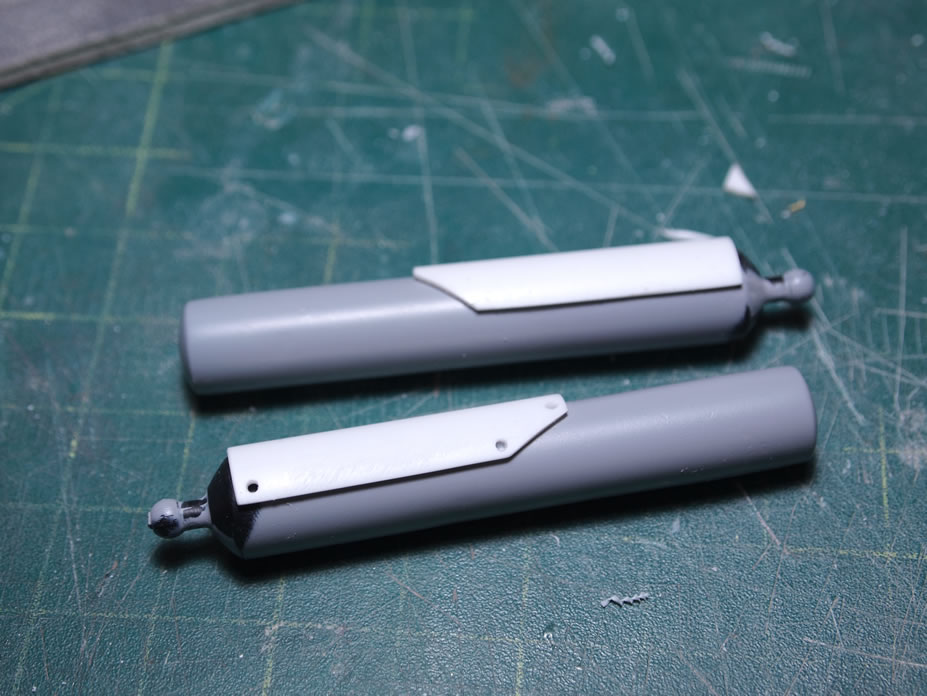
The fuel tanks are lengthened, but they still look a bit on the boring side. A styrene tube is cut to length, then bisected lengthwise to create two half pieces. The corners of the half pieces are trimmed off then the half pieces are glued to the fuel tanks. Small detail holes are then drilled into the corner areas of the tube. I may add some more details, but along that idea, I don’t want to go over board with details and make things too busy.
Here’s a quick mock up of the leg waist and torso testing out the lighted leg. I only had enough time last night to thread and assemble one leg. I still have a bunch of modding to do so up through this point, I think it makes for a decent progress blog post.
great post. i learned a lot. this stuff is really going to help my modeling when i return to north america. excellent color choice as well.