March 25, 2016:
Model building ADD strikes again. I sorta hit a wall with the Zaku/Guntank diorama. I’ll eventually return to it like most projects. But this sucker came in a sometime last month and I’ve been itching to build it. I recently finished the 1/144 version, so I was curious to what I could do with the 1/100. The first thought was to just Out of Box the damn thing. But as I snapped and built this week and during our bi-weekly live broadcast, ideas started swirling and the past two days has seen a bit cutting fiddling. The following picture won’t last too long…
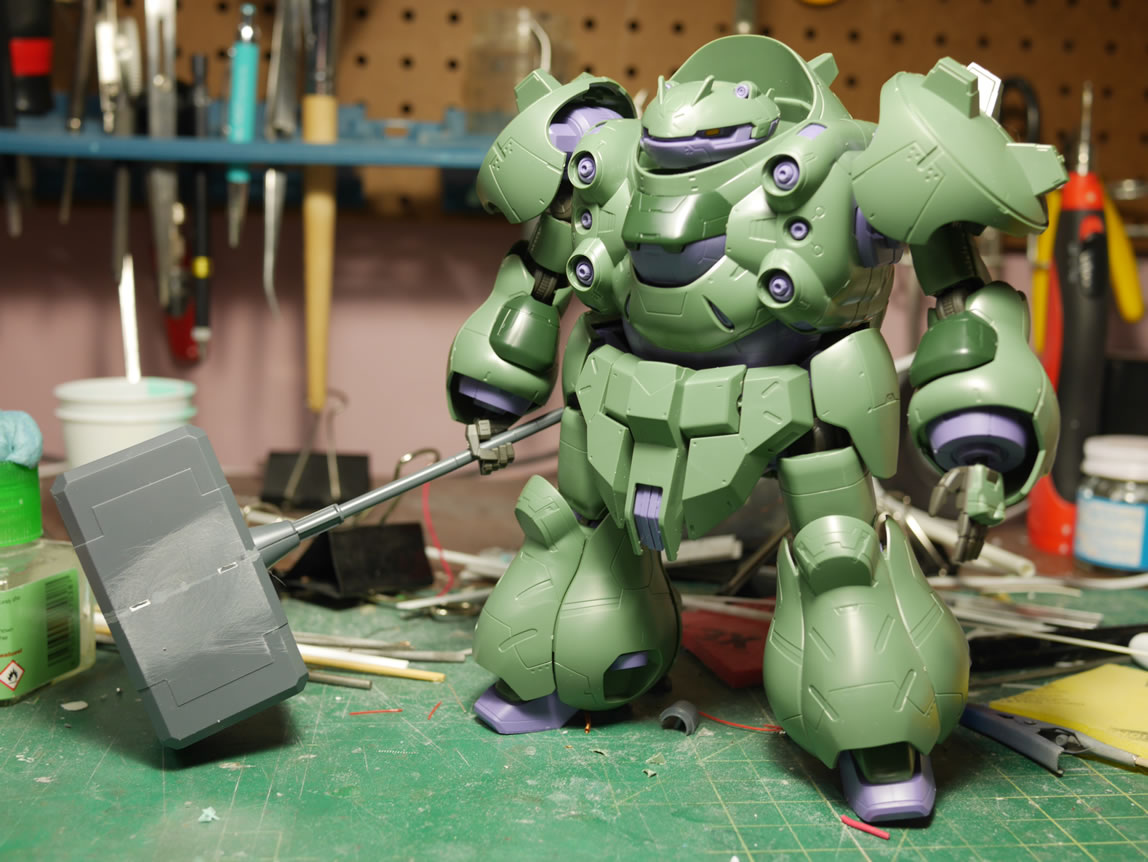
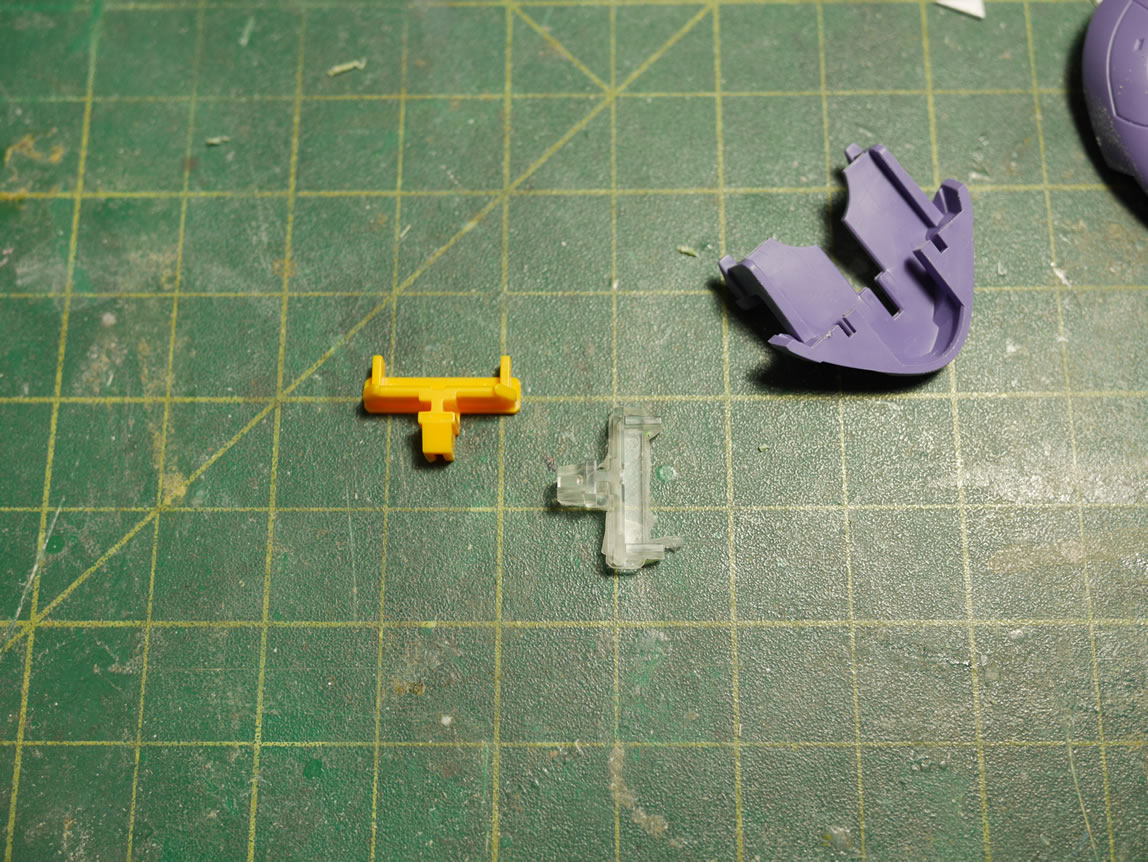
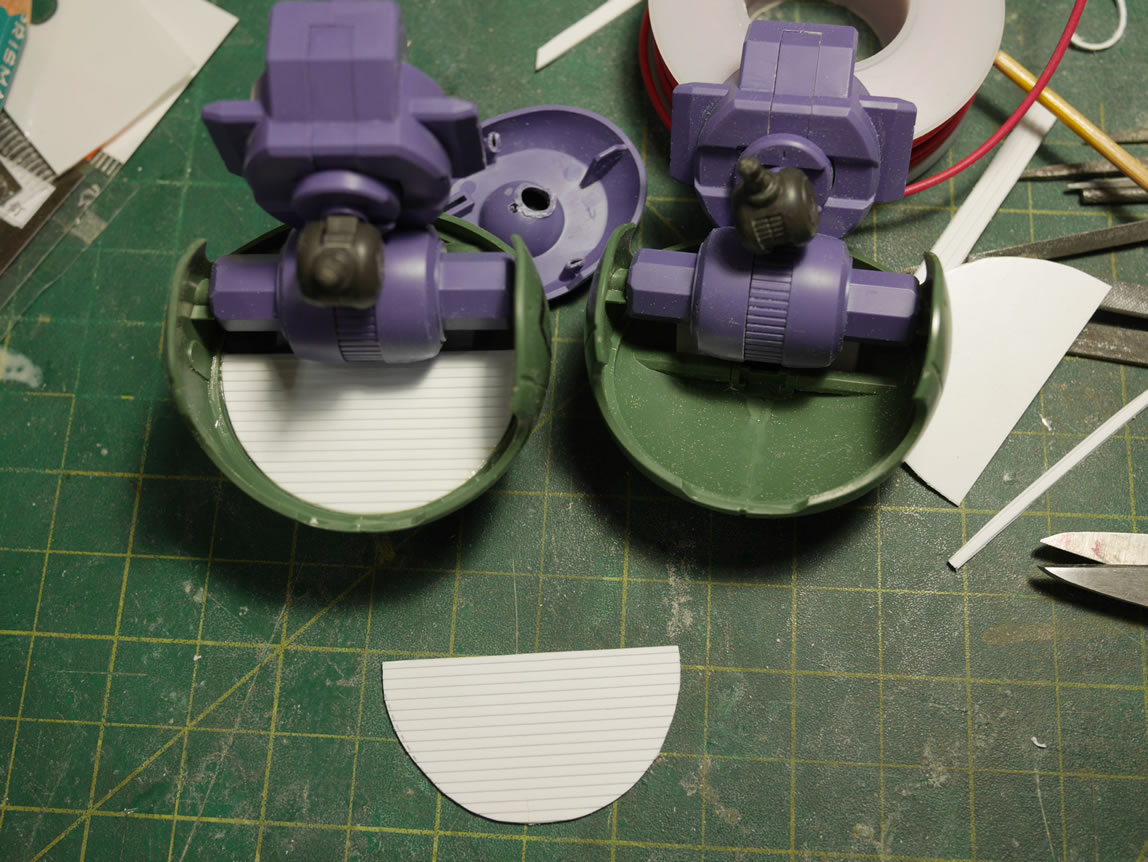
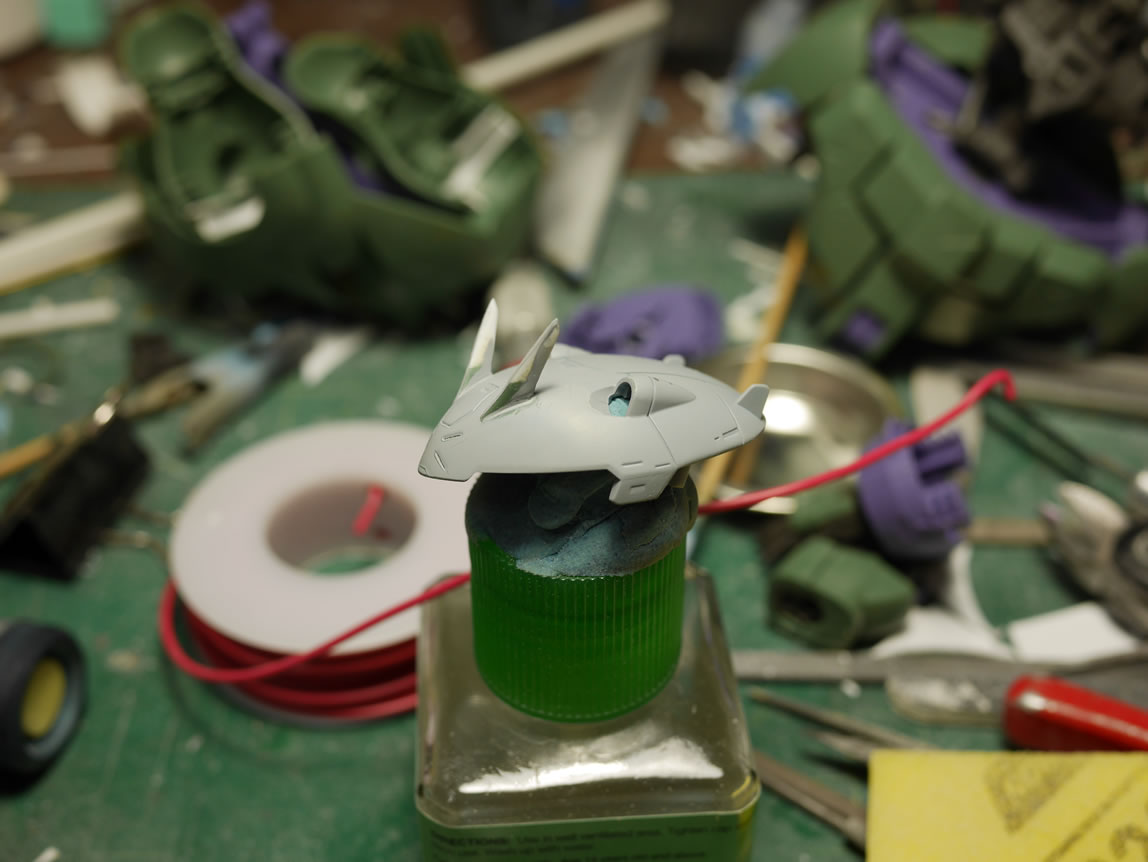
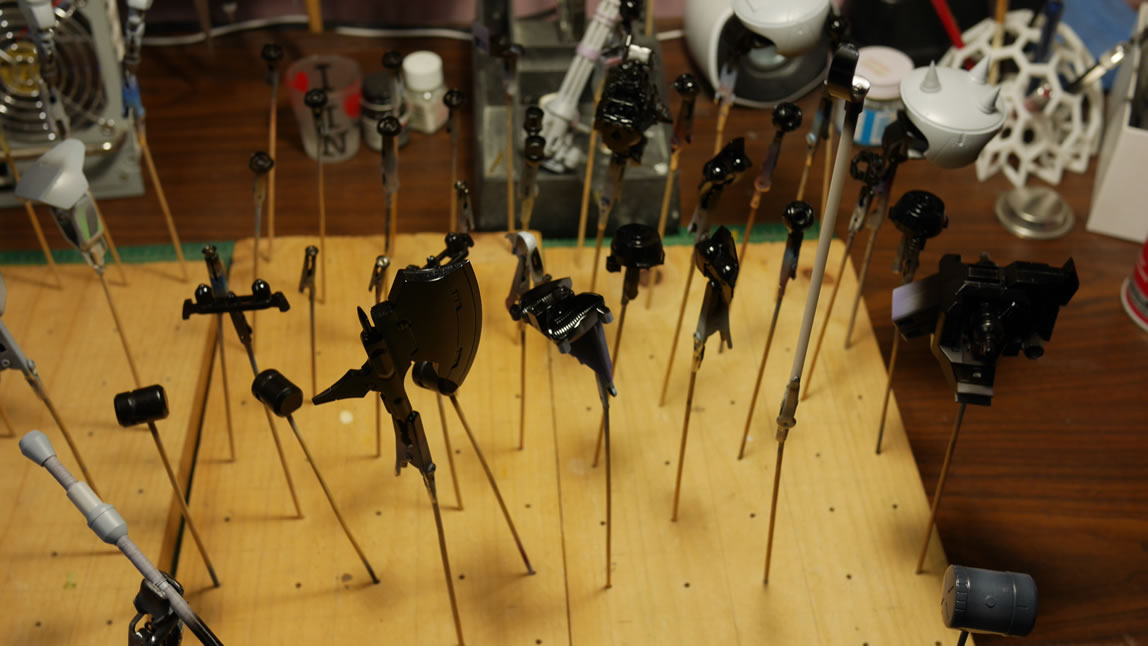
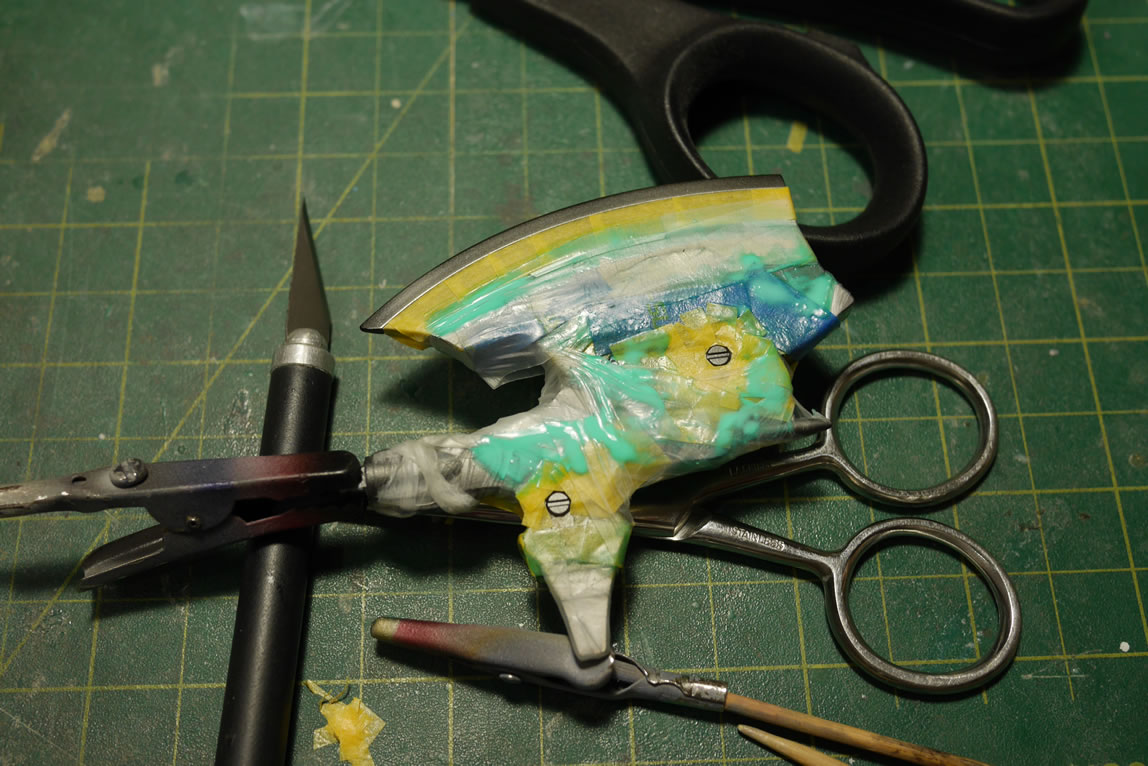
I cracked open the box this Monday and started the snapping, actually sanding the stupid inner frame, for which is COMPLETELY hidden, with very few exceptions. I got the sucker snapped together by the end of this week’s live broadcast on Tuesday. Going back to Monday for a bit, I started work to mold the Gusion Head’s yellow part (its eyes). I made the second part of the mold on Tuesday.
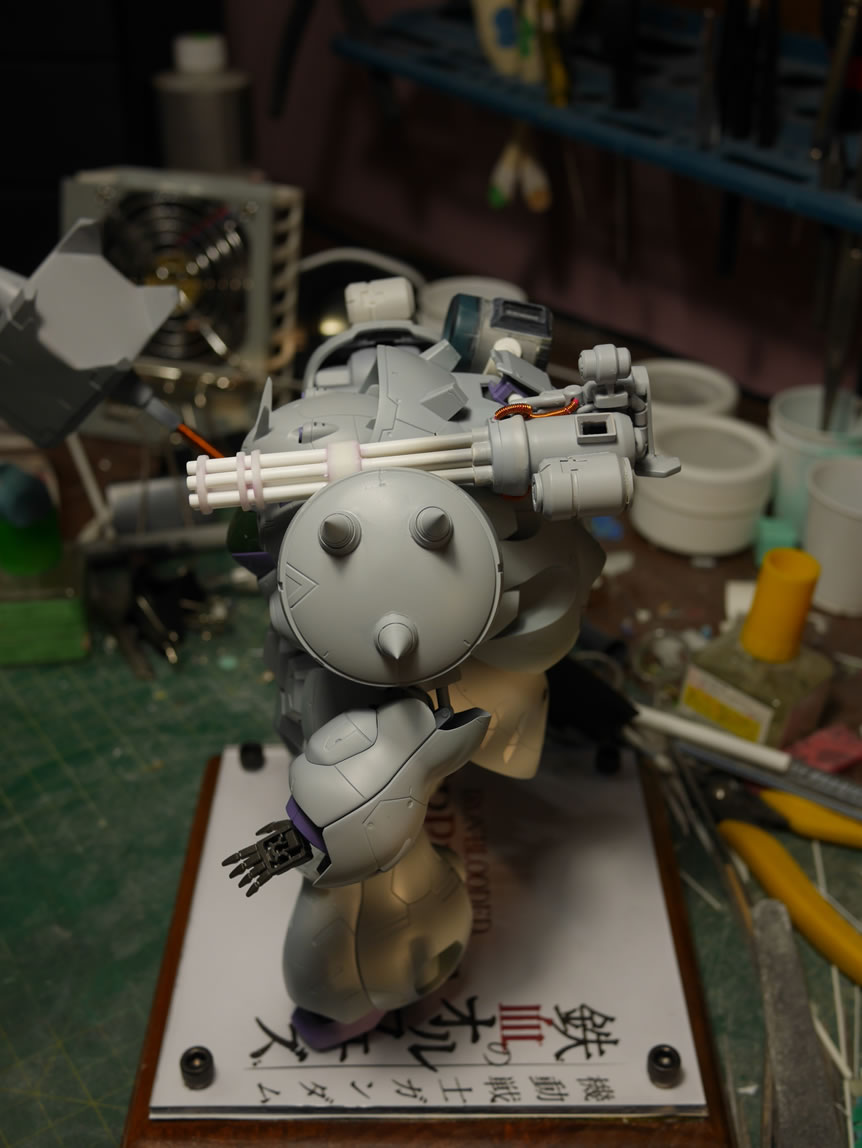
The first mod was very simple, I just glued some metal thrusters to the rear thruster. Gives the thing a little more detail in that realm. Next up, I cut apart the shoulder details. I have some ideas but first, I need to clear the area for more workable real estate. Some plastic strips fill in the hole as well as some basic putty to help fill small gaps and such.
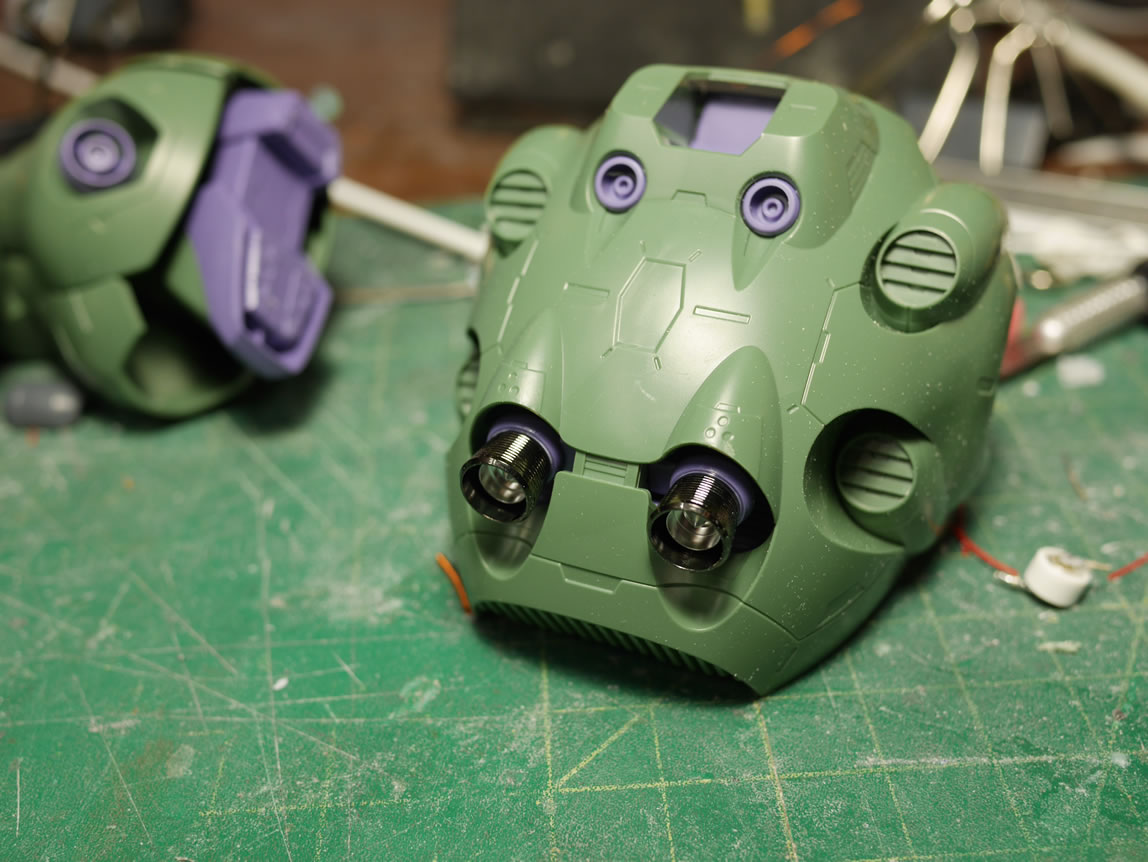


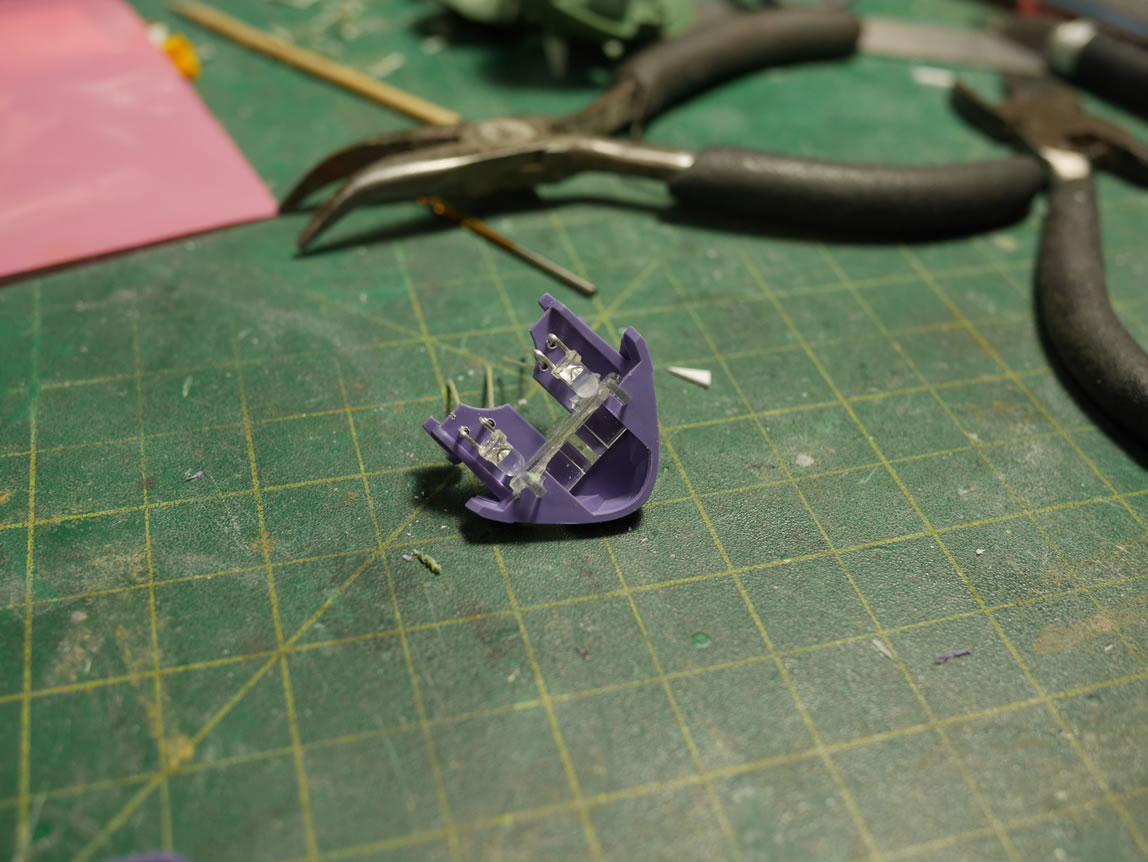
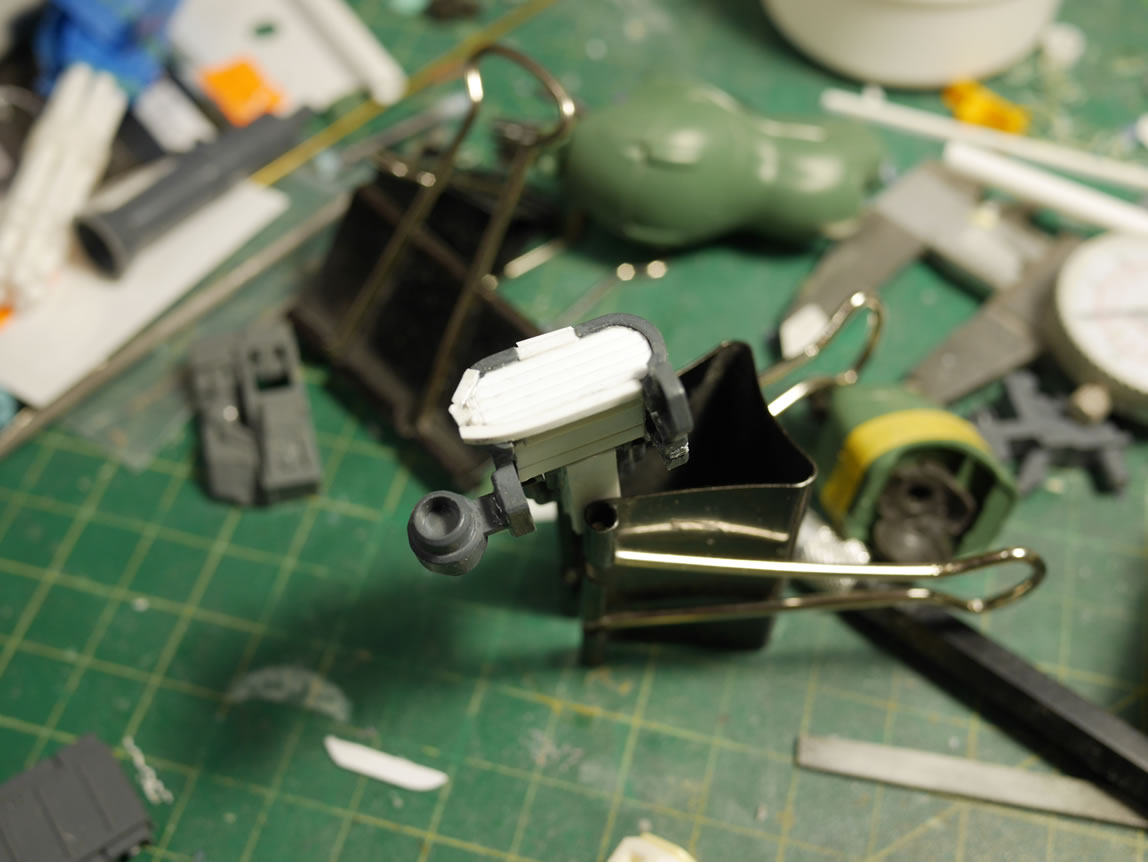
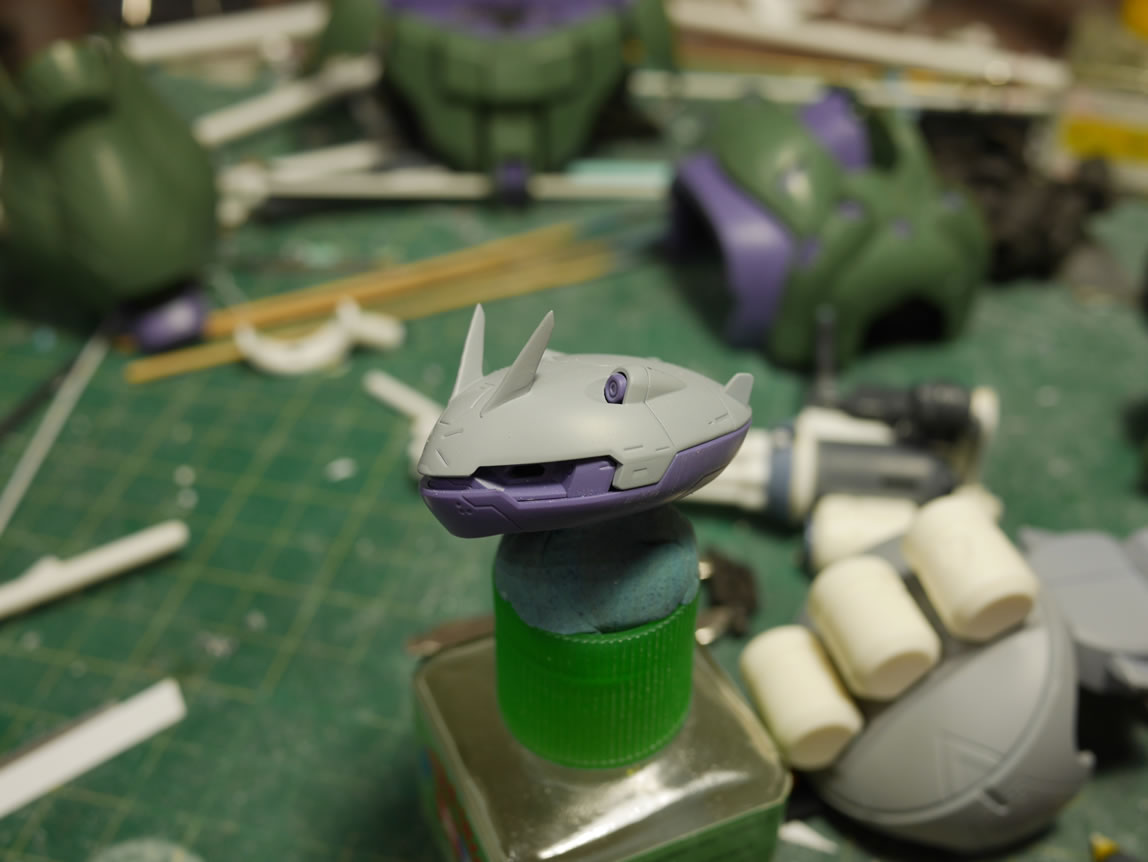
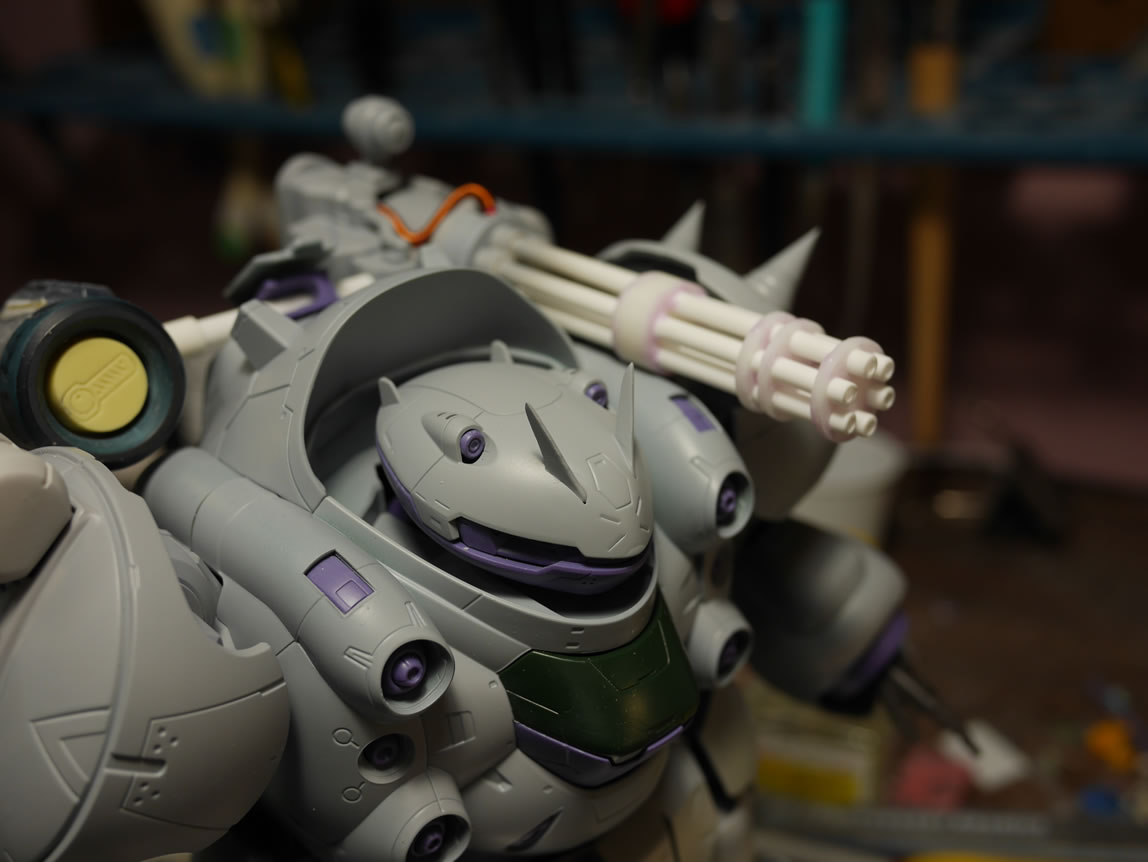
Next, I sanded down the front antennas slightly so that I had a flat surface to work with then glued some styrene strips to the flattened antenna. I’m going to extend the antenna slightly. So once glued, this was placed off to the side. Next up, we have the mold made from the yellow head part. I made a mold so I could cast a clear resin replica.

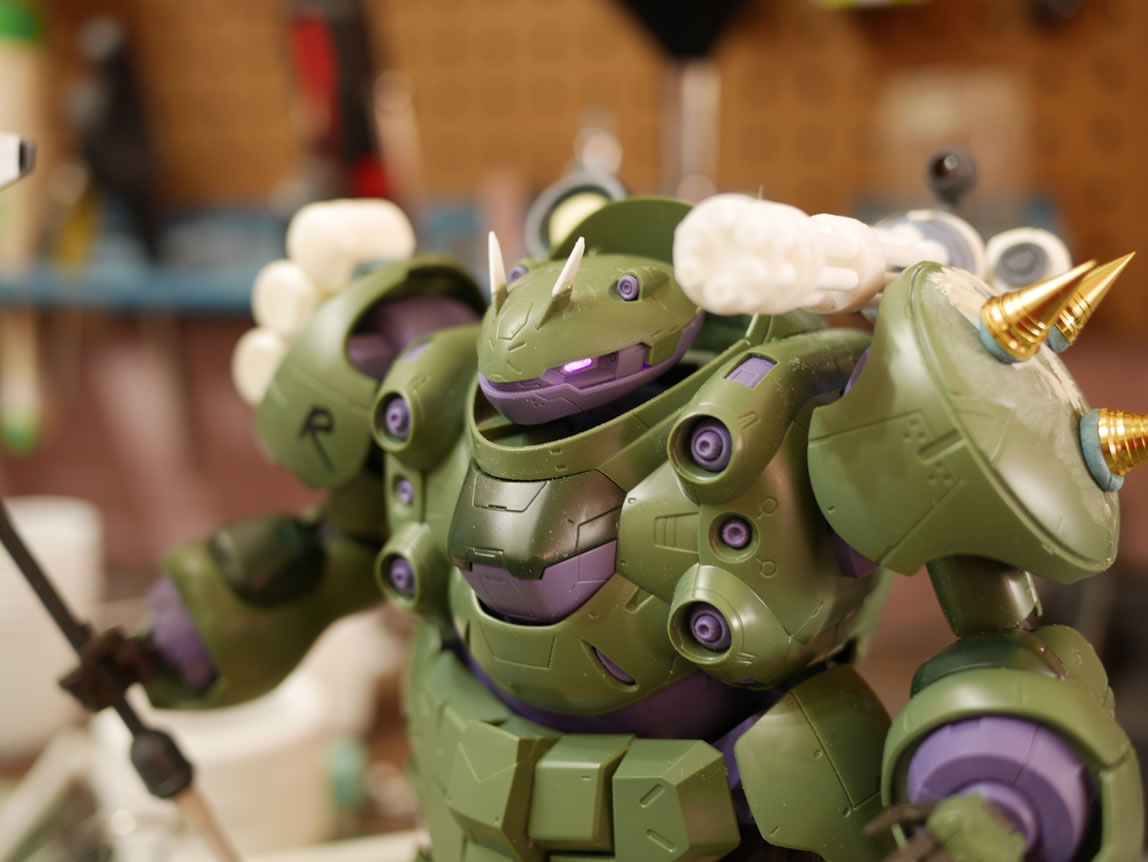
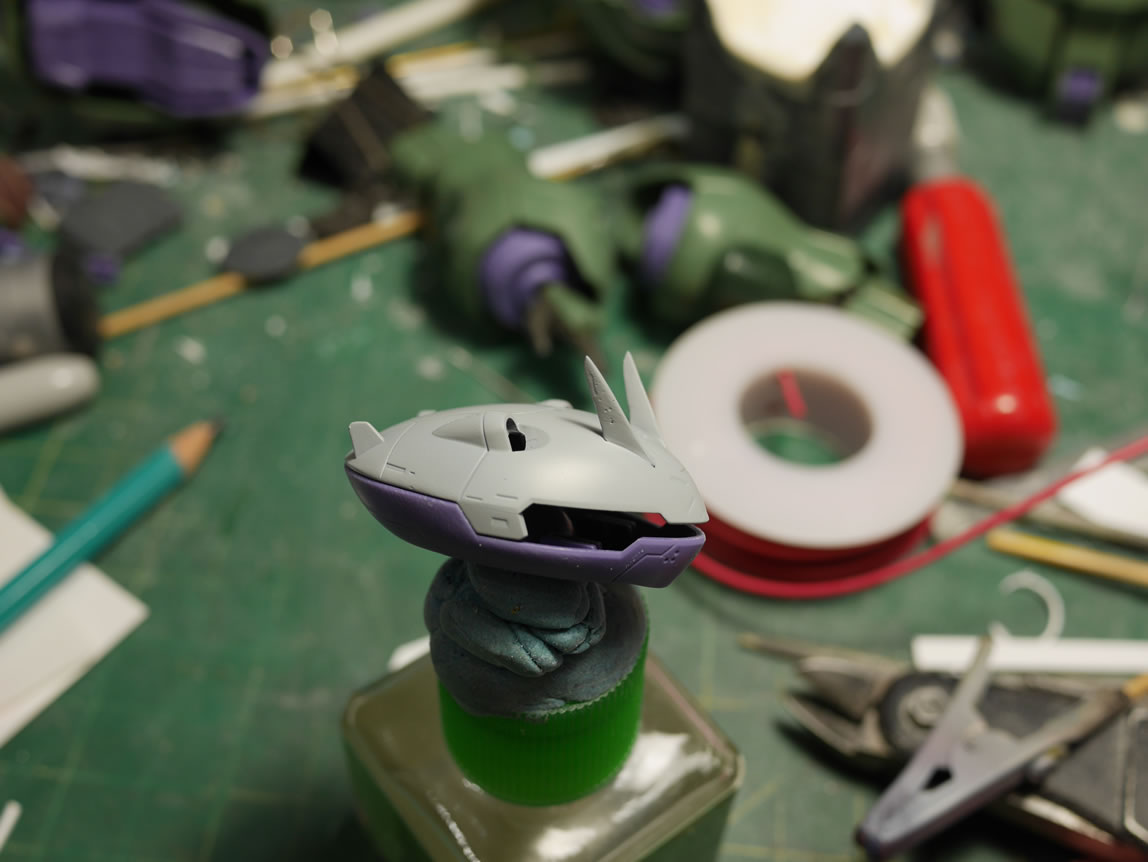
With a clear resin replica in place, I added in some LEDs, assembled the head, snapped a quick picture, then attached a power source and snapped another picture. I went from yellow to pink!
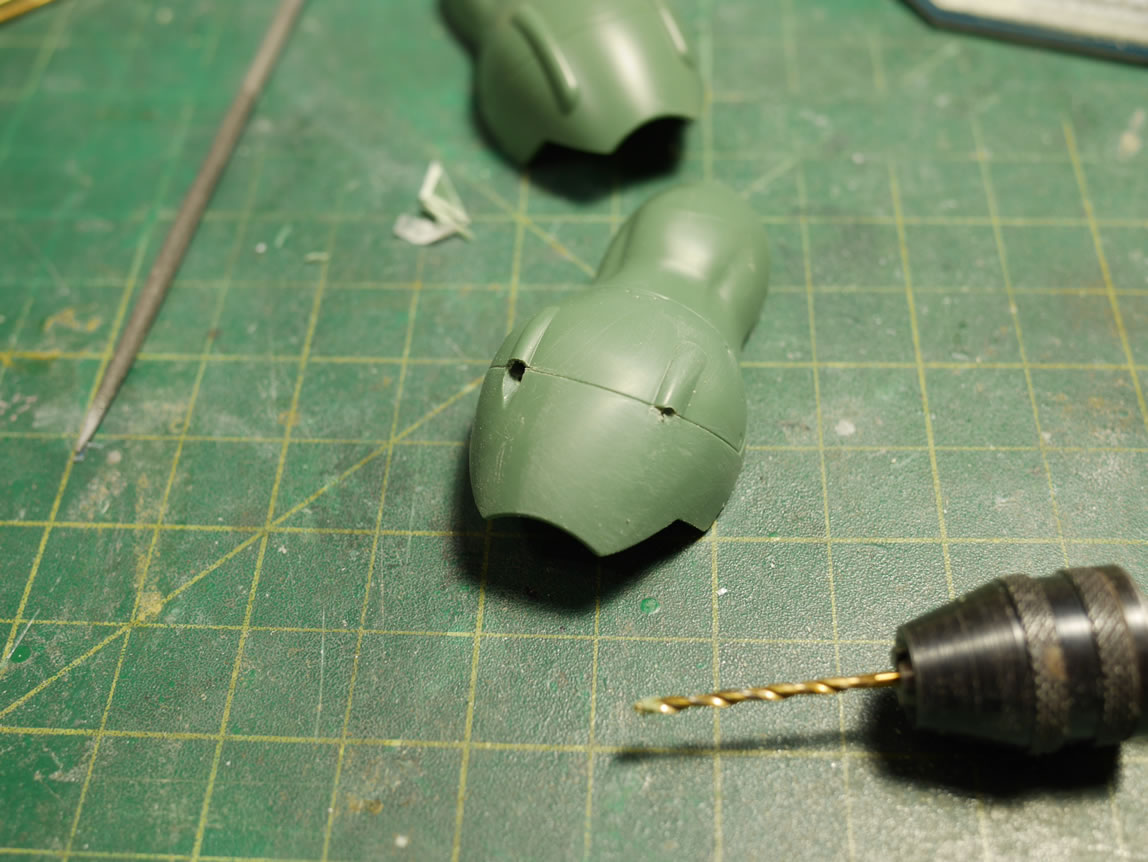
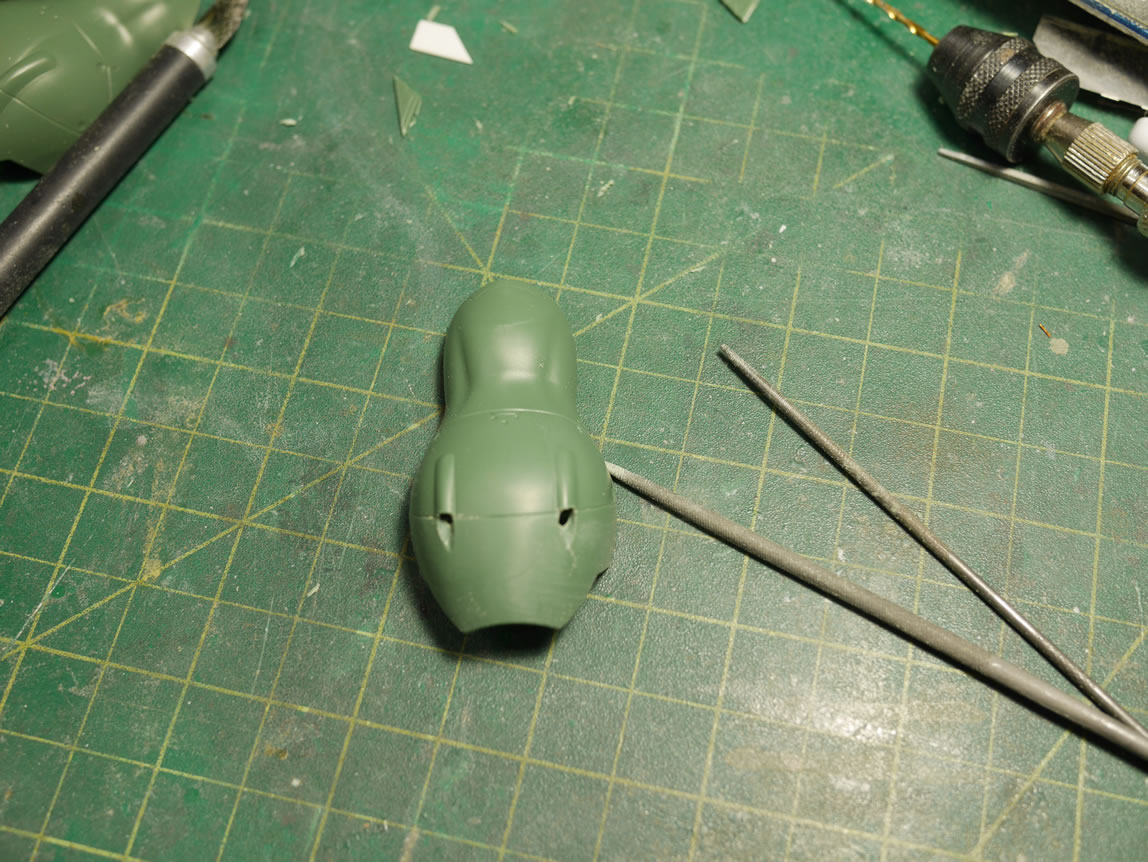
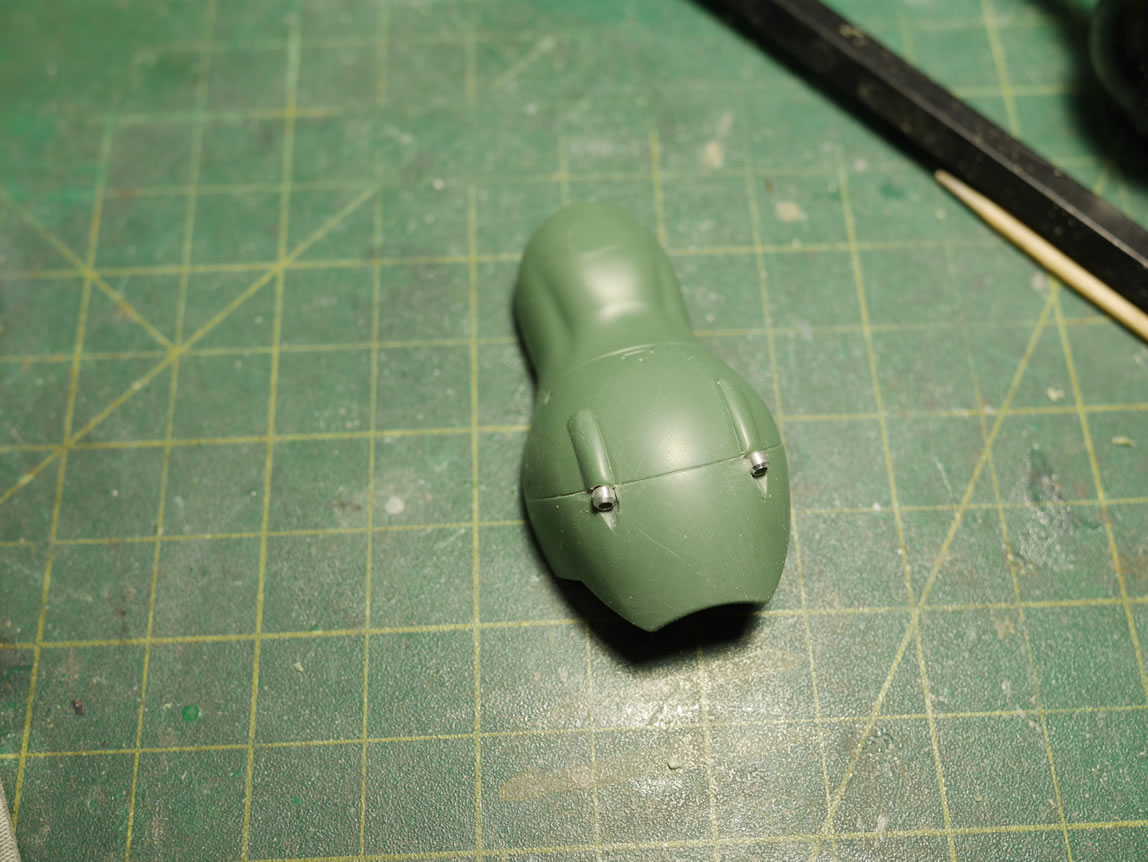
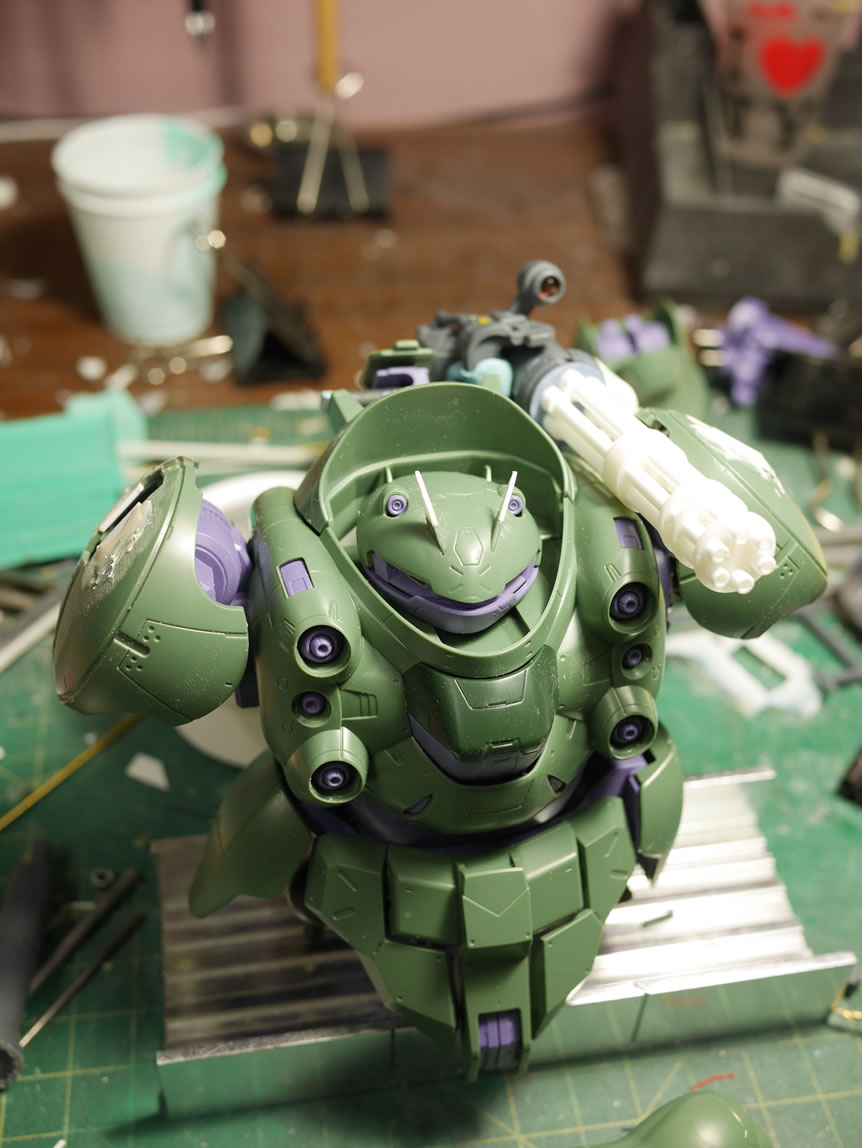
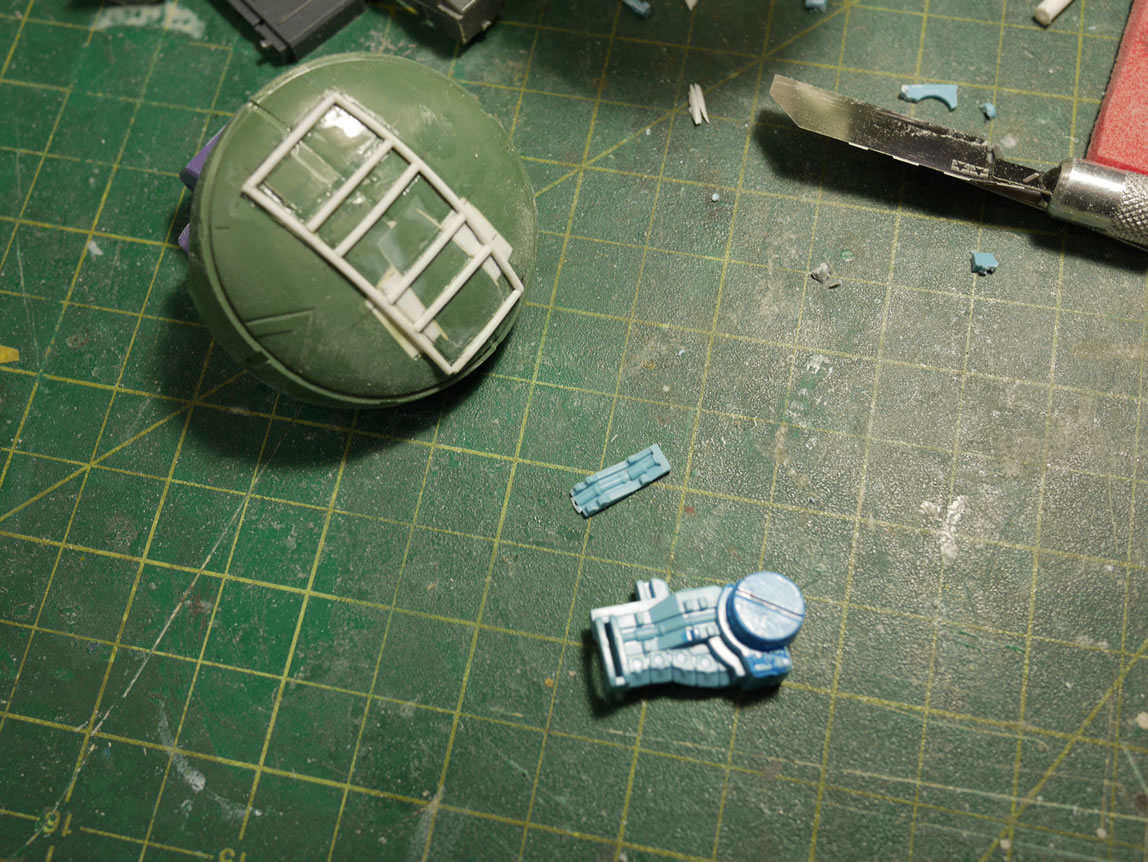
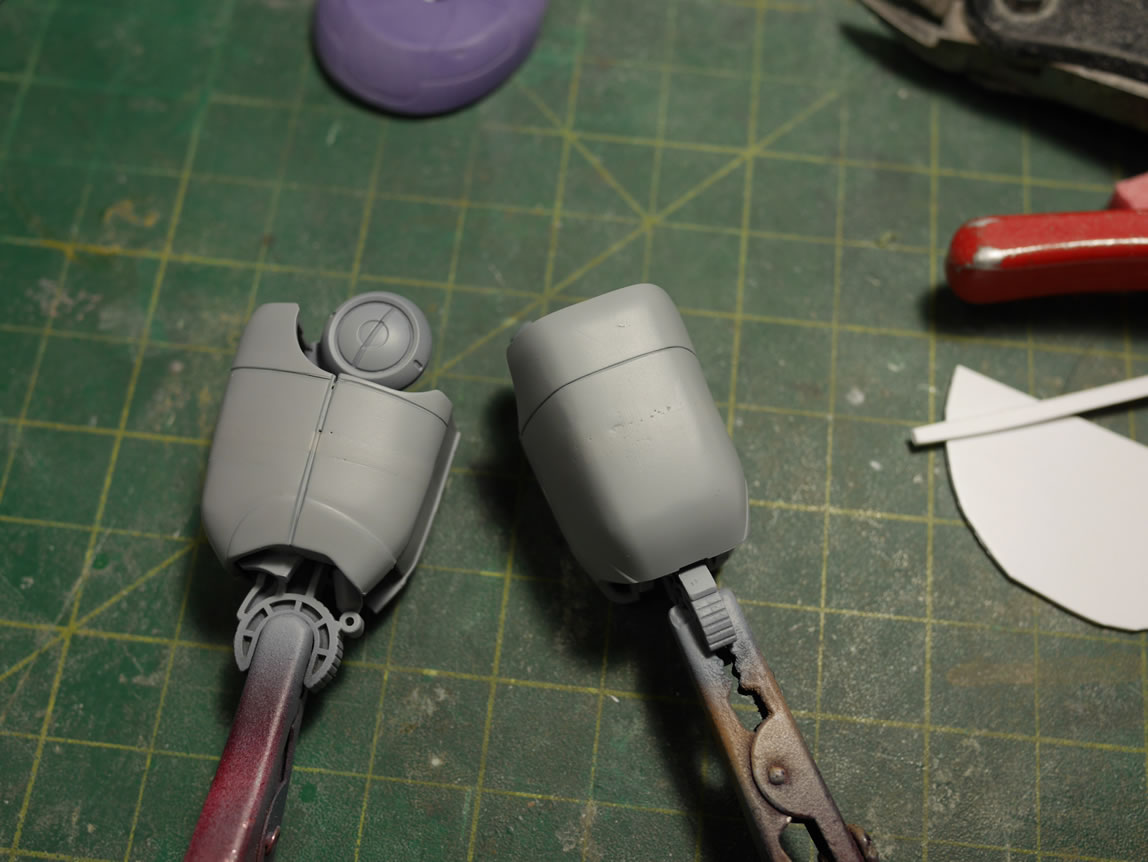
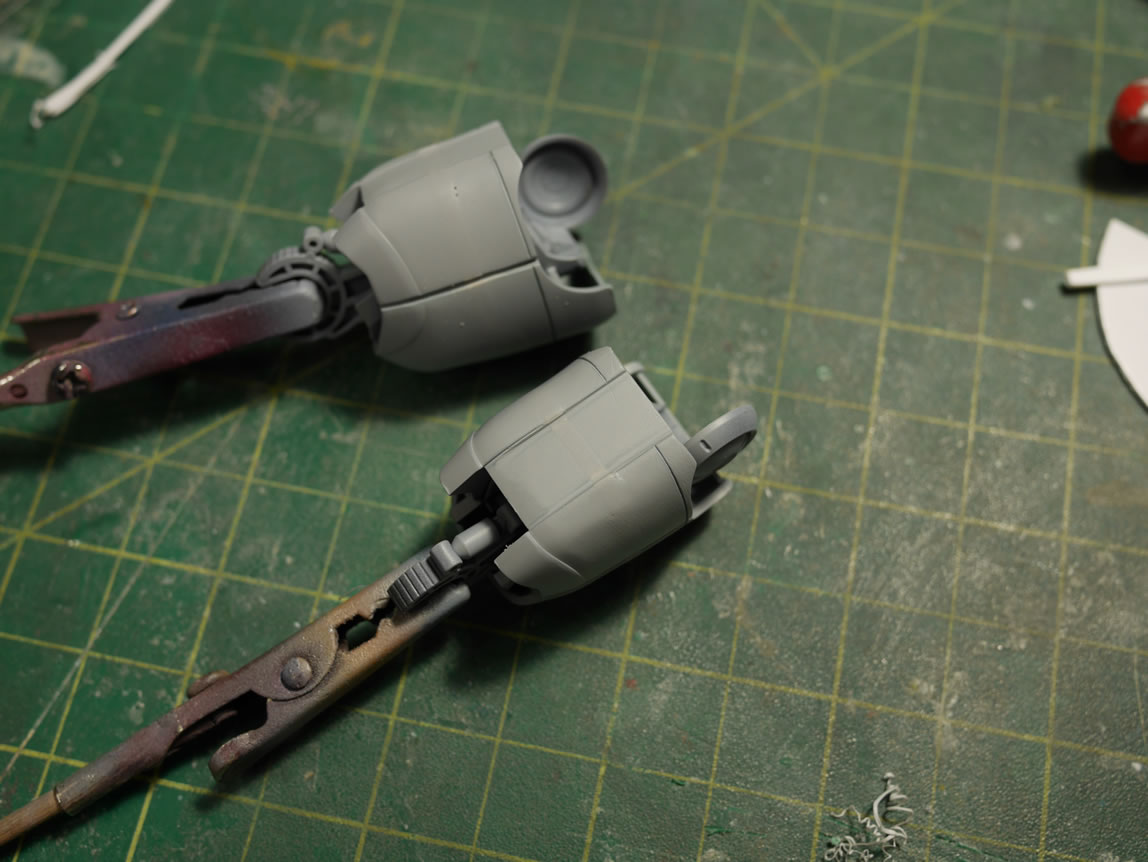
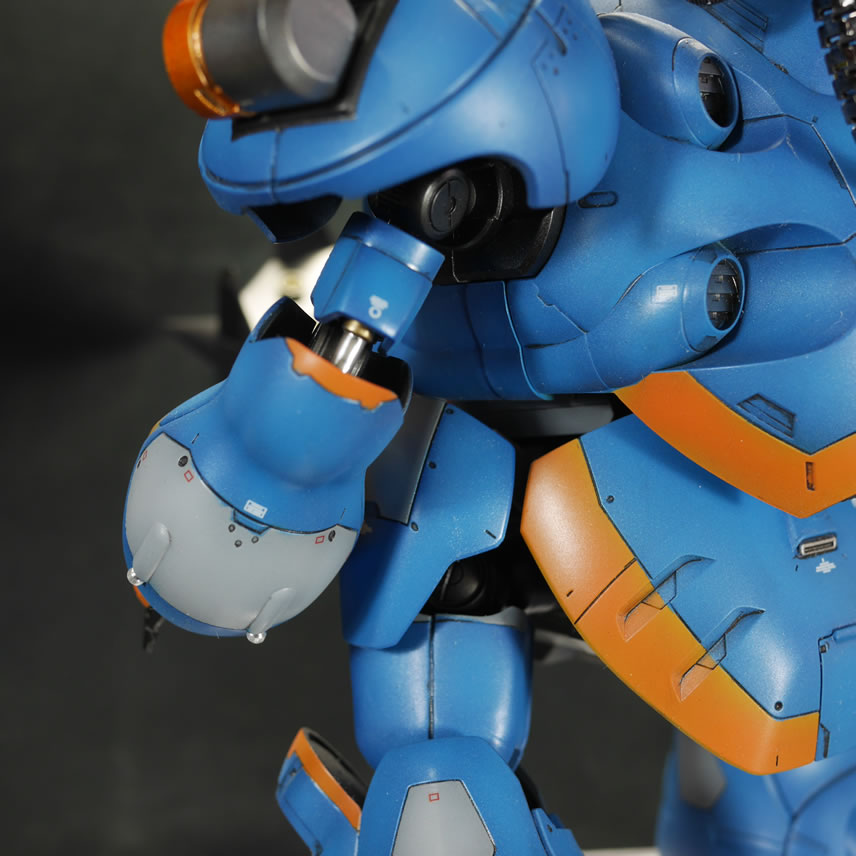
Looking at the forearms, That front bump detail just screamed to but cut out. So I took a thin hobby saw and traced along the panel line to cut down the bump. I then sanded the lower part of the bump away. Drilled into the area where the lower bump used to be as well as into the still existing upper bump.
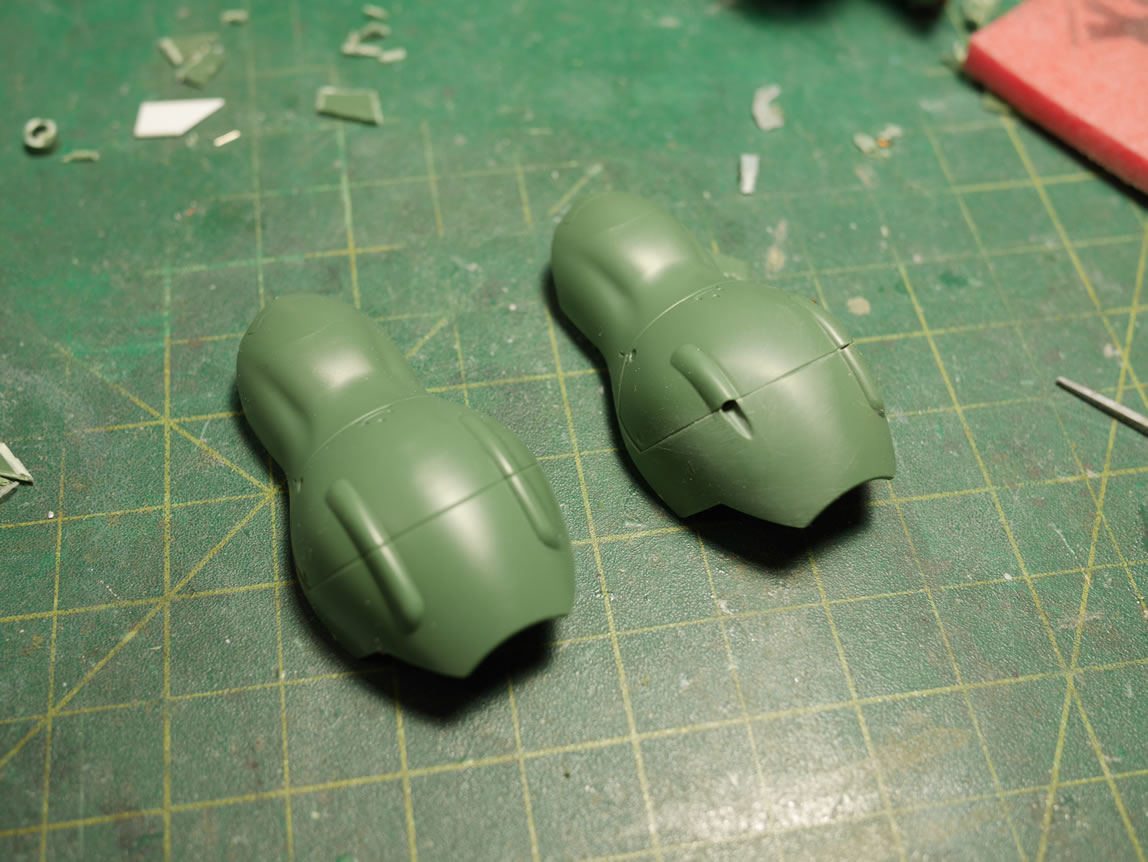
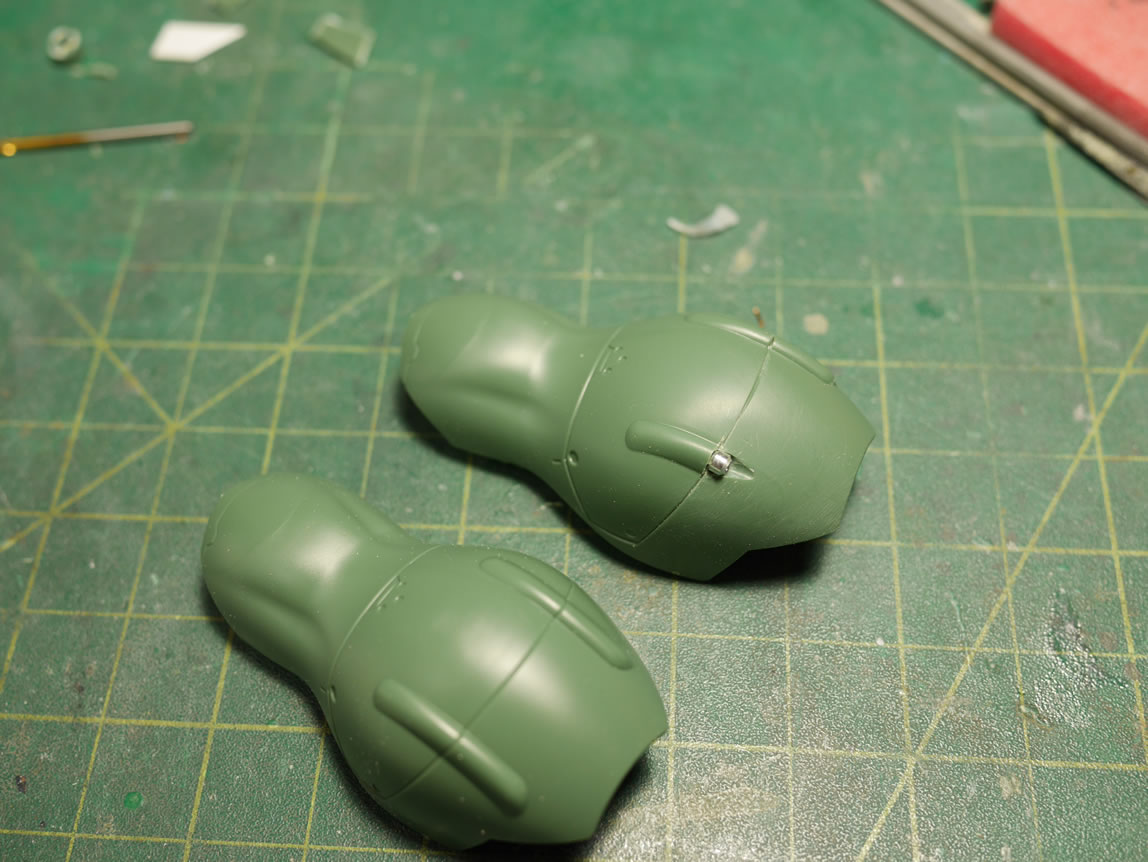
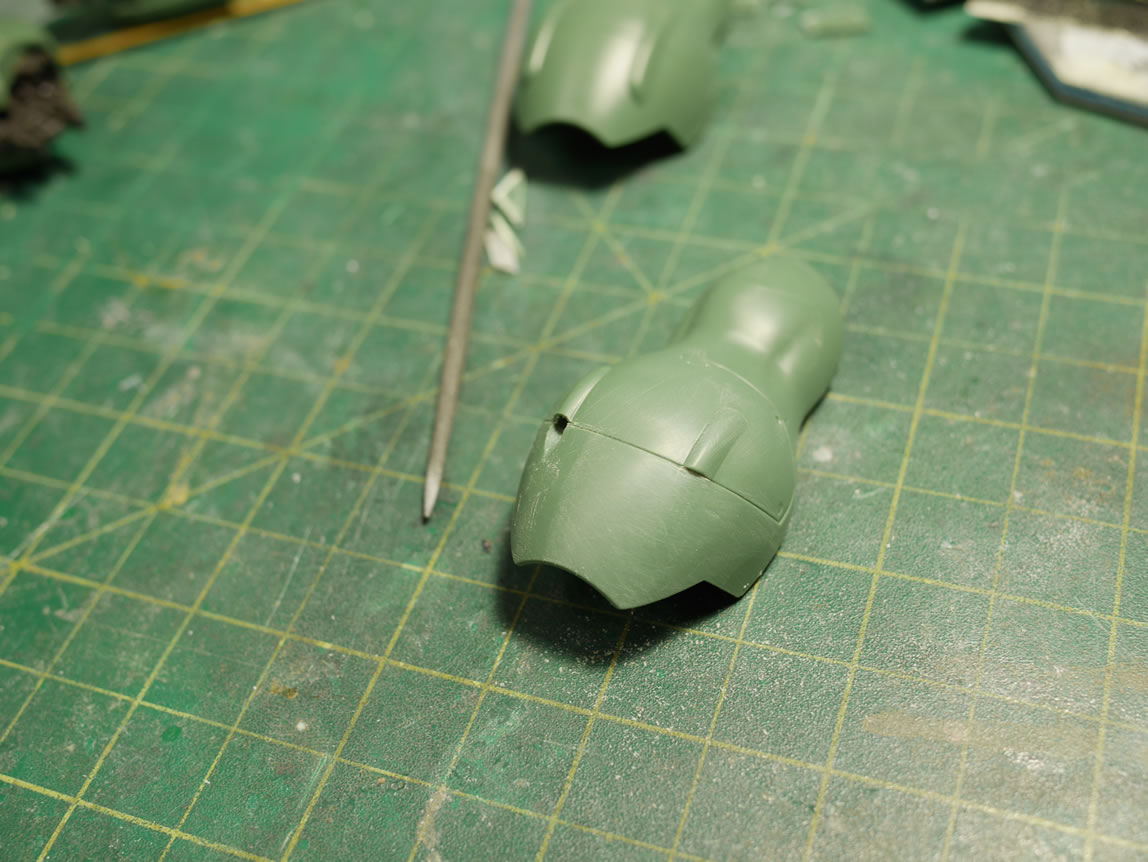
With a small pilot hole drilled, I went in with some files and slowly shaped out a spot for some forearm weaponry or metal bead details.
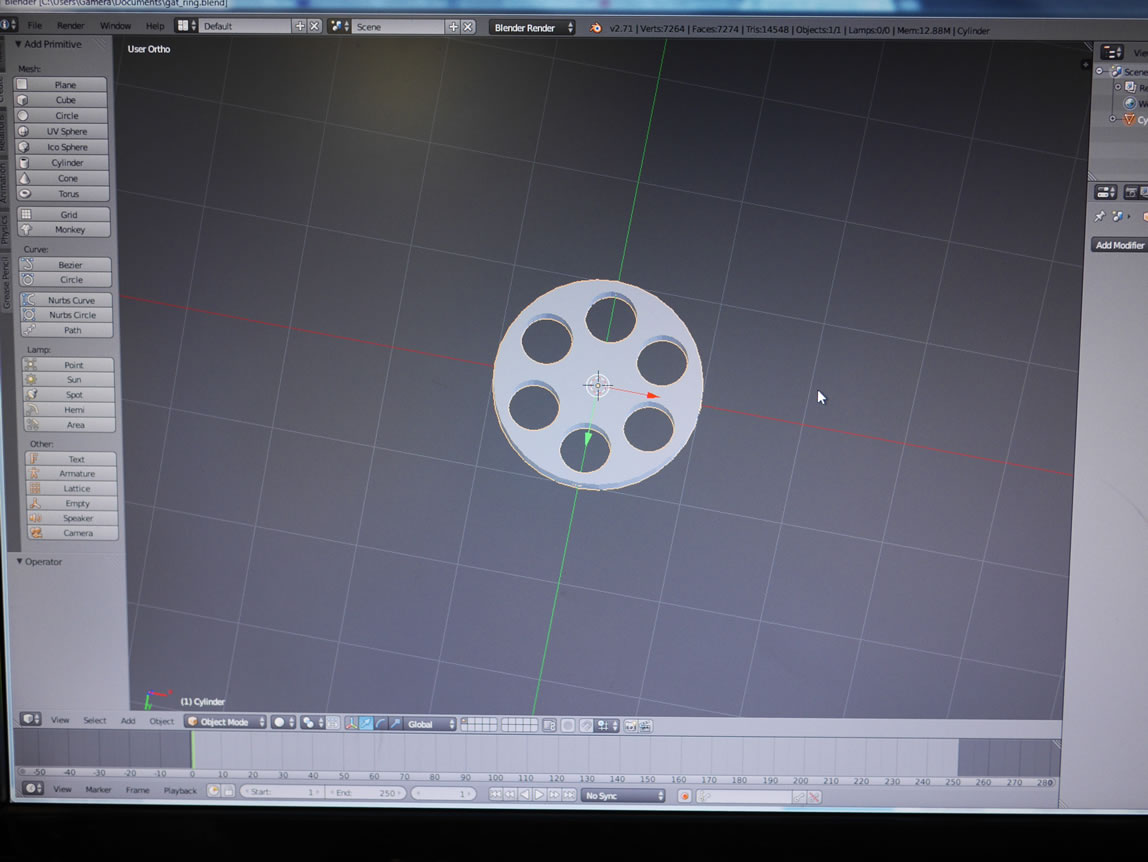
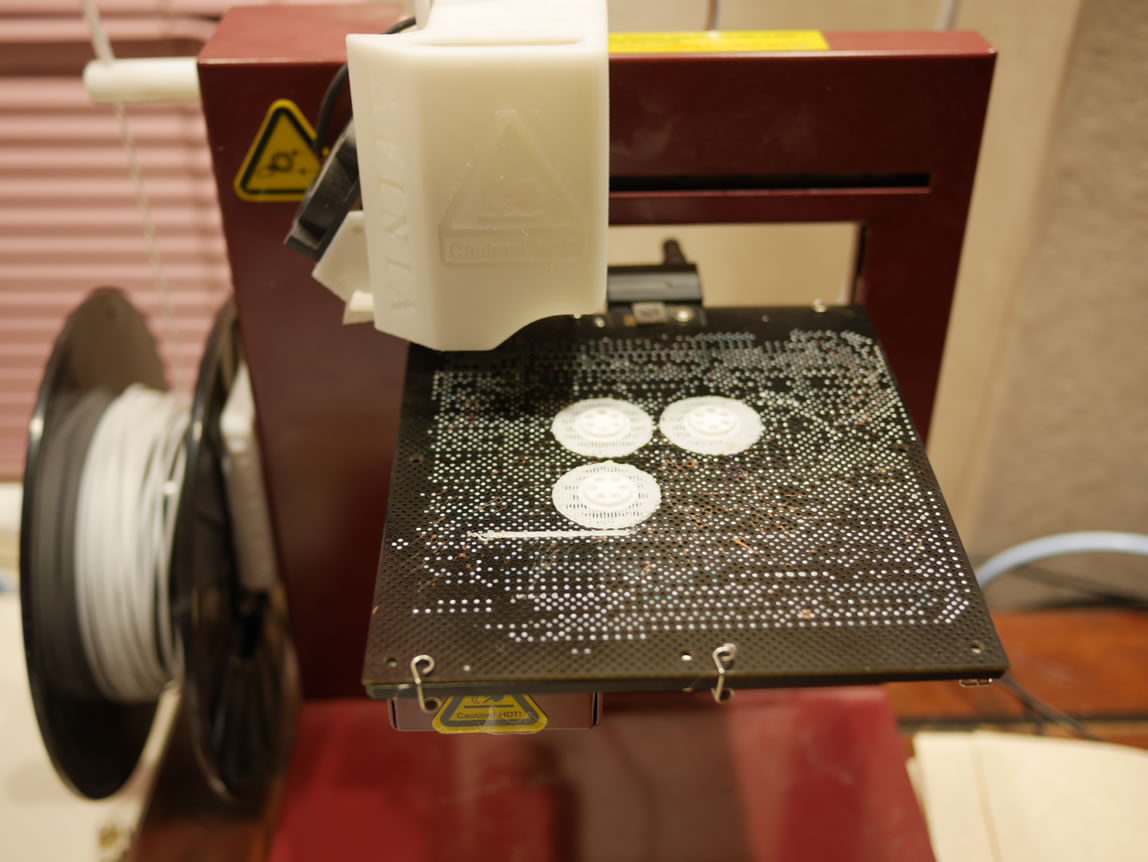
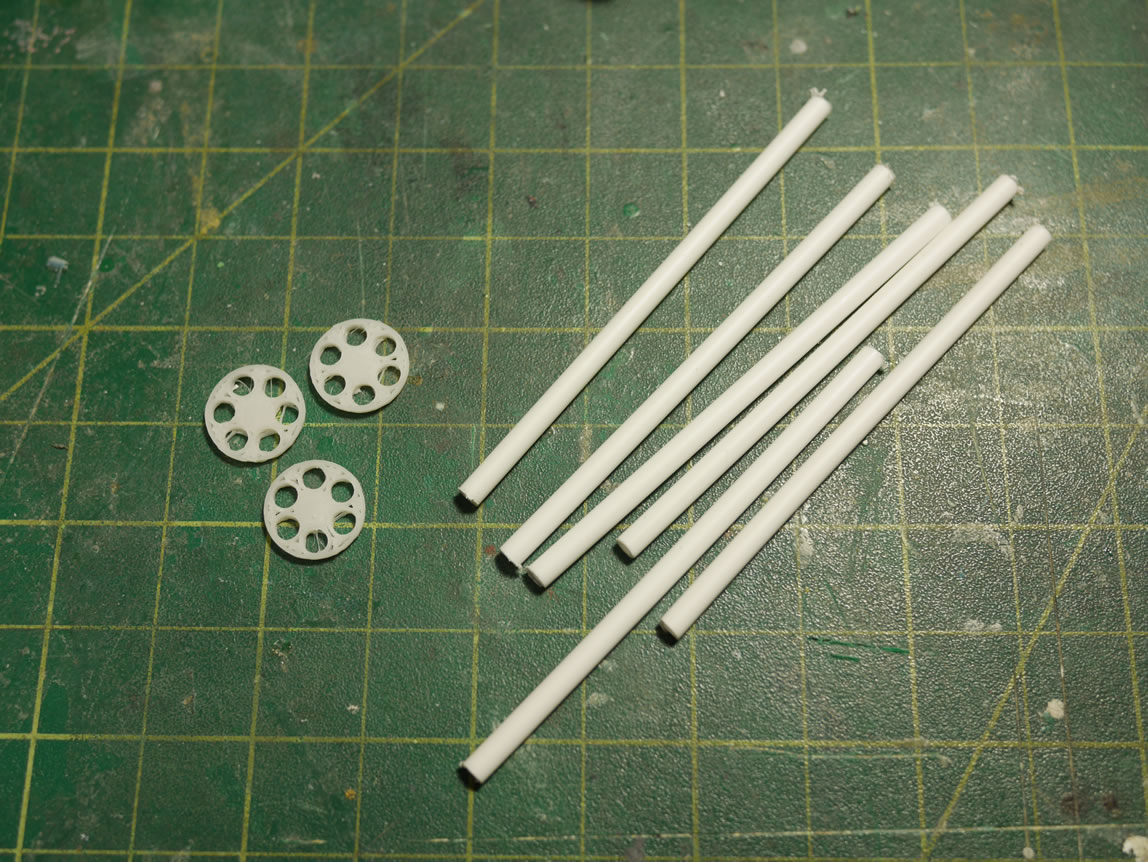
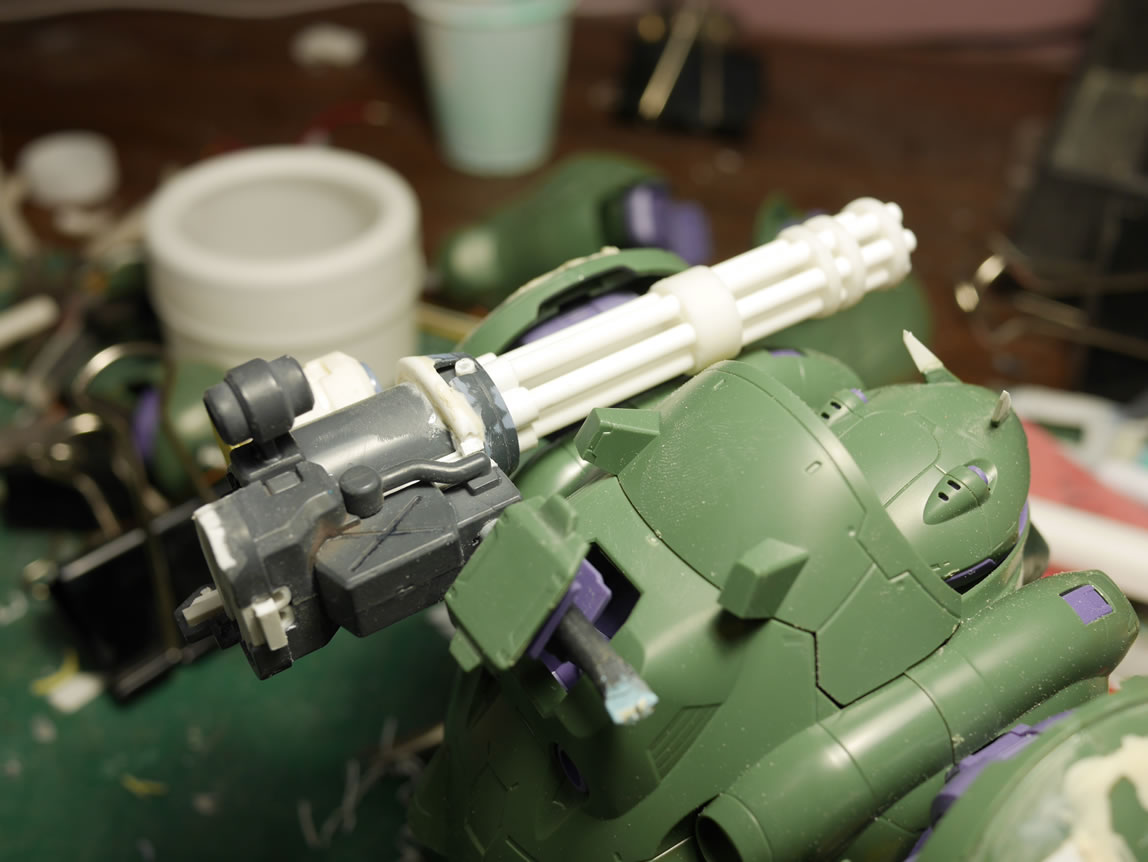
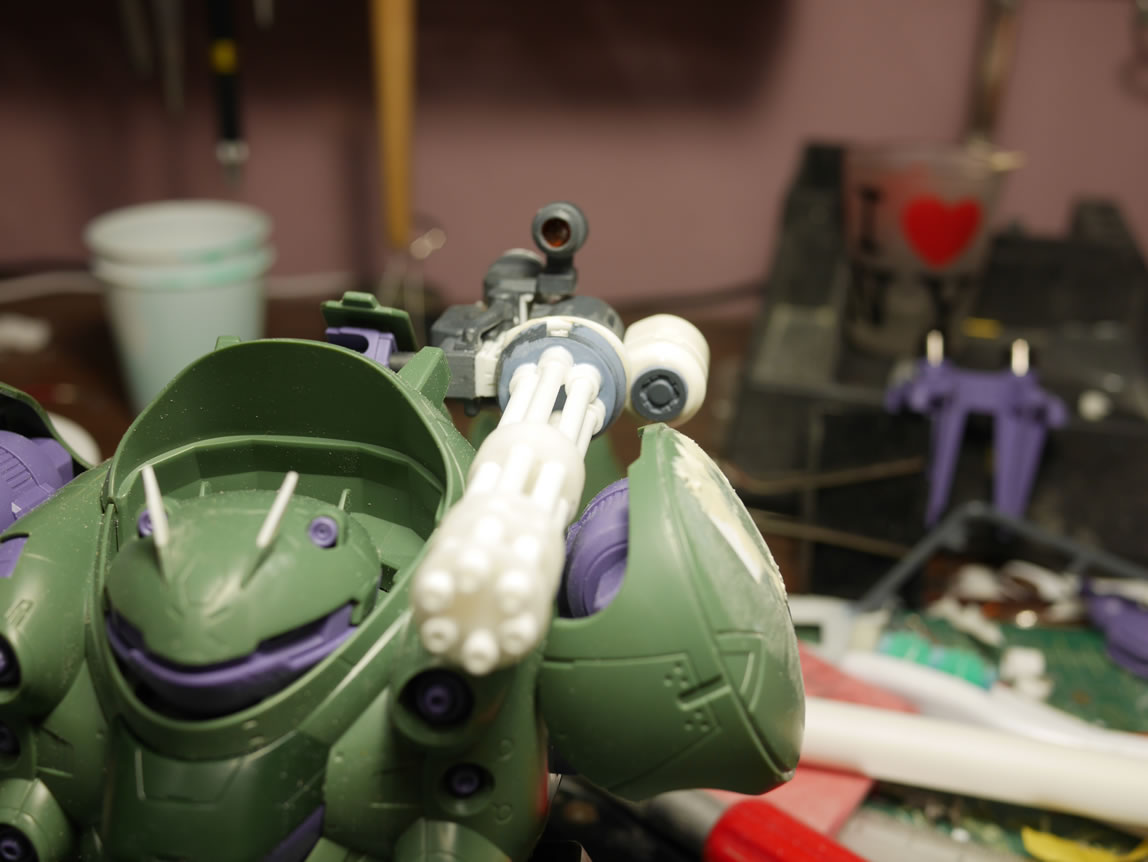
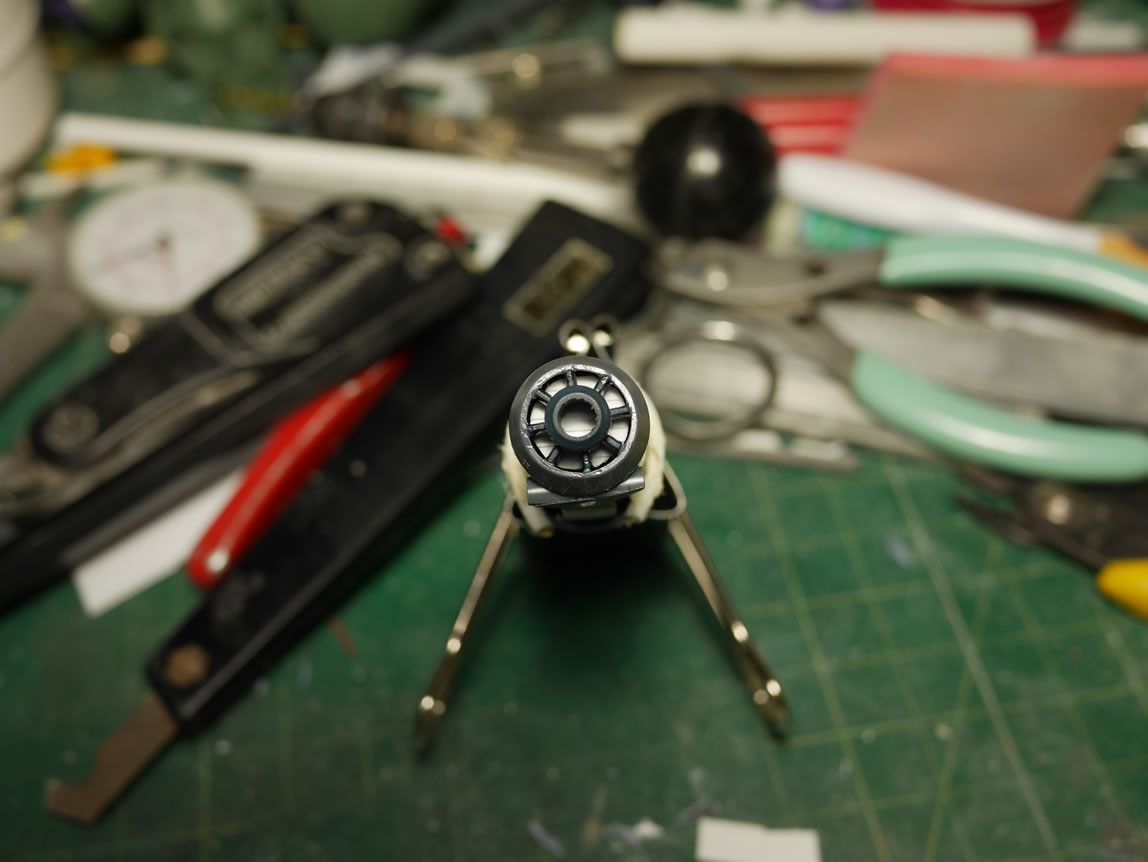
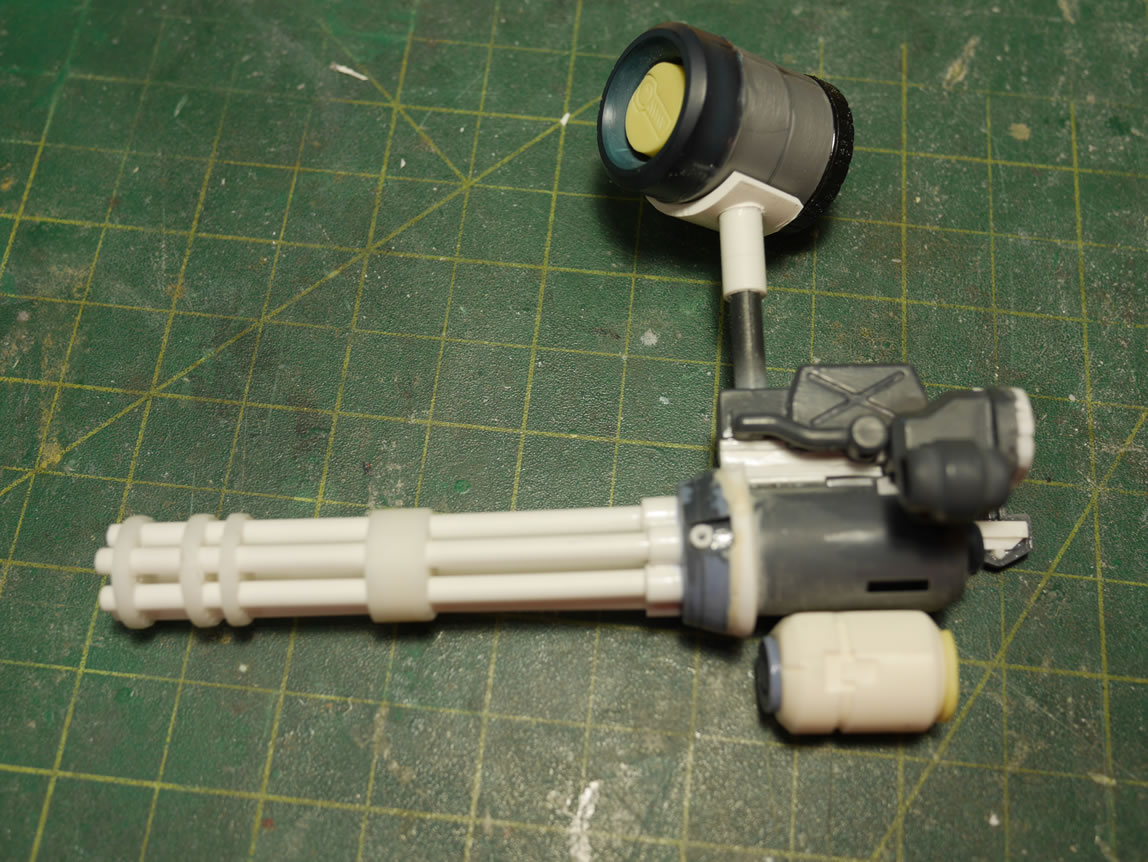
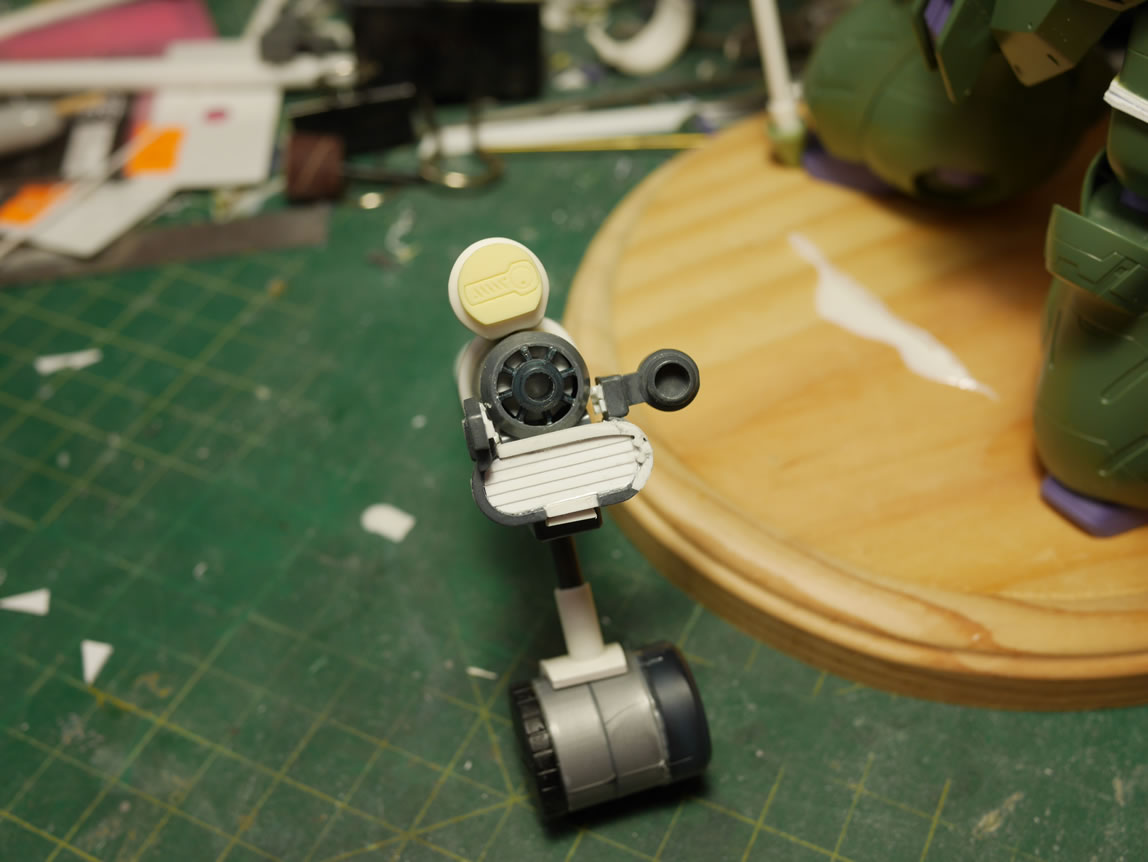
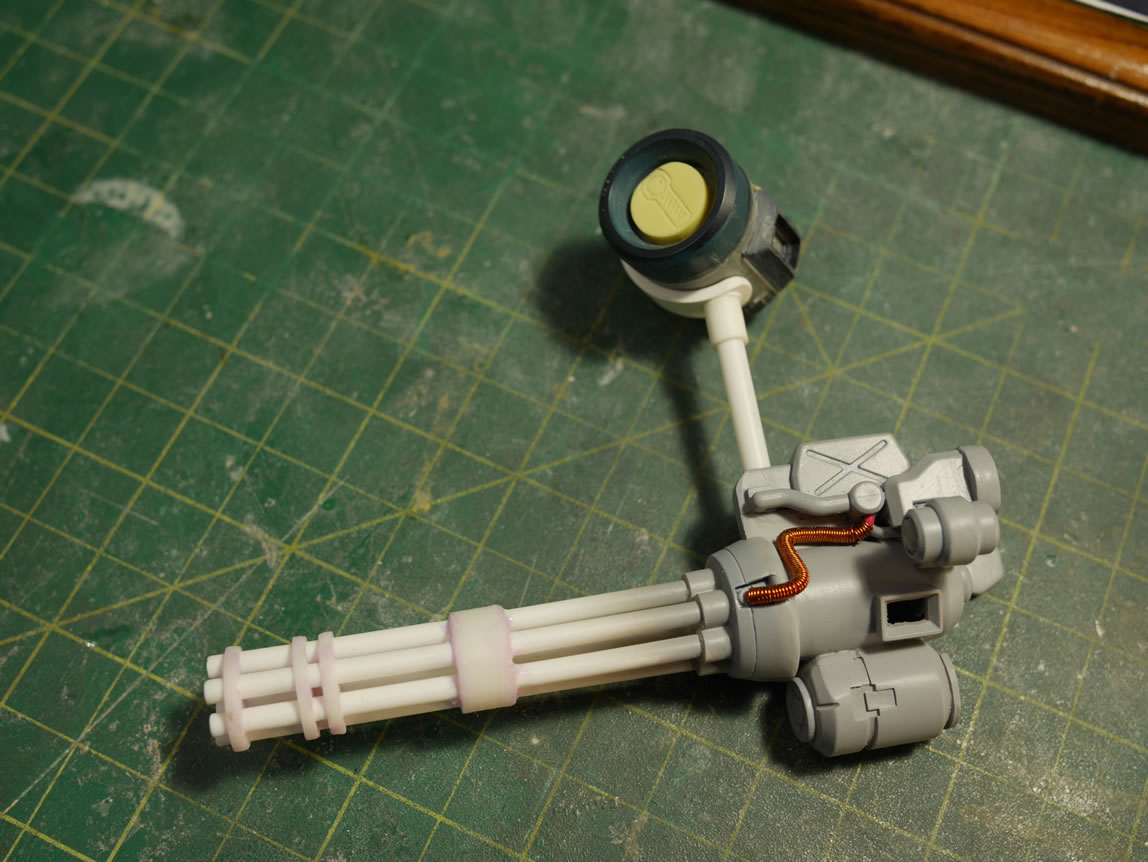
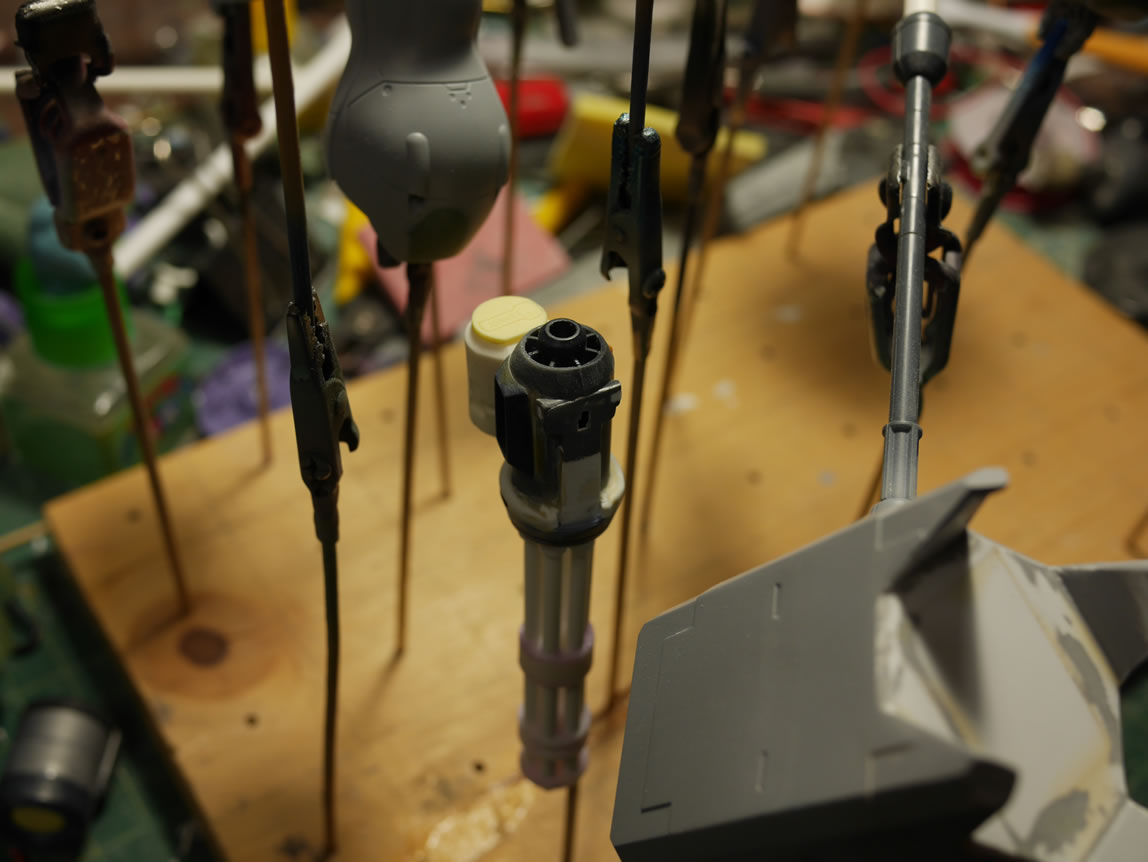
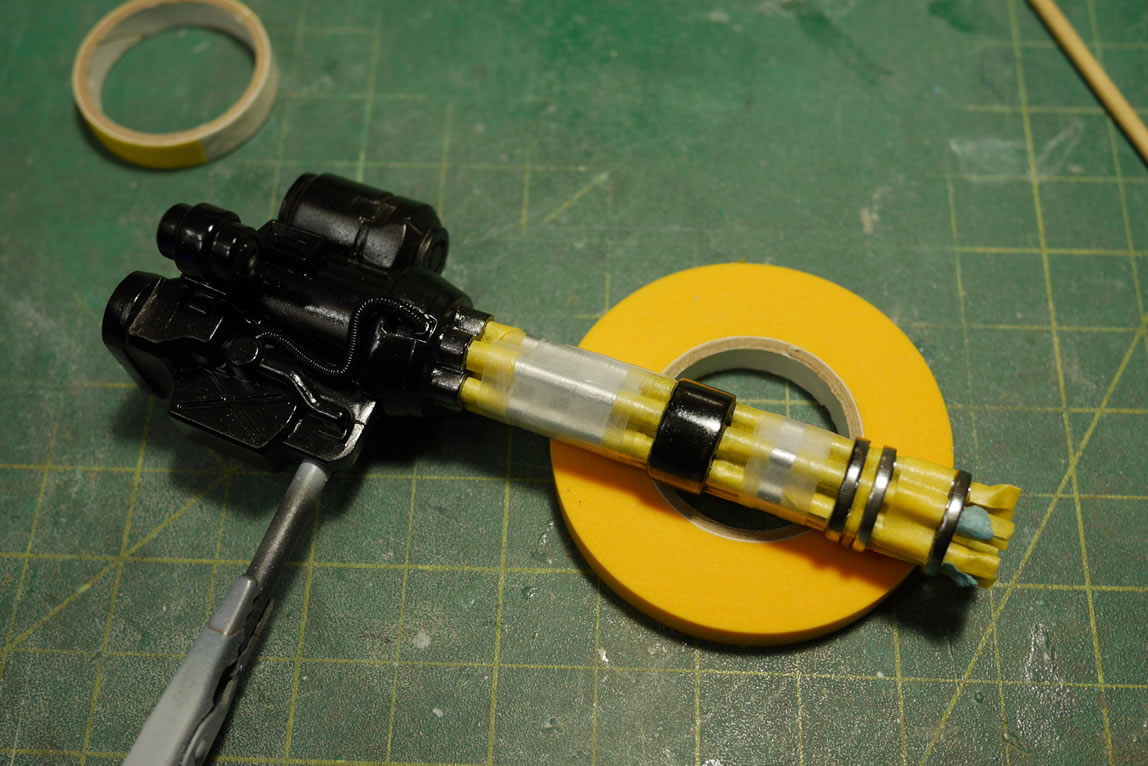
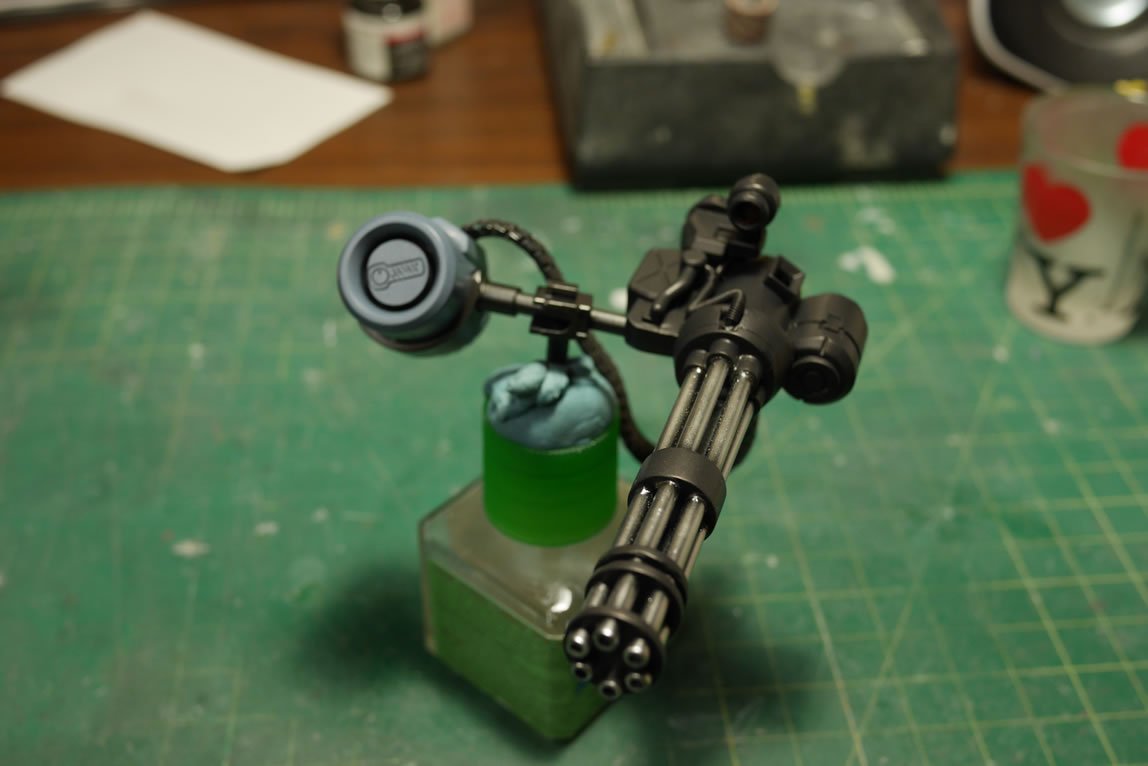
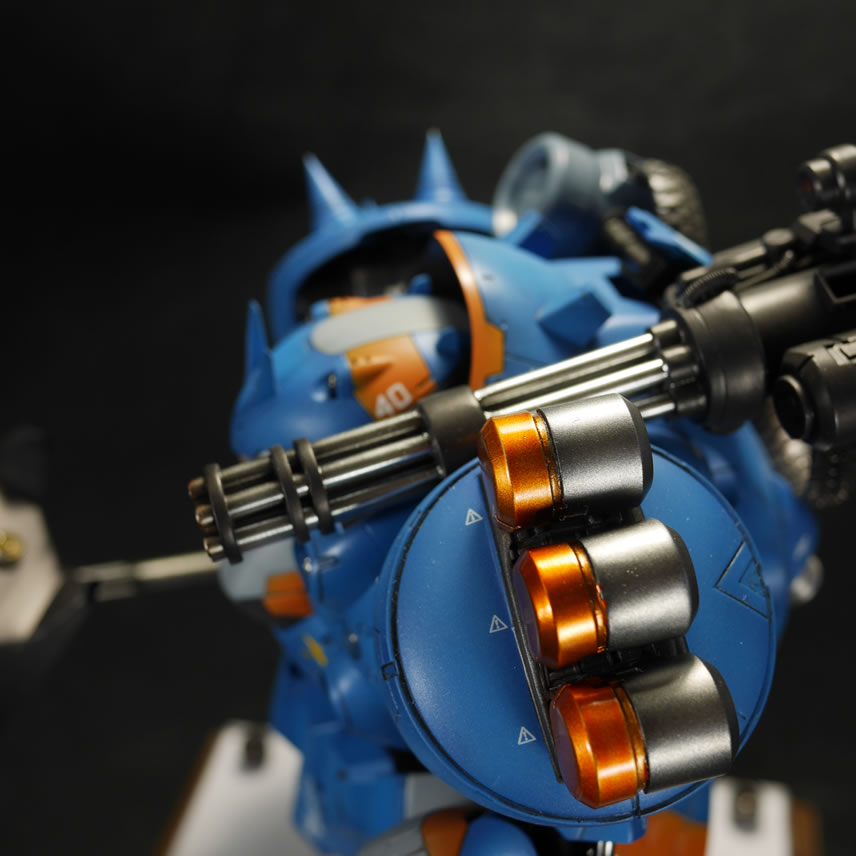
I want to build a gatling gun for the sucker. I’m entirely too lazy to measure and draw out the raw frame pieces for a 6 barrel gatling gun. So I drew one in blender, then sized it on my 3D printer, and printed out some frame pieces. I cut some styrene tubes to length and I’m ready to assemble the gatling gun.
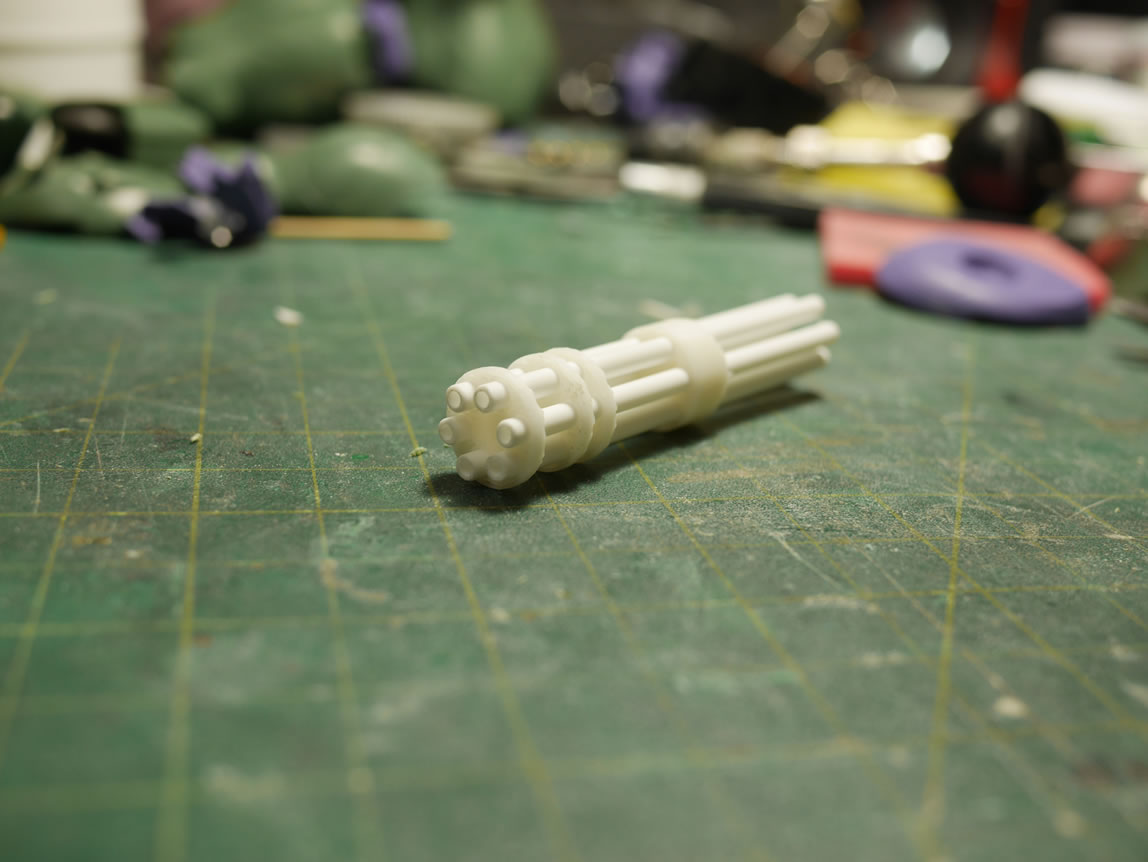
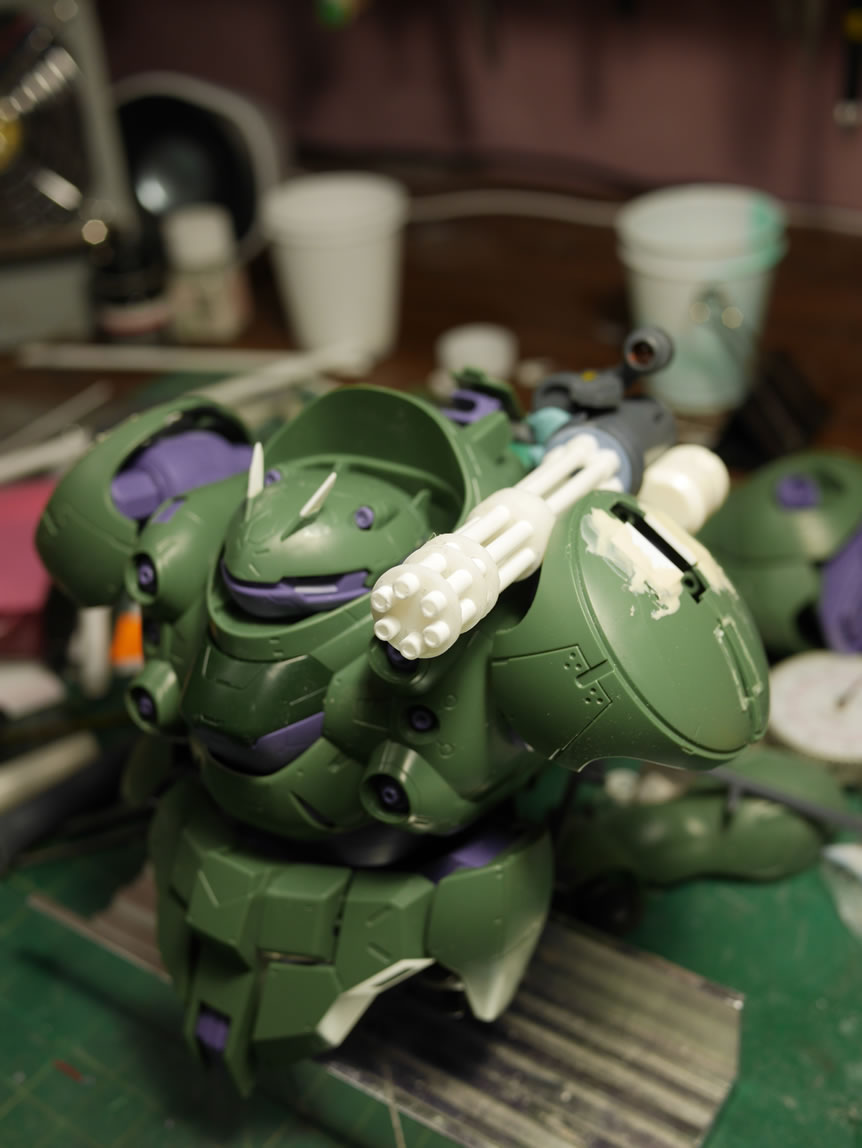
The main barrel of the gatling gun is assembled. I printed off another piece of the frame part extending it to mimic pictures of real live gatling guns. The last picture is a quick tack weld of bits and pieces from my parts bin. I used the MG Gouf Custom’s hand cannon parts; the MG Dom’s Giant Bazooka’s front barrel for the main body of the gatling gun, and quickly made a resin cast of the ore gun cylindrical piece; and just sorta slapped this all together. There is still a great deal of work, but the general idea is there.
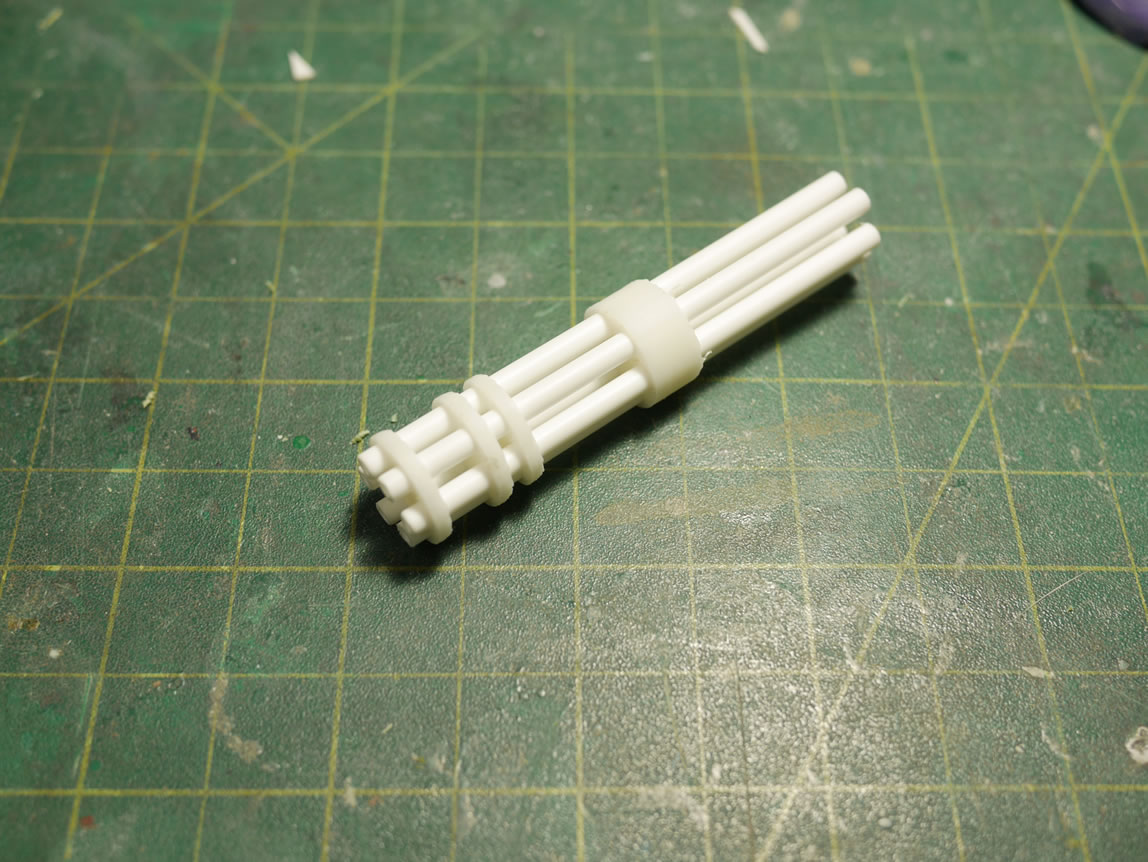
The last bit of work was to do a test fitting on the Gusion to make sure everything looked ok and fit in the position I wanted. I will still need to build the attachment assembly. The Gusion’s Hammer holding piece will work very nicely as the hard point for the gatling gun attachment.
March 28, 2016
This was a very productive weekend. When inspiration is there, never shy away from it, and just let it flow. I’ve gotten to the point where I cannot force myself to build something or it will just lose interest. Or if I come to a roadblock that gets me stumped, I may give up for something more powerful. The fun of this build is really keeping me focused and I got a great deal done this weekend. Here’s where the kit is standing now that it’s Sunday night and I’m recapping all I’ve done for the past few days, actually, since the last update really, which was only a few days ago too.
A little discussion about kit bashing and scratch building. I personally believe that there’s a distinction. For me, scratch building is taking raw materials such as styrene strips, plates, tubes, metal, glue, putty, etc and creating something out of nothing. There’s a gray area between scratchbuilding and kit bashing – somewhere between the two, there’s a line. What I do most of the time is kitbashing. I take leftover parts from kits, add in a little styrene, add in some putty, and an ass load of styrene glue, and create something.
For example, take the gatling gun I slapped together for this project; I designed some frame pieces and printed them out on a 3D printer. Then I took parts from an MG Z’Gok, MG Dom, MG Gouf Custom, SD Resin Kampfer, MG Kampfer, a part from a resin ore gun kit, and an MG Zaku II. Mix in some styrene tubes, styrene strips, and glue, I’m starting to get a basic weapon together. So am I really scratchbuilding? I don’t believe I am, at least for this instance. Have I built something completely out of raw materials, maybe? I think there’s a mix of scratchbuilding and kitbashing, but definitely more kitbashing going on in some of my builds. I’m sort of a software engineer (CS degree) so I tend to take the approach of “if it’s already built out there, repurpose it” I’m not much of the reinvent the wheel type guy. So I spend a great deal of time looking through my spare parts bins (I have 4 of them so far) and looking at things that could have the potential. I ended up cutting things apart all the time; because hell, it beats building it from scratch. I understand that a great deal of modelers need to have a very specific end product, and just building upon something that already exists just isn’t for them. Me, I’m f-ing lazy, I want to do the least amount of work possible.
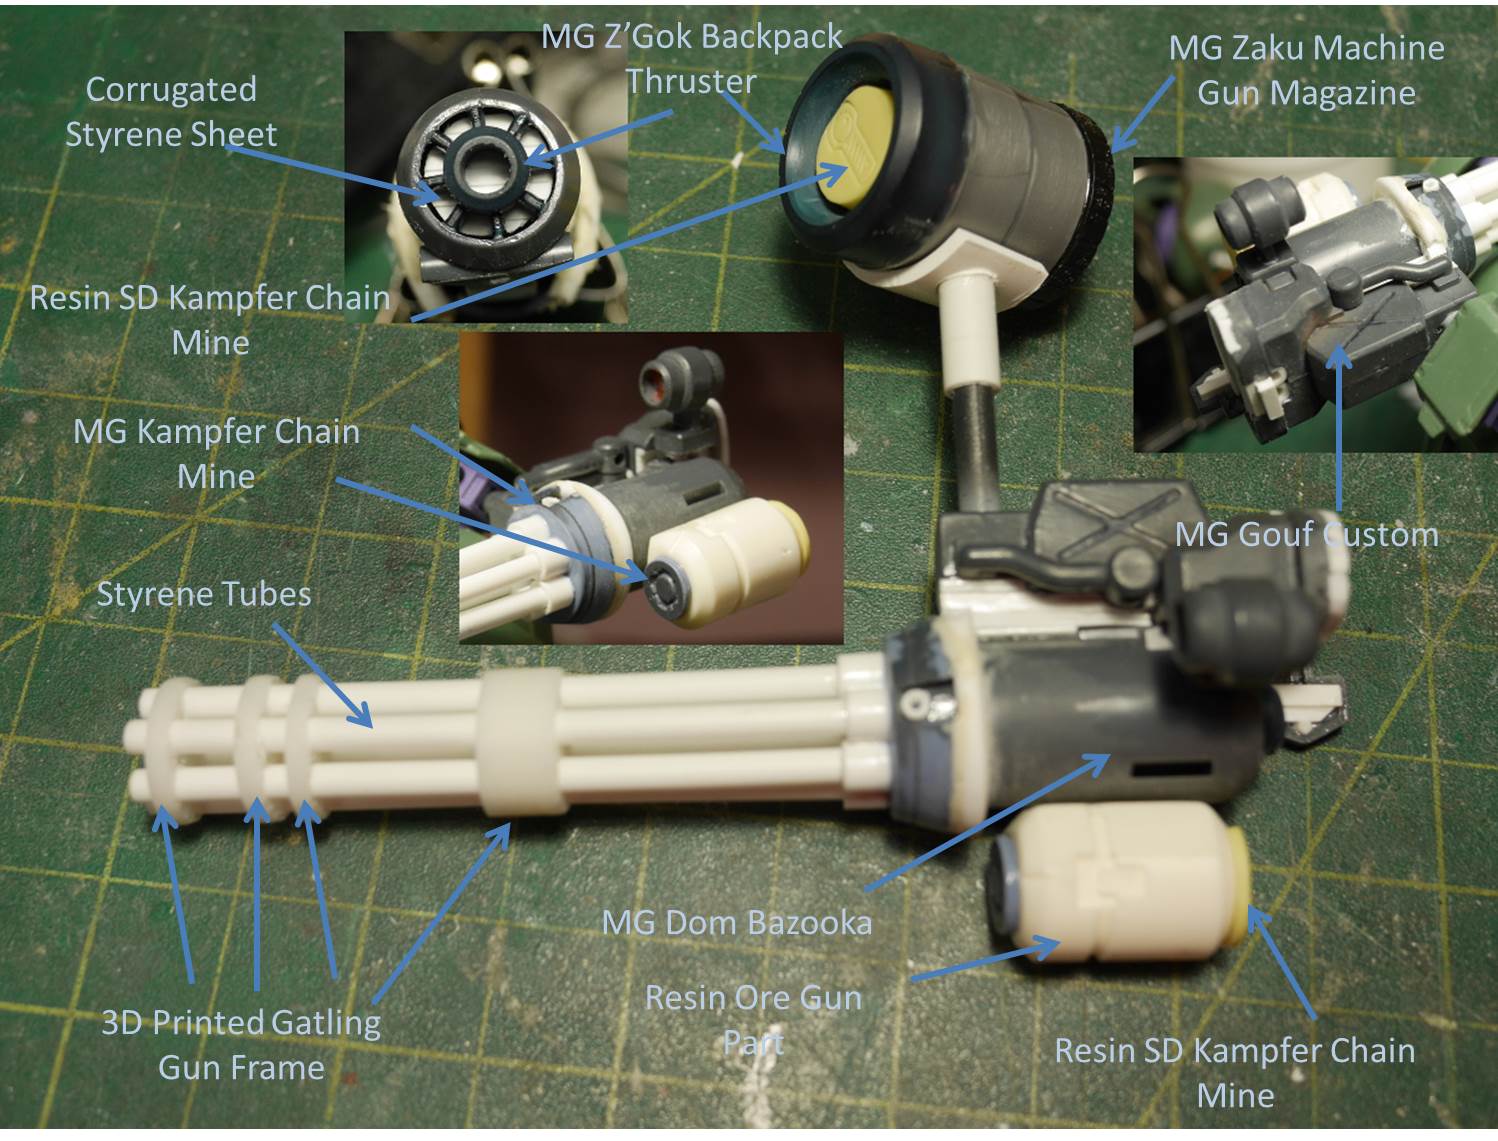
A complete break down of the gun work so far:
- 3D printed frame pieces
- Styrene tubes for the barrels
- Kampfer’s chain mine for the attachment point for the gatling gun barrels (I sanded down the detail on the top side)
- Kamfper’s chain mine underside cut away as a detail piece on the resin ore gun part
- Resin ore gun on the side of the gun’s main body
- Styrene tube heated and bent around the body as a transition piece for the kampfer mine top part to the main body of the gun
- The front barrel of a Dom’s giant bazooka as the main body for the gun
- Some resin SD Kampfer top mine pieces as details for the back of the ore gun detail and for the top of the ammo canister
- Z’Gok’s backpack thruster cover. I cut out the center detail and glued it to a sheet of corrugated styrene then glued this to the back of the gun’s main body
- Z’Gok’s backpack thruster cover, the cowl was used as the top of the ammo canister
- Zaku II’s machine gun ammo clip as the bottom detail for the ammo canister
- Cut away PVC pipe and styrene tubing to start the structure for the ammo canister holder
- Gouf Custom’s gatling gun detail as a perfect detail peice and attachment area from the main body of the gun
- Styrene strips stacked to fill in gaps and create transition areas between major parts.
I still have a great deal of work on the gun, but it’s starting to take shape. not much scratchbuilding going on there, just a whole lot of kitbashing things together. I think I would have been great friends with Dr. Frankenschteen…
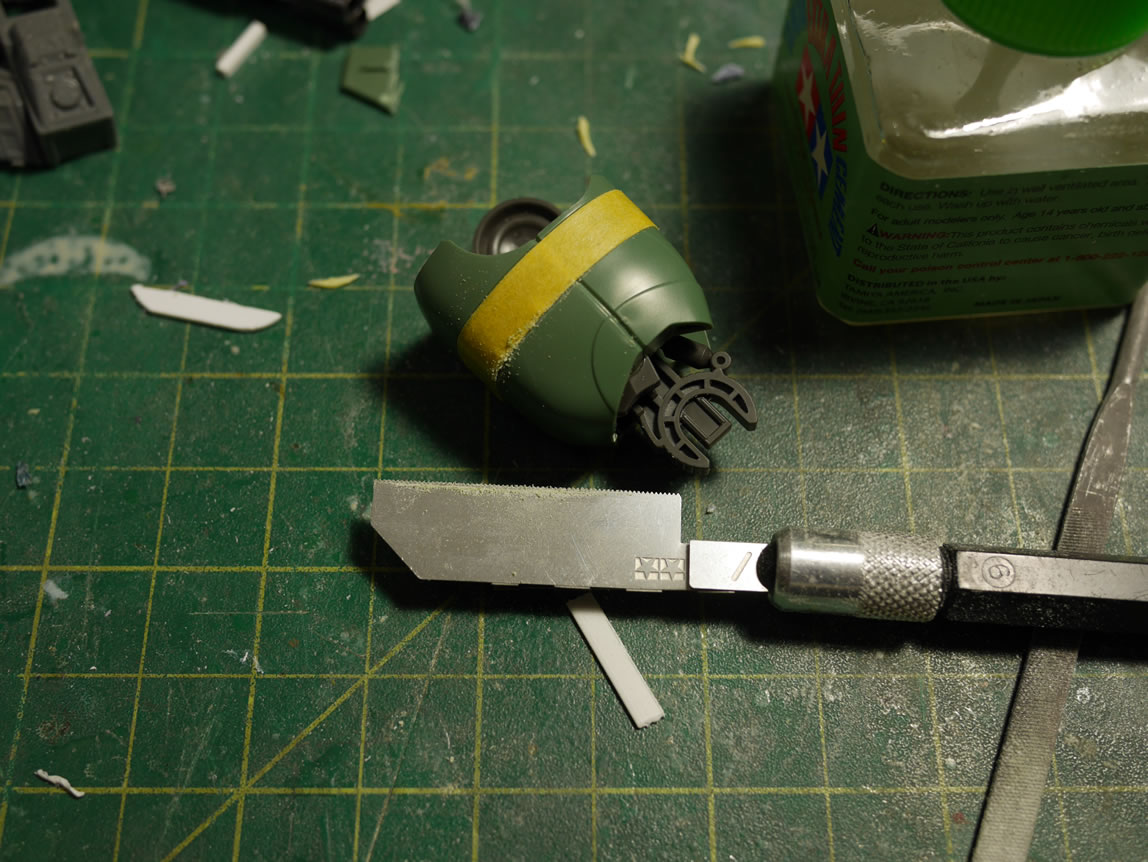
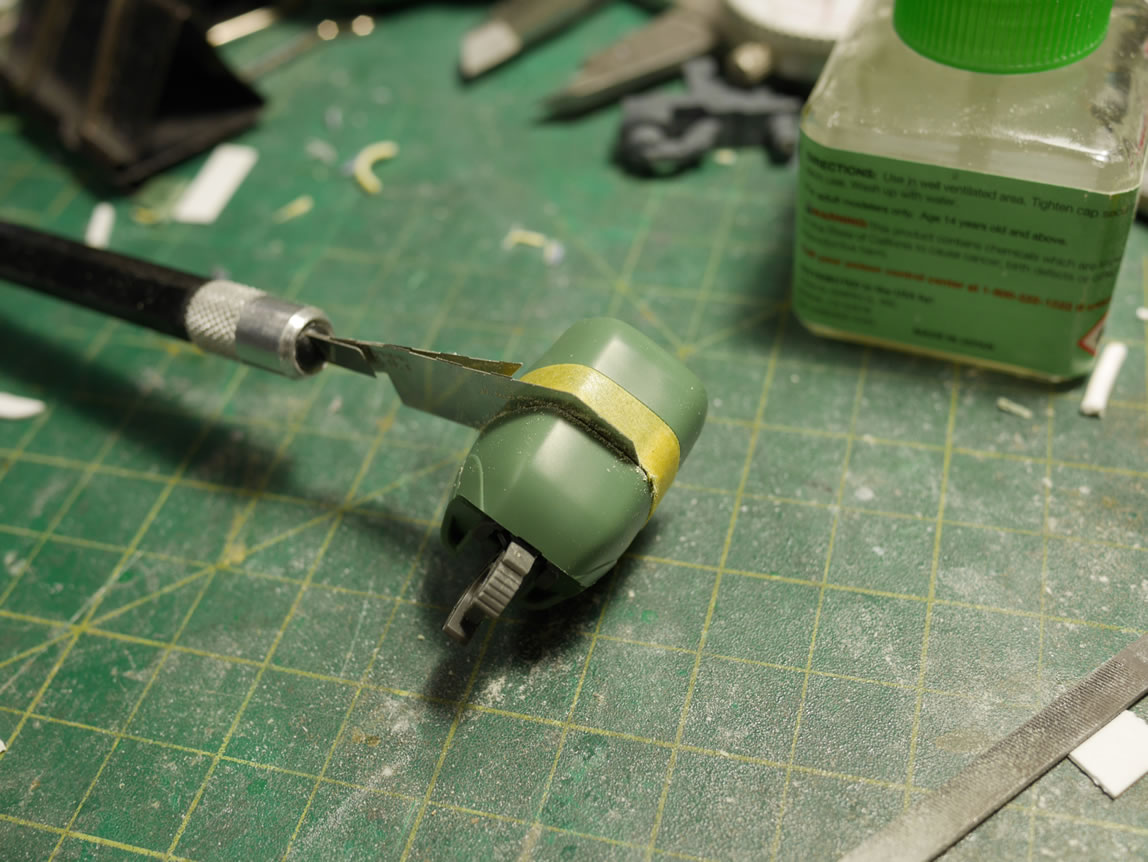
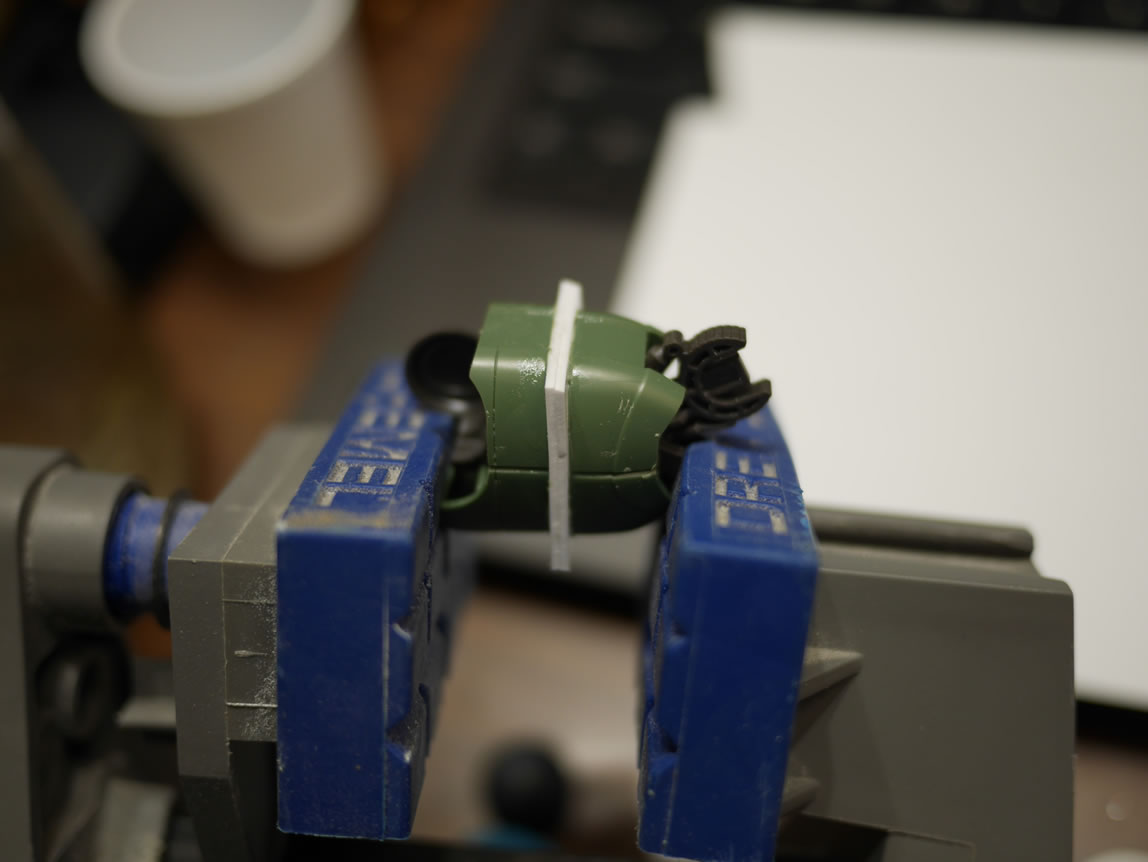
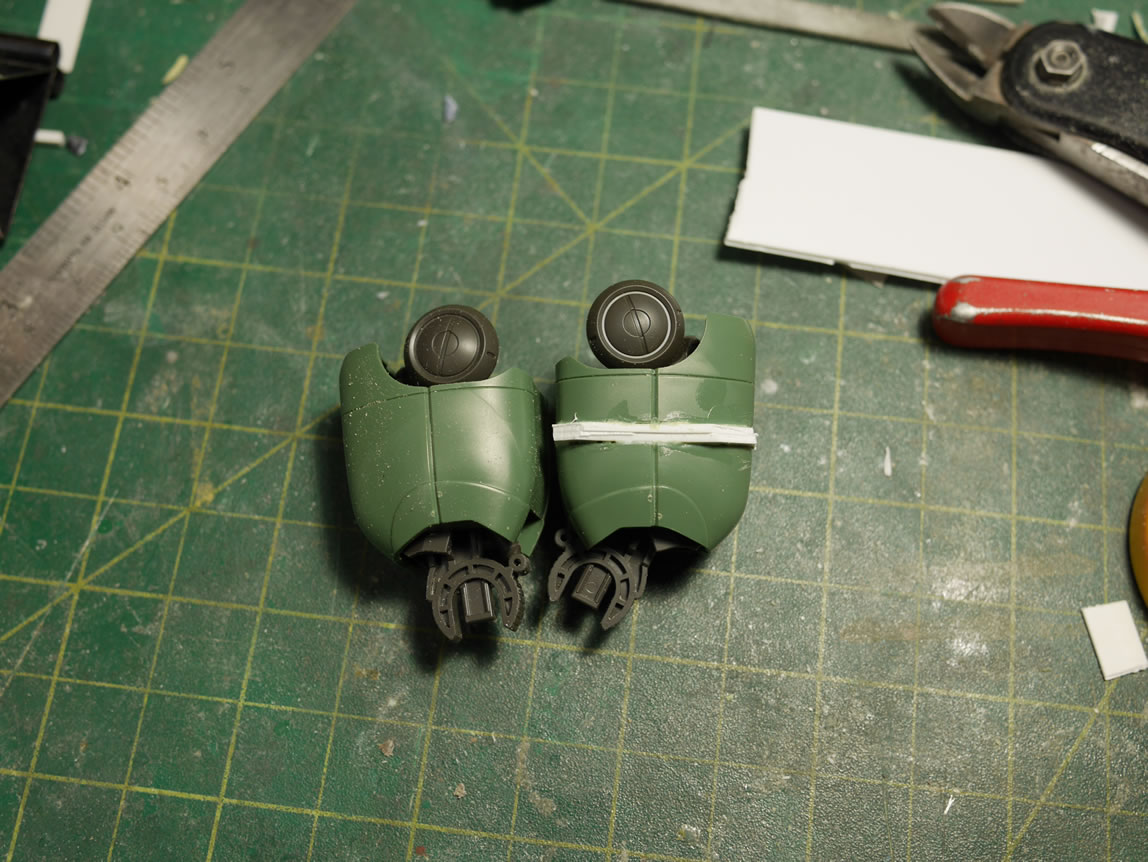
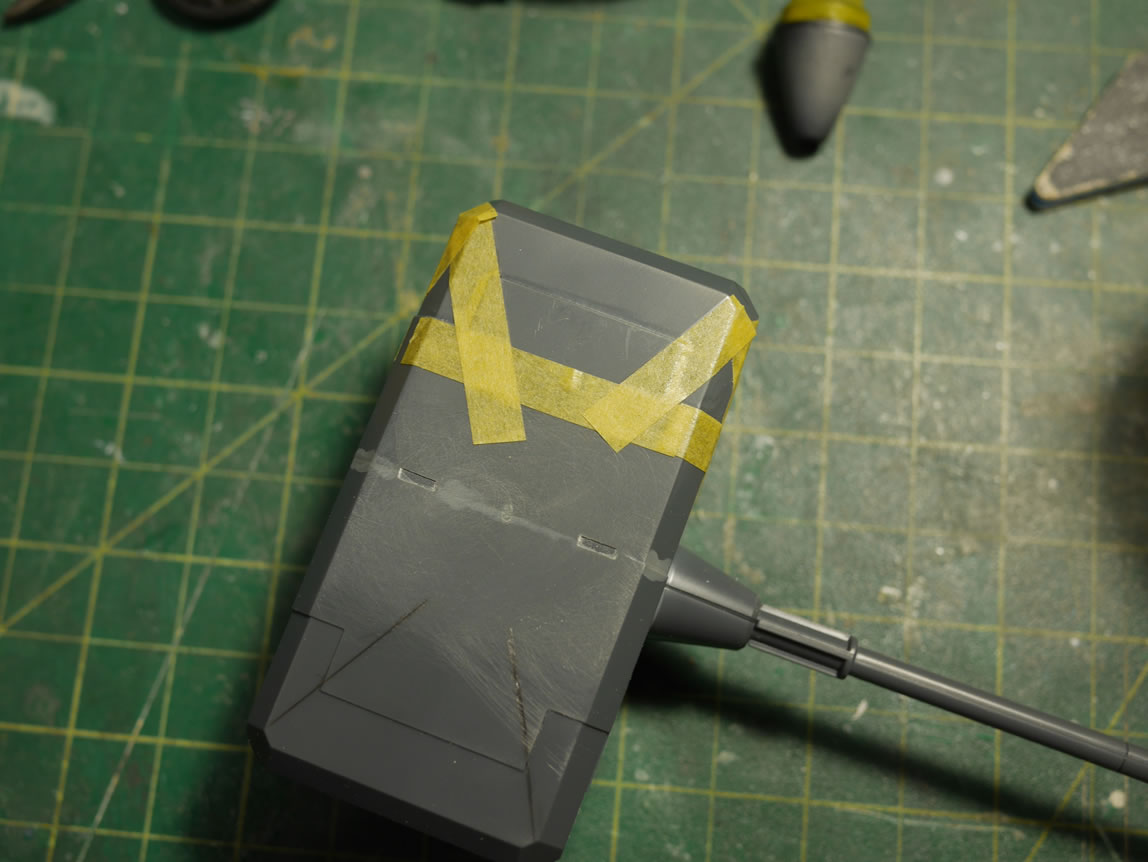
Next up, I taped up the upper thigh, ran a scriber across the surface along the edge of the tape to give me a starting groove, then used a tamiya saw to cut the parts into two pieces. I had earlier glued the part together so that when I cut, it didn’t fall apart on me. Funny to have to do this kind of prep work; glue it together to only cut it apart in a completely different plane. The tape helps me keep a level cut.
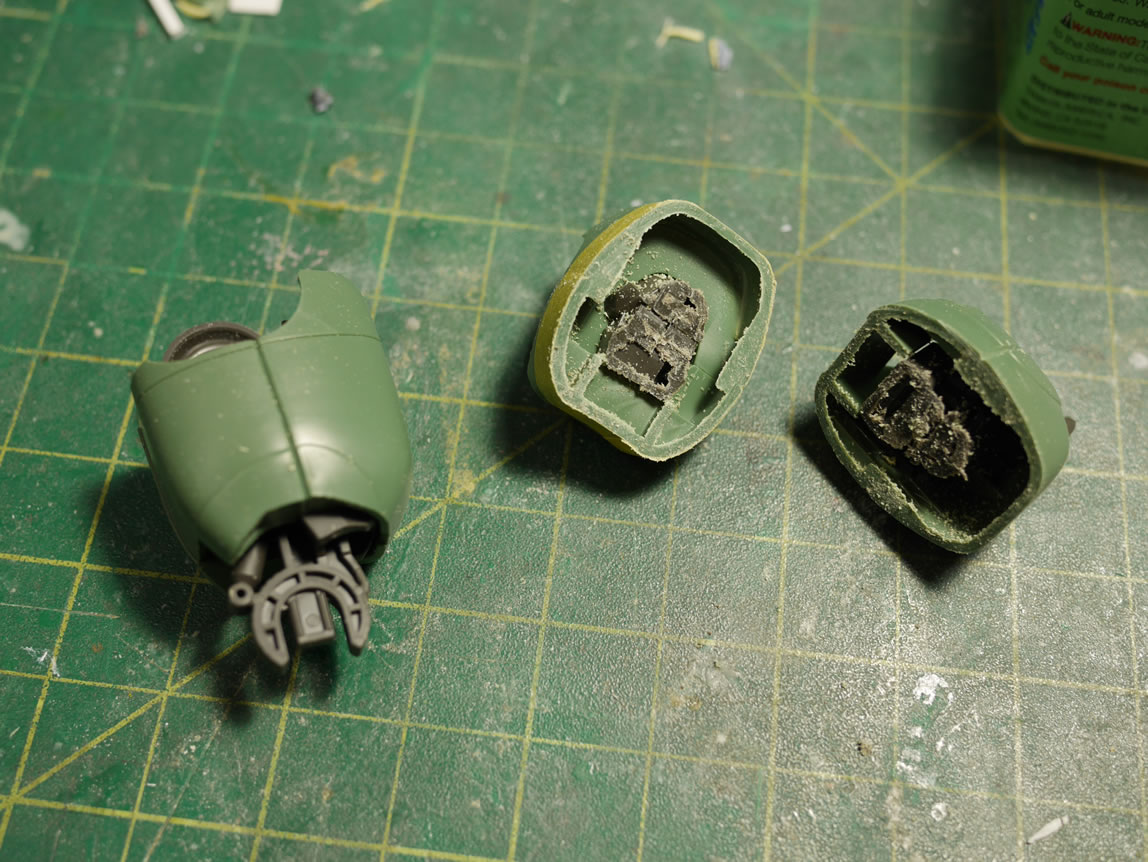
I used two strips of 4mm thick styrene plate to give an added 8mm height to the kit. I used a vice to put constant pressure on the part as the glue set up. This helps with a solid bond and less filling when I get to sanding down everything. Once this has set up, I have a comparison with the other leg yet to be messed with. The difference isn’t too great, but once done, as seen in the first set of picture, it is noticeable.
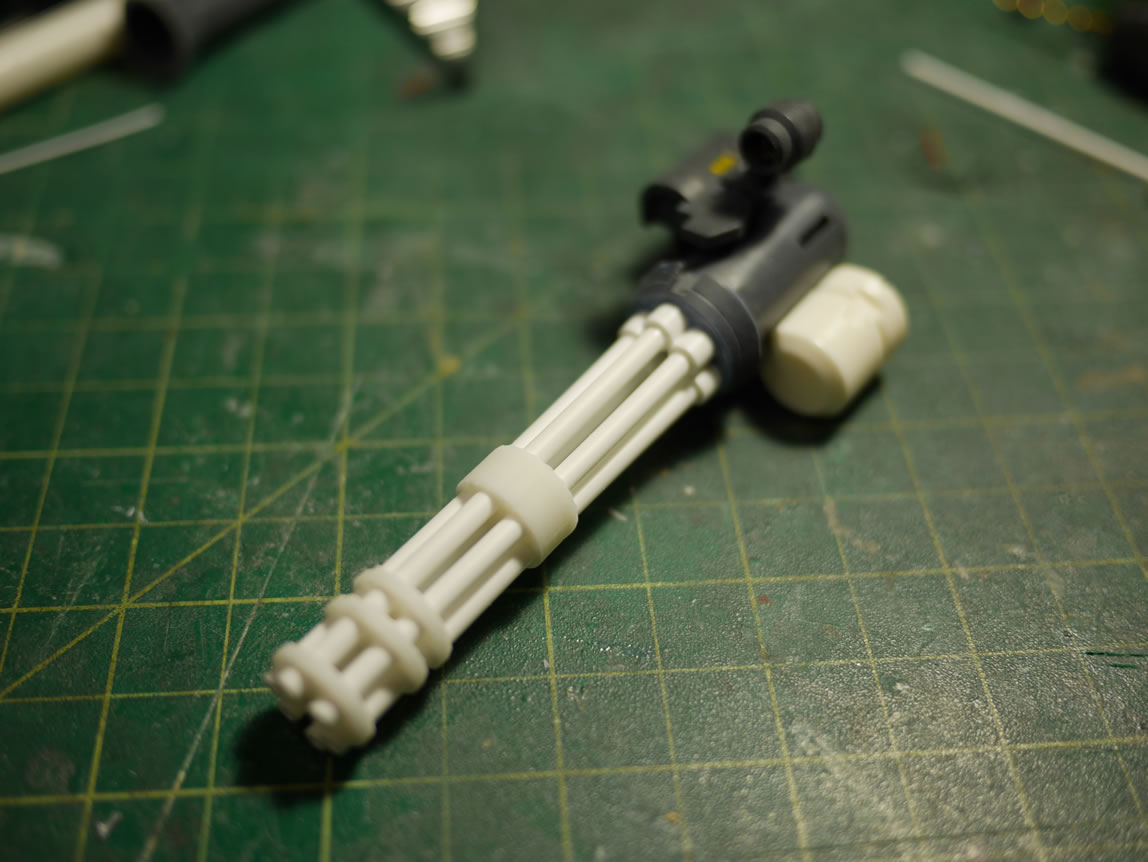
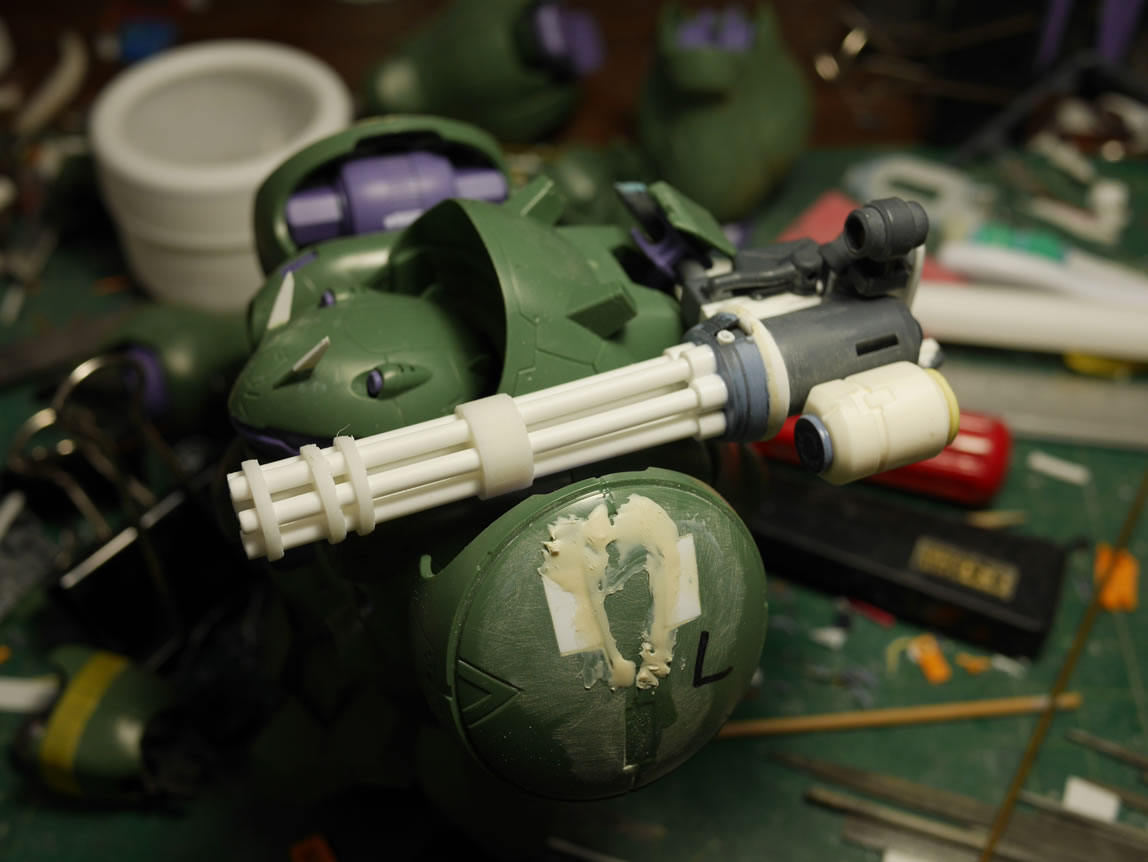
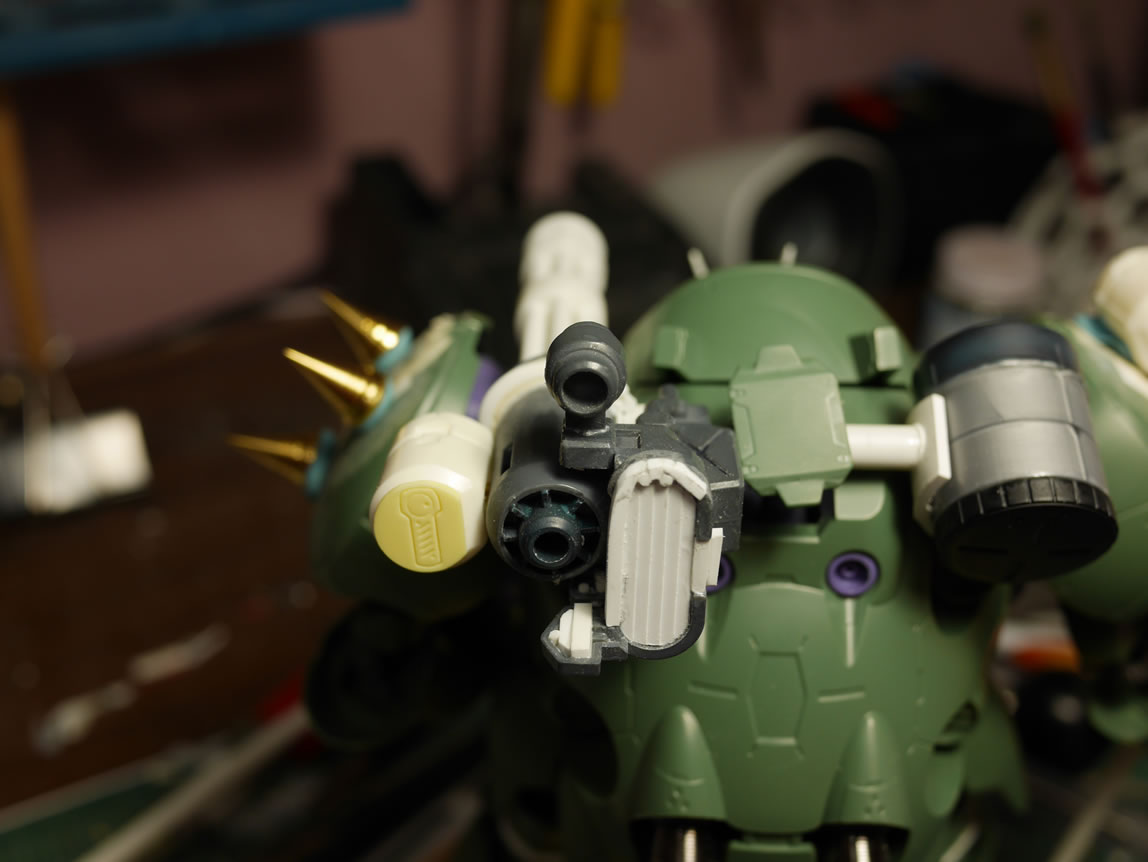
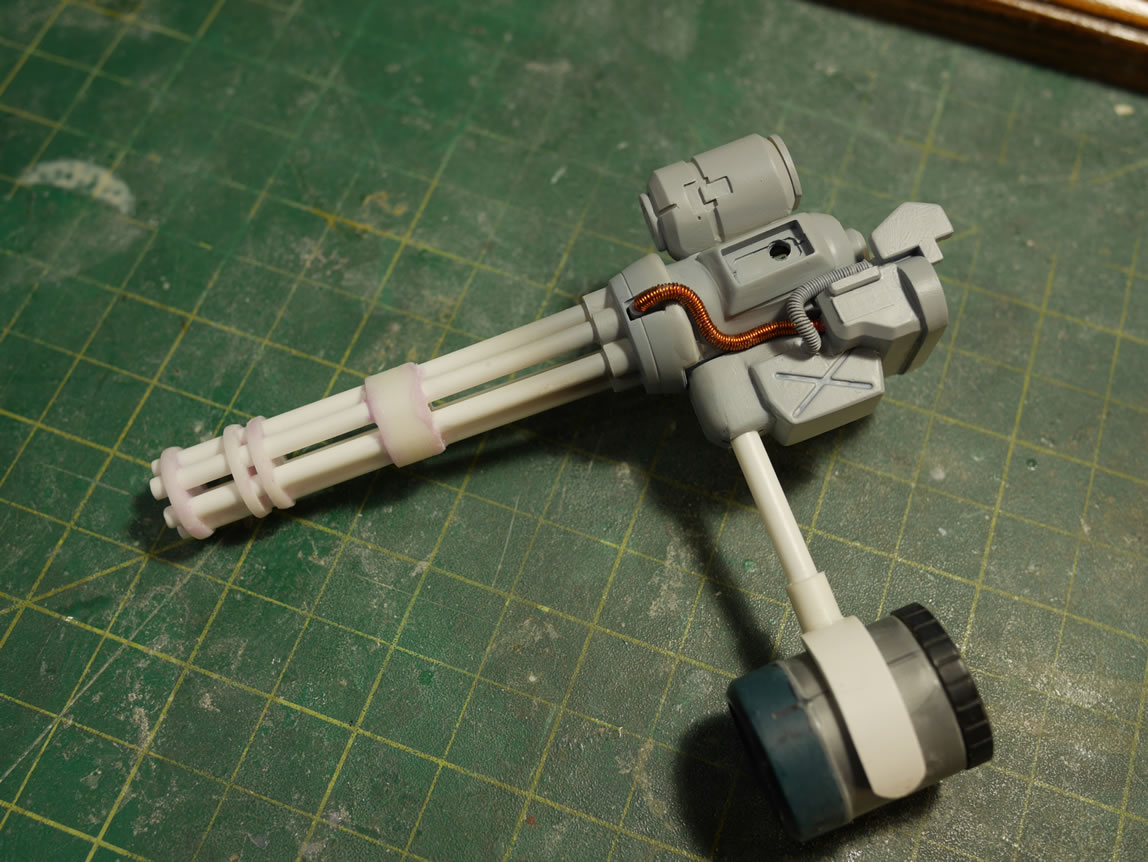
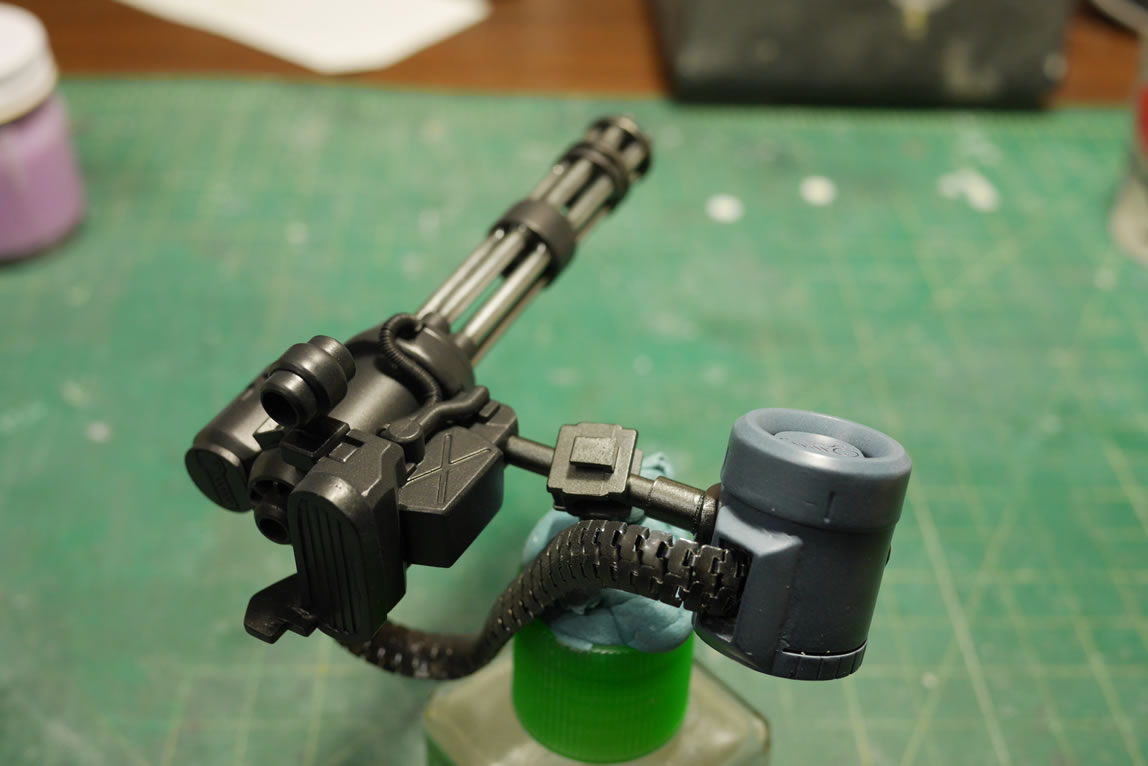
Here are some shots of the gatling gun as I continue to work and add on details. The back of the gun is actually the front end of the Dom’s giant bazooka, so this big gaping hole needed to be filled. I cut out the Z’Gok’s backpack thruster cover, glued some detail styrene, and I have an instant detailed vent piece.
Test fitting the weapon, I originally had the orientation of the Gouf Custom’s gun part reversed. But since I’m using the Gusion’s hammer holder part as the attachment point, it just worked out better to reposition the Gouf’s part differently. I then added some of the detail styrene plating to the back of this part and started rebuilding a frame around the detail plating. Some styrene strips are glued together to the bottom of this part to help work as a transition area from this piece to the main gun’s body.
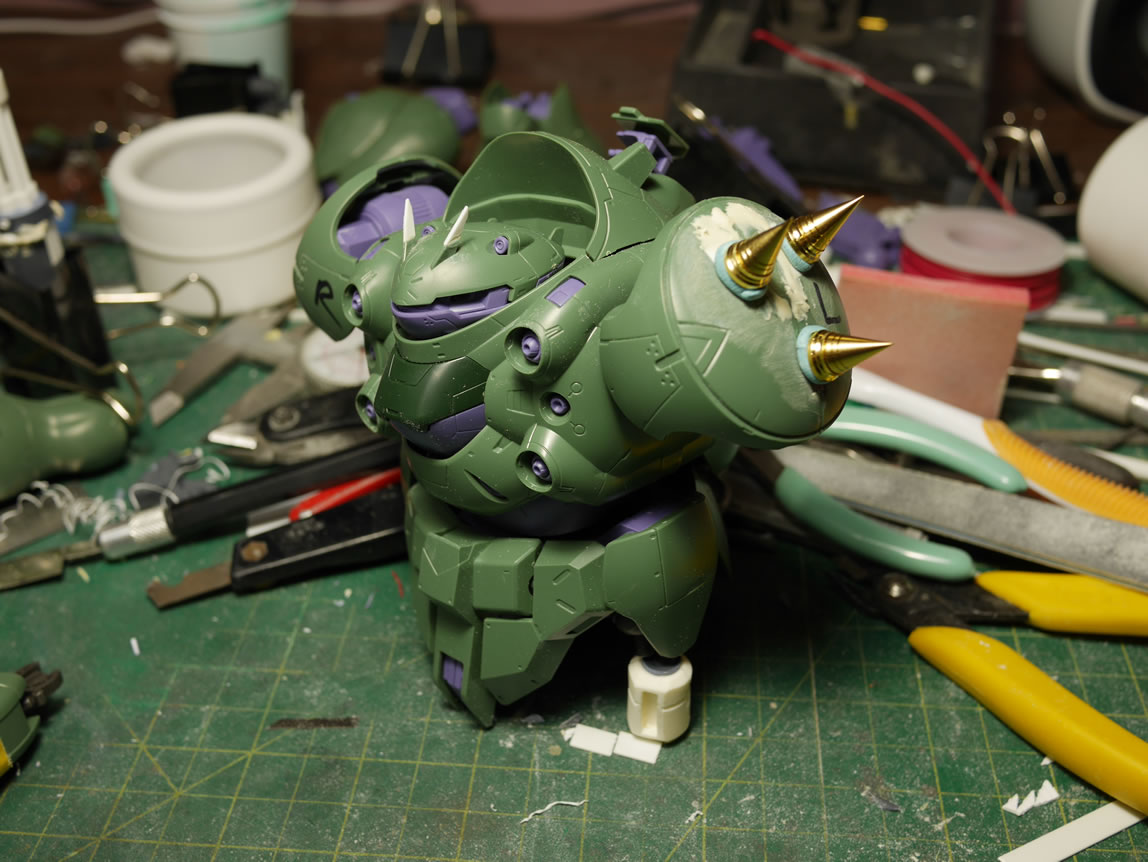
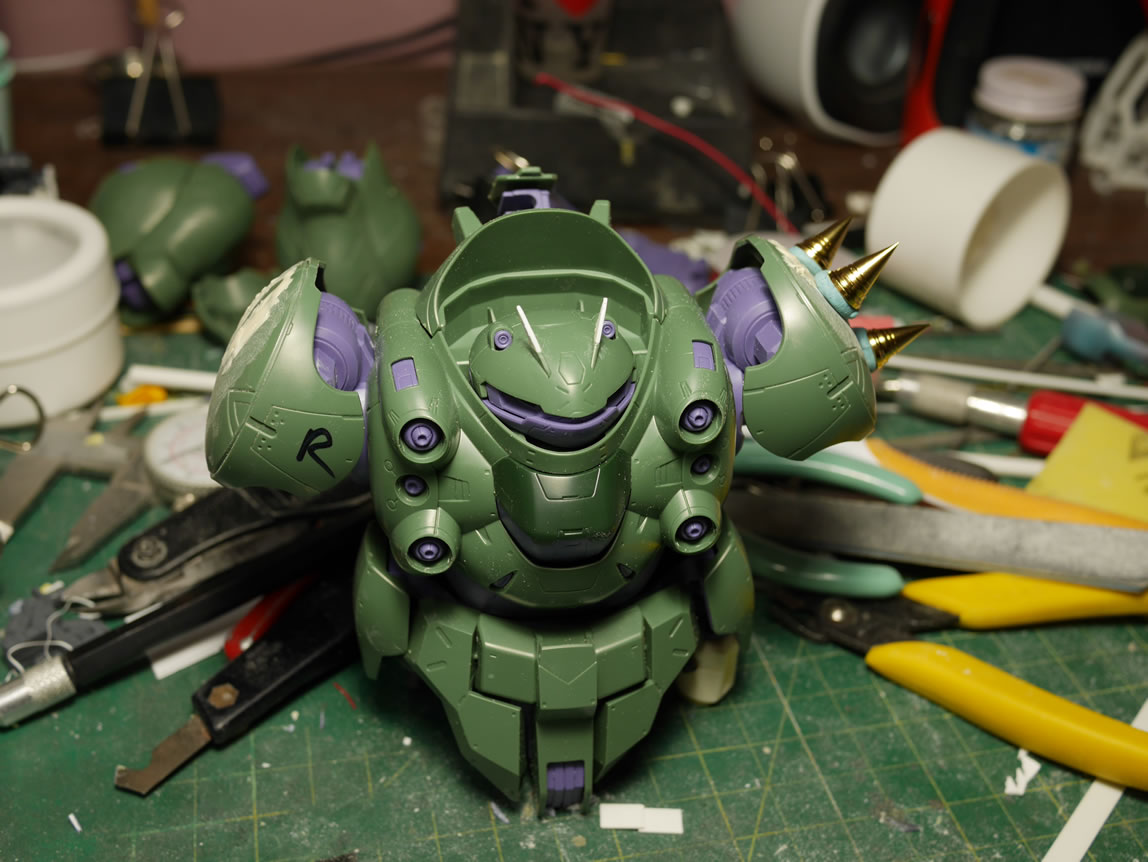
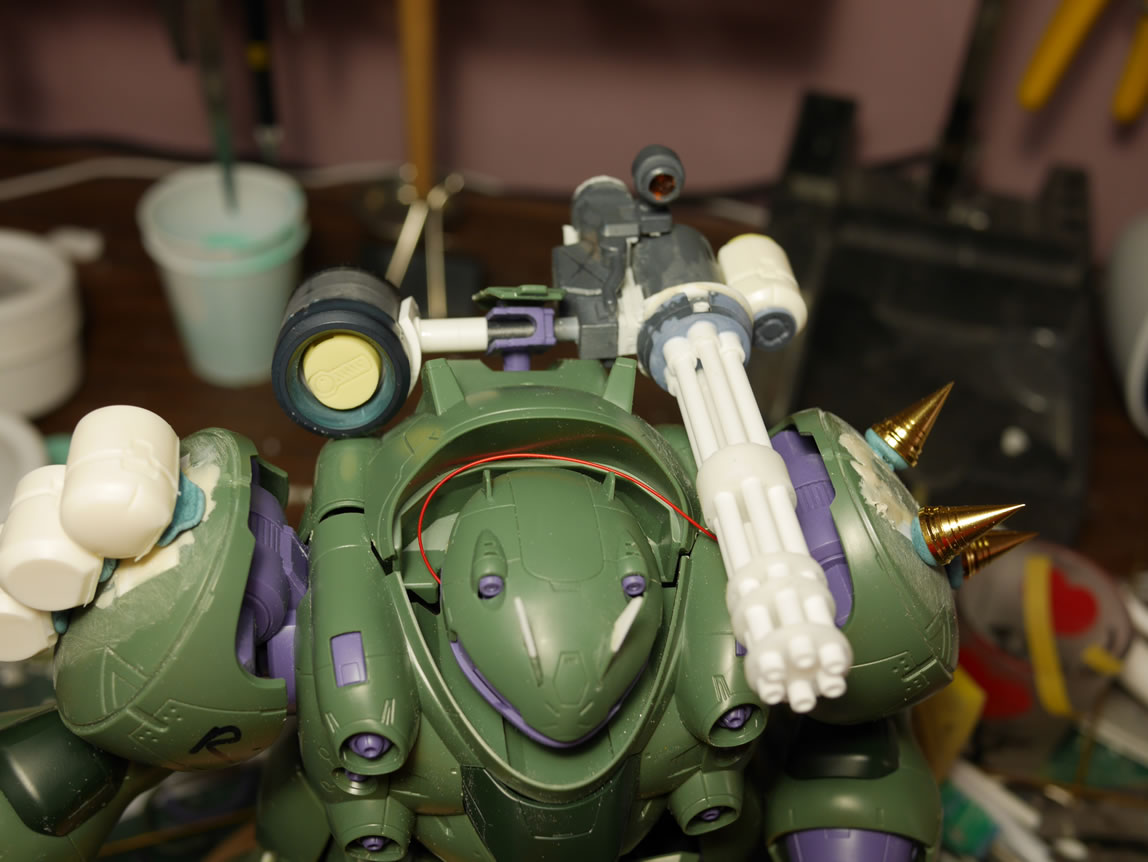
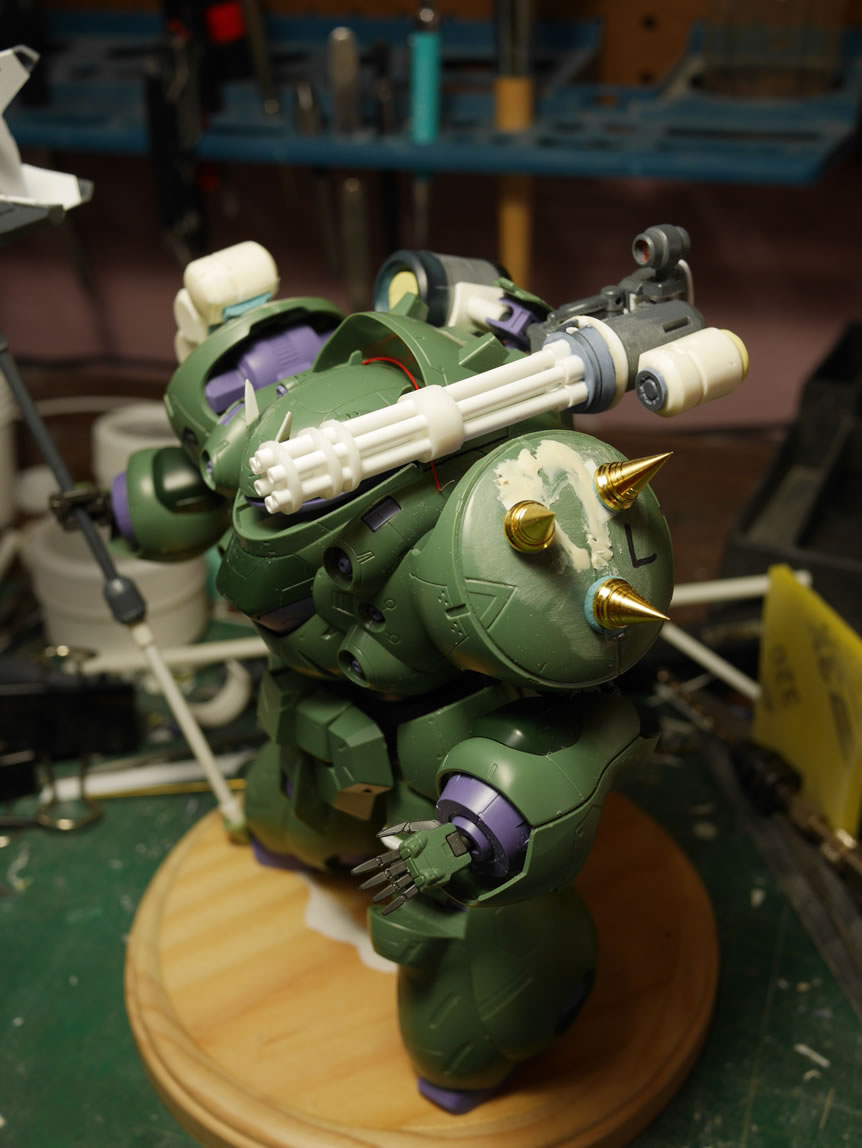
In my previous post, I had cut off the details on the shoulder pieces and started to fill the area with styrene strips and putty. Sanding those areas down, I glued the two halves of the shoulders together and added more putty to fill in any left over gaps. I’m adding some aftermarket metal spikes to the left shoulder; using the same position as the square spikes. The spikes are just attached with sticky tack for now as I’m still working on preparing the shoulders.
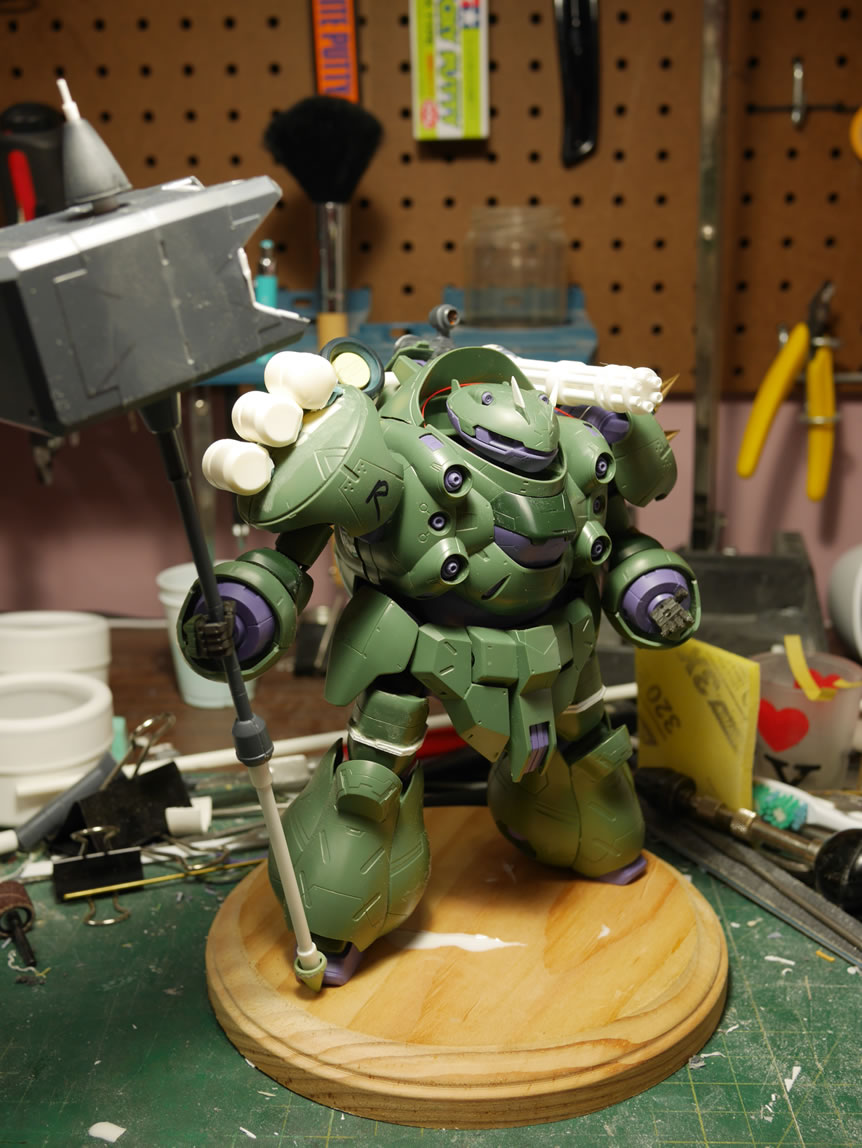
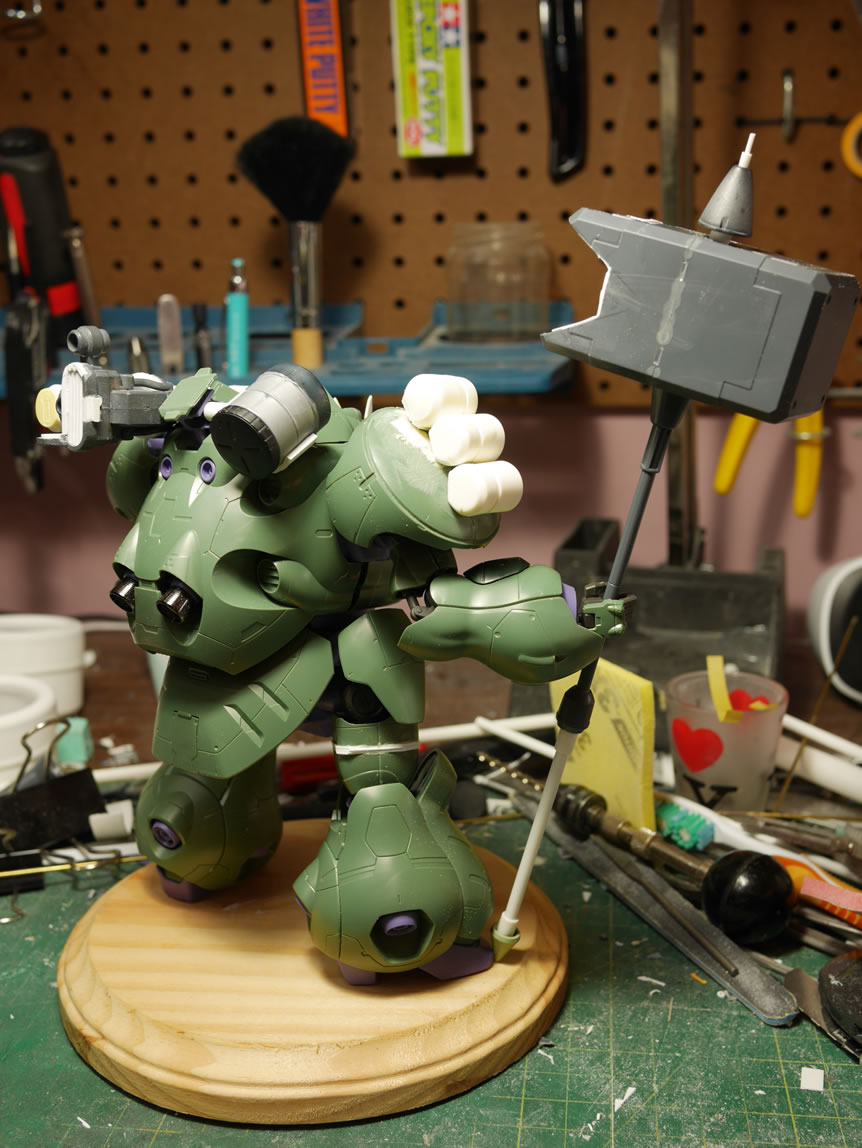
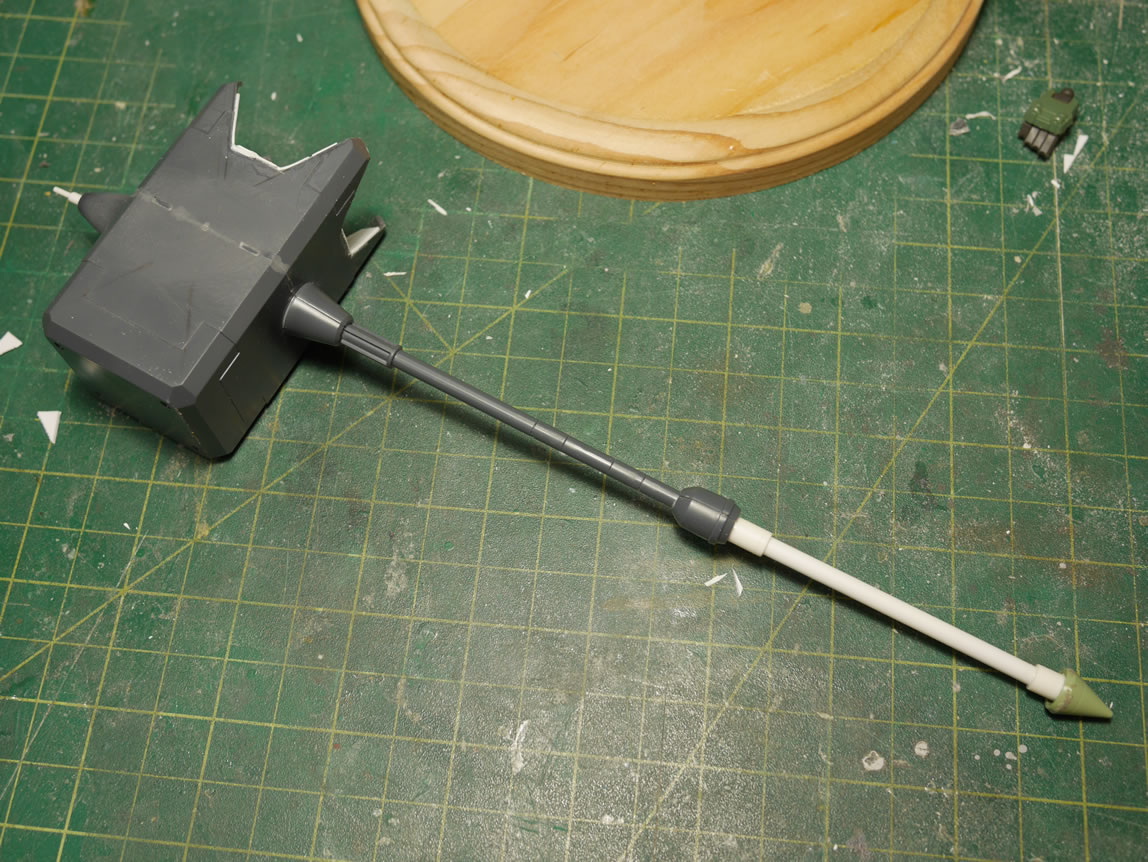
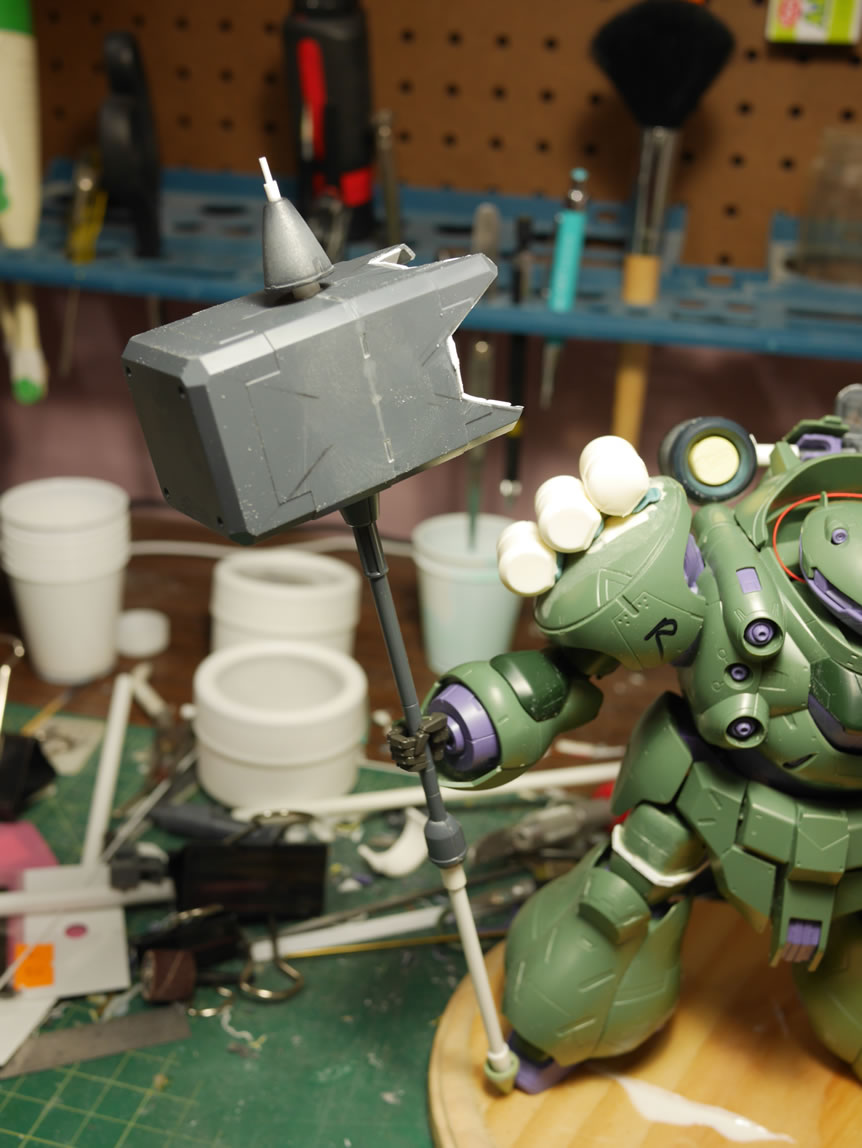
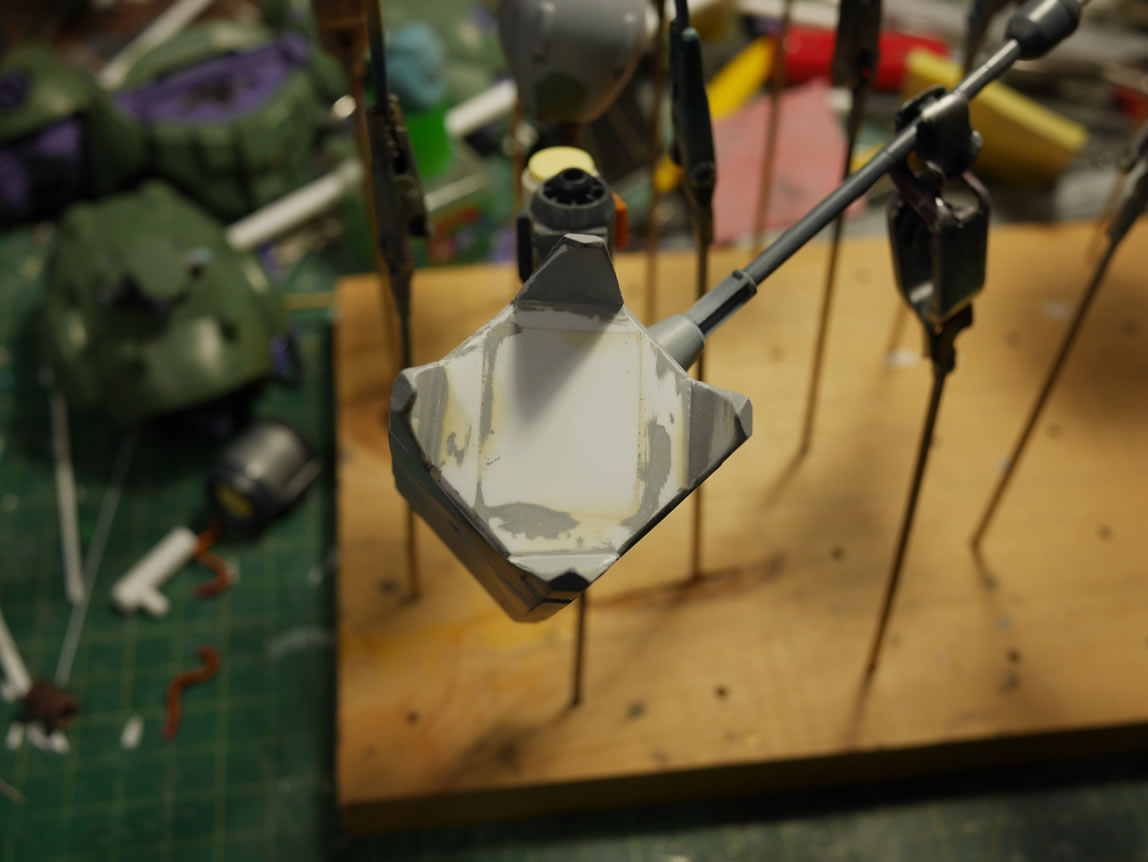
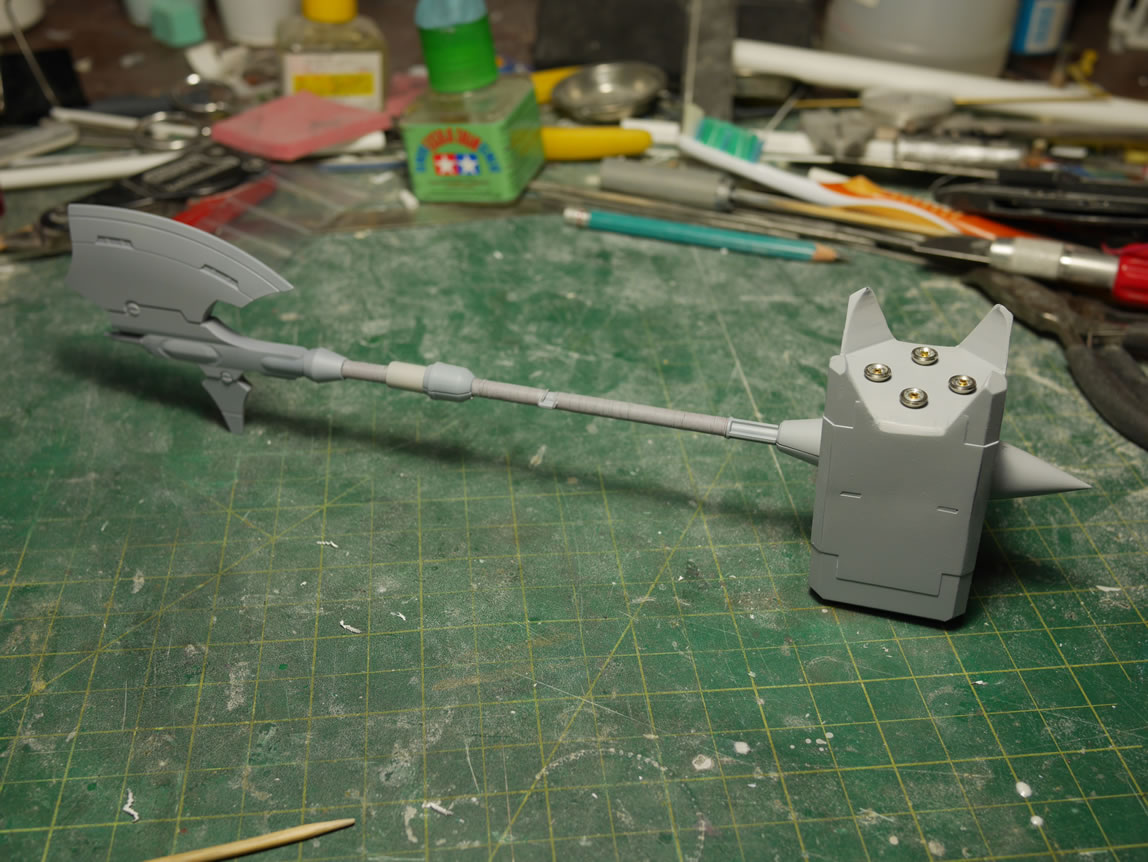
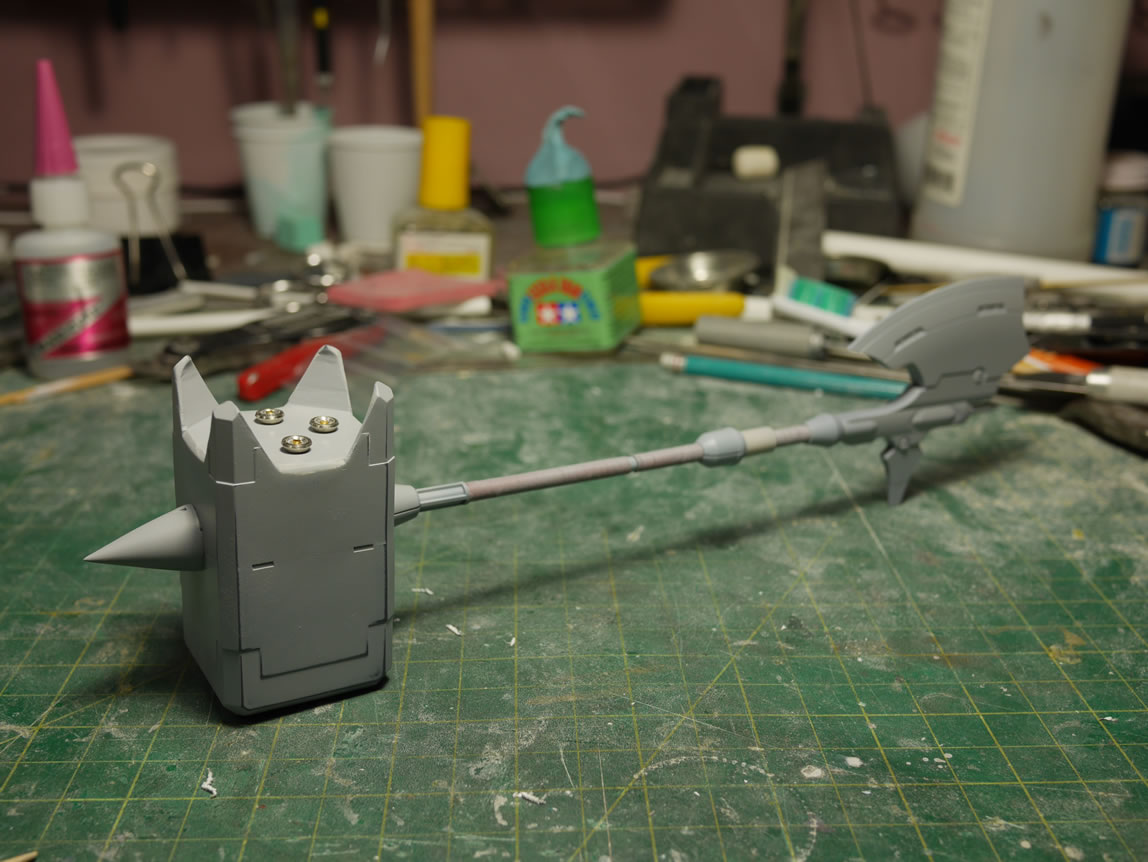
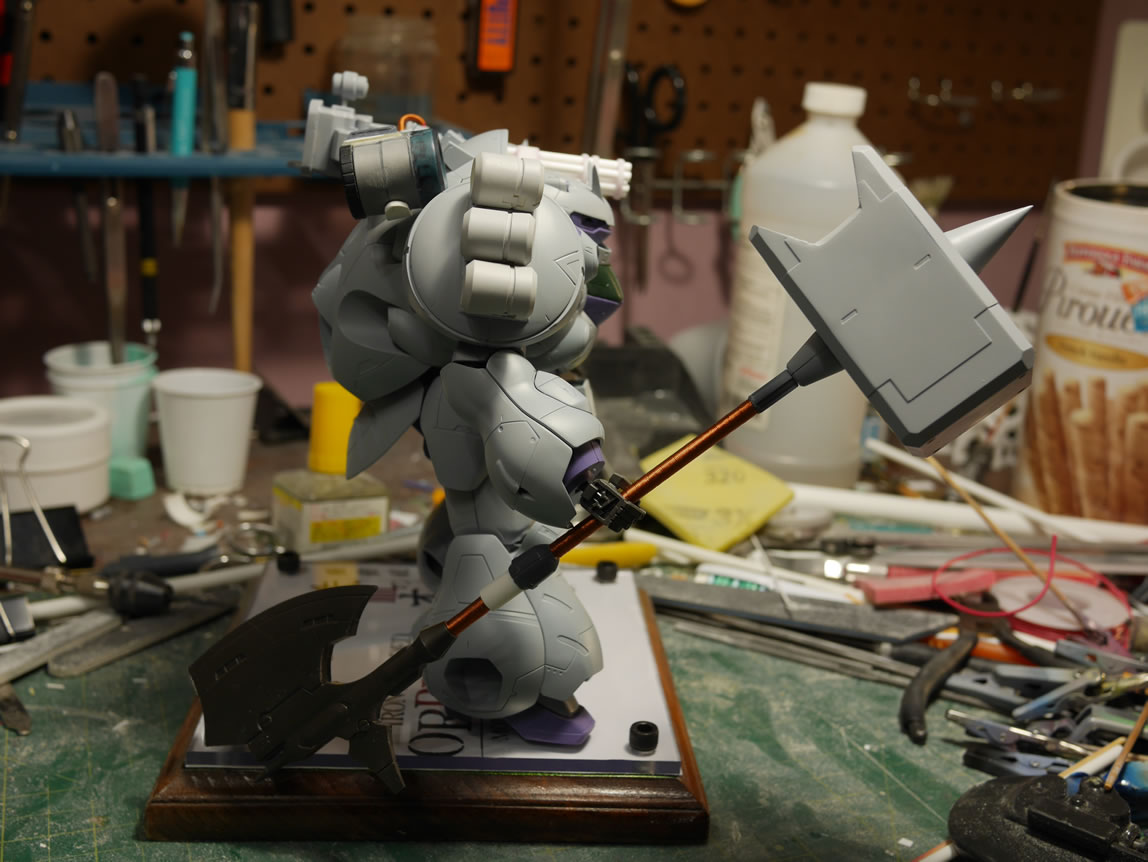
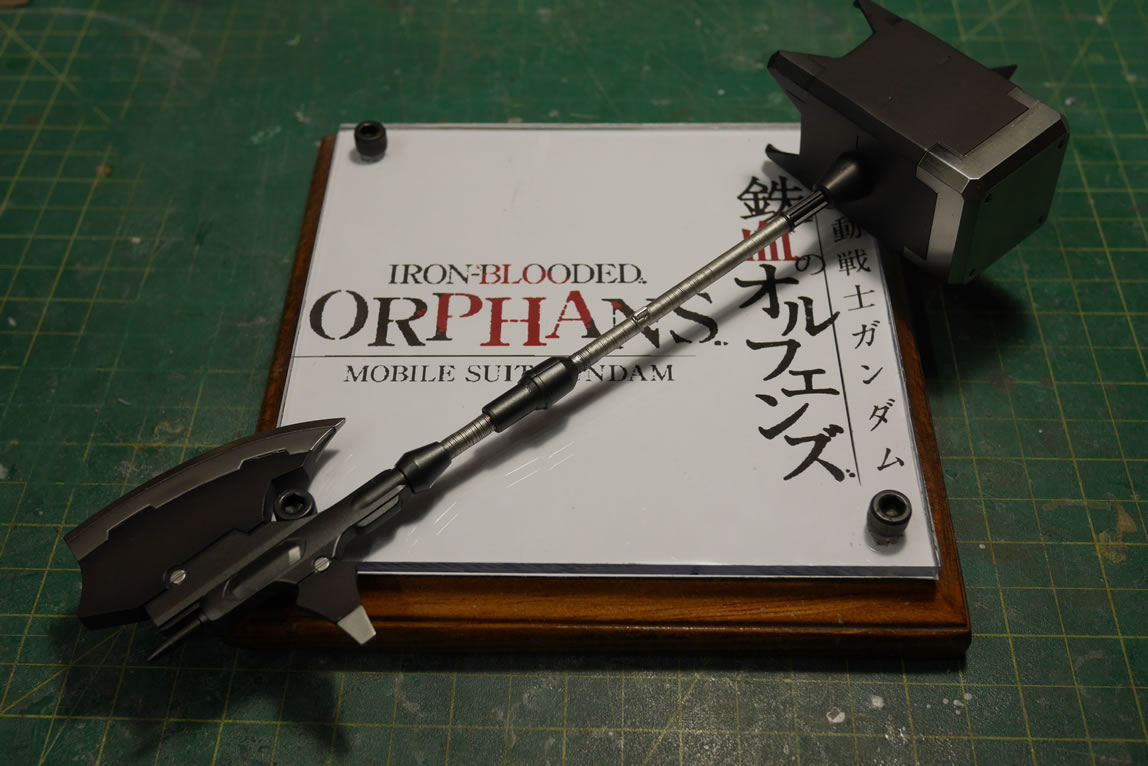
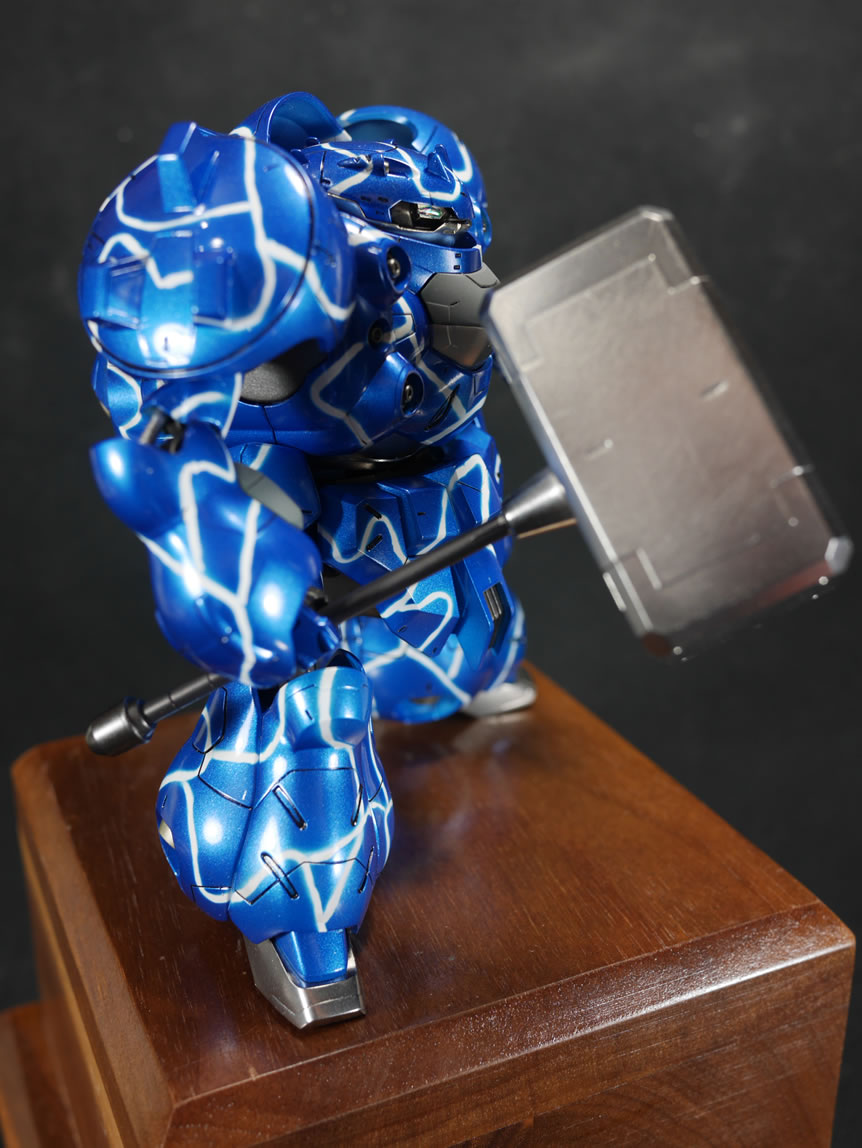
Next up, I drew out a pattern on the “back” of the hammer, and I put that in quotes as the hammer really doesn’t have a front or back. Time to fix that. I drew out some lines in pencil, then laid down some tamiya tape. The dremel and a cutting disc was used to quickly remove a bulk of the plastic materials. The a sanding bit to help speed the process. And finally, some files and sanding sticks to do the fine detail removal work. Once that was done, strips of styrene are used to cover up the now opened up back of the hammer.


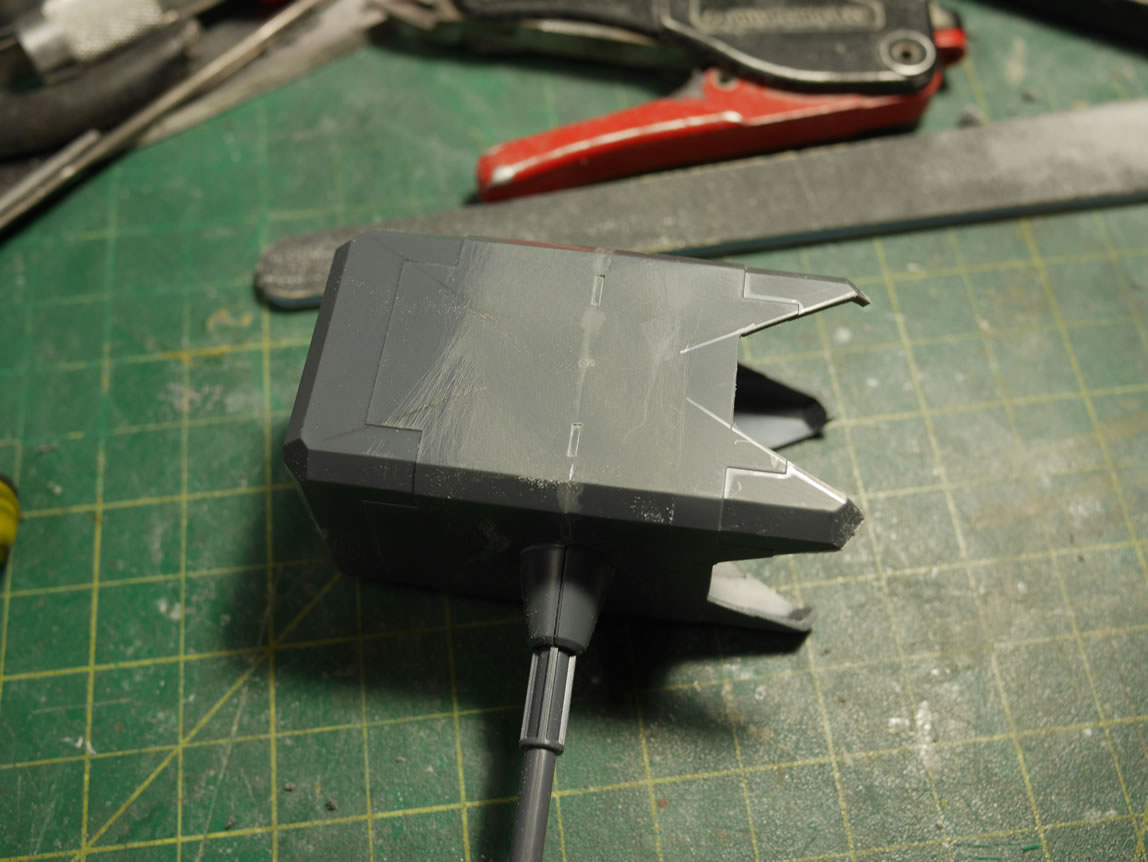
Some styrene tubes, a metal rods attach a handle extension turning this into a dual wield weapon of blunt force trauma. A lone Zaku II should spike is added to cap the bottom of the lengthened handle. I used the bottom half of a Kampfer’s sturm faust and some styrene tubes to create the beginning structure of a top spike. The hammer’s starting to look more unique now.
The gatling gun needs an ammo canister. So I created one using the leftover cowl from the Z’Gok’s thruster cover (where I gutted the internal detail). Glued on a Kampfer mine piece as a detail part, some cylindrical tower parts and capped off at the end with a Zaku machine gun magazine clip cover. Some PVC is cut and onto this a piece of styrene tube is glued. A magnet is embedded into the pvc so that I can make quick attachment and removal of the ammo canister. I did some sanding work on the gatling gun, but I still have a bunch of detail to add; so more on this for a future post.
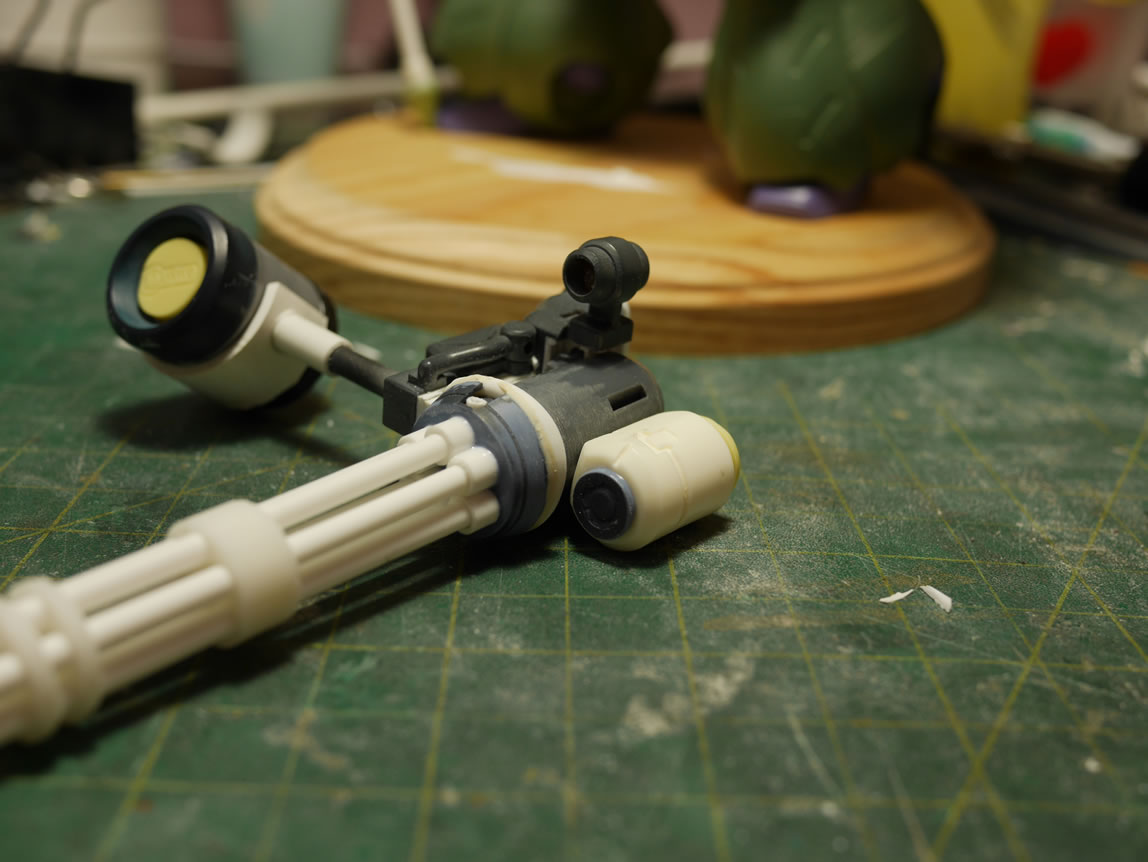
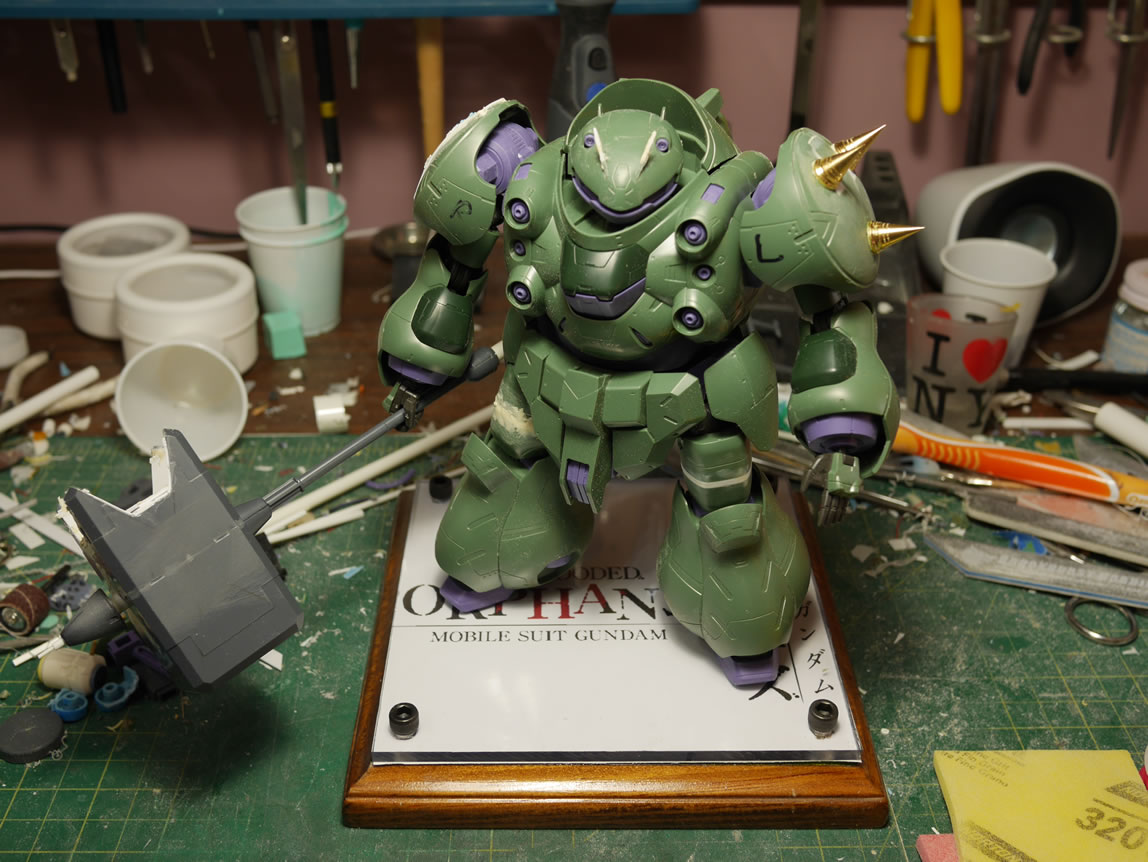
Here are some quick mockups with the gatling gun and ammo canister attached. Also note that the right shoulder has some ore gun parts attached temporarily with sticky tack. I still need to build a holding assembly for these canisters. But this is what I’m headed towards in terms of the shoulder work.

Here’s what the sucker looks like so far; it is a decent amount of work, but still very rough work that needs quite a bit of refinement. The last picture shows the pink eyes lit. I think that color should go nicely with my envisioned paint scheme. Hopefully I get another good week of work in and there will be another post later this week.

This is quite exciting, the first season of IBO has ended, and I’ve not watched a single episode…. maybe it’s time to marathon it… and possibly get more ideas for the damn thing.
April 18, 2016
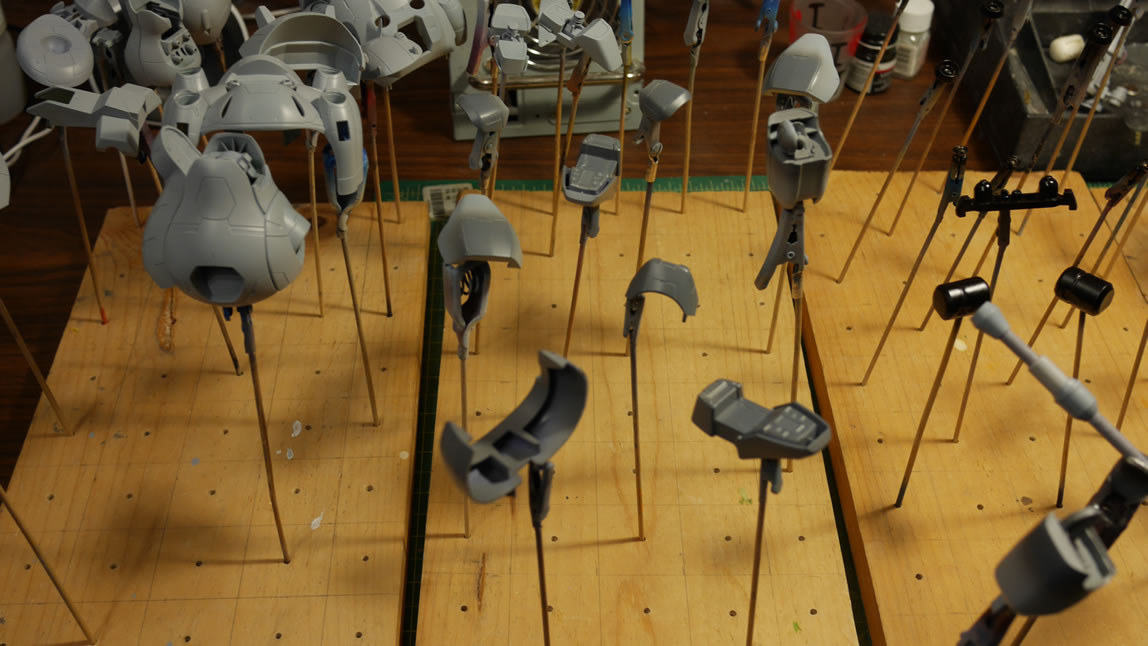
It’s been 3 weeks since the last update, so this will be a sizeable progress report for this kit. I’ve finally gotten past the seemingly endless cycle of putty –> sand –> primer; which means some actual color is getting on to the parts. And with painting, there’s always some amount of masking. And for this project, there is a bit of cycling with masking, painting, adding more masking, and continued painting. It’s almost inception level masking with how recursive this process can be; so I guess it’s a good thing I studied computer science. I can laugh at the simplicity of model building after breaking down everything to a basic concept. A function to build which uses glues, plastic, primer, putties, and cycling through the process. Then a function to paint with the masking, painting, and then remasking, and then rework after the mask is removed and problems pop up because of missed masking. But enough of this mindless rambling; on to the actual work.

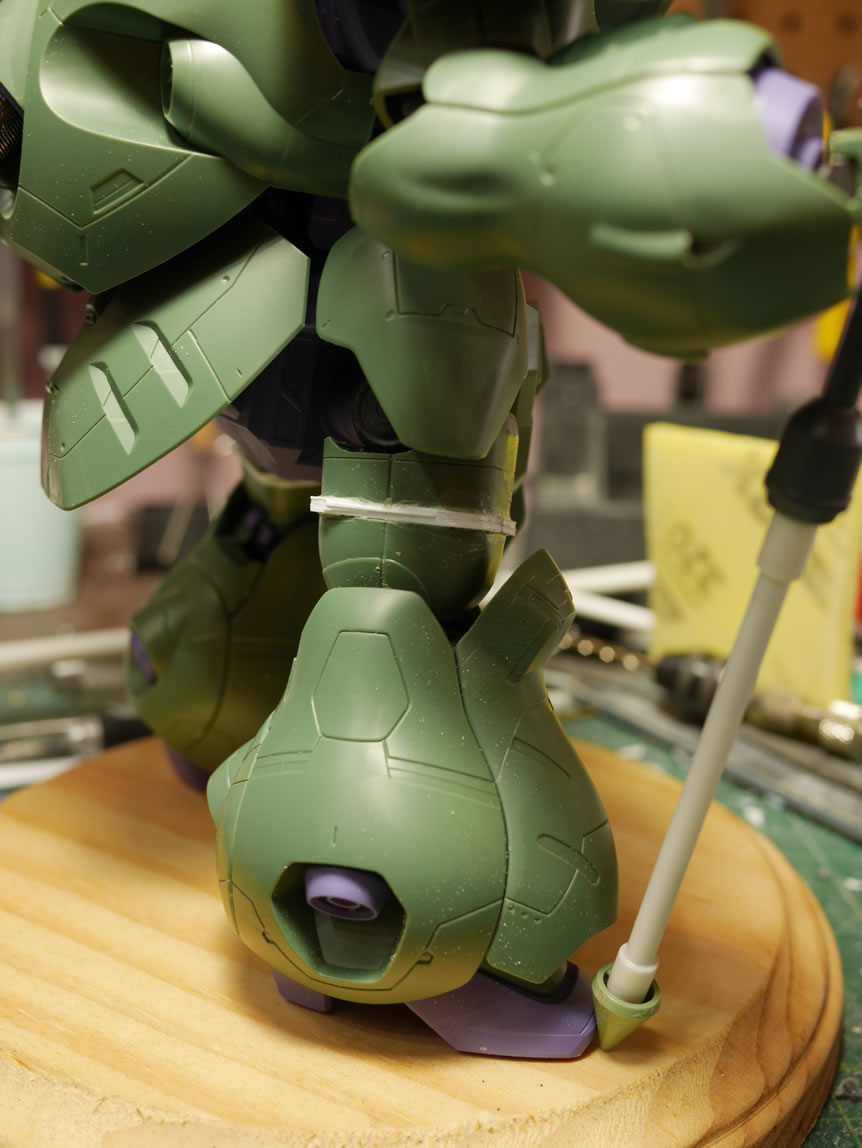
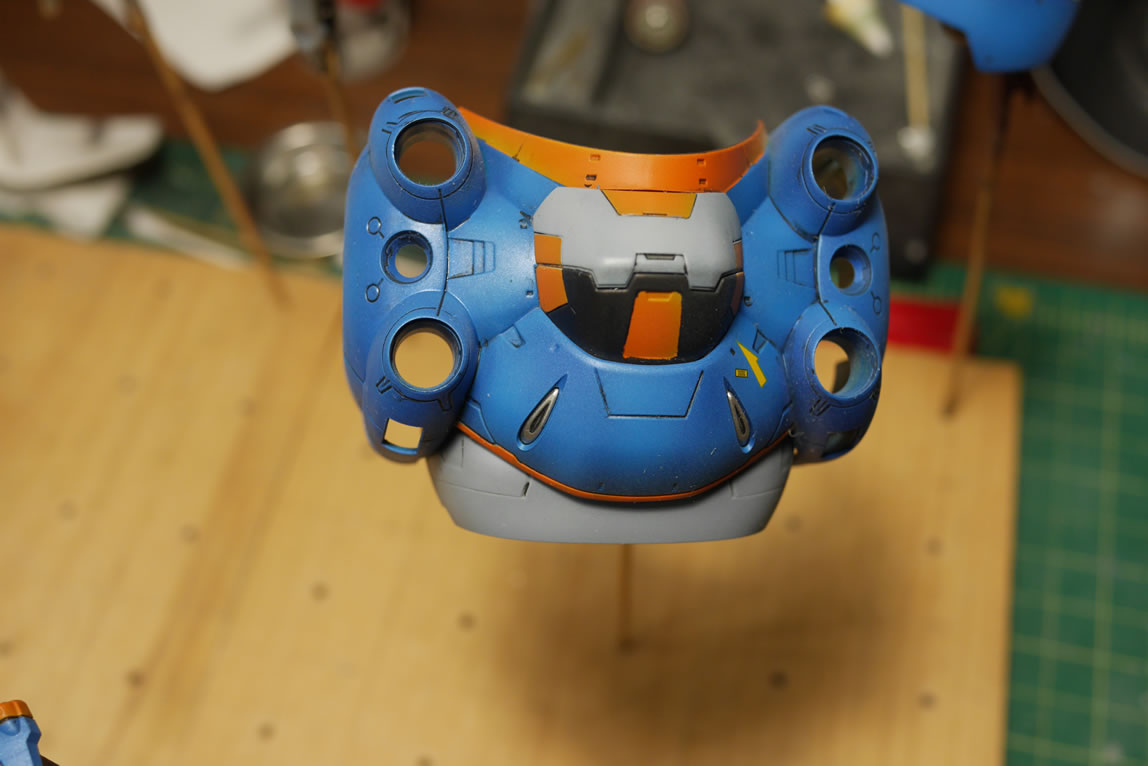
I wanted to mount some resin tanks on the left shoulder so rather than just gluing them onto the bare shoulders, I drew out a plan for a mount rack. The basic frame is done with styrene rods glued to the pencil drawing, then I added in some details by cutting up a MG Gouf Custom’s arm part. The arm piece is cut apart for the small bit of detail then glued to the shoulder. The underside of the shoulders are pretty lacking in details. The right shoulder has metal spikes added and the bottom sides of those spikes stick out from under the shoulders too. To best hide that and add in some underside details to the shoulders; I cut some semi circles of slatted styrene and glued it into place. After priming, the tanks are test fit against the shoulder rack.
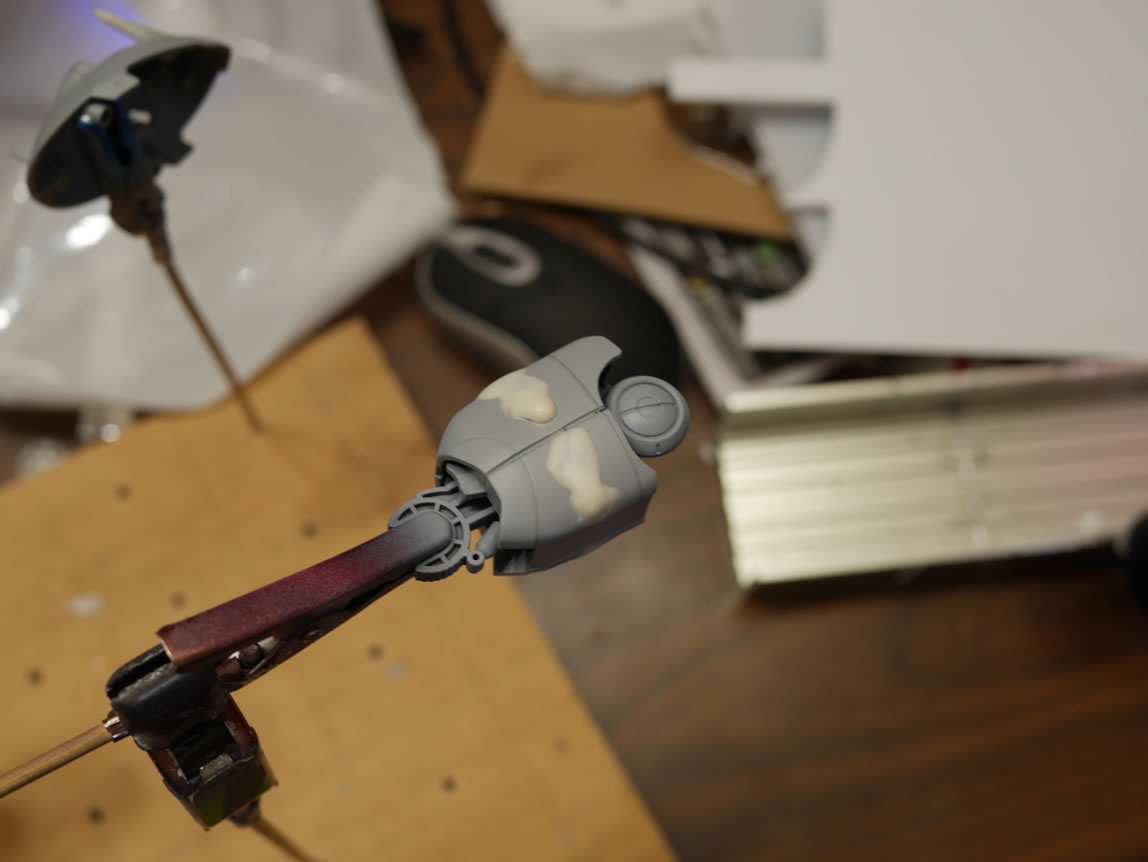
The leg extensions required a great deal of sanding, putty filling, and priming. Once excess styrene is sanded, the part is primed which shows all the defects such as holes, bubbles, or rough sanding spots. Putty is applied to these areas and once cured, the part is sanded again. There is an immense amount of sanding during this stage of the build.
Depending on what I’m working with, I use either Mr dissolved putty which looks suspiciously like I got a little too excited while filling; or I used light curing putty *points to the yellow tinted areas*. And continue to sand, fill, and prime until it looks good enough, or I just gave the f up.
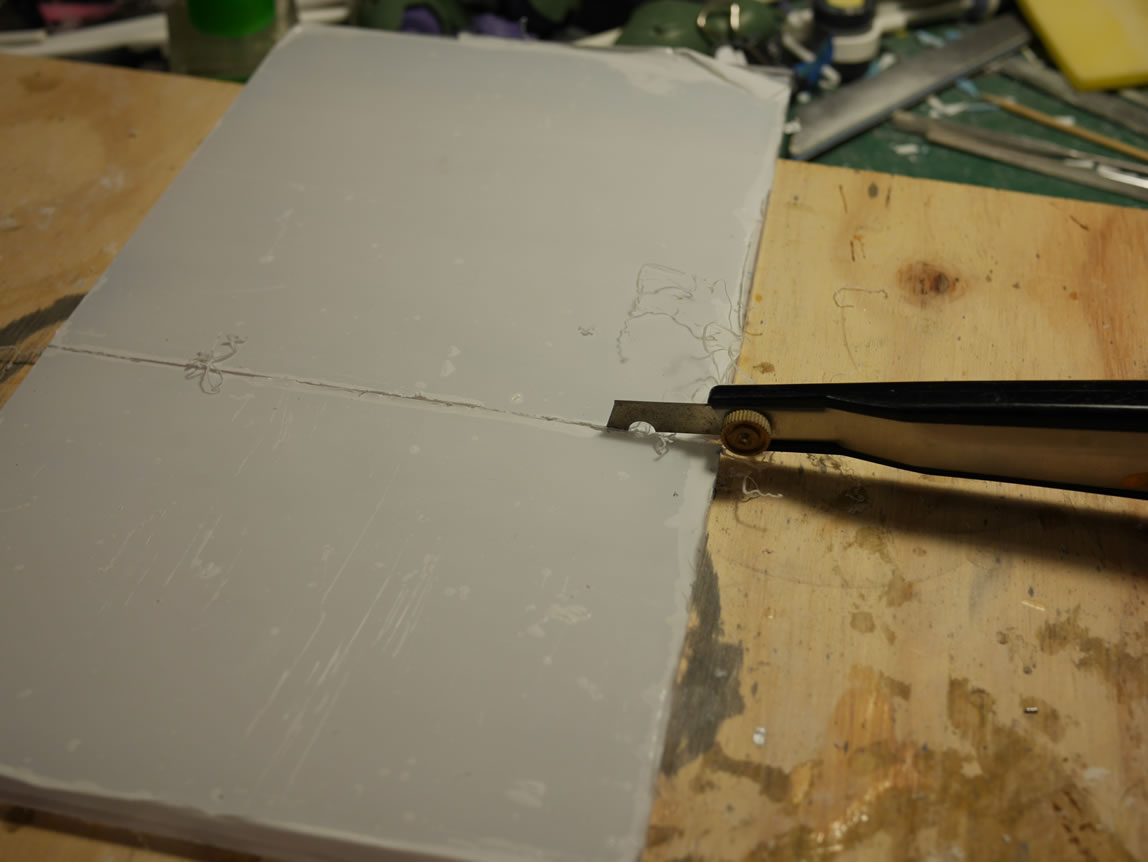
Next up, I grabbed an older painted display base to create a new display for this project. I started with about a 1/4 inch thick piece of clear acrylic sheet and used the tamiya scriber to slowly cut away the plastic. This creates enough of a groove to snap the acrylic sheet cleanly. I then printed out a simple IBO design on matte photo paper, cut that to size; then sandwiched it all together onto the wood base. The final step is to drill out some holes at the four corners and screw in some decorative bolts to finish the base.

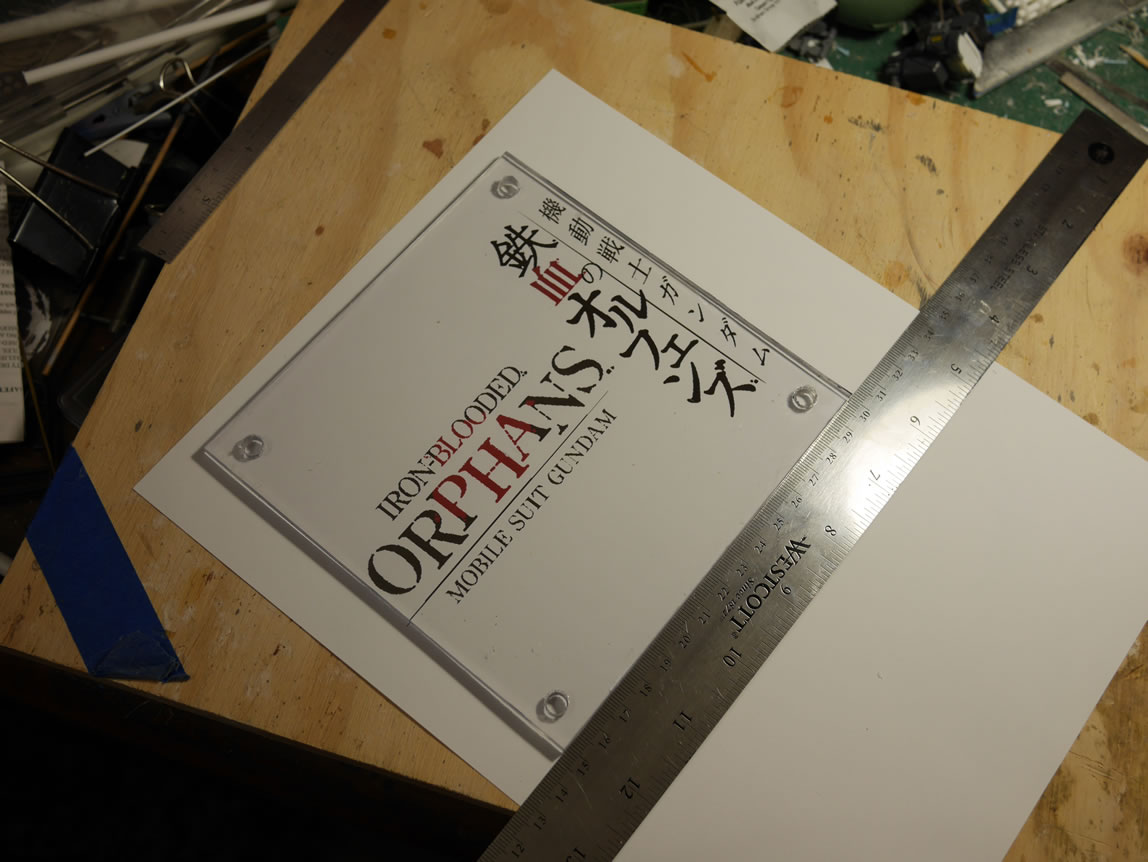

And a quick mock up with the Gusion standing on the completed base.
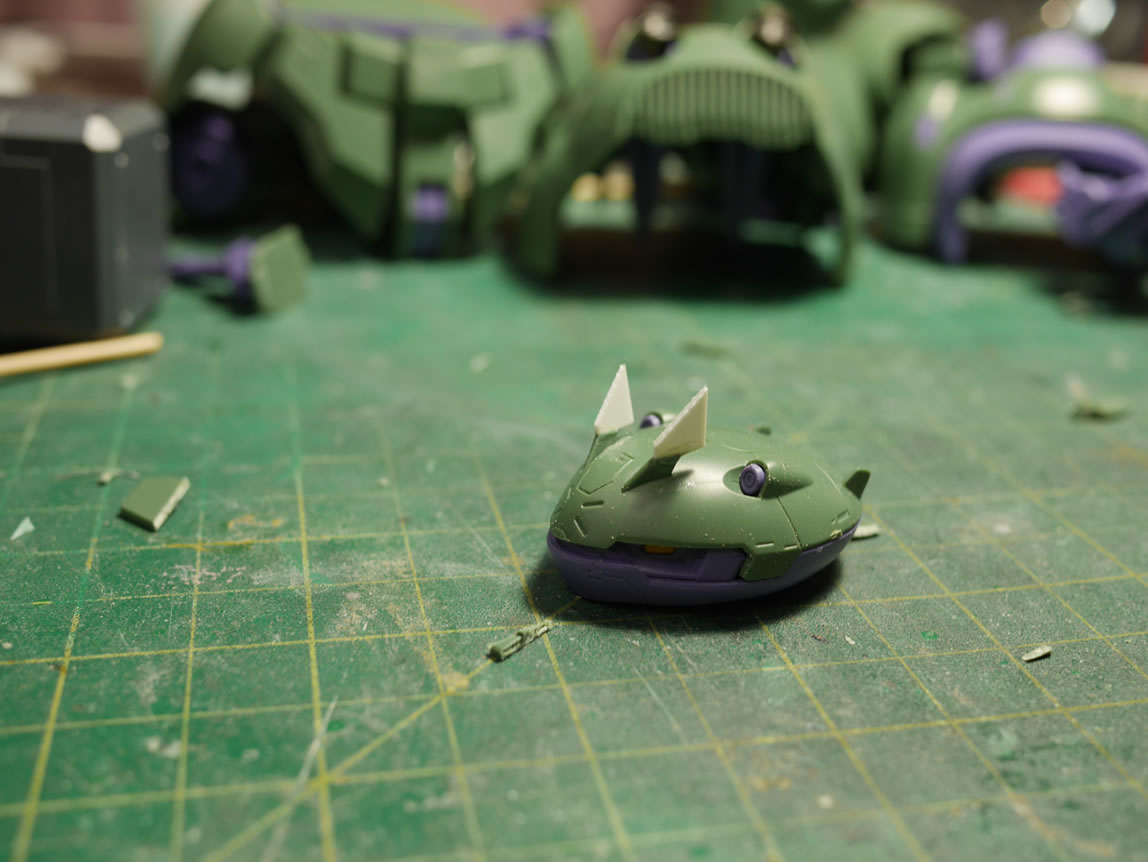
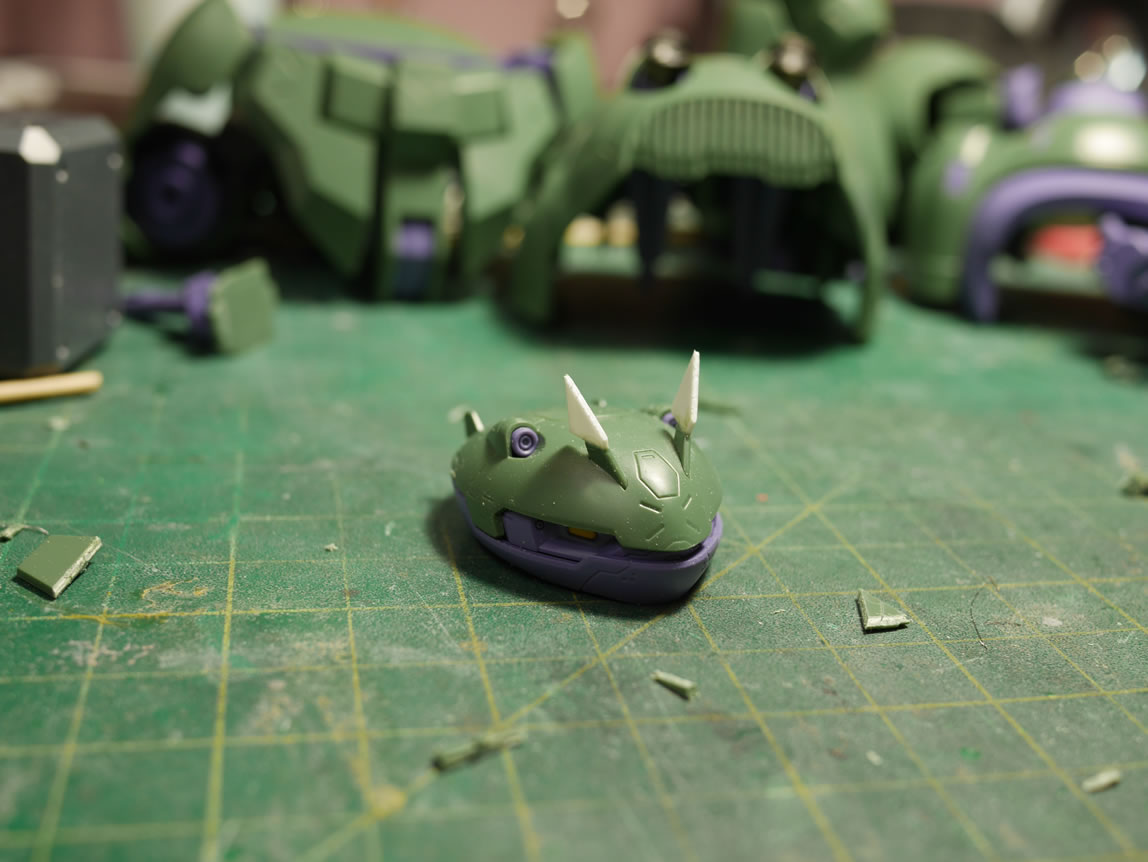
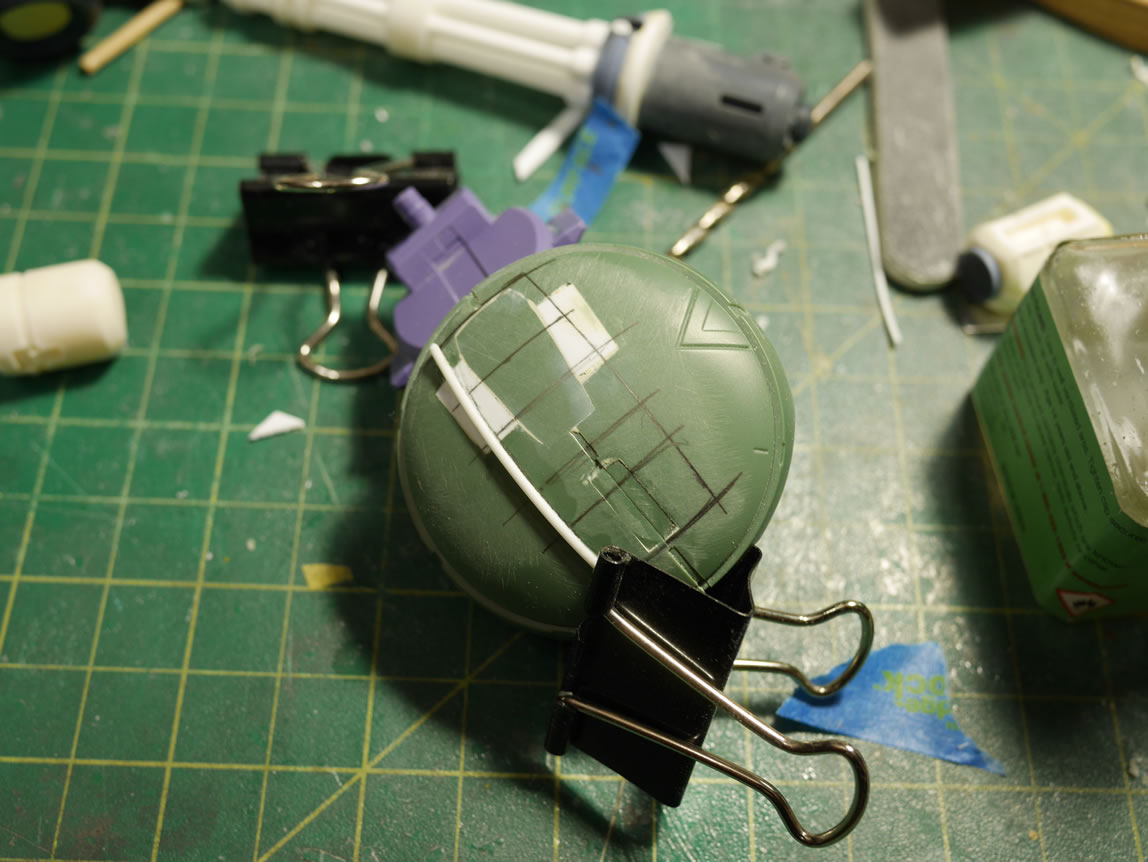
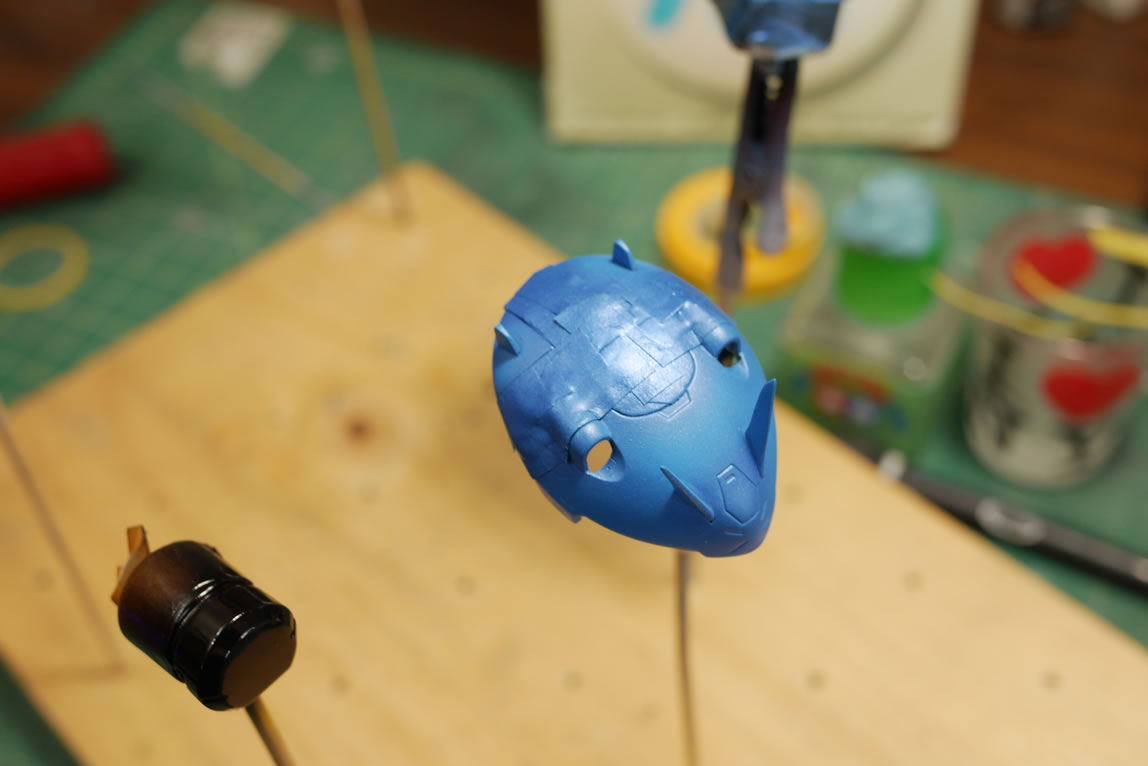
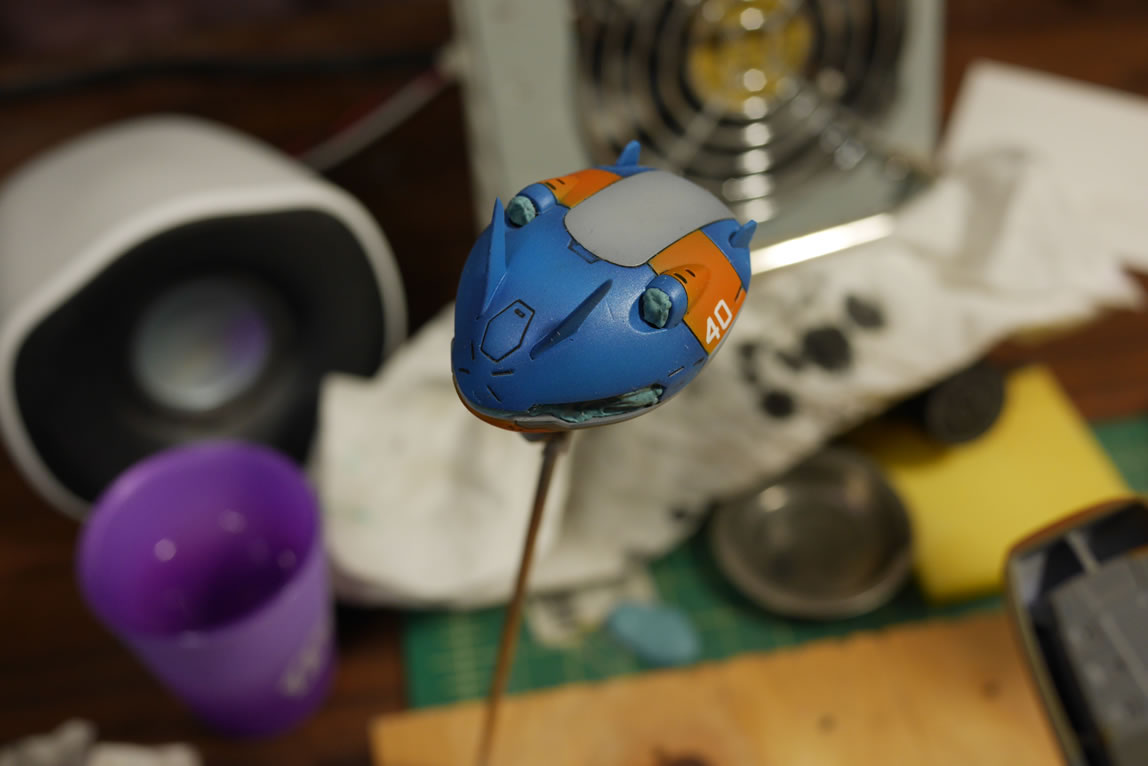
The fins on the front of the head were extended with styrene, so more putty and priming to work on that area. Again, primer really shows the areas that need additional attention. Once filled and sanded, it is primed again and checked.
The work on the major modification areas see the primer first. And at each step, it is always a good idea to put everything together as a good sanity check to make sure everything still fits and at least looks decent. With modifications, it is very easy to completely screw up the fit of the whole kit effectively messing with Bandai’s careful planning and engineering.
Work on the hammer continues. The back area that was cut apart is filled and run through the sanding, putty, priming cycles. Not satisfied with just extending the hammer’s handle; I found the Rebake’s axe piece; so I thought it would be cool to add that to the end of the hammer’s handle. I also added some metal thrusters to the back of the hammer.
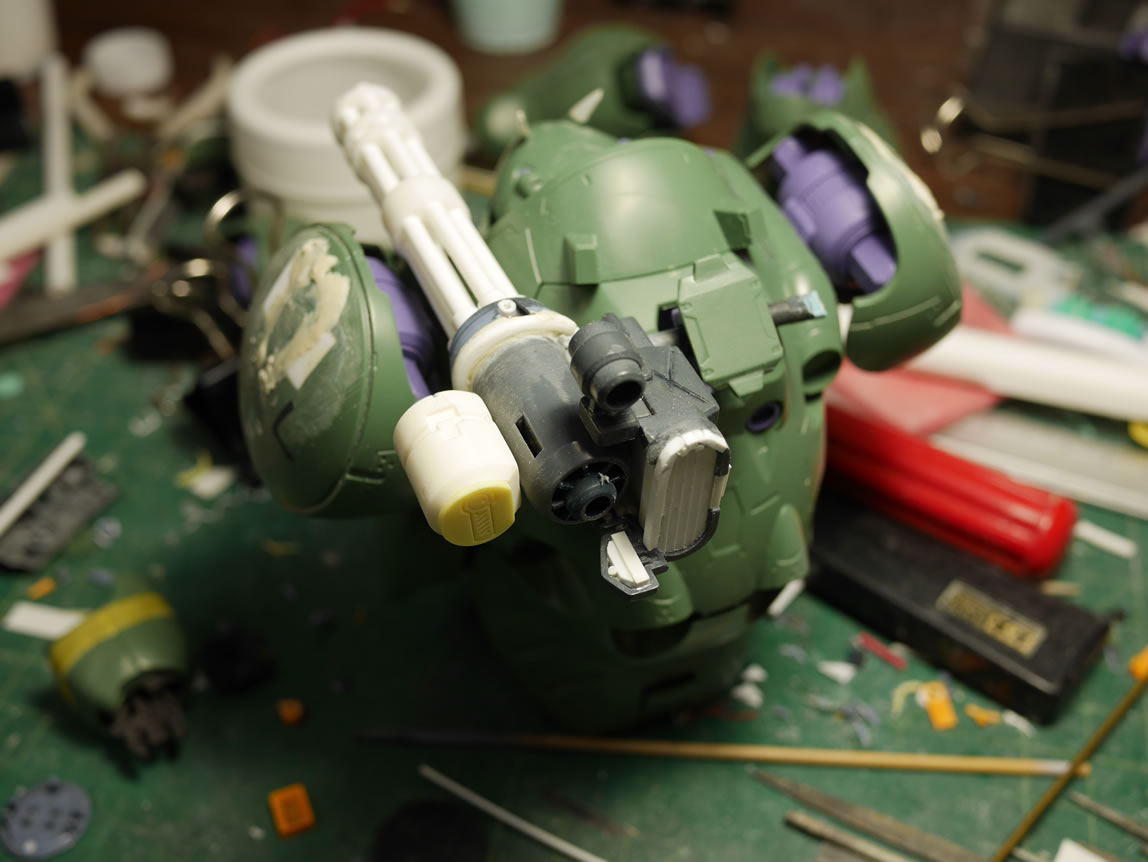
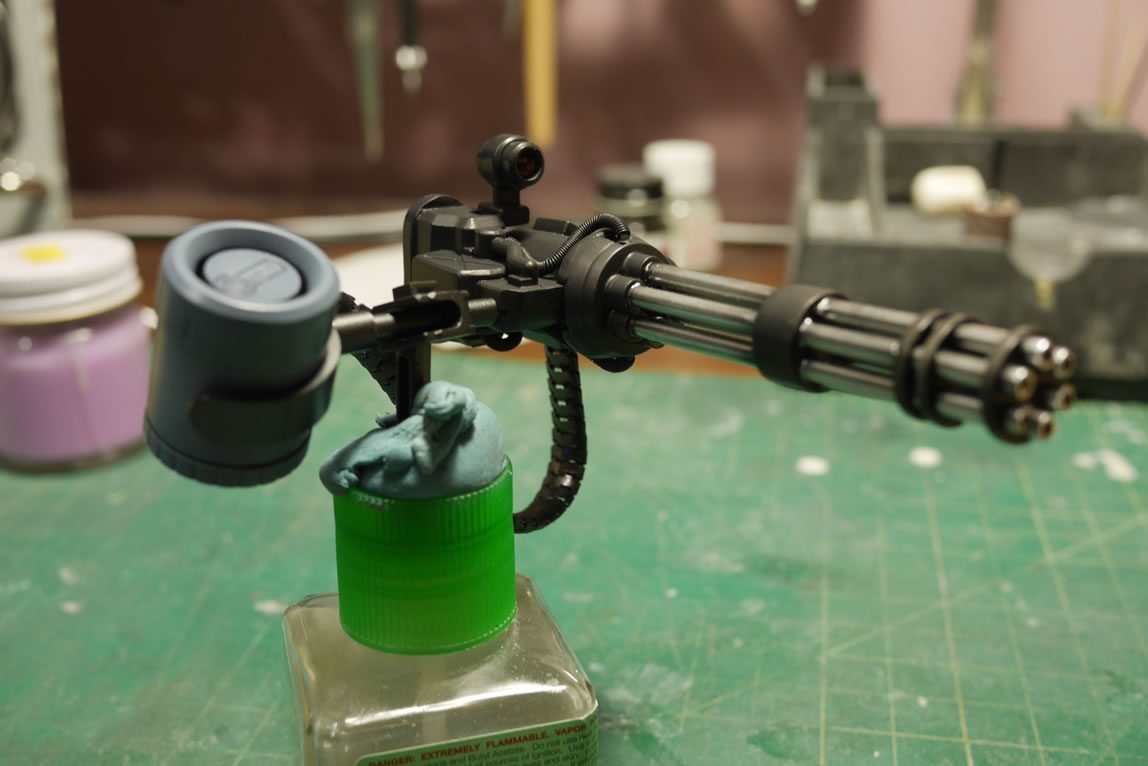
Going back to the gatling gun; I slowly added more details here and there. A ammo shell ejector port is added using the inner piece of a MG Nu Gundam Funnel piece (the yellow vent part). I added in an ammo feed location using the MG Nu Gundam’s funnel piece (black part). I cut this piece in half to shorten the size then glued it back together. I added a corresponding feed port to the ammo drum. The two main pieces of the weapon is primed and worked on independently to clean up the build before gluing the whole piece together. It is much easier to work on the individual parts than as a whole piece; this all goes to build planning.
I wrapped some solid wires with magnet wire and connected some open hole areas as well as used this bit of detail to hide the connection point between the two main pieces of the gatling gun.
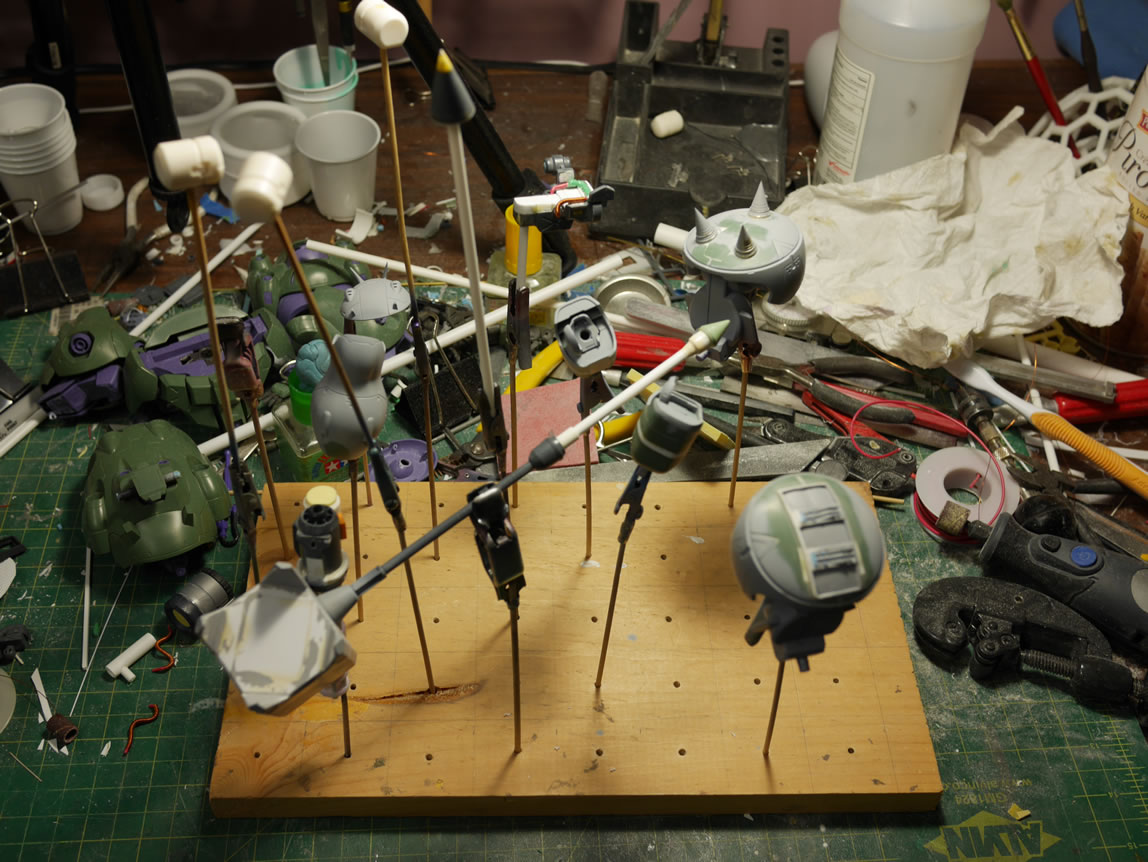
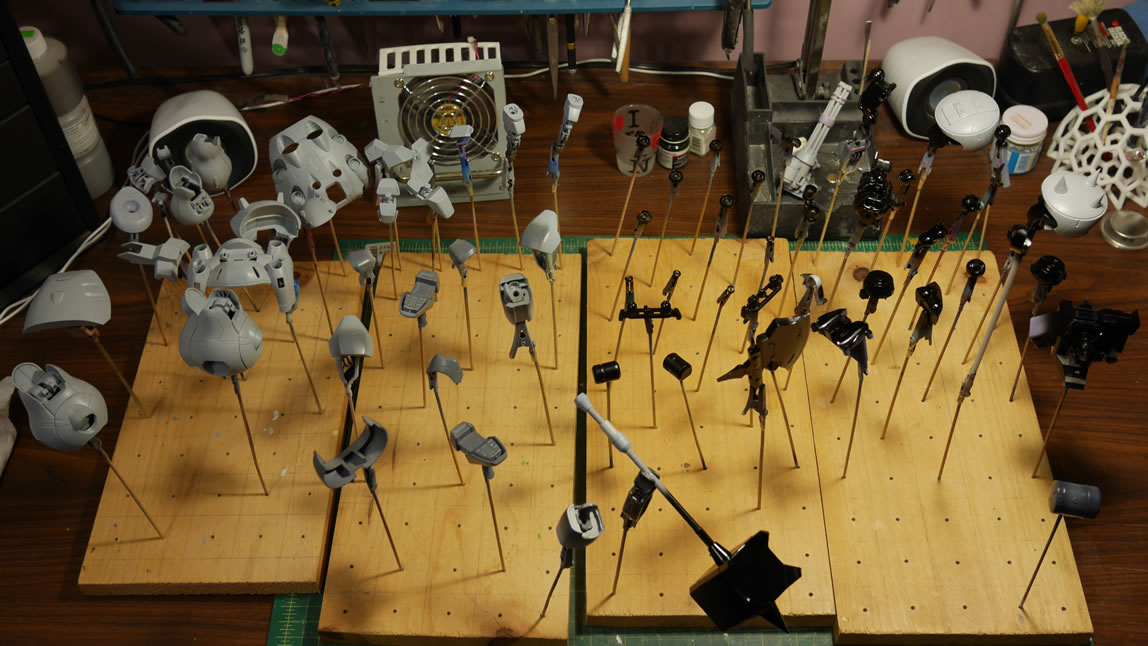
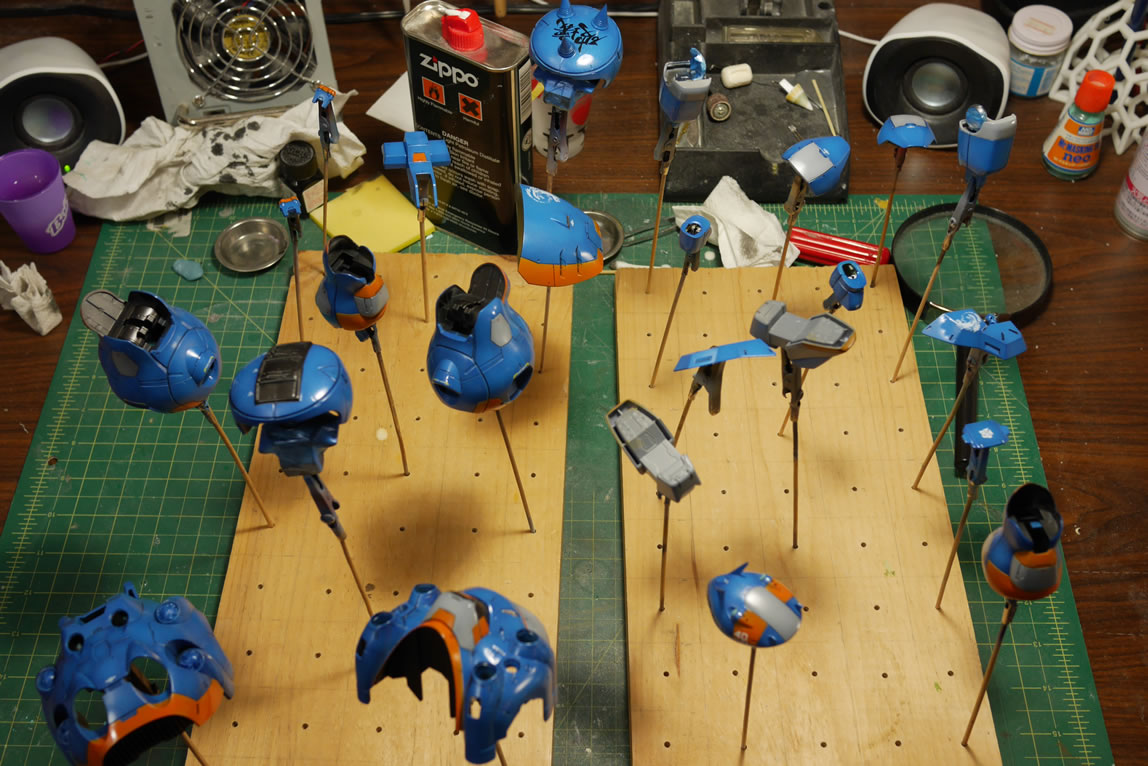
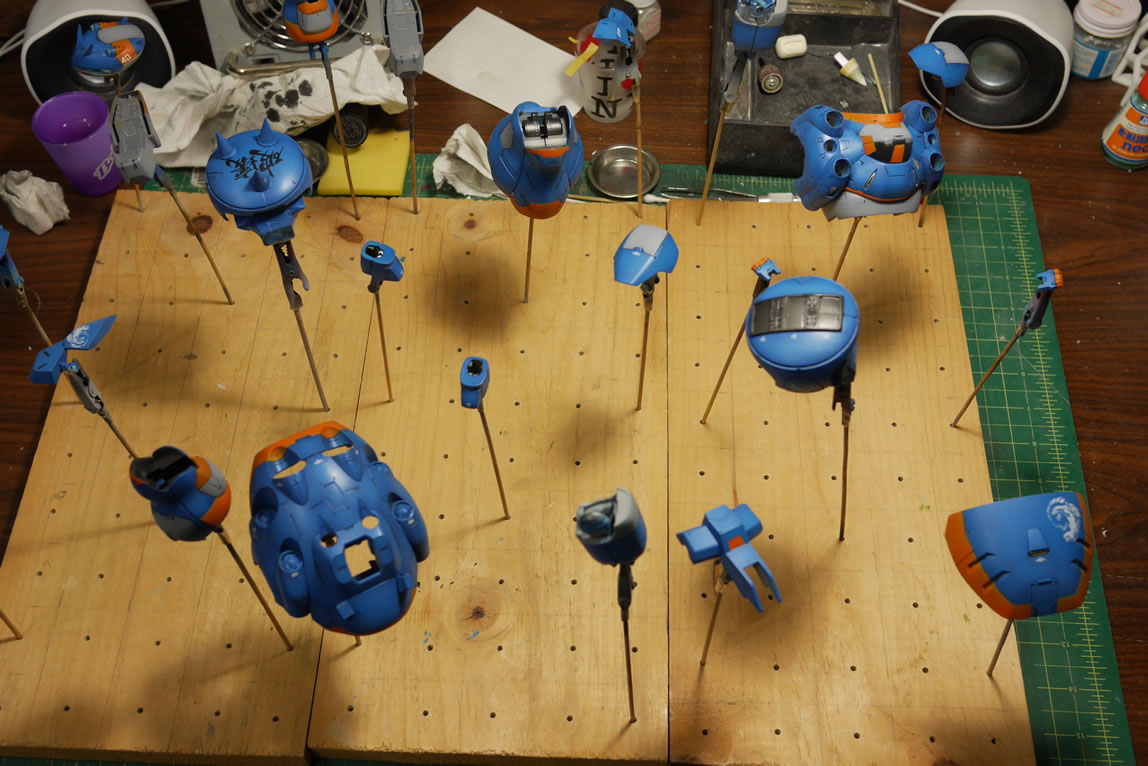
After all the building and clean up work; the rest of the kit is primed to check for sanding problems or even missed nub work. Then once cured, another round of test fitting to get a much better look at the kit since it’s all one basic color.
Once everything looks good, I can finally get to my favorite part of the whole process; painting. The frame pieces and most of the planned metallic parts are base coated with gloss black. Some of the exterior pieces are painted with two grey tones to create a shaded effect.
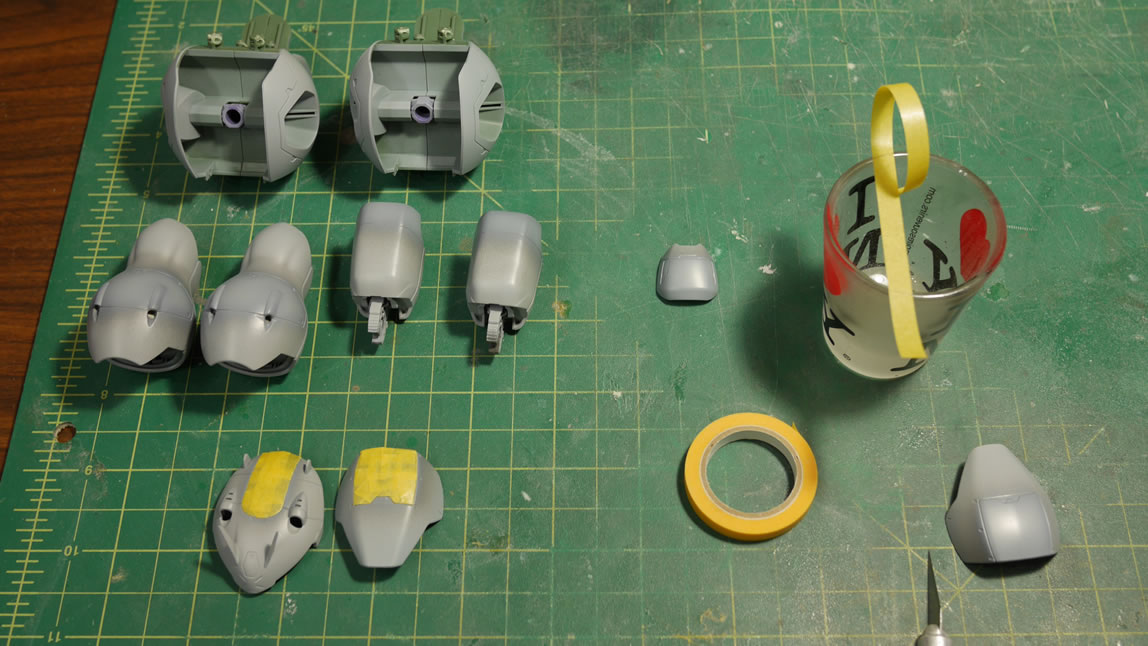
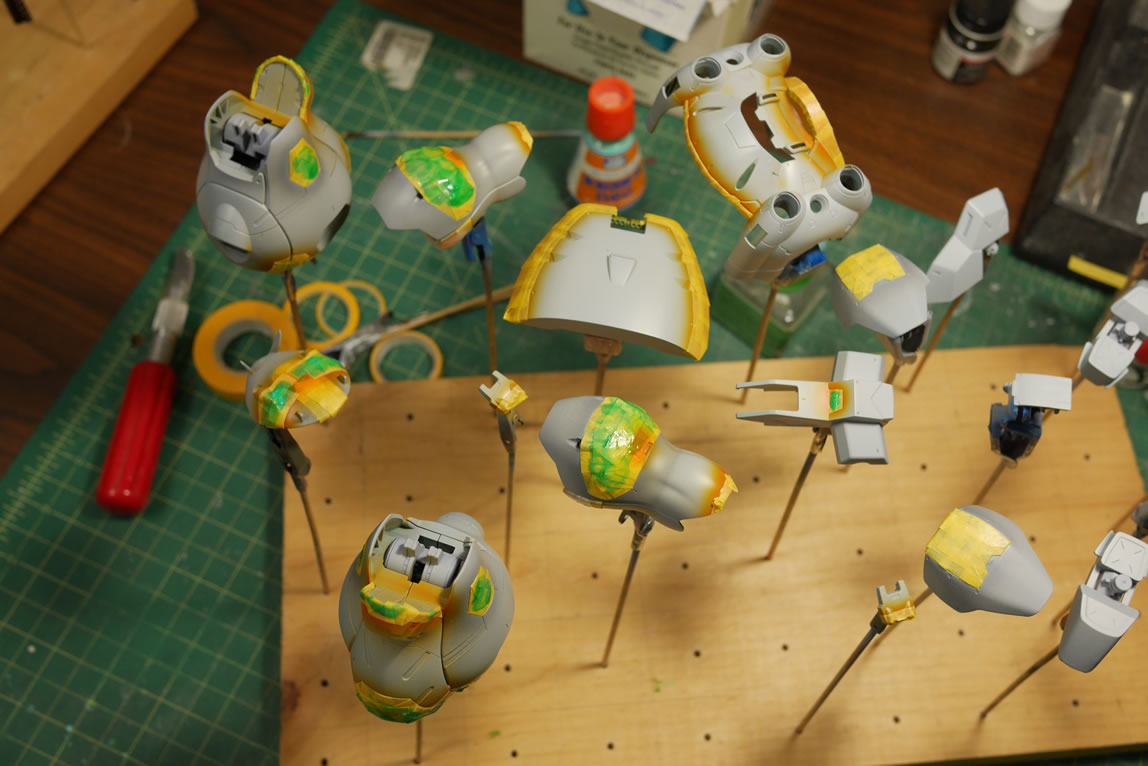
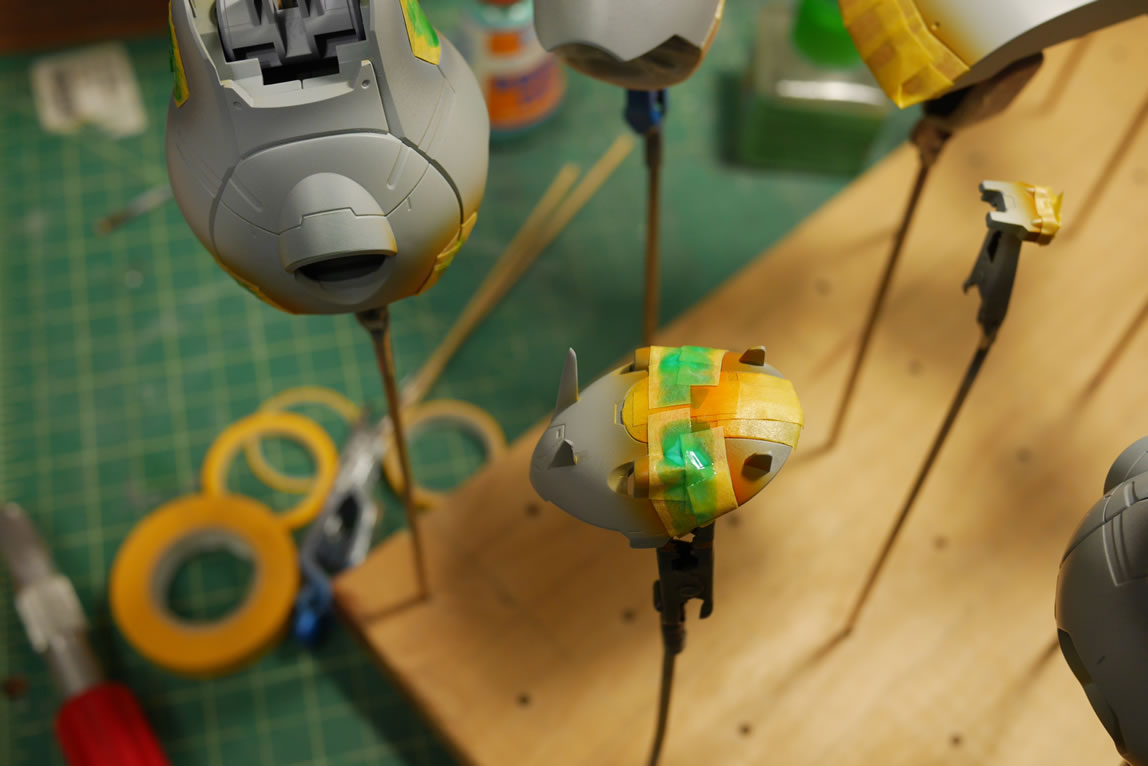
Once the paints have cured; I can get the first layer of masking done. The grey details are masked off using mostly tamiya masking tape.
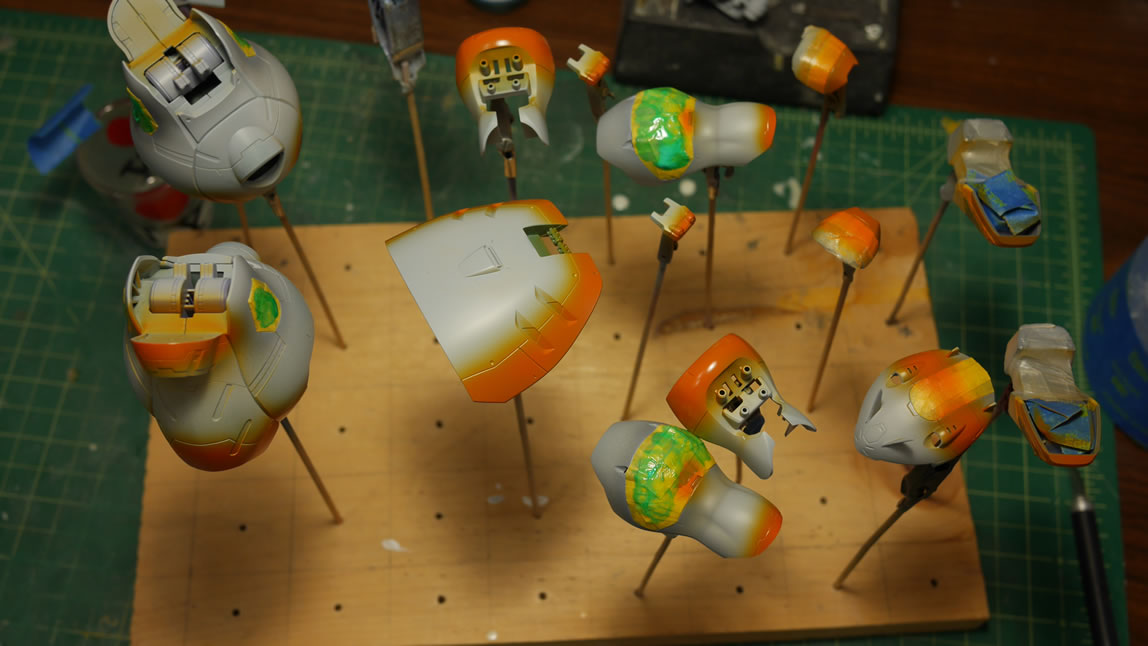
Orange you glad I didn’t say green? The next layer of paint is a custom mix of finisher’s deep yellow and finisher’s mica red to create a custom orange; since my bottle of Mr Color orange was empty. Highlight areas are painted and left to cure.
SHAMELESS PLUG!!!
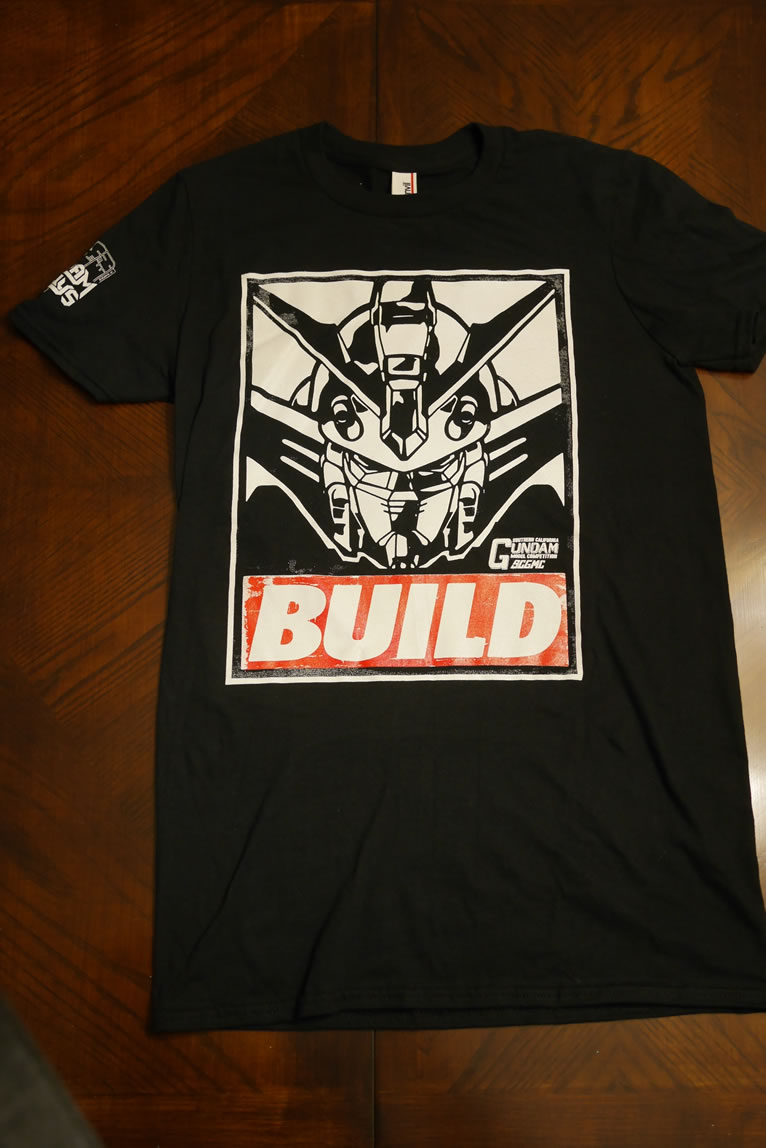
Back by popular demand, we got our Wing Build Shirt printed and up for sale. Click here to order yours!
And along the lines of shameless plugs; one of our newer build gathering members started up a blog: Freddy Was Wrong Check out his site as it is from the perspective of a builder fairly new to gunpla, but pushing the envelope and all the cool mistakes he’s learned as he continues to build.
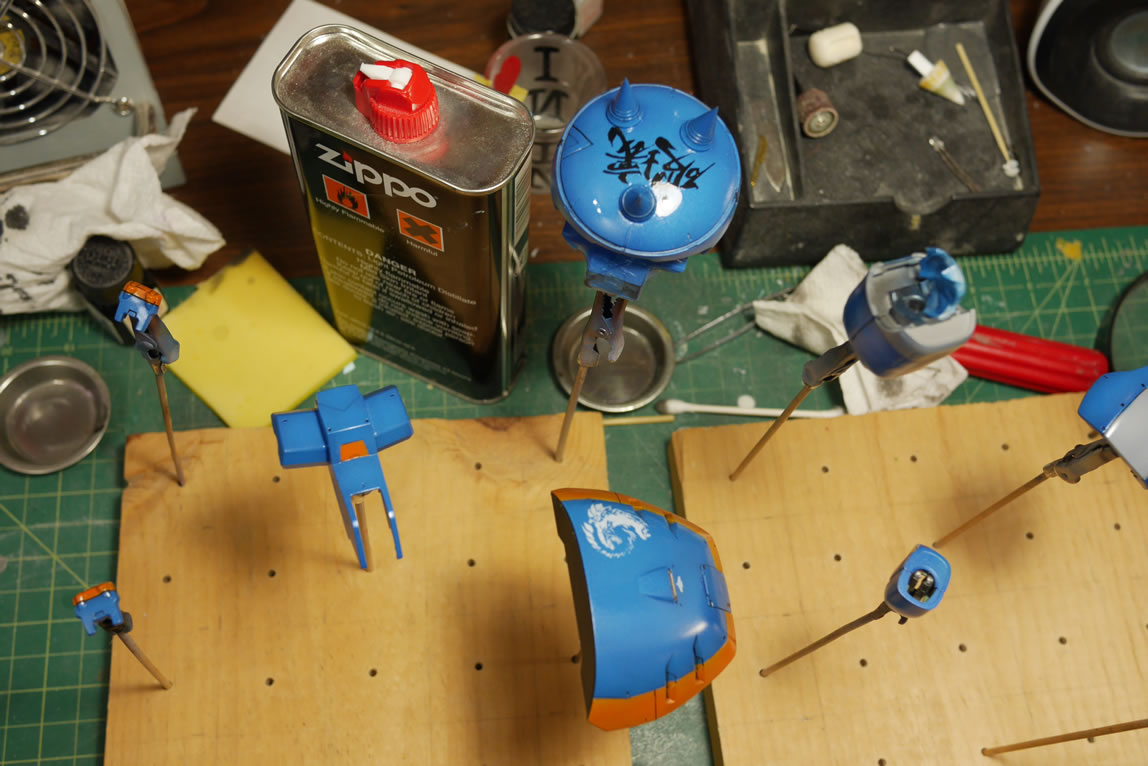
Next up, the internal bells of the thrusters were painted with an ochre color, then masked off using blue sticky tack. This is a very simple way to mask off the thrusters to paint them in two steps.

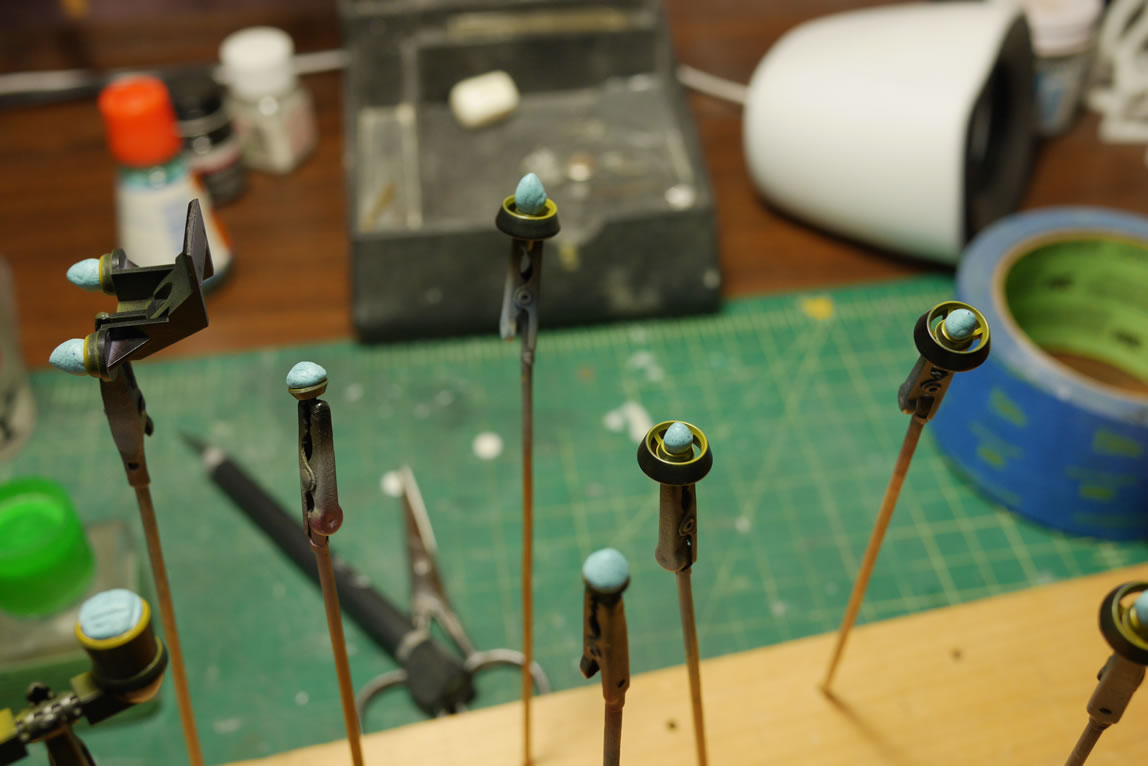
The orange is masked off using tamiya masking tape. Mr Masking Sol is also added over the layers of the tamiya masking tape as a catch all (green tint over the yellow masking). The axe head is also being painted and masked in several layers. The larger areas here were masked off with parafilm. Small details are masked off with blue sticky tack.
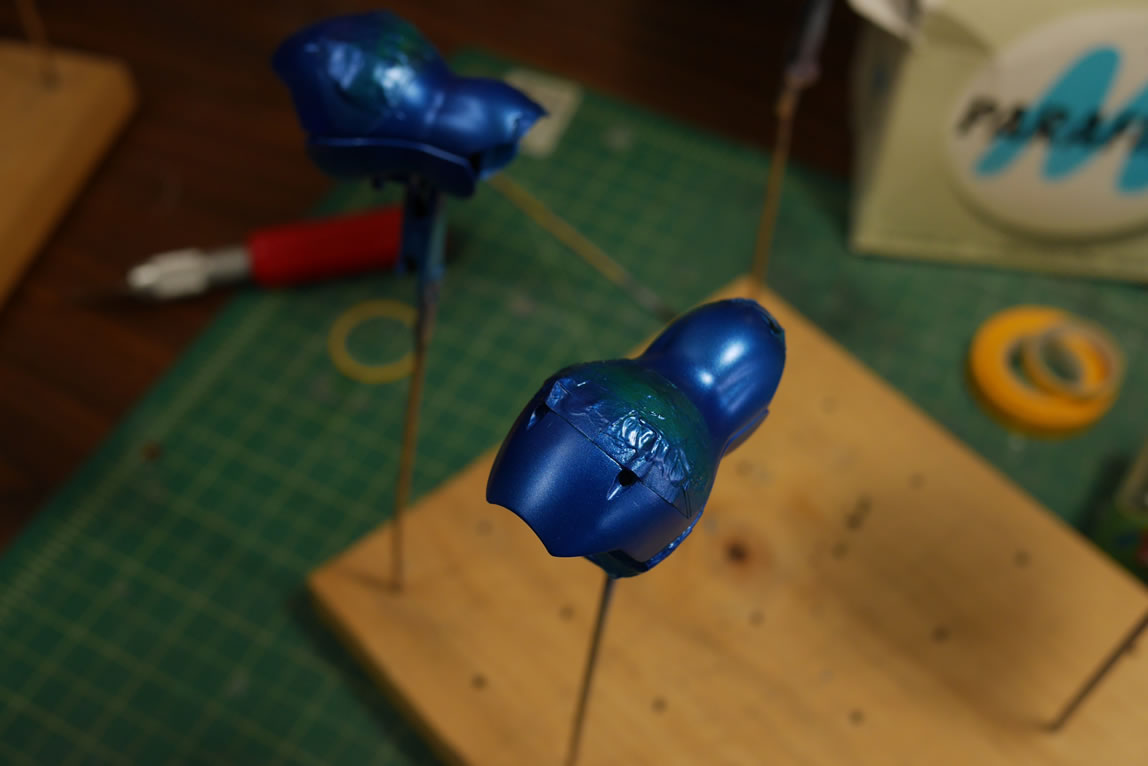
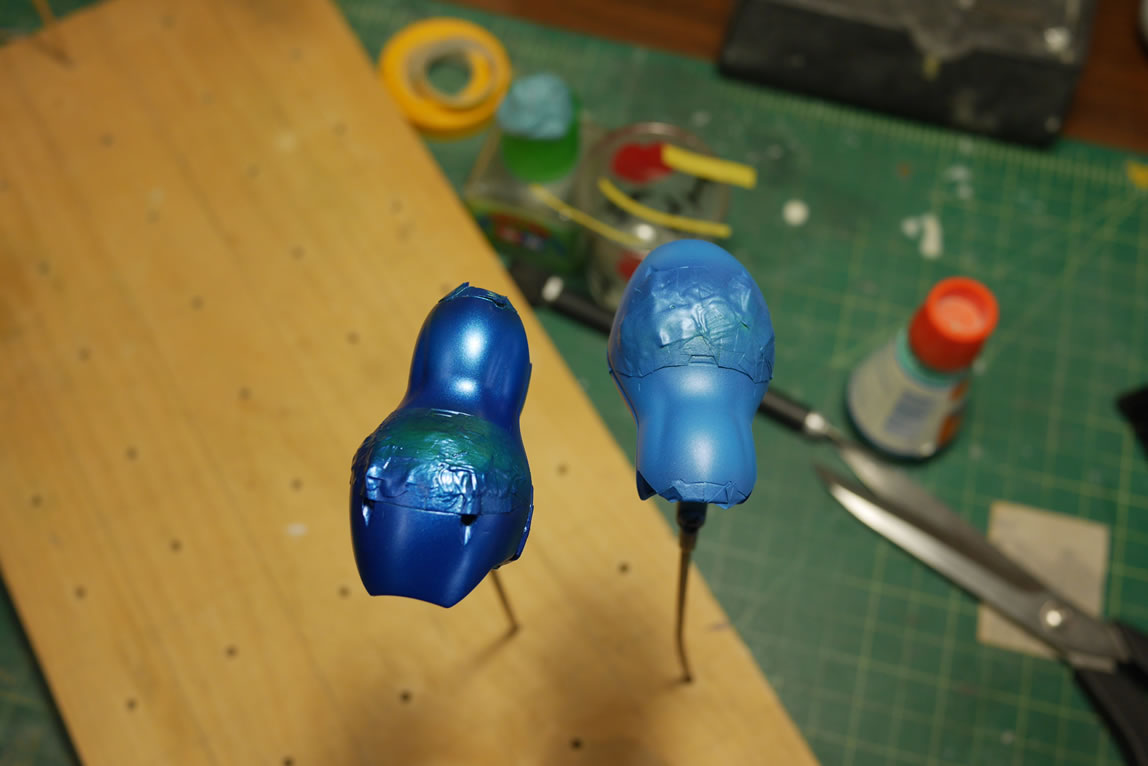
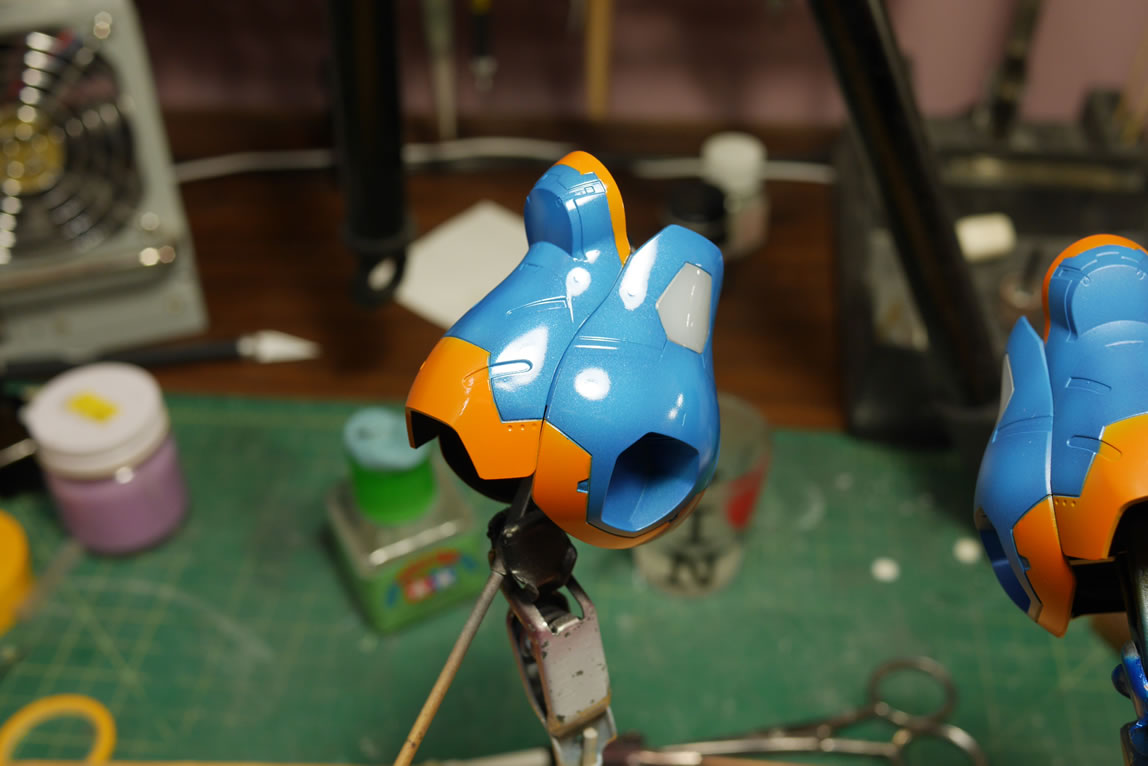
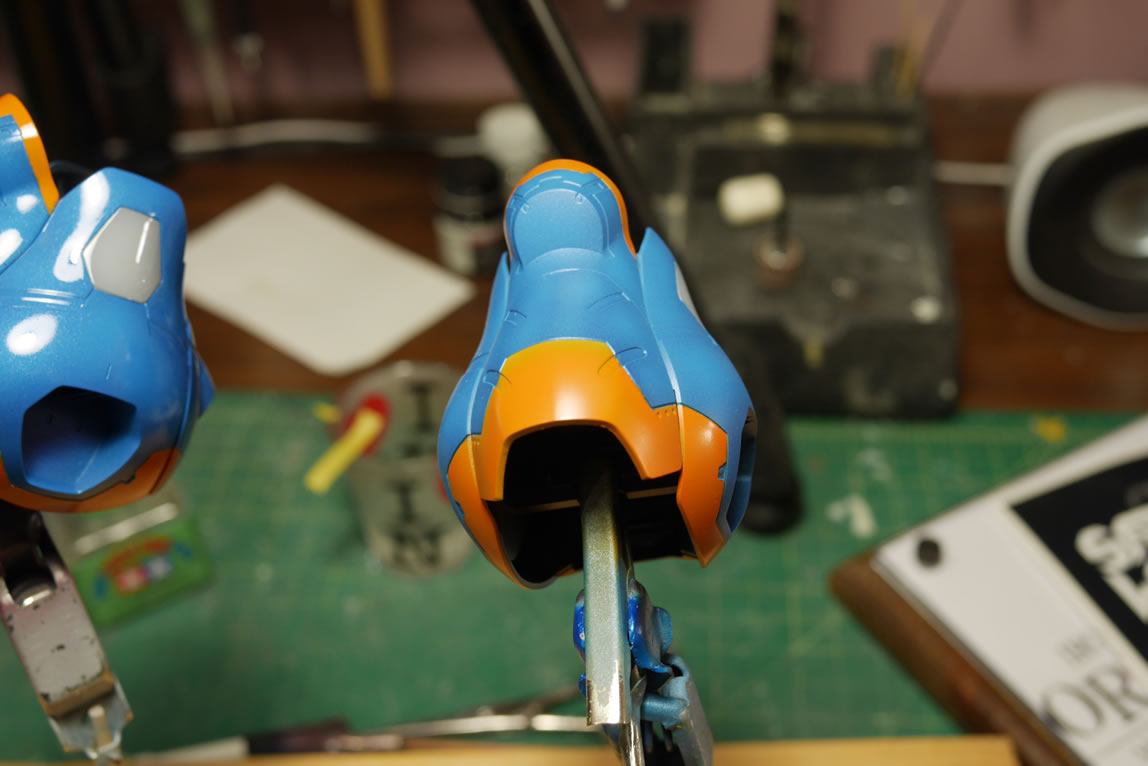
With the second masking layer down. The first base coat of the main color is sprayed. I used the same color as I did the 1/144 Gusion, my old Subie’s World Rally Blue. This worked as the base color. I custom mixed this color with Mr White Base to create a powder blue main color. The white base makes the final finish of the paint a semi gloss and keeps a little bit of the pearl effect. I really like the finish so far.
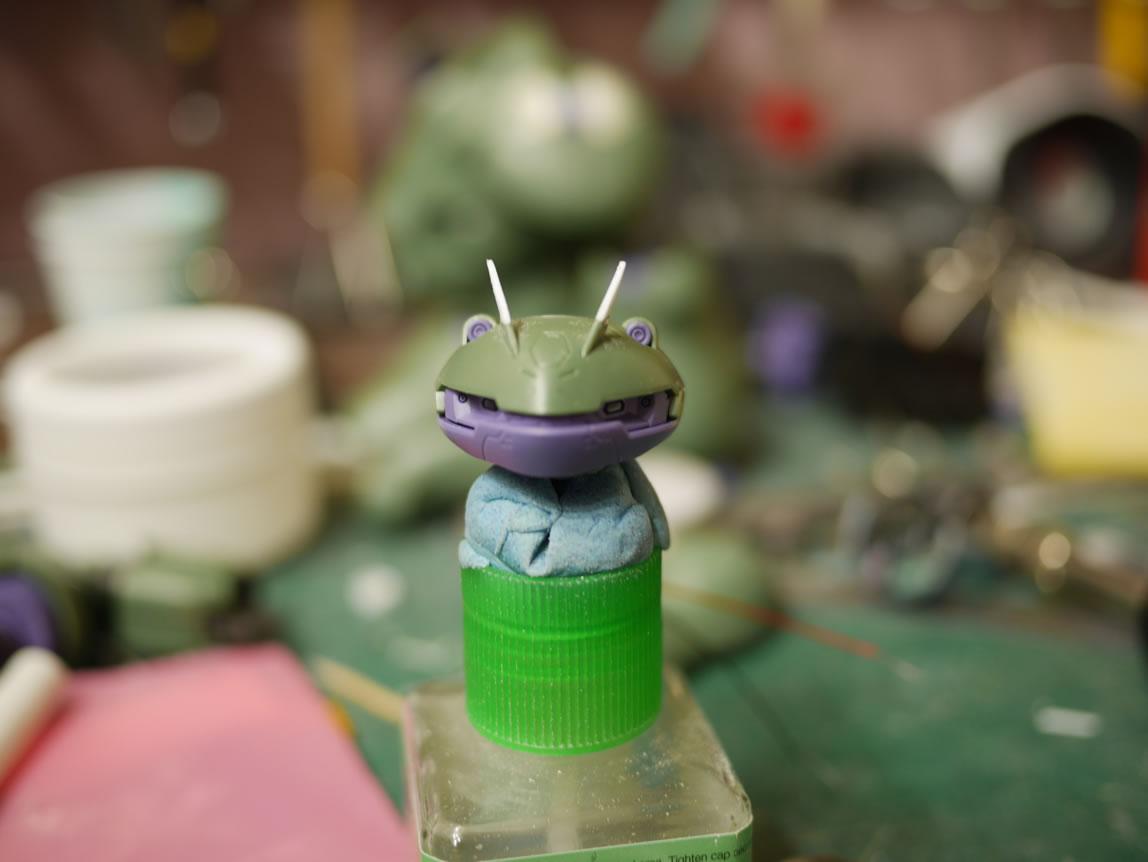
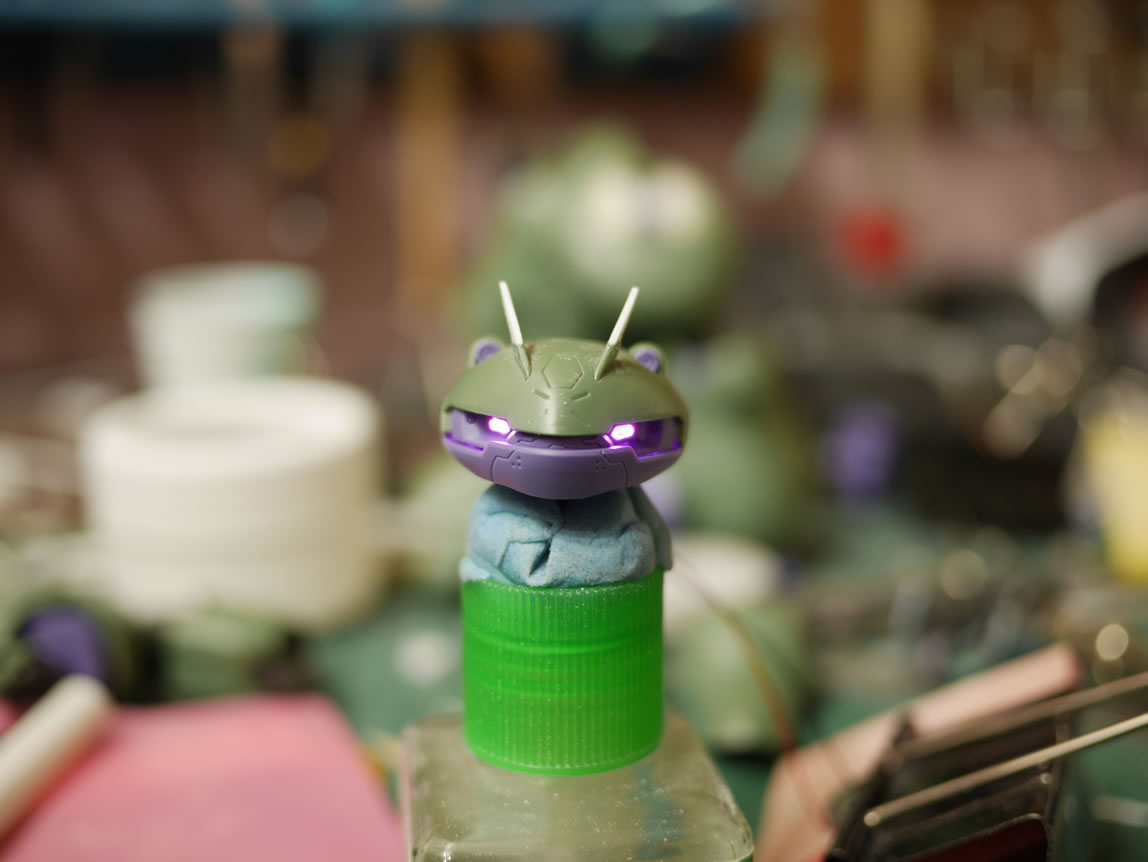
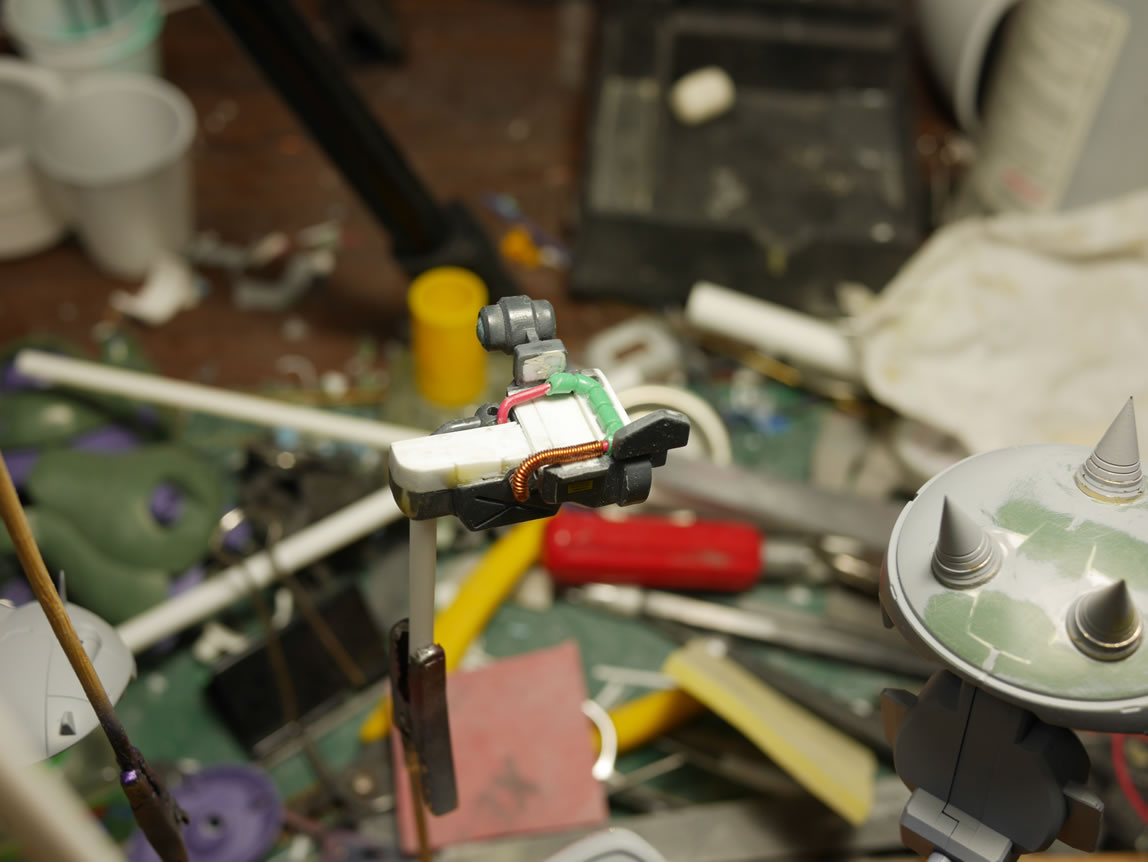
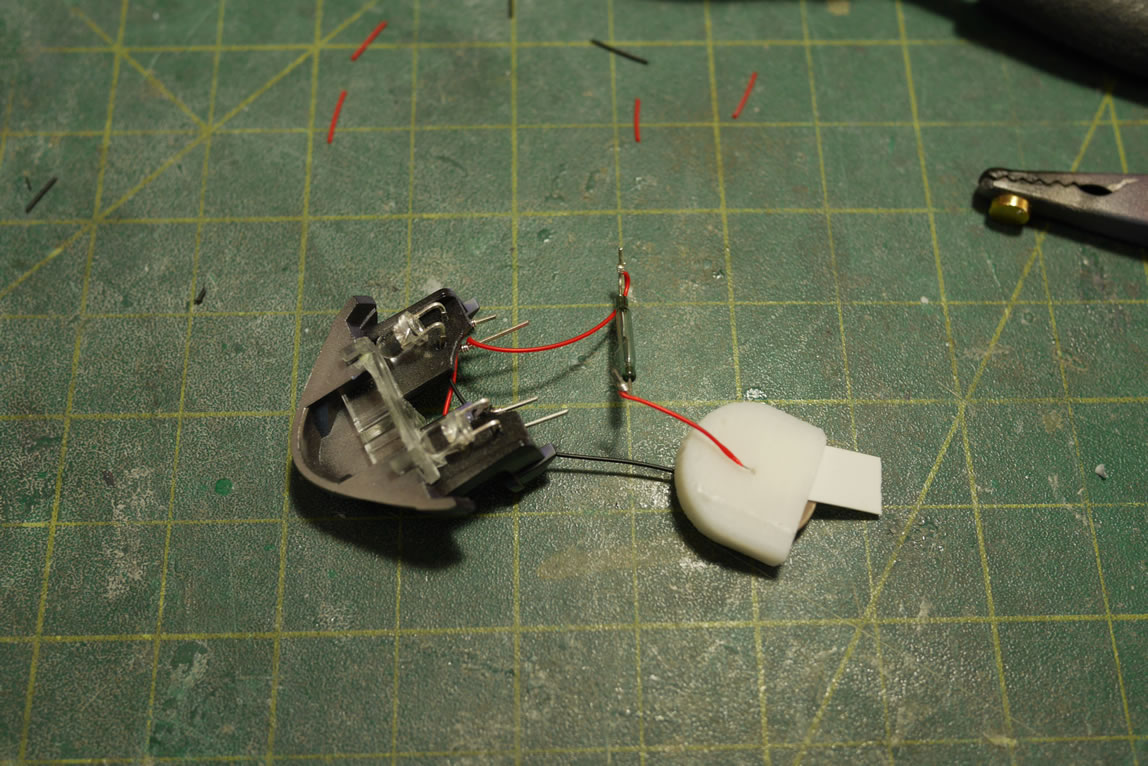
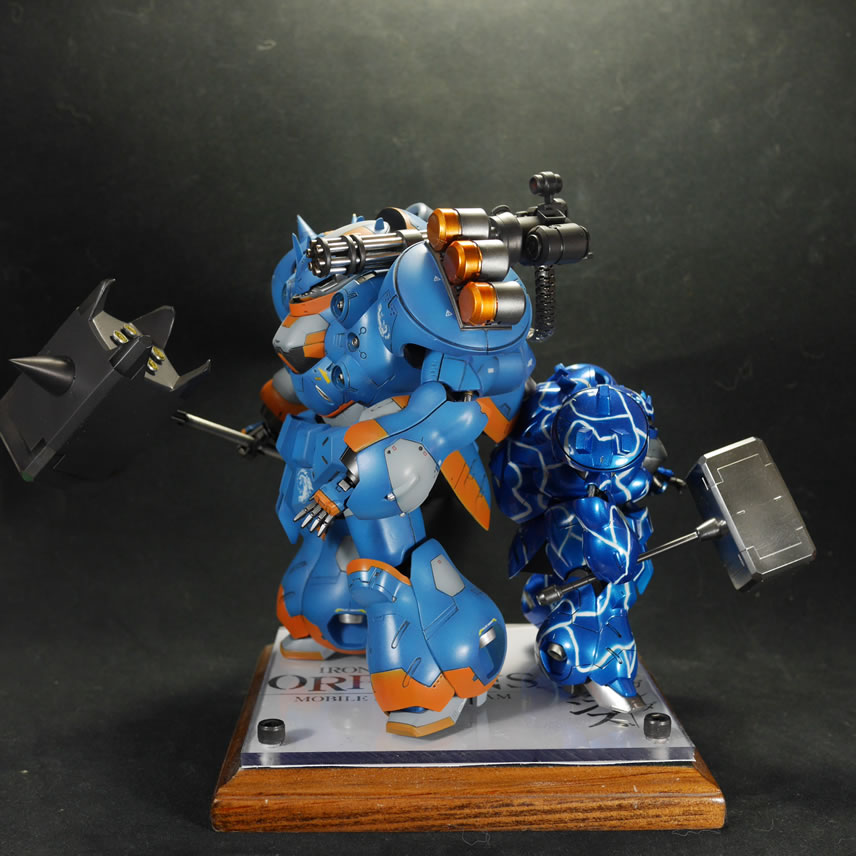
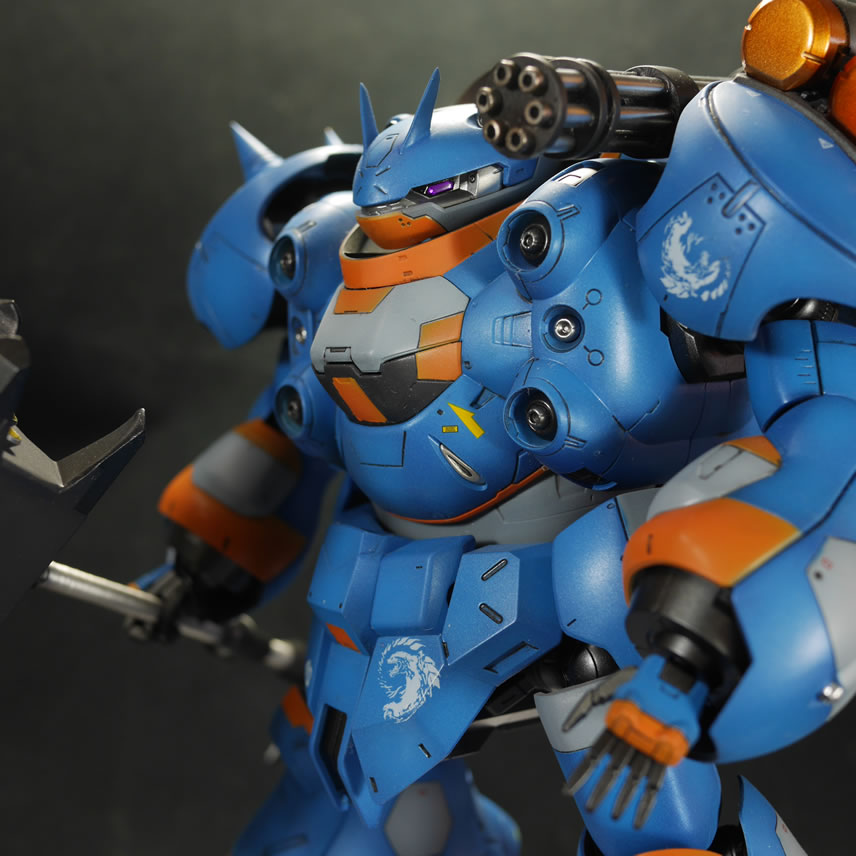
With most of the painting done, I went to work on the electronics for lighting the eyes. Using pink LEDs, the two lights are wired in parallel, and connected to a battery and reed switch. The reed switch is operated with a magnet. And a quick test of the assembly shows the completed head with the eyes lit.
This brings the build up to date. I still have more masking for the arm’s frames as well as the gatling gun. I’m still in debates with how I want to finish the kit. I’m leaning towards a bit of weathering, but not going overboard, just a small amount. But I do like the current semi gloss finish. But I’m getting close, and the light is starting to get brighter as the tunnel exit gets closer.
I learned nothing from my mistake with the 1/144 Gusion, and colossally fucked it all up again with the 1/100. Just look at the shoulders for the 1/100 as well as the 1/144. It’s not the same issue per say, but it’s the same underlying issue that resulted in the problem. But we’ll get to that later.
First, there’s the final bits of detail paint work and the ever-so-fun patience game once all the paint has been sprayed. The first gloss coat needs time to cure. Decal application needs time for the decal softening and setting solutions to work. The second layer of gloss coat needs to cure. The enamel wash needs to be applied – then a bit of time to allow it to partially dry, then the cleanup then letting it sit to fully dry. And the final flat coat and letting that cure. But once the flat coat is done, we’re not quite done yet either. Since there are some detail parts that need attention as well as the final assembly. It’s damn hard fighting the temptation to only wait an hour after the final flat to dry to the touch and just get in and start assembling and gluing final detail bits. The flat coat is like any layer of paint, it needs time to cure. The one hour, dry to the touch ain’t gonna cut it. My impatience has caused horrific accidents at this stage from fingerprints to marred paint. Patience sucks ass; but is a necessary evil.
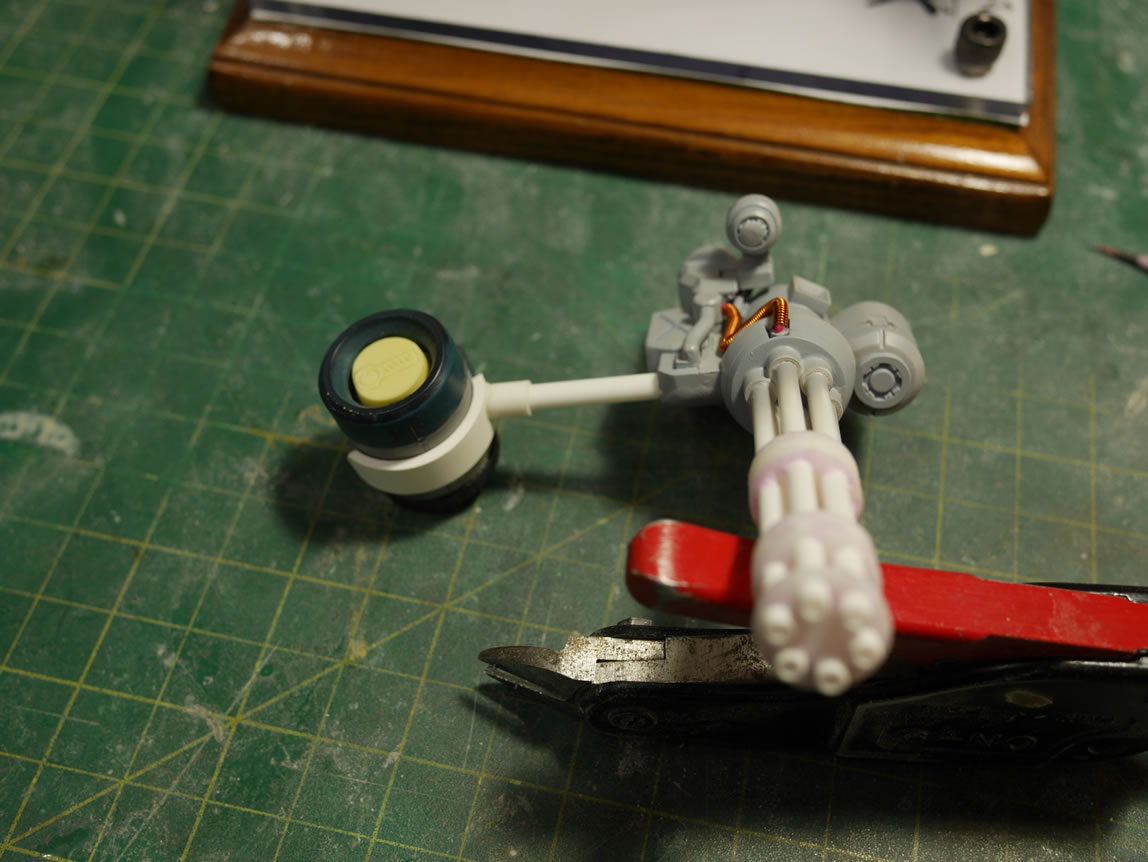
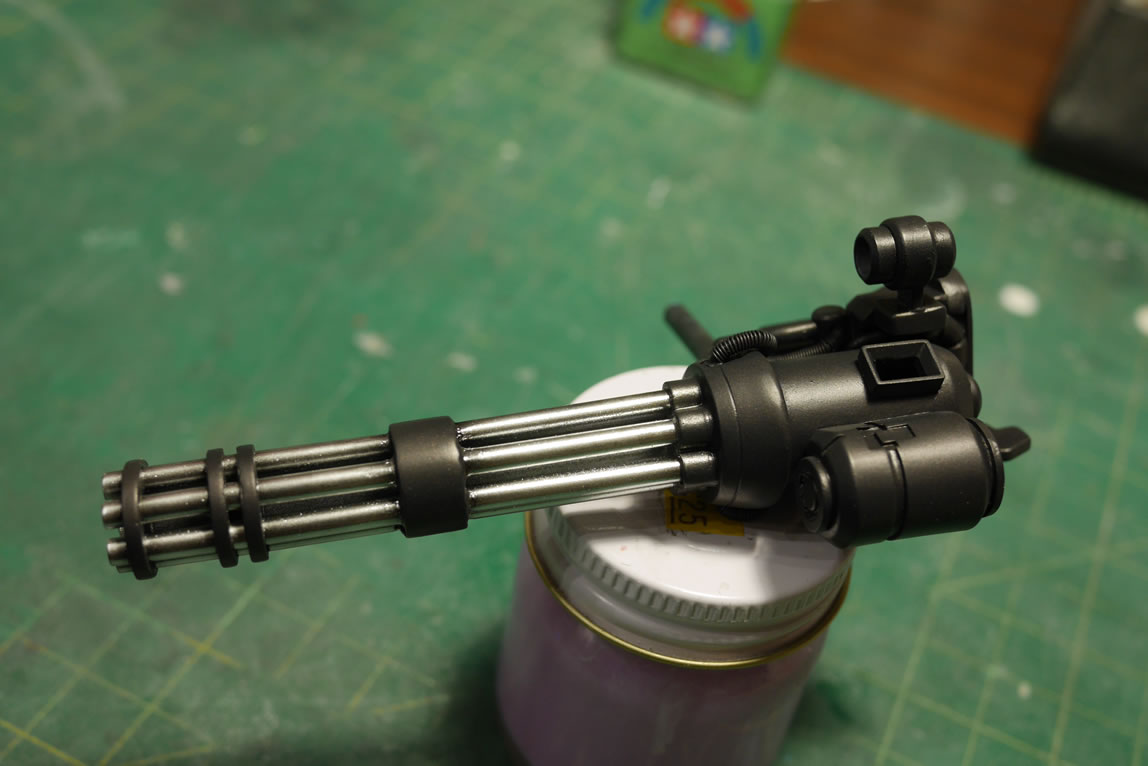
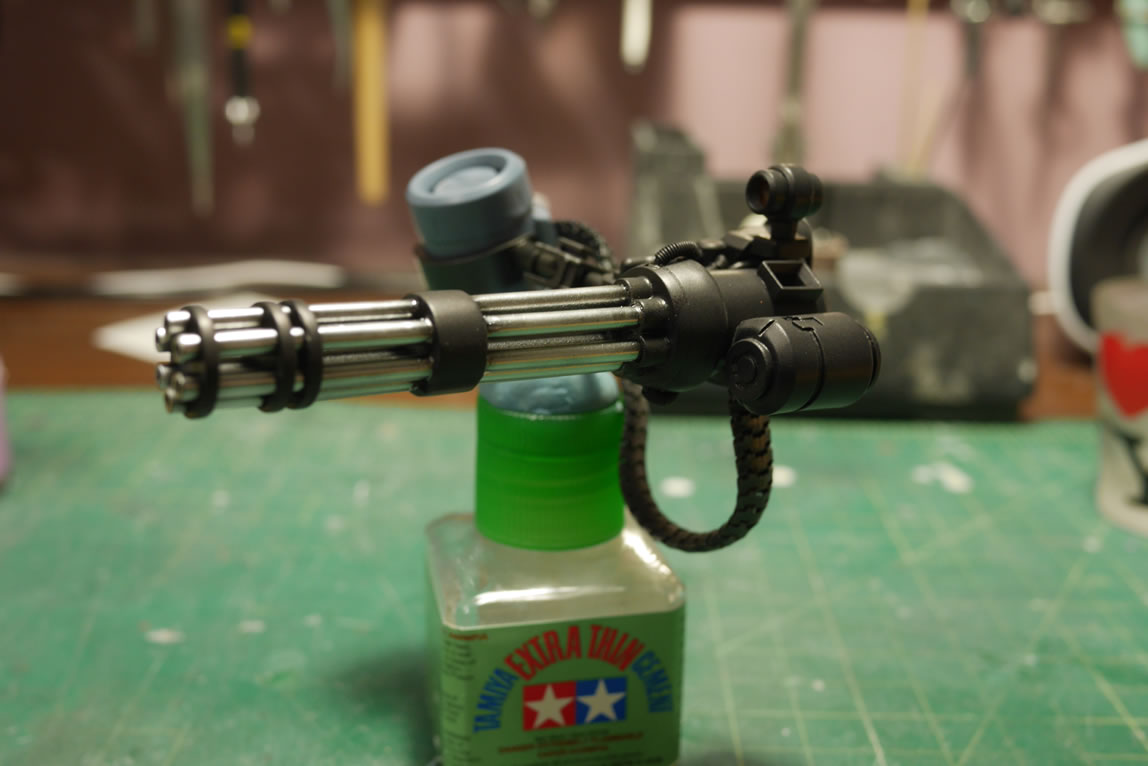
The last bit of work was on the gatling gun. I painted the thing gloss black and then sprayed the barrels with alclad polished aluminum for that chrome like finish. How does this differ from the chrome? No idea, I’m a wee bit color blind, so just by itself, I don’t see the tonal differences; maybe I need to spray something with alclad chrome and the polished aluminum. But I digress. The painted pipes were left for a full day to cure up. I don’t want to lay down some tape only to have the tape peel up any uncured paint. But once cured, tamiya masking tape is laid down and the larger areas of the pipes were masked with parafilm. The less sticky tape I need to use, the less chance for screwing up the paint. Once the masking is down, the whole gun is painted with Alclad Burnt Iron. I love the look of this paint right out of the bottle. It has a flat finish that I really like and still somehow looks fairly metallic.
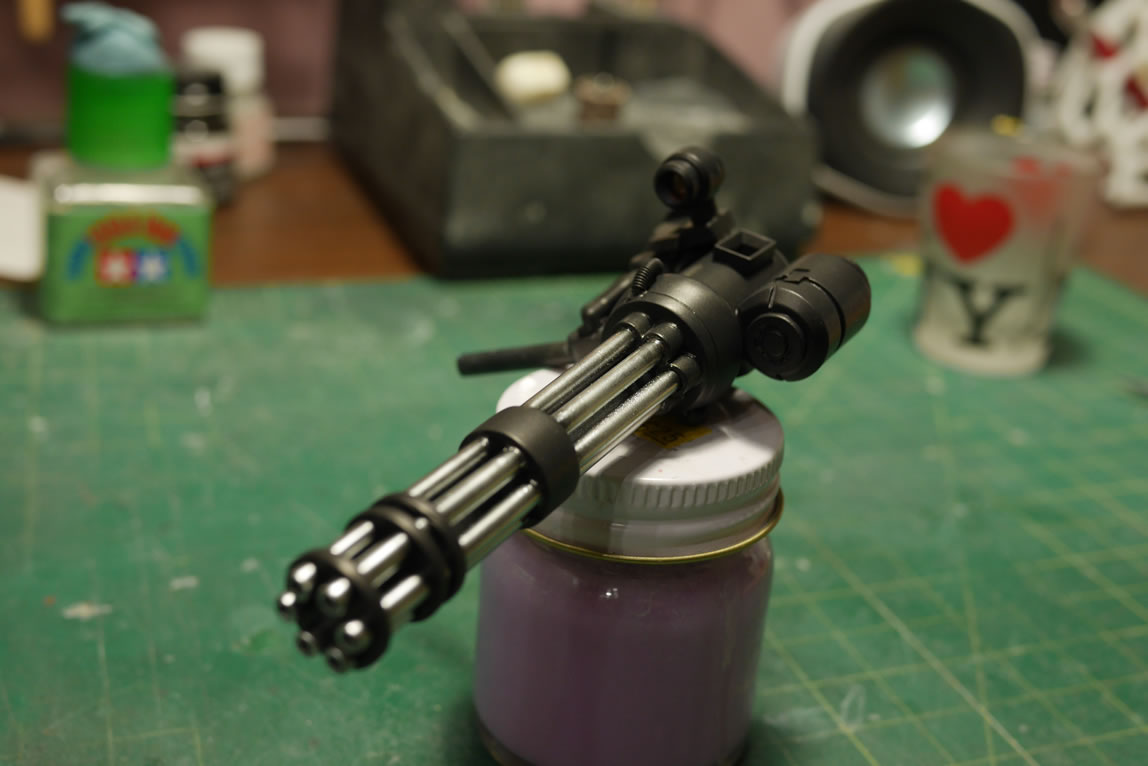
Once the paint cures for a day, I peeled up the masking and finding no errors, I moved on to a quick test assembly. I still needed an ammo belt and was having trouble finding something to use short of just scratch building one; then I remembered that my Gouf Custom displayed at a local gunpla shop was destroyed sometime last year; so I had the perfect part, the metal link ammo belt that came with that Neo Grade conversion kit. The belt was ultra glossy which caused an issue when I entered the Gouf at another competition years ago after I had first completed it; so I flat coated the belt. Connecting everything together, I think it looks pretty cool.
The gun is set aside to slowly cure; I focus back on the main armor pieces. Time for a gloss coat. I really liked the finish of the custom mixed Mr White base and the Subie World Rally Blue pearl. It was a semi gloss and there were some bits of pearl still visible. BUT, I needed to protect this paint layer from the onslaught of other fun chemicals I have planned. The first layer of gloss covers all the exterior parts. Even the parts that I did not have plans of applying decals. Why bother? Well, the gloss coat makes the finish tone darker. So to keep from having uneven tones, all the parts were gloss coated. I have a comparison shot of one of the legs in it’s new gloss coated glory next to the really cool raw finish I was about to ruin with the gloss.

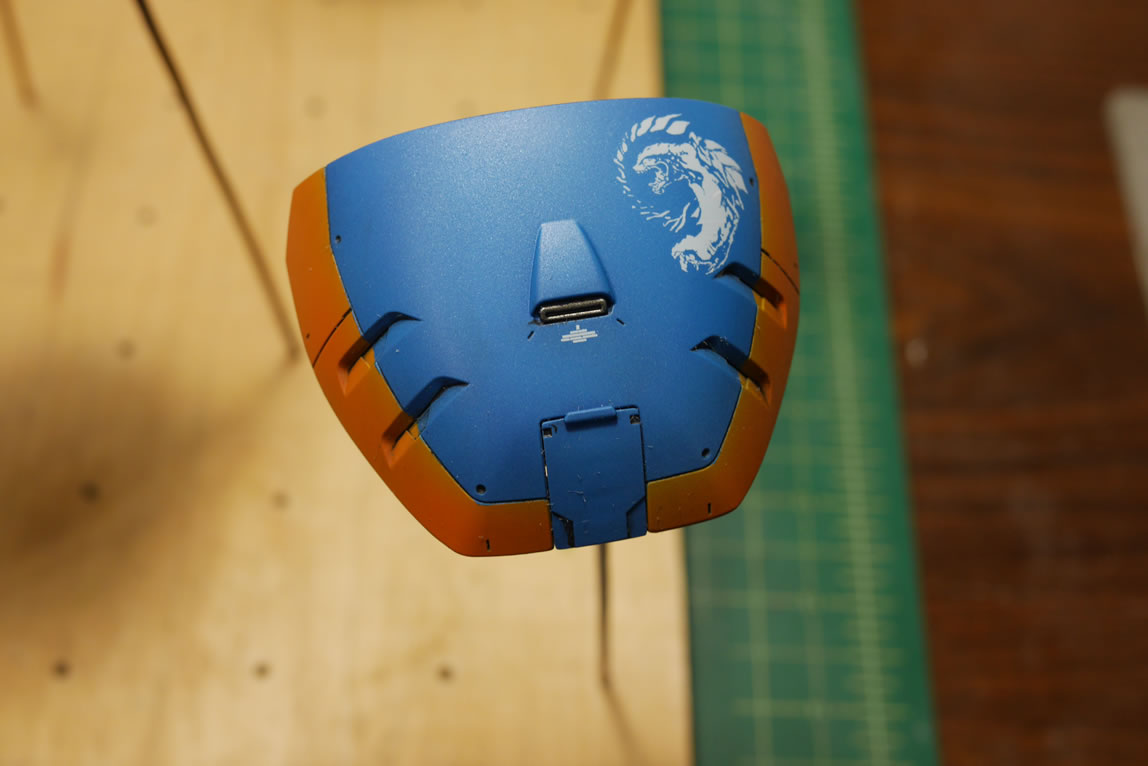
After letting the gloss sit for a day, I laid down some decals I found from my decals’ box. I got some promotional water slide decals with Chinese writing a few years ago from one of the GBWC events and I’m finally using them. I picked “ç ´å£ž” which literally translated means “to ruin” Oh the irony. It can also be a noun for “destroyer”. Which fit the suit when I was picking out the phrase to use. I used this as well as some warning decals, and then some Gamera decals. I didn’t have a waterslide decal set for the Gusion, the kit is really too new, and there really isn’t much in terms of decals for the kit anyways. Creative licensing at its best. I also added the 40 as an hommage to the old Ford GT40 in Gulf Oil Livery. I didn’t plan this, but after painting the damn thing and removing the masking, that’s the first thing that popped into my head; I subconsciously painted the Gusion in Gulf Oil Livery.
Happy with my decal placement, because it hasn’t even clicked yet. I let the decal softer solution sit for a full day then spray gloss over the decal areas. I don’t need to gloss the whole parts since I’m only protecting the decals as well as spraying enough gloss to cover some of the thicker decal edges. That dried for another day. Panel lines are applied using an enamel wash and lighter fluid soaked paper towels for cleanup. Another day passes while the enamels dry enough to be cleaned up. Only when it’s cured can I spray a flat coat.
I think trapping uncured enamel thinner/lighter fluid leads to that stuff breaking down the plastic and turning it brittle. I know that excessive use of lighter fluid in my weathered projects have severely weakened the plastic of those kits. I could look at those kits wrong and they’d crumble on me. So time was allotted for the panel line wash to dry and cure.
Friday of this past week rolls around and after work, I finally get to spray the final flat coat to finish everything. And I need to let this cure. This is the absolute most difficult level in the patience game. The kit is SO GODDAMN CLOSE to completion. Just removing some masking bits, gluing some detail bits, and assembling the whole thing right? Gotta wait. Gotta wait. I’m excited.
I failed at the game, AGAIN! About 8 hours go by and I cannot help myself, I sit down and start removing masking tape, assembling the inner frame to the outer frame pieces. Start gluing some detail pieces into place. Start putting the thing together; and it’s starting to take shape. I got the arms together. I got the legs together. Getting the waist and attaching the legs. Getting the upper body together… Uh oh, fuck me…. At this point, let us revisit the 1/144 Gusion that I built earlier this year; look at the shoulders, notice anything strange?
Ok, here’s a picture of the Gusion from IBO anime; look at the goddamn shoulders.
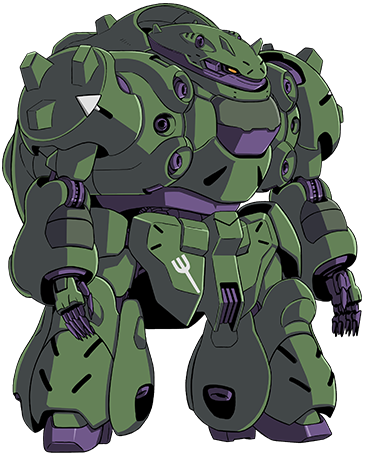
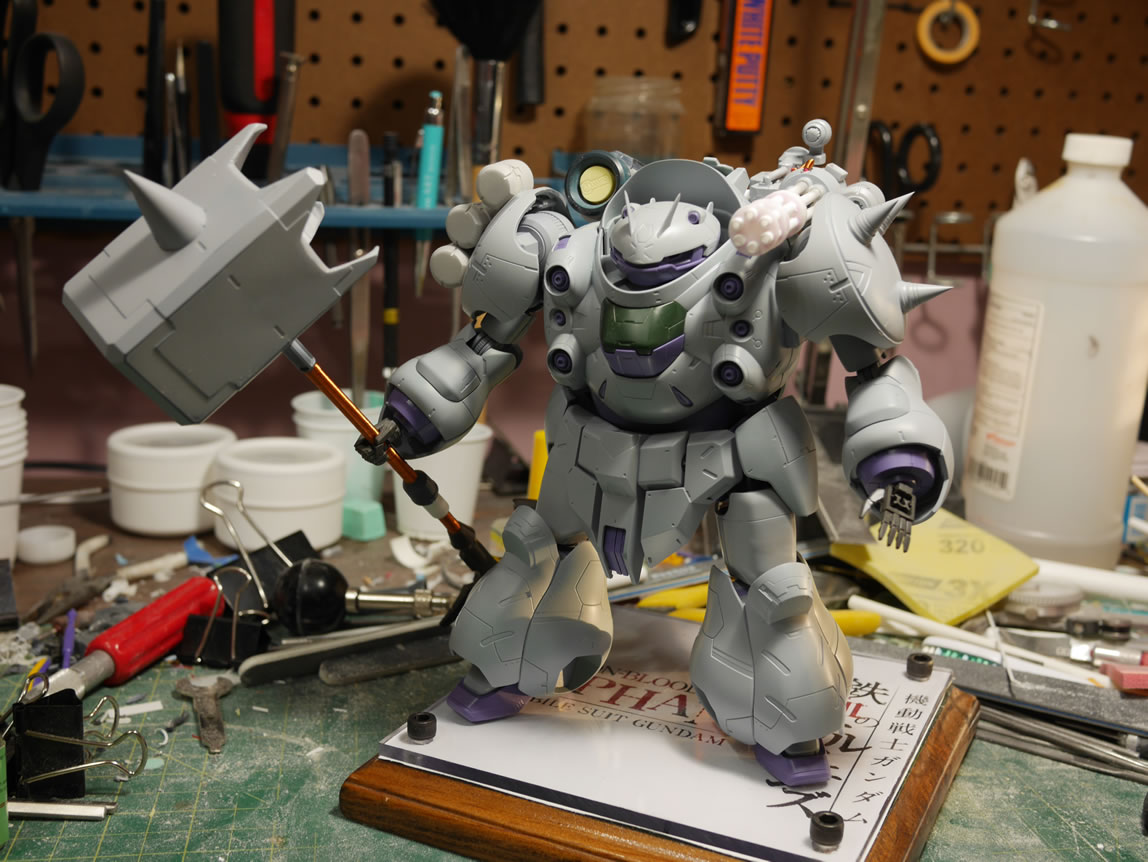
Yep, I assembled them upside down. And the fix is too much a pain in the ass since it’s already glued together and painted. So lessoned learned right? While I was working on this Gusion, I marked the shoulders right and left. But this time, I’m gonna outsmart the kit, I chopped off those damn square pegs in the shoulders and replaced them with my own spikes and such. Oh but I still failed to mark them up and down. And so I learned nothing from the 1/144 a mere few months ago. My Gamera decal as well as the ç ´å£ž decal are; as I discovered while doing the final assembly; fucking upside down. Awesome. I have plenty more Gamera decals, but no more of the ç ´å£ž decal; so I guess I could carefully sand away those decals and apply something new there. But I’m entirely too lazy. So the irony of “ruining” this; the decal application was a true ç ´å£ž(ruin) of the kit. So I guess it now a true double entendre; completely unintentional. At least all the other decals are right side up… This also lead me to swap out my originally planned right and left shoulder placements. The spikes are now on the right and the shoulder with the tanks on the left
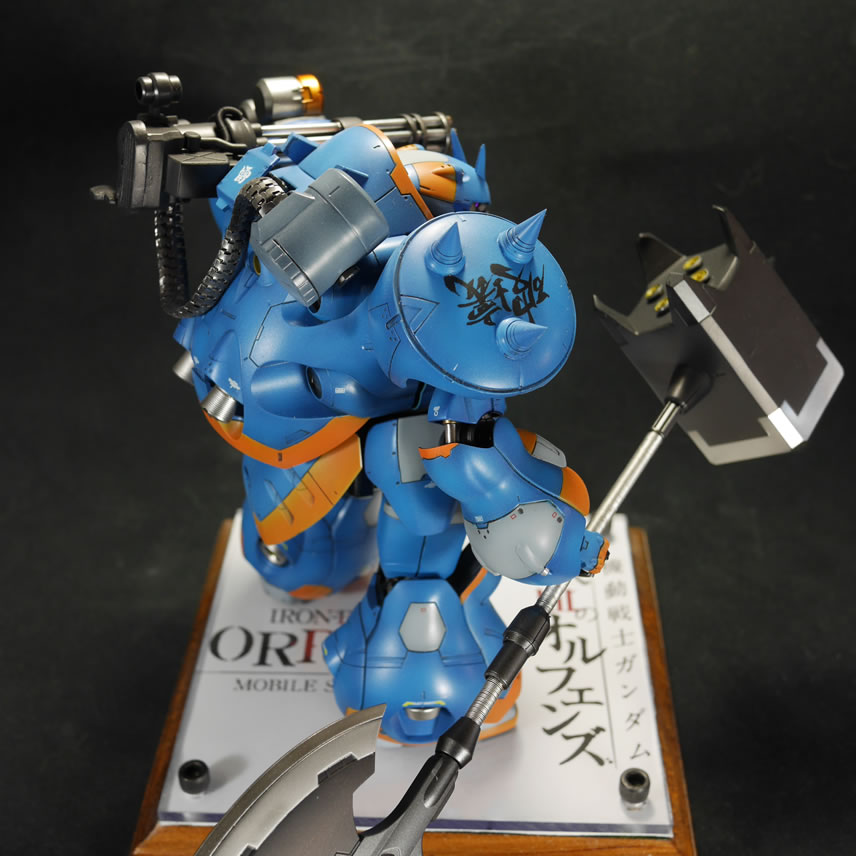
Saturday morning, I glued on the final bits of details for the forearms as well as the shoulder tanks.
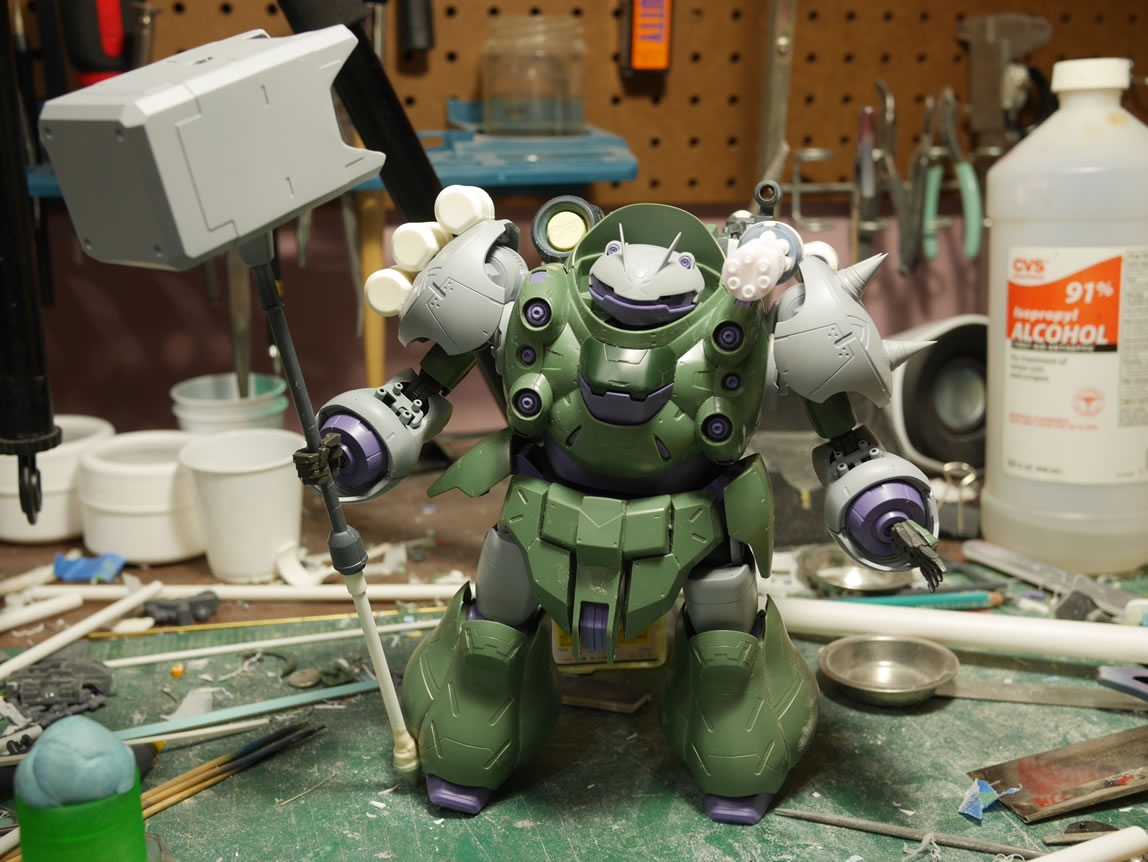
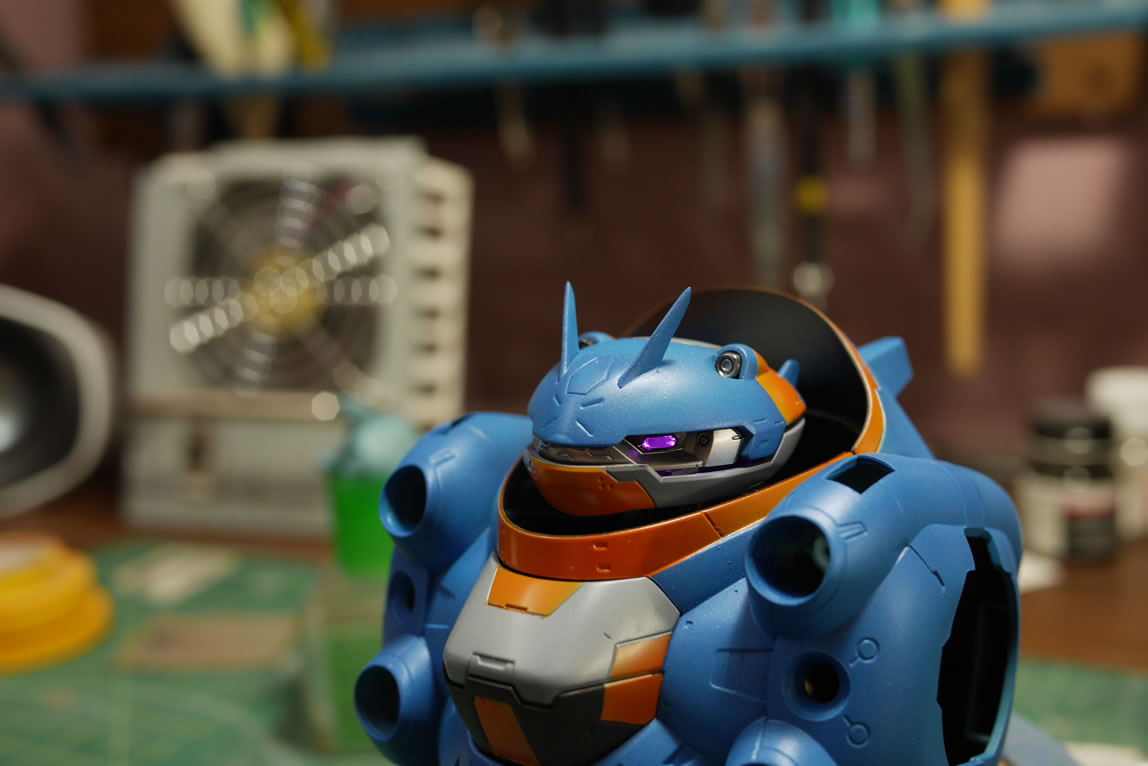
Once everything got put together; I set up the photo booth and snapped some pictures of the completed kit. I have a magnet at the back of the base of the neck frame piece. When the head is pushed down into position, the reed switch is activated by the magnetic field and the LED circuit is complete, lighting the pink eyes for the kit up. I think this looks much better than the original yellow eyes for the kit. Granted I could have just painted it, but there’s just a ton of room in this kit; so it just begged for an LED. I didn’t feel the need to go overboard and add LEDs to the rest of the kit; so only the eyes this time.