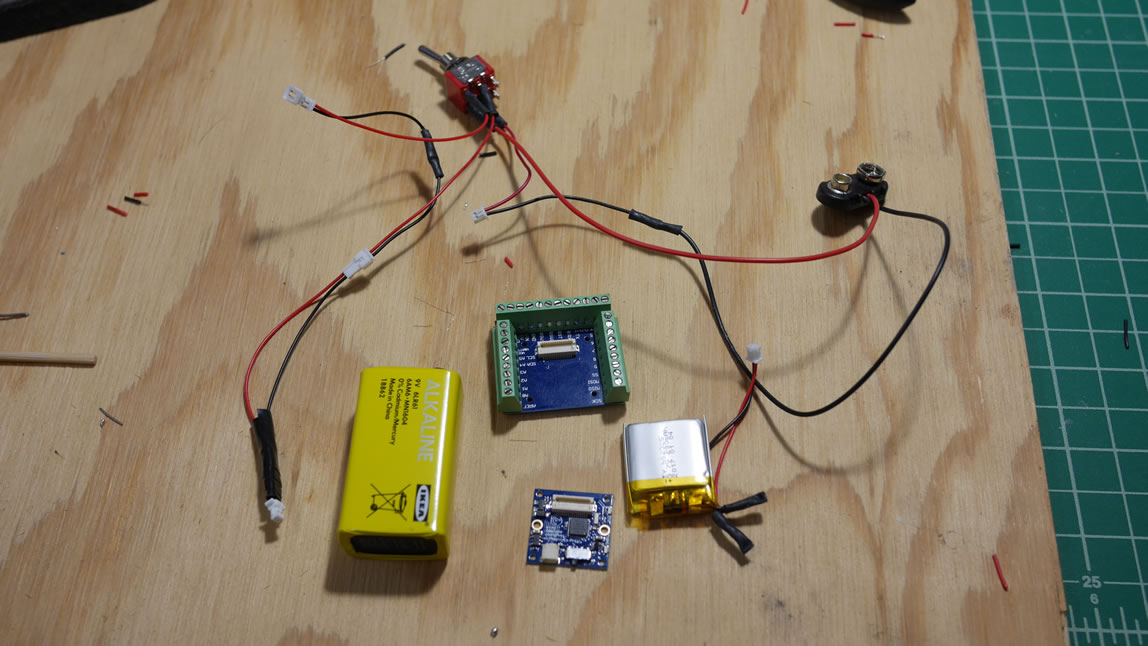
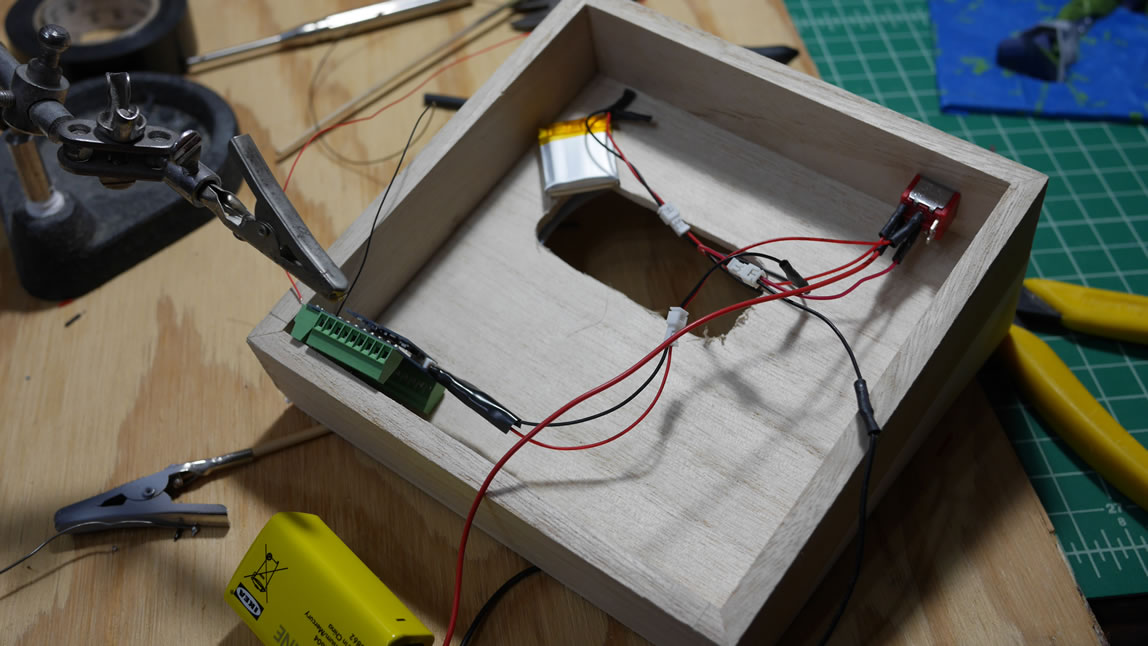
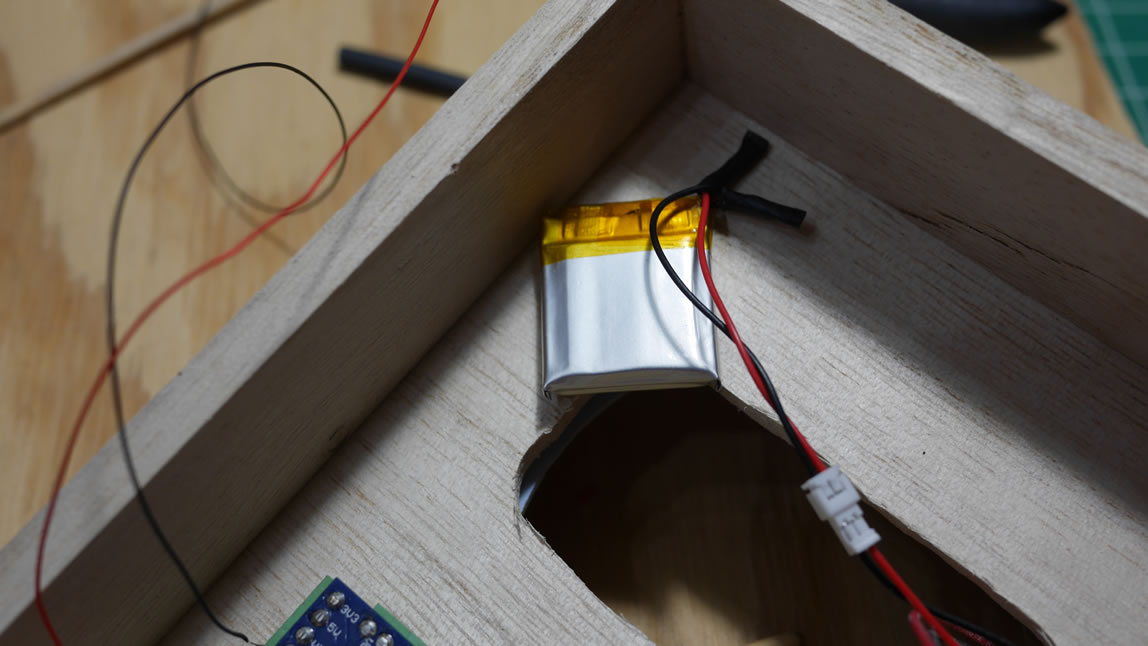
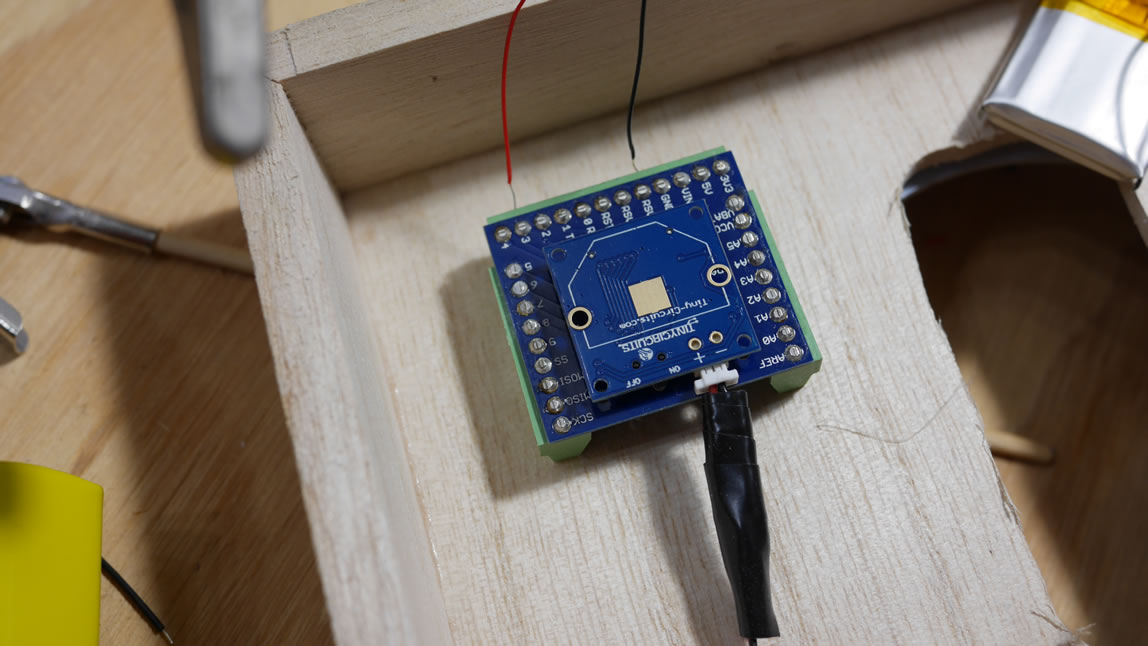
This last bit of work has been ongoing since I finished the Sniper. This is the display base. I got the idea to do an relief style display when I was up at Tatsu Hobby’s Blue and Yellow Ball event a few months back. I saw a display that had half a figure projecting out of a wall piece and thought that would be a really cool effect to try with a kit. So I want to start small first, then possibly do something bigger in the future. A more wall mount piece in the future, but here we go. I had been working on the Zaku bit for a while and only touched a little on the wood base in a previous update. I have some electronics involved here too. Previously, I had a ring light attached at the bottom of the box with some angled styrene sides. Aside from that, I also have the electronics that will drive the mono eye. I’m using some tinyduino boards to power and run the mono eye.
Here is a quick video of ths base.
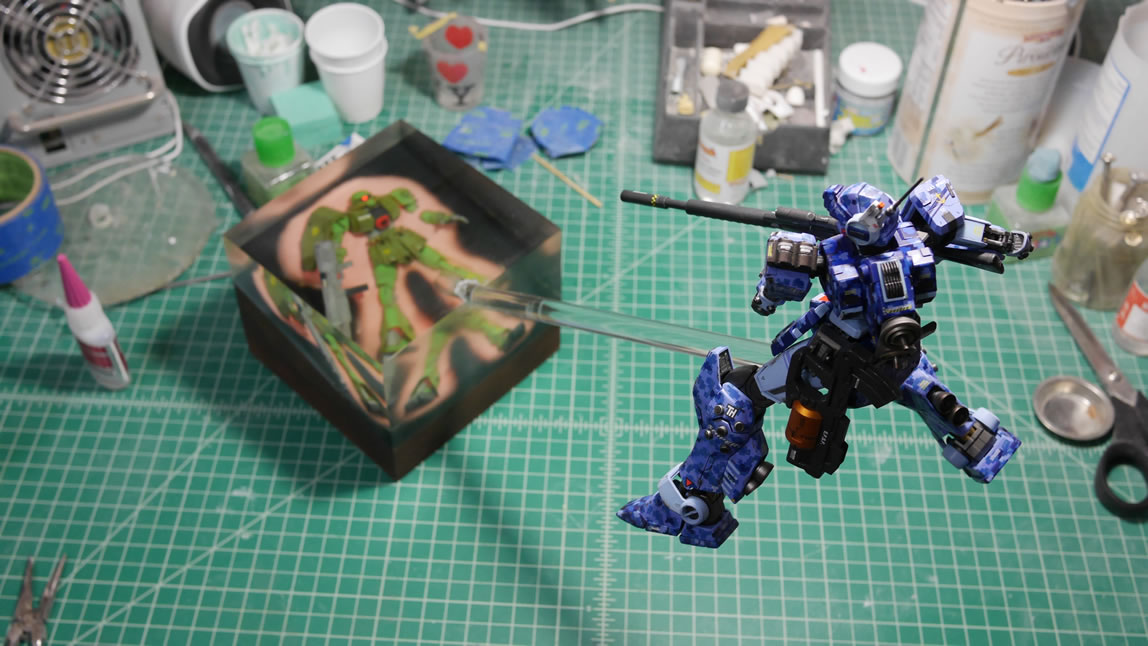
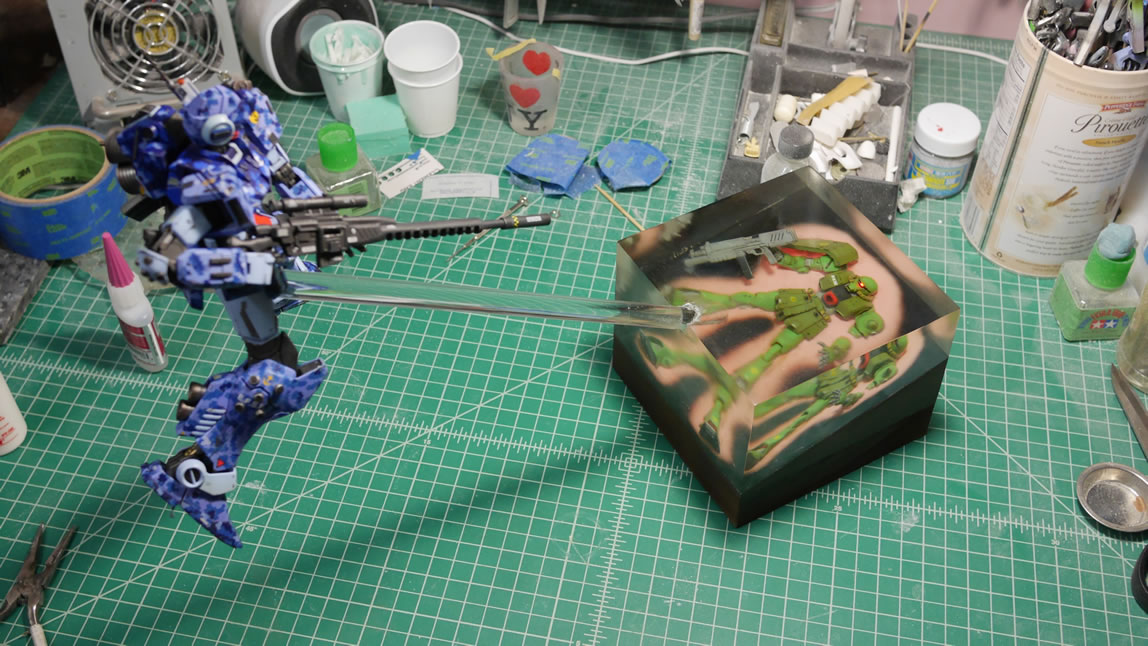
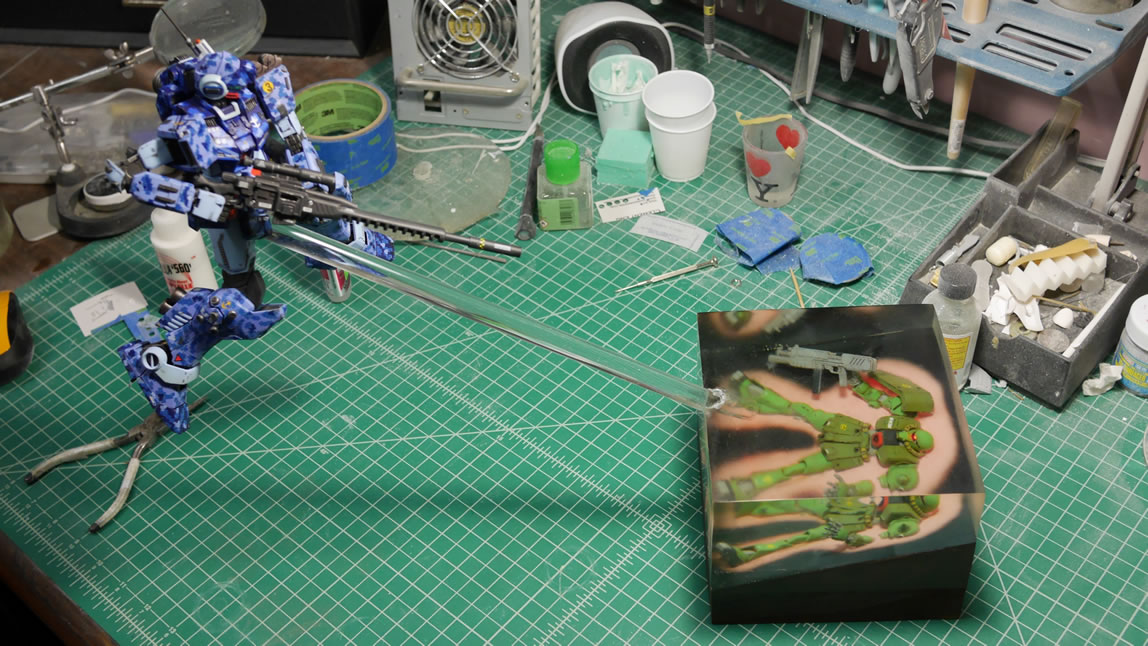
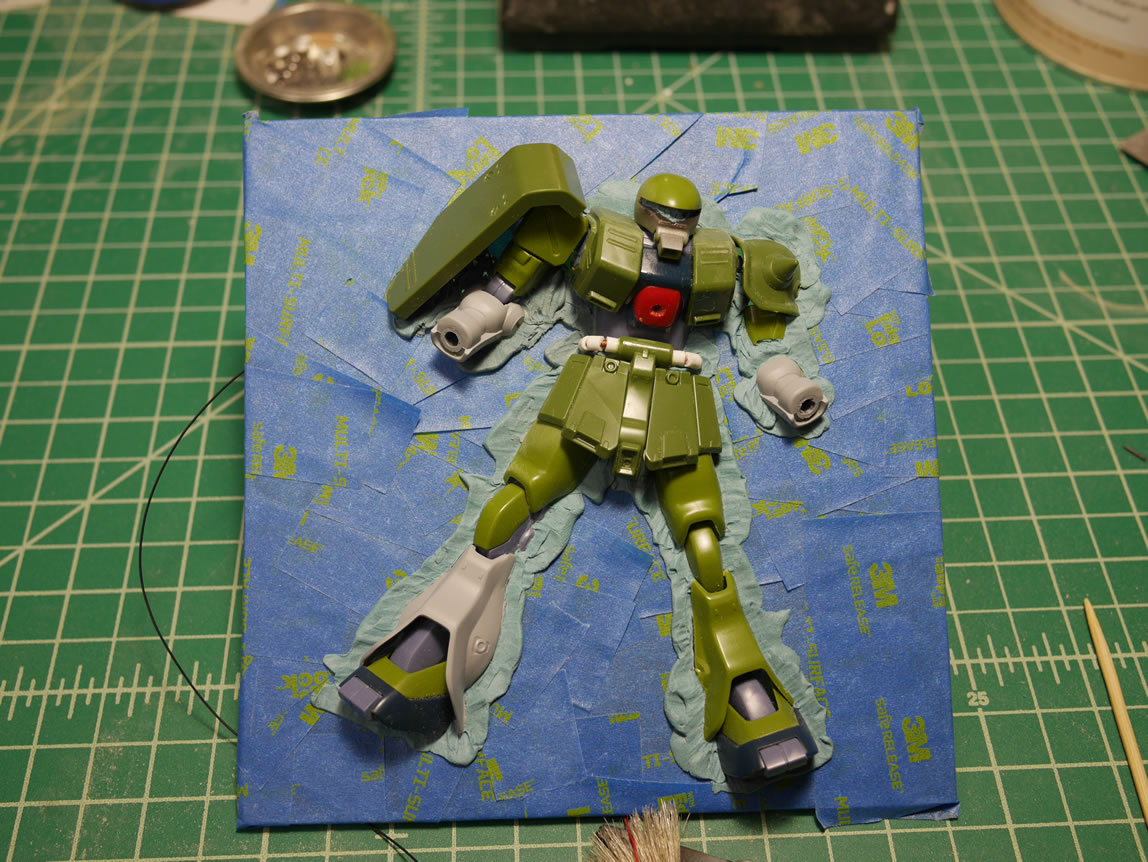
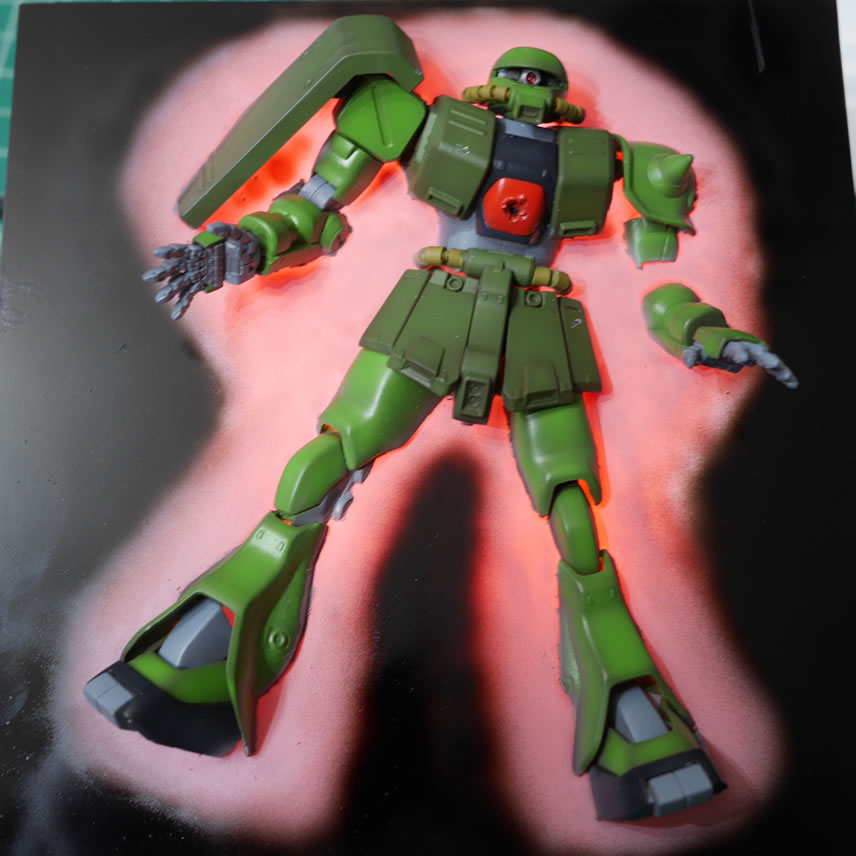
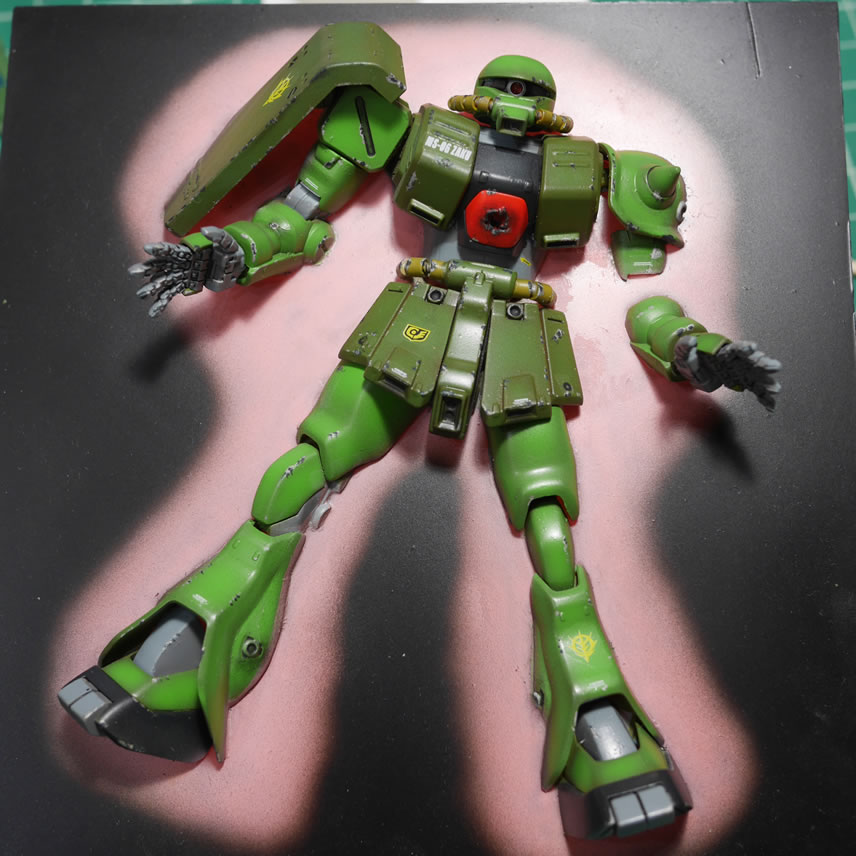
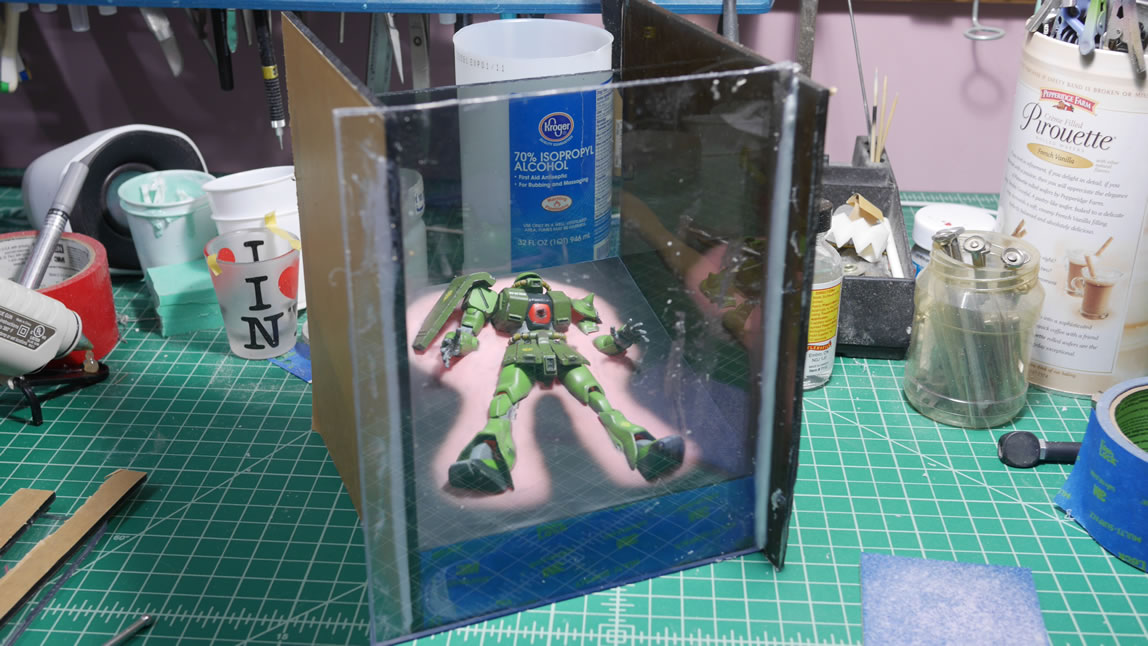
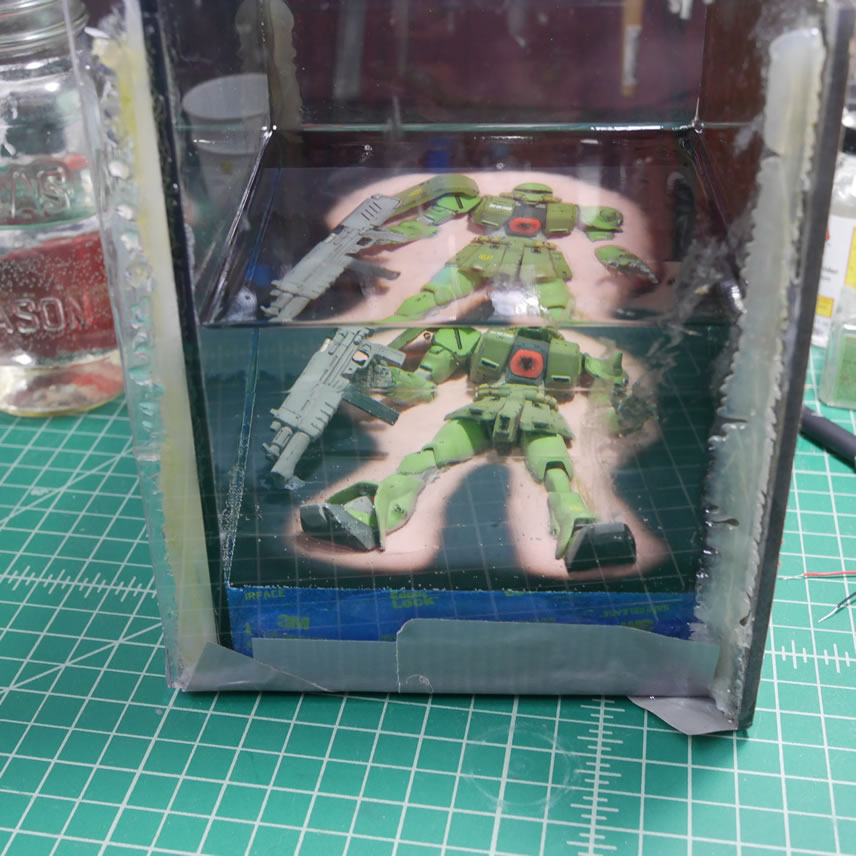
I’m using a 1/144 Zaku II FZ. The idea is that I have some forced perspective. The sniper has just shot up poor Bernie and I’m trying to present the shot as a page out of a manga. The shock of getting shot with everything around fading to black and a cloud of pink/red halo around the suit. The ring light comes into play here to accent the halo effect by backlighting it. So that’s the basic premise.
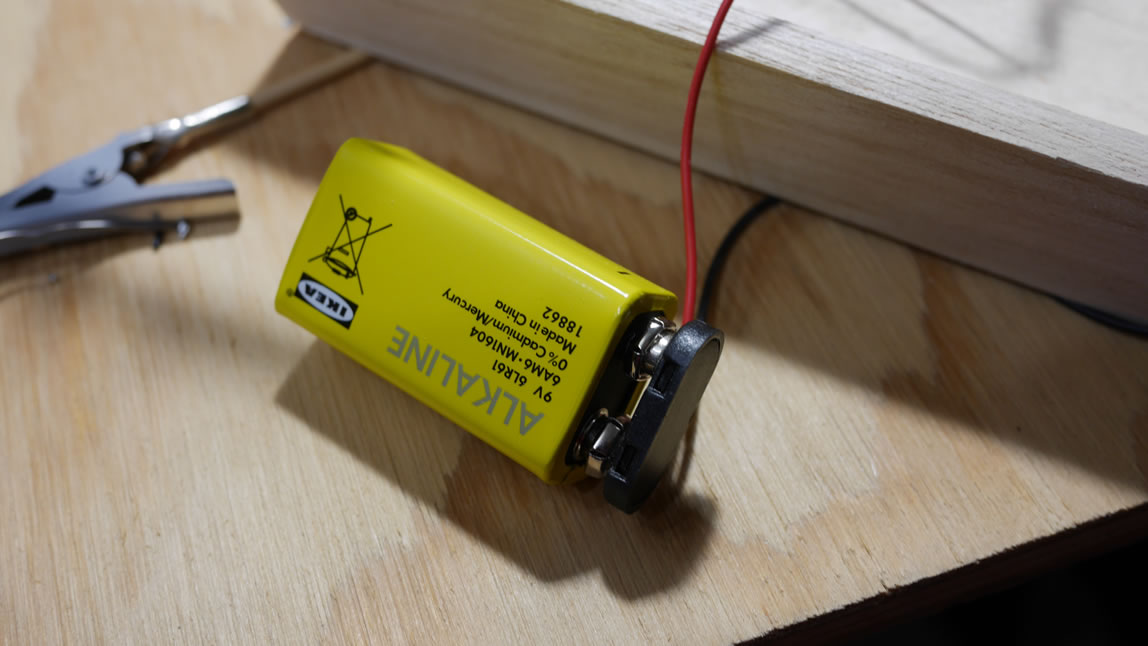
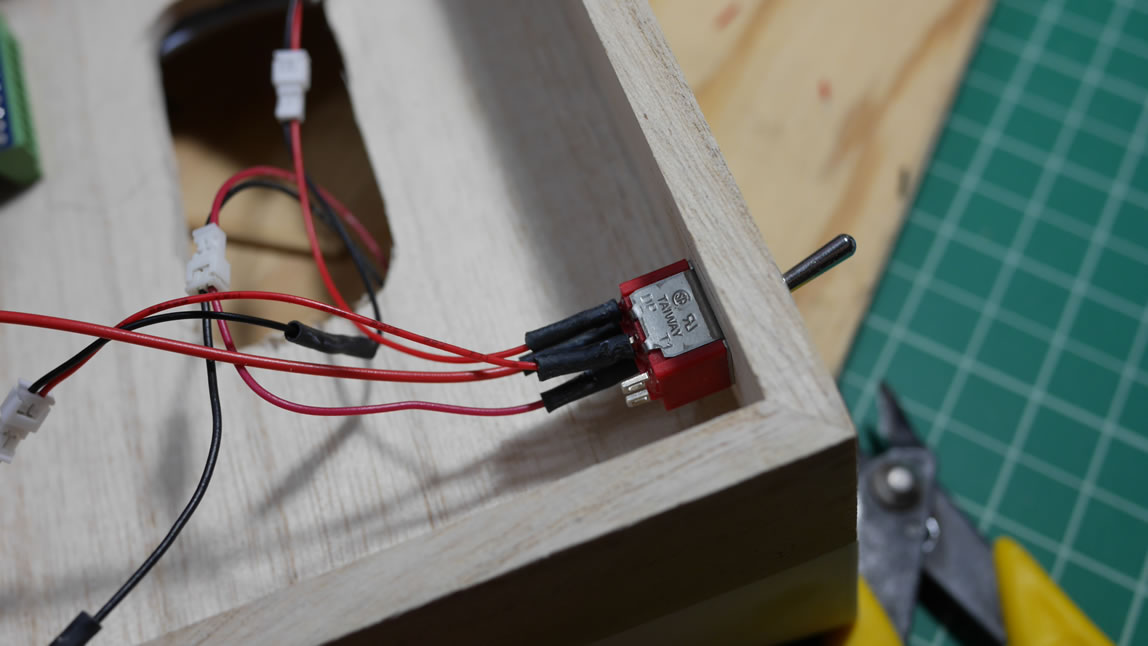
Returning to the lighting, I’m powering this with two sources since I have a ring light that runs off the 9V and the circuits that run off 5V. Soldering everything together I get the above harness with the switch assembly and micro plugs.
This is the tinyduino board stack. These things are damn fun to play with and pretty damn powerful. I’m just using it very simply to drive the mono eye. The switch assembly is as simple DPDT, so that I can switch on the lights with two different power sources.
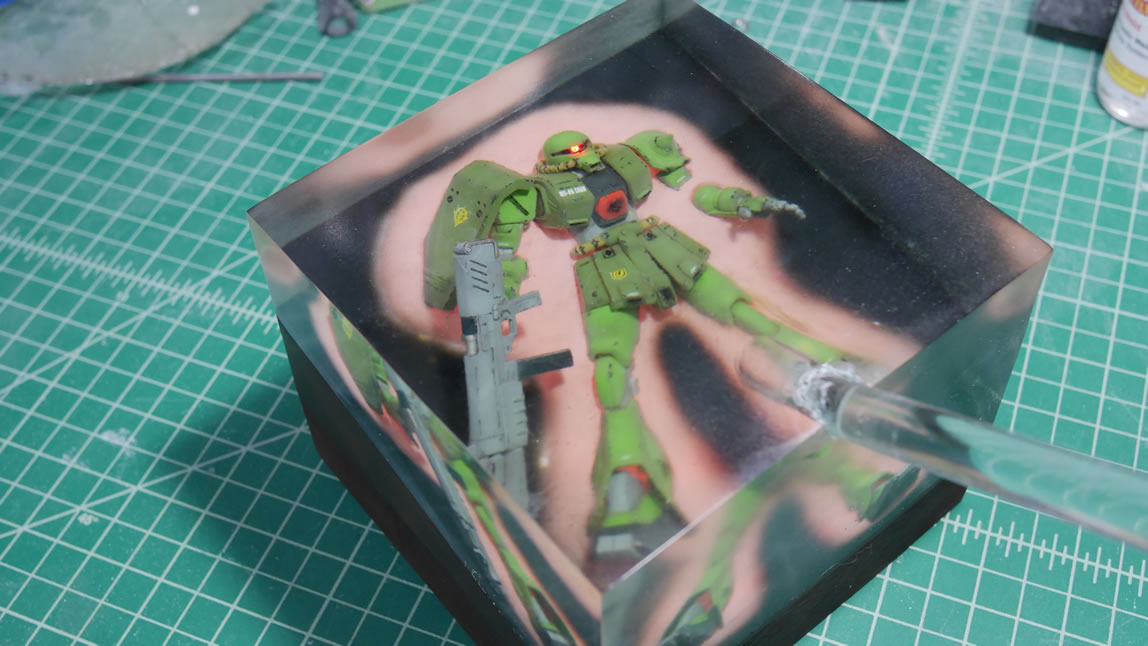
Even with the acrylic sheet masked off, once I flip the switch, the mono eye comes on and you can see the backlight coming through the masking and gaps in the masking.
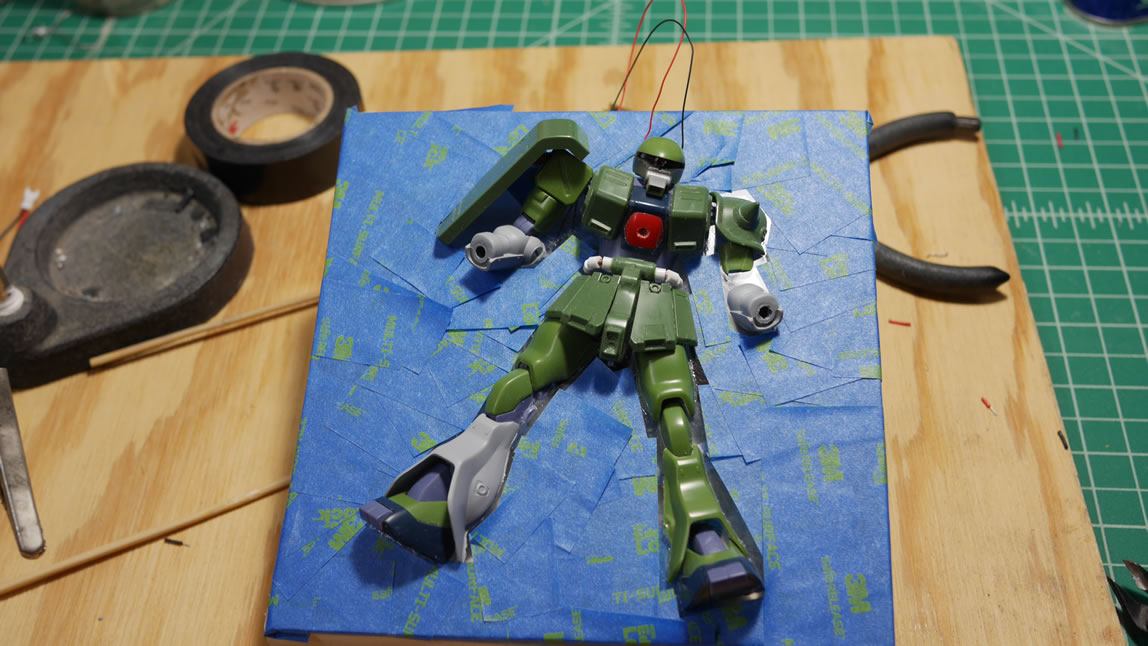
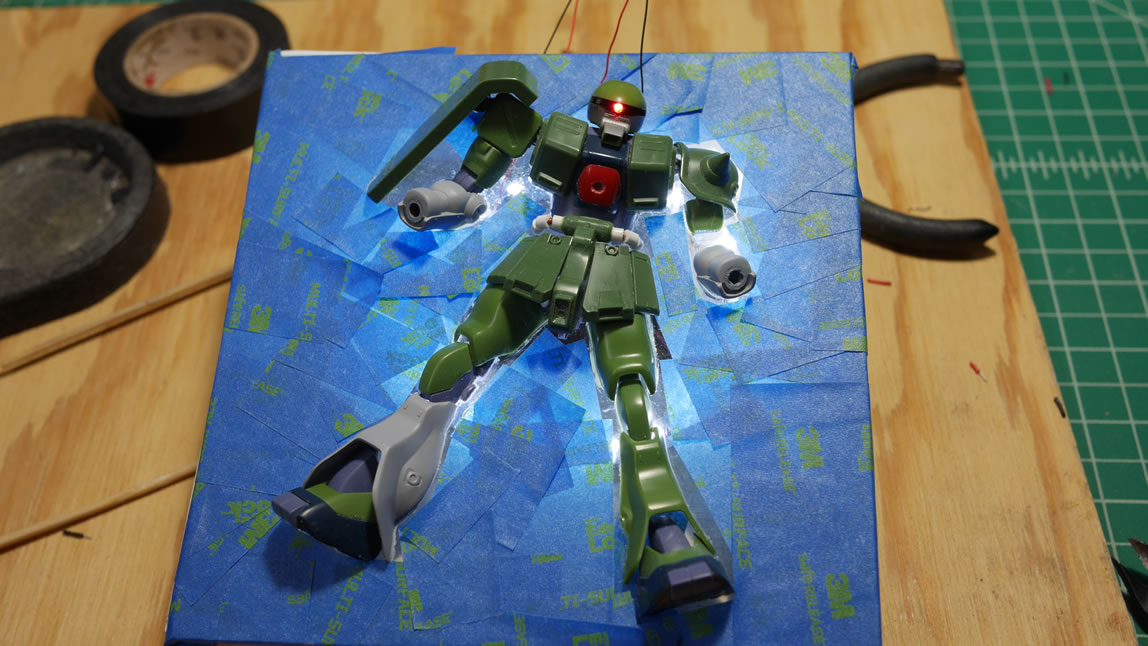
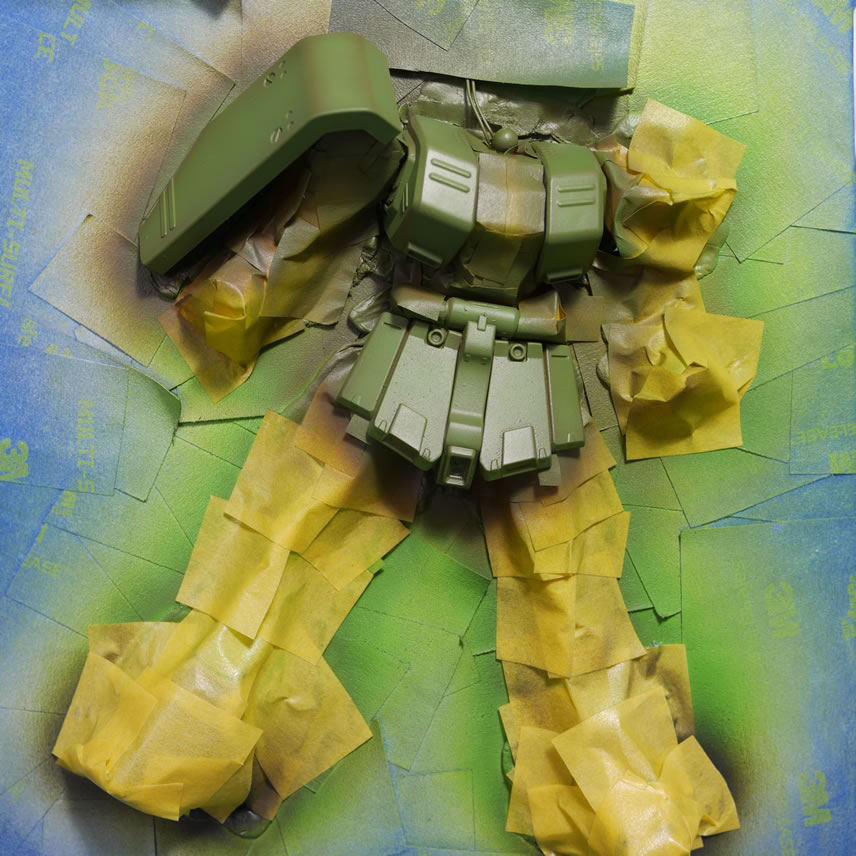
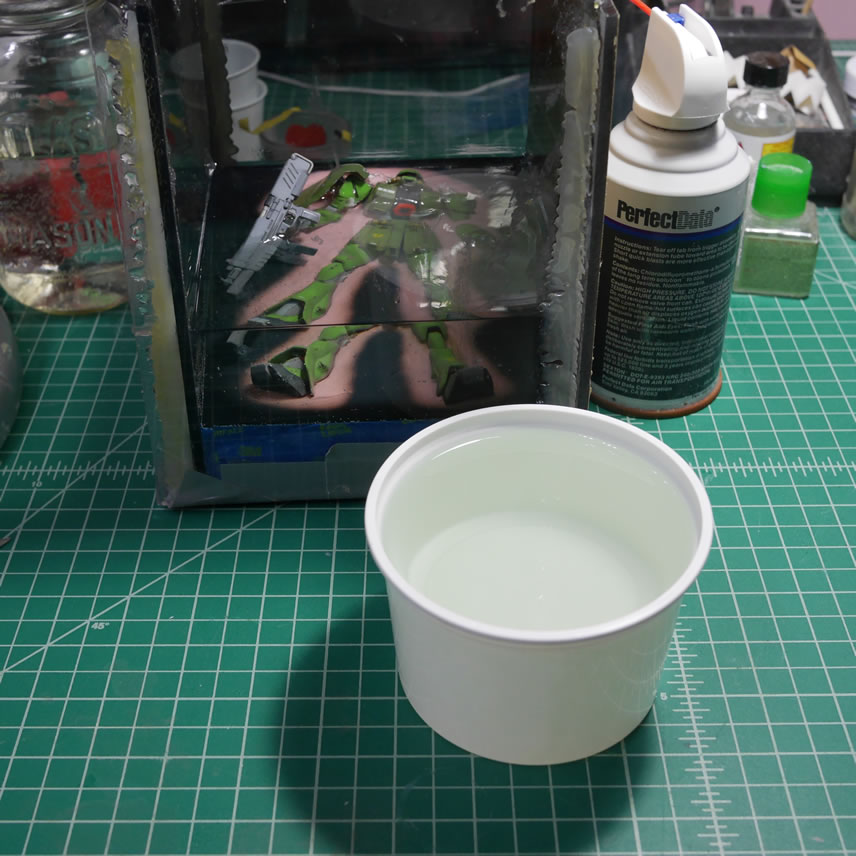
Now that all the electronics are tested and set up and the kit is sanded and ready for painting. I get the gaps masked off as well as the internal head details masked off with sticky tack.
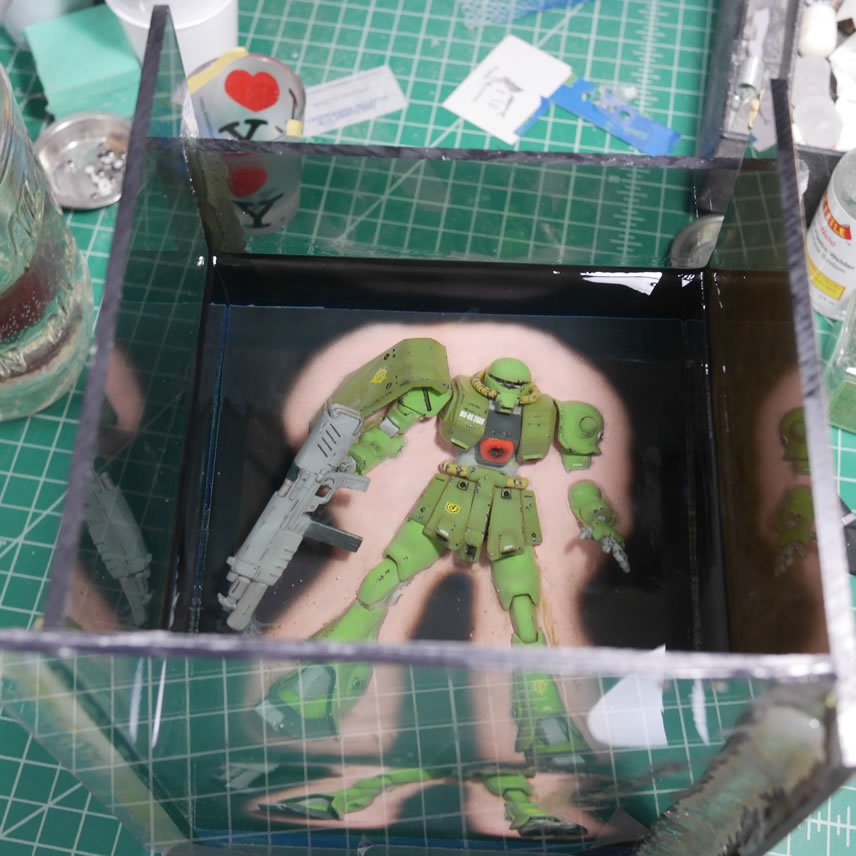
There are pros and cons to how I painted the sucker. I didn’t want to ruin any paint if I had prepainted the kit before gluing it to the acrylic sheet. So I just glued 95% of it and went ahead and painted. I originally wanted to try my hand at cell shading, but it wasn’t working out. The deadline was looming and I really should just get the damn thing done the best I know how; so that technique I will save for another day. The greys are painted and masked. The main suit color is painted in Mr Color Olive Drab as te base color. Over the base color, I used Mr Color yellow green and did some fairly heavy shading. Heavier than my normal shading tastes.

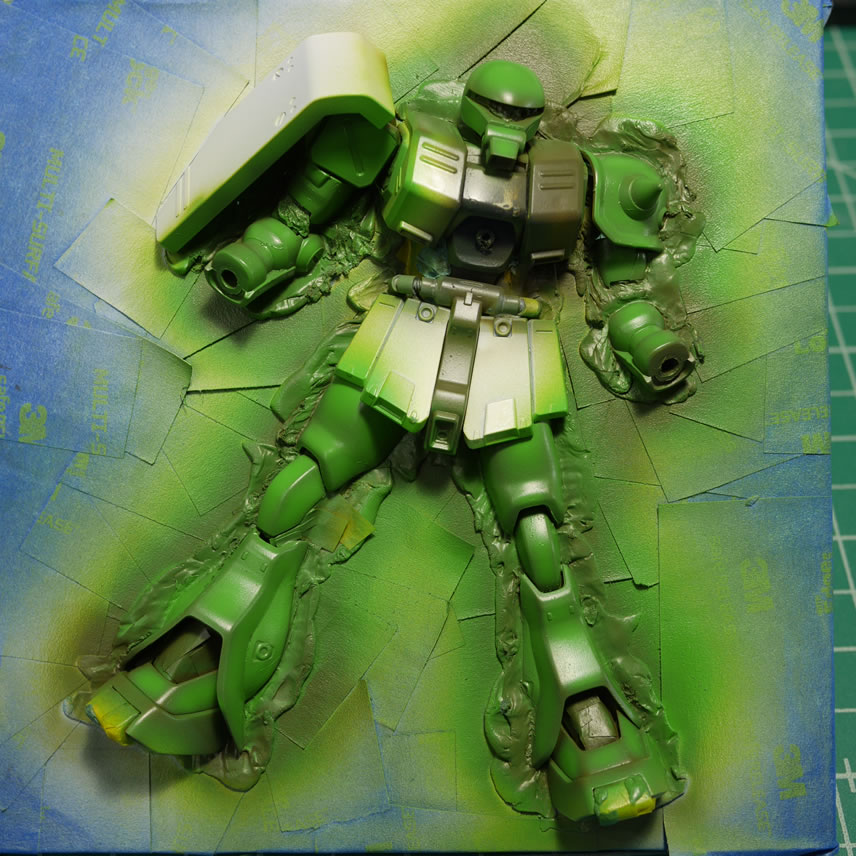
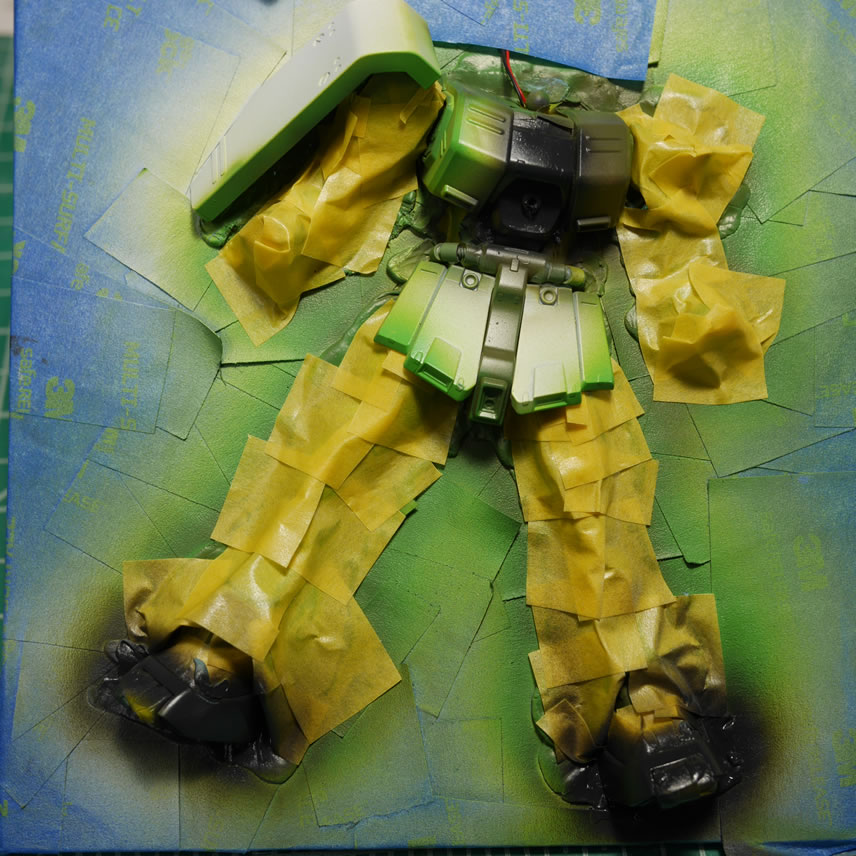
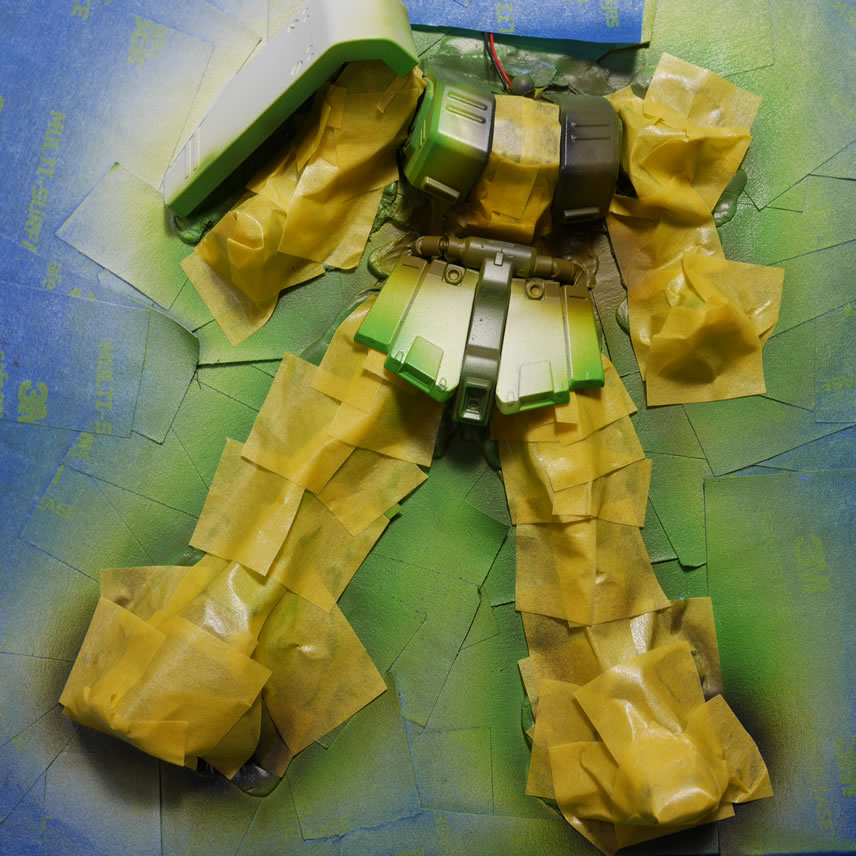
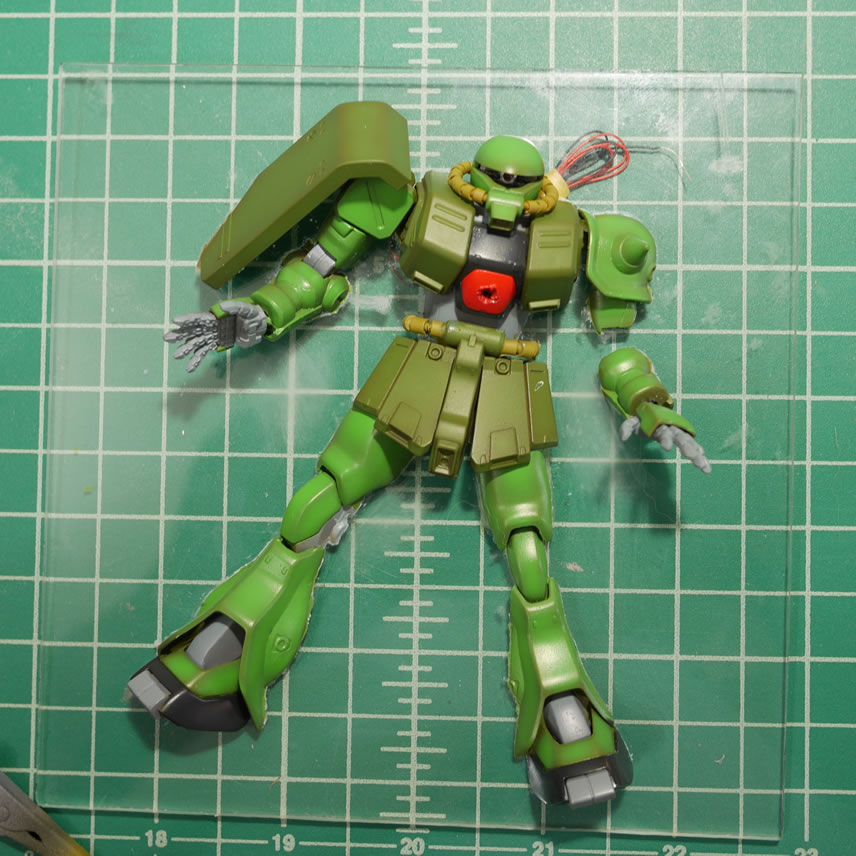
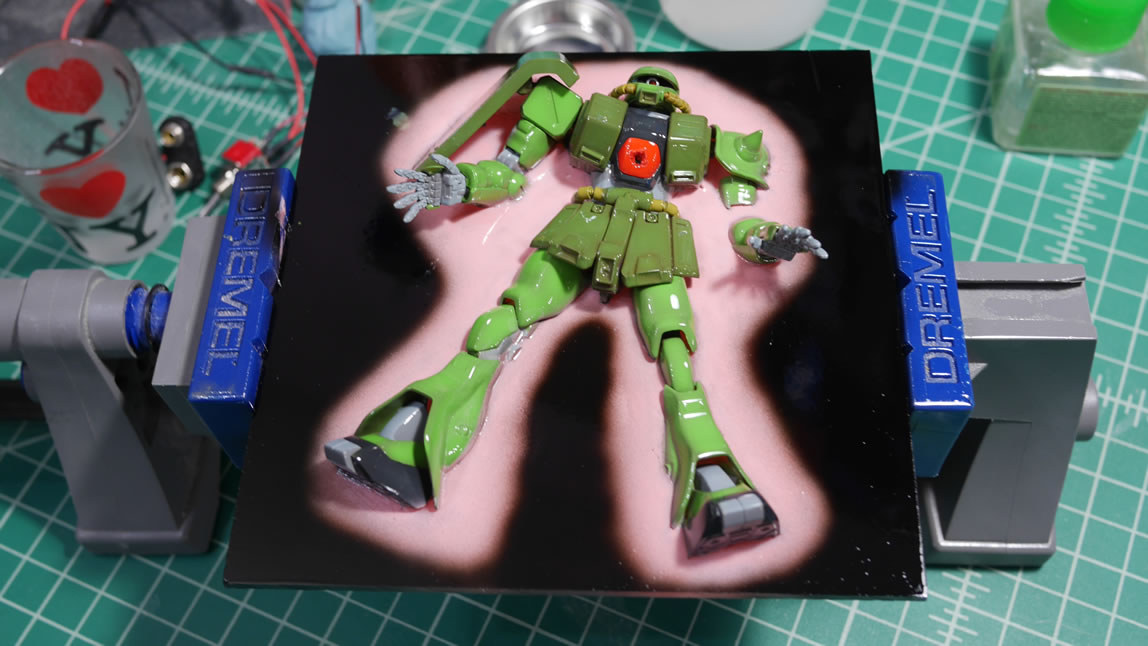
The green is left to cure and then masked off to paint the inner chest piece and feet with Mr color midnight blue and a dark grey for shading. These are left to cure, then masked off further to paint the cable with Mr Color Khaki and a mixed Khaki for a lighter shade. And finally the darker green areas are painted first with Olive drab again then with a russian green as the final color. I found that the masking was MUCH easier for this part of the project than the Sniper. I think if I do a relief display again, I will probably try it this way again – depending on the size of the kit I work on next.
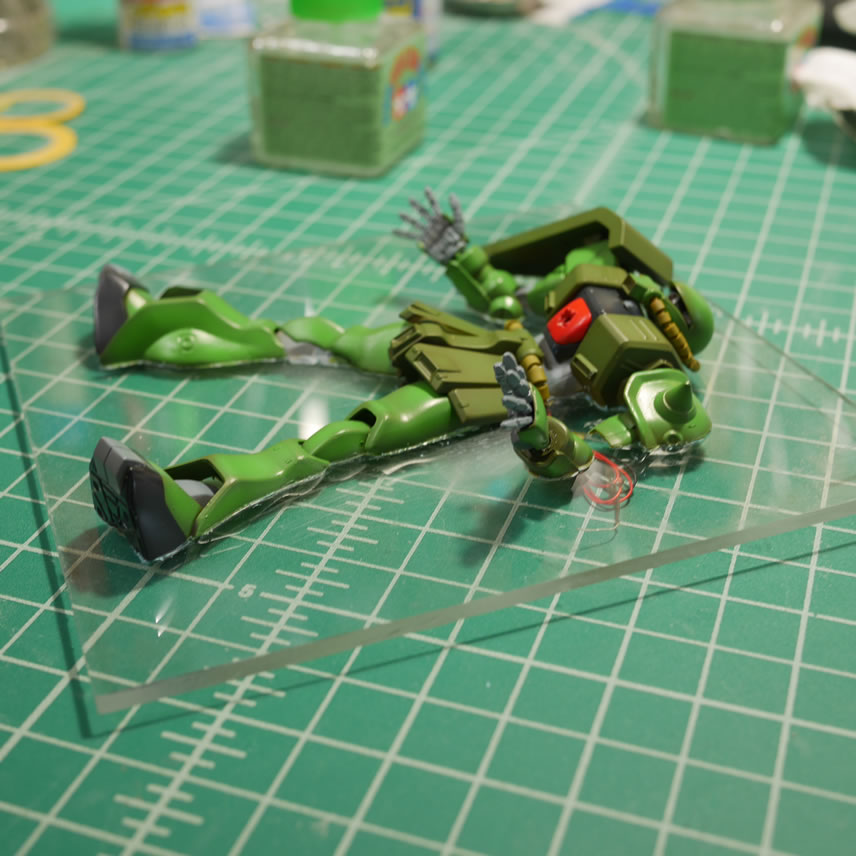
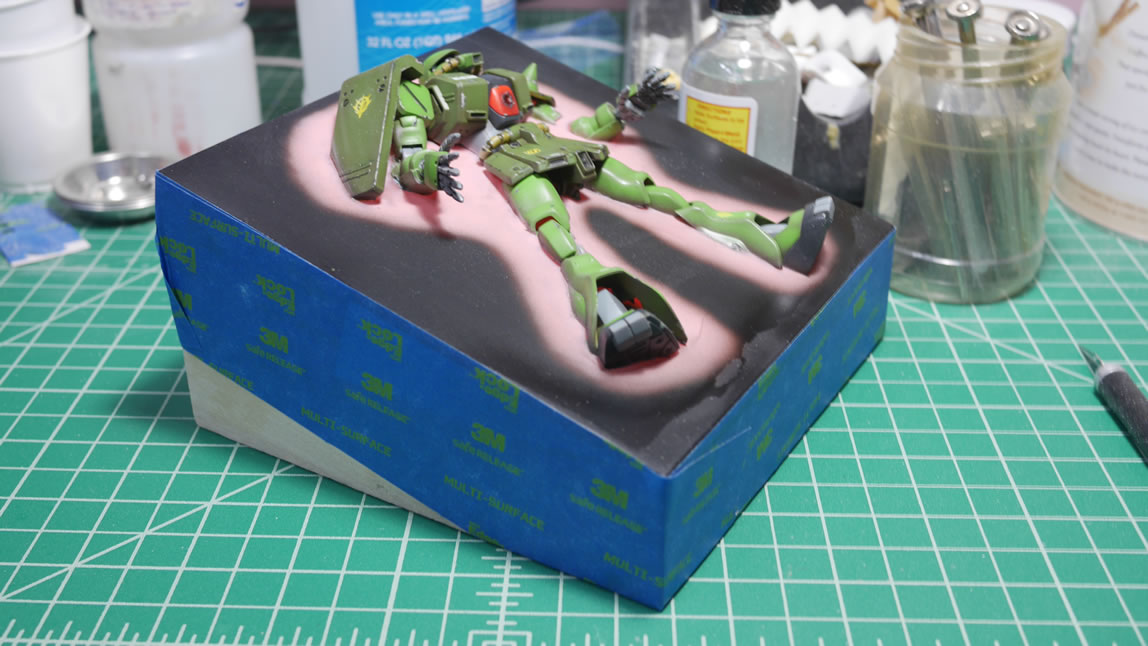
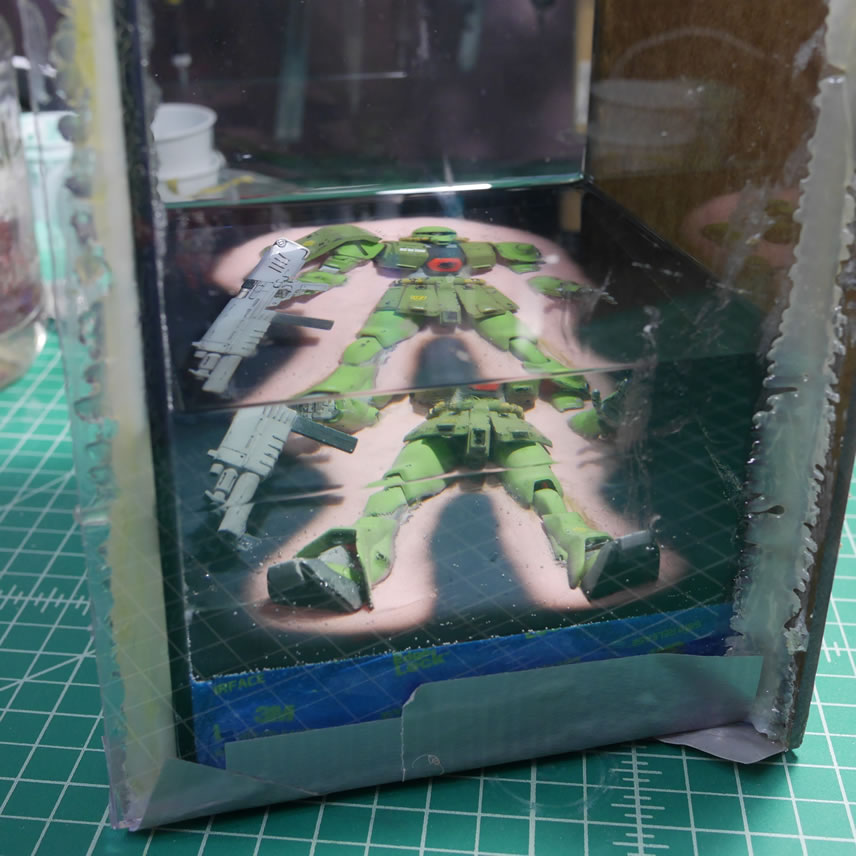
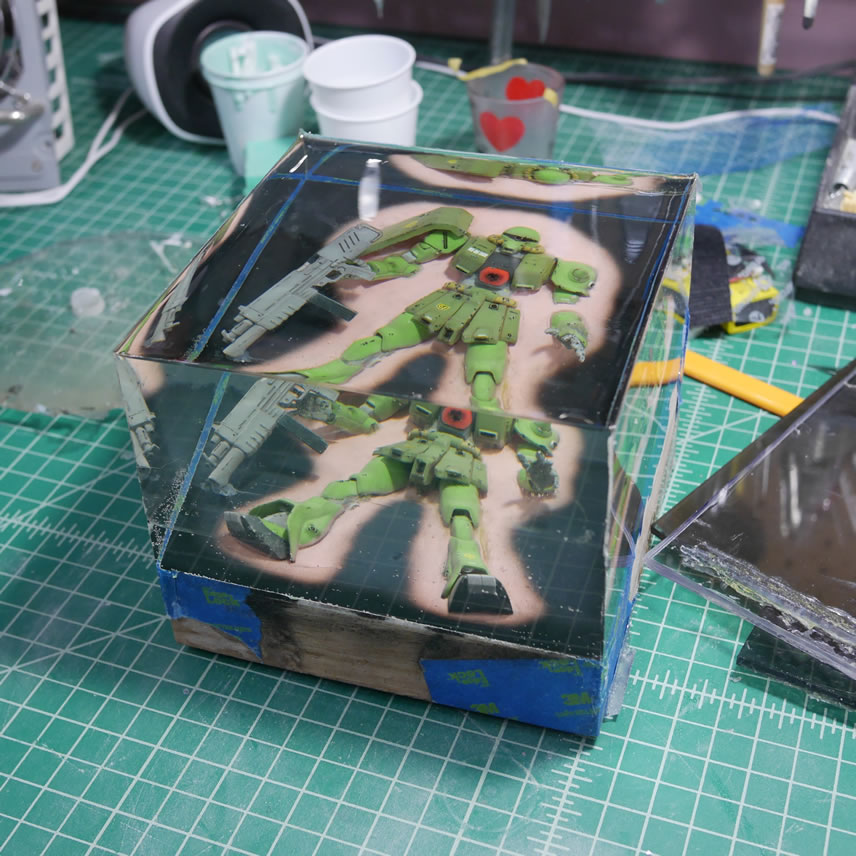
The kit painting is done so all the masking is removed and we have the clear acrylic piece left. It looks funny with the painted kit and the clear acrylic.

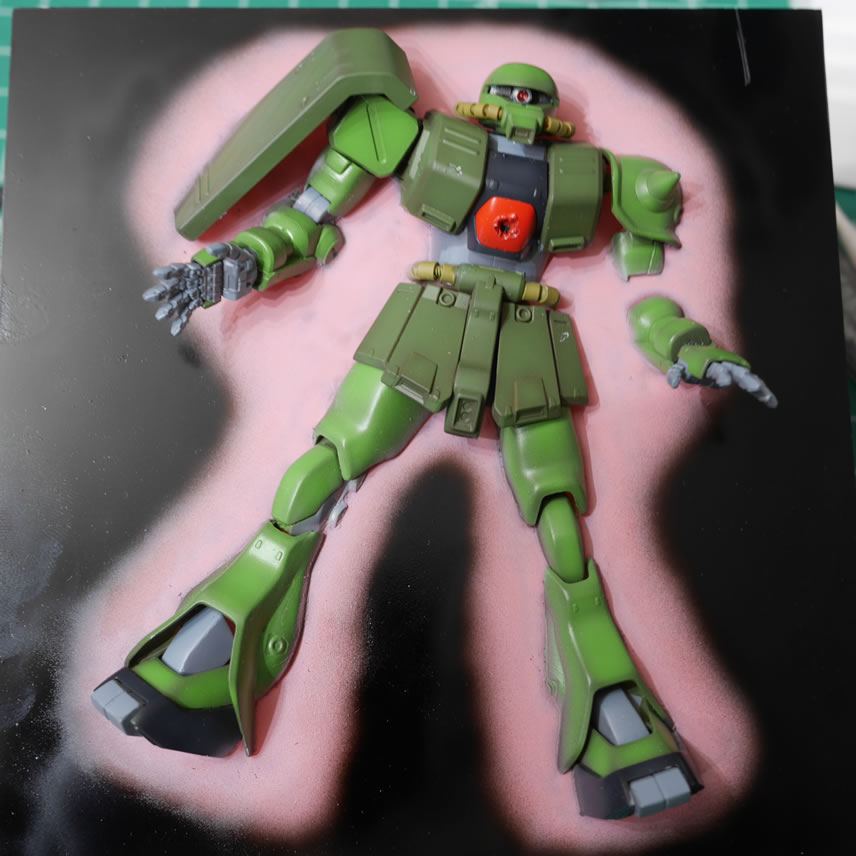
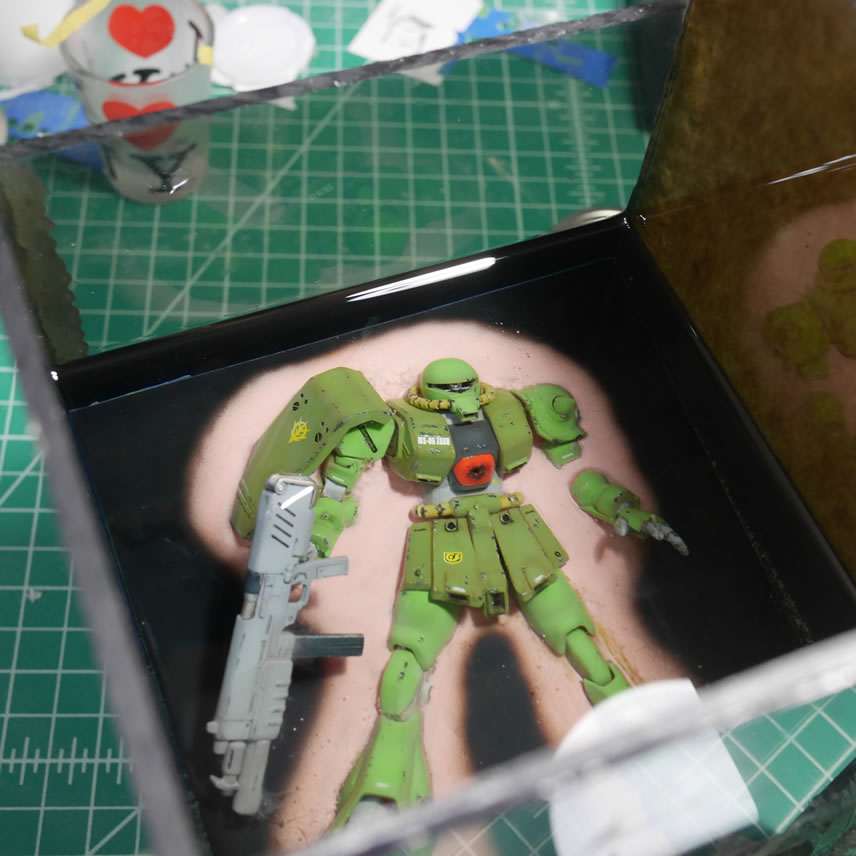
Next up, the pink is painted. I used an enamel pink so that if I got too much overspray; it is an easy fix to clean it off the kit since the enamel thinner won’t harm the lacquer paints. Then the black is painted around to finish it off. Once cured, I did a test fit over the wood box and turned on the backlighting in the second picture.
Once all that paint cured. I sprayed a heavy clear gloss over everything.
Small amount of decals added. I added the Cyclops Team logo to further the idea that this is right out of 0080.
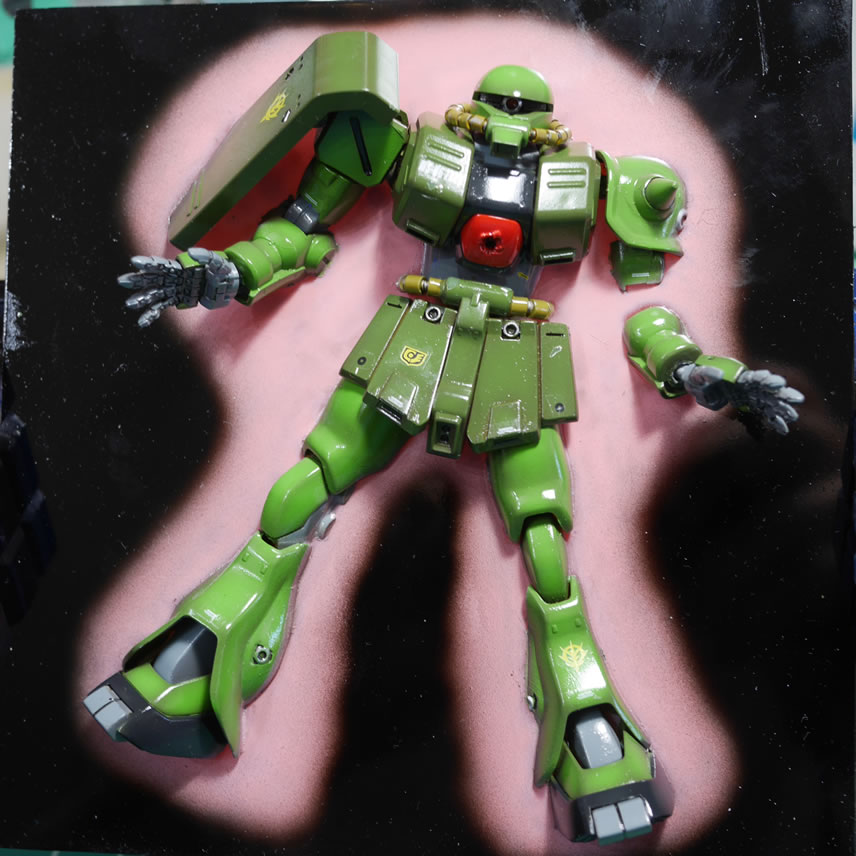
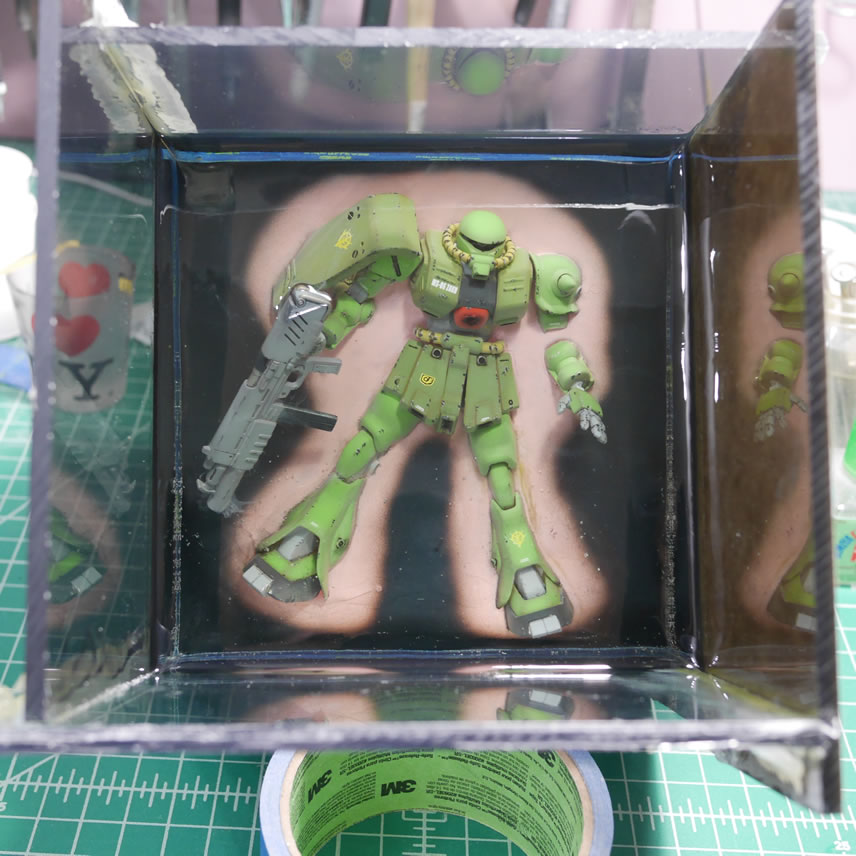
The whole plate is flat coated and ready for some light weathering.
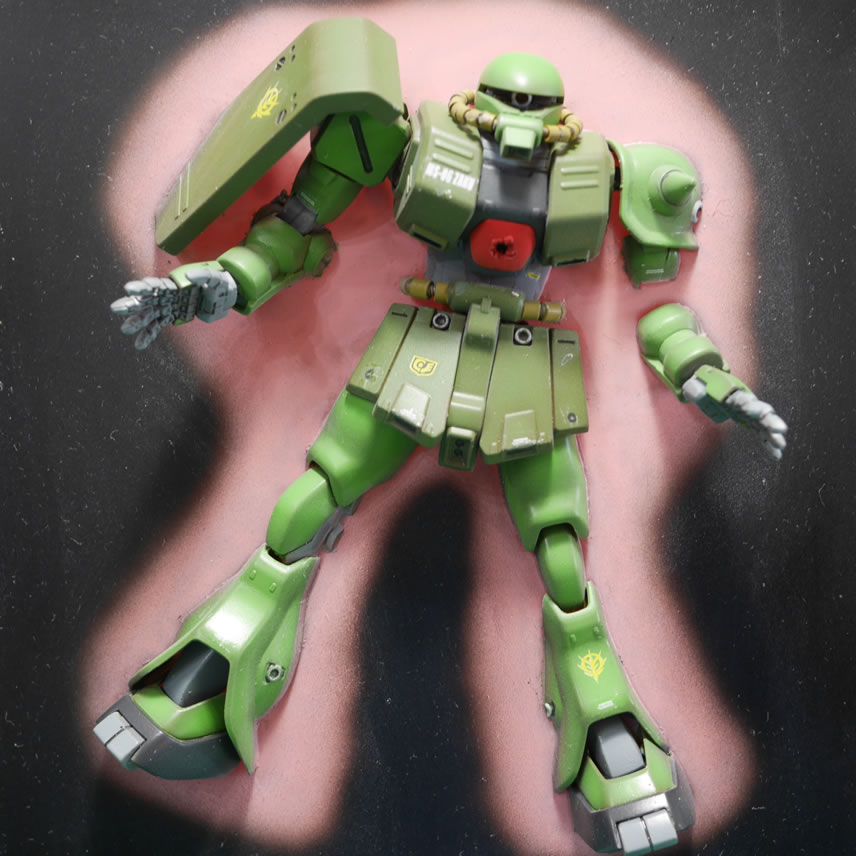
Light weathering. Some paint chipping and some pastels finish the kit off. A quick spray of clear flat seals everything in and gets it ready for the next stage.
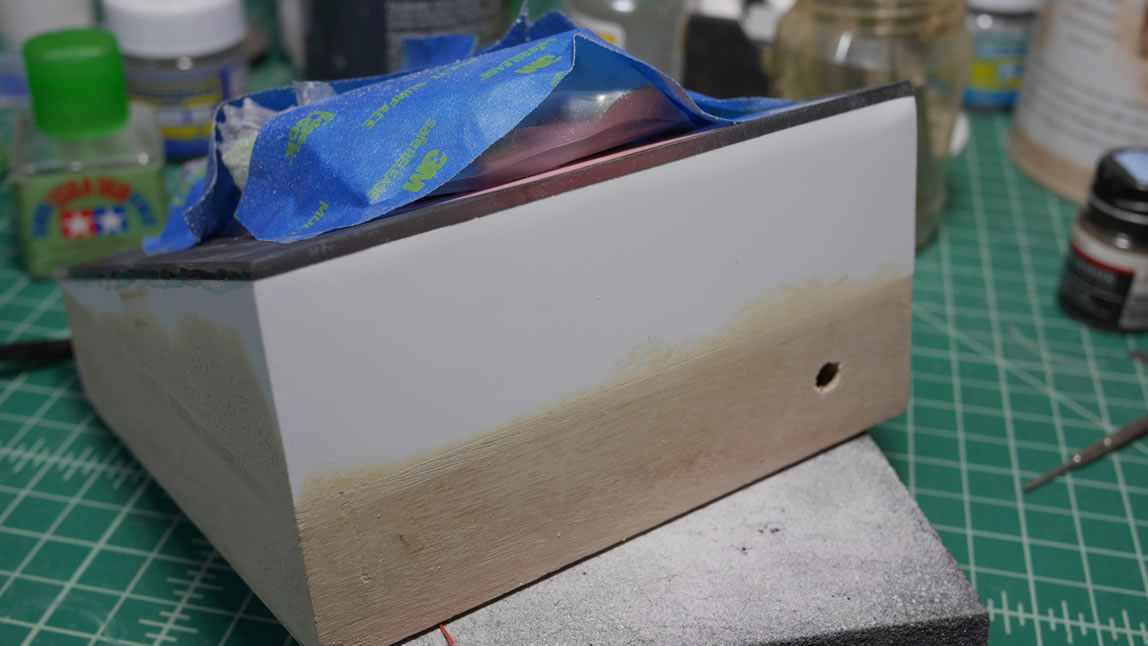
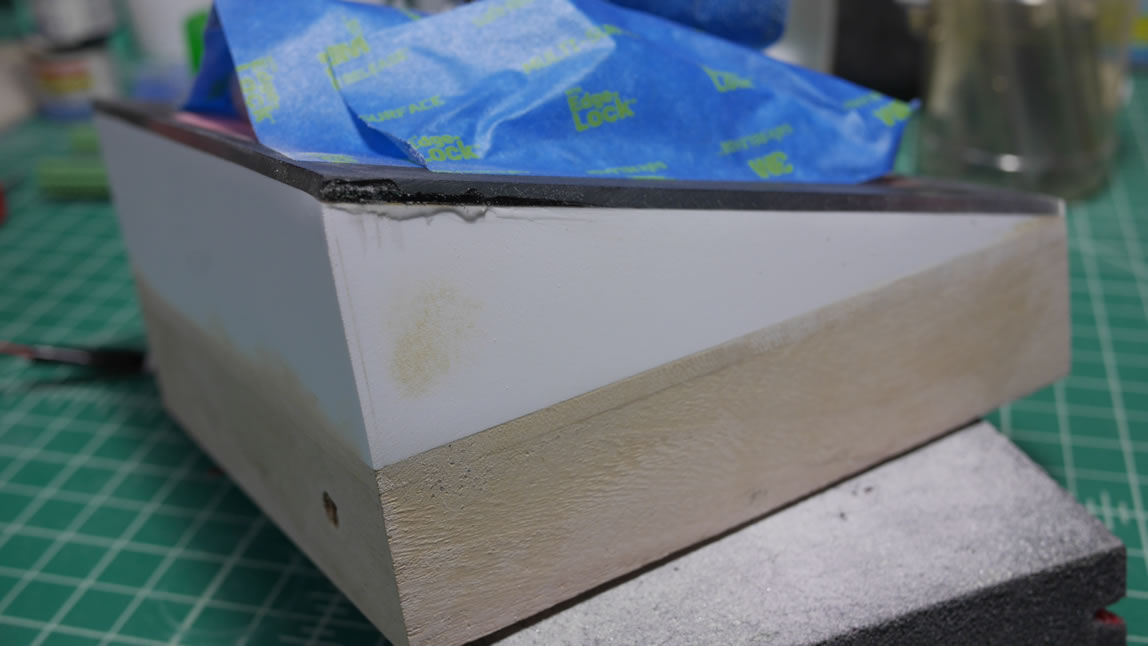
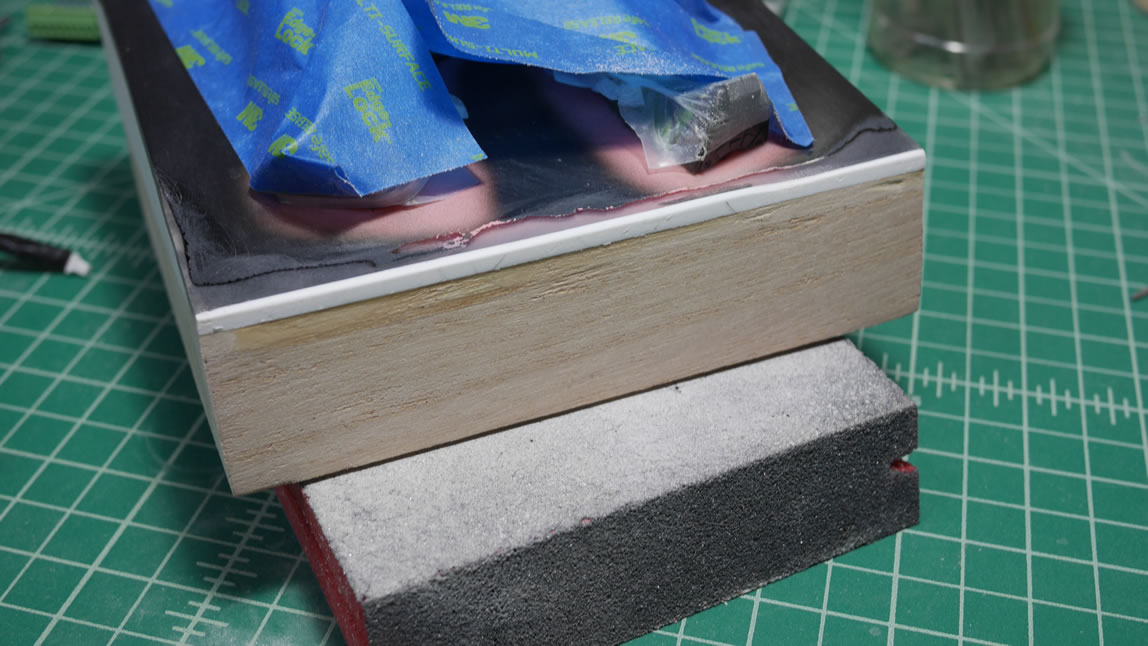
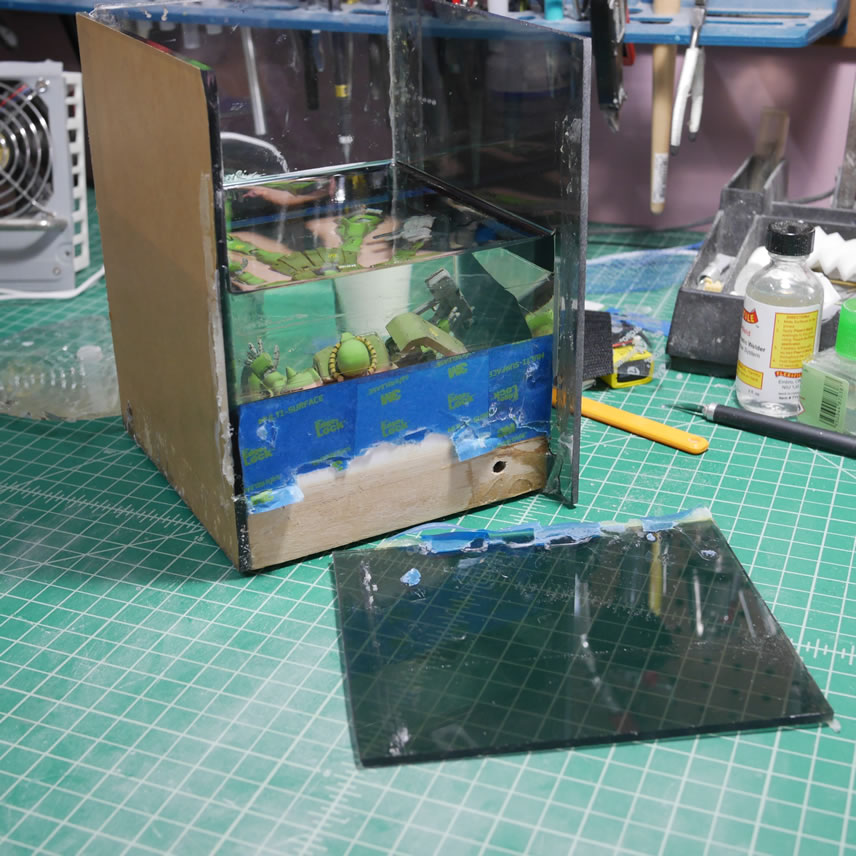
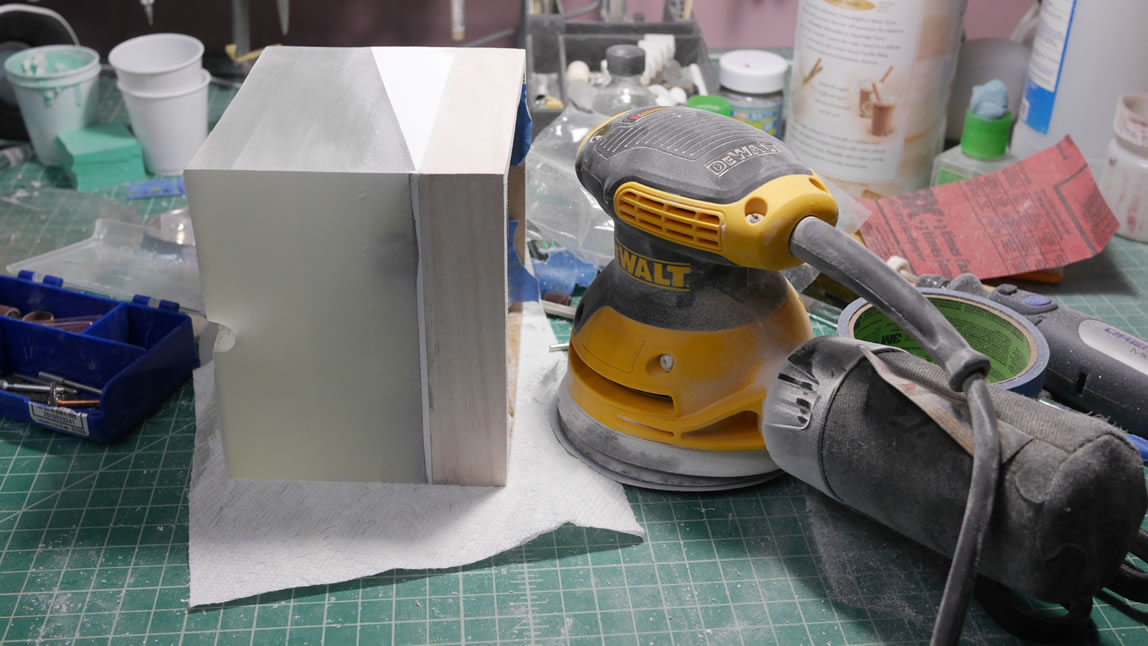
The fit of the acrylic plate and the display base don’t match up perfectly. Some plastic is glued as a filler for the front and everything needs to be sanded. I also glued the acrylic and the base together.
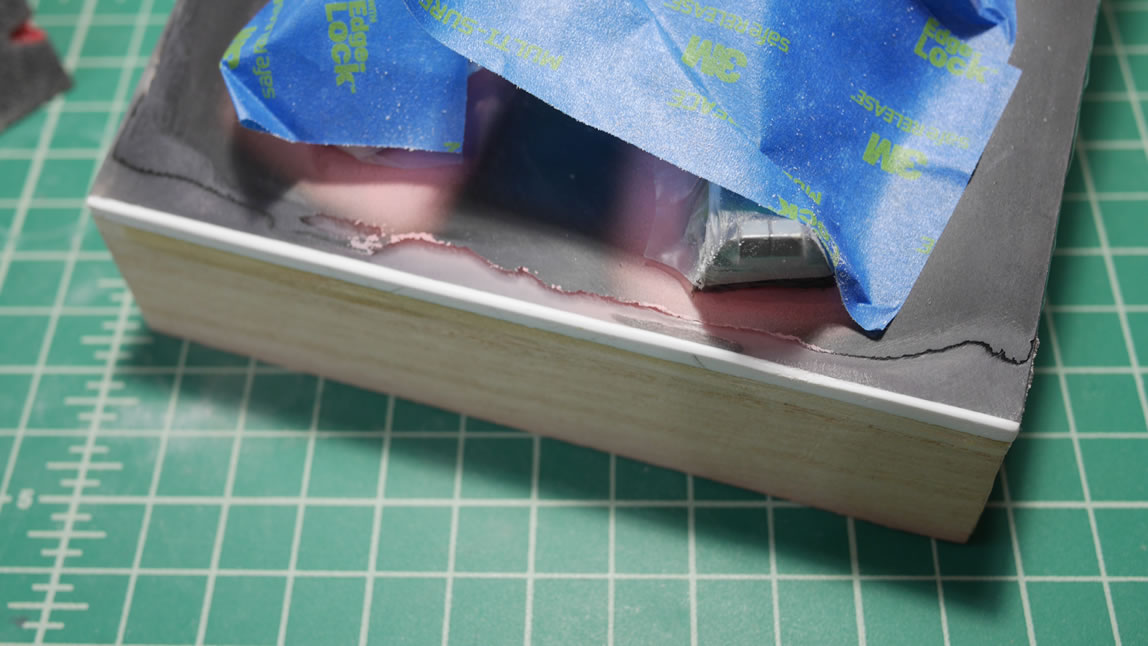
Using a oscillating power sander, I cleaned up the edges as well as square it all up and made everything flush. The power sander does this VERY quickly.
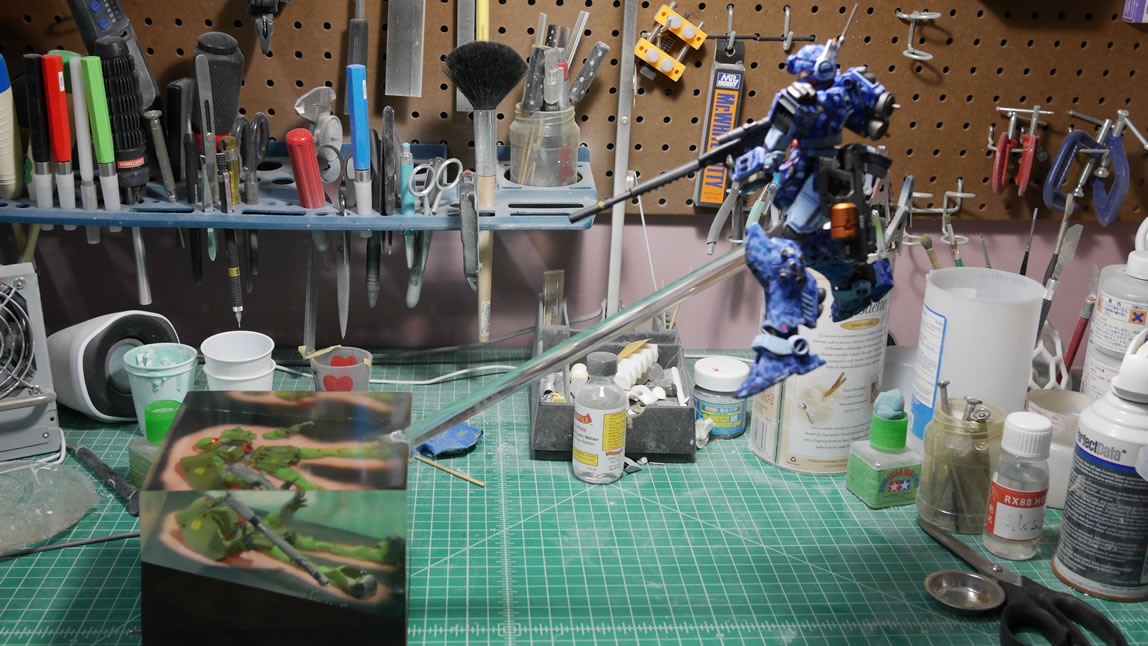
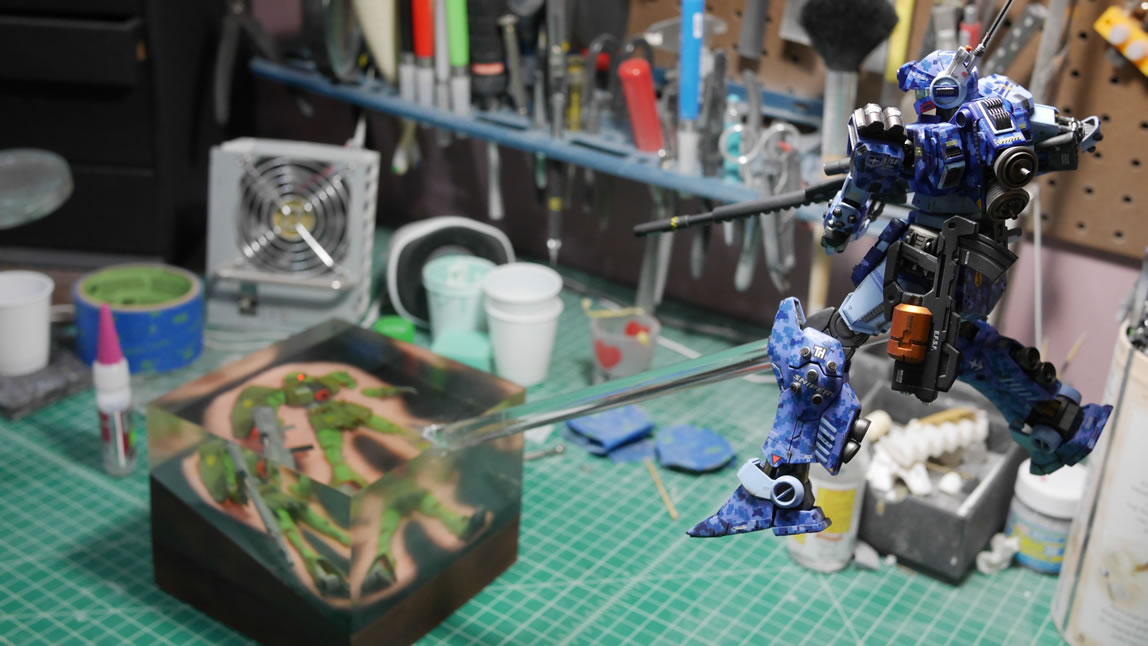
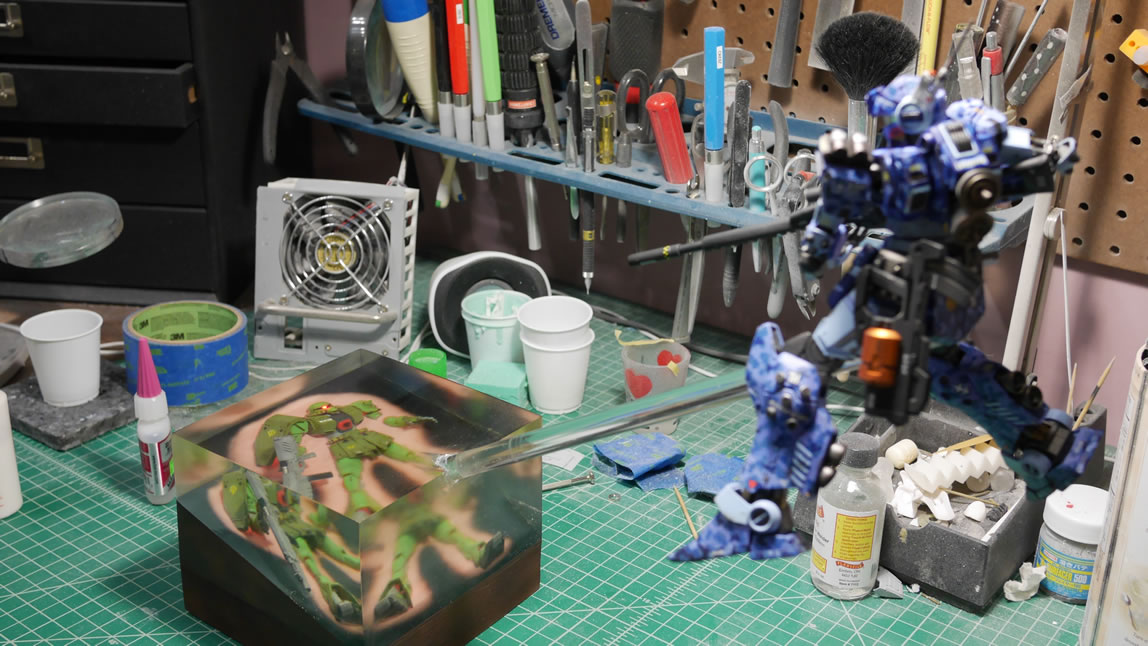
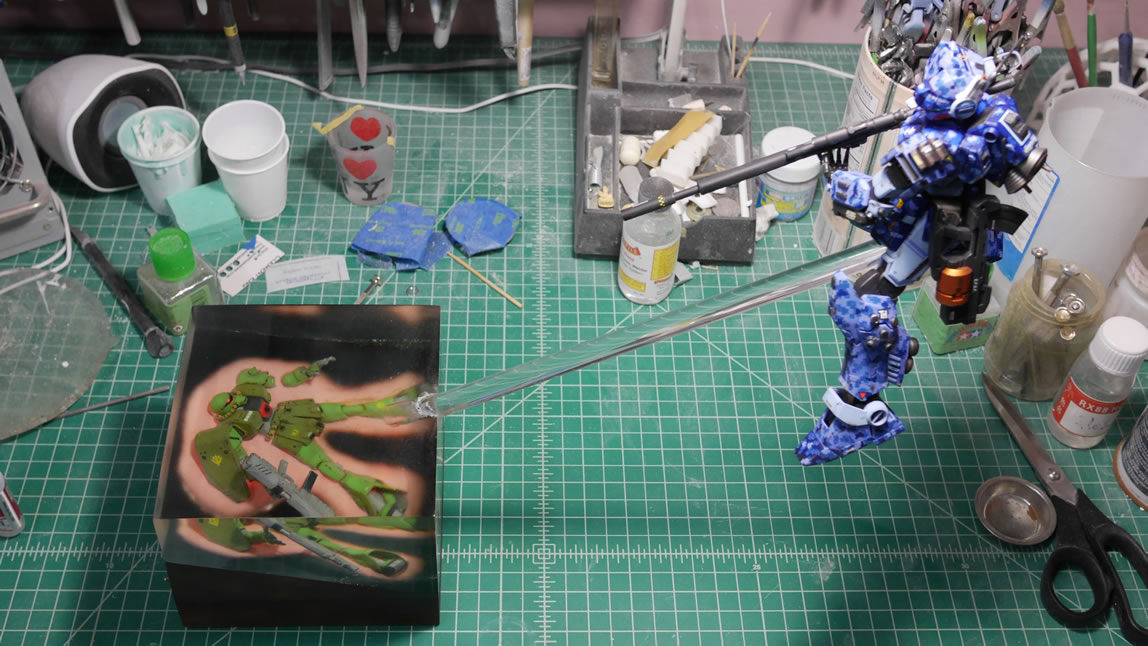
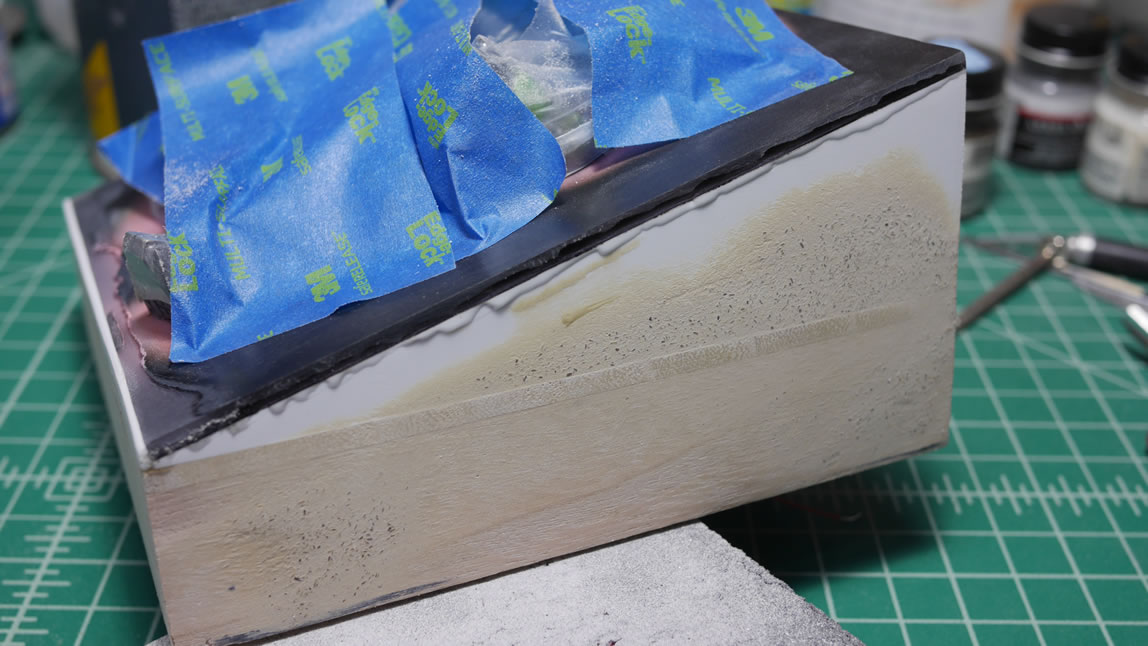
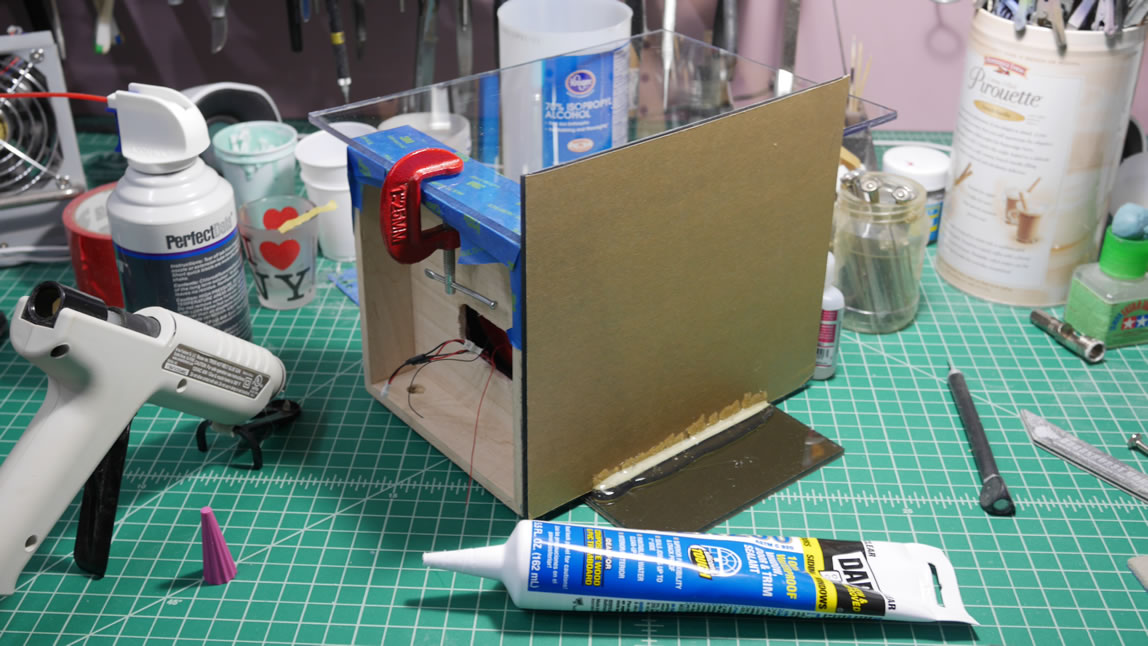
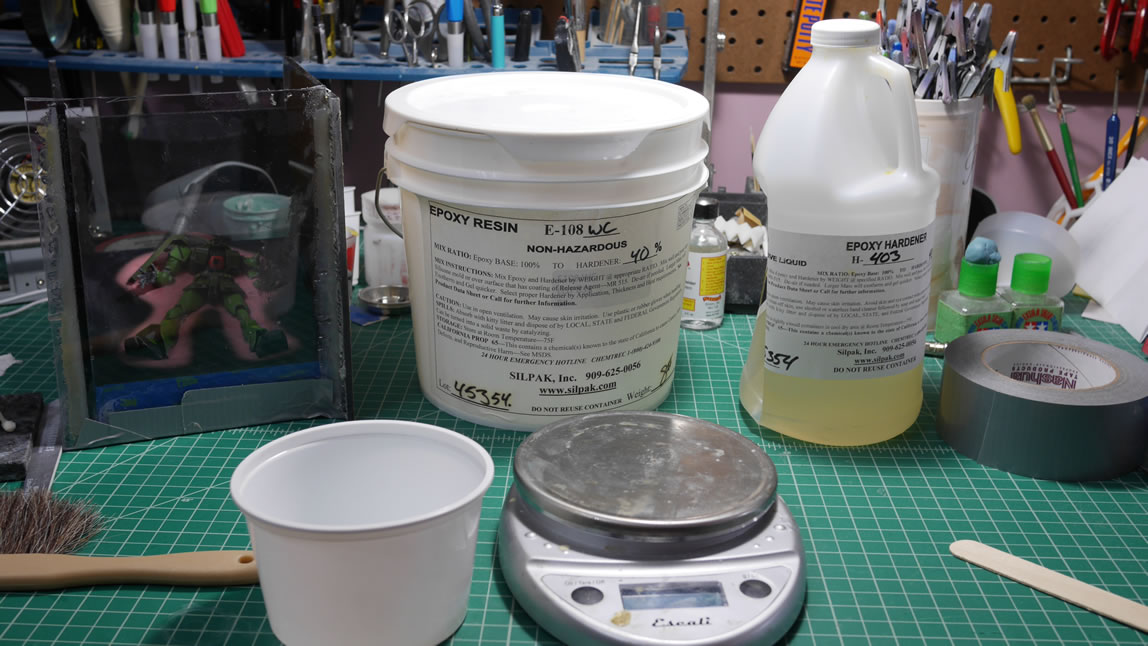
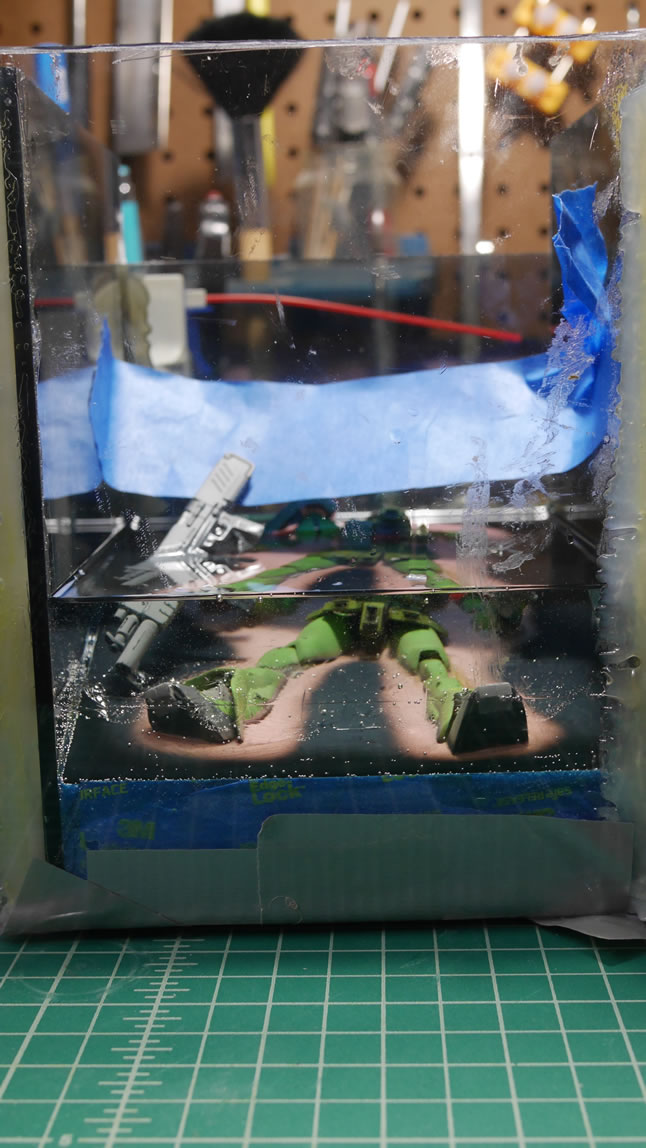
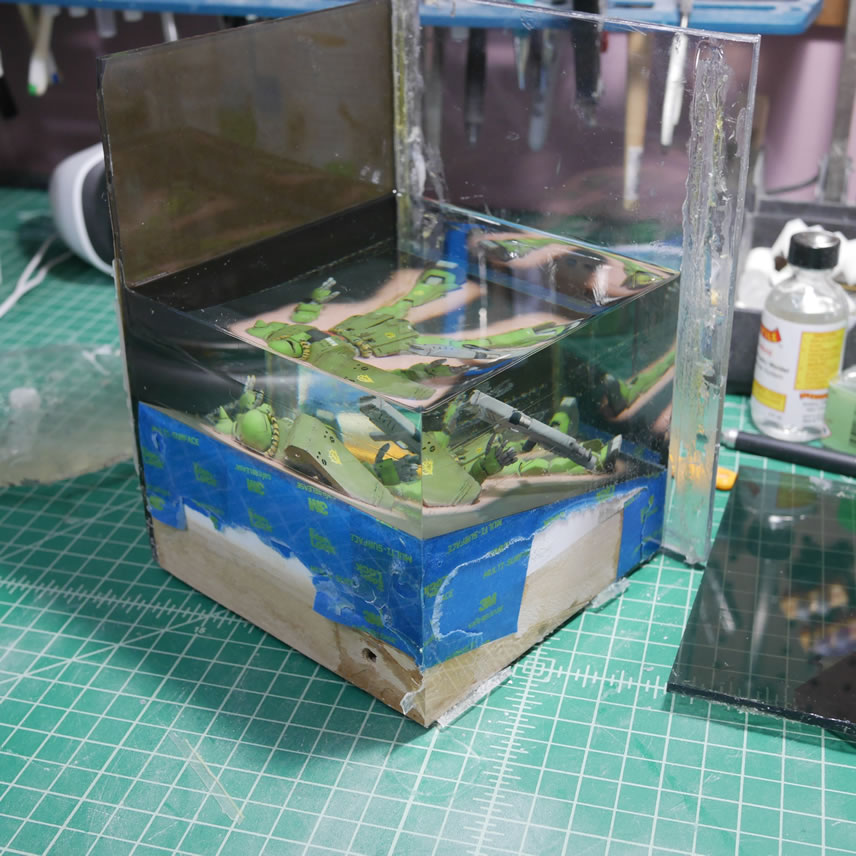
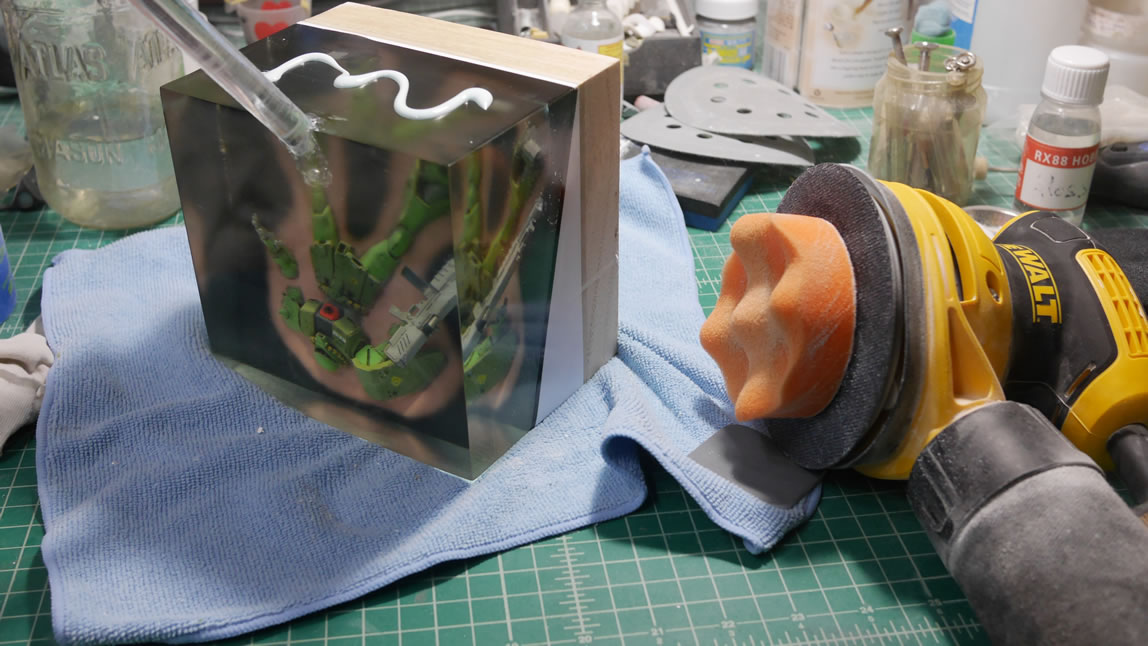
Blue masking tape is applied all around the box so that I can glued some more acrylic sheets around it to create an enclosure. I want to create a block of clear resin encasing the Zaku. I’m doing this for a few reasons. First, I want to have the Zaku’s gun floating – the shock of being shot, the weapon is released and it’s in mid fall. I also want to add some broken off armor bits around the cockpit hole, and I want those pieces floating too. So I figured I could use clear resin to create those effects. It also acts as a counter weight to the GM Sniper that will be sitting on an acrylic rod off to the side and diagonally above the base.
The temporary acrylic sides are glued into place and sealed up with some silicone and hot glue.
I’m using a clear epoxy resin from Silpak. It is a VERY slow curing resin so that I have the lowest amount of bubbles and the curing happens with the lowest temperature. Faster curing resins require heat to cure. Too much heat will leave my poor Zaku a melted mess. So instead of just fresh hamburger, we have a nuked hamburger. Slow and steady wins the race. But it’s also agonizing to have to wait in hopes that the resin cures with the smallest amount of bubbles as possible.

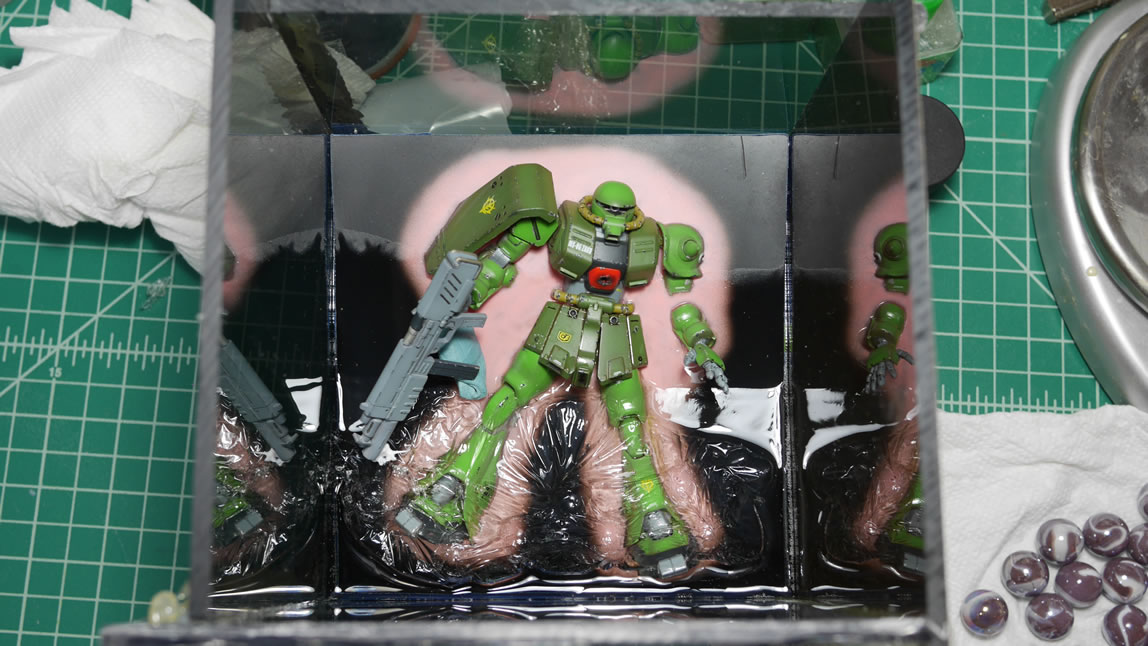
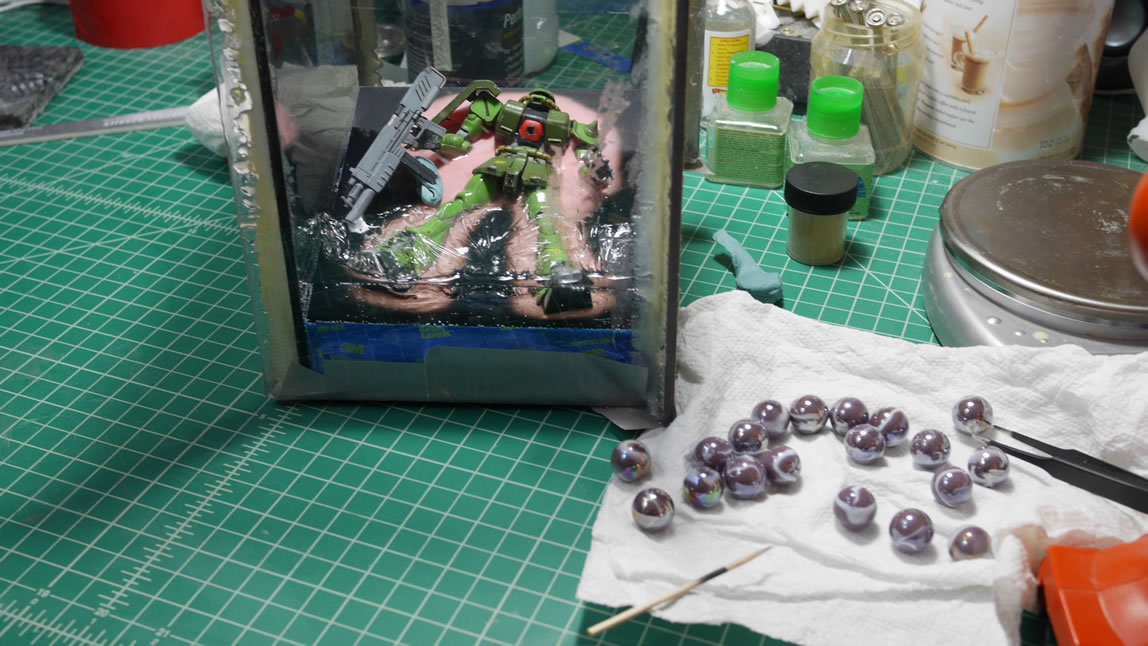
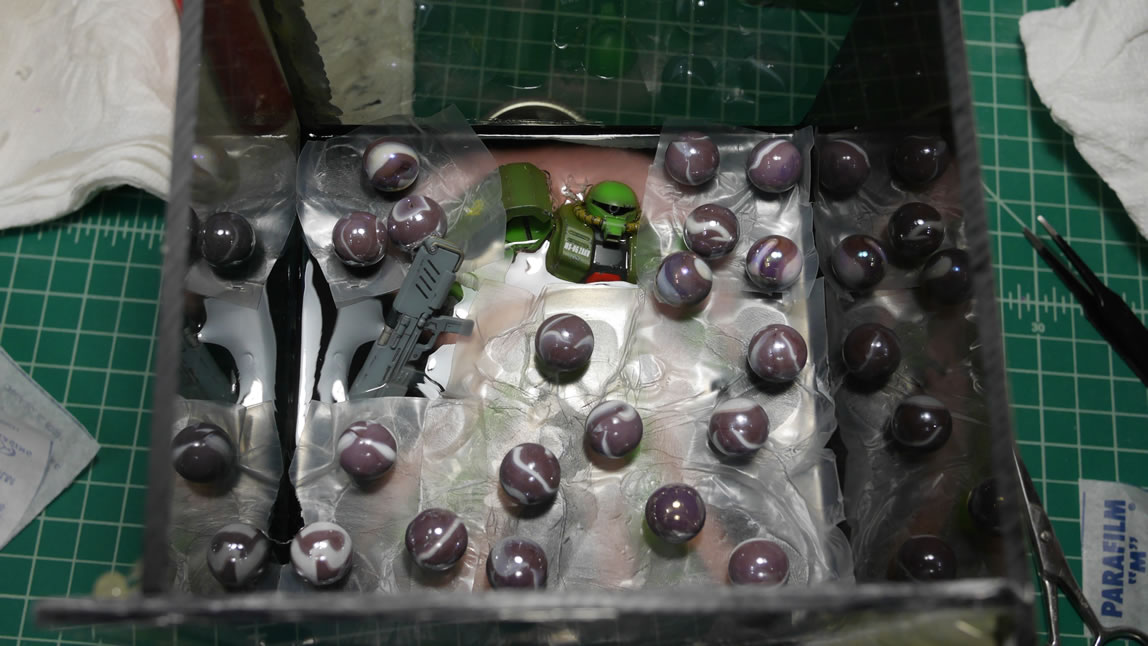
In my previous experiments with encasing models in clear resin. I learned that the different layers will cause a visible line. To thwart that; I was told and read online that you can create waves in the resin to break up the lines which tricks the eye because light is bent in different directions instead of just along the line between layers. So I tried this with the first layer using saran wrap and marbles. I think it was a little over board. I will try a different approach with the next layer. So 48 hours has passed and I can remove the marbles and saran wrap and start to work on adding the next layer.
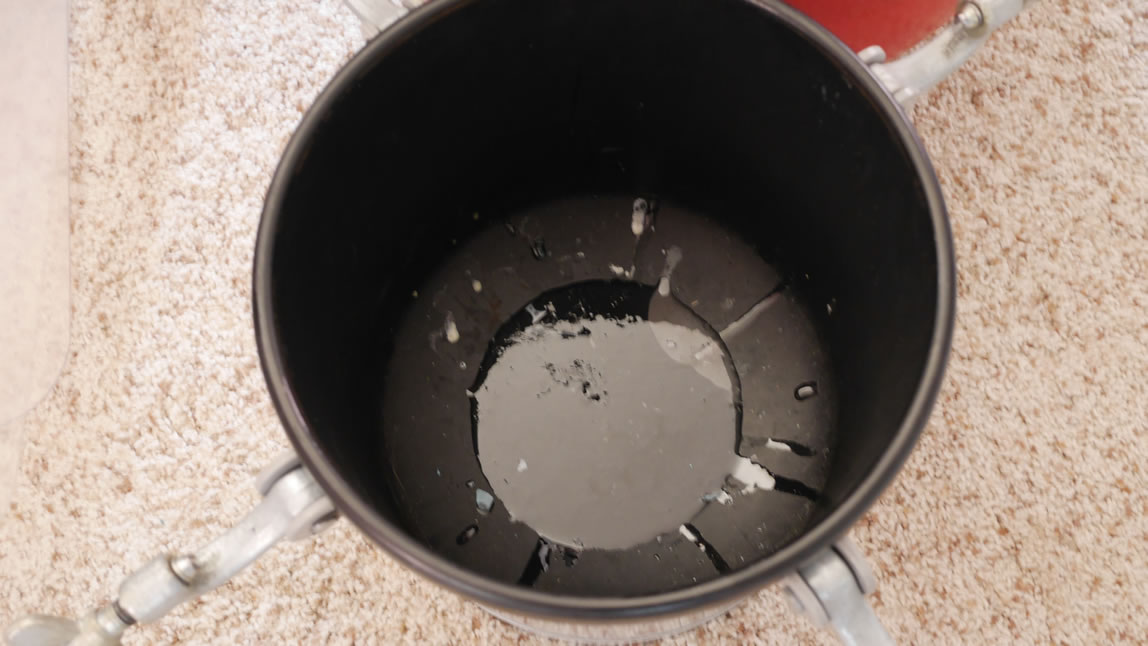
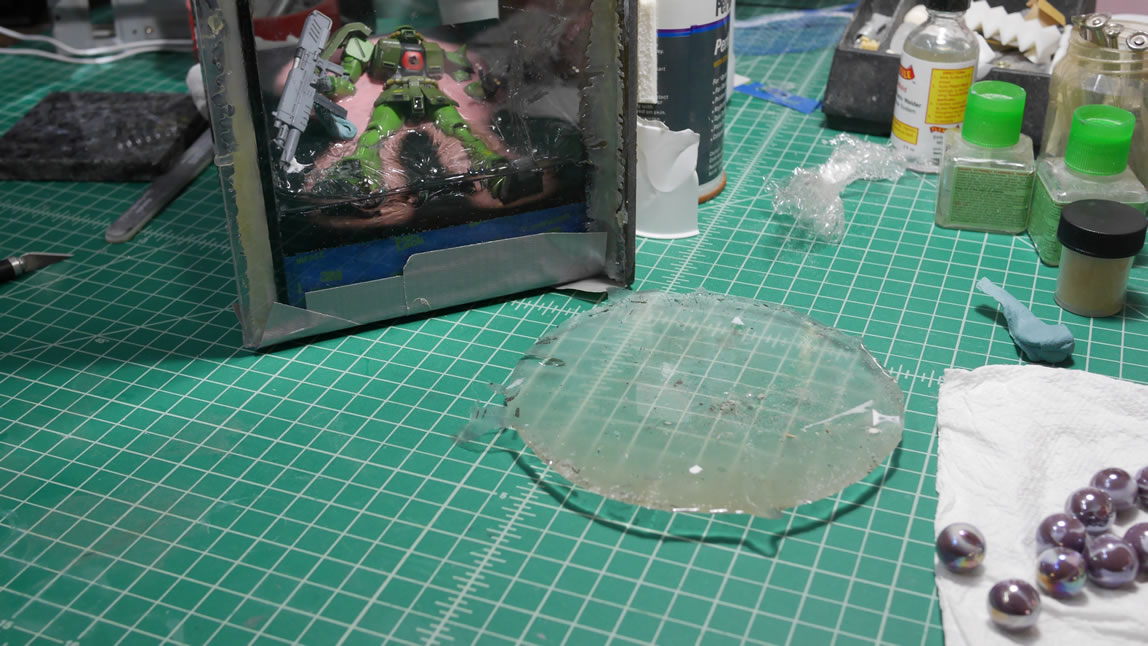
Notice that the cured layer is much lower than the original poured layer. When I removed the box from my pressure pot, there was a disc of solid clear resin at the bottom of the pot. The bottom of the box leaked. The leak was expected and I just tried to minimize it as much as possible. Still, it leaked more than I expected/wanted. But it not too bad. I didn’t lose all the resin. And I have a fairly solid base for the next layers, so I shouldn’t have this much of a problem with the next pours. I hope.
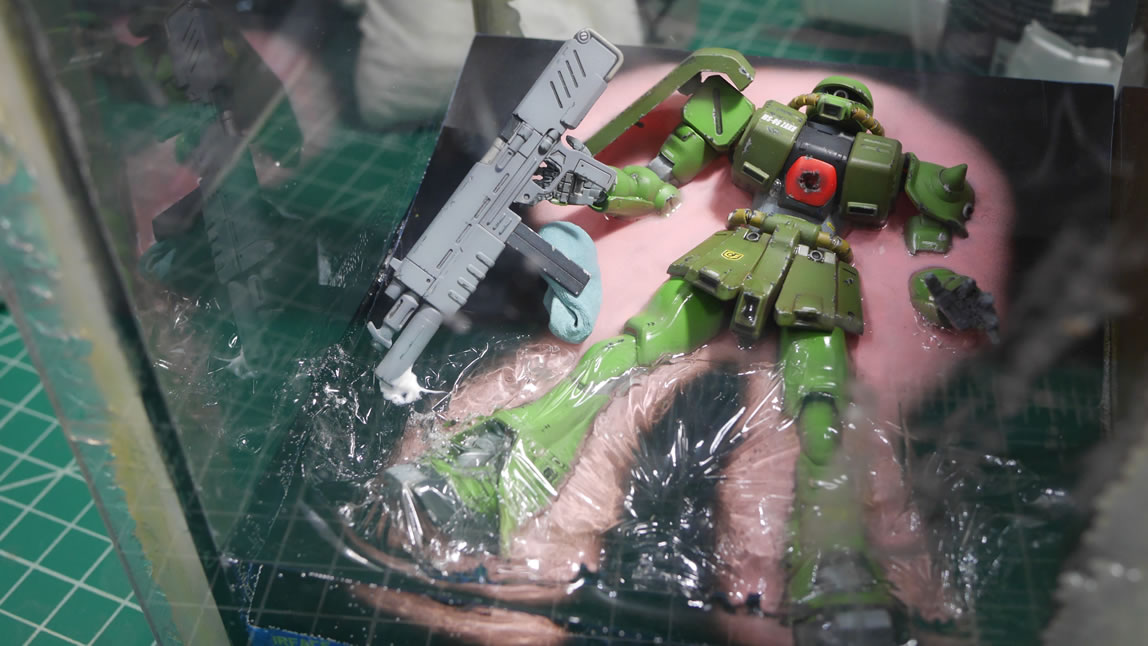
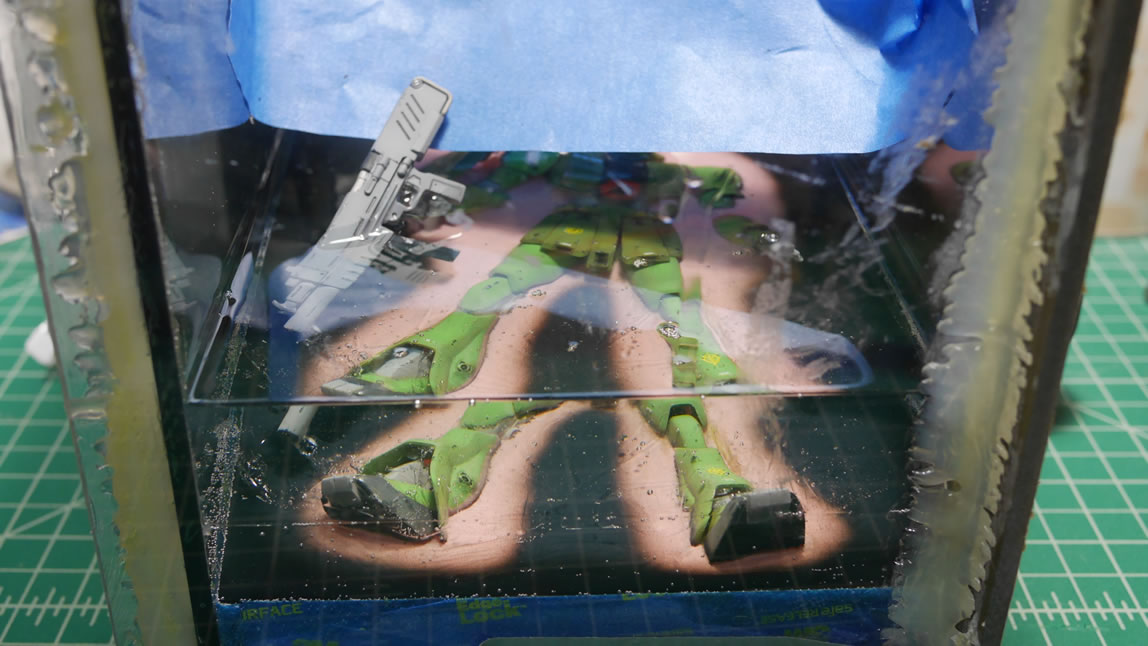
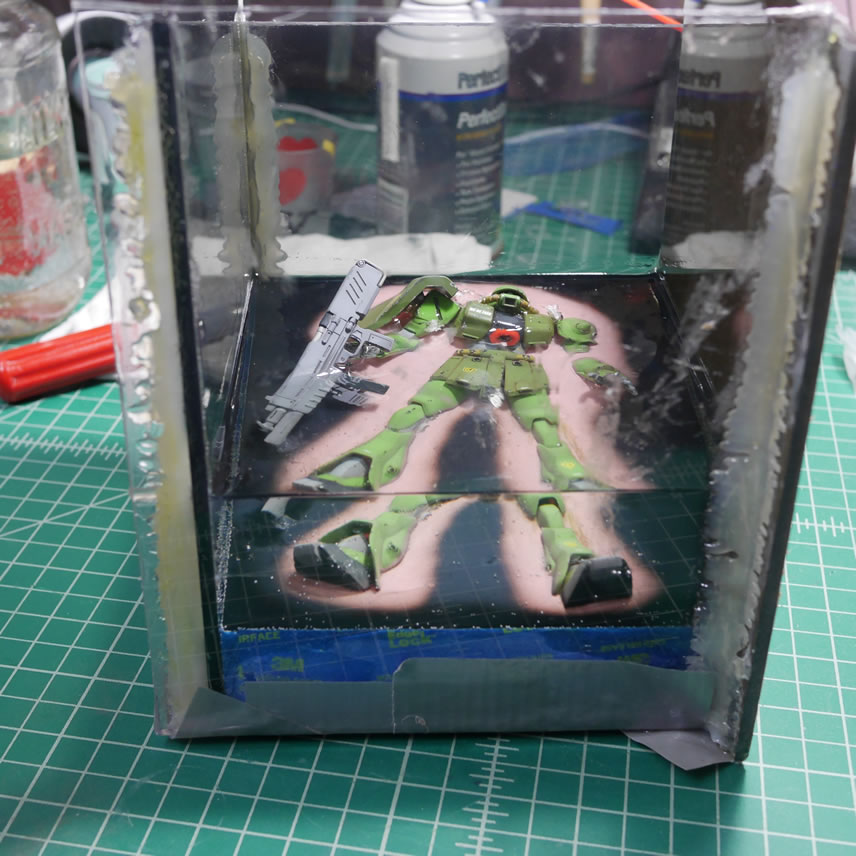
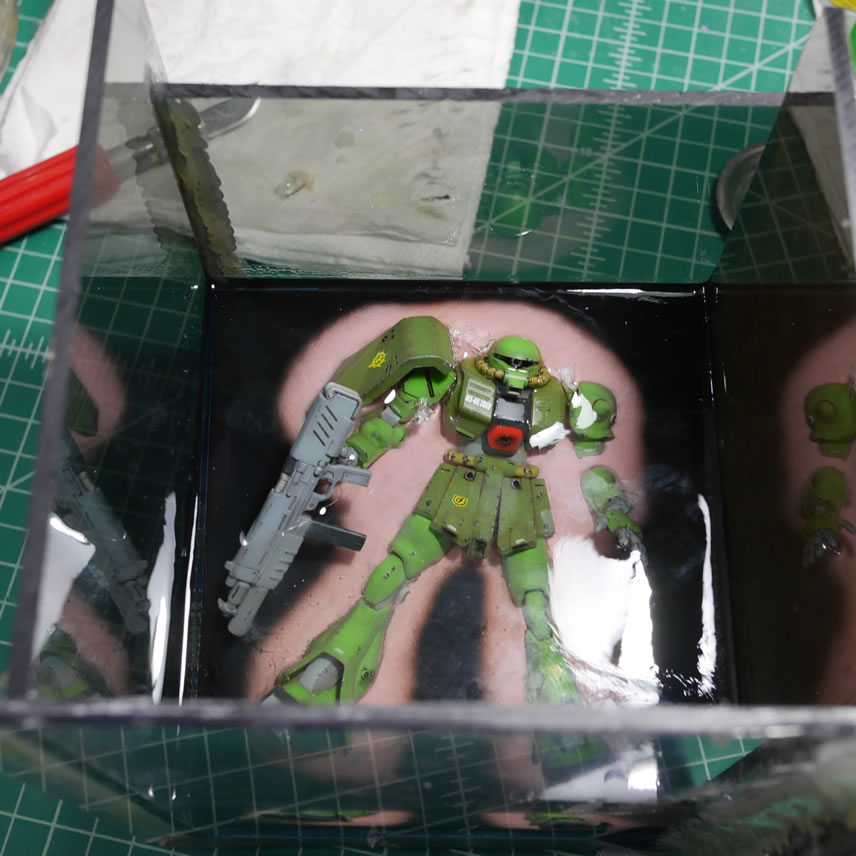
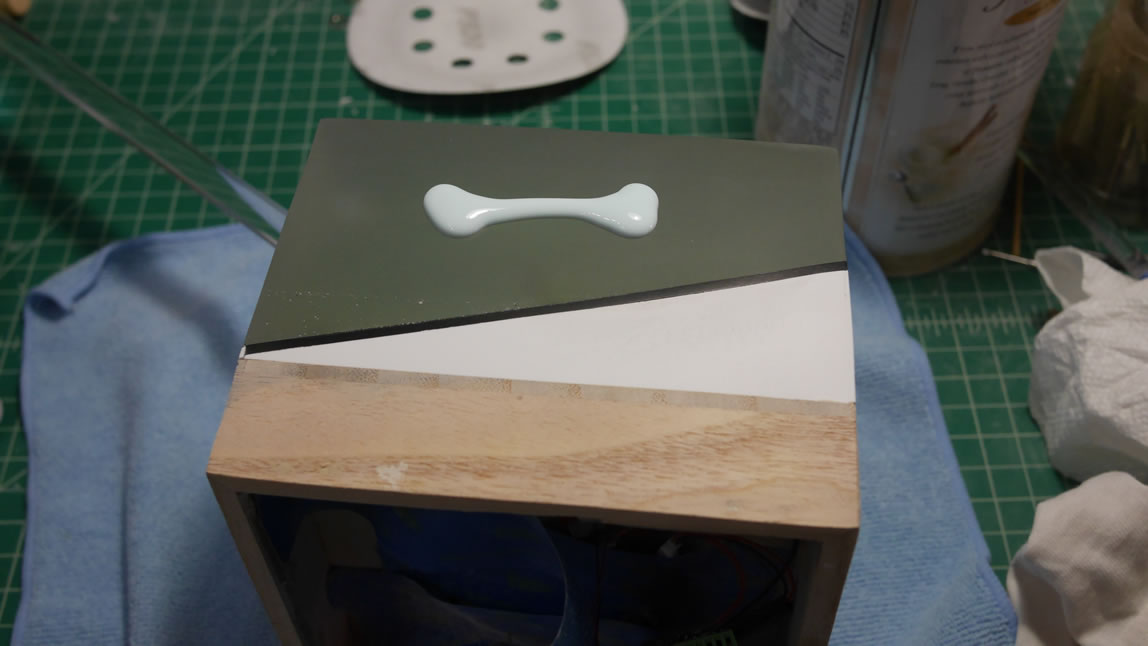
I need to add in the gun, so I use some canopy glue and glue the gun into position first using some sticky tack as a spacer between the hand and the gun.
Once that cures, I used some masking tape to hold the gun up while I mixed and poured the next layer of resin.
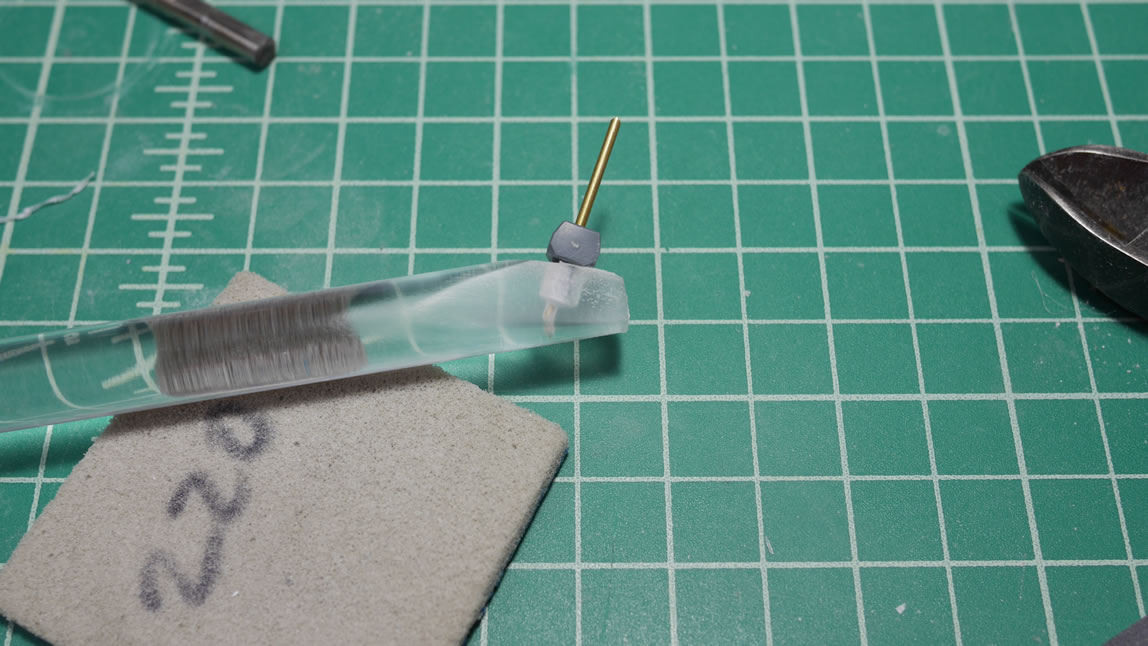
While this is all happening, I get some work on the acrylic rod piece. I sanded down some edges, drilled a hole and placed the taint attachment piece into the acrylic rod. The hold isn’t that great, so I drilled a hole into the taint and into the holder piece all the way through to the acrylic rod and inserted a brass rod. The brass rod adds significant strength to this joint so that I don’t have to worry about the sniper falling over.
In an attempt to add waves to the surface of the curing resin, I used some parafilm and marbles. But I waited too long and the resin was already set pretty solid. It was still quite malleable but it would return to it’s normal shape rather quickly.
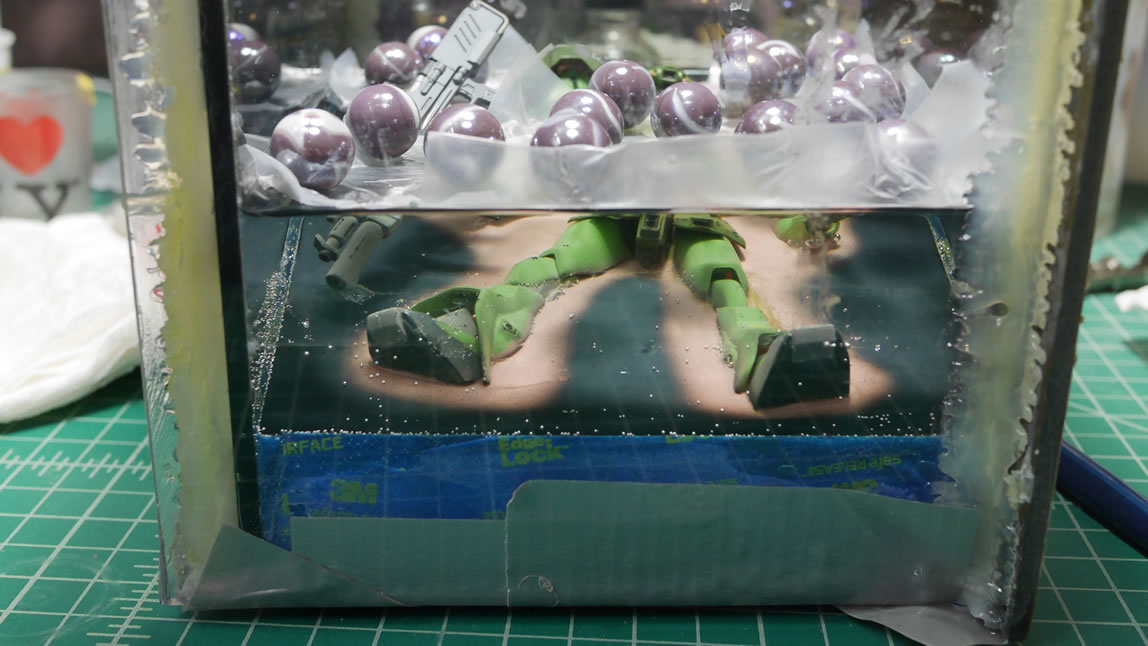
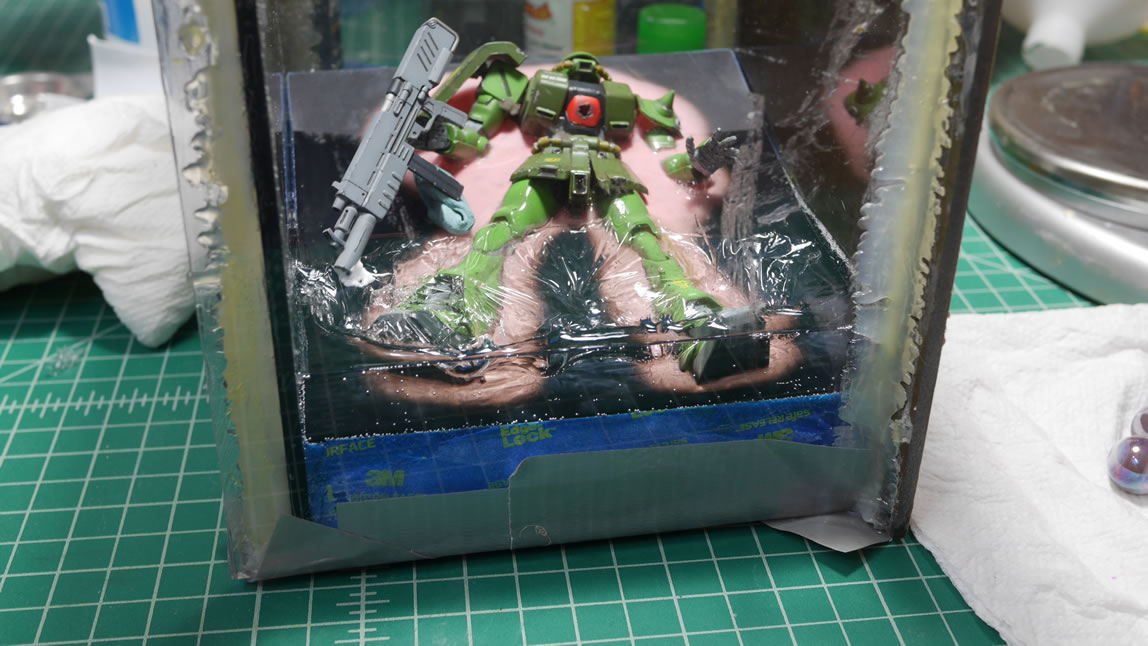
The glue I used for the gun dried clear, but was a different clarity than the resin, so that is showing up. I’m going to chalk this up to rushing to finish the damn thing. I also didn’t pressurize the first layer before I poured the mixture and the bottom layer is riddled with bubbles. Ugh. Again. rushing to finish this project, I’m ignoring the small little details. Not a good thing.

Ready for the third pour. I’ve been pressurizing the mixes before pours and that’ve given some pretty bubble free pours. The problem is that I’m not making it in time to add waves. If I try to add the waves when I pour, it’s too liquid and I’ll have a odd mess. It’s all timing, and my timing on this last part of the project is totally off.
The third pour wasn’t enough to cover the gun, so I needed a fourth pour. I’m pouring at about 24 hours of cure time. The immediate layer below is pretty solid, but not completely cured. I did this because I was again, running really short on time.
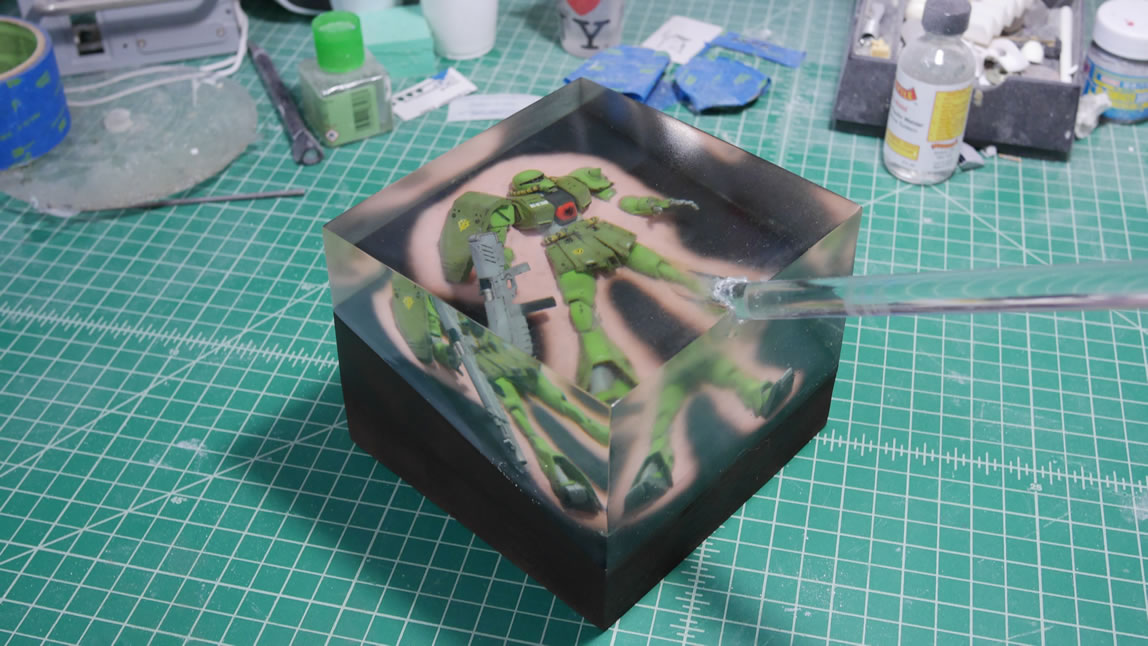
The final pour covered everything and I have to let that completely cure before I can start working on the damn thing. 48 hour cure times are no joke.
If I didn’t wait, the top layer would still stick to the acrylic sides. But once cured, they come off with a little bit of force and I’m left with a clear block of resin.
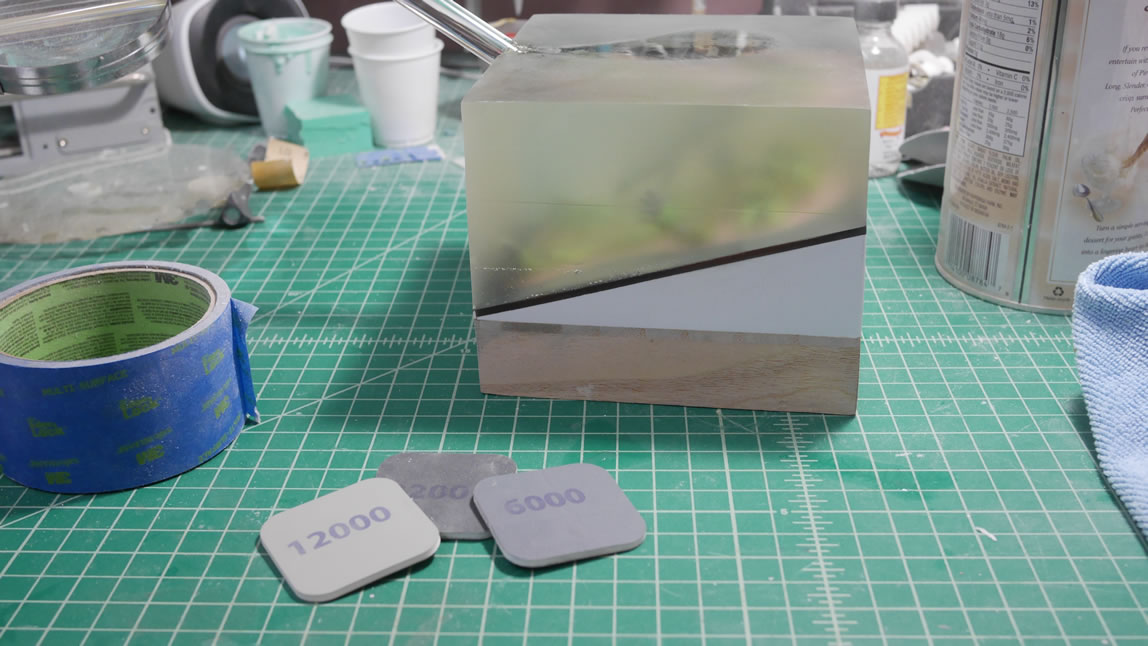
The clarity is short lived because there are edges from the top that need to be removed as well as the over pour areas along the sides of the base that need to be cleaned up as well. So the orbital sander comes into play and the whole block is sanded. A hole is drilled for the acrylic rod attachment.

Using a bunch of different sanding elements, I get the block sanded down with ever increasing grits of sand paper.
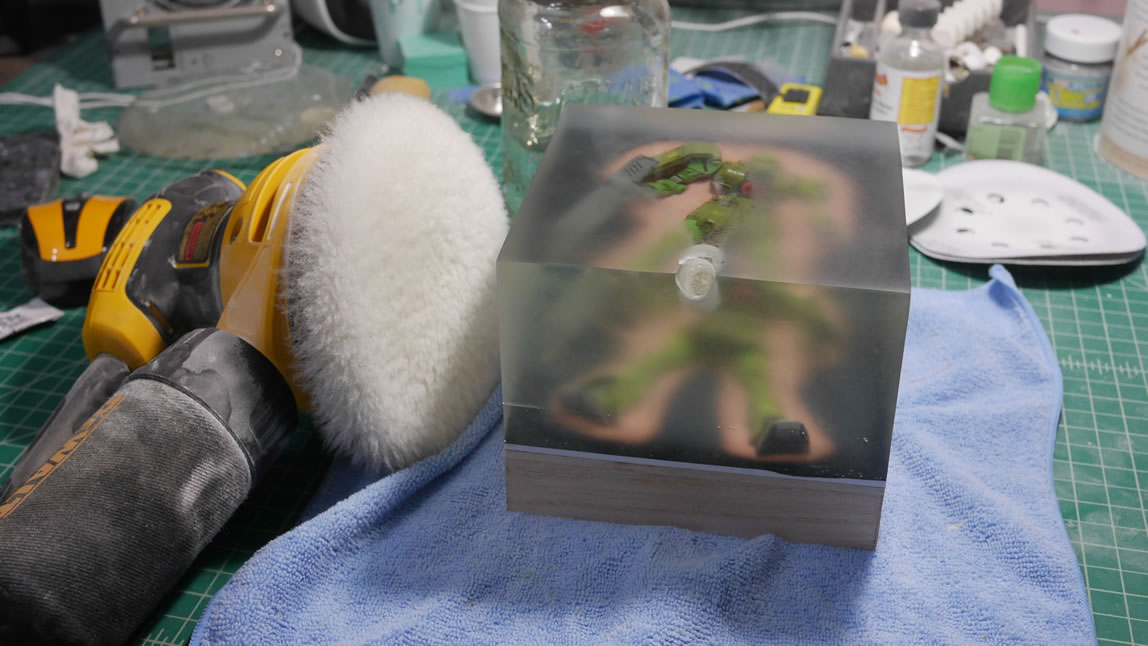
Tonight, I spent my time polishing the sanded block with some polishing compound and the orbital sander with some foam polishing pads. This process leaves a fairly clear block of resin. I still need to do more polishing but I’ve set the acrylic rod into the hole with more epoxy resin and it’s taking a while to cure. I still need at least another full 24 hours before I get that cured. The rod attachment point is looking pretty rough, but again, tight schedule to have this thing finished before Friday.
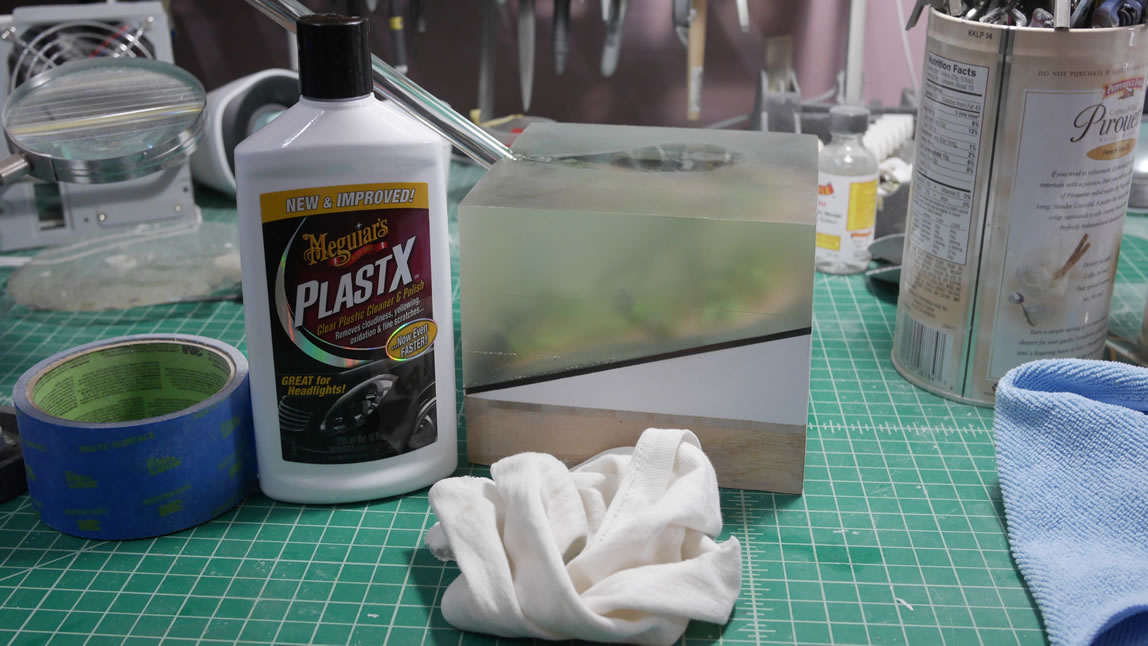

Here’s what the block of resin looks like now. I still need more polishing sessions. I will probably do that tomorrow night if the acrylic rod attachment piece has cured enough.

Here’s a quick test shot with the GM Sniper 2. The base really works to accent the kit. At least that’s my hope. For now, it’s close, but not completely finished. I’m going on 4 and a half months since I started the project.