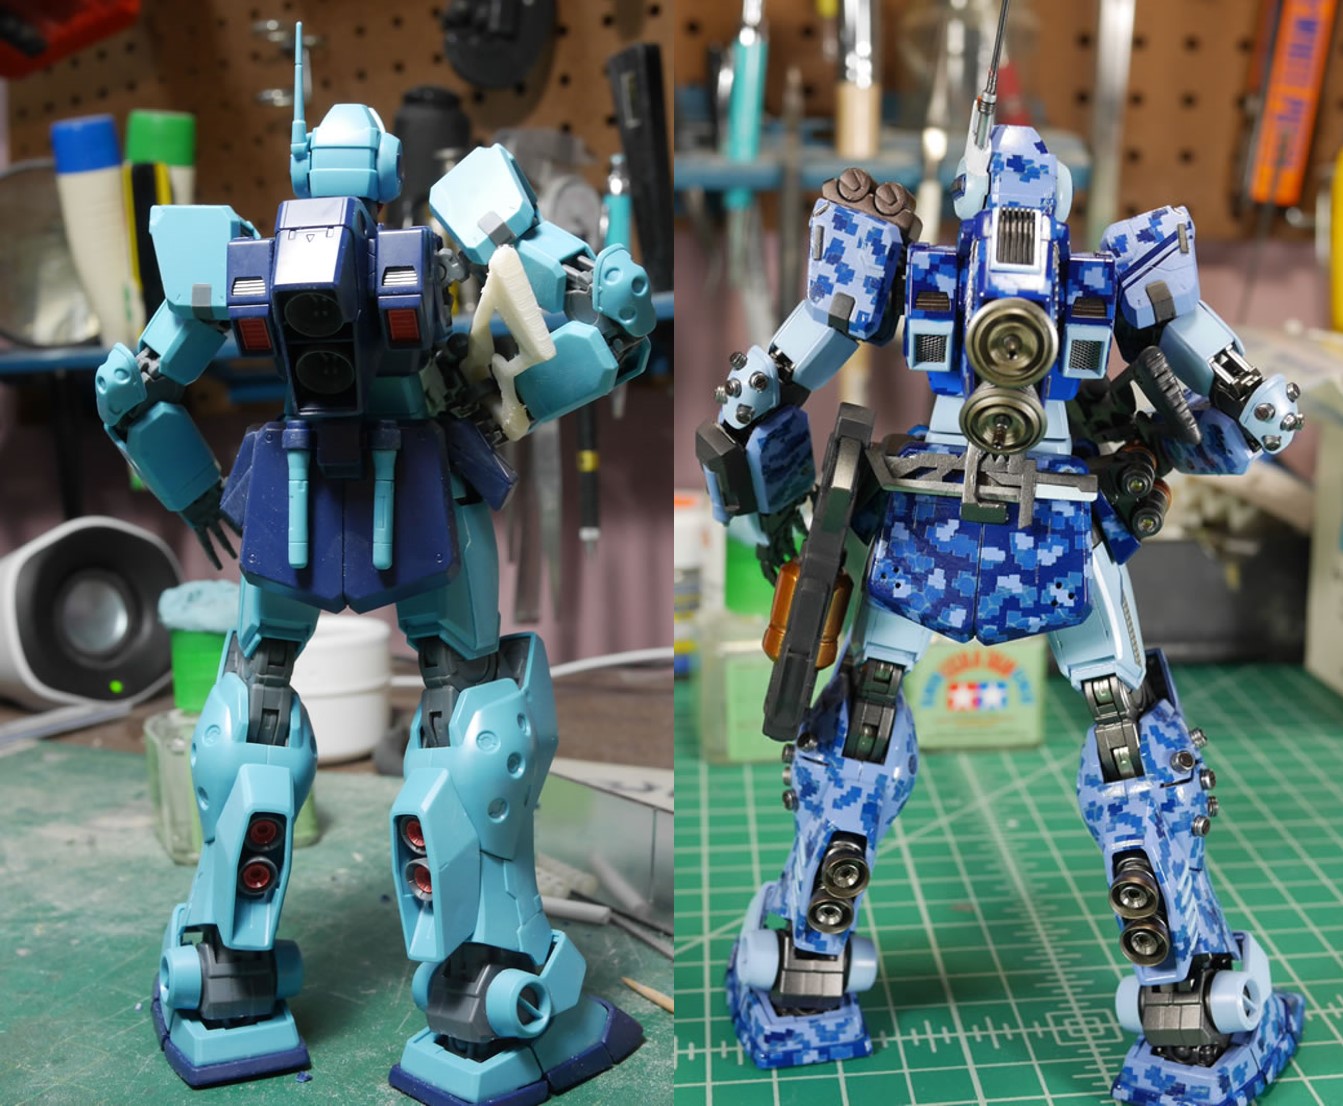
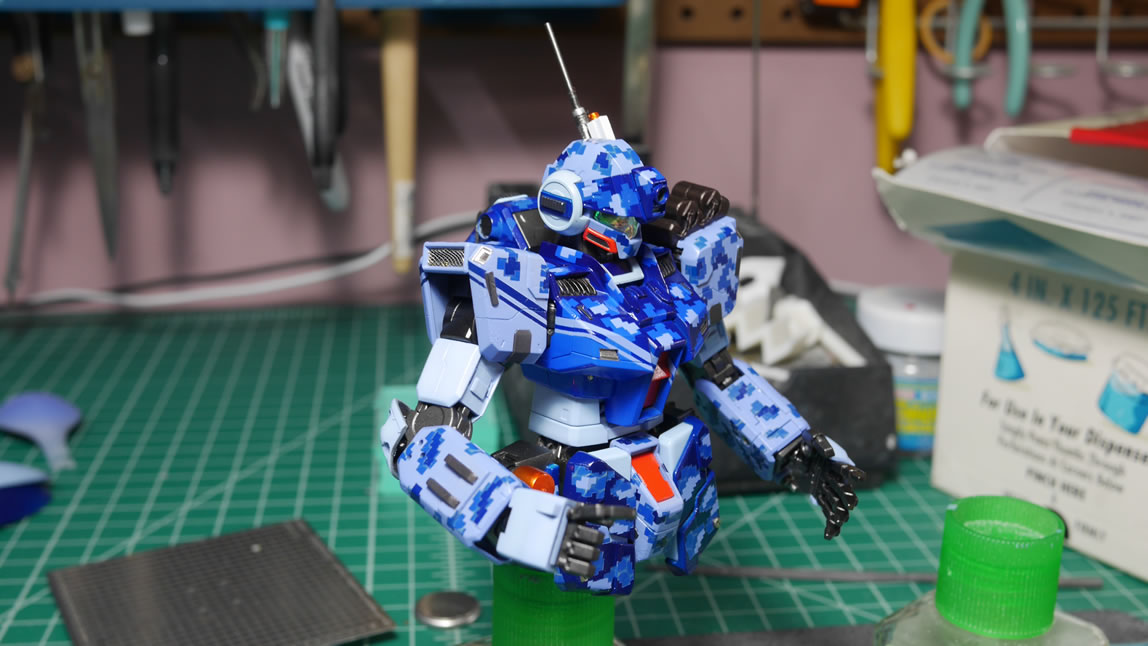
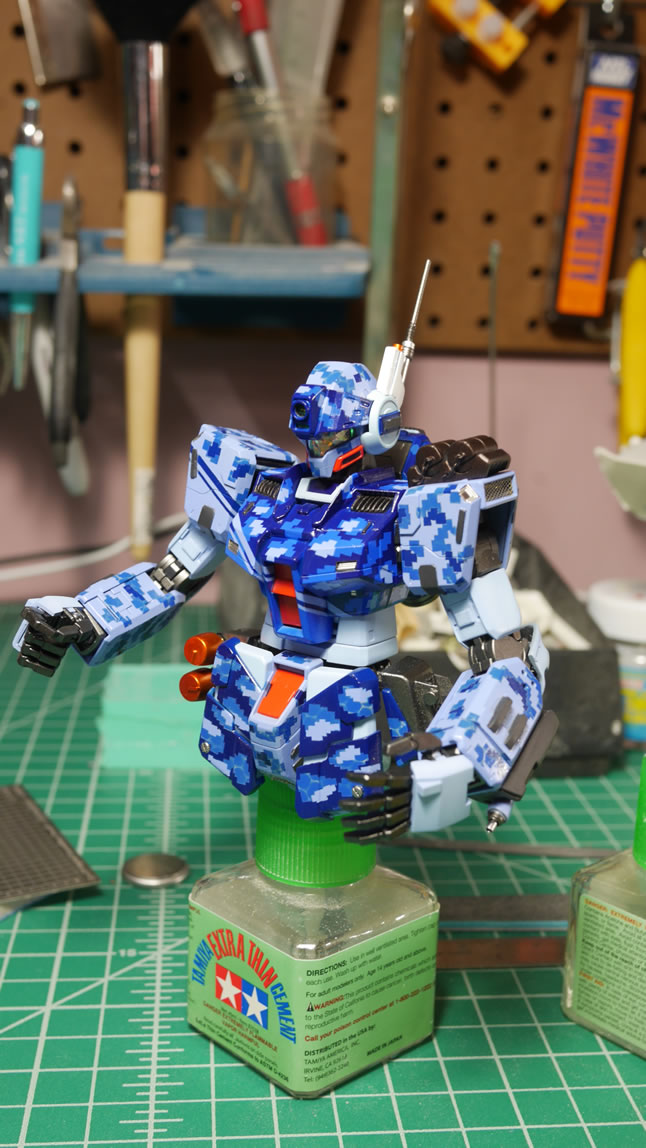
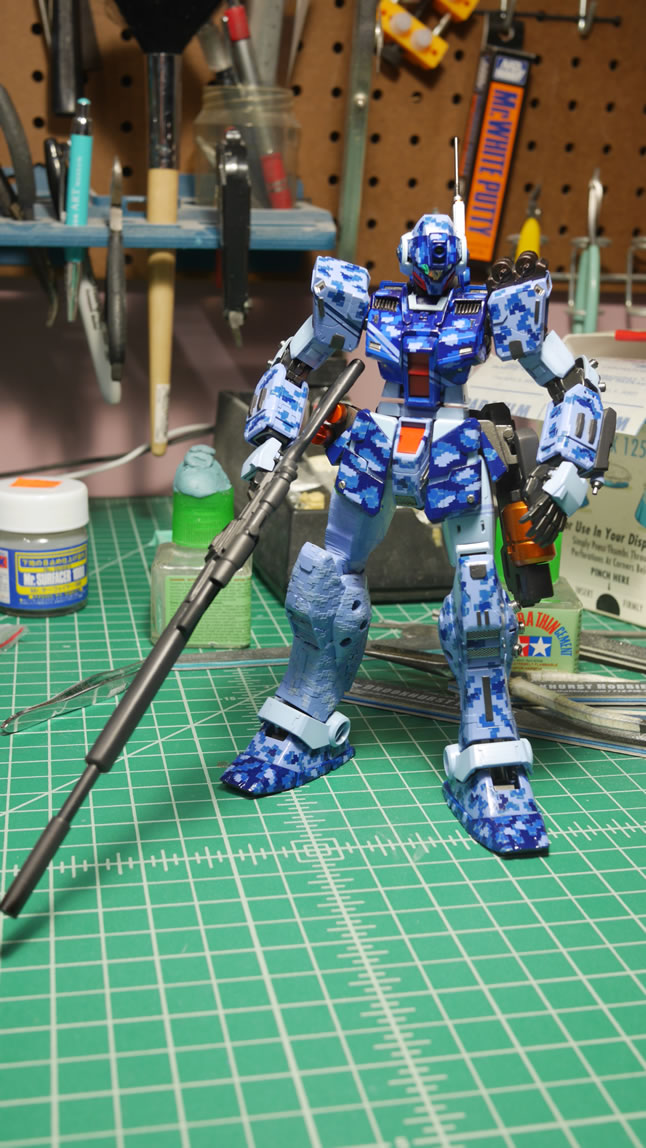
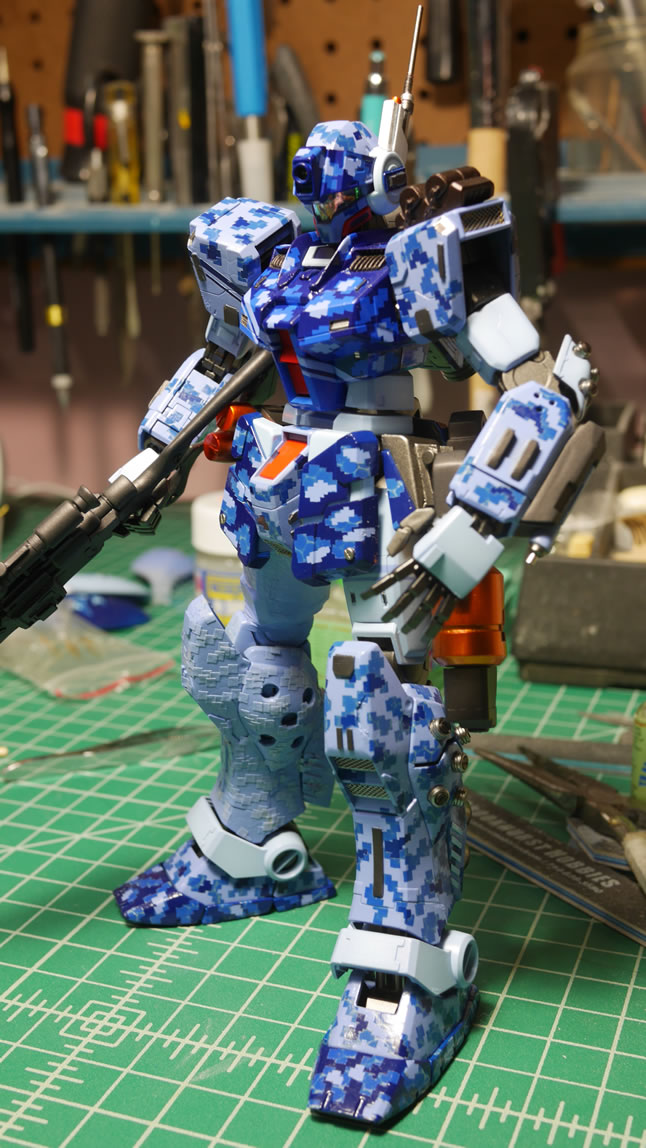
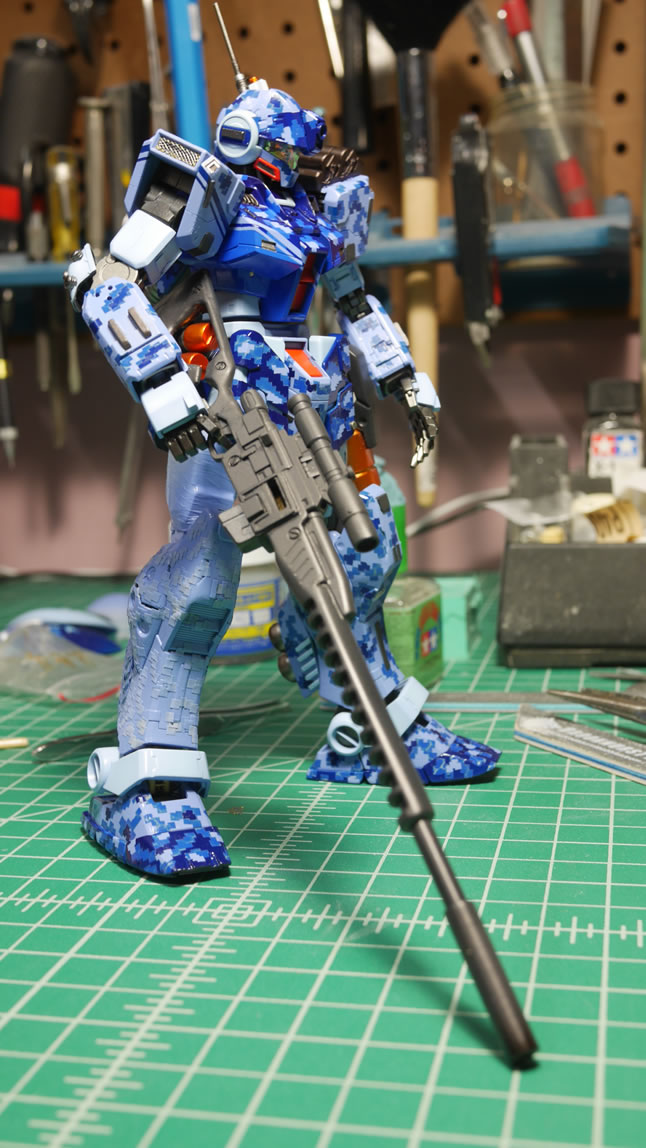
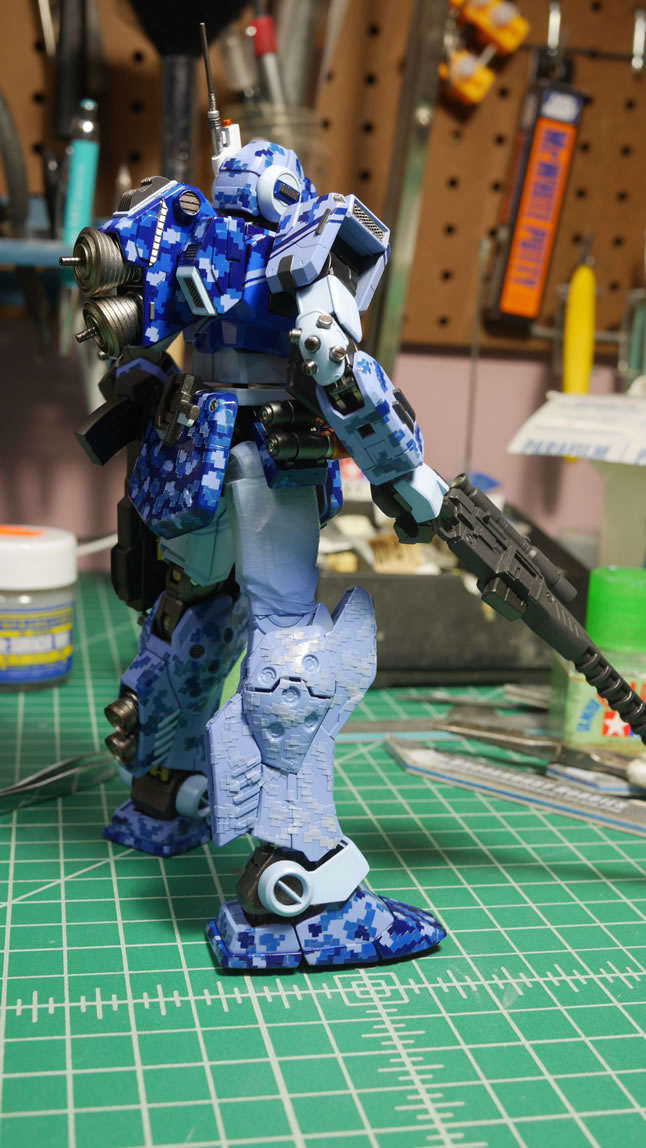
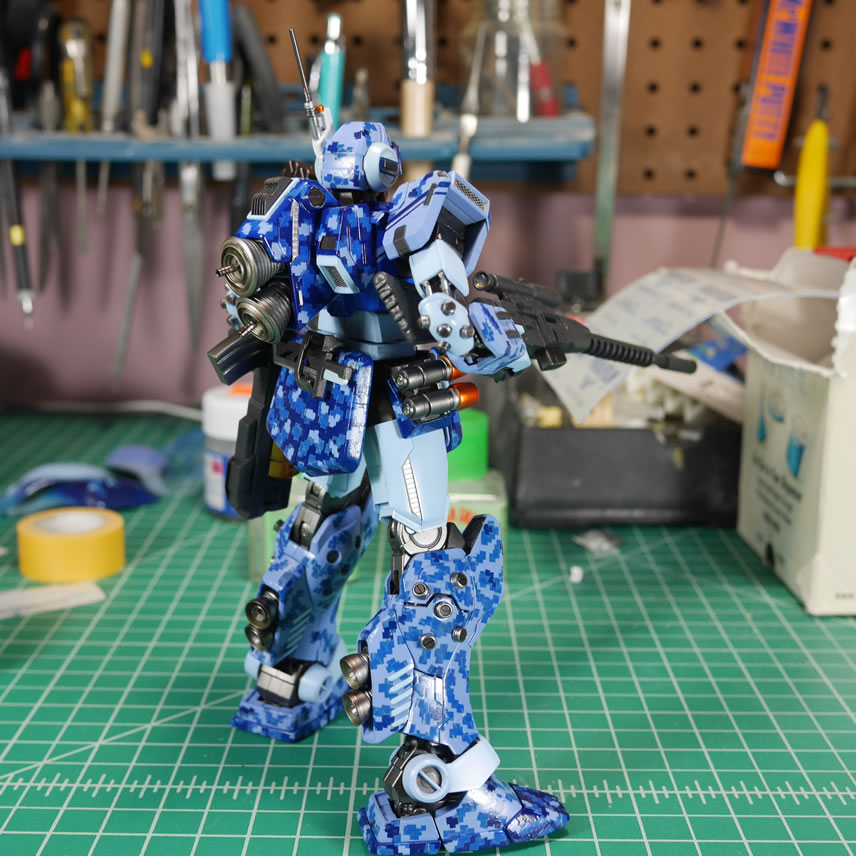
Its been two weeks since the last update post. There were a few busy weekends where not much progressed and all the work in these past two weeks was just the endless cycle of paint-mask-paint-mask. So this will just show you how f-ing tedious that process was and hopefully show that it’s actually worth the grinding. The last bit of work done last night was spraying the clear gloss over the kit. Several coats of clear gloss. And the reason for this will become more apparent as we progress through this update. Before taking the kit apart into small subsections for the clear gloss, I snapped a few assembled pictures. It’s a good time to bring back the snapped pictures I took over 3 months ago when I first started this project to get a side by side comparison.
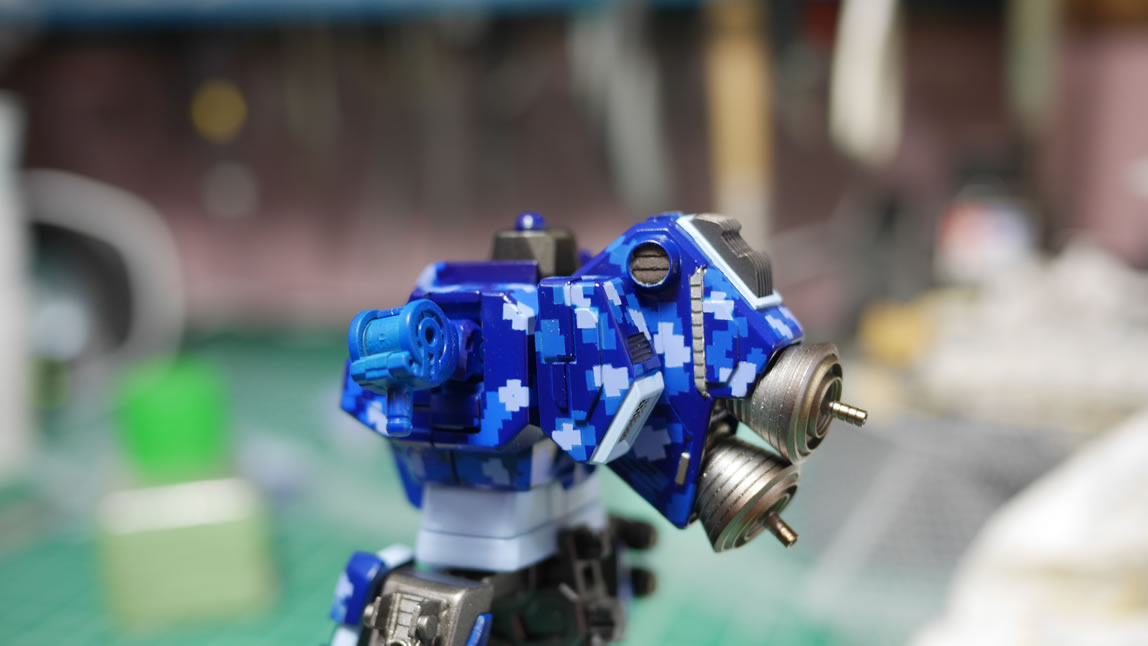
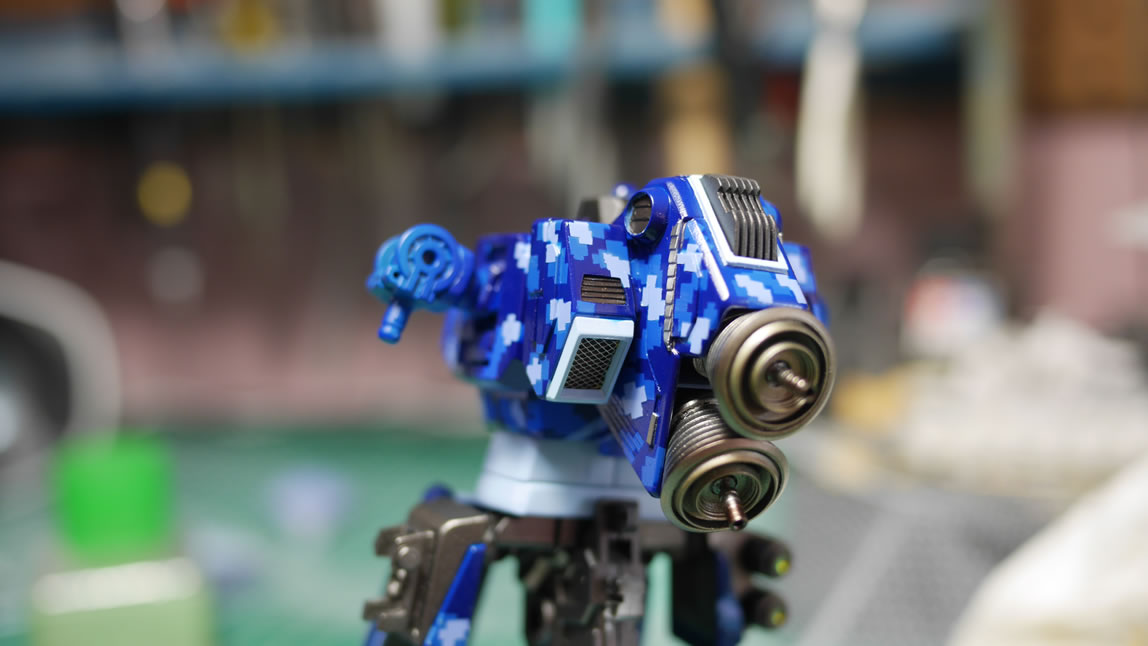
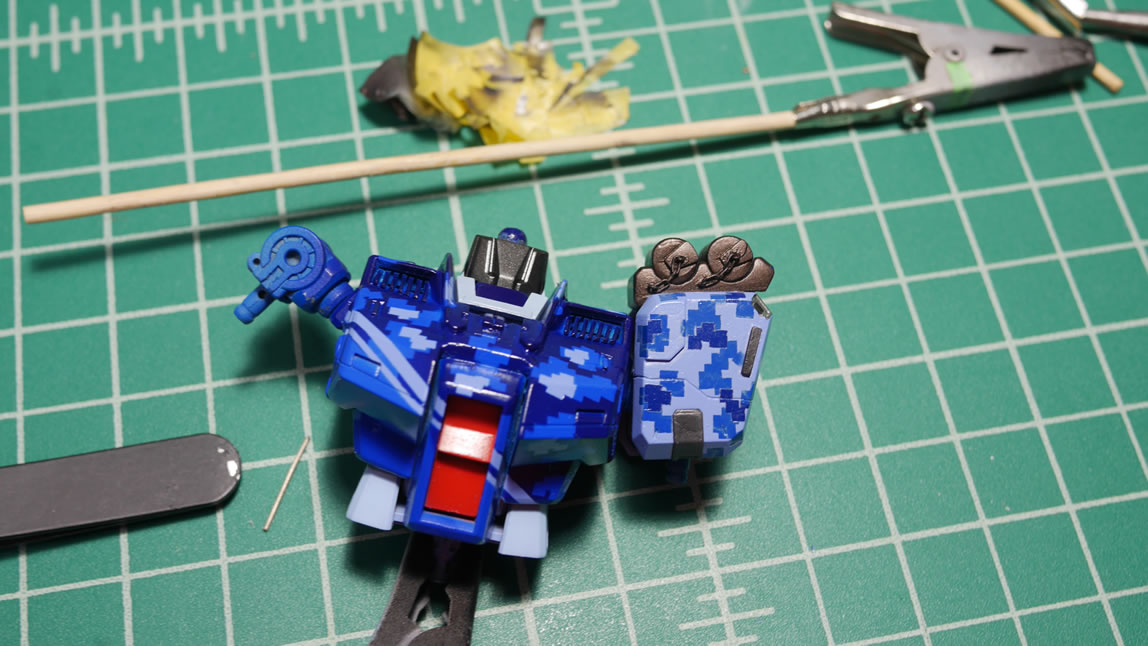
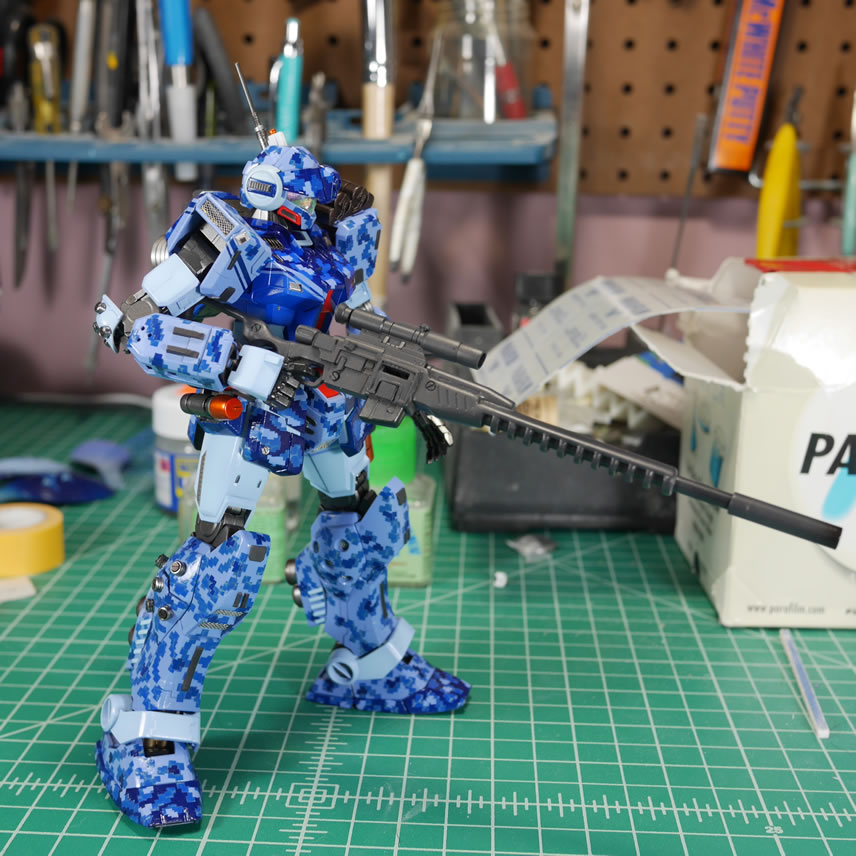
Frontside:

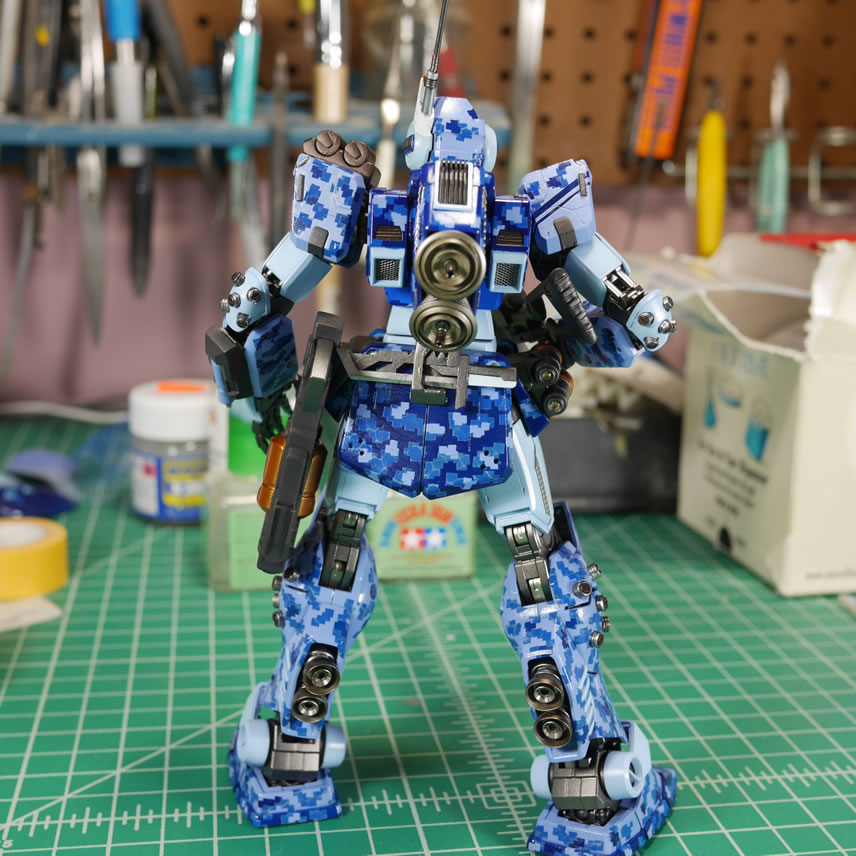
Backside:
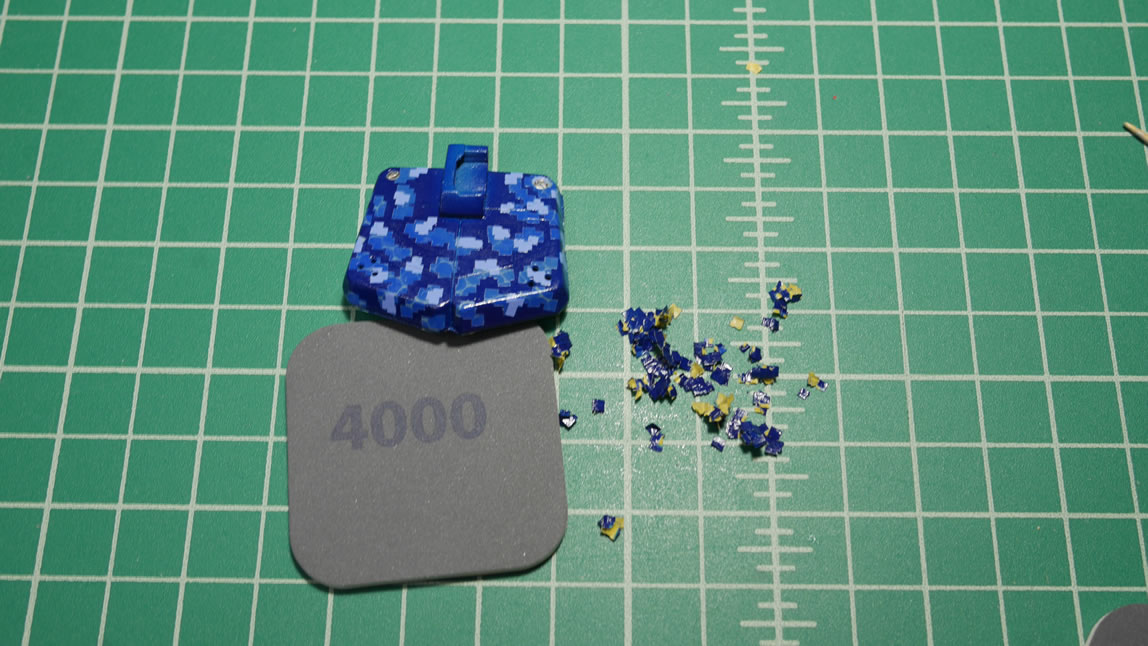
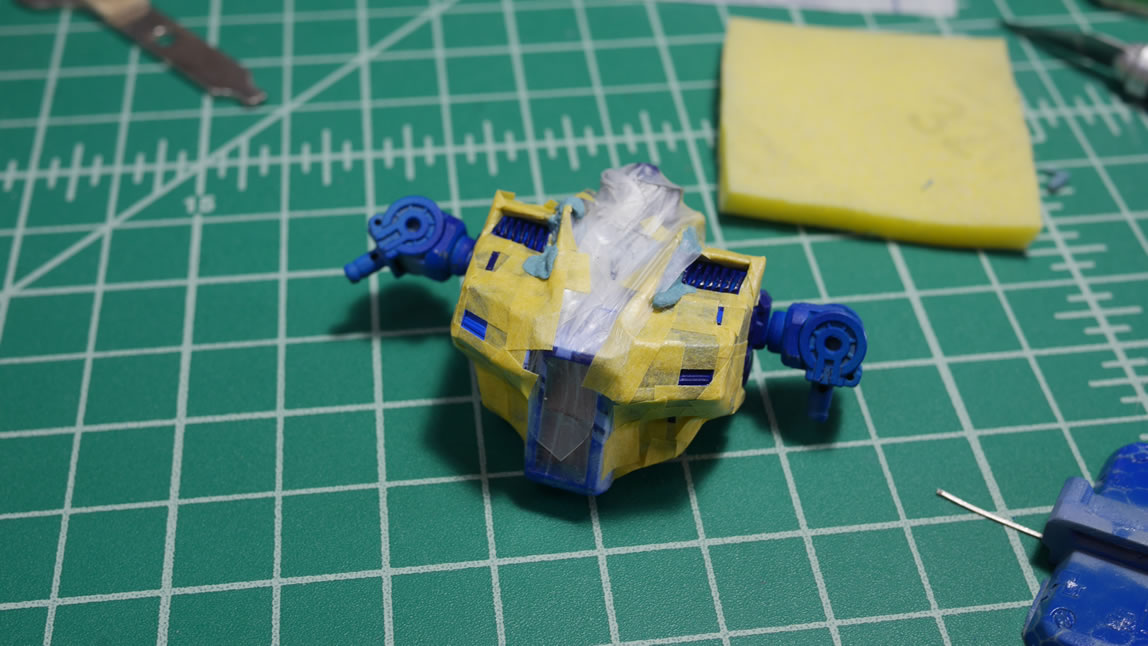
Returning to the rear skirts, I reprimed and got the base colors down and started the first layer of masking. Small bits here and there. Then the cloth hex mesh masking and painted with cobalt blue. And then the next layer of small square masking. Then the removal of the masking. The problem with so many layers of masking is that the paint will build up and you end up with very uneven paint. One solution is to lightly sand each layer of paint with a very high grit sanding pad. This polishes the paint and helps level things. To avoid having to sand over the paint, I try to keep the layers of paint thin – but when there are colors that take a heavier layer to show; this is unavoidable; so the high grit sanding pads come out to play.

The chest block is masked off and painted. Because of the problem I ran into with the rear skirt when I tried the cloth hex masking (I didn’t have a picture of the process while I worked on most of the kit – but later in this post, I have a picture of how I did the leg). The process I was using would make it very difficult to actually look halfway decent on the chest and backpack. I decided to skip that step and just use the cobalt blue alone. This kind of bites me in the ass later when the kit comes together and there is a tonal difference from the rest of the dark blue parts. I’m hoping that once I get all the clear coats, decals, weathering, this difference will be less glaring.
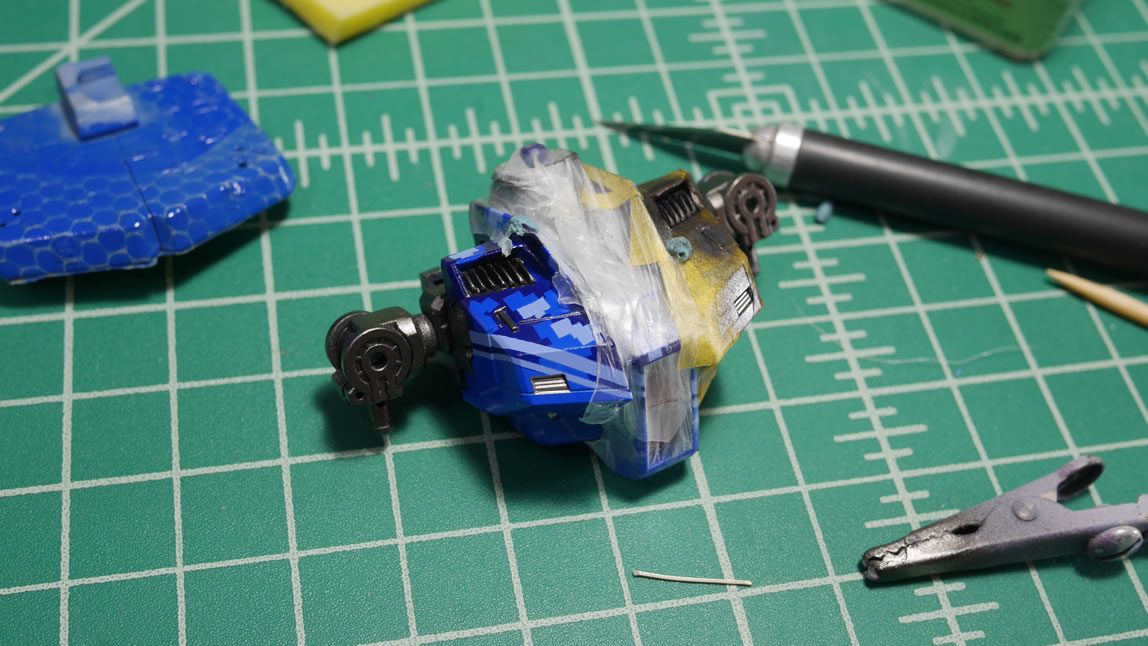
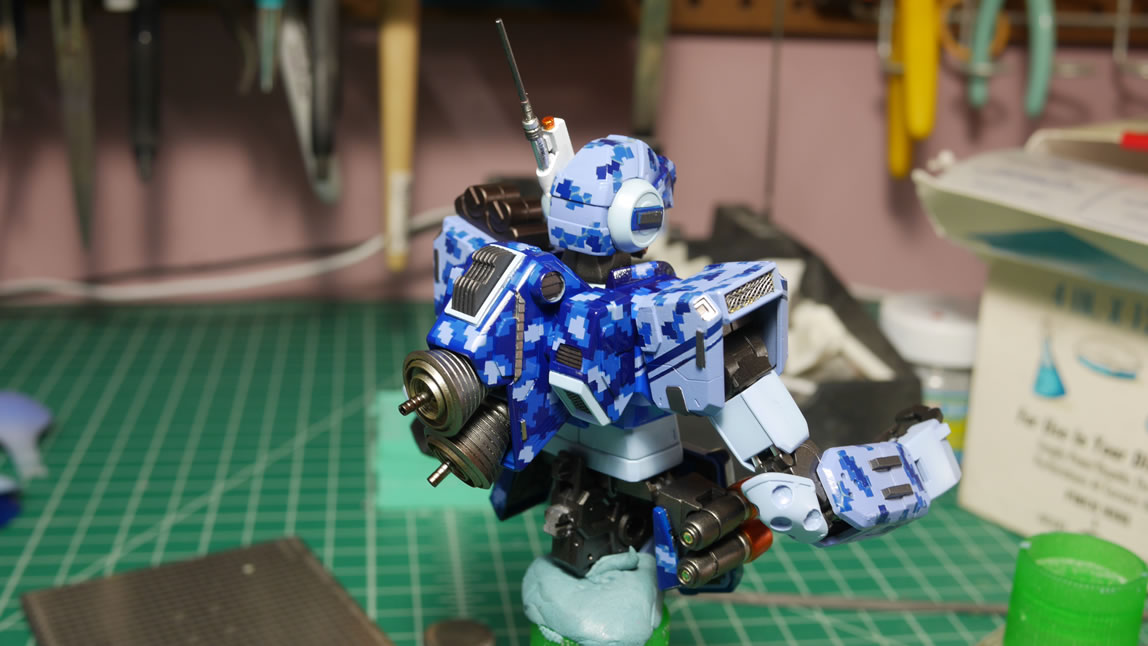
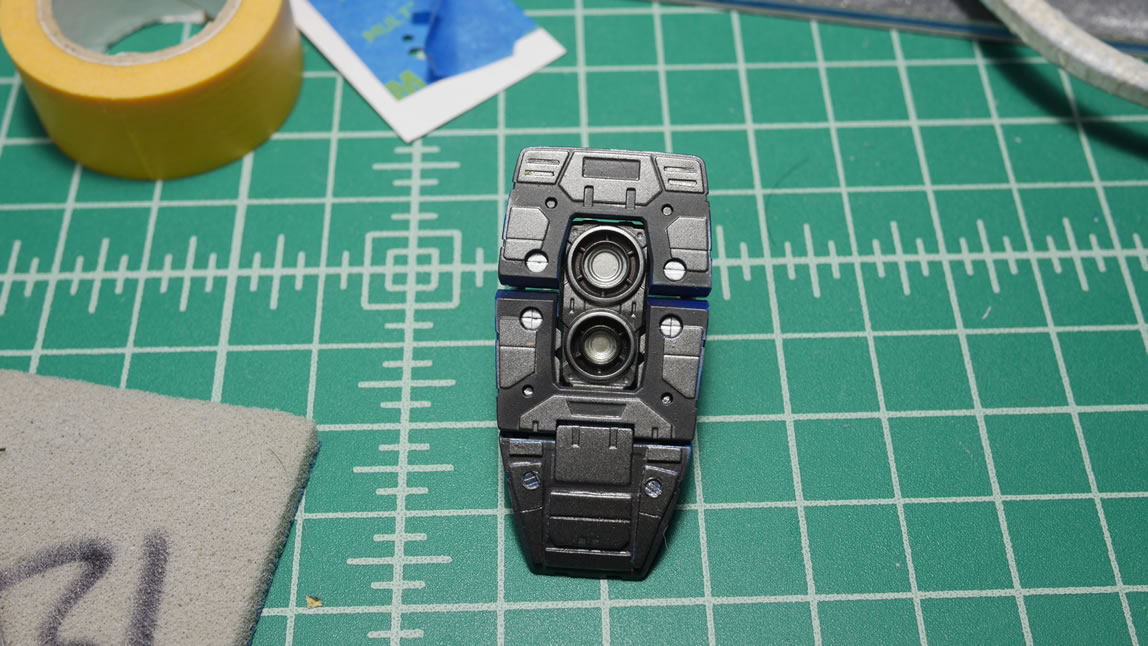
Once the upper torso and most of the waist are done; a quick assembly helps to get a better look at the progression. Metal mesh is added to the vents and the kit is actually starting to take shape. Putting things together when I finish also helps check against tonal differences or even the fit. With enough paint sprayed, things that were tight before without any paint are near impossible to assemble. So this is a good exercise in making sure it all still fits as designed. And it is a sense of accomplishment.
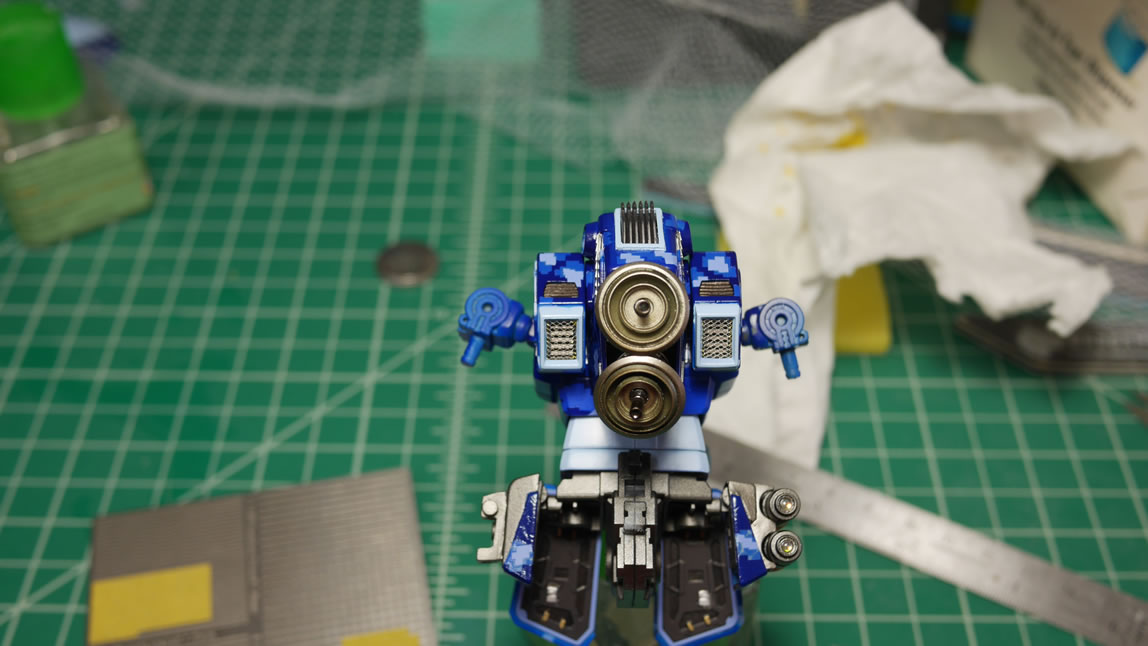
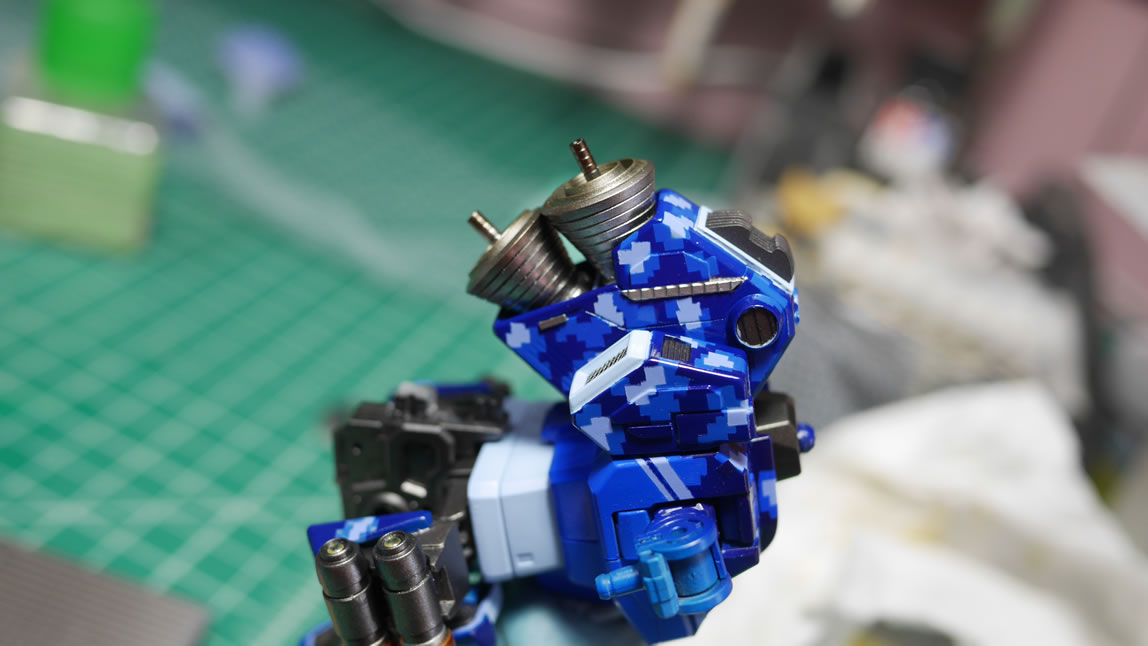
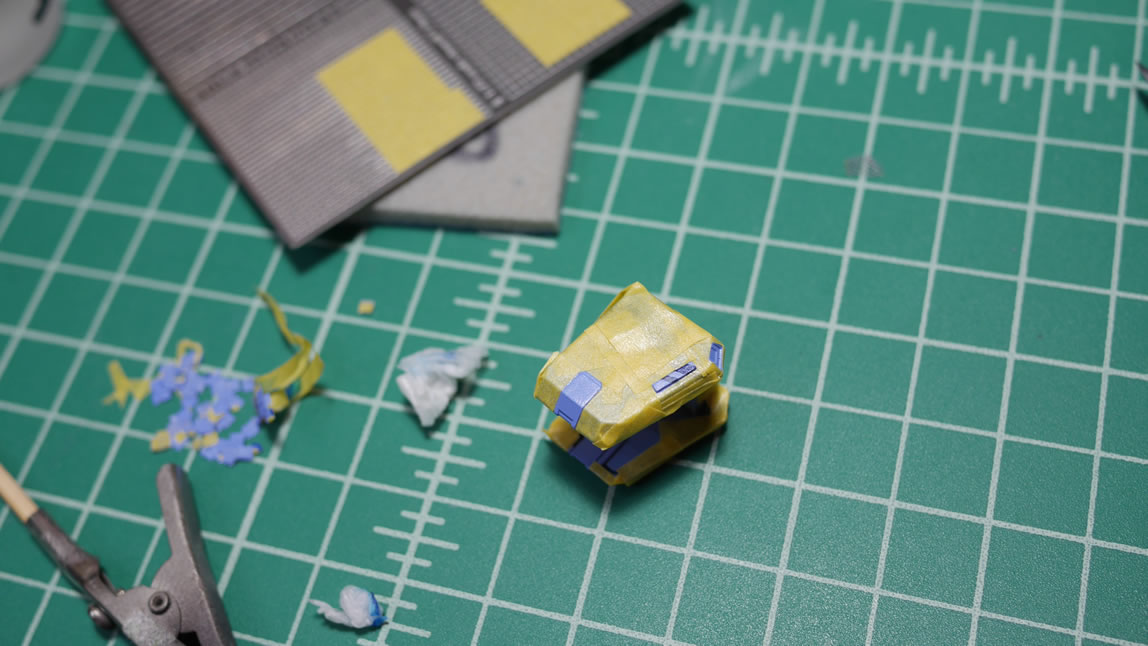
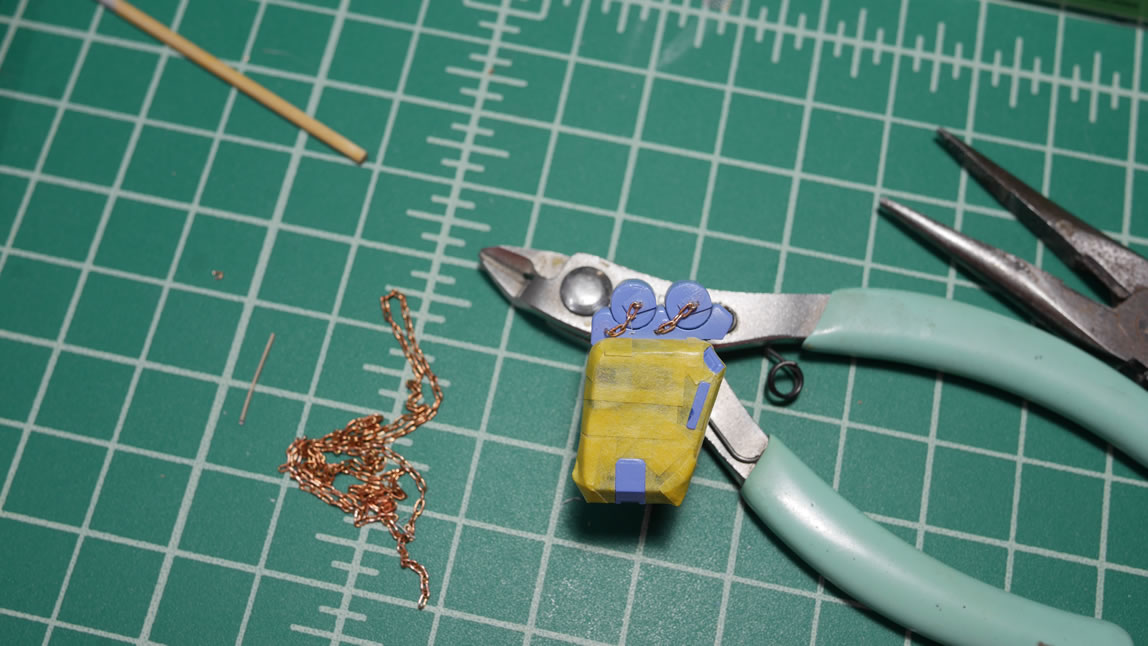
For the left shoulder, I added some canisters akin to the GM Spartan’s shoulder. But I wanted these canisters to be smoke grenades or just smoke dispensers. I figured as a sniper, the smoke dispensers would be a good defensive tool. Doing some research online for real world smoke dispenser on tanks, I found that they were usually connected with a chain. I thought this looked cool so I added a very small chain that I found at the local railroad store. Once I drybrush it a little, the chain should stand out more; but for now, the shoulders are done.
I’ve been making update posts on reddit and our TGG FB page. One of the users on reddit pointed out that my masking for the head’s cheek vents was sloppy. Our camera phones have gotten so good with high resolution pictures of tiny thing; that when I got home, I couldn’t actually see the issue. Well, I could if I looked REALLY close. I went ahead and fixed it anyways. It’s always good to get comments about the kit as you’re working on it so that it’s never too late to fix issues that I miss.
Returning the the shoulder. I had masked off and painted the detail areas but noticed that the different paint layers is too noticeable. The part is masked off and the detail bit is sanded down then repainted. This goes back to earlier in the post when some high grit sanding pads are useful in leveling out things as you continue to paint.

The shoulders are now done and can be added along with the arms that were completed a few weeks ago and we almost have a complete upper torso. All I have left are the legs and feet.
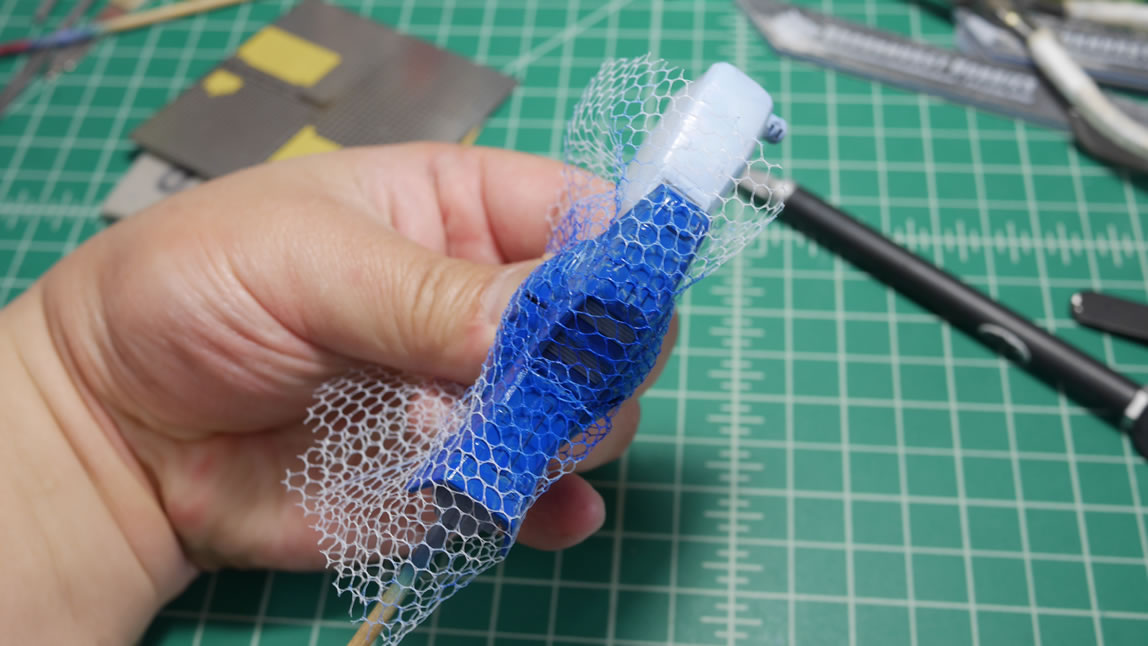
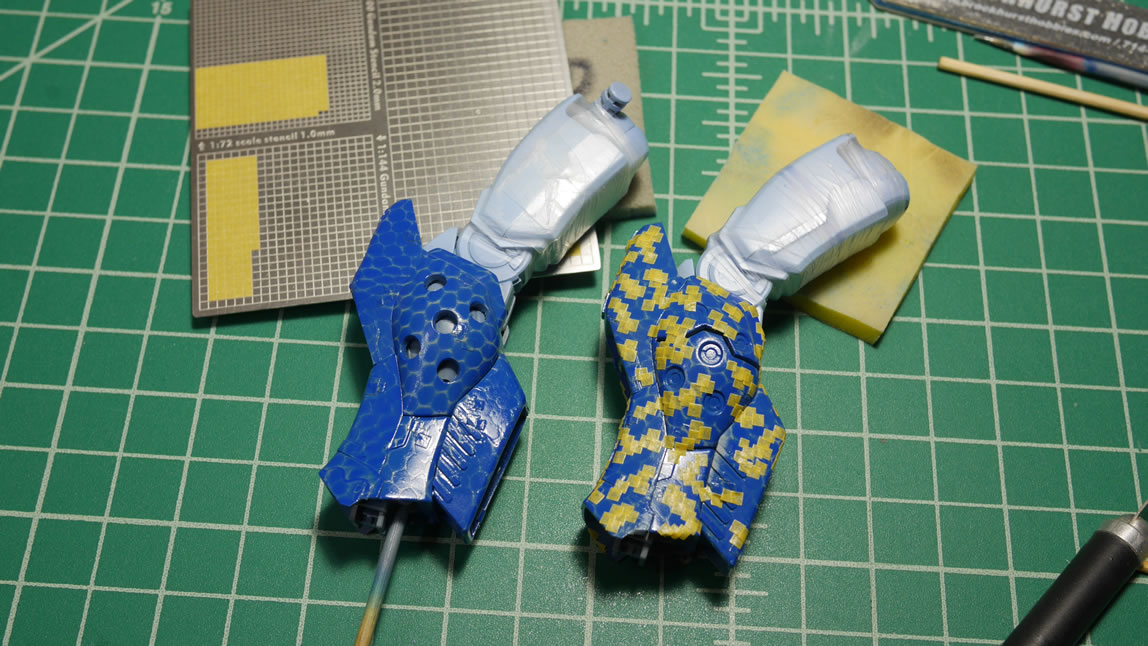
Since the legs are going to be the same light tone as the arms. I first sprayed the dark wolf blue color, then applied the first masking layer. The next step is to spray the bluish gray. This will be the hex color. The hex effect is done with a cloth mesh. The mesh is held against the part and cobalt blue is sprayed. The problem with this technique is that the mesh isn’t completely attached to the surface. Now if all the parts were flat with no raised details, this would work beautifully and the hex lines would be very crisp. But the cloth is raised here and there so there are blurry feathered lines. Now if that’s the effect you want, then you’re set. I was looking for something more crisp and precise; but I was experimenting with a technique my friend Mike Wine did for his Sinanju Stein. It’s not until later that I found a FB site that was selling hex masking. In the grand scheme of the project the blurry hex lines are not too big a deal because I’m not using the hex masking heavily. I just want a subtle hint that there’s some hex masking sandwiched between the digital camo. The thighs were also painted with the lighter cobalt blue mixture around this time too; they were masked off with parafilm so that the remainder of the leg painting continues.
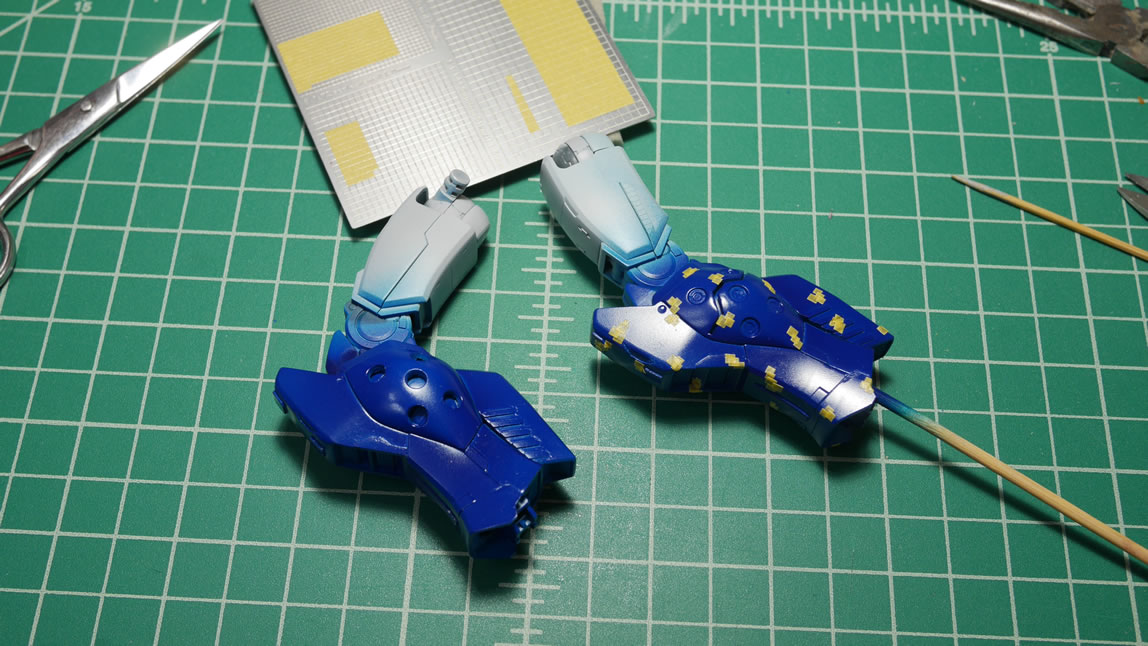
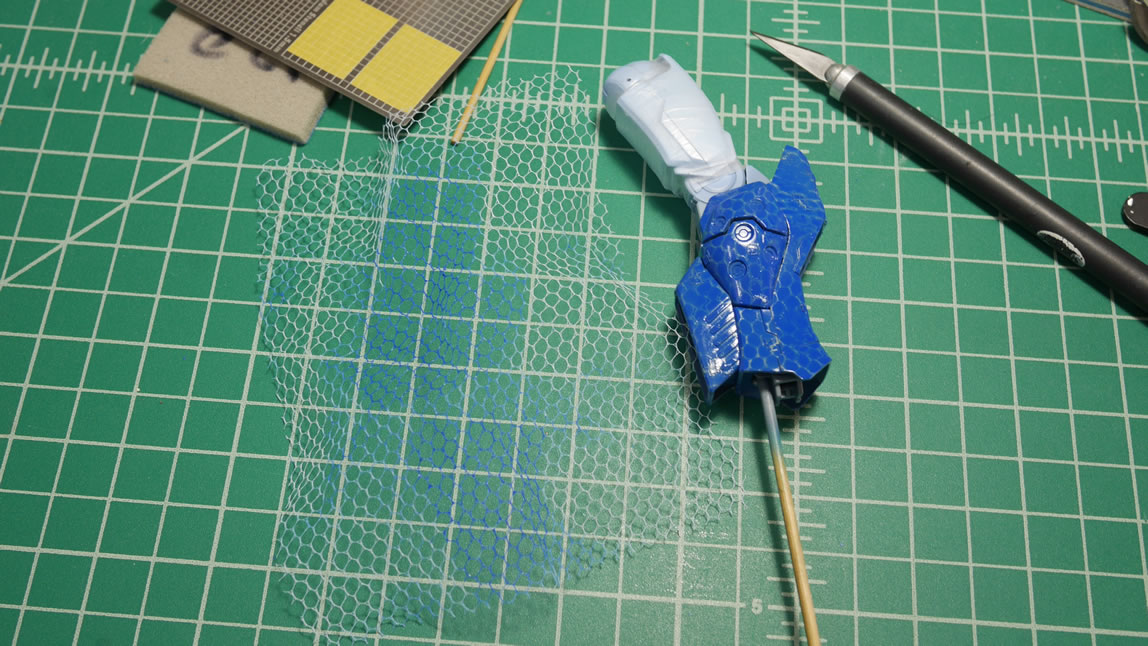
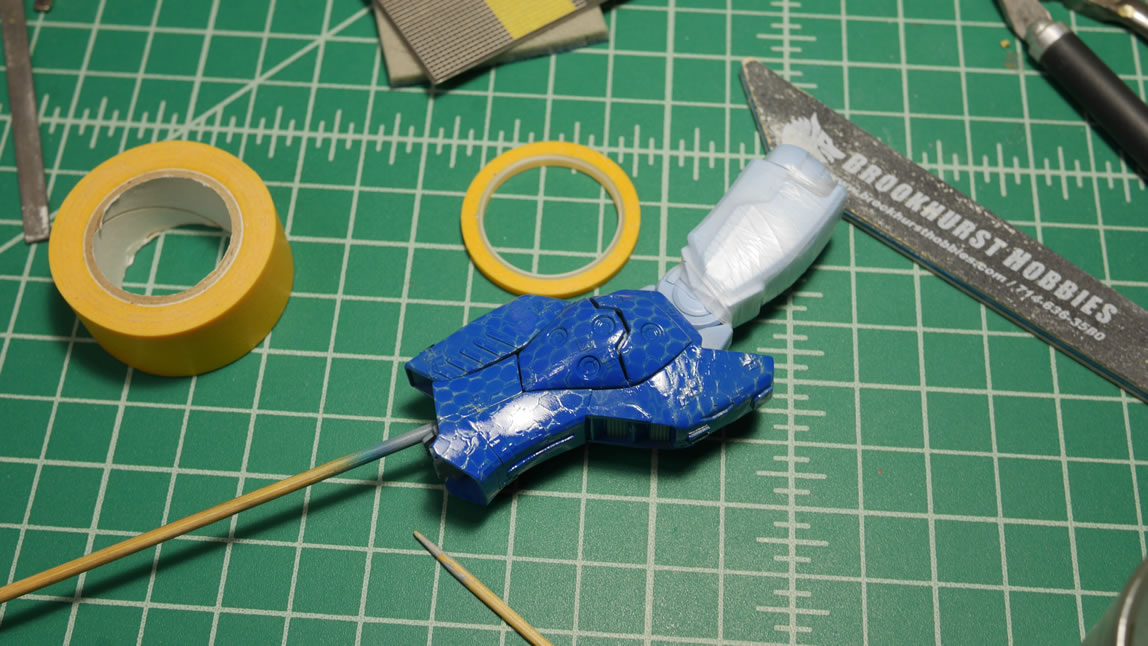
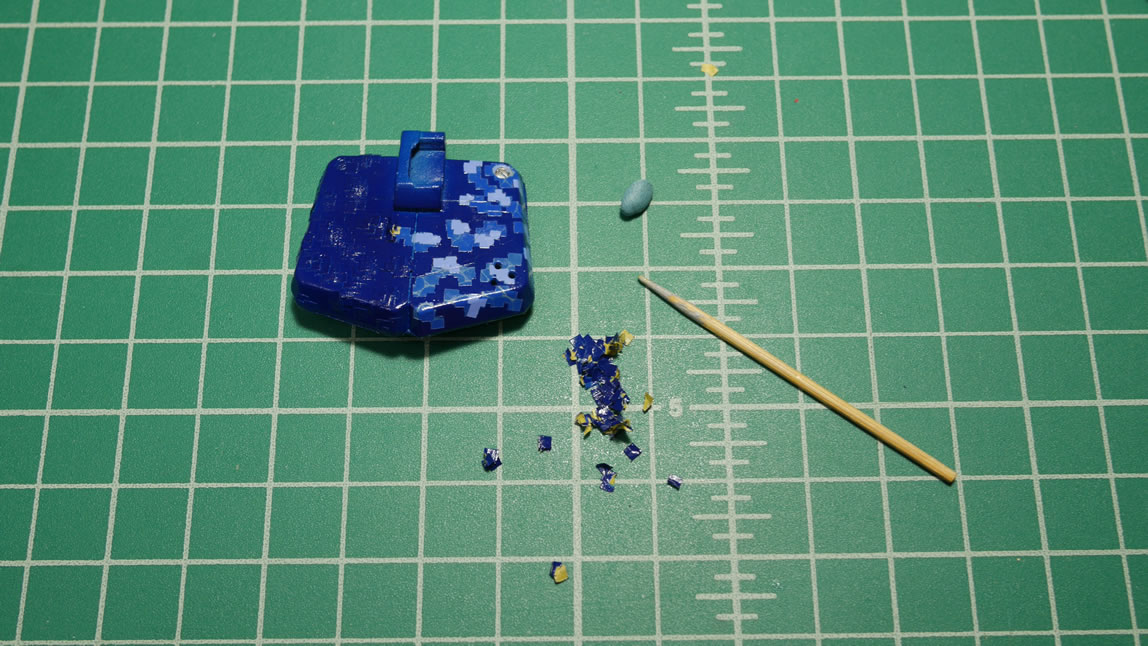
Once the hex pattern is cured. The next layer of masking is applied. Using the metal template, squares are applied. This process takes hours. The payoff is less than 2 minutes of airbrushing with the lighter lavender tone.
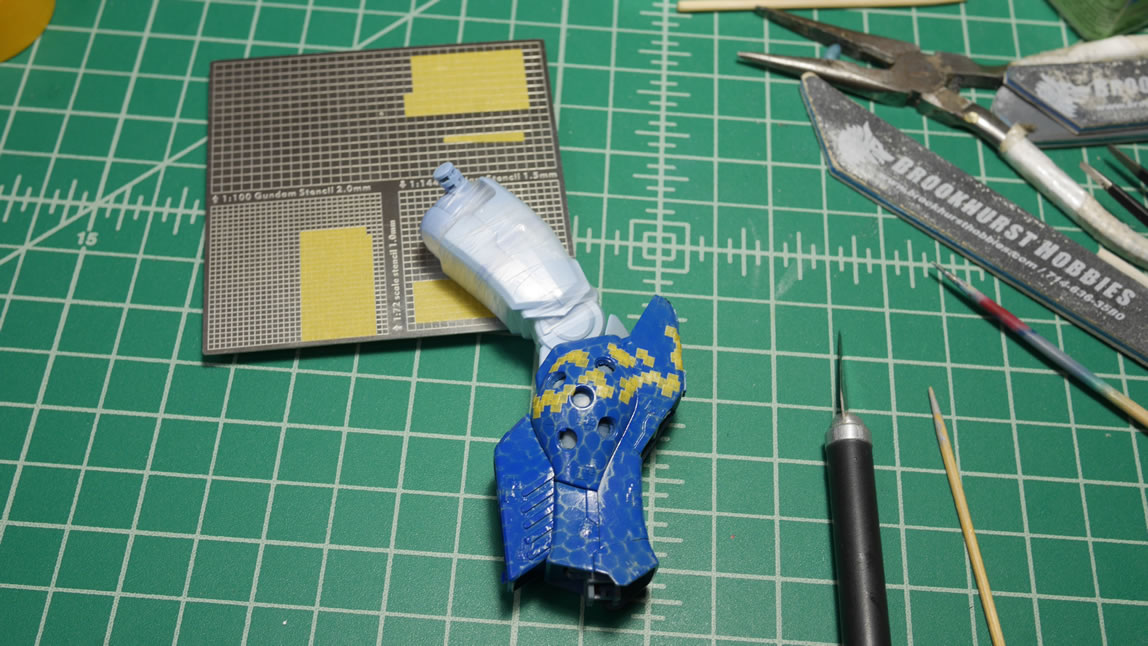
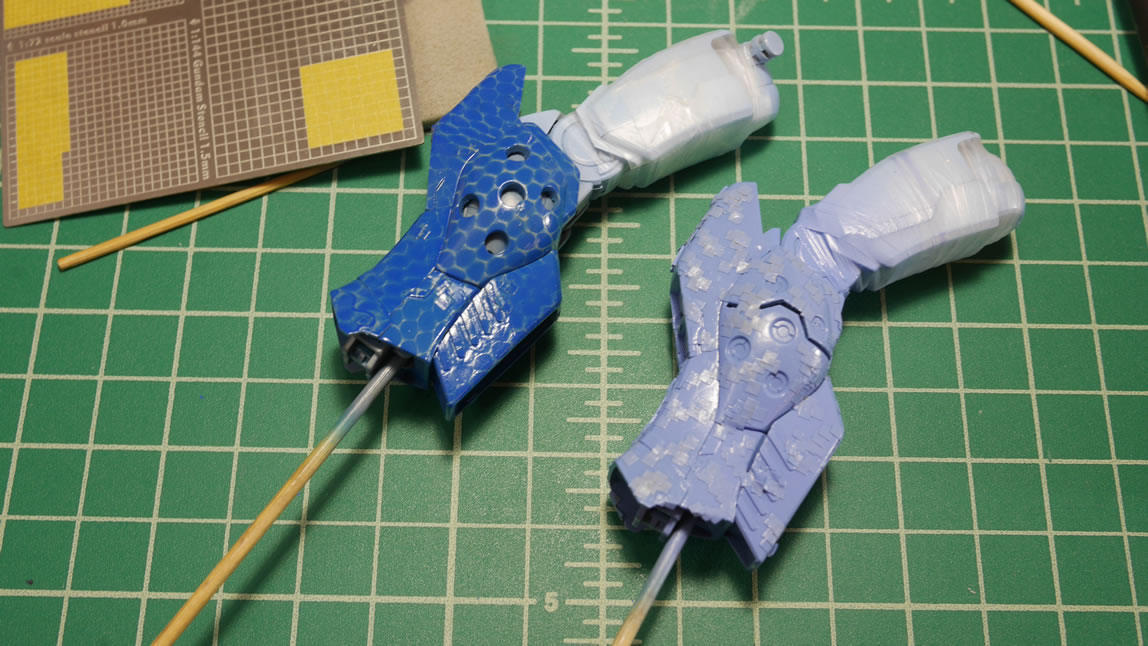
It takes longer to remove the masking tape than it did to airbrush. But thankfully, not as long as it did applying the damn little squares. And once all the masking is removed, bits of the armor pieces are remasked to paint up some of the raised details.

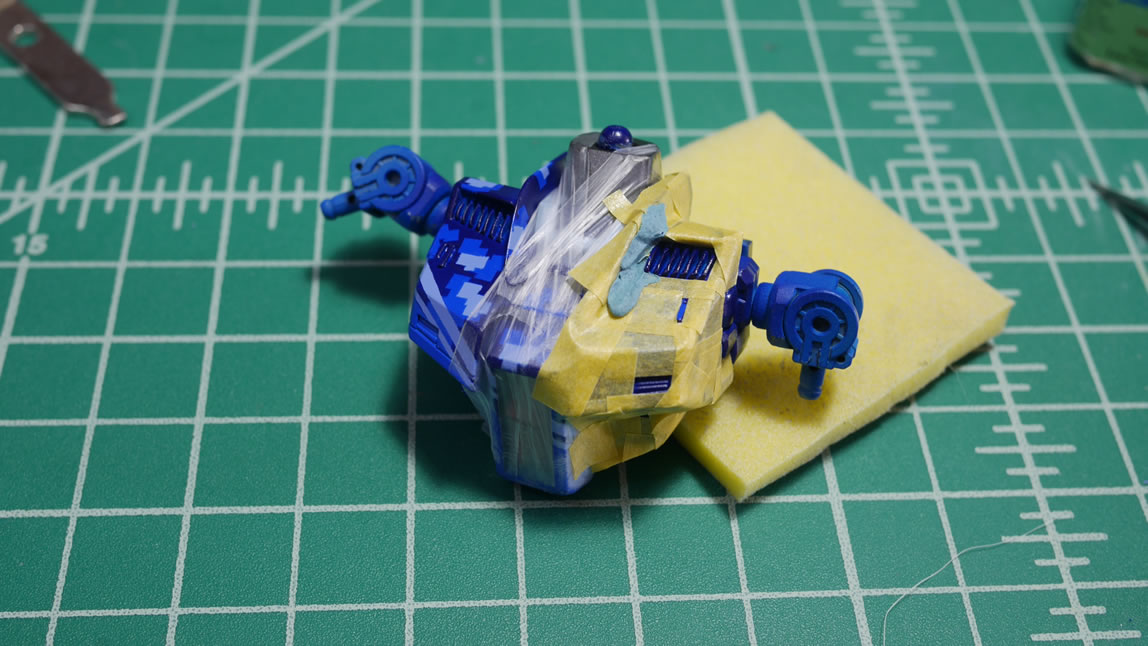
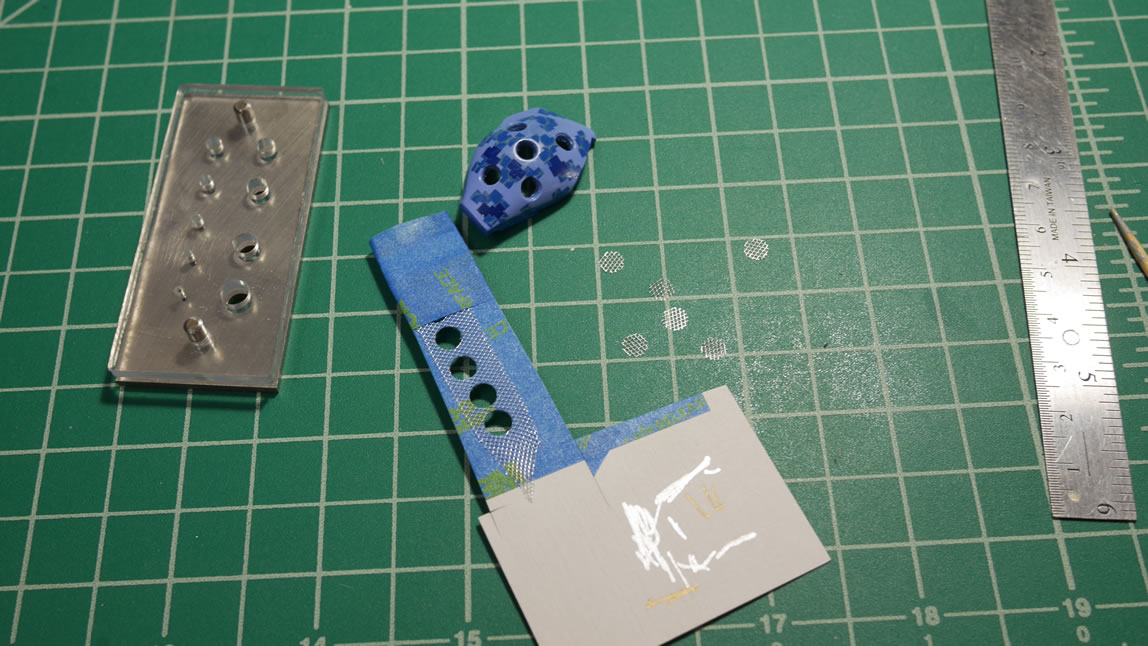
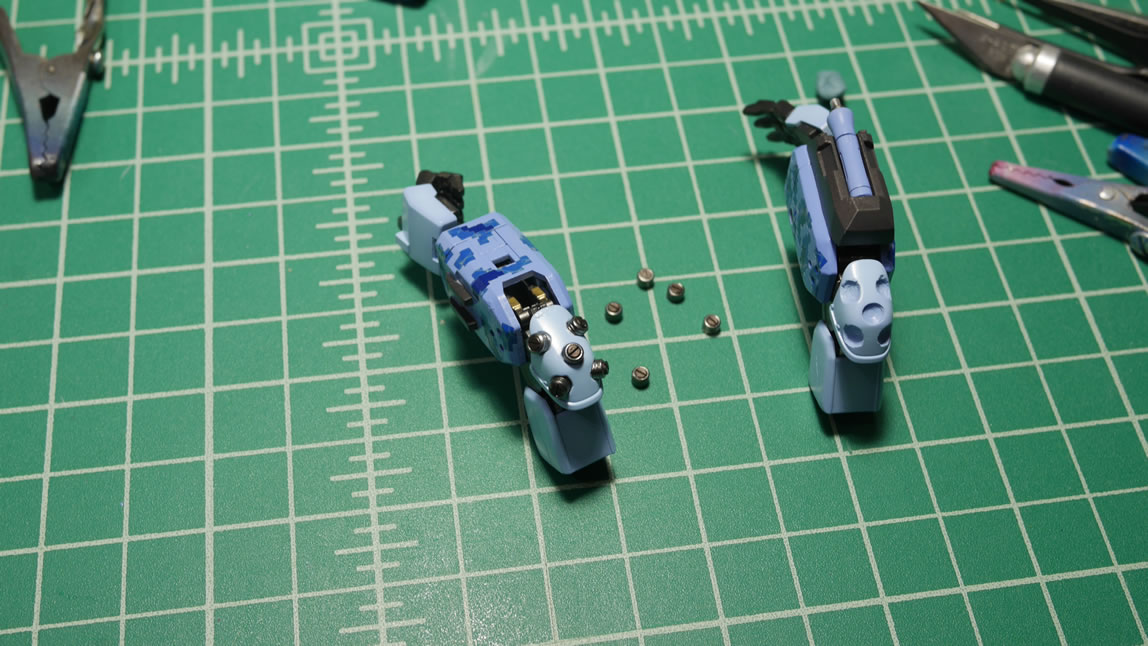
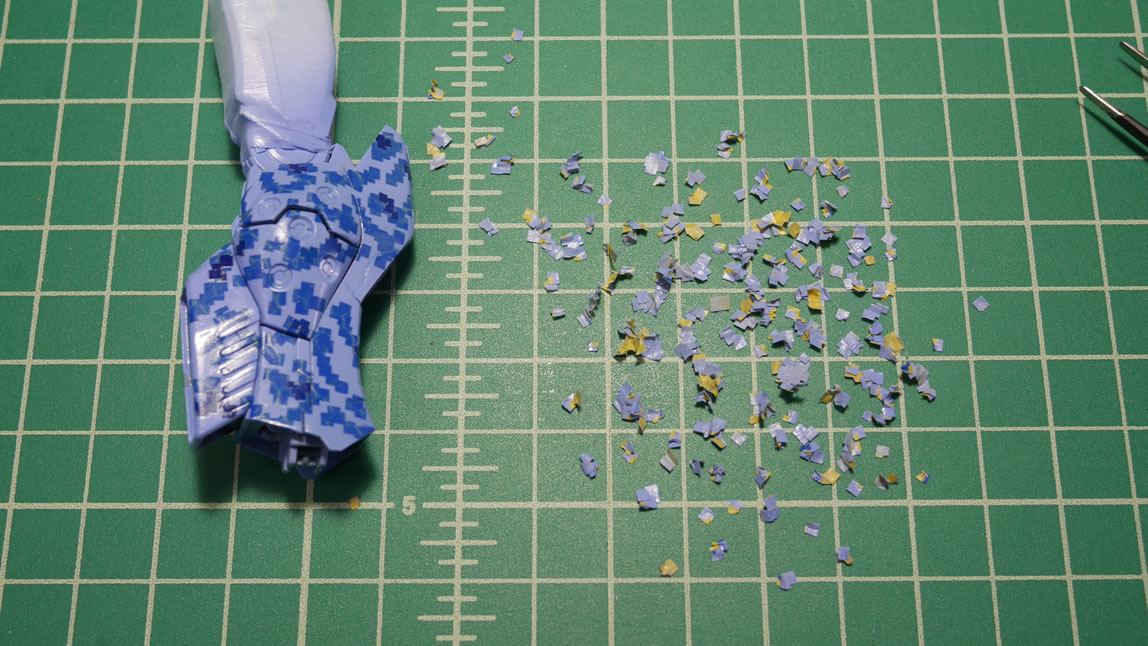
With all the painting done on ONE leg, the armor pieces are separated to add in the metal mesh details. I had drilled out the holes for the inner calf details and originally glued them into position. I did not want to mask and paint the mesh, so I removed them while I painted the kit. The mesh was also brass in color. I found an aluminum colored mesh from the local railroad hobby shop and grabbed that. I didn’t want a brass colored mesh, so having the aluminum one lets me skip the paint/mask process if I did use the brass. The punch is brought out and the mesh is taped to a thick sheet of paper for support. The mesh is pretty delicate; so if I just used the mesh in the punch, I would end up wasting more mesh since the punch wouldn’t be completely clean. The added cardstock support helps get clean cut circular mesh pieces. Once the mesh is cut, they are just glued to the back of the calf piece and the rest of the leg is assembled with some mesh on the vents below the knee. The work on just one leg took most of the week.
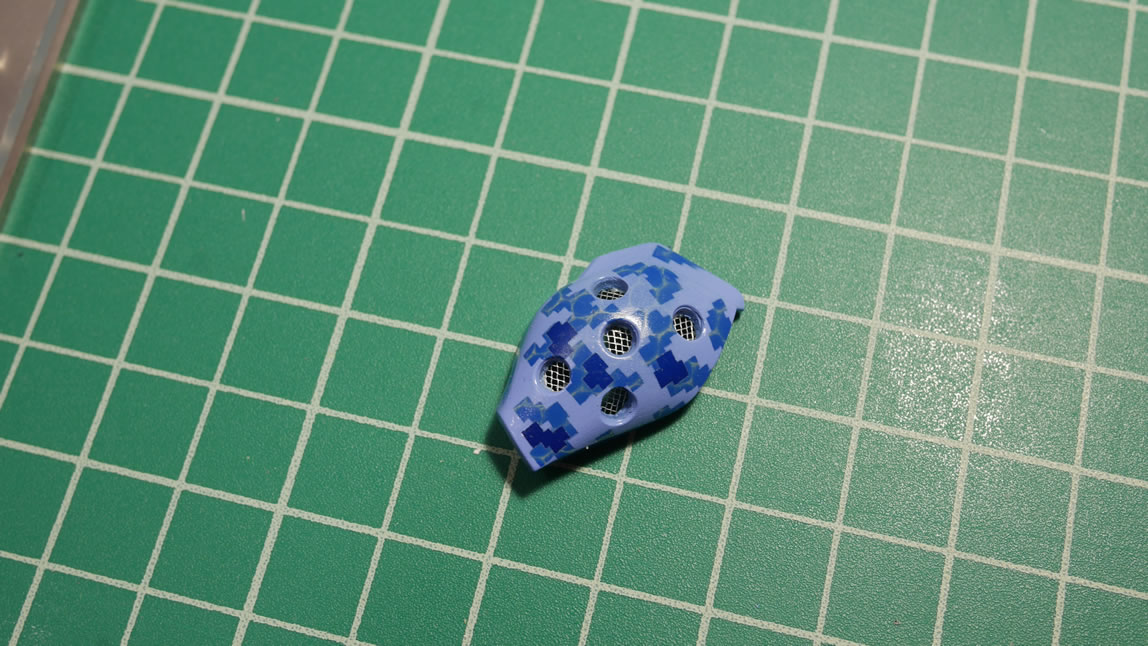
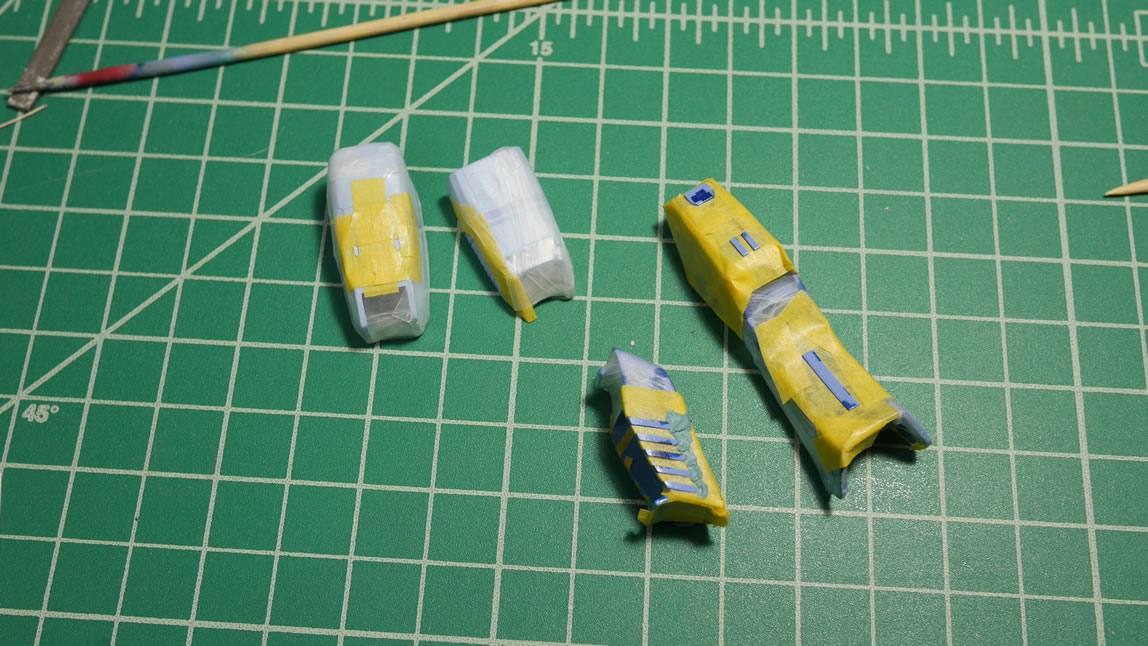
The bottom of the feet are painted and masked with alclad metallics. The feet tops are also painted. Originally, I had the dark blue areas of the lower foot a solid color. But decided to apply the digital camo pattern. I’m not sure that was the right decision. It looks a bit on the busy side. I didn’t want the upper foot to have such a stark contrast with a solid colored lower foot since I already had the ankle covers a solid color. I’m still on the fence about this. And in the interest of time, I will most likely leave it, unless it really starts to bother me in the next week or so.
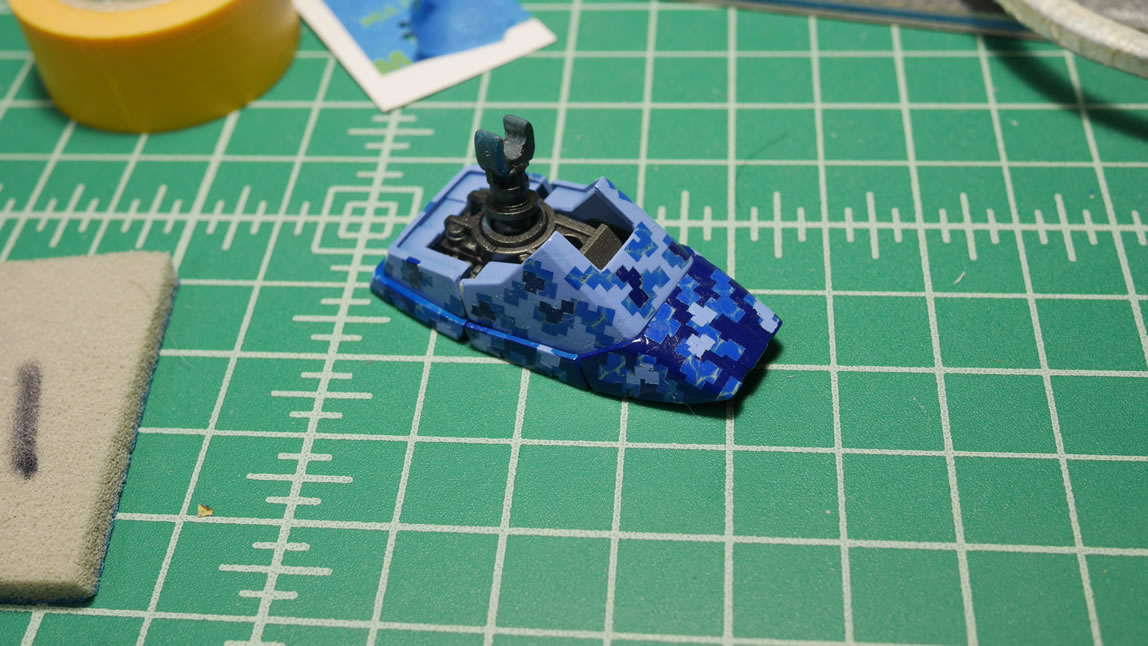
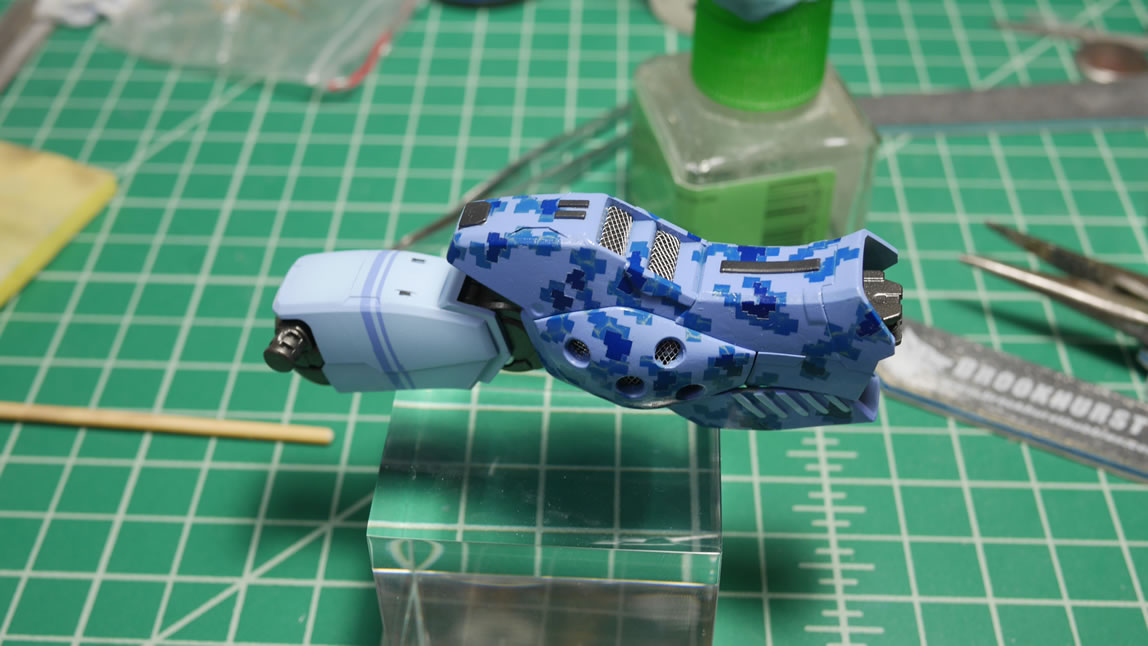
The feet and one leg is done. Time to assemble an entire leg!

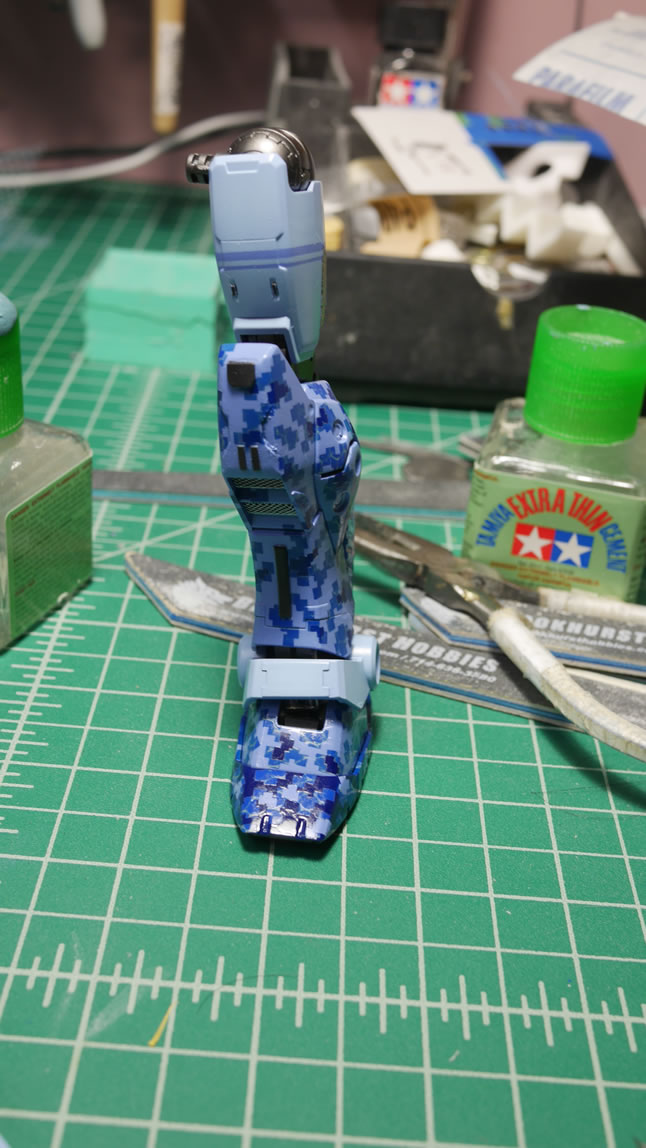
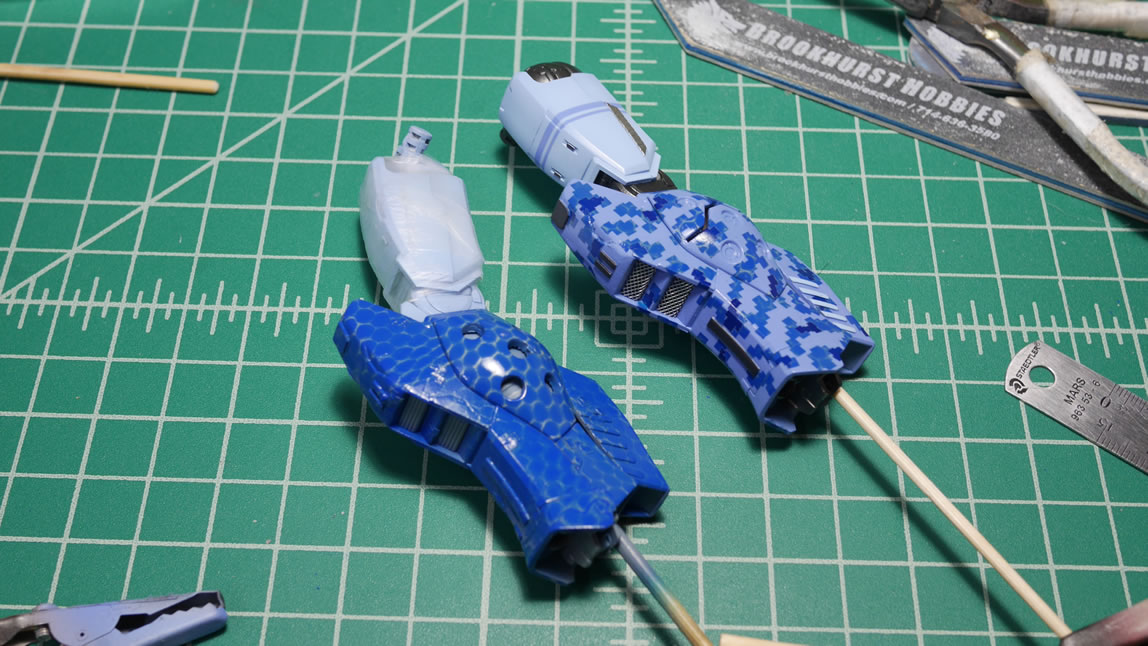
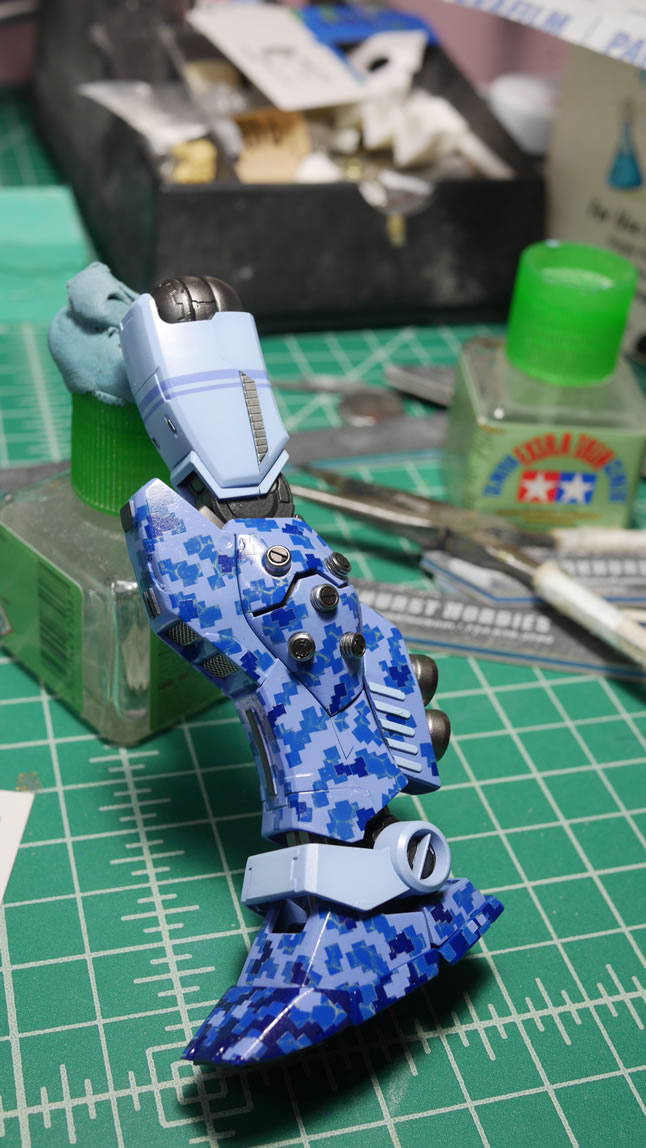
Going back to my first test fit with some metal bits that I had casted in resin. The painted bits are added to the elbows and outer calf to complete the arms and leg. It was pointed out to me that these details may be a bit too large. I agree with the elbows, but it is an interesting look and kind of matches up with the absurdity of the extended thrusters I have on the kit. As a whole, I think it balances decently. In previous updated, the arms were commented as being a little too skinny. Again, a few days of looking at this should help me decide if I wanna go back and fiddle with it.
Since I had the one leg done and the other leg was still in the process of being painted. I did a quick assembly to get a better look at how the kit comes together. Light at the end of the tunnel indeed!
This is the first weekend where I have a decent amount of time to dedicate to the project. So the second leg was finished much quicker than the first. The unmasked mess:
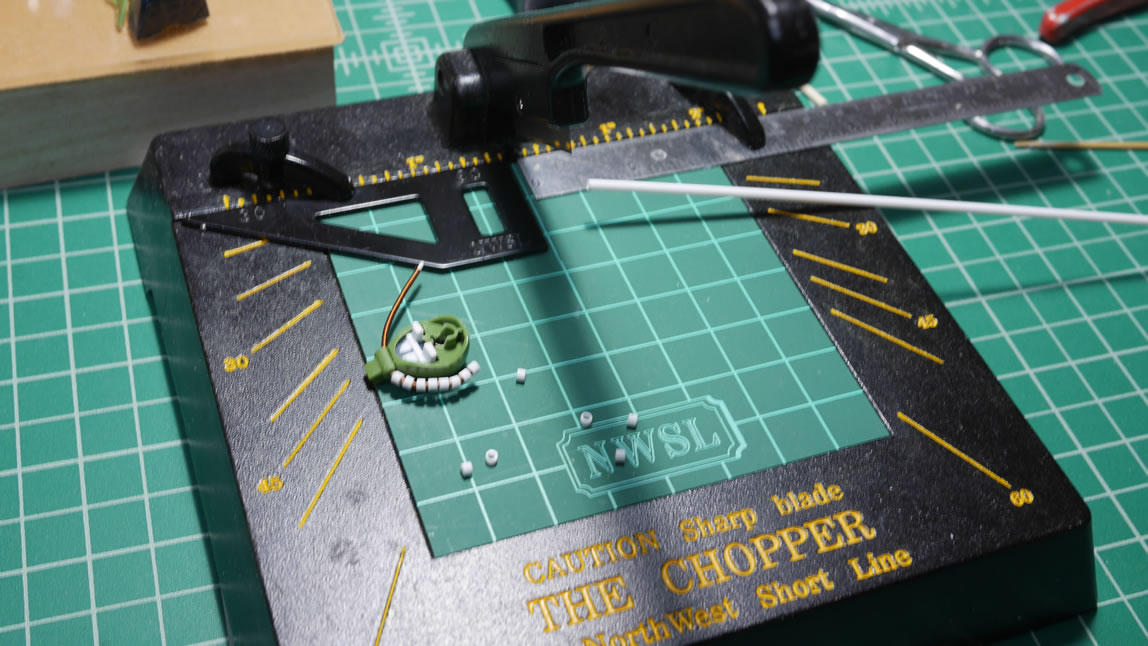
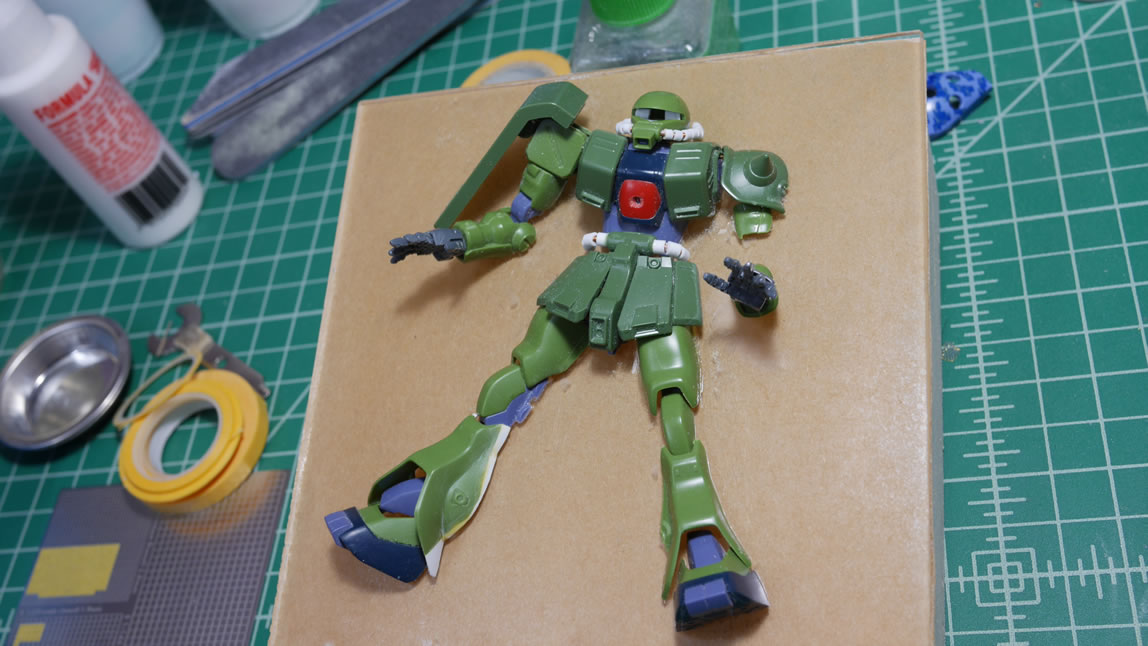
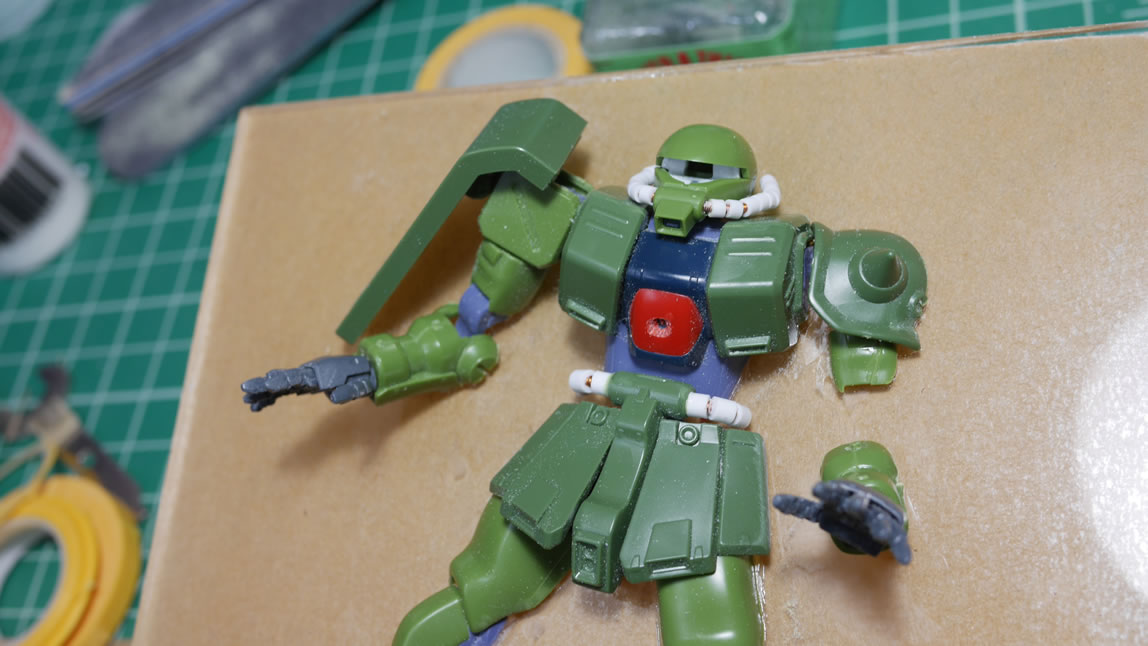
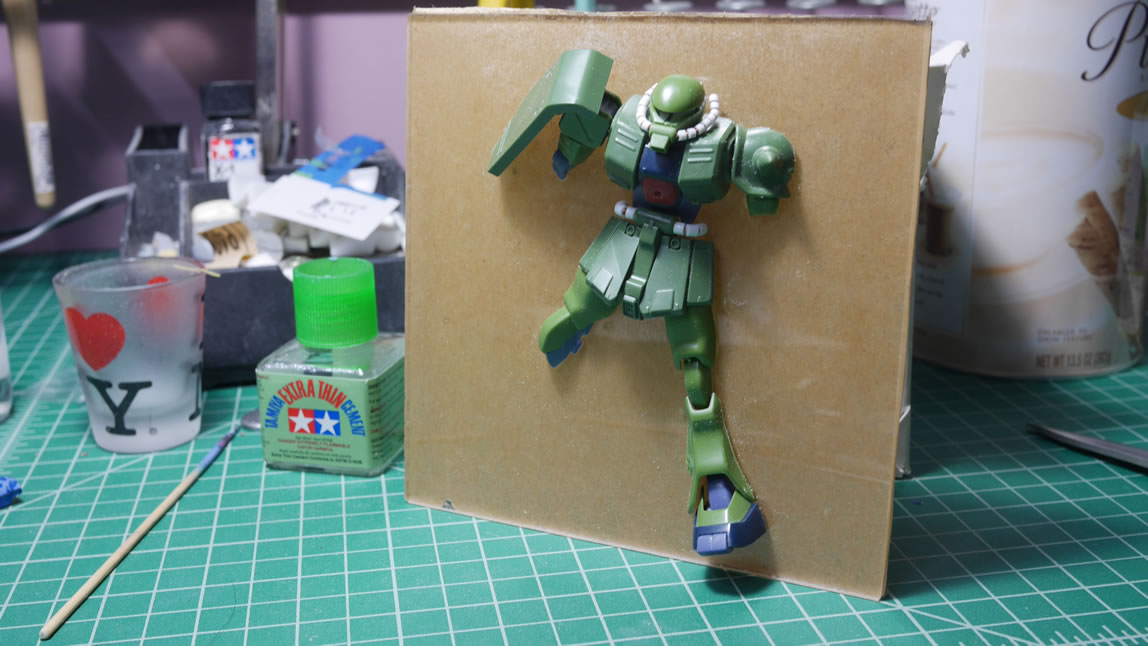
We had a build gathering this past weekend. So along with getting a good amount of work done on the last leg, I also got some work in on the display base. Returning to the HGUC Zaku FZ, the cut up suit is glued to an acrylic sheet. In an earlier update, I had been a bit overzealous when I cut up the right leg. I had to glue back some styrene and putty back the mess, so that part isn’t glued down to the acrylic base yet. I need to putty/sand/paint/ and recheck that part for mistakes before slapping it down onto the acrylic with the rest of the body parts. The chopping tool is used to cut up some styrene tubes to create new cables for waist and head. The stock cables for HGUC kits never look good. I start with a piece of 26 awg gauge wire as the base cable; which is wrapped with 28 gauge magnet wire for detail effect; then the wrapped wired is sleeved with cut styrene tubes for the waist. The same 26 awg is used for the head wire but using 34 gauge magnet wire to wrap that before adding in a cables cut from a slightly thinner tube. The last picture of the set looks almost Han Soloesq with the acrylic sheet standing up.
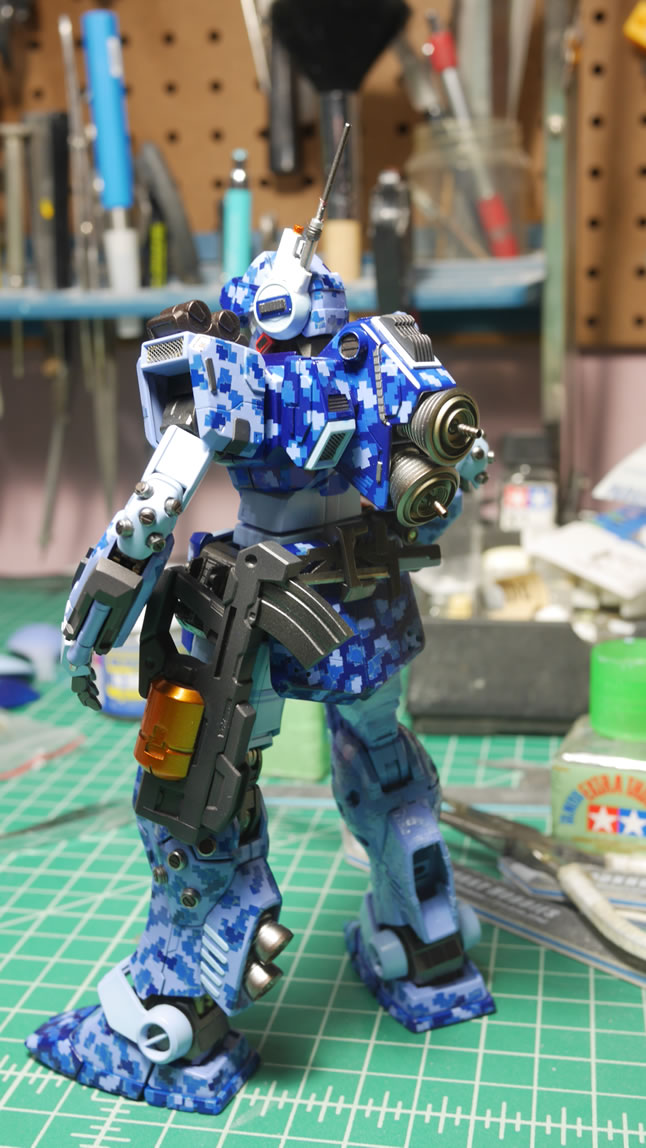
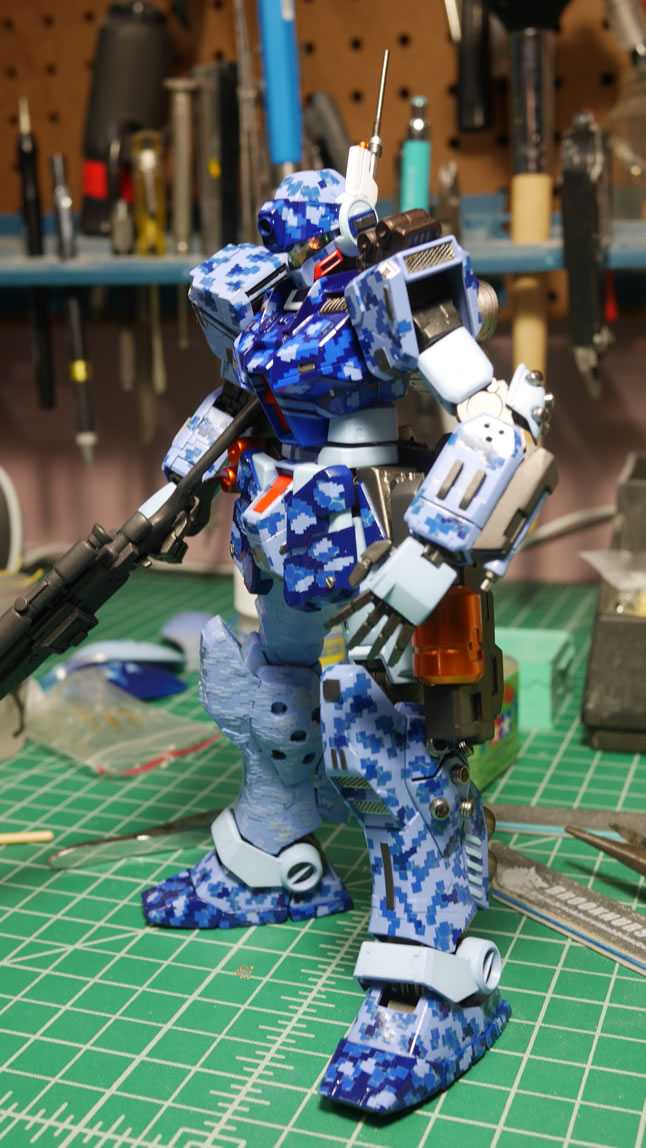
The last leg is done and I did a quick test fit with everything for a very quick photoshoot.
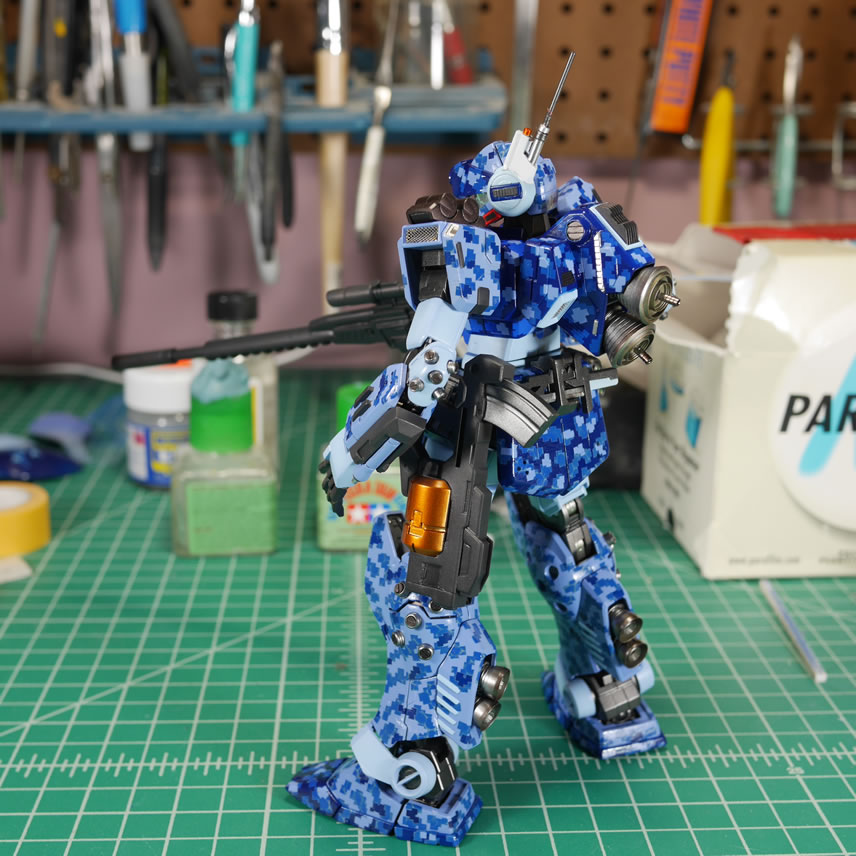
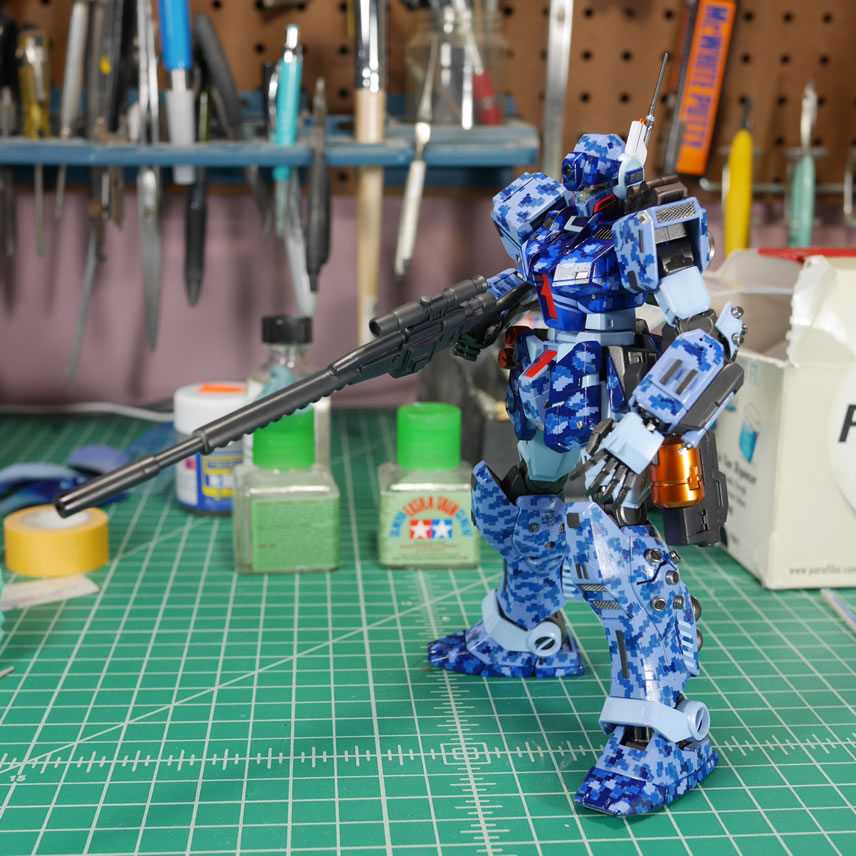
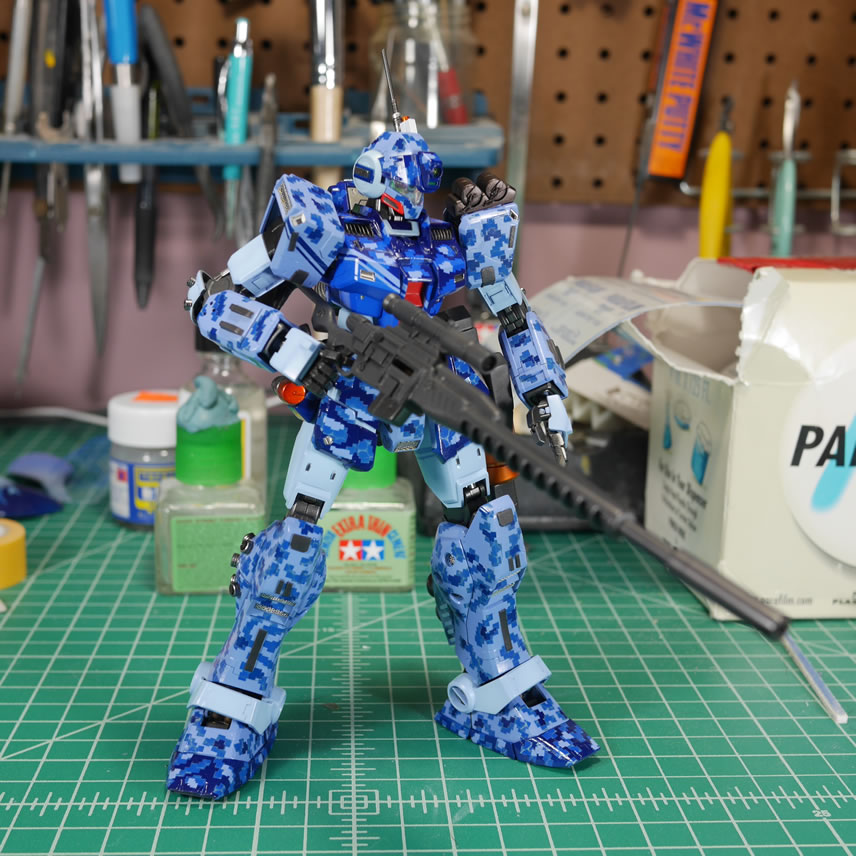
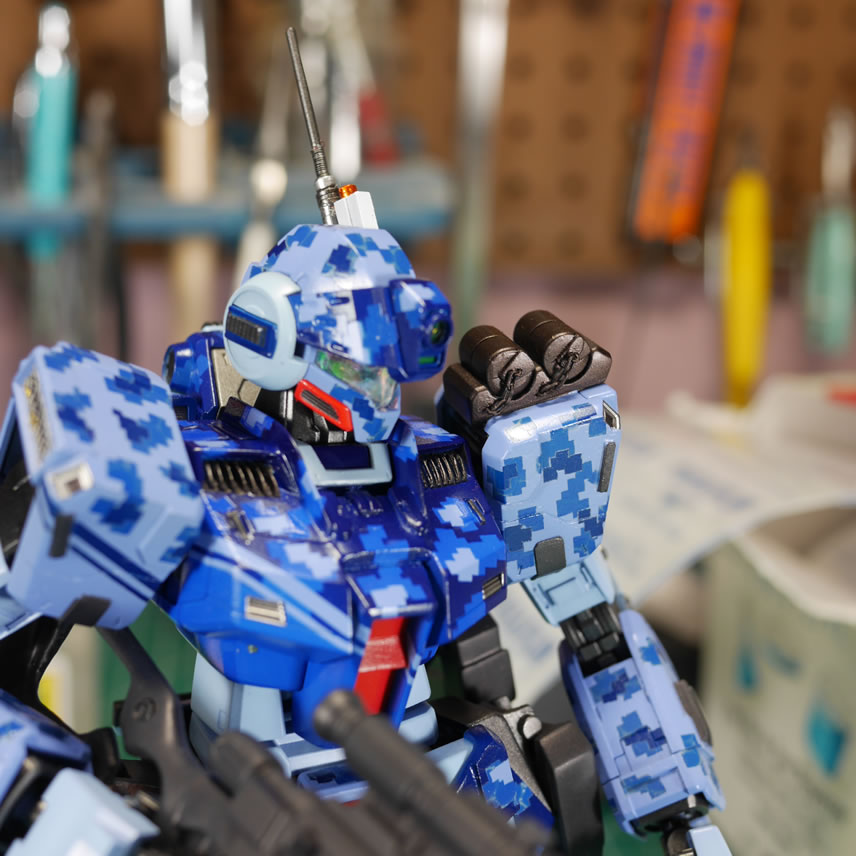
Additional angles. I think it’s looking fairly decent. Things will now slow down a bit as I work on the clear coats, decals, weathering. But it shouldn’t be too long before the star of this project is done.
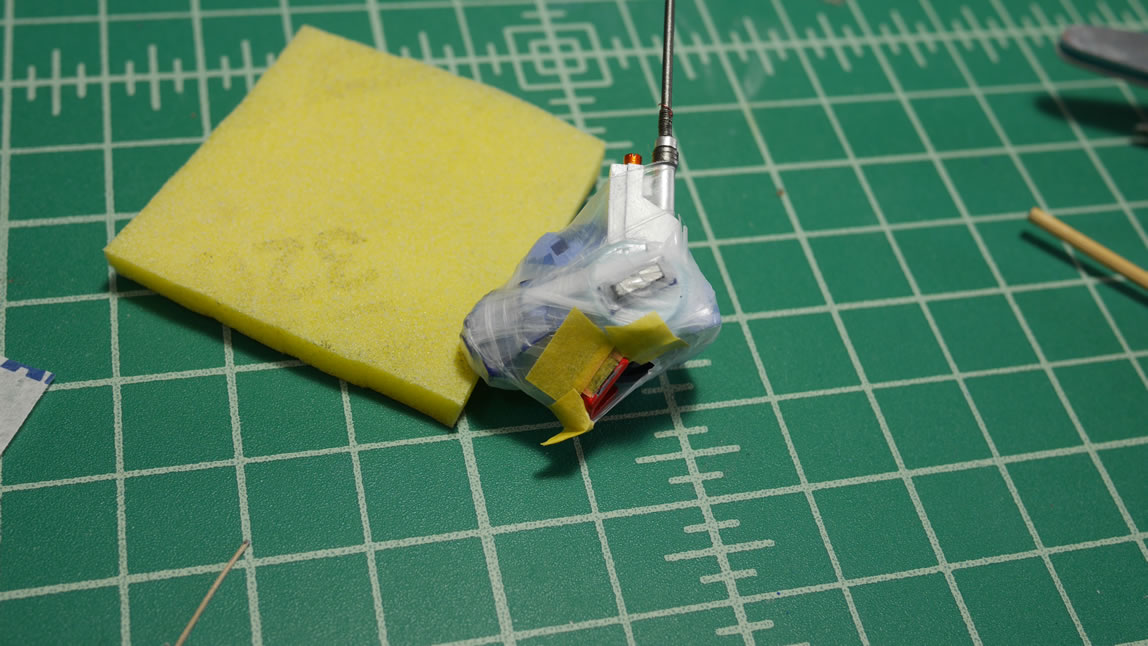
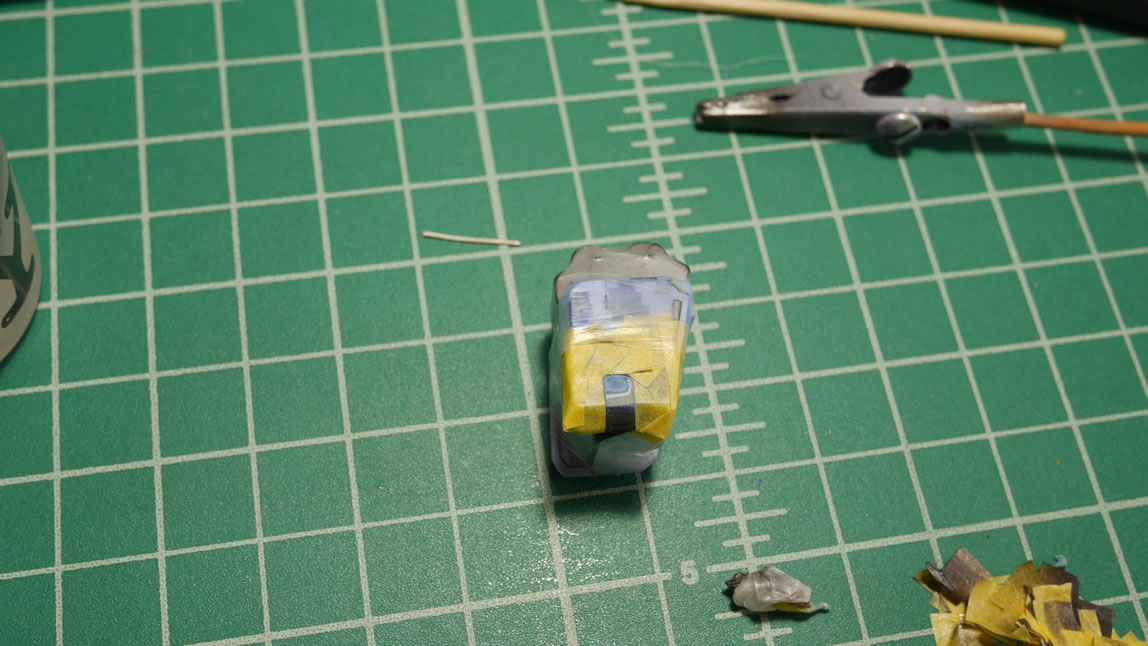
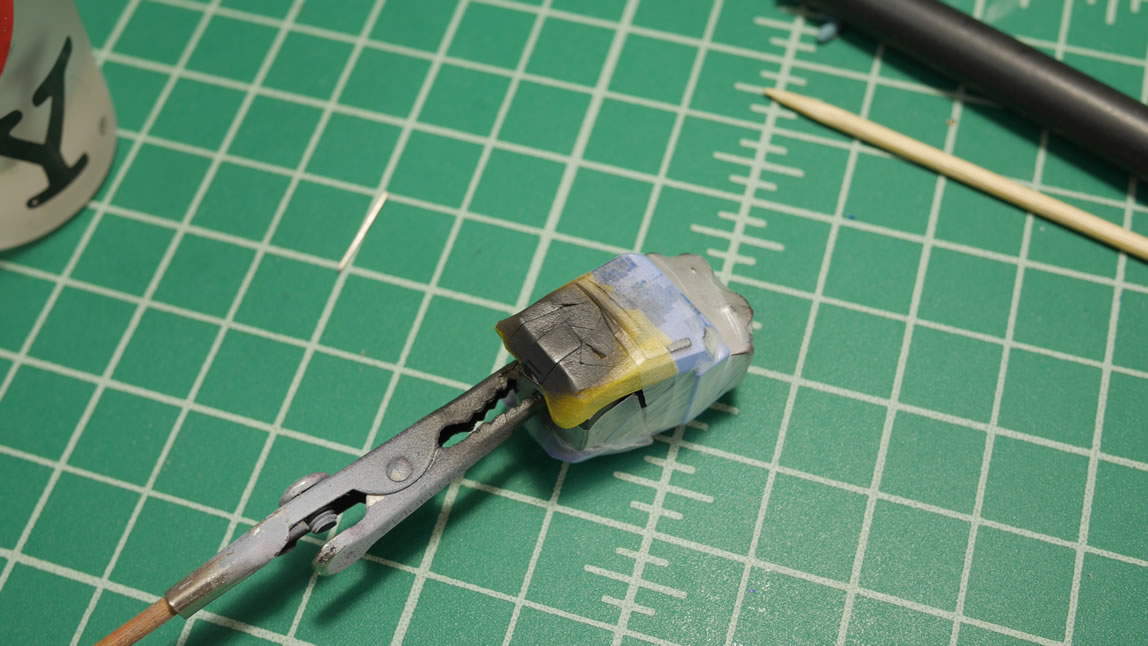
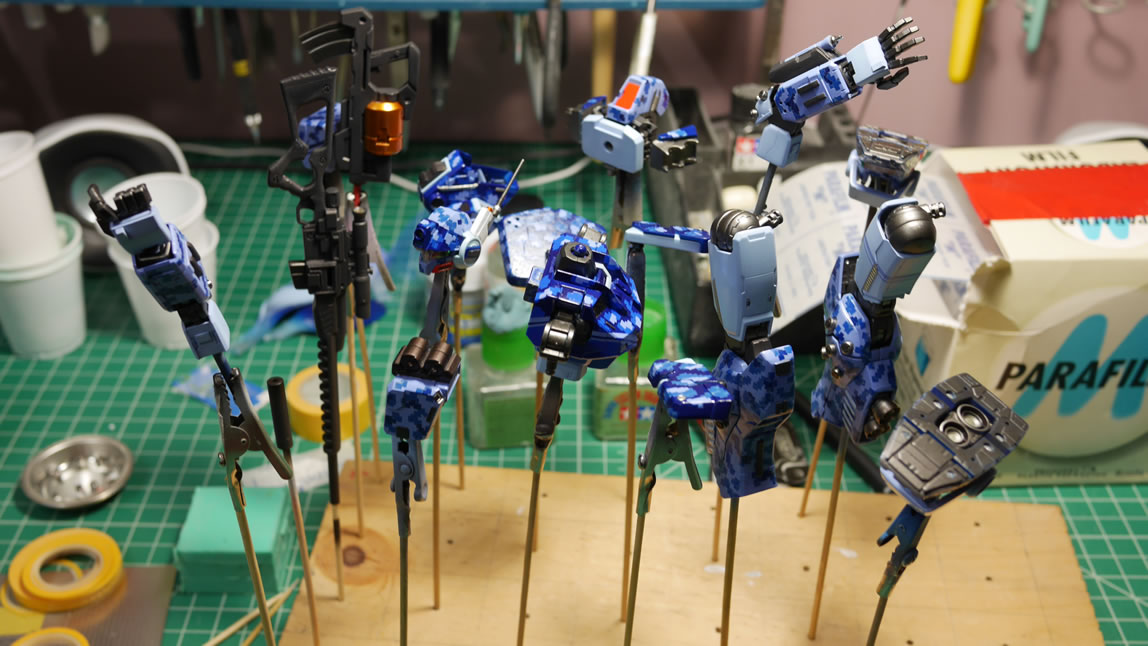
After the photoshoot, the kit is disassembled and skewered for the coats and coats of clear gloss. The clear gloss will help level out the uneven digi camo byproduct surface. It will also help with decal adhesion by giving the surface an ultra smooth platform.
Can I get this whole thing done in three weeks? We shall see.